Alan Wake
"content": "## Game Introduction for Alan Wake ### Genre Alan Wake is a **psychological thriller action-adventure game** that blends survival horror elements with a deeply narrative-driven experience. Players must use light as a weapon against dark, supernatural forces in a gripping, episodic story...
Download & Installation
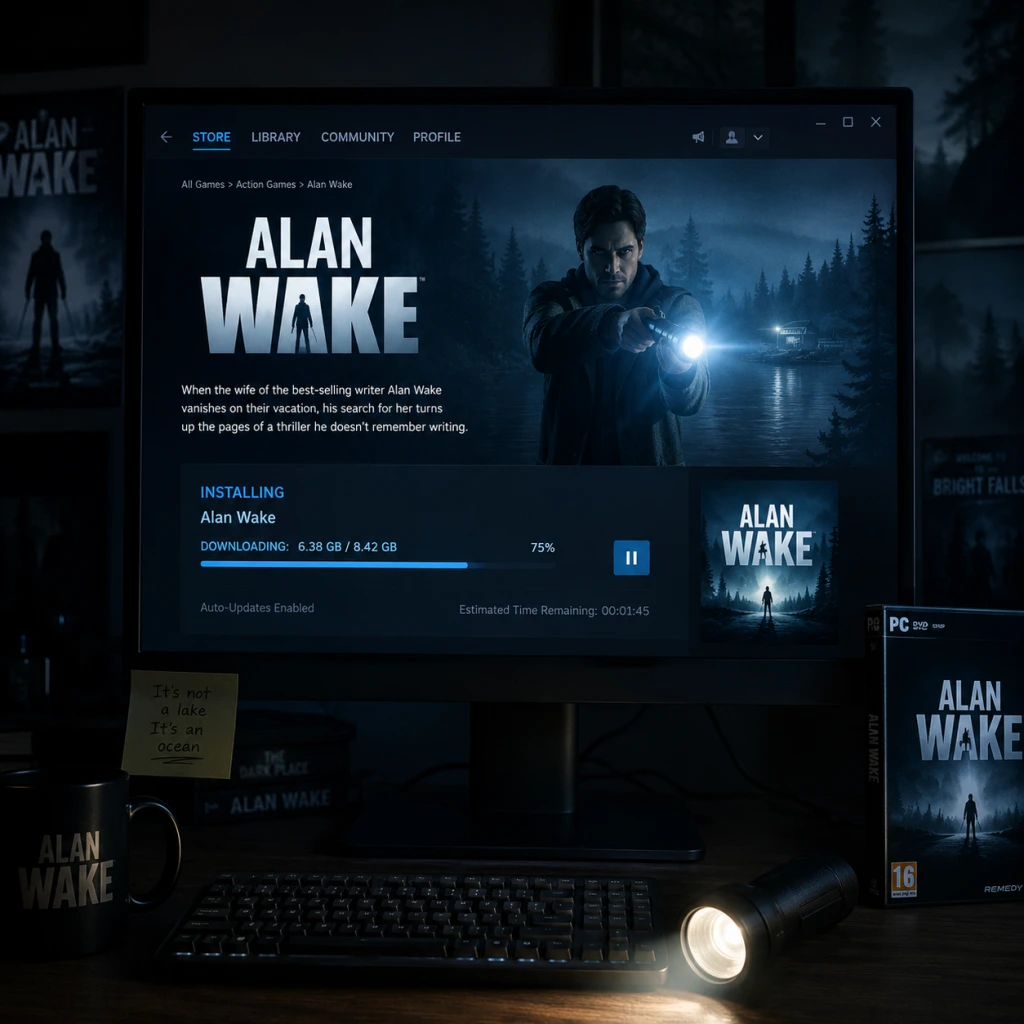
Download & Installation Guide for Alan Wake
This guide covers the official, legitimate download and installation processes for Alan Wake (the original 2010 PC release) and Alan Wake Remastered (2021) across all major platforms. It includes system requirements, step-by-step instructions, account requirements, first-launch setup, common errors and fixes, and post-installation verification.
1. Platform Overview
| Version | Platforms | Storefronts |
|---|---|---|
| Alan Wake (Original) | PC (Windows) | Steam, GOG, Epic Games Store |
| Alan Wake Remastered | PC, PlayStation 4/5, Xbox One/Series X | S, Nintendo Switch |
2. System Requirements
Alan Wake (Original PC)
| Component | Minimum | Recommended |
|---|---|---|
| OS | Windows 7 | Windows 10 |
| CPU | Intel Core 2 Duo 2.0 GHz or AMD Athlon X2 2.0 GHz | Intel Core 2 Quad 2.66 GHz or AMD Phenom II X4 2.66 GHz |
| RAM | 2 GB | 4 GB |
| GPU | NVIDIA GeForce 8800 GT 512 MB or AMD Radeon HD 3870 512 MB | NVIDIA GeForce GTX 560 or AMD Radeon HD 5850 |
| DirectX | Version 10 | Version 11 |
| Storage | 8 GB available space | 8 GB available space |
| Sound | DirectX-compatible | DirectX-compatible |
Alan Wake Remastered (All Platforms)
| Component | Minimum | Recommended |
|---|---|---|
| OS (PC) | Windows 10 (64-bit) | Windows 10 (64-bit) |
| CPU (PC) | Intel Core i5-3340 or AMD Ryzen 3 1200 | Intel Core i7-4790 or AMD Ryzen 5 1600 |
| RAM (PC) | 8 GB | 16 GB |
| GPU (PC) | NVIDIA GeForce GTX 950 or AMD Radeon RX 550 | NVIDIA GeForce GTX 1660 or AMD Radeon RX 5600 |
| DirectX (PC) | Version 12 | Version 12 |
| Storage (PC) | 25 GB available space | 25 GB available space |
| Console/Handheld |
- PS4/PS5: 25 GB, PS5 (backward compatibility)
- Xbox One/Series: 25 GB, optimized for Series X|S
- Nintendo Switch: 8.5 GB (game) + ~2 GB updates |
- Steam: Valid Steam account (free registration).
- Epic Games Store: Epic Games account (free registration).
- GOG: GOG account (free).
- PlayStation Network: Account for PS4/PS5 (free, but PlayStation Plus not required for single-player).
- Microsoft: Xbox profile (free) for Xbox consoles; on PC, a Microsoft account for Xbox app (if playing via Game Pass – although Alan Wake is not on Game Pass).
- Nintendo: Nintendo Account and Nintendo Switch Online membership not required (only for multiplayer features, which this game lacks).
3. Download & Installation Instructions
3.1 PC – Steam (Original & Remastered)
1. Purchase: Visit [store.steampowered.com](https://store.steampowered.com), search for "Alan Wake", and buy the game.
2. Install Steam Client: If not installed, download the Steam installer from [store.steampowered.com/about](https://store.steampowered.com/about) and run it.
3. Log In: Launch Steam, log into your account.
4. Library: Click Library > find Alan Wake (or Remastered).
5. Install: Click Install, choose installation directory (default: `C:\Program Files (x86)\Steam\steamapps\common`).
6. Wait: Steam downloads ~8 GB (original) or ~25 GB (Remastered).
7. Play: After download, click Play.
3.2 PC – Epic Games Store (Remastered & Original)
1. Purchase: On [epicgames.com](https://www.epicgames.com), search "Alan Wake" and buy.
2. Install Epic Launcher: Download the Epic Games Launcher from the site and install.
3. Log In: Open the launcher, log in.
4. Library: Go to Library > find the game.
5. Install: Click Install, select path.
6. Wait: Downloads complete, progress visible.
7. Launch: Click Launch.
3.3 PC – GOG (Original Only)
1. Purchase: Visit [gog.com](https://www.gog.com), search for "Alan Wake", add to cart, check out.
2. Install GOG Galaxy (optional): Download GOG Galaxy client or use offline installer.
3. Install via Galaxy: Log in, Library > Alan Wake > Install.
4. Offline Installer: Download the exe from your account, run it, follow prompts.
5. Play: Launch via Galaxy or desktop shortcut.
3.4 PlayStation 4/5 (Remastered)
1. Purchase: On PS4/PS5, open PlayStation Store, search "Alan Wake Remastered", buy.
2. Download: Go to Library > Purchased > select game > Download.
3. Install: The console automatically installs the game (25 GB).
4. Play: Once download completes, select the game from the home screen.
> PS5: Game runs via backward compatibility; ensure system software is up-to-date.
3.5 Xbox One / Xbox Series X|S (Remastered)
1. Purchase: On Xbox, open Microsoft Store or Xbox Store, search "Alan Wake Remastered", buy.
2. Download: Game appears in My games & apps > Ready to install. Select Install.
3. Wait: Downloads ~25 GB. Optimized on Series X|S for 60 FPS.
4. Play: Launch from home or library.
> Original Alan Wake on Xbox is only available via backward compatibility with a disc; digital version delisted.
3.6 Nintendo Switch (Remastered)
1. Purchase: Open Nintendo eShop from the Home menu, search "Alan Wake Remastered", buy.
2. Download: The game will automatically start downloading (~8.5 GB base + updates).
3. Install: No manual steps; the console handles it.
4. Play: Icon appears on the Home screen.
> Note: The Switch version is a native port (not cloud streaming), runs at 30 FPS in handheld/docked.
4. Account Requirements
5. First Launch Setup
1. Language Selection: On first launch (PC), you may be prompted to choose language via a launcher or in-game settings. The Steam version defaults to system language; can be changed in game options.
2. Graphics Settings:
- Original PC: Set resolution, texture quality, anti-aliasing, shadows, etc. Recommended to cap FPS at 60 (game engine may have issues above 60).
- Remastered: Options include resolution, quality presets (Low/Medium/High/Ultra), V-Sync, ray tracing (if supported), and dynamic resolution.
- Console: Auto-detects optimal settings; you can adjust brightness and subtitles.
3. Audio Calibration: Access Options > Audio, adjust master volume, voice, music, SFX sliders.
4. Brightness Calibration: Use the in-game calibration screen (usually a barely visible logo) to set brightness for HDR (if supported) or SDR.
5. Cloud Saves:
- Steam/Epic/GOG Galaxy: Enable cloud saves to sync progress across devices.
- Consoles: Automatic via respective services (PS Plus cloud saves optional, Xbox Live, Nintendo Switch Online).
6. Patches/Updates: On first launch, the platform may download a small patch; ensure you are online.
6. Common Installation Errors & Fixes
| Error | Cause | Solution |
|---|---|---|
| “MSVCP140.dll / VCRUNTIME140.dll missing” | Missing Visual C++ Redistributable | Install the latest VC++ redistributable ([Microsoft Visual C++ 2015-2022](https://aka.ms/vs/17/release/vc_redist.x64.exe) for 64-bit). |
| “D3DCOMPILER_47.dll not found” | Missing DirectX runtime | Reinstall DirectX End-User Runtime from Microsoft’s website. |
| “The game won’t launch / crashes at startup” | Outdated graphics drivers | Update your GPU drivers (NVIDIA GeForce Experience, AMD Adrenalin, Intel Driver & Support Assistant). |
| Low disk space warning | Not enough free space (game requires 8 GB original / 25 GB Remastered) | Free up space or install on a different drive. |
| Steam/Epic download stuck or slow | Network issues or corrupted cache | Pause/resume download, or clear download cache (Steam: Settings > Downloads > Clear Download Cache; Epic: Settings > Troubleshoot > Verify). |
| “Failed to initialize renderer” | GPU does not support required DirectX feature level | Update GPU drivers; if using integrated GPU, switch to dedicated. Original may need DirectX 10-capable card. |
| Game runs at very low FPS | Settings too high for hardware | Lower graphics preset, disable V-Sync, reduce shadow quality. For original, consider the “FOV fix” mod (optional). |
| Antivirus blocking installation | False positive | Temporarily disable antivirus during install, or add the game folder to exceptions. |
| Nintendo Switch download fails | Corrupt SD card or insufficient space | Reformat SD card (backup data) or free space. Re-download. |
7. Post-Installation Verification
After installation, perform these checks to ensure everything is working:
- Integrity Check:
- Launch Game: Start a new game and play for at least 5 minutes. Listen for audio, check for graphical glitches.
- Check for Updates: Ensure the game is patched to the latest version (often auto-updates).
- Benchmark (PC): For Remastered, there is an in-game benchmark under Options > Graphics. Run it to gauge performance.
- Cloud Sync: After playing a few minutes, exit and check that a cloud save was uploaded (Steam overlay cloud icon, Epic/Galaxy indicator).
- Steam: Right-click game in Library > Properties > Local Files > Verify integrity of game files.
- Epic: Settings > Manage Games > Verify.
- GOG Galaxy: Click game > Manage > Verify / Repair.
- Console: No manual option; reinstall if issues arise.
8. Conclusion
You are now ready to enjoy Alan Wake (or Alan Wake Remastered). The game is a single-player, story-driven experience; no additional subscriptions are needed beyond the base game. If you encounter further issues, consult official support pages or community forums (Steam Community, Reddit r/AlanWake). Remember to adjust your settings for the best balance of visuals and performance, and consider using a controller for the intended experience (especially on PC where keyboard and mouse are fully supported but the game was designed for a gamepad).
---
Guide last updated: December 2025. Game versions and store policies may change; verify official sources for the most current information.
Game Introduction
"content": "## Game Introduction for Alan Wake
Alan Wake is a psychological thriller action-adventure game that blends survival horror elements with a deeply narrative-driven experience. Players must use light as a weapon against dark, supernatural forces in a gripping, episodic story.
- Remastered (2021): Epic Games Publishing
Alan Wake stands out for its episodic television format in a video game—complete with recaps, credits, and a licensed soundtrack that changes dynamically. Its combat system, revolving around light as both a weapon and a shield, was innovative at release. The deep integration of the manuscript page mechanic (the player reads story fragments that then occur moments later) creates a unique metafictional layer. The game’s atmosphere, inspired by Pacific Northwest folklore and the works of Stephen King, remains unmatched in its ability to evoke dread and curiosity simultaneously. The Remastered edition introduces updated visuals (4K resolution, HDR, improved character models) while preserving the original’s soul, making it the definitive way to experience the dark journey of Alan Wake.
Genre
Alan Wake is a psychological thriller action-adventure game that blends survival horror elements with a deeply narrative-driven experience. Players must use light as a weapon against dark, supernatural forces in a gripping, episodic story.
Developer & Publisher
- Developer: Remedy Entertainment (known for Max Payne, Control, Quantum Break)
- Publishers:
- Remastered (2021): Epic Games Publishing
Release Timeline
| Version | Platform | Release Date |
|---|---|---|
| Original | Xbox 360 | May 14, 2010 (NA), May 21, 2010 (EU) |
| Original | PC (Steam, GOG) | February 16, 2012 |
| Remastered | PC, PlayStation 4/5, Xbox One/Series X\\ | S |
| Remastered | Nintendo Switch | October 8, 2022 |
Platforms
- Original: Xbox 360, Windows PC (via Steam, GOG, Epic Games Store)
- Remastered: Windows PC (Epic Games Store, Steam), PlayStation 4, PlayStation 5, Xbox One, Xbox Series X\\|S, Nintendo Switch
- Note: The original PC version is no longer sold on Steam but remains available on GOG. The Remastered version is the currently supported release.
- Alan Wake – The protagonist, a best-selling crime novelist. He is intelligent, determined, and emotionally strained by his wife’s disappearance and his own failing grip on reality.
- Alice Wake – Alan’s wife, a photographer. Her disappearance is the catalyst for the story. She is resourceful and deeply connected to the lake’s mystery.
- Barry Wheeler – Alan’s eccentric, loyal, and often humorous agent. He arrives in Bright Falls to help Alan and becomes a key ally.
- Sheriff Sarah Breaker – The no-nonsense local sheriff who gradually realizes the supernatural nature of the events.
- Dr. Emil Hartman – A mysterious psychiatrist living at Cauldron Lake Lodge with hidden motives.
- Mr. Scratch – Alan’s doppelgänger and the physical manifestation of the Dark Presence. He appears later in the story and in the spin-off Alan Wake’s American Nightmare.
- Atmospheric Storytelling: The game is structured like a TV series, complete with “Previously on Alan Wake” recaps, cliffhanger episode breaks, and a soundtrack synced to the action (e.g., “The Poet and the Muse” by Old Gods of Asgard).
- Unique Combat: Enemies (the Taken) are shielded by darkness. The player must use light to destroy their shield before they can be harmed with firearms. Flashlight, flares, flashbang grenades, and environmental lights are essential tools.
- Immersion through Environment: The setting feels alive with dynamic weather, night/day cycles (mostly night), and audio logs that build tension.
- Manuscript Pages: Scattered throughout the game, these pages reveal future events, adding a layer of foreshadowing and reward for exploration.
- Fans of psychological horror and supernatural thrillers
- Players who enjoy narrative-driven, single-player experiences
- Admirers of Stephen King’s works or David Lynch’s surreal style
- Veterans of Remedy’s other titles (Max Payne, Control)
- Gamers looking for a focused, linear adventure with a compelling story (approx. 10–12 hours for the main game)
- Single-Player Campaign: The only mode. The game is strictly a linear, story-driven experience with no multiplayer or co-op.
- Episodic Structure: The original release had 6 episodes; the Remastered version includes the base game’s 6 episodes plus the two DLC episodes (“The Signal” and “The Writer”) seamlessly integrated into the campaign flow.
- Offline: Fully playable offline with no internet connection required after installation. All content is single-player.
- Online: No online multiplayer or co-op. Some platform-specific cloud saving and achievements/trophies are supported when online.
- The Signal – Alan finds himself trapped in a dark version of his own mind, fighting manifestations of his fears. Takes place after the main game’s ending.
- The Writer – The conclusion of Alan’s story in the original release, where he confronts Mr. Scratch and battles through the Dark Place’s shifting realities.
- Alan Wake’s American Nightmare (2012) – A non-canonical spin-off that bridges Alan Wake and Quantum Break (loosely). It features arcade-style combat, three replayable episodes, and a self-contained story with Mr. Scratch. It is often included in bundles but is not part of the Remastered collection.
Story Overview
Alan Wake, a celebrated horror novelist, is suffering from a severe case of writer’s block. Hoping to break the slump, he travels to the idyllic Pacific Northwest town of Bright Falls with his wife, Alice. But shortly after arriving, Alice mysteriously vanishes into the dark waters of Cauldron Lake. Alan soon discovers a manuscript he does not remember writing—a manuscript that is coming true, page by page. As reality begins to warp, Alan must confront the Dark Presence, an ancient evil that feeds on creativity and can take physical form. Armed only with a flashlight, flares, and finally a revolver, Alan must fight through the night, uncover the truth, and rescue Alice before the darkness consumes everything.
Setting
The game is set in the fictional town of Bright Falls, Washington, a remote community surrounded by dense forests, misty lakes, and mountains. The atmosphere draws heavily from the Pacific Northwest’s brooding landscapes, resembling the works of Stephen King and David Lynch’s Twin Peaks. Key locations include the Oh Deer Diner, Cauldron Lake Lodge, a power plant, and a lighthouse. The world is largely linear but features explorable areas with collectible manuscript pages, thermoses, and radio broadcasts that deepen the lore.
Main Characters
Core Appeal
Target Audience
Alan Wake appeals to:
Game Modes
Online/Offline Support
DLC / Expansion Overview
Original Game DLCs (now included in the Remastered version):
Standalone Spin-off:
What Makes This Game Unique?
Alan Wake stands out for its episodic television format in a video game—complete with recaps, credits, and a licensed soundtrack that changes dynamically. Its combat system, revolving around light as both a weapon and a shield, was innovative at release. The deep integration of the manuscript page mechanic (the player reads story fragments that then occur moments later) creates a unique metafictional layer. The game’s atmosphere, inspired by Pacific Northwest folklore and the works of Stephen King, remains unmatched in its ability to evoke dread and curiosity simultaneously. The Remastered edition introduces updated visuals (4K resolution, HDR, improved character models) while preserving the original’s soul, making it the definitive way to experience the dark journey of Alan Wake.
Getting Started
Getting Started Guide for Alan Wake
Introduction
Welcome to Bright Falls, Washington. You are Alan Wake, a bestselling thriller writer suffering from writer’s block. This guide will help brand-new players survive the first hour, understand controls, and avoid common pitfalls. There is no character creation – you play as Alan Wake, and his appearance and backstory are fixed.
First Hour Walkthrough (Spoiler-Free)
1. Opening Cutscene – You arrive in Bright Falls by ferry. Absorb the atmosphere; no gameplay yet.
2. Driving to the Lodge – A short driving sequence through the woods. Follow the road signs; ignore the suicide cult mannequins (they’re just set dressing).
3. Arrival at Cauldron Lake Lodge – Meet your wife Alice. Explore the lodge living room, kitchen, and balcony. Pick up collectible manuscript pages on the coffee table. Do not skip the TV show Night Springs – it contains clues.
4. The Lake House Incident – Alice drops her camera from the dock. You go after it and witness a mysterious light show. A possessed deer head attacks. This is your first combat encounter. Use the flashlight to burn away the darkness, then shoot with your revolver.
5. Escape to the Cabin – After drowning (don’t worry, it’s a dream), you wake in a crashed car. Follow the path to a safe cabin. Pick up the flashlight and revolver upgrades here.
6. First Real Combat – Outside, you face Taken (possessed humans). Remember: light weakens them, bullets finish them. Use environmental lights (car headlights, flares, street lamps) as safe zones.
7. The Cauldron Lake Lighthouse – Reach the lighthouse to trigger a major cutscene. The first hour ends with Alan realizing he wrote a manuscript that predicts the events.
Controls (All Platforms)
#### Xbox (360/One/Series X|S)
| Action | Button |
|---|---|
| Move/Look | Left/Right sticks |
| Aim/Fire | Left trigger / Right trigger |
| Flashlight Focus | LB (hold) |
| Reload | X |
| Interact/Pick Up | Y |
| Run | Hold Left stick click |
| Dodge | A (tap while moving) |
| Use Flare/Flashbang | RB |
| Pause | Start |
| Map | Back / View |
| Switch Weapon | D-Pad Up (next) / Down (previous) |
| Action | Button |
|---|---|
| Move/Look | Left/Right sticks |
| Aim/Fire | L2 / R2 |
| Flashlight Focus | L1 (hold) |
| Reload | Square |
| Interact/Pick Up | Triangle |
| Run | Hold Left stick click |
| Dodge | Cross (tap while moving) |
| Use Flare/Flashbang | R1 |
| Pause | Options |
| Map | Touchpad |
| Switch Weapon | D-Pad Up/Down |
Recommended: Use a controller for better camera control and dodge timing.
| Action | Key |
|---|---|
| Move | W/A/S/D |
| Look | Mouse |
| Aim | Right Mouse Button (hold) |
| Fire | Left Mouse Button |
| Flashlight Focus | Left Shift (hold) |
| Reload | R |
| Interact/Pick Up | E |
| Run | Hold W + Shift |
| Dodge | Space (tap) |
| Use Flare/Flashbang | F |
| Pause/Menu | Esc |
| Map | Tab |
| Switch Weapon | 1 (handgun), 2 (shotgun, later), 3 (flashbang/flare) |
| Flashlight On/Off | Middle Mouse Button |
Same as console controls. Enable controller in settings if not auto-detected.
UI Overview
- Health Bar: Bottom-left, marked by a silhouette of Alan. Red flashing means low health.
- Ammo Counter: Bottom-right, shows current/max ammo for equipped weapon.
- Flashlight Battery: Beside ammo; a small battery icon. Runs out faster when focusing.
- Weapon Slots: Top-left corner of the screen, small icons for equipped weapons.
- Map: Press Tab (PC) or Back/View (Xbox) or Touchpad (PS). Important: Look for blue markers for safe rooms, and red markers for story objectives.
- Manuscript Pages: Found throughout; they grant optional lore and sometimes foreshadow enemy spawns (read them to survive).
- Radar (optional): Some versions have a mini-map; toggle in settings.
- Explore thoroughly – Many resources and lore items are off the main path.
- Save often – At every thermos or pause menu (autosave points are frequent, but manual saves protect you).
- Listen to dialogue – Alan’s narration and radio broadcasts contain puzzle hints.
- Use flares – Against swarms of Taken, toss a flare at your feet to create a safe zone.
- Aim for the light – When you focus the flashlight on a Taken, it glows brighter. Wait until the darkness skin shatters before shooting – you deal triple damage.
- Wasting ammo on un-removed darkness – Always weaken with light first. Shooting a full-dark Taken does minimal damage.
- Running into the darkness – Staying in the dark without a light source drains health rapidly. Stick to lit paths or carry a flashlight.
- Ignoring the environment – Look for flickering lights; they indicate a Taken ambush. Throw a flare into a suspicious patch of darkness.
- Using heavy weapons on weak enemies – Save shotgun shells for large groups or shielded Taken (like the ones with pickaxes).
- Skipping the tutorial pop-ups – They teach advanced combat like dodge-and-shoot timing.
Essential Early Objectives (First 2-3 Hours)
1. Find and read manuscript pages – They give hints about upcoming ambushes.
2. Learn to switch weapons quickly – Handgun for generic Taken, shotgun (found later) for heavy enemies.
3. Master the dodge – Tap dodge just as an enemy attacks; invincibility frames exist. Practicing early prevents deaths.
4. Collect batteries and ammo – Search every desk, drawer, and corpse. Ammo is scarce.
5. Use environmental lights – Stand next to street lamps or car headlights to regenerate health slowly and prevent Taken from spawning nearby.
6. Find the first shotgun – In the trailer park (around Chapter 2). It’s behind a locked gate; use a crowbar found nearby.
7. Upgrade your flashlight – In safe rooms (marked by a lightbulb icon on map), you can enhance battery life or focus intensity.
What to Do First and What to Avoid
#### DO:
#### AVOID:
Early Resource Priorities
| Resource | Priority | Notes |
|---|---|---|
| Batteries | High | Flashlight focus is your primary weapon; always carry extra batteries. |
| Handgun Ammo | Medium | Common, but you’ll need plenty for basic Taken. |
| Shotgun Shells | High (save) | Use only for emergencies: multiple enemies or shielded ones. |
| Flares | Medium | Excellent crowd control; keep one slot full. |
| Flashbangs | Low (early) | Found later; use primarily against large groups or to buy time. |
| First Aid Kits | High | Heal when health is below half; don’t hoard them. |
| Manuscript Pages | Lore + Hint | Always read; they might reveal a hidden cache. |
Common Beginner Mistakes
1. Not using flashlight focus – Many players shoot without weakening. This wastes ammo and takes longer to kill.
2. Ignoring the dodge – Standing still is death. Always dodge toward the enemy (you phase through them).
3. Hoarding batteries – Using flashlight focus conserves ammo more than batteries. Don’t be afraid to focus.
4. Walking into the dark – Only travel through darkness if you have a flashlight or flare active. The darkness hurts.
5. Skipping safe rooms – They contain weapon upgrades, supplies, and a complete health restore. Always enter them.
6. Not reading maps – The map shows item locations (chests, stashes). Use it to plan routes.
7. Forgetting to switch to the right weapon – D-Pad swapping is slow; practice so you don’t fumble mid-fight.
Day-One Checklist (First Play Session)
- [ ] Complete the first hour (up to lighthouse chapter).
- [ ] Master the dodge timing by practicing on the first two Taken near the cabin.
- [ ] Collect all manuscript pages in Chapter 1 (approx. 3 pages).
- [ ] Find and upgrade flashlight at the first safe room (the cabin with a radio).
- [ ] Pick up the first shotgun (Chapter 2, trailer park).
- [ ] Save manually at the start of Chapter 2.
- [ ] Set brightness to at least 70% (game is intentionally dark).
- [ ] Adjust audio settings: enable subtitles, turn down music slightly for better ambient cues.
- [ ] Check control layout in settings; remap if needed (e.g., swap reload and interact on controller).
- [ ] Watch the Night Springs episodes fully – they contain collectible lore and a brief achievement.
- Persistence pays off: The story gets better as you go. Don’t get discouraged by the first hour’s difficulty.
- Collectibles: There are 100 coffee thermoses, 20 manuscript pages (per episode), and 10 TV shows. Use a guide if you want 100% completion.
- Combat rhythm: Light, shoot, dodge, repeat. Once it clicks, you’ll feel powerful.
- Play at night: The atmosphere is unmatched with lights off and headphones on.
Final Tips
Welcome to Bright Falls. The darkness is coming. Stay in the light.
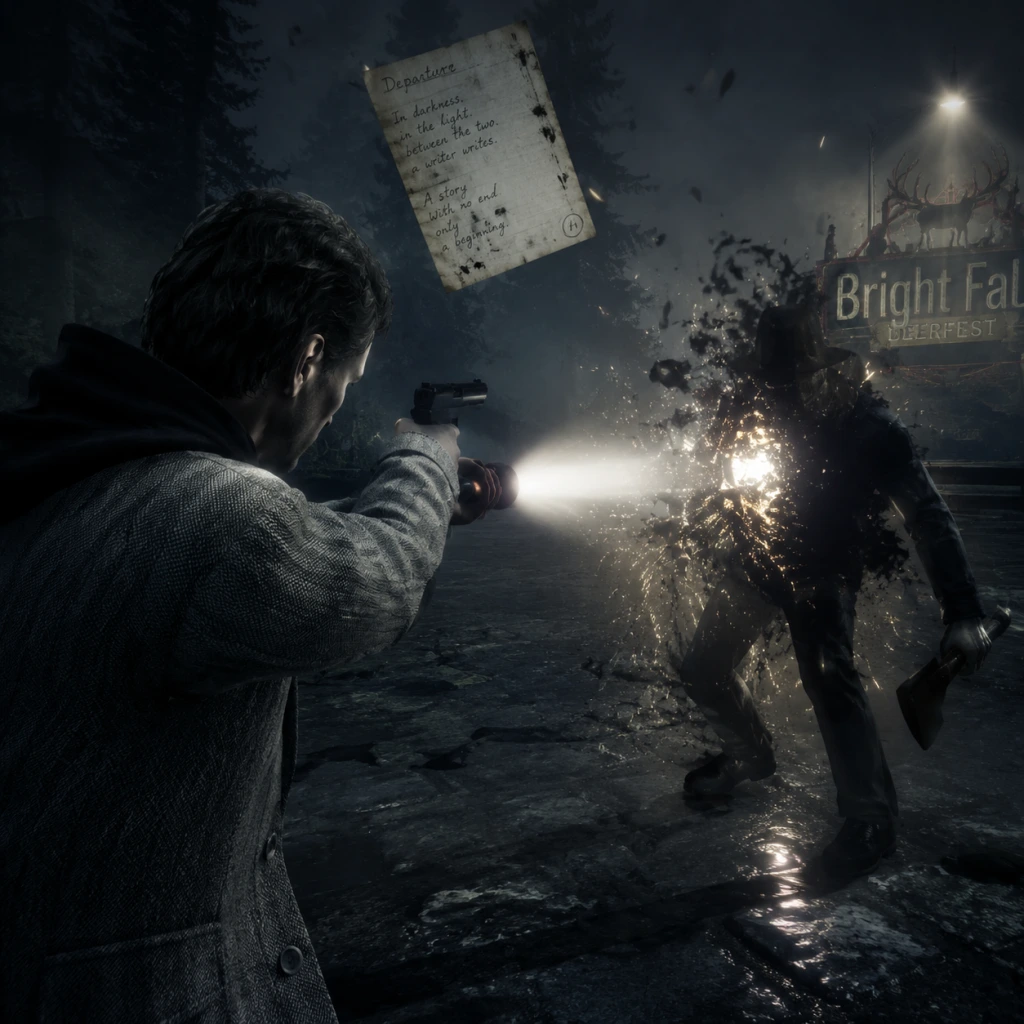
Core Gameplay
Core Gameplay Guide for Alan Wake
Overview
_Alan Wake_ is a psychological third-person shooter where light is your primary weapon against the supernatural “Taken.” The core gameplay loop alternates between exploration of the eerie Pacific Northwest, combat with darkness‑infused enemies, and unraveling a story through manuscript pages and radio/TV shows. The game is structured into six episodes (chapters), plus two DLC episodes (The Signal, The Writer) and a New Game+ mode in the Remastered version.
---
Main Gameplay Loop
1. Explore – Traverse forest paths, cabins, and small towns. Search for supplies (ammo, batteries, flares, flashbangs) and collectibles (manuscript pages, coffee thermoses, radios, TVs).
2. Encounter Darkness – The Taken appear. Use light to strip their immunity, then finish with firearms.
3. Push Forward – Solve environmental puzzles (generators, light towers), follow waypoints, and advance the linear story.
4. Narrative Rewards – Find manuscript pages to reveal future events; watch cutscenes; listen to dialog during walks.
---
Combat & Interaction Systems
The Light Mechanic
Every enemy is shielded by darkness. You must expose them with light before dealing damage.
- Flashlight: Default with infinite battery (drains quickly when focused). Hold left trigger to focus – destroys darkness faster but depletes battery. Collect batteries to recharge.
- Flares: Create a temporary safe zone; thrown flares can ignite Taken and stagger them.
- Flashbangs: Stun all enemies in a wide area, completely removing their shields for a short time.
- Light Sources: Streetlights, car headlights, and light towers. Standing in light gradually recharges your flashlight and drains nearby Taken.
- Revolver: Standard sidearm, slow fire rate, decent damage. Best for single enemies.
- Pump‑Action Shotgun: Devastating at close range; scarce ammo. Preferred for groups.
- Hunting Rifle (appears later): High damage, long range, very rare ammo. Good for sniping Taken from safety.
- Flare Gun (late game): Fires a flare that sticks to enemies, burning them over time. Excellent crowd control.
- Manuscript Pages: Scattered throughout. Reading them reveals plot clues and achievements. Some alter the narrative (e.g., “A page says a Taken will ambush from a shed – prepare”).
- Radios & Televisions: Activate to hear optional story content or psychological warnings.
- Thermos Flasks (100 total): Collectibles for achievement only; no gameplay effect.
- Signs/Doors: Some are interactive (open, read). No traditional quest log – story is driven by linear progression.
- Inventory: You carry a limited number of weapons (two long guns + pistol) and consumables (batteries, flares, flashbangs). Upgrades are rare – you find a shotgun in Episode 2, a hunting rifle in Episode 4, a flare gun in Episode 5.
- Health: No health bar. Screen turns red; find hidden first‑aid kits (limited) or rest in light to slowly regenerate (very slow). Much of the game is about avoiding damage.
- Narrative Unlocks: Each episode ends with a cliffhanger and a “Previously on…” recap. Completing an episode unlocks the next.
- Linear Paths: The game rarely branches. You follow a road, a trail, or a series of landmarks. No open world – but small hub areas (like the town of Bright Falls, the Cauldron Lake cabin) allow back‑tracking for collectibles.
- Side Objectives: None in the traditional sense. The only “side” content is finding all collectibles (thermoses, manuscript pages) for achievements/Trophies. No side quests from NPCs.
- Environmental Puzzles: Examples:
- Time of Day: Most of the game is set at night; daytime sections are brief intermissions where you explore safely (no enemies).
- No currency or shops. All resources are found in the world.
- Ammo: Revolver rounds are plentiful; shotgun shells are moderate; rifle rounds are very rare.
- Batteries: Common, but less so than ammo. Manage flashlight usage – don’t focus unnecessarily.
- Flares & Flashbangs: Uncommon. Use them wisely in large groups.
- First Aid Kits: Rare; often hidden in cabinets, drawers, or under beds.
- Setting: Cabin at Cauldron Lake → Bright Falls town. You learn controls, flashlight focus, and first combat.
- Combat: Only revolver and flashlight. Enemies are few (2–4 at a time). Learn to keep distance and focus light.
- Exploration: Mostly indoors; find manuscript pages and a few flares. Key puzzle: escape from the cabin attic.
- Progression: No weapon upgrades yet. The game teaches you to prioritize light over bullets.
- Health Management: You find one first‑aid kit in the cabin. A single hit takes about 1/3 health; two hits kill you. Learn to dodge (double tap movement).
- Resource Tips: Save ammunition; use flashlight focus only when necessary. Pick up every battery (they’re rare early).
- Example: In Episode 1, you must survive a Taken ambush in the woods. Use the environment (car headlights) to slow them, then fire when their shield drops.
- Setting: Bright Falls streets, a farmhouse, a mine, a dam. More outdoor areas with multiple enemies.
- Combat Upgrades: You acquire the pump‑action shotgun (Episode 2 – in a safe after solving a puzzle). Enemies appear in groups of 5–8, including armored Taken (need longer light exposure).
- New Consumables: Flashbangs appear for the first time (about Episode 3). Use them to stun a crowd and reload.
- Exploration: The town of Bright Falls is semi‑open – you can explore a few buildings. Collect thermoses and manuscript pages. One puzzle involves restarting a generator for a floodlight.
- Resource Economy: Ammo becomes more common, but so does enemy density. Prioritize shotgun ammo for close groups; revolver for isolated foes.
- Difficulty Spike: The first fight at the farmhouse (Episode 2) and the dam sequence (Episode 4) are notorious. Use light towers to create safe zones.
- Example: In Episode 3, during the “Night in the Woods” segment, you must defend a light‑protected area from waves. Throw flares at your feet to buy time while using the shotgun on approaching Taken.
- Setting: Dark forests, a construction site, the Cauldron Lake lodge, and the final confrontation. Ambient darkness is thicker; enemies spawn more aggressively.
- Weapon Upgrades: You find the hunting rifle (Episode 4/5) – excellent for sniping from a distance – and the flare gun (Episode 5). The flare gun’s burning effect is crucial for bosses.
- New Enemy Types:
- Resource Scarcity: Despite more enemies, ammo pickups are spaced out. Conserve shotgun and rifle rounds for weaker enemies; use revolver for most.
- Environmental Puzzles: Activating multiple generators, opening locked gates with combinations, and a long series of light‑platform puzzles in the final lodge.
- Example: In Episode 6, you face waves in a large arena. Use the central light tower to recharge and take cover behind pillars. Deploy flashbangs when surrounded, then focus fire on the boss’s weak points (glowing chest).
- Main Story Completion: After finishing Episode 6, the credits roll. There is no sandbox mode – the game ends, but you can replay any episode from the main menu (select episode).
- New Game+ (Remastered only): Unlocked after finishing the story. You carry over all weapons (shotgun, hunting rifle, flare gun) and all manuscript page discoveries into a fresh playthrough. Enemies are tougher and drop more resources. This is the optimal way to collect all thermoses and achievements.
- DLC Episodes:
- Endgame Goal: Achieve 100% completion (all manuscript pages, thermoses, achievements). The only “grind” is replaying chapters for missed collectibles. The game offers no New Game+ in the original Xbox 360/PC version (only Remastered).
- Example: After finishing the main game, load Episode 2 in New Game+ with the flare gun and hunting rifle. The early farmhouse fight becomes trivial – you can kill Taken from a safe distance. This makes collecting thermoses easier.
Weapons
Interaction Key Items
---
Progression & Character Growth
Alan Wake does not have XP, skill trees, or character levels. Progression is item‑based and narrative‑driven.
---
Exploration & Quests/Missions
- Power generators that need to be refueled or repaired to activate floodlights.
- Moving platforms (e.g., a gondola) that must be activated by flipping switches.
- Finding keys or combination codes (e.g., to a safe containing a shotgun).
---
Economy & Resources
---
Player Progression Tiers
Early Game (Episode 1 – “Nightmare” & start of Episode 2 – “Taken”)
Mid Game (Episode 2 – “Taken” to Episode 4 – “The Truth”)
Late Game (Episode 5 – “The Clicker” & Episode 6 – “Departure”)
- Poltergeists: Hurl objects (barrels, cars) – dodge and shoot them while avoiding flying debris.
- Birds (flocks of crows): Can be killed with a flare or flashlight before they attack.
- Boss Encounters: A giant Taken called the “Molten Man” (a burning truck) and a final boss (Mr. Scratch’s manifestation). Both require heavy use of flares and the flare gun.
Endgame (Post‑Main Story & DLCs)
- The Signal: Set inside a dark, twisted version of the story. You have only a flashlight and a special “light gun.” Puzzles revolve around using light to reveal hidden platforms. No new weapons.
- The Writer: More combat‑focused with Taken and Poltergeists. You regain your full arsenal partway through. Both DLCs take about 1–2 hours each and tie up narrative loose ends.
---
Summary Table: Progression Overview
| Tier | Weapons Obtained | Typical Encounters | Resource Availability | Key Mechanics Introduced |
|---|---|---|---|---|
| Early Game | Revolver | 2–4 Taken, small groups | Ammo scarce, batteries low | Flashlight focus, dodge, flares |
| Mid Game | Shotgun, flashbangs | 5–8 Taken, armored types | Ammo moderate, flares rare | Generators, light towers |
| Late Game | Hunting rifle, flare gun | Poltergeists, birds, bosses | Ammo tight, flashbangs key | Flare gun burn, boss patterns |
| Endgame | All weapons carried | Same but more health | Rich (NG+), DLC new ammo | New Game+, DLC puzzle variations |
Final Tips
- Always watch your flashlight battery. A dead battery in combat means death – never waste it on already‑dead enemies.
- Use the environment: lure Taken under streetlights or near lamp poles to drain their darkness for free.
- Pick up every manuscript page immediately; some reveal upcoming ambushes, giving you a split‑second heads‑up.
- In DLC (The Signal), light reveals invisible platforms – don’t rely on your gun for navigation.
This guide covers everything from your first steps in the cabin to 100% completion. Keep the light burning, Alan.
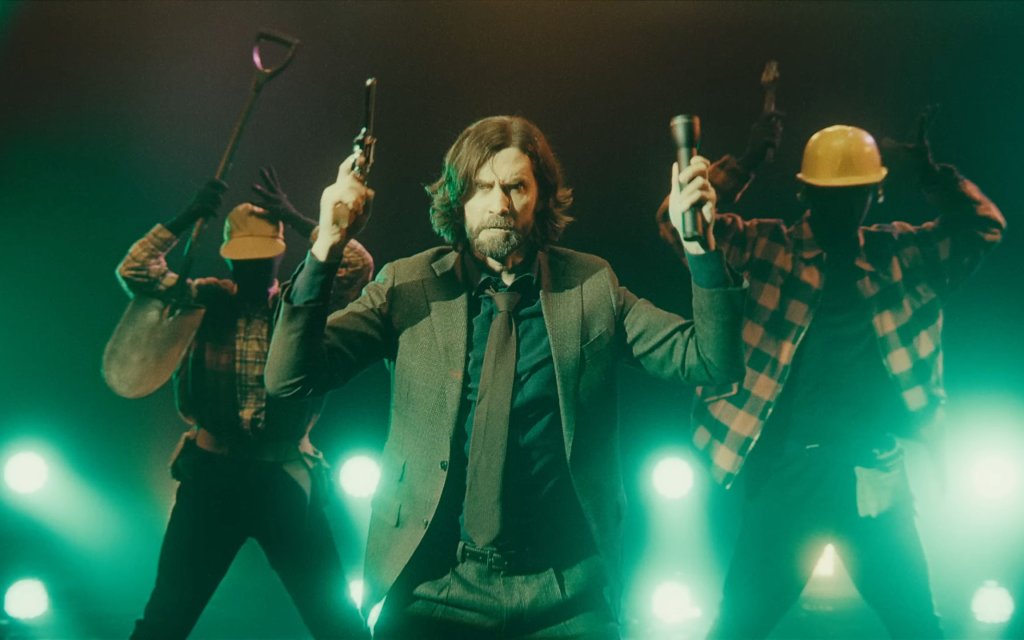
Game Tips
Game Tips for Alan Wake
Below is a comprehensive collection of tips, strategies, and optimizations for Alan Wake (original 2010 PC/Remastered 2021). These are grouped by category to help you survive the darkness of Bright Falls.
---
Beginner Tips
1. Always Aim for the Weak Point First
Every Taken enemy has a weak point: the light-cocooned head or chest. Shine your flashlight on them until the light shield breaks (the enemy becomes fully visible and staggers), then switch to a firearm for maximum damage. This is the core combat loop—never waste bullets on a shielded enemy.
2. Stay in the Light
Streetlights, car headlights, and flares are your safe zones. The darkness drains your health (especially during night sequences). When you see a light source, stand in it to regenerate health and calm your nerves. Use the environment to lure Taken into light pools.
3. Conserve Batteries and Ammo
Early in the game, resources are scarce. Only use the flashlight boost (click the right stick on console / Space on PC) when absolutely necessary to stun a nearby enemy or to break a shield. For ammo, rely on the revolver (plentiful ammo) and save shotgun shells for tougher threats.
4. Listen to Radio Shows and TVs
They are not just flavor—many broadcasts contain hints about upcoming enemies, safe room locations, or collectible positions. For example, the “Night Springs” segments sometimes foreshadow a sudden attack.
5. Dodge, Dodge, Dodge
The dodge roll (press A on Xbox / X on PlayStation / Shift on PC while moving) grants a brief invincibility window. Use it to avoid Taken grabs, thrown objects, and especially chainsaw attacks from the Taken Workers. Practice timing: dodge into the attack direction to avoid being cornered.
---
Combat Tips
1. Weapon Prioritization
- Flashlight (Primary): Use the focus beam (hold LT/right-click) to break shields from a distance. The focus beam deals stun damage to multiple enemies.
- Revolver: Best for finishing off single, unshielded Taken. Headshots do extra damage.
- Shotgun: Devastating at close range but slow. Use when trapped or against Heavy Taken.
- Hunting Rifle: Rare but one-shots most enemies if you hit the head after shield break. Save for Birds (crow swarms) or Bosses.
2. Environmental Combos
- Use explosive barrels (red barrels) to clear groups. Shoot them only when enemies are near.
- Flare gun: Hits a large area and sets enemies on fire. Great for crowd control.
- Flashbang: Instant shield break on all nearby Taken. Use before a shotgun rush.
3. The “Dodge-Shoot” Technique
For aggressive enemies like the Taken Axe Thrower: wait for them to wind up, dodge to the side, immediately focus your flashlight to break their shield (if not already broken), then fire a quick revolver shot. This minimizes damage taken.
4. Headlamp Strategy
Your headlamp is always on and illuminates a small area, but you can turn it off to save battery in the main flashlight. In brightly lit areas (e.g., near a spotlight), turn off the main flashlight to conserve battery for emergencies.
5. When to Run vs. Fight
Not every encounter requires killing all enemies. If you are low on resources and near your destination, sprint toward a light source. The Taken will stop chasing once you reach a well-lit area. This is especially useful in sequences like the Woods or the Construction Site.
---
Exploration Tips
1. Collect All Manuscript Pages
There are 106 collectible manuscript pages. They not only flesh out the story but often forecast future events (e.g., “Alan will be ambushed at the dam”). Read them in your inventory to gain tactical knowledge: you’ll know exactly where enemies spawn or how to solve a puzzle. Use a guide if needed for 100% completion.
2. Night Springs TV Episodes and Radio Shows
These are essential for the “Story within a Story” achievement and provide insight into Bright Falls’ weirdness. Check every TV (even if not glowing) and radio (look for the red light). Some are hidden behind destructible barriers or require backtracking.
3. Safe Rooms
Every episode has a safe room with a thermos of coffee (saves your game) and a stash of supplies. Always save before leaving a safe room—the next area may be a boss fight. In the safe room, you can also check collectibles progress.
4. Double Back for Secrets
The game opens up new areas in later episodes. For example, after Episode 3, you can return to earlier locations (like the Cauldron Lake area) to find missed collectibles. Use the episode select feature to revisit any completed episode without losing progress.
5. Look for Glowing Objects
Manuscript pages, ammunition, and batteries emit a faint white glow. During night segments, your flashlight will highlight them. Always scan the environment before moving on—resources are finite.
---
Resource Management
1. Battery Economy
Your flashlight battery depletes when you use the focus beam. Recharge by holstering the flashlight (press Y/triangle/button 2) or by walking near a light source. To maximize uptime:
- Use short bursts of focus (tap, don’t hold).
- In areas with many streetlights, your battery recharges quickly; disable the flashlight entirely to speed recharge.
- Battery pickups are rare—only use the focus beam when necessary.
2. Ammo Conservation
- Revolver bullets are the most common. Fire only at unshielded enemies.
- Shotgun shells are precious; only use them when surrounded or against large groups.
- Flares and Flashbangs should be saved for emergency crowd control or boss fights (e.g., the Boatyard).
- Hunting rifle ammo is extremely limited; reserve for high-value targets like Taken Birds (which can kill you in seconds) or the Mr. Scratch fights.
3. Healing Items
You only heal when near a light source. There are painkiller bottles (instant heal) and coffee thermoses (slow heal over time). Always carry at least one painkiller. Coffee is better used right before a large fight because it heals over time.
4. Max Inventory Slots
You can carry up to 6 weapons (including flashlight) and 6 items (flares, batteries, etc.). Manage your loadout: drop a weapon you don’t need (e.g., hunting rifle if you have no ammo) to pick up supplies. Items can be dropped via the inventory screen.
---
Advanced Strategies
1. The “Light Bomb” Tactic
Combine a flare gun with a flashbang: shoot a flare into a group of Taken to set them on fire, then throw a flashbang to instantly break the shields of any survivors, then mop up with the shotgun. This combo kills most non-boss enemies in seconds.
2. Boss Fight: The Taken Worker (Chainsaw)
This enemy is fast and lethal. Strategy: keep moving, use the environment (cars, tables) to block its charge. When it revs the chainsaw, dodge sideways. Break its shield quickly with a focus beam + revolver headshots (2-3 hits). If you have the pump shotgun, one close-range blast after shield break stuns it.
3. The Floaters (Poltergeist Enemies)
They are immune to guns until you hit them with light. Use the flashlight beam until the light cocoon breaks, then finish with the revolver. They hover and throw objects—dodge the objects and keep moving. Flashbang instantly breaks their shield.
4. Resource Farming
In certain areas (e.g., the Elderwood National Park), after clearing a group, wait a few seconds in a light source—sometimes enemies respawn and drop additional batteries or ammo. Use this to stock up before progressing. Beware: they may ambush you from behind.
5. Weapon Selection for Each Episode
- Episode 1: Revolver and shotgun are best; save flares for the finale.
- Episode 2 (Woods): Hunting rifle is useful for birds; avoid shotguns if you can’t get close.
- Episode 3 (Police Station): Pump shotgun is excellent in tight corridors.
- Episode 4 (Farm): Flare gun for the large outdoor groups.
- Episode 5 (Boatyard): Flashbangs and shotguns for the boat chase.
- Episode 6 (Cauldron Lake): Save all high-powered gear for the final boss.
6. Keyboard & Mouse vs. Controller
On PC, keyboard+mouse offers faster aiming and easier headshots, but controller provides smoother movement and dodge rolls. For the Remastered version, both work well; choose based on your comfort. On console, adjust sensitivity to 70-80% for quicker turns.
---
Economy & Achievements
Achievement/Trophy Tips:
- “Come on, really?” – Hit a bird with a flare gun. Easiest in the woods after Episode 2. Wait for a flock and fire.
- “Collect all manuscript pages” – Use a chapter select guide; you can replay individual episodes without overwriting your save.
- “Avoid all enemies from point A to B” – For “In a Light Blaze of Glory” or similar, you need to sprint past enemies—only fight when necessary.
---
Platform-Specific Notes
PC Original (2010): Use the widescreen fix if on modern resolutions. Set graphics to Medium if you experience stutter. Save frequently—there are no autosaves in some sections.
PC Remastered (2021): Runs smooth at 60 FPS on modern hardware. Enable Ray Tracing only on high-end GPUs (RTX 2060+). Shadows may flicker; lower shadow quality to fix.
Xbox/PlayStation: Quick Resume (Xbox Series) works well. On older consoles (PS4/Xbox One), expect loading times of 20-30 seconds. Delete unused game data to speed up.
Cloud Saves: Enable cloud sync (Steam/Epic/GOG) to avoid losing progress; Alan Wake has no manual save slots.
---
Final Pro Tips
Light is life: Always keep your flashlight battery above 50% before entering a dark area.
Read those pages: Manuscript pages often give you the exact sequence of events—use them to anticipate enemy placements.
Turn up the brightness if you find the darkness too oppressive (accessibility option).
Enable subtitles** for the story-heavy sequences; dialogue can be muffled during combat.
With these tips, you’ll be ready to face the Taken and uncover the mystery of Alan Wake. Good luck, writer. The darkness is always watching.
Game Settings
Game Settings Guide for Alan Wake
Introduction
Configuring the settings correctly is crucial to fully immerse yourself in the psychological horror of Bright Falls. This guide covers all settings categories for both the original 2010 PC release and Alan Wake Remastered (2021) , highlighting differences where they exist. Optimal settings recommendations are provided for low-end, mid-range, and high-end systems, with special attention to common misconfigurations that can harm performance or break immersion.
---
Graphics Settings
Both versions offer a range of graphics options. The Remastered edition adds 4K support, ray-traced reflections (on supported hardware), and improved textures. Below is a detailed table of key settings and recommended presets.
#### Graphics Settings Table
| Setting | Low-End (30 FPS target) | Mid-Range (60 FPS) | High-End (60+ FPS, 4K) | Notes |
|---|---|---|---|---|
| Resolution | 1280×720 | 1920×1080 | 3840×2160 (if possible) | Lowering resolution is most impactful for FPS. |
| Display Mode | Fullscreen | Fullscreen | Fullscreen | Borderless can reduce input lag but may cause stutter; use Fullscreen for pure performance. |
| Texture Quality | Low (or Medium) | High | Ultra (Remastered only) | In original, “High” is the max; Remastered “Ultra” adds 4K textures. |
| Shadow Quality | Low | Medium | High | Hard shadows are performance-heavy; set to Low on weak GPUs. |
| Anti-Aliasing | Off | FXAA (Remastered: TAA) | MSAA 2x or TAA (Remastered) | MSAA is expensive; TAA is a good balance. |
| Post-Processing | Off | On (Bloom, DoF) | On (all options) | Motion Blur and Depth of Field can cause visual discomfort for some players; disable if nauseating. |
| Ambient Occlusion | Off | SSAO (Medium) | HBAO+ (if available) | Adds depth but costs FPS; turn off on low-end. |
| Reflections | Off | Screen Space | Ray-Traced (RTX cards) | Ray-traced reflections are exclusive to Remastered and require a powerful GPU. |
| VSync | Off | Off | Off | Enable only if screen tearing is present; it caps FPS to refresh rate. |
| FOV | Default (65°) | 70-75° | 75-80° | A higher FOV reduces motion sickness but may slightly lower performance. |
| Texture Filtering | Bilinear | Trilinear | Anisotropic 16x | Minimal performance impact; set to max if possible. |
- Motion Blur is enabled by default in both versions. Many players find it distracting or nausea-inducing; disable it in the graphics menu if you experience discomfort. Look for a checkbox marked “Motion Blur” (original) or toggle in “Post-Processing” (Remastered).
- Depth of Field blurs the background during cutscenes and gameplay. While cinematic, it can make distant enemies harder to spot. Consider disabling for better tactical awareness.
- Texture Quality in the original 2010 release is limited to “High”; setting it to “Low” drastically reduces visual quality but frees up VRAM. In Remastered, “Ultra” demands 6+ GB VRAM – drop to “High” if you encounter stuttering.
- VSync should be turned off unless you experience tearing, as it introduces input lag. Use an external cap like RivaTuner instead.
- Master Volume: Default 100%; adjust based on your system.
- Music Volume: Keep high – the score by Petri Alanko is iconic.
- SFX Volume: Set to 70-80% so sound effects don’t overpower voice.
- Voice Volume: Keep at 80% or higher to catch dialogue.
- Surround Sound: Both versions support stereo and 5.1/7.1 surround. Select your speaker configuration in the audio menu. Windows Sonic or Dolby Atmos can be enabled for spatial audio if you have compatible headphones – this helps locate Taken off-screen.
- Subtitles: Toggle on/off. Recommend ON for accessibility and catching lore.
- Language: See Language section.
- If using surround sound, ensure your system is set to the correct channel count. The game may default to stereo; check under “Audio Output Mode” (Remastered) or “Speaker Configuration” (original).
- The original game has a known bug where music volume resets after cutscenes; adjust with slider if it becomes too loud.
- Mouse Sensitivity: Default is often too high (especially in original). Reduce to 2-3 on a scale of 10 if you find aiming twitchy.
- Invert Y-Axis: Toggle on if you prefer inverted look.
- Key Binding: In the original, you cannot rebind keys; Remastered allows full rebinding via the “Controls” menu. Common useful rebinds:
- Mouse Smoothing: Disable in both versions for precise aiming – it adds lag.
- Controller Vibration: On by default; can be disabled if distracting.
- Dead Zones: Not adjustable in either version. If stick drift occurs, try calibrating outside the game.
- Aim Assist: Available only in Remastered (see Gameplay Settings).
- The original game’s mouse acceleration (unremovable) can make aiming inconsistent. Some community tweaks exist (e.g., disabling via config file), but not officially supported.
- On keyboard, the Dodge action is bound to Space by default. Some players prefer moving it to Shift to avoid accidental jumps; Remastered allows this rebind, original does not.
---
Audio Settings
Audio design is critical in Alan Wake – the soundtrack and ambient sounds build tension. Settings are similar between versions.
#### Special Attention Points
---
Controls Settings
Both versions support keyboard & mouse and game controllers. The Remastered version adds native support for Xbox and PlayStation controllers with proper button prompts.
#### Keyboard & Mouse
- Dodge (original: Space → Shift)
- Weapon Switch (original: Mouse Wheel → Q)
#### Controller
#### Special Attention Points
---
Accessibility Settings
Alan Wake offers limited accessibility options, but the Remastered version improves on the original.
| Feature | Original (2010) | Remastered (2021) |
|---|---|---|
| Subtitles | On/Off, also for gameplay audio. | On/Off, with background transparency option. |
| Colorblind Modes | None. | Deuteranopia, Protanopia, Tritanopia filters. |
| Difficulty | 3 presets (Easy, Normal, Hard). | Same 3 presets; no custom difficulty. |
| Auto-Aim | None. | Toggle (Aim Assist) – helps lock onto Taken. |
| Camera Shake | No toggle. | Can be reduced in settings. |
- Enable Subtitles – crucial for understanding story amidst combat noise.
- Use Colorblind Mode if needed; it alters the flashlight beam and health indicators.
- Difficulty: Start on Normal for balanced experience; Hard is unforgiving with scarce ammo.
- Voice Language: English (default). Original game also supports French, German, Italian, Spanish (text and subtitles). Remastered adds Japanese, Russian, Polish, and more – check platform store.
- Subtitle Language: Independent from voice; you can have English audio with your native subtitles.
- Menu Language: Matches system language by default; can be changed in settings.
- Achievements/Trophies: Require an online connection on Xbox/PlayStation (original’s Xbox 360 version tied to Live; Remastered syncs to platform services).
- Cloud Saves: Supported on Steam and Epic Games Store (Remastered). Enable cloud sync in your platform settings.
- Difficulty: Choose from Easy, Normal, Hard. No custom sliders.
- Aim Assist (Remastered only): ON helps controller users; OFF for mouse/competitive feel.
- Auto-Look/Auto-Centre: Not present. Camera is fully manual.
- Save System: Auto-save at checkpoints; cannot adjust frequency.
- The Hard difficulty is not recommended for first playthrough – it removes some tutorial hints and spawns more enemies.
- If you are playing the original game, note that Quick Time Events (QTEs) are present; there is no setting to skip them. Just be prepared.
- Resolution: 1280×720
- Graphics Preset: Low (all sliders to minimum)
- Disable VSync, Motion Blur, Depth of Field
- Audio: Stereo
- Difficulty: Easy (to reduce stress)
- Expected FPS: 25-35
- Resolution: 1920×1080
- Graphics Preset: Medium-High (textures High, shadows Medium, AA FXAA)
- Post-Processing: Keep Bloom, disable Motion Blur
- Audio: 5.1 Surround
- Difficulty: Normal
- Expected FPS: 50-60
- Resolution: 3840×2160
- Graphics Preset: Ultra (Remastered) or Max (original)
- Ray-Traced Reflections: ON (Remastered only)
- Anti-Aliasing: TAA
- FOV: 75
- Expected FPS: 60+ (may need DLSS on Remastered for stable 60 at 4K)
- Always update your graphics drivers for the best performance.
- Check the game’s install folder for a configuration file (e.g., `config.ini` in original) if you want to tweak hidden settings (use at own risk).
- Alan Wake Remastered includes a built-in benchmark tool – use it to fine-tune your settings after initial changes.
---
Language Settings
---
Network Settings
Alan Wake is a single-player game. There are no multiplayer or dedicated network settings. However, note:
No in-game network configuration is present.
---
Gameplay Settings
Both versions offer minimal gameplay modifications:
- Easy: More ammo, less enemy health, slower Taken.
- Hard: Limited supplies, aggressive enemies; recommended for returning players.
#### Special Attention Points
---
Recommended Combined Presets
#### Low-End System (e.g., Intel HD Graphics, 4GB RAM)
#### Mid-Range System (e.g., GTX 1060, 8GB RAM)
#### High-End System (e.g., RTX 3080, 16GB RAM)
---
Final Tips
By thoughtfully adjusting these settings, you’ll be ready to face the darkness without technical distractions. Enjoy your time in Bright Falls!
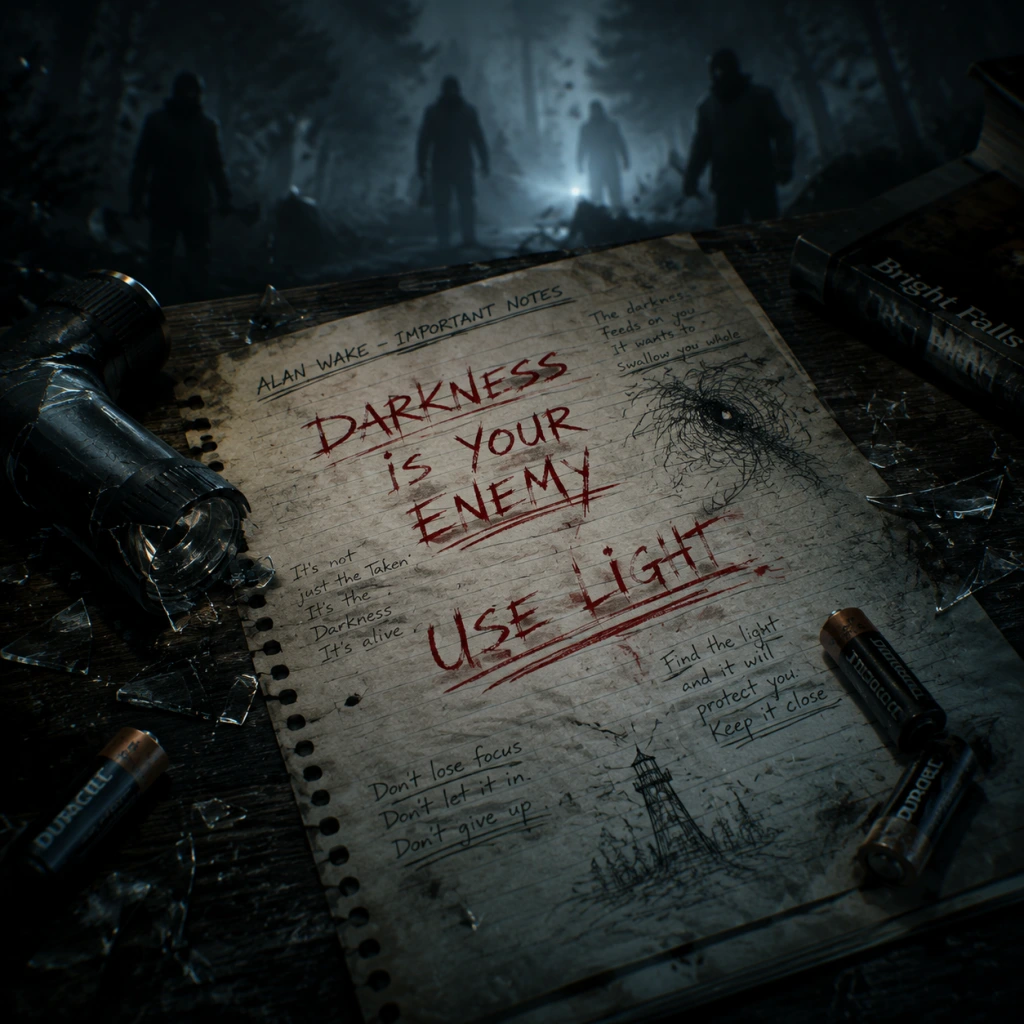
Important Notes
Important Notes for Alan Wake
General Warnings
- Darkness is your enemy: The Taken are vulnerable only when their darkness shield is removed by light. Always keep your flashlight charged and use flares, flashbangs, and environmental light sources (street lamps, generators, car headlights) to break their defenses.
- Battery management: Your flashlight consumes batteries rapidly. Prioritize finding batteries in the environment and conserve flashlight use when not in combat. Only use the boost (LB/L1/LShift) when you are about to shoot.
- Dodge is essential: Press the dodge button (A/X/Space) to avoid melee attacks and projectiles. Master the timing—dodging at the last second can save you from damage and interrupt enemy lunges.
- No manual saves: The game uses an automatic checkpoint system. You cannot manually save progress. Quitting mid-chapter will return you to the last checkpoint. Be sure to reach a checkpoint before closing the game.
- No story-altering choices: Alan Wake is a linear story with no branching dialogue or moral decisions. Your playthrough will always follow the same plot.
- Collectibles are per-chapter and missable:
- Chapter replay: You can replay chapters from the main menu to collect missed items, but you cannot carry collected items into a new game+ (the game has no New Game+). You must start a fresh playthrough for 100%.
- Chapter 2 – The Taken farmhouse: The first large indoor fight with multiple Taken. Manage your light and ammo carefully; retreat to lit areas.
- Chapter 4 – The bulldozer scene: A powerful, invulnerable enemy until you use environmental light. Stay mobile and use flares to keep it away.
- Chapter 5 – The Elderwood National Park: Multiple waves of Taken, including the fast "Bird" enemies. Use the environment to funnel them.
- Chapter 6 – The Mine: Tight corridors with many enemies. Flashbangs and shotguns are your friends.
- No leveling or skill points: There is no grinding in Alan Wake. Your character does not become stronger; your skill improves. Do not waste time farming enemies—they do not drop resources.
- Resource scarcity: Ammo and batteries are limited. Do not hoard them excessively—use them when needed—but avoid wasteful firing. The game is balanced so you can finish each encounter with careful play.
- Checkpoints are frequent but not everywhere: Checkpoints trigger after story events, entering new areas, or completing combat sequences. If you die, you respawn at the last checkpoint with the health and resources you had at that point.
- Before quitting: Ensure you have reached a checkpoint by seeing the autosave icon (spinning circle in the corner) or by pausing and checking that "Quit to Menu" is available without warning. Quitting during combat may set you back.
- Do not turn off the game during saving: If the autosave icon is visible, wait until it disappears.
- You can sprint by holding the run button (left stick click / Shift). This drains stamina but is vital for escaping tight spots.
- Flashlight boost recharges over time when not in use. Use it sparingly.
- Aim for the head: Once the darkness shield is stripped, headshots with the revolver or shotgun deal maximum damage.
- Environmental lights can be temporarily activated (e.g., gas station generators) to create safe zones. Always check for generators near fuse boxes.
- Pause recharges your flashlight: If you are out of batteries, pause the game. The flashlight will slowly recharge while paused (a known quirk).
- Do not skip cutscenes on your first playthrough – they contain critical story context and collectible hints (e.g., manuscript page locations are often highlighted in cutscenes).
- Read all manuscript pages – they reveal story elements, enemy weaknesses, and lore. Ignoring them hurts narrative understanding.
- Original 2010 PC version: May have compatibility issues on modern systems. Use the official patch and consider the remastered version for better performance. The original PC version has no achievements on Steam (only the remastered does).
- Remastered version (PC/consoles): Runs smoother, includes all DLC (The Signal, The Writer), and has achievements/trophies. No major bugs. Save data is cloud-synced on Steam and consoles (if subscribed to PlayStation Plus or Xbox Live).
- Console versions: On Xbox, achievements unlock without issue. On PlayStation, save data can be backed up to USB or cloud via PS Plus. Avoid deleting local saves accidentally.
- The Signal and The Writer DLC are set after the main game. They are accessed from the main menu after completing the story. They are not missable but are recommended to be played after finishing the campaign for story continuity.
- DLC difficulty: The DLC is harder than the main game. Stock up on strategy and expect fewer resources. Save often (through checkpoints).
Irreversible Choices & Missable Content
- Manuscript pages (90 total) – found in specific locations each chapter; once you progress, you cannot return.
- Coffee thermoses (100 total) – hidden throughout Bright Falls; missable if you skip areas.
- Radios & TVs – interact with all radios and TVs you encounter; they provide backstory and achievements.
- Signs & posters – some achievements (e.g., "Gone Reading") require reading specific signs; many are missable.
Difficulty Spikes
Grinding Traps
Save Management Advice
Things Players Commonly Regret Not Knowing Earlier
Platform-Specific Notes
DLC Content Considerations
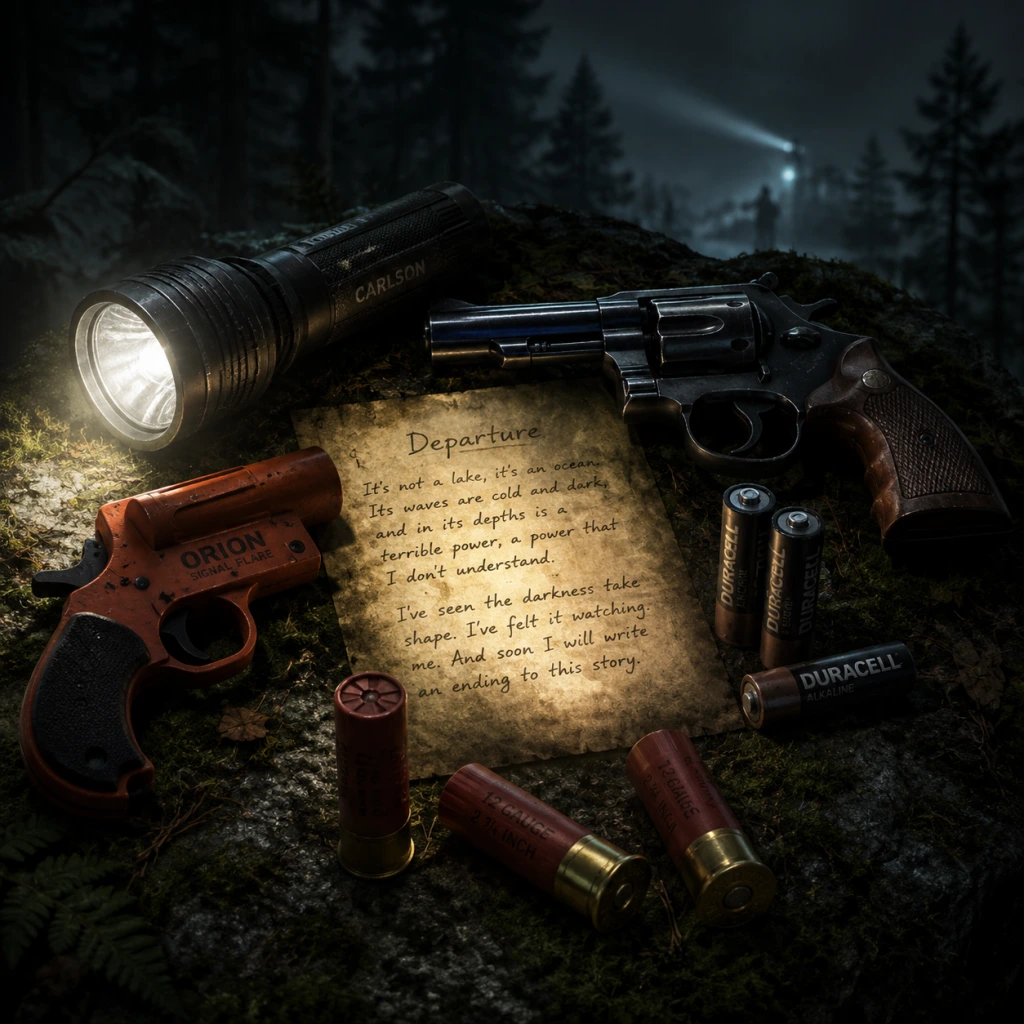
All Game Items
All Game Items Guide for Alan Wake
This guide covers every obtainable item in Alan Wake (original 2010 and Remastered editions). Items are grouped by category: Weapons, Ammo & Tools, Consumables, Key Items, Collectibles, and Upgrades. Each entry explains what the item does, how to obtain it, optimal use cases, and any important synergies (e.g., light + weapons). Note that Alan Wake has no armor or currency system; all items are either found in levels or unlocked through story progression.
---
Weapons
Weapons require ammo and are used to destroy Taken after removing their darkness shield with light. Most weapons are found in specific story moments and cannot be purchased.
#### 1. Flashlight (Primary Tool)
- Description: Your constant companion. Emits a beam of light that can be focused to burn away the darkness shield of Taken. The harder you press the focus button, the faster the battery drains.
- How to Obtain: Always equipped from the start. Can be upgraded later (see Upgrades).
- When Useful: Essential for every encounter. Use focused light to strip shields quickly, then switch to a firearm. Also lights up dark areas and reveals hidden items.
- Synergies: Works with all weapons. Upgraded beam (after obtaining the focus upgrade) makes shield removal much faster.
- Description: A six-shooter pistol. Reliable, decent damage, moderate fire rate. Holds 6 rounds; reloads instantly.
- How to Obtain: Found early in Episode 1 (after escaping the car crash). Ammo is common throughout the game.
- When Useful: All-purpose weapon. Effective against most Taken from mid-range. Weak against bosses without upgrades.
- Synergies: Quick to aim; pairs well with flashlight focus. Use headshots for extra damage.
- Description: Pump-action shotgun. Devastating at close range but slow fire rate and long reload. Holds 8 shells.
- How to Obtain: First found in Episode 2 (at the construction site). Appears regularly afterward.
- When Useful: Ideal for close-quarters combat, especially indoors or tight corridors. One shot can stagger multiple Taken.
- Synergies: Combine with flashbangs to stun groups, then blast them. The spread makes headshots less critical.
- Description: Bolt-action rifle with high damage and excellent range. Holds 5 rounds; reloads slowly.
- How to Obtain: First acquired in Episode 3 (at the Anderson Farm). Ammo is scarce.
- When Useful: Best for sniping Taken at long range or taking down shielded tough enemies (e.g., Clutch Cutter enemies). Save ammo for bosses.
- Synergies: Use with focused flashlight for a quick kill. A single headshot often kills unshielded Taken.
- Description: Single-shot pistol that fires a bright flare. The flare sticks to surfaces and creates a temporary light zone. The projectile itself can damage Taken if it hits.
- How to Obtain: Found in Episode 4 (at the lumberyard). One-time use per pickup; extra flares are found sparingly.
- When Useful: Excellent for emergency crowd control. Fire into a group of Taken to blind them and buy time. Can also ignite environmental hazards (e.g., gas leaks).
- Synergies: After a flare lands, you can safely run past enemies or focus fire on one target. Pairs with Molotov-like environmental traps.
- Description: Throwable explosive that creates a brilliant flash of light, stunning all Taken in radius and instantly removing their darkness shields.
- How to Obtain: Found rarely in levels, often in toolboxes. Can be crafted? No, only found.
- When Useful: Lifesaver in overwhelming situations. Use when surrounded to stun enemies and then quickly dispatch them. Also useful to blind a boss momentarily.
- Synergies: After a flashbang, Switch to shotgun for quick kills. Avoid use near explosive barrels if you want to conserve them.
- Description: Recharge your flashlight battery to full instantly. Cannot be carried; used automatically when picked up if battery is not full.
- How to Obtain: Found everywhere—on tables, in drawers, dropped by Taken. Very common.
- When Useful: Always useful. Keep an eye on the battery meter; pick up batteries to stay mobile. If full, you cannot pick them up (they stay for later).
- Synergies: The upgraded flashlight drains battery faster, so batteries become even more critical.
- Description: Heal Alan instantly when used. Restores a moderate amount of health (about 1/3 of the health bar). Can be carried in inventory (max of 3 or 5 depending on difficulty).
- How to Obtain: Found in bathrooms, kitchens, and medical kits. Also dropped by Taken occasionally.
- When Useful: Use when health is low, especially before a difficult combat. Because health does not regenerate, painkillers are your only healing.
- Synergies: Save them for boss fights or long stretches without checkpoints.
- Description: Not a consumable but a collectible. See Collectibles section.
- Description: Not a consumable but a collectible. See Collectibles section.
- Description: A small device that emits a distinct clicking sound. Used to turn off lights (including neon signs) and later to defeat the Dark Presence. Essentially a sonic distraction. Also used to solve light-related puzzles.
- How to Obtain: Given by Alice’s sister in Episode 1. Used throughout the story.
- When Useful: Essential for advancing plot. In combat, clicking can distract Taken for a brief moment (they pause). Not a primary weapon.
- Synergies: Combine with stealth—click to lure Taken away from doors.
- Description: Single-use key items that unlock specific doors or vehicles. Appear in episodic order.
- How to Obtain: Found in scripted locations. Each key is used immediately after acquisition.
- When Useful: They are mandatory for progress.
#### 2. Revolver
#### 3. Shotgun
#### 4. Hunting Rifle
#### 5. Flare Gun
#### 6. Flashbang
---
Ammo & Tools (Consumables)
These items are consumed on use and are essential for survival. They are found as pickups throughout the environment.
#### 1. Flashlight Batteries
#### 2. Painkillers
#### 3. Coffee Thermoses
#### 4. Manuscript Pages
---
Key Items
These are plot-related items with specific uses. They cannot be dropped or lost.
#### 1. The Clicker
#### 2. Car Keys / Gate Keys / Various Keys
#### 3. Battery (for the lighthouse?)Not a distinct item.; the game has no battery item beyond flashlights.
---
Collectibles
Collectibles are optional but unlock achievements, provide backstory, and enhance the narrative. They are persistent across saves.
#### 1. Manuscript Pages
Description: Pages from Alan’s novel “Departure” (his new manuscript). Collecting them reveals the story ahead and offers gameplay tips. There are 105 pages in total.
How to Obtain: Scattered throughout the environment, often in open drawers, on benches, or behind objects. Some are only obtainable on first playthrough; New Game+ does not reset them.
When Useful: Purely narrative and achievement. They do not affect gameplay directly but give insight into upcoming events.
Synergies: None. Full collection unlocks the “Collector’s Edition” achievement or trophy.
#### 2. Coffee Thermoses
Description: Thermos flasks that represent the game’s “hidden collectible” (like audio logs). There are 15 Coffee Thermoses total. Collecting them unlocks an achievement/trophy and a video about the making of the game.
How to Obtain: Hidden in every episode. Usually in out-of-way places. There are no hints; use guides.
When Useful: Optional. No in-game reward beyond the secret video.
#### 3. TV Shows (Bright Falls / Night Springs)
Description: Televisions that play short episodes of a fictional show (Night Springs) or news broadcasts. Viewing them provides comic relief and lore.
How to Obtain: Found in houses, trailers, and stores. Interact with them to watch. Number varies by game version.
When Useful: Purely for atmosphere. Some provide clues about the story.
#### 4. Radios
Description: Radios that broadcast a local talk show with Pat Maine. Each radio has a unique segment that fleshes out the town.
How to Obtain: Found in vehicles and buildings. Interact to listen. There are 8 radios in the original game.
When Useful: Same as TVs – flavor content.
#### 5. Signs / Posters
Description: Various environmental signs that are interactive (e.g., “Keep Off the Grass,” “Caution,” etc.). Interacting with them plays a short voice line from Alan—usually humorous or insightful.
How to Obtain: Throughout the world. There are over 50 signs in total. They are not tracked in-game but count toward an achievement.
When Useful: For the “Read ’em and Weep” achievement. Also adds personality to the game.
#### 6. Weapon Parts (Upgrade Components)
Description: Caches containing weapon mods. Found after defeating Taken or in secret areas. There are 10 upgrades available (see Upgrades section).
How to Obtain: In specific locations, often locked behind optional paths.
When Useful: Each part permanently improves the flashlight or a weapon.
---
Upgrades
Upgrades are permanent enhancements that improve the flashlight or weapons. They are discovered as plot-related items or collectibles.
#### 1. Flashlight Focus Upgrade
Description: A lens attachment that allows the flashlight to focus its beam into a concentrated point, burning darkness shields much faster.
How to Obtain: Found in Episode 2 at the Rusty Nail trailer park (in a trailer). Mandatory for progression? Not strictly, but very helpful.
When Useful: Unlocks the ability to press the right mouse button (or controller trigger) to focus. Use it to strip shields quickly. Essential for efficient combat.
#### 2. Revolver Upgrades (Parts)
Description: Four parts scattered across episodes (e.g., laser sight, speed loader, etc. – exact effects vary by version). In Remastered, upgrades are collected as “Weapon Parts” that permanently increase damage, fire rate, or reload speed.
How to Obtain: Found in hidden locations (e.g., behind breakable walls, in locked rooms). Specific to each weapon type.
When Useful: Makes weapons more effective against tougher Taken. Prioritize revolver upgrades early because you use it most.
Synergies: A fully upgraded revolver can kill weaker Taken in one headshot.
#### 3. Shotgun Upgrades (Parts)
Description: Two or three parts that increase damage, range, or reload speed.
How to Obtain: Similarly hidden. One common upgrade is in the flooded area of Episode 3.
When Useful: Improves crowd control.
#### 4. Hunting Rifle Upgrades (Parts)
Description: Two parts that improve damage and reduce recoil.
How to Obtain: One in Episode 4, another in Episode 5.
When Useful: Makes the rifle a one-shot kill on most Taken (if headshot).
Note:** Upgrades are not mandatory but highly recommended for higher difficulty settings. There are exactly 10 upgrades total across all weapons. The flashlight focus is the only non-weapon upgrade.
---
Summary Table
| Category | Item | Purpose | Rarity |
|---|---|---|---|
| Weapon | Revovler | General combat | Common |
| Weapon | Shotgun | Close-range damage | Common |
| Weapon | Hunting Rifle | Long-range sniping | Uncommon |
| Weapon | Flare Gun | Area denial + light zone | Rare |
| Weapon | Flashbang | Stuns all enemies in radius | Very Rare |
| Tool | Flashlight | Primary light source | Always |
| Consumable | Batteries | Recharge flashlight | Abundant |
| Consumable | Painkillers | Healing | Common |
| Key Item | Clicker | Puzzle solving, story progression | Unique |
| Key Item | Keys | Unlock specific doors | Single-use |
| Collectible | Manuscript Pages | Lore and achievements | 105 total |
| Collectible | Coffee Thermoses | Secret video unlock | 15 total |
| Collectible | TV Shows | Flavor | Episodic |
| Collectible | Radios | Flavor | 8 |
| Collectible | Signs | Achievement (“Read ’em and Weep”) | 50+ |
| Upgrade | Flashlight Focus | Faster shield removal | Story |
| Upgrade | Weapon Parts | Permanently improve weapons | 10 total |
Important Notes
- No inventory system: Alan can carry unlimited items? Actually, you can hold a finite number of ammo and consumables: max 3-5 painkillers, 12 revolver rounds (inventory display), etc. But you pick up items automatically within capacity.
- Ammo conservation: On higher difficulties, prioritize flashlight and melee-like attacks? There is no melee weapon; only firearm attacks after shield removal.
- Batteries: Always top off your flashlight when you see them. A dead flashlight in combat is deadly.
- Flashbang crafting: Not a feature in the original or Remastered. All items are static finds.
For exact locations of every collectible and upgrade, refer to the individual episode guides or walkthroughs. This guide covers all item types to prepare you for the darkness of Bright Falls.
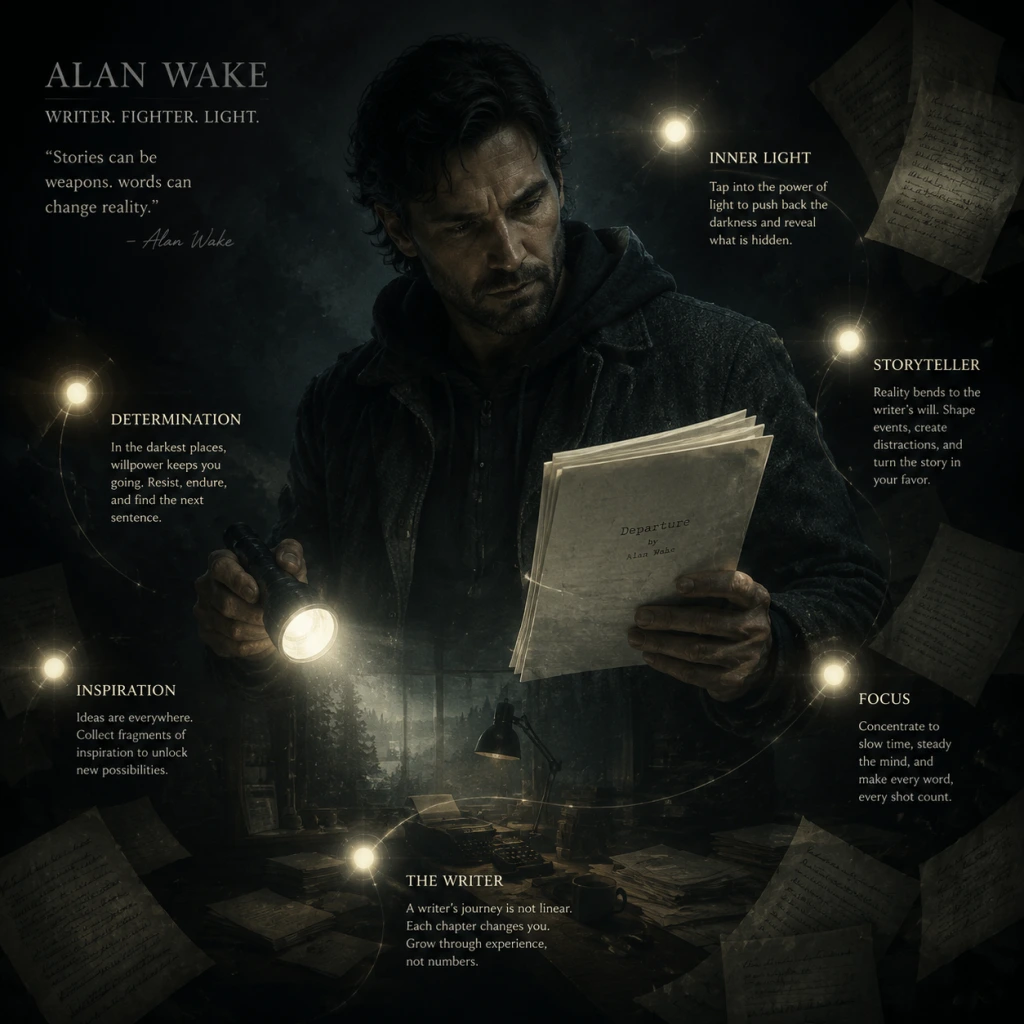
Character Skills
Character Skills for Alan Wake
Overview
Unlike traditional RPGs, Alan Wake has no skill trees, talents, or spells. Alan Wake is the sole playable character, and his abilities are defined entirely by his weapons and tools – specifically his mastery of light. This guide treats every weapon, item, and action as a “skill,” detailing its effects, usage, and optimal situations. All information applies to both the original 2010 release and the Remastered version.
---
Core Ability: Flashlight
Alan’s most essential tool. It serves as both a light source and a weapon to strip the darkness shield from Taken.
- Modes:
- Battery: Depletes over time, recharges automatically when not in use (slower during combat). Batteries (found in the environment) instantly restore full charge.
- Cooldown / Management: No cooldown – only battery capacity. Always keep an eye on the battery indicator. Switch to low beam when exploring to conserve charge.
- Upgrades: None permanent. Finding extra batteries in the world increases your reserves (carry limit starts at 4, can be increased to 6 by picking up battery packs).
- Best Use: Always use focused beam to break a Taken’s darkness shield, then continue to shine to stun them before switching to firearms. Against large groups, use focused beam only on the nearest enemy.
- Input: Press the dodge button (B on Xbox, Ctrl/C on PC?). Standard third-person dodge.
- Cooldown: None; can be spammed, but careful timing is required to avoid attacks.
- Effect: Evades melee attacks, projectiles (like thrown axes), and explosions. Does not break the darkness shield but keeps you alive.
- Upgrades: None.
- Best Use: Use just as a Taken swings or just before an explosion. It can also be used to quickly reposition when surrounded.
- Low Beam: Wards off darkness slowly; battery lasts longer.
- Focused Beam (hold RT/click RMB): Burns darkness rapidly, but drains battery twice as fast. Required to stun and damage Taken after the shield is gone.
---
Defensive Maneuver: Dodge
A quick sidestep or roll that provides temporary invincibility frames.
---
Primary Weapons
| Weapon | Damage | Ammo Capacity | Reload Speed | Effective Range | Best Use |
|---|---|---|---|---|---|
| Revolver | High per shot (headshot kills most Taken instantly when darkness is gone) | 6 rounds | Moderate | Medium | Precision; taking down isolated enemies from a distance. |
| Shotgun | Very high burst; one shot can kill multiple Taken at close range | 2 shells | Slow | Short | Crowd control; close quarters. |
| Hunting Rifle | Extremely high; one-shot kills even from a distance (after darkness removed) | 6 rounds | Slow | Very long | Sniper; eliminating threats from afar, especially Taken with ranged attacks. |
| Flare Gun | Instant light damage; sets enemies on fire for seconds | 1 flare | Very slow | Medium, but AoE | Stunning groups; emergency escape. |
Combos: Light + Shoot. Burn shield with flashlight, then switch to revolver/shotgun for the kill. Or use flare to stun, then shotgun blast to the chest.
---
Consumable Light Tools
| Tool | Effect | Duration | Carry Limit | Best Use |
|---|---|---|---|---|
| Flare | Burns brightly, repelling nearby Taken; provides safe zone. | ~8 seconds | 5 | Area denial; protecting yourself while reviving or switching weapons. |
| Flashbang | Instant blinding light; stuns all Taken in radius for ~3 seconds. | Instant | 5 | Crowd control; buying time to escape or kill multiple enemies. |
| Signal Flare (rare) | A powerful flare that lasts longer and attracts Taken, burning them. | ~15 seconds | 2 | Distraction; luring enemies into an area then shooting them. |
| Thermos (note: not a tool, but collectible) | – | – | – | No combat use. |
- Toss a flare at your feet, then use the revolver to pick off enemies from inside the safe zone.
- Throw a flashbang, then immediately sprint through a group to safety.
- Streetlights, floodlights, car headlights, TV screens – Standing under these temporarily stuns incoming Taken. No cooldown, but enemies will avoid them unless forced.
- Generator-powered lights – Turn on generators to create permanent safe zones. Useful for choke points.
- Flashlight – The only portable light source.
- No cooldown – As long as the light is on, it works.
- Weapon 1: Revolver (versatile)
- Weapon 2: Shotgun (crowd control)
- Tools: 2 Flares, 2 Flashbangs
- Best for most encounters.
- Weapon 1: Hunting Rifle
- Weapon 2: Revolver (backup for close range)
- Tools: 4 Flares (to keep enemies at distance)
- Ideal for open areas like Cauldron Lake.
- Weapon 1: Shotgun
- Weapon 2: Flare Gun (secondary)
- Tools: 4 Flashbangs (to stun then shove shotgun in face)
- Use in tight corridors or when expecting heavy Taken pressure.
- Flashlight: Always on. Switch to focused beam only when enemies are near. Use low beam to preserve battery during exploration.
- Dodge: Use when you hear the enemy’s attack sound or see them lunge. Essential against axe-throwing Taken.
- Revolver: Any time you can line up a headshot. Best for lone Taken or when ammo is scarce.
- Shotgun: When three or more Taken are within 5 meters. Also great for braking through wooden barriers.
- Hunting Rifle: Use against Taken that stand still (e.g., those with ranged weapons) or snipers on high ledges. Not good for crowded fights.
- Flare Gun: Emergency only – ammo is rare. Use when overwhelmed or to clear a path through a tight spot.
- Flares: Throw one before entering a dark building to light your way and keep enemies at bay.
- Flashbangs: Throw into a group before charging in with the shotgun. Or use to interrupt a second wave of enemies.
- There are no character upgrades – Alan’s skills remain the same throughout the game. Progression comes from player skill and resource management.
- The DLC chapters (“The Signal” and “The Writer”) add no new abilities but introduce more challenging enemy types.
- In Alan Wake’s American Nightmare (a separate game), additional weapons like the submachine gun and crossbow appear, but this guide focuses on the main Alan Wake experience.
---
Environmental Light Sources
Best Use: Lure enemies into light sources to stun them, then shoot without wasting battery. In the woods, use car headlights as temporary safe havens.
---
Advanced Techniques & Combos
1. The Light-Stun-Kill Combo: Activate focused beam → burn shield → switch to revolver → headshot. This is the bread and butter.
2. Flare-Stun-Close-Quarters: Throw a flare or flashbang → close distance → shotgun blast to multiple enemies.
3. Dodge-Through: Dodge _toward_ an attacking Taken – then immediately shine light on its back, causing it to stun for a longer period.
4. Ammo Conservation: Use environmental light to stun large groups, then focus on one at a time with pistol headshots. Do not waste ammo on shielded enemies.
5. Flare Gun Emergency: When surrounded, fire the flare gun at your feet – it creates a temporary safe zone that burns all nearby Taken, allowing you to escape or reload.
---
Recommended Loadouts
#### Balanced (Default)
#### Sniper / Ranged
#### Aggressive Close Quarters
---
When to Use Each Skill
---
Notes
---
Master the light, and the darkness will yield.
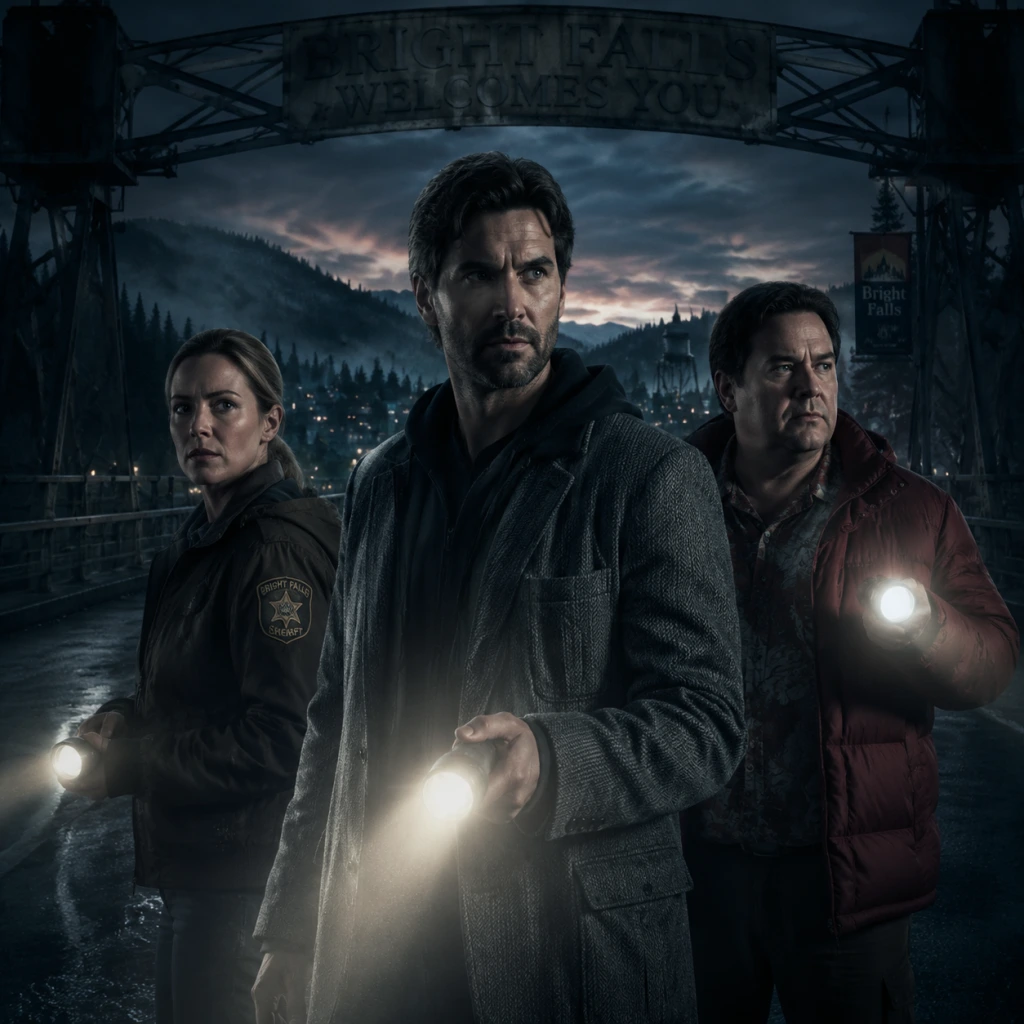
Characters & Roles
Characters & Roles Guide for Alan Wake
Introduction
_Alan Wake_ is a narrative-driven psychological thriller with a single playable character: Alan Wake himself. However, the game features a rich cast of supporting characters who drive the story, provide assistance, or serve as antagonists. This guide covers every major character, their background, role in the game, and how they interact with the gameplay. Since there is no class system or multiple playable units, the focus is on narrative roles and practical advice for using Alan alongside his allies.
Playable Character
#### Alan Wake
- Background: Alan Wake is a bestselling thriller writer from New York, suffering from severe writer’s block. He travels to the small town of Bright Falls, Washington, with his wife Alice for a vacation. When Alice mysteriously disappears, Alan is plunged into a nightmare where his own written manuscript is coming to life, unleashing the supernatural Dark Presence and its minions, the Taken. Alan must use light and writing to survive and save his wife.
- Role: Sole protagonist and playable character. He is a survivor, not a combat specialist. His primary means of defense are light sources and firearms.
- Strengths:
- Weaknesses:
- Playstyle: Alan’s playstyle is tactical and resource-conscious. The core loop: Illuminate – use flashlight or flare to burn away the darkness shield of a Taken; Shoot – fire weapons to kill the now-vulnerable enemy; Survive – manage resources, dodge, and use environmental light. Alan must always prioritize positioning to avoid being surrounded.
- Unlock Conditions: Alan is available from the start of the game. No unlock required.
- Recommended Equipment/Builds: Since there is no skill tree, Alan’s effectiveness depends entirely on item selection and usage:
- Team Synergy: Alan works best when he uses NPC allies as distractions or temporary covers. For example, in Episode 3, Barry Wheeler provides comic relief and sometimes holds a light source, allowing Alan to focus on shooting. In Episode 5, Sheriff Sarah Breaker helps by clearing a path with a shotgun. Play close to them when possible but do not rely on their AI.
- Background: Alan’s wife, a photographer. She is the catalyst for the story; her disappearance drives Alan into Bright Falls’ darkness. She is held captive by the Dark Presence in Cauldron Lake’s cabin.
- Role: Motivational goal and damsel in distress. She appears only in cutscenes and phone calls, never as a gameplay ally.
- Gameplay Impact: She is not controllable. Finding clues about Alice (e.g., her manuscript pages) advances the plot and grants Alan health restoration via manuscript pickups.
- Background: Alan’s loyal but neurotic literary agent. He arrives in Bright Falls to help Alan after hearing of Alice’s disappearance. Barry is terrified of everything but extremely resourceful and unintentionally brave.
- Role: Ally in Episode 3 (and appears briefly in later episodes). He drives a car, carries a flashlight, and occasionally provides light support during combat sequences.
- Strengths: He can distract enemies; his panic often draws Taken away from Alan temporarily. He also has a flashlight that can help weaken nearby Taken.
- Weaknesses: Barry’s AI is scripted and not controllable. He may run into danger, get stuck, or stop helping. He cannot fight, only provide light.
- Synergy: Stay near Barry in areas where he accompanies you; use his light to supplement your own, saving flashlight batteries. However, be prepared to protect him if enemies target him.
- Background: The tough, no-nonsense sheriff of Bright Falls. She initially suspects Alan of wrongdoing but later becomes a key ally, helping him navigate the town and fight the Taken.
- Role: Ally in Episode 5. She provides information, unlocks doors, and in one sequence fires a shotgun at enemies from a distance.
- Strengths: She has a shotgun and good aim; can eliminate some Taken from afar, easing pressure during the drive-by shooting section (the “Thermos” part).
- Weaknesses: Her involvement is very limited (one episode). She does not follow Alan into later areas.
- Synergy: Follow her lead during the car sequence; she will shoot enemies in the road. Keep your own weapon ready for flanks.
- Background: A mysterious old woman who lives in a cabin on Cauldron Lake. She is actually the former “witch” who tried to contain the Dark Presence. She helps Alan through cryptic advice and by taking him to the lake in Episode 6.
- Role: Quest-giver and boat driver. She is not a combat ally.
- Gameplay Impact: She guides Alan to the final confrontation. No direct gameplay synergy.
- Background: An ancient, malevolent entity that dwells in Cauldron Lake. It feeds on creativity and darkness, and can warp reality by manifesting written stories. It is the primary antagonist.
- Role: Final boss and source of all Taken.
- Combat: Fought only at the end of Episode 6 as a swirling mass of darkness. Must be defeated by using light beams from the lighthouse.
- Weakness: Extremely vulnerable to intense light (searchlight, flare gun).
- Background: Humans possessed by the Dark Presence. They appear as shadowy figures with glowing red eyes. They are invulnerable until their darkness shield is burned away by light.
- Types:
- Role: Standard enemies. Not playable.
- Background: A dark, evil twin of Alan Wake, created by the Dark Presence. He appears in the DLC “The Signal” and “The Writer,” and later in _Alan Wake’s American Nightmare_.
- Role: Antagonist in DLC. Not playable in the main game.
- Weakness: Similar to Taken – needs light exposure.
- Background: A crazed hermit living in the woods, driven mad by the Dark Presence. He sometimes appears as a Taken or a hallucination.
- Role: Minor enemy/guide. Not playable.
- Background: The cheerful but clueless host of Bright Falls’ radio station. He provides atmospheric commentary and clues via his show.
- Role: Narrative exposition only. No gameplay interaction.
- Background: Dr. Hartman (not to be confused with Emma) and FBI agent Nightingale investigate the strange events. They appear in cutscenes and provide context.
- Highly resourceful with light-based weaponry (flashlight, flares, flashbangs, flare gun).
- Can use environmental light (streetlights, generators, searchlights) to weaken Taken.
- The “Focus” ability allows him to dodge enemy attacks and run faster for a brief time (by pressing the sprint button).
- Can find and use manuscript pages to gain insight and heal.
- Physically fragile; can only take a few hits before dying.
- No melee combat; must rely on ranged weapons and light.
- Limited inventory space (pistol and shotgun cannot be carried simultaneously; only one rifle in special episodes).
- Light sources are consumable and must be managed carefully.
- Primary Weapon: Revolver (most common, reliable). Use it for standard Taken. Shotgun is powerful but has limited ammo; save for close encounters or large groups. Rifle appears only in Episode 4.
- Light Tools: Always carry at least one flare to panic groups, and flashbangs for emergency crowd control. Flashlight batteries are critical – upgrade to the high-beam mode (hold flashlight button) when able.
- Consumables: Manuscript pages boost health; coffee thermoses are fetch quests not usable in combat. Ammo is scarce – aim for headshots after burning the shield.
- Synergy with Allies: Not directly controllable, but allies provide narrative support and occasional combat aid (see below). Use their presence to draw enemy attention or get a temporary safe zone.
Major Supporting Characters (Allies)
#### Alice Wake
#### Barry Wheeler
#### Sheriff Sarah Breaker
#### Dr. Emma Hartman / “The Witch of Cauldron Lake”
Antagonists / Major Non-Playable Characters
#### The Dark Presence
#### The Taken (Minions)
- Basic Taken: Slow, melee attackers. Weak to light.
- Ranged Taken: Throw axes, rocks, or use tools. Shield takes longer to burn.
- Boomer Taken: Carry explosive barrels – shoot after lighting.
- Bird Swarms: Appear in Episode 5; can be dispersed with flares.
#### Mr. Scratch (Doppelgänger)
#### Dr. Edward “Ed” Booker / “The Old Man”
#### Pat Maine (Radio Host)
#### Various Doctors / FBI Agents (Narratively)
Special NPCs (Non-Interactive)
The game includes several characters who are purely narrative, such as the old woman in the nursing home, the cult of the tree, and the members of the Bright Falls supporting cast. They do not affect gameplay.
Conclusion
While you only play as Alan Wake, understanding the roles of the supporting cast enriches the experience. Use Barry and Sarah when they are present to conserve resources, and remember that the true enemy is the Dark Presence itself. Manage your light and ammo carefully, listen to the radio broadcasts for clues, and immerse yourself in the story. The characters are the heart of Bright Falls – your survival depends on both your wits and your willingness to trust those who help you.
Cheats & Secrets
Cheats & Secrets for Alan Wake
Overview
_Alan Wake_ does not include traditional cheat codes such as invincibility, infinite ammo, or level-select passwords. The game was designed without debug console commands accessible to players. However, it contains hidden unlockable content, Easter eggs, and developer-intended secrets that reward exploration and completion. This guide covers every known hidden feature in the original 2010 PC release and the 2021 Remastered edition.
---
Unlockable Content
#### Episodes as Chapter Select
After completing the main story (Episode 6), you unlock the ability to replay any individual episode from the main menu via Select Episode. This allows you to revisit areas and collect any missed Manuscript Pages, Coffee Thermos, or Can Pyramids. The Remastered edition also includes the two DLC episodes (_The Signal_ and _The Writer_) as part of the base game, which are also replayable after completion.
#### Achievements / Trophies as Unlockables
Certain achievements unlock bonus content in the original PC version (and by extension on Xbox 360/One via backward compatibility). These include:
- "Collector" (collect all 100 Coffee Thermos) – unlocks a short making-of video.
- "Page Turner" (collect all 106 Manuscript Pages) – unlocks a developer commentary video.
- "Epicurean" (complete game on Normal) – unlocks the script for Episode 1.
- "Alcoholic" (find all six optional can pyramids) – unlocks a short comedy video about can pyramids.
- "No Mere Mortal" (complete game on Nightmare difficulty) – unlocks the script for the entire game (via the in-game bonus menu).
On the Remastered edition, achievements/trophies do not unlock additional in-game content, but completing specific challenges still grants the achievement itself.
---
Easter Eggs and Hidden Content
#### 1. The Night Springs Episode
Throughout the game, you can find television sets that play snippets of a fictional show called _Night Springs_ (a parody of _The Twilight Zone_). These segments are hidden but are part of the main story. There is no hidden trigger to unlock extra episodes.
#### 2. The "Bunnies" Easter Egg
In the farmhouse area in Episode 2, look for a small shed. Inside, you can find a pile of stuffed rabbits. This is a nod to the developer Remedy's earlier game _Max Payne_ (bunnies appeared in that game's dream sequences).
#### 3. The "Max Payne" Reference
In Episode 5, in the Anderson farmhouse, there is a room with a TV showing a black-and-white noir film. The narrator sounds like Max Payne. This is a direct reference to Remedy's previous game series.
#### 4. The "Alan Wake" Novel
In the DLC episode _The Writer_, you can find a copy of the fake book _Departure_ (the same name as a manuscript page collectible). Interacting with it triggers a line from Alan.
#### 5. The "Bright Falls" Live-Action Web Series
Prior to the game's release, Remedy produced a six-part live-action miniseries called _Bright Falls_. Portions of this series are viewable via hidden TVs in the game. The full series is available on YouTube but is not unlockable within the game itself.
#### 6. Secret Cavern in Episode 6
During the final episode, just before entering the cabin, there is a hidden path to the left of the main trail (near a fallen log). Following it leads to a small cave containing a Coffee Thermos and a Manuscript Page. This is not marked on any map.
#### 7. The "Clicker" Reference
In the original script, the clicker (a key item used to call for Alice) was originally meant to have a hidden function. In the final game, it only serves a narrative purpose. However, if you rapidly press the interact button while holding the clicker in any playthrough, Alan will occasionally comment "Are you there?" – a minor Easter egg.
#### 8. Developer Comments in Bonus Content
After unlocking the developer commentary video (by collecting all Manuscript Pages), you can hear the developers discuss hidden design choices, including cut content like a planned survival mode.
---
Exploit-Safe Secrets (Developer Intended)
#### Alternate Dialogue
If you stand idle in certain locations for an extended time (e.g., at the start of Episode 1 near the car), Alan will mutter unique lines such as "I really need to get going." This is not a secret per se but a subtle detail.
#### Coffee Thermos Placement
All 100 Coffee Thermos locations are fixed, but some are very well hidden. For example, in Episode 3 on the construction site, one is behind a pillar that is easy to miss. Collecting all 100 does not give gameplay advantages but unlocks the making-of video.
#### Manuscript Pages
There are 106 Manuscript Pages in total (including 6 that are story-required and cannot be missed). The optional pages contain foreshadowing and secret lore. Some pages are hidden behind destructible light sources (e.g., prop flares or barrels). This is intentional design.
#### Can Pyramids
Six optional can pyramids can be shot down. Each one is a stack of soda cans found in the environment (e.g., on picnic tables, in pantries). Destroying all six unlocks the "Alcoholic" video. This is a developer-intended hidden collectible chain.
---
Summary Table of Unlockables
| Achievement / Task | Unlock in Original PC | Unlock in Remastered |
|---|---|---|
| Complete game on Normal | Episode 1 script | None (achievement only) |
| Complete game on Nightmare | Full game script | None (achievement only) |
| Collect all 100 Coffee Thermos | Making-of video | None (achievement only) |
| Collect all 106 Manuscript Pages | Developer commentary | None (achievement only) |
| Destroy all 6 can pyramids | Comedy video | None (achievement only) |
Conclusion
While _Alan Wake_ lacks traditional cheat codes, its depth comes from hidden collectibles and lore Easter eggs. The game rewards thorough exploration with developer commentaries and humorous videos. The Remastered edition streamlines unlockables into achievements, so players should focus on finding every Manuscript Page and Thermos for the full experience.