
Alien: Isolation
## Introduction *Alien: Isolation* is a first-person survival horror game that masterfully captures the claustrophobic terror of Ridley Scott's original 1979 film. Developed by Creative Assembly and published by Sega, it was initially released on October 7, 2014 for Windows, PlayStation 4, Xbox One...
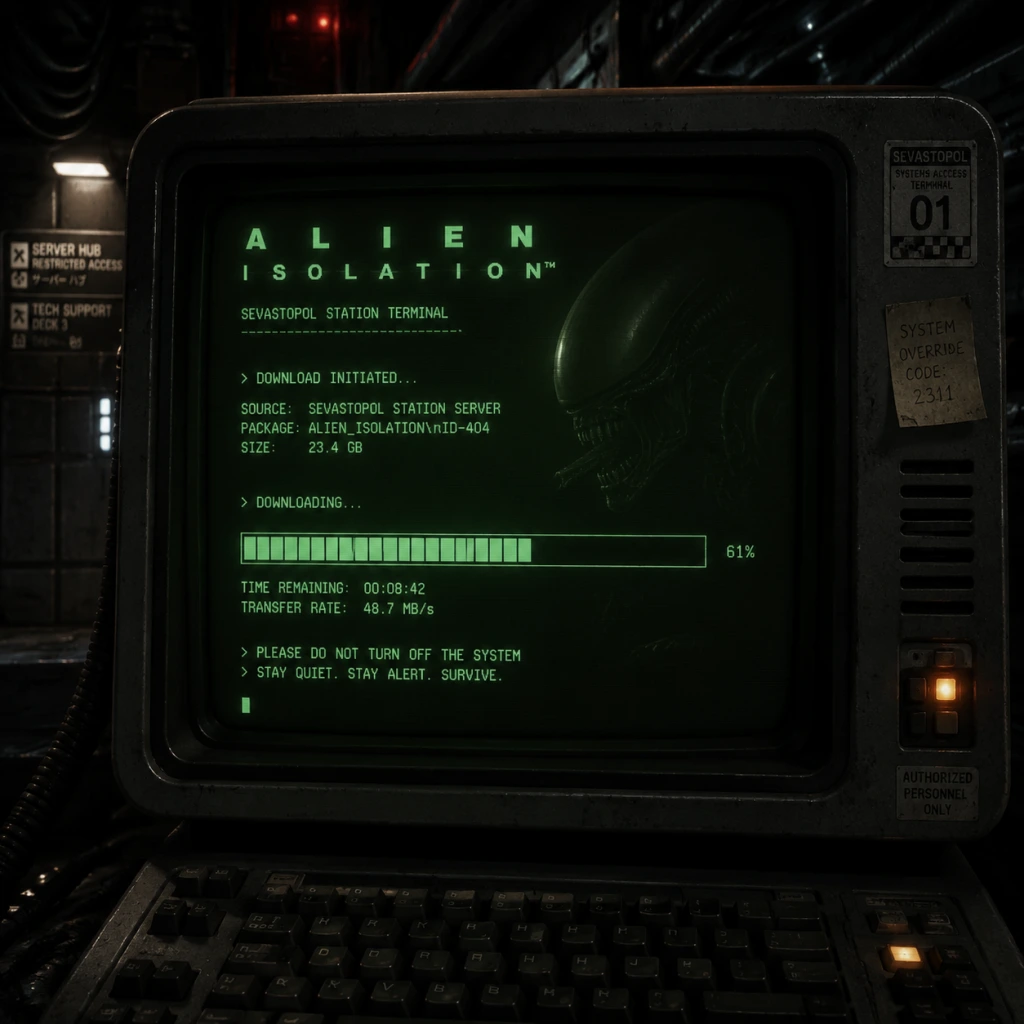
Download & Installation
Introduction
Alien: Isolation is a survival horror game developed by Creative Assembly and published by Sega. It is available on multiple platforms, each with its own download and installation process. This guide covers all legitimate sources, step-by-step installation for each platform, system requirements, storage needs, account prerequisites, first-launch setup, common errors, and post-install verification.
---
Platform Availability & Official Sources
| Platform | Digital Storefront | Physical Media |
|---|---|---|
| PC (Windows) | [Steam](https://store.steampowered.com/app/214490/Alien_Isolation/), [Epic Games Store](https://store.epicgames.com/en-US/p/alien-isolation) | DVD (rare) |
| PlayStation 4 / PS5 (backward compatible) | PlayStation Store | Blu-ray Disc |
| **Xbox One / Xbox Series X | S (backward compatible)** | Microsoft Store |
| Nintendo Switch | Nintendo eShop | Game Card |
---
System Requirements (PC)
Minimum Requirements
- OS: Windows 7 (64-bit)
- CPU: Intel Core 2 Duo 2.4 GHz / AMD Athlon X2 2.7 GHz
- RAM: 4 GB
- GPU: NVIDIA GeForce GTX 260 / AMD Radeon HD 5700 (1 GB VRAM)
- DirectX: Version 11
- Storage: 35 GB available space
- Sound: DirectX 9.0c compatible
- OS: Windows 7, 8, or 10 (64-bit)
- CPU: Intel Core i5-2500K / AMD FX-8350
- RAM: 8 GB
- GPU: NVIDIA GeForce GTX 660 (2 GB) / AMD Radeon HD 7800 (2 GB VRAM)
- DirectX: Version 11
- Storage: 35 GB available space (SSD recommended)
- Sound: DirectX 9.0c compatible
Recommended Requirements
---
Storage Space
| Platform | Install Size | Additional Notes |
|---|---|---|
| PC (Steam/Epic) | ~35 GB | May increase with patches/DLC |
| PlayStation 4/5 | ~25 GB | PS5 version uses same PS4 data via backward compatibility |
| Xbox One/Series X | S | ~34 GB |
| Nintendo Switch | ~8 GB | Lower resolution textures, compressed assets |
Account Requirements
- PC (Steam): Steam account (free, purchase game).
- PC (Epic): Epic Games account (free, purchase game or claim if free).
- PlayStation: PlayStation Network account (free or paid subscription for online features – not required for single-player).
- Xbox: Xbox Live account (free for single-player; Game Pass subscription optional).
- Nintendo Switch: Nintendo Account (free).
---
Step-by-Step Installation
PC (Steam)
1. Create a Steam account at [store.steampowered.com](https://store.steampowered.com) if you don't have one.
2. Purchase the game – either directly from Steam or activate a retail key via Games → Activate a Product on Steam.
3. Download the Steam client from the website and install it.
4. Log in to your Steam account.
5. Go to your Library → find Alien: Isolation → click Install.
6. Choose installation location (ensure >35 GB free).
7. Wait for the download and automatic installation – Steam will handle file extraction.
8. Launch the game from Library or desktop shortcut after installation completes.
PC (Epic Games Store)
1. Create an Epic Games account at [epicgames.com](https://www.epicgames.com).
2. Install the Epic Games Launcher from the website.
3. Log in and go to the Store – search for Alien: Isolation.
4. Purchase or claim the game.
5. Click Get or Buy then Install.
6. Select installation directory (at least 35 GB free).
7. Download and install – the launcher manages files.
8. Launch from Epic Library after completion.
PlayStation 4 / PS5
Digital version:
1. Ensure you have a PlayStation Network account and are signed in.
2. Go to PlayStation Store on your console.
3. Search for Alien: Isolation.
4. Purchase the game if not already owned.
5. Click Download – the console will begin downloading and installing automatically.
6. Once finished, the game appears on your home screen.
Disc version (PS4 disc on PS4 or PS5):
1. Insert the disc into the console.
2. The console will install the game data (may require a large update).
3. Follow on-screen prompts.
4. Keep the disc inserted to play.
Xbox One / Xbox Series X|S
Digital version:
1. Sign in with your Xbox Live account.
2. Open Microsoft Store.
3. Search for Alien: Isolation.
4. Buy or Install if you own it (e.g., via Game Pass).
5. Click Install – the console downloads the appropriate version.
6. Game appears in My Games & Apps.
Disc version:
1. Insert the disc.
2. The console prompts to install – confirm.
3. The game installs from disc; may download patches.
4. Disc required for play.
Nintendo Switch
Digital version:
1. Sign in with your Nintendo Account on the console.
2. Open Nintendo eShop.
3. Search for Alien: Isolation.
4. Purchase the game.
5. Select Download – the game downloads and installs automatically.
6. Access from Home Menu.
Physical game card:
1. Insert the game card into the console.
2. An icon appears on the Home Menu – select it.
3. The game may prompt a quick initial update; confirm.
4. Play from the card (no full install required, but updates increase storage).
---
First Launch Setup
1. Language Selection – Choose from available languages (English, French, German, Spanish, etc.).
2. Graphics Settings (PC only) – The game defaults to auto-detected settings. You can adjust:
- Resolution, V-Sync, Anti-aliasing, Shadow Quality, Texture Quality, etc.
- Main menu → Options → Graphics.
3. Audio Settings – Adjust volume for effects, music, and dialogue. Subtitles can be enabled.
4. Controller Configuration – Console players can remap buttons in the in-game settings. PC supports keyboard/mouse or controller.
5. Begin Game* – Select New Game or Load Game*.
---
Common Installation Errors & Fixes
| Error | Platform | Cause | Solution |
|---|---|---|---|
| Insufficient disk space | All | Not enough free storage. | Free up space (delete temporary files, uninstall other games). Check install size requirements. |
| Corrupted files / “Verify integrity” | PC (Steam) | Download errors or file damage. | Right-click game in Steam Library → Properties → Local Files → Verify integrity of game files. Steam repairs automatically. |
| Corrupted files / “Verify files” | PC (Epic) | Similar cause. | In Epic Launcher, go to Library → click three dots on Alien: Isolation → Verify. |
| Installation stuck at 0% or very slow | PC (Steam/Epic) | Server congestion, antivirus interference, or disk issues. | Pause and resume download; disable real-time antivirus temporarily; run launcher as administrator. |
| Error “Could not load X3DAudio” | PC | Missing DirectX components. | Install/repair DirectX via the game’s redistributable folder (e.g., `_CommonRedist` in Steam directory) or download from Microsoft. |
| Black screen on launch (PC) | PC | Outdated drivers, resolution mismatch. | Update GPU drivers; run game in windowed mode (edit `%LOCALAPPDATA%\Alien Isolation\settings.xml` to set `Fullscreen=false`). |
| Console fails to download | PS4/PS5, Xbox, Switch | Account or store issues. | Restart console; check PSN/Xbox Live/eShop status; re-enter account credentials; clear system cache. |
| Disc read error (console) | PS4, Xbox, Switch | Scratched disc or dirty lens. | Clean disc; try another game to test lens; if fails, contact platform support. |
| Error CE-34878-0 (PS4) | PS4 | Corrupted save or game data. | Rebuild database (Safe Mode option 5); reinstall game. |
| Error 0x80070005 (Windows) | PC | Permission issues. | Run Steam/Epic as administrator; install game on a drive with proper write permissions. |
Post-Installation Verification
1. Check file integrity (on PC) using launcher verification tools as described above.
2. Launch the game – ensure it reaches the main menu without crashes.
3. Test in-game performance (PC):
- Run a benchmark or play the first minutes.
- Monitor FPS using an overlay (e.g., Steam FPS counter or MSI Afterburner).
4. Check for updates – Sometimes a day-one patch is available. On Steam/Epic, updates are automatic if enabled. On consoles, check for game update in system settings.
5. Save a test game – Create a manual save to ensure saving works.
6. Verify achievements / trophies – If desired, check that achievement tracking is functional (PC achievements via Steam/Epic overlay; console via OS).
---
Additional Tips
- Cloud Saves: Supported on Steam, Epic (if enabled), PlayStation Plus (optional), Xbox Live, and Nintendo Switch Online (with subscription). Enable them to back up progress.
- Mods (PC only): Alien: Isolation has a modding community. To install mods, use tools like Fluffy Manager or manually place files in the game directory. Backup original files first.
- DLC: The game includes DLC like Last Survivor, Crew Expendable, and Safe Haven. These are included in the Alien: Isolation – The Collection edition or sold separately. They install automatically with the base game if owned.
---
This guide should cover all legitimate ways to download and install Alien: Isolation. If you encounter issues not listed, consult the official Sega support page or community forums. Happy surviving!

Game Introduction
Introduction
Alien: Isolation is a first-person survival horror game that masterfully captures the claustrophobic terror of Ridley Scott's original 1979 film. Developed by Creative Assembly and published by Sega, it was initially released on October 7, 2014 for Windows, PlayStation 4, Xbox One, PlayStation 3, and Xbox 360, with a later port arriving on Nintendo Switch on December 5, 2019. The game has also been optimized for PlayStation 5 and Xbox Series X|S via backward compatibility, offering enhanced frame rates.
Story Overview
Set 15 years after the events of the first film, Alien: Isolation follows Amanda Ripley, the daughter of Ellen Ripley. Amanda is approached by a Weyland-Yutani representative who claims to have recovered the flight recorder from the ill-fated Nostromo. Determined to uncover the truth about her mother's disappearance, she boards the space station Sevastopol to retrieve the recorder. However, the station has fallen into ruin—overrun by desperate survivors, rogue Working Joes (androids), and a single, relentless Xenomorph that stalks the corridors. Amanda must survive, repair the station's transit system, and escape before the creature picks off everyone.
Setting and Atmosphere
The game takes place aboard the Sevastopol, a sprawling, decaying space station that serves as a decommissioned trading post. Its cramped corridors, flickering lights, and atmospheric sound design evoke the grimy, industrial look of the original film. The environment is fully explorable, with multiple decks, maintenance tunnels, and office areas that feel lived-in and terrifyingly real. The constant threat of the Xenomorph—which learns from your actions and adapts its patrol patterns—creates a dynamic, unpredictable experience.
Main Characters
- Amanda Ripley: The protagonist, a skilled engineer and survivor. She is resourceful but not a soldier, relying on stealth, gadgets, and wits.
- Samuels: A Weyland-Yutani android and ally who assists Amanda on the station. His true nature and motives become a key part of the story.
- Verlaine: The pilot of the Anesidora, a salvage ship that brings Amanda to Sevastopol. She provides mission support via radio.
- The Xenomorph: A single, deadly Alien that cannot be killed. It has a complex AI that tracks sound, sight, and movement, forcing players to use stealth and distractions.
- Working Joes: Unsettlingly polite androids that become hostile as the station's systems fail. They are less intelligent than the Xenomorph but numerous and dangerous.
- Stealth: Crouching, hiding in lockers, under tables, or behind objects.
- Crafting: Using scavenged materials to create tools like noisemakers, flashbangs, EMP mines, and medkits.
- Resource Management: Ammunition and crafting materials are scarce; the flamethrower is the only real deterrent, but fuel is limited.
- Exploration: The Sevastopol is non-linear, with backtracking and side objectives that reveal story logs and audio diaries.
- Puzzles: Hacking terminals, rewiring circuits, and using the motion tracker to navigate.
- Crew Expendable: A short campaign set on the Nostromo during the events of the 1979 film. You play as Ripley, Dallas, or Parker, trying to escape the Alien. Includes a new playable map and objective.
- Last Survivor: Another Nostromo-based DLC, putting you in the final confrontation from the film—Ripley must activate the self-destruct sequence and escape to the Narcissus shuttle.
- Survivor Mode DLC: Challenge maps that place you in short, self-contained missions with specific objectives (e.g., "Survive 10 minutes" or "Collect X items"). These are available as separate purchases or in the Season Pass / Complete Collection editions.
- Safe Haven, Lost Contact, The Trigger, Corporate Lockdown: Additional challenge packs that add more maps and scenarios.
- The Intelligent Alien: Unlike scripted enemies in most games, the Xenomorph uses a two-tier AI system ("Director" and "Player") to create genuinely emergent behavior. It never follows a set path, making every playthrough different.
- Authentic Canon: The game is considered by many fans to be the best Alien video game because it respects the source material—no space marines, no guns blazing. The only weapon that stops the Alien (temporarily) is the iconic flamethrower.
- No Combat Proficiency: Amanda is not a combat expert; you cannot kill the Xenomorph. This forces constant stealth and creativity.
- Atmospheric Design: The sound, lighting, and level design were built to mimic the film's iconic look, including CRT monitors, analog buttons, and retro-futuristic technology.
- Long Campaign: The game offers a substantial single-player experience with a satisfying narrative arc, rare for horror games.
Core Appeal and Gameplay
The game's defining feature is its unpredictability. The Xenomorph does not follow a scripted path; instead, its AI reacts to player actions. If you run, it hears you. If you use a vent, it learns to check vents. If you hide in a locker too often, it starts searching lockers. This creates a genuine sense of dread and tension, rewarding careful, methodical play. Core gameplay elements include:
Game Modes and Online/Offline Support
Alien: Isolation is a single-player, offline experience. There is no multiplayer or online component. The only "online" feature is optional leaderboards for the game's challenge modes (see DLC below). The campaign is roughly 15-20 hours long, with high replayability due to the Alien's dynamic AI.
DLC and Expansions
The game has two major story DLCs, plus several smaller challenge packs:
Note: The Alien: Isolation – Collection (sold on various platforms) includes all DLC. On PC, the Nostromo DLCs are also available individually or as part of the Digital Deluxe Edition.
Target Audience
This game is aimed squarely at hardcore survival horror fans who appreciate tense, slow-paced gameplay and an emphasis on atmosphere over action. It is particularly appealing to fans of the original Alien film, as it faithfully recreates its aesthetic and tone. It is not recommended for those seeking fast-paced shooters or multiplayer experiences.
What Makes It Unique?
Several elements set Alien: Isolation apart from other horror games:
In summary, Alien: Isolation is a landmark survival horror title that masterfully recreates the dread of the original film. Its emphasis on stealth, resourcefulness, and a truly frightening, unscripted enemy makes it a must-play for genre enthusiasts.
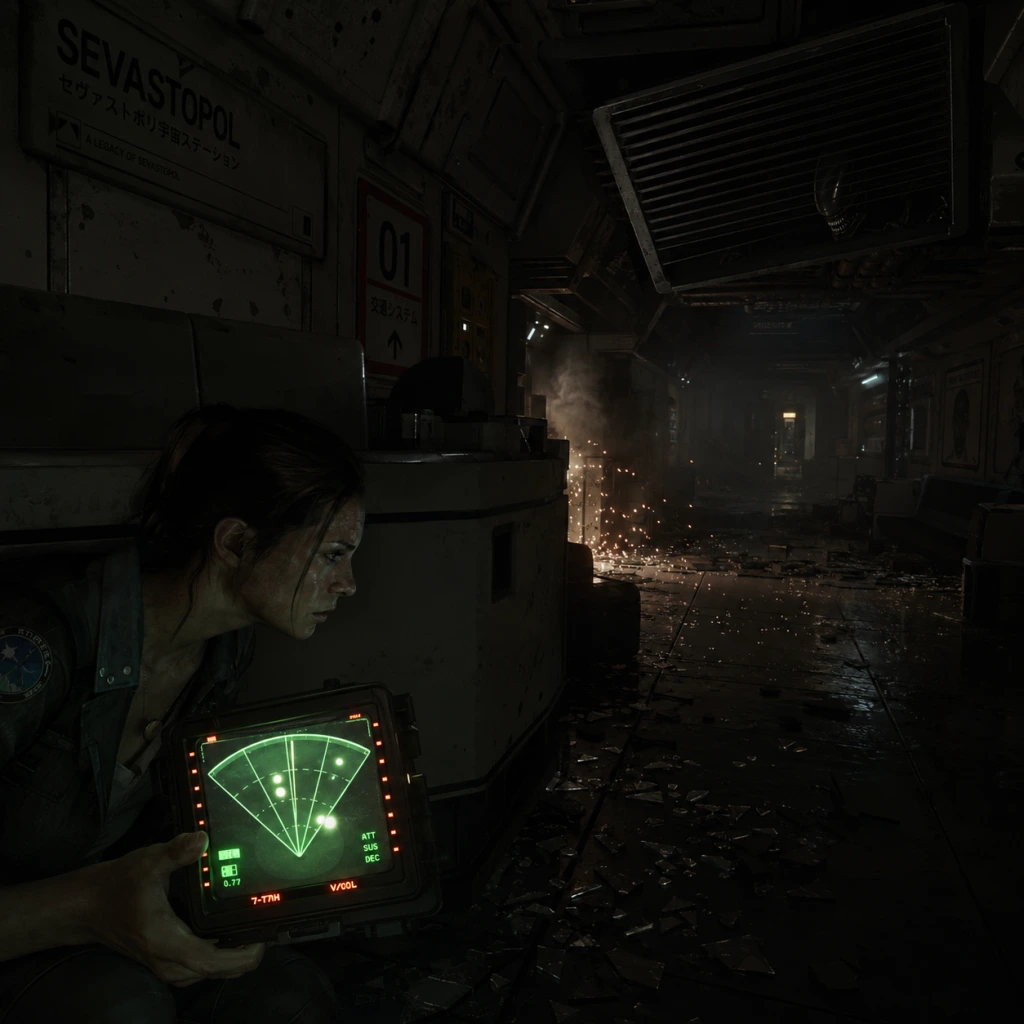
Getting Started
Getting Started
Game Introduction
Alien: Isolation is a first-person survival horror game that masterfully captures the claustrophobic terror of Ridley Scott's original 1979 film. Developed by Creative Assembly and published by Sega, it was initially released on October 7, 2014, for Windows, PlayStation 3, PlayStation 4, Xbox 360, and Xbox One. Later ports include Nintendo Switch (2019) and backward compatibility on PS5 and Xbox Series X/S. You play as Amanda Ripley, daughter of Ellen Ripley, 15 years after the events of the first film. You board the derelict space station Sevastopol to recover the flight recorder from the Nostromo—and soon discover you are not alone.
No Character Creation
Alien: Isolation does not feature character creation. You play as a predefined character: Amanda Ripley. Your appearance, name, and backstory are fixed. This guide focuses entirely on gameplay, survival, and navigation.
---
First Hour Walkthrough (Steps 1–10)
1. Opening Cinematic: Watch the cutscene. You’ll see Amanda arriving at Sevastopol station. Pay attention to the setting—the station is in disrepair.
2. Control Tutorial: After the cinematic, you’re in the Torrens (Samuels’ ship). Follow the on-screen prompts to move, look, interact, crouch, and sprint. Complete the short tutorial: pick up the flashlight (E on PC, X on Xbox, Square on PS, Y on Switch) and use the terminal.
3. First Hacking Mini-Game: The tutorial introduces the hacking tool. A simple rotation puzzle: rotate the rings until all segments align. Time is limited, but you can retry infinitely.
4. Exiting the Torrens: You’ll dock with Sevastopol. Walk down the ramp into the station. The atmosphere changes—lights flicker, emergency alarms sound.
5. First Corridor & Save Point: Immediately after entering, you find a Save Station (a tall, beeping device shaped like a dome). Use it to save your game. Save often—there is no autosave in combat areas.
6. Finding the Mission Terminal: Follow the objective marker to a terminal showing a map of the station. You learn your first goal: reach the Anesidora (the salvage ship) at the Gemini Exoplanet Solutions lobby.
7. First Human Enemy: Shortly after, you encounter hostile survivors. They are armed and aggressive. Do not fight—hide in lockers or under desks until they pass. The game encourages stealth, not combat.
8. First Working Joe (Synthetic): You’ll enter the Gemini Exoplanet Lobby. Here you meet your first Working Joe—a friendly android that initially offers no threat. Interact if you want, but avoid attacking; it only triggers hostility later.
9. Using the Motion Tracker: When you receive the motion tracker (G on PC, up on D-pad on consoles), equip it. It detects movement in a 180-degree arc. Use it constantly—it’s your best survival tool.
10. First Alien Encounter: The Alien is scripted to drop from a vent in the medical bay area (Mission 1). You cannot kill it. Hide immediately—do not run, do not use the flashlight. Crouch behind a desk or inside a locker. Wait for the Alien to leave. Then proceed to the objective: the Anesidora dock.
---
Controls on All Platforms
| Action | PC (Keyboard/Mouse) | PlayStation (PS4/PS5) | Xbox (One/Series X | S) | Nintendo Switch |
|---|---|---|---|---|---|
| Move | WASD | Left stick | Left stick | Left stick | |
| Look/Aim | Mouse | Right stick | Right stick | Right stick | |
| Interact/Use | E | Square | X | Y | |
| Crouch | Ctrl | Circle (hold) | B (hold) | B (hold) | |
| Sprint | Shift (hold) | L3 (click left stick) | L3 (click left stick) | L3 (click left stick) | |
| Flashlight | F | R1 | RB | R | |
| Motion Tracker | G | Up on D-pad | Up on D-pad | Up on D-pad | |
| Inventory / Crafting | Tab | Touchpad | View | Minus (-) | |
| Equip Item | 1–4 | D-pad | D-pad | D-pad | |
| Use Medkit | Q | Triangle | Y | X | |
| Reload | R | Square (in aiming?) | X (in aiming?) | Y (in aiming?) | |
| Hacking Tool | Automatically equipped when near a hackable terminal | - | - | - | |
| Aim Weapon | Right mouse button | L2 | LT | ZL | |
| Fire/Throw | Left mouse button | R2 | RT | ZR | |
| Map | M | Options | Menu | + | |
| Pause Menu | Escape | Options | Menu | + |
---
UI Overview
1. HUD Elements: Minimal. No health bar on screen—check health via inventory screen (Tab/view button). The only persistent HUD element is the Flashlight Indicator (corner of screen) and Motion Tracker when active.
2. Flashlight Indicator: A small icon shows if your flashlight is on. Red when on, white when off or low battery. Battery drains quickly—use sparingly.
3. Motion Tracker: When equipped, it covers most of the screen. Green blips are moving objects; larger, faster blips mean danger. The Alien appears as a large green circle. The tracker uses batteries too.
4. Inventory Screen: Shows health, resources, equipped items. Health is a bar; when it’s low, you see blood on screen edges. Craft items from resources.
5. Notification Text: Objective updates and story notes appear in the lower-left. Small font.
6. Save Station Beacon: A tall, cylindrical device with blinking lights. Activate it to save—nearby safe zones.
7. Map: Accessed via M/Options/Menu/+. Overhead view of current area with objective markers, locked doors, and your location. Use it constantly.
---
Essential Early Objectives (First 2 Hours)
- Mission 0: Welcome to Sevastopol – Navigate from docking bay to Gemini Lobby. Learn basic movement, interaction, and stealth from human enemies.
- Mission 1: Find the Anesidora – Reach the ship dock. You’ll encounter the Alien for the first time. You must hide and wait for it to leave. Then board the Anesidora and return to station.
- Mission 2: The Core – You need to access the station’s core systems. This introduces working joes (enemy androids) and the flamethrower (first real weapon against the Alien). Obtain the flamethrower by exploring the core area.
- Save at every station you see. Death can send you back 15 minutes.
- Read the hint posters and notes. They explain game mechanics like how to distract enemies with noise makers.
- Crouch when you hear the Alien or Androids. Walking upright creates noise.
- Use the environment: lockers, vents, under desks. The Alien can break vents but rarely locker doors.
- Turn off your flashlight when hiding. A bright light attracts the Alien from across the room.
- Collect resources: scrap, components, alcohol, adhesive. You’ll craft medkits, noise makers, pipe bombs, and EMP mines.
- Learn the motion tracker rhythm: Pause every few seconds to listen for the Alien’s heavy footsteps and hissing.
- Running in non-combat zones. Footsteps attract enemies. Only sprint when you know the area is clear.
- Using the flamethrower too early. Ammo is scarce. Use it only as a deterrent—one quick burst makes the Alien flee, but it returns.
- Attacking Working Joes head-on. They are bullet sponges and alert other joes. Use stealth or EMP mines.
- Staying in one place too long. The Alien patrols randomly. If you stop for too long, it may find you.
- Ignoring the crafting menu. Craft noise makers and medkits early; they are life-savers.
- Hacking without knowing the minigame. Practice with the first few puzzles. They get harder, and failing too many times can lock the terminal temporarily.
Progression Tip: You do not have to memorize all objectives. The game always shows a waypoint marker and a brief description. Just follow them, but explore for resources.
---
What to Do First and What to Avoid
#### Do First:
#### Avoid:
---
Early Resource Priorities
| Resource | Use | Priority | Notes |
|---|---|---|---|
| Scrap Metal | Craft noise makers, pipe bombs | High | Most common. Loot lockers, drawers. |
| Alcove (Alcohol) | Craft medkits, fuel for flamethrower | High | Found in bathrooms, kitchens. |
| Adhesive | Craft noise makers, medkits | Medium | Less common; be conservative. |
| Revolver Ammo | Use for human enemies | Low | Avoid combat with humans if possible. Save ammo for emergencies. |
| Shotgun Shells | For androids or critical moments | Low | Very scarce early. |
| Flamethrower Fuel | Craft from alcohol & scrap | Medium | Only use to scare off Alien. |
| EMP Parts | Craft EMP mines for androids | Low | Found later; mine early only if you find components. |
| Flare / Flare Gun | Distraction | Medium | Flares can lure the Alien away. Use sparingly. |
| Blueprints | Unlocks new crafts | High | Always pick up blueprint tapes. They upgrade your crafting. |
---
Common Beginner Mistakes
1. Staying in the open when the Alien is near. Always have a hiding spot in mind. Use vents and lockers.
2. Forgetting to save. The game has no autosave in large sections. Save manually at every station.
3. Using the flashlight in the dark near enemies. The Alien sees it. Use the motion tracker instead.
4. Running through rooms without checking corners. Listen—if you hear heavy breathing, that’s the Alien near you.
5. Not using distractions. Tossing a flare or noisemaker sends the Alien to investigate. Use this to cross open areas.
6. Attacking the Alien. It cannot be killed. Shooting it only wastes ammo and alerts it. Use the flamethrower briefly to scare it away.
7. Ignoring the map. The map shows locked doors and alternate routes. Study it to avoid dead ends.
8. Hoarding resources. Use crafted items early; you will find more. A dead player loses everything.
9. Trying to fight multiple humans. Stealth takedowns (from behind) are silent. Group fights attract the Alien.
10. Not adjusting difficulty. If you’re too frustrated, lower the difficulty to “Novice” for more resources and less aggressive Alien. No shame—focus on narrative.
---
Day-One Checklist for New Players
- [ ] Read the Control Options: Set invert, sensitivity, button layout as preferred. Test run in the tutorial area.
- [ ] Adjust Graphic Settings (PC): Turn off V-Sync if input lag bothers you. Set FOV to at least 85. Lower shadows for performance.
- [ ] Adjust Audio: Headset is recommended. Play with volume high; audio cues are vital.
- [ ] Save at the first station you see after entering Sevastopol.
- [ ] Loot everything in the first rooms: the derelict office drawers, lockers, and tables.
- [ ] Craft at least one medkit and one noise maker before reaching the Gemini Lobby.
- [ ] Memorize the save station locations in the early area (Gemini Lobby has one in the back room).
- [ ] Practice hiding in lockers and crouch-walking without running.
- [ ] Use the motion tracker every 10–15 seconds when moving through unknown areas.
- [ ] Read the notes you find—they contain lore and sometimes hints about safe paths.
- [ ] Avoid the Alien’s initial scripted encounter by hiding in a desk (not a locker) in the medical bay area—it checks lockers first.
- [ ] Set a mental rule: never sprint unless you are certain the area is clear.
- Binge-playing without breaks. The tension is exhausting. Take 10-minute breaks every hour.
- Playing in a brightly lit room. Dim lights or play at night for immersion.
- Watching walkthroughs for every corner. Exploration is rewarding. Only use guides if stuck for >15 minutes.
- Over-relying on the revolver. It makes noise and attracts the Alien. Use it only for human enemies blocking a necessary corridor.
- Ignoring the “Distraction” options. They are essential for managing the Alien’s path.
Success Tip for the First Hour: The game is designed to be tense. Panic leads to mistakes. When the Alien appears, take a deep breath, find cover, and wait. It will leave. Use the motion tracker to time your escape.
---
What to Avoid on Day One
Now you are ready to begin your terrifying journey through Sevastopol. Remember: hide, listen, survive.
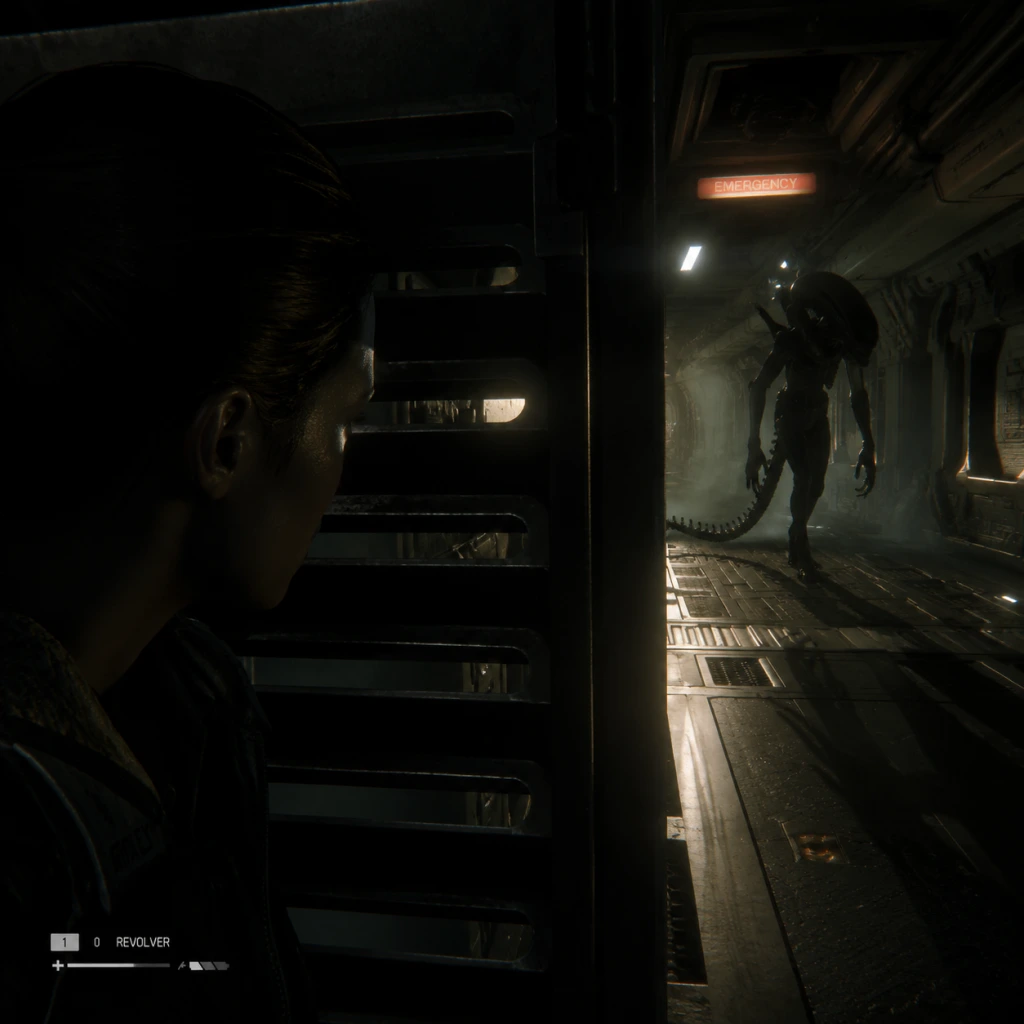
Core Gameplay
Introduction
Alien: Isolation is a first-person survival horror game that emphasizes stealth, resource management, and tension over combat. The core gameplay loop involves navigating the derelict Sevastopol station while evading a single, nearly indestructible Xenomorph and other hostile humans and synthetic "Working Joes." You must scavenge for resources, craft tools and weapons, solve environmental puzzles, and complete mission objectives to progress. There is no traditional character leveling or class system; progression is defined by the tools you acquire, your growing knowledge of the station’s layout, and your mastery of stealth and evasion. The game is structured around a linear story divided into 18 chapters, each with distinct areas and threats. Below, the core gameplay elements are broken down by player progression tiers, though note that the story is strictly linear and there is no open-world free play endgame.
Player Progression Tiers
Early Game (Chapters 1–5: The Arrival to The Quarantine)
Main Gameplay Loop: Learn the basics of stealth, hiding, and using the motion tracker. Objectives are clear: reach Sevastopol station, find survivors, and attempt to contact the Anesidora.
- Combat/Interaction Systems: You start with only a wrench for blunt melee (effective against humans but dangerous). No firearms yet. The primary interaction is using the motion tracker to detect moving objects (including the Alien) and hiding in lockers, under tables, or behind vents. The first encounter with the Xenomorph (Chapter 3) forces you to master silent movement and distraction.
- Progression: Obtain the Ion Torch (Chapter 2) to open sealed doors and cut through vents. Gain the first crafting tool: the Fabricator. Unlock basic blueprints for “Noisemaker” (distraction) and “Flashbang” (temporary stun). Health is limited; you can craft Medkits from scavenged supplies.
- Exploration: Linear corridors of Sevastopol’s entry areas (e.g., Transit Hub, San Cristobal Medical Facility). You are guided by waypoints but can explore side rooms for resources and lore logs. Early locked doors require keycards or hacking (simple minigame).
- Quests/Missions: “Welcome to Sevastopol” – reach the station; “Contact” – find the communications array; “Seegson Synthetics” – navigate the San Cristobal Medical Facility. These are story-driven with few optional objectives.
- Economy: Scavenge components like “Electronic Components,” “Scrap Metal,” and “Alcohol” from desks, lockers, and dead humanoid enemies. Use Fabricators to craft items. Credits are found but are only used to purchase from the single Merchant at the start; later, credits become irrelevant as the Merchant disappears. Rationing is critical.
- Character/Build Growth: No skill trees or stat upgrades. The only “growth” is learning enemy patterns and map layouts. Your health increases slightly as you find hidden health upgrades (blue canisters), but there are no level-up mechanics.
- Endgame Structure: Not applicable; you are in the introductory phase of a linear story.
- Combat/Interaction Systems: Acquire the Revolver (Chapter 6) – a powerful but loud weapon that attracts the Alien. Use it sparingly. Obtain the EMP Mine (Chapter 8) to disable Working Joes temporarily. The Pipe Bomb becomes craftable later (Chapter 10) for area denial. Hacking terminals (minigame) and cutting locks with Ion Torch remain essential. The Flamethrower appears in Chapter 8, providing a temporary deterrent against the Xenomorph (it will flee but return).
- Progression: New blueprints: EMP Mine, Pipe Bomb, Smoke Bomb, and increased capacity for items via hidden upgrades (e.g., tool belt upgrades). Key story line: you must access the Apollo Core by collecting three keycards. This requires backtracking across previously visited areas, now patrolled by new enemies.
- Exploration: More open environments like the Seegson Communications Center and Marshall’s Office offer multiple routes. The Vent system becomes a key traversal method, but the Alien can also use it. Explore side paths for extra resources and logs.
- Quests/Missions: “The Missing Doctor” – find Dr. Morley; “The Apollo Core” – gather keycards; “The Message” – listen to the cache logs. These involve finding specific locations and sometimes stealth missions around aggressive human survivors.
- Economy: Resource scarcity increases. You must prioritize what to craft: medical kits, noisemakers, or ammunition (revolver rounds are rare). Fabricators are your only source of crafted items; ammo for the revolver is found but not craftable. Learn to reserve components for critical tools (e.g., EMP mines for unavoidable Working Joe encounters).
- Character/Build Growth: No permanent stat increases. You may find a Security Suit upgrade (Chapter 9) that increases explosion resistance, but that’s a single-use item. Knowledge of the Alien’s behavior (e.g., it investigates sound sources) is your main progression.
- Endgame Structure: Still story-driven; no repeatable content or side quests.
- Combat/Interaction Systems: The Flamethrower becomes essential for keeping the Xenomorph at bay, but fuel is extremely limited. The Shotgun (Chapter 12) offers a powerful but noisy option against humans and Working Joes. Use the Stun Baton (Chapter 13) for quiet incapacitation of humans. The EMP effect is crucial for bypassing massed Working Joes. All weapons attract the Alien if used, so stealth is still paramount.
- Progression: No major new tools; instead, you gain access to the Mainframe and the ability to override door locks via terminal commands in some rooms. A key story beat: you must restore main power, which requires completing a complex puzzle in the Reactor (Chapter 14). Your Map updates with new waypoints but no fast travel.
- Exploration: The Reactor Core is a multi-level labyrinth with exposed floors, live steam pipes, and limited hiding spots. The Apollo Core (Chapter 15) is a tight, maze-like server room. Both areas heavily feature the Alien and Working Joes. Exploration focus is on finding alternative routes and resource caches.
- Quests/Missions: “The Power Core” – calibrate the reactor; “The Escape Plan” – reach the Torrens; “The Last Survivor” – navigate the core. These missions demand extensive backtracking through infested areas. Some optional objectives appear (e.g., find a keycard to unlock a shortcut), but they are not marked.
- Economy: Ammo and health become very scarce. You must rely on the flamethrower to deter the Alien rather than kill it. Fabricators are still present but may be in dangerous positions. Conservation is critical: use flare s (craftable) to distract the Alien instead of noisemakers if you have a shortage of components.
- Character/Build Growth: By this point you have all possible tool capacity upgrades (found earlier in the game). No further growth. Your skill at using the motion tracker and predicting the Alien’s patrol patterns is your primary “build.”
- Endgame Structure: The story is approaching its climax. There is no endgame content; endgame is essentially the final couple of chapters.
- Combat/Interaction Systems: You have access to all equipment, but resources are exhausted from the previous chapters. The final areas are linear gauntlets: first, a flooded Operations Deck with zero visibility and constant Alien patrols; then the Sevastopol Station’s external dock where you must use the flamethrower to hold off the Xenomorph while fixing an elevator. The final encounter (Chapter 18) is a scripted sequence where you must repeatedly use the flamethrower to push back the Alien while activating the Torrens’ launch sequence. Combat with other enemies is minimal; focus is solely on the final threat.
- Progression: No new tools. The game ends after the final cutscene. There is no New Game+ or difficulty-unlock content (aside from higher difficulty options from the start).
- Exploration: Linear path; no deviations. The environment is heavily scripted.
- Quests/Missions: “The Final Signal” – reach the Torrens; “The Escape” – launch the ship. These are linear with no alternatives.
- Economy: The final chapters are stingy with resources. You likely have few components left. Crafting is mostly irrelevant; you rely on pre-crafted items and the flamethrower fuel you saved.
- Character/Build Growth: None. The endgame tests your cumulative skill, not stats.
- Endgame Structure: There is no endgame after the story. The game ends and returns to the main menu. There is no free-play mode or additional content (except DLCs like “Crew Expandable” which are separate campaigns).
Mid Game (Chapters 6–10: “The Maintenance to “The Lab” )
Main Gameplay Loop: Continue evasion-based survival, now with more tools to manage enemies. The Alien’s patrol patterns become more unpredictable, and you must also handle armed humans and Working Joes.
Late Game (Chapters 11–15: “The Facehugger to The Distress Call )
Main Gameplay Loop: The tension peaks as the Alien is now nearly always present, and multiple threats coexist. You must navigate the station’s most dangerous sections – the reactor and the central Apollo Core – often with no clear safe zones.
Endgame (Chapters 16–18: “The Signal” to The Exit )
Main Gameplay Loop: Escape the station. The game pulls together all gameplay elements in a final frantic sequence. The Alien is relentless, and you must use all skills and tools to survive long enough to trigger the final cutscene.
Core Gameplay Systems Summary
The following table summarizes how each core system evolves across tiers:
| System | Early Game | Mid Game | Late Game | Endgame |
|---|---|---|---|---|
| Stealth | Basic hiding, crouch walk, use lockers. | Use vents, noisemakers, EMP mines to control enemy movement. | Flamethrower as active deterrent; must manage multiple enemies. | Pure evasion with very limited resources. |
| Combat | Wrench melee only. | Revolver, EMP mines, Pipe bomb introduction – combat draws Alien. | Shotgun, Stun Baton, Flamethrower – combat only as last resort. | Flamethrower-focused scripted encounters. |
| Crafting | Medkits, Noisemakers, Flashbangs. | Smoke bombs, EMP mines, Pipe bombs. | All above plus flares; component shortage. | Same, but fabricators limited. |
| Exploration | Linear, guided. | More branching paths, backtracking. | Complex multi-level maps (Reactor, Apollo). | Linear gauntlet. |
| Risk/Reward | Stealth is mandatory; combat rarely worthwhile. | More tools allow limited aggressive tactics, but risk high. | Small risk of using flamethrower can save time but waste fuel. | No alternative; must use flamethrower. |
| Progression | Key tools (Ion Torch, Tracker). | Flamethrower, EMP, heavy weapons. | Full toolset; knowledge of AI patterns. | Skill execution. |
Conclusion
Alien: Isolation offers a tightly paced survival horror experience without traditional RPG progression. Your character does not level up; instead, progress is defined by the expanding toolkit and your growing understanding of enemy AI and station geography. Each tier increases the intensity and complexity of threats, culminating in a climactic escape. The game rewards patience, careful resource management, and stealth above all, making it a unique example of skill-based horror progression.
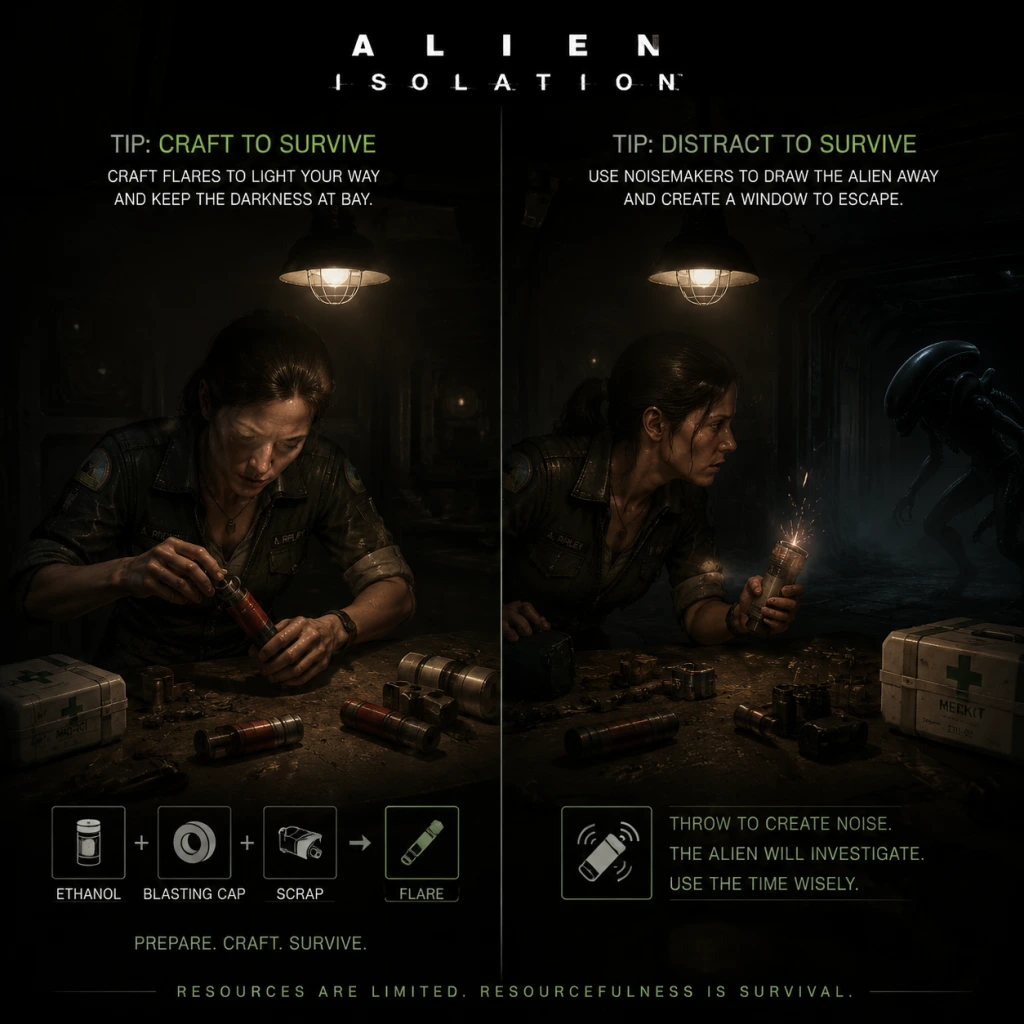
Game Tips
Introduction
This guide provides essential tips for surviving the nightmare aboard Sevastopol Station in Alien: Isolation. Whether you're a newcomer or a veteran, these strategies will help you outsmart the Alien, manage your resources, and escape the terror.
Beginner Tips
1. Stay Hidden, Not Silent – The Alien hunts by sound. Crouch walk (hold Ctrl/C) to stay quiet. Running or bumping into objects draws its attention.
2. Use the Motion Tracker Sparingly – The tracker beeps audibly. Enemies can hear it. Peek around corners manually instead.
3. Master the Lean Mechanic – Lean left/right (Q/E) to see around corners without exposing your body. Essential for scouting.
4. Close Doors Behind You – The Alien can open most doors. Closing them buys you time and creates obstacles.
5. Save Often and in Multiple Slots – The game has limited save stations (emergency phones). Rotate saves to avoid softlocks.
6. Read Environment Notes – Keycodes, map locations, and lore are hidden in PDAs and documents. Explore thoroughly.
Combat Tips
- Avoid Direct Combat – The Alien cannot be killed. Only use the revolver/flamethrower to scare it away temporarily.
- Flamethrower: Your Best Deterrent – Short burst (2-3 seconds) forces the Alien to retreat. Use only when cornered; fuel is scarce.
- Molotov Cocktails vs. Humans/Androids – But not against Alien (it tanks fire). Use EMP mines for androids; stun baton for close encounters.
- Pipe Bombs: Area Denial – Good for clearing rooms of humans, but loud. Use only when necessary.
- Headshots with Revolver – One-shot humans, but alerts all nearby. Only if stealth fails.
- The Alien's AI Adapts – Overusing any weapon reduces its effectiveness. The Alien learns to avoid flamethrower if you spam it.
- Always Have a Backup Route – The Alien patrols unpredictably. Memorize vents, lockers, and alternate paths.
- Vents: Double-Edged – The Alien uses them too. Listen for hissing before entering.
- Loot Everything – Scrounge desks, lockers, bodies. Resources are finite on Hard/Nightmare.
- Use the Map – Pull up the station map (M). Red areas are hostile; blue are safe. Plan your route accordingly.
- Check Behind You – The Alien often stalks behind corners. Turn around periodically.
- Mission Objectives Aren't Always Direct – Sometimes you need to backtrack for keycards or items. Explore thoroughly before proceeding.
- Prioritize Crafting Blueprints – Find all blueprints early: medkit, pipe bomb, smoke bomb, molotov, etc. Always have materials for at least one medkit and one distraction.
- Components List: Scrap metal, alcohol, adhesive, electronic components, etc. Each has multiple uses. Don't waste rare items.
- Ammo Conservation – Revolver ammo is rare. Use stun baton or wrench for humans. Only shoot when necessary.
- Save Fuel for Critical Moments – Flamethrower fuel is the most precious resource. Use only when Alien is about to grab you.
- Medkits: Full Heal – Wait until health is critically low before using a medkit, unless you have spare components.
- Smoke Bombs: Distraction, Not Attack – Obscure vision, but Alien can still hear. Use to cover escape, not to hide.
- Early Game – Focus on crafting medkits and noise makers (to lure Alien away). Upgrade flamethrower capacity when possible.
- Mid Game – Unlock EMP mine blueprints. Carry at least one for androids. Upgrade revolver damage.
- Late Game – All crafting options available. Recommended loadout: Flamethrower (full tank), 2 pipe bombs, 2 EMP mines, 3 medkits, 1 smoke bomb, revolver with 12 rounds.
- Weapon Upgrades – Find workbenches. Prioritize: flamethrower range (stops Alien further), revolver damage (one-shot humans), stun baton charge (more uses).
- Wrench vs. Stun Baton – Wrench is silent but slow. Stun baton stuns androids quickly but consumes charge. Both good; stun baton is better for emergencies.
- Never Run – Walking (not crouching) is okay if Alien is far, but crouch walk when close (within 15m).
- Use Audio Cues – Alien hisses when entering a vent; thuds when dropping. React accordingly.
- Hiding in Lockers – Hold breath (space) when Alien investigates. Don't stay too long; it may camp.
- Unpredictable Patrols – Alien AI uses a "tether" that changes based on your actions. Moving too fast or using loud weapons increases its frequency.
- Flamethrower Timing – Wait until Alien rears back to attack. One burst sends it fleeing. Short bursts conserve fuel.
- Stealth Takedown – Use X (or melee key) from behind. Silent and efficient.
- Distract with Noise Makers – Lure them away from objectives.
- Avoid Firefights – They alert the Alien. Use stun baton or wrench instead of guns.
- EMP Mines – Instant disable. Throw near group.
- Stun Baton – Two hits to destroy. Use when one is isolated.
- Avoid Eye Contact – They detect you if you stare too long. Look away or break line of sight.
- Headshots with Revolver – Takes 5-6 shots. Not efficient; use EMP or stun baton.
- Melee Them – One wrench hit kills. But careful: they're fast. Use flamethrower if swarmed.
- Listen for Scuttling – They hide in vents and under objects.
- Nightmare Mode Tips – Resources are extremely scarce, save points limited. Plan routes meticulously. Use lockers only as last resort. Conserve flamethrower fuel for absolute emergencies.
- Alien Manipulation – The Alien can be tricked. Throw a noise maker in a different direction, then sneak past. Works best when it's already in the vent.
- Speedrun Techniques – Skip optional areas, abuse leaning to peek through vents, save only at critical checkpoints.
- No Death Run – Practice paths, memorize Alien spawn triggers. Always have an escape route.
- Disable Alien for Free Exploration – On easier difficulties, the Alien is less aggressive. Use this to farm resources.
- Best Place to Farm Resources – The Medical wing has many containers. But beware: Alien often patrols there.
- PC – Lower mouse sensitivity for better stealth. Use FOV mod if claustrophobic.
- Console – Use headphones for 3D audio. The Alien's location is critical.
- VR (PC mod) – More immersive but scarier. Crouch in real life to avoid detection.
- Overconfidence – Even with flamethrower, don't taunt the Alien.
- Ignoring the Map – Getting lost leads to panic and noise.
- Hoarding Resources Too Much – Use them; you'll find more. Dying wastes everything.
- Running Through Rooms – Always walk or crouch.
- Not Closing Doors – Lets Alien track you easily.
Exploration Tips
Resource Management
Builds & Loadout (Crafting Priority)
Enemy-Specific Strategies
Alien
Humans (Hostile Survivors)
Androids (Working Joe)
Facehuggers
Advanced Optimization
Platform-Specific Tips
Common Mistakes to Avoid
Conclusion
Alien: Isolation rewards patience, observation, and smart resource management. By mastering these tips, you can survive the worst the station throws at you. Remember: the goal is not to kill, but to escape.
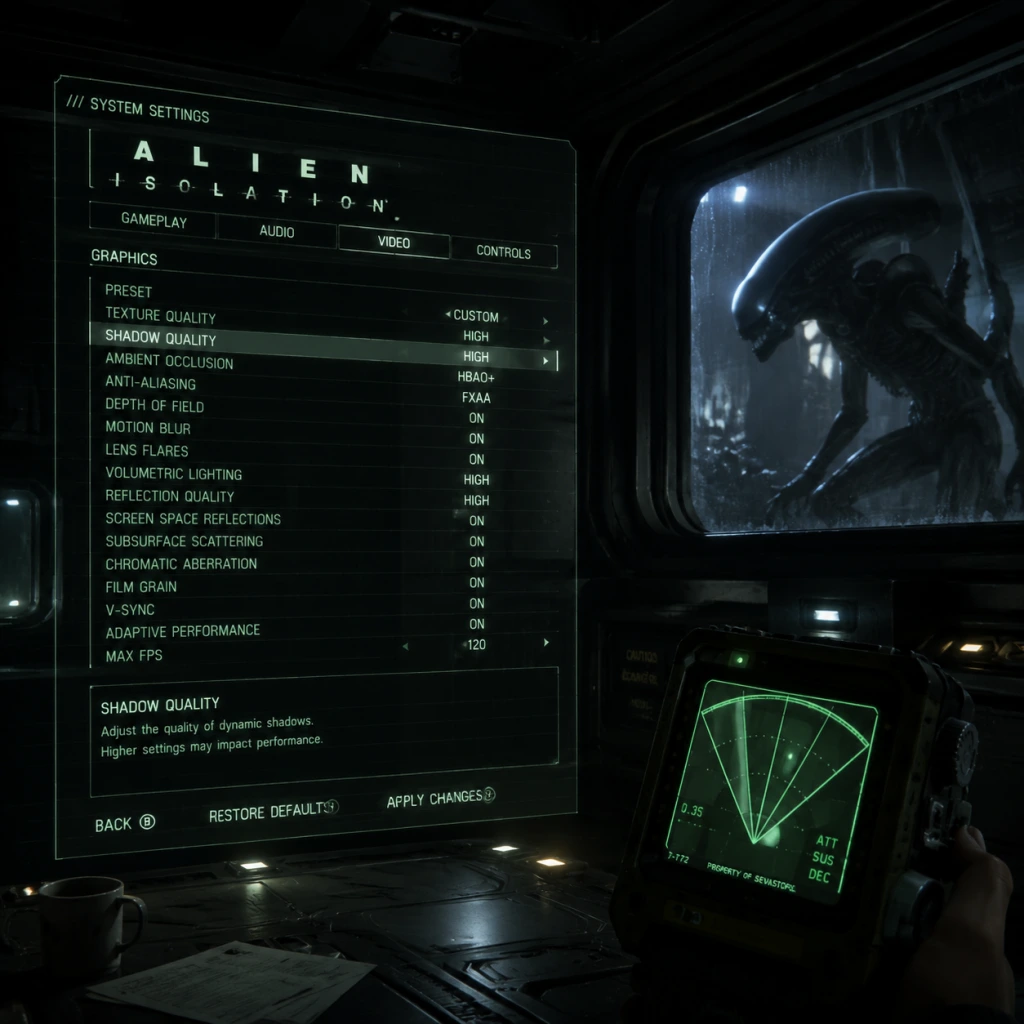
Game Settings
Introduction
Optimizing your settings in Alien: Isolation is crucial for both performance and immersion. The game's dark corridors, dynamic lighting, and tense audio require careful balancing to avoid visual artifacts, stuttering, or audio imbalances. This guide covers every setting category and provides recommended configurations for low-end, mid-range, and high-end hardware, along with pitfalls to avoid.
Graphics Settings
Display Configuration
- Fullscreen Mode: Use Exclusive Fullscreen for best performance on PC. Borderless Windowed may cause input lag.
- Resolution: Match your monitor's native resolution. Lower only if performance is inadequate.
- Refresh Rate: Set to your monitor's maximum supported (e.g., 60Hz, 144Hz). Ensure V-Sync is off if using G-Sync/Freesync.
- V-Sync: Disable unless you experience screen tearing. On 60Hz displays it can add input lag. The game's V-Sync is frame-pacing unfriendly; consider using a custom cap via GPU driver or RivaTuner.
- Overall Quality: Choose "Custom" to fine-tune. Presets are safe but not optimized.
Quality Presets
Advanced Graphics Options
| Setting | Low-End (GTX 960 / RX 560) | Mid-Range (GTX 1060 / RX 580) | High-End (RTX 2060 / RX 5700 XT) | Notes |
|---|---|---|---|---|
| Ambient Occlusion | Off | SSAO (Low) | HBAO+ | HBAO+ is heavy; SSAO is a good middle ground. |
| Anti-Aliasing | SMAA (Low) | SMAA (Medium) | TXAA (4x) | TXAA can blur; SMAA is sharper but less effective on edges. |
| Depth of Field | Off | On | On | Can hide pop-in but may reduce visibility. |
| Lens Flares | Off | Off | On | Minimal performance impact; purely aesthetic. |
| Motion Blur | Off | Off | Low | Off for cleanliness; motion blur can cause disorientation. |
| Quality (Texture) | Low | Medium | Ultra | VRAM is key; on 2GB VRAM cards keep Medium. |
| Quality (Shadow) | Low | Medium | Ultra | Shadows cost performance; high resolution shadows hurt FPS. |
| Quality (Reflection) | Low | Medium | Ultra | Water and polished surfaces; Ultra is heavy. |
| Quality (Volumetric Lighting) | Low | Medium | Ultra | Atmosphere enhancer; big FPS hit on Ultra. |
| SSAO | Off | On | On | Part of Ambient Occlusion but separate toggle. |
| Vsyncc | Off | Off | Off | Use external frame limiter if needed. |
| Field of View (FOV) | 60-70 | 70-80 | 80-90 | Wider FOV reduces tunnel vision but may distort edges. Default 60 is narrow. |
- Anti-Aliasing: TXAA at 4x can make the game look blurry on lower resolution monitors. Use SMAA 2x or off with a high resolution.
- Depth of Field: When aiming down sights, DoF blurs distant objects; some players prefer it off for clarity.
- Motion Blur: Disable immediately; it hampers tracking the Alien in motion.
- The game does not have dynamic resolution. Use Render Scale (if available in some config files) only for upscaling. Not recommended unless desperate for performance.
- Master Volume: 100% then adjust headphones/speakers separately.
- Music Volume: 70-80%. Music can drown out Alien footsteps.
- SFX Volume: 100%. Crucial for hearing Alien and android sounds.
- Voice Volume: 100%. Dialogue and radio are important for story.
- Speaker Configuration: Select your setup (Stereo, 5.1, 7.1). For headphones, use "Headphones" if available; otherwise Stereo with virtual surround.
- 3D Audio: If your device supports it, enable. The game uses positional audio for the Alien's location.
- The Alien's approach is signaled by a low-frequency rumble and ventilation sounds. Keep SFX high and consider reducing music further (30-50%) to heighten tension.
- Dynamic Range: Set to "Small" for headphones to avoid losing quiet sounds. "Large" for home theater systems.
- Enable Subtitles: Recommended for non-native speakers and to catch dialogue during loud ambushes.
- Sensitivity: Start at 50% for both horizontal and vertical. Increase slowly; high sensitivity can lead to overcorrection while hiding.
- Invert Mouse Y: Uncheck unless you prefer inverted.
- Mouse Smoothing: Disable. It adds input lag.
- Mouse Acceleration: Disable. Use raw input if possible (via launch options `-rawinput`).
- Vibration: On for immersion (feels the Alien stomping), but Off for minimal grip noise.
- Look Sensitivity: 70% recommended for quick turns; lower for precision in lockpicking.
- Aim Assist: Off. The game's stealth doesn't benefit from aim snap.
- Button Layout: Default works well. Consider swapping crouch and sprint (if on console) for faster evasive actions.
- Enable "Reduce Input Lag" if available (PC only; located in advanced graphics).
- Pre-rendered Frames: Set to 1 in GPU control panel.
- Subtitles: Yes, with speaker names. Size adjustable (small/medium/large).
- Colorblind Modes: Not available natively. Use external overlays or GPU filters.
- Controller Mapping: Fully remappable on PC via Steam Input; console limited to preset swaps.
- Difficulty Options: Separate from settings; Novice makes Alien less aggressive, more audio cues. Use if needed.
- High Contrast Mode: Not present. Use Gamma slider (see below).
- The game's gamma slider is critical for visibility in dark areas. Follow the on-screen prompt: adjust until the center logo is barely visible. Too dark = can't see Alien; too bright = loses atmosphere.
- Audio Language: English (original) or localized (French, German, Italian, Spanish, Russian, Japanese depending on platform). Voice acting is excellent in English.
- Text Language: Select your preferred UI language. Separate from audio.
- Subtitles: Can be on/off regardless of audio language.
- Alien: Isolation has no multiplayer. Network settings are only relevant for leaderboards (Survival Mode) and DLC authentication.
- Online Features: Enable if you want to see player times in challenge missions. Disable for offline play; saves are local.
- Automatic Updates: Keep on to receive patches. The game has no anti-cheat or always-online requirement.
- Auto-Map Rotation: On. The map rotates with your character; off for static north-up. On is more intuitive.
- Objective Markers: On. Off for immersive play (you'll rely on audio logs and signs).
- Retro Mode: Not in standard settings but exists as a cheat/DLC. Enables classic scanner look. Not recommended for first playthrough.
- WARNING: Easy to Misconfigure
Resolution Scaling
Audio Settings
Master Volume & Music
Output Configuration
Special Attention: Audio Mix
Controls Settings
Keyboard & Mouse (PC)
Controller
Input Lag Reduction
Accessibility Settings
Gamma Calibration
Language Settings
Note: On PC, language is set via Steam properties (right-click → Properties → Language). In-game language settings only affect subtitles and UI, not voice if the pack is missing. Reinstall if you change.
Network Settings
Gameplay Settings
Quick Options
- Hint System: On for beginners; off for veterans. Hints spoil puzzle solutions.
- Crouch Toggle vs Hold: Toggle is safer for long hiding; hold for quick peeks. Choose Toggle.
Recommended Preset Summary
| Hardware Level | Graphics Preset | FOV | Audio Dynamic Range | Motion Blur |
|---|---|---|---|---|
| Low-end (30 FPS target) | Custom: Low textures, SSAO off, shadows Low, DoF off, SMAA Low | 65 | Small | Off |
| Mid-range (60 FPS target) | Custom: Medium textures, SSAO on, shadows Medium, DoF off, SMAA Medium | 75 | Small | Off |
| High-end (60+ FPS) | Custom: Ultra textures, HBAO+, shadows Ultra, DoF on, TXAA 2x | 85 | Small | Low |
Final Tips for Setup
- Set FOV before starting: Changing later can affect how you perceive corridor widths. Test in the first safe room.
- Audio is your best weapon: If sounds are muffled, check speaker configuration. The Alien's footsteps are directional.
- Consider an SSD: The game benefits from faster loading when entering new areas and hiding under desks.
- Launch Options (PC): Add `-novid` to skip intro logos, `-high` to set CPU priority normal (not above normal, which can cause stutter).
- Compatibility: On Windows 10/11, the game may crash on startup due to outdated PhysX. Install latest NVIDIA PhysX system software.
With these settings tuned, you'll maximize both terror and performance. Experiment in the main menu's playable area (the Anesidora) to find your sweet spot before embarking on Sevastopol's nightmare.
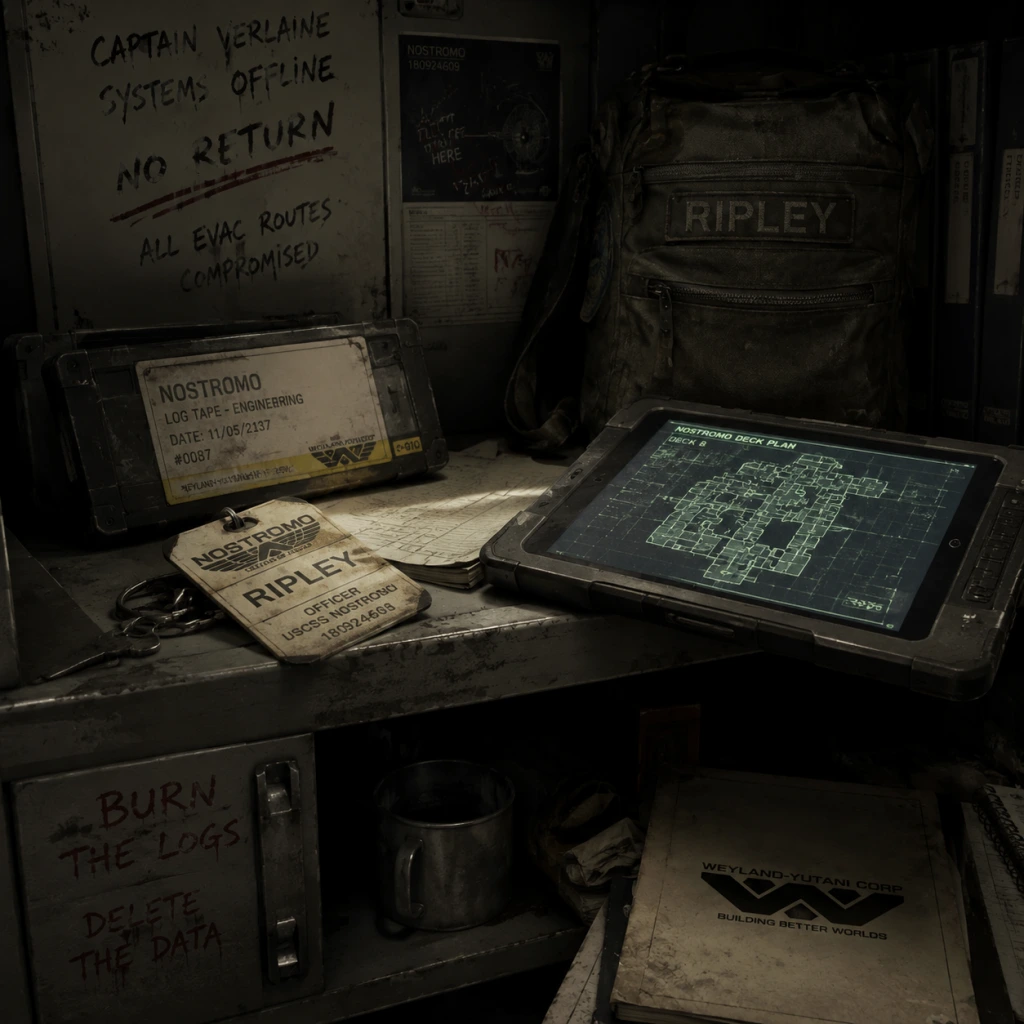
Important Notes
Important Notes
Irreversible Choices & Missable Content
- Nostromo Logs & ID Tags: These collectibles are tied to achievements/trophies and are missable if you progress past certain story points. For example, the Nostromo Log in Mission 3 ("The Trap") is only accessible before you open the door to the transit station. Always search thoroughly before leaving a major area.
- Mission 5 – "The Quarantine": The medical bay contains several key items that become inaccessible once you enter the morgue and the Alien triggers the lockdown. Loot all cabinets and desks before proceeding.
- Mission 10 – "The Hive" (Synthetic Disassembly): The working joe encounters are scripted; destroying them early can prevent later ambushes, but you may miss lore collectibles if you skip areas (like the e-mails in the lobby of the KG348 terminal). Always backtrack to check vents and offices after clearing threats.
- No Story Branching: Your choices do not alter the main plot or ending, but how you spend resources and which paths you take in the station can affect your ability to survive later sections. Save weapon upgrades for the most critical moments (e.g., the flamethrower is best used sparingly).
- Save Stations Only: Manual saves are only possible at wall-mounted save stations. They are scattered throughout the station, but you cannot save during active Alien encounters or while being chased. Plan your save points: always use a station immediately after a quiet moment, as the Alien’s patrol can ambush you between stations.
- Autosave Frequency: The game autosaves at story checkpoints (e.g., after opening certain doors, completing objectives). These are spaced generously, so if you die after 20 minutes of exploration, you may lose progress. Rely on manual saves at stations whenever you find a safe room.
- Save Scumming is Safe: There is no penalty for reloading a save. If you’re low on health or resources, you can reload from a recent save to retry a section with perfect execution. This is especially useful during the “survive until the elevator arrives” sequences.
- Risk of Overwriting: The game allows only one manual save per slot (up to 3 slots). If you save at a station after a difficult encounter, you may overwrite a better checkpoint. Consider using different slots for different missions if you want to revisit earlier areas.
- Medical Bay (Mission 5): The first major spike occurs when the Alien becomes fully active. It will patrol the main hall regularly. Use vents, hiding in lockers (but don’t stay too long), and distractions (noise makers, smoke bombs) to cross open areas. The motion tracker is vital here.
- Reactor Core (Mission 14): The Alien is extremely aggressive here and the environment is full of narrow corridors. Save your flamethrower fuel – you will need it for the final escape sequence. Use the environment to break line of sight, and avoid running.
- The Hive (Final Mission): The Alien becomes near-constant, and you must traverse a narrow hive with limited cover. Use flares to distract it and molotovs to clear working joes. Save your game often before entering the hive proper.
- Working Joes: These androids are tough to kill; they soak up bullets and can grab you. Use the electric stun baton or melee attacks from behind. Once alert, they will chase you relentlessly. Better to avoid them or use the environment to stun them (e.g., opening/closing doors repeatedly).
- No Grinding Required: There are no leveling or crafting systems that force repetition. However, you can replay sections to reroll loot drops from dead humans or androids, but this is rarely beneficial. Better to move forward.
- Resource Hoarding Danger: Many players hoard items (especially fuel for the flamethrower) and never use them, only to die later because they were overwhelmed. Use items proactively! The flamethrower is best used to scare the Alien away, not to kill it. A quick burst saves fuel and buys you time.
- Weapon Upgrade Distribution: You find upgrade kits throughout the game. There are exactly enough to upgrade every weapon at least once, but reassignments cost nothing. Don’t worry about “wasting” upgrades; you can reapply them at any bench. However, you cannot recover used parts, so prioritize the weapons you use most (pistol, shotgun, flamethrower).
- Crafting Components: Items like scrap metal, electronic components, and gunpowder are finite per playthrough and do not respawn. Use them to craft essential tools: medkits, smoke bombs, and noise makers are mandatory; molotovs are optional but useful for working joes. Avoid crafting flashbangs – they are rarely useful.
- Single-Player Only: Alien: Isolation is a purely single-player game; no online multiplayer exists. As such, there are no etiquette rules or anti-cheat systems beyond DRM (e.g., Steam DRM on PC).
- Modding & Achievements: On PC, mods (from NexusMods or Workshop) can alter gameplay, graphics, or add new content. These do not typically disable achievements, but using third-party trainers may flag your account (if you are signed into Steam). For console, mods are not available.
- No Leaderboards or Competitive Play: You cannot cheat to affect other players. However, if you care about achievements/trophies, be aware that using a trainer to spawn items or set invincibility will likely prevent some achievements from unlocking mid-playthrough. It’s safest to avoid mods for a first playthrough.
- Human Enemies: In some sections (e.g., the anarchist survivors in Mission 6-7), humans can be killed or avoided. Killing them reduces future enemies, but makes noise that attracts the Alien. Use stealth or non-lethal takedowns (no option) – you can only kill or hide. Sometimes peaceful coexistence is impossible.
- Glitches & Softlocks: On rare occasions, the Alien may get stuck in a wall or refuse to leave an area. If this happens, quit to the main menu and reload your last save. Also, do not skip tutorial prompts (e.g., crafting) as it can break quest triggers.
- Difficulty Selection Affects Alien AI: On Hard and Nightmare, the Alien is more aggressive, learns faster, and has a shorter cooldown after being scared. It also spawns closer to you. For a first playthrough, choose Medium; for a challenge, Hard; Nightmare removes HUD elements and makes items even rarer.
- Check Your Map Frequently: The map is your navigational guide, but it does update in real-time. If you get lost, re-enter a safe area and study the map. Climbable vents are marked with small arrows.
Save Management & Pitfalls
Difficulty Spikes
Grinding Traps & Resource Management
Online Etiquette & Anti-Cheat Notes
Things Players Commonly Regret Not Knowing Earlier
1. The Motion Tracker is Your Best Friend (and Worst Enemy): Always have it out when exploring, but be aware that its blips can be heard by the Alien. Tap it briefly to check, then crouch and move. The Alien can also see the tracker’s light in the dark.
2. Hiding in Lockers is a Trap: The Alien can open lockers if it sees you enter or hears you breathing. Hold your breath (R3/left stick click) when it’s near. Never stay in a locker longer than 30 seconds; it will start a search pattern. Peek out via the door crack (press up on d-pad/arrow) to check the coast.
3. The Flamethrower’s True Purpose: It does not kill the Alien; it only scares it away temporarily. One second of flame is enough. Conserve fuel for the final segments where you need multiple scares. Overusing it can leave you defenseless.
4. You Can Melee Working Joes: A charged melee attack (hold melee button) from behind can take out a working joe with one blow if you have the stun baton. Otherwise, a few hits with the wrench can stun them. But direct confrontation is risky.
5. Noise Makers are More Useful than Flares: Noise makers attract the Alien to a specific location and are especially good for distracting it away from your path. Flares produce light and noise but are less reliable. Always carry at least one noise maker.
6. The Alien Learns (Sort Of): The game tracks your behavior patterns. If you frequently hide in vents, it will start checking vents. If you use the flamethrower a lot, it becomes resistant. Vary your tactics: sometimes hide in lockers, sometimes under desks, sometimes run openly. This will keep the Alien from predicting you.
7. Backtracking is Not Always Possible: After major story events, many areas become inaccessible (e.g., the transit system shuts down temporarily). Complete all side objectives (like retrieving ID tags or weapon parts) before moving to the next mission marker.
8. Save Often in Safe Rooms: Anytime you find a save station and the coast is clear, save. If you die 10 minutes later, you’ll thank yourself. Don’t skip save stations just because you think you’re safe.
9. The Ambi-Player (PC Specific): On PC, the mouse acceleration can be annoying; turning it off in settings improves aiming. Also increase FOV if you feel claustrophobic (there is a secret command: open the console with ~ and type `fov 90`).
10. The Final Hive is a Gauntlet: In the last mission, you cannot rely on hiding – you must keep moving. Use flares, noise makers, and all remaining fuel. The Alien will be on your tail constantly. Don’t hoard anything; use everything you have because the game ends after the escape.
Additional Warnings
In summary, play carefully, save often, and embrace the fear. The Alien is always learning – you must too.
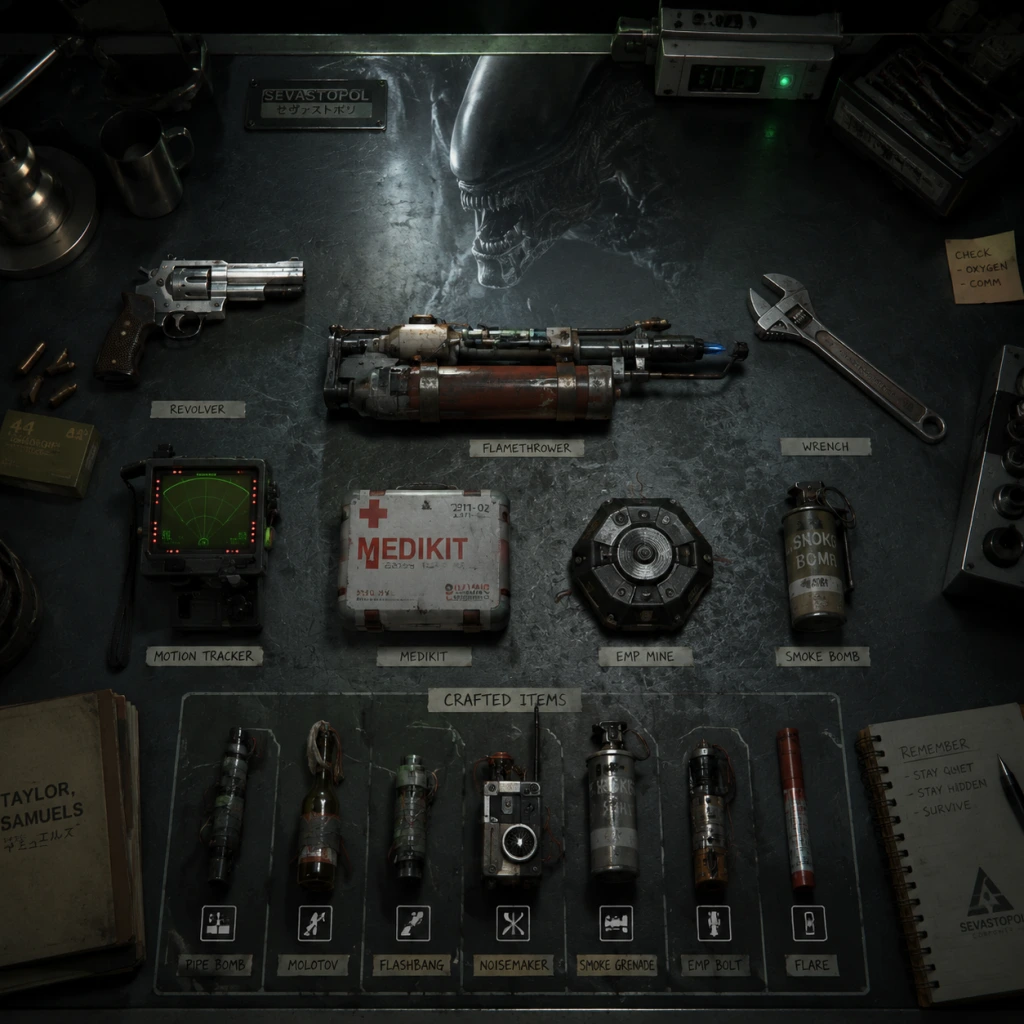
All Game Items
Overview
In Alien: Isolation, your survival depends on careful resource management and improvisation. Items are scarce, and every tool has a specific purpose. This guide covers all major item categories: Weapons & Tools, Consumables & Materials, Key Items & Upgrades, Collectibles, and Currencies. Each entry includes function, acquisition, optimal use, and any upgrades or synergies.
---
Weapons & Tools
1. Revolver
- Function: Low-damage firearm; useful for breaking locks, stunning humans, or creating noise to distract the Alien. Ammo is very limited.
- Obtain: Found in Mission 3 (San Cristobal Medical Facility) on a desk in the treatment room.
- When Useful: Early game against hostile humans; rarely effective against the Alien. Best used as a noise maker.
- Upgrades: None. Ammo can be crafted from scrap (see Crafting).
- Function: Powerful close-range weapon; can stun the Alien for a few seconds, allowing escape. Fires shells, which are rare.
- Obtain: In Mission 6 (Solanos / Lorenz Systech Spire) – located in a locked safe (code 3861) or later in the transit hub.
- When Useful: Last resort against the Alien; one direct shot can force it to retreat. Also effective against humans and Working Joes.
- Upgrades: None. Shells can be crafted from scrap and gunpowder.
- Function: The most effective weapon against the Alien. Fuel blasts cause the Alien to flee and hide in vents, buying you precious time. Can also ignite flares.
- Obtain: Mission 10 (Syndicate / Pioneer) – in the room before the elevator to the reactor.
- When Useful: Primary defense against the Alien after Mission 10. Use short bursts to conserve fuel; longer bursts cause it to retreat further. Also damages Working Joes.
- Upgrades: None. Fuel can be crafted from chemicals and scrap.
- Function: Disables electronic devices (door panels, cameras, Working Joes) in a radius. Can be placed or thrown. Emits a loud noise that can attract the Alien.
- Obtain: Blueprint found in Mission 5 (Sevastopol Station – Engineering). Craft from electronics and metal parts.
- When Useful: Dealing with multiple Working Joes or disabling security cameras. The noise can be used to lure the Alien away from a path. Works on the Alien? No – it is biological.
- Synergy: Combine with a noise distraction to herd enemies.
- Function: Lethal explosive; can kill humans instantly and severely damage the Alien (forces retreat). Loud, attracts enemies.
- Obtain: Blueprint in Mission 5 (Engineering). Craft from explosive powder, metal parts, and chemical components.
- When Useful: Clearing a room of humans or as a last resort against the Alien. Use with caution because of noise.
- Note: The Alien can be killed by a direct hit? No, but it will flee for an extended period.
- Function: Creates a bright flash and loud bang. Stuns humans and Working Joes briefly; attracts the Alien to the location.
- Obtain: Blueprint in Mission 2 (Backup Power Relay). Craft from scrap and electrical components.
- When Useful: Distracting enemies, blinding humans to slip past, or redirecting the Alien. Essential for stealth.
- Synergy: Use while hiding in a locker; the Alien will investigate the noise and leave.
- Function: Creates a cloud of smoke that obscures vision for humans and the Alien. Does not block the Alien's hearing or sense of smell.
- Obtain: Blueprint in Mission 8 (Team Briefing / Cargo Bay). Craft from chemicals and metal parts.
- When Useful: Crossing open areas under surveillance, escaping combat, or blocking line-of-sight for security cameras.
- Function: Illuminates dark areas. Attracts the Attention Meter (not the Alien directly) – enemies can see light.
- Obtain: Equipped from start. Can be toggled on/off.
- When Useful: Essential for navigation but risky. Use sparingly; use the motion tracker to navigate without light.
- Upgrades: None; however, you can find a Flashlight Upgrade in Mission 8 (Projector Room) that increases brightness but also draw more attention – use with discretion.
- Function: Detects moving enemies (humans, Working Joes, and the Alien) within a 30-meter range. Shows distance via blips. Does not detect stationary enemies or unconscious bodies.
- Obtain: Equipped from start.
- When Useful: Vital for situational awareness – always keep on. The Alien can hear the tracker's beeping if you are close; use it in short bursts.
- Upgrades: None.
- Function: Melee tool; used to break vents, open stubborn doors, and as a weapon (weak).
- Obtain: In Mission 1 (Start of game).
- When Useful: Opening shortcuts, breaking vents to create hiding spots, and as a last-resort melee attack against humans.
- Note: The Jack can be used on certain panels to disable alarms temporarily.
- Function: Used to hack datapads and security terminals to unlock doors, turn off cameras, etc. Requires a minigame; higher-level locks need more time or skill.
- Obtain: In Mission 3 (Medical – after meeting Samuels).
- When Useful: Accessing locked rooms, disabling door security, or reading logs. Some terminals can deactivate reactor alarms.
- Upgrades: None; but you can find Hacking Mods (e.g., “Agility” reduces noise during hack) in some lockers.
- Scrap Metal: Most common; used for almost all craftable items (Noise Makers, EMP Mines, flares, revolver ammo, shotgun shells).
- Gunpowder: Found in weapon crates and lockers. Used for revolver ammo and shotgun shells.
- Chemicals: Found in janitor closets and labs. Used for smoke bombs, flamethrower fuel, and pipe bombs.
- Electrical Components: From computers, circuit boards. Used for EMP Mines, flares, hacking mods.
- Metal Parts: From machines and structural debris. Used for pipe bombs and melee upgrades.
- Explosive Powder: Rare; found in military lockers. Used exclusively for pipe bombs.
2. Shotgun
3. Flamethrower
4. EMP Mine
5. Pipe Bomb
6. Flashbang (Noise Maker)
7. Smoke Bomb
8. Flashlight
9. Motion Tracker
10. Maintenance Jack
11. Hacking Device
---
Consumables & Materials
Crafting Materials (Scavenge from environment)
Crafting Recipes (Blueprints automatically learned)
| Item | Materials | Effect |
|---|---|---|
| Revolver Ammo | 2 Scrap + 1 Gunpowder | Ammo for revolver (6 rounds). |
| Shotgun Shells | 3 Scrap + 2 Gunpowder | Ammo for shotgun (4 shells per craft). |
| Flamethrower Fuel | 2 Chemicals + 1 Scrap | Refuels flamethrower (200 units). |
| Flashbang (Noise Maker) | 2 Scrap + 1 Electrical Components | Distraction device. |
| Smoke Bomb | 2 Chemicals + 1 Metal Parts | Obscures vision. |
| EMP Mine | 3 Scrap + 2 Electrical Components | Disables electronics. |
| Pipe Bomb | 1 Explosive Powder + 2 Metal Parts + 1 Chemical | High explosive. |
| Flare | 1 Scrap + 1 Electrical Components | Light source; can be ignited with flamethrower to create fire. |
Medkits
- Function: Restores health to full.
- Obtain: Rarely found in cabinets; less spawn on harder difficulties. Can be crafted with 2 Chemicals + 1 Scrap after collecting the Medkit Blueprint (Mission 6).
- When Useful: After taking damage from Humans, Working Joes, or the Alien (direct attack). Save for emergencies.
- Revolver ammo: 6 rounds per pickup (blue box).
- Shotgun shells: 4 shells per pickup (red box).
- Flamethrower fuel: 200 units per canister.
- Found in weapon lockers, security stations, or on dead bodies.
- Function: Rechargeable health packs in rooms. Use once; they take time to recharge (about 30 seconds). Can only be used if you have a medical kit slot (max 1).
- When Useful: Free healing when you are near a station. Note that using it emits a loud hiss that can attract enemies.
- Access Tuner: Allows you to open certain doors and use lifts. (Mission 1).
- Plasma Cutter: Used to cut through sealed doors and panels. (Mission 2).
- Torch: Used to burn through weak walls and vents. (Mission 4 – Engineering).
- Ion Torch: Upgrade of Torch; can cut through stronger panels. (Mission 9).
- Reluctant Assistant's Keycard: Unlocks various doors in Medical.
- AJ's Keycard: Unlocks Marsh’s office.
- Katherine’s Keycard: Unlocks certain security doors.
- API Access Key: For the reactor override.
- Flashlight Brightness Upgrade: Increases light output but also enemy detection.
- Flamethrower Fuel Efficiency: Reduces fuel consumption per blast (found in Mission 12).
- EMP Mine Range Increase: Larger radius (found in Mission 9).
- Pipe Bomb Damage Increase: More explosive force (rare).
- Melee Damage Upgrade: For the Maintenance Jack – makes it more effective against humans.
- Hacking Speed Upgrade: Reduces time taken to hack terminals.
- Stealth Module (Cloaking): Found in Mission 6 – temporary invisibility when standing still (30 seconds). Consumes power.
- Flares: Can be lit with the Flamethrower to create a fire barrier that deters the Alien for a short time. Can also be thrown as noise distraction.
- Noise Makers: See Consumables.
- Security Cameras: Can be temporarily disabled by hacking or EMP.
- Function: Lore items belonging to dead crew members. Collect all 20 for the “All Clear” Trophy/Achievement.
- Locations: Scattered across all missions. Often in hard-to-reach places or near dead bodies.
- Missable: If you leave a mission area, some become inaccessible. Check guide by mission.
- Function: Audio recordings from the original Nostromo crew. Collect all 10 for an achievement.
- Locations: Most are in Mission 3 (Medical). Others in later missions like the Gemini Exoplanet Solutions lab.
- Missable: Yes, especially the one in the Apollo Core server room (Mission 6).
- Function: Text documents and audio diaries that expand the story. Not required for achievements but provide backstory.
- Locations: Everywhere – desks, bodies, terminals.
- Function: Blueprints for crafting. Some are automatic, but a few have physical blueprints you must pick up (e.g., Medkit blueprint).
- Function: Read on terminals. Some contain codes for safes or side information.
- Primary currency for crafting. Not a literal currency, but the most common resource. Used in almost all recipes.
- How to Obtain: Scavenge from containers, lockers, dead bodies, and environment. Vendors? There are none. Only crafting.
- The game has no shops. All items are scavenged or crafted. There is no currency like credits. The only “currency” is materials.
- Function as keys to unlock doors. Not a currency but essential for progression.
- Common Codes: 1270 (Medical safe), 3861 (Shotgun safe), 4356 (Engineering safe), 8923 (Morley’s safe).
- Flares+Flames: Fire deters the Alien for ~10 seconds. Use before sprinting through an area.
- Noise Makers + Locker: Effective combo to dispatch the Alien to a different room.
- EMP + Working Joes: Disable multiple androids silently, but the EMP attracts the Alien.
- Flashlight + Smoke Bomb: Flashlight through smoke can blind you, but enemies can still see your light – not recommended.
- Always carry a stack of Noise Makers and Smoke Bombs. They are cheap to craft.
- Save Flamethrower fuel for critical moments. Each full tank (200 units) can make the Alien flee about 4-6 times.
- Collect Medkit blueprint early; scrap is abundant but chemicals are rarer.
- Upgrade Flamethrower fuel efficiency ASAP.
- Novice: Abundant ammo and medkits. Crafting materials spawn more frequently.
- Hard / Nightmare: Drastically reduced resource spawns. The Alien is more persistent. Crafting becomes essential.
- General Rule: Resources do not respawn; once taken, they are gone. Plan your crafting carefully.
Ammo Pickups
Health Stations
---
Key Items & Equipment Upgrades
Key Items (Story Progression)
Upgrade Kits (Weapon/Tool Upgrades)
Scattered throughout the station. They improve equipment stats:
Tools (One-Time Use or Environment Interaction)
---
Collectibles
ID Tags
Nostromo Logs
Composite Logs
Schematics
E-Mails
---
Currencies
1. Scrap
2. Credits? Not present – no vendor system.
3. Keycards & Passcodes
---
Special Items & Synergies
The Alien’s Behavior Modifiers
Best Practices for Item Use
---
Item Rarity & Availability by Difficulty
---
Summary Table of All Item Types
| Category | Items |
|---|---|
| Weapons | Revolver, Shotgun, Flamethrower |
| Tools | Maintenance Jack, Plasma Cutter, Torch, Ion Torch, Hacking Device, Motion Tracker, Flashlight |
| Explosives & Traps | Pipe Bomb, EMP Mine, Smoke Bomb, Flashbang/Noise Maker |
| Consumables | Medkits, Ammo (Revolver & Shotgun), Flamethrower Fuel, Flares |
| Crafting Materials | Scrap, Gunpowder, Chemicals, Electrical Components, Metal Parts, Explosive Powder |
| Key Items | Access Tuner, various keycards, passcodes |
| Upgrades | Flashlight Brightness, Fuel Efficiency, EMP Range, etc. |
| Collectibles | ID Tags (20), Nostromo Logs (10), Composite Logs, Schematics, E-Mails |
| Currencies | None (only materials) |
This guide covers all items in Alien: Isolation as of the latest version. Always check your inventory and crafting tab for available recipes. Good luck surviving Sevastopol!
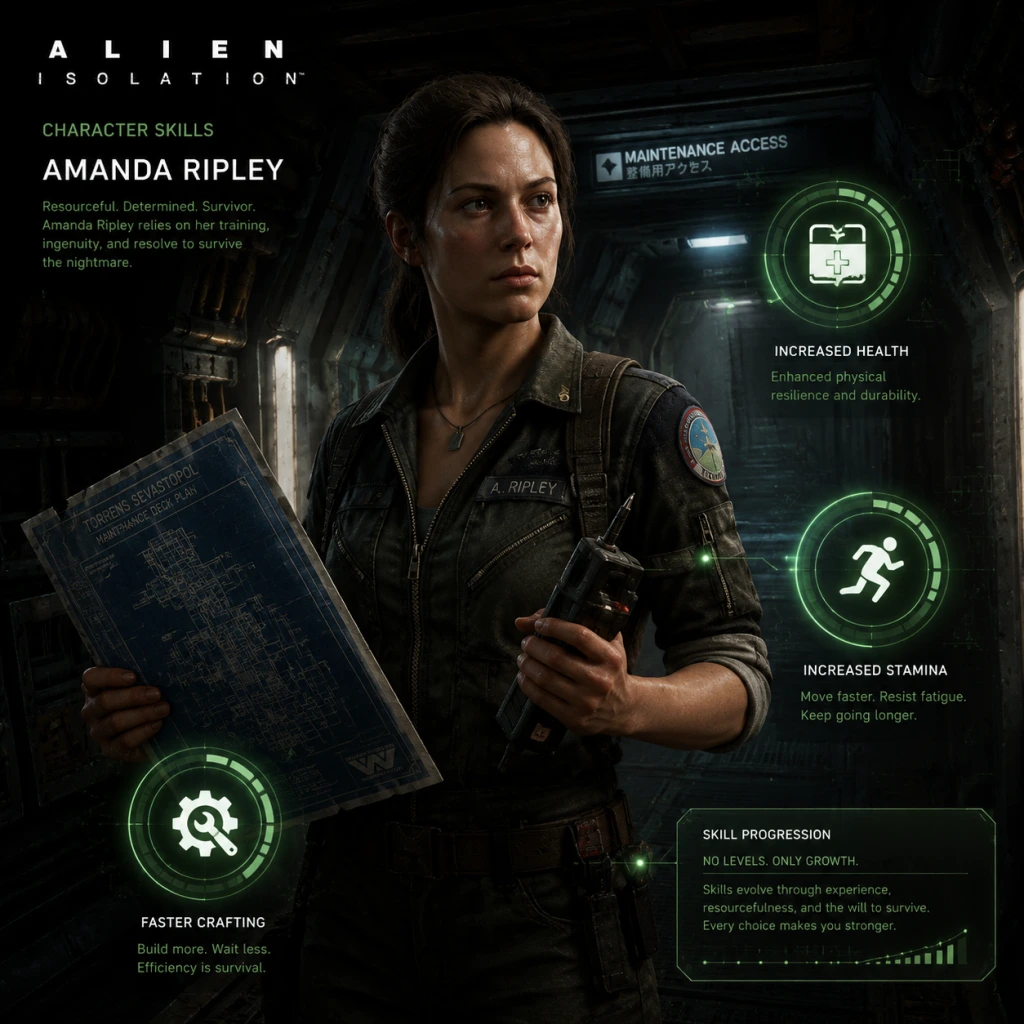
Character Skills
Overview
Alien: Isolation features a single playable character, Amanda Ripley. Unlike traditional RPGs, there are no skill trees, experience levels, or unlockable spells. Instead, "skills" in this guide refer to the tools, weapons, and actions at your disposal. Each item is a form of ability that can be crafted, upgraded, and used tactically. This guide covers everything from innate actions (sprinting, vent crawling) to every weapon, tool, and craftable item. For each "skill", we provide:
- Effect: What it does.
- Obtained / Upgrades: How to get it and improve it.
- Resource Costs: Crafting or battery requirements.
- Cooldown / Duration: Reload time or effect length.
- Combos & Synergies: Pairings with other items or enemy behavior.
- Recommended Usage: When and how to use effectively.
- Build Strategies: Different playstyles (stealth, combat, distraction).
- Effect: Move faster than walking. Drains stamina (gauge shown on HUD).
- Cooldown: Stamina recharges after a few seconds of not sprinting.
- When to Use: Short bursts to close distance to cover, escape a stun, or dodge a human's bullet. Avoid prolonged sprinting; the Alien will hear it (especially on Hard/Nightmare).
- Effect: Lowers your profile, reduces noise, and allows slow movement. Can pass under some objects (tables, ducts).
- When to Use: Essential for staying undetected by the Alien, Working Joes, and humans. Always sneak when the Alien is active; standing or running will attract it.
- Effect: Peek around corners or edges without full body exposure.
- When to Use: Scout ahead before committing to a path. Combine with motion tracker to see enemies without being seen.
- Effect: Enter ventilation shafts for traversal and hiding. Movement is noisy; crouching still makes noise but less than upright.
- When to Use: Navigate between zones, escape pursuit, or bypass locked doors. The Alien also uses vents, so listen carefully.
- Effect: Hop over low obstacles (crates, railings) and climb ladders.
- When to Use: Evading enemies or reaching alternate routes. No stamina cost.
- Effect: Enter lockers, under desks, or other hiding spots. Hold breath to reduce noise when Alien is near.
- When to Use: Core survival tactic. If the Alien is searching, hide and wait. Do not move or use items (except tracker) while hidden.
- Effect: Handheld radar that detects moving enemies in a cone. Range ~10-15 meters. Displays blips for humans, Working Joes, and the Alien (unique blip).
- Battery Consumption: Drains battery while active; can toggle on/off.
- Upgrades: None (it's always usable). But later you can craft a Tracker Upgrade? Actually no – the motion tracker is always the same.
- Combos: Use before rounding corners, while hiding, or to track the Alien's patrol pattern. Essential for navigation.
- When to Use: Almost always. Keep it on when exploring to anticipate threats. Turn off when stationary to save battery.
- Effect: Standard firearm. Six rounds. Deals lethal damage to humans; can stun the Alien momentarily (multiple shots needed).
- Obtained: Mission 2 (Sevastopol Police Station armory).
- Upgrades: None.
- Cooldown: Reload ~2 seconds. No heat system.
- Ammo: Scavenged from dead humans, lockers, or found as loot.
- Combos: Use after stunning Alien with pipe bomb to finish it? Not recommended (Alien cannot be killed permanently). Best against humans.
- When to Use: Only as a last resort against humans. Gunfire attracts the Alien instantly. Never fire at the Alien unless absolutely desperate (it will flee, then return angrier).
- Effect: Powerful close-range weapon. Holds 4 shells. Can kill humans in one shot; stuns the Alien heavily but does not kill.
- Obtained: Mission 6 (Transit Control sub-level).
- Upgrades: None.
- Cooldown: Reload per shell (~1 sec each).
- Combos: Use with pipe bomb to damage/hinder Alien while escaping.
- When to Use: Tight corridors, multiple humans, or a quick reprieve from the Alien. Loud; only fire if you have an escape route.
- Effect: Melee weapon with infinite durability. Slow swing but high damage to humans (2 hits kill). Can break wooden crates, open certain doors/lockers.
- Obtained: Mission 1 (from the outer hangar locker).
- Cooldown: Swing speed moderate.
- Combos: Use after stunning enemy with stun baton or EMP. Break vents covers.
- When to Use: Quiet takedowns of isolated humans (sneak up and attack). Do not use against Alien or Working Joes (ineffective). Also useful for opening shortcut doors.
- Effect: One-hit stun on humans and Working Joes. Does not kill, but knocks them down for several seconds. Works on Working Joes (temporarily disables).
- Obtained: Craftable (Blueprint found in Mission 2).
- Crafting Cost: 1 Scrap Metal + 1 Electronic Component.
- Durability: Single use; must craft another.
- Cooldown: Immediate reuse after crafting.
- Combos: Follow up with maintenance jack for silent kill on humans; ignore after stunning (leave them).
- When to Use: Non-lethal option for humans; excellent for disabling Working Joes quietly. Not effective against Alien.
- Effect: Disorients all enemies in radius (including Alien) for ~4 seconds. Blinds humans and Joes; Alien staggers and retreats temporarily.
- Obtained: Craftable (Blueprint found in Mission 7).
- Crafting Cost: 1 Scrap Metal + 1 Adhesive + 1 Unstable Flammable (from flamethrower fuel/chemicals).
- Cooldown: Instant.
- Combos: Use before running past a tight spot, or to escape the Alien when caught in the open.
- When to Use: Emergency escape tool. Does not attract noise; safer than gunfire.
- Effect: Creates a thick cloud that blocks line of sight. Humans and Joes will not enter it; the Alien may pause or avoid it briefly.
- Obtained: Craftable (Blueprint found in Mission 5).
- Crafting Cost: 1 Scrap Metal + 1 Adhesive + 1 Acid (from green canisters/caustic).
- Cooldown: Instant.
- Combos: Throw at choke points to hide your movement or to rescue a human from being attacked (distraction).
- When to Use: Creating cover in open areas, or to slow pursuing enemies.
- Effect: Emits a noise pattern that distracts enemies. Humans and Working Joes will investigate the source; the Alien will move toward it and may attack the area.
- Obtained: Craftable (Blueprint from Mission 2).
- Crafting Cost: 1 Scrap Metal + 1 Electrical Component.
- Cooldown: Instant.
- Duration: Beeps for ~10 seconds.
- Combos: Throw in opposite direction of intended path. Use when the Alien is patrolling a corridor to lure it away.
- When to Use: One of the best tools. Use to distract humans while looting or to misdirect the Alien. Can also be thrown near a human to get them attacked (the Alien will kill them).
- Effect: Creates a mine that upon activation releases an electromagnetic pulse. Disables all electronics in range: cameras, turrets, and Working Joes (freezes for ~10 seconds). Does not affect humans or the Alien.
- Obtained: Craftable (Blueprint found in Mission 6).
- Crafting Cost: 1 Scrap Metal + 1 Electrical Component + 1 Detonator (from explosives or made).
- Cooldown: Instant after placement.
- Combos: Place at a choke point before a combat encounter or to bypass a camera. Use with stun baton to silently take down a disabled Joe.
- When to Use: Stealth approaches to areas with cameras or multiple Joes.
- Effect: Explosive device with a timer (about 3 seconds after arming). Large blast radius, kills humans instantly, severely damages Working Joes (two can destroy one), and stuns the Alien (~5 seconds).
- Obtained: Craftable (Blueprint from Mission 5).
- Crafting Cost: 1 Scrap Metal + 1 Adhesive + 1 Unstable Flammable + 1 Detonator.
- Cooldown: Instant.
- Combos: Throw at feet of the Alien when it corners you to buy time. Use against human groups.
- When to Use: Last resort offensive tool. Extremely loud; attracts the Alien from across the station. Only use if you have an immediate escape.
- Effect: Place a tripwire that triggers a burst of flame. Works similar to pipe bomb but creates a fire zone. Xenomorph avoids fire; will not pass through burning area. Humans burn alive.
- Obtained: Craftable (Blueprint from Mission 8).
- Crafting Cost: 1 Scrap Metal + 1 Adhesive + 1 Unstable Flammable + 1 Spool of Wire (common).
- Cooldown: Instant.
- Combos: Block doorways or vents to create a safe passage. Use two in series to funnel the Alien.
- When to Use: Defensive perimeter. Place before looting a room or performing a objective where the Alien may wander.
- Effect: Primary deterrent against the Alien. Releases a stream of fire that forces the Xenomorph to retreat. Also damages humans and Working Joes. Fuel is consumed per burst.
- Obtained: Mission 8 (San Cristobal Medical Facility).
- Upgrades: None (fuel can be found).
- Cooldown: Continuous use until fuel depletes; refuel with canisters.
- Duration: Each canister provides ~3-5 bursts.
- Combos: Always keep as last defense. Use brief bursts to scare the Alien instead of full fuel drain.
- When to Use: The Alien is invulnerable to other weapons; flamethrower is the only reliable way to drive it away. Use sparingly, as fuel is limited.
- Effect: Cuts through sealed doors, panels, and cables. Essential for progression.
- Obtained: Mission 3 (Sevastopol Transit Control).
- Cooldown: Infinite uses; no fuel.
- When to Use: Only for scripted objectives. Not a combat tool.
- Effect: Used to hack computer terminals, panels, and safes. Comes with limited uses (4 charges per battery). Consumes a charge each hack. Later you can craft new ones.
- Obtained: Mission 2 (from the armory desk).
- Crafting Cost: 1 Electronic Component + 1 Adhesive? (Actually, consumable Access Tuners cannot be crafted; you find them). Wait – There are Access Tuners that are used up. You cannot craft them, only find. The main hacking tool is the Hacking Device (like a tablet) that has 4 slots for tuners. Each hack uses 1 tuner. Tuners are scavenged.
- Cooldown: None, until tuners run out.
- When to Use: Hack doors, safes, mission objectives. Prioritize safes for rare materials.
- Focus: Noisemaker, Smoke Bomb, Stun Baton, Motion Tracker.
- Strategy: Avoid combat. Use distractions liberally. Hoard fuel and explosives for emergencies. Crouch always.
- Recommended Upgrades: None (items don't upgrade). But prioritize carrying extra Noisemaker materials.
- Focus: Shotgun, Pipe Bomb, Incendiary Trap, Flamethrower.
- Strategy: Aggressively eliminate humans and Working Joes. Use bombs to stun the Alien and flee. Requires more ammo management.
- Recommended: Always have at least one pipe bomb and flamethrower fuel.
- Focus: Revolver, Stun Baton, EMP Mine, Flamethrower.
- Strategy: Adapt to situation. Use EMP for Joes, revolver for humans, flamethrower for Alien.
- Recommended: Keep a noisemaker and a smoke bomb for flexibility.
- Noisemaker + Smoke Bomb: Toss noisemaker at location, then smoke bomb at your escape route to break line of sight.
- Stun Baton + Maintenance Jack: Stun a human or Working Joe then sneak behind and whack with jack for silent kill (or just leave stunned).
- EMP Mine + Stun Baton: Disable a Working Joe with EMP, then stun baton to permanently shut down (EMP only stuns; stun baton can destroy? Actually, stun baton does not destroy; but you can use maintenance jack to destroy disabled Joe? In the game, you can destroy Working Joes by damaging them enough; stun baton does not destroy, but you can follow up with shotgun or pipe bomb. Best to just run past disabled Joe.)
- Incendiary Trap + Pipe Bomb: Block two paths: one with fire, other with explosion to force the Alien to a third route.
- Flashbang + Sprint: Disorient enemies and sprint to cover before they recover.
- Flamethrower + Pipe Bomb: If Alien is charging, fire a burst, then throw pipe bomb at its feet for extra stun and time to escape.
Innate Skills (Amanda's Natural Abilities)
These are always available, no resources required.
Sprint
Crouch & Sneak
Lean
Vent Crawling
Quick Climb / Vault
Hiding / Lockers
Motion Tracker (Base)
Weapons & Tools (Acquired or Crafted)
Each counts as a "skill" with specific uses.
Revolver
Shotgun
Maintenance Jack (Crowbar)
Stun Baton
Flashbang
Smoke Bomb
Noisemaker
EMP Mine
Pipe Bomb
Incendiary Trap (Flammable Canister + Tripwire)
Flamethrower
Ion Torch
Hacking Tool (Access Tuner)
Skills by Playstyle (Builds)
Although no formal builds exist, resource prioritization defines your playstyle.
Stealth Build
Combat Build (High Risk)
Hybrid / Balanced
Synergies & Combos
When to Use Each Skill (Quick Reference)
| Enemy Type | Best Tools | Avoid / Ineffective |
|---|---|---|
| Humans | Stun Baton, Noisemaker, Revolver, Shotgun | Flamethrower (waste) |
| Working Joes | EMP Mine, Stun Baton, Pipe Bomb | Revolver (weak), Shotgun (inefficient) |
| Alien (Xenomorph) | Flamethrower, Pipe Bomb, Flashbang, Incendiary Trap | All silent weapons, Stun Baton, Revolver |
| Cameras / Turrets | EMP Mine, Hacking (for cameras) | None special |
Final Tips
- Always save your flamethrower fuel for the Alien. Do not waste on humans.
- Craft noisemakers frequently; they are cheap and extremely versatile.
- The motion tracker is your best friend – learn its patterns and the Alien's patrol routes.
- When the Alien is in the vents, you can move freely – but it may drop down at any moment.
- Use hiding spots (lockers, beds) to wait out enemy searches. Hold breath when the Alien is very close.
- On higher difficulties, resources are scarcer; practice zero-kill runs to conserve materials.
This guide covers every actionable "skill" in Alien: Isolation. Master these tools and you will survive the horror of Sevastopol Station.

Characters & Roles
Introduction
Alien: Isolation is a single-player survival horror game with no character classes or multiple playable heroes. The only character you control is Amanda Ripley, but the game features a cast of major NPCs (both allies and enemies) that drive the story and challenge you. This guide covers every significant character and enemy "role" in the game: their backgrounds, strengths, weaknesses, and how to deal with them effectively.
---
Playable Character: Amanda Ripley
Background
Amanda Ripley is the daughter of Ellen Ripley, the heroine of the original Alien film. 15 years after her mother's disappearance, Amanda works as a flight engineer for the Weyland-Yutani Corporation. She joins a team sent to Sevastopol Station to retrieve the flight recorder from the USS Nostromo. The mission quickly becomes a nightmare as she faces a single, near‑unstoppable Xenomorph, hostile humans, and malfunctioning androids.
Strengths
- Resourcefulness: Can craft tools and weapons from scavenged components.
- Agility: Can sprint, crouch, and slide under low obstacles.
- Stealth Mastery: Uses hiding spots, vents, and noise distraction.
- Tech Savvy: Competent with the Maintenance Jack, stun baton, and hacking tools.
- Extremely Fragile: One hit from the Alien kills her; two shots from a human gun can kill her.
- Limited Combat: Handguns are weak against the Alien; explosives attract it.
- Resource Dependent: Without materials for tools, survival becomes nearly impossible.
- No Permanent Upgrades: Skill is entirely player‑dependent, no stat progression.
Weaknesses
Playstyle
Amanda plays as a pure survival‑stealth character. The core loop is:
1. Scavenge – search drawers, lockers, and bodies for components (e.g., scrap, electronic parts).
2. Craft – use the inventory menu to build items (noisemakers, flashbangs, medkits).
3. Hide – rely on lockers, vents, and under desks when the Alien or humans are near.
4. Evade – use the motion tracker to plan routes and avoid patrols.
5. Distract – throw a noisemaker or turn off lights to manipulate enemies.
Avoid direct combat whenever possible. Firing a gun draws the Alien immediately. If forced to fight humans, use the stun baton or a well‑timed melee to stun them and run.
Unlock Conditions
Amanda Ripley is the sole character from the start of the game. There are no alternate characters to unlock; the story is linear and always played as her.
Recommended Equipment & Builds
Since there are no skill trees, “builds” refer to your crafted item loadout. Carry these at all times:
| Item | Purpose | Priority |
|---|---|---|
| Motion Tracker | Detects moving enemies (including Alien). | Always have powered on. |
| Noisemaker | Distract the Alien/humans. | 2+ in inventory. |
| Flashbang | Blind humans and stun androids. | 1–2. |
| Flare | Long‑duration distraction; also lights dark areas. | 1–2. |
| Medkit | Heal wounds (human attacks, explosive damage). | 2+. |
| EMP Mine | Disable Working Joes and electronic doors. | 1 if facing Joes. |
| Stun Baton | Quietly incapacitate humans or temporarily stun Alien (difficult). | 1 (rechargeable). |
| Revolver / Shotgun | Last resort for humans – avoid using against Alien. | 1 weapon only (bullets scarce). |
Team Synergy
Alien: Isolation is entirely single‑player. There is no team synergy. Amanda must rely on solo tactics. However, certain NPCs (like Samuels or Taylor) will accompany you temporarily; they are AI‑controlled and cannot be commanded. Use them as meat‑shields or distractions only if absolutely necessary – they often hinder stealth.
---
Major Antagonists & Enemy Roles
1. The Alien (Xenomorph)
#### Background
The lone Xenomorph stalks Amanda throughout most of the game. It is an intelligent, predatory creature released from the Salvage Station. It learns from your actions, so repeating behaviors (e.g., hiding in lockers repeatedly) reduces its effectiveness.
#### Strengths
- Instant Kill: Any physical contact with the Alien results in death (except using the stun baton in a very tight timing window).
- Adaptive AI: It reacts to noise, light, line of sight, and your recent hiding spots.
- Senses: Can hear footsteps, movement, and even your motion tracker if used too long.
- Unpredictable Patrol: Does not follow a set path; it hunts dynamically.
- Easily Distracted: Flares and noisemakers reliably pull it away.
- Can Be Stunned: The stun baton can briefly stun it, giving you a few seconds to escape.
- Environment Bound: It cannot enter small vents (ducts that Amanda can fit through) or certain sealed rooms.
- Avoidable: Many sequences allow you to sneak past without ever engaging.
- Stay Low and Move Slowly. Crouch‑walking is quieter than sprinting.
- Use the Motion Tracker Sparingly. Turn it off when the Alien is close; the beep attracts it.
- Never Run unless directly warned (e.g., “Run!” prompt in scripted events).
- Hide in Lockers Only as a Last Resort. The Alien will check lockers if it saw you enter.
- Distract, Distract, Distract. Throw a noisemaker away from your intended path.
- Face the Alien Occasionally. If it’s staring at you from a vent, back away slowly – sudden movement triggers.
- Relentless Pursuit: Once alerted, they walk slowly toward you, taunting, and track you through vents.
- Network Connection: If one spots you, it may alert others via a station‑wide network.
- Toughness: Need multiple shots from a revolver to destroy; unaffected by bullets in the head (only a flamethrower or explosion kills quickly).
- Grabs and Kills: A single grab results in death if you don’t have a stun baton or EMP.
- Slow Movement: You can easily outrun them.
- Blind When Still: They have poor peripheral vision; standing perfectly still can break detection.
- EMP Mines and Stun Baton: One EMP mine disables a Joe for a long time; the stun baton delivers a temporary shock.
- Predictable Patrols: They follow set paths unless drawn by noise.
#### Weaknesses
#### How to Survive Against the Alien
2. Working Joes (Androids)
#### Background
Working Joes are humanoid service androids built by Seegson Corporation to maintain Sevastopol Station. A transmission from the ship has caused them to become hostile – they view all biological life as a threat to station order.
#### Strengths
#### Weaknesses
#### Combat Tips vs Working Joes
| Method | Effectiveness | Notes |
|---|---|---|
| Run away | High | Simply leave the area; they won’t chase forever. |
| EMP Mine | Very High | Places mine on the ground; Joe walks into it and is disabled. |
| Stun Baton | High | Melee range; stuns for 3–4 seconds. |
| Revolver/Shotgun | Low | Takes 6+ revolver shots; shotgun 3–4 – loud, attracts Alien. |
| Flamethrower (Alien) | Not usable on Joes | Flamethrower is ineffective against androids (only works on Alien). |
3. Human Enemies (Survivors, Looters, Seegson Security)
#### Background
Sevastopol’s human survivors are divided into several groups:
- Scavengers / Survivors: Desperate, armed with pipes or pistols. They shoot on sight.
- Seegson Security: Station police still loyal to the corporation. Better armed (revolvers, shotguns).
- Hostile Cultists (The Faithful?): Actually there is a cult led by Dr. Kuhlman – they attack Amanda.
- Firearms: Can wound or kill Amanda quickly if they see her.
- Group Tactics: Often patrol in pairs; one may flank while the other distracts.
- Alerting the Alien: Gunfire draws the Xenomorph – which can benefit you if you hide.
- Poor Senses: They can be easily flanked by hiding in the darkness.
- Short Range: Many only have melee weapons; those with guns have limited ammo.
- Distractable: Use noisemakers or flares to divert them.
- Killable Silently: A melee attack or stun baton can knock them down without noise.
- Stealth Kills: Approach from behind and press the melee button to choke them out (silent). Unsafe if the Alien is nearby (it hears the struggle).
- Flashbang: Use to blind a group and then run or pick them off.
- Firefights: Avoid at all costs. If you must shoot, aim for the head with the revolver (1–2 hits). Immediately relocate after firing because the Alien will investigate.
- Use the Alien: Lead humans toward the Alien’s patrol path – it will kill them, leaving you free to scavenge their bodies.
- Role: Weyland‑Yutani executive, part of the initial team. He is calm and rational.
- Interaction: Accompanies Amanda briefly; will occasionally unlock doors or give advice. He is killed by the Working Joes late in the game.
- Significance: His death removes the only other PC with access codes; you must find alternatives.
- Role: Weyland‑Yutani medical officer. She is abrasive and distrusts Amanda.
- Interaction: She appears sporadically; can be seen as an obstacle or a source of info. She eventually tries to steal the escape shuttle.
- Tip: Do not fully trust her; she will betray you to save herself.
- Role: A lone survivor with a military background. He helps Amanda via radio and provides weapons/ammo caches.
- Interaction: He gives you the revolver and later the shotgun. He stays in a safe room and offers guidance.
- Significance: His safe rooms are the only true respite from the Alien; he can craft items for you if you bring materials.
- Role: A deranged scientist who believes the Alien is a divine test. He leads a cult of survivors.
- Interaction: He ambushes Amanda and tries to capture her for his “experiments.” You must evade or confront him.
- Weakness: He is a human with a knife; can be killed with gunfire or the stun baton. But killing him draws the Alien.
- Role: Station command personnel; mostly found dead or recorded in logs.
- Significance: Their logs reveal the station’s downfall and provide context for puzzles and codes.
#### Strengths
#### Weaknesses
#### Playstyle vs Humans
---
Supporting Characters & Allies (Non‑Playable)
Christopher Samuels
Nina Taylor
Officer Ricardo
Dr. Karl Kuhlman
Chief Verlaine & The Sevastopol Crew
---
Summary Table of Roles
| Character / Role | Playable? | Primary Threat | Key Weakness |
|---|---|---|---|
| Amanda Ripley | Yes | N/A (player) | Fragile, no combat power |
| The Alien | No | Instant kill, adaptive | Distractions, small vents |
| Working Joe | No | Relentless patrol | EMP mines, stun baton |
| Human Hostiles | No | Gunfire, numbers | Poor senses, can be distracted |
| Samuels / Taylor / Ricardo | No (allies) | N/A (friendly) | Cannot be ordered, often die |
| Dr. Kuhlman | No (boss) | Melee attack | Human, easily killed – but risky |
Final Tips for Role‑Based Play
- As Amanda, treat every enemy role differently: distract the Alien, EMP the Joes, and avoid humans unless you can silently kill them.
- Always carry at least one item from each category: distraction (flare/noisemaker), stun (baton/EMP), and healing (medkit).
- The Alien is the deadliest role; never engage it head‑on. Use the environment and ambush mechanics.
- Working Joes become more numerous later; learn their patrol routes and place EMP mines preemptively.
- Human enemies become bullet sponges on higher difficulties; use stealth takedowns or let the Alien handle them.
Mastering these roles is the key to surviving the horror of Sevastopol Station.
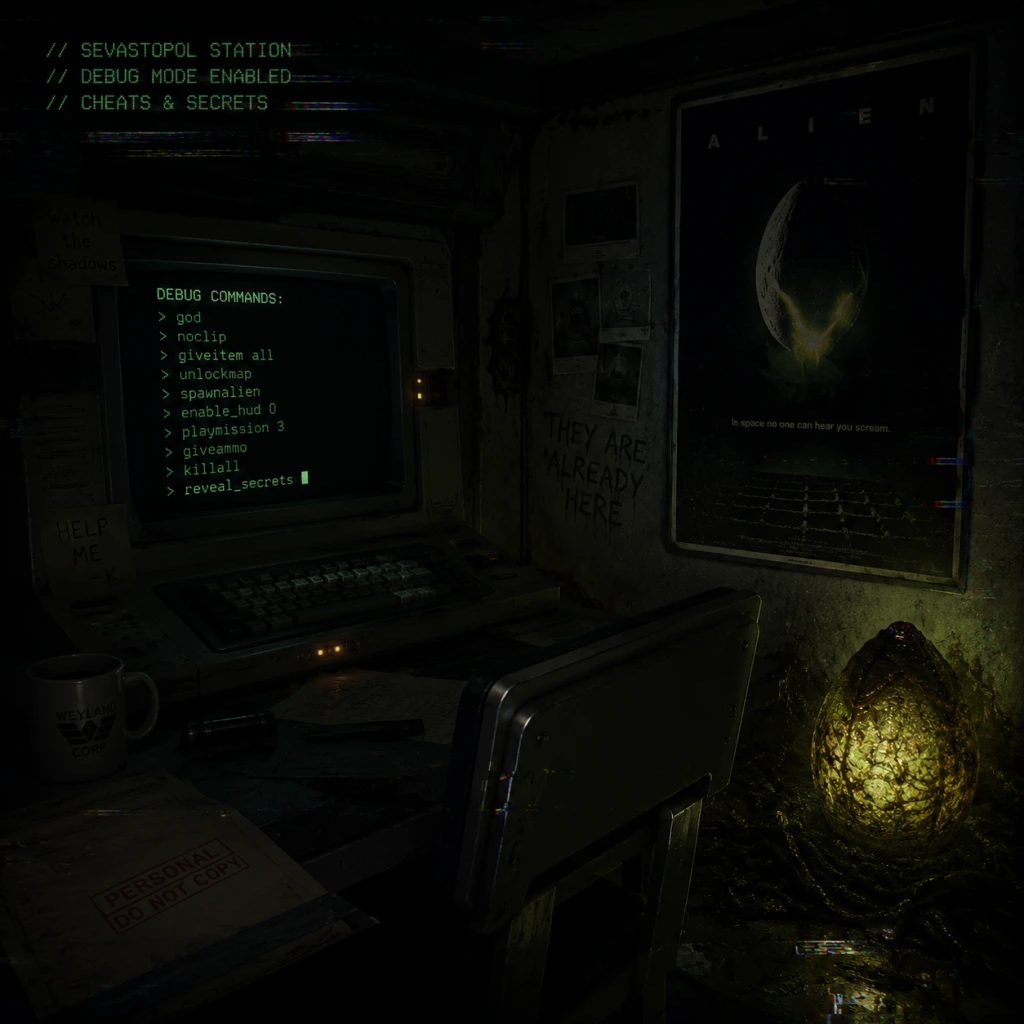
Cheats & Secrets
Cheats & Secrets
Introduction
Alien: Isolation does not include traditional cheat codes (e.g., button combinations or password entries) on any platform. The developers intentionally avoided cheat systems to preserve the game’s tense, unforgiving atmosphere. However, the PC version offers an unofficial developer console that can be enabled, and the game is rich in hidden content, Easter eggs, and unlockable features. This guide covers all legitimate secrets, including console commands, Easter eggs, hidden areas, and achievement/trophy secrets.
---
Developer Console (PC Only)
The PC version includes a debug console that can be activated via a launch argument. Use this at your own risk—enabling the console may disable achievements and can break game progression if used improperly.
How to Enable the Console
1. Open Steam Library > right-click Alien: Isolation > Properties > General > Launch Options.
2. Add the following argument: `-dev`
3. Launch the game. Press the ~ (tilde) key to open the console.
Useful Console Commands
| Command | Effect |
|---|---|
| `god` | God mode (invulnerability) |
| `noclip` | Fly through walls |
| `giveammo` | Fill all weapon ammunition |
| `giveresources` | Max out crafting materials |
| `teleport X Y Z` | Teleport to coordinates (use with caution) |
| `setobjectivename [name]` | Jump to a specific objective (e.g., `setobjectivename Mission1`) |
| `killall` | Eliminate all human enemies (does not affect Alien) |
| `disableai` | Disable enemy AI (Alien becomes docile) |
| `enableai` | Re-enable AI |
| `giveitem [item_name]` | Spawn specific items (e.g., `giveitem flamethrower`, `giveitem revolver`) |
---
Easter Eggs
1. The Nostromo Logs & ID Tags
Collectible logs and ID tags from the original Alien film appear throughout Sevastopol. They are not real cheat codes, but finding all 10 Nostromo Logs and 50 ID Tags unlocks achievements/trophies. Locations are missable after certain story events; see the All Game Items section for a full list.
2. The Original Alien Film Reference: “You’re My Lucky Star”
In Mission 5 – The Descent, when Amanda enters the San Cristobal Medical Facility and finds the sanitarium, you can sometimes hear the song “You’re My Lucky Star” playing on a distant radio. This is a direct reference to the 1979 film, where the same song plays during the Nostromo crew’s last supper.
3. Ash’s Head
In Mission 10 – The Trap, after the Android attack in the Apollo Core server room, you can find a severed synthetic head on a desk. It resembles the remains of Ash from the original film. Interacting with it triggers a short audio line from the game’s synthetic, Samuels, referencing Ash’s betrayal.
4. The Cowboy Hat
In Mission 7 – Seegson Synthetics, inside the synth manufacturing area, look for a small desk with a cowboy hat and a flask. This is an homage to the character Dallas from the original Alien (he wore a similar hat in the film’s opening scenes).
5. “Get Away From Her…”
If you manage to stun the Alien with the flamethrower at close range repeatedly, Amanda may sometimes whisper “Get away from her… you bitch!”—a direct callback to Ellen Ripley’s line in Aliens.
6. The Crew Expendable DLC Poster
In the main menu, if you own the Crew Expendable DLC, the menu background changes to the original Alien film poster. This is a subtle nod to the DLC’s retro aesthetic.
---
Hidden Content
1. “Nightmare” Difficulty
Unlocked by completing the game on any difficulty. Nightmare mode makes the Alien more aggressive, resources extremely scarce, and removes the motion tracker from certain areas. It is the toughest challenge available.
2. The “One-Shot” Mechanic
While not a secret, the Alien can kill Amanda with a single strike on Hard and Nightmare difficulties. On Easy and Medium, you survive with a small amount of health. This is a developer-intended balance hidden until you experiment with difficulty.
3. “No One Can Hear You Scream” Achievement/Trophy
Earned by completing the game without dying. This is a hidden achievement that requires perfect play—no checkpoints, no reloads from a death. It does not appear in the in-game list until unlocked.
4. Secret Room in Mission 5 (San Cristobal Medical Facility)
In the area with the operating tables and corpse, there is a small security office with an ID Tag and a Nostromo Log. To reach it, you must use the vent above the double doors after the Alien leaves the area. Inside, you’ll find a terminal with a message about “medical experiments” – a subtle nod to the film’s “facehugger” scenes.
5. Seegson Communications “Easter Egg” Audio Log
In Mission 15 – The Descent, before entering the hive, search the Seegson Communications office. A specific audio log titled “Test Subject #7” contains a distorted version of the Alien theme song played backwards.
---
Secret Achievements & Trophies
| Name | Description | How to Unlock |
|---|---|---|
| Ammo Conservation | Complete the game using only the stun baton and fists (no guns or flamethrower). | Start a new game on any difficulty and never fire a weapon. Smoke bombs and flares are allowed. |
| One Shot | Complete the game without dying. | Requires perfect play—save often, avoid all lethal mistakes. |
| True Survivor | Complete the game on Nightmare difficulty. | Unlock Nightmare by beating the game once, then complete it on that difficulty. |
| Reach for the Stars | Find all Nostromo Logs. | Collect all 10 Nostromo Logs. They are missable. |
| The Lost | Find all ID Tags. | Collect all 50 ID Tags. Some are in seemingly unreachable areas; use the map to backtrack. |
---
Unlockable Modes
- New Game Plus: Not available. The game only offers New Game mode with carry-over of difficulty unlocks.
- Crew Expendable DLC: If purchased, play as the original Alien cast (Ellen Ripley, Dallas, Lambert) on the Nostromo. Unlock by selecting it from the main menu.
- Last Survivor DLC: Another DLC featuring a mission based on the original film’s final act.
- Alien Senses: If you hold the motion tracker while crouched and not moving, the Alien will not detect you even if you are in its line of sight (within certain ranges). This is not a cheat but an exploit of the game’s AI.
- Flamethrower Fear Radius: The Alien will never attack you while you are actively spraying fire, even if you have only 1% fuel remaining. This is a developer-intended safety net.
---
Developer-Intended Hidden Gimmicks
---
Final Notes
Alien: Isolation lacks conventional cheat codes, but the PC developer console, Easter eggs, and hidden achievements provide plenty of secrets for dedicated players. Use the console sparingly if you want to preserve the intended challenge. All secrets listed here are safe and developer-approved—no mods or third-party tools required (except the console).