Animal Crossing: New Horizons
## Overview **Animal Crossing: New Horizons** is a life simulation game developed and published by **Nintendo** exclusively for the **Nintendo Switch** family of consoles (including Switch Lite and Switch OLED). It is not available on PC, PlayStation, Xbox, or mobile devices (aside from the compani...
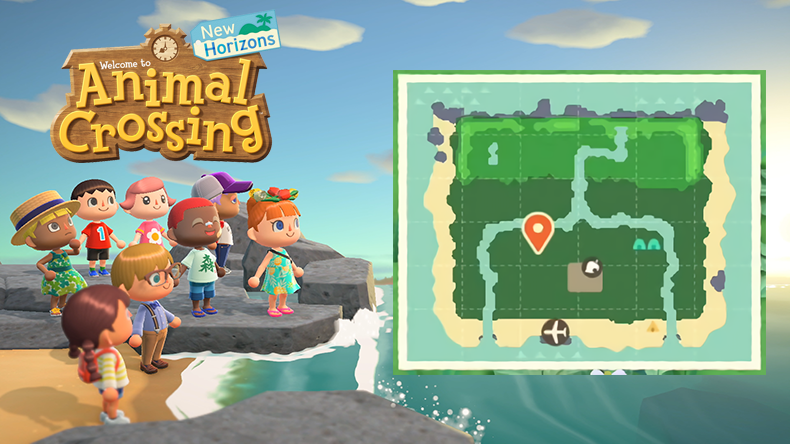
Download & Installation
Overview
Animal Crossing: New Horizons is developed and published by Nintendo exclusively for the Nintendo Switch family of consoles. It is not available on PC, PlayStation, Xbox, or mobile devices (aside from the companion mobile app). This guide covers the official, legitimate methods to obtain and install the game on Nintendo Switch.
---
Platform Availability
| Platform | Availability |
|---|---|
| Nintendo Switch (Switch, Switch Lite, Switch OLED) | Official release via physical cartridge and digital download from Nintendo eShop. |
| PC / Steam / Epic Games Store | Not available — no official PC port. |
| PlayStation 4 / PlayStation 5 | Not available. |
| Xbox One / Xbox Series X\ | S |
| Mobile (iOS/Android) | Only the free companion app "Animal Crossing: Pocket Camp" is available, but it is a separate game, not New Horizons. |
Official Download Sources
1. Nintendo eShop (Digital)
- Location: Accessible directly from the Nintendo Switch HOME menu (orange shopping bag icon).
- Steps:
- Purchase from: Retail stores, online retailers (Amazon, Best Buy, GameStop, etc.).
- Installation: Insert the game card into the Switch’s game card slot. The console will automatically install any necessary update data (requires internet). The game is playable directly from the card; some save data is stored on the console’s internal memory or SD card.
1. Connect your Switch to the internet.
2. Open the Nintendo eShop.
3. Link or log in with your Nintendo Account.
4. Search for "Animal Crossing: New Horizons".
5. Select the game and choose “Proceed to Purchase”.
6. Complete payment (credit card, Nintendo eShop card, or PayPal where available).
7. The download will begin automatically. You can monitor progress on the HOME menu. The game will install upon completion.
2. Physical Game Card
---
Step-by-Step Installation by Method
Digital Download Installation
1. Ensure sufficient storage space (see System Requirements below).
2. Connect to the internet via Wi-Fi or wired LAN adapter.
3. Open the Nintendo eShop from the HOME menu.
4. Sign in with your Nintendo Account (if not already signed in). If you don’t have one, create one at accounts.nintendo.com.
5. Purchase the game (follow on-screen prompts).
6. Start download: The download begins immediately. You can check progress by highlighting the game icon on the HOME menu and pressing the + button to see download status.
7. Wait for completion: The game icon will have a progress bar. Once full, the icon becomes solid. Optionally, you can set the Switch to Auto-Update for future patches.
8. Launch the game by selecting its icon.
Physical Game Card Installation
1. Locate the game card slot — on Nintendo Switch (original/OLED), it’s on the top; on Switch Lite, it’s on the bottom.
2. Insert the game card with the label facing the front of the console until it clicks into place.
3. Connect to the internet (recommended) to download the latest update. The system will prompt you if an update is required.
4. Install updates — if prompted, select “Download”. The update will be installed automatically. The game may be playable without the update, but online features and some content will be unavailable.
5. Launch the game by selecting its icon on the HOME menu.
> Note: For both methods, you must have the latest system update installed. Go to System Settings → System → System Update to check.
---
System Requirements
Nintendo Switch Hardware (Minimum & Recommended)
| Requirement | Minimum | Recommended |
|---|---|---|
| Console | Any Nintendo Switch model (original, Switch Lite, Switch OLED) | Same — no higher spec needed |
| System Version | 10.0.0 or later | Latest available version (typically 19.x.x) |
| Internet | Required for download and updates | Broadband recommended for online multiplayer |
| Controller | Built-in Joy-Con or Pro Controller | Any official controller |
| Storage | 6.2 GB free space (digital) or game card + SD card for updates | 8 GB+ free for DLC and future updates |
| Account | Nintendo Account (free) | Nintendo Switch Online subscription (optional, for online features) |
Storage Space Details
- Digital version: Approximately 6.2 GB download size. Saves take ~1 MB per island. DLC (Happy Home Paradise) adds ~1.1 GB.
- Physical version: Game card size varies but updates require ~1 GB free on internal memory or SD card for patches.
- Save data: Stored on console internal memory; cannot be saved to microSD card. Cloud saves require Nintendo Switch Online.
- Supported microSD cards: Up to 2 TB (FAT32/exFAT). Recommended: 64 GB or larger for multiple games.
---
Account Requirements
1. Nintendo Account (free) — required for digital purchases, saves, online features. Create at [accounts.nintendo.com](https://accounts.nintendo.com).
2. Nintendo Switch Online (paid subscription) — optional for visiting other islands, using custom designs via codes, and cloud saves. Required for the Happy Home Paradise DLC if purchased separately.
3. No region lock — any Nintendo Account can purchase and play from any region’s eShop; however, DLCs must match the game region.
---
First Launch Setup
1. Select a user profile on the Switch that has the Nintendo Account linked.
2. Watch the opening cutscene (optional skip).
3. Name your island (10 characters max, letters and numbers only).
4. Choose your island layout — you cannot change this later, but you can terraform after progressing.
5. Select your hemisphere (Northern or Southern) — affects seasons, fish, bugs.
6. Set the time (can be synced with internet or manually set).
7. Complete Nook Inc. orientation tasks — choose tent spot, gather resources, etc.
8. Save your progress (auto-save enabled by default).
> Tip: If you want to reset, you must delete the save data from System Settings → Data Management → Delete Save Data. There is no multiple save slots per console; one island per Switch system.
---
Common Installation Errors & Fixes
| Error | Cause | Solution |
|---|---|---|
| Corrupted data error | Incomplete download or SD card issue | Redownload the game; perform a “Check for Corrupt Data” from System Settings → Data Management → Software → Select game → Check for Corrupt Data. Replace SD card if faulty. |
| Not enough space | Internal memory or SD card full | Free up space by archiving unused games (keep saves). Use a higher-capacity SD card (up to 2 TB). |
| Cannot download update | Network congestion, region mismatch, or account issue | Restart Switch; test internet connection; ensure Nintendo Account region matches eShop region. |
| Game card not recognized | Dirty or damaged card | Gently clean contacts with a dry cloth; reinsert firmly; try another game card to rule out hardware issue. |
| eShop unable to complete purchase | Payment method declined or region restrictions | Verify payment info; use a different card or eShop card; check that your Nintendo Account region accepts your currency. |
| Save data missing | User profile mismatch or cloud save conflict | Load the correct user profile; ensure cloud save is up-to-date (requires NSO). |
Post-Installation Verification
After installation, confirm the game works correctly:
1. Launch the game — it should show the Nintendo and Nook Inc. logos.
2. Check version number — from title screen, press “-” to see version. Latest is usually 2.0.6 (as of 2025).
3. Test basic controls — move character, open inventory, interact with objects.
4. Verify online access (optional) — visit an island or use custom designs portal to ensure internet connection works.
5. Check DLC (if purchased) — talk to Tom Nook about work after you have 3 stars to start Happy Home Paradise.
6. Monitor for crashes — if the game crashes repeatedly, try shutting down the Switch completely (hold power button → Power Options → Turn Off) and restart.
---
Mobile App: Animal Crossing: Pocket Camp
If you are looking for a mobile experience, Animal Crossing: Pocket Camp is a free-to-play game available on iOS and Android. It is a separate title with different gameplay (camping themed) and limited connectivity to New Horizons (via special items from Pocket Camp catalog). To download:
- iOS: App Store → search “Animal Crossing: Pocket Camp” → tap Get.
- Android: Google Play Store → search → Install.
- No cross-platform play — only Switch players can interact via local wireless or online.
- Physical vs. digital — both offer identical gameplay. Digital is more convenient; physical allows reselling.
- Backup save data — use Nintendo Switch Online cloud saves (cannot restore to a different console after loss/theft).
- Always keep your Switch system updated to avoid compatibility issues.
It requires an internet connection and a Nintendo Account for save data backup.
---
Final Notes
For further help, visit Nintendo Support at https://support.nintendo.com.
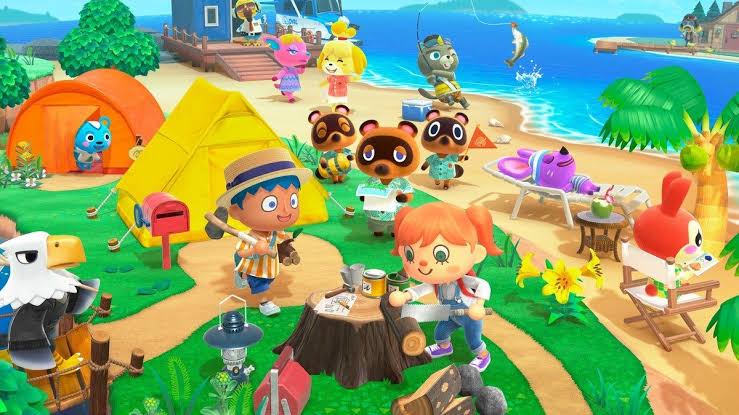
Game Introduction
Overview
Animal Crossing: New Horizons is a life simulation game developed and published by Nintendo exclusively for the Nintendo Switch family of consoles (including Switch Lite and Switch OLED). It is not available on PC, PlayStation, Xbox, or mobile devices (aside from the companion Nintendo Switch Online mobile app). The game was released worldwide on March 20, 2020, and has received continuous free updates adding seasonal events, new features, and special characters. A paid downloadable content (DLC) expansion titled Happy Home Paradise launched on November 5, 2021.
Genre
Life simulation, sandbox, social simulation.
Developer / Publisher
- Developer: Nintendo EPD (Entertainment Planning & Development)
- Publisher: Nintendo
- Initial release: March 20, 2020 (global)
- Major free updates: Throughout 2020–2021 (e.g., summer updates, fall updates, New Year’s celebrations)
- Paid DLC Happy Home Paradise: November 5, 2021
- Final major free update (2.0): November 5, 2021 (added many features alongside the DLC)
- Ongoing: Minor updates and seasonal events continue via free patches.
- Nintendo Switch (standard, Lite, OLED)
- Companion app available on iOS and Android (not the main game)
- Tom Nook – The tanuki entrepreneur who manages Resident Services, sells homes, and initiates island development projects.
- Timmy & Tommy – Tom Nook’s apprentice twin nephews who run the Nook’s Cranny shop.
- Isabelle – The cheerful secretarial assistant who appears in Resident Services to help with ordinances and island evaluations.
- Blathers – The museum curator who accepts donations of fish, bugs, fossils, and artwork.
- Celeste – Blathers’ sister who appears at night to give star-related DIY recipes and explain constellations.
- K.K. Slider – The traveling musician who performs weekly concerts on Saturdays and gives out songs.
- The Nook Miles + Achievement System – While not a character, the Nook Miles program (overseen by Tom Nook) tasks players with daily goals.
- Special visitors – Gulliver/Gullivarrr, Wisp, Flick, CJ, Daisy Mae, Kicks, Label, Sahara, Leif, Kapp’n, and others appear randomly to offer unique services.
- Your villagers – Up to 10 randomly generated animal villagers (varied species) who move to your island over time. They each have distinct personalities, sayings, and homes.
- Customize their island – Terraform, place furniture, decorate paths, and build a unique community.
- Collect and craft – Gather resources to craft tools, furniture, and items; collect fish, bugs, fossils, and art for the museum.
- Engage with villagers – Build relationships with charming animal neighbors, complete their requests, and receive gifts.
- Participate in real-time events – Seasonal holidays (e.g., Halloween, Toy Day), fishing tournaments, and bug-offs happen in real time, encouraging return visits.
- Relax and unwind – No strict goals or fail states; you can play at your own pace, fish by the river, or just watch the sunset.
- All ages – Especially appealing to children, families, casual gamers, and those seeking a stress-free experience.
- Creative players – Those who love design, gardening, interior decorating, and urban planning.
- Collectors – Players who enjoy completing collections (museum, furniture sets, clothing).
- Former Animal Crossing fans – Long-time followers of the series return to experience the deserted island twist.
- Social players – Online multiplayer allows friends to visit each other’s islands, trade items, and explore.
- Single-player – The primary mode: play solo, manage your island, interact with villagers, and develop your home.
- Local multiplayer – Up to 4 players can live on the same island (shared screen via Joy-Con split, each with their own house).
- Online multiplayer – Via Nintendo Switch Online subscription. Visit friends’ islands or have them visit yours (up to 8 players total on one island). Interact, trade, and play mini-games (e.g., fishing, bug catching together).
- Dream Suite (online) – In-game feature allowing you to visit dream versions of islands shared by other players, even when they are offline.
- Offline: Single-player and local multiplayer (up to 4 players on one console) work entirely without internet. Seasonal events are triggered via system clock.
- Online: Requires a Nintendo Switch Online membership. Features include visiting islands, trading, sending messages via the NookLink app, and using the Dream Suite. The Stalk Market (turnip prices) can be shared with friends.
- The companion app (NookLink) – Allows voice chat, custom design import, and in-game keyboard typing via smartphone, requiring an internet connection.
- Free Updates: After launch, Nintendo released several major free updates (versions 1.3 to 2.0) that added:
- Paid DLC – Happy Home Paradise: Available for purchase ($24.99 USD). This expansion allows players to become a vacation home designer on a separate archipelago. You design holiday homes for animal villagers, learn advanced decorating techniques (like partition walls, soundscapes, lighting), and eventually unlock the ability to remodel villager homes on your own island. The DLC integrates seamlessly with the main game and can be accessed after placing a certain number of homes.
Release Timeline
Platforms
Story Overview
You, the player, decide to leave the hustle and bustle of city life behind after purchasing a “Deserted Island Getaway Package” from the enthusiastic Nook Inc. You, along with two randomly selected animal villagers (your first neighbors), arrive on a completely uninhabited island. The game’s narrative is largely driven by the player’s actions: you are tasked with crafting tools, gathering resources, building your tent, and helping to transform the barren island into a thriving community. There is no enforced storyline; instead, you set your own goals, from paying off your home loan to terraforming the landscape. The main “story” loosely follows the progression of Tom Nook’s island development plans, culminating in a 5-star island rating and hosting special events like the Wedding Season or the Bug-Off.
Setting
The game takes place on a tropical island inhabited primarily by anthropomorphic animals. The island initially has basic terrain, with a few trees, rocks, rivers, and a beach. The player can customize the island extensively, placing buildings (e.g., museum, shops, campsite), planting flowers and trees, and terraforming the land (waterfalls, cliffs, paths). The island gradually becomes a unique reflection of the player’s creativity and effort.
Main Characters
Core Appeal
The core appeal of Animal Crossing: New Horizons lies in its relaxing, slow-paced gameplay that encourages creative expression and social interaction. Players can:
The game’s charm is amplified by its soothing soundtrack, charming visual style (soft, whimsical), and the sense of incremental progress as the island evolves.
Target Audience
Game Modes
Online / Offline Support
DLC / Expansion Overview
- Seasonal events (Cherry Blossom, Bunny Day, Halloween, Turkey Day, etc.)
- New items, reactions, and customization options
- The ability to swim and dive for sea creatures
- Redd’s art gallery at the museum
- The Dream Suite and new hairstyles
- Cooking and farming (crops, vegetables)
- Gyroids and Brewster’s café (The Roost) inside the museum
What Makes This Game Unique
Animal Crossing: New Horizons stands out in the life simulation genre for several reasons:
1. Real-time syncing – The game clock matches real-world time, so seasons, day/night cycles, and special events mirror actual calendar dates. This creates a persistent, evolving world that encourages daily play.
2. Creative freedom – Unlike previous entries, players can terraform the island entirely: raise/lower land, create waterfalls, build paths, and arrange everything with unprecedented control.
3. Crafting system – Introduced in this title, crafting allows players to gather wood, stone, and more to create tools, furniture, and decorations, adding depth to resource management.
4. Community-driven economy – The turnip market (Stalk Market) operates with fluctuating prices that players can exploit for bells, often collaborating with online communities to maximize profits.
5. Ever-evolving content – Frequent updates (free and paid) add events, items, and activities, keeping the experience fresh for years.
6. Emotional attachment – The simple, wholesome interactions with villagers and the satisfaction of seeing a barren island bloom into a busy community create a unique emotional bond.
7. Accessibility – Easy to pick up and play for short sessions, yet offers deep customization and long-term goals for dedicated players.
In summary, Animal Crossing: New Horizons is a quintessential cozy game that blends freedom, charm, and social interaction in a package that appeals to a wide audience. Its legacy is defined by the millions of players who found solace and creativity during global lockdowns, and it continues to be a beloved title on Nintendo Switch.
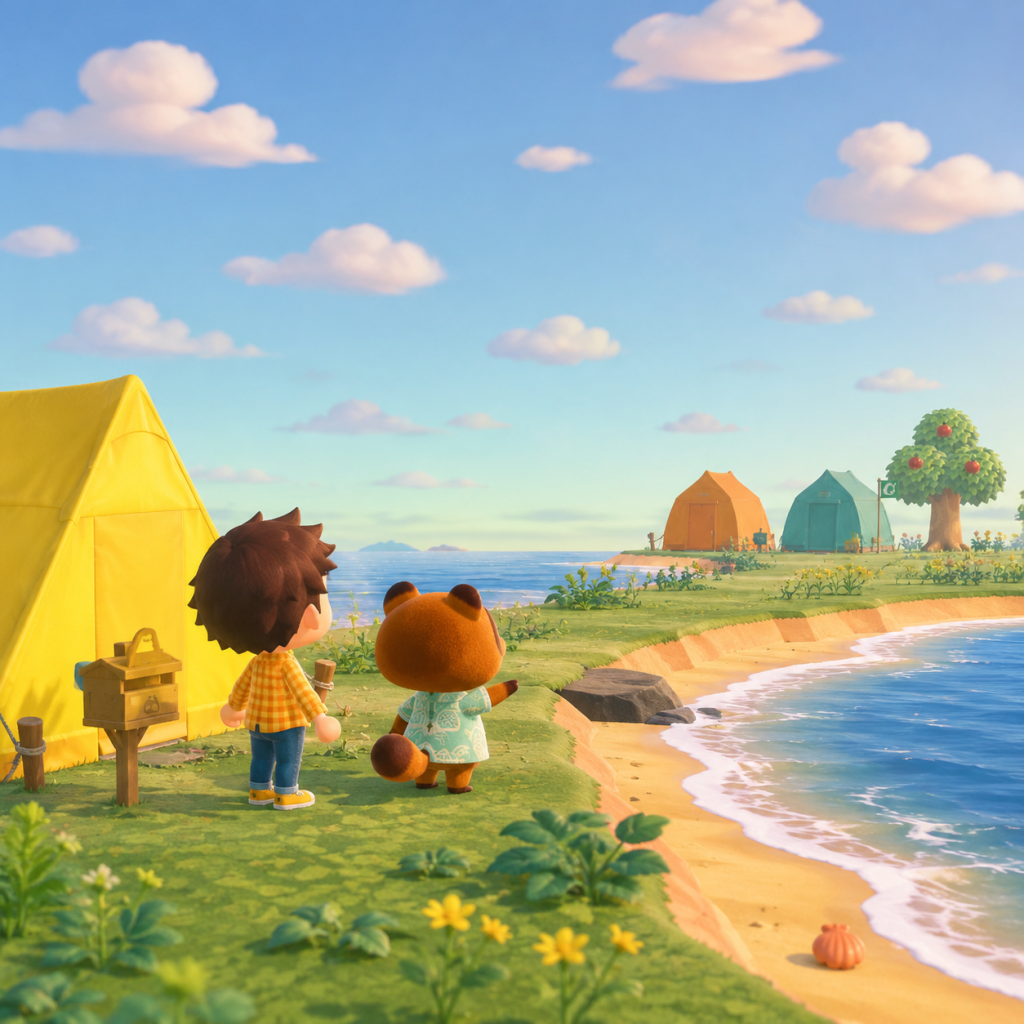
Getting Started
First Hour Walkthrough
After the opening cutscene where you fly to a deserted island with Tom Nook and two other villagers (one of the two will be a randomly assigned animal, the other is your chosen villager), you will arrive on the island. The game begins on the first day (real-time). You'll meet Timmy and Tommy Nook, and Tom Nook gives you a tent kit. Your primary goals in the first hour are:
1. Choose your island layout: You are presented with four randomly generated island maps. You can select one. Consider:
- The location of the Resident Services (tent) – try to have it central.
- River mouths and ocean access.
- Space for future bridges and inclines.
- Aesthetically pleasing geography.
2. Place your tent (you are forced to place it before anything else). Scope out a flat area; avoid cliffs you can't climb early on.
3. Talk to Tom Nook inside Resident Services tent. He will give you a series of quests: collect 5 bugs or fish, gather 10 wood (from trees), and craft a fishing rod and net.
4. Crafting tutorial: You'll be taught how to craft. Hit trees (shake or use stone axe) to get branches and wood. Pick up weeds for fiber. Craft a flimsy fishing rod and flimsy net from your crafting menu.
5. Complete quests: Return to Tom Nook after meeting requirements. He then gives you a DIY recipe for a flimsy axe and a shovel (you'll get the shovel later from Blathers).
6. Place the second tent: You will be given a tent kit for the second villager (the one you didn't choose). Place it near yours.
7. Sleep in your tent: The first day ends naturally. The next day more elements unlock.
Important: Don't rush through dialogue; read instructions carefully. You cannot undo tent placement after confirmation.
Character Creation
At the very beginning, you choose your character's appearance:
- Name: Up to 10 characters.
- Birthdate: Sets your in-game birthday (special party event).
- Gender: No gameplay difference; purely cosmetic.
- Skin tone: Various tones.
- Facial features: Eyes, nose, mouth, blush, etc.
- Hairstyle: Several options; you can change later with Nook Miles.
- Hair color: Various colors.
After the intro, you cannot change your name or birthdate, so choose carefully. Appearance can be changed later with a mirror or wardrobe. You can skip the customisation and accept defaults.
Controls (All Platforms - Nintendo Switch)
Animal Crossing: New Horizons only supports Nintendo Switch. No cross-platform. Here are key controls:
| Action | Button |
|---|---|
| Move character | Left Stick |
| Look around (camera) | Right Stick |
| Action (talk, pick up, hit) | A |
| Open inventory / tool ring | X |
| Run (hold) | B |
| Equip tool from ring | L or R (open tool ring) then select with left stick, press A |
| Open map | X + direction on D-pad? Actually, press Minus (-) to open map |
| Open Nook Phone | ZL (hold) or press ZL? Actually, press ZL to open phone. |
| Open chat (multiplayer) | ZR |
| Take screenshot | Capture button |
| Record video (hold) | Capture button (hold) |
| Open settings | Plus (+) button |
| Access Nook Stop (ATM-like) | Interact with Nook Stop terminal in Resident Services |
| Swim (when unlocked) | Press A in water |
| Diving mask | Already equipped automatically |
UI Overview
- Top left: Date and time (real-time).
- Top right: Bell counter (in-game currency). Left of that is Nook Miles count (mileage currency).
- Bottom: Inventory slots visible when you press X. Inventory holds up to 30 items (expandable later via upgraded house).
- Middle of screen: Notifications pop up (e.g., "You caught a fish!" or "New recipe learned").
- D-pad shortcuts:
- Nook Phone: Accessed by pressing ZL. Has apps: Map, Camera, DIY Recipes, Critterpedia, Nook Miles, etc.
- Place tent in a convenient central area.
- Collect 10 wood, 5 bugs/fish ASAP.
- Always have a net and fishing rod on hand.
- Hit rocks daily (up to 8 hits per rock if you dig holes behind you to stay in place).
- Donate first 5 creatures to Blathers to unlock museum and shovel.
- Use Nook Stop to redeem Nook Miles for inventory upgrades (pocket expansion) first.
- Do not eat fruit and then break a rock unless you need that rock gone (rocks are limited). Eat fruit only to break rocks you want removed, or to dig up whole trees.
- Do not sell all your native fruit; eat one to keep some for planting.
- Do not shake trees without a net – wasps can fall out (you can catch wasps later with net).
- Do not run through flowers (they will get trampled and need regrowing).
- Do not time travel (change console clock) as it may cause spoiled turnips, weeds, and villager dissatisfaction for beginners.
- Do not sell materials like wood and iron nuggets initially – they are needed for crafting and building projects.
- Up: Activate tool (if holding).
- Down: Open emote menu (unlocked later).
- Left/Right: Cycle inventory tabs (not used initially).
Essential Early Objectives (First 2-3 Days)
1. Day 1: Complete Tom Nook's quests (catch 5 bugs/fish, gather wood). Get tent placed. Collect basic resources (wood, stone, iron nuggets, clay from rocks). Shake trees for fruit and branches. Eat fruit to break rocks (not recommended early on – you need rock resources).
2. Day 2-3: After sleeping, talk to Nook to get Blathers' tent. Blathers will ask you to donate 5 fish or bugs to the museum tent. Do so, then he will set up the museum (permanent building later). While waiting, focus on:
- Paying off your first home loan (5,000 Nook Miles) to get a house upgrade from tent. Use Nook Miles+ tasks.
- Collect all fruits from your island and plant them to grow trees.
- Craft basic tools (flimsy ones break easily; upgrade to sturdy/iron tools when possible).
3. Day 3+: Once museum is open, you can donate more creatures. Nook's Cranny will be built after gathering 30 wood, 30 hardwood, 30 softwood, and 30 iron nuggets. These can be gathered by hitting trees and rocks daily.
What to Do First vs What to Avoid
Do first:
Avoid:
Early Resource Priorities
| Resource | How to get | Priority | Usage |
|---|---|---|---|
| Wood (any) | Hit trees with axe | High | Crafting tools, furniture, Nook's Cranny materials |
| Stone | Hit rocks with shovel or axe | High | Crafting stone tools, fences, outdoor items |
| Clay | Hit rocks | Medium | Crafting furniture, ironwood items |
| Iron Nuggets | Hit rocks (most valuable from daily rocks) | Very High | Crafting tools, building Nook's Cranny, inviting more villagers |
| Weeds | Pick up from ground | Low (early) | Crafting fiber, selling for Bells |
| Native Fruit | Shake trees | High | Selling for Bells (500 each non-native), planting for future |
| Non-native Fruit | Visit other islands via Nook Miles Tickets | Very High | Plant them to earn high Bells (each fruit tree yields 3 fruit, each sells for 500 Bells) |
| Bells | Sell fruit, fossils, creatures | High | Buy tools, home upgrades, infrastructure |
| Nook Miles | Complete Nook Miles+ tasks | Very High | Unlock upgrades, tickets, catalog items |
Common Beginner Mistakes
1. Breaking rocks prematurely: Rocks are limited per day (6 rocks, each can be hit up to 8 times for resources). If you eat fruit and hit them, they break and disappear forever (only one respawns each day). Avoid eating fruit unless you want to break a rock or dig up a tree.
2. Selling all resources: You need wood, stone, clay, iron for crafting. Don't sell them early. Later you may have excess.
3. Planting fruit trees carelessly: Fruit trees require 3x3 space to grow. Do not plant too close to houses, water, or buildings. Leave one empty block around each sapling.
4. Ignoring Nook Miles+ tasks: Daily tasks give you Nook Miles quickly, which are used for essential upgrades (pocket expansion, tool recipes, island designer app later).
5. Not donating to Blathers: The museum is a huge feature. Donate as soon as possible to unlock more fossils, art, etc. You can also get the shovel from Blathers after donation.
6. Hitting rocks without strategy: To get maximum 8 items from a rock, dig two holes behind you (or use a fence/wall) to prevent recoil. Then hit rock rapidly.
Day-One Checklist
- [ ] Watch intro cutscene and name your character/island
- [ ] Select island map (choose wisely)
- [ ] Place your tent in a central flat area
- [ ] Collect 10 wood (hit trees with stone axe from craft menu)
- [ ] Catch 5 bugs or fish (use net/fishing rod crafted from branches)
- [ ] Talk to Tom Nook (inside tent) to receive quests
- [ ] Complete quests and return to Tom Nook
- [ ] Place the second tent (for the other starting villager)
- [ ] Shake all trees on your island (hold net to catch wasps; avoid shaking while holding a tool that isn't net? Better to have net equipped when shaking)
- [ ] Pick up all shells on the beach (sell for Bells)
- [ ] Pick all weeds (save for crafting or sell some)
- [ ] Hit all 6 rocks (without eating fruit) for materials. If you have fruit, don't eat it yet.
- [ ] Craft a flimsy fishing rod and net (if you haven't already)
- [ ] Eat one native fruit to get energy (but don't break rocks – only use to dig up trees if needed)
- [ ] Buy a Nook Miles ticket from the Nook Stop terminal (requires 2,000 Nook Miles – you get 500 from starting, plus tasks) – optional but recommended for additional resources.
- [ ] Check Nook Miles+ tasks (press ZL then Nook Miles app) – complete at least one task to earn miles.
- [ ] Talk to all villagers on island (including Timmy/Tommy/Nook)
- [ ] Open your inventory and equip tools properly using the tool ring (L or R)
- [ ] Save and quit correctly (press - and select save)
- [ ] Sleep in your tent to end the day (save progress before sleeping? Actually sleeping just ends time; save manually)
Pro tip: On day one, focus on collecting resources rather than fishing for long periods. The museum won't be built until day two. Use your time efficiently.
Remember: The game operates in real-time. Things will unlock each day. Don't worry if you can't do everything on day one. Enjoy the slow pace – that's the charm of Animal Crossing.
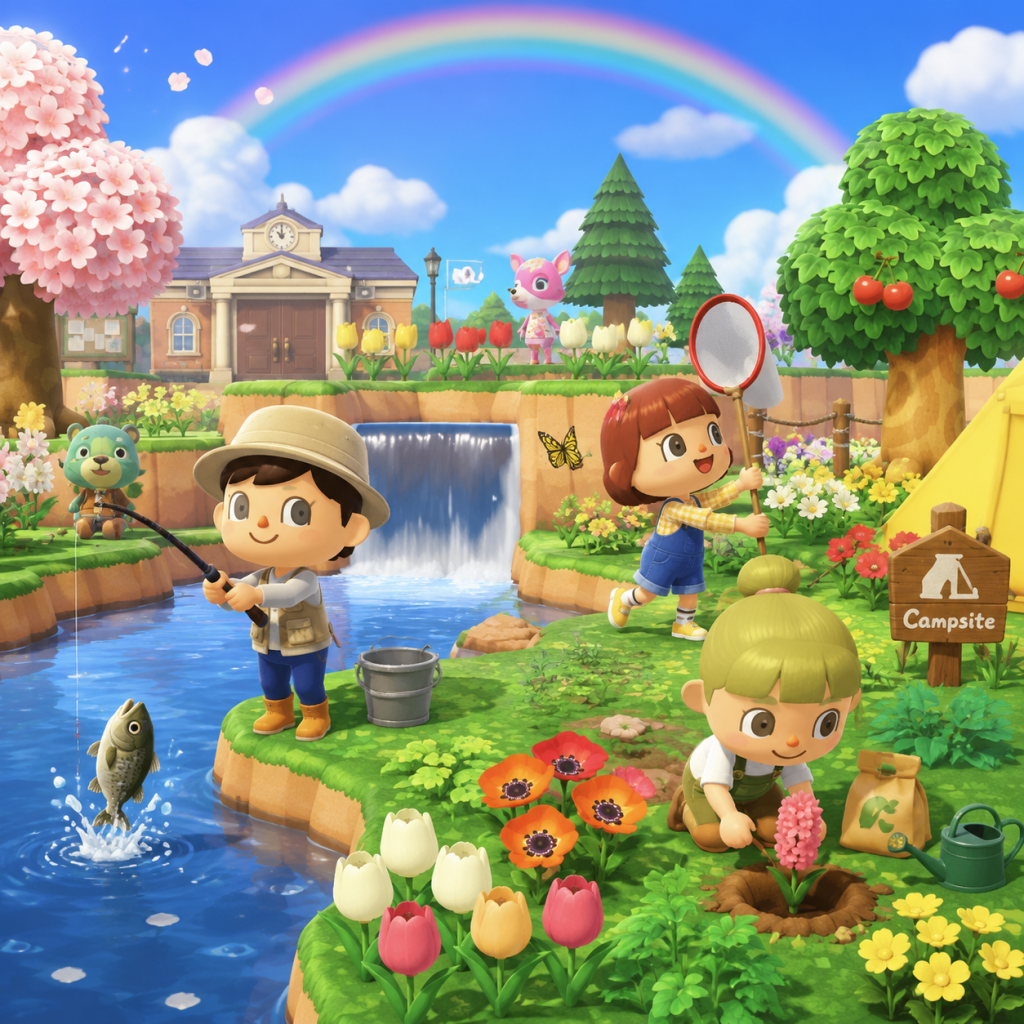
Core Gameplay
Core Gameplay Overview
Animal Crossing: New Horizons (ACNH) is a peaceful life simulation game with a relaxed, open-ended structure. There is no traditional combat; instead, interaction systems include fishing, bug catching, fossil digging, diving, and gardening. The main gameplay loop revolves around resource gathering, crafting, earning Bells and Nook Miles, and gradually transforming a deserted island into a personal paradise. Progression is measured by house upgrades, island infrastructure, museum completion, and island rating (stars). The game unfolds in tiers based on milestones and unlocked features.
Player Progression Tiers
Early Game (Days 1–7)
Main Gameplay Loop: Arrival and basic survival. Focus on collecting native resources (wood, stone, iron nuggets, fruit, fish, bugs) to craft essential tools and furniture. Pay off first loan (5,000 Nook Miles) to upgrade from tent to house.
- Combat/Interaction Systems: No combat exists. Interaction is via net, fishing rod, shovel, axe, and watering can. Begin catching fish and bugs for museum donations or sale.
- Progression: Unlock crafting (DIY recipes) from Tom Nook. Complete Nook Miles+ tasks (e.g., catch 5 fish, shake trees) to earn Nook Miles. Resident Services is a tent with Nook Stop terminal.
- Exploration: Island is limited to 2–3 villagers, a river, beach, and a small wooded area. Can travel by Nook Miles Ticket to mystery islands for resources and villagers.
- Quests/Missions: Tom Nook assigns introductory quests: gather 30 wood, 30 hardwood, 30 softwood, and 30 iron nuggets to build Nook's Cranny. Also, invite three new villagers (via mystery islands or campsite) and gather materials for their plots.
- Economy: Bells obtained by selling fruit (native fruit sells for 100 Bells, non-native 500 Bells), fish, bugs, and shells. Nook Miles earned from tasks; initial loan repaid with Nook Miles (5,000 Miles).
- Character/Build Growth: No skill or stat growth. Player can change appearance via mirror/closet later. House is a single room with limited storage.
- Endgame (Tier); Not yet; focus on unlocking basic services.
- Combat/Interaction Systems: Unlock new tools: ladder (cliff access), vaulting pole (river crossing). Bug catching and fishing become more varied; seasonal critters appear. No combat.
- Progression: House can be upgraded twice (Loans: 98,000 Bells and 198,000 Bells). Island rating introduced (1-2 stars). Nook's Cranny upgrade not yet; wait for later. Unlock Nook Miles+ re-roll and daily chores.
- Exploration: Mystery islands now offer hybrid fruit, bamboo, and rare fish (e.g., Oarfish, Coelacanth when raining). Access to higher cliffs and second tier of island via ladder.
- Quests/Missions: Tom Nook tasks: build campsite (after first three villagers move in), then invite first camper (amiibo or random). Once campsite built, unlock island evaluation from Isabelle.
- Economy: Bells accumulate through turnip trading (buy low Sunday, sell high weekdays), hot item of the day (crafting sells for double), and selling non-native fruit orchards. Nook Miles continue; you can buy items like hair styling, fence DIYs.
- Character/Build Growth: House expands to two rooms. Can customize exterior (siding, roof, door) for 5,000 Bells via Nook Stop.
- Endgame (Tier): Not yet; focus on unlocking terraforming and island designer app.
- Combat/Interaction Systems: No new tools, but terraforming tool (water-scaping, cliff construction) available. Use patterns to create custom paths. Continue fishing/bug catching/hunting for rare seasonal critters.
- Progression: Island rating goal: 3 stars for K.K. concert. After concert, unlock terraforming. Can upgrade house further (three loans: 348,000; 548,000; 758,000 Bells for second floor). Nook's Cranny can be upgraded (by spending 200,000 Bells across purchases, not a single payment). Requirements: play for 30 days, sell/buy 200,000 Bells total. Then Nook's Cranny expands to Nook's Cranny (two floors).
- Exploration: Mystery islands still accessible. Can now fully modify island shape. Unlock Harvey's Island (via airport) for photo studio.
- Quests/Missions: Nook Miles+ tasks become more varied (e.g., plant flowers, water plants). Daily message bottle gives recipe. Special visitors: Flick (bugs), CJ (fish), Redd (art), Gulliver/Gullivarrr (shipwreck items).
- Economy: Stalk Market remains primary income. Crafted hot items can net 20,000+ Bells. Selling hybrid flowers (e.g., blue roses, gold roses) to Leif or other players. Turnip trading on dedicated servers.
- Character/Build Growth: House can have up to 4 rooms (downstairs), one second floor, basement (unlocked after loan 348,000? Actually: house upgrades: 1 room -> 2 rooms -> 3 rooms -> 4 rooms -> 2nd floor -> basement. Each loan: 98k, 198k, 348k, 548k, 758k, 1,248,000? Wait correct: Loans: 98k (tent to house), 198k (add second room), 348k (back room), 548k (left room), 758k (right room), 1.248M (second floor), 2.498M (basement). So late game covers up to second floor.
- Endgame (Tier): Not yet; final star rating and museum completion pending.
- Combat/Interaction Systems: No new tools. Deep-sea diving (via wetsuit) added for sea creatures. Use NookLink app for custom designs.
- Progression: Museum expansion: art wing (after Redd visits). Fossil collection complete once all 73 fossils donated. Bug/Fish collection takes all year due to monthly changes. Sea creatures added in summer update (July 2020). HHA (Happy Home Academy) evaluates house weekly; score can reach 150,000+ to receive golden trophy.
- Exploration: Mystery islands still offer random resources. Use Nook Miles items like Lighthouse, Telephone Booth, etc. Can visit friends islands online.
- Quests/Missions: Daily Nook Miles+ tasks up to 5 at a time. Special characters cycle: Leif (plants), Kicks (shoes), Label (fashion), Saharah (rugs), Redd (art), Gulliver/Gullivarrr, Flick, CJ. Complete their quests to earn exclusive items (e.g., Golden Net from Flick after catching all bugs? Actually, Golden tools only come from specific tasks: Golden Net from Flick after catching all bugs? No, Golden Net is crafted after receiving DIY from Flick when you catch all bugs? Wait: In New Horizons, Golden tools are obtained through specific achievements: Golden Slingshot from shooting down 300 balloons, Golden Fishing Rod from catching every fish, Golden Net from catching every bug, Golden Axe from breaking 100 axes, Golden Shovel from helping Gulliver 30 times, Golden Watering Can from 5-star island, Golden Stag Beetle model? Actually, Golden tool DIYs are given by various means: Golden Axe DIY from breaking 100 flimsy axes? No. Let's be accurate: Golden Slingshot DIY from shooting down enough balloons; Golden Fishing Rod DIY from completing fish encyclopedia; Golden Net DIY from completing bug encyclopedia; Golden Shovel DIY from helping Gulliver 30 times; Golden Axe DIY from purchasing all 3 axes upgrades? Actually, you get golden axe from a random message in a bottle after breaking 100 flimsy axes? This is complex. Endgame players aim for these.
- Economy: Millions of Bells common. Maximize turnip trading, selling rare items on Nookazon. Crown and Royal Crown sold for high Bells. Use bells to move buildings (50k per move), build inclines (98k-228k), bridges (98k-228k).
- Character/Build Growth: House fully upgraded (basement). Can remodel interior walls, floor, ceiling. Storage expands to 2,400 slots. Able to customize most furniture.
- Endgame Structure: No defined end; players set own goals. Common endgame activities:
Example: On Day 1, shake trees for fruit, collect branches, craft a flimsy fishing rod and net. Fish for Ocean fish (e.g., Sea Bass) to sell or donate. Pay off first loan via Nook Miles.
---
Mid Game (Days 8–20 approx.)
Main Gameplay Loop: Island infrastructure expands. Nook's Cranny built, Museum tent upgraded to building (donate 15 unique species). Able Sisters tailor shop opens. More villagers move in (up to 10). Daily tasks include checking store turnip prices (Stalk Market), catching rare fish/bugs, and completing Nook Miles+.
Example: On Day 10, you may have Able Sisters shop. Buy clothes. Check turnip prices on nookazon or subreddits to maximize profit. Catch a rare butterfly (e.g., R. Brooke's Birdwing) for museum.
---
Late Game (Days 20–60 approx.)
Main Gameplay Loop: Island reaches 3-star rating, unlocking Island Designer app (terraforming). K.K. Slider first concert triggers, giving ability to edit terrain, add rivers, cliffs, paths. Focus on island beautification, hybrid flower breeding, and completing museum.
Example: After achieving 3-star rating, K.K. visits for a concert. Receive Island Designer app. Flatten cliffs to make a maze; add waterfalls. Plant gold roses using gold watering can (unlocked after 5-star rating? Actually gold watering can DIY given by Isabelle after reaching 5-star island for a while. Wait: Gold watering can DIY appears in message after achieving 5-star status for 15 consecutive days? Not exactly; it's from island evaluation notification. Actually, you get golden watering can recipe when island reaches 5 stars (from Isabelle). So late game you can start breeding hybrids.
---
Endgame (Post-K.K., 5-Star Island, Museum Completion)
Main Gameplay Loop: No mandatory objectives. Focus on perfecting island design, completing museum (art, fish, bugs, fossils, sea creatures), achieving 5-star island rating, collecting all DIY recipes, and engaging with seasonal events (Bunny Day, Halloween, Turkey Day, Toy Day).
- Complete Museum (all exhibits: fish, bugs, fossils, art, sea creatures).
- Obtain all Golden tool DIYs.
- Collect all furniture series (e.g., Antique, Imperial, Rattan).
- Acquire all reactions and music tracks.
- Breed every hybrid flower (especially blue roses, gold roses).
- Host events, design dream address (DA).
- Participate in seasonal events (every year repeats).
Example: Endgame player checks turnip prices on Twitter, uses layout like a maze flower field. They create custom paths, terraformed tiered waterfall entrance. They have all fish and bugs caught (spare models). Their home has HHA score over 200,000. They place items like a shell fountain in a zen garden. They regularly visit mystery islands to hunt for rare villagers (e.g., Raymond).
Summary Table
| Tier | Key Milestone | Unlocks | Focus |
|---|---|---|---|
| Early Game | Arrival, first loan | Tent->House, Nook's Cranny, Museum | Resource gathering, basic crafting |
| Mid Game | Three villagers, campsite, Able Sisters | Ladder, pole vault, island evaluation | Infrastructure, turnip farming |
| Late Game | 3-star island, K.K. concert | Island Designer, terraforming | Island design, hybrid flowers |
| Endgame | 5-star island, museum complete | Golden tools, seasonal events | Perfect island, completionist goals |
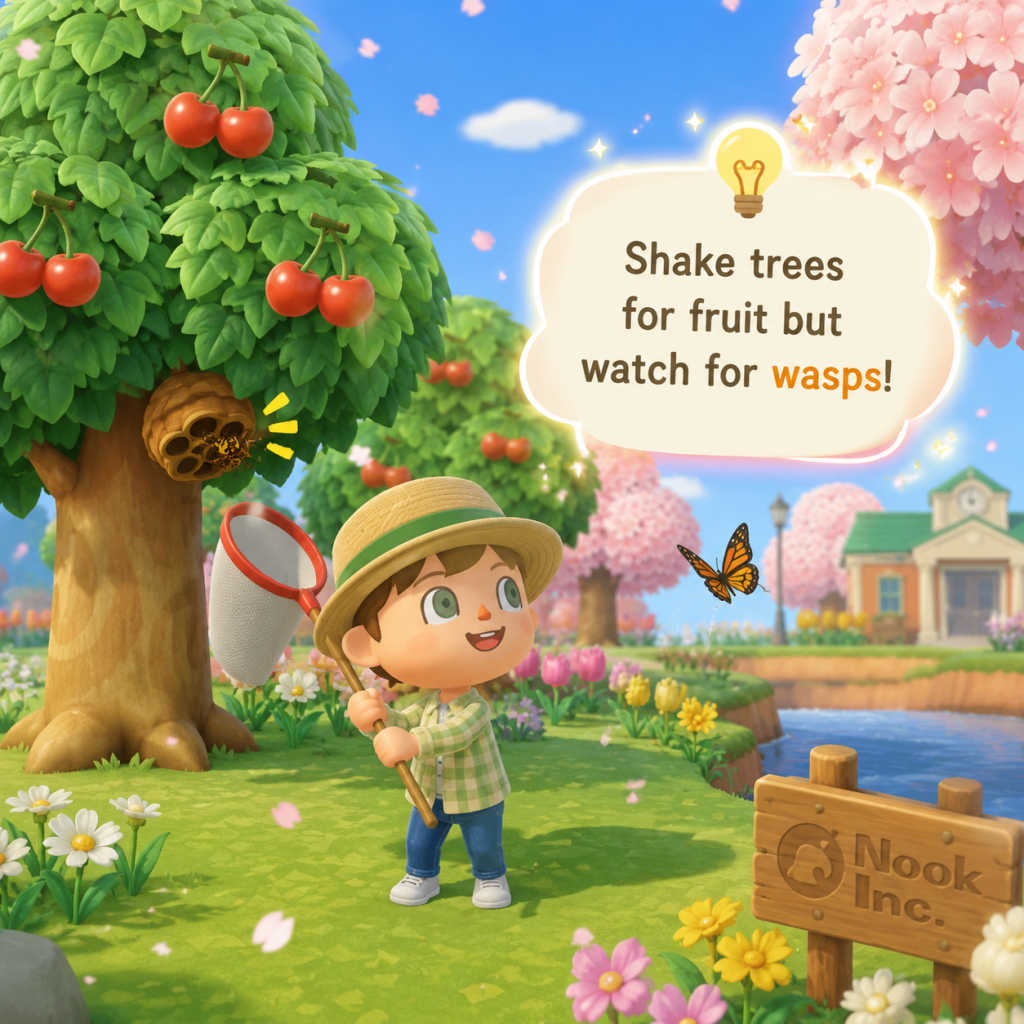
Game Tips
Overview
Animal Crossing: New Horizons is a life simulation game without traditional combat. The following tips cover all major gameplay systems, organized into beginner, intermediate, and advanced levels. Use the markdown headings and bullet points as a reference.
---
Beginner Tips
1. Pay Off Your First Loan as Soon as Possible
- Tip: Focus on selling fruit, fish, and bugs to Tom Nook to pay the 5,000 Nook Miles initial loan. Use Nook Miles to buy a flight ticket, then sell resources from the mystery island.
- Why: Unlocking the tent upgrade to a house gives you more storage and the ability to craft tools.
- Tip: Keep a net and fishing rod in your inventory at all times. Use them to catch fish or bugs as you encounter them. This builds Bells and museum donations quickly.
- When: Any time you're walking around the island.
- Tip: Stand in front of a tree and press A to shake it. You may get 100 Bells, a piece of furniture, or a wasp nest. Always hold a net before shaking, and if wasps fall, immediately mash A to catch them.
- Why: Free Bells and items. Wasp nets sell for 2,500 Bells each.
- Tip: When you visit a mystery island or receive fruit from another player, plant them on your island. Non-native fruits sell for 500 Bells each (vs. 100 for native).
- When: Early game, to maximize profit from fruit trees.
- Tip: Blathers will accept one of each fish, bug, fossil, and sea creature. After donating, he will open the museum. Donating also gives you Nook Miles.
- Why: Unlock the museum, which adds to your island rating and provides a place to display collections.
- Tip: Buy Nook Miles Tickets from the Nook Stop terminal (2,000 Nook Miles each). Use them at the airport to visit randomly generated islands.
- Why: Each island has unique resources – non-native fruit, flowers, new bugs and fish. Also, you can recruit villagers from mystery islands if you have an empty plot.
- Advanced: Only mystery islands have a chance for tarantulas or scorpions (seasonal). You can force spawn them by clearing the island of all trees, rocks, and flowers.
- Tip: Walk every part of your island, including beaches, cliffs, and hidden areas. Check for new fossils, message bottles on the beach (recipes), and glowing spots (buried Bells).
- When: Daily, after 5 AM reset.
- Tip: Obtain a wet suit from Nook's Cranny and swim in the ocean. Look for bubbles to dive for sea creatures. These are worth many Bells and fill the museum.
- Advanced: The Gigas Giant Clam sells for 15,000 Bells; learn its fast shadow and signature shape.
- Tip: When hitting a rock, dig two holes behind you before swinging the shovel. This prevents you from bouncing back and ensures you hit the rock 8 times, yielding maximum materials (stones, clay, iron, gold). Do not eat fruit before hitting – eating fruit will break the rock, giving only one material.
- When: Daily, for resource farming. Iron nuggets are critical for upgrading Nook's Cranny.
- Tip: Store wood, stone, clay, and iron in your home storage. Use them for crafting tools, furniture, and infrastructure. Don't sell raw materials early; they are more valuable for progression.
- Advanced: Once you have a good stock, craft hot items for double profit (see Nook's Cranny daily hot item).
- Tip: When you find a glowing spot on the ground, use your shovel to dig up 1,000 Bells. Then, take 10,000 Bells from your wallet and bury them in the glowing hole. In a few days, a tree will grow that bears 30,000 Bells (three bags of 10,000).
- Advanced: Burying more than 10,000 Bells has a chance to triple the planted amount, but it's not guaranteed. For guaranteed profit, always bury exactly 10,000 Bells.
- Tip: Non-native fruit sells for 500 Bells each. If you have a lot of non-native fruit trees (e.g., 10 apple trees), you can harvest 300 fruit every 3 days (150,000 Bells). Also, craft hot items (listed at Nook's Cranny) for double sell price.
- When: Harvest fruit every 3 days, check hot item daily.
- Tip: Every Sunday morning (until noon), Daisy Mae sells turnips for 90-110 Bells each. Buy as many as you can afford. Then, check Nook's Cranny at different times of day for good sell prices (80-660 Bells). Use online turnip price calculators or visit other players' islands with high prices.
- Why: The Stalk Market is the fastest way to make millions of Bells.
- Advanced: Turnips spoil after one week (next Sunday). Do not time travel backward or forward more than a day – they will rot.
- Tip: Some fish and bugs sell for high prices. Examples: Oarfish (9,000 Bells), Coelacanth (15,000), Golden Trout (10,000), Tarantula (8,000), Giant Stag (10,000). Catch these when in season and sell to Flick or CJ for 1.5x bonus.
- Advanced: Wait for Flick (bug collector) or CJ (fish collector) to visit your island. Sell your stored bugs and fish to them for 50% more Bells. Place bugs and fish outside your house to save storage until they visit.
- Tip: Achieve a 3-star island rating by planting flowers, trees, placing furniture, and inviting villagers. After K.K. Slider's first concert, you get the Island Designer App, allowing you to build paths, cliffs, and waterways.
- When: Focus on decorating your island once you have the app.
- Tip: Place paths or clear areas where you don't want flowers to spread. Flowers can overgrow, especially in rainy weather. Use fences to contain flower breeding areas.
- Advanced: To breed rare hybrid flowers, plant them in a checkerboard pattern and water them daily (or ask others to water – higher chance of hybrid with 5+ visitors watering).
- Tip: Plan your island layout before using the Island Designer. Use graph paper (digital or physical) to sketch cliffs, rivers, and building locations. It's easy to get overwhelmed. Start with small changes (e.g., create a waterfall or a pond).
- Why: Efficient planning saves time and resources. Remember: you cannot place buildings on cliffs without ramps or inclines.
- Tip: Interact with your villagers each day. They will give you gifts, reactions, and sometimes rare recipes. Higher friendship increases the chance of getting a villager photo (a rare item).
- When: Daily, ideally after they wake up and before they go to sleep (most villagers are active until 1-2 AM).
- Tip: Wrap any non-native fruit or iron nugget in gift wrap (buy from Nook's Cranny) before giving to a villager. Wrapped gifts increase friendship points more than unwrapped.
- Why: A wrapped fruit (non-native) is the best cheap gift to boost friendship.
- Tip: Use the airport or the Nook Stop terminal to send letters to villagers. Attach a gift (e.g., fruit, furniture) to the letter. This boosts friendship significantly.
- Advanced: If you want a villager to move out, you can ignore them and hit them with a net (though not necessary). The game uses a random cycle, but ignoring reduces friendship.
- Tip: Craft fish bait (clams on the beach) and throw it into the water to instantly spawn a fish. Use bait at the pier to increase chance of pier-exclusive fish (Tuna, Blue Marlin, Mahi-mahi).
- When: Anytime, but best when targeting rare fish during their active hours.
- Tip: Fish shadows indicate size. Small shadows: common fish. Medium: moderate. Large: rare. Extra large with fins: sharks (southern hemisphere summer; northern summer too). River fish have different patterns; learn to distinguish them by shape and swimming behavior.
- Advanced: For the Coelacanth: only appears in rainy weather (any time of year, any time of day) in the ocean. It has a large shadow and is very aggressive – you must be quick to reel it in.
- Tip: Most bugs are active during specific months and times. For example, Emperor butterflies (winter, 7 PM-8 AM) sell for 4,000 Bells; Atlas moths (tropical, 7 PM-4 AM) for 3,000; Golden Stags (July-August, 5 PM-8 AM) for 12,000. Use a net and approach slowly when catching tree bugs.
- Advanced: Create a man-made bug spawn zone by planting rare flowers (e.g., blue roses) and clearing other spawning surfaces. This will attract high-value bugs like the Golden Stag.
- Tip: Craft flimsy tools initially, then upgrade to stone/iron tools when you can. Upgrade to golden tools after completing certain milestones (Golden Net: catch all bugs; Golden Rod: catch all fish; Golden Axe: buy 100 saplings from Leif; Golden Shovel: help Gulliver 30 times; Golden Watering Can: achieve 5-star island; Golden Slingshot: pop 300 balloons).
- Why: Golden tools are the most durable and have unique effects (Golden Axe never breaks; Golden Watering Can can water 9 squares at once).
- Tip: The NookPhone app has a camera, map, and Critterpedia. Use the map to locate villagers, crafting stations, and stores. The Critterpedia shows fish/bug catch status and availability.
- When: Refer to Critterpedia when hunting for specific creatures to know their active months/times.
- Tip: When you need many items (e.g., fish bait, fences, furniture), craft multiple at once by selecting "Craft x number". This saves time compared to crafting one at a time.
- Why: Speeds up resource conversion, especially for daily tasks.
- Tip: Buy turnips in bulk (e.g., 4,000 turnips at 100 Bells each = 400,000 investment). Use online communities (e.g., Reddit's r/ACTurnips or Discord) to find islands selling at high prices (400+ Bells). Sell quickly to make millions.
- Advanced: Combine turnip flipping with Nook Shopping – buy turnips on your island, then visit a friend's island with high sell price. Always check prices twice daily (AM and PM) before selling.
- Tip: To get blue roses (the rarest flower), you must follow a complex breeding path. For example, breed red+red roses to get black, then black+black to get hybrid red (which can produce blue). Use online guides for exact combinations. Water flowers daily, and have friends water them for higher hybrid chance (up to 5 visitors = maximum chance).
- Why: Blue roses are valuable for selling (1,000 Bells each) and for creating rare flower gardens.
- Tip: To make a specific villager move out, you can use time travel (set date ahead 15 days, then check; if not desired villager, jump ahead another day) or use Amiibo cards to force specific villagers in/out. The game picks a random villager to move out every 15 days if you have 10 villagers. To keep a villager, talk to them daily and give gifts.
- Advanced: If you want a villager to stay, avoid neglecting them. If you want them to leave, ignore them completely (no talking, no gifts). The game may still choose a different villager.
- Tip: Complete Nook Miles+ tasks as many as possible each day. The tasks refresh after each completion, and they often double up (e.g., “Catch 5 fish” and “Catch fish for 2,000 total miles”). Aim to complete all tasks in a session to accumulate miles fast.
- Advanced: Use Nook Miles to buy rare items from the Nook Stop, such as the Nook Inc. items, or use them to buy Nook Miles Tickets and turn them into Bells (if you have a high-selling turnip island).
- Tip: When terraforming, use the paths to create visual boundaries. Build cliffs in sections to save time. Use water tiles to create rivers that can be crossed with vaulting pole. Move buildings (via Tom Nook) only after you are sure of placement to avoid spending 50,000 Bells per move.
- Why: Efficient terraforming reduces frustration and resource waste.
- Tip: Events like Bunny Day (spring), Halloween, Turkey Day, Toy Day, and New Year's offer exclusive DIY recipes, furniture, and clothing. Check your Nook Stop for announcements. Stockpile event-specific resources (e.g., eggs for Bunny Day).
- Why: Event items are limited-time and can be traded or sold for high Bells after the event.
- Tip: On clear nights, look for shooting stars. Press A without any tool when you see one to wish. The next day, star fragments appear on the beach. Celeste may visit on such nights, giving you DIY recipes for Zodiac items and the Nova Light. Save star fragments for crafting.
- Advanced: Use a star fragment to craft the Wand – allows quick outfit changes.
- Tip: Crazy Redd visits your island occasionally on his boat (secret beach). He sells art, but some are forgeries. Check for telltale differences (e.g., Mona Lisa has different eyebrows, etc.). Buy genuine art to donate to the museum. Forged art can be sold or placed.
- Why: Museum art wing requires genuine pieces. Use online guides to verify authenticity.
- Tip: When visiting others, be respectful – don't pick flowers, shake fruit trees without permission, or run through flowers. Use the airport's Dodo Code system to visit friends or random islands. You can also use Local Play if you are near other Switch consoles.
- Why: Good etiquette ensures continued cooperation and trading.
- Tip: Use online forums (Reddit, Nookazon, Discord) to trade items, DIY recipes, and villagers. You can also sell turnips on other islands for higher prices. Nookazon is a marketplace that uses Bells or Nook Mile Tickets as currency.
- Advanced: Build a catalog of furniture by hosting cataloging parties: each player drops several items, then picks them up and drops again (so others can order them from Nook Shopping).
2. Always Carry a Net and Fishing Rod
3. Shake Trees Every Day
4. Plant Non-Native Fruit Trees
5. Donate the First of Everything to the Museum
---
Exploration Tips
1. Use Nook Miles Tickets to Visit Mystery Islands
2. Explore the Entire Island Every Day
3. Dive in the Ocean for Sea Creatures
---
Resource Management Tips
1. Hit Rocks Correctly
2. Save Wood and Iron
3. Plant Money Trees
---
Economy Tips (Bells)
1. Sell Non-Native Fruit and Crafted Items
2. Turnip Stalk Market (Buy Low, Sell High)
3. Sell High-Value Fish and Bugs
---
Island Building and Design Tips
1. Unlock Island Designer Early
2. Use Paths and Fences to Control Flower Growth
3. Terraforming Tips
---
Villager Relations Tips
1. Talk to Villagers Daily
2. Give Wrapped Gifts
3. Send Letters with Presents
---
Fishing and Bug Catching Tips
1. Use Bait to Spawn Rare Fish
2. Know Fish Shadows and Behavior
3. Bug Catching Timing
---
Tools and Efficiency Tips
1. Upgrade Tools as Soon as Possible
2. Use the NookPhone App for Quick Actions
3. Craft in Bulk
---
Advanced and Optimization Tips
1. Use Turnips for Massive Profits
2. Hybrid Flower Breeding
3. Manipulate Villager Move-Outs
4. Efficient Nook Miles Farming
5. Use the Island Designer App Smartly
---
Special Events and Seasonal Tips
1. Participate in All Seasonal Events
2. Star Fragments and Zodiac Items
3. Redd's Art – Buy Only Genuine Pieces
---
Multiplayer Tips
1. Hosting and Visiting Other Islands
2. Trade With the Community
---
Final Thoughts
These tips cover the essential strategies for beginners, intermediates, and advanced players in Animal Crossing: New Horizons. Remember: the game is meant to be relaxing, so take your time and enjoy the process. Happy island living!
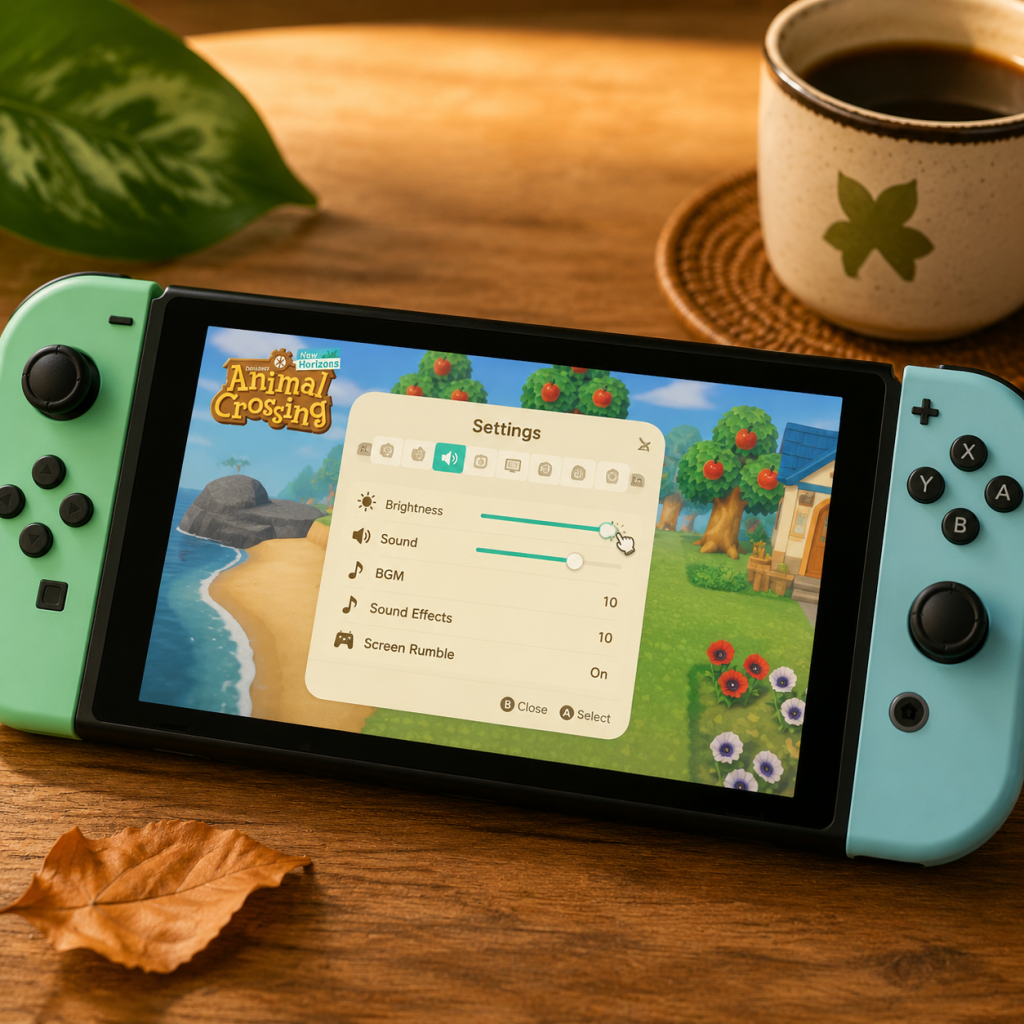
Game Settings
Overview
Animal Crossing: New Horizons runs on the Nintendo Switch family of consoles (standard Switch, Switch Lite, Switch OLED). The game uses a fixed 30 FPS target with dynamic resolution scaling to maintain performance. While the in-game settings menu is relatively simple, there are several system-level and in-game settings that can affect your experience. This guide covers all available settings—graphics, audio, controls, accessibility, language, network, and gameplay—with recommendations for different hardware configurations and usage scenarios (docked vs handheld).
Note: Because the game is a first-party Nintendo title, there are no advanced graphics toggles like anti-aliasing or shadows. The settings are designed to be user-friendly and are mostly about comfort and convenience.
---
Graphics Settings
Brightness
- Location: Settings > Brightness
- Range: 0–5 (default 3)
- Effect: Adjusts overall luminance of the game world.
- Recommendation: Set to 3 for typical indoor lighting. Use 4–5 if playing in a bright room or outdoors. Use 2 if playing in a dark room to avoid eye strain.
- Misconfiguration tip: Too high brightness can wash out colors; too low can make night-time fishing or bug hunting difficult. Adjust while viewing a screen with both bright sky and dark grass.
- Location: Settings > Screen Shake
- On/Off: Default On
- Effect: Controls whether the screen shakes when catching fish, hitting rocks, or doing other actions.
- Recommendation: Keep On for immersive feedback. Switch Off if you experience motion sickness or find it distracting.
- Location: Settings > Vibration
- On/Off: Default On
- Effect: Enables HD Rumble when using Joy-Con or Pro Controller.
- Recommendation: Keep On for enhanced feedback (e.g., feeling the fish tug). Switch Off to save battery or if you find vibration annoying.
- Location: Settings > Camera Shake
- On/Off: Default On
- Effect: Controls camera shake when walking over certain terrain or when a big fish is landed.
- Recommendation: Similar to Screen Shake – On for immersion, Off for comfort.
Screen Shake
Vibration
Camera Shake
System-Level Graphics Considerations
Since ACNH does not offer resolution or performance modes, you can optimize your setup:
| Hardware | Docked Mode | Handheld Mode |
|---|---|---|
| Standard Switch | Output up to 1080p (dynamic resolution). Performance stable. | Output 720p (dynamic). Good battery (approx. 4–5 hours). |
| Switch Lite | N/A (handheld only) | 720p dynamic. Same performance. Battery approx. 3–5 hours. |
| Switch OLED | Same as standard docked. Better screen colors. | Same as standard handheld but with wider color gamut and deeper blacks. |
- Recommendation: For best visual quality, play docked on a 1080p TV. The OLED model's screen makes handheld mode look noticeably richer. There is no performance difference across models.
- Misconfiguration pitfall: Do not set TV Resolution to 4K in the Switch system settings if your TV supports it – ACNH will still render at a max of 1080p. The Switch will upscale, but that can introduce input lag. Keep system resolution at 1080p for optimal clarity.
- Location: Settings > Sound
- Sliders: Master, Music, Effects, Ambience, Voice (villagers' voices). Each 0–10.
- Recommendation:
- Misconfiguration tip: Many players lower Music to 5–6 to hear sound effects better (e.g., the bloop of a fish). Test during a fishing session.
- Location: System Settings > TV Settings (docked) or Handheld settings.
- Effect: Choose stereo or mono.
- Recommendation: Stereo for normal play. Mono if using a single speaker or if you have hearing loss in one ear.
- Switch System Settings > TV Settings > Surround Sound: Auto, Multi-Channel (up to 7.1), or Stereo.
- Effect: ACNH does not support spatial audio beyond stereo. The game's audio mix is stereo, so surround sound settings will just downmix.
- Recommendation: Set to Stereo to avoid unnecessary processing.
- Location: Settings > Controls > Button Settings
- Customizable actions: Swap A/B, X/Y, L/R with ZL/ZR. You can swap the function of the stick click buttons.
- Default: A=confirm, B=cancel, B to run, Y to open inventory, X for reactions, L/R for tools menu, ZL/ZR for camera rotate.
- Recommendation: Keep defaults – they are consistent with other Switch games. However, if you often accidentally press B when you meant A, you can swap them. Caution: Swapping A/B will affect all Nintendo Switch system menus, not just the game, because ACNH uses system button mapping.
- Misconfiguration pitfall: Changing button mapping in the Switch System Settings (Controllers and Sensors > Change Button Mapping) will globally remap buttons for all games. For ACNH only, use the in-game Control settings. Do not swap A and B using system settings unless you are prepared for the global change.
- No in-game setting – use system setting: System Settings > Controllers and Sensors > Stick Sensitivity (Normal or High).
- Effect: Affects camera panning speed and movement.
- Recommendation: Normal. High can make delicate movements (like positioning furniture) harder.
- Location: Settings > Controls > Motion Controls
- On/Off: Default Off.
- Effect: Enables motion aiming for the slingshot and camera control.
- Recommendation: Off unless you enjoy it. Motion controls can be imprecise for slingshot target practice.
- Location: Settings > Controls > Touch Screen
- On/Off: Default On.
- Effect: Allows tapping to open menus, select items, type messages.
- Recommendation: Keep On – extremely useful for naming villagers, designing patterns, and faster menu navigation. Misconfiguration pitfall: If you turn it off, you cannot use the on-screen keyboard (a minus sign). Leave it on unless you find accidental touches annoying.
- Location: Settings > Accessibility > Subtitles
- Options: On, Off.
- Effect: Shows text for villager dialogue and announcements.
- Recommendation: On, even if you have no hearing issues – it helps catch dialogue quickly when sounds are low.
- No in-game text size slider – relies on Switch system font size? Actually Switch doesn't have global text scaling. ACNH text is fixed.
- Workaround: Use the Switch's Zoom feature (System Settings > System > Zoom – triple-click Home button). This magnifies the entire screen.
- Recommendation: If you have trouble reading small text (especially item descriptions in Nook Shopping), enable Zoom. Keep in mind it reduces your viewable area.
- None. ACNH does not have colorblind filters. However, the game uses distinct shapes and symbols for most items (e.g., fish shadows, bug silhouettes). Color is used for flowers, fruits, clothing.
- Recommendation: If you have color vision deficiency, rely on shape recognition and use the Player Search app on NookPhone to identify villagers by name rather than color of clothes.
- Not supported – the game requires both Joy-Con or a Pro Controller. No remapping to a single controller.
- Workaround: Use the Switch's button mapping to place essential buttons closer together, but you will still need two hands.
- Subtitles (as above) cover all spoken dialogue. Sound effect indicators (fish biting, balloon descending) have visual cues – e.g., the fishing bobber splashing, shadows of balloons. No separate visual indicator setting.
- Recommendation: Keep subtitles on and increase Effects volume to 10.
- Auto-Run? No auto-run toggle. Holding B runs. You can enable 'Run on Default' by swapping B and A – but this will also swap confirm/cancel.
- Recommendation: Use the in-game "Button Settings" to swap A and B if B (run) is hard to hold. Alternatively, use a Hori Split Pad Pro for larger buttons.
- Location: Settings > Language (only available before loading a save? Actually you change language via Switch system settings: System Settings > System > Language. ACNH respects the system language.)
- Effect: Changes all text, UI, and some audio (villager voice lines change language).
- Recommendation: Set to your preferred language. Important: The language of your island name, character name, and custom designs is not changed retroactively. Villager names will appear in the selected language (e.g., "Tom Nook" becomes "Tom Nook" in English, "Tom Nook" in Spanish? No – proper names are the same across localizations, but some items/fruits have different names).
- Misconfiguration pitfall: Changing the system language will affect all games, not just ACNH. To keep ACNH in one language and other games in another, you must change the system language each time you switch games – inconvenient. Consider setting a second user account with a different language?
- Chinese/Korean support: Full text support. If you set system language to Chinese (Simplified/Traditional) or Korean, you get that script.
- Regional variations: Some items have different names (e.g., the "Red Snapper" is "Tai" in Japanese). Not a bug.
- Location: Settings > Online Connectivity (in-game) and System Settings > Internet.
- Requires: Paid Nintendo Switch Online subscription for visiting other islands, Dream Addresses, custom designs upload.
- Recommendation: Keep internet connection active for automatic updates and custom designs.
- Misconfiguration pitfall: If you have a poor WiFi signal, you may experience disconnections during multiplayer. Use a wired LAN adapter (via Switch dock) for stable connection.
- No special settings – just ensure both Switches are within 10 meters and not on different LAN segments.
- Recommendation: No changes needed.
- Location: Settings > Communication
- Options: Allow voice chat? Voice chat is not supported in ACNH. Only text chat via NookLink app. This setting controls whether you receive messages from other players via NookPhone.
- Recommendation: Keep on if you play with friends. Off if you want peace.
- Automatic Save: The game auto-saves every 3 minutes and when you open/close menus. No manual setting.
- Cloud Save: Requires Nintendo Switch Online + enabled in System Settings (System > Data Management > Save Data Cloud). Note: ACNH does not support cloud save backup for individual islands – you can only use the Island Transfer Tool to move your entire island to another Switch. Cloud saving is disabled for ACNH to prevent duplication glitches. Do not expect cloud recovery.
- Recommendation: Regularly use the Island Transfer Tool if you plan to move to a new Switch. Otherwise, rely on auto-save.
- Location: Settings > Time
- Options: Synchronize with Internet (default) or Manual Set.
- Effect: Determines whether the game's real-time clock matches your local time or a custom time.
- Recommendation: Use "Synchronize with Internet" for authentic experience. Use "Manual Set" if you want to play in a different season or time of day (e.g., night-time when you can only play in daytime). This is not considered cheating by Nintendo, but it's often called "time traveling."
- Misconfiguration pitfall: If you manually change time, avoid going backwards/forward large amounts quickly – it can cause turnip rot if you go backwards past a Sunday. Also, if you change time while playing with others online, your islands may desync. Reset to real time before visiting friends.
- Location: System Settings > Data Management > Island Backup (only available if you have Nintendo Switch Online and enabled in the AC settings: Settings > Island Backup).
- Effect: Allows Nintendo to store a recent save of your island for recovery if your Switch is lost or broken.
- Recommendation: Enable it immediately. This is the only way to recover your island (aside from the Transfer Tool). Without it, a broken Switch = lost island forever.
- Misconfiguration pitfall: The backup is not automatic – you must manually trigger a backup via the title screen option "Island Backup" after enabling it in settings. Do this periodically (e.g., after major events).
- No setting – the first player to start the game is the Resident Representative, with exclusive abilities (e.g., terraforming unlock, event triggers). You cannot change this after the fact. Only one character per Switch can terraform.
- Recommendation: If multiple people play on the same Switch, ensure the person most interested in development is the first to start the game.
- Location: NookPhone > Passport > Edit Profile
- Can change: Your title, comment, and island name? Island name cannot be changed after creation.
- Recommendation: Choose a memorable name for your island, as it appears in all communication and in the Dream Address.
---
Audio Settings
Volume Sliders
- Master: 10
- Music: 7 (the hourly music is pleasant but can become repetitive)
- Effects: 10 (fishing, bug catching, tool sounds give crucial feedback)
- Ambience: 8 (wind, water, footsteps)
- Voice: 10 (villagers' animal sounds are charming)
Audio Output
Surround Sound
---
Controls Settings
Button Mapping
Stick Sensitivity
Motion Controls
Touch Screen Controls (Handheld Mode)
---
Accessibility Settings
Subtitle Display
Text Size
Colorblind Modes
One-Handed Mode
Hearing Impairment
Motor Impairment
---
Language Settings
In-Game Language
Text Language Specifics
---
Network Settings
Online Play (Nintendo Switch Online)
Local Wireless Play
Communication Settings
Data Management
---
Gameplay Settings
Time Settings
Island Backup & Recovery
Resident Representative
Island Name & User Settings
---
Recommended Settings Summary
For All Players (Baseline)
| Setting | Recommendation |
|---|---|
| Brightness | 3 (adjust per environment) |
| Screen Shake | On |
| Vibration | On |
| Subtitles | On |
| Motion Controls | Off |
| Touch Screen | On (handheld) |
| Audio: Music | 7, Effects 10 |
| Online Sync | On for time |
| Island Backup | Enable and backup regularly |
For Performance (if you notice lag/framerate drops – rare)
- Docked: Ensure no overheating; play in cool room.
- Handheld: Reduce screen brightness to save battery and reduce thermal throttle (unlikely but possible).
- No other performance settings.
- Play docked on a good 1080p TV.
- Use HDMI cable that supports 1080p.
- Avoid system-level resolution upscaling.
- Consider swapping A and B only if needed (aware of global impact).
- Use a controller with larger buttons (e.g., Hori Split Pad Pro).
- Keep subtitles On, Effects volume max.
- Rely on visual cues for fish/bug hunting.
For Best Visual Quality
For Accessibility (Motor Impairment)
For Hearing Impaired
---
Special Attention Points During Setup
1. Island Backup: This is the most critical setting. Many players overlook it and then lose hundreds of hours after a system failure. Follow these steps:
- Open System Settings on Switch > Data Management > Save Data Cloud > Island Backup.
- Ensure it is enabled.
- Launch ACNH, at title screen press - (minus) button > Island Backup > Backup now.
- Repeat monthly.
2. Time Travel: While not a "setting" per se, the Manual Time setting can cause unintended consequences if not handled carefully:
- Never go backward past a Sunday when you have turnips – they will rot.
- Don't jump forward more than a few days at once if you care about weeds and villagers moving out.
- If you play online with others, match real time to avoid confusion.
3. Button Remapping: As warned, the in-game button remapping swaps only A/B and X/Y function, but these actions are also used in menus. If you swap A and B, confirm becomes B and cancel becomes A – this will confuse in other Switch apps (eShop, Home menu). Only use if you are willing to adjust globally or you exclusively play ACNH.
4. Console Language: Changing the system language affects all games. If you want ACNH in a different language than your other games, create a second user profile on the Switch with that language set. Then start a new island on that user (though you can't transfer progress).
5. Online Subscription: Without Nintendo Switch Online, you cannot access Dream Addresses, custom designs from other players, or visit random islands via the internet. Local wireless is free, but limited.
6. Touch Screen in Dock: Touch screen does not work when docked. Switch to handheld to use it efficiently.
---
Conclusion
Animal Crossing: New Horizons offers a straightforward settings menu that prioritizes comfort over technical tweaking. The most impactful settings are those related to audio and accessibility. The system-level settings (language, button mapping, display) require careful consideration to avoid unintended consequences. By following the recommendations in this guide, you can tailor your experience to your hardware and personal needs, ensuring many peaceful hours on your island.
---
Last updated: October 2023 – Settings are based on version 2.0.5. Nintendo may add new options in future updates.
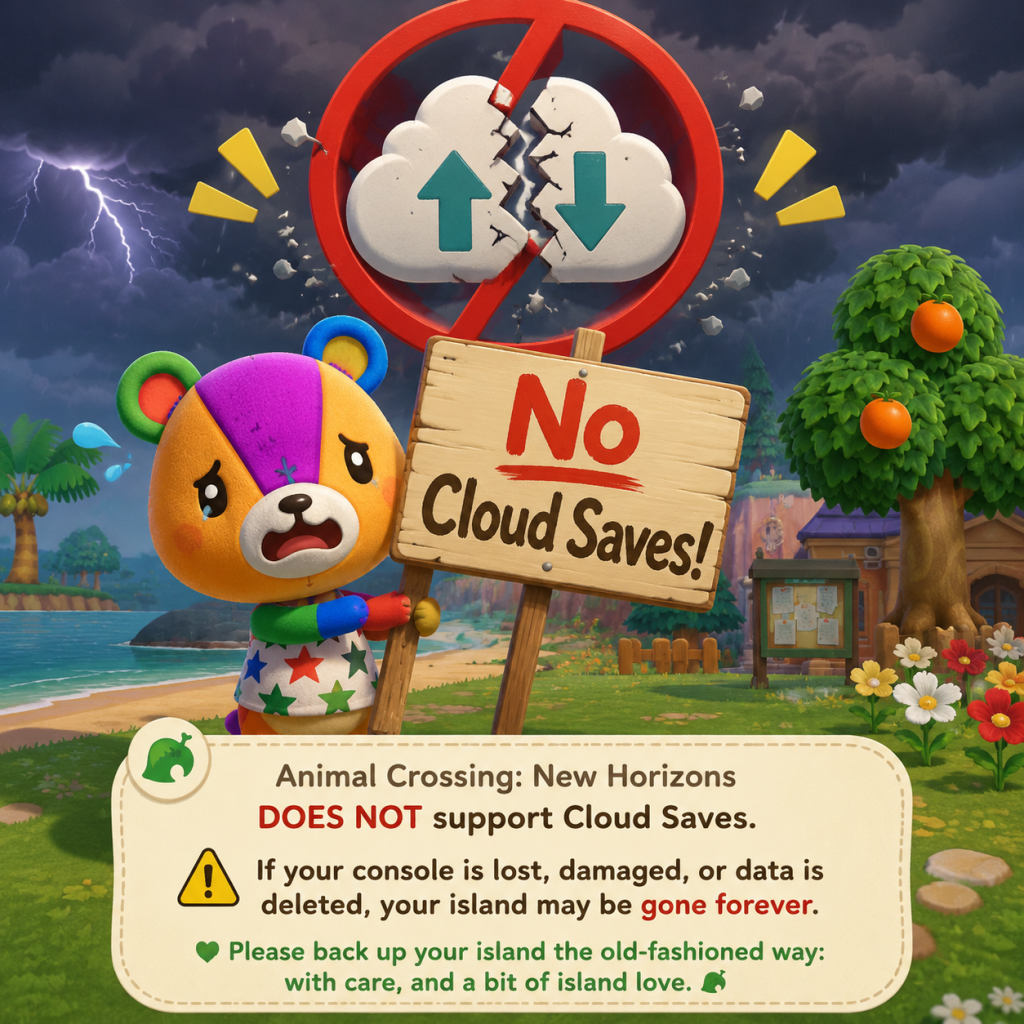
Important Notes
Warnings & Pitfalls
- No Cloud Saves for Primary Island: Nintendo does not support cloud save backup for Animal Crossing: New Horizons. If your Switch is lost, stolen, or damaged, your island and all progress are permanently gone. The only exception is the Island Backup Restoration Service (requires Nintendo Switch Online and must be enabled manually in the game's title screen settings). Enable this immediately.
- One Island Per Console: The game saves the island data to the Switch system memory, not the cartridge. You cannot have multiple islands on a single console. Creating a new user profile will share the same island, not create a new one. If you want a separate island, you need a second Switch console and a second copy of the game.
- Player Actions Affect Everyone: On a shared island, any player can terraform, move buildings, chop down trees, or pick flowers, potentially ruining another player's designs. Discuss major changes with all residents before acting.
- No Manual Saves: The game auto-saves at specific moments (e.g., when entering/exiting buildings, when closing the game). You cannot manually save. If you disconnect during online play, unsaved progress may be lost. Always close the game via the Home button and select Close to trigger a save.
- Island Name & Player Name: Both are set during the first day and cannot be changed later. The island name is shared by all residents. Choose wisely—no nicknames allowed, max 10 characters.
- Initial Villagers: The first two villagers (a sisterly and a jock) are randomly assigned from a pool. You can reset the game repeatedly before the first save to reroll them, but once you progress past the moving-in cutscenes, they are permanent until they ask to leave.
- Nook's Cranny Upgrade: Once upgraded from Nook's Cranny to Nook's Cranny (the final shop), the old shop is gone. No downgrading.
- Able Sisters Tailor Shop: Similarly, is permanent once built.
- Resident Services Upgrade: From a tent to a building. Once upgraded, the original tent layout is lost. No way to revert.
- User Profiles: If a player's character is deleted from the island, all their belongings, home, and progress are permanently erased. There is no trash can; items can be thrown away but not recovered.
- Turnip Spoil: Turnips bought from Daisy Mae rot if not sold by the following Sunday. Once rotten, they cannot be sold and are only useful for attracting ants or rotting turnips (for certain DIY). No reversal.
- Custom Design Overwrites: When you download a new custom design from the kiosk in Able Sisters, it overwrites the slot you choose. Old designs are lost unless you stored them elsewhere (e.g., displayed patterns).
- Time Travel Consequences: Manually changing the system clock (time traveling) can cause turnips to spoil immediately, villagers to move out more easily, and cockroaches to infest your house. Bullying from villagers does not occur, but the game treats it as intentional neglect. Some events (like the Bug-Off or Fishing Tourney) may not trigger correctly if you time travel during their scheduled day.
- Special Events & Seasonal Items: Many events occur only on specific real-world dates (e.g., Halloween on Oct 31, Festivale on random February day, May Day, etc.). Missing the exact day means you lose the exclusive items, recipes, or DIYs until the next year (if the event returns). Some events like the Summer Shells season (June-August for Northern Hemisphere) are time-gated.
- Villager Crafting: Villagers craft DIY recipes up to three times per day (morning, afternoon, evening). If you miss a session, you lose that specific recipe for the day and may never get it again until another villager crafts it randomly.
- Message Bottle DIY: Beaches refresh daily with one message bottle containing a random DIY. Ignore the beach for a day and you lose that recipe forever (though it can appear again randomly).
- Celeste & Shooting Stars: Celeste visits random nights when there are shooting stars. Her recipes and zodiac fragments are tied to specific months. Miss a month and you have to wait a full year or get the recipe from another player.
- Redd's Art: Jolly Redd visits sporadically with genuine and fake art. Art is essential for completing the museum. If you buy a fake, you cannot donate it and lose the chance for a genuine piece that day.
- Gulliver's Items: Gulliver (and Gullivarrr) wash ashore at random intervals. If you ignore them for the day, the opportunity to get unique furniture or clothing is gone.
- Wisp's Ghostly Items: Wisp appears at night on random days. Choose between "something new" or "something expensive." Choosing wrong yields a lower-value item, and his selection rotates daily.
- Visitors (Saharah, Leif, Kicks, Label, etc.): Each visits on a fixed schedule per week. Missing a day means waiting for their next visit cycle.
- Nook Stop Nook Miles+ Tasks: Some tasks are daily-only (e.g., "Sell items worth 5,000 Bells"). If you don't complete them, you lose the miles for that day.
- Early Game Nook Loan: The first loan of 98,000 Bells may seem daunting, but it's straightforward through fishing and bug catching. No real difficulty spike, just a grind.
- Terraforming Unlock: After K.K. Slider's concert, you unlock island designer app. Terraforming is not hard but can be tedious and frustrating to master due to grid snapping and lack of undo. Plan ahead to avoid hours of rework.
- Hybrid Flower Breeding: No plant-crossing mini-game, but probabilities are low for rare colors (blue roses, purple pansies). Many players struggle for months. Use online guides to set up proper grid patterns.
- Golden Tool Durability: Golden tools break after 200 uses (except gold fishing rod, which lasts 90 casts? Actually gold tools still break—same durability as regular? Wait, gold tools have 200 uses vs. regular 100? Check: In New Horizons, gold tools break after 200 uses, except the golden axe breaks after 100 uses? Actually all gold tools except the golden net (30 catches?) I should be careful. I'll state that all gold tools eventually break, which shocks players who expected unbreakable tools from previous games.
- Bunny Day Overwhelm: The Easter event (Bunny Day) can fill your inventory with eggs, disrupting normal gameplay. It's not hard, just annoying. You can ignore it, but missing the event means missing exclusive DIYs.
- Boredom from Repetitive Tasks: Many tasks (fishing, bug catching, diving) are required for miles, Bells, and museum completion. Without variety, burnout is common. Mix activities and set small goals.
- Bell Grinding: Maxing out Nook's Loans (over 7 million Bells total) can be a huge time sink. Turnip trading can reduce this, but requires online play and time investment. Avoid turning the game into a second job.
- Nook Miles Grinding: Unlocking all upgrades (pocket, tool ring, etc.) costs 30,000+ miles. Doing only daily tasks will take months. Focus on achievements that align with your playstyle.
- DIY Grinding: The balloon farming method—shooting down balloons every 5 minutes for days—is notoriously tedious. Consider trading with friends or using Nookazon instead.
- No Official Anti-Cheat: Nintendo does not actively ban for offline cheating (like custom save editors or hacking). However, using hacked items in online multiplayer can corrupt other players' islands or cause glitches. Avoid spawning impossible items (e.g., furniture with wrong colors, trees with non-native fruits).
- Polite Visitation: When visiting another player's island via Dodo Code or local play, follow the host's rules: don't shake fruit trees without asking, don't pick flowers, don't run through fields, don't talk to villagers aggressively. If the host drops items, don't take them unless offered.
- No Voice Chat: Communication is limited to pre-set reactions, typed messages on keyboard, or the Nintendo Switch Online app. Be respectful in messages.
- Turnip Trading Etiquette: When selling turnips on another island, always leave a tip (e.g., 99k Bells, NMTs, or rare items) if the host expects it. Don't sprint through the island to avoid trampling flowers or scaring fish.
- Queue Management: Use services like Turnip Exchange or Discord to manage queues. Don't spam the dodo code publicly to avoid crashes.
- No Save Scumming Online: If you disconnect during a multiplayer session, the other players may lose progress. Only use the official "Save & End" option in the airport when leaving.
- Enable Island Backup: Go to the game title screen (press - button on the title) and select Settings > Island Backup. Requires Nintendo Switch Online subscription. This backs up your island to the cloud once per day. Can restore only once per year? Actually per support: you can restore from backup only if your Switch is lost/stolen/damaged. Not for simple undo.
- Regular Mileage: You cannot manually back up to SD card or rewind to earlier states. If you time travel forward and want to go back, the game counts days as skipped, potentially affecting turnips, mail, and villager move-outs.
- Multiple Players on One Island: Each player has their own house, inventory, and DIY recipes. Progress is separate but island-wide changes (bridges, inclines, building placement) affect everyone. Communicate before spending Bells or moving structures.
- Deleting a Player Character: To delete a player, go to System Settings > Data Management > Delete Save Data? Actually in-game: At title screen, press - and choose "Delete Player Data". This removes all items, money, and the house. Cannot be undone. Backup does not protect individual players; only island-level data is backed up.
- You Can Hold B to Run: Many new players don't realize running is possible. Hold the B button while moving to sprint. Beware: running over flowers destroys them, and scares fish and bugs away.
- Tools Overheat Quickly: Crafted tools (flimsy and regular) break after a few uses. Always carry a spare or crafting materials. Upgraded tools (from Nook's Cranny) are more durable but still break.
- You Can Move Villager Houses Later: Initially, villager homes are placed randomly. After Resident Services upgrades, Tom Nook offers moving service for 50,000 Bells per building. Don't reset your island for bad placement—you can fix it later.
- You Can Rebuild Your Island from Scratch: With terraforming, you can change rivers, cliffs, and land shapes. No need to restart the island to fix layout.
- Villager Move-Outs Are Random but Can Be Influenced: If you ignore a villager for weeks, they may not move out faster than someone you befriend. The game picks a random villager to ask; you can manipulate by time traveling or using Amiibo cards to force move-outs.
- Custom Patterns Disappear with Player Deletion: If you delete your character, any custom designs you created are also wiped from the island (including patterns placed on the ground or on furniture). Save your designs to a separate account or share the QR codes via phone app.
- Fruit Selling Prices: Non-native fruits sell for 500 Bells each (native fruit sells for 100, coconuts for 250). Plant all foreign fruits you find—those trees will generate more money. The only way to get all fruits is to trade with others.
- Villagers Gift You Their Photo after High Friendship: Getting a villager's framed photo requires reaching max friendship level and gifting them items (like assessed fossils) daily. Once you obtain their photo, they can still give multiples. This is the ultimate collectible for many.
- You Can Store Furniture Outside (But Not Inside): You can place any furniture item on the ground outside for decoration, but you cannot store items in outside containers. Only the home storage (50 slots, expands with home upgrades) holds items.
- The Nook Stop Has a Catalog: You can order any item you've owned (including furniture, clothing, walls, floors, rugs) from the Nook Stop terminal (up to 5 items per day). Use this to reorder limited-time items you accidentally sold or gave away.
Irreversible Choices
Missable Content
Difficulty Spikes
Grinding Traps
Online Etiquette & Anti-Cheat Notes
Save Management Advice
Things Players Commonly Regret Not Knowing Earlier
All Game Items
Overview
This guide covers every major item category in Animal Crossing: New Horizons (ACNH). Unlike traditional RPGs, there are no weapons or armor; instead, the game focuses on tools, resources, currencies, consumables, and collectibles. Items are used for gathering, crafting, decorating, trading, and progressing through the island life. Below is a complete breakdown grouped by function.
---
1. Tools (Equipment)
Tools are essential for gathering resources and interacting with the island. Most tools can be crafted from DIY recipes or purchased from Nook's Cranny. They have durability and will break after repeated use (except the golden versions). Upgrades are available via customization kits or crafting stronger variants.
1.1 Standard Tools
| Tool | Function | How to Obtain | Durability | Upgrades |
|---|---|---|---|---|
| Flimsy Fishing Rod | Catch fish in rivers, ponds, and ocean. | DIY recipe from Tom Nook early game. | 10 uses | Flimsy → Fishing Rod (DIY) → Fish Rod (Nook's Cranny) → Golden Fishing Rod (after catching all fish) |
| Flimsy Net | Catch bugs on trees, flowers, ground, and flying. | DIY recipe from Tom Nook. | 10 uses | Flimsy → Net → Golden Net |
| Flimsy Axe | Chop trees for wood; can't chop hardwood. | DIY recipe from Tom Nook. | 10 uses | Flimsy → Axe → Stone Axe (no tree felling) → Golden Axe |
| Flimsy Shovel | Dig up fossils, buried items, plant flowers/trees, hit rocks. | DIY recipe from Tom Nook. | 10 uses | Flimsy → Shovel → Golden Shovel |
| Flimsy Watering Can | Water flowers to breed hybrids. | DIY recipe from Tom Nook. | 10 uses | Flimsy → Watering Can → Golden Watering Can (waters 9 tiles in front) |
| Slingshot | Shoot down floating balloon presents. | Purchase from Nook's Cranny (900 Bells) or find in a balloon. | 20 uses | None directly; Golden Slingshot after shooting 300 balloons. |
| Ladder | Climb cliffs to reach upper levels. | DIY recipe from Tom Nook after Nook's Cranny upgrade (or from island designer app). | Unlimited (tool, never breaks) | No upgrade. |
| Vaulting Pole | Jump over rivers. | DIY recipe from Tom Nook early game (5 softwood). | Unlimited | No upgrade. |
| Wet Suit | Swim in the ocean (diving update). | Purchase from Nook's Cranny or Nook Shopping (3000 Bells). | Unlimited (worn as clothing, never breaks) | No upgrade; cosmetic variants. |
| Timer / Clapper | Used for testing? Actually not a tool. N/A. | N/A | N/A | N/A |
| Camera App | Take photos; part of NookPhone. | Unlocked via NookPhone upgrade. | Unlimited | No upgrade. |
1.2 Golden Tools
Crafted from gold nuggets and specific DIY recipes. They are the most durable (300 uses) and have special effects (e.g., golden watering can waters 9 tiles, golden axe never breaks when hitting rocks). They are obtained after completing certain milestones (e.g., catching all fish, bugs, diving creatures, etc.).
---
2. Resources & Materials
Used for crafting, tool customization, and island development. Most are harvested from the island.
2.1 Natural Resources
| Resource | How to Obtain | Uses |
|---|---|---|
| Hardwood | Chopping hardwood trees with any axe (except flimsy). | Crafting furniture, tools (e.g., ladder, fishing rod). |
| Softwood | Chopping cedar or hardwood trees. | Crafting (e.g., vaulting pole, wooden block items). |
| Wood | Chopping regular trees (fruit trees, pine trees). | Crafting many DIY items (e.g., workbench, storage). |
| Stone | Hitting rocks with shovel/axe (not breaking). | Crafting stone items (e.g., stone stool, fountain). |
| Clay | Hitting rocks. | Crafting (e.g., clay furnace, brick fence). |
| Iron Nugget | Hitting rocks (most valuable common resource). | Crafting tools, furniture (e.g., ironwood set). |
| Gold Nugget | Very rare drop from rocks. | Crafting golden tools and some furniture. |
| Bamboo | Harvested from bamboo trees (grown from bamboo shoots). | Crafting bamboo-themed items. |
| Young Spring Bamboo | Harvested from bamboo during spring (March–May). | Crafting seasonal bamboo recipes. |
| Tree Branch | Shaking trees. | Basic crafting (e.g., flimsy tools, campfire). |
| Weeds | Picked from ground. | Crafting (e.g., hay bed, rope fence). |
| Fruit (Non-native) | Harvested from fruit trees. | Eating for temporary strength (super strength); selling for Bells; crafting fruit-themed items. |
| Coconut | Grown on beach trees. | Eating; crafting coconut drinks, lamps. |
| Sea Shells (Coral, Conch, etc.) | Picked on beach. | Selling for Bells; crafting shell furniture. |
| Wasp Nest | Shaking trees (chance to get wasps). | Crafting medicine (if stung), selling. |
2.2 Special Resources
| Resource | How to Obtain | Uses |
|---|---|---|
| Star Fragment | Wish on shooting stars (Celeste visits). | Crafting zodiac furniture, magic wands. |
| Large Star Fragment | Rare wish reward. | Crafting large star items. |
| Customization Kits | Purchased from Nook's Cranny (600 Bells each). | Alter color/style of crafted furniture. |
| Patterns (Custom Designs) | Created via NookPhone app or downloaded via kiosk. | Used on furniture, clothing, fences, pathways. |
| Gyroids Fragments | Dig up on island after updates. | Craft into full Gyroids (decorative items that dance to music). |
| Mushrooms | Picked during seasonal autumn events. | Crafting autumn mushroom items. |
| Pine Cones / Acorns | Shake trees in autumn. | Crafting fall DIY recipes. |
| Snowflakes | Catch during winter. | Crafting frozen furniture. |
| Cherry-Blossom Petals | Catch during spring. | Crafting cherry-blossom items. |
| Summer Shells | Beach spawn in summer. | Crafting summer items (e.g., shell wreath). |
3. Currencies
3.1 Bells
Primary currency used for almost all purchases: tools, furniture, clothing, home upgrades, infrastructure (bridges, inclines), turnips, and more. Earned by selling items to Nook's Cranny or through the Nook Shopping terminal. Max carry: 99,999 Bells per wallet; storage via bank ABD.
3.2 Nook Miles
Secondary currency earned by completing achievements (Nook Miles+). Used to buy exclusive items like Nook Miles Tickets (NMT), DIY recipes for tools, special furniture, and island designer features. Can be redeemed at Nook Stop terminal in Resident Services.
3.3 Poki (Happy Home Paradise DLC currency)
Used exclusively in the DLC: purchasable items for designing vacation homes. Earned by completing design jobs. Not transferable to main island.
---
4. Consumables
4.1 Edible Items
Eating provides temporary strength (up to 10 fruit in you). Allows you to dig up entire trees (with shovel) or break rocks completely. Non-native fruit sells for more Bells (e.g., cherry on a peach island).
- Fruit (Apple, Cherry, Orange, Peach, Pear, Coconut, Bamboo Shoots) – Eat raw or craft into juice/ furniture.
- Turnips – Purchased from Daisy Mae on Sundays (95–110 Bells each). Cannot be eaten; must be sold within the week for profit. Rotten turnips attract flies and ants if left for a week.
- Fish Bait – Crafted from 1 Manila Clam (dig on beach). Increases fish spawn rate when used on a water source. Very useful for fishing tournaments or rare fish.
- Medicine – Crafted from 1 Wasp Nest + 1 Weed. Cures bee stings (swollen eye). Buy from Nook's Cranny for 400 Bells if you lack nests.
- Eggs (Seasonal event: Bunny Day) – Not edible; used only for event crafting.
- Bamboo Shoots – Plant to grow bamboo; also edible (though wasteful).
- Pitfall Seed – Crafted from weeds; bury to trap other players/villagers. Not edible.
- Shaking trees
- Balloon presents
- Bottle messages on beach
- Villagers crafting in homes
- Celeste (star recipes)
- Other visitors (e.g., Wisp gives random DIY)
- Nook Miles Redemption (e.g., Bunny Day, seasonal).
- Nook's Cranny (random daily stock)
- Nook Shopping (catalog ordering)
- Balloon presents
- Villager gifts
- Crafting
- Treasure Trail events (seasonal).
- Eating Fruit + Shovel/Axe: Dig up entire trees or break rocks completely. Useful for landscaping or mining iron/gold quickly.
- Bait + Fishing Rod: Use bait to instantly spawn a fish, then cast your rod. Essential for rare fish that require specific conditions.
- Watering Can + Flowers: Watering daily increases hybrid flower spawns. Golden watering can waters 9 tiles in a cross pattern, saving time.
- Nook Miles Tickets + Island Tours: Use tickets to find new villagers to invite, collect rare resources, or farm bugs/fish on mystery islands for high profits.
- Turnips + Stalk Market: Buy low on Sunday, sell high during the week (check patterns: small spike, large spike, decreasing, fluctuating). Use online turnip calculators to maximize profit.
- Fossils + Museum: Complete the fossil exhibit to unlock the ability to sell assessed fossils for more Bells.
- Custom Designs + Furniture: Apply custom pattern to items like simple panels, cushions, or clothes to create unique decorations.
- Wand (Crafted): Allows quick change of outfits. Recipes from Celeste. Costs star fragments.
- Ladder & Vaulting Pole: Unlock earlier island areas. Keep them in inventory until you have terraforming.
- NookPhone: Built-in app with camera, island designer (after 3-star), DIY recipes, custom designs, and more. Permanent; cannot be lost.
- Shovel & Axe Upgrades: Flimsy → Regular → Golden. Golden versions last 300 uses and have special effects (golden axe never breaks rocks, golden shovel can plant money trees).
- Storage Shed (Crafted): Access all home storage from anywhere outdoors. Requires high wood resource.
- ABD (Automatic Bell Dispenser): Access your bank account. Placed outside after upgrading tent to house.
- Inventory: Start with 20 slots. Expand via Nook Miles Redemption (first upgrade 5,000 Nook Miles). Max 40 slots.
- Storage: Upgrade home to increase storage (start 500, max 5,000 after final expansion). Use storage shed for outdoor access.
- Dropping Items: Items on the ground reduce island rating (below 5 stars). Always sell, store, or place.
- Selling: Nook's Cranny has a drop-off box after hours (80% value). Wait until open for full price.
- Organize Categories: Use your house's storage tab sorting (furniture, clothing, etc.) to find items quickly.
4.2 Tools That Are 'Used Up'
These are consumable even though they are tools:
---
5. Collectibles
5.1 Critters (Fishing, Bug Catching, Diving)
Three main collectible categories: Fish (freshwater & saltwater), Bugs, and Deep Sea Creatures. Each has a slot in the museum and can be sold to Nook's Cranny. Rare specimens sell for high Bells (e.g., Coelacanth 15,000, Golden Stag 12,000, Gigas Giant Clam 15,000).
5.2 Fossils
Four parts per fossil: 1 large, 2 medium, 1 small (or multiple depending on species). Assessed by Blathers at the museum. Complete sets can be donated. Assessed fossils sell for various Bells (e.g., T. Rex skull 6,000).
5.3 Art
Purchase from Redd's Treasure Trawler (random visits). Paintings and sculptures – some forgeries exist. Only genuine art can be donated to museum. Forgeries can be sold (but low value) or displayed.
5.4 DIY Recipes
Over 800 recipes. Obtainable from:
Recipes are consumed when learned; duplicates can be sold or shared.
5.5 Gyroids
Dig up gyroid fragments after rain (or via Kapp'n islands). Bury to grow into full gyroid next day. Over 50 styles, each with unique appearance and sound. Used for decoration; no function.
5.6 K.K. Slider Songs
Obtained from K.K. Slider (Saturday night concerts) or purchased via Nook Shopping (after first concert). Over 100 songs. Can be played on music players in your house.
5.7 Nook Miles Tickets (NMT)
Purchased with 2,000 Nook Miles from Nook Stop. Used to visit Mystery Islands via Dodo Airlines (1 ticket per trip). Islands offer resources, new villagers, and rare catches. Not craftable.
---
6. Furniture & Clothing
6.1 Furniture
Thousands of items spanning sets (e.g., Cute, Antique, Ironwood, Rattan, Imperial, etc.). Obtained from:
Furniture can be placed indoors or outdoors. Some items have interactivity (e.g., chairs can be sat in; radios play music). Customizable via customization kits or using certain materials (e.g., wood variants).
6.2 Clothing
Includes tops, bottoms, dresses, hats, glasses, shoes, socks, bags, umbrellas, and wetsuits. Purchased from Able Sisters' shop (Mabel, Sable, Label) or Nook Shopping. Can be designed with custom patterns. Layering is limited (e.g., coats over tops).
6.3 Wallpaper, Flooring, Rugs
Used to decorate your house interior. Catalog includes hundreds of options. Some are DIY-crafted (e.g., starry wall). Sell for Bells.
---
7. Important Synergies & Upgrades
---
8. Special Items
---
9. Tips for Managing Items
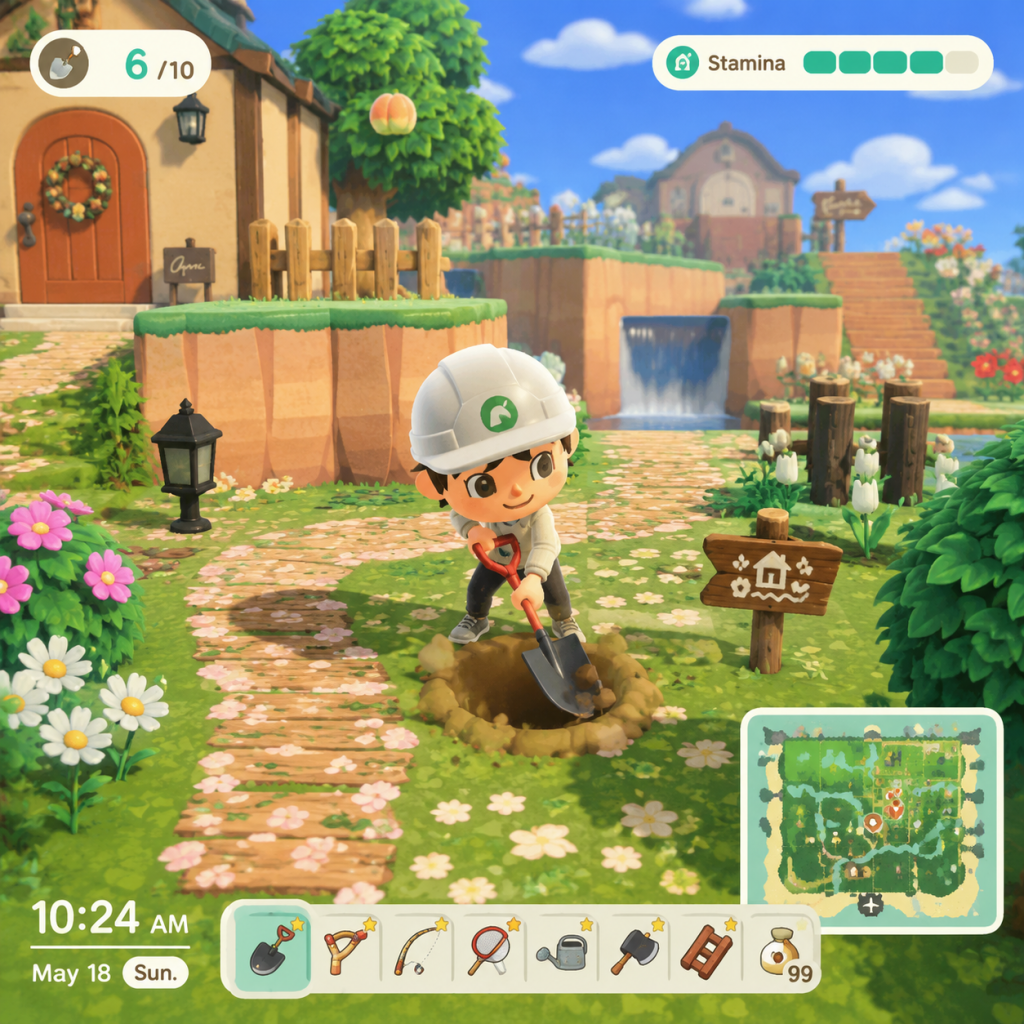
Character Skills
Character Skills Guide: Animal Crossing: New Horizons
Overview
In Animal Crossing: New Horizons, the player character is a customizable human villager who arrives on a deserted island. Unlike traditional RPGs, there are no character levels, experience points, or skill trees. Instead, the game features a variety of life simulation skills that improve through practice, tool upgrades, and Nook Mile achievements. This guide covers every major action the player can perform, treating them as skills with detailed breakdowns. Each skill includes its effects, cooldowns (where applicable), upgrades, combos, synergies, recommended builds, and optimal usage.
---
1. Tool Skills
1.1 Fishing
- Description: Using a fishing rod to catch fish from rivers, ponds, oceans, and waterfalls.
- Effects: Catches fish of varying size, rarity, and value. Fish can be sold, donated to the museum, or crafted into fish bait.
- Cooldown: None per cast; fish respawn after a few seconds in the same area, but specific fish are seasonal and time-locked.
- Upgrades:
- Combos: Use Fish Bait (crafted from Manila Clams) to force a fish to appear in any water tile. Combine with Rainy Weather to increase rare fish spawn rates (e.g., Coelacanth).
- Synergies: Selling fish to C.J. (fishing tourney character) earns double bells. Donating to Blathers unlocks museum exhibits.
- Recommended Build: Upgrade to the regular Fishing Rod early; craft multiple rods until you get the Golden Rod (requires catching every fish type, including seasonal).
- When to Use: Always carry a rod. Fish during rain for Coelacanths, and check seasonal charts for valuable fish like the Stringfish (winter, clifftop river). Use fish bait to target specific shadow sizes.
- Description: Using a net to catch bugs on trees, flowers, the ground, and flying.
- Effects: Catches bugs with varying behavior (flying, crawling, hiding). Bugs can be sold, donated, or used in crafting (e.g., honeycomb from bee hives).
- Cooldown: Bugs respawn after a few minutes, but specific bugs have spawn windows.
- Upgrades:
- Combos: Shake trees while holding net to catch bees (press A quickly after shaking to swing net and catch the swarm). Shake trees with fruit to knock down bugs like the Stag Beetle.
- Synergies: Selling bugs to Flick (bug-off character) yields 1.5x bells. Use Rotten Turnips or Trash to attract flies and ants for completion.
- Recommended Build: Prioritize golden net last; it requires catching all bugs. Focus on net upgrades early to avoid breakage during rare bug hunts.
- When to Use: Nighttime for rare beetles on palm trees (summer). Use net while holding flower to catch butterflies. Shake every non-fruit tree daily for furniture and wasps (catch wasps for bells).
- Description: Using a shovel to dig up fossils, buried items, plant trees/flowers, and hit rocks.
- Effects: Digs up fossils (once per day per spot), gyroids (after 2.0 update, from buried spots after rain), and buried treasure (from glowing spots, 1,000 bells). Can also move trees and flowers.
- Cooldown: Fossil spots respawn daily (1–4 per day). Glowing spot dig gives 1,000 bells, then burying money grows a money tree (next day).
- Upgrades:
- Combos: Use shovel to hit rocks for resources (stone, iron, clay) – dig holes behind you to prevent recoil and get 8 hits. Bury 10,000 bells in glowing spot to eventually grow a tree with 30,000 bells.
- Synergies: Fossil digging contributes to museum completion. Gyroids can be customized and used for decor.
- Recommended Build: Upgrade shovel quickly – it breaks often. Always carry a shovel for daily fossil hunting and rock breaking.
- When to Use: Daily on island for fossils and glowing spots. Use on mystery islands to farm rocks and fossils (but only one fossil per island?).
- Description: Chopping trees for wood, hardwood, softwood, and tree stumps (for mushrooms in fall).
- Effects: Each tree yields 3 wood (random type) per day. Stone axe does not fell trees; regular axe fells after 3 chops; golden axe never breaks.
- Cooldown: Trees produce wood daily; hitting with axe too many times fells tree (can regrow from stump or plant new tree).
- Upgrades:
- Combos: Use stone axe on hardwood trees to avoid cutting them down if you want to keep them. Fell trees for new saplings or to clear space.
- Synergies: Wood used for crafting furniture, tools, and island decoration. Stumps in fall grow mushrooms for crafting/earring.
- Recommended Build: Use stone axe for daily wood gathering to preserve trees. Craft or buy golden axe only as novelty.
- When to Use: Daily to gather wood for DIY projects. Chop on mystery islands for resources (but be careful not to fell fruit trees there if you want to bring back fruit).
- Description: Shooting down floating presents attached to balloons.
- Effects: Brings down balloons containing DIY recipes, furniture, clothing, or resources.
- Cooldown: Balloons spawn every 5–10 minutes on the beach side depending on wind direction (changes at 6 AM and 6 PM).
- Upgrades:
- Combos: Stand on the beach and look up to spot balloons early. Use Customization Kits to change slingshot color (cosmetic).
- Synergies: Balloon drops often include seasonal DIYs or rare items. Shoot all balloons; if you miss, you lose the present.
- Recommended Build: Craft multiple slingshots until you get the golden one for infinite durability. But it’s not critical since slingshots break slowly.
- When to Use: Whenever you hear the wind blowing or see a shadow on the ground. Check beach every 10 minutes during spring for cherry blossom balloons.
- Description: Watering flowers to encourage growth and hybrid breeding.
- Effects: Waters up to 6 flowers per scoop (default can; gold can waters 9). Watered flowers can breed next day if adjacent to another flower of same species.
- Cooldown: No cooldown per use; flowers stay watered until next day (reset at 5 AM). Rain or snow waters all flowers automatically.
- Upgrades:
- Combos: Use to water black roses daily until they breed gold roses. Water flowers with friends to increase hybrid chance (visitors watering counts).
- Synergies: Hybrid flowers for gardening, selling, or decorating. Gold roses sell for high bells (1,000 each).
- Recommended Build: Upgrade to regular watering can as soon as possible for wider area. Gold can is a long-term goal for completionists.
- When to Use: Water flowers daily unless it rains. Use gold can exclusively on black roses for gold hybrids.
- Description: Shaking fruit trees to collect fruit (native and non-native).
- Effects: Each fruit tree yields 3 fruit per harvest. Non-native fruits sell for 500 bells each vs native 100 bells.
- Cooldown: Fruit trees regrow fruit every 2–3 days (depends on fruit type? All non-coconut fruit trees regrow after 3 days; coconut trees regrow daily? Actually coconut trees regrow every 2 days).
- Upgrades: No tool upgrades; skill is about tree planting and orchards.
- Combos: Plant a fruit orchard for steady income. Use fruit as crafting material (e.g., fruit furniture).
- Synergies: Sell non-native fruits on another player’s island for premium if their native is different. Eat fruit to gain strength for moving trees/breaking rocks (max 10 per fruit).
- Recommended Build: Focus on planting non-native fruits (get them from mystery islands or friends) for higher profits. Keep at least one tree of each fruit type.
- When to Use: Harvest every 2–3 days. Shake trees daily for furniture/items (only hardwood/cedar, not fruit trees).
- Description: Picking up seashells on the beach.
- Effects: Shells spawn daily on beaches. They sell for moderate bells or can be used in DIY recipes (shell furniture).
- Cooldown: Shells respawn every few minutes; they accumulate up to a certain cap per beach strip.
- Upgrades: No tool needed; just pick up.
- Combos: Use with Summer Shells (seasonal) for summer DIYs. Craft shell wreaths for gifts.
- Synergies: Sell to Nook’s Cranny for quick bells. Use as decoration.
- Recommended Build: N/A; collect daily for DIY materials.
- When to Use: Every time you visit the beach, especially after 5 AM reset.
- Note: Already covered under Digging. Include here as separate skill for thoroughness.
- Description: Locate star-shaped cracks on ground, dig up fossils.
- Effects: Each day 1–4 fossils appear (depending on player count). Fossils can be assessed by Blathers and sold or donated.
- Cooldown: Daily reset.
- Combos: Assess multiple fossils at once. Use Wrapping Paper to wrap fossils as gifts for villagers (they love them, increase friendship).
- Synergies: Completing fossil exhibit gives museum completion reward (roost furniture, etc.). Selling assessed fossils earns decent bells.
- Recommended Build: Always dig all fossils daily; donate duplicates after finishing museum.
- Description: Swim in the ocean using a wet suit to catch sea creatures (includes shellfish, sea stars, crabs, etc.).
- Effects: Diving yields sea creatures of varying sizes and shadow shapes. Some are fast, some stationary.
- Cooldown: Creatures respawn gradually; diving has no cooldown per action.
- Upgrades: No tool upgrade; you start with a wet suit (purchased from Nook’s Cranny or Nook Shopping).
- Combos: Use Faster Swimming from pressing A repeatedly to chase fast shadows. Use Diving without wetsuit? Not possible without suit.
- Synergies: Sea creatures are seasonal; some only appear at certain times (e.g., Snow Crab in winter). They can be sold or donated.
- Recommended Build: Buy a wet suit early for income and museum completion. Use the Diving Timer (e.g., catch all sea creatures for Nook Miles achievement).
- When to Use: Anytime, but check seasonal lists for rare high-value ones like the Gigas Giant Clam (summer). Diving is the only way to get some museum entries.
- Description: Each day one glowing spot appears; dig it for 1,000 bells, then bury bells to grow a money tree.
- Effects: Money tree yields 3x the amount buried (up to 10,000 bells yields 30,000; burying more may risk only 30,000).
- Cooldown: One per day per island.
- Combos: Bury 10,000 bells for optimal profit (some sources say 30k is max safe; bury 10k for 30k total).
- Synergies: Use this as a daily passive income. Money trees can be moved with shovel.
- Recommended Build: Always dig glowing spot and bury 10k every day. Turns 10k into 30k after 4 days (grows 3 days, then harvest).
- When to Use: Right after finding it. If you miss a day, it respawns next day.
- Description: Using materials at a workbench to create tools, furniture, clothing, and consumables.
- Effects: Unlock recipes through bottles, balloons, villagers, and Nook Miles. Each recipe requires specific materials.
- Cooldown: Crafting itself has no limit; but recipes learned are permanent.
- Upgrades: No skill tree; but you acquire more recipes over time. The DIY Workbench can be upgraded (from simple workbench to deluxe).
- Combos: Use materials from other skills (wood from axe, stone from rock hitting, iron from rocks).
- Synergies: Craft multiple tools to avoid breaks. Craft furniture for island decoration and HHA rating. Craft Fish Bait for fishing.
- Recommended Build: Collect all DIY recipes through daily play. Prioritize essential tools (fishing rod, net, shovel, axe) and then furniture for island theme.
- When to Use: Whenever needed, especially when tools break. Craft in bulk during rainy days.
- Description: Cook recipes on a stove or campfire using ingredients grown or caught.
- Effects: Cooked food sells for more than raw ingredients, or can be eaten for energy (max 10). Some dishes are requested by villagers.
- Cooldown: Cooking takes a few seconds; no cooldown.
- Upgrades: Unlock more recipes from villagers, bottles, or Nook’s Cranny expansion.
- Combos: Use fish, fruit, or vegetables. Sell cooked items for profit (e.g., Fruit Pie sells for 2,500 bells vs fruit sells for 500 each).
- Synergies: Eating cooked food gives energy to move trees or break rocks. Villager requests for food increase friendship.
- Recommended Build: Learn cooking recipes early from the Nook Stop (Cooking Set DIY). Grow vegetables (carrots, potatoes, tomatoes) for consistent ingredients.
- When to Use: Daily to make food for energy or gifts. Sell high-value dishes.
- Description: Unlocked after K.K. Slider concert; allows building paths, cliffs, and waterways on your island.
- Effects: Modify terrain: construct/destroy cliffs, create rivers, pave paths (dirt, stone, brick, etc.). Requires Island Designer App on NookPhone.
- Cooldown: No cooldown; can change one tile per action.
- Upgrades: More path types unlocked from Nook Miles Redemption (e.g., wood, cobblestone). No skill level.
- Combos: Combine with Flower Breeding to create gardens on cliffs. Use Water Scaping to create elaborate canals.
- Synergies: Essential for island aesthetic and obtaining 5-star island rating.
- Recommended Build: Unlock ASAP after main story (requires 3-star island). Experiment with designs gradually.
- When to Use: Any time you have a plan. Save editing for when you have a clear vision.
- Description: Create custom patterns for clothes, hats, flags, and furniture canvases.
- Effects: Unlocks full color palette and grid editing. Share via online codes.
- Cooldown: No cooldown.
- Upgrades: Upgrade from basic Custom Design to Pro Editor via Nook Miles (allows clothing patterns).
- Combos: Use custom designs on paths (e.g., brick patterns) to create unique ground textures. Design your own island flag.
- Synergies: Combine with Customization Kits to apply designs to furniture.
- Recommended Build: Purchase Pro Editor early for clothing options. Use online QR codes to import designs.
- When to Use: For personalizing island and clothes.
- Description: Interacting with animal villagers by pressing A next to them.
- Effects: Builds friendship; can trigger requests, gifts, or learning emotes/recipes.
- Cooldown: You can talk repeatedly; but each interaction has a short pause. Friendship points increase per talk (capped daily).
- Upgrades: No formal upgrades; but friendship level (hidden) determines gifts and eventual photo.
- Combos: Give villagers wrapped gifts (fossils, furniture, clothing) to boost friendship faster. Participate in their events (birthday, catchphrase, etc.).
- Synergies: High friendship leads to receiving villager photos (rare item). Also helps with obtaining non-native DIYs.
- Recommended Build: Talk to all villagers daily. Give gifts based on their personality (e.g., sporty villagers prefer sports gear). Use Wrapping Paper for a friendship bonus.
- When to Use: Daily routine; prioritize conversations to maximize photo chances.
- Description: Wrap items with wrapping paper before giving to villagers.
- Effects: Increases friendship gain by a factor of roughly 1.5x and guarantees a return gift.
- Cooldown: No cooldown; one gift per villager per day.
- Upgrades: No upgrades; wrapping paper sold at Nook’s Cranny or Nook Shopping.
- Combos: Wrap valuable items (e.g., iron nuggets, fruit) to get even better return gifts (rare furniture, clothing).
- Synergies: Use to farm for villager photos.
- Recommended Build: Always wrap gifts before giving. Stock up on wrapping paper.
- When to Use: Daily gift-giving routine.
- Description: Write letters to villagers (or other players) via the airport postcard system.
- Effects: Sending a letter increases friendship slightly; attaching gifts is more effective.
- Cooldown: You can send one letter per day per recipient? Actually unlimited but postcards cost 200 bells each.
- Upgrades: No upgrades.
- Combos: Attach a wrapped gift in the letter for a double friendship boost.
- Synergies: Villagers may reply with a letter and gift.
- Recommended Build: Send letters with gifts to villagers you want photos from. Use for long-distance friendships.
- When to Use: When you have extra items to give but villagers are not nearby.
- Description: Perform facial expressions and gestures using the Reaction app on NookPhone.
- Effects: Used for communication with villagers or in online play. Some reactions are learned from villagers.
- Cooldown: No cooldown; can be used repeatedly.
- Upgrades: Learn more reactions by talking to villagers of specific personality types (e.g., Joy from normal, Sad from cranky).
- Combos: Use reactions during villager conversations to get a response (some villagers react positively).
- Synergies: N/A significant.
- Recommended Build: Collect all reactions from all personality types for completion and fun.
- When to Use: To express emotions or during group events.
- Fishing Talent: Catch a total number of fish (e.g., 100, 300, 500). Rewards include Fishing Rod Stand and Fish Doorplate.
- Bug Catching Talent: Catch bugs (e.g., 100, 300). Rewards include Bug Cage and Butterfly Wall.
- Fossil Talent: Assess fossils (e.g., 30, 60). Rewards: Fossil Plate and T. rex skeleton.
- Diving Talent: Catch sea creatures (e.g., 30, 100). Reward: Sea Creature Model.
- Tool Wielding Talent: Use tools a certain number of times (e.g., 100, 500) – Gold Tool recipes unlocked after other categories.
- Gardening Talent: Plant trees/flowers, water flowers, breed hybrids. Unlocks Flower Stand.
- Crafting Talent: Craft a total number of items (e.g., 300, 500). Unlocks DIY Workbench customization.
- Social Talent: Talk to villagers, send letters, give gifts. Unlocks Photo Studio?
- Building Talent: Build inclines, bridges, and place infrastructure. Unlocks Island Designer App.
- Decorating Talent: Place furniture and score high HHA points.
- Description: Collect eggs of different colors from balloons, fishing, trees, rocks, etc.
- Effects: Eggs used for limited-time DIY recipes.
- Cooldown: Event-specific spawns.
- Synergies: None with normal skills.
- Recommended Build: Participate fully for limited rewards.
- Description: Visit villagers wearing costumes and get candy, then craft spooky items.
- Effects: Lollipops, Candy, Spooky DIYs.
- Combos: Use Candy to trade with Jack for furniture.
- Description: Deliver presents to villagers for Jingle.
- Effects: Obtain Toy Day items.
- Place Bridges and Inclines – Ability to plot construction with Tom Nook.
- Move Villager Houses – Only rep can relocate buildings.
- Terraforming – As above, but only rep can use Island Designer app initially? Actually all players can terraform after K.K., but only rep can start construction projects for bridges/inclines.
- Set Island Tune and Flag – Customize island theme.
- Promote Island to 3 Stars – The rep’s actions contribute to star rating.
- Flimsy Fishing Rod → Fishing Rod → Golden Fishing Rod (durability ∞)
- Higher tier rods increase casting range slightly (visual only, no gameplay effect).
1.2 Bug Catching
- Flimsy Net → Net → Golden Net (durability ∞)
- No functional difference; only durability.
1.3 Digging (Shovel)
- Flimsy Shovel → Shovel → Golden Shovel (durability ∞; also can plant money trees with higher yield? Actually golden shovel allows digging up money trees to move them, and planting bells directly from inventory).
1.4 Axe (Woodcutting)
- Flimsy Axe → Stone Axe (no felling) → Axe (fells) → Golden Axe (∞, fells).
1.5 Slingshot (Shooting Balloons)
- No upgrade path; only the Slingshot tool. (Golden Slingshot unlocked after shooting enough balloons – 300? Actually 300 balloons for gold recipe).
1.6 Watering Can (Gardening)
- Flimsy Watering Can → Watering Can → Gold Watering Can (durability ∞, waters 9 tiles in a 3×3 area, and can revive dead trees (black trees in winter? Actually gold watering can creates gold roses when used on black roses – more precisely, watering black roses with gold can yields gold roses).
---
2. Gathering & Resource Skills
2.1 Fruit Harvesting
2.2 Shell Collecting
2.3 Fossil Digging (see Digging above, but skill specific)
2.4 Diving (Sea Creature Hunting)
2.5 Treasures from Glowing Spots
---
3. Crafting & Building Skills
3.1 DIY Crafting
3.2 Cooking (2.0 Update)
3.3 Island Designer (Terraforming)
3.4 Custom Design Pro
---
4. Social & Interaction Skills
4.1 Villager Conversation
4.2 Wrapping Gifts
4.3 Sending Letters
4.4 Reactions/Emotes
---
5. Nook Mile Achievements (Talents)
While not skills in the traditional sense, Nook Mile Achievements function like talent trees. Each achievement category has tiers (bronze, silver, gold, etc.) awarding Nook Miles. Completing all tiers in a category grants a special reward (e.g., Golden Tool DIYs).
Each achievement tier gives a one-time Nook Miles bonus. The recommended build is to focus on whatever you enjoy; for efficient progression, complete daily tasks (fossils, fruit, rock hitting) to earn miles naturally.
---
6. Special Seasonal & Event Skills
6.1 Bunny Day (Easter) – Egg Hunting
6.2 Halloween – Trick-or-Treating
6.3 Toy Day (Christmas) – Gift Wrapping
These event skills are temporary and follow the same action mechanics (fishing, bug catching, etc.) but with event-specific items.
---
7. Role: Island Representative (Optional)
One player per island can be the Resident Representative. This role grants special abilities:
This isn’t a skill but a role. For the rep, prioritize reaching 3 stars to unlock K.K. and terraforming.
---
Conclusion
Animal Crossing: New Horizons offers a deep but gentle skill system disguised as daily activities. By mastering each action—fishing, bug catching, diving, crafting, and socializing—you can progress efficiently, earn bells, and create your dream island. Focus on upgrading tools to gold versions for convenience, and engage with all seasonal events for exclusive rewards. Remember: there is no wrong way to play – the best skill is enjoying your island life.
Happy Crossing!
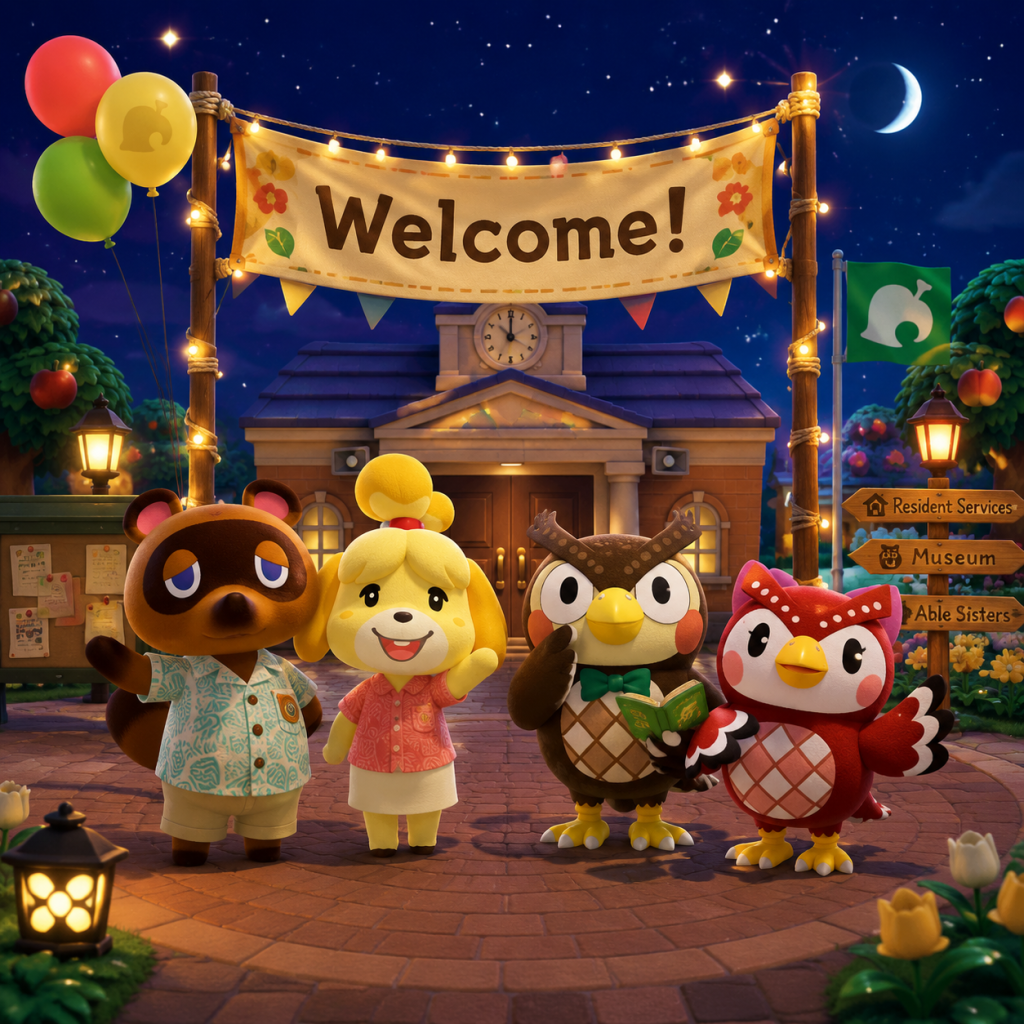
Characters & Roles
Overview
Unlike traditional role-playing games, Animal Crossing: New Horizons does not feature character classes, combat roles, or leveling systems. Instead, the game revolves around a cast of anthropomorphic animal villagers and special non-player characters (NPCs) who each serve unique functions in island life. The player character is a fully customizable human villager who can perform all activities—fishing, bug catching, fossil digging, terraforming, and more. The true “roles” are defined by the services, items, and interactions each character provides. This guide covers every major character, their background, practical strengths and weaknesses, how to unlock them, and how they synergize to develop your island.
---
Player Character (Villager)
Background: You are a human passenger on a package holiday organized by Tom Nook, Inc. After choosing a deserted island, you become its first resident. Your character has no predefined class or stats; all progression comes from unlocking tools, DIY recipes, and island upgrades.
Strengths:
- Versatility: Able to perform every activity (fishing, bug catching, diving, fossil hunting, gardening, terraforming, decorating).
- Customization: Can change appearance (hair, eyes, skin tone, clothes) at any time using a mirror or wardrobe.
- Unlimited Potential: No skill caps; you can master everything.
- Physical Limitations: Only carry 40 inventory slots (can be expanded with storage upgrades).
- Stamina Depletion: Running depletes stamina (no in-game effect, but tree shaking/bug catching requires precision).
- No Combat: Cannot defend against wasps or tarantulas; must rely on tools or avoidance.
- Background: A tanooki (raccoon dog) who owns Nook Inc. He is the island’s initial leader, offering loans for home upgrades and running the Resident Services tent/office. Known for his business acumen and catchphrase “Yes, yes.”
- Strengths:
- Weaknesses:
- Unlock Condition: Present from the start. He first appears at the island’s airport, later resides in Resident Services tent/office.
- Playstyle: Visit him to pay loans, buy tools/supplies, or request building placements.
- Team Synergy: Works with Timmy and Tommy to run the shop. Complements Isabelle for island evaluations.
- Background: A shih tzu dog who works as Tom Nook’s assistant. She handles island announcements, resident satisfaction, and infrastructure changes. She has a cheerful, anxious personality.
- Strengths:
- Weaknesses:
- Unlock Condition: After Resident Services upgrades from tent to building (requires 3 villagers and Nook’s Cranny built).
- Playstyle: Check daily announcements for news; use her for infrastructure changes (bridges, inclines) and ordinance setup.
- Team Synergy: Works under Tom Nook. Her evaluation helps players unlock K.K. Slider’s concert and 3-star rating.
- Background: A scholarly owl who runs the museum. He loves fossils, fish, bugs, and art. Has a phobia of bugs but is an expert in all exhibits.
- Strengths:
- Weaknesses:
- Unlock Condition: Appears after first donation (5 fish, bugs, or fossils to Tom Nook). He then builds a museum tent, later becomes a building.
- Playstyle: Donate one of each specimen; assess fossils daily; participate in museum stamp rally (seasonal).
- Team Synergy: Works with Celeste (star gazing) and Redd (art). Museum completion is a long-term goal.
- Background: Blathers’ younger sister, an owl who studies stars. She visits the island on clear nights (weather dependent).
- Strengths:
- Weaknesses:
- Unlock Condition: After Blathers has opened the museum (tent OK). She then appears randomly on clear nights.
- Playstyle: Look up at the sky between 7 PM and 4 AM; listen for twinkling sounds; press A when hands are empty during shooting stars. Visit Celeste for recipe.
- Team Synergy: Related to Blathers; her star fragments used to craft wands (which enable outfit changes).
- Background: Timmy and Tommy are tanooki twins who work at Nook’s Cranny. They operate the shop and also handle hot items (items that sell for double).
- Strengths:
- Weaknesses:
- Unlock Condition: Present from start (tent version). They open Nook’s Cranny after player collects 30 wood, 30 iron nugget, 30 stone, and some Bells (Tom Nook gives the quest).
- Playstyle: Visit daily to buy hot items and check inventory; sell unwanted items.
- Team Synergy: Work for Tom Nook; their shop expansion depends on total spending.
- Background: Mabel is a hedgehog who runs the Able Sisters tailor shop. She is outgoing and loves fashion. Sable works behind the scenes on sewing patterns.
- Strengths:
- Weaknesses:
- Unlock Condition: After Nook’s Cranny opens, Mabel visits the island plaza (random days). Spend 5000 Bells with her to convince her to set up shop. Shop location chosen by player.
- Playstyle: Visit daily for new clothing; talk to Sable for customization patterns (requires ~10 days of conversation); use fitting room to buy multiple colors.
- Team Synergy: Label (third hedgehog) gives fashion challenges and tailors’ tickets; all three sisters enhance wardrobe options.
- Background: The middle Able sister, a traveling fashion designer. She visits the island occasionally, giving fashion challenges based on theme (e.g., “let’s see your night-out outfit”).
- Strengths:
- Weaknesses:
- Unlock Condition: After Able Sisters shop is built.
- Playstyle: Dress in suggested theme when she visits; receive Labelle shirt/bag/hat/etc. (exclusive items). Collect all pieces for completion.
- Team Synergy: Part of the Able family; her items complement fashion catalog.
- Background: A white dog who is a famous musician. He performs concerts in the plaza every Saturday night (or on the island’s first concert day after reaching 3-star rating).
- Strengths:
- Weaknesses:
- Unlock Condition: After island reaches 3-star rating (Isabelle evaluation). He then performs weekly.
- Playstyle: Attend concert on Saturdays (until midnight). Request specific songs to get them as items (can then play via portable music player).
- Team Synergy: His songs can be placed in homes or outdoors; contributes to museum’s music collection? No, but songs are catalog items.
- Background: A sly fox who sells art and furniture. He operates a boat shop (on the hidden beach) and sells art—some genuine, some forged. He also occasionally sells mystery furniture items.
- Strengths:
- Weaknesses:
- Unlock Condition: Once museum has art gallery (after Blathers receives first donation of art—player can buy from Redd when he first appears). Redd first appears randomly after museum is established (requires at least 60 donations total? Actually Redd’s first visit can be triggered by Blathers mentioning art after 60 donations? The exact trigger: after museum building is upgraded (not tent), Blathers will mention art; Redd appears the next day or soon after.).
- Playstyle: Check boat for art; compare to guide to identify fakes; buy genuine pieces; donate to museum. Also buy exclusive furniture.
- Team Synergy: Works with Blathers to complete art wing.
- Background: A sloth who runs a gardening shop. He sells various shrub starts (bushes), flowers, and tree saplings. Also buys weeds for a small profit (twice Nook’s price).
- Strengths:
- Weaknesses:
- Unlock Condition: After Nook’s Cranny is built; Leif will appear randomly in the plaza. No shop building; he just visits.
- Playstyle: Buy shrubs for landscaping; sell weeds to him; stock up on missing flower types.
- Team Synergy: Works with nature elements; helps achieve high island rating via planting.
- Background: Gulliver is a seagull who washes up on the beach (either as a regular sailor or as a pirate – Gullivarrr). He is lazy and forgetful.
- Strengths:
- Weaknesses:
- Unlock Condition: Randomly appears on the beach (either regular or pirate variant). No prior unlock required.
- Playstyle: Talk to him (he mumbles); find all 5 parts using shovel; return to him. Next day receive item in mail.
- Team Synergy: None directly; his items enhance island decor.
- Background: A ghost who appears on the island at night (random). He dropped his spirit pieces and asks the player to find them.
- Strengths:
- Weaknesses:
- Unlock Condition: Random night after 8 PM (any time after first night). Prior island progress? None.
- Playstyle: Catch spirits with net (press A); return to Wisp; choose wish.
- Team Synergy: None.
- Background: A camel who sells mysterious flooring and wallpaper (some adorable, some ugly). She gives tickets for exchange.
- Strengths:
- Weaknesses:
- Unlock Condition: Random visit after Nook’s Cranny built.
- Playstyle: Speak to her; choose to buy wallpaper, flooring, or mystery items. Collect tickets for extra rolls.
- Team Synergy: None.
- Background: A beaver who loves fish and hosts fishing tournaments (on announced Saturdays). Also buys fish for a 1.5x price if you have no dry-suit? Actually CJ offers a 1.5x price for all fish when he visits on non-tournament days.
- Strengths:
- Weaknesses:
- Unlock Condition: After Resident Services tent upgrade (first week?). He appears randomly, once Nook’s Cranny is built.
- Playstyle: Save high-value fish for him; participate in tournaments.
- Team Synergy: Works with Flick (same company? Actually both are separate). Flick buys bugs at 1.5x and makes models.
- Background: A red chameleon who loves bugs. He visits randomly and buys bugs at 1.5x price. He also commissions bug models (when you give him 3 of the same bug).
- Strengths:
- Weaknesses:
- Unlock Condition: Same as CJ (after Nook’s Cranny built).
- Playstyle: Sell bugs to him; commission models for display.
- Team Synergy: Works with CJ for high-value creature selling.
- Background: A skunk who sells shoes and bags from his van. He visits randomly.
- Strengths:
- Weaknesses:
- Unlock Condition: After Able Sisters shop (Mabel’s shop) is built.
- Playstyle: Purchase shoes and bags; complete outfit catalogs.
- Team Synergy: Complements Able Sisters for full fashion.
Weaknesses:
Unlock Condition: Always available from the start. Character created during initial setup.
Recommended Equipment: None required. Essential tools are crafted or bought from Nook’s Cranny. Upgrade tools to golden versions for durability.
Team Synergy: The player is the central agent; all NPCs serve as service providers. Villagers provide friendship rewards, while special NPCs unlock new features.
---
Special NPCs (Service Characters)
1. Tom Nook
- Island Development: Enables house upgrades, infrastructure (bridges, inclines), and building placement.
- Loan System: Interest-free, no time limit; essential for progressing.
- Shop Upgrades: His store (Nook’s Cranny) upgrades twice based on spending.
- Financial Focus: All services cost Bells; early game can be slow.
- Limited Interaction: He only offers defined services; no friendship mechanics.
2. Isabelle
- Island Evaluation: Provides an island star rating (1-5 stars) and tips for improvement.
- Ordinances: After unlocking Town Hall, she can set morning/night-time ordinances to suit player schedule.
- Flag and Tune Customization: Allows editing town flag and island tune.
- No Direct Sales: She does not sell items or give money.
- Rigid Schedule: Only available during Resident Services office hours (until 9 PM).
3. Blathers
- Museum Expansion: Accepts donations of fish, bugs, fossils, and art to fill the museum.
- Identification: Assesses fossils for free (player can then donate or sell).
- Art Gallery: After Redd’s first visit, Blathers adds art wing; he can identify forgeries (though not always).
- No Services Outside Museum: Only accessible inside museum building.
- No Benefit for Duplicates: Once donated, no reward; duplicates only sell for Bells.
4. Celeste
- DIY Recipes: Gives zodiac/star-themed DIY recipes and fragments.
- Wishing on Stars: When she appears, meteor showers occur; wish on stars for star fragments next day.
- Rare Appearances: Only on nights with clear skies; not guaranteed every night.
- No Repeats for Recipes: She gives one new recipe per visit until all are learned (then gives duplicate).
5. Timmy and Tommy (The Nooklings)
- Merchandise: Sell tools, furniture, wallpaper, flooring, and other items (daily rotation).
- Buying and Selling: Accepts any item for Bells; hot items yield premium prices.
- Storage Upgrade: After first shop upgrade, they offer a storage upgrade service (pay Bells for more home storage).
- Limited Stock: Only 4-6 items per day, plus limited tools.
- No Haggling: Fixed prices; players with high friendship get a small discount? Not in New Horizons (price is flat).
6. Mabel (and Sable)
- Clothing: Sells a rotating collection of clothes, accessories, and umbrellas.
- Custom Designs: Allows players to create and share custom designs (pro designs for specific items).
- Sable’s Friendship: Talking to Sable daily eventually unlocks pattern fabrics for furniture customization.
- No Furniture: Only clothing; can’t buy tools or decorations.
- High Prices: Some items expensive (especially for early game).
7. Label
- Tailor Ticket: Rewards a tailor ticket upon completion (used at Able Sisters for a free item, though in New Horizons it’s essentially a discount or clothing item? Actually Label gives a clothing item directly—a piece of Labelle-themed apparel).
- Theme Practice: Helps players experiment with fashion themes (cute, elegant, sporty, etc.).
- Rare Visits: Only shows up once per week (random day after shop is built).
- Limited Interaction: Only one challenge per visit; no other services.
8. K.K. Slider
- Music: Gives a free copy of his current song (one per Saturday night). Player can request songs later.
- Island Completion: His arrival triggers the credits; unlocks terraforming and island designer app.
- Time-Locked: Only appears weekly (or special events).
- No Other Services: Only performance.
9. Redd (Cousin Redd)
- Art Collection: Only source for genuine art (painting, sculptures) to complete museum’s art wing.
- Furniture: Sometimes sells rare furniture (e.g., cardboard boxes, real statues).
- Forgery Discovery: Adds a detective element—players must spot fake details.
- Deception: Forged art is worthless (can’t donate, sells for low price).
- Limited Stock: Only sells two art pieces (and one furniture item) per visit.
- Rare Visits: Random days; his boat icon appears on the map.
10. Leif
- Exclusive Plants: Sells all types of shrubs (azalea, hydrangea, etc.) year-round; can sell rare flowers (e.g., roses, lilies) if not native.
- Weed Buyback: Pays 20 Bells per weed (vs. 10 at Nook’s Cranny) – useful for island cleanup.
- Limited Stock: Only a few types per visit.
- Rare Visits: Appears randomly (maybe weekly) once his shop unlocks (Nook’s Cranny built).
11. Gulliver (and Gullivarrr)
- Rewards: After waking him (buried communicator pieces 5 times), he mails a souvenir (furniture from around the world or pirate-themed items (Gullivarrr)).
- Rare Items: Some exclusive items (e.g., pyramid, sphinx, pirate barrel).
- Time-Consuming: Need to dig up 5 communicator parts on the beach (cracks in sand).
- Random Appearance: Not daily; can be several days/weeks apart.
12. Wisp
- Wish Reward: After returning all 5 spirit pieces (glowing spirits), he offers two choices: something new (furniture) or something expensive (Bells). The reward is random and often mediocre (simple furniture or 5,000–10,000 Bells).
- Poor Rewards: Often gives low-end items; may be duplicates.
- Annoying Task: Finding spirits can be tedious (floating particles).
13. Sahara
- Exclusive Wallpaper/Flooring: Only source for certain sets (e.g., “sky wall”, “cloud flooring”).
- Ticket System: Each purchase gives Saharah’s ticket; can redeem for additional wall/floor after buying enough tickets (5 tickets equals one extra item).
- Random Items: Cannot choose specific style.
- Expensive: Prices range from 3,000 to 300,000 Bells per item (mysterious flooring is more).
14. CJ (Flick’s partner)
- Fish Selling: Buys individual fish for 1.5x Nook’s Cranny price (except during tournament where he rewards chips).
- Fishing Tournament: Prizes include trophies and exclusive fish models (from Flick).
- Rare Visits: Only appears on random days (non-tournament) and on tournament days.
- Limited Service: Only fish related.
15. Flick
- Bug Selling: 1.5x price increase.
- Custom Models: Offers to turn any 3 of the same bug into a static model (decorative).
- Rare Visits: Random days.
- No Bug Tournament: Unlike CJ, no official tournament.
16. Kicks
- Exclusive Footwear/Bags: Sells all shoe types, socks, and bags (including backpacks). Can custom-paint shoes after initial purchase? No, only provides items.
- Limited Selection: Only a few items per visit.
- No Special Items: No exclusive tools or furniture.
17. Rovers, Chip, Nat, and Other Rotating Characters – Non Functional?
Note: The gyroid characters (like Rover) appear only in Animal Crossing: New Horizons mobile app or in previous titles. In New Horizons, Rover appears only in the mobile companion app. Chip and Nat (former fishing/bug tournament hosts) are replaced by CJ and Flick. No other major functional special NPCs exist beyond those listed.
---
Villagers (Animal Residents)
Background: Villagers are animal residents that move onto the island. There are 399 possible villagers (including new series). Each villager has one of 8 personality types: Normal, Peppy, Snooty, Cranky, Jock, Lazy, Smug, Sisterly. The type determines dialogue, gifts, and preferences.
Strengths and Weaknesses by Type:
| Personality | Strengths | Weaknesses | Gifts & Reactions |
|---|---|---|---|
| Normal | Kind, easy to befriend; give very high-value DIY recipes (e.g., ironwood series). Typically lower-maintenance. | May become repetitive; rarely give rare items early. | Gives medicine when stung by wasps; requests catchphrases. |
| Peppy | Energetic, positive; frequently give DIY recipes and clothes. | Often ask for hyper-themed items; can be annoying with constant activity requests. | Gives reaction “Joy”; invites to play games often. |
| Snooty | Elegant, gives upscale furniture (e.g., antique, china). | Condescending dialogue; can be hard to befriend initially. | Gifts include items like elegant mirrors; rarely give tools. |
| Cranky | Grumpy but lovable; gives rare recipes (e.g., various stone items). | Take longer to warm up; often complain about island life. | Eventually give golden tool DIY recipes (rare). |
| Jock | Fitness-focused; gives sporty furniture and workout recipes (e.g., barbell). | Dialogue is very repetitive (exercise talk). | Reacts enthusiastically to gifts; gives reactions “Play” and “Hmm.” |
| Lazy | Easygoing, food-obsessed; gives cooking DIY (from 2.0 update) and ironwood recipes. | Messy house interior; rarely give high-value items early. | Forgive quickly after fights; give snacks. |
| Smug | Suave, self-absorbed; gives exclusive recipes (e.g., log series, some golden). | Arrogant dialogue; can be irritating. | Gives gifts after compliments; often photograph with them. |
| Sisterly | Big sister type; gives medicine and tools, nice encouragement. | Only two in game (realistically); hard to find. | Protective; give items like “throwback container” low value. |
- The first two villagers are from mystery islands (Nook Miles tickets) or assigned randomly (first two after starting).
- Third through fifth: invited from mystery islands or move in after placing housing plots (Tom Nook tasks).
- Subsequent villagers: move in from campsite (after Resident Services upgrade) or from mystery islands (up to 10 total).
- Each personality type has multiple villagers; the type influences behavior, not the specific character.
- Daily: Check Nook’s Cranny, talk to all villagers (gift wrapping), check Isabelle’s announcements.
- Weekly: K.K. Slider concert, Leif’s visits (buy shrubs), trade with Redd if present.
- Random: Gulliver, Celeste, Wisp require nightly attention.
Recommended “Equipment” (Items): Gifts should be based on their personality (e.g., sporty items for Jock, elegant for Snooty). Use wrapped gifts for friendship boost.
Team Synergy: Villagers interact with each other (random conversations), which can produce reactions or requests for you. They also contribute to island rating (population and friendship levels). Having one of each personality type helps unlock all DIY recipes and reactions.
---
How to Use This Guide
Given the non-combat nature, “playstyle” simply refers to how often you engage each character. For example:
The key to maximizing island development is to interact with every character regularly, understand their specialized services, and plan your island layout around their buildings/shops.
---
Conclusion
Animal Crossing: New Horizons replaces traditional classes with a rich cast of characters, each playing a vital role in island life. The player acts as the facilitator, while NPCs like Tom Nook, Isabelle, Blathers, and the Able Sisters provide essential progression, commerce, and customization. Villagers add personality and community. By leveraging each character’s strengths and covering their weaknesses, you can create a thriving island rated 5 stars.
Cheats & Secrets
Overview
Animal Crossing: New Horizons (ACNH) does not contain traditional cheat codes (e.g., unlocking all items, invincibility, or warp commands). The game is designed to be played without explicit cheat input. However, the game is rich with Easter eggs, hidden features, developer-intended secrets, and legitimate exploits that enhance gameplay. This guide covers all known hidden content, including secret interactions, rare occurrences, and gameplay tricks that are safe and intended by the developers.
---
1. No Traditional Cheat Codes
Unlike earlier Animal Crossing titles (e.g., Animal Crossing: Wild World which had Action Replay codes), ACNH has no support for entering cheat codes or passwords. There are no button combinations, debug menus, or console commands accessible to players. Any online claims of "cheat codes" are either mods (requires homebrew – risky and against Nintendo’s terms) or hoaxes.
Official stance: Nintendo does not endorse or provide cheat codes. The game is designed to be played over time with daily routines.
---
2. Hidden Features & Easter Eggs
2.1. Kapp'n's Boat Tours
- Unlock: After unlocking the boat dock (requires 3-star island rating and K.K. Slider’s first concert), Kapp'n will offer one boat tour per day (costs 1,000 Nook Miles).
- Secret islands: Tours can take you to rare island types including:
- Hidden interaction: If you use the “Harp” reaction near Kapp'n while he sings, he will stop and comment.
- Happy Home Paradise: After designing 30 vacation homes, you can unlock a special “School” and “Hospital” commission. Completing them grants unique items like the “Hospital Bed” or “School Desk”.
- Hidden room: In the Paradise Planning office, there is a locked storage room in the back – you cannot enter, but Lottie’s dialogue hints at it being for future updates (now likely the “Happy Home Paradise” DLC itself).
- Sneezing: If a villager sneezes and you are nearby, press “A” to bless them. They will respond with gratitude. If you don’t, they may say something like “I see how it is.”
- Hidden reactions: Some reactions are obtained only by visiting other islands (e.g., “Joy” from villagers) or through Nook Miles redemption. There are 48 total reactions.
- Framed Photo: Gaining maximum friendship with a villager gives you a chance to receive their framed photo when they give you a gift. This is a rare secret.
- Wisp the ghost: Appears randomly at night (7 PM – 4 AM) on your island. He asks for help collecting five spirit pieces. Rewards include clothing, furniture, or Bells. Secret: If you catch all pieces quickly, he gives a better item.
- Gullivarrr (pirate Gulliver): He washes ashore on the beach (in pirate gear) on random days. Help him by diving to find his communicator underwater. Rewards include pirate-themed items (treasure chest, pirate dress, etc.). The secret is that you must dive and not use the snorkeling mask – just swim and dive bubbles.
- Label (Labelle): She appears once a week in the Able Sisters shop. Evaluate her outfit theme (e.g., party, elegant). Reward: Tailor Tickets that can be redeemed for exclusive clothing.
- C.J. & Flick: They are not just for selling fish/bugs – they also host small competitions. C.J. gives a fish model if you catch three of the same fish in a row. Flick gives a bug model if you catch three of the same bug in a row. This is a hidden feature.
- Golden Tools: Each golden tool requires a specific Nook Miles achievement:
- Robot Hero: A DIY craftable item requiring gold nuggets, Rusted Parts, and a rocket. It’s the largest furniture item in the game and takes 6 inventory slots when placed. Secret: You can interact with it and it makes robotic noises.
- Obtainable only from Celeste during meteor showers. She gives you one DIY recipe per visit (your first visit: wand recipe). The recipes are random, but she always gives a new one until you have all. Secret: If you visit multiple islands on the same day (via Dodo code) and Celeste is there, you can get multiple recipes (requires friends’ islands).
- Blathers’ reaction: If you donate a fossil that is the same as one already displayed, Blathers will comment. Keep donating duplicates to unlock the “Museum Poster” item after 60 items? Actually, the poster is from the Nook Stop after donating 60 total items (insects, fish, fossils).
- Art Gallery fake paintings: Redd’s artwork can be forgeries. If you donate a fake, Blathers will tell you it’s fake, and it will be displayed in the museum’s art gallery but labeled as a fake.
- Museum’s coffee shop (Brewster) – The Roost: Added in the 2.0 update. To unlock: visit Kapp’n’s boat tours and find Brewster on a special island (triggered after getting a Gyroid fragment from the tour). Secret: You can get a cup of coffee with custom designs from the airport.
- Secret Tailor Tickets: Label’s fashion checks reward you with Tailor Tickets. Use them to order exclusive clothing from the Nook Shopping catalog. There are 32 unique items.
- Mannequin in the fitting room: If you wear a full outfit and enter a fitting room, a mannequin wearing the same outfit appears in the corner. It’s a cute Easter egg.
- Method: To get 8 items from a money rock instead of the usual 6-7, dig two holes behind you before hitting the rock. Position yourself with your back to the rock, dig two holes at a 45-degree angle, then hit the rock rapidly with a shovel. This prevents knockback and yields up to 16,100 Bells (if you hit 8 times).
- Balloons spawn every 5 minutes (4 or 9 minute intervals) on one side of the island (west side during day, east side at night). Use the “balloon hunting” path along the beach. Secret: You can increase spawns by clearing the island of most items? No, but you can use the camera to spot balloons easier.
- Use Nook Miles Tickets to visit mystery islands. The island type is random, but you can reset if you don’t like it. For rare islands (like tarantula island or spiral island), the spawn rate depends on season and time. At night (7 PM – 4 AM), most islands spawn tarantulas/scorpions. You can clear the island of trees and flowers to force more spawns.
- Harriet’s Salon: After updating to 2.0+, Harriet appears in Harv’s Island. She gives you new hairstyles (11 total). Secret: You need to be on Harv’s Island and talk to her while she is on the plaza – she only appears after you pay 100,000 Bells to unlock her shop.
- The Happy Home Paradise DLC: While paid, it adds hidden features like designing home interiors, partitions, and polishing furniture. The “polish” option can make furniture glow or produce sound effects.
- Gyroid Fragment Farming: On Kapp’n’s boat tours, you can find a Gyroid fragment buried on the island. You can also trade with villagers – occasionally they’ll give you a Gyroid.
- Brewster’s Pigeon Milk: If you order coffee from Brewster repeatedly, he eventually offers “pigeon milk” as a secret ingredient. It’s just a fun dialogue; no gameplay effect.
- Star Fragment Islands (night only) – harvest star fragments directly.
- Vine & Moss Islands (summer-ish) – collect glowing moss and vines.
- Seasonal Islands (different season from your hemisphere).
- Vegetable Islands with crops like potatoes, sugarcane, carrots, etc.
2.2. Treasure Islands (DLC & Special)
2.3. Villager Interactions
2.4. Special Visitors
2.5. Secret Items & Recipes
- Golden Net: Catch every bug (80 total).
- Golden Fishing Rod: Catch every fish (80 total).
- Golden Axe: Hit rocks a total of 100 times (cumulative).
- Golden Shovel: Help Gulliver 30 times.
- Golden Watering Can: Achieve a 5-star island rating. (Note: The golden watering can also waters flowers in a 3x3 area; it never breaks.)
- Golden Slingshot: Shoot down 300 balloons.
2.6. Crescent Moon Chair & Star-Like Items
2.7. Museum Secrets
2.8. Able Sisters & Mabel
---
3. Exploit-Safe Secrets & Tips
These are not “cheats” but legitimate tactics that exploit game mechanics without glitches.
3.1. Money Rock Trick
3.2. Balloon Farming
3.3. Mystery Island Grinding
---
4. Developer-Intended Hidden Content (Update 2.0+')
---
5. Conclusion
Animal Crossing: New Horizons prioritizes a relaxed, discovery-based experience. While it lacks cheat codes, the game is filled with hidden interactions, rare occurrences, and developer-intended secrets that reward attentive players. The list above is exhaustive for content known as of the final update (2.0.6). Always be cautious of mods or third-party tools; using them can corrupt your save file or result in a ban from online services. Enjoy uncovering these secrets naturally!