Apex Legends
## Introduction **Apex Legends** is a free-to-play, hero-based battle royale first-person shooter developed by **Respawn Entertainment** and published by **Electronic Arts**. Set in the same sci-fi universe as Respawn's critically acclaimed *Titanfall* series, Apex Legends launched on February 4, 2...
Download & Installation
Introduction
Apex Legends is a free-to-play battle royale developed by Respawn Entertainment and published by Electronic Arts. This guide covers legitimate download sources and step-by-step installation for PC (Steam, Epic Games Store, EA app/Origin), PlayStation 4 & 5, Xbox One & Series X|S, and Nintendo Switch. Apex Legends Mobile is a separate title and is also covered briefly.
---
System Requirements (PC)
Minimum Requirements (for 30 FPS @ 720p)
| Component | Specification |
|---|---|
| OS | Windows 7 64-bit |
| CPU | Intel Core i3-6100 / AMD FX-4350 |
| GPU | NVIDIA GeForce GT 640 / AMD Radeon HD 7730 |
| RAM | 6 GB |
| DirectX | Version 11 |
| Storage | 45 GB (SSD recommended) |
| Internet | Broadband connection |
Recommended Requirements (for 60 FPS @ 1080p)
| Component | Specification |
|---|---|
| OS | Windows 10 64-bit |
| CPU | Intel Core i5-3570K / AMD Ryzen 5 1400 |
| GPU | NVIDIA GeForce GTX 970 / AMD Radeon R9 290 |
| RAM | 8 GB |
| DirectX | Version 11 |
| Storage | 45 GB SSD |
| Internet | Broadband connection |
---
Platform-Specific Installation Guides
PC – Steam
1. Download and install the [Steam client](https://store.steampowered.com/about/) if not already installed.
2. Launch Steam and log in to your Steam account.
3. Click the Store tab, search for "Apex Legends".
4. Click Play Game (free) and select your account region (if asked).
5. Click Install – choose an installation directory with at least 45 GB free space.
6. Wait for download (approx. 30-60 minutes on a 100 Mbps connection) and installation.
7. Once installed, click Play from Library or Desktop shortcut.
PC – Epic Games Store
1. Install the [Epic Games Launcher](https://www.epicgames.com/store/en-US/download).
2. Open launcher, log in, go to Store.
3. Search "Apex Legends", click Get to add to your library.
4. Go to your Library, find Apex Legends, click Install.
5. Select installation folder (ensure 45 GB free), confirm.
6. After download, launch from Library.
PC – EA app (formerly Origin)
1. Download and install the [EA app](https://www.ea.com/ea-app) from EA's official site.
2. Open EA app, log in with your EA account.
3. Go to Store, search "Apex Legends", click Download (free).
4. Choose install location, click Install.
5. Once complete, launch from My Library.
Note: The old Origin client is being phased out; use EA app for best compatibility.
PlayStation 4 & 5
1. Ensure your console is connected to the internet and has enough storage (45 GB).
2. Go to the PlayStation Store from the home screen.
3. Search for "Apex Legends".
4. Click Download (the game is free to play).
5. For PS4: Download will begin automatically. For PS5: choose PS5 version if available (recommended) or PS4 version.
6. Wait for installation – you can monitor progress from Notifications > Downloads.
7. Once installed, launch from the game tile on the home screen.
PS5 Native Version: Offers improved graphics, faster loading, and DualSense features. It is a separate download (approx. 50 GB).
Xbox One & Series X|S
1. Turn on Xbox and sign in to your Microsoft account.
2. Press the Xbox button to open the guide, go to Microsoft Store.
3. Search "Apex Legends".
4. Select Get (free) to start download.
5. On Xbox Series X|S, the system will automatically choose the optimized version.
6. Download progress appears in My games & apps > Manage > Queue.
7. After installation, launch from Home or Game Library.
Cross-Platform Progress: Log in with your EA account on any platform to keep your progress.
Nintendo Switch
1. Ensure your Switch is updated and has at least 25 GB free space (the game is around 25-30 GB).
2. Go to the Nintendo eShop from the HOME menu.
3. Search "Apex Legends".
4. Click Free Download. Confirm download (you may need to add a payment method even for free games – add a credit card or PayPal, it will not be charged).
5. Download begins automatically. You can play while downloading (partial download).
6. Launch from the game icon on the HOME screen once installation completes.
Note: Switch version has lower graphical fidelity and runs at 30 FPS. Cross-play is enabled by default.
Apex Legends Mobile (iOS / Android)
1. Open the App Store (iOS) or Google Play Store (Android).
2. Search "Apex Legends Mobile" – do not confuse with the console/PC version.
3. Tap Install / Get. The file is ~3-5 GB (additional assets may download in-game).
4. Wait for installation, then launch the app.
5. Sign in with your EA account or guest account (cross-progression is NOT shared with PC/console).
Note: Apex Legends Mobile is a separate game and not cross-play compatible with other platforms.
---
Account Requirements
- EA Account: Required to play on all platforms. Create one at [help.ea.com](https://help.ea.com) or during first launch.
- Console: Requires respective platform subscription (Xbox Game Pass Core/Ultimate, PlayStation Plus, Nintendo Switch Online) for online multiplayer.
- PC: No subscription required, but you need an internet connection.
- Mobile: Optional EA account – guest play is possible but progress will be lost if app is deleted.
- Fix: Free up space by deleting unused programs. For PC, move the installation to a drive with at least 50 GB free (SSD preferred). For consoles, delete old games or media.
- PC: Restart the launcher (Steam/EA/Epic). Pause and resume the download. Check internet connection.
- Console: Restart the console. Check network settings. For Xbox, go to Settings > Network > Test connection.
- Switch: Put the console in sleep mode and wake it, or restart the eShop download.
- Steam: Right-click Apex Legends in Library > Properties > Local Files > Verify Integrity of Game Files.
- EA App: Click the gear icon next to Apex Legends > Repair.
- Epic Games: Click the three dots > Manage > Verify.
- Update your GPU drivers (NVIDIA GeForce Experience, AMD Adrenalin).
- Disable incompatible overlays (Discord, MSI Afterburner).
- Run the game as administrator.
- Check server status at [ea.com/service-status](https://ea.com/service-status).
- Restart router/modem.
- Add Apex Legends and launcher to firewall exceptions (allowed through Windows Defender).
- Change DNS to Google (8.8.8.8 / 8.8.4.4) or Cloudflare (1.1.1.1).
- PC: Update Windows, disable antivirus temporarily, close background apps (Razer Cortex, etc.).
- Console: Rebuild database (PS4/5 Safe Mode, Option 5) or clear cache (Xbox: hold power button 10 sec).
- Switch: Archive and redownload the game.
- This may appear if you’ve downloaded before. Try restoring licenses:
- PC SSD: Installing on an SSD drastically reduces loading times and texture pop-in.
- Console External Drive: You can move Apex Legends to an external USB drive (USB 3.0 required for best performance).
- Avoid Mods: Apex Legends does not support mods and using them may result in a ban.
- Preload: For major updates (season launches), preload is available about 24 hours before. Keep the launcher updated.
- Mobile Data: Apex Legends Mobile consumes ~15-25 MB per match. Use Wi-Fi for initial download.
---
First Launch Setup
1. Language/Region Selection: Choose your language and region (affects server latency).
2. Login: Enter your EA account credentials. You may be prompted to link your platform account (e.g., Steam, PSN).
3. Tutorial: You can skip the introductory cinematic and tutorial match, but it's recommended for new players.
4. Graphics Settings (PC): Adjust resolution, V-Sync, texture quality, etc. The game will auto-detect optimal settings.
5. Shader Compilation (PC): First launch may take a few minutes to compile shaders – this is normal.
6. Game Updates: Check for any pending updates before playing.
7. Accessibility Options: Enable subtitles, colorblind modes, etc. in Settings.
---
Common Installation Errors & Fixes
Error: "Not Enough Disk Space"
Error: "Download Stuck/Paused"
Error: "Corrupted Files" (PC)
Error: "Failed to Initialize Graphics" (PC)
Error: "Connection to EA Servers Timed Out"
Error: "Apex Legends Stopped Working" (Crash on Launch)
Error: "Product Code Already Redeemed" (Console)
- PS4/5: Settings > Account Management > Restore Licenses.
- Xbox: Settings > Account > Licenses > Refresh.
---
Post-Installation Verification
1. Check Game Version: On the main menu, look at the bottom left corner for the version number (e.g., v1.85). Update if necessary.
2. Test Connection: Go to the Data Center selection in settings to see ping. Aim for <100 ms.
3. Update Graphics Drivers (PC): Ensure you have the latest Game Ready driver.
4. Launch a Match: Join the Firing Range to test performance and controls.
5. Audio Check: Ensure sound is working: gunshots, footsteps, voice comms.
6. Storage Check: The installed folder should be ~45 GB. On consoles, verify under System Storage.
7. Cross-Play Verification: If playing with friends on other platforms, ensure cross-play is enabled (Settings > Gameplay > Cross-Platform Play).
---
Additional Tips
---
Last updated: [Current Date]. Always download from official sources to avoid malware.
Game Introduction
Introduction
Apex Legends is a free-to-play, hero-based battle royale first-person shooter developed by Respawn Entertainment and published by Electronic Arts. Set in the same sci-fi universe as Respawn's critically acclaimed Titanfall series, Apex Legends launched on February 4, 2019, for PlayStation 4, Xbox One, and PC. It later expanded to Nintendo Switch on March 9, 2021, and to the latest console generation (PlayStation 5 and Xbox Series X|S) in March 2022 with native optimizations. The game is available on PC via Steam, Epic Games Store, and the EA app (originally Origin).
---
Story & Setting
Apex Legends is set in the Frontier, a region of star systems on the edge of known space, decades after the events of Titanfall 2. The Frontier is home to the Apex Games — a brutal, high-stakes blood sport broadcasted to millions across the Outlands. Competitors, known as Legends, fight in themed arenas on the planet Solace and other locations, vying for glory, fame, and a massive cash prize. The game’s narrative unfolds through seasonal storylines, animated short films, quests, and in-game lore. Key factions include the Syndicate (the corrupt organizers of the games) and various groups like the Mercenary Syndicate, the Apex Predators, and the militaristic IMC remnants.
---
Main Characters (Legends)
Each Legend has a unique set of abilities (Passive, Tactical, and Ultimate) that fit into team roles such as Assault, Support, Recon, Controller, and Skirmisher. The roster has grown to over 25 characters as of 2025. Notable originals include:
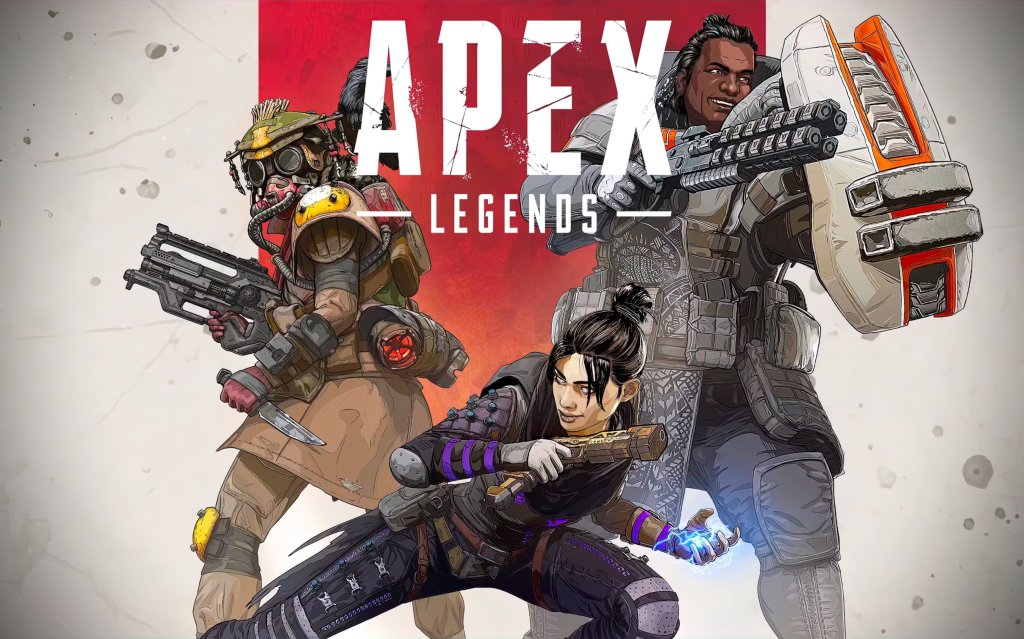
- Wraith – Interdimensional skirmisher; can phase-shift and create portals.
- Bloodhound – Techno-predator tracker; can see enemy footprints and highlight foes.
- Gibraltar – Shielded fortress; provides defensive domes and a mortar strike.
- Lifeline – Combat medic; can heal and revive teammates faster with a drone.
- Pathfinder – Optimized scout; zipline mobility and surveying capabilities.
- Battle Royale – The core mode: 20 squads of three (or duos/trios) drop into a map, loot, fight, and survive as the ring closes. Squads can also play as Duos or Solos (limited-time).
- Arena – Introduced in Season 9: 3v3 round-based deathmatch with round-by-round weapon purchases. Removed as a permanent mode in 2023 but appears in limited-time rotations.
- Mixtape (Rotating Playlist) – Includes:
- Limited-Time Modes (LTMs) – Themed events like Winter Express, Shadow Royale, Armed & Dangerous, and more.
- Custom Lobbies – For private matches, tournaments, and practice.
- Ping System – Revolutionary contextual ping allows players to communicate loot, enemies, and locations without voice chat, making teamwork accessible to everyone.
- Movement Mechanics – Fluid slide-hopping, wall-running (on certain surfaces from Titanfall), ziplines, jump towers, and unique character abilities create a high-mobility combat sandbox.
- No Pay-to-Win – All competitive elements are free; only cosmetics are monetized.
- Respawn System – Unlike many battle royales, eliminated squadmates can be respawned if their banner is retrieved and taken to a beacon, reducing frustration.
- Character Abilities – Legends are not just skins; each offers distinct tactical depth, encouraging team composition and strategic play.
New Legends are added each season (roughly every 3-4 months), often tied to ongoing story arcs.
---
Core Appeal & Target Audience
Apex Legends appeals to players who enjoy fast-paced, squad-based tactical shooters with a high skill ceiling. Its core appeal lies in its seamless movement (sliding, climbing, wall-jumping), ping-based communication system (no voice chat required), and team-oriented ability synergy. It targets fans of battle royale games (Fortnite, Call of Duty Warzone) but also attracts players from class-based shooters (Overwatch) and arena shooters (Quake/Unreal Tournament) due to its deep movement mechanics. The game is designed for ages 16+ (PEGI 16 / ESRB Teen) and has a strong esports scene with the Apex Legends Global Series.
---
Game Modes
- Control – 9v9 capture-and-hold with respawns.
- Gun Run – Team deathmatch with progressive weapon tiers.
- Team Deathmatch – Standard 6v6 or 3v3.
Online / Offline Support: Apex Legends is an online-only game. There is no offline or single-player mode (except for the tutorial and training range). A persistent internet connection is required to play.
---
DLC & Expansions
Apex Legends operates on a seasonal live-service model. All gameplay updates, new Legends, map changes, and balance patches are free. Revenue comes from cosmetic Battle Passes (each season), Loot Boxes (Apex Packs), and direct-purchase skins, weapon charms, and emotes. There are no paid expansions or map packs; new content is delivered automatically through updates. Occasional Collection Events offer exclusive cosmetics and a chance to earn heirloom shards.
---
What Makes Apex Legends Unique?
---
Release Timeline & Platforms
| Platform | Release Date | Notes |
|---|---|---|
| PS4, Xbox One, PC (Origin) | February 4, 2019 | Original launch |
| Nintendo Switch | March 9, 2021 | With cross-play support |
| PS5, Xbox Series X\ | S | March 29, 2022 |
| Steam | November 4, 2020 | Cross-progress with EA account |
| Epic Games Store | March 2, 2022 | Same cross-play & progression |
---
Conclusion
Apex Legends revolutionized the battle royale genre by blending hero-based abilities with exceptional gunplay and movement. Its free-to-play model, constant content updates, and vibrant competitive scene have kept it at the forefront of multiplayer shooters since 2019. Whether you’re a newcomer or a returning veteran, Apex Legends offers a deep, rewarding experience that emphasizes teamwork, skill, and adaptability.

Getting Started
Introduction
Welcome to the Apex Games, rookie! Apex Legends is a fast-paced, team-based battle royale where squads of three compete to be the last team standing. Unlike traditional shooters, you choose a Legend – each with unique abilities – and use teamwork, map knowledge, and quick reflexes to survive. This guide will walk you through your first hour, controls, UI, priorities, and common mistakes so you can start your journey with confidence.
Character Selection (No Creation, Just Choice)
There is no character creation in Apex Legends. Instead, you pick from a roster of Legends, each with a tactical, passive, and ultimate ability. New players start with six free Legends: Bangalore, Bloodhound, Gibraltar, Lifeline, Pathfinder, Wraith, plus Octane unlocked later (or you can earn/unlock others).
- Your first pick: Try Bloodhound (track enemies) or Lifeline (heal/revive team) for beginner-friendly kits.
- In the lobby: Before queueing, you can select your Legend. If you don’t pick, the game chooses a random one.
- Note: You cannot change Legend mid-match, so choose wisely.
First Hour Walkthrough
1. Launch the game – After installation, start Apex Legends. You’ll see a splash screen, followed by the main menu.
2. Play the Tutorial (Highly Recommended) – The game offers a short tutorial (Press Firing Range button). It teaches basic movement, shooting, and ability use. Complete it.
3. Firing Range – Optionally, spend 5–10 minutes in the Firing Range (accessible from lobby) to practice with weapons and Legends.
4. First Match – Queue for Battle Royale (trios). You’ll be matched with two random teammates or fill with friends.
5. Drop Phase – As the dropship flies over the map, press E (PC) / X (Xbox) / Square (PS) / A (Switch) to ping a location, then jump when near your chosen spot. Look for named areas with decent loot (e.g., Fragment East, Lava City, The Cage).
6. Loot, Fight, Survive – Collect weapons, armor, and items. Stick with your team, use the ping system to communicate, and rotate toward the ring.
7. Expect to die quickly – It’s normal. Each match teaches map layout, loot spots, and combat basics.
Controls – All Platforms
Below are default controls. You can customize them in Settings.
PC (Keyboard & Mouse)
| Action | Key |
|---|---|
| Move | W, A, S, D |
| Look | Mouse move |
| Shoot | Left Click |
| Aim Down Sights | Right Click |
| Reload | R |
| Interact/Pickup | E |
| Ability: Tactical | Q |
| Ability: Ultimate | Z |
| Ability: Passive | (Auto) |
| Ping | Mouse Middle |
| Jump | Space |
| Crouch | Left Ctrl |
| Sprint | Shift |
| Melee | V |
| Inventory | Tab |
| Map | M |
| Heal | 4 (health), 5 (shield) |
| Grenade | G |
| Slide | Sprint + Crouch |
| Climb | Hold Forward at wall |
Xbox
| Action | Button |
|---|---|
| Move | Left Stick |
| Look | Right Stick |
| Shoot | RT |
| Aim Down Sights | LT |
| Reload | X |
| Interact/Pickup | A |
| Ability: Tactical | LB |
| Ability: Ultimate | RB |
| Ping | R Stick (click) |
| Jump | Y |
| Crouch | B (hold for toggle) |
| Sprint | L Stick (click) |
| Melee | R Stick (click twice?) – check |
| Inventory | Back/View |
| Map | Start/Menu |
| Heal | D-Pad Up (health), Right (shield) |
| Grenade | D-Pad Left |
| Slide | Sprint + Crouch |
| Climb | Move into wall |
PlayStation
| Action | Button |
|---|---|
| Move | Left Stick |
| Look | Right Stick |
| Shoot | R2 |
| Aim Down Sights | L2 |
| Reload | Square |
| Interact/Pickup | Cross (X) |
| Ability: Tactical | L1 |
| Ability: Ultimate | R1 |
| Ping | R3 (click stick) |
| Jump | Triangle |
| Crouch | Circle (hold for toggle) |
| Sprint | L3 (click stick) |
| Melee | R3 (?) – default R3 click |
| Inventory | Touchpad (left half) |
| Map | Touchpad (right half) or Options |
| Heal | D-Pad Up (health), Right (shield) |
| Grenade | D-Pad Left |
| Slide | Sprint + Crouch |
| Climb | Move into wall |
Nintendo Switch
| Action | Button |
|---|---|
| Move | Left Stick |
| Look | Right Stick |
| Shoot | ZR |
| Aim Down Sights | ZL |
| Reload | B |
| Interact/Pickup | A |
| Ability: Tactical | L |
| Ability: Ultimate | R |
| Ping | R Stick (click) |
| Jump | X |
| Crouch | Y (hold for toggle) |
| Sprint | L Stick (click) |
| Melee | R Stick (?) |
| Inventory | – (see Button Help) |
| Map | + |
| Heal | D-Down (?) – refer to in-game |
| Grenade | D-Left |
| Slide | Sprint + Crouch |
| Climb | Move into wall |
UI Overview
Your HUD shows:
- Top-center: Kill feed (enemy eliminations) and team announcements.
- Top-left: Team banners – shows each teammate’s Legend, health, shield, and knockdown status.
- Center-bottom: Your Legend’s portrait, health bar (red), shield bar (blue), ability cooldowns.
- Bottom-left: Weapon slots – current weapon, ammo count, and equipped attachments.
- Bottom-right: Minimap – shows squad positions, ring timer, and nearby points of interest. Press M to expand full map.
- Center (when pinging): Ping wheel with options like “Enemy here”, “Looting here”, “Defending”.
- Inventory screen (Tab/Back): Manage weapons, attachments, armor, helmet, backpack, and consumables.
- Shield cells, batteries = rectangular blue symbols.
- Syringes, med kits = cross symbols.
- Grenades = round icons (frag, thermite, arc star).
- Complete the tutorial – Unlocks basic knowledge and free rewards.
- Turn on Aim Assist (if on controller) – Default settings are fine.
- Adjust sensitivity – Start medium (4–5 on PC, default on console) then tweak.
- Use a headset – Audio cues are critical (footsteps, gunshots, ziplines).
- Play with friends – Or find a squad via Discord. Communication reduces frustration.
- Land at named locations – Supply bins, weapon racks, and buildings. Avoid open fields.
- Check death boxes quickly – Scan loot and move; don’t stand still.
- Hot-dropping (landing in crowded zones) – You’ll die instantly without loot. Learn slowly.
- Ignoring armor upgrades – A blue shield is far better than white. Upgrade whenever possible.
- Looting too long – After you have a decent weapon, shield, and heals, move. The ring closes and enemies will push.
- Running in the open – Always use cover (rocks, walls, buildings). Slide to move faster.
- Not using your Legend’s abilities – Abilities win fights. Use tactical and ult often (but not wastefully).
- Solo queuing without pinging – Your team can’t read your mind. Ping everything.
- Reloading after every shot – Reserve ammo isn’t infinite. Reload only when safe.
- Forgetting to heal before fights – Pop a shield cell/phoenix kit before engaging a team.
- Over-looting – Spending minutes in one building while ring closes or enemies ambush.
- Not sliding – Sliding downhill preserves momentum and you become a harder target.
- Forgetting to heal before fighting – Always start a fight at full shields and health if possible.
- Ignoring sound – Footsteps, ziplines, and ability sounds give enemy positions.
- Wrong weapon combos – Don’t use two snipers; combine close-range (SMG/shotgun) and mid-range (AR).
- Dropping your guard after a kill – Third parties are frequent; heal and reposition immediately.
- Not using the minimap – Rotate toward the ring and avoid open chokepoints.
- Playing too passively – Hiding doesn’t improve skill. Engage in fights (even if you die) to learn.
- Giving up after one down – Your teammates can revive you. Stay in the game.
- Use the firing range regularly to practice weapon recoil and movement.
- Legends are not pay-to-win – All free Legends are viable. Unlock new ones by earning Legend Tokens (via leveling).
- Watch your teammates – If they ping an enemy or a direction, follow their lead.
- Don’t be afraid to ask questions – Many experienced players are willing to help if you use voice chat politely.
- Remember: Every pro was once a newbie. Persistence pays off.
Key Symbols:
Essential Early Objectives
Your first 10–20 matches should focus on:
1. Survive the drop – Land at a safe spot with teammates. Avoid the hottest zones (e.g., Fragment, The Streamer Building) until you know combat basics.
2. Loot efficiently – Grab a weapon, armor, and helmet. Prioritize body shield (at least white), then ammo, then heals.
3. Stick together – Never wander off alone. Ping your intentions and follow teammates.
4. Master the ping system – Use Middle Mouse / R3 to mark enemies, loot, or directions. It’s faster than voice chat for many.
5. Rotate before the ring – Keep an eye on the ring timer. Move toward the safe zone early to avoid damage and third parties.
6. Engage smartly – Only fight when you have an advantage (better position, numbers, loot). Third-partying is common; be aware of nearby fights.
What to Do First – What to Avoid
✅ Do This:
❌ Avoid:
Early Resource Priorities
When looting, always prioritize:
1. Weapon – Start with any gun; learn recoil patterns later. Best starters: R-301 (assault rifle), Volt SMG, or a shotgun + SMG combo.
2. Body Shield – Always equip the highest level (white < blue < purple < gold).
3. Ammo – 120–160 rounds for your primary, 60–80 for secondary.
4. Helmet – Reduces headshot damage; any better than none.
5. Healing Items – 2–4 syringes, 2 shield cells, 1–2 med kits, 1–2 shield batteries. More as you survive.
6. Attachments – Sights, stocks, magazines, barrels. Prioritize extended mags and sights that suit your playstyle.
7. Grenades – Frag grenades are versatile; thermite for area denial; arc stars for sticking enemies.
8. Ultimate Accelerants – Only if your Legend’s ult is powerful; otherwise leave.
> Tip: Don’t hoard everything. Drop low-tier items for better ones your teammates can use.
Common Beginner Mistakes
Day-One Checklist
Here’s a concrete list for your first session:
1. Download & Install (if not done).
2. Launch the game.
3. Complete the tutorial (if prompted).
4. Spend 5 minutes in Firing Range – test 2–3 weapons and one Legend’s abilities.
5. Queue for Battle Royale (Trios) with fill on.
6. Your first match objectives:
- Land at a named location (e.g., Fragment East).
- Pick up any weapon and armor.
- Stay within 50 meters of teammates.
- Ping at least one enemy, one loot item, and one direction.
- Try to survive more than 5 minutes (just focus on looting and rotating).
- Don’t worry about kills; survival is key.
7. After first match, go to Legend selection – Try a different Legend to understand roles.
8. Adjust settings – Lower sensitivity if aiming feels jerky; enable auto-sprinting if comfortable.
9. Play 3–5 more matches – Each match, focus on one new thing: using abilities, sliding, or checking the minimap.
10. Watch your kill cams – Learn from deaths: were you out of position? Did you not heal?
11. Optional: Watch a beginner’s guide on YouTube (e.g., from Aceu or iTemp Plays).
12. Have fun! – Losing is part of learning. The goal is improvement.
Final Tips
Now drop in, grab a weapon, and become an Apex Champion!
Core Gameplay
Core Gameplay Overview
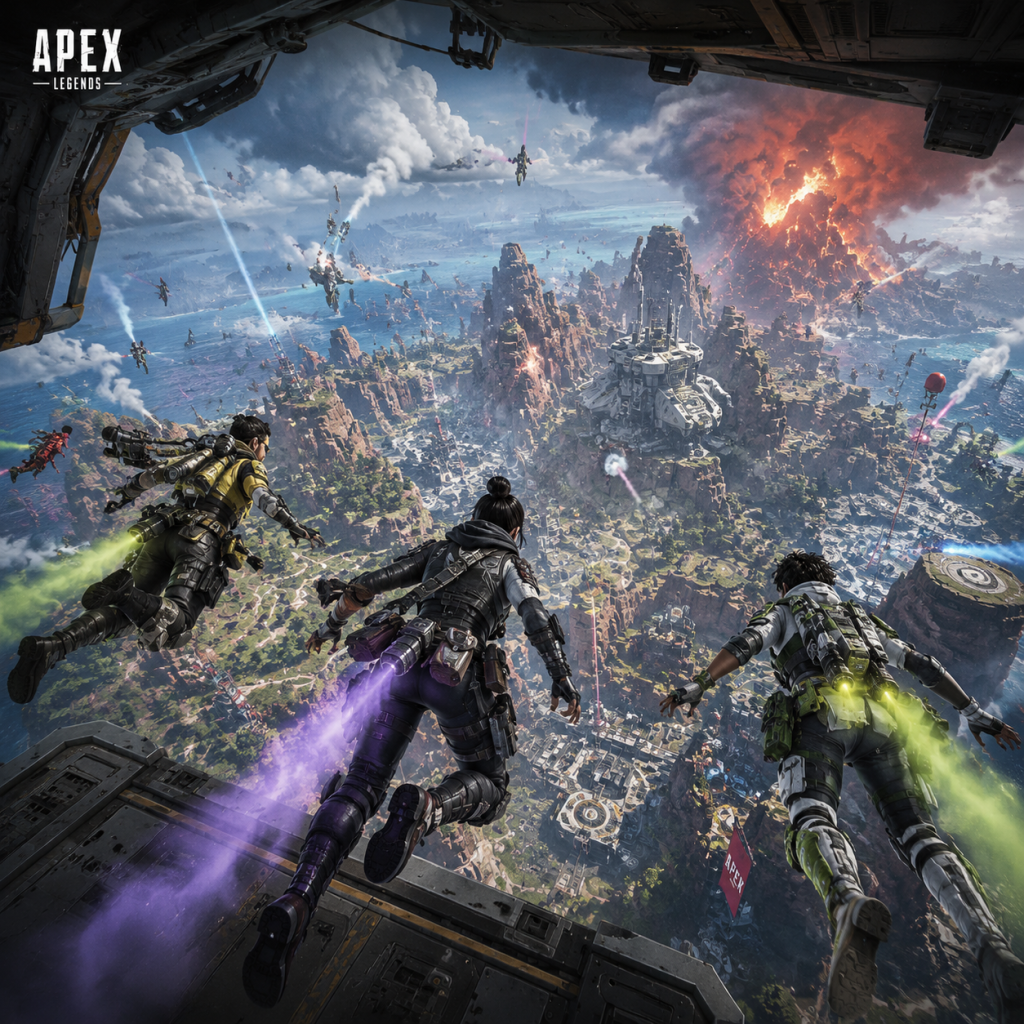
Apex Legends is a team-based battle royale where three-player squads compete to be the last team standing. The core gameplay loop is: Drop → Loot → Fight → Survive → Win. Each match starts on a dropship, players choose a Legend (each with unique abilities), and then skydive to a location on the map (Kings Canyon, World's Edge, Olympus, Storm Point, or Broken Moon). Once on the ground, you must gather weapons, armor, attachments, and consumables while the ring (a shrinking circle of deadly energy) forces you into closer quarters. Combat is fast-paced, movement-focused, and ability-driven. Success requires mastering gunplay, Legend synergies, map rotations, and team communication.
---
Player Progression Tiers
Progression in Apex Legends is divided by account level, skill growth, and competitive ambitions. Below, we break down each tier with detailed explanations and examples.
Early Game (Account Level 1–50 / First 50 Hours)
Focus: Learning the basics – movement, gunplay, and Legend abilities.
- Main Gameplay Loop: You spend most matches looting, learning POI (Point of Interest) layouts, and getting into early fights to understand weapon recoil and shield mechanics. Dying quickly is common; focus on staying with your squad and pinging useful items.
- Combat/Interaction: Start with easy-to-use weapons like the R-301 Carbine (assault rifle) or Peacekeeper (shotgun). Practice slide-jumping, wall bouncing, and using cover. Understand shield tiers: White (2 bars), Blue (3), Purple (4), Red (5, from Evo shields). Evolve shields by dealing damage. Learn ping system – use middle mouse button to mark enemies, items, or locations.
- Progression Systems:
- Exploration: Stick to named POIs with good loot (e.g., Fragment East/West on World's Edge, Containment on Storm Point). Learn loot spawn patterns – weapons spawn on racks, floor, or in bins. Supply bins have better loot but make noise.
- Economy: Collect Crafting Metals (from Apex Packs) to craft skins. Legend Tokens (from leveling) buy new Legends or recolors. Apex Coins (real money or Battle Pass) buy cosmetics and Battle Pass. Avoid spending coins on anything except Battle Pass early on.
- Character/Build Growth: Stick to one or two beginner-friendly Legends: Bloodhound (scan tactics), Lifeline (healing support), Wraith (escape with Into the Void). No gear builds – only weapon loadouts and shield evolution. Learn your Legend’s passive, tactical, and ultimate cooldowns.
- Main Gameplay Loop: You now consistently survive looting phase. Focus shifts to mid-game engagements – fighting for third-party positions, securing crafting stations (to upgrade armor or make gear), and controlling ring pulls. You start using Replicators to craft needed items (e.g., missing attachments, med kits).
- Combat/Interaction: Master at least five weapons (e.g., Flatline, Volt SMG, Sentinel). Use movement tactics like tap-strafing (PC) or slide-bunny hops to dodge hits. Learn hot dropping strategies – landing at busy POIs to fight early for loot and kill RP (in Ranked). Communicate with pings and voice – call out enemy shield color, health, and abilities.
- Progression Systems:
- Exploration: Learn rotation paths – safe routes between POIs using high ground, cover, and tridents (on certain maps). Know loot tier zones – hot zones (blue highlighted drop) have better gear but more enemies. Practice using survey beacons (Bloodhound, Crypto, Vantage) to reveal next ring location.
- Economy: Start focusing on Crafting Metals to craft legendaries for your mains. Use Legend Tokens to buy recolors from the store (rotates weekly). Never buy Apex Packs with coins – only buy Battle Pass.
- Character/Build Growth: Expand your Legend pool to 3–4 characters with different roles (e.g., Pathfinder for mobility, Gibraltar for defense, Valkyrie for redeploy). Begin thinking about team comps – a balanced squad has one scan Legend, one support, one aggressive fragger. For example: Bloodhound (scan) + Lifeline (support) + Wraith (entry fragger).
- Main Gameplay Loop: The initial drop and looting phase become second nature. You now focus on endgame circles – managing inventory for max grenades, ult accelerants, and prioritizing upgrades. You deliberately set up for third-party avoidance and zone control. Every decision (when to craft, when to fight, when to rotate) is optimized for the highest probability of winning.
- Combat/Interaction: Advanced mechanics include: superglide (slide + jump at same time), mixing armor swaps during fights, and aim-tracking through jittery movement. You know every weapon’s perfect TTK (time-to- kill) and can hit consistent no-scope shots with Kraber or wingman. Team synergy executes seamlessly – e.g., Gibby bubble + Caustic gas combo, or Ash snare + Maggie drill trap.
- Progression Systems:
- Exploration: Master zoning – knowing exactly how far you can rotate based on ring timer and your Legend’s mobility. Use heat maps (from third-party sites) to know where fights traditionally occur at each ring phase. Memorize hidden loot spots (e.g., behind waterfalls, under stairs) and replicator spawns.
- Economy: You have likely stockpiled thousands of Legend Tokens and Crafting Metals. Use metals to craft event skins for heirloom shard events (save 1,200 metals per event to get the free epic from prize tracker). You may also purchase Apex Coins for guaranteed high-tier items in collection events.
- Character/Build Growth: Specialize in 1–2 Legends that suit your playstyle (e.g., a Pathfinder main who can grapple to high ground instantly). Understand ability interactions – e.g., Crypto’s drone can respawn teammates, Revvie’s totem allows aggressive pushes. Build loadouts around your Legend: Valkyrie loves long-range weapons (because her tactical reveals enemies), Octane prefers SMGs (for close-range aggression).
- Main Gameplay Loop: Winning is no longer the only goal. You aim for high kill/damage games (4k damage badges, 20 kill badges). In Ranked, you focus on maintaining Apex Predator rank each split, which requires consistent top placements in Master/Predator lobbies. You also grind BR Bronze to Predator recertification each season. Outside Ranked, you play Mixtape (Control, Gun Run, TDM) to warm up or farm weapon challenges.
- Combat/Interaction: Advanced techniques become muscle memory. You can wallrun bounce (Lifeline, Valkyrie) to get unexpected angles. Combat revives with Gibby dome and Lifeline drone are automated. Utility usage is optimized: you carry exactly two grenades, one ult accelerant, and prioritize batts over med kits. Team fight coordination uses pre-planned callouts: "Cracked one on blue" (broke shields), "One-shot on Wraith".
- Progression Systems:
- Exploration: You know every map inside-out. You can heat scan (look for bullet trails, death boxes, or trail icons) to predict enemy positions. You rotate with smart nades – cooking them to land precisely on enemy cover. You use ziplines and jump pads to bypass open fields. You also know when to rat (hide solo) if your team dies – staying alive for placement points in Ranked.
- Economy: You have likely spent real money on Collection Events to get heirlooms (typically $160–$200 per event to unlock all items). You may also buy Battle Pass bundles to maximize cosmetics. Crafting Metals are used to craft missing items in ongoing events. You track Apex Pack pity timer (every 500 packs guaranteed heirloom shards) – many endgame players have all heirlooms.
- Character/Build Growth: You have mastered every Legend, but you have a main (e.g., Horizon, Seer, or Octane) whom you use in 90% of matches. You switch to counter-meta picks like Vantage to counter Gibby or Maggie to counter shield-heavy comps. Your loadout always includes one movement ability Legend and one support. Build refers to your Legend’s statistics – you have over 10,000 kills and 5,000 wins on your main.
- Account Level: Unlocks Legends (e.g., Caustic, Mirage) every few levels. At level 25, you unlock Ranked mode. Earn Apex Packs every 7 levels (guaranteed Legendary every 30 packs).
- Battle Pass: Premium track rewards skins, charms, and materials. Free track gives Apex Packs and a few items.
- Challenges: Daily (3 per day) and Weekly (reset Tuesdays) give Star Points for Battle Pass and XP.
Example Match: You drop at Containment (Storm Point). Grab a Hemlok and Mozambique. Your squad fights one team – you die but learn not to push open areas. Ping enemy location after death. Revived by Lifeline. Next ring forces rotation; you follow your teammate through a tunnel, avoiding third parties. End up in top 5 but lose because you had white shields vs full purple teams.
---
Mid Game (Account Level 50–200 / 50–200 Hours)
Focus: Understanding meta, team composition, and rotating efficiently.
- Ranked Mode (Unlocked at level 25): Silver/Gold leagues. Understand RP (Ranked Points) system – placement and kills matter. Loss forgiveness if teammate quits.
- Battle Pass becomes primary goal – complete all weekly challenges to reach level 110 for reactive skins.
- Stats & Trackers: Equip Legend-specific trackers (wins, kills, damage) on your banner.
Example Match: In Kenetic Fissure (World’s Edge), you and your squad drop at Sorting Factory – it’s hot. You take one kill, loot quickly and rotate to a high-ground building near the ring edge. You craft a Barrel Stabilizer. A third party appears – you use Bloodhound’s tactical to scan and see them through smoke. Your Wraith portals into building; you wipe the team with coordinated fire. Final ring is in Fragment West – you use a Valkyrie ultimate to reposition onto a roof and win the game. This match nets you 200+ RP in Gold.
---
Late Game (Account Level 200–500 / 200–500 Hours)
Focus: High-level mechanics, niche strategies, and mastering endgame scenarios.
- Apex Predator Rank: Top 750 on each platform per split. You grind RP in Diamond/Master lobbies – need high placements (top 3) and consistent kill points (2–3 kp per game).
- Heirloom Shards: After opening 500 Apex Packs (guaranteed), you get heirloom shards to buy mythic items. Use calculations to track progress.
- Seasonal Badges: Complete flash events or collection events for limited-time badges.
Example Match: Diamond-ranked match on Olympus. You rotate early to a central building with a replicator. Your squad (Valkyrie, Caustic, Wraith) sets up with Caustic trapping doors and Valkyrie periodically using her passive to see enemies rotating. Third ring pushes – a team tries to push from below; you throw grenades, Wraith portals to a different building to apply crossfire. You win the fight with shields intact. Final ring in open field – Valkyrie ults your team onto a high rock, Caustic drops ult below, you clean up the last two squads. Win with 8 kills.
---
Endgame (Post Level 500 / Competitive Grind)
Focus: Peak performance, seasonal mastery, and long-term goals.
- Account Level 500: Max level. After that, you earn Apex Packs every 10,000 XP (slow). The real progression is Seasonal Rank Badges and Heirloom collection completion – collecting all heirloom items (about 4–5 years of grinding).
- Alumni Pass: Some seasons offer a second premium track. Complete it for exclusive skins.
- Leaderboards: Track your stats on sites like ApexLegendsStatus.com. Aim for top 0.1% in kills or damage with your main Legend.
Example Match: Predator-ranked lobby on Broken Moon. Your squad (Horizon, Lifeline, Bloodhound) lands at a contested POI – you quickly wipe a team, loot and rotate early. You use Horizon’s gravity lift to float above a doorway, spotting a team hiding with Bloodhound scan. You push, Lifeline drops her drone, and using Horizon’s ultimate (black hole) you pull the enemies out of cover. You win the fight with zero deaths. Final ring is on a zip rail – you use the rail to reposition and kill the last two players with a Wingman headshot. This match earns +600 RP. You are now ranked #450 on your server.
---
Summary of Core Systems
| System | Early Game | Mid Game | Late Game | Endgame |
|---|---|---|---|---|
| Gameplay Loop | Drop, loot, die, learn | Survive, secure position, rotate | Dominate endgames, avoid third parties | Maximize kills/damage, win consistently |
| Combat | Basic weapons, use cover | Weapon mastery, movement tech | Superglides, armor swaps | Meta comps, perfect team coordination |
| Progression | Level up, unlock Legends | Ranked Silver–Gold | Diamond–Master ranks | Apex Predator, Heirloom collection |
| Exploration | Stick to known POIs | Learn rotation paths | Memorized loot and zone timing | Heat maps, smart grenades, ratting |
| Economy | Save coins, craft metals | Buy battle pass, craft skins | Stockpile metals for events | Predict heirloom pity, buy collection events |
| Character/Build | 1–2 beginner Legends | 3–4 Legends, team comps | 1–2 mains, ability combos | All Legends mastered, counter-meta picks |
Final Tips for Each Tier
- Early: Don't worry about stats – focus on surviving longer. Land at blue loot zones for extra gear.
- Mid: Practice the 3-stack rule – always stay within three seconds of your teammates. Use the ping system to call targets.
- Late: Record and review your matches. Identify rotational mistakes or wasted abilities.
- Endgame: Join an Apex community (discord servers) to find consistent squads. Grind game sense over aim – positioning wins more games than insane aim.
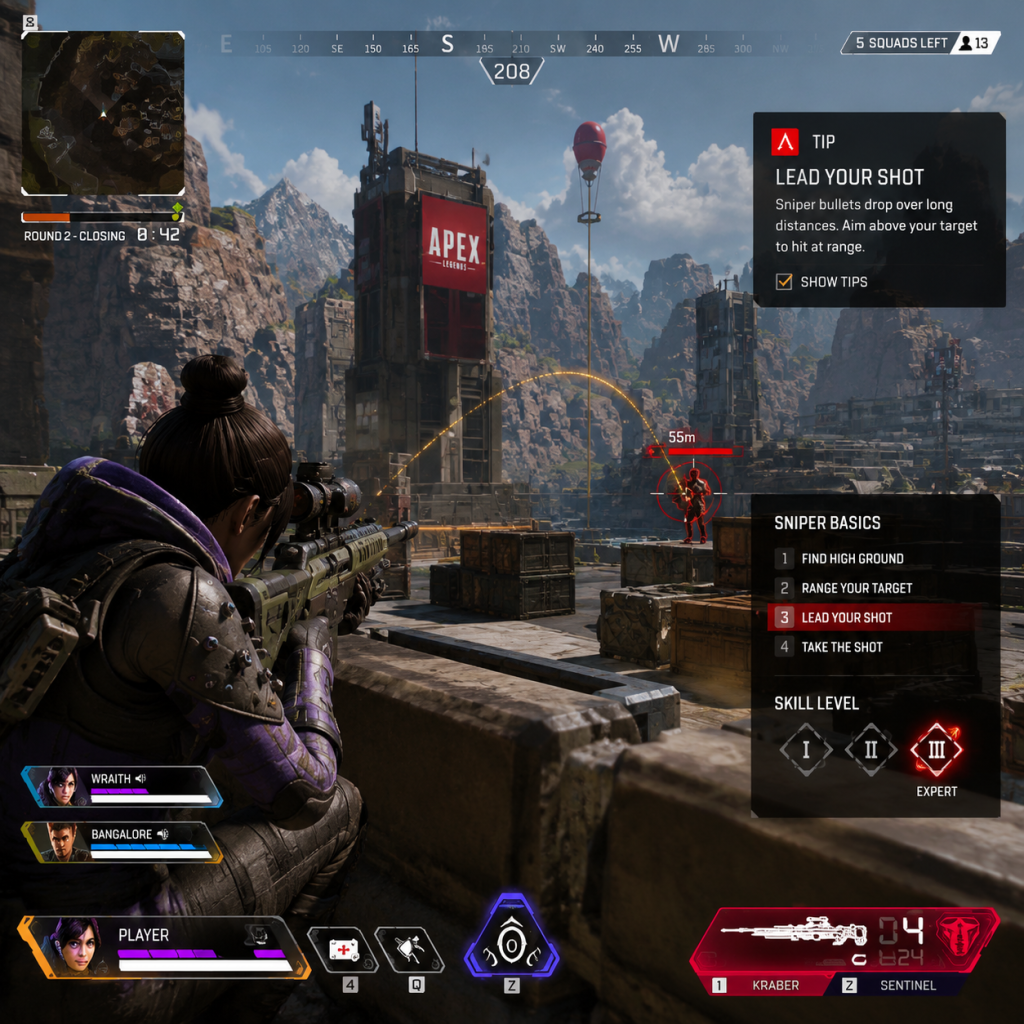
Game Tips
Game Tips for Apex Legends
This section provides proven tips across all skill levels, organized by category. Each tip includes a clear explanation and deeper analysis of why it works and when to apply it.
---
Combat
1. Peek with Purpose
- Explanation: Don't repeek the same angle repeatedly. The enemy will pre-aim your head. Instead, take a shot, reposition, or use a different angle.
- When to use: After landing a shot that doesn't kill; reset the fight. Use headglitches or slide-jump peeks to minimize exposure.
2. Master the Slide-Jump
- Explanation: Slide-jumping preserves momentum and makes you a harder target while maintaining speed. Practice chaining slide-jumps across open ground.
- When to use: Rotating between cover, disengaging from a losing fight, or closing distance quickly with a shotgun.
3. Use Hipfire at Close Range
- Explanation: Hipfire has minimal spread when moving and allows faster strafing. ADS at close range slows you down and makes you an easy target.
- When to use: Within 10 meters with SMGs, shotguns, or even some ARs (e.g., R-99 alternator). For marksman rifles, always ADS.
4. Learn Recoil Patterns
- Explanation: Each weapon has a unique recoil pattern. Practice in Firing Range to control the visual recoil and spray transfer between targets.
- When to use: Mid-to-long range engagements when the enemy is not moving erratically. Use a 2x or 3x sight to see the pattern more clearly.
5. Third-Party Awareness
- Explanation: After a fight, heal and reset before looting. Third parties often wait for gunfire to die down. Use audio cues and situational awareness to expect them.
- When to use: Always after a firefight. If you hear shots nearby, prioritize repositioning over looting.
6. Shield Swapping
- Explanation: Swapping a cracked shield for a fresh one from a death box is faster than using shield cells/batteries. The animation is shorter and you avoid heals.
- When to use: During a fight when you have no shields and an enemy death box is nearby. Do it in cover.
---
Exploration & Movement
1. Utilize the Map's Verticality
- Explanation: High ground offers superior sightlines and damage bonuses. Use ziplines, jump pads, and climbable surfaces to gain height advantage.
- When to use: During rotations or when holding a building. Never fight from low ground if you can avoid it.
2. Wall Bouncing
- Explanation: Jump off a wall while sliding into it to maintain momentum and change direction instantly. A high-skill movement technique.
- When to use: To escape a pursuer, juke an enemy's aim, or quickly peek corners without losing speed.
3. Sound Cues for Rotations
- Explanation: Footsteps, zip sounds, and ability audio reveal enemy positions. Move quietly when near enemies; use loud moments (smoke, explosions) to mask your reposition.
- When to use: When you know an enemy is in a building or around the corner. Crouch-walk on metal surfaces to minimize noise.
4. Slide Down Slopes for Speed
- Explanation: Sliding down any incline builds momentum, allowing faster traversal and less exposure. Use this to get behind cover quickly.
- When to use: When rotating downhill, escape the ring, or engage from a new angle.
5. Balloon and Trident Usage
- Explanation: Balloons grant height and distance but leave you vulnerable mid-air. Tridents provide cover and speed but are loud and have a fixed path.
- When to use: Balloons for rotating across open areas safely (if not contested). Tridents for fast team rotation on flat ground, but avoid during fights.
---
Resources & Loot
1. Prioritize Backpack Upgrades
- Explanation: Larger backpacks let you carry more heals, ammo, and grenades. A purple backpack can hold 6 shield cells, 4 med kits, etc.
- When to use: Always loot backpacks first. If you have a blue backpack and see a purple, swap immediately regardless of other loot.
2. Ammo Management
- Explanation: Carry 2-3 stacks of ammo for your primary and 1-2 for your secondary. Too much ammo wastes inventory space; too little forces mid-fight reload.
- When to use: Early game, stack more ammo (3-4 stacks). After securing loot, drop one stack for more heals or grenades.
3. Loot Efficiently in Hot Drops
- Explanation: Don't empty a single bin; grab a weapon, armor, and immediate ammunition, then fight. Loot after securing the area.
- When to use: Landing at Fragment East, Estates, or any popular POI. Time is life; looting too long gets you killed.
4. Heal Order
- Explanation: Shields heal faster than health when using cells vs syringes. In fights, prioritize shields. Use batteries for instant full shield (4 seconds) vs cells (3 seconds each, 4 cells = 12 seconds).
- When to use: After taking shield-damage only, use cells. If armor is cracked and you have a battery, swap if available or pop battery. In final rings, use med kits to top off health.
5. Grenade Usage
- Explanation: Grenades force enemies out of position. Arc Stars stick and slow, Fragmentations area denial, Thermolite burn and obscure vision.
- When to use: To clear a building, force an enemy out from behind a rock, or prevent a revive. Always carry at least one arc star for rushing shields.
---
Economy & Crafting
1. Crafting Materials Scarcity
- Explanation: Materials are found on the ground or in bins (one per bin). They are used to upgrade armor at Replicators. Don't waste them on suboptimal items.
- When to use: Only craft when you need a specific item (e.g., missing helmet, backpack upgrade). Avoid crafting weapon attachments unless you have extra materials.
2. Replicator Priority
- Explanation: Replicators are stations that convert materials into loot. They offer one free item per station per round, and two paid items. The free item cycles per match.
- When to use: Loot first, then use Replicator for upgrade. If you see a free purple shield or helmet, grab it before fighting. Paid items: focus on armor upgrades first.
3. Supply Drops
- Explanation: Care packages drop mid-game and contain fully kitted weapons (e.g., Kraber, R-301). They also drop high-tier armor and helmet. Contesting them is risky but rewarding.
- When to use: If you are well-equipped and near the drop, contest. Otherwise, let others fight and third-party the winner. Never cross open ground to reach a supply drop if the ring is far.
---
Character & Team Composition
1. Role Synergy
- Explanation: A balanced squad includes a recon (e.g., Bloodhound, Valk), a support (e.g., Lifeline, Newcastle), and a skirmisher (Wraith, Octane). This covers scanning, healing, and mobility.
- When to use: In ranked, always aim for this mix. In casual, any composition can work with communication.
2. Ability Timing
- Explanation: Use tactical abilities on cooldown but with purpose. For example, Wraith's phase to reposition, not as a panic button. Use Bloodhound scan when you suspect enemies nearby, not randomly.
- When to use: Scan before entering a building, pop tactical after taking damage, use ultimate for rotational advantage (e.g., Bangalore's smoke to disengage).
3. Support Legend Tips
- Explanation: Lifeline's drone heals over time; place it behind cover. Newcastle's tactical provides a mobile shield; use to revive safely. Loba's market allows quick loot; drop it in safe zones.
- When to use: Lifeline drone after a fight, Newcastle shield when reviving under fire, Loba ult when looting a POI after a fight.
---
Settings & Optimization
1. Adjust Sensitivity and FOV
- Explanation: Lower sensitivity (1.5-3.0 at 400 DPI) allows precise aim; higher FOV (90-100) increases peripheral vision but makes targets smaller. Find a balance.
- When to use: For flick-heavy play, higher sens; for tracking, lower sens. Test in Firing Range for 20 minutes to dial in.
2. Audio Settings
- Explanation: Use headphones with surround sound (or stereo with L/R balance). Reduce music and subtitles volume; increase effects and dialogue volume.
- When to use: Always. Clear audio is critical for knowing enemy location and direction. In crowded fights, reduce chat volume temporarily.
3. Input Buffer and Auto-Sprint
- Explanation: Enable auto-sprint under Controls; it reduces the need to click shift constantly. Set input buffer to "0" for faster response.
- When to use: Always. This improves movement fluidity and reduces finger strain.
---
Game Sense & Rotations
1. Ring Awareness
- Explanation: Know the ring closing schedule (closing times and damage per tick). Rotate early to avoid gatekeeping teams. Use the map to plan a path through cover.
- When to use: When the ring is 2 rings away from closing, start moving. If you are in the edge of the next ring, hold position to catch late rotators.
2. Positioning in Final Rings
- Explanation: In last 3 rings, high ground and cover are vital. Avoid open areas. Use grenades to flush out enemies from the last building. If no cover, create it with abilities (e.g., Caustic traps, Rampart walls).
- When to use: When the ring is small (circle 4 and beyond). Patience is key; let others fight while you hold an advantageous spot.
3. Third-Party Strategy
- Explanation: Wait for two teams to engage, then attack when one team is weak. Use the chaos to clean up. Do not engage too early or you become the third party target.
- When to use: When you hear gunfire nearby but not part of the fight. Approach silently, position near the exit route, then push after the initial explosion.
---
Endgame & Victory
1. Survive with Your Team
- Explanation: In final rings, staying alive is more important than kills. Shield up, use knockdown shields for cover, and prioritize revives. A 2v3 with good shields is winnable.
- When to use: When the team count is below 5 squads. If a teammate is downed, use crypto drone or other abilities to safely respawn if ring permits.
2. Use Ultimate Accelerants
- Explanation: Accelerants give charge for your ultimate. In endgame, having your ult ready can turn the tide (e.g., Gibby bombardment, Caustic gas).
- When to use: When you have a free moment and your ult is not fully charged. Keep one accelerant for emergencies.
3. Final Circle Tactics
- Explanation: When the circle is tiny, play in the middle if you have cover. Use healing items to outheal ring damage if necessary. Avoid being the first to peek; let enemies expose themselves.
- When to use: In the last few seconds before the ring fully closes. Use thermite to block doors, arc stars to stun, and frags to force movement. If you are in a building with roof access, climb up for unexpected angles.
---
This guide covers essentials across all skill levels. Practice these tips in Firing Range and actual matches to improve your consistency and win rate.
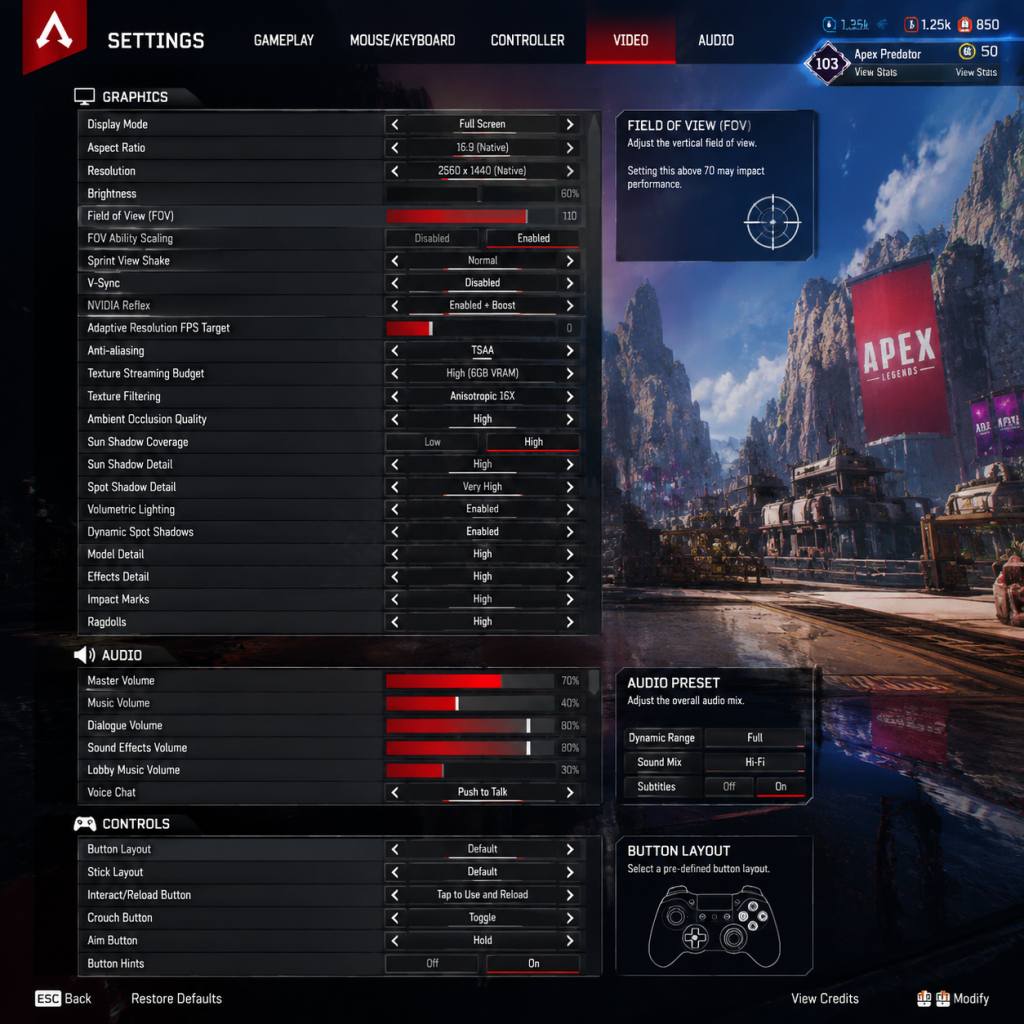
Game Settings
Game Settings Guide for Apex Legends
Apex Legends offers a wide array of settings across multiple categories. Proper configuration can significantly improve your performance, visibility, and overall experience. This guide covers each settings category, recommends optimal values for different hardware tiers, and highlights common pitfalls.
---
Graphics Settings
Graphics settings primarily affect visual quality and performance (FPS). Apex Legends is a competitive shooter, so high and stable FPS is more important than maximum eye candy.
#### Display Mode
- Fullscreen (recommended): Best performance, lowest input lag.
- Windowed Fullscreen: More convenient for alt-tabbing, but can introduce minor input lag and frame drops.
- Windowed: Not recommended for gaming.
- Set to your monitor’s native resolution (e.g., 1920x1080). Downscaling reduces clarity.
- For low-end PCs: 1600x900 or 1280x720 can boost FPS significantly.
- Use Native (usually 16:9). Stretching to 4:3 can enlarge player models but distorts the field of view; not recommended unless you prefer it.
- Disabled (recommended). V-Sync introduces input lag and can reduce FPS. Use an FPS cap instead.
- Enable only if you experience severe screen tearing and can tolerate the lag.
- Options: None, TSAA, FXAA
- TSAA (preferred): Reduces jagged edges with minimal performance cost.
- FXAA: Slightly faster but blurs image more.
- None: Sharper but jaggies may distract.
- Recommendation: TSAA for most; FXAA for very low-end.
- Controls how much video memory (VRAM) is used for textures.
- Set based on your GPU’s VRAM:
- Special Attention: If you set this too high for your VRAM, you will experience stuttering and texture pop-in. Monitor VRAM usage in-game via task manager or OSD.
- Anisotropic 4x or 8x for best balance of quality and performance. Higher (16x) minimal visual gain over 8x.
- Low-end: 2x or 4x.
- Disabled or SSAO (low quality). Ambient occlusion darkens corners and shadows. Disabling gives a noticeable FPS boost with little competitive disadvantage.
- Shadows can help spot enemies hiding in dark areas, but they are expensive.
- Low or Medium are recommended. Low gives a significant FPS boost; shadows still show general locations.
- Ultra is very demanding; avoid.
- Low: Shows player shadows more clearly (good for spotting).
- High: More detailed but less impactful. Keep Low.
- Disabled. Very taxing on GPU. Minimal gameplay benefit.
- Disabled. Saves performance.
- Controls particle effects like explosions, smoke, muzzle flash.
- Medium recommended. Low removes important visual cues (e.g., smoke grenade size). High can obscure vision and lower FPS.
- Enabled or Low. Shows bullet holes and damage decals. Low reduces clutter.
- Low or Medium. High can cause FPS drops when many bodies are present.
- Medium recommended. Low reduces far LODs, making enemies slightly harder to see at range.
- This dynamic resolution scaler reduces render resolution to maintain target FPS.
- Disabled for consistent image quality. Enable only if you need to hit a specific FPS floor (e.g., 60 FPS on low-end).
- Affects how much of the game world you see horizontally.
- Slider: 70 to 110 degrees.
- Competitive players often use 100-104 (max 110). Higher FOV lets you see more peripherally, but makes targets appear smaller.
- Special Attention: If you experience motion sickness, lower FOV (90-96) may help. Do not go below 90 unless necessary.
Special Attention: Always use Fullscreen for competitive play. Windowed modes can cause inconsistent frame pacing.
#### Resolution
#### Aspect Ratio
#### V-Sync
#### Anti-Aliasing
#### Texture Streaming Budget
- 2 GB VRAM: Low
- 4 GB VRAM: Medium
- 6+ GB VRAM: High / Insane (if you have enough VRAM spare)
#### Texture Filtering (Anisotropic)
#### Ambient Occlusion
#### Sun Shadow Coverage & Resolution
#### Spot Shadow Detail
#### Volumetric Lighting
#### Dynamic Spot Shadows
#### Effect Detail
#### Impact Marks
#### Ragdolls
#### Model Detail
#### Adaptive Resolution FPS Target
#### FOV (Field of View)
#### Recommended Graphics Presets by Hardware
| Hardware Tier | Example GPU | Recommended Preset | Key Adjustments |
|---|---|---|---|
| Low-End | GTX 1050 / RX 560 | All Low + 75% Render Scale | Disable shadows, ambient occlusion, volumetric lighting; FOV 90-96 |
| Mid-Range | GTX 1060 / RX 580 | Low/Medium Mix | TSAA, Texture Streaming Medium, Shadows Low, Effect Detail Medium, FOV 100 |
| High-End | RTX 2060 / RX 5600 XT | Medium/High Mix | TSAA, Texture Streaming High, Shadows Medium, Volumetric Lighting Off, FOV 104 |
| Ultra | RTX 3080 / RX 6800 XT | High (or custom) | Max textures, shadows High, but keep Volumetric Off, spot shadows Low; FOV 104-110 |
---
Audio Settings
Audio is critical in Apex Legends for directional awareness. Footsteps, gunshots, and abilities give vital cues.
#### Master Volume
- Set to a comfortable level (80-100%). Do not set too loud; you need to avoid distortion.
- 100%. This covers all in-game sounds including footsteps and gunfire.
- 0-10%. Music is not needed for gameplay and can mask important sounds. Many pros mute it entirely.
- 100%. Legend callouts tell you if a teammate is downed, pinging, or using ultimates.
- Adjust based on your squadmates. Typically 70-100%. Can be lowered if teammates are loud.
- 0% to reduce distractions in menu.
- Options: Stereo, Surround Sound (5.1/7.1)
- Recommendation: Stereo Headphones (or Stereo if using headphones). Most headsets are stereo; virtual surround sound can distort spatial audio.
- If you have a true multi-speaker setup, select your configuration.
- Windows setting (not in-game). Disable in Windows sound settings. Equalization compresses audio, reducing dynamic range and making footsteps harder to distinguish.
- Ensure it's set to your headphones/speakers. Avoid "Default" if you have multiple devices; select explicitly.
- Adjust input volume so your teammates can hear you clearly without clipping.
- Push-to-Talk (PTT) recommended to avoid background noise.
- Use DPS * in-game sensitivity formula. Common eDPI (effective DPI) for Apex: 800-1600 DPI, in-game sensitivity between 1.0 and 2.5.
- Most pros use 800 DPI and 1.4-2.0 sens.
- Special Attention: Low sensitivity improves aim precision but requires larger mouse movements. Find a balance. Use a large mousepad.
- Default is 1.0. For better recoil control, some players use 0.8-1.0. If you find ADS too fast, lower it.
- Per optic sensitivity can be set individually.
- Crouch: Toggle (recommended for slide-jumping) or Hold. Many pros bind crouch to C or a mouse side button.
- Jump: Spacebar or scroll wheel down (for easier bhop/tap strafe - requires enabling in config).
- Interact: E or F.
- Ping: Middle mouse button or Q.
- Ability: Q (tactical), Z (ultimate).
- Item binds: 1-4 for weapon slots. Consider binding healing items to side buttons.
- Toggle Sprint: Set to "Auto-Sprint"? Many players keep Auto-Sprint Off to avoid accidental sprinting when looting or crouching. Alternatively, bind Sprint to Shift (hold).
- Look Sensitivity: (per ADS) Fine-tune per optic.
- Response Curve: Classic or Linear (preferred by many). Linear gives direct stick movement.
- Deadzone: Small deadzone (0.10-0.15) to avoid stick drift.
- Aim Assist: On (default). Apex has strong aim assist on controllers; keep enabled.
- Button Layout: Use "Evolved" or "Ninja" to jump and slide without taking thumbs off sticks.
- Off, Protanopia, Deuteranopia, Tritanopia. Select based on your color vision type. This changes HUD colors, shield bars, and enemy highlights.
- Even if not colorblind, some players use Deuteranopia mode to make enemies more visible (shields appear yellow).
- All Speech or Dialogue Only. Enables speech-to-text for voice lines. Helpful for hearing-impaired or non-native speakers.
- On/Off. Reads menu options aloud. Useful for visually impaired.
- Adjust transparency of HUD elements. Can reduce clutter.
- Color: Choose a color that contrasts with backgrounds (e.g., bright green or cyan).
- Dot/Cross: Some players prefer a small dot for precision. Toggle using `bind "X" "toggle crosshair 0 1"` in autoexec.
- Thickness: 1 or 2 (thin).
- Size: Default or slightly smaller.
- Reduce motion sickness by disabling background blur in menus.
- Display Language: Change text and UI language (e.g., English, Spanish, Japanese).
- Audio Language: Separate from text. Some players prefer English audio for clear callouts; others use native language.
- Voice Chat Language: Not a setting—team-based.
- Special Attention: Changing audio language may affect the pitch of Legends’ voices; it’s purely preference.
- In the main menu, click the data center icon (bottom right, looks like a globe). Select a ping with low latency and 0% packet loss. Avoid servers above 150ms ping for competitive play.
- Special Attention: If you experience lag or rubber-banding, try another data center.
- Adaptive Resolution – Enable to reduce resolution during packet loss spikes (smoother experience).
- Networking: ‘Low Latency’ or ‘Balanced’. Low latency prioritizes response over smooth movement; may cause rubber-banding on unstable connections.
- Unlimited (recommended). If you have data caps, set a limit, but this can affect texture streaming.
- Not exposed in UI, but can be set via config files (rate 128000, cl_interp 0, cl_interp_ratio 1). Default is fine.
- On (default). Cannot be turned off independently; only on PC with controller you can disable via config? Not officially.
- Off (recommended). Reduces visual shake while sprinting, improving clarity.
- Off. Prevents weapon switching automatically when you empty a magazine. Keep off to maintain control.
- Stacking: Enabled (cumulative damage text).
- Position: Default (bottom center).
- Size: Small or Normal.
- Rotates with you (default) or Fixed North. Personal preference; rotating helps orientation.
- Double-tap Ping Danger: On (double-tap pings to indicate enemies). Enable.
- Ping Wheel Menu: Customize quick pings (enemy here, looting here, etc.).
- On (default). Allows pressing Interact to both open doors and pick up items. Keeping on is recommended.
- Hold to Interact: Some players prefer Hold to prevent accidental looting; but it's slower.
- Off for most competitive players. Having control over sprint vs. walk is helpful for silent movement and crouch-strafing.
- If you have difficulty holding shift, consider On, but be aware of the trade-off.
- You can bind jump/wheel down and +forward/wheel up to enable easier movement tech (bunny hop, tap strafe). Requires editing config or autoexec. Not official in menu.
- Start with the Low preset on low-end hardware and adjust upward until FPS is stable at your target.
- On mid/high-end, use a custom mix: keep shadows Low-Medium, volumetric lighting Off, TSAA on, textures High (if VRAM allows), FOV 100-104.
- Perform a field test: drop into the firing range or a low-population server to test settings before queuing.
- Save your settings after changes; they sometimes revert after updates (note: most settings are saved locally and may reset).
- For advanced tweaks (e.g., autoexec.cfg), see community guides. This guide covers in-menu settings only.
#### Sound Effects Volume
#### Music Volume
#### Dialogue Volume
#### Voice Chat Volume
#### Lobby Music Volume
#### Sound Mode
#### Loudness Equalization
#### Audio Output Device
#### Microphone
---
Controls Settings
Customizing controls can improve aim and movement. Apex Legends allows extensive keybinding.
#### Mouse Sensitivity
#### ADS Sensitivity Multiplier
#### Keybinds
Special Attention: Weapon Cycle — Do not bind "Next Weapon" to mouse wheel unless you are comfortable with accidental weapon swaps during fights. Bind to specific keys (1,2).
#### Controller Settings (if applicable)
---
Accessibility Settings
Apex Legends includes options to help players with visual, auditory, or motor impairments.
#### Colorblind Mode
#### Subtitles
#### Menu Narrator
#### HUD Opacity
#### Crosshair
#### Menu Background Blur
---
Language Settings
---
Network Settings
#### Data Center Selection
#### Network Quality Settings
#### Bandwidth Limit
#### Incoming/Outgoing Rates
---
Gameplay Settings
These affect how the game plays and interacts.
#### Aim Assist (Controller)
#### Sprint View Shake
#### Weapon Auto-Cycle
#### Damage Numbers
#### Minimap Rotation
#### Pinging
#### Contextual Tap/Interact
#### Auto-Sprint
#### Mouse Wheel Tweak (PC)
---
Settings Easy to Misconfigure & Special Attention Points
1. FOV: Setting too high (110) can reduce target visibility at distance. Use 100-104 for a good balance.
2. VSync: Default may be enabled; turn it off immediately to reduce input lag.
3. Texture Streaming Budget: Too high for your VRAM = stutter. Always check VRAM usage.
4. Sound Mode: Selecting virtual surround can make footsteps less precise. Stick to Stereo.
5. Mouse Sensitivity: Extremely low or high hinders aim. Measure your eDPI and adjust gradually.
6. Auto-Sprint: Many new players leave it on, but it can cause accidental loud movements. Test both modes.
7. Data Center: The game sometimes auto-selects a server with high ping; always manually choose the best.
8. Windowed Fullscreen: Introduces minor input lag. Use Fullscreen.
9. Accessibility Colorblind Mode: Even if you aren't colorblind, try Deuteranopia – many pros use it for better shield visibility.
10. Damage Numbers: If you find them distracting, reduce size or disable stacking.
---
Final Recommendations
With these optimizations, you can enjoy a smooth, competitive Apex Legends experience regardless of your hardware. Good luck in the Apex Games!
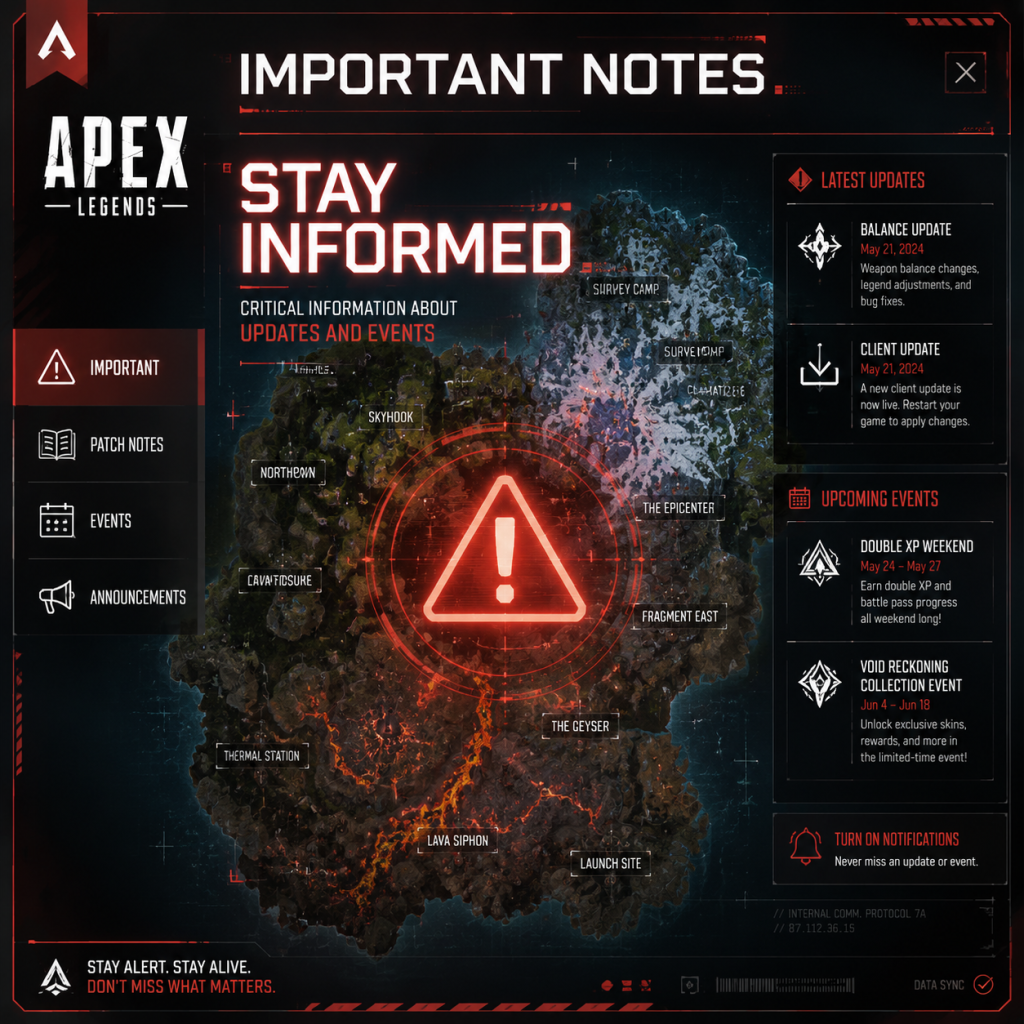
Important Notes
Important Notes for Apex Legends
This section covers critical information that can save you time, frustration, and regret. Whether you are a new player or a veteran, understanding these pitfalls, irreversible choices, and hidden mechanics will significantly improve your experience.
---
⚠️ Warnings & Account Security
- Anti-Cheat: Apex Legends uses Easy Anti-Cheat (EAC). Do not use any third-party software that modifies the game files, injects code, or automates gameplay (e.g., aimbots, wallhacks, recoil scripts, or macro keys that simulate repeated inputs). Even unintentional violations can result in a permanent hardware ban.
- Account Linking: If you link your EA account to Steam, Epic Games Store, or console (PlayStation, Xbox, Nintendo Switch), the link is permanent for 180 days. You cannot unlink and re-link an account used with a different platform. Be absolutely certain before linking.
- Phishing & Scams: Never click on suspicious links claiming to give free Apex Coins, Heirloom Shards, or Legend Tokens. Only official sources: the in-game store, EA website, or trusted retailers.
- Two-Factor Authentication (2FA): Enable 2FA on your EA account. Many players have lost accounts due to weak passwords or reused credentials.
###
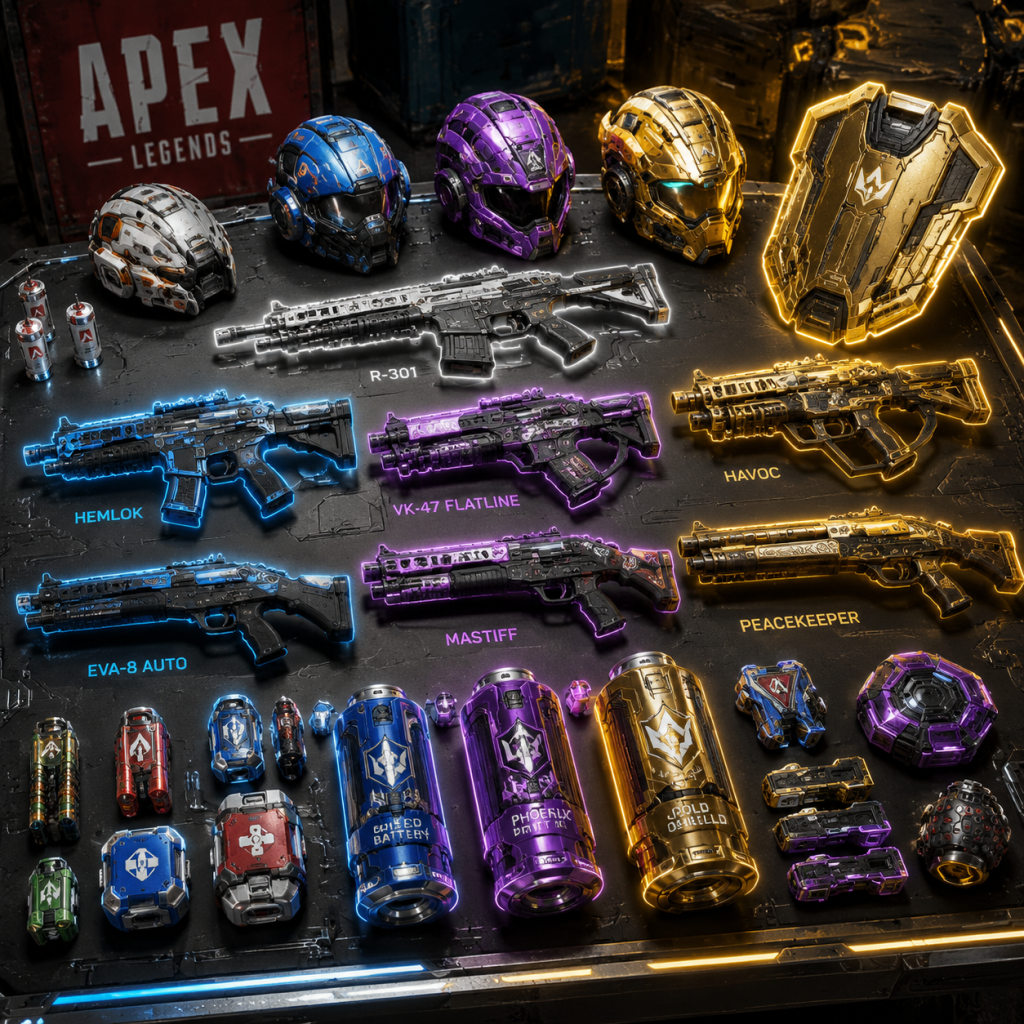
All Game Items
All Game Items
This guide covers every item in Apex Legends — weapons, attachments, armor, consumables, materials, currencies, collectibles, and key equipment. Items are grouped logically with explanations, acquisition methods, usage tips, and synergies/upgrades.
---
Weapons
Weapons are the primary means of dealing damage. They are found on the ground in loot bins, from enemies, care packages, and crafting stations. Each weapon belongs to a class with specific ammo types and attachment slots.
Ammo Types
- Light Rounds – Used by SMGs, assault rifles, and some pistols.
- Heavy Rounds – Used by assault rifles, LMGs, and some shotguns.
- Energy Ammo – Used by energy weapons (e.g., Volt, Havoc).
- Shotgun Shells – Used by shotguns.
- Sniper Ammo – Used by sniper rifles and marksman weapons.
- Arrow – Used by the Bocek Bow (seasonal weapon).
Weapon Types & Notable Weapons
| Category | Notable Weapons | Notes |
|---|---|---|
| Assault Rifles | R-301 Carbine, Flatline, Hemlok, Havoc | Versatile medium-range. Havoc has a spin-up; use Turbocharger. |
| SMGs | R-99, Volt SMG, CAR SMG, Alternator | High fire rate, close-range. Alternator has Disruptor Rounds hop-up. |
| Shotguns | Mastiff, Peacekeeper, Eva-8, Mozambique | Mastiff and Peacekeeper are high-damage; Eva-8 is automatic. |
| LMGs | Spitfire, Devotion, L-STAR | Large mags, heavy damage. Devotion needs Turbocharger. |
| Sniper Rifles | Kraber (care package), Longbow, Sentinel, Charge Rifle | Kraber is a one-shot headshot. Sentinel charges with shield cells. |
| Marksman Weapons | G7 Scout, Triple Take, 30-30 Repeater | Mid-to-long range. Triple Take fires three projectiles. |
| Pistols | Wingman, RE-45, P2020 | Wingman is high skill, high reward. RE-45 with Hammerpoints shreds unshielded. |
| Special/Supply Drop Weapons | Kraber, Mastiff (supply drop), Rampage (seasonal), Bocek Bow | Very powerful, limited availability. |
Hop-Ups (Weapon Mods)
Hop-ups modify weapon behavior. They are found on the ground or in care packages.
- Turbocharger – Eliminates spin-up for Havoc/Devotion.
- Selectfire Receiver – Converts Prowler to auto or Havoc to single-shot.
- Hammerpoint Rounds – Increases damage against unshielded targets (RE-45, P2020, Mozambique).
- Disruptor Rounds – Increased damage to shields (Alternator, Peacekeeper).
- Skullpiercer Rifling – Headshot damage multiplier (Wingman, Longbow).
- Kinetic Feeder – Reload while sliding (Triple Take, Bocek Bow).
- Anvil Receiver – Alternates fire mode for Flatline/R-301 to heavy single shots (uses 2 ammo per shot).
- Boosted Loader – Faster reloads/greater mag capacity for certain weapons (Sentinel, Hemlok).
- Shatter Caps – Single-target vs spread toggle (30-30, Bocek).
- 1x HCOG – Clear sight, medium zoom.
- 1x Holo – Blue circle reticle.
- 2x HCOG – Clean 2x zoom.
- 1x-2x Variable – Toggle between 1x and 2x.
- 3x HCOG – Good for midrange.
- 2x-4x Variable – Sniper scope for ARs.
- 4x-8x Variable – Sniper scope.
- 6x Sniper – Fixed 6x.
- Digital Threat – Highlights enemies in red (available in all zoom levels: 1x, 2x, 3x, 4x-8x). Best for Vision or smoke reveals.
- Damage – 100 damage to white → blue, 300 to purple, 750 to red.
- Crafting – Use crafting materials at replicators to upgrade tiers.
- Swap – Loot higher-tier shields from dead enemies.
---
Attachments
Attachments improve weapon performance. Each weapon has specific slots: Optics, Magazine, Barrel Mod (or Laser Sight for SMGs), and Stock. Hop-ups are a separate fourth slot. Attachments are found on ground and in loot bins.
Optics
Magazines
Increase magazine capacity and reduce reload time. Levels 1–4 (white, blue, purple, gold). Gold mag auto-reloads on holster.
Barrel Mod
Reduces recoil. Levels 1–4. Gold barrel gives a slight damage reduction? (Note: Gold barrel was removed in some seasons; check current).
Laser Sight
Improves hip-fire accuracy (SMGs and some pistols). Levels 1–3. No gold variant.
Stocks
Improves weapon handling (quicker aim-down-sight, weapon swap, reload). Levels 1–4. Gold stock reduces hip-fire spread.
---
Armor & Helmets
Body Armor (Evo Shields)
All armor is now Evo Shields – they evolve by dealing damage. No longer found as loot; everyone starts with white Evo. Upgrade by:
| Tier | Color | HP | Notes |
|---|---|---|---|
| Level 1 | White | 50 | Starting shield. |
| Level 2 | Blue | 75 | Improved. |
| Level 3 | Purple / Gold | 100 | Gold has Fast Heal (shields recharge on execution). |
| Level 4 | Red | 125 | Maximum, no special perk. |
Helmets
Reduce headshot damage and impact flinch. Found on ground and loot bins.
| Level | Color | Reduction |
|---|---|---|
| 1 | White | 20% |
| 2 | Blue | 30% |
| 3/4 | Purple/Gold | 40% (Gold gives fast revive? Actually Gold Helmet gives Faster Revive? In some seasons yes. Confirm: Gold Helmet reduces tactical cooldown? Wait: As of current season (e.g., Season 23), Gold Helmet reduces Tactical cooldown by 50% and Ultimate cooldown by 20%. The headshot damage reduction is same as purple.) |
Consumables
Health Items
- Syringe – Heals 25 HP over 3 seconds. Max stack 4.
- Med Kit – Heals 100 HP over 6 seconds. Max stack 2.
- Phoenix Kit – Fully restores HP and Shield (100 HP + shield level amount) over 8 seconds. Max stack 1.
- Shield Cell – Restores 25 shield points over 2.5 seconds. Max stack 4.
- Shield Battery – Fully recharges shield (to current tier max) over 5 seconds. Max stack 2.
- Ultimate Accelerant – Instantly recharges Ultimate ability by 25%. Found in loot bins and as floor loot. Max stack 2.
- Heat Shield – Creates a protective dome that blocks ring damage for about 30 seconds. Used in ring to survive longer. Found in ground loot and care packages. Max stack 2.
- Mobile Respawn Beacon – Allows respawning a dead teammate at any location (used once). Found in ground loot. Max stack 1.
- Survey Beacon – (Now integrated into Recons) Not an item.
- Ranked Survival Items – Not applicable.
- Crafting Materials – Used to craft attachments, weapons, or upgrade armor at replicators. Found on ground, in bins, or from Recycler. Max stack 100? Actually 1000 cap? Typically stack to 200. Each replicator costs 30–45 materials for most items. Replicator rotation changes.
- Apex Coins – Real-money currency. Used to buy Apex Packs, Battle Pass, cosmetics, and event items. Earned from Battle Pass tiers.
- Legend Tokens – Earned by leveling up (600 per level). Used to unlock new Legends (12,000 each) and some cosmetic rerolls.
- Crafting Metals – Earned from Apex Packs (random amounts). Used to craft specific cosmetic items (skins, banners, finishers) for Legend or weapons.
- Heirloom Shards – Extremely rare currency obtained from Apex Packs (1 in 500 chance guaranteed after 500 packs). Can be used to buy Heirloom melee weapons or prestige skins. Heirlom Shards are not farmable via gameplay.
- Contain three random items: cosmetics (skins, banners, trackers, quips), crafting metals, or Legend Tokens. Cannot be purchased directly with Legend Tokens; earn via Battle Pass, levels, or Apex Coins.
- Guaranteed Legendary every 30 packs (some exceptions).
- Legend Skins – Change appearance of a Legend. Rare (blue), Epic (purple), Legendary (gold), Mythic (red/purple prestige).
- Weapon Skins – Change weapon appearance. Same rarity tiers.
- Banner Frames & Poses – Cosmetic for Legend select screen.
- Badges – Earned from achievements, seasons, events.
- Trackers – Display stats (kills, wins, damage).
- Intro Quips & Kill Quips – Voice lines.
- Holosprays – Decorative sprays.
- Emotes – Taunts in-game (rarely used).
- Heat Shield – Already covered.
- Mobile Respawn Beacon – Already covered.
- Recon Data Knife – (If equipped by a Recon legend, they can scan survey beacons.) Not an item per se.
- Support Bin Key – Unlocks a special support bin (blue). Found in care packages. Use once.
- Weapons (often limited-time: Rampage, Bocek, some Sniper ammo)
- Attachments (any tier except gold? You can craft up to purple attachments)
- Armor Upgrades (pay materials to upgrade Evo shield tier)
- Consumables (ammo, heat shields, med kits, shield batteries)
- Utility (Mobile Respawn Beacon, Ultimate Accelerant)
- One Supply Drop Weapon (Kraber, Mastiff, or a rotated weapon like the Rampage)
- Armor (red Evo shield)
- Helmet (gold or purple)
- Knockdown Shield (purple/gold)
- Attachments (gold optics, magazines, stocks)
- Consumables (shield batteries, med kits, phoenix kits)
- Survival Items (Heat Shield, Mobile Respawn Beacons)
- Evo Shield + Damage – The only way to max armor without looting.
- Gold Helmet + Tactical/Ult – Reduces cooldowns, great for support legends (Lifeline, Loba, Gibby).
- Gold Backpack + Lifeline or Newcastle – Extremely strong revives with health/shield.
- Digital Threat + Smoke (Bangalore/Caustic) – See through smoke/gas.
- Hammerpoint + Unshielded enemies – Quick kills.
- Disruptor Rounds + Shields – Melts shielded targets.
- Kinetic Feeder + Slide reload – Allows aggressive play.
- Boosted Loader + Sentinel – Faster reload and larger mag, great for peeking.
Shield Items
Utility Consumables
Crafting Materials (Consumed at Replicators)
---
Currencies
Premium Currency
Free Currency
Crafting Currency
Heirloom Shards
---
Collectibles & Cosmetics
Apex Packs (Loot Boxes)
Cosmetics
Heirlooms
Unique melee weapons for specific Legends (e.g., Wraith’s Kunai, Pathfinder’s boxing gloves). Obtained via Heirloom Shards (rare). They have unique inspect animations and sound effects. No gameplay impact.
Prestige Skins
Ultra-rare skins that evolve as you get kills during a match. Example: Bloodhound’s “Apex Hunter” – three tiers. Obtained via Heirloom Shards or special events.
---
Key Equipment / Gear
Backpack
Increases inventory capacity. Levels 1–4 (white, blue, purple, gold). Gold backpack: When you revive a teammate, they get full HP and shield (if you have a shield cell/battery? Actually Gold backpack gives the revived teammate a health boost and shield regeneration over time? As of current season, Gold Backpack revives with 100 HP and full shield if you have shield? Let’s state: Gold Backpack provides faster revives and extra health/shield on revive. Exact mechanics vary per season. Currently (Season 23), Gold Backpack provides a burst of health and shield to the revived teammate.)
Knockdown Shield
Protects you when knocked down. Levels 1–4. Higher levels increase shield HP and coverage area (full dome at purple/gold). Gold shield (now rare) allows self-revive once per match? As of recent updates self-revive has been removed from Gold Knockdown; it now provides a larger dome and faster revive time when used by a teammate. Verify: Gold KD gives a bigger shield and when you are revived you get extra HP? Actually in Season 23, Gold KD provides a larger dome and the revived teammate gets a small health burst. Self-revive is no longer a feature.
Survival Slot Items
These items occupy the survival slot (besides backpack/armor/helmet). You can carry one at a time.
Launch Sites / Legend-Specific Gear
Some legends have unique gear (e.g., Crypto’s drone, Lifeline’s DOC, Rampart’s turret) but these are abilities, not items.
---
Crafting System Items
At Replicators, you can craft:
---
Care Package Items
Care packages drop randomly during the match. They contain:
---
Important Synergies & Upgrades
---
Summary Table of All Items by Slot
| Slot | Items |
|---|---|
| Weapon | All weapons, ammo types, hop-ups |
| Armor | Evo Shields (white→red) |
| Helmet | Helmet levels 1–4 |
| Backpack | Backpack levels 1–4 |
| Knockdown | Knockdown Shield levels 1–4 |
| Survival | Heat Shield, Mobile Respawn Beacon, Support Bin Key |
| Consumables | Syringe, Med Kit, Phoenix Kit, Shield Cell, Shield Battery, Ultimate Accelerant |
| Crafting | Crafting Materials |
| Currency | Apex Coins, Legend Tokens, Crafting Metals, Heirloom Shards |
| Collectibles | Apex Packs, Cosmetics (skins, badges, trackers), Heirlooms, Prestige Skins |
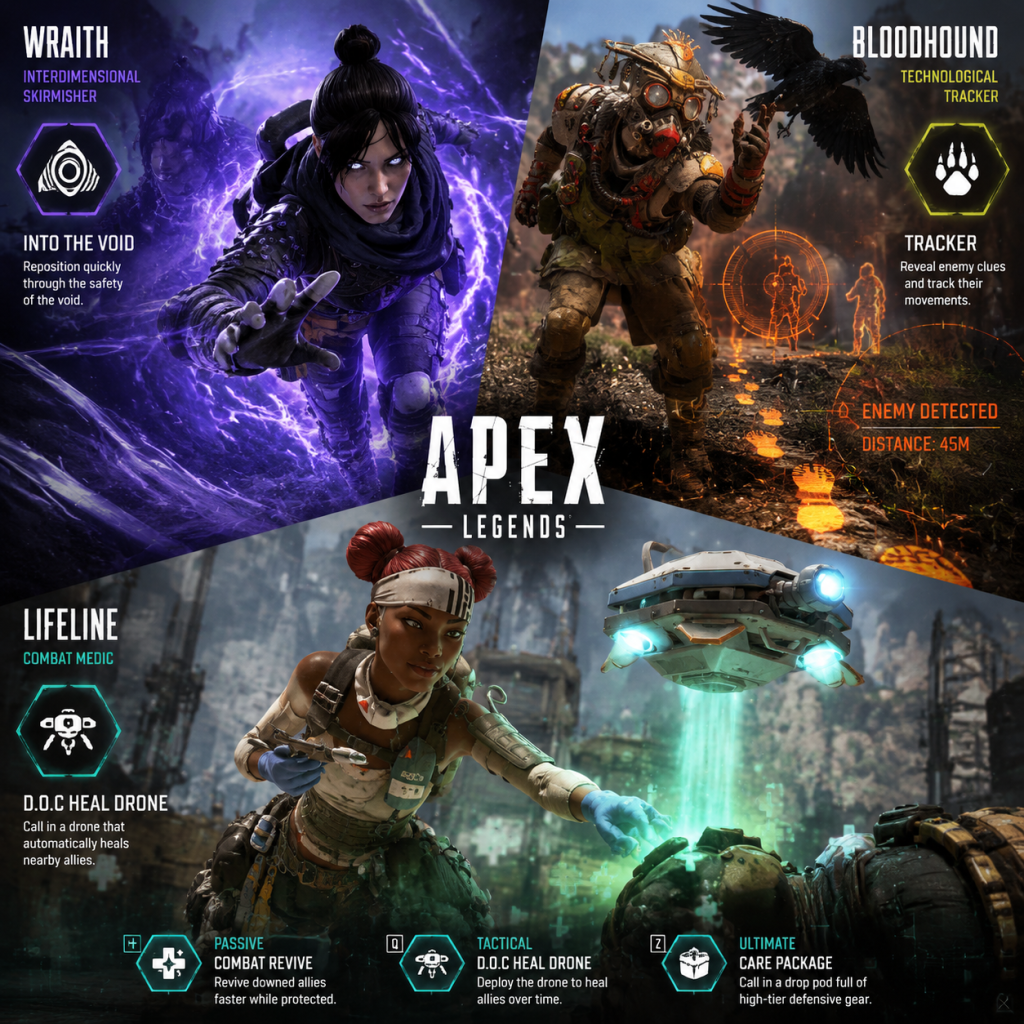
Character Skills
"content": "## Character Skills Guide
This guide covers every Legend in Apex Legends and their unique abilities: Passive, Tactical, and Ultimate. For each skill, you’ll find a detailed description, cooldown times (where applicable), upgrade notes (if any), tips for combos, synergies with other Legends, recommended builds (gear/perks), and best-use scenarios. Legends are ordered alphabetically.
---
---
This guide covers every Legend in Apex Legends and their unique abilities: Passive, Tactical, and Ultimate. For each skill, you’ll find a detailed description, cooldown times (where applicable), upgrade notes (if any), tips for combos, synergies with other Legends, recommended builds (gear/perks), and best-use scenarios. Legends are ordered alphabetically.
---
Ash
- Role: Assault / Recon
- Passive – Marked for Death: Ash’s map shows the locations of all recent death boxes. Interacting with a death box reveals the location of the surviving attackers on the map (once per box).
- Tactical – Arc Snare: Throw a spinning snare that damages and tethers the first enemy hit, slowing them and preventing movement abilities (e.g., Pathfinder’s grapple, Wraith’s Phase). Cooldown: 20 seconds. Duration of tether: 3 seconds.
- Ultimate – Phase Breach: Create a one-way portal to a targeted location up to 50 meters away. The portal lasts 10 seconds and can be used by Ash and her squad. Cooldown: 2 minutes.
- Combos & Synergies: Use Arc Snare to lock down a fleeing enemy for your team to finish. Phase Breach pairs well with aggressive Legends like Octane or Wraith for quick flanks. Combine with Crypto’s drone to push a stunned squad.
- Recommended Build: Focus on close-to-mid range weapons (R-99, Flatline). Use an SMG/Shotgun combo to capitalize on snare immobilization. Perks: Quick Swap or Gun Shield.
- When to Use: Use Phase Breach to reposition behind cover, escape a third party, or close gaps on a pinned squad. Arc Snare is best for interrupting revives or preventing escapes.
- Role: Assault
- Passive – Sling: Ballistic carries a third weapon in a sling. It cannot be upgraded with attachments. He can swap to it faster than normal.
- Tactical – Whistler: Fire a projectile that disables the enemy’s weapon, causing overheating if they fire. The enemy takes damage over time if they continue firing. Cooldown: 15 seconds. Duration: 6 seconds.
- Ultimate – Tempest: Activate to give nearby teammates faster weapon swap speed, infinite ammo for a short duration (no reload needed), and increased movement speed when running with weapons. Duration: 18 seconds. Cooldown: 3 minutes.
- Combos & Synergies: Use Whistler to force enemies to stop shooting, then push while they are weaponless. Tempest synergizes with high-fire-rate weapons (Devotion, R-99) and with Legends like Bloodhound who can scan to keep enemies visible.
- Recommended Build: Prioritize an SMG and a Shotgun for the sling weapon (since it can’t have attachments), and use your main slots for a fully kitted AR or LMG. Perks: Extra Ammo Capacity.
- When to Use: Activate Tempest before a close-quarters team fight or a hot drop to suppress an early squad. Use Whistler to counter an enemy peeking with a sniper – disable their weapon and push.
- Role: Assault
- Passive – Double Time: Taking damage while sprinting makes you move faster for 2 seconds.
- Tactical – Smoke Launcher: Fire a smoke canister that creates a smoke screen on impact. You get one canister per charge, hold up to 2 charges. Cooldown per charge: 20 seconds. Smoke lasts 18 seconds.
- Ultimate – Rolling Thunder: Call in an artillery strike that advances across the landscape, dealing damage and slowing enemies. Duration: 8 seconds. Cooldown: 4 minutes.
- Combos & Synergies: Use smoke to block sightlines for revives or repositioning. Combine with Bloodhound’s tactical to see enemies through smoke, or with Caustic’s gas to create chaotic area denial. Works well with R-301 or Flatline for precision through smoke.
- Recommended Build: Mid-range weapons (G7 Scout, Triple Take) and a close-range backup (EVA-8). Always carry two smoke charges. Perks: Fortified? (No, but consider Fast Cooldown).
- When to Use: Smoke is versatile: cover revives, block enemy sight for a rotation, or confuse opponents. Rolling Thunder is excellent for flushing enemies out of buildings or forcing them out of cover in the open.
- Role: Recon
- Passive – Tracker: See tracks left by enemies (footsteps, recent actions) and receive hints about their direction and time since passage.
- Tactical – Eye of the Allfather: Briefly reveal hidden enemies, traps, and clues in a cone in front of you. Duration of scan: 1.5 seconds. Cooldown: 25 seconds.
- Ultimate – Beast of the Hunt: Transform into an enhanced hunter: gain increased movement speed, see enemy outlines (even through smoke), and highlighted tracks. Duration: 30 seconds. Cooldown: 3 minutes. Can be extended by scanning enemies while active (kills add time).
- Combos & Synergies: Bloodhound is the ultimate team-Wallhack. Pair with Bangalore smoke for free vision on enemies. Ultimate pairs with any aggressive team comp (Octane, Wraith, Horizon). Use tactical before pushing a building to spot traps or campers.
- Recommended Build: SMG (R-99 or Alternator) and a ranged weapon (G7 Scout). Use the ultimate to initiate fights. Perks: Faster Ultimate Charge.
- When to Use: Use tactical when you suspect enemies are nearby but can’t see them. Activate ultimate before a third-party encounter or when you need to clean up a messy fight. The passive is always active – follow tracks to find safe rotations.
- Role: Controller
- Passive – Nox Vision: Enemies inside your gas are highlighted in a distinct green glow (through walls) for you. You are immune to your own gas (but not enemy Nessie gas).
- Tactical – Nox Gas Trap: Place a canister that releases a cloud of Nox gas when triggered by an enemy or shot. You can place up to 6 at once. Cooldown per canister: 15 seconds. Gas duration: 10 seconds, lingering another 2.
- Ultimate – Nox Gas Grenade: Throw a grenade that creates a large Nox gas cloud for 22 seconds. Cooldown: 3 minutes.
- Combos & Synergies: Place traps near doors or revives. Combine with Watson’s fences to create deadly kill boxes. Use gas to block doorways or force enemies to take damage if they push. Works well with Gibraltar’s dome to create a safe gas bubble for you.
- Recommended Build: Shotgun (Mastiff or Peacekeeper) and a fast-firing weapon (R-99). Use traps to hold buildings. Perks: Increased Trap Capacity or Reduced Cooldown.
- When to Use: Gas traps are perfect for area denial in buildings or near loot. Proactively place them before a fight. Use the ultimate to flush enemies out of cover or to break a revive attempt.
- Role: Recon
- Passive – Neurolink: Team also sees what Crypto’s drone sees in a 30m radius – enemies are marked with a red outline.
- Tactical – Surveillance Drone: Deploy a drone that flies, can scan enemies and traps, and can interact with beacons (survey respawn). Drone has 50 HP. Recon duration: indefinite until destroyed or recalled. Cooldown on recall: 40 seconds.
- Ultimate – Drone EMP: Your drone emits an EMP that deals 50 shield damage to all enemies and destroys traps and abilities in a large radius. It also disables enemy shields for a moment. Cooldown: 3 minutes.
- Combos & Synergies: Use drone to scout ahead before pushing. The EMP is a fantastic engagement tool – pair with Wraith portal or Octane jump pad for a coordinated push. Works with Gibraltar dome to place drone safely. Crypto’s passive is great for team coordination.
- Recommended Build: Sniper or marksman (Longbow, Sentinel) and an SMG. Use drone to get intel before peeking. Perks: Faster Drone Speed or Extra HP.
- When to Use: Use drone to check for enemies in a building before entering. Save EMP for enemy squads bunkered in a building or before a third-party attack. Don’t stay in drone for too long; keep track of your own body.
- Role: Assault
- Passive – Grenadier: Each stack of grenades takes up one inventory slot (instead of two). You can also arc grenades farther and faster.
- Tactical – Knuckle Cluster: Fire a cluster bomb that sticks to surfaces or enemies, then explodes into a series of small explosions over 2 seconds. Cooldown: 20 seconds. Charges: 2.
- Ultimate – The Motherlode: Launch a ring of fire that encircles a target area, dealing damage to enemies who cross the ring. Lasts 15 seconds. Cooldown: 3 minutes. The ring is impassable (enemies take damage if they try to cross).
- Combos & Synergies: Use Knuckle Cluster to flush enemies from behind cover or to prevent revives. The Motherlode can trap a team inside a building or cut off a retreat path. Combine with Caustic gas or Bangalore smoke to obscure vision inside the ring. Fuse with a semi-auto weapon (Hemlok, Wingman) to poke from range.
- Recommended Build: Stock up on grenades (frags, thermites, arc stars) due to passive. Use an AR and a shotgun. Perks: Extra Grenade Slot.
- When to Use: Use the motherlode to separate a team or force them into the open. Use Knuckle Cluster as a zoning tool or to pressure a downed enemy being revived. Always carry at least 2 arc stars.
- Role: Support / Controller
- Passive – Gun Shield: When aiming down sights, a gun shield deploys that blocks some damage (50 HP). Shield regenerates when not ADS.
- Tactical – Dome of Protection: Throw a deployable dome that blocks incoming fire from outside and heals allies inside faster (25% faster healing, including shields and revives). Lasts 15 seconds. Cooldown: 30 seconds.
- Ultimate – Defensive Bombardment: Call an artillery strike on a targeted area (circular area). Explosions deal 40 damage each, total 6 shells. Cooldown: 4 minutes.
- Combos & Synergies: Dome is ideal for safely reviving a teammate under fire. Combine with Lifeline’s drone for massive healing. Use Bombardment to force enemies out of cover. Works well in tight circles. Gibraltar is the most reliable anchor Legend.
- Recommended Build: Use an LMG (Spitfire) and a shotgun. The gun shield allows you to win peek fights. Perks: Fortified (naturally) – but consider Fast Revive or Dome Duration.
- When to Use: Always drop the dome when a teammate is down in open ground. Use the ultimate to clear a capture point or during the final circle. The passive is great for dueling – ADS around corners.
- Role: Movement / Recon
- Passive – Spacewalk: Reduced gravity landing – no landing stun. Also, slide speed is slightly increased.
- Tactical – Gravity Lift: Create a vertical column of upward gravity that lifts players up. Teammates can use it; enemies can be lifted but can’t control as well. Duration: 10 seconds. Cooldown: 20 seconds.
- Ultimate – Black Hole: Throw a device that creates a singularity that pulls enemies towards it. The gravitational pull lasts 10 seconds. Cooldown: 3 minutes.
- Combos & Synergies: Gravity Lift is perfect for getting high ground quickly or escaping. Black Hole combos well with grenades (arc stars, frags) or with AoE ultimates (Gibraltar bombardment, Fuse motherlode). Also works with Caustic gas. Use with a strong close-range weapon (R-99, Mastiff) to clean up pulled enemies.
- Recommended Build: SMG + Shotgun or SMG + AR. Use Gravity Lift to engage from unexpected angles. Perks: Faster Ultimate Charge.
- When to Use: Use Gravity Lift to peek over cover or to lift a downed teammate to safety. Black Hole is best used when multiple enemies are clustered – throw an arc star first, then black hole to amplify damage.
- Role: Support
- Passive – Combat Revive: You can revive a downed teammate while still being able to move and shoot, but at a reduced speed. The revive drone deploys and revives for you. Can also heal yourself with the drone.
- Tactical – D.O.C. Heal Drone: Deploy a drone that heals all nearby allies (including you) over time. Heals 10 HP per second, lasts 15 seconds. Cooldown: 45 seconds.
- Ultimate – Care Package: Call in a drop pod with high-tier loot (armor, helmet, knockdown shield, attachments). Cooldown: 5 minutes. The package can be stolen by enemies.
- Combos & Synergies: Lifeline is the ultimate healer. Combine with Gibraltar dome for a safe revive spot. Use D.O.C. to heal after a fight. Care package can give your squad an early advantage but also reveals your position. Works well with any team.
- Recommended Build: Standard weapons; prioritize healing items (shield cells, syringes) to free up inventory for loot from care package. Perks: Faster Ultimate Charge or Extra Healing.
- When to Use: Respawn teammates aggressively with the passive. Drop care package early in the game for gear. Use D.O.C. after fights to avoid using meds. Be wary of enemies looting your care package.
- Role: Support
- Passive – Eye for Quality: All loot – including epic and legendary – shows up on your minimap within a certain range. You can see items through walls.
- Tactical – Burglar’s Best Friend: Throw a bracelet that teleports you to the targeted location. Cooldown: 30 seconds. Distance: up to 50m. Can be cancelled by taking damage or interrupting.
- Ultimate – Black Market Boutique: Place a device that allows you and your squad to grab up to 2 items from the surrounding area (within 60m) – including ammo, attachments, consumables, and weapons. Lasts 60 seconds. Cooldown: 5 minutes.
- Combos & Synergies: Loba is the best loot gatherer. Use Black Market to quickly gear up after landing or to steal from enemies in a nearby building. Teleport to escape or reach high ground. Works well with Crypto (scout then loot) or any team needing gear.
- Recommended Build: Focus on grabbing loot for your team – you don’t need to carry much. Use an SMG and an AR. Perks: Reduced Ultimate Cooldown.
- When to Use: Use Black Market early to secure attachments. Use teleport to escape third parties or to flank. The passive is always useful to spot high-tier loot in a hot zone.
- Role: Assault / Breacher
- Passive – Warlord’s Ire: Temporarily see enemies you’ve damaged through walls for 2 seconds. Also, move faster with shotguns and see their reticle.
- Tactical – Riot Drill: Fire a drill that burns through surfaces, dealing damage over time to anyone in its path. It can penetrate walls, floors, and doors. Duration: 8 seconds. Cooldown: 20 seconds.
- Ultimate – Wrecking Ball: Roll a fast ball that bounces and leaves behind speed pads for teammates. Enemies hit take damage. The ball can destroy enemy traps and doors. Duration: 15 seconds. Cooldown: 3 minutes.
- Combos & Synergies: Use Riot Drill to flush enemies from behind cover or to damage a team hiding in a building. Wrecking Ball is great for pushing a position – the speed pads allow your team to move quickly. Pair with a shotgun (Peacekeeper, Mastiff) to take advantage of passive. Works well with Octane for extremely fast pushes.
- Recommended Build: Shotgun + SMG (R-99) or Shotgun + AR. Use shotgun for close-up damage. Perks: Faster Shotgun Reload or Increased Shotgun Damage.
- When to Use: Use riot drill to prevent revives or to harass campers. Wrecking Ball to initiate a fight or to create chaos – the ball can break caustic traps or Watson fences. The passive is great for tracking after landing shots.
- Role: Support / Stealth
- Passive – Encore!: When knocked down, you become invisible for 3 seconds and deploy a decoy. Also, reviving teammates makes both you and the revived teammate invisible for 3 seconds.
- Tactical – Psyche Out: Send a holographic decoy that runs in the direction you are aiming. You can control it once by pressing the tactical again. Decoy lasts 10 seconds. Cooldown: 15 seconds.
- Ultimate – Life of the Party: Deploy a group of decoys that run around, mimicking your movements. You become invisible for 5 seconds while they are active. Duration: 10 seconds. Cooldown: 3 minutes.
- Combos & Synergies: Use decoys to bait enemies into revealing their position. Ultimate is perfect for escaping or creating confusion in a fight. Combine with Lifeline or Gibraltar for safe revives. Works well with Rampart walls to block sight lines while you disappear.
- Recommended Build: Any weapon works – Mirage is versatile. Use an AR (R-301) and an SMG. Perks: Increased Decoy Duration or Faster Invisibility.
- When to Use: Use decoys to test for enemy presence; if they shoot, you know their location. Use ultimate when you need to reposition without being seen – always behind cover or in smoke. The passive invisibility when knocked can save you from being thirsted.
- Role: Support / Controller
- Passive – Retrieve the Wounded: Drag downed teammates while you can still move and shoot at a reduced speed. Also, you can deploy a mini-shield when reviving that blocks damage to the reviver.
- Tactical – Mobile Shield: Throw a small shield that travels forward and then deploys into a large mobile shield wall. The shield can be destroyed (800 HP). Duration: indefinite until destroyed. Cooldown: 25 seconds.
- Ultimate – Castle Wall: Jump and slam the ground to create a fortified wall with a small platform – blocks enemy fire and provides high ground. Lasts 30 seconds. Cooldown: 5 minutes.
- Combos & Synergies: Newcastle is a mobile tank. Use tactical to create cover while reviving or pushing. Ultimate is great for securing high ground in final zones. Pair with Gibraltar dome to create overlapping cover. Works well with Lifeline for safe revives.
- Recommended Build: LMG (Devotion) and a shotgun. Use the mobile shield to advance. Perks: Shield HP increase or Faster Tactical Cooldown.
- When to Use: Use mobile shield to protect a teammate reviving or to close distance on a sniper. Castle Wall to control a choke or to get an instant high ground platform. The passive allows you to rescue downed teammates even from open areas.
- Role: Assault / Speed
- Passive – Swift Mend: Automatically regenerate health over time when out of combat. Heals 1 HP per second after 6 seconds of not taking damage.
- Tactical – Stim: Use surgical stimulants to increase movement speed by 30% for 6 seconds, at the cost of 20 HP. Cooldown: 4 seconds after duration ends.
- Ultimate – Launch Pad: Deploy a launch pad that launches you and teammates high into the air. Can be used to double jump or to gain altitude. Cooldown: 2 minutes.
- Combos & Synergies: Octane is made for aggressive pushes. Use Stim to rotate faster or dodge shots. Launch pad combos with almost any Legend – use with Wraith for portal + pad, or with Gibraltar to drop a bombardment from the air. Best used with a fast-moving team (Horizon, Pathfinder).
- Recommended Build: SMG (R-99) and a Shotgun – you need high damage up close. Carry a lot of syringes to offset Stim health cost. Perks: Stim Duration extension or Faster Pad Recharge.
- When to Use: Use Stim when rotating to the next circle or when chasing a kill. Use Launch Pad to get high ground or to initiate a team fight. Avoid overusing Stim when near enemies – it leaves you low HP.
- Role: Recon / Mobility
- Passive – Insider Knowledge: Scan survey beacons to reveal the next circle location. Also, zipline usage is faster.
- Tactical – Grappling Hook: Fire a hook that can latch onto surfaces and pull you toward it. Can be used to travel long distances or reach high ground. Cooldown: 20 seconds.
- Ultimate – Zipline Gun: Create a zipline that you and your teammates can use to travel across gaps or between elevated points. Lasts 60 seconds. Cooldown: 3 minutes.
- Combos & Synergies: Pathfinder is excellent for rotations and flanking. Grapple allows you to escape or reposition instantly. Zipline can be used to move an entire squad quickly. Works well with any team composition. Best with a sniper (Sentinel) to control high ground, or an SMG for aggressive grappling.
- Recommended Build: A marksman weapon (Triple Take) and an SMG. Use grapple to get to unexpected angles. Perks: Grapple Cooldown Reduction.
- When to Use: Use grapple to avoid storm damage or to catch an enemy off guard. Use zipline to move your team across open areas safely. Always scan beacons when possible.
- Role: Controller / Defensive
- Passive – Modded Loader: Use LMG weapons with faster reload and increased magazine capacity. Also, you can use the Sheila mobile minigun (part of ultimate).
- Tactical – Amped Cover: Place a wall that provides cover and amplifies outgoing damage (+20% damage through it). Walls have 45 HP and can be destroyed. You can place up to 5 walls at once. Cooldown per wall: 15 seconds.
- Ultimate – Emplaced Fortress (Sheila): Deploy a stationary minigun with 50 rounds that deals high damage per bullet. Can be removed and moved while firing (slowly). Cooldown: 5 minutes.
- Combos & Synergies: Use Amped Cover to block sight lines and boost your team’s damage. Place walls in doorways or behind cover. Sheila is a massive area denial tool – use it to hold a building or to break pushes. Works well with Caustic traps to protect the walls. Combine with Gibraltar dome to protect Sheila.
- Recommended Build: Use an LMG (Spitfire or Devotion) to exploit passive. Also carry a shotgun. Perks: Wall HP increase or faster placement.
- When to Use: Place walls before engaging a fight or when holding a position. Use Sheila when you know a team is pushing you, but be aware you are vulnerable from the side. You can also use Sheila on the move for a short burst.
- Role: Assault / Skirmisher
- Passive – Stalker: Increased climb height and faster crouch walk speed. Also, you can wall-run on vertical surfaces briefly.
- Tactical – Silence: Throw a projectile that, on hit, disables enemy abilities (tactical and ultimate) for 20 seconds. Also does 10 damage. Cooldown: 25 seconds.
- Ultimate – Forged Shadows: Activate to grant yourself and nearby teammates a shadow form: you gain +30 HP as shields, and when you take damage that would knock you down, you instead take shield damage and then revert with some HP. Duration: 30 seconds. Cooldown: 3 minutes.
- Combos & Synergies: Silence is excellent against ability-heavy Legends (Crypto, Lifeline, Gibraltar). Use it before pushing. Forged Shadows is a team fight enabler – push with your squad and the extra shield will give you an edge. Works well with Octane stim + shadow or with Wraith portal for a coordinated team push.
- Recommended Build: SMG + Shotgun (R-99, Mastiff). Use your mobility to flank. Perks: Silence Duration or increased climb height.
- When to Use: Use Silence on key targets – Lifeline before reviving, Wraith before phasing. Use ultimate when you want to force a fight, especially in the final circles. The shadow form allows you to take risks.
- Role: Recon
- Passive – Heart Seeker: While aiming down sights (no scope), you can hear and see heartbeats of nearby enemies within 75m. Also, you can see their location for a brief moment when you fire.
- Tactical – Focus of Attention: Send out a micro-drone that scans a cone in front of you, revealing enemies and interrupting their actions (heals, revives, abilities) and dealing 10 damage. Also shows health and shield info. Cooldown: 30 seconds.
- Ultimate – Exhibit: Deploy a sphere of micro-drones that reveal enemies moving, shooting, or healing inside the sphere. Also, you can track their movement with audio and visual cues. Duration: 30 seconds. Cooldown: 3 minutes.
- Combos & Synergies: Seer is a hard counter to stealth and revives. Use tactical to interrupt a revived attempt or a Lifeline drone. Ultimate is perfect for tracking a team hiding in a building. Pair with Bloodhound for ultimate intel dominance. Works well with a team that can capitalize on enemy locations (snipers, grenades).
- Recommended Build: Sniper (Sentinel) and an SMG. Use passive to detect enemies in buildings. Perks: Faster Tactical Cooldown or Increased Pulse Duration.
- When to Use: Use tactical to cancel an enemy’s heal or revive from range. Use ultimate when you know a team is in a building but won’t come out. The passive lets you pre-aim before peeking.
- Role: Recon / Mobility
- Passive – VTOL Jets: Jump jet pack allows you to hover and boost upwards briefly. Has a fuel meter that recharges when on ground.
- Tactical – Missile Swarm: Fire a swarm of mini-rockets that stun and damage enemies within a small area. Deals 25 damage and 2 seconds stun. Cooldown: 20 seconds.
- Ultimate – Skyward Dive: Launch your entire squad into the air and then skydive to a chosen location. You can spot enemies during the ascent. Cooldown: 4 minutes.
- Combos & Synergies: Use jetpack to get high ground easily. Missile Swarm is great for dislodging enemies from behind cover. Skyward Dive is perfect for rotating long distances or escaping a bad fight. Works with any team – provides unmatched rotation flexibility. Combine with Gibralter dome for safe landings.
- Recommended Build: SMG + Shotgun – you’ll often fight close range after landing from ultimate. Use an AR for mid-range. Perks: Jetpack fuel regeneration speed.
- When to Use: Use jetpack to peek over cover or to avoid damage. Use Missile Swarm to stun enemies before pushing or to interrupt revives. Use ultimate to rotate safely or to third-party a distant fight.
- Role: Recon / Sniper
- Passive – Spotted: When aiming down sights with a sniper rifle, you see the enemy’s shield count and armor type. Also, you have a bat (Echo) that can be used to mark enemies or scout.
- Tactical – Echo Relocation: Send out your bat Echo to a target location, then you can fly (glide) to that location. Can be used to reposition quickly. Cooldown: 30 seconds.
- Ultimate – Personal Spotter (Sniper): Activate to mark a target enemy within 200m, then you and your team get a damage bonus against that enemy for 5 seconds. Also, you gain a temporary sniper with 5 shots (powerful). Duration: 6 seconds. Cooldown: 3 minutes.
- Combos & Synergies: Vantage is the ultimate sniper. Use tactical to get to high ground angles. Ultimate is great for focusing a single enemy – combo with teammates’ heavy damage. Works well with any team that can follow up on your marks. Pair with Bloodhound to see enemies through smoke while sniping.
- Recommended Build: Sniper (Sentinel, Charge Rifle) and an SMG for close range. Use the passive to choose the right shield to target. Perks: Sniper Damage or Faster Reload.
- When to Use: Use tactical to reposition behind cover or onto a ledge. Use ultimate on a priority target (armor-less or low HP) to help your squad wipe them quickly.
- Role: Controller / Defensive
- Passive – Spark of Genius: Use ultimate accelerants to instantly charge your ultimate. Also, you regenerate shield slowly over time. Holding an ultimate accelerant gives you a shield recharge boost.
- Tactical – Perimeter Security: Place an electrical fence that damages and slows enemies who cross. Fence nodes must be placed 2 at a time to connect. Can hold 4 nodes, max 12 nodes placed. Cooldown per node: 10 seconds.
- Ultimate – Interception Pylon: Place a pylon that destroys incoming projectiles (nades, artillery, rockets) and regenerates shields for you and teammates in its radius. Duration: indefinite until destroyed. Cooldown: 3 minutes.
- Combos & Synergies: Wattson is the queen of area denial. Place fences in doorways and choke points. Pylon counters grenades and Gibralter bombardment. Works extremely well with Caustic gas and Rampart walls to create a fortress. Use with a shotgun (Mastiff) to hold buildings.
- Recommended Build: Shotgun + R-301. Use fences to lock down an area. Perks: Increased Fence Damage or Extra Node Capacity.
- When to Use: Always place pylon when holding a building for an extended time. Use fences to protect doors and windows. The passive allows you to keep pylon up with accelerants.
- Role: Assault / Skirmisher
- Passive – Voices from the Void: An inner voice warns you when danger is near (when a sniper is aiming at you or a trap is nearby).
- Tactical – Into the Void: Phase into another dimension for 3 seconds, becoming invulnerable and moving faster. Enemies cannot see you, but you are not completely invisible (you have a trail). Cooldown: 25 seconds.
- Ultimate – Dimensional Rift: Create a portal that appears at your current location and connects to a second location. You and your team can teleport between the two ends. Duration: 60 seconds. Cooldown: 3.5 minutes.
- Combos & Synergies: Wraith is the best for flanking and escapes. Portal allows your team to reposition quickly or rescue a downed teammate. Use tactical to dodge grenades or to peek without risk. Works well with Octane launch pad to extend portal range. Pair with any aggressive team.
- Recommended Build: SMG (R-99) and an AR. Use phase to reposition in fights. Perks: Shorter Phase Cooldown or Faster Portal Activation.
- When to Use: Use phase to rotate to a different position or to escape a firefight. Place portal to bring a downed teammate to safety or to initiate a coordinated push with your team. The passive keeps you alert of threats.
- Role: Controller / Defensive
- Passive – Barricade: Your tactical ferrofluid walls are reinforced and can block enemy scans (like Bloodhound tactical). Also, you can reinforce doors with ferrofluid.
- Tactical – Piercing Spikes: Place a patch of ferrofluid that forms a spiky barrier, slowing and damaging enemies who walk through it. Can be placed on walls or floors. Cooldown: 20 seconds per charge, hold 2 charges. Max 2 patches active.
- Ultimate – Dark Veil: Create a large wall of dark ferrofluid that blocks vision, blocks abilities, and reveals enemies who walk through it. Lasts 30 seconds. Cooldown: 3 minutes.
- Combos & Synergies: Catalyst is a defensive powerhouse. Use Dark Veil to block sight lines for your team or to separate enemies. Piercing Spikes can be placed at doors to deny entry. Combines well with Wattson fences and Caustic gas to create impenetrable areas. Use with a shotgun and LMG.
- Recommended Build: SMG + Shotgun. Use the ultimate to break a third-party or to protect a revive. Perks: Spike Duration or Wall HP.
- When to Use: Use Dark Veil to block an enemy sniper’s view or to create a safe corridor for a rotation. Use Piercing Spikes to discourage enemies from pushing through a door or choke point. The passive door reinforcement can delay enemies.
- Role: Support
- Passive – Savior’s Speed: When running towards a downed teammate, you gain increased movement speed.
- Tactical – Radiant Energizer: Throw a pack of energy batteries that heal nearby teammates for 25 shields instantly and then provides a regeneration of 12 shield per second for 3 seconds. Affects Conduit too. Cooldown: 20 seconds. Max charges: 2.
- Ultimate – Shield Conduit: Create a protective dome that continuously recharges shields for allies inside. Lasts 15 seconds. Cooldown: 3 minutes.
- Combos & Synergies: Conduit is the best shield support. Use tactical to top off shields before a fight. Ultimate is excellent for holding a position or during a siege. Works well with Lifeline (heal HP and shields) or Gibraltar dome. Use with SMG and AR.
- Recommended Build: AR and SMG. Carry many shield cells to share. Perks: Increased Tactical Charge or Faster Regen.
- When to Use: Use tactical before engaging a team to buff shields. Use ultimate when you need to survive a bombardment or when you are bunkering down in the final circle. The passive helps you reach downed teammates quickly.
---
Ballistic
---
Bangalore
---
Bloodhound
---
Caustic
---
Crypto
---
Fuse
---
Gibraltar
---
Horizon
---
Lifeline
---
Loba
---
Mad Maggie
---
Mirage
---
Newcastle
---
Octane
---
Pathfinder
---
Rampart
---
Revenant
---
Seer
---
Valkyrie
---
Vantage
---
Wattson
---
Wraith
---
Catalyst
---
Conduit
---
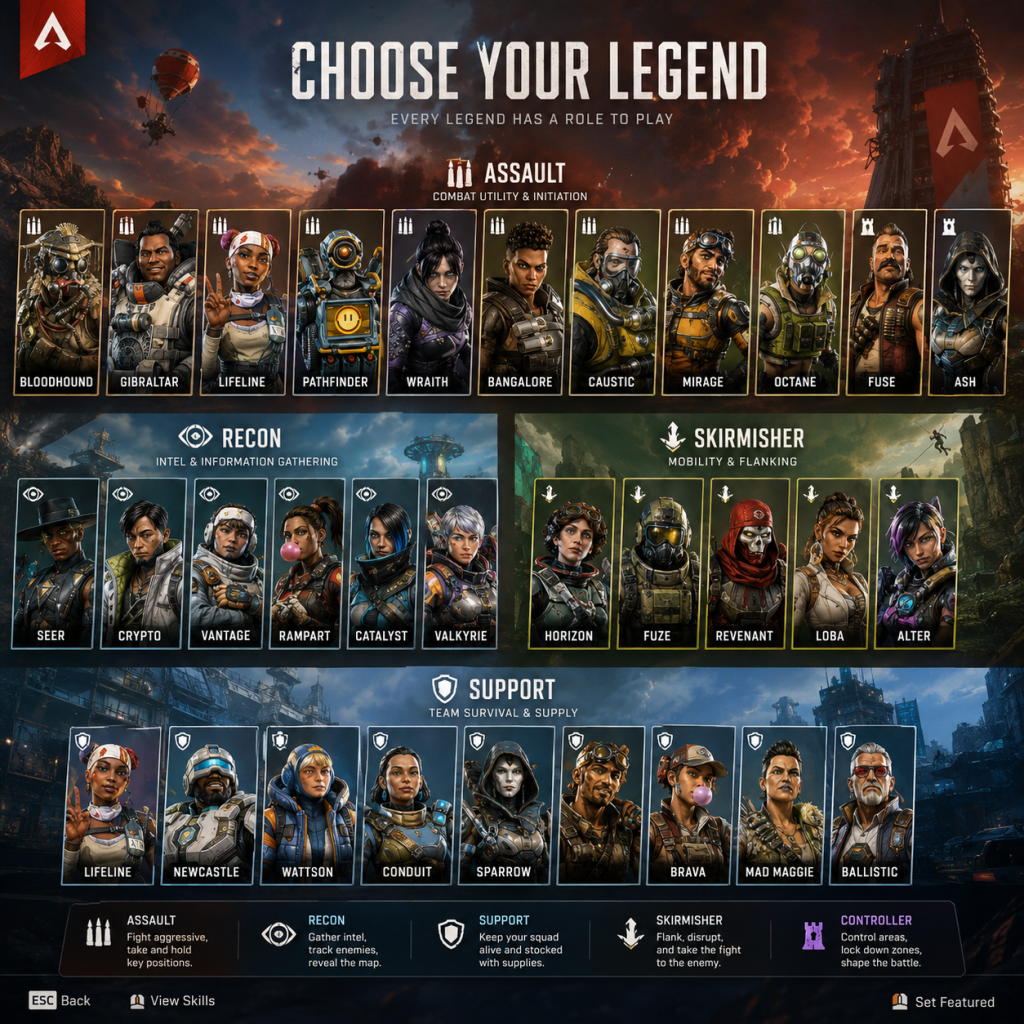
Characters & Roles
"content": "## Characters & Roles
Apex Legends features a diverse cast of characters called Legends, each with unique abilities that fit into one of five classes: Assault, Skirmisher, Recon, Controller, Support. Your choice of Legend determines your team's tactical options and your personal playstyle. Below is a comprehensive guide to every legend, their role, and how to master them.
Unlock conditions: All legends can be unlocked permanently using Legend Tokens (in-game currency earned by leveling up) or Apex Coins (premium currency). The original eight legends (Bloodhound, Gibraltar, Lifeline, Pathfinder, Wraith, Bangalore, Caustic, Mirage) are free from the start. Newer legends require 12,000 Legend Tokens or 750 Apex Coins each.
#### Assault Legends
Bangalore – The Professional Soldier
Apex Legends features a diverse cast of characters called Legends, each with unique abilities that fit into one of five classes: Assault, Skirmisher, Recon, Controller, Support. Your choice of Legend determines your team's tactical options and your personal playstyle. Below is a comprehensive guide to every legend, their role, and how to master them.
Legend Classes Overview
| Class | Playstyle | Key Traits |
|---|---|---|
| Assault | Aggressive fraggers | Access to red weapon bins; abilities designed for direct combat and pushing |
| Skirmisher | Mobile flankers | Ability to reposition quickly; high solo potential |
| Recon | Information gatherers | Can scan ring beacons; abilities reveal enemy locations |
| Controller | Area denial | Access to ring console; abilities create zones of control |
| Support | Team sustain | Access to blue supply bins; abilities heal, revive, or provide supplies |
#### Assault Legends
Bangalore – The Professional Soldier
- Background: Anita Williams, a former IMC soldier, fights with military precision.
- Strengths: Excellent for aggressive pushes; Smoke Launcher provides cover; Double Time passive allows faster movement while under fire.
- Weaknesses: Her smoke can obscure teammates' vision; Rolling Thunder ultimate has a long delay and can be avoided.
- Playstyle: Use smoke to break line of sight, then push with the speed boost. Ult to dislodge campers or deny areas.
- Unlock: Free (original eight).
- Recommended Equipment: Assault rifles (R-301, Flatline) and SMGs. Attachments: extended mag, barrel stabilizer.
- Team Synergy: Pairs well with Bloodhound (scan through smoke) or Caustic (gas + smoke). Good with any comp.
- Background: Dr. Ashleigh Reid, a simulacrum with a tactical mind.
- Strengths: Arc Snare traps enemies; Phase Breach ultimate is a one-way portal for aggressive flanks.
- Weaknesses: No escape ability for herself; ult is one-way and can strand her.
- Playstyle: Use snare to catch fleeing enemies, then portal behind them.
- Unlock: Unlock via 12,000 LT or 750 AC.
- Recommended Equipment: Shotguns (Peacekeeper, Mastiff) and ARs.
- Team Synergy: Works with Valkyrie or Pathfinder for vertical rotations.
- Background: A simulacrum assassin seeking revenge.
- Strengths: Stalker passive lets him climb higher and crouch-walk faster; Silence tactical disables enemy abilities; Death Totem ultimate gives a second chance.
- Weaknesses: Silence has short range; Death Totem can be destroyed; large hitbox.
- Playstyle: Flank and silence key enemies; use totem before a risky push.
- Unlock: Unlock via 12,000 LT or 750 AC.
- Recommended Equipment: SMGs (Alternator, R-99) and marksman weapons.
- Team Synergy: Great with Octane (fast push with totem) or Pathfinder.
- Background: Walter Fitzroy, a bomb-loving outlaw.
- Strengths: Grenadier passive allows double grenade stack and aiming trajectory; Knuckle Cluster tactical deals area damage; The Motherlode ultimate creates a ring of fire.
- Weaknesses: Abilities can hurt himself; ult is slow and easy to avoid.
- Playstyle: Spam grenades and knuckle clusters to zone enemies; use ult to trap teams in buildings.
- Unlock: Unlock via 12,000 LT or 750 AC.
- Recommended Equipment: Shotguns and LMGs (Spitfire, Devotion).
- Team Synergy: Works with Caustic or Wattson for area denial combos.
- Background: Maggie leads the Salvo rebellion with a shotgun in hand.
- Strengths: Warlord's Ire passive highlights enemies she damages; Riot Drill tactical goes through walls; Wrecking Ball ultimate breaks cover and speeds allies.
- Weaknesses: Shotgun focus limits range; ult can bounce unpredictably.
- Playstyle: Aggressive shotgun play; use drill to flush out campers; ult to break defensive positions.
- Unlock: Unlock via 12,000 LT or 750 AC.
- Recommended Equipment: Shotguns (Peacekeeper, Mozambique with hammerpoint), secondary SMG or AR.
- Team Synergy: Pairs with Ballistic or Bloodhound for damage focus.
- Background: Augustus Ballistic, a former legend from the early Apex Games.
- Strengths: Sling passive lets him carry a third weapon; Whistler tactical disarms enemies; Tempest ultimate gives squad unlimited ammo and faster reloads.
- Weaknesses: Whistler requires accuracy; sling weapon must be unmodded.
- Playstyle: Use sling for a backup sniper or shotgun; ult in teamfights for firepower boost.
- Unlock: Unlock via 12,000 LT or 750 AC.
- Recommended Equipment: All weapon types; consider a sniper in sling.
- Team Synergy: Great with any team; ultimate benefits whole squad.
- Background: Renee Blasey, a scientist who can manipulate dimensions.
- Strengths: Voices from the Void passive warns of danger; Into the Void tactical gives invulnerability and speed; Dimensional Rift ultimate creates portals for team movement.
- Weaknesses: Tactical leaves a visual trace; portal can be used by enemies.
- Playstyle: Use tactical to escape or reposition; place portals for rotations or rescue.
- Unlock: Free.
- Recommended Equipment: SMGs and ARs; lightweight weapons.
- Team Synergy: Works with any team; best with aggressive or rotational comps.
- Background: Octavio Silva, a thrill-seeker with mechanical legs.
- Strengths: Swift Mend passive heals over time; Stim tactical grants speed at health cost; Launch Pad ultimate for team jumps.
- Weaknesses: Stim damages health; launch pad can be heard and predicted.
- Playstyle: Constantly move; use stim for flanks; place launch pads for high ground.
- Unlock: Unlock via 12,000 LT or 750 AC.
- Recommended Equipment: SMGs and shotguns; movement friendly.
- Team Synergy: Great with Revenant (totem push) or Pathfinder.
- Background: MRVN robot with a grappling hook.
- Strengths: Grapple tactical provides insane mobility; Zipline Gun ultimate for team movement; Insider Knowledge passive reveals next ring location.
- Weaknesses: Large hitbox; grapple has long cooldown if missed.
- Playstyle: Use grapple to gain height or escape; place ziplines for rotations.
- Unlock: Free.
- Recommended Equipment: SMGs and shotguns; any weapon works.
- Team Synergy: Pairs well with Wraith or Octane for fast rotations.
- Background: Elliott Witt, a lovable prankster.
- Strengths: Psyche Out tactical creates decoys; Life of the Party ultimate creates multiple clones while turning invisible for a moment; Now You See Me passive makes him invisible while reviving.
- Weaknesses: Decoys are obvious to experienced players; ult requires timing.
- Playstyle: Use decoys to confuse enemies; play mind games; revive teammates safely.
- Unlock: Free.
- Recommended Equipment: Shotguns and SMGs; high burst damage.
- Team Synergy: Works with any team; good with support legends.
- Background: Dr. Mary Somers, a physicist.
- Strengths: Gravity Lift tactical lifts her and allies for high ground; Black Hole ultimate pulls enemies together; Spacewalk passive reduces fall impact.
- Weaknesses: Ult can be destroyed; gravity lift is predictable.
- Playstyle: Use lift to gain height and peek; ult to cluster enemies for grenades.
- Unlock: Unlock via 12,000 LT or 750 AC.
- Recommended Equipment: ARs and SMGs; weapons that benefit from height advantage.
- Team Synergy: Works with Caustic or Fuse for combo ults.
- Background: Kairi Imahara, daughter of a Titan pilot.
- Strengths: Jetpack passive allows limited flight; Missile Swarm tactical deals damage and disorients; Skyward Dive ultimate launches the entire team into the air to reposition.
- Weaknesses: Jetpack fuel runs out; ult requires open area and is loud.
- Playstyle: Use jetpack for verticality; scan beacons; ult for rotation or escape.
- Unlock: Unlock via 12,000 LT or 750 AC.
- Recommended Equipment: Shotguns and SMGs; weapons that
Ash – The Incisive Mechanic
Revenant – The Synthetic Nightmare
Fuse – The Explosive Enthusiast
Mad Maggie – The Rebel Warlord
Ballistic – The Retired Veteran
#### Skirmisher Legends
Wraith – The Interdimensional Skirmisher
Octane – The Adrenaline Junkie
Pathfinder – The Forward Scout
Mirage – The Holographic Trickster
Horizon – The Gravitational Manipulator
Valkyrie – The Winged Avenger
Cheats & Secrets
Cheats & Secrets
Apex Legends is a competitive online multiplayer game, and as such, no traditional cheat codes (e.g., invincibility, infinite ammo, god mode) exist in the official game. Using unauthorized third-party cheats or hacks violates EA’s terms of service and can result in permanent bans. However, Respawn Entertainment has hidden numerous Easter eggs, developer-intended secrets, and interactive hidden content across maps and modes. This guide documents all known legitimate secrets.
---
No Cheat Codes
Apex Legends does not have debug codes, console commands, or unlockable cheats. All gameplay benefits come from skill, loot, and legend abilities. The following sections cover only hidden, intentional content designed to be discovered by players.
---
Easter Eggs & Interactive Secrets
#### Nessie Plushies
Nessie, the Loch Ness monster, is a recurring Easter egg across all battle royale maps (Kings Canyon, World’s Edge, Olympus, Storm Point, Broken Moon). Each map has multiple hidden Nessie plushies that can be shot or punched. Collecting them triggers no reward, but they are a nod to Respawn’s Titanfall series.
- Kings Canyon: Found in Swamps (underwater cave), Bunker (ventilation shaft), and Skull Town (not available since season 5).
- World’s Edge: Near Fuel Depot, inside a train car, and at the top of The Geyser.
- Olympus: Inside the waterfall at Rift, near the Phase Runner tunnel.
- Storm Point: Under the pier at The Mill, inside a cave near Checkpoint.
- Broken Moon: Inside the Biodome, near the Brontosaurus statue.
- Smart Dummies: Walk to the small tunnel under the central platform, find a crate labeled “Apex Pack,” and interact with it (press ‘E’ on PC). The training dummies will turn hostile, move, and shoot back. Great for practice.
- Secret Loot Room: On the far right side of the range, shoot the three targets in order: top-left, bottom-right, top-right (or vice versa; timing matters). A panel will open revealing a room with high-tier loot (gold weapons, armor, etc.). This refreshes each time you exit and re-enter.
- Nessie’s Chest: Above the central pavilion, a hidden Nessie plushie floats. Shoot it to drop a crate with loot.
- Unlocking the Mozambique: There is no legitimate way to spawn the Mozambique with gold bullets; that was a removed Easter egg. However, you can still find the golden Mozambique on some map Easter eggs (see below).
- Kings Canyon’s Leviathans: In earlier seasons, giant leviathans could be seen roaming the map. They have since been removed but appear in some trailers.
- Titanfall References: Abandoned Titans (e.g., on World’s Edge near the train tracks) are model references to Titanfall. You can climb on them but not pilot them.
- The Moon in Olympus: Shooting the moon with a sniper rifle causes it to wobble; this is a callback to Titanfall 2’s moon Easter egg.
#### Mirage’s Party Boat (World’s Edge)
On World’s Edge, a large ship (Mirage Voyage) occasionally appears near Fragment East. You can enter the ship, find a button inside the cockpit, and press it to trigger party lights and music. This is a permanent Easter egg added in Season 4.
#### Firing Range Secrets
The Firing Range (accessible from the main menu) contains multiple hidden interactions:
#### Golden Mozambique Easter Egg (Kings Canyon)
In Kings Canyon (season 3-5, now accessible only in LTMs), there was a secret weapon locker near The Cage. Shooting a series of glowing targets in the correct sequence would open a vault containing a golden Mozambique (full auto, high damage). This Easter egg was removed with the map rotation overhaul but may return in limited-time modes.
#### Dummy’s Big Day (April Fools)
Every year around April 1st, Respawn releases a limited-time mode called “Dummy’s Big Day” where all legends are replaced with training dummies with random abilities. This is a developer-intended seasonal joke; look for it annually.
#### The Skybox and Ring Easter Eggs
#### Collectible Lore Items
Across maps, you can find hidden lore objects (e.g., data pads, login terminals) that play voice logs or reveal backstory. These are not interactive but provide context for the Apex Games. Example: In the Locked Vault on Kings Canyon (requires key card), you can find lore about Ash.
---
Exploit-Safe Secrets (No Cheating)
#### Quip Wheel Secrets
Some legends have unique quips that can be activated in specific locations. For example, Wraith has a voice line that references a “void” when standing near certain portals. No gameplay effect, but fun for lore.
#### Pathfinder’s “Secret” Voice Line
If you play Pathfinder and grapple onto a specific spot (e.g., the top of the waterfall on Olympus), he might say a rare line about being “the best robot.” This is random and purely cosmetic.
---
Developer-Intended Hidden Content
#### Easter Egg Hunt Challenges
During special events (e.g., The Collection Event), Respawn hides lootable treasure packs on the map. These are temporary and grant event rewards. In 2022, the “Easter Egg Hunt” event required finding hidden character-themed eggs.
#### Jump Pad Trickjumps
Not a cheat, but advanced players use Octane’s jump pad with a specific crouch timing to perform a “super jump.” This is an exploit by design, allowed.
---
Conclusion
Apex Legends has no conventional cheats. All legitimate secrets are cosmetic Easter eggs, lore nods, or hidden training mechanisms. Avoid using third-party software or hardware cheats, as they are detected and punished severely. Instead, enjoy hunting Nessies and exploring every corner of the Apex Games.