ARK: Survival Evolved
## Overview **ARK: Survival Evolved** is an open-world survival sandbox game that thrusts players onto a mysterious island teeming with dinosaurs, mythical creatures, and hostile environments. Developed by **Studio Wildcard** and published by **Studio Wildcard** (with additional support from **Inst...
Download & Installation
Overview
ARK: Survival Evolved is a massive open-world survival game set on a mysterious island populated with dinosaurs and other prehistoric creatures. This guide covers legitimate download sources and step-by-step installation for all major platforms, system requirements, account setup, common errors, and post-install verification. The base game is required before applying any downloadable content (DLC) or expansion packs.
Platforms and Legitimate Download Sources
| Platform | Official Store / Source | Notes |
|---|---|---|
| PC (Steam) | [Steam Store](https://store.steampowered.com/app/346110/ARK_Survival_Evolved/) | DRM: Steam. Includes all updates and multiplayer access via Steam servers. |
| PC (Epic Games Store) | [Epic Games Store](https://store.epicgames.com/en-US/p/ark-survival-evolved) | DRM: Epic Online Services. Crossplay with Steam is limited to specific servers (official servers are cross-ark but not full crossplay). |
| PlayStation 4 / 5 | PlayStation Store (requires PlayStation Plus for online multiplayer) | PS4 version runs via backward compatibility on PS5; PS5 native version available (ARK: Survival Evolved – PS5 Edition). |
| **Xbox One / Series X | S** | Microsoft Store (Xbox Game Pass included with Ultimate/Game Pass Core is not sufficient; requires at least Game Pass Console or Game Pass Ultimate for online play). |
| Nintendo Switch | Nintendo eShop (digital) or retail cartridge | The Switch version is a port by Grove Street Games; performance and graphics are significantly downgraded. |
| Mobile (iOS / Android) | App Store (iOS) / Google Play Store (Android) | This is a separate mobile version (ARK: Survival Evolved Mobile) with microtransactions and different mechanics. It is NOT cross-platform with PC/console. |
System Requirements (PC)
Minimum Requirements (for playable performance at low settings 720p)
- OS: Windows 7/8.1/10 (64-bit) or macOS Mojave (10.14) or Ubuntu 18.04 (Linux – experimental, via Steam Play)
- Processor: Intel Core i5-2400 / AMD FX-8320 or better
- Memory: 8 GB RAM
- Graphics: NVIDIA GTX 670 2GB / AMD R9 270X 2GB or better (DirectX 10 compatible)
- DirectX: Version 10
- Network: Broadband Internet connection
- Storage: 250 GB available space (base game ~100 GB; DLCs add 30-40 GB each)
- OS: Windows 10/11 (64-bit)
- Processor: Intel Core i7-4770 / AMD Ryzen 5 1600X
- Memory: 16 GB RAM
- Graphics: NVIDIA GTX 1070 8GB / AMD RX 580 8GB or better (DirectX 12 capable)
- DirectX: Version 12
- Network: Broadband Internet connection
- Storage: 300 GB SSD (recommended for faster loading times)
- Steam: A Steam account is required. The game is tied to your Steam license.
- Epic Games: An Epic Games account is required. You must be logged into the Epic Launcher.
- PlayStation: A PlayStation Network (PSN) account is required. Multiplayer needs an active PlayStation Plus subscription.
- Xbox: A Microsoft account (Xbox profile) is required. Online multiplayer requires Xbox Game Pass Core (formerly Xbox Live Gold) or Game Pass Ultimate.
- Nintendo Switch: A Nintendo Account is required for eShop purchases. Online multiplayer (server access) is free; no subscription needed for the Switch version (but dedicated servers are limited).
- Mobile: An Epic Games account (optional but recommended for cross-save between iOS and Android). No subscription required.
- Cause: ARK installation is very large. Even if you have 100 GB free, the installer may require additional temporary space (up to double the download size).
- Fix: Clear unnecessary files, uninstall other games, or free up at least 300 GB (for base game plus future updates). Consider installing on an external drive.
- Cause: Server congestion, network issues, or corrupted download cache.
- Fix:
- Cause: Missing or outdated Visual C++ Redistributables, DirectX, or .NET Framework.
- Fix:
- Cause: ARK is unoptimized; may need tweaks.
- Fix:
- Cause: Corrupted config files, incompatible mods, or insufficient permissions.
- Fix:
- Cause: Firewall blocking, NAT issues, or server maintenance.
- Fix:
- Cause: DLC not enabled or not downloaded.
- Fix:
Recommended Requirements (for high/ultra settings at 1080p 60fps)
Note: ARK is notorious for high storage demands. Including all free DLC maps (The Island, Scorched Earth, Ragnarok, Valguero, Crystal Isles, Lost Island, Fjordur) and expansion packs (Aberration, Extinction, Genesis Part 1 & 2) the total game size can exceed 400 GB. Plan your drive space accordingly.
Step-by-Step Installation per Platform
PC – Steam
1. Install the Steam client from [store.steampowered.com](https://store.steampowered.com). Create or log into your Steam account.
2. In the Steam client, use the search bar (top right) to find "ARK: Survival Evolved".
3. Click the game in the results, then click the "Add to Cart" or "Play Game" button. If you haven't purchased it, proceed to checkout. (If you already own it, it will show "Install".)
4. Once purchased, click "Install". A dialog will appear asking for installation location. Choose a drive with at least 200 GB free space (more if you plan to install DLCs later).
5. Click "Next" and then "Install". The download will begin. ARK is large (approx 100 GB base game). Ensure stable internet connection.
6. After download, Steam will verify and install. The game will appear in your Library under "Ready to play".
7. Optional: To install DLCs or free maps, right-click ARK in Library → Properties → DLC tab → check each DLC you want. They will download automatically.
PC – Epic Games Store
1. Install the Epic Games Launcher from [store.epicgames.com](https://store.epicgames.com). Create or log into your Epic Games account.
2. In the launcher, search for "ARK: Survival Evolved".
3. Click on the game and select "Get" (if free or purchased) or "Buy". Complete purchase if needed.
4. After acquiring the license, click "Install". Choose installation directory (ensure sufficient space).
5. Click "Install". The launcher will download the game. It may take several hours.
6. Once installed, a "Launch" button will appear. Click to start the game.
PlayStation 4 / 5
1. On your PS4 or PS5, navigate to PlayStation Store.
2. Search for "ARK: Survival Evolved".
3. Select the game (PS4 version; PS5 users can also get the free PS5 upgrade if available).
4. Click "Download" or "Purchase". If you have a disc, insert it and follow on-screen prompts.
5. The console will download and install the game. You can monitor progress from the Home screen.
6. Once installed, the game icon appears. Launch and allow any required updates.
7. For online multiplayer, ensure you have an active PlayStation Plus subscription.
Xbox One / Series X|S
1. On your Xbox, open the Microsoft Store (or the Game Pass app if you have Game Pass).
2. Search for "ARK: Survival Evolved".
3. If you have Game Pass Ultimate or Game Pass Console, you can install it at no extra cost. Otherwise purchase the game.
4. Select "Install" and choose a location (Internal or external storage). Ensure at least 200 GB free.
5. The download begins. You can resume later if interrupted.
6. After installation, the game appears in your library. Launch and install any updates.
7. Xbox Live Gold (now Game Pass Core) is required for online multiplayer on Xbox One; Series X|S uses Xbox Game Pass Core or higher for online.
Nintendo Switch
1. From the Nintendo Switch home screen, open the Nintendo eShop.
2. Search for "ARK: Survival Evolved". Note: The eShop version is the full base game; DLCs may be sold separately (check the "Add-On Content" section).
3. Select the game and click "Proceed to Purchase" or "Download". If you have a physical cartridge, insert it and follow prompts; you may still need to download a substantial update (often 10+ GB).
4. Digital: The download will start. You can check progress from the Home screen. ARK on Switch is around 15-20 GB due to compressed assets.
5. After installation, launch the game. Be prepared for lower performance (target 30 fps, dynamic resolution).
Mobile (iOS/Android)
1. Open the App Store (iOS) or Google Play Store (Android).
2. Search for "ARK: Survival Evolved Mobile". Ensure you download the official version by Studio Wildcard.
3. Tap "Get" or "Install". The free app includes the base map (The Island) with optional in-app purchases for cosmetics and faster progression.
4. Once installed, open the app. It will download additional assets (approx 2-4 GB) on first launch. Use Wi-Fi to avoid data charges.
5. Create an Epic Games account or log in to sync progress across devices (iOS/Android).
Account Requirements
First Launch Setup
After installation, launch the game. The following steps are common across platforms:
1. Title Screen: You may see a message about DLCs or updates. Click "Play".
2. Mod Selection (PC only): If you have Steam, you may see an optional mod manager (Steam Workshop). For now, skip or disable mods for first launch; you can add them later.
3. EULA and Privacy: Accept the End User License Agreement and privacy policy.
4. Graphics Settings: The game will attempt to auto-detect settings. You can adjust:
- Resolution, fullscreen/windowed
- Graphics quality (Low/Medium/High/Epic)
- View distance, textures, post-processing, shadows, anti-aliasing, etc.
- Recommended: Start with Medium settings on PC with 8GB RAM; adjust up or down based on performance.
5. Account Login (if needed): For Epic/Steam, it will automatically use your launcher account. On consoles, you may see a prompt to link to Epic Games for cross-progression (optional).
6. Server Selection: You can choose:
- Single Player (play offline)
- Official Servers (public, online)
- Non-dedicated Session (host a session for friends)
- Player Dedicated Servers (join via IP)
- (Mobile) Server browser limited.
Select "Official Server" to connect to the internet and verify your account works.
7. Create Character: You'll be prompted to create a survivor. This is cosmetic; you can customize later.
8. Spawn: After character creation, you'll spawn on the selected map. The game will show basic tutorial prompts.
If the game crashes at first launch, see the next section.
Common Installation Errors and Fixes
Error: Not enough disk space
Error: Steam/Epic download stuck at 0% or slow
- Restart the launcher.
- Verify integrity of game files (Steam: right-click game → Properties → Local Files → Verify integrity of game files).
- Clear download cache: Steam → Settings → Downloads → Clear Download Cache; Epic: Settings → Manage Games → verify files.
- Disable firewall/antivirus temporarily (but be cautious).
Error: Application failed to launch / Missing DLL / C++ Runtime errors
- Install the latest Visual C++ Redistributable packages (2015-2022 x64 and x86) from Microsoft.
- Install DirectX End-User Runtimes from Microsoft (web installer).
- Update your graphics drivers (NVIDIA/AMD/Intel).
- On Windows, run the game as administrator.
Error: Low FPS / Stuttering after installation
- Lower graphics settings: especially shadows, post-processing, and view distance.
- Disable "Light Bloom" and "Light Shafts" in Advanced Options.
- Set resolution scaling to 70-80%.
- Ensure your GPU supports DirectX 12 (set launch option `-dx12` on Steam for better performance).
- On low-end PCs, use launch options: `-USEALLAVAILABLECORES -sm4 -d3d10 -nomansky -lowmemory` (be careful: may reduce visuals significantly).
Error: "Ark has stopped working" or crash on launch
- Delete the `Saved` folder located in `%USERPROFILE%\AppData\Local\ARK\Saved\` (Windows). This resets settings.
- Disable all mods in Steam Workshop.
- Update GPU drivers.
- Run game as administrator.
- On Epic, try launching with `-norhithread` command line argument (add in Epic launcher game properties).
Error: Online connection issues (Unable to connect to servers)
- Allow ARK through Windows Firewall (add exception for `ShooterGame.exe` and `Steam.exe` or `EpicGamesLauncher.exe`).
- Restart router and console/PC.
- Check [ARK Server Status](https://status.ark.game/) for maintenance.
- If on console, ensure your subscription (PS Plus / Game Pass Core) is active.
Error: DLC not appearing after installation
- On Epic: Go to Library → ARK → Manage Add-ons → ensure DLCs are installed.
- On Console: Check your library and download DLC separately from store.
Post-Installation Verification
To ensure your installation is complete and working:
1. Launch the game and reach the main menu without crashes.
2. Connect to an Official Server (or Single Player) and load a map. Verify that the map terrain, dinosaurs, and UI appear correctly.
3. Check file integrity (optional but recommended):
- Steam: Right-click ARK → Properties → Local Files → Verify integrity of game files.
- Epic: Click the three dots under ARK → Manage → Verify.
- Console: No built-in verification; reinstall if issues persist.
4. Monitor performance: Play for at least 10 minutes. If frames are consistently below 30 fps on medium settings, consider lowering graphics.
5. Confirm DLC Maps: In the main menu, go to "Host/Local" and see if additional maps (Scorched Earth, Ragnarok, etc.) are listed. If not, ensure DLCs are installed.
6. Update drivers: If you experience graphical artifacts, update your GPU drivers to the latest version.
Important: ARK frequently receives updates. Keep the game up to date. On Steam/Epic, enable automatic updates. On consoles, enable automatic downloads in system settings.
---
This guide references ARK: Survival Evolved version as of 2025. Always check official sources (Studio Wildcard, snailgames) for the latest patch notes and storage requirements.
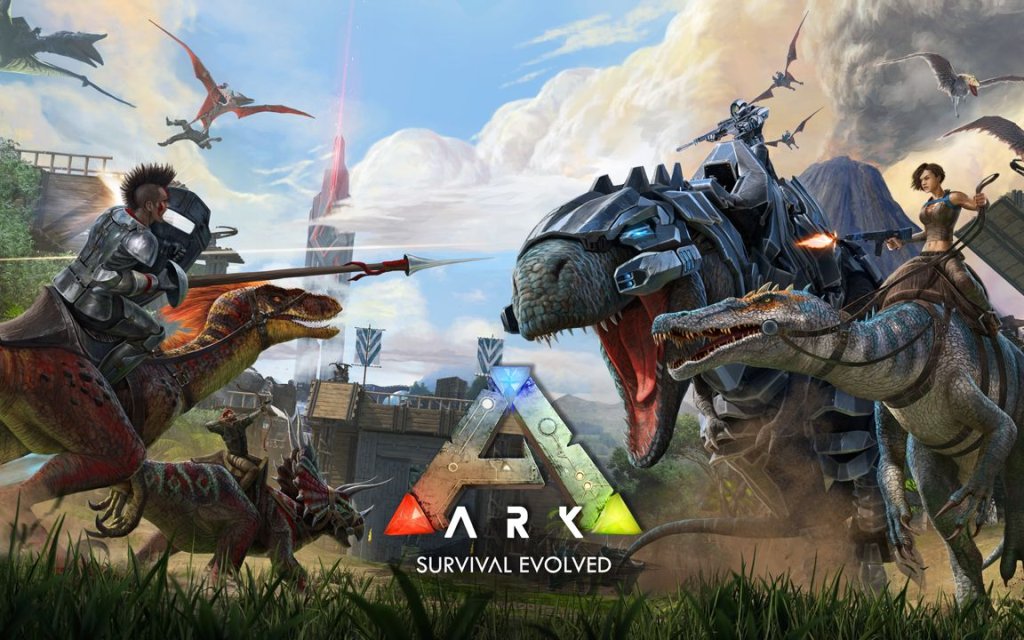
Game Introduction
Overview
ARK: Survival Evolved is an open-world survival sandbox game that thrusts players onto a mysterious island teeming with dinosaurs, mythical creatures, and hostile environments. Developed by Studio Wildcard and published by Studio Wildcard (with additional support from Instinct Games, Efecto Studios, and Virtual Basement for ports), the game launched in Early Access on Steam in June 2015, with a full release on August 29, 2017 for Windows, PlayStation 4, and Xbox One. It has since expanded to Nintendo Switch (2018), Android & iOS (2018), Stadia (2020), and current-gen consoles (PlayStation 5, Xbox Series X/S – 2022/2023).
Story & Setting
You begin as a stranded survivor on the ARK, a vast, uncharted island alive with dinosaurs, mammoths, and giant insects. The central mystery: who built the ARKs? Collect Explorer Notes left by previous inhabitants to piece together the narrative of an ancient alien race, the Overseers, and a war between the Federation and the Brood. The ultimate goal is to defeat the final bosses and ascend to the next ARK, unlocking the true story across The Island, Scorched Earth, Aberration, Extinction, and Genesis expansions. The setting evolves from primal wilderness to post-apocalyptic wastelands, futuristic biomes, and even space. Each map ties into a larger lore about humanity's survival and the enigmatic ARK systems.
Main Characters
While ARK is player-driven, key NPCs feature in the storyline:
- Helena Walker – A paleontologist whose Explorer Notes and diary entries guide players through the lore. Her journey from survival to understanding the ARKs forms the emotional backbone.
- Diana Slaney – A survivor who becomes a leader on The Island, eventually sacrificing herself for others.
- Li Mei – A resourceful engineer whose notes document the technological wonders and dangers of the ARKs.
- Gaius Marcellus – A Federation soldier whose logs reveal the dark side of the ARK experiments.
- The Overseer – The final AI boss of The Island, part of the ancient system testing survivors.
- The Titans – Colossal creatures like the King Titan, Corrupted Master Controller, and the Forest, Ice, and Desert Titans that serve as endgame bosses in later maps.
- Survival game enthusiasts who enjoy resource management, crafting, and base-building.
- Dinosaur and prehistoric fans seeking a realistic (and fantastical) creature-filled world.
- PvP players who thrive on high-stakes tribe warfare and territorial control.
- PvE players who prefer cooperative base-building and boss fights.
- Sandbox gamers who love emergent gameplay, mods, and player-driven stories.
- Roleplayers who can create custom scenarios on dedicated servers.
- Single Player – Offline mode with adjustable settings (tame speed, difficulty, etc.). Progress saves locally.
- Official Servers (PvP, PvE, or Survival of the Fittest) – Persistent online worlds with strict rules and large player bases.
- Unofficial Servers – Player-hosted servers with custom rates, mods (via Steam Workshop), and maps.
- Non-Dedicated Sessions – Host a game locally and invite friends (tether distance limit).
- ARK: Survival of the Fittest (SotF) – Standalone battle royale mode (removed from main game but playable via mods).
- Online: Full multiplayer across all platforms (crossplay supported within console/PC families but not fully unified). Official servers require internet. Unofficial servers can be accessed online.
- Offline: Single-player and non-dedicated sessions can be played entirely offline, with saved progress. Note: Some features (dino downloads, server transfers) require online connection.
- Dedicated Servers: Available on PC and some console versions for persistent worlds.
Core Appeal
ARK’s primary draw is its unmatched scale of freedom and creativity. Hundreds of tameable dinosaurs and creatures—from the humble Dodo to the colossal Giganotosaurus—can be ridden, bred, and used in combat, farming, or transport. Players can build sprawling bases, craft complex gear, form tribes, and engage in PvP or PvE. The game rewards exploration with rare resources, blueprints, and hidden caves. Its real persistence (world continues even when offline) and deep taming mechanics (knockout, passive, or nursing) create a truly immersive survival loop.
Target Audience
ARK appeals to:
Game Modes
Online/Offline Support
DLC & Expansions
ARK features three major paid expansions (often called “maps”) plus a season pass:
| Expansion | Release | Key Features |
|---|---|---|
| Scorched Earth (Sep 2016) | Desert biome, new creatures (Wyvem, Rock Elemental), sandstorms, and a new boss (Manticore). | |
| Aberration (Dec 2017) | Underground biome with radiation, no flyers, hazard suits, new creatures (Ravager, Karkinos), and a unique boss (Rockwell). | |
| Extinction (Nov 2018) | City ruins, corrupted creatures, robotic dinos, Titans as tameable bosses, and the King Titan final boss. | |
| Genesis Part 1 (Feb 2020) | Space station biome, mission system, HLN-A companion, new creatures (Bloodstalker, Magmasaur), and “Chibi” pets. | |
| Genesis Part 2 (Jun 2021) | Huge spaceship map, space travel, new creatures (Voidwyrm, Astrocetus), and the final showdown with Rockwell. |
What Makes ARK Unique?
1. Unprecedented Creature Taming & Breeding – Over 100+ creatures with distinct taming methods, mutations, and imprinting mechanics. Breeding allows you to create super-dinos with specific stats and colors.
2. Extreme Scale & Persistence – Worlds with thousands of players, massive bases, and 24/7 server uptime. Your progress (or destruction) is always at risk.
3. Living Ecosystem – Dinosaurs interact with each other and the environment. Pack animals like Raptors hunt together; herbivores migrate; weather affects behavior.
4. Vertical Progression – From stone tools to tek armor, laser rifles, and space travel. Technology tiers mirror narrative advancement.
5. Modding Community – Steam Workshop support for maps, creatures, items, and total conversions (e.g., Primal Fear, ARK Additions).
6. Free Post-Launch Content – Regular updates with new creatures, items, and events (e.g., Winter Wonderland, ARK: Fear Evolved).
7. Cross-Platform Play (partial) – Xbox, Windows Store, Playstation, and Switch have limited crossplay between same ecosystems.
Whether you want to build a rustic wooden cabin on a beach, tame a pack of Velociraptors, or raid enemy megabases with a rocket launcher while riding a dragon, ARK: Survival Evolved offers a sandbox experience unlike any other. Its combination of survival mechanics, prehistoric fantasy, and persistent multiplayer creates endless stories—and challenges—that have kept millions of players exploring, building, and surviving since 2015.
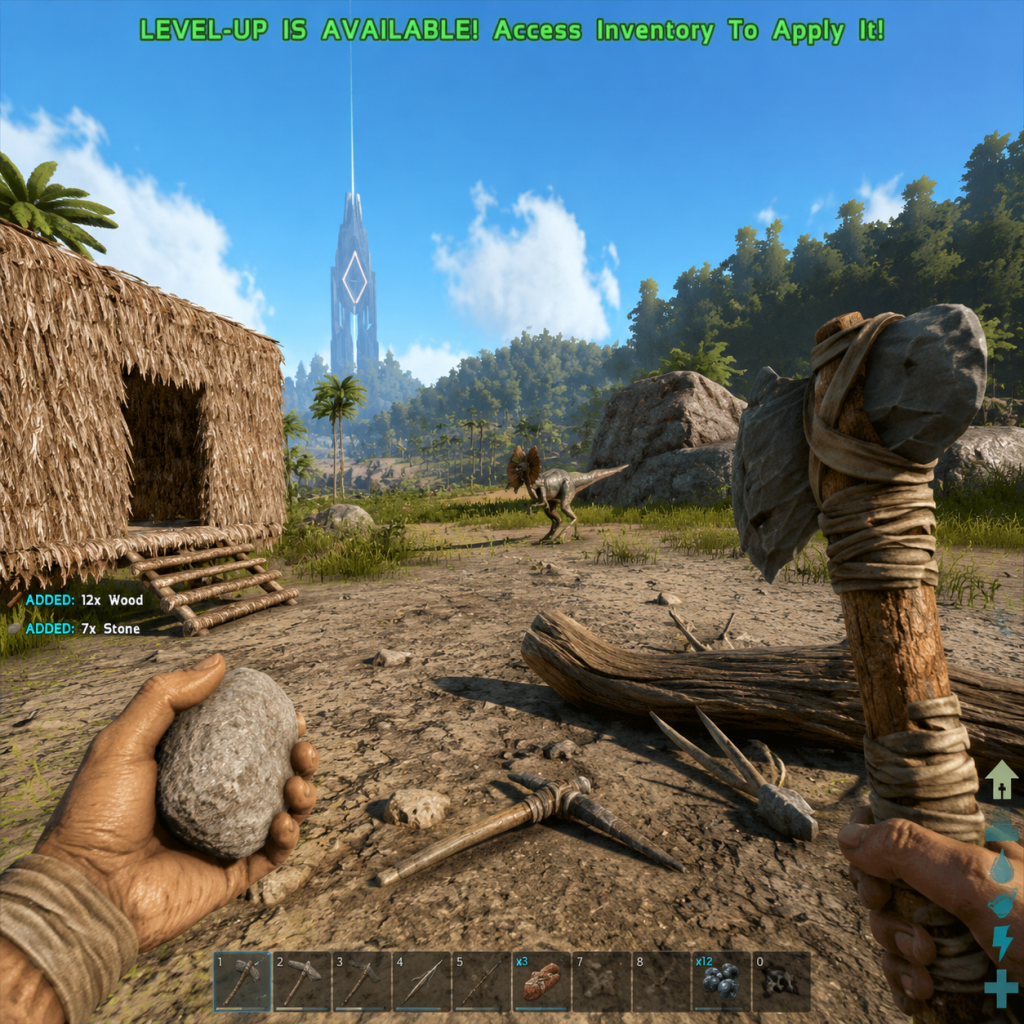
Getting Started
Overview
Welcome to ARK: Survival Evolved. This guide will walk you through your first hour in the game, explain the UI, controls, and early objectives, and help you avoid common mistakes. Whether you are on PC, Xbox, PlayStation, or Nintendo Switch, the core survival loop is the same: gather resources, build shelter, tame dinosaurs, and avoid becoming a meal.
Character Creation
Your journey begins on a beach. Before spawning, you can customize your character:
- Gender (Male/Female) – affects animations and model, no gameplay difference.
- Appearance – sliders for head shape, body build, hair, skin color, etc. These are purely cosmetic.
- Name – appears on your inventory and when interacting with others.
Note: You can change appearance later using a Mindwipe Tonic (unlocks at level 30), but it costs resources. Don't spend too long customizing – you will likely die and respawn quickly.
First 5 Minutes: Spawn Location & Immediate Actions
Spawn Selection
You can choose your spawn area from a map. For beginners, select Easy regions (South zones 1, 2, or 3) – marked with green icons. These have fewer aggressive dinosaurs and more resources.
Immediate Checklist (First 5 Minutes)
1. Look around – You are on a beach. Note the direction of the sun (east/west) to orient yourself.
2. Punch a tree – Approach any small tree or bush. Press the interact key/button to gather Thatch, Wood, and Fiber from bushes.
3. Pick up stones – Collect stones from the ground by looking at them and pressing pickup.
4. Check your inventory – Press Tab (PC), Menu button (console) to see what you have.
5. Craft your first tools:
- Pick (Thatch + Stone): Gathers flint and stone faster.
- Hatchet (Wood + Stone): Gathers wood and thatch faster.
- Spear (Wood + Stone + Fiber): Your first weapon.
6. Drink water – Find a river or coastline. Walk into shallow water and press the interact key to drink (or use the radial menu).
7. Eat berries – Pick Mejo Berries (blue) from bushes. Avoid Amarberry (red) until you need Narcotics; Azulberry (purple) gives water.
UI Overview
The Heads-Up Display (HUD) shows critical info:
| Element | Description |
|---|
| Stamina bar (blue) | Depletes when sprinting, jumping, attacking. Regenerates quickly when idle.
| Oxygen bar (white) | Drains underwater. Refills when you surface.
| Food bar (green) | Drains over time. Eat berries or meat to fill.
| Water bar (blue droplet) | Drains over time. Drink from water sources.
| Torpor (purple bar) | Builds up from being hit or drugged. If full, you fall unconscious. Avoid getting knocked out.
| Inventory weight (bottom-right) | Shows carried weight limit. Overencumbered = can't run.
| Hotbar (bottom center) | 0-9 slots for quick access items. Drag items from inventory to assign.
| Level & XP (bottom-left) | Yellow bar – gain XP by harvesting, killing, crafting. Level up to unlock engrams (blueprints).
Controls (All Platforms)
PC (Keyboard & Mouse)
- WASD – Move
- Left Mouse – Attack/Use
- Right Mouse – Zoom/Secondary use
- E – Interact/Pick up
- Tab – Inventory
- I – Player inventory
- F – Mount/Dismount
- C – Crouch
- X – Prone
- Space – Jump
- Shift – Sprint
- Ctrl – Walk
- 1-9 – Hotbar slots
- Q – Smart Remote (toggle tool)
- R – Reload/Alternate use
- T – Access inventory of targeted structure/dino
- Numpad – Whisper/Shout
- Print Screen – Screenshot
- Left Stick – Move
- Right Stick – Look
- A – Jump/Interact
- B – Crouch/Prone (hold)
- X – Use item
- Y – Access inventory
- RB – Eat/drink (while holding item)
- LB – Toggle inventory
- D-Pad Up – Mount/Dismount
- D-Pad Down – Flare/Whistle
- D-Pad Left/Right – Cycle targets
- Right Stick Click – Zoom
- Left Stick Click – Sprint
- Menu – Options
- View – Map
- Left Stick – Move
- Right Stick – Look
- Cross – Jump/Interact
- Circle – Crouch/Prone (hold)
- Square – Use item
- Triangle – Inventory
- R1 – Eat/drink (while holding item)
- L1 – Toggle inventory
- D-Pad Up – Mount/Dismount
- D-Pad Down – Flare/Whistle
- D-Pad Left/Right – Cycle targets
- Right Stick Click – Zoom
- Left Stick Click – Sprint
- Options – Menu
- Touchpad – Map
- Left Stick – Move
- Right Stick – Look
- B – Jump/Interact
- A – Pick up/Eat
- X – Inventory
- Y – Use item
- R – Eat/drink
- L – Toggle inventory
- ZR – Attack
- ZL – Zoom
- D-Pad Up – Mount/Dismount
- D-Pad Down – Whistle
- D-Pad Left/Right – Cycle
- Right Stick Click – Crouch
- Left Stick Click – Sprint
- + – Menu
- - – Map
- Fishing – Craft a fishing rod? Not yet. Instead: hunt small animals:
- Cook meat – Place Raw Meat in campfire with fuel (wood/thatch). Press Start Cooking.
- Water – Fill a waterskin (crafted from Hide/Stone? Actually Waterskin requires 4 Hide and 10 Fiber). Or just drink from rivers.
- Berries – Still good for food but less nutritious.
- Thatch Foundation – Cheap, but weak. Recommended: start with Wood.
- Wooden Walls, Doorway, Door – craft at least 4 walls, 1 doorframe, 1 door.
- Roof – Wooden ceiling.
- Place foundation – Use a hammer to align.
- Place walls, then doorframe, door, ceiling.
- Craft a Mortar and Pestle (requires 20 Stone, 5 Wood, 5 Fiber) – used later for narcotics.
- Craft a Small Chest (store extra items).
- Dodo or Lystrosaurus – Passive tame: put berries in last hotbar slot, approach cautiously, press E (interact). Do not hit them. They follow if you have food.
- Parasaur – Knockout tame: use slingshot or club on head until unconscious, then put Mejo Berries in its inventory. Wait for taming bar to fill. Protect it during taming.
- Don't attack a Raptor without a bola and spear. They are fast and kill you quickly.
- Don't swim in deep water – Megalodons (sharks) will eat you. Stay near shore.
- Don't stay in the open at night – temperatures drop, and dangerous predators like Raptors hunt. Stay near your campfire.
- Don't eat Narcoberries – they increase Torpor. You'll fall unconscious and die.
- Don't build on a spawn beach – other players might destroy your base (PvP servers) or it's too crowded. Move inland a bit.
- Don't ignore your water/food bars – death from dehydration/hunger is common.
- Don't punch a Trike – it will trample you.
- Don't litter the beach with structures – it's considered bad server etiquette, and you may get raided.
- Don't try to tame a high-level dino first – start with low-level dodos or parasaurs.
- Don't store all your resources in one box – if your base is raided, you lose everything. Spread out multiple small caches.
Xbox
PlayStation
Nintendo Switch
First Hour Walkthrough (Step-by-Step)
Step 1: Survive the First Night (0-20 minutes)
1. Gather 50 Thatch, 50 Wood, 50 Fiber, 30 Stone – use tools.
2. Craft a Campfire (requires 2 Stone, 20 Thatch, 12 Wood). Place it on safe ground.
3. Craft a Stone Pick and Stone Hatchet if not done.
4. Scout for a safe spot – near water but not too close to carnivores. Avoid the swamp and redwood forest.
5. Craft a Bed (requires 40 Thatch, 80 Wood, 15 Fiber, 10 Hide). Place inside a shelter. This is your respawn point. Without it, you respawn randomly.
6. Storage Box (make one) – Store extra resources.
Step 2: Get Food & Water (20-40 minutes)
- Dodo – Slow, easy to kill with a spear. Gives Raw Meat and Hide.
- Parasaur – Similar, but be careful not to aggro its herd.
Step 3: Build a Basic Base (40-60 minutes)
Optional Early Goal: Tame a Dino
What to Do First – Essential Early Objectives (Levels 1-10)
1. Craft tools – Pick, Hatchet, Spear, Campfire.
2. Find a safe location – Near water, with access to trees, rocks, and not near spawn points (to avoid griefing on PvP).
3. Build a small shelter – Even a 2x1 thatch hut with a bed.
4. Gather 100 Fiber – Needed for bola, clothes, and later items.
5. Craft a Bola (requires 3 Fiber, 5 Stone, 2 Thatch) – Can immobilize small dinos like Raptors for easy kills or taming.
6. Gather Hide – From dodos, dilos, and parasaurs. Craft Cloth Armor (3 pieces: shirt, pants, hat) for insulation.
7. Level up – Unlock engrams: Bola, Mortar and Pestle, Narcotics (level 10).
8. Craft a Narcotics: in mortar, 1 Spoiled Meat + 5 Narcoberries = 1 Narcotic. Used to keep unconscious dinos asleep during taming.
What to Avoid – Beginner Don'ts
Early Resource Priorities
| Resource | Use | How to Get | Priority |
|---|
| Wood | Stronger buildings, weapons | Hatchet on trees | High (first 2 hours)
| Stone | Tools, weapons, foundations | Pick on rocks | High (first hour)
| Fiber | Bola, cloth armor, ropes | Pick from bushes | High (immediate)
| Hide | Armor, bed, sleeping bag | Harvest from dead animals | Medium (first 3 hours)
| Flint | Sparkpowder (ammo for guns) | Pick on rocks | Low early game
| Metal | Advanced tools, structures | Pick on metal rocks (shiny) | Low (after level 20)
| Crystal | Spyglass, later tech | Pick from crystal nodes | Low early game
| Berries | Food, taming, narcotics | Pick from bushes | Constant
| Raw Meat | Food, taming carnivores | Hunt small animals | Constant
| Water | Survival | Rivers, ocean | Constant
Common Beginner Mistakes & How to Avoid Them
1. Running blindly – Always have a plan. Scout the area before exploring.
2. Not building a bed – You will die and lose progress.
3. Overburdening carry weight – Keep weight below 50% to sprint. Drop unnecessary items.
4. Not using the hotbar – Assign food, weapons, and tools to hotbar for quick access.
5. Ignoring torpor – If a dilophosaur spits on you, your torpor rises. Eat Stimberries (yellow) to reduce torpor.
6. Taming without a trap – For larger dinos, build a simple ramp and box trap to safely knock them out.
7. Wasting engram points – Don't unlock every primitive structure. Focus on tools, weapons, and taming-related engrams first.
8. Not cooking meat – Raw meat spoils quickly. Cook it to last longer.
9. Fighting in melee vs. Raptors – Use ranged weapons like a slingshot or bow from high ground.
10. Forgetting to repair tools – Carry extra tools or repair them at a smithy.
Day-One Checklist (Printable Summary)
Objectives for your first in-game day (approx 40 minutes real time):
- [ ] Choose Easy spawn (South zone)
- [ ] Gather 50 Thatch, 50 Wood, 50 Fiber, 30 Stone
- [ ] Craft Stone Pick + Stone Hatchet
- [ ] Craft Campfire (place it near water)
- [ ] Eat berries and drink water
- [ ] Craft a Bed (40 Thatch, 80 Wood, 15 Fiber, 10 Hide)
- [ ] Build a small shelter (foundation, 3 walls, doorframe, door, ceiling)
- [ ] Gather 100 Fiber for Bola
- [ ] Craft Bola + Spear
- [ ] Kill 3-4 dodos for Hide and Raw Meat
- [ ] Cook meat on campfire
- [ ] Craft Cloth Armor (shirt, pants, hat) – 20 Hide each
- [ ] Place a Storage Box inside shelter
- [ ] Level up to at least level 5 (crafting gives XP)
- [ ] Unlock engrams: Bola, Mortar and Pestle, Narcotics (at level 10)
- [ ] Tame a Dodo (optional – first day)
- [ ] Craft a Spyglass (requires Crystal, Metal, Hide – may skip if no Crystal)
- [ ] Sleep in bed to set spawn point
- Singleplayer – Adjust settings in Options: increase taming speed, resource gathering rate, and disable structure decay to learn without pressure.
- Official servers – Harsh. Consider unofficial PvE servers with boosted rates for a friendlier experience.
- Join a tribe – Safety in numbers. You can share resources and tames.
- Watch your surroundings – Listen for footsteps and roars. Use the ”Whistle” radial menu to command tamed dinos.
- Have fun – Dying is part of the learning curve. Each death teaches you something.
End of day one: You should have a shelter, bed, basic tools, cooked food, cloth armor, and a storage crate. You are ready for day two: taming a Parasaur, exploring further, and building a more secure base.
Final Tips for New Players
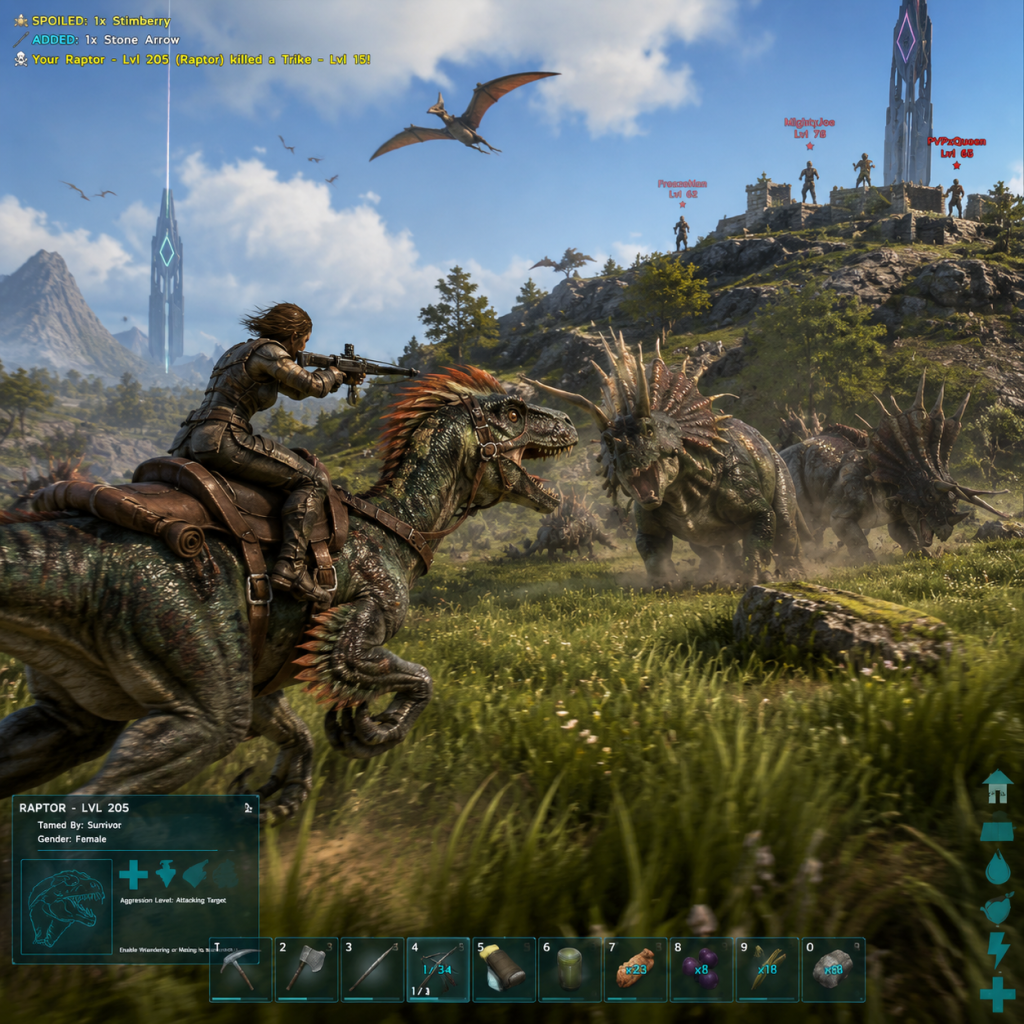
Core Gameplay
Overview
ARK: Survival Evolved is a sandbox survival game where your primary goal is to survive, tame dinosaurs, build bases, and conquer the island. The core gameplay loop revolves around gathering resources, crafting tools and structures, taming creatures, and progressing through increasingly difficult challenges. This guide breaks down the gameplay by player progression tiers—Early Game, Mid Game, Late Game, and Endgame—covering combat, exploration, missions, economy, character growth, and endgame structure.
---
Early Game (Levels 1–30)
Main Gameplay Loop
- Gather basic resources (thatch, fiber, wood, stone, flint) using your hands or simple tools (pickaxe, hatchet).
- Manage vitals: Eat berries or meat, drink water from rivers or crafted waterskins, avoid extreme temperatures (use shelter/clothing).
- Craft a thatch or wood hut, a campfire, storage box, and bed (to respawn).
- Tame your first dinosaurs: Usually a Parasaur (passive tame with berries) for early transport, a Dodo for eggs/lazy meat, or a Lystrosaurus for experience boost.
- Explore the starting area (beaches, forests) to learn the map, locate resources, and avoid predators like Raptors and Dilos.
- Melee: Use a spear, club, or stone axe to fend off small creatures. Backpedal and stab for reach.
- Ranged: Unlock the bow (levels 1–10) and craft arrows. Headshots deal extra damage.
- Taming: Knockout tames (e.g., Dodo, Parasaur) with a club or slingshot, then feed berries or raw meat. Passive tames (e.g., Mesopithecus) require feeding without aggro.
- Survival: Craft and equip cloth armor (low protection, okay for early temperature) and simple tools.
- Level Up: Prioritize Fortitude (resist weather/disease), Weight (carry more), and Stamina (run/sprint). Unlock engrams based on level.
- Engrams: Unlock campfire, mortar & pestle, bed, basic structures, and taming-related items (narcotics, simple kibble) first.
- Exploration: Stay near the beach—venture inland only with a tame. Look for caves (marked by stone pillars) but do not enter without gear.
- Quests/Missions: No explicit quests, but "Survivor Notes" (collectible lore) are scattered across the map. Completing them gives experience and lore.
- Economy: None yet—all resources are gathered directly. Later, you may trade with other players on servers, but early game is self-sufficient.
- Character Growth: Invest engram points wisely—unlock tools, weapons, and early saddles. Stat build: 10–15 Fortitude, 200–300 Weight, 200–300 Stamina, rest into Health/Movement Speed.
- Upgrade your base to stone or metal for durability. Build a smithy, forge, and refining forge (smelt metal).
- Tame medium-to-large dinos: Raptor (mount, speed), Trike (berry farmer, mild combat), Sarco (water travel), Pteranodon (flying mount—essential).
- Craft firearms: Fabricator (level ~30) to produce guns (pistol, longneck rifle), ammo, and advanced tools.
- Start farming: Plant berries and vegetables in crop plots with fertilizer (from dino dung).
- Explore caves and collect Artifacts: These are needed for boss summoning. Bring a full set of hide armor, a good tame, and plenty of food/water.
- Ranged Combat: Longneck rifle with tranq darts (dart gun) for taming high-level dinos. Use assault rifle or shotgun for combat against carnivores.
- Riding Dinos: Equip saddles and control mounts directly—each has unique attacks (Trike can charge, Raptor pounce).
- Taming: Use narcotics to keep dinos unconscious, kibble for faster taming, and transponder nodes to track lost tames (if engram learned).
- Breeding Basics: If you have a mating pair, breed small dinos to get eggs and imprint (gives stat bonuses). Not yet essential but good for future boss runs.
- Level Up: Focus on Health (300–500), Stamina, Weight (400–600), and some Oxygen (for underwater). Start unlocking Tek Engrams (if you defeat certain bosses—but early mid-game you just see them).
- Engrams: Prioritize metal tools, fabricator, industrial grill, chemistry bench, greenhouse, and advanced weapons. Also unlock Electronics (for turrets/scuba gear).
- Exploration: Visit all major biomes: Redwoods (big trees, Megapithecus threat), Swamp (leeches, alligators), Snow (cold with direwolves), and Valguero (if on that map). Learn the map layout—cave locations for artifacts.
- Boss Arenas: Unlock by collecting Artifacts and tributing them at Obelisks. Early mid-game you can attempt the Broodmother Lysrix (Beta) with a pack of high-level melee Megatheriums or Rexes.
- Economy: On official servers, players often trade tamed dinos, kibble, or metal ingots. Kibble is a secondary currency for taming. Chibis (pets) are collected from defeating bosses.
- Character Growth: Respect stats occasionally (Mindwipe Tonic) to optimize. For bossing, a loadout of 40–50 Fortitude (against Dragon fire), 200–300 Stamina, and rest into Health (600–1000).
- Tek Tier: Unlock Tek gear after defeating bosses (Gamma, Beta, Alpha). Craft Tek armor, saddles, generators, and gates from Element (obtained from bosses).
- Mutated Breeding: Breed multiple generations of dinos (especially Rexes, Therizinos, Spinos) for boss fights. Imprint for stat bonuses.
- Base Fortification: Build a dedicated boss-pen or dino arena. Use Tek walls, auto-turrets, and heavy turrets for PvE defense (against wild dinos) or PvP.
- Resource Runs: Farm obsidian, crystal, metal, and polymer (organic from Mantis or with cementing paste). Use a Ankylosaurus for metal/flint, Dozier for stone/wood.
- Deep Sea Exploration: Use a Basilosaurus (immune to stun) to explore underwater caves for rare loot drops and pearls.
- Tek Weapons: Unlock Tek sword, Tek chestpiece (jetpack), Tek rifle (plasma damage). Use Tek in boss arenas for mobility and damage.
- Mount Combat: Use bred and imprinted top-tier tames—Rex for brute force, Managarmr (freeze breath), Velonasaur (rapid fire) from Extinction DLC.
- Boss Fights: Battle the Dragon (Vanilla), Megapithecus, or Broodmother again on Alpha difficulty. Best solo or in tribes—bring a pack of 10–20 high-level tames with good saddles.
- Artifacts: Collect all 6 for each boss fight (12 for the Island's Overseer). Farming certain caves (e.g., Swamp Cave) requires gas masks and good tames.
- Level Up: Now you have many engrams unlocked—use engram points for Tek items and high-tier structures. Stats: 1000+ Health, 1000+ Stamina for boss tanking.
- Engrams: After Tek engrams, unlock Tek Transmitter for teleportation, Tek Cloning Chamber to clone tames (resource heavy).
- Exploration: Go to all Obelisks to access boss arenas. Also explore Extinction (if owned) for corrupted dinos, OSD nodes, and Titan bosses.
- Chibis & Skins: Collect Chibi pets from Alpha boss kills; they level up and grant bonus health or other perks.
- Economy: Trading high-level dinos, element, Tek blueprints, or kibble. Farming is big—mutated dinos with high stat points are valuable. Use Observation of Dino Stats to calculate value.
- Character Growth: You can now afford to Mindwipe for specific roles: a tank build (high health/fortitude) for Dragon, or speed/weight for resource farming. Imprinting on tames is crucial: the rider gets 30% bonus damage and damage reduction.
- Ascension: Defeat the Overseer (the final boss on The Island) in Alpha difficulty to unlock Tek Gen 2 and gain access to Genesis maps or server transfers.
- Tek Everything: Fully upgrade your base with Tek structures—teleporters, turrets, replicators, and forcefields. Power all with Element.
- Mutated Breeding Projects: Create super-dinos with 100+ mutation stacks in specific stats (melee, health). Use these for last-level challenges.
- Boss Marathon: Fight all three vanillas+Overseer in one session (Alpha) for maximum rewards. Also attempt Extinction Titans (King Titan on Alpha) and Gen 1/2 boss missions.
- Explore DLC Content: If you own expansion maps, complete their boss fights and explore unique biomes (Aberration, Extinction, Genesis Part 1 & 2).
- Tek Armor Superiority: Use Tek leggings (super sprint), Tek gauntlets (melee boost), and Tek helmet (thermal vision). Combined with Tek weapons, you become nearly unkillable in PvE.
- Dino Combat: Top-tier tames like Shadowmane (invisible, leap), Magmasaur (lava ball), Voidwyrm (electric). Use them in maps generated from DLC.
- No More Taming Penalties: With endgame kibble and high-level tames, you can 100% tame most creatures within an hour.
- Level Cap: By this point you're max level (105-150 depending on DLC). Use Chibi XP bonuses and Broth of Enlightenment to grind last levels.
- Engrams All Unlocked: Now you know everything—use engram points on vanity items or duplicates for base designs.
- Exploration: Every map is fully explored. Main goal is to collect all Explorer Notes and Dossier Topphies for 100% completion.
- No New Quests: Endgame is self-directed: build a breeding empire, PvP raiding (if on official), or help new players.
- Economy: Element becomes the primary currency. Tek Blueprints and Fully Bred Dinos with perfect stats trade for real money or other in-game items. On unofficial servers, economy may be based on admin shops.
- Character Growth: You have max stats—typically a spread of 2,000 Health, 1,500 Stamina, 500 Weight, and rest into Fortitude (for high-damage zones). Use Mindwipe Tonic every 10–20 hours to reassign for different activities (PvP vs PvE).
- Imprinting for All: Every important tame is imprinted to you (or your tribemates). Bonuses stack for tribe.
Combat & Interaction Systems
Progression & Exploration
Economy & Character Growth
---
Mid Game (Levels 30–65)
Main Gameplay Loop
Combat & Interaction Systems
Progression & Exploration
Economy & Character Growth
---
Late Game (Levels 65–100)
Main Gameplay Loop
Combat & Interaction Systems
Progression & Exploration
Economy & Character Growth
---
Endgame (Level 100+ and Ascension)
Main Gameplay Loop
Combat & Interaction Systems
Progression & Exploration
Economy & Character Growth
---
Summary Table: Progression by Tier
| Aspect | Early Game (1–30) | Mid Game (30–65) | Late Game (65–100) | Endgame (100+) |
|---|---|---|---|---|
| Main Base | Thatch/Wood | Stone/Metal | Tek/Steel | Fully Tek |
| Tames | Parasaur, Dodo, Lystro | Raptor, Trike, Pteranodon | Rex, Therizino, Mantis | Shadowmane, Magmasaur, Voidwyrm |
| Weapons | Spear, Bola | Longneck Rifle, Shotgun | Tek Pistol, Tek Shotgun | Tek Rifle, Tek Sword |
| Bosses | None yet | Broodmother (Gamma) | All three van+Overseer | Ascension+Old & New DLC |
| Economy | Self-sustained | Trade kibble/tames | Element, Saddle BPs | Element, Perfectly Bred Dinos |
| Engram Focus | Survival Basics | Metal/Tech | Tek Tier | All Unlocked |
Final Tips
- Always keep a sleeping bag/bed near your base for quick respawn.
- In multiplayer, build hidden caches or small bases around the map to recover from raids.
- Use the ARK Smart Breeding tool (external) to track mutations and best breeding pairs.
- Save your Ascension for a full tribe effort—Alpha Overseer is extremely challenging.
This guide covers the core gameplay loop of ARK from start to finish. Adapt strategies to your server settings (tame rates, difficulty) and enjoy the journey of survival and evolution.
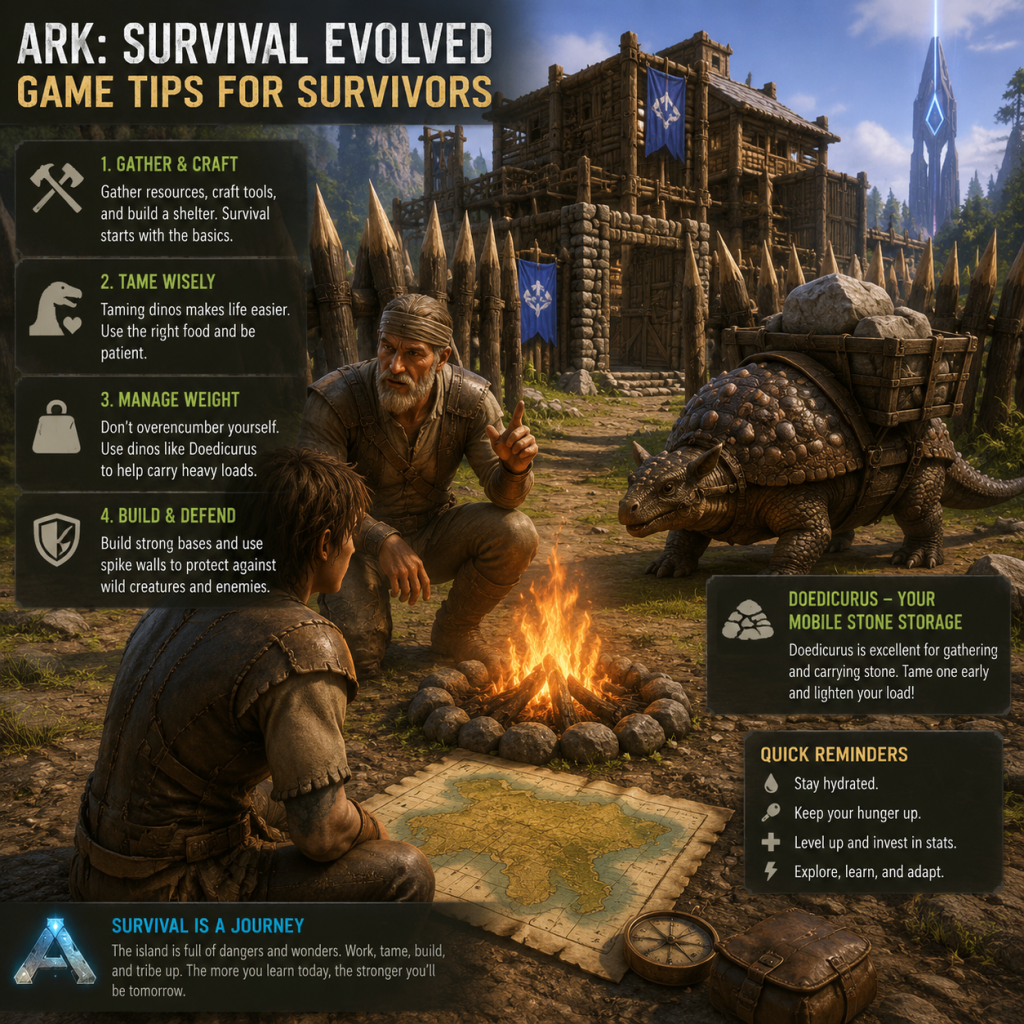
Game Tips
Overview
Welcome to the ultimate tips guide for ARK: Survival Evolved. Whether you're a fresh survivor or a seasoned veteran, these tips will help you survive, thrive, and dominate the island. The guide is organized by category, covering combat, exploration, resource gathering, base building, economy/trading, taming, and advanced optimizations. Each tip includes a clear explanation and deeper analysis of why it works and when to use it.
---
Combat Tips
Beginner: Use Melee and Ranged Wisely
- Tip: Start with a simple spear or bow. For early dinosaurs (Dilos, Dodos), kiting and headshots work best.
- Why: The spear has a thrown attack that deals high damage. The bow allows safe distance. Headshots on most creatures deal extra damage.
- When: First few days on the beach. Avoid taking on Raptors or larger creatures without a bola.
- Tip: Craft bolas early. They immobilize small to medium creatures (like Raptors, Pteranodons) for 30 seconds.
- Why: Bolas are cheap (fiber, hide, thatch) and give you time to land arrows or run. They are essential for taming and escape.
- When: Use against pack hunters, fleeing threats, or to pin down a tame. Always carry 5+.
- Tip: Larger creatures have blind spots (e.g., under a Bronto or behind a Trike). Use sprint and slide to dodge attacks.
- Why: Many creatures have slow turning speed. Circle strafing with a fast mount (e.g., Raptor) lets you avoid damage while dealing melee hits.
- When: Fighting Rexes, Spinos, or Golems. Use terrain (rocks, trees) to block charges.
- Tip: Tame a high-level utility mount for combat (e.g., Baryonyx for its stun attack, Thylacoleo for leaping, or Mantis for tools).
- Why: These mounts have unique abilities that turn fights in your favor. Baryonyx stun locks aquatic enemies; Thylacoleo can climb and pin.
- When: After establishing a small base and a flyer. Use these for caves, deep sea, or PvP.
- Tip: The southern beaches (e.g., the easy zones on The Island) are safest. Avoid swamps, snow, and redwoods early.
- Why: Fewer aggressive predators; abundant resources (berries, wood, stone, fiber).
- When: First 10–20 levels. Venture inland only when you have flak armor and a ranged weapon.
- Tip: Enable coordinates in settings (hold H on PC, or use a GPS mod). Learn to recognize key landmarks: red obelisk, green obelisk, volcano, mountain peaks.
- Why: The island is huge and easy to get lost. Coordinates help you return to base or meet friends.
- When: Always. For multiplayer, place sleeping bags or beds at strategic spots.
- Tip: Use the "jump" feature with an Otter or a flying mount to reach hidden crates (loot crates) on cliffs. For underwater caves, wear SCUBA and use a Baryonyx or Basilosaurus.
- Why: Deep sea loot crates and cave artifacts give high-tier blueprints and resources.
- When: After you can craft quality weapons and armor. Bring grappling hooks and cryopods for escape.
- Tip: Essential items: 2× water jars, cooked meat stack, sleeping bag, parachute, spyglass, grapnel, stimulants (for torpor), and a ranged weapon with ammo.
- Why: Parachute saves you from falling; grapnel lets you climb cliffs; stims keep you awake if attacked by troodons.
- When: Every trip outside your base.
- Tip: Use the stone pick for thatch and flint; the stone axe for wood and hide. Punch trees for berries (or use a trike for mass berry).
- Why: Tools give different yields. Picking right reduces wasted stamina.
- When: Early levels until you tame a resource dino.
- Tip: Tame an Ankylosaurus for metal/flint/crystal, a Doedicurus for stone, a Mammoth or Castoroides for wood, and a Therizinosaurus for fiber/berries/wood.
- Why: These dinos multiply your gather rate and carry weight. Anky can gather metal in one swing equal to 20 pickaxes.
- When: As soon as you can craft a saddle (usually level 30–60).
- Tip: Metal nodes are primarily on mountains and in caves (e.g., Volcano, Frozen Fang). The best metal spawns are at the top of the volcano. Use a Quetzal or a skiff to transport.
- Why: Mountains have rich nodes that respawn quickly. Setting up a small outpost on the volcano lets you grind metal without hauling far.
- When: Mid-game; after you have an argy (Argentavis) for long-distance carry.
- Tip: Use a fishing rod with leech blood or honey as bait. Fishing can give you prime fish meat, high-level blueprints, and rare resources (silica pearls, black pearls).
- Why: Fishing is a passive but powerful way to get rare items. Best done in deep water.
- When: After you have a raft or water mount. Fish in the ocean or rivers.
- Tip: Build a 2×2 thatch hut with a refining forge and bed. Upgrade to wood, then stone, then metal as you level.
- Why: Early resources are limited. Thatch huts are quick to place but weak. Stone is explosion resistant. Metal is near impenetrable.
- When: First base at level 1–20. Move to stone around level 30.
- Tip: Build near water and resources, but not directly on a beach (Tsunami). Common spots: Herbivore Island (safe), Hidden Lake (beautiful, defensible), or the rocky hills near the volcano.
- Why: Proximity to water for thirst and farming; resources reduce travel time. Defensible locations (cliffs, islands) reduce raiding risks.
- When: When you decide on a permanent base (around level 40+).
- Tip: Use multiple layers of walls, plant turrets (species X), and automatic turrets. Build a "pillar base" to prevent foundation spam.
- Why: Layers slow raiders. Species X slows enemies. Turrets kill players and tames. Pillars prevent others from building on your claim.
- When: For PvP or high-value servers. In PvE, focus on aesthetics and functionality.
- Tip: Always build foundations at least 2 tiles high off the ground with pillars. Use foundations to snap ceiling for upper floors.
- Why: Prevents creatures from clipping through, adds stability, and allows water pipes/cables below.
- When: All builds, especially multi-story.
- Tip: Upload items and creatures to the Ark Data or creature terminals at the obelisks (or supply drops). This allows cross-ARK transfer in official clusters.
- Why: Move resources between maps or store items safely for later.
- When: When you plan to move bases or transfer to another server.
- Tip: Craft kibble using specific eggs. Each kibble is used to tame certain creatures faster. Trade extra kibble with other players.
- Why: High-tier kibble (e.g., Rex kibble) is valuable. You can trade it for metal ingots, polymer, or blueprints.
- When: Mid-game after you have a dino farm (several females for eggs).
- Tip: Farm swamp cave or deep sea loot crates for high-level saddles, weapons, and armor blueprints. Trade duplicates for bullets, materials, or tames.
- Why: Rare blueprints (e.g., Ascendant Sword, Mastercraft Flak) are end-game currency. Many players will overpay for them.
- When: After you have a reliable farming route.
- Tip: Metal ingots are the universal currency. Gather metal, smelt it, and use it as trade. Bulk selling 10k ingots can net you a good tame or base materials.
- Why: Everyone needs metal. It doesn't spoil, and it's used for all advanced structures.
- When: Always, but especially during server events or new map releases.
- Tip: Use a slingshot or tranq arrows (narcotic arrows) for early tames. Make narcotics from spoiled meat and narco berries.
- Why: Tranq darts (for crossbow) are more efficient but require higher level. Slingshot is free but low damage.
- When: For Dodos, Dilos, Parasaurus, or Pteranodon.
- Tip: Bola a creature, then shoot it with tranq arrows from a crossbow. For larger creatures, use a trap (two gateways with doorways).
- Why: Bolas immobilize, preventing escape. Traps allow safe taming of Rexes, Spinos, etc.
- When: Taming Raptors, Sabertooths, etc. For Rexes, build a 3×3 stone pen with ramps.
- Tip: Some creatures (e.g., Oviraptor, Moschops) must be passive-tamed by dropping favorite food (e.g., rare flowers, honey). For fast taming, use a high-level tame with kibble and a tribe mate to guard.
- Why: Passive tames require patience; your presence must stay steady. Tribe mates can fend off threats while you feed.
- When: For utility tames that are otherwise difficult to knock out.
- Tip: Keep the creature unconscious and eat the preferred kibble or food. Avoid letting it wake up or take damage. Use narcotics regularly (every 30–60 seconds for large tames).
- Why: Higher effectiveness means more levels added and better stats after tame. A perfect tame (with best food & no damage) yields the most levels.
- When: Always, especially for combat mounts. Use a taming calculator (online) to time narcotics.
- Tip: Breed high-stat parents (HP, Stamina, Melee) to get mutations. Mutations give bonus levels and color changes. Focus on a male with all best stats and breed with many females.
- Why: Stacking mutations produces dinos with 50+ extra levels, perfect for boss fights. Each mutation adds either a stat increase or a color region.
- When: End-game, after you have a breeding pair with desired stats.
- Tip: Craft cryopods and a cryofridge. Cryopods store dinos in your inventory; cryofridge charges them. Use them to carry multiple tames easily.
- Why: Cryopods let you transport tames without mounting or flying slow. They are essential for cave runs, boss arenas, and PvP raids.
- When: After you unlock engrams (level 50+). Always keep a charged pod.
- Tip: Defeat bosses (Broodmother, Megapithecus, Dragon) to earn element. Use element to craft Tek structures, armor, and saddles. Tek allows flight, teleportation, and super weapons.
- Why: Tek rex saddle with shield, Tek chest with jetpack – these make you nearly invincible. Teleporters let you travel instantly between locations.
- When: After you have a good boss battle team (e.g., 19 Rexes + 1 Yuty).
- Tip: On PC, install Super Structures mod (S+) for better building: snapping, pull system, automated crafting, and stacking storage. On console, use structure placement preview and toggle snap points.
- Why: Reduces frustration and saves hours. S+ also includes a gardener that auto-fertilizes crops.
- When: Immediately after setting up your server or single-player game.
- Tip: Use a Tek Helmet with element to see creature stats and taming effectiveness percentage. Or use a mod like "Dino Tracker" (PC) to find lost tames.
- Why: Knowing the exact stat values helps with breeding decisions.
- When: Late mid-game onward.
- Never leave your base without a sleeping bag in your inventory. Place it at your destination to avoid long corpse runs.
- Always carry a spyglass. It reveals creature level and gender (for breeding).
- Use the "Hide HUD" key (default: Backspace) to take screenshots or spot enemies better.
- Build a greenhouse for crop plots. Greenhouse effect (+300%) yields massive amounts of narco berries and crops.
- In PvP, hidden storage crates are your friend. Dig a hole with a shovel (if modded) or place a vault inside a hidden room behind a bookshelf.
- Learn the command "EnableCheats" (single-player) or "Cheat God" for testing builds. On official, stick to the rules.
- Watch your temperature! Desert and snow biomes require insulation. Craft ghillie (cool) or fur (warm) armor.
Intermediate: Master the Bola
Advanced: Exploit Hitboxes and Movement
Advanced: Taming Combat Mounts
---
Exploration Tips
Beginner: Stick to the Beach and River Valleys
Intermediate: Use Landmarks and Coordinate Systems
Advanced: Map Exploitation and Cave Runs
Exploration General: Always Carry Survival Kit
---
Resource Gathering Tips
Beginner: Gather by Hand and with Basic Tools
Intermediate: Use Dinos for Bulk Harvest
Advanced: Resource Node Locations and Trips
Ultimate Resource Tip: The Fishing Basket
---
Base Building Tips
Beginner: Start Small and Expand Gradually
Intermediate: Choose Location Wisely
Advanced: Design and Defense
Building General: The 2+1 Rule
---
Economy & Trading Tips
Beginner: Use the Obelisk for Transfers
Intermediate: The "Kibble" Economy
Advanced: Structure and Blueprint Trading
Economy General: The Value of Metal
---
Taming Tips
Beginner: Knockout Taming Basics
Intermediate: The Bola & Crossbow Method
Advanced: The "Passive Tame" & "Tribe Taming"
Taming General: The Taming Effectiveness
---
Advanced Optimizations
1. Breeding: The Superstats
2. Cryopods: Portable Dinos
3. Tek Tier: End-Game Power
4. S+ Mods (PC) or QoL+ Settings
5. Dino GPS and Telemetry
---
Final Pro Tips
This guide covers the most impactful tips for every stage of ARK. Remember: the island is unforgiving, but with these strategies you’ll conquer it. Good luck, survivor!
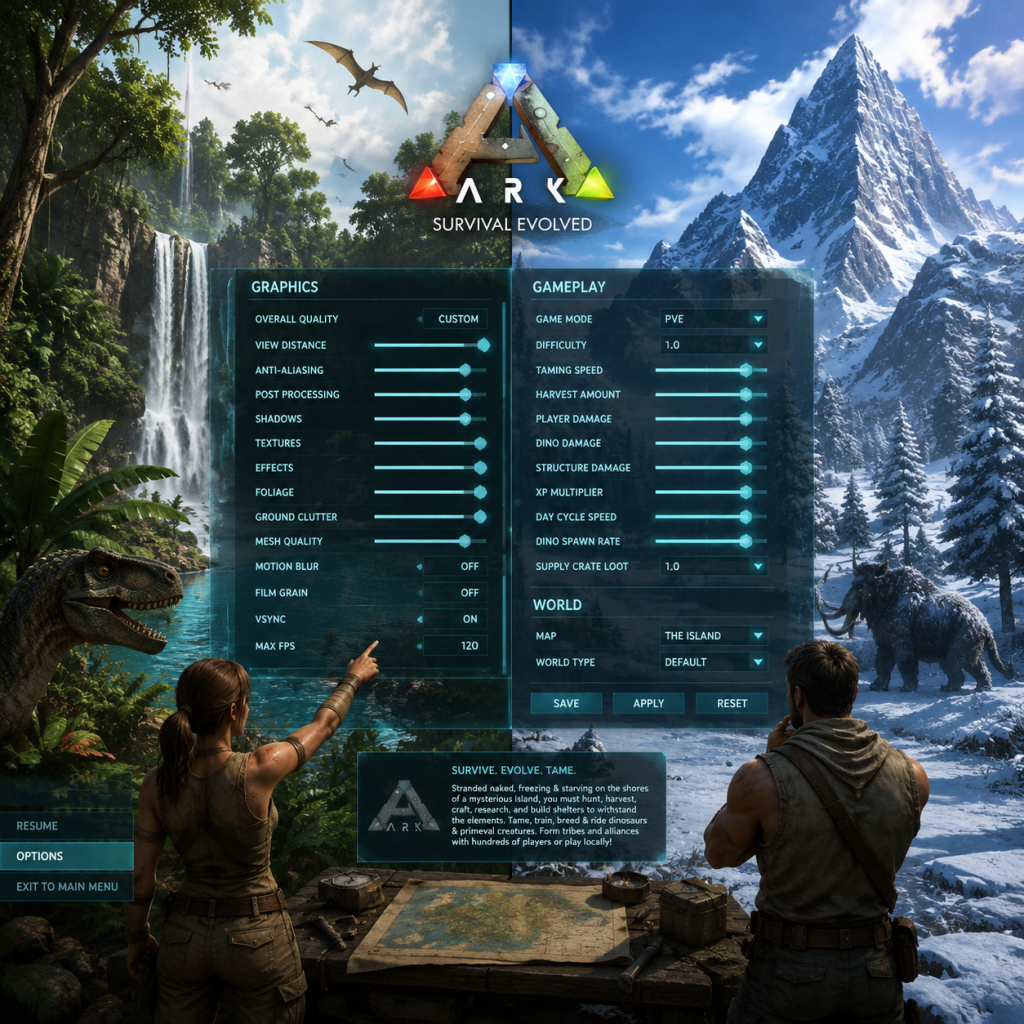
Game Settings
Overview
ARK: Survival Evolved offers a vast array of settings that significantly impact performance, visuals, and gameplay feel. This guide covers all major settings categories: Graphics, Audio, Controls, Accessibility, Language, Network, and Gameplay. Recommended presets for low-end, mid-range, and high-end hardware are provided, along with common pitfalls and settings that are easy to misconfigure. Settings menus vary slightly between platforms (PC, Xbox, PlayStation, and Nintendo Switch) but the core options remain similar.
---
Graphics Settings
Graphics settings have the largest impact on performance and visual quality. Adjust them based on your hardware capabilities.
| Setting | Low-End (e.g., GTX 1050 / RX 560) | Mid-Range (e.g., GTX 1660 / RX 580) | High-End (e.g., RTX 3070 / RX 6800) | Ultra (RTX 4090 / RX 7900 XTX) |
|---|---|---|---|---|
| Resolution Scale | 70% (or lower if needed) | 100% | 100% | 100% (or 125% supersampling) |
| View Distance | Low | Medium | High | Epic |
| Anti-Aliasing | Low (FXAA) | Medium (TAA) | High (TAA) | Epic (TAA + sharpening) |
| Post Processing | Low | Medium | High | Epic |
| Shadows | Low | Medium | High | Epic |
| Textures | Low (or Medium with 2GB VRAM) | Medium | High | Epic |
| Global Illumination | Low | Medium | High | Epic |
| Effects | Low | Medium | High | Epic |
| Foliage | Low | Medium | High | Epic |
| Motion Blur | Off | Off | Off (personal preference) | Off |
| Light Shafts | Off | Off | On | On |
| Bloom | Off | Off | On (reduce glare) | On |
| Subsurface Scattering | Off | Off | On | On |
| Terrain Shadows | Low | Medium | High | Epic |
| High Detail Structures | On (if VRAM permits) | On | On | On |
| Advanced Graphics (tessellation, etc.) | Off | Off | On | On |
- Resolution Scale: This is the most effective setting for performance gains. Reducing it to 70% can nearly double FPS but will make the game blurry. Keep it at 100% if possible.
- Motion Blur & Bloom: Many players find these reduce clarity and cause discomfort. It's recommended to disable them for better visibility, especially during combat.
- Light Shafts: Can tank performance on lower-end hardware; turn off.
- Textures: Use the lowest setting if your GPU has less than 2GB VRAM to avoid stuttering.
- Foliage and View Distance: These greatly affect CPU performance. If you have a weaker CPU, lower these settings first.
- Anti-Aliasing: TAA (Temporal Anti-Aliasing) can cause ghosting. If you dislike it, use FXAA or turn off AA and rely on resolution scaling.
- Xbox Series X / PS5: Use "High Quality" preset, then disable motion blur and reduce bloom if desired.
- Xbox One / PS4: Use "Balanced" or "Performance" mode. Lower foliage and view distance for smoother exploration.
- Nintendo Switch: Use lowest settings, reduce resolution scale to 50-60%, and disable all post-processing effects.
Console Presets (Xbox / PlayStation):
---
Audio Settings
| Option | Recommended Setting | Notes |
|---|---|---|
| Master Volume | 80% (adjust to personal preference) | Keep below 100% to avoid distortion. |
| Music Volume | 50% (or lower) | Music can be immersive but often obscures important sounds. |
| SFX Volume | 100% | Essential for hearing footsteps, creature roars, and crafting. |
| Voice Chat Volume | 80% | Depends on in-game voice activity. |
| UI Volume | 100% | Sounds for menu interactions. |
| Ambient Volume | 70% | Environmental sounds like wind, water. |
| Enable Spatial Audio | On (if supported) | Improves directional awareness of threats. |
| Sound Quality | High | On PC; console may have fixed quality. |
| Audio Output | Headphones or Surround | Choose based on your setup. |
- Lower sound quality can cause missing sounds (e.g., approaching raptor). Keep at High.
- Voice chat volume can interfere with gameplay if too high; reduce if you are in a party using external comms.
- Turn off "Play Music on Startup" in the settings if you find the menu music annoying.
---
Controls Settings
ARK supports keyboard/mouse (PC), gamepad (all platforms), and custom key bindings.
| Setting | Recommended | Notes |
|---|---|---|
| Invert Look | Off (unless accustomed) | Personal preference. |
| Mouse Sensitivity | 0.3–0.5 (adjust per DPI) | Higher sensitivity for quick turns, lower for aiming. |
| Aim Sensitivity | 0.5 (same as general) | Some players prefer lower for precision. |
| Controller Sensitivity (X/Y) | 0.5 / 0.5 | Start here; adjust to avoid overshooting. |
| Controller Dead Zone | 0.2 (left stick), 0.2 (right stick) | Increase if stick drift occurs. |
| Enable Vibration | Off (recommended) | Vibration can mask important audio cues. |
| Use Contextual Controls | On | Allows different actions based on target (e.g., use vs. pickup). |
| Quick Access Wheel | Hold or Toggle | Choose "Hold" for precise selection, "Toggle" for ease. |
| Sprint Mode | Toggle | Easier on hands; Hold can be tiring. |
| Crouch Mode | Toggle | Stealth advantage without holding. |
| Prone Mode | Hold | Avoid accidental prone in combat. |
| Reload Weapon | Tap R | Avoid hold-to-reload which can be mis-triggered. |
- Mouse Smoothing – Disable this in the `GameUserSettings.ini` (add `Smoothing=False` under `[/script/engine.inputsettings]`) for raw input; otherwise, mouse movement may feel floaty.
- Controller Dead Zone – Many players leave it at 0, resulting in drift. Set to 0.15-0.2 for new controllers, 0.25-0.35 for older ones.
- Key Binds for Structures – Bind "Auto Run" and "Toggle Map" to easily accessible keys (e.g., `N` and `M`).
---
Accessibility Settings
| Option | Purpose | Recommended |
|---|---|---|
| Colorblind Mode | Adjusts UI colors for protanopia, deuteranopia, tritanopia. | Select based on your type; affects health bars, dino info. |
| Subtitle Display | Shows spoken text for NPCs and player radio. | On (helps with background noise). |
| Subtitle Size | Increases text size. | Large for easier reading. |
| HUD Scale | Adjusts size of on-screen elements. | 100% default; increase if playing on a small screen. |
| Crosshair Size | Changes reticle size. | Medium; avoid too large which obscures target. |
| Camera Shake | Intensity of screen shake from explosions, quakes. | Off (reduces motion sickness). |
| Field of View (FOV) | Horizontal view angle. | 90–110 on PC; 75–85 on console (limited by hardware). |
- Field of View: ARK's default FOV is quite narrow (~70). Increase to 90-100 for better peripheral awareness, but it may impact performance slightly. On consoles, max FOV is often 85.
- Camera Shake: Turn off to prevent nausea during intense moments.
- Colorblind Mode: Even if not colorblind, some players find the deuteranopia mode enhances visibility of health bars.
---
Language Settings
| Option | Notes |
|---|---|
| Game Language | Select from available languages (English, French, German, Spanish, etc.). Changes UI text and subtitles. |
| Audio Language | Usually reads the selected UI language; some versions have separate audio languages for narrator. |
| Text Language | Separate from voice; useful for multi-language households. |
---
Network Settings
These are found in the main menu under "Options" → "Network" or in server browser.
| Setting | Description | Recommendation |
|---|---|---|
| Server Browser Region Filter | Filters servers by geographic region. | Use your region for lowest latency. |
| Max Ping Display | Shows ping when above a threshold. | Set to 150 ms (or higher if playing with friends far away). |
| Show Player List | Displays connected players. | On (useful for spotting admins or friends). |
| Enable Voice Chat | In-game voice communication. | Off if using Discord/party; On otherwise. |
| Voice Chat Mode | Push-to-talk or open mic. | Push-to-Talk (PTT) to avoid background noise. |
| Enable Crossplay (on consoles) | Allows play with PC or other console players. | On (if you want larger player pool); note that mods may not sync. |
| Show Server FPS | Displays server performance. | Off (not needed for most players). |
- Voice Chat Mode: Set to PTT and bind a key (e.g., V) to avoid broadcasting unwanted sounds.
- Server Browser: Use filters to hide full/high-ping servers. Sort by player count and ping.
---
Gameplay Settings
| Option | Effect | Recommended |
|---|---|---|
| Difficulty (1-5) | Affects wild dino levels (5= max level 150). | 5 (or 1 if you prefer easier early game). |
| Taming Speed | Multiplier on taming time. | 2x – 5x (official is 1x, but very slow). Adjust to preference. |
| Harvest Amount | Resource yield from nodes. | 2x (slightly reduced grind compared to 1x). |
| XP Multiplier | Experience gain rate. | 2x – 3x (faster leveling without trivializing). |
| Player Damage | Damage dealt by players. | 1.0 (can increase for PvE, but break balance). |
| Dino Damage | Damage dealt by dinos. | 1.0 (official). |
| Resistance | Damage reduction for players/dinos. | 1.0 (official); higher for easier survival. |
| Allow Third Person | Enables 3rd person view. | On (helpful for seeing around you). |
| Show Map Player Location | Marks your position on minimap. | On (essential for navigation). |
| HUD Mode | Always show, toggle, or hide. | Always Show (default). |
| Auto Engram Unlock | Automatically learn engrams of your level. | Off (customization is better). |
| Structure Placement Collision | Prevents building inside objects. | On (official). |
| Flyer Carry | Allows flyers to carry other players/dinos. | On (for PvP or transport). |
- Difficulty: Setting difficulty to 5 gives max wild dino level 150, which is standard for official servers. On servers with lower difficulty, high-level dinos are rare.
- Taming Speed & Harvest: Official rates are extremely grindy. In single-player/non-dedicated, increase these multipliers to save time (e.g., Taming 5x, Harvest 3x, XP 3x). Avoid setting too high (e.g., 50x) as it can remove challenge.
- Show Map Player Location: Ensure this is ON in single-player; it is often off by default on some platforms, causing confusion.
- Allow Third Person: Essential for situational awareness. However, it can be cheating in PvP if used to see around walls (servers may disable).
---
Special Attention Points & Common Misconfigurations
1. Resolution Scale (in Graphics) – Many players leave this at 100% but run at 4K on a 1080p monitor, causing heavy performance loss. Always set it to match your display resolution.
2. Motion Blur & Camera Shake – These are often enabled by default and can induce motion sickness. Disable them immediately in the Controls/Accessibility menus.
3. FOV (Field of View) – Default is very low (~70). Increase to at least 90 for better awareness, but note that higher FOV reduces performance.
4. Key Bindings for Important Actions – By default, 'E' is interact/use. Rebinding 'E' to a less-used key can help avoid accidental actions (e.g., mounting when trying to harvest). Set 'E' to a different key for "Use" and keep 'F' for interaction.
5. Voice Chat Not Working – Check input device in your OS settings and ensure voice chat is enabled in ARK's network settings. Console players may need to check platform privacy settings.
6. Controller Dead Zone – New players often leave dead zones at 0, leading to stick drift. Increase to 0.2-0.3.
7. Taming Speed Multiplier – Single-player defaults to 1x, which can take hours to tame a high-level dino. Adjust to 3x-5x to keep the game enjoyable.
8. Mouse Smoothing – Off by default on PC but sometimes hidden in INI files. Check the `GameUserSettings.ini` in `.../ARK/ShooterGame/Saved/Config/WindowsNoEditor/`. Add `Smoothing=False` under `[/script/engine.inputsettings]` if you feel input lag.
9. Auto Engram Unlock – Disable this so you can choose which engrams to learn based on your playstyle. Otherwise, you may waste engram points on items you never use.
10. Server Browser Filters – New players often join high-ping servers because they don't filter by region. Always set "Region" to your continent to avoid lag.
---
This guide covers all major settings in ARK: Survival Evolved. Adjust slowly and test performance in a single-player world before committing to multiplayer. Remember that official servers have fixed settings; you cannot change multipliers there.
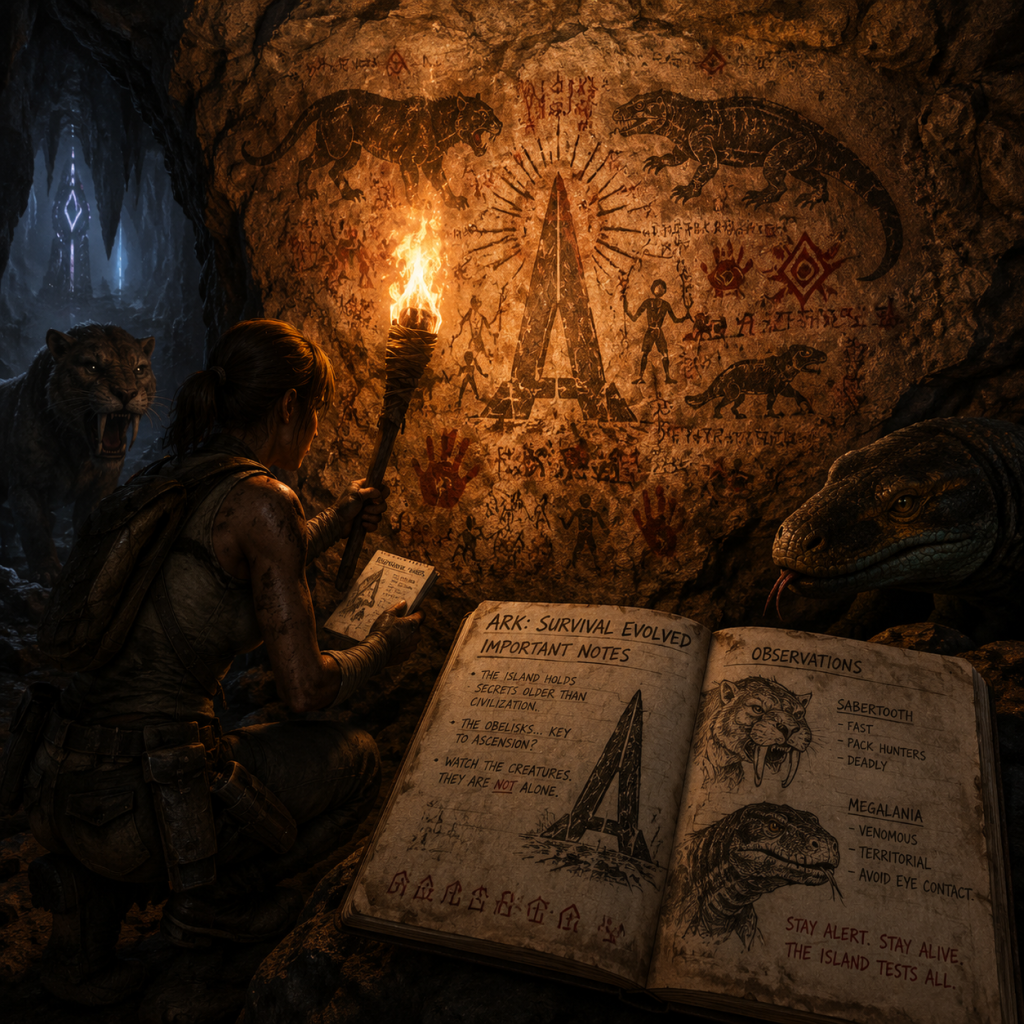
Important Notes
Overview
Welcome to the Important Notes section of the ARK: Survival Evolved guide. This page collects critical warnings, common pitfalls, irreversible decisions, missable content, difficulty spikes, grinding traps, online etiquette, anti-cheat notes, save management advice, and things players often regret not knowing earlier. Read this before diving deep—it will save you countless hours of frustration.
---
Warnings & Common Pitfalls
1. Always Stay Near Water and Food Early On
- Thirst and hunger drain fast. Without a water source, you die in minutes. Spawn near a river or coast.
- Berries are everywhere, but some are poisonous (e.g., Mejoberries are safe; Narcoberries are for knockout, not eating). Eat only thatch-colored berries (Azulberries, Tintoberries) until you unlock a cooking pot.
- TIP: Use `E` to pick berries; hold `E` on a bush to see the berry type.
- On Player vs. Player (PvP) servers, building near popular spawn points, resources (metal, crystal), or caves invites raiding. Build hidden, elevated, or underwater.
- PvE servers have no raiding, but you can be blocked by pillars (structure spam). Check server rules or use official PvE servers with building limits.
- KO taming: Always carry enough narcotics and food. A tame that wakes up halfway will attack you. Build a small thatch trap around the creature before firing tranq darts.
- Passive taming: Some creatures (e.g., Ichthyornis, Ovis) require you to hand-feed while they wander. If you get too close, they flee or attack.
- Never tame a high-level Rex without a good trap and a lot of tranqs. One enraged bite can kill you through armor.
- Default keybinds are clunky. Remap `E` to use/access inventory, `F` to whistle (useful in combat), and `Q` to drink water.
- Use the Options > Controls menu to change keybindings. Console players can use the radial menu effectively.
- The game is very dark at night. Increase your gamma in settings to see clearly. Alternatively, craft a torch or use the `G` key to toggle a flashlight (if you have a headlamp).
- Stats (Fortitude, Weight, Melee Damage) can be reset with Mindwipe Tonics (craftable after level 60? Actually, mindwipe resets engrams and stats, but it costs a lot of materials). However, the first time you create a character, you cannot change name, gender, or appearance later without admin commands (singleplayer) or a new character (servers).
- Engrams: You get limited points per level. Choose carefully! Do not waste engrams on primitive items you outgrow fast (e.g., stone pickaxe if you can find a metal one in a drop). Prioritize: Campfire → Tools → Storage Boxes → Bed (to respawn) → Smithy → Tranq arrows.
- Tip: Some engrams are locked behind other engrams (e.g., Fabricator requires Electronics, which requires Polymer). Plan ahead.
- Singleplayer vs. Multiplayer: You cannot transfer your singleplayer character to official servers (except through unofficial server transfers with mods). Once you start multiplayer, that character is tied to that cluster (if cross-ARK enabled).
- Primitive Plus: This game mode (if still available) removes many industrial items. Joining a Primitive Plus server means you cannot use Tek. The choice is permanent unless you restart.
- Difficulty setting: In singleplayer, you can change the difficulty, max level, and taming rates without penalty. But if you start a server and later change rates drastically, it may feel like cheating. Most official servers are fixed.
- Once you tame a creature, it is yours forever (until it dies). Killing it is irreversible. Always have a safe cryopod or base ready before taming high-value creatures.
- Passive tames that you start healing but fail to complete will eventually despawn. Do not waste resources on half-tames.
- Tribe creation is free. Leaving a tribe means you lose everything you built (structures, tames, items) unless the admin transfers ownership. On official servers, leaving a tribe without dissolving it can result in losing all your progress if the tribe leader logs off.
- Tribe name and motto cannot be changed without admin tools. Choose wisely.
- Collecting Explorer Notes (glowing blue pages) grants +10% XP per note for 10 minutes. There are hundreds scattered across the map. Some notes are only available during specific events (e.g., Fear Evolved). Miss one event, and you may never get that note on that save.
- Artifacts in caves are required for boss fights. Caves are dangerous but re-enterable. However, some caves require key items (e.g., scuba gear for underwater caves) that you might not have prepared.
- Dossiers (creature dossiers) are unlocked by killing or taming each creature. They are not missable per se, but some creatures are seasonal (e.g., DodoRex only during events).
- ARK has regular events like ARK: Fear Evolved (Halloween), Winter Wonderland, and Easter. During these events, special creatures, skins, and recipes appear (e.g., Bone costumes, Chibis). If you miss the event, you have to wait a year or use admin commands (singleplayer) or buy skins from other players (multiplayer).
- Dedicated servers can spawn event items via admin commands, but official servers and most unofficial servers follow the calendar.
- The Island has a cheat terminal (Obelisks) where you can upload/download creatures and items. There is also a Tek Cave that leads to the final boss. Beating the final boss on the Island unlocks the ability to fight the Overseer. If you never venture into the Tek Cave, you miss the entire endgame story.
- Scorched Earth, Aberration, Extinction, Genesis maps each have their own story and final bosses. Many players never complete them because the difficulty spikes.
- Night falls fast (20 minutes into a fresh spawn). Without a campfire, torch, or structure, you will freeze or be eaten by a Raptor. Always build a small shelter (4 walls, roof, door) before dark.
- Raptors, Dilophosaurs, and Compys spawn frequently near beaches. Early levels are deadly; wear cloth armor immediately.
- The Lower South Cave is relatively easy, but Hunter Cave and Swamp Cave have swarms of high-level creatures and hazardous terrain. Swamp Cave requires gas masks (or a high-quality scuba mask with anti-radiation?). Bring grappling hooks, shotguns, and med brews.
- The Tek Cave is the hardest: it’s a puzzle-platformer with deadly traps, then a boss fight against waves of corrupted creatures and the Overseer. Requires endgame tier gear (Tek armor, saddles) and a well-bred army.
- Broodmother, Megapithecus, Dragon – each on The Island requires a specific strategy. Dragon fires can destroy saddles and riders. You need a high-level army of Rexes/Megatherium, plus Yutyrannus buffs and Daeodon healing. Underestimating the boss means losing your dinos permanently.
- King Titan on Extinction – arguably the hardest official boss, requiring dozens of mutated Giganotosaurus or Mech suits. Not for casual players.
- On official PvP servers, you will likely be raided within a week. Tribes with hundreds of turrets and Tek shields defend against rocket launchers and grenades. If you are solo, expect to be wiped frequently unless you hide or play on a PvP-ve server.
- Gathering resources (metal, wood, stone) can become mindless. Breeding and mutations take hundreds of hours. Many players burn out trying to get a perfect stat line.
- Tip: Increase harvesting rates in singleplayer (settings > Harvest Amount x2–x5) to reduce grind. On multiplayer, find a server with boosted rates (3x-10x).
- Kibble recipes are complex: you need specific eggs, meat, berries, and crops. Taming a Argentavis with raw meat takes hours, but with kibble it takes minutes. Always research the preferred food for each tame. Use dododex.com or in-game calculator.
- Mammoths, Paracers, and Brontos take immense amounts of food (thousands of berries). Without a crop plot and a dedicated gatherer, you’ll spend days feeding them.
- To get mutations, you need to hatch hundreds of eggs and check stats. Many players waste weeks because they don’t learn the mutation stacking mechanic (only paternal and maternal mutations count, and there is a cap of 20 mutations per side).
- Tip: Use multiple females with the same stats as the male (breed line). Use a clean male to reset mutation counter. Watch YouTube tutorials before starting.
- Crafting large amounts of narcotics, sparkpowder, or metal ingots by hand is painfully slow. Rush to build a Refining Forge and later an Industrial Forge. The Industrial Grinder turns stone into flint and metal – invaluable.
- No griefing in PvE: do not block spawn points, do not seal caves, do not harass others. Violations can result in a ban by admin or server rollback.
- Do not meshing; exploiting the mesh to get inside bases is a bannable offense. ARK uses BattlEye anti-cheat, which detects most cheat programs (aimbots, ESP).
- Cheating (using trainers, spawning items) on official servers will get your account permanently banned. Steam/Epic accounts are tied.
- Read the server rules before building. Many have tribe size limits, offline raid protection hours, or anti-pillar spam rules.
- Common courtesy: Do not steal other players' dinos even if they are unclaimed (they may be waiting for the owner). Ask before taming near someone’s base. Do not spam global chat.
- On trade servers (like CrossARK), scamming is common. Never trade high-end items upfront. Use a middleman (trusted admin) or trade only with established players. Screenshot all conversations.
- Be wary of “free tribe” giveaways—these are often traps to raid your base after you transfer your dinos.
- If you are an admin, use commands responsibly. Over-spawning resources or dinos can break the game economy. Back up your save before any major admin action.
- ARK saves automatically every 15 minutes by default (can be changed in `GameUserSettings.ini`). The save file is in `ShooterGame/Saved/SavedArks/`.
- Back up your save regularly: Copy the folder to another location. If the game crashes or becomes corrupt, you can restore. Corruption happens (especially on giant bases).
- Use multiple save slots: The game allows multiple characters, each with its own map save. You can level a new character on a different map without losing progress on the main.
- For dedicated servers, automatic saves are also periodic. Back up the `SavedArks/` folder and the `Players/` folders (player inventories).
- When updating the server, always back up first. Mod updates can break saves irreversibly.
- Steam Cloud Sync is enabled by default. This can conflict with manual backups. If you restore an old save, disable cloud sync to prevent overwriting.
- On consoles, save data is tied to your account; cannot be manually backed up. Be extra cautious with glitches.
- Turning off the game while it is saving (hard power off). Wait for the save icon to disappear.
- Using mods that are poorly coded. Failing to update mods can corrupt world data.
- Giant tames and massive structures (thousands of foundations) can cause performance issues and save bloat. Use FPS-friendly building techniques (minimize foundations, use pillars).
- A whip (crafted in smithy) can be used to trigger a creature’s attack or to remove torpor from an ally (by hitting the ground near them). This is critical for taming: if your tame is getting too much torpor (e.g., from narcotics overdose?), you can whip it to wake it up? Actually, whipping does not affect torpor directly, but it can aggro a creature and make it flee. Better to use stimulants in food.
- Stimberries increase torpor but also drain food? No, stimulants increase torpor? Actually, stimulants (injections) reduce torpor. Use dodo food to reduce torpor? Wait, correct: Stimulant (crafted from stimberries and narcotics) reduces torpor. Use it if you accidentally over-narcotize a tame.
- Bola (early game) can immobilize Pteranodon, Tapejara, and other flying creatures for 25 seconds. Run up and club it with a slingshot or tranq. This is the fastest way to get a flyer for exploring.
- There are three Obelisks (red, blue, green) on The Island. You can upload your character, items, and dinos, then download them on another server (or singleplayer) in the same cluster. This allows you to move between maps without losing progress. Many players start on The Island and later move to Ragnarok or Extinction.
- Caution: Uploaded items have a decay timer (usually 24 hours on official). If you don't download them in time, they disappear.
- The Moschops is a passive tame that is great for early fiber. Approach it slowly while it’s looking away, feed it a veg cake (requires crops). It can be leveled in harvesting fiber (up to 400% yield). You can ride it without a saddle.
- Cryopods (requires Obelisk loot or crafting) allow you to shrink a tame into a ball. This is essential for moving dinos, saving them from raids, and reducing lag. Always carry a cryopod and a cryofridge for storage.
- Important: Cryopodded dinos lose 10% food every day. Feed them by uncing them (hold E) near a feeding trough or by uploading and downloading. They can starve.
- Hitting `J` (default) commands all tames to follow you. If you are in a dangerous area, they will walk into traps, lava, or water. Instead, whisper to specific tames (`. ` key and then click the tame).
- Fortitude (a stat) reduces the risk of being knocked out by predators (e.g., Troodon, Pulmonoscorpius) and lessens weather effects. On Scorched Earth, you need high fortitude. On The Island, at least 20 points is recommended for caves.
- The default inventory key (`I` or `Tab`?) Many players change it to `Tab` for quick access. Also, `F` for whistle is terrible; rebind whistles to number keys.
- On PC, install mods like S+ (Structures Plus, now integrated into base game? Actually, some features were added to base game, but S+ still offers advanced building tools, item pull, and stacking). On consoles, you cannot use mods unless you have a PC server with mod support (unlikely).
- Tip: On official, you cannot use mods. On unofficial, check which mods the server uses before joining.
- Pickaxe yields more metal per swing but less per rock. Ankylosaurus yields much more metal per rock (and also flint). Always use an Anky for metal gathering once you have a saddle.
- Patience is key. ARK is a marathon, not a sprint. Take breaks to avoid burnout.
- Join a community (Discord, subreddit) for clues and help. Many veterans enjoy assisting newcomers.
- If you are solo, consider increasing your harvesting, taming, and XP rates in singleplayer to reduce grind. There is no shame in making the game fun.
- Always have a backup plan: a hidden cache of supplies, a second base, and a cryopodded flyer to escape.
2. Never Build in a High-Traffic Area on PvP Servers
3. Taming a Dinosaur Without Proper Preparation Can Kill You
4. The UI Can Be Overwhelming – Customize It
5. Gamma/Brightness Settings Save Lives
---
Irreversible Choices
1. Character Creation and Engram Points
2. Server and Mode Selection
3. Taming a Dinosaur vs. Killing It
4. Setting Up a Tribe on Official Servers
---
Missable Content
1. Explorer Notes and Data Notebooks
2. Seasonal Events & Limited-Time Skins
3. Story-Related Content (if you care about lore)
---
Difficulty Spikes
1. The First Night
2. Caves on The Island
3. Boss Fights
4. PvP Raiding
---
Grinding Traps
1. The “Just One More Run” Syndrome
2. Taming Slow Creatures Without Proper Kibble
3. Breeding Mutations – The Endless Hatch
4. Crafting Without Industrial Grinder or Fabricator
---
Online Etiquette & Anti-Cheat Notes
1. Official Server Rules
2. Unofficial Server Community Guidelines
3. Trading and Scamming
4. Admin Commands on Private Servers
---
Save Management Advice
1. Singleplayer Saves
2. Server Saves
3. Cloud Saves
4. What Causes Save Corruption?
---
Things Players Commonly Regret Not Knowing Earlier
1. You Can Whip or Grapple to Remove Torpor
2. You Can Tame a Pteranodon Quickly with a Bolas
3. The Map Has Teleport Points (Obelisks)
4. You Can Ride a Moschops to Harvest Fiber Efficiently
5. Use Cryopod to Store Tames Safely
6. The “Whistle All Follow” Key Can Get Your Tames Killed
7. Fortitude Prevents Hypothermia and Torpor
8. You Can Re-Bind the Inventory Key to `Tab`
9. The Console Mods (e.g., Structures Plus) Are Massive Quality-of-Life
10. You Can Farm Metal with a Pickaxe vs. Ankylosaurus
---
Final Advice
Good luck, survivor!
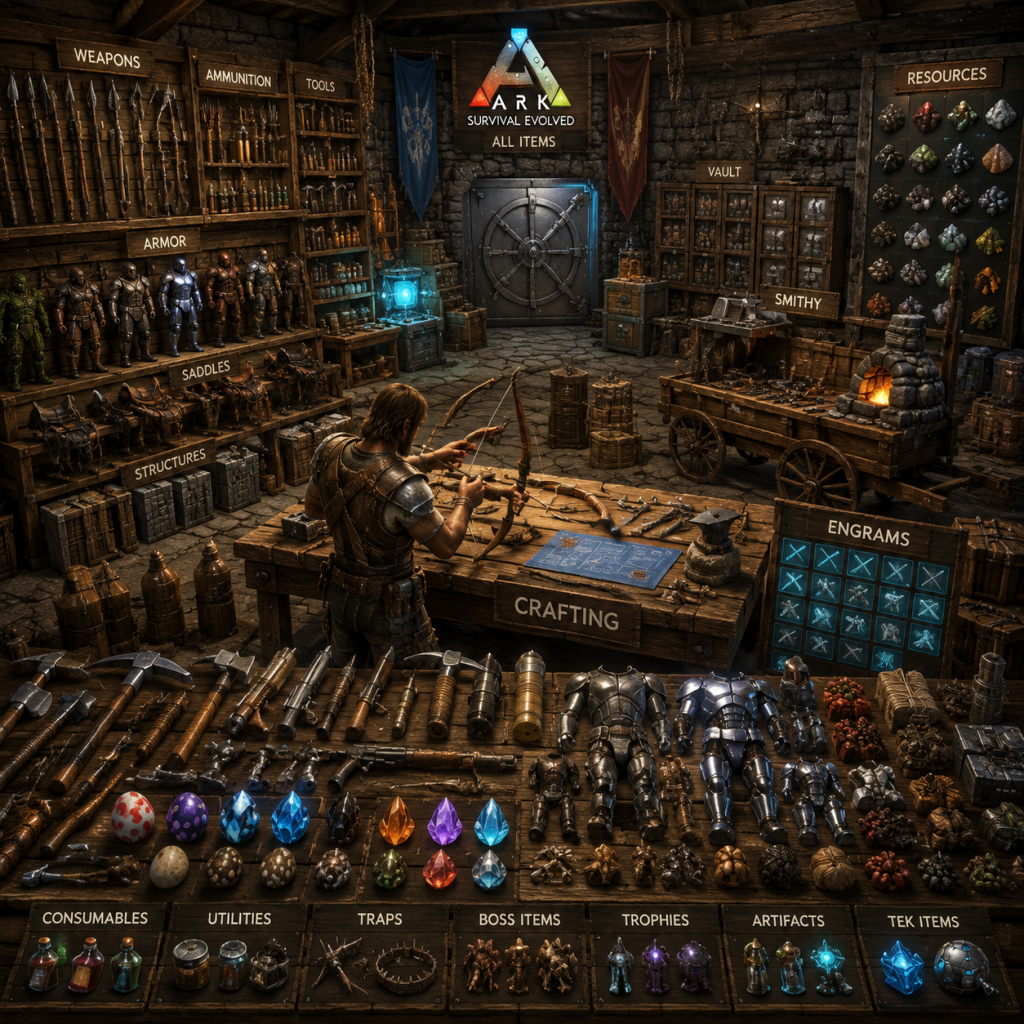
All Game Items
Overview
ARK: Survival Evolved features hundreds of items spanning raw materials, crafted tools, weapons, armor, consumables, structures, and special collectibles. This guide organizes every major item group, explains its purpose, acquisition methods, optimal uses, and important upgrades or synergies.
---
1. Raw Materials
Raw materials are the basic resources gathered from the environment. They are used in crafting almost everything.
1.1 Stone, Wood, Thatch, Fiber
- Stone: Mined from rocks. Used for tools, structures, and sparkpowder.
- Wood: Chopped from trees. Used for structures, tools, and fuel.
- Thatch: Harvested from trees using tools or hands. Used for early-game structures and taming.
- Fiber: Harvested from bushes. Essential for cloth armor, fishing rods, and many saddles.
- Flint: Found from small rocks. Used for tools (hatchet, pick), sparkpowder, and arrows.
- Metal: Smelted from metal nodes. Used for advanced tools, weapons, saddles, and Tek tier.
- Crystal: Found in caves and mountains. Used for spyglass, scopes, electronics, and Tek.
- Obsidian: Black volcanic rocks. Used for electronics, weapons, and Tek replicator.
- Oil: From oil veins, trilobites, and deep sea. Used for fuel, gasoline, and polymers.
- Sulfur: Found in volcanic areas. Used for gunpowder, propellant, and fertilizers.
- Hide: From most creatures. Used for armor, saddles, and sleeping bags.
- Chitin/Keratin: From insects, turtles, and other creatures. Used for armor (chitin) and crafting.
- Raw Meat/Fish: Food sources. Cooked to improve nutrition.
- Berries: Various colors. Used for taming kibble, dyes, and narcotics.
- Seeds: From plants. Used for farming.
1.2 Flint, Metal, Crystals, Obsidian, etc.
1.3 Organic Resources
---
2. Crafted Resources
These are processed from raw materials in the inventory, forge, or other stations.
| Item | How to Obtain | Uses |
|---|---|---|
| Sparkpowder | Flint + Stone (mortar & pestle) | Fuel for torches, bullets, and early electricity |
| Gunpowder | Sparkpowder + Charcoal | Bullets, grenades, rockets |
| Cementing Paste | Chitin/Keratin + Stone (mortar & pestle) or from beaver dams | Structures, saddles, advanced items |
| Polymer | Obsidian + Cementing Paste or from organic (e.g., Mantis) | Electronics, armor, weapons, Tek |
| Electronics | Silica Pearls + Metal (fabricator) | Tek gear, scopes, generators, etc. |
| Gasoline | Oil + Hide (refining forge) | Fuel for generators, vehicles, and fabricator |
| Narcotics | Spoiled Meat + Narcoberries (mortar & pestle) | Taming and tranquilizing |
| Medical Brew | Narcotics + Stimulants + Water + Tintoberries | Healing and curing disease |
3. Tools
3.1 Early Tools (Handcrafted)
- Stone Pick / Hatchet: Basic gathering.
- Stone Knife: Harvest meat and hide faster.
- Torch: Light source and weapon.
- Metal Pick / Hatchet: Faster yield of metal and other ores.
- Metal Knife: Improved harvest.
- Fishing Rod: Catch fish for food or prime meat.
- Spyglass: Zoom to see creature levels and stats.
- GPS / Compass: Navigation aids.
- Grappling Hook: Mobility and taming.
- Whip: Dismount riders, drag items, and herd creatures.
- Chain Bola: Immobilize small to medium creatures.
- Parachute: Air drop safety.
- Climbing Pick: Scale walls and cliffs.
3.2 Metal Tools (Smithy/Fabricator)
3.3 Special Tools
---
4. Weapons
4.1 Ranged Weapons
| Weapon | Ammo | How to Obtain | Notes |
|---|---|---|---|
| Slingshot | Stone | Engram (Lv.6) | Stuns small creatures |
| Bow / Crossbow | Stone Arrow / Tranq Arrow | Engram | Crossbow has higher damage but slower reload |
| Longneck Rifle | Tranq Dart, Bullet | Engram (Lv.20) or loot | Best for taming with darts |
| Pump-Action Shotgun | Shotgun Shell | Engram (Lv.60) | High spread damage, excellent vs dinos |
| Assault Rifle | Advanced Bullet | Engram (Lv.55) or drops | Automatic fire, versatile |
| Sniper Rifle | Advanced Bullet | Engram or loot | High damage, long range |
| Fabricated Pistol | Pistol Bullet | Engram (Lv.30) | Medium damage, cheap |
| Rocket Launcher | Rocket Propelled Grenade | Engram (Lv.80) | Explosive area damage |
| Compound Bow | Metal Arrow or Tranq | DLC or loot | Higher damage and accuracy |
4.2 Melee Weapons
- Spear (Stone/Metal): Thrown or thrust.
- Sword (Metal): Slash damage, high DPS.
- Pike: Reach weapon, good for mounted combat.
- Club: Blunt damage, can knock out small creatures.
- Electric Prod: Transfers electricity (shock).
- Tek Sword: Powered by Element (Tek tier).
- Bola: Immobilizes small/medium creatures.
- Poison Grenade: Gas cloud damage and torpor.
- Smoke Grenade: Concealment.
- Cluster Grenade: Multi-explosion.
4.3 Thrown Weapons
---
5. Armor
5.1 Armor Sets (from weakest to strongest)
| Armor | Material | Engram Level | Protection | Weight | Notes |
|---|---|---|---|---|---|
| Cloth | Fiber, Hide | Lv.5 | Very low | Very low | Good for heat, poor for cold/hits |
| Hide | Hide | Lv.10 | Low | Low | Balanced for early game |
| Chitin | Chitin | Lv.32 | Medium | Medium | Good vs carnivores, bad vs cold |
| Flak | Metal | Lv.38 | High | High | Standard PvP/PvE armor |
| Riot | Polymer, Electronics | Lv.70 | Very high | Very high | Best non-Tek protection, but heavy |
| SCUBA | Chitin, Polymer, Electronics | Lv.45 | Underwater | Medium | Required for underwater breathing and speed |
| Tek | Element, Polymer, Crystal | Lv.96-100 | Extremely high | Medium | Provides fly, jump, and special abilities |
5.2 Helmets & Accessories
- Gas Mask: Protects from poisonous gas (e.g., swamp cave).
- Night Vision Goggles: See in dark.
- Hunter Hat (Raptor Mask): Reduces penalties from plants (rare).
- Cooked Meat/Prime: Restores hunger and health slightly.
- Kibble (Various): Used for taming with high efficiency. Types: Basic, Simple, Regular, Superior, Extraordinary.
- Sweet Vegetable Cake: For taming herbivores and healing.
- Water Jar / Canteen: Portable water storage.
- Shadow Steak Saute: Increases melee damage and movement speed.
- Medical Brew: Restores health over time, cures swamp fever.
- Energy Brew: Temporary stamina boost.
- Lazarus Chowder: Boosts movement and oxygen in water.
- Enduro Stew: Increases HP, stamina, and damage resistance.
- Focal Chili: Increases crafting speed and XP.
- Narcotics: Induces torpor (for taming).
- Stimulant: Removes torpor.
- Tranquilizer Arrow/Dart: Fired from bow/crossbow/rifle to increase torpor.
- Narcotics: Keep creatures unconscious.
- Tranq Arrows/Darts: Shoot to knock out.
- Raw Prime Meat / Kibble: Favorite food for taming.
- Bola / Chain Bola: Immobilize to shoot freely.
- Bear Trap: Largely immobilizes creatures.
- Taming Timer: Not an item but a mechanic; use narcotics to maintain torpor.
- Materials: Thatch, Wood, Stone, Metal, Tek.
- Doors, Trapdoors, Windows: Add access points.
- Ramps, Ladders, Elevators: Vertical movement.
---
6. Consumables
6.1 Food & Drink
6.2 Medical & Buffs
6.3 Narcotics & Tranqs
---
7. Taming Items
---
8. Structures
8.1 Base Building (Foundation, Walls, Ceilings)
8.2 Utility Structures
| Structure | Function | Engram Level |
|---|---|---|
| Campfire | Cooking, warmth | Lv.3 |
| Mortar & Pestle | Crafting narcotics, sparkpowder | Lv.4 |
| Smithy | Crafting metal items (alloy) | Lv.20 |
| Fabricator | Advanced electronics, polymer, ammo | Lv.30 |
| Refining Forge | Smelt metal, create gasoline and ingots | Lv.15 (requires engram) |
| Industrial Forge | Fast smelting for large quantities | Lv.70 |
| Chemistry Bench | Mass production of narcotics, gunpowder | Lv.70 |
| Generator | Provides electricity using gasoline | Lv.50 |
| Tek Replicator | Craft Tek items using Element | Lv.100 |
8.3 Defenses
- Spike Walls: Damage creatures when touched.
- Auto Turret / Heavy Auto Turret: Fires bullets at enemies.
- Plant Species X: Plant that shoots acid at enemies. Requires fertilizer.
- Tek Turret: High damage, uses Element.
- Trikes/Behemoth Gates: Large doors for dinosaur entry.
- Common Collector Saddles: e.g., Tranq Darts from Bronto Saddle?
- Platform Saddles: For building on creatures (e.g., Bronto, Quetzal, Mosa).
- Armored Saddles: Provide damage reduction to rider and dino.
- Saddle Types: There are over 100 saddle engrams, each specific to a creature. Example: Raptor Saddle, Argentavis Saddle, Rex Saddle.
- Dino Leash: Teleports tamed dino back to base.
- Dino Whistle: Remote control.
- Cryopod: Store dino in a ball for easy transport.
- Tek Transmitter: Upload/download dinos.
---
9. Saddles & Dino Equipment
9.1 Saddles (by Dino Type)
9.2 Dino Gear
---
10. Ammunition & Projectiles
| Ammo Type | Weapon(s) | Crafting Recipe (if crafted) |
|---|---|---|
| Stone Arrow | Bow, Crossbow | Stone + Fiber |
| Tranq Arrow | Bow, Crossbow | Narcotics + Arrow |
| Shocking Tranq Dart | Longneck Rifle | Tranq Dart + Bio Toxin |
| Bullet (Simple) | Pistol, Rifle, Turret | Gunpowder + Metal Ingot |
| Advanced Bullet | Assault Rifle, Sniper | Polymer? Actually: Gunpowder + Metal Ingot + Sparkpowder? Check: Requires Spinoferum? No, standard recipe: Gunpowder + Metal Ingot (Fabricator). Advanced uses more resources. |
| Shotgun Shell | Shotgun | Gunpowder + Metal + Chitin/Stone? |
| Rocket Propelled Grenade | Rocket Launcher | Polymer + Electronics + Metal + Gunpowder |
| Element Shard | Tek Weapons | Element (obtained from bosses) |
11. Currencies
ARK does not have a single global currency, but several items serve as trade mediums:
- Element: Endgame crafting material, also used as currency on some servers.
- Silica Pearls: Often traded for resources.
- Crystal: Commonly traded.
- Metal Ingots: The most common currency in player trading.
- Kibble (valuable types): Used for trade in dino breeding.
- Artifact of the Hunter (Carno Cave)
- Artifact of the Massive (Swamp Cave, etc.)
- Artifact of the Clever (hidden in ruins)
- Artifact of the Devourer (jellyfish cave)
- Artifact of the Skylord (volcano cave)
- Artifact of the Pack (snow cave)
- Artifact of the Immune (swamp cave)
- Artifact of the Strong (water cave)
- Artifact of the Cunning (Ruins of Nosti)
- Artifact of the Brute (Ice Cave)
---
12. Collectibles & Artifacts
12.1 Artifacts
Found in caves. Used to summon bosses. Each artifact has a specific cave location.
12.2 Explorer Notes
Collectible lore items scattered across maps. Reading them gives temporary XP boost. Some notes reveal boss locations.
12.3 Dossiers
Collectible drawings of dinosaurs (not actual items but achievements).
---
13. Tek Items (Endgame)
Requires Element unlocked from defeating bosses.
| Tek Item | Function |
|---|---|
| Tek Helmet | Night vision, target tracking, radar |
| Tek Chestpiece | Jetpack flight |
| Tek Leggings | Super speed, jump boost |
| Tek Boots | Increased movement in water |
| Tek Shield | Absorbs damage (sword and shield) |
| Tek Sword | High damage, disables some creatures |
| Tek Rifle | Laser beam, drains Element |
| Tek Bow | Arrows that home? |
| Tek Tapejara Saddle | Fast flying with guns |
| Tek Rex Saddle | Mount laser cannon on Rex |
| Tek Turret | Automated defense with Element |
| Tek Generator | Powers base without gasoline |
| Tek Teleporter | Instant travel between points |
| Tek Replicator | Mass crafting of Tek items |
14. Important Consumables for Progression
- Narcotics: Indispensable for taming.
- Medical Brew: Necessary for cave runs (healing).
- Calien Soup: Heat protection for lava areas.
- Fria Curry: Cold protection for snow biomes.
- Shadow Steak Saute: Increases damage and speed for boss fights.
- Enduro Stew: Essential for tanking.
- Focal Chili: Speeds up crafting of many items.
- Mortar & Pestle to Chemistry Bench: Narcotics and gunpowder become craftable in bulk.
- Refining Forge to Industrial Forge: Faster smelting.
- Simple Bullets to Advanced Bullets: Higher damage for same weapon.
- Old Kibble System (pre-255) vs New Kibble: New kibble is tied to egg size and is more friendly.
- Tek Armor vs Flak: Tek provides mobility and energy shield vs Flak’s high durability.
- Compound Bow vs Longneck Rifle: Compound bow does torpor faster for taming but is harder to use.
- Dinos Saddle vs Tek Saddle: Tek saddles have built-in weapons.
- Always carry an Argentavis or Wyvern for weight reduction and air lifts.
- Use Dedicated Storage Boxes for auto-sorting bulk items.
- Craft Cooking Pot early for custom recipes.
- Cryofridge stores cryopods and your dinos.
- Smithy has no weight capacity but can be carried by some dinos.
---
15. Upgrades & Synergies
---
16. Tips for Item Management
This guide covers the vast majority of items in ARK: Survival Evolved. Always check your game version and any DLC maps (Scorched Earth, Abberation, Extinction, Genesis) for map-specific items not listed here.
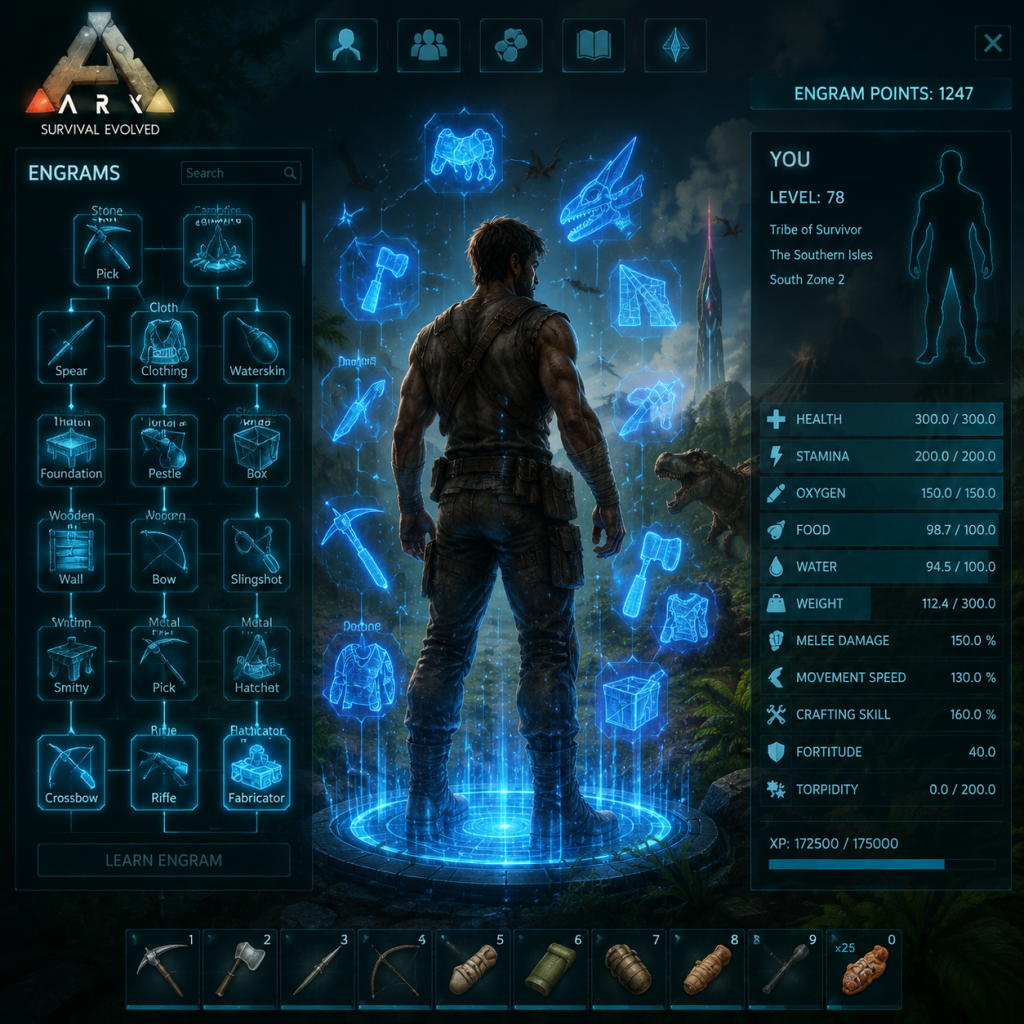
Character Skills
Overview
In ARK: Survival Evolved, there are no predefined character classes or traditional skill trees. Instead, every survivor starts with basic abilities and gains levels (up to 105 normally, higher with certain DLCs and ascensions). Each level grants:
- 10 Engram Points (used to unlock crafting recipes)
- 1 Stat Point to allocate into one of ten stats
- Effect: Increases total hit points. Base: 100. Each point adds +10 HP.
- Recommended Value: 200–400 (20–30 points) for most builds. Tanks may go up to 600.
- When to Use: Essential for surviving creature attacks, falls, and player combat. Prioritize if you engage in PvP or tame aggressive dinos.
- Effect: Increases stamina pool (used for sprinting, swimming, attacking, and jumping). Base: 100. Each point adds +10 stamina.
- Recommended Value: 150–300 (5–20 points). Heavy sprint builds (e.g., using Tek Legs) may need more.
- When to Use: Critical for long-distance travel, escaping threats, and sustained combat (e.g., wielding a Pike or Sword).
- Effect: Increases breath-holding duration and reduces drowning damage. Base: 100. Each point adds +10 oxygen. Also affects underwater movement speed slightly.
- Recommended Value: 100–200 (0–10 points). Often left at base unless focusing on underwater bases or taming aquatic creatures.
- When to Use: Only needed for prolonged underwater activities like pearl gathering or fighting Mosasaurs.
- Effect: Increases maximum food meter and slows hunger depletion. Base: 100. Each point adds +10 food capacity. Does not affect healing from food.
- Recommended Value: 100–150 (0–5 points). Most builds ignore this, but it helps during long tames or when using high-level narcotics.
- When to Use: Situational — reduces how often you need to eat. Combine with Fortitude for sustained hunger/thirst resistance.
- Effect: Increases maximum water meter and slows thirst depletion. Base: 100. Each point adds +10 water capacity.
- Recommended Value: 100–150 (0–5 points). Same logic as Food.
- When to Use: Helpful in deserts (Scorched Earth, Ragnarok desert) or during long expeditions away from water sources.
- Effect: Increases carry capacity. Base: 100. Each point adds +10 weight.
- Recommended Value: 200–400 (10–30 points). Essential for gatherers, builders, and resource runners. Endgame may push to 600+ with Tek Exosuit bonus.
- When to Use: Always valuable. Allows carrying more metal, wood, stone, or equipment without being encumbered.
- Effect: Increases damage dealt by weapons, tools, and fists. Base: 100%. Each point adds +5% melee damage multiplier. Affects harvest yield from tools (e.g., pick/hatchet) and damage from dinos you ride.
- Recommended Value: 150–300% (10–40 points) for combat builds. Gatherers may keep at 200% for faster resource harvest.
- When to Use: Critical for PvP, boss fights, and any direct combat. Also improves resource gathering speed (e.g., using a chainsaw or pick on nodes).
- Effect: Increases walking, sprinting, and swimming speed. Base: 100%. Each point adds +2% movement speed.
- Recommended Value: 110–130% (5–15 points). Speedsters may go up to 150% but sacrifice other stats.
- When to Use: Useful for evading predators, PvP jukes, and covering ground quickly. Note that speed bonuses do not apply when riding dinos (except the speed of your mount).
- Effect: Increases resistance to extreme temperatures, torpor (tranq darts), diseases, and some environmental effects. Base: 0. Each point adds +2 Fortitude. Reduces hypothermia/hyperthermia damage and increases torpor threshold by 1.2 per point (tested).
- Recommended Value: 10–30 points for PvP or extreme climate zones. Standard PvE may ignore.
- When to Use: Vital for surviving Scorched Earth, Aberration, or Extinction’s corrupted regions. Also counters player tranqs in PvP.
- Effect: Increases crafting speed (time to craft items) and reduces the duration of crafting but does not affect the amount produced. Base: 0%. Each point adds +10% crafting speed (i.e., 10% faster per point). Does not stack with some crafting stations?
- Recommended Value: 0–10 points. Only useful for mass production (e.g., cooking jerky, making ammo) or when using Mindwipe to allocate temporarily.
- When to Use: Not essential; most players ignore it. Some use a dedicated crafting character (with high Crafting Speed + Mindwipe after crafting).
- Total EP at max level (105): 1045 EP (since level 1 gives none? Actually level 1 to 2 gives first 10 EP, etc. Total is (level-1)10 = 1040 EP for level 105? Check: At level 105 you have 1040 EP? Formula: 10(105-1)=1040. Plus potential bonus from Chibi pets (max +20 EP). So approx 1060 EP total.
- Critical early unlocks: Pick, Hatchet, Spear, Campfire, Thatch Foundation, etc.
- Respeccing: Use Mindwipe Tonic (requires level 60+ to craft) to reset all engram and stat points. Alternatively, in some modes you can reselect engrams via menu.
- Ability: Target Lock (like a Sonar) – highlights nearby enemies, resources, and creatures through walls. Also grants Thermal Vision and Night Vision.
- Duration/Cooldown: Toggleable, drains Element Shards quickly.
- When to Use: Scouting caves, locating hidden enemies, or finding metal nodes.
- Ability: Jetpack – allows sustained flight. Hold jump to ascend, C to descend, sprint to boost forward.
- Element Cost: Consumes Element per second.
- When to Use: Traversal, escaping danger, reaching high ledges, aerial combat.
- Ability: Super Speed and Jump Boost – run faster and jump higher. Activates with sprint key.
- Element Cost: Consumes while moving.
- When to Use: Ground travel, chasing prey, leaping over obstacles.
- Ability: No fall damage when Tek Boots are worn? Actually, Tek Boots prevent fall damage entirely while worn (passive). No active ability.
- Effect: You can survive any fall.
- Best Used: In combination with jetpack or glider suit.
- Ability: Punch increased damage and can break certain rocks. Also allows grappling (if using Tek Claws? Wait, Tek Gauntlets themselves have a punch ability that damages creatures and gathers resources. Cooldown: 2 seconds.
- Element Cost: None for basic punch, but using the “Armor Mode” (shield) consumes Element.
- When to Use: As backup weapon, breaking stone nodes, or PvP hit-stun.
- Ability: Deploy a force field that blocks projectiles and reduces damage. Activate while looking down.
- Duration: 5 seconds, then cooldown.
- When to Use: Defensive emergency, reviving allies, blocking sniper shots.
- Stat Allocation: 20 Health, 10 Stamina, 0 O2, 0 Food, 0 Water, 20 Weight, 10 Melee, 10 Speed, 5 Fortitude, 0 Crafting.
- Reasoning: Balanced for early to mid-game. Enough health to survive, weight to carry resources, melee for self-defense.
- When to Use: Solo play, starting fresh.
- Stat Allocation: 40 Health, 20 Stamina, 0 O2, 0 Food, 0 Water, 10 Weight, 30 Melee, 5 Speed, 20 Fortitude, 0 Crafting.
- Reasoning: Massive health and torpor resistance. Melee damage for boss fights. Weight low – rely on mounts.
- When to Use: Boss arenas, PvP frontline.
- Stat Allocation: 10 Health, 10 Stamina, 0 O2, 0 Food, 0 Water, 50 Weight, 20 Melee, 5 Speed, 5 Fortitude, 0 Crafting.
- Reasoning: High weight and melee to harvest faster. Low health – kite with speed.
- When to Use: Metal farming, wood gathering, stone runs.
- Stat Allocation: 10 Health, 30 Stamina, 0 O2, 0 Food, 0 Water, 10 Weight, 0 Melee, 30 Speed, 10 Fortitude, 0 Crafting.
- Reasoning: Max movement speed and stamina for evasion. Avoid direct fights.
- When to Use: Exploring unknown areas, kiting enemies, retrieving loot.
- Stat Allocation: After Mindwipe Tonic, dump all points into Crafting Speed (e.g., 90+).
- Reasoning: Craft everything super fast, then Mindwipe back to combat build.
- When to Use: When mass-producing ammo, kibble, or structures.
- Melee Damage + Chainsaw: Higher melee% increases gathering rate (wood/meat).
- Movement Speed + Grappling Hook: Allows quick escapes and vertical traversal.
- Weight + Tek Leggings: Can run while encumbered? No, but high weight lets you carry resources while using Tek leggings for speed boost.
- Fortitude + Scorched Earth Gear: Combined with Ghillie or Desert Cloth, you can survive extreme heat without water rooms.
- Health + Tek Chestpiece Shield: Use shield to absorb burst damage, then regenerate health naturally.
- Stamina + Tek Legs: Sprint longer without depleting stamina – but Tek Legs use Element separate from stamina.
- Respecing: You can reset stats/engrams any time with a Mindwipe Tonic (crafted at Level 60+). This allows you to adapt to different roles as needed.
- Hidden Stat Caps: Melee Damage caps at 500%? Actually no hard cap, but returns diminish. Movement Speed capped at 200% (some servers allow higher).
- Tek Armor Redundancy: Each piece requires Element Shards to fuel. Keep a stock. Jetpack and super speed drain quickly.
- No Skill Trees: Unlike RPGs, you cannot specialize into a “class” – every survivor is identical in base potential. Your playstyle comes from your stat allocation and engram choices.
These stat points function as your character's core skills, directly affecting survival, combat, and utility. Additionally, endgame Tek Armor pieces grant powerful active abilities (like flight and shields), and your Implant allows for respawning – a fundamental passive skill. This guide covers every way your character can grow, from stats and engrams to Tek abilities and build recommendations.
Survivor Stats (Core Skills)
Each time you level up, you can invest one point into one of these ten stats. Respeccing is possible via Mindwipe Tonic (unlocks all stat and engram points for reallocation) or the simpler Respec option in Genesis/Survival of the Fittest.
1. Health
2. Stamina
3. Oxygen
4. Food
5. Water
6. Weight
7. Melee Damage
8. Movement Speed
9. Fortitude
10. Crafting Speed
Engram Unlocks (Crafting Skills)
Engram Points (EP) are used to unlock crafting recipes permanently. You gain 10 EP per level. To unlock all available engrams (including DLCs) you would need far more EP than earned naturally, so strategic selection is key. There is no class restriction – any survivor can unlock any engram. However, you can learn engrams from Teachables (e.g., Explorer Notes) or transfer knowledge via custom servers.
Tek Abilities (Special Moves)
At endgame (after defeating bosses and obtaining Element), you can craft Tek Armor pieces. Each piece grants a unique activated ability (usually bound to a hotkey, default G or H). These are essentially your character’s “spells” or “special moves.”
Tek Helmet
Tek Chestpiece
Tek Leggings
Tek Boots
Tek Gauntlets
Tek Shield (from Tek Chestpiece? Actually, Tek Chestpiece can create a temporary shield bubble.)
Other Tek Mods (Saddle, Weapons): Not character skills, but mounts.
Implant and Respawn (Passive Ability)
Every survivor has an Implant in their arm. It serves as your identity and allows you to respawn at a bed, sleeping bag, or random location upon death. This is your only innate “skill” – the ability to come back from death (with limited inventory). There is no way to improve this; it’s always active. Advanced respawn options come from Tek Bed or Transmitter.
Recommended Builds
All-Around Builder/Explorer
Tank (PvP/Boss Fighter)
Gatherer (Resource Farmer)
Speedster (Scout/Runner)
Crafting Specialist (Mindwipe Build)
Synergies and Combos
Important Notes
This guide covers every skill, ability, and special move available to your character in ARK: Survival Evolved. Master your stat distribution and Tek gear to conquer the island!

Characters & Roles
Overview
ARK: Survival Evolved does not feature traditional character classes, heroes, or predefined playable units. Every player begins as a generic survivor with identical base stats. However, as you progress, you develop a unique role based on your chosen playstyle, attribute distribution, tame selection, and crafting specialization. This guide introduces the major survivor roles (archetypes) that emerge organically, along with notable NPC lore characters who appear in Explorer Notes and story events. While you can switch roles at any time by respeccing, each role has distinct strengths, weaknesses, and recommended setups.
---
Survivor Roles (Player Archetypes)
These are the most common roles players adopt, whether solo or in a tribe. They are not mutually exclusive; many players mix aspects of several roles.
1. The Gatherer (Resource Collector)
Background: The bread and blood of any tribe. Focuses on harvesting raw materials: wood, stone, metal, fiber, thatch, and rare resources.
Strengths:
- Extremely efficient at gathering large quantities of resources.
- Can rapidly supply base construction and crafting.
- Often uses high-weight tames and tools.
- Low combat effectiveness if caught off-guard.
- Relies heavily on specific tames and tools.
- Vulnerable to environmental hazards while gathering.
- Ascendant pickaxe/hatchet, stone hatchet (early game)
- Gas Mask (for swamp caves), SCUBA (for underwater)
- Focal Chili (increases movement speed), Enduro Stew (stamina)
- High-weight armor (Flak or Tek) to carry more.
- Access to a wide variety of tames for all purposes.
- Can breed super-boss fighters with exceptional stats.
- Understands kibble chains and taming strategies.
- Time-intensive; taming high-level creatures takes hours.
- Requires many resources for narcotics, kibble, and food.
- Breeding mutations demand dedicated infrastructure.
- Tranq weapons: Longneck Rifle with Tranq Darts, Crossbow with Tranq Arrows, or a Tame with torpor attacks (e.g., Equus, Scorpion).
- Narcotic production: Mortar and Pestle, Chemistry Bench.
- Kibble: Cooked Meat, Berries, Fiber, and specific eggs.
- Taming Calculator (external tool) for precise timing.
- Creates secure, functional bases for storage and defense.
- Efficient layout and resource management.
- Can build defensive structures (turrets, walls, traps).
- Less effective in direct combat unless specialized.
- Base upkeep requires constant resource flow.
- Large builds attract raiders.
- Smithy, Fabricator, Tek Replicator (end-game)
- Resource Gathering Tames (e.g., Anky, Doedic) for materials.
- Flyers (Argentavis, Quetzal) for transporting heavy parts.
- Tek Generator, Auto Turrets, Tek Shields for defense.
- High damage output with firearms, melee weapons, or tames.
- Good survivability in dangerous zones (caves, boss arenas).
- Excellent for defending the tribe or attacking enemies.
- Low resource gathering efficiency.
- Often requires expensive ammunition and gear.
- High risk of death and loss of equipment.
- Flak Armor (early), Riot Gear (mid), Tek Armor (late).
- Assault Rifle / Pump Shotgun / Sword with Ascendant quality.
- Med Brews, Enduro Stew, Fria Curry (cold resistance).
- Compound Bow (long range, high damage).
- Extremely mobile; can cross the map quickly.
- Good at locating valuable spawns (e.g., alpha predators, rare resources).
- Often carries low-weight, fast tames.
- Weak in prolonged combat – relies on speed to escape.
- May die easily if pinned down.
- Less effective in base tasks.
- GPS, Compass, Maps (inventory item).
- Grappling Hook (for vertical movement).
- Climbing Pick (Scorched Earth / maps with cliffs).
- Canteen, Water Jar for desert runs.
- Access to exclusive underwater resources and artifacts.
- Can tame aquatic creatures like Mosasaurus, Tusoteuthis, and Plesiosaur.
- Good for sailing content and underwater bases.
- Limited to water biomes; vulnerable in open land.
- Requires SCUBA gear or aquatic tames to survive depths.
- Dangerous due to megalodons, jellyfish, and eels.
- SCUBA Mask, Tank, Leggings, Flippers – full set needed.
- Harpoon Gun with harpoons (for taming Tusoteuthis).
- Tek Helmet (night vision underwater).
- Cryopods for quick aquatic tame transport.
- High success rate in boss fights when properly prepared.
- Understands imprinting, mutation stacking, and tributes.
- Can lead tribe members to victories for ascension.
- Extremely time- and resource-heavy (mutations, saddles, trophies).
- Requires specific tames (Rexes, Therizinos, Yutyrannus, Daeodon) with high stats.
- Failure can wipe out months of progress.
- Ascendant Sadles (crafted with high-quality blueprints).
- Tek Armor (jetpack, shield, cannon).
- Medical Brews, Custom Consumable (like Element).
- Teleporters for quick retreat (Tek Teleporter).
Weaknesses:
Playstyle: Prioritize leveling Weight and Movement Speed. Use tools like Metal Hatchet, Pickaxe, and Chainsaw. Tames: Ankylosaurus (metal, flint, crystal), Doedicurus (stone), Mammoth (wood), Therizinosaurus (thatch, fiber, berries), Dunkleosteus (oil, silica pearls), Gacha (random resources).
Recommended Equipment:
Team Synergy: Synergizes with Builders (provides materials) and Fighters (protection). Gatherers often pair with a Tamer to bring back resources quickly.
2. The Tamer (Creature Tamer / Breeder)
Background: Master of animal handling. Tames, levels, and breeds the island’s creatures, from dodos to wyverns.
Strengths:
Weaknesses:
Playstyle: Invest heavily in Taming Speed (increases taming effectiveness) and Fortitude (for environmental resistance). Use Narcotics and Kibble (prefers exceptional kibble for max efficiency).
Recommended Equipment:
Team Synergy: Essential for any tribe wanting high-level boss tames. Works closely with Gatherers to supply narcotics and with Breeders to produce mutated lines.
3. The Builder (Base Architect / Engineer)
Background: Designs and constructs bases, from simple thatch huts to Tek-tier fortresses.
Strengths:
Weaknesses:
Playstyle: Level Weight and Crafting Skill (reduces resource cost when crafting). Learn engrams for all structure tiers: Thatch, Wood, Stone, Metal, Tek.
Recommended Equipment:
Team Synergy: Builders are the backbone of a tribe. They rely on Gatherers for materials and Fighters for base defense. Good builders also plan escape routes and teleporters.
4. The Fighter (Combat Specialist / Raider)
Background: PvE boss killer or PvP raider. Invests in combat stats and weapons.
Strengths:
Weaknesses:
Playstyle: Max Health and Melee Damage (or Ranged Damage for firearms). Moderate Stamina. Use high-level Rexes, Therizinos, Megalosaurs, Wyverns, or Giganotosauruses for brute force. In PvP, use Pump-Action Shotgun, Fabricated Sniper Rifle, Rocket Launcher, C4, and Tek Armor.
Recommended Equipment:
Team Synergy: Works best with a Buffer (using Yutyrannus courage roar) and a Healer (using Daeodon healing). In PvP, coordinates with a Scout (pteranodon) and Gatherers for ammo.
5. The Scout / Explorer (Map Runner)
Background: Specializes in traversal, map discovery, and finding rare loot drops, supply crates, and explorer notes.
Strengths:
Weaknesses:
Playstyle: Invest heavily in Movement Speed (often 200%+) and Stamina. Use Pteranodon (fast flyer), Thylacoleo (climber), Raptor (ground speed), or Fjordhawk (teleport retrieval). Tek Helmet (night vision) and Parachute for cliff escapes.
Recommended Equipment:
Team Synergy: Scouts provide intelligence for the tribe—locate enemy bases (PvP), rare resources, and boss tribute items. They often duo with Tamers to find high-level creatures.
6. The Fisher (Underwater / Water Specialist)
Background: Focuses on ocean resources: silica pearls, oil, angler gel, and deep-sea loot crates.
Strengths:
Weaknesses:
Playstyle: Level Oxygen (for breath-holding), Fortitude (cold resistance). Tame Anglerfish (gathers silica pearls), Dunkleosteus (oil), Mosasaur (ocean combat), Basilosaurus (insulated against eels/jellyfish).
Recommended Equipment:
Team Synergy: Supplies the tribe with oil, pearls, and poly. Often teams with a land-based Gatherer to offload resources. In PvP, underwater bases are hard to raid—Fishers become base defenders.
7. The Bossing Specialist (Dino Commander)
Background: End-game role dedicated to taming, breeding, and fighting boss arenas (Broodmother, Megapithecus, Dragon, King Titan, etc.).
Strengths:
Weaknesses:
Playstyle: Level Health and Melee Damage on boss tames. Use Yutyrannus (courage roar), Daeodon (heal), and 18 damage-dealers. For Dragon, use Therizinos (herbivores avoid fire damage). For Rockwell (Aberration), use Spinos or Megalosaurs with light pets.
Recommended Equipment:
Team Synergy: A tribe needs at least one bossing specialist to ascend. They coordinate with Tamers (for breeding) and Gatherers (for tributes).
---
Notable NPC Lore Characters
These are story-important survivors from the ARK lore, revealed through Explorer Notes, HLN-A dialogues, and Genesis simulations. They are not playable but are essential to understanding the game’s narrative.
| Character | Role | Background | Key Traits |
|---|---|---|---|
| Helena Walker | Paleontologist / Narrator | The main protagonist from the Island’s explorer notes. An Australian woman trapped on the ARK, she uncovers the truth about the ARKs and teaches survival. | Clever, resourceful, determined. She writes notes for other survivors. |
| Rockwell | Mad Scientist | A chemist from Helena’s timeline who becomes corrupted by Element. He appears on the Island, Scorched Earth, and Aberration. | Genius, obsessed, eventually monstrous. He is a major antagonist in the story, especially in Aberration and Genesis Part 2. |
| Diana | Homesteader | A fellow survivor on the Island featured in explorer notes. She builds a farm and tames creatures, representing the peaceful survivor. | Kind, nurturing, good with animals. Her notes offer a contrast to Helena’s analytical style. |
| Ned | Soldier | A British soldier on the Island. He leads a group called the “Militia” and understands combat. | Loyal, tactical, but struggles with paranoia. He eventually betrays Helena. |
| Li Mei | Engineer | A Chinese engineer who teams up with Helena. She designs structures and weapons. | Practical, inventive, motherly. Her notes cover crafting and base building. |
| Unknown (HLN-A) | Hologram Guide | The AI companion in Genesis Part 1 and Part 2. It teaches survivors about the simulation and helps with missions. | Friendly, omniscient, hints at larger mysteries. |
---
How to Define Your Role in ARK
Since ARK has no class system, your role emerges from:
- Stat Allocation: Each point in Health, Stamina, Weight, Melee Damage, etc., shifts your effectiveness.
- Engram Choices: Focus on crafting specific items (weapons, structures, taming gear).
- Tame Selection: Different tames complement different roles.
- Tribe Dynamics: Play to your strengths and fill gaps.
Respeccing: You can reset your stats and engrams at any time using a Mindwipe Tonic (requires Narcotics, Spoiled Meat, and Rare Mushroom). This allows you to switch roles without restarting.
---
Team Synergy Summary
| Role | Best Partner Roles | Notes |
|---|---|---|
| Gatherer | Builder, Tamer | Supplies materials for buildings and taming. |
| Tamer | Fighter, Breeder | Needs protection while taming and help with breeding mutations. |
| Builder | Gatherer, Fighter | Needs resources and defense. |
| Fighter | Bossing Specialist, Scout | Works with buffers and healers for boss fights. |
| Scout | Tamer, Bossing Specialist | Locates high-level tames and resources. |
| Fisher | Gatherer, Builder | Offers oil/pearls for Tek tier. |
| Bossing Specialist | Tamer, Fighter, Gatherer | Requires perfect bred tames and ample tributes. |
Final Notes
- No role is locked; you can be a jack-of-all-trades or hyper-specialized.
- For solo play, a balanced role combining gathering, taming, and light combat is recommended.
- In tribes, assign roles based on interest and expertise. Use voice communication for coordination.
- DLC maps (Scorched Earth, Aberration, Extinction, Genesis) introduce new creatures that may enhance specific roles—adapt accordingly.
This guide covers the core systems of characters and roles in ARK: Survival Evolved. Adapt your strategy to your map, playstyle, and tribe needs, and remember: survival is about evolution.

Cheats & Secrets
Overview
ARK: Survival Evolved is a game that heavily supports modding and admin commands, but it also contains numerous built-in cheats, secrets, and Easter eggs that are part of the official game. This guide covers every known cheat code (admin console commands), unlock codes (special item IDs, color IDs), hidden features (Explorer Notes, Terminals, secret caves), Easter eggs (tributes, references, visual gags), and developer-intended hidden content (Tek items, ascension fights, secret missions). All content listed is legitimately accessible without mods or external tools, and none rely on glitches or exploits.
Admin Commands (Cheat Codes)
ARK has a powerful admin command system accessible via the console (press Tab on PC, or use admin command on consoles). These commands require you to be in singleplayer, on a dedicated server with admin privileges, or in a non-dedicated session with cheats enabled. To enable cheats on a singleplayer session, use the console command `enablecheats <adminpassword>` (default password is blank or set in server settings).
Basic Administrative Commands
| Command | Effect | Example |
|---|---|---|
| `cheat fly` | Enables flight mode | `cheat fly` |
| `cheat walk` | Disables flight mode | `cheat walk` |
| `cheat god` | Grants invulnerability (no damage) | `cheat god` |
| `cheat noclip` | Enables noclip (pass through everything) | `cheat noclip` |
| `cheat giveselfxp <amount>` | Adds experience points | `cheat giveselfxp 1000` |
| `cheat playersonly` | Pauses all non-player actions | `cheat playersonly` |
| `cheat togglegun` | Removes weapons from hands (toggle) | `cheat togglegun` |
| `cheat infinitestats` | Enables infinite stamina, health, oxygen, food, water | `cheat infinitestats` |
| `cheat invisible` | Makes player invisible to creatures (not other players) | `cheat invisible` |
| `cheat hurtself <amount>` | Deals self-damage | `cheat hurtself 200` |
| `cheat listplayers` | Shows connected players | `cheat listplayers` |
| `cheat slomo <multiplier>` | Changes game speed (1.0 is normal) | `cheat slomo 2.0` |
| `cheat destroyallenemies` | Kills all tamed/non-tamed hostile dinos nearby | `cheat destroyallenemies` |
| `cheat destroywilddinos` | Removes all wild dinosaurs (forces respawn) | `cheat destroywilddinos` |
| `cheat forcejointribe` | Forces tribe membership (admin only) | `cheat forcejointribe` |
Item Spawning Commands
Use `cheat giveitemnum <blueprint_path> <quantity> <quality> <force_bp>` or `cheat gfi <blueprint_path> <quantity> <quality>`. The easiest is `cheat giveitem`. Examples:
- Spawn a Rocket Launcher: `cheat giveitemnum 1 1 100 0` (quality 100)
- Spawn a Metal Sword: `cheat giveitem "Blueprint'/Game/PrimalEarth/Weapons/Sword/PrimalItem_WeaponSword.PrimalItem_WeaponSword'" 1 0 false`
- Spawn Max Level Creature: `cheat spawndino "Blueprint'/Game/PrimalEarth/Dinos/Rex/Rex_Character_BP.Rex_Character_BP'" 1 1 0 200` (level 200 Rex)
Known Blueprint Paths:
| Item | Blueprint Path (short) |
|---|---|
| Rex Saddle | `"Blueprint'/Game/PrimalEarth/Structures/Saddles/SaddleRex.SaddleRex'"` |
| Gacha Crystal | `"Blueprint'/Game/PrimalEarth/Items/PrimalItemResource_GachaCrystal.PrimalItemResource_GachaCrystal'"` |
| Tek Helmet | `"Blueprint'/Game/Extinction/Tek/Helmet/PrimalItemArmor_TekHelmet.PrimalItemArmor_TekHelmet'"` |
| Wyvern Egg (Fire) | `"Blueprint'/Game/ScorchedEarth/Dinos/Wyvern/Fire/PrimalItemConsumable_Egg_Wyvern_Fertilized.PrimalItemConsumable_Egg_Wyvern_Fertilized'"` |
Teleport Commands
- `cheat tp` – Teleports to your cursor location.
- `cheat teleport` – Teleports player to coordinates: `cheat teleport x y z`.
- `cheat setplayerpos x y z` – Sets player position (relative to map origin).
- `cheat teleporttoactor <actor_id>` – Teleports to a specific actor (e.g., a dino).
- `cheat forcetame` – Tames the dinosaur you are looking at (instant).
- `cheat dotame` – Same as forcetame but lower level.
- `cheat kill` – Kills the target creature.
- `cheat hurtme` – Damages target creature by 500.
- `cheat addexperience <amount> 0 1` – Adds XP to your mount.
- `cheat setimprintquality <0-1>` – Sets imprint percentage on baby dinos.
- `cheat setbabyage <0-1>` – Sets age of baby dino.
- `cheat setlevel` – Sets level (but not recommended – use XP commands).
- `cheat exec <command>` – Executes server commands.
- `cheat teleporttome <player_id>` – Teleports a player to you.
- `cheat setdinocolors <target_id> <region> <color_id>` (must target a dino).
- Alternative: `cheat forcetame` then `cheat setdinocolors`.
- `cheat giveitem "Blueprint'/Game/PrimalEarth/Items/PrimalItemConsumable_Skin_Unid.Skin_Unid'" 1 0 false` – gives random skin.
- `cheat giveitem "Blueprint'/Game/PrimalEarth/Items/PrimalItemConsumable_Skin_BionicRex.Skin_BionicRex'" 1 0 false` – Bionic Rex skin.
- Specific skins for events (e.g., Easter, Halloween) can be spawned via their blueprints.
- The bridge on The Center resembles the Jurassic Park bird cage.
- Certain rock formations mimic the "Welcome to Jurassic Park" scene.
- Dino AI sometimes causes raptors to open doors (a reference to the kitchen scene).
- All admin commands are cheat-enabled and do not disable achievements on PC (unless you use `cheat` in singleplayer – achievement lock is removed). On consoles, using cheats disables trophies/achievements for that session.
- Using `cheat` commands in multiplayer without permission is considered griefing and bannable.
- The game receives updates that may change blueprint paths or command syntax; always check the ARK Wiki for the latest.
- Many Easter eggs are hidden on DLC maps; explore thoroughly.
Dino-Related Commands
Map Change Commands
Unlock Codes
Player Color IDs
Use `cheat setplayercolor <color_id>` to change your body region colors (0-60). Example: `cheat setplayercolor 1 0` changes region 1 to color 0 (usually black). Full list available on ARK wiki.
Dino Color Commands
Skin & Cosmetic Codes
Unlock All Engrams
`cheat giveengrams` – unlocks all engrams for the player.
Hidden Features
Explorer Notes
ARK features hundreds of Explorer Notes scattered across all maps. They provide lore and can be collected by interacting. They are not hidden but many are in hard-to-reach places. Collecting all notes on a map grants a special skin (e.g., Note of the Survivor).
Obelisks & Supply Crates
The three Obelisks (Red, Green, Blue) are central to boss fights and terminal functions. Supply crates drop periodically; red drops are highest level. Hidden deep-sea crates contain Tek items.
Secret Caves
Many maps have hidden caves: on The Island, there's the "Swamp Cave" (underwater entrance), "Ice Cave" (hidden behind waterfall), "Lava Cave" (under volcano). These require artifacts for boss fights.
Boss Fights
Bosses are hidden behind summoning terminals (at Obelisks or specific locations). Required artifacts and tributes are often in hard-to-reach caves. Broodmother, Megapithecus, Dragon, and Manticore are standard.
Ascension
After defeating all three Island bosses (Gamma, Beta, Alpha), you can ascend on the Island and unlock Tek engrams. Ascension also provides a new character level cap and unlocks "The Center" or "Scorched Earth" endgame teleport.
Tek Items
Unlockable only after defeating bosses or using admin commands. Spawnable with `cheat giveitem` and blueprint paths; e.g., Tek Rifle: `"Blueprint'/Game/Extinction/Tek/Rifle/PrimalItem_WeaponTekRifle.PrimalItem_WeaponTekRifle'"`.
Easter Eggs
The ARK Logo in the Sky
On The Island, during certain times, the ASCII-art ARK logo appears above the Obelisks (visible only from specific angles). This is a developer signature.
Tributes to Jurassic Park
Dossiers
Each creature has a dossier with humorous text and sketches. Collecting all dossiers on a map gives a special dossier item (no in-game effect).
Hidden Underwater City
On "The Center" map, there is an abandoned underwater city structure with no loot but eerie atmosphere. It's a reference to Atlantis.
The "Manticore" Boss Easter Egg
In Scorched Earth, the Manticore boss drops a unique item called "Manticore's Fang" which references the Greek myth.
Bob's Path
On "Ragnarok", there is a hidden path called Bob's Trail marked with signs. It leads to a cliff with a view and a note from a developer.
Developer Homes
On maps like "Ragnarok" and "Valguero", there are developer-built structures (e.g., a castle, a treehouse) that are accessible but not part of any quest.
The "Giga" Egg Exploit (Not an Exploit)
The Giganotosaurus is normally untamable via normal means, but an Easter egg allows you to tame a baby Giga by stealing its egg from a nest in the Wyvern trench on Scorched Earth. This is intended behavior.
The "Equus" (Horse) Dance
Taming an Equus allows you to perform a special dance emote (hold E while mounted). This is a developer inside joke.
"ARK" VR Hidden Content
In the Steam version, the game includes a separate VR mode (ARK Park) that is a tie-in, not a secret.
Developer-Intended Secrets
The "Tek Cave" and Overseer
On The Island, the Tek Cave is a hidden underground area accessible only after collecting all artifacts. It leads to the Overseer boss fight and ascension. This is the ultimate endgame secret.
The "Rockwell" Boss (Aberration)
On Aberration, Rockwell is a secret boss fought in the "Element Chamber". It requires energy elements and is the map's true ending.
The "King Titan" (Extinction)
On Extinction, the King Titan spawns in the Forbidden Zone after a global event. Defeating him rewards the highest tier Tek and allows ascension to Genesis.
Genesis Missions
Genesis Part 1 & 2 have hidden missions that unlock upon meeting conditions (e.g., defeating all biomes' bosses). Some missions have secret locations, like the "Hunt" missions which lead to rare creature spawns.
Secret Dino Colors
Certain wild dinos have extremely rare color mutations (e.g., Pink Dodo, Teal Rex). These are not guaranteed but can be force-spawned with `cheat setdinocolors`.