Arma 3
## Overview Arma 3 is a PC-exclusive military simulation game developed and published by Bohemia Interactive. It was initially released on September 12, 2013, following a beta and early access period, and has since received continuous updates and expansions. The game is available only on Windows, L...
Download & Installation
Overview
Arma 3 is a PC-exclusive military simulation game developed by Bohemia Interactive. It is officially available only on PC (Windows, Linux, macOS) and is not released for PlayStation, Xbox, Nintendo Switch, or mobile platforms. The primary legitimate distribution platforms are Steam and the Bohemia Interactive Store (standalone version). The game is also available through third-party key resellers, but official sources are strongly recommended for support and security.
System Requirements
Minimum Requirements
| Component | Specification |
|---|---|
| OS | Windows 7 SP1 (64-bit), macOS 10.12, or Ubuntu 16.04 / SteamOS (64-bit) |
| Processor | Intel Core i3-4340 / AMD FX-6300 |
| Memory | 6 GB RAM |
| Graphics | NVIDIA GeForce GTX 660 / AMD Radeon HD 7850 (2 GB VRAM) |
| Storage | 45 GB free space on an SSD (recommended) or HDD (slower loading) |
| DirectX | Version 10 |
| Network | Broadband Internet connection |
| Additional | .NET Framework 4.5.2 (Windows), Visual C++ Redistributables (automatically installed) |
Recommended Requirements
| Component | Specification |
|---|---|
| OS | Windows 10 (64-bit) |
| Processor | Intel Core i5-4460 / AMD Ryzen 3 1200 |
| Memory | 8 GB RAM (16 GB for large multiplayer or mods) |
| Graphics | NVIDIA GeForce GTX 1060 / AMD Radeon RX 580 (4 GB VRAM) |
| Storage | 45 GB free space on an SSD |
| DirectX | Version 11 |
| Network | Broadband Internet connection |
Account Requirements
- Steam version: Requires a free Steam account and the Steam client installed.
- Bohemia Interactive Store version: Requires a free Bohemia account for activation and download.
- The base game occupies ~45 GB after installation. With all official DLCs and some mods, expect 60–100 GB.
- SSD is strongly recommended for faster loading times, especially in multiplayer and with mods.
- If using an HDD, fragmentation and slower read speeds may cause long loading screens (5–10+ minutes).
- Cause: Network interruption or antivirus blocking.
- Fix: In Steam, right-click Arma 3 → Properties → Local Files → Verify Integrity of Game Files. For standalone version, re-run the installer as administrator.
- Cause: Missing Visual C++ Redistributables.
- Fix: Install the latest Visual C++ Redistributable for Visual Studio 2015–2022 from Microsoft. Both x86 and x64 versions are required.
- Cause: Antivirus or firewall blocking BattlEye (anti-cheat).
- Fix: Add the entire Arma 3 folder and the BattlEye folder (`\BattlEye`) to your antivirus exclusions. Re-install BattlEye by navigating to `<Arma3>\BattlEye` and running `BEService_x64.exe -install`.
- Cause: Missing write permissions in the user directory.
- Fix: Run the game as administrator once, or manually create a folder called `Arma 3 - Other Profiles` in `Documents`.
- Cause: Corrupted configuration files or outdated graphics drivers.
- Fix: Delete the configuration files in `%USERPROFILE%\Documents\Arma 3` (backup if needed). Update GPU drivers to the latest version.
- Cause: 32-bit mode with large mods.
- Fix: In the launcher, go to Parameters → Advanced and enable Use 64-bit executable (checked by default) and increase memory allocator to 2 GB or more.
- Disable Windows Game Mode and background apps to improve performance.
- Set the game process to High Priority in Task Manager if you experience micro-stuttering.
- For mod management, use the official Arma 3 Launcher or third-party tools like Arma PBO Manager for manual installations.
Step-by-Step Installation
Option 1: Steam
1. Install the Steam client from [store.steampowered.com](https://store.steampowered.com).
2. Sign in to your Steam account (create one if needed).
3. Use the Steam Store search and type "Arma 3".
4. Click the Add to Cart button or Buy for the base game or a bundle (e.g., Arma 3 Creator DLC Bundle).
5. Complete the purchase using a supported payment method.
6. After purchase, go to your Library and find Arma 3 under "Games".
7. Click Install – a dialog appears with installation options:
- Choose a destination folder (can be changed via Steam Library settings).
- Select optional components: Arma 3 Tools, Arma 3 Launcher (always included), and any DLC you own.
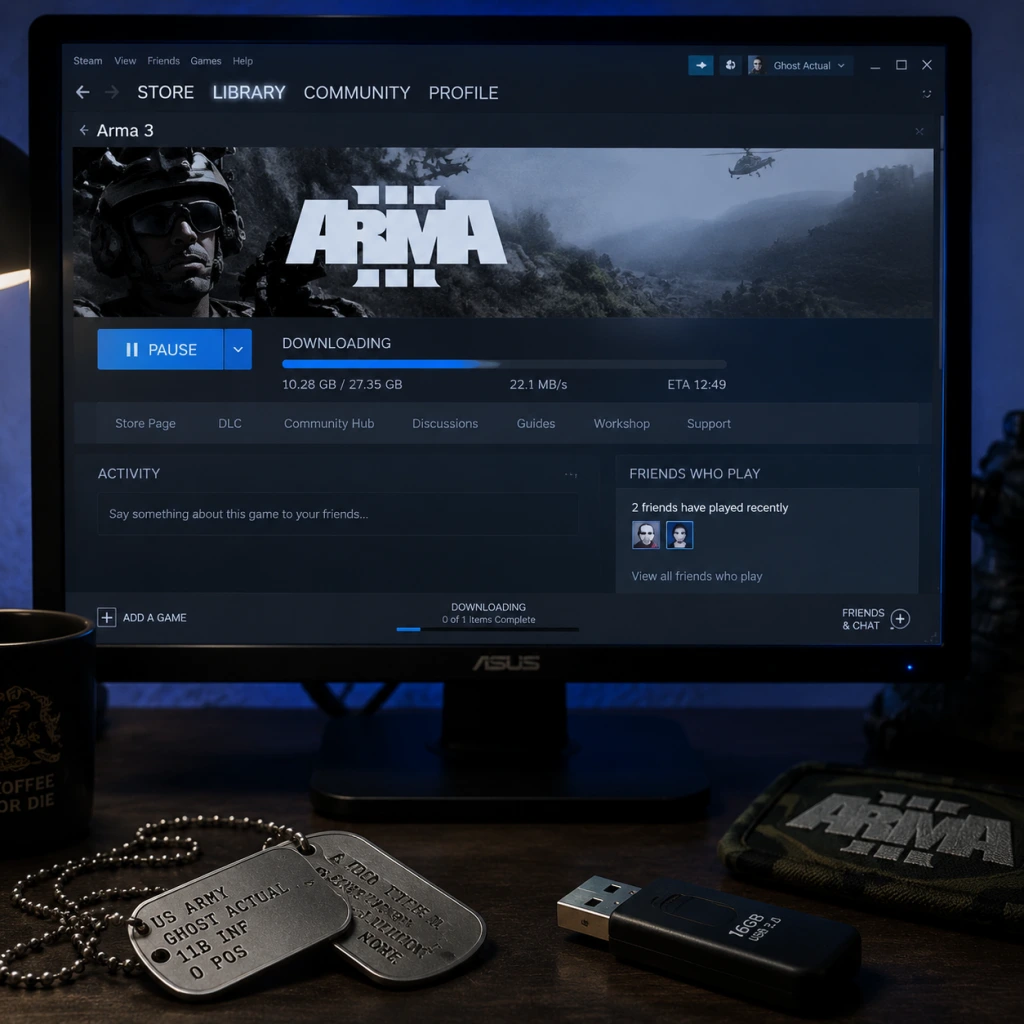
8. Click Next – Steam begins downloading the game. The initial download size is approximately 18 GB for the base game, but it will expand to ~45 GB after unpacking.
9. Wait for the download and installation to finish. Steam will verify the files automatically.
10. A desktop shortcut can be created by right-clicking the game in Library and selecting Manage → Create Desktop Shortcut.
Option 2: Bohemia Interactive Store (Standalone)
1. Visit the [Bohemia Interactive Store](https://store.bistudio.com) and sign in (create an account if necessary).
2. Navigate to the Arma 3 product page and add it to your cart. Complete the purchase.
3. After purchase, go to My Account → My Products and locate Arma 3.
4. Click Download – you will receive a standalone installer executable (e.g., `Arma3_Setup.exe`) or a download manager.
5. Run the installer and follow the on-screen instructions:
- Accept the license agreement.
- Choose an installation directory (avoid `Program Files` to prevent permission issues; e.g., `C:/Games/Arma 3`).
- Select components: you can choose to include the Arma 3 Launcher, which is highly recommended.
6. The installer will download and install the game files. Ensure you have a stable internet connection.
7. Launch the game from the Start Menu or desktop shortcut created by the installer.
8. Upon first launch, you must activate the game with your Bohemia account (an internet connection is required). The launcher will prompt you to log in.
Storage Space Notes
First Launch Setup
1. Run the Arma 3 Launcher (Steam or standalone version).
2. The launcher will automatically check for updates and verify integrity of files.
3. Configure Graphics:
- Click PLAY to open the game. On the main menu, go to Options → Video Options.
- Recommended preset: Standard or High depending on your hardware.
- Disable Anti-Aliasing (or set to FXAA) for better performance on mid-range GPUs.
- Set View Distance to 2000–3000 m for balanced performance.
4. Audio & Controls:
- Adjust master volume and voice chat settings.
- Configure key bindings under Controls. Default layout matches Arma 2.
5. Mod Setup (optional):
- Use the Mods tab in the launcher to install mods from Steam Workshop or local files.
- Enable only the mods you intend to use to avoid conflicts.
6. Benchmark: Run the single-player Showcase missions or the Arma 3 Benchmark tool (available as a separate free DLC on Steam) to test performance.
Common Installation Errors & Fixes
Error 1: "Download failed" or "Corrupt update files"
Error 2: "Missing MSVCP140.dll" or similar DLL errors
Error 3: "Launch failed: BattlEye not installed correctly"
Error 4: "No user profile" or "Profile creation failed"
Error 5: Game crashes on launch with no error
Error 6: High memory usage or out-of-memory crashes
Post-Installation Verification
1. Check Game File Integrity:
- Steam: Right-click Arma 3 → Properties → Local Files → Verify Integrity of Game Files.
- Standalone version: Use the built-in `Arma3Launcher.exe` → Settings → Check for updates.
2. Test Basic Launch: Start a single-player scenario (e.g., Showcase: Infantry) and play for a few minutes. If it runs without crashes, the installation is successful.
3. Verify Multiplayer Access: Join an official Bohemia Interactive server (e.g., "Official Arma 3 Server") to confirm BattlEye and network connectivity work.
4. Mod Compatibility Test: If you installed mods, enable them one by one and load a single-player mission to verify no missing dependencies.
5. Benchmark Results: If you used the Arma 3 Benchmark tool, compare your FPS with online user results for your hardware tier.
Additional Tips
Game Introduction
Overview
Arma 3 is a PC-exclusive military simulation game developed and published by Bohemia Interactive. It was initially released on September 12, 2013, following a beta and early access period, and has since received continuous updates and expansions. The game is available only on Windows, Linux, and macOS – it is not released for PlayStation, Xbox, Nintendo Switch, or mobile platforms.
Genre & Core Identity
Arma 3 is a military simulation (often abbreviated "mil-sim") with strong elements of tactical first-person shooter, open-world sandbox, and combined arms warfare. It emphasizes realism, large-scale battles, and player freedom over arcade-style action.
Story Overview
The game is set in 2035, in the Mediterranean region of Altis and Stratis. The plot follows a NATO-led force (primarily the United States and allied nations) confronting the Iranian-aligned CSAT faction and a local insurgency, the FIA (Freedom and Independence Army). The single-player campaign, "The East Wind," follows Sergeant Ben Kerry of the U.S. Army’s 111th Infantry Division as he uncovers a conspiracy involving biological weapons and political manipulation.
Setting
- Altis – A large, 270+ km² island inspired by the Greek island of Lemnos, featuring diverse terrain: mountains, forests, coastal towns, airfields, and an extensive road network.
- Stratis – A smaller training island (20 km²) used for basic orientation and smaller-scale engagements.
- Tanoa (via Apex DLC) – A tropical archipelago based on the South Pacific, dense jungle, and unique naval environments.
- Sergeant Ben Kerry (player character) – A U.S. Army infantryman, the protagonist of the main campaign.
- Corporal Jacob Kelly – Kerry’s close friend and squadmate.
- Colonel Bruno Figueiredo – A Portuguese NATO officer with hidden motives.
- Miller – A mysterious figure working for NATO intelligence.
- Captain Caldwell – Kerry’s commanding officer.
- Unmatched realism – Ballistics, damage models, injury systems (medical system), vehicle mechanics, and radio communications are simulated with extreme depth.
- Player freedom – No linear paths; every mission can be approached in endless ways; the sandbox allows total creativity.
- Massive scope – Up to 100+ players in multiplayer scenarios with AI-controlled units on huge maps.
- Modding ecosystem – The engine (Real Virtuality 4) supports enormous mods like ALiVE, ACE3, and total conversions (e.g., DayZ, Antistasi, many real-world military simulations).
- Hardcore military simulation enthusiasts who value realism over instant gratification.
- Tactical shooter fans who enjoy planning and coordination.
- Roleplay communities (military and civilian scenarios).
- Modders and creators seeking a powerful sandbox for custom content.
- Players interested in combined arms (infantry, armor, air, naval).
- The East Wind – Main story campaign (acts 1-3).
- Survival to the Edge – A short standalone survival scenario on Stratis.
- Bootcamp – Tutorials for basic controls, vehicles, weapons.
- VR Training – Simulated training exercises.
- Showcases – Scenario-based challenges (infantry, helicopters, tanks, etc.).
- Scenario Editor – Full-fledged mission editor; players can create and play custom scenarios.
- Cooperative – Players work together against AI in custom missions (e.g., "Dedicated Server" with Zeus).
- Adversarial – PvP modes like Capture the Flag, Team Deathmatch, Warfare, and Sector Control.
- Zeus – A real-time game master mode where one player (Zeus) controls AI and environmental effects to challenge others.
- Community Servers – Thousands of servers hosting persistent modes (e.g., Wasteland, King of the Hill, Life-style servers, Mil-Sim communities).
- Offline – Full single-player campaign, bootcamp, training, editor, and custom scenarios playable without internet.
- Online – Dedicated servers, official multiplayer modes, multiplayer campaigns (co-op), and modded servers. Internet required for updates and downloading mods via Steam Workshop.
- Arma 3 Apex (2016) – The largest expansion, adding the Tanoa terrain, new weapons, vehicles, a co-op campaign, and the "Apex Protocol" story.
- Arma 3 Laws of War (2017) – Focuses on civilian consequences and humanitarian law; adds the IDAP faction, non-lethal weapons, and a narrative campaign.
- Arma 3 Malden 2035 (2018) – A remastered version of the classic Arma 2 terrain, free to all owners.
- Arma 3 Contact (2019) – Adds a first-contact sci-fi story set in Livonia, new alien technology, and a new terrain (Livonia).
- Other Content – Multiple Creator DLCs (e.g., Global Mobilization, Prairie Fire, CSLA Iron Curtain) themed around historical Cold War conflicts, developed with external teams.
- Free content updates – Every DLC release brings free improvements to all players (e.g., night vision, new vehicles, physics updates).
- Unrivaled depth of simulation – No other military shooter models weapon maintenance, wind affecting ballistics, layered medical systems, or dynamic radio frequencies out of the box.
- Massive modding community – The Steam Workshop hosts over 100,000 mods; total conversions can fundamentally change the game (e.g., Arma 3 into a Star Wars battlefield, WWII Europe, or modern counterterrorism).
- Zeus Game Master mode – A unique feature empowering one player to act as a dungeon master, spawning enemies, controlling weather, and creating dynamic scenarios in real time.
- Persistent military sandbox – With mods like Antistasi or Liberation, players can run persistent wars against AI with territory control, resource management, and dynamic objectives.
- Professional use – Arma 3 is used for military training and simulation by armed forces worldwide due to its realism and modifiability.
Main Characters
Core Appeal
Target Audience
Arma 3 appeals to:
It is not recommended for casual gamers looking for fast-paced action or immediate gratification.
Game Modes
Singleplayer
Multiplayer
Online / Offline Support
DLC & Expansions
Arma 3 has a range of premium DLCs that add content without splitting the player base (core game updates remain free). Major DLCs:
What Makes Arma 3 Unique?
In summary, Arma 3 is a demanding but deeply rewarding title that sets the standard for military simulation on PC, offering a virtually limitless sandbox for those willing to invest time into its mechanics and community.
Getting Started
Overview
Welcome to Arma 3, a PC-exclusive military simulation that prioritizes realism, teamwork, and tactical freedom. This guide is crafted for complete beginners to help you survive your first hour, understand the interface, avoid common pitfalls, and set yourself up for long-term enjoyment.
Character Creation & Loadout Basics
Arma 3 does not have traditional character creation with appearances. Instead, you choose a role (rifleman, medic, engineer, etc.) in multiplayer missions or the singleplayer campaign. Your loadout (weapons, equipment, uniform) is determined by the mission designer or the unit you join. In the main menu under Training > Virtual Arsenal, you can freely customize any gear—but this is only for practice or editor use, not saved as a persistent character.
Controls: PC Only (Keyboard & Mouse + Controller Options)
Arma 3 is designed for keyboard and mouse. A gamepad is not officially supported, but you can map actions using third-party software or built-in Steam Input. However, for serious play, keyboard and mouse are essential.
Essential Keyboard & Mouse Controls
| Action | Key |
|---|---|
| Move | WASD |
| Sprint | Hold Left Shift |
| Crouch | C (toggle) / Hold Ctrl (temporary) |
| Prone | Z (toggle) / Hold X (temporary) |
| Interact / Use | F |
| Fire weapon | Left Mouse Button |
| Aim down sights | Right Mouse Button (hold) |
| Reload | R |
| Inventory | Tab |
| Map | M |
| GPS / Watch | Ctrl + M / Ctrl + T |
| Radio (team) | Caps Lock (key for transmitting, hold) |
| Range finder | Ctrl + Right-click (hold) |
| Stance adjustment | Ctrl + W (up) / Ctrl + S (down) within current height |
Basic Camera & View
- Free look: Hold Alt (move mouse to look around without turning your body)
- Zoom in/out: Scroll wheel (while aiming)
- Switch between 1st/3rd person: In singleplayer or certain servers, press keypad Enter (default). Many multiplayer servers restrict to first-person only for realism.
- HUD top: Mission timer (if any), current objective text.
- Bottom center: Stance indicator, weapon icon/magazine count, stance (standing/crouch/prone).
- Bottom left: Health indicator (green=healthy, yellow=wounded, red=incapacitated).
- Bottom right: Mini-map (if large map available) or compass.
- Middle left: Interact menu when near objects (vehicles, doors, weapons) – press F cycle options.
- Inventory screen (Tab): Shows your gear, weapons, backpack, uniform, and vest. Drag items to equip or discard.
- Map (M): Large map with terrain, markers, and your position. Use mouse wheel to zoom, left-click drag to pan. Double-click to place marker (team leader feature).
- Command menu: In vehicle or as squad leader, use F1–F12 or the extended number row. For infantry, press 0 to access radio commands.
- Learn to open your map and compass. Know which direction you're facing.
- Use the `F` key to interact with everything (vehicles, objects, fallen comrades).
- Stay behind cover. Peek out, shoot, get back.
- Manage your stamina: Sprint only when necessary. Hold `W` lightly to walk quietly.
- Bind a key to quick-bandage (`Q` default? Actually default is H for health menu. I recommend binding bandage to a side mouse button.)
- Spraying full-auto – fire in short bursts or single-shot. Ammo is limited and recoil is heavy.
- Running in open fields – you'll be killed in seconds. Use terrain, walls, and foliage.
- Picking up every weapon – stick to your role’s weapon; different ammo types are rare.
- Friendly fire – always double-check your target with binoculars (B key).
- Ignoring the medical system – if you're hurt, bandage yourself (bandages in inventory) or call for a medic. Bleeding out is permanent.
- Ammo: Conserve standard rifle rounds. A single assault rifle mag holds 30 rounds; use 2–3 bullets per enemy.
- Medical supplies: At the start, you only have basic field dressings. Use them sparingly, especially on squadmates.
- Fuel: Keep vehicles full. Find fuel barrels at bases or motor pools.
- Money/Nothing: There is no currency system. Progression is story-based.
- Respawn tickets (if limited): Avoid dying uselessly.
- Vehicles: Work with teammates to repair and rearm rather than hoarding.
- Not using the terrain for cover – standing up while shooting is a death wish.
- Ignoring the compass – you’ll get lost instantly without one. Remember: red arrow always points north.
- Forgetting to use the radio – keybind a button (e.g., Left Windows) for direct comms. In silent runs, you’ll be left behind.
- Running into buildings – clear rooms slowly; use grenades or flashbangs (press G).
- Saving too often – Arma autosaves at checkpoints, but manual saves can corrupt if you save during combat. Wait for a safe moment.
- Firing from the hip – always aim down sights unless close-quarters.
- [ ] Complete Bootcamp training.
- [ ] Play the Prologue mission.
- [ ] Adjust keyboard bindings (especially medical and stance keys).
- [ ] Set graphics to medium, disable mouse smoothing.
- [ ] Join a training server and ask for help.
- [ ] Learn to use the map and compass together.
- [ ] Practice medical self-care (bandage, morphine) in Virtual Arsenal.
- [ ] Understand stance system: standing, crouch, prone – use Ctrl+W/S to micro-adjust.
- [ ] Play one full co-op mission (e.g., “COOP - Defend”) without dying.
- [ ] Find a beginner-friendly community (Discord/TeamSpeak) for guidance.
User Interface (UI) Overview
Upon entering a mission, the screen will show:
Important Interface Elements
First Hour Walkthrough: What to Do Immediately
1. Complete the Bootcamp (main menu > Training > Bootcamp). This teaches movement, weapon handling, medical basics, and vehicle operation. It takes ~30 minutes and is mandatory to avoid frustration.
2. Play the Prologue (singleplayer > Prologue). A short story mission that lets you practice basic combat without overwhelming complexity.
3. Adjust your settings. Go to Settings > Game and turn off `Auto-hud` (set to No), set `Weapon sway` to Reduced, and `Mouse smoothing` to Off. In Audio, increase `Voice volume` for radio chatter. In Graphics, start with Medium preset, disable `Overlay UI` if performance is poor.
4. Join a noob-friendly server. Look for servers marked “Training,” “Sandbox,” or “New Player Friendly” in the server browser (filter by: Mission/Name). Avoid hardcore realistic servers initially.
5. Follow your squad leader (SL). In multiplayer, stick with the group. Use Caps Lock + V to say you're new. Watch what others do and ask questions.
What to Do First vs. What to Avoid
Do First:
Avoid:
Early Resource Priorities (Singleplayer Campaign & Solo Practice)
In the campaign “The East Wind”:
In Multiplayer (e.g., Warfare modes):
Common Beginner Mistakes
Day-One Checklist
Final Advice: Arma 3 is a marathon, not a sprint. Expect to die a lot. Every death teaches something about positioning, communication, or patience. Stick with it, and you’ll unlock a depth that no other shooter offers. Good luck, soldier.
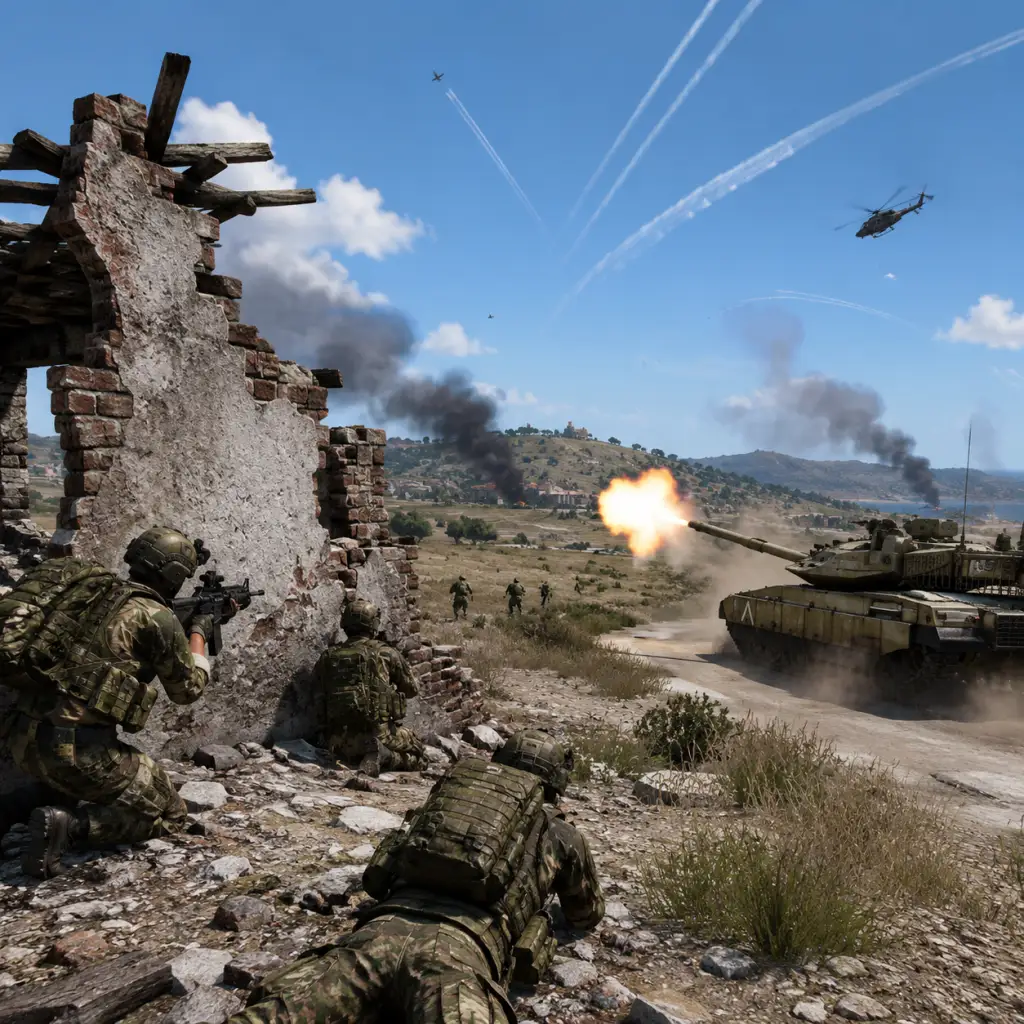
Core Gameplay
Overview
Arma 3's core gameplay revolves around realistic military operations across large sandbox environments. The main gameplay loop consists of: receiving a task (from a campaign mission, scenario, or multiplayer objective), planning your approach, executing with movement, combat, and communication, then completing the objective and returning to base to rearm and prepare for the next task. The game emphasizes teamwork, situational awareness, and authentic simulation of modern warfare.
Progression is not measured by levels or experience points but by player skill, knowledge of tools, and access to more complex content. The game supports single-player campaigns, multiplayer co-op, competitive PvP, and endless user-created scenarios. As you advance through tiers, you move from basic survival and understanding controls to commanding large squads, flying jets, and mastering modifications (mods).
---
Early Game (Hours 1–10)
Focus: Learning controls, basic movement, aiming, completing the first campaign missions or simple scenarios.
Combat/Interaction Systems
- Movement: WASD keys, lean with Q/E, prone with C, crouch with X, stand with Z. Sprint with Shift (limited by stamina bar).
- Weapons: Single-shot, burst, full-auto. Adjust zeroing with Page Up/Page Down. Use the breathing hold key (Left Shift while scoped) for steadier aim.
- Inventory: Press TAB to open. Drag items between uniform, vest, backpack, and hands. Pick up weapons, ammo, medical supplies.
- Medical basic: Use medkit (self) or buddy aid using interaction menu (mouse wheel). Only bandaging and epinephrine in vanilla.
- Vehicles: Entry/exit by holding V. Driving with WASD. Basic navigation on roads.
- Campaign: Follow the "Survive" and "Adapt" chapters of "The East Wind." Each mission teaches one new skill (e.g., using a rangefinder, calling for fire support).
- No XP system: Progress is linear through mission objectives.
- Unlocks: Access to new weapons/gear is mission-granted, not earned via points.
- Limited to the starting areas of Altis (Greek island).
- Use the map (M key) with GPS marker. Stick to marked waypoints to avoid walking into enemy patrols.
- Beginner tip: Stay on green terrain, avoid open fields.
- Campaign: Linear, heavily scripted. Example: "Survive" – escape a burning plane, find allies, reach safety.
- Showcases: Short scenarios for specific roles (e.g., helicopter pilot, sniper). Play these to learn specialized controls without campaign pressure.
- None in single-player. No currency or shops.
- Multiplayer modes (e.g., Wasteland, Altis Life) start you with minimal cash (e.g., $500) and a basic loadout (rifle, uniform).
- Loadout fixed per mission in campaign. You can swap gear found on enemies.
- Multiplayer: You choose a class (e.g., Rifleman, Medic) at spawn. No stat increases; your effectiveness depends on skill and equipment.
- Not applicable yet. Early game is about learning fundamentals.
- Tactics: Use suppression, bounding overwatch, fire and movement. Call out enemy positions (e.g., "Contact 300 meters, 10 o'clock!")
- Advanced optics: Thermal scopes, night vision (NVG). Zeroing for different ranges.
- Grenades and launchers: Frag, smoke, HEAT. Use the launcher zeroing and backblast awareness.
- Medical extended: With mods like ACE3, learn to apply tourniquets, blood transfusions, and treat fractures. In vanilla, you can still use medkits on teammates.
- Vehicles: Drive armored vehicles (e.g., Hunter, Strider) and operate mounted weapons. Basic helicopter flight (take off, hover, land).
- Campaign concludes (chapters "Resist" and "Win"). Afterward, you unlock all single-player content.
- Multiplayer rank systems (e.g., in King of the Hill): gain XP for kills/objectives to unlock weapons and attachments. Typical ranks: from Private to Colonel.
- DLC (e.g., Apex, Tanks, Jets) adds new terrains, vehicles, and weapons that become accessible.
- Full access to Altis and Stratis. If you own Apex DLC, explore Tanoa (jungle archipelago).
- Use map, GPS, compass, and satellite view (mod). Learn to navigate without GPS in night ops.
- Example: Move from Kavala to the airport avoiding enemy patrols by using ridges and forests.
- User-made co-op scenarios: "Escape" (survive and evade behind enemy lines), "Patrol Ops" (dynamic tasks), "Dynamic Universal War System" (capture zones).
- Multiplayer PvP: King of the Hill (KOTH) – control an area, earn points. Wasteland – gather gear, fight factions, build bases.
- Official multiplayer: Co-op campaigns like "Beyond Hope" (with Apex) or "Stepping Stone" (free).
- Wasteland mode: Earn money by killing, looting, selling vehicles. Buy weapons, vehicles, and build bases.
- Altis Life: Work jobs (fishing, mining) to earn money, buy houses, cars, and gear. Risk being robbed.
- KOTH: No economy; only progression via rank unlocks.
- Specialize: Choose a role – Marksman (long-range), AT (anti-tank), Medic (healing), Engineer (repair vehicles). Your loadout becomes tailored.
- Customization: Attach scopes, suppressors, bipods, laser pointers to weapons. Different vests/helmets for protection vs. weight.
- No skill trees: Growth is in your personal expertise and familiarity with tools.
- Not yet; you are still learning team coordination and advanced mechanics.
- Command squads: Use the radio command menu (0-0-0 etc.) for AI. For humans, use VoIP (discord, TFAR mod). Issue fire orders, movement waypoints.
- Combined arms: Coordinate infantry with armor, artillery, and close air support (CAS). Use laser designators (Laser Target Designator) to guide bombs.
- Advanced mods: ACE3 adds realistic ballistics, medical, and equipment interactions. RHS/CUP add real-world weapons and vehicles. JTF2 adds special forces gear.
- Heavy vehicles: Drive tanks (e.g., M2A1 Slammer, T-100) with precise turret control. Fly jets (e.g., A-164 Wipeout) with radar, missiles, and countermeasures.
- Mastery of vanilla + DLC: All weapons, vehicles, and roles are available.
- Multiplayer ranks: Max rank in KOTH (General) or Wasteland money cap.
- Mods open new progression systems (e.g., Antistasi rebellion mode has tech tree upgrades).
- All official terrains plus community-made (e.g., Takistan, Chernarus). Use mods for realistic satellite imagery.
- Explore dynamic sandboxes: in Antistasi, you control territory; in Liberation, you push frontlines.
- Complex co-op: Liberation (capture towns, build arsenal), Antistasi (insurgency with resource management), Overthrow (tactical conquest).
- Competitive PvP: KOTH high-rank servers (premium weapons), MSO (Missions for Special Operations), or private milsim operations.
- Zeus missions: A Zeus (game master) creates dynamic scenarios in real time; players react to enemy waves, ambushes, and objectives.
- Modded modes: Antistasi – earn money/respect, buy vehicles and weapons from faction arms dealers. Liberation – collect supplies for base upgrades.
- Editor: No economy, but you can script any scenario.
- Role mastery: You can now fill any role effectively – from sniper to pilot to medic.
- Custom loadouts: Use mods like Virtual Arsenal to create pre-saved loadouts for different mission types.
- Skill: Tactical decision-making, map reading, communication under stress.
- This tier ends when you can handle the most complex official and popular modded content. You begin to hit the ceiling of vanilla depth.
- Full suite: Use every control, mod, and tactic seamlessly. Employ advanced maneuvers (e.g., bounding overwatch with fire support).
- Medical: Perform complex trauma care (ACE3); stabilize and evac teammates using helicopters.
- Vehicles: Operate all types: naval boats, VTOL, heavy armor, drones. Use radar and countermeasures effectively.
- Zeus: Act as Game Master, spawning units, triggering events, managing AI.
- No numerical cap. Reputation in the community is your progression. You may lead a milsim unit (group of 30+ players) or create popular mods/missions.
- Unlock all DLC content: You own all optional DLC and can use all items.
- Content creation: Use Eden Editor to build custom islands and missions. Explore modded worlds like Lingor, Sahrani, or Namalsk (horror-themed).
- Dynamic campaigns: Modify existing scripts to create new experiences (e.g., persistent supply chains).
- Create and lead Zeus missions for others.
- Participate in PvP tournaments (e.g., Arma 3 community leagues, tactical matches).
- Milsim operations: Join private units that run structured campaigns with ranking, radio protocols, and after-action reports.
- Modding: Script custom missions, create assets, or balance existing systems.
- Multiplayer: In mods like Wasteland, accumulate massive wealth and control entire towns with bases. In Antistasi, become leader of the rebellion.
- Editor: No economy, but you can script complex economic systems (e.g., trader towns, resource gathering).
- Perfect expertise: You know every scope's zeroing, every vehicle's weak spots, every map's hidden path.
- Custom scripts: Use Arma's scripting language to create custom loadouts, skill systems, or even new player mechanics via mods.
- Leadership: Command and train other players.
- Endless replayability: The game never truly ends. You can always try a new mod, create a new mission, or join a different group. The endgame is a sandbox where you decide the goal – whether it's mastering a specific weapon, completing every campaign on hardcore, or building a persistent server community.
Progression
Exploration
Missions/Quests
Economy
Character/Build Growth
Endgame Structure
---
Mid Game (Hours 10–50)
Focus: Tactical proficiency, teamwork, advanced weapon systems, night operations, deeper understanding of the medical system.
Combat/Interaction Systems
Progression
Exploration
Missions/Quests
Economy
Character/Build Growth
Endgame Structure
---
Late Game (Hours 50–200)
Focus: Specialization, commanding, heavy vehicles, combined arms, and integration of mods.
Combat/Interaction Systems
Progression
Exploration
Missions/Quests
Economy
Character/Build Growth
Endgame Structure
---
Endgame (200+ hours)
Focus: Content creation, milsim leadership, extreme mods, competitive edge, and community involvement.
Combat/Interaction Systems
Progression
Exploration
Missions/Quests
Economy
Character/Build Growth
Endgame Structure
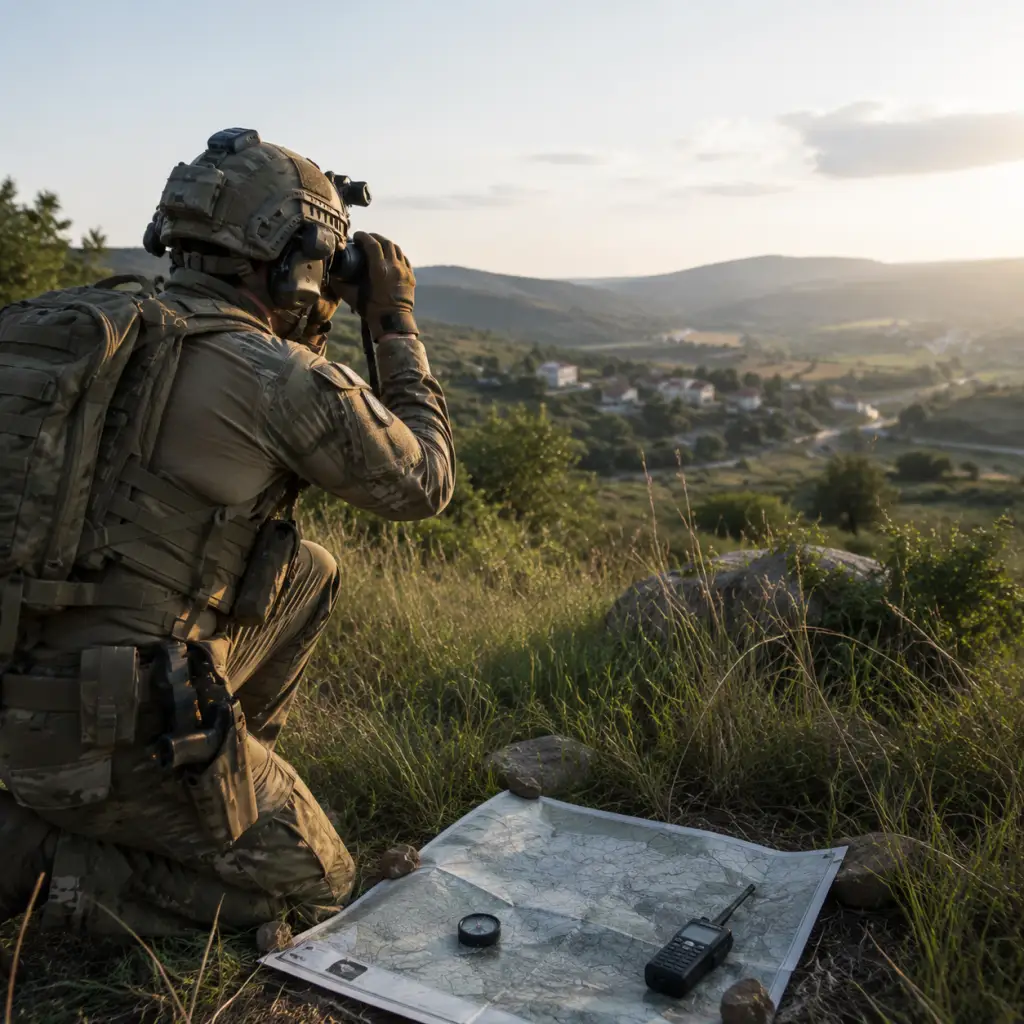
Game Tips
Game Tips
1. Beginner Tips
- Start with the Prologue and Boot Camp: The in-game tutorials (accessible from the main menu under "Learn") teach basic movement, weapon handling, communication, and medical care. Complete them before stepping into multiplayer.
- Learn the Controls: Arma 3 has over 100 keybindings. At minimum, memorize: W/A/S/D (move), Q/E (lean), C (crouch), Z (prone), Space (walk/run toggle), Left Shift (sprint), F (interact), R (reload), V (tactical switch/view), and the inventory key (default Tab).
- Use the Virtual Arsenal (Arsenal): In the main menu, select "Virtual Arsenal" to freely experiment with weapons, attachments, equipment, uniforms, and items. This helps you understand what each item does without risk.
- Understand the Stamina System: Running, jumping, and carrying heavy loads drain stamina. When exhausted, actions slow and accuracy drops. Manage stamina by walking or stopping to recover. Lighten your load to improve endurance.
- Play the Campaigns ("The East Wind", "Adapt") in Sequence: They gradually introduce mechanics and story. Do not skip to the later DLC campaigns without mastering the basics.
- Join a Beginner-Friendly Community: Arma 3 has a steep learning curve. Play with friends or join a casual unit (find them on Reddit r/FindAUnit or the Bohemia Forums). Veteran players can teach you teamwork and tactics.
- Adjust Graphics and Performance Settings: Lower terrain detail, shadows, and object draw distance to improve FPS. Disable anti-aliasing if struggling. Use the in-game Benchmark (Main Menu > Options > Performance) to test settings.
- Use Cover and Concealment: Always move between cover (objects that stop bullets) and concealment (bushes/grain that hide you). Arma 3 has realistic ballistics; small rocks or walls provide protection. Do not peek from the same spot twice.
- Fire Control: Fire in short bursts (3-5 rounds) to maintain accuracy. Full auto wastes ammo and reduces control. For single-shot weapons like DMRs, aim for center mass or headshots.
- Suppression: Firing at an enemy’s position, even with poor aim, suppresses them. Suppressed enemies have blurred vision, lowered accuracy, and are less likely to return fire. Use this to pin down foes while teammates flank.
- Communicate: Use voice chat or in-game radio (if using Task Force Radio or ACRE) to call out targets with clock directions, distance, and cardinal directions. Example: “Contact, enemy infantry, 200 meters, 1 o’clock, moving south.”
- Flank and Overwhelm: Head-on attacks are rarely effective. Use the terrain and team splits to attack from multiple directions. The enemy AI reacts slowly to threats from unexpected angles.
- Check Your Stance: Standing is loud and offers no stability. Crouch for better accuracy and partial cover. Prone gives best stability and lowest profile but limits mobility and view. Switch stances based on terrain and engagement distance.
- Zeroing and Bullet Drop: All weapons have a zeroing setting (default Page Up/Page Down). For ranges beyond 200-300m, adjust zero. Use the range card or laser rangefinder to estimate distance. Learn the drop for your preferred weapon at various ranges.
- Wind and Coriolis Effect (Mods like ACE): In advanced modded environments, wind affects bullet trajectory. Use the Kestrel wind gauge or player height over target. Coriolis matters only over very long (>1000m) shots.
- Medical System (Vanilla & ACE): Vanilla health is simple – bandage and use morphine. With ACE Advanced Medical, wounds require proper treatment: tourniquets for limbs, surgical kits for stitches, morphine for pain. Carry a personal medical kit and know how to use it. Check your teammate’s wound types before treating.
- Vehicle Combat: Always dismount before engaging infantry – vehicles are loud, vulnerable to AT, and have limited weapon arcs. Use vehicles for transport, fire support from standoff range, or amphibious crossings. Learn to repair with a toolkit.
- Explosive Ordnance: Mines, claymores, and IEDs are deadly. Move slowly in suspected areas. Use mine detectors (like those in mods) or sweep with binoculars. Place explosives on vehicle roads or choke points.
- Use the Map and Compass: Press M for map. Right-click to place markers, which all squad mates can see. Use the compass (default K) to align with map orientation. Draw a line on the map from your position to the objective to get an azimuth.
- GPS (Vanilla): Enable GPS via inventory (item map GPS or similar) or vehicle. It shows your position and direction on a small screen. Useful for fast navigation but drains battery (if modded).
- Waypoints: In single-player, use map clicks to set up to 5 waypoints (dashed lines). Your group AI follows them. In multiplayer, waypoints are often placed by the mission maker or squad leader.
- Stance and Speed: Use the stance bar (bottom-left) to cycle between standing, crouching, and prone. Speed key (default Left Alt) toggles walk/run. Sprint (Left Shift) boosts speed but drains stamina quickly.
- Stealth Movement: Crouch or prone when sneaking near enemies. Avoid running on gravel or through bushes. Move from tree to tree. Use night vision or thermal if available, but be aware NV draws power.
- Climbing and Vaulting: Use V (default) to climb over low obstacles or vault over walls. You can also climb ladders (press W on ladder). Jump (Space) only works when running.
- Traversing Rivers and Ponds: You can swim – press Shift to dive, Ctrl to surface. However, swimming is slow and loud. Use boats or bridges when possible. Wading through water is faster than swimming.
- Carry the Right Ammo: Always bring an extra magazine or two, but don’t overload. Standard loadout: 6-8 magazines for primary, 2-3 for secondary (if any), and a few grenades. Adjust based on role (autorifleman carries more ammo).
- Use Backpacks Wisely: Backpacks add weight and noise. Choose a size appropriate for your role. Medics carry large medical packs; riflemen can use small assault packs. Know how to transfer items between teammates (drag and drop in inventory or use scroll wheel actions).
- Medical Supplies: Carry at least 2 bandages, 1 morphine, and 1 tourniquet (if ACE). For vanilla, one medical kit can heal you fully. Share medical supplies with your squad; don’t hoard.
- Fuel: Vehicles have fuel tanks. Monitor fuel gauge; refuel at fuel stations (vanilla) or with jerry cans (mods). Running out of fuel in enemy territory is fatal.
- Repair: Use a toolkit to repair vehicle damage (tires, engine). Damaged parts reduce performance. If the vehicle is smoking heavily, abandon it before it explodes.
- Supply Drops: In many missions, you can request supply crates (via radio or menu). These contain ammo, weapon attachments, medical supplies, and replacement vehicles. Place them in safe areas and guard them.
- Earning Money: In roleplay or survival servers (e.g., Altis Life, Exile), earn cash by completing missions, crafting, trading, gathering resources, or selling loot. Always check server rules for allowed income methods.
- Spending Wisely: Prioritize essentials: a basic weapon, ammo, medical supplies, and a vehicle. Avoid buying high-end gear early – it attracts attention and many servers allow gear to be looted upon death.
- Base Building (Mods like Epoch): If the server has base building, gather resources (wood, metal, concrete) via tools or buy from traders. Place a storage box for items. Build walls and defenses to protect your loot. Use combination locks on doors.
- Trading: Many economy servers have traders who buy/sell items. Prices vary by location. Some items are illegal – be careful near police/military NPCs.
- Insurance and Banking: Some mods offer vehicle insurance or bank safes. Use them to protect your assets. Never carry all your money; stash some in a bank if possible.
- Weapon: MX or M4 (vanilla) – versatile, reliable. Attach red dot or optics for close-mid range.
- Gear: 6-8 magazines, 2 frag grenades, personal medical kit, map, compass.
- Role: Core infantry. Engages at all ranges, supports team with suppressive fire, follows squad leader’s orders.
- Tips: Use single fire for precision, burst for suppression. Carry a launcher (if available) for vehicles.
- Weapon: LMG like the 6.5mm MX LSW or MK200. Bipod attached.
- Gear: 4-5 belts/drums of ammo, spare barrel, tripod (if space), medical supplies.
- Role: Provide sustained suppressive fire, covering team movement, pinning enemies.
- Tips: Deploy bipod (default C) on walls or ground for zero recoil. Fire in long bursts (10-15 rounds) to suppress. Use cover – LMGs attract enemy fire.
- Weapon: DMR (7.62mm) or sniper rifle like the Cyrus or Lynx (vanilla). High-magnification scope (e.g., Sniper Scope).
- Gear: 2-3 magazines of special ammo (AP, tracer), range card, laser designator (if spotter), earplugs.
- Role: Eliminate high-value targets, provide overwatch, call out enemy positions.
- Tips: Always work with a spotter who uses binoculars. Adjust zero and account for bullet drop. Stay far from main fight – at least 300m. Relocate after every few shots to avoid detection.
- Vehicle: Medical kit and extra supplies (bandages, morphine, tourniquets). Backpack full of medical items.
- Weapon: Same as rifleman – you need to defend yourself.
- Role: Heal and revive squad members. Manage triage: treat most critical wounds first (chest/unconscious).
- Tips: In ACE mod, learn cpr, use epinephrine for shock, and surgical kit for deep wounds. Stay behind front line but close enough to respond quickly. Communicate your position.
- Weapon: Rifle with underslung grenade launcher or compact SMG.
- Gear: Tool kit, mine detector, explosive charges (satchel, claymore), detonator.
- Role: Clear obstacles (walls, doors), place explosives on targets, repair vehicles.
- Tips: Use explosives sparingly – they are heavy and attract attention. Place charges on vehicle engines or ammunition piles for maximum damage. Use remote detonators to avoid being caught in blast.
- Vehicle: Choose appropriate vehicle: tank (crew: hull gunner and driver), helicopter (pilot), jet (pilot).
- Gear: Flight helmet, NVG, oxygen mask (for high air). Crewman kit includes repair items.
- Role: Maneuver, provide fire support, transport troops.
- Tips: Learn basic vehicular controls: throttle, brake, pitch, yaw. Use sound as feedback – engine whine indicates over-rev. In helicopters, practice hovering and landing on slopes. In jets, manage speed to avoid stalls.
- Graphics: Set Terrain Detail to “Standard” or “Low” to improve FPS in dense environments. Turn off Ambient Occlusion and Motion Blur. Reduce Object Draw Distance to 1200m; view distance to 3000m is usually enough.
- CPU and GPU: Arma 3 is CPU-intensive. Overclock your processor if possible. Disable hyperthreading for older CPUs. Use Launch Parameters: `-malloc=system -enableHT -cpuCount=3 -exThreads=7` (adjust according to your core count).
- Memory: Use the 64-bit executable to avoid memory crashes. Increase pagefile size to at least 16GB.
- Create Custom Keybinds: Bind frequently used actions like “Open Map”, “Switch Weapon Mode”, “Use Medic Item” to easily reachable keys. For example, set “Auto Run” to a side mouse button.
- Macros: Use third-party software (AutoHotkey) or in-game scripting to automate repetitive actions (like menu navigation). However, avoid cheating – most servers ban macros that give unfair advantage.
- View Distance and Object Draw Distance: Bind keys to quickly adjust view distance (e.g., Ctrl+Page Up/Down) to toggle between high for spotting and low for performance during combat.
- Use a Mod Launcher: The official Arma 3 launcher supports mod presets. Use third-party launchers like JSRS or swifty for larger mod collections. Always verify mod compatibility with the server you join.
- Essential Mods for Enhanced Gameplay:
- Mod Order: Load mods alphabetically or follow server modlist order. A wrong load order can cause crashes.
- Delete or move the `Documents/Arma 3/userconfig` folder after major mod updates to clear stuck settings.
- Use `-world=empty` launch param to skip intro and loading of default terrain (saves time).
- Enable Console (Ctrl+D): Useful for debugging mod conflicts or checking error messages.
- Customize HUD: Use options to disable unnecessary icons (e.g., compass, weapon info) for a more immersive experience. Bind toggle HUD key (default Left Shift+H).
- Reduce Lag: Use wired internet connection. Select servers with low ping (<100ms) and high player count (50-80) for stable performance.
- Local vs Dedicated Server: For single-player or co-op, host a dedicated server on a separate machine to offload AI processing. Or use LAN with a friend.
- Use `-noSound` launch param if you have audio issues (not recommended for gameplay).
2. Combat Tips
General Combat
Advanced Combat Mechanics
3. Movement and Navigation
Basic Navigation
Advanced Movement
4. Resources and Logistics
Ammo and Inventory Management
Vehicle Logistics
5. Economy (Multiplayer Servers)
6. Loadout Builds (Role Specialization)
Rifleman (Standard) – Beginner to Expert
Autorifleman (Support)
Marksman / Sniper (Precision)
Medic (Support)
Engineer / Explosive Specialist
Vehicle Crew / Pilot (Specialist)
7. Advanced Optimizations
Performance Settings
Custom Keybinds and Macros
Mod Management
- ACE3: Realistic medical, ballistics, and teamwork mechanics.
- CUP Units/Weapons/Vehicles: Adds content from older Arma titles.
- RHS (USAF, AFRF, GREF): High-fidelity US and Russian military assets.
- Task Force Radio/ACRE2: Realistic radio communication.
- CBA (Community Base Addons): Required by many mods.
Scripting and User Interface Tweaks
Network and Server Optimization
This guide covers the essentials for every Arma 3 player, from fresh recruits to seasoned veterans. Practice, patience, and teamwork are the keys to mastering this complex simulation. Good luck out there!
Game Settings
Game Settings
Optimising Arma 3’s settings is crucial because the game is famously CPU-intensive and can be unforgiving on mid-range hardware. This guide covers every major settings category, offers performance/quality recommendations for low, medium, high, and ultra hardware tiers, and highlights common pitfalls.
---
1. Graphics Settings
Arma 3 uses its proprietary Real Virtuality 4 engine. Most graphics options affect either GPU or CPU load. Two critical pitfalls: the game defaults to a 2–3 km viewing distance even on weak hardware, and the “Shadow Quality” setting has a disproportionate CPU impact.
#### General Performance Tiers (1920×1080, 60 fps target)
| Tier | GPU Example | CPU Example | Recommended Preset |
|---|---|---|---|
| Low | GTX 1050 / RX 560 | i5-3470 / Ryzen 3 1200 | Standard + lowered view distances |
| Medium | GTX 1060 / RX 580 | i5-8400 / Ryzen 5 2600 | High with 2–3 km view distance |
| High | RTX 2060 / RX 5700 | i7-9700 / Ryzen 5 3600 | Ultra with 4 km view distance |
| Ultra | RTX 3080 / RX 6800 XT | i9-12900K / Ryzen 7 5800X3D | Ultra+ with 6–10 km view distance |
- Texture Quality: GPU memory dependent. Set to High (2 GB VRAM), Very High (4 GB VRAM), Ultra (6+ GB VRAM). Low textures look muddy and make distance spotting harder.
- Object Quality: Controls LOD switching. Higher = more detailed objects at distance. Medium-High recommended. Ultra can cause pop-in on slow HDDs.
- Terrain Quality: Affects ground texture sharpness. Medium is a good balance. Low makes grass look flat and can hide small obstacles.
- Shadow Quality: Most impactful CPU setting. Very Low disables shadows entirely; Low gives simple blobs; High and Ultra cast dynamic shadows for all objects. For CPUs weaker than i7-8700 / Ryzen 5 3600, set to Low. Shadows in Arma drain FPS more than in any other game.
- Pip Quality: Controls rendering within vehicle periscopes and optics. High causes a second render pass – turn to Standard or Low for +10-15 FPS when using vehicles.
- Anisotropic Filtering: Forces texture sharpening at angles. Set to High (4x) or Very High (8x). Almost no performance cost.
- Anti‑Aliasing: Options: Off, FXAA (cheap blur), SMAA (good quality), MSAA (expensive). Recommended: SMAA for quality; FXAA for performance. MSAA at 4x+ heavily impacts GPU.
- Post‑Processing: Includes HDR, bloom, depth of field. Disable for performance; they can also obscure distant enemies.
- Ambient Occlusion (SSAO): Adds subtle shadows. Low performance cost on modern GPUs; disable on Low tier.
- Visibility / View Distance: The most common misconfiguration. Two sliders:
- Grass Density: Set to Standard or Low on Low tier. High grass hides players but costs GPU. For competitive multiplayer, set to Low to see prone enemies.
- Vegetation Detail: Affects tree/grass LOD. Medium or Low for performance.
- FSR / DLSS: Arma 3 does not natively support FSR or DLSS. You can force them via driver settings (e.g., AMD FSR via Adrenalin, NVIDIA Image Scaling). Performance boost, but UI may become blurry.
- Master Volume: 60-80% is typical. Never max out – the dynamic range is wide and explosions can clip.
- Sound Effects Volume: 100%. Lowering it reduces footstep/weapon volume.
- Voice Volume: 100% for mission briefings and radio.
- Music Volume: 30-50%, or 0% in multiplayer – music can mask enemy footsteps.
- 2D vs. 3D Audio: The game defaults to “Auto” which uses 3D if available. Ensure “Enable 3D Audio” is checked for directional sound.
- Audio Output Device: Select your headset or speakers. Avoid “Default” if you have multiple audio devices – Arma can misroute sound.
- Experimental Audio: A checkbox in the launcher (Arma 3 Launcher → Parameters). Enables higher quality compression for voice chat. Leave off unless you have a fast internet connection.
- Overall View Distance (ground and objects) – default 10000 m is ridiculous. For normal play, 3000–5000 m is plenty. For air combat or sniping, 6000–8000 m.
- Object View Distance – controls how far objects are rendered in high detail. Keep it close to Overall View Distance, but you can lower it to 2000–3000 m for FPS gains without losing ground texture.
Special attention point: After changing graphics settings, the game often requires a restart for certain options (e.g., Fullscreen vs. Windowed). Always restart if you change resolution or multi-GPU settings.
---
2. Audio Settings
Audio in Arma 3 is crucial for situational awareness (footsteps, gunfire direction, radio chatter). The game uses a custom 3D audio system but does not support TrueHRTF natively.
Pitfall: The in-game “Audio” menu resets when switching between SP and MP sometimes. Check it each session.
---
3. Controls Settings
Arma 3 has hundreds of bindable actions. The default key layout is inherited from Arma 2 and can feel clunky. Many new players never discover the crucial “Toggle stance” or “Direct Commands” keys.
#### Essential Default Bindings You Should Know
| Action | Default Key | Notes |
|---|---|---|
| Move forward/back/strafe | W, S, A, D | |
| Free look | Alt (hold) | Must enable in settings: “Hold Alt to look around” |
| Zoom | Right mouse button (hold) | Multi-purpose, combined with aim |
| Interact / Enter vehicle | F | Left-click also works on context menu |
| Open gear / Inventory | G | |
| Map | M | Double-tap to toggle map visibility |
| GPS | Ctrl+M | Shows on compass bar if enabled |
| Compass | K | |
| Toggle stance (cycle) | C | Critical – cycles between stand/crouch/prone |
| Sprint | Left Shift | Hold to run, but drains stamina |
| Reload | R | |
| Fire mode selector | Ctrl+F | Changes automatic, single, burst |
| Headlight | L | Only on vehicles |
| Direct Communication | ` (backtick) | Opens command menu for AI |
| Voice Chat | Caps Lock (side) / Num0 (global) | Depends on server settings |
- Mouse Sensitivity: Start at 0.5 (in-game). Higher sensitivity helps with fast 360° turns, but too high hurts aim. Disable “Enhanced Mouse Smoothing” (it adds acceleration).
- Invert Mouse Y: Unchecked unless you fly a lot.
- Key Bindings: Change “Get In/Out Vehicle” to something easier (e.g., F+E). Bind “Push to talk” to a mouse thumb button for easier communication.
- Double-tapping: Set “Double tap to run” to OFF – hold-to-run is more reliable.
- Stance toggle: Set “Toggle Stance” to C (default). Avoid using “Hold” for stance – toggle is safer.
- Color Blind Modes: No in-game option. Workaround: Use third-party reshade filters or Windows color filters.
- Subtitle Language: In the Audio menu, “Speech Languages” – set to your language or English. Subtitles only appear during scripted cutscenes.
- Chat Size: In-game chat can be resized with the option “Chat Font Size” (under Game Settings). Increase to 150% for readability.
- UI Scale: Available in Game Settings → “Interface Scale”. 1.0–1.5 range. At 1080p, 1.2 is comfortable. Increases HUD, inventory, and map text.
- Stamina Bar: Can be disabled in difficulty settings (if mission allows) to reduce visual clutter.
- Aim Assist: None – the game is simulation, no aim assist.
- Hold vs Toggle: The controls menu allows you to set many actions (zoom, stance, run) to hold or toggle. For accessibility (motor impairments), set most to toggle.
- Color Corrections: In Advanced → Video → Color Correction, you can boost contrast help visibility. Default is fine.
- In Launcher: Arma 3 Launcher → Game Settings → Language. Supports English, Czech, German, French, Italian, Spanish, Polish, Japanese, Korean, etc.
- In Game: If you change language via launcher, restart completely. The language affects main menus, mission briefings (if translated), and subtitles. Not all mods support non-English.
- Audio Language: In Audio settings, “Speech Language” selects the voiceover language for cutscenes (if available). Set to your preferred language; English is most complete.
- Steam Overlay: Some languages cause the Steam overlay to interfere. If UI text is missing, verify game files or reinstall.
- Connection Type: In Game Settings → Network → “Bandwidth Limit”. Options: No Limit, 1 Mbps, 2 Mbps, etc. Choose “No Limit” unless you have a capped connection.
- Max Bandwidth: Should be 64 kbps for each player (for 100 players, 6.4 Mbps). But Arma uses UDP heavily; set to No Limit.
- LAN / Online: The game automatically detects; you can manually force LAN settings if playing on a local server.
- Port Forwarding: If hosting a server, forward UDP ports 2302-2305 in your router. Default server port is 2302.
- Voice Chat Volume: Server-side. In Audio, adjust “Voice Chat Volume” to balance with game sounds.
- Server Connection Warning: If you see “High Command Latency” error, reduce your view distance in game (even on server side, client view distance affects sync).
- Ping Smoothing: Disabled by default. Do not enable – it adds artificial lag.
- Difficulty Presets: In Main Menu → Options → Gameplay → Difficulty. Choose from “Recruit”, “Regular”, “Veteran”, “Custom”. Recruit is arcade (no recoil, self-aiming); Veteran is simulation. Custom allows tweaks.
- Personal Difficulty Options (all can be toggled individually):
- Auto-Pickup: Default on. When you walk over an item, you automatically collect it. Can be toggled off in Game Settings → Controls → Misc. Toggle off to avoid accidentally picking up enemy weapons.
- Third Person View: Often disabled in multiplayer servers. Toggle via key (default Numpad Enter). In singleplayer, you can allow it.
- Field of View (FOV): Under Video → Field of View. Options: Narrow, Normal, Wide, Very Wide. Choose Normal or Wide to avoid peripheral tunnel vision. Very Wide may cause fisheye on ultrawides.
- Sight Alignment (Gas Mask): The game will force a blur effect when wearing a gas mask. In Gameplay → Gas Mask Effect, you can set to Low to reduce blur.
- All settings changes take effect immediately except resolution and some video options. Use Ctrl+Shift+Numpad Minus after changing to confirm (or restart).
- Keep your graphics driver up-to-date – Arma 3 benefits from newer drivers optimised for DX11.
- For competitive multiplayer, prioritise high FPS over visual quality. A stable 60+ FPS is more important than Ultra textures.
- Mods like CBA, ACE, and various performance-enhancing mods can drastically improve FPS and settings flexibility – consider them after mastering vanilla.
Special attention point: The “Combat Pace” key (default Tab) cycles between walking, jogging, and running. Many players accidentally press Tab and wonder why they move slow. Consider unbinding it or moving it to a less used key (e.g., Pause).
---
4. Accessibility Settings
Arma 3 lacks a dedicated accessibility menu but offers several options via the launcher and in-game config files.
Pitfall: The “Interface Scale” does not affect the 3D world but only menus. Some mods offer additional scaling.
---
5. Language Settings
---
6. Network Settings
Arma 3’s netcode is sensitive. Poor settings cause desync, rubber-banding, or high ping.
Pitfall: The “Bandwidth Limit” setting is often set to 512 kbps for old servers. If you join a modern server, always set to No Limit to avoid bandwidth throttling.
---
7. Gameplay Settings
These settings affect game difficulty, HUD, and interaction styles.
- Reduced Damage: Makes enemies less lethal. Off for realism.
- Stamina Bar: On (displays a stamina meter). Some players turn it off for immersion.
- Weapon Crosshair: On helps aiming; Off forces iron sights.
- Aim Down Sights (ADS) Toggle: Set to hold (default) or toggle. Many prefer hold for faster response.
- Auto-Aim: Set to Off for simulation.
- Tracers: On shows bullet paths; Off for realism.
- GPS: On gives a moving map marker; Off for immersion.
- Radio Chat (ACRE/TFAR): Not a game setting but a mod requirement. Ensure you have correct mods activated.
Special attention point: The “Difficulty” settings are often locked by server admins. In multiplayer, you cannot change certain options like third person or crosshair; they are forced to server defaults. Check server parameters before joining.
---
8. Performance Optimisation Checklist
1. Lower view distances first – the biggest FPS gain.
2. Set Shadow Quality to Low if you have a CPU bottleneck.
3. Disable or reduce Post-Processing effects (bloom, depth of field).
4. Set Pip Quality to Low if you use vehicles often.
5. Use SMAA or FXAA instead of MSAA.
6. Launch via Arma 3 Launcher with parameters:
- `-malloc=system` for memory allocation (fixes stuttering on some systems).
- `-maxMem=4096` (set to your actual RAM in MB).
- `-cpuCount=8` (set to your core count, max 8).
- `-exThreads=7` (for extra threads; use 7 for 4+ cores).
7. Use SSD – the game streams terrain; an SSD drastically reduces stutter and loading times.
8. Disable Steam Overlay – sometimes causes frame drops in Arma. Right-click Arma in Steam → Properties → uncheck “Enable Steam Overlay while in-game”.
9. Verify game files if settings reset or crashes occur.
---
9. Final Notes
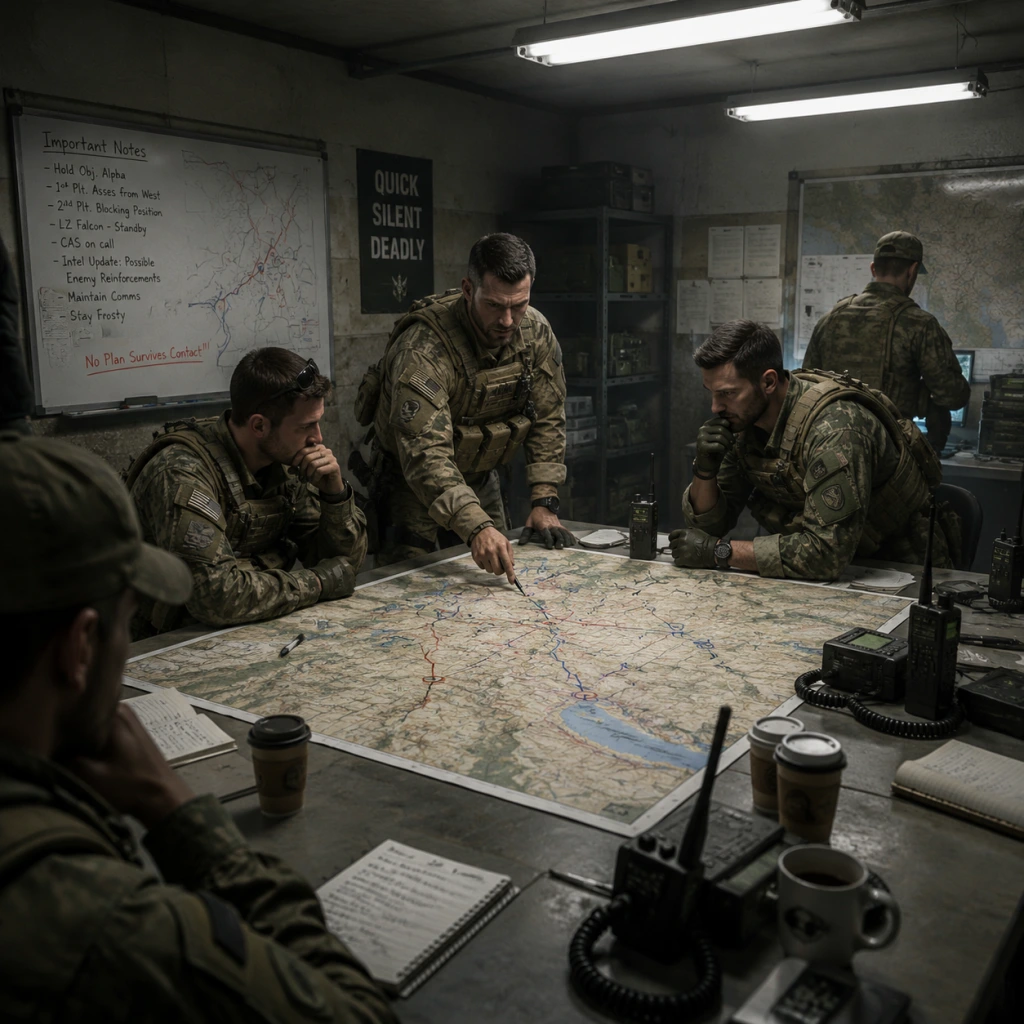
Important Notes
Important Notes for Arma 3
Introduction
Arma 3 is a deep tactical military simulation with many mechanics that can catch newcomers off guard. This section covers critical warnings, irreversible choices, missable content, difficulty spikes, grinding traps, online etiquette, anti-cheat system quirks, save management, and common regrets. Reading this before diving in will save you frustration and help you enjoy the game to its fullest.
---
Save Management & Irreversible Choices
- Manual Saves Only in Single-Player: The main campaign (\"The East Wind\") and most official scenarios do not auto-save. You must manually save via the Escape menu → Save Game. There are only 10 save slots per campaign playthrough. If you overwrite a save, the old progress is gone. Always keep multiple saves—especially before major decisions or difficult engagements.
- Campaign Branching Decisions: In \"The East Wind\", certain dialogue choices and mission outcomes affect which subsequent missions you play. For example, sparing or executing a captured enemy can alter the story arc. These decisions are irreversible once you proceed past a certain point. Reloading a prior save is the only way to change outcome. Consult a campaign walkthrough if you want to see all content.
- No New Game+: After completing the campaign, you cannot carry over your weapons or character progress into a new game. Each playthrough starts from scratch.
- Scenarios & MODs: Custom scenarios often have their own save systems (usually manual). Check the scenario description. Some total conversion mods (e.g., \"Antistasi\", \"Dynamic Recon Ops\") have persistent save files that you must manually back up from `%USERPROFILE%\\Documents\\Arma 3 - Other Profiles\\<YourProfile>\\`.
- Side Missions in Campaign: The East Wind has optional side objectives that appear only if you explore or complete certain tasks before main objectives. For example, during the mission \"Survive\", you can collect intel from a crashed helicopter—if you skip that area, the side mission is permanently lost.
- Achievements/Trophies: Several steam achievements require completing specific optional tasks (e.g., \"They Remembered Who They Were\"—shoot certain named enemies). Missing them means replaying entire campaign chapters.
- Learn the Controls via Tutorials: The Boot Camp and Prologue are only accessible from the main menu. There is no in-game reminder. If you skip them, you must external guides to learn basics like weapon zeroing, radio usage, and medical treatment—which can be punishing later.
- Mod/DLC Content Integration: DLC weapons and vehicles appear in the campaign only if you own the corresponding DLC. If you don't own a DLC but try to use its assets in the editor, you will see placeholder models. Missable: temporary free weekends often grant access to DLC, but if you don't claim them, you lose the chance to test them without purchase.
- Campaign Difficulty: The first few missions of \"The East Wind\" are relatively forgiving, but late missions (e.g., \"Adapt\", \"The Show\" or \"Stepping Stone\") ramp up enemy accuracy, numbers, and coordination. Expect high lethality—one bullet can kill you. Always keep cover, use smoke, and coordinate AI subordinates.
- AI Teammate Limitations: The default AI squad can be frustratingly stupid. They may: ignore radio orders, stand in the open, fail to suppress enemies. This can lead to unnecessary deaths. Use commanding radio (default \",\" key) to assign waypoints, and set fire modes (e.g., \"Weapons Free\" vs \"Hold Fire\") to avoid friendly fire. Alternatively, play with human players for better teamwork.
- Friendly Fire: Accidental team kills are common, especially in close quarters or at night. In multiplayer, this can get you kicked or banned from servers. In single-player, your own AI may kill you if you walk into their line of fire. Always check your fire and use map markers to hold positions.
- Performance Drops: Large battles, heavy mods, or poorly optimized custom missions can cause significant frame drops. Lower your view distance and shadow settings (see Settings guide) to avoid sudden stutter during critical firefights.
- No Traditional Leveling: Arma 3 has no character levels, skill trees, or unlockable gear through grinding. The game is entirely skill-based. However, some multiplayer modes (e.g., \"Wasteland\", \"King of the Hill\”) have in-game currency earned by killing enemies and completing objectives. Wasting this on cosmetic items offers no gameplay advantage. The only meaningful progression is learning the game's mechanics.
- Mod Dependency Trap: Some community mods require a chain of dependencies. Installing a large mod pack (e.g., ACE, RHS, CUP) without reading the required mod list can lead to broken missions or crashes. Always read the mod description and use mod manager tools (like Arma 3 Launcher) to enable dependencies automatically.
- Workshop Subscriptions: Removing a subscribed mod may break saved scenarios that depended on it. Before unsubscribing, back up your mod content or note which mods were active for each save.
- BattlEye Anti-Cheat: Arma 3 uses BattlEye, which automatically kicks or bans players for certain behaviors (e.g., modified game files, cheating). Always run the game with BattlEye active unless playing on a whitelisted server that explicitly allows mods. False positives are rare, but avoid using any 3rd-party overlays or injectors while playing multiplayer.
- Server Rules: Each multiplayer server has its own rules (often posted on the server’s website or Discord). Common rules: no teamkilling, no harassment, no stealing vehicles, no exploiting glitches. Violations can result in permanent bans from that server community. Read the server message that appears on join.
- Voice Chat & Communication: Use direct voice communication (default Caps Lock for global, V for vehicle) appropriately. In serious mil-sim servers, talking out of character (OOC) during gameplay is considered disruptive. For casual servers, be respectful and avoid loud or offensive language.
- Squad and Role Etiquette: If you join a squad (e.g., in Zeus or Liberation modes), follow the squad leader’s orders. Don’t take a role you aren’t trained for (e.g., pilot without experience). Admit you are new; most communities will teach you.
- Respect Custom Content: Some servers use mods that add custom vehicles or weapons. Do not tamper with them (e.g., by spawning duplicates via admin commands) unless you are an admin. Using exploits to duplicate gear can get you banned.
- “I Wish I Had Adjusted the Controls Early”: The default keybinds are not intuitive for many actions (e.g., weapon zeroing is NumPad+, leaning is Q/E). Many new players suffer through the campaign without rebinding keys. Spend 15 minutes in the controls menu rebinding movement, comms, and intercom keys to your preference.
- “I Ignored the Medical System”: Arma 3’s advanced medical system (especially if using mods like ACE) is complex. In the base game, a simple bandage can stop bleeding, but without proper care (morphine, splints), you can die from shock or broken bones. Learn at least the basics of medical treatment from Boot Camp.
- “I Didn't Know About Mods”: The vanilla game is good, but the community has created incredible content (maps, missions, realism improvements). Many players quit because they didn’t explore the Steam Workshop. The most popular mods (e.g., ACE, RHS, ALiVE) can completely transform your experience. Search for "must have mods Arma 3" and start with a curated collection.
- “I Underestimated Performance Tuning”: Arma 3 is CPU-heavy and can be unplayable on default settings. Not adjusting view distance, object detail, or shadows leads to frustration. Follow the Settings guide to tailor the game to your hardware.
- “I Solo’d a Co-op Campaign”: Some campaign missions are designed for a squad (human-controlled). Trying to play alone with AI can be exasperating due to AI limitations. Join a co-op server (e.g., through the “Find a Unit” forum on r/Arma) to experience the game as intended.
- “I Accidentally Discarded Essential Gear”: In the campaign inventory menu, you can drop items. If you discard a mission-critical item (like a satchel charge or radio), you may be unable to complete objectives. Always check required items in the briefing.
- “I Ruined My Save by Overwriting”: See Save Management above. This is the #1 regret among new players.
---
Missable Content
---
Difficulty Spikes & Pitfalls
---
Grinding Traps & Progression
---
Online Etiquette & Anti-Cheat
---
Common Regrets & Warnings
---
Final Advice
Arma 3 is not a game you master overnight. Embrace the learning curve, communicate with the community, and don't be afraid to restart a mission or campaign chapter. Use the resources available: official tutorials, the Bohemia Interactive forums, and player-created guides. Patience and willingness to learn are the most important assets you can bring into this simulation. Good luck, soldier.
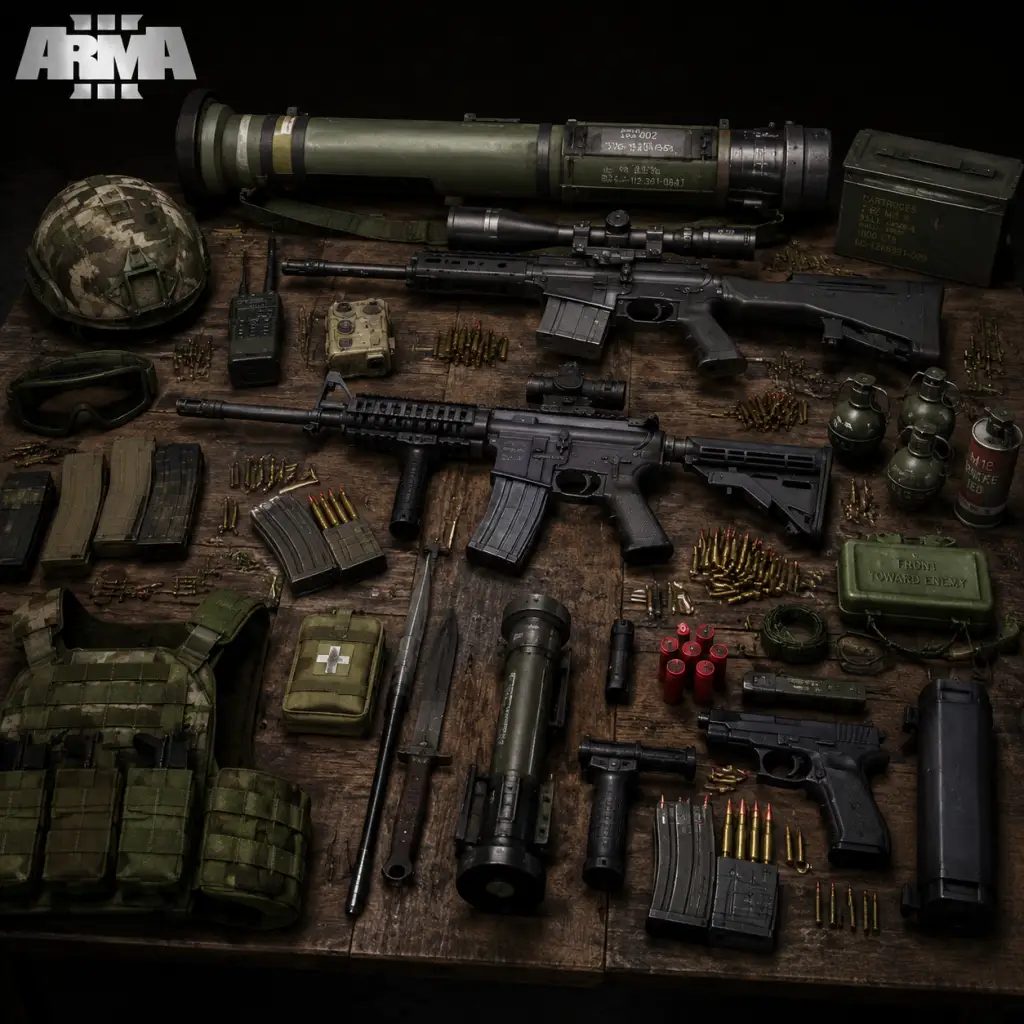
All Game Items
Introduction
Arma 3 features an extensive arsenal of military equipment, ranging from standard infantry weapons to advanced optics, explosive devices, medical supplies, and unique campaign collectibles. This guide covers all major item categories available in the base game and core DLCs (Apex, Tanks, Jets, Laws of War, Contact). Items are grouped logically for easy reference.
1. Weapons
1.1 Primary Weapons
Primary weapons are the main combat tools. They are divided by caliber and role:
- Assault Rifles:
- Carbines:
- Designated Marksman Rifles (DMR):
- Sniper Rifles:
- Machine Guns:
- Launchers:
- Pistols:
- Grenades:
- Mines:
- Red Dot Sights: Holosight, RCO (4x), ARCO (4x), MRCO (6x).
- Magnified Scopes: DMS (6x), SOS (12x), AMS (4x-12x), LRPS (20x).
- Thermal and NV: TWS (thermal), NVS (night vision). Available on some rifles.
- Suppressors: Reduce sound and flash. Different calibers (e.g., 556, 65, 762).
- Flash Hiders: Reduce muzzle flash.
- Compensators: Reduce recoil.
- Bipods: Improve stability when deployed.
- Grip Pods: Bipod and foregrip combination.
- Foregrips: Reduce vertical recoil.
- Laser/Light: IR laser or white light attachments for aiming or illumination.
- Flashlights: Illuminate dark areas.
- Laser Aiming Modules: IR or visible lasers.
- Carrier Lite: Lightweight, minimal protection.
- Carrier Rig: Medium protection, holds four magazines.
- Carrier GL Rig: For grenadiers, holds 40mm grenades.
- Carrier Special: Heavy vest, high protection, large inventory space.
- LBV Vest: Low-visibility, used by special forces.
- CSAT Vests: Similar tiers, distinct appearance.
- ECH: Enhanced Combat Helmet (NATO), high protection.
- MICH: Medium protection, common.
- ACH: Advanced Combat Helmet, lighter.
- Paratrooper Helmet: Lighter, no ear protection.
- OPFOR (CSAT) Helmets: Similar tiers.
- Helmet Covers: Camouflage variants (Woodland, Desert, etc.).
- Standard Fatigues: Provide minimal carry capacity and camouflage.
- Ghillie Suits: Exceptional camouflage, slow movement. Woodland, Desert, Arctic variants.
- Wetsuits: For underwater operations, provide thermal protection.
- Police Uniform: Used in certain missions for disguise.
- Assault Pack: Small (2000 capacity), holds essentials.
- Kitbag: Medium (3000), good for medics or riflemen.
- Carryall: Large (4000), for heavies or specialists.
- Bergen: Very large (6000), but heavy.
- Radio Backpack: Used by Covert Recon missions.
- UAV Terminal Backpack: For operating drones.
- Specialty: Parachute, fuel drums, etc.
- First Aid Kit (FAK): Basic healing, stops bleeding and restores some health.
- Medikit: Full medical kit, can heal all wounds, treat fractures, and revive.
- Bandages: Stop bleeding (packing, elastic, quickclot).
- Tourniquet: Stops bleeding from limbs, must be removed later.
- Morphine: Reduces pain, but lowers stamina.
- Epinephrine: Revives a downed player (if unconscious).
- Splint: Stabilizes fractures.
- Surgical Kit: Used to treat wounds.
- IV Bag: Restores blood volume.
- Water Bottle: Replenishes thirst (in survival mods or campaign).
- MRE: Meal Ready-to-Eat, restores hunger.
- Energy Drink: Temporary stamina boost.
- Painkillers: Reduce pain for a short time.
- Binoculars: Standard observation (10x magnification).
- Rangefinder: Measures distance to target.
- Vector 21 Nite: Advanced rangefinder with thermal.
- GPS: Displays map with own position; some show waypoints.
- NVGs: Night vision goggles (allows movement at night). Generations: GEN1 (green) and GEN2 (white phosphor).
- IR Grenade: Infrared strobe for friendly forces.
- Chemlight: Light stick, various colors.
- Entrenching Tool: Used to dig foxholes (in some scenarios).
- Radio: For communication (in unit context).
- Mine Detector: Detects buried mines.
- UAV Terminal: Remote control for drones (Darter, Tayran, etc.).
- Laser Designator: Lases targets for guided munitions.
- Tripod: For deploying machine guns or launchers.
- Satchel Charge: Large explosive, timed or remote detonation.
- Explosive Charge: Smaller, used for breaching.
- Intel Folders: Contain story-critical documents. Found in specific locations (e.g., military bases, safe houses).
- Flash Drives: Store digital data; used to unlock secondary missions.
- Memos: Small notes providing background lore.
- Photos: Depict key characters or locations.
- CP (Command Points): In Warlords, used to call in support (ammo drop, vehicle, etc.).
- Score Points: In various modes, determines endgame ranking but not spendable.
- Suppressor + Subsonic Ammo: Reduces shot detection range. Used in stealth missions.
- Thermal Optics + Smoke: Thermal can see through smoke. Team can use this to engage obscured enemies.
- Bipod + Foregrip: Combined reduce recoil significantly when deployed.
- NVGs + IR Laser: Allows for covert operations at night.
- Ghillie Suit + Sniper Rifle: Optimal for recon; movement speed penalty but excellent concealment.
- Explosives + Mine Detector: Player can clear paths safely.
- Laser Designator + Guided Missiles (from UAV or friend): Coordinates precision strikes.
- Medical Items: Using bandages before morphine prevents additional damage; epinephrine only if unconscious.
- Arsenal: Press Escape -> Arsenal (in most modes) to equip any available weapon, attachment, or gear. Unlock by scoring kills or completing tasks in some modes.
- Campaign Missions: Specific loadouts are provided; pick up weapons from dead enemies or caches.
- Supply Boxes: In Warlords and other modes, ammo crates contain random gear.
- Virtual Arsenal: A training mode where all items are unlocked.
- Mods and DLC: Additional weapons (e.g., from "Weapons" or "Uniform" DLCs) appear in arsenal if owned.
- Apex DLC: Adds SPAR series, CAR-95, Navid, and contact gear.
- Tanks DLC: Adds heavy weapons like the cannon launcher.
- Jets DLC: Adds aircraft, not infantry items.
- Laws of War DLC: Adds humanitarian equipment like medkits, but not new weapons.
- Contact DLC: Adds alien artifacts (used only in that campaign).
- MX Series (6.5mm): Standard NATO rifle (MX, MXM, MXC). Burst and full-auto modes. Obtained via arsenal or campaign. Best all-around.
- Katiba (6.5mm): FIA/CSAT bullpup, high fire rate. Less recoil than MX. Common in Apex.
- Mk20 (5.56mm): Low recoil, accurate. Used by NATO special forces.
- TRG-21 (5.56mm): FIA standard, cheap and lightweight.
- AK-12 (7.62mm): CSAT weapon, high damage but heavy recoil.
- SPAR-16 (5.56mm): From Apex DLC, excellent modularity.
- CAR-95 (5.56mm): From Tanks DLC, compact and reliable.
- MX Carbine (6.5mm): Shorter barrel, good for CQB.
- MXC (6.5mm): Compact version of MX.
- PDW2000 (9mm): Submachine gun, quiet with suppressor.
- Mk18 ABR (7.62mm): Semi-auto, high damage.
- MAR-10 (7.62mm): Very high damage, low rate of fire.
- M14 (7.62mm): Classic DMR, available in campaign.
- M320 LRR (7.62mm): Bolt-action, extremely accurate.
- GM6 Lynx (12.7mm): Anti-materiel, destroys light vehicles.
- Mk1 (7.62mm): Semi-auto sniper, good balance.
- MX SW (6.5mm): Light machine gun variant.
- Mk200 (6.5mm): Belt-fed, high suppression.
- SPMG (7.62mm): From Apex, very accurate.
- Navid (9.3mm): Heavy machine gun, used from bipod.
- MAAWS (84mm): Recoilless rifle, anti-vehicle and anti-structure.
- PCML (84mm): Guided anti-tank missile.
- RPG-7 (40mm): Unguided, high explosive.
- Mk153 SMAW (83mm): Short-range AT.
- Titan MPRL: Multi-purpose rocket launcher, anti-air/anti-vehicle.
- NLAW: Disposable anti-tank weapon, excellent accuracy.
1.2 Secondary Weapons
- P07 (9mm): NATO standard sidearm.
- ACP-C2 (.45 ACP): Compact, high stopping power.
- Zubr (.45 ACP): Revolver, slow but powerful.
- 4-five (.45 ACP): From Apex, excellent accuracy.
- Sting (9mm): Full-auto pistol, rare.
1.3 Throwables
- M67 Fragmentation: High explosive radius.
- M84 Flashbang: Blinds enemies.
- Smoke Grenades (White, Red, Green, etc.): Conceal movement or mark targets.
- M18 Smoke (Colored): Similar, used for signaling.
- Luchnik (CSAT grenade): Proxy fragmentation with fuse.
- Claymore: Directional, tripwire-activated.
- SLAM: Anti-vehicle, can be placed on roads.
- APERS Mine: Anti-personnel bounding mine.
- AT Mine: Anti-tank, heavy damage.
2. Attachments and Optics
2.1 Optics (Sights)
2.2 Muzzle Attachments
2.3 Underbarrel Attachments
2.4 Side Rail Attachments
3. Equipment (Vests, Helmets, Uniforms, Backpacks)
3.1 Vests
3.2 Helmets
3.3 Uniforms
3.4 Backpacks
4. Medical Items
5. Consumables
6. Tools and Special Items
7. Campaign Collectibles
In the main campaign "The East Wind," players can find intel items:
These are not used for gameplay but unlock achievement/trophy "Researcher." Collect all for full story context.
8. Currencies
Arma 3 has no universal in-game currency in singleplayer. However, in some multiplayer modes (e.g., Warlords, Escape), players earn points or funds:
In the campaign, money is irrelevant; equipment is issued based on mission.
9. Important Synergies and Upgrades
10. Obtaining Items
Items can be obtained through:
11. Notes on DLC Items
12. Conclusion
This guide provides a complete overview of Arma 3's items. Use the arsenal to experiment with loadouts, synergize attachments with mission role, and collect campaign intel for full story immersion. Always consider weight and stamina when equipping heavy items.
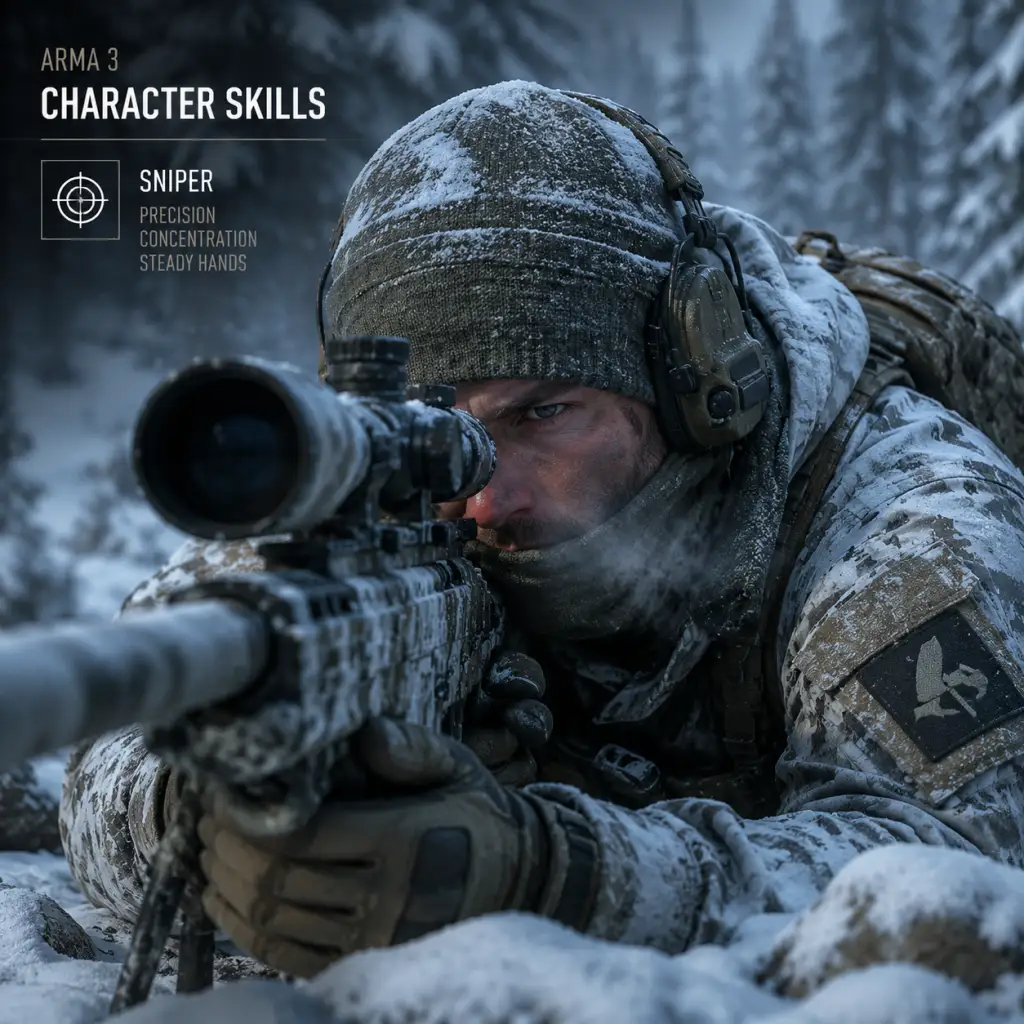
Character Skills
"content": "## Overview
In Arma 3, character skills are split between the single-player campaign's progression system and the varied role specializations used in multiplayer and custom scenarios. Unlike traditional RPGs, there are no \"spells\" or \"talent trees\" in the usual sense; instead, abilities are tied to training, equipment, and context-sensitive actions. This guide covers all official skills and character roles from the base game and major DLCs.
In the main campaign (“The East Wind” and some later campaigns like “Laws of War” and “Contact”), you earn skill points by completing missions and bonus objectives. These points are spent in four categories:
Each category contains five skills, each with two ranks (Rank I and Rank II). To unlock a rank, you must have spent the required points; earlier skills in the same category must be purchased before later ones. Below is the complete list.
Build Recommendation: For a general infantry playthrough, invest first in Weapon Handling and Explosives. For a stealth approach, focus on Stealth and Melee.
Build Recommendation: If you are the designated medic in a co-op scenario, max out Bandaging, Blood Transfusion, and Surgery first. For solo play, Morphine and Splints keep you combat-ready longer.
Build Recommendation: If you frequently drive vehicles, invest in Repair. For night missions, Recharge is invaluable. Hackings is niche but powerful.
Build Recommendation: As squad leader, prioritise Command and Logistics. For snipers, Survival and Awareness are top.
Your first skill points should go into one category that matches your preferred playstyle. A balanced approach is less effective than specialising. Reset points? No, choices are permanent – plan ahead (max 30-40 points total per campaign). Example builds:
In Arma 3, character skills are split between the single-player campaign's progression system and the varied role specializations used in multiplayer and custom scenarios. Unlike traditional RPGs, there are no \"spells\" or \"talent trees\" in the usual sense; instead, abilities are tied to training, equipment, and context-sensitive actions. This guide covers all official skills and character roles from the base game and major DLCs.
1. Campaign Skill Progression (Single-Player)
In the main campaign (“The East Wind” and some later campaigns like “Laws of War” and “Contact”), you earn skill points by completing missions and bonus objectives. These points are spent in four categories:
- Combat – improves weapons proficiency and survivability in firefights.
- Medical – makes healing faster and more effective.
- Mechanical – enhances vehicle repair, battery recharge, and salvage.
- Leadership – boosts command range, situational awareness, and logistics.
Each category contains five skills, each with two ranks (Rank I and Rank II). To unlock a rank, you must have spent the required points; earlier skills in the same category must be purchased before later ones. Below is the complete list.
1.1 Combat Skills
| Skill | Rank I Effect | Rank II Effect | Recommended Use |
|---|---|---|---|
| Weapon Handling | Faster weapon switch & reload; reduced recoil | Further improvement; ability to switch weapons while moving faster | All combat roles, especially assault infantry |
| Stealth | Quieter footsteps; reduced detection range | Sprinting is almost silent; enemies detect you at half range | Stealth missions, recon, assassinations |
| Melee | +25% knife damage | One-hit kill on unarmoured enemies from behind | Close quarters, silent takedowns |
| Heavy Weapons | Faster deploy time for bipods/launchers | Reduced sway when carrying heavy weapons; quicker aim down sights | Machine gunners, AT soldiers |
| Explosives | Faster arming of satchel charges; larger radius | Can disarm enemy mines faster; increased explosive radius by 20% | Breaching, demolitions, mine clearance |
1.2 Medical Skills
| Skill | Rank I Effect | Rank II Effect | Recommended Use |
|---|---|---|---|
| Bandaging | Bandages wounds 30% faster | Bandages wounds 60% faster; less pain penalty after healing | Squad medics, any firefighter |
| Splints | Apply splints 40% faster | Splints are applied instantly; fracture recovery time reduced by 50% | When fractures are common (urban combat) |
| Blood Transfusion | Restore blood level 25% more per transfusion | Restore blood level 50% more; transfusion time reduced by 30% | Medic role, heavy bleeding situations |
| Surgery | Treat critical wounds (gaping wounds) without a surgery kit | Surgery kit not needed at all; treat wounds in half the time | Rescuing downed teammates, prolonged ops |
| Morphine | Morphine injection reduces pain 20% more | Morphine lasts twice as long; reduces screen blur | Pain management during intense firefights |
1.3 Mechanical Skills
| Skill | Rank I Effect | Rank II Effect | Recommended Use |
|---|---|---|---|
| Repair | Repair vehicles 30% faster | Repair vehicles 60% faster; can repair tracks/wheels without toolkit | Armor crews, vehicle support |
| Recharge | Recharge batteries (NVGs, lasers) 20% faster | Recharge 40% faster; batteries last 30% longer | Night operations, sniper support |
| Salvage | Extract 20% more resources from wrecks | Extract 40% more resources; salvage at double speed | Resource gathering, survival scenarios |
| Hacking | Disable enemy electronics (e.g., UAVs) for 15 seconds | Disable for 30 seconds; hack range increased by 50% | Electronic warfare, stealth missions |
| Fortification | Build sandbags/barbed wire 30% faster | Build fortifications 60% faster; structures have 20% more HP | Defensive positions, base building |
1.4 Leadership Skills
| Skill | Rank I Effect | Rank II Effect | Recommended Use |
|---|---|---|---|
| Command | Radiocommand range increased by 25% | Range increased by 50%; orders executed 20% faster | Squad leaders, platoon commanders |
| Awareness | Detect enemy markers on map 10% farther | Detect enemies 20% farther; minimap shows enemy direction | Reconnaissance, overwatch |
| Morale | Squadmates recover stamina 15% faster | Stamina recovery 30% faster; suppression effect reduced 25% | Any squad with AI teammates |
| Logistics | Call in supply drops 20% faster | Supply drops 40% faster; can request heavier crates | Sustained operations, ammo resupply |
| Survival | Longer breath-hold for scopes | Breath-hold 50% longer; reduce fall damage by 30% | Snipers, high-altitude operations |
1.5 Spending Strategy (Campaign)
Your first skill points should go into one category that matches your preferred playstyle. A balanced approach is less effective than specialising. Reset points? No, choices are permanent – plan ahead (max 30-40 points total per campaign). Example builds:
- Assault build: Combat (Weapon Handling > Explosives > Melee) + Medical (Bandaging > Surgery).
- Sniper build: Leadership (Survival > Awareness) + Combat (Stealth > Weapon Handling) + Mechanical (Recharge).
- Medic build: Medical (Bandaging > Blood Transfusion > Surgery) + Leadership (Morale) + Mechanical (Repair if vehicle support).
- Abilities: Use standard assault rifle, can carry extra ammo, fragmentation grenades, smoke grenades.
- Special Moves: None unique; can throw grenades (frag, smoke, flashbang), use underbarrel GL if equipped.
- When to use: General-purpose infantry; best for beginners.
- Synergies: Backup any specialist; good for suppressing fire.
- Abilities: Can place markers on the map (via radio menu), order AI teammates (in single-player or Zeus missions), designate targets for artillery/CAS.
- Special Moves: \"Request Support\" – via radio (F keys) to call mortar fire, CAS, supply drop (mission-dependent). Use binoculars and laser designator.
- When to use: Leading fireteams; essential for coordinated attacks.
- Synergies: Works with Medic to keep squad alive, with Engineer to clear obstacles.
- Abilities: Can treat wounds (use medkit, bandages, blood bag, splint, morphine injection), perform CPR, use defibrillator to revive from cardiac arrest. Can carry medic backpack with additional supplies.
- Special Moves: \"Heal\" contextual wheel; \"Defibrillate\" on incapacitated soldiers.
- When to use: Any mission with high risk of injury; always at least one per squad.
- Synergies: Essential for survival; pairs with Engineer for vehicle crew support.
2. Role-Based Abilities (Multiplayer & Scenarios)
In multiplayer, Arma 3 does not have a rigid class system; instead, roles are defined by the loadout (weapons, equipment) and the player's training. However, certain roles are standardised in mission templates and mods (e.g., ACE3, Arma 3's own Warlords mode). Below are the common roles and their special abilities.
2.1 Rifleman
2.2 Squad Leader (TL)
2.3 Medic
2.4 Engineer (Explos
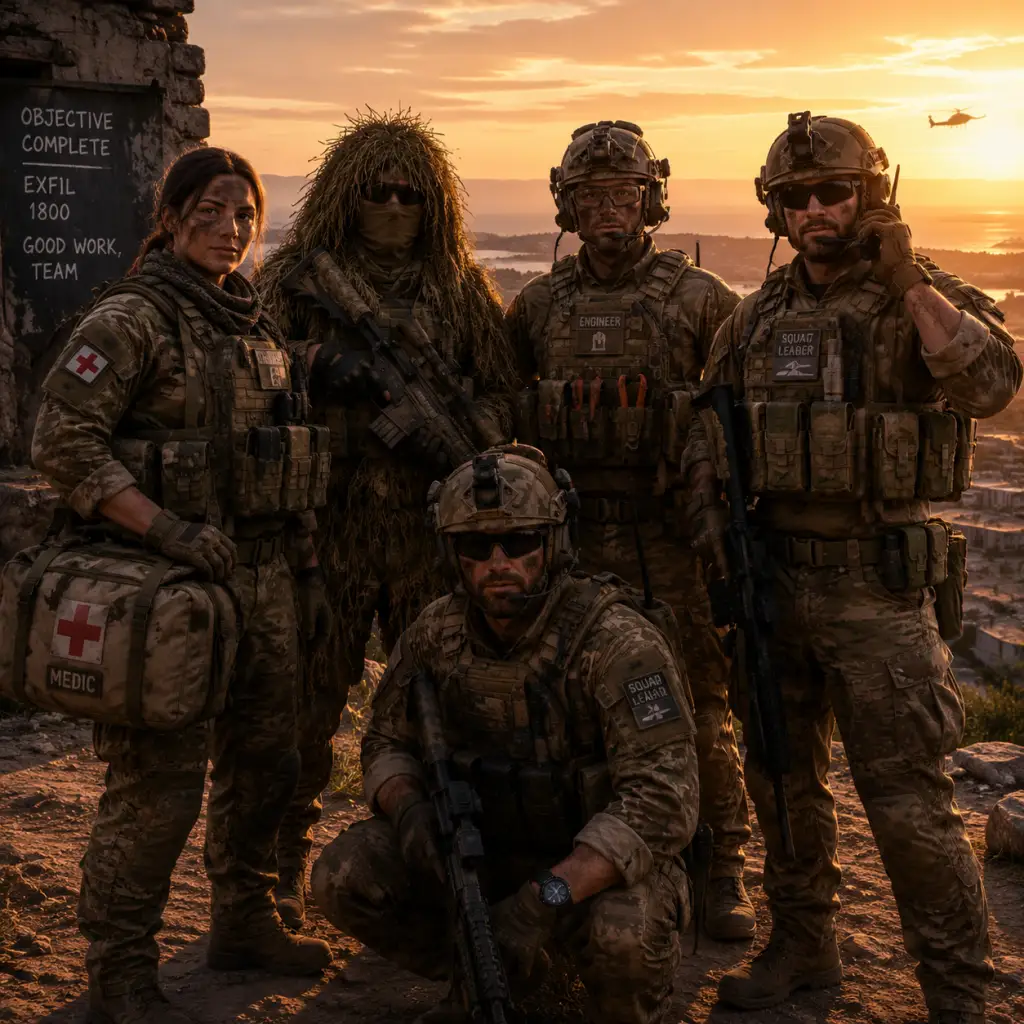
Characters & Roles
Characters & Roles Overview
Arma 3 is a military simulation that does not feature traditional RPG classes or heroes. Instead, character identity is defined by campaign protagonists, multiplayer roles (classes), and distinct unit types. This guide covers all major campaign characters, every standard multiplayer role, and the special factions (like CTRG, NATO, CSAT, AAF) that serve as playable units in missions. Roles are primarily defined by equipment, specialization, and team function rather than individual stats.
---
1. Campaign Characters
The single-player campaign is divided into three episodes: "Survive," "Adapt," and "Win." Each follows a different protagonist.
1.1 Corporal Ben Kerry (Survive & Adapt)
- Background:
- Strengths:
- Weaknesses:
- Playstyle:
- Unlock Conditions:
- Recommended Equipment:
- Team Synergy:
- Background:
- Strengths:
- Weaknesses:
- Playstyle:
- Unlock Conditions:
- Recommended Equipment:
- Team Synergy:
- Background:
- Strengths:
- Weaknesses:
- Playstyle:
- Unlock Conditions:
- Recommended Equipment:
- Team Synergy:
- Lieutenant James (played by you in training missions): A generic soldier used in Boot Camp. No special traits.
- Captured NATO Soldiers: Playable briefly during escape sequences. Use standard gear.
- Strengths: High situational awareness, ability to mark targets and control fire teams. Can rally dead teammates (if modded).
- Weaknesses: Heavy radio equipment slows him; primary objective is coordination, so he should avoid frontline combat.
- Playstyle: Use binoculars for recon, stay in cover, issue orders via voice or command menu. Keep a small weapon (carbine) for emergencies.
- Unlock: Usually available by default in roles menu (no grind).
- Recommended Equipment:
- Team Synergy: Essential for squad cohesion; works with FTLs and RTO.
- Strengths: Can manage 3-4 soldiers, relay orders from SL. Has some command ability.
- Weaknesses: Less command authority than SL; still carries heavy communication gear.
- Playstyle: Similar to SL but more hands-on. Lead from the front, but prioritize team positioning.
- Recommended Equipment:
- Team Synergy: Bridge between SL and riflemen.
- Strengths: Universal, no specialization but can adapt to any situation. Light pack.
- Weaknesses: No unique abilities; may lack skill points (in ACE mods).
- Playstyle: Obey orders, maintain formation, suppress enemies. Carry spare ammo for autorifleman.
- Recommended Equipment:
- Team Synergy: Core layout; pairs with autorifleman.
- Strengths: Heavy suppression with LMG (MX Sw, LSW, or MK200). Sustained fire capability.
- Weaknesses: Slow movement, large profile, exposes to return fire, heavy ammo consumption.
- Playstyle: Use bipod when prone, lay down covering fire for advancing squad. Manage heat buildup (M119 weapons).
- Recommended Equipment:
- Team Synergy: Pair with rifleman who carries extra ammo. Need cover from grenadier.
- Strengths: Underbarrel grenade launcher (UGL) provides indirect fire capability. Useful for destroying cover and light vehicles.
- Weaknesses: Heavy launcher reduces rate of fire; limited HE grenades.
- Playstyle: Use grenades for area denial, flush enemies from buildings, smoke for concealment.
- Recommended Equipment:
- Team Synergy: Supports autorifleman by removing threats; works with marksman for coordination.
- Strengths: Destroys armored vehicles and emplacements. Carries RPG-42, PCML, or Titan MPRL.
- Weaknesses: Single-shot capability; must reload or carry multiple launchers. Vulnerable while aiming.
- Playstyle: Position on high ground, ambush vectors, coordinate with squad for protection.
- Recommended Equipment:
- Team Synergy: Essential against mechanized enemies; rely on squad to cover flanks.
- Strengths: Heals and revives teammates. In vanilla, can use medkits and field dressings; in ACE, has advanced medical skills.
- Weaknesses: Non-combat role; carries heavy med supplies; limited ammunition.
- Playstyle: Stay near squad center, prioritize treating wounded, call for extraction if overwhelmed.
- Recommended Equipment:
- Team Synergy: Works with every role; critical for sustaining firefights.
- Strengths: Long-range precision (Mk18 ABR, ASP-1 Kir, or MAR-10 .338). Can eliminate key targets from distance.
- Weaknesses: Limited close-quarters capacity; slow aim; team must provide security.
- Playstyle: Scout ahead, engage HVTs, adjust for wind and range. Use ghillie if available.
- Recommended Equipment:
- Team Synergy: Pairs with spotter (often another marksman or squad leader).
- Strengths: Supports marksman with range, wind, target detection. Carries extra ammo.
- Weaknesses: Light combat role; must avoid aggro.
- Playstyle: Stay with marksman, call out ranges and targets, carry laser designator for guiding artillery.
- Recommended Equipment:
- Team Synergy: Essential for sniper team composition.
- Strengths: Can operate vehicles (tanks, helicopters, boats) with higher efficiency. Specialized skills (repair, piloting).
- Weaknesses: Less effective on foot; limited infantry gear.
- Playstyle: Stick to vehicle; maintain situational awareness, coordinate with ground troops.
- Recommended Equipment:
- Team Synergy: Essential for transport and fire support.
- Background: Elite multinational special forces unit, seen in the Remnants of War missions.
- Strengths: Advanced weapons (SPAR-16, GM6 Lynx), night vision, suppressed weapons by default. High skill levels in AI.
- Weaknesses: Limited numbers, no heavy armor.
- Playstyle: High-speed infiltration, sabotage, and precision strikes.
- Equipment: SPAR-16, 4-five, Stiletto launcher, black uniforms.
- Team Synergy: Best used in small teams (4-6).
- Background: Bluefor faction in the campaign. Standard infantry with MX rifles.
- Strengths: Balanced loadouts, air and armor support.
- Weaknesses: Not specialized.
- Playstyle: Conventional combined arms.
- Equipment: MX series, M2 sniper, MAAWS launcher.
- Team Synergy: Works well in platoon-sized ops.
- Background: Redfor faction, invading Altis. Use Chinese/Russian-inspired gear.
- Strengths: Katiba rifles (fast fire rate), heavy armor (T-100 tanks), chemical weapons.
- Weaknesses: Uniform easier to spot in forests? (subjective).
- Playstyle: Overwhelming force, mechanized assaults.
- Equipment: Katiba 6.5mm, RPG-42, Zafir LMG.
- Team Synergy: Synergizes with armored columns.
- Background: Local military, initially neutral, later hostile. Use mixed gear (Mk20, TRG-21).
- Strengths: Familiarity with terrain, cheap equipment.
- Weaknesses: Older weapons, less training.
- Playstyle: Guerrilla tactics, defensive positions.
- Equipment: Mk20 5.56mm, TRG-21, Vorona launcher.
- Team Synergy: Often used as insurgent enemies.
- Background: Altian resistance fighters, allies of NATO in the campaign.
- Strengths: Lightweight, high mobility, using captured gear.
- Weaknesses: Poor armor, limited ammo.
- Playstyle: Ambushes, hit-and-run, unconventional warfare.
- Equipment: Mk20, 4-five, improvised explosives.
- Team Synergy: Works with CTRG for covert ops.
- A British soldier of the NATO Task Force Aegis, assigned to the island of Altis. He is a rifleman and later a squad leader after the invasion by CSAT forces. His journey spans from a survivor to a resistance leader.
- Adaptive—learns on the fly; no unique abilities but can use any standard NATO weapon.
- High survivability in scripted situations (plot armor).
- Scripted limitations: cannot deviate far from mission objectives.
- No perks or bonuses; relies on player skill.
- Tactical infantry combat using NATO equipment (MX series rifles, GLs, launchers). Missions emphasize survival, stealth, and coordination with AI squadmates.
- Automatically available by starting Episode 1 campaign.
- Primary: MX 6.5mm (with or without scope).
- Secondary: 4-five .45 or 9mm.
- Launcher: Titan MPRL (against vehicles).
- Uniform: CTRG/Resistance gear (later episodes).
- Functions as a standard squad member; must follow orders from Commander Miller in early missions. Later becomes squad leader, relying on AI teammates.
1.2 Colonel Scott Miller (Adapt & Win)
- A high-ranking NATO intelligence officer, previously commander of Task Force Aegis. He orchestrates the resistance from the shadows, and later takes direct command of Kerry's squad. He is the strategic mastermind.
- Access to planning maps and recon assets (UAV feeds, satellite imagery).
- Command experience: can call in airstrikes or reinforcements in certain missions.
- Limited direct combat role; rarely on front lines.
- Slower movement due to equipment.
- High-level tactical oversight; move cautiously, use binoculars and map to coordinate allies. Engage only when necessary.
- Appears in Episode 2 and 3; playable from certain missions.
- Primary: Mk18 ABR (7.62mm DMR) or MXM.
- Secondary: 4-five .45.
- Equipment: Rangefinder, GPS, UAV terminal (when available).
- Acts as a force multiplier; keep him safe to maintain command benefits.
1.3 Agent Mark "Mac" Adams (Win - The East Wind)
- A CTRG (Counter-Terrorist Response Group) operative, working covertly on Altis to expose the true threat of CSAT's biological weapon. Elite special forces soldier.
- Superior weapon handling: can use specialized CTRG gear (SPAR-16, 4-five, Stiletto).
- Stealth and speed: uniform reduces detection.
- Less offensive power than heavy infantry; relies on precision.
- Limited medical supplies (operates alone).
- Infiltration and sabotage: use silenced weapons, night vision, and avoid direct firefights. Execute hit-and-run tactics.
- Playable in the final chapters of Episode 3.
- Primary: SPAR-16 (5.56mm) with suppressor and RCO scope.
- Secondary: 4-five with suppressor.
- Equipment: NVGs, laser designator (optional).
- Works best alone or with small, high-skill groups. Avoid heavy fire support.
1.4 Additional Minor Campaign Characters
All campaign characters are unlocked via progression and do not have separate progression systems.
---
2. Multiplayer Roles (Classes)
In multiplayer (especially in mods like ACE, but also vanilla), roles are defined by the gear loadout and slot chosen in the mission menu. The following are the standard roles recognized by the community and mission designers.
2.1 Squad Leader (SL)
- Primary: MX Carbine or short-barreled rifle.
- Secondary: None or pistol.
- Gear: Rangefinder, GPS, map tools, smoke grenades (white and green for marking).
2.2 Fireteam Leader (FTL)
- Primary: MX or Mk20 (from AAF).
- Gear: Binoculars, map, compass.
2.3 Rifleman
- Primary: MX 6.5mm or Katiba 6.5mm.
- Secondary: None or pistol.
- Gear: Backpack with extra magazines, medical supplies (if allowed).
2.4 Autorifleman (AR)
- Primary: MX LSW or Mk200 6.5mm.
- Secondary: Pistol.
- Gear: Ammo backpacks (spare drums).
2.5 Grenadier
- Primary: MX 3GL (with UGL) or Katiba GL.
- Secondary: Pistol.
- Gear: Grenade vest (HE, smoke, flares).
2.6 Anti-Tank (AT) / Missile Specialist
- Primary: Carbine (for self-defense).
- Launcher: Two tubes (one loaded, one in backpack).
- Gear: Ear protection, range finder.
2.7 Medic / Corpsman
- Primary: Carbine or PDW.
- Gear: Large medpack (backpack), bandages, morphines, blood IV (ACE).
2.8 Marksman / Sharpshooter
- Primary: High-caliber DMR with scope (LRPS or RCO).
- Secondary: Pistol.
- Gear: Rangefinder, kestrel (wind), bipod, spotter if possible.
2.9 Spotter
- Primary: Same as marksman or carbine.
- Gear: Laser designator, binoculars, map.
2.10 Crewman (Pilot / Driver / Gunner)
- Primary: PDW (Sting 9mm) or SMG.
- Gear: Helmet, vest, repair toolkit or pilot gear.
---
3. Special Units & Factions
Arma 3 has distinct military forces that can be considered playable units in scenarios and the editor. While they don't have unique abilities per se, their equipment and uniforms define their role.
3.1 CTRG (Counter-Terrorist Response Group)
3.2 NATO (North Atlantic Treaty Organization—Task Force Aegis)
3.3 CSAT (Canton Protocol Strategic Alliance Treaty)
3.4 AAF (Altis Armed Forces)
3.5 FIA (Freedom and Independence Army)
---
4. Hero Abilities & Unlocks
Arma 3 does not have hero classes or unlockable superpowers. However, in the campaign, specific achievements grant medals (e.g., Purple Heart, Distinguished Service Cross) that appear on your profile but do not affect gameplay. In multiplayer mods like "Tactical Battlefield" or "Warlords," you can level up and unlock better gear, but these are not characters—they are loadout progressions.
---
5. Recommended Loadouts for Common Scenarios
Use the following loadout templates for balanced team composition:
| Role | Primary Weapon | Secondary | Gear | Special |
|---|---|---|---|---|
| Squad Leader | MX Carbine | 4-five | Binoculars, GPS, Map | Smoke grenades (green/white) |
| Medic | Sting 9mm | 4-five | Medpack, bandages, morphine | Backpack full of supplies |
| Autorifleman | MX LSW | 4-five | Bipod, extra drums | Toolbox (optional) |
| Grenadier | MX 3GL | 4-five | 6+ HE rounds, 2 smoke | Night vision (if night) |
| Marksman | Mk18 ABR | 4-five | Rangefinder, bipod | Ghillie (optional) |
6. Team Synergy Summary
- Small Team (4-6): Squad Leader + Medic + Autorifleman + Grenadier + Marksman + Rifleman.
- Vehicle Support: Add Crewman roles as needed.
- Stealth Mission: Use CTRG or suppressors; no autorifleman (too noisy).
- Defense: Two autoriflemen and grenadiers for suppression.
---
7. Conclusion
Arma 3's character system is fluid—roles are defined by loadout and player skill rather than fixed abilities. Understanding each role's purpose and proper gear selection is critical for effective team play in multiplayer and campaign success. Use the above guide to select the right role for your playstyle and to build cohesive squads.
Remember: Communication and adaptability matter more than any class perk. Stay tactical, and watch your sector!
Cheats & Secrets
Overview
Arma 3 includes several developer-intended cheat codes and secret features, mostly accessible through the in-game Debug Console (also called the script console). These are available only in single-player modes (campaign, scenarios, editor) and will disable achievements for that session. Multiplayer servers can also enable the debug console at their discretion, but using cheats on official or ranked servers may result in a ban. This guide covers all known cheat codes, secret commands, hidden features, and Easter eggs discovered by the community and confirmed by Bohemia Interactive.
Cheat Codes (Debug Console)
To use cheat codes:
1. Enable the Debug Console: Press the tilde key (`~`) or Esc → Configure → Controls → Configure Addons → find Debug Console and bind a key. By default it's bound to `~` (tilde).
2. Open the console: Press your bound key during gameplay.
3. Enter a command: Type or paste a command and press Enter or click Exec.
Note: Some commands require a semicolon (`;`) to separate multiple statements. All commands are case-insensitive but must be syntactically correct.
Essential Cheat Commands
| Command | Effect | Example |
|---|---|---|
| `enableCamShake false` | Disables camera shake (useful for motion sickness) | `enableCamShake false;` |
| `allowPlayerWeight 500` | Increases inventory weight limit (default 100) | `allowPlayerWeight 500;` |
| `hint "text"` | Displays a hint message on screen | `hint "Cheats enabled!";` |
| `player setCaptive true` | Makes player invisible to enemies (god-like stealth) | `player setCaptive true;` |
| `player allowDamage false` | Toggles player invincibility | `player allowDamage false;` |
| `["","","",""] spawn BIS_fnc_curatorRespawn` | Opens Zeus (game master) interface to spawn units | Requires Zeus module; see below |
| `debugConsole` | Opens the debug console from anywhere (if closed) | `debugConsole;` |
| `hint "BIS_fnc_help"` | Shows a list of available functions | `hint str (allFunctions select {_x find "BIS_fnc" > -1});` |
Complete God Mode & Infinite Resources
Combine these lines in one execution:
```sqf
player allowDamage false;
player setBehaviour "CARELESS";
player setCaptive true;
player setVariable ["BIS_noCoreConversations", true];
```
Spawn Vehicles & Weapons
Use the editor-like spawning via script. Example to spawn an M2A1 tank:
```sqf
_vehicle = "B_MBT_01_cannon_F" createVehicle (getPos player);
_vehicle setDir (getDir player);
_vehicle setDamage 0;
player moveInDriver _vehicle;
```
To spawn weapons: `player addWeapon "arifle_MX_F";`
Teleport & Flying
- Teleport to coordinates: `player setPos [x,y,z];` (e.g., `player setPos [1000,2000,0];`)
- Toggle flight mode: `player allowFlying true;` (works only if vehicle has flight capability)
- `#monitor` – Opens performance monitor (FPS, frame times).
- `#getout` – Forces player out of current vehicle.
- `#login` – Used in multiplayer to authenticate as admin.
- `#kick` / `#ban` – Admin commands.
- `#exec` – Execute a script on server.
- "I am the Law": Arrest a civilian in the End Game mode while playing as UN forces.
- "To the Rescue": Rescue an AI teammate who is bleeding out in the Warlords mode.
- "Ghost of the Mountain": Complete the Survive campaign without using any fast travel.
- `BIS_fnc_helppage` – Opens a help page.
- `BIS_fnc_curatorRespawn` – Opens Zeus interface with ability to spawn.
- `BIS_fnc_showMissionFeedback` – Displays mission stats.
- Cheats are only for single-player. Using them in multiplayer may trigger anti-cheat (BattlEye) or get you banned from servers.
- The Debug Console can be used to execute malicious scripts; only use trusted commands from official sources.
- Some cheats (like god mode) will disable achievements for that session. You can re-enable achievements by restarting the game without cheats.
- The game has no unlock codes or traditional cheat codes (like Konami code). All cheats are script-based.
Secret Commands & Hidden Features
Developer Console Secrets
The "Old Man" Campaign Secrets
In the 2020 standalone campaign Old Man, there are hidden stash locations and a secret ending. At the final mission, if you have collected all 10 hidden caches (marked on map only after finding intel), you can trigger an alternate cutscene by interacting with the radio at the extraction point AFTER completing the main objective. No cheat code needed, but a hidden feature.
End Game Mode Hidden Content
In the End Game multiplayer mode (formerly Escape), there is a secret weapon cache on the map Stratis located inside a cave at grid coordinates `044 087`. It contains rare weapons like the Mk200 and a RCO scope. This is a developer-intended secret, not an error.
Easter Eggs
1. The Giant Rubber Duck: On the map Altis, near the town of Kavala at coordinates ` [22400, 25500] `, there is a large inflatable rubber duck floating in the water. It was added as a joke by developers.
2. Hidden Base Under the Sea: On Tanoa (Apex expansion), at depth near `[12800, 12800]`, there is an underwater research station that can be explored. It contains references to previous Bohemia games.
3. The "Bohemia Interactive" Sign: On Malden (remastered), at the top of the lighthouse, a sign reads "Bohemia Interactive FTW".
4. Pigeon Almighty: In the single-player campaign Survive, near the first town, there is a pigeon that cannot be killed. It is a reference to an old Bohemia game Arma 2.
5. The Man with a Briefcase: On Altis at night, a lone man in a suit walks randomly on the road with a briefcase (spawns occasionally). He has no collision and vanishes if shot. Believed to be a reference to Hitman or The Matrix.
Exploit-Safe Secrets & Developer-Intended Hidden Content
Unlockable Achievements
Arma 3 has achievements that require specific hidden actions, not cheats:
Hidden Lore Documents
In the Apex expansion campaign, there are 12 Intel Documents scattered across the island of Tanoa. Collecting them unlocks a bonus video in the main menu gallery. No cheat, but a secret.
Community Manager Easter Egg
In the main menu, hold Alt + Shift + F for 3 seconds to see a hidden splash screen of the community manager's face (added in update 1.76). This is a harmless fun feature.
Scripted Cheats for Modders
Bohemia provides a set of scripted functions intended for developers but usable by players who know scripting:
These are not exploits but intended tools.
Important Notes
Conclusion
Arma 3's cheat system revolves around the powerful Debug Console, giving unlimited possibilities for messing around in single-player. The Easter eggs and hidden content add charm to the simulation. Remember to use cheats responsibly and only in appropriate modes.