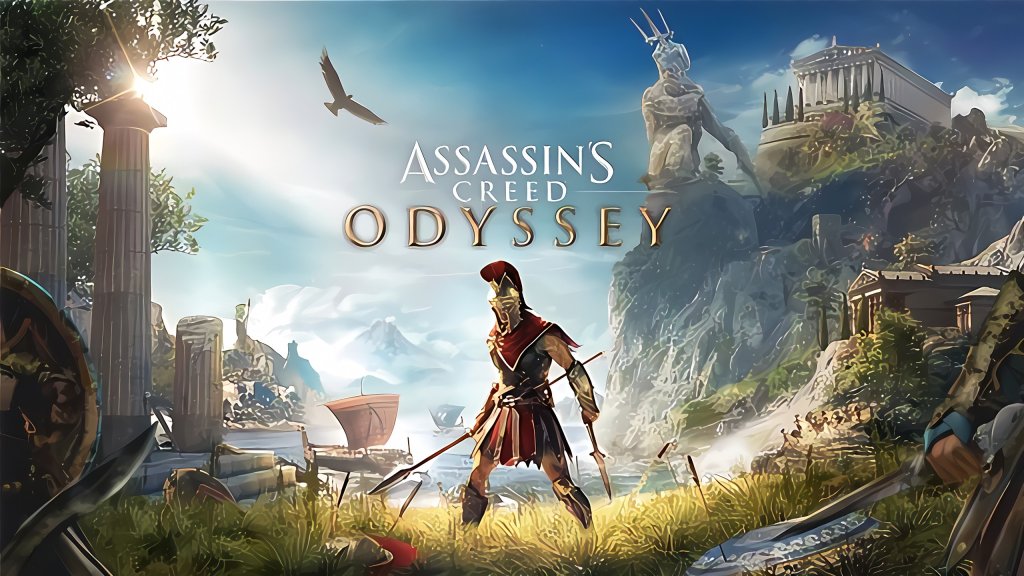
Assassin's Creed Odyssey
## Game Introduction ### Overview *Assassin's Creed Odyssey* is an action role-playing game developed by Ubisoft Quebec and published by Ubisoft. It was released on October 5, 2018, for Microsoft Windows, PlayStation 4, Xbox One, and later for Nintendo Switch (cloud version) and Stadia. It is the e...
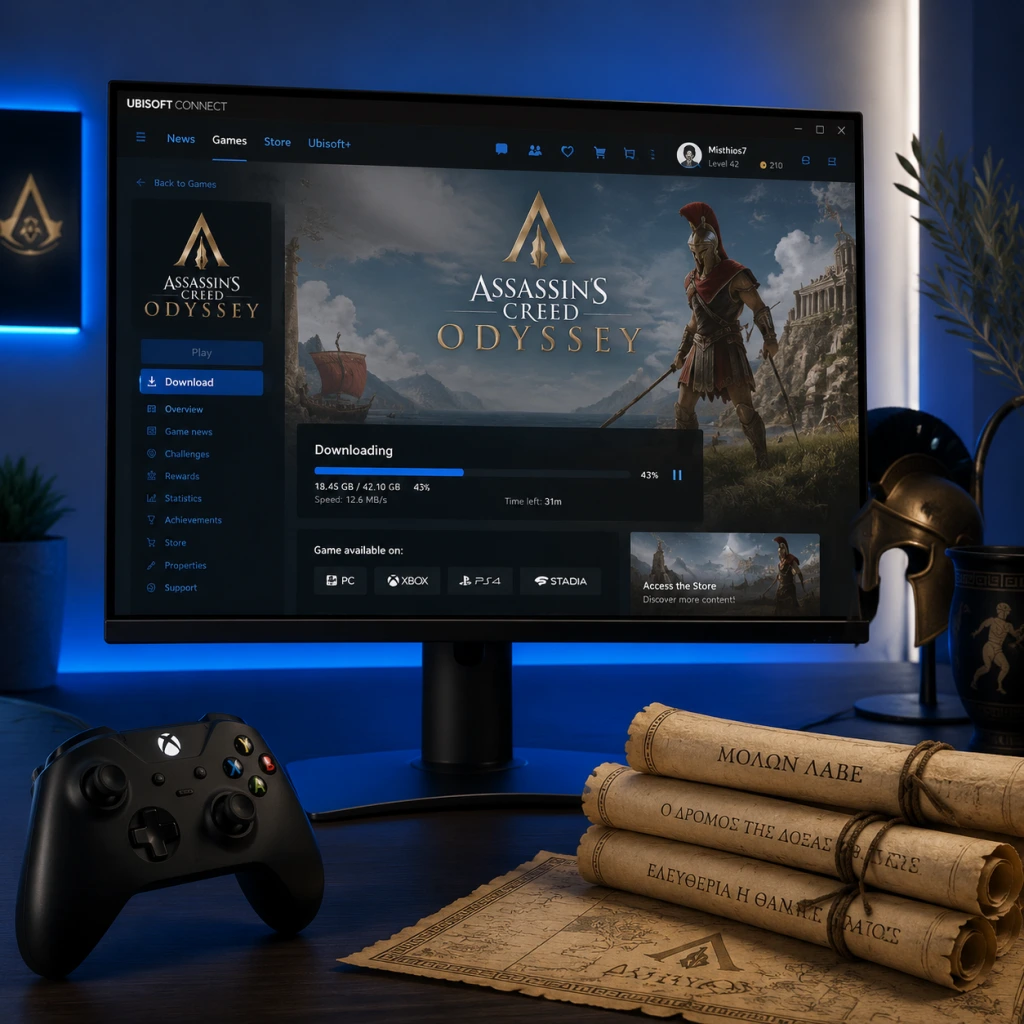
Download & Installation
Assassin's Creed Odyssey: Complete Download & Installation Guide
This guide covers all legitimate ways to download and install Assassin's Creed Odyssey across supported platforms. Follow the steps carefully to ensure a smooth installation and avoid common pitfalls.
---
Platform Overview
| Platform | Store / Source | Availability |
|---|---|---|
| PC | Steam, Epic Games Store, Ubisoft Connect (Uplay) | Full game |
| PlayStation 4 | PlayStation Store, physical disc | PS4 native; backward compatible on PS5 |
| PlayStation 5 | PlayStation Store (PS4 version via backwards compatibility) | Runs via BC |
| Xbox One | Microsoft Store, physical disc | Full game |
| Xbox Series X | S | Microsoft Store (optimized via backward compatibility + FPS Boost) |
| Nintendo Switch | Cloud streaming only (Japan exclusive via Ubisoft Connect) | Limited regions |
| Mobile | Not available | N/A |
System Requirements (PC)
Minimum Requirements (1080p, Low Settings, 30 FPS)
- OS: Windows 7 SP1, Windows 8.1, Windows 10 (64-bit)
- CPU: AMD FX-6300 @ 3.8 GHz or Intel Core i5-2400 @ 3.1 GHz (or better)
- RAM: 8 GB
- GPU: AMD Radeon R9 285 (2GB VRAM) or NVIDIA GeForce GTX 660 (2GB VRAM)
- DirectX: DirectX 11
- Storage: 46 GB available space (HDD recommended; SSD for faster loads)
- Sound: DirectX 9.0c compatible sound card
- OS: Windows 10 (64-bit)
- CPU: AMD FX-8350 @ 4.0 GHz or Intel Core i7-3770 @ 3.5 GHz
- RAM: 8 GB
- GPU: AMD Radeon R9 290 (4GB VRAM) or NVIDIA GeForce GTX 970 (4GB VRAM)
- DirectX: DirectX 11
- Storage: 46 GB SSD
- Sound: DirectX 9.0c compatible sound card
- Ubisoft Connect Account: Mandatory for all PC versions (Steam, Epic, Uplay) and optional for consoles (for cloud saves, achievements).
- Console Accounts: PlayStation Network (PSN) for PlayStation, Xbox Live for Xbox, Nintendo Account for Switch.
- Cross-platform save: Not supported. Saves are locked to the platform.
Recommended Requirements (1080p, High Settings, 30+ FPS)
> Note: For higher resolutions or frame rates (1440p/4K), you will need significantly more powerful hardware (e.g., RTX 2060 or RX 5700 XT and 16 GB RAM).
---
Step-by-Step Installation by Platform
PC – Steam
1. Install Steam Client: Download from [store.steampowered.com](https://store.steampowered.com) and log in (or create an account).
2. Purchase & Add to Library: Search for "Assassin's Creed Odyssey" → buy or redeem a key → click "Add to Library."
3. Install: Go to your Library → find the game → click "Install." Choose your installation path (ensure 46 GB free space).
4. Download & Play: Steam will download the game. After completion, click "Play." It will also install Ubisoft Connect launcher if not present.
PC – Epic Games Store
1. Install Epic Games Launcher: Download from [store.epicgames.com](https://store.epicgames.com) → install and log in.
2. Purchase & Library: Find "Assassin's Creed Odyssey" → buy or add free copy (if owned) → click "Get" or "Buy" → confirm.
3. Install: Go to Library → click game → "Install" → choose location (46 GB free).
4. Launch: After download, click "Launch." The game will start via Ubisoft Connect (installed automatically).
PC – Ubisoft Connect (Uplay)
1. Install Ubisoft Connect: Download from [ubisoftconnect.com](https://ubisoftconnect.com) → install and log in.
2. Redeem Key / Purchase: If you have a retail key, go to "Activate a product" → enter key. Or buy directly in the Store.
3. Install: Go to Games tab → find Odyssey → click "Download" → choose install folder (46 GB).
4. Play: Once download finishes, click "Play." No additional launcher needed.
PlayStation 4/5
1. Physical Disc: Insert disc → follow on-screen prompts to install. Ensure at least 46 GB free. Accept updates if prompted.
2. Digital (PlayStation Store): On PS4 or PS5 (via backward compatible) → go to PlayStation Store → search "Assassin's Creed Odyssey" → purchase → download from library.
3. Installation: The game installs automatically. On PS5, play the PS4 version; no native PS5 version exists.
4. Launch: After installation, start from the home screen.
Xbox One / Series X|S
1. Physical Disc: Insert disc → install from dashboard. Downloads may be required for updates.
2. Digital (Microsoft Store): From console → Microsoft Store → search → buy → select "Install to" (choose internal or external storage).
3. Storage: 46 GB required. On Series X|S, the game runs via backward compatibility with possible FPS Boost (enable in compatibility settings).
4. Launch: After download, launch from My Games & Apps.
Nintendo Switch (Cloud Streaming – Japan only)
1. Prerequisites: Stable high-speed internet (minimum 30 Mbps). Nintendo Switch Online membership required.
2. Region & Account: Must have a Japanese Nintendo eShop account (region set to Japan). Use a Japanese payment method or buy a digital code.
3. Download: Switch to Japanese eShop → search "Assassin's Creed Odyssey" → purchase → download the cloud streaming client (small app).
4. Play: Launch the app → stream the game. Note: Requires persistent internet connection; performance depends on your connection.
---
Account Requirements
---
First Launch Setup
1. Language & Region Settings: The game will detect your system language. You can change it in Options > Audio/Subtitle.
2. Graphics Options (PC): On first launch, the game offers a benchmark/auto-detect. Let it run for optimal settings. Adjust manually if needed.
3. Control Preferences: Customize keyboard/mouse or controller layout in Options > Controls.
4. Ubisoft Connect Overlay: If on PC, sign in to unlock achievements and cloud saves. You can disable overlay by pressing Shift+F2 and settings.
5. Difficulty Selection: Choose from Easy, Normal, Hard, or Nightmare. You can change later.
6. Story Mode vs. Exploration Mode: Select guided or exploration mode (no map markers).
---
Common Installation Errors & Fixes
| Error | Platform | Cause | Solution |
|---|---|---|---|
| "Insufficient Disk Space" | All | Not enough free space (46 GB required) | Free up space; check drive for temporary files. For PC, ensure OS drive also has space for updates. |
| "Game failed to install" | PC (Steam/Epic) | Corrupted download file | Verify game files: Steam → Properties → Local Files → Verify integrity. Epic → Options → Verify. |
| "Ubisoft Connect not installed" | PC | Missing launcher | Manually download and install Ubisoft Connect from ubisoftconnect.com. |
| "Can't launch – Xbox Live error" | Xbox | Account or service issue | Check Xbox Live status; sign out and back in. |
| "Network connection required" (Switch) | Switch | Cloud streaming | Ensure internet is stable; reboot router. |
| "Application error 0xc0000005" | PC | Memory or driver issue | Update GPU drivers; run as administrator; disable antivirus temporarily. |
| "Stuck at 99% download" | All | Background updater blocking | Restart launcher; pause and resume download. |
| "Access denied" / store registration | All | Region lock | Verify your account region matches store region (especially for Switch Japan). |
General Troubleshooting Steps
- Restart your device/console.
- Check for system updates (Windows, console firmware).
- On PC: Disable overlay programs (Discord, Steam Overlay) temporarily.
- Reboot router if downloads are slow.
- Reinstall the launcher (Steam, Epic, Uplay).
- Assassin's Creed Odyssey does not support cross-platform multiplayer or cooperative play; it is a single-player game.
- The game size is approximately 46 GB (may vary slightly with updates). Ensure you have at least 50 GB free to accommodate future patches.
- Voice languages: English, French, Italian, German, Spanish, Portuguese (Brazilian), Polish, Russian, Arabic, Japanese, Korean, Simplified Chinese, Traditional Chinese. Text languages vary.
- For optimal performance on PC, keep GPU drivers updated (NVIDIA GeForce Experience or AMD Adrenalin).
- If you encounter persistent crashes, disable third-party overlays and reduce graphics settings to High (not Ultra).
---
Post-Installation Verification
1. Check Version Number: From main menu → Settings → About. Ensure it is the latest (usually 1.5.x or later).
2. Run Benchmark (PC): Settings → Graphics → Benchmark. Compare results with expected performance.
3. Save Game: Start a new game or load a cloud save. Verify save function works (manual save in the pause menu).
4. Achievements: Check if Ubisoft Connect (or platform) achievements pop correctly (e.g., "Welcome to Greece").
5. Audio & Controls: Test sound, subtitles, controller input (if applicable).
6. Update: If the game does not launch or shows outdated content, manually check for updates (platform launcher → check for updates).
---
Final Notes
---
Guide last updated: October 2023. Game versions and store policies may change. Always refer to official support pages.
Game Introduction
Game Introduction
Overview
Assassin's Creed Odyssey is an action role-playing game developed by Ubisoft Quebec and published by Ubisoft. It was released on October 5, 2018, for Microsoft Windows, PlayStation 4, Xbox One, and later for Nintendo Switch (cloud version) and Stadia. It is the eleventh major installment in the Assassin's Creed series and the successor to 2017's Assassin's Creed Origins.
Genre
The game blends action-adventure, stealth, open-world exploration, and RPG elements. It features a vast, historically inspired world, branching dialogue, multiple endings, and deep customization.
Developer & Publisher
- Developer: Ubisoft Quebec (lead), with support from multiple Ubisoft studios.
- Publisher: Ubisoft.
- Worldwide release: October 5, 2018 (PC, PS4, Xbox One)
- Nintendo Switch (cloud version): October 5, 2018 (Japan), later in other regions.
- Google Stadia: November 19, 2019.
- Post-launch content: Multiple free updates and paid expansions released through 2019.
- Microsoft Windows (Steam, Uplay, Epic Games Store)
- PlayStation 4 (and PS4 Pro enhanced)
- Xbox One (and Xbox One X enhanced)
- Nintendo Switch (cloud streaming only)
- Google Stadia
- Also backward compatible on PlayStation 5 and Xbox Series X|S at up to 60 FPS.
- Alexios/Kassandra – The protagonist (spouse of the player’s choice; the other sibling becomes the antagonist Deimos).
- Deimos – The sibling corrupted by the Cult, serving as a primary antagonist.
- Myrrine – The mother of Alexios/Kassandra, a former Spartan queen.
- Nikolaos – The father figure, a Spartan general known as the Wolf of Sparta.
- Herodotos – A historian and friend who accompanies the player.
- Barnabas – A naval captain who provides the ship.
- Layla Hassan – Modern-day protagonist from the Assassin's Creed lore, researching memories using the Animus.
- Expansive open world with countless quests, including choices that affect the story’s outcome.
- Combat system blending melee, ranged, and Spartan kick maneuvers.
- Naval exploration and ship combat, reminiscent of Assassin's Creed IV.
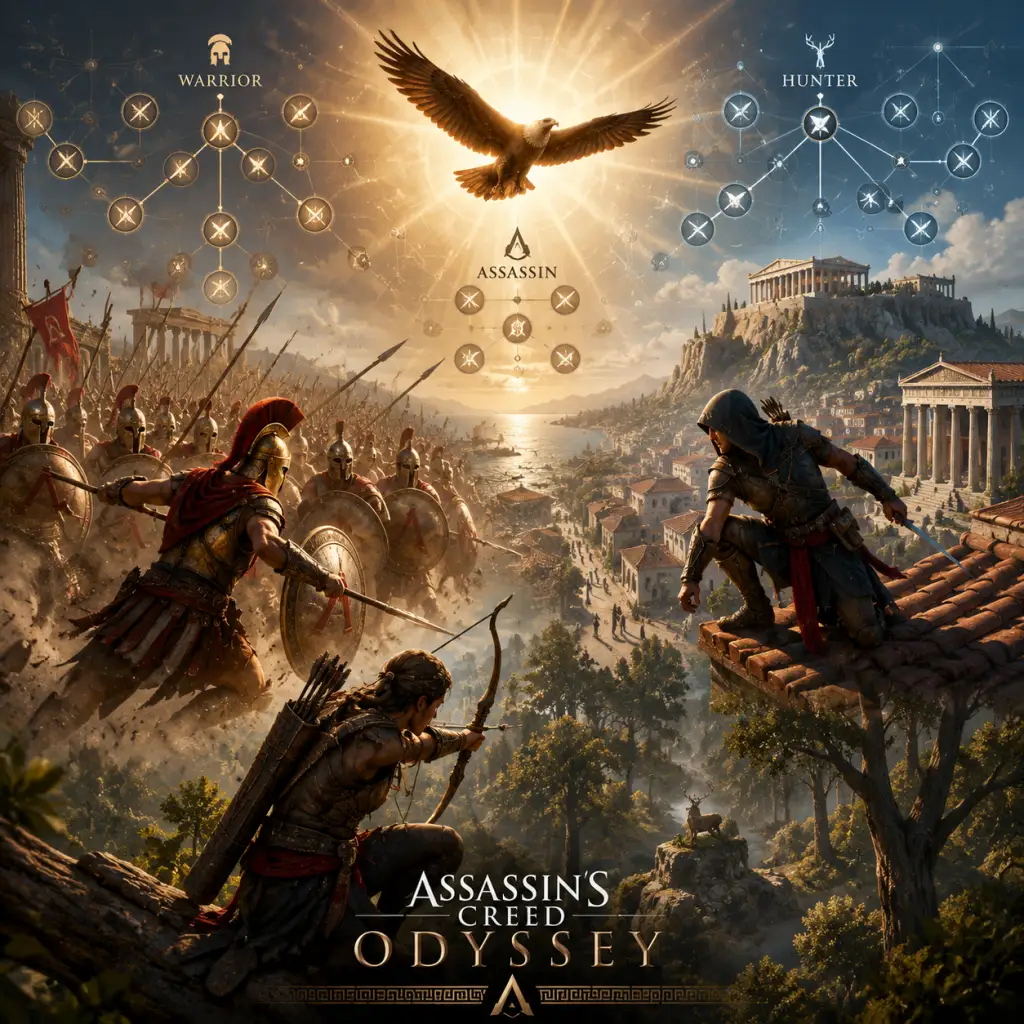
- RPG progression with skill trees (Hunter, Warrior, Assassin).
- Rich historical immersion with Greek mythology, culture, and landmarks.
- Fans of open-world RPGs and action-adventure games.
- History enthusiasts fascinated by ancient Greece.
- Players who enjoyed Assassin’s Creed Origins or The Witcher 3.
- Those who appreciate player choice and consequence.
- Single-player campaign (main story and side content).
- Discovery Tour – An educational mode that removes combat and allows free exploration with guided tours.
- New Game+ – Available after completing the main story.
- Endgame content – The Fate of Atlantis expansions, Lost Tales of Greece quests.
- Offline: Entire single-player campaign playable offline after initial installation.
- Online: Optional online features include updating leaderboards for certain challenges, accessing the Ubisoft Club, and using photo sharing.
- No mandatory online for single-player.
- Choice matters: Dialogue choices and actions lead to multiple endings, including character deaths and faction outcomes.
- Sibling dynamic: The player character’s sibling is the main antagonist, adding personal stakes.
- Historical accuracy meets mythology: While grounded in historical events, the game incorporates Greek myths (e.g., Medusa, Minotaur) as mythical creatures to fight.
- Naval combat returns: The Adrestia ship allows for sea battles and boarding.
- Open-world scale: One of the largest game worlds ever created, with over 100 hours of content.
- No hidden blade: Unlike other Assassin's Creed titles, the protagonist uses a rebuilt Spear of Leonidas as the primary weapon.
Release Timeline
Platforms
Story Overview
Set in 431 BCE during the Peloponnesian War, players choose to play as Alexios or Kassandra, a mercenary descended from the Spartan king Leonidas. The story follows their quest to reunite their fractured family while uncovering a mysterious order manipulating the war from the shadows—the Cult of Kosmos. Players also encounter the First Civilization artifact, the Staff of Hermes Trismegistus, and bridge into the modern-day storyline involving Layla Hassan.
Setting
The game is set in ancient Greece, featuring detailed recreations of Athens, Sparta, Corinth, Delphi, Crete, and many islands. The world is massive and vibrant, with dynamic weather, day-night cycles, and historical landmarks.
Main Characters
Core Appeal
Target Audience
Game Modes
Online/Offline Support
DLC / Expansion Overview
Three major paid expansions:
1. Legacy of the First Blade (episodic) – Explores the first hidden blade users in ancient Greece.
2. The Fate of Atlantis (episodic) – Dives into the mythical city and First Civilization lore.
3. Lost Tales of Greece (free episodic quests) – Extra storylines released post-launch.
Additionally, the game received several free updates including the Discovery Tour, new game plus, and level cap increases.
What Makes This Game Unique
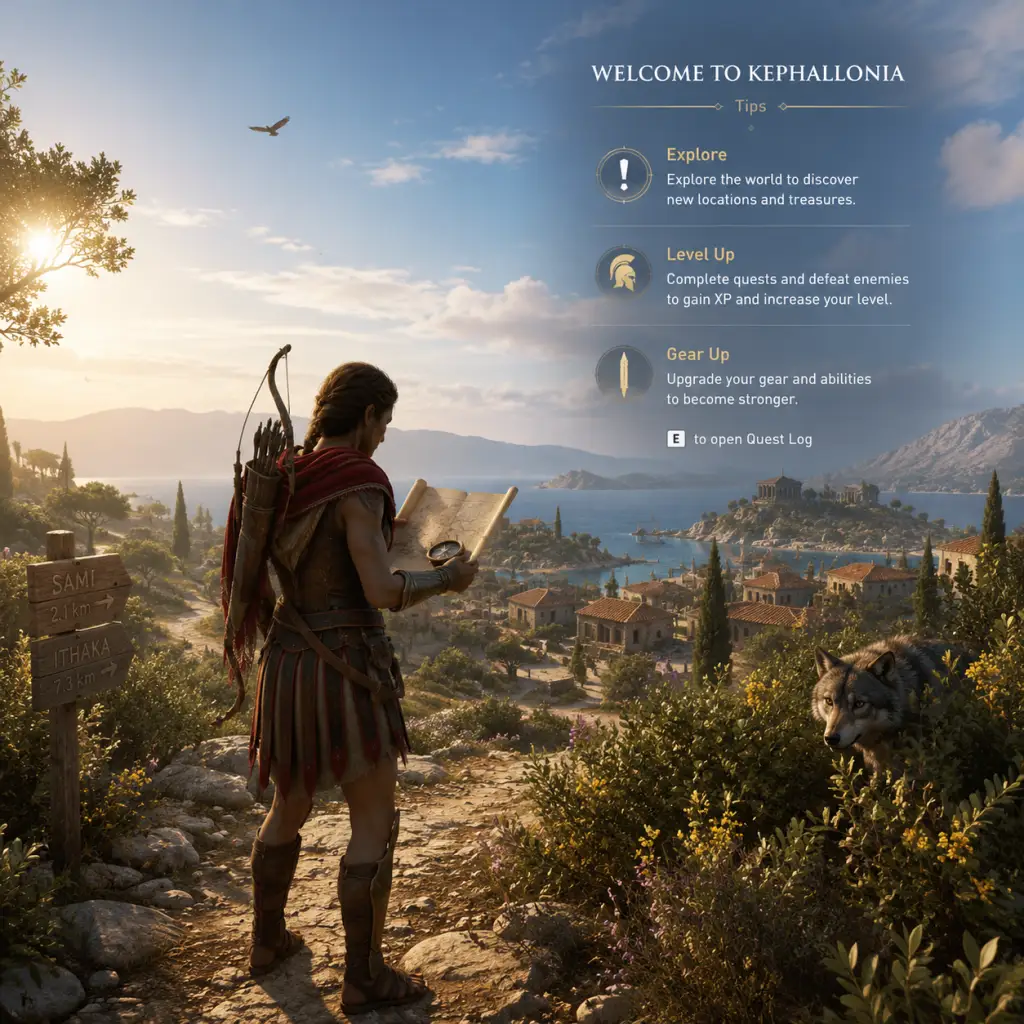
Getting Started
Getting Started
Welcome to Assassin's Creed Odyssey! This guide will help you survive your first few hours, avoid common pitfalls, and set you on a path to become a true Spartan warrior. We'll cover everything from character creation to your first day checklist.
Character Creation
At the very start you choose between Alexios and Kassandra. This choice determines the protagonist; the other sibling becomes a major antagonist. Both have the same gameplay and dialogue options, so pick whichever you prefer.
- Alexios: Male, slightly bulkier.
- Kassandra: Female, slightly more acrobatic animations.
After choosing, you make no further customization; the character's appearance is fixed.
First Hour Walkthrough
1. Prologue (The Battle of Thermopylae) – You control King Leonidas in a tutorial fight. Learn basic combat: light attack (square/X/A button), heavy attack (triangle/Y/B button), dodge (circle/B), and block/parry (L1/LB). After the battle, you get the Spear of Leonidas – your main artifact.
2. Kephallonia Island – You are now a young misthios (mercenary) named Alexios/Kassandra. Follow the main quest marker (yellow diamond) to meet Markos. Complete his quests: "Debt Collector" and "An Eye for an Eye". These teach you looting, assassination, and combat.
3. First Assassination – The cultist Kouris is marked. Use stealth: crouch (L3/left stick click), approach from behind, and press triangle/Y (or equivalent) to assassinate. This introduces the Adrestia (your ship) and the cult system.
4. Escape Kephallonia – After revealing your true identity, you must flee. Complete "The Big Break" quest to set sail with Barnabas. You’ll now control the Adrestia. Learn naval combat basics – ramming, javelins, and boarding.
5. Arrival in Megaris – Your first mainland region. The main quest "The Taxman Cometh" starts here. Meet Barnabas’s friend and get your first real foothold.
By the end of the first hour, you should be on the Adrestia heading to Megaris. If you explore too much on Kephallonia, you may take longer – that’s fine.
Controls (All Platforms)
#### PC (Keyboard + Mouse)
| Action | Key |
|---|---|
| Move | WASD |
| Light Attack / Confirm | Left Mouse Button |
| Heavy Attack | Right Mouse Button |
| Parry / Block | Q |
| Dodge | Space |
| Sprint | Shift |
| Crouch | Ctrl |
| Interact / Assassinate | E |
| Call Horse | X |
| Use Ability | 1,2,3,4 (or assign in menu) |
| Map | M |
| Inventory | I |
| Weapon Wheel (hold) | Tab |
| Action | Button |
|---|---|
| Move | Left Stick |
| Light Attack / Confirm | Square |
| Heavy Attack | Triangle |
| Parry / Block | L1 |
| Dodge | Circle |
| Sprint | R2 (hold) |
| Crouch | L3 (click) |
| Interact / Assassinate | Triangle (near enemy) or Square (loot) |
| Call Horse | Right on D-Pad |
| Use Ability | R1 + Face Button |
| Map | Touch Pad |
| Inventory | Options |
| Weapon Wheel (hold) | L2 |
| Action | Button |
|---|---|
| Move | Left Stick |
| Light Attack / Confirm | X |
| Heavy Attack | Y |
| Parry / Block | LB |
| Dodge | B |
| Sprint | RT (hold) |
| Crouch | L3 (click) |
| Interact / Assassinate | Y (near enemy) or X (loot) |
| Call Horse | Right on D-Pad |
| Use Ability | RB + Face Button |
| Map | View Button (two squares) |
| Inventory | Menu Button (three lines) |
| Weapon Wheel (hold) | LT |
UI Overview
- Health Bar: Top-left (green line). Red damage numbers appear.
- Adrenaline Segments: Below health – up to 3 segments (gain by attacking). Used for powerful abilities.
- Quest Tracker: Right side – shows current objectives. Yellow diamond = main, white = side, blue = world event.
- Minimap: Top-right corner. Shows nearby points of interest, enemies (red dots), and quest markers.
- Compass: Above minimap – cardinal directions and far quest markers.
- Resource Counter: Bottom – Drachmae (money), wood, leather, iron, etc.
- Level & XP Bar: Center bottom – shows current level and progress to next.
- Ability Wheel: Hold L2/LT/Tab to choose equipped abilities.
- Follow the main story until you reach Megaris (region just past Kephallonia).
- Complete at least one side quest per region to level up.
- Sync every Viewpoint you see.
- Loot everything – wood, leather, iron are abundant but needed for upgrades.
- Kill the first mercenary that finds you (they drop gear).
- Selling valuable materials – You’ll need wood for ship upgrades and leather/iron for gear upgrades. Break down unwanted gear instead of selling it.
- Fighting mercenaries above your level – They will destroy you. If pursued, run away or pay the bounty.
- Ignoring the ship – Upgrade the Adrestia early (hull, ram, storage). It helps with fast travel and naval battles.
- Over-leveling gear – Only upgrade gear that you’ll use for 5+ levels. Use resources to upgrade the spear instead.
- Wasting Drachmae on cosmetics or expensive horses – Save money for ship upgrades and legendary gear from blacksmiths.
- Drachaem (Gold): Spend on ship upgrades (first priority), then on upgrading the spear, then on good weapons from blacksmiths.
- Wood: Crucial for ship upgrades (hull, ram). Prioritize looting warships and breaking down wooden furniture in houses.
- Leather: Needed for armor upgrades. Skim animals (boars, deer, wolves) and loot human enemies.
- Iron: Used for weapon upgrades. Mine iron deposits (blue rock veins) and loot chests in forts.
- Ancient Tablets: Rare – found in forts and military camps. Use them to upgrade the Spear of Leonidas at any forge.
- [ ] Complete the prologue and choose your sibling (Alexios or Kassandra).
- [ ] Finish all quests on Kephallonia (including side quests from locals).
- [ ] Synchronize the Viewpoint in Kephallonia (top of Zeus statue).
- [ ] Defeat the first mercenary (Bounties trigger after killing civilians – avoid civilian kills).
- [ ] Get the Adrestia and sail to Megaris.
- [ ] In Megaris, meet Barnabas’s contact and start the main quest.
- [ ] Sync at least two Viewpoints on Megaris.
- [ ] Loot 5 chests and 10 resources (wood/leather/iron).
- [ ] Upgrade your spear of Leonidas once (find a forge in Megaris – near the big military camp).
- [ ] Equip a full set of armor (doesn't matter rarity – just fill slots).
- [ ] Save the game manually (Pause → Save) before taking on any fort or ship battle.
- [ ] Explore your first region (Megaris) for side quests – accept a few from locals.
- [ ] If you find a blacksmith, sell any broken weapons you don't need (keep good ones).
- [ ] End your first session after reaching level 3-4 and having completed at least two main quests.
Essential Early Objectives
1. Complete the Kephallonia quests – Do not skip. They teach core mechanics.
2. Get the Adrestia – Your ship unlocks fast travel between regions and naval gameplay.
3. Sync Viewpoints – Climb high spots (white icon) and synchronize to reveal the map and unlock fast travel points.
4. Start the Cultist Hunt – After meeting Barnabas, you get the first cultist clue. Investigate when you can.
5. Visit a Blacksmith – Buy/kill for better gear. Focus on weapons with engravings that suit your playstyle.
6. Upgrade the Spear of Leonidas – This unlocks more ability slots. Find Ancient Tablets (in forts) to upgrade.
What to Do First and What to Avoid
#### Do First:
#### Avoid:
Early Resource Priorities
Common Beginner Mistakes
1. Trying to fight too many enemies at once – Use assassination and stealth to thin the herd. Tag enemies with Ikaros (eagle) before engaging.
2. Ignoring Ikaros – Scout every location first. Press right stick (click) or equivalent to send Ikaros to mark enemies, treasures, and objectives.
3. Not fast traveling – Once you synchronize a Viewpoint, you can fast travel to it from the map. Press M/Map and hold Square/X to confirm.
4. Neglecting ship lieutenants – Recruit mercenaries and named NPCs (knock out rather than kill) to assign them as lieutenants – they boost ship stats.
5. Skipping side quests – They provide XP, gear, and story context. The game expects you to do some to stay on-level.
6. Using only one type of weapon – Experiment with swords, spears, heavy blades, and daggers. Each has different combos and reach.
7. Forgetting to use abilities – Early abilities like Spartan Kick (R1 + Circle/L1+B) can knock enemies off cliffs, saving you a fight.
Day-One Checklist
By following this guide, you’ll avoid frustration and build a strong foundation for the 100+ hour journey ahead. Good luck, misthios!
Core Gameplay
Core Gameplay
Assassin's Creed Odyssey blends action-RPG mechanics with open-world exploration, offering three distinct difficulty modes (Easy, Normal, Hard) and a New Game+ after the main story. The core gameplay loop revolves around completing quests, exploring regions, developing your mercenary (misthios), and making choices that shape the world. Below is a progression-tier guide covering all key systems.
Main Gameplay Loop
1. Accept Contracts & Quests from town boards, NPCs, or the Family/main questline.
2. Travel on foot, horseback (Phobos), or by ship (Adrestia) to objectives.
3. Engage in combat, stealth, or dialogue choices.
4. Loot equipment, resources, drachmae, and XP.
5. Upgrade gear, abilities, ship, and your character.
6. Repeat, with increasing difficulty and branching narratives.
Combat & Interaction Systems
- Melee Combat: Light/heavy attacks, dodging, parrying (timed block), and powerful overpower attacks (charged heavy). Weapon types include swords, daggers, spears, heavy blades, blunt weapons, and staffs.
- Ranged Combat: Bow with three arrow types: normal, fire (sets enemies ablaze), and poison (damage over time). Use slow-motion ability while mid-air (Eagle Bearer's ability).
- Stealth: Crouch in grass, whistle to lure enemies, assassinate from behind (one-hit kills based on level). Critical Assassination uses adrenaline segments for guaranteed kill on elites.
- Spear of Leonidas Abilities: Regenerating adrenaline segments allow special moves like Sparta Kick, Shield Breaker, Hero Strike, and Area-of-effect attacks. Unlock more via ability points.
- Ship Combat: Ram, fire javelins, and brace against enemy ships. Boarding crew fights reward extra resources.
- Conquest Battles: Large-scale battles between Athens and Sparta. Choose a side, kill enough soldiers, then defeat the faction leader. Affects region control.
- Dialogue Wheel: Choices influence quest outcomes, alliance with factions, and romance options. Some choices lock you into specific story branches.
- Levels: XP from quests, kills, exploration discoveries. Each level gives 1 ability point and small attribute boosts.
- Ability Points: Spend in three trees – Warrior (melee damage, tanky), Hunter (bow damage, ranged utility), Assassin (stealth kills, movement speed). Each tree has 20+ abilities; you unlock higher tiers by mastering previous ones.
- Mastery Levels: After level 50, earn Mastery Points (indefinite) to improve stats in small increments (e.g., +0.5% warrior damage per point).
- Engraving: Apply buffs to gear (melee damage, health, critical chance) at a blacksmith. Blacksmiths also sell and upgrade items.
- Ship Upgrades: Hull, ram, javelins, arrows, crew, and lieutenants (recruited via knockout or persuasion). Each tier increases ship stats.
- Tier of Mercenaries: Earn bounties and climb the mercenary ranks (S1–S4, then Tiers 1–9). Higher tiers reward gear, drachmae, and bonuses. Cultist clues also unlock during this.
- Synchronization Points: Climb high locations (statues, towers, cliffs) to reveal the map, fast travel points, and quest locations.
- Region Discovery: Each area has a recommended level range (e.g., Megaris level 8–12). Entering too high-level zones is deadly.
- Question Marks: Randomized points of interest – forts, caves, ruins, tombs (which provide Ancient Tablets for ship upgrades).
- Treasure Hunts: Follow clues to buried loot; often guarded by animals or soldiers.
- Ainigmata Ostraka: Solve riddles to find hidden engravings for special gear.
- Sync with Ikaros: Your eagle scouts enemies, marks resources, and reveals quest objectives from above.
- Main Story Quests: Family (Odyssey), Cult of Kosmos, and Atlantis arcs. Golden icon.
- Side Quests: Silver icon. Many impact smaller regional stories and give unique gear or XP.
- Contracts: Daily/Weekly from message boards. Repeatable for extra drachmae and XP.
- Bounties: Hunt mercenaries (white marker) or be hunted by them. Killing them raises your bounty level, attracting elite hunters.
- Lost Tales of Greece: Free episodic quests (install separately) with substantial stories and rewards.
- World Events: Spontaneous encounters like a warrior challenge, bandit ambush, or animal attack.
- Drachmae: Primary currency from loot, selling items, completing quests, and naval cargo. Used for upgrading gear, buying resources, paying bounties, and bribing.
- Resources: Wood, stone, metal, hides, obsidian, and gems. Needed for ship upgrades, crafting, and upgrading weapons/armor.
- Olive Wood, Iron, Leather: Basic resources from looting chests, bodies, and breaking down unwanted gear.
- Orichalcum: Special currency from daily/weekly quests and some mercenary tiers. Spent at Oikos of the Olympians for rare legendary gear and items.
- Selling vs Breaking Down: Sell unwanted blue/purple gear for drachmae; break down green/white gear for materials. Unlock engravings by breaking down certain items.
- Black Market: Some merchants offer rare items or temporary stat boosts.
- Archetypes: Pure warrior (engravings for melee dmg + armor), assassin (stealth damage + crit from behind), hunter (bow damage + ranged adrenaline), or hybrid (split points across two trees).
- Legendary Gear: Sets with complete bonuses (e.g., "Pirate Set" for assassin). Mix sets from Cultists, Mercenaries, and story quests.
- Engravings: Prioritize damage, crit chance, crit damage, health, and specific weapon damage. Balance per build.
- Ability Loadouts: Save up to 7 abilities for quick use. Swap between melee and ranged. Examples: Hero Strike (assassin), Spartan Kick (warrior), Spread Shot (hunter).
- Mastery Points: After level 50, invest in key stats: e.g., +5% crit damage per point, or +1% armor penetration.
- Ship Lieutenants: Recruited NPCs provide passive buffs (e.g., more ship HP, faster rowing). Legendary lieutenants from cultist kills.
- Focus: Tutorial island (Kephallonia), then Megaris and Phokis. Learn basic combat, stealth, and ship controls.
- Objectives: Complete Odyssey quest "The Wolf" and meet key characters. Liberate or conquer Megaris for first faction gear. Upgrade Spear of Leonidas to unlock first ability tier.
- Combat Tips: Use overpower attacks (heavy+heavy) early; they stun normal enemies. Practice parrying with shields (red flash). Use Sparta Kick to knock enemies off cliffs.
- Build Recommendation: Put first 5–6 points into Warrior abilities (especially Shield Breaker and Second Wind). Use a sword and wooden shield for balanced stats.
- Economy: Loot every chest in Kephallonia. Sell bows you don't use. Buy the Phobos mount as soon as you can (costs 500 drachmae in starting area).
- Exploration: Synchronize viewpoints in Kephallonia and Megaris. Avoid high-level areas (e.g., Attika until level 10+).
- Example Mission: "The Wolf's Lair" – a main quest where you infiltrate a fort; use stealth or brute force. Loot the treasure room for early legendary gear.
- Focus: Main story branches (Family, Cultists, Atlantis). Explore northern Greece (Attika, Lakonia, Argolis). Unlock second tier of abilities.
- Objectives: Defeat the first Cultist branch, recruit lieutenants, upgrade the Adrestia to at least Tier III hull/ram. Complete regional quests for legendary gear sets (e.g., Pilgrim Set from Naxos).
- Combat Tips: Use Hero Strike (assassin) on heavy soldiers. Unlock Chain Assassination (knife icon) to kill two nearby enemies in stealth. Parry becomes essential against mercenaries.
- Build Recommendation: Specialize. If going assassin, invest in Shadow of Nyx (invisibility) and Critical Assassination. For warrior, get Battlecry of Ares (invulnerability). Spread points to get one move from each tree for utility.
- Economy: Start breaking down green gear for materials. Use Drachmae mostly for ship upgrades and purchasing rare ingots for equipment upgrades. Sell purple gear you don't need; keep legendary items.
- Exploration: Fast travel between major cities. Complete Ainigmata Ostraka riddles (e.g., "A Ship in a Storm" in Attika) for special engravings. Discover tombs for Ancient Tablets (especially the one under the Temple of Poseidon at Sounion).
- Example Mission: "The Serpent's Lair" – a Cultist hunt via clues; culminates in a boss fight against a high-level mercenary. Use the environment for fire arrows and traps.
- Focus: Finish Family Odyssey, eliminate all Cultists, and complete Atlantis questline. Reach Level 50 to unlock Mastery system.
- Objectives: Defeat the final Cultist (Ghost), choose your ending (family, rule, etc.). Complete the four legendary beast hunts (e.g., Erymanthian Boar). Acquire full Legendary sets (e.g., "Arena Fighter" Set from completing the Arena).
- Combat Tips: Max out one ability tree. Use engravings like "+30% damage on full health" for assassins, or "+50% crit damage at low health" for tanky warriors. The ability "Slow Time" from Atlantis upgrades makes boss fights easier.
- Build Recommendation: Optimize engravings. For example, Warrior build: Battlecry of Ares + Shield Breaker + Ring of Chaos + Health restoration on hit. Engrave melee damage + crit chance. Assassin: Critical Assassination + Shadow of Nyx + Hero Strike + Vanish.
- Economy: Orichalcum becomes valuable; buy weekly legendary items from Oikos. Craft legendary gear upgrades using expensive resources from defeated mercenaries. Blacksmiths can sell you rare engravings.
- Exploration: Uncover all regions. Some areas require high-level abilities (e.g., underwater currents require Poseidon's Trident?). Complete the four mythical creature fights (Minotaur, Medusa, etc.) for special items.
- Example Mission: The Cultist Branch – "The Tempest" – a multi-ship naval battle against a fleet of Athenian ships. Use fire javelins and boarding crew to capture the flagship.
- Focus: Mastery levels, New Game+, and DLCs (Legacy of the First Blade, The Fate of Atlantis). Complete all Lost Tales of Greece. Climb to Mercenary Tier 1.
- Objectives: Reach Mastery Level 100+ (150 max base, but infinite via Mythical creatures?). Conquer all regions for Sparta or Athens (region conquests reset). Hunt legendary animals for rewards from Artemis's Daughters questline. Fully upgrade the Adrestia (Tier IV).
- Combat Tips: Mastery points allow tiny stat boosts. Use multiple ability loadouts (up to 5 saved sets). For ship combat, have full legendary crew and max javelins. For on-foot, use a hybrid build that can adapt.
- Build Recommendation: Go for 100% crit chance at full health (assassin) or 50% damage reduction at low health (warrior). Invest Mastery in all three trees for balance. For pure fun, try a poison/fire hybrid (engrave both status chancels).
- Economy: Drachmae is abundant; buy resources to upgrade every piece of legendary gear to max level (99 in New Game+). Orichalcum still used for rare cosmetics. Chests in forts respawn after region conquest.
- Exploration: No new regions, but Discovery Tour mode offers historical tours. New Game+ carries over gear and abilities; enemies scale to your level. DLCs add areas like Atlantis (Underworld).
- Example Activity: Daily Mercenary Bounty – Kill a Tier 1 mercenary in a region. Use the Arena for combat challenges. Complete weekly Orichalcum quests from the message boards.
Progression Systems
Exploration
Quests & Missions
Economy
Character & Build Growth
Progression Tiers
Early Game (Levels 1–15)
Mid Game (Levels 16–35)
Late Game (Levels 36–50)
Endgame (Level 50+, Mastery Levels)
---
This guide covers all core gameplay elements of Assassin's Creed Odyssey. Adapt strategies based on your preferred playstyle and difficulty. Remember that choices carry weight, and experimenting with abilities leads to the most rewarding experience.
Game Tips
Combat Tips
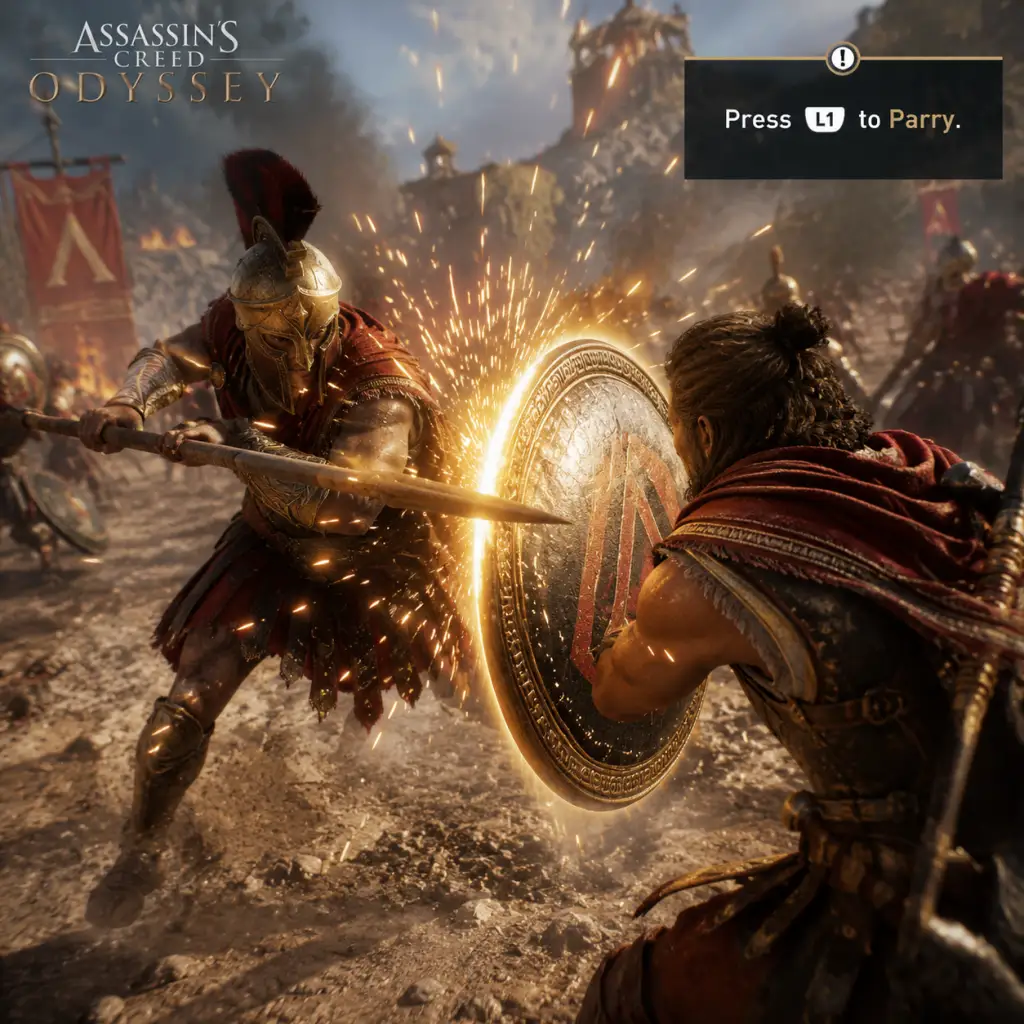
Learn to Parry (L1/LB)
- Explanation: Tap L1/LB just before an enemy's attack lands to parry, stunning them and leaving them open for a powerful counterattack.
- Why it works: Parrying breaks enemy combos, prevents damage, and creates a window for Hero Strike or a heavy attack. It's essential against tough enemies like mercenaries and polemarchs.
- When to use: Against any enemy with telegraphed attacks; avoid against large groups where dodging is safer.
- Explanation: Dodge (circle/B) has invincibility frames (i-frames) that let you evade all damage even if the attack animation touches you.
- Why it works: Perfect dodges slow down time, allowing free hits. crucial for avoiding unblockable attacks (red glow).
- When to use: Always vs. red-glint attacks; use to reposition in crowded fights.
- Explanation: Hold the ability button to unleash an Overpower attack, dealing massive damage at the cost of one adrenaline segment.
- Why it works: Overpower attacks can stagger enemies and deal significant burst damage, especially with single-target abilities like Overpower Bow Shot or Overpower Shield Bash.
- When to use: When you need to quickly eliminate a priority target or break an enemy's guard.
- Explanation: Kick enemies (press square/X while sprinting or with ability) to send them flying backward.
- Why it works: Instantly kills any enemy thrown off a cliff, mountain, or ship. Also interrupts attacks and creates space.
- When to use: Near any edge or while fighting on fortress walls; also useful to knock enemies into fire pits.
- Explanation: Apply fire or poison to your weapon (via abilities or perks) to add a damage-over-time (DoT) effect.
- Why it works: DoT ignores armor and continues draining health even when you're not attacking. Fire spreads between enemies; poison reduces their damage output.
- When to use: For crowd control or against heavily armored foes. Fire is great for area denial; poison for sustained single-target pressure.
- Explanation: Use Ring of Chaos (warrior tree) to knock back surrounding enemies, or Hero Strike (assassin tree) to deal huge damage to a single target while making you briefly invulnerable.
- Why it works: These abilities give you breathing room in tight spots. Ring of Chaos clears space; Hero Strike is a godsend against mercenaries who won't flinch.
- When to use: Ring of Chaos when surrounded; Hero Strike vs. elites or when you need a quick burst during cooldowns.
- Explanation: Climb high points and synchronize to reveal a large portion of the map and unlock fast travel points.
- Why it works: Fast travel saves enormous time; viewing the map from above reveals nearby points of interest.
- When to use: Whenever you reach a new region; prioritize viewpoints over questing.
- Explanation: Send Ikaros (eagle) to fly over areas. Tag enemies, treasures, quest items, and elite enemies.
- Why it works: Knowing enemy positions lets you plan stealth approaches or avoid unnecessary fights. Tagging also helps you track targets.
- When to use: Before entering any fort, camp, or city. Also use in open fields to spot animal packs.
- Explanation: Main roads often lead to towns, quest givers, and interesting locations. Off-road paths sometimes lead to hidden caves or ruins.
- Why it works: The game's world is historically accurate; following roads ensures you don't miss key locations.
- When to use: When travelling between regions without a specific quest marker.
- Explanation: Swim at shipwrecks or underwater caves to find chests with gear and resources. Watch for sharks (they attack on sight).
- Why it works: Underwater loot is often high-quality or contains unique engravings. sharks can be killed with a few spear throws.
- When to use: When you see a submerged location on the map; bring a ranged weapon for sharks.
- Explanation: Sprinting up mountains drains stamina quickly. Use ledges, small bushes, or t instead climb diagonally to conserve stamina.
- Why it works: If stamina depletes you fall, taking damage. Slower climbing prevents falls.
- When to use: For any vertical climb longer than 20 meters.
- Explanation: Pick up all weapons and armor from enemies, chests, and bodies. Even common items can be sold for drachmae.
- Why it works: Early game money is tight; selling junk funds gear upgrades and ship improvements.
- When to use: For the first 20 levels, loot everything. Later you can be more selective.
- Explanation: Upgrade weapons and armor only at every 10 levels (e.g., level 20, 30, 40) because upgrade costs scale with level difference.
- Why it works: Upgrading every 2-3 levels is wasteful; waiting 10 levels gives you a big power spike while keeping costs predictable.
- When to use: When you have a piece of gear with perfect engravings for your build. Sell or dismantle the rest.
- Explanation: Use your ship to ram and destroy enemy ships for wood, or sail near coastlines to collect floating crates.
- Why it works: Ship upgrades require large amounts of wood and iron. Naval combat is the fastest way to gather these.
- When to use: Whenever you need to improve the Adrestia (ship) for story progression.
- Explanation: Visit blacksmiths to engrave legendary perks onto your gear. You can also remove engravings for a fee.
- Why it works: Engravings stack with gear stats, allowing powerful synergies (e.g., +50% crit damage).
- When to use: Once you've settled on a build (around level 30+), invest in engravings that complement your playstyle.
- Explanation: The game has three skill trees: Warrior, Assassin, Hunter. Focus on one to maximize damage output.
- Why it works: Spreading points thin dilutes effectiveness. A specialized build deals significantly more damage than a hybrid.
- When to use: Decide before level 20. Warrior for brawling, Assassin for stealth, Hunter for ranged. Respec later if desired.
- Explanation: Unlock Second Wind (heal and remove fire/poison), Spartan Kick, and Hero Strike as soon as possible.
- Why it works: Second Wind is a lifesaver; Kick is versatile; Hero Strike is the best assassin damage.
- When to use: These abilities should be in your active loadout from level 1-30.
- Explanation: Visit a mercenary ship or any town to reset all ability points for a few thousand drachmae.
- Why it works: Mistakes in early builds aren't permanent. Experiment freely.
- When to use: Whenever you feel your build isn't working or you want to try a new playstyle.
- Explanation: Some gear sets (e.g., Pilgrim Set for invisibility, Demigod Set for warrior) grant powerful set bonuses.
- Why it works: Set bonuses often define a build: Pilgrim Set makes you permanently invisible while crouched; Demigod Set boosts all damage.
- When to use: Aim to complete one full set before mixing pieces. Use set bonuses in conjunction with engravings.
- Explanation: Killing mercenaries raises your mercenary tier, unlocking discounts at blacksmiths, better bounties, and gear rewards.
- Why it works: Higher tiers give 5% discount per tier (up to 20%), reducing upgrade costs dramatically.
- When to use: Actively hunt mercenaries (especially those near your level) to climb tiers. Use bounties to lure them out.
- Explanation: Participate in conquest battles (available after weakening a nation by killing leaders, burning supplies, etc.) for huge XP and epic gear.
- Why it works: Conquest battles are repeatable and give high-tier loot even at low levels.
- When to use: Before leveling up to bridge a gap; also to farm legendary weapons.
- Explanation: Message board bounties (animal kills, ship sinking, etc.) are easy and reward XP and drachmae.
- Why it works: They often stack with other activities, giving bonus rewards for things you'd do anyway.
- When to use: Always pick up bounties before exploring or going to a new region.
- Explanation: Early game sell everything for money. Later, dismantle epic/rare duplicates for resources (wood, leather, iron, obsidian glass).
- Why it works: Money is scarce early; resources become scarce later when upgrading legendary gear.
- When to use: Sell all common/uncommon until level 30. After that, dismantle duplicates and sell only if you need cash.
- Explanation: Pause and enter photo mode to get an overhead view of an area. It also shows enemy positions if you angle correctly.
- Why it works: Photo mode has no restrictions and can reveal hidden locations or enemies behind walls.
- When to use: When you suspect a hidden path or want to check a fortress before entering.
- Explanation: In settings, set exploration mode to "high" to rely on quest descriptions and road signs instead of markers.
- Why it works: Mode forces you to engage with the world, leading to organic discoveries and side quests. It's more immersive.
- When to use: For a truly immersive playthrough; if you get lost, switch back to guided mode anytime.
- Explanation: Main story quests give fixed XP; side quests offer large XP rewards and unique gear/engravings.
- Why it works: Many side quests are part of character arcs (e.g., the Lost Tales of Greece) and provide lore. XP is crucial for leveling.
- When to use: Always accept side quests; complete them before main missions to stay on-level.
- Explanation: The Adrestia can fast travel between towns and synchronize points near coasts.
- Why it works: When land fast travel is far away, sailing is quicker than riding across the entire island.
- When to use: When traveling between different islands or across large bodies of water.
- Explanation: Stack crit chance engravings (up to 25%) and crit damage engravings (up to 100%). Combine with the Sword of Damokles for massive critical hits.
- Why it works: With high crit chance, almost every hit is a crit. Damage multiplies by 3-4x. This is the highest DPS build.
- When to use: Once you have access to legendary engravings (level 35+). Use it for conquest battles and mercenary killing.
- Explanation: The Falx of Olympos engraving reduces health by 75% but increases all damage by 100%.
- Why it works: With such high damage, you can one-shot most enemies. Combined with Second Wind and dodge master, survivability is manageable.
- When to use: For experienced players who never get hit. Avoid if you take damage often.
- Explanation: Practice parrying repeatedly at the moment of an enemy's swing. Perfect parries grant a longer stun window and a temporary damage buff.
- Why it works: This is the skill ceiling for combat; it allows you to chain enemy assassinations even in open combat.
- When to use: Against solo mercenaries or in high-level arenas. Use the training area at Phokis to practice.
- Explanation: Use abilities that generate adrenaline (e.g., Shield Bash restores adrenaline). Pair with gear that reduces adrenaline cost.
- Why it works: If you can generate adrenaline faster than you spend it, you can spam abilities endlessly.
- When to use: For builds centered around Hero Strike or Overpower shots. Requires specific gear and skill investment.
- Explanation: Equip gear that boosts fire/poison damage and duration. Then use one element exclusively.
- Why it works: Elemental effects stack powerfully; a fully specced fire build can burn even legendary beasts.
- When to use: Against mythical creatures or large groups. Pair with the Prometheus's Sika sword for extra fire damage.
Master Dodging
Overpower Abilities
Sparta Kick (Offensively & Utilitively)
Fire and Poison Damage Over Time
Crowd Control Abilities
Exploration Tips
Synchronize All Viewpoints
Use Ikaros to Scout
Follow Roads for Discoveries
Underwater Loot
Mountaineering Stamina Management
Resources & Crafting
Loot Everything Initially
Upgrade Gear Strategically
Ship Material Gathering
Engraving System
Builds & Abilities
Choose a Primary Damage Path
Must-Have Abilities Early
Respeccing is Cheap
Legendary Gear Sets
Economy & Mercenary System
Mercenary Tiers
Conquest Battles
Accept All Bounties
Sell vs. Dismantle
General Tips
Use Photo Mode as a Scout
Enable Exploration Mode for Full Experience
Side Quests are Not Optional
Use the Ship for Fast Travel (Sea)
Advanced Optimizations
Crit Chance / Crit Damage Build
Falx of Olympos Mastery
Perfect Parry Timing
Adrenaline Management for Infinite Abilities
Elemental Immersion
Game Settings
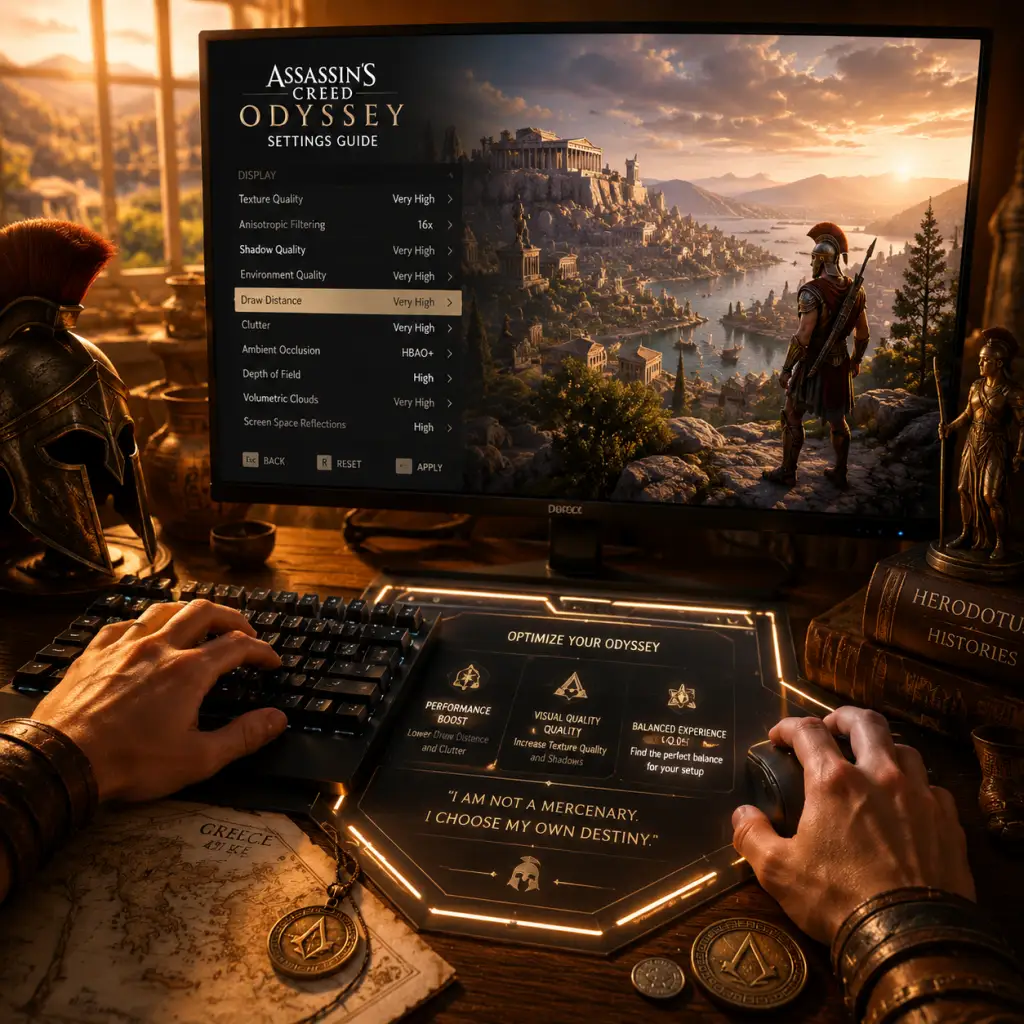
Assassin's Creed Odyssey: Complete Game Settings Guide
Properly configuring your settings in Assassin's Creed Odyssey can drastically improve performance, visual quality, and overall enjoyment. This guide covers every settings category: Graphics, Audio, Controls, Accessibility, Language, Network, and Gameplay. Whether you're on a low-end PC or a high-end rig, we'll help you find the best balance.
---
Graphics Settings
The graphics menu includes presets (Low, Medium, High, Ultra, Custom) as well as individual toggles. These settings have the largest impact on performance and image quality.
Resolution & Display
- Resolution: Set to your monitor's native resolution (e.g., 1920x1080). Lowering this improves performance but reduces sharpness.
- Display Mode: Fullscreen (best performance), Windowed, or Borderless. Fullscreen recommended for exclusive access to GPU.
- Resolution Scale: Range 50-200%. Above 100% (supersampling) looks sharper but hits performance hard. Use only on extreme hardware. On low-end, drop to 90% for a small FPS boost with minimal quality loss.
- V-Sync: Off (reduces input lag but may cause screen tearing), On (capped to monitor refresh rate, may add input lag), or Adaptive (syncs only when FPS exceeds refresh rate). Easy to misconfigure: Adaptive is often best; if you have a G-Sync/FreeSync monitor, set V-Sync to Off in-game and enable it in driver settings.
- Frame Rate Limit: Cap FPS to your monitor's refresh rate (e.g., 60, 144) to avoid tearing and reduce GPU load. Set to Off only if you want uncapped FPS.
- Field of View (FOV): Slider from 85 to 115 (vertical degrees). Higher FOV shows more periphery but can reduce performance and cause fisheye distortion. Recommended: 100-105 for a good balance. Tricky: Some players miss this slider; a higher FOV is vital for seasick-prone players.
- Low: For very old hardware (e.g., GTX 960, 2GB VRAM). Expect blurry textures, shadows, and 30-45 FPS.
- Medium: Mid-range (GTX 1060, 4GB VRAM). 45-60 FPS at 1080p.
- High: Recommended for RTX 2060/3060 and up. 60+ FPS at 1080p.
- Ultra: Requires RTX 3080/4080 for 60+ FPS at 1440p. Upscales well to 4K with some compromises.
- Custom: Tweak individual settings (see table below).
Quality Presets
If you don't want to tweak individually, use a preset as a starting point:
Individual Graphics Settings (Performance Impact & Recommendations)
| Setting | Low Impact | Medium Impact | High Impact | Recommendations |
|---|---|---|---|---|
| Anti-aliasing | Off | FXAA (medium) | TAA (high) | TAA is best for quality; FXAA is lighter. Do not use OFF unless desperate — edges will be jagged. |
| Ambient Occlusion | Off | SSAO (Medium) | HBAO+ (High) | HBAO+ adds depth but hits FPS by 5-10%. Use SSAO on mid-range. |
| Shadows | Low | Medium | High/Ultra | Shadows have moderate impact. Low=blob shadows; Ultra=sharp, high-resolution shadows. Medium is a good trade-off. |
| Textures | Low | Medium | High/Ultra | VRAM heavy. High requires 4GB VRAM; Ultra needs 6-8GB. If VRAM limited, set to Medium to avoid stutter. |
| Draw Distance | Low | Medium | High/Ultra | Affects pop-in of foliage and structures. High impact on CPU. Medium is usually fine. |
| Terrain | Low | Medium | High/Ultra | Similar to draw distance. Low reduces detail at distance. Medium recommended. |
| Volumetric Clouds | Off | Low | High/Ultra | Very heavy on GPU. Turn to Low or Off on low-end; High adds dramatic sky but costs 10-15 FPS. |
| Screen Space Reflections | Off | Low | High/Ultra | Computationally expensive. Medium looks decent; Ultra not worth the cost. |
| Bloom, Depth of Field, Motion Blur, Chromatic Aberration | Off or On | Off or On | Off or On | These are post-processing effects. Disable them for clarity and performance (saves 3-5 FPS total). Motion Blur especially can cause nausea — turn it Off. |
| Adaptive Quality | Off | On | On | Dynamic resolution scaling. When enabled, game lowers resolution to maintain target FPS. Useful for consoles but on PC it can cause sudden blurriness. Recommend Off for consistent image quality. |
Optimal Settings by Hardware Tier
Low-End (e.g., GTX 960 2GB, i5-4460, 8GB RAM)
- Resolution: 1600x900 or 1280x720
- Preset: Low (then tweak)
- Textures: Medium (to avoid blur) but keep VRAM in check
- Shadows: Low
- Volumetric Clouds: Off
- Anti-aliasing: FXAA
- V-Sync: Off (use driver cap at 30 or 45 FPS)
- Expect 30-45 FPS average.
- Resolution: 1920x1080
- Preset: High then adjust down
- Textures: High (4-6GB VRAM)
- Shadows: Medium
- Volumetric Clouds: Low
- Anti-aliasing: TAA
- V-Sync: Adaptive (or Off with FPS cap at 60)
- Expect 50-60 FPS average.
- Resolution: 2560x1440
- Preset: Ultra, then tune
- Textures: Ultra
- Shadows: High
- Volumetric Clouds: High
- Anti-aliasing: TAA
- Resolution Scale: 100%
- V-Sync: Off (use G-Sync/FreeSync)
- Expect 60-70 FPS average.
- Resolution: 4K (3840x2160)
- Preset: Ultra (all maxed)
- Textures: Ultra
- Shadows: Ultra
- Volumetric Clouds: Ultra
- Anti-aliasing: TAA
- Resolution Scale: 100% (or 80% if struggling)
- V-Sync: Off (use adaptive sync)
- Expect 60 FPS (adjust settings for stable 60).
- Master Volume: Overall volume, default 100%. Adjust to taste.
- Sound Effects: Volume of combat, footsteps, abilities. Keep high for environmental awareness.
- Dialogue Volume: NPC and player voice lines. Turn up if subtitles are off or for immersion.
- Music Volume: Epic soundtrack. Lower if it overwhelms dialogue.
- Cinematic Volume: Volume during cutscenes. Keep equal to dialogue.
- Sound Quality: Low/Medium/High. High uses more memory but provides better positional audio. Set to High if your system can handle it; low sounds compressed.
- Dynamic Range: Headphones (small), TV (large), or Dynamic. Headphones recommended for stereo immersion; TV for surround sound systems.
- Subtitles: On/Off. Also toggle for spoken language subtitles separately.
- Hard of Hearing Subtitles: Adds speaker names and sound descriptions (e.g., [sword clang]). Accessibility essential — turn On.
- Controller Layout: Default (Ubisoft) or Classic (similar to older AC games). Default recommended for new players.
- Invert Vertical Look: Off (pushing up looks up) — change if you prefer flight-sim style.
- Invert Horizontal Look: Rarely used, keep Off.
- Stick Sensitivity: Horizontal/Vertical (0-100). Default 50 is balanced. Increase if turning feels sluggish; decrease if too twitchy.
- Aim Sensitivity: Separate from look sensitivity. Default 50. Lower for more precise bow aiming.
- Aim Assist: On/Off. Highly recommended On for controller users — helps lock onto enemies for bow shots and melee.
- Deadzone: Left/Right stick. Default moderate. If sticks drift, increase deadzone; if unresponsive, lower. Worth tweaking if you have an older controller.
- Vibration: On/Off. Turn Off to save battery or if you dislike feedback.
- Button Mapping: Full remapping allowed. Common changes: swap jump and crouch, or assign phobos call to a pad button.
- Mouse Sensitivity: Overall look sensitivity (0-100). Default 50. Adjust to your DPI.
- Mouse Smoothing: Off (recommended) or On. On adds latency and artificially smooths movement. Turn Off for raw input.
- Invert Mouse: Off.
- Aim Sensitivity (Mouse): Separate slider for bow aiming. Default 50. Lower for precision.
- Key Bindings: Nearly every action can be rebound. Important: Sprint is default Shift, but you might want to rebind to a mouse button. Parry (default Q) is critical — ensure easy access.
- Quick Weapon Swap: Default middle mouse. Can be clunky; assign to a side mouse button.
- Camera Shake: On/Off. Strongly recommended Off if you suffer from motion sickness or epilepsy.
- Motion Blur: On/Off. Off preserves clarity and reduces nausea. Tricky: This setting is often overlooked — find it under Graphics > Post Effects.
- Screen Effects: Blood, dust, lens flare. Can be disabled for a cleaner view.
- Colorblind Modes: Protanopia, Deuteranopia, Tritanopia, or Off. Changes UI colors for markers, health bars, etc. If you have mild color vision deficiency, use the appropriate mode.
- Subtitle Background: Opaque, Semi-transparent, or Off. Opaque improves readability.
- Subtitle Size: Normal or Large. Large helps readability on small screens or for visually impaired.
- High Contrast UI: On/Off. Makes icons and text more visible. Good for low-vision players.
- Objective Marker Navigation: Can be set to Show Always, Show on Compass, or Off. If you prefer exploration without arrows, turn off.
- Guided Mode vs Exploration Mode: This is a Gameplay setting (see below) but impacts accessibility — Exploration Mode requires you to find quest locations via dialogue and map clues, which can be challenging for some. Easy to misconfigure: If you get lost easily, keep Guided Mode on.
- Text Language: The language of menus, subtitles, and UI. Choose from available region options (e.g., English, French, German, Spanish, Italian, Portuguese, Russian, Arabic, Japanese, etc.)
- Voice Language: Spoken dialogue language. Separate from text. You can have English text with German voices, for example.
- Subtitles: On/Off. Independent of language.
- Subtitle Language: Override text language for subtitles only? Usually inherits from Text Language.
- Enable Online Features: On/Off. Disabling improves load times and prevents interruptions but also removes other players' ship encounters, leaderboards, and photo mode sharing. If you have slow internet, turn Off.
- Automatic Uploads: On/Off. Uploads screenshots from Photo Mode to Ubisoft servers. Off if privacy is concern.
- Leaderboards: Choose which leaderboards to display (e.g., Weekly Quests). Can be filtered to Friends or Worldwide.
- Data Sharing: Opt in/out. Ubisoft collects anonymous telemetry for game improvement. Optional.
- Cross Platform Saves: Available only if you have an Ubisoft Account and linked platforms (PC, Stadia? Not active anymore). Use the Ubisoft Connect overlay to enable cloud saves.
- Easy: Enemies deal less damage, AI less aggressive. Recommended for story-focused players or newcomers.
- Normal: Balanced. Default experience.
- Hard: Enemies tougher, more aggressive, parry timings tighter. For experienced gamers.
- Nightmare: (Unlocked after completing the game once?) Very punishing. Only for masochists or high-level experts.
- Guided Mode (original): Quest markers automatically appear on map and compass. Objectives are clear and direct.
- Exploration Mode: You must find quest locations by listening to dialogue and reading clues. Markers only appear when you are near the target. Easy to misconfigure: Many players unknowingly enable this and become frustrated. If you want classic hand-holding, stick to Guided.
- Default: Enemies scale to your level (slightly weaker).
- Heavy: Enemies always your level or higher.
- Light: Enemies stay lower level (easier).
- None: Enemies are fixed level (makes some areas trivial or impossible).
- Aim Assist: On/Off (affects aiming with bow — mostly for controller).
- Lock On: On/Off. If On, pressing target lock focuses camera on one enemy. Off allows free aim. Recommended On for melee focus.
- Auto-Loot: Off, Common, All. Auto-Loot picks up items automatically after combat. Very useful — set to All to avoid spamming loot button.
- Auto-Advance Dialogue: On/Off. If On, cutscene dialogue automatically proceeds without button prompt. Off requires button press to advance each line. Personal preference.
- HUD Presets: Default, Light, Minimalist, Custom. Default shows everything; Light hides some elements; Minimalist removes most HUD for immersion. Custom lets you toggle each element individually (compass, health bar, stamina, quest log, etc.)
- Damage Numbers: On/Off. If you want to see precise damage, keep On. Disable for cleaner combat screen.
- Photo Mode Hints: On/Off. If Off, hides tutorial prompts when entering Photo Mode.
- Allow Alternative Controls: For mixing control schemes (e.g., hold vs toggle for sprint). Check the Controls menu for specific toggles.
- Quick Time Events (QTE): In cutscenes (e.g., boss kills). Cannot be disabled, but you can set QTE animations to simplified prompts.
- Photo Mode: Accessible during gameplay (not in cutscenes). Settings include focal length, aperture, filters, etc. Pausing the game with Photo Mode might break immersion but is useful for screenshots.
Mid-Range (e.g., GTX 1060 6GB, Ryzen 5 2600, 16GB RAM)
High-End (e.g., RTX 2070 Super, i7-9700K, 16GB RAM)
Ultra (e.g., RTX 3080/4080, i9-12900K, 32GB RAM)
Special Note: Assassin's Creed Odyssey is CPU-intensive, especially in cities like Athens. Even on high-end, you may see dips. Lower Draw Distance and Terrain if CPU bound.
---
Audio Settings
Easy to misconfigure: Many players forget to set Dynamic Range according to their audio setup, leading to muddy sound. Also, if using a headset, choose Headphones for best surround simulation.
---
Controls Settings
This menu lets you rebind keyboard, mouse, and controller buttons. There are also sensitivity and aiming options.
Controller (Xbox / PlayStation / Others)
Keyboard & Mouse
Special attention: The controls menu has a separate tab for Vehicle (Phobos) controls. You can invert the camera or adjust sensitivity for horse riding.
---
Accessibility Settings
Assassin's Creed Odyssey offers several accessibility features, though not as extensive as newer titles. These are found under Interface or Gameplay tabs.
---
Language Settings
Region lock note: Some versions (especially on consoles) tie language to system language. On PC, you can change within the game launcher (Uplay/Steam) as well. If you buy a different region key, you may be locked out of certain language packs. Check before purchasing.
---
Network Settings
Special attention: If you play offline (e.g., no internet), disable Online Features to prevent constant login attempts.
---
Gameplay Settings
These settings affect how the game plays, from difficulty to exploration style.
Difficulty
You can change difficulty at any time from the pause menu. No achievement lock.
Exploration Mode
Enemy Auto-Level Scaling
Tricky setting: If you like to overlevel and steamroll, set Light or None. But if you want balanced challenge, keep Default or Heavy. Changing this mid-game can break the intended pacing.
Combat Assistance
User Interface
Special attention: The Custom HUD settings are hidden behind a separate sub-menu. You can turn off the compass entirely, or keep only health bars. This is a great way to customize your experience without using a preset that removes too much.
Other Gameplay Toggles
---
Final Tips for Configuration
1. Start with a preset that matches your hardware, then tweak down one by one until you reach your target FPS. Don't max everything immediately.
2. Always restart the game after changing graphics settings for them to take full effect (especially resolution and anti-aliasing).
3. Save your custom preset once you're happy — the game stores it in the settings file (documents\Assassin's Creed Odyssey\). Back this up if you reinstall.
4. Check for driver updates — Odyssey benefits from recent NVIDIA/AMD drivers that include day-one patches.
5. If using an overclocked GPU, stability can cause crashes. Lower graphics settings slightly to reduce load if you experience crashes.
6. Test Exploration Mode after you're comfortable with the world — it adds a rewarding sense of discovery.
Now that you have your settings dialed in, you're ready to conquer ancient Greece with the best possible experience!
Important Notes
Important Notes
Critical Warnings & Pitfalls
- Irreversible Choices: The game features multiple branching storylines with permanent consequences. Major choices affect the fate of your family (the "Family" arc), the order of cultists (the "Cult of Kosmos" arc), and the future of Greece (the "Atlantis" arc). Always save before a choice that feels significant.
- Missable Side Quests: Some side quests (identified by gold exclamation marks on the map) become unavailable after you complete specific main story chapters. Notably, several “Lost Tales of Greece” quests (free DLC) can be missed. Check your quest log regularly and prioritize time-sensitive missions.
- Romance Lock-Outs: Romance options are often tied to dialogue choices. If you reject a character's advances or fail a related quest, that romance becomes permanently unavailable. Use manual saves before flirtatious dialogues.
- Cultist Branch Lock: You can kill cultists out of order, but some cultists require specific quests or activities. The final cultist in each branch only appears after all other members in that branch are eliminated. If you kill a non-target cultist who happens to be a branch leader, the branch may still be incomplete if you missed a prerequisite.
- Difficulty Spikes: Certain regions (e.g., Messara, Lakonia, parts of the “Fate of the Atlantis” DLC) are significantly higher-level than surrounding areas. The arena battles and mythical creatures (e.g., Minotaur, Medusa) are tough even for your level. Be overlevelled by 2-3 levels and have upgraded gear before attempting.
- Level Gating: The main story requires you to be around level 50 for the final sequence. If you rush through the story without side content, you'll hit walls. Do not ignore side quests and world activities (bounties, forts, conquest battles).
- XP Boost Pendants: Ubisoft sells time savers and XP boosts. The game is perfectly beatable without them, but some players find the leveling curve tedious. If you buy an XP boost, it is account-bound and non-transferable—use it wisely.
- Resource Grind: Ship upgrades, especially at higher tiers, require massive amounts of wood, metal, glass, and other resources. Looting war supplies and boarding ships is faster than farming underwater locations. Use Ikaros to spot resource-laden ships on the map.
- Ability Point Farming: Ability points are earned by gaining XP (every level grants 1 point, plus occasional ability points from tombs, quests). You can respec abilities for a small cost using drachmae, which becomes trivial later. Do not hoard points—experiment.
- New Game+: After completing the main story, you can start New Game+. This resets the world to its initial state but retains your character level, gear, ship upgrades, and abilities. All quest decisions are reset—you can obtain different endings.
- Stealth vs. Combat Consequences: Some missions require stealth to avoid killing certain NPCs (e.g., the “Theater of War” quest). Failing stealth can lock you into a different outcome, sometimes preventing a peaceful resolution.
- Atlantis Ending Choice: Near the end of the main game, you must choose to close the Atlantis gate or enter it. This choice determines which final cutscene you see and whether you can continue to the “Fate of the Atlantis” DLC seamlessly. Entering Atlantis leads (story-wise) directly into the DLC; closing it results in a different standard ending. You can still play the DLC via the “Continue” option from the main menu, but the narrative flow changes.
- Cultist Ostrakas: Some cultists are revealed only after finding and solving Ostraka puzzles (clues). If you ignore these, you may never encounter certain cultists. The map does not mark these automatically—talk to NPCs and examine locations.
- Manual Saves: The game allows only a limited number of manual save slots (20–30 depending on platform). Each manual save can be overwritten. Always keep at least two or three manual saves from different play sessions—corruption is rare but possible, especially after mods or crashes on PC.
- Autosave Limitations: The game autosaves frequently but only retains a few slots (autosave, quicksave, and a few rotation slots). If you make an irreversible choice or die, you many not have an old enough autosave to revert. Rely on manual saves before major story beats.
- Cross-Save & Cloud: PlayStation and Xbox do not support cross-save with PC. Ubisoft Connect cloud saves are automatic, but if you play offline or exit abruptly, your local save may be newer. On PC, you can manually backup saves from `Documents\Assassin's Creed Odyssey\[numbers]` to avoid loss.
- Modding (PC): Using unofficial mods (e.g., gameplay tweaks, texture packs) can corrupt your save file, especially if they edit core game files. Always make a backup before installing mods. Mods that alter ability or loot drops may also break compatibility with future patches.
- Online Features: The game has no competitive multiplayer. Online elements are limited to the Ubisoft Club challenges (now part of Ubisoft Connect) and the Photo Mode gallery. These do not affect gameplay progression.
- Anti-Cheat: There is no anti-cheat client. Cheats or trainers (on PC) work offline, but if you accidentally go online with a modified save, Ubisoft may flag it and lock you out of certain features (e.g., Ubisoft Connect rewards). Use them at your own risk and stay offline while cheating.
- Pirated/Unauthorized Copies: Playing cracked versions prevents access to official updates, patches, and the Discovery Tour. Support the developers to get the full experience.
- Early Stealth & Gear: Do not ignore the Locust ability (long-range assassination) or the Shadow of Nyx (invisibility). They make stealth much easier. Also, upgrade your spear as soon as possible—it unlocks the ability to break enemy shields.
- Ship Upgrades Are Permanent: Invest burnt offerings (wood, stone) into ship hull and archery early. A weak ship makes naval battles frustrating, especially in the main story’s required sea engagements.
- Use Ikaros Constantly: Scan every region with Ikaros to reveal treasure chests, leader houses, and cultist clues. This saves hours of hunting.
- Olympian Gift Store: You can purchase legendary gear sets from the in-game store using Orichalcum (a special currency). Orichalcum is rare, so spend it carefully. The weekly shop resets each Tuesday.
- Synchronize Viewpoints: Climbing high points not only fast travel but also reveals nearby quests and icons. Make a habit of synchronizing all viewpoints in a region before exploring.
- Engraving Is Critical: Adding engravings (e.g., +20% assassin damage) to your gear greatly boosts effectiveness. Unlock new engravings by completing the Hephaistos workshop questline.
- Conquest Battles Are Repeatable: If you need to grind levels or resources, participate in conquest battles (choose a side after weakening a region). They reward large XP and loot.
- Secondary Character Choices: The game allows you to play as Alexios or Kassandra. The story is nearly identical, but voice acting quality differs; most players prefer Kassandra’s delivery. Once chosen, you cannot switch mid-playthrough.
Grinding Traps & Efficiency Tips
Irreversible & Missable Content
Save Management Advice
Online, Anti-Cheat, & Etiquette
Things Players Commonly Regret Not Knowing
Final Note: Take your time. Assassin's Creed Odyssey is massive—over 100 hours for completion. Rushing will lead to burnout and missed content. Enjoy the world, the lore, and the freedom.
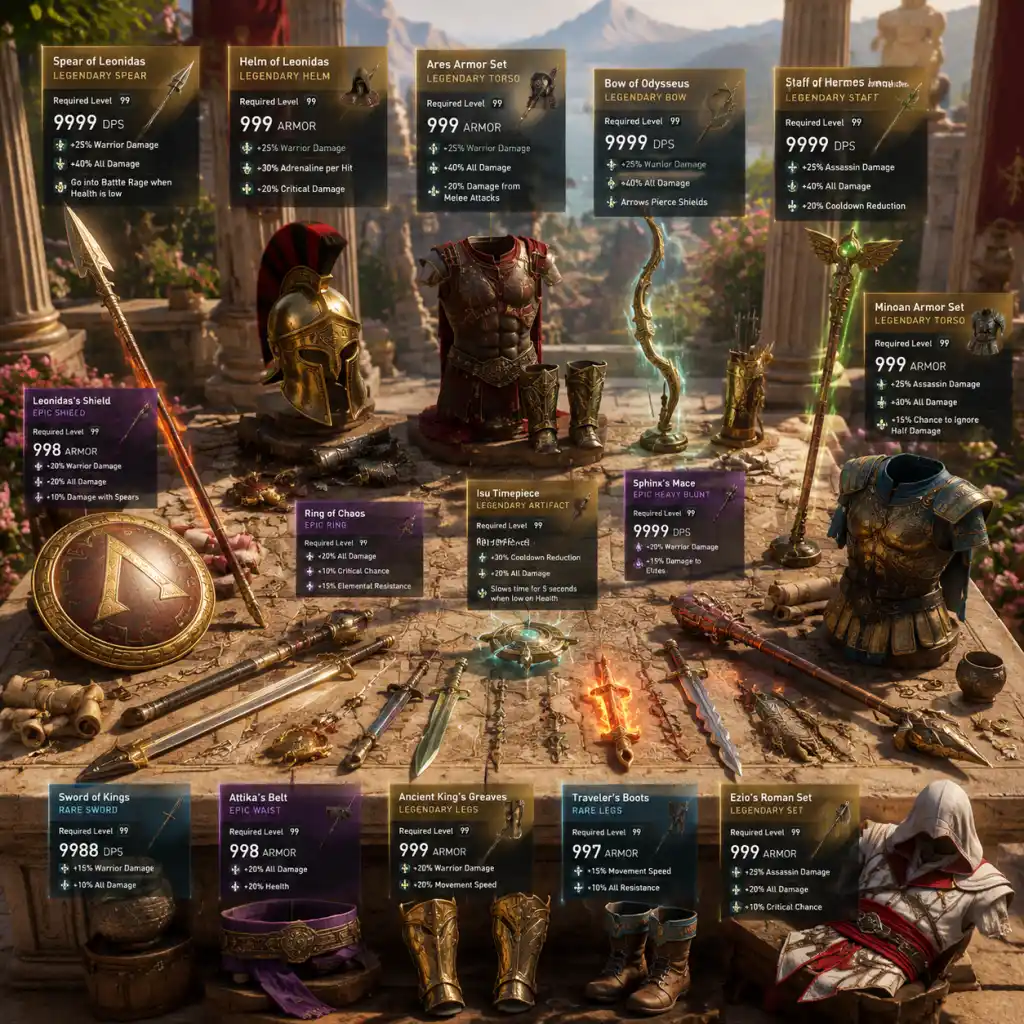
All Game Items
All Game Items
This guide provides a comprehensive overview of every major item category in Assassin's Creed Odyssey: weapons, armor, consumables, materials, currencies, collectibles, and key equipment. Each section explains how items function, how to obtain them, when they are most useful, and important synergies or upgrade paths.
---
Weapons
Weapons are divided into six main types. Each has unique movesets, damage per second (DPS), and perks. You can equip up to two melee weapons and one bow.
| Weapon Type | Playstyle Strengths | Base Perk Slot (random) | Engraving Slots |
|---|---|---|---|
| Sword | Balanced speed, good for parry-counter chains | Usually Warrior/Hunter damage | 2 |
| Dagger | Fast strikes, low hit-stun, excellent for poison/bleed builds | Assassin damage | 2 |
| Heavy Bladed | Slow but massive damage, high shield crush | Warrior damage | 1 (unique legendary has 2) |
| Heavy Blunt | Slowest, highest stun/knockdown chance | Warrior damage | 1 |
| Spear | Long reach, sweeping attacks, good for crowd control | Warrior damage | 2 |
| Staff | Fast sweeping, high mobility, weak against shields | Hunter or Warrior | 2 |
- Loot from chests, enemies, forts, and camps.
- Blacksmith purchases – refresh with Fast Travel or level up. Legendary items appear after level 50.
- Quest rewards – main/side quests often reward unique weapons.
- Fallen Heroes – special mercenary drops.
- Hephaistos’ Forge – upgrade any weapon to match your level for a cost.
- Poison Damage + Daggers or Swords = rapid status build-up. Pair with the “Poisonous” engraving and the “Serpent’s Bite” ability.
- Fire Damage + Heavy Blades = high burst. Use “Ring of Chaos” to spread fire.
- Crit Chance + Spears = reliable headshots; combine with Hunter mastery.
- Visit Hephaistos’ Forge at the blacksmith (costs drachmae and materials).
- Engraving system: Add a perk from a known engraving (unlocked by completing locations, achievements, or finding tablets).
- Legendary engraving on specific legendary weapons cannot be changed.
Weapon Synergies:
Upgrades:
---
Armor
Five armor slots: Head, Arms, Torso, Waist, Legs. Each piece has base stats (armor value) and one random perk (except legendary which have fixed legendary perks).
Armor Sets (Legendary): Each set provides a 5-piece bonus when equipped together. Farmed from cultists, mercenaries, or store.
| Set Name | Bonus Description | How to Obtain |
|---|---|---|
| Greek Hero's | +15% Warrior damage, +20% max health | Complete the “Family” questline (good ending) |
| Pirate | +15% Assassin damage, +15% Hunter damage | Kill every member of the “Peloponnesian League” cult branch |
| Agamemnon | +50% fire buildup, +20% burning duration | Kill the “Silver Vein” branch of the Cult of Kosmos |
| Traveler | +50% Ostraka clues, +20% speed on roads | Random loot; easier from blacksmith |
Useful Engravings for Armor:
- “+All Damage” (from completing locations)
- “+Crit Chance” (from certain Ostrakas)
- “+Armor” or “+Health” for tanks.
---
Consumables
Consumables are crafted from materials and provide temporary boosts or healing.
| Item | Effect | Crafting Cost | Best Use |
|---|---|---|---|
| Health Potion | Restores a chunk of health; max stock 3 (+ upgrades) | 2 Leather, 1 Olive Wood | Default heal – always carry |
| Staminatonic | Restores stamina barrels; max stock 3 | 2 Soft Leather, 1 Iron Ore | Critical for heavy combat combos |
| Explosive Arrows | Arrows that detonate on impact | 1 Olive Wood, 1 Sulfur | AoE damage, oil jars, crowd control |
| Heavy Arrows | Pierces shields, high damage | 1 Olive Wood, 1 Ship Timber | Hunters vs. shield-bearers |
| Poison Coating | Applies poison to melee weapon for 30 seconds | 1 Olive Wood, 1 Gems (rubies) | Boost poison build-up without engraving |
| Fire Coating | Applies fire for 30 seconds | 1 Olive Wood, 1 Metal Ore | Same as poison but for fire |
---
Materials
Used for upgrading gear, crafting consumables, and ship upgrades.
| Material | Primary Use | Sources |
|---|---|---|
| Leather | Armor upgrades, Health/Stamina potions | Dismantling armor, hunting animals |
| Soft Leather | Same as leather but required for better potions | Higher-level animals, blacksmiths |
| Olive Wood | Arrows, ship repairs, stamina items | Looting wooden crates, trees, forts |
| Iron Ore | Sword, heavy weapon upgrades, fire coatings | Mining rocks, dismantling weapons |
| Ship Timber | Ship health and speed upgrades | Sea battles, sunken treasure |
| Gems (Ruby, Sapphire, Crystal) | Special engravings, legendary upgrades | Cultist chests, mercenary drops, high-level loot |
| Sulfur | Explosive arrows, fire bombs | Caves, volcanic regions, loot from soldiers |
| Obsidian | High-end weapon upgrades | Rare loot from legendary creatures |
---
Currencies
| Currency | Purpose | How to Get |
|---|---|---|
| Drachmae | Standard money – buy gear, upgrades, cosmetic items | Quests, selling loot, looting chests |
| Orichalcum | Premium currency – buy legendary gear from Sargon’s shop (limited rotation), Oikos of the Olympians store | Daily missions, bounties, conquest battles, large chests |
| Ability Points | Unlock and upgrade active abilities | Leveling up, completing tomb locations, achieving certain milestones |
| Experience Points (XP) | Level progression | Combat, quests, exploration |
| Skill Points (separate) | Mastery levels after max level (Lvl 50) | Earned after level cap; can be reset with drachmae |
---
Collectibles
These are not used in crafting but are required for trophies/achievements, cosmetic rewards, or lore.
- Ancient Tablets – (10 total) Upgrade the Spear of Leonidas to its full potential (allows 4 ability bars). Found in hidden tombs across each region.
- Cultist Clues – Lead you to kill cult members of the Cult of Kosmos. Each clue is a note or symbol that reveals a cultist location.
- Ainigmata Ostraka – (30 total) Environmental puzzles that grant famous engravings when solved.
- Legendary Gear – Unique weapons/armor with fixed legendary engravings placed in chests guarded by mythical beasts or mercenaries.
- Mythical Clues – For defeating legendary animals (e.g., Boar, Wolf). Drop unique engravings.
- Orichalcum Chests – Special large golden chests scattered on islands; contain Orichalcum (10–20) and sometimes random gear.
- Naval Mods – upgrade ship durability, ram damage, javelins, arrow efficiency. Acquired from forts, naval commanders, and quests.
- Ship Legendary Sets – hull designs, figureheads (cosmetic) from defeating legendary ships.
Ship Collectibles:
---
Key Equipment (Story & Progression)
| Item | Description | Significance |
|---|---|---|
| Spear of Leonidas | The broken spear passed from Leonidas; start of the game. Upgraded with Ancient Tablets to reach level 6 (max). Enables 4 ability bars. | Central to the story and gear progression. Cannot be dropped. |
| Infinity Blade | Optional – rewarded for completing the “Fate of Atlantis” DLC; adds a teleport ability when broken. | Endgame DLC item; provides extra mobility. |
| The Adrestia (ship) | Your personal ship – upgrades all affect naval combat speed, health, and crew morale. | Essential for crossing seas, fighting naval battles, and accessing certain islands. |
| Forgotten Mayon’s Bow | Unique legendary bow found in a hidden chest; grants +50% burn duration for fire arrows. | Excellent for fire-based Hunter builds. |
| Hermes’ Carapace | Legendary torso armor that grants +10% movement speed and +15% All Damage when under 50% health. | Great for glass-cannon builds. |
- Spear of Leonidas: Requires 1, 2, 2, 2, 3 Ancient Tablets (total 10) from tombs. Cannot be upgraded by level – it scales with story progress.
- Ship upgrades: Spend drachmae and Ship Timber at shipwrights. Prioritize hull and ram for early-game success.
- Achilles’ Bow – Bow; +50% damage on charged shots.
- Heracles’ Hammer – Heavy Blunt; +50% bash damage.
- Nemean Lion’s Club – Heavy Bladed; +100% damage on first hit after enemy kill.
- Artemis’ Spear – Spear; +25% speed on dodges.
- Koru's Bow – Legendary bow from Oikos; +40% fire damage.
- Fall of the Hegemons – Dagger; +30% assassin damage on night attacks.
- Always upgrade gear every 5–6 levels – enemy scaling makes old armour weak. Prioritize weapon DPS over armor rating.
- Engraving is FREE – you can re-engrave any item at a blacksmith for a material cost. Test different combos.
- Sell items you never use – especially if you have too many; use drachmae to buy rare materials from blacksmiths.
- Collect All Ostraka – they grant exclusive engravings that cannot be found elsewhere.
---
Important Synergies & Build Tips
1. Fire/Poison Hybrid: Use a weapon with a base fire or poison perk (e.g., Sword of Damocles) + the complementary coating + the “Omega” engraving from Ostraka. Works best with Warrior abilities.
2. Assassin Sneak Build: Daggers with +Assassin damage, full Pirate set, and mastery in stealth. Use “Shadow of Nyx” ability to remain invisible. Stack extra hunter damage for long-range assassinations.
3. Hunter Crit Build: Legendary Bow (“Master of the Hunt” from Artemis), plus full crit chance engravings on armor. Use abilities like “Ghost Arrows of Artemis” and “Predator Shot.”
4. Elemental Resistance Tank: Torso with +Armor, pair with the “Greek Hero” set and an engraving that reduces elemental damage. Ideal for boss fights.
---
Complete List of Unique Legendary Items (Name & Type)
(This is a subset – full list available in-game under inventory.)
Where to Find: Each is tied to a specific mercenary, cultist, or side quest. Use Ikaros to scout and track marks on the world map.
---
Final Tips
This concludes the All Game Items guide. Use it as a reference to maximize your Spartan’s power and tailor your equipment to your favorite playstyle.
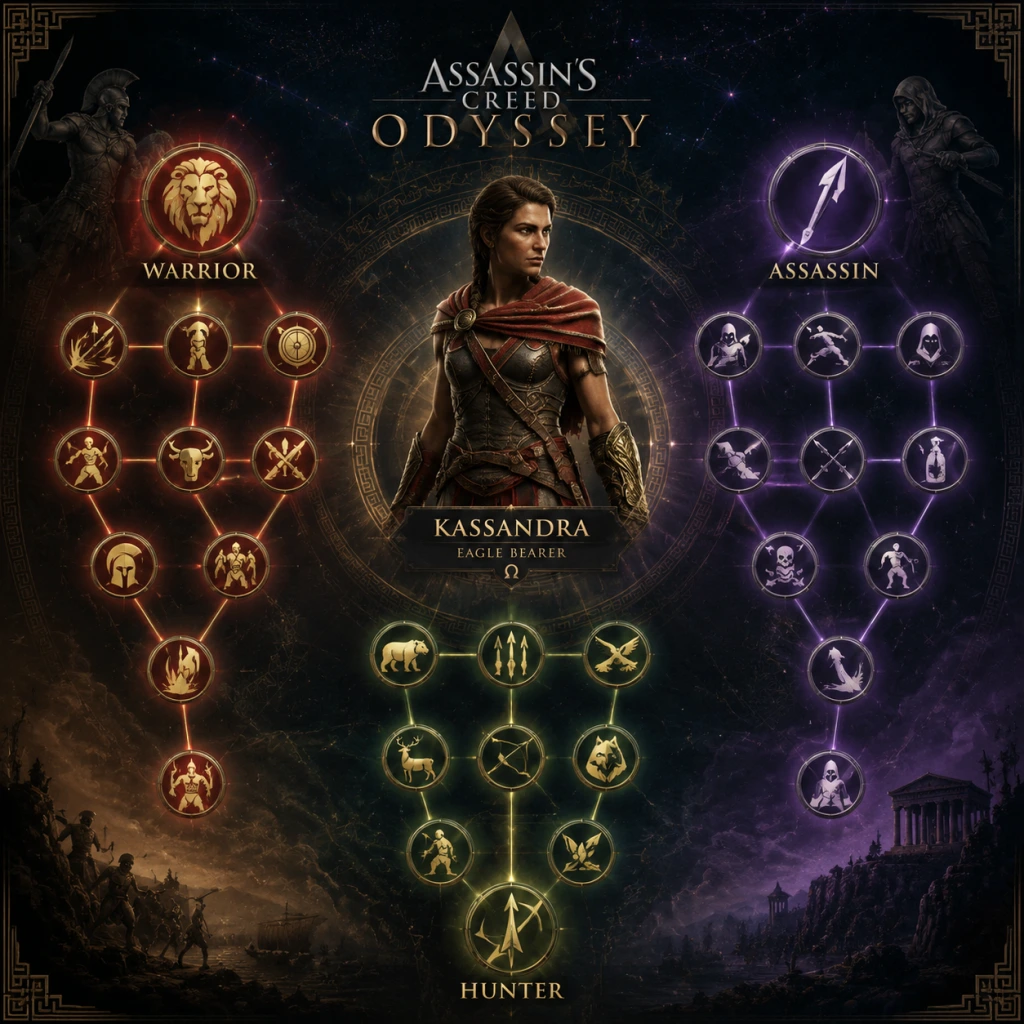
Character Skills
Character Skills
Overview of the Skill System
In Assassin's Creed Odyssey, both playable characters (Alexios and Kassandra) share the exact same set of skills. Skills are divided into three primary trees: Hunter (bow and ranged), Warrior (melee and defense), and Assassin (stealth and critical assassination). You unlock skill points by leveling up, discovering locations, completing certain quests, and acquiring Tomes (found in tombs). At level 50, you unlock Mastery Levels—each Mastery level grants a point to invest into stat boosts or special Mastery Skills. This guide covers every skill, including its base effect, cooldown, upgrades (each skill can be upgraded once to +20% effectiveness or duration), synergies, combat roles, and recommended builds.
---
Hunter Skills (Ranged / Bow)
1. Devastating Shot
- Description: A powerful arrow shot that deals high damage to a single target.
- Cooldown: 8 seconds (base).
- Upgrade: +20% damage.
- Use cases: Opening a fight from stealth, hitting tough enemies from range, interrupting enemy archers.
- Synergies: Crowd control enemies before they close distance. Combos with “Rain of Destruction” for area damage.
- Builds: Essential for any Hunter-focused build or as a secondary option for hybrid builds.
- Description: Fires an arrow that you can manually steer to hit distant or moving targets. Deals moderate damage.
- Cooldown: 10 seconds.
- Upgrade: +20% damage; larger hitbox.
- Use cases: Sniping unaware enemies from extreme range (e.g., clearing forts without alerting). Best for assassinations from afar.
- Synergies: Use with “Ghost Arrows of Artemis” for wall penetration. Pair with the “Revelation” skill to mark enemies first.
- Builds: Mandatory for pure Hunter assassins.
- Description: Fires a spread of arrows at multiple targets in front of you. Damage per arrow is moderate.
- Cooldown: 14 seconds.
- Upgrade: +20% damage; increased spread angle.
- Use cases: Crowd control against tightly packed groups, especially during conquest battles or bounty hunter fights.
- Synergies: Use after a “Paralyzing Arrow” to weaken multiple foes. Combined with fire/poison arrows increases area denial.
- Builds: Core for area damage in Hunter/Warrior hybrid builds.
- Description: Shoots a volley of arrows into the sky that rain down over a large area. High damage per arrow.
- Cooldown: 30 seconds.
- Upgrade: +20% damage; larger area of effect.
- Use cases: Clearing out camps or forts when detected, dealing massive damage to clustered enemies. Excellent for conquest battles.
- Synergies: Pair with “Overpower Bow Strike” (Warrior tree) for a devastating opener. Use fire/poison to add elemental damage.
- Builds: Essential for area-of-effect Hunter builds.
- Description: Arrows can pass through walls and obstacles, hitting enemies behind cover. Damage slightly reduced.
- Cooldown: Passive (toggled on/off).
- Upgrade: +20% damage through walls; larger penetration depth.
- Use cases: Killing enemies hiding behind walls, shooting through thin structures, safe assassinations from inside a building.
- Synergies: Combine with “Predator Shot” for guided shots through obstacles. Works well with “Revelation” to see enemies through walls.
- Builds: A staple for stealth archers.
- Description: Fires a massive, slow-moving arrow that deals extreme damage and knocks back enemies. Very long cooldown.
- Cooldown: 60 seconds.
- Upgrade: +20% damage; increased knockback distance.
- Use cases: Boss fights, killing elite enemies, interrupting large groups. Use when enemies are stationary or stunned.
- Synergies: Combine with “Slow Time” (Warrior tree) for easy aiming. Pair with “Devastating Shot” for a one-two punch.
- Builds: Essential for pure Hunter builds as a finisher.
- Description: Increases bow damage by a flat percentage and reduces adrenaline cost for Hunter abilities.
- Cooldown: Passive.
- Upgrade: +20% bow damage; greater adrenaline cost reduction.
- Use cases: Core passive for any Hunter build.
- Synergies: Every Hunter ability benefits.
- Builds: Mandatory in all Hunter-focused builds.
- Description: Automatically marks nearby enemies when you draw your bow, highlighting them even through walls.
- Cooldown: Passive.
- Upgrade: Increased marking range.
- Use cases: Planning stealth kills, avoiding detection, targeting priority enemies.
- Synergies: Works with all bow abilities.
- Builds: Highly recommended for all players, especially in stealth missions.
- Description: Ikaros can spot and mark enemies more frequently, and you can use Ikaros while moving.
- Cooldown: Passive.
- Upgrade: Extended Ikaros scouting time.
- Use cases: Recon before engagement.
- Synergies: Provides intel for all combat styles.
- Builds: Universally useful.
- Description: A heavy attack that knocks aside an enemy’s shield, leaving them open for a few seconds.
- Cooldown: 6 seconds.
- Upgrade: +20% chance to break shield on hit; longer stun.
- Use cases: Fighting shielded enemies (Spartan soldiers, mercenaries with shields). Essential for breaking defenses.
- Synergies: Follow up with “Overpower Attack” for guaranteed damage. Works with “Bull Rush” to close distance.
- Builds: Critical for Warrior builds that face many shielded foes.
- Description: Dash forward (or hold to charge) dealing damage to all enemies in your path and knocking them down.
- Cooldown: 10 seconds.
- Upgrade: +20% damage; longer charge distance.
- Use cases: Initiating combat, breaking enemy formations, escaping surrounded situations. Useful for closing gaps against archers.
- Synergies: Combine with “Spartan Kick” to launch enemies off cliffs. Pair with “Second Wind” for survivability.
- Builds: Great for aggressive Warrior hybrids.
- Description: A powerful kick that knocks an enemy backward. Deals moderate damage and can send enemies off ledges.
- Cooldown: 15 seconds.
- Upgrade: +20% damage; increased knockback distance.
- Use cases: Environmental kills (cliffs, fire pits), interrupting enemy attacks, creating space.
- Synergies: Use near edges for instant kills. Combos with “Bull Rush” after a knockback.
- Builds: A fun skill for all melee builds, especially for Spartan roleplay.
- Description: Slam the ground, creating a shockwave that damages and staggers nearby enemies. Can be charged for a larger area.
- Cooldown: 20 seconds.
- Upgrade: +20% damage; increased radius.
- Use cases: Crowd control when surrounded. Clears smaller enemies in conquest battles.
- Synergies: Use after “Second Wind” to regain adrenaline and unleash again.
- Builds: Core for area-clearing Warrior builds.
- Description: Instantly restores a portion of health and grants a temporary damage reduction shield.
- Cooldown: 25 seconds.
- Upgrade: +20% health restored; longer shield duration.
- Use cases: Emergency healing, surviving burst damage, restoring adrenaline (if upgraded via passives).
- Synergies: Combine with “Weapon Master” for reduced cooldown. Pairs well with “Overpower Attack” for a healing counter.
- Builds: Essential for any melee build due to healing.
- Description: A series of powerful, unblockable melee strikes that consume adrenaline (press heavy attack when adrenaline bar is full).
- Cooldown: 2 seconds between activations (depends on adrenaline).
- Upgrade: +20% damage per strike.
- Use cases: Finishing off stunned enemies, breaking through defenses, maximizing damage on bosses.
- Synergies: Build adrenaline quickly with “Weapon Master” and “Adrenaline Boost” passives. Use with “Shield Breaker” for safe openings.
- Builds: Core for damage in Warrior builds.
- Description: Increases melee damage dealt and reduces damage taken for a short duration. Also gives immunity to interruption.
- Cooldown: 60 seconds.
- Upgrade: +20% longer duration; increased damage.
- Use cases: Activate before engaging multiple enemies, during boss fights, or when low on health.
- Synergies: Combine with “Second Wind” for survivability. Perfect with “Overpower Attack” for maximum burst.
- Builds: Mandatory for Warrior tanks.
- Description: Slows time around you for a few seconds, allowing you to evade or attack enemies easily.
- Cooldown: 30 seconds.
- Upgrade: +20% longer slow effect.
- Use cases: Dodging multiple attacks, landing precise shots (useful for Hunter abilities), turning the tide in a tight fight.
- Synergies: Use with “Archer’s Stance” for safe bow combos. Works well with “Ring of Chaos” for uninterrupted area damage.
- Builds: Excellent for hybrid builds that need breathing room.
- Description: Increases melee damage, reduces adrenaline cost of Warrior abilities, and adds a chance to cause bleeding.
- Cooldown: Passive.
- Upgrade: +20% melee damage; greater adrenaline reduction; higher bleed chance.
- Use cases: Core passive for any Warrior build.
- Synergies: All Warrior abilities benefit.
- Builds: Mandatory.
- Description: Gain additional adrenaline segments (up to 4 total) and adrenaline regenerates faster over time.
- Cooldown: Passive.
- Upgrade: +1 extra adrenaline segment; faster regen.
- Use cases: Enable more Overpower Attacks and special abilities.
- Synergies: Essential for any build that relies on adrenaline-heavy skills.
- Builds: Highly recommended for all builds.
- Description: Increases damage reduction when blocking with a shield and grants immunity to critical hits from the front while blocking.
- Cooldown: Passive.
- Upgrade: +10% block damage reduction; extended immunity time.
- Use cases: Tanking heavy hits from bosses or mercenaries.
- Synergies: Best paired with a heavy shield and “Second Wind.”
- Builds: Useful for defensive Warrior tanks.
- Description: Increases bow damage and reduces adrenaline cost of Hunter abilities when wielding a melee weapon. (Note: This is a Warrior tree passive.)
- Cooldown: Passive.
- Upgrade: +20% bow damage; further adrenaline reduction.
- Use cases: Hybrid builds that switch between melee and bow often.
- Synergies: Pairs with all Hunter skills.
- Builds: Core for Warrior/Hunter hybrids.
- Description: Perform a powerful assassination that deals massive damage. Can be charged for even more damage (hold button).
- Cooldown: 2 seconds after use.
- Upgrade: +20% assassination damage.
- Use cases: Eliminating high-health enemies (polemarchs, mercenaries) silently. Essential for one-hit kills on most targets.
- Synergies: Combine with “Shadow of Nyx” for stealth approach. Works with “Venomous Attacks” to add poison.
- Builds: Core for all Assassin builds.
- Description: A melee attack that adds bonus assassination damage. Can be used in combat to deal heavy damage and restore some adrenaline.
- Cooldown: 8 seconds.
- Upgrade: +20% damage; increased adrenaline gain.
- Use cases: Fighting in melee while still dealing assassination damage to enemies that are alerted. Great for bosses with high health.
- Synergies: Use after parrying or stunning. Pairs with “Shadow Assassin” for increased critical chance.
- Builds: Key for hybrid Assassin/Warrior builds.
- Description: Become invisible for a short duration. Attacking or performing actions breaks stealth. Upgraded version allows movement while invisible.
- Cooldown: 40 seconds.
- Upgrade: +20% duration; movement speed increased while invisible.
- Use cases: Sneaking past enemies, setting up assassinations, escaping combat without fighting.
- Synergies: Critical Assassination from invisibility grants bonus damage. Use with “Revelation” to plan routes.
- Builds: Essential for pure stealth Assassins.
- Description: Drop a smoke bomb that blinds enemies, allowing you to escape or perform a stealth attack.
- Cooldown: 30 seconds.
- Upgrade: +20% larger smoke cloud; shorter duration of blind.
- Use cases: Breaking enemy line of sight when detected, escaping from overwhelming odds, setting up assassinations in combat.
- Synergies: Use with “Shadow of Nyx” for extended stealth. Follow with “Critical Assassination.”
- Builds: Useful for any Assassin build as a safety tool.
- Description: Scan the area to mark all enemies, loot, and points of interest through walls. Also highlights clues.
- Cooldown: 20 seconds.
- Upgrade: Increased scanning range; longer marking duration.
- Use cases: Reconnaissance before infiltration, finding secret paths, tracking targets.
- Synergies: All assassination skills benefit from knowing enemy positions.
- Builds: Highly recommended for all playstyles, especially stealth.
- Description: Throw your spear (the Spear of Leonidas) at an enemy after a brief lock-on, dealing assassination damage. Can chain to up to four enemies if upgraded.
- Cooldown: 12 seconds (chain has 1-second delay between throws).
- Upgrade: +1 additional chain target (max 4).
- Use cases: Clearing a group of unaware enemies quickly, taking out priority targets from a distance while remaining hidden.
- Synergies: Use after “Shadow of Nyx” for safe positioning. Combos with “Critical Assassination” to finish survivors.
- Builds: Core for multi-target assassination.
- Description: Increases poison damage and duration. Also allows you to apply poison to weapons/arrows.
- Cooldown: Passive.
- Upgrade: +20% poison damage; longer poison duration.
- Use cases: Add poison to weapons for sustained damage over time. Effective against tanky enemies.
- Synergies: Combine with “Venomous Attacks” (Assassin skill that applies poison on assassination) for double proc.
- Builds: Great for Assassin builds that want DoT.
- Description: Increases fire damage and duration. Allows you to apply fire to weapons/arrows.
- Cooldown: Passive.
- Upgrade: +20% fire damage; longer burn duration.
- Use cases: Set enemies on fire for extra damage and panic. Effective against groups.
- Synergies: Use with “Rain of Destruction” fire arrows for area denial.
- Builds: Alternate to poison; mix with Warrior for fiery melee.
- Description: While using an assassin ability (Critical Assassination, Hero Strike, etc.), there is a chance to poison the target.
- Cooldown: Passive.
- Upgrade: Increased poison application chance.
- Use cases: Adds free DoT to assassination moves.
- Synergies: Works with “Poison Mastery” for amplified effect.
- Builds: A solid passive for any Assassin.
- Description: Increases critical assassination damage and reduces detection range while crouching.
- Cooldown: Passive.
- Upgrade: +20% critical assassination damage; further reduced detection.
- Use cases: Maximize one-shot kills, improve stealth movement.
- Synergies: Core for any Assassin build.
- Builds: Mandatory.
- Description: Increases all assassination damage by a flat percentage and reduces the noise of footsteps.
- Cooldown: Passive.
- Upgrade: +20% assassination damage.
- Use cases: Essential for reliable assassinations.
- Synergies: All assassination moves benefit.
- Builds: Mandatory.
- Description: Adds one extra chain to Rush Assassination and reduces its cooldown.
- Cooldown: Passive.
- Upgrade: +1 chain; cooldown reduced by 2 seconds.
- Use cases: Eliminate up to 4 enemies with Rush Assassination.
- Synergies: Pairs with “Shadow of Nyx” for safe chaining.
- Builds: Essential for assassination chains.
- Effect: +5% all weapon damage.
- Use: Universal damage increase.
- Stackable: Can invest multiple points (each adds 1% after the first, up to 30% total).
- Effect: +5% max health.
- Use: Survivability.
- Stackable: Up to 30%.
- Effect: +5% armor.
- Use: Damage reduction.
- Stackable: Up to 30%.
- Effect: +5% fire/poison damage.
- Use: Hybrid elemental builds.
- Stackable: Up to 30%.
- Effect: +5% adrenaline gain from all sources.
- Use: Faster ability spam.
- Stackable: Up to 30%.
- Effect: +2% critical hit chance.
- Use: Increase critical rate.
- Stackable: Up to 20%.
- Effect: +10% critical damage.
- Use: Boost crit damage.
- Stackable: Up to 50%.
- Effect: +5% resistance to all damage types.
- Use: Mitigate elemental/poison/blunt damage.
- Stackable: Up to 30%.
- Effect: +5% movement speed while crouching.
- Use: Stealth positioning.
- Stackable: Up to 20%.
- Effect: +5% bow damage.
- Use: Hunter builds.
- Stackable: Up to 30%.
- Effect: +5% melee damage.
- Use: Warrior builds.
- Stackable: Up to 30%.
- Effect: +5% assassination damage.
- Use: Assassin builds.
- Stackable: Up to 30%.
- Effect: -5% enemy detection speed.
- Use: Harder to be spotted.
- Stackable: Up to 30%.
- Core Skills: Overpower Attack, Battlecry of Ares, Second Wind, Shield Breaker, Ring of Chaos, Bull Rush, Spartan Kick (optional).
- Passives: Weapon Master, Adrenaline Boost, Shield Master, Archer’s Stance (optional).
- Mastery Priority: Melee Damage, Health, Armor, Critical Chance/Damage.
- Playstyle: Aggressive melee combat. Use Battlecry before large fights, rely on Overpower Attack and Ring of Chaos for AoE. Shield Breaker for shielded enemies.
- Core Skills: Critical Assassination, Hero Strike, Rush Assassination, Shadow of Nyx, Vanish, Revelation.
- Passives: Shadow Assassin, Stealth Master, Venomous Attacks, Poison/Fire Mastery (choose one).
- Mastery Priority: Assassination Damage, Stealth Detection Reduction, Critical Damage.
- Playstyle: Utter stealth. Use Shadow of Nyx to position, then Critical Assassinate high-value targets. Chain Rush Assassination for groups. Use Vanish as escape.
- Core Skills: Devastating Shot, Predator Shot, Multi-Shot, Rain of Destruction, Ghost Arrows of Artemis, Artemis’s Arrow.
- Passives: Archery Master, Sixth Sense, Eagle Bearer, Archer’s Stance (Warrior tree).
- Mastery Priority: Ranged Damage, Critical Chance, Adrenaline Gain, Elemental Damage (if using fire/poison arrows).
- Playstyle: Stay at range. Use Predator Shot for precision, Rain of Destruction for groups. Ghost Arrows for wall kills. Artemis’s Arrow for bosses.
- Core Skills: Hero Strike, Overpower Attack, Second Wind, Critical Assassination, Rush Assassination (optional).
- Passives: Weapon Master, Shadow Assassin, Stealth Master, Adrenaline Boost.
- Mastery Priority: Melee Damage, Assassination Damage, Health, Adrenaline.
- Playstyle: Begin fights with assassination, then switch to melee. Hero Strike adds assassination damage in combat.
- Core Skills: Rain of Destruction (fire/poison), Ring of Chaos (elemental version), Overpower Attack (with elemental), Battlecry of Ares (to survive).
- Passives: Fire Mastery or Poison Mastery, Weapon Master, Archer’s Stance, Adrenaline Boost.
- Mastery Priority: Elemental Damage, Health, Adrenaline Gain.
- Playstyle: Apply element to weapon and bow, then spam AoE abilities to stack burns/poisons. Extremely effective against crowds.
- Adrenaline Management: Always try to keep at least one adrenaline segment for emergencies (Second Wind or Overpower Attack). Use weapon engravings that boost adrenaline gain.
- Skill Upgrades: Prioritize upgrading your most-used skills to +20% (each upgrade costs 1 point after unlocking). You can respec at any time using drachmae at the abilities screen.
- Combo Example (Warrior): “Shield Breaker” → “Overpower Attack” → “Spartan Kick” (if near ledge).
- Combo Example (Assassin): “Shadow of Nyx” → “Critical Assassination” → “Rush Assassination” (chain to others).
- Combo Example (Hunter): “Revelation” → “Predator Shot” → “Rain of Destruction” on group.
- Synergies Across Trees: For example, use “Slow Time” (Warrior) to line up “Artemis’s Arrow” (Hunter) or to land a “Critical Assassination” (Assassin).
- When to Use Each Skill:
2. Predator Shot
3. Multi-Shot
4. Rain of Destruction
5. Ghost Arrows of Artemis
6. Artemis’s Arrow (Ultimate Hunter Ability)
7. Archery Master (Passive)
8. Sixth Sense (Passive)
9. Eagle Bearer (Passive)
---
Warrior Skills (Melee / Defense)
1. Shield Breaker
2. Bull Rush
3. Spartan Kick
4. Ring of Chaos
5. Second Wind
6. Overpower Attack
7. Battlecry of Ares
8. Slow Time
9. Weapon Master (Passive)
10. Adrenaline Boost (Passive)
11. Shield Master (Passive)
12. Archer’s Stance (Passive, Warrior/Hunter Hybrid)
---
Assassin Skills (Stealth / Critical Assassination)
1. Critical Assassination
2. Hero Strike
3. Shadow of Nyx
4. Vanish
5. Revelation
6. Rush Assassination
7. Poison Mastery (Passive)
8. Fire Mastery (Passive)
9. Venomous Attacks (Passive)
10. Shadow Assassin (Passive)
11. Stealth Master (Passive)
12. Rush Assassination Master (Passive)
---
Mastery Skills (Post-Level 50)
After reaching level 50, every additional level (Mastery Level) grants a Mastery Point. You can invest these points into any of the three trees’ Mastery levels to gain stat boosts or unlock special Mastery Skills. The following are the major Mastery Skills that can be unlocked (each requires 1 point):
1. Weapon Damage Boost
2. Health Boost
3. Armor Boost
4. Elemental Damage Boost
5. Adrenaline Gain Boost
6. Critical Chance Boost
7. Critical Damage Boost
8. Resistance Boost
9. Speed Boost (Hunter Mastery)
10. Ranged Damage Boost (Hunter Mastery)
11. Melee Damage Boost (Warrior Mastery)
12. Assassination Damage Boost (Assassin Mastery)
13. Stealth Detection Reduction (Assassin Mastery)
---
Recommended Builds
A. Pure Warrior Build
B. Pure Assassin Build
C. Pure Hunter Build
D. Hybrid Warrior/Assassin Build
E. Elemental Mage Build (Fire or Poison)
---
General Skill Usage Tips
- Predator Shot: Sniping from extreme range, killing isolated patrols.
- Multi-Shot: When enemies are clustered (2+).
- Rain of Destruction: Large groups, conquest battles, forts.
- Ghost Arrows: Shooting through walls, killing enemies behind cover.
- Artemis’s Arrow: Bosses, tough elites, or when you need a knockdown.
- Shield Breaker: First attack against shielded enemies.
- Bull Rush: Initiating combat or escaping encirclement.
- Spartan Kick: Environmental kills, interrupting enemy attacks.
- Ring of Chaos: When surrounded by multiple enemies.
- Second Wind: Emergency heal, use whenever health is below 30%.
- Overpower Attack: When adrenaline is full and enemy is vulnerable (stunned, parried).
- Battlecry of Ares: Activate before a tough fight or when facing multiple elites.
- Slow Time: Use to dodge multiple incoming attacks or to line up shots.
- Critical Assassination: Always use for single-target stealth kills.
- Hero Strike: Use in melee combat against tough foes (after parry).
- Shadow of Nyx: For stealth repositioning or bypassing areas.
- Vanish: When detected and overwhelmed, to reset combat.
- Revelation: Before any infiltration.
- Rush Assassination: To chain-kill multiple unaware enemies.
---
Conclusion
Mastering the skill system in Assassin’s Creed Odyssey is key to conquering Greece. Experiment with different combinations, as the game encourages hybrid builds. Remember that you can respec at any time, so don’t be afraid to try new setups. Focus on the skills that suit your preferred playstyle, and use the Mastery system to further refine your strengths.
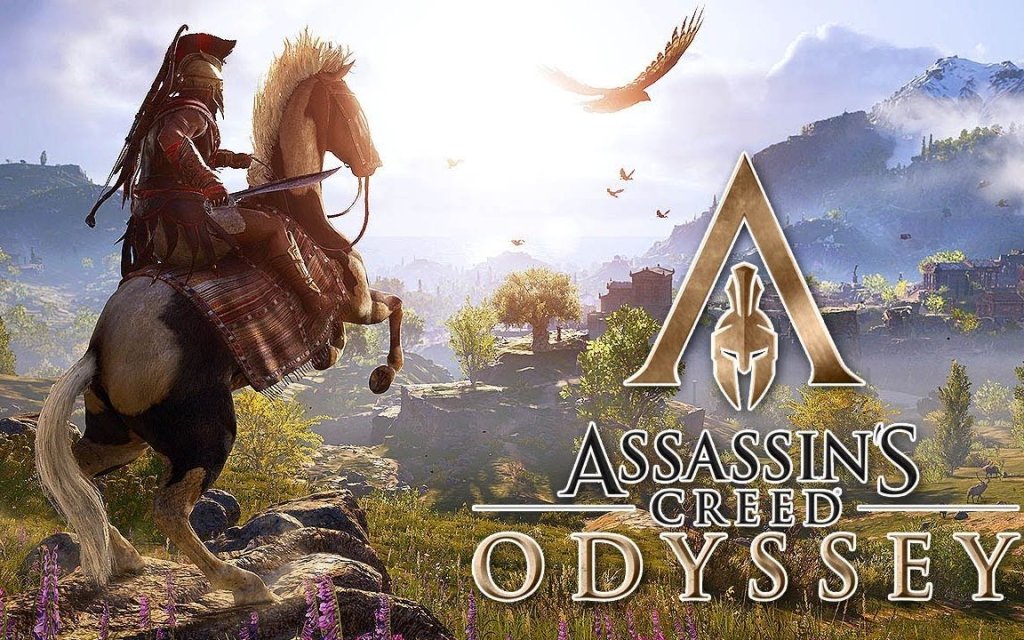
Characters & Roles
Characters & Roles
Overview
Assassin's Creed Odyssey offers a single player experience with no traditional character classes. Instead, you choose between two protagonists—Kassandra (canonical) or Alexios—and develop their abilities across three skill trees: Warrior, Hunter, and Assassin. This guide covers every major character you'll encounter, the playable protagonist(s), and the three distinct combat roles you can build toward.
---
Playable Characters
#### Kassandra / Alexios
- Background: A Spartan mercenary, descendant of King Leonidas, and the main protagonist. One is the Eagle Bearer; the other becomes the antagonist Deimos depending on your choice. Both share identical stats, skills, and dialogue options—only appearance and voice differ.
- Strengths: Incredibly versatile. Can be built for any playstyle. Has access to all skills, legendary weapons, and can recruit lieutenants.
- Weaknesses: None innate; all weaknesses come from your chosen build (e.g., glass cannon assassin lacks durability).
- Playstyle: Fully customizable. You can switch between Warrior, Hunter, or Assassin at any time by respeccing skills (costs drachmae).
- Unlock Conditions: Available from the start. You choose at the beginning of the game; no further unlock required.
- Recommended Equipment: Depends on role (see role sections below). As a generalist early on, use whatever has the highest DPS and armor rating.
- Team Synergy: You can recruit lieutenants for the Adrestia (your ship). Best lieutenants include legendary animals, mercenaries, and story NPCs. Their abilities (e.g., fire arrows, ramming boost) complement your ship combat style.
- Playstyle: Frontline brawler. Focus on melee damage, high health, and heavy armor. Use swords, spears, heavy weapons, or staffs.
- Strengths: Excellent survivability, consistent damage, good crowd control with area attacks.
- Weaknesses: Lower stealth mobility, can't one-shot high-level enemies, vulnerable to ranged fire if not closing distance.
- Recommended Skills (from skill tree):
- Recommended Equipment: Heavy armor sets like Spartan War Hero set or Achilles set. Weapons with damage bonuses at full health or against humans.
- Engravings: Focus on +Warrior Damage, +Armor, +Health, and +All Damage.
- Lieutenant Synergy: Recruit mercenaries with the Tank or Brawler archetype for ship boarding.
- Playstyle: Ranged archer. Uses bows to deal damage from distance. Can be stealthy or open combat.
- Strengths: Safe distance, high single-target damage (especially with headshots), can slow time with Devastating Shot.
- Weaknesses: Very fragile in close combat, limited ammo (must craft arrows), weaker against shielded enemies from the front.
- Recommended Skills:
- Recommended Equipment: Hunter-oriented sets like Pale Rider set or Prowl of the Wolf set. Bows with +Hunter Damage and +Headshot Damage.
- Engravings: +Hunter Damage, +Headshot Damage, +Critical Damage, +Arrow Capacity.
- Lieutenant Synergy: Recruit lieutenants with Sniper or Archer trait for fire arrow support.
- Playstyle: Stealth specialist. Focus on one-shot assassinations from hiding. Uses daggers or light blades.
- Strengths: Can kill powerful enemies instantly if undetected, excellent for clearing forts without alarm.
- Weaknesses: Poor direct combat survivability, requires careful positioning, less effective in open battles (unless using assassinations mid-combat via Shadow Assassin).
- Recommended Skills:
- Recommended Equipment: Assassin damage sets like Pilgrim set or Nordic Traveler set. Daggers and swords with +Assassin Damage.
- Engravings: +Assassin Damage, +Crit Damage while at full health, +Poison Damage, +Adrenaline on Assassination.
- Lieutenant Synergy: Recruit lieutenants with Shadow or Silent trait for stealth bonuses on ship missions.
- Assassin/Warrior: Use Critical Assassination to start a fight, then switch to melee combat. Engravings for both damage types.
- Hunter/Assassin: Snipe from a distance, then clean up with stealth. Focus on crit chance and damage.
- All-Rounder: Spread skill points evenly; flexible but less specialized. Good for story playthroughs.
- Mercenaries: When you knock them out in combat (not kill), recruit them.
- Certain NPCs: Some story characters (e.g., Nikolaos, Stentor) can be recruited after specific choices.
- Legendary Animals: After hunting and either killing or taming them (if you have the Taming skill).
- Nikolaos (+50% spear damage)
- Testikles (legendary animal, +fire damage)
- High-level mercenaries with specific bonuses like +adrenaline or +elemental damage.
---
Major Non-Playable Characters
1. Myrrine (Mother)
- Background: A former Spartan queen, mother of Kassandra/Alexios. She is a key ally in the family storyline.
- Role: Provides quests, emotional support, and rewards. Cannot be recruited as a lieutenant.
- Strengths: Has influence in Spartan politics. Her choices affect the family ending.
2. Nikolaos (Stepfather / The Wolf of Sparta)
- Background: A legendary Spartan general. He was forced to throw Kassandra/Alexios off a cliff. Later becomes an ally or enemy based on player choices.
- Role: Mentor figure in combat. Can be recruited as a lieutenant if spared.
- Unique Ability: +50% damage with spears (if recruited).
3. Stentor (Adoptive Brother)
- Background: Nikolaos's adoptive son, a young Spartan soldier. Jealous of the protagonist's fame.
- Role: Antagonist or ally depending on choices. Can be recruited as a lieutenant.
- Note: His loyalty is tenuous; killing him in battle prevents recruitment.
4. Deimos (Sibling – Alexios if you chose Kassandra, or vice versa)
- Background: The cult's champion, brainwashed by the Cult of Kosmos. The main antagonist of the family story.
- Role: Final boss of the family arc unless you persuade them to rejoin you.
- Strengths: Extremely high damage and health. Uses heavy weapons.
- Weaknesses: Slow attacks; vulnerable to parries.
5. Herodotos (Historian)
- Background: The famous Greek historian, a close friend and quest-giver.
- Role: Provides lore, side quests, and moral support. Not a combatant.
6. Barnabas (Captain of the Adrestia)
- Background: Your loyal ship captain, always cheerful and supportive.
- Role: Narrates sea travel, provides upgrades, and offers personal quests. Not a lieutenant.
7. Kleon (Politician)
- Background: An Athenian demagogue, antagonist in the main story. He is a target of the Cult.
- Role: Main antagonist in the Athens arc. Must be assassinated or confronted.
8. Aspasia (Leader of the Cult of Kosmos)
- Background: The powerful, manipulative leader of the Cult. Also a companion if you romance her.
- Role: Final boss of the Cult storyline. You can choose to spare or kill her.
9. Pythagoras (Biological Father)
- Background: The legendary philosopher, revealed as the protagonist's true father. He guards the Staff of Hermes Trismegistus.
- Role: Provides the Staff of Hermes and explains the Isu lore.
10. Phobos (Horse)
- Background: Your faithful steed, customizable with skins.
- Role: Mount. Can be summoned anywhere, upgraded with stamina and health.
11. Ikaros (Eagle Companion)
- Background: A trained eagle, your primary scout.
- Role: Used to tag enemies, find treasure, and distract guards. Cannot be killed. Upgrades via Sync Points.
---
Combat Roles (Build Archetypes)
While there are no formal classes, you can specialize your character into one of three roles. Below is a detailed breakdown for each.
#### Warrior
- Spartan Kick (knockback)
- Shield Breaker (ignore shields)
- Ring of Chaos (AoE knockback)
- Battlecry of Ares (increased damage and health regen)
- Second Wind (heal)
#### Hunter
- Predator Shot (controlled arrow, massive headshot damage)
- Multi-Shot (AoE for groups)
- Rain of Destruction (rapid fire)
- Chain Lure (pull enemies)
- Archer's Stance (endurance refill)
#### Assassin
- Critical Assassination (chargeable)
- Hero Strike (assassin attack in combat)
- Shadow of Nyx (temporary invisibility)
- Vanish (smoke bomb escape)
- Venomous Attacks (poison damage)
---
Hybrid Builds
Experienced players can combine two roles. Examples:
---
Recruitment & Lieutenants
Your ship's crew consists of lieutenants you recruit. To recruit a lieutenant:
Best lieutenants to aim for:
---
Conclusion
Mastering Assassin's Creed Odyssey requires understanding both the narrative characters and your customizable protagonist. Choose a role that fits your preferred playstyle, but don't hesitate to respec as you unlock new skills. Recruit the best lieutenants to make naval combat easier. The world of ancient Greece is yours to conquer.
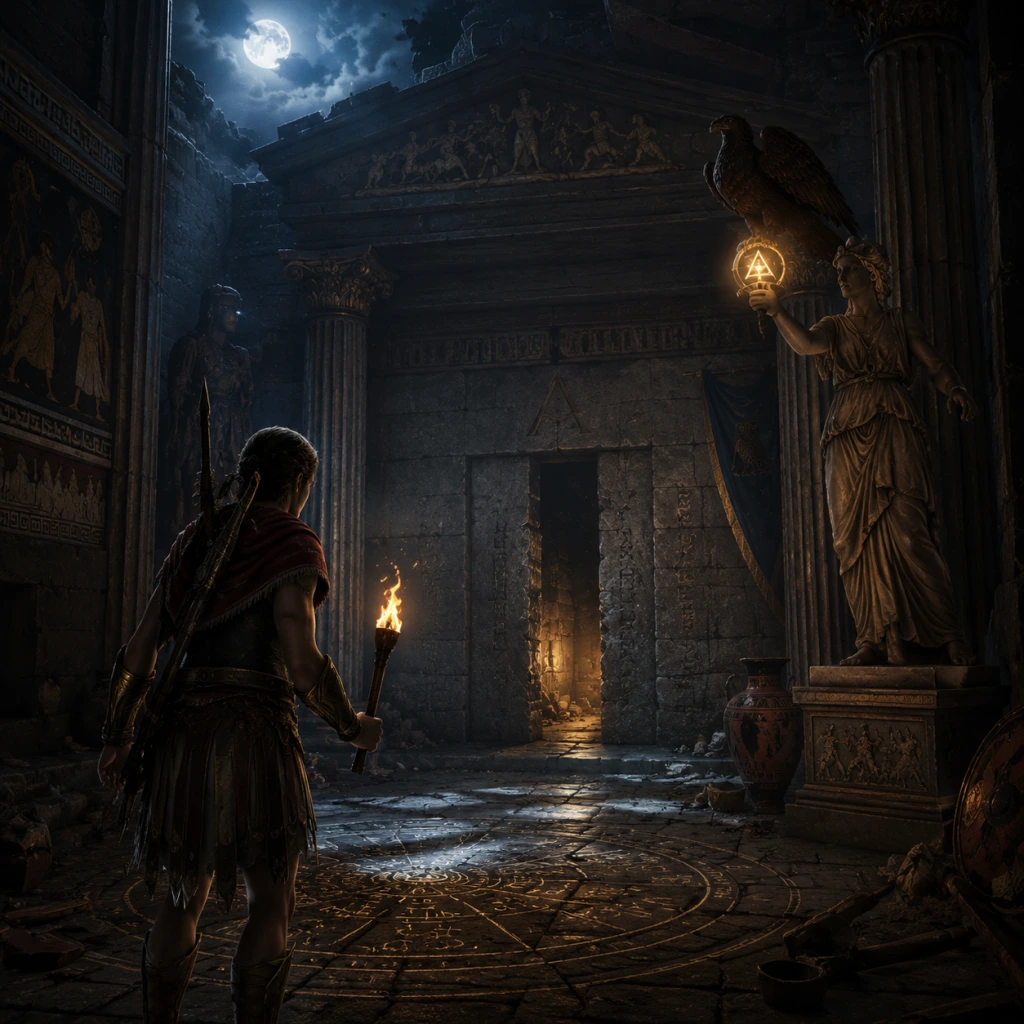
Cheats & Secrets
Cheats & Secrets
No Traditional Cheat Codes
Assassin's Creed Odyssey does not include any built-in cheat codes, console commands, or debug menus on any platform (PC, PlayStation, Xbox, or Stadia). Unlike older Assassin's Creed titles, there is no way to toggle invincibility, unlock all abilities, or spawn items through a developer console. Any third-party trainers or memory editors (e.g., Cheat Engine) used on PC are unofficial and may violate the game's terms of service; they are not covered in this guide.
Legitimate Hidden Content & Developer-Intended Secrets
Despite the lack of cheats, Odyssey is packed with secret quests, Easter eggs, unlockable items, and hidden areas that reward exploration and player ingenuity. Below is a comprehensive list of all known secrets and Easter eggs that are safe to use (no exploits or patched glitches).
---
Unlockable Items & Secret Gear
| Item / Outfit | How to Obtain | Notes |
|---|---|---|
| Banana of Doom | Complete the "Wine, Women, and Song" quest chain on the island of Kephallonia (starting area). When you speak with the farmer about the stolen wine, choose the dialogue option to challenge him to a fight. After defeating him, loot the Bana of Doom from his body. | A joke weapon (a large banana) that deals ridiculous damage. It is a permanent item and not a temporary placeholder. |
| The Dumbbell | Located on the island of Melos at the Temple of Apollo. Inside a small building near the temple, you'll find a golden dumbbell on a pedestal. Interact with it. | A weapon that looks like a giant metal dumbbell. It has a unique heavy attack and is more a cosmetic novelty than a power item. |
| Engraving: "+100% Damage but Health Capped to 25%" | Complete all Cultist clues and defeat the Cult of Kosmos. After the final cultist is eliminated, you receive this engraving as a reward for ng+. | This engraving is a risk-reward modifier perfect for high-skill builds. |
| Isu Armor Set | Collect all Isu (Ancient Forge) artifacts by solving the four mythic creature labyrinths (Minotaur, Cyclops, Sphinx, and Medusa). Once you have all four, visit the Forge of the Cyclops on Andros island. | This armor set provides a massive resistance boost and is essential for the highest difficulty levels. |
| Pegasus Mount (Phobos Skin) | Unlock the First Civilization ability tree and complete the quest line "A Matter of Legacy" on Korfu island. The final reward is a winged horse skin for your mount. | This skin makes Phobos look like a mythical Pegasus and gives no stat bonuses, but is purely cosmetic. |
| 'The Lost Tales of Greece' quest rewards | Download the free DLC quests from the Ubisoft Store. Each quest gives unique gear (e.g., the Sword of the Florentine from "The Heir of Memories" quest). | These are officially added content, not cheats, but they are hidden until you accept them from the quest board or message board. |
Easter Eggs & Pop Culture References
- The "Brotherhood" Reference: On the island of Seriphos, you can find a man named Hippokrates (not the historical one) who is trying to cure a plague. This is a direct reference to the Assassin's Creed II character Leonardo da Vinci's flying machine, as Hippokrates' house has a blueprint of a flying machine on the wall.
- "This is Sparta!" Moment: During the main story, when you meet King Leonidas, you can trigger a dialogue option that references the famous movie line (if you choose to kick a messenger off a cliff during the prologue). The game even has a brief camera angle reminiscent of the film 300.
- The Chicken Fight: On Kephallonia, there is a chicken named Chicken that you can interact with. If you attack it repeatedly, it will eventually summon a horde of aggressive chickens that can kill you—a nod to the legendary Assassin's Creed chickens that are actually deadly.
- Achilles' Heel: In the Elysium DLC (Fate of Atlantis), you can find a character named Patroclus lying on a bed with a heel injury. This is a humorous take on the myth of Achilles' weak spot.
- The Gold Key Mystery: Despite many rumors, there is no secret gold key that opens a hidden treasure room anywhere in the base game. This is a player-created myth; do not waste time searching for it.
- 'The Wizard of Oz' Reference: On Lesbos, during the quest "The Battle of 300". A character named Dorothy (a woman) appears with a dog named Toto. She asks for directions to the Emerald City (which doesn't exist in Greece). This is a clear Wizard of Oz parody.
- Pyramid Scheme: On the island of Chios, you can find a tomb interior that exactly resembles a small pyramid, complete with a hieroglyphic-style mural. This is an anachronistic Easter egg referencing ancient Egypt.
- Developer Cameo: In the Legacy of the First Blade DLC, you can find a gravestone that says "Here lies the game director," a joking tribute to the project lead.
- The Serpentine Wall Puzzle: On the island of Thera, there is a puzzle involving three serpentine stone keys that must be inserted in a specific order to open a hidden door. Inside, you'll find an Epic armor piece and a unique engraving. This is completely optional but easy to miss.
- Korfu Island (The Lost Tales of Greece): After completing Chapter 7 of the main story, a new quest board appears in Phokis that starts "The Lost Tales of Greece". This opens the Korfu island, a hidden location with its own humorous story arc that breaks the fourth wall. It includes items like the Pegasus skin and the Sword of the Florentine.
- The Minotaur Labyrinth (Mythical Creature): To unlock this secret boss, you must collect three iconic items from other quests: the Eyes of Kosmos, the Golden Fleece, and the Sword of Damokles. Then, travel to the Palace of Minos on Crete and enter the labyrinth. Defeating the Minotaur grants an Isu artifact.
- The Underworld Exploration: The Fate of Atlantis DLC has multiple hidden chambers and puzzles (e.g., the Sphynx's riddle area in Elysium). Solving all riddles in the base game's Sphinx encounter gives an extra ability point.
---
Hidden Quests & Secret Areas
---
Exploits (Patched / Not Recommended)
| Exploit Name | What It Did | Current Status |
|---|---|---|
| Infinite Drachmae Glitch (v1.0.x) | Killing certain NPCs dropped gold repeatedly leading to infinite money. | Patched in Title Update 1.2.0. Do not attempt. |
| Ability Point Duplication (v1.1.x) | Using the engraving system could duplicate ability points when respecing. | Patched in v1.3.0. |
| Wall Clipping Exploit (v1.0.x) | Using Parry + Roll together could clip through walls. | Patched; no longer works. |
| XP Exploit via Bounties (v1.0.x) | Completing bounties while accepting another from a different region caused cumulative XP. | Patched in v1.4.0. |
---
Developer-Intended Secrets: The Fate of Atlantis & Legacy of the First Blade DLCs
These paid expansions contain a treasure trove of hidden content:
- Fate of Atlantis:
- Legacy of the First Blade:
- No cheat codes exist – any online video claiming a code is fake.
- All secrets listed above are obtainable without any hacks and are part of the intended game design.
- Easter eggs are numerous; keep an eye out for odd characters, anachronistic objects, and fourth-wall-breaking dialogue.
- New Game+ is the closest thing to a "cheat" for replaying with all gear and abilities – access it from the main menu after finishing the main story.
- Solve the Three Gates of Atlantis puzzle in Elysium to unlock the Forge of Atlantis.
- Find all Isu Notes scattered across Atlantis to piece together the origin of the Assassin-Templar conflict.
- The Keeper's Insights (hidden in each realm) boost your Isu knowledge tree.
- The Hidden Blade ability is unlocked naturally, but you can find a golden Hidden Blade skin in a chest near the end of Episode 2.
- A secret ambush sequence triggers if you explore the outskirts of Makedonia before starting the main DLC quests.
---
How to Access Hidden Content (Step-by-Step)
1. Banana of Doom: On Kephallonia, go to the farm southwest of the starting village. The farmer will be drinking – attack him to start a fight. After he's down, loot the area behind the house.
2. Dumbbell: Fast travel to the Temple of Apollo on Melos (southwest island). Inside the small temple to the north of the main building, you'll see a pedestal. Interact.
3. Korfu Island: After reaching Chapter 7, return to the message board in Phokis (or any message board). Accept the quest "A Matter of Legacy" – it will mark Korfu on your map.
4. Pegasus Mount: Complete the entire Korfu storyline. During the final cutscene, you'll receive the skin. Equip it from your inventory > mount tab.
5. Isu Armor: Collect one artifact from each of the four mythical beast locations (Minotaur in Crete, Cyclops on Andros, Sphinx in Boeotia, Medusa on Lesbos). Then go to the forge on Andros (northern part of the island) and place them in the slots. The armor drops instantly.
---
Summary
Happy exploring, misthios!