Assassin's Creed Valhalla
## Game Introduction: Assassin's Creed Valhalla **Genre:** Action Role-Playing Game (ARPG), Stealth, Open World, Historical Fiction **Developer:** Ubisoft Montreal (lead), with contributions from Ubisoft Quebec, Ubisoft Sofia, Ubisoft Shanghai, and others. **Publisher:** Ubisoft **Release Timeline:...
Download & Installation
Download & Installation Guide for Assassin's Creed Valhalla
This guide covers all official platforms and methods to download and install Assassin's Creed Valhalla. Follow the steps for your specific platform.
---
Official Download Sources
| Platform | Store / Launcher | Notes |
|---|---|---|
| PC | Ubisoft Connect | Required; purchase from Ubisoft Store or redeem codes. |
| PC | Epic Games Store | Purchase & download via Epic; launches Ubisoft Connect. |
| PC | Steam | Purchase & download via Steam; launches Ubisoft Connect. |
| PlayStation | PlayStation Store (PS4/PS5) | Digital purchase required; disc version available. |
| Xbox | Microsoft Store (Xbox One, Series X | S) |
| Stadia | Stadia Store | Service discontinued Jan 2023; no longer purchasable. |
---
System Requirements (PC)
#### Minimum Requirements (1080p, Low Settings, 30 FPS)
- OS: Windows 10 (64-bit)
- CPU: Intel i5-4460 or AMD Ryzen 3 1200
- RAM: 8 GB
- GPU: NVIDIA GTX 960 (4GB) or AMD R9 380 (4GB)
- DirectX: Version 12
- Storage: 160 GB HDD (SSD recommended)
- OS: Windows 10 (64-bit)
- CPU: Intel i7-6700 or AMD Ryzen 5 1600
- GPU: NVIDIA GTX 1060 (6GB) or AMD RX 570 (8GB)
- RAM: 16 GB
- Storage: 160 GB SSD
- Digital:
- Disc:
- Digital:
- Disc:
- Ubisoft Account: Mandatory for all platforms. Required for cloud saves, online features, and DRM.
- Platform Accounts: PlayStation Network (PS), Xbox Live/Microsoft Account, Steam, Epic Games account (if using those stores).
- No subscription needed for single-player; online co-op features require respective platform subscription (PlayStation Plus, Xbox Game Pass Core/Ultimate) for multiplayer modes.
#### Recommended Requirements (1080p, High Settings, 30 FPS)
Ultra / 4K: i7-8700K or Ryzen 7 2700X, RTX 2080S / RX 5700 XT, 16 GB RAM, 160 GB SSD.
> Note: Actual storage required after updates is ~140-160 GB. Ensure at least 180 GB free for installation and patching.
---
Step-by-Step Installation
#### PC – Ubisoft Connect
1. Download and install Ubisoft Connect PC from [ubisoft.com](https://ubisoft.com).
2. Log in with your Ubisoft account. If you don't have one, create it.
3. Go to Games > All Games and find Assassin's Creed Valhalla (or use search).
4. Click Download (or Install if already purchased).
5. Choose installation directory (ensure 180+ GB free).
6. Wait for download and installation. The launcher will verify files afterwards.
7. Launch the game from Ubisoft Connect or desktop shortcut.
#### PC – Epic Games Store
1. Install Epic Games Launcher from [epicgames.com](https://epicgames.com).
2. Log in and go to Library.
3. Locate Assassin's Creed Valhalla and click Install.
4. Select an installation folder. Epic will also install Ubisoft Connect automatically.
5. After download, Ubisoft Connect will open and perform additional setup.
6. Complete any Ubisoft updates, then launch from Epic or Ubisoft Connect.
#### PC – Steam
1. Install Steam from [store.steampowered.com](https://store.steampowered.com).
2. Log in and go to Library.
3. Right-click Assassin's Creed Valhalla > Install.
4. Choose a folder on an SSD with ample space.
5. Steam will download; once done, it will prompt to install Ubisoft Connect.
6. Accept, and Ubisoft Connect will handle final setup. Launch via Steam.
#### PlayStation 4 / 5
1. Navigate to PlayStation Store on your console.
2. Search for Assassin's Creed Valhalla.
3. Purchase (or redeem code) and select Download.
4. The game will install automatically. On PS5, choose PS5 version if available.
5. Once installed, launch from the home screen.
1. Insert the game disc.
2. Follow on-screen prompts to copy the data from disc and download patches.
3. Patches are required; ensure internet connection.
4. Launch after installation.
PS4 → PS5 Free Upgrade: Insert PS4 disc into PS5 (or own digital PS4 version) and download the free PS5 upgrade from the store.
#### Xbox One / Series X|S
1. Go to Microsoft Store on your console or online.
2. Search for Assassin's Creed Valhalla and purchase.
3. Select Install on your console.
4. The game will download and install; Smart Delivery automatically gives the best version for your console.
5. Launch from Home.
1. Insert disc. Console will install mandatory data.
2. Download any required updates via internet.
3. Play after installation.
Smart Delivery: If you own Xbox One version, the Series X|S upgrade is free and automatic.
---
Account Requirements
---
First Launch Setup
1. After installation, launch the game.
2. Ubisoft Connect overlay will appear (on PC). Log in if not already.
3. Choose Graphics Settings (auto-detected, adjust as needed).
4. Accept the End User License Agreement (EULA).
5. Select Difficulty (Exploration/Combat/Narrative).
6. Adjust Audio (subtitles, language).
7. Wait for shader compilation (PC – may take several minutes).
8. The game will begin a prologue cutscene and tutorial.
9. Optional: Link Twitch Drops or Ubisoft Connect rewards from the menu.
---
Common Installation Errors & Fixes
| Error | Platform | Cause & Solution |
|---|---|---|
| Insufficient disk space | All | Free up space; at least 180 GB required. Run Disk Cleanup. |
| Ubisoft Connect not installed | PC (Epic/Steam) | Uninstall and reinstall Ubisoft Connect from Ubisoft's site. |
| Download stuck / slow | All | Pause/resume; check internet; disable VPN; restart launcher. |
| “Failed to install” errors | PC | Run launcher as Administrator; disable antivirus temporarily; verify game files. |
| Corrupted data | PlayStation | Rebuild database (Safe Mode) or delete and reinstall game. |
| Disc read errors | Xbox/PS | Clean disc; try offline installation; contact support. |
| Shader compilation crash (PC) | PC | Update GPU drivers (NVIDIA/AMD). Lower graphics settings before launch. |
| Ubisoft Connect offline | PC | Ensure Ubisoft servers are online; check firewall. |
| Controller not working | PC | Connect via USB; update drivers; disable Steam Input per-game. |
- Ubisoft Connect: Right-click game > Verify files.
- Steam: Right-click > Properties > Local Files > Verify integrity.
- Epic: Click three dots > Manage > Verify.
- PC (base game + day 1 patch): ~140 GB
- PS5: ~85 GB
- PS4: ~105 GB
- Xbox Series X|S: ~95 GB
- Xbox One: ~115 GB
- With all DLC (Wrath of the Druids, Siege of Paris, Dawn of Ragnarök): Add ~30-50 GB total.
- SSD highly recommended on all platforms to reduce load times (PC/Xbox/PS5).
- Pre-loading – If you pre-ordered, download the game before launch day. On PC, this is typically available 2 days before release.
- Cross-progression – If you play on multiple platforms (e.g., PS and PC), enable cloud saves via Ubisoft Connect (requires same Ubisoft account).
- Game updates – Enable automatic updates on your platform to keep the game patched without manual action.
---
Post-Installation Verification
1. Check game version – Main menu should show version number (e.g., 1.7.0).
2. Test performance – Run the built-in benchmark (Options > Graphics > Benchmark) to confirm FPS targets.
3. Check DLC/Season Pass – Ensure purchased content appears in “Downloadable Content” menu.
4. Cloud saves – Play for a few minutes, then exit. Verify that a cloud save icon appears in Ubisoft Connect.
5. Audio/Visual – Ensure no missing textures, audio crackles, or crashes.
If issues persist, visit [Ubisoft Support](https://support.ubisoft.com) or your platform’s help center.
---
Storage Space Breakdown (Approximate)
Always keep at least 20 GB free above the required space for updates and saves.
---
Additional Tips
---
This guide is accurate as of game update 1.7.0. Always check official channels for changes.
Game Introduction
Game Introduction: Assassin's Creed Valhalla
Genre: Action Role-Playing Game (ARPG), Stealth, Open World, Historical Fiction
Developer: Ubisoft Montreal (lead), with contributions from Ubisoft Quebec, Ubisoft Sofia, Ubisoft Shanghai, and others.
Publisher: Ubisoft
Release Timeline:
- Worldwide: November 10, 2020 (PC, Xbox Series X|S, Xbox One, PlayStation 4, Stadia)
- PlayStation 5: November 12, 2020 (North America), November 19, 2020 (Europe/other regions)
- Amazon Luna: November 2020
- Later updates: Multiple free seasonal updates, expansions, and a full next-gen patch.
- Norway: Frigid fjords, snowy peaks, and sparse settlements (mainly early game).
- England: Four major kingdoms with distinct biomes—lush fields, dense forests, rivers, marshes, and Roman ruins. Major cities include London, Winchester, Jorvik (York), and Repton.
- Vinland: A smaller, remote region (via side quests) representing North America before European colonization.
- Asgard & Jotunheim: Mythological realms accessible through hallucinogenic visions, offering fantastical segments with Norse gods.
- Eivor Varinsdottir – The protagonist, a fierce yet diplomatic Viking leader. Players can choose male (voice: Magnus Bruun) or female (voice: Cecilie Stenspil) and customize appearance.
- Sigurd Styrbjornsson – Eivor’s adoptive brother and co-leader of the Raven Clan, whose arc involves manipulation by the Order.
- Randi, Guthrum, and other clan members – Key supporting characters with personal quests.
- Basim Ibn Ishaq – A cunning Hidden One (Assassin) who becomes both ally and antagonist.
- Alfred the Great – King of Wessex, the main human antagonist and leader of the Order of the Ancients.
- Layla Hassan – Modern-day protagonist in the Animus, continuing her role from previous games.
- Odin/Havi – Appears in Asgard visions; intertwined with Eivor’s Isu heritage.
- Raiding and Conquest: Lead your clan on epic Viking raids to plunder monasteries and fortresses.
- Settlement Building: Build and upgrade Ravensthorpe—your personal village with trading posts, barracks, a tattoo shop, and more.
- Combat System: Dual-wield axes, shields, and even heavy weapons; use adrenaline-fueled abilities and stun kills.
- Stealth & Parkour: Blend into crowds, use haystacks, climb structures, and assassinate key targets (with optional disabling of one-hit assassinations).
- Character Customization: Hundreds of armor pieces, weapons, and cosmetic options; skill tree with three branches (Raven, Bear, Wolf).
- Mythology & Supernatural: Explore realms of Norse gods via hallucinogenic visions or ancient Isu temples.
- Action RPG Fans: Those who enjoy The Witcher 3, Skyrim, or Ghost of Tsushima.
- Assassin’s Creed Veterans: Players who love the historical fiction and modern-day conspiracy.
- Viking Enthusiasts: History buffs drawn to the Viking Age and Norse mythology.
- Open World Explorers: Gamers who thrive on hundreds of hours of content, side quests, and collectibles.
- Casual to Hardcore: Difficulty options and gameplay toggles (e.g., guided vs. exploration mode) accommodate various playstyles.
- Story Mode (Main Campaign): Complete the main narrative—Eivor’s journey to unite the English kingdoms and defeat the Order.
- Open World Free Roam: Explore the entire map, complete side activities, hunting, fishing, and world events.
- Raids: Cooperative or solo? Raids are solo in campaign; later updates added “River Raids” that are semi-randomized and repeatable.
- Online Multiplayer: No traditional multiplayer; however, there is a Discovery Tour: Viking Age mode (educational, non-combat) available as free DLC.
- Offline: The entire single-player campaign can be played offline after initial installation. No persistent internet connection required for basic gameplay.
- Online: Internet required for:
- No dedicated multiplayer servers; all content is solo.
Platforms: Microsoft Windows, Xbox Series X|S, Xbox One, PlayStation 5, PlayStation 4, Google Stadia, Amazon Luna (also playable on macOS via Shadow streaming).
Story Overview
Set in the 9th century AD, Assassin's Creed Valhalla follows the saga of Eivor Varinsdottir (male or female, choice available), a Viking raider born in Norway. After a tragic betrayal and the death of their clan chief father, Eivor grows up seeking vengeance and a new home. Escaping a tyrannical king in Norway, Eivor leads their clan—the Raven Clan—to the shores of Anglo-Saxon England. The land is fractured into warring kingdoms: Wessex, Mercia, East Anglia, and Northumbria, each ripe for conquest. Eivor must forge alliances, build a settlement, and carve out a new destiny while clashing with the secret war between the Assassins (Hidden Ones) and Templars (Order of the Ancients). The player unravels a modern-day mystery as Layla Hassan, continuing the animus storyline, while exploring the hidden Isu (precursor) history.
Setting
The game depicts a stunning, vast open world spanning:
Main Characters
Core Appeal
Assassin's Creed Valhalla combines the gritty brutality of Viking raids with deep RPG progression, strategic settlement management, and the iconic stealth of the Assassin’s Creed franchise. Its key hooks:
Target Audience
Game Modes
Online/Offline Support
- Installing the game and updates.
- Accessing the in-game store (microtransactions for cosmetics/time-savers).
- Reda’s Shop (daily/weekly quests).
- River Raids and weekly challenges (post-launch content).
- Cloud saves.
DLC / Expansion Overview
Ubisoft released two major narrative expansions and several free seasonal updates:
| Expansion | Release Date | Description |
|---|---|---|
| Wrath of the Druids | May 13, 2021 | Eivor travels to Ireland to confront the druidic order of the Children of Danu. New region, weapons, abilities, and trade mechanics. |
| The Siege of Paris | August 12, 2021 | A dark story set in Francia, featuring the Siege of Paris (885–886 AD). Includes new weapons, a rebellion faction, and black-box assassination missions. |
| Dawn of Ragnarok | March 10, 2022 | A massive expansion set in the mythical Norse realms. Eivor plays as Odin in Svartalfheim to rescue Baldr. New powers, gear, and a giant open world. |
| The Last Chapter | December 6, 2022 | Free final update that concludes Eivor’s story and ties up loose ends. |
What Makes This Game Unique?
1. Dual Protagonist Choice: Unlike previous entries, the canon protagonist is female Eivor, but players can freely choose gender and romantic options, with the narrative adapting accordingly.
2. Settlement as a Hub: Ravensthorpe evolves physically as you complete storyline arcs, with NPCs offering quests, tattoos, and resource management—similar to AC II’s Monteriggioni but deeper.
3. Skill Tree without Level Caps: The power level system (150+ points) allows near-unlimited progression via a circular skill web.
4. Exploration Mode: A map that uses vague directions (e.g., “west of the river, near a ruined abbey”) instead of precise markers, rewarding player observation.
5. Viking Realism & Myth: Blends historical Viking raids (with shieldmaidens, longboats, and Saxon kingdoms) with mythological segments that are revealed as Isu visions, offering trippy, psychedelic levels.
6. Longest Assassin’s Creed Campaign: Main story alone takes ~60 hours; with all content, over 150 hours of gameplay.
7. Next-Gen Features: On Xbox Series X|S and PS5, 60fps performance, faster load times, and dynamic resolution up to 4K. Also supports HDR and spatial audio.
In summary, Assassin's Creed Valhalla is a monumental Viking epic that refines the RPG formula established by Origins and Odyssey while injecting brutal combat, deep customization, and a living settlement. It’s a must-play for fans of historical action-RPGs and Norse sagas.
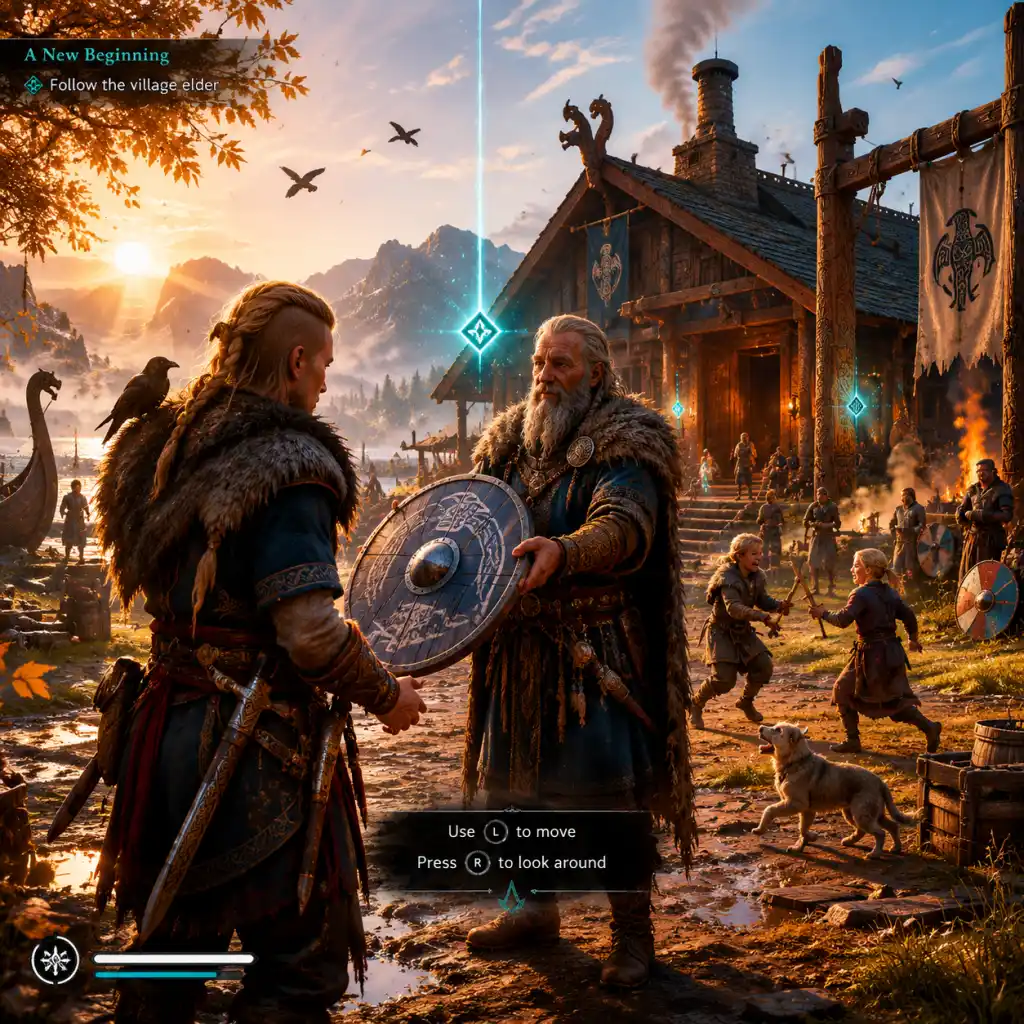
Getting Started
Getting Started Guide for Assassin's Creed Valhalla
Welcome to Assassin's Creed Valhalla! This guide is designed for brand-new players to help you survive your first hours as Eivor, a Viking raider caught between the cold shores of Norway and the warring kingdoms of England. Follow this step-by-step walkthrough, learn the controls, avoid common pitfalls, and set yourself up for a successful journey.
---
First-Hour Walkthrough: From Character Creation to England
Your first hour will roughly follow this path:
1. Launch the game → You will be prompted to choose a difficulty mode. We recommend Normal if you’re new, but you can change it later in the settings.
2. Cinematic introduction → You see a young boy (Eivor) and his sister. This sets up the story.
3. Character Creation → After the opening cinematic, you enter the character customization screen.
4. Prologue: Norway → You control Eivor as a child in a snowy village. Follow the on-screen prompts to move, interact, and climb. This is a safe tutorial. After a short sequence, you time-skip to adult Eivor.
5. Adult Prologue → You wake up after a battle. You’ll learn basic combat, parkour, and stealth. Do not rush – experiment with each button.
6. The Return of the Raven → Your first main objective. You meet Valka and learn about the settlement. Then you receive your longship and sail to England.
7. Arrival in England → After a storm, you wash ashore near the River Exe. Follow the story mission to find a place for your new home. This ends the first hour.
Tip: During the prologue, remember to use your raven (Synnin) to scout areas and mark enemies. Hold the button shown on screen to activate her.
---
Character Creation
At the very start, you define your Eivor. Here are the options:
| Option | Description |
|---|---|
| Gender | Choose Male, Female, or Let the Animus Decide (swaps gender during modern-day segments). Canonically, female Eivor is the main historical character; male is a disguise. Pick whichever feels right. |
| Appearance | Customize hair, beard (male only), face paint, outfit colors, and more. You can later change these at the tattoo shop in your settlement. |
| Difficulty | Normal, Hard, or Nightmarish. You can change difficulty in the pause menu at any time. |
---
Controls (All Platforms)
Below are the default control schemes. You can remap controls in the settings menu.
#### PC (Keyboard + Mouse)
| Action | Keys |
|---|---|
| Move | W A S D |
| Sprint / Mount | Shift (hold) |
| Interact / Pick up | E |
| Attack (Light) | Left Mouse Button |
| Attack (Heavy) | Right Mouse Button |
| Block / Parry | Q |
| Dodge / Roll | Alt (or double-tap movement) |
| Crouch / Stealth | Ctrl |
| Use Odin’s Sight | V (hold) |
| Call Raven | X |
| Skill Wheel | R |
| Weapon Swap | Mouse wheel up/down or 1/2 |
| Open Map | M |
| Pause / Menu | Escape |
| Action | Button |
|---|---|
| Move | Left stick |
| Sprint / Mount | Hold A |
| Interact / Pick up | Y |
| Attack (Light) | RB |
| Attack (Heavy) | RT |
| Block / Parry | LB |
| Dodge / Roll | B |
| Crouch / Stealth | Left stick (click) or X (hold) |
| Odin’s Sight | Hold Right stick |
| Call Raven | Up on D-pad |
| Skill Wheel | Hold LB + press RB? Actually hold LB to quick ability? Check in-game. Typically hold LB to bring up ability wheel. |
| Weapon Swap | Left/Right on D-pad |
| Open Map | Touchpad button or Select |
| Action | Button |
|---|---|
| Move | Left stick |
| Sprint / Mount | Hold X |
| Interact / Pick up | Triangle |
| Attack (Light) | R1 |
| Attack (Heavy) | R2 |
| Block / Parry | L1 |
| Dodge / Roll | Circle |
| Crouch / Stealth | L3 (click) or Square (hold) |
| Odin’s Sight | Hold R3 |
| Call Raven | Up on D-pad |
| Skill Wheel | Hold L1 |
| Weapon Swap | Left/Right on D-pad |
| Open Map | Touch pad or Options |
---
UI Overview
When you start playing, you’ll see several icons on your screen:
- Health Bar (top-left) – Red bar for health; grey bar shows maximum health.
- Stamina & Adrenaline (below health) – Green stamina depletes when sprinting or climbing. Fill adrenaline (yellow segments) by landing hits; you spend adrenaline on special abilities.
- Quest Tracker (top-right) – Shows your current objective. Press Tab (PC) or the menu button to see your full quest log.
- Compass (top of screen) – Shows directions, points of interest (white dots), quest markers (yellow), and enemy locations (red).
- Mini-map – Located bottom-left by default. Shows immediate surroundings; you can cycle map zoom with the map key.
- Action Prompts – Appears in the center of screen when near something interactive.
- Skill Points – Shown next to health bar; you earn one per level-up and can spend them in the Skill Tree.
- Do the tutorial missions – They teach you core mechanics.
- Build the Blacksmith in your settlement – Upgrades are essential.
- Spend your first skill points wisely – Focus on one branch: Raven (stealth), Wolf (ranged), or Bear (melee). Don’t spread too thin.
- Collect resources from the environment – Loot every chest, break wooden crates, and harvest plants.
- Talk to NPCs in your settlement – They give quests and lore.
- Use Odin’s Sight (hold V on PC) constantly to reveal hidden objects and enemies.
- Save your silver for later – Avoid buying gear from early merchants; you’ll find better loot in the world.
- Complete your first raid – The tutorial raid teaches you to call your longship crew and break into fortified towns.
- Don’t rush to the southern regions of England – Enemies there are level 90+ and will one-shot you.
- Don’t ignore the settlement – Upgrading Ravensthorpe unlocks new services (stables, hunter’s hut, etc.) that make the game easier.
- Don’t fight large groups head-on – Use stealth, arrows, and abilities to thin them out.
- Don’t skip side content entirely – World Events and Mysteries give skill points and gear. But don’t get lost in them either.
- Don’t waste resources on upgrading every weapon – Pick one or two favorite weapons and upgrade only those.
- Don’t sell all your spare gear – Some gear can be upgraded later, and you can always store it. Instead, dismantle for raw materials.
- Don’t forget to use your longship as fast travel – You can summon it to rivers via the map.
- [ ] Set difficulty (Normal recommended for first time).
- [ ] Create your character – Choose gender, customize appearance.
- [ ] Complete the prologue (Norway) – Follow the story until you sail to England.
- [ ] Reach England and begin the quest “The Port of Exe.”
- [ ] Arrive at your settlement site – Build the Blacksmith.
- [ ] Unlock fast travel by synchronizing at least two viewpoints (one near your settlement).
- [ ] Spend your first skill points – Pick one branch and unlock one core ability.
- [ ] Complete your first raid (the tutorial raid on a nearby monastery).
- [ ] Upgrade at least one weapon to level 2 (use iron/leather from the raid).
- [ ] Equip a piece of gear from the Hidden Ones quest if you find it, or from loot.
- [ ] Explore a few World Events to get a handle on side quests.
- [ ] Talk to your clan members in your settlement to start building relationships.
- [ ] Practice stealth – Try clearing a small enemy camp without being detected.
- [ ] Save your game manually before quitting.
Other elements like loot notifications and raid alerts appear temporarily. You can customize the UI opacity and toggle elements in the Options menu.
---
Essential Early Objectives
Your first priority after character creation is to follow the main story until you establish your settlement, Ravensthorpe, in England. Specifically:
1. Complete the prologue in Norway (story quest “The Return of the Raven”).
2. Sail to England (story quest “The Port of Exe” or similar).
3. Build the first settlement building – the Blacksmith. This allows you to upgrade your gear.
4. Complete the quest “The Sons of Ragnar” to unlock your first proper open-world region.
5. Visit the Hidden Ones Bureau early (once you find it) to unlock the Hidden Ones questline and gain early assassin armor.
6. Synchronize viewpoints (the tall towers) to reveal the map and unlock fast travel.
Avoid skipping the main story to explore far away. The early game gates many features behind settlement progress.
---
What to Do First vs. What to Avoid
#### ✅ Do First
#### ❌ What to Avoid
---
Early Resource Priorities
Resources are scarce early on. Focus on these:
1. Raw Materials (stone and timber) – These build and upgrade settlement structures. Highest priority.
2. Supplies (cloth, leather, iron) – Used for upgrading gear and some settlement projects. Gather from loot and raids.
3. Silver – Currency for buying items and bribes. Earn from selling valuables (jewels, ingots) and completing quests. Save it for important upgrades.
4. Leather – Needed for upgrading armor. Dismantle unwanted armor pieces to get leather.
5. Iron Ore – For upgrading weapons. Dismantle unwanted weapons.
6. Skill Points – Earned from leveling up and discovering “Books of Knowledge.” Spend them immediately; you can reset later.
7. Opals – Rare currency for the shop of the mysterious merchant “Reda” (appears every week). Collect opals from daily quests and glowing blue treasures in the world.
Tip: In the first 10 hours, prioritize settlement upgrades over gear upgrades. A level-2 settlement gives you a stable (free mount) and a hunter’s hut (special arrows).
---
Common Beginner Mistakes
1. Not using the raven – Synnin reveals enemy positions, loot, and quest objectives. Use her often.
2. Forgetting Odin’s Sight – This highlights lootable items, secrets, and enemies in your vicinity. Hold the assigned key/finger every few steps.
3. Ignoring combat tutorials – Blocking, parrying, and dodging are vital. Practice until you can parry Viking attacks consistently.
4. Spending all skill points in one area but then wanting another – You can reset the entire skill tree at any time for a small silver fee at the skill interface. But it’s better to plan a build early. Look online for beginner-friendly builds.
5. Trying to fight zealots (golden enemies) early – They are level 200+ and roam the map. Avoid until you are at least power level 100.
6. Not upgrading the rations pouch – You carry limited healing rations. Upgrade at the herbalist’s hut in your settlement to carry more.
7. Skipping dialogue – The story gives context for your actions and often reveals clues for puzzles.
8. Forgetting to manually save – The auto-save is generous, but occasional manual saves (Save in pause menu) prevent losing progress.
---
Day-One Checklist
Complete these tasks during your first play session (approximately 2–4 hours):
Congratulations! You’ve survived the first day. The world of Assassin’s Creed Valhalla is now open for you to raid, explore, and conquer. Go – become a legend of the Northmen.
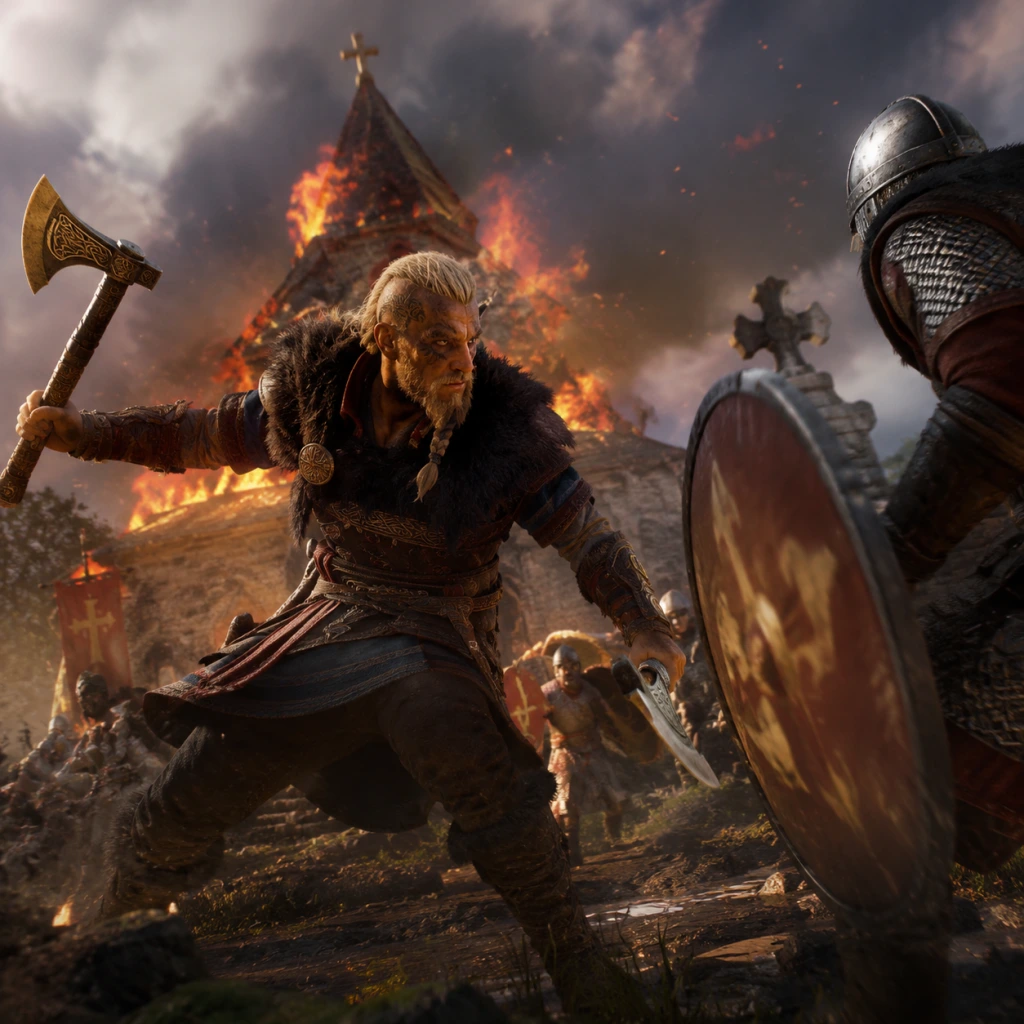
Core Gameplay
Core Gameplay Guide for Assassin's Creed Valhalla
This guide breaks down the core gameplay loop of Assassin's Creed Valhalla across four progression tiers: Early Game (Power 1–90), Mid Game (Power 90–200), Late Game (Power 200–340), and Endgame (Power 340+). Each tier explains the main loop, combat and interaction systems, progression mechanics, exploration, quests, economy, character/build growth, and endgame structure.
---
Early Game (Power 1–90)
Main Gameplay Loop
- Raid & Loot: Sail to enemy territories with your crew to raid monasteries, forts, and camps for raw materials (used to upgrade your settlement) and gear. Raids are your primary source of early resources.
- Complete Quests: Follow the main story arcs in Norway and early England (Rygjafylke, Ledecestrescire, Grantebridgescire). Each arc includes a mix of story missions, world events, and optional activities.
- Explore & Gather: Traverse open landscapes to collect wealth (gear, ingots, books of knowledge), secrets (flyting, drinking games, standing stones), and artifacts (tattoos, treasure hoard maps).
- Build Your Settlement: Spend raw materials and supplies to construct buildings in Ravensthorpe (e.g., the Hidden Ones' Bureau, stables, fishing hut). Each building unlocks new services and missions.
- Weapons & Skills: You start with a simple one-handed axe and shield, plus a few basic abilities (e.g., Stun Attack, Light Bow). Unlock skill nodes from the Raven, Bear, and Wolf skill trees. Early focus: "Brutal Assault" (Bear) for heavy damage, "Chain Assassination" (Raven) for stealth.
- Light & Heavy Attacks: Light attacks are fast; heavy attacks break guard. Use stamina management—dodging and parrying cost stamina.
- Parry & Stun: Time a block just before a hit to parry, opening enemies to a stun attack (light attack after parry). Stun attacks build the stun meter; when full, perform a powerful finisher.
- Ranged: Use the bow for stealth kills, explosive arrows (via abilities), and harassing enemies. Early game bows are weak; upgrade at the Hunter's Hut.
- Stealth: Crouch to enter stealth. Assassinate unaware enemies (one-hit kill if your weapon level is sufficient). Use whistle to lure guards, Hide in bushes, and perform air assassinations.
- Raiding: Call your longship crew to help attack settlements. They will automatically engage enemies, break doors, and carry loot.
- Power Level: Increases via skill points earned from leveling up (gaining XP from kills, quests, discoveries). Each skill node raises your power by 1.
- Settlement Level: Ranks 1–6. Early game reach Level 2–3 by building essential structures (Blacksmith, Stable, Hidden Ones' Bureau). This unlocks new quests and gear upgrades.
- Gear Rarity: Weapons and armor start as Common (gray) or Rare (blue). Upgrade them at the Blacksmith using leather and iron ore, but prioritize strong weapons like the Varins Axe (from Norway) or the Fyrd Axe.
- Sync Points: Climb tall structures (churches, towers) to reveal surrounding points of interest on the map. Always synchronize when new regions unlock.
- Treasure Maps: Loot wealth on the map indicated by golden icons. Each region has three types: gear, ingots (for upgrading settlement), and books of knowledge (new abilities).
- World Events: Small side stories that grant XP and sometimes gear. Examples: helping a farmer fight wolves, solving a mystery with a cursed child.
- Flying Papers: Chase glowing blue papers to unlock new tattoo designs.
- Main Story Arcs: Start in Norway with "The Sacking of Chesterton" and move to England via "The Saga of the Northmen." Each alliance arc consists of several quests; you can choose order of regions from the Alliance Map in your settlement.
- Side Quests: Unlock after building certain structures (e.g., the Seer's Hut for drug-induced visions, the Trading Post for river raids).
- World Events: Scattered, non-marked quests. Interact with NPCs to trigger them.
- Currency: Silver—used to buy gear, resources, and cosmetic items. Earn from selling surplus loot, completing contracts, and looting.
- Resources: Raw materials (from raids) and supplies (from chests, trade) are settlement-only. Leather and iron ore are used for personal gear upgrades.
- Trading: Build the Trading Post to exchange resources for silver, but early game prioritize upgrading gear over selling.
- Skill Trees: Early points should go into: Raven tree for stealth (e.g., "Guided Arrow," "Dominate" skill), Bear tree for durability (e.g., "War Cry," "Battlefield Cremation"), Wolf tree for ranged (e.g., "Blinding Bow," "Explosive Arrow"). Aim for a hybrid build—focus on Raven/Bear for a balanced assassin/warrior.
- Armor Sets: Complete early armor sets like the Raven Clan gear (stealth bonuses) or the Celtic set (from preorder). Mix and match for stat bonuses (head, chest, arms, legs, cloak).
- Abilities: Unlock up to 4 active abilities and equip them via the weapon wheel. Early favorites: "Harpoon Impalement" (drag enemies), "Throw V.A. Trap" (stun), "Dust of Man" (garbage ability, skip).
- Not applicable yet—focus on completing the Norway intro and first two English regions. Do not attempt high-power regions like Snotinghamscire or Essexe.
- Alliance Arc Chains: Complete story arcs in several English shires (e.g., Oxenefordscire, Sciropescire, East Anglia). Each arc culminates in an alliance with a local ruler, progressing the larger narrative about unifying England.
- River Raids: After building the River Raid Barracks (settlement Level 4), embark on repeatable raids along rivers in England, Francia, and Iberia for exclusive gear and resources.
- Wealth of Wissen: Collect all wealth in regions to reach full completion. Focus on ingots (to upgrade settlement to Level 5) and books of knowledge for powerful new abilities.
- Cairn Puzzles & Flyting: Engage in brain teasers (stacking stones) and verbal battles to earn XP and skill points.
- Dual-Wielding: At Power ~100, unlock the ability to wield two one-handed weapons or a two-handed weapon in one hand. Key combo: dual daggers for fast attack speed, or a hammer + shield for heavy damage.
- Special Attacks: Use adrenaline (gained from combat) to perform powerful moves like "Meteor Strike," "Are You My Mentor?" (hidden blade strike), or "Ring of Fire."
- Ranged Upgrades: Unlock explosive arrows, poison arrows, and triple shot. Use bows effectively against weak spots on enemies (e.g., bellows, armor gaps).
- Stealth Assassination: One-hit kills become easier with upgraded hidden blade and stealth gear. Use the social stealth (blending with crowds) in larger towns like Lunden or Jórvik.
- Drengr Combat: Face legendary warriors (Drengr) for unique gear. Use parry-heavy tactics; they have unblockable attacks signaled with a red flash.
- Power Level: Skill points are earned faster. Reach Power 160–200 by completing most of England's story arcs. Prioritize legendary nodes that grant unique abilities (e.g., "Breath of the Bear" increases attack damage at low health).
- Settlement Level: Reach Level 5. Build the Hidden Ones' Bureau (for assassination contracts), the Fishing Hut (for sea challenges), and the Trading Post (for river raids).
- Gear Rarity: Upgrade weapons and armor to Superior (purple) or Mythical (gold) using refined materials from river raids and higher-level chests. The Blacksmith can also re-skin gear at no cost.
- World Events: Many events become available, including “The Abbot’s Gambit,” “The Honor’s Path,” and “A Quiet Homecoming.” Complete them for unique rewards.
- Mysteries: Solve animus anomalies (glitched memories) and anomaly puzzles to unlock a secret ending.
- Treasure Hoards: follow maps to dig up massive caches of silver and iron.
- Weald & Marsh: Discover new regions like Suthsexe, Glowecestrescire, and Lincolnscire, each with distinct environments and enemy types.
- Main Story Arcs: Recommended order for mid game: Grantebridgescire → Ledecestrescire → East Anglia → Oxenefordscire → Sciropescire → Cent → Essexe → Suthsexe. These arcs introduce key characters (e.g., Ceolbert, Sigurd's relationship) and major decisions that affect the narrative.
- World Events: Many mid-game events are longer, sometimes with multiple outcomes. Example: “The Lord of Lunden” has you choose between two candidates, affecting your relationship with the city.
- River Raids: These are separate from the main game but provide valuable resources and gear. Each raid has an area of operations; you can reset them by returning to the River Raid board.
- Silver: More abundant now; sell surplus gear (especially duplicates) at shops. Use silver to buy raw materials for settlement if short.
- Refining Materials: Acquire tungsten ingots, nickel ingots, and carbon ingots from river raids and high-tier chests. Use them to upgrade gear from Rare to Superior to Mythical.
- Trading: Build the Aelfred's Trading Post (requires Level 5 settlement) to trade resources for unique items and silver.
- Skill Specialization: Define your playstyle by mid game. For a warrior build, invest in Bear tree (heavy attacks, health, damage resistance). For an assassin, Raven tree (stealth damage, speed, poison). For a ranger, Wolf tree (bow damage, crit chance, headshot bonus). Hybrid builds are viable—e.g., Raven/Bear for a battle-assassin.
- Armor Set Bonuses: Wear complete sets for 2-piece and 5-piece bonuses. For example, the Thegn's Armor set boosts heavy damage; the Brigandine set improves crit after parry. Collect all pieces from specific regions.
- Runes: Equip runes on weapons and armor for additional stats (e.g., +fire damage, +critical chance). Runes can be crafted at the rune forge after building the Hidden Ones' Bureau.
- Mid game itself is not endgame, but prepare for endgame by completing all alliance arcs and reaching Settlement Level 5. This unlocks the final story missions and access to powerful gear.
- Final Alliance Arcs: Complete the remaining story arcs (e.g., Snotinghamscire, Lincolnscire, Hamtunscire) and the main storyline “Family Matters” and “A Fork in the Tree.”
- Drengr and Legendary Battles: Hunt down all Legendary Beasts and Ancient Sarcophagi (the Souls-like bosses) for rare gear and trophies.
- Assassination Contracts: From the Hidden Ones' Bureau, take on contracts that require specific methods (e.g., kill with poison, stealth only) for high-tier currency.
- Church and Monastery Raids: By now, you can clear most regions completely. Focus on earning 100% completion bonuses.
- Advanced Abilities: Unlock abilities like "Raven's Lunge" (teleport to distracted enemy), "Barrel of Trouble" (throw explosive barrels), and "Brainsurging" (control enemy).
- Boss Fights: Late-game boss encounters (e.g., members of the Order of the Ancients, final battles) require mastery of parry, dodge, and stamina management. Use health runes and heavy armor.
- Stealth Domination: With fully upgraded hidden blade and stealth skills, one-hit assassinate even tough enemies. Use smoke bombs and poison to control groups.
- Animal Combat: Some legendary beasts (e.g., the Black Shuck) have unique attack patterns; study and exploit weaknesses.
- Power Level: Reach ~340 by investing all skill points. The skill tree is vast; you can eventually unlock all nodes across all three trees via repeated leveling (no cap on skill points).
- Settlement Level: Maximum Level 6. Build the hidden treasure room, unlock the best ship cosmetics, and start the endgame river raids with larger crews.
- Gear: Upgrade all favorite gear to Mythical (gold). The Blacksmith can now apply a visual upgrade for free.
- All Wealth Discovered: By now, you should have visited every region. Explore the final region, Hamtunscire, which has the most challenging terrain and strongholds.
- Secret Areas: Find the cave with the spear of Leonidas (a reference to previous Assassin's Creed games). Solve the final animus anomaly puzzle to unlock the Isu armor.
- World Events: The final world events often tie into the main story, e.g., “The Cursed Swords” or “The Lost Stone.”
- Main Story Climax: The final story arc “Hamtunscire” includes the assault on the royal fortress and the confrontation with the main antagonist. Your decisions across earlier arcs affect the outcome (which characters survive, alliances).
- Order of the Ancients: Track down remaining members via clues. Killing all brings an epilogue mission.
- Legendary Quests: “The Legend of Lugh” and “The Legacy of the Hidden Ones” are late-game post-launch missions that introduce new gear and story.
- Silver Overflow: You’ll have thousands of silver. Spend on cosmetic upgrades, training new crew members, and purchasing expensive runes.
- Resources: Raw materials and supplies become abundant; sell excess for silver.
- Trading: The final tier of trading post offers unique items like the “Swordfish” weapon and decorative items.
- Master Build: By now, you can have all skills. But focus on synergies—e.g., combine “Perfect Dodge” (Wolf) with “Counter Roll” (Raven) for a flashy dodge-counter build. Or combine “Stampede” (Bear) with “Disorienting Blade” for crowd control.
- Gear Sets: Finalize your build: for warrior, use the “Mentor’s Robe” set (hidden blade bonuses) or the “Draugr” set (health steal). For stealth, use “Raven Clan” set fully upgraded.
- Runes: Equip diamond runes (best quality) on your weapon and armor: +15% attack damage, +10% speed, +20% crit chance.
- Late game transitions into endgame after completing the main story and reaching Settlement Level 6. Endgame content is now fully unlocked.
- The Forgotten Saga: Repeatable roguelike mode accessible from Ravensthorpe. Enter the Norse underworld Niflheim, defeat waves of enemies, gain temporary upgrades, and fight bosses. Each run yields exclusive resources (Dreams of the Dead) used to upgrade a special Eivor ability set.
- River Raids (Endgame Variants): Harder river raids in Francia and Iberia with new enemy types (e.g., Frankish knights, Saracen archers). Unique rewards like the Mjolnir hammer and Excalibur sword.
- Mastery Challenges: Complete weekly and daily challenges in the “Mastery” tab (Ubisoft Connect) for bonus XP and cosmetics.
- Revisiting Regions: Finish any leftover mysteries, wealth, and artifacts for 100% completion. Achieve completionist status for all 16 regions.
- Final Boss Gauntlet: In The Forgotten Saga, the final boss is a giant wolf (Fenrir) or Odin himself. Use all abilities at your disposal. Dodge unblockable attacks, use adrenaline for massive damage.
- Godly Powers: In Niflheim, you can unlock temporary God Powers (e.g., summon wolves, lightning strikes) that change combat flow.
- Stealth in Endgame: Stealth is still effective but enemies have high detection; use long-range silent kills and vanish.
- Skill Mastery: Level past 340 continues granting skill points. Earn mastery points after reaching the cap; each mastery point adds a small buff (e.g., +0.6% melee damage) and unlocks a new cosmetic for your Ravensthorpe banner.
- Settlement: Fully upgraded; no further upgrades. Settlement decorations can still be purchased.
- Gear: All weapons and armor can be upgraded to max level (Mythical 10). New gear from The Forgotten Saga and late-game river raids fills any gaps.
- All Regions Complete: Traverse every corner of England, Norway, Vinland, and the mythological realms (Asgard, Jotunheim). The world offers no new areas, but discover secrets like the giant basilisk lair in Glowecestrescire.
- Easter Eggs: Find the cave with the “Mario 64” reference, the “Ghost of Tsushima” tomb, and other pop-culture nods.
- No New Main Quests: The main story is done. Remaining quests are from completed arcs (cleanup).
- The Forgotten Saga: This is the primary endgame activity. You can reset runs and attempt higher difficulties for better rewards. Completing all challenges unlocks the “Radiance” outfit.
- Contracts: Complete Hidden Ones contracts repeatedly for XP and silver, but they are finite per week.
- Resource Abundance: Silver, leather, iron, and raw materials are plentiful. Trade for Titanium Ingots (rare) to upgrade Mythical gear further (beyond level 10).
- New Currency: In The Forgotten Saga, collect “Niflheim Coins” to buy permanent upgrades like extra health or new abilities.
- Endgame Shop: The merchant in Niflheim sells unique items only available there.
- Max Stats: At the ultimate endgame, you have all skills, best gear, optimal runes, and full mastery. There is no further growth—only cosmetic differences.
- Build Variety: Experiment with different weapon combinations (e.g., two spears for reach, dual shields for blocking). Use the respec token (available from the Hidden Ones' Bureau) to try new builds at no cost.
- The Forgotten Saga Build: In Niflheim, you can customize a loadout from your inventory; but you also earn temporary blessings each run. Adapt your style to the blessings you find.
- True Endgame: The ultimate challenge is 100% completion (all regions, all items, all achievements). However, Assassin's Creed Valhalla has no seasonal content; endgame is entirely player-driven. The Forgotten Saga provides a roguelike loop for replayability.
- Weekly & Daily: Ubisoft Connect challenges offer minor rewards, but no major content updates.
- New Game Plus: There is no New Game Plus mode; you must start a new save to replay the story with existing gear (not officially supported).
Combat & Interaction Systems
Progression
Exploration
Quests & Missions
Economy
Character/Build Growth
Endgame Structure (Early Game Perspective)
---
Mid Game (Power 90–200)
Main Gameplay Loop
Combat & Interaction Systems
Progression
Exploration
Quests & Missions
Economy
Character/Build Growth
Endgame Structure
---
Late Game (Power 200–340)
Main Gameplay Loop
Combat & Interaction Systems
Progression
Exploration
Quests & Missions
Economy
Character/Build Growth
Endgame Structure
---
Endgame (Power 340+)
Main Gameplay Loop
Combat & Interaction Systems
Progression
Exploration
Quests & Missions
Economy
Character/Build Growth
Endgame Structure
---
This guide covers all core gameplay aspects by progression tier. Use it to plan your journey through Eivor's epic saga, from a simple Viking raider to a master of the hidden blade and ruler of a thriving settlement.
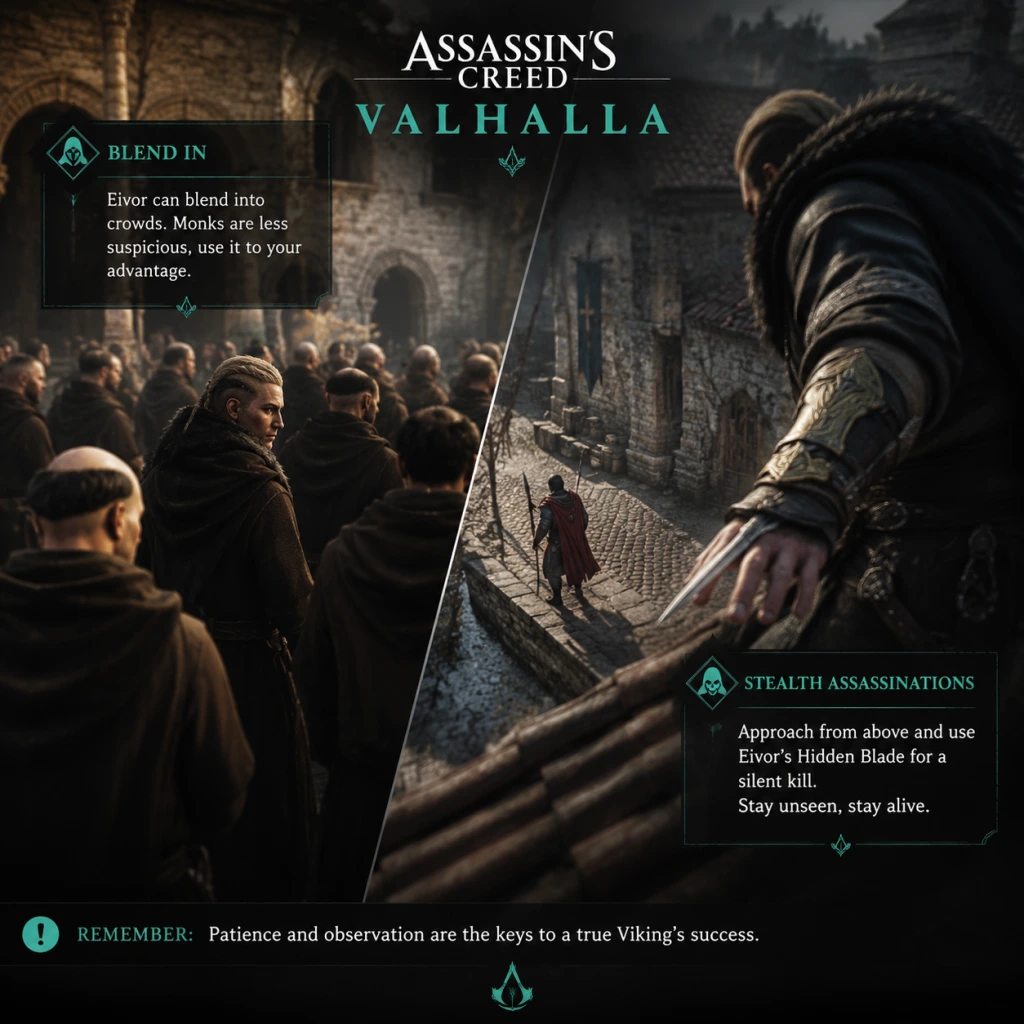
Game Tips
Game Tips for Assassin's Creed Valhalla
This guide compiles the most effective tips across all aspects of the game, from combat and exploration to builds and economy. Tips are categorized by playstyle and progression level.
---
Combat Tips
#### Beginner: Master the Basics
- Learn the Parry Timing – Press L1/LB just before an enemy's attack hits. A successful parry stuns the enemy, leaving them open for a heavy attack or a finisher. Practice against low-level guards in Norway; the timing window is generous but narrows in late game.
- Use Adrenaline Slots Wisely – You start with one slot and can earn up to three. Spend adrenaline only on high-impact abilities like Harpoon Impalement (throws enemies into walls/fire) or Viking Salute (AoE damage). Recharge adrenaline by landing hits and performing finishers.
- Switch Weapons for Different Foes – Light shields work well against archers (fast blocks), while heavy shields break guards. If an enemy is blocking, use a heavy attack or the Heavy Shield Bash ability to break their defense.
- Dodge, Don't Just Block – Some attacks (red runes) are unblockable. Practice dodging sideways or backward, then counter with a light attack combo.
- Use Your Hidden Blade for Assassination – Even if an enemy is higher level, you can one-hit assassinate from stealth by pressing R1/RB. If they resist, use the Assassination skill from the Raven tree to perform a quick-time event (QTE) for a guaranteed kill.
- Chain Abilities with Light Attacks – The Harpoon Impalement can drag an enemy closer, then follow up with the Blinding Rush ability to disorient them. Or use Vorpal Edge (a heavy axe throw) to knock down multiple foes.
- Use the Environment – Kicking enemies off cliffs, into fire pits, or through breakable walls deals massive damage. The Kick of Tyr ability is excellent for this.
- Stun Attack Timing – After landing enough hits on a stunned enemy (white ring on health bar), you can perform a Stun Attack (press R3/RS). This instantly kills most grunts and deals heavy damage to elites. Prioritize stun damage on gear (e.g., from the Bear skill tree).
- Switch Stances – Light stance (single weapon) is fast but low damage; heavy stance (dual-wielding or two-handed weapons) is slow but high power. Use light stance against quick enemies, heavy stance against slow, shielded foes.
- Exploit Elemental Weaknesses – Fire damage ticks after the initial hit, good for DoT against health. Poison reduces enemy armor and slows movement. Combine both on a single weapon set using runes or the Toxic Flame ability.
- Critical Chance Builds – Stack crit chance (from Warrior skill tree) and crit damage (from Raven skill tree). Use weapons with high base crit (e.g., daggers, spears). In late game, the Candle of the Dead skill (from the Wolf tree) increases crit chance when low on health.
- Dual-Wield Heavy Weapons – Unlock the Dual-Wield perk from the Bear skill tree to equip two hammers or two axes. This triggers massive stun and heavy damage per hit but leaves you vulnerable. Combine with the Heavy Dual-Wield skill for even slower but stronger attacks.
- Use Grit and Health Regen – The Grit skill (Bear tree) restores health on hit after taking damage. Pair it with the Critical Health Bonus runes to stay alive in tough fights.
- Perfect Dodge – Time a dodge perfectly (just before the attack lands) to slow time and land a guaranteed critical hit. This is essential against endgame bosses and zealots.
- Synchronize All Viewpoints – They reveal the surrounding area and act as fast travel points. Always climb to the top immediately upon entering a new region.
- Use Synin's Tag Feature – When flying with Synin, press R3/RS to tag enemies, chests, and secrets. This permanently marks them on your compass and map until you interact with them. Always tag before landing.
- Look for Glowing Objects – Wealth (golden chests), Mysteries (mysterious icons), and Artifacts (blue runes) are always worth pursuing. Wealth gives gear upgrades, Mysteries give skill points or abilities, Artifacts complete collections.
- Follow Roads and Rivers – Most quests and secrets are near roads or water bodies. Riverbanks often lead to caves or abandoned camps with loot.
- Breakable Walls and Obstacles – Many secret rooms are behind weak wooden planks or stone walls. Use your heavy weapon or the Break the Wall ability (from the Bear tree) to smash through. Listen for the creaking sound.
- World Events Instead of Side Quests – These are small, self-contained stories that often reward skill points, gear, or unique items. They appear as glowing dots on the map and are worth completing for XP and lore.
- Use Your Horse to Cross Rivers – The horse can swim. Hold sprint and the horse will automatically swim across short distances. This saves time finding bridges.
- Save in Safe Spots – Manual saves are allowed anywhere, but autosaves only happen after major events. During exploration, before opening a high-level treasure (locked by summons), manually save.
- Climbing Techniques – Hold R2/RT while climbing to jump further. Angle yourself diagonally to scale sheer cliffs. Use the Falling Grace skill (Raven tree) to negate fall damage from any height.
- Rainbow Gear Locations – The Isle of Skye DLC has unique gear sets. Each piece is behind a puzzle (often involving light reflections). Look for glowing pedestals.
- The Hidden One's Armor – Obtain this by completing the Legacy of the First Blade DLC. It boosts assassination damage significantly. To get it early, prioritize this storyline after power level 90.
- Leather and Iron – Essential for upgrading armor and weapons. You'll need hundreds of each. Always loot from every rack, barrel, or slain animal. Leather comes from animals and loot crates; iron from ore nodes and chests.
- Fabric – Rare material needed to upgrade the quiver and ration pouch. Only found in small blue chests (wealth chests) and some mysteries. Never sell or dismantle fabric.
- Titanium – For high-level upgrades (quality levels silver and above). Found in metal ore nodes in higher-level regions (power 160+). Also from some river raids.
- River Raids for Materials – Unlock the River Raids feature after building the Ravenstown. These are separate areas with abundant leather, iron, and fabric. Fastest way to gather bulk materials.
- Dismantle vs Sell – Early game: dismantle common gear (white/green) for leather and iron. Late game: sell rare gear (blue/purple) for silver, as upgrade materials become abundant from raids.
- Upgrade Priority: First upgrade the quiver (more arrows), then ration pouch (healing), then hidden blade (distance for assassination), then your favorite weapon to get perks.
- Fabric Respawn Exploit – After clearing a region, fabric from blue chests does not respawn. But river raid areas reset every 2-3 raids. Use river raids to farm fabric infinitely.
- Skill Point Farming – The Cannibalism skill (Wolf tree) gives you health from dead enemies, reducing reliance on rations. Combine with Field Rations skill to double ration effectiveness.
- Use the Taker Skill – (Bear tree) Increases resources dropped from enemies. Activate during raids or at bandit camps for extra leather and iron.
- Loot Everything – Even common items like animal bones, ingots, and silver coins. Sell them at the merchant in Ravensthorpe or any settlement trader.
- Complete Contracts – At the Alliance Map in Ravensthorpe, choose contracts (shield icons) for extra silver and resources. These are repeatable.
- Sell Excess Gear – Once you have a full set of armor and a few weapons you like, sell duplicate or lower-level gear. Check the merchant's Sell tab.
- Upgrade the Trading Post – Build the Trading Post in Ravensthorpe to gain passive silver income and access to rare materials for purchase.
- Buy Resources from Merchants – Check merchants for leather, iron, and fabric. If silver is plentiful, buy them to speed upgrades. The Merchant upgrade in Ravensthorpe reduces prices.
- Sell Runes You Don't Use – Each rune can be sold for 20-50 silver. Keep only those that match your build (e.g., crit chance, stun, poison).
- Invest in the Dock and Shipyard – These unlock river raids (which yield rare materials). The rewards are worth the initial silver cost.
- Use the Sell All Feature Carefully – It automatically sells all items of a certain category. Set favorite items (press R3/RS in inventory) to prevent accidental sale of gear you want to keep.
- Trade with Other Settlements – Each settlement has unique items. For instance, in Francia (DLC) you can buy special gear. Always check new regions for exclusive merchandise.
- Spread Early Points – Put first 10 points into each tree: Raven (assassination), Wolf (ranged), Bear (melee). Unlock Assassination in Raven, Bow Focus in Wolf, and Stun in Bear. This gives flexibility for early missions.
- Must-Have Skills in the First 20 Levels: Guided Arrow (Wolf), Viking Salute (Raven), Grit (Bear). These three improve survivability and combat fluidity.
- Assassin Stealth Build – Max Raven tree. Focus on Assassination, Chain Assassination, Critical Sneak (stealth attacks crit), Instinct (increased assassination range). Gear: Hidden Ones Armor (DLC) or Mentor Set from main game. Weapons: Daggers (fast, high crit). Runes: Increased assassination damage, movement speed while crouching.
- Berserker Melee Build – Max Bear tree. Berserker's Charge, Stun Attack Mastery, Heavy Dual-Wield, Unbreakable Shield. Gear: Bear Armor (best melee defense). Weapons: Two-handed hammers or battle axes. Use Harpoon Impalement to pull enemies and Kick of Tyr for crowd control.
- Ranged Archer Build – Max Wolf tree. Arrow of Death, Guided Arrow, Bow Focus, Critical Shot. Gear: Hunter Set (bonus to headshots). Weapons: Predator Bow (long-range) and Light Bow (rapid fire). Runes: Increase bow damage, damage after kill.
- Fire Poison Crit Build – Combine Toxic Flame ability with Critical Chance runes. Level Raven for crit, Bear for stun, Wolf for poison duration. Gear: The Death-Speaker Set (gives poison on crit). Use a fast dual-wield combo (light sword + dagger). This triggers multiple elemental effects per second.
- Perfect Parry/Stun Lock Build – Max Bear's stun damage, Raven's parry window, Wolf's attack speed after parry. Gear: Jotunheim's Armor (increases stun after parry). Use a heavy shield and a light spear. Parry, then immediately heavy attack for stun lock.
- Glass Cannon Speed Build – No health upgrades, full crit and speed. Use Nodding's Spear (when at full health, all attacks are crits) from the River Raids. Pair with Candle of the Dead (crit chance when low health) – keep health at 50% for constant high crit. This is risky but devastating.
- Avoid building Church or Trading Post until after you have the core four.
- Raids Refresh – After completing a river raid area, leave the region and return; the area resets with new loot after a few in-game days.
- Bring a Jomsviking Party – Recruit a full crew (5-6) from the Barracks before raiding. They help clear camps and carry loot.
- Focus on Purple Chests – River raid chests are color-coded. Purple (rare) contain fabric and titanium; gold contain gear; blue contain leather and iron. Prioritize purple.
- Use the Longship Ram – Upgrade the ship's ram to break through stone walls in river raid areas. This opens shortcuts.
- Maximize Workers – Assign workers to the Farm (food for rations), Hunter's Hut (leather), and Mine (iron). The Mint (silver) is optional until late game.
- Send Jomsvikings on Hunts – From the Barracks, send them on missions for resources. They return after a few hours of real time. This is passive income.
- Unlock the Seer's Hut – Allows access to the Norse mythic realm (Asgard, Jotunheim) for unique skill points and gear. Build it early if you enjoy mystical storylines.
- Complete Mystery Locations – Each mystery (blue dot) gives one skill point. This is the fastest way to level in early game. Focus on regions labeled Power 20-90 first.
- Do Main Story Arcs – Each story arc (e.g., Sævine in Norway) significantly boosts power. Complete the arc's final mission to get a large XP reward.
- Avoid High-Level Regions – If an area is marked Power 200+ and you are at 50, you will one-shot enemies. Explore lower-level zones first (Grantebridgescire, Ledecestrescire).
- Wealth Chests Give Gear – Not XP. But gear upgrades increase power. Open them when you have materials to upgrade.
- Use the Synergistic Skill Bonuses – Leveling up gives one point. But some skill nodes give +1 to all attributes (e.g., Way of the Raven). Prioritize those early for a broad power boost.
- Complete World Events – Many give skill points directly. They are short and more interesting than repetitive side quests.
- Reach Power 50 before Leaving Norway – You get a Valkyrie mission that rewards a major skill point. Also, all gear found in Norway is low-tier; save upgrades for England.
- Unlock Way of the Wolf Skill – This node gives +1 to all stats and becomes accessible at level ∼120. After that, your power curve accelerates.
- Do the DLCs Early – The Siege of Paris requires around power 200, but you can enter earlier with good gear. The loot there is endgame-quality, helping you through the main story.
- Manual Save Before Boss Fights – Some boss fights have no autosave mid-combat. Save just outside the arena to reload immediately if you die.
- Use Odin's Sight (-TAB/-Option) Frequently – Press R3/RS to highlight interactable objects, enemies, and loot in a large radius. This is essential for not missing hidden paths.
- Fast Travel via Map – Unlock viewpoints to reduce travel time. You can also fast travel to your settlement and the docks.
- Adjust Difficulty Settings – In Options, you can change combat difficulty, stealth difficulty, and enemy level scaling. If you get frustrated, lower one aspect rather than quitting.
- Viking Rap Battles (Flying) Are Worth It – They award charisma points. High charisma unlocks dialogue options for better rewards in quests. You can practice at any Drink and Fly location.
- Upgrade the Ration Pouch to Max – This increases how many rations you can carry (up to 8). Rations are your only healing item, so more is always better.
- Use Fast Travel from Anywhere – Open the map and select a viewpoint or settlement. You can do this even while in combat (though you may get hit before the timer finishes).
- Complete the Tartan Collection (Cassius's Fish) – Finding all fish unlocks a special mount. The fishing method: use the Fishing Spots (ripples) at dawn/dusk for rare fish.
#### Intermediate: Combine Abilities and Stun
#### Advanced: Optimize Damage and Survivability
---
Exploration Tips
#### Beginner: Efficient Mapping
#### Intermediate: Hidden Secrets and Shortcuts
#### Advanced: Speedruns and Rare Loot
---
Resource Management
#### Beginner: What to Hoard
#### Intermediate: Farm Efficiently
#### Advanced: Max Efficiency
---
Economy & Trading
#### Beginner: Earning Silver
#### Intermediate: Best Investments
#### Advanced: Maximizing Profit
---
Builds & Skill Trees
#### Beginner: Balanced Starting Build
#### Intermediate: Theme Builds
#### Advanced: Min-Maxed Hybrid Builds
---
Settlement & Raids
#### Beginner: Build Order
1. Blacksmith – Allows gear upgrades (quality levels). Needed to progress from Silver to Gold quality.
2. Stable – Unlocks horse upgrade (speed, stamina). Essential for exploration.
3. Shipyard – Unlocks river raids and ship upgrades (ram, armor). Second priority.
4. Cattle Farm – Passive food income (rations). Helpful but not urgent.
5. Barracks – Allows recruiting Jomsvikings for defense and raids. Useful mid-game.
#### Intermediate: River Raid Strategies
#### Advanced: Settlement Efficiency
---
Progression & Leveling
#### Beginner: Power Level Tips
#### Intermediate: Efficient Skill Point Gain
#### Advanced: Power Spikes
---
General Tips
---
Summary Table: Essential Early Skills
| Skill Name | Tree | Effect | Why Get It |
|---|---|---|---|
| Assassination | Raven | Adds QTE for one-hit stealth kill | Required for stealth |
| Guided Arrow | Wolf | Switch bow to guided mode | Can hit weak spots from cover |
| Grit | Bear | Restore health on hit after taking damage | Survivability |
| Viking Salute | Raven | AoE shout that stuns enemies | Crowd control |
| Heavy Dual-Wield | Bear | Equip two heavy weapons | Massive damage potential |
| Falling Grace | Raven | Ignore fall damage | No worry about high platforms |
This guide covers everything from your first hour to endgame optimization. Use these tips to conquer England and beyond as a legendary Viking.
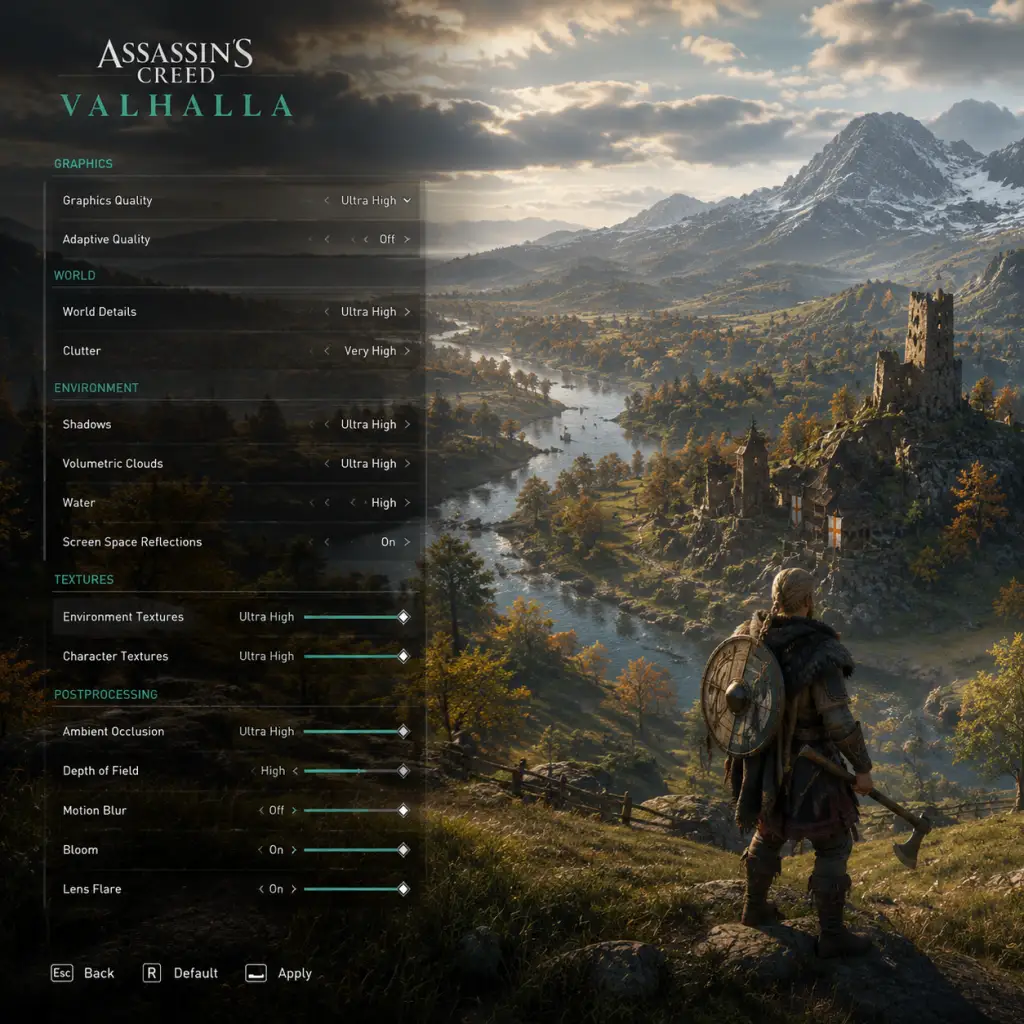
Game Settings
Graphics Settings for Assassin’s Creed Valhalla
This section covers all video and display options. The game uses the AnvilNext engine, which is GPU-intensive but offers a wide range of scalability.
Display Mode
- Windowed: For multi-monitor setups or debugging.
- Fullscreen: Recommended for best performance and lowest input lag.
- Borderless Windowed: Useful for alt-tabbing but may reduce performance slightly.
- Set to your monitor’s native resolution for sharpest image.
- Aspect ratio (16:9, 21:9, 32:9) is detected automatically. For ultrawide, note that cutscenes may have pillarboxing.
- Match your monitor’s maximum refresh rate (e.g., 60, 144, 240 Hz). Cannot exceed monitor capabilities.
- Off: Maximum FPS but screen tearing possible.
- On: Eliminates tearing, but caps FPS to refresh rate and may add slight input lag.
- Adaptive: Less input lag than On but still prevents tearing above refresh rate.
- Default 70° (vertical). Range: 55°–90°.
- Attention Point: A wide FOV (85°–90°) helps situational awareness but may cause fisheye effect on standard screens; reduce on consoles or lower-end PCs to maintain performance. Misconfiguration here can cause motion sickness for some players.
Resolution & Aspect Ratio
Refresh Rate
V-Sync
Field of View (FOV)
Graphics Quality Presets
Ubisoft provides four presets: Low, Medium, High, Ultra High. Custom below.
#### Individual Settings
| Setting | Description | Easy to Misconfigure? |
|---|---|---|
| World Quality | Governs draw distance, object density, and LOD. High affects distant village details. | Yes: Setting too low populates objects too early, breaking immersion. |
| Clutter | Grass, bushes, rocks density. Heavy performance hit. | Yes: Max setting cripples low-end GPUs. |
| Shadows | Cascade resolution and softness. Medium is a good balance. | Yes: Ultra has minimal visual gain over High but large performance cost. |
| Volumetric Clouds | Realistic clouds. Very heavy on GPU. | Yes: Can reduce FPS by 20%+; set to Medium or Low if struggling. |
| Water Quality | Reflections and refraction. High looks great but impacts coastal areas. | Minor impact. |
| Textures | Resolution of surfaces. VRAM hog; match to your GPU memory. | Yes: Exceeding VRAM causes stuttering – set to High for 6GB cards. |
| Anti-Aliasing | Options: Off, FXAA, SMAA, TAA, TAA+Sharpening. TAA recommended for clarity. | TAA can cause blur; enable Sharpening (0.5-1.0) to compensate. |
| Ambient Occlusion | Adds depth shadowing. Options: SSBC (medium quality), HBAO+, and Ultra HBAO+. HBAO+ is sweet spot. | Yes: Ultra HBAO+ costs performance but subtle improvement. |
| Screen Space Reflections | Reflective surfaces (water, metal). High impact on AMD GPUs. | Yes: Off on low-end; Medium on mid-range; High on high-end. |
| Depth of Field | Blurs background during cutscenes. Off for clarity or on for cinematic feel. | No major performance impact. |
| Motion Blur | Blurs during camera/character movement. Off recommended for competitive or sensitive players. | Yes: Can cause nausea; many prefer off. |
| Bloom | Brightness bloom from light sources. Subtle effect, small cost. | Usually fine left on. |
| Lens Flares | Anamorphic flare from sun. Personal preference. | No performance impact. |
| Chromatric Aberration | Adds color fringing. Off for sharp image. | Yes: Some dislike it; disable for cleaner visuals. |
| Tier | Spec Example | Preset | Custom Tweaks |
|---|---|---|---|
| Low (30 FPS) | GTX 1060 / RX 580 4GB, 8GB RAM | Medium | Set Clutter & Volumetric Clouds to Low, Shadows Medium, SSR Off, Textures Medium. Resolution 1080p. |
| Medium (60 FPS) | RTX 2060 / RX 5600 XT, 16GB RAM | High | Lower Volumetric Clouds to Medium, keep Ambient Occlusion HBAO+, Textures High. Resolution 1080p or 1440p with scaling. |
| High (60 FPS high quality) | RTX 3070 / RX 6800, 16GB RAM | Ultra High | Tweak Volumetric Clouds to High (not Ultra), Shadows High, Textures Ultra. Resolution 1440p or 4K with DLSS/FSR. |
| Ultra (60+ FPS 4K) | RTX 4080 / RX 7900 XTX, 32GB RAM | Custom | Max everything except perhaps Volumetric Clouds (High). Enable DLSS Quality (NVIDIA) or FSR Quality (AMD). Use Sharpening 0.5. |
- DLSS: NVIDIA RTX cards. Quality mode preserves image at lower render resolution. Recommended for 4K.
- FSR: AMD and all GPUs. Performance mode aggressive; Quality mode good for 1440p.
- XeSS: Intel ARC cards. Similar to DLSS.
- Attention Point: Using DLSS/FSR may cause flickering in distant objects; tweak sharpening or switch to TAA if distracting.
- Set to 70-100% and adjust other sliders relative.
- Controls combat, footsteps, ambient. Keep high for immersion.
- Crucial for story. Set to 100% unless you want subtitles only.
- Epic score. Lower if you prefer environment sounds.
- For cutscenes. Usually same as Master.
- Options: Headphones, 2.0, 5.1, 7.1. Headphones provides virtual surround via HRTF. Important: If using 5.1/7.1, make sure your system actually supports that channel count; misconfiguration leads to missing sounds. For stereo headsets, always choose Headphones.
- On/Off for spoken dialogue, including NPCs and ambient speech. Easy to miss: Enabling "Show Speaker Name" helps identify who is talking.
- Adds descriptions of sound effects (e.g., [gunfire], [wind howling]). Useful for accessibility.
- Mouse Sensitivity: Default 25. Adjust per your DPI. Start at 30 if you have a gaming mouse.
- Invert Y-Axis: Off normally, but for flight/traversal some prefer on.
- Mouse Smoothing: Off for raw input; on may reduce jitter.
- Aim Assist (Snap Aim): Helps lock onto targets. On for controllers; off for precision with mouse.
- Lock-On Target: Toggle or hold. Hold is more responsive.
- Crouch Mode: Toggle vs Hold. Toggle is recommended for stealth.
- Call Mount: Default Z (initially unbound from quick bar). Change to an easily reachable key (e.g., C).
- Use Raven: Default V. Fine but can be moved to middle mouse button.
- Quick Access Wheel: Tab. May conflict with inventory; rebind to Q if needed.
- Interact: E. Good default.
- Dodge: Spacebar. Consider binding to a side mouse button for faster reaction.
- Layout: Standard or Custom. Note: Swap left stick for movement and right stick for camera is default.
- Vibration: On for immersion, off for competitive or battery saving.
- Trigger Deadzone: Increase slightly if accidental aiming occurs.
- Aim Assist: Strong (console-like) or Light. Strong recommended for controller.
- Look Sensitivity: Start at 50% and adjust.
- Camera Acceleration: Default 50%. Higher speeds up turns when stick is fully tilted; can cause overshoot.
- Story: Very easy combat and enemy health. Best for narrative focus.
- Default: Balanced.
- Hard & Very Hard: Increased enemy damage, aggression, and health drain. Recommended for experienced players.
- Nightmarish: Enemies one-shot, Eivor fragile. Hardcore only.
- Auto-Loot: On by default – do not turn off.
- Auto-Equip Gear: Off (you want manual control).
- Guided Exploration vs. Pathfinding: Guided gives quest markers; Pathfinding disables compass markers but still shows objective location on map. Pathfinding is more immersive but may cause frustration.
- Enemy Scaling: Adjusts enemies to match your power level. Options: Off (easier early), Moderate, Hard (always challenging).
- HUD Presets: Customizable. Turn off minimap for immersion; enable health bar and stamina only.
- Damage Numbers: On/Off. Off for realism.
- Crosshair: Always On, Dynamic, Off. Keep On for ranged combat.
- Options: Protanopia, Deuteranopia, Tritanopia. Adjusts HUD colors (e.g., enemy highlights). Test in menu – works well but some UI elements may still be confusing.
- Subtitle Size: Small, Medium, Large. For readability choose Large.
- Subtitle Background: Subtle or Opaque. Opaque helps contrast.
- Choose from menu: English, French, Italian, German, Spanish, Japanese, etc. The game allows separate voice and subtitle languages.
- Download Required: Changing spoken language after installation may trigger a large patch (audio packs). Ensure you have space and bandwidth.
- Can differ from voice. For example, Japanese voices with English subtitles.
- Determines menus, quest logs, items. Typically same as platform language.
- Always Online: Not required for single-player but needed for Discovery Tour (educational mode) and Jomsviking recruiting.
- Ubisoft Connect Overlay: On by default. Disable if it causes performance stutter or FPS drops (common issue).
- Enable to sync progress across platforms (PC, Xbox). Note: PlayStation and PC do not cross-save.
- Options: Low, Medium, High (controls texture streaming). High recommended if you have fast internet (50+ Mbps). Low reduces streaming but increases pop-in.
- Off if you have privacy concerns.
- Guided: Full quest markers, compass on.
- Exploration: Hidden markers; you must discover objectives by exploring. More rewarding but time-consuming.
- Auto-Loot: On.
- Auto-Equip: Off (prevents unwanted gear changes).
- Show Loot Icons: Always or on interact. Useful to see valuables.
- Melee Assistance: Off (makes combat more precise). On for casual players.
- Stamina Display: Always or dynamic. Keep Always to manage stamina.
- Parry & Break Guard Timing: Default is tight; can be adjusted in Combat Settings (but no slider). Pro tip: Practice in training.
- Assassination Guaranteed: On (standard AC style). Off makes high-level enemies survive stealth attacks.
- Auto-Noise Level: Affects how bushes/grass mask your noise. Recommend default.
- Camera Sensitivity: Separate for on-foot and mounted.
- Camera Distance: Zoom out for wider view; zoom in for immersion. No perfect setting – adjust based on preference.
- Enable/Disable from pause menu. Always on.
---
Audio Settings
Master Volume
Sound Effects Volume
Dialogue Volume
Music Volume
Cinematics Volume
Speaker Configuration
Subtitles
Closed Captions
---
Controls Settings
Keyboard & Mouse
#### Important Keybinds to Customize
Controller (Xbox, PlayStation, Switch Pro)
Easy to Misconfigure: The "Raven" button (pressing R3) may interfere with crouch if not remapped. Consider swapping with O/B for easier access.
---
Accessibility Settings
Gameplay Difficulty
Combat Assistance
Difficulty Modifiers
Display Options
Colorblind Modes
Subtitle Size & Background
---
Language Settings
Spoken Language
Subtitle Language
Interface Language
Easy to Misconfigure: If you change spoken language in-game, the game will restart to apply. If you cancel mid-download, audio may be missing or broken. Always download full pack before switching.
---
Network Settings
Online Connection
Cloud Saves
Bandwidth
Data Sharing
---
Gameplay Settings
Difficulty & Assists (already covered, but note)
Exploration Mode
Loot & Gear
Combat
Stealth
Camera
Fast Travel
---
Special Attention Points During Setup
1. First Launch Stuttering: The game compiles shaders on initial load. Allow 5–10 minutes; do not skip or the game will stutter constantly.
2. VRAM Monitoring: Check your GPU memory usage in advanced graphics settings. If you exceed VRAM, set Textures down one notch.
3. Ultrawide Fixes: Native support is good but HUD may stretch. No in-game fix; community mods available.
4. Controller Detection: Some PCs fail to detect controller unless plugged before launch. Use Ubisoft Connect to verify.
5. Audio Language Pack: If you select a language without downloading the pack, voices will be silent. Download from in-game menu or Ubisoft Connect DLC tab.
6. Save Corruption Risk: Cloud saves can corrupt if internet disconnects during save. Disable cloud if you have frequent drops.
7. Mouse Input Delay: If you feel lag, turn off V-Sync and enable raw input (found in game files \.ini not in menu).
8. DLSS TAA Compared: DLSS Quality often looks better than TAA for 1440p and above; TAA is better for 1080p due to lower rendering resolution of DLSS.
This concludes the comprehensive Game Settings guide. Adjust each option according to your hardware and preference, and always test changes in the open world (not menu) because the menu’s performance does not reflect real gameplay.
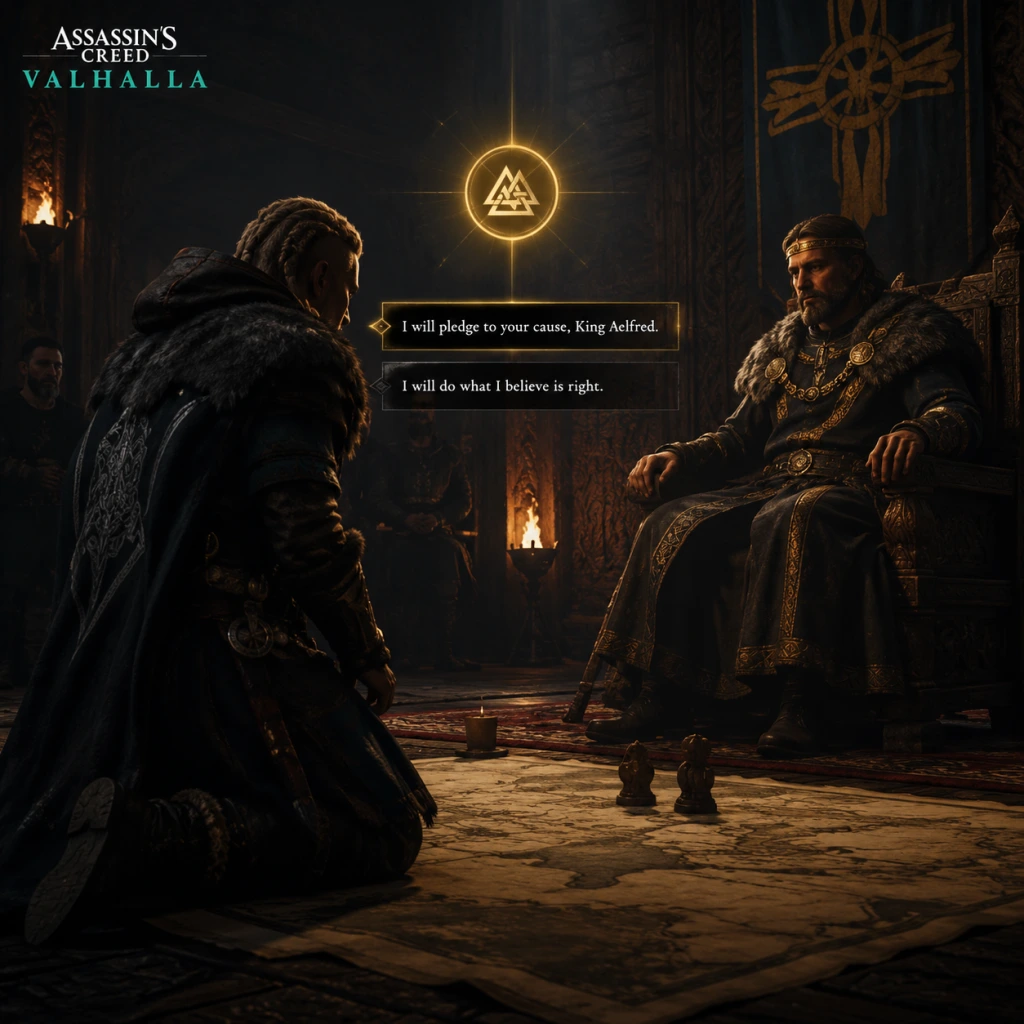
Important Notes
Important Notes for Assassin's Creed Valhalla
This guide covers critical warnings, irreversible choices, missable content, difficulty spikes, grinding traps, online etiquette, save management, and common regrets. Read this to avoid frustration and wasted time.
---
1. Irreversible Choices & Permadeath
- Romance Decisions: Most romance options are non-essential, but some affect dialogue and minor quest outcomes. No missable achievements tied to romance, but you cannot pursue certain characters after finishing their questlines (e.g., Randvi, Petra). Choose wisely if role-playing.
- Alliance Map Pledges (Ravensthorpe Arc Order): You must complete the initial Norway intro before the Alliance Map unlocks. The order you pick regions matters for story pacing, but no content is locked forever. However, once you start a region's arc, you must finish it to unlock the next, but you can switch between arcs later—no permanent lock.
- Sigurd’s Fate: Your choices during the story (specifically regarding Sigurd in Norway and later in England) affect the ending. There are three possible endings (good, bad, neutral). Key decisions:
- Tattoos and Cosmetics: No irreversible impact on gameplay. You can change appearance at any time for silver.
- World Events (Side Quests): Most world events are permanently available unless you leave the region unfinished. However, some are tied to specific seasons (in-game day/night or story progression). For example, some events in Norway are inaccessible after you leave (you can return later, but certain NPCs may have moved). Generally, complete all world events in a region before moving on if you want full completion.
- Treasure Hoard Maps (DLCs): If you own DLCs (Wrath of the Druids, Siege of Paris, Dawn of Ragnarök), some treasures are missable if you progress the main story past certain points. For example, in Siege of Paris, some wealth items disappear after completing the final siege battle. Search online for guides.
- Order of the Ancients Targets: You can kill them anytime after they appear, but some require finding clues in specific locations that may become locked after region story completion? No: all clues remain accessible, but certain targets vanish if you eliminate their region's leader too early? Not exactly—most are missable only if you fail to trigger their spawn condition. Example: The Fools (target in Lunden) requires completing a short side quest in Lunden before assassination. Finish regional arcs before moving on to avoid confusion.
- Jomsviking Recruits: You can recruit any non-story NPC via the Jomsviking hall, but some special characters (e.g., Bjorn, Ubba) are only available during specific story missions. If you fail to recruit them during those scenes, they are permanently lost. Save before major battles and check for recruit prompts.
- Festival Events (Limited-Time): Ubisoft holds seasonal events (e.g., Yule, Ostara, Sigrblot). These offer exclusive gear, cosmetics, and achievements (like "Beating the Heat" for the Ostara event). These events are not always available—they run for a few weeks each year. Miss them and you might never get the items. Check the in-game event calendar or Ubisoft news.
- Treasure Hoard Maps (Base Game): In the base game, some wealth items in caves or under ruins require solving a puzzle or completing a short quest. These are not missable, but the environment might change? No permanent lock.
- Power Level Gating: The game suggests a power level for each region. Going into a region 20+ levels under is very tough. Enemies will one-shot you, and your attacks do little damage. Follow the recommended levels strictly in early game (e.g., Norway 1-20, Ledecestrescire 20-50, etc.).
- Boss Fights: Some story bosses are notably harder:
- Stealth vs. Combat: Early enemies have low awareness, but later fortresses have many patrols. The game rewards assassination but detection is punishing. If you dislike stealth, level up combat skills first.
- River Raids: These are side activities introduced early. They are not mandatory but become very difficult if you go too early. The enemy galleys and forts are strong. Wait until power 100+ and have a good longship crew.
- Silver Scarcity: Silver is used for gear upgrades, tattoos, and some purchases. Do not waste it on cosmetics early. Upgrade your main weapon and armor set only. You will find plenty of leather and ingots through raiding.
- Raw Materials & Supplies: Needed for settlement upgrades. You get them from raiding monasteries and small chests. Prioritize the Ravensthorpe upgrade quests - they unlock important features (e.g., Fishing Hut, Ship upgrades). Don't hoard materials; upgrade as soon as you can.
- Skill Points / Books of Knowledge: Skill points are plentiful; you can respec anytime for a fee (silver). But books of knowledge are limited - each gives one ability. Find all of them; no missable? Actually, some books are in restricted areas or after story events, but you can always return later. No permanent miss.
- River Raids Rewards: Some river raids offer foreign supplies needed for certain settlement buildings. You might grind raids excessively, but they are not required for main story completion. Only do them if you want the gear from the River Raids merchant.
- DLC Over-Leveling: If you own DLCs, their content scales to your current power. However, completing a DLC too early (e.g., Wrath of the Druids at power 55) may over-level you for the base game regions, making the main story too easy. The game does have power scaling but it's limited. Play DLCs after the main story or when you reach recommended levels.
- No Multiplayer: Assassin's Creed Valhalla is single-player only. No online interactions beyond leaderboards and daily challenges (Ubisoft Connect). No need for etiquette.
- Ubisoft Connect Overlay: You can earn experience points (XP) and units to spend on cosmetic rewards. Some achievements require connecting to Ubisoft servers. No anti-cheat is active; no worry about bans.
- Cloud Saves: Enable cloud save through Ubisoft Connect or the platform (Steam, Epic, Xbox, PlayStation) to sync across devices. Be aware: manual saves can be corrupted rarely. Keep multiple save slots.
- Multiple Manual Saves: The game auto-saves frequently, but manual saves are crucial before major decisions or after completing a region. Keep at least 3 rotating manual saves. Bugs can corrupt saves (especially after updates).
- Known Save-Corruption Issues: On PC, some users report save file corruption after using quick resume on Xbox or switching between resolutions. If you encounter infinite loading screen, try reloading a previous manual save.
- Ubisoft Connect Sync: Do not alt-F4 or close the game during sync. It may break the save.
- If you lose progress: On consoles, cloud saves can help. On PC, check the saved games folder in Documents/Assassin's Creed Valhalla. Back up manually before major patches.
- Not Unlocking the Hidden Blade Early: You get it during the main story in Norway, but many players missed it because they didn't follow the critical path. Do the quest "Uncle's Return" triggering.
- Wasting Silver on Cosmetic Tattoos: They do nothing. Save silver for upgrades.
- Not Looting All the Wealth in a Region: Some wealth items are gear. Missing one means you have to backtrack later.
- Not Using the Bird Synr to scout constantly. It highlights enemies, loot, and secrets. Use it before entering any camp.
- Ignoring Settlement Upgrades: Upgrades unlock useful features like the hidden chamber, ship upgrades, and new story arcs. Prioritize the stable and blacksmith.
- Selling All Gear: You can dismantle or sell. But some gear sets are required for achievements (e.g., Thor's armor). Keep one of each type.
- Not Changing Difficulty: The game offers a "Exploration" mode that removes quest markers, making it harder to find objectives. If you get stuck, switch to "Pathfinder" in settings. Also, you can lower combat difficulty at any time.
- Missing River Raids Foreign Supplies: If you want the full settlement, you need foreign supplies from river raids. Many players skip them and later regret not having the chest.
- Not Respeccing for Bosses: The respec cost is trivial. If you struggle, respec into more health and stun skills.
- Not Using the World Map Filters: You can filter by wealth, mysteries, and artifacts. Check them often to see what's left.
- Quick Resume on Xbox: Can cause stuttering and save issues. Quit the game fully when done.
- PC Performance: The game is demanding. Avoid Ultra textures if you have less than 8GB VRAM. Turn off volumetric clouds for FPS boost.
- Console Stuttering: On base Xbox One and PS4, there are loading delays when fast traveling. Be patient.
- Sound Bug: Some players report audio cutting out during combat. Restart game fixes.
- Quest Bug - "Turning the Tide" (Siege of Paris DLC): Can fail to trigger. Reload previous save.
- [ ] Manually save before leaving Norway.
- [ ] Unlock Hidden Blade before leaving Norway.
- [ ] Complete all Norway mysteries / world events before sailing to England.
- [ ] Upgrade settlement to level 2 as soon as possible.
- [ ] Practice the stun attack (R3) and dodge.
- [ ] Use Synin frequently.
- [ ] Keep a backup manual save before every major story decision.
- [ ] Check event calendar for seasonal loot.
- [ ] Do not sell unique gear from chests.
- Stigr's betrayal: Whether to spare or kill Stigr in the prologue.
- Dag's challenge: Agreeing or refusing to fight Dag.
- Sigurd's wrath: Whether you take Sigurd's side during certain conflicts (e.g., letting him keep the cloak, choosing Seer's solution).
- Final confrontation with Basim: Depends on previous choices. These choices are permanent and impact the post-game epilogue. Check a detailed flowchart if you care about ending.
---
2. Missable Content & Time-Sensitive Events
---
3. Difficulty Spikes & Recommended Progression
- The Drengr (Leviathan's Lair): Around power 55. A dual-wielding axe wretch with unblockable combos. Use dodge and stun attacks.
- The First Zealot (Order Member): Around power 60. Extremely aggressive. Recommended to be at or above 80.
- Fenrir (Dawn of Ragnarök): Endgame DLC boss with multiple phases. Don't attempt under power 400.
---
4. Grinding Traps & Economy Traps
---
5. Online Etiquette & Anti-Cheat Notes
---
6. Save Management & Bug Mitigation
---
7. Common Regrets & What Players Wish They Knew
---
8. Technical Warnings
---
9. Final Checklist for New Players
By following these notes, you'll save time, avoid frustration, and experience all the content Assassin's Creed Valhalla has to offer. Happy raiding!
All Game Items
All Game Items
This guide covers every major item type in Assassin's Creed Valhalla, including weapons, armor, consumables, materials, currencies, collectibles, and key equipment. Items are grouped logically with explanations of function, acquisition, optimal use, and synergies. All stats and behaviors are based on the latest patch as of 2024.
---
Weapons
Weapons are divided into Melee and Ranged categories. Each weapon type has unique movesets, stat weighting, and special properties. Weapons are obtained through looting, purchase from merchants, completing quests, or exploring Wealth chests.
Melee Weapons
| Type | Description | Example Weapon | Notes |
|---|---|---|---|
| Bearded Axe | Fast, balanced one-handed axe. Good for parrying and light combos. | Varin’s Axe | Starts with the player; excellent for early game. Synergizes with heavy damage runes. |
| Dane Axe | Large two-handed axe. Slow but powerful; staggers enemies easily. | Sepulcher Axe | Great for clearing groups. Upgrade to Mythical for bonus stun. |
| Dual Daggers | Very fast twin blades. Best for rapid flurry attacks and building stun. | Kopis | Combine with Assassin’s poison for high burst damage. |
| Flail | Chained weapon with wide arcs; charged attacks hit in two stages. | Spinning-Death Flail | Unique attack pattern; ideal for breaking shields after a dodge. |
| Greatsword | Two-handed sword with sweeping arcs and a lunging heavy attack. | Excalibur | Legendary weapon; requires 11 hidden tablets. Mythical tier; ignites on heavy finishers. |
| Hammer | Slow but high stun damage; good for breaking guard. | Mjolnir | Legendary hammer; requires all Thor’s armor pieces and defeating the Daughters of Lerion. Mythical tier; throws lightning on heavy attacks. |
| Scythe (DLC) | Two-handed weapon with long reach and bleed effects. | Reaper’s Scythe | From Dawn of Ragnarök DLC. Inflicts poison on light attacks. |
| Spear | Long reach, quick thrusts; can stun from distance. | Gungnir | Legendary spear; obtained in Hordafylke after Order of the Ancients story. Mythical tier; ignores block. |
| Sword | Versatile one-handed sword; balance of speed and power. | Petrel’s Sword | Found in Lunden; good for all-purpose builds. Upgrades well with crit chance runes. |
| War Hammer (shield equivalent?) – Not used; hammers are separate. |
Rune Synergies:
- Diamond Runes (e.g., +Melee Damage, +Stun) best for aggressive builds.
- Ruby Runes (e.g., +Fire Damage) for elemental builds.
- Garnet Runes (e.g., +Health on Kill) for survivability.
Ranged Weapons
| Type | Description | Example Weapon | Notes |
|---|---|---|---|
| Hunter Bow | Fast, medium range. Ideal for light shots and quick drawing. | Hunewood Bow | Good for general use; upgrade for faster draw speed. |
| Light Bow | Very fast, low damage per arrow. Best for applying status effects quickly. | Arc of Asgard | Excellent for stacking stagger or poison. Pair with Fire Arrows talent. |
| Predator Bow | Slow, long-range, use for stealth one-shot kills from distance. | Petra’s Arc | Unlocked after River Raids? Actually obtained in Eurvicscire. High damage but requires manual zoom when aiming. |
| Sniper Bow (DLC) – actually Predator Bow serves this role. |
- Light Arrows – default, unlimited.
- Hunter Arrows – unlimited, no special effect.
- Predator Arrows – unlimited; zoom and slow time while aiming.
- Special Arrows (crafted from materials):
- Poison Arrows – poison enemies over time. Crafted with Iron Ore and Mushroom.
- Stun Arrows – increase stun buildup. Found rarely.
All ranged weapons can be upgraded similarly to melee weapons. Rune slots affect arrow damage or status effect chance.
---
Armor
Armor consists of chest piece, bracers, pants, cloak, and helmet (if equipped; many Viking helmets are not used by Eivor by default but are available as gear). Armor is grouped into sets that provide set bonuses when wearing multiple pieces.
Major Armor Sets
| Set Name | Bonus (2 pieces) | Bonus (5 pieces) | Source |
|---|---|---|---|
| Brigandine | +10 Melee Damage | +7.5% Melee Resistance | Purchase from merchants; random world drops. Good tank set. |
| Huntsman | +10 Ranged Damage | +7.5% Ranged Resistance | Found in wealth chests in Grantebridgescire and Suthsexe. Good for archer builds. |
| Thegn’s | +10% Critical Chance | +15% Critical Damage | Obtained by completing all Wincestre mysteries. Best for crit builds. |
| Galloglach | +10% Stun Damage | +15% Heavy Damage | From completing Dublin’s Trade Post in Wrath of the Druids DLC. |
| Berserker | +15% Melee Damage while below 50% health | +10% Resistances while below 50% health | Purchase from Havi’s shop for 120 Opals each piece. Good for high-risk high-reward. |
| Norse Gael | +10% Assassination Damage | +15% Health Recovery | From the Isle of Skye arc. Useful for stealth builds. |
| Thor’s | +7.5% Melee Damage | +7.5% Stun Damage | Complete all three Daughters of Lerion; then find the hidden cave. Powerful with Lightning runes. |
| Isu Armor (Mythical) | +15% All Damage | +10% Max Health | Only obtainable after fully upgrading the Hidden Blade and completing the Animus Anomalies. |
Cosmetic Transmog: Any armor can be transmogged to look like another piece once you have owned it. No cost.
---
Consumables
Consumables are used in combat, exploration, and settlement building. Most are crafted or bought from merchants.
Combat Consumables
| Item | Effect | Crafting Recipe | Notes |
|---|---|---|---|
| Rations | Heal 35% of max health (up to 2 carried, upgrade to 3). | Crafted from 1 Leather + 1 Herring or other fish. | Essential for survival; stock up before raids. |
| Regeneration Tonic | Slowly heal over 10 seconds. | 1 Mushroom + 1 Herring (some recipes). | Good for post-combat recovery. |
| Poison Bomb (Feather) | Create a poison cloud that damages enemies over time. | 1 Feather + 1 Carbon | Useful for crowd control; damages unaware enemies. |
| Explosive Arrow (Flail?) – Not a consumable; rather, use Flail or explosive jars. | |||
| Fire Bomb (Oil Jar) | Creates a fire patch that burns enemies. | 1 Feather + 1 Sulfur | Best for clearing groups or burning shields. |
| Luring Ration (Ration) | Drop ration to attract animals or enemies. | Same as normal ration. | Use to distract or bait. |
| Poison Throwing Knife (Lure?) – Not a consumable; use bow. |
World Consumables (Non-craftable)
| Item | Effect | Location |
|---|
| Fjotvir’s Mead | Restore 100% health. | Rare drops from legendary animals. |
| Spendless Coin | Gives 100 silver instantly. | Found in wealth chests. |
---
Materials
Materials are used for upgrades, crafting, and settlement development. They are categorized by rarity and purpose.
Common Materials
| Material | Use | Sources |
|---|---|---|
| Iron Ore | Weapon and armor upgrades (low tier). | Mining nodes, chests, enemies. |
| Leather | Armor upgrades and crafting consumables. | Animals, chests. |
| Furs | Crafting quivers, pouches, and certain runes. | Hunt animals. |
| Feathers | Crafting bombs and lures. | Birds, chests. |
| Carbon | Crafting fire bombs and poison bombs. | Found in caves and loot. |
| Sulfur | Crafting fire bombs. | Mining nodes. |
| Silicon (Runes) – Not a material; runes are separate. |
Rare Materials
| Material | Use | Sources |
|---|---|---|
| Titanium | Upgrade weapons to Flawless tier. | Wealth chests, order members, specific regions. |
| Tungsten | Upgrade weapons to Mythical tier. | Found in higher-level regions (e.g., Eurviscire, Snotinghamscire). |
| Platinum | Upgrade armor to Flawless and Mythical tiers. | Rare world loot, Order members, river raids. |
| Niello | Upgrade armor to Mythical tier. | Very rare; found in endgame regions and River Raids. |
| Fabric | Upgrade quiver and ration pouch. | Found in monasteries and chests. |
| Small Textile | Upgrade armor (intermediate). | Looted from tents and fabric bundles. |
| Large Textile | Upgrade armor (high tier). | Rare from world events. |
Settlement Materials
| Material | Use | Sources |
|---|---|---|
| Raw Materials | Build/upgrade settlement structures. | Raiding monasteries. |
| Supplies | Build/upgrade lower-tier structures. | Smaller raids, chests. |
| Fell Gold (DLC) | Used in Wrath of the Druids to trade for items. | DLC-specific trade system. |
Currencies
There are three main currencies in Valhalla, plus DLC-specific ones.
| Currency | Purpose | Acquisition |
|---|---|---|
| Silver | Standard currency for buying weapons, armor, runes, materials, and cosmetics from merchants. | Selling items, looting bodies, completing quests. |
| Opals | Premium currency for limited-time rewards from the Reda’s shop. Used to buy exclusive cosmetics and some gear. | Daily and weekly quests from Reda in Ravensthorpe. |
| Tokens (Viking Tokens) | Used for the world event mini-games (Orlog). Not tradeable for gear. | Winning Orlog games. |
| Coin of the Realm (DLC Dawn of Ragnarök) | Used in Svartalfheim shops. | DLC quests and chests. |
| Fell Gold (DLC Wrath of the Druids) | Used to trade with Dublin merchants. | DLC quest rewards and loot. |
---
Collectibles
Collectibles are scattered across England, Norway, and DLC regions. They contribute to completion percentages and unlock rewards.
Core Collectibles
Wealth (Gold icons on map): Contains gear, ingots, abilities, or raw materials. Usually guarded by enemies or puzzles.
Mysteries (Blue icons): World events, puzzles, offerings, and rare encounters. Rewards XP, ability points, cosmetics, and sometimes gear.
Artifacts (White icons):
- Roman Artifacts (scrolls, masks, etc.) – unlock cosmetic items.
- Rigs (Viking artifacts?): Actually, there are Treasure Hoard Maps, Rune Tablets, Ancient Weapons, and Cairns (stone stacking puzzles). Each type gives XP or abilities.
- Wrath of the Druids: Trade items, druid outposts, and the Children of Danu Order.
- Dawn of Ragnarök: Sleipnir fragments, new abilities, and Svartalfheim treasures.
- The Siege of Paris: Rebel missions and Francia artifacts.
- River Raids: Special gear and high-tier materials.
- Obtained early in the story. Used for Assassination.
- Can be upgraded three times at the Hidden Bureau in Norway, then later in England. Upgrades increase assassination damage and allow chain assassination.
- Synergy: Pair with Assassinate Damage runes on gear and the Advanced Assassination skill.
- Used for scouting, tagging enemies, and finding objectives. Cannot attack.
- Upgraded via the Synin skill in the Raven Skill Tree (increase detection range, faster flight).
- Carried in an inventory slot. Two default; upgrade to three via fabric at the blacksmith.
- Carries arrows. Upgrade at the blacksmith using fabric: start with 12, upgrade to 15, then 22 (max).
- Cosmetic items (tattoos, hair, ship trails) found in chests and purchased from merchants. No effect on gameplay.
- Obtained early; can be changed via stable tokens. Each mount has the same stats; only cosmetics differ.
- Your Viking ship. Can be customized with cosmetics (figurehead, sail, etc.) from the shop or loot. No stat differences.
- Inventory Limit: You can hold unlimited items, but you can only equip one weapon set at a time (two melee weapons, two bows). Unequipped gear goes to inventory.
- Salvage vs. Sell: Early game, salvage common gear for materials. Late game, sell duplicates for silver.
- Rune Removal: Runes can be removed at any blacksmith for a small silver fee. You keep the rune.
- Transmog: Any armor or weapon you have ever owned can be applied as a cosmetic skin over your currently equipped gear at no cost.
- DLC Items: DLC gear is usually stronger than base game at the same tier, but all items can be upgraded to Mythical and perform equally at max level.
Animus Anomalies: Glowing puzzles that unlock part of the Isu armor set after completing all.
Daughters of Lerion: Three powerful boss fights in East Anglia (Gonnadr), Lincolnscire (Aelfswith), and Suthsexe (Cornelia?). Defeating all three drops pieces of Thor’s armor and a key to access a hidden cave.
Order of the Ancients: Kill 45 members to unlock the final confrontation and the legendary spear Gungnir.
Legendary Animals: Defeating them provides unique trophies for the longhouse and some materials.
DLC Collectibles
---
Key Equipment (Abilities & Tools)
These are not traditional items but essential tools that function like equipment.
Hidden Blade
Raven (Synin)
Rations
Quiver
Tattoo Collection
Mount (Horse/Elk/Dog)
Longship
---
Important Notes on Item Management
---
This guide covers all essential items in Assassin's Creed Valhalla. For specific location details, consult the relevant region guides.
Character Skills
Character Skills Guide for Assassin's Creed Valhalla
Assassin's Creed Valhalla features one playable character, Eivor, with three distinct skill trees: Raven (stealth/assassination), Wolf (ranged/utility), and Bear (melee/brute). Skills are passive or active nodes unlocked with skill points earned from leveling or exploration. In addition, active abilities (combat Arts) are acquired from Books of Knowledge scattered throughout the world. This guide covers every skill tree node and every active ability, with detailed effects, cooldowns, upgrades, combos, synergies, builds, and usage tips.
---
Skill System Overview
- Skill Points: Earned by gaining XP (kills, quests, exploration) or by finding Skill Books in the world. Each level of Power grants one skill point.
- Skill Trees: Three trees, each with 3 main branches (total 9 branches). Nodes vary from small stat boosts (+2 Armor, +2 Ranged Damage) to major powers that unlock new mechanics (e.g., Chain Assassination, Advanced Assassination).
- Mastery Points: After unlocking all nodes in a tree, additional points go into Mastery, which grants small bonuses per point.
- Abilities: Active skills acquired from Books of Knowledge. You can equip up to 8 abilities (4 weapon, 4 ranged) and swap them freely. Each has a cooldown and can be upgraded with Ability Runes found in treasures.
- Effect: Unlocks the ability to perform a timed quick-time event (QTE) during an assassination attempt. If successful against a higher-level enemy, you one-shot them regardless of level difference. If failed, the assassination does partial damage and alerts the target.
- Usage: Essential against foes above your Power level. Practice the timing (press attack when circle meets target).
- Synergy: Pairs with any stealth build; use for guaranteed kills on zealots or guards.
- Effect: After performing an assassination, you can instantly throw a secondary throwing axe at another nearby enemy within range (about 15m) to assassinate them. Costs 1 adrenaline slot per chain.
- Cooldown: None, but requires adrenaline.
- Upgrades: No direct upgrades; effectiveness depends on throwing axe aim. The skill becomes more reliable with practice.
- Synergy: Use with Stealth Assassination and Backstab to clear groups silently.
- Effect: Increases assassination damage by 50%. This affects all assassination attempts (hidden blade, chain, air).
- Usage: Core of any stealth build. Stack with gear bonuses for insta-kills.
- Synergy: Multiplies with the Hidden Blade damage runes.
- Effect: Attacking an enemy from behind while undetected deals 50% bonus damage. Stacks with assassination but also works with melee/ranged attacks if not detected.
- Usage: Great for hybrid stealth-fighters. After a whistle, backstab a guard before combat.
- Effect: While crouching and undetected, enemies are highlighted through walls (like Odin's Sight but passive). Range about 40m.
- Usage: Lets you plan routes without spamming Odin's Sight. Essential for no-alert runs.
- Effect: Headshots from the hunter bow briefly stagger enemies, interrupting attacks.
- Usage: Useful for crowd control from stealth before initiating combat.
- Effect: While aiming a predator bow, you can slow time by holding the aim button and then manually steer the arrow by moving the camera. Arrow turns in flight.
- Usage: Hit enemies behind cover or at tricky angles. Great for long-distance pickoffs.
- Effect: Increases the amount of raw materials, leather, and iron collected from kills and chests by 10%.
- Usage: Quality-of-life skill for resource hoarders. No combat benefit.
- Effect: Increases chance to dodge incoming attacks while sprinting by 10%.
- Usage: Helps when fleeing or repositioning during combat.
- Effect: After a successful parry, the next attack deals 20% bonus damage and causes heavy stagger.
- Usage: Encourages parry-focused gameplay. Works well with shields.
- Raven Damage: +1.5 to +2.0 Raven damage (affects assassination and stealth damage).
- Headshot Damage: +1.5% – +2.0% headshot damage.
- Assassination Damage: +1.5% – +2.0% (additive).
- Stealth: +1.5% – +2.0% movement speed while crouching.
- Focus: Max Advanced Assassination, Chain Assassination, Backstab, and all assassination damage nodes.
- Gear: Hidden Blade with damage runes, Raven Clan armor for stealth bonuses.
- Playstyle: Lure enemies, chain assassinate, use Odin's Sight to mark all, then methodically clear.
- Effect: While aiming a bow, time slows down as long as you hold the aim button. Provides a circle that depletes; movement or firing depletes it faster. Recharges slowly.
- Cooldown: Recharge time ~10 seconds after full depletion.
- Usage: Crucial for headshots on moving targets or during combat. Pairs with any bow.
- Synergy: Use with Guided Arrow for easy steering.
- Effect: Hunter and light bow arrows can penetrate and hit an enemy behind the first target, dealing 50% of the damage to the second.
- Usage: Great for hitting clustered enemies or shooting through thin walls.
- Effect: Holding the fire ability button (default Q) while aiming a bow will ignite the arrow, making it deal fire damage on impact and causing enemies to burn (DoT).
- Cost: 1 adrenaline slot per fire arrow.
- Usage: Excellent for area denial, destroying barriers, or applying fire status.
- Effect: Similarly, hold the poison button to coat arrows with poison. Enemies hit take poison DoT and are slowed.
- Cost: 1 adrenaline per poison arrow.
- Usage: Crowd control and sustained damage.
- Effect: Increases the range of Odin's Sight by 20m and highlights enemies through walls even while moving (not just crouched).
- Usage: Scout entire camp from a distance before entering.
- Effect: Gain an additional adrenaline slot (max 3 slots from tree, total up to 5 with gear runes). Each slot allows one special active ability use.
- Usage: Vital for ability-heavy builds. Allows more frequent use of special arrows or combat abilities.
- Effect: Unlocks the ability to slide while sprinting (press crouch). You can slide under obstacles and break boxes.
- Usage: Mobility and secret passage access.
- Effect: While sprinting, you can jump higher and perform a roll upon landing, reducing damage.
- Usage: Useful for escaping or traversing rough terrain.
- Effect: Increases arrow capacity by 10 for each bow type (30 total extra).
- Usage: Essential for ranged-focused builds to avoid running out.
- Effect: Headshots with hunter bow cause a small shockwave that damages enemies near the target for 15% of the headshot damage.
- Usage: AoE damage on headshots. Synergizes with headshot damage nodes.
- Effect: Increases adrenaline gain from ranged kills by 15%.
- Usage: Keeps adrenaline flowing for abilities.
- Ranged Damage: +1.5 – +2.0 per node.
- Headshot Damage: +1.5% – +2.0%.
- Adrenaline Gain: +1.0% – +1.5%.
- Arrow Capacity: +2 per small node.
- Focus: Max Focus of the Nornir, Piercing Arrow, Wolf's Favor, and headshot damage nodes.
- Gear: Hunter bow with fire/poison runes. Armor that boosts ranged damage (Thegn's set).
- Playstyle: Use Focus to land repeated headshots, burn/poison groups, and stay at range.
- Effect: After a successful stun (parry, heavy attack, or ability), you can perform a brutal finisher on a staggered enemy by pressing the attack button. Deals massive damage and restores a small amount of health.
- Usage: Turn the tide in tough fights. Use on heavily armored foes.
- Effect: When health drops below 30%, you gain increased attack speed and damage by 30% for 10 seconds. Cooldown 60 seconds.
- Usage: Last-ditch survival tool. Aggressive players can bait low health for the buff.
- Effect: While blocking, press attack to perform a bash that staggers enemies. Can break guard of normal enemies. Costs stamina.
- Usage: Create openings for heavy attacks or finishers.
- Effect: When dodging, you can press the dodge button again immediately to perform a roll that covers more distance and evades attacks more reliably.
- Usage: Essential for avoiding unblockable red attacks.
- Effect: While an enemy is on the ground (downed), you can press attack to stomp them, dealing damage and interrupting their get-up.
- Usage: Prevents enemies from recovering, keeps them vulnerable.
- Effect: After taking damage, your next attack within 3 seconds deals 20% bonus damage.
- Usage: Encourages trading blows. High-risk, high-reward.
- Effect: Unlocks a third heavy attack in the basic combo, which has increased damage and stagger.
- Usage: Extends combos; use with slow weapons for big damage.
- Effect: Unlocks a fourth light attack in the combo, which has hyper armor (cannot be interrupted).
- Usage: Useful for breaking through enemy attacks.
- Effect: Allows you to swap weapons while blocking or dodging without interrupting momentum.
- Usage: Switch between one-handed and two-handed as needed.
- Effect: While sprinting, press attack to perform a sprinting bash that staggers and can knock down enemies.
- Usage: Initiate combat with a charge.
- Effect: Melee hits generate +15% additional adrenaline.
- Usage: Fuel abilities faster in melee combat.
- Effect: Enemies killed by melee attacks sometimes explode, dealing damage to nearby enemies. Chance increases with Power level.
- Usage: Chain kills cause chain explosions.
- Melee Damage: +1.5 – +2.0 per node.
- Health: +2.0 – +3.0 max health per node.
- Stun Damage: +1.5% – +2.0%.
- Armor: +1.5 – +2.0.
- Focus: Brutality, Berserker's Favor, Heavy/Light Attack Chains, all melee damage nodes.
- Gear: Two-handed weapon (greatsword or Dane axe) with crit/stun runes. Heavy armor (e.g., Bear Clan).
- Playstyle: Aggressive parry and stun, use Brutality, stay in enemies' faces, use Berserker's Favor when low.
---
Raven Skill Tree (Stealth & Assassination)
Designed for stealth players. Focuses on assassination damage, stealth movement, and utility. Raven tree nodes are passive or toggleable.
Major Raven Nodes
#### Advanced Assassination
#### Chain Assassination
#### Stealth Assassination
#### Backstab
#### Stealth Recon
#### Arrow to the Knee
#### Guided Arrow
#### Raven's Loot
#### Finesse
#### Twist the Knife
Small Raven Nodes (Stat Boosts)
Recommended Raven Build
---
Wolf Skill Tree (Ranged & Utility)
Enhances bow combat, exploration, and survival. Wolf nodes improve damage with all bow types (hunter, predator, light), provide adrenaline gains, and unlock special arrow abilities.
Major Wolf Nodes
#### Focus of the Nornir
#### Piercing Arrow
#### Burning Arrow
#### Poison Arrow
#### Breath of the Wolf
#### Wolf's Favor
#### Sprint and Slide
#### Bunny Hop
#### Extra Arrow
#### Thunderstrike
#### Wolf's Skill
Small Wolf Nodes
Recommended Wolf Build
---
Bear Skill Tree (Melee & Brute)
Designed for aggressive melee combat. Increases health, melee damage, stamina, and unlocks powerful combat moves.
Major Bear Nodes
#### Brutality
#### Berserker's Favor
#### Shield Bash
#### Counter Roll
#### Stomp
#### Warrior's Vengeance
#### Heavy Attack Chain
#### Light Attack Chain
#### Dual Swap
#### Rush and Bash
#### Adrenaline Gain on Hit
#### Explosive Corpse
Small Bear Nodes
Recommended Bear Build
---
Active Abilities (From Books of Knowledge)
Abilities are special moves you equip to your weapon or ranged slots. Each has a cooldown and can be upgraded with Ability Runes (up to 2 runes per ability, found in chests). There are 16 weapon abilities and 8 ranged abilities. Below is the complete list.
Weapon Abilities (Melee/Ranged combo)
| Ability | Description | Cooldown | Upgrade Effects | Best Use |
|---|---|---|---|---|
| Dive of the Valkyries | Leap into the air and slam down, creating a shockwave that knocks back and damages enemies in a radius. | 20s | Runes: Increased damage, increased radius. | Crowd control, interrupt groups. |
| Harpoon Impalement | Throw a harpoon that impales an enemy; if it hits a surface, the enemy is pinned. You can also pull yourself to them. | 15s | Runes: Longer range, pin duration. | Isolate targets, pull to ledges (instant kill), or stun. |
| Sprint Assault | Sprint forward and deliver a powerful attack that throws enemies aside. | 12s | Runes: Extra damage, break blocks. | Open combat, break through shield walls. |
| Throwing Axe Fury | Unleash a rapid flurry of throwing axes, each hitting for decent damage. | 25s | Runes: More axes, fire/poison effect. | Ranged option from melee slot, good for softening or finishing. |
| Poison Strike | Coat your weapon with poison; next melee hit applies poison DoT AND slows enemy. | 15s | Runes: Poison duration, damage. | Debuff tough enemies before melee. |
| Fire Strike | Coat weapon with fire; next hit causes fire DoT. | 15s | Runes: Fire duration, spread to nearby enemies. | Same as poison but fire deals more raw damage. |
| Stomp | Same as skill tree node but as an active ability with a short cooldown; allows you to stomp a downed enemy. | 5s | No runes. | Cheaper than the passive? Actually this is an ability; you can equip it to have a dedicated stomp button. |
| Shield Breaker | A heavy strike that breaks an enemy's guard and leaves them staggered. | 10s | Runes: Increased stagger, damage. | Essential against shielded opponents. |
| Combo Assassination | After a kill, teleport to another nearby enemy and perform an assassination (similar to chain assassination but costs adrenaline and works in combat). | 20s | Runes: More teleport range, no adrenaline cost? | Chain kills in combat. |
| Rally Cry | Let out a war cry that increases your damage and reduces damage taken for 10 seconds. | 40s | Runes: Duration, party boost. | Buff before big fights. |
| Warrior's Bane | A sweeping attack that knocks down enemies around you. | 18s | Runes: Radius, knockdown time. | Create breathing room. |
| Explosive Trap | Place a trap that explodes when an enemy steps near. | 30s | Runes: Damage, radius. | Preemptive area denial. |
| Guided Missile | Summon a blowgun-like dart that you can steer to hit enemies; deals damage and staggers. | 20s | Runes: Distance, damage. | Long-range stealth assassination from distance? Actually not an assassination. |
| Mark of Death | Mark an enemy; if they die within 10 seconds, they explode into a cloud that damages and blinds nearby enemies. | 25s | Runes: Damage, duration. | Synergy with group kills. |
| Blinding Flash | A flash of light that blinds enemies in front of you for 3 seconds. | 20s | Runes: Duration, radius. | Setup for assassinations. |
| Breath of Fire | Unleash a cone of fire that ignites enemies. | 25s | Runes: Damage, fire duration. | AoE fire damage. |
Ranged Abilities (Bow Slot)
| Ability | Description | Cooldown | Upgrade Effects | Best Use |
|---|---|---|---|---|
| Light Arrow | Fire a quick shot that deals light damage and staggers. | 5s | Runes: Damage, stun. | Spam between heavy shots. |
| Poison Arrow | Same as skill tree poison arrow but as an ability; requires adrenaline? Actually the skill tree version is passive, this is an active skill that consumes no adrenaline. | 15s | Runes: Poison strength, spread. | Apply poison without using adrenaline. |
| Fire Arrow | Same as skill tree fire arrow but active; consumes no adrenaline. | 15s | Runes: Fire duration. | Set enemies ablaze for free. |
| Explosive Arrow | Fire an arrow that explodes on impact, dealing AoE damage. | 20s | Runes: Blast radius, damage. | Destroy breakable walls, damage groups. |
| Sleep Arrow | Fire an arrow that puts an enemy to sleep for 10 seconds. | 30s | Runes: Duration, no alert on hit. | Non-lethal takedown, avoid combat. |
| Poison Bomb | Launch a bomb that creates a poison cloud that lingers for 5 seconds. | 25s | Runes: Cloud duration, damage. | Area denial. |
| Smoke Bomb | Create a smoke screen that blinds enemies and allows you to break line-of-sight. | 30s | Runes: Duration, radius. | Escape or reset combat. |
| Tactical Bow | Equip a slower, more powerful bow that deals extra damage but takes longer to draw. | 10s | Runes: Draw speed, damage. | Sniper shots from cover. |
Ability Synergies and Builds
- Fire/Poison Hybrid: Equip Fire Strike and Poison Strike weapon abilities, plus Fire Arrow and Poison Arrow ranged. Apply both statuses on a boss for continuous damage. Use Runes to extend duration.
- Stealth Assassin: Use Blinding Flash, Sleep Arrow, Mark of Death. Blinding Flash to open, sleep any guard you can't assassinate, then Mark of Death on a kill to cause chaos.
- Ranged Sniper: Tactical Bow + Breach of the Nornir + Explosive Arrow. Focus on headshots from far away; use Explosive Arrow for groups.
- Berserker Melee: Rally Cry + Dive of the Valkyries + Throwing Axe Fury. Pop Rally Cry then dive into enemy groups, then fury axes to finish.
- Control: Harpoon Impalement + Shield Breaker + Sleep Arrow. Harpoon to isolate, Shield Breaker for guard, Sleep for tough fights.
- Respec Anytime: Silver can respec all skill points (but not mastery). Experiment freely.
- Skill Books: Found in gold chests or small world events; each gives a skill point.
- Prioritize Major Nodes: Always unlock the major nodes first in your chosen playstyle; stat nodes are secondary.
- Adrenaline Slots: From Wolf tree and gear. Max 5 slots allows you to use 5 abilities in quick succession.
- Cooldown Reduction: Some runes reduce ability cooldowns; gear perks also help.
- Combos: Chain abilities for devastating results: e.g., Dive of the Valkyries -> Stomp -> Poinson Strike -> Shield Breaker -> Brutality (if stunned).
---
Mastery Points
After unlocking every node in a tree, additional skill points go into Mastery. Each Mastery point adds a small bonus (e.g., +0.5% damage, +1% critical chance, +0.5% armor). Mastery is shared across all trees but you must choose which tree's masteries to invest in (you can invest all into one or spread). There is no cap, but gains become diminishing after 30 points. For min-maxing, invest 30 into your primary tree, then spread to secondary.
---
General Tips
This guide covers every skill and ability in Assassin's Creed Valhalla. Use the tables and recommendations to craft the perfect Viking for your playstyle.
Characters & Roles
Characters & Roles Guide for Assassin's Creed Valhalla
This guide covers every major character, role, and playable unit in Assassin's Creed Valhalla. While Eivor is the sole playable protagonist, the game offers deep customization through three distinct skill trees (Raven, Wolf, Bear) that define your playstyle. Supporting characters and Jomsvikings round out the experience.
---
Main Character: Eivor Varinsdottir / Varinsson
Background: Eivor is a fierce Viking raider from Norway, driven by a quest for glory and vengeance after a childhood tragedy. Players can choose between male (Eivor Varinsson) or female (Eivor Varinsdottir) versions at the start, with the option to let the Animus decide. The canonical lore favors the female version, but both are fully voiced and supported.
Strengths:
- Extremely versatile: can excel in stealth, ranged, or melee combat depending on skill allocation.
- Dual-wield any weapon combination, allowing for creative builds.
- Access to the Hidden Blade for guaranteed assassinations after upgrading.
- Strong base stats (health, stamina) that grow with power level.
- Jack-of-all-trades early on; specialization requires deliberate skill point placement.
- Limited stamina in early game; spam attacks leads to exhaustion.
- Assassinations fail against higher-level enemies until Hidden Blade upgrades are applied.
- Skill Tree: Invest heavily in Raven (stealth, assassination, critical strikes).
- Weapons: Varin’s Axe (starting) or Yngling Seax (dagger) for fast, silent kills. Upgrade Hidden Blade to max.
- Armor: The Hidden Ones set (bonus to assassination damage and stealth). Acquired via the Hidden Ones Bureau quests.
- Abilities: Chain Assassination, Advanced Assassination, Raven’s Distraction.
- Runes: Focus on assassination damage, stealth movement speed, and crit chance.
- Strengths: Can eliminate entire camps without detection.
- Weaknesses: Struggles in open combat against multiple strong foes.
- Skill Tree: Wolf tree (bow damage, time-slowing, predator abilities).
- Weapons: Hunter Bow (preferably the Petra’s Arc legendary) for precision shots; light shield for defense.
- Armor: The Huntsman set (bonus to headshot damage and bow speed).
- Abilities: Focus of the Nornir, Sharp Shot, Blinding Smoke.
- Runes: Bow damage, headshot multiplier, fire or poison effects.
- Strengths: Deadly at range; can thin enemies before engaging.
- Weaknesses: Weak in close quarters; slow bow draw time can be punished.
- Skill Tree: Bear tree (melee damage, armor, health, heavy attacks).
- Weapons: Dual Dane Axes (e.g., Sepulcher Axe + Mjölnir) for massive stagger and area damage.
- Armor: The Brigandine set (bonus to armor and melee resistance) or Thegn’s set (bonus to heavy attacks).
- Abilities: Dive of the Valkyries, Rush & Bash, Harpoon Impalement.
- Runes: Melee damage, armor, health regeneration.
- Strengths: Can absorb damage and deal heavy blows; excellent for raids.
- Weaknesses: Slow movement; struggles against agile enemies and archers.
Weaknesses:
Playstyle:
Eivor’s playstyle is entirely defined by the three skill trees. You can invest points freely, but most players specialize in one or two trees. The game encourages mixing for synergy.
Unlock Conditions:
Eivor is unlocked immediately upon starting a new game. No progress is needed.
Recommended Equipment & Builds:
Build 1: Raven Assassin (Stealth-focused)
Build 2: Wolf Hunter (Ranged/Utility)
Build 3: Bear Juggernaut (Melee/Brute)
Team Synergy:
Eivor does not have a traditional party, but during story missions you ally with various NPCs who accompany you temporarily. Eivor’s build should complement the mission type. For stealth missions, use Raven; for large battles, use Bear; for hunting or skirmishes, use Wolf.
---
Supporting Characters (Key NPCs)
While not playable, these characters provide essential story, quests, and upgrades.
| Character | Role in Game | Gameplay Influence |
|---|---|---|
| Sigurd Styrbjornsson | Eivor’s foster brother, a central figure in the clan’s journey to England. His choices affect the ending. | He joins you in some story raids but is AI-controlled. His approval affects alliance decisions. |
| Randvi | Settlement advisor, manages alliances and relationships. | She provides regional quests (Alliance Map) and romance options. Her advice impacts political standing. |
| Basim Ibn Ishaq | Hidden One mentor, teaches Eivor about the Brotherhood. | Unlocks the Hidden One Bureau quests, rewards Hidden Blade upgrades and stealth gear. |
| Hytham | Hidden One apprentice, operates from Ravensthorpe. | Gives weekly contracts (experience and opals), also teaches new abilities like Assassination techniques. |
| Valka | Seeress, guides Eivor through the Asgard/Jotunheim dream sequences. | Unlocks the mythical realms (Asgard, Jotunheim) for unique armor and weapons. |
| Gunnar | Blacksmith at Ravensthorpe. | Upgrades gear, adds rune slots, and allows transmogrification. |
| Tarben the Baker / Petra / Hunwald etc. | Settlement residents, romance options, and quest-givers. | Provide short quests, reward items, and improve settlement mood. |
---
Jomsvikings (Customizable Raiding Crew)
Description: Jomsvikings are AI-controlled Viking warriors that you can recruit, customize, and deploy during river raids and large-scale attacks. They are not directly playable but serve as your personal army.
Background: After building the Jomsviking Hall in Ravensthorpe, you can recruit crew members from other players’ creations online or create your own.
Strengths:
- Provide significant support in battles, drawing enemy aggro and dealing damage.
- Can be equipped with weapons and armor you choose, affecting their performance.
- Recruited Jomsvikings level up with you.
- AI can be unpredictable; they may ignore commands or get stuck.
- They are not essential for most solo content; mainly for river raids and optional assaults.
- Cannot be directly controlled.
- Use Jomsvikings to overwhelm fortified positions during river raids.
- Equip them with heavy weapons (e.g., Dane axes) for maximum damage.
- For stealth-focused players, Jomsvikings are a liability; better to leave them behind.
- Build the Jomsviking Hall (requires 400 Supplies and 300 Raw Materials) in Ravensthorpe.
- Then interact with the dock to recruit or manage your crew.
- Weapons: Spears or Great Swords (good range and damage).
- Armor: Heavy armor (Brigandine or Thegn) to increase survivability.
- Runes: Add health or armor runes to keep them alive longer.
- Best used with a Bear or Wolf build that can draw attention while they flank.
- Avoid using them if you plan to stealth; they will break cover.
- Focus: Silent movement, assassination damage, critical opportunities, and utility tools.
- Key Skills: Chain Assassination (kill two enemies in quick succession), Advanced Assassination (QTE to kill higher-level enemies), and Stealth Recon (reveal enemy patrols).
- Best For: Players who prefer infiltrating forts, eliminating targets quietly, and avoiding direct combat.
- Focus: Bow accuracy, time-slowing, predator abilities, and crafting bonuses.
- Key Skills: Focus of the Nornir (slow time when aiming), Brush with Death (slow time on dodge), and Predator Sense (highlight enemies through walls).
- Best For: Players who enjoy sniping, scouting, and controlling the battlefield from a distance.
- Focus: Weapon damage, armor, health, stagger, and heavy attacks.
- Key Skills: War Cry (increase damage for self and allies), Charge (break shields), and Tireless (reduce stamina costs).
- Best For: Players who charge into combat head-on, dual-wield heavy weapons, and want to tank damage.
Weaknesses:
Playstyle Integration:
Unlock Condition:
Recommended Equipment for Crew:
Team Synergy:
---
Skill Trees as Roles
Assassin’s Creed Valhalla does not have fixed classes. Instead, the three skill trees act as roles that define your specialization.
#### Raven Tree (Stealth & Assassination)
#### Wolf Tree (Ranged & Utility)
#### Bear Tree (Melee & Brute)
Build Flexibility: You can reset skill points at any time for a small cost (500 silver at the skill reset vendor in Ravensthorpe). This allows you to adapt to different challenges or try new playstyles without starting a new game.
---
Playable Units: Final Verdict
Only Eivor is directly playable. However, the depth of customization through skill trees, weapon combinations, and gear sets effectively creates multiple “character builds” that feel like different roles. Supporting characters and Jomsvikings enhance the experience but are not player-controlled. Master all three trees to become the ultimate Viking raider.
Cheats & Secrets
Cheats & Secrets
Official Cheat Codes
There are no official cheat codes built into Assassin's Creed Valhalla on any platform (PC, PlayStation, Xbox, Stadia). The game does not support developer console commands or traditional button sequences to unlock infinite health, resources, or abilities.
However, PC players can access a hidden developer debug menu by hex-editing the game executable. This is not endorsed by Ubisoft and may corrupt saves or disable achievements. Use at your own risk.
How to enable the debug menu (PC only):
1. Navigate to your game installation folder (e.g., `C:\Program Files (x86)\Ubisoft\Ubisoft Game Launcher\games\Assassin's Creed Valhalla`).
2. Locate `ACValhalla.exe` and make a backup copy.
3. Open the original `.exe` with a hex editor (e.g., HxD).
4. Search for the byte sequence `74 0C 48 8B 05 ?? ?? ?? ?? 48 85 C0 74 04` and change the first `74` to `EB`.
5. Save the file and launch the game.
6. In-game, press F2 (or F3 on some versions) to open the debug menu. You can toggle god mode, spawn items, teleport, and more.
Warning: This mod is unsupported and may trigger anti-cheat or EAC (if enabled). Ubisoft may patch this method in updates.
---
Hidden Secrets & Unlockable Content (Developer-Intended)
Assassin's Creed Valhalla rewards exploration with several major hidden gear sets and weapons that require solving puzzles, defeating optional bosses, or completing secret quest chains.
#### 1. Thor's Armor Set & Mjolnir (Hammer)
- Location: England & Norway.
- Requirements:
- Reward: Complete set boosts lightning damage; Mjolnir can be lifted after wearing Thor’s full armor and holding the weapon in the cave.
- Location: Hamtunscire, in a cave beneath Saint Michael’s Mount (south coast).
- Requirements:
- Reward: Heavy sword with blinding flash on heavy critical hits.
- Location: River Raids questline.
- Requirements:
- Reward: Heavy armor set with fiery effect on heavy attacks; sword with burning damage.
- Location: Suthsexe, inside a cave near the central river (southwest of Chichester).
- Requirements:
- Reward: Legendary hunter bow that applies poison on headshots.
- Location: Ireland, in the area of “The Corpse Feeders” legendary animal.
- Requirements:
- Reward: Spear that deals bonus damage to poisoned enemies.
- Location: Eurvicscire, in a cave under the “Hunter’s Camp” near the frozen lake.
- Requirements:
- Reward: Bow that slows time on a perfect draw.
- Location: Grantebridgescire, in a small cave at the western edge of the region (near the synchronisation point).
- Details: Inside, you find a skeleton sitting by a campfire. On the ground is the text “You Died” written in blood. Nearby, a flaming sword reminiscent of the Dark Souls bonfire can be picked up (a weapon called “Suttungr’s Claw”? Actually it’s just a regular sword). This is a direct nod to the Souls series.
- Location: Obtainable from Reda’s weekly shop (requires Opals). The emote is called “Sun Salutation” and mimics the iconic Dark Souls gesture.
- Location: Hidden in the basement of the Bureau of the Hidden Ones (in Lunden). After completing the main story, return to the bureau and find a letter from Hytham referencing the Assassin’s Creed maxim.
- Location: In the “House of the Eagle” (a hidden quest in the Isle of Skye DLC). A statue of Bayek appears, and Eivor can comment on it.
- Location: In the “East Anglia” region (Englaland), near a river east of Thetford. A small grave with a hat and a revolver (replica) references Arthur Morgan.
- Location: In the “River Severn” area, you can find a contract called “The Beast of White Orchard” – a nod to the griffin from The Witcher 3.
- Location: Norway, at a location called “Troll’s Tooth” (southwest of Fornburg). Climb to the top and a troll appears briefly and disappears, similar to a mythical creature sighting.
- Prerequisites: Complete the main story (end of the England arc) and reach Settlement Level 4.
- How to start: A new quest appears in your journal. Travel to the small island of “Agon” in the Atlantic off the coast of England (southwest of Wessex).
- Content: Fight alongside Kassandra (from Assassin’s Creed Odyssey), who has been alive for centuries. The quest yields a unique spear called “The Spear of Leonidas” (reskinned) and a cutscene referencing the Isu.
- Note: This is a limited-time event that was later added permanently for all players via a free update.
- “The End” (Trophy): Complete the main story – but there is a secret ending after defeating all Order members and speaking to Hytham.
- “Dawn of Ragnarok” (DLC): Not a secret, but Forgotten Saga mode (unlocked after starting the DLC) contains roguelike secrets.
- Dual Heavy Weapon Glitch: Equip two heavy swords (like Excalibur and another) by using the “main hand / off-hand” swap in combat. This was intended for dual-wielding, but combining two heavy weapons gives immense stagger. No external tools required.
- Defeat all three Daughters of Lerion (Goneril, Regan, Cordelia) to obtain their daggers.
- Offer the daggers at the statue of Thor in Rygjafylke, Norway (southeast of the starting area).
- The armor pieces are hidden in chests around the same region, unlocked after each daughter kill.
#### 2. Excalibur
- Collect all 11 Tablets from treasure hoards spread across England. Each tablet is in a hidden chest guarded by enemies or puzzles.
- Insert the tablets into the stone sockets in the cave.
#### 3. Saint George’s Armor & Sword
- Complete the first River Raid tutorial from Vagn.
- Raid river beron, river severn, and river exe to collect key items (e.g., Saint George’s Tome).
- Exchange the items with Vagn at your settlement to unlock the armor and sword.
#### 4. Nodens' Arc (Bow)
- Shoot the barred wooden door with a fire arrow to break it.
- Loot the chest inside.
#### 5. Gae Bolg (Spear) – Wrath of the Druids DLC
- Defeat the legendary beast (a giant wolf) in the Ruins of Bán - it spawns after completing the main DLC story.
- Loot the spear from its corpse.
#### 6. Frostruin (Hunting Bow)
- Defeat the legendary animal “The Beast of Blackwood” (a bear) – it appears only at night during a snowstorm.
- Loot the cave after the fight.
---
Easter Eggs (Pop Culture & Series References)
Assassin's Creed Valhalla is packed with homages to other franchises and previous AC games. Most are strictly cosmetic or humorous and do not affect gameplay.
#### 1. Dark Souls Reference – “You Died”
#### 2. “Praise the Sun” Emote
#### 3. The “Nothing is True” Letter
#### 4. AC Origins & Bayek Reference
#### 5. Red Dead Redemption 2 Grave
#### 6. The Witcher Reference
#### 7. Hidden “Troll” Easter Egg
---
Secret Crossover Quest: “A Fated Encounter” (Legacy of the First Blade)
---
Hidden Achievements / Trophies
Some achievements require secret actions:
---
Developer-Intended Exploits (Patched or Current)
Ubisoft has patched many unintentional exploits (e.g., infinite XP glitches). However, one safe exploit remains:
---
Conclusion
While Assassin’s Creed Valhalla lacks traditional cheat codes, its open world is rich with developer-intended secrets, Easter eggs, and hidden gear that reward thorough exploration. For PC players comfortable with hex editing, the debug menu offers unofficial cheats, but proceed with caution. Always backup your saves before experimenting.