Baldur's Gate 3
## Overview **Baldur's Gate 3** is a critically acclaimed, narrative-driven role-playing game (RPG) developed by **Larian Studios** and published by **Larian Studios**. It was released on **August 3, 2023** for PC (Windows and macOS via Steam, GOG, and Epic Games Store), followed by a **PlayStation...
Download & Installation
Overview
Baldur's Gate 3 is a deep RPG available on PC (Windows/Mac via Steam, GOG, Epic Games Store), PlayStation 5, and Xbox Series X|S. There is no native Switch or mobile version. The game requires a digital download on all platforms, with physical disc versions for consoles containing only a license code (no disc data).
Key points before starting:
- Always purchase from official stores (Steam, GOG, Epic Games Store, PlayStation Store, Microsoft Store) to avoid malware and ensure updates.
- Storage: ~150 GB on PC/console (SSD strongly recommended). Pre-allocate an extra 20 GB for patches.
- Internet: Required for download, activation, and day-one patches. Single-player works offline after installation but updates need connectivity.
- Account: Store account (Steam/GOG/Epic/PSN/Xbox Live) needed; no subscription required for single-player (Xbox Game Pass Core/Ultimate for online features on console).
- OS: Windows 10 64-bit (or macOS 10.15 Cataline+)
- CPU: Intel i5-4690 / AMD FX 8350
- RAM: 8 GB
- GPU: Nvidia GTX 970 / AMD RX 480 (4 GB VRAM)
- DirectX: Version 11
- Storage: 150 GB SSD (HDD possible but long load times)
- Notes: Requires a 64-bit processor and OS.
- OS: Windows 10/11 64-bit (or macOS 11 Big Sur+)
- CPU: Intel i7-8700K / AMD Ryzen 5 3600
- RAM: 16 GB
- GPU: Nvidia RTX 2060 Super / AMD RX 5700 XT (8 GB VRAM)
- DirectX: Version 11
- Storage: 150 GB SSD
- Notes: Vulkan renderer recommended for AMD GPUs; DX11 for Nvidia (performance varies).
- CPU: Intel i7-12700K / AMD Ryzen 7 5800X3D
- RAM: 32 GB
- GPU: Nvidia RTX 4080 / AMD RX 7900 XTX (16 GB VRAM)
- Storage: 150 GB NVMe SSD
- Steam: Follow PC Steam steps, but install the macOS version (check under Library > Baldur's Gate 3 > Properties > DLC > tick macOS).
- GOG: Offline installer for macOS available. Requires Mac with Apple Silicon or Intel (Intel performance poor).
- Storage: Same 150 GB on APFS formatted drive (SSD highly recommended).
- First launch: May prompt for “Allow this app to access files” – click Allow.
- Vulkan (default on PS5/Xbox/PC) – generally better for AMD GPUs and offers slightly better performance on most systems.
- DirectX 11 – more stable for some Nvidia cards; may fix crashes.
- Console: No choice – uses proprietary API.
- Calibrate brightness (follow on-screen image).
- Select difficulty (Explorer, Balanced, Tactician).
- Choose your character (this can be changed later via respec).
- Wait for shader cache on PC (may take up to 10 minutes on first launch) and console (2-5 minutes). Do NOT close the application.
- Adjust settings: Go to Options > Video > set resolution, V-Sync, FPS cap (60/120). Recommended: Turn off Depth of Field if experiencing performance issues.
- Solution: Free up space. Use Disk Cleanup (Windows), move other games to external drives. Check page file size (Windows: 16-20 GB).
- Mac: Use Storage Management.
- Console: Delete unused games or use external storage (PS5: internal only for PS5 games; Xbox: Seagate expansion).
- PC: Pause and resume download. Change download region in Steam/Epic/GOG settings. Restart launcher.
- Console: Test network connection (Settings > Network > Test). Use wired connection.
- Universal: Disable VPN, firewall, or antivirus temporarily (re-enable after).
- Cause: Antivirus deleting exe or file corruption.
- Fix: Verify game files (right-click > Properties > Local Files > Verify Integrity of Game Files). Add folder to antivirus exclusion.
- Try: Switch to the other API. In Steam Launch Options add `--dx11` or `--vulkan`. For Epic/GOG, edit properties.
- Update GPU drivers (Nvidia/AMD/Intel).
- Disable overlays (Discord, GeForce Experience).
- Fix: Close launcher from Task Manager, restart Steam as admin. Delete `%LocalAppData%\Larian Studios\Launcher\` (Windows).
- Wait: May take up to 10-15 minutes. If frozen more than 20 minutes, restart console/PC. Ensure game is fully updated.
- Fix: Full shutdown (hold power button 10 secs). Restart console. Try offline mode after downloading (may need to set console as home).
- Cause: Intel Macs below minimum spec. Only workaround is to reduce resolution to 720p and close all apps. Apple Silicon M1+ is required for stable play.
- Steam: Right-click game > Properties > Local Files > Verify Integrity of Game Files.
- GOG Galaxy: Manage Installation > Verify/Repair.
- Epic: Settings > Manage Games > Verify (icon).
- Manual: Check game folder size (should be ~150 GB). Look for folder `BaldursGate3.exe` in `bin` subfolder.
- Go to Settings > Storage > Games and Apps. Baldur's Gate 3 should show ~150 GB. If not, rebuild database: Turn off console, boot into Safe Mode (hold power button until two beeps), select option 6 (Rebuild Database).
- Press Xbox button > Profile & system > Settings > System > Storage > Internal > Baldur's Gate 3. Size should be ~125-150 GB. Run “Verify and Repair” if crashes persist.
- Test: Start a new game and play the first area (the Nautiloid ship). If you can move, attack, and interact with objects, the installation is successful.
- Update check: Ensure game version matches the latest patch (e.g., Patch 7). Check official Larian forums or game menu > version number.
- Save profiles: Your saves are stored locally on PC (`%LocalAppData%\Larian Studios\Baldur's Gate 3\PlayerProfiles`) and in cloud storage. On console, use cloud saves (require PS Plus / Xbox Gold).
- Mod installation: Only on PC. Use Vortex mod manager or manual installation. Disable mods before verifying files.
- Multiple drives: On PC you can move the game after install using Steam's “Move Install Folder” or symlinks. Not officially supported on consoles.
- Pre-loading: Not available for this game pre-release; full download required.
---
System Requirements (PC)
Minimum (1080p / 30 FPS / Low Settings)
Recommended (1440p / 60 FPS / High Settings)
Ultra (4K / 60 FPS / Ultra Settings)
Mac-specific: Apple Silicon (M1/M2/M3) required for best performance; Intel Macs struggle.
---
Platform-Specific Installation Steps
PC (Steam)
1. Create/Log in to your Steam account (download Steam client from [store.steampowered.com](https://store.steampowered.com)).
2. Purchase Baldur's Gate 3 on the Steam Store. Wait for email confirmation.
3. Install Steam client (if not already). Navigate to Library > Baldur's Gate 3.
4. Click Install – choose installation directory (default: `C:\Program Files (x86)\Steam\steamapps\common`). Ensure drive has 150+ GB free.
5. Select “Install” – Steam downloads the full game (approx. 150 GB). Time depends on internet speed.
6. Post-download: Steam automatically applies any patches. Wait for “Ready” status.
7. Launch from Library or desktop shortcut. First launch may prompt for Vulkan vs DX11 selection. Choose Vulkan for AMD GPUs, DX11 for Nvidia (or test both).
PC (GOG)
1. Install GOG Galaxy from [gog.com](https://www.gog.com) if you want auto-updates. Alternatively, you can download offline installers.
2. Log in and purchase the game. In Library, click Baldur's Gate 3 > Install.
3. Choose installation path – default `C:\GOG Games\Baldur's Gate 3`. Can also use an external drive.
4. Let Galaxy download (or download offline installers manually if no Galaxy). Extract installers and run `setup_baldurs_gate_3_*.exe`.
5. Verify integrity via Galaxy: right-click game > Manage Installation > Verify/Repair.
6. Launch – same Vulkan/DX11 prompt as Steam version.
PC (Epic Games Store)
1. Install Epic Games Launcher from [epicgames.com](https://www.epicgames.com).
2. Log in and purchase the game. Go to Library > Baldur's Gate 3.
3. Click Install – choose installation folder (default: `C:\Program Files\Epic Games\BaldursGate3`).
4. Wait for download – uses Epic's CDN. Pause/resume works.
5. Launch – same first-run renderer choice.
PlayStation 5
1. Ensure console firmware is updated (Settings > System > System Software Update).
2. Purchase Baldur's Gate 3 from PlayStation Store (digital) or insert disc (physical discs act as license keys – installation data still downloads).
3. Digital: Go to Game Library > Purchased > select Baldur's Gate 3 > Download.
4. Physical: Insert disc – a pop-up appears. Select “Copy” to install from disc. After initial copy, download patch (approx. 50-70 GB). Keep disc in drive to play.
5. Manage Storage: Settings > Storage > Console Storage > Delete if needed to free 150+ GB.
6. First launch: Game installs shaders on first run (may take 5-10 minutes).
Xbox Series X|S
1. Log in to Xbox Live account. Ensure subscription (Game Pass Core/Ultimate) if you want online co-op; single-player works without subscription.
2. Purchase: Microsoft Store (digital) or insert disc (physical uses code only – no disc data).
3. Digital: Press Xbox button > My Games & Apps > See All > Install queue > Baldur's Gate 3.
4. Physical: Insert disc – select “Install” from pop-up. Requires disc in drive to play.
5. Storage: Use internal SSD or Seagate Expansion Card (external HDD not supported for Series X|S optimized games).
6. First launch: Shader compilation (progress bar). Internet needed for license check.
Mac (Steam / GOG)
---
First Launch Setup
After installation, every platform presents a screen asking to Select Graphics API:
Next steps:
---
Common Installation Errors & Fixes
1. Insufficient Disk Space
2. Download Stuck / Slow
3. Steam Launch Error (Missing Executable)
4. Vulkan/DX11 Crash on Startup
5. “Larian Studio Launcher” Not Responding
6. Shader Compilation Stuck (Console/PC)
7. Xbox/PS5 “Game Won’t Start” Error
8. Mac Intel: Extreme Crashes
---
Post-Installation Verification
PC
PlayStation 5
Xbox Series X|S
All Platforms
---
Additional Tips
If you encounter persistent errors after following these steps, contact Larian Studios Support at [support.larian.com](https://support.larian.com) or use the in-game bug report tool.
---
Platform Summary Table
| Platform | Store | Account Required | Storage (GB) | Physical Media? |
|---|---|---|---|---|
| PC (Windows/Mac) | Steam, GOG, Epic | Store account | ~150 | No (code in box) |
| PlayStation 5 | PlayStation Store | PSN | ~150 | Yes (disc acts as key) |
| Xbox Series X/S | Microsoft Store | Xbox Live | ~150 | Yes (code disc) |
Last updated: November 2024. Check official Larian patch notes for changes.

Game Introduction
Overview
Baldur's Gate 3 is a critically acclaimed, narrative-driven role-playing game (RPG) developed by Larian Studios and published by Larian Studios. It was released on August 3, 2023 for PC (Windows and macOS via Steam, GOG, and Epic Games Store), followed by a PlayStation 5 release on September 6, 2023, and an Xbox Series X|S release on December 7, 2023. There are no native versions for Nintendo Switch or mobile platforms.
Genre
- Genre: Deep, turn-based tactical RPG with real-time exploration, rich dialogue systems, and vast player choice.
- Sub-genre: Dungeons & Dragons 5th Edition (D&D 5e) adaptation, combining classic CRPG elements with modern storytelling.
- World: The Forgotten Realms, a classic Dungeons & Dragons campaign setting, specifically the Sword Coast and the city of Baldur's Gate.
- Time Period: The year 1492 DR (Dalereckoning), roughly 120 years after the events of Baldur's Gate II: Shadows of Amn.
- Key Locations: The Nautiloid (mind flayer ship), the Underdark, the Shadow-Cursed Lands, Baldur's Gate city, and many diverse regions.
- The Inciting Incident: Your character is abducted by mind flayers (illithids) aboard a Nautiloid ship. A tadpole is implanted into your brain, threatening to transform you into a mind flayer. A desperate escape leads to a crash landing.
- Central Conflict: You and a band of fellow infected survivors must find a way to remove the tadpole before it's too late, while uncovering a sinister plot involving the Absolute—a mysterious force controlling the tadpole's powers. The fate of Faerûn hangs in the balance.
- Player Agency: The story adapts to your choices, alliances, and actions, with multiple possible endings and branching quests.
- Shadowheart: A devout cleric of Shar with a mysterious past and a strange artifact.
- Astarion: A charming vampire spawn rogue seeking freedom from his master.
- Gale: A brilliant but cursed wizard harboring a dangerous magical catastrophe.
- Lae'zel: A fierce githyanki warrior on a quest to join the Githyanki crèche and fight the mind flayers.
- Wyll: A warlock bound by a pact with the archdevil Mizora, seeking redemption.
- Karlach: A fiery tiefling barbarian with a infernal engine heart, fleeing from Zariel's forces.
- The Dark Urge: A fully customizable origin character with a violent internal compulsion (a special playthrough option).
- Unprecedented Choice & Consequence: Almost every dialogue, combat, and exploration decision can alter the story, relationships, and world state. Actions have far-reaching ripple effects.
- Deep Tactical Combat: Turn-based battles inspired by D&D 5e rules, with verticality, environmental interactions (e.g., shoving enemies off cliffs, setting surfaces on fire), and creative spell/ability combinations.
- Rich Companion Interactions: Companions have full backstories, personal quests, romance options, and dynamic reactions to your choices. They can even leave or betray you.
- High Production Value: Full voice acting (over 170 hours), cinematic cutscenes, and a sweeping orchestral score.
- RPG enthusiasts who love deep narrative, character customization, and meaningful choices.
- Dungeons & Dragons fans seeking a faithful digital adaptation of the 5th Edition ruleset.
- CRPG veterans from games like Divinity: Original Sin 2, Pillars of Eternity, or Baldur's Gate 1 & 2.
- Newcomers willing to invest time in a complex, story-rich game; the difficulty can be adjusted via multiple modes.
- Single-Player: Full campaign with one player controlling up to four characters (the player avatar plus up to three companions).
- Multiplayer: Up to four players cooperatively control their own custom origin characters or join the host's party. Drop-in/drop-out supported.
- Origin Stories: Choose from seven pre-made origin characters with unique narratives and personal quests (including a custom character or the Dark Urge).
- Honour Mode: A permadeath difficulty mode (optional) with increased enemy abilities and a single save file; losing means starting over.
- Offline: The single-player campaign can be played entirely offline without an internet connection. Account/DRM requirements vary by platform (e.g., Steam requires online for first-time activation).
- Online Multiplayer: Requires an internet connection for cooperative play. Cross-play is available between PC (Steam, GOG) and consoles (PS5, Xbox Series X|S). Platform-specific subscriptions (PlayStation Plus, Xbox Game Pass Core/Ultimate) are required on consoles for online multiplayer.
- Cloud Saves: Supported via Larian Studios account on PC, and platform-specific clouds on consoles.
- No major story expansions have been released as of early 2025. Larian Studios has stated they are not developing DLC for Baldur's Gate 3 and are focusing on new projects (e.g., Divinity: Original Sin 3).
- Post-launch updates have included:
- Faithful D&D 5e Implementation: The game translates tabletop rules into a video game with remarkable accuracy, including dice rolls, spell slots, advantage/disadvantage, and reactions.
- Narrative Reactivity: The world remembers your actions. NPCs comment on past deeds, quest givers may recognize you, and the ending changes dramatically based on your relationships and key decisions. Larian's Divinity: Original Sin 2 engine is pushed to new heights.
- Verticality & Environmental Interaction: Combat isn't just about stats; you can use the environment (chandeliers, cliffs, pools of water, exploding barrels) creatively to gain an edge.
- No Strict Alignment System: Unlike earlier Baldur's Gate games, morality is fluid. You accumulate approval with companions based on your actions, but you're not locked into a preset alignment.
- Couch Co-op on PC: Local split-screen play is available on PC, PS5, and Xbox Series X|S, allowing two players to share the same screen.
Setting
Story Overview
Main Characters (Companions)
Core Appeal
Target Audience
Game Modes
Online/Offline Support
DLC/Expansion Overview
- Patch releases with new epilogue content, additional cinematics, and gameplay improvements.
- Official modding support via the Baldur's Gate 3 Toolkit and community mods through platforms like Nexus Mods and Steam Workshop.
- The Deluxe Edition upgrade (available separately) includes digital artbook, soundtrack, and some in-game cosmetics, but no story content.
What Makes This Game Unique
Baldur's Gate 3 has won numerous Game of the Year awards, including The Game Awards 2023, due to its monumental scope, staggering depth, and respect for player autonomy. It stands as a landmark RPG and a definitive adaptation of D&D 5th Edition.
Getting Started
Introduction
Welcome to Baldur's Gate 3! As a brand-new player, you're stepping into a vast RPG that rewards creativity, patience, and curiosity. This guide will help you survive your first hour, avoid common traps, and set you up for a smooth adventure. We'll cover character creation, controls, UI, early objectives, and a crash course in what not to do.
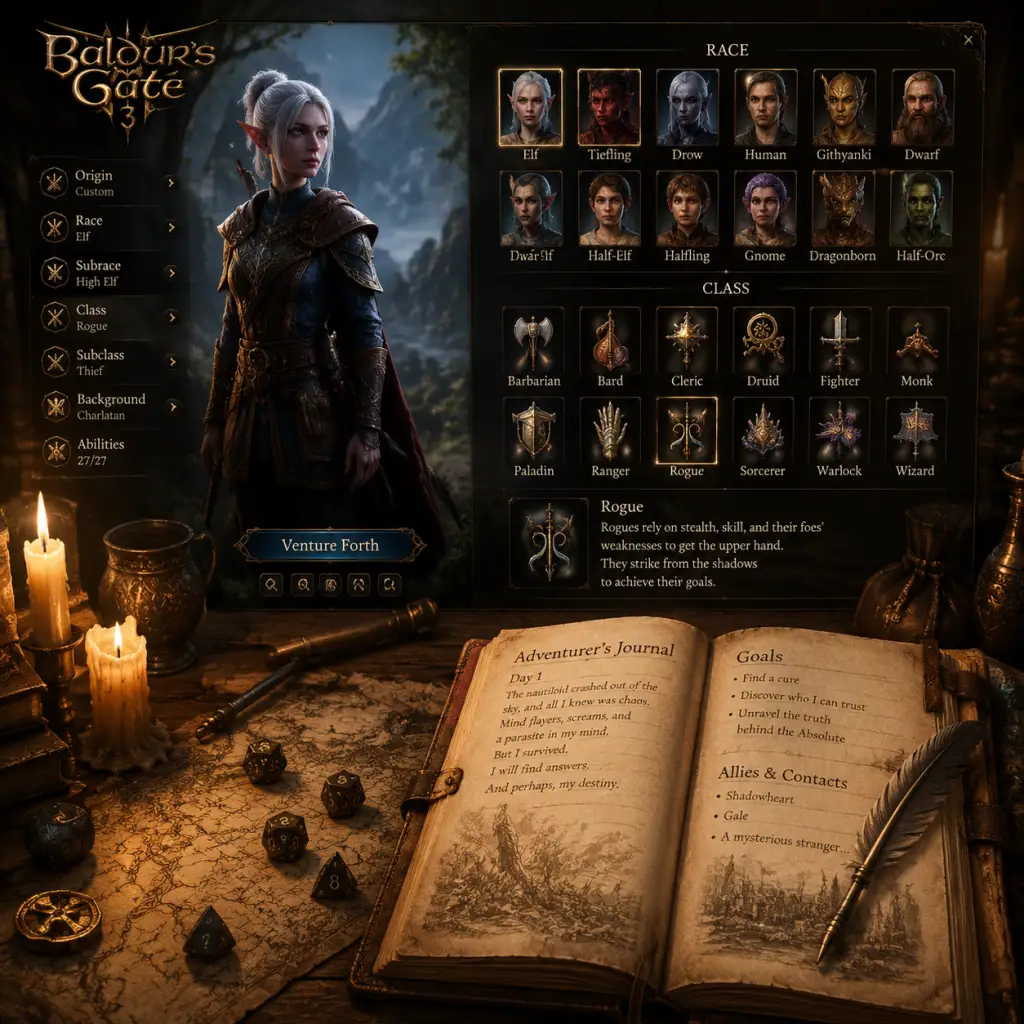
Character Creation
The first 10–15 minutes are spent building your hero. Don't worry – you can respec later (after meeting Withers in the Dank Crypt). Choose what feels fun, not what seems "optimal."
Step 1: Choose Origin or Custom
- Origin Characters have predefined backstories, quests, and voice acting. Strong for roleplay. Examples: Shadowheart, Astarion, Gale.
- Custom Character gives full freedom over race, class, appearance. Best for first-time players who want to learn at their own pace.
- Races provide bonuses (e.g., Half-Elf gets darkvision and charisma).
- Subraces add flavor: Wood Elf gets stealth, High Elf gets a cantrip.
- Tip: Darkvision (ability to see in the dark) is extremely useful – pick a race that has it (Dwarf, Elf, Half-Elf, Tiefling, Drow).
- Fighter – simplest melee class, great for beginners.
- Cleric – healer and support, can wear heavy armour.
- Wizard – powerful but needs intelligence and careful spell management.
- Rogue – sneaky, good for traps and dialogue.
- Warlock – strong cantrips and short-rest spells.
- Our recommendation: Start with a Fighter (Battle Master or Champion) or a Cleric (Life Domain) to learn the ropes.
- Background gives skill proficiencies (e.g., Soldier gives Athletics and Intimidation).
- Pick one that matches your character concept – no wrong choice.
- Use the "Point Buy" system or the default array (easier).
- Prioritize your class's main stat: Strength (Fighter), Charisma (Warlock), Dexterity (Rogue).
- Don't dump Constitution – it affects hit points and concentration.
- Cosmetics are permanent without mods, but you can change appearance later via magic mirror in camp (after patch 3).
- Choose a name and confirm.
- You're aboard a Mind Flayer Nautiloid. The ship is crashing.
- Follow the tutorial prompts: move with WASD (PC) or left stick (console).
- Press Space (PC) or X (PlayStation) / A (Xbox) to interact.
- You wake up on the beach (Wilderness area).
- Loot everything: pick up crates, barrels, bodies – all have useful items (camp supplies, gold, weapons).
- Find companions: Shadowheart is nearby (on the beach). Rescue her from the pod by interacting with the console. She joins your party.
- Explore the ruin: to the north is a ruined temple. Inside, you can find Lae'zel (Githyanki warrior) trapped in a cage. Free her by shooting the lock (use ranged weapon) or dialogue.
- Collect the first waypoint: activate the “Roadside Cliffs” waypoint to fast travel later.
- Your party has 2–3 members now. Stick together.
- Don't rush into fights. Use stealth (press C on PC, hold down on d-pad on console) to scout.
- First enemies: weak intellect devourers and imps. Kite them one by one.
- Rest often: Press T (PC) or open the camp menu to take a short rest (heals some health). Long rest (full heal and restore spells) at a campfire or bedroll.
- Save frequently: F5 quick save (PC) or manual save in menu (console). Save before every major decision.
- Head northwest from the crash site. Follow the road. You'll encounter a gate guarded by tieflings.
- Dialogue options: be polite – no need to fight.
- Enter the Grove: this is your first safe hub. Don't attack anyone here except the tiefling who provoked you (but avoid it).
- Meet Zevlor (tiefling leader) – accept his quest to find a druid healer.
- First major objective: Find Halsin (druid) or help the tieflings.
Step 2: Select Race and Subrace
Step 3: Pick a Class
Step 4: Choose Background
Step 5: Assign Ability Scores
Step 6: Appearance and Finalize
First Hour Walkthrough
Starting Cinematic (0–5 min)
Escape the Ship (5–15 min)
1. Wake up in a pod. Use the console to open the door.
2. Find a weapon – there's a sword on a corpse near the starting room.
3. Meet Commander Zhalk – you can ignore him or fight. Avoid fighting him as a beginner; he's tough. Just run past.
4. Unlock the helm – use the Transponder (a glowing lever) at the ship's helm after a small puzzle. Or attack the intellect devourers.
5. Use the Transponder – a cutscene triggers. You crash-land.
Crash Site (15–30 min)
Early Combat & Survival (30–45 min)
Reach the Druid Grove (45–60 min)
Controls on All Platforms
PC (Keyboard + Mouse)
| Action | Key |
|---|---|
| Move | WASD |
| Interact | E |
| Jump | Space |
| Shove | F |
| Hide/Crouch | C |
| Select all party | Backspace |
| Quick save | F5 |
| Quick load | F8 |
| Open inventory | I |
| Open journal | J |
| Open map | M |
| Open character sheet | C (hold) or K |
| Short rest | T |
| Long rest | L (in camp) |
| Switch character | Tab or click portrait |
| Group/ungroup | G |
| Use consumable | Drag to hotbar or right-click |
PlayStation 5
| Action | Button |
|---|---|
| Move | Left stick |
| Camera | Right stick |
| Interact | X |
| Jump | Triangle |
| Shove | Circle (hold) |
| Hide | Down on d-pad (hold) |
| Quick menu | L1 |
| Wheel of actions | R2 |
| Open inventory | Touchpad (left) |
| Open map | Touchpad (right) |
| Journal | Options button |
| Short rest | L1 + Square |
| Long rest | R1 (in camp) |
| Switch character | L2 + D-pad up/down |
| Group/ungroup | L1 + Triangle |
Xbox Series X|S
| Action | Button |
|---|---|
| Move | Left stick |
| Camera | Right stick |
| Interact | A |
| Jump | Y |
| Shove | B (hold) |
| Hide | Down on d-pad (hold) |
| Quick menu | LB |
| Wheel of actions | RB |
| Open inventory | View button (left) |
| Open map | Menu button (right) |
| Journal | Options button |
| Short rest | LB + X |
| Long rest | RB (in camp) |
| Switch character | LT + D-pad up/down |
| Group/ungroup | LB + Y |
UI Overview
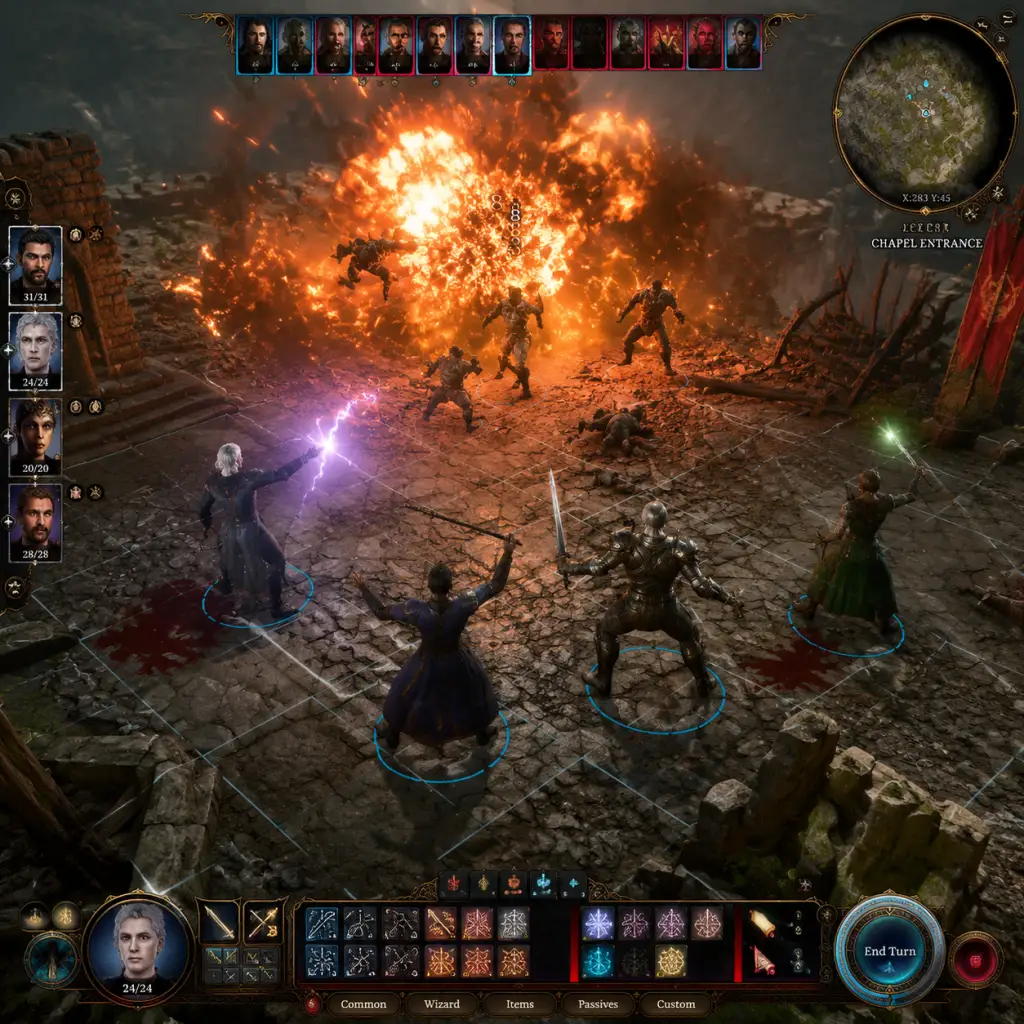
Main HUD Elements
- Top left: Party portraits – click to select a character. Right-click for additional commands.
- Top center: Mini-map with fog of war.
- Bottom center: Action bar – your equipped weapons, spells, items, and cantrips. Drag items here for quick use.
- Bottom left: Hotbar for consumables (potions, scrolls). Press number keys (PC) or use D-pad (console).
- Bottom right: End turn (in combat) and camera controls.
- Right side: Character status (health, conditions, buffs/debuffs).
- Turn order shows at the top of the screen. Each character has an icon with initiative number.
- Action Points (green circle) – you have one action and one bonus action per turn. Movement (yellow circle) is separate.
- Spell slots (blue diamonds) – shown under character portrait during casting.
- Tooltips: Examine enemies with right-click (PC) or hold R3 (console) to see resistances, immunities, and lore.
- Dialogue wheel (PC) shows choices; console uses radial menus.
- World tooltips: hover over objects (chests, levers, loot) to see names and interact prompts.
- Distance indicator: a yellow outline when you're close enough to interact.
- Loot everything – even rotten food (can be turned into camp supplies).
- Talk to every NPC – they give quests, lore, or hints.
- Save often – especially before dialogue checks (F5 on PC, manual save on console).
- Use short rests – free healing after every combat.
- Examine enemies before attacking to see weaknesses.
- Explore off the main path – hidden treasures and optional bosses await.
- Upgrade gear – buy or find better weapons/armor. Check traders.
- Manage inventory – sell junk, keep potions, scrolls, and camp supplies.
- Attacking neutral NPCs – like the tieflings, druids, or guards. Entire factions can become hostile.
- Fighting higher-level enemies – skull icons on enemy portraits mean they outlevel you. Run away.
- Skipping long rests – you'll miss companion scenes and camp events. Rest after every big fight or story beat.
- Ignoring camp supplies – you need 40 total to long rest. Pick up food, alcohol, and supply packs.
- Selling magical items – many have unique uses or are needed for quests. Check before selling.
- Standing in fire / acid – environmental hazards hurt. Use jump (Space) to avoid.
- Forgetting to heal – use Healing Word (cleric), potions, or short rests.
- Regretting class choices – you can respec at Withers for 100 gold (any time after Dank Crypt).
Combat UI
Navigation & Interaction
Essential Early Objectives
1. Survive the Nautiloid – escape the crash.
2. Assemble a party – recruit Shadowheart, Lae'zel, and eventually Gale, Astarion, and Wyll.
3. Reach the Druid Grove – to get quests, traders, and a safe camp.
4. Find a healer – talk to Nettie (druid) about your tadpole infection, or follow Halsin's quest.
5. Unlock fast travel waypoints – each activates a teleport point for quick movement.
6. Visit the Dank Crypt (west of crash site) – loot useful items and meet Withers (who can resurrect dead party members for a fee).
7. Long rest at camp – triggers story events and companion dialogues.
8. Learn lockpicking – find a set of thieves' tools and use Astarion or a rogue to open chests.
9. Complete side quests – rescue the artist's wife (in the Grove), help the tieflings, etc.
10. Kill the goblins outside the Grove – optional but gives good loot and experience.
What to Do First and What to Avoid
✅ Do First
❌ What to Avoid
Early Resource Priorities
| Resource | Priority | Why & How |
|---|---|---|
| Gold | High | Buy gear, respec, resurrect companions. Loot corpses, sell unwanted items, complete quests. |
| Camp Supplies | High | Needed for long rest. Collect food, drink, barrels. |
| Healing Potions | High | Emergency heal. Found in crates, dropped by enemies, bought from traders. |
| Thieves' Tools | Medium | Required to unlock chests and doors. Pick up from dead goblins or buy. |
| Poison & Acid Vials | Low | Useful for combined attacks (throw at enemies). But not essential early. |
| Scrolls | Medium | Powerful one-time spells. Keep for tough fights or utility (e.g., Misty Step). |
| Arrows & Bolts | High if ranged | Ranged characters need ammo. Loot from archers. |
| Lockpicks | High | Same as Thieves' Tools – needed for exploration. |
| Potions of Speed | Very High | Rare but incredible – give an extra action for 3 turns. Use sparingly. |
Common Beginner Mistakes
1. Not saving – death or failed dialogue can cost hours. F5 is your best friend.
2. Neglecting long rests – you need them to recover all spell slots, hit dice, and advance companion stories. Don't be afraid to rest.
3. Wasting spell slots on out-of-combat heals – use short rests first, then potions, only then spells.
4. Charging into fights – use stealth, set ambushes, separate enemies with ranged pulls.
5. Not using consumables – scrolls, potions, grenades, and arrows are powerful. Hoarding is common; use them liberally.
6. Ignoring the environment – high ground gives attack bonuses. Chasms can insta-kill enemies if shoved. Explosive barrels can be shot.
7. Selling everything – keep at least one copy of each unique item. Some are needed for quests later.
8. Overlooking the camp chest – your party has a shared stash in camp (the glowing chest). Transfer items there to free inventory.
9. Not talking to all companions – you can recruit up to 4 in the first hour. Talk to everyone at camp.
10. Rushing the main quest – take your time. The game scales with your level, and side content is rich.
Day-One Checklist (First Play Session)
Aimed at completing before you reach the Goblin Camp or level 4.
- [ ] Complete character creation (custom or origin).
- [ ] Escape the Nautiloid (win the tutorial).
- [ ] Rescue Shadowheart on the beach.
- [ ] Loot the crash site (beach, dead thralls, crates).
- [ ] Free Lae'zel from the cage near the ruin.
- [ ] Explore the Dank Crypt (locate at X:-100, Y:380 on map). Enter, find Withers’ tomb, avoid traps.
- [ ] Recruit Gale (appears at the ruined temple).
- [ ] Recruit Astarion (beneath the stone arch near the beach).
- [ ] Reach the Druid Grove – activate its waypoint.
- [ ] Talk to Zevlor (tiefling leader) and Nettie (druid healer).
- [ ] Take a long rest at the Grove camp – triggers dialogue.
- [ ] Complete one side quest (e.g., rescue the tiefling kid, or explore the Underdark entrance).
- [ ] Upgrade gear – buy a decent weapon from the druid vendor (Dammon).
- [ ] Save the game (manual save before moving to the next area).
- [ ] Have fun! And remember: save often, experiment, and embrace failure as part of the story.
> Pro Tip: Explore every building, cave, and corner of the map. Some of the best items are hidden in plain sight. Good luck, adventurer!
Core Gameplay
Core Gameplay Overview
Baldur's Gate 3 is a turn-based tactical RPG that emphasizes player choice, character customization, and reactive storytelling. The core gameplay loop consists of exploring the world, engaging in turn-based combat, completing quests, managing inventory and economy, and advancing your characters through leveling and gear. The game is divided into three acts, plus a brief epilogue, with a clear progression of difficulty and complexity.
The Main Gameplay Loop
1. Explore a hand-crafted, vertical environment (wilderness, dungeons, cities) — either in real-time or turn-based mode outside combat.
2. Encounter NPCs, environmental puzzles, traps, and enemies. You can initiate dialogue or attack freely.
3. Complete Quests — main story (tadpole removal) and hundreds of side quests. Quests are multi-solution (dialogue, stealth, combat, persuasion).
4. Combat — turn-based D&D 5e rules. Each character has Actions, Bonus Actions, Movement, and Reactions. Positioning, terrain, and spell interactions are key.
5. Loot & Economy — collect gear, consumables, gold, and story items. Buy/sell/trade with merchants. Craft potions and elixirs via alchemy.
6. Character Growth — level up (max level 12), gain spells, feats, abilities. Multiclassing available. Find magical items upgrades.
7. Resting — Short Rest (recovers some HP and abilities) and Long Rest (full heal, restores spell slots, advances camp events).
Combat & Interaction Systems
- Initiative and turn order based on Dexterity + d4 roll.
- Each turn: 1 Action (Attack, Cast Spell, Dash, Disengage, Hide, etc.), 1 Bonus Action (off-hand attack, specific spells, Cunning Action), Movement (up to speed), and 1 Reaction (opportunity attacks, Counterspell, Shield).
- Advantage/Disadvantage from positioning (high ground, stealth, status effects).
- Spell Slots per level; prepared/known spells. Cantrips unlimited.
- Environmental interactions: barrels, chandeliers, water, fire, grease, webs — all interact (e.g., poison cloud + fire = explosion).
- Non-lethal combat possible (toggle passive).
- Experience points from quests, kills, exploration, and skill checks. Level cap 12 (multi-classing can change distribution).
- Each level grants new features: spell slots, subclass features, Ability Score Improvements (every 4 levels). Feats optional.
- Gear progression: common → uncommon → rare → very rare → legendary. Magic items often have unique effects.
- Overworld divided into zones (Wilderness, Underdark, Grymforge, Shadow-Cursed Lands, Lower City, etc.).
- Fast travel via waypoints. Many hidden areas, secrets, and verticality.
- Stealth, lockpicking, and survival skills used to bypass hazards and find loot.
- Environmental story-telling through notes, books, and objects.
- Main quest: remove the tadpole, find a cure, confront the Absolute. Urgency is time-limited but not strictly enforced.
- Side quests: companion personal quests, faction quests (Harpers, Githyanki, etc.), exploration rewards.
- Multiple solutions: combat, dialogue (Persuasion, Intimidation, Deception, etc.), stealth, bribery.
- Quest log available; journal entries update based on actions.
- Currency: gold. Earned from loot, quest rewards, selling items, stealing.
- Merchants have limited gold and inventory; prices affected by Charisma (Persuasion) and reputation.
- Crafting: Alchemy (potions, elixirs) from ingredients. No weapon/armor crafting except special sets.
- Important: Camp supplies needed for Long Rests (40 per rest). Manage food items.
- Each class has a progression table. Subclasses chosen at level 2 or 3 (for most).
- Feats at levels 4, 8, 12 (if single class). Choose Ability Score increase or a feat.
- Multiclassing: any combination, but must meet ability requirements. Spellcasting slots combine.
- Companions have fixed classes but can be respec'd via Withers for 100 gold.
- Respeccing any character allowed (except origin story race/gender changes).
- Act 3 is the final act, set in Baldur's Gate city and surrounding areas. Many major decisions converge.
- Endgame questline: defeat the Netherbrain, decide the fate of the tadpoles, the Netherstones, the Absolute.
- No traditional endgame content after final boss. Game ends with epilogue slides showing consequences.
- New Game Plus? No. But you can reload a save before final fight to explore unfinished quests.
- Post-ending: no free roam. A few mods add post-game content, but vanilla game ends.
- Goal: Survive the Nautiloid, reach Druid Grove, investigate the tadpole, gain first levels.
- Combat: Very dangerous. Low HP, few spells. Use stealth, high ground, and environmental traps. Example: The battle outside the Druid Grove with goblins — use the bridge and oil barrels to even the odds.
- Exploration: Focus on the Dank Crypt, Blighted Village, and the Overgrown Ruins. Many hidden items (e.g., Everburn Blade) require creative solutions (jumping, pushing).
- Quests: Escape the Nautiloid → Find a healer (Nettie) → Save the Druid Grove / Side with goblins. Companion quests begin (Shadowheart, Astarion, Lae'zel, Gale, Wyll, Karlach).
- Economy: Gold is scarce. Prioritize buying camp supplies (to rest) and a few key potions. Sell unused weapons and armor. Alchemy: make basic health potions.
- Character Growth: Level 1–2 very fast. At level 2, choose subclass for most classes. Level 3 introduces core features (e.g., Rogue Cunning Action, Cleric Channel Divinity). Level 4: first feat or ASI (e.g., Alert for initiative, or +2 Dexterity).
- Tactical Tips:
- Key Example: In the Goblin Camp, instead of fighting all goblins, you can dialogue with Priestess Gut, kill her in private, or use stealth to assassinate leaders (Dror Ragzlin, Minthara, Gut) without alerting the whole camp.
- Goal: Find the Githyanki creche, explore the Underdark and Shadow-Cursed Lands, reach Moonrise Towers, resolve the Shadow Curse.
- Combat: Enemies have more HP, multiattack, and spells. Crowd control (Hypnotic Pattern, Hold Person) becomes essential. Example: The fight against the Phase Spider Matriarch — push her into the chasm or use Web to immobilize her offspring.
- Progression: Level 5 is a huge power spike: Extra Attack for martials, 3rd-level spells for casters (Fireball, Haste, Counterspell). Level 8 gives second feat.
- Exploration: Underdark has multiple entrances (Well in Blighted Village, Whispering Depths, Zhentarim hideout). Each area is dense with lore and loot (e.g., Adamantine Forge). Shadow-Cursed Lands require a light source (Torch, Light spell, Moonlantern).
- Quests: Find the Nightsong (choice: free or give to Shar). Rescue the tieflings. Decide about the Githyanki creche (result: Voss's questline). Interact with the Harpers and Dark Justiciars.
- Economy: Gold becomes more plentiful. Save 5,000+ for the necromancy book or trader rare items. Sell magical items you don't use. Alchemy: produce elixirs (e.g., Elixir of Battlemage's Power).
- Build Advice:
- Key Example: In the Shadow-Cursed Lands, you are attacked by Shambling Mound. Using control water + lightning spells can deal massive damage, but beware of its regeneration. Alternatively, use Sunlight spell to suppress the curse and heal allies.
- Goal: Enter Baldur's Gate, gather allies for final confrontation, defeat the Netherbrain's chosen (Orin, Gortash), and storm the High Hall.
- Combat: Enemies include Paladins, Vampire Spawn, spellcasters with high-level slots. Counterspell, Globe of Invulnerability, and Cleric's Divine Intervention become game-changers. Example: The fight against Orin in the Temple of Bhaal — uses Unstoppable stacks; Dispel Magic or multiple attacks per turn remove them.
- Exploration: Vast open city with many districts (Rivington, Lower City, Baldur's Mouth, Sorcerous Sundries). Complex verticality and rooftops. Many houses and shops to loot.
- Quests: Companion climax quests (e.g., free Orpheus, kill Cazador, save Wyll's father). Faction decisions (Guild vs. Zhentarim, Ironhand Gnomes vs. Steel Watch). Main quest: gather Netherstones, decide to control or destroy the brain.
- Economy: Gold is abundant (10k+). Best gear in shops (e.g., Legendaries like Balduran's Giantslayer, Markoheshkir, Crimson Mischief). Spend freely on potions, scrolls, and arrows of many targets.
- Build Optimization:
- Key Example: The battle at the Steel Watch Foundry — you can disable the factory's defenses via pressure plates or stealth, or fight through waves of robots. Use lightning damage against Steel Watchers (they are vulnerable).
- Goal: Defeat the Netherbrain in the final battle atop the High Hall. Then take control, destroy the tadpoles, or allow the Absolute to rule.
- Preparation: Ensure you have all allies (almost every faction can be called in for the final fight if you helped them). Bring high-damage dealers and at least one character with Globe of Invulnerability or Artistry of War.
- Final Battle Structure:
- No Post-Game: Once credits roll, you return to main menu. No free roam after the final fight. Reload a save before entering the portal to tie unfinished quests.
- Endgame Examples:
Progression
Exploration
Quests & Missions
Economy
Character / Build Growth
Endgame Structure
---
Core Gameplay by Player Progression Tiers
Early Game (Levels 1–4, Act 1: Wilderness & Underdark)
- Use Fog Cloud or Darkness to block enemy line of sight.
- Grease + a fire spell creates a burning floor.
- Bless is extremely valuable for to-hit.
- Long Rest often to regain spells and advance companion dialogues (but be careful with timed quests like Save the Grove — rest sparingly until resolved).
Mid Game (Levels 5–8, Act 1.5–Act 2: Underdark to Moonrise Towers)
- Multiclassing shines here (e.g., Sorcerer 1 / Warlock 5 for quickened Eldritch Blast).
- Feats like Sharpshooter or Great Weapon Master become viable with high attack bonuses.
- Spellcasters: focus on concentration spells that dominate fights (Spirit Guardians, Moonbeam).
Late Game (Levels 9–12, Act 3: Rivington & Lower City)
- Level 12 is cap. Single class builds get 3 feats (e.g., Barbarian 12 with Resilient, GWM, Sentinel).
- Multiclass builds cap at level 12 too (e.g., 2 Paladin / 10 Bard for Divine Smite + spell slots).
- Legendary items like the Netherstone (gives free cast of Dominate Mind) but not for long.
Endgame (Post-Act 3 Climax & Final Boss)
- Phase 1: On the top of the High Hall, fight the Crown of Madness-controlled army — a horde of intellect devourers, dragon riders, and the Netherbrain's appendages.
- Phase 2: Enter the illithid colony via the portal. Fight a weakened version of the Netherbrain (without tentacles) but with high HP (800+).
- After: Quick dialogue choice (dominate or destroy). Epilogue scenes per companion and factions.
- The Dragon High Rider near the brain: can be persuaded to fight for you (if you have the right dialogue options from Act 1-2).
- If you use the Illithid powers (become half-illithid) you get more options in the final dialogue but risk losing your soul.
---
Summary Table
| Tier | Levels | Key Activities | Power Spike | Important Quests |
|---|---|---|---|---|
| Early | 1–4 | Survive Nautiloid, Grove, Goblin Camp | Level 4 feat | Save the Grove, Find a Cure |
| Mid | 5–8 | Underdark, Creche, Shadow-Cursed Lands | Level 5 (Extra Attack/3rd slot) | Nightsong, Resolve Shadow Curse |
| Late | 9–12 | Baldur's Gate, Lower City | Level 9/10 spells, feats | Orin, Gortash, Netherstone |
| End | 12 | Final Battle | — | Defeat Netherbrain |
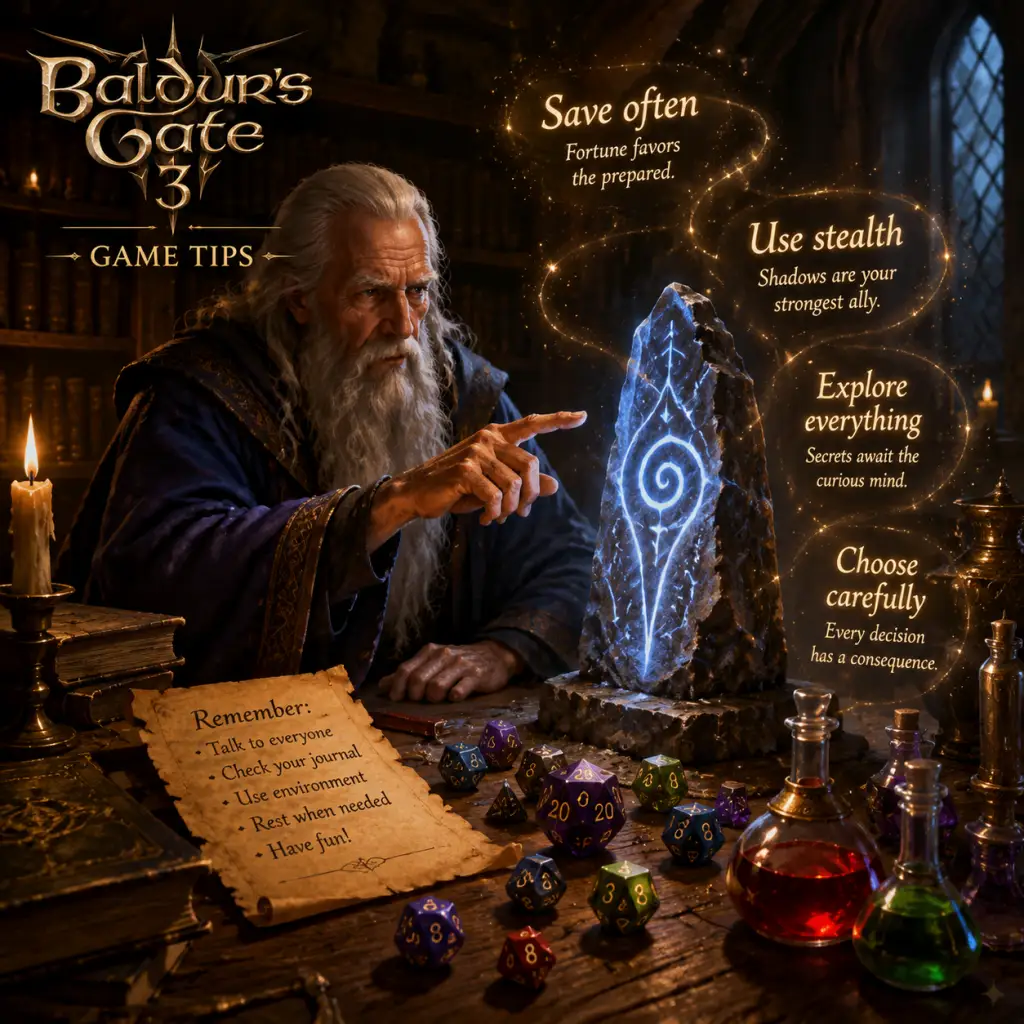
Game Tips
Overview
This guide provides a comprehensive collection of tips for Baldur's Gate 3 (BG3), covering everything from basic survival advice to high-level tactical optimizations. Tips are grouped by category so you can quickly find what you need.
---
Combat
Beginner Tips
- Use Height Advantage: Standing on high ground gives you a +2 bonus to attack rolls and adds your Dexterity modifier to damage (if applicable). Always scout for elevated positions before combat. For example, in the Druid Grove, attacking goblins from the top of the stone arch gives you a significant edge.
- End Your Turn Wisely: Use bonus actions first (e.g., drink a potion, jump, hide) before your main action. If you have nothing else to do, consider using "Ready Action" to prepare an attack for when an enemy moves into range.
- Leverage Sneak Attack: Rogues can get Sneak Attack damage once per turn if they have advantage or an ally within 1.5m of the target. Use stealth or spells like Faerie Fire to grant advantage easily.
- Action Economy is King: The biggest advantage comes from getting more actions than the enemy. Use abilities like Haste (spell or potion) or the Action Surge (Fighter) to gain an extra action. Controlling the battlefield with Hold Person or Web denies enemies actions.
- Elemental Interactions: Combos are powerful. Throw a water bottle to make enemies wet (doubles lightning and cold damage), then cast Call Lightning or Ray of Frost. Similarly, poison and fire can be combined for explosive results (e.g., Cloud of Daggers + Fire Bolt).
- Shove and Positioning: Shove is a bonus action (if your Athletics/Acrobatics is high enough). Push enemies off cliffs, into hazards (like Spike Growth), or away from downed allies. The classic is shoving a goblin into the chasm in the goblin camp.
- Pre-Buff Before Hard Fights: Use spells like Mage Armor, Longstrider, Bless, and Mirror Image before initiating combat (you can cast outside of turn-based mode). Duration is typically 10 turns—ample for most fights. Also, cast Darkness on an arrow and fire it into a group to blind enemies.
- Use Terrain and Objects: Exploit explosive barrels, chandeliers (shoot them to drop on enemies), and weak floors. In the Grymforge, lure Earth Elementals near lava vents, then trigger the vents.
- Legendary Actions and Resistances: In Tactician or Honour Mode, bosses have Legendary Actions. Learn their patterns. For example, the Act 2 boss has a reaction that triggers when you attack—spread damage across multiple characters or use Counterspell.
- Press the "T" Key (or Highlight): On PC, hold Left Alt to see all interactable objects in range. On controller, use the highlight button. This reveals hidden loot, levers, and traps. Always scan every room.
- Rest Often: Let the party take a Long Rest after a few fights. It restores HP and spell slots. You also get camp events (narrative scenes) that can unlock companion quests or story beats. Don't hoard supplies—use them.
- Try Jumping Everywhere: Many vertical routes are hidden. Jump gaps, climb vines, and check rooftops. In the Blighted Village, you can jump onto a broken tower to find a hidden ogre.
- Use Non-Lethal Attacks: Turn on Non-Lethal (passive toggle) to knock out enemies instead of killing them. This can give alternative dialogue options or spare useful NPCs. Example: knocking out the tiefling Sazza in the grove prevents trigger-happy guards.
- Speak with Animals and Dead: The Speak with Animals spell (available to Druids, Rangers, and from potions) unlocks many quests and secrets. Speak with Dead (Clerics, Paladins, Wizards) allows you to interrogate corpses for clues. Use them liberally.
- Use the Environment for Puzzles: Many puzzles require reading notes or noticing patterns. The Defiled Temple puzzle in Act 1: the moon phases painted on the wall correspond to the floor plates. A strong Perception check will highlight them.
- Fast Travel and Waypoints: Activate every waypoint you find. You can fast travel from almost anywhere via the map. Use this to return to camp or merchants quickly. For example, after a fight, fast travel to a vendor to sell loot and restock potions.
- Stack Multiple Passives: Equip items that grant See Invisibility (e.g., the Sentinel Shield from the creche). Combine with Daylight spell to counter shadow curses in Act 2. Also, use Feather Fall from scrolls or items to survive long falls and access hidden areas.
- Scout with Invisibility/Familiar: Summon a familiar (find familiar spell) or cast Invisibility on a rogue to scout ahead. You can see enemy positions, traps, and patrol routes. This allows you to plan your engagement before pulling. Useful in the House of Grief (Act 3).
- Loot Everything: Pick up weapons, armor, books, plates, etc. Sell them for gold. Even rotten food can be combined with a camp supply pack. Use the "Send to Camp" feature (right-click > Send to Camp) to offload heavy items.
- Manage Camp Supplies: You need 40 camp supplies for a long rest (80 on Tactician). Always collect food from crates and barrels. Buy cheap supplies from vendors if needed. Avoid long resting just for a few HP—use Short Rests instead.
- Craft Potions from Alchemy: Combine two or three ingredients to create potions (e.g., Antidote: Suspension of Brimstone + Mugwort). The Alchemy panel shows recipes you've learned. Collect plants, organs, and minerals.
- Re-Spec for Free at Withers: In the Dank Crypt (Act 1), you find Withers. Once recruited (cost 200 gold), you can re-spec any companion or your avatar for 100 gold. This is unlimited. Use this to fix suboptimal builds or respec for different encounters.
- Identify Items Cheaply: Instead of paying for Identify (spell or vendors), use a character with high Perception or a Scroll of Identify. Better yet, sell unidentified items—vendors identify them for free? Actually no—better to identify at camp via Gale or a hireling with the spell. Saves gold.
- Use the Camp Chest as Infinite Storage: Send everything you don't need to the camp chest. It's bottomless. You can retrieve items from any camp location. This prevents inventory clutter.
- Gather All Skill Checks: Before opening a locked chest or door, have the party spread out—you can use multiple characters to make ability checks (e.g., one for lockpicking, another for strength if it's jammed). Also, use consumables like Enhance Ability (Owl's Wisdom for Investigation).
- Duplicate Items with Cheat? No - legitimate: There's a known exploit: drop an item from inventory, then have another character pick it up while the first character uses a reaction? Actually, just follow legitimate duplication via multiplayer? Not recommended. Instead, use the Conjure Food spell to create camp supplies from a wizard/sorcerer.
- Restock Merchants: Vendors refresh their inventory and gold after a long rest or level up. Buy rare scrolls, potions, or gear. Some merchants like the quartermaster in Last Light Inn have excellent stock.
- Choose a Balanced Party: At minimum, have one front-liner (Fighter, Paladin, Barbarian), one healer/support (Cleric, Druid, Bard), one ranged damage dealer (Ranger, Sorcerer, Wizard), and one skill-monkey (Rogue, Bard). This covers combat roles and skill checks.
- Focus Your Ability Scores: Don't spread points. Prioritize your main stat (Strength for melee, Dexterity for ranged/finesse, Intelligence for Wizards, Charisma for Paladins/Sorcerers) to 16-17 at level 1. Then Constitution for HP.
- Pick Feats That Synergize: At level 4, 8, 12 choose feats wisely. For casters, War Caster (advantage on concentration saves) is near mandatory. For martials, Great Weapon Master or Sharpshooter (+10 damage at -5 to hit) are incredibly strong with advantage.
- Multiclass for Power Spikes: Multiclassing can break the game. A popular combo: 5 levels in Gloom Stalker Ranger + 3 in Assassin Rogue + 4 in Battle Master Fighter gives you a devastating first turn (extra attack, action surge, bonus action stealth attacks). Aim for level 5 in a primary class first to get extra attack.
- Use Equipment to Fill Gaps: Gear can provide spells or abilities. For example, the Helmet of Arcane Acuity (Act 2) gives spell attack bonus when you deal weapon damage. Or Necklace of Elemental Augmentation adds your spellcasting mod to cantrip damage. Check vendor inventories.
- Build Around a Theme: Poisoner? Use Ray of Sickness, Poison Spray, and the Sporekeeper armor. Fire Mage? Scorching Ray, Fireball, and items that add fire damage. Thematic builds are often powerful because gear supports them.
- Abuse Tavern Brawler: This feat adds your Strength modifier twice to unarmed attacks and thrown weapons. Combine with a Monk (for multiple unarmed strikes) or a Barbarian throwing javelins. With Hill Giant Elixir (+5 Str), you get +10 to hit and damage. Ridiculously strong early game.
- Lich King Sorlock: 2 levels in Paladin (for Smite) + 5 levels in Warlock (for Short Rest slots and deep pool) + 5 levels in Sorcerer (for Meta Magic and more slots). This build can smite multiple times per turn using warlock slots. Requires careful stat allocation.
- Use Haste Wisely: Haste gives an extra action, but when it ends, the target loses one turn. Use Haste on a high-damage martial, but ensure you won't lose concentration (War Caster feat, high Con save). Alternatively, use the Haste spell from a Paladin's oath or a Potion of Speed to avoid concentration risk.
- Buy Low, Sell High: Prices depend on Charisma and vendor attitude. Use a high-Cha character (16+ Charisma) for buying/selling. Cast Friends cantrip for advantage on persuasion checks (but beware it may turn hostile after).
- Sell Everything but Potions/Scrolls: Armor, weapons, books, loot—sell them. Keep potions (healing, speed, invisibility) and spell scrolls (for learning or emergency casting).
- Don't Buy Common Gear: Basic weapons and armor can be found or crafted. Only buy unique items (e.g., swords with special effects, rings). Vendors in the Druid Grove have some early game gems like The Whispering Promise ring.
- Steal from Merchants: Use a Rogue or Bard with high Sleight of Hand. Cast Invisibility or Minor Illusion to distract. You can steal items, but be prepared for consequences. However, you can bribe or run away. The merchant in the Goblin Camp has a valuable Ring of Protection - steal it early.
- Invest in Lockpicking: Many locked chests contain rare loot. The Knave's Eye ring (Act 1) gives +1 Sleight of Hand. Keep good thieves' tools (Dex + Sleight of Hand bonuses).
- Use the Owlbear Cub and Other Pets: You can get a pet (like the Owlbear cub) from the goblin camp via persuasion. It stays in camp and doesn't cost gold, but you can trade with it? No—pets provide no economic benefit but are cute.
- Scam Vendor Reputation: You can use Disguise Self (or a magical hat that changes appearance) to interact with a vendor after stealing from them. The vendor's hostility resets, allowing you to trade again. Combine with high Charisma for best prices.
- Farm Gold with Alchemy: Some potions are profitable to craft. Check vendor buy prices vs ingredient costs. For example, Potion of Speed (ingredients: Asmonate, Crimson Hilberry) sells for ~400 gold, but ingredients are cheap. Craft and sell for steady income.
- Use the Astral Plane's Infinite Merchant: In Act 3, you can access the House of Hope. The merchant there sells powerful items, but you can also steal everything and then kill him without consequence (he's a devil). This yields massive gold and gear.
- Save Often: Use quick saves (F5) before any dialogue, lockpicking attempt, or boss fight. The game saves automatically but not always at optimal points.
- Read Tooltips: Hover over abilities, statuses, and items. BG3 is deep, and tooltips explain interactions (e.g., "advantage" or "restrained").
- Use Environmental Objects: Throw a healing potion at an ally to heal them from range (minor heal). Throw a water bottle to extinguish flames.
- Companion Approval: Each companion has approval/disapproval based on your choices. Check the character sheet to see their personality. Shadowheart likes pragmatic choices, Gale prefers knowledge, Astarion enjoys chaos. High approval unlocks personal quests and even romance.
- Use the Environment for Stealth: Hide in darkness, behind boxes, or use Fog Cloud to break line of sight. Sneak attacks from hidden are automatic crits if hitting a surprised enemy.
- Spells with No Concentration: Some spells like Armor of Agathys (temp HP and damage attackers) don't need concentration—they stack with concentration buffs. Use them freely.
- Bypass Fights with Dialogue: Often, you can resolve conflicts with persuasion, intimidation, or deception. For example, you can convince the goblin priestess to leave without fighting. Check your party's best talker.
- Abuse Barrelmancy: Carry explosive barrels (like Smokepowder) in inventory. Place them near enemies in stealth, then blow them up with a fire spell. This can one-shot bosses if you arrange a large pile.
- Use the 'Feign Death' Spell: Feign Death (level 3) can trick enemies into ignoring a party member. It also can be used to skip certain encounters by pretending to be dead.
Intermediate Strategies
Advanced Optimizations
---
Exploration
Beginner Tips
Intermediate Strategies
Advanced Optimizations
---
Resources
Beginner Tips
Intermediate Strategies
Advanced Optimizations
---
Builds
Beginner Tips
Intermediate Strategies
Advanced Optimizations
---
Economy
Beginner Tips
Intermediate Strategies
Advanced Optimizations
---
General Tips
Beginner
Intermediate
Advanced
---
Conclusion
Baldur's Gate 3 rewards creativity, planning, and experimentation. Start with basic tactics, then incorporate interactions between spells, environment, and items. As you progress, optimize your builds and resource management. Remember: there is no single correct way to play—every party composition can win with smart strategy. Happy adventuring!

Game Settings
Overview
The settings menu in Baldur's Gate 3 is extensive, offering deep customization for visuals, audio, controls, accessibility, and gameplay. Properly configuring these options is essential for an optimal experience – whether you aim for silky-smooth performance on a mid-range PC, maximum fidelity on a high-end rig, or a comfortable playthrough on console. This guide breaks down every settings category, highlights easy-to-miss pitfalls, and provides recommended configurations for different hardware levels.
---
Graphics Settings
Graphics settings are the most impactful on both performance and visual quality. BG3 uses Larian's Divinity Engine 4.0, supporting both Vulkan and DirectX 11 renderers. Vulkan is generally recommended for better performance and stability, but if you encounter crashes, switch to DX11.
Display
| Setting | Recommended Value | Notes |
|---|---|---|
| Display Mode | Fullscreen | Borderless windowed can cause input lag; exclusive fullscreen yields best performance. |
| Resolution | Native monitor resolution | Match your monitor’s native res. |
| Refresh Rate | Max monitor refresh (e.g., 144 Hz) | Uncapped frame rate; monitor’s max is preferred. |
| V-Sync | Off (or use GPU driver) | On can cap FPS to monitor refresh; off reduces input lag. |
| Frame Rate Cap | 60 or 90 FPS (optional) | Locks FPS to reduce power draw / heat. Leave uncapped for best responsiveness. |
Quality Presets & Advanced
The Quality Presets (Low, Medium, High, Ultra) are a good starting point:
- Low: 60 FPS on Low-end hardware (e.g., GTX 1060, RX 580).
- Medium: Stable 60 FPS on Mid-range (RTX 2060, RX 5600 XT).
- High: Great visuals on High-end (RTX 3070, RX 6800) – target 1440p.
- Ultra: Maximum eye candy on RTX 4080/4090 or equivalent – expect 4K 30-60 FPS.
- Shadow Quality – High to Ultra cost significant performance. Set to High (not Ultra) for minimal visual loss.
- Volumetric Clouds & Fog – Very demanding. Medium is a good balance.
- Ambient Occlusion – HBAO+ is attractive but costly. SSAO is lighter. Turn off for low-end PCs.
- Anti-Aliasing – TAA (Temporal AA) is sharp, but can cause blur. DLSS / FSR (see below) often replace it.
- DLSS / FSR / XeSS – Upscaling tech:
- Texture Quality – Impacts VRAM. On 6GB+ cards use High; on 4GB cards use Medium. Ultra can cause stutter on 8GB cards in busy areas.
- Model Quality – Controls polygon detail. High is fine for most; drop to Medium only on very weak GPUs.
- Anisotropic Filtering – 8x or 16x has minimal performance cost. Leave at 16x.
Key adjustments for performance vs. quality:
- NVIDIA GPUs: Enable DLSS Quality or Balanced to boost FPS with minimal quality loss.
- AMD / Intel GPUs: Use FSR 2.2 (or XeSS for Intel Arc). Quality mode is recommended.
- Lower settings (Performance, Ultra Performance) save FPS but soften image.
Special attention: The DirectX vs Vulkan option is found before launching the game (launcher). Inside settings, only the API indicator is visible. If you crash often, try the other API.
---
Audio Settings
| Setting | Recommended | Notes |
|---|---|---|
| Master Volume | 80-100% | Adjust to taste. |
| Music Volume | 70% | BG3’s soundtrack is atmospheric; no need to overpower dialogue. |
| SFX Volume | 80% | Combat sounds, spells, footsteps. |
| Voice Volume | 100% | Essential for story; keep high. |
| Ambient Volume | 70% | Environmental sounds (wind, water). |
| Cinematic Volume | 100% | For cutscenes. |
| Narrator Volume | Same as Voice | The narrator is a key character. |
| 3D Audio | On (if supported) | Enhances spatial awareness. Disable if you experience echo or distortion. |
| Audio Output | Speakers / Headphones | Choose the correct device; headphones may enable virtual surround. |
---
Controls Settings
Keyboard & Mouse
- Key Bindings: Fully customizable. Rebind camera rotation (default: Middle Mouse Button) to something comfortable.
- Camera Controls: Mouse sensitivity and camera scroll speed. Default is fine, but adjust if camera feels sluggish.
- Left Click vs Right Click: Left selects/actions; right opens context menu. Can be swapped in accessibility if needed.
- Multiselect / Grouping: Ctrl+Click to select multiple characters. Learn these shortcuts for efficient inventory management.
- Controller Layout: Choose between Default (most intuitive) and Alternative (swaps some button functions).
- Stick Sensitivity: Adjust if movement feels floaty. Default is usually good.
- Vibration: Toggle on/off.
- Radial Menu: Customize slots for quick items/spells. Very important – assign your most used skills.
Controller (Xbox / PlayStation)
Special attention: The controller UI changes drastically from keyboard. If you switch controllers mid-game, restart the game to avoid input conflicts.
---
Accessibility Settings
BG3 is praised for its robust accessibility options.
| Setting | Description | Recommended |
|---|---|---|
| Subtitle Size | Small, Medium, Large | Large for readability. |
| Subtitle Background | On (black box) or Off | On improves legibility. |
| Speaker Names | Show character names in subtitles | On |
| Colorblind Mode | Protanopia, Deuteranopia, Tritanopia | Choose as needed. |
| High Contrast Mode | Increases UI contrast | Helpful for low vision. |
| Screen Shake Intensity | 0% to 100% | 0% if sensitive to motion. |
| Camera Bobbing | On/Off | Off for motion sickness. |
| Auto-Rotate Camera | On/Off | Off if you prefer manual control. |
| Tooltips Delay | Normal, Long, Very Long | Extend duration if you read slowly. |
| Narration Speed | Slow, Normal, Fast | Choose according to preference. |
| Simplify Visual Effects | Reduces particle effects | Can help with performance and sensory overload. |
---
Language Settings
- Text Language: Choose from 11+ languages (English, French, German, Spanish, etc.). This changes all in-game text.
- Audio Language: Separate from text. Only a few languages have full voice acting (English, French, German, Spanish, etc.). Changing audio language requires a restart.
- Subtitles: Can be forced on even when audio matches your language.
Note: Language settings are applied after restart. If you’re using the Steam version, you can also set language in Steam properties, but in-game settings override.
---
Network Settings
Only applicable for multiplayer sessions (co-op or PvP).
| Setting | Description | Recommended |
|---|---|---|
| Network Type | Direct Connection or Larian Account | Direct is simpler for LAN; Larian account for online friends. |
| Server Region | Auto or manual | Use Auto unless you know a specific region. |
| Voice Chat | Push-to-Talk or Open Mic | Push-to-Talk to avoid background noise. |
| Cross-Platform Play | On/Off | Enable to play with friends on different platforms (PC, PS5, Xbox). Requires Larian account. |
| Show Connection Quality | Toggle network indicator | On to diagnose lag. |
---
Gameplay Settings
These affect how the game plays, not just visuals or audio.
| Setting | Description | Recommended |
|---|---|---|
| Difficulty | Explorer (easy), Balanced, Tactician (hard) | Newcomers: Balanced; veterans: Tactician. |
| Enemy Aggression | Default or Aggressive (enemies more proactive) | Leave on Default. |
| Show Hit Chance | Always, Conditional, Never | Always for clarity (default). |
| Turn-Based Mode | Always or Out of Combat | Always is safest; some prefer out-of-combat only for exploration. |
| AutoSave Frequency | Every Short Rest, Every 10 min (default), etc. | Every Short Rest or Every 10 min to avoid major loss. |
| QuickSave / QuickLoad | Works instantly; no settings needed | Be aware QuickSave overwrites previous. |
| Auto-Pause Options | On enemy sight, on trap detection, on level up, etc. | Enable all for new players to avoid surprises. |
| Subtitles in Cutscenes | Same as accessibility | On. |
| Camera Distance | Default is close; can be zoomed out manually | No slider – use mouse wheel or right stick. |
| Auto Loot | Toggle to automatically pick up items from clicked containers | Useful to reduce micro-management. |
---
Recommended Settings by Hardware Tier
| Tier | Example GPU | Resolution Target | Key Settings |
|---|---|---|---|
| Low | GTX 1060 / RX 580 | 1080p 30-60 FPS | Preset Low, FSR Performance (if needed), Shadows Low, Volumetrics Low, Ambient Occlusion Off, Texture Quality Medium |
| Mid | RTX 2060 / RX 5700 | 1080p 60 FPS or 1440p 30 FPS | Preset High, DLSS/FSR Quality, Shadows High, Volumetrics Medium, Ambient Occlusion HBAO+ (on/off), Texture Quality High |
| High | RTX 3070 / RX 6800 | 1440p 60 FPS or 4K 30-45 FPS | Preset Ultra, DLSS/FSR Quality, Shadows High, Volumetrics High, Ambient Occlusion HBAO+, Texture Quality Ultra |
| Ultra | RTX 4090 / RX 7900 XTX | 4K 60 FPS | Preset Ultra, DLSS Quality/Balanced, Shadows Ultra, Volumetrics Ultra, Ambient Occlusion HBAO+, Texture Quality Ultra |
---
Easy-to-Misconfigure Settings & Attention Points
1. API Selection (Vulkan vs DX11) : The launcher is the only place to change this. If you experience crashes (especially on AMD GPUs), switch to DX11. For NVIDIA, Vulkan is usually better.
2. Gamma/Brightness Calibration: The in-game calibration tool can appear too dark if not adjusted. Set so that the barely visible logo is just distinguishable – if you see nothing in dark areas, increase gamma slightly.
3. Controller Hotplugging: If you connect a controller after launching the game with keyboard, the game may not recognize it properly. Restart the game after connecting/disconnecting.
4. DLSS/FSR Quality Impact: Using these on Low preset with “Performance” mode can cause blurriness. Always use at least Quality or Balanced.
5. Autosave Overwrite: QuickSave and QuickLoad are convenient but autosaves stack up. Regularly use manual saves to keep important moments.
6. Cross-Platform Saves: If playing across PC and console, ensure cloud saves are enabled on both platforms and that you have a Larian account. Transfer may take a minute.
7. Gameplay Difficulty Changes Mid-Game: You can switch difficulty at any time (except between Tactician and higher in some patches). Use this if you find a section too tough.
8. Subtitle Delay: Some players report subtitles appearing late. Ensure your audio language and text language match to reduce sync issues.
Important Notes
Important Notes for Baldur's Gate 3
Warnings & Common Pitfalls
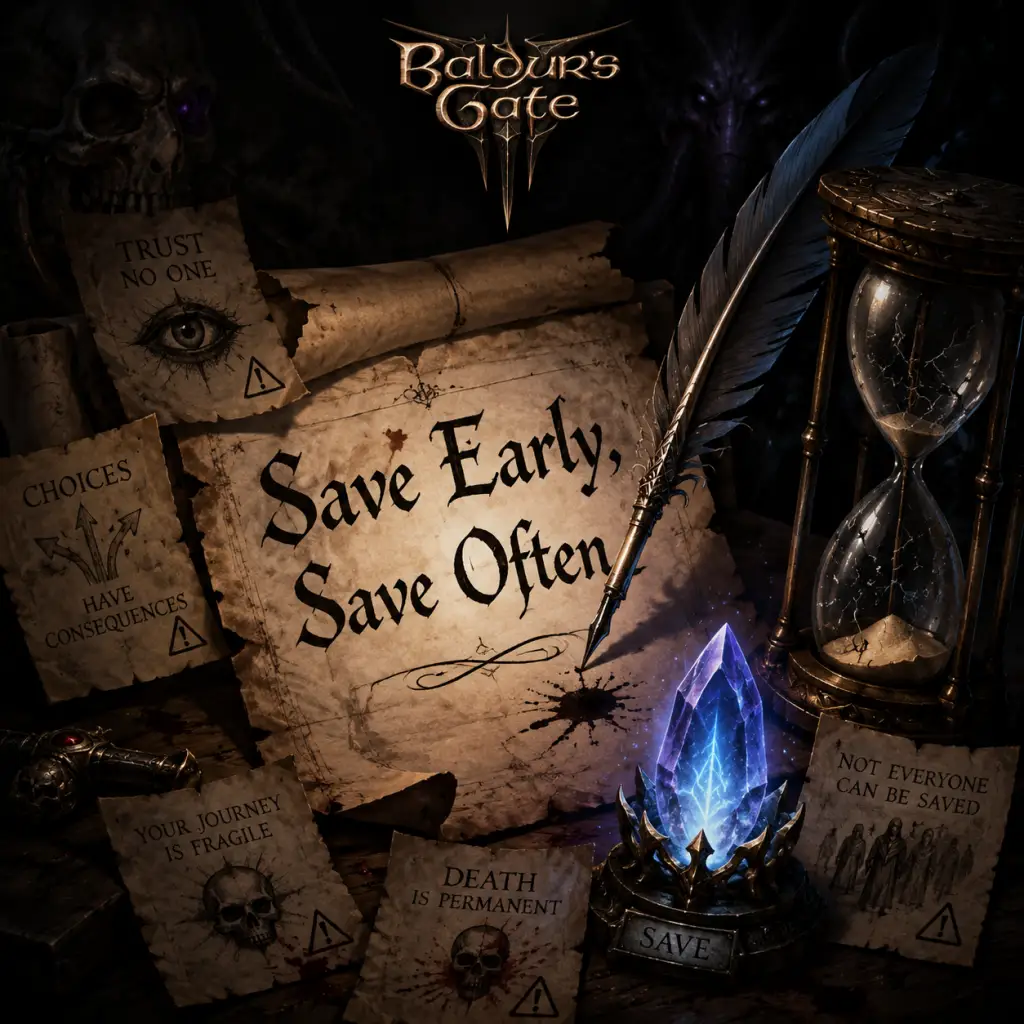
Save Early, Save Often: The game has an auto-save feature, but it's not always reliable. Manual quicksave (F5 on PC) before every major encounter, dialogue, or risky move. Use multiple save slots, not just one, to avoid corrupt saves or being stuck.
Don't Rush the Main Quest: Act 1 is deceptively open. Exploring side areas, talking to everyone, and completing companion quests is essential. Rushing the main story can lock you out of content or make Act 2 brutally difficult.
Party Composition Matters: A balanced party is crucial. Healers (Cleric, Druid, Bard), a frontliner (Fighter, Paladin, Barbarian), a damage dealer (Rogue, Ranger, Warlock), and a caster (Wizard, Sorcerer) is recommended. Avoid going all-melee or all-squishy.
Long Rest Often: Camp supplies are plentiful. Don't hoard them. Long resting advances companion stories, triggers cutscenes, and reveals important lore. If you skip rests, you miss content.
Stealth is Not Always Safe: Even with high stealth, some areas have magical detection, environmental hazards, or scripted encounters that trigger on proximity. Save before trying to sneak past enemies.
Check Your Inventory: The game's inventory can become cluttered. Dispose of junk, sell extra gear, and keep only what you need. Your carry weight limits movement speed.
Read Everything: Books, notes, and item descriptions often contain lore, puzzle hints, and quest clues. Ignoring them leads to confusion and missed opportunities.
Irreversible Choices & Missable Content
Character Creation is Permanent: Your race, class, background, ability scores, and appearance are locked at the start. You can respec your class and abilities later (via Withers), but not race or appearance. Choose wisely.
Companion Deaths: If a companion dies in combat and you don't revive them quickly (via scrolls, spells, or Withers), they may leave permanently. Some story decisions can also kill companions off-screen.
Grove vs. Goblins: In Act 1, you must choose sides between the Tiefling refugees and the goblins. This decision locks out entire quests and companions. Think carefully, and save before committing.
Dark Urge Origin: The Dark Urge has unique, often dark choices that can lead to permanent companion death or story branches. If you play this origin, be prepared for moral consequences.
Mind Flayer Parasite Usage: Using illithid powers (tadpole abilities) influences your character's appearance and story. Certain dialogue choices can make you partially or fully illithid, affecting the ending. You cannot undo this transformation.
Romance Lock-In: You can pursue multiple romance options, but later in the game, you must choose one. You cannot romance everyone in a single playthrough without mods. Save before major romance dialogues.
Act Transitions: Moving from Act 1 to Act 2, or Act 2 to Act 3, is a point of no return for many quests. The game warns you, but it's easy to miss. Complete all side content before progressing. Missable quests include the Hag's quest, the Adamantine Forge, and some companion personal quests (e.g., Lae'zel's creche, Astarion's spawn hunt, Shadowheart's Shar temple, etc.).
Endings: Your choices throughout the game determine which ending you get. There is no simple "good" ending. Many decisions lock out certain endings. Save often in Act 3.
Difficulty Spikes & Gatecheck Encounters
Level 1-2: Very fragile. Encounters like the Prologue nautiloid, the ruins near the beach, and the first goblin camp can wipe you if you're reckless. Use stealth, positioning, and consumables.
Level 3-4: The Hag's swamp (Act 1) is a major spike. The Hag has powerful illusions and can one-shot low-HP characters. Bring the Heavensward? No, bring anti-magic or an elf to avoid sleep. Prepare for crowd control.
The Githyanki Crèche (Level 5-6): This optional area is full of tough, high-damage enemies. The inquisitor fight is brutal. Save before entering. If underleveled, leave and come back later.
Act 2 - Shadow-Cursed Lands: The curse deals damage over time. Without the Pixie's blessing (from the Moonlantern quest), you'll die slowly. Enemies here have high magic resistance.
Act 2 Boss - Thorm: Ketheric Thorm has multiple phases, and his second form is devastating. Ensure you have some form of radiant damage (e.g., Cleric spells, Holy Weapon) to prevent his healing.
Act 3 - The Foundry: This area has many high-level constructs with heavy damage. Bring bludgeoning weapons and lightning resistance.
Act 3 - Cazador's Palace: The final boss of Astarion's quest can be very punishing if you don't use sunlight spells or avoid his legendary actions.
House of Hope (Act 3): Raphael's domain is a massive difficulty spike. Enemies have legendary actions and high stats. Come fully prepared with a solid party and strategy.
Grinding Traps & XP Waste
No Traditional Grinding: BG3 is not an MMO. You cannot grind random enemies for XP efficiently. Most XP comes from quests, exploration, and boss kills. Killing random mobs multiple times gives minimal XP (only first kill matters).
Lockpicking and Traps: There is no separate XP for opening locks or disarming traps. Don't waste time attempting to pick every lock unless there's loot behind it. Use cantrips like Knife in the Heart? No, use guidance.
Save Scumming for Skill Checks: Reloading after every failed persuasion or lockpick attempt is tedious and unnecessary. Gameplay is balanced for failure; you can often find alternative paths. Let the dice roll.
Vendor Shopping: You don't need to grind gold for gear. Most items can be found, crafted, or quest-rewarded. Only buy powerful consumables (scrolls, potions, elixirs) from vendors.
Online Etiquette & Anti-Cheat Notes
Game Mode: BG3 is entirely single-player or co-op (up to 4 players). Multiplayer can be open or invite-only. There is no competitive multiplayer, so no anti-cheat software is used. Modding is allowed; Larian supports it.
Ettiquette for Multiplayer: Communicate with your party. Respect others' choices. Don't initiate dialogues that affect the whole party without consent. Avoid stealing from party members without permission. Use turn-based mode if players are in combat.
Modding: If you play with mods, be aware that they can cause instability, especially after patches. Keep a vanilla save backup. If you use mods that affect game balance (e.g., weightless items, infinite jump), it might trivialize the experience.
Crossplay: Cross-platform play is available between PC and consoles, but not all features exist on all platforms. Expect occasional latency in co-op if playing with high ping.
Save Management Advice
Use Multiple Save Slots: The game has a limited number of auto-save slots (usually 3-5). Manual saves are unlimited. Create a new manual save every hour or before major decisions.
Label Saves: On PC, you can rename save files. Use descriptive names like "Before Underdark", "After Grove Decision", "Pre-Raphael Fight" to help reload later.
Cloud Saves: Enable cloud saves (Steam/GOG/Epic) to back up your progress. However, be cautious: cloud sync can sometimes overwrite local saves. Turn off cloud saving if you have many manual saves.
Modded Saves: If you uninstall a mod, your save may become corrupted or non-loadable. Always back up saves before removing mods.
Save File Size: Save files are relatively small (~20-50 MB), but many saves can accumulate. Periodically clean out old ones to avoid clutter.
Things Players Commonly Regret Not Knowing Earlier
1. You can respec your class and abilities for a small fee (100 gold) at Withers, found early in Act 1 (in the ruins near the beach). This means you can fix bad stat allocations or try different builds.
2. Camp supplies are abundant; you can long rest after every major fight without worrying about running out. The game even lets you use "partial rest" without supplies (but no spell slot recovery).
3. Jumping is a bonus action and can cover surprising distances. Use it to reach higher ground, avoid traps, or get into combat advantage.
4. Throwing healing potions at allies heals them for the potion's value. You can throw potions at the ground to heal multiple characters. Also, you can throw other items (poisons, alchemist fire, etc.) for area effects.
5. The environment is your weapon: Use barrels, chandeliers, and explosive surfaces. Shooting a fire arrow at a grease puddle ignites it. Push enemies off cliffs or into hazards.
6. You can talk to animals with the spell Speak with Animals (available to Rangers, Druids, Bards, or via potion). This unlocks many side quests and secrets. Prioritize getting it.
7. Illithid tadpole powers are optional. You do not have to use them. If you want to avoid transformation, just ignore the tadpoles in your inventory.
8. The game respects your time: There are no endless fetch quests. Most quests have multiple solutions, and you can often skip areas entirely without penalty. Don't feel pressured to 100% everything.
9. Control + click (PC) or hold and select (console) lets you select multiple units to move as a group. Use this to avoid splitting your party.
10. Reclass your companions: You can respec companions using Withers. If you don't like Shadowheart's default Trickery Domain, change it to Life Domain. You can change Astarion to a Bard if you wish. This opens up many party compositions.
11. The game has a built-in quest journal that updates your log with new objectives. But it doesn't always tell you where to go. Use the map markers and read quest descriptions carefully.
12. Merchant prices are affected by your Charisma and the Friends cantrip can be cast on vendors to reduce prices, but after the spell ends, they may become hostile (depending on their dialogue). Use Friends cautiously.
13. Legendary Actions (introduced in Honor Mode and some bosses in Tactician) make boss fights much harder. Always expect the unexpected.
14. You can hide during combat using the Hide action (if you're not in enemy line of sight) to break focus and sneak attack.
15. Steal with caution: If you get caught stealing, the entire faction may turn hostile. But if you can't be seen, there are no consequences. Use spells like Invisibility or Pass Without Trace.
Final Advice
Baldur's Gate 3 is a game about adaptation and creativity. There is no single correct path, and failure often leads to memorable stories. Embrace the dice rolls, explore fearlessly, and never be afraid to reload if you make a choice you truly regret. But also, allow yourself to live with consequences – some of the best moments come from unexpected outcomes. May your rolls be natural 20s!
All Game Items
Overview
This guide provides a comprehensive, categorized listing of all major items in Baldur's Gate 3 (BG3). Items are grouped logically by type: Weapons, Armor, Consumables, Materials, Currencies, Collectibles, and Key Equipment. For each item, you'll learn its function, how to obtain it (general region or quest), when it is most useful, and any important synergies or upgrade paths. Note that due to the game's immense loot variety, this guide highlights the most impactful and unique items; common variations (e.g., +1 weapons) are described generically where appropriate.
Weapons
Weapons in BG3 fall into categories based on proficiency and damage type. Many have special abilities, enchantments, or set bonuses.
Simple Weapons
- Dagger: Light, finesse, can be thrown. Useful for rogues for Sneak Attack. Obtain: starting gear, looted from goblins. Synergy: Dual Wielder feat.
- Quarterstaff: Versatile, two-handed. Good for casters as a melee backup. Notable Unique: Mourning Frost (Act 1, from the Underdark – adds Cold damage and can freeze enemies).
- Longsword: Versatile. Notable Unique: The Everburn Blade (Act 1, on the Nautiloid – deals +1d4 Fire damage, but early game; later replaced).
- Greatsword: Heavy, two-handed. Notable Unique: Silver Sword of the Astral Plane (Act 3, from Voss – deals +2d6 psychic damage to githyanki and can lower ability scores).
- Rapier: Finesse, one-handed. Notable Unique: Duelist's Prerogative (Act 3, from the Last Light Inn quest – a legendary rapier that allows an extra reaction attack).
- Shortbow: Ranged. Notable Unique: The Dead Shot (Act 3, from a vendor in the Temple of Bhaal – a bow that gives +2 to attack rolls and critical hit range).
- Hand Crossbow: Light, can dual-wield. Notable Unique: Hellfire Hand Crossbow (Act 3, from the Infernal Rapier quest – adds +1d6 fire damage).
- Polearms: Glaive, Halberd, Pike. Notable Unique: The Unseen Menace (Act 2, from a hidden chest in the Shadow-Cursed Lands – a pike that gives Advantage on attacks when hidden and +1d4 psychic damage).
- Flail: Notable Unique: Flail of Ages (Act 1, from the Underdark Myconid colony – a flail that deals 1d6 of three damage types: fire, cold, acid).
- Scimitar: Finesse, light. Notable Unique: Knife of the Undermountain King (Act 2, from the Crèche Y'llek – gives extra critical threat range and expanded bonus action attack options).
Martial Weapons
Versatile / Special Weapons
| Weapon Category | Example Unique | Location | Key Effect |
|---|---|---|---|
| Light Melee | Sneak Attack Dagger | Starter | Finesse, can offhand |
| Heavy Melee | Sword of the Astral Plane | Act 3 | Psychic damage, stat drain |
| Ranged | The Dead Shot | Act 3 | Crit on 18-20 |
Armor
Armor types: Light, Medium, Heavy, and Shields. Many have magical properties.
Light Armor
- Leather Armor: Notable Unique: Bracers of Defense (Act 1, from the Grymforge – gives +2 AC if not wearing armor, best for monks or mages with Mage Armor).
- Studded Leather: Notable Unique: Yuanti Scale Mail (Act 2, from a merchant in Last Light – gives +1 AC and Poison Resistance).
- Chain Mail: Notable Unique: Armor of Landfall (Act 3, from the Iron Throne – heavy, but gives Fire Resistance and the ability to cast Heat Metal once per day).
- Half Plate: Notable Unique: Ketheric's Armor (Act 2, from Ketheric Thorm – gives Reaper's Embrace: damage reduction when low on HP).
- Splint Armor: Notable Unique: Adamantine Splint Armor (Act 1, forged at the Adamantine Forge – gives +1 AC, and attacks that hit you deal only 11 damage minimum, plus enemy critical hits become normal hits).
- Plate Armor: Notable Unique: Helldusk Armor (Act 3, from Raphael's possession – gives +2 AC, Fire Resistance, and the ability to cast Hellish Rebuke).
- Wooden Shield: Basic. Notable Unique: The Swires' Sled Board (Act 1, from the harpies near the Grove – a shield that gives +1d6 thunder damage on a shield bash).
- Shield of Faith: A unique item that grants constant Sanctuary effect. Obtained from the Monastery.
- Potion of Healing: Restores 2d4+2 HP. Common drop. Essential early game.
- Potion of Speed: Haste for 3 turns. Very rare; use in boss fights.
- Potion of Invisibility: Turn invisible for 10 turns. Use to bypass encounters or escape.
- Elixir of Hill Giant Strength: Sets Strength to 21 until long rest. Great for martial classes.
- Scroll of Misty Step: Teleport as a bonus action. Use to reach high ground or escape.
- Scroll of Fireball: AoE damage. Use against groups.
- Scroll of Revivify: Revive a dead ally. Carry one always.
- Alchemist's Fire: Deals 1d4 fire damage per round until put out. Use on flammable surfaces.
- Smoke Powder Bomb: Deals 3d6 force damage in a radius. Good for barrels.
- Holy Water: Deals X damage to fiends and undead. Use in Act 2.
- Camp Supplies: Used to take a Long Rest. Various food items (e.g., Fish, Cheese) provide 40-80 supplies. Loot all containers.
- Dwarven Spirits: A rare alcohol that gives +1 bonus on Constitution saves for one day. Obtain from Zhentarim hideout.
- Sublimate (e.g., Mudwort, Balsam): Used to craft potions at a Camp Alchemist Table. Requires Alchemist feat for advanced.
- Nightshade: Used for poisons and Antidote.
- Troll Blood: Used for healing potions. Drops from trolls.
- Ingots (Iron, Steel, Adamantine): Used in forging at the Adamantine Forge (Act 1) or for weapon repairs. Adamantine Ingot is rare; used for the best armor.
- Sussur Sap: Used to craft the Sussur weapons (silence enemies). Found in the Arcane Tower.
- Infernal Iron: Used to upgrade Karlach's engine. Found in various locations.
- Rune of Mental Fortitude: Used in the Adamantine Forge to make mace that buffs Wisdom saves.
- Gemstones (Ruby, Sapphire): Valued at vendors. Some used in quests.
- Use: Buy items, bribe, pay for services. Earned from loot, quest rewards. Manage by selling unused gear.
- Tip: Save gold for Act 3 where powerful items cost thousands.
- Use: Power Karlach's engine (gives temporary Hellish Resistance), or feed to the Steel Watchers. Obtain from Zariel's followers, found in Rivington.
- Tip: Save at least 5 for Karlach's upgrade quest.
- Use: Currency in Githyanki society (Crèche). Convert to gold at vendors. Not used elsewhere.
- Use: Rewarded by Raphael, used to buy from his inventory (very powerful). Obtain by serving him or trading.
- Use: Trade for prizes in the circus. Obtain by winning games.
- The Library of the Arcane: Books that give XP when read. Some unlock quests (e.g., The Neathdark Gur gives a clue to the Underdark).
- The Necromancy of Thay: A rare tome that grants permanent skill bonuses if read. Found in Arcane Tower.
- Idol of Silvanus: A valuable statue (500 gold). Steal from the Druid Grove. Selling it helps with a quest.
- Shattered Flagon: A broken vase worth 200 gold. Found in many houses.
- Ruby of the Mountain: Required for the Shadowheart quest in Act 2.
- Moonlantern: Carried by lanterns to protect against Shadow Curse. Essential for Act 2 navigation.
- The Crown of Karsus: A legendary artifact needed for the final battle. Obtained in Act 3.
- The Blood of Lathander: Act 1, Legendary mace. Deals +1d6 Radiant damage, grants Light Domain spells, and revives you on death once per day. Perfect for clerics.
- The Legendary Spear: Shar's Spear of Evening: Act 2, on Shadowheart's path. Grants Darkness immunity, deals +1d8 Necrotic, and gives Invisibility when killing.
- The Red Knight's Mace: Act 3, from a hidden crypt. Deals +1d6 Force damage and can paralyze on critical.
- The Guiding Light (Rapier): Act 3, from the Devil's Fee vendor. Grants +1d6 Psychic and allows a reaction attack when nearby ally is hit.
- The Strength Armor (Gauntlets of Hill Giant Strength): Act 2, from the House of Hope. Sets Strength to 23. Essential for builds that want low STR but heavy attacks.
- The Armor of Persistence: Act 3, from the Steel Watch Foundry. Heavy armor that gives +2 AC, Resistance to all elemental damage, and immunity to prone.
- The Helmet of Balduran: Act 2, from the Underdark. Gives +1 AC, advantage on saving throws, and immunity to stun. Arguably best helmet.
- The Ring of Flinging: Act 1, from the Grove. Adds +1d4 damage to thrown weapons. Great for barbarians.
- The Marksmanship Hat (Harold): Act 1, from a vendor. Gives +1 to ranged attack rolls and a chance to Bane on hit.
- The Stalker's Gloves: Act 2, from the Crèche. Give free Hunter's Mark once per turn when attacking a wounded enemy. Synergy with rangers.
- The Amulet of Misty Step: Act 1, from the Arcane Tower. Free Misty Step once per short rest. Excellent mobility.
Medium Armor
Heavy Armor
Shields
Consumables
Potions, scrolls, grenades, and food.
Potions
Scrolls
Grenades & Bombs
Food & Camp Supplies
Materials
Used for crafting, trading, or quests.
Alchemy Ingredients
Smithing Components
Other Materials
Currencies
Standard and special currencies.
Gold
Soul Coins
Githyanki Silver Pieces
Infernal Tokens
Statue Coins (from the Circus)
Collectibles
Items that are not directly usable but contribute to lore, achievements, or quests.
Books & Notes
Paintings & Art Objects
Quest Items
Key Equipment (Unique & Legendary)
These items stand out due to their power and are often build-defining.
Weapons
Armor
Accessories
Conclusion
This guide covers the most influential items in Baldur's Gate 3. Always remember that the best item depends on your party composition and playstyle. Keep an eye out for items that grant extra actions, set ability scores, or provide unique damage riders. Experiment with synergies (e.g., weapon + elixir + feats). Happy looting!

Character Skills
"content": "## Overview
In Baldur's Gate 3, every character's abilities are defined by their class, subclass, race, background, feats, and spells. This guide focuses on the unique skills, abilities, spells, and features provided by each class and subclass. It covers all 12 base classes, their subclasses, key spells, action surges, rage abilities, bardic inspirations, and more. Also included are essential feats and racial traits that synergize with class skills.
In Baldur's Gate 3, every character's abilities are defined by their class, subclass, race, background, feats, and spells. This guide focuses on the unique skills, abilities, spells, and features provided by each class and subclass. It covers all 12 base classes, their subclasses, key spells, action surges, rage abilities, bardic inspirations, and more. Also included are essential feats and racial traits that synergize with class skills.
Barbarian
Core Skills
- Rage: Bonus action. Lasts 10 turns. Grants +2 damage to melee attacks, resistance to physical damage, advantage on Strength checks/saves. Cannot cast spells while raging. Use before combat or when overwhelmed.
- Unarmored Defense: AC = 10 + Dex mod + Con mod when not wearing armor.
- Fast Movement: +3m movement speed while unarmored.
- Frenzy: While raging, you can make a bonus action attack each turn. After rage ends, gain 1 level of Exhaustion. Best for burst damage.
- Frenzied Throw: Throw a creature or object as a bonus action during rage. Great for crowd control.
- Bestial Heart: Choose a spirit animal (Bear, Eagle, Elk, Tiger, Wolf) for passive bonuses. Bear gives resistance to all damage except psychic. Eagle: Dash as bonus action, enemies have disadvantage on opportunity attacks. Elk: Extra movement and charge. Tiger: Improved jumping and stealth. Wolf: Allies have advantage on attacks against enemies near you.
- Aspect of the Beast: Additional benefit at level 6 (e.g., Bear gives carrying capacity, Eagle gives free disengage).
- Magic Awareness: Detect magic while raging.
- Wild Surge: When you rage or cast a spell, trigger a random magical effect (e.g., heal, teleport, summon weapon). Unpredictable but powerful with careful positioning.
- Bardic Inspiration (Bonus action): Give a d6 inspiration die to an ally. They can add it to attack rolls, ability checks, or saving throws. Scales to d8 at level 5, d10 at level 10, and replenishes on short rest at higher levels.
- Song of Rest: Provides additional healing during short rests.
- Jack of All Trades: Half proficiency on ability checks you are not proficient in.
- Cutting Words: Use Bardic Inspiration to subtract it from an enemy's attack roll, ability check, or damage roll. Excellent for defense.
- Additional Magical Secrets: Pick spells from any class at levels 6 and 10. Grab Counterspell, Fireball, Haste.
- Combat Inspiration: Bardic Inspiration can be used for damage or AC boosts.
- Extra Attack: Second weapon attack at level 6.
- Defensive Flourish: When you use Bardic Inspiration for an attack, add to AC until next turn.
- Blade Flourish: Spend a Bardic Inspiration to add effects to a weapon attack (e.g., push enemies, increase AC, hit multiple targets).
- Extra Attack at level 6.
- Dual Wielding style: Fight with two weapons without penalty.
- Vicious Mockery (Cantrip): Deal psychic damage and give enemy disadvantage on next attack.
- Healing Word, Faerie Fire, Hypnotic Pattern, Hold Person, Greater Invisibility.
- Channel Divinity (once per short rest): Varies by subclass. Gain additional uses at level 6 and 18.
- Divine Intervention (level 10, once per long rest): Powerful effect (heal all allies, summon a Deva, cast a high-level spell).
- Turn Undead: Channel Divinity to frighten undead or fiends for 10 turns (Wisdom save).
- Disciple of Life: Healing spells restore extra HP (2 + spell level).
- Preserve Life: Channel Divinity to heal a party member up to half their max HP (up to 5x cleric level).
- Blessed Healer: When you cast a healing spell on others, you also heal.
- Warding Flare: Reaction to impose disadvantage on an attack against you or ally within 30 ft.
- Radiance of the Dawn: Channel Divinity to deal radiant damage to all enemies in a radius (no friendly fire).
- Fireball, Wall of Fire domain spells.
- Blessing of the Trickster: Give an ally advantage on Stealth checks.
- Invoke Duplicity: Create an illusion duplicate to distract enemies; you can cast spells from its location.
- Cloak of Shadows: Channel Divinity for invisibility until end of turn.
- War Priest: Extra attack as a bonus action (Wis mod times per long rest).
- Guided Strike: Channel Divinity to add +10 to an attack roll.
- Spirit Guardians, Crusader's Mantle.
- Blessings of Knowledge: Expertise in two skills (Arcana, History, Nature, or Religion).
- Channel Divinity: Knowledge of the Ages: Gain proficiency in any skill or tool for 1 hour.
- Read Thoughts: Use action to probe a creature's mind for insight or advantage.
- Guidance (Cantrip): Add d4 to ability checks.
- Bless, Healing Word, Spiritual Weapon, Spirit Guardians, Mass Healing Word, Resurrection.
- Wild Shape: Transform into an animal for combat or exploration. Uses per short rest (2 at level 2, 3 at level 4). While wild shaped, you retain mental stats but gain physical stats and abilities of the form.
- Druidic: Language known to all druids.
- Timeless Body (level 18): Aging is slowed.
- Natural Recovery: Recover some spell slots during a short rest.
- Bonus Cantrips: Learn additional cantrips outside druid list.
- Circle Spells: Domain-like bonus spells (e.g., Misty Step, Haste, Plant Growth).
- Combat Wild Shape: Wild Shape as a bonus action instead of action.
- Moon Forms: Access to higher CR beasts early (e.g., Dire Wolf, Polar Bear, Owlbear).
- Primal Strike: Wild Shape attacks count as magical for overcoming resistance.
- Symbiotic Entity: Gain temporary HP and deal necrotic damage to nearby enemies when you Wild Shape or activate.
- Spreading Spores: Bonus action to create a cloud of necrotic spores that damages enemies.
- Fungal Zombies: Raise dead as spore servant allies.
- Shillelagh (Cantrip): Make a staff/quarterstaff use Wisdom for attack and damage.
- Moonbeam, Heat Metal, Call Lightning, Conjure Animals, Heal.
- Second Wind (Bonus action): Heal for 1d10 + Fighter level. Recharges per short rest.
- Action Surge: Immediately gain an additional action and possible bonus action. Recharges per short rest. Use for nova damage or cast two spells in one turn (but only one leveled spell per turn rule applies? BG3 allows two leveled spells per turn if using Action Surge).
- Extra Attack (2 attacks at level 5, 3 at level 11).
- Combat Superiority: Gain superiority dice (d8) for maneuvers. You learn 3 maneuvers at level 3, more at higher levels.
- Maneuvers (select list):
- Student of War: Gain proficiency in one artisan tool.
- Improved Critical: Crit on a roll of 19-20 (later 18-20).
- Remarkable Athlete: Add half proficiency to Strength, Dexterity, Constitution checks.
- Extra Fighting Style (level 10): Choose an additional fighting style.
- Spellcasting: Learn wizard spells (primarily abjuration and evocation). Max spell level 4.
- Weapon Bond: Bond to a weapon; can summon it as a bonus action.
- War Magic: When you cast a cantrip, you can make a weapon attack as a bonus action.
- Eldritch Strike: After hitting with a weapon attack, enemy has disadvantage on save against your next spell.
- Unarmored Defense: AC = 10 + Dex mod + Wis mod.
- Martial Arts: Use Dexterity for unarmed attacks, bonus action unarmed strike after attack action. Unarmed damage scales with level (d4 -> d10).
- Flurry of Blows: Spend 1 ki point to make two unarmed strikes as bonus action.
- Step of the Wind: Spend 1 ki point to Dash or Disengage as bonus action.
- Patient Defense: Spend 1 ki point to take Dodge action as bonus action.
- Open Hand Technique: When you hit with Flurry of Blows, you can apply effects (prone, push, prevent reactions).
- Wholeness of Body: Heal yourself (3× monk level) as an action. Recharges per long rest.
- Tranquility: Gain Sanctuary-like effect after long rest until you attack.
- Quivering Palm: Spend 3 ki to set up devastating damage that can kill on next action or be triggered instantly.
- Shadow Arts: Spend 2 ki to cast Darkness, Darkvision, Pass Without Trace, Silence.
- Shadow Step: Teleport between shadows as a bonus action; advantage on next attack.
- Cloak of Shadows: Invisibility as an action while in dim light.
- Opportunist: Automatically attack an enemy that is hit by an ally's melee attack.
- Elemental Disciplines: Spend ki to cast elemental spells/effects (e.g., Fist of Unbroken Air, Water Whip, Flame Blade).
- Elemental Attunement: Create minor elemental effects (mold earth, shape water, produce flame).
- Ki-Empowered Strikes: Unarmed attacks count as magical.
- Divine Sense: Detect celestials, fiends, undead within 60 ft.
- Lay on Hands: Heal for 5× Paladin level pool. Can also cure diseases/poison (5 HP cost).
- Divine Smite: Spend a spell slot to add radiant damage to a melee attack (2d8 + 1d8 per spell level above 1, max 5d8). Can be used after hitting.
- Fighting Style: Choose one (e.g., Defense, Dueling, Great Weapon Fighting).
- Extra Attack at level 5.
- Aura of Protection (level 6): Add Charisma mod to all saves for self and allies within 3m.
- Improved Divine Smite (level 11): All melee attacks deal additional 1d8 radiant damage.
- Sacred Weapon: Channel Divinity to add Charisma mod to attack rolls and weapons become magical. Good for accuracy.
- Turn the Unholy: Turn fiends and undead.
- Aura of Devotion: Become immune to charm.
- Nature's Wrath: Channel Divinity to restrain a foe with vines (Strength save).
- Turn the Faithless: Turn fey and fiends.
- Aura of Warding: Resistance to spell damage for self and allies.
- Elder Champion: At level 20, gain regeneration and can cast Heal.
- Abjure Enemy: Channel Divinity to frighten a creature (Wisdom save).
- Vow of Enmity: Channel Divinity to gain advantage on attacks against one target for 10 turns.
- Relentless Avenger: When you hit with an opportunity attack, move up to half speed.
- Aura of Vengeance: Allies can make opportunity attacks against enemies that hit you.
- Control Undead: Channel Divinity to control an undead creature for 1 hour.
- Dreadful Aspect: Frighten all enemies within 30 ft.
- Aura of Hate: Add Charisma mod to melee damage for yourself and nearby fiends/undead.
- Shatter Oath: Special abilities tied to breaking your oath.
- Bless, Thunderous Smite, Wrathful Smite, Aid, Crusader's Mantle, Find Steed.
- Favored Foe: Hunt a target; deal extra damage once per turn (uses Wisdom mod). Alternatively, Favored Enemy from class table (e.g., Bounty Hunter grants bonus to investigation and survival against chosen foe).
- Natural Explorer: Gain proficiency in Survival, advantage on ability checks in favored terrain, and reduced travel time.
- Fighting Style: Archery, Defense, Dueling, Two-Weapon Fighting.
- Spellcasting: Use Wisdom for spells. Spells include Hunter's Mark, Ensnaring Strike, Swift Quiver, Conjure Animals.
- Extra Attack at level 5.
- Hunter's Prey: Choose between Colossus Slayer (extra d8 damage to wounded creatures), Giant Killer (reaction attack after large enemy hits), or Horde Breaker (attack another enemy within 5 ft when you attack).
- Defensive Tactics: Choose Escape the Horde (opportunity attacks miss), Steel Will (advantage on fear saves), or Multiattack Defense (bonus AC on next attack after first hit).
- Volley (level 11): Make ranged attacks against multiple enemies in a cone.
- Whirlwind Attack: Melee attacks against all enemies within reach.
- Ranger's Companion: Summon a beast (wolf, bear, spider, raven, boar, or the new Dire Raven). Companion acts on its own turn and can be commanded with bonus action.
- Exceptional Training: At higher levels, companion scales, gains extra attacks, and can be revived with a spell slot.
- Bestial Fury: Companion can attack twice when you command it.
- Dread Ambusher: Extra attack with extra damage on first turn; bonus HP and Dexterity saving throw proficiency.
- Umbral Sight: See in magical darkness; become invisible to enemies that rely on darkvision.
- Fearful Foe: Cause frightened condition on enemies.
- Stalker's Flurry: When you miss, you can make another attack.
- Hunter's Mark (concentration): Bonus damage on each hit; track target.
- Goodberry, Pass Without Trace, Conjure Barrage, Swift Quiver.
- Sneak Attack (once per turn): Deal extra damage when you have advantage or an ally is within 1.5m of the target. Scales with level (1d6 to 10d6). Use with finesse or ranged weapons.
- Cunning Action: Bonus action to Dash, Disengage, or Hide.
- Expertise: Double proficiency in two skills at level 1, two more at level 6.
- Uncanny Dodge (level 5): Halve damage from a visible attacker as a reaction.
- Evasion (level 7): No damage on Dexterity saves if successful; half damage if fail.
- Fast Hands: Bonus action unlocks doors/disarms traps; also gain an extra bonus action (can be used for Cunning Action or drink potion).
- Supreme Sneak: Have advantage on Stealth checks.
- Use Magic Device: Ignore race/class requirements for scrolls and items.
- Assassinate: Attacks against surprised creatures auto-crit. Also have advantage on initiative.
- Infiltration Expertise: Create disguises, forge documents (out of combat).
- Imposter: You can impersonate a target after studying them.
- Death Strike: If you surprise a creature and hit, it must make a Constitution save or die.
- Mage Hand Legerdemain: Your Mage Hand is invisible, can pick locks, disarm traps.
- Spellcasting: Learn illusion and enchantment wizard spells up to level 4.
- Magical Ambush: Enemies have disadvantage on saves vs your spells if you are hidden.
- Versatile Trickster: Use bonus action to distract a creature with Mage Hand, giving you advantage against it.
- Sorcery Points: Metamagic resource. Gain 2 at level 2, increases every level. Can convert spell slots to points or vice versa.
- Metamagic Options (choose two at level 2, more at levels 3, 10, 17):
- Draconic Resilience: Base AC = 13 + Dex modifier; +1 HP per sorcerer level.
- Elemental Affinity: Choose a dragon type (fire, cold, lightning, etc.). When you cast a spell of that damage type, add Charisma mod to damage. Also resistance to that element.
- Dragon Wings (level 11): Flames of fury? Actually in BG3, at level 11 you gain flight for short bursts (reaction to avoid opportunity attacks).
- Wild Magic Surge: Whenever you cast a sorcerer spell, the DM can roll on a surge table (in BG3, it always triggers on certain spells or Tides of Chaos). Random effect (e.g., heal, fireball centered on self, turn into a sheep).
- Tides of Chaos: Gain advantage on one attack, check, or save; then must roll on surge table each time you cast a leveled spell.
- Bend Luck: Use reaction to affect a d4 on a creature's attack or ability check (costs 2 sorc points).
- Tempestuous Magic: When you cast a leveled spell, you can fly up to 3m without provoking opportunity attacks.
- Heart of the Storm: Enemies near you take lightning/thunder damage when you cast a spell of that type (costs sorc points).
- Storm Guide: Control weather mildly.
- Wind Soul: Resistance to lightning and thunder; eventually flight.
- Fire Bolt (Cantrip), Magic Missile, Scorching Ray, Haste, Counterspell, Fireball, Hold Monster.
- Pact Magic: Spell slots regenerate on short rest; max level 5 at level 9. Limited slots but always upcast.
- Eldritch Invocations: Gain customizable passive or active abilities. Examples:
- Dark One's Blessing: Gain temporary HP equal to Charisma mod + warlock level when you kill a creature.
- Dark One's Own Luck: Add d10 to ability check once per short rest.
- Hurl Through Hell: Once per long rest, after hitting with a melee attack, deal 10d10 psychic damage and stun until end of your next turn.
- Awakened Mind: Telepathically communicate with creatures within 30 ft.
- Entropic Ward: Reaction to give disadvantage on an attack; if it misses, you gain advantage on next attack against that enemy.
- Thought Shield: Resistance to psychic damage, can't read your thoughts.
- Fey Presence: Charm or fear creatures in a 10 ft radius.
- Misty Escape: When you take damage, become invisible and teleport.
- Beguiling Defenses: Charm or fear creatures that target you.
- Pact of the Chain: Summon a familiar (imp, quasit, pseudodragon). Special abilities and invisible.
- Pact of the Tome: Learn additional cantrips from any class.
- Pact of the Blade: Create a melee weapon from own hand; can bond to one magical weapon. Use Charisma for attack and damage.
- Eldritch Blast (Cantrip): Multiple beams (scales with level). Best with Agonizing Blast.
- Hex: Bonus action to curse a target, add 1d6 necrotic damage per hit.
- Armour of Agathys, Darkness, Hypnotic Pattern, Counterspell, Hunger of Hadar.
- Spellcasting: Use Intelligence for spells. Learn spells from scrolls (pay gold cost).
- Arcane Recovery: Once per long rest, recover a number of spell slot levels equal to half your wizard level (rounded up). Use during short rest.
- Spellbook: Can prepare spells equal to Int mod + wizard level.
- Sculpt Spells: Allies automatically succeed on saves vs your evocation spells and take no damage.
- Potent Cantrip: Cantrips deal half damage even on save.
- Empowered Evocation: Add Int mod to damage of evocation spells.
- Overchannel: Maximize damage of a level 5 or lower evocation spell but take damage yourself (once per long rest).
- Abjuration Ward: Create a protective barrier (temp HP) that recharges when you cast abjuration spells.
- Arcane Ward: Ward can also absorb damage for allies.
- Projected Ward: Share your ward with adjacent allies.
- Spell Resistance: Advantage on saves vs spells.
- Conjuration Savant: Learn conjuration spells at half cost.
- Minor Conjuration: Create a non-magical object (replaces at level 2).
- Benign Transportation: Teleport an ally or yourself after casting a conjuration spell.
- Focus Conjuration: Concentration can't be broken while casting conjuration spells.
- Portent: Roll two d20s at the start of the day; can replace any attack roll, saving throw, or ability check with one of those rolls. Incredibly powerful.
- Expert Divination: Regain spell slots when you cast a divination spell.
- The Third Eye: Gain darkvision, see invisibility, read thoughts, or similar.
- Hypnotic Gaze: Charm or hold a creature (costs action, can be maintained).
- Instinctive Charm: When an enemy attacks you, redirect to another creature.
- Split Enchantment: Single-target enchantment spells can target one additional creature.
- Grim Harvest: Heal when you kill a creature with a necromancy spell (3× spell level).
- Animate Dead: Raise skeletons or zombies.
- Inured Necromancy: Resistance to necrotic damage.
- Command Undead: Control an undead creature.
- Improved Minor Illusion: Can create both sound and image.
- Malleable Illusions: Change your illusion each turn.
- Illusory Self: Create a duplicate that takes one hit.
- Illusory Reality: Make an illusion real for a short duration.
- Minor Alchemy: Change material of an object.
- Transmuter's Stone: Create a stone that grants darkvision, speed, or saving throw proficiency.
- Shapechanger: Polymorph yourself into a wolf (temporary).
- Master Transmuter: Gain ability like restore youth, resistance, or teleport.
- Fire Bolt, Magic Missile, Shield, Misty Step, Counterspell, Fireball, Lightning Bolt, Wall of Force, Disintegrate, Globe of Invulnerability.
- Ability Score Improvement (ASI): +2 to one ability or +1 to two.
- Alert: +5 initiative, cannot be surprised.
- Athlete: +1 Str/Dex, improved climbing/jumping, stand up with less movement.
- Actor: +1 Cha, advantage on Deception and Performance.
- Crossbow Expert: Ignore loading, no penalty when in melee, extra bonus action attack.
- Defensive Duelist: + proficiency to AC as reaction when wielding finesse weapon.
- Dual Wielder: +1 AC when dual wielding, can use two non-light weapons.
- Elemental Adept: Spells ignore resistance to chosen element, treat 1 as 2.
- Great Weapon Master: -5 attack roll, +10 damage; or on crit/kill can make bonus action attack.
- Heavily Armoured: Gain heavy armor proficiency and +1 Str.
- Heavy Armor Master: Reduce non-magical bludgeoning/piercing/slashing damage by 3.
- Inspiring Leader: Grant temp HP to allies (Cha mod + level) after short rest.
- Keen Mind: +1 Int, perfect recall, always know direction.
- Lightly Armoured: +1 Dex, gain light armor proficiency.
- Lucky: 3 luck points per long rest to reroll attacks, checks, or saves.
- Mage Slayer: Advantage on saves vs spells from adjacent enemy; reaction attack when they cast.
- Magic Initiate: Learn two cantrips and one level 1 spell from chosen class.
- Martial Adept: One superiority die and two maneuvers (if no Battle Master).
- Medium Armour Master: Increase AC bonus from medium armor, no stealth penalty.
- Mobile: +3m speed, ignore difficult terrain after dashing, no opportunity attacks after melee.
- Moderately Armoured: +1 Str/Dex, gain medium armor and shield proficiency.
- Mounted Combatant: Advantage vs unmounted targets, force attacks to mount, protect mount.
- Observant: +1 Int/Wis, +5 passive perception, lip-read.
- Polearm Master: Opportunity attacks when enemy enters range; extra clubbing attack.
- Resilient: +1 to one ability, proficiency in saves of that ability.
- Ritual Caster: Learn ritual spells from any class and cast as rituals.
- Savage Attacker: When rolling weapon damage dice, roll twice and take higher.
- Sentinel: Opportunity attacks reduce speed to 0; can combo with Polearm Master.
- Sharpshooter: -5 attack, +10 damage; ignore half and three-quarters cover; no long range penalty.
- Shield Master: Add shield AC to Dex saves; take no damage on success; shove as bonus action.
- Skilled: Gain proficiency in three skills.
- Spell Sniper: Learn a cantrip; crit range for attack spells expands to 19-20.
- Tough: +2 HP per level.
- War Caster: Advantage on concentration saves; can cast spells as opportunity attacks.
- Weapon Master: +1 Str/Dex, proficiency in four weapons.
- Drow: Superior Darkvision, Fey Ancestry (advantage vs charmed), Drow Magic (Dancing Lights, Faerie Fire, Darkness).
- Half-Elf: Civil Militia (weapon and light armor proficiencies), Darkvision.
- Human: +1 to all abilities.
- **G
Subclasses
#### Berserker
#### Wildheart (Totem Warrior)
#### Wild Magic
Recommended Combo
Pair Barbarian with a Fighter or Paladin for frontline synergy. Use Reckless Attack (always advantage, but enemies get advantage against you) to trigger critical hits with Great Weapon Master feat.
---
Bard
Core Skills
Subclasses
#### College of Lore
#### College of Valor
#### College of Swords
Key Spells
Recommended Build
Lore Bard with high Charisma, heavy focus on control spells and Cutting Words. Multiclass with Paladin for Sword Bard smite hybrid, or with Warlock for Eldritch Blast synergy.
---
Cleric
Core Skills
Subclasses
#### Life Domain
#### Light Domain
#### Trickery Domain
#### War Domain
#### Knowledge Domain (Added in Patch 8 – not yet standard, but included for completeness)
Key Spells
Recommended Build
Light Cleric for high damage and support; Life Cleric for dedicated healer. Use Warding Flare strategically. Multiclass with Sorcerer for twinned spell heals.
---
Druid
Core Skills
Subclasses
#### Circle of the Land
#### Circle of the Moon
#### Circle of Spores
Key Spells
Recommended Build
Moon Druid for tanking and shapeshifting; Land Druid for caster/support. Use Conjure Animals to overwhelm action economy. Spores Druid works well with melee or summoner playstyle.
---
Fighter
Core Skills
Subclasses
#### Battle Master
- Menacing Attack: Add dice to damage and frighten target.
- Trip Attack: Add dice and knock prone.
- Disarming Attack: Add dice and disarm weapon.
- Precision Attack: Add dice to improve attack roll.
- Riposte: When enemy misses you, use reaction to attack back.
#### Champion
#### Eldritch Knight
Recommended Build
Battle Master with Great Weapon Master and Sentinel feat for control. Champion with Dueling style for high crit chance. Eldritch Knight for hybrid tank/caster.
---
Monk
Core Skills
Subclasses
#### Way of the Open Hand
#### Way of Shadow
#### Way of the Four Elements
Recommended Build
Open Hand Monk for control and damage; use Tavern Brawler feat to add Strength to unarmed attacks (if high Str). Shadow Monk for stealth/assassin multiclass. Use Step of the Wind to reposition.
---
Paladin
Core Skills
Subclasses
#### Oath of Devotion
#### Oath of the Ancients
#### Oath of Vengeance
#### Oathbreaker (Unlockable)
Key Spells
Recommended Combos
Smite with Great Weapon Master feat for massive crits. Use Vow of Enmity to guarantee advantage. Multiclass with Warlock for pact magic slots for more smites, or Sorcerer for quickened spell + smite.
---
Ranger
Core Skills
Subclasses
#### Hunter
#### Beast Master
#### Gloom Stalker
Key Spells
Recommended Build
Gloom Stalker with Sharpshooter feat for massive ranged damage. Multiclass with Rogue Assassin for auto-crit on surprise rounds. Use Hunter's Mark for sustained damage.
---
Rogue
Core Skills
Subclasses
#### Thief
#### Assassin
#### Arcane Trickster
Key Skills & Combos
Use Stealth and Cunning Action: Hide to gain Sneak Attack repeatedly. Pair Assassin with Gloom Stalker Ranger for alpha strike. Use Two-Weapon Fighting (or Dual Wielder feat) for extra chance to land Sneak Attack.
---
Sorcerer
Core Skills
- Twinned Spell: Target two creatures with a single-target spell (costs sorc points equal to spell level).
- Quickened Spell: Cast a spell as a bonus action (costs 2 points).
- Distant Spell: Double range; touch spells become 30 ft.
- Heightened Spell: Target has disadvantage on first save (costs 3 points).
- Extended Spell: Double duration (costs 1 point).
- Subtle Spell: Cast without verbal/somatic components (not available in BG3 base game? It is via mods).
Subclasses
#### Draconic Bloodline
#### Wild Magic
#### Storm Sorcery
Key Spells
Recommended Build
Use Twinned Spell with Haste on two martial allies. Quickened Spell + Fireball for action economy. Draconic Sorcerer (fire) with Elemental Adept feat to ignore resistance.
---
Warlock
Core Skills
- Agonizing Blast: Add Charisma mod to Eldritch Blast damage.
- Repelling Blast: Push target 3m per Eldritch Blast hit.
- Devil's Sight: See in magical darkness.
- Misty Visions: Cast Silent Image at will.
- Lifedrinker: Add Charisma mod to pact weapon damage (requires level 12).
Subclasses (Pact Boons)
#### The Fiend
#### The Great Old One
#### The Archfey
Pact Boon Choices (level 3)
Key Spells
Recommended Build
Bladelock with Pact of the Blade and Lifedrinker for melee. TomeLock for utility, Chainlock for scouting. Use Devil's Sight + Darkness to give yourself advantage and enemies disadvantage. Multiclass with Paladin for smite synergy.
---
Wizard
Core Skills
Subclasses
#### Evocation
#### Abjuration
#### Conjuration
#### Divination
#### Enchantment
#### Necromancy
#### Illusion
#### Transmutation
Key Spells
Recommended Build
Evocation Wizard with Sculpt Spells for AoE without friendly fire. Divination Wizard for control and portent dice. Use Arcane Recovery to refresh high-level slots.
---
Feats (General Skills)
Feats are special talents gained at levels 4, 8, 12 (for most classes) or from human variant at level 1. Notable feats for skill synergy:
---
Racial & Background Skills
Racial traits also provide unique abilities that act as skills:

Characters & Roles
Overview
This guide covers every major character and playable role in Baldur's Gate 3, including the six Origin characters, the fully customizable protagonist (Tav), the Dark Urge, and all recruitable companions (Halsin, Jaheira, Minsc, and the hirelings). For each character, you'll find their background, class/subclass, strengths, weaknesses, optimal playstyle, how to unlock them, recommended equipment and builds, and how they fit into a party.
Origin Characters (Playable Protagonists)
Each Origin character can be selected as your main avatar at character creation. They have unique personal quests, lines, and romance options.
---
Astarion
- Race: High Elf (Wood Elf variant, but mechanically High Elf)
- Class: Rogue (Arcane Trickster subclass by default, can be respecced)
- Background: Charlatan
- Role: Stealth, lockpicking, trap disarmament, burst damage
- Strengths: High Dexterity, excellent skills (Sleight of Hand, Stealth), Cunning Action for bonus action Dash/Disengage/Hide. His bite ability (from his vampire lineage) grants a permanent buff (Happy: +1 to attack rolls and saves) and can heal him.
- Weaknesses: Low Constitution (needs positioning), limited AoE damage, struggles with heavy armor or direct confrontation. His bite can break party trust if used on unwilling allies.
- Playstyle: Sneak attack from shadows, use bow or dual-wield finesse weapons. Arcane Trickster gives minor illusion and mage hand for utility. Open combats by surprise round from stealth.
- Unlock: Chosen as Origin character at start; or met on the Nautiloid (free from pod) or on the beach west of the crash site. Must pass persuasion checks or offer blood to recruit.
- Recommended Equipment: +1 Shortswords (like Ritual Dagger from Volo's eye), bows like The Dead Shot (Act 3), Armor of Shadows (Act 1 from the Necromancy of Thay? Actually, best is Bhaalist Armor or Leather Armor +2). Use items that boost Dex, stealth, or critical hit chance (like Knife of the Undermountain King).
- Build Tip: Pure Thief subclass (respec at Withers) for extra bonus actions, dual hand crossbows with Sharpshooter feat. Or stay Arcane Trickster for utility spells like Shield and Invisibility.
- Team Synergy: Pairs well with a tank (Lae'zel or Karlach) to trigger sneak attacks from melee range, and a caster for crowd control (Gale, Shadowheart).
- Race: Human
- Class: Wizard (default subclass: Evoker)
- Background: Sage
- Role: Ranged magical damage, arcane utility, crowd control
- Strengths: Huge spell variety (rituals, AoE, debuffs), can learn spells from scrolls. His special ability (Netherese Orb) can be used as a giant explosion in story moments, but also requires feeding him magical items every few long rests.
- Weaknesses: Squishy (low HP, poor armor), limited sustained damage once spells are exhausted, requires careful resource management. The orb questline can be annoying if you don't feed him.
- Playstyle: Stay at back, cast powerful area spells like Fireball, Lightning Bolt, Haste. Use Mage Hand and Familiar for scouting. Learn key rituals like Longstrider, Detect Thoughts.
- Unlock: Chosen as Origin; or met at the Roadside Cliffs near the crash site (pulling a lever from a rock). Recruited easily by talking.
- Recommended Equipment: Staff of Arcane Blessing (Act 1 from Emerald Grove), Robe of the Weave (Act 3), Ring of Wizardry, Amulet of the Unworthy. Prioritize Spell Save DC and Spell Attack bonus.
- Build Tip: Respec as Divination Wizard for portent dice that control enemy rolls, or Abjuration for tankier wizard with Arcane Ward. Evoker is fine for new players to avoid friendly fire.
- Team Synergy: Needs a frontline defender (Lae'zel, Shadowheart with heavy armor) and a healer (Shadowheart). Works with any party.
- Race: Tiefling (Zariel variant)
- Class: Barbarian (Berserker subclass by default)
- Background: Outlander
- Role: Melee damage sponge, aggressive DPS, thrower
- Strengths: Very high HP, Rage gives damage resistance and bonus damage. Frenzy (Berserker) allows a bonus action attack each turn. Her engine grants Fire damage on melee hits when she's not in contact with the infernal iron. Excellent for throwing enemies or objects.
- Weaknesses: Low AC (can be mitigated with Unarmored Defense if high Con), limited ranged options, Rage ends if she doesn't take damage or attack. Her engine needs infernal iron upgrades (two in Act 1, Act 2 & 3) to function fully.
- Playstyle: Charge into melee, Rage, then attack recklessly. Use bonus actions for Frenzy strikes or throw enemies. She can also use improvised weapons. Keep her away from water (short circuits her engine but gives a shock AoE? Actually, it's a debuff).
- Unlock: Met north of the Risen Road (where the toll house and paladins of Tyr are). Must kill the paladins or help her. Recruited after dealing with Anders.
- Recommended Equipment: Balduran's Giantslayer (Act 3), Gauntlets of Flaming Fury (Act 1), Helmet of Grit (Act 2, for extra bonus action when below half health), Ring of Regeneration. For Act 1, a simple greatsword or greataxe.
- Build Tip: Pure Berserker is fine. Alternatively, respec as Wildheart (Bear) for even more tankiness or Tiger for cleave attacks. Take Great Weapon Master feat for massive damage.
- Team Synergy: With a healer (Shadowheart) for sustain, and a caster to clear groups she can't reach. Astarion can sneak attack enemies she engages.
- Race: Githyanki
- Class: Fighter (Battle Master subclass by default)
- Background: Soldier
- Role: Frontline melee tank and damage dealer, skill monkey for athletics
- Strengths: Very high AC (with heavy armor), Action Surge for extra actions, Battle Manoeuvres provide control and damage boosts. Githyanki gives Misty Step and Jump spells as racial.
- Weaknesses: Poor out-of-combat utility (no social skills, low Int), can be stubborn in dialogues, limited AoE. Her story can conflict with party approval if you go against Vlaakith.
- Playstyle: Equip heavy armor and a two-hander or sword-and-board. Use Manoeuvres like Trip Attack, Menacing Attack, Riposte. Action Surge then attack twice. Use Misty Step to mobility.
- Unlock: Chosen as Origin; or rescued from the Nautiloid cage (must fight the two imps or use skill checks). Recruited after talking.
- Recommended Equipment: Helm of Balduran (Act 3), Armor of Persistence (Act 3, crafted), The Sacred Star (mace) or Silver Sword of the Astral Plane (Act 3, from the crèche or House of Hope). In Act 1, the Adamantine Longsword from Grymforge.
- Build Tip: Battle Master is excellent. Champion is simpler but weaker. For a more complex build, respec to Eldritch Knight to get Shield spell.
- Team Synergy: Works with any party. She can protect squishy mages, and Astarion can pick off enemies she's knocked prone.
- Race: Half-Elf (High Half-Elf variant)
- Class: Cleric (Trickery Domain by default)
- Background: Acolyte
- Role: Healer, support caster, off-tank, utility
- Strengths: Excellent healing and support spells (Bless, Healing Word, Spiritual Weapon). Can wear heavy armor (with subclass, though Trickery doesn't, but with a feat or respec she can). Has a unique artifact (the Astral Prism) that protects from the Absolute. Her domain spells include Pass Without Trace and Mirror Image.
- Weaknesses: Trickery Domain is considered one of the weaker cleric subclasses (though not terrible), often respec to Life or Light. Low damage output compared to other casters. Her quest involves a morality choice regarding the Nightsong.
- Playstyle: Stay in medium/heavy armor, cast Bless on party for accuracy, use Healing Word to revive downed allies, and use Spiritual Weapon for bonus action damage. Use Turn Undead against undead. In combat, she can also cast Command or Hold Person.
- Unlock: First companion encountered (on the Nautiloid, then on the beach). Recruited automatically after the prologue.
- Recommended Equipment: Volo's Ring of Protection (Act 1, from Volo's eye exchange, but careful), The Skinburster (Act 2, dwarven thrower?), actually best is: Amulet of the Devout (Act 1 from Underdark), Luminous Armor (Act 2), Coruscation Ring (Act 1) for radiating orb build. For healing, staff of healing (Act 1 in the Myconid circle?).
- Build Tip: Respec to Life Cleric for better healing (Disciple of Life). Alternatively, Light Cleric for powerful fire AoE and support (Warding Flare). Keep Trickery for roleplay but consider multiclassing into Rogue for stealth.
- Team Synergy: Essential for early game. Works well with any team, especially with Karlach and Lae'zel who benefit from Bless.
- Race: Human
- Class: Warlock (Fiend Pact by default)
- Background: Folk Hero
- Role: Ranged magical damage (Eldritch Blast), crowd control (Repelling Blast), face character (high Charisma)
- Strengths: Repelling Blast knocks enemies away, Hex increases damage, high Charisma for dialogues. Fiend gives temp HP on kills. His patron grants Fireball at level 5. Can dual wield quarterstaves for extra effects. His rapier is a decent melee option.
- Weaknesses: Limited spell slots (only two per short rest until level 11), relies heavily on cantrips. Repelling Blast can accidentally push enemies off ledges (can be good or bad). His personal quest with Mizora can be frustrating.
- Playstyle: Spam Eldritch Blast with Agonizing Blast and Repelling Blast invocations. Use Hex before combat for extra damage per hit. Use spells like Darkness or Hunger of Hadar for control. On short rests, regain all spell slots.
- Unlock: Met at the Druid Grove (near the gate, fighting goblins). Recruited after helping defend the grove or talking to him inside.
- Recommended Equipment: Potent Robe (Act 2 from saving the tieflings), Melf's First Staff (Act 1), Spellcrux Amulet (Act 2), Daredevil Gloves (Act 1). For early game, any staff that boosts spell attack.
- Build Tip: Pure Warlock is fine. Alternatively, multiclass with Paladin (Oathbreaker or Vengeance) for smites and heavy armor. The classic "Pact of the Blade" allows using Charisma for melee.
- Team Synergy: Works well with Shadowheart (buffs) and Gale (combat). His Repelling Blast can set up surfaces for Karlach's fire or Gale's spells.
- Race: Any (Dragonborn is default but not forced)
- Class: Any (Dragonborn default is Draconic Bloodline Sorcerer? Actually default is a White Dragonborn Sorcerer, but you can change anything)
- Background: The Dark Urge (special background with unique memories and violent impulses)
- Role: Customizable, but with an evil-aligned story path. You can resist the Urge or embrace it.
- Strengths: Unique narrative content (extra cutscenes, a special item from the butler later, and a hidden identity reveal). Can gain allies like Orin's followers. Allows a more savage playthrough.
- Weaknesses: Some players find the compulsion to commit murder off-putting. Can lose companions if you fail checks. The butler (Sceleritas) can force you to kill a companion in Act 2 if you give in.
- Playstyle: Up to you. Usually a martial class fits the flavor (Barbarian, Paladin of Conquest), but any works. Resisting the Urge adds roleplaying depth.
- Unlock: Selected as Origin character at creation. Cannot be recruited as companion; must be main character.
- Recommended Equipment: Depends on class. If you embrace the Urge, the Deathstalker Mantle (Act 1, after first murder) turns you invisible on kills. Also the Sarevok's Anarchic Blade? Actually never mind.
- Build Tip: For resist Urge, go Paladin of Devotion for a redemption arc. For embrace Urge, Oathbreaker Paladin works thematically. Any viable build.
- Team Synergy: Any party works. Dark Urge adds conflict and drama.
- Race: Wood Elf
- Class: Druid (Circle of the Moon by default)
- Background: Outlander
- Role: Shapeshifter tank/utility, summoner, AoE crowd control
- Strengths: Wild Shape into powerful beasts (Bear, Owlbear, Myrmidon later) for tanking. Can cast spells like Moonbeam, Call Lightning, Entangle. Has high Wisdom for perception.
- Weaknesses: Limited healing compared to Cleric, Wild Shape nerfs his AC in human form, some spells require concentration. Joins relatively late (at end of Act 2).
- Playstyle: In combat, either cast area control spells or Wild Shape into a bear to soak damage. Use Healing Word for emergency revives. Use summons (Woodland Being, Elementals) to overwhelm enemies.
- Unlock: Complete the "Rescue the Druid Halsin" quest by clearing the goblin camp. He then joins your camp as a guest. After completing Act 2's Shadow Curse (lift it by completing his quest), he becomes a full companion in Act 3.
- Recommended Equipment: Armor of the Sporekeeper (Act 2, from the Myconid colony? Actually from the House of Hope? No, it's from the Myconid questline after sparing the Sovereign). Ring of Psionic Protection, Amulet of the Harpers. Use staffs that boost spell attacks.
- Build Tip: Circle of the Moon is best for new players. Circle of Spores for a necromancy theme. Circle of Land for more casting but weaker wildshape.
- Team Synergy: Pairs well with summoner builds (Gale can conjure elementals). His tanking allows squishy members to focus on damage.
- Race: Half-Elf (High Half-Elf)
- Class: Druid (Land Circle default?) Actually she is a Fighter/Druid multiclass originally, but in BG3 she is a pure Moon Druid? No, she is a level 5 Druid (Circle of the Land: Coast) when recruited.
- Background: Folk Hero
- Role: Support caster, tank via Wild Shape, experienced veteran
- Strengths: Can summon status, has great dialogue insights (she knows about the Absolute from the original games). Her staff (Sylvanus?) is decent. She can dual-wield scimitars in human form.
- Weaknesses: Late recruitment (Act 3, though she joins as a temporary ally in Act 2). Low starting level when you meet her (if you are high level, she scales poorly). Her subclass is not optimal.
- Playstyle: Similar to Halsin but slightly more caster-oriented. Use her for buffs (Longstrider, Protection from Poison) and Wild Shape for scouting or tanking.
- Unlock: Found in Rivington (Act 3) after the events of the Last Light Inn. If she survived the fight at Moonrise Towers, she will be available.
- Recommended Equipment: The Rhapsody (Act 2, from the D'Sparil? Actually from the basement of the Mason's Guild? No, it's from the House of Hope or maybe the Lichdragon? Better: staff of the woodlands). Armor: Armor of the Sporekeeper (if Halsin doesn't have it).
- Build Tip: Respec to Circle of the Moon to match her iconic Wild Shape. Or keep as Land for more casting.
- Team Synergy: Works well with other druids (Halsin) for a nature-themed team. Or with fighters (Lae'zel) and rogues (Astarion).
- Race: Human
- Class: Ranger (Beast Master Subclass with his giant miniature space hamster Boo)
- Background: Folk Hero (but his background is actually unique "Bhaalspawn"? no, he's just a ranger)
- Role: Melee/ranged hybrid with pet, comic relief
- Strengths: Boo (his hamster) counts as a summon that can attack and provide advantage. Minsc has high Strength and Dexterity, good for dual-wielding or archery. Unique dialogue and events from BG1/BG2.
- Weaknesses: Very late recruitment (Act 3, near the very end). Boo is not very powerful. Minsc is a bit one-dimensional in combat.
- Playstyle: Use ranged attacks (bow or crossbow) while Boo harries enemies. Or charge in with two scimitars. Use Hunter's Mark for extra damage.
- Unlock: Recruited from the Guildhall in the Lower City (Act 3) after completing the quest "The High Harper" (Jaheira's quest). He is locked in a cage; you must kill the doppelgangers.
- Recommended Equipment: The Giantbreaker (a maul from the Githyanki crèche?), or the Dead Shot bow. Give him items that boost initiative and damage.
- Build Tip: Keep as Beast Master for Boo. Alternatively, swap to Gloom Stalker for ambush bonuses.
- Team Synergy: Pairs well with Jaheira (old friends). Any party will benefit from another damage dealer.
- Tav: Default name for custom protagonist. Any race, class, background.
- Role: Any; you define it. You can be whatever the party needs.
- Strengths: Fully customizable. You can min-max stats, choose feats, and equip to fill gaps in your party.
- Weaknesses: No unique storyline unless you choose Dark Urge.
- Recommended Playstyle: Decide early what role you enjoy: tank, healer, damage, control. Build accordingly. Don't spread too thin.
- Availability: From Withers in camp after you find him in the Dank Crypt (Act 1). You can hire up to 3 hirelings.
- Classes: All base classes (no subclasses? Actually they can be respecced). They are generic characters with predefined appearances and names (e.g., Brinna Brightsong, Varanna Sunblossom).
- Role: Fill any role when your main companions are not suitable or for specific builds (e.g., a camp caster).
- Tips: Use them for buffing before going out (like Longstrider, Aid, Heroes' Feast). They don't have companion quests but are fully functional.
---
Gale
---
Karlach
---
Lae'zel
---
Shadowheart
---
Wyll
---
The Dark Urge (Custom Origin)
Recruitable Companions (Non-Origin)
Halsin
---
Jaheira
---
Minsc
Custom & Tav (Player Character)
Hirelings
Summary Table of Character Roles
| Character | Primary Role | Secondary Role | Best Party Position | Difficulty Level |
|---|---|---|---|---|
| Astarion | Damage (single target) | Skills (lockpick, stealth) | Flanking | Easy |
| Gale | Damage (AoE) | Control, Utility | Backline | Medium |
| Karlach | Damage (melee) | Tank | Frontline | Easy |
| Lae'zel | Tank/Damage | Mobility | Frontline | Easy |
| Shadowheart | Support (heal/buff) | Control (Trickery) | Mid-line | Easy |
| Wyll | Ranged damage | Control (push) | Backline | Medium |
| Dark Urge | Any (custom) | Story impact | Any | Hard (roleplay) |
| Halsin | Tank (shapeshift) | Summon | Frontline | Medium |
| Jaheira | Support/Damage | Tank (shift) | Mid-line | Medium |
| Minsc | Damage | Pet summon | Any | Easy |
Team Synergy Tips
- All-around balanced party: Frontline (Lae'zel/Karlach), Support (Shadowheart), Ranged damage (Gale/Astarion/Wyll), Utility (a second caster or rogue). Good for first playthrough.
- Stealth team: Astarion (thief), any cleric with Pass Without Trace (Trickery Shadowheart or a Druid), a ranged fighter (Wyll with Eldritch Blast?), and a backup. Focus on surprising enemies.
- Summoner party: Gale (conjuration), Halsin (Moon), Shadowheart (maybe with Spiritual Weapon), and a tank. Overwhelm with summons.
- High damage nova party: Lae'zel (Battle Master action surge), Karlach (Frenzy), Astarion (sneak attack), and a caster to Haste them. Burst down bosses.
- Roleplay heavy: Use the origin characters you love most. Every combination is viable on Normal difficulty.
Always consider long rest frequency: Wyll and Warlocks regain spells on short rest, while Wizards and Clerics need long rests more. Balance your party's resource reliance.
Conclusion
Baldur's Gate 3 offers incredible flexibility in character choice and party composition. Understanding each companion's strengths and weaknesses will allow you to build a team that complements your own playstyle. Experiment with respeccing at Withers (costs 100 gold) to try new builds. The game rewards creativity, so don't be afraid to break the mold.
Cheats & Secrets
Overview
Baldur's Gate 3 does not include traditional cheat codes or unlock codes that you type into a menu. However, it does have a developer console that allows for extensive cheating on PC, as well as numerous secrets, Easter eggs, and hidden content intentionally placed by Larian Studios. This guide covers how to enable the console, all known console commands, and a comprehensive list of hidden features, Easter eggs, and exploitable (but developer-intended) secrets. Note: Using the console may disable achievements; use a mod like Script Extender to re-enable them if desired.
Developer Console Cheats (PC Only)
Enabling the Developer Console
1. Open the game's launch options in Steam/GOG/Epic: Right-click the game in your library > Properties > General > Launch Options.
2. Add the following: `--console` (no quotes).
3. Launch the game. In-game, press the tilde key (`~`) to open the console. On some keyboards, it may be the key above Tab or beside 1.
Essential Console Commands
Commands are case-sensitive; type them exactly as shown.
| Command | Effect | Example |
|---|---|---|
| `Osis.TemplateAddToPlayer(\"[itemUUID]\", [quantity])` | Adds an item to your inventory. UUIDs are long strings (see below). | `Osis.TemplateAddToPlayer(\"hag_eye\", 1)` |
| `Osis.GiveExperience([amount])` | Grants XP to the entire party. | `Osis.GiveExperience(5000)` |
| `Osis.SetStrength([value])` | Sets the character's Strength score (1-30). | `Osis.SetStrength(20)` |
| `Osis.SetDexterity([value])` | Sets Dexterity. | `Osis.SetDexterity(20)` |
| `Osis.SetConstitution([value])` | Sets Constitution. | `Osis.SetConstitution(20)` |
| `Osis.SetIntelligence([value])` | Sets Intelligence. | `Osis.SetIntelligence(20)` |
| `Osis.SetWisdom([value])` | Sets Wisdom. | `Osis.SetWisdom(20)` |
| `Osis.SetCharisma([value])` | Sets Charisma. | `Osis.SetCharisma(20)` |
| `Osis.AddGold([amount])` | Adds gold to your character. | `Osis.AddGold(10000)` |
| `Osis.AddCampSupplies([amount])` | Adds camp supplies. | `Osis.AddCampSupplies(80)` |
| `Osis.AddAllSpells()` | Adds every spell to your spellbook (can cause bugs). | – |
| `Osis.RemoveAllSpells()` | Removes all spells. | – |
| `Osis.LongRest()` | Triggers a long rest immediately. | – |
| `Osis.ShortRest()` | Triggers a short rest. | – |
| `Osis.KillSelectedTarget()` | Kills the currently selected unit (must be targeting). | – |
| `Osis.ResurrectPartyMembers()` | Revives all dead party members. | – |
| `Osis.UnlockAllTeleportPoints()` | Reveals all waypoints on the map. | – |
| `Osis.EnableAchievements()` | Re-enables achievements if they were disabled by console usage. | – |
| `Osis.SetLevel([level])` | Sets character level (1-12). | `Osis.SetLevel(12)` |
| `Osis.GiveProficiency([proficiencyName])` | Grants a proficiency (e.g., \"Armour: Light Armour\"). | – |
Useful Item UUIDs (partial list)
- Legendary weapons: `\"SwordOfTheGods\"` (Silver Sword of the Astral Plane), `\"Nyrulna\"` (trident), `\"CrossbowOfTheGarlicBreath\"` (Harold? Use `\"Rare\_Crossbow\_Sharpshooter\"`). Better to search online for updated UUID lists.
- Key quest items: `\"HagEye\"`, `\"NecromancyOfThay\"`, `\"BloodOfLathander\"`.
- Gold: `Osis.AddGold(99999)` works faster than item.
- Using any command may disable Steam achievements permanently for that save. Use `Osis.EnableAchievements()` to re-enable, but it doesn't always work. Better to back up saves.
- Adding items can break quest triggers; save before using.
- Console commands are not available on consoles (PS5, Xbox) or Mac (unless you launch with the same parameter, but Mac console is limited).
- Location: In the Blighted Village, inside the apothecary's cellar. Solve the mural puzzle to open the secret door behind the bookcase; the book is on an altar.
- Use: Read the book to gain the ability to speak with the dead without a spell slot. Later, you can unlock its full power by finding three rare necromancy tomes scattered across Acts 2 and 3.
- Location: Rosymorn Monastery in Act 1. Complete the puzzle in the stained-glass room to get the ceremonial weapon, then insert it into the statue in the basement. Take the mace – but beware the trap! You can disarm it by destroying four crystal pillars or by using a combination lock.
- Benefit: +3 mace that deals radiant damage and blinds fiends/undead on hit.
- How to get: Defeat the owlbear mother in Act 1 (or intimidate her). Later, the cub appears in the goblin camp. Kill or persuade the goblins to let you take it. It will appear at your camp after a few long rests.
- Secret: If you also get the scratch dog, they will interact. The cub can eventually be tamed as a pet and even fight in combat at a later stage.
- Location: Under the Grymforge in Act 1. Solve the puzzle by finding two molds and then fighting the lava elemental boss. Activate the forge to craft legendary armor or weapons.
- Tip: Use the hammer in the fight to instantly kill the boss. The resulting items are powerful but use a single-use mold.
- Location: Philgrave's Mansion. You can find the Necromancer's lair behind a painting. Loot the necromancy notes and the unique staff.
- Location: The Circus of the Last Days. Play the Djinni's game and win the jackpot. He will cheat and teleport you to a jungle. There, fight the boss and loot the Djinni Ring, which gives you a free cast of Wish? No, but it's a powerful ring that gives you one free spell every short rest.
- Location: Underdark, near the arcane tower. You can pick Sussur Blooms, which act as anti-magic grenades. Very useful against magic-heavy enemies.
- In Act 3, near the font of the House of Hope, you can find a note referencing a 'FBCK' (Federal Bureau of Control) – a nod to Remedy's Control game.
- Minsc, when recruited, carries a miniature giant space hamster named Boo. If you use Speak with Animals on Boo, he says a phrase referencing the original Baldur's Gate games. Boo also has a hidden dialogue if you try to use him as a weapon (no effect).
- Several items and characters reference Larian's previous game: the 'Red Prince' armor, the 'Pet Pal' ability (here as Speak with Animals), and a painting of the 'Godwoken' in the wizard's tower.
- In the House of Healing, you can find a skeleton lying in a bathtub. If you examine it, the narrator says \"Just a skeleton taking a bath. Nothing to see here.\"
- In Act 2, near the Last Light Inn, there is a cow that speaks if you have Speak with Animals. It complains about its life, and if you talk to it again later, it says something even darker (related to the curse).
- In Act 3, in the Lower City, you can find a house that looks like 12 Grimmauld Place. The owner is a 'Mrs. Black' (reference to Sirius Black).
- In the Underdark, near the arcane tower, there is a mossy statue that looks exactly like a Creeper from Minecraft. It does not explode; it's just a stone statue.
- If you play as a Bard and use Performance, you can attract a crowd. One of the NPCs will occasionally say \"I can't believe it's not butter!\" – a reference to the old meme.
- While the game has no bag of holding item, you can use the Traveller's Chest in camp to store infinite items. Alternatively, you can throw items into a container and carry that container. This is not a bug but an intended mechanic.
- Outside combat, you can enter turn-based mode (Shift+Space) to freeze time. This lets you walk through hostile areas without triggering traps or ambushes. Use it to steal items right in front of NPCs if you’re quick enough.
- The Dream Visitor character is not who they seem. If you refuse their dream gifts multiple times, you unlock a special dialogue option that reveals their true nature – a netherese creation. This leads to a unique ending variant.
- In Act 3, rescuing the prisoners from the Iron Throne is a timed mission. If you use Dimension Door or teleportation, you can save everyone easily. The devs intended you to plan, not brute-force.
- If you give Shadowheart a night orchid (found in Act 2), she has a unique dialogue line. Not a major secret but a nice touch.
- Playing as a Gloom Stalker Ranger / Assassin Rogue / Fighter can one-shot most bosses on turn 1. This is not a secret but a well-known build that the developers balanced around.
- If you side with the emperor fully, you may miss the Githyanki rebellion. To unlock the secret Orpheus ending, you need to refuse the emperor's final request and free Orpheus from the prism using a special weapon (the Orphic Hammer).
- In Act 3, you can break into Raphael's home (House of Hope). There, you can steal the Orphic Hammer and fight a secret boss: Raphael in his devil form. Winning unlocks a special dialogue with Raphael and the ability to free Orpheus.
- In Act 3, under the Wyrm's Rock prison, there is a secret dragon boss named Ansur. He is tied to the Emperor's backstory. To find him, solve a puzzle involving a hidden lever and a sacrificial sword. Defeating him gives you the legendary item 'The Dragon's Wrath' (a helm).
- You can recruit Minsc in Act 3 if you help the Guild against the Stone Lord. After the battle, knock Minsc unconscious (non-lethal damage) and then recruit him. He is a powerful Ranger with his unique hamster.
- Choosing the Dark Urge origin unlocks unique items and cutscenes, including a special cloak from the butler, the ability to summon a necromancer's servant, and a hidden redemption arc or full evil ending.
Important Notes on Console Cheats
Secrets & Hidden Features
1. The Necromancy of Thay
2. The Blood of Lathander
3. Owlbear Cub
4. The Adamantine Forge
5. The Mysterious Carrion (Act 3)
6. The Djinni's Ring (Act 3)
7. The Sussur Tree & Sussur Blooms
Easter Eggs
1. The 'Control' Easter Egg
2. The 'Boo' Easter Egg
3. The 'Divinity Original Sin 2' References
4. The 'Skeletons' Joke
5. The 'Cows' Easter Egg
6. The 'Harry Potter' Reference
7. The 'Minecraft' Creeper
8. The 'Bards' Joke
Exploit-Safe Secrets (Developer-Intended)
1. Bag of Holding Trick
2. The 'Turn-Based Mode' Exploit
3. The 'Dream Visitor' Secret
4. The 'Iron Throne' Prison
5. The 'Shadowheart's Night Orchid' Secret
6. The 'Stealth Archer' Overpowered Build
Legitimate Hidden Content
1. The 'Orpheus' Quest
2. The 'House of Hope' – Hidden Raphael Battle
3. The 'Ansur' the Dragon
4. The 'Minsc and Boo' Companion
5. The 'Dark Urge' Exclusive Content
Conclusion
Baldur's Gate 3 is filled with secrets, Easter eggs, and hidden content that reward exploration and creativity. While official cheat codes are absent, the developer console provides extensive cheating capabilities on PC. Enjoy discovering all the hidden treasures and jokes Larian Studios has embedded in the game!