Battlefield 4
## Battlefield 4: Game Introduction ### Genre, Developer & Publisher **Genre:** First-person shooter (FPS) with a strong emphasis on large-scale combined arms warfare. **Developer:** DICE (EA Digital Illusions CE) **Publisher:** Electronic Arts ### Release Timeline - **Initial Release:** October 2...
Download & Installation
Battlefield 4: Complete Download & Installation Guide
Battlefield 4 is a first-person shooter developed by DICE and published by Electronic Arts. It is available on PC, PlayStation 3, PlayStation 4, PlayStation 5 (via backward compatibility), Xbox 360, Xbox One, and Xbox Series X|S. There is no native mobile or Nintendo Switch version. This guide covers legitimate download sources and step-by-step installation for all platforms.
---
1. Official Download Sources
| Platform | Store / Service | Notes |
|---|---|---|
| PC | EA app (formerly Origin) | Primary store; supports all DLC and multiplayer. |
| PC | Steam | Available since June 2020; requires EA account. |
| PC | Epic Games Store | Not officially available on Epic. |
| PlayStation 3 | PlayStation Store (PS3) | Digital download only; PS3 store still accessible. |
| PlayStation 4 | PlayStation Store | Plays on PS5 via backward compatibility. |
| PlayStation 5 | PlayStation Store | PS4 version playable; no native PS5 version. |
| Xbox 360 | Xbox Games Store | Digital download; also via disc. |
| Xbox One | Microsoft Store (Xbox One) | Digital and disc; backward compatible on Xbox Series X |
| **Xbox Series X\ | S** | Microsoft Store |
---
2. System Requirements (PC)
#### Minimum Requirements
- OS: Windows Vista SP2 32-bit (with KB971512 update)
- CPU: AMD Athlon X2 2.8 GHz or Intel Core 2 Duo 2.4 GHz
- RAM: 4 GB
- GPU: AMD Radeon HD 3870 or NVIDIA GeForce 8800 GT with 512 MB VRAM
- DirectX: 10
- Storage: 30 GB free space
- Network: Broadband connection
- Sound: DirectX-compatible
- OS: Windows 8 64-bit (Windows 10/11 recommended for best compatibility)
- CPU: AMD FX-8350 or Intel Core i5-3570K
- RAM: 8 GB
- GPU: AMD Radeon HD 7870 or NVIDIA GeForce GTX 660 with 3 GB VRAM
- DirectX: 11
- Storage: 30 GB free space (SSD recommended)
- Network: Broadband connection
- PC (vanilla): ~30 GB for base game. Premium Edition with all expansions (China Rising, Second Assault, Naval Strike, Dragon's Teeth, Final Stand, plus community maps) requires ~70 GB after updates.
- PlayStation 3: ~11 GB (base) — game installs to HDD.
- PlayStation 4 / PS5: ~40-50 GB (with patches).
- Xbox 360: ~7.5 GB (installs from disc or download).
- Xbox One / Series X|S: ~45-50 GB (includes all updates).
- PC (EA app or Steam): EA account (free) required. Steam version also needs EA account linked.
- PlayStation: PSN account (free for multiplayer, PS Plus required for online play).
- Xbox: Xbox Live account (Xbox Game Pass Core/Ultimate required for online multiplayer on Xbox One/Series).
- PS3: Purchase from PlayStation Store on console or via web. Download/install directly to system HDD.
- Xbox 360: Purchase from Xbox Games Store or insert disc. Disc-based games require full installation to HDD (optional for Xbox 360). Follow on-screen prompts.
- Note: Online multiplayer services for PS3 and Xbox 360 still function but player counts are low.
#### Recommended Requirements
---
3. Storage Space Details
Note: Additional free space (10-20%) is needed during installation for temporary files.
---
4. Account Requirements
---
5. Step-by-Step Installation per Platform
#### 5.1 PC via EA App (Origin legacy)
1. Create or sign in to an EA account at [ea.com](https://www.ea.com).
2. Download and install the EA app from the official site.
3. Launch EA app, log in.
4. Go to Store → search "Battlefield 4".
5. Select your edition (Standard or Premium). Purchase if not owned.
6. Click Download or Install. The app will place the game in your library.
7. Choose installation directory (default: `C:\Program Files\EA Games\`).
8. Wait for download (~30 GB). Ensure uninterrupted internet.
9. After download, the game will install and apply any necessary patches automatically.
10. Launch from EA app library.
#### 5.2 PC via Steam
1. Ensure you have Steam installed and an account.
2. Open Steam → Store → search "Battlefield 4".
3. Add to cart, purchase.
4. In your Library, select Battlefield 4 → click Install.
5. Choose install location (SSD recommended).
6. Steam will download via its content servers.
7. Upon first launch, Steam will prompt you to link your EA account. Follow the on-screen browser window to sign in or create an EA account.
8. After linking, the game launches (with EA app overlay running behind the scenes).
#### 5.3 PlayStation 4 / PS5 (digital)
1. From PS4/PS5 home screen, go to PlayStation Store.
2. Search “Battlefield 4”.
3. Select your edition (Premium recommended for best value) → Download.
4. The console will download the game in the background. Downloads can be viewed from Notifications.
5. Once installed (check Library → Purchased), launch the game.
6. On first launch, the game will prompt for installation of multiplayer and single-player files (optional).
7. Sign in with your PSN account; link EA account if prompted (for online features).
#### 5.4 Xbox One / Xbox Series X|S (digital)
1. Press Xbox button → Microsoft Store.
2. Search “Battlefield 4”.
3. Purchase or select Install if already owned.
4. The game will download to your internal or external drive.
5. After installation, launch from My games & apps.
6. Sign in to Xbox Live; game will prompt for EA account linking.
7. Install updates if prompted (usually automatic).
#### 5.5 Older Consoles (PS3 / Xbox 360)
---
6. First Launch Setup
After installation, the first launch typically involves:
1. EA Account Linking (if not done during installation).
2. Language Selection (game supports English, French, German, Italian, Spanish, Japanese, etc.).
3. Display Calibration — adjust brightness/screen boundaries.
4. Graphics/Performance Settings (PC only): Set resolution, quality presets, VSync, field of view, etc. Recommended to run the built-in benchmark to tweak settings.
5. Controller Configuration (console/PC): Sensitivity, button layout.
6. Update Prompt — ensure you have the latest patch (typically automatic on all platforms).
7. Multiplayer Tutorial — optional, but recommended for new players.
On PC, you may also see a PunkBuster installation prompt (anti-cheat). Allow it to install.
---
7. Common Installation Errors and Fixes
| Error / Issue | Platform | Cause | Fix |
|---|---|---|---|
| Error: "The installation is incomplete" | PC (EA app) | Corrupted download or insufficient disk space | Reinstall EA app, clear cache (restart app and delete `ProgramData\Electronic Arts\EA Desktop\Cache`), or run as administrator. |
| Error: "DirectX runtime error" | PC | Missing Visual C++ or DirectX redistributables | Install latest DirectX from Microsoft and Visual C++ 2015-2022 Redistributable. Repair EA app. |
| Error: "Origin is already running" | PC (Steam/EA app conflict) | Both EA app and Origin installed | Close both; uninstall Origin if using EA app. For Steam users, allow EA app overlay. |
| Error: "PunkBuster has encountered a problem" | PC | Outdated PunkBuster | Download and run `pbsvc.exe` from Even Balance website to reinstall PunkBuster services. |
| Error: "Failed to connect to EA servers" | All | Firewall/antivirus blocking or server down | Add `bf4.exe` and EA app to firewall exceptions. Check server status on EA Help. |
| Error: "The game failed to load. The license has expired" | Xbox One/Series | License sync issue | Go to Settings → Account → Licenses → Refresh. Perform a power cycle. |
| Error: "CE-30005-8" | PS4 | Corrupted installation | Delete game and reinstall. Check for system software update. Rebuild database in Safe Mode. |
| Error: "EULA not accepted" | PC | Pop-up behind window | Press Alt+Tab to accept license agreement. |
| Game crashes on launch | PC | Outdated graphics drivers or incompatible mods | Update GPU drivers (NVIDIA/AMD). Disable any overlays (Discord, NVIDIA GeForce Experience). Verify game files via EA app or Steam. |
- Run as Administrator (PC): Right-click shortcut → Properties → Compatibility → Run this program as administrator.
- Disable Antivirus Temporarily during download/installation.
- Use Wired Connection for stable download.
- Check Game Version: In the main menu, look at the lower-left corner for patch version (e.g., 1.0.0.x). Latest patch as of 2025 is usually included.
- Test Single-Player: Launch the campaign mission "Baku". If it loads without issues, installation is successful.
- Test Multiplayer: Quick join any server via Server Browser. Ensure you can connect and see other players.
- Verify File Integrity (PC):
- Check Storage: Ensure free space remains for future updates (at least 20 GB).
- Update GPU Drivers for best performance.
- Premium Edition includes all DLC maps, weapons, and vehicles. If you already own standard, consider Premium membership (in-game purchase) for access to all expansions.
- Cross-play is not supported. PC and console players are separated.
- Cloud Saves are automatic on Steam and EA app for PC, and PSN/Xbox for consoles.
- Mods are not officially supported. Third-party tools like BF4DB are for server management only.
---
8. Post-Installation Verification
After installing, verify the game is ready to play:
- EA App: Library → Battlefield 4 → Manage → Repair.
- Steam: Library → right-click Battlefield 4 → Properties → Local Files → Verify integrity of game files.
---
9. Additional Tips
---
Summary Table
| Platform | Storefront | Account Needed | Storage | Multiplayer Required Subscription |
|---|---|---|---|---|
| PC (EA app) | EA app | EA account | ~70 GB | None |
| PC (Steam) | Steam | EA + Steam | ~70 GB | None |
| PS4/PS5 | PS Store | PSN | ~50 GB | PS Plus (for online) |
| Xbox One/Series | MS Store | Xbox Live | ~50 GB | Game Pass Core/Ultimate |
| PS3 | PS Store (PS3) | PSN | ~11 GB | None (online free) |
| Xbox 360 | Xbox Games Store | Xbox Live | ~7.5 GB | Xbox Live Gold (now Core) |
Enjoy Battlefield 4 – still one of the most immersive military shooters with destructible environments and large-scale battles!
Game Introduction
Battlefield 4: Game Introduction
Genre, Developer & Publisher
Genre: First-person shooter (FPS) with a strong emphasis on large-scale combined arms warfare.
Developer: DICE (EA Digital Illusions CE)
Publisher: Electronic Arts
Release Timeline
- Initial Release: October 29, 2013 (North America), November 1, 2013 (Europe)
- Post-launch updates: Intensive patches and community-driven improvements continued through 2014–2015, culminating in the "Community Test Environment" and final updates.
- PC (Windows)
- PlayStation 4 (native) and PlayStation 5 (via backward compatibility with enhanced performance)
- Xbox One, Xbox Series X|S (backward compatible)
- PlayStation 3 and Xbox 360 (last-gen versions with smaller maps and reduced player counts)
- Baku, Azerbaijan (oil rig and city)
- Shanghai, China (urban warfare, skyscrapers, and the iconic Shanghai Tower)
- Paracel Islands (tropical island naval battles)
- Sichuan, China (mountainous terrain and dam)
- Kunlong, China (Hainan Island naval base)
- Sergeant Daniel Recker (playable protagonist) – Tombstone squad leader, a stoic and tactical Marine.
- Staff Sergeant William Dunn – Team medic, former Army Ranger.
- Irish (Sergeant Clayton Pakowski) – Demolitions expert, provides humor and heavy firepower.
- Laszlo W. Kovic – CIA operative, later a main villain alongside Admiral Chang.
- Admiral Chang – Antagonist, a Chinese naval officer who orchestrates the coup.
- 64-player multiplayer (PC/current-gen) with huge maps.
- Levolution – dynamic map changes that force tactics to adapt mid-match.
- Combined arms warfare – driving tanks, flying jets, piloting attack helicopters, or commanding naval support.
- Realistic weapon mechanics with extensive customization through 100+ weapons and attachments.
- FPS veterans who crave large-scale, team-based combat.
- Players who enjoy vehicle warfare (tanks, aircraft, naval vessels).
- Tactical squad players (classes: Assault, Engineer, Support, Recon).
- Fans of military simulation and modern combat who appreciate destructible environments.
- Competitive players (Rush, Conquest, Obliteration modes) and those who enjoy cooperative PvE (though limited).
- Single-player Campaign – 7 missions with a linear but cinematic narrative.
- Multiplayer Modes:
- Co-op – None (campaign is single-player only).
- Offline: Single-player campaign only (fully playable without internet).
- Online: All multiplayer modes require an internet connection. Battlelog (web-based server browser and stat tracking) is mandatory for PC; consoles use in-game menu. Servers are still active as of 2025, with community-run servers on all platforms.
- Levolution (dynamic destruction that reshapes entire maps) – a signature feature that distinguishes it from other shooters.
- 64-player scale on console (Xbox One/PS4) – a feat at the time, now standard.
- Extensive vehicle variety – from jets and attack helis to amphibious hovercraft, naval transports, and even the AC-130 gunship.
- Battlelog integration – the web-based platform for server browsing, loadout management, and stat tracking was innovative, though controversial.
- Enduring community – thanks to continued server support and the "Community Test Environment" (CTE) that fixed many launch issues, Battlefield 4 remains one of the most-played entries in the series.
Platforms
Battlefield 4 is available on a wide range of platforms:
Story Overview
In the single-player campaign, the narrative follows Sergeant Daniel Recker, a U.S. Marine from the elite Tombstone squad, during a fictional war between the United States, Russia, and China. The conflict escalates after a coup in the People's Liberation Army (PLA) led by Admiral Chang, who seizes control of the Chinese navy and launches a devastating attack on the U.S. fleet in the South China Sea. Recker and his team must retrieve intelligence, rescue allies, and prevent a global catastrophe—all while grappling with the moral complexities of modern warfare. The story is told through cinematic set-pieces and dynamic firefights.
Setting
The game takes place across a modern-day theater of war in 2020, focusing on the fictional conflict in the South China Sea. Key locations include:
Each locale is designed with Levolution mechanics—environmental changes triggered by player actions (e.g., collapsing a skyscraper, flooding a dam) that dynamically alter the battlefield.
Main Characters
Core Appeal
Battlefield 4’s core appeal lies in its massive, player-driven battles that combine infantry, vehicles, and environmental destruction. Key pillars:
Target Audience
Game Modes
- Conquest – Classic large-scale capture-the-flag variant.
- Rush – Attacking/defending MCOM stations.
- Obliteration – Bomb transport and planting at enemy objectives.
- Domination – Close-quarters infantry combat.
- Defuse – No-respawn tactical mode.
- Team Deathmatch – Standard team elimination.
- Air Superiority – Jet-only dogfights.
- Carrier Assault (DLC) – Naval-focused capture and destroy.
- Chain Link (DLC) – Linking capture points.
Online / Offline Support
DLC / Expansion Overview (if relevant)
Battlefield 4 received five major expansion packs (plus free updates):
1. China Rising (December 2013) – Adds four maps set in mainland China, new vehicles (e.g., the AC-130 gunship), and new weapons.
2. Second Assault (February 2014) – Remastered fan-favorite maps from Battlefield 3 (Operation Metro, Caspian Border, Gulf of Oman, Firestorm) with Levolution.
3. Naval Strike (March 2014) – Four naval-focused maps, introduces the hovercraft and the Carrier Assault mode.
4. Dragon’s Teeth (July 2014) – Urban-centric maps in Shanghai, adds the RAWR (Remote Attack Weapons Robot) and new Rifles.
5. Final Stand (November 2014) – Futuristic maps with prototype vehicles (hover tank, railgun) and gadgets, set in Siberia.
Additionally, Battlefield 4: Premium provides all five expansions plus cosmetic packs and early access.
What Makes This Game Unique
Getting Started
Getting Started with Battlefield 4
First Hour Walkthrough: From Menu to Battlefield
1. Launch the game – After installation, you’ll see the Battlefield 4 main menu. The first screen asks you to sign in to your EA/Origin account (PC) or PSN/Xbox Live (console). Do so.
2. No character creation – Battlefield 4 does not have a character creator. You play as a generic soldier for one of two factions: U.S. Marines (blue) or Russian Army (orange). Your appearance is fixed per faction. Your identity is your soldier name (tied to your platform account) and your class loadout.
3. Training: “A Galaxy Untamed” – The first pop-up is an offer to play the single-player campaign. Do not skip it if you’re brand new to Battlefield. The campaign acts as a tutorial for basic movement, shooting, vehicles, and gadgets. The first mission teaches you to sprint, vault, aim, shoot, revive, and use cover. Completing the prologue (about 15–20 minutes) unlocks the “Assault Class Basic” assignment, giving you early weapon attachments.
4. After the prologue – Return to the main menu. You can now access Multiplayer. Select “Multiplayer” → “Server Browser” rather than Quick Match. Filter by game mode “Conquest Large” and map “Paracel Storm” or “Siege of Shanghai” (these are beginner-friendly). Join a server with 32–64 players.
5. First match – be a medic – When you spawn, select the Assault class (default). Stick with your squad, stay behind a wall, and revive teammates with defibrillators. Do not charge into enemy fire. Your goals: stay alive, revive, heal, and capture flags (objectives marked with A, B, C, etc.). Don’t worry about kills.
6. Unlock your first gadget – After a few minutes, you’ll earn enough experience to reach level 2. This unlocks your first weapon attachment (e.g., a sight). Equip it in the Customization menu (Soldier → Loadout).
Controls on All Platforms
| Action | PC (Keyboard & Mouse) | PlayStation (PS3/PS4/PS5) | Xbox (360/One/Series X | S) |
|---|---|---|---|---|
| Move | W/A/S/D | Left stick | Left stick | |
| Look | Mouse | Right stick | Right stick | |
| Sprint | Shift (hold) | L3 (press left stick) | LS (press left stick) | |
| Jump | Space | X | A | |
| Crouch | Ctrl (hold to toggle) | Circle (press to toggle) | B (press to toggle) | |
| Prone | Z (hold to toggle) | Circle (hold) | B (hold) | |
| Fire | Left mouse button | R2 | RT | |
| Aim | Right mouse button | L2 | LT | |
| Reload | R | Square | X | |
| Interact | E | Triangle | Y | |
| Gadget 1 | 3 | L1 | LB | |
| Gadget 2 | 4 | R1 | RB | |
| Map | M | Touchpad (PS4)/Select (PS3) | Back/View button | |
| Scoreboard | Tab | Options | Menu | |
| Voice chat | V (push-to-talk) | N/A (uses controller mic) | N/A (uses controller mic) | |
| Vehicle enter/exit | E | Triangle | Y | |
| Spot enemy | Q | R1 (double-tap) | RB (double-tap) |
UI Overview
- HUD Elements (center screen): Crosshair (reticle), health bar (bottom left), ammo counter (bottom right), minimap (bottom left corner).
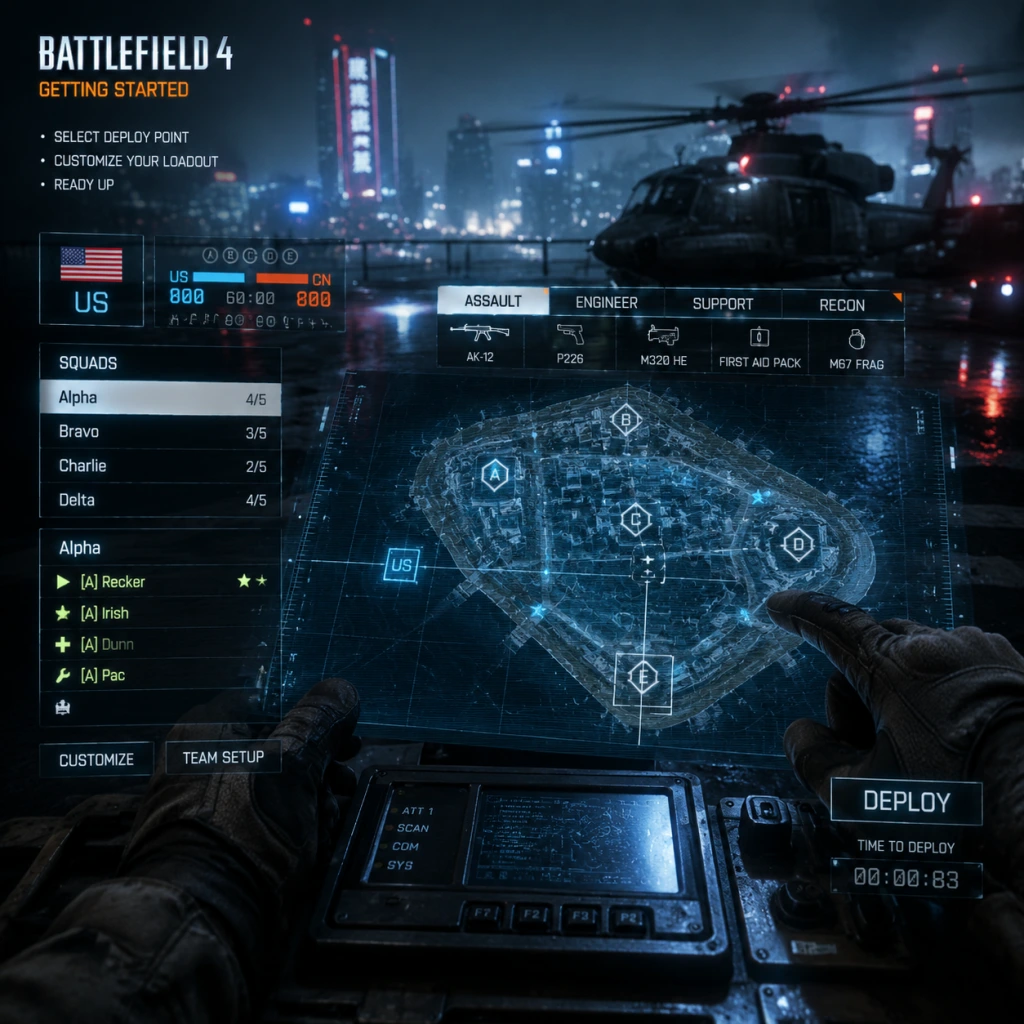
- Minimap: Shows nearby teammates, spotted enemies (red triangles), objectives (letters A,B,C,D,E), and vehicle icons. Zoom with N (PC) or D-pad down (console).
- Objective markers: Floating letters above capture points. Colored blue (friendly), orange (enemy), flashing (contested).
- Squad list: Top left – shows your squadmates’ health and class icons. When they die, you can revive if you’re Assault.
- Vehicle HUD: When driving a tank, heli, or jet, extra gauges appear (ammo, speed, altitude).
- Kill feed: Top right – shows kills, revives, and vehicle destructions.
- Notifications: Center-top – “Objective Lost/Gained”, “Enemy Spotted”, “Friendly Fire” (if you hit a teammate).
- Deploy screen: After death, you see a full-screen map. Use left stick/ arrow keys to select squad member or a vehicle to spawn on (press X/A/Enter).
- Complete the single-player prologue and first two missions (unlocks the “Assault Class Basic” assignment).
- Play a few rounds of Conquest Large on Paracel Storm or Siege of Shanghai as Assault.
- Customize your first weapon: unlock the Coyote or Red Dot sight (requires 10 kills with the default M16A4 or AK-12). Use it in the loadout menu.
- Join a squad (auto-join is fine) and stick with them.
- Spot every enemy you see.
- Sniper class – rookie players often camp far away and contribute little. Sniper rifles have awkward bullet drop and slow fire rate. Stick to Assault or Engineer.
- Going solo – Battlefield rewards teamplay. Running alone gets you killed fast.
- Taking vehicles without repairs – If you hop in a tank or helicopter, you become a priority target. Learn vehicle controls in the Test Range first (accessible from main menu → Multiplayer → Test Range).
- Spamming the deploy button – Wait a few seconds to see which squad member is safest to spawn on. Spawning on a teammate under fire = instant death.
- Experience (XP) – Levels 1–10: Focus on objective captures, revives, and assists. Kills give only 100 XP, but a capture gives 250–500 XP. Revives give 100 XP each. You unlock new weapons and gadgets every 2–3 levels.
- Assignments – From the menu, check Assignments. Early ones like “Basic Training” reward weapon attachments. Complete them.
- Battlepacks – Earned randomly after matches. Open them to get weapon battlepacks, XP boosts, camos, and knife skins. Use XP boosts (available in Battlepack items) to accelerate early leveling.
- Unlock order – For Assault, first unlock the defibrillator (already owned) then the M320 HE launcher (level 3). For Engineer, unlock the RPG-7 (level 2) or SRAW (level 4) for anti-vehicle.
- [ ] Complete single-player prologue (“Baku” mission).
- [ ] Play one multiplayer match on Conquest Large (Paracel Storm).
- [ ] Complete the “Basic Training” assignment (earned after prologue).
- [ ] Unlock a red dot sight (10 kills with default AR).
- [ ] Equip defibrillators on Assault class.
- [ ] Spot at least 10 enemies in one match.
- [ ] Capture at least 3 objectives in one match.
- [ ] Revive 5 teammates in one match.
- [ ] Learn to use the minimap: zoom out/in using N (PC) or D-pad down (console).
- [ ] Visit the Test Range (main menu → Multiplayer → Test Range) to try vehicles and weapons for 10 minutes.
- [ ] Adjust sensitivity in Settings: Default is fine, but reduce stick deadzone on console.
- [ ] Turn on “Uniform Soldier Aiming” (Settings → Gameplay) for consistent aim across weapons.
Essential Early Objectives
1. Learn to spot – Press Q (PC) or R1/RB double-tap (console) to mark enemies. This helps your team and gives you small XP. Always spot before shooting.
2. Capture flags – Stand near an objective (indicated by a flag) until it turns blue (your team). Capturing gives hundreds of XP and helps win the match.
3. Revive teammates – If you play Assault, use defibrillators (gadget 2) on downed teammates. Reviving is worth 100 XP per revive and keeps your team alive.
4. Use cover – Battlefield 4 has destruction; walls can collapse. Never run across open fields. Move from cover to cover.
5. Call in vehicle drops – When you have enough squad score, your squad leader can request a vehicle drop (PC: press B on objective, console: D-pad up on objective). Request it for your squad.
What to Do First and What to Avoid
Do first:
Avoid:
Early Resource Priorities
Common Beginner Mistakes
1. Not spotting – Enemies become invisible if you don’t spot them. Always press spot.
2. Standing still – In Battlefield, campers die. Keep moving, even while shooting.
3. Using the wrong class – New players often pick Recon (sniper). You contribute almost nothing. Assault and Support are better.
4. Ignoring the minimap – Enemy fire appears as a red blip. Watch the minimap to know where danger is.
5. Spawning on a killed teammate – If the icon is flashing red, the squadmate is under fire. Spawn on a safe blue icon.
6. Not using cover – Vault over walls, lie prone in grass, hide behind rocks. Always use something between you and the enemy.
7. Forgetting gadgets – Use medpacks (Assault), ammo packs (Support), repair tools (Engineer). Dropping a medpack heals you and teammates over time.
Day-One Checklist
With this checklist completed, you’ll have a solid foundation to enjoy Battlefield 4’s chaotic, rewarding gameplay. Good luck, soldier!
Core Gameplay
Battlefield 4: Core Gameplay Guide
Battlefield 4 is a large-scale multiplayer first-person shooter that emphasizes combined arms warfare—infantry, armor, aircraft, and naval combat—on sprawling maps with dynamic destruction. Unlike single-player campaigns, BF4's core gameplay is entirely multiplayer (the single-player campaign exists but is separate). The main gameplay loop is: Spawn → Fight over objectives → Use vehicles and gadgets → Communicate with squad → Earn XP and unlocks → Repeat with deeper customization. There is no traditional quest system; instead, Assignments serve as mini-missions that reward unlocks. Progression is driven by experience points (XP) that increase your rank, unlocking weapons, gadgets, and vehicle upgrades. This guide breaks down the core gameplay into four progression tiers to help you understand how the game evolves as you play.
Main Gameplay Loop
- Spawn on a flag (Conquest) or as part of a team (Rush, Obliteration).
- Engage enemies using a wide arsenal of firearms, explosives, and melee.
- Capture/defend objectives to control the map and earn team points.
- Use vehicles (tanks, jets, helicopters, boats, APCs) to support teammates or destroy enemy armor.
- Spot enemies with Q key to mark them for your squad.
- Communicate via VoIP, text chat, or quick commo rose.
- Die and respawn (or be revived by medics).
- Earn XP for kills, assists, objective captures, resupplies, heals, repairs, and more.
- Unlock new gear as you level up and complete assignments.
- Weapons: Assault rifles, carbines, PDWs, shotguns, DMRs, sniper rifles, and more. Each has unique recoil patterns, bullet drop, and damage models. Attachments (grips, sights, barrels) modify handling and performance.
- Gadgets: Per-class: Medkit/Defibrillator (Assault), Ammo Box/Repair Tool (Engineer, Support), C4/Claymore (Support), Recon uses spawn beacon, motion sensors, and sniper gadgets.
- Vehicles: Tanks, IFVs, attack boats, jets, attack helicopters, transport helicopters, and dirt bikes. Each has primary/secondary weapons, countermeasures, and upgrades.
- Levolution: Dynamic map-changing events (e.g., collapsing skyscraper in Siege of Shanghai, flooding in Hainan Resort) that alter flow and visibility.
- Destruction: Walls, buildings, and cover can be destroyed by explosives and vehicle fire.
- Squad System: Join or create a squad of up to 5 players. Squad members can spawn on each other (if squad leader places a spawn beacon or they are alive). Effective squad play grants bonus XP.
- Spotting: Press Q to highlight an enemy. Spotted enemies appear on minimap for your team. Crucial for vehicle ambushes and air strikes.
- Health & Revive: Health regenerates to 100% if not hit. Medics can revive downed teammates; defibrillators can instantly revive (or charge for full health).
- Ammo & Resupply: Support class can drop ammo boxes; you can also pick up ammo from own ammo box.
- Flag locations and capture zones.
- Choke points and flanking routes.
- Vehicle spawn zones (some maps have helipads, runways, etc.).
- Destructible structures and Levolution triggers.
- Water ways for naval movement.
- Verticality: rooftops, towers, underground tunnels.
- Campaign: A separate single-player story with linear missions. Not part of core multiplayer progression.
- Assignments: The de facto multiplayer quests. They range from weapon-specific tasks (e.g., "Get 100 kills with the ACW-R") to broader goals (e.g., "Capture 50 flags in Conquest"). Completing them unlocks specific weapons, vehicle upgrades, or cosmetics.
- Battlelog Missions (PC-only, optional): Community-limited-time assignments with special rewards.
- Class System: Four main classes—Assault (healing, reviving), Engineer (anti-vehicle, repair), Support (ammo, suppressive fire), Recon (sniping, intel). Each class has unique primary weapons, gadgets, and specialization slots.
- Customization: You can customize each class with a primary weapon (with up to 4 attachment slots), a pistol, a knife, a gadget, a grenade type, and a field upgrade path (perk tree). Field upgrades are a set of perks you earn during a life (e.g., increasing sprint speed, faster reload). Choosing the right combination for your playstyle is key.
- Vehicle builds: Tanks can equip different cannons (HE, sabot, HESH), secondary weapons (LMG, HMG, canister shells), countermeasures (smoke, IR smoke, active protection), and upgrades (autoloader, reactive armor). Similarly for aircraft and boats.
- Mastery: Each weapon and vehicle has a Mastery Dog Tag after 500 kills. Players often grind for all Mastery tags.
- Perfecting stats: K/D, SPM (score per minute), W/L ratio.
- Competitive play: Joining servers with high skill players, participating in clan matches, playing in Battlefield leagues (e.g., ESL historic).
- Collecting: All camos, weapon skins, dog tags, and vehicle skins (from Battlepacks).
- Community challenges: Some servers have custom rules (hardcore mode, pistols only).
- DLC content: BF4 has several expansions (China Rising, Second Assault, Naval Strike, Dragon's Teeth, Final Stand) that add new maps, weapons, and assignments. Endgame includes mastering these as well.
- There is no New Game+ or prestige system beyond officer ranks; you can reset stats if desired.
- Loadout: Start with default weapons – M16A4 (Assault), SCAR-H (Engineer), M249 (Support), Scout Elite (Recon). These are solid but not top-tier. Focus on unlocking attachments by getting kills with each weapon.
- Combat: Stay with your squad, use cover, and practice aiming. Use spotting frequently. Don't rely on vehicles yet.
- Vehicles: Stick to simple transports (jeeps, RHIB boats) or as a passenger in a tank. Learn how to use the repair tool as Engineer.
- Progression: Earn XP from captures and kills. Your first major unlock is the M4 carbine (unlocked at rank 1 for all classes) — a versatile alternative. Unlock M35 M9A1 (rank 3) for Assault rifles.
- Assignments: Start the first few weapon-specific assignments (e.g., "Get 10 kills with M416") to unlock early attachments.
- Map Knowledge: Play on smaller maps like Operation Locker (close quarters infantry) or Shanghai to learn flag layouts.
- Tip: Enable 2x or 4x scopes for better medium-range engagement.
- Loadout: By now you have unlocked many weapon attachments. Key unlocks: ACE 23 (rank 43 Assault), AK-12 (rank 31 Engineer), M240B (rank 43 Support), CS-LR4 (rank 31 Recon). Also unlock Field Upgrade paths: for example, Assault's "Defensive" path gives bonus armor.
- Combat: Understand bullet drop and leading shots. Start using gadgets effectively: place spawn beacons as Recon, drop ammo constantly as Support, use Repair Tool as Engineer on critical vehicles.
- Vehicles: Learn to pilot F-35 or J-20 on training servers (not in live matches). For ground vehicles, try MBT LAW (lock-on launcher) as Engineer. Get comfortable in Scout Helicopter – practice in offline mode.
- Progression: Aim to reach rank 50 for the DMRs like SKS (unlocked at rank 42). Complete assignments for weapons like PDW-R (Engineer) or UMP-45.
- Assignments: Tackle class-specific assignments like "Support — Resupply 50 teammates" to unlock the M60-E4.
- Map Knowledge: Learn larger maps like Rogue Transmission (vertical play) and Hainan Resort (water routes). Understand vehicle spawn times.
- Tip: Use the M1 IRNV scope in dark maps (like Operation Mortar) for a significant advantage.
- Loadout: You likely have 90% of weapons. The last unlocks are at rank 100 (e.g., FY-JS sniper rifle, MPX PDW). Specialize: e.g., Assault with Heavy Barrel + Stubby Grip for recoil control. Engineer with SMAW or RPG-7 (no lock) vs. Stinger/IGLA (lock-on) depending on enemy air presence.
- Combat: High skill: headshot accuracy, quick target acquisition, use of peeker's advantage. Know when to use Defibrillator for instant revives. Coordinate with squad to use Levolution for map control.
- Vehicles: Advanced tactics: pilot attack helicopter with a gunner, use guided missiles against air, employ countermeasures at the right moment. In tanks, use reactive armor to survive extra hits. Learn to aim for critical hits on other vehicles (engine, turret).
- Progression: All weapons unlocked; now focus on Mastery Dog Tags (500 kills per weapon). Also complete vehicle Mastery assignments (e.g., 500 kills with each tank).
- Assignments: The hardest assignments are the Phantom Initiative (requires completing four separate steps to unlock the Phantom Bow and later a secret dog tag). Also cross-game assignments like "Kill someone with the XM25" require specific achievements.
- Map Knowledge: Memorize all ammo points on each map, know where Levolution events can be triggered from enemy side. Use map routes to flank armored columns.
- Tip: Play in Hardcore mode (reduced HUD, increased damage) to challenge aim and map awareness.
- Loadout: The best weapons are already available; now optimize for specific roles. For example, run M416 with Angled Grip + Heavy Barrel for a laser beam. Try non-meta weapons like the G36C for variety.
- Combat: You can consistently land headshots at medium range. Use advanced movement: slide, vault over obstacles while maintaining aim, and use sprint cancels to corner enemies. Master the Quick-knife (press melee in tight situations).
- Vehicles: Achieve Vehicle Mastery for all vehicles (500 kills each). Some vehicles like the AC-130 (gunship) are only available in specific game modes. Pilot the Little Bird for transport and then switch to attack role.
- Progression: The true max rank is 140 (Rank 100 + Officer Ranks 1–40). This requires grinding XP indefinitely—often best achieved by playing Conquest Large with XP boosters. Also earn the Master Dog Tag for your most-used weapon.
- Assignments: Complete every single assignment, including the extremely rare ones like the Phantom Bow set (requires interacting with hidden switches). This may involve coordinating with other players on particular server configurations.
- Economy: Battlepacks are earned at every rank (1 per level) – open them for skins and boosts. No new gameplay items from packs.
- Community: Participate in infantry-only, vehicles-only, or themed servers. Many players create custom games with modified rules (e.g., knife-only, zoomed snipers). Some servers run rankings via Battlelog.
- Endgame Goal: Achieve a K/D over 2.0 or a Score per Minute over 600 in Conquest. Complete all gold dog tags, earn every camo, and be a highly respected player in the community.
Combat & Interaction Systems
Progression System
Battlefield 4 uses a linear rank progression (from Rank 1 to 100, then Officer Ranks 1–40, and finally Legendary Ranks 1–300 before the true max of 140). Each level requires a set amount of XP. Unlocks are tied to both rank and class-specific assignments. Assignments are in-mission tasks (e.g., "Get 10 kills with M416 + 5 headshots") that reward unique weapons, camos, or dog tags. There is no skill tree—character growth is about unlocking more tools and attachments, which you customize per soldier class.
Exploration & Map Knowledge
BF4 maps are large and dense. Exploration is not a separate activity but tied to learning:
Good players memorize these to predict enemy movement.
Quests/Missions
Economy
There is no in-game currency or microtransactions for gameplay items. All weapons, gadgets, and attachments are unlocked purely through XP and assignment completion. Shortcuts are available via paid Battlepacks (cosmetic only) or experience boosters (premium, etc.). You cannot buy power.
Character/Build Growth
Endgame Structure
By the time you reach max rank (140) and have unlocked every weapon and gadget, the endgame becomes about:
---
Gameplay Progression by Tiers
Early Game (Rank 1–20, ~1–10 hours)
Focus: Learn the basics of infantry combat, one or two classes, and a simple map. Stick to Assault or Support for survivability.
Mid Game (Rank 20–50, ~10–50 hours)
Focus: Diversify into all four classes, learn vehicle combat, and start completing class-specific assignments.
Late Game (Rank 50–100, ~50–150 hours)
Focus: Master one class or vehicle type, optimize loadouts for specific maps, and complete all assignment chains.
Endgame (Rank 100–140 & beyond)
Focus: Achieve 100% completion across weapons, vehicles, and assignments. Continue improving personal records.
Summary of Progression Tiers
| Tier | Rank Range | Time Estimate | Key Goals |
|---|---|---|---|
| Early | 1–20 | 1–10 hrs | Learn basics, unlock first weapons, play as a squad. |
| Mid | 20–50 | 10–50 hrs | Diversify classes, learn vehicle basics, complete intermediate assignments. |
| Late | 50–100 | 50–150 hrs | Master one class, optimize loadouts, complete hardest assignments. |
| Endgame | 100–140+ | 150+ hrs | Reach max rank, earn Mastery Dog Tags, dominate in any situation. |
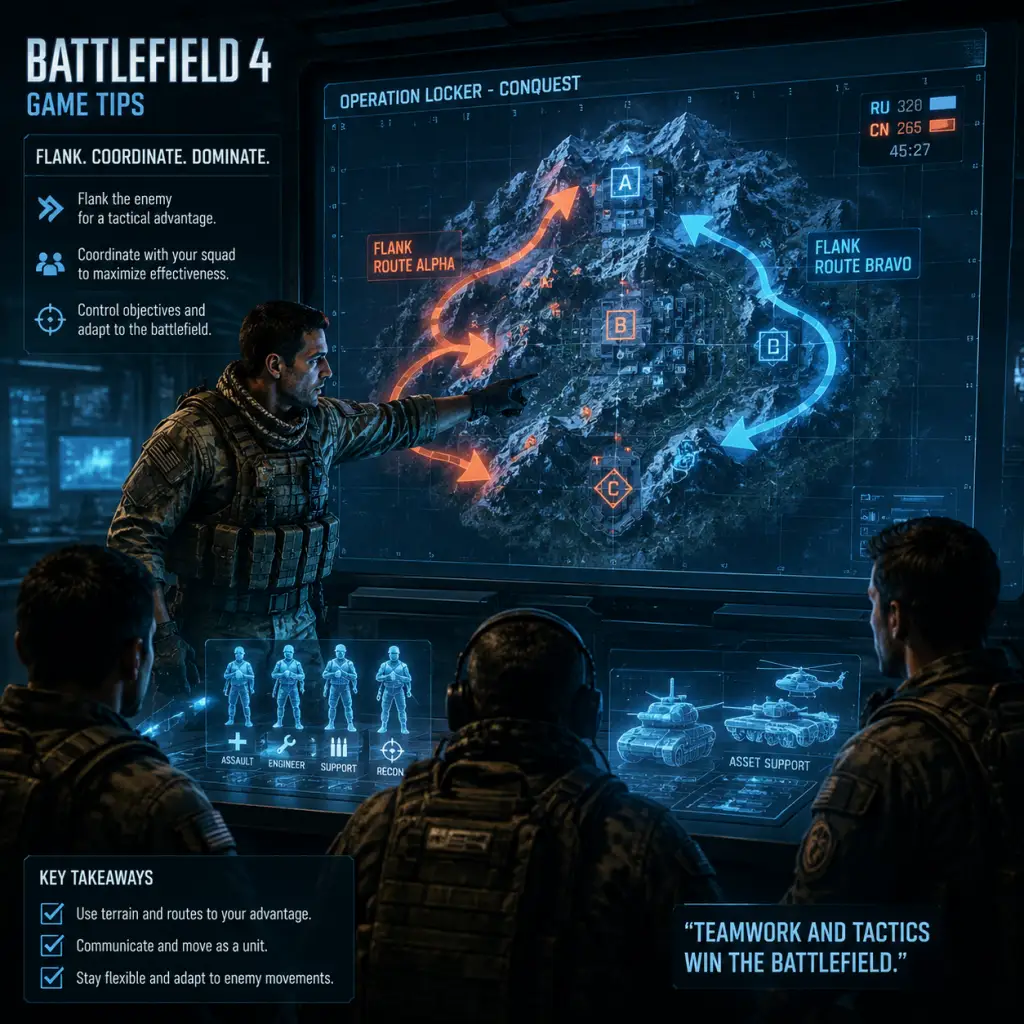
Game Tips
Battlefield 4: Complete Game Tips Guide
This guide compiles essential tips for Battlefield 4, from beginner basics to advanced optimizations. Each tip includes a clear explanation and deep analysis of why it works and when to apply it.
Beginner Tips
#### 1. Stick with Your Squad
- Tip: Always spawn on a squadmate and move as a unit. Lone wolves die quickly.
- Why it works: Spawning on teammates lets you rejoin the fight faster and provides mutual cover. Squads that stick together capture objectives faster, share ammo/health, and can revive you.
- When to use: At the start of a round, choose a squad that is actively attacking an objective. Use the spawn beacon gadget (Recon) to create rally points.
- Tip: Press the spot button (Q on PC, R1/RB on console) every time you see an enemy, even before you shoot.
- Why it works: Spotted enemies appear as red triangles on the minimap and on teammates’ screens. This helps your entire team, especially snipers and vehicle gunners. Spotting also marks enemies for air strikes.
- When to use: While scouting, when engaging multiple enemies, and before calling in mortar strikes or javelins.
- Tip: Always stay behind cover and use the “head glitch” – hiding your body while only your helmet shows.
- Why it works: Battlefield 4 has bullet penetration, so thin walls protect you from small arms but not explosives. Using cover reduces your hitbox exposure.
- When to use: In firefights, peek around corners instead of standing in the open. Learn common head glitch spots on each map.
- Tip: Burst fire at medium to long range; don’t hold the trigger. Pull down slightly to counter vertical recoil.
- Why it works: Battlefield 4’s recoil patterns are predictable. Burst fire keeps bullets on target. Compensating for recoil improves accuracy.
- When to use: Engage enemies at >20 meters with 3-5 round bursts. Up close, full-auto is fine. Practice on the test range.
- Tip: At least take medpacks (Assault), ammo boxes (Support), repair tool (Engineer), or spawn beacon (Recon).
- Why it works: Team play is the core of Battlefield. Medpacks and ammo boxes score points and keep your squad alive. Repairing vehicles wins tank duels. Beacons allow squad to spawn behind enemy lines.
- When to use: Equip before spawning. Swap gadgets only when needed (e.g., switch to repair tool when near friendly vehicles).
- Tip: Aim for the head, especially with DMRs and sniper rifles. Use the target headshot multiplier.
- Why it works: Headshots deal 2x damage for most weapons. One headshot with a bolt-action sniper can kill instantly. For assault rifles, a headshot reduces TTK significantly.
- When to use: At medium range when you have time to aim. Up close, hipfire is faster. Use laser sight for better hipfire accuracy.
- Tip: Throw grenades, use M320, or RPG into buildings before entering. Always check corners.
- Why it works: Explosives kill enemies behind cover and flush them out. Destruction also creates new sightlines. Clearing rooms reduces risk of ambush.
- When to use: Before entering a capture point, after spotting enemies inside, or when breaching a hallway.
- Tip: Move after every shot, use camouflage, and equip a suppressor for sniper rifles (though it reduces bullet speed).
- Why it works: Enemy snipers will see your scope glint. Moving prevents counter-sniping. Suppressor hides you from minimap but increases bullet drop.
- When to use: When engaging from a known sniper hill. Switch to a non-glint scope (like the 4x) for aggressive recon play.
- Tip: Hipfire when within 10 meters; ADS for anything beyond. Use laser sight to tighten hipfire spread.
- Why it works: ADS slows movement and reduces peripheral vision. Hipfire is accurate up close, especially with PDWs and shotguns.
- When to use: In CQB (indoor areas of Zavod 311), hipfire. Outdoors, ADS.
- Tip: Never take a main battle tank (MBT) alone. Wait for a dedicated gunner or have an Engineer repair from the passenger seat.
- Why it works: Tanks are vulnerable to C4 from infantry and to enemy tanks. A gunner can spot and shoot threats while you drive. Repairs from passenger or external Engineer keep you alive.
- When to use: Always when spawning a tank. If no one joins as gunner, consider using a lighter vehicle instead.
- Tip: Use the hover mode (press S to slow down) to stationary shoot. Learn to “circle strafe” using rudder and collective.
- Why it works: Stationary hovering allows accurate shots but makes you an easy target. Circle strafing (moving sideways while turning) minimizes enemy hit chance.
- When to use: Attack Helicopter – when engaging armor from a distance. Scout Helicopter – use speed to evade lock-ons.
- Tip: Pop flares/ECM just before the missile hits, not immediately. Learn to judge incoming threats.
- Why it works: Flares have a very short duration; using them too early leaves you vulnerable. ECM jams the lock but has a cooldown. Wait for the beep to become rapid.
- When to use: When you hear the lock tone change to rapid beeps. Against multiple Stingers, pop flares then quickly fly behind cover.
- Tip: As Engineer, prioritize repairing friendly vehicles over engaging infantry. Use the repair tool (hold fire button).
- Why it works: A damaged tank is useless; a repaired one can dominate. Repairing gives points and helps the team push objectives.
- When to use: After a tank engages enemies, repair behind cover. In contested areas, repair while the tank is moving.
- Recommended Build: M416 (or AEK-971) + Coyote/RDS + Angled Grip + Heavy Barrel. Gadgets: Med Kit + Defibrillator.
- Why it works: M416 is versatile with low recoil. Defibs allow instant revive. Med kit heals multiple allies. This build keeps your squad in the fight.
- When to use: On infantry-focused maps like Operation Locker. If you want to reach higher K/D, swap defibs for a grenade launcher.
- Recommended Build: PDW (like the MP7) + Laser Sight + Reflex Sight. Gadgets: SMAW (or RPG) + Repair Tool.
- Why it works: PDWs are deadly in CQB; you’ll often be close to vehicles. SMAW/RPG can one-hit kill helicopters and deal massive damage to tanks. Repair tool helps friendlies.
- When to use: On vehicle-heavy maps (Golmud Railway, Siege of Shanghai). Always have anti-tank mines or slams as secondary.
- Recommended Build: M249 SAW (or MG4) + 3.4x Scope + Bipod + IRNV (optional). Gadgets: Ammo Box + C4.
- Why it works: LMGs with bipod become laser beams at long range. Ammo box keeps teammates supplied. C4 allows you to destroy vehicles and campers.
- When to use: Defensive maps like Hainan Resort. Set up bipod on choke points. Drop ammo near snipers and engineers.
- Recommended Build: CS-LR4 (or M40A5) + 4x Scope (no glint) + Straight Pull Bolt + Laser Sight. Gadgets: Spawn Beacon + T-UGS or C4.
- Why it works: Straight pull bolt allows you to stay scoped after firing. 4x scope has no glint, keeping you hidden. Spawn beacon provides squad forward spawn. T-UGS detects enemies on minimap.
- When to use: When you want to PTFO (play the objective) as Recon, not just camping. Place beacon behind enemy lines.
- Tip: Call out enemy positions using cardinal directions (“Enemy tank, north of B”) or minimap grid coordinates.
- Why it works: Clear communication prevents friendly fire and allows quick reaction. Squad leaders can set attack orders.
- When to use: When you spot a crucial threat (e.g., a repairing tank). In competitive play, always use third-party VoIP like Discord.
- Tip: As Support/Assault, press the gadget button to throw ammo/medic packs near teammates. Do this even if they don’t ask.
- Why it works: Many players forget to request supplies. Proactive drop helps your team survive longer and maintains firepower.
- When to use: After a firefight, when you see a group of teammates, or when you are near a capture point.
- Tip: Only revive if it’s safe. If the area is under fire, throw smoke first. Use defibrillator from cover.
- Why it works: Reviving in the open gets both you and the revived soldier killed. Smoke blocks vision and gives cover. A safe revive is more valuable than a fast one.
- When to use: When the downed teammate is behind solid cover or when you have cleared the immediate threat.
- Tip: Squad leaders should set attack/defend orders on objectives. Soldiers get extra points for following orders.
- Why it works: Orders guide the squad’s focus. Bonus XP encourages team-play. Good squad leaders can direct the flow of battle.
- When to use: At the start of the round, attack the nearest flag. When in doubt, order to defend a lost flag.
- Tip: On every map, memorize the main corridors and common flanking routes. Use them to predict enemy movement.
- Why it works: Predicting enemy paths allows you to set up ambushes or avoid being flanked. Common chokepoints include bridges, tunnels, and central buildings.
- Examples: On Siege of Shanghai, the central skyscraper (D flag) is a constant fight. On Golmud Railway, the railway tunnel between B and A is a sniper hotspot.
- Tip: Always seek higher ground – rooftops, hills, towers. Overlooking an objective gives you visibility and cover.
- Why it works: Height advantage provides a better view of enemies and more cover from ground fire. It’s harder for enemies to see you from below.
- When to use: When defending an objective. On Paracel Storm, the wind turbines provide excellent sniping spots.
- Tip: Certain walls, floors, and pillars can be destroyed. Use explosives to create new sightlines or block enemy access.
- Why it works: Destruction changes the map dynamic. Blowing a hole in a wall can give you a surprise attack angle. Collapsing a building can deny cover to enemies.
- When to use: Use RPG on a concrete wall between two rooms on Zavod 311 to create a kill lane.
- Tip: Battlepacks contain weapon attachments, XP boosts, and camos. Open them regularly. Use XP boosts during double XP weekends.
- Why it works: Attachments improve weapon performance. XP boosts accelerate class progression, unlocking more options faster.
- When to use: Save rare boosts for high-score games (e.g., when playing with a full squad on Operation Locker).
- Tip: Many weapons require completing specific assignments (e.g., “50 kills with DMR”). Check the assignment menu and prioritize ones that suit your playstyle.
- Why it works: Unlocks like the M249 SAW or SRR-61 are top-tier weapons. Completing assignments gives you access without requiring high class rank.
- When to use: If you want a specific weapon early, grind its assignment. For example, the DBV-12 shotgun assignment is easy if you play Support.
- Tip: Use in-game currency (battlepacks are earned via gameplay) – don’t buy them with real money. The items are cosmetic or attachments you can earn anyway.
- Why it works: Pay-to-win is minimal in BF4; all performance attachments are earnable. Buying battlepacks is unnecessary.
- When to use: Never. Just play the game.
- Tip: On PC, turn down settings like “Mesh Quality” to Ultra (for seeing enemies far) and “Effects” to Low (reduce smoke lag). Set FOV to 90-100.
- Why it works: Higher mesh quality renders distant objects, especially players. Lower effects reduce screen shake and smoke performance hit. Wider FOV gives better peripheral vision.
- When to use: Before entering multiplayer. Disable V-Sync to reduce input lag. Use the config file to adjust mouse sensitivity beyond in-game limits.
- Tip: Every map has a “Levolution” – a large-scale destruction event (e.g., collapsing the skyscraper in Shanghai). Triggering it changes the map significantly.
- Why it works: Levolution can open new paths, block others, or alter objective capture zones. Controlling the event can give your team a strategic advantage.
- When to use: Trigger it when your team is losing control of the central flag (e.g., collapse the tower on Siege of Shanghai to deny enemy rooftop campers). Or avoid triggering it if your team benefits from the current layout.
- Tip: On maps with trains (e.g., Golmud Railway), the train moves around the perimeter. You can ride it as safe transport to the enemy base.
- Why it works: The train provides mobile cover and allows you to bypass the frontline. It’s also a great way to get behind snipers.
- When to use: At the start of a round, jump on the train heading towards the enemy side. Be aware that the train can be destroyed.
- Tip: As Engineer, use the Stinger or IGLA against aircraft. For vehicles, use Javelin with a laser designator (recon can provide). Use PLA or SRAW for manual guidance.
- Why it works: Lock-on missiles are effective but can be countered by flares. The SRAW is wire-guided; you can hit moving targets by leading the projectile. The RPG is unguided but does high damage.
- When to use: Against helicopters – Stinger is best. Against MBTs – Javelin with laser designator ensures hit. For skilled players, use SRAW for mobility kills.
- Tip: Sprint + crouch to slide. Combine slide with jump to maintain speed. Use it to evade fire or quickly cross open ground.
- Why it works: Slide-jumping breaks enemy aim and covers ground faster than sprinting. It’s essential for CQB.
- When to use: When peeking a corner, when disengaging from a firefight, or when rushing to cover.
- Tip: In the options menu, set “Network Smoothing” to 0% (reduces interpolation, giving you more accurate hit detection). Set “High Frequency Network” to On.
- Why it works: Lower smoothing reduces lag compensation delays, making kills feel more precise. High frequency updates your position faster, reducing “dying around corners.”
- When to use: Always. Test on your network; if you experience packet loss, adjust smoothing by 10-20%.
- Tip: The knife has a lunge that extends repair. Use it when sprinting at an enemy – you’ll lunge forward about 2 meters.
- Why it works: Quick knife is a one-hit kill at close range. Mastering the lunge helps you win unexpected encounters.
- When to use: When you surprise an enemy from behind or when you run out of ammo. Avoid knifing in the open; it leaves you vulnerable.
#### 2. Spot Enemies Constantly
#### 3. Use Cover and Head Glitches
#### 4. Learn Basic Weapon Recoil Control
#### 5. Always Equip a Gadget That Helps Your Team
Combat Tips
#### 1. Master the Headshot
#### 2. Use Explosives to Clear Rooms
#### 3. Counter Sniper Tactics
#### 4. Hipfire vs. ADS Decision
Vehicle Tips
#### 1. Do Not Be a Solo Tanker
#### 2. Master Helicopter Hovering
#### 3. Use Countermeasures Wisely
#### 4. Always Repair Vehicles
Loadout & Builds Tips
#### 1. Assault Class: Balanced Healer
#### 2. Engineer Class: Tank Buster
#### 3. Support Class: Ammo Provider
#### 4. Recon Class: Aggressive Spotter
Teamwork & Communication Tips
#### 1. Use VOIP or Chat to Coordinate
#### 2. Always Drop Ammo and Health
#### 3. Revive Wisely
#### 4. Squad Leader Orders
Map Knowledge & Exploration Tips
#### 1. Learn High-Traffic Chokepoints
#### 2. Use Elevation to Your Advantage
#### 3. Know Destruction Points
Economy & Progression Tips
#### 1. Focus on Battlepack Tacticals
#### 2. Unlock Weapons Through Assignments
#### 3. Don’t Waste Money on Battlepacks
Advanced Tips & Optimizations
#### 1. Edit Your Settings for Better Performance
#### 2. Master the “Levolution” Events
#### 3. Use the “Train” for Quick Flanks
#### 4. Counter-Electronic Warfare
#### 5. Advanced Movement: Slide-Jumping
#### 6. Use the “Netcode” Settings
#### 7. Learn the “Quick Knife” Range
Conclusion
Battlefield 4 rewards teamwork, map knowledge, and mechanical skill. Combine these tips with practice on the test range and in matches. Adapt your playstyle to the map and team composition. Remember: PTFO (play the objective) and you’ll help your team win. Good luck, soldier!
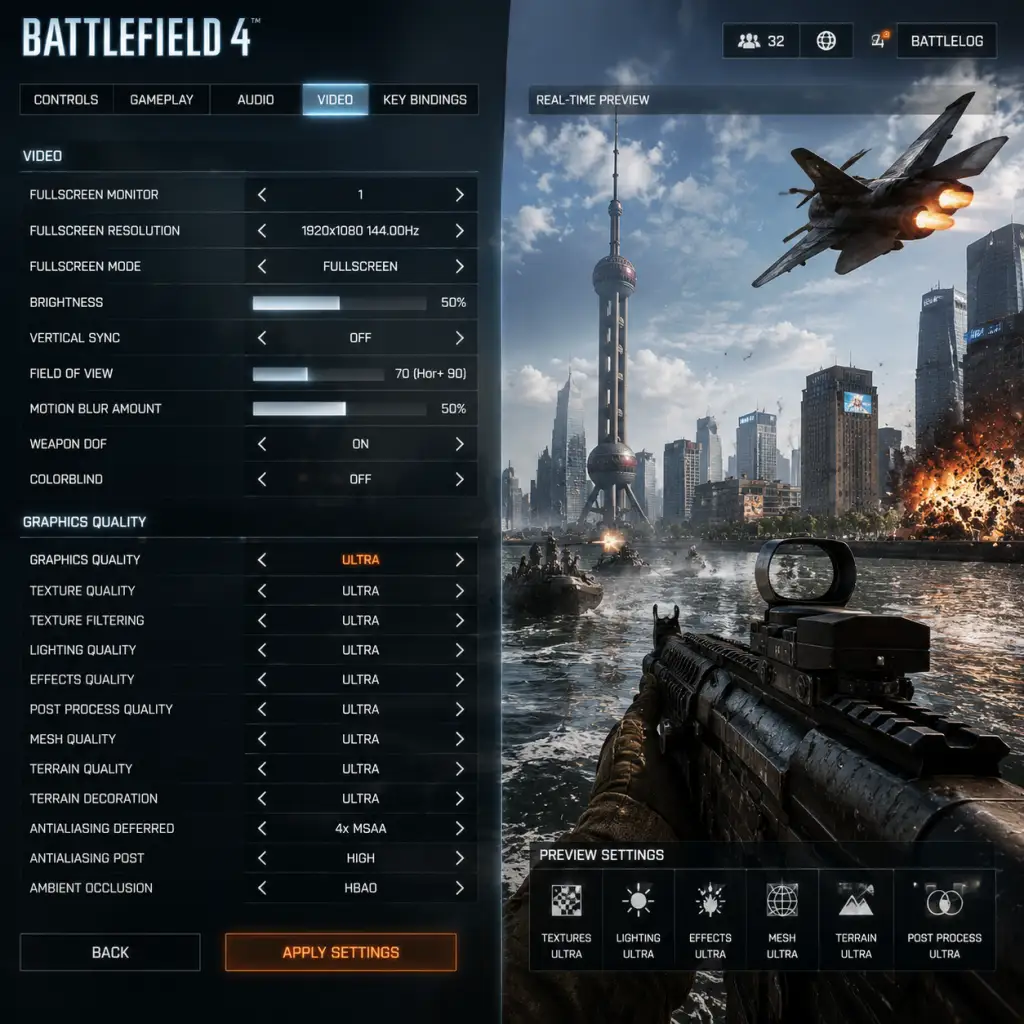
Game Settings
Battlefield 4: Comprehensive Game Settings Guide
This guide covers every adjustable setting in Battlefield 4, with optimization recommendations for different hardware tiers and platform-specific quirks. Settings are grouped into seven categories: Graphics, Audio, Controls, Accessibility, Language, Network, and Gameplay. Special attention is given to commonly misconfigured options and settings that impact performance or competitive advantage.
---
1. Graphics Settings
Graphics settings heavily affect performance and visual quality. Battlefield 4 scales well from low-end PCs to high-end rigs. On consoles, presets are fixed but some options exist (e.g., FOV, motion blur).
#### PC Graphics Options (Advanced)
| Setting | Low-End (e.g., GTX 750 Ti / i3-4130) | Mid-Range (e.g., GTX 1060 / Ryzen 5 2600) | High-End (e.g., RTX 3080 / i7-10700K) | Notes |
|---|---|---|---|---|
| Resolution | 1600x900 or 1280x720 | 1920x1080 | 2560x1440 or 4K | Match monitor native res; lower for FPS boost. |
| Field of View (FOV) | 70-75 | 80-90 | 90-100 | Higher FOV increases peripheral vision but reduces target size. Misconfiguration trap: On low-end PCs, high FOV drops FPS due to more objects on screen. Console players have a slider but capped at ~80. |
| Brightness | Adjust until the center symbol is barely visible in calibration screen | Same | Same | Critical for seeing in dark corners. Too low = death from shadows. |
| Graphics Quality | Custom – see individual settings below | Auto High or custom | Ultra (may adjust AA) | Misconfiguration: Many players set "Ultra" on low-end hardware, causing stutter. |
| Texture Quality | Low | Medium | Ultra | VRAM dependent. Low uses less GPU memory. |
| Texture Filtering | 2x Anisotropic | 8x | 16x | Small performance impact; 8x recommended for most. |
| Lighting Quality | Low | Medium | High | Affects shadows and dynamic lights. High can drop FPS in firefights. |
| Effect Quality | Low | Medium | High | Controls particle effects (explosions, smoke). Low makes smoke less dense – actually a competitive advantage! |
| Post Processing Quality | Low | Medium | High | Includes bloom, motion blur, and ambient occlusion. Motion blur should be OFF for clarity. |
| Mesh Quality | Low | High | Ultra | Crucial for spotting enemies. High mesh renders distant objects with more polygons – enemies appear sharper at range. Set to High even on low-end if possible. |
| Terrain Quality | Low | Medium | Ultra | Affects ground detail. Low makes terrain simpler, helping spot prone enemies. |
| Terrain Decoration | Low | Medium | Ultra | Grass and bushes. Low reduces foliage, making campers easier to see. Another competitive trick. |
| Anti-Aliasing (AA) | Off or FXAA | 2x MSAA | 4x MSAA or Off (if using high res) | MSAA is costly. FXAA is cheap but blurs edges. Consider turning AA off at 1440p+. |
| Ambient Occlusion | Off | SSAO | HBAO | Adds depth shadows. Slight performance hit. |
| Motion Blur | OFF | OFF | OFF | Always disable. No benefit, reduces clarity. |
| VSync | Off | Off | Off (unless screen tearing bothers you) | Enables input lag. Only enable to cap FPS at monitor refresh if you can't use external limiter. |
| Resolution Scale | 100% | 100% | 100% (can supersample if GPU has headroom) | Above 100% downsamples for smoother image but hits FPS hard. |
- Mesh Quality – many players leave it on Low to save FPS, but this makes enemies hard to see beyond 50m. Set to High or Ultra regardless of system if you can maintain 60 FPS.
- Post Processing Quality – the "Motion Blur" sub-setting is separate. Always turn motion blur OFF.
- Effect Quality – could be set to Low for competitive play as smoke and fire become less opaque.
- Field of View (FOV): Available on PS4, PS5, Xbox One, Xbox Series (not PS3, Xbox 360). Default is ~55 vertical. Recommended: increase to 70-75 (depending on comfort). Warning: higher FOV reduces aim assist effectiveness and makes distant targets smaller. Test in a quiet server.
- Brightness: Use calibration in menu.
- Colorblind Options: See Accessibility section.
#### Console Graphics Settings
Consoles have very limited options. Key adjustments:
---
2. Audio Settings
Audio is critical for situational awareness. Footsteps, vehicle engines, and gunfire direction can save your life.
| Setting | Recommended Value | Explanation |
|---|---|---|
| Master Volume | 70-80% | Prevents ear fatigue; adjust for environment. |
| Music Volume | 0% | Battlefield 4’s OST is epic but masks footsteps. Misconfiguration: many leave it on, missing enemy sounds. |
| SFX Volume | 100% | Primary – gunshots, explosions, footsteps. |
| Voice Over Volume | 100% (English or native) | Commander and squad callouts. |
| Dialogue Volume | 100% | Single-player and MP announcer. |
| Vehicle Speaker (War Tapes) | Off or War Tapes | War Tapes makes explosions more intense but muddies directional audio. Competitive setting: Off for clearer positional cues. |
| Headphone/Speaker Mode | Headphones if using cans, Cinematic for speakers | Headphone mode adds spatial audio simulation. Misconfiguration: using speakers with headphone mode results in hollow sound. |
| Audio Language | English (if not changed) | Keep consistent with subtitles if needed. |
- War Tapes is enabled by default on some platforms. It compresses audio to sound "epic" but removes subtle directional cues. Turn it off.
- Headphone mode is not just for headphones – it’s a DSP that works with any output. If you have a proper surround system, use speaker mode.
---
3. Controls Settings
Customize binds for faster reactions. Default controls are decent but suboptimal for advanced techniques (e.g., crouch-sliding, dolphin diving).
#### PC Keybinds (Critical adjustments)
| Action | Default | Recommended | Reason |
|---|---|---|---|
| Crouch (toggle) | Left Ctrl | Side mouse button or C | Frees left hand for movement. Binding to mouse thumb allows instant stance changes. |
| Prone | Z | Same | Keep if comfortable; avoid binding to a hard-to-reach key. |
| Melee | F | Mouse button 4 or V | Quick melee takes you out of ADS; use a convenient button. |
| Gadget 1 / 2 | 3 / 4 | Thumb buttons if available | Minimizes finger stretch. |
| Spot | Q | Mouse wheel click | Spotting consistently improves team play; mouse click is faster than keyboard. |
| Interact | E | E or a thumb button | Reviving, repairing, etc. Keep easily accessible. |
| Toggle Sprint | Shift | Toggle ON in options | Allows tapping shift once to sprint; reduces fatigue. |
| Pistol swap | 2 | 2 | Leave default; practice quick draw. |
| Setting | Recommendation |
|---|---|
| DPI | 400-800 (most competitive players) |
| In-Game Sensitivity | 4-8 (at 400 DPI); 2-4 (at 800 DPI) |
| ADS Sensitivity Multiplier | 0.75-1.0 |
| Uniform Soldier Aiming | Enabled |
| Mouse Smoothing | OFF |
| Raw Mouse Input | On |
| Setting | Recommendation |
|---|---|
| Sensitivity (X/Y) | 50-70 (adjust up slowly) |
| Aim Assist | On (default) – but can be off for manual feel |
| Stick Deadzone | Small (5-10%) |
| Button Layout | Veteran (flips triggers/bumpers) or Bumper Jumper for jump while aiming |
| Invert Y | Personal preference |
- Uniform Soldier Aiming – pivotal for building consistent aim. Without it, each zoom level has different sensitivity, ruining flick shots.
- ADS Sensitivity Multiplier – too high causes overcompensation. Start at 0.8 and fine-tune.
- Toggle vs Hold for Zoom – Toggle is easier for scoping stationary; Hold gives faster reactions for quick peeks. Some toggle accidentally; test both.
---
4. Accessibility Settings
Battlefield 4 offers basic accessibility features. Make sure to configure them before jumping into combat.
| Setting | Option | Description |
|---|---|---|
| Colorblind Mode | Off, Protanopia, Deuteranopia, Tritanopia | Changes team colors (blue/orange) for color-deficient players. Misconfiguration: Players with normal vision sometimes enable this to get high-contrast colors – it doesn't harm but may look odd. |
| Subtitles | On/Off | Displays spoken dialogue text. Useful for hearing-impaired or non-native speakers. |
| Closed Captions | On/Off | Adds sound descriptions (e.g., "explosion in distance"). |
| Crosshair Color | White, Red, Green, Blue, Yellow | Override to a color that stands out against the environment. Avoid red in firefights (too common). Yellow or green works well. |
| Crosshair Scale/Thickness | Adjustable | Larger crosshair helps visibility; thin may be lost in bright areas. |
| Hit Marker Color | Same as crosshair options | Change to same or different – ensure contrast. |
| Controller Vibration | On/Off | Some players turn off for precision; vibration can mask fine aim adjustments. |
- Colorblind Mode can actually benefit non-colorblind players by making the minimap and team markers more distinct. Experiment.
- Subtitles: In multiplayer, subtitles for commander commands can be distracting. Disable unless needed.
---
5. Language Settings
Battlefield 4 supports multiple languages for text, voice, and audio. These settings are separate and can be mixed.
| Setting | Options | Recommendation |
|---|---|---|
| Game Language | Full list (English, French, German, etc.) | Set to your preference; changes all interface and subtitles. |
| Audio Language | Same list | Often matches game language by default. For non-native speakers, set dialogue to English if you understand it – it’s clearer. |
| Subtitle Language | Per language | Independent of audio. Handy for playing with foreign audio but reading native text. |
| Text Chat Language Filter | On/Off | Filters offensive words in chat. Off if you want unfiltered communication. |
- Audio Language does not affect vehicle or weapon sounds, only spoken lines. If you want to keep the original English voice acting while having menus in your native language, set Audio to English and Game Language to your own.
- On console, language is usually tied to system language. To change, you may need to switch console region or reinstall the game. Check store page for supported languages.
---
6. Network Settings
Network settings directly impact latency, packet loss, and rubberbanding. Most are found in the multiplayer menu under "Options > Gameplay" or a dedicated "Network" tab (PC only).
#### PC Network Options
| Setting | Recommended | Explanation |
|---|---|---|
| Network Smoothing Factor | 0% (Zero) | This is the most debated setting. It controls client-side interpolation for other players. At 0%, you see the most recent data with minimal delay – enemies appear exactly where they are, but you may see more jitter if your internet is unstable. At higher values (50-100%), movement appears smoothed but you shoot where they were. Optimal: 0% for wired high-speed connections; 20-30% if you experience lag compensation issues. Misconfiguration: Many players leave at 100% (default) and wonder why their shots miss – because the enemy model is ahead of actual position. |
| Graphics Quality for Network (unrelated) | Not relevant | Separated. |
| Bandwidth Limiter | Unlimited (or 1Mbps+ if on capped) | Forces game to cap data usage; set to max available. |
| Port Forwarding / UPnP | Ensure UDP ports 3657, 3658, 3659, 14000-14009 for PC | Required for stable connections. Enable UPnP on router or forward manually. Special: If experiencing constant disconnects, try setting static IP and forwarding. |
Consoles lack in-game network settings. You can:
- Check NAT type in system network settings (Open = best).
- Use wired Ethernet instead of Wi-Fi.
- Close background apps that use bandwidth.
- Network Smoothing Factor (PC only) – set to 0% for the lowest latency. However, if you see other players teleporting or you die behind cover, increase to 10-20% incrementally until stable.
- Packet Loss can be monitored via the in-game performance overlay (toggle with ~ and `perfOverlay.DrawGraph 1`). Aim for less than 1% loss.
Special Attention:
---
7. Gameplay Settings
These settings affect how the game plays, from minimap to crosshair customization.
#### Multiplayer Gameplay Settings
| Setting | Options | Recommendation | Explanation |
|---|---|---|---|
| Minimap Zoom Level | 50m, 75m, 100m (default 50) | 100m | Larger view helps spot distant enemies and vehicles. |
| Minimap Rotation | Normal (rotates) / Fixed | Normal | Rotating minimap is easier for orienting. Fixed may be better for top-down map readers. |
| Minimap Size | Small / Big | Big (if HUD space permits) | Larger minimap gives more info at a glance. |
| Crosshair Type | Several shapes (circle, cross, dot, etc.) | Circle or Dot | Circle gives good spread indication; dot for precision. |
| Crosshair Scale | 1 to 5 | 2-3 | Not too large to block view, not too small to lose. |
| Crosshair Color | White, Red, Green, Blue, Yellow | Yellow or Blue | Contrasts well with most environments. |
| Weapon Crosshair | On/Off | On | Shows hip-fire spread. Only turn off for immersion. |
| Underbarrel Aim (e.g., CLAW) | On/Off | On | Prevents accidental underbarrel activation. |
| Auto-Sprint | Off (default) | Off | Manual sprint gives better control; accidental auto-sprint can alert enemies. |
| Auto-Repair on Vehicles | On | Off | If you tap repair, auto stops after a bit; manual repair is more reliable. |
| Vehicle Camera Shake | Off | Off | Reduces disorientation in tanks and helis. |
- Difficulty: Easy, Normal, Hard. Hard reduces enemy health and increases damage taken.
- Quick Time Event (QTE) Timer: On/Off – disable for less frustration.
- Minimap Zoom to 100m is one of the first adjustments new players miss. It gives a massive advantage in spotting enemy movements and vehicle positions.
- Auto-Sprint default is off; many players press Shift and hold it. That's fine, but if you toggle sprint, be cautious of accidentally hitting shift while aiming.
- Vehicle Camera Shake off is a must for pilots and drivers; the default shake can make aiming while moving impossible.
- PS3 / Xbox 360: Limited settings; graphics are locked, no FOV slider, no network smoothing. Focus on brightness, audio, and controls.
- PS4 / Xbox One: FOV slider available, but on Xbox One S/X you may need to lower resolution scale in system settings (if present) for 60 FPS. Check console video modes (e.g., 1080p vs 720p).
- PS5 / Xbox Series X|S (Backward Compatibility): The game runs at 60 FPS with boosted resolution. FOV slider works. No adaptive triggers or haptics. Settings carry over from PS4/Xbox One version.
- PC: Allows unlimited customization. Use `.cfg` files to fine-tune beyond menu options if desired (e.g., `renderer.drawFps 1`).
Special Attention:
---
Platform-Specific Notes
---
Summary: First Things to Change
Before your first multiplayer match, apply these changes immediately:
1. Graphics: Disable Motion Blur, set Mesh Quality to High, Effect Quality to Low (competitive edge).
2. Audio: Turn Music Volume to 0%, disable War Tapes, set Speaker/Headphone mode correctly.
3. Controls: Enable Uniform Soldier Aiming, adjust ADS sensitivity to 0.8, set sprint to toggle (if desired), rebind spot to mouse wheel click.
4. Accessibility: Set Crosshair Color to Yellow, enable Colorblind Mode if beneficial, adjust subtitles if needed.
5. Network (PC): Set Network Smoothing Factor to 0%, ensure port forwarding is correct.
6. Gameplay: Increase Minimap Zoom to 100m, disable Vehicle Camera Shake, turn off Auto-Sprint.
These adjustments will give you a immediate competitive advantage and a smoother experience. Revisit settings after several play sessions to fine-tune based on personal preference and hardware performance.
Important Notes
Important Notes for Battlefield 4
Warnings & Pitfalls
- Multiplayer Server Bans: Battlefield 4 uses FairFight and PunkBuster for anti-cheat. Using any third-party software (even simple macro programs) can trigger a permanent ban across all EA games linked to your account. Avoid any cheat tools, wallhacks, or scripted recoil compensation.
- Campaign Autosave Only: The single-player campaign does not allow manual saving. If you exit mid-mission, you restart the entire mission from the beginning (not from last checkpoint). Plan your sessions accordingly, especially on Expert difficulty.
- Install All Updates: Many early bugs were fixed via patches. On PC, ensure you download all updates through Origin/Steam. On console, verify the game is fully updated. Missing patches can cause crashes, broken multiplayer matchmaking, or missing content.
- VPN Usage: Using a VPN can cause connection issues, high ping, or even get you mistaken for a cheater by FairFight. If you must use a VPN, choose a server close to your physical location and avoid switching regions mid-game.
- Campaign Final Decision: At the end of the campaign, you choose between two endings: "Russian" or "Chinese." This choice is irreversible per playthrough and affects a unique trophy/achievement and a dog tag unlock. To get both, you must replay the final mission. Save before the decision point by restarting the mission from the main menu.
- Assignments: Some assignments require you to choose between two rewards (e.g., a weapon vs. a camo). Once claimed, you cannot undo the choice. If you want both, you must complete the assignment again on another playthrough (if the assignment is repeatable) or via multiplayer assignments (which are not reversible). For campaign-specific assignments tied to collectibles, you can replay missions to re-complete them.
- Campaign Dog Tags (Collectibles): Each mission has 3 hidden dog tags. They are missable if you skip an area or progress past a point of no return. There is no chapter select; you must replay the entire mission from the start. Use a guide to get all 20 dog tags for the "Complete Collection" achievement/trophy.
- Multiplayer Assignments Unlock Weapons: Many weapons are tied to specific assignments. Some assignments are time-limited (e.g., "Community" or "Special" assignments) or tied to DLC maps. If you miss the event, those weapons may become permanently unavailable. Always check the "Assignments" menu and prioritize time-sensitive ones.
- Easter Eggs: Phantom Program and other hidden assignments require specific actions (e.g., shooting certain lights, entering codes). These are missable if you don't know the steps. The Phantom Bow and other rewards may be locked forever if you don't complete the steps before the event ends.
- Campaign on Expert: Enemy accuracy and damage are massively increased. Stealth sections (e.g., "Baku" and "Shanghai") become extremely punishing. Save frequently by reaching checkpoints, and abuse smoke grenades and suppressors. One hit from a sniper can kill you.
- Multiplayer Learning Curve: New players often get frustrated by veteran players with high-level gear. The first 10-20 hours can feel like a death loop. Stick with the AK-5C or M416 until you unlock better attachments. Play on "Normal" or "Hardcore" mode? Hardcore removes HUD and increases damage, making it even more punishing.
- Vehicle Combat: Learning to fly helicopters or jets without prior experience is brutally hard. Use the Test Range to practice without pressure. Start with the Scout Helicopter (easier to control) before moving to Attack Helicopters.
- Over-specializing in One Class: Unlocking all gadgets for one class may seem efficient, but you'll miss out on key tools. For example, grinding the Engineer class alone leaves you vulnerable to long-range infantry. Spread your time across all four classes to unlock necessary gadgets (e.g., Defibrillator for Medic, Motion Sensors for Recon).
- Grinding Weapon Attachments on One Gun: The game rewards you for using multiple weapons. Focusing only on one gun (e.g., ACE 23) will cause you to miss the bonus XP and attachments from completing weapon-specific assignments. Try each weapon for at least 1,000 kills.
- Ignoring Assignments: Many players grind kills but ignore assignments that unlock essential weapons (e.g., the U-100 MK5 or the Desert Eagle). Always check assignments before playing and prioritize those that reward powerful gear.
- Boosting in Locker/Metro 24/7 Servers: These maps are XP farms but teach bad habits (no vehicle awareness, poor positioning). You'll struggle on larger maps like Golmud Railway or Caspian Border. Use variety in your server selection.
- Don't Teamkill: In Hardcore mode, team damage is on. Accidental team kills happen, but intentional TKing will get you kicked or banned from servers. Apologize in chat if you TK.
- Spot Enemies (Q Key / R1): Always press the spot button when you see an enemy. It marks them on the minimap for your team. Failure to spot is considered poor play.
- Revive Only When Safe: If you're a Medic, don't revive someone in the open while enemies are actively shooting. It wastes tickets and frustration.
- Respect Vehicle Roles: A Transport Helicopter is for transport, not for soloing. Don't steal a teammate's jet when they are waiting for it. Wait your turn.
- Anti-Cheat Reporting: Use the in-game report function or external sites like bftracker.com. False reporting can get you warned. Never use hacks or even suspicious config files (e.g., custom .cfg files on PC can be flagged).
- PC Save File Backup: The single-player save file is located at:
- Multiplayer Progress: All multiplayer data is stored on EA servers. You cannot back up or edit it. If you get banned, progress is lost permanently.
- Local Server Configs: If you host a server (rented), back up server config files before updates. Updates can reset settings.
- Not Using the Test Range: Many players jump into multiplayer without mastering vehicle controls or weapon recoil patterns. Spend 30 minutes in the Test Range (accessible from the main menu) to learn basic maneuvers.
- Ignoring Keybind Customization: Default keybinds on PC are not optimal. Rebinding gadgets to convenient keys (e.g., defibrillator to a mouse button) can drastically improve reaction time. Do this early.
- Not Completing Single-Player First: The campaign unlocks three weapons usable in multiplayer (M249 SAW, M9A4, AK-12C). Complete the campaign on any difficulty to get these instantly. They are solid choices.
- Skipping the Tutorial: The "Prologue" mission teaches basic controls. If you skip it, you'll miss out on understanding the heavy vehicle mechanics and squad order system.
- Playing Without Headphones: Audio cues (footsteps, vehicle engines, enemy callouts) are critical. Using TV speakers puts you at a huge disadvantage. Invest in a good headset.
- Sticking to the Same Loadout: Battlefield 4 rewards adaptability. For example, if you always use a suppressor, you sacrifice range and damage. Experiment with different barrel attachments to match the map.
Irreversible Choices
Missable Content
Difficulty Spikes
Grinding Traps
Online Etiquette & Anti-Cheat Notes
Save Management Advice
- Origin: `C:\Users\[Username]\Documents\Battlefield 4\settings\PROF_SAVE_profile`
- Steam: `C:\Users\[Username]\Documents\Battlefield 4\settings\PROF_SAVE_profile`
- Cloud saves are unreliable. Manually copy this file before uninstalling or reinstalling the game.
Common Regrets Players Have
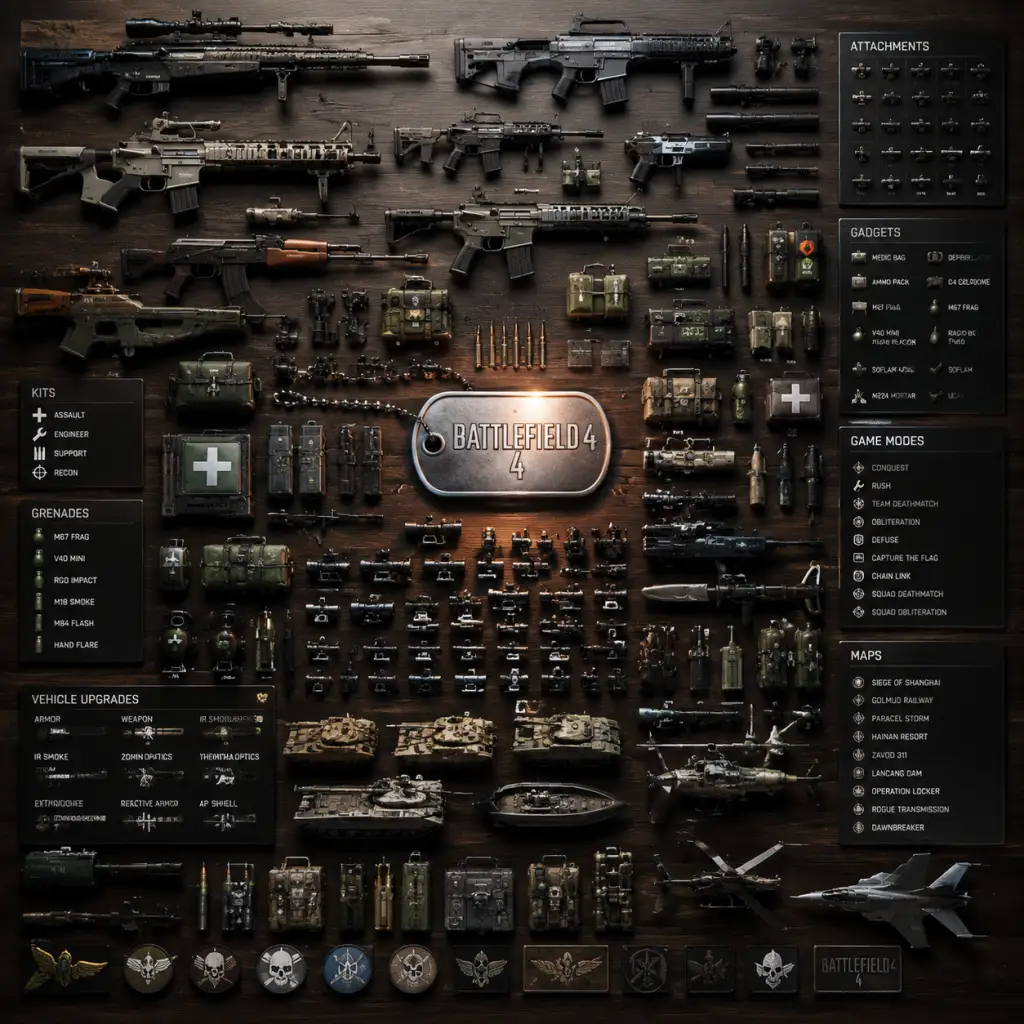
All Game Items
Overview
Battlefield 4 offers thousands of items across weapons, gadgets, attachments, vehicle upgrades, cosmetics, and progression systems. This guide covers every major category, explaining how to obtain each item, when it’s most useful, and any important synergies or upgrade paths. Items are tied to class progression, vehicle unlocks, Battlepacks, and Assignments.
---
1. Weapons
Weapons are divided into Primary, Secondary, Gadgets, and Grenades. Each class (Assault, Engineer, Support, Recon) has access to specific primaries and gadgets.
1.1 Primary Weapons
| Weapon Class | Examples | Class Access | How to Obtain | When Useful | Synergies / Upgrades |
|---|---|---|---|---|---|
| Assault Rifles | AK-12, M16A4, ACE 23 | Assault only | Unlock via class score or Battlepacks | General infantry combat; best at medium range. Pairs with Medkit/Defibrillator. | Use with Magnifier or 4x scope for mid-range. Underbarrel Shotgun for close quarters. |
| Carbines | AK-5C, MTAR-21 | All classes (shared) | Unlock via class score or Battlepacks | Versatile; used when you want a compact weapon on any class. Good for Engineer (repair tool). | Attachments like Heavy Barrel + Stubby Grip for accuracy. |
| PDWs (Personal Defense Weapons) | P90, MP7, AS VAL | All classes (shared) | Unlock via class score or Battlepacks | Close quarters combat (CQC). Ideal for Support or Recon with close-range playstyle. | Use with Laser Sight + Suppressor. High rate of fire synergy. |
| Shotguns | 870 MCS, Saiga 12 | All classes (shared) | Unlock via class score or Battlepacks | Extreme close range; one-shot potential. Best on small maps or indoors. | Flechette rounds for more range. Pairs with Smoke Grenade to close distance. |
| LMGs (Light Machine Guns) | M249, PKP Pecheneg | Support only | Unlock via class score or Battlepacks | Suppression; bipod for long-range sustained fire. Excellent for defending objectives. | Use with Bipod and 3.4x scope. Combine with Ammo Box for infinite ammo. |
| DMRs (Designated Marksman Rifles) | Mk 11 MOD 0, SVD-12 | Recon, Engineer, Support | Unlock via class score or Battlepacks | Long-range single-shot damage; medium scope. Better than sniper rifles for aggressive play. | Match with a Carbine or PDW for close backup. Use Straight Pull Bolt (if available) for faster follow-ups. |
| Sniper Rifles | SRR-61, L96A1, CS-LR4 | Recon only | Unlock via class score or Battlepacks | Extreme long-range; one-shot headshot. Recon’s primary tool. | Use 40x scope for long-range, but swap to a ranged gadget. Pair with Spawn Beacon for aggressive positioning. |
1.2 Secondary Weapons
Available to all classes. Include pistols, machine pistols, and hand cannons.
| Item | How to Obtain | When Useful |
|---|---|---|
| M9 | Base unlock | Reliable backup; fast reload. Good for finishing enemies. |
| G18 | Unlock via Assault score | Full-auto capability; melt enemies at close range. Pairs with a DMR for close range. |
| .44 Magnum | Unlock via Recon score | High damage; two-shot kill. Powerful with Laser Sight. |
| Shorty 12G | Battlepack drop | Pocket shotgun; great for CQC surprise. |
1.3 Gadgets
Class-specific equipment. Can be swapped via Battlepacks (some special variants).
| Gadget | Class | How to Obtain | When Useful | Synergies / Upgrades |
|---|---|---|---|---|
| Medkit | Assault | Default | Heals teammates and yourself. Essential for assaulting. | Combines with Defibrillator for medic role. |
| Defibrillator | Assault | Unlock via score | Revives downed teammates. Critical for team pushes. | Use with Medkit to keep squad alive. |
| Repair Tool | Engineer | Default | Repairs vehicles. Also damages enemy vehicles (melee). | Must have for vehicle support. |
| RPG-7 | Engineer | Unlock via score | Anti-vehicle launcher. High damage, slow reload. | Effective against armor; pair with SMAW for quick follow-up. |
| SMAW | Engineer | Unlock via score | Similar to RPG but faster reload, less damage. | Good for hit-and-run. |
| Stinger | Engineer | Unlock via score | Lock-on anti-air missile. Must be aimed to lock. | Best with Scout Helmet field upgrade to stay hidden. |
| IGLA | Engineer | Unlock via score | Same as Stinger but with a different lock tone. | Use against aircraft. |
| Ammo Box | Support | Default | Refills ammo for teammates and yourself. Essential for Suppressive fire. | Place near choke points. |
| C4 Explosives | Support | Unlock via score | Can be thrown on vehicles or placed on buildings. Detonated manually. | Useful for destroying fortified positions. |
| Claymore | Support | Unlock via score | Proximity mine. Kills enemies. Good for flank protection. | Place near objectives. |
| Spawn Beacon | Recon | Default | Allows squad to spawn at its location. Critical for flanking. | Place behind enemy lines. |
| Motion Sensor | Recon | Unlock via score | Detects nearby enemies on minimap. | Helps gather intel; use with suppressed weapon. |
| T-UGS | Recon | Unlock via score | Deployable motion sensor that pings enemies. | Place in high-traffic areas. |
| MAV | Recon | Unlock via score | Remote-controlled drone; can spot and destroy enemy equipment. | Good for spotting and killing enemy spawn beacons. |
| SOFLAM | Recon | Unlock via score | Laser designator; locks on vehicles for guided missiles from teammates. | Coordinate with Engineer for javelin/SRAW. |
| PLD | Recon | Unlock via score | Same as SOFLAM but handheld. | Use to paint targets. |
1.4 Grenades
All classes can equip one type of grenade.
| Item | How to Obtain | When Useful |
|---|---|---|
| Fragmentation | Default | General purpose; damage and suppression. |
| M18 Smoke | Unlock via score | Creates cover; used to block vision. |
| M34 Incendiary | Unlock via score | Area denial; damage over time. Great for chokepoints. |
| V40 Mini | Battlepack drop | Low damage but quick throw; can be used to finish enemies. |
| RGO Impact | Battlepack drop | Detonates on impact; reduces cooking time. |
2. Vehicle Weapons & Equipment
Each vehicle class (Tanks, IFVs, Attack Helis, Scout Helis, Jets, Boats) has unlockable primary and secondary weapons, countermeasures, and upgrades.
2.1 Tanks (MBTs)
| Item | How to Obtain | When Useful |
|---|---|---|
| AP Shell | Default | Standard anti-tank round. |
| HE Shell | Unlock via tank score | High explosive; good against infantry and light vehicles. |
| Sabot Shell | Unlock via tank score | Armor-piercing; higher velocity, better against heavy armor. |
| Canister Shell | Unlock via tank score | Shotgun effect; devastating against infantry. |
| Guided Shell | Unlock via tank score | Laser-guided; must have SOFLAM or PLD. |
| Thermal Optics | Unlock via tank score | See heat signatures; useful in smoke/fog. |
| IR Smoke | Default | Countermeasure to break lock-ons. |
| APS (Active Protection System) | Unlock via tank score | Intercepts incoming rockets for a short time. |
| Reactive Armor | Unlock via tank score | Reduces damage from shaped charges. |
| Belt Speed | Unlock via tank score | Faster reload. |
2.2 IFVs (Infantry Fighting Vehicles)
Similar to tanks but with a secondary autocannon. Unlocks include:
- AP/HE rounds
- TOW Missile (wire-guided)
- Zuni Rockets
- Airburst (for anti-infantry)
- Thermal Imaging
- Smoke, APS
- Proximity Scan (detect nearby enemies)
2.3 Attack Helicopters
| Item | How to Obtain | When Useful |
|---|---|---|
| 25mm Cannon | Default | Main weapon |
| 30mm Cannon | Unlock | More damage, slower fire |
| TOW Missiles | Unlock | Lock-on not required; wire-guided |
| Hydra Rockets | Unlock | Area damage |
| Heatseekers | Unlock | Lock-on missiles for air combat |
| Flares | Default | Countermeasure |
| ECM Jammer | Unlock | Disrupts locks briefly |
| Air Radar | Unlock | See aircraft on minimap |
| Stealth Coating | Unlock | Reduce lock-on range |
| Belt Speed | Unlock | Faster cannon reload |
2.4 Scout Helicopters
Smaller, agile. Unlocks include:
- 7.62mm Minigun
- 25mm Cannon
- TOW Missile
- Zuni Rockets
- Heatseekers
- Laser Painter (for guided munitions)
- Flares, ECM
- Air Radar, Proximity Scan
- Primary: 20mm/25mm/30mm cannon
- Secondary: Heatseekers, Laser Guided Bombs, Rockets
- Countermeasures: Flares, ECM
- Upgrades: Stealth, Radar, Belt Speed
- 50 cal MG
- Tow Missile
- Zuni Rockets
- Countermeasures
2.5 Jets
2.6 Boats (RHB)
---
3. Attachments
Attachments are unlocked per weapon via score, Battlepacks, or Assignments. They modify weapon performance.
| Category | Examples | How to Obtain | When Useful |
|---|---|---|---|
| Muzzle | Flash Hider, Suppressor, Heavy Barrel, Muzzle Brake, Compensator | Unlock via weapon score | Flash hider hides muzzle flash; Suppressor hides minimap blip but reduces range. Heavy barrel improves accuracy. |
| Underbarrel | Bipod, Vertical Grip, Stubby Grip, Angled Grip, Laser/Light Combo, Tactical Light, Ergo Grip | Unlock via weapon score | Bipod for LMGs; grips reduce recoil or improve hipfire. |
| Optics | Red Dot, Holographic, Kobra, PKA-S, ACOG, 3.4x, 4x, 8x, 40x (sniper) | Unlock via weapon score or Battlepacks | Choose based on engagement range. |
| Magazine | Extended Mag, Quick Mag | Unlock via weapon score | Extended gives more bullets; Quick speeds reload. |
| Underbarrel Mount for Assault Rifles | M320 (HE, Smoke, FB) | Unlock via score (M320) or Battlepacks (alternatives) | Adds grenade launcher to assault rifle instead of underbarrel. |
4. Field Upgrades (Perk System)
Each class has a set of field upgrades that unlock as you earn score during a life. They provide passive bonuses.
| Field Upgrade | How to Obtain | Effects | When Useful |
|---|---|---|---|
| Offensive (Assault) | Default | Increased sprint speed, faster health regen, extra grenade | Pushing objectives |
| Defensive (Assault) | Unlock via class score | Reduced explosive damage, increased armor, faster revive | Holding positions |
| Anti-Armor (Engineer) | Default | Faster rocket reload, extra rocket, more explosive damage | Vehicle hunting |
| Mechanized (Engineer) | Unlock via class score | Faster repair, vehicle damage reduction while repairing, extra repair tool | Vehicle support |
| Support (Support) | Default | More ammo per box, faster LMG resupply, extra explosive | Suppression |
| Indirect Fire (Support) | Unlock via class score | Increased blast radius for explosives, extra claymore | Area denial |
| Shadow (Recon) | Default | Suppressor equip delay reduction, faster movement when crouched, silent sprint | Stealth |
| Spec Ops (Recon) | Unlock via class score | Spawn beacon lasts longer, spawn on beacon with more health, extra motion sensor | Flanking |
5. Battlepacks
Battlepacks contain random cosmetic and gameplay items. Gold Battlepacks earned via leveling, Bronze via assignments, and Premium Battlepacks via Premium membership.
| Item Type | Contents | How to Obtain |
|---|---|---|
| Weapon Camos | Paint schemes for weapons | Random drop |
| Vehicle Paints | Paint schemes for vehicles | Random drop |
| Weapon Battlelog Emblem Pieces | For customizing emblem | Random drop |
| Knife Weapon (melee) | Unique melee weapons (e.g., Carbon Fiber) | Random drop from Gold/ Premium Battlepacks |
| Accessory Items | XP Boosts, Gadget Paint, Soldier Camo | Random drop |
| Assignment Shortcuts | Unlocks specific assignments | Premium Battlepacks only |
6. Assignments
Assignments are challenges that unlock specific weapons, camos, or dog tags. They are available from the menu or through Battlepacks.
| Assignment Name | Objective | Reward |
|---|---|---|
| Roadkill Maniac | 10 vehicle kills with the same vehicle in one round | Dog tag |
| Expert Recon | 50 headshots with sniper rifles | Unlock the CS-LR4 sniper rifle |
| Bomb Squad | Destroy 20 enemy pieces of equipment | Unlock the MAV |
| Chain Link Commander | Get 50 kills with any carbine | Unlock the ACW-R |
| Many more… | Vary | Weapons, camos, dog tags, XP |
7. Dog Tags
Virtual collectibles displayed in-game after kills. Over 200 dog tags, earned via assignments, class progression, or Battlepacks. They serve no gameplay function but show your achievements.
---
8. Cosmetics (Camos, Skins, Character Outfits)
| Category | Examples | How to Obtain |
|---|---|---|
| Weapon Camos | Flat finish, Digital patterns, Woodland, Arctic | Battlepacks, Assignments, Premium |
| Vehicle Camos | Tank, Heli, Jet paints | Battlepacks, Assignments |
| Character Camo | Soldier camouflage patterns | Battlepacks |
| Knife Skins | Default, Carbon Fiber, Gold | Battlepacks (Gold on rare) |
| Emblems | Custom emblem parts | Battlepacks |
9. Currency & Progression
Battlefield 4 has no premium currency. Progression is entirely score-based.
| System | Description | How to Earn |
|---|---|---|
| Score (XP) | Experience points – every action gives XP. | Kills, objectives, assists, revives, repairs, resupplies, vehicle kills. |
| Class Score | Separate XP for each class – unlocks class-specific weapons/ gadgets. | Playing that class. |
| Vehicle Score | Separate XP for each vehicle type – unlocks vehicle weapons/ upgrades. | Using that vehicle. |
| Weapon Score | XP per weapon – unlocks attachments for that weapon. | Kills with that weapon. |
| Rank | Overall soldier level (1–100, then Paragon levels). Unlocks some items and Battlepacks. | Total XP earned. |
| Service Stars | Earned at 100 kills with a weapon; gives a dog tag and small XP bonus. | 100 kills per star. |
| Battlepacks | Earned at rank milestones, class level-ups, or via assignments. | Leveling, completing assignments. |
10. Consumables & Equipment Summary
| Item | Type | How to Obtain | Use |
|---|---|---|---|
| Medkit | Throwable/gadget | Default Assault | Heals 60 HP per second in radius. |
| Defibrillator | Gadget | Unlock by Assault 2 | Revives with 100 HP (if fully charged). |
| Ammo Box | Gadget | Default Support | Resupplies all ammo types over time. |
| Repair Tool | Gadget | Default Engineer | Repairs vehicles for 25 HP per second (can overheat). |
| C4 Explosives | Gadget | Unlock Support | Placed and detonated remotely; 2 sticks per life (max 6). |
| Claymore | Gadget | Unlock Support | Proximity mine; kills infantry. |
| Spawn Beacon | Gadget | Default Recon | Placed beacon; squad can spawn on it. |
| Motion Sensor | Gadget | Recon unlock | Scans area; enemies appear on minimap. |
| MAV | Gadget | Recon unlock | Flying drone; can destroy enemy equipment. |
| SOFLAM | Gadget | Recon unlock | Laser designator; guides lock-on missiles. |
| PLD | Gadget | Recon unlock | Same as SOFLAM but handheld. |
| T-UGS | Gadget | Recon unlock | Deployable motion sensor. |
| M320 (HE/Smoke/FB) | Underbarrel | Assault AR unlock | Grenade launcher attachment. |
| Frag Grenade | Equipped | Default | Explosive damage. |
| Smoke Grenade | Equipped | Unlock | Creates smoke screen. |
| Incendiary Grenade | Equipped | Unlock | Fire area denial. |
| V40 Mini | Equipped | Battlepack | Small impact grenade. |
| RGO Impact | Equipped | Battlepack | Impact detonation. |
11. Special Items – XP Boosts
Obtained from Battlepacks. Consumable items that double or triple XP for a period (e.g., 25%, 50%, 100% boost for 1 hour). Use them during double XP events for maximum effect.
---
12. Collectibles – Single-Player
In the single-player campaign, there are 21 collectible “Field Upgrade” modules that unlock weapon attachments in multiplayer. They are found in hidden locations. Each module corresponds to a specific attachment (e.g., Red Dot Sight, Laser Sight). Collecting all unlocks the “Full Upgrade” achievement.
---
Final Notes
- Most items are unlocked by playing the game; no real-money purchases required (except Premium for some content).
- Synergies: Use the SOFLAM with Engineer’s Javelin for deadly anti-tank combos. Pair the Spawn Beacon with a suppressed PDW for flanks.
- Always check your class’s field upgrade tree; the final perk is powerful (e.g., Offensive’s extra grenade).
- Battlepack drops are RNG; you cannot trade or craft items.
This guide covers all major item categories in Battlefield 4. For specific unlock requirements, refer to the in-game progression menu or the Battlefield 4 wiki.
Character Skills
Character Skills Guide (Classes & Roles)
Battlefield 4 does not feature individual characters with unique skill trees; instead, it uses a class system with four distinct roles: Assault, Engineer, Support, and Recon. Each class has exclusive gadgets, weapons, and a set of Field Upgrades (specializations) that act as passive and active skills. Additionally, all players share universal abilities like sprinting, vaulting, and swimming.
This guide covers every class-specific ability, gadget, field upgrade, and special move, including effects, cooldowns, upgrades, recommended builds, and usage scenarios.
---
1. Assault Class
Role: Infantry Healer & Shocker
Primary weaponry: Assault Rifles. Secondary: Pistols. Gadget slots: two (one is the class gadget, the other can be a universal gadget like med kit or defibrillator).
Class Gadgets
#### M320 Grenade Launcher (HE & Smoke variants)
- Effect: Fires a single 40mm high-explosive or smoke grenade. HE deals heavy splash damage (max 200 direct, 100 splash). Smoke creates a large opaque cloud for ~20 seconds.
- Cooldown: None (ammo-based; resupply from Support or ammo boxes). Rate of fire ~60 RPM.
- Upgrades: No direct upgrades. Can equip the M320 LVG (low-velocity grenade) which bounces and detonates on impact.
- Combos/Synergies: Smoke + thermal optics for Assault or Recon to engage while hidden. HE to clear room corners before entry.
- When to use: Use HE for anti-infantry or light vehicles. Smoke for reviving teammates in open areas or denying sightlines.
- Effect: Underbarrel shotgun. M26 Frag fires flechette rounds (low dmg, wide spread). M26 Slug fires a single slug (high dmg, accurate). Both attach to an assault rifle.
- Cooldown: None; reload per shell (1.5s per shell).
- Combos: Use M26 Slug to one-shot enemies at close range when your rifle runs dry. Frag rounds are weak – avoid.
- Effect: Revives a downed teammate (full health with 50 charge? Actually BF4 paddles revive with 20% health by default, but can be upgraded via field upgrades to 50% or 100% with the "Combat Medic" field upgrade). Can also be used offensively – shock an enemy (kill at close range, 100 damage).
- Cooldown: 1 second between uses; charging time ~2 seconds for full revive (hold trigger).
- Upgrades: Field upgrade tree: Combat Medic (reduces charge time, increases revive health).
- Synergies: Equip the Med Kit to heal after revive. Use smoke for cover while reviving.
- When to use: Always revive when safe. Offensive paddles are risky but can surprise.
- Effect: Deploy a stationary med pack that heals nearby teammates over time (heals ~15 HP per second). Can be picked up.
- Cooldown: None; resupply from ammo boxes. Has 3 uses before depleting (recharge via ammo).
- Upgrades: Improved healing speed? Not directly. Field upgrade "Combat Medic" increases healing AoE radius.
- Synergies: Use with smoke and paddles to keep squad alive.
- Effect: Underbarrel flashbang – blinds and deafens enemies for ~5 seconds. Long-range but small radius.
- Cooldown: Ammo based (1 round).
- When to use: Breaching rooms before assault.
- Effect: Repair friendly vehicles (10 HP per second) or damage enemy vehicles/equipment (low damage, ~5 HP per second). Can destroy enemy gadgets like spawn beacons.
- Cooldown: Overheat mechanic: continuous use for ~10s causes 3s cooldown. Not ammo-based.
- Upgrades: No direct upgrades; field upgrade "Mechanic" (see below) increases repair speed by up to 25%.
- Synergies: Jump off a vehicle to repair while moving? Not recommended. Use smoke to cover your repair.
- When to use: Repair your squad’s tank, support helicopter, or repair from behind cover.
- Effect: High-damage unguided rocket. RPG deals 100 direct hit damage to MBTs? Actually less – RPG deals 400 max damage to tanks (about 50% HP). SMAW similar. Lock-on to aircraft? No. Can lock onto laser-designated targets with ISRV? Actually only guided launchers like Stinger/IGLA lock. RPG/SMAW are dumb-fire.
- Cooldown: Reload ~4 seconds. Ammo: 2 rockets (resupply from ammo).
- Upgrades: None.
- Combos: Use with PLD (target designator) to see highlighted vehicles? Not necessary. Pair with smoke to conceal reload.
- Effect: Lock-on to aircraft. Stinger: fire-and-forget, 1.5s lock, damage ~40% to jets, higher to helis? IGLA: lock-on with flare countermeasure delay (can maintain lock after flares). Both require clear line-of-sight.
- Cooldown: Reload 4s, ammo 2. Stinger has 2 rockets; IGLA has 4? Actually carries 2 rockets.
- Synergies: Use with SOFLAM / PLD to increase lock range and reduce countermeasure effectiveness.
- Effect: MBT LAW: lock-on to ground vehicles, top-down attack (high damage). SRAW: wire-guided missile (can be manually steered, high skill). Both moderate damage.
- Cooldown: Reload ~4s.
- Effect: Remote-controlled robot (crawls, can repair vehicles, disarm/arm M-COM, destroy gadgets). Uses ammo? No, cooldown on deploy? It's a gadget with limited durability.
- When to use: Repair from safety, arm M-COMs from behind cover.
- Effect: Deploy a box that resupplies teammates' primary/secondary ammo (partial) and gadgets (slowly). Also heals? No. Can be picked up.
- Cooldown: None; box has ~5 supplies before depleting (resupply from ammo box itself? No). Perk "Ammo" increases capacity.
- Upgrades: Field upgrade "Resupply" increases resupply speed and box capacity.
- Effect: Thrown ammo bag that resupplies one teammate (single use, faster than box).
- Cooldown: Ammo-based (2 or 3 ?).
- When to use: Quick resupply in combat.
- Effect: Remote-detonated explosive. Can be placed on vehicles, walls, floors. Max 3 C4. Detonation button triggers explosion (1s delay).
- Damage: ~200 damage per brick – enough to destroy a tank with 2 bricks? Actually 3 bricks destroy an MBT. Can kill infantry with splash.
- Cooldown: None; resupply after use.
- Synergies: Place on Capture Points or M-COMs. Use smoke to cover placement.
- Effect: Proximity mine (laser tripwire). Deals lethal damage (1-shot infantry). Can be destroyed.
- Cooldown: None; max 2 active.
- When to use: Defend corridors, flanks.
- Effect: Deployable mortar that fires HE shells (with trajectory). Need line-of-sight elevation? No, uses minimap targeting. Slow projectile, 3s reload.
- Cooldown: None; ammo capacity 10 shells.
- Combos: Use with SOFLAM? No. Target spotted positions.
- Effect: Deploy a beacon that allows squadmates to spawn on it. Only one active at a time. Can be destroyed by enemies.
- Cooldown: None; after placed, it's permanent until destroyed or you place a new one.
- Synergies: Place behind enemy lines with smoke cover.
- When to use: Flanking routes, close to objectives.
- Effect: Thrown sensor that blips enemies on minimap within radius (~30m) for 30 seconds. Can be shot down.
- Cooldown: Ammo-based (3 balls).
- Upgrades: Field upgrade "Intel" increases lifetime and range.
- When to use: Clear rooms, defend flanks.
- Effect: Stationary motion detector. Placed on ground, detects crouch-walking enemies? Actually detects any movement within 50m. Stays active indefinitely until destroyed.
- Cooldown: None; resupply from ammo.
- When to use: Guarding a building entrance or objective.
- Effect: Laser-designates enemy vehicles, enabling lock-on for guided missiles (Stinger, Javelin, etc.). Also highlights vehicles for team.
- Cooldown: None; battery lasts indefinitely? Actually PLD has limited battery? No, unlimited usage.
- Synergies: Coordinate with Engineer with Javelin/Sraw.
- Effect: Same as Support's Claymore.
- When to use: Protecting beacon or sniper positions.
- Sprint – hold Shift (PC) or L3 (console). Speed boost but no weapon fire.
- Vault – climb over low obstacles. Press jump while sprinting.
- Slide – crouch while sprinting to slide (can fire during slide).
- Spotting (Q) – highlight enemies for team. Essential.
- Combat Roll – while sprinting, jump then crouch (advanced).
- Swimming/Diving – remain underwater limited time.
- Parachute – automatically deploys when falling from high? Actually you need to press space to deploy.
- Scan – reveals active enemies in an area for ~15s.
- Supply Drop – drops an ammo/health crate for team.
- Vehicle Drop – drops a light vehicle (jeep/buggy) at location.
- Cruise Missile – devastating explosive strike (long cooldown).
- EMP – disables enemy electronics in area. (Not in all maps?)
- Primary: M416 (high RoF) or ACE 23 (balanced).
- Gadgets: Defibrillator + Med Kit.
- Field Upgrade: Combat Medic (4 tiers).
- Playstyle: Stay near squad, revive and heal. Use smoke to cover revives.
- Primary: PDW (like MPX) for close quarters.
- Gadgets: Repair Tool + RPG (if no air threat) or Stinger (if enemy air).
- Field Upgrade: Mechanic tree for faster repair. Or Anti-Vehicle for extra rocket.
- Synergy: Pair with Recon's SOFLAM.
- Primary: M249 Saw (high mag) or Type 88 LMG.
- Gadgets: Ammo Box + C4.
- Field Upgrade: Resupply tree.
- Playstyle: Lay down suppression, resupply teammates, use C4 on tanks.
- Primary: Sniper Rifle (SRR-61 or CS-LR4) + any pistol.
- Gadgets: Spawn Beacon + Motion Sensor.
- Field Upgrade: Intel tree.
- Playstyle: Place beacon behind enemy lines, flank, spot enemies with motion balls.
#### M26 MASS Shotgun (Frag & Slug variants)
#### Defibrillator (Paddles)
#### Med Kit
#### M320 FB (Flash Bang)
Field Upgrades (Specializations)
Assault has two preset paths: Offensive (speed/ammo) and Defensive (survivability). You can mix via custom loadouts.
#### Offensive Tree
1. Fast Hands – faster weapon swapping (passive - always active? Actually it’s a bonus after reaching perk tier. Needs resupply? No, it's automatic after squad actions).
2. Ammo – grants extra magazines (all weapons). Max 2 tiers.
3. Cover – reduces suppression effect.
4. Perk 4 – Sprint (increase sprint speed by 10%).
5. Perk 5 – Nimble (improved movement while crouching/prone).
#### Defensive Tree
1. Flak – reduces explosive damage.
2. Body Armor – reduces bullet damage (minor).
3. Cover – same.
4. Perk 4 – Quick Regen (health regen starts earlier).
5. Perk 5 – Durable (reduces fall damage and revive time).
Also the Combat Medic field upgrade (class-specific) – 4 tiers:
1. Defibrillator charge time reduced by 20%.
2. Revived teammates start with 50% HP.
3. Healing radius increased.
4. Revived teammates start with 100% HP.
Recommended Build: Combat Medic – essential for team play.
---
2. Engineer Class
Role: Vehicle Buster & Repairman
Primary: Carbines / PDWs. Gadgets: Repair Tool, anti-vehicle launchers.
Class Gadgets
#### Repair Tool
#### RPG-7V2 / SMAW (Rocket Launchers)
#### Stinger / IGLA (Anti-Air Launchers)
#### MBT LAW / SRAW (Guided Launchers)
#### EOD Bot
Field Upgrades
Engineer-specific: Mechanic tree (repair speed) and Anti-Vehicle tree.
#### Mechanic Tree
1. Repair Speed (increases repair tool healing speed by 10% per tier, max 25% at tier 3).
2. Vehicle Armor (adds minor explosive resistance? Actually "Defense" perk).
3. Ammo (extra magazines).
4. Cover / Flak (depending on path).
#### Anti-Vehicle Tree
1. Extra Rockets (carry an additional rocket, max +1 at tier 3).
2. Lock-On Range (increases lock distance for Stinger/IGLA? Actually "Target Acquisition" perk).
3. Suppression (increases accuracy after being hit).
Recommended build: Mechanic tree for repairing; Anti-Vehicle for ammo capacity.
---
3. Support Class
Role: Ammo Supplier & Suppressive Fire
Primary: Light Machine Guns (LMGs). Gadgets: Ammo Box / C4 / Claymore / Mortar.
Class Gadgets
#### Ammo Box
#### Ammo Pack
#### C4 Explosive
#### Claymore
#### M224 Mortar
Field Upgrades
Support has Resupply (ammo related) and Explosives (C4/Claymore) trees.
#### Resupply Tree
1. Ammo Capacity (more ammo for gadgets).
2. Resupply Speed (faster replenishment).
3. Extra Gadget (carry an extra gadget item? Actually adds a second C4 brick? No, it's "Gadget" perk that reduces gadget deploy time).
4. Cover / Suppression (reduced suppression effect).
#### Explosives Tree
1. Demolition (C4 damage increase? No, it reduces time to detonate).
2. Extra C4 (carry an extra brick).
3. Claymore (deploy an additional claymore? Actually "Mine" perk increases mine count).
4. Flak (explosive resistance).
Recommended Build: Resupply tree for team play; Explosives for solo anti-vehicle.
---
4. Recon Class
Role: Sniping & Intel Gathering
Primary: Sniper Rifles / DMRs. Gadgets: Radio Beacon, Motion Sensor, T-UGS, SOFLAM/PLD.
Class Gadgets
#### Radio Beacon (Spawn Beacon)
#### Motion Sensor (Motion Balls)
#### T-UGS
#### SOFLAM / PLD (Target Designators)
#### C4 (also available? No, only Support gets C4. Recon has Claymore? Actually Recon has Claymore and C4? No, only Support has C4. Recon has C4? Let's check: In BF4, Recon can equip C4? Actually yes, but the gadget list includes C4 as a universal gadget? No, it's class-specific: Support gets C4 and Claymore; Recon gets Claymore? I recall Recon can use Claymore. Let's correct: Recon's exclusive gadgets are Spawn Beacon, Motion Sensor, T-UGS, SOFLAM/PLD, C4? Wait, in Battlefield 4, C4 is available to both Support and Recon? Actually in BF4, C4 is a gadget for Support only. Recon has Claymore. Yes, Recon has Claymore (can be equipped as a gadget). So we include Claymore under Recon.
#### Claymore (Recon)
Field Upgrades
Recon has Intel (sensor upgrades) and Sniper (stealth/accuracy).
#### Intel Tree
1. Motion Sensor (increases detection range and lifetime).
2. T-UGS (increases range).
3. Spawn Beacon (faster spawn using beacon? Actually "Beacon" perk removes spawn delay).
4. Cover / Quick Regen (health regen).
#### Sniper Tree
1. Hold Breath (longer breath hold time for sniper rifles).
2. Steady Aim (reduces scope sway after being hit).
3. Scope Magnification (optional).
4. Flak / Body Armor.
Recommended Build: Intel tree for team support; Sniper tree for aggressive sniping.
---
5. Universal Skills & Abilities
All players can perform the following without requiring class-specific loadouts:
These are not 'skills' that can be upgraded but are core movement mechanics.
---
6. Commander Mode (Role)
While not a 'character skill' per se, the Commander can issue orders, drop supply/vehicle crates, scan areas, and launch Cruise Missiles. Requires iPad or separate screen.
---
7. Recommended Loadouts & Synergies
Assault (Combat Medic)
Engineer (Anti-Vehicle)
Support (Suppressive Fire)
Recon (Spotter/Sniper)
---
8. Conclusion
In Battlefield 4, character skills are defined by class gadgets, field upgrades, and team coordination. There are no explicit 'spells' or 'talents'—instead, mastery comes from choosing the right loadout for the situation, stacking field upgrades via squad actions, and using gadgets effectively. Focus on supporting your squad and adapting your role based on map and enemy composition.
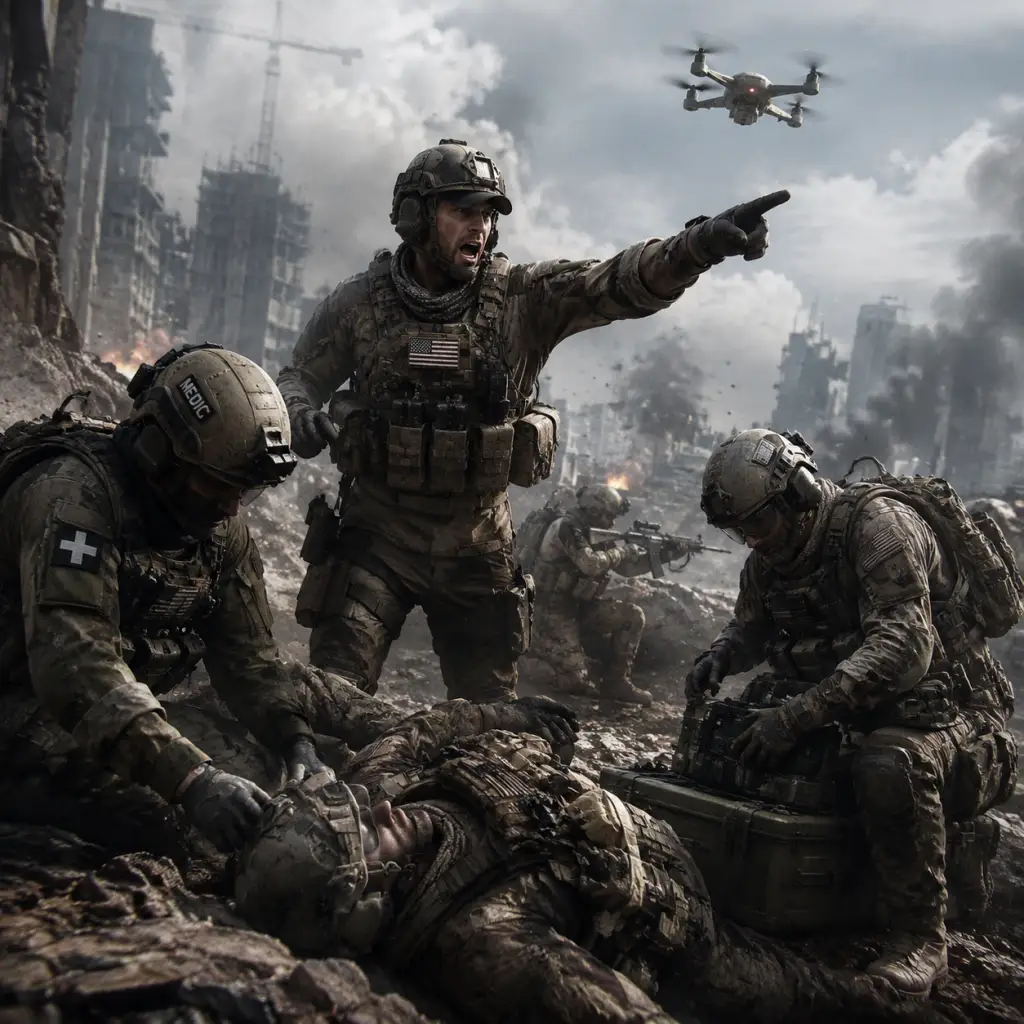
Characters & Roles
Battlefield 4: Characters & Roles Guide
Battlefield 4 does not feature individual named heroes or characters with unique abilities. Instead, the game revolves around a class-based system where players choose one of four distinct infantry classes, each with a dedicated role on the battlefield. Additionally, the Commander role offers a strategic overhead perspective for those who prefer leadership. This guide covers every playable role in the multiplayer experience, including their strengths, weaknesses, optimal loadouts, and team synergy.
---
1. Assault Class
The Assault class is the frontline medic and aggressive infantry pusher. It is the most versatile class for objective-focused combat, capable of healing and reviving teammates while engaging enemies at medium range.
- Background: The Assault class represents the standard rifleman and combat medic of a modern military force. Equipped with assault rifles and defibrillators, they are the backbone of any squad pushing into enemy territory.
- Strengths:
- Weaknesses:
- Playstyle: Stay with your squad, push objectives, and prioritize reviving teammates. Use assault rifles for mid-range dominance. Equip the M320 HE or M26 MASS for extra utility or close-quarters destruction.
- Unlock Conditions: Available from level 1. Gadgets and weapons unlock through class progression (e.g., Defibrillator at 500 points, Medic Bag at 10,000 points).
- Recommended Equipment/Build:
- Team Synergy: Pairs well with Support (ammo) and Engineer (anti-vehicle). Revives keep squad alive. Use voice comms to call out need for ammo.
- Background: Engineers are the technical experts who maintain and destroy vehicles. Equipped with carbines and launchers, they protect friendly armor and disable enemy vehicles.
- Strengths:
- Weaknesses:
- Playstyle: Stick with friendly vehicles to repair them. Use terrain to ambush tanks. When no vehicles are present, act as an aggressive infantry flanker with a carbine. Prioritize destroying enemy armor.
- Unlock Conditions: Available from level 1. Unlock RPG-7 (start), SMAW (10,000 Engineer points), Stinger (50,000 Engineer points).
- Recommended Equipment/Build:
- Team Synergy: Vital for every vehicle crew. Support can resupply your rockets. Recon can spot vehicles. Coordinate with Assault to keep you healed.
- Background: Support gunners are the firebase of a squad, laying down suppressive fire to pin enemies while supplying their team. They are the backbone of defensive holds and offensive pushes alike.
- Strengths:
- Weaknesses:
- Playstyle: Find a good vantage point or bunker. Deploy ammo near your squad. Use bipod on LMG for sustained fire. Place C4 on chokepoints or objective areas. Use Mortar only when safe from counter-battery.
- Unlock Conditions: Available from level 1. C4 unlocked at 10,000 Support points; Mortar at 50,000 Support points.
- Recommended Equipment/Build:
- Team Synergy: Always be near Assault and Engineer to keep them supplied. Recon appreciates ammo for spawn beacons. Use Smoke to cover revives or advances.
- Background: Recon soldiers are scouts and sharpshooters. Their primary role is spotting enemies via Motion Sensors and Spawn Beacons, allowing the team to anticipate enemy movements. They are not just snipers; they are force multipliers.
- Strengths:
- Weaknesses:
- Playstyle: Find a hidden spot with a good view of objectives. Use motion sensor near flags to detect flanks. Place spawn beacon in a safe, strategic location. Spot enemies constantly (Q key). Engage priority targets (eg, other snipers, engineers, medics). Use C4 or Claymores for close defense.
- Unlock Conditions: Available from level 1. Spawn Beacon unlocked at 500 Recon points; PLD at 50,000 Recon points.
- Recommended Equipment/Build:
- Team Synergy: Place beacon behind enemy objectives for Assault/Engineer flanks. Spot for Engineer with PLD. Use motion sensors to warn Support of flankers. Communicate enemy positions.
- Background: The Commander acts as the overarching strategist, coordinating squads and deploying powerful team-wide bonuses. This role is inspired by real-world command and control.
- Strengths:
- Weaknesses:
- Playstyle: Stay alive, scan frequently, drop supplies near objectives where fighting is heavy. Prioritize squads that follow orders. Use Cruise Missile on clustered enemies or to destroy M-COMs. Coordinate with squad leaders.
- Unlock Conditions: Available after reaching rank 10 (or Commander rank). Accessed via Battlelog multiplayer menu or in-game Commander screen.
- Recommended Equipment/Tools:
- Team Synergy: The entire team benefits from Commander. Best synergy with Squad Leaders who listen and mark objectives. Use EMP to disable enemy assets like Mortar or Gunship.
- Tank Driver: Controls movement, uses main cannon (AP or HE), can equip secondary weapons (e.g., HMG, canister shell). Strengths: Frontline armor, area denial. Weaknesses: Slow, vulnerable to C4 and RPGs from sides/rear. Playstyle: Stay with friendly engineers, angle armor, use terrain.
- Tank Gunner: Controls the coaxial LMG and possibly a secondary weapon like a grenade launcher. Focus on infantry and spotting. Very exposed if turret is popped.
- Attack Helicopter Pilot: Maneuvers the chopper, fires TV missiles, rockets, and cannon (if gunner is present). Strengths: High mobility, devastating against armor. Weaknesses: Can be locked by Stingers, easily shot down by skilled pilots.
- Jet Pilot: Controls fixed-wing aircraft. Air superiority or ground attack (stealth jet vs. attack jet). Requires high skill and map awareness.
- Naval Craft: Similar driver/gunner roles for boats (e.g., RHIB, DV-15). Used on maps like Paracel Storm.
- Can revive downed teammates with the Defibrillator (instant revive vs. syringe revive).
- Heals allies with Medic Bag or M320 Flashbang (less common).
- Assault rifles are powerful at all ranges; high damage output and accuracy.
- No anti-vehicle gadgets (cannot destroy tanks or aircraft without help).
- Lacks suppression capabilities compared to Support class.
- Defibrillator leaves you vulnerable during use.
- Primary: AEK-971 (high ROF, aggressive) or SCAR-H (heavy damage, low ROF).
- Secondary: G18 (full-auto) for close range.
- Gadget 1: Medic Bag (area heal).
- Gadget 2: Defibrillator.
- Grenade: M67 Frag or Smoke (cover revives).
- Field Upgrade: Offensive (more ammo, faster sprint).
---
2. Engineer Class
The Engineer class is the vehicle hunter and repair specialist. They are essential on maps with heavy armor and aircraft. Their anti-tank rockets and repair tools make them indispensable for combined arms.
- Repair Tool can repair friendly vehicles and damage enemy vehicles (risky).
- RPG-7 or SMAW deals massive damage to armor.
- Stinger or IGLA for anti-air (lock-on).
- Carbines are effective at close to medium range, better than LMGs for mobile combat.
- Weak against infantry at long range (carbines have damage drop-off).
- Anti-air lock-on requires line of sight and can be countered by flares.
- Repair Tool requires proximity, exposing you to fire.
- Primary: AK5C (balanced) or ACW-R (high ROF).
- Secondary: SW40 (revolver) for backup.
- Gadget 1: RPG-7 or SMAW (dumb-fire, high damage) – prefer RPG for mobility hits.
- Gadget 2: Repair Tool.
- Grenade: M67 Frag or M18 Smoke (cover repairs).
- Field Upgrade: Anti-Vehicle (faster lock-on, increased launcher ammo).
---
3. Support Class
The Support class provides suppressive fire and ammunition. Their LMGs are devastating at medium to long range, and they can resupply teammates with ammo packs or boxes.
- Ammo Pack or Ammo Box resupplies all gadget and explosive ammo.
- C4 can destroy vehicles or blow up walls.
- LMGs have large magazines and suppress enemies (makes them inaccurate).
- Mortar (unlocked later) provides indirect fire.
- LMGs are heavy; slower movement and reload.
- Suppression mechanic reduces your own accuracy if you move while firing.
- C4 is risky to plant on moving vehicles.
- Primary: M249 SAW (stable) or PKP Pecheneg (high damage).
- Secondary: Compact 45 (quick swap).
- Gadget 1: Ammo Box (larger radius, dowses all ammo).
- Gadget 2: C4 (2 x 3 packs).
- Grenade: M67 Frag or Smoke (to cover ammo reposition).
- Field Upgrade: Support (more ammo, faster resupply).
---
4. Recon Class
The Recon class is the eyes and ears of the team, spotting enemies and providing intel. They can also engage at extreme ranges with sniper rifles or use DMRs for mid-range support.
- Spawn Beacon allows squad to parachute behind enemy lines.
- Motion Sensor (T-UGS) detects enemies in a radius (invisible to enemies).
- PLD (Target Designator) can lock onto vehicles for guided missiles.
- Sniper rifles can one-shot headshot at any range.
- Weak in close quarters (unless using DMR or C4).
- Snipers have slow fire rate and long reloads.
- Spawn beacons can be destroyed if placed poorly.
- Primary: SRR-61 (best ballistics) or CS-LR4 (fast bullet velocity). For aggressive play: M39 EMR (DMR) with medium scope.
- Secondary: G18 (close range panic).
- Gadget 1: Spawn Beacon (mandatory for squad mobility).
- Gadget 2: Motion Sensor (T-UGS) or C4 (if you push).
- Grenade: M18 Smoke (cover retreats or conceal line of sight).
- Field Upgrade: Recon (extended motion sensor range, faster beacon spawn).
---
5. Commander Mode (Playable Role)
The Commander is a non-infantry strategic role available on PC and consoles (via tablet or second screen). The Commander supports the team from a top-down map view, issuing orders and deploying assets.
- Can issue squad orders (attack/defend) which grant bonus points.
- Drops Supply Crates (ammo, health) and Vehicles (e.g., MRAP, ATV, or even a Gunship on some maps).
- Uses EMP, Cruise Missile, and UAV scans.
- Scans reveal enemy positions on minimap.
- No direct combat involvement; relies on squads to execute orders.
- Vulnerable to enemy Commander countermeasures (e.g., EMP can disable your scans).
- Can be killed (Commander dies if player-controlled slot is eliminated) – but usually safe behind lines.
- UAV Scan (reconnaissance)
- Supply Drop (keep your team fed)
- CR Missile (offensive)
- EMP (counter enemy Commander gadgets)
---
6. Vehicle Crews (Driver/Gunner Roles)
While not a distinct class, Battlefield 4 features vehicle roles that function separately from infantry. In tanks, IFVs, helicopters, and jets, players take on driver or gunner positions, each with unique responsibilities.
Each vehicle crew position requires coordination. Engineers are the best repairers; Support can resupply vehicle ammo (if inside).
---
Class Progression & Unlock Summary
Classes are available from the start but specific gadgets and weapons require cumulative points in that class. Below are key unlocks per class:
| Class | Gadget Unlock 1 | Gadget Unlock 2 | Gadget Unlock 3 |
|---|---|---|---|
| Assault | Defibrillator (500 pts) | M320 HE (10k) | M26 MASS (50k) |
| Engineer | RPG-7 (default) | SMAW (10k) | Stinger (50k) |
| Support | Ammo Pack (default) | C4 (10k) | Mortar (50k) |
| Recon | Spawn Beacon (500 pts) | Motion Sensor (10k) | PLD (50k) |
---
Final Tips for Role Selection
- Always adapt to your team's needs. If your team lacks medics, switch to Assault. If vehicles dominate, go Engineer.
- Coordinate gadgets. A Support with C4 can be a vehicle hunter, but Engineer is more reliable.
- Use Field Upgrades that complement your playstyle. For example, Offensive for Assault, Anti-Vehicle for Engineer.
- Communicate with your squad. A coordinated squad with one of each class is incredibly effective.
This guide covers all playable roles in Battlefield 4. Master them to become a versatile and valuable team member.
Cheats & Secrets
Cheats & Secrets for Battlefield 4
Battlefield 4 does not include traditional cheat codes, console commands, or unlock-all cheats. The game is primarily online multiplayer with strong anti-cheat (FairFight, PunkBuster), and any attempt to use third-party software or exploit glitches can result in a permanent ban. However, DICE included several developer-intended hidden features, Easter eggs, and secret unlockable content that are legitimate and safe to pursue. Below is a complete guide.
1. No Cheat Codes
- Single-player: No console commands, god mode, or ammo cheats exist in the campaign. The single-player is linear with no built-in cheat menu.
- Multiplayer: Using any hack, macro, or trainer violates EA’s terms of service. Do not attempt.
- Test Range: The Test Range (accessible from multiplayer menu) is a free-play area with unlimited ammo; treat it as the only “cheat” for practice.
- Play on Operation Outbreak. At the start of the round, go to the central tower (the crashed ship). On the ground floor, there is a hidden room (look for a wall with a faint outline). Interact with it – if you have the Phantom Assignment active, it will open. Inside you can pick up the Phantom Bow. Use it to complete the assignment.
- Phantom Bow – A silent, one-hit-kill weapon (uses arrows). Very rare.
- Phantom Camo – A special camouflage pattern (unlocked by finishing the assignment).
- Phantom Dog Tag – A unique dog tag.
- Giant Floating Rubber Duck: On the map Paracel Storm, there is a hidden giant rubber duck that appears when you activate a certain sequence. Step on a series of pressure plates near the crashed satellite dish to make a rubber duck fall from the sky. (No gameplay effect, just fun.)
- Mega Duck (Seaside Duck): On Hainan Resort, there is a hidden, oversized inflatable duck that can be launched by shooting its base. Located in the pool area near the hotel.
- Radio Towers & Music: On several maps (e.g., Golmud Railway), you can climb certain radio towers. The top might play a short, hidden music loop (like “The Final Countdown”).
- Gold Battlefield 4 Logo Dog Tag: Earned by completing all base game assignments.
- Phantom Dog Tags: As described above.
- Easter Egg Dog Tags: Some dog tags are unlocked by performing specific, obscure actions:
2. Secret Unlockables & Easter Eggs
#### 2.1 Phantom Program (Hidden Assignment & Weapon)
The Phantom Program was a community-driven ARG that eventually became an official hidden assignment. It rewards the Phantom Bow (special weapon) and Phantom Camo.
How to Unlock (as of final patch):
1. Unlock the Phantom Assignment: You need to collect the three Phantom Dog Tags (available as Battlelog rewards or by completing specific steps – now mostly legacy). Since the ARG is complete, the assignment is automatically granted if you meet the requirements.
2. Complete the assignment tasks:
- Get 10 kills with the Phantom Bow (if you don’t have it, see below).
- Get 10 kills while using the Phantom Camo.
- Get 10 kills on the map Operation Outbreak (or Hangar 21 / Giants of Karelia – check current assignment).
3. Phantom Bow Access: Requires the Phantom Assignment itself. Originally obtainable by entering a code on Battlelog (now defunct) or by killing a Phantom Operator at the hidden room. The easiest current method: find a player who already has the weapon and pick it up from their dead body, then get a kill with it. That counts.
4. Phantom Room Key: On Hangar 21, Giants of Karelia, and Operation Outbreak, there are hidden, locked doors that require a Phantom Key. To get the key, you must complete assignments that reward it. The key allows you to open a secret room containing the Phantom Bow pickup.
Alternative Method (still works):
Rewards:
#### 2.2 M1911 Target Designer (Hidden Weapon)
The M1911 Target Designer is a gold-plated version of the M1911 pistol with unique iron sights. It is a promotional weapon originally tied to Battlefield 4 pre-orders or limited editions. As of now, it cannot be unlocked through normal gameplay. It appears in the Customization menu if you have the license. No legitimate unlock method exists post-release. (Not a cheat, just legacy content.)
#### 2.3 Battlelog Easter Eggs
#### 2.4 Secret Dog Tags
- “Pirate” – Got stabbed? Unclear requirements.
#### 2.5 “No HUD” Mode (Hidden Feature)
Players can remove the entire heads-up display by holding the Select/Back button (console) or Z key (PC, default) for 3 seconds. This is an intentional feature for immersion and screenshots. Not a cheat.
3. Developer-Intended Hidden Content
| Feature | Description | How to Access |
|---|---|---|
| Commander Mode | Strategic overview; not exactly hidden, but many players don’t realize it exists. Available on certain servers. | Join a server with Commander enabled and apply via the role menu. |
| Test Range Secrets | On the Test Range, you can find a hidden basketball court. Shoot hoops for amusement. | Outside the main hangar, go left towards the training area. Look for a hoop near the wall. |
| Single-player Easter Egg (Baku) | In the mission “Baku,” there is a hidden room with a teddy bear and a toothbrush. | After the elevator scene, go right instead of left into a small office. |
| Hidden Crates (Multiplayer) | On Lancang Dam, destructible walls near the dam control room hide a crate with a special painting. | Shoot the weak wall next to the control room door. |
4. Exploit-Free Secrets (No Glitches)
All secrets listed above are developer-intended and do not require glitches or exploits. The Phantom Program is the deepest hidden content. It is still achievable today on all platforms (PC, PS4, Xbox One) by following the steps above, though the Battlelog website integration is limited. Use in-game assignments menu to track progress.
5. Important Note
Do not use third-party programs to unlock these items automatically. The game’s anti-cheat system will flag any unusual account activity. Patience and legitimate play are required. The Phantom Bow especially is a rare trophy that few players have unlocked legitimately.
Summary: Battlefield 4 has no cheat codes but offers deep, community-driven hidden content that rewards persistent players. Pursue the Phantom Program and Easter eggs for unique bragging rights.