Battlefield V
## Game Introduction: Battlefield V **Battlefield V** is a first-person shooter (FPS) video game developed by **DICE (Digital Illusions CE)** and published by **Electronic Arts (EA)**. It is the sixteenth installment in the *Battlefield* series and a direct successor to *Battlefield 1*. The game wa...
Download & Installation
Download & Installation Guide for Battlefield V
This guide covers the official ways to download and install Battlefield V on PC (Origin/EA app, Steam, Epic Games Store), PlayStation 4 & 5, and Xbox One & Series X|S. The game is not available on Nintendo Switch or mobile devices.
---
1. System Requirements (PC)
| Component | Minimum | Recommended |
|---|---|---|
| OS | Windows 7 64-bit or Windows 10 64-bit | Windows 10 64-bit (latest update) |
| Processor | AMD FX-8350 / Intel Core i5-6600K | AMD Ryzen 5 1600 / Intel Core i7-8700 |
| Memory | 8 GB RAM | 16 GB RAM |
| Graphics | AMD Radeon R9 290 / NVIDIA GeForce GTX 680 (4GB) | AMD Radeon RX 580 / NVIDIA GeForce GTX 1060 (6GB) |
| DirectX | Version 11.0 compatible | Version 11.0 or 12.0 |
| Storage | 50 GB available space (SSD recommended) | 50 GB available space (SSD required) |
| Internet | Broadband connection (512 kbps or faster) | DSL or faster (6 Mbps+ for online play) |
---
2. Account Requirements
All platforms require an EA Account (formerly Origin account). You can create one for free at [ea.com](https://www.ea.com).
- PC (Origin/EA app): An EA account is mandatory and linked to the client.
- PC (Steam / Epic): You will need both an EA account and a Steam/Epic account. The first launch will prompt you to link them.
- Consoles: An EA account is linked to your platform account (PSN or Xbox Live). If you don't have one, you can create it during the first run.
- Battlefield V runs on PS5 via backward compatibility, benefiting from faster loading and stable 60 FPS (dynamic 4K).
- No separate PS5 version; install the PS4 version.
- Battlefield V is not Series X|S optimized (no native version), but runs via backward compatibility with improved performance (60 FPS, faster load times).
---
3. Platform-Specific Installation Steps
3.1 PC – Origin / EA app (EA's Client)
The primary PC storefront for Battlefield V is the EA app (successor to Origin).
1. Download the EA app from [ea.com/ea-app](https://www.ea.com/ea-app).
2. Install and launch the app. Log in with your EA account.
3. Go to Store → search for "Battlefield V" or "Battlefield V Definitive Edition".
4. Click Get (if you own the game on EA Play or purchased previously) or Buy.
5. Complete purchase if not already owned.
6. The game will appear in My Library. Click Download.
7. Choose install location (NTFS drive with at least 50 GB free).
8. Wait for the download and installation to finish (about 40–80 GB depending on language packs).
9. Once done, click Play.
3.2 PC – Steam
1. Install the Steam client from [store.steampowered.com](https://store.steampowered.com).
2. Log in or create a Steam account.
3. In the Store, search for "Battlefield V".
4. Purchase or launch if already in library.
5. Click Install → choose a library folder.
6. During installation, Steam will also download and install the EA app in the background (required).
7. After download, click Play → this will launch the EA app to handle authentication.
8. The first time, you will see a prompt to link your Steam account with your EA account. Follow the on-screen instructions.
9. After linking, Battlefield V will start.
3.3 PC – Epic Games Store
1. Install the Epic Games Launcher from [epicgames.com](https://www.epicgames.com).
2. Log in with your Epic account.
3. Go to the Store → search "Battlefield V".
4. Purchase or click Get (if free via promotion).
5. The game is added to your library. Click Install → choose location.
6. The launcher will install Battlefield V and also set up the EA app within the Epic environment.
7. After installation, click Launch. A small EA app window will open for account linking/verification.
8. Link your Epic account to your EA account if not already done, then the game will launch.
3.4 PlayStation (PS4 & PS5)
#### Physical Disc
1. Insert the disc into the console.
2. The game will auto-install. On PS5, you may need to insert the PS4 disc and confirm installation.
3. Wait for installation to finish (you can play while downloading updates).
4. Launch from the home screen.
#### Digital Download
1. On your PS4/PS5, go to PlayStation Store.
2. Search for "Battlefield V".
3. Select the edition (Standard, Definitive, etc.) and purchase if not owned.
4. Click Download.
5. The console will queue the download. Ensure at least 50 GB free (PS5: same).
6. Once downloaded (and installed automatically), launch from the home screen.
7. You will be prompted to sign in to your PSN account and then link your EA account (if not linked).
#### PS5 Backward Compatibility
3.5 Xbox (Xbox One & Series X|S)
#### Physical Disc
1. Insert the disc.
2. The console will copy the disc. Wait for installation.
3. After copying, the game will appear in My games & apps.
4. Launch to play.
#### Digital Download
1. Press Xbox button → go to Microsoft Store.
2. Search for "Battlefield V".
3. Choose edition and purchase/download if needed.
4. The game will be added to My games & apps queue. Installation is automatic.
5. Ensure at least 50 GB free on internal or external drive.
6. Once installed, launch the game.
7. Sign in to Xbox Live, then link your EA account (prompted on first start).
#### Xbox Series X|S Optimization
---
4. Storage Space Details
| Platform | Required Space (approx.) | Additional Notes |
|---|---|---|
| PC (EA app/Steam/Epic) | ~50 GB base game + up to 20 GB for language packs & updates | SSD recommended; HDD may cause stuttering. Full install may reach 80 GB with updates. |
| PlayStation 4 | 50–60 GB | With patches and high-resolution textures. |
| PlayStation 5 | 50–60 GB (installs PS4 version) | Same size, but SSD reduces load times. |
| Xbox One | ~50–60 GB | Updates can increase to 70 GB+. |
| Xbox Series X\ | S | ~50–60 GB |
Game Introduction
Game Introduction: Battlefield V
Battlefield V is a first-person shooter (FPS) video game developed by DICE (Digital Illusions CE) and published by Electronic Arts (EA). It is the sixteenth installment in the Battlefield series and a direct successor to Battlefield 1. The game was officially announced on May 23, 2018, and released worldwide on November 20, 2018 for PC (Windows), PlayStation 4, and Xbox One. It later became playable on PlayStation 5 and Xbox Series X|S via backward compatibility, with enhanced performance patches. The PC version is available through Origin, Steam, EA app, and Epic Games Store.
Story Overview & Setting
Battlefield V returns to World War II, but instead of retreading the most familiar campaigns, it focuses on untold stories and diverse fronts. The single-player campaign is composed of multiple War Stories—self-contained, character-driven narratives that highlight individual experiences and lesser-known battles. These include:
- "Under No Flag" – A British convict is recruited into a special operations unit for sabotage missions in North Africa.
- "Nordlys" – A young Norwegian resistance fighter battles the German occupation and atomic bomb research.
- "Tirailleur" – Senegalese Tirailleurs (colonial soldiers) fight for France during the invasion of southern France.
- "The Last Tiger" – A German tank crew’s desperate last stand in the Ruhr pocket, told from a sympathetic enemy perspective.
- Billy Bridger (Under No Flag) – A British criminal turned commando.
- Solveig F. Bjørnstad (Nordlys) – A Norwegian resistance fighter.
- Deme Cissé (Tirailleur) – A Senegalese soldier fighting for France.
- Peter Müller (The Last Tiger) – A German tank commander confronting the futility of war.
- Conquest – Classic capture-and-hold mode with 64 players.
- Breakthrough – Attackers push through sectors against defenders.
- Grand Operations – Multi-day, multi-mode narrative battles (e.g., Fall of Norway, Battle of Crete).
- Frontlines – Teams fight over a single frontline flag, pushing into enemy territory.
- Team Deathmatch – Standard elimination mode.
- Dominion – Small-scale capture point mode (limited-time).
- Outpost – Build and defend radio beacons (limited-time).
- Firestorm – Battle royale for up to 64 players (removed from updates in 2019, still playable in some regions but no longer supported).
- Combined Arms – 1–4 players complete objectives against AI enemies, available in single-player or online co-op.
- War Stories – Four main campaigns (listed above), plus a prologue and intro mission. Completely offline.
- Offline: Single-player War Stories and the Combined Arms solo mode (without matchmaking). No offline multiplayer.
- Online: All multiplayer modes require an internet connection and EA account. Cross-play is not supported between consoles and PC, but PS4 and PS5 players can play together, as can Xbox One and Series X|S players within the same console family.
- Chapter 1: Overture – Introduced Panzerstorm map and vehicle customizations.
- Chapter 2: Lightning Strikes – Added Merkur map, new weapons, and vehicles.
- Chapter 3: Trial by Fire – Firestorm battle royale mode, Halvoy map.
- Chapter 4: Defying the Fall – Pacific Theater content: Wake Island, Iwo Jima, Pacific Storm maps, U.S. and Japanese factions, new weapons/vehicles.
- Chapter 5: War in the Pacific – Continued Pacific updates including a new map and weapons.
- Chapter 6: Into the Jungle – Added Solomon Islands map, plus more cosmetics and weapons.
- Fortifications System – Players can build sandbags, anti-tank obstacles, machine gun nests, and bunkers to shape the battlefield. This adds a tactical layer not seen in previous Battlefield titles.
- Attrition System – Limited ammo and health encourages squad play; medics revive faster and can heal fully. No automatic health regeneration (except through supply stations).
- Squad Revives – Any squad member can revive a downed teammate, reducing reliance on medics.
- Tides of War – Free live service with narrative-driven chapters, weekly challenges, and unlockable rewards.
- Customization – Extensive soldier and weapon cosmetics, including historically authentic and fictional outfits, earned through gameplay or purchase.
- Physical Destruction – The Frostbite engine delivers dynamic destruction: buildings collapse, terrain craters form, and walls can be breached by explosives.
- No Season Pass – Battlefield V was one of the first major EA shooters to offer all gameplay content for free, a response to community backlash against paid DLC fragmentation.
There is no overarching narrative; each War Story is a standalone vignette. The multiplayer mode is set across various WWII theaters, including Europe, North Africa, and the Pacific (via later updates).
Main Characters
Core Appeal & Target Audience
Battlefield V appeals to fans of large-scale multiplayer warfare who enjoy team-based tactics, combined arms combat (infantry, vehicles, aircraft), and immersive destruction. Its core features—dynamic fortification building, squad revives, attrition systems (limited ammo/health), and the new Tides of War live service—attract both veteran Battlefield players and newcomers to the series. The game is rated M for Mature (17+) due to violence, blood, and language.
Game Modes
Multiplayer (online):
Co-op:
Single-player:
Online / Offline Support
DLC & Expansion Overview
Battlefield V abandoned the traditional premium pass model in favor of a live service called Tides of War. All major gameplay content updates were free. Post-launch chapters added:
Additional maps (e.g., Al Marj Encampment, Operation Underground, Provence, Lofoten Islands, Fjell 652) were released through updates. No paid map packs were ever required. Microtransactions exist for cosmetic items (skins, weapon charms) through Battlefield Currency.
What Makes Battlefield V Unique?
Overall, Battlefield V is a visually stunning, large-scale WWII shooter that emphasizes squad teamwork, player agency through fortifications, and a commitment to telling lesser-known war stories. Its refined gunplay, combined with the epic set pieces Battlefield is known for, makes it a memorable entry in the series despite a rocky launch and eventual shift in support.
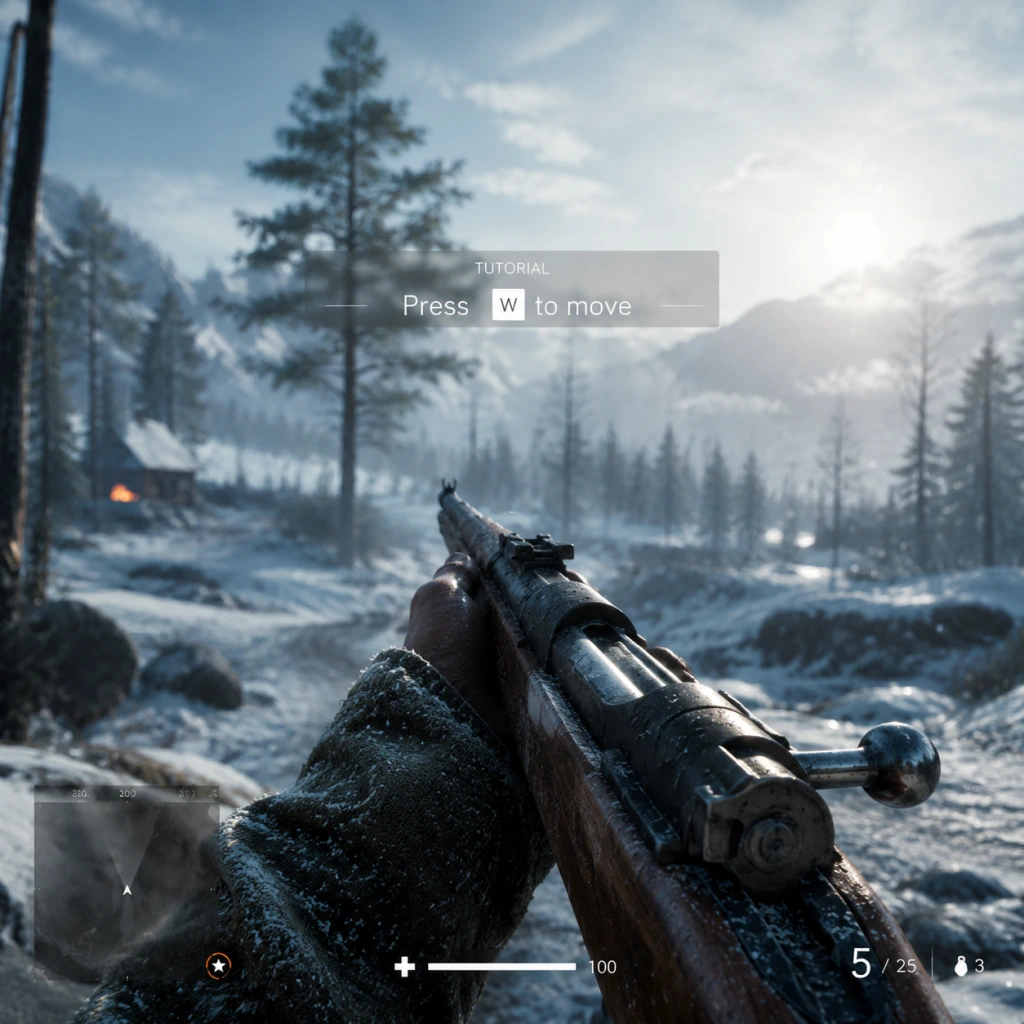
Getting Started
Getting Started with Battlefield V
This guide is designed to help brand-new players jump into Battlefield V without feeling overwhelmed. We'll cover your first hour, controls on all platforms, UI basics, what to prioritize, common mistakes, and a day-one checklist.
First Hour Walkthrough
1. Launch the game – After installation, start Battlefield V. You'll see the main menu. If you have an EA Play subscription or purchased the Definitive Edition, you may get extra currency or cosmetics, but ignore those for now.
2. Skip the prologue – The game offers a single-player "Prologue" mission. Beginners should skip it initially and head straight to multiplayer. You can return later for story context.
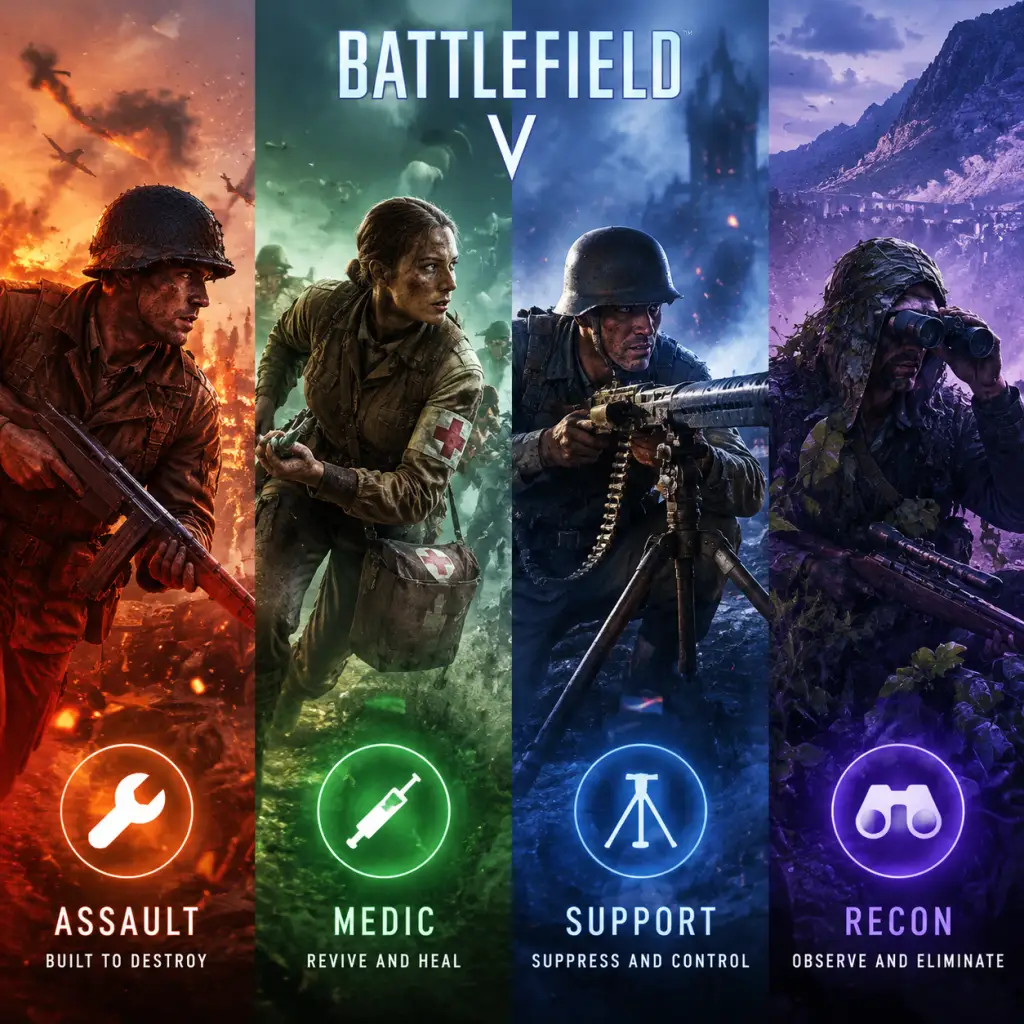
3. Select your faction and class – In the multiplayer lobby, you'll be assigned to either Allies or Axis. Choose a class from the four available:
- Assault – Best for all-purpose combat and destroying vehicles.
- Medic – Heals teammates, has SMGs, and revives downed soldiers.
- Support – Supplies ammo, deploys bipod machine guns, and can repair vehicles.
- Recon – Sniper class, spots enemies, and uses bolt-action rifles.
Recommendation for absolute beginners: start with Assault or Medic. They are forgiving and help the team.
4. Your first match – You'll be dropped into a map. Follow your squad (indicated by green markers). Shoot enemies, capture objectives (flags), and stay near teammates. Don't worry about dying – it's part of learning.
5. After the match – You earn Company Coin and XP. Use Company Coin to buy weapon upgrades or cosmetics. Spend early coins on a weapon upgrade (like faster reload or better accuracy) rather than cosmetic items.
Character Creation & Customization
Battlefield V does not have a character creation screen. You play as preset soldiers per faction. However, you can customize:
- Soldier appearance (head, torso, legs, helmet, face paint) – Unlocked via Company Coin or assignments.
- Weapon skins – Earned or bought.
- Vehicle skins – Earned or bought.
- Melee weapons – Unlockable.
Your character's appearance does not affect gameplay. Invest early Company Coin in weapon specializations (upgrades) rather than cosmetics.
Controls on All Platforms
#### PC (Keyboard & Mouse)
| Action | Default Key |
|---|---|
| Move | W, A, S, D |
| Sprint | Shift (hold) |
| Crouch/Slide | Ctrl (hold for hold crouch, double-tap to slide) |
| Prone | Z |
| Jump | Space |
| Fire | Left Mouse Button |
| Aim Down Sights (ADS) | Right Mouse Button (hold) |
| Reload | R |
| Switch Weapon | 1 (primary), 2 (secondary), 3 (gadget), 4 (grenade) |
| Use/Interact | E |
| Spot/Communicate | Q (tap to spot, hold for commo rose) |
| Call in Reinforcements | B (when squad leader) |
| Map | M |
| Scoreboard | Tab |
| Action | Default Button |
|---|---|
| Move | Left Stick |
| Sprint | L3 (press left stick) |
| Crouch/Slide | Circle (hold for crouch, double-tap to slide) |
| Prone | Hold Circle |
| Jump | X |
| Fire | R2 |
| ADS | L2 |
| Reload | Square |
| Switch Weapon | Triangle |
| Use/Interact | R1 |
| Spot/Communicate | R1 (hold for commo rose) |
| Map | Touchpad (swipe up or press) |
| Scoreboard | Options button |
| Call in Reinforcements | L1 + R1 (when squad leader) |
| Action | Default Button |
|---|---|
| Move | Left Stick |
| Sprint | Left Stick (click) |
| Crouch/Slide | B (hold for crouch, double-tap to slide) |
| Prone | Hold B |
| Jump | A |
| Fire | RT |
| ADS | LT |
| Reload | X |
| Switch Weapon | Y |
| Use/Interact | RB |
| Spot/Communicate | RB (hold for commo rose) |
| Map | View button (two overlapping squares) |
| Scoreboard | Menu button |
| Call in Reinforcements | LB + RB (when squad leader) |
UI Overview
When in a match, your screen displays:
- Minimap (bottom-left) – Shows nearby enemies when spotted, objectives, and teammate positions.
- Health bar (bottom-center) – Shows current health. Use a Medic bag or health station to heal.
- Ammo counter (bottom-right) – Shows current magazine count and total reserve. Support players can resupply you.
- Objective markers – Blue for friendly, red for enemy, grey for neutral. Cap points are letters (A, B, C, etc.).
- Squad info (left side) – Green icons for squadmates, with health and class symbols.
- Score/Time (top) – Your team's tickets and match timer.
- Kill feed (top-right) – Recent kills and assists.
- Specialization menu (when in spawn screen) – Allows upgrading weapons with unlocked specializations.
- Adjust settings: sensitivity, field of view (90-100 recommended), and turn on "Uniform Soldier Aiming" for consistent ADS sensitivity.
- Play one or two rounds of Conquest or Breakthrough to get a feel for the flow.
- Join a squad and stick together.
- Use cover and move from cover to cover.
- Spot enemies by tapping Q (PC) or R1/RB (console).
- Running straight into open areas – you will be shot immediately.
- Playing Recon as a camper – Battlefield rewards aggressive but smart positioning. If you snipe, move after each shot.
- Ignoring your squad – You get bonus XP for squad actions.
- Spending Company Coin on cosmetics early – Weapon specializations are more impactful.
- Spamming the grenade button – You have limited grenades; resupply at Support crates.
- Company Coin – Earned by completing assignments and leveling up. Use it for:
- War Bonds (Definitive Edition only) – Spend these on weapons and gadgets you want to try, but still prioritize specializations.
- XP/Class Rank – Focus on leveling one class to Level 4 to unlock the class-specific gadgets (like the Medical Crates for Medic, or Ammo Crates for Support).
- [ ] Launch Battlefield V and adjust video/audio settings for performance.
- [ ] Set up control preferences (sensitivity, button layout, etc.).
- [ ] Complete the Prologue War Story tutorial (optional but helpful).
- [ ] Play one round of "Combined Arms" (co-op mode) to learn mechanics.
- [ ] Join a match of Conquest with a squad – focus on capturing flags.
- [ ] Unlock your first weapon specialization (e.g., for the default assault rifle).
- [ ] Spend any starter Company Coin on a specialization node (not cosmetics).
- [ ] Add a few friends or join the Battlefield V community for squad play.
- [ ] Save customizations for later – invest in gameplay upgrades first.
Essential Early Objectives
1. Complete the War Stories tutorials – Optional but recommended. They teach basic mechanics like driving, shooting, and using gadgets. Access from main menu > War Stories > Prologue or any chapter.
2. Play the "Combined Arms" mode – Co-op missions against AI. Great for learning without pressure from human opponents.
3. Focus on teamplay – Your first priority is to help your squad. Revive (Medic), resupply (Support), or follow squad leader orders.
4. Capture objectives – The core of Conquest and other modes. Capture flags to drain enemy tickets. Stay near the objective area.
5. Unlock weapon specializations – Use XP earned in matches to level up your weapons. Each weapon has a tree of upgrades. Prioritize upgrades that improve control or magazine size.
What to Do First vs. What to Avoid
Do First:
Avoid:
Early Resource Priorities
1. Weapon specializations (unlock nodes in the specialization tree).
2. Vehicle specializations (for tanks and planes).
3. Cosmetic items (only after you've upgraded key weapons).
Common Beginner Mistakes
1. Not using the minimap – The minimap is your best friend. Watch for red dots (enemies firing unsuppressed) and spotted enemies.
2. Forgetting to heal – After taking damage, find cover and use a Medic pouch/health station. Health regenerates only to ~50% without healing items.
3. Reloading after every kill – Learn to manage ammo. Reload only when safe and after the magazine is low. Dying with empty ammo is fine, but don't reload in the open.
4. Standing still – In Battlefield, constant movement is key. Crouch, slide, sprint, and use smoke grenades to cross open areas.
5. Ignoring objectives – Kills don't win matches; capturing and defending objectives does. If you're not playing the objective, you're not helping your team.
6. Using the wrong class for the situation – As a Recon, don't charge into close quarters. As an Assault, don't camp in the back. Play to your class strengths.
Day-One Checklist
Once you're comfortable with the basics, explore the different game modes (Grand Operations, Breakthrough, TDM, etc.) and try other classes. Welcome to Battlefield V – see you on the frontline!
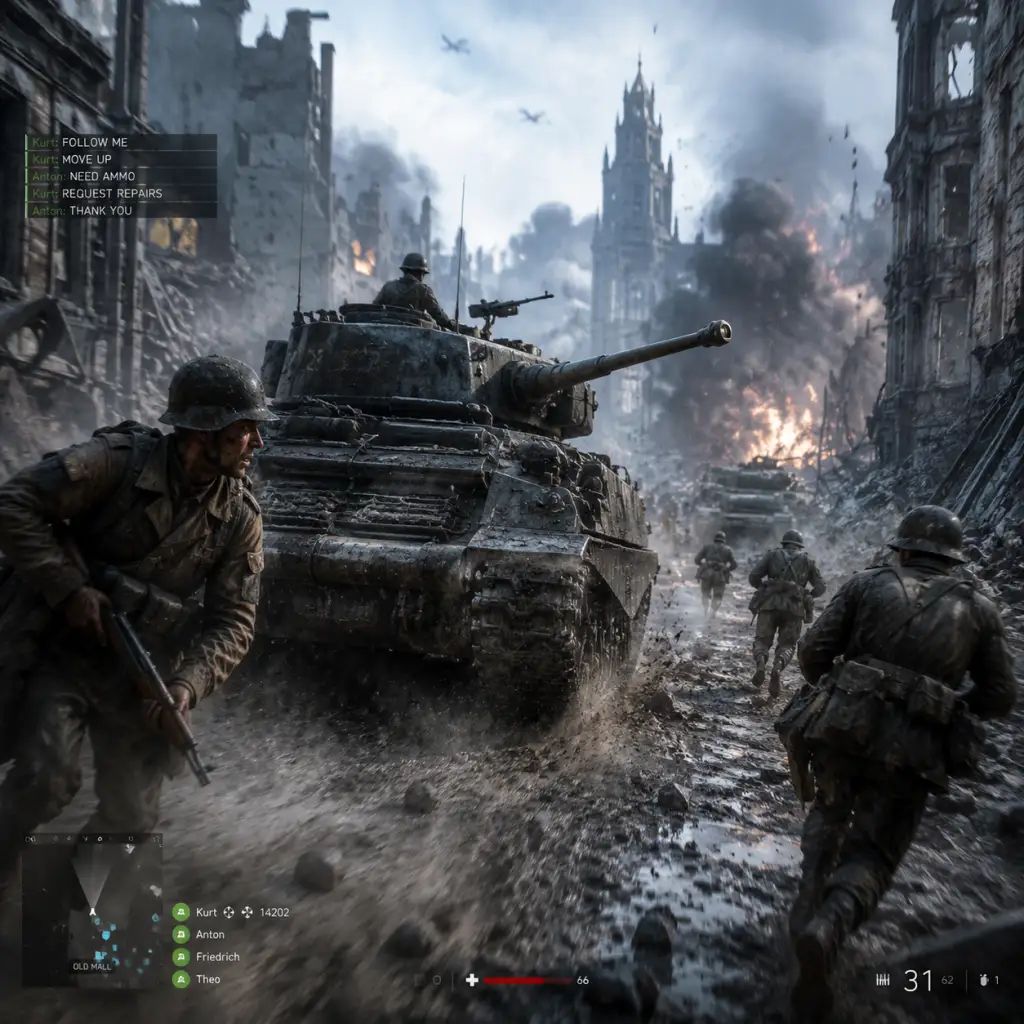
Core Gameplay
Core Gameplay Guide for Battlefield V
This guide explains the foundational systems and progression of Battlefield V, organized by player progression tiers: Early Game, Mid Game, Late Game, and Endgame. Each tier covers the main gameplay loop, combat/interaction systems, progression, exploration, quests/missions, economy, character/build growth, and endgame structure.
---
Core Gameplay Loop
The core loop in Battlefield V is: Spawn → Fight for Objectives → Revive/Resupply → Earn Score → Unlock Gear → Customize Loadout → Repeat. Matches are round-based (Conquest, Breakthrough, Grand Operations, etc.) where teams fight over control points. The loop emphasizes teamwork, class synergy, and adaptive combat.
Combat & Interaction Systems
- Weapons: Each class has unique primary weapons (rifles, SMGs, MGs, snipers). Weapon specializations unlock via progression (e.g., recoil reduction, faster ADS).
- Vehicles: Tanks (e.g., Tiger I), planes (Spitfire), and transport. Vehicle specializations modify performance (armor, weapons, mobility).
- Classes: Assault (anti-vehicle, assault rifles), Medic (SMGs, health crates, defibrillator), Support (LMGs, ammo crates, repair tool), Recon (sniper rifles, spawn beacon, flare gun).
- Attrition: Health does not auto-regenerate fully; require medics or health stations. Ammo is limited; rely on support or ammo stations.
- Fortifications: Build sandbags, trenches, and stationary weapons (e.g., MG42) at flags using the Support's build tool or any class at pre-built locations.
- Spotting: Use Q (default) to spot enemies on minimap. Recon's spotting scope highlights multiple enemies.
- Reviving: Medics can revive downed squadmates; squad leaders can revive squadmates. Remaining downed state can be skipped or waiting.
- Company Coin (CC): Earned by leveling up, completing assignments, and in-game score. Used to buy weapon/vehicle specializations, cosmetics, and upgrades.
- Class Rank: Each class levels independently (1–20). Unlocks new weapons, gadgets, and cosmetic rewards.
- Weapon & Vehicle Specializations: Spend CC on tree-based upgrades (left or right path, e.g., “Rapid Fire” vs “Recoil Buffer”).
- Assignments: Daily, weekly, and special challenges (e.g., “Get 10 kills with assault rifles”) that reward CC and cosmetics.
- Maps are large, destructible environments (e.g., Rotterdam, Arras, Hamada). Destruction alters lines of sight and cover.
- Sectors: In Breakthrough mode, capture sector-captures; in Conquest, capture flags in any order.
- Environmental interaction: Siege weapons (V-1 rocket, artillery), vehicle wrecks, and interactive doors.
- Tides of War (ToW): Seasonal chapters with narrative-driven assignments. Complete to earn cosmetics, Boins (premium currency), and weapons.
- Class Assignments: Unlock new weapons for each class (e.g., “M1 Garand” for Assault).
- Mastery Assignments: Unlock final specializations for weapons and vehicles (e.g., “Get 60 kills with Gewehr 43 while in objective area”).
- Company Coin (CC): Soft currency for all gameplay unlocks. Earned at rate ~100 per match, bug bonus from assignments.
- Boins: Premium currency (bought with real money) for exclusive cosmetics (Elite skins, vehicle skins).
- No loot boxes: All gameplay items are unlocked via progression or CC.
- Soldier: Choose class and customize with skins, headgear, torso, legs, and face paint (earned via rank, ToW, or CC purchases).
- Weapon Builds: Specialization trees allow different playstyles (e.g., for STG 44: choose between “Quick Aim” for close range or “Extended Magazine” for sustained fire).
- Vehicle Builds: Tank specializations (e.g., “Cannon Upgrade” for more splash, “Side Shrapnel” for anti-infantry).
- Gameplay Loop: Learn basic movement, shooting, and objective play. Stick to squad and one class (Medic or Assault recommended). Focus on capturing flags and staying alive.
- Combat Systems: Use starting weapons (e.g., StG 44 for Assault, MP40 for Medic). Understand attrition: always pick up health/ammo from stations or teammates. Practice reviving and fortifying.
- Progression: Prioritize leveling Assault or Medic to class rank 5 to unlock the M1 Garand and M3 Grease Gun (respectively). Spend CC on weapon specializations for favorites.
- Exploration: Play on smaller maps (e.g., Rotterdam) to learn layouts. Learn basic destructible walls and cover spots.
- Quests: Complete introductory War Stories (single-player) to earn free CC. Accept daily assignments (e.g., “Capture 5 flags”).
- Economy: Earn ~300 CC per match. Save CC for weapon specializations (do not waste on cosmetics yet).
- Build Growth: Unlock two specialization tiers per weapon. Example: STG 44: pick “Quick Aim” + “Lightened Stock” for faster handling.
- Common Mistakes: Reviving without smoke, not requesting ammo, ignoring fortifications.
- Gameplay Loop: Start using vehicles and specializing in one class. Play Breakthrough (more structured) or Grand Operations. Focus on squad play and call-ins (e.g., V-1 rocket).
- Combat Systems: Use specialized weapons (e.g., Gewehr 43 for Recon, FG 42 for Support). Learn counter-sniping, vehicle weak spots (engine, tracks), and air combat basics.
- Progression: Reach class rank 10 for all classes to unlock pinnacle gadgets (e.g., Assault’s Panzerfaust, Medic’s M1928A1). Complete weapon assignments to unlock new primaries.
- Exploration: Know every map’s capture points and good vehicle routes (e.g., tank paths on Panzerstorm).
- Quests: Start Tides of War chapter assignments. Do weekly challenges for epic cosmetics.
- Economy: Spend CC on vehicle specializations (e.g., tank armor upgrade). Buy one or two cosmetic items if desired. Earn Boins from ToW (free tier).
- Build Growth: Max out weapon specializations for 2–3 favorite weapons. Example: MP40 with “Quick Reload” + “Improved Hipfire” for aggressive medic.
- Endgame Prep: Begin completing Mastery assignments for weapons you plan to main.
- Gameplay Loop: High-skill play – aggressively push objectives, use advanced tactics (e.g., squad call-ins, vehicle assault). Coordinate with squad for maximum efficiency.
- Combat Systems: Master all classes. Use elite weapons (e.g., M1A1 Carbine, Type 2A). Perfect reviving under fire, vehicle disabled shots, and anti-air rockets.
- Progression: Reach class rank 20 for final cosmetics and gadgets (e.g., Recon’s “Fliegerfaust” – anti-air). Complete Mastery assignments for gold/gold-plated weapon skins.
- Exploration: Know every map’s chokepoints, flank routes, and vehicle spawn timers.
- Quests: Finish all Tides of War chapters for the season. Complete “The Last Man Standing” style assignments.
- Economy: Stockpile CC (~50k). Purchase remaining specializations for all used vehicles. Consider buying Boins for exclusive cosmetics if desired.
- Build Growth: Create multiple loadouts for each class. Example Assault: one anti-vehicle loadout (Panzerfaust + AT Grenade), one anti-infantry (M1 Garand + Frag Grenade).
- Endgame Structure: You are now ready for high-level competitive play or game modes like “Squad Conquest” or “Frontlines”.
- Gameplay Loop: Same core, but focus on mastery and team coordination. Play in squads with voice chat. Use tactics like-suppressive fire, smoke screens, and coordinated vehicle pushes.
- Combat Systems: Fully familiar with all weapons and vehicles. You can counter any class. Advanced skills: rocket jumping (rare), curveball grenades, and vehicle periscope spotting.
- Progression: No more level-based unlocks – only Mastery assignments and Tides of War chapters provide new items. Earn all gold weapon skins (e.g., “Gold” for Gewehr 43 requires 60 headshot kills in objective areas).
- Exploration: Know hidden paths on all maps (e.g., swimming routes on Marita, underground tunnels on Devastation).
- Quests: Complete the entire Tides of War timeline (all chapters). Special community challenges (e.g., “Play 100 rounds”).
- Economy: Use excess CC to buy all weapon specializations for every weapon (if desired). Purchase expensive cosmetics like Elite skins (e.g., “Hannah”).
- Build Growth: Fine-tune every possible loadout. Example Support: “Lewis Gun” with fast fire-rate specialization, “Ammo Crate” + “Anti-tank Grenade” for area denial. Vehicle builds: “Tiger I” with “Camouflage” + “Heavy Shells” + “Squad Spawn” for support.
- Endgame Content:
Progression
Exploration & Maps
Quests/Missions
Economy
Character & Build Growth
---
Progression Tiers Breakdown
Early Game (Player Level 1–20)
Mid Game (Player Level 21–40)
Late Game (Player Level 41–50)
Endgame (Post-Level 50 – Continuous)
- Ranked or Competitive Play: Participate in Battlefield V esports (low activity but still possible) or just Pub-stomp with maxed loadouts.
- Collecting: Unlock every weapon, vehicle, and cosmetic (over 1000 items).
- Mastery Is The Goal: No formal endgame boss – only personal satisfaction and leaderboards (if playing Squad Conquest).
---
Summary Table of Progression Tiers
| Tier | Levels | Focus | Key Unlock | Economy Priority |
|---|---|---|---|---|
| Early | 1–20 | Learn mechanics, one class | StG 44, MP40, M1 Garand | CC for weapon specs |
| Mid | 21–40 | Specialize, vehicles, ToW | Panzerfaust, FG 42 | CC for vehicle specs + 1-2 cosmetics |
| Late | 41–50 | Mastery assignments, all classes | Fliegerfaust, gold skins | Save CC for all specs |
| Endgame | 50+ | Mastery, ToW chapters, collection | Elite skins, boins | CC for any remaining cosmetics |
This guide outlines the full core gameplay progression of Battlefield V. Adapt your playstyle to each tier, and always prioritize squad teamwork for the best experience.
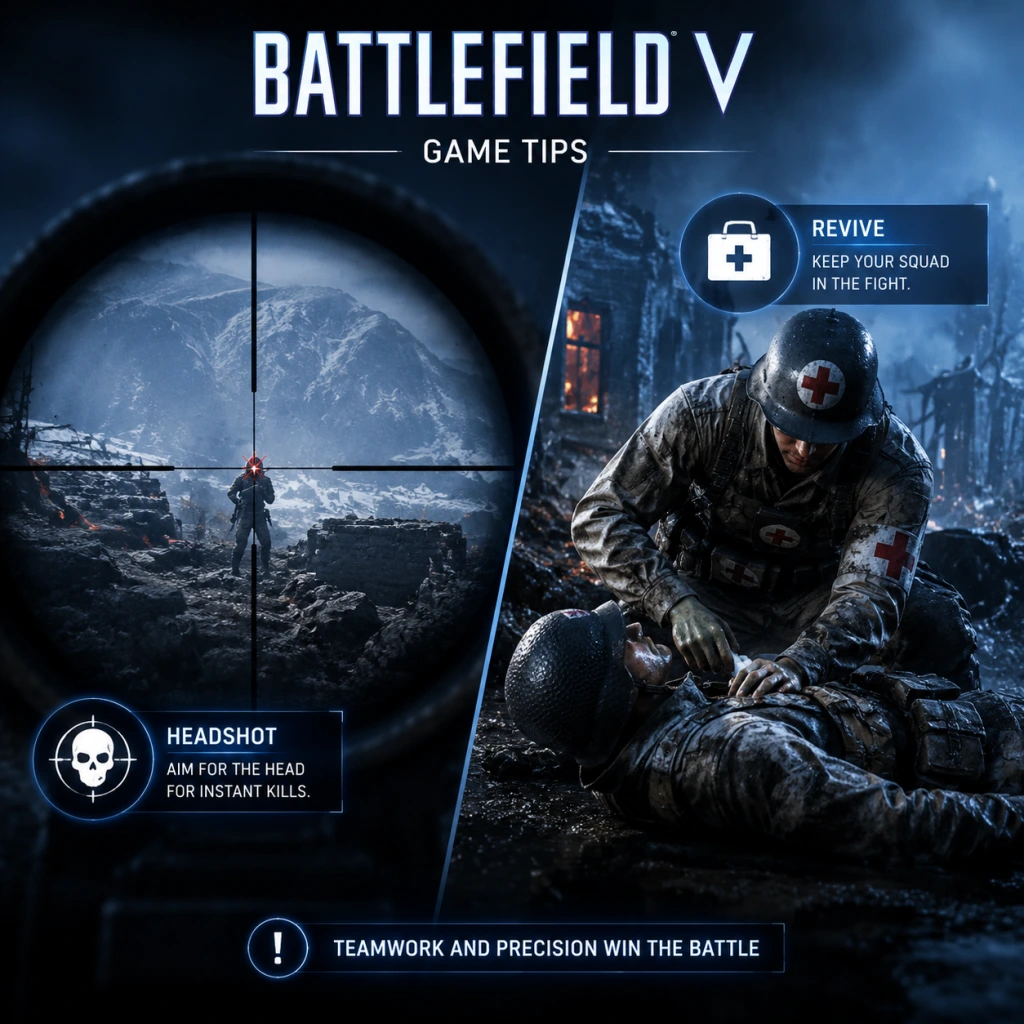
Game Tips
Game Tips for Battlefield V
This guide covers essential tips for all skill levels, organized by category. Use these to improve your effectiveness on the battlefield.
---
Combat Tips
Beginner: Stick with cover and use the Fortification system.
- Explanation: Battlefield V emphasizes positional play. Always move between cover points (walls, craters, rocks) and use the fortification tool (press and hold B on PC, circle on console) to build sandbags, trenches, or repair damaged structures. This gives you better sightlines and protects flanks.
- When to use: In any infantry engagement, especially when defending an objective (flag). Building heavy machine gun nests can suppress multiple enemies.
- Explanation: Most weapons (like the STG 44 or KE7) have significant recoil. Fire in short 3-5 round bursts for automatic weapons; tap-firing for semi-autos. Practice pulling down on the mouse/right stick slightly to compensate during bursts. Use the Training range to practice with your favorite guns.
- When to use: Medium to long range engagements. Spraying full auto at a distant enemy will waste ammo and reveal your position.
- Explanation: Only medics can revive squadmates quickly, but any squad member can revive a downed squadmate (slowly, takes ~4 seconds). After killing an enemy, quickly check for a downed squadmate nearby and use the “drag” mechanic (hold spot button on a downed ally) to pull them into cover before reviving. This prevents getting killed during the revive animation.
- When to use: Always prioritize dragging a squadmate behind a wall or into smoke before reviving. In chaotic CQ flags, a well-timed drag can turn a fight.
- Explanation: Each map (e.g., Rotterdam, Arras, Twisted Steel) has distinct chokepoints and hidden paths. Spend time in solo or empty Servers (via Advanced Search) to walk around. Note where snipers hide and where vehicles spawn. Use the minimap (press M on PC) to spot enemy icons when spotted.
- When to use: Before any match, review the map loading screen for objectives. During a match, use the 3D spot (Q on PC, RB on console) to mark enemies for your team.
- Explanation: Many buildings, cliffs, and towers offer elevated angles. Climb to rooftops (use Ziplines on some maps) to spot enemies below. Beware of limited escape routes.
- When to use: As a Recon or Support, controlling high ground gives massive advantage. On Rotterdam, the church tower overlooks D flag.
- Explanation: Pay attention to spawn beacons, enemy movement patterns, and kill feed. If you see several squad wipes on one flag, expect a counterattack. Use the map to predict where enemies will push next.
- When to use: When deciding which objective to attack or defend. If your team loses a flag, expect the enemy to push the next closest flag.
- Explanation: Accumulate “Squad Points” by capturing objectives, killing enemies, healing, reviving, resupplying. These are shared with your squad. Once you have enough, the Squad Leader can call in special items: V-1 Rocket (large area kill), JB-2 Rocket (similar), Churchill Crocodile tank, Supply Drop, or improved resupply stations.
- When to use: Save for V-1 against clustered enemies on a flag. Supply Drops are great for sustained pushes.
- Explanation: Support players can build resupply stations (with the fortification tool) that give ammo and gadgets. Medics can build health stations. Always restock when safe, especially grenades and gadgets.
- When to use: Before pushing into a hot objective, or after surviving a firefight. A Support can resupply your ammo and also give you a repair tool for vehicles.
- Explanation: When low on ammo or health, press the commo rose (Q on PC, up on D-pad) and select “Request Ammo” or “Request Health.” This creates a visible icon for nearby Supports/Medics. They get bonus XP for resupplying/healing you.
- When to use: Whenever you are below 50% health or have fired more than half your magazines. Do this from cover.
- Explanation: All four classes (Assault, Medic, Support, Recon) have distinct roles. Pick Assault for anti-tank, Medic for close-range healing, Support for ammo and suppression, Recon for sniping. Don’t switch wildly; mastery comes with practice.
- When to use: Begin with Medic (fast healing, SMGs) or Assault (versatile assault rifles).
- Explanation: Each weapon has a “Specialization Tree” that modifies stats (reduced recoil, faster reload, etc.). Use the Company menu to unlock and equip. For example, the STG 44 can be specced for faster ADS or better hipfire.
- When to use: Before a match, select your loadout. Build depending on map size: longer range specializations for open maps, hipfire for CQC.
- Explanation: Combine gadgets to counter enemies. Assault: Use the Panzerfaust (anti-tank) and Anti-tank grenade bundle for armor. Support: Use the Repair Tool to fix vehicles (great for earning vehicle points) and the AP Mines for area denial. Recon: Use the Flare Gun to reveal enemies in a large radius – crucial for your team’s Situational Awareness.
- When to use: Switch gadget between respawns based on enemy vehicles. If the enemy has a lot of tanks, equip the “Bazooka” (M1A1) or similarly.
- Explanation: You earn Company Coins (CC) from daily assignments, milestones, and through leveling. Spend on weapon upgrades (specializations) first, then cosmetic items. Avoid buying weapon skins early; functional upgrades matter more.
- When to use: Prioritize unlocking specializations for weapons you use regularly. Each weapon has 4 tiers of upgrades – buy them in order.
- Explanation: Daily and weekly assignments give significant XP and CC. Always check the Assignments menu (accessible from the main menu) and equip them to track progress.
- When to use: Before starting a match, select 3 assignments that match your playstyle. For example, “Get 10 kills with Assault” will give bonus XP.
- Explanation: Timed events often reward exclusive weapons or cosmetics. Track the Battlefield V community calendar for these. Participating can get you premium weapons early.
- When to use: Only if you want to maximize content; many weapons are later unlockable via Company Coin, so don’t stress.
- Explanation: Vehicles (tanks, planes) are powerful but easily destroyed if misused. Learn their strengths: tanks are slow but powerful against infantry, planes dominate the skies. In a tank, stick with your team – never go alone.
- When to use: Starting out, take a tank only when your squad has a Support with Repair Tool. Drive to objectives that have infantry cover.
- Explanation: While driving a vehicle, press the switch camera button (C on PC, R3 on console) to toggle between 1st and 3rd person. 3rd person gives a wider field of view, crucial to spot flanking soldiers with AT grenades.
- When to use: When moving through urban areas or open fields. Quickly switch to 1st person when aiming at a distant target for better precision.
- Explanation: Tank shells have travel time. Against moving vehicles or infantry, aim ahead of their movement. Use the spotting lens (if equipped) to increase zoom and range estimation.
- When to use: Against enemy tanks that are moving perpendicular. Fire a shot, note the impact, adjust accordingly. Also use HE (High Explosive) shells for infantry, AP (Armor Piercing) for tanks.
- Explanation: Squadmates can spawn on each other (as long as it’s safe). Staying together increases survivability. Use the comma rose to request orders from squad leader, or call for help.
- When to use: When you are downed, press the spot button to call for help. A medic icon appears for medics nearby.
- Explanation: Even if you can’t engage, spot (Q/R1). Each spot reveals enemy icons to your whole team. This is especially powerful for snipers and vehicle users.
- When to use: Always, especially when scanning a horizon or before opening fire. Spotting helps your teammates kill unseen enemies.
- Explanation: While many players don’t use voice, the ping system (holding the spot button on an enemy) works. You can also ping locations. For squad leaders, give clear orders (Attack Objective A) which gives squad bonus XP on capture.
- When to use: In coordination with a premade squad. Use the “Request Orders” if your squad leader isn’t giving them.
- Explanation: While sprinting, press crouch (C on PC, B on console) to slide. Sliding can disrupt enemy aim. Combine with sliding into cover. Also, learn to vault quickly over low walls by sprinting and jumping.
- When to use: When crossing open areas under fire. Slide into a crater, then pop up to shoot.
- Explanation: Deploying the bipod by aiming near a ledge or prone reduces recoil drastically. This turns machine guns into deadly sustained fire weapons. For snipers, it stabilizes the scope.
- When to use: On windowsills, sandbags, or any flat surface. Always prone when possible for maximum stability.
- Explanation: This is a faction-specific weapon for the Medic class (available on some maps). It has a high fire rate and excellent hipfire. Useful for aggressive CQ medics.
- When to use: On tight infantry maps like Operation Underground or Rotterdam.
- Explanation: After a reload animation completes, but before the final “chamber” sound, you can sprint or swap weapons to skip a small portion. Not a huge time save but can help in emergencies.
- When to use: Only after the magazine is inserted; do not cancel early or you lose the reload.
- Explanation: Some tank specializations give improved splash damage or faster fire rate. For example, the Tiger I can be upgraded to reduce reload time. Research tank upgrades in the Company menu.
- When to use: When you are comfortable with a specific tank, invest in its specialization tree to maximize its effectiveness.
- Turn off chromatic aberration and film grain in video settings for clearer visibility.
- Adjust your FOV (Field of View) to around 90-100 (PC) for better peripheral awareness.
- Use a medium sensitivity – too high loses precision, too low causes slow turns.
- Play the objective – kills are secondary to capturing flags. You earn more XP and help win.
- Don’t always autoclick – wait for clear shots to conserve ammo.
- Learn from death cam – where you got shot from, then adjust positioning.
- Use the “Advanced Search” in multiplayer menu to find specific modes (e.g., Conquest, Breakthrough) or maps.
Intermediate: Master recoil control and burst firing.
Advanced: Abuse the squad revive and buddy drag.
---
Exploration / Map Knowledge
Beginner: Learn flag layouts and flank routes.
Intermediate: Use the environment for verticality.
Advanced: “Read” the flow of battle.
---
Resources & Reinforcements
Beginner: Understand the squad reinforcement system.
Intermediate: Ammo and health stations are critical.
Advanced: Use the “Request Ammo/Health” feature.
---
Class Builds & Kit Optimization
Beginner: Stick to one class you enjoy.
Intermediate: Specializations matter – configure them.
Advanced: Gadget synergy with playstyle.
---
Economy / Company Progression
Beginner: Use your “Company Coins” wisely.
Intermediate: Complete assignments for boost.
Advanced: Grind for “Tides of War” rewards.
---
Vehicle Usage
Beginner: Don’t instantly rush into a vehicle.
Intermediate: Use the 3rd person camera for awareness.
Advanced: Practice lead aiming with tank shells.
---
Teamwork & Communication
Beginner: Stick with your squad and use the “Need Help” feature.
Intermediate: Spot enemies aggressively.
Advanced: Use voice chat or ping system.
---
Advanced Techniques & Optimizations
Slide and jump to avoid fire.
Use bipods on LMGs and snipers.
Master the “Noob” weapon: M1907 SF.
Learn to reload cancel.
Use the “Danger Close” specialization for tanks.
---
General Tips
---
By implementing these tips gradually, you’ll go from a clumsy recruit to a tactical veteran. Good luck on the frontline!
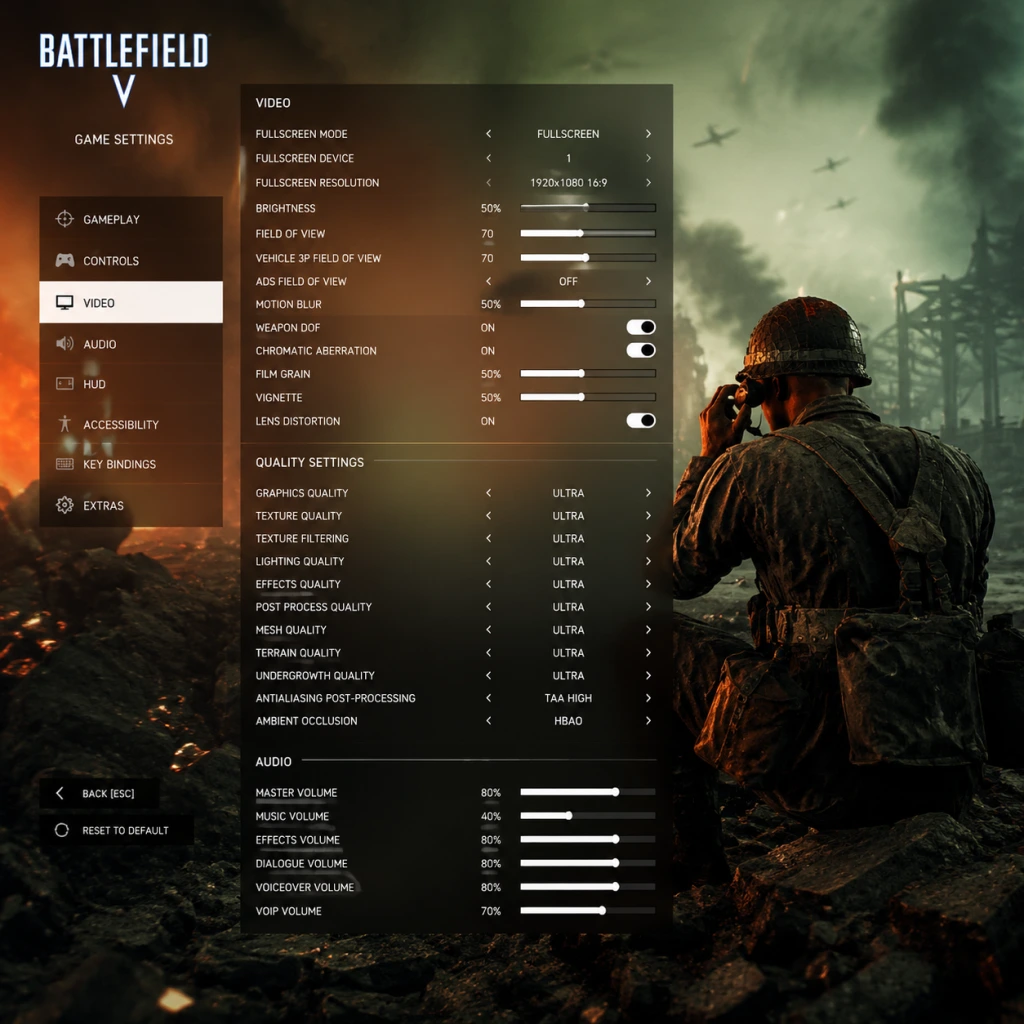
Game Settings
Game Settings Guide for Battlefield V
This guide covers every setting category in Battlefield V and provides optimized recommendations for different hardware tiers. Proper configuration can significantly improve performance, clarity, and competitive advantage. Settings that are commonly misconfigured or require special attention are highlighted.
---
Graphics Settings
Graphics are the most impactful category for both visual quality and performance. Battlefield V uses the Frostbite engine and supports DirectX 11, DirectX 12, and Ray Tracing (on RTX cards).
#### Key Graphics Options
| Setting | Description | Recommendation |
|---|---|---|
| Video Resolution | Native display resolution. | Set to monitor native (e.g., 1920x1080). For performance, use a lower resolution or enable DLSS/FSR. |
| Display Mode | Fullscreen, Borderless, Windowed. | Fullscreen for best performance and lowest input lag. Borderless may cause micro-stutters. |
| Field of View (FOV) | Horizontal FOV in degrees. | 70-90 (default 55 is too narrow). 90 is common for awareness. Higher FOV reduces visual stress but slightly increases performance cost. |
| Soldier FOV | Affects first-person view. | Same as FOV suggestion. |
| Vehicle FOV | Third-person vehicle camera. | 70-90 for better situational awareness. |
| Graphics Quality Preset | Ultra, High, Medium, Low, Custom. | Start with Custom and adjust individual settings. |
| Texture Quality | Detail of surfaces. | Medium on low-end; High/Ultra on high-end. VRAM bottleneck: 4-6GB use Medium, 8GB+ use High/Ultra. |
| Texture Filtering | Anisotropic filter level. | 4x minimum; 16x negligible performance hit on modern GPUs. Improves texture clarity at angles. |
| Lighting Quality | Dynamic shadows and lighting. | Low for performance (reduces shadow density). Medium on mid-range. High/Ultra are expensive. |
| Effects Quality | Explosion particles, smoke, fire. | Low to reduce visual clutter and particle load. Medium if you have spare performance. |
| Post-Process Quality | Bloom, motion blur, depth of field. | Low to disable motion blur and other distracting effects. Improves clarity. |
| Mesh Quality | Draw distance and detail of objects. | Medium is a good balance. High/Ultra heavily impacts CPU. |
| Terrain Quality | Ground texture detail. | Low to reduce load on GPU. Medium for visual improvement. |
| Undergrowth Quality | Grass and foliage density. | Low improves visibility of prone enemies. Also saves performance. |
| Anti-Aliasing | FXAA, TAA, TAA+FXAA. | TAA (best quality) or TAA+FXAA (if you have CPU headroom). Off for sharpest image but aliasing visible. |
| Ambient Occlusion | HBAO, SSAO, Off. | Off or SSAO (cheaper) on low end; HBAO on high end. Adds depth but costs performance. |
| Level of Detail (LOD) Distance | Object detail scaling. | Medium; high barely improves experience but costs performance. |
| Dynamic Resolution Scaling | Automatically lowers resolution to maintain FPS. | Off for consistent quality. Use instead of lowering resolution if you need smoothness. |
| Resolution Scale | Percentage of native resolution. | 100% by default. Lower if desperate for FPS (e.g., 75% on low-end). |
| DirectX Version | DX11 vs DX12. | DX11 for most systems (more stable). DX12 can improve CPU utilization on multi-core systems but may cause stuttering on older hardware. |
| Ray Tracing (RTX) | Real-time reflections and shadows (requires RTX card). | Off for performance. On only if you have an RTX 3060 or better and can tolerate ~20% FPS loss. |
| DLSS (NVIDIA) | AI upscaling for performance. | Quality if you want image quality, Performance if FPS is critical. Requires RTX card and DX12. |
| FSR (AMD) | Similar upscaling for all GPUs. | Quality or Balanced. Works with DX11 as well. |
| Future Frame Rendering | Pre-renders frames for smoother output. | Enable (default) for higher FPS, Disable to reduce input lag at the cost of frame pacing. |
| GPU Memory Restriction | Limits VRAM usage. | Off (unchecked) to allow full utilization. Check only if you experience VRAM-related crashes. |
| Tier | Example Hardware | Graphics Settings Summary | Expected FPS (1080p) |
|---|---|---|---|
| Low-End | Intel HD 630, GTX 1050, RX 560 | Resolution 1600x900 or 1280x720, all settings Low or Off (except textures medium), FOV 70, DX11, no RT/DLSS, Future Frame Rendering ON | 40-60 |
| Mid-Range | GTX 1060 6GB, RX 580, GTX 1660 Super | 1080p Fullscreen, Textures High, Filtering 16x, Lighting Medium, Effects Low, Post-Process Low, Mesh Medium, Terrain Low, Undergrowth Low, Anti-Aliasing TAA, Ambient Occlusion SSAO, DX11, FSR Quality | 60-90 |
| High-End | RTX 3060 Ti, RTX 4060, RX 6700 XT | 1440p Fullscreen, Textures Ultra, Filtering 16x, Lighting High, Effects Low, Post-Process Low, Mesh High, Terrain Medium, Undergrowth Low, Anti-Aliasing TAA, Ambient Occlusion HBAO, DX12, DLSS/FSR Quality | 90-144 |
| Ultra (4K) | RTX 4090, RX 7900 XTX | 4K Fullscreen, Ultra preset except Effects Low, Post-Process Low, Undergrowth Low, FOV 90, DX12, DLSS/FSR Performance or Ultra Performance, RT Off | 60-120 |
- Field of View (FOV): Default 55 is extremely narrow and can cause motion sickness and reduce peripheral awareness. Always increase to 80-90.
- Post-Process Quality: Includes motion blur and depth of field. Many players turn these off for competitive clarity, but they are enabled by default on High/Ultra presets.
- Undergrowth Quality: High undergrowth hides enemies but tanks performance. Set to Low for both visibility and FPS.
- DirectX 12: While DX12 can improve CPU scaling, many players experience stuttering or crashes. Test thoroughly. DX11 is more reliable.
- Future Frame Rendering: Off reduces input lag but may cause less smooth frametimes. Recommend ON for most.
- Resolution Scale: Accidentally setting below 100% without Dynamic Resolution Scaling can blur the game unnecessarily.
---
Audio Settings
Audio in Battlefield V is crucial for spatial awareness. Proper setup can let you hear footsteps, vehicle engines, and gunfire direction.
#### Key Audio Options
| Setting | Description | Recommendation |
|---|---|---|
| Master Volume | Overall game volume. | 80-100%, adjust based on your speakers/headphones. |
| Music Volume | Background musical score. | 0% for competitive play (music obscures footsteps). |
| SFX Volume | All sound effects. | 100%. |
| Voice Over Volume | Character voices. | 100% (announces objectives). |
| Dialogue Volume | In-game radio chatter. | 80-100%. |
| Vehicle Music | Epic music when entering vehicles. | 0% (distracting). |
| Dynamic Range | Compression of loud sounds vs soft. | Headphones (most realistic) or Small Speakers. TV/Large Speakers may reduce subtle sounds. |
| Speaker Setup | Stereo, Surround, etc. | Stereo for headphones; Surround 5.1/7.1 for proper home theater system. |
| War Tapes | Audio filter that boosts bass and explosion. | Off – creates unnatural sound that masks footsteps. |
| Hit Marker Sound | Confirm hits. | Keep On (default). Helps confirm damage. |
- Use headphones with stereo setting.
- Disable War Tapes and all music (Vehicle and Background).
- Set Dynamic Range to Headphones for best directional cues.
---
Controls & Input
Optimizing controls improves reaction speed and comfort.
#### Key Control Options
| Setting | Description | Recommendation |
|---|---|---|
| Controller Sensitivity (X/Y) | Stick sensitivity. | Start at 50% and adjust per preference. Lower for precision, higher for snap turning. |
| Aim Assist (Controller) | Slowing reticle over enemies. | ON for beginners, but competitive players often turn it off to maintain full control. |
| ADS Sensitivity | Sensitivity while aiming down sights. | 70-100% of hipfire sensitivity. Lower for sniping. |
| Uniform Soldier Aiming | Makes sensitivity scale uniformly across all scopes. | Enable for consistency. |
| Mouse Sensitivity (PC) | Base pointer speed. | Choose a low eDPI (800-1200 DPI) for precision. E.g., 400 DPI * 8 in-game = 3200 eDPI. |
| Mouse Acceleration | Pointer speed changes with movement speed. | Disable completely. |
| Raw Input | Bypasses Windows mouse settings. | Enable to avoid artificial smoothing. |
| Key Bindings | Customize all actions. | Remap grenade (G) to a thumb button, spot (Q) to a side mouse button if possible. Set push-to-talk. |
| Vibration (Controller) | Controller rumble. | Disable for competitive play (distracting and delays input). |
| Invert Vertical Look | Invert Y-axis. | Off (unless used to flight sims). |
- Mouse Acceleration: By default it's off, but some Windows settings can interfere. Check Windows "Enhance pointer precision" – disable.
- Aim Assist on PC: Aim assist is only for controllers. PC players should not have it.
- Uniform Soldier Aiming: This setting is often overlooked; enable it to have consistent muscle memory across all weapons.
- Controller Deadzone: In the controller section (accessible only when controller is plugged in), adjust inner deadzone to smallest value without drift for faster response.
---
Accessibility Settings
Battlefield V offers several options to make the game more accessible.
| Setting | Description | Recommendation |
|---|---|---|
| Subtitle Size | Text size of subtitles. | Large if you have visual difficulties; default is fine. |
| Subtitles | On/Off for spoken dialogue. | On to never miss callouts. |
| Colorblind Modes | Protanopia, Deuteranopia, Tritanopia. | Choose based on your vision type. Affects UI elements (team colors, minimap icons). Test each. |
| Controller Remapping | Customize all controller buttons. | Use to assign slide, crouch, jump to paddles if available. |
| Vibration | Already covered. Disable for clarity. | Off. |
| Text-to-Speech | Not available in BFV. | N/A. |
| Chat Font Size | In PC only, adjust chat font. | Larger for readability. |
Language Settings
In the game options (PC and consoles):
| Setting | Description | Recommendation |
|---|---|---|
| Text Language | Language for menus, UI, subtitles. | Choose your native language. |
| Audio Language | Language of voiceovers. | Usually regional (e.g., English, French, German). Keep as spoken language to match subtitle language. |
| Subtitles | Already covered. | On. |
---
Network Settings
Network settings affect latency, bandwidth usage, and online stability.
| Setting | Description | Recommendation |
|---|---|---|
| Network Smoothing | Interpolation between frames to smooth out missing packets. | 0% (or very low) for competitive play (reduces input lag but may cause stutter); 50% default is balanced. Higher values increase latency. |
| High-Frequency Network Tick | Updates hitboxes more frequently. | Enable (default). Reduces trade kills and improves hit registration. |
| Bandwidth Limit | Maximum upload/download usage. | Unlimited or set to your connection's max (e.g., 100 Mbps). Lower if you have data caps. |
| Region | Select server region. | Choose the closest region for lowest ping (e.g., US East, EU West). |
| In-Game Network Indicator | Shows ping, packet loss, etc. | Enable (can be toggled in gameplay options via "Advanced" -> "Network Performance Graph"). |
- Network Smoothing: Setting it too high (100%) adds noticeable delay, making it harder to hit moving targets. Low or 0% is used by top players, but requires stable internet. Test between 0-25%.
- High-Frequency Network Tick: This is enabled by default and should stay on. Disabling it reduces server authoritative updates, increasing delay.
- Bandwidth Limit: If set too low (e.g., 512 kbps), you may experience rubberbanding and packet loss. Always set to a value that exceeds your internet speed.
---
Gameplay Settings
These settings affect how the game plays and feels.
| Setting | Description | Recommendation |
|---|---|---|
| Advanced Takedowns | Cinematic melee kills. | Off (default? Actually it's On). Set Off to avoid long animations where you're vulnerable. |
| Auto-Equip Weapon | Automatically switch to a new weapon when out of ammo? Not directly present. Alternate: Auto Cycle through weapons? | Keep defaults. |
| Weapon Auto-Cycle | When empty, automatically switch to next weapon. | Off – you should manually switch to maintain control. |
| Hold to Sprint | Hold shift vs toggle to sprint. | Hold (default) is fine. Many players prefer toggle to reduce finger strain; that’s a personal choice. |
| ADS Behavior | Hold or toggle to aim down sights. | Hold for more control. Toggle if you prefer. |
| Zoom on Fire Mode | Not directly present. | N/A. |
| Crouch Behavior | Hold vs toggle. | Toggle for easier crouch-peeking. |
| Prone Behavior | Toggle prone. | Toggle (default). |
| Minimap Size & Zoom | Display size and zoom level of minimap. | Increase size slightly, set zoom to Medium (default). You can also change minimap zoom bind to toggle in combat. |
| Minimap Icons | Show friendly and enemy markers. | Keep all enabled. |
| Crosshair Options | Customize color, size, and style of crosshair. | Use a bright color (green, cyan) for visibility. Size 3-5, shape dynamic or static. |
| HUD Scale | Overall HUD size. | Adjust to your screen size; default 100% is fine. |
| Vehicle Controls | Toggle between normal and (zoomed view). | Keep defaults. |
| Airplane Controls | Invert pitch settings for planes. | If you fly, invert pitch for more natural pull-up direction. |
| Weapon DoF / Bipod Behavior | etc. Not many settings. | Keep defaults. |
- Advanced Takedowns: Default is ON, which plays a lengthy animation. For competitive play, disable to quickly knife and move.
- Weapon Auto-Cycle: Off prevents accidentally pulling out a pistol when your primary runs dry during a fight.
- Minimap Zoom: You can bind a key to zoom minimap (default: N). Keep zoom at medium for overview, zoom in for close-quarters.
---
Final Setup Checklist
1. Graphics: Use the preset table above appropriate for your hardware. Test both DX11 and DX12 with the same settings for 10 minutes each.
2. Audio: Disable music, War Tapes, set Dynamic Range to Headphones.
3. Controls: Configure key binds, disable mouse acceleration, set sensitivity to comfortable eDPI.
4. Accessibility: Enable subtitles, set colorblind mode if needed.
5. Network: Enable High-Frequency Tick, set Network Smoothing to 0% (test), bandwidth unlimited, select closest region.
6. Gameplay: Turn off Advanced Takedowns and Weapon Auto-Cycle. Adjust crosshair color.
After initial setup, play at least 3 multiplayer matches before further tweaking. Use the Performance Overlay (press ~ and type `perfoverlay.drawFps 1` or enable in video options) to monitor FPS. Always restart the game after changing graphics or network settings.

Important Notes
Important Notes for Battlefield V
⚠️ Warnings
- End of Live Service: DICE has ceased all content updates for Battlefield V. No new weapons, maps, or Tides of War chapters will be added. The game is in maintenance mode—only server stability and critical bug fixes may occur. Any future changes are unlikely.
- Online-Only Progression: All player rank, weapon/vehicle experience, assignments, and Company Coins are stored on EA servers. There is no local save file. If you lose access to your EA account (e.g., banned, hacked, forgotten password), all progress is irrecoverable. Always secure your account with two-factor authentication and keep your login details safe.
- Cheating on PC: Despite Easy Anti-Cheat, PC servers have active cheaters, especially in popular modes like Conquest and Breakthrough. Cheaters often use aimbots, wallhacks, and vehicle exploits. To mitigate: play on official DICE servers (they enforce anti-cheat), avoid rank 1 players with suspicious stats, and report via the scoreboard (select player > Report). Console versions have virtually no cheaters, but some players use mouse-and-keyboard adapters (e.g., XIM) for a competitive edge, which is technically not allowed.
- Account Bans: EA may ban accounts for breaking Terms of Service (e.g., using unauthorized third-party software, harassment, boosting). Bans are permanent and can affect other EA titles linked to the same account. Do not use any "hacks," "trainers," or modifications while playing multiplayer.
###
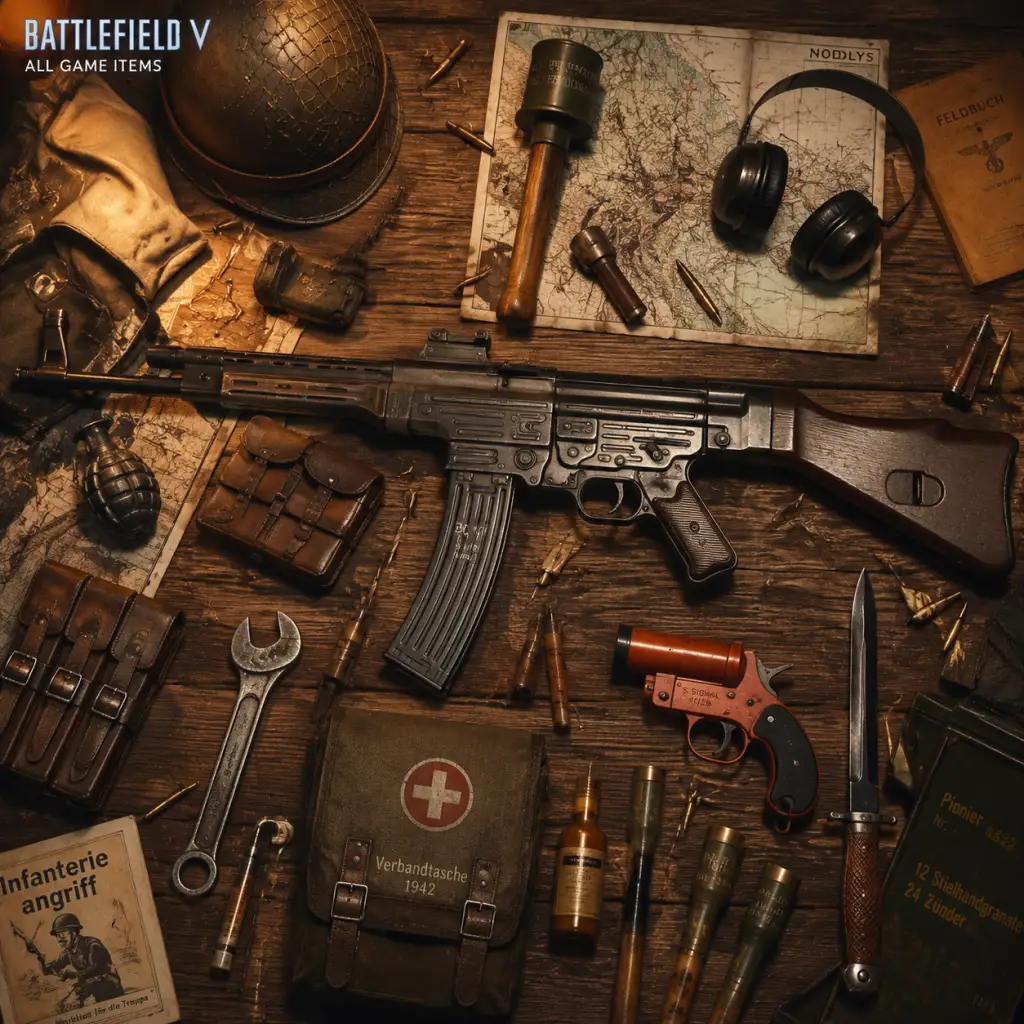
All Game Items
All Game Items Guide for Battlefield V
This guide covers every major item category in Battlefield V, including weapons, gadgets, grenades, vehicles, specializations, currencies, and cosmetics. Items are grouped by class, role, and acquisition method. Note that Battlefield V has no traditional armor or consumable items like health packs (these are class gadgets or pickups). All items are obtained through class progression, vehicle progression, Tides of War chapters, assignments, or the in-game store.
---
Primary Weapons
Each class has its own set of primary weapons, unlocked by gaining class rank (up to rank 20). All weapons have specializations (see below) that can be unlocked as you earn kills/score with that weapon.
#### Assault Class Weapons
| Weapon | Type | Caliber | Fire Rate | Best Use | Unlock Condition |
|---|---|---|---|---|---|
| M1 Garand | Semi-auto rifle | .30-06 | 300 RPM | Medium range, accurate follow-up shots | Unlocked at class rank 1 (default) |
| Gewehr 43 | Semi-auto rifle | 7.92×57mm Mauser | 300 RPM | Versatile, good recoil control | Rank 4 |
| StG 44 | Assault rifle | 7.92×33mm Kurz | 600 RPM | Close to medium range, full-auto | Rank 8 |
| M1907 SF | Semi-auto rifle | .351 Winchester | 450 RPM | Fast cycling, good for aggressive play | Rank 12 |
| Turner SMLE | Semi-auto rifle | .303 British | 300 RPM | High damage-per-shot, slow reload | Rank 16 |
| M2 Carbine | Semi-auto carbine | .30 Carbine | 700 RPM | High-capacity magazine, controllable | Rank 20 |
#### Medic Class Weapons
| Weapon | Type | Caliber | Fire Rate | Best Use | Unlock Condition |
|---|---|---|---|---|---|
| MP40 | Submachine gun (SMG) | 9×19mm Parabellum | 550 RPM | Reliable, low recoil, good for mid-range | Rank 1 (default) |
| Sten | SMG | 9×19mm Parabellum | 550 RPM | Suppressed (if using the Suppressed specialization – not default) | Rank 4 |
| M1928A1 (Thompson) | SMG | .45 ACP | 700 RPM | High close-range damage, drum mag | Rank 8 |
| Suomi KP/-31 | SMG | 9×19mm Parabellum | 750 RPM | Very high fire rate, small mag | Rank 12 |
| ZK-383 | SMG | 9×19mm Parabellum | 500 RPM / 700 RPM (select fire) | Select fire mode, versatile | Rank 16 |
| M3 Grease Gun | SMG | .45 ACP | 450 RPM | Very controllable, stealthy | Rank 20 |
#### Support Class Weapons
| Weapon | Type | Caliber | Fire Rate | Best Use | Unlock Condition |
|---|---|---|---|---|---|
| KE7 | Light machine gun (LMG) | 7.92×57mm Mauser | 650 RPM | Bipod deploy, good for suppression | Rank 1 (default) |
| Bren Gun | LMG | .303 British | 500 RPM | Accurate, slow reload | Rank 4 |
| MG 34 | Machine gun (MMG) | 7.92×57mm Mauser | 800 RPM / 1000 RPM (select fire) | High damage, mount required | Rank 8 |
| FG 42 | LMG | 7.92×57mm Mauser | 700 RPM | Can be used without bipod, good for aggressive support | Rank 12 |
| Lewis Gun | LMG | .303 British | 550 RPM | Large magazine, good sustained fire | Rank 16 |
| M1919A6 | Machine gun (MMG) | .30-06 Springfield | 650 RPM | Powerful, slow mobility | Rank 20 |
#### Recon Class Weapons
| Weapon | Type | Caliber | Fire Rate / Bolt Action | Best Use | Unlock Condition |
|---|---|---|---|---|---|
| Gewehr M95/30 | Bolt-action rifle | 7.92×57mm Mauser | Bolt-action | Medium-range sniping, fast bolt | Rank 1 (default) |
| Lee-Enfield No.4 Mk I | Bolt-action rifle | .303 British | Bolt-action | Good iron sights, 10-round magazine | Rank 4 |
| Karabiner 98k | Bolt-action rifle | 7.92×57mm Mauser | Bolt-action | Long-range damage, standard sniper | Rank 8 |
| ZH-29 | Semi-auto sniper | 7.92×57mm Mauser | Semi-auto | Two-shot kill at range, fast follow-up | Rank 12 |
| Model 8 | Semi-auto sniper | .35 Remington | Semi-auto | Higher damage but slower firing than ZH-29 | Rank 16 |
| Boys AT Rifle | Anti-material rifle | .55 Boys | Bolt-action | One-shot kill to body, vehicle damage | Rank 20 |
---
Sidearms (All Classes)
| Weapon | Type | Magazine | Best Use | Unlock Condition |
|---|---|---|---|---|
| M1911 | Pistol | 7 rounds | Reliable high damage | Default (all classes) |
| P38 | Pistol | 8 rounds | Good accuracy, lower recoil | Rank 2 (any class) |
| Webley Mk VI | Revolver | 6 rounds | High damage, slow reload | Rank 6 |
| Ruby | Pistol | 9 rounds | Fast fire rate, low damage | Rank 10 |
| Repetierpistole M1912 | Pistol | 8 rounds | Can be fired in burst mode | Rank 14 |
| M1911 Suppressed | Pistol | 7 rounds | Silent, ideal for stealth | Tides of War reward or Company Coin purchase |
| Welrod | Pistol | 7 rounds (integral suppressor) | Extremely quiet, low capacity | Tides of War or Boins |
Melee Weapons
All melee weapons have the same basic functionality (one-hit kill from behind, two-hit from front). Differ only in speed and animation. Unlocked via assignments or the Armoury.
| Weapon | Special Trait |
|---|---|
| Scout Knife | Default, balanced |
| Kukri | Slightly longer range |
| Pickaxe | Slower but high damage |
| Cricket Bat | Fast swing speed |
| Mace | Medium speed and range |
| Cleaver | Fast, low range |
| Trench Shovel | Can dig fortifications? (No, just cosmetic) |
Grenades & Throwables
| Item | Effect | Max Carry | How to Obtain |
|---|---|---|---|
| Frag Grenade | Standard explosive, damage radius | 2 | Default (all classes) |
| Smoke Grenade | Obscures vision, can conceal revives | 2 | Unlocked at class rank 1 |
| Incendiary Grenade | Creates fire area, denies space | 1 | Rank 3 (all classes) |
| Sticky Dynamite | Attaches to surfaces/vehicles, timed fuse | 2 | Assault class gadget (see Gadgets) |
| AT Grenade (Hafthohlladung) | Magnetic anti-tank grenade | 1 | Assault class gadget |
| Incendiary Grenade (Bundle) | Large fire AoE | 1 | Tides of War reward |
Gadgets (Class Equipment)
Each class can equip two gadgets. They are unlocked via class progression or assignments.
#### Assault Gadgets
- M1A1 Bazooka: Anti-tank rocket launcher, 2 rockets. Best for medium range. Unlock: Rank 1.
- PIAT (Projector, Infantry, Anti-Tank): Launchable bomb with arcing trajectory, good for indirect fire. Unlock: Rank 4.
- Lunge Mine: One-shot anti-tank explosive on a stick. Must be used in melee range. Unlock: Rank 8.
- Sticky Dynamite: Can be thrown or planted on vehicles. Unlock: Rank 12.
- Anti-Tank Grenade Bundle: High damage but short throw. Unlock: Rank 16.
- Panzerfaust: One-shot disposable rocket. High damage, single use. Unlock: Rank 20.
- Medical Syringe: Revive downed teammates. Unlock: Rank 1.
- Medical Crate: Deployable resupply for health for all nearby friendlies. Unlock: Rank 4.
- Medical Pouch: Throwable small health pack. Unlock: Rank 8.
- Smoke Rifle: Launcher that fires smoke grenades. Unlock: Rank 12.
- Ammo Crate: Deployable resupply for all primary and secondary ammo. Unlock: Rank 1.
- Ammo Pouch: Throwable small ammo resupply. Unlock: Rank 4.
- Repair Tool: Repairs damaged vehicles and fortifications. Unlock: Rank 8.
- AP Mine: Anti-personnel mine. Unlock: Rank 12.
- AT Mine: Anti-tank mine. Unlock: Rank 16.
- Spotting Flare (Pistol): Fires a flare that spots enemies in a radius. Unlock: Rank 1.
- Spawn Beacon: Deployable spawn point for squad. Unlock: Rank 4.
- Sniper Decoy: Deployable model that makes noise; rarely used. Unlock: Rank 8.
- Flare Gun (Incendiary): Fires a flare that damages enemies. Unlock: Rank 16.
- Trench Carbine: Scout-specific sidearm, effective at close range. Unlock: Rank 20.
#### Medic Gadgets
#### Support Gadgets
#### Recon Gadgets
---
Vehicles
Vehicles are divided into tanks, aircraft, and transports. Each has its own progression tree with specializations. Unlocked by earning vehicle score in matches.
#### Tanks (Ground Vehicles)
| Tank | Type | Armament | Unlock Condition |
|---|---|---|---|
| Panzer IV | Medium tank (German) | 7.5cm cannon + MG | Default |
| Tiger I | Heavy tank (German) | 8.8cm cannon | Rank 4 (German) |
| Churchill VII | Heavy tank (British) | 75mm cannon | Default (British) |
| Valentine Mk VIII | Light tank (British) | 75mm cannon | Rank 4 (British) |
| Staghound | Armored car (both) | 37mm cannon | Tides of War reward |
| Plane | Role | Unlock Condition |
|---|---|---|
| Spitfire Mk VA | Fighter (British) | Default |
| Bf 109 G-2 | Fighter (German) | Default |
| Ju 87 Stuka | Dive bomber (German) | Rank 4 (German) |
| Mosquito FB Mk VI | Fighter-bomber (British) | Rank 4 (British) |
| Blenheim Mk I | Bomber (British) | Rank 8 |
| He 111 H-16 | Bomber (German) | Rank 8 |
- Kübelwagen / Utility Car: Light transport, no weapons. Default.
- Universal Carrier: Armored transport, one MG. Default.
- Sd.Kfz 251 (Half-track): Troop transport with MG. Unlock: Rank 4.
- Horsa Glider: Used in Airborne mode, not player-controlled.
- Quick Reload: Faster reload speed.
- Recoil Buffer: Reduces vertical recoil.
- Bipod: Deployable bipod for LMGs/MMGs.
- Extended Magazine: Larger ammo capacity.
- High Velocity Bullets: Increased bullet velocity (rifles).
- Hip Fire Accuracy: Improved hip-fire spread (SMGs).
- Quick Repair: Automatically repairs when stationary.
- Smoke Canisters: Deploy smoke screen.
- Armor Plating: Extra health.
- Payload Upgrade: Additional bombs or rockets for planes.
- Tracks: Improved traction for tanks.
- Soldier Outfits: Headgear, torso, legs, face paint. Unlocked via Tides of War, assignments, or purchased with Boins.
- Weapon Skins: Apply to specific weapons. Common rarities: Common, Rare, Epic, Legendary.
- Vehicle Skins: Paint schemes for tanks and planes.
- Melee Weapon Skins: Different appearances but same stats.
- Company Coin (CC): Earned by playing matches, completing assignments, and ranking up. Can buy some skins in the Armoury.
- Battlefield Currency (Boins): Premium currency purchased with real money. Used for exclusive cosmetics.
- Tides of War Chapters: Free rewards including unique outfits and skins.
- Assignments: Specific challenges reward cosmetic items.
---
Specializations (Perk Trees)
Every weapon and vehicle has a specialization tree with four slots. These are unlocked by earning kills or score with that item. Each slot offers a choice between two or three upgrades.
Weapon Specializations (examples):
Vehicle Specializations (examples):
---
Cosmetics (Skins & Outfits)
Cosmetics have no gameplay effect and are purely visual. They fall into four categories:
How to Obtain:
---
Currencies
| Currency | Earned From | Used For |
|---|---|---|
| Company Coin (CC) | Match completion, daily assignments, rank ups, Tides of War | Purchasing weapons? (no – weapons are rank-locked), buying cosmetics in the Armoury, purchasing specializations for weapons (limited) |
| Battlefield Currency (Boins) | Real-money purchase (microtransactions) | Exclusive cosmetics, rare weapon skins, vehicle skins, some Tides of War shortcuts |
| XP | All actions | Leveling up classes and overall player rank (Chapter XP) |
---
Collectibles & Miscellaneous Items
- Letters & Documents: Scattered on campaign maps (War Stories). No multiplayer significance.
- Dog Tags: Can be equipped to show off achievements. No direct effect.
- Emblems: Customizable player emblems displayed on uniforms and vehicles. Unlocked via assignments.
- Quarters (Company): Soldiers in your company (four for each class). You can customize their appearance and gear.
- Attrition system: Ammo and health are limited; rely on Support and Medics for resupply.
- No armor or consumables that you equip – only health and ammo pouches/crates are class gadgets.
- End of live service: All currently available items are final. No new weapons or gadgets will be added.
- Some items from limited-time Tides of War events are now unobtainable (e.g., M1911 Suppressed). Check the Armoury for time-limited re-releases.
---
Important Notes
---
Quick Reference: How to Get Any Item
1. Primary weapon: Increase class rank (Assault, Medic, Support, Recon) to level 20.
2. Sidearm: Class rank milestones 2,6,10,14.
3. Grenade: Class rank 1-3.
4. Gadget: Class rank 1-20.
5. Vehicle: Earn vehicle score in matches; each vehicle type has a separate progression.
6. Cosmetics: Company Coin (earning), Boins (buying), Tides of War (free).
7. Specializations: Use the weapon/vehicle; earns points to unlock nodes.
---
This guide was last updated with Battlefield V's final content update (Chapter 6: Into the Jungle). All information is accurate as of the game's end of lifecycle.
Character Skills
Character Skills Guide for Battlefield V
Battlefield V does not feature traditional RPG-style characters with unique skill trees. Instead, progression and customization come from four distinct Classes, each with a variety of Combat Roles (subclasses), Gadgets, Weapons, and Vehicle Specializations. This guide covers every class, its Combat Roles, all available gadgets, weapon specializations (the closest equivalent to active skills), vehicle abilities, and how to use them effectively.
---
Class Overview
Each class has two primary Combat Roles that alter your playstyle. You can swap Combat Roles in the Deploy screen by clicking on the class icon. Gadgets and weapons are unlocked via class rank progression and Company Coin purchases.
---
Assault Class
Role: Anti-vehicle and aggressive infantry.
#### Combat Roles
1. Vehicle Buster
- Passive Effect: Increased damage against vehicles (all weapons and gadgets deal +X% extra damage to vehicles – exact multiplier varies by patch, roughly 15-20%).
- Recommended Use: When the enemy has strong armor presence. Prioritize using the PIAT or Panzerfaust.
- Vehicle Buster: +25% explosive damage resistance when near enemy vehicles; +20% reload speed on anti-vehicle gadgets.
- Assault: Hipfire spread reduced by 30%; movement speed while crouched increased by 15%.
- Effect: Single-shot, high-damage anti-tank launcher. Fires a rocket that deals massive damage to vehicles and can destroy light fortifications.
- Cooldown: Gadget resupplies from Supply Stations or Support players; no cooldown per se but limited ammo (1 rocket per life unless resupplied).
- Upgrades: None.
- Combos: Use with AT Grenade for a quick vehicle kill. Fire Panzerfaust, then immediately throw AT Grenade to finish a tank.
- Synergies: Vehicle Buster role speeds up reload; Team up with Support for ammo crates.
- Recommended Build: Always carry both Panzerfaust and AT Grenade for a devastating anti-armor combo.
- When to Use: Engage medium to heavy tanks; avoid using on infantry due to low splash damage.
- Effect: Shoulder-fired spigot mortar that fires a high-explosive bomb. Can be fired indirectly over cover. Less velocity than Panzerfaust but more splash and area damage.
- Cooldown: Same – one shot, resupply.
- Combos: Use to bombard enemy infantry in buildings or behind cover.
- Synergies: None specific.
- When to Use: Against infantry groups or to clear fortified positions; less effective vs. tanks than Panzerfaust.
- Effect: Thrown anti-tank grenade. Sticks to vehicles. Deals heavy damage. Can also be used against infantry with moderate blast.
- Cooldown: One throw – resupply again.
- Combos: Panzerfaust then AT Grenade for instant vehicle kill on medium tanks.
- When to Use: After disabling a vehicle or for ambushes.
- Effect: Melee weapon that explodes on contact with vehicles. Extremely high damage (can one-shot light tanks). You must sprint and lunge.
- Cooldown: Consumable; one per life.
- Combos: Use with smoke to close distance.
- When to Use: Surprise attacks on tanks when you are close.
- StG 44:
- Synergies: Choose based on playstyle. For aggressive assault, pick hipfire and reload. For ranged, pick recoil reduction and bullet velocity.
- Recommended Build: For StG 44: Quick Aim (T1), Recoil Buffer (T2), Extended Magazine (T3).
- Combat Medic: +40% faster revive speed; can revive squad mates with full health; +20% faster bandage usage.
- Field Medic: +15% faster movement while healing; +20% increased range on medical syringe; +50% faster heal-on-revive (allies revived get 50 health).
- Effect: Revive downed teammates instantly to 50 health (or 100 with Combat Medic). Also can self-heal if you have bandages.
- Cooldown: No cooldown, but limited by bandages.
- Combos: Use after deploying smoke grenade to safely revive.
- Synergies: Pair with Medical Crate for team healing.
- When to Use: Always when near downed ally.
- Effect: Throwable healing item that heals one teammate over time (restores up to 100 health). Also heals yourself if thrown at your feet.
- Cooldown: Refills from ammo crates or Support; 2 pouches per resupply.
- Combos: Toss to an ally before engaging.
- When to Use: To heal teammates without getting close.
- Effect: Self-heal to 100 health over time; also used with syringe for self-revive? No – only revive others. Bandages are for self-heal.
- Cooldown: 2 bandages per life; resupplied by Support.
- When to Use: After taking damage.
- Example: MP40
- Recommended Build: Hipfire (T1), Extended Mag (T2), Light Bolt (T3) for close combat.
- Engineer: +20% faster repair tool; +20% faster building of fortifications; +1 extra explosive gadget.
- Machine Gunner: +30% faster recoil recovery on MGs; +20% suppression duration; bipod deploys 50% faster.
- Effect: Deployable crate that resupplies all gadgets and weapons (including grenades) for allies. Slowly resupplies over time.
- Cooldown: One crate; destroyed if you place another.
- Combos: Place near chokepoints.
- When to Use: At squad objectives.
- Effect: Throwable pouch that immediately gives limited ammo to one ally (one use).
- Cooldown: 2 pouches.
- Combos: Toss to a teammate in a firefight.
- When to Use: Quick resupply during combat.
- Effect: Repairs friendly vehicles and damages enemy vehicles (slow). Also rebuilds fortifications.
- Cooldown: Continuous use while equipped.
- Combos: Repair tank while it moves.
- When to Use: Always near damaged vehicles.
- Effect: Bouncing Betty antipersonnel mine. Activates when an enemy is within 3m, jumps up, and explodes.
- Cooldown: 2 mines maximum placed.
- Combos: Place near ammo crates or objectives.
- When to Use: Defending flag points.
- Vickers K, M2 Flamethrower, etc. – build on fortifications.
- T1: Quick Aim vs. Faster Reload
- T2: Extended Belt (250 rounds) vs. Light Barrel (faster fire rate)
- T3: Reduced Recoil vs. Improved ADS movement
- Recommended Build: Quick Aim, Extended Belt, Reduced Recoil for sustained suppression.
- Sniper: +30% faster bolt-action cycle; +20% decreased scope sway; +1 extra flare.
- Pathfinder: +20% faster movement while scoped; +20% longer spotting duration; can spawn on squad leaders' beacons.
- Effect: Place a beacon anywhere; squad mates can spawn on it.
- Cooldown: One beacon; destroyed after one spawn or if enemy finds it.
- Combos: Use with smoke to hide placement.
- When to Use: Flanking behind enemy lines.
- Effect: Fires a flare that reveals all enemies in a large area on the minimap. Two flares total.
- Cooldown: Resupply from Support.
- Combos: Fire before pushing objective.
- When to Use: To spot enemies in buildings or foliage.
- Effect: Deployable dummy that looks like a sniper when you are elsewhere. Not effective.
- When to Use: Rarely; can distract briefly.
- Effect: Binoculars that mark enemies for your team; can see through smoke and foliage on scope.
- Cooldown: Continuous.
- Combos: Use to designate targets for bombers.
- When to Use: From a safe vantage point.
- Ammo type that explodes on impact; limited to 1.
- T1: Quick Scope vs. Iron Sights Efficiency
- T2: Bayonet vs. Sling (faster weapon swap)
- T3: Variable Zoom vs. Faster Bullet Velocity
- Recommended Build: Quick Scope, Bayonet, Variable Zoom for aggressive sniping.
- Quick Repair: Instantly repairs 25 health; cooldown 60 seconds.
- Emergency Repair: Same as Quick Repair but auto-triggers at 10% health?
- Siren: Scare infantry; no effect.
- Smoke Launcher: Fires smoke screen.
- Case Round (HE): High explosive shell for anti-infantry.
- AP Round: Armor-piercing for anti-tank.
- Coaxial MG: Additional machine gun.
- Thermal Optics: Highlight enemies.
- Radar: Spot enemies.
- Rocket: Fire unguided rockets.
- Bombs: 250lb, 500lb.
- Nose Gun: Improved or different cannon.
- Repair: Quick repair.
- Smoke: Release smoke trail.
- Combos: Fighter planes use rockets to strafe ground targets; bombers use bombs.
- Recommended Build: For fighters: radar + rockets; for bombers: improved bombs + rear gunner (if available).
- Assault + Support: Support gives ammo; Assault uses Panzerfaust and AT Grenade combo to destroy tanks.
- Medic + Recon: Medic revives downed Recon who spots enemies from distance.
- Support + Medic: Support places ammo/health crates together for sustained defense.
- Vehicle Buster (Assault) + Engineer (Support): Assault disables vehicle; Support repairs friendly vehicle while placing mines.
- Aggressive Infantry: Assault with StG 44 (hipfire spec), Panzerfaust, AT Grenade, Smoke grenade. Combat Role: Assault (hipfire).
- Frontline Healer: Medic with MP40 (hipfire + extended mag), Medical Crate, Smoke Grenades. Combat Role: Combat Medic for fast revives.
- Suppression Machine: Support with MG 42 (extended belt + recoil), Ammo Crate, AP Mines. Combat Role: Machine Gunner.
- Counter-Sniper: Recon with Kar98k (scope spec), Flare Gun, Spotting Scope. Combat Role: Sniper for faster bolt.
- Panzerfaust: As soon as you see a tank; prioritize engine hits to slow it.
- Medical Syringe: Revive squad mates immediately; use smoke first.
- Repair Tool: Repair every friendly tank you encounter; repair while they shoot.
- Flare Gun: Before entering a flag zone to spot enemies.
- Quick Repair: Use when tank health is below 50%.
2. Tank Buster (no separate role in BFV – actually the default Assault has anti-vehicle gadgets; there is no separate role selection for Assault – but the class itself is the vehicle buster. Correction: In BFV, Assault does not have selectable Combat Roles; it's a single role with access to anti-vehicle gadgets. All classes have roles, but Assault’s role is fixed. Actually: Assault has two Combat Roles: Vehicle Buster and Assault (the standard). Wait – BFV class roles: Each class has two specializations? No: Each class has one class-specific gadget and then two combat roles (per class) that change passive abilities. Let me correct: In BFV, each class has two Combat Roles that you can choose in the deploy screen. Assault’s roles are:
- Vehicle Buster: Passive: increased explosive resistance; faster reload on anti-vehicle weapons.
- Assault: Passive: increased hipfire accuracy; faster movement while crouched.
But the official in-game names: "Vehicle Buster" and "Assault" – let’s list them properly.
#### Combat Roles (Assault)
#### Gadgets
1. Panzerfaust 100
2. PIAT
3. AT Grenade
4. Lunge Mine (Tides of War unlock)
#### Weapon Specializations (Assault Weapons)
Assault weapons (e.g., StG 44, M1 Garand, Turner SMLE) have Specialization Trees that act like skill upgrades. Each weapon has two to three tiers with two choices each. Example:
- Tier 1: Reduced recoil (Quick Aim) vs. Faster reload (Lightened Stock)
- Tier 2: Hipfire accuracy (Quick ADS) vs. Improved burst (Recoil Buffer)
- Tier 3: Extended mag (Extended Magazine) vs. Faster bullet velocity (Custom Stock)
---
Medic Class
Role: Healing and reviving teammates.
#### Combat Roles
#### Gadgets
1. Medical Syringe
2. Medical Pouch
3. Bandages
#### Weapon Specializations (Medic Weapons)
Medic weapons (SMGs like MP40, Sten, Thompson) have specializations:
- Tier 1: Quick Aim vs. Hipfire Accuracy
- Tier 2: Extended Mag vs. Faster Reload
- Tier 3: Reduced Recoil vs. Light Bolt (faster fire rate)
---
Support Class
Role: Suppressive fire, ammo resupply, and repairing vehicles.
#### Combat Roles
#### Gadgets
1. Ammo Crate
2. Ammo Pouch
3. Repair Tool
4. AP Mine
5. Fixed Weapons (buildable)
#### Weapon Specializations (LMG/MMG)
Example: MG 42
---
Recon Class
Role: Long-range scouting and headshots, spotting.
#### Combat Roles
#### Gadgets
1. Spawn Beacon
2. Flare Gun
3. Sniper Decoy
4. Spotting Scope
5. Rifle Grenade (for Self-Loading Rifles)*
#### Weapon Specializations (Sniper Rifles & SLRs)
Example: Kar98k
---
Vehicle Specializations
Tanks, Planes, and Transport vehicles have specialization trees with active abilities. Below are key ones.
#### Tank Specializations (e.g., Panzer IV, Sherman)
#### Plane Specializations (e.g., Spitfire, Bf 109)
---
Synergies & Combos
Recommended Builds by Playstyle
When to Use Each Skill
---
Conclusion
Battlefield V's skill system is deeply integrated into class gadgets, combat roles, and weapon/vehicle specializations. There are no multiple characters with unique spells – instead, your loadout defines your skill set. Master the gadgets and specialization trees to dominate the battlefield. Always adapt your role to the team's needs.

Characters & Roles
Characters & Roles in Battlefield V
Overview
Battlefield V does not feature named heroes or unique character abilities. Instead, players assume the role of a soldier from one of four Classes: Assault, Medic, Support, and Scout. Each class has unique weapons, gadgets, and Combat Roles (specializations) that tailor your playstyle. Additionally, Elite Characters are cosmetic skins that offer no gameplay advantage. This guide covers every class and their combat roles in detail.
Classes (Playable Characters)
#### Assault
- Role: Frontline offensive and anti-vehicle specialist.
- Strengths: High damage with semi-automatic rifles and assault rifles; powerful anti-tank gadgets (Panzerfaust, sticky dynamite, anti-tank grenades).
- Weaknesses: No self-healing abilities; limited ammo capacity.
- Playstyle: Aggressive pushes, flanking, and prioritizing vehicles. Use cover to reload and rely on Supports for ammo.
- Unlock: Available from the start.
- Recommended Equipment:
- Combat Roles:
- Team Synergy: Assault clears vehicles, allowing Medics and Scouts to advance. Pair with Support for ammo and Medic for healing.
- Role: Healer and reviver.
- Strengths: Infinite healing pouches/boxes; smoke grenades for cover; fast revive speed.
- Weaknesses: Limited to SMGs (lower damage and range).
- Playstyle: Stay with squad, prioritize revives, use smoke to obscure enemy lines.
- Unlock: Available from start.
- Recommended Equipment:
- Combat Roles:
- Team Synergy: Essential for sustaining pushes. Use smoke to protect revives. Supports can keep you stocked with ammo.
- Role: Ammo provider, suppressive fire, and fortification builder.
- Strengths: LMGs/MMGs with large magazines; unlimited ammo boxes; ability to build and repair fortifications/vehicles.
- Weaknesses: Slow movement speed; vulnerable during long reloads; poor accuracy at range.
- Playstyle: Hold defensive positions, resupply teammates, construct cover, suppress enemies to pin them down.
- Unlock: Available from start.
- Recommended Equipment:
- Combat Roles:
- Team Synergy: Provides ammo for all classes; repairs vehicles driven by teammates; builds defensive positions for Scouts and Medics.
- Role: Reconnaissance, long-range elimination, and spotting.
- Strengths: High damage bolt-action rifles; spotting flares reveal enemies on minimap; spawn beacon for squad spawn points.
- Weaknesses: Low health; slow rate of fire; weak in close quarters.
- Playstyle: Position on high ground or flanks, use flares to reveal enemies, eliminate key targets, place spawn beacons for squad infiltration.
- Unlock: Available from start.
- Recommended Equipment:
- Combat Roles:
- Team Synergy: Flares help Assaults and Supports engage enemies; spawn beacon allows squad to flank from unexpected angles. Medics can revive you if positioned safely.
- Hanna: Female German soldier (Assault class).
- Norman “Mac”: British paratrooper.
- Wilfrid “Will”: British pilot.
- “The Last Tiger” crew (German tanker skins).
- Various seasonal elites (e.g., “Patriot”, “Valkyrie”).
- Weapons: StG 44 (assault rifle) or M1 Garand (semi-auto)
- Gadgets: Panzerfaust + sticky dynamite (for vehicle busting) or anti-tank grenade + grenade launcher (area denial)
- Vehicle Buster: Faster reload for anti-tank gadgets and increased damage to vehicles.
- Tank Hunter: Equip anti-tank rifles (e.g., Boys AT Rifle) with improved accuracy and handling.
- Demolition: Increased explosive damage and radius for grenades and dynamite.
#### Medic
- Weapons: MP40 or Thompson (high fire rate for close quarters)
- Gadgets: Medical crate (area heal) or pouches (quick single use); smoke grenade launcher optional.
- Field Medic: Faster revive and heal speed; increased health regeneration.
- Combat Medic: Improved weapon accuracy and handling while moving.
#### Support
- Weapons: MG42 or Lewis Gun (high round count for sustained fire)
- Gadgets: Ammo crate or pouches; repair tool for vehicle maintenance.
- Machine Gunner: Improved suppression effect and faster bipod deploy.
- Engineer: Faster fortification building and vehicle repair speed.
#### Scout
- Weapons: Krag-Jørgensen or Gewehr M95 (bolt-action rifles)
- Gadgets: Spotting flare + spawn beacon (team utility) or tripwire mines (defensive).
- Sniper: Increased accuracy and reduced scope sway when stationary.
- Spotter: Faster spotting time, extra flare capacity, and increased mark duration.
Elite Characters (Cosmetic)
Battlefield V includes Elite Characters—premium cosmetic skins that change a soldier’s appearance and voice lines but do not alter gameplay or abilities. They are purchased with real money or were earned through Tides of War (no longer obtainable). Examples:
These skins are purely cosmetic. You can equip them in the Company menu, but they function identically to the base classes.
Summary Table of Classes
| Class | Primary Role | Typical Weapons | Key Gadgets | Weaknesses |
|---|---|---|---|---|
| Assault | Anti-vehicle/offense | Assault rifles, semi-autos | Panzerfaust, dynamite, AT grenade | No healing, limited ammo |
| Medic | Healer/reviver | SMGs | Medical crate/pouch, smoke grenade | Low damage, short range |
| Support | Ammo/fortifications | LMGs, MMGs | Ammo box/pouch, repair tool | Slow, poor accuracy at range |
| Scout | Recon/sniper | Bolt-action rifles | Spotting flares, spawn beacon | Low health, weak CQC |
Conclusion
Master your chosen class and combat role to contribute effectively to your squad. Coordinate with teammates to cover each other's weaknesses—Assault destroys vehicles, Medic keeps everyone alive, Support provides resources, and Scout delivers intel. Switch roles as needed based on the situation and map. Remember that Elite Characters are cosmetic only; focus on mastering the class system for success on the battlefield.
Cheats & Secrets
Cheats & Secrets for Battlefield V
No Traditional Cheat Codes
Battlefield V, like most modern multiplayer-focused games, does not include any traditional cheat codes, console commands, or unlock codes that can be entered into the game to gain unfair advantages. DICE has not included any developer cheats like invincibility, infinite ammo, or level skip commands. All progression must be earned through gameplay.
However, the game contains numerous Easter eggs, hidden features, and developer-intended secrets hidden across its maps and menus. These are harmless, often require teamwork or exploration, and reward players with cosmetic items, sound cues, or humorous reveals.
---
Known Easter Eggs and Hidden Secrets
#### 1. The Giant Shark (Panzerstorm Map)
- Location: Panzerstorm (Grand Operations or Conquest).
- Trigger: Find and shoot the red fuel barrel near the windmill at the edge of the map (coordinates roughly D7 on the minimap). This causes a hidden door to open underneath the windmill, leading to a secret underground room containing a cardboard cutout of a shark. Interacting with the shark triggers a loud roar and the unlock of the “Mighty Roar” dog tag (if earned during the Tides of War event).
- Note: This Easter egg was part of a limited-time Tides of War challenge but can still be activated; however, the dog tag may no longer unlock.
- Location: Mercury (Greek island map).
- Trigger: Near the cave system on the eastern side of the map, there is a hidden golden krolik (rabbit) statue. You must shoot it in a specific order (left ear, right ear, tail) to open a secret cave entrance. Inside, you’ll find a hidden weapon skin or a easter egg room with a gramophone playing a funny song.
- Reward: The “Krolik” dog tag (if earned during the limited-time event). The statue respawns each round.
- Location: Fjell 652 (mountain map).
- Trigger: Climb to the highest peak of the mountain (northeast sector). At the top, next to a broken antenna, there is a small yeti plushie. Approach and press the interact key to make a yeti roar sound. No permanent unlock, but a fun secret.
- Location: Rotterdam (in a building near the central bridge, second floor).
- Trigger: Find the piano and play a specific sequence of keys (notes: C, D, E, F, G, A, B). This causes a secret door to open in the same room, revealing a hidden room with a painting of a cat and a parachute. The painting can be shot to reveal a secret message.
- Reward: No item, but a cosmetic “Cat” player card background (if earned during the event).
- Location: Twisted Steel (the massive bridge).
- Trigger: At the northern end of the bridge, there is a hidden lever behind a crate. Pulling it activates a hidden cannon that fires a giant soccer ball (football) across the map. This is purely visual and does not damage players.
- Location: Devastation (cathedral ruins).
- Trigger: In the bell tower, there is a hidden room accessible by destroying a specific wall. Inside, you’ll find a “Spectre” soldier mannequin wearing a gas mask. Interacting with it triggers a spooky whisper sound effect.
- “The Rat”: On the Narvik map, find a hidden rat in a sewer and follow it to a dead end. Interact to get the tag (no longer awarded).
- “The Wolf”: On the Arras map, find a wolf statue in a barn and howl by shooting it three times.
- Location: Any map with a gramophone (e.g., Rotterdam, Narvik).
- Trigger: Approach a gramophone and interact to change the music. Some rooms contain multiple gramophones that can be synchronized to play a hidden song.
- Location: Hamada (desert map).
- Trigger: In the large cave system (center-south), there is a hidden skeleton of a T-Rex dinosaur. Shoot it to make it roar. No reward.
- Availability: Not an in-game feature, but DICE released official developer tools for creating machinima. These are separate from the game and not accessible during normal play.
- How to access: Requires a separate download from EA’s developer portal (no longer officially supported). Not considered a cheat.
#### 2. The Krolik (Mercury Map)
#### 3. The Yeti (Fjell 652 Map)
#### 4. Piano Easter Egg (Rotterdam Map)
#### 5. The Fortress Cannon Secret (Twisted Steel Map)
#### 6. The Mystery of the “Spectre” (Devastation Map)
#### 7. The “Dog Tag” Unlock Secrets
Several dog tags were only obtainable via Easter eggs during Tides of War events. Most are no longer obtainable, but the secrets still work for fun:
#### 8. The Music Room (Multiplayer)
#### 9. The “Mighty Roar” Dog Tag (Panzerstorm)
Part of the shark Easter egg (see #1). The dog tag was awarded during a 2019 challenge. The secret still works, but the tag is no longer granted.
#### 10. The Hidden T-Rex (Hamada Map)
---
Developer-Intended Hidden Features
#### 1. “Cinematic Tools” (PC Only)
#### 2. “The Battlefield V Beta Commando” (Easter Egg Uniform)
During the open beta, players who completed a specific challenge (spotting a hidden V-1 rocket on the map) unlocked a special “Commando” uniform. This item is now unobtainable but remains in the game files.
#### 3. Hidden Weapon Skins (No Longer Obtainable)
Several weapon skins were tied to timed Easter eggs, like the “Mint” skin for the M1 Garand (found by shooting a specific window on the Rotterdam map). All are legacy content.
---
Exploits and Glitches (Not Recommended)
While not intended secrets, some players have discovered exploits like out-of-map glitches, under-map hiding spots, or wall breaches. These are considered bugs and are patched over time. Using them can result in bans. This guide does not condone or list exploits.
---
Conclusion
Battlefield V contains no cheat codes or developer commands that allow players to gain an unfair advantage. Instead, its secrets are all about exploration, teamwork, and fun. Most Easter eggs are still active in the game as of the last update (2020). While some rewards are no longer obtainable due to the end of live service, the secrets themselves remain intact. Enjoy hunting them!