Bloodborne
## Overview **Bloodborne** is a critically acclaimed action role-playing game developed by **FromSoftware** and published by **Sony Computer Entertainment** (later Sony Interactive Entertainment). Released exclusively for the **PlayStation 4** on March 24, 2015, it quickly became a landmark title i...
Download & Installation
Overview
Bloodborne is a PlayStation 4 exclusive action RPG developed by FromSoftware. It is not officially available on PC, Xbox, Nintendo Switch, or mobile devices. The only legitimate ways to obtain and play the game are on a PlayStation 4 console or via backward compatibility on a PlayStation 5. The game can be acquired as a digital download from the PlayStation Store, as a physical Blu‑ray disc, or through a PlayStation Plus subscription (Extra or Premium tiers). This guide covers all official methods.
Official Sources
| Platform | Source | Type |
|---|---|---|
| PS4 / PS5 | PlayStation Store (digital) | Purchase / Download |
| PS4 / PS5 | PlayStation Plus Game Catalog | Subscription (Extra/Premium) |
| PS4 / PS5 | Physical disc (retail) | Disc installation |
System Requirements
PlayStation 4 (Minimum / Recommended)
- Console: Any PS4 model (Slim, Pro, or original).
- Storage Space: Approximately 50 GB free space (more if you download updates).
- Internet: Required for first-time patch download and online features.
- Account: PlayStation Network (PSN) account.
- Console: Any PS5 model (disc or digital edition).
- Storage Space: Same as PS4 – ~50 GB on internal SSD or compatible external storage.
- Performance: Runs via backward compatibility; no native PS5 upgrade but benefits from faster load times and stable frame rate on PS5 hardware.
- Internet: Required for initial patch download.
- Account: PSN account (same as PS4).
- Disc edition PS5 can install from PS4 disc; digital edition PS5 cannot use discs.
- Discs are region‑locked (only PSN account matching the disc region can install DLC or updates without switching accounts).
- Digital: The same digital copy purchased on PS4 will appear in your PS5 library. Download directly from library.
- Disc Edition PS5: Insert the PS4 disc; the PS5 will install the game as a PS4 title. You may be prompted to download a compatible version (no special PS5 version exists).
- Digital Edition PS5: Cannot use discs – only digital copies or PS Plus subscriptions.
- Performance Note: The game runs at 30 FPS (or variable 30) on PS5; there is no 60 FPS patch. Load times are significantly shorter.
- PlayStation Network (PSN) Account – Required for all digital purchases, disc patch downloads, and online multiplayer (including co‑op and PvP).
- Region Restriction (Disc) – If you buy a disc from another region, you may need a PSN account matching that region to download DLC or updates without changing accounts.
- Parental Controls – Users under 18 may need guardian approval to purchase or download the game (rated M for Mature).
PlayStation 5 (Backward Compatibility)
Disc Version Notes
Step‑by‑Step Installation
1. Digital Download (PlayStation Store)
1. Create / Sign In to PSN Account – If you don’t have one, create a Sony account at [playstation.com](https://www.playstation.com/).
2. Access PlayStation Store – From the PS4/PS5 home screen, select the PlayStation Store icon.
3. Search for Bloodborne – Use the search function or browse Action / RPG categories.
4. Purchase the Game – You can buy the standard edition, or the Game of the Year Edition (includes The Old Hunters DLC). Add to cart and complete checkout using a payment method or wallet funds.
5. Download Begins Automatically – After purchase, the game will be added to your library and start downloading. You can monitor progress from the notifications or library.
6. Wait for Completion – Ensure you have at least 50 GB free. Download time depends on internet speed (the game is ~40 GB base, plus patches).
7. Install Patches – After the initial download, the console will apply the latest update patch automatically (if connected to the internet).
2. Physical Disc Installation (PS4)
1. Insert the Disc – Place the Bloodborne Blu‑ray disc into the PS4 disc drive.
2. Automatic Prompt – The console will detect the disc and show a prompt to install. Select "Install" or wait for it to start automatically.
3. Install Game Data – The system copies necessary files to the internal hard drive. This can take 30–60 minutes.
4. Download Patch – Once the disc data is copied, the console will check for updates and download any available patches (required for multiplayer and bug fixes).
5. Play – After installation and patch application, the game will be ready to launch from the main menu.
3. Backward Compatibility on PS5 (Digital & Disc)
4. PlayStation Plus (Extra / Premium) – Game Catalog
1. Active Subscription – You must have an active PS Plus Extra or Premium tier membership.
2. Navigate to the Game Catalog – On the PS5/PS4 home screen, go to the PS Plus hub or the PlayStation Store and select the "Game Catalog" tab.
3. Find Bloodborne – It is included in the catalog. Select "Add to Library" (or Download).
4. Download & Install – The game will be added to your library and begin downloading. Follow the same steps as the digital purchase method.
5. Keep Subscription Active – You can play only while your PS Plus Extra/Premium subscription is active. If it lapses, the game becomes locked until renewal.
Account Requirements
First Launch Setup
1. Start the Game – After installation, launch Bloodborne from the home screen.
2. Title Screen & Patches – The game may apply a small update on first launch (if not already done).
3. Language Selection – Choose your preferred language (English, French, German, etc.). This can be changed later from system settings.
4. Brightness Calibration – A screen will appear to adjust the in‑game brightness. Follow the on‑screen instructions to make the "almost invisible" icon just visible. This affects lighting and visibility.
5. Controller Settings – Default controls are standard. You can remap buttons later from the game’s options menu.
6. Offline / Online Mode – The game will ask if you want to play online. Selecting "Play Online" will connect to the server for messages, co‑op, and invasions. You can switch to offline anytime from the settings.
7. Create a Save – The game creates an autosave slot. Ensure you have enough free space (saves are small).
8. Begin Game – New Game or Load Game options appear after initial setup.
Common Installation Errors & Fixes
| Error | Cause | Fix |
|---|---|---|
| Insufficient Storage | Less than 50 GB free. | Delete unused games/apps or add external storage. Check that saved data doesn’t fill the drive. |
| Disc Read Error | Dirty or damaged disc. | Clean the disc with a soft, dry cloth. If scratched, consider digital purchase. |
| Download Stuck / Paused | Network issue, overloaded servers, or power interruption. | Restart the console, check internet connection, pause/unpause download. If persists, delete and redownload. |
| Corrupted Data (CE-34878-0) | Patch file corruption or storage issue. | Delete the game data (not saves) and re‑install. If error continues, rebuild PS4 database (Safe Mode option 5) or initialize the console. On PS5, use Safe Mode option 6. |
| PS Plus Game Not Available | Subscription expired or regional mismatch. | Verify your subscription is active and matches your PSN region. |
| No Sound / Audio Issues | HDMI configuration, audio output settings. | Go to PS4/PS5 Settings > Sound > Audio Output and select proper format (Linear PCM). Check TV/receiver settings. |
| “Cannot Start Application” (NP-31948-5) | License verification failure. | Restore licenses: Settings > Account Management > Restore Licenses. If on PS4, also try logging out and back into PSN. |
| Update File Too Large | Patch cumulative. | Ensure you have enough free space; patches can be up to 10 GB. Delete unnecessary data. |
Post‑Installation Verification
1. Check Game Version – On the PS4/PS5 home screen, highlight the game tile, press Options, and select Information. The version number should be at least 1.09 (the final major patch).
2. Verify DLC – If you own The Old Hunters DLC, confirm it is installed: go to the game’s options menu and check “Downloadable Content.” The “The Old Hunters” entry should show as installed.
3. Test Performance – Launch the game and play the opening area (Central Yharnam). Look for stable frame rate (30 FPS) and no graphical glitches. If you experience stuttering, try restarting the console.
4. Check Online Features – If you intend to play online, make sure you can see player messages on the ground and can ring the Beckoning Bell (co‑op). If messages are absent, check your network settings (NAT type 2 or 1 recommended).
5. Save Data Backup – After playing for a few minutes, back up your save data to the cloud (if PS Plus) or to a USB drive for safety.
---
> Final Note: Bloodborne has no official PC release. Any websites claiming a “PC version” are either scams or involve unofficial emulation. The only legitimate way to play is on PlayStation hardware. For the best experience, play on a PS5 (disc or digital) with a fast internet connection for patches and online features.

Game Introduction
Overview
Bloodborne is a critically acclaimed action role-playing game developed by FromSoftware and published by Sony Computer Entertainment (later Sony Interactive Entertainment). Released exclusively for the PlayStation 4 on March 24, 2015, it quickly became a landmark title in the souls-like genre, blending gothic Victorian aesthetics with cosmic Lovecraftian horror.
Genre & Developer
- Genre: Action RPG, Souls-like, Gothic Horror
- Developer: FromSoftware (creators of the Dark Souls series)
- Publisher: Sony Computer Entertainment
- Announced: June 2014 at E3
- Worldwide Release: March 24, 2015 (PS4 exclusive)
- Platform: PlayStation 4 only – not available on PC, Xbox, Nintendo Switch, or mobile. Backward compatible on PS5 with enhanced performance.
- The Hunter: The silent protagonist, customizable in appearance and build.
- Gehrman, the First Hunter: An elderly mentor who oversees the Hunter's Dream from his wheelchair.
- Lady Maria of the Astral Clocktower: A tragic figure and skilled hunter, encountered in The Old Hunters DLC.
- Father Gascoigne: A hunter who has succumbed to the beast curse – one of the first major bosses.
- Vicar Amelia: A high-ranking member of the Healing Church, now transformed into a beast.
- Micolash, Host of the Nightmare: A mad scholar encountered in the nightmare realm.
- Aggressive Combat: Unlike the defensive stamina management of Dark Souls, Bloodborne encourages relentless offense. The trick weapons (weapons that transform mid-combat into different forms) and the regain system (recovering health by quickly counterattacking after taking damage) reward risky, aggressive play.
- Interconnected World Design: A sprawling, non-linear world filled with shortcuts, hidden paths, and optional areas.
- Deep Lore: The story is told through item descriptions, environment details, and vague NPC dialogue, leaving much to player interpretation.
- Atmospheric Audio & Visuals: A haunting orchestral soundtrack, chilling sound design, and striking art direction create an unforgettable sense of dread and wonder.
- Enjoy challenging, methodical combat and learning boss patterns through trial and error.
- Appreciate cryptic storytelling and exploration over hand-holding narratives.
- Have experience with or are willing to adapt to the Souls-like genre's difficulty.
- Love gothic, horror, and cosmic mythology aesthetics.
- Single-Player Campaign: Full main story with multiple endings, optional areas, and secret bosses.
- Cooperative Multiplayer: Use the Beckoning Bell to summon up to two other players for help with areas or bosses (requires Insight).
- Competitive Multiplayer: Use the Sinister Resonant Bell to invade other players' worlds for PvP combat. Alternatively, use the Small Resonant Bell to be summoned as an ally.
- Chalice Dungeons: Procedurally generated dungeons with unique enemies, bosses, and loot – playable solo or cooperatively.
- A new area: The Hunter's Nightmare and the Fishing Hamlet.
- Over a dozen new weapons and off-hand items.
- New bosses: Ludwig the Accursed, Lady Maria, Laurence the First Vicar, and the Orphan of Kos.
- Expanded lore, directly addressing the origins of the Hunter's Dream and the Great Ones.
- No shields: Combat is built around dodging, parrying with firearms, and aggressive counters.
- Trick Weapons: Each weapon has two distinct forms with different move sets, encouraging versatile strategies.
- The Regain System: Encourages risky counterattacks rather than retreating.
- Gothic Lovecraftian Fusion: A perfect marriage of Victorian horror and cosmic dread, unlike any other game.
- Chalice Dungeons: Endless replayability through randomized dungeons that are separate from the main story.
- Art Direction: The world of Yharnam is visually breathtaking and deeply unsettling, with a cohesive design that lingers in memory.
Release Timeline & Platforms
Story Overview
In the decaying city of Yharnam, a mysterious blood-borne plague has transformed its inhabitants into monstrous beasts. Players assume the role of a Hunter, an outsider drawn to Yharnam in search of a cure. Guided by cryptic notes and strange dreams, you must hunt down the source of the scourge while uncovering the dark secrets of the Healing Church, the School of Mensis, and the Great Ones – ancient cosmic beings that influence Yharnam from beyond the veil.
Setting
The game's world is a masterful blend of Victorian-era architecture, gothic cathedrals, and cobblestone streets drenched in fog and blood. As you progress, the setting shifts from the plague-ridden streets of Central Yharnam to the eerie Forbidden Woods, the nightmarish nightmare realms, and the cosmic fishing hamlet of the DLC. Every location is interconnected, encouraging exploration and rewarding keen observation.
Main Characters
Core Appeal
Target Audience
Bloodborne is designed for players who:
Game Modes
Online / Offline Support
Bloodborne can be played entirely offline without any restrictions. Online features (co-op, invasions, messaging, and leaderboards) require a PlayStation Plus subscription on PS4/PS5. The game does not require an always-online connection; you can choose to play offline at any time.
DLC / Expansion Overview
The Old Hunters (released November 24, 2015) is the only major expansion for Bloodborne. It adds:
The DLC is widely considered essential, offering some of the game's best content.
What Makes Bloodborne Unique
Bloodborne stands apart from other action RPGs and even FromSoftware's own Dark Souls series due to:
For many, Bloodborne is the pinnacle of the souls-like genre – a tight, refined, and haunting experience that rewards mastery and curiosity.
Getting Started
Overview
Bloodborne is a punishing action RPG for the PlayStation 4 (also playable on PS5 via backward compatibility). It demands patience, observation, and precision. This guide is designed for absolute newcomers to help you survive your first night in Yharnam. We'll cover character creation, controls, the UI, the critical first hour, early priorities, common mistakes, and a day-one checklist.
---
1. Character Creation (First 10 Minutes)
When you start a new game, you'll create your Hunter. This step is permanent – you cannot respec later. Focus on practical choices:
- Name & Appearance: Cosmetic only. No effect on gameplay.
- Origin (Class): Origins determine starting stats and give a small bonus. For new players, Military Veteran or Troubled Childhood are excellent choices because they offer high Vitality (HP) and Endurance (stamina). Avoid "Cruel Fate" (low starting stats).
- Starting Stats: Your most important stats early:
- Starting Weapon: You can choose between the Saw Cleaver (fast, serrated – good for beasts), Hunter Axe (powerful, long reach – good for crowd control), and Threaded Cane (fast, whip mode – more technical). For beginners, Saw Cleaver is the most forgiving due to its speed and damage output. The Hunter Axe is also great; its charged attack can knock down enemies.
- Starting Gun: Choose the Hunter Pistol (faster, better for parrying) or Blunderbuss (wider spread, easier to hit but slower). For learning parry, the Hunter Pistol is recommended.
- Vitality (HP): Priority #1. More HP means you survive mistakes.
- Endurance (Stamina): Priority #2. More stamina lets you attack, dodge, and run longer.
- Strength/Skill: Invest in these only when you have a weapon you like. Base starting stats are enough for the first area.
- Bloodtinge/Arcane: Ignore these for the first few hours unless you know what you're doing.
Tip: You can preview starting weapons in the character creation screen by selecting them, but you won't see movesets. If unsure, choose Saw Cleaver + Hunter Pistol.
---
2. Controls (PlayStation 4 & PS5)
Bloodborne uses the DualShock 4 (or DualSense on PS5) with the following default controls:
| Button | Action |
|---|---|
| Left Stick | Movement |
| Right Stick | Camera control |
| R1 | Light attack (right hand weapon) |
| R2 | Heavy attack (hold for charged attack) |
| L1 | Transform weapon (switch between two modes) |
| L2 | Fire gun / use left-hand weapon |
| Triangle | Use item in quick slot (heal with blood vial) |
| Circle | Dodge/roll (tap) or sprint (hold) |
| Square | Interact (talk, open doors, pick up items) |
| Cross | Jump (while sprinting) |
| D-Pad Up | Switch quick item (cycling through inventory) |
| D-Pad Down | Use equipped consumable (e.g., Molotov) |
| D-Pad Left | Swap left-hand weapon (e.g., torch or gun) |
| D-Pad Right | Swap right-hand weapon (two main weapons) |
| Touchpad | Open menu / gestures (swipe) |
| Options | System menu (pause, quit, settings) |
- Rally System: After taking damage, attack immediately to recover some health (white portion of HP bar). This encourages aggressive play.
- Parry: Fire your gun just as an enemy's attack is about to hit you. If successful, the enemy will stagger (visceral attack prompt – press R1 near them to deal massive damage). Practice on the big executioner in the first area.
- Backstep & Quickstep: Tap Circle while locked on to sidestep. Tap Circle without lock-on to backstep. Both have invincibility frames.
- Sprint: Hold Circle to run. Use this to escape danger or close gaps.
- Top-left: Health bar (green) and stamina bar (light blue). Below that, your equipped right-hand weapon and left-hand weapon icons.
- Top-right: Blood Echoes (currency/XP) count. Below that, Insight (a second currency gained from bosses, items, or discovering areas).
- Bottom-left: Quick item slots. You have two types: a consumable item (default: Blood Vial) and a quick-use item (default: Blood Vial or Molotov). Cycle with D-Pad Up/Down.
- Bottom-center: Active effects (e.g., "Bold Hunter's Mark" if used).
- Center: Crosshair when locked on (R3 to lock onto an enemy).
- Right: No mini-map! You must learn the layout by memory and landmarks.
- Inventory: View all items, equip weapons/armor, use consumables.
- Status: See character stats, resistances, and active buffs.
- Equipment: Change weapons, guns, attire.
- System: Settings, save/quit.
- In the dream, you can access the Workshop (upgrade weapons later), the Messengers (buy items with Blood Echoes), and the Gravestones (travel to different areas).
- Use the first gravestone to travel to Central Yharnam.
- Explore slowly. Listen for enemy sounds.
- Use pebbles to lure single enemies away from groups.
- Prioritize Vitality and Endurance when leveling.
- Upgrade your weapon (using Blood Stone Shards) at the Workshop in Hunter's Dream once you have the materials.
- Use the Rally mechanic aggressively after taking a hit.
- Open shortcuts – they are permanent progress.
- Read item descriptions for lore and hints.
- Rushing into crowds – you'll get ganked.
- Wasting Blood Vials – try to heal only when safe. Enemies often drop them, but you can run out and be stuck farming.
- Ignoring the parry system – it's crucial for tougher enemies.
- Spending Blood Echoes on consumables early – save for leveling.
- Fighting the giant executioner in the aqueduct (near the wheelchair guy) until you're comfortable with parrying.
- Using the small resonant bell (co-op) if you have low Insight – it costs Insight to summon others.
- Attacking NPCs – you might miss quests or a potential vendor.
---
3. UI Overview
Your screen shows:
Menu Screen (Touchpad):
---
4. First Hour Walkthrough (From the Clinic to the First Lamp)
1. Opening Cinematic: Watch the sequence. You wake up in the Iosefka's Clinic.
2. Initial Room: On the floor is a note: "Seek the Paleblood to transcend the hunt." Pick it up. Interact with the door on the right to exit.
3. First Steps: You are now in the Hunter's Dream – a safe hub. Speak to the doll? (Not yet – she only awakens after you gain Insight).
4. Central Yharnam (The First Area):
- You appear on a path. Immediately ahead is a bonfire with a group of enemies.
- Do not engage the crowd. Instead, turn left and go down the stairs. You'll find a small building with a lantern – this is your first checkpoint (the first lamp). Light it by interacting.
5. Learning the Basics:
- Practice attacking the few scattered enemies near the lamp. Use R1 combos, then R2 for strong hits.
- Learn to dodge (Circle). Enemies have slow but powerful attacks.
- Use your gun to parry the larger church servant (the one in the black cloak). Time the shot just as he swings.
6. Collect Items: In the area near the lamp, there are Blood Vials (healing) and Quicksilver Bullets (for gun). Pick them up. They respawn if you die.
7. Your First Death (Inevitable): Expect to die many times. Each death resets enemies but preserves your progress (opened shortcuts remain).
8. Goal: Reach the Central Yharnam Lamp (the first one you lit). Then return to the Hunter's Dream via the lamp. Now you can level up (if you have 1 Insight from encountering a boss or using a Madman's Knowledge – the first boss you'll see is the Cleric Beast, but you can also gain Insight by seeing the boss for the first time).
9. If you die without lighting a lamp: You'll return to the Hunter's Dream automatically. Use the gravestone to go back to Central Yharnam.
Key Tip: The first area is a maze. Use the trick of "opening shortcuts" (gates, elevators) to make traversal easier. One crucial shortcut: from the central Yharnam lamp, go down the stairs, across a bridge, down more stairs, and you'll find a gate that can be opened from the other side (near the dog kennels).
---
5. Essential Early Objectives
1. Light the first lamp in Central Yharnam.
2. Gain 1 Insight – either by encountering the Cleric Beast (boss) or using a Madman's Knowledge (found in the sewers below the bridge). This unlocks the ability to level up at the doll in Hunter's Dream.
3. Level up your Vitality to at least 20 as soon as possible. Health is your best defense.
4. Learn to parry – practice on the large brick troll near the first lamp. It drops Blood Vials.
5. Find and equip the Hunter Set (armor) – located in the sewers (near the rats). It offers better physical defense than your starting garb.
6. Open all shortcuts – especially the gate from Central Yharnam lamp to the bridge leading to the Cleric Beast. This makes boss runs faster.
7. Defeat the first boss (Cleric Beast or Father Gascoigne) – Cleric Beast is optional but recommended to learn large boss fights. Gascoigne is mandatory. You can summon NPC help (use the Beckoning Bell with Insight).
---
6. What to Do First / What to Avoid
✅ Do:
❌ Avoid:
---
7. Early Resource Priorities
| Resource | Priority | How to Get | Use For |
|---|---|---|---|
| Blood Echoes | #1 | Killing enemies, selling items | Leveling up, buying items, weapon upgrades |
| Blood Vials | High | Enemies drop, item pickups, buy from messengers | Healing – always keep a stock of 20+ |
| Quicksilver Bullets | Medium | Enemies drop, pickups, buy | Parrying and using firearm |
| Blood Stone Shards | High | Enemies (especially in sewers), pickups | Weapon upgrades (+1, +2, etc.) |
| Insight | Medium | Seeing/defeating bosses, Madman's Knowledge items | Leveling up (first point), summoning NPCs, buying special items |
| Pebbles | Low | Pickups, enemies | Luring single enemies |
| Molotov Cocktails | Low | Pickups, craft from Quicksilver Bullets | Ranged damage, especially against beast enemies |
---
8. Common Beginner Mistakes
1. Panic Rolling: Dodging frantically without stamina management. Learn enemy attack patterns and time your dodges (into the attack, not away).
2. Not Using Rally: After taking damage, attack back immediately to recover health. Retreating can be a death sentence.
3. Hoard Blood Vials: Use them. You can carry up to 20 + more in storage. They are meant to be consumed.
4. Spending Echoes on Unimportant Items: Early game, only buy Blood Vials (if you need them) and weapon upgrade materials. Everything else is a luxury.
5. Skipping Shortcuts: Running through the entire area each death is frustrating. Always look for gates and elevators you can open from one side.
6. Not Leveling Vitality: A glass-cannon build is painful for newcomers. Pump Vitality to 20-25 before touching damage stats.
7. Insight Mismanagement: Using Insight to summon help when you have little – save Insight for leveling up purpose (you need 1 to level). You can also use Insight to buy useful items later.
8. Trying to Kill Everything: Some enemies can be run past. Use sprinting (hold Circle) to bypass non-essential fights.
9. Ignoring Weapon Scaling: Check your weapon's stat requirements and scaling letters (S, A, B, etc.). Build your stats to match your weapon's best scaling.
10. Not Exploring the Sewers: The sewers in Central Yharnam contain the Hunter Set (armor), Blood Stone Shards, and a key item. Don't miss it.
---
9. Day-One Checklist
Hour 1-2 Objectives:
- [ ] Create your Hunter (recommend Military Veteran, Saw Cleaver, Hunter Pistol).
- [ ] Light the first lamp in Central Yharnam.
- [ ] Gain 1 Insight (encounter Cleric Beast or use Madman's Knowledge).
- [ ] Return to Hunter's Dream and level up Vitality to at least 12.
- [ ] Find and equip the Hunter Set (sewers).
- [ ] Open the shortcut gate near the central Yharnam lamp.
- [ ] Collect all Blood Stone Shards in the area (at least 4 – enough for +1 upgrade).
- [ ] Upgrade your weapon to +1 at the Workshop.
- [ ] Learn the parry timing on the brick trolls.
- [ ] Defeat at least one boss (Cleric Beast or Father Gascoigne – both are early).
- [ ] Die at least 10 times to understand the flow of combat – it's part of the process.
- [ ] Always keep 20 Blood Vials in storage (top off after each lamp rest).
- [ ] Never discard any item – you never know when it becomes useful.
Progression Check: After the first boss, you will unlock the ability to use Rune Tools and obtain new areas. Do not skip the Hunter's Dream – interact with the doll to level up, use the Bath Messengers to buy items, and upgrade weapons regularly.
---
Final Advice
Bloodborne rewards patience and observation. Don't be afraid to die – each death is a lesson. Read item descriptions, listen to NPCs, and explore every corner. The first area is designed to teach you the core mechanics; once you master the rally system, parry, and shortcut exploitation, the rest of the game becomes manageable.
Remember: You are a Hunter, not a hero. Be cunning, adapt, and never give up. May the good blood guide your way.
---
End of Getting Started Guide

Core Gameplay
Core Gameplay
Bloodborne is an action RPG with a relentless, aggressive combat system. The core gameplay loop revolves around exploring gothic, interconnected areas, defeating enemies to collect Blood Echoes (experience and currency), using them to level up and purchase items, and progressing through boss fights that unlock new paths. Dying resets enemies but allows you to recover lost Echoes if you reach your bloodstain. The game rewards aggressive play through the "Rally" system: after taking damage, hitting enemies briefly restores lost health.
Early Game (Central Yharnam – First 1–3 Bosses)
Gameplay Loop
- Central Yharnam is the first major area. Your objective: survive the mobs of huntsmen and beasts, find shortcuts, and defeat the boss (Cleric Beast or Father Gascoigne).
- Blood Echoes are scarce. Use them to level Vitality (HP) and Endurance (stamina) first. Upgrade your starting weapon (Saw Cleaver, Hunter Axe, Threaded Cane) at the Workshop in Hunter’s Dream using Blood Stone Shards.
- Combat: Learn the parry mechanic – fire your pistol just as an enemy’s attack begins; if successful, they stagger, and a visceral attack (R1 while close) deals massive damage. Practice on brick trolls and huntsmen.
- Exploration: Every alley hides shortcuts (gates, ladders, elevators) that connect the large level. Prioritize unlocking the shortcut to the Cleric Beast and the aqueduct route to Father Gascoigne.
- Quests/Missions: Talk to Gilbert (window by first lamp). He gives a Flamesprayer after you defeat Cleric Beast. Save the little girl in the window (Gascoeigne’s daughter) by giving her the Tiny Music Box. Do not kill her father until you have the box – it stuns him in phase 2.
- Economy: Buy Blood Vials (180 Echoes) and Quicksilver Bullets (180 Echoes) from the Bath Messengers. Do not farm them in early Yharnam – instead learn to parry and use the rally system to heal. Madman’s Knowledge (consumable) gives 1 Insight – spend at the Insight Shop in Hunter’s Dream for items like the Saw Spear or Bold Hunter’s Marks.
- Character Build: Choose a weapon that matches your preferred stat. Saw Cleaver scales with Strength and Skill (quality). Hunter Axe is pure Strength (twohanded charged R2 has hyper armor). Threaded Cane scales with Skill. Put early levels into Vitality (25 capish) and Endurance (15–20). Increase main damage stat later.
- Tips: Use Molotov Cocktails against Cleric Beast (it’s weak to fire). Fight Gascoigne near the tombstones to break his AI pathing. Always be aggressive – health regen via rally encourages not retreating.
- After defeating Amelia and entering the Forbidden Woods, the game opens up. You can access Chalice Dungeons (first one from a corpse in Hunter’s Dream) – procedurally generated dungeons that offer unique bosses, upgrade materials, and the best Blood Gems.
- Progression: Level up to 40–60. Focus on a single main damage stat (Strength to 40, Skill to 40, or Arcane/BT if committed). Upgrade weapons to +6 using Twin Blood Stone Shards (found in Woods, Hypogean Gaol).
- Exploration: The Woods are huge and maze-like. Follow lamp posts to avoid getting lost. Find the shortcut to the boss (Shadows of Yharnam). After Rom, the world changes – Amygdalae grab you near certain items, teleporting to Lecture Building (dormitory) or Nightmare Frontier (optional).
- Combat: Enemies become aggressive with combos. Use heavy attacks to stagger (Saw Cleaver transformed R1 spam works). Parry Church Servants and Snatchers. Visceral attacks scale with Skill – if you are Strength, use them anyway for invincibility frames.
- Quests: Eileen the Crow appears in Central Yharnam (near the sewers). Exhaust her dialogue. She later appears at Oedon Chapel; help her kill Henryk in Tomb of Oedon (before Rom). If she lives, you get the Hunter of Hunters oath rune. Alfred the Executioner at the Grand Cathedral offers a quest to find the “Cainhurst Badge” (use it to summon him for Logarius fight).
- Economy: Echoes become plentiful from farming pigs in the Woods. Buy upgrade materials (Twin Shards from Bath Messengers after defeating Amelia? Actually, they appear after obtaining Radiant Sword Badge from Hunter’s Nightmare? But generally, you find them). Insight Shop sells unique items – save Insight for Blood Rocks later.
- Build: By now you should have at least 25 VIT, 15–20 END, and 30 in main damage stat. Start considering a secondary stat – if Quality, push STR and SKL both to 25. If Arcane, start investing in Arcane to 15 for Hunter Tools like Empty Phantasm Shell. Don’t spread too thin.
- Tips: Summon NPCs for help – Father Gascoigne can be summoned but only before you fight him? Actually, for Amelia, you can summon Henriett (old hunter) using the Belltower lamp insight. Use Bolt Paper on Rom’s spiders (bolt damage melts them).
- After killing Rom, Yahar’gul, Unseen Village becomes accessible. The enemies are tough (Bell Maidens summon hostile hunters). Rush to kill Bell Maidens first. Bosses here: The One Reborn (weak to bolt paper, git to the platform first).
- Progression: Level 60–90. Weapons should be +9 (Chunks) or +10 (Blood Rock – one per playthrough in Nightmare of Mensis). Blood Gems boost damage significantly. Farm Winter Lanterns (brain girls) for high-tier Cursed Gems (radial from Mergo’s Loft: Middle).
- Exploration: Nightmare Frontier (optional but highly recommended for rune tool and boss Amygdala). Choir area (Upper Cathedral Ward) leads to Celestial Emissary and Ebrietas (boss). Nightmare of Mensis includes the Brain of Mensis (gives Living String for Chalice Dungeons).
- Combat: Learn to parry Labyrinth Hunters in Chalices; same for Shadows of Yharnam clones. Use Beast Blood Pellets to increase damage (consume after applying buff). Fire damage is effective against beasts (beasts of Yharnam, Amygdala?).
- Quests: Eileen’s quest ends here – if you killed Henryk and spoke to her at Oedon Chapel, she gives the Hunter Rune; if you fail, you fight her as a hostile NPC. Adella the Nun appears in Church of the Good Chalice? Actually, the quest for Cainhurst Summons triggers now – go to Hemwick Charnel Lane (already visited) after obtaining Cainhurst Summons from Iosefka’s Clinic or the Queen? To get it, you need to progress in Castle Cainhurst (reached via special carriage in Hemwick). Fight Martyr Logarius – use fast weapon, parry his close-range attacks.
- Economy: Echoes are abundant from Mergo’s Loft: Middle (run past the pigs and shadows, kill the three pigs, collect ~30k per run). Buy Blood Vials cheaply (180 each, but at this point you should have max storage). Upgrade materials are scarce – farm Chunks from blue-eyed wolves in Upper Cathedral Ward (5 chunks per run) or from Chalice depth 3 bosses.
- Build: Finalize your build. Soft caps: VIT 30/50 (50 gives 1500 HP), END 15/20/40 (40 gives 160 stamina but diminishing returns), main damage stat 50 (soft cap). Hard caps: 99. For Arcane builds, 50 is fine for tools; Bloodtinge (BT) 50 for Evelyn/Chikage. Use runes to boost HP, stamina, or visceral damage (+30% from Hunter Rune).
- Tips: Use Blue Elixir to stealth past enemies in Nightmare of Mensis. The Micolash boss fight is a puzzle – chase him through mirrors, dodge A Call Beyond (use Old Hunter Bone for dodging). For Mergo’s Wet Nurse, stick to her back legs, use Beast Blood Pellet + Fire Paper for massive damage.
- After defeating the final boss (Gehrman or Moon Presence), you can choose to enter New Game+ (NG+) – enemies scale up, and you retain all gear, levels, and most items. Alternatively, explore the Chalice Dungeons (Depth 5 F/R/C – Fetid/Rotted/Cursed) for the best Gems and to fight Queen Yharnam (true final boss of Dungeons).
- The Old Hunters DLC (recommended before NG+) is accessed by speaking to the Flower Lady (Adella?) Actually, you get the Eye of a Blood-drunk Hunter from a corpse after killing Vicar Amelia, then approach the Hunter’s Nightmare (coffin in Oedon Chapel). This area offers 5 bosses, new weapons (Whirligig Saw, Holy Moonlight Sword, Rakuyo) and some of the hardest encounters (Orphan of Kos).
- Progression: Max level meta is around 120 for PvP (e.g., 50 VIT, 20 END, 50 STR, 20 SKL). Or go unlimited if you want challenge. Weapons need optimal Blood Gems – Physical: 27.2% cursed radials (farm Winter Lanterns in Mergo’s Loft or the Watchers in Chalice). Elemental: flat Arcane gems from fire/bolt enemies.
- Exploration: NG+ offers the same areas but with increased difficulty. You can also gather additional Blood Rocks (buy for 60 Insight each after beating final boss? Actually, Insight Shop sells Blood Rock for 60 Insight in NG+). Explore every area again for missed items.
- Combat: Master any weapon moveset (e.g., Church Pick transformed L2 sweep for crowds). Use tools (Augur of Ebrietas for backstabs, Old Hunter Bone for dodging, Empty Phantasm Shell for magic). Parrying remains powerful but some enemies resist. Beast Blood Pellets shred bosses when used correctly.
- Quests: Most NPC quests have no NG+ changes. The Chalice Dungeon questline: beat Pthumerian Descendant, Headless Bloodletting Beast, and Queen Yharnam at Depth 5 Pthumeru Ihyll. You’ll need the Living String from Nightmare of Mensis to access the final layer.
- Economy: Echoes are worthless after you hit your desired level. Buy all consumables to max storage (99 vials, 99 bullets). Upgrade materials: Chunks and Rocks are the bottleneck. Farm Chunks in NG+ from endgame enemies (Werewolves in Upper Cathedral Ward drop 3 per run). Blood Rocks: 60 Insight each – farm Insight by co-oping bosses (Small Resonant Bell) or use Madman’s Knowledge.
- Build: If you want to PvP, keep level 120–150. Common builds: Quality (STR/SKL 50/25), Pure STR (80 STR), Pure SKL (80 SKL), Arcane (99 ARC) with Kos Parasite, Bloodtinge (50 BT) with Chikage/Evelyn. Use the relevant Hunter Rune (Hunter of Hunters for visceral damage, Radiance for HP regen, Beast’s Embrace for transformation).
- Endgame Structure: After beating the final boss, you are forced into NG+ unless you use a Bold Hunter’s Mark to quit before cutscene? Actually, after the final boss, you are automatically taken to NG+. To avoid missing content, do the DLC and Chalices before defeating Gehrman. You can also do Chalice Dungeons in NG+ – they do not scale with NG cycle (except shared depths? Actually, Chalice Dungeon difficulty is fixed based on depth, not NG cycle, so you can do them in NG or NG+ equally).
- Tips: For Orphan of Kos, use parries in phase 1, then in phase 2 dodge into his lightning storm (left). For Laurence (DLC final boss), use serrated weapons (Saw Cleaver transformed) and fire-resistant gear (Charred Hunter Set). For PvP at Nightmare Frontier or Mergo’s Loft: Middle, use the Sinister Resonant Bell to invade – be aware of level ranges (BL 100-150 is active).
Mid Game (Cathedral Ward – Byrgenwerth – Rom)
Gameplay Loop
Late Game (Yahar’gul – Nightmare of Mensis – Final Bosses)
Gameplay Loop
Endgame (New Game+ – Chalice Depth 5 – DLC – PvP)
Gameplay Loop
Game Tips
"content": "## Bloodborne Game Tips – Comprehensive Guide
This guide covers every aspect of Bloodborne, from beginner survival to advanced optimizations. Tips are grouped by category for easy reference.
---
1. Learn to Parry with the Hunter's Pistol
The pistol can interrupt enemy attacks and set up a visceral attack (R1 when close after the stagger). Practice timing: shoot just as the enemy’s weapon begins its forward swing. Even if you miss, you’ll often stagger smaller foes. This is your most powerful tool against hunters and large beasts early on.
2. Use the Rally Mechanic
After taking damage, your health bar has a orange/red section that slowly depletes. If you attack enemies immediately, you recover lost health. Be aggressive but not reckless—this encourages trading blows safely.
3. Always Have a Bold Hunter's Mark
They allow you to escape a boss fight or dangerous area without losing Blood Echoes. Always carry at least three from the Bath Messengers (purchase early). If you’re about to die with a large Echoes stash, use one.
4. Explore Thoroughly Before Bosses
Bloodborne’s world is interconnected. Opening shortcuts (gates, elevators) creates safe paths back to lanterns. Never rush through an area; look for breakable objects, doors, and ladders. Many areas have hidden passages behind coffins or crates.
5. Don’t Level Up Too Many Stats at Once
Focus on one damage stat (Strength or Skill) and Vitality early. Endurance is important but 15-20 is enough for most builds. Arcane and Bloodtinge are advanced; leave them for a second playthrough.
6. Use Throwing Knives and Pebbles
These items can aggro a single enemy from a distance, pulling it away from a group. Pebbles are cheap from the Messengers. Also useful for finishing off fleeing enemies or triggering traps safely.
7. Always Read Item Descriptions
Key lore and game mechanics are hidden in item text. For example, the “Beast Blood Pellet” description explains how it boosts attack but reduces defense. Knowledge is power.
---
#### General Combat
---
By applying these tips, you’ll transform from a frightened hunter into a ruthless slayer of beasts. Remember: a hunter is never alone—even in solitude, the moon watches over you.
This guide covers every aspect of Bloodborne, from beginner survival to advanced optimizations. Tips are grouped by category for easy reference.
---
Beginner Tips – Foundational Knowledge
1. Learn to Parry with the Hunter's Pistol
The pistol can interrupt enemy attacks and set up a visceral attack (R1 when close after the stagger). Practice timing: shoot just as the enemy’s weapon begins its forward swing. Even if you miss, you’ll often stagger smaller foes. This is your most powerful tool against hunters and large beasts early on.
2. Use the Rally Mechanic
After taking damage, your health bar has a orange/red section that slowly depletes. If you attack enemies immediately, you recover lost health. Be aggressive but not reckless—this encourages trading blows safely.
3. Always Have a Bold Hunter's Mark
They allow you to escape a boss fight or dangerous area without losing Blood Echoes. Always carry at least three from the Bath Messengers (purchase early). If you’re about to die with a large Echoes stash, use one.
4. Explore Thoroughly Before Bosses
Bloodborne’s world is interconnected. Opening shortcuts (gates, elevators) creates safe paths back to lanterns. Never rush through an area; look for breakable objects, doors, and ladders. Many areas have hidden passages behind coffins or crates.
5. Don’t Level Up Too Many Stats at Once
Focus on one damage stat (Strength or Skill) and Vitality early. Endurance is important but 15-20 is enough for most builds. Arcane and Bloodtinge are advanced; leave them for a second playthrough.
6. Use Throwing Knives and Pebbles
These items can aggro a single enemy from a distance, pulling it away from a group. Pebbles are cheap from the Messengers. Also useful for finishing off fleeing enemies or triggering traps safely.
7. Always Read Item Descriptions
Key lore and game mechanics are hidden in item text. For example, the “Beast Blood Pellet” description explains how it boosts attack but reduces defense. Knowledge is power.
---
Combat Tips – From Beginner to Advanced
#### General Combat
- Stamina Management
- Lock-On is Your Friend, But Not Always
- Use the Environment
- Two-Handed vs One-Handed Weapons
- Charged R2 Backstab
- Visceral Attack Scaling
- Boss Proximity Tactics
- Use Beast Blood Pellets for Damage Spikes
- Fire Paper and Bolt Paper
- Quickstep R1 Combos
- Perfect Parry Timing for Fast Enemies
- Transform Attacks
- Spend Early, Spend Often
- Echo Farming Spots
- Use Moon Runes for More Echoes
- Buy Them Early
- Farm from Enemies
- Use “Bullets from Blood Vials” (Hunter’s Tool)
- Blood Stone Shards & Chunks
- Blood Rock (Max Upgrade)
- Tempering Gems vs Elemental Gems
- Vitality: Get to 30 by mid-game, 50 by endgame. More HP = more mistakes allowed.
- Endurance: 15-20 is enough for most weapons. Hard cap is 40, but diminishing returns kick in after 25.
- Strength vs Skill: Choose one primary damage stat. Strength weapons are slower and heavier (e.g., Hunter Axe, Kirkhammer). Skill weapons are faster and have better scaling for viscerals (e.g., Saw Spear, Blades of Mercy).
- Bloodtinge: Only for gun-focused builds (e.g., Evelyn + Chikage). Requires heavy investment (50+).
- Arcane: For using Hunter Tools like A Call Beyond, and converting weapons to elemental. Arcane builds are powerful but complex.
- Beginner: Strength/Focus
- Intermediate: Skill/Dexterity
- Advanced: Arcane
- +3 ASAP
- +6 by Forbidden Woods
- +9 by Nightmare of Mensis
- +10 only for endgame
- Chalice Dungeon Tips
- Ledge Kiting
- Poison Knives & Numbing Mist
- Run-Back Optimization
- Invasion Survival
- Caryll Runes Explanation
- Frenzy Management
- Beast vs Kin Weaknesses
- Trick Weapon Special Moves
- Quick L2 Gun
- Save Scumming for Bosses
- Buy Items That Don't Spawn
- Sell Unwanted Equipment
- Farm Echoes by Selling Gems
- Use the “Messenger’s Gift” Shop Trick
- Summoning Etiquette
- Insight Management
- Silencing Blank
- Password System
- Never give up. Death is a lesson. Bloodborne’s difficulty is fair; each death teaches you enemy patterns. Keep a calm mindset.
- Watch your stamina bar like a hawk. The difference between life and death is often one missed dodgeroll.
- Use the environment to your advantage against all odds. Pyre in Cathedral Ward? Lure enemies into the fire. Elevator in Old Yharnam? Jump at the last second to confuse pursuers.
- The DLC (The Old Hunters) is essential. It adds the best weapons, bosses, and lore. Play it before the final boss (before fighting Gehrman) for the full experience.
- Patches can change boss AI. Stay updated to the latest version (1.09 is current). Some exploits like the “door skip” in Forbidden Woods have been patched.
Never exhaust your stamina completely. Leave 1-2 bars to dodge or dash away. The green bar refills faster when you’re not attacking, so learn attack patterns that allow for short pauses.
Lock-on helps with single enemies but can disorient you against groups or large bosses. Unlock briefly to reposition or run past enemies.
Lure enemies into narrow corridors, off ledges, or near explosive barrels. Many areas have chandeliers or lamps that can be shot down to stun enemies below.
Trick weapons have two forms. One-handed is faster and allows off-hand gun; two-handed is slower but has more range and damage. Switch mid-combo for surprise attacks.
#### Intermediate Strategies
If you land a fully charged R2 on an enemy’s back (while they are unaware or staggered), they fall to their knees, allowing a visceral attack. Use this on slow enemies like the Executioners or Church Giants.
Visceral damage scales with your Skill stat and weapon upgrade level. If you rely on parries, invest in Skill. The Clawmark Rune boosts visceral damage further.
Stick to a boss’s back or rear legs. Most bosses have limited attacks behind them. Watch for sweeps and tail attacks. Use the dash (not roll) to stay close.
Pellets build up a “beast meter” as you attack—the more hits, the higher your attack power (and lower defense). Pop one before a boss fight when you know the moveset, then go aggressive.
#### Advanced Optimizations
These temporarily add elemental damage. Fire is very effective against beast-type enemies (e.g., Cleric Beast, Blood-starved Beast). Bolt works well against kin (e.g., Rom, Ebrietas). Apply just before engaging for maximum DPS.
After a quickstep (dodge without lock-on), R1 performs a unique attack that often covers more distance. Use this to close gaps or punish whiffed attacks.
Enemies like the Crow enemies or the Winter Lanterns require shooting exactly when their attack hand starts moving forward. Practice in Hunter’s Nightmare area (DLC) with the respawning enemies.
L1 after any attack (R1 or R2) will transform your weapon and attack in one motion. This is faster than a standard transform and can catch enemies off guard. (e.g., Saw Cleaver L1 after R1 is a quick slash with extended range).
---
Exploration Tips – Mapping Yharnam
1. Always Light Every Lantern
Lanterns are checkpoints but also allow warping. Light them even if you don’t plan to rest; they remain unlocked for later shortcuts.
2. Look for Shortcut Doors
Many areas have one-way doors that lead back to a previous lantern. Open them as soon as you see them—they drastically reduce backtracking.
3. Listen for Audio Cues
Bloodborne uses sound for hidden enemies, traps, and item pickups. A faint jingling means a nearby item; a low growl means a beast is patrolling.
4. Check Corners and Dead Ends
Developers often hide items in areas that look like dead ends. Smash crates and coffins—they can conceal passageways. For example, in Central Yharnam, the sewer area has a hidden path to the Hunter’s Set.
5. Explore in All Directions
After unlocking the Cathedral Ward, you have multiple branching paths. Go to Hemwick Charnel Lane early for the Rune Workshop Tool (unlocks rune equipping).
6. Use the Torch in Dark Areas
The torch (equipped in off-hand) illuminates dark zones like Old Yharnam and the Hypogean Gaol. Enemies are harder to dodge in pitch black, so keep it out.
---
Resources & Economy Tips
#### Blood Echoes (Currency & XP)
Never hold a huge pile of Blood Echoes if you can level up or buy supplies. If you die twice before retrieving, you lose them. Always visit the Hunter’s Dream after gaining enough for the next level.
Early: Central Yharnam bonfire area (kill the mob of townspeople). Mid: Forbidden Woods (the herd of giants). Late: Mergo’s Loft: Middle (the three pigs and shadows).
The higher tier Moon runes (e.g., from the School of Mensis) increase Echo acquisition by up to 30%. Equip before boss fights or farming runs.
#### Blood Vials & Quicksilver Bullets
The Bath Messengers in Hunter’s Dream sell Vials for 180 Echoes each (later 540). Always keep a stash of 20+. Bullets cost 180 as well; buy 50-100 every few hours.
Early: The two Brick Trolls near the Central Yharnam lantern drop Vials reliably. Later: The church doctors in Cathedral Ward drop both Vials and Bullets.
Some tools allow converting health to bullets (e.g., “Formless Oedon” rune). Emergency use only.
#### Upgrade Materials
Shards are common early; buy them from the Messengers after obtaining the “Saw Hunter Badge”. Chunks are rarer; farm from werewolves in Upper Cathedral Ward or from Chalice Dungeon bosses.
Only one per playthrough (found in Nightmare of Mensis). Deepen Chalice Dungeons also drop them. Use only on your favorite weapon.
Physical weapons benefit from Tempering (increase ATK). Convert to elemental (fire/bolt) by adding a gem that converts damage type—this changes stat scaling. Only do this if you have high Arcane.
---
Builds & Character Optimization
#### Stat Allocation Principles
#### Recommended Starting Builds
Start with the Military Veteran. Use Hunter Axe (charged R2 spin attack). Pump Vitality to 25 then Strength to 30. Endurance 15.
Start with the Professional. Use Saw Spear or Threaded Cane. High Skill gives better visceral damage. Later get Blades of Mercy.
Start with Cruel Fate. Use saw cleaver with fire gems. Level Arcane to 40 early. Use Molotovs and later Hunter Tools.
#### Weapon Upgrade Order
Get your main weapon to +3 using Blood Stone Shards found early (Central Yharnam sewers, Old Yharnam).
You’ll find Twin Shards in Woods and the Village. +6 makes mid-game bosses manageable.
Chunks are scarce; save them for your primary weapon. Farm Chalice Dungeons for more.
Use the single Blood Rock wisely.
---
Advanced Tactics & Niche Mechanics
Don't bother with depth-1 dungeons for loot; depth 3+ drop the best gems. Use glyphs (online) to find easy farming runs (e.g., “pwmf22gu” for high-level physical gems). Summon help for defiled chalice bosses (they one-shot you often).
Some bosses (e.g., Cleric Beast) can be cheesed by staying on a high ledge and using ranged attacks or molotovs. Only for desperate situations.
Poison knifes can slowly kill large enemies. Numbing Mist prevents enemy healing (used against Martyr Logarius and Blood-starved Beast). Keep 5-10 of each.
After dying to a boss, learn the fastest route from the lantern without fighting enemies. Usually you can sprint past everything—many enemies stop chasing after a short distance.
If invaded, stay near the lamp or use the “Shaman Bone Blade” to confuse the invader. Equip the “Corruption” rune to gain covenant allies for co-op.
You can equip three rune slots after obtaining the Rune Workshop Tool (Hemwick Charnel Lane). Prioritize: +HP (Lake), +Visceral Damage (Clawmark), +Stamina (Anti-Clockwise). Oedon Writhe gives extra bullets.
Frenzy builds up in certain areas (e.g., Nightmare of Mensis). Wear gear with high Frenzy resist (e.g., Ashen Hunter Set). Use Sedatives to cure Frenzy quickly. If your Frenzy meter is about to fill, use a Sedative BEFORE it pops—you’ll avoid damage.
Beasts: Fire damage + serrated weapons (Saw Cleaver, Saw Spear give extra damage). Kin: Bolt damage + thrust attacks (Thrust gems on a Church Pick shreds kin). Learn which enemies are which for massive damage boosts.
Many weapons have hidden movesets. Example: The Cannon has a charged R2 that fires a massive blast but takes multiple bullets. The Blade of Mercy’s dual-wield L2 is a fast flurry. Experiment in the Hunter’s Dream with the training doll.
While two-handing a weapon, you can still shoot by pressing L2 (if your off-hand is the gun). This is slower but useful for parries without switching stances.
If you’re stuck on a boss, you can upload your save to PS+ cloud before the fog gate. If you lose a lot of echoes, download the save. Use sparingly to avoid ruining the experience.
---
Economy & Shop Management
Coldblood Dew? Rare. Vials and bullets? Buy them. Also stock up on Fire Paper (2,000 echoes each) from any messenger after obtaining the “Radiant Sword Hunter Badge” (found in Old Yharnam).
Duplicate weapon drops can be sold for decent echoes (e.g., extra Saw Spear = 500 echoes). Don’t sell rare items like upgrade materials.
Once you have good gems, low-tier gems from enemies are worthless. Sell them for quick cash. Keep only the best.
After completing the game, the Bath Messengers sell everything except rare materials. For NG+, you can buy infinite numbers of upgrade shards.
---
Co-op & Multiplayer Tips
Use the Small Resonant Bell to join others or the Beckoning Bell to call for help. Always wait for the bell to stop ringing before ringing again (prevents wasted insight).
Insight is used for co-op, summoning, and buying certain items. But high insight (30+) makes enemies tougher (more damage, new attacks) and reduces Frenzy resist. Keep insight low (below 15) if you're struggling. Spend excess on items like Blood Rocks or Chunks.
If you accidentally summon or want to stop coop, use a Silencing Blank. It cancels the bell effect.
Set a password in Network Settings (both you and partner) to bypass level restrictions. Works even if you are much stronger.
---
Final Pro Tips
---
By applying these tips, you’ll transform from a frightened hunter into a ruthless slayer of beasts. Remember: a hunter is never alone—even in solitude, the moon watches over you.
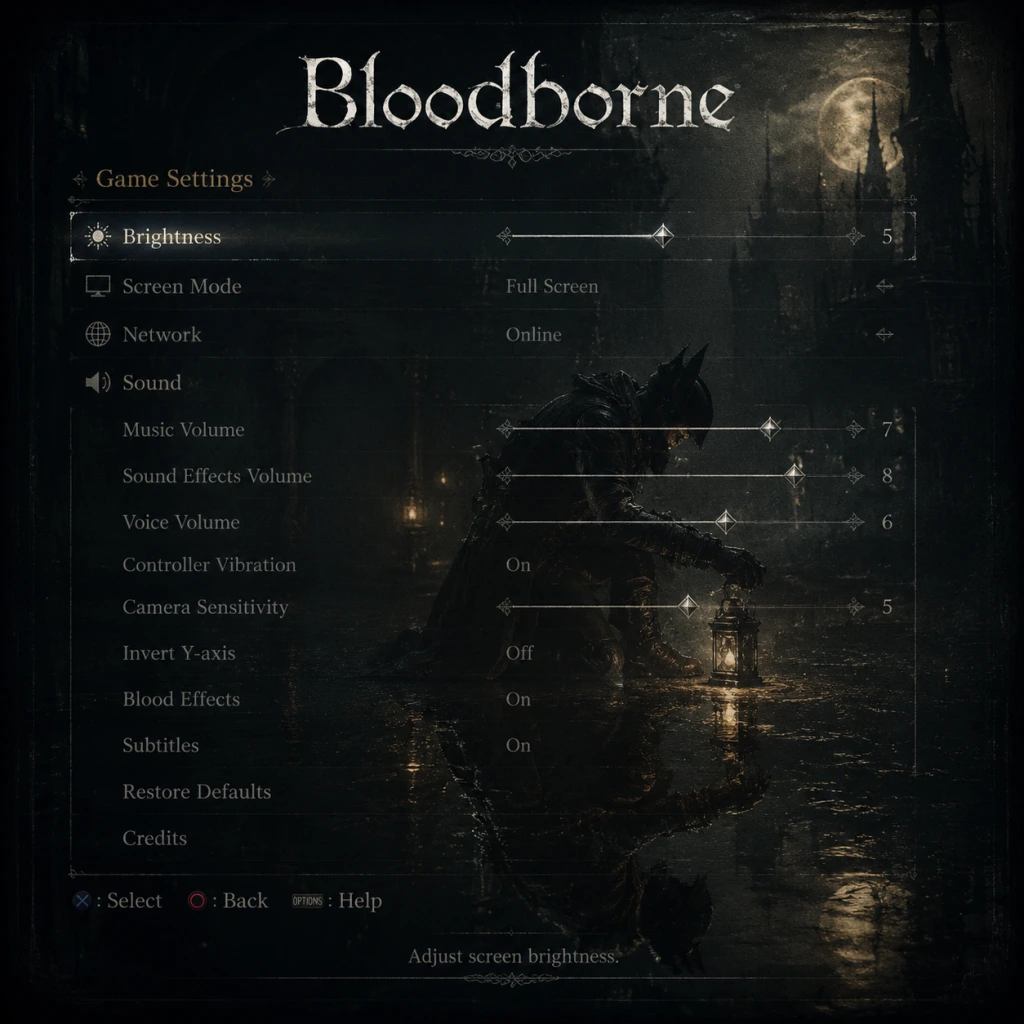
Game Settings
Bloodborne Game Settings – Comprehensive Guide
Bloodborne is a PlayStation 4 exclusive, with backward compatibility on PlayStation 5. Unlike many modern titles, it offers a minimal in-game settings menu. Most graphical adjustments are handled at the system level (PS4/PS5 display and audio settings). This guide covers every setting you can configure, including system-level tweaks that directly impact the experience, and provides optimal recommendations for performance and visual quality across different hardware.
---
Overview of Available Settings
Bloodborne’s in-game options are accessed from the Settings menu on the title screen. You cannot change settings mid-game; any modifications require returning to the main menu. The menu includes:
- Display (Brightness, HDR calibration)
- Audio (Master Volume, SFX Volume, BGM Volume, Voice Volume, Subtitle toggle, Subtitle Background toggle)
- Controls (Camera Horizontal/Vertical Speed, Invert Camera, R1/R2 Swap – a preset swap that exchanges light attack and heavy attack buttons)
- Network (Password Matching, Region, Language Filter)
- Language (Game Text, Voice – only selectable before starting a new game; subsequent changes require system language switch)
Additionally, the PS4/PS5 system settings (Sound/Display, Accessibility) affect Bloodborne. These are critical for optimal experience.
---
1. Display Settings & Graphics
Bloodborne runs at a fixed 30 frames per second on all PlayStation 4 models (including PS4 Pro) and on PS5 via backward compatibility. The frame rate is capped and cannot be changed. However, resolution and HDR vary by hardware:
| Hardware | Native Resolution | HDR Support | Notes |
|---|---|---|---|
| PS4 (Slim/Original) | 1080p | No | Standard experience; loading times ~15-20 seconds. |
| PS4 Pro | 1440p (checkerboard upscaled to 2160p) | Yes (if TV supports) | Slightly sharper image; still 30 fps. |
| PS5 | 1440p (checkerboard upscaled to 2160p) | Yes (if TV supports) | Same resolution as PS4 Pro but dramatically faster loading (under 5 seconds). The game runs at 30 fps, but is more stable. |
- Brightness: Adjust until the image of the Hunter is barely visible against the background (the optimal calibration screen). Setting it too high washes out dark areas, making ambushes harder to spot. Too low loses detail in shadows.
- HDR Calibration (PS4 Pro and PS5 only): Accessible from the title screen Settings -> Display -> HDR Calibration. You must have an HDR-capable TV and have HDR enabled in PS4/PS5 system settings. The calibration provides a slider for peak brightness (nits).
- Resolution: Set to 1080p (PS4 base) or 2160p (PS4 Pro/PS5 if you have a 4K TV). For PS4 Pro, you can force 1080p output through system settings to reduce upscaling artifacts, but image will be sharper natively. No performance gain – both modes are 30 fps.
- RGB Range: Set to “Full” if your TV supports it, or “Limited” for older TVs. Wrong setting crushes blacks or washes out colors.
- HDR (PS4 Pro/PS5): Enable “HDR” in system settings and use the system’s calibration tool. Then launch Bloodborne and adjust its internal slider.
- Game Mode: Enable your TV’s Game mode to reduce input lag (critical for parrying and dodging).
- PS4/Slim: Keep system resolution at 1080p. Brightness: calibrate as described. No HDR.
- PS4 Pro with 1080p TV: Set system resolution to 1080p (output) – you still get supersampling from the internal 1440p, resulting in a cleaner image. Keep HDR off if TV doesn’t support it.
- PS4 Pro/PS5 with 4K HDR TV: Enable 2160p output, HDR on, calibrate both system and game HDR. Use Game Mode. Brightness calibration is less important after HDR setup.
- PS5 with 1080p TV: Set system resolution to 1080p. The game still runs at the Pro’s 1440p internal resolution, supersampled to 1080p. Loading times are the biggest benefit.
- Master Volume: Overall volume. Recommended 70-80% initially; adjust to taste. Too high may cause distortion on some headsets.
- SFX Volume: Sound effects (weapons, enemies, environment). Keep at 100% or slightly lower if you play with headphones – some attacks can be loud.
- BGM Volume: Background music. Many bosses have iconic tracks. 80-100% recommended for atmosphere. Lowering it can help you hear gameplay cues during intense fights.
- Voice Volume: Character voices and NPC dialogue. Keep at 100% to catch lore hints and quest triggers.
- Subtitle: On or Off. Highly recommended to set to ON – NPCs often speak softly or with accents, and subtitles help follow the story.
- Subtitle Background: Enables a dark box behind subtitles for readability. Recommended ON.
- Audio Output: Choose HDMI or Optical. For best quality, use HDMI to your TV (or receiver) with Linear PCM. If using a gaming headset, ensure chat/game audio balance is set to prioritize game sound.
- Headphones: On PS5, use Tempest 3D AudioTech – it works with Bloodborne for spatial audio, making enemy directions clearer. Enable “3D Audio” in system settings. For PS4, virtual surround sound (e.g., via Gold Wireless headset) can help.
- Volume: Set system volume appropriately; avoid max to prevent distortion.
- Camera Horizontal/Vertical Speed: Affects how quickly the camera turns when you move the right analog stick. Default is 5. Increase if you feel sluggish, especially against fast enemies. Recommended: 7-10 for better situational awareness. Too high may cause dizziness – adjust gradually.
- Invert Camera: If you prefer inverted Y-axis (pushing up looks down), set to ON. Default is OFF.
- Swap R1/R2: This exchange light attack (normally R1) with heavy attack (normally R2). Only useful if you have a specific comfort preference. Do not enable accidentally – it radically changes combat flow. Default: OFF.
- Button Assignments (PS4/PS5 Accessibility settings): You can completely remap buttons at the system level. This is useful if you have disabilities or want to change dodge (normally Circle) to L1 or another button. Warning: Remapping affects all games. Create a profile for Bloodborne only (PS5 supports per-game profiles via “Custom Button Assignments” that can be toggled on/off).
- Vibration: In-game, there is no separate toggle; vibration is controlled by the game. You can disable it system-wide in PS4/PS5 settings under “Controller Vibration”. Vibration provides feedback for taking damage and visceral attacks – disabling it may reduce immersion but can help conserve battery.
- Trigger Effect Intensity (PS5 DualSense): Bloodborne does not use adaptive triggers, so this setting has no effect.
- Camera speed: 7 (horizontal) and 6 (vertical) as a starting point. Increase to 10 for maximum awareness.
- Keep R1/R2 swap OFF unless you have a specific reason.
- If you use system-level remapping, create a separate profile and toggle it only for Bloodborne (PS5) or remember to switch back when playing other games.
- Subtitle On/Off: Already covered – enable for hearing-impaired or for better story comprehension.
- Subtitle Background: Makes text readable on bright backgrounds. Recommended ON.
- Closed Captions: Not supported in Bloodborne; only subtitles for spoken words are available.
- Zoom/Magnification: PS4/PS5 system zoom can enlarge the screen. Useful if you struggle to read item descriptions or UI elements.
- High Contrast: Not built into the game. Use system-level color correction with care.
- Controller Remapping: As mentioned, allows you to assign dodge, attack, or interact buttons to more accessible positions. For example, map Circle (dodge) to L1 so you can dodge without taking your thumb off the right stick.
- Audio Cues: Relying on sound is crucial. Turn on subtitles, but also keep SFX volume high to hear enemy movements. Consider using a headset for precise audio.
- Difficulty: Bloodborne has no difficulty slider. The game’s challenge is static. Accessibility is largely about control modifications and persistence.
- Initial Selection: When you first start a new game, you choose language for text and voice. This choice is permanent for that save file. You cannot change it later except by starting a new game or switching the entire console’s system language (which also affects all other games).
- Misconfiguration trap: If you accidentally select a language you don’t understand, you will need to either play through with subtitles (if you keep voice in English) or restart the entire game. Be very careful at the language selection screen.
- Subsequent changes: To change text language after starting, you must change your PS4/PS5 system language to the desired one. The game will follow. Voice language remains as originally chosen for that save file.
- Password Matching: Set a password to connect specifically with friends. Both summoning and being summoned require matching passwords. Leave blank for random connections.
- Region: Choose “Worldwide” for maximum player pool (faster matchmaking), or “Local” to connect only within your geographic region (lower latency). Default: Worldwide.
- Language Filter: Filters matchmaking by the language set in the game. Keep at default unless you want to restrict to players with the same language.
- PlayStation Plus: Required for all online features (co-op, invasions, covenants). Ensure your subscription is active.
- Load Times: Online mode loads slower than offline because it constantly checks for connections. If you are farming or exploring, consider setting the game to Offline Mode (from title screen → Game Options → Online → Offline). This dramatically speeds up loading and avoids unintended invasions.
- Connection Type: Wired Ethernet is strongly recommended for stable co-op and PvP. Wi-Fi can introduce lag spikes.
- Camera Auto-Adjust: Not directly togglable. The camera tries to auto-center behind the player when moving. This can be disorienting during lock-on. You can partially mitigate by increasing camera speed.
- Lock-On Behavior: The lock-on system cycles through enemies. You cannot change its behavior (e.g., toggle to lock onto nearest). Practice switching between locked and unlocked situations.
- HUD: No HUD opacity or size options. The HUD displays health, stamina, blood echoes, and equipped items. It cannot be customized.
- Save Data: Bloodborne auto-saves constantly. You cannot manually save or create multiple saves without using PS4/PS5 system backup. Be careful not to overwrite your only save.
- In-Game Pause: Bloodborne does not support pausing in any context (even offline). The only way to pause is to use the PS4/PS5 system “Rest Mode” or the “Home” button. Note: If you are online, leaving the game may result in invasions if you are in an area where bell ringing is active.
- Accidental Overwrites: Since there is only one save slot per user profile, never start a new game if you want to keep your progress. Instead, create a backup to USB or cloud storage (PS Plus required for cloud).
- Recommendation: Follow the in-game calibration exactly. On PS5/HDR, the HDR calibration (next) takes priority.
- Misconfiguration trap: If your TV’s HDR implementation is poor, or if you set the slider too high, the image may look washed out (gray blacks, blown-out whites). Start with the default (usually 800 nits) and adjust downwards if blacks appear milky.
- Optimal setup: Use your TV’s HDR Game Mode. Also, in PS5 system settings, set HDR to “On When Supported” and calibrate using the PS5’s own HDR setup (first time setup). Then fine-tune in Bloodborne’s HDR calibration.
#### PS4/PS5 System Display Settings to Check
Recommendations by Hardware:
---
2. Audio Settings
Bloodborne’s audio settings are straightforward but important for immersion and awareness (e.g., enemy footsteps, boss roars).
#### In-Game Audio Options
#### PS4/PS5 System Audio Settings
Recommendation: Enable subtitles, keep SFX and BGM balanced (both at 100%), voice at 100%, and Master around 80%. PS5 users should enable Tempest 3D Audio.
---
3. Controls & Input
Bloodborne’s control scheme is optimized for the DualShock 4 / DualSense. You cannot fully remap buttons within the game, but you can swap light and heavy attacks (R1 ↔ R2) and adjust camera behavior.
#### In-Game Control Options
#### System-Level Control Settings
Recommendation:
---
4. Accessibility Settings
Bloodborne has minimal built-in accessibility features, but PS4/PS5 system-level options can help.
#### In-Game Accessibility
#### System-Level Accessibility (PS4/PS5)
Recommendation: Enable subtitles with background, adjust camera speed to your comfort, and explore system-level remapping if standard controls are uncomfortable.
---
5. Language Settings
Language in Bloodborne is split into two parts: Game Text (menus, item descriptions) and Voice (character speech).
Recommendation: Select your native language for both text and voice. If you prefer original Japanese voice with English text, choose English text and Japanese voice at the start. This is the only way to get that combination.
---
6. Network & Online Settings
Bloodborne’s online features allow cooperative play (beckoning) and player versus player (invading). These settings are critical for multiplayer success.
#### In-Game Network Options
- Misconfiguration: If you forget to remove a password, you will not be matched with random players. Always clear the password after co-op sessions.
- Recommendation: Use Worldwide for quick co-op, especially for boss fights. If you experience lag, switch to Local.
#### Additional Online Considerations
Recommendation: For first playthrough, play Offline to avoid invasions and reduce loading times. Once comfortable, switch to Online with Worldwide region and no password. Use a password only for specific co-op partners.
---
7. Gameplay Settings (Miscellaneous)
Bloodborne has no dedicated “gameplay” settings menu, but several system and in-game options affect the feel:
Special Attention Point:
---
8. Optimal Settings Summary Table
| Setting Category | PS4 (Base/Slim) | PS4 Pro | PS5 |
|---|---|---|---|
| Display - Resolution | 1080p | 2160p (or 1080p supersampled) | 2160p (or 1080p) |
| Display - HDR | Off | On (if TV supports; calibrate) | On (calibrate) |
| Brightness | Calibrate per in-game screen | After HDR, brightness is less critical | Same as PS4 Pro |
| Audio - SFX/BGM/Voice | All 100% or adjust preference | Same | Same; enable Tempest 3D Audio |
| Subtitles | ON with background | ON with background | ON with background |
| Camera Speed | 7-10 | 7-10 | 7-10 |
| Invert Camera | As preferred | As preferred | As preferred |
| R1/R2 Swap | OFF | OFF | OFF |
| Network Mode | Offline for first playthrough; Online later | Same | Same |
| Region | Worldwide | Worldwide | Worldwide |
| Password (co-op) | Blank for random, set for friends | Same | Same |
| Language | Native language text + voice | Same | Same |
| System Game Mode ON TV | ON | ON | ON |
| Ethernet Connection | Recommended | Recommended | Recommended |
| PS Plus | Required for online | Required | Required |
9. Final Recommendations & Pitfalls
- Most common misconfiguration: Leaving a password active when you want random co-op. Always clear the password field after playing with friends.
- Washed out HDR: Bloodborne’s HDR calibration is finicky. If colors look gray, reduce the peak brightness slider until blacks return to deep inky levels. Also check your TV’s HDR settings (set to “Game” mode and disable dynamic contrast).
- Camera sickness: If you feel motion sickness, lower the camera speed to 5-6 and increase the field of view (not adjustable). Try playing on a larger screen and sitting further away.
- Control remapping addiction: Once you remap at the system level, you may find it hard to revert. Use PS5’s profile feature or keep a note of your default settings.
- Language lock: Double-check your language selection at the start. A mistake means starting over or changing the entire console language.
- Save backup is essential: Bloodborne’s single autosave can be corrupted. Back up your save to USB regularly or to the cloud (PS Plus).
By carefully adjusting these settings, you’ll achieve the most comfortable and visually optimal experience on your PlayStation hardware. Remember that Bloodborne’s challenge is intentional – settings will not make the game easier, but they will let you focus on the gameplay without frustration from controls, audio, or display issues.

Important Notes
Important Notes for Bloodborne
Bloodborne is an unforgiving game that rewards patience, observation, and knowledge. This section covers the essential warnings, pitfalls, irreversible decisions, and things veterans wish they knew from the start. Read carefully before diving in.
---
⚠️ General Warnings
- Do not panic. Bloodborne punishes frantic button-mashing. Every swing, dodge, and heal must be deliberate.
- Aggression is rewarded, but not recklessness. The Rally mechanic lets you regain lost health by attacking immediately after being hit, but mindlessly rushing into a crowd will get you killed.
- Insight is a double-edged sword. Having high Insight (above 15) makes enemies tougher and adds new attacks. Spend it at the Insight Bath Messenger in the Hunter’s Dream if you need to lower it or buy useful items.
- Blood Vials and Bullets are finite resources in early game. Don’t hoard them—but also don’t waste them. The Central Yharnam brick trolls are a reliable early farm for Vials; the wheelchair enemies drop Bullets.
---
###
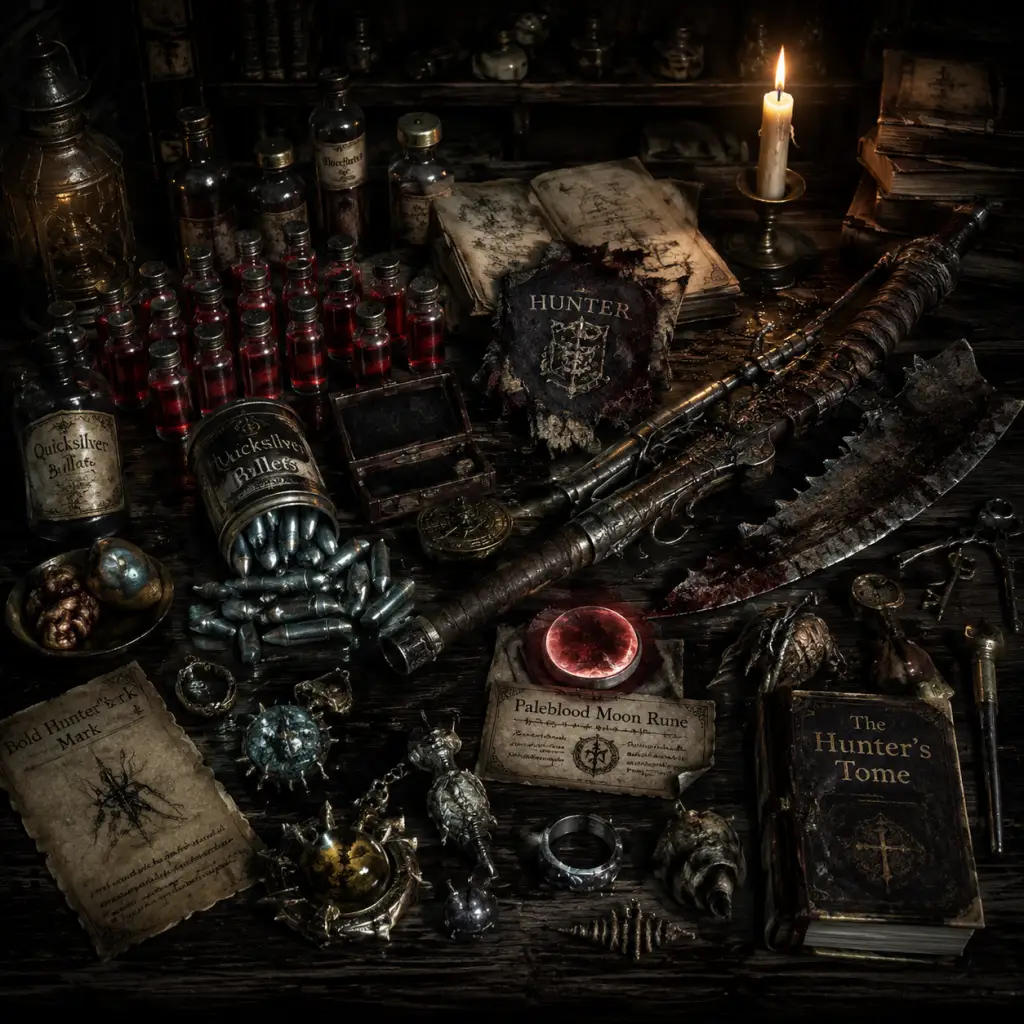
All Game Items
All Game Items – Comprehensive Guide
This guide covers every major item category in Bloodborne. Items are grouped by function: weapons, armor, consumables, materials, currencies, collectibles, and key equipment. Each entry includes purpose, how to obtain, optimal use, and notable synergies.
---
Weapons
Bloodborne features a unique transformable weapon system. Each weapon has two forms, accessible via L1. Weapons scale with stats (Strength, Skill, Bloodtinge, Arcane).
#### Trick Weapons (Primary)
| Weapon | Forms | Scaling Focus | Special Notes |
|---|---|---|---|
| Saw Cleaver | Short saw / Extended cleaver | Str, Skill | Starting weapon; fast, serrated bonus vs beasts. |
| Hunter Axe | One-handed axe / Two-handed halberd | Str | High stagger; charged R2 spin. |
| Threaded Cane | Cane / Whip | Skill | Serrated whip form; excellent crowd control. |
| Ludwig's Holy Blade | Straight sword / Greatsword | Str, Skill | Holy damage in greatsword; popular quality build. |
| Kirkhammer | Silver sword / Giant hammer | Str | Blunt damage; high stagger. |
| Blades of Mercy | Dual wield daggers | Skill, Arc | Fast attack, low stamina cost; high DPS. |
| Amygdalan Arm | Club / Arm with head | Str, Arc | Blunt & Arcane; charged R2 deals extra damage. |
| Beast Cleaver | Club / Cleaver | Str, Skill | Serrated; high rally potential. |
| Church Pick | Pick / Thrusting sword | Skill | Thrust damage; serrated in both forms. |
| Whirligig Saw | Saw / Buzzsaw | Str, Skill | High DPS; L2 spins while held. |
| Bloodletter | Mace / Blood spear | Str, Bld | Requires 14 Bloodtinge; transforms with bullet cost. |
| Chikage | Katana / Blood Katana | Skill, Bld | Transformed form drains HP but adds blood damage. |
| Evelyn | Pistol / Long-range pistol | Bld | Highest blood damage; good for parrying. |
| Repeating Pistol | Pistol / Dual shot | Bld | Fires two bullets per shot; high damage. |
#### Firearms (Secondary Weapons)
- Hunter Pistol: Standard parry tool; found in Central Yharnam sewers.
- Blunderbuss: Shotgun-like spread; better for parrying large enemies. Found in Central Yharnam (near first lantern).
- Ludwig's Rifle: High damage; purchased after defeating Ludwig.
- Cannon: Massive damage; requires 30 Strength. Found in Old Yharnam.
- Gatling Gun: Rapid fire; drops from Djura in Old Yharnam.
- Rosmarinus: Arcane spray; deals rapid Arcane damage. Found in Cathedral Ward.
- Flamesprayer: Fire damage; found in Central Yharnam (after Gascoigne).
- Torch: Provides light and fire damage; found near first lantern.
Synergies: Use firearms for parrying (R2 or L2 when enemy attacks). Evelyn best for Bloodtinge builds. Cannon paired with Bone Marrow Ash for massive burst.
---
Armor Sets
Armor in Bloodborne provides defense, resistances (to poison, frenzy, fire, bolt, arcane), and "beast" or "kin" protection. No single set is best; mix for situation.
| Set | Location | Key Resistances |
|---|---|---|
| Hunter Set | Central Yharnam (first merchant) | Balanced |
| Yharnam Set | Central Yharnam sewers | Blood, Slow poison |
| Charred Hunter Set | Old Yharnam (after killing BSB) | Fire, Frenzy |
| Cainhurst Set | Cainhurst Castle | Bolt, Frenzy |
| Gold Ardeo | Found in Forbidden Woods | Arcane (headpiece) |
| Bone Ash Set | Cainhurst Castle (hidden wall) | Physical, Frenzy |
| Mensis Cage | Mergo's Loft (Micolash area) | Frenzy immunity (head) |
| Ashen Set | Cathedral Ward (Eileen quest) | Balanced; light |
| Choir Set | Upper Cathedral Ward | Arcane, Frenzy |
| Henryk's Set | Tomb of Oedon (Eileen quest) | Blood (slightly) |
| Hunter Garb (Yamamura) | DLC (Hunter's Nightmare) | Balanced |
---
Consumables
| Item | Effect | How to Obtain | Best Use |
|---|---|---|---|
| Blood Vial | Restores 40% max HP | Dropped by enemies, bought from Bath Messengers (180 echoes) | Always keep stocked; farm in Central Yharnam. |
| Quicksilver Bullets | Used for firearms and special attacks | Dropped, bought (360 echoes for 10) | Manage ammo; can convert HP to bullets (Up + D-Pad). |
| Molotov Cocktail | Thrown fire damage | Found, bought | Early game beast killer; scales with Arcane. |
| Torn Pungent Blood Cocktail | Lures beasts to impact point | Found, bought | Distraction for large crowds or bosses like Blood-starved Beast. |
| Pebble | Thrown distraction | Found, bought | Aggro single enemy; cheap. |
| Fire Paper | Adds fire damage to weapon for 60s | Found | Boosts damage vs beasts. |
| Bolt Paper | Adds bolt damage for 60s | Found | Effective vs kin (e.g., Celestial Emissary). |
| Bone Marrow Ash | Greatly increases firearm damage for one shot | Found | Use with Cannon for massive damage. |
| Beast Blood Pellet | Builds beasthood meter; increases damage and vulnerability | Found | Melee builds; attack rapidly to stack. |
| Lead Elixir | Reduces damage and prevents interruption | Found | Against heavy attacks; use before charge. |
| Blue Elixir | Temporarily reduces visibility | Found | Stealth bypass. |
| Antidote | Cures poison buildup | Found, bought | Essential in Forbidden Woods and chalices. |
| Sedative | Cures frenzy buildup | Found | Critical in Nightmare of Mensis. |
| Coldblood Dew | Consumable Blood Echo (small, medium, large) | Found | Instant echoes; helpful for leveling. |
| Bold Hunter's Mark | Returns to last lantern with echoes | Found, bought | Escape without losing echoes. |
| Shining Coins | Leaves glowing trail | Found, bought | Mark explored paths; not very useful. |
Materials & Upgrade Items
Used to reinforce weapons, equip runes, and craft.
#### Weapon Upgrade Materials
- Blood Stone Shards – Upgrade +1 to +3. Dropped by early enemies, bought from Bath Messengers.
- Twin Blood Stone Shards – Upgrade +4 to +6. Dropped by mid-game enemies, found in Hemwick, etc.
- Blood Stone Chunks – Upgrade +7 to +9. Dropped by late-game enemies, rare.
- Blood Rock – Upgrade +10. One per playthrough (Nightmare of Mensis), also in Chalice Dungeons.
- Sage's Wrist (DLC) – Upgrade specific DLC weapons.
- Rune Workshop Tool – Enables equipping Caryll Runes. Found in Hemwick Charnel Lane (after boss).
- Ritual Blood (1-5) – Used to create Chalice Dungeons. Dropped by enemies inside chalices.
- Arcane Haze (various levels) – Used for chalice rituals.
- Tomb Mold (1-5) – For high-depth chalices.
- Bolt and Fire Papers (see consumables) – Not permanent; can be bought unlimited after certain badges.
- Messenger's Gift – Transforms character into a messenger. Found in Nightmare Frontier.
- Madman's Knowledge – Gives 1 or 2 Insight. Found, dropped by some enemies.
- Blood Echoes – Primary currency and experience. Gain from killing enemies. Lose on death unless retrieved. Spend at Doll (leveling) or Bath Messengers (items).
- Insight – Secondary currency. Gained from discovering bosses (1st time), using Madman's Knowledge, co-op, etc. Spend at Insight Shop (Bath Messengers) or use for special items like Blood Rock. Also affects Frenzy resistance and enemy movesets (at 15+ Insight new attacks appear).
#### Rune Workshop Tools
#### Consumable Materials
---
Currencies
---
Collectibles & Key Items
These items are non-consumable and often required for progression, side quests, or unlocking secrets.
| Item | Purpose | Where/How |
|---|---|---|
| Hunter's Mark | Infinite use; returns to lantern with echoes (same as Bold but free) | Starting item |
| Small Resonant Bell | Ring to be summoned as cooperator | Bath Messengers (after 10 Insight or beating Cleric Beast) |
| Sinister Resonant Bell | Invade other worlds | Bath Messengers after gaining Blood Dreg |
| Beckoning Bell | Summon cooperators | Bath Messengers |
| Old Hunter Bell | Summon NPC hunter (e.g., Valtr) | Find specific districts |
| Chalice – Allows creation of Chalice Dungeons. Types: Pthumeru, Hintertomb, Loran, Isz, Sinister. Obtain from bosses.
| Key Items:
| - Saw Hunter Badge – Unlocks certain weapons. Found in lower optional area.
| - Radiant Sword Hunter Badge – Unlocks Ludwig's Holy Blade, etc. After defeating Blood-starved Beast.
| - Cainhurst Summons – Allows travel to Cainhurst Castle. Found in Hemwick Charnel Lane.
| - Lecture Building Key – Opens door in Cathedral Ward to Forbidden Woods path.
| - Upper Cathedral Key – Opens door in Cathedral Ward to Upper Cathedral Ward.
| - Livewort (DLC) – Used to cure The Beast’s Embrace rune’s drawback.
| - Eye of a Blood Drunk Hunter – Used to enter Hunter's Nightmare (DLC). Found after defeating Amygdala.
Important Notes:
- Insight can be lost by spending at Insight Shop, but Madman's Knowledge provides permanent Insight.
- Blood Echoes are the lifeblood; never hoard them – level up or buy supplies regularly.
- Caryll Runes are permanent once equipped; can be swapped freely in Hunter's Dream.
- Chalice Dungeons provide unique gems and upgrade materials; depth 5 dungeons drop best loot.
---
This guide covers all major item categories. For specific item locations, refer to area guides. Remember: every item serves a purpose; experiment with combinations to suit your playstyle.
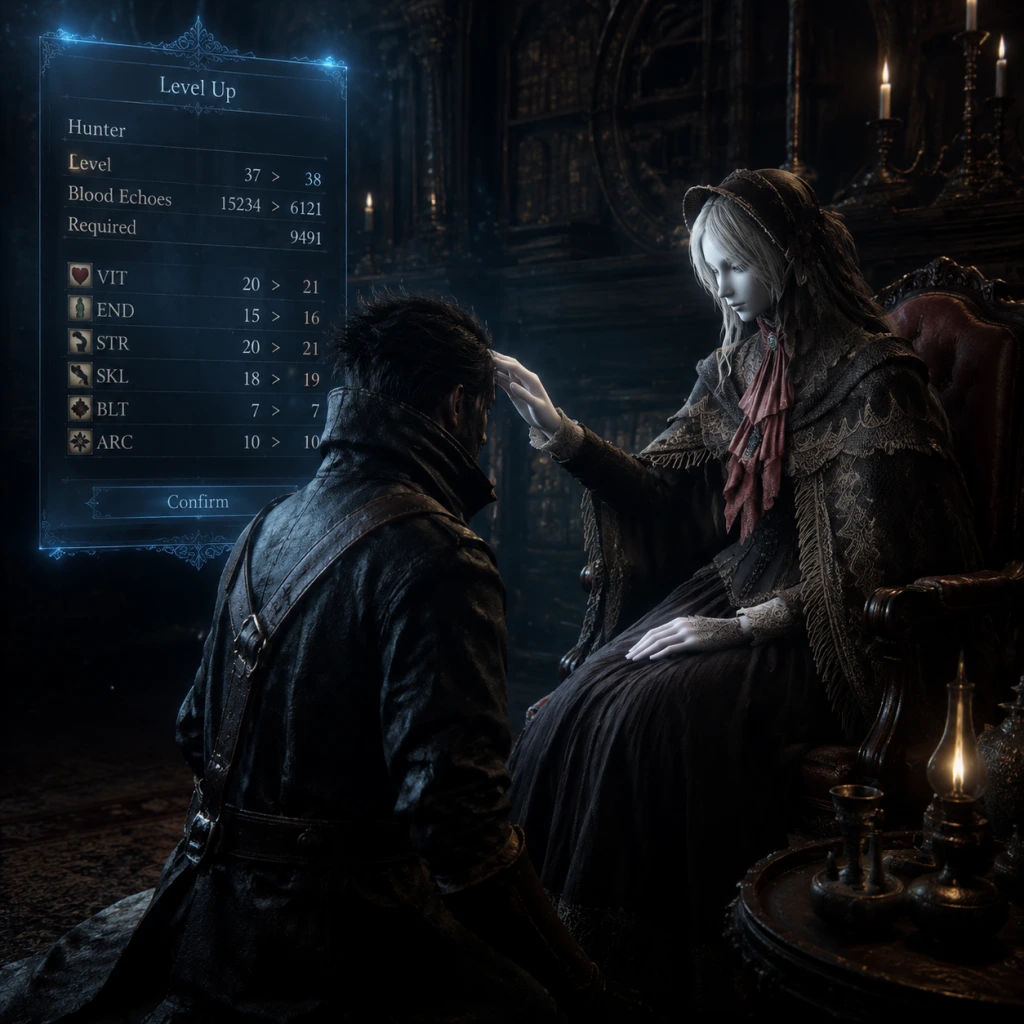
Character Skills
Character Skills – Comprehensive Guide
Bloodborne does not have a traditional skill tree. Instead, your character's capabilities are defined by Attribute Levels, Hunter Tools (spells), Caryll Runes (passive buffs), and Weapon Techniques. This guide covers all character development systems, including origins, attributes, every hunter tool, rune effects, and core combat abilities.
---
1. Character Creation – Origins (Starting Classes)
Your choice of Origin determines starting attribute points. All Origins can eventually reach the same maximum level (99 in each stat, up to level 544). The only difference is the starting stat spread. Choose based on your intended build.
| Origin | Vitality | Endurance | Strength | Skill | Bloodtinge | Arcane | Best For |
|---|---|---|---|---|---|---|---|
| Milquetoast | 10 | 9 | 10 | 9 | 7 | 9 | Balanced start, flexible |
| Lone Survivor | 14 | 10 | 11 | 10 | 7 | 7 | Tanky, high VIT early |
| Troubled Childhood | 9 | 10 | 12 | 13 | 6 | 7 | Quality build (STR/SKL) |
| Violent Past | 12 | 11 | 15 | 9 | 6 | 6 | Pure strength start |
| Professional | 9 | 10 | 9 | 15 | 7 | 7 | Skill/parry-focused |
| Military Veteran | 10 | 10 | 13 | 11 | 8 | 5 | Balanced with good endurance |
| Noble Scion | 7 | 8 | 9 | 13 | 14 | 9 | Bloodtinge/Chikage build |
| Cruel Fate | 10 | 12 | 10 | 9 | 5 | 14 | Arcane/Tools build |
| Waste of Skin | 6 | 6 | 6 | 6 | 6 | 6 | Min-max challenge / max level |
2. Attributes (Stats)
Leveling up increases attributes using Blood Echoes. Soft caps determine diminishing returns. Hard cap is 99.
| Attribute | Effect | Soft Caps | Build Recommendations |
|---|---|---|---|
| Vitality (VIT) | Increases HP. Resistances also scale. | 30 (soft cap 1), 50 (soft cap 2) | Minimum 30 for PVE; 40-50 for endgame Hard as Nails. |
| Endurance (END) | Increases stamina. Equip load (only for rolling). | 15 (soft cap 1), 40 (soft cap 2; offers 170 stamina) | Stop at 25-30; further gains minimal. |
| Strength (STR) | Scales damage with STR weapons. Two-handing gives 1.5x multiplier. | 25 (soft cap 1), 50 (soft cap 2) | 50 for pure STR; 25 for quality builds. |
| Skill (SKL) | Scales damage with SKL weapons. Increases visceral attack damage. | 25 (soft cap 1), 50 (soft cap 2) | 50 for pure SKL; 25 for quality; 40-50 for viscerals. |
| Bloodtinge (BLT) | Scales damage with blood-based weapons (e.g., Chikage, Evelyn). Also affects firearm damage and some tools. | 25 (soft cap 1), 50 (soft cap 2) | 50 for BLT builds; 30-40 if secondary. |
| Arcane (ARC) | Scales damage with arcane weapons, increases item discovery, and unlocks Hunter Tools. Also buffs fire/bolt/arcane damage. | 15 (first tool), 25 (more tools), 40 (another tool), 50 (max tool damage scaling) | 15, 25, 40, or 99 for pure arcane caster. |
- Early game: VIT to 20-30, then damage stat to 25.
- Mid game: VIT to 40, damage stat to 40-50, END to 20-25.
- Late game: Push VIT to 50, damage stat to 50, then invest in secondary stats.
---
3. Hunter Tools (Spells / Abilities)
Hunter Tools are items consumed from your quick slots that use Quicksilver Bullets (QS Bullets) and require a minimum Arcane level. They are the equivalent of spells in Bloodborne. Each tool has a bullet cost and effect.
#### Offensive Tools
| Tool | Arcane Req | Bullet Cost | Effect | Use Cases |
|---|---|---|---|---|
| Hunter's Bone | 15 | 8 | Temporarily grants rapid dodges (Old Hunter Bone). Increases mobility for a few seconds. | Dodge heavy combos; PVP trick; low damage but high utility. |
| Tiny Tonitrus | 25 | 6 | Calls down a slow but powerful lightning bolt. Good crowd control. | Large enemies weak to bolt; mobs in tight corridors. |
| Call Beyond | 40 | 7 | Fires a volley of homing projectiles (6-12 depending on proximity). High burst damage. | Boss fights when enemy is large; PVP ambushes. High Arcane scaling. |
| Accursed Brew | 20 | 5 | Throws a stench ball that creates a cloud of toxic poison. | Area denial; crowd control; poison buildup. |
| Blacksky Eye | 9 | 1 | Fires a single arcane projectile. Low bullet cost, moderate damage. | Cheap pressuring; finishing off enemies; compatible with Bone Marrow Ash? No. |
| Executioner's Gloves | 20 | 3 | Fires two homing skulls that deal physical + arcane damage. | Good tracking; boss damage; moderate cost. |
| Augur of Ebrietas | 18 | 1 | Short-range tentacle attack that knocks back enemies. Can backstab. | Parry alternative; quick punish; good for Arcane builds. |
| A Call of Humanity (rare tool, from DLC? Actually not available in main game – skip) | — | — | — | — |
| Tool | Arcane Req | Bullet Cost | Effect | Use Cases |
|---|---|---|---|---|
| Beast Roar | 15 | 4 | Emits a roar that pushes back enemies and staggers them. Can cancel enemy attacks. | Creates breathing room; knock enemies off ledges (e.g., Nightmare of Mensis). |
| Empty Phantasm Shell | 15 | 1 | Buffs right-hand weapon with flat arcane damage for 60 seconds. | Boosting damage on weapons that lack arcane scaling; works with all weapons. |
| Old Hunter Bone (same as Hunter's Bone) | 15 | 8 | See above. | See above. |
| Messenger's Gift | 15 | 2 | Turns you into a Messenger for a few seconds. Enemies lose aggro briefly. | Stealth; escaping; PVP confusion. |
| Choir Bell | 30 | 7 | Heals the player and nearby allies for a moderate amount. Area of effect. | Co-op healing; self-heal without vials; expensive. |
| Madara's Whistle | 25 | 6 | Summons a snake that attacks enemies after a delay. Hard to aim but hits hard. | Surprise attacks; combo with knockdown. |
| Eye of Kos (not a tool) | — | — | — | — |
Recommended Arcane Thresholds: 15 (basic tools), 25 (decent), 40 (strong), 50 (very strong), 70+ (max damage).
---
4. Caryll Runes (Passive Buffs)
Caryll Runes are equippable items (like rings/charms) that provide passive bonuses. You can equip up to 4 Runes: 1 each in Rune Workshop (Memory Rune, Guidance Rune, etc.). Actually: you unlock rune slots via collecting Caryll Rune Tools (from Witch of Hemwick). Slots: 3 base + 1 via Deep Pthumeru Chalice (later).
Runes are categorized by shape: Radiance, Lake, Stench, Dissipating, etc. But for practical purposes, here are the most valuable runes grouped by effect:
#### Health & Stamina
| Rune | Effect | Max Version (Cursed) |
|---|---|---|
| Clockwise Metamorphosis | Increase max HP by 5%, 10%, 15% | +15% HP |
| Anti-Clockwise Metamorphosis | Increase max stamina by 10%, 15%, 20% | +20% stamina |
| Great Lake | Reduce all damage taken by 3%, 5%, 7% (10% from all sources? Actually reduces by % gradually) | +7% damage reduction |
| Rune | Effect |
|---|---|
| Great Lake (defense) | Reduces physical & elemental damage by up to 7% |
| Lake | Reduces physical damage by up to 7% |
| Stench | Reduces slow poison damage |
| Dissipating | Reduces rapid poison buildup |
| Fading Lake | Reduces elemental damage (fire/bolt) |
| Fading Great Lake | Reduces all elemental damage up to 7% |
| Crescent | Increases frenzy resistance |
| Eye | Increases item discovery (up to +100) |
| Rune | Effect |
|---|---|
| Formless Oedon | Increases maximum Quicksilver Bullets by +1, +2, +3 (up to +5 with all three tiers) |
| Guidance | Increases Blood Vial drop rate from enemies? Actually increases rally potential (heal back damage). Max +30% rally |
| Corruption (not a rune) | PVP related |
| Rune | Effect |
|---|---|
| Clawmark | Increases visceral attack damage by +10%, +20%, +30% (recommended for SKL builds) |
| Beast (from Beast Embrace) | Increases beast transformation damage (only with Beast Embrace rune equipped) |
- Blood Rapture: Restore HP on visceral kill (up to +300 HP).
- Heir: Gain extra Blood Echoes on visceral kill (up to +40%).
- Guidance (rally): heal back up to +30% of damage taken.
- Example: Saw Cleaver: Form 1 (short blade) fast; Form 2 (extended) slower but longer range. L1 attack while attacking deals extra damage (Transform Attack bonus).
- Synergy: Using transformation after a dodge or roll creates unique moves.
- Damage scales with Skill (SKL). Use Clawmark rune for +30% damage.
- Stamina cost is low, but recovery is long. Use when enemy is staggered.
- Weapon scaling: Visceral damage also depends on weapon's thrust attack gems? (Actually no, only SKL and runes).
- Rune Guidance improves rally percentage.
- Rally is the core risk-reward mechanic; aggressiveness pays off.
- Only works on humanoid or beast enemies that can be staggered. Not all attacks are parriable.
- Bullets cost 1 each. Use Bone Marrow Ash for more damage (but not necessary).
- Best used on slow enemies or those unaware of you.
- Works on bosses? Only some (e.g., Mergo's Wet Nurse, Nightmare of Mensis).
- Quickstep (dodge while locked on): Consumes stamina, provides brief invincibility frames. Use to circle around bosses.
- Roll (dodge while unlocked): Covers more distance. Use for escaping large AoEs.
- Backstep (tap circle without moving): Quick retreat, can be followed by a backstep attack (R1).
- Attributes: VIT 50, END 25, STR 50, SKL 50, BLT base, ARC base.
- Weapons: Ludwig’s Holy Blade, Saw Cleaver, Hunter Axe.
- Runes: Clockwise Metamorphosis, Anti-Clockwise, Great Lake, Clawmark.
- Strategy: Universal damage on most weapons. High visceral damage. Use transform attacks.
- Attributes: VIT 40, END 20, STR 25, SKL 50, BLT base, ARC 15 (for Old Hunter Bone).
- Weapons: Blades of Mercy, Threaded Cane, Rakuyo.
- Runes: Clawmark (+30% visceral), Blood Rapture (HP on visceral), Heir (echoes on visceral).
- Strategy: Parry everything. Use Old Hunter Bone for evasion. Kill bosses via viscerals.
- Attributes: VIT 50, END 20, STR 50, SKL base, BLT base, ARC 50.
- Weapons: Logarius’ Wheel (split phys/arcane), Amygdalan Arm, Tonitrus.
- Tools: Empty Phantasm Shell, A Call Beyond, Executioner's Gloves.
- Strategy: Buff weapon with arcane. Use tools at range. Wheel transformed deals massive arcane damage.
- Attributes: VIT 50, END 20, STR base (enough for Chikage? It requires 10 STR), SKL 25 (for Evelyn scaling? Actually Evelyn scales with BLT only), BLT 50, ARC base.
- Weapons: Chikage (transformed uses HP but deals blood damage), Evelyn (best BLT firearm), Simon’s Bowblade (bow form uses BLT).
- Runes: Formless Oedon (+bullets), Guidance (rally to offset HP drain).
- Strategy: Use transformed Chikage for high damage, heal via rally on enemies. Bone Marrow Ash + Evelyn for massive bullet damage.
- Attributes: VIT 50, END 20, STR 25 (for elemental weapons), SKL base, BLT base, ARC 99.
- Weapons: Fire Saw Spear (convert with fire gem), Holy Moonlight Sword (ARC scaling), Kos Parasite (only ARC).
- Tools: All arcane tools. Prioritize Call Beyond, Blacksky Eye, Augur of Ebrietas.
- Runes: Clockwise Metamorphosis, Great Lake, Formless Oedon, Eye (more item discovery).
- Strategy: Use tools from distance. Augur for backstabs. Empty Phantasm Shell on non-arcane weapon for extra damage.
- Not recommended primary, but can push END to 40 for high stamina. Works with fast weapons like Blades of Mercy.
- Sword (light): R1 x2-3, then L1 transform attack.
- Axe charged R2: Can be followed by another charged R2 or a rolling R1.
- Saw Cleaver: R1, R1, L1 (transform swipe) then L1 again to revert.
- Quickstep + R1: Lunging attack, good for closing distance.
- Backstep + R1: Retreating poke, useful for spacing.
- Running R2: Jump attack, crushes posture.
- Transformation attacks (L1 after any attack) deal bonus damage and can break enemy stance. Use them often.
- Augur of Ebrietas can be used to counter an enemy attack (like a parry) and you can chain into Visceral. Works on some bosses.
- Blacksky Eye can be spammed repeatedly due to low cost.
- Executioner's Gloves -> while homing skulls fly, you can melee attack for extra damage.
Rune Slot Priority: Typically 1 HP boost (Clockwise Metamorphosis), 1 stamina boost (Anti-Clockwise), 1 defense (Great Lake or specific resistance), 1 utility (Formless Oedon for bullets or Clawmark for visceral).
---
5. Combat Techniques & Special Moves
Bloodborne’s combat relies on weapon transformations and contextual moves. These are not unlocked via skill points; they are inherent to weapons and the player’s actions.
#### Trick Weapon Transformations
Every right-handed weapon has two forms. Press L1 to transform mid-combat. This can be chained into attacks (Transform Attacks).
#### Visceral Attack
A critical attack performed after a parry (shooting an enemy mid-attack) or a backstab (charged R2 to the back).
#### Rally (Health Recovery)
After taking damage, a portion of your health bar appears in orange. Hitting enemies within a few seconds recovers that health. The rally amount depends on weapon (e.g., Saw Cleaver has high rally potential).
#### Parry
Fire your firearm just as an enemy attacks to stagger them. Then approach and press R1 for a Visceral Attack.
#### Backstab
Charge a heavy attack (hold R2) to an enemy's back. They will fall to their knees. Press R1 to perform a Visceral Attack.
#### Quickstepping & Rolling
#### Charge Attacks & Follow-ups
Hold R2 for a charge attack. On most weapons, a fully charged R2 can stagger or knock down enemies. Follow up with R1 for a special attack (e.g., Saw Cleaver's double charged R2).
#### Jump Attacks
While running, press R2 to perform a jumping attack that deals heavy damage and can stagger.
#### Lure & Sneak Attacks
Use Pebbles or Throwing Knives to draw one enemy. While they are walking away, you can backstab or hit them with a charged R2.
---
6. Recommended Builds & Skill Synergies
#### A. Quality Build (STR/SKL)
#### B. Skill / Visceral Build
#### C. Strength / Arcane Build
#### D. Bloodtinge Build
#### E. Arcane Caster Build
#### F. Endurance-focused (for fun)
---
7. Combos & Advanced Techniques
Basic Combos:
Advanced:
Visceral Chain: Backstab -> Visceral -> while enemy is standing up, you can charge R2 again? Usually not enough time, but for large enemies you might get a second backstab if you delay the visceral.
Parry + Bone Marrow Ash: Shoot with BMA for high bullet damage, but then you cannot visceral if enemy died. Better to parry and then visceral.
Spell Combos:
---
8. When to Use Each Skill / Mechanic
| Situation | Best Skill / Mechanic |
|---|---|
| Enemy finishing attack wind-up | Parry with firearm |
| Large, slow enemy facing away | Backstab (charged R2) |
| Need to heal quickly after taking damage | Rally by attacking enemy |
| Groups of weak enemies | Transform attacks (sweeping moves) |
| Boss with long recovery frames | Charge R2 -> Visceral if possible |
| Ranged enemy on a ledge | Beast Roar to knock them off; or use Tiny Tonitrus |
| Co-op or healing | Choir Bell (if you have Arcane 30) |
| Low on bullets | Formless Oedon rune; pick up bullets from enemies |
| Frenzy buildup (e.g., Brain of Mensis) | Use Sedatives; equip frenzy resistance runes (Crescent) |
| Fast boss that dodge often | Use homing tools (Executioner's Gloves, Call Beyond) |
| PVP player using strong attacks | Old Hunter Bone for evasion |
| Poison swamp area | Use Antidote; equip Stench rune |
9. Summary
In Bloodborne, your character's “skills” are shaped by your attribute choices, equipped runes, and mastery of combat mechanics. There is no skill tree to unlock; instead, you gradually level up and choose which tools to invest in. The most important “skills” to learn are:
1. Timing of dodges and parries (crucial for survival).
2. Weapon transformation combos (maximize damage).
3. Rally mechanic (aggressive health recovery).
4. Bullet management (for tools and parrying).
5. Rune setup (tailor to boss or area).
By understanding all of the above, you can design any character build and use any skill effectively. Experiment with different tools and weapons to find your playstyle. Remember: Bloodborne rewards aggression, but calculated aggression.

Characters & Roles
Characters & Roles – Comprehensive Guide
Bloodborne does not have traditional character classes or selectable heroes. Instead, you create a Hunter from one of several Origins (starting stat templates) and then customize your playstyle through stat allocation, weapon choice, and equipment. This guide covers every major character, origin, and role archetype, including their backgrounds, strengths, weaknesses, playstyle, unlock conditions, recommended equipment/builds, and team synergy (co-op / NPC summons).
---
1. Player Origins (Starting Classes)
At character creation, you choose an Origin that determines your starting attributes and initial gear. These only affect the first hour or so; any Origin can become any build. Choose based on your desired early game experience.
| Origin | Starting Stats (STR/SKL/BLT/ARC) | Starting Equipment | Background | Strengths | Weaknesses | Playstyle | Unlock | Recommended Build | Team Synergy |
|---|---|---|---|---|---|---|---|---|---|
| Milquetoast | 12/10/7/8 | Saw Cleaver, Hunter Pistol, Hunter Set | A bland, balanced hunter – default choice. | Even stats for early flexibility. | No specialized advantage. | Versatile, easy to test weapons. | Always available | Quality (STR+SKL) | Good foundation for any co-op role. |
| Military Veteran | 14/9/7/8 | Saw Spear, Hunter Pistol, Hunter Set (with bandage) | Former soldier, hardened by war. | High Strength (14) for early heavy weapons. | Low Skill (9) limits early skill weapons. | Heavy-hitting, high stagger. | Always available | Pure Strength or Quality | Best as frontline aggressor in co-op. |
| Violent Past | 15/9/6/7 | Hunter Axe, Hunter Blunderbuss, Hunter Set (torn cloak) | Brutal past, raw power. | Highest starting Strength (15). | Low Bloodtinge (6) and Arcane (7) – no early magic/guns. | All-in melee, high damage. | Always available | Pure Strength, Beast Claw builds | Relies on healing near teammates. |
| Professional | 9/13/7/8 | Threaded Cane, Hunter Pistol, Hunter Set (crisp) | Quick, precise, tailored. | Highest Skill (13) for visceral attacks. | Low Strength (9) – can't use heavy weapons early. | Fast, evasive, parry-focused. | Always available | Skill or Quality | Complements strength tanks with backstabs. |
| Waste of Skin | 10/9/7/6 | Saw Cleaver, Hunter Pistol, worn gear | Nothing, a blank slate. | Lowest starting level (4) – min-max potential. | Very fragile early. | Requires careful play, high value from level-ups. | Always available | Any min-maxed build | Hard in co-op early, but scales well. |
| Cruel Fate | 9/9/8/9 | Threaded Cane or Saw Spear, Hunter Pistol, Hunter Set (dark) | Mysterious past, attuned to arcane. | High Arcane (9) and Bloodtinge (8) – hybrid potential. | Low Strength (9) and Skill (9) – weak melee early. | Arcane tools and firearms from start. | Always available | Arcane or Bloodtinge builds | Great for ranged support and elemental damage. |
| Lone Survivor | 11/10/7/7 | Saw Cleaver, Hunter Pistol, Hunter Set (scrounged) | Last of a fallen group, resourceful. | High Vitality (14) – most HP starting. | Slightly lower damage stats. | Tanky, forgiving early game. | Always available | High VIT builds, defensive role | Reliable co-op partner for survivability. |
---
2. Major NPC Characters
Bloodborne features several key NPCs who offer quests, items, or combat aid. They are not playable, but understanding them enriches the story and gameplay.
#### The Doll
- Background: Animated doll in the Hunter's Dream, created by Gehrman. She levels up your character using Blood Echoes.
- Strengths: Only NPC that can level you up; also provides insight for memory altars (later).
- Weaknesses: No combat ability; stays in the Dream.
- Playstyle: N/A – she is a service NPC.
- Unlock: Automatically after reaching the Hunter's Dream (after first death or using a Hunter's Mark).
- Recommended Equipment: None.
- Team Synergy: Essential for all hunters – you must spend Echoes with her to progress.
- Background: The mysterious old man in the wheelchair in the Hunter's Dream. Mentors you about the hunt. Later becomes a boss (optional final boss).
- Strengths: None as summon; his boss form is a skilled swordsman with a scythe, using quick slashes and area attacks.
- Weaknesses: Boss form is vulnerable to parries and bolt damage.
- Playstyle: As boss: fast, aggressive, uses a transformed scythe for range. Phase 2 includes rifle shots and a powerful charge.
- Unlock: For boss fight, submit to him after defeating Mergo's Wet Nurse (endgame), or refuse to trigger final battle. No summon.
- Recommended Equipment: For defeating him: use Hunter's Axe (reach), high Bolt Paper, and Parry window practice.
- Team Synergy: Does not appear in co-op. You fight him alone (or with optional NPC summons?).
- Background: A fellow hunter of beasts, she follows the Hunter of Hunters creed – hunts hunters who have become blood-drunk. Located in Central Yharnam, then Cathedral Ward, then Grand Cathedral.
- Strengths: As an ally (if summoned for Henryk fight), she is agile, uses the Blades of Mercy, and is highly damaging.
- Weaknesses: Easily killed in the Henryk fight if you don't assist; she can die permanently.
- Playstyle: Fast, dodge-centric, high Skill. Wields dual blades (Blades of Mercy) that have high DPS but short range.
- Unlock: Meet her in Central Yharnam (sewer area); complete her questline to receive the Crow Hunter Badge (shop unlock) and Blades of Mercy weapon.
- Recommended Equipment: For her quest: high damage build to quickly eliminate Henryk. Use Bolt Paper to stagger.
- Team Synergy: If summoned, she acts as a distraction and damage source. Best paired with a tanky or aggressive hunter.
- Background: An old hunter on top of the Healing Church Workshop tower (Old Yharnam). He guards the beasts of Old Yharnam, believing they are innocent. He will attack on sight unless you befriend him.
- Strengths: As an enemy, he wields the Gatling Gun (flaming bullets) and a melee weapon. High range and damage.
- Weaknesses: Can be knocked off the tower; limit his line of sight. Once befriended, he gives the Powder Keg Badge and a gesture.
- Playstyle: Aggressive, uses gun to suppress. He can be parried.
- Unlock: Befriend by not killing any beasts in Old Yharnam (do not enter through the shortcut?), then approach him via the tower ladder (requires the Church Workshop badge? Actually, you need to go to the tower from the back – detailed steps).
- Recommended Equipment: For fighting: high Bolt damage, quick weapon to stagger. For befriending: wear the Black Church Set (from Cathedral Ward) to approach peacefully after killing no beasts.
- Team Synergy: N/A – he is not a summonable ally.
- Background: A devout hunter of the Healing Church who despises the Cainhurst Vilebloods. Found in Central Yharnam, then Cathedral Ward, then Cainhurst Castle.
- Strengths: As a summon, uses a Kirkhammer (high damage, slow) and has strong stagger. He is tanky.
- Weaknesses: Slow; can get trapped by multiple enemies. In his unhinged state, he becomes a mad NPC with high damage but still slow.
- Playstyle: Heavy melee brawler. Uses Logarius’ Wheel later.
- Unlock: Summon him for the Cleric Beast (optional) and for the Martyr Logarius fight. Complete his questline to receive Logarius‘ Wheel (weapon) and the Radiance Oath (rune).
- Recommended Equipment: For co-op with him: use a fast weapon to compensate for his slowness; he can tank bosses.
- Team Synergy: Pair with a Skill or Bloodtinge build for balanced offense.
- Background: The immortal queen of Cainhurst Castle. She gives the player the Cainhurst Badge and can be offered Blood Dregs for rewards.
- Strengths: No combat – she is a lore NPC. She can be either helped (become a Vileblood) or killed.
- Weaknesses: If killed, you lose the ability to offer Blood Dregs and get the Cainhurst Badge (but can still get it from her corpse).
- Playstyle: N/A.
- Unlock: After defeating Martyr Logarius (Cainhurst), obtain the Cainhurst Summons from Iosefka’s Clinic or the Forbidden Woods.
- Recommended Equipment: None – choose to join Vileblood covenant for invader-oriented runes.
- Team Synergy: The covenant rewards invaders, not co-op.
- Background: The real Iosefka is a kind doctor who runs Iosefka's Clinic. She gives you the Iosefka‘s Blood Vial (full heal if you side with her). Impostor Iosefka (a member of the Choir) takes over the clinic and conducts experiments.
- Strengths/Weaknesses: N/A for combat – they are quest givers. The real one can be killed by impostor; you can choose to help the impostor (receive a One Third of Umbilical Cord) or kill her.
- Unlock: Visit clinic early; later after Blood Moon, you can find the impostor and get the cord.
- Team Synergy: None.
- Gilbert (window in Central Yharnam) – gives the Flamesprayer if talked to multiple times before Blood Moon.
- Gascoigne‘s Daughter (window near Gascoigne boss area) – gives a Music Box and later a Red Brooch (if you lie or tell truth). Relevant to quest.
- Arianna (Cathedral Ward) – saves you, later gives Blood Vials, can become a surrogate for the vileblood child. Provides Access to the Upper Cathedral Ward key (if you send her to Oedon Chapel).
- Adella (Hypogean Gaol) – a nun of the Healing Church, saved by sending her to Cathedral Ward. Gives you a Tears of Denial-like item (the Celestial Mob? Actually gives a free res on death once).
- Fake Iosefka (Clinic) – as above.
- Suspicious Beggar (Forbidden Woods) – offers beast-like dialogue; can be sent to either Clinic (turns into beast) or Chapel (kills others). Provides a Beast Rune.
#### Gehrman, the First Hunter
#### Eileen the Crow
#### Djura, the Retired Hunter
#### Alfred, the Hunter of Vilebloods
#### Annalise, Queen of the Vilebloods
#### Iosefka (Real and Impostor)
#### Other Notable NPCs
---
3. Build Archetypes (Roles)
Bloodborne has no strict classes, but players gravitate toward these build archetypes based on stat priorities. Each has strengths, weaknesses, and synergy in co-op (summoning/being summoned).
| Build | Primary Stats | Weapon Examples | Strengths | Weaknesses | Playstyle | Recommended Caryll Runes | Team Synergy (Co-op) |
|---|---|---|---|---|---|---|---|
| Strength | 50+ STR, 15-25 END, 30-50 VIT | Hunter Axe, Kirkhammer, Logarius' Wheel, Amygdalan Arm, Beast Cutter | High stagger, heavy damage, break poise. Can use heavy shields (Loch Shield). | Slow swing speeds, high stamina cost, poor against fast bosses. | Aggressive, using charged R2 to pancake enemies. Use Hunter Blunderbuss for stagger. | Rune: Clawmark (+visceral), Anti-Clockwise (+stamina), Great Lake (+def) | Tank and aggro; good for drawing boss attention while skill/arcane builds deal damage. |
| Skill | 50 SKL, 15-25 END, 30-50 VIT | Threaded Cane, Blades of Mercy, Rakuyo, Church Pick, Saif, Beasthunter Saif, Burial Blade (requires finishing game) | Fast attacks, high visceral damage, low stamina cost, excellent parry potential. | Low poise damage, shorter range (except Threaded Cane whip). | Dodge-heavy, parry with Hunter Pistol, visceral attack loops. | Rune: Clawmark (x3 for visceral damage), Heir (more echoes) | Great for backstabs, can peel enemies off teammates. Best paired with Strength tank. |
| Quality (STR+SKL) | 50 STR / 50 SKL, 20-30 END, 40-50 VIT | Ludwig's Holy Blade, Saw Cleaver/Spear, Beasthunter Saif, Burial Blade, Holy Moonlight Sword (if also 50 Arc?) | Access to almost all weapons, high damage scaling with both stats, versatile. | Requires many stats (high level needed). | Flexible; can adapt to any situation. Use any weapon effectively. | Rune: As needed – lead elixir? Standard offensive runes. | Very versatile – can fill any gap in a team. Reliable. |
| Arcane | 50+ ARC (softcap 50, hardcap 99), 15-25 END, 30-40 VIT, min STR/SKL for weapon requirements | Ludwig's Holy Blade (fire/bolt gems), Tonitrus, Holy Moonlight Sword (hybrid), Kos Parasite (requires 70ARC?), Hunter Tools (A Call Beyond, Blacksky Eye, Executioner's Gloves) | Elemental damage ignores enemy physical resistances, powerful ranged spells, can use tools without bullets. | Requires farming elemental gems (fire/bolt/arcane), low physical damage early, limited weapon choices. | Cast spells like Executioner's Gloves (homing), use transformed Tonitrus for bolt. Use Augur of Ebrietas for backstabs. | Rune: Eye (+discovery), Communion (+blood vials), Guidance (+rally) | Great at range, deals huge damage to beast enemies. In co-op, can provide consistent DPS while tank engages. |
| Bloodtinge | 50+ BLT, 15-25 END, 30-40 VIT, low STR/SKL (just for weapon requirements) | Chikage, Simon's Bowblade, Bloodletter (requires DLC), Evelyn (pistol), Repeating Pistol (but better use Evelyn) | Very high gun damage, strong transformed melee on Chikage/Bloodletter, unique playstyle. | Health drain on transformed Chikage, requires specific gems (bloodtinge gems) and late-game items. | Use Chikage in transformed mode for rapid damage, or Bowblade for ranged shots. Parry with Evelyn. | Rune: Blood Rapture (+heal on visceral), Great Lake for defense | In co-op, high burst damage; can snipe from distance with Bowblade. Works well with an Arcane support providing debuffs. |
| Pure Vitality / Meme Build | 99 VIT, minimum offensive stats | Any low requirement weapon (e.g., Saw Cleaver) | Extremely tanky, lots of health, low damage but high survivability. | Very low damage output, slow boss kills. | Uses Flamesprayer or weapon with gem chips; relies on rally and Lead Elixir to tank. | Rune: Great Lake, Lake, Clockwise (+HP) | Great as a distraction – can soak hits while allies DPS. Not recommended for beginners. |
---
4. Co-op Team Synergy Tips
\Although Bloodborne does not have traditional role classes, a balanced co-op team (2–3 players) benefits from covering each other’s weaknesses:
- Tank (Strength/Quality) – draws aggro, staggers enemies.
- Striker (Skill/Bloodtinge) – high DPS, visceral attacks, or ranged damage.
- Support (Arcane) – deals elemental damage, uses Hunter Tools like Empty Phantasm Shell (to buff allies), Old Hunter Bone (for evasion), Messenger‘s Gift (for stealth).
- Healer? – No direct healing skills, but Communion Rune increases Blood Vial capacity, and Guidance Rune increases rally potential.
- Alfred – for Cleric Beast (Bell requires 10 Insight) and Martyr Logarius.
- Henriette (Old Hunter) – for Vicar Amelia (summon near the fog using the Old Hunter Bell with Insight).
- Queen Killer (for Lawrwnce? actually only in Defiled Chalice).
- Young Hunter Madaras – for Shadows of Yharnam.
- Attributes (VIT, END, STR, SKL, BLT, ARC) are the only stats; no separate class leveling.
- Weapon Scaling changes when you equip Blood Gems; focus on your primary damage stat.
- Hunter Tools (spells) scale with Arcane; require at least 15–40 ARC to use effectively.
- Caryll Runes provide passive bonuses – you can equip three (eventually four) once you obtain the Rune Workshop Tool.
- Oath Runes (like Radiance, Corruption, Beast) add covenant effects and faction flavor.
Recommended Summonable NPCs (by location):
---
5. Importants Notes on Character Progression
---
Conclusion
Bloodborne’s character system is deceptively simple but rich with depth. Your Origin only sets the starting line; your build is defined by how you allocate stats and which weapons/runes you choose. Each NPC adds flavor and unique rewards. Whether you want to be a nimble Skill hunter, a powerhouse Strength brute, an Arcane wizard, or a Bloodtinge gunslinger, the game allows full customization. Use this guide to plan your role, synergise with co-op partners, and enjoy the hunt.
Platform: PlayStation 4, PlayStation 5 (backward compatibility). All information applies to the base game and The Old Hunters DLC.
Cheats & Secrets
Cheats & Secrets
Bloodborne does not have traditional cheat codes, debug menus, or unlock codes. There are no console commands, password entry screens, or developer-console shortcuts. However, the game is packed with hidden content, Easter eggs, developer-intended secrets, and subtle exploits that enhance the experience. This guide covers all known legitimate secrets and hidden features.
---
No Cheat Codes
Bloodborne, like all FromSoftware games, intentionally omits cheat codes to preserve its challenging, immersive design. There is no way to enable invincibility, infinite ammo, or item spawning without external software (which violates the terms of service). The only in-game assistance is the Beckoning Bell for co-op and the Small Resonant Bell for invasion help.
---
Hidden Areas and Optional Content
#### 1. Cainhurst Castle
- How to access: After defeating Vicar Amelia, obtain the Cainhurst Summons from a hidden area in the Forbidden Woods (near the poison lake, beside a giant sentinel). Then go to Hemwick Charnel Lane and approach the tall stone obelisk in the center of the executioner’s plaza. Interact with it to be taken to Castle Cainhurst.
- Secrets: Inside, find the Reiterpallasch (sword/gun), Chikage (katana), and the Cainhurst Armor Set. Defeat the optional boss Martyr Logarius to unlock the Executioner’s Gloves and access the Vileblood Queen covenant.
- How to access: After defeating Rom, the Vacuous Spider, return to the Cathedral Ward. From the entrance, take the elevator that leads to the upper floor, then unlock the door using the Upper Cathedral Ward Key (found in the jail cells of Yahar’gul, Unseen Village).
- Secrets: This area contains the Celestial Emissary boss and the optional boss Ebrietas, Daughter of the Cosmos. Defeating them unlocks the Isz Chalice and the Arcane Lake rune. The area also holds the Choir set and several high-level Blood Gems.
- How to access: Interact with the Amygdala near the entrance of the Cathedral Ward (after obtaining the key item Tonsil Stone from any window NPC after defeating the Blood-starved Beast). The Amygdala will grab you and transport you to the Nightmare Frontier.
- Secrets: This area contains the Great One’s Wisdom item, a unique boss Amygdala (optional), and many Boulder traps. Access the Nightmare of Mensis later via this area’s second lamp.
- How to access: After defeating Vicar Amelia, interact with the Headless Bloodletting Beast body in the Oedon Chapel graveyard. You must have the Eye of a Blood-drunk Hunter key item from the Hunter’s Dream (found near the doll).
- Secrets: Adds new weapons, armor, bosses (Laurence, Ludwig, Maria, Orphan of Kos, Living Failures), and the Rakuyo weapon. The DLC also contains the Whirligig Saw and the Bowblade.
- Where to find: In the Hunter’s Dream, after obtaining the Messenger’s Gift item from the central tombstone, you can unlock a secret gesture by standing in a specific spot near the Doll and using the Make Contact gesture. The gesture itself requires the Make Contact emote found in the Nightmare Frontier (on a corpse near the winter lanterns).
- Effect: If you stand still in the right location, a message appears: "You must accept the eldritch truth." This references the Lovecraftian theme.
- In the Hunter's Dream, you can find a small chair hidden behind the workshop. If you sit in it (by pressing X while facing it), the Doll will react with unique dialogue. This is a callback to the original Hunter's Workshop.
- If you ring the Beckoning Bell in the Mergo’s Loft area near the boss fog, you might hear a faint baby cry (Mergo). This is an atmospheric Easter egg, not a mechanic.
- The Titanite Slab from Dark Souls appears as a joke: In the Chalice Dungeons, you can find a corpse with an item called Great One’s Wisdom, but if you inspect a particular tombstone in the Hunter’s Dream, the text reads "Like a slab of titanite... but not."
- Patches the Spider appears as a character who tricks you into a pit. He appears in the Nightmare Frontier and later in the Chalice Dungeons. This is a recurring FromSoftware character across all Soulsborne games.
- If you complete the game’s Childhood’s Beginning ending (refuse Gehrman’s offer and fight him, then also defeat the Moon Presence), the Doll becomes a sentient NPC with unique dialogue. She can also be given the Small Hair Ornament to trigger a cutscene.
- Not a hidden code but a core mechanic: Charged R2 attacks to the back, then press R1 for a visceral attack. The timing and positioning are intentional.
- With the Hunter’s Pistol, you can parry multiple times in a row if an enemy’s animation is long enough. This is exploited against bosses like the Shadows of Yharnam for easy visceral kills.
- The three Mergo's Wet Nurse hallway enemies drop high Blood Echoes. Using the Moon runes (available after killing Micolash) increases yield.
- You can remove a chalice dungeon from the altar by holding the touchpad and selecting “Remove Chalice.” This is essential for managing storage space.
- If you are in a boss arena and want to reset without dying, you can use the Hunter's Mark (consumed) or Bold Hunter's Mark (preserving echoes). This is intended to allow escape from bosses.
- There are three One Third Umbilical Cords needed for the secret ending. Locations:
- Consuming three cords before fighting Gehrman unlocks the secret final boss Moon Presence.
- Located in the Hunter’s Dream, accessible by a hidden path behind the first headstone. Enter through a door near the central workshop. This area contains the One Third Umbilical Cord and lore about the First Hunter.
- Equipping a heavier weapon can increase your run speed if you animation-cancel by switching weapons mid-dodge. This is a known exploit but not a cheat.
- In the first patches, you could duplicate items using the storage box. This has been fixed. Not recommended for online play.
- As of Ver. 1.00, you can duplicate items by rapidly pressing buttons during menu operations. This is not available in current game versions.
#### 2. Upper Cathedral Ward
#### 3. Nightmare Frontier
#### 4. Hunter’s Nightmare (The Old Hunters DLC)
---
Easter Eggs
#### 1. Praise the Moon Gesture
#### 2. Gehrman's Chair in the Workshop
#### 3. The Beckoning Bell and Mergo's Wet Nurse
#### 4. Flavor Text References
#### 5. Patches the Spider
#### 6. The Doll's True Identity
---
Exploit-Safe Secrets (Developer-Intended)
#### 1. Backstab and Visceral Attack
#### 2. Continuous Parry Loop
#### 3. Blood Echoes Farming via Mergo's Loft: Middle
#### 4. Chalice Dungeon Ritual Removal
#### 5. Reset Area without Lamp
---
Hidden Lore and Secrets
#### 1. The Third Cord
1. Abandoned Workshop (Hunter’s Dream, after defeating Gehrman? No: in the real Hunter’s Workshop, accessible via the Cathedral Ward upper area behind the hidden wall).
2. Iosefka’s Clinic (after defeating the imposter Iosefka, obtain from the operating table).
3. The Wet Nurse area (after defeating Mergo’s Wet Nurse, examine the item near the baby carriage).
4. Arianna’s Child (if you send Arianna to the Oedon Chapel and she becomes pregnant, kill her baby after it crawls out).
#### 2. The Abandoned Old Workshop
---
Tricks and Glitches (Use at your own risk)
#### 1. Speed Boost by Equipping Weapons
#### 2. Item Duplication (Patched in later versions)
#### 3. Menu Duplication (Unpatched PS4 disc versions only)
Note: Using glitches online may result in softbans. Never modify save files externally.
---
Summary
While Bloodborne lacks traditional cheat codes, its depth comes from hidden content, optional bosses, covenant quests, and lore-driven secrets. The game rewards thorough exploration and attention to detail. Always play the latest version for stability, and enjoy the hunt!