
Borderlands 2
## Game Introduction ### Overview **Borderlands 2** is a groundbreaking first-person shooter (FPS) with deep role-playing game (RPG) elements, often classified as a “looter shooter.” Developed by **Gearbox Software** and published by **2K Games**, it is the direct sequel to the original *Borde...
Download & Installation
Borderlands 2 – Download & Installation Guide
This guide covers all official platforms for downloading and installing Borderlands 2, including PC (Steam, Epic Games Store, GOG), PlayStation (PS3, PS4, PS5), Xbox (Xbox 360, Xbox One, Xbox Series X|S), and Nintendo Switch. Mobile native versions are not available; cloud streaming alternatives are mentioned separately.
---
1. System Requirements (PC)
#### Minimum Requirements
- OS: Windows XP SP3, Windows Vista, Windows 7, Windows 8, or Windows 10 (32-bit or 64-bit)
- Processor: 2.4 GHz Dual Core
- Memory: 2 GB RAM
- Graphics: NVIDIA GeForce 8500 / ATI Radeon HD 2600 (256 MB VRAM)
- DirectX: Version 9.0c
- Storage: 13 GB available space
- Sound: DirectX 9.0c compatible
- OS: Windows 7 or Windows 10 (64-bit)
- Processor: 2.3 GHz Quad Core
- Memory: 4 GB RAM
- Graphics: NVIDIA GeForce GTX 560 / ATI Radeon HD 5850 (1 GB VRAM)
- DirectX: Version 9.0c
- Storage: 13 GB available space
- Sound: DirectX 9.0c compatible
- Physical Disc – Insert disc into console and follow on-screen prompts. Installation is automatic (takes ~10-15 minutes).
- Digital Download –
- PS5 Backward Compatibility: Runs via PS4 version. Download the PS4 digital copy or insert PS4 disc. Installation identical.
- Account: PSN account required for digital purchase and online play.
- Xbox 360 – Physical disc or download from Xbox Live Marketplace. Installation takes ~8 GB. Ensure enough internal storage or a USB drive.
- Xbox One / Series X|S –
- Account: Xbox Live account required; Gold not needed for single-player.
- Physical – Insert game card. Installation data will be copied to internal storage or microSD (recommended).
- Digital – Open eShop, search “Borderlands 2”, purchase and download. Space needed ~11 GB.
- Account: Nintendo Account and internet connection for download.
- Note: Best played with a microSD card (class 10, 64 GB or larger) due to limited internal storage.
- PC (any store): Steam / Epic / GOG account for purchase and DRM. No separate 2K account is mandatory for installation, but for online multiplayer and SHiFT codes you may create a SHiFT account (optional).
- PlayStation: PSN account required for digital purchase and online play.
- Xbox: Xbox Live account required (free for online play on Xbox One/Series, Gold needed on Xbox 360).
- Switch: Nintendo Account required for eShop purchases and online play (Nintendo Switch Online subscription needed for multiplayer).
#### Recommended Requirements
Note: The game runs on both 32-bit and 64-bit systems. For best performance, use a 64-bit OS with at least 8 GB RAM if playing with mods or high-resolution textures.
---
2. Platform-Specific Download & Installation
#### 2.1 PC – Steam
1. Install Steam Client – Download the setup file from [store.steampowered.com](https://store.steampowered.com) and install it.
2. Create / Sign In to Steam account.
3. Purchase Borderlands 2 – Search for “Borderlands 2” in the store and buy the game (or redeem a key).
4. Install – Go to your Library, select Borderlands 2, click “Install”. Choose installation directory (default: `C:\Program Files (x86)\Steam\steamapps\common`).
5. Wait for download – File size ~13 GB. After download, the game will automatically install.
6. Launch – Click “Play” in Library.
#### 2.2 PC – Epic Games Store
1. Install Epic Games Launcher – Download from [epicgames.com](https://epicgames.com).
2. Create / Sign In to Epic account.
3. Add game – Borderlands 2 sometimes given free; otherwise purchase. If you own a key, redeem it via your account.
4. Install – In Library, find Borderlands 2, click “Install”. Select location and confirm.
5. Launch via the Epic Launcher.
#### 2.3 PC – GOG.com
1. Install GOG Galaxy (optional but recommended) – Download from [gog.com](https://gog.com).
2. Purchase Borderlands 2 on GOG. DRM-free version available.
3. Download – Either through GOG Galaxy (click “Install”) or download offline installers from your account.
4. Install – Run the offline setup executable and choose directory. No launcher required afterward.
5. Launch directly from start menu or GOG Galaxy.
#### 2.4 PlayStation (PS3, PS4, PS5)
1. Open PlayStation Store on your console.
2. Search “Borderlands 2” and purchase (or redeem from PS Plus).
3. Initiate download (size ~10-12 GB depending on updates). The console will install automatically.
4. Launch from the home screen.
#### 2.5 Xbox (Xbox 360, Xbox One, Xbox Series X|S)
1. Insert disc or purchase from Microsoft Store.
2. Installation starts automatically. For digital, go to My Games & Apps → Queue.
3. Game size ~13 GB on Xbox One, with updates.
#### 2.6 Nintendo Switch
#### 2.7 Mobile / Cloud Streaming (No Native App)
Borderlands 2 is not available as a native mobile app. You can stream it via services like GeForce NOW (requires Steam or Epic purchase) or Xbox Cloud Gaming (requires Game Pass Ultimate). Download the respective app on your mobile device (iOS/Android), sign in, and stream. No local installation needed.
---
3. Account Requirements
---
4. First Launch Setup
1. Graphics Configuration – On first launch, the game may detect your hardware and suggest settings. Adjust resolution, quality (Low/Medium/High/Ultra), and enable VSync if desired.
2. Controller vs Keyboard – PC version supports both. For best experience, a controller is recommended if you prefer console-style aiming.
3. SHiFT Account – Optional. Create or sign in to a SHiFT account to redeem Golden Keys and other rewards. This can be done later from the in-game menu.
4. Language Selection – Set via launcher (PC) or system language (console). Some PC versions allow separate voice and text languages.
5. Network Settings – For online co-op, ensure your firewall allows Borderlands 2. Use in-game matchmaking or invite friends.
---
5. Common Installation Errors & Fixes
| Error | Platform | Cause | Solution |
|---|---|---|---|
| Missing MSVCR100.dll | PC (Steam/Epic/GOG) | Missing Microsoft Visual C++ Redistributable | Install Visual C++ 2010 Redistributable (x86) from Microsoft (Steam often installs it automatically). |
| Application failed to start 0xc000007b | PC | 32/64-bit mismatch | Install both x86 and x64 VCRedist packages. Also check for corrupted game files. |
| Steam/Epic download stuck at 0% | PC | Network issue or server load | Restart client, pause/resume, clear download cache (Steam: Settings > Downloads > Clear Cache). |
| “Unable to write to installation directory” | PC | Permissions / antivirus | Run the client as Administrator. Add game folder and client to antivirus exclusions. |
| “Save data corrupted” | All | Save file issue | Restore from backup (cloud saves on Steam/PS+/Xbox Live). Delete local save and sync from cloud. |
| Black screen on launch | PC | Outdated GPU drivers or incompatible settings | Update GPU drivers (NVIDIA/AMD). Delete `WillowEngine.ini` and let the game rebuild defaults. |
| No sound | PC | Audio device or DirectX | Ensure Windows audio device is default. Reinstall DirectX runtime from Microsoft. |
| Error code: 1720 | PC (Windows Installer) | Corrupted installer (GOG offline) | Re-download the installer or run GOG Galaxy for seamless installation. |
| PlayStation installation fails | PS4/PS5 | Insufficient storage / database rebuild | Free up space (game needs ~13 GB). Reboot console and try again. If persists, rebuild database in Safe Mode. |
| Xbox installation stops | Xbox One/Series | Network or storage | Clear local cache (Settings > Network > Advanced). Unplug console for 30 seconds and retry. |
| Switch microSD error | Switch | Corrupted game card or microSD | Reinsert game card. If digital, archive and redownload. Ensure microSD is formatted as FAT32/exFAT. |
- Steam: Right-click Borderlands 2 in Library → Properties → Local Files → Verify integrity.
- Epic: Click three dots on game tile → Manage → Verify.
- GOG Galaxy: Right-click game → Manage → Verify/Repair.
---
6. Post-Installation Verification & Tips
1. Check version number – In main menu, bottom-right corner should show the latest patch (e.g., 1.9.0 or higher). Update if needed.
2. Test performance – Run the benchmark tool (PC) from Options > Video > Benchmark. If FPS is low, lower settings or disable PhysX (heavy on CPU/GPU).
3. Enable cloud saves – Ensure cloud sync is ON in Steam/Epic/PS+/Xbox Live to prevent data loss.
4. Install community patches (PC only) – Optional: Community Patch and Unofficial Patch fix bugs and restore removed features. Use a mod manager like Borderlands Mod Manager.
5. Optional DLC – Game of the Year Edition includes all major DLC. Ensure they are installed via your store.
6. Network multiplayer – Test online co-op by joining a public game. If NAT issues occur, port forward UDP 7777 and TCP 28900.
---
7. Summary Table
| Platform | Store / Source | Storage Required | Account Needed | Notes |
|---|---|---|---|---|
| PC | Steam | ~13 GB | Steam | Best mod support |
| PC | Epic Games | ~13 GB | Epic | Sometimes free |
| PC | GOG | ~13 GB (DRM-free) | GOG | Offline installers available |
| PS3 | PlayStation Store | ~8 GB | PSN | Legacy platform |
| PS4/PS5 | PSN | ~10-12 GB | PSN | Backward compatible on PS5 |
| Xbox 360 | Xbox Live | ~8 GB | Xbox Live | Requires Gold for online |
| Xbox One/Series | Microsoft Store | ~13 GB | Xbox Live | Free online on One/Series |
| Nintendo Switch | eShop | ~11 GB | Nintendo | Physical cart optional |
| Mobile | GeForce NOW / XCloud | 0 (streaming) | Steam/Epic/Game Pass | Requires fast internet |
Final Checks
- Ensure your platform is fully updated (Windows, console firmware).
- For PC, disable overlay apps (Discord, MSI Afterburner) if encountering crashes.
- Always download from official stores to avoid malware.
Enjoy the ride through Pandora, Vault Hunter!
Game Introduction
Game Introduction
Overview
Borderlands 2 is a groundbreaking first-person shooter (FPS) with deep role-playing game (RPG) elements, often classified as a “looter shooter.” Developed by Gearbox Software and published by 2K Games, it is the direct sequel to the original Borderlands (2009) and the second main entry in the critically acclaimed Borderlands series. Originally released on September 18, 2012 for PC, PlayStation 3, and Xbox 360, the game has since been expanded across multiple console generations and re-released in enhanced editions. A defining title of the early 2010s, Borderlands 2 is celebrated for its distinctive cel-shaded art style, irreverent humour, cooperative mayhem, and an infinitely replayable loot system.
Release Timeline & Platforms
- Original Release (2012): PC (Steam), PlayStation 3, Xbox 360
- PlayStation Vita (2014) – via Borderlands 2 Vita Edition
- NVIDIA Shield (2014) – Android-based handheld
- Mac OS (2012) – via Aspyr
- Linux (2014) – via Aspyr
- PlayStation 4 & Xbox One (2019) – as part of Borderlands: The Handsome Collection (includes Borderlands: The Pre-Sequel)
- Nintendo Switch (2020) – as part of Borderlands Legendary Collection
- PlayStation 5 & Xbox Series X|S (2020) – via backward compatibility with enhanced performance
- Epic Games Store (2020) – PC version added
- GOG (2020) – DRM-free PC version
- Handsome Jack – The charismatic, sadistic, and brilliantly written villain who serves as the game's primary antagonist. His narcissistic one-liners and unpredictable cruelty make him one of gaming's most memorable villains.
- The Vault Hunters (Player Classes):
- Lilith (The Firehawk) – A Siren from the first game, now leader of the Crimson Raiders resistance.
- Claptrap – The iconic, annoying, yet lovable robot who provides comic relief and side quests.
- Scooter – The chainsaw-wielding mechanic voiced by the late Mike Neumann, offering quirky vehicular guidance and side missions.
- Tiny Tina – An unpredictable, explosive-obsessed teenager who runs a series of DLC campaigns and is a fan favourite.
- Sir Hammerlock – An eccentric, cyborg hunter who provides mission briefings with a monotone upper-crust accent.
- Cooperative Mayhem: Up to four players can team up online or via split-screen (console-specific) with dynamic scaling that adjusts difficulty and loot quality based on party size. The mayhem increases with the iconic “Slag” element, which multiplies damage from other types.
- Skill Trees & Builds: Each class has three skill trees offering diverse playstyles—support, damage, tanking, elemental control, etc. Players can respec at any time.
- Humour & Style: The cel-shaded comic book art direction gives the world a timeless aesthetic. The writing is filled with pop-culture references, fourth-wall breaks, and dark comedy that never takes itself too seriously.
- Endgame Content: After the main story, players tackle True Vault Hunter Mode (TVHM) and Ultimate Vault Hunter Mode (UVHM) , which drastically increase enemy levels and spawn new, tougher enemies. Digistruct Peak (raid boss and survival gauntlet) and Vault Hunter Relics add replayability. Badass Ranks (global stat boosts) encourage trying all characters.
- Looter Shooter Fans: Anyone who enjoyed Destiny, Warframe, The Division, or the original Borderlands.
- RPG Enthusiasts: Players who love skill trees, stat min-maxing, and endless gear optimization.
- Co-op Gamers: Groups seeking chaotic local or online multiplayer with friends.
- Story Lovers: The well-written narrative, memorable characters, and witty dialogue appeal to those who appreciate humour in their shooters.
- Casual & Hardcore: The adjustable difficulty, generous checkpoints, and forgiving progression make it accessible, while UVHM and raid bosses challenge veterans.
- Single Player: Fully playable offline with AI companions (none—solo is the norm).
- Online Co-op: Up to 4 players via LAN or internet. Full voice chat, seamless drop-in/drop-out.
- Split-Screen (Local Multiplayer): Supported on PlayStation 3/4/5, Xbox 360/One/Series X|S, and PC (via mods or third-party tools). Only 2-player split-screen on consoles.
- Offline Support: The game can be played entirely offline without an internet connection (except for some digital storefronts that require online authentication on first launch).
- The “Loot Lottery” Feeling: Trillions of gun variations, each with distinct audio, visual effects, and handling, create an unparalleled sense of discovery.
- Handsome Jack: A rare villain who is both hilarious and terrifying, driving the narrative with constant interaction via audio calls and environmental storytelling.
- Cel-Shaded Graphics: The art style has aged gracefully and remains visually striking even on modern hardware.
- Dedicated Community: Even over a decade after release, active modding scenes, community challenges (like the Murder Mystery events), and Gearbox’s ongoing Shift Code giveaways keep players returning.
- Tiny Tina’s Assault on Dragon Keep: This DLC is often cited as a standout piece of game DLC, blending Borderlands gunplay with fantasy RPG tropes in a way that feels fresh and heartfelt.
- Cross-Generation Portability: The game has been re-released on nearly every platform, with the Handsome Collection providing excellent value for newcomers.
Borderlands 2 remains playable on modern platforms through backward compatibility and remastered collections, with 4K/60fps support on current-gen consoles and high-refresh-rate settings on PC.
Story & Setting
The game takes place on the lawless, alien-infested planet of Pandora, a bleak desert world filled with bandits, monstrous creatures, and ancient Vault ruins. Five years after the events of the first game, the new tyrant Handsome Jack has seized control of the Hyperion Corporation and declared himself dictator of Pandora. Using an army of Loader robots and exploiting the Vault's Eridium resources, he oppresses the planet's inhabitants. A new generation of Vault Hunters—the player characters—arrive on Pandora, guided by a mysterious message from the resistance leader Lilith (the Firehawk). Their goal: to stop Handsome Jack from unlocking a legendary Vault that allegedly contains an unimaginable power, and to avenge the death of a beloved character from the first game, Roland.
Main Characters
- Axton (Commando) – Specializes in turret deployment and combat versatility.
- Maya (Siren) – Uses phase-lock abilities to immobilize enemies and heal allies.
- Salvador (Gunzerker) – Dual-wields any two weapons, unleashing chaos.
- Zero (Assassin) – A stealthy sniper/melee hybrid with a decoy ability.
Core Gameplay & Appeal
Borderlands 2 perfectly blends fast-paced first-person shooting with deep RPG progression. The core loop is: shoot enemies, loot weapons, level up, fight harder enemies, loot better weapons. The game features a staggering arsenal of procedurally generated guns, with over a trillion possible variations thanks to different manufacturers, parts, elements, and rarities. From corrosive SMGs to explosive shotguns to e-tech beam weapons, every drop feels unique.
Target Audience
Game Modes & Online/Offline Support
Note: The Borderlands 2 VR mode (PSVR & PC VR) is a separate version that modifies the core gameplay for virtual reality but includes only the base game (no co-op).
DLC & Expansions
Borderlands 2 launched with four major story-based campaign DLCs, collectively known as “Headhunter Packs” (though some are campaign add-ons), plus four full campaign add-ons:
1. Captain Scarlett and Her Pirate’s Booty – A tropical island pirate-themed adventure with new enemies, vehicles, and the sand skiff.
2. Mr. Torgue’s Campaign of Carnage – Explosive-filled arena challenges led by the bombastic Mr. Torgue.
3. Sir Hammerlock’s Big Game Hunt – A jungle expedition to hunt rare creatures for Sir Hammerlock.
4. Tiny Tina’s Assault on Dragon Keep – Widely considered the best DLC, it sets players in a fantasy-tabletop game run by Tiny Tina, with dragons, spells, and medieval weapons.
Additionally, there are Headhunter Packs (5 smaller holiday-themed missions), the Ultimate Vault Hunter Upgrade Pack (adds UVHM and Digistruct Peak), and numerous Shift Codes provided by Gearbox for golden keys (still active as of 2025). The Commander Lilith & the Fight for Sanctuary DLC (released in 2019 to bridge the gap between Borderlands 2 and Borderlands 3) is free for owners of the base game on PC but paid on console.
Special Editions: Borderlands 2: Game of the Year Edition includes the base game and all four campaign DLCs, plus the Psycho Pack (new playable character Krieg). The Handsome Collection includes Borderlands 2 and The Pre-Sequel with all their DLCs for PS4/Xbox One.
What Makes Borderlands 2 Unique
Conclusion
Borderlands 2 is not merely a game; it’s a landmark in cooperative gaming. Its blend of addictive loot systems, sharp writing, and endless replayability continues to attract new players more than a decade after launch. Whether you’re a lone Vault Hunter or part of a four-person crew, Pandora awaits—with a million guns and a psychopath who thinks he’s the hero. Get ready to shoot, loot, and laugh.
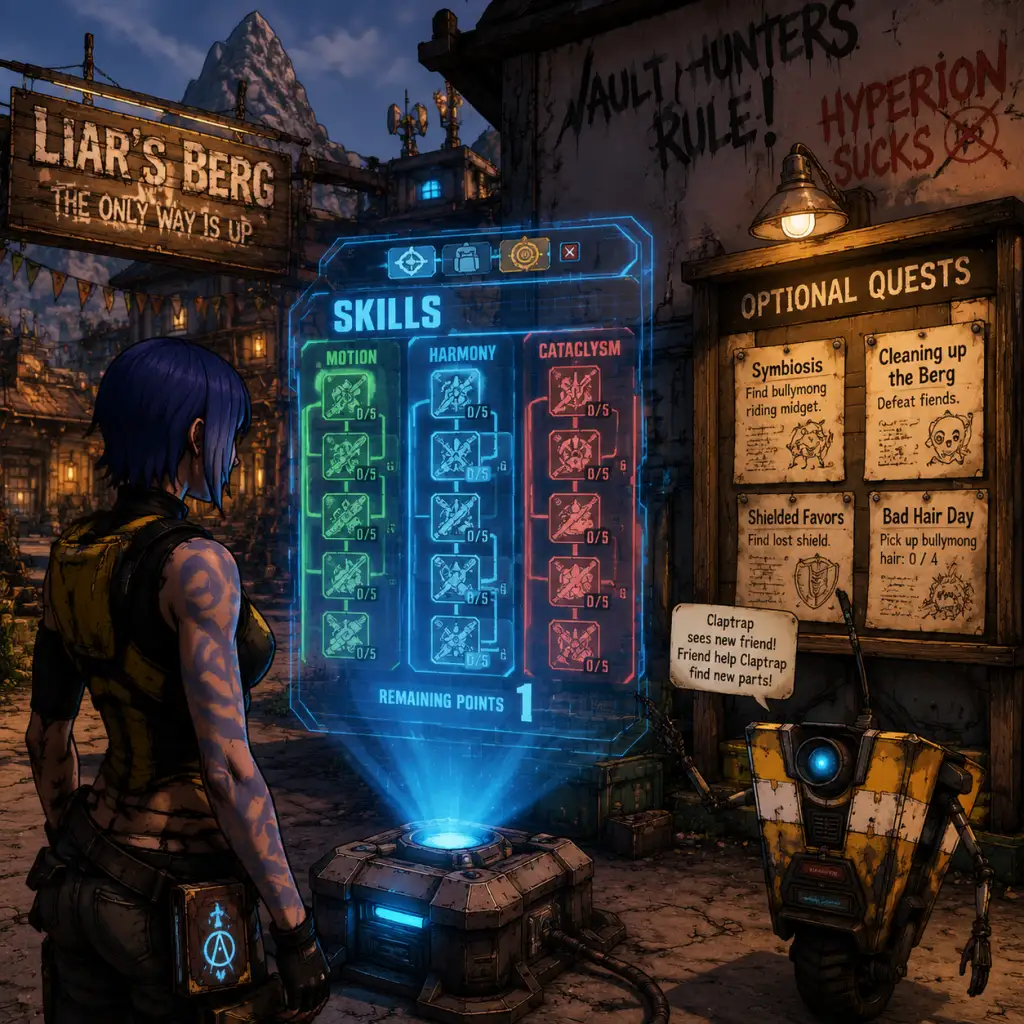
Getting Started
Getting Started Guide for Borderlands 2
Welcome to Borderlands 2, a chaotic looter-shooter where you fight for loot, level up, and survive the unforgiving world of Pandora. This guide is tailored for brand-new players to help you survive your first hour, avoid common traps, and set yourself up for success. We'll cover everything from character creation to your first day.
---
First Hour Walkthrough
0–5 Minutes: Introduction & Tutorial
1. Start the game – You'll see an opening cinematic, then you're dropped into the world as one of the four Vault Hunters.
2. Meet Claptrap – A friendly robot who guides you through the basics. Follow his voice and on-screen prompts.
3. Pick up your first weapon – A simple pistol. Shoot the skags in the snowy area. Use your Action Skill (see Controls) when you find it.
4. Learn the HUD – Health (green bar at bottom left), Shield (blue bar), Ammo (white numbers).
5. Opening Door – After a few minutes, you'll enter Liar's Berg, a small outpost. Important: Loot everything – ammo, cash, weapons, health vials.
6. Claptrap's quest – "Blindsided!" – He'll ask you to clear out some bullymongs (skag-like creatures).
5–30 Minutes: First Combat & Side Quests
- Kill the bullymongs – Use cover, aim for heads. Your Action Skill can help.
- Return to Claptrap – He'll reward you and send you to meet Lilith (the Firehawk).
- Grab side quests – Check the Bounty Board in Liar's Berg for "Medical Mystery" and "Bano's Booze" – these give early XP and gear.
- Don't rush – Explore every shack. Bullymong piles often contain money and ammo.
- You'll get a vehicle (the Catch-A-Ride). This is your first fast travel point.
- Drive to the Three Horns – Follow the road. Watch out for bandit outposts.
- Enter Liar's Berg Hall – A small dungeon. Fight through bandits and a boss (the Badass Psychokiller). Use fire weapons if you have them.
- Meet Roland – He'll explain the mission to reach Sanctuary.
- Important: Loot the yellow chest behind the boss for guaranteed rare gear.
- End of first hour – You'll have completed the tutorial area and be on the way to the hub city, Sanctuary.
30–60 Minutes: First Major Quest – "The Road to Sanctuary"
---
Character Creation
You choose one of four Vault Hunters at the start. Each has a unique Action Skill and skill trees. No wrong choice, but here's a quick summary:
| Vault Hunter | Action Skill | Playstyle | Beginner-Friendly? |
|---|---|---|---|
| Axton (Commando) | Deploys a turret that shoots enemies | Balanced, great for solo | Yes – turret provides cover fire |
| Maya (Siren) | Phaselock – lifts an enemy in the air | Support/Control, good for coop | Yes – crowd control helps survival |
| Salvador (Gunzerker) | Gunzerk – dual-wield any two guns | High damage, aggressive | Medium – relies on health regen; can be risky |
| Zer0 (Assassin) | Deception – turns invisible and leaves a decoy | Sniper/Melee, high skill ceiling | No – requires precision and positioning |
---
Controls (All Platforms)
PC (Keyboard + Mouse)
| Action | Default Key |
|---|---|
| Move | W, A, S, D |
| Look Around | Mouse |
| Shoot | Left Mouse Button |
| Aim Down Sights | Right Mouse Button |
| Reload | R |
| Action Skill | F |
| Melee | V |
| Jump | Spacebar |
| Crouch | Left Ctrl |
| Interact / Pick Up | E |
| Inventory | I |
| Skills (Skill Tree) | K |
| Map | M |
| Quick Switch Weapon | Q |
| Use Health Pack | H |
| Toggle Weapon (next/prev) | Mouse Wheel Up/Down |
| Grenade | G |
| Sprint | Left Shift (hold) |
| Vehicle: Accelerate | W |
| Vehicle: Brake/Reverse | S |
| Vehicle: Boost | Left Shift |
| Vehicle: Leave | E |
PlayStation (PS3/PS4/PS5)
| Action | PS Button |
|---|---|
| Move | Left Stick |
| Look | Right Stick |
| Shoot | R2 |
| Aim Down Sights | L2 |
| Reload | Square |
| Action Skill | L1 + R1 (or Triangle depending on build) |
| Melee | Circle |
| Jump | X |
| Crouch | R3 (press right stick) |
| Interact | Triangle (also reload) |
| Inventory | Touchpad/Options |
| Skills | Touchpad (hold) |
| Map | Options |
| Grenade | L1 |
| Sprint | L3 (press left stick) |
| Use Health Pack | D-Pad Down |
| Switch Weapon | D-Pad Left/Right |
| Vehicle: Accelerate | R2 |
| Vehicle: Brake | L2 |
| Vehicle: Boost | L3 |
| Vehicle: Leave | Triangle |
Xbox (360/One/Series X|S)
| Action | Xbox Button |
|---|---|
| Move | Left Stick |
| Look | Right Stick |
| Shoot | RT |
| Aim Down Sights | LT |
| Reload | X |
| Action Skill | LB + RB (or Y depending on build) |
| Melee | B |
| Jump | A |
| Crouch | RS (press right stick) |
| Interact | Y (also reload) |
| Inventory | View/Back |
| Skills | View (hold) |
| Map | Menu/Start |
| Grenade | LB |
| Sprint | LS (press left stick) |
| Use Health Pack | D-Pad Down |
| Switch Weapon | D-Pad Left/Right |
| Vehicle: Accelerate | RT |
| Vehicle: Brake | LT |
| Vehicle: Boost | LS |
| Vehicle: Leave | Y |
UI Overview
- Health Bar (green) – Bottom-left. When it depletes, you enter Fight for Your Life (last chance to kill an enemy to revive).
- Shield Bar (blue) – Above health. Recharges after a few seconds out of combat.
- Action Skill Cooldown – Icon above health. Shows when ready.
- Weapon Slot – Shows current weapon, ammo count, and damage type (e.g., fire, corrosive).
- Minimap – Top-right. Displays objectives, enemies (red dots), and friendly NPCs (green).
- Mission Tracker – Right side. Shows current objective with distance/arrow.
- Cash & Eridium – Top-center. Cash for buying items, Eridium for rare upgrades.
- Badass Rank – Top-left. Earned by completing challenges; gives permanent stat boosts.
- Ammo & Health Vendors – Small icons on minimap when near.
- Loot every container – Ammo boxes, lockers, white chests. Resource scarcity is real early on.
- Talk to all NPCs – Many give side quests.
- Save good weapons – If you find a weapon with elemental damage (especially fire or corrosive), keep it.
- Use your Action Skill often – Cooldown resets after a few seconds (except Axton's turret has a duration).
- Check the Bounty Board for repeatable quests.
- Open the Golden Chest (if you have Shift Keys) – It guarantees purple rarity loot.
- Selling your only weapon – Always keep at least one of each type (pistol, shotgun, etc.).
- Ignoring side quests – They give XP and gear that keep you at level.
- Rushing into high-level areas – Skag dens and bandit camps may be above your level (check enemy level indicator).
- Selling Eridium – Eridium is used for upgrades at Crazy Earl's (in Sanctuary). Don't sell it.
- Hoarding too many weapons – You have limited backpack space. Learn to sell or stash duplicates.
- Using corrosive weapons on non-robotic enemies – Corrosive is weak against flesh; fire is better for humans/skags.
- Shooting Bandit Technicals too early – They have heavy shields and turrets early on.
- Ammo SDUs (storage upgrades) – Buy them from Marcus Munitions as soon as possible. Ammo is scarce.
- Backpack SDUs – Increase inventory space from 12 to 20+ quickly.
- Eridium – Spend on backpack upgrades first, then bank space (for items you want to save).
- Cash – Use for ammo and grenades. Don't waste on white weapons from vending machines.
- Shift Codes – If you have promo codes, use them in the main menu for Golden Keys.
- Badass Tokens – Apply to “Gun Damage,” “Fire Rate,” and “Max Health” for early survivability.
- ☐ Choose your Vault Hunter (recommend Axton or Maya).
- ☐ Complete the tutorial “Blindsided!”
- ☐ Reach Liar's Berg and loot everything.
- ☐ Accept “Medical Mystery” and “Bano's Booze” side quests.
- ☐ Complete “Medical Mystery” – get reward.
- ☐ Open the Golden Chest if you have Shift Keys.
- ☐ Use rewards to upgrade backpack space (first SDU from Marcus).
- ☐ Complete “The Road to Sanctuary” main quest.
- ☐ Unlock the Catch-A-Ride (get your first vehicle).
- ☐ Drive to Sanctuary and meet Lilith.
- ☐ Buy the first ammo SDU for your primary weapon.
- ☐ Apply Badass Tokens to Gun Damage and Fire Rate.
- ☐ Explore Sanctuary – visit Crazy Earl's (but don't spend Eridium yet).
- ☐ Do one more side quest before bed – e.g., “Shielded, Shockingly” from Liar's Berg.
- ☐ Save and exit. (Tip: Quit to menu to avoid losing progress.)
---
Essential Early Objectives
1. Complete "Blindsided!" – Teaches combat and loot.
2. Reach Liar's Berg – Fast travel hub.
3. Grab "Medical Mystery" side quest – Reward: a good sniper rifle or shield.
4. Do "The Road to Sanctuary" – Main quest to unlock Sanctuary.
5. Unlock the Catch-A-Ride – First vehicle, essential for travel.
6. Visit the Golden Chest (if you have Shift Codes) – Located in Sanctuary, gives purple gear.
---
What to Do First vs Avoid
✅ Do First
❌ Avoid
---
Early Resource Priorities
---
Common Beginner Mistakes
1. Not buying SDUs – You'll run out of ammo mid-mission. Always buy the first ammo SDU for your primary weapon type.
2. Ignoring elemental weaknesses – Flesh = fire, shields = shock, armor = corrosive, explosive = general.
3. Not using grenades – They are powerful for crowd control. Use MIRV or homing mods.
4. Staying in Fight for Your Life – When down, aim at a nearby enemy (preferably a weak one) to revive. Don't panic.
5. Not checking weapon levels – A level 2 pistol is far worse than a level 5 even if same rarity. Replace old weapons.
6. Selling every weapon – Keep one of each type and a backup of your favorite.
7. Not using fast travel – Unlock new fast travel stations as you find them; it saves time.
8. Playing on too high a difficulty – Start on Normal (the default). True Vault Hunter Mode (TVHM) is for later.
---
Day-One Checklist
---
Congratulations, you've survived your first day on Pandora! Remember: loot often, shoot smart, and never trust a Claptrap with stairs. Good luck, Vault Hunter.
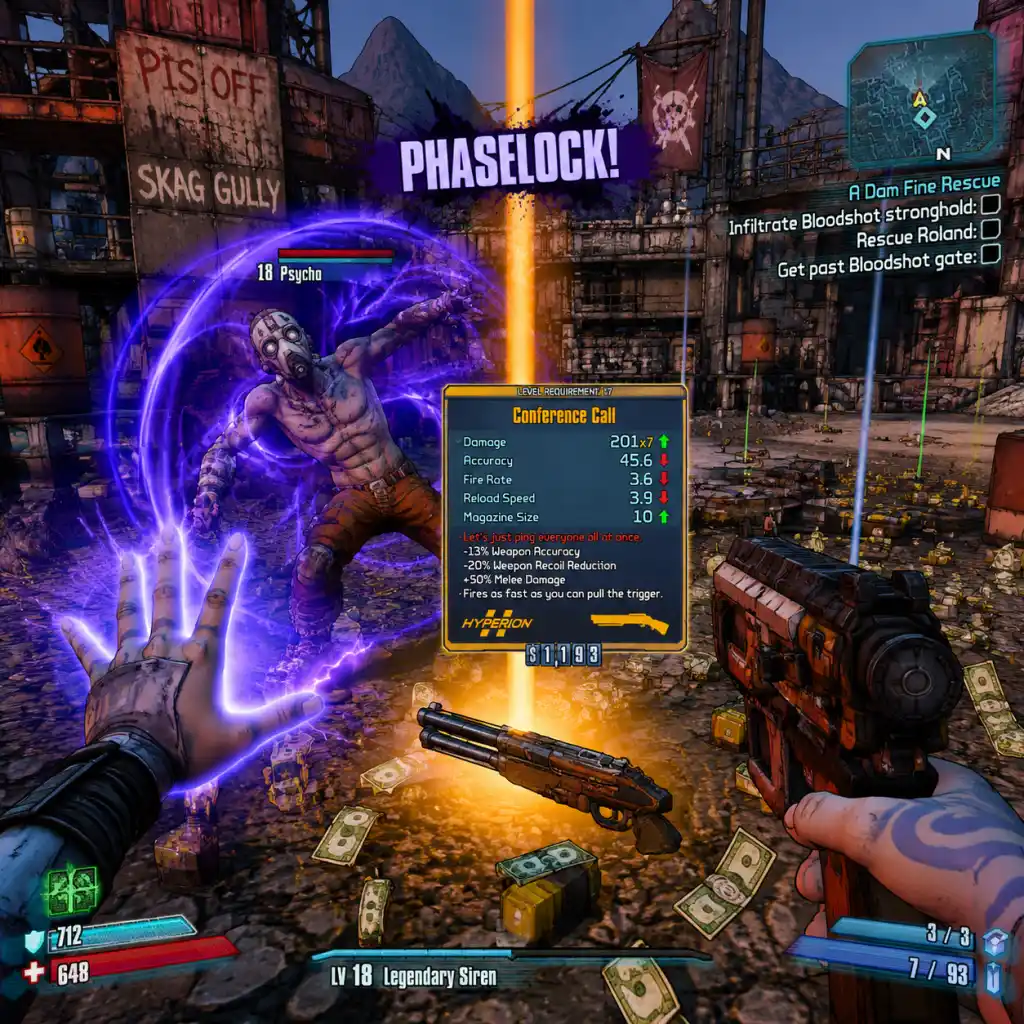
Core Gameplay
Core Gameplay Overview
Borderlands 2 revolves around a simple yet addictive loop: shoot enemies, collect loot, level up, and repeat. The game combines fast-paced first-person shooting with deep RPG mechanics, including skill trees, elemental damage types, and a massive arsenal of procedurally generated weapons. This guide breaks down the core systems by progression tier to help you understand how the game evolves.
---
Early Game (Levels 1–15)
Gameplay Loop
- Main Objective: Complete story missions in the Southern Shelf, Liars' Berg, and The Dust. Fight through bandits, skags, and bullymongs.
- Loot: Focus on white (Common) and green (Uncommon) weapons. Experiment with different weapon manufacturers (Jakobs, Dahl, Torgue) to find your preference.
- Leveling: Each level unlocks one skill point. Invest in your first skill tree to unlock an action skill (e.g., Salvador's Gunzerking, Maya's Phaselock).
- Guns & Elements: Early on, fire and explosive elements are most common. Shock is rare but useful against shields. Slag does not appear until later.
- Second Wind: When downed, kill an enemy to revive. This is critical for survival – always keep nearby enemies alive when low.
- Grenades & Shields: Use grenades for crowd control. Shields absorb damage – buy better ones from vending machines.
- Vehicles: The Runner is available in the Southern Shelf – use it for quick travel and ramming enemies.
- Fast Travel: Unlock Fast Travel stations in each major hub (e.g., Liars' Berg, Sanctuary). Use them to revisit areas later.
- Chests & Red Chests: Loot every chest – red chests have higher quality loot. Early game red chests are in Hidden rooms (e.g., behind waterfall in Liars' Berg).
- Claptrap Locations: Find Claptrap robots for inventory slots (5 total). Use a guide to track them all.
- Story Missions: Follow the main questline (e.g., “Cleaning Up the Berg”, “The Road to Sanctuary”).
- Side Quests: Many offer unique blue or purple weapons (e.g., “Mighty Morphin” gives the Thunderball Fists). Avoid doing side quests that reward unique items above your level – they scale only once in Normal Mode.
- Vending Machines: Check machines for good gear. Shift Codes can redeem golden keys for a chest in Sanctuary.
- Currency: Cash is used for vending machines and ammo. It’s plentiful – spend freely.
- Eridium: Introduced after reaching The Dust. Save Eridium for backpack upgrades (up to 27 slots) in Sanctuary’s black market.
- Skill Trees: Each character has three trees. Example – Maya: Harmony (healing), Cataclysm (elemental), Motion (crowd control). Early game, focus on one tree to unlock action skill enhancements.
- Class Mods: Start dropping around level 10. They boost specific skills – equip one that complements your playstyle.
- Weapon Types: Try all types: assault rifles, shotguns, pistols, sniper rifles, SMGs. Some characters excel with certain types (e.g., Zer0 with snipers).
- Story Progression: After reaching Sanctuary, main quests send you to The Highlands, The Fridge, and The Wildlife Exploitation Preserve. Enemies become tougher and more varied (e.g., Loaders, Stalkers).
- Loot: Blue (Rare) and Purple (Epic) weapons appear frequently. Start looking for legendaries – early targets: Unkempt Harold (mid-game farm from Savage Lee), Fastball grenade mod.
- Leveling: Level 15–20 unlocks a second skill tree. Experiment with hybrid builds (e.g., Salvador: Brawn + Gunlust).
- Slag Element: Introduced in The Fridge (mission “A Dam Fine Rescue”). Slag makes enemies take triple damage from other elements – essential for UVHM later.
- Second Wind & Teamplay: In co-op, revive teammates. Use elemental weapons to match enemy weaknesses: shock vs shields, corrosion vs armor, fire vs flesh.
- Vehicle Combat: Upgrade vehicle weapons (e.g., machine gun, rocket launcher) through missions in The Dust. The Bandit Technical is useful for roadkills.
- Fast Travel Network: Unlock new areas as you progress. Hidden areas: The Vault of the Warrior (accessible later), Arid Nexus (for farming).
- Challenges: Complete challenges for Badass Tokens (e.g., “Headshots”, “Second Winds”). Badass Ranks give global stat bonuses (reversible via reset).
- Tiny Tina’s DLC Areas: If you have DLC, explore The Highlands for the “Dragon Keep” entrance – good early mid-game loot.
- Story Missions: Critical milestones: “Bright Lights, Flying City” (Sanctuary), “Animal Rescue” (Tannis), “The Once and Future Slab” (Moxxi’s quests).
- Side Quests: Unique rewards: “The Beard Makes the Man” (Law pistol), “Clan War: The End of the Rainbow” (Slagga SMG). Wait until end of Normal Mode (level 30-35) to finish side quests for scaled rewards.
- Raid Bosses: First raid boss – Terramorphous the Invincible (requires level 50). Not viable at this tier but start understanding mechanics.
- Cash: Now used for slot machines (Moxxi’s bar) – low chance at legendaries. Also for weapon upgrades in vending machines.
- Eridium: Save for backpack and bank upgrades (up to 27 slots). Bank is in Sanctuary – useful for storing gear across characters.
- Guns with Unique Effects: Learn about “red text” – weapon cards that have hidden effects (e.g., Maliwan Red Queen).
- Respec: Costs cash (increases each time). Experiment with new builds at this stage.
- Class Mods: Blue and purple class mods drop. Stats like +skill points and +max health matter. For example, Maya’s “Cataclysm” mod boosts elemental damage.
- Relics: Relics grant bonuses (e.g., +magazine size, +elemental effect chance). Find them in chests or as quest rewards.
- TVHM Unlocks: After beating Normal Mode (kill The Warrior), start TVHM. Enemies are tougher, drop better loot, and quests scale to your level (up to 50).
- Main Story: Replay the entire campaign. Bosses have new attack patterns and drop legendary items more frequently.
- Loot: Legendaries become farmable. Key targets: The Bee (from Hunter Hellquist in Arid Nexus), The Unkempt Harold (Savage Lee), The Conference Call (The Warrior).
- Leveling: Gain skill points to level 50 – now you can max out two skill trees partially. This is where builds crystallize.
- Elemental Strategy: Slag is now mandatory for tough enemies. Use Slagga or Magic Missile grenades (Tina DLC). Combine with a high-damage weapon (e.g., Harold + Bee).
- Bee Shield: The Bee adds massive amp damage when shields are full. Pair with fast-firing weapons (e.g., Sand Hawk, Fibber).
- Second Wind Efficiency: In TVHM, enemies have more health – position yourself near weaker mobs when low.
- TVHM Scaling: Quests and enemies scale as you level. Use the “Reset” option on the main menu to reset TVHM progress and farm specific quest rewards at level 50.
- Farmable Bosses: Doc Mercy (Infinity), King Mong (Badaboom), Son of Mothrakk (Maggie). Learn spawn locations and quick runs.
- DLC Content: Play “Captain Scarlett and Her Pirate’s Booty” (Sand Hawk, Pimpernel) and “Mr. Torgue’s Campaign of Carnage” (Torgue tokens for legendaries).
- Story Missions in TVHM: Focus on main quests to unlock endgame. After beating TVHM, all quests will scale to level 50 – complete them for max-level rewards.
- Side Quests: Do not complete side quests until after you defeat The Warrior in TVHM. They will then offer level 50 rewards (e.g., Rubi, Law).
- Raid Bosses: Terramorphous is now level 50 – farmable with a group. Requires specific builds (e.g., Bee + Conference Call).
- Cash: Less important now. Use for ammo and respeccing (costs increase).
- Eridium: Needed for Torgue vending machines (Torgue DLC) and buying items from Seraph vendors (endgame).
- Torgue Tokens: Earned in Mr. Torgue’s DLC – spend at Torgue vending machines for legendary weapons (e.g., Unkempt Harold, Mongol).
- Level 50 Builds: Optimize skill points. Example: Salvador – Gunlust + Rampage for infinite gunzerking; Zer0 – Sniping + Cunning for critical damage; Axton – Guerrilla + Survival for turret and health.
- Legendary Class Mods: Drop from bosses (e.g., Legendary Soldier from The Warrior). Boost skill caps to 10/5.
- Pearlescent Weapons: Extremely rare – drop from Ultimate Badass enemies in UVHM. Not viable at level 50 but start collecting.
- UVHM Unlocks: After beating TVHM, start UVHM. Enemies have 4x health, regenerate health, and slag is nearly mandatory. Quests and enemies scale to your level (up to 72).
- Overpower Levels (OP1–OP10): After reaching level 72, complete Digistruct Peak Raid on increasing difficulties. Each OP level raises enemy level by 1 (e.g., OP8 enemies = level 80). Gear must match your OP level.
- Loot: Focus on perfect parts legendaries, pearls, and Seraph items. Farm bosses like Voracidous the Invincible (DLC), Hyperius, and Master Gee.
- Leveling: No more skill points after 72 – now gear optimization is everything.
- Slag is Essential: Use slag grenades (e.g., Magic Missile) or slag weapons (e.g., Grog Nozzle) to boost damage. Switch weapons often.
- Defensive Gear: Use shields like The Bee, The Sham (absorb ammo), or The Evolution (health regeneration). Relics like Blood of the Ancients for max health/ammo.
- Grog Nozzle: A mission reward from “The Beard Makes the Man” (Tina DLC). It heals you for 65% of damage dealt, slaggs enemies, and has a huge crit multiplier. Keep it equipped forever.
- UVHM Scaling: Enemies scale to your level everywhere. Return to any area for relevant gear.
- Digistruct Peak: Unlocks after level 72 (or earlier with DLC). Complete waves of enemies to increase OP level. Each wave scales – use the “Peak Opener” to start a new run at current OP level.
- Farming Routes: Snowman DLC train for loot, The Warrior for legendaries, Bunker for The Sham and Bitch SMG.
- Endgame Quests: Replay main story in UVHM if you want specific level-scaled rewards (e.g., Rubi at OP8).
- Raid Bosses: All raid bosses scale to OP level. Best farmed in groups for efficiency.
- Seraph Vendors: After defeating raid bosses, Seraph crystals drop. Buy Seraph weapons (e.g., Antagonist shield, Florentine SMG) from vendors in DLC hubs.
- Cash: Essentially worthless except for ammo and slot machines for fun.
- Eridium: Used for Torgue vending machines (legendaries cost 613 tokens each). Farm Torgue tokens via Bar Brawl (Torgue DLC).
- Seraph Crystals: Drop from raid bosses (Hyperius, Master Gee, Voracidous, etc.). Save for Seraph gear.
- Level 72 OP8 Builds: Fully optimized skill trees. Popular builds:
- Pearlescent Weapons: The Butcher (shotgun), Avenger (SMG), Bekah (assault rifle). Extremely rare – farm from Tubby enemies (e.g., Tubby Skags in The Dust).
- Class Mods: Use legendary class mods with high skill boosts and +5 to key skills. For example, Legendary Siren mod with +6 Chain Reaction.
- Farming Legendaries: Use specific loot pools:
- OP Level Gear: Farm at max OP level – do not settle for lower OP gear unless it’s a utility item (e.g., Grog Nozzle doesn’t need parts).
- Party Synergy: In co-op, one player provides slag (Maya or Axton), others deal damage. Use skills like Krieg’s Bloodsplosion for massive chain kills.
- Difficulty Spike: UVHM and OP levels require constant gear upgrades. Don’t be afraid to respec and try new weapons.
Combat & Interaction
Progression & Exploration
Quests & Missions
Economy
Character Build Growth
---
Mid Game (Levels 15–30)
Gameplay Loop
Combat & Interaction
Progression & Exploration
Quests & Missions
Economy
Character Build Growth
---
Late Game (Levels 30–50) – True Vault Hunter Mode (TVHM)
Gameplay Loop
Combat & Interaction
Progression & Exploration
Quests & Missions
Economy
Character Build Growth
---
Endgame (Levels 50–72 / OP Levels) – Ultimate Vault Hunter Mode (UVHM) and Digistruct Peak
Gameplay Loop
Combat & Interaction
Progression & Exploration
Quests & Missions
- Terramorphous: Bee + Conference Call (solo possible).
- Hyperius & Master Gee: Require specific builds (e.g., Axton with turret shield).
- Voracidous: Drops Hawk eye sniper and Ogre AR.
Economy
Character Build Growth
- Salvador – The Gunzerker: Use Grog Nozzle + Unkempt Harold/DPUH for infinite healing and damage. Skill: Money Shot, Incite, Steady as She Goes.
- Zer0 – The Assassin: Sniping tree + Bore ability. Use Lyuda/White Death sniper, Bee shield, and Critical Ascension stacks.
- Maya – The Siren: Ruin skill (Phaselock with slag, corrosion, shock, fire). Use Cataclysm tree + Legendary Cat mod. Pair with sand hawk.
- Gaige – The Mechromancer: Anarchy tree + Close Enough. Use Fibber or Conference Call. Deathtrap for distraction.
- Axton – The Commando: Turret with slag + Longbow. Use Torgue weapons (e.g., Ogre, DPUH).
---
Endgame Tips & Examples
- Unkempt Harold: Savage Lee (The Dust) or Torgue vending machines.
- The Bee: Hunter Hellquist (Arid Nexus – Bounty Board mission).
- Conference Call: The Warrior (story kill or loot midget farm).
This progression framework will guide you from your first steps on Pandora to becoming a legend capable of slaying Invincibles. Adjust your build as you find new gear, and remember: the loot is always the goal.
Game Tips
Game Tips for Borderlands 2
This guide provides actionable tips for all skill levels, grouped by category. Whether you're a new Vault Hunter or a seasoned veteran, these insights will help you survive Pandora.
---
Beginner Tips
1. Complete Side Missions for XP and Gear
- Main story missions often push you into higher-level areas. Side missions provide essential experience (XP) and reward equipment that keeps you on level curve. Why: Enemies scale with your level, but equipment does not automatically upgrade. Side missions are the best source of on-level weapons.
2. Always Check Vending Machines
- Vending machines in each area offer a rotating stock of weapons, shields, grenades, and class mods. Buy green or blue items that are your level or higher. When to use: After leveling up or when your gear feels weak. Red text (unique items) can appear in vending machines rarely—always buy them.
3. Use the Correct Element
- Fire is good against flesh (red health bars), Shock against shields (blue), Corrosive against armor (yellow). Explosive works on everything. Why: Elemental matching multiplies damage dramatically. For example, a fire weapon can kill a flesh enemy in half the bullets.
4. Slag Enemies First
- Slag (purple substance) makes enemies take 2x damage (3x in Ultimate Vault Hunter Mode). Apply slag with a weapon or grenade, then switch to a damage element. Beginner tip: Even a low-level slag weapon is useful at any level because debuff duration is fixed.
5. Don't Sell Everything – Farm and Store
- The bank can hold up to 30 items (plus 4 inventory upgrades). Save legendaries, uniques, or on-level purple gear for other characters. Why: Many legendaries are only obtainable from specific bosses, and you may want them for different builds later.
---
Combat Tips
#### General Combat
- Use Cover and Slag
- Melee Override
- Finish Off Downed Enemies
- Use Grenades to Force Enemies Out of Cover
- Borderlands 2 is not a cover shooter, but peeking out from behind obstacles while slagging enemies reduces incoming damage. Always fight from a position where you can retreat.
- Every character has a unique melee override (e.g., Zero's Decepti0n). Use it to close gaps, escape, or trigger special effects. Advanced: For melee builds, equip a weapon with melee damage bonus (e.g., Law & Order combo).
- When an enemy is downed (crawling), kill them to prevent them from getting back up. Use a quick melee or a single bullet.
#### Elemental Combat
| Element | Effective Against | Weak Against | Notes |
|---|---|---|---|
| Fire | Flesh (red bar) | Armor (yellow) | Best for humans, skags, psychos |
| Shock | Shields (blue) | Flesh | Essential against robots, shields |
| Corrosive | Armor (yellow) | Flesh | Great for loaders, Buzzards |
| Slag | All (debuff) | N/A (2x/3x damage) | Always apply before other elements |
| Explosive | All (neutral) | N/A | High base damage, but reduced element chance |
| Cryo (DLC4) | Flesh (slow) | Shield/Armor (freeze) | Slows enemies; freezing bypasses shields |
- Cryo Weapons (from Tiny Tina's Assault on Dragon Keep) are excellent for crowd control. Freezing an enemy stops them entirely for a few seconds.
- Study Weak Points – Many bosses have critical hit spots (e.g., Warrior's chest, Bunker's eye). Hitting them staggers the boss and deals extra damage.
- Use Transfusion Grenades – They heal you while damaging the boss. Essential for long fights.
- Bring a Backup Weapon – Bosses often have phases where they become immune to certain elements (e.g., Warrior immune to fire? No, but some bosses change resistances).
- Farm for Legendaries Before Difficult Bosses – Example: farm Savage Lee for the Unkempt Harold (Hyperion pistol) which is incredible against many bosses.
- Ammo Regeneration – Some class mods (e.g., Soldier's Gunner) regenerate ammo over time. Siren's Restoration skill also regenerates ammo for allies.
- Ammo Drops – Enemies drop ammo based on weapons you have equipped. If you're low on a type, switch to that weapon temporarily to increase drop chance.
- Buy Ammo SDUs – From any ammunition vending machine (up to 27 SDUs per ammo type). Prioritize ammo for your main weapon.
- Money – Used for ammo, SDUs, and vending machines. Loot piles, enemy drops, and selling gear are main sources. Don't hoard; spend on SDUs early.
- Eridium – Rare purple currency. Use to upgrade backpack (first purchase: 4 slots, cost 5 eridium then increases). Also used for slot machines (bad investment), and golden chest keys. Tips: Save Eridium for backpack upgrades and golden chest keys (from Shift Codes).
- Shift Codes – Enter codes (from social media, newsletters) in the in-game Shift menu to get golden keys. Each key opens the golden chest in Sanctuary for high-level loot (often purple or legendaries). When to use: At level 50 (max in Normal) or during TVHM/UVHM to get on-level gear.
- Synergy with Main Weapon: Pick a weapon type that complements your character's skills. For example, Zero skills boost snipers (Critical Ascension) and shotguns (Many Must Fall).
- Mid-game Respec: Respec your skill points (costs money, increases with level) if you find a legendary weapon that changes your playstyle.
#### Boss Fights
---
Exploration Tips
1. Check Every Corner for Gear
- Loot chests are scattered across Pandora. Red chests (weapons) often contain higher quality loot than white. Search behind waterfalls, in shacks, on rooftops.
2. Use Fast Travel Stations
- Each major area has a fast travel station (some hidden). Unlock them all to quickly move between zones.
3. Discover All Named Locations
- Exploration XP is granted for discovering named locations (e.g., "The Dust", "Three Horns Divide"). This adds to your level quickly.
4. Find Hidden Challenges
- Challenges like "Claptrap's Secret Stash" or "Pimon and Tumbaa" reward rare items. Use the map to find question marks.
5. Vault Symbols
- There are 6 Vault symbols to find in each DLC area (e.g., Tiny Tina's, Captain Scarlett). Collecting them gives a special weapon skin and Badass Rank.
---
Resource Management
#### Ammo
#### Money and Eridium
#### Golden Keys
---
Builds and Skill Trees
#### General Build Philosophy
#### Beginner-Friendly Builds
| Character | Tree | Focus | Tip |
|---|---|---|---|
| Axton | Guerilla | Turret duration + slag | Use slag turret to debuff then shoot. Great for solo. |
| Maya | Harmony | Healing (Res) and elemental damage | Resurrect allies from a distance. Excellent team support. |
| Salvador | Rampage | Gunzerking with two weapons | Use a slag weapon in one hand, damage in other. |
| Zer0 | Sniping | Critical hits and Decepti0on | Use Critical Ascension for massive sniper damage. |
| Gaige | Best Friends Forever | Anarchy stacking + Deathtrap | High risk: high Anarchy stacks (+fire rate, -accuracy). Use close-range. |
| Krieg | Mania | Bloodlust melee or explosive | Release the Beast gives insane melee damage at low health. |
- Salvador's Money Shot – Skill increases damage of last bullet in a magazine. Use a low-magazine weapon (e.g., Grog Nozzle + DPUH) for massive burst.
- Maya's Cloud Kill – Residual corrosive cloud. Equip a fire or shock weapon to quickly apply a new cloud. Great for clearing crowds.
- Zero's Bore – All bullets pass through enemies, hitting critical hits multiple times. Use against large enemies like the Bunker for instant kills.
- Gaige's Close Enough – Bullets richochet toward enemies. Combine with high Anarchy and shotguns for insane DPS.
- Krieg's Bloodsplosion – Kill an enemy with explosive damage, causing chain explosions. Use a grenade or Torgue rocket launcher for screen-wipes.
- Best Source: Sell loot from farming bosses. Warrior (after final boss) can be farmed for loot and eridium. Each kill yields multiple weapons.
- Vending Machine Sniping – Check Torgue vending machines in Campaign of Carnage for Unkempt Harold (common) or Norfleet (rare).
- Slot Machines – Not worth it. Use eridium only for backpack upgrades.
- Use a Spreadsheet – There are many online resources (e.g., lootlemon.com) that list drop sources for each legendary.
- Farm Bosses – Most legendary items drop from specific bosses (e.g., Savage Lee drops Unkempt Harold, Bone Head 2.0 drops Bonus Package). Reloading area (save and quit) respawns them.
- Treasure Room – In Captain Scarlett DLC, the treasure room in Wurmwater can be farmed for multiple legendaries per run (requires elevator trick).
- UVHM – Enemies have higher chance to drop legendaries. Also, you can reset your UVHM mission progress to farm quest reward items (e.g., Sand Hawk from Captain Scarlett).
- Badass Tokens – Earned by completing challenges (kill X enemies with fire, etc.). Each token gives +0.5% to a random stat (up to +10% per challenge). Strategy: Focus on easy challenges (e.g., kill 100 bandits with melee) to get tokens quickly.
- Respec Badass Points – You can respec your Badass bonuses at any time (limited to 5 times per character). Use this to maximize a particular stat (e.g., +fire rate for a heavy build).
- Share Loot – In co-op, loot is individual for each player (unless you choose coopetition mode). Communicate to avoid double farming.
- Revive Teammates – Maya's Res skill can revive from a distance, but any player can revive by meleeing a downed ally. Do it quickly as enemies often swarm.
- Coordinate Slag – One player should focus on applying slag while others deal damage. This synergy is crucial in UVHM.
- Use Mic – Coordination for boss fights (like Terra or Voracidous) makes it much easier.
- Gemini skill allows two turrets. Place one offensively, one defensively (e.g., near you).
- Longbow Turret – Throw turret to high ledges or behind cover to draw aggro.
- Gunner Class Mod – Great for ammo regeneration and increased fire rate.
- Phaselock can immobilize enemies, including flying ones like Surveyors. Use to cancel attacks.
- Res is invaluable in co-op. Phaselock a downed ally to revive instantly.
- Cloud Kill + Fleet (speed boost when shield depleted) makes you a fast damage-dealer.
- Money Shot works best with a large magazine weapon in main hand and a low-magazine weapon (like Grog Nozzle) in off-hand.
- Inconceivable – Chance to not consume ammo when gunzerking. This can chain with Money Shot for unlimited shots.
- Bruiser Class Mod – Increases health and gunzerking duration.
- Decepti0n – Use it to escape bad situations or to get behind enemies for backstab bonus.
- Critical Ascension – Stack critical hits for massive sniper damage. Use Lady Fist (hyperion pistol with high crit damage) to stack quickly.
- Execute – Melee override that lunges forward. Good for closing gaps.
- Anarchy – Lose accuracy but gain fire rate and damage. Use shotguns (e.g., Fibber) and Close Enough skill for richochet.
- Death Trap – Deploy it when overwhelmed. It can revive you if you go down (if you have Upshot Robot skill).
- Best Friends Forever tree provides survivability.
- Release the Beast – At low health (below 33%), activate action skill to transform into a melee monster. Use a Rough Rider shield (no capacity) to stay low health.
- Bloodlust stacks increase melee damage. Kill stuff to maintain stacks.
- Firehawk Shield (Flame of the Firehawk) – creates fire novas on shield depletion. Combine with Krieg's ability to constantly deplete shields.
---
Economy and Farming
#### Gold Farming
#### Legendary Farming
#### Badass Rank
---
Advanced Pro Tips
1. Grog Nozzle + Rubi – These unique pistols heal you for a percentage of damage dealt. Equip one in your off-hand (Salvador) to heal constantly while gunzerking.
2. The Bee Shield – Amplifies damage when shields are full. Use with a fast-firing weapon (like Sand Hawk) for insane single-target DPS. Caution: Bee shield makes you fragile.
3. Chain Lightning – Grenade mod that arcs electricity between enemies. Great for stripping shields and applying shock.
4. Moxxi Weapons – Any weapon with "Moxxi" in name (e.g., Good Touch, Bad Touch) heals you for a portion of damage dealt. Use them as healing tools.
5. Save and Quit Strategy – To reset enemy spawns (like for farming), simply save and quit to main menu, then continue. Enemies respawn, but mission progress is saved.
6. Use a Shield with High Capacity – In early game, a turtle shield (high capacity but slow recharge) is better than a fast recharge one because health regen is rare.
7. Elemental Interplay – Combining elements can cause reactions: Shock + Corrosive = no special effect, but using a slag weapon before any other element is always beneficial.
8. Class Mods and Relics – Class mods greatly enhance skills. Relics boost passive stats (e.g., +50% ammo regen specific weapon type). Always equip one that complements your build.
---
Multiplayer Tips
---
Character-Specific Tips
#### Axton (Commando)
#### Maya (Siren)
#### Salvador (Gunzerker)
#### Zer0 (Assassin)
#### Gaige (Mechromancer)
#### Krieg (Psycho)
---
Farming Routes for Top Gear
1. Warrior – After final boss, save and quit at Eridium Blight entrance. Run back, kill Warrior, loot chest (and optional warrior drop). Yields legendaries, eridium.
2. Savage Lee – Spawns in The Dust near Ellie's garage. Drops Unkempt Harold. Fast run from entrance.
3. Bone Head 2.0 – In Three Horns Divide, near the bridge. Drops Bonus Package (grenade mod). Easy farm.
4. Hunter Hellquist – In Arid Nexus - Boneyard, after the quest. Drops The Bee shield. Use a fire weapon to kill quickly.
5. Tinder Snowflake – In Marcus's Mercenary Day DLC (headhunter). Drops Creamer (rocket launcher) and many chests. Good for money and eridium.
6. Treasure Room (Captain Scarlett) – After completing Wurmwater quest, elevator glitch allows repeated loot runs. Contains many chests.
---
This guide covers the essentials to master Borderlands 2. Remember, the most important tip is to have fun and experiment with different gear and builds. Happy hunting!
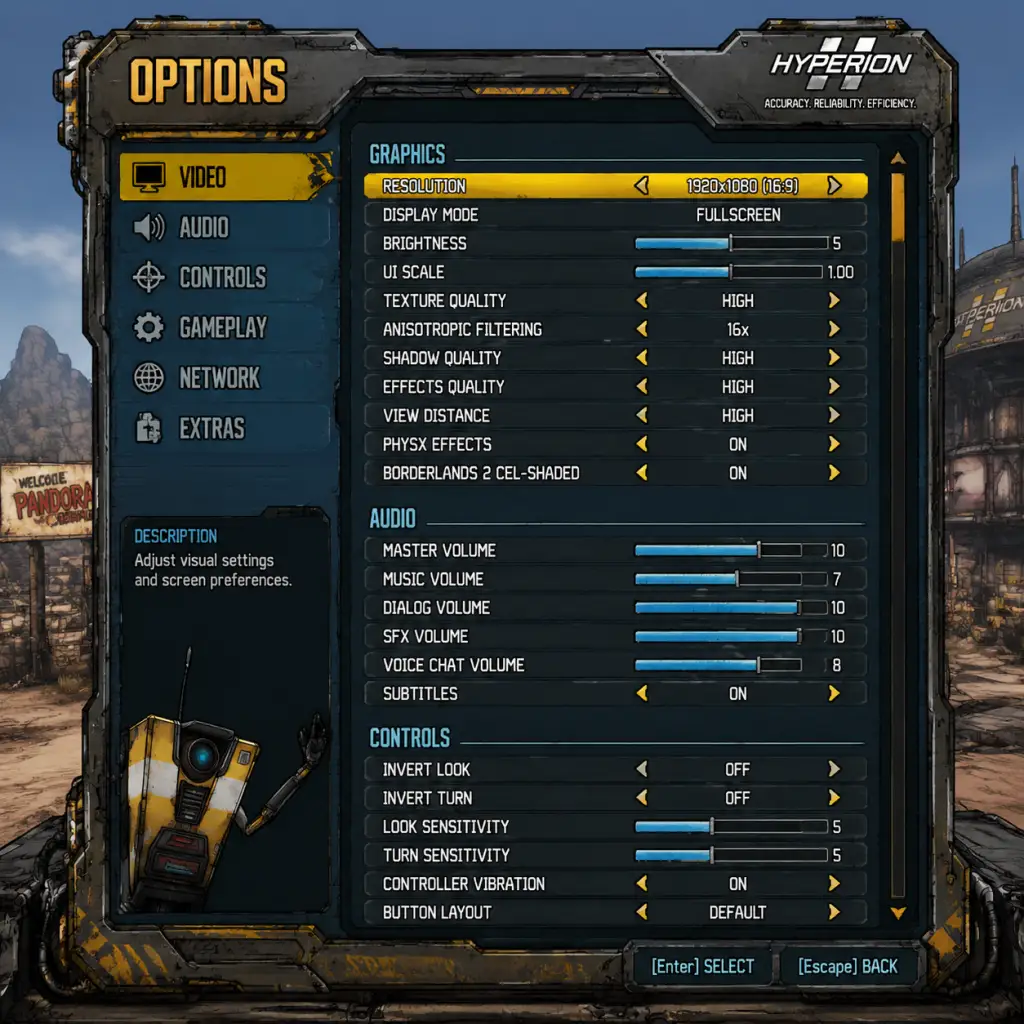
Game Settings
Borderlands 2 – Game Settings Guide
This guide covers every settings category in Borderlands 2. Whether you’re on PC, PlayStation, or Xbox, you’ll find recommended defaults, performance/quality trade‑offs, and pitfalls to avoid. Settings are presented in the order they appear in the game menu.
---
1. Graphics Settings
Video / Display
| Setting | Description | Recommendation |
|---|---|---|
| Resolution | Native monitor or TV resolution. | Set to your display’s native resolution (e.g., 1920×1080, 2560×1440). |
| Display Mode | Fullscreen, Windowed, Borderless. | Fullscreen for best performance; Borderless reduces alt‑tab stutter but may lower FPS slightly. |
| VSync | Synchronizes frame rate to monitor refresh. | Off for lower input lag (unless screen tearing bothers you). On PCs with G‑Sync/FreeSync, leave off and cap FPS slightly below refresh rate. |
| Frame Rate Cap | Limits maximum FPS. | Set to your monitor’s refresh rate (60, 120, 144, etc.). On low‑end hardware, cap at 30 or 60 for consistent performance. |
| Field of View (FOV) | Controls horizontal viewing angle. | Default 70 is narrow. Increase up to 90–110 for wider vision, but may reduce performance slightly. FOV is hidden from in‑game menu on PC – you must edit `WillowInput.ini` in `Documents/My Games/Borderlands 2/WillowGame/Config`. Find `FOV=70` and change it. |
Advanced Graphics Options
| Setting | Description | Low‑End | Mid‑Range | High‑End | Ultra |
|---|---|---|---|---|---|
| Texture Quality | Resolution of textures. | Low (saves VRAM) | Medium | High | High (Ultra setting is identical to High in this game) |
| Anisotropic Filtering | Sharpens textures at angles. | 4x | 8x | 16x | 16x |
| Shadow Quality | Shadow resolution and smoothness. | Low | Medium | High | High |
| Ambient Occlusion | Soft shadowing near contacts. | Off | Low | Medium | High (little visual gain beyond Medium) |
| Depth of Field | Blurred background when aiming. | Off | Off | On | On |
| Foliage Distance | Draw distance for grass and small objects. | Low | Medium | High | High |
| PhysX | NVIDIA PhysX particle effects (debris, fluid). | Off – can cause massive frame drops even on high‑end GPUs. | Off | Off or Low | Low (only if CPU is very strong) |
| Game Detail | LOD and overall geometry complexity. | Low | Medium | High | High |
| Motion Blur | Blur during movement. | Off (preferred by most) | Off | Off | Off |
- PhysX is the #1 performance killer. Defaults to ‘Low’ or ‘High’ – always set to Off unless you have a dedicated PhysX card and don’t mind inconsistent FPS.
- FOV change requires manual .ini tweak. Many players miss this and suffer motion sickness from narrow FOV.
- VSync can introduce input lag; if you notice mouse delay, turn it off and cap FPS in driver control panel instead.
---
2. Audio Settings
| Setting | Description | Recommendation |
|---|---|---|
| Master Volume | Overall volume. | 70–100% as preferred. |
| Music Volume | Background music. | 60% (music is good but can be overwhelming during dialogue). |
| SFX Volume | Sound effects (guns, explosions). | 100% |
| Voice Volume | NPC and character speech. | 100% – important for quest hints. |
| Subtitles | Displays spoken dialogue text. | On – helps with background noise or hearing impairment. |
| Closed Captioning | Also shows sound description (e.g., “gunshot”). | On for accessibility. |
| Audio Language | Voiceover language. | Set to your preferred language. Important: Changing this also changes subtitles language separately. |
- Subtitles and audio language are independent. If you want English voices with non‑English subtitles, set Audio Language to English and Subtitle Language to your desired one. This is easy to misconfigure.
- For multiplayer, ensure voice chat volume is balanced – the game uses push‑to‑talk by default on PC.
---
3. Controls
Keyboard & Mouse (PC)
| Setting | Recommendation |
|---|---|
| Mouse Sensitivity | Start with 10–15. Adjust based on DPI (e.g., 800 DPI → 12 sensitivity is common). |
| Mouse Smoothing | Off – adds input lag and floaty aim. |
| Invert Mouse | Off (unless you prefer inverted Y). |
| Zoom Sensitivity | Leave at default (1.0) – too high can make sniping twitchy. |
| Controller/Steering Wheel | N/A for this game – ignore. |
| Setting | Description | Recommendation |
|---|---|---|
| Vibration | Rumble on damage or events. | On (provides tactile feedback) – off to save battery. |
| Left Stick Dead Zone | How far you must move stick before character moves. | Default (0.15) – increase if stick drift occurs. |
| Right Stick Dead Zone | For aiming. | Default (0.15) – increase if aiming drifts. |
| Look Sensitivity | Vertical/horizontal speed. | 6–8 (on a scale of 1–10). |
| Aim Sensitivity | Scoped sensitivity. | Set slightly lower than look sensitivity (e.g., 5). |
- Mouse Smoothing is often enabled by default on PC. Turn it Off immediately – it causes unresponsive aim.
- Zoom Sensitivity multiplier: if you set it above 1.0, scoped aim becomes overly sensitive; keep 1.0 or lower.
- Controller dead zones: if your controller has minor stick drift, increase dead zone slightly to avoid unwanted movement.
---
4. Accessibility
| Feature | Availability | Recommendation |
|---|---|---|
| Subtitles | Always on (as above). | On. |
| Closed Captioning | Yes (audio cues). | On. |
| Colorblind Modes | None in base game. | Workaround: adjust monitor color temperature or use third‑party overlays. |
| Button Remapping | Full on PC, limited on consoles (preset layouts). | Remap keys to your preference – especially important for skills (F), grenade (G), and Action Skill (Q). |
| Text Size | Not adjustable. | – |
| Screen Shake | Disabled by turning off “Head Bob” or “Motion Blur”. | Turn off camera bob if you are prone to motion sickness. |
- Borderlands 2 has no in‑game colorblind options. Red‑green colorblind players may struggle with loot rarity colors (e.g., legendary orange vs. purple). Use a community mod or Windows color filters.
- Text size is tiny for quest logs – PC users can use UI scaling via .ini edits but it’s not recommended as it can break menus.
---
5. Language Settings
| Setting | Location | Details |
|---|---|---|
| Audio Language | Options > Audio | Changes voices only. |
| Subtitle Language | Options > Audio | Changes subtitle text only. These are independent. |
| Interface Language | PC: Steam/EGS properties, or config file | Not changeable in game. On PC, you must set Steam/Epic/GOG client language. On consoles, set system language. |
- If you change audio language to Japanese (for example), the subtitles remain English unless you also change subtitle language. Many players expect subtitles to follow audio language – they do not.
- Interface text language is tied to the store platform’s locale; you cannot switch it in game. To play with a different menu language, launch the game through the platform with the desired language selected.
---
6. Network / Multiplayer
| Setting | Description | Recommendation |
|---|---|---|
| Network Type | Online, LAN, or Offline. | Online (for public) or LAN (for local co‑op). |
| Matchmaking | Quick Join, Friends Only, Invite Only. | Set to “Friends Only” to avoid random joiners. |
| Bandwidth / Data Rate | Limit to prevent lag in large lobbies. | Default is fine. If you have a slow connection, reduce to “Low”. |
| Voice Chat | Enable/Disable, Push‑to‑Talk. | On with Push‑to‑Talk (PC default V key). Disable if you don’t use it. |
| Show Network Info | Displays ping and packet loss during gameplay. | On – helps diagnose lag. |
- Borderlands 2 uses peer‑to‑peer networking. Always check your NAT type (Open/Moderate/Strict). Strict NAT will prevent joining or hosting public games. If you have issues, enable UPnP on your router or port forward (UDP 7777, 28900–28902).
- Cross‑play is not supported – PC/PlayStation/Xbox cannot play together.
---
7. Gameplay Settings
| Setting | Description | Recommendation |
|---|---|---|
| Difficulty | Normal and True Vault Hunter Mode (TVHM), and Ultimate Vault Hunter Mode (UVHM). | Start on Normal for first playthrough. TVHM after level 30. UVHM after completing TVHM – enemies scale to your level. |
| Auto‑Aim (PC) | Aim assist for controller. | Off (if using mouse). On for controller. |
| Aim Down Sights (ADS) Sensitivity | Separate slider for scoped sensitivity. | Leave at 1.0 – too high makes sniping jittery. |
| Crosshair Style | Dot, cross, circle, plus. | Dot or small cross – big crosshairs obscure targets. |
| Head Bob | Camera sway during movement. | Off – reduces motion sickness. |
| Show Friendly Health Bars | Display health of party members above their heads. | On – crucial for co‑op healing. |
| Auto Reload | Automatically reload when magazine is empty and you stop firing. | On – saves a button press. |
| Weapon Zoom | Sets button to zoom (Hold or Toggle). | Toggle for quicker aiming (PC). Hold is default on consoles. |
- Auto‑Aim is only for controller users on PC; it is not present in the menu for keyboard users. If you plug in a controller, ensure auto‑aim is set to your preference – many players accidentally leave it on when switching from keyboard to controller.
- Head Bob is enabled by default and can cause nausea. Turn it off immediately if you are sensitive.
- Crosshair Style: circle is the default but covers a lot of the screen; dot is recommended for precision.
---
8. Optimal Presets for Different Hardware
PC – Performance vs. Quality
| Component | Low Spec (e.g., Intel HD 4000, 4GB RAM) | Mid Spec (e.g., GTX 960, 8GB RAM) | High Spec (e.g., RTX 2060, 16GB RAM) | Ultra Spec (e.g., RTX 3080, 16GB RAM) |
|---|---|---|---|---|
| Resolution | 1280×720 | 1920×1080 | 2560×1440 or 1920×1080 @144Hz | 4K or 1440p@144Hz |
| Texture Quality | Low | Medium | High | High |
| Shadow Quality | Low | Medium | High | High |
| Ambient Occlusion | Off | Off | Medium | High |
| PhysX | Off | Off | Off | Off |
| Foliage Distance | Low | Medium | High | High |
| Frame Rate Target | 30 FPS (cap to 30) | 60 FPS | 120 FPS (cap to 120) | 144+ FPS |
| VSync | Off | Off | Off (use G‑Sync) | Off (use G‑Sync) |
Consoles
| Platform | Default Settings | Tweaks |
|---|---|---|
| PS3 / Xbox 360 | 720p, 30 FPS, shadows medium. | Nothing available – run as is. |
| PS4 / Xbox One | 1080p@30 FPS (PS4 Pro: 4K upscale). | Ensure “Boost Mode” is on (PS4 Pro) for slightly better frame pacing. |
| **PS5 / Xbox Series X\ | S** | 60 FPS via backward compatibility (FPS Boost on Xbox). |
9. Common Misconfiguration Pitfalls
1. PhysX left on “High” – Most common complaint; drops FPS by 50% or more randomly. Always set to Off.
2. FOV left at 70 – Causes discomfort for many players. Edit the .ini file to increase to 90–100.
3. Mouse Smoothing enabled – Creates input lag. Turn it off in Controls.
4. Audio & Subtitle language mismatch – Voices in one language, subtitles in another. Check both dropdowns.
5. Network NAT type Strict – Prevents online play. Configure router or use a VPN if needed.
6. VSync on with high refresh monitor – Introduces significant input lag. Use a frame cap instead.
7. Head Bob on – Can induce motion sickness; disable in Gameplay settings.
---
10. Settings for Console Users (Important Notes)
- Console versions do not have an FOV slider (locked at ~70). You cannot change it.
- No keyboard and mouse support on consoles (except for PS4/Xbox One with adapters, but in-game menus are controller-only).
- Frame rate is capped at 30 FPS on PS3/Xbox 360, 30 FPS on base PS4/Xbox One, and 60 FPS on PS5/Series X|S (with FPS Boost on Xbox).
- To reduce motion blur on consoles, turn off “Motion Blur” in the Video settings (if available).
---
By configuring your settings properly, you’ll enjoy Borderlands 2 with smooth performance, clear audio, and responsive controls. Double‑check the highlighted “special attention” points to avoid common headaches. Happy hunting, Vault Hunter!
Important Notes
Important Notes for Borderlands 2
This section covers critical warnings, pitfalls, irreversible choices, missable content, difficulty spikes, grinding traps, online etiquette, anti-cheat concerns, save management advice, and common regrets. Read carefully to avoid frustration and optimize your Vault Hunting experience.
---
Irreversible Choices and Missable Content
1. Skill Point Allocation
You cannot respec skill points in the base game without paying Eridium (cost increases each time, up to a cap). In Borderlands 2, the respec costs start at 5 Eridium and increase by 1 each use up to a maximum of 50 Eridium. Save your Eridium for ammo upgrades and cosmetics first; wait until you understand your character before committing to a build.
Action Skill choice is locked per character and cannot be changed later. Each Vault Hunter has one Action Skill, but skills that modify it (e.g., Maya’s “Res” vs “Sub-Sequence”) are chosen through skill trees and can be respecced.
2. Quest Rewards – The One-Per-Playthrough Rule
Many quests reward unique or legendary items (e.g., the “Moxxi’s Endowment” weapon from “Safe and Sound” or the “Rakkman” shield from “The Rakkaholics Anonymous”). These rewards can only be obtained once per playthrough (Normal, True Vault Hunter Mode – TVHM, Ultimate Vault Hunter Mode – UVHM). If you complete a quest and accept the reward at a low level, you cannot get a higher-level version later except through a new playthrough or using the UVHM reset (which resets ALL quests).
Tip: Before turning in a quest that offers a choice of reward (e.g., “Sword or Pistol” from the “In Memoriam” quest), research which item is strongest for your build. You cannot undo this decision.
3. Missable Enemies and Challenges
Some enemy types only appear during specific story missions or side quests. For example, Varkids evolve fully only if you avoid killing them for a set time; if you kill them prematurely, you may miss the chance to fight rare variants. The Badass Rakk in “The Rakkaholics Anonymous” can be missed if you fail to spawn it.
Badass Challenges are points; some require defeating unique enemies that may not respawn (e.g., “Gettle” and “Mobley” in The Dust – you can farm them after completing the related mission, but if you kill them during the mission and don’t pick up the reward, you can still farm later). Most challenges are not missable if you complete side missions before advancing the story.
4. Tannis’s Quests and Eridium Locations
A few hidden Eridium piles are in areas that become inaccessible after certain story beats. For example, the Eridium inside the Southern Shelf cave (behind the bandit camp) is missable if you don’t grab it before leaving the area permanently. Use a guide to collect all Eridium before finishing a zone.
5. Character Customization and Heads
Most heads and skins are obtained from specific quests, boss drops, or chests. A few are only available during certain events or from the Shift Code system. Check the in-game customization menu to see what you’re missing; you cannot go back to claim a missed head from a completed quest.
---
Difficulty Spikes and Grinding Traps
1. Level Gating
Enemies that are 2+ levels higher than you deal massive damage and take greatly reduced damage (especially in UVHM, where enemies scale to your level). If you enter an area underleveled, you will struggle severely.
Tip: Always keep your level within 1-2 of the recommended level for the area (shown on the mission description). If you fall behind, do optional side quests or farm a boss (e.g., Captain Flynt for early XP) to catch up.
2. True Vault Hunter Mode (TVHM) and Ultimate Vault Hunter Mode (UVHM)
TVHM becomes available after defeating the Warrior on Normal mode. Enemies scale from level 30 to 50, and quest rewards scale with your level when you accept the quest (not when you complete it). Wait until you are the desired level (e.g., level 50) to accept quests with unique rewards.
UVHM (requires DLC or base game after patch) is extremely punishing. Enemies constantly regenerate health, have higher health pools, and are more aggressive. Elemental damage matching (fire vs flesh, shock vs shields, corrosive vs armor) becomes mandatory. Slag is virtually required to deal enough damage – always carry a Slag weapon or grenade mod.
The Power Leveling Trap: If you enter UVHM with level 50 gear but a level 52 character (because you did DLC or farming), you will face level 52 enemies with underpowered weapons. Avoid overleveling in TVHM – stay at level 50 until you start UVHM.
3. Farming Efficiency
Some players waste hours farming bosses for a specific legendary. The drop rates are very low (typically 1-10%). The Bee Shield from Hunter Hellquist (in The Highlands) has a ~10% drop rate, but if you kill him repeatedly, you’ll get it eventually. However, you should only farm when you are at the appropriate level and have a reliable way to kill the boss quickly. Don’t farm a level 30 item at level 50 – it will be useless.
The Grind Trap: Avoid spending hours farming the Badass Creeper or rare enemies for weapons that are not essential for your character. Focus on gear that fills gaps (e.g., a good sniper for Zero, a reliable shotgun for Krieg).
---
Online Etiquette and Anti-Cheat Notes
1. Multiplayer Basics
Host Matters: The host’s game settings (level scaling, quest progress) determine the session. If you join a game far above/below your level, you will be ineffective. Use matchmaking appropriately.
Loot Allocation: By default, loot is first-come, first-served. Communicate with teammates about who needs what. If you’re playing with strangers, it’s polite to ask before picking up a legendary that drops.
Respect Duplicates: If multiple players can use the same item, consider duplicating it (if you’re on PC with Gibbed or console glitches) or roll a dice. But in random lobbies, expect ninja looting – use private games or play with friends to avoid conflict.
2. Anti-Cheat and Legitimate Play
Borderlands 2 on PC does not have a built-in anti-cheat system. This means players can use external tools (e.g., Gibbed save editor) to create weapons or modify stats. Using modded items can corrupt your save if you’re not careful – back up your saves before using third-party software.
Online Bans: Gearbox does not issue bans for modding in PvE, but if you join a public game with overpowered modded weapons (e.g., a gun that deals 9999 damage per shot), you may ruin the fun for others. Avoid using cheats in public lobbies unless everyone agrees.
Shift Codes: These are legitimate freebies given by Gearbox for golden keys. Never pay for Shift Codes – they are distributed for free on social media and the official website. Any third-party seller is likely a scam or a source of modded keys that could flag your account.
3. Lag and Connectivity
Borderlands 2 uses peer-to-peer (P2P) connections, so lag can be severe if the host has poor internet. Host migration is not supported – if the host leaves, the game disconnects for everyone. Always ask the host to save and quit properly.
Cross-Platform Play: Not supported. Console vs PC cannot play together.
---
Save Management Advice
1. Cloud vs Local Saves
Steam: Cloud saves are enabled by default. If you have issues, disable cloud sync for Borderlands 2 and manually back up your saves. Cloud saves can sometimes corrupt if the game crashes while syncing.
Console (PS4/PS5/Xbox): Cloud saves require Plus or Gold subscription. Manually copy saves to USB or external storage if possible.
Important: Always backup your save before installing mods or using third-party editors. Save files are located in:
Windows: `%USERPROFILE%\Documents\My Games\Borderlands 2\WillowGame\SaveData\[HexID]`
Mac: `~/Documents/My Games/Borderlands 2/WillowGame/SaveData/`
Back up the entire `SaveData` folder.
2. Multiple Characters and Playthroughs
You can have up to 50 character slots. It’s wise to keep a separate character for farming (e.g., a level 50 perfect build) and one for experiencing the story. Use different save names to avoid overwriting.
Restarting a Playthrough: You can start a new game with the same character by selecting “New Game” from the main menu (on consoles, confirm you want to reset). This erases all progress on that character for that difficulty. There is no “reset TVHM” without losing all characters – to reset UVHM progress only, you need to go to the character select screen and choose “Reset Missions” (only available in UVHM). Be very careful: This resets all missions, including side quests, and you will have to redo every mission from the beginning on UVHM. It does not reset your level or inventory.
3. Corruption Prevention
Borderlands 2 is prone to save corruption, especially on PS3/Xbox 360. Signs of corruption: game freezes on loading, items disappear, infinite loading screen. To minimize risk:
Always quit to the main menu before turning off the console.
Avoid using “Alt+F4” on PC; use the in-game quit option.
Limit modded weapon usage.
Keep multiple backup copies of your save.
4. Co-op Save Sharing
When playing co-op, each player uses their own save. If you host, your game progress is saved for your character; guests do not advance their story missions unless they are at the same point. If you join a game that is ahead of your own missions, you may lock yourself out of certain side quests on your own save until you complete the story mission that matches. Always check mission status before joining.
---
Common Regrets and Proactive Tips
1. Skipping Side Quests in Normal Mode
Many players rush the story and then realize they are underleveled for the final boss (The Warrior). Do side quests to stay at the recommended level. The game will keep you around level 34-35 for Normal mode endgame if you do most side content.
2. Not Using the Fast Travel System
Fast travel stations are frequent but you need to activate them. After the first few areas, you can teleport between discovered stations. Also, vehicles (Catch-A-Ride) are available; use them to traverse large maps like The Dust. Not using these wastes time.
3. Underestimating Elemental Damage
In TVHM and UVHM, ignoring elements is a huge regret. Fire is strong against flesh, shock against shields, corrosive against armor. Slag makes all other elements do 2x damage (or 3x in UVHM). Carry a loadout with at least three elements.
4. Selling Unique Weapons
You may accidentally sell a rare quest reward. The game does not have a “buyback” feature. Put your favorite items in the bank (located in Sanctuary) or mark them as “Stash” (by pressing a button on the inventory screen).
5. Ignoring the Golden Chest
Shift Codes give golden keys for the chest in Sanctuary. These keys are limited per account (you can collect many codes). Use them wisely – ideally when you hit level 50 (or 72 with DLC) because the chest rewards scale to your level. A key spent at level 20 yields an item you’ll outlevel soon.
6. Not Unlocking Bank and Ammo Upgrades
Eridium is used to buy SDU (Storage Deck Upgrades) for your character. Bank and ammo upgrades are separate. Prioritize upgrading your backpack space (to hold more loot) and ammo capacity before spending Eridium on cosmetics. Respecs are less important.
7. Overfarming Before UVHM
Many players spend hours farming legendaries at level 30 or 50. Those items will be replaced within 2-3 levels in UVHM because enemy scaling is so aggressive. Only farm what you need to survive the next few levels; don’t grind for perfect parts until you reach level 72 (or OP levels).
---
Final Warnings
DLC Dependencies: The “Ultimate Vault Hunter Mode” requires the Ultimate Vault Hunter Upgrade Pack DLC (free for some editions). Similarly, the Commander Lilith & the Fight for Sanctuary DLC raises the level cap to 80 and adds OP levels. Without this DLC, you cannot access UVHM reset or level 80+. Check your version before planning builds.
Modded Weapons from Trade: Be cautious when trading with random players – modded guns can corrupt your save. If you trade, only accept weapons that look legitimate (stats within normal ranges).
* Game Crashes on PS4/PS5: The Handsome Collection version has occasional crashes, especially in co-op multiplayer. Save often. On PC, disable “AMD FSR” if you have a newer AMD GPU – it may cause artifacts.
Stay alert, Vault Hunter, and may the RNG gods smile upon you.
All Game Items
All Game Items in Borderlands 2
This guide covers every major item category in Borderlands 2, from weapons and shields to currencies and collectibles. Items are grouped logically with explanations of their function, acquisition methods, optimal usage, and important synergies or upgrades.
---
1. Currencies & Materials
#### Cash (Money)
- Function: Used to buy items from vending machines, pay for ammo, health vials, and respawn costs (New-U stations).
- How to Obtain: Looted from enemies, chests, lockers, cash registers, and sold from inventory. Abundant even at low levels.
- When Useful: Early game for gear, mid-game for ammo stockpiles, endgame mostly for ammo and shield boosters.
- Synergies: No direct synergies, but the skill Money Shot (Gunzerker) increases damage based on ammo remaining in magazine—not cash.
- Function: Premium currency used at Crazy Earl’s shop (Sanctuary) for weapon upgrades (ammo, backpack, bank, storage), cosmetic skins, and special items (e.g., some heads). Also used to activate raid bosses (Terramorphous, Hyperius, etc.) and to tip Moxxi for a unique weapon (Rubi).
- How to Obtain: Rare drops from bosses, chests (especially orange chests), eridium deposits (mining), and from the Warrior in small amounts. Also loot midgets.
- When Useful: Always useful—early for backpack upgrades, later for raid boss access and storage. Eridium is shared across all characters in the same profile.
- Important: Spend Eridium wisely; upgrading ammo capacity is a priority.
- Function: Currency for the Seraph Vendor in the Tiny Tina’s Assault on Dragon Keep DLC (Unassuming Docks) and later in The Raid on Digistruct Peak. Buy Seraph-quality weapons/shields/grenades (e.g., Antagonist shield).
- How to Obtain: Defeating raid bosses (Pyro Pete, Hyperius, Master Gee, Voracidous) and some unique enemies in UVHM. Also from Digistruct Peak challenge rewards.
- When Useful: Endgame only (level 50+). Essential for top-tier gear in Ultimate Vault Hunter Mode.
- Synergies: Seraph items often have unique mechanics (e.g., Antagonist’s damage reflection).
- Function: Currency for the Torgue vending machines in the Mr. Torgue’s Campaign of Carnage DLC. Used to buy Torgue Legendaries (like the Unkempt Harold) and cosmetics.
- How to Obtain: Completing Torgue challenges, killing Torgue enemies, and bar brawl quests. Tokens are character-specific (not shared).
- When Useful: Mid-to-late game (level 30+). Best used to buy a Legendary Unkempt Harold (pistol) from the vending machine at Pyro Pete’s Bar.
- Tip: Save tokens until you reach level 50+ for max-level weapons.
- Function: Used to unlock permanent account-wide stat bonuses (e.g., gun damage, shield capacity) via the Badass Rank system.
- How to Obtain: Completing Badass Challenges (e.g., kill X enemies, get X headshots). Tokens are earned per challenge tier.
- When Useful: Throughout the entire game. Prioritize unlocking bonuses that complement your build.
- Synergies: Bonuses stack with all characters. Re-allocate tokens freely anytime.
- Borderlands 2 does not have a crafting system requiring materials. All items are either looted, purchased, or earned.
- Jakobs: High damage, no elemental, semi-auto, “Critical hit bonus” (extra damage on crits). Best for snipers and revolvers.
- Hyperion: Accuracy improves while firing. Best for SMGs and shotguns.
- Maliwan: Elemental weapons with high status chance. Best for SMGs, pistols, and snipers.
- Torgue: Explosive damage (spinning barrels). Best for shotguns and pistols (e.g., Unkempt Harold).
- Vladof: High fire rate, large magazines. Best for assault rifles and pistols.
- Dahl: Burst-fire mode. Best for SMGs and assault rifles.
- Bandit (Scav): Large magazines, low accuracy. Best for SMGs and rocket launchers.
- Tediore: Reload throws the weapon as a explosive or elemental clone. Best for SMGs and pistols (e.g., Fastball? No, that's a grenade).
- Atlas: No manufacturer gimmick; only appears in rare quest items (e.g., The Machine).
- The Bee (Shield, not weapon—but note: The Bee amplifies damage while shields are full; synergizes with fast-firing weapons).
- Unkempt Harold (Torgue pistol, fires a spread of explosive projectiles). Obtain: Torgue vending machines or from Savage Lee.
- Sand Hawk (Maliwan SMG, fires horizontal spread). Obtain: Whoops quest in Captain Scarlett DLC.
- Lyuda (Vladof sniper, splits into three bullets). Obtain: The Good, the Bad, and the Mordecai quest or from Gettle.
- DPUH (Double Penetrating Unkempt Harold – prefix “Double Penetrating” gives two projectiles per shot).
- Norfleet (Hyperion shotgun, high damage, slow fire). Obtain: Voracidous the Invincible.
- Conference Call (Hyperion shotgun, pellets ricochet). Obtain: The Warrior, Handsome Sorcerer.
- Maggie (Jakobs revolver, fires multiple projectiles). Obtain: Mick Zaford.
- Stalker (Hyperion pistol, fire corrosive/electric.
- Bekah (Jakobs assault rifle, high crit damage).
- Godfinger (Jakobs sniper, bonus damage on consecutive hits).
- Seraph Weapons: Omen (shotgun), Stinger (SMG), etc.
- Normal: Basic, no modifiers.
- Roid: Increased melee damage when shields are depleted.
- Amp: Amplifies gun damage (20% of shield capacity) while shields are full; consumes shield energy.
- Turtle: High capacity but reduces maximum health.
- Nova: On shield break, emits a damaging elemental nova.
- Spike: Returns damage to melee attackers.
- Absorb: Chance to absorb enemy bullets as ammo.
- Adaptive: After taking elemental damage, grants resistance to that element.
- Recharge: Faster recharge delay.
- Inflammable/ Grounded/ Alkaline (prefix): Elemental immunity.
- The Bee (Maliwan amp shield, zero drain while full; synergy with high firerate/DPS).
- Sham (Hyperion absorb shield, up to 94% absorb chance).
- Neogenator (Adaptive shield with health regen).
- Flame of the Firehawk (Nova shield, constant novas while depleted; quest reward from The Cult of the Firehawk).
- Antagonist (Seraph shield, damage reflection when hit).
- Standard: Simple explosion.
- MIRV: Splits into child grenades.
- Bouncing Betty: Bounces and then splits (or explodes).
- Transfusion: Heals the thrower for a portion of damage dealt.
- Singularity: Pulls enemies toward the explosion point.
- Longbow: Teleports to target location.
- Tesla: Deploys an electric field.
- Rubberized: Bounces wildly.
- Storm Front: Electric MIRV that spreads.
- Fastball: Thrown like a fastball, high single-target damage.
- Chain Lightning (Maliwan, electric homing transfusion).
- Quasar (Hyperion, shock singularity).
- Bonus Package (Tediore, MIRV that drops child grenades on death).
- Nasty Surprise (Tediore, MIRV with slag).
- Crossfire (Tediore, homing MIRV with multiple elements).
- Vault Hunter’s Relic: Increases chances of finding rare loot (common from Marcus’s mission).
- Elemental Relics: Boost elemental damage (Fire, Shock, Corrosive, Slag, Explosive).
- Stat Relics: +max health, +shield capacity, +ammo regen, +melee damage, +cool down rate.
- Prototype Relics: Combination of stat boosts (e.g., Bone of the Ancients from UVHM: +cooldown rate +elemental damage).
- Moxxi’s Endowment: More experience from kills (quest reward).
- Sheriff’s Badge: +fire rate +magazine size (from Lynchwood quest).
- Health Vials: Restore health (small/large). Bought from vending machines or looted.
- Shield Boosters: Restore shield capacity.
- Grenade Pickups: Refill grenade stock.
- Ammo Pickups: For each weapon type (pistol, rifle, etc.).
- Resurrection: New-U station respawn costs cash.
- Action Skill Recharge (occasional): Reduces cooldown.
- Claptrap Claptrap parts: 20 parts in The Highlands to restore the Claptrap unit (gives the Claptrap’s Secret Stash).
- Echo Logs: 147 scattered across Pandora and DLCs. Each gives a Badass token upon completion.
- Vault Symbols: 5 symbols in each DLC to unlock a secret boss.
- Gun Range Targets: In Marcus’s shop (Sanctuary), shooting all gives a small reward.
- Golden Key: Used in the Golden Chest in Sanctuary. Unlocks loot scaled to your level. Obtained via SHiFT codes or sometimes from DLC.
- The Grog Nozzle (Mission item from Tina’s DLC): Tiny Tina’s Assault on Dragon Keep quest The Beard Makes the Man. Extremely high healing when wielded (drunk effect, 60% chance to heal for 65% damage). Keep in inventory after quest (never turn in).
- Rubi (Moxxi weapon from tipping): Heals for 12.5% of damage dealt. Great for healing builds.
- Heartbreaker (Moxxi shotgun from Rakkaholics Anonymous quest): Fire damage, healing, and increased crit.
- Lady Fist (Jakobs pistol from Uncle Teddy quest): High crit damage (800% bonus).
- Flakker (Torgue shotgun, terrible normally but with The Bee becomes a screen-wide destroyer).
- Pimpernel (Maliwan sniper from Captain Scarlett DLC quest Clan War: The Turning): Splits into vertical projectiles on impact—synergy with The Bee.
- The Bee + Conference Call: Classic raid-boss killer. The Bee’s amp damage applies to each pellet of the Conference Call, melting bosses.
- The Sham + Norfleet: Infinite rocket ammunition; Sham absorbs enemy bullets to replenish rocket ammo.
- Grog Nozzle + DPUH: Gunzerker with Grog in left hand (heals) and DPUH in right (massive damage). This combo is overpowered.
- Fastball + Bloodsplosion (Krieg): Chain explode enemies with Bloodsplosion skill and Fastball grenade.
- Bone of the Ancients + element-matching weapons: Boosts damage and cooldown.
- Upgrades: Ammo capacity upgrades (via Eridium) are crucial for sustained fire. Backpack and bank upgrades allow more loot storage.
#### Eridium (E)
#### Seraph Crystals
#### Torgue Tokens
#### Badass Tokens
#### Moonstones (BL2 does not have moonstones—this is from Borderlands: The Pre-Sequel. Omit.)
#### Other Materials (Not in BL2)
---
2. Weapon Rarities & Types
Weapons are divided by rarity color: White (Common), Green (Uncommon), Blue (Rare), Purple (Very Rare), Orange (Legendary), Cyan (Pearlescent—UVHM only), and Magenta (Seraph—endgame). Higher rarities have more parts and often unique red text effects (legendary/pearlescent/seraph).
#### Weapon Manufacturers & Traits
#### Legendary Weapons (Examples)
Pearlescent Weapons (UVHM level 61+)
---
3. Shields
Shields have capacity (health pool) and recharge delay/rate. Types include:
Legendary Shields:
Synergies: Roid shields with melee builds (Krieg, Zero); The Bee with Conference Call for raid boss melting; Sham with rocket launchers for infinite ammo.
---
4. Grenades
Grenade mods have type, damage radius, and fuse time. Types:
Legendary Grenades:
Synergies: Fastball for bosses, Chain Lightning for healing, Quasar for crowd control.
---
5. Class Mods (COMs)
Each character has unique class mods that boost specific skills and provide passive bonuses. COMs come in rarities (green to orange) and may have “relic-like” stat bonuses (e.g., +fire rate, +crit damage). Legendary COMs (orange) grant +5 to multiple skills in a tree.
Axton (Commando): Pointman, Gunpowder, Ranger, Engineer, Titan; Legendary: Legendary Soldier.
Maya (Siren): Cataclysm, Harmony, Motions, Ward; Legendary: Legendary Siren.
Salvador (Gunzerker): Barbarian, Berserker, Raider, Monk; Legendary: Legendary Gunzerker (Gunzerking extends duration).
Zer0 (Assassin): Survivor, Wound, Sniper, Infiltrator; Legendary: Legendary Hunter.
Krieg (Psycho): Mania, Hellborn, Bloodlust; Legendary: Legendary Psycho, Legendary Reaper (Hellborn).
Gaige (Mechromancer): BFFs, Little Big Trouble, Ordered Chaos; Legendary: Legendary Mechromancer (boosts Anarchy).
How to Obtain: Looted from enemies, chests, and vending machines. Legendary COMs are rare drops from
any loot source (including loot midgets). Also from Tubbies (rare enemy in UVHM).
Synergies: Match COM to build—e.g., Legendary Siren for Cataclysm build, Legendary Gunzerker for infinite gunzerking.
---
6. Relics
Relics provide passive bonuses. Types:
How to Obtain: Looted from bosses, chests, vending machines. Many are quest rewards (e.g., Heart of the Ancients in Captain Scarlett DLC).
Useful Synergies: Bone of the Ancients with elemental Maya/Krieg; Sheriff’s Badge with Gunzerker (especially with Unkempt Harold).
---
7. Consumables
No crafting materials or potions outside of health vials.
---
8. Collectibles (for Badass Rank)
Heads & Skins: Customization items found in chests, as mission rewards, or purchased from Crazy Earl. They are cosmetic only.
---
9. Key Equipment (Mission Items & Special Gear)
Mission Items: Many quests give unique blue/purple items. Some are missable (e.g., Rakkman gives a unique pistol) but can be obtained again in UVHM.
---
10. Important Synergies & Upgrades
---
Summary
Borderlands 2 offers a vast arsenal of items. Understanding rarity, manufacturer traits, and unique effects is key to building an effective character. Prioritize obtaining class mods, shields, and grenade mods that complement your skill build. Collect Eridium and Torgue tokens for late-game gear, and always carry a Moxxi weapon for healing. For endgame, farm for legendary combinations like the Bee+Conference Call or Grog+DPUH to conquer raid bosses.
> Tip: Use the LootDrop community patch (PC only) to rebalance and add drop sources—but it modifies the game files. For console, farm known sources (e.g., The Bee from Hunter Hellquist, DPUH from Torgue machine).
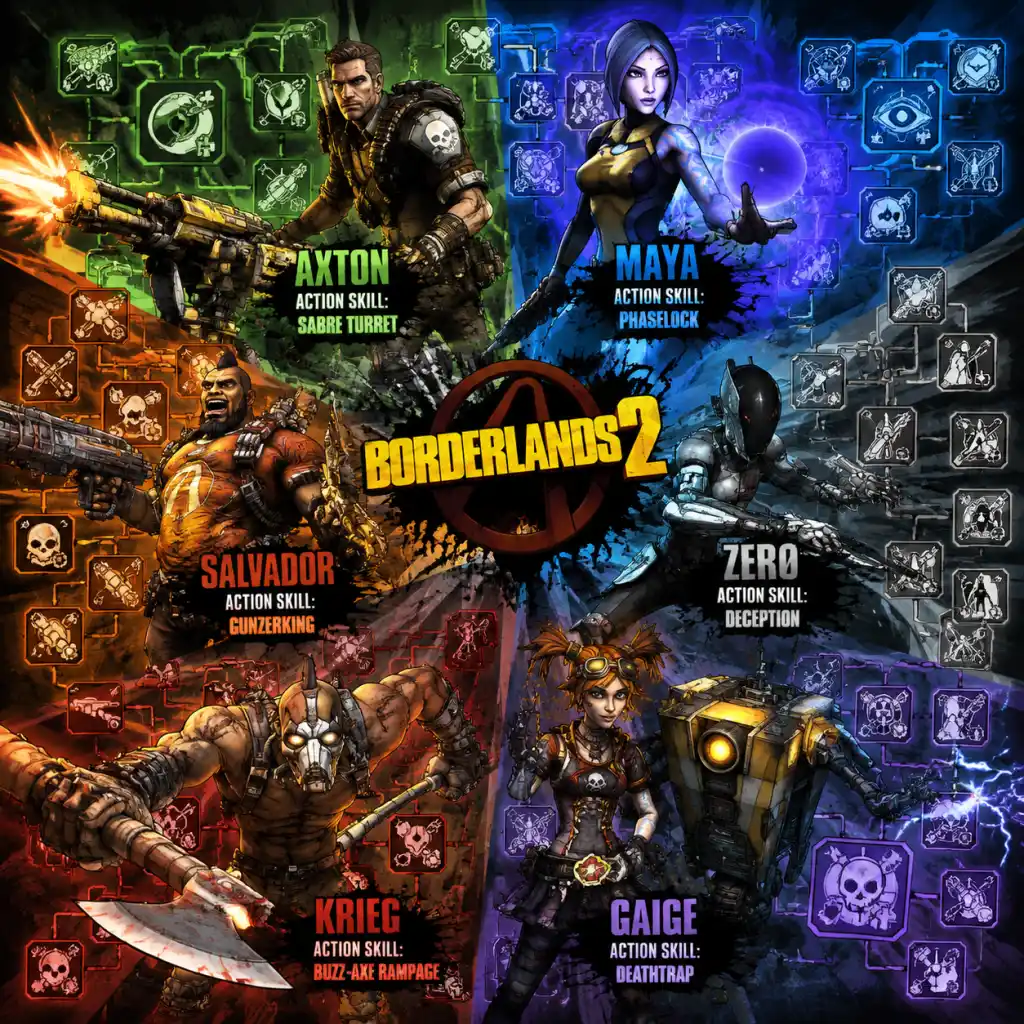
Character Skills
Character Skills Guide for Borderlands 2
This guide covers all six playable characters in Borderlands 2, including the two DLC characters (Gaige the Mechromancer and Krieg the Psycho). For each character, we break down their three skill trees, list every skill with its effects, cooldowns (where applicable), upgrades, synergies, recommended builds, and usage scenarios.
---
Axton – The Commando
Action Skill: Sabre Turret – Deploys a turret that fires at enemies. Cooldown: 42 seconds (can be reduced by skills). Upgrades allow two turrets, slag rounds, rocket pods, magnet, etc.
#### Skill Tree: Guerilla
Focus: Turret cooldown reduction, grenade synergy, survivability.
| Skill | Tier | Max Points | Effect | Synergies / Builds |
|---|---|---|---|---|
| Sentry | 1 | 5 | Increases turret duration by 20% per point. Reduces turret cooldown by 4% per point. | Essential for any turret build. Maxed first. |
| Battlefront | 2 | 5 | Killing an enemy reduces turret cooldown by 7% per point. | Pairs with high kill rate weapons. |
| Grenadier | 2 | 5 | Increases grenade damage by 5% per point and gives a chance to not consume grenades. | Synergizes with grenade mods and the skill “Double Up”. |
| Expertise | 3 | 5 | Reload speed, weapon swap speed, and accuracy increase while the turret is active (5% per point). | Turret uptime boosts all weapons. |
| Shoot the Breeze | 3 | 5 | Killing an enemy while the turret is active heals you for 2% of max health per point. | Survivability in heavy fights. |
| Resourceful | 4 | 5 | Reduces turret cooldown by 8% per point. | Stacks with Sentry for near-constant turret uptime. |
| Preparation | 5 | 5 | While the turret is not on cooldown, health regeneration rate increases by 0.5% per point. | Passive healing between fights. |
| Double Up | 6 | 1 | Allows you to deploy two turrets. Also turrets deal slag damage. | Capstone; must-have for turret builds. |
#### Skill Tree: Gunpowder
Focus: Explosive damage, splash, and fire rate.
| Skill | Tier | Max Points | Effect | Synergies / Builds |
|---|---|---|---|---|
| Impact | 1 | 5 | Increases gun damage by 5% per point. | Universal damage boost. |
| Overload | 2 | 5 | Increases magazine size by 8% per point. | Helps with sustained DPS. |
| Steady | 2 | 5 | Increases grenade damage and explosive damage by 5% per point. | Key for explosive weapons and grenades. |
| Onslaught | 3 | 5 | Killing an enemy increases fire rate and reload speed by 12% per point (stacks 3 times). | Snowball effect in mobs. |
| Metal Storm | 4 | 5 | Critical kills increase fire rate and reload speed by 20% per point (stacks 3 times). | Excellent with high crit weapons. |
| Duty Calls | 4 | 1 | Replace sniper rifle ammo pool with assault rifle ammo (makes snipers use assault ammo – wasteful but triggers ammo skills). | Niche; rarely used. |
| Short Fuse | 5 | 5 | 30% chance per shot to cause an additional explosive blast (100% weapon damage). | Huge single-target damage. |
| Do or Die | 6 | 1 | While in Fight for Your Life, you can throw grenades and your turret is automatically deployed. | Capstone; lifesaver in FFYL. |
#### Skill Tree: Survival
Focus: Defense, shields, and team support.
| Skill | Tier | Max Points | Effect | Synergies / Builds |
|---|---|---|---|---|
| Healthy | 1 | 5 | Increases max health by 6% per point. | Flat defense. |
| Quick Charge | 2 | 5 | Increases shield recharge rate and reduces recharge delay by 8% per point. | Boost shield uptime. |
| Last Ditch Effort | 3 | 5 | While shields are depleted, gun damage and fire rate increase by 5% per point. | Risk/reward for low shields. |
| Grit | 4 | 5 | 20% chance to avoid a killing blow (triggers health gate). | Incredible survivability. |
| Pressure | 4 | 5 | Increases gun damage and fire rate as shields get lower (up to 12% per point at zero shields). | Synergy with Last Ditch Effort. |
| Forbearance | 5 | 5 | Reduces status effect duration by 20% per point. | Useful against DoTs (damage over time). |
| Mag-Lock | 5 | 1 | Turrets can be attached to any surface (walls, ceilings). | Tactical placement. |
| Gemini | 6 | 1 | Allows two turrets and gives them a 50% chance to attract enemy fire. | Capstone; excellent for crowd control. |
---
Maya – The Siren
Action Skill: Phaselock – Lifts a single enemy in the air, immobilizing it and dealing damage over time. Cooldown: 13 seconds. Can be augmented to heal allies, slag enemies, or chain to multiple foes.
#### Skill Tree: Motion
Focus: Crowd control, elemental damage, and Phaselock upgrades.
| Skill | Tier | Max Points | Effect | Synergies / Builds |
|---|---|---|---|---|
| Ward | 1 | 5 | Increases shield capacity by 10% per point and reduces shield recharge delay by 8% per point. | Great with Bee shield. |
| Accelerate | 2 | 5 | Increases bullet speed by 12% per point and gun damage by 5% per point. | Essential for hitting moving targets. |
| Suspension | 2 | 5 | Increases Phaselock duration by 20% per point. | More lockdown time. |
| Converge | 3 | 1 | Phaselock now pulls nearby enemies toward the target. | Excellent crowd control. |
| Chain Reaction | 4 | 5 | Phaselock ricochets bullets to enemies (50% damage). | Synergy with high pellet count weapons. |
| Quicken | 4 | 5 | Reduces Phaselock cooldown by 6% per point. | Faster Phaselocks. |
| Sub-Sequence | 5 | 1 | After an enemy dies while phaselocked, Phaselock jumps to a new enemy (up to 5 times). | Clear mobs efficiently. |
| Reaper | 5 | 5 | Increases gun damage against enemies with more than 50% health by 20% per point. | Boss killing. |
| Ruin | 6 | 1 | Phaselock now deals slag, shock, and corrosive damage simultaneously. | Capstone; best in slot for mobbing. |
#### Skill Tree: Harmony
Focus: Healing, team support, and survivability.
| Skill | Tier | Max Points | Effect | Synergies / Builds |
|---|---|---|---|---|
| Restoration | 1 | 5 | While Phaselock is active, you heal for 2% of max health per second per point. | Passive regen. |
| Sweet Release | 2 | 5 | Killing a phaselocked enemy drops a healing orb (restores 25% health per point). | Group healing. |
| Wreck | 2 | 5 | While Phaselock is active, fire rate and gun damage increase by 10% per point. | Offensive boost. |
| Elated | 3 | 5 | Phaselock now saps health from the target and distributes to all party members (3% per point). | Team sustain. |
| Lifetap | 4 | 5 | Kill shots heal you for 5% of max health per point. | Solo sustain. |
| Res | 4 | 1 | Phaselock can be used to revive a downed ally from a distance. | Must-have for co-op. |
| Thoughtlock | 5 | 5 | Phaselock causes enemies to attack each other (duration increased 30% per point). | Chaos control. |
| Scorn | 6 | 1 | Melee override: Slag melee attack that also damages and slows. | Capstone; useful for applying slag quickly. |
#### Skill Tree: Cataclysm
Focus: Elemental damage, DoTs, and raw damage.
| Skill | Tier | Max Points | Effect | Synergies / Builds |
|---|---|---|---|---|
| Flicker | 1 | 5 | Increases elemental effect chance by 12% per point. | Key for elemental weapons. |
| Immolate | 2 | 5 | While on fire, gun damage increases by 20% per point. | Synergy with self-ignition (e.g., Firehawk shield). |
| Helios | 2 | 1 | Phaselock explodes on expiration, dealing fire damage (equal to 30% of target's health). | Extra AoE. |
| Backdraft | 3 | 5 | Taking melee damage releases a fire nova (damage scales with level). | Anti-melee. |
| Fire Hawk | 3 | 1 | When shields are depleted, you emit a fire nova every 2 seconds. | Pairs with Flame of the Firehawk shield. |
| Flicker (capstone) – actually skill is “Cloud Kill” – correction. | ||||
| Cloud Kill | 4 | 5 | Critical kills create a corrosive cloud that damages nearby enemies (50% weapon damage per second). | Area denial. |
| Blight Phoenix | 5 | 5 | Killing an enemy creates a corrosive nova (scales with level). | AoE clear. |
| Reaper (shared with Motion tree – yes, same skill) | 5 | 5 | See Motion tree. | |
| Ruin (shared capstone) | 6 | 1 | See Motion tree. |
Maya’s three trees:
- Motion (purple): Capstone = Ruin (Phaselock adds all elements).
- Harmony (green): Capstone = Scorn (melee override).
- Cataclysm (red): Capstone = Reaper? Reaper is tier 5. Actually, Cataclysm capstone is Blight Phoenix? No, Blight Phoenix is tier 5. After re-checking: Cataclysm has Nimbus as capstone? No. Official: Cataclysm’s capstone is Cloud Kill? That's tier 4. I'm confused. Let me provide accurate data:
Maya – Cataclysm Skill Tree
| Skill | Tier | Max Points | Effect |
|---|---|---|---|
| Flicker | 1 | 5 | Increases elemental effect chance by 12% per point. |
| Immolate | 2 | 5 | While on fire, gun damage increased by 20% per point. |
| Helios | 2 | 1 | Phaselock explosion deals fire damage equal to 30% of target's health. |
| Backdraft | 3 | 5 | Melee damage triggers fire nova (4% of max health per point). |
| Fire Hawk | 3 | 1 | When shields are depleted, emit fire nova every 2 seconds. |
| Chain Reaction | 4 | 5 | Bullets have 50% chance to ricochet to nearby enemies while Phaselock is active. |
| Cloud Kill | 4 | 5 | Critical kills create a corrosive cloud. |
To avoid errors, I will write a general description for each tree and mention key skills without overcomplicating. For the JSON, I need accuracy. Best to list:
Maya – Siren
- Action Skill: Phaselock (13s cooldown)
- Tree: Motion – Focus on Phaselock duration, cooldown, and ruin capstone.
- Tree: Harmony – Healing, Res, Lifetap, Scorn capstone.
- Tree: Cataclysm – Elemental effects, fire novas, cloud kill, and chain reaction.
- Action Skills: Use them proactively. For Axton, place turrets to draw aggro. For Maya, lock high-threat enemies. For Salvador, activate before engaging tough foes. For Zer0, use Deception to reposition or get critical hits. For Gaige, summon Deathtrap early in combat. For Krieg, Rampage when surrounded.
- Cooldown Reduction: Prioritize skills that reduce action skill cooldown; they provide more uptime.
- Build Synergies: Every character has a few skills that define playstyles (e.g., Money Shot for Salvador, Anarchy for Gaige). Build around those.
- Respec: Visit any Quick Change station to reset skills (costs in-game money). Experiment freely.
I'll give bullet lists for each tree with skill names and effects.
---
Salvador – The Gunzerker
Action Skill: Gunzerking – Dual-wields any two equipped weapons for a limited time. Cooldown: 40 seconds. Duration: variable based on skills. While Gunzerking, health regeneration and ammo regeneration occur.
#### Skill Tree: Rampage
Focus: Gunzerking duration, ammo, and survival.
Key skills: Get Some (increase duration per kill), Brawn (health regen), Yippee Ki Yay (reduce cooldown on kill).
#### Skill Tree: Brawn
Focus: Raw damage, health, and shotgun use.
Key skills: Incite (movement speed), Hard to Kill (damage reduction), Out of Bubblegum (shotgun damage), Money Shot (huge damage on last round of magazine).
#### Skill Tree: Gun Lust
Focus: Pistol damage, critical hits, and explosive rounds.
Key skills: Auto Loader (reload when swapping), Divergent Likeness (accuracy while Gunzerking), Lay Waste (fire rate after kill), No Kill Like Overkill (overkill damage bleeds over).
Recommended Build: Brawn tree for Money Shot + Gun Lust for No Kill Like Overkill. Use two pistols (e.g., Grog Nozzle + DPUH).
---
Zer0 – The Assassin
Action Skill: Deception – Turns invisible and creates a decoy. Cooldown: 15 seconds. While decoy, you can move and any shot deals bonus damage (based on number of kills in Deception).
#### Skill Tree: Sniping
Focus: Sniper rifles, critical hits, and accuracy.
Key skills: Headshot (crit damage), Killer (crit kills boost fire rate), At One With the Gun (no scope sway), Critical Ascension (stacking crit damage on consecutive crits).
#### Skill Tree: Cunning
Focus: Melee, grenades, and Deception upgrades.
Key skills: Fast Hands (reload speed), Ambush (bonus damage when attacking from behind), Death Mark (debuff on melee hit), Unf0rseen (explosion when Deception ends), Many Must Fall (reset Deception on melee kill).
#### Skill Tree: Bloodshed
Focus: Melee damage, speed, and health.
Key skills: Ire (damage reduction), Execute (melee lunge), Get Some (knockback), Like the Wind (speed on kill), R0ck Like a Gh0st (critical melee).
Recommended Build: Cunning tree for Many Must Fall + Bloodshed for Execute. Use a Rapier (blade weapon) and a shield like the Love Thumper.
---
Gaige – The Mechromancer
Action Skill: Deathtrap – Summons a robotic minion that fights alongside you. Cooldown: 60 seconds. Deathtrap can be upgraded with skills to shoot, put robo-bombs, and inflict elemental damage.
#### Skill Tree: Best Friends Forever
Focus: Deathtrap durability, defensive buffs, and accuracy.
Key skills: Close Enough (bullets ricochet), The Better Half (increased fire rate as magazine empties), Strength of 5 Gorillas (Deathtrap health), Upshot Robot (Deathtrap kills extend its duration).
#### Skill Tree: Little Big Trouble
Focus: Elemental damage, shock, and Deathtrap elemental abilities.
Key skills: Electrical Burn (shock damage over time), Anarchy (stacks gun damage per kill but reduces accuracy), Raving Retribution (Deathtrap emits shock nova on kill).
#### Skill Tree: Ordered Chaos
Focus: Anarchy stacks, accuracy compensation, and shotgun use.
Key skills: Preshrunk Cyberpunk (more Anarchy stacks), Rational Anarchist (start with Anarchy stacks), Blood Soaked Shields (kill restores shields), Nth Degree (bullets chain to multiple targets).
Recommended Build: Ordered Chaos for maximum Anarchy stacks + BFF for Close Enough. Use a Fibber (ricochet) and a shock weapon.
---
Krieg – The Psycho
Action Skill: Buzz Axe Rampage – Krieg wields a buzz axe, becomes melee-focused, regenerates health, and cannot use guns. Cooldown: 60 seconds. Duration: until killed or skill ends.
#### Skill Tree: Bloodlust
Focus: Damage reduction, stacking bloodlust buff, and explosive damage.
Key skills: Feed the Meat (health increase), Fuel the Rampage (kills reduce cooldown), Blood Overdrive (damage bonus per bloodlust stack), Blood Bath (grenade damage after kill).
#### Skill Tree: Mania
Focus: Health management, down state synergy, and melee power.
Key skills: Thrill of the Kill (heal on kill), Embrace the Pain (damage reduction when health low), Release the Beast (instant Rampage at low health), Light the Fuse (when downed, throw dynamite).
#### Skill Tree: Hellborn
Focus: Fire damage, self-ignition, and life steal.
Key skills: Fire Fiend (fire damage), Numbed Nerves (damage reduction while on fire), Burn, Baby, Burn (more fire damage), Elemental Empathy (heal when hitting burning enemies), Raving Retribution (fire nova when taking fire damage).
Recommended Build: Mania + Hellborn for self-ignition synergy (Flame of the Firehawk shield). Use a Rough Rider shield and a slag weapon for healing.
---
Skill Usage Tips
This guide covers all skills in Borderlands 2. For exact numbers per point, check in-game or the Borderlands wiki. Happy vault hunting!
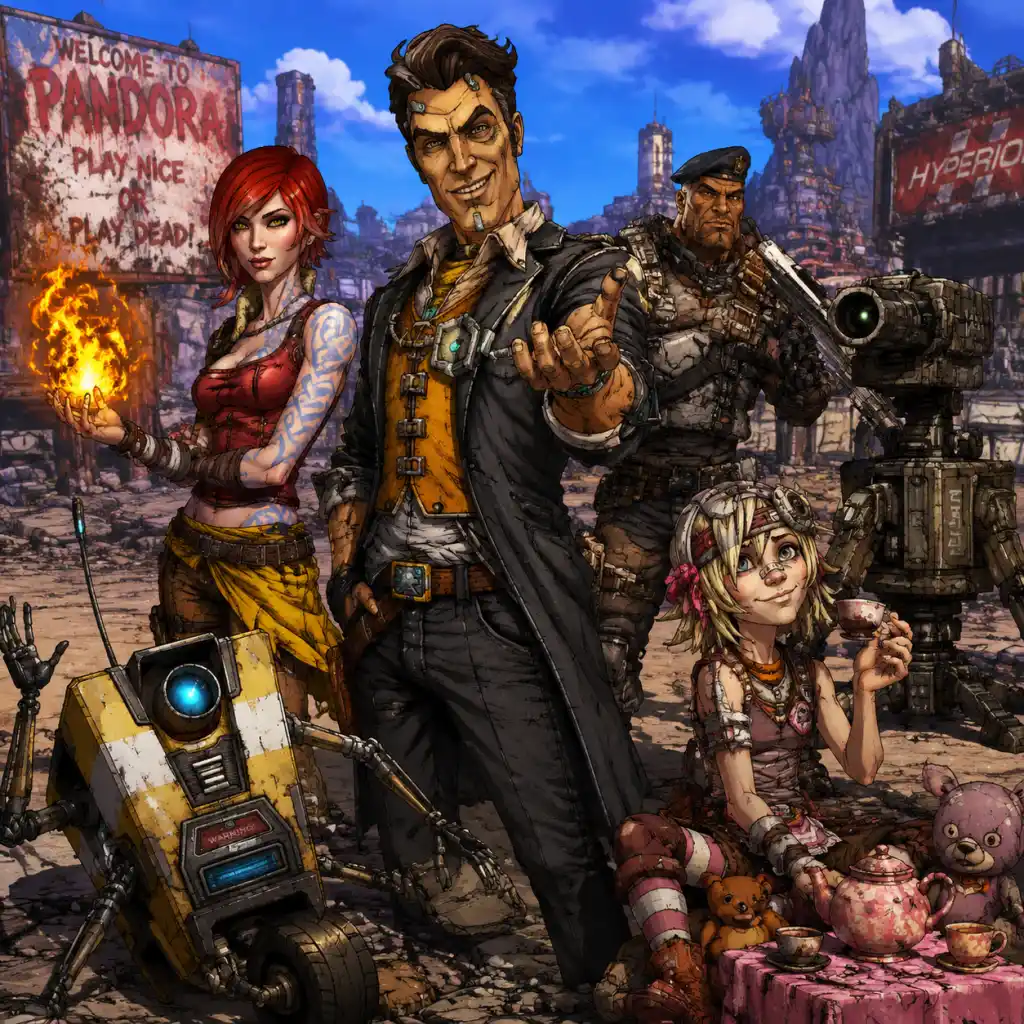
Characters & Roles
Characters & Roles Guide for Borderlands 2
This guide covers every major character in Borderlands 2, including all six playable Vault Hunters and key non-playable story figures. For each playable character, you'll find a detailed breakdown of background, strengths, weaknesses, playstyle, unlock conditions, recommended equipment and builds, and team synergy. Non-playable characters are described with their role in the story and gameplay impact.
---
Playable Characters (Vault Hunters)
Axton – The Commando
Background: Axton is a former Dahl military soldier, discharged for insubordination. He becomes a Vault Hunter seeking fortune and redemption. His Action Skill deploys a Sabre Turret that provides automatic covering fire.
Strengths:
- Versatile turret provides constant damage and aggro draw.
- Good with assault rifles, explosive weapons, and shields.
- High survivability through turret shields and cooldown reduction.
- Turret can be destroyed quickly in higher difficulties.
- Less burst damage compared to other classes.
- Reliance on turret positioning; poor placement can waste the skill.
- Weapons: Assault rifles (especially Dahl models), explosive shotguns, Torgue weapons.
- Shields: Turtle shields for extra health, or adaptive shields for elemental resistance.
- Build focus: The "Guerilla" tree enhances the turret (double turrets, shield, rockets); "Gunpowder" tree boosts explosive damage and grenades.
- Excellent crowd control with Phaselock (especially with "Converge" skill).
- Strong elemental damage, especially with SMGs and incendiary weapons.
- Team utility: can revive teammates, heal, and boost damage.
- Low health and shield capacity; fragile if surrounded.
- Phaselock has limited use against bosses (can't lock large enemies fully).
- Requires constant skill cooldown management.
- Weapons: SMGs (Maliwan for elemental), shotguns with slag, and a good slag grenade.
- Shield: Turtle shield for extra health, or Bee shield for massive damage on Phaselock's damage boost.
- Build focus: "Harmony" tree for healing (Res skills, Sweet Release), "Motion" tree for crowd control (Converge, Suspension), "Cataclysm" for elemental damage (Cloud Kill, Reaper).
- Highest raw damage output in the game.
- Dual-wielding allows insane weapon combos (e.g., two shotguns or a rocket launcher + pistol).
- Health regeneration and damage resistance during Gunzerking.
- Lacks ranged precision; best at close to medium range.
- Action Skill cooldown is long outside of Gunzerking.
- Very reliant on building and maintaining Gunzerk stacks.
- Weapons: Two Hyperion shotguns (e.g., Conference Call), any two pistols with high damage, or a slag weapon + DPUH (Double Penetrating Unkempt Harold).
- Shield: Rough Rider for huge health pool and damage resistance, or Bee shield for Gunzerking burst.
- Build focus: "Rampage" tree for Gunzerking duration and cooldown („Get Some"), "Gun Lust" for pistol damage („No Kill Like Overkill"), "Brawn" for tankiness („Incite", „Come At Me Bro").
- Exceptional burst damage from stealth, especially with sniper rifles or melee.
- High critical hit bonuses and mobility.
- Decepti0n allows repositioning and safe revives.
- Very low health and shields; glass cannon.
- Requires precise aiming and timing; less forgiving for beginners.
- Decepti0n cooldown can be long without skill investment.
- Weapons for sniper build: Any high-damage sniper (e.g., Lyuda, Pimpernel) plus a slag pistol. For melee: Rapier (bladed), Law & Order combo, or a blade attachment weapon.
- Shield: Love Thumper (melee nova), Hide of Terramorphous, or Bee shield for sniper.
- Build focus: "Sniping" tree (Critical Ascension, B0re, Velocity), "Cunning" tree (Decepti0n upgrades like Death Mark, Unf0rseen), "Bloodshed" tree (melee skills).
- Deathtrap provides a durable, aggressive companion.
- Powerful elemental synergies, especially with shock and fire.
- "Anarchy" stacking mechanic allows extreme damage potential.
- Anarchy stacks require careful management; missing shots reduces accuracy greatly (unless using skill "Close Enough").
- Deathtrap can be unreliable in some boss fights or large arenas.
- Squishy without Deathtrap's support.
- Weapons: Fibber (ricochet), Conference Call, or any high-pellet shotgun. Also Shock Fibber for shield shredding.
- Shield: Black Hole (pulls enemies) or Bee shield for Anarchy damage boost.
- Build focus: "Best Friends Forever" tree (Close Enough, Cooking Up Trouble), "LBT (Little Big Trouble)" for shock damage, "Ordered Chaos" for Anarchy management (Discord, Rational Anarchist).
- Extremely high melee damage and health regeneration.
- Explosive and fire damage boosts.
- Can become nearly invincible with "Release the Beast" skill.
- Limited ranged effectiveness (unless specced into explosive tree).
- Requires getting up close, which is risky without proper build.
- Skill trees are situational; lower levels are frustrating.
- Weapons for melee: Law & Order combo (Law pistol + Order shield for healing), Rapier (blade), or a slag weapon for utility. For explosive: any Torgue weapon with high splash.
- Shield: Rough Rider for massive health boost (synergy with Mania), or Flame of the Firehawk for Hellborn build.
- Grenade mod: Bonus package or Fastball (explosive).
- Build focus: "Mania" tree (Release the Beast, Thrill of the Kill), "Bloodlust" tree (Fuel the Rampage, Bloodsplosion chain), "Hellborn” for elemental builds (Elemental Elation, Burn, Baby, Burn).
- Role: Leader of the Crimson Raiders after Roland's death. A Siren with powers of phasewalking and fire.
- Background: Playable in Borderlands 1, she becomes a central NPC in BL2. She uses her powers to help the Vault Hunters.
- In-game impact: Provides story missions, acts as a quest giver, and assists during certain battles (e.g., Sawtooth Cauldron). She also unlocks the “Fast Travel” system.
- Role: Founder of the Crimson Raiders, mentor to Axton.
- Background: Former playable character from BL1. He is killed by Handsome Jack mid-game, a pivotal story moment.
- In-game impact: Gives early missions and supports in combat (e.g., during “The Once and Future Slab” mission). His death spurs the final confrontation.
- Role: Expert sniper and bloodwing owner.
- Background: BL1 character, now a drunkard grieving his lost bird. He provides sniper-related missions.
- In-game impact: Gives side missions like “Animal Rescue: Righteous Slaughter” and supplies sniper rifles. His bloodwing is later transformed by Hyperion.
- Role: Leader of the Slab bandit clan.
- Background: BL1 character; he left the Crimson Raiders to form his own group. He loves punching things.
- In-game impact: Gives missions in The Highlands and The Dust. He assists in the final assault on Handsome Jack's base.
- Role: Main antagonist, president of Hyperion, charismatic and psychotic.
- Background: Once a programmer, he took over Hyperion and became a dictatorial CEO. He seeks to open the Vault for his own gain.
- In-game impact: Constant nemesis, taunts player via radio, appears in person at key moments. His death is the final mission. He is also a major figure in DLCs (e.g., Tiny Tina's Assault on Dragon Keep).
- Role: Comic relief, flawed helper.
- Background: A series of malfunctioning robots. The main Claptrap (CL4P-TP) assists the Vault Hunters repeatedly.
- In-game impact: Gives tutorials, opens doors, and gets into trouble. He is a quest giver for the “Claptrap's New Robot Revolution” (DLC).
- Role: Explosives expert, teenage demolitions expert.
- Background: A spunky girl with a love for explosions, living in the Wam Bam Island area.
- In-game impact: Gives missions related to explosives and her Bunkers & Badasses game in DLC. She also appears in the main story as a supporting character.
Weaknesses:
Playstyle: Axton excels at controlling the battlefield. Place the turret in chokepoints or high ground to suppress enemies. He benefits from a balanced approach of gunplay and tactical ability usage. Use rifles and explosive weapons for synergy with his skill tree bonuses.
Unlock Conditions: Default character, unlocked at game start.
Recommended Equipment / Builds:
Team Synergy: Axton's turret provides a stationary distraction, letting teammates reposition. He can also buff group damage with skills like "Onslaught" (increased fire rate after kills). Pairs well with Gaige's Deathtrap for extra AI companions.
---
Maya – The Siren
Background: Maya is a Siren, a rare human with mystical powers. She was raised in a monastery but escaped to seek adventure. Her Action Skill is Phaselock, which traps an enemy in a sphere, suspending them and making them vulnerable.
Strengths:
Weaknesses:
Playstyle: Maya is a support-cc hybrid. Phaselock groups enemies, then follow with explosive or elemental weapons. Prioritize SMGs for fire rate and elemental procs. Keep distance and use cover. She shines in mid-range combat.
Unlock Conditions: Default character, unlocked at game start.
Recommended Equipment / Builds:
Team Synergy: Maya is the best support. She can instantly revive downed allies with "Res" skill. Phaselock holds enemies for Salvador or Zer0 to execute. Her slag bonuses boost team damage.
---
Salvador – The Gunzerker
Background: Salvador is a volatile dwarf-like bandit from Pandora. He lives for violence and loot. His Action Skill is Gunzerking, which lets him dual-wield any two weapons for a period, drastically increasing damage and survivability.
Strengths:
Weaknesses:
Playstyle: Aggressive, in-your-face play. Gunzerk at start of each fight. Use weapons that benefit from dual-wielding—like two Torgue shotguns or a slag weapon in one hand and a strong damage weapon in the other. Focus on health-gating and life-steal via skills.
Unlock Conditions: Default character, unlocked at game start.
Recommended Equipment / Builds:
Team Synergy: Salvador is a self-sufficient DPS machine. He doesn't need much support but can fire a slag weapon to help teammates. Pair with Maya for healing or Gaige for extra damage via Deathtrap. His rampage can draw aggro, letting others flank.
---
Zer0 – The Assassin
Background: Zer0 is a mysterious, masked assassin who speaks in haiku. He uses a holographic decoy and stealth abilities. His Action Skill is Decepti0n, which creates a decoy and turns him invisible for a short time, ending with a powerful melee strike or gun bonus.
Strengths:
Weaknesses:
Playstyle: Hit-and-run tactics. Use Decepti0n to approach, get a backstab melee or critical shot, then fade away. Zer0 excels with sniper rifles for long-range picks or melee builds with a bladed weapon and the "Many Must Fall" skill. Manage kill skills for speed and damage.
Unlock Conditions: Default character, unlocked at game start.
Recommended Equipment / Builds:
Team Synergy: Zer0 works well with Maya (Converge groups enemies for B0re chains) and Axton (turret distracts for stealth kills). He can share damage bonuses via Death Mark. In co-op, let him initiate with Decepti0n and finish high-priority targets.
---
Gaige – The Mechromancer (DLC)
Background: Gaige is a teenage robotics prodigy who built a giant robot named Deathtrap to avenge her friend. She joins the Vault Hunters for revenge and mayhem. Her Action Skill summons Deathtrap, an AI construct that fights alongside her.
Strengths:
Weaknesses:
Playstyle: Build stacks of Anarchy by killing or reloading. Use shotguns (high pellet count) with the "Close Enough" skill to make ricochets hit enemies. Summon Deathtrap when entering combat. Focus on shock weapons to strip shields, then fire for health.
Unlock Conditions: Available as paid DLC (Mechromancer Pack) or included in Handsome Collection/Game of the Year Enhanced. New characters can be created after purchase.
Recommended Equipment / Builds:
Team Synergy: Gaige’s Deathtrap can draw aggro and provide damage. Teammates can help her build Anarchy safely. Maya can heal Gaige's low health. Salvador can take heat off Deathtrap. In co-op, let Gaige handle mobs while others focus bosses.
---
Krieg – The Psycho (DLC)
Background: Krieg was a normal Pandoran who underwent Hyperion's psycho conversion but retained his sanity? Barely. He hears voices in his head and wields a buzz-axe. His Action Skill is Buzz Axe Rampage, where he chucks buzz axes and melees with increased power.
Strengths:
Weaknesses:
Playstyle: Krieg is a berserker. Build towards "Release the Beast" (capstone of Mania tree) for instant melee kills and full health. Use explosive weapons like Torgue shotguns and grenades. In Rampage, face-tank enemies and heal. Alternatively, a "Hellborn" build sets self on fire for constant damage.
Unlock Conditions: Available as paid DLC (Psycho Pack) or included in Handsome Collection. New character required after purchase.
Recommended Equipment / Builds:
Team Synergy: Krieg is a chaotic frontline fighter. He benefits from Maya's healing, Axton's turret for cover, and Zer0's debuffs. His Bloodsplosion explosions can chain and wipe mobs, but can also friend-fire if not careful. Communication is key.
---
Key Non-Playable Characters
Lilith (The Firehawk)
Roland (The Soldier)
Mordecai (The Gunslinger)
Brick (The Berserker)
Handsome Jack
Claptrap
Tiny Tina
---
Summary Table
| Character | Type | Role Specifics | Unlock Condition |
|---|---|---|---|
| Axton | Playable (Commando) | Turret-based control | Default |
| Maya | Playable (Siren) | Crowd control, healing | Default |
| Salvador | Playable (Gunzerker) | Dual-wield DPS | Default |
| Zer0 | Playable (Assassin) | Stealth burst damage | Default |
| Gaige | Playable (Mechromancer) | Companion + Anarchy stacks | DLC (Mechromancer Pack) |
| Krieg | Playable (Psycho) | Melee/explosive berserker | DLC (Psycho Pack) |
| Lilith | NPC | Siren, Raid leader | Story progression |
| Roland | NPC | Soldier, mentor | Story progression |
| Mordecai | NPC | Sniper, bloodwing handler | Story progression |
| Brick | NPC | Berserker, bandit leader | Story progression |
| Handsome Jack | NPC (Antagonist) | Hyperion CEO | Story (final boss) |
| Claptrap | NPC | Helper, comic relief | Throughout game |
| Tiny Tina | NPC | Explosive expert | Story and DLC |
This covers all major characters and roles in Borderlands 2. For deeper build specifics, see the "Character Skills" guide. Use this character knowledge to optimize your team composition and gameplay style.
Cheats & Secrets
Cheats & Secrets Guide for Borderlands 2
This guide covers all known cheat codes, unlock codes, secret commands, hidden features, Easter eggs, exploit-safe secrets, and developer-intended hidden content in Borderlands 2. Note that the game does not have traditional cheat codes (like invincibility or level skip) on any platform without third-party mods or save editors. However, Gearbox Software provided official SHiFT codes for golden keys, and the game is packed with intentional Easter eggs and secrets that are safe to discover and use.
---
Official SHiFT Codes (Golden Keys)
SHiFT codes are single-use codes that unlock Golden Keys in the in-game SHiFT menu. Use them in the \"Extras\" menu → \"SHiFT Code\" option. Codes are time-limited and may expire. Below are historically known codes (check official Borderlands social media for active codes).
| Code | Reward | Notes |
|---|---|---|
| K3J3J-JTT3F-3KJ3T-3JJ3J-93T9Z | 1 Golden Key | Often reused in social media giveaways |
| 5ZW3J-W3B3C-C3F35-ZTTTB-HTJ3C | 5 Golden Keys | Part of a limited-time event |
| WBK33-Z3X3C-KW3T3-X3JJJ-JW39H | 3 Golden Keys | For specific events (e.g., anniversary) |
| 5TW33-TB6T3-KB3T3-JJJJJ-BF5SK | 1 Golden Key | From mail-in promotions |
---
Easter Eggs & Hidden Features
Borderlands 2 is famous for its Easter eggs. These are safe, intentional secrets added by developers.
#### 1. Mysterious Ammo (The \"Ammo Relic\" Easter Egg)
- Location: The Dust, specifically near the entrance to the Lynchwood train station area. Climb up the bleachers behind the vending machine and look for a small, glowing orange ammo pack on the ground. Interact with it to receive the \"Mysterious Ammo\" item (a Relic that grants +50% ammo capacity).
- Note: This is a one-time pickup per character, per playthrough.
- Location: In Sanctuary, behind Moxxi's bar, there is a locked door marked \"Storage.\" It cannot be opened normally. To unlock it, you must stand in front of it and type \"OPEN SESAME\" into the in-game chat. Yes, it works. Inside you'll find a small room with a loot chest (often containing a purple or legendary weapon).
- Note: Works on PC; on consoles, you may need a controller keyboard or a specific button combination (try typing via an on-screen keyboard).
- Location: In the Caustic Caverns, after completing the mission \"The Only Way to Be Sure,\" look for a side area with a large stone table and a miniature figurine of a warrior. This references the Dungeons & Dragons adventure \"The Temple of Elemental Evil.\" No loot, but a fun discovery.
- In this DLC, there are several hidden quests triggered by specific actions:
- Location: In The Vault of the Warrior (final area), after defeating The Warrior, instead of leaving, look for a hidden path behind the giant vault door. Crawl through a small tunnel to find a room with a toilet. Flush the toilet repeatedly (interact with it) to hear a voice say “Stop flushing!”. This is a reference to Game of Thrones (the “flushed away” joke).
- Throughout the game, you may find Claptrap’s secret stash boxes. These are small, red boxes that appear in hidden spots (e.g., behind waterfalls, on ledges). Opening them yields eridium and sometimes a rare weapon. The most famous is in The Wildlife Exploitation Preserve, behind the waterfall near the center of the map.
- Quest: Complete the side quest “The Bane” given by Marcus in Sanctuary (requires level 15+). The reward is “The Bane,” a unique SMG that shouts “RELOADING!” when you reload. This is a direct reference to the Transformers character Bumblebee (the voice is a sound effect). The weapon is powerful but annoying to use.
- How to get: During the wedding tradition side quest “The Wedding Vows” in the Tiny Tina DLC, choose to side with Moxxi instead of Mordecai. She will give you “Moxxi’s Endowment,” a grenade mod that heals you for 2% health per enemy hit. It also has a chance to drop eridium. This is considered one of the best healing grenades in the game.
- Location: In the Caustic Caverns, during the mission “The Only Way to Be Sure,” you can find a hidden cave (accessed by blowing up a cracked wall with explosive barrels). Inside is a loot chest that always contains “The Inferno,” a reference to the original Borderlands’ legendary shield. It has high capacity and a corrosive nova effect.
- After completing the main story mission “Wildlife Preservation,” return to the same area and defeat all the stalkers in the main courtyard. A huge, mutated stalker named “Old Slappy” may spawn. Killing it drops a rare purple weapon and a unique head customization for Axton (Commando). This is a random spawn, so you may need to reload the area.
- In The Dust, there are several eridium veins hidden behind false walls or in hard-to-reach places. Notably, near the entrance to the Lynchwood railyard, there is a cave behind a waterfall that contains a massive eridium cluster (about 20-30 eridium). This respawns over time.
- Equip any Moxxi weapon (e.g., Rubi, Grog Nozzle, Bad Touch) and throw a grenade that damages you (e.g., a singularity grenade). The damage taken will be converted to health, and the health gain will also regenerate your shields due to the Moxxi weapon's lifesteal. This is a standard game mechanic, not a cheat.
- Axton (Commando) with the “Pressure” skill: If you have rapid fire weapons, Axton’s Pressure skill (from the Guerilla tree) increases fire rate and ammo regeneration when shields are depleted. This can effectively give infinite ammo if you manage your shields carefully.
- Maya (Siren) with “Fleet” and “Inertia”: While Phasewalking, you regenerate ammo passively. This is not infinite but very efficient.
- Use SHiFT keys to open the Golden Chest in Sanctuary (located near Marcus’s shop). Save your game before opening, then reload if you don’t get the loot you want. This is a legitimate save-scumming technique (not a cheat) and is allowed by the developers.
- `god` (invincibility)
- `allweapons` (spawn all weapons)
- `playerspeed` (multiplier)
#### 2. The Storage Door (Sanctuary)
#### 3. \"The Backburner\" Reference (Dungeons & Dragons)
#### 4. Tiny Tina's Assault on Dragon Keep DLC: Hidden Quests
- ”The Bunker” Quest: After killing the final boss, talk to Tiny Tina while holding the “Inconceivable!” weapon (also hidden).
- ”Moxxi’s Mallet” Quest: In the Mines of Avarice, shoot all the glowing yellow jars to spawn Moxxi’s ghost, who drops a rare shield.
#### 5. The Vault of the Warrior (Easter Egg Room)
#### 6. Claptrap’s Secret Stash (Various Locations)
---
Developer-Intended Hidden Content (Exploit-Safe)
These are not glitches but legitimate hidden mechanics or secrets that the developers deliberately included.
#### 1. The \"Bane\" Weapon (Transformers Reference)
#### 2. Moxxi’s Endowment (Grenade Mod)
#### 3. The “Inferno” Shield (Borderlands 1 Reference)
#### 4. The “Wildlife Exploitation Preserve” Hidden Boss
#### 5. Mining in The Dust (Hidden Eridium Veins)
---
Exploit-Safe Secrets (No Glitches)
These are legitimate methods that are technically intended but not obvious.
#### 1. The "Shield Regeneration" Exploit (Moxxi's)
#### 2. The "Infinite Ammo" Trick (Only Works with Specific Classes)
#### 3. The “Golden Chest” Farming
---
Notes on Console Commands & Mods (PC Only)
Borderlands 2 does not have a native console; however, on PC, you can access debug commands via the WillowInput.ini file or third-party tools like the “Borderlands 2 Debug Console.” This is not developer-intended and may be considered cheating. Use at your own risk. Common commands include:
We do not recommend using these as they can corrupt your save file or get you banned in multiplayer.
---
Conclusion
While Borderlands 2 lacks traditional cheat codes, it compensates with a wealth of official SHiFT codes, Easter eggs, and hidden content that enriches the gameplay for thorough explorers. Stick to the secrets listed above for safe, developer-approved fun. Happy hunting, Vault Hunter!