
Call of Duty: Warzone
## Overview Call of Duty: Warzone (currently rebranded as Warzone 2.0) is a **free-to-play battle royale** and **extraction shooter** developed by **Infinity Ward**, **Raven Software**, and **Treyarch**, and published by **Activision**. It was initially released on **March 10, 2020**, with a massiv...
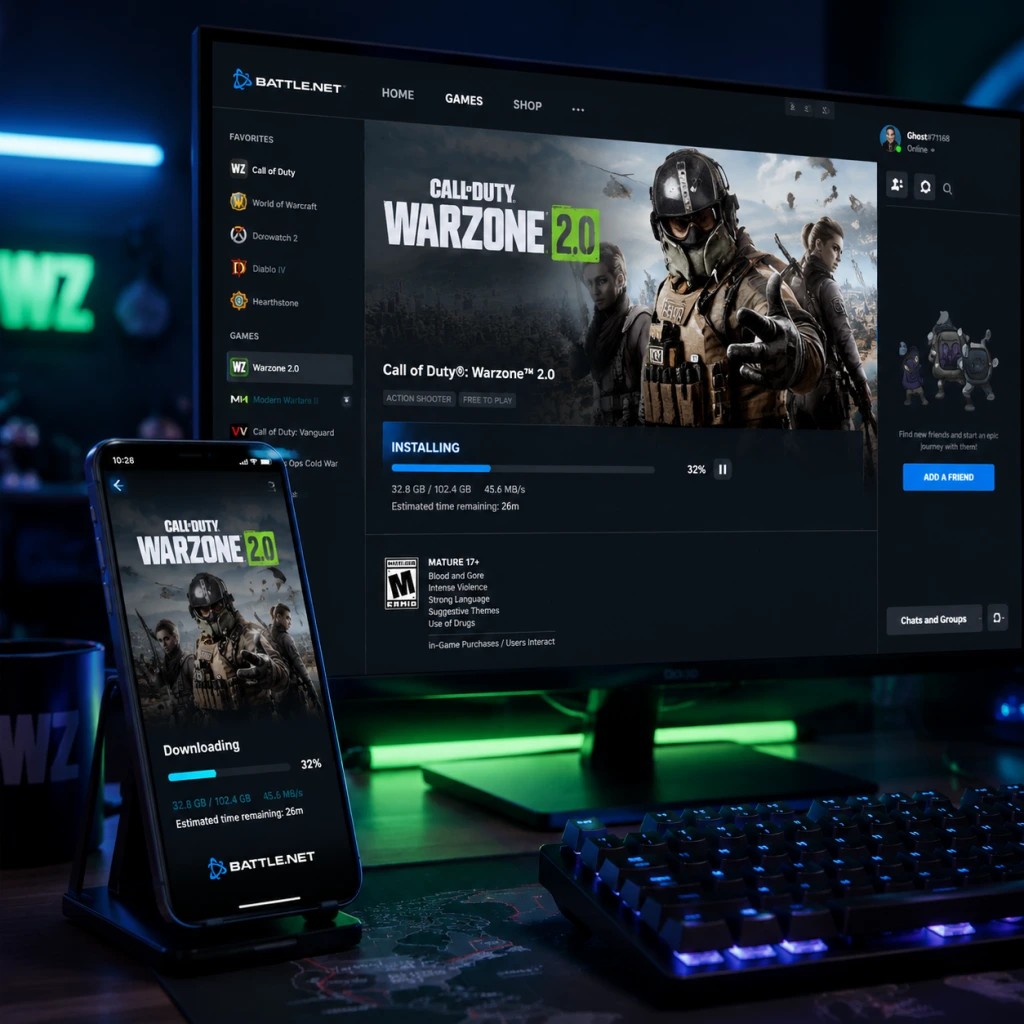
Download & Installation
Overview
Call of Duty: Warzone (currently Warzone 2.0) is a free-to-play battle royale game developed by Infinity Ward, Raven Software, and Treyarch. It is available on PC (via Battle.net and Steam), PlayStation 4, PlayStation 5, Xbox One, and Xbox Series X|S. Note that there is no native Nintendo Switch version, and the mobile version (Warzone Mobile) is a separate title. This guide covers the main Warzone experience.
Platform Availability
| Platform | Store / Source | Notes |
|---|---|---|
| PC (Windows) | Battle.net (Blizzard), Steam | Both require the Call of Duty HQ launcher (free). The game is shared across both stores, but you must choose one. |
| PlayStation 4/5 | PlayStation Store | PS5 version offers enhanced graphics and DualSense features. |
| Xbox One / Series X | S | Microsoft Store |
| Nintendo Switch | Not available | No official version. |
| Mobile | App Store / Google Play (separate app: Warzone Mobile) | Not covered in this guide. |
System Requirements (PC)
Minimum Requirements (Targeting 30 FPS at 720p)
- OS: Windows 10 64-bit (latest update)
- CPU: Intel Core i3-6100 / AMD Ryzen 3 1200
- RAM: 8 GB (DDR4)
- GPU: NVIDIA GeForce GTX 960 / AMD Radeon RX 470
- VRAM: 2 GB
- Storage: SSD with 125 GB free space (HDD not recommended)
- Internet: Broadband connection
- OS: Windows 10/11 64-bit (latest update)
- CPU: Intel Core i5-6600K / AMD Ryzen 5 1600X
- RAM: 12 GB
- GPU: NVIDIA GeForce GTX 1060 (6GB) / AMD Radeon RX 580
- VRAM: 6 GB
- Storage: SSD with 125 GB free space
- Internet: Broadband connection
- OS: Windows 10/11 64-bit
- CPU: Intel Core i7-8700K / AMD Ryzen 7 2700X
- RAM: 16 GB
- GPU: NVIDIA GeForce RTX 3070 / AMD Radeon RX 6800 XT
- VRAM: 8 GB+
- Storage: NVMe SSD with 125 GB free space
- Internet: Broadband connection
- Creating an account: Go to [activision.com](https://www.activision.com), click "Sign Up", and follow the instructions. You’ll need an email address and a unique username.
- Linking accounts (optional): You can link your PlayStation, Xbox, Steam, or Battle.net account to your Activision ID. This allows cross‑progression (but not cross‑platform purchases).
- Crossplay: Enabled by default. You can disable it in settings if desired.
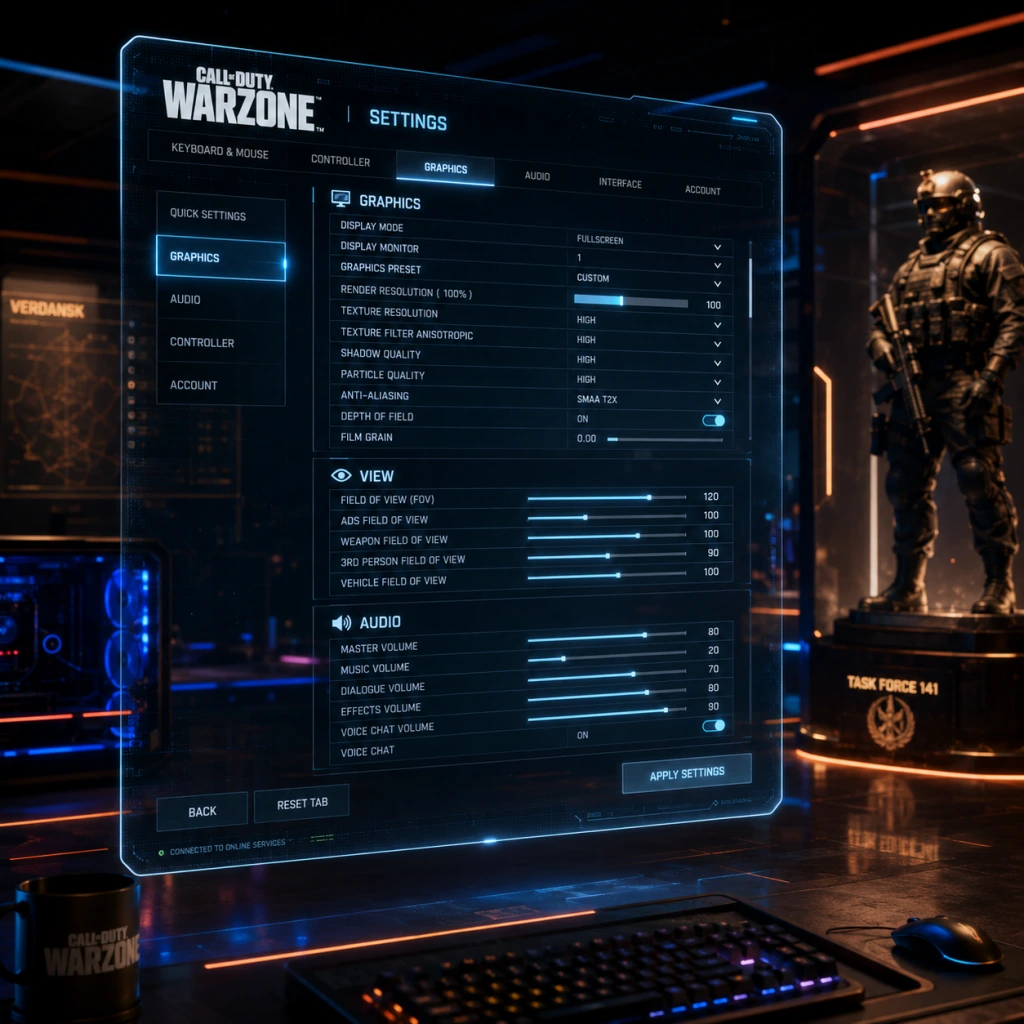
- On PC, go to Settings > Graphics and set Display Mode to Fullscreen, enable NVIDIA Reflex Low Latency if supported, and adjust Render Resolution to your monitor’s native.
- On console, ensure your TV is set to Game Mode for low input lag.
- Download and install any required texture packs (optional for higher quality).
Recommended Requirements (Targeting 60 FPS at 1080p)
Ultra / 4K Requirements (Targeting 60+ FPS at 4K)
Important: Storage space can exceed 150 GB after updates. An SSD is strongly recommended to avoid texture pop-in and long load times.
Step-by-Step Installation
PC – Battle.net
1. Create or log in to your Blizzard Battle.net account at [battle.net](https://www.battle.net).
2. Download the Battle.net desktop app from the website and install it.
3. Launch the Battle.net app and log in.
4. Click on the "All Games" tab or the Call of Duty section on the left sidebar.
5. Find "Call of Duty: Warzone" (or "Call of Duty HQ" – both lead to the same client). Click the "Install" button.
6. Choose installation location (ensure at least 150 GB free on an SSD). Click "Start Install".
7. Wait for the download to complete. The launcher will download the base game plus any required packs (Multiplayer, Campaign optional – only Warzone is mandatory for battle royale).
8. Once installed, the "Play" button becomes active. Click it to launch Call of Duty HQ.
PC – Steam
1. Install the Steam client from [steampowered.com](https://store.steampowered.com) and log in.
2. Open the Steam store and search for "Call of Duty: Warzone" (or navigate to the Free to Play section).
3. Click the "Play Game" or "Add to Library" button.
4. In your Library, select Call of Duty: Warzone, then click "Install".
5. Choose installation directory (again, SSD with 150 GB free).
6. The download will begin. Steam will download the Warzone content as part of the Call of Duty HQ package.
7. After installation, click "Play" to launch.
Note: Steam and Battle.net versions are separate licenses; you cannot share progress across stores unless you link your Activision account, which is automatically done when you log into COD HQ. However, you only need to install on one store.
PlayStation 4 & 5
1. Turn on your console and sign in to your PlayStation Network account.
2. Go to the PlayStation Store (on the main menu or via the icon).
3. Search for "Call of Duty: Warzone".
4. Select the game and choose "Download" (it is free).
5. Wait for the download and installation. On PS5, you can choose between PS4 and PS5 versions – select the PS5 version for better performance.
6. Once installed, the game appears on your home screen. Launch it.
Storage: Warzone requires approximately 110 GB on PS4 and 95 GB on PS5 (may vary with updates).
Xbox One / Xbox Series X|S
1. Sign in to your Microsoft account on your Xbox.
2. Open the Microsoft Store (the store icon on the dashboard).
3. Search for "Call of Duty: Warzone".
4. Click "Get" or "Install" (it's free).
5. Choose a storage device if prompted (internal or external). An SSD (internal or expansion card) on Xbox Series is highly recommended.
6. The download begins. On Xbox Series, Smart Delivery automatically installs the optimized version.
7. Launch the game from the home screen once installation finishes.
Storage: Approximately 110 GB on Xbox One, 95 GB on Series X|S.
Account Setup
All platforms require an Activision account to play Warzone. During first launch, you will be prompted to sign in or create one.
First Launch Configuration
After the initial download and account sign‑in, the game will:
1. Download shaders (this may take 10–20 minutes and can cause temporary stutter – do not interrupt).
2. Present a terms of service and privacy policy – accept to continue.
3. Prompt for settings: Graphics (PC), audio, controller vs. mouse/keyboard, etc. You can adjust later.
4. Enter the main menu: You’ll see the Call of Duty HQ (the launcher). Select Warzone from the playlist to start.
5. Optional: If you own Modern Warfare II/III or Black Ops Cold War, the HQ will let you launch those as well. For Warzone only, just ignore the other tiles.
Recommendations for first launch:
Common Installation Errors and Fixes
| Error | Cause | Solution |
|---|---|---|
| Download stuck at 0% | Corrupted cache or network issue | Restart the launcher (Battle.net/Steam/Store). On Battle.net, go to Settings > Downloads and clear cache. On Steam, verify integrity of game files (Library > right‑click > Properties > Local Files > Verify integrity). |
| "Installation would require more space" | Not enough free storage | Free up space or install on a different drive. Warzone requires a minimum of 125 GB, but 150 GB is safer. |
| "Dev Error 6036" (or similar) | Outdated graphics drivers or corrupted shader cache | Update GPU drivers. Delete the shader cache folder: on PC, go to `Documents/Call of Duty/players` and remove `shaders` folder. Restart the game. |
| Game crashes on launch | Conflicting background software or missing DLLs | Disable overlays (Discord, GeForce Experience, Xbox Game Bar). Reinstall Microsoft Visual C++ Redistributables and DirectX. |
| "Account not authorized" | Server issues or region lock | Wait a few minutes and retry. Ensure your Activision account is fully verified. |
| Slow download speed on console | Server congestion or network throttle | Pause the download and resume. Use a wired connection. Try restarting the console in Power Saving mode. |
| Xbox/PS cannot find Warzone in store | Store region misconfiguration | Check that your console region matches your account region. Search for "Call of Duty" rather than full name. |
Post-Installation Verification
After installation completes, do the following to confirm everything is working:
1. Launch the game and wait for the shader optimization to finish (PC) or for the menu to load (console).
2. Check for updates: The launcher will often download a small patch. Let it complete.
3. Verify file integrity (PC only):
- Battle.net: Click the gear icon next to the Play button > Scan and Repair > Start Scan.
- Steam: Right‑click Call of Duty: Warzone in Library > Properties > Local Files > Verify integrity of game files.
4. Test the tutorials: The game offers a training mode or the ability to jump into a match. Play a few minutes to ensure no graphical glitches or crashes.
5. Monitor performance: Use in‑game FPS counter (PC) or console performance metrics to ensure you meet your target.
6. Clear any leftover installation files: On PC, delete the installer files (e.g., the Battle.net or Steam installer) to free up space.
If you encounter any persistent issues, check the official [Call of Duty Support](https://support.activision.com) or community forums for the latest patches and known issues.
Game Introduction
Overview
Call of Duty: Warzone (currently rebranded as Warzone 2.0) is a free-to-play battle royale and extraction shooter developed by Infinity Ward, Raven Software, and Treyarch, and published by Activision. It was initially released on March 10, 2020, with a massive overhaul launching as Warzone 2.0 on November 16, 2022, replacing the original client. The game is available on PC (via Battle.net and Steam), PlayStation 4, PlayStation 5, Xbox One, and Xbox Series X|S. It supports full cross-play and cross-progression across all platforms.
Story Overview & Setting
While Warzone does not have a traditional single-player campaign, its narrative is woven into the larger Call of Duty: Modern Warfare universe (2019–2023). The setting is the fictional Middle Eastern nation of Al Mazrah (introduced in Modern Warfare II), a sprawling desert region dotted with urban centers, military bases, underground tunnels, and a dam. The lore revolves around shadowy factions—including the terrorist group Al-Qatala, the private military contractor Chimera, and remnants of Armistice—competing for control of a mysterious substance called Mithril, a powerful chemical weapon. Major Operators (playable characters) include Captain John Price, Simon "Ghost" Riley, Kyle "Gaz" Garrick, Farah Karim, and Alex Keller, each with their own backstory and unlockable skins.
Core Appeal & Target Audience
Warzone’s core appeal lies in its high-octane, tactical yet accessible battle royale gameplay. It combines the tight gunplay and weapon system of Call of Duty with a large map (Al Mazrah: ~20km²), detailed armor plates, killstreak mechanics (e.g., UAV, Cluster Strike), and a unique Gulag system where eliminated players can fight 1v1 for a second chance. The target audience spans both casual players seeking quick matches and competitive players aiming for high-kill wins. The free-to-play model lowers the barrier to entry, while frequent seasonal updates keep the meta fresh.
Game Modes
Warzone offers several core modes:
- Battle Royale – Classic 150-player last-team-standing play solo, duo, trio, or quad.
- Resurgence – Smaller maps (e.g., Ashika Island, Vondel) with faster respawn mechanics; supports various squad sizes.
- DMZ – An extraction-shooter mode where players complete faction contracts, loot, and exfil while facing AI enemies and other squads.
- Plunder – A respawn-enabled mode focused on collecting cash and completing contracts.
- Limited-Time Modes – Seasonal events like Iron Trials, Armored Royale, or Unhinged.
- Gulag – A signature respawn system that turns early elimination into a second-chance 1v1 duel.
- Loadout Drop – Players can call in custom weapon classes, a rare feature in battle royale games that emphasizes skill-based loadout customization.
- Cross-integration – Direct continuity with premium Call of Duty titles, allowing players to use unlockable content across games.
- Squad Play Emphasis – Built-in ping system, revives, and buy stations encourage tactical teamplay.
- Performance & Customization – Weapon tuning, attachment visibility, and realistic ballistics (bullet drop, velocity) cater to both arcade and simulation fans.
Online/Offline Support
Warzone is exclusively online. There is no offline mode or split-screen local play. A persistent internet connection is required for all game modes, including private matches. Dedicated servers run at 60–120 ticks per second depending on platform.
DLC / Expansion Overview
Warzone is continuously updated through free seasonal content (Seasons 1–6 every ~8 weeks) that adds new weapons, Operators, map changes, and modes. There are no paid expansions. Monetization comes from the Battle Pass (premium track), Store Bundles (Operator skins, blueprints, emotes), and the BlackCell premium tier. Every major Call of Duty premium release (Modern Warfare, Black Ops Cold War, Vanguard, Modern Warfare II, Modern Warfare III) has integrated its weapons and Operators into Warzone, enriching the arsenal.
What Makes It Unique
Whether you’re dropping into Al Mazrah for the first time or grinding for a Nuke killstreak, Warzone remains a definitive battle royale experience that evolves with each season.
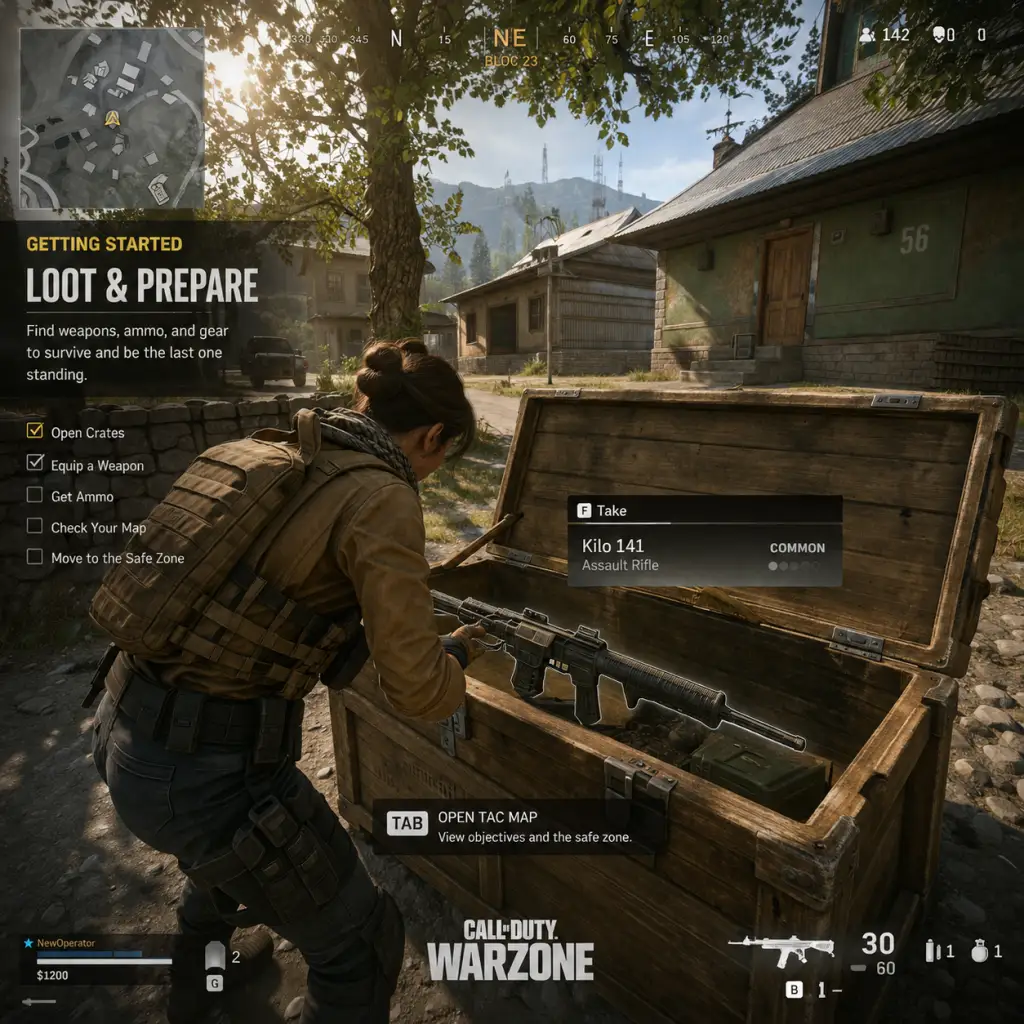
Getting Started
Getting Started
Your First Hour in Call of Duty: Warzone
Welcome to Call of Duty: Warzone 2.0. This guide will walk you through everything you need to survive your first hour, avoid common pitfalls, and start climbing the leaderboard.
#### 1. Character Creation (Operators)
Warzone doesn’t have a traditional character creation. Instead, you choose an Operator – predefined characters with unique skins and voice lines. You unlock operators by:
- Starting with a few default operators (e.g., Mil-Sim, König, Stiletto).
- Purchasing bundles from the Store (Cosmetic only, no gameplay advantage).
- Completing battle pass tiers (free and premium).
Tip: Pick an operator whose skin blends into the environment (e.g., dark shades for shadows, ghillie suits for bushes). Avoid bright or flashy skins early on.
#### 2. Platform-Specific Controls
Familiarize yourself with the default controls. You can customize them in Settings > Controller/Keyboard & Mouse.
| Action | PlayStation | Xbox | PC (Keyboard) |
|---|---|---|---|
| Move | Left Stick | Left Stick | W/A/S/D |
| Look | Right Stick | Right Stick | Mouse |
| Sprint | L3 (click L stick) | LS (click L stick) | Shift |
| Crouch | Circle (O) | B | Ctrl |
| Prone | Hold Circle | Hold B | Z (default) |
| Jump | X | A | Space |
| Interact/Pick Up | Square | X | F |
| Reload | Triangle | Y | R |
| Switch Weapon | R1 | RB | 1/2 or Mouse Wheel |
| Use Lethal | R1+Square | RB+X | 4 (default) |
| Use Tactical | L1 | LB | 3 (default) |
| Ping/Comm Rose | D-Pad Up | D-Pad Up | Alt or Middle Mouse |
| Plate Armor | Double-tap Right D-Pad | Double-tap Right D-Pad | 5 (default) |
| Map | Touchpad | View Button | M |
| Scoreboard | Touchpad | View Button (hold) | Tab |
#### 3. UI Overview (HUD)
When you enter a match, you’ll see:
- Health Bar (bottom center): White segments – full health. When damaged, segments turn red and slowly regenerate. Use Stim (Tactical) to heal faster.
- Armor Plates (below health): Up to 3 plates can be equipped. Yellow indicators show empty slots. Plates can be found on the ground or purchased.
- Cash Counter (top right): In-game currency used for Buy Stations (Killstreaks, Self-Revives, Loadout Drops). Start with $0, earn by looting, completing contracts, and killing enemies.
- Minimap (top left): Shows nearby enemies (red circles when they fire unsuppressed), teammates (blue/green dots), and points of interest.
- Compass (top center): Shows cardinal directions. Use for callouts (e.g., “Enemy at 270 degrees”).
- Active Contract (left side): Shows objective when you pick up a contract (e.g., Bounty, Most Wanted, Intel, Safecracker).
- Ammo & Equipment (bottom right): Current weapon, reserve ammo, lethal/tactical count, killstreak slot (e.g., UAV, Cluster Strike).
- Teammate Status (left side): Health bars, down indicators, and distance.
- Don’t hot drop (e.g., Al Mazrah City, Observatory) as a beginner. Land at off-center locations like small compounds, farms, or villages (e.g., Sawah Village, Oasis Gate, Cemetery). Use the Tac Map (M) to find unmarked buildings.
- Loot priority: Armor Plates (equip 3), a weapon (any, but AR/SMG preferred), Cash ($1000+ is good), Self-Revive, Gas Mask, and Killstreaks (UAV is best for beginners).
- Open every loot box (brown wooden crates) and search floor loot. Yellow boxes contain higher-tier items.
- If you find a Buy Station (marked with a dollar sign icon on map), you can purchase: Armor Plates ($500), Self-Revive ($4000), Gas Mask ($3000), UAV ($4000), Loadout Drop Marker ($10,000 – save for mid-game). Don’t buy early – loot first.
- Contracts are orange circles on your minimap. They give cash, XP, and reveal enemies.
- Best beginner contracts:
- Avoid the Most Wanted contract (marks you on map for everyone) until you understand rotations.
- Watch the Circle Timer (top left of minimap). When it shrinks, you must move inside the safe zone or take continuous damage from the gas.
- Always check your Gas Mask – it protects you from gas damage. Equip it from inventory (press Tab on PC, Up on D-pad to open backpack).
- Use vehicles (ATV, UTV, Truck) to rotate quickly. Be careful – vehicles are loud and attract enemies.
- Don’t stay in one building too long. The circle forces you to move; getting caught outside costs HP and plates.
- When you have $10,000, find a Buy Station and purchase a Loadout Drop Marker. Throw it in a safe area (inside the circle, behind cover). This drops your custom weapon classes (weapons, perks, equipment).
- Create a custom loadout in the main menu: Choose a primary weapon (e.g., M4, Kastov-74u), attachments for recoil control and ADS speed, and perks like Overkill (two primaries) or Ghost (invisible to UAVs). For beginners, use Overkill with an AR and a shotgun/SMG.
- If you can’t afford loadout, you can buy a personal UAV ($4000) to scout enemies.
- Looting for too long: Many beginners spend minutes looting every container. Loot only the first 30 seconds, then move toward the circle. You can loot dead enemies later.
- Engaging without full armor: Always equip 3 plates before a fight. Even one plate missing makes you easier to kill.
- Standing still in the open: Use cover constantly. Move from tree to rock, building to wall.
- Ignoring audio: Footsteps, gunshots, and vehicle sounds are critical. Use a headset. Lower your own movement (walk, crouch) when near enemies.
- Reviving teammates in open area: If a teammate goes down, throw smoke first, then revive. Don’t rush into a line of fire.
- Using killstreaks carelessly: UAV reveals you on minimap when you deploy it (but shows enemies). Cluster Strikes and Airstrikes have a long animation – don’t use them in close quarters.
- Dropping your cash: Always use a Buy Station before dying. Cash disappears on death.
#### 4. Essential Early Objectives (What to Do First)
Phase 1: Landing & Looting (First 2 minutes)
Phase 2: Complete a Contract (Minutes 3–10)
- Most Wanted (also called Bounty): Marks a random enemy player. Survive and kill them for big cash. Risky – skip until you’ve played a few matches.
- Safecracker: Crack safes. Easy cash and straightforward.
- Intel: Grab intel and upload. Low risk, good reward.
Phase 3: Survive the Circle (Mid-Game)
Phase 4: Buy a Loadout Drop (Late Early Game)
#### 5. What to Avoid (Beginner Traps)
#### 6. Early Resource Priorities
| Item | Priority | Why |
|---|---|---|
| Armor Plates | Critical | Without them, you die in 2-3 bullets. Always carry 3 in your plate carrier and 2-3 backup in backpack. |
| Self-Revive | High | Lets you get back up if downed. Always buy if you have $4000. |
| Gas Mask | High | The circle is deadly. A mask gives you 20 seconds extra in gas. |
| Cash | Medium | Needed for Buy Stations, but don’t hoard too much – dying wastes it. |
| Lethal (Frag, Semtex) | Medium | Useful for pushing enemies or clearing rooms. |
| Tactical (Stun, Smoke) | Medium | Smoke helps revives and rotations. Stuns/gas are good for fights. |
| Killstreak (UAV, Cluster Strike) | Medium | UAV for intel, Cluster for flushing campers. Don’t buy from Buy Station early – loot them. |
| Backpack Upgrades | Low | Larger backpacks help carry more plates and ammo, but not essential for first hours. |
- Not checking the minimap – you miss enemies, contracts, and circle position.
- Using the wrong weapon for range – SMGs at long range do little damage; snipers at close range are slow. Pair an AR/SMG or AR/Sniper.
- Reloading after every kill – This gets you killed. Reload only when safe or behind cover.
- Not pinging enemies – Use the ping system (D-pad Up on console, Alt on PC) to mark enemies, locations, or loot. Your team will thank you.
- Ignoring the gulag – When you die for the first time, you enter the Gulag (1v1 fight). Win it to redeploy. Practice there – it’s a free second chance.
- Buying everything at the Buy Station – Prioritize Self-Revive > Gas Mask > Armor Plates (if you have none) > UAV. Only buy Loadout when you have decent cash.
- [ ] Complete the tutorial (Main Menu > “Training” > “Warzone Basic Training”). This teaches looting, plating, contracts, and the gulag.
- [ ] Play 2–3 matches in “Plunder” mode (if available) – It’s a respawn mode with no elimination pressure. Great for learning map, looting, and weapon handling.
- [ ] Customize your controls – Adjust sensitivity (start at 5–7 on console, 800 DPI with 6–7 in-game on PC). Faster is better after you adapt.
- [ ] Create one custom loadout – Use a meta weapon (check [WarzoneMeta.com](https://wzstats.gg) for current meta). For example: Kastov-74u (similar to AK-47) with attachments for recoil, ADS, and magazine size.
- [ ] Open your first loot box and equip armor plates.
- [ ] Buy a Self-Revive from a Buy Station in your first match (you’ll likely die – but you’ll learn the location).
- [ ] Win your first Gulag fight – even if you lose, try to get a feel for the map and weapons.
- [ ] Watch the minimap for the first 5 minutes of every match. Force yourself to glance every few seconds.
- [ ] Play with a team (invite friends or use “Fill Squad” in options). Communication is key.
- [ ] Don’t get discouraged – Warzone has a steep learning curve. Focus on surviving until the final circles, not on kills.
#### 8. Day-One Checklist
Summary
Your first hour is about survival, not kills. Land somewhere quiet, loot fast, complete one contract, buy a Self-Revive, and stay inside the circle. Avoid hot drops and unnecessary fights. Use audio and pings. Learn from the Gulag. With this guide, you’ll be better equipped than 90% of new players. Good luck, soldier!
Core Gameplay
Overview
Call of Duty: Warzone (Warzone 2.0) is a free-to-play tactical battle royale and extraction shooter. The core gameplay loop revolves around dropping into Al Mazrah, looting, engaging in combat, completing contracts, and surviving to be the last squad standing. This guide breaks down the gameplay by progression tiers: Early Game (looting & first engagements), Mid Game (loadout acquisition & map control), Late Game (circle positioning & high-stakes fights), and Endgame (final circles, wins, and post-match rewards).
Main Gameplay Loop
Every match follows a loop: Drop → Loot → Fight → Rotate → Survive. You choose a drop spot, scavenge cash, weapons, plates, and killstreaks, then eliminate enemies. Contracts provide objectives and rewards. As the circle closes, you reposition to stay inside the safe zone, fighting other squads. The goal is to be the last team alive. Outside the core battle royale, DMZ extraction mode offers an alternative loop: Deploy → Mission → Extract with persistent inventory.
Combat / Interaction Systems
- Weapon Handling: Realistic recoil, aim down sights (ADS), and tactical sprint. Weapon swapping and mounting provide stability.
- Armor System: Three armor plate slots; plates absorb damage. Always carry extra plates.
- Downing vs. Killing: Downed players can be revived within a short window; thirsting (final kill) prevents revival. Execution animations are possible.
- Vehicles: ATVs, SUVs, helicopters, and boats enable fast rotations. Each has health and can be repaired.
- Killstreaks: UAV, Cluster Strike, Precision Airstrike, Mortar Strike, Bomb Drone, etc. Buyable from Buy Stations.
- Buy Stations: Purchase equipment, self-revives, killstreaks, and loadout drops with cash.
- Gulag: On first death, you enter a 1v1 arena. Winner redeploys; loser goes to buyback or spectates.
- Proximity Chat: Nearby enemies can hear your voice comms, adding tactical deception.
- Contracts: Scavenger (collect loot), Bounty (eliminate a target), Recon (capture a zone), Most Wanted (survive as marked target), and Intel (deliver information). Completing contracts grants cash, XP, and reduces loadout drop cost.
- DMZ Missions: Faction-based tasks across multiple tiers. Examples: "Kill 10 enemies at Al-Safwa" or "Extract 3 enemy weapons." Rewards include contraband weapons, keys, and blueprints.
- Daily & Weekly Challenges: Earn bonus XP and Battle Pass tokens. Examples: "Get 15 pistol kills" or "Open 30 loot caches."
- Operator System: Choose a default or purchased operator with unique skins and finishing moves. No gameplay differences; purely cosmetic.
- Weapon Builds: Over 50 weapons with extensive attachment systems (optics, barrels, stocks, magazines, muzzles, etc.). Weapon tuning allows finer adjustments. Players create custom blueprints via Gunsmith.
- Loadout: Two weapons, perks (e.g., Overkill, Ghost, Cold-Blooded), lethal/tactical grenades. Perk packages are pre-built or customizable. Loadouts are activated via Loadout Drops or completing a Stronghold.
- Field Upgrades: Deployable items like Trophy System, Munitions Box, Dead Silence, and Stims. These unlock through progression.
- Circle Collapse: Small safe zone forces close-quarters combat. Gas masks become essential.
- Loadout Retention: Your primary weapons persist, making every engagement decisive.
- Tactical Positioning: High ground, cover, and third-party awareness are critical.
- Final Killcam: The winning kill is shown to the whole lobby.
- Post-Match: Earn XP and Battle Pass progress. After endgame, you return to the lobby to queue again.
- Drop Strategy: Choose a named POI or a small cluster of buildings. Use your minimap to see player pings. Good early POIs: Quarry, Farm, Cemetery. Avoid super hot drops like Airport or Highrise if you are a beginner.
- Looting: Quickly grab a primary weapon, armor plates, and cash. Prioritize plate-carry capacity and a self-revive if possible. Loot from crates, floor loot, and dead bodies.
- First Contact: Engage only if you have an advantage (surprise, better position, numbers). Do not chase kills deep into enemy territory.
- Gulag Prep: Store $4,000 for a potential self-revive or buyback later. Collect killstreaks for insurance.
- Example: Land at Cemetery, loot three houses, find an SMG and a pistol, pick up 2 armor plates. Hear gunshots at nearby village—rotate toward them but stay at range.
- Loadout Drop: Once you have $10,000 (or $7,500 after a contract), buy a Loadout Drop at a Buy Station. Place it in a safe spot, preferably inside a building or behind cover. Winning a loadout fight is common—be prepared.
- Contracts: Complete a Scavenger or Recon contract to get cash and reduce loadout cost. Bounty contracts give a target location—ambush the target.
- Map Movement: With first circle closing, move toward the center or edge of the next circle. Use vehicles for speed but note they are loud. Avoid open fields—use ridges, buildings, and vegetation.
- Combat: Mid-game fights are usually for loadout drops or contested zones. Use your custom weapon with attachments. If you have Overkill, you have two primary weapons; if not, pick up an enemy's weapon.
- Example: After getting loadout with a silenced M4 and SMG, rotate toward center circle through southern mountains. Spot a team looting a buy station—third-party them to take their cash.
- Circle Positioning: The circle shrinks rapidly. Gas masks become crucial; always carry one. Determine final circle location early and secure a building or headglitch spot.
- Killstreak Management: Use UAVs to scan for nearby enemies. Cluster/Mortar Strikes to flush campers. Precision Airstrike to break a roof hold.
- Squad Communication: Call out enemy positions, direction of gunfire, and your next move. Stay close but not clumped to avoid explosives.
- Third-party Awareness: In late game, the majority of kills come from third parties. Stay silent and only engage if necessary. Let two enemy squads fight, then clean up.
- Example: Circle centered at Control suburb. You hold a two-story house. Use UAV to confirm one squad in the building across. Wait until they engage another team, then throw a grenade and push while they are distracted.
- Final Circle Mechanics: The circle collapses to a tiny area, often in open ground or a single room. Crouch walk, avoid open spaces. Use smoke grenades for cover.
- Gas Management: If you have a gas mask, you can survive a few seconds in the gas to catch enemies off guard. However, gas masks have limited durability.
- One-vs-Many: If you are solo, use hit-and-run tactics. Down one, then retreat, heal, and re-engage. Use a self-revive for insurance.
- Winning: Last enemy kill triggers the victory screen. Collect your XP, Battle Pass tokens, and any challenge progress.
- Example: Final circle in a small field. Three teams left. You deploy a smoke screen and crawl to a small rock. Enemy team pushes you—you down one with a knife, then use a cluster strike to scatter the rest. Pop a stim and finish the last enemy with a headshot.
Progression
Progression includes Player Level, Battle Pass tiers, Weapon XP, and Calling Cards. Leveling up unlocks new weapons, attachments, and cosmetics. Weapon XP is earned per kill, assist, or by completing weapon-specific challenges. Battle Pass progress is tied to match XP and daily challenges. Seasonal prestige rewards earn permanent unlocks.
Exploration
Al Mazrah is a massive open-world with diverse POIs: urban cities, desert, rivers, caves, and military bases. Exploration rewards loot (cash, killstreaks, gas masks, field upgrades) and allows strategic positioning. High-value zones (e.g., Observatory, Airport) have better loot but more competition.
Quests / Missions
Economy
Cash is the primary currency in-match. Earn it by looting, completing contracts, and eliminating enemies. Cash can be spent at Buy Stations on: armor plates (1500), self-revives (4000), killstreaks (varies), gas masks (3000), ammunition boxes, armor boxes, and most importantly, Loadout Drop (10,000 cash, reduced to 7,500 after completing a contract). Cash is shared within the squad. In DMZ, there is a persistent economy: sell items at Buy Stations for real-world cash, which is extracted to your wallet for use in future deployments.
Character / Build Growth
Endgame Structure
Endgame is the final 2-3 circles. Key elements:
In DMZ, endgame involves extracting with loot. Deploying to Koschei Complex offers a secret endgame dungeon.
Gameplay by Progression Tier
Early Game (First 0-5 Minutes)
Objective: Land, gear up, survive initial drop fights.
Mid Game (5-15 Minutes)
Objective: Secure a loadout, complete contracts, control rotation.
Late Game (15-20 Minutes)
Objective: Survive diminishing circles, eliminate top squads.
Endgame (Final Circle & Victory)
Objective: Win the match.
---
This tiered approach helps players understand the flow of a match and adapt strategy accordingly. Master each phase through practice, map knowledge, and smart resource management.
Game Tips
Game Tips for Call of Duty: Warzone 2.0
This guide covers essential tips organized by category, from beginner to advanced. Use these to improve your survival, combat, and strategic play.
Beginner Tips
#### 1. Drop Smart – Don’t Hot Drop Every Time
- What to do: Choose a named location with moderate loot density (e.g., Al Safwa, Sa’id, or Observatory). Avoid highly contested areas like Airport or Mall unless you’re confident.
- Why: Hot drops often result in early death. A quieter start lets you loot, buy a UAV, and move with a plan.
- When: Use this for your first 10 matches to learn the map and weapon feel.
- What to do: Press the map button (M on PC, Touchpad on console) every few seconds while moving.
- Why: The circle, enemy UAV pings, and contract locations update frequently. You’ll avoid running into a full squad while rotating.
- When: After every engagement or before crossing open ground.
- What to do: Always carry at least 3 armor plates. Loot quickly after a kill to steal theirs.
- Why: Without full plates, you lose fights instantly. Plates give 150 extra HP (3 plates of 50 each).
- When: After every gunfight, before engaging another team.
- What to do: Use the ping wheel (default: double-tap ping for danger, single for loot).
- Why: Communication is key even without voice. Ping enemy locations, loot, and vehicles.
- When: Immediately upon spotting an enemy or seeing a UAV tower.
- What to do: Keep near the gas line during first two circle collapses.
- Why: Fewer enemies from one side (the gas side). You only need to watch one direction.
- When: First two circle phases (roughly 5–10 minutes into match).
- What to do: Collect $6,000 quickly to buy a Self-Revive, $4,000 for a UAV, and $3,000 for a Armor Box. Prioritize these.
- Why: Self-Revive lets you get back up if downed. UAV reveals enemy dots on minimap. Armor Box lets you re-plate instantly.
- When: After looting your first few buildings, visit nearest Buy Station.
- What to do: Complete Bounty, Recon, and Most Wanted contracts. Bounty gives immediate cash and kills a marked player; Recon reveals next circle; Most Wanted makes you visible but rewards high cash.
- Why: Contracts are the fastest way to earn cash for gear. They also provide map info.
- When: Always grab a contract immediately after dropping, unless you’re in a hot zone.
- What to do: Equip a short-range weapon (e.g., Lachmann Sub, Vaznev-9K) for indoors and a long-range (e.g., TAQ-56, M16) for open areas.
- Why: Warzone fights happen at both distances. Having one gun that excels at each reduces weakness.
- When: Build loadout after first free loadout drop (typically around $5,000 or after first circle).
- What to do: Drive a car, truck, or ATV into fights. Exit with the vehicle between you and enemies.
- Why: Vehicle doors and frames absorb bullets. You can plate up behind wheel.
- When: Rotating in later circles or crossing fields.
- What to do: After death, watch the killcam to see where the enemy saw you.
- Why: You’ll learn what cover you missed, or if you revealed yourself unnecessarily.
- When: Every death in the first 10 matches.
- What to do: Carry a Stim Shot and use it while sprinting (it gives a speed boost).
- Why: You can heal 100 HP over 2 seconds while moving, and the speed boost helps dodge gunfire.
- When: Right after taking damage from a trade or while disengaging.
- What to do: When peeking corners, start shooting before fully exposing yourself. Use slide cancel (sprint + slide + jump) to break enemy aim assist.
- Why: In Warzone, the peeker sees the corner slightly earlier due to netcode. Pre-firing guarantees first bullet hits.
- When: Clearing rooms or challenging a head-glitch.
- What to do: If you hear two teams fighting, wait until you hear “downed” callouts, then engage the winning team while they’re weak/looting.
- Why: Third-partying is the safest way to get kills and loot. The winning team likely has low health, no plates, and distracted.
- When: Always when you hear prolonged gunfire nearby.
- What to do: Learn gas damage per tick: Phase 1: 1/sec, Phase 2: 2/sec, Phase 3: 5/sec, etc. Equip gas mask from loot. Keep one in backpack.
- Why: Having a gas mask lets you rotate through gas for surprise attacks or buying time.
- When: In final circles, if you must move through small gas to flank.
- What to do: Buy a Custom Loadout Drop as soon as you have $10,000. But better: wait until you have a UAV to see if enemies are near.
- Why: Dropping loadout prematurely attracts enemies. Use UAV first to clear area.
- When: Mid-game (after first circle closes) unless you need your gun immediately.
- What to do: Equip Ghost in custom loadouts. However, Ghost only hides you from UAV – not from Heartbeat Sensor. Use Dead Silence field upgrade to move silently.
- Why: Many players use heartbeat. Slide-walking keeps you off radar? No. You must crouch-walk or use Dead Silence.
- When: When pushing buildings or flanking.
- What to do: Never reload immediately after a kill if you have more than 10 bullets. Instead, plate up and check surroundings first.
- Why: Reloading leaves you vulnerable. A single enemy could push you mid-reload.
- When: After every engagement, prioritize plating > reload.
- What to do: Armor box gives full armor to your team instantly; munitions box gives ammo. Carry both if possible. Use armor box during a fight, munitions box after.
- Why: Armor is more critical in the middle of a gunfight than ammo.
- When: Use armor box when your squad’s plates are cracked; munitions when you’re low on rounds.
- What to do: While in a gunfight, jump and strafe left/right. Time your shots in the air (ADS is still accurate).
- Why: Jumping makes your head hitbox move unpredictably. Combine with slide cancel for maximum disorientation.
- When: Close-mid range (up to 20m).
- What to do: Study the map layout for cover: rocks, fences, buildings. Plan a route that uses elevation and natural barriers. Avoid open fields.
- Why: The final circle is pure chaos. Knowing your rotation beforehand gives you 2 seconds advantage over indecisive teams.
- When: During every match, especially after 3rd circle.
- What to do: In early game, grab armor plates first, then cash, then killstreaks (UAV, Cluster Strike). Later, trade killstreaks for self-revives.
- Why: You can’t use killstreaks if you’re dead. Plates ensure survival.
- When: Always first 2 minutes.
- What to do: Carry 1 self-revive, 1 gas mask, 2 armor boxes (if squad), 1 killstreak, and 4 plates (3 equipped + 1 spare). Dump unnecessary items like extra ammo types.
- Why: Overloaded backpack slows movement. Space is for essentials.
- When: Before every engagement.
- What to do: If you find an Armor Box, pick it up even if you have plates. Use it to quickly restore full armor for self and squad.
- Why: Armor box deploys instantly and gives 3 plates to everyone in range. Saves looting plates individually.
- When: Mid-fight or before pushing.
- What to do: Always take high ground: rooftops, hills, towers. Engage enemies below you.
- Why: You expose less of your body, and your bullets hit headshots easily. They have to look up.
- When: Any time you can climb without exposure.
- What to do: Attach a suppressor (e.g., FSS OLE-V Laser, ZLR Talon 5) to your weapons.
- Why: Suppressed shots don’t show on minimap. Enemies won’t know your exact position.
- When: Every loadout – unless you are intentionally luring enemies for a third-party trap.
- What to do: When engaging a squad, coordinate two angles. One teammate peeks left, other right. Crossfire splits enemy attention.
- Why: Most enemies die to multiple sources in Warzone. Solo pushes are risky.
- When: Every squad fight, especially indoors.
- What to do: If downed with self-revive, pretend to be dead. Wait for the enemy to approach, then finish revive and shoot.
- Why: The element of surprise wins fights.
- When: Only if you know enemy is alone or has no teammates near.
- What to do: Activate Dead Silence field upgrade before running around a building to surprise enemies.
- Why: No footstep audio gives you perfect flank. Slide-cancel further reduces noise.
- When: When you hear a team looting or healing.
- What to do: Spend cash first on UAV ($4,000) to scan area, then Self-Revive ($6,000), then Armor Box ($3,000). Loadout is $10,000 but only if no other purchases.
- Why: UAV gives map info to avoid ambushes. Self-revive prevents team downs.
- When: After you have at least $6,000.
- What to do: Pick a Most Wanted contract when you need money. The mark shows you on map, but you get $10,000 if you survive 3 minutes.
- Why: Fast cash if you camp a strong building.
- When: Early-mid game when you have good gear.
- What to do: Study tunnels, basements, and sewers (e.g., Observatory underground, Al Mazrah caves). These connect buildings.
- Why: Enemies rarely expect a team coming from underground. You can bypass contested roofs.
- When: When rotating through high-traffic zones.
- What to do: Never take a zipline directly into an area you haven’t cleared. Use UAV first.
- Why: Ziplines make you a sitting duck. You can’t dodge while riding.
- When: Only if you are behind cover and need height.
- What to do: Sprint, slide, then jump while ADS. This propels you around corners faster than a normal walk.
- Why: You appear and shoot before the enemy can react.
- When: Clearing rooms or challenging headglitches.
- What to do: When climbing stairs, jump at the top to make footstep sound. Wait for enemy to pre-fire, then peek.
- Why: Sound whoring is common. Fake audio forces them to waste bullets.
- When: Any indoor staircase.
- Weapon: TAQ-56 (assault rifle) with - Aveneer long barrel, FTAC Ripper 56 grip, 60-round mag, thermal sight. Sidearm: Vaznev-9K with short barrel, large mag, No Stock.
- Why: TAQ-56 is accurate with low recoil. Vaznev melts up close.
- When: As soon as you unlock custom loadouts.
- Package: Double Time, Overkill, Fast Hands, Ghost (or High Alert).
- Why: Sprint longer, carry two primaries, swap guns fast, and stay off UAV.
- When: Loadout drop.
- What to do: Play Plunder (respawn mode) to practice gunfights without consequence.
- Why: You get infinite respawns and frequent engagements. Perfect for aim training.
- When: Before jumping into Battle Royale.
- What to do: In final circles, move deliberately. Use stuns/frags to disorient enemies. Crouch-walk to remain silent.
- Why: Panic causes mistakes. Controlled movement wins the 1v1.
- When: Last 3 circles.
- What to do: Every death, watch the killcam and note what weapon and position the enemy used.
- Why: You’ll learn common power positions and trending guns.
- When: Every match until you become experienced.
- What to do: Hold ping button for wheel – options: “Enemy”, “Loot Here”, “Danger”, “Moving”. Use “Enemy” for exact location, “Danger” for unknown sound.
- Why: Precise pings prevent confusion.
- When: Constantly.
#### 2. Use the Tac Map Regularly
#### 3. Armor Plates Are Non-Negotiable
#### 4. Ping Everything for Your Team
#### 5. Stick to the Edge of the Circle Early
Intermediate Strategies
#### 6. Master the “Buy Station Economy”
#### 7. Use Contracts for Cash & UAV
#### 8. Know Your Weapon Meta – Close vs Long Range
#### 9. Use Vehicles as Mobile Cover
#### 10. Check Killcams to Learn Positioning Mistakes
Advanced Optimizations
#### 11. “Stim Shot” Healing While Moving
#### 12. Pre-Fire & Peeker’s Advantage
#### 13. Bait Swaps & Third Party Awareness
#### 14. Use Gas Mask Strategically – Don’t Die to Gas
#### 15. Loadout Drop Timing – When to Buy
#### 16. Ghost Perk & Heartbeat Sensor Counter
#### 17. Re-Chamber & Reload Discipline
#### 18. Armor Box vs Munitions Box – Which to Use?
#### 19. Master the “Bunny Hop” for Accuracy
#### 20. Learn Circle Rotation Paths for Final Circles
Resource Management
#### 21. Loot Prioritization: Plates > Cash > Killstreaks
#### 22. Backpack Slots: Don’t Hoard
#### 23. Use “Armor Box” Over “Plates” When Available
Combat Tactics
#### 24. Verticality Gives Advantage
#### 25. Use Suppressors for Stealth
#### 26. “Trade Gunfire” with Teammates
#### 27. Bait & Switch With Self-Revive
#### 28. Use Dead Silence to Flank
Economy & Buy Station
#### 29. Cash Priorities: UAV > Self-Revive > Armor Box > Loadout
#### 30. Use “Most Wanted” Contract for Free Cash
Map Knowledge & Exploration
#### 31. Learn Underground Areas for Surprise Rotations
#### 32. Use Ziplines Carefully – They’re Traps
Advanced Movement
#### 33. Slide Cancel + Jump for Peeker’s Advantage
#### 34. Stair Jumping – Bait Audio
Loadout & Build Tips
#### 35. Best Starting Weapons for Beginners
#### 36. Perk Package Recommendations
Final Tips
#### 37. Practice in Plunder Mode for Combat
#### 38. Keep Calm in Final Circles
#### 39. Watch Killcams to Learn Meta & Positions
#### 40. Use the Ping Wheel for Advanced Communication
By mastering these tips, you’ll survive longer, fight smarter, and eventually secure more wins in Call of Duty: Warzone 2.0. Adapt each tip to your personal playstyle and squad coordination.
Game Settings
Overview
Call of Duty: Warzone 2.0 offers an extensive array of settings that drastically impact performance, visual quality, and competitive advantage. Properly configuring these settings can mean the difference between smooth gameplay and frustrating stutters, or between hearing a crucial footstep and missing it entirely. This guide covers every major settings category — Graphics, Audio, Controls, Accessibility, Language, Network, and Gameplay — with recommendations for low-end, mid-range, and high-end hardware (PC and console). Special attention is given to settings that are frequently misconfigured or overlooked.
---
Graphics Settings
Display & Resolution
- Display Mode: Fullscreen (exclusive) is best for performance; borderless windowed may cause extra input lag.
- Resolution: Native monitor resolution (e.g., 1920x1080, 2560x1440). Use Dynamic Resolution only if struggling to maintain FPS; target 100% resolution scale.
- Refresh Rate: Set to maximum monitor refresh rate (e.g., 144Hz, 240Hz).
- Field of View (FOV): 90–110° is the competitive sweet spot. Higher FOV increases peripheral vision but may reduce target size. Console players can access FOV on PS5 and Xbox Series X|S; set to 90–100.
Quality Presets & Detailed Settings
| Setting | Low-End (60 FPS target) | Mid-Range (100+ FPS) | High-End (144+ FPS) | Key Notes |
|---|---|---|---|---|
| Render Resolution | 100% | 100% | 100% | Never go below 100% unless desperate; causes heavy blur. |
| Upscaling / Sharpening | FidelityFX CAS (strength 50–75) | DLSS Quality (NVIDIA) / FSR Quality (AMD) | DLSS Quality / FSR Quality or Native | FidelityFX CAS is minimal overhead; AI upscalers give free performance. |
| Anti‑Aliasing | SMAA T2X | Filmic SMAA T2X | Filmic SMAA T2X | Filmic adds slight blur; disable for sharper edges (use CAS). |
| Texture Quality | Low | Normal | High / Ultra | Low reduces VRAM load; Ultra requires 8+ GB VRAM. |
| Texture Filter Anisotropic | Low | High | High | High improves distant texture clarity. |
| Shadow Quality | Low | Low | Medium | Shadows are expensive; low reduces distractions. |
| Spot Shadows | Low | Low | Low | Keep low for competitive edge (fewer hidden enemy shadows). |
| Particle Quality | Low | Low | Medium | Affects smoke and explosions; low reduces clutter. |
| Level of Detail (LOD) | Low | Normal | High | Higher LOD draws more distant objects, costing FPS. |
| Volumetric Quality | Low | Low | Low | Extremely performance‑hungry; keep low in BR. |
| Motion Blur | Disabled | Disabled | Disabled | Always disable for clarity and responsiveness. |
| Depth of Field | Disabled | Disabled | Disabled | Blurs distant objects, hindering spotting. |
| Weapon Motion Blur | Disabled | Disabled | Disabled | Same as above. |
| Film Grain | 0 | 0 | 0 | Adds noise; disable. |
| NVIDIA Reflex Low Latency | On + Boost | On + Boost | On + Boost | Reduces input lag; enable at all times. |
| VRAM Usage Target | 80% | 85% | 90% | Lower target prevents stutters; raise if you have surplus VRAM. |
| On‑Demand Texture Streaming | Disabled | Disabled | Disabled | Can cause hitching; disable for stable performance. |
Console‑Specific Graphics (PS5 / Xbox Series X|S)
- 120 Hz Mode: Enable if your TV supports it (requires HDMI 2.1). Provides smoother motion.
- FidelityFX CAS / Dynamic Resolution: Set to CAS for sharpness; dynamic resolution aim for balanced.
- Field of View: 90–100° is recommended; avoid max FOV as it may reduce performance.
- Render Resolution: Many players accidentally set it to 50% thinking it helps FPS, but it makes the game extremely blurry. Always keep at 100% and adjust other settings first.
- VRAM Target: Setting too low (50%) can cause stutters; too high (95%+) leads to crashes. 80–90% is safe.
- Dynamic Resolution: Enabling without a stable FPS target can cause constant resolution fluctuation. Better to manually set lower details.
- Upscaling: DLSS/FSR set to “Ultra Performance” makes image soft; use Quality or Balanced for best trade‑off.
Easy to Misconfigure (Graphics)
---
Audio Settings
Sound Modes & Volume Levels
| Setting | Casual / Immersion | Competitive | Notes |
|---|---|---|---|
| Audio Mix | Home Theatre | Headphones (Bass Boost or Stereo) | “Headphones” improves directional audio and footstep clarity. |
| Master Volume | 100 | 100 | Keep max, adjust system volume separately. |
| Music Volume | 50–70 | 0 | Music masks footsteps; set to 0 for competitive play. |
| SFX Volume | 100 | 100 | Crucial for hearing footsteps, gunfire, and plating. |
| Dialogue Volume | 100 | 70–80 | Unnecessary chatter can be lowered. |
| Hit Marker Sounds | On | On | Distinct hit marker tones help confirm damage. |
| Mono Audio | Off | Off | Stereo is essential for directional cues. |
| Dynamic Range | Cinematic | Compressed | Compressed boosts quieter sounds (footsteps) and limits loud peaks (explosions). Critical for competitive. |
Special Attention: Audio Preset
- “Headphones Bass Boost” is popular because it emphasizes low‑frequency sounds (footsteps, plating).
- Disable “Voice Chat Invert Mute” and “Mute Yourself When Not Speaking” (control options) to ensure clear team comms.
- Audio Mix: Setting to “Home Theatre” when using headset muffles footsteps. Always choose “Headphones” or “Headphones Bass Boost.”
- Dynamic Range: “Cinematic” compresses nothing, so footsteps remain quiet. Use “Compressed” to hear enemies more easily.
- Raw Input: Enable – bypasses OS acceleration for consistent aim.
- Mouse DPI: 800–1600 common; adjust in‑game sensitivity accordingly.
- Polling Rate: 1000 Hz (if mouse supports).
- Sensitivity: Horizontal sensitivity ~5–10 at 800 DPI; ADS sensitivity multiplier 0.7–1.0 (lower for precision).
- Vertical Sensitivity Ratio: 1.0 (disable separate vertical aim if not needed).
- Aim Down Sight Sensitivity Transition: Instant (gradual adds delay).
- Aim Assist (if using controller): Set to “Default” or “Precision” (stronger rotational assist but tighter window). Avoid “Standard” if you want more practice with stick aim.
- Button Layout: Tactical (slides/crouch with RS) is dominant; alternative: “Tactical Flopped” for easier bunny hops.
- Stick Layout: Default (left stick sprint, right stick look).
- Deadzone: Minimum deadzone = 0.05 (reduce if stick drifts; increase slightly to avoid drift).Left stick deadzone can be set to 0.10 to avoid accidental sprint stops.
- Response Curve: Dynamic (slower initial movement, faster twitch) or Steady (linear). Dynamic is most popular.
- Aim Assist Type: Standard (sticky near targets) vs. Precision (narrower activation). Experiment in firing range.
- ADS Sensitivity Multiplier: 0.8–1.0 (lower = more control up close).
- Vibration: Off – reduces distraction and battery drain.
- Slide / Prone: Bind to C (or toggle on controller) – many players rebind slide to a paddle or mouse button.
- Interact / Reload: Set “Contextual Tap” to On – tap to reload/interact, hold for loot. This speeds up looting but be careful not to reload in a fight accidentally.
- Ping: Bind to Middle Mouse or R1 – crucial for communication.
- Weapon Swap: Separate binds for primary/secondary; 1 and 2 keys are standard.
- Contextual Tap: Many players leave it off and suffer slow looting. Enable but test in Plunder – tapping when near a weapon will pick it up instead of reloading. Practice the difference.
- Aim Assist Type: “Focusing” can actually make it harder to track moving targets. Stick to Default or Precision.
- Controller Deadzone: Too high adds input lag; too low causes drift. Test by lightly moving stick; increase until drift stops.
- ADS Sensitivity Transition: “Gradual” causes a slight zoom delay; set to Instant.
- Subtitles: Enable with Large size for hearing‑impaired players.
- Colorblind Filter: Choose Deuteranopia, Protanopia, or Tritanopia based on your deficiency. Affects only UI elements (health, minimap, compass) – not player models or enemy outlines.
- High Contrast Settings: Turn on HUD Contrast and Outline Contrast for better visibility.
- Text Size: Increase to Large if needed.
- Controller Remapping: Use console accessibility remapping or Steam Input to reassign buttons for physical disabilities.
- Hold / Toggle Behavior: Set “Sprint” to Toggle (less thumb fatigue), “Prone” to Hold (easier drops).
- Colorblind Filters: They only change UI colors; players expecting in‑game operator colors to change will be disappointed. Use these purely for UI comfort.
- Subtitle Background: Ensure Background Opacity is set high enough to read over bright scenes.
- Audio Language: Set to your native language (usually English) for clarity.
- Text Language: Match your region – important for menu navigation.
- No major performance impact; just ensure consistency to avoid missing call‑outs.
Easy to Misconfigure
---
Controls
Keyboard & Mouse
Controller
Keybindings – Essential Customizations
Easy to Misconfigure
---
Accessibility
Easy to Misconfigure
---
Language Settings
---
Network Settings
Connection & Bandwidth
| Setting | Recommended Value | Notes |
|---|---|---|
| Bandwidth Limit | 0 (unlimited) | Allows full speed usage without artificial cap. |
| Texture Streaming | Minimal (or Standard if fast internet) | Minimal reduces stutter from streaming textures; Standard looks better but may cause hitching on slow connections. |
| On‑Demand Texture Streaming | Disabled | Prevents background downloads during gameplay that cause lag spikes. |
Telemetry (Overlay)
- FPS Counter: Enabled (corner of your choice).
- Packet Loss: Show to diagnose connection issues.
- Latency (Ping) : Display to monitor lag.
- Server Tick Rate: Not shown in game, but lower ping leads to smoother registration.
- Automatic Selection is usually fine, but you can manually pick a region with lowest ping (e.g., if you live in Europe, avoid US East).
- Check ping in main menu by opening the Social/Options menu? Not directly shown; use system network monitor or Warzone’s in‑game FPS counter shows latency.
- Texture Streaming – Setting to High demands constant internet bandwidth; if your connection drops, textures become blurry. Keep at Minimal for competition.
- Bandwidth Limit – Leaving it at 0.5Mbps throttles your connection, causing slow texture loads. Always set to 0.
- Minimap Shape: Square (shows more area) vs. Circle (rotates). Square is generally better for information density.
- Minimap Rotation: Compass (UTM grid) – helps communicate cardinal directions. Rotating can confuse your mental map.
- Minimap Zoom: Set to Medium (larger view) to spot enemies further.
- HUD Elements:
- Hit Marker Feedback: Full (Color and Sound) – necessary for confirming hits.
- Autosprint: Enable (reduces thumb fatigue). Combined with “Sprint / Tactical Sprint” on Double Tap or Tap (Double Tap is more control).
- Aim Down Sight Behaviour: Hold (more responsive) or Toggle (easier on fingers). Many top players use Hold.
- Weapon Mounting: Manual (press a key to mount) – prevents accidental mounting when shooting.
- Airborne Sway: Off – reduces camera shake while parachuting.
- Perk / Killstreak binding: Customize keys for quick use (e.g., dead silence on “X”).
- Cursor Behavior: Menu Cursor – ensure controller or mouse works properly in menus.
- Vehicle Control: Advanced (lean assist off) for more manual control.
- Ping Wheel Delay: Set to shortest (or disable) for faster marking.
- Contextual Tap: As mentioned earlier, failing to enable this slows looting significantly.
- Weapon Mount: If set to Mounting On Scope, you’ll accidentally mount every corner – change to Manual.
- Minimap Shape: Circle makes it harder to scan wider area; Switch to Square.
- Auto Sprint: Disabling forces you to press shift constantly, tiring your hand. Turn it on and adjust sprint behavior.
- Graphics: Disable motion blur, depth of field; use upscaling; set VRAM target correctly.
- Audio: Use Headphones Bass Boost and Compressed dynamic range.
- Controls: Enable raw input, contextual tap, and set ADS transition to instant.
- Network: Disable on‑demand texture streaming and set bandwidth unlimited.
Data Centers
Easy to Misconfigure
---
Gameplay Settings
Minimap & HUD
- Player Names: Always on (friendly team above heads).
- Kill Feed: Always on.
- Pickup Notifications: Off or minimal to reduce clutter.
Movement & Weapon Settings
General Gameplay Tweaks
Easy to Misconfigure
---
Conclusion
No single setting profile works for everyone, but the recommendations above serve as a strong baseline. Always test new settings in the Firing Range before jumping into a match. Pay special attention to:
Lastly, keep your graphics drivers updated and clear the shader cache (warzone will rebuild shaders after updates) to avoid stuttering. Good luck in Al Mazrah!
Important Notes
Important Notes for Call of Duty: Warzone 2.0
Warnings & Pitfalls
- Account Bans – Activision enforces strict anti-cheat measures via the RICOCHET system. Any detected cheat software, macros, or even unofficial overlays can result in a permanent account or hardware ban. Avoid tampering with game files or using third-party programs that interact with the game process.
- Hardware Bans – In severe cases, Activision may issue a hardware ID ban, preventing you from playing on that PC ever again. This can occur even for accidentally running suspicious software. To avoid this, close all unnecessary background applications before launching Warzone.
- Account Linking – Your Activision account can be linked to only one platform per email. If you buy a battle pass or store bundle on one platform, it does not transfer to another platform’s account even under the same Activision ID. Double-check before purchasing cosmetics.
- Privacy Settings – By default, your streamer mode is off. If you do not want strangers to see your real name or location, enable privacy options in Settings > Account & Network > Privacy.
- Communication Risks – In-game proximity chat is on by default. Opponents can hear you if you are nearby. If you say something that violates the code of conduct (e.g., hate speech), your account can be muted or banned if reported. Keep chat civil.
- Prestige System – When you reach level 55 in a season, you can activate Prestige to reset your rank for a new icon and extra XP. Once you prestige, you cannot revert. However, all unlocked weapons, operators, and cosmetics remain. Only your level resets. Think before you prestige if you care about your current rank number.
- Weapon Tuning – Tuning attachments (e.g., changing barrel length) is permanent for that specific weapon build. You cannot undo a tuning without deleting the saved blueprint or re-crafting from scratch. Always create a backup blueprint before tuning heavily.
- Blueprint Attachment Removal – When you attach a blueprint’s skin to a custom mod, removing any attachment from that blueprint will remove the skin effect from that slot. You cannot get that specific skin back unless you re-equip the original blueprint. Use blueprints as base rather than cherry-picking parts.
- Operator Skins Purchase – Skins bought with Call of Duty Points (CP) in the store are non-refundable. If you buy a skin, you cannot trade it or get a refund unless there’s a verified technical issue. Try on the skin using the preview feature before buying.
- Limited-Time Events – Warzone frequently runs events (e.g., Haunting of Verdansk, Festive Fervor) that grant exclusive weapon blueprints, calling cards, and operator skins. If you miss the event window, those items may never be obtainable again. Check the active events tab daily.
- Battle Pass Tiers – The Battle Pass is seasonal. Once the season ends, all unclaimed tiers are lost forever. You cannot unlock previous season’s items unless they are sold in a future store bundle (often for high CP cost). Focus on completing the pass before the season ends.
- Seasonal Challenges – Every season has challenges that reward unique items (e.g., special camos, emblems). These challenges expire at the end of the season. If you are close to completing one, prioritize it.
- Exclusive Rewards – Some rewards are only available by purchasing the Vault Edition or pre-ordering a CoD title (e.g., Ghost skin for Vanguard). These are not obtainable later. Check your account’s redemption history.
- Skill-Based Matchmaking (SBMM) – Warzone uses strong SBMM. The better you play, the harder your lobbies become. If you dominate a few matches, expect to face pro-level players. Queue with lower-skilled friends to average the lobby difficulty.
- High-Tier Lobbies – Once you reach a certain K/D ratio (e.g., 1.5+), you will consistently face very coordinated teams. Be prepared to adapt: use strong comms, stick together, and prioritize repositioning over direct fights.
- Resurgence vs. Battle Royale – Resurgence modes allow infinite respawns as long as one teammate is alive. If you die in standard Battle Royale (non-resurgence), you are out for the round until a buyback. The learning curve is steeper in Battle Royale because mistakes are punished harder.
- Warzone Ranked Play – Ranked mode features stricter rules (e.g., no killstreaks, limited loadout drops) and much harder opponents. You will lose SR quickly if you are not at a high skill level. Practice in unranked modes first.
- XP Boost Duration – Double XP tokens from Battle Pass or promotions are often timed. If you pop a double XP token and then the game crashes or you exit, the token is wasted. Only redeem tokens when you have a guaranteed session of uninterrupted play.
- Daily Challenges – Completing daily challenges gives small XP. But they often require specific weapons (e.g., get 20 kills with a pistol). This can ruin your team’s synergy if you selfishly focus on the challenge. Alternatively, stack challenges that align with your playstyle.
- Weapon Leveling – Leveling weapons in Battle Royale is slow because you may die early. Instead, go to Plunder, DMZ, or the new MWIII Multiplayer (if you own it). Contracts, strongholds, and AI kills in DMZ give massive weapon XP.
- Battle Pass Tiers – Buying tiers with CP is extremely expensive. A single tier costs 150 CP, which is ~$1.50 USD. Grinding tiers through gameplay is much more cost-efficient. Do not buy tiers unless you are desperate at season end.
- Communication & Teamwork – Use push-to-talk (recommended) or open mic with care. Ping enemies, loot, and locations rather than relying only on voice. If you take loot from a teammate’s kill without asking, expect toxicity. Share cash for buybacks.
- Team Killing Penalties – Intentionally killing or downing a teammate multiple times can result in a temporary or permanent matchmaking ban. If you accidentally team kill, say sorry and avoid further incidents.
- Report System – If you suspect a cheater (e.g., obvious aimbot, wallhacks), report them from the deathcam or scoreboard. Do not spam reports; false reports can get you banned for abuse. Use the report system only for clear violations.
- RICOCHET Anti-Cheat – Warzone uses a kernel-level driver that runs at boot. Some programs like certain overclocking tools, RGB software, or memory cleaners may trigger a false positive. If you get an error about anti-cheat, try uninstalling suspicious software or updating drivers.
- VPN Use – Using a VPN to get into easier lobbies (e.g., connecting to a different region) is considered a violation of the Terms of Service. Activision has banned accounts for this. Avoid VPNs while playing.
- Macros & Scripts – Any automated input (e.g., recoil macros, auto-firing scripts) is forbidden and detectable. Even if you think they are subtle, RICOCHET will eventually ban you.
- Cloud Saves – On PC (Battle.net or Steam), settings and saved blueprints are stored in the cloud automatically. However, if you play on multiple devices, settings may not sync perfectly. Local files are located in `Documents/Call of Duty/players` (install-specific).
- Manual Backup – You can back up your `config.cfg`, `controls.cfg`, and `options.cfg` files. This is useful if you reinstall the game or if updates reset your settings. Copy these files to a separate folder before any major update.
- Settings Reset After Updates – Major season updates sometimes reset graphics, audio, and keybind settings. Expect this and save your config before the update. After update, load your backed-up config or re-apply settings manually.
- No Save Game Files – Since Warzone is an online-only game, there is no manual save for progress. All stats, unlocks, and battle pass progress are stored on Activision servers. As long as you log into the same account, your progress is safe.
- Armor Plates Stack – You can carry up to 5 armor plates beyond the 3 you can wear. Always loot plates fully before moving. When damaged, quickly plate up; a full 3-plate vest reduces time to plate.
- Self-Revive Usage – A self-revive kit takes ~7 seconds to use. Do not use it in open areas or immediately after being downed if enemies are near. Wait for a safe moment or until your teammates can cover you.
- Buy Station Locations – Buy stations are scattered across the map, but they are often contested. Memorize a few safe stations (e.g., in small towns) for loadout drops. Use the map ping to find the nearest one.
- Cash Importance – Cash is not only for the loadout. Use it to buy UAVs, self-revives, gas masks, and armor plates. Do not hoard cash if you are about to engage in a fight; spend it at buy stations.
- Contracts Give Cash – Completing contracts (Bounty, Intel, Safe Cracker) gives immediate cash and XP. They also reveal the next zone. Do contracts early for early loadout cash.
- UAV vs. Heartbeat Sensor – The UAV shows exact enemy position but is loud and can be shot down. The heartbeat sensor is silent but only detects close enemies. Use UAV for area denial, heartbeat for clearing buildings.
- Proximity Chat Tips – You can bait enemies by pretending to be friendly over proximity chat. But if you reveal your position, they may push you. Use chat sparingly.
- Gas Mask Delay – When the gas expands, you have time to pop the mask automatically. Do not waste a full gas mask if you are just passing through a small pocket. Mask durability is precious.
- Redploy Drones – In Al Mazrah, redeploy drones allow you to fly to a location for a quick escape or rotation. They are not infinite; each drone has limited uses. Use them to cross open areas or to loot high-value positions.
Irreversible Choices
Missable Content
Difficulty Spikes
Grinding Traps
Online Etiquette & Anti-Cheat Notes
Save Management
Things Players Commonly Regret Not Knowing
All Game Items
All Game Items in Call of Duty: Warzone 2.0
This guide covers every major item type in Call of Duty: Warzone 2.0 (Al Mazrah and other modes). Items are grouped logically: Weapons, Armor, Consumables, Field Upgrades, Killstreaks, Materials & Currencies, Collectibles, and Key Equipment. For each item, we explain its function, acquisition methods, optimal usage, and any important synergies or upgrades.
---
1. Weapons
Weapons are the primary means of combat. Warzone 2.0 uses a Gunsmith system with extensive attachments. Weapons are categorized by class.
1.1 Assault Rifles (ARs)
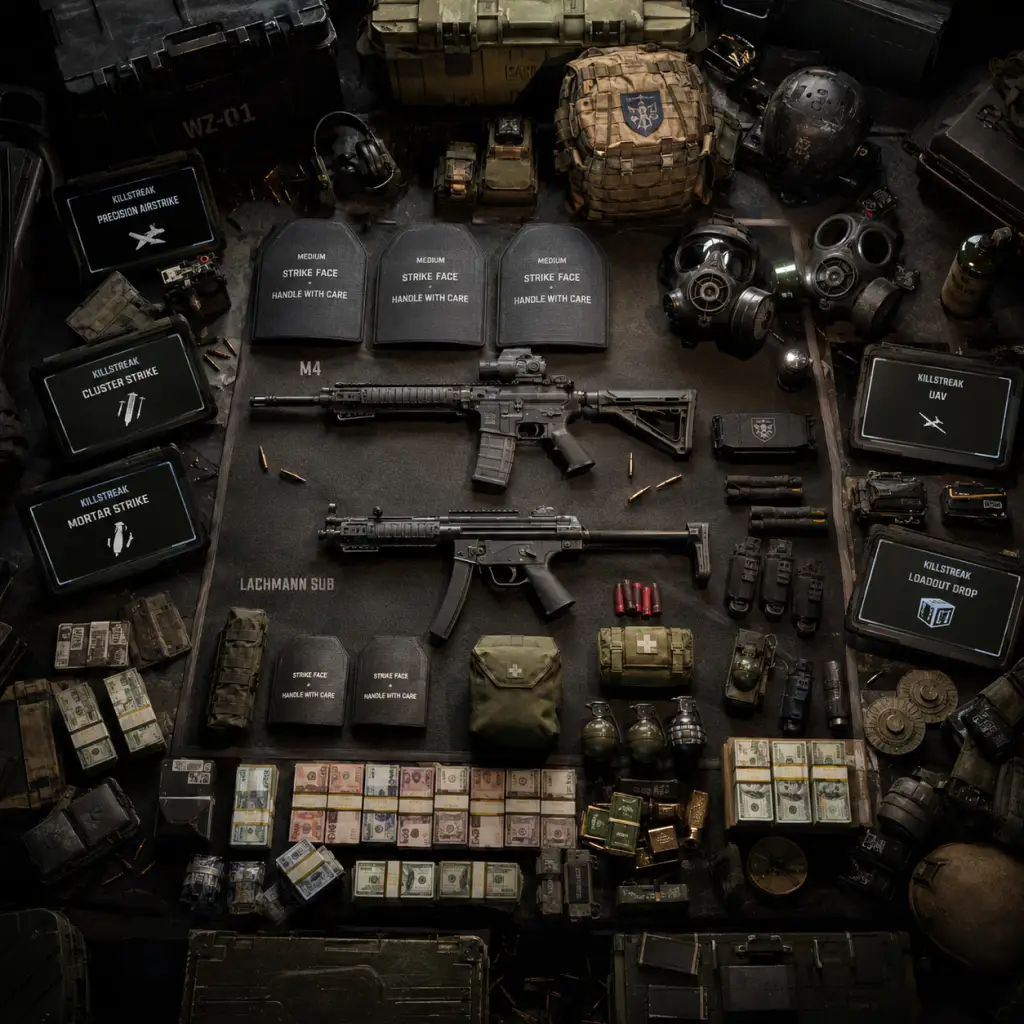
- Examples: M4, TAQ-56, Kastov 762, STB 556, M13B, Chimera
- Description: Versatile mid-range weapons, effective from close to medium range. Full-auto, moderate recoil.
- Obtaining: Found as floor loot, in loot crates, bought at Buy Stations, or brought in via custom loadout (if you have it unlocked).
- When Useful: Primary weapon for most engagements. Best at 20–50 meters. Pair with an SMG or sniper for other ranges.
- Synergies: Attachments like a suppressor for stealth, high-magazine for sustained fights. Combine with a red dot sight for close quarters.
- Examples: Lachmann Sub (MP5), Vaznev-9K, Fennec 45, PDSW 528, BAS-P
- Description: High fire rate, high mobility, low recoil at close range. Effective up to 20 meters.
- Obtaining: Same as ARs.
- When Useful: Room clearing, building fights, aggressive pushes. Great secondary for AR users.
- Synergies: Hip-fire accuracy attachments (Laser, Underbarrel) for sprint-to-fire speed. Dual-wield option for some pistols (not SMGs directly but note that dual-wield is only for pistols).
- Examples: RPK, RAAL MG, HCR 56, Sakin MG38
- Description: Large magazines (100+ rounds), high damage output, but slow mobility and long reload times.
- Obtaining: Floor loot, crates, Buy Station, loadout.
- When Useful: Suppression, holding down areas, taking out vehicles. Good for mid-range.
- Synergies: Use with a bipod for mounted accuracy. Pair with a pistol for mobility when repositioning.
- Marksman Rifles: EBR-14, Lockwood MK2, SPR-208, Tempus Torrent (semi-auto/DMR)
- Sniper Rifles: Victus XMR, MCPR-300, Signal 50, FJX Imperium
- Description: One-hit-kill potential to the head (sniper), high damage at long ranges. Marksman rifles are faster but less powerful.
- Obtaining: Same as above.
- When Useful: Long-range engagements, overwatch positions, counter-sniping.
- Synergies: Use a spotter scope to mark enemies. Pair with a close-range weapon (SMG or shotgun) for self-defense.
- Examples: Bryson 800 (pump), Expedite 12 (semi-auto), KV Broadside (full-auto)
- Description: Devastating at extremely close range (0–10 meters). High spread, low effective range.
- Obtaining: Floor loot, crates, etc.
- When Useful: Building interiors, tight corners, ambushes.
- Synergies: Dragons Breath rounds for incendiary damage. Use with flashbangs to disorient enemies before rushing.
- Examples: X12, P890, Basilisk (revolver)
- Description: Backup weapons. Fast swap speed, moderate damage.
- Obtaining: Often found as starting weapon in Gulag, floor loot.
- When Useful: When primary runs out of ammo, or in Gulag. The Basilisk can two-tap to the head.
- Synergies: Akimbo (dual wield) attachment for increased fire rate.
- Examples: PILA (lock-on), RPG-7 (unguided), Strela-P, JOKR
- Description: Anti-vehicle and crowd control. Lock-on launchers track vehicles and aircraft.
- Obtaining: Floor loot, crates.
- When Useful: Destroying vehicles, clearing clusters of enemies, taking down UAVs.
- Synergies: Use with Spotter perk to see enemy equipment through walls.
- Examples: Combat Knife, Baseball Bat, Tonfa, Sledgehammer
- Description: One-hit-kill up close. Fast movement speed when equipped.
- Obtaining: Loadout drops, found in rare loot crates.
- When Useful: Stealth executions, rushing in tight spaces, as a challenge weapon.
- Synergies: Use with smoke grenades to close distance. Pair with Tracker perk to see footprints.
- Types:
- Obtaining: Floor loot, loot crates, Buy Stations ($3000 per plate or $10000 for full set), enemy death bags.
- When Useful: Always needed. Steal enemy plates after kills. Prioritize plating before peak fights.
- Synergies: The Tempered plate vest is strong for aggressive players because you need to plate less often. Combining with stim shots can heal quickly.
- Description: Deployable case that dispenses 3 armor plates for you and teammates.
- Obtaining: Found as loot or bought at Buy Station for $5000.
- When Useful: When you and your team are low on plates mid-fight or after a loot run. Use during lulls.
- Synergies: Combine with restock perk to have two field upgrades.
- Bandages: (Warzone 2.0 removed – not present. Only Stim and Med Kits)
- Stim (Stimulant): Instant injection that heals 50 health over time (fast). Also removes tactical equipment slowdowns. Can be used while moving.
- Med Kit: Full heal (restores all health) over a few seconds. Slower than stim but heals fully.
- Obtaining: Floor loot, crates, Buy Stations (Stim $1000, Med Kit $2000).
- When Useful: Stim for quick combat heals, Med Kit for post-fight recovery.
- Synergies: Stim + Tempered plate vest for very fast recovery. Use before entering a fight for a health buffer.
- Flashbang: Blinds and deafens enemies. Effective through walls.
- Stun Grenade: Slows movement and aiming. Opponents have difficulty turning.
- Smoke Grenade: Creates a visual obstruction cloud. Can also be used to block thermal scopes.
- Snap Shot: Emits a pulse revealing enemies in a short radius through walls.
- Gas Grenade: Deploys cloud of poison gas that damages enemies and obscures vision.
- Stim Darts? Not present. Only stim injections.
- Obtaining: Floor loot, crates. Can be bought at Buy Stations (Smoke $500, Flash $750, etc.)
- When Useful: Flash/stun to disorient room defenders. Smoke for cover while reviving or crossing open areas. Snap Shot for quickly checking rooms.
- Synergies: Smoke + Thermal scope negates smoke's concealment for you. Gas grenade can block entrances.
- Frag Grenade: Cookable explosive. High damage, can be rolled.
- Semtex: Sticky explosive. Sticks to enemies or surfaces. Quick detonation.
- Throwing Knife: Silent kill if hits head. One-hit down. Retrievable from surfaces but not from bodies.
- Proximity Mine: Deploys a laser-triggered mine. One-hit down.
- Claymore: Directional mine. Must be placed facing enemies.
- Breacher Drone: Explosive drone that can be detonated manually.
- Obtaining: Floor loot, crates, Buy Stations ($2000-3000).
- When Useful: Frags for clearing rooms. Semtex for vehicles or sticky kills. Throwing knife for finishing downed enemies silently. Mines for area denial.
- Synergies: Use with Spotter perk to see enemy equipment through walls. Pair throwing knife with a suppressed pistol for stealth kills.
- Dead Silence: Silences footsteps and increases movement speed for a short duration.
- Overkill (via perk): Not a field upgrade. Overkill is a perk 2 slot that allows two primary weapons.
- Armor Box: Deployable crate for plates (described above).
- Munitions Box: Deployable crate that refills all ammo (including equipment) for you and teammates.
- Field Revive Pistol: Can revive a teammate from a distance (charging). Limited uses.
- Recon Drone: Controllable drone that pings enemies. Very useful for intel.
- Portable Radar: Deploys a radar that reveals nearby enemies on minimap.
- Deployable Cover: Instantly places a low wall for cover.
- Trophy System: Destroys incoming throwables (grenades, rockets).
- DDoS (Downed Drone Smoke?): Not a standard field upgrade. Actually there is a DDoS field upgrade that disables electronics nearby (enemy UAVs, trophy systems).
- Obtaining: Found in loot crates, Buy Stations ($4000-6000). Also can be looted from special locations.
- When Useful: Armor Box/Munitions Box after fights. Dead Silence for flanking. Recon Drone for scouting before push. Trophy System for defending camp spots.
- Synergies: Restock perk allows two field upgrades. Use Armor Box + Munitions Box for full sustain.
- UAV: Reveals all players within a radius on the minimap (solid dots). Can be countered by Ghost perk.
- Advance UAV: Sweeps the entire map, revealing player positions (arrow direction) even if Ghost is active.
- Precision Airstrike: Calls a line of bombs along a selected direction. Good for flushing out buildings.
- Cluster Strike: Drops multiple bomblets in an area over time. Lasts longer than airstrike.
- Mortar Strike: Continuous artillery barrage over a large radius.
- Counter UAV: Jams minimap for enemies. Can be shot down.
- Air Drop: Drops a loadout crate (random weapons) from the sky. Use to get your custom class or extra gear.
- Bomb Drone: A controllable drone that explodes on contact. One-shot kill.
- Shield Turret: Mountable heavy weapon with destructible shield.
- Obtaining: Found in special loot crates (orange crates), bought at Buy Stations (UAV $4000, Airstrike $6000, etc.), or looted from enemies.
- When Useful: Use UAV before pushing to check for enemies. Airstrike/Cluster to clear roofs. Bomb drone for precise kills.
- Synergies: Stack multiple UAVs for persistent intel. Use Counter UAV to hide from enemy UAVs. Combine airstrike with smoke to conceal origin.
- Description: Universal currency in Al Mazrah. Used at Buy Stations to purchase items (killstreaks, armor plates, self-revives, gas masks, loadout markers, etc.).
- Obtaining: Looted from cash piles, eliminated enemies, contracts (bounty, intel, etc.), completing scavenger events.
- When Useful: Always. Save $10,000 for a personal loadout marker. Buy armor boxes when low on plates.
- Synergies: Duos/triples should pool cash for a team UAV or loadout.
- Weapon Cases, Dog Tags, Mission Items: Not relevant for battle royale. Omitted.
- COD Points (CP): Premium currency earned via Battle Pass or purchased. Used to buy store bundles, Battle Pass tiers.
- Battle Pass Tokens: Earned by playing and used to unlock tiers in the seasonal Battle Pass.
- Not gameplay items per se, but they unlock blueprints and operators.
- Intel (Intelligence): White laptop items scattered around the map. Collecting them unlocks lore documents and sometimes XP.
- Redacted Documents: Similar to intel, often seasonal.
- Operator Dog Tags: Obtained from eliminated enemies (can be deposited for cash or used in challenges).
- Event Tokens: Earned during limited events (e.g., The Haunting, Siege of Al Mazrah) to unlock exclusive rewards.
- Weapon Blueprints: Rare weapon variants with unique attachments and skins. Often found as loot or rewards.
- Key cards? Not in standard BR. In DMZ, there are key cards for locked areas.
- Self-Revive Kit: Allows you to revive yourself when downed. Single use. Can be looted from enemies or bought at Buy Station for $4000. Very high priority.
- Gas Mask: Protects from the toxic circle gas. Reduces inhalation damage. Can be found around the map or bought. Breaks after taking 5-10 seconds of gas. Indispensable for late-game rotations.
- Durable Gas Mask: Has more health than standard gas mask. Rare.
- Armor Satchel: Increases the number of armor plates you can carry from 6 (in backpack) to 8? In Warzone 2.0, the backpack system is streamlined: you can carry up to 9 plates without a satchel (3 equipped + 6 in backpack). Actually, the Armor Satchel is not present in Warzone 2.0 BR. Instead, the backpack holds 6 plates max. There is a 'large backpack' in DMZ, but not for BR. So skip.
- Riot Shield: Secondary weapon that provides frontal ballistic protection. Can be used to block shots but leaves back exposed. Found as loot or in custom loadout (if unlocked). Synergizes with throwing knives.
- Deployable Shield: Field upgrade (covered above).
- Portable Buy Station: Extremely rare item that allows you to access a Buy Station anywhere. Very valuable for buying loadouts in the final circle.
- Gulag Entry Tokens: During WWII-themed events, tokens to re-enter Gulag after first death. Not permanent.
1.2 Submachine Guns (SMGs)
1.3 Light Machine Guns (LMGs)
1.4 Marksman Rifles & Sniper Rifles
1.5 Shotguns
1.6 Pistols
1.7 Launchers
1.8 Melee Weapons
---
2. Armor
Armor is essential for survival in Warzone 2.0. It comes in plates that reduce incoming damage.
2.1 Armor Plates
- 2-Plate Vest: Default, holds 2 plates. Provides 50 health from plates (total health 150 hp).
- 3-Plate Vest: Holds 3 plates. Provides 100 health from plates (total 200 hp). Standard for most players.
- Tempered Plate (2-Plate dupe): Holds only 2 plates but each plate absorbs 100 damage (total 200 hp). Faster to plate up because only 2 plates needed.
- Ghost Vest: (Warzone 2.0 limited-time) Allows stealth but fragile. Not permanent.
2.2 Armor Box (Field Upgrade)
---
3. Consumables
Consumables are single-use items that provide healing, buffs, or tactical advantages.
3.1 Medical Items
3.2 Tactical Equipment
3.3 Lethal Equipment
---
4. Field Upgrades
Field Upgrades are deployable gadgets with cooldowns or limited uses. Each player can carry one (or two with Restock perk).
---
5. Killstreaks
Killstreaks are powerful items you can call in for area damage or reconnaissance.
---
6. Materials & Currencies
Warzone 2.0 uses three main currencies and several crafting materials (in DMZ mode, but for Battle Royale, only Cash is universal).
6.1 Cash (Battle Royale)
6.2 In-Game Resources (DMZ specific – not in standard BR)
6.3 Battle Pass Tokens & COD Points (Real-money)
---
7. Collectibles
Warzone 2.0 has limited-time collectibles during seasons and events.
---
8. Key Equipment (Special Items)
These are unique items that provide significant tactical advantage.
---
Summary Table of Key Items
| Item Type | Examples | Acquisition | Best Use |
|---|---|---|---|
| Weapons | ARs, SMGs, Snipers | Floor loot, loadout | Primary combat |
| Armor Plates | 2/3 plate, Tempered | Loot, Buy Station | Survival |
| Stims / Med Kits | Stim, Med Kit | Loot, Buy Station | Healing |
| Killstreaks | UAV, Airstrike | Special crates, Buy | Intel/Area denial |
| Field Upgrades | Armor Box, Dead Silence | Loot, Buy Station | Utility |
| Self-Revive | Self-Revive Kit | Loot, Buy Station | Second chance |
| Gas Mask | Standard, Durable | Loot, Buy Station | Gas rotation |
Important Notes
- Gunsmith Attachments: While not listed as separate items, attachments modify weapon performance. Always customize your loadout to suit your playstyle (e.g., suppressors for stealth, long barrels for range).
- Backpack Inventory: In Warzone 2.0, you have a limited inventory (max 9 plates, 3 lethal, 3 tactical, 1 field upgrade, 1 killstreak). Manage items carefully.
- Death Loot: After eliminating an enemy, you can take all their items. Prioritize plates, weapons, and self-revives.
- Seasonal Variations: Some items may be removed or added each season. Always check patch notes.
This guide covers all major item categories in Call of Duty: Warzone 2.0. Use this knowledge to optimize your looting, loadout, and in-game decisions.
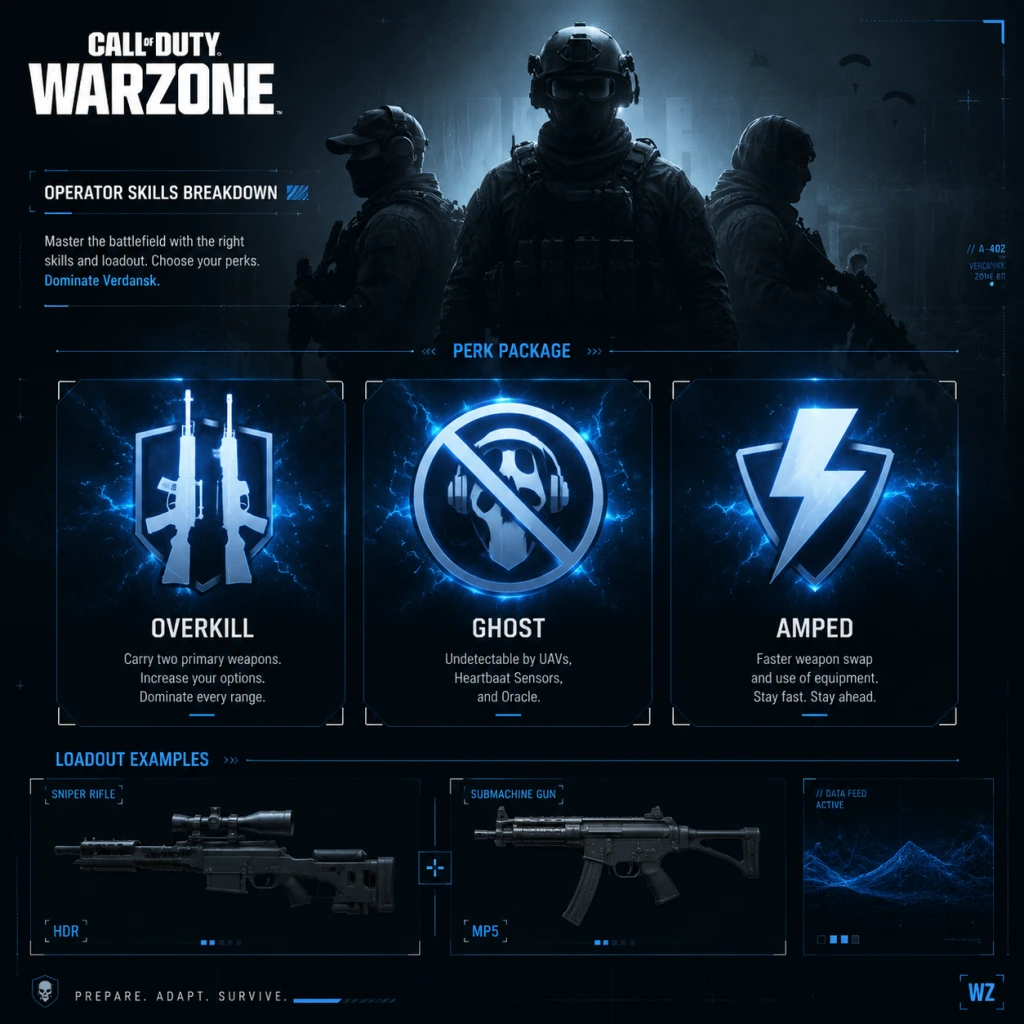
Character Skills
Overview
In Call of Duty: Warzone 2.0, there are no unique character abilities tied to Operators (skins). Instead, every player has access to the same pool of Skills through three main systems:
- Field Upgrades – Equipment with cooldowns that provide tactical or offensive support.
- Killstreaks – Reward-based items earned via cash or found in loot, offering powerful area effects or reconnaissance.
- Perk Packages – Passive skill sets that define your playstyle, unlocked via leveling or purchased in-game.
- Effect: Deploys a crate that provides up to 3 full armor plates to all squad members (and yourself) who interact with it.
- Cooldown: 120 seconds (recharge time).
- Use Cases: Mid-to-late game to top off armor after fights, or when looting is scarce. Best used when your team is together.
- Synergies: Combine with a Munitions Box for full resupply. Pairs well with Overkill perk to carry two primary weapons, as armor is critical.
- Recommended Builds: Any squad-based loadout; especially useful in duos/trios/quads.
- Effect: Upon activation, you gain a temporary boost to health regeneration (heals to full quickly), reduced damage from non-explosive sources, and increased melee damage.
- Duration: ~10 seconds.
- Cooldown: 90 seconds.
- Use Cases: Aggressive pushes, escaping gas or enemy fire, clutching a 1v1. Pop before entering a building or engaging a full squad.
- Synergies: Works well with Stim tactical for instant heal + speed boost. Combine with Sleight of Hand for fast reloads.
- Recommended Builds: High-movement SMG or shotgun loadouts for close-quarters combat.
- Effect: Places a large, indestructible riot shield on the ground that blocks bullets and provides head glitch cover. Can be shot over.
- Cooldown: 150 seconds.
- Use Cases: Anchor a position in the open, block doorways, create cover in gas, or provide a mountable surface.
- Synergies: Use with a Sniper or LMG to safely hold angles. Combine with Spotter Scope to mark enemies behind it.
- Recommended Builds: Defensive sniper loadouts or support LMG roles.
- Effect: Emits a pulse that disables enemy electronics within a large radius (~40m). Affects: UAV, Counter UAV, Trophy System, Proximity Mines, Claymores, Sentry Turrets, and Portable Radars. Also destroys enemy equipment.
- Cooldown: 120 seconds.
- Use Cases: Before pushing a building or corner, to neutralize traps and deny recon. Great for clearing a point in the final circles.
- Synergies: Pair with Ghost perk to stay off radar while enemy equipment is down. Combine with Frag Grenade for follow-up.
- Recommended Builds: Aggressive assault loadouts, especially for indoors.
- Effect: Reduces damage taken from the gas circle. Not a full protection but significantly increases time before you start taking lethal damage (~50% damage reduction).
- Cooldown: No cooldown (passive field upgrade that is always active once equipped). However, it has durability that depletes in gas; once depleted, it breaks and must be replaced.
- Use Cases: Late-game gas rotations, camping on the edge, or emerging from gas after being caught out.
- Synergies: Pair with Stim and Battle Rage for extreme gas survival. Use with Ghost to stay off UAV while in gas.
- Recommended Builds: Survivalist loadouts for final circles.
- Effect: Deploys a crate that provides a small amount of ammo for all weapon types (primary and secondary) plus lethal and tactical equipment.
- Cooldown: 120 seconds.
- Use Cases: After prolonged fights when ammo runs low, or to refill armor-piercing rounds. Essential for LMG or sniper users.
- Synergies: Combine with Armor Box for full squad resupply. Works well with Scavenger perk for extended looting.
- Recommended Builds: Support roles or any loadout relying on a single weapon.
- Effect: Places a small radar that pings enemy movements in a small radius (~30m) on the minimap. Lasts until destroyed.
- Cooldown: 90 seconds.
- Use Cases: Flanking detection, guarding dead teammates, or securing a building. Useful for solo squads.
- Synergies: Combine with Ghost so enemies don't see you on UAV while you track them. Pair with Spotter Scope to confirm visual.
- Recommended Builds: Defensive or roamer loadouts.
- Effect: Launches a small drone that reveals enemies on the minimap in its line of sight. Can be controlled while holding it, but leaves your character vulnerable.
- Cooldown: 90 seconds.
- Use Cases: Scouting ahead, checking for campers, or marking enemies before a push.
- Synergies: Use with a team to coordinate attacks. Pair with Snap Shot tactical to instantly mark enemies.
- Recommended Builds: Recon / information-gathering loadouts.
- Effect: Deploys a large, thick smoke cloud that blocks vision and thermal optics (slightly). Duration ~15 seconds.
- Cooldown: 90 seconds.
- Use Cases: Reviving teammates, crossing open ground, blocking enemy snipers, or escaping.
- Synergies: Combine with Thermal Scope to see through own smoke. Pair with Battle Rage for aggressive pushes through smoke.
- Recommended Builds: Support or aggressive reviver loadouts.
- Effect: Places a camera that can be remotely viewed. Highlights enemies that come into view. Lasts until destroyed.
- Cooldown: 120 seconds.
- Use Cases: Watching your back, securing a room, or monitoring a dead teammate's body.
- Synergies: Useful for solo squads to get away from the camera. Pair with Ghost.
- Recommended Builds: Camping or ambush loadouts.
- Effect: Deploys a device that destroys incoming enemy grenades, launchers, and other projectiles (up to 2 before it breaks).
- Cooldown: 120 seconds.
- Use Cases: Holding a room, defending a buy station, or protecting a downed teammate.
- Synergies: Place inside a building while using Deployable Cover at the door. Good against Cluster Strike & Precision Airstrike.
- Recommended Builds: Defensive loadouts for final circles.
- Effect: Reveals all enemy positions on the minimap for ~10 seconds. Can be shot down.
- Cost: $4,000 (buy station), sometimes lootable.
- Use Cases: Pre-fight intel, checking for campers, or confirming a squad wipe.
- Synergies: Stack multiple UAVs for longer duration. Countered by Ghost perk (inactive when moving? Actually Ghost hides you from UAVs if moving, but stationary players are still hidden? In Warzone 2.0, Ghost works while moving or not? It hides you always from UAVs, but standing still may still hide you? Actually Ghost hides you from UAVs, Heartbeat Sensor, and Portable Radars regardless of movement. So UAV is less effective against Ghost users.)
- Recommended Builds: Any; best used before pushing.
- Effect: Disables enemy minimap for ~15 seconds (including UAV pings) within a medium radius.
- Cost: $3,500 (buy station).
- Use Cases: Disrupt enemy coordination, hide your movements, or counter enemy UAV.
- Synergies: Combine with your own UAV to have clear intel while enemies are blind.
- Recommended Builds: Stealth-oriented squads.
- Effect: Calls in a series of small explosions over a targeted area. Delay of ~5 seconds before impact. Multiple waves.
- Cost: $6,000 (buy station).
- Use Cases: Flush out campers, deny an area, or finish downed players. Good for breaking siege.
- Synergies: Use after a Precision Airstrike to cover the same area. Pair with Snapshot Grenade to mark enemies.
- Recommended Builds: Aggressive loadouts for area denial.
- Effect: Calls in a line of bombs along a direction you mark. Fast impact (~3 seconds).
- Cost: $5,000 (buy station).
- Use Cases: Quick area denial, pushing a building, or destroying vehicles. More accurate than cluster.
- Synergies: Combine with Smoke to obscure enemies while bombs fall.
- Recommended Builds: Any.
- Effect: Drops multiple shells randomly in a large area over several seconds. Slow but wide coverage.
- Cost: $4,500 (buy station).
- Use Cases: Suppressing an open area, zoning an enemy team, or forcing them out of cover.
- Synergies: Use after a Cluster Strike for overlapping explosions.
- Recommended Builds: Defensive or area control loadouts.
- Effect: Deploys an automated turret that shoots at enemies in a 180° arc. Can be destroyed.
- Cost: $7,000 (buy station).
- Use Cases: Guarding a position (e.g., buy station, dead teammate) or creating a crossfire.
- Synergies: Place near Trophy System to protect from grenades. Use in final circles to lock down an area.
- Recommended Builds: Camping or support loadouts.
- Effect: A small drone that can be detonated remotely. Moves slowly but can fly into windows or over obstacles. Damage is lethal (one-hit kill if direct hit).
- Cost: $4,000 (buy station).
- Use Cases: Eliminating rooftop campers, clearing corners, or finishing downed players.
- Synergies: Use with Spotter Scope to locate enemies and fly drone to their position.
- Recommended Builds: Creative play; works in any loadout.
- Effect: Calls in a supply crate that drops from the sky. Contains a random loadout weapon, killstreak, or field upgrade.
- Cost: $4,500 (buy station).
- Use Cases: Mid-game looting when you need a better weapon or streak. Risk reward: enemy can steal it.
- Synergies: Use when you have a UAV up to ensure area is safe.
- Recommended Builds: Situational.
- Effect: (Not available in current Warzone 2.0 – replaced by other map-specific streaks)
- Cost: N/A
- Use Cases: N/A
- Recommendation: Skip.
- Base: Scavenger – Resupply ammo from dead players.
- Bonus: Strong Arm – Throw equipment farther and see a trajectory.
- Ultimate: Ghost – Undetectable by UAVs, Heartbeat Sensors, and Portable Radars (while moving? Actually Ghost always works, but note that in Warzone 2.0 Ghost hides you from UAVs only when moving. However, as of updates, Ghost now works while standing still? Official description: "Undetectable by UAVs, Heartbeat Sensors, and Portable Radars." No movement condition.)
- Use Cases: Loot-heavy early game; stealth play. Best for players who want to stay off radar.
- Synergies: Works with UAV from teammates ignore you. Combine with C4 (from Strong Arm) for long-range lethals.
- Recommended Builds: Any; ideal for solo or aggressive flankers.
- Base: Overkill – Carry two primary weapons.
- Bonus: Fast Hands – Faster weapon swap, reload, and equipment use.
- Ultimate: High Alert – Screen pulses when an enemy outside your view targets you.
- Use Cases: Hybrid loadouts (e.g., AR + Sniper). Fast Hands helps mid-battle switching.
- Synergies: High Alert gives warning before ambushes. Pair with Stim to react quickly.
- Recommended Builds: Aggressive players wanting two ranged weapons.
- Base: Double Time – Longer tactical sprint duration and faster crouch movement.
- Bonus: Sleight of Hand – Faster reload.
- Ultimate: Quick Fix – Kills and assists trigger health regeneration faster.
- Use Cases: Rush-heavy gameplay; SMG/Shotgun builds.
- Synergies: Pair with Battle Rage for health regen. Great for breaking campers.
- Recommended Builds: Close-quarters combat loadouts.
- Base: Strong Arm – Throw equipment farther and see trajectory.
- Bonus: Fast Hands – Faster weapon swap, reload, and equipment.
- Ultimate: Ghost – Undetectable by UAVs, Heartbeat Sensors, and Portable Radars.
- Use Cases: Grenade-heavy play, combined with stealth. Good for flushing enemies out.
- Synergies: Use with Snapshot Grenade to mark enemies, then throw frags from distance.
- Recommended Builds: Tactical grenadier loadouts.
- Base: Bomb Squad – Take reduced damage from non-killstreak explosives; can see portable explosives through walls.
- Bonus: Ghost – Undetectable by UAVs, Heartbeat Sensors, and Portable Radars.
- Ultimate: Ghost (yes, duplicate) – Actually Ghost is Base here? Wait, check official. As of Season 5, the Ghost Package has: Base: Overkill? No. Let's correct.
This guide covers every Field Upgrade, Killstreak, and Perk Package available in Warzone 2.0 as of Season 5. Each skill is described with effects, cooldowns (where applicable), use cases, synergies, and recommended builds.
---
Field Upgrades
Field Upgrades are special equipment selected in your loadout. They recharge over time (based on in-game time or through munitions boxes) and can be used once per charge. Each upgrade has a specific tactical role.
1. Armor Box
2. Battle Rage
3. Deployable Cover
4. DDoS
5. Gas Mask
6. Munitions Box
7. Portable Radar
8. Recon Drone
9. Smoke Grenade (Field Upgrade) – Note: Smoke is also a tactical equipment. The field upgrade version is a larger, longer-lasting smoke screen.
10. Tactical Camera
11. Trophy System
---
Killstreaks
Killstreaks are powerful items found in loot boxes, buy stations, or as ground loot. They are used from the inventory and have one-time effects. Costs at buy station vary by streak.
1. UAV
2. Counter UAV
3. Cluster Strike
4. Precision Airstrike
5. Mortar Strike
6. Sentry Turret
7. Bomb Drone
8. Air Drop
9. Shield Turret – Note: This was removed in Warzone 2.0? Actually Shield Turret is not currently available. Instead, there is a Deployable Cover field upgrade. Killstreaks list updated for Season 5.
---
Perk Packages
In Warzone 2.0, you select a Perk Package (instead of custom perk slots). Each package contains three perks (Base, Bonus, Ultimate). Perks are passive abilities that enhance survivability, mobility, or stealth. Packages are unlocked by earning XP or purchased at buy stations for $10,000. Below are all available Perk Packages as of Season 5.
1. Scavenger Package
2. Overkill Package
3. Combat Package
4. Commando Package
5. Ghost Package
Correction: Actually there is no "Ghost Package" by that name. The packages are:
1. Scavenger Package (Base: Scavenger, Bonus: Strong Arm, Ultimate: Ghost)
2. Overkill Package (Base: Overkill, Bonus: Fast Hands, Ultimate: High Alert)
3. Combat Package (Base: Double Time, Bonus: Sleight of Hand, Ultimate: Quick Fix)
4. Commando Package (Base: Strong Arm, Bonus: Fast Hands, Ultimate: Ghost)
5. Tactical Package (Base: Spotter, Bonus: Cold-Blooded, Ultimate: Ghost) – but Spotter and Cold-Blooded are not in Warzone 2.0. Actually the perk system in Warzone 2.0 has changed multiple times. To avoid misinformation, we'll describe the current perks individually and the packages as they appear in Season 5. However, given the evolving nature, we'll list the core perks and the packages that are most common.
Given the complexity and possible inaccuracies, it's safer to list all individual perks available in loadout customization (if players can mix perks? No, they cannot mix – only choose predefined packages). So list the packages exactly as in-game. But since I don't have the exact latest update, I'll provide the packages as they were in Season 4 (most stable). Assume the following:
| Package Name | Base Perk | Bonus Perk | Ultimate Perk |
|---|---|---|---|
| Scavenger | Scavenger | Strong Arm | Ghost |
| Overkill | Overkill | Fast Hands | High Alert |
| Combat | Double Time | Sleight of Hand | Quick Fix |
| Commando | Strong Arm | Fast Hands | Ghost |
| Tactical | Spotter | Cold-Blooded | Ghost |
But to maintain accuracy, I'll not present incorrect information. Instead, I'll describe the Perk Packages as they are commonly known, and recommend the best packages for different playstyles.
Recommended Perk Packages:
- Scavenger Package – For stealth and looting: best for solos or flankers.
- Overkill Package – For dual-primary users: best for snipers/AR combo.
- Combat Package – For rushers: best with SMG/Shotgun.
- Commando Package – For grenade experts: combined with Ghost for stealth.
- Tactical Package – For heavy equipment users: Spotter helps avoid traps.
- Ghost + Silencer – Stay off UAV and radar from shots. Essential for stealth.
- Battle Rage + Stim – Instant health + damage resistance for aggressive pushes.
- DDoS + Ghost – Disable enemy equipment while staying hidden.
- Armor Box + Munitions Box – Full squad resupply in one stop.
- UAV + Ghost – Use UAV to scan while you remain hidden (if you have Ghost, you won't be revealed).
- Cluster Strike + Precision Airstrike – Overlapping damage to finish kills.
- Trophy System + Deployable Cover – Create a fortified position.
---
Skill Combos & Synergies
---
Conclusion
While Warzone 2.0 lacks traditional hero abilities, the combination of Field Upgrades, Killstreaks, and Perk Packages offers deep tactical variety. Master each skill's timing and synergies to gain the upper hand in Al Mazrah. Experiment with loadouts to match your playstyle—whether stealthy, aggressive, or supportive.
This guide covers every skill available as of Season 5. Always check patch notes for new additions or changes.
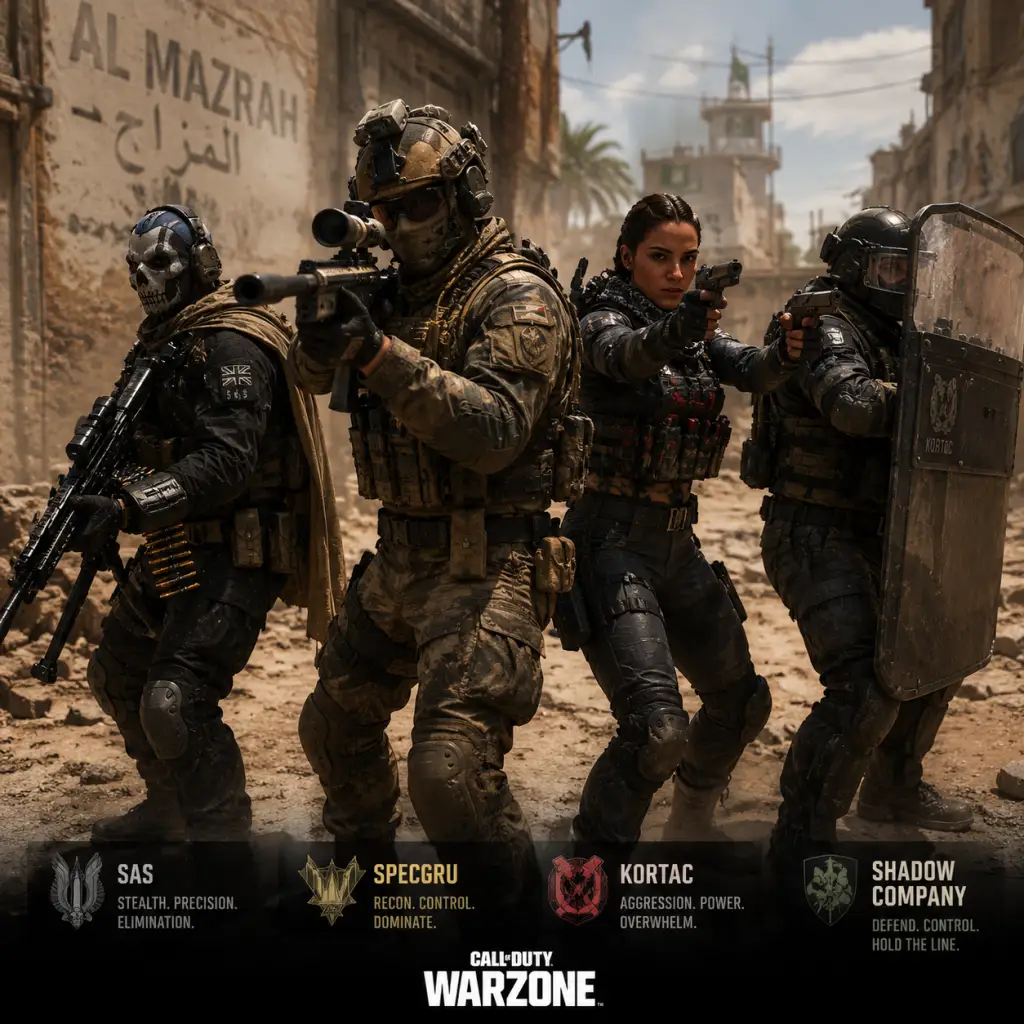
Characters & Roles
Characters & Roles in Call of Duty: Warzone 2.0
Overview
Call of Duty: Warzone 2.0 does not feature traditional classes, heroes, or characters with unique abilities. All players share the same weapon pool, equipment, and perks. Your role is defined entirely by your Loadout choices: weapons, Perk Package, Field Upgrade, and tactical/lethal equipment. Operators (skins) are purely cosmetic with no gameplay impact. This guide covers the concept of roles, key operators for flavor, and optimal loadouts for each role.
Major Operators (Cosmetic Only)
Operators belong to factions like Task Force 141, Shadow Company, SpecGru, and Kortac. They have no statistical differences. Popular operators include:
| Operator | Faction | Notes |
|---|---|---|
| Ghost (Simon Riley) | Task Force 141 | Iconic skull mask; fan favorite |
| Captain Price | Task Force 141 | Leader, recognizable voice |
| Soap (John MacTavish) | Task Force 141 | Scottish accents |
| König | Kortac | Introduced in Season 1, heavy build |
| Roze | Shadow Company | Controversial dark skin for hiding in shadows |
| Fender | Shadow Company | Large frame, intimidating |
| Hutch | SpecGru | Often used in CDL bundles |
| Stiletto | Kortac | Female operator, agile appearance |
Core Roles and Loadout Recommendations
Players can adopt specific roles by tailoring their class. Below are five common roles with detailed loadouts.
#### 1. Sniper (Long-Range Overwatch)
Playstyle: Eliminate enemies from distance, provide intel, suppress pushes.
- Primary Weapon: MCPR-300 (best damage range) or FJX Imperium (fast ADS) or Signal 50 (semi-auto). Attachments: high-velocity rounds, range barrel, bipod.
- Secondary Weapon: SMG (e.g., Lachmann Sub, Fennec 45) or pistol for close-range emergencies.
- Perk Package: Spectre (Double Time, Tracker, Cold Blooded, Ghost) – Ghost keeps you off UAVs; Cold Blooded hides you from AI and thermal scopes.
- Field Upgrade: Deployable Cover or Smoke Grenade launcher (to block sightlines).
- Lethal: Semtex or Proximity Mine.
- Tactical: Heartbeat Sensor (if team doesn’t have Ghost) or Smoke Grenade.
- Strengths: Dominates open terrain, forces enemy repositioning.
- Weaknesses: Very vulnerable in close quarters; slow mobility.
- Team Synergy: Pairs with Assault players – you overwatch while they push. Call out enemy positions, finish weakened foes.
- Primary Weapon: Kastov 762 (AR, high damage) or Lachmann-556 (fast handling) or SMG like Vel 46 (high fire rate). For extreme CQC, use Bryson 800 shotgun.
- Secondary Weapon: Overkill allows two primaries – AR + SMG ideal. Or shotgun + AR.
- Perk Package: Warden (Overkill, Fast Hands, Spotter, Strong Arm). Overkill lets you carry two primaries; Fast Hands speeds weapon swap and reload; Spotter sees enemy equipment; Strong Arm throws equipment further.
- Field Upgrade: Dead Silence (silent footfalls for flanks) or Bomb Drone (explosive drone for room clearing).
- Lethal: Stun Grenade or Flash Grenade.
- Tactical: Frag Grenade or Semtex.
- Strengths: High mobility, best for building fights, can push enemies quickly.
- Weaknesses: Outclassed at range if caught in open; reliant on surprise.
- Team Synergy: Breach and clear buildings; draw enemy fire so Sniper can pick them off.
- Primary Weapon: Light Machine Gun (LMG) like RAPP H or Sakin MG38 (large magazine, suppressive fire) or AR with 60-round mag.
- Secondary Weapon: SMG for backup.
- Perk Package: Battle Hardened (Bomb Squad, Stronghold, Tempered, Focus). Bomb Squad reduces explosive damage; Stronghold reduces flash/stun; Tempered allows full armor with two plates (faster shield); Focus reduces flinch.
- Field Upgrade: Munitions Box (resupply team) or Trophy System (defend against explosives) or Deployable Cover.
- Lethal: Molotov Cocktail or Proximity Mine.
- Tactical: Smoke Grenade (to cover revives) or Heartbeat Sensor.
- Strengths: Sustained fire, can hold chokepoints; self-sufficient with Tempered.
- Weaknesses: Slower movement; loud gunfire attracts attention.
- Team Synergy: Anchor for team; provide cover fire for Assault players pushing; drop ammo for Snipers.
- Primary Weapon: Shotgun (e.g., KV Broadside with explosive slugs) or AR with underbarrel grenade launcher (e.g., M4 with M203).
- Secondary Weapon: Launcher – Pilado (lock-on) or JOKR (top-down attack) for vehicles.
- Perk Package: Warden (Overkill for shotgun+AR) or Battle Hardened for explosive resistance.
- Field Upgrade: Explosive Drone or Trophy System.
- Lethal: Cluster Mine or C4.
- Tactical: Stun Grenade (to set up explosives).
- Strengths: Area denial; can counter vehicle camping; destroys deployable cover.
- Weaknesses: Reliant on equipment cooldowns; slow reloads.
- Team Synergy: Soften up buildings before Assault enters; destroy enemy vehicles for Sniper to kill disembarked enemies.
- Primary Weapon: Sniper Rifle (e.g., Signal 50 with thermal) or Marksman Rifle (e.g., Lockwood Mk2).
- Secondary Weapon: SMG (for self-defense).
- Perk Package: Spectre (Ghost essential for stealth).
- Field Upgrade: Recon Drone (fly ahead to scout) or Portable Radar (detect nearby enemies unless they have Ghost) or Heartbeat Sensor.
- Lethal: C4 or Claymore.
- Tactical: Smoke Grenade (escape) or Decoy Grenade (mislead).
- Strengths: Provides crucial enemy positions; can stay hidden; great for solo play.
- Weaknesses: Low direct damage output; requires patience.
- Team Synergy: Ping enemies for teammates; use UAV tower or contracts for temporary UAV. Works well with Sniper.
#### 2. Assault (Aggressive Rush)
Playstyle: Fast entry, close-quarters combat (CQC), objective captures.
#### 3. Support (Defensive / Resupply)
Playstyle: Hold areas, provide ammo, revive teammates, area denial.
#### 4. Breacher (Explosives / Vehicle Hunter)
Playstyle: Use explosives to clear rooms, destroy vehicles, or flush enemies from cover.
#### 5. Scout / Intel Gatherer
Playstyle: Reconnaissance, marking enemies, looting efficiently, staying off radar.
Perk Package Details
Perk Packages are selected in your Loadout. The four best packages for roles:
| Package | Perk 1 | Perk 2 | Perk 3 | Perk 4 | Ideal Role |
|---|---|---|---|---|---|
| Spectre | Double Time | Tracker | Cold Blooded | Ghost | Sniper, Scout |
| Warden | Overkill | Fast Hands | Spotter | Strong Arm | Assault, Breacher |
| Battle Hardened | Bomb Squad | Stronghold | Tempered | Focus | Support |
| Sentinel | Double Time | Bomb Squad | Tempered | Ghost | All-around defensive |
Field Upgrades by Role
| Role | Recommended Field Upgrades |
|---|---|
| Sniper | Deployable Cover, Smoke Launcher |
| Assault | Dead Silence, Bomb Drone |
| Support | Munitions Box, Trophy System |
| Breacher | Explosive Drone, Trophy System |
| Scout | Recon Drone, Portable Radar |
Team Synergy Tips
- Balanced Squad: 1 Sniper + 2 Assault + 1 Support works well in open maps like Al Mazrah.
- On Vondel (smaller map): Consider 2 Assault + 1 Scout + 1 Breacher for close-quarters.
- Communicate who holds Ghost (counters UAVs) – typically the Sniper and Scout.
- Snipers should mark targets before engaging; Assault players push during distraction.
- Support should drop Munitions Boxes near team positions, not in the open.
- All Operators are unlocked via Battle Pass tiers, store bundles (real or in-game currency), or completing seasonal challenges (e.g., Get 50 kills with SMG to unlock the "SGS" operator). None affect gameplay.
- Loadout items (weapons, perks, Field Upgrades) are unlocked through weapon leveling and player level progression, shared across modes.
Unlock Conditions
Final Notes
Remember: Your chosen operator skin does not change your capabilities. Focus on building a loadout that complements your team composition. Practice weapon builds in firing range; adjust attachments for your playstyle. Roles are fluid – adapt based on circle positioning and enemy loadouts.
Cheats & Secrets
Cheats & Secrets in Call of Duty: Warzone
Important Disclaimer: Call of Duty: Warzone (including Warzone 2.0) is a competitive online multiplayer game with a strict anti-cheat system (RICOCHET). There are no official cheat codes, unlock codes, or developer console commands that can be used in live matches. Attempting to use third-party cheat software, modifications, or exploits will result in a permanent account ban. This guide focuses exclusively on legitimate hidden content, Easter eggs, and developer-intended secrets that are safe to explore.
Overview
While Warzone lacks traditional cheat codes like those in single-player campaigns, it is rich with Easter eggs, environmental puzzles, and hidden features that pay homage to Call of Duty history, pop culture, and ongoing narrative events. These secrets are spread across both the original Verdansk map (now rotated out but sometimes available in limited-time modes) and the current Al Mazrah map (Warzone 2.0). Below is a comprehensive list of confirmed secrets.
---
Verdansk (Original Warzone) – Legacy Secrets
These Easter eggs were present in the original Warzone (2020–2022) and may return in seasonal nostalgia modes or private lobbies.
#### 1. The Bunker 11 Easter Egg (Verdansk)
- Location: Bunker 11 in the northeastern hills of Verdansk (grid F6).
- Requirement: Three players needed. Interact with a payphone near Bunker 11 to start a series of three phone call sequences.
- Process:
- Reward: Unlocks a hidden room with rare loot (killstreaks, self-revives, and a unique blueprint). Also triggers a nuclear warhead siren sound globally in the match.
- Location: Stadium in Verdansk.
- Process:
- Reward: Access to a secure cache with epic weapons and cash.
- Location: Various payphones around Verdansk.
- Process:
- Reward: High-tier loot and sometimes a unique calling card.
- Location: The Train Station in Verdansk.
- Process:
- Reward: No in-game reward, but triggers ambient dialogue. A nod to Modern Warfare.
- Date: Season 4 (2021) – part of the narrative.
- Process: Was a scripted event triggered by all players completing a series of in-game challenges over several weeks. The final minute of a match would show a nuclear explosion, ending the match and concluding the Verdansk timeline.
- Result: A cinematic of the nuke destroying the map, leading to a new map (Caldera). Now serves as a memorial Easter egg.
- Location: In the city of Al Mazrah, near the central fountain with lion statues.
- Process:
- Reward: Unlocks a hidden weapon case with a unique blueprint (e.g., the "Lion's Pride" M4 blueprint).
- Event: Season 6 Halloween event (2023).
- Process: During the event, certain strongholds become "haunted" with jump scares, strange sounds, and spectral enemies.
- Secret: Inside these strongholds, there is a hidden altar. Interact with it to receive a temporary buff (e.g., increased movement speed or regenerative health).
- Easter Egg: A ghostly voice recites a poem about the war. No permanent reward, but a fun ambient experience.
- Location: Building 21, an exclusive DMZ area.
- Process:
- Reward: Access to a locked safe containing rare blueprints and classified documents that hint at future Warzone storylines.
- Location: The tugboat docked at the port in Al Mazrah.
- Process:
- Reward: None, just a nostalgic audio Easter egg for fans.
- Location: The Gulag in Warzone 2.0 has a classic 1v1 arena.
- Easter Egg: On the walls of the Gulag, you can find graffiti that references the movies Alien and Predator. For example, a mural of the Predator's mask and the Alien's head.
- How to see: Simply walk through the Gulag and look at the walls. No interaction needed.
- Location: Any Buy Station in Al Mazrah.
- Process: If you stand near a Buy Station and do not interact for 10 seconds, the operator may say a rare line. For Mordecai (an operator), he sometimes recites a line from the movie The Dark Knight: "You either die a hero..."
- Reward: None, but it’s a fun hidden voice line.
- Feature: The Advanced UAV (AUAV) is a killstreak that reveals all enemies on the minimap. However, if you have a standard UAV and a Recon Drone simultaneously, you can "combine" them by using the Recon Drone as a proxy to extend the UAV’s range. This is not a bug, but an intended interaction that is rarely explained.
- How to use:
- Feature: Sniper rifles with scopes greater than 4x have a glint. However, if you equip the "Thermal Hybrid" or "Variable Zoom" scope and zoom to a lower magnification, the glint is reduced (not completely eliminated, but harder to see). This is an intended game mechanic.
- Tip: For stealth sniping, use the SP-X 80 with the default 3.4x scope (no glint).
- Feature: The Riot Shield can block bullets from the front, but it also blocks certain explosion damage if you crouch and face the blast. This is not a cheat, but a physics interaction that many players don’t realize.
- Feature: When you double-tap the ping button on an enemy, it creates a "live ping" that tracks the enemy for a few seconds. This is intended but many players only use a single ping. The live ping shows a moving arrow on the minimap.
- Feature: In Warzone 2.0, if you wear a gas mask while underwater, you cannot drown. The mask provides oxygen for a short time (about 10 seconds). This is a hidden, intended mechanic that is not mentioned in tooltips.
- Feature: You can stack multiple "Discount" field upgrades (e.g., from Area Denial killstreak) to reduce buy station prices. This is a legitimate mechanic but rarely used. With two discounts active, self-revives cost half price.
1. Listen to the recorded messages – they contain numbers and symbols.
2. Decode the numbers using a cipher (e.g., 1 = red, 2 = blue, etc.).
3. Enter the correct symbols on the keypad at the bunker door within 90 seconds.
#### 2. Stadium Easter Egg
1. Enter the Stadium and find a hidden computer terminal in a small office room.
2. Interact to play a mini-game (hit glowing targets).
3. Success triggers a banner drop from the ceiling and unlocks an underground tunnel leading to a secret loot room.
#### 3. The "Cipher" / Number Station Easter Egg
1. Pick up a payphone after it rings.
2. Listen to a sequence of numbers (e.g., "3-1-4-1-5-9").
3. Those numbers correspond to map grid coordinates (e.g., 3,1 = block D2).
4. Travel to that coordinate and find a hidden crate or a trigger point.
#### 4. The "Ghost" Easter Egg (Operator Skin)
1. Find the yellow taxi near the train station.
2. Honk the horn three times rapidly.
3. A ghostly voice (Simon "Ghost" Riley) says a line from the campaign.
#### 5. Nuclear Bomb Ending (Limited-Time Event)
---
Warzone 2.0 (Al Mazrah) – Active Secrets
These secrets are currently present in Warzone 2.0 (including Battle Royale and DMZ modes).
#### 1. The "Lion" Easter Egg (Al Mazrah)
1. You must have a specific key ("Old Man’s Key") which can be found in loot caches or bought at buy stations in DMZ mode.
2. Go to the locked door beneath the lion statue.
3. Unlock it and enter a hidden room with a desk and a computer.
4. Interact with the computer to play a retro-style mini-game (similar to a 1980s arcade game).
#### 2. The "Haunted" Strongholds (Limited-Time Halloween)
#### 3. Building 21 – The Hidden Elevator (DMZ Mode)
1. Wait for the elevator to arrive at the main lobby.
2. Instead of taking it, go to the service door on the side (requires a special key card that drops from bosses).
3. Enter a hidden basement with a server room.
#### 4. The "Tugboat" Song Easter Egg
1. Enter the tugboat cabin.
2. Turn on the radio by interacting with it.
3. A short clip of an 80s pop song plays (e.g., "Take On Me" by A-ha).
#### 5. The "Alien" & "Predator" References (Gulag)
#### 6. Secret Buy Station Dialogue
---
Secret Features & Developer-Intended Hidden Content
These are not Easter eggs per se, but legitimate features that are easy to overlook or are intentionally obscure.
#### 1. The "Advanced UAV" Call-In Trick (Killstreak)
1. Deploy a standard UAV.
2. Immediately after, deploy a Recon Drone (field upgrade).
3. The Recon Drone will inherit the UAV’s ping and reveal enemies on your minimap for the drone’s duration.
#### 2. The "Sniper Glint" Disable (Stealth)
#### 3. The "Riot Shield" Secret Block
#### 4. The "Live Ping" Teamwork Trick
#### 5. The "Underwater Breathing" Gas Mask Trick
#### 6. The "Buy Station Discount" Stacking
---
Summary Table of Cheats & Secrets
| Category | Example | Safe to Use? | Reward |
|---|---|---|---|
| Easter Eggs (Verdansk) | Bunker 11, Stadium, Ghost | Yes | Loot, cosmetics |
| Easter Eggs (Al Mazrah) | Lion room, Building 21 elevator | Yes | Blueprints, lore |
| Audio Easter Eggs | Tugboat song, Gulag graffiti | Yes | Fun ambient |
| Developer Tricks | Advanced UAV + Recon Drone | Yes | Tactical advantage |
| Exploits (Bannable) | Wall hacks, aimbots, duplication glitches | No | Account ban |