Cyberpunk 2077
## Game Introduction: Cyberpunk 2077 ### Genre **Action role-playing game (RPG)** with first-person perspective, open world, and immersive sim elements. It blends shooter mechanics, hacking, cybernetic upgrades, and branching narrative choices. ### Developer & Publisher - **Developer:** CD Projekt...
Download & Installation
Download & Installation Guide for Cyberpunk 2077
This guide covers everything you need to download and install Cyberpunk 2077 on your chosen platform. Follow the steps carefully to ensure a smooth installation and first launch.
---
1. System Requirements
Before downloading, verify your system meets the requirements. These apply to the PC version; console versions are optimized for their respective hardware.
Minimum (1080p / Low settings)
| Component | Requirement |
|---|---|
| OS | Windows 10 64-bit |
| CPU | Intel Core i5-3570K / AMD FX-8310 |
| RAM | 8 GB |
| GPU | Nvidia GeForce GTX 780 3GB / AMD Radeon RX 470 |
| Storage | 70 GB SSD (recommended) or HDD |
| DirectX | Version 12 |
Recommended (1080p / High settings)
| Component | Requirement |
|---|---|
| OS | Windows 10 64-bit |
| CPU | Intel Core i7-4790 / AMD Ryzen 3 3200G |
| RAM | 12 GB |
| GPU | Nvidia GeForce GTX 1060 6GB / AMD Radeon R9 Fury |
| Storage | 70 GB SSD (Strongly recommended) |
| DirectX | Version 12 |
Ultra (1440p+ / Ray Tracing)
| Component | Requirement |
|---|---|
| OS | Windows 10 64-bit |
| CPU | Intel Core i7-8700K / AMD Ryzen 7 3800X |
| RAM | 16 GB |
| GPU | Nvidia GeForce RTX 2060 / AMD Radeon RX 5700 XT |
| Storage | 70 GB NVMe SSD |
| DirectX | Version 12 |
---
2. Official & Legitimate Download Sources
Only download from authorized stores to avoid malware and ensure updates. Cyberpunk 2077 is available on:
| Platform | Store / Source | Installer Type |
|---|---|---|
| PC | [GOG.COM](https://www.gog.com/game/cyberpunk_2077) | DRM-free installer / GOG Galaxy |
| PC | [Steam](https://store.steampowered.com/app/1091500) | Steam client |
| PC | [Epic Games Store](https://www.epicgames.com/store/en-US/p/cyberpunk-2077) | Epic Games Launcher |
| PlayStation 4/5 | PlayStation Store (digital) or physical disc | System install |
| **Xbox One / Series X | S** | Microsoft Store (digital) or physical disc |
---
3. Step-by-Step Installation by Platform
3.1 PC – Steam
1. Install Steam – Download and install the Steam client from [store.steampowered.com](https://store.steampowered.com). Create an account if needed.
2. Purchase or Redeem – Buy the game or activate a key (Library → Add a Game → Activate a Product on Steam).
3. Install via Library – Go to your Library, find Cyberpunk 2077, and click Install. Choose a location with sufficient space.
4. Download – The client will download and automatically install. Ensure your antivirus does not block Steam’s download folder.
5. Completion – Once done, click Play to launch.
3.2 PC – Epic Games Store
1. Install Epic Games Launcher – Download from [epicgames.com](https://www.epicgames.com). Create/ log in to your Epic account.
2. Add to Library – Purchase the game from the store or redeem a code. It will appear in your Library.
3. Install – Click the game tile, then Install. Select drive and folder.
4. Download & Verify – Launcher will download and verify files. Keep the launcher open.
5. Launch – Click Launch or open from Library.
3.3 PC – GOG (DRM-free) / GOG Galaxy
1. Install GOG Galaxy – Download from [gog.com/galaxy](https://www.gog.com/galaxy). Or use offline installer directly.
2. Buy & Connect – Purchase on GOG. The game appears in your GOG Galaxy library.
3. Install via Galaxy – Click Install → choose destination. Offline installers are also available from your account’s “My Games” page.
4. Manual Install (Offline) – Download the offline installer `.exe` files from GOG (multipart). Run `setup_cyberpunk_2077_...exe`. It will prompt you to select installation directory.
5. No DRM – You can copy the installed folder to another PC and play without Galaxy, but updates require Galaxy.
3.4 PlayStation 4 & 5
- Digital: Purchase from PlayStation Store on console or web. Go to your Library → Purchased → Cyberpunk 2077 → Download. It will install automatically.
- Physical Disc: Insert disc. The console will prompt installation. You may need to download a large day-one patch (around 30–50 GB). Ensure you have enough space (minimum 80 GB free).
- PS4 to PS5 Upgrade: If you own the PS4 version, you can upgrade to the PS5 native version (free if you bought the PS4 version before a certain date). Insert the PS4 disc or redeem digital license on PS5 → select the free upgrade from the game’s hub.
- Digital: Purchase from Microsoft Store on console or web. The game will start downloading to your default install drive.
- Physical Disc: Insert disc. Installation begins. Again, a large patch will download.
- Smart Delivery: If you own on Xbox One, the Series X|S version is automatically provided. Downloads the optimized version for your hardware.
- PC (any store): You need a valid account for the respective store (Steam, Epic, GOG). A CD Projekt Red account is not required to play, but you may be prompted to create one for community features.
- PlayStation: PlayStation Network (PSN) account (free). PS Plus is not required for single-player.
- Xbox: Microsoft account. Xbox Live Gold/ Game Pass Core is not required for single-player.
- Base game: ~70 GB (depends on version and language packs).
- With Patch 2.0 + Phantom Liberty: ~80–90 GB recommended.
- SSD: Strongly recommended for faster loading and texture streaming. HDD may cause pop-in and longer load times.
- Console: Ensure you have at least 100 GB free before installation to accommodate patches and temporary files.
3.5 Xbox One & Series X|S
---
4. Account Requirements
---
5. Storage Space
---
6. First Launch Setup
After installation, when you first launch the game:
1. Language Selection – Choose text and voice language. Note that some voice packs are separate downloads.
2. Brightness / HDR Calibration – Follow on-screen prompts to adjust gamma and HDR (if supported).
3. Graphics Settings – The game will auto-detect your hardware and suggest a preset (Low/Medium/High/Ultra). You can change later.
4. Controller vs KB+M – The game supports both. Switch in Settings → Controls.
5. Legal Screens – Accept EULA.
6. Main Menu – You can start a new game, load, or access Settings. It is recommended to first run the Benchmark (Settings → Gameplay → Benchmark) to evaluate performance.
---
7. Common Installation Errors & Fixes
| Error / Issue | Cause | Fix |
|---|---|---|
| Disk write error | Antivirus blocking, corrupted cache, or permission issues. | Disable antivirus temporarily during install. Run installer/launcher as Administrator. Clean temporary files. |
| Insufficient space | System reserved space or hidden files. | Free up additional space (at least 100 GB). Check recycle bin and downloads folder. Use Disk Cleanup. |
| Corrupted files (PC) | Incomplete download or bad sector. | Verify game files: Steam → right-click game → Properties → Local Files → Verify integrity. Epic -> Click three dots -> Verify. GOG Galaxy -> Manage Installation -> Verify/Repair. |
| Slow download speed | ISP throttling, server load, or Wi-Fi interference. | Use a wired connection. Pause/resume download. Change download region in launcher settings. Use a VPN. |
| Black screen on launch (PC) | Outdated drivers or conflicting overlays. | Update GPU drivers (NVIDIA/AMD). Disable Discord overlay, GeForce Experience overlay, or Steam overlay. Run the game in Windowed mode via launch options (`-windowed` in Steam). |
| Game crashes before menu | Missing Visual C++ redistributable, or corrupted save files. | Install all required runtime libraries from the game’s `_CommonRedist` folder (for Steam/GOG). Delete any existing save files temporarily. |
| Console installation stuck | Patch download failure or full storage. | Restart console. Check network. Delete old games to free space. Install the game and patch sequentially if possible. |
| PS5 upgrade not recognised | PS4 disc region mismatch or license issue. | Ensure you are using the same PSN account that purchased/registered the disc. Restore licenses (Settings → Users and Accounts → Other → Restore Licenses). |
8. Post-Installation Verification
After successful installation:
1. Verify Game Files – Run a verification tool (as described above) to ensure no files are missing or corrupted.
2. Check Game Version – From main menu or pause screen, view the version number. Latest stable is 2.21 (as of mid-2025). Patches are cumulative.
3. Update Graphics Drivers – Install the latest Game Ready drivers from NVIDIA or AMD (often optimized for Cyberpunk 2077).
4. Run Built-in Benchmark – Helps determine if your settings are stable. Aim for at least 30 FPS (console) or 60 FPS (PC).
5. Test Controller Setup – If using a controller, ensure it's recognised and mappings are correct.
6. Download High-Resolution Textures (Optional) – On PC, you can download a free HD texture pack (approx. 30 GB) from GOG, Steam, or Epic. Only for high-end systems.
---
Summary
- Use official stores only (GOG, Steam, Epic, PlayStation Store, Microsoft Store).
- Allocate 80–100 GB free space.
- SSD is mandatory for best performance.
- Update drivers and verify files after install.
- For any issues, consult the common errors table above.
Enjoy your time in Night City, choom!
Game Introduction
Game Introduction: Cyberpunk 2077
Genre
Action role-playing game (RPG) with first-person perspective, open world, and immersive sim elements. It blends shooter mechanics, hacking, cybernetic upgrades, and branching narrative choices.
Developer & Publisher
- Developer: CD Projekt Red (known for The Witcher series)
- Publisher: CD Projekt
- Original release: December 10, 2020 (Windows, PlayStation 4, Xbox One, Stadia)
- Next-gen upgrade: February 15, 2022 (PlayStation 5, Xbox Series X|S)
- Latest major patch (2.0 / Phantom Liberty): September 2023 (all platforms)
- Platforms: PC (Windows), PlayStation 5, PlayStation 4, Xbox Series X|S, Xbox One (backward compatible on new consoles), Stadia (defunct as of 2023)
- V (protagonist): A customizable mercenary with three possible lifepaths (Nomad, Street Kid, Corpo) that affect the opening act and dialogue options.
- Johnny Silverhand: A digital ghost on the biochip, charismatic, rebellious, and deeply flawed. His memories and personality influence V’s journey.
- Jackie Welles: V’s best friend and partner in the heist that goes wrong.
- Panam Palmer: Leader of a Nomad clan; a potential romance and ally.
- Judy Alvarez: A braindance editor connected to the Mox gang; another romance option.
- Goro Takemura: A high-ranking Arasaka corpo agent with goals that intersect with V’s.
- Hanako Arasaka: Daughter of Arasaka’s CEO, a key figure in the main story.
- Cyberpunk IP Fidelity: Authentic adaptation of Mike Pondsmith’s tabletop RPG world, with deep lore, neon-noir aesthetics, and transhumanist themes.
- Player Choice Impact: Main quests and side gigs have meaningful consequences, multiple endings, and branching dialogue.
- Cybernetic Customization: V can install cyberware (e.g., reinforced arms, cyberdeck for hacking, optical camo) that change gameplay abilities and appearance.
- Open-World Sandbox: Night City is dense, vertical, and reactive—driving, hacking, stealth, combat are all viable approaches.
- Immersive Sim Elements: Hacking cameras, turning turrets against enemies, environmental storytelling, and multiple ways to complete objectives.
- Phantom Liberty Expansion: Adds a whole new district (Dogtown), espionage-themed story with Idris Elba’s character Solomon Reed, new endings, and gameplay improvements.
- Mature players (rated M for Blood and Gore, Intense Violence, Nudity, Strong Language, Strong Sexual Content, Use of Drugs and Alcohol)
- Fans of open-world RPGs with deep narrative (e.g., The Witcher 3, Fallout: New Vegas)
- Cyberpunk and dystopian/sci-fi enthusiasts
- Players who enjoy character customization, moral ambiguity, and systemic gameplay
- Single-player: The entire experience is a solo, offline campaign with a main story, side jobs, gigs, and open-world activities. No multiplayer or co-op.
- Difficulty Levels: Easy, Normal, Hard, Very Hard—adjust damage dealt/taken and enemy AI aggression.
- New Game Plus: Not officially supported, but patches have added increased level cap and perks in update 2.0.
- Offline: The game is fully playable offline after installation (except for updates/DLC downloads). No persistent internet required.
- Online Features: Only for updates, cloud saves, and optional photo mode sharing (no multiplayer).
- Phantom Liberty (2023): The only large expansion. Adds a new story, district (Dogtown), gigs, vehicles, weapons, cyberware, and a revamped skill tree. The soundtrack and quest design are widely praised. It integrates into the middle of the main story and offers additional endings.
- Free DLC: Several free content packs released in 2021-2022 (e.g., new jackets, Johnny’s alternate look, better loot balancing, etc.) but no story expansions besides Phantom Liberty.
- The successful redemption arc: from a disastrous launch to a polished, immersive experience via major patches and the 2.0 revamp.
- Keanu Reeves’ full performance-captured role as a non-playable character who constantly interacts with the player, breaking the fourth wall.
- Night City is arguably the most detailed and atmospheric RPG city ever created, with dynamic lighting, massive verticality, and countless environmental stories.
- The seamless blend of high-octane action, deep role-playing, and cybernetic customization with narrative consequences.
Release Timeline & Platforms
Setting
Night City, a sprawling, hyper-capitalist metropolis in the Free State of California, year 2077. A world of extreme inequality, where megacorporations rule, cybernetic enhancements are commonplace, and AI, gangs, and mercenaries clash for power. The city is divided into distinct districts, each with unique culture and dangers.
Story Overview
You play as V, a mercenary on the rise (customizable gender, appearance, background). After a heist goes catastrophically wrong, V becomes infected with a unique biochip containing the digital engram of the legendary rockerboy-turned-terrorist Johnny Silverhand (played by Keanu Reeves). The chip is rewriting V’s mind, giving them only weeks to live. Together, V and Johnny must find a way to separate the two consciousnesses before V loses their own identity—while navigating corporate conspiracies, gang wars, and the price of immortality.
Main Characters
Core Appeal & Unique Features
Target Audience
Game Modes
Online / Offline Support
DLC / Expansions Overview
What Makes This Game Unique?
---
This introduction covers the essential knowledge for anyone new to Cyberpunk 2077. For platform-specific installation steps, see the Download & Installation section.
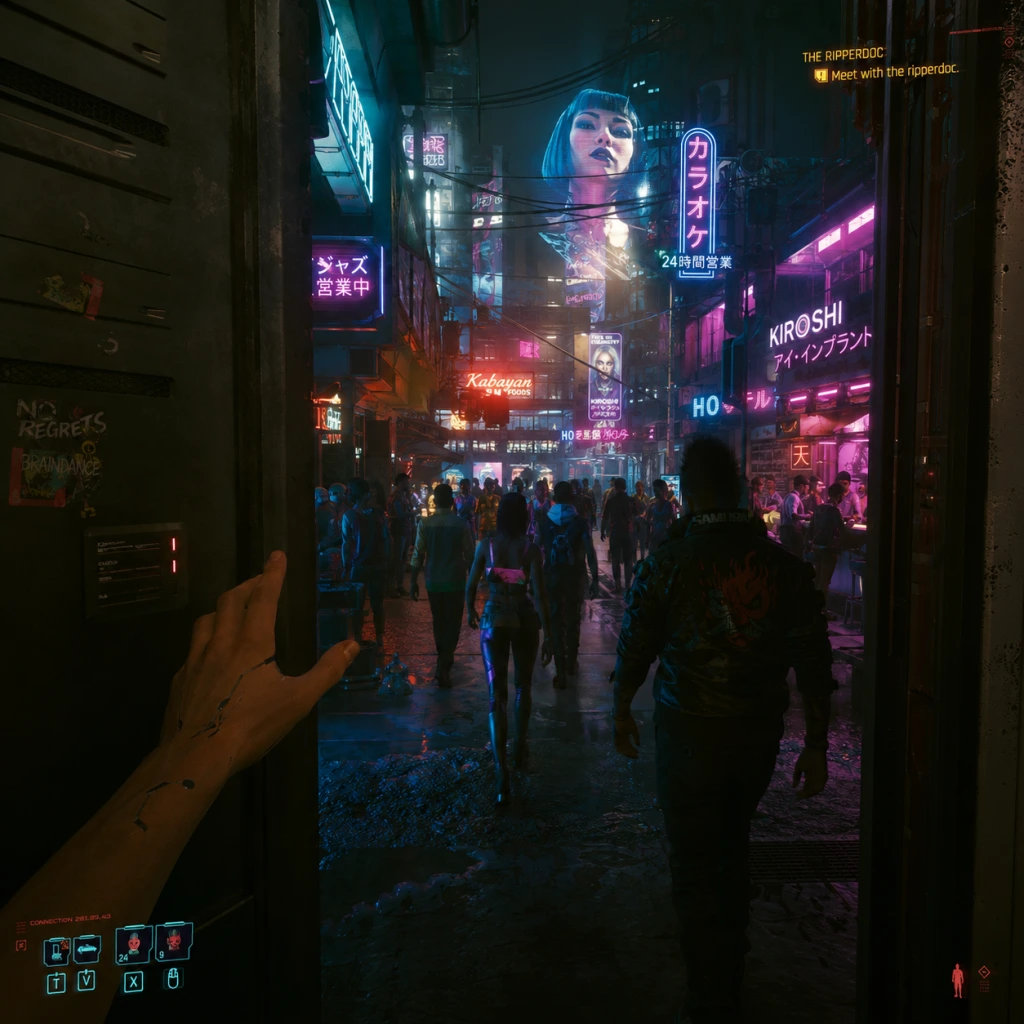
Getting Started
Getting Started: Your First Night in Night City
Welcome to Cyberpunk 2077, an open-world RPG set in the dystopian metropolis of Night City. This guide is designed for brand-new players, covering the critical first hour, character creation, controls, UI basics, and essential early strategies to avoid frustration and get you on the path to becoming a legendary merc.
---
1. The First Hour Walkthrough (Light Spoilers)
Your journey begins after a brief cinematic. You will be in control of V, a mercenary in the back of a car with Jackie Welles, your best friend. Mission: The Rescue – this is the tutorial. Follow these steps:
1. Car Ride: Listen to Jackie’s dialogue. No interactivity yet.
2. Arasaka Warehouse: Exit the car. The game teaches movement (WASD on PC, left stick on consoles) and basic interaction (E on PC, X on PlayStation, A on Xbox).
3. Stealth Section (optional): You can either sneak past guards or go loud. The tutorial suggests stealth—crouch (Ctrl on PC, L3 click on consoles) and avoid detection. Use the scanner (Tab on PC, touchpad on PlayStation, view button on Xbox) to highlight enemies and loot.
4. First Combat: You get a pistol. Aim with RMB (PC), L2 (PS), LT (Xbox). Shoot at the training target, then fight a few easy enemies. Use cover (Q on PC, auto-cover near walls on consoles).
5. Jackie & the Bot: Follow Jackie through the warehouse. Eventually, you confront a giant robot (Mech). Do not try to fight it head-on – the game expects you to use the environment (explosive barrels) or wait for Jackie’s plan.
6. Escape: After the cutscene, you escape through a garage. Jump into the driver’s seat (F on PC, triangle on PS, Y on Xbox) and drive to the drop point. The driving mechanics are arcade-like; brake early and steer gently.
7. Aftermath: You meet Viktor at the ripperdoc clinic. This is your first chance to install cyberware. Follow the on-screen prompts. Then you are free to explore.
Key tip: During the tutorial, pick up everything that glows (ammo, health items, junk). Junk can be sold later for fast cash.
---
2. Character Creation (Life Path & Attributes)
Before starting, you choose a Life Path (Nomad, Street Kid, or Corpo). This affects the prologue (first ~30 minutes) and some dialogue options, but the main story remains the same. For beginners, Street Kid offers the most straightforward introduction to Night City. Nomad has a desert starting area (good for learning driving), and Corpo starts in an office (more dialogue-heavy).
Attribute Points: You get 7 points to distribute among five stats:
| Attribute | Primary Use | Good for Beginners? |
|---|---|---|
| Body | Health, blunt weapons, shotguns | Yes – gives more HP and melee survivability |
| Reflexes | Handguns, blades, movement speed | Yes – improves gunplay and dodging |
| Technical Ability | Crafting, tech weapons, opening doors | Yes – unlocks crafting early, useful for resources |
| Intelligence | Quickhacks, breach protocol, netrunning | If you like hacking, can be strong but needs points |
| Cool | Stealth, cold blood, sniper rifles | Optional – good for stealth builds but complex |
---
3. Controls – All Platforms
Below are the default controls. You can customise them in settings.
#### PC (Keyboard + Mouse)
| Action | Key |
|---|---|
| Move | W A S D |
| Look | Mouse |
| Sprint (hold) | Left Shift |
| Jump / Mantle | Space |
| Crouch (toggle) | Ctrl |
| Dodge (double-tap) / Slide | C (crouch while sprinting) |
| Interact / Pick up | E |
| Attack (shoot / melee) | Left Mouse |
| Aim (hold) | Right Mouse |
| Reload | R |
| Weapon Wheel (hold) | Alt |
| Quickhack / Scanner | Tab |
| Inventory | I |
| Map | M |
| Journal | J |
| Cyberware Menu | U |
| Vehicle: Accelerate | W |
| Vehicle: Brake / Reverse | S |
| Vehicle: Handbrake | Space |
| Action | Button |
|---|---|
| Move | Left Stick |
| Look | Right Stick |
| Sprint (hold) | L3 (click left stick) |
| Jump | X |
| Crouch (toggle) | Circle (hold to slide) |
| Interact | Triangle |
| Attack | R2 |
| Aim (hold) | L2 |
| Reload | Square |
| Weapon Wheel | L1 (hold) |
| Quickhack (hold) | R1 (hold + target) |
| Scanner | Touchpad (tap) |
| Inventory | Options (then navigate) |
| Map | Touchpad (swipe up) |
| Vehicle: Accelerate | R2 |
| Vehicle: Brake | L2 |
| Vehicle: Handbrake | L1 |
| Action | Button |
|---|---|
| Move | Left Stick |
| Look | Right Stick |
| Sprint (hold) | LS (click left stick) |
| Jump | A |
| Crouch (toggle) | B (hold to slide) |
| Interact | Y |
| Attack | RT |
| Aim (hold) | LT |
| Reload | X |
| Weapon Wheel | LB (hold) |
| Quickhack (hold) | RB (hold + target) |
| Scanner | View button |
| Inventory | Menu button (then navigate) |
| Map | View button (swipe?) – check in-game |
| Vehicle: Accelerate | RT |
| Vehicle: Brake | LT |
| Vehicle: Handbrake | LB |
4. UI Overview
Your Heads-Up Display (HUD) shows:
- Health bar (top-left): green. When damaged, it turns red; below it is a stamina bar (yellow) and a cyberware energy bar (blue for quickhacks).
- Mini-map (top-right): shows nearby enemies (red dots), quest markers (yellow diamond), and points of interest.
- Ammo counter (bottom-right): current magazine / total reserve.
- Quick Access (bottom-center): weapon, quickhack, grenade slots (switched with mouse wheel or d-pad).
- Objective tracker (top-left area): current mission step.
- Scanner overlay (hold Tab / touchpad): highlights loot, enemies, hackable objects, and breach points.
- The Journal (J) tracks main jobs, side jobs, gigs, and NCPD scanner hustles. Always check it!
- The Map (M) can filter vendors, fast travel points, and quests. Fast travel is unlocked from the start via metro stations (blue icons).
- Inventory (I) shows weapons, clothing, cyberware, and consumables. You can dismantle or sell items.
- Visit the Ripperdoc (Viktor) – install a free cyberdeck (if you didn’t choose a netrunner path, you get a basic one). This enables quickhacks.
- Sell or dismantle junk (under “Backpack” > “Junk”) to make quick eddies (money).
- Loot everything – vending machines, containers, bodies. Be thorough.
- Complete the side gig “The Ride” (given by Mama Welles) for a free vehicle and some early XP.
- Find the “Automatic Love” main mission after meeting Judy – this opens up the world and rewards.
- Charging into high-level areas – the map shows skulls or red icons for enemies above your level. Stay in Watson district for now.
- Ignoring cyberware – cyberware slots are limited. Invest in a “Frenzied Cyberware” (heal on kill) or “Biotic Coolant” (reduce cyber cooldown) early.
- Selling all clothes – keep clothing with mod slots or high armor. You can upgrade them later.
- Wasting perk points – you cannot respec perks easily (except with a paid item later). Only unlock perks you understand. Avoid “increases sneak attack damage by 5%” until you commit to stealth.
- Starting with “Very Hard” difficulty – beginners should pick “Normal” or “Hard” at most. Very Hard requires optimal builds and gear.
Key UI tips:
---
5. Essential Early Objectives
After the prologue, the main story quest “The Rescue” remains. Follow it to meet Dex and receive your first major job. But before you dive in, do these:
---
6. What to Do First & What to Avoid
#### Do First:
1. Spend attribute points wisely – do not spread too thin. Focus on 2-3 attributes.
2. Upgrade your starting pistol (or buy a better one from a gun vendor near V’s apartment).
3. Unlock fast travel points – every metro station you discover becomes a fast travel point. Use them to traverse the city quickly.
4. Do NCPD Scanner Hustles (blue icons on map) – they are easy combat encounters that reward loot, experience, and street cred. Great for levelling up early.
5. Read shards – lore and skill shards provide XP and crafting recipes. Pick up every shard you see.
#### Avoid:
---
7. Early Resource Priorities
| Resource | Priority | Why |
|---|---|---|
| Eddies (money) | High | Buy ammo, healing items, better weapons, and cyberware. Early money comes from selling junk and completing NCPD hustles. |
| Ammo | Medium | You will run out of ammo quickly if you spray. Use cover and aim for headshots. Craft ammo after unlocking the “Grease Monkey” perk in Technical Ability. |
| Health Items | High | MaxDoc and Bounce Back are essential for survival. Always carry 5+ each. Buy from vendors when low. |
| Component Parts | Medium | Needed for crafting and upgrading weapons. Dismantle unwanted weapons and junk. |
| Cyberware Capacity | Low early | You start with 2-3 slots. Focus on upgrading your cyberdeck (if netrunner) or arm implants (gorilla arms for melee). |
8. Common Beginner Mistakes
1. Not using quickhacks – even non-netrunners can use “Ping” to locate enemies and objects. Bind it to a slot and use it constantly.
2. Driving too fast – Night City traffic is aggressive. Slow down for corners; use handbrake (Space / L1 / LB) to drift.
3. Ignoring the camera system – you can hack cameras (breach protocol) to see enemy positions and disable them. Always look for terminals.
4. Not saving often – the game autosaves frequently, but manual saves (F5) are cheap. Quick save before every mission.
5. Selling iconic weapons – iconic weapons (with a gold border) are unique and can be upgraded later. Store them in your stash.
6. Choosing wrong dialogue – while some choices have consequences, don’t stress. The game is forgiving; just be consistent with your character’s personality.
7. Overlooking crafting – even if you aren’t a tech build, crafting ammo and grenades saves money. Unlock the “Technical Ability” perk “Mechanic” early for component recycling.
---
9. Day-One Checklist
Complete these tasks in your first play session (2-3 hours):
- [ ] Do NOT skip the prologue – complete “The Rescue” and all tutorial prompts.
- [ ] Choose a life path (recommend Street Kid) and allocate attributes (3 Body, 2 Reflexes, 2 Technical Ability).
- [ ] Visit Viktor the Ripperdoc and install the free cyberdeck.
- [ ] Sell all junk items (from inventory) to a vendor (the gun shop or food stand near V’s megabuilding).
- [ ] Dismantle any duplicate weapons you don’t need – you get components.
- [ ] Equip a pistol and a submachine gun (if found).
- [ ] Unlock 2-3 fast travel points by discovering metro stations (blue pillars).
- [ ] Complete “The Ride” side gig for a free car.
- [ ] Do at least 3-4 NCPD Scanner Hustles in Watson (yellow or blue icons).
- [ ] Read all skill shards and lore shards you picked up.
- [ ] Quick save before every major encounter.
- [ ] Visit a Ripperdoc and install basic cyberware (e.g., “Optic Camo” or “Strong Arms”).
- [ ] Turn off “Pinky” (the tutorial helper) in settings if you find it annoying.
---
Final tip: Cyberpunk 2077 is a marathon, not a sprint. Explore at your own pace, experiment with playstyles, and don’t be afraid to reload a save if you backed yourself into a corner. Night City rewards curiosity. Happy hunting, merc!
Core Gameplay
Core Gameplay Overview
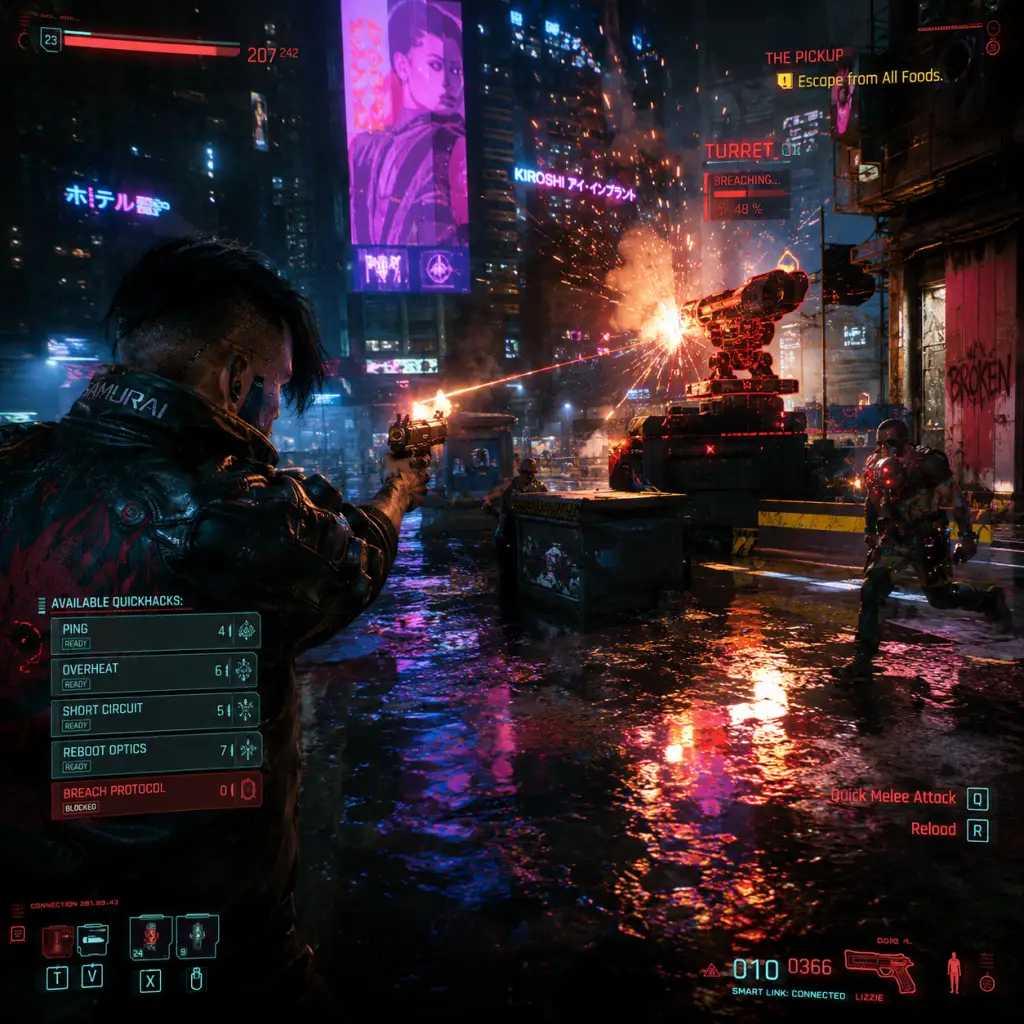
Cyberpunk 2077 combines first-person shooting, hacking, stealth, and deep role-playing mechanics within a sprawling open world. Your choices in dialogue, combat approach, and character builds shape every aspect of the experience. The game loops around completing gigs and main jobs, looting and crafting gear, upgrading cyberware, and navigating the political intrigue of Night City’s fixers, gangs, and corporations.
---
Player Progression Tiers
Early Game (Levels 1–15, Act 1 & early Act 2)
Main Gameplay Loop
- Start with the prologue (The Rescue) and arrive in Night City.
- Accept small gigs from fixers (e.g., Regina Jones, Wakako Okada) for quick cash and XP.
- Complete main story quests like "The Heist" and "Playing for Time" to unlock new districts and vehicles.
- Loot everything: weapons, components, clothing, and junk. Sell junk, keep useful gear.
- Focus on a single weapon type (e.g., power rifles or smart pistols) to avoid spreading Perk points thin.
- Use early cyberware (Kiroshi optics for scanning, fortified ankles for double-jump) to improve mobility and combat options.
- Enemies are low level; use cover and basic quickhacks (e.g., Overheat, Short Circuit) for crowd control.
- Stealth is viable but requires patience; invest in the Ninjutsu or Cool skill tree for silenced pistols.
- Non-lethal takedowns from behind are silent and grant Street Cred.
- Dialogues with fixers and NPCs often reveal side jobs or lore; choose options that match your roleplay (e.g., Corpo, Street Kid, Nomad).
- Level up by earning XP from kills, mission completions, and discovered locations.
- Street Cred increases via contracts completed; it unlocks better buyable gear and higher-quality missions.
- Allocate your first Attribute points into Reflexes (for pistols/blades) or Technical Ability (for crafting and early armor).
- Perk early into "Hardening" (Tech) or "Sliding" (Reflexes) to survive gunfights.
- Money is tight; only buy essential ammo and health items.
- Sell unwanted weapons to vending machines (better rates than drop points).
- Complete the "Gig: The Lord Giveth" and other early gigs for high payouts.
- Don’t spend on cars yet – you get a free vehicle early in Act 2.
- The first district (Watson) is your playground; scan every access point for quickhack brews (free components).
- Find iconic weapons like "Skippy" (in a garbage can) or "The Headsman" (hidden stash) – they scale with level.
- Side quests like "Sinnerman" may unlock unique rewards but are best completed after level 10.
- Story missions escalate to complex heists (e.g., "I Walk the Line").
- Specialize your build: become a netrunner (INT), solo (BODY/REF), or assassin (COOL/REF).
- Invest in crafting if you want to upgrade iconic weapons – a maxed Tech tree allows legendary crafting.
- Engage in longer gigs that require multiple approaches (stealth, hack, loud).
- Complete police scanner hustles to earn Street Cred quickly.
- Enemies have new resistances and healing abilities; use quickhacks like “Contagion” for area damage or “Cyberware Malfunction” to disable smart weapons.
- Cyberware upgrades are crucial: consider the “Mantis Blades” (arm blades) for melee or “Projectile Launcher” for crowd control.
- Enemy netrunners can hack you; invest in “Breach Protocol” skills to counter them.
- Dialogue choices now affect story branches (e.g., helping a fixer vs. a corp).
- Respec Perks (not Attributes) via a Tabula Rasa item (purchased from Ripperdocs) if you want to adjust your build.
- Attribute spread: keep one primary stat at 12+, and a secondary at 10+. Example: 12 Reflexes / 10 Cool for an assault/pistol build.
- Unlock the “Double Jump” leg cyberware and “Reinforced Tendons” for vertical mobility.
- Vehicle combat becomes more important; upgrade your car’s weaponry at Afterlife members.
- Money flow improves; sell crafted legendary items for massive profits.
- Buy vehicles too – the “Javelina” (Nomad car) or “Quadra Avenger” are worth saving for.
- Invest in crafting components: they become scarce in late game.
- Complete the “Riders of the Storm” side job for a free motorcycle.
- By mid-game, you can access Pacifica, Santo Domingo, and Badlands. Gigs there offer high rewards but tougher enemies.
- Hidden gem locations: “The Docks” in Pacifica has a legendary cyberdeck schematic.
- Explore NCPD scanner hustles for crafting specs and iconic items.
- Main story reaches its climax; multiple endings become available.
- Build is optimized – you should have a clear role (e.g., netrunner, solo, hybrid).
- Focus on completing companion side quests (Panam, Judy, River, Kerry) for unique ending conditions.
- Legendary gear becomes mandatory; craft or loot from high-level enemies.
- Use the skills of your teammates (e.g., Panam’s sniper cover) in missions.
- Enemies are level 35–50; use the “Legendary Short Circuit” quickhack to stun bosses.
- Equip the “Lizzie” (smart pistol) or “Sovereign” (power rifle) for crowd clearing.
- Cyberware: legendary “Synaptic Accelerator” for time dilation, “Microgenerator” for bleed damage.
- Dialogue matters: some conversations can skip entire boss fights (e.g., with Adam Smasher via certain choices).
- Max level is 50; you earn both XP and Street Cred until max. After that only Street Cred improves drops.
- Perk points are finite (57 total); finalize your build with rare perks like “Bloodswell” (BODY) or “Qiant” (INT).
- Complete “The Heist” and “The Beast in Me” races for additional rewards.
- Story branches: your choices now lock out certain endings. Save before major decisions.
- Maximum cash is not a concern; you can buy any vehicle.
- Invest in “Supercar” like the “Caliburn” for speed + stealth missiles.
- Legendary crafting specs cost around 10k eddies; save up.
- Dismantle all low-tier weapons for epic components.
- Endgame locations: “The Final Quest” is a multi-stage dungeon.
- Hidden side content: the “A Day in the Life” quest chain (Aldecaldos) rewards a unique vehicle.
- Fast travel points are maxed; use them to zip between mission zones.
- Post-story free roam: all unfinished gigs, NCPD hustles, and side jobs remain.
- No time constraints – you can continue to explore, complete collections, and hunt achievements.
- Challenge runs: try soloing Arasaka Warehouse, or completing all gigs without killing.
- New Game+ is not officially supported, but mods on PC add it.
- Play the DLC “Phantom Liberty” (if installed) for a new area (Dogtown) and story.
- Max-level enemies only; you should be able to destroy almost anything with a maxed build.
- Some gang leaders (like the Animals) respawn in certain locations for infinite loot.
- Use legendary loot to sell or dismantle for components.
- Quickhacking can trivialize most fights even on Very Hard difficulty.
- Achieve all possible Perk combinations? No, but you can respec infinitely.
- Achieve 100% completion: all territories, all gigs, all races, all fast travels, all skill checks.
- Endings: “The Sun” (solo), “The Star” (Panam), “The Devil” (Arasaka), “Temperance” (Suicide). Each modifies the world slightly.
- Phantom Liberty adds a new ending path (“The Tower”) which locks some content.
- Unlimited money via crafting and selling legendary weapons. The “Satori” katana duplicates for high profit.
- Buy all apartments (e.g., Japantown, Northside) for fast travel points and lore.
- No need for economy management; treat it as sandbox.
- Find all 219+ iconic items (e.g., “Skippy” returns, “The Face” hidden).
- Explore Dogtown: new cyberware, vendors, and vehicle missions.
- Secrets: the “Devil” ending reveals a hidden data shard on the space station.
Combat & Interaction
Progression Tips
Economy
Exploration
---
Mid Game (Levels 15–30, Act 2 & mid Act 3)
Main Gameplay Loop
Combat & Interaction
Progression Tips
Economy
Exploration
---
Late Game (Levels 30–50, Act 3 & post-Heist)
Main Gameplay Loop
Combat & Interaction
Progression Tips
Economy
Exploration
---
Endgame (After Main Story, Levels 40–50+)
Main Gameplay Loop
Combat & Interaction
Progression Tips
Economy
Exploration
---
Core Systems Deep Dive
| System | Early Game | Mid Game | Late Game | Endgame |
|---|---|---|---|---|
| Combat | Cover shooting, basic quickhacks, stealth optional | Specialized weapon usage, enemy hacking, cyberware combos | Full build synergy (e.g., crit-bleed), boss mechanics | Power fantasy; maxed gear trivializes fights |
| Hacking | Breach protocols, short circuit, overheat | Contagion, suicide, system reset | Legendary daemons, legendary quickhacks, time dilation | Hack any enemy; instant kills with legendary short circuit |
| Crafting | Upgrade common weapons, craft ammo | Craft rare/iconic weapons, upgrade to legendary | Craft legendary armor sets, spec mods | Craft infinite legendary items for profit or dismantle |
| Stealth | Crouch, silent pistols, quickhacks for distraction | Camouflage via cyberware, one-hit takedowns | Optical camouflage (legendary), silenced rifles | Invisible – can bypass entire encounters |
| Vehicles | Free car from Act 2, buy cheap bike | Upgrade with weapons, purchase sports cars | Own all cars, max weaponized vehicles | All vehicles unlocked; race challenges trivial |
| Story Choices | Introduction to factions, reputation | Important branching decisions affect alliances | Lock some endings; companion fates decided | Only new story via DLC; replay for different endings |
Key Tips for Each Tier
- Early: Save all crafting components; don’t craft anything until you have legendary specs. Use Ping quickhack to locate all enemies.
- Mid: Invest in the “Cold Blood” perk tree (Cool attribute) for movement speed and damage bonuses. Do all side job chains that involve unique vehicles (e.g., Panam’s Basilisk).
- Late: Save before meeting Hanako Arasaka. Choose your ending carefully – each locks you out of some side content. Use legendary quickhacks to farm high-level enemies.
- Endgame: If you have the Phantom Liberty DLC, start it at level 40+ for best rewards. Finish all NCPD scanners to unlock the “A Giver” achievement. Build specific gear sets for fun (e.g., full assault, full netrunner).
---
This guide adapts to any playstyle. Remember that your first playthrough is for experience; your second for perfection. Night City waits, choom.
Game Tips
Game Tips: Cyberpunk 2077
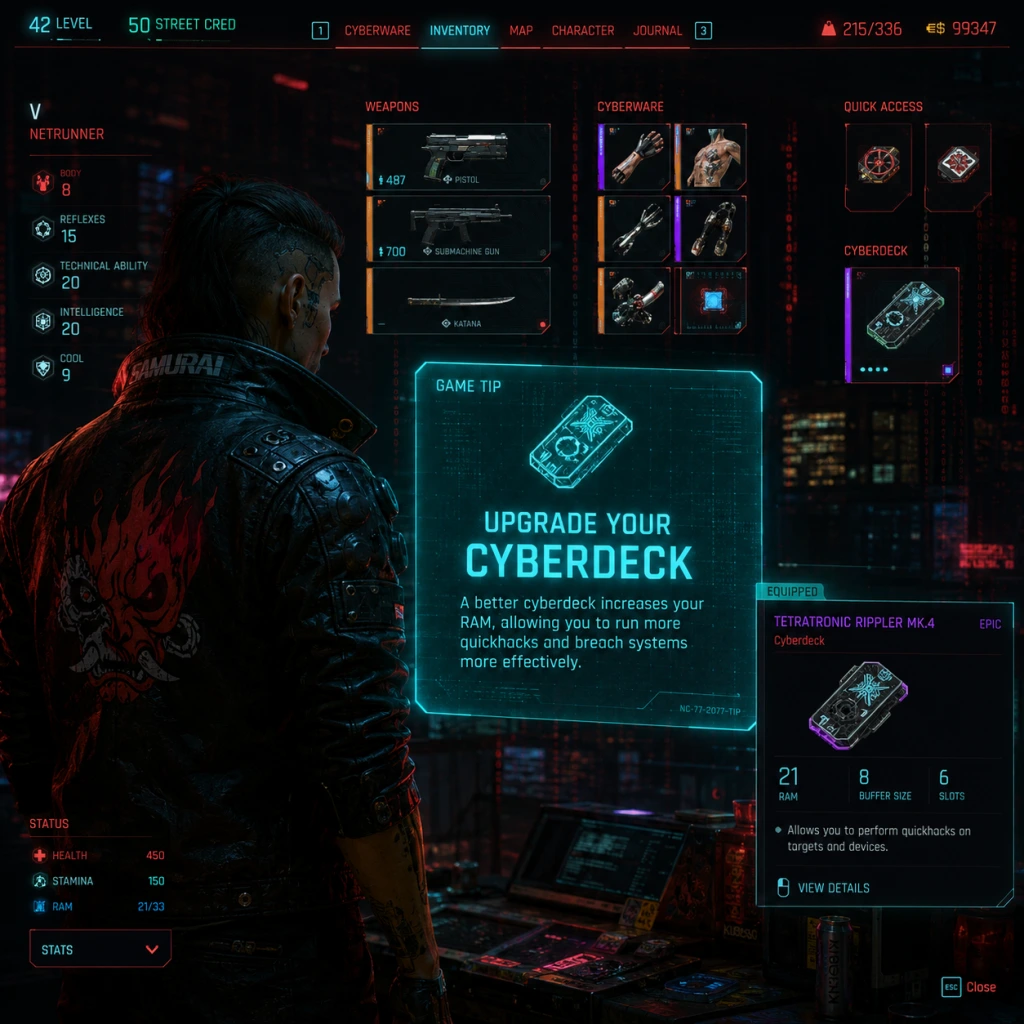
Welcome to Night City, V. These tips will help you survive, thrive, and dominate the streets. The guide is organized by category, with tips for all skill levels: beginner (B), intermediate (I), and advanced (A). Each tip includes the why and when for practical application.
---
Combat Tips
1. B: Use cover smartly – The game’s AI is aggressive; popping out of cover while blind-firing is often safer than standing still. Always aim for headshots when enemies are unaware.
- Why: Cyberpunk’s damage system rewards precision; headshots with a silenced pistol can one-shot most early enemies. Cover reduces incoming fire.
- When: Every gunfight, especially when outnumbered.
2. I: Combine quickhacks with weapons – Cripple Movement + a shotgun rush is lethal. Use "Ping" to see enemies through walls, then take them out with a Tech weapon that shoots through cover.
- Why: Quickhacks disable enemies, making them easier targets. Tech weapons (like the Widow Maker) ignore walls, creating synergy.
- When: Confrontations in dense interiors or when enemies have good cover.
3. A: Exploit the “Cyberpsycho” effect – Equip the "Contagion" quickhack on a high-intelligence build. It spreads from enemy to enemy, and if combined with the "Spread" perk, can take down entire groups without firing a shot.
- Why: Contagion deals high poison damage over time and jumps to nearby enemies. Paired with "Mass Vulnerability," it shreds armor.
- When: Clearing large rooms with clustered enemies; for maximum stealth efficiency.
4. B: Always hack the access points – After combat, look for glowing orange access points. Breaching them gives you quickhack components and money. Even if you don’t use hacking, these are free resources.
- Why: They respawn daily and are essential for upgrading your cyberdeck. Easy early cash.
- When: After clearing any enemy camp or mission area.
5. I: Master the dodge-button (double-tap movement) – Dodging breaks enemy lock-on and reduces damage from explosives. Practice using it to flank enemies while reloading.
- Why: The dodge is your best defensive tool; it costs no stamina and can save you from one-hit kills.
- When: Against fast melee enemies like Animals or during boss fights.
6. A: Stack armor via clothing mods – Insert Armadillo mods (crafted or bought) into every clothing slot. Do not rely on outfit style; armor is king in higher difficulties.
- Why: Armor reduces all physical damage. On Very Hard, a single bullet can kill V; stacking armor to 1000+ is borderline invincibility.
- When: Immediately after reaching the first clothing vendor. Farm crafting components from junk.
---
Exploration Tips
7. B: Scan everything – Hold the scan button (Tab on PC, PS5: R1, Xbox: RB) constantly. It reveals loot, enemies, and hidden items. Blue containers always hold useful components or eddies.
- Why: Scanning highlights interactive objects, including secret paths and environmental storytelling. It also shows enemy threat levels and cyberware weaknesses.
- When: Every second you’re not in combat.
8. I: Unlock “Gang of One: All Ways Lead to Night City” by completing gigs – Side jobs and gigs reveal hidden loot rooms and legendary weapons. The “Solo” questline from Padre or Regina gives iconic gear.
- Why: Many iconic weapons (like "Skippy" or "Yinglong") are rewards from specific gigs. Exploration without these is a waste.
- When: As soon as you finish the heist prologue. Check your Journal > Gigs list.
9. A: Use vehicles with machine guns for open-world farming – The "Quadra Type-66" variants can mount weapons. Drive around the Badlands, mowing down groups of scavengers without ever getting out. Loot then drive away.
- Why: Vehicle combat keeps you mobile and helps clear groups quickly for loot without armor damage.
- When: After unlocking vehicle weapon upgrade (requires Street Cred 30+ and buying from certain fixers).
10. B: Don’t skip Braindances (BDs) – These are required for story progression, but also contain hidden loot codes and clues. Scan everything in BD replay—not just the objective markers.
- Why: BDs often hide optional loot locations or unlock dialogue options that lead to better rewards.
- When: During any main story BD segment.
---
Resources & Crafting Tips
11. B: Collect all junk items – At junk vendors, buy everything that costs less than 100 eddies. Disassemble junk into common components (common, uncommon, rare). These fuel your crafting.
- Why: Crafting upgrades for weapons and clothing requires thousands of components. Junk is the cheapest source.
- When: Early game, especially before you start crafting iconic weapons.
12. I: Craft "Purple" gear immediately – Once you hit level 10 and have the "Grease Monkey" perk, craft blue (rare) and purple (epic) versions of your favorite weapons. They have higher damage and additional mod slots.
- Why: Crafted weapons scale with your level up to a point; they are stronger than random drops. Mod slots allow you to add crit chance or damage.
- When: After you have enough components and a reliable blueprint.
13. A: Economy: Flip armor mods – Buy Armadillo mods from vendors (they cost ~1k), then disassemble them. You often get 2-3 times the components back. Use those to craft legendary mods.
- Why: This exploits the game’s economy; it’s the fastest way to get legendary components without farming.
- When: Mid-game when you have money to spare (Street Cred 20+).
14. B: Spend your perk points on "Technical Ability" early – The "Crafting" line unlocks ability to craft legendary items and reduces upgrade costs. Even non-crafters benefit from common component savings.
- Why: Legendary weapons are significantly better than epic. You can craft them at level 18 in Tech.
- When: After you have at least level 9 in Reflexes or Cool for survival.
---
Build & Character Tips
15. B: Choose your playstyle early – don’t spread points thinly – Pick one primary attribute (Reflexes for guns, Cool for stealth/sniper, Intelligence for hacking, Body for shotguns/melee, Technical for crafting). Splitting points makes you mediocre at everything.
- Why: Attributes gate perk trees; a Level 20 in Cool unlocks "Juggler" for instant weapon swap and reload while sprinting, which is insane for a stealth build.
- When: During character creation, but you can respec only perks (not attributes) later. Choose wisely.
16. I: Cyberware matters more than your gun – Upgrade to Legendary level cyberware as soon as possible. The "Synaptic Accelerator" mod gives you slow-mo when enemies detect you; "Mantis Blades" lets you break through doors.
- Why: Cyberware provides passive abilities that can’t be matched by items. For example, "Second Heart" revives you once per combat.
- When: As soon as you have 10k+ eddies. Visit ripperdoc every few levels.
17. A: The “Netrunner” build is broken: 20 Intelligence, 20 Cool, 15 Technical – Use Contagion + Suicide quickhacks. Cool’s "Thrown Knife" perk gives free stealth kills. Tech allows crafting legendary short circuit which procs on crits.
- Why: With the right perks, you never need to fire a gun. Monowire counts as a blade for bleed chance. This build clears even the hardest content without breaking stealth.
- When: New Game Plus or a second playthrough; it requires careful curation.
18. B: Max out "Street Cred" by completing side gigs – Street Cred unlocks better weapons and cyberware at vendors. Don’t rush the main story; do NCPD hustles and fixer jobs.
- Why: Many legendary items require Street Cred 30+ to purchase. The faster you get cred, the faster you can equip endgame gear.
- When: After Act 1, spend at least 5 hours on side content before progressing.
---
Economy Tips
19. B: Sell weapons, not junk – Junk is worth 10 eddies but yields rare components when disassembled. Weapons (especially iconic ones) sell for 1k+. Only disassemble white/green weapons.
- Why: Early game you need cash for cyberware. Junk is better for components.
- When: Always; never sell purple or orange weapons until you have duplicates.
20. I: Invest in "Rare Backpack" upgrades – Buy the "Better Metabolism" cyberware (reduces consumption) but more importantly, upgrade your inventory capacity via the "Strong Back" perk in Body tree. Carry more loot.
- Why: More inventory means fewer trips to vendors, maximizing your farming efficiency.
- When: After you have 3 points in Body (requires attribute 6).
21. A: Capitalize on the “Victory” drinking game trick – After the mission “Sinnerman”, you can sell the unique weapon “Sword of Damocles” to a vendor, then buy it back disassembled for components? Actually, some items respawn. Check YouTube for current money glitches. Generally, the best stable method is looting all guns from enemies and selling them.
- Why: The game has been patched, but looting and selling is always reliable. Also, selling crafted legendary armors yields good profits.
- When: Post-patch, no glitches. Just grind NCPD scanner missions.
---
Miscellaneous Tips
22. B: Save often – manual saves – The autosave system can put you in a checkpoint just before a boss fight with low health. Use quicksave (F5) before every new area.
- Why: Some quests have irreversible choices; manual saves let you reload and try different outcomes.
- When: Upon entering a new district, before hacking, before dialogue options.
23. I: Use "Double Jump" cyberware legs – Purchase the "Fortified Ankles" or "Lynx Paws" for vertical mobility. This allows access to high ledges with loot.
- Why: Many loot containers are on rooftops reachable only with double jump. Saves time and avoids fights.
- When: As soon as you have 15k eddies and a ripperdoc in Watson.
24. A: Time-of-day matters for stealth – At night, enemies have reduced vision range. Use the "Optical Camo" cyberware (gives invisibility) for one-shot stealth kills. Turn off your weapon’s laser sight.
- Why: Game AI checks light levels; night missions are easier. Optical Camo makes you invisible for 10 seconds, allowing escapes.
- When: Stealth missions, especially "The Heist" or "The Pickup."
25. B: Read shards – They contain passwords for access points, lore, and sometimes side quest triggers.
- Why: Certain secret weapons unlock after reading specific shards. Also, some doors require passwords found on shards.
- When: Always pick up and read all shards found on bodies.
---
These tips should transform your experience from struggling to surviving, and from surviving to dominating. Remember: Night City rewards preparation, adaptation, and a trigger finger for the right quickhack. Good luck, V.
Game Settings
Game Settings Guide for Cyberpunk 2077
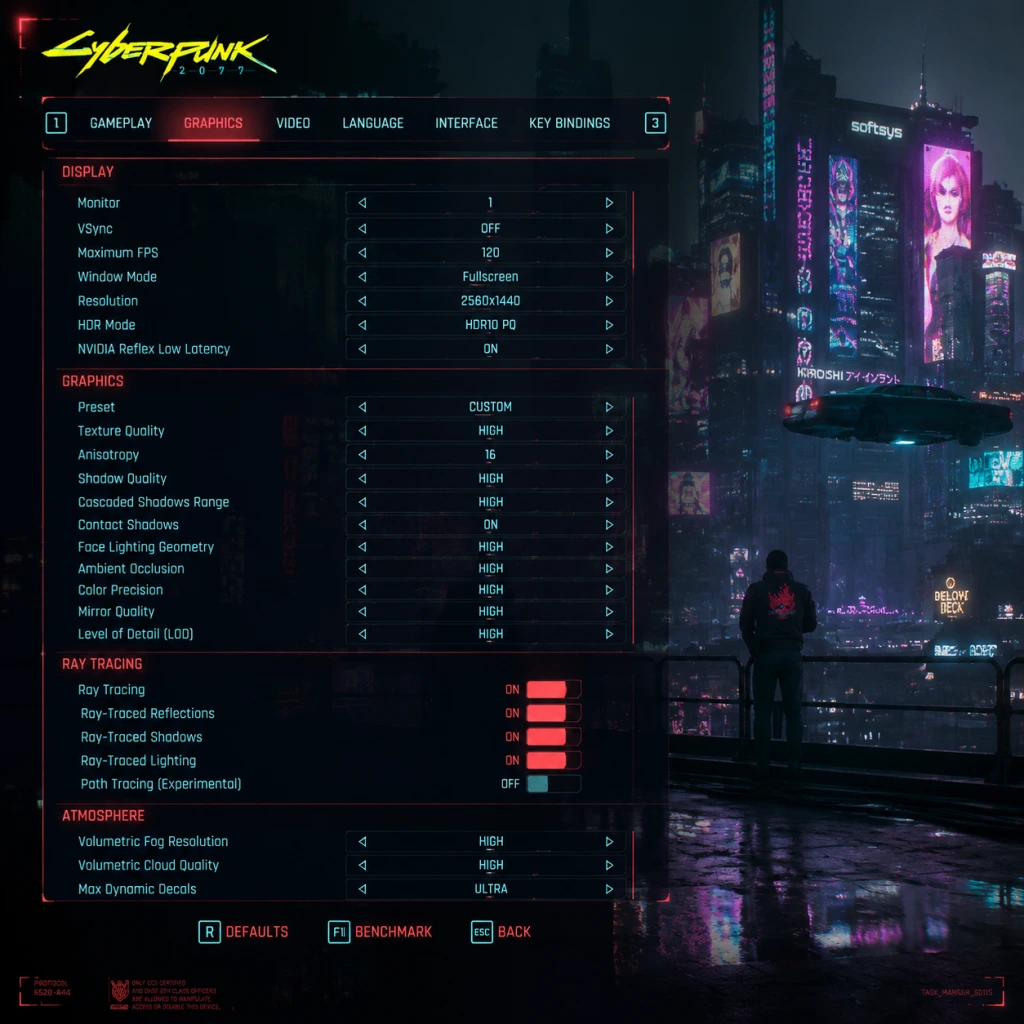
This guide covers every major settings category in Cyberpunk 2077: Graphics, Audio, Controls, Accessibility, Language, Network, and Gameplay. We provide recommended configurations for different hardware tiers (Low, Medium, High, Ultra/Ray Tracing) and highlight settings that are frequently misconfigured or need special attention.
---
1. Graphics Settings
Graphics are the most performance-intensive settings. Cyberpunk 2077 supports a wide range of hardware, from legacy GPUs to the latest ray-tracing beasts. Below are the key settings and their impact.
1.1 Quick Presets & Hardware Recommendations
| Hardware Tier | Example GPU / Platform | Recommended Preset | Notes |
|---|---|---|---|
| Low | GTX 1050 Ti / RX 570 / Xbox One / PS4 | Low | Turn off ray tracing, use FSR 2.0+ (Quality) if available. |
| Medium | GTX 1660 Super / RTX 2060 / RX 5600 XT | Medium | Keep ray tracing off. Use DLSS (Quality) or FSR (Quality). |
| High | RTX 3070 / RX 6800 / Xbox Series X | High | Enable ray tracing (low preset for reflections/shadows). DLSS Balanced. |
| Ultra / RT | RTX 4080 / RX 7900 XTX / PS5 (Performance mode) | Ultra + RT Psycho | Full ray tracing (Psycho for reflections, Ultra for shadows/lighting). DLSS Performance or FSR Performance. |
1.2 Critical Graphics Settings Explained
#### Resolution & Scaling
- Resolution: Native 1080p/1440p/4K. Lower resolution for higher FPS.
- Dynamic Resolution Scaling: On consoles, this is automatic. On PC, you can set min/max resolution scales.
- DLSS (NVIDIA) / FSR (AMD) / XeSS (Intel): Crucial for performance. Set to Quality for best image fidelity, Balanced for even gain, Performance for maximum FPS. DLSS 3 Frame Generation (RTX 40 series) can double FPS but adds latency – enable only if your base FPS is 60+.
- RT Reflections: High performance cost. Medium-Reflections is recommended for most AMD GPUs; NVIDIA can handle Ultra/Psy cho.
- RT Lighting: Set to Medium for a good balance. Ultra is very heavy.
- RT Shadows: Low impact, enable if you have spare GPU headroom.
- RT Sun Shadows: Similar to RT Shadows, can be kept off.
- Path Tracing (RT Overdrive): Available only on high-end RTX 40 series. Requires DLSS 3 Frame Generation to playable FPS. Not recommended for competitive or smooth play.
- Field of View (FOV): Default 80°. Increase to 90-100 for better peripheral vision, but may cause VRAM strain. Adjust slowly.
- Volumetric Fog & Clouds: High CPU/GPU cost. Set to Low or Medium on mid-range hardware.
- Screen Space Reflections (SSR): High quality is fine, but Ultra can be heavy. Medium is a good sweet spot.
- Ambient Occlusion (AO): Use Lumen or RT AO if available, else FidelityFX AO (medium/high).
- Crowd Density: Low helps CPU performance, especially in crowded areas like the market. Set to Medium or High on powerful CPUs.
- Texture Quality: High uses 4-6 GB VRAM. Low uses 2 GB. Medium is the default.
- Level of Detail (LOD): Set to Medium or High. Ultra increases pop-in distance but hits VRAM.
- Motion Blur & Depth of Field: Many turn these off for clarity and performance. Disable if you find them nauseating.
- Film Grain & Chromatic Aberration: Purely aesthetic, disable for a cleaner image.
- VSync: Turn off if using G-Sync/FreeSync. Otherwise, enable in fullscreen mode to avoid screen tearing.
- Window Mode: Use Fullscreen for best performance. Borderless Window can cause input lag.
#### Ray Tracing (RT)
#### Other Graphical Settings
1.3 Misconfiguration Pitfalls
---
2. Audio Settings
Audio quality affects immersion and gameplay feedback. Cyberpunk 2077 supports various audio standards.
2.1 Audio Options
| Setting | Recommendation | Notes |
|---|---|---|
| Master Volume | 70-80% | Leave some headroom for dynamic range. |
| Music Volume | 80% | Keeps the iconic soundtrack prominent. |
| SFX Volume | 100% | Critical for combat cues (gunfire, footsteps). |
| Dialogue Volume | 100% | Don't reduce – story is essential. |
| Dynamic Range | Headphones: Small / Speakers: Medium / Home Theater: Large | Misconfigured range can make dialog hard to hear. Use Headphone (Small) for most setups. |
| Audio Quality | High | Uses more bandwidth, no performance hit. |
| Speaker Configuration | Stereo, 5.1, 7.1, or Headphones | Headphones is the safest; don't use 5.1 if you only have stereo speakers. |
| Subtitles | Always on | Large text, optional speaker name. |
| Hearing Impaired Mode | On | Adds visual cues for off-screen sounds. |
2.2 Special Attention Points
- Dynamic Range: Many players complain that dialogue is too quiet compared to explosions. Set to Small (Headphones) – even if you use speakers – to avoid this issue. The 'Large' setting is intended for home theater setups with dedicated center channels.
- Audio Language: If you want the original English voice acting but localized subtitles, set Language to English and text to your language.
---
3. Controls Settings
Controls can be fully remapped on PC and partially on consoles. We recommend the following adjustments for better responsiveness.
3.1 Input Device & Sensitivity
| Setting | PC Recommendation | Console Recommendation |
|---|---|---|
| Mouse Sensitivity | Start at 5, adjust incrementally. | N/A |
| Controller Sensitivity (Horizontal/Vertical) | N/A | 5-7 for both. |
| Invert Y-Axis | Off (unless you're used to it) | Off (toggle if needed) |
| Aim Assist (Controller) | N/A | On (default) – helps with tracking. |
| Look Deadzone (Controller) | N/A | 0.10 – larger deadzone reduces drift but delays response. |
| Mouse Smoothing | Off – causes input lag. | N/A |
| Mouse Acceleration | Off – makes aim inconsistent. | N/A |
| Stick Deadzone (Controller) | N/A | 0.10-0.15 |
3.2 Key Rebinding Tips
- Quickhack Toggle: Bind to a convenient mouse button or a keyboard key (e.g., Q or E).
- Jump: Spacebar is fine, but some prefer Mouse Wheel Down (avoid if you use scroll for weapon swap).
- Crouch/Slide: Ctrl or Left Shift – avoid toggling if you use shift for sprint.
- Vehicle Controls: If you use a controller for driving, consider separate keybindings for vehicles vs on-foot.
- Mouse Smoothing and Acceleration: Both should be OFF for consistent aiming. They are on by default in some PC versions. Turn them off in the .ini file or via the settings menu.
- Raw Input: Ensure "Raw Mouse Input" is enabled (PC only). This bypasses Windows mouse acceleration.
- Controller Vibration: Turn off if you want precise aiming in gunfights.
- Text Size: Small / Medium / Large. Choose Large for easier reading of UI elements.
- HUD Size: Normal / Large. Large reduces UI clutter.
- Colorblind Filters: Deuteranopia, Protanopia, Tritanopia. Apply via Interface > Colorblind Mode.
- Subtitle Background: Enable to improve readability against bright backgrounds.
- High Contrast Mode: Highlight enemies and objects (Interface > High Contrast).
- Controller Scheme: Choose Standard, Southpaw (left-handed), or Custom remap.
- Auto-Equip Weapons: Off (prevents accidental weapon changes during looting).
- Hold vs Toggle Crouch: Toggle is easier on hands.
- Quick Hacks: Enable "Hold to confirm" (in Gameplay > Quickhacks) to avoid accidental hacking.
- Photo Mode Pause: Disable to keep game running during photo mode (default: pause).
- Subtitle Display: Always on, with speaker name and background.
- Audio Language: Separate from subtitle language – useful for learning or preference.
3.3 Misconfiguration Pitfalls
---
4. Accessibility Settings
Cyberpunk 2077 offers several features to accommodate players with disabilities.
4.1 Visual Accessibility
4.2 Audio & Input Accessibility
4.3 Text & Language
---
5. Language Settings
Cyberpunk 2077 supports full localization in multiple languages.
| Setting | Explanation |
|---|---|
| Interface Language | Menus, UI text. |
| Audio Language | Voice acting – English, French, German, Japanese, etc. |
| Subtitles | Text language – can differ from audio. |
| Subtitle Size | Small / Medium / Large. |
| Subtitle Background | On/Off for readability. |
---
6. Network Settings
Cyberpunk 2077 is a single-player game, but it has limited online features (telemetry, photo sharing, cloud saves).
6.1 Network Options
| Setting | Recommendation | Notes |
|---|---|---|
| Enable Telemetry | Off | Sends usage data to CDPR – minor privacy concern. |
| Anonymous Usage Data | Off | Same as above. |
| Automatically Sync Saves (Cloud) | On (if you want cross-progression on multiple devices) | Requires GOG/Steam account. Off for privacy. |
| Allow Photo Sharing | Off | Prevents uploading screenshots to CDPR servers. |
| In-Game Browser | On | Used for some in-game terminals. No performance impact. |
| Mod Support (PC) | On | Enables mod integration via REDmod (if installed). |
6.2 Special Considerations
- Cloud Saves: If you play on PC and console (via cross-save with GOG), ensure cloud sync is on. On console, it's automatic if you're signed into an account.
- Offline Play: Cyberpunk 2077 works fully offline after initial installation. Disable all network features if you have strict data caps.
---
7. Gameplay Settings
These settings affect how the game plays, from difficulty to combat assist.
7.1 Difficulty & Game Rules
| Setting | Description | Recommendation |
|---|---|---|
| Difficulty | Easy / Normal / Hard / Very Hard | Normal for balanced first playthrough. Hard adds bullet sponge enemies. |
| Auto-Loot | Automatically pick up items when near bodies/containers | Off – prevents accidental pickup of junk that crowds inventory. |
| Quickhack Mode | Tap to execute / Hold to confirm | Hold – avoids accidental hacking. |
| Breach Protocol | Manual / Automatic | Automatic – simplifies the hacking minigame. |
| Crowd Density | Affects number of NPCs in hubs | Medium for performance; High for immersion on strong CPUs. |
| Ragdoll Physics | On / Off | On for fun, off to reduce CPU load. |
7.2 Combat & Movement
- Aim Assist (Controller): Set to Standard for fine-tuning. Strong can be too sticky.
- Snap to Cover (Controller): Off – you can manually enter cover by pressing a button.
- Weapon Auto-Recharge (Tech Weapons): Enable – these weapons benefit from automatic charging.
- Mantle Obstacles: On – allows vaulting over low walls.
- Vehicle Camera: Set to Third Person for easier driving (or First Person for immersion).
- Radio Station: Off – to avoid distraction during exploration (tune in when you want atmosphere).
- Minimap Rotation: Off (static north) / On (rotates with camera). Personal preference.
- Compass Display: Always on – helpful for navigation.
- Quest Tracker: On – shows current objective on HUD.
- Damage Numbers: On – helps gauge weapon effectiveness.
- Enemy HP Bars: On – essential for tactical awareness.
- Auto-Loot: New players often leave it on and end up with thousands of trash items, slowing inventory management. Turn it off.
- Difficulty: Very Hard can be frustrating early on due to low damage output. Stick to Normal until you unlock cyberware and perks.
- Quickhack Mode (Tap): You can accidentally hack innocent civilians, causing police aggression. Use Hold mode.
- Profile Your Settings: After changing graphics, run the built-in benchmark (Settings > Graphics > Run Benchmark). It provides a relative performance score and identifies bottlenecks.
- Save & Test: Adjust one group of settings at a time (e.g., only ray tracing) and test in a busy area like the Afterlife or a firefight.
- Console Players: Most graphics settings are locked, but you can still adjust FOV, controls, and accessibility. Use Performance mode for smoother 60 FPS.
- Mods: If you install visual mods, recheck settings – some mods override built-in options.
7.3 HUD & Interface
7.4 Misconfiguration Traps
---
8. Final Advice
Armed with these settings, you can tailor Cyberpunk 2077 to your hardware and playstyle for the best experience in Night City.
Important Notes
Important Notes: Cyberpunk 2077
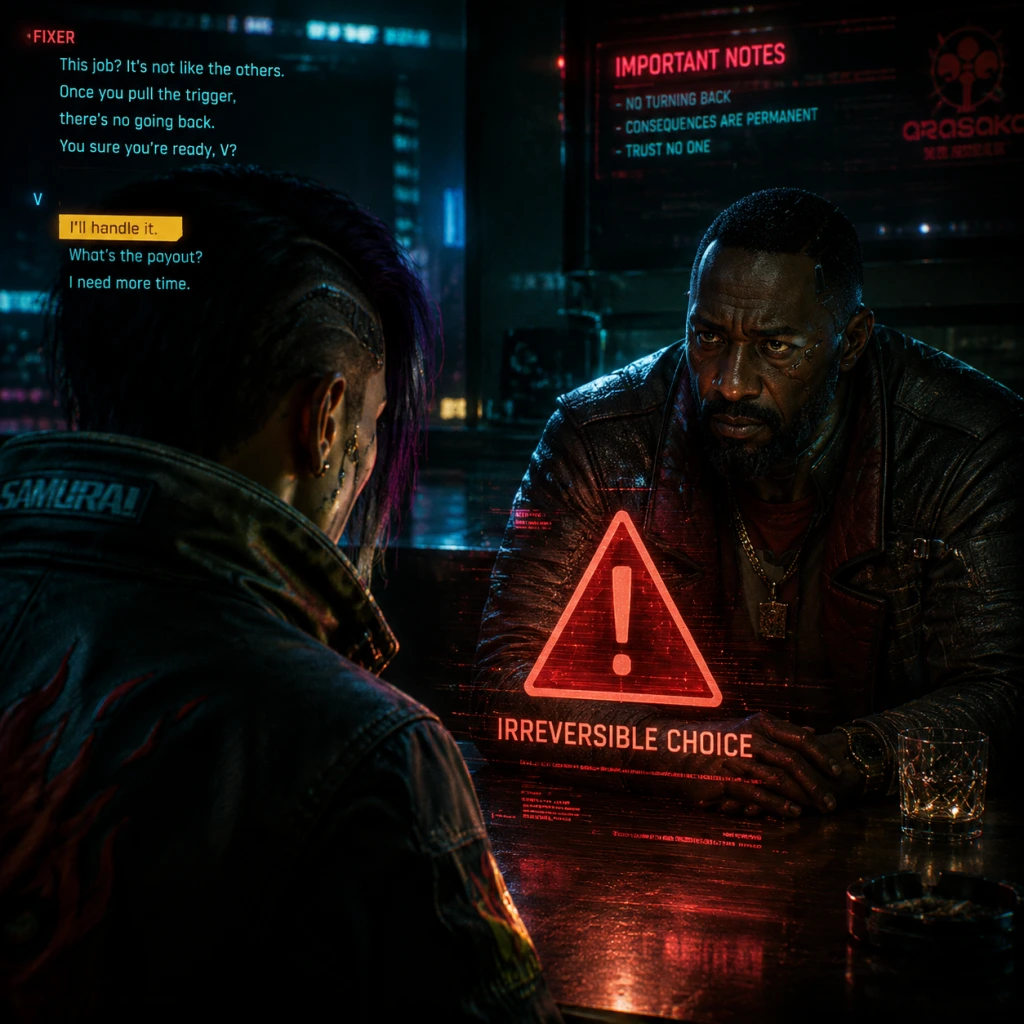
This guide covers critical warnings, pitfalls, irreversible choices, missable content, difficulty spikes, grinding traps, save management advice, and common regrets. Read carefully to avoid permanent mistakes and maximize your experience in Night City.
---
1. Warnings & Pitfalls
- Auto-scaling Enemies: Enemies scale with your level, but gear quality matters more. A weak weapon against a high-level enemy will still feel weak. Don't neglect upgrading your gear.
- Police System: The wanted system is harsh. Committing crimes in front of NCPD officers triggers an immediate response. Use stealth or run away—killing cops escalates quickly and makes escape very difficult.
- Fall Damage: Fall damage is lethal at any height beyond a small drop. Always look for ledges or use double-jump cyberware before attempting high falls. Quick save before risky jumps.
- Traffic Physics: Cars are heavy and can pin you. Avoid standing in traffic or near exploding vehicles. The physics engine can send cars flying unpredictably.
- Cyberpsychosis Glitch: Some quests involving cyberpsychos may bug if you use non-lethal takedowns or certain hacks. Save before engaging.
- The Point of No Return (Nocturne Op55N1): After accepting the job "Nocturne Op55N1" from Hanako, you cannot return to free roam until you finish the main story. Complete all side content first. This mission triggers the ending sequence. Your choices throughout the game determine which endings are available.
- Romance Lock-Outs: Certain dialogue options lock you into or out of romances. For example:
- Faction Reputation Permanence: While there are no explicit reputation meters, your choices in major gigs and side jobs can permanently lock out certain endings or character relations. For instance, siding with NetWatch against the Voodoo Boys may close off the Voodoo Boys' ending path.
- Cyberware Removal: Once you purchase and install cyberware, you cannot uninstall it to get a refund. You can replace it with a different piece, but the old one is lost. Plan your cyberware purchases carefully.
- Perk Refund: You can respec perk points at any time using the "Reset Perks" button in the Perk menu (costs 100,000 Eurodollars). However, there is no way to respec attribute points after character creation. Choose your starting attributes wisely.
- Time-Sensitive Side Gigs: Many side gigs (from fixers like Regina, Dino, etc.) are only available during certain windows. If you progress the main story too far, some become unavailable. Always check your journal and complete gigs before advancing major story beats.
- Cyberpsycho Sightings: This side job chain from Regina Jones must be completed before the end of Act 2. After a certain story trigger, some cyberpsychos may disappear.
- Delemain's Quests: Delemain's side jobs appear after "The Heist" and are missable if you don't visit the location near the Afterlife early enough. The final "Delemain" quest can be locked out if you rush the main story.
- Vending Machine & Auto-Doc Interactions: Certain unique items (like the "Arasaka 3D" gun) require specific dialogue with vending machines or auto-docs. These are easy to miss if you don't explore thoroughly.
- Icons on Map: Some iconic weapons and blueprint schematics are hidden in random containers or apartments. Use the "Sell Junk" option carefully—you might accidentally sell a unique item. Always check your inventory before selling.
- Reading Shards & Computers: Many shards and computer entries contain lore, side job triggers, or password hints for later doors. Read them! Some quests are activated only by reading specific shards.
- The Heist (Act 1 Finale): This mission is linear and intense. You must follow the escape sequence exactly. Enemies are tough, and you have limited gear. Use stealth and avoid open combat if possible. Save often.
- Riot Club (Act 2): Some missions in Pacifica have high-level enemies that can one-shot you if you're under-leveled. Recommended minimum level: 15-20 for this area.
- Final Battle Scenarios: The game's ending sequences can be brutal. For example, the "Don't Fear the Reaper" ending requires you to solo Arasaka tower with no help. You need a strong build, high-level gear, and plenty of healing items.
- Beat on the Brat Fistfights: These are pure melee boxing matches. If you have no body attribute or melee skills, these fights become extremely hard. Consider leveling up Body and getting the "Street Brawler" perks before attempting.
- Over-farming Street Cred: Street Cred levels up naturally through completing missions and gigs. Grinding random assaults or gang fights is inefficient. Focus on main quests and side jobs for the best rewards.
- Crafting Economy: Crafting is powerful but consumes many components. Don't break down every item; sell excess loot for cash first. Only craft your best weapons and armor.
- Buying Everything from Ripperdocs: Cyberware is expensive. Save your money for critical upgrades (e.g., legendary weapons, high-level cyberware). Don't buy every cheap implant—they become obsolete quickly.
- Vehicle Purchases: Cars are costly but not essential. You can use fast travel points and the "Call Vehicle" feature with your default car. Only buy vehicles if you have spare cash and want a specific one for style.
- Back up your save folder before installing mods.
- Using console commands or trainers will not get you banned, but they can break quest triggers or achievements.
- Some achievements may be disabled if you use mods that alter game files (though many work fine).
- There is no online etiquette required—just enjoy your personal playthrough.
- Manual Saves Are Critical: The autosave feature is limited. It saves only at certain checkpoints (e.g., after completing a quest, fast traveling, sleeping). Always make a manual save before:
- Multiple Save Slots: Use at least three rotating manual saves. If a save becomes corrupted or you accidentally lock yourself out of content, you can revert. This is especially important given the game's history of bugs.
- Quick Save vs. Manual Save: Quick save (F5 on PC) overwrites your previous quick save. Use it often, but also create manual save slots for important milestones.
- Cloud Save: Enable cloud saves (via GOG, Steam, or Epic) to protect against local hardware failure. Note that cloud saves may not sync perfectly if you switch between PC and console.
- Save File Corruption Risk: Rare but possible, especially with mods. Keep a backup of the entire save folder (usually in your user directory under "Saved Games" or similar).
- After Point of No Return: Once you enter the final mission, the game creates a separate save just before the point of no return. You can load that save to do other content after finishing. However, completing the game will also create a post-credits autosave that returns you to before that point.
- You Can Change Appearance Post-Creation: Visit any ripperdoc and select "Change Appearance" for a fee. You can alter hair, tattoos, makeup, and more—but not your body type or voice.
- Scanner is Essential: Use the scanner (Tab on PC) constantly. It highlights enemies, loot, hackable objects, and quest objectives. Also reveals secret passages and environmental hazards.
- Double Jump Cyberware (Fortified Ankles): This is arguably the best leg cyberware. Purchase it from a ripperdoc early (requires Street Cred 20 and 13,000 Eurodollars). It opens up vertical exploration and makes combat much easier.
- Stealth is OP: If you invest in Cool and Stealth perks, you can kill entire groups without being detected. Non-lethal takedowns are quiet and useful. Combine with silenced pistols or throwing knives.
- Quickhacks Are Free with the Right Build: Once you invest in Intelligence and breach protocol, many quickhacks cost no RAM. The "System Reset" quickhack can incapacitate almost any human enemy instantly.
- Money is Easy to Earn Later: Don't stress about cash early on. Complete side gigs and sell excess weapons. The largest expenses (legendary cars, apartments) are endgame luxuries.
- Skill Checks Scale with Attributes: Dialogue skill checks (e.g., Body, Intelligence, Cool) are based on your current attribute level, not your perks. Leveling attributes is the only way to pass high-tier checks.
- Fast Travel Terminals: They are everywhere. Use them to avoid long drives. You can also call a vehicle from the quick menu.
- You Can Replay Completed Missions: After the main story, you can load a save from before the point of no return to replay side content. However, there is no New Game+—you must start fresh for a new build.
- Achievements Can Be Missed: Some achievements are tied to specific choices or completion of all gigs in a district. Use a guide if you're a completionist.
---
2. Irreversible Choices
- Panam Palmer: Requires choosing supportive dialogue during her personal quests (e.g., the campfire scene). Be gentle and honest.
- Judy Alvarez: Must complete her side quests and pick flirtatious options. Avoid siding against her during the "Pyramid Song" quest.
- River Ward: Must choose flirty options in his final personal mission ("The Hunt").
- Kerry Eurodyne: Requires completing his full storyline and picking romantic dialogue near the end.
---
3. Missable Content
---
4. Difficulty Spikes
---
5. Grinding Traps
---
6. Online / Anti-Cheat Notes (Single-Player Only)
Cyberpunk 2077 is a single-player game with no multiplayer or official anti-cheat. Mods are allowed but can corrupt save files or cause instability. Be cautious:
---
7. Save Management Advice
- Major story choices
- Entering a dangerous area
- Starting a risky jump or stealth section
---
8. Things Players Commonly Regret Not Knowing Earlier
---
Remember: Night City rewards careful planning and punishes recklessness. Save often, think before you speak, and embrace the chaos. Good luck, V.
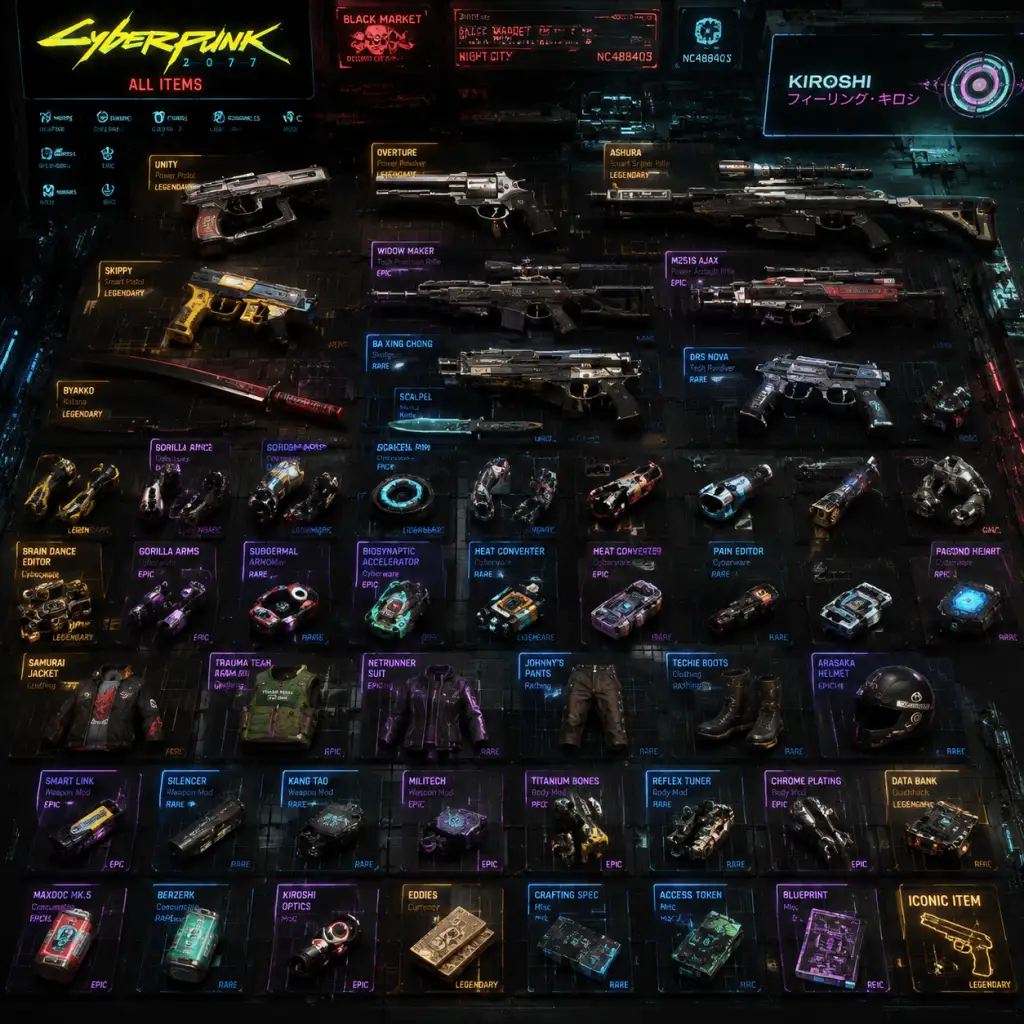
All Game Items
All Game Items Guide for Cyberpunk 2077
This guide catalogs every major item type in Cyberpunk 2077, including weapons, armor, consumables, materials, currencies, collectibles, and key equipment. Each entry explains functionality, acquisition methods, optimal usage, and important synergies or upgrades.
---
1. Weapons
Weapons fall into four categories based on bullet type and handling: Power, Tech, Smart, and Melee. Within each, there are iconic variants (unique, often with special perks). Every weapon has a rarity level (Common, Uncommon, Rare, Epic, Legendary) that affects base damage and mod slots.
1.1 Power Weapons
- Description: Standard kinetic firearms. Bullets can ricochet off surfaces if the weapon has the "Ricochet" stat; many Power weapons also accept the "Ricochet" barrel mod.
- How to obtain: Looted from enemies, purchased from gun vendors, found in containers, or crafted.
- When useful: Versatile for all combat situations, especially when you can predict enemy positions and bounce shots around corners.
- Synergies: Best with the "Handguns" or "Assault" skill trees. Use the "Ricochet" perk to increase ricochet damage. The legendary mod "Ricochet Master" further improves bounce behavior.
- Upgrades: Crafted versions can be upgraded via the crafting system. Iconic Power weapons (e.g., "Skippy", "Overwatch") have fixed tiers and unique effects.
- Description: Electromagnetic projectile weapons. They charge up to fire a penetrating shot that can go through walls, cover, and enemies. Cannot ricochet, but ignore armor on charged shots.
- How to obtain: Vendors specializing in tech gear (e.g., Wilson's in Watson), enemy drops, crafting.
- When useful: Excellent against heavily armored enemies, enemies behind cover, or groups in a line. The charge mechanic makes them less suited for fast-paced run-and-gun.
- Synergies: "Tech" skill tree perks (like "Revoke" or "Mechanical Phenomenon") enhance charge speed and penetration. Pair with a Kiroshi optical mod that highlights enemies through walls.
- Upgrades: Crafting can increase tier. Iconic Tech weapons (e.g., "Comrade's Hammer", "Yonobu's Hurricane") have unique charge effects.
- Description: Bullets that home in on targets once you have a lock-on (requires a smart link cyberware). Track enemies even when you're not aiming down sights.
- How to obtain: Start with a smart link (from Ripperdoc), then buy or loot smart weapons. Iconic versions are often tied to specific quests (e.g., "Dying Night" from the Heist).
- When useful: Great for new players or those with poor aim, especially in hectic fights with multiple enemies. Less effective against very fast-moving targets or in EMP areas.
- Synergies: "Smart Weapons" skill tree is mandatory. Equip the best smart link cyberware (Legendary version from Viktor). Combine with "Hands Free" perk for simultaneous lock-on and movement.
- Upgrades: Upgrade smart link cyberware for more lock-on targets. Iconic smart weapons (e.g., "Ashura" smart sniper) have high headshot multiplier.
- Description: Blades (knives, katanas, machetes), blunt (batons, hammers, fists with gorilla arms), and the Mantis Blades cyberware. Melee attacks do not consume ammo.
- How to obtain: Looted, crafted, or purchased from melee-focused vendors (e.g., the Kabuki market). Cyberware melee comes from Ripperdocs.
- When useful: Ideal for stealth takedowns, close-quarters combat, and builds focusing on Reflexes (Blades) or Body (Blunt/Street Brawler).
- Synergies: "Blades" or "Street Brawler" skill trees. Stack attack speed mods (e.g., Sandevistan) to unleash rapid combos. Use poison mods on blades for DoT.
- Upgrades: Crafting allows increasing tier. Iconic melee weapons like "Satori" (katana from the Heist) have unique crit or attack speed bonuses.
- Skippy (Power Pistol): Sentient AI weapon that changes between "Puckish" (leg shots) and "Stone Cold" (headshots) modes after 50 kills. Obtainable from a NCPD scanner hustle in Heywood. Useful for early-to-mid game comedy and power.
- Comrade's Hammer (Tech Revolver): Single-shot revolver that deals massive explosive damage. Found in a side quest in the Badlands. Excellent for one-shotting enemies but slow fire rate.
- Yonobu's Hurricane (Tech Shotgun): Full-auto tech shotgun found during the "Riders on the Storm" quest (Panam line). High penetration and crowd control.
- Byakko (Blade Katana): Granted for completing all Cyberpsycho sightings. Fast attack speed and unique “Eviscerate” finisher.
- Description: Each piece has an armor value and can have mod slots. Rarity affects base armor and number of slots (Clothing mods can add armor, resistances, or utility).
- How to obtain: Looted from enemies, bought from clothing vendors, found in containers, or crafted (requires a spec from crafting perks).
- When useful: Always wear the highest armor pieces until you find a set that matches your style. For builds, focus on either high armor or specific resistances (e.g., thermal for fire fights).
- Synergies: Equip mods like "Armadillo" to massively increase armor, "Resist: Burn" for fire resistance, or "Stealth Boost" for covert ops. No set bonuses in base game, but update 2.0 added Cyberware Set bonuses.
- Upgrades: Clothing cannot be upgraded directly; you must find or craft better versions. However, you can swap mods.
- Description: Implanted upgrades purchased from Ripperdocs. They consume capacity slots (limited by level and perks). Categories: Skeleton, Arms, Legs, Nervous System, Integumentary, Frontal Cortex, Optical, Hands.
- How to obtain: Buy from any Ripperdoc (each has unique inventory). Some are quest rewards.
- When useful: Essential for any build—cyberware defines your playstyle. Critical early purchases: a Kiroshi optics (better highlighting), Smart Link (if using smart weapons), Mantis Blades / Gorilla Arms (for melee), Synaptic Accelerator (time slow on detection), Sandevistan (time slow for burst damage), Berserk (melee damage reduction/damage).
- Synergies: Update 2.0 introduced Cyberware Set Bonuses (e.g., “Netrunner set” increases quickhack damage, “Solo set” increases health and mitigation). Collect all pieces of a set for maximum effect.
- Upgrades: You can replace lower-tier cyberware with higher-tier versions (Epic/Legendary) from Ripperdocs as you level. Some cyberware (e.g., Sandevistan) have cooldown and duration variants.
- Synaptic Accelerator (Nervous System): Slows time when detected. Great for stealth players to react.
- Fortified Ankles (Legs): Double jump. Obtainable early from Fingers in Jig-Jig Street. Essential for platforming and combat mobility.
- Pain Editor (Integumentary): Reduces damage by a flat amount. Very strong for tank builds.
- Netwatch Netdriver MK.5 (Frontal Cortex): Legendary cyberdeck that allows spreading quickhacks. Must have for netrunner builds.
- Bounce Heal Mk.1/2/3: Restore health over time. Mk.3 is best. Recipes can be crafted with crafting materials.
- MaxDoc: Instant health restore. Can be crafted or looted. Essential for emergency healing.
- Live Fresh!: Slightly weaker instant health.
- How to obtain: Looted from enemies, bought from vendors (e.g., medication vendors), crafted.
- When useful: Always carry a mix of MaxDoc (burst) and Bounce Heal (sustain). Craft higher tiers as you go.
- Buzzencraft: Temporary increase to max health and health regen.
- Optic Camo: Invisibility for a short duration. Craftable from crafting components. Great for stealth.
- Toxioplasm Dioxin: Resist poison damage.
- Zetanic: Increase melee damage and attack speed.
- How to obtain: Loot, buy from junk vendors, craft.
- When useful: Before tough fights or stealth sections. Optic Camo is especially valuable for stealth runs.
- Frag Grenade: Explosive damage. Common.
- Flashbang: Blinds enemies in a radius. Useful for crowd control.
- EMP Grenade: Disables electronics, kills cameras, and damages robots. Crucial for netrunner/hacker builds.
- Incendiary Grenade: Fire damage over time. Good against organic enemies.
- Recon Grenade: Marks all enemies inside a radius. Excellent for planning attacks.
- How to obtain: Looted, crafted, bought.
- Synergies: Grenades can be thrown while sprinting. Pair with "Grenade Hacker" skill for extra effects.
1.2 Tech Weapons
1.3 Smart Weapons
1.4 Melee Weapons
1.5 Iconic Weapons (Examples)
---
2. Armor
Armor comes in two forms: Clothing (outer layers, pants, shoes, etc.) and Cyberware (implanted modifications). Clothing provides base armor, while cyberware grants passive bonuses and active abilities.
2.1 Clothing
2.2 Cyberware
#### Key Cyberware Examples
---
3. Consumables
Consumables include healing items, buffs, grenades, and crafting materials that are one-time use.
3.1 Healing Items
3.2 Buff Consumables
3.3 Grenades
---
4. Materials & Crafting Components
Materials are used to craft and upgrade weapons, clothing, and cyberware.
| Material Name | Rarity | Used For | Acquisition |
|---|---|---|---|
| Common Component | Common | Crafting/upgrading common items, low-tier grenades | Loot from junk, destroyed items, enemies. |
| Uncommon Component | Uncommon | Rare items, mods | Disassemble uncommon gear, buy from vendor. |
| Rare Component | Rare | Epic items, iconic weapons | Disassemble rare gear, craft from uncommon (requires perk). |
| Epic Component | Epic | Legendary items, high-end crafting | Disassemble epic gear, craft from rare. |
| Legendary Component | Legendary | Legendary iconic weapons, top-tier cyberware | Craft from epic, very rare loot from high-level enemies, gig rewards. |
| Quickhack Component | Varies | Crafting quickhacks (netrunner builds) | Loot from access points, enemies, as rewards. |
| Common/Uncommon/Rare/Epic/Legendary Junk | Mismatched | Dismantle into components | Everywhere, but low-value. |
- How to obtain components: Dismantle unwanted weapons and clothing at a crafting station. Loot from containers and enemies. Buy from junk vendors (costly).
- When useful: Always dismantle junk and low-rarity items to build up your component stockpile. For crafting runs, invest in the "Grease Monkey" or "Edgerunner Artisan" perks.
- Synergies: The "Crafter" skill tree increases component yield and allows creation of higher-tier components. Always tag "Junk" items as disassemble.
- Description: Primary currency for buying weapons, armor, cyberware, vehicles, apartments, and cosmetic items.
- How to obtain: Completing gigs, main missions, selling loot, breaking into access points (payroll data), lashing enemies, and selling crafted items.
- When useful: Essential for everything. Early game, prioritize spending on a good cyberdeck, smart link, and a few weapon mods. Mid-game, invest in a decent vehicle. Late game, purchase legendary cyberware and iconic weapons.
- Tips: Loot everything and sell spare weapons/armor. Crafting high-tier items and selling them can net profit. Do NCPD scanner hustles for quick cash.
- Description: Reputation points that unlock new weapons, cyberware, and gigs from fixers. Levels 1–50.
- How to obtain: Completing gigs, NCPD scanner hustles, main missions. Killing enemies gives negligible cred.
- When useful: Unlocks higher-tier items from vendors, quality of life (e.g., better cars), and special missions. Street cred gates some iconic weapons.
- Tips: Focus on completing all scanner hustles in each district early to build cred fast. Gig rewards also increase cred significantly.
- While not a currency per se, components are a finite resource that must be managed. They are used like currency for crafting/upgrading.
- Description: 21 collectible graffiti cards hidden across Night City. Each depicts a Major Arcana tarot card with unique art.
- How to obtain: Find them in specific locations, often in remote areas or rooftops. Misty's esoterica shop sells a map that marks them all.
- Rewards: None beyond an achievement/trophy. Lore flavor text explains each card's meaning in relation to the story.
- Tips: Use the map from Misty (available after "The Heist" mission) to locate them. Some are in locked areas, accessible only during specific missions.
- Description: 17 organized crime and 10 assault in progress events per district. Each nets Eurodollars and Street Cred. Some drop iconic weapons or blueprint.
- How to obtain: Activate by approaching the blue icon on the map. Complete the objective (kill all enemies, retrieve item).
- Rewards: Money, components, sometimes rare clothing or weapons. The final reward for completing all hustles in a district is a legendary iconic item (e.g., "The Skeleton" arm cyberware).
- Tips: Do these early for creds and cash. They respawn? No, but each is a one-time event.
- Description: 17 cyberpsycho encounters. You must incapacitate (not kill) the target to get full reward.
- How to obtain: Triggered by reading shards or approaching the location. Regina sends coordinates after completing the "Cyberpsycho" side job.
- Rewards: Eurodollars, Street Cred, and iconic weapon "Byakko" katana after completing all. Also unlocks a unique cyberware mod from Regina.
- Tips: Use non-lethal takedowns or the "Pax" weapon mod. Each cyberpsycho has unique tactics; exploit their weaknesses.
- Description: Unique weapons and clothing with special stats, obtained from specific quests, gigs, or hidden stashes. Many can be upgraded to legendary via crafting.
- Examples: "Plan B" (pistol from the Heist), "Breakthrough" (tech sniper from a gig), "Nehan" (katana from a Cyberpsycho).
- How to obtain: Follow main/side quests, explore locked rooms, complete NCPD hustles.
- Synergies: Iconic weapons often have unique perks that synergize with certain builds (e.g., "Yorinobu's Hurricane" for tech shotguns).
- Description: Cars and motorcycles used for traversal. Each has different speed, handling, and durability. Can be purchased from fixer contacts or obtained as rewards.
- How to obtain: Buy from fixer (e.g., El Capitan, Dino), earn from completing driver jobs (Auto Fixer), or find as loot (e.g., the Cthulhu). Some are exclusive to DLC.
- When useful: Essential for fast travel between districts. A motorcycle is cheaper and easier to maneuver in traffic. High-end cars (e.g., Rayfield Aerondight) are expensive but fast.
- Synergies: The "Vrooms!" perk set improves driving. Off-road vehicles are best for Badlands.
- Description: Safe houses where you can sleep, change clothes, craft, and store items. Base apartment in Megabuilding H10. Additional ones can be purchased from fixers.
- How to obtain: Buy from fixer after completing certain side jobs (e.g., Northside apartment from Wakako). The Glen apartment (City Center) is the largest.
- When useful: Sleeping grants a 1-hour buff to XP gain (the “Well Rested” bonus). Storage is shared across all apartments. Crafting stations are available in each.
- Tips: Purchase the Corpo Plaza apartment for easy access to a Ripperdoc and clothing vendor.
- Description: Key items that are used in main or side quests. Usually cannot be sold or dropped. Examples: Biochip (main story), Relic (critical), Pacifica Data Shard (Rogue quest).
- How to obtain: Automatically given during quests.
- When useful: Only during related missions. Do not discard; they are essential for progression.
- Description: A cyberdeck is a special cyberware that allows you to use quickhacks. They have buffer size, RAM cost reduction, and passive effects.
- How to obtain: Buy from Ripperdocs. Types: Netdriver (spread hacks), Tetratronic (increase damage), Netwatch (speed and cooldown reduction).
- Synergies: Pair with the quickhack crafting perk to create legendary hacks like "System Reset" or "Suicide".
- Craft early, craft often: Dismantle all unwanted gear to build components. Upgrade your favorite iconic weapon to keep it viable.
- Always carry grenades: They solve many problems (EMPs for cameras, flashbangs for crowds).
- Stay on top of cyberware: Visit Ripperdocs every few levels to upgrade capacity and get better gear.
- Collectibles: Only necessary for 100% completion, but the Byakko katana is a top-tier melee weapon reward.
- Economy: Avoid buying common items; loot is plentiful. Save for legendary cyberware and iconic weapons from vendors.
---
5. Currencies
Cyberpunk 2077 uses three main resources: Eurodollars (money), Street Cred (reputation), and Crafting Components (as materials, but also a resource).
5.1 Eurodollars (Eddies)
5.2 Street Cred
5.3 Crafting Components (as a resource)
---
6. Collectibles
Collectibles are optional items that serve as lore, rewards, or achievements. They do not affect gameplay directly but provide context and bonus content.
6.1 Tarot Cards
6.2 NCPD Scanner Hustles (Gigs)
6.3 Cyberpsycho Sightings
6.4 Iconic Weapons & Armor Blueprints
---
7. Key Equipment
Key equipment includes items that are not weapons or armor but are essential for progression or quality of life.
7.1 Vehicles
7.2 Apartments
7.3 Quest Items
7.4 Cyberdecks (Netrunner)
---
Final Tips
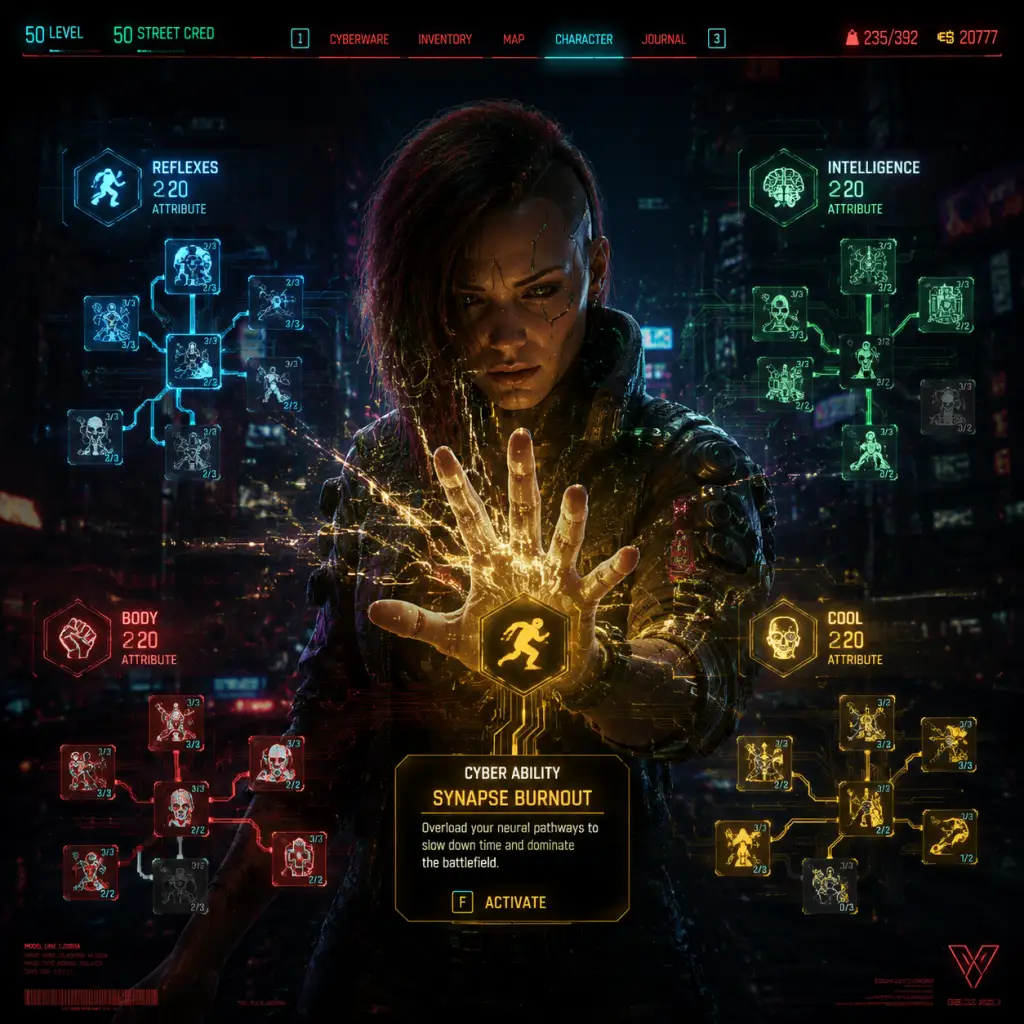
Character Skills
Character Skills Guide for Cyberpunk 2077
Welcome to the definitive guide on V's skills in Cyberpunk 2077. This guide covers every Attribute, Perk Tree, quickhack, special cyberware move, and Relic ability. All descriptions include effects, cooldowns (where applicable), upgrade ranks, combos, synergies, recommended builds, and optimal usage scenarios. Skills are divided by the five core Attributes (Body, Reflexes, Technical Ability, Intelligence, Cool) and the additional Relic tree from the Phantom Liberty expansion.
---
1. Body Attribute
Body governs raw strength, resilience, and heavy weaponry. It has three perk trees: Athletics, Annihilation, and Street Brawler.
Athletics
Focuses on stamina, melee damage, and survivability.
- Regen (Rank 1-3): Increases health regeneration out of combat by 0.5/1/1.5 HP per second. Passive. No cooldown. Synergy: Pairs with health items. Build: Tank builds.
- Invincible (Rank 1-3): Reduces damage taken by 5/10/15% while below 30% health. Passive. When: Survival low-health moments.
- Pack Mule (Rank 1-3): Increases carrying capacity by 30/60/90. Passive. Use: Loot-heavy runs.
- Steel and Chrome (Rank 1-3): Increases melee damage by 10/20/30% and armor by 5/10/15%. Passive. Synergy: With Body gorilla arms builds.
- True Grit (Rank 1-3): Reduces health loss from fall damage by 30/50/70%. Passive. Use: Parkour or vertical combat.
- Berserk (Active): Replaces Cyberware ability. For 10 seconds: +20% damage, +50% armor, melee attacks stun. Cooldown 60 seconds. Upgrades: Extended duration. Combo: Use before melee rush.
- Easy There, Solo (Rank 1-3): Reduces reload speed by 15/25/35%. Passive. Build: Shotgun builds.
- Bullet Ballet (Rank 1-3): Increases hip-fire accuracy by 10/15/20%. Passive. Synergy: With LMGs.
- Tank (Rank 1-3): Increases armor by 10/20/30 when using shotguns/LMGs. Passive.
- Frenzy (Active): On kill, +10% movement speed and +10% damage for 5 seconds. Stacks 3 times. Cooldown: 0 (proc). Use: Crowd control.
- Spray and Pray (Rank 1-3): Increases bullet penetration by 10/20/30%. Passive. When: Against walls.
- Shotgun/ LMG Perks (e.g., Violence increases crit chance). Each has three ranks.
- Steel and Chrome (shared with Athletics).
- Brawl (Rank 1-3): Increases blunt weapon damage by 10/20/30%. Passive.
- Fury (Active) : On receiving damage, +10% melee damage for 8 seconds. Stackable 3 times. Cooldown: 0.
- Stronger (Rank 1-3): Increases armor by 5/10/15% while wielding a blunt weapon. Passive.
- Gladiator (Rank 1-3): Reduces stamina cost of heavy attacks by 50/65/80%. Passive.
- Berserk (Active) – same as Athletics but with added blunt melee stun.
- Gun Whisperer (Rank 1-3): Reduces handgun recoil by 15/25/35%. Passive.
- Crack Shot (Rank 1-3): Increases headshot damage by 10/15/20%. Passive. Synergy: With revolvers.
- Long Arm (Rank 1-3): Increases effective range by 10/15/20%. Passive.
- Frontal Artery (Active) : On headshot kill, +10% crit chance for 8 seconds. Stacks 3. Cooldown: 0.
- Akimbo (Rank 1-3) : Allows dual-wielding pistols (requires cyberware). Increases fire rate but reduces accuracy. Cooldown: N/A.
- Ricochet (Rank 1-3) : Bullets ricochet off surfaces, dealing 25/50/75% damage. Passive. When: Around corners.
- Sting Like a Bee (Rank 1-3): Increases attack speed by 10/15/20%. Passive.
- Float Like a Butterfly (Rank 1-3): Increases dodge distance by 15/25/35%. Passive.
- Deathbolt (Active) : On kill with blade, +15% movement speed and +10% damage for 8 seconds. Cooldown: 0.
- Blade Flurry (Active) : Activate for rapid slashes (forward dash). Cooldown 8 seconds. Upgrade: Duration.
- Counter (Active) : Perfect block then counterattack. Stuns enemy. Cooldown 3 seconds.
- Mantis Blades special : (from cyberware) leap attack, lunge, etc. Not a perk but enhanced by blades tree.
- Steady Hand (Rank 1-3): Reduces weapon sway while aiming by 20/30/40%. Passive.
- Spray (Rank 1-3): Increases hip-fire accuracy by 10/15/20%. Passive.
- Rifleman (Rank 1-3): Increases assault rifle damage by 10/15/20%. Passive.
- Submachine Fun (Rank 1-3): Increases SMG reload speed by 15/25/35%. Passive.
- Run and Gun (Active) : While sprinting, +10% movement speed and +10% accuracy. Cooldown: N/A (toggle).
- Trajectory (Active) : On kill, +15% fire rate for 5 seconds. Cooldown: 0.
- Crafter (Rank 1-3): Unlocks crafting of Common/Blue/Purple items. Passive.
- Eddie for Eddie (Rank 1-3): Reduces crafting cost by 10/15/20%. Passive.
- Tuned Up (Rank 1-3): Increases upgrade efficiency by 10/15/20%. Passive.
- Quality Control (Active) : On crafting an item, +10% chance for a higher rarity. Passive.
- Including (Rank 1-3): Allows disassembly of components into rarer materials. Passive.
- Grenadier (Rank 1-3): Increases grenade damage by 10/20/30%. Passive.
- Welcome to Night City (Rank 1-3): Increases grenade radius by 10/15/20%. Passive.
- Blast Shielding (Rank 1-3): Reduces self-damage from explosions by 30/50/70%. Passive.
- Demolition Man (Active) : On grenade kill, +20% grenade damage for 10 seconds. Stackable 2 times. Cooldown: 0.
- Turret Tamer (Active) : Hack enemy turrets to attack allies. Cooldown 30 seconds. Synergy: With Int Quickhacks.
- Bomb Squad (Rank 1-3): Reduces grenade cook time by 15/25/35%. Passive.
- Tech Slinger (Rank 1-3): Increases charge speed by 10/15/20%. Passive.
- Sniper (Rank 1-3): Increases tech weapon range by 10/15/20%. Passive.
- Overload (Active) : On fully charged shot, +30% damage and stun. Cooldown: 4 seconds.
- Rebound (Rank 1-3): Projectiles bounce off surfaces, dealing 25/50/75% damage. Passive.
- Critical Charge (Rank 1-3): Increases crit chance for tech weapons by 5/10/15%. Passive.
- Upload Duration (Rank 1-3): Reduces quickhack upload time by 10/15/20%. Passive.
- RAM Recovery (Rank 1-3): Increases RAM regeneration by 0.25/0.5/0.75 per second. Passive.
- Breach Protocol (Active) : Use to access enemy networks, reveal enemies, and upload mass debuffs. Cooldown: 10 seconds. Synergy: With Overclock.
- Eavesdropper (Rank 1-3): Increases range for data mining from access points by 5/10/15 meters. Passive.
- Short Circuit (Active): Deal electric damage and stun. Costs 4 RAM. Cooldown: 2 seconds. Upgrade: Legendary version deals bonus damage to robotic enemies.
- Overheat (Active): Deal thermal damage and burn. Costs 5 RAM. Cooldown: 3 seconds. Synergy: With thermal damage perks.
- Cyberware Malfunction (Active): Disables enemy cyberware for 10 seconds. Costs 8 RAM. Cooldown: 15 seconds. Use: Against bosses.
- System Shutdown (Active): Instantly knocks out an enemy (non-lethal). Costs 10 RAM. Cooldown: 30 seconds. When: Stealth.
- Detonate Grenade (Active): Causes enemy to detonate their equipped grenade. Costs 5 RAM. Cooldown: 10 seconds.
- Suicide (Active): Enemy shoots themselves (lethal). Costs 12 RAM. Cooldown: 60 seconds. Risk: High RAM cost.
- Legendary Quickhacks: Require perk investment; each has unique effects (e.g., Legendary Short Circuit adds damage on crit).
- Overclock (Active): For 10 seconds, quickhacks cost no RAM but health is consumed. Cooldown: 60 seconds. Synergy: With health regeneration perks.
- Iron Will (Rank 1-3): Reduces damage taken while quickhacking by 10/20/30%. Passive.
- Wait for It (Rank 1-3): Increases quickhack damage against enemies affected by breach protocol by 10/15/20%. Passive.
- Hacker's Arsenal (Rank 1-3): Unlocks crafting of legendary quickhacks. Passive.
- Silent and Deadly (Rank 1-3): Increases stealth damage by 15/25/35%. Passive.
- Ghost (Rank 1-3): Reduces detection time by 10/15/20%. Passive.
- Assassin (Active) : On stealth kill, +15% movement speed for 8 seconds. Cooldown: 0.
- Optical Camo (Active) : Temporarily invisible for 10 seconds when not moving. Cooldown 30 seconds. Upgrade: Longer duration.
- Dagger Master (Rank 1-3): Increases throwing knife damage by 10/15/20% and recovery speed.
- Cold Blood (Passive): On kill, gain +2% crit chance, +2% movement speed, +2% armor for 10 seconds. Stacks up to 10 times. Core mechanic.
- Cold Blood Capstones: At 5 stacks, gain +20% damage; at 10 stacks, gain +30% crit damage.
- Will to Live (Rank 1-3): Increases health regeneration per Cold Blood stack by 1/2/3% per second. Passive.
- Frozen Precision (Rank 1-3): Each Cold Blood stack adds +2/3/4% crit chance. Passive.
- Avalanche (Active) : Activate to consume all Cold Blood stacks and deal massive damage in an area (based on number of stacks). Cooldown 30 seconds. Use: Crowd finisher.
- Steady Hand (Rank 1-3): Reduces weapon sway while aiming by 20/30/40%. Passive.
- Head Hunter (Rank 1-3): Increases headshot damage by 10/15/20%. Passive.
- Long Arm (Rank 1-3): Increases effective range by 10/15/20%. Passive.
- Reveal (Active) : On kill with sniper, marks nearby enemies for 10 seconds. Cooldown: 0. Synergy: With stealth.
- Bullseye (Rank 1-3): Increases armor penetration by 10/20/30%. Passive.
- Magnetic Hands (Rank 1-3): Increases weapon handling while wall-running or grabbing edges. Passive.
- Spider Sense (Active) : On detection, auto-dodge for 2 seconds (reflects bullets). Cooldown 30 seconds.
- Synaptic Accelerator (Active) : On low health, slow time for 5 seconds. Cooldown 60 seconds.
- Exoskeleton (Active) : Activate to gain massive armor and increased jump height for 15 seconds. Cooldown 90 seconds.
- Crisps (Passive): Increases RAM regen by 0.25 per second per piece of deployed cyberware.
- Overdrive (Active) : All cyberware cooldowns reduced by 50% for 20 seconds. Cooldown 120 seconds.
- System Expansion (Passive): Unlocks extra cyberware slot per piece.
- Ping: Reveals all enemies in a radius for 4 seconds when used on a device. Costs 2 RAM. Cooldown: 3 seconds.
- Overheat: Deals thermal damage over time. Costs 4 RAM; upgrades increase damage.
- Short Circuit: Electric damage plus stun. Costs 4 RAM.
- Breach Protocol: See Core Quickhacks section.
- Cyberpsychosis: Makes an enemy attack allies for 10 seconds. Costs 12 RAM. Cooldown: 60 seconds. Use: Disable groups.
- Contagion: Spreads a virus that deals poison damage over time to nearby enemies. Costs 8 RAM. Cooldown: 15 seconds.
- Suicide: See earlier.
- Detonate Grenade: See earlier.
- Memory Wipe: Removes all traces of V from enemy detection for 10 seconds. Costs 10 RAM. Cooldown: 30 seconds.
- Power Attack: Charged punch that stuns. No cooldown. Use: Breaks doors, stuns humans.
- Ground Smash: Slams ground, knocking back enemies. Cooldown 15 seconds.
- Lunge Attack: Forward dash with blades. Cooldown 8 seconds.
- Spin Attack: Area melee attack. Cooldown 12 seconds.
- Wall Leaping: Automatically leaps at enemies when attacking from above.
- Whip Strike: Long-range melee attack. Cooldown 2 seconds.
- Electric Lash: Deals electric damage and stuns. Cooldown 10 seconds (requires mod).
- Grenade Launcher: Fires explosive projectile. Cooldown based on ammo (recharges).
- Nerve Gas: Emits gas cloud that poisons. Cooldown 20 seconds.
Annihilation
Specializes in light machine guns (LMGs) and shotguns.
Street Brawler
Hand-to-hand combat, blunt weapons, and gorilla arms.
Recommended Body Build: Tanky melee or shotgunner. Max Body (20), then invest perks in either Street Brawler (gorilla arms) or Annihilation (shotgun). Use Berserk for emergency damage.
---
2. Reflexes Attribute
Reflexes govern speed, handguns, blades, and evasion. Trees: Handguns, Blades, and Assault.
Handguns
Pistols, revolvers, and precision.
Blades
Katana, knives, and mantis blades.
Assault
Assault rifles and submachine guns (SMGs).
Recommended Reflex Build: High mobility pistolero or blade ninja. Reflexes 20, with perks in Handguns for crits or Blades for flurries. Use Kerenzikov cyberware for time slow on dodge.
---
3. Technical Ability Attribute
Technical Ability governs tech weapons, grenades, and crafting/hacking. Trees: Crafting, Engineering, and Tech Weapons.
Crafting
Build and upgrade items.
Engineering
Grenades, turrets, and tech traps.
Tech Weapons
Tech rifles, pistols, and charge weapons.
Recommended Tech Build: Crafting + Tech weapons (like Comrade's Hammer). Max Tech (20), use Grenadier for explosive carnage.
---
4. Intelligence Attribute
Intelligence governs hacking, quickhacks, and cyberdeck abilities. Trees: Core Quickhacks, Quickhack Mastery, and Netrunning.
Core Quickhacks
Basic hacking efficiency.
Quickhack Mastery
Enhances specific quickhacks.
Netrunning
Passives and active cyberdeck abilities.
Recommended Intelligence Build: Pure netrunner. Max Int (20), invest in Core Quickhacks for RAM, then Mastery for lethal combos like Short Circuit + Overheat. Use Overclock for burst.
---
5. Cool Attribute
Cool governs stealth, cold blood, and precision weapons (sniper rifles, pistols). Trees: Stealth, Cold Blood, and Sniper.
Stealth
Silent takedowns, evasion, and visibility.
Cold Blood
Stackable buffs on kills.
Sniper
Sniper rifles and long-range precision.
Recommended Cool Build: Sniper stealth from afar, then Cold Blood stacks for finishing. Max Cool (20), perks in Sniping and Cold Blood. Use Optical Camo for escapes.
---
6. Relic Perks (Phantom Liberty)
Unlocked during the expansion, these are placed in a separate Relic tree (accessible after completing certain missions). They enhance cyberware and grant unique abilities.
Recommended Relic Build: For any build, pick up low-cooldown perks like Spider Sense and Synaptic Accelerator for emergency survival.
---
7. Quickhacks Detailed (Netrunning Skills)
Quickhacks are the primary magical abilities of netrunners. They require a cyberdeck and RAM. Cooldowns are replaced by RAM cost (regenerates over time). Below are the most powerful quickhacks, categorized by tier.
Common Quickhacks
Rare/Legendary Quickhacks
Combos: Use Breach Protocol first to lower RAM cost, then spam Short Circuit on mechanical enemies, Overheat on fleshy ones. Legendary variants add extra effects.
---
8. Special Cyberware Moves (Non-Perk Skills)
These are tied to specific arm cyberware and are not perks but are activated abilities.
Gorilla Arms
Mantis Blades
Monowire
Projectile Launch System
Synergies: These cyberware moves benefit from corresponding attribute perks (e.g., Street Brawler perks boost Gorilla Arms damage).
---
9. Build Archetypes Summary
| Build Name | Attributes (Max) | Main Perk Trees | Cyberware Focus | Playstyle |
|---|---|---|---|---|
| Solo Tank | 20 Body, 20 Tech | Athletics, Annihilation, Tech | Berserk, projectile arms | Frontline heavy weapons |
| Netrunner | 20 Int, 20 Cool | Quickhack Mastery, Stealth | Cyberdeck, optical camo | Stealth hacking |
| Ninja Blades | 20 Reflexes, 20 Cool | Blades, Cold Blood | Mantis blades, kerenzikov | Fast melee/stealth |
| Gunslinger | 20 Reflexes, 20 Int | Handguns, Core Quickhacks | Pistols, short circuit | Crit pistol + hacking |
| Tech Crafter | 20 Tech, 20 Body | Crafting, Engineering, Tech | Exoskeleton, grenade mod | Explosive + crafted weapons |
10. Tips for Skill Use
- Actives: Always have Berserk, Overclock, or Optical Camo ready for emergencies. Bind to hotkeys.
- Passive Synergy: Cold Blood stacks enhance any build that kills fast. Combine with short-cooldown active perks.
- Quickhack Rotation: For netrunners, use Ping to locate enemies, then Short Circuit on mechs, Overheat on organics. Manage RAM with Overclock.
- Cyberware Activation: Mantis blades lunge is excellent for closing gaps. Gorilla arms ground smash for crowd control.
- Upgrade Priority: Invest perk points first into passive damage multipliers (e.g., headshot damage) before active abilities to maximize consistent DPS.
---
This guide covers every skill, perk, and special ability in Cyberpunk 2077. Use the tables and sections above to tailor your V to any desired playstyle. Remember that all skills can be reset with the Tabula Rasa perk, so experiment freely.

Characters & Roles
Characters & Roles Guide for Cyberpunk 2077
This guide covers every important character in Cyberpunk 2077, including the player character V (with all life paths), the main companions and allies, and the distinct role archetypes you can build. Learn their backgrounds, strengths, weaknesses, unlock conditions, optimal equipment and builds, and how they synergize with your team.
---
1. V – The Player Character
V is the protagonist, a mercenary trying to make a name in Night City. You define V’s backstory through three Life Paths. V is fully customizable in appearance, attributes, and skills.
#### 1.1 Life Paths: Background & Unlock Conditions
All Life Paths are chosen during character creation and affect dialogue options, some quests, and initial reputation with certain factions. No unlock required; they are the first choice.
- Nomad – V grew up in the Badlands, part of a nomadic clan. They value freedom and have a handyman’s skills. Start: a border crossing into Night City. Strengths: Car culture, independence, Badlands survival. Weaknesses: Can feel out of place in corporate circles. Unique dialogue: Off-road vehicle knowledge, clan references.
- Street Kid – V was raised on the streets of Heywood. They know the alleys, gangs, and back channels. Start: a deal gone wrong in a bar. Strengths: Streetwise, underworld connections, intimidation. Weaknesses: Distrust of authorities, limited corporate etiquette. Unique dialogue: Gang slang, fixer knowledge.
- Corpo (Corporate) – V was a mid-level counterintelligence agent at Arasaka. They understand corporate politics and have access to corpo lingo. Start: being terminated and betrayed. Strengths: Business acumen, infiltration skills, cyberware knowledge. Weaknesses: Arrogant, enemies inside Arasaka, less street cred initially. Unique dialogue: Corpo jargon, negotiation tactics.
- Body (Solo/Heavy): Tank, melee, shotguns, health regen. Max Body = 20.
- Reflexes (Solo/Gunslinger): Handguns, rifles, blades, movement speed. Max Reflexes = 20.
- Technical Ability (Techie): Crafting, engineering, cyberware, armor. Max Technical = 20.
- Intelligence (Netrunner): Quickhacks, breach protocol, cyberdeck upgrades. Max Intelligence = 20.
- Cool (Assassin/Ninja): Stealth, cold blood, sniper rifles, critical hits. Max Cool = 20.
- Netrunner Build: High Intelligence, Cool. Cyberdeck with legendary quickhacks (e.g., System Reset, Contagion, Short Circuit). Weapons: silenced pistols for stealth. Armor: Netwatch gear. Synergy: Crowd control, long-range hacking.
- Solo Build: Max Body, Reflexes. Use Sandevistan or Berserk operating system. Weapons: shotguns (e.g., Guts), LMGs, smart weapons (e.g., Skippy). Armor: heavy, with subdermal armor. Playstyle: aggressive, up-close.
- Techie Build: Max Technical Ability, Body. Craft legendary items, upgrade cyberware. Weapons: tech weapons (e.g., Tier 5 Ashura, Breakthrough) that charge and penetrate walls. Armor: high armor rating, self-crafted mods. Playstyle: tactical, uses environment.
- Stealth Assassin: Max Cool, Reflexes. Use stealth cyberware (optical camo, silenced feet). Weapons: throwing knives, suppressed pistols, sniper rifles (e.g., O'Five). Armor: light, high crit chance. Playstyle: one-shot kills, reposition.
- With Panam: She is a sniper/Solo hybrid. V can be Netrunner to hack while she shoots.
- With Judy: She is skilled at technical puzzles (doors, cameras). V can brute force combat.
- With River: He is a detective/overwatch. V can provide stealth or fire support.
- With Kerry: Rockerboy; V can be anything, but dialogue choices matter.
- With Takemura: He is a corpo warrior; V can play as a Netrunner to disable enemies.
- With Johnny Silverhand: He is in your head; his combat style is heavy pistol and aggressive. V’s build affects how Johnny views you.
- Background: V’s best friend, a Street Kid from Heywood. He is a loyal mercenary with dreams of glory.
- Strengths: Combat mercenary – uses pistols, shotguns, and melee. High health, aggressive.
- Weaknesses: Can be reckless, emotional. Not stealthy.
- Playstyle: In the prologue, you control V with Jackie as an AI companion. He is a damage sponge.
- Unlock Condition: Appears automatically at game start after Life Path intro, leaves early in the story (The Heist). You cannot play as him.
- Recommended Equipment: Legendary pistol (e.g., La Chingona Dorada, his iconic weapon). When you get his weapon after he dies, you can keep it.
- Team Synergy: He excels as a frontline tank. V should either support from range or hack enemies while Jackie draws aggro.
- Background: The legendary Rockerboy and terrorist, digitally engrammed into V’s Relic chip. He is a ghost in V’s mind.
- Strengths: Expert gunfighter (uses his iconic Malorian Arms 3516 pistol), high charisma, knowledge of Arasaka and Night City.
- Weaknesses: Arrogant, hot-headed, may take over in critical moments (e.g., during Johnny segments).
- Playstyle: In segments where Johnny takes over the body, you play as him. He is aggressive, uses his special revolver and grenades. He can also talk his way through situations.
- Unlock Condition: After The Heist, Johnny appears in your head. You play as him during specific story missions (e.g., “The Ballad of Buck Ravers,” “Never Fade Away”).
- Recommended Equipment: Only his iconic pistol is available; no customization. But you can acquire his pistol for V later.
- Team Synergy: Johnny is a companion in your consciousness; his advice influences V. In combat sequences where Johnny takes over, you must adapt to his blunt style.
- Background: Ex-Nomad from the Aldecaldos clan. A tough, independent woman with a strong sense of loyalty.
- Strengths: Excellent sniper, driver, and mechanic. Known for her precision with the Overwatch sniper rifle.
- Weaknesses: Stubborn, distrusts outsiders, family loyalty can override logic.
- Playstyle: In missions with Panam (e.g., Ghost Town, Queen of the Highway), she provides overwatch and drives. You can ride shotgun in her vehicle. She is AI-controlled and cannot be commanded.
- Unlock Condition: Completing the quest “Ghost Town” after The Heist. Further romance and quests available if you build affinity (choose supportive dialogues).
- Recommended Equipment: Give her the iconic Overwatch sniper (legendary) if you find it. She will use it effectively. Also, her personal vehicle (the warhorse) is a tank.
- Team Synergy: Panam is best paired with a V who can handle close-quarters combat or hacking while she picks off enemies from distance. She also has access to Aldecaldos support (vehicles, backup).
- Background: A braindance (BD) editor and technician, affiliated with Moxes. Kind-hearted but traumatized by Night City.
- Strengths: Master of braindance technology, hacking, and technical puzzles. Can unlock security doors, disable cameras, and provide data.
- Weaknesses: Physically weak in combat, unwilling to kill unnecessarily. She is a pacifist at heart.
- Playstyle: In her missions (e.g., The Space in Between, Pyramid Song), Judy will often stay behind and give instructions via radio. You control V. She rarely engages in direct combat.
- Unlock Condition: After The Heist, meet her at Lizzie’s Bar (quest “The Information”). Continue her romance line by responding positively.
- Recommended Equipment: She doesn’t use weapons. V should bring a stealth or non-lethal approach to respect her pacifism.
- Team Synergy: Judy excels at providing intel, opening paths, and decoding. V should handle all combat. She is invaluable for stealth missions (braindance clues).
- Background: A disgraced NCPD officer turned private investigator. Honest, driven, but jaded.
- Strengths: Hand-to-hand combat, investigation skills, good with pistols and shotguns. He can track suspects.
- Weaknesses: By-the-book mentality, prone to depression, not streetwise.
- Playstyle: In missions like “The Hunt” and “Following the River,” River accompanies V. He will attack enemies, follow your lead, and provide support fire.
- Unlock Condition: After the main quest “Automatic Love,” find River at the diner in Charter Hill. Complete his questline for romance.
- Recommended Equipment: Give him an iconic pistol (e.g., his own “Archangel”? No. Just upgrade his default weapon). He can use shotguns.
- Team Synergy: River is a balanced companion; he can take hits and shoot. V can complement with Netrunning or stealth. He synergizes well with a Body/Reflexes build.
- Background: Former Samurai band member, rockerboy, and Johnny’s old friend. Wealthy, aging, bitter.
- Strengths: Charismatic, influential, has resources (yacht, apartment). Combat: uses pistols and rock music-themed attacks?
- Weaknesses: Self-destructive, narcissistic, struggles with relevance.
- Playstyle: In his quests (e.g., Second Conflict, A Like Supreme), Kerry fights alongside V using his iconic pistol. He is also a key figure in the ending choice with Rogue.
- Unlock Condition: Complete Rogue’s questline (Chippin’ In) and then do Kerry’s side gigs after “I Don’t Wanna Hear It.”
- Recommended Equipment: His iconic pistol (from Johnny) can be given to V. Kerry’s combat style is similar to Johnny’s.
- Team Synergy: Kerry is a damage-dealer with good aim. He can serve as a distraction while V flanks. His dialogue provides insight into old Night City.
- Background: Former Arasaka counterintelligence agent, loyal to Saburo Arasaka. A samurai in a corporate world.
- Strengths: Expert hacker, swordsmanship (uses a katana), tactical planning. He has inside knowledge of Arasaka.
- Weaknesses: Stuck in old ways, overly honorable, vulnerable to betrayal.
- Playstyle: In missions “Play It Safe” and “Search and Destroy,” Takemura fights as an AI companion. He uses a pistol and katana, and can hack.
- Unlock Condition: After the parade mission, you can save him from Arasaka agents (choose to help him).
- Recommended Equipment: Give him the iconic katana “Skippy”? No, but you can give him the Monowire? He prefers bladed weapons.
- Team Synergy: Takemura is excellent for medium-range combat. V can be a Netrunner to disable enemies while he slices them. He also provides critical intel on Arasaka.
#### 1.2 Playstyle & Attribute Ranges
V can be built in many ways. Every character is V; there are no separate classes. However, attribute points define your role:
No unlock conditions – you invest attribute points from level 1 to 50.
#### 1.3 Recommended Equipment & Builds
#### 1.4 Team Synergy (with companions)
V works with companions in story missions. Build your V to complement the ally you’ll bring:
---
2. Major Allies & Companions
These are key characters who accompany you on specific missions. They cannot be permanently unlocked as playable characters, but they have unique roles.
#### 2.1 Jackie Welles
#### 2.2 Johnny Silverhand
#### 2.3 Panam Palmer
#### 2.4 Judy Alvarez
#### 2.5 River Ward
#### 2.6 Kerry Eurodyne
#### 2.7 Goro Takemura
---
3. Role Archetypes (Playstyles)
While V is a single character, you can specialize into these roles by distributing attribute points and selecting appropriate perks and cyberware. These are not separate classes, but distinct builds.
| Role | Primary Attributes | Signature Combat Style | Key Perks / Cyberware | Recommended Weapons | Unlock Conditions | Team Synergy (with V) |
|---|---|---|---|---|---|---|
| Solo | Body (20), Reflexes (18+) | Heavy weapons, shotguns, melee, health regeneration | Painkiller, Juggernaut, epimorphosis, military-grade Sandevistan | Guts (shotgun), Shotguns, LMGs, Mantis Blades | Invest points in Body; reach level 20 Body for final perks | Draws enemy fire; V can flank or hack |
| Netrunner | Intelligence (20), Cool (15+) | Hacking enemies, stealth, crowd control via quickhacks | Ultimate quickhacks (System Reset), Breach Protocol, Legendary Cyberdeck, optical camo | Silenced pistols, tech weapons (e.g., Ashura) | Invest in Intelligence (20) and Cool for stealth | V disables enemies; allies kill them safely |
| Techie | Technical Ability (20), Body (15) | Crafting, upgrading, using tech weapons that charge/penetrate | Legendary crafting specs, Tech Weapons Mastery, inventory weight reduction, increased armor from cyberware | Breakthrough, Comrade's Hammer, Widow Maker | Max Technical Ability (20) and spend perks on crafting | V can craft Legendary gear for allies; tech weapons ignore cover |
| Assassin | Cool (20), Reflexes (18) | Stealth, critical hits, sniping, throwing knives | Cold Blood perks, Silent and Deadly, dagger mastery, handgun headshot damage bonus | O'Five (sniper), suppressed pistols, throwing knives | Max Cool (20) and Reflexes (18+) for movement speed | V eliminates high-value targets; allies can be backup |
| Brawler (Melee) | Body (20), Reflexes (20) | Blades (katanas, mantis blades), blunt weapons, gorilla arms | Flurry, Bleeding Edge, slow-time cyberware, increased movement | Scalpel (katana), Sir John Phallustiff (for fun), Gorilla Arms | Max Body and Reflexes; equip Sandevistan or Berserk | V rushes into melee; allies support from range |
4. Minor Allies & Support Characters
These are non-combatants or temporary allies that provide missions, upgrades, or lore.
- Viktor Vector (Vik) – Rippersdoc (cyberware surgeon). Unlocks cyberware upgrades after V’s first visit. No combat role. Strong synergy: he is your main source of cyberware; invest in Technical Ability to maximize benefits.
- Misty Olszewski – Mystic and friend of Jackie. Provides tarot readings that affect Johnny’s storyline. Not combat.
- Rogue Amendiares – Legendary fixer, leader of Afterlife. Provides high-level gigs and is a key ending ally. She is a hardened solo\. In the ending “Temperance” or “The Sun,” she accompanies V (combat AI). She uses pistol and grenades.
- Claire Russell – Bartender at Afterlife, she drives a vehicle in racing quests. Not combat.
- Dum Dum (Maelstrom) – Temporary ally in “The Pickup,” can be friendly or hostile based on choices. He is a heavy solo with shotgun.
- Saul Bright – Aldecaldos leader, appears in Panam’s quests. He provides cover fire in some missions.
- Mitch – Aldecaldos mechanic/sniper, appears in Panam’s ending.
- Ozob Bozo – A clown fanatic; appears in Beat on the Brat mission. Very tanky.
- Brendan – An AI vending machine; not playable but a memorable character.
- Delamain – AI cab driver; multiple personalities. You can free or merge them. No combat.
- Johnny Silverhand (Full Control) – In one ending, you let Johnny take over V’s body. You then play as Johnny for the rest of the game? No, the game ends. But within the story, you have segments where you control Johnny.
- Choose a Life Path that matches your preferred roleplaying style. No mechanical advantage, only dialogue flavor.
- Build around a role but stay flexible: you can respec attribute points once after the heist? No, you cannot respec attributes, only perks. So plan your role early.
- Companions are story-locked; you cannot swap them at will. Use the companion that fits your build: netrunner V with Panam for ranged support; solo V with Judy for technical support.
- Equipment for companions is mostly predetermined; you can give them iconic weapons (e.g., Overwatch for Panam, Malorian for Johnny).
- Romance options (Panam, Judy, River, Kerry) affect endings and some quests.
- Always save before major choices to experience different character interactions.
---
5. Unique Unlockable Characters (Cameos)
---
6. Summary & Best Practices
---
This guide covers all major characters and roles in Cyberpunk 2077. Use it to plan your V’s build, choose your allies wisely, and master Night City.
Cheats & Secrets
Cheats & Secrets for Cyberpunk 2077
Cyberpunk 2077 does not include any official cheat codes or built-in console commands accessible from the pause menu or in-game terminal. The game is designed as a single-player RPG with no developer-sanctioned cheat systems. However, there are several secret commands, hidden content, Easter eggs, and developer-intended unlockable secrets that you can access. Below is a comprehensive breakdown.
---
1. Official Cheats
- None. There are no official cheat codes (e.g., God Mode, unlimited ammo, level skip) that can be toggled via button combinations or in-game menus. All player advantages must be obtained through normal gameplay or via mods.
- `God()` – Toggle invulnerability (damage immunity).
- `Game.Player.GiveItem('{item_code}', {quantity})` – Spawn any item (e.g., `'Items.QuantumTuner'`, `'Items.PingQuickhack'`).
- `Game.Player.SetLevel({level})` – Set player level (e.g., `50`).
- `Game.FastTravel({location_code})` – Teleport to a fast travel point.
- `Game.AdvanceTime({hours})` – Jump time forward (e.g., `8` for 8 hours).
- `ClearNotifications()` – Remove all screen notifications.
- Requirement: During the mission "Nocturne OP55N1" (the point of no return), when Misty asks if you want to go to the roof, do not select any of the three faction options. Instead, wait silently for about 5–10 seconds. A new dialogue option will appear: "Think you can handle it alone?" – choose it.
- Result: V storms Arasaka tower solo. Extremely difficult, but if you survive, you get a unique ending.
- Condition: Your relationship with Johnny must be at 70%+ (select friendly dialogue choices during his flashbacks).
- Skippy the Smart Gun: During the side gig "Machine Gun" (in Heywood), you can encounter Skippy in a trash container. After the job, you can either keep him or return him to Regina Jones. Skippy has two modes: Puppy-Loving Pacifist (headshots only, non-lethal) or Stone-Cold Killer (lethal). Switching modes is possible but limited.
- The Prototype Shingen Mark V: Found in the Arasaka Industrial Park during the gig "Spare Parts" (from Dakota Smith). Loot a crate in a locked room for this iconic smart submachine gun with enhanced tracking.
- The Cocktail Stick: A unique melee weapon hidden in a locked room at the No-Tell Motel. Requires Technical Ability 8 to open the door.
- Legendary Gorilla Arms: Can be obtained early by defeating the cyberpsycho in "Cyberpsycho Sighting: The Old Soldier" (in Watson). If you spare him, you get the arms as a reward.
- Second Heart (Legendary): Found in the mission "The Heist" – after escaping the hotel, look in a hidden container near the pier (requires high Body to break through a door).
- Hideo Kojima Cameo: During the mission "The Heist", look behind the bar in the penthouse – a character named "Ojima" (modeled after Hideo Kojima) is standing there.
- The Shard of the Future: In the badlands, near the Biotechnica Flats fast travel point, you can find a shard titled "Message from the Future" referencing an unreleased game (a nod to CD Projekt Red's own delays).
- "Never Fade Away" Song: The full version of the Samurai song is only heard during the secret ending. Part of the song plays on radio but not the complete version.
- Lizard Cyberpsycho: In Pacifica, a cyberpsycho named "The Lizard" has a note referencing the game The Witcher 3 ("Winds howling").
- Cyberpunk 2020 Tabletop References: Various notes and shards mention characters and events from Mike Pondsmith's original tabletop game, such as Morgan Blackhand.
- Dildo Weapon: In the Fingers ripperdoc's clinic (Jig-Jig Street), you can loot a dildo from a device. It's a joke melee weapon that can be upgraded.
- The Abandoned Apartment in the Glen: Accessible after the mission "Automatic Love" – you can find a stash with legendary loot (requires high Street Cred or Technical Ability).
- The Skyline Observatory: Off-map area above the city; reachable via a glitch or precise jumping. Contains a hidden message from the developers.
- The Stadium Parking Lot: In the Rancho Coronado area, a locked container (requires 8 Technical Ability) yields the Chaos iconic pistol.
- System Reset (Legendary): Can be crafted only after acquiring a specific perk and finding crafting spec at a hidden terminal in the Arasaka Waterfront during the ending mission.
- Memory Wipe: Found in a shard during the quest "The Hunt" ; not sold by any vendor.
- Legendary Armor in the Megabuilding H10 Apartment: After the prologue, inspect your stash room. A hidden panel behind the mirror (requires Body 6 or Technical Ability 6) reveals a stash with random legendary gear. Respawns after a few in-game days.
- Legendary Weapon from the Shooting Range: In the "Gimme Danger" quest, you can find a legendary Overture revolver in a locked locker (requires Technical Ability 8) in the Shooting Range basement.
- An early exploit allowing infinite money via selling painting duplicates was patched in version 1.23. No longer functional.
- The item duplication glitch (using the stash inventory) was fixed in patch 1.5.
- Johnny's Secret Recordings: Throughout the game, you can find hidden audio logs from Johnny Silverhand in various locations (docks, Arasaka tower, etc.). They reveal backstory not found elsewhere.
- The Cat Mission: A hidden side job "Epistrophy" involving a cyber-cat. It only triggers if you scan a specific cat in various locations across Night City (spread across the map).
- The Tarot Card Readings: Scattered throughout the city are tarot card graffiti that trigger unique dialogue with Misty. Finding all 22 unlocks a special scene.
- The Bloody Mary Quest: In the Badlands, a random encounter involves a crashed AV with a body that has a shard triggering a short quest chain that ends with a unique weapon.
---
2. Console Commands (PC Only – Developer Mode)
On PC, you can enable a developer console to execute commands that function like cheats. This is not officially supported and requires modifying game files or using a mod. Use at your own risk; achievements may be disabled.
#### How to Enable the Console
1. Navigate to your game installation folder (e.g., `.../Cyberpunk 2077/bin/x64`).
2. Create a shortcut of `Cyberpunk2077.exe`.
3. Right-click the shortcut, select Properties, and in the Target field append ` -consoleanddebugbuild` after the file path (e.g., `"C:\\Games\\Cyberpunk 2077\\bin\\x64\\Cyberpunk2077.exe" -consoleanddebugbuild`).
4. Launch the game using this shortcut.
5. Press the Tilde key (`~`) to open the console during gameplay.
#### Useful Console Commands
> Note: Item codes are extensive. Search online for a full list of `items.csv` codes. Using these commands may corrupt your save or prevent achievements – backup saves first.
---
3. Unlock Codes & Secret Endings
These are legitimate, developer-intended secrets accessible through specific in-game actions and choices.
#### The Secret Ending: "(Don't Fear) The Reaper"
#### Secret Weapons & Items
#### Hidden Cyberware
---
4. Hidden Features & Easter Eggs
#### Easter Eggs
#### Hidden Locations
#### Secret Quickhacks
---
5. Exploit-Safe Secrets (Legitimate Hidden Content)
These are not exploits but rather clever shortcuts or optional content the developers intended players to discover.
#### Early Legendary Loot
#### EZ Money Glitch (Fixed)
#### Safe Exploit: Duplicate Items (Patched)
---
6. Developer-Intended Hidden Content
CD Projekt Red deliberately hid certain content that is fully canonical but requires extensive exploration or specific dialogue choices.
---
Summary Table
| Secret Type | Example | How to Access | Platform |
|---|---|---|---|
| Console Commands | God Mode | Enable `-consoleanddebugbuild` (PC only) | PC |
| Secret Ending | (Don't Fear) The Reaper | Wait at point of no return | All |
| Hidden Weapon | Skippy | Gig "Machine Gun" | All |
| Easter Egg | Hideo Kojima | The Heist penthouse | All |
| Legendary Loot | Apartment stash | Behind mirror in V's apartment | All |
Important Notes
- No official cheats exist – using console commands on PC may disable achievements or corrupt saves.
- Console commands only work on PC and require manual config editing or mods.
- Secrets are missable – many require specific dialogue choices or exploration before the point of no return.
- Patch notes have removed some exploits (e.g., infinite money) – always update your game for stability.
---
Final Tips for Secret Hunters
1. Save often – multiple saves allow you to undo choices that lock you out of secrets.
2. Max out Technical Ability – many hidden containers require high skill checks.
3. Scan everything – use your Kiroshi optics to spot hidden loot, quest items, and Easter egg triggers.
4. Complete all side gigs – many secrets are tied to specific gigs from fixers.
5. Check Cyberpunk 2077 Wiki – for accurate, up-to-date item codes and hidden locations post-patches.
Enjoy uncovering every secret Night City has to offer!