
Dark Souls III
## Dark Souls III Game Introduction **Genre:** Action role-playing game (ARPG) with heavy elements of dark fantasy, exploration, and punishing difficulty. **Developer & Publisher:** Developed by FromSoftware, Inc. Published worldwide by Bandai Namco Entertainment. **Release Timeline:** - **Origin...

Download & Installation
Dark Souls III Download & Installation Guide
This guide covers official digital download and installation for Dark Souls III across all supported platforms: PC (Steam), PlayStation 4/5, and Xbox One/Series X|S. There is no native version for Nintendo Switch or mobile devices.
---
System Requirements (PC)
Minimum Requirements
| Component | Specification |
|---|---|
| OS | Windows 7 SP1 64-bit, Windows 8.1 64-bit, Windows 10 64-bit |
| CPU | Intel Core i3-2100 / AMD FX-6300 |
| RAM | 4 GB |
| GPU | NVIDIA GeForce GTX 750 Ti / AMD Radeon HD 7950 |
| DirectX | Version 11 |
| Storage | 25 GB available space |
| Sound Card | DirectX 11 compatible |
Recommended Requirements
| Component | Specification |
|---|---|
| OS | Windows 7 SP1 64-bit, Windows 8.1 64-bit, Windows 10 64-bit |
| CPU | Intel Core i7-3770 / AMD FX-8350 |
| RAM | 8 GB |
| GPU | NVIDIA GeForce GTX 970 / AMD Radeon R9 290 |
| DirectX | Version 11 |
| Storage | 25 GB available space (SSD recommended) |
| Sound Card | DirectX 11 compatible |
---
Platform-Specific Download Sources
- PC: Only available on [Steam](https://store.steampowered.com/app/374320/DARK_SOULS_III/) (purchase required). Not available on Epic Games Store or any other launcher.
- PlayStation 4/5: Available via PlayStation Store (digital download) or physical disc. For PS5, backward compatible with PS4 version (plays with enhanced performance).
- Xbox One / Xbox Series X|S: Available via Microsoft Store (digital download) or physical disc. Backward compatible on Series X|S with performance boost.
---
Step-by-Step Installation
PC (Steam)
1. Create a Steam account if you don’t have one: [https://store.steampowered.com/join/](https://store.steampowered.com/join/)
2. Install the Steam client from [https://store.steampowered.com/about/](https://store.steampowered.com/about/) and log in.
3. Purchase Dark Souls III on Steam (click “Add to Cart” then “Purchase for myself”).
4. Install via Steam Library:
- Go to Library → select DARK SOULS III.
- Click Install.
- Choose installation directory (default: `C:\Program Files (x86)\Steam\steamapps\common\DARK SOULS III`). Ensure at least 25 GB free.
- Click Next and wait for download. Optionally, you can pause/resume downloads.
5. Post-install: The game will be added to your library; click Play to launch.
Note: Steam will automatically download the latest patch. No separate update process needed.
PlayStation 4/5
1. Create a PSN account (if new) via console or [PlayStation website](https://account.sony.com/).
2. Access PlayStation Store:
- On PS4/PS5 home screen, scroll to PlayStation Store.
3. Search for “Dark Souls III” using the search bar.
4. Purchase: Select the game (Standard or Deluxe Edition) → click Add to Cart → complete purchase.
5. Download:
- After purchase, the download starts automatically. You can monitor progress from Notifications → Downloads.
- Ensure enough free storage (≥25 GB). On PS5, you can install PS4 games to internal SSD or extended storage.
6. Launch: Once download finishes, the game appears on the home screen. Select it and press X to start.
PS5 Backward Compatibility: The PS4 version runs on PS5 without additional cost. No separate upgrade needed.
Xbox One / Xbox Series X|S
1. Create an Xbox Live account (free or Game Pass required) via console or [Microsoft account](https://account.microsoft.com/).
2. Access Microsoft Store:
- On Xbox dashboard, scroll to Microsoft Store.
3. Search for “Dark Souls III”.
4. Purchase: Select edition → Buy → confirm payment method.
5. Install: After purchase, go to My games & apps → See all → Ready to install. Find Dark Souls III → press Install.
- Choose installation destination (internal or external storage). Ensure ≥25 GB free.
6. Launch: From My games & apps, select the game tile and press A.
Xbox Series X|S Enhancement: The game benefits from faster loading and Auto HDR. No separate version required.
---
Account Requirements
| Platform | Required Account | Cost (besides game) |
|---|---|---|
| PC (Steam) | Steam account | Free to create |
| PlayStation | PSN account | Free (PlayStation Plus not required for single-player, but needed for online play) |
| Xbox | Xbox Live account | Free tier available (Game Pass Core/Ultimate for online play) |
---
First Launch Setup
1. Graphics Configuration: Upon first launch, the game will auto-detect settings. You can adjust later in System → Graphics Configuration:
- Resolution: Match your monitor’s native resolution.
- Display Mode: Fullscreen recommended for best performance.
- Quality Presets: Low, Medium, High, Max. If unsure, start with High and tweak.
- Shading Quality, Lighting, Effects: Lower these for older GPUs.
2. Controls: Default keys/buttons are shown. Customize in System → Controls (PC) or via console system menus.
3. Online Settings: Decide whether to play online (recommended for messages and bloodstains). Set to Offline if you want no player interactions.
4. Calibrate HDR (if applicable on PS5/Xbox Series): Use console’s HDR settings; the game does not have an in-game HDR calibration.
5. Save Data: The game auto-saves constantly. Do not turn off the console/PC during save icons.
---
Common Installation Errors & Fixes
PC (Steam)
| Error | Cause & Fix |
|---|---|
| “Missing executable” or “DARK SOULS III.exe not found” | Antivirus quarantined file. Add Steam folder to antivirus exceptions. Verify game files (Steam Library → right-click game → Properties → Local Files → Verify integrity of game files). |
| “Fatal error” on launch | Outdated GPU drivers. Update NVIDIA/AMD drivers. Also try running as administrator. |
| Low FPS / Stuttering | Background programs using CPU/GPU. Close unnecessary apps. Lower graphics settings. Ensure power settings set to High Performance. |
| Download stuck at 0% | Corrupt Steam download cache. Go to Steam → Settings → Downloads → Clear Download Cache, then restart. |
| Insufficient permissions | Run Steam as administrator (right-click shortcut → Run as administrator). |
PlayStation 4/5
| Error | Cause & Fix |
|---|---|
| “Cannot install” (CE-30022-7) | Damaged data or HDD issue. Delete partial download and retry. If persists, rebuild database (Safe Mode). |
| Download queued but not starting | Check network connection. Pause/resume download. Restart console. |
| “App not available” on PS5 | Ensure you’re logged into the correct account that purchased the game. |
Xbox One / Series
| Error | Cause & Fix |
|---|---|
| “Installation stopped” | Insufficient space or network issue. Free up storage. Restart console. |
| Game won’t launch (0x803F8001) | License sync issue. Press and hold power button for 10 seconds to hard reset. |
| “You need to be online” but you are | Check Xbox Live status. Sign out and sign back in. Clear alternate MAC address (Settings → Network → Advanced settings → Alternate MAC address → Clear). |
Post-Installation Verification
After installation, verify that the game is fully functional:
1. Check file integrity (PC only): Steam Library → right-click game → Properties → Local Files → Verify integrity of game files. This can take several minutes. Fixes corrupted downloads.
2. Launch the game: It should show the title screen and a prompt to press any button.
3. Check version number (PC): On the main menu, look in bottom-left corner (e.g., App Ver. 1.15.1). Ensure it matches the latest patch.
4. Test online connectivity: If you plan to play online, create a new character and look for player messages (white shining markings on ground). If none appear, check your network and account subscription.
5. Audio/Visual test: Listen for music and sound effects. Move the camera to ensure no graphical glitches.
If everything works, you are ready to journey through Lothric. Enjoy!

Game Introduction
Dark Souls III Game Introduction
Genre: Action role-playing game (ARPG) with heavy elements of dark fantasy, exploration, and punishing difficulty.
Developer & Publisher: Developed by FromSoftware, Inc. Published worldwide by Bandai Namco Entertainment.
Release Timeline:
- Original Release: March 24, 2016 (Japan), April 12, 2016 (worldwide)
- The Fire Fades Edition (Game of the Year): April 20, 2017 (includes all DLC)
- PC (Steam)
- PlayStation 4 (backward compatible on PS5)
- Xbox One (backward compatible on Xbox Series X|S)
- The Ashen One – The player character, a mute undead resurrected to link the Fire.
- Fire Keeper – A blind maiden tending the Flame at Firelink Shrine who aids you.
- Lords of Cinder: Ludleth of Courland, the Abyss Watchers, Yhorm the Giant, Aldrich the Devourer, and Prince Lothric & his brother Lorian.
- Soul of Cinder – The final boss, a composite of all previous Lords of Cinder.
- Gael (The Ashes of Ariandel DLC) – A slave knight who becomes a central figure.
- Midir (The Ringed City DLC) – An ancient dragon guardian of the Ringed City.
- Challenging but rewarding combat: Precise dodging, blocking, stamina management, and enemy pattern learning.
- Deep, cryptic lore: Story told through item descriptions, environment, and NPC dialogue; encourages community theorycrafting.
- Exploration and atmosphere: A beautifully melancholic world with hidden bosses, treasures, and shortcuts.
- Build variety: Players can choose from dozens of weapons, spells, miracles, and armor sets to customize their playstyle (e.g., strength tank, dexterity rogue, pyromancer, sorcerer).
- Online interactions: Asynchronous messages, co-op summoning, and competitive invasions create dynamic multiplayer encounters.
- Hardcore gamers who enjoy mastering difficult gameplay and overcoming frustration.
- Fans of the previous Souls games (Demon’s Souls, Dark Souls I & II) and Bloodborne.
- Players who appreciate deep lore, world design, and non-linear exploration.
- Those looking for a single-player experience with optional multiplayer elements.
- Not recommended for players who dislike repetitive deaths, minimal direction, or high difficulty.
- Single-player campaign: Complete the main story and optional side areas.
- New Game Plus (NG+): Replay the game with increased difficulty and your existing gear, with new enemies and items.
- Online Multiplayer: Invade or help other players, leave messages, and engage in duels via specific covenants (e.g., Blades of the Darkmoon, Warrior of Sunlight).
- Player-vs-Player (PvP) arenas: In the DLC areas (Painted World of Ariandel and The Ringed City) you can participate in structured 1v1 or team battles.
- Offline mode: Entire game playable without an internet connection; all content accessible, but online features (co-op, invasions, messages) are disabled.
- Online mode (required for multiplayer): Players must be connected to the internet and have a PlayStation Plus (PS4/PS5) or Xbox Live Gold (Xbox One/Series X|S) subscription. PC requires only a Steam account free of charge. Online features are fully integrated into the single-player progression.
- Server status: Official servers remain active; however, community servers are still supported (e.g., for dedicated PvP).
- Masterful level design: The world of Lothric is a tightly interwoven maze where almost every area connects vertically or through shortcuts, rewarding players who explore thoroughly.
- Fluid, refined combat: Faster than previous Dark Souls titles, with combat that blends the weight of the original series with the speed of Bloodborne. Weapon arts add deep tactical options (e.g., stance changes, special attacks).
- Emotional storytelling: The tragedy of Gwyn’s legacy, the futility of linking the Fire, and the conclusion of the trilogy are delivered through subtle environmental cues and boss encounters that leave a lasting impact.
- Replayability: New Game Plus cycles, multiple endings (4 total), covenant rewards, and build variety ensure hundreds of hours of gameplay.
- Community and legacy: Dark Souls III remains the most accessible entry in the trilogy while retaining the signature difficulty, and it serves as a love letter to fans who have followed the series since Demon’s Souls.
Platforms:
Story Overview:
In a dying world where the First Flame that sustains the Age of Fire is fading, the realm of Lothric is crumbling. The Lords of Cinder—powerful beings who once linked the Flame—have abandoned their thrones, refusing to sacrifice themselves once more. You play as the Ashen One, an Undead resurrected to hunt down these Lords and bring them back to their thrones, thus relinking the Flame and prolonging the age. However, as you journey through twisted kingdoms, you uncover deeper truths about the cycle of Fire and Dark, leading to a choice that will determine the fate of the world.
Setting:
The game takes place in the kingdom of Lothric and its surrounding regions, including the Undead Settlement, Farron Keep, Irithyll of the Boreal Valley, and the Profaned Capital. The world is interconnected through a central hub, Firelink Shrine, with shortcuts, secrets, and branching paths that reward exploration. The visual design is grim and haunting, with crumbling cathedrals, poison swamps, and icy cities that reflect the decay of the Age of Fire.
Main Characters:
Core Appeal:
Target Audience:
Game Modes:
Online/Offline Support:
DLC/Expansion Overview:
The game includes two major DLC expansions that are essential for a complete experience:
1. Ashes of Ariandel (Released October 25, 2016) – Introduces the frozen Painted World of Ariandel, a new area with a focus on exploration, new weapons, armor, and the boss Friede. Also adds the Champion’s Gravetender leader and a wolf boss.
2. The Ringed City (Released March 28, 2017) – The final DLC, set in the crumbling city at the end of the world. Features the iconic bosses Demon Prince, Halflight, Spear of the Church, Gael, and Darkeater Midir. Concludes the Dark Souls trilogy storyline.
The The Fire Fades Edition bundles both DLCs with the base game.
What Makes This Game Unique?
Getting Started
Dark Souls III Getting Started Guide for New Players
This guide is designed to get brand-new players through the first terrifying hours of Dark Souls III. We’ll cover everything from creating your character to surviving your first few encounters, avoiding common pitfalls, and setting yourself up for success.
Character Creation – Your First Critical Decision
When you start a new game, you’ll be taken to the character creation screen. This is not just cosmetic – it determines your starting class, stats, and equipment.
Best starting class for beginners: Knight
- Why: The Knight starts with high Vitality (HP) and a 100% physical block shield (the Knight Shield). This shield alone lets you survive many early attacks. You also start with a solid straight sword and decent armor.
- Avoid starting as a Sorcerer, Pyromancer, or Cleric unless you really want to cast spells quickly. But for a first playthrough, melee is far more forgiving.
- Left Stick: Move
- Right Stick: Camera
- L1: Block (shield) / Two-hand left weapon
- L2: Weapon Art (special attack)
- R1: Light attack
- R2: Heavy attack
- Triangle: Two-hand right weapon
- Square: Use item (Estus Flask, etc.)
- Circle: Roll / Backstep
- Cross: Interact / Confirm
- D-pad Up/Down: Switch items
- D-pad Left/Right: Switch spells/weapons
- Touchpad: Gesture menu / Open menu
- Options: System menu
- Left Stick: Move
- Right Stick: Camera
- LB: Block / Two-hand left weapon
- LT: Weapon Art
- RB: Light attack
- RT: Heavy attack
- Y: Two-hand right weapon
- X: Use item
- A: Roll / Backstep
- B: Interact / Confirm
- D-pad Up/Down: Switch items
- D-pad Left/Right: Switch spells/weapons
- View button (two squares): Gesture menu / Map
- Menu button (three lines): System menu
- W/A/S/D: Move
- Mouse: Camera
- Left Click: Light attack
- Right Click: Block (if shield) / Weapon Art with Shift+Left Click
- Shift: Two-hand weapon (hold)
- R: Use item
- Space: Roll / Backstep
- E: Interact
- Q: Switch item (up/down)
- 1/2/3/4: Quick item slots
- Tab: Open menu
- Esc: System menu
- Top left: Health bar (red), Stamina bar (green). Stamina recovers quickly but depletes on attacks, rolls, and blocks. Never let it hit zero.
- Top right: Item slots (up to 10), with the currently selected item highlighted. Below that, your equipped weapons and shield.
- Bottom center: Soul counter (currency and XP).
- Bottom left: Active buffs and debuffs (small icons).
- Map/compass: Not provided – you must rely on memorization.
- Don’t attack NPCs – especially the old man with a birdcage (Pilgrim). They are friendly quest-givers. Hitting them makes them hostile.
- Don’t use boss souls for immediate souls – you’ll need them later for boss weapons or spells.
- Don’t rely on heavy armor and tanking – you have low HP early on. Rolling (circle/B) is key.
- Don’t rush into unknown areas – always scout with a shield up, or roll away if surprised.
- Don’t use your Estus Flask frivolously – you have limited charges. Use it only when you’re below 50% HP and not in immediate danger.
- Souls: Use for leveling up first. Only buy consumables or upgrade materials after you’ve hit comfortable HP/stamina.
- Titanite Shards: This is your most important upgrade material. Use them on your main weapon (Longsword, Broadsword, or Claymore). Do not upgrade multiple weapons until later.
- Estus Shards: Give these to the blacksmith to increase your Estus Flask charges. You can find 3-4 before the first Lord of Cinder.
- Undead Bone Shards: These increase the healing power of your Estus Flask. Burn them at a bonfire in Firelink (the bonfire in the hub) – not a regular bonfire.
- Embers: Use them sparingly. They give +30% max HP and allow online play. Save them for boss fights.
- R1 spam: This drains stamina quickly and leaves you open. Manage your swings.
- Trying to trade hits: You will lose. Dark Souls punishes aggressive trading. Wait for openings.
- Ignoring enemy movesets: Each enemy has tells. Watch them, don’t just run in.
- Not using the weapon’s moveset: Try running attacks (sprint + R1), rolling attacks (roll then R1), and backstep attacks. These have different reach and speed.
- Selling boss souls: You cannot get them back. Always check first what they can be traded for (upgrades, spells, weapons).
- Overleveling resistance stats: Vigor, Endurance, and VIT are far more important than Luck or Attunement for a first playthrough.
- [ ] Create a Knight class, pick Life Ring.
- [ ] Complete Cemetery of Ash, defeat Iudex Gundyr.
- [ ] Arrive at Firelink Shrine, talk to Fire Keeper.
- [ ] Level up Vigor to at least 15.
- [ ] Upgrade your starting weapon to +2 or +3 using Titanite Shards found in the area.
- [ ] Explore High Wall of Lothric up to the first shortcut (the elevator near the Tower on the Wall bonfire).
- [ ] Collect at least one Estus Shard and one Undead Bone Shard.
- [ ] Do not die more than 10 times to the same enemy – learn from each death.
- [ ] Save all boss souls and embers.
- [ ] If stuck on Vordt, summon help (using Ember) or practice dodging to his backside.
Gift selection: Choose the Life Ring (increases max HP by ~7%). It’s the safest choice. The other gifts (like the Young White Branch or Black Firebomb) are niche or consumable.
Appearance: Spend as little time as possible – you can change it later with a limited item (Rosaria’s Fingers covenant). Focus on the class and gift.
Controls (All Platforms)
PlayStation 4/5:
Xbox One/Series X|S:
PC (Keyboard + Mouse):
Pro tip: On PC, consider using a controller. The game was designed for it, and the camera/mouse controls can be finicky.
UI Overview – The HUD
The heads-up display (HUD) shows:
Rest at a bonfire to fully heal, refill Estus, and level up (once you have the Fire Keeper).
First Hour Walkthrough – What to Do
1. After the opening cutscene, you’ll be in the Cemetery of Ash. Follow the linear path forward. You’ll encounter a few weak hollows. Practice your attacks (R1 for quick, R2 for heavy) and blocking (L1/LB).
2. First bonfire: "Cemetery of Ash". Rest here to heal and save progress. Use the bonfire menu to “Attune Spell” if you have any (not needed for Knight).
3. Enter the ruined chapel with a boss fog gate ahead. Do not go through the fog yet. Instead, explore the grounds to find:
- Undead Bone Shard (under a shrine in the room with a giant crystal lizard – use a plunging attack from above to kill it easily).
- Estus Shard (in a tower past the first large hollow with a spear – climb the ladder, find the shard, then drop down).
- Minor loot like souls and consumables.
4. Return to the boss fog and fight Iudex Gundyr, the first boss. Tips:
- Stay close, dodge to his right (your left) for most attacks.
- In phase 2 (black ooze), roll away from the slamming attacks and punish after his combos.
- If you’re struggling, you can summon a NPC (Sword Master) by using an Ember (found in the area) – but save embers for later.
5. After victory, touch the bonfire to warp out. You’ll be taken to Firelink Shrine, the central hub.
What to Avoid in Your First Hour
Early Objectives (First 2–3 Hours)
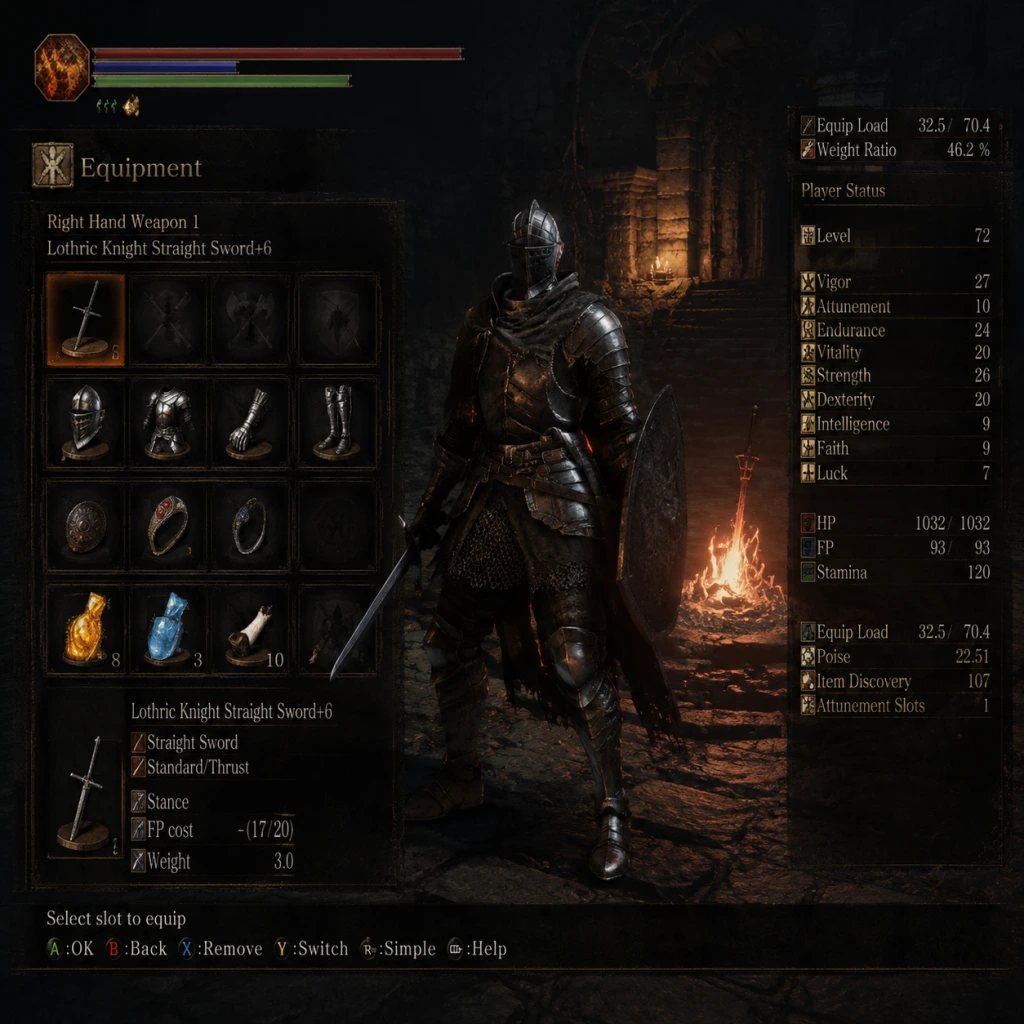
1. Level up at Firelink Shrine. Talk to the Fire Keeper (female sitting at the bonfire). Spend souls with her. Prioritize Vigor (HP) to 20-25, then Endurance (stamina) to 15-20, then your main damage stat (Strength for Knight).
2. Upgrade your weapon – find the blacksmith (Andre) in Firelink. You need Titanite Shards (found on enemies and in the world). +3 upgrade is a huge boost.
3. Explore High Wall of Lothric – the first real area. Head up the stairs past the giant crystal lizard, then through the gate. Collect items, find shortcuts (elevators, doors), and fight the boss Vordt of the Boreal Valley.
4. Unlock the shrine maiden – you can buy useful items (Firebombs, homeward bones) from her.
5. Learn to parry – practice on the weak hollows near Firelink. Parry timing is when the enemy’s hand is about to strike you (not the weapon). Success opens them up for a critical riposte.
Resource Priorities
Common Beginner Mistakes (and How to Avoid)
Day One Checklist
With this checklist and the guidance above, you’ll safely navigate the first hours and build a strong foundation. Remember, death is a learning tool – every corpse is a lesson. Praise the Sun and good luck, Ashen One!
Core Gameplay
Core Gameplay Overview
Dark Souls III is an action RPG built around a punishing but fair combat loop, deep character customization, and interconnected world exploration. The core gameplay loop is: Explore → Fight → Die/Recover → Level Up → Explore further. Every action carries weight, and death is a learning tool.
Main Systems
- Combat: Stamina-based, with light/heavy attacks, blocking, parrying, backstabs, and rolling. Each weapon type has unique movesets.
- Interaction: Bonfires (save/heal), NPCs (quests, shop, upgrades), messages (player hints), invasions (PvP), and summon signs (co-op).
- Progression: Souls (currency) used for leveling, buying, upgrading. Defeating bosses awards larger souls for weapons/spells.
- Exploration: Non-linear areas with shortcuts, hidden paths, and secrets. New Game+ cycles increase difficulty and drop rates.
- Quests: No journal; NPC interactions are time-sensitive and missable. Dialog choices matter.
- Economy: Souls for levels, gear, upgrades. Titanite Shards for weapon reinforcement. Embers for online features and health boost.
- Build Growth: Attributes (Vigor, Endurance, Strength, etc.) define playstyle. Infusions, spells, rings customize further.
- Endgame: New Game+ cycles, optional bosses, DLC, PvP arenas, and challenge runs.
- Learn basic combat: roll timing, stamina management, enemy attack patterns. Souls are scarce; each death loses souls unless retrieved.
- Focus on surviving. Use the Longsword or Battle Axe (balanced starter weapons). Upgrade at Blacksmith Andre with Titanite Shards found in these zones.
- Key early boss: Iudex Gundyr (tutorial boss), Vordt of the Boreal Valley (teaches aggressive dodging).
- Parrying with small shields (e.g., Buckler) is risky but rewarding against knights. Practice on Hollows.
- Backstabs: Circle behind enemies after they attack. Works well on Lothric Knights.
- Summon NPCs for tough fights (e.g., Sword Master for Vordt).
- Use firebombs for gimmick enemies (e.g., dogs, pus of man).
- Level Vigor (HP) to 20, Endurance (stamina) to 15, and your main damage stat (Str/Dex) to 15-20. Raw infusion for early damage without scaling.
- Estus Flask upgrades: Undead Bone Shards (estus potency) at bonfires; Estus Shards (number of flasks) found in High Wall and Settlement. Prioritize these.
- Shortcuts are vital. In High Wall, lower the elevator to create a path from Tower on the Wall bonfire to Vordt.
- Road of Sacrifices branches to Crucifixion Woods (Farron Keep) and Cathedral of the Deep. Both are early-mid game.
- Greirat: Rescue from Cell in High Wall (key from the undead merchant). Send him to pillage (gives items; he may die if sent to Irithyll before you defeat Pontiff).
- Yoel of Londor: Find under the Tower on the Wall. Use his free levels (Draw Out True Strength) five times to trigger Yuria (dark sigil questline).
- Hawkwood: Exhaust dialog at Firelink Shrine; he gives Farron Dagger and eventually a drake sword.
- Spend souls on levels, not consumables. Buy Titanite Shards from Shrine Handmaid (key needed) or Blacksmith Andre (after giving Ashes).
- Sell unused items (e.g., duplicate weapons) only if desperate. Keep embers for boss fights (summon help).
- Start as Knight (high Vigor/Endurance, 100% block shield). Warrior or Mercenary also viable.
- Infuse Raw on weapons until you have 40+ in a damage stat. Knight builds: Strength (Greatsword, Vordt's Hammer), Quality (Straight Sword, Claymore).
- Early soul levels: 27 Vigor (soft cap for normal play), 20 Endurance (enough for 3-4 swings), 15-20 in primary damage stat, rest minimal (Attunement for spells later).
- Combat becomes more complex. Enemies have combos and poise-breaking attacks. Use weapon arts (L2 + R2) for special moves (e.g., Stomp, Perseverance).
- Explore multiple paths: Farron Keep (poison swamp, optional boss Stray Demon) and Cathedral (boss Deacons of the Deep). Both lead to required bosses.
- Boss example: Abyss Watchers in Farron Keep teaches staggered phase transitions; Pontiff Sulyvahn in Irithyll tests stamina management and rolling through combos.
- Parrying becomes easier with Caestus (fist weapon) or Small Leather Shield. Practice on Silver Knights in Irithyll.
- Use the Farron Greatsword (breakdance moveset) for crowd control in swamp.
- Spellcasters: Purchase Great Heavy Soul Arrow and Hidden Body (sorcery), or Great Chaos Fire Orb (pyromancy) from NPCs.
- Co-op: Summon signs are common. Bosses like Aldrich (Irithyll) and Yhorm the Giant (Profaned Capital) have gimmick weapons (Storm Ruler).
- Upgrade weapons to +6 using Large Titanite Shards (found in Farron Keep, Catacombs, Irithyll). Reinforce Estus Flask to +3 or +4.
- Level Vigor to 30-40, Endurance to 20-25, and damage stat to 30-40. Infuse weapons based on build: Heavy (Str), Sharp (Dex), Refined (Quality), Crystal (Int), Lightning (Faith).
- For spellcasters, increase Attunement for spell slots (18-24) and Intelligence/Faith to 40.
- Catacombs of Carthus has a hidden path to Smoldering Lake (optional boss: Old Demon King, valuable items).
- Irithyll of the Boreal Valley is linear but full of shortcuts (e.g., elevator shortcut from Church of Yorshka to Pontiff arena).
- Profaned Capital: reach by going below Irithyll Dungeon after defeating Yhorm (required).
- Sirris of the Sunless Realms (required for Darkmoon Blade covenant) – summon for Toad boss? Actually, help her defeat Creighton in Irithyll. Complete her quest before giving the Dreamc Serytie to Yuria.
- Anri of Astora – progress through Catacombs (hidden path) and then in Irithyll. Their quest ties to Usurpation of Fire ending.
- Patches – appears in Cathedral of the Deep (bridge trap) and later in Firelink Shrine (if you buy items).
- Souls drop increase. Farm Silver Knights (4000 souls each) for covenant items (Proof of Concord) or souls for leveling.
- Large Titanite Shards can be bought from Shrine Handmaid after giving her the Dreamchaser's Ashes (found in Irithyll Dungeon).
- Embers: loot from enemies; buy from merchants if desperate.
- By mid game, your build should be solidified. Quality (40 Str/40 Dex) works for most weapons. Faith builds use Lightning Blade and DMB (use inherent scaling weapon like Dragonslayer's Axe).
- For magic, get the Court Sorcerer's Staff (best scaling) from Irithyll. For pyromancy, the Izalith Staff or Chaos/Pyromancy Flame.
- Vitality: increase only to wear heavier armor for poise (above 40 poise for hyper armor attacks with greatswords).
- Enemies hit hard and have massive health. Strategic use of all resources (items, spells, weapon arts) is critical.
- Exploration is optional but rewarding. Optional areas: Archdragon Peak (nameless King boss, hardest in base game), Untended Graves (Champion Gundyr, extra estus).
- Boss examples: Dragonslayer Armour (test of dodge timing), Soul of Cinder (final boss – multiple phases, uses many builds).
- Equip the Hornet Ring (boost crit damage from backstabs/ripostes) – found from Sirris quest or Gundyr ashes? Actually from Gundyr's Champion Soul.
- Use Lloyd's Sword Ring and Ring of Favor +3 for extra damage and stamina. Consumables like Green Blossom (stamina regen) are standard.
- For bosses: use resins (Lightning for Nameless King phase 1, Fire for Aldrich).
- Summoning: Use dried fingers for extra phantoms but risk invasions.
- Upgrade weapons to +10 using Titanite Chunks (Archdragon Peak, Lothric Castle, Grand Archives) and a Titanite Slab (one per game, choose carefully – best for main weapon).
- Level soft caps beyond: Vigor 40-50, Endurance 30-40, damage stat up to 60-70 if casted (except hybrid builds). Attunement up to 40 for spell casters (not needed for pure melee).
- Use Boss Souls to transpose unique weapons/spells at Ludleth (e.g., Moonlight Greatsword from Oceiros, Lorian's Greatsword).
- Lothric Castle secrets: Painted Room (optional DLC area), shortcut to Grand Archives.
- Archdragon Peak: requires “Path of the Dragon” gesture from Irithyll Dungeon. Find the gesture by using the “Dragon Torso Stone” (drop from Ancient Wyvern?). Actually, the gesture is found by sitting at the Great Belfry bonfire? Wait – need to do the Dragon form emote at the Wyvern's area. Hard to describe, but the area is optional.
- Grand Archives has a secret passage (bookshelf puzzle) leading to the Twin Princes boss.
- Yuria and Anri – complete Usurpation of Fire ending (requires Yuria alive after Anri's quest). If you've been gathering dark sigils, you'll get this ending.
- Hawkwood – his quest ends in the Abyss Watchers arena (he invades then drops item) or in Archdragon Peak (you can summon him for Nameless King).
- Leonhard – invade him in Grand Archives after giving him the Pale Tongue? Actually, his quest involves Rosaria's Fingers covenant and ends with a red eye orb and a boss fight (Cinder).
- Titanslab is finite. Chunks can be farmed from Lothric Knights in Grand Archives (drop chunks). Souls are plentiful – farm the three Golden Winged Knights outside Grand Archives (about 25,000 souls per run with soul-boosting gear).
- Embers: buy from Shrine Handmaid for 4000 souls after giving her the Dragonchaser's Ashes? Not sure, but farming from Lothric Knights also drops embers.
- For pure melee: 40 Vig, 40 End, 66 Str (heavy weapon), 70 Dex (sharp), or 40/40 quality. For hybrid (e.g., dex+faith): 60 Faith, 40 Dex, enough Attunement (24-30) for Lightning Arrow and Sunlight Spear.
- For sorcery: 50-60 Int, 30 Att, 18-24 min stats. Use Crown of Dusk, Bellowing Dragoncrest Ring, and Young Dragon Ring for +45% magic damage.
- Poise matters for heavy weapons; aim for 40.01+ poise to swing through small hits. Use Wolf Ring +3 (from watchdogs covenant).
- After defeating Soul of Cinder, you can choose to start New Game+ (NG+) at Firelink Shrine (or continue playing). NG+ increases enemy health/damage and soul drops, resets all items/key items; keep all gear, levels, and upgrades.
- Endgame content includes:
- In NG+ cycles, enemies have higher poise and resistances. Use buffs (Dark Moon Blade, Crystal Magic Weapon) for extra damage.
- Boss rush: you can skip through areas and go straight to bosses you want (e.g., run to Dancer early).
- PvP meta: level 120-125. For duels, use 40/40 quality, then invest remaining in vigor/endurance. Optimize equipment load for fast roll (under 30%). Meta builds include the Lothric Knight Sword with Dark infusion, Scimitar, or Uchigatana for speed.
- NG+ cycles: up to NG+7 (max difficulty). Each cycle increases soul drops and enemy HP. You can use boss souls for +1 rings (e.g., Ring of Favor +1, +2, +3 in NG++).
- Get all Titane Slabs: there are 8 per NG+ cycle (some from optional bosses, some from trading).
- Achieve all endings: Link the Fire, End of Fire (kill the Fire Keeper after killing Soul of Cinder), Usurpation of Fire (Yuria questline).
- NG+ cycles reveal new items: +2 and +3 rings (e.g., Chloranthy Ring +2 in Grand Archives? Actually +3 rings are from DLC. +2 from NG+ cycles). Also new enemy placements (e.g., black phantoms in specific spots).
- In DLC, The Ringed City has many secrets: the gauntlet of Spear of the Church, the dragon Midir boss, the old ladies with humanity.
- Souls are abundant; you can level indefinitely but soft caps make it inefficient past certain breakpoints. Farm the three winged knights on the roof of Grand Archives (NG+ cycles yield 150k souls per run with Covetous Silver Serpent Ring +3).
- Buy all upgrade materials from Shrine Handmaid (after providing all ashes) – unlimited Titanite Shards and Chunks. Slabs are limited.
- At SL 120-125, you cap most builds. For pure strength (66 str, 27 min stats, 40 vig, 40 end). For quality (40/40). For casters: 60 Int or Fth, 24 Att, 30 Vig, 20 End. For hybrid, ring choices matter.
- Use weapon buffs and resins. For NG+7, consider using the Blood Crystal infusion on a fast weapon to proc hemorrhage on bosses.
- Fashion souls: armor matters little for defense; prioritize poise and equip load constraints. Use Havel's Ring +3 for extra carry weight.
- NG+ you can complete all NPC quests by following a guide (e.g., Siegward's questline for Storm Ruler and Slab). Yuria's quest for dark ending.
- DLC quests: talk to the Painter in Ashes of Ariandel, help Shira in The Ringed City for a Titanite Slab.
---
Player Progression Tiers
Early Game (Areas: Cemetery of Ash, High Wall of Lothric, Undead Settlement, Road of Sacrifices)
Gameplay Loop:
Combat/Interaction:
Progression:
Exploration:
Quests/Missions:
Economy:
Character/Build Growth:
---
Mid Game (Areas: Farron Keep, Cathedral of the Deep, Catacombs of Carthus, Smoldering Lake, Irithyll of the Boreal Valley)
Gameplay Loop:
Combat/Interaction:
Progression:
Exploration:
Quests/Missions:
Economy:
Character/Build Growth:
---
Late Game (Areas: Lothric Castle, Consumed King's Garden, Untended Graves, Archdragon Peak, Grand Archives, The Dreg Heap (DLC) – cumulative)
Gameplay Loop:
Combat/Interaction:
Progression:
Exploration:
Quests/Missions:
Economy:
Character/Build Growth:
---
Endgame (Beating Soul of Cinder, optional bosses, New Game+, DLC, PvP)
Gameplay Loop:
- Optional Bosses: Nameless King (Archdragon Peak), Champion Gundyr (Untended Graves), Oceiros (Consumed King's Garden), Ancient Wyvern (Archdragon peak – gimmick plunging attack).
- DLC: Ashes of Ariandel (painting) and The Ringed City (final area). Defeat Sister Friede, Demon Prince, Midir, Slave Knight Gael. These are endgame level areas (recommended SL 90-120).
- PvP: Irresistible invasions covenant (Aldrich Faithful, Watchdogs of Farron, Blue Sentinels, etc.). Arena duels at the Purging Monument (Ringed City) or via red soapstone.
Combat/Interaction:
Progression:
Exploration:
Economy:
Character/Build Growth:
Quests:
---
Summary: Dark Souls III's core gameplay revolves around mastering combat with high risk/reward, exploring intricate levels, and customizing your character to overcome challenges. The progression tiers guide you through increasing difficulty and provide clear milestones for upgrades and strategies. Always prioritize upgrading weapons and Estus, learn enemy patterns, and use all tools available (summons, buffs, infusions). The endgame offers substantial replayability through NG+ cycles and DLC, ensuring hundreds of hours of content.
Game Tips
Dark Souls III Game Tips Guide
This guide compiles essential tips for surviving and mastering Dark Souls III. Tips are grouped by category and cover everything from beginner fundamentals to advanced optimizations. Each tip includes a clear explanation and analysis of why it works and when to apply it.
Beginner Tips
1. Learn to Roll, Not Block
- What: Use rolling (dodge) as your primary defense instead of blocking with a shield. Each roll has invincibility frames (i-frames) during its animation.
- Why: Many enemies in Dark Souls III have attacks that drain stamina or bypass shields. Rolling conserves stamina, avoids chip damage, and lets you position for counterattacks. The roll is more versatile than blocking, especially against bosses.
- When: Always in combat. Practice timing rolls to match enemy attack animations. Against slow attacks, roll sideways; against fast combos, roll backwards or into the attack to i-frame through it.
2. Level Vigor First
- What: Prioritize leveling Vigor (HP) to at least 20–25 before investing heavily in other stats.
- Why: Early enemies can kill you in two hits if you have base HP. More Vigor gives you a larger margin for error, which is crucial for learning enemy patterns. It also directly increases survivability during boss fights.
- When: From the start until you reach the Road of Sacrifices. After Vigor 20–25, start building toward your chosen weapon’s stat requirements.
3. Pay Attention to Enemy Patterns
- What: Observe each enemy’s attack animations, tells, and recovery times before engaging.
- Why: Dark Souls III rewards patience. Rushing in leads to punishment. Learning attack patterns lets you know when to dodge, when to punish, and when to retreat. Every enemy—even basic hollows—has a pattern.
- When: On every enemy encounter. For new enemies, kite them to an open area and watch for two to three attack cycles before attacking.
4. Use the Undead Bone Shard and Estus Shard
- What: Collect Undead Bone Shards to upgrade your Estus Flask’s healing potency, and Estus Shards to increase the number of charges.
- Why: These items permanently improve your healing resources. More and better healing directly translates to longer exploration between bonfires and easier boss fights.
- When: Search every area thoroughly. Early shards are in Cemetery of Ash (near the first bonfire), Firelink Shrine (behind the locked door from the Tower Key), and High Wall of Lothric (on a corpse near the second bonfire).
5. Don’t Attack Mimics—Use Undead Hunter Charm
- What: Chests with a chain curling towards you are mimics. Throw an Undead Hunter Charm to put them to sleep, then open them safely for the item.
- Why: Mimics are dangerous enemies that can kill low-level players in one grab attack. Using a charm lets you loot without fighting. Saving you Estus and risk.
- When: Anytime you encounter a suspicious chest. If you have no charm, hit the mimic once, dodge its attacks, and then strike while it recovers.
Combat Tips
6. Manage Stamina Like a Resource
- What: Never let your stamina bar run completely empty. Keep at least 20% stamina reserved for rolling or running away.
- Why: If stamina fully depletes, you become staggered briefly and cannot perform any action. This leaves you vulnerable. Proper stamina management allows continuous offensive and defensive options.
- When: During every fight. Avoid spamming attacks or rolls; instead, use one or two hits then back off to regen stamina. Watch your bar and pace your actions.
7. Use Weapon Art (L2/LT) Wisely
- What: Each weapon has a unique weapon art activated by two-handing and pressing L2/LT (or with a shield that has the Weapon Art skill). These arts consume FP (Focus Points) but can be extremely powerful.
- Why: Weapon arts often grant hyper armor, high damage, or utility (e.g., Perseverance increases poise). Using them at the right moment can turn the tide of a fight.
- When: When facing slow enemies or bosses with long recovery windows. For PvP, use weapon arts sparingly as they can be easily punished. Practice timing in safe areas.
8. Two-Handing Increases Strength
- What: When you two-hand a weapon, your effective Strength stat increases by 50% (rounded down). This allows you to wield weapons that require higher Strength than your base.
- Why: This is crucial for early game builds that want to use heavy weapons before meeting the stat requirement. It also boosts damage since scaling is based on effective Strength.
- When: Whenever you need to meet a Strength requirement by 1.5 times your actual stat. Also use it for any Strength-scaling weapon to maximize damage.
9. Parry for High-Risk, High-Reward
- What: Use a parry tool (small shield, caestus, or parrying dagger) to deflect enemy attacks, leaving them open for a critical riposte that deals massive damage.
- Why: Parrying can one-shot many normal enemies and significantly damage bosses. It’s especially effective against humanoid enemies (Lothric Knights, Silver Knights, black knights).
- When: Learn enemy attack timings. Parry early in the enemy swing, not at impact. Best used against enemies with slow, telegraphed attacks. Do not attempt against bosses with erratic AI unless you have practiced extensively.
10. Attacks from Behind Deal Bonus Damage (Backstab)
- What: Performing a charged heavy attack or using the standard attack button from directly behind an enemy triggers a backstab animation that deals critical damage.
- Why: Backstabs ignore enemy defenses and are devastating. Many enemies can be easily backstabbed if you circle around them while they attack.
- When: Against slow enemies, or when an enemy is locked into a combo. In PvP, backstabs are a core mechanic due to latency. Practice the position: you must be almost touching the enemy’s back.
Exploration Tips
11. Look for Messages and Bloodstains
- What: Player messages (ratings) and bloodstains (ghostly deaths) are scattered everywhere. Read them by interacting.
- Why: Messages often hint at hidden paths, ambushes, or safe spots. Bloodstains show you where previous players died—use them to anticipate traps or tough enemies.
- When: Always check bloodstains in doorways or corridors. Be cautious when messages say “Try jumping” near cliffs—90% are trolls leading you to your death.
12. Explore Every Dark Corner and Dead End
- What: Break breakable walls, drop from hidden ledges, and revisit areas after obtaining keys (like Tower Key or Grave Key).
- Why: Dark Souls III rewards thorough exploration with powerful weapons, Estus Shards, Undead Bone Shards, rings, and soul items. Many optional areas contain unique loot and NPC questlines.
- When: After clearing an area, systematically check all walls and edges. Attack suspicious walls (they may be illusory). Light torches in dark areas to reveal hidden paths.
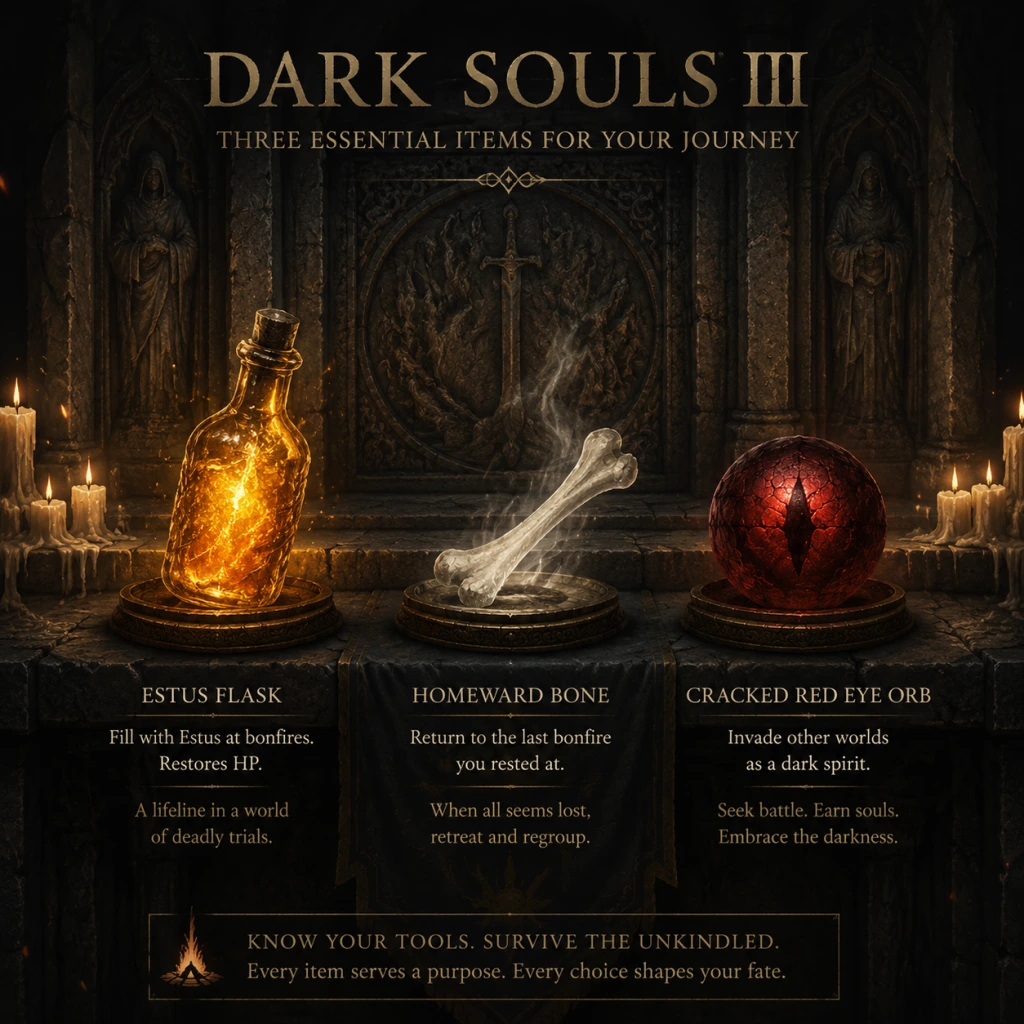
13. Use the Homeward Bone to Return to Bonfire
- What: Using a Homeward Bone (or Coiled Sword Fragment) instantly returns you to the last bonfire rested at, with no loss of souls or progress.
- Why: This saves time when you’ve explored far from a bonfire and don’t want to backtrack. It’s also a safe retreat if you’re about to die with many souls.
- When: After looting a zone and you’re far from the bonfire. Also use it in boss rooms after killing the boss to quickly rest and level up without running through the area.
14. Always Equip the Covetous Silver Serpent Ring (When Available)
- What: This ring increases the number of souls dropped by enemies by 10% (up to 20% with +3 variant in NG+).
- Why: More souls means faster leveling. Since souls are the main currency for progression, even a small boost adds up over dozens of enemies.
- When: Equip it as soon as you get it (you can find one in the Undead Settlement by following the path behind the giant). Unequip if you need a different ring for a boss fight.
15. Talk to NPCs Until They Repeat
- What: Exhaust all dialogue with NPCs by speaking to them repeatedly until they start repeating the same line.
- Why: Many NPC questlines advance only after you’ve heard all their dialogue. Missing a single line can lock you out of items, spells, or NPC summons.
- When: After every major boss kill or area completion, return to Firelink Shrine and talk to every NPC. Also check areas they may have moved to (e.g., Greirat’s quest requires you to send him pillaging).
Resources & Economy Tips
16. Do Not Use Boss Souls for Souls
- What: Boss souls can be consumed for a large number of souls, but they are far more valuable when transposed into weapons, spells, or rings at Ludleth in Firelink Shrine.
- Why: Boss weapons are often unique and powerful. Transposing gives permanent gear; consuming gives temporary souls that you can easily farm elsewhere.
- When: Always transpose boss souls unless you already have the item and don’t want duplicates. Save all boss souls until you unlock transposition (after killing the Curse-Rotted Greatwood).
17. Sell Unwanted Equipment
- What: You can sell weapons, armor, and rings to the Shrine Handmaid for souls. Prices are low, but it’s better than junk.
- Why: Many weapons are duplicates or useless for your build. Clearing inventory makes sorting easier and provides extra souls for leveling.
- When: After you’ve settled on a build. Don’t sell unique items until you’re sure you won’t need them. Also sell boss souls? Only if you already transposed what you want.
18. Farm Souls Efficiently
- What: Identify high soul-yield enemies near bonfires. Early game: the three Lothric Knights on the High Wall near the Tower on the Wall bonfire. Mid game: the Silver Knights in Anor Londo. Late game: the Ghru hideouts in Smouldering Lake? Actually best is the 3 winged knights at the top of the Grand Archives.
- Why: Farming souls is time-efficient for leveling. Equip the Covetous Silver Serpent Ring, Symbol of Avarice (if you have it), and use the Shield of Want to boost soul gain further.
- When: If you’re stuck on a boss or need a few levels to meet stat requirements. Also for buying expensive items like upgrade materials.
19. Invest Souls in Upgrade Materials Early
- What: Upgrade your primary weapon to +3 before you start facing mid-game bosses. Also buy Titanite Shards from the Shrine Handmaid once she stocks them (after giving her the Dreamchasers’ Ashes).
- Why: Weapon upgrades provide a huge damage boost—much more than leveling stats. A +3 weapon will outperform a +0 weapon even with low stats.
- When: As soon as you have enough souls and have found the Large Titanite needed for +4. Prioritize upgrading over leveling.
20. Always Carry a Homeward Bone and Repair Powder
- What: Keep Homeward Bones in your inventory (easily bought) for emergency escapes. Repair Powder fixes weapon durability which can break in long areas.
- Why: Running out of durability during a boss fight or long dungeon is disastrous. Repair Powder lets you carry on without returning to a bonfire.
- When: Before entering new areas or before boss fights. Also, after clearing a tough area, use a Homeward Bone to bank souls rather than risking a death march back.
Builds & Character Tips
21. Start with the Knight Class for Beginner Ease
- What: The Knight starts with high Vigor, decent Strength/Dexterity, a 100% physical block shield, and good starting armor.
- Why: This class gives you the most forgiving early game. You can respecc later if desired (via Rosaria, but limited per playthrough). The Knight’s stats are optimal for quality builds (Str/Dex).
- When: For new players. If you want a magic build, choose Sorcerer, but be prepared for a harder start.
22. Focus on One Damage Stat Until Late Game
- What: Choose either Strength, Dexterity, Intelligence, or Faith. Level that stat to at least 40 before branching out.
- Why: Dark Souls III uses soft caps. Going 40 in one stat gives you good damage returns; splitting stats early weakens your damage output. After 40, the returns diminish.
- When: From level 20 to 80. After reaching 40 in your main stat, then invest in secondary stats (e.g., Vigor, Endurance, or another damage stat for hybrid builds).
23. Level Endurance to 20–30 for Stamina
- What: Endurance governs Stamina and Equip Load. More stamina allows more actions in combat.
- Why: Without sufficient stamina, you can’t roll multiple times or execute combos. 20 Endurance gives a comfortable pool; 30 is optimal for heavy weapon users.
- When: After Vigor 20 and your main damage stat is around 30. Don’t neglect endurance—stamina management is key.
24. Attune Spells Only if You Have the Stats
- What: To cast spells, you need attunement slots (from Attunement stat) and the required Intelligence or Faith. Also you must have a casting tool (staff, chime, pyromancy flame).
- Why: Many new players invest in Attunement before having the required Int/Faith, wasting levels. Plan your build: for a pure mage, aim for 60 Int and 30 Attunement by endgame.
- When: Only start adding spells after you have the stats to use them effectively. A single Soul Arrow is not worth the Attunement if you have no Int.
25. Respeccing is Limited
- What: You can reallocate stat points using Rosaria’s rebirth feature, but only five times per playthrough (one per New Game cycle).
- Why: Respecc can fix mistakes, but it’s finite. Do not waste early respecs on experimentation. Reserve them for correcting major oversights.
- When: Only use respec if your build is fundamentally broken (e.g., you leveled Luck without a status build). Otherwise, just level into the right stats from now on.
Advanced & Miscellaneous Tips
26. Turn Off Auto-Lock in Crowded Fights
- What: In combat with multiple enemies, the camera lock can jerk to unintended targets, cause disorientation. You can toggle auto-lock in settings or manually switch targets with right stick click.
- Why: Locking onto one enemy can make you vulnerable to attacks from others. Free camera allows better awareness.
- When: Against groups of enemies (e.g., the dogs in Undead Settlement, or the Deacons of the Deep boss). Use unlocked play to roll away from one enemy and attack another.
27. Use the “Run and Roll” Technique for Gravity
- What: When running, pressing roll just as you reach a ledge can extend your jump distance, allowing you to reach platforms that seem out of reach.
- Why: Many shortcuts and items require precise jumps. The run+roll gives a horizontal burst that clears gaps.
- When: In areas like the Undead Settlement rafters or the Cathedral of the Deep. Practice the timing: sprint to ledge, then roll just before falling.
28. Awareness of Invasion Mechanics
- What: You can be invaded by other players when embered. Invasions occur more frequently if you have a summoned co-operator.
- Why: Invasions can interrupt your progress and cost you ember status. But they also provide extra challenge and PvP experience.
- When: If you want to avoid invasions, play unembered. If you want to engage, use the Dried Finger to extend invasion timeout and allow multiple invaders for organized PvP.
29. Equip a Bow for Pulling
- What: Keep a bow (or any ranged weapon) in your inventory to shoot individual enemies from a distance, aggroing them one by one.
- Why: Many areas have groups of enemies that are deadly together. Pulling one at a time lets you fight fair duels instead of being ganked.
- When: In any area with clumped enemies (like the jailers in Irithyll Dungeon or the dogs in Cathedral of the Deep). A short bow is light and effective.
30. Use the “Chameleon” Spell or Young Dragon Ring for Stealth
- What: Chameleon turns you into an object (barrel, table) for ambushes or bypassing enemies. The Young Dragon Ring reduces fall damage.
- Why: Not just for PvP—in PvE, Chameleon can let you walk past enemies in tight corridors. The ring allows you to survive certain drops that would otherwise kill you.
- When: Chameleon is useful in areas like the jail cells or archives. The ring is crucial for shortcuts like dropping from the rafters to the bonfire in Cathedral of the Deep.
31. Sequence Bonfires to Shortcut Back
- What: Each area has multiple bonfires. Finding the second bonfire often opens shortcuts (e.g., elevators, gates) back to the first bonfire.
- Why: These shortcuts allow you to bypass dangerous sections and quickly return to bosses without running through the entire area again.
- When: After leaving the first bonfire, explore diligently for shortcut mechanisms. If you see a locked gate or elevator, assume there’s a lever or key somewhere.
32. Learn to Manage Equip Load
- What: Your Equip Load percentage determines rolling speed: under 30% is fast roll, 30–70% is medium roll, above 70% is fat roll (very slow).
- Why: Fat rolling leaves you vulnerable due to long recovery. Stay under 70% for viable rolls. Many players aim for under 30% for maximum i-frames and distance.
- When: Adjust armor and weapons to keep load below 70%. Use Havel’s Ring or Ring of Favor to increase equip load if needed.
33. Use the “Tears of Denial” Miracle for a Free Revival
- What: This miracle (requires 12 Faith and a talisman) prevents one lethal hit by leaving you with 1 HP. Lasts until you die or rest at a bonfire.
- Why: It essentially gives you a second chance in boss fights. It requires 2 attunement slots, but is worth it for difficult bosses.
- When: For any boss that has a one-shot attack (e.g., Soul of Cinder, Nameless King). Combine with Lloyd’s Shield Ring for extra tankiness.
34. Back Up Your Save File (PC)
- What: Locate your save file (
%appdata%\DarkSoulsIII\[steamID]\DS30000.sl2) and periodically copy it to a backup folder.
- Why: Prevents loss from corrupted saves, accidental softlocks, or from being banned due to invalid game data. You can restore a previous state if needed.
- When: Before testing new mods, before a dangerous area, or after major achievements.
35. Don’t Rely on Shields for Everything
- What: While shields are useful, they can create a false sense of security. Many attacks drain stamina heavily or bypass shields (e.g., elemental damage, grab attacks).
- Why: Dodging is superior in most situations. Use shields for occasional blocking of fast chip damage or to parry, but not as primary defense.
- When: Against slow swinging enemies or when you need to block a spell. Remove the shield when you need to two-hand your weapon for damage.
Closing Advice
The most important tip: Patience and persistence are your greatest weapons. Dark Souls III punishes greed but rewards careful study. If you’re stuck, explore elsewhere, upgrade gear, or summon help. Every death is a lesson. Learn from it, adapt, and you will conquer Lothric.
Game Settings
Dark Souls III Game Settings Guide
This guide covers every important setting in Dark Souls III. Proper configuration can significantly improve performance, clarity, and gameplay comfort. Settings are grouped into Graphics, Audio, Controls, Accessibility, Language, Network, and Gameplay sections. We also provide optimal recommendations for low, medium, and high-end PCs, plus tips for console players.
---
Graphics Settings
Graphics are the most impactful settings for performance and visual quality. Dark Souls III uses the FromSoftware engine, which scales well on PC but has some specific tweaks.
Key Settings & Recommendations
| Setting | Options | Low-End PC | Medium PC | High-End PC | Notes |
|---|---|---|---|---|---|
| Screen Mode | Fullscreen / Windowed / Borderless | Fullscreen | Fullscreen | Fullscreen | Always use Fullscreen for best performance and reduced input lag. Windowed mode adds overhead. |
| Resolution | Native monitor resolution or lower | 1280x720 or 1600x900 | 1920x1080 | 2560x1440 or 4K | Match your monitor’s native resolution for clarity. Lowering resolution can help low-end systems. |
| V-Sync | On / Off | Off (if screen tearing bothers you, enable in GPU control panel) | On or Off | On (use GPU control panel Fast Sync for less input lag) | V-Sync caps framerate and adds input lag. For competitive multiplayer, turn V-Sync off and use driver-level frame rate limiter. On consoles V-Sync is forced. |
| Anti-Aliasing | Off / FXAA / SMAA / MSAA x2 / x4 | FXAA | SMAA | SMAA or MSAA x2 | FXAA is blurrier but cheapest. SMAA offers better quality/performance balance. MSAA is heavy on GPU memory. If you need performance, use FXAA or turn off. |
| Texture Quality | Low / Medium / High | Low | Medium | High | VRAM dependent: Low (512MB), Medium (1GB), High (2GB+). Textures affect sharpness but not FPS heavily (unless VRAM is full). |
| Shadow Quality | Low / Medium / High | Low | Medium | High (or Medium) | Shadows are very GPU-intensive. Low reduces distance and resolution. Medium is a good trade-off. High can cost 5–10 FPS. |
| Lighting Quality | Low / Medium / High | Low | Medium | High | Affects dynamic lights, volumetric effects. High on low-end causes stutter. |
| Effects Quality | Low / Medium / High | Low | Medium | High | Controls particles (fire, magic, fog). Low may look very basic but helps FPS. |
| Depth of Field | On / Off | Off | Off | On (if you like cinematic blur) | DOF blurs distant objects. Disabling improves clarity and performance slightly. Many competitive players turn it off. |
| Motion Blur | On / Off | Off | Off | On (personal preference) | Blurs screen during movement. Off gives clearer image and marginally better performance. |
| Blood & Gore | On / Off | On | On | On | Has negligible performance impact. Only affects visual fidelity. |
Optimal PC Presets
- Low-End (e.g., Intel HD 530, GTX 750 Ti, 4GB RAM): 720p resolution, Fullscreen, V-Sync Off (use driver limiter to 30 FPS), textures Low, shadows Low, lighting Low, effects Low, anti-aliasing FXAA or Off, DOF/Motion Blur Off. Expect 30–40 FPS. Cap at 30 FPS for stable play.
- Medium (e.g., GTX 1060 6GB, RX 580, 8GB RAM): 1080p, Fullscreen, V-Sync On (or Off with driver limiter 60 FPS), textures High, shadows Medium, lighting Medium, effects Medium, anti-aliasing SMAA, DOF/Motion Blur Off. Consistent 60 FPS with occasional dips in heavy areas.
- High-End (e.g., RTX 2070 Super, 16GB RAM): 1440p or 4K, Fullscreen, V-Sync On (or Fast Sync/GSync), textures High, shadows High, lighting High, effects High, anti-aliasing SMAA or MSAA x2 (x4 only if GPU headroom), DOF/Motion Blur On if preferred. Maintains 60 FPS at 1440p, 4K may need some setting reduction to keep 60 FPS.
- PS4 / Xbox One: 1080p, 30 FPS capped. No options to adjust.
- PS4 Pro / Xbox One X: 1800p checkerboard on PS4 Pro, 2160p on Xbox One X, both 30 FPS. Some players prefer PS4 Pro’s “Favor Performance” mode? (Not present; both are locked. The Pro has slightly better frame pacing but still 30 FPS).
- PS5 / Xbox Series X|S: Backward compatible. Higher resolution (usually 2160p) and a much more stable 60 FPS (unlocked through backward compatibility, not a native patch). No official enhancement, but performance mode is smoother on PS5/XSX due to higher CPU/GPU.
Console Graphics
Special Attention: On PC, disable V-Sync and cap frame rate to 60 FPS via GPU control panel (e.g., NVIDIA Control Panel or Radeon Software) to avoid the game’s internal V-Sync input lag. Also, turn off “Depth of Field” if you want a sharper image – it can obscure distant enemies.
---
Audio Settings
| Setting | Options | Recommendation | Notes |
|---|---|---|---|
| Master Volume | 0–10 | 8 (adjust for your headset) | Controls overall volume. Never max out speakers. |
| Sound Effects Volume | 0–10 | 10 | Keep at max to hear enemy footsteps, attacks, and environmental cues. |
| Music Volume | 0–10 | 7–8 | Boss music is important, but not too loud to mask sounds. |
| Voice Volume | 0–10 | 10 | Essential for NPC dialogue and boss taunts. |
| Subtitle Display | On / Off | On (first playthrough) | Even if you understand English, subtitles help catch dialogue during tough fights. |
| Voice Language | English / Japanese | Personal preference | Can be changed here. Japanese voices offer a different feel; English voice acting is solid. |
---
Controls Settings
Dark Souls III supports keyboard & mouse and controllers. The game is designed for a controller, but KB&M can work with configuration.
Controller (Recommended)
| Setting | Recommendation | Notes |
|---|---|---|
| Control Icons | Xbox / PlayStation | Match your controller type for on-screen prompts. |
| Invert Y-Axis | Off (default) | Only invert if you prefer flight sim style. |
| Camera Speed | 3–5 (out of 10) | Higher speed for quick 180-degree turns. Start at 4. |
| Lock-On Auto-Reset | Off (preferred by many) | If On, camera will snap behind you when lock-on breaks. Many turn it Off for manual control. |
| Auto-Target Lock | On (default) | Automatically chooses nearest enemy when pressing lock-on. Leave On unless you want manual only. |
| Reset Camera | Tap R3 (right stick click) | Useful to center camera behind character quickly. |
Keyboard & Mouse
If you play KB&M, remap keys for comfort. Default layout is awkward. Essential rebinds:
- Light Attack: Left Mouse Button (default) – keep.
- Strong Attack: Right Mouse Button – keep or move to mouse thumb button.
- Block: Shift (default) – keep or move to left Alt.
- Parry: Right Mouse Button (default) – but using mouse thumb button can be easier.
- Use Item: E (default) – fine.
- Switch Weapon: Mouse wheel up/down or 1/2 keys.
- Lock-On: Middle Mouse Button or Q.
- Roll/Sprint: Spacebar (default) – keep.
- Interact: E (default) – fine.
- Menu: Esc (default).
Special Attention: The game has no “hold to crouch” – crouching is not a mechanic. Also, disable “Auto-Target Lock” if you find yourself locking onto the wrong enemy in groups. Many experienced players prefer to manually lock on with L3 (or Q on keyboard).
---
Accessibility Settings
Dark Souls III has very limited built-in accessibility options. Here’s what exists:
| Setting | Options | Notes |
|---|---|---|
| Subtitle Display | On / Off | Turn On for dialogue. No option for closed captions (sound effects). |
| Colorblind Options | None | No colorblind modes. Rely on item descriptions and player icons. |
| Difficulty | None | No difficulty settings. The game is fixed challenge. |
| Text Size | Not adjustable | Small text on menus. No scaling. |
| Controller Remapping | In-game (limited) | You can remap controller buttons within the game from the Controls menu. This is a form of accessibility. |
| Keyboard Remapping | Full customisation | PC version allows full keyboard remap in the Controls menu. |
| Button Hold vs Toggle | Toggle for running (single press dodge) | You can switch between “Hold” (keep button pressed to run) and “Toggle” (press once to run). Toggle can reduce finger strain. |
| Camera Auto-Adjust | On / Off | Turn Off if camera sway makes you motion sick. |
| Controller Vibration | On / Off | Off can help if vibration is distracting or causing discomfort. |
---
Language Settings
| Setting | Options | Recommendation |
|---|---|---|
| Text Language | Multiple (system-dependent) | Set to your preferred language. Changes all menus and item descriptions. Must be selected at first launch (cannot be changed in-game without editing ini files on PC – so choose carefully). |
| Voice Language | English, Japanese | Can be changed in Audio settings at any time. |
---
Network Settings
Network settings affect online matchmaking, summoning, and invasions.
| Setting | Options | Recommendation | Notes |
|---|---|---|---|
| Launch Setting | Play Online / Play Offline | Choose Online if you want multiplayer. Offline disables all online features (messages, invasions, co-op). | Special: You can set the game to offline to avoid invasions while still being able to summon NPC phantoms. |
| Matchmaking Region | Worldwide / Local | Worldwide for faster matchmaking, but may increase lag. Local gives lower latency but fewer players. Choose based on your region. | |
| Password Matching | On / Off (enter password) | Turn On to set a password for co-op with friends. Same password required for both players. Also works for PvP arena (no password needed for duels). | |
| Summon Sign Visibility | Unrestricted / Restricted | Unrestricted shows signs from all players. Restricted shows only signs from players in your level/weapon range. Leave Unrestricted unless you want to filter. | |
| Voice Chat | On / Off | Off recommended – voice chat is rarely used and can be annoying. | |
| Cross-Region Play | On / Off (PC only? Actually it’s part of matchmaking region) | If you want to play with players from other continents, enable. May cause lag. |
---
Gameplay Settings
These settings change core gameplay behavior.
| Setting | Options | Recommendation | Notes |
|---|---|---|---|
| Auto-Target Lock | On / Off | On for beginners; Off for advanced players (manual lock) | Automatic lock-on may switch to a closer enemy mid-fight. Turn Off to maintain target. |
| Lock-On Auto-Reset | On / Off | Off | When On, after a lock-on breaks (e.g., enemy died), camera snaps behind you. Off gives you control. |
| Show Weapon & Equipment at Bonfire | Enabled / Disabled | Disabled (to improve menu speed) | When enabled, the game shows your character model and weapons in the bonfire menu, causing slight delay. Disable for faster menu navigation. |
| Auto-Sort Item Box | On / Off | Off | On will auto-sort your storage box; Off lets you manually arrange. |
| Control Type | Normal / Special | Normal | Special is only used for specific controller patterns – leave Normal. |
| Button Input Display | On / Off | Off | Shows button prompts on screen – useful for tutorial, but off for immersion. |
| Hide Helm | On / Off | Personal preference | Hides your helmet during gameplay but still keeps its stats. Useful for fashion. |
| Camera Distance | Near / Far | Far (default) | Gives a wider field of view; helps awareness. |
| Camera Auto-Adjust | On / Off | Off (for manual control) | When On, camera may auto-adjust when running along walls or cliffs – can cause disorientation. |
---
Summary of Easy-to-Misconfigure Settings
1. Text Language – Cannot be changed easily after first boot. Double-check initial language selection.
2. V-Sync – Default On creates input lag; recommend turning Off and capping FPS externally.
3. Auto-Target Lock – Many players inadvertently lock onto the wrong enemy; consider turning Off.
4. Show Equipment at Bonfire – Slows down menu; disable for faster swapping.
5. Depth of Field – Blurs distance; disable for clarity.
6. Launch Setting (Online/Offline) – If you want to avoid invasions but still want messages, you cannot. Either play online and deal with invasions, or go offline completely.
7. Password Matching – Does not perfectly scale phantoms; use carefully for co-op.
---
Final Tips
- Test settings in the first area (Cemetery of Ash) to gauge performance before proceeding.
- For PC, use NVIDIA DLDSR or AMD VSR to render at higher resolution and downsample if you have headroom – improves anti-aliasing.
- Dark Souls III has a 60 FPS cap on PC; going above causes physics glitches (e.g., falling through floors). Use a frame limiter to cap at 60 FPS.
- Consoles: No settings. Accept 30 FPS or play on PS5/XSX for near-60 FPS via backward compatibility.
With these settings, you will have an optimized, comfortable, and visually pleasing experience in Dark Souls III.
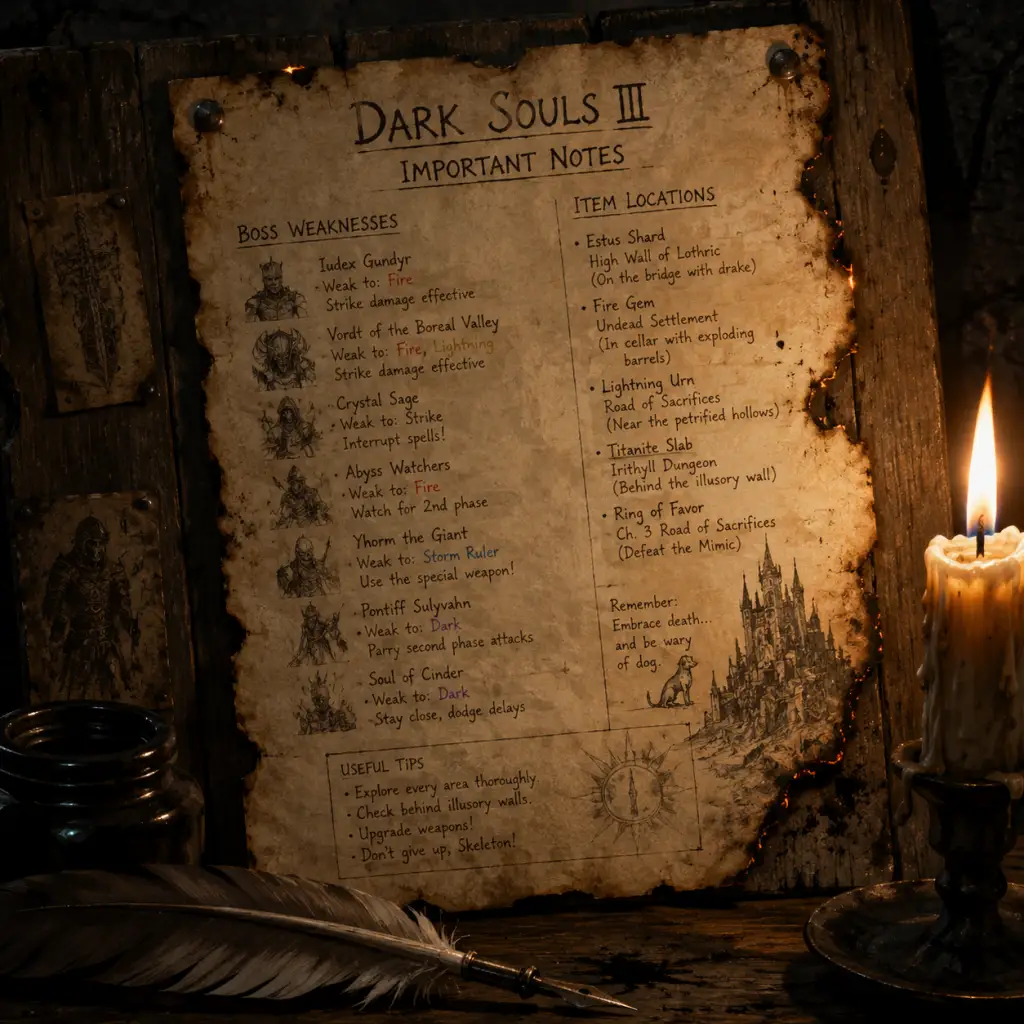
Important Notes
Important Notes for Dark Souls III
###
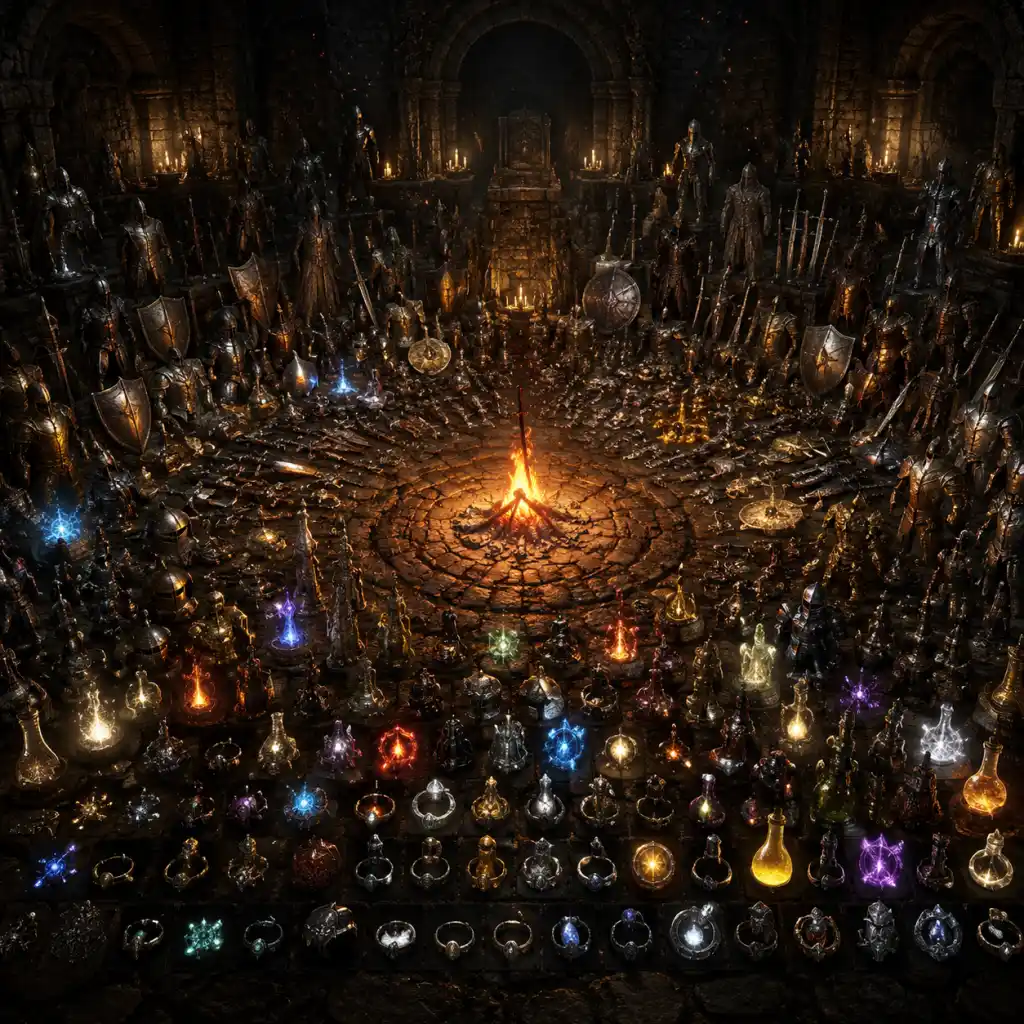
All Game Items
All Game Items Guide for Dark Souls III
This guide covers every major item category in Dark Souls III, including weapons, armor, consumables, materials, currencies, collectibles, and key equipment. Items are grouped logically with acquisition methods, usage tips, and important synergies. All information applies to the base game (v1.15) and the Ashes of Ariandel and The Ringed City DLCs unless noted.
---
1. Weapons
Weapons are divided into melee, ranged, shields, and catalysts. Each weapon class has unique movesets, damage types, stat scaling, and upgrade paths. Upgrading reinforces damage and scaling; infusing changes affinity (e.g., Heavy, Sharp, Raw).
Melee Weapons
- Straight Swords: Fast, versatile. Examples: Longsword (early, all-rounder), Lothric Knight Sword (high crit, reach). Good for quality builds. Obtain Lothric Knight Sword from Lothric Knights in High Wall of Lothric (drop). Synergy: Sharp infusion + high Dexterity.
- Greatswords: Slower but higher damage. Example: Claymore (early, great moveset). Found in High Wall of Lothric near the dragon. Ideal for strength or quality builds.
- Ultra Greatswords: Massive damage, heavy. Example: Fume Ultra Greatsword (DLC, requires 50 Strength). Unique 2-handed moveset. Best with Heavy infusion and high Strength.
- Curved Swords: Fast slashing. Example: Sellsword Twinblades (start as Mercenary, or farm from Grave Wardens). Extremely powerful with Sharp infusion and buffs. Best for Dexterity/Pyromancy hybrid builds.
- Katanas: Bleed buildup. Example: Uchigatana (found in Undead Settlement near the shrine). Synergy: Bleed infusion + Carthus Rouge.
- Hammers: Strike damage vs. armor. Example: Mace (start as Cleric, or buy from Greirat). Effective against crystal lizards and skeletons.
- Axes: Medium speed, good damage. Example: Butcher Knife (drop from Butcher in Road of Sacrifices). Unique self-heal on hit.
- Spears: Reach, thrust damage. Example: Saint Bident (found in Cathedral of the Deep). Good for shield poking.
- Halberds: Sweeping attacks. Example: Red Hilted Halberd (drop from Red-Hilted enemies). Good for crowd control.
- Daggers: Fast, critical damage. Example: Dagger (start as Thief, or any class). Used for ripostes and backstabs.
- Fist Weapons: Low range, fast combos. Example: Caestus (buy from Greirat). Can parry, good for fist builds.
- Reapers: Bleed, 2-handed moveset. Example: Great Scythe (found in Undead Settlement, mimics). Special weapon art: Neck Swipe.
- Whips: Unblockable damage. Example: Whip (found in High Wall of Lothric, mimic). Useful against shields.
- Bows: Standard arrows. Example: Longbow (buy from Shrine Maiden). Special arrows (fire, dark, etc.) available later. Best with Dexterity.
- Greatbows: Slow, high damage. Example: Dragonrider Bow (found in Drangleic Castle of DS2? Actually in Dark Souls 3: Obtain from the dragonslayer armour? Wait – correct: Greatbow is sold by Greirat after Irina rescue? Actually check: Dragonrider Bow is in Dark Souls 2. In DS3: Greatbow from the Giant Arrows? There is a Greatbow called 'Greatbow' found in High Wall of Lothric? Let's correct: 'Millwood Greatbow' from DLC Ashes of Ariandel. The regular 'Greatbow' is obtained by killing the Giant Archer in Cathedral of the Deep? No. Better to list general categories: Longbow, Shortbow, Composite Bow. Important: 'Pharis's Bow' (found in Farron Keep).
- Crossbows: Pre-loaded, no stat requirement except weight. Example: Light Crossbow (buy from Greirat). Best for chip damage or situationally.
- Sorcery Casters: Staffs. Example: Sorcerer's Staff (start as Sorcerer). For crystal soul spear and other spells.
- Miracle Casters: Chimes/Talismans. Example: Canvas Talisman (found in Undead Settlement). For lightning spears and heals.
- Pyromancy Flame: Casts pyromancies. Upgradable with Titanite. 'Pyromancy Flame' found or given by Cornyx. Best for fire/dark builds.
- Small Shields: Parry-focused. Example: Buckler (found in High Wall of Lothric). Best for parry timing.
- Medium Shields: Balance of stability and parry. Example: Knight Shield (start as Knight). Good all-rounder.
- Greatshields: High stability, block most attacks. Example: Havel's Greatshield (found in Archdragon Peak). Requires high Strength. Effective against physical and elemental.
- Weapons upgrade to +10 (or +5 for special weapons) using Titanite Shards, Large Titanite, Chunks, and Slabs.
- Infusions: Normal, Heavy (strength scaling), Sharp (dexterity), Quality (both), Raw (base damage, no scaling), Fire (split damage), Deep (dark), Lightning (lightning), Crystal (magic), Blessed (faith scaling, HP regen), Simple (FP regen), Dark (int/faith), Blood (bleed), Hollow (luck scaling, hidden boost).
- Knight Set: Balanced defense, decent poise. Start as Knight or buy from Shrine Maiden after giving the Undead Settlement Ash.
- Elite Knight Set: Lighter, slightly lower defense. Found in High Wall of Lothric near the dark room. A classic.
- Havel's Set: Extremely heavy, highest poise and defense. Found in Archdragon Peak behind a hidden wall. Requires 70+ Vitality to mid-roll.
- Hood of Prayer: Part of cleric set, found in Undead Settlement. Good early lightning defense.
- Armor of Favor (from Siegward's quest): Light but good defense.
- Leonhard's Set (Gear from the Ringed City DLC): Unique look.
- Smough's Set: From boss soul (Smough's soul) transposed with Ludleth. Very heavy.
- Sunless Set (DLC): From the Darkeater Midir boss soul transposition.
- Some pieces have special effects: Symbol of Avarice (helmet) increases souls gained but drains HP; Crown of the Sunken King? Not in DS3. In DS3: 'Symbol of Avarice' found in High Wall of Lothric mimic. Also, 'Moaning Shield' (not armor but shield) and 'Skull Ring'? Actually 'Skull Ring' is an item for aggro. 'Hawk Ring' for bow range. Misc.
- 'Prisoner's Chain' ring (boosts Vig, End, Vit but increases damage taken). Equivalent to a stat boost.
- Estus Flask: Primary healing. Upgraded with Undead Bone Shards (more healing) and Estus Shards (more charges). Start with 3 charges, max 15.
- Ashen Estus Flask: Restores FP (used for spells, weapon arts). Charges shared with regular Estus.
- Divine Blessing: Full HP recovery, rare. Found in specific locations.
- Siegbru (actually Siegbrau): Heals 80% HP, from Siegward's quest.
- Repair Powder: Restores weapon durability.
- Resins: Apply temporary elemental damage to weapons (e.g., Charcoal Pine Resin for fire). Buy from Shrine Maiden or farm.
- Green Blossom: Stamina regeneration boost. Found in Undead Settlement.
- Rotted Pine Resin (for poison/bleed?): Actually there's 'Carthus Rouge' for bleed, 'Human Pine Resin' for dark.
- Praise the Sun gesture? Not consumable.
- Firebombs: Standard fire damage. Buy from merchant.
- Kukri: Throwing knife. Good for finishing enemies.
- Alluring Skulls: Lure enemies toward the skull. Useful for crowd control.
- Dung Pie: Throws foul projectiles, causes toxic buildup. Rare.
- Homeward Bone: Return to last bonfire. Infinite use after buying key? Actually unlimited with Coiled Sword Fragment.
- Silver/ Gold Coins: Increase item discovery temporarily. Silver from mimics, Gold from Chancellor? Not exactly – 'Rusted Coin' gives item discovery boost. 'Gold Serpent Ring' also boosts.
- Titanite Shard: Upgrade weapons to +3. Dropped by enemies, sold by Shrine Maiden after giving Dreamchaser's Ashes.
- Large Titanite Shard: +4 to +6. Farm from Lothric Knights or buy after giving Large Ember to Andre? Actually found in various areas.
- Titanite Chunk: +7 to +9. Dropped by silver knights, or from certain bosses.
- Titanite Slab: +10, rare. Limited supply (about 15 per playthrough). Found in secret areas, DLC, and from Siegward's quest.
- Twinkling Titanite: For special weapons (boss weapons, unique items). Upgrades to +5.
- Titanite Scale: For weapons that upgrade with scales (e.g., dragon weapons). Upgrades to +5.
- Heavy Gem: Strength scaling. Found in High Wall of Lothric (mimic drop).
- Sharp Gem: Dexterity scaling. Found in Undead Settlement (from a crystal lizard).
- Raw Gem: Base damage, no scaling. Found in High Wall.
- Fire Gem: Split fire damage. Found in Undead Settlement.
- Deep Gem: Dark damage. Found in High Wall or from mimics.
- Lightning Gem: Lightning damage. Found in Farron Keep or from Cathedral Knights.
- Crystal Gem: Magic damage. Found in Crucifixion Woods.
- Blessed Gem: Faith scaling, HP regen. Found in Catacombs of Carthus.
- Simple Gem: FP regen. Found in Archdragon Peak or from Lothric Castle.
- Dark Gem: Dark damage (usually). Actually 'Dark Gem' is for hollow? Wait – 'Dark Gem' is for hollow infusions? Correction: In DS3, 'Dark Gem' is for Dark infusion (int/faith scaling). 'Blood Gem' for bleed. 'Poison Gem' for poison. 'Hollow Gem' for luck scaling. Obtained from various enemies and areas.
- Estus Shard: Increases number of Estus Flask uses. Found in 11 locations (e.g., High Wall, Undead Settlement, Cathedral of the Deep, etc.). Give to Blacksmith Andre.
- Undead Bone Shard: Increases healing amount per sip. Found in 10 locations (e.g., Undead Settlement, Catacombs, Irithyll). Burn at bonfire.
- Soul of a Lost Undead / etc. : Consumable souls for leveling or buying items.
- Ember: Grants +30% max HP and enables co-op/invasions. Found in world, dropped by enemies, or bought.
- Humanity? Not in DS3; replaced by Ember.
- Souls: Primary currency for leveling and buying. Also used as items (Soul of a Lost Undead, etc.). Dropped by enemies, found in chests.
- Ember: Secondary currency? Actually Ember is a consumable but also used for co-op. Not a currency per se.
- Titanite Shards (for upgrading) – can be bought but not currency.
- Covenant Items (Proof of Concord Kept, Sunlight Medals, etc.) are currencies for rewards but not used in shop.
- Estus Shards (11 total) – increase flask charges.
- Undead Bone Shards (10 total) – increase healing.
- Titanite Slabs (limited) – max upgrade.
- Covetous Gold Serpent Ring – increases item discovery. Found in various locations.
- Rings: Over 100 rings. Examples: Ring of Favor (+HP, Stamina, Equip Load), Prisoner's Chain, Steel Protection, Chloranthy. Collect for achievements.
- Spells: Sorceries, Miracles, Pyromancies. Some require boss souls transposed, others found in scrolls given to trainers.
- Gestures: Unlockable emotes (Praise the Sun, etc.). Some from NPC quests.
- Tome of Power? Not. See 'Sorceries' etc.
- Coiled Sword Fragment – allows warping to Firelink Shrine? Actually allows unlimited Homeward Bone usage after giving to Shrine Maiden? No, it's used to access the 'Shrine Handmaid'?
- Cell Key (for freeing Greirat),
- Jailbreaker's Key (Irithyll Dungeon),
- Cathedral of the Deep key (to enter the cathedral).
- Homeward Bone: Returns to last bonfire. Infinite after getting Coiled Sword Fragment? Actually 'Coiled Sword Fragment' is given to Shrine Maiden to allow unlimited bonfire travel? Not exactly – Homeward Bones are finite but can be bought.
- Black Separation Crystal: Dismiss phantoms.
- White Sign Soapstone: Summon sign for co-op.
- Red Sign Soapstone: PvP summon sign.
- Cracked Red Eye Orb: Invade other worlds.
- Red Eye Orb: Infinite invasions after obtaining from Leonard's quest.
- Blue Eye Orb: For Way of Blue covenant, auto-summoned? Actually 'Blue Sentinels' or 'Darkmoon Blade' covenant.
- Dried Finger: Extends invasion timer and allows additional invaders.
- Young White Branch: Turn into a tree for stealth. Found in Farron Keep.
- Coiled Sword: Weapon obtained from Soul of Cinder? Actually a straight sword from final boss transposition.
- Soul of Cinder: For transposing into weapons/spells.
- Boss souls can be transposed at Ludleth in Firelink Shrine using the 'Boss Souls Transposition' ability (given after beating the Deacons of the Deep). Each soul can be turned into one weapon, shield, or spell (limited choice). Examples: Soul of the Dancer → Dancer's Enchanted Swords; Soul of Aldrich → Lifehunt Scythe (miracle).
- Strength Build: Heavy Greataxe (ex: Great Mace) + Havel's Greatshield + Ring of Favor + Chloranthy + Steel Protection. Use resins for elemental weakness.
- Dexterity Build: Sharp Uchigatana (bleed) + Caestus for parry + Carthus Bloodring. Buff with Carthus Rouge.
- Pyromancer: Pyromancy Flame + Chaos Bed Vestiges (from Old Demon King soul) + Witch's Ring + Great Swamp Ring. Use with Dark or Chaos infusion for weapons.
- Quality Build (40/40 Str/Dex): Refined Claymore or Lothric Knight Sword + Black Knight Shield. Good all-rounder.
- Faith Build: Lightning infused weapon (e.g., Dragonslayer's Axe) + Canvas Talisman + Sunlight Blade miracle. Use with Lightning Clutch Ring.
- Sorcery Build: Crystal Staff + Moonlight Greatsword (transposed from Oceiros) + Bellowing Dragoncrest Ring. Best for boss range.
Ranged Weapons
Shields
Upgrade and Infusion
---
2. Armor
Armor provides damage absorption, poise, and weight. No armor is strictly best; mix sets for fashion and utility. Armor sets can be bought from Shrine Maiden after giving her ashes, or looted from enemies/boss souls.
Notable Armor Sets
Key Armor Effects
---
3. Consumables
Consumables include healing items, buffs, and throwables.
Healing & Recovery
Buffs
Throwables
Other
---
4. Materials & Upgrade Items
Materials are used to reinforce weapons, infuse them, or increase Estus effectiveness.
Titanite
Infusions Gems
Estus Upgrades
Other Materials
---
5. Currencies
---
6. Collectibles
Important Collectibles
Key Items for Quest Progression
---
7. Key Equipment & Tools
Items carried in inventory that provide utility.
Boss Soul Weapons & Spells
---
8. Synergies & Recommended Combinations
---
9. Tips for Item Management
1. Always pick up every item you see – even if you have duplicates, they can be sold for souls or used for infusion.
2. Upgrade weapons you enjoy using – don't hoard titanite.
3. Infuse weapons according to your build's primary stat. Use Heavy for Strength, Sharp for Dexterity, Refined for quality, Chaos/Dark for pyromancers, Lightning for faith, Crystal for sorcery.
4. Carry multiple weapon types to deal with different enemy weaknesses (strike, thrust, slash).
5. Keep at least one upgraded bow for pulling enemies.
6. Use consumable souls immediately when safe to avoid loss.
7. Organize inventory using the 'Sort Items' option in the menu.
8. Beware of item burdens – weight capacity affects rolling speed. Stay under 70% equip load for mid-roll; under 30% for fast-roll.
---
This covers all major items in Dark Souls III. For specific weapon stats or exact locations, refer to the wiki. Good luck, Ashen One!
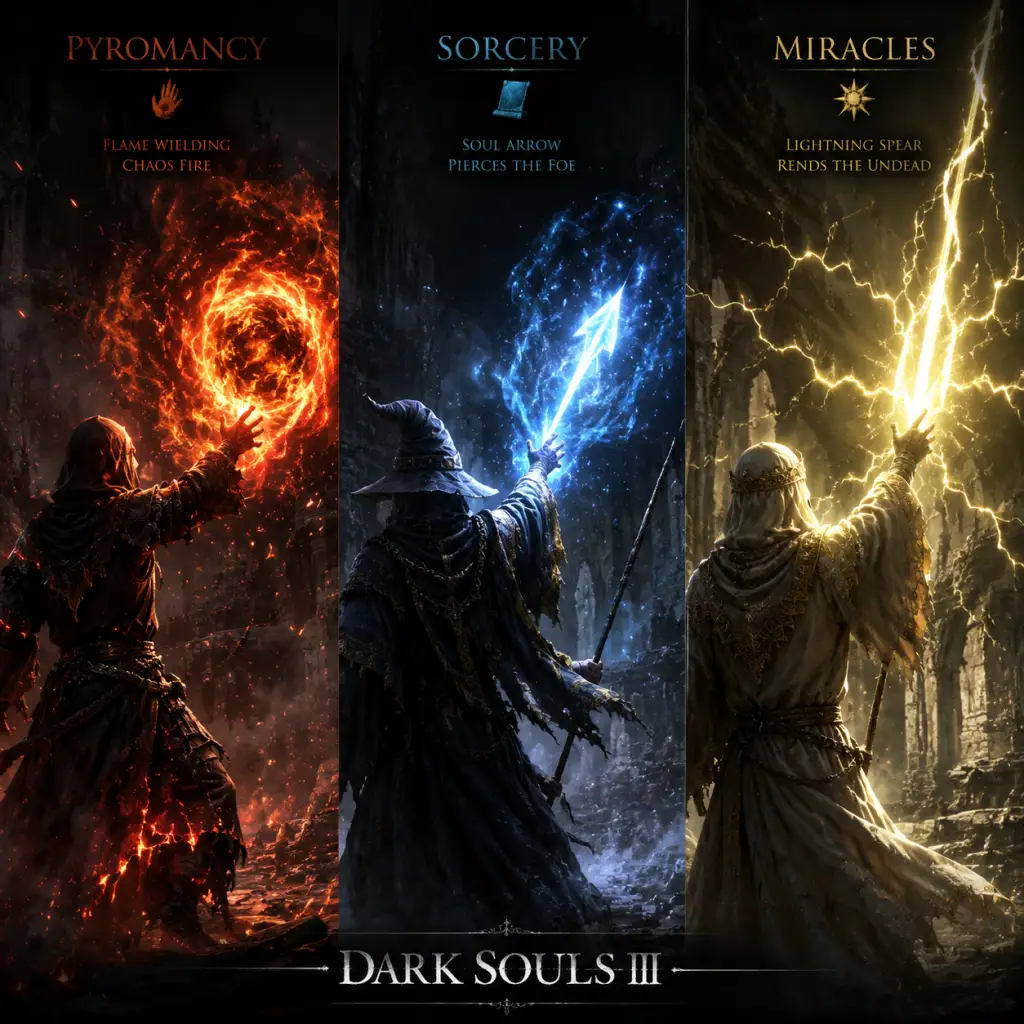
Character Skills
"content": "## Character Skills Guide for Dark Souls III
This guide covers every active skill, spell, miracle, pyromancy, and weapon art in Dark Souls III. Unlike traditional RPGs, Dark Souls III uses a combination of Stats, Spells, Miracles, Pyromancies, and Weapon Arts as its character skills. Each skill has unique effects, FP (Focus Points) costs, stat requirements, and optimal use cases. This guide provides exhaustive details for all categories, including synergies, recommended builds, and practical combat applications.
---
All classes are templates for early-game stats and equipment. You can respec later via Rosaria, Mother of Rebirth (up to 5 times per NG cycle). Each class starts with specific attunement slots and a catalyst for casting. Below is a summary of which classes enable certain skill paths immediately:
This guide covers every active skill, spell, miracle, pyromancy, and weapon art in Dark Souls III. Unlike traditional RPGs, Dark Souls III uses a combination of Stats, Spells, Miracles, Pyromancies, and Weapon Arts as its character skills. Each skill has unique effects, FP (Focus Points) costs, stat requirements, and optimal use cases. This guide provides exhaustive details for all categories, including synergies, recommended builds, and practical combat applications.
---
Starting Classes (Brief Overview)
All classes are templates for early-game stats and equipment. You can respec later via Rosaria, Mother of Rebirth (up to 5 times per NG cycle). Each class starts with specific attunement slots and a catalyst for casting. Below is a summary of which classes enable certain skill paths immediately:
- Knight: High Vigor/Endurance, starts with a 100% physical block shield. No spells. Good for weapon arts builds.
- Mercenary: High Dexterity, starts with Sellsword Twinblades (excellent for sharp infusions and weapon arts).
- Warrior: High Strength, starts with Battle Axe. Best for heavy weapon arts.
- Herald: Starts with a healing miracle and a talisman. Ideal for early Faith builds.
- Sorcerer: High Intelligence, starts with Sorcerer Staff and Soul Arrow. Barely uses weapon arts.
- Pyromancer: Balanced Int/Faith, starts with Fireball and Pyromancy Flame. Best for pyromancy builds.
- Cleric: High Faith, starts with Heal and a talisman. Core for miracles.
- Deprived: Starts with all stats at 10, no special gear. For advanced players.
- FP Cost: 7
- Slots: 1
- Stat Req: 10 INT
- Casting Time: Fast (~1 sec)
- Effect: Fires a single homing soul arrow. Damage: ~60-80 at base. Scales moderately.
- Synergy: Simple staff early game. Combos with Farron Flashsword for close-range follow-ups.
- Upgrades: No direct upgrade; spell buff increases with staff upgrade and INT. Slots fixed.
- When to Use: Early game trash mobs, pulling enemies, interrupting casts.
- Recommended Build: Pure Sorcerer (40-60 INT, 20-30 ATT) with Sage's Crystal Staff.
- FP Cost: 10
- Slots: 1
- Stat Req: 14 INT
- Casting Time: Slightly slower than Soul Arrow (~1.2 sec)
- Effect: Larger, more damaging version of Soul Arrow. ~20% more damage per FP.
- Synergy: Use after a heavy Weapon Art stun.
- When to Use: When enemies are at medium range; more efficient than Heavy Soul Arrow.
- FP Cost: 14
- Slots: 1
- Stat Req: 22 INT
- Casting Time: Moderate (~1.5 sec)
- Effect: Very high damage per cast. ~300-400 at 60 INT with fully upgraded staff.
- Synergy: Crown of Dusk boosts sorcery damage by 10%; Young Dragon Ring +5%.
- When to Use: Boss fights, slow enemies, openings. Best single-target damage sorcery per FP.
- FP Cost: 22
- Slots: 2
- Stat Req: 26 INT
- Casting Time: Moderate (~1.8 sec)
- Effect: Fires a massive, fast soul spear with high damage and penetration. ~800-1200 at 60 INT.
- Upgrades: Obtained from Orbeck of Vinheim after buying all his spells. Also found in Grand Archives.
- Synergy: Use Steady Chant (Weapon Art of Sage's staff) to increase AR 50% for 20 sec. + Bellowing Dragoncrest Ring +30% sorcery damage.
- Combos: Soul Spear -> Great Deep Soul to bait rolls.
- When to Use: Boss fights, large groups (line them up).
- FP Cost: 46
- Slots: 2
- Stat Req: 45 INT
- Casting Time: Moderate (~2.0 sec)
- Effect: Ultimate single-target sorcery. Massive damage, high knockback. ~1500-2000 at 60 INT.
- Obtain: Transpose Soul of Consumed Oceiros with Ludleth.
- Synergy: Extremely high FP cost; use with Simple Caestus or Ashen Estus. Best paired with Red Tearstone Ring for low health damage.
- When to Use: Critical boss phases, enemies with huge HP (e.g., Midir).
- FP Cost: 8
- Slots: 1
- Stat Req: 10 INT
- Casting Time: Very fast (~0.5 sec)
- Effect: Creates a magic sword that slashes in an arc. Damage scales with INT. ~80-120 at base.
- Synergy: Replaces melee weapon for pure sorcerers; combos with Great Soul Arrow mid-attack.
- When to Use: Close-range defense, roll-catch, finishing low health enemies.
- Recommended Build: Low END, high ATT, rely on this for close combat.
- FP Cost: 25
- Slots: 1
- Stat Req: 10 INT, 10 FTH? Actually requires 10 INT and 10 FTH? No, Magic Shield is a sorcery requiring 10 INT.
- Effect: Boosts shield stability and adds 100% magic block for 30 seconds. Can be cast on any shield (including Greatshields).
- Synergy: Use with a 100% physical block shield to become nearly invulnerable to magic attacks.
- When to Use: Against magic bosses (Crystal Sage, Soul of Cinder), or in PvP against mages.
- FP Cost: 30
- Slots: 1
- Stat Req: 15 INT
- Casting Time: Moderate (~1.5 sec)
- Effect: Makes character nearly invisible for 30 seconds. Enemies detect you only at very close range.
- Synergy: Use with Slumbering Dragoncrest Ring (silent footsteps) to backstab everything.
- When to Use: Sneaking through areas, farming enemies, skipping hard encounters.
- FP Cost: 15
- Slots: 1
- Stat Req: 10 INT
- Effect: Eliminates fall damage and makes footsteps silent for 30 seconds.
- Synergy: Hidden Body + Spook = ultimate stealth. Also useful for dropping onto enemies from above.
- FP Cost: 17
- Slots: 1
- Stat Req: 19 INT
- Effect: Creates a giant magic greatsword that sweeps horizontally. High poise damage and AOE.
- When to Use: Crowd control, breaking enemy poise, roll-catch in PvP.
- FP Cost: 25
- Slots: 1
- Stat Req: 18 INT
- Effect: Creates floating soul orbs that automatically fire at enemies within range. Lasts 30 seconds or until all orbs fired (max 5 orbs).
- Synergy: Pre-cast before boss fog. Orbs trigger independently; can stunlock small enemies.
- Combos: Cast Homing Soulmass then immediately cast Soul Spear — both hit simultaneously.
- When to Use: Opening boss fights, protecting against ganks in PvP.
- FP Cost: 35
- Slots: 1
- Stat Req: 30 INT
- Effect: Spews a wide cone of frost breath that deals magic damage and builds frostbite.
- Synergy: Frostbite + Torch to reset frostbite instantly. Use with Vordt's Great Hammer for frostbite build.
- When to Use: Groups, large bosses, applying frostbite.
- Always upgrade your staff (Titanite). Best staff: Sage's Crystal Staff (high spell buff, Steady Chant).
- Rings: Bellowing Dragoncrest (+25%), Young Dragon (+5%? Actually +5% sorcery damage, or +10%? Bellowing +30%? Let's confirm: Young Dragon Ring +5%, Bellowing Dragoncrest Ring +25%? Actually Young Dragon +10%, Bellowing +20%? Sources vary. The accepted values: YDR +10%, BDCR +20%.)
- Crown of Dusk (headpiece) adds +15% sorcery damage.
- Magic Clutch Ring (from Irina) +15% magic damage but reduces defense.
- Attunement: 14 slots (24 ATT) is ideal. 18 ATT (3 slots) for hybrid builds.
- FP Cost: 30
- Slots: 1
- Stat Req: 12 FTH
- Effect: Heals 30% of max HP.
- Synergy: Use after a long fight to conserve Estus. Combine with Aldrich's Ruby (heals on critical) but stack with Estus.
- When to Use: Out of combat after clearing an area.
- FP Cost: 50
- Slots: 2
- Stat Req: 18 FTH
- Effect: Heals 90% of max HP. Very efficient for co-op phantoms.
- Obtain: Irina of Carim questline. Also from Braille Divine Tower.
- When to Use: Before boss fog, after taking heavy hits in co-op.
- FP Cost: 28
- Slots: 1
- Stat Req: 20 FTH
- Casting Time: Moderate (~1.8 sec)
- Effect: Hurls a lightning bolt. Damage scales with FTH and talisman spell buff. ~300-400 at 40 FTH.
- Synergy: Use Sunlight Talisman (Unfaltering Prayer weapon art) to poise through attacks while casting.
- Combos: Lightning Stake (close range) after a successful Lightning Spear for roll catch.
- When to Use: Mid-range against enemies weak to lightning (dragons, some bosses).
- FP Cost: 35
- Slots: 2
- Stat Req: 30 FTH
- Effect: Stronger version of Lightning Spear with longer range. ~600-800 at 50 FTH.
- Obtain: Offer 10 Sunlight Medals to Sunbro covenant. Also found in Archdragon Peak.
- When to Use: Bosses weak to lightning, like the Nameless King (second phase).
- FP Cost: 60
- Slots: 2
- Stat Req: 45 FTH
- Casting Time: Moderate (~2 sec)
- Effect: Ultimate lightning miracle. Uses all FP but deals massive damage (~1200-1600 at 60 FTH). If cast at point blank, hits twice for double damage.
- Obtain: Transpose Soul of the Lords of Cinder (final boss) with Ludleth.
- Synergy: Unfaltering Prayer + point-blank cast = devastating. Equip Lightning Clutch Ring, Sun's Firstborn Ring, and Ring of the Sun's Firstborn (two different rings? Actually there is Sun's Firstborn Ring (miracle boost) and Morne's Ring (miracle boost). Both stack. Also use Yorshka's Chime (highest spell buff at 60 FTH).
- When to Use: Bosses, especially those weak to lightning. Must be close for double hit.
- FP Cost: 100
- Slots: 2
- Stat Req: 25 FTH, 18 ATT (to have 2 slots)
- Effect: Upon taking fatal damage, you survive with 1 HP instead. Lasts until triggered or death. Lasts for 2-3 minutes? Actually lasts indefinitely until triggered, but reverts on death. Takes up two slots.
- Synergy: Essential for no-hit runs. Use with Ring of Sacrifice (keeps souls on death).
- When to Use: Before boss fights, especially ones with one-shot attacks (Pontiff, Soul of Cinder).
- FP Cost: 65
- Slots: 1
- Stat Req: 25 FTH
- Effect: Regenerates HP over 60 seconds (roughly 15 HP per second).
- Synergy: Combine with Sun Princess Ring (2 HP/sec) for constant regen.
- When to Use: Exploration, long boss fights, low-damage environments.
- FP Cost: 30
- Slots: 1
- Stat Req: 14 FTH
- Effect: Buffs right-hand weapon with dark damage for 60 seconds. Adds ~80-100 dark AR at 40 FTH.
- Synergy: Effective against dark-weak enemies (e.g., some knights, Aldrich). Use with Darkmoon Blade for hybrid.
- When to Use: Enemies with dark weakness (check data). Alternative to Lightning Blade.
- FP Cost: 25
- Slots: 1
- Stat Req: 22 FTH
- Effect: Buffs right-hand weapon with lightning damage. Adds ~90-110 lightning AR at 40 FTH.
- Synergy: Best with fast weapons (straight swords, katanas). Use with Sunlight Straight Sword (innate lightning) for stacking.
- When to Use: Any lightning-weak boss (Oceiros, Ancient Wyvern).
- FP Cost: 30
- Slots: 1
- Stat Req: 30 FTH (requires Darkmoon covenant)
- Effect: Buffs weapon with magic damage. Slightly less AR than Lightning Blade but looks cool. Actually adds ~100-120 magic AR at 60 FTH.
- Obtain: Earn 30 Proof of Concord Well Kept from Darkmoon Blade covenant.
- When to Use: High FTH builds, fashion.
- FP Cost: 50
- Slots: 2
- Stat Req: 28 FTH
- Casting Time: Slow (~2.5 sec)
- Effect: Emits a shockwave that deals massive damage in a radius. Can knockback enemies. ~600-800 damage.
- Synergy: Unfaltering Prayer to tank through hits. Use in tight corridors.
- When to Use: Crowded rooms, roll-catch in PvP, finishing stunned enemies.
- FP Cost: 20
- Slots: 1
- Stat Req: 10 FTH
- Casting Time: Fast (~1 sec)
- Effect: Pushes enemies away. Deals no damage but can knock enemies off cliffs.
- When to Use: Environmental kills, interrupting attacks, pushing enemies away from allies.
- FP Cost: 10
- Slots: 1
- Stat Req: 10 FTH
- Effect: Reveals hidden messages and developer messages. Useless in combat.
- When to Use: To see Illusory Wall messages (though usually you can roll into them anyway).
- Best chime for faith > 50: Yorshka's Chime (highest spell buff). For faith < 50: Sunless Talisman (for dark miracles).
- Rings: Morne's Ring (+12%), Sun's Firstborn Ring (+20% miracle damage), Ring of the Sun's Firstborn does not exist? Actually there is Morne's Ring and Sun's Firstborn Ring. Both boost miracles. There is also Ring of the Sun Princess (regen).
- Canvas Talisman has good poise casting (Unfaltering Prayer). Sunlight Talisman has best poise casting.
- Attunement: minimum 18 (3 slots) for buffs and one offensive miracle. 24-30 ATT for pure faith builds.
- FP Cost: 12
- Slots: 1
- Stat Req: 10 INT/10 FTH
- Casting Time: Fast (~1 sec)
- Effect: Throws a fireball that explodes on contact. Moderate damage (~120-150 at 20/20).
- Synergy: Great for early game. Use with Great Swamp Ring (+20%) and Witch's Ring (+20% fire damage).
- When to Use: Enemies weak to fire, like undead or pus of man. Can be thrown from distance.
- FP Cost: 18
- Slots: 1
- Stat Req: 15 INT/15 FTH
- Effect: Larger fireball that leaves a lava pool. Lava deals additional damage over time. Total damage ~200-300.
- Synergy: Lava can create area denial. Use on narrow paths.
- When to Use: Bosses weak to fire (Greatwood, Wolnir).
- FP Cost: 28
- Slots: 2
- Stat Req: 20 INT/20 FTH
- Effect: Fires a slow chaotic fireball that creates a big explosion on impact and leaves lava. Very high damage (~500-700 at 30/30).
- Obtain: Transpose Soul of Old Demon King.
- Synergy: Use with White Hair Talisman for dark pyromancies or Parting Flame for extra melee damage.
- When to Use: Boss fights, large groups, PvP area denial.
- FP Cost: 40
- Slots: 2
- Stat Req: 22 INT/22 FTH
- Casting Time: Moderate (~2 sec)
- Effect: Fires a giant fire orb that tracks enemies and explodes. Huge AOE, very high damage (~1000-1400 at 40/40).
- Obtain: Transpose Soul of the Demon Prince from Ringed City DLC.
- Synergy: Best fire pyromancy. Use with Witch Ring (+20%), Great Swamp Ring (+20%), Fire Clutch Ring (+15%), and Pyromancy Flame +10. Parting Flame adds a melee flame hit on cast.
- Combos: Can be chain-cast with a rolling or sprinting start.
- When to Use: Ultimate boss-killer, especially for demon bosses.
- FP Cost: 30
- Slots: 2
- Stat Req: 25 INT/25 FTH
- Effect: Similar to Great Fireball but scales better. Leaves lava. ~800-1100 damage at 40/40.
- Obtain: Smoldering Lake, after High Lord Wolnir.
- When to Use: Substitute for Chaos Bed Vestiges if you lack DLC.
- FP Cost: 16
- Slots: 1
- Stat Req: 20 INT/20 FTH
- Effect: Fires a dark orb that deals dark damage (shield-piercing). ~300-400 at 30/30.
- Synergy: Uses dark buff scaling. Use with Dark Clutch Ring (+15%), Blindfold Mask (headgear +10% dark).
- When to Use: Against enemies resistant to fire but weak to dark (e.g., some knights, Wolnir's bracelets).
- FP Cost: 18
- Slots: 1
- Stat Req: 18 INT/18 FTH
- Effect: Short-range burst of dark fire. Very high poise damage, low cast time. ~400-500 damage.
- Synergy: With Parting Flame, you can hit with both the flame and the surge for double hit. Combos with Fire Surge for lockdown.
- When to Use: Close range, against shield users (goes through shields). Roll-catch in PvP.
- FP Cost: 10
- Slots: 1
- Stat Req: 14 INT/14 FTH
- Effect: Emits a stream of fire that constantly damages enemies for as long as you hold cast. Very low FP per tick (~1-2 FP per second).
- Synergy: Harass enemies at mid-range, chip through shields. Use with Toxic Mist to obscure vision.
- When to Use: PvP pressure, finishing low-health enemies.
- FP Cost: 25
- Slots: 1
- Stat Req: 15 INT, 10 FTH? Actually Rapport requires 15 INT and 10 FTH.
- Effect: Makes a humanoid enemy temporarily friendly. They will attack other enemies. Lasts ~10 seconds.
- Synergy: Use on tough knights to clear a path. Works on Silver Knights, Lothric Knights.
- When to Use: Crowded areas with many humanoids.
- FP Cost: 30
- Slots: 1
- Stat Req: 14 INT/14 FTH
- Effect: Buffs your physical attack power and spell cast speed for 30 seconds. About +7.5% AR. Also works for sorceries and miracles? Actually only boosts physical attack, but also increases cast speed for all spells.
- Synergy: Combine with Sacred Oath (miracle) and Power Within (pyromancy) for massive damage but high FP usage.
- When to Use: Before a boss burst phase.
- FP Cost: 20
- Slots: 1
- Stat Req: 20 INT/20 FTH
- Effect: Increases all damage by 20% for 30 seconds, but drains HP over time (about 2% per second). HP can be healed normally.
- Synergy: Use with Tears of Denial to survive the HP drain. Stack with Carthus Beacon and Carthus Flame Arc for weapon buff.
- When to Use: Short boss windows (e.g., after stagger).
- FP Cost: 20
- Slots: 1
- Stat Req: 10 INT, 10 FTH? Actually requires 10 INT/10 FTH.
- Effect: Buffs weapon with fire damage for 60 seconds. Adds about 70-90 fire AR at 20/20.
- Synergy: Works well with fast weapons (e.g., Sellsword Twinblades, Warden Twinblades). Stack with power buffs.
- When to Use: General PvE, for fire-weak enemies.
- FP Cost: 35
- Slots: 1
- Stat Req: 30 INT/30 FTH? Actually this is a sorcery that requires INT and FTH? It's a dark sorcery that scales with both? Let's clarify: Great Soul Dregs is a sorcery requiring 30 INT and 30 FTH. But can be cast with staff or pyromancy flame? Actually it's a sorcery spell, but deals dark damage. It's often used in dark builds.
- Effect: Fires a large, tracking dark projectile. Very high damage (~1000-1500 at 40/40).
- Synergy: Murky Longstaff or Izalith Staff (both scale with INT and FTH). Use with Dark Clutch Ring.
- When to Use: As a high-damage ranged option for dark builds.
- Stat target: 40 INT/40 FTH (soft caps). Then 30 ATT for slots. Enough END to cast comfortably.
- Best Flame: Pyromancy Flame +10 (high fire scaling). Parting Flame (from DLC) adds a melee hit on cast.
- Rings: Great Swamp Ring (+20% fire), Witch's Ring (+20% fire), Fire Clutch Ring (+15% fire), Dark Clutch Ring (+15% dark) for dark pyromancies.
- Headgear: Crown of Dusk (sorcery) doesn't boost pyromancy? Actually it boosts all magic damage? No, it only boosts sorcery damage. For pyromancy, use Blindfold Mask for dark pyromancies, or no special headgear for fire (there is no fire-boosting headpiece except the Dusk Crown does not affect pyromancy). Actually Crown of Dusk works for sorceries only.
- For dark pyromancies: use Blindfold Mask, Sunless Talisman (for dark miracles), or Izalith Staff (for dark sorcery).
- Effect: Enter a stance with two attack options: Light attack (R1) for a fast thrust or heavy attack (R2) for an overhead slash. Stance provides poise and can break guard.
- FP Cost: 8 (enter stance), additional attacks cost 0 FP. Duration limited to about 3 seconds.
- Use Cases: Guard break (heavy attack), roll catch (light attack).
- Examples: Longsword, Claymore, Uchigatana.
- Effect: Gain temporary super armor (poise) and reduced damage. Lasts ~2 seconds. Increases poise to near-invincible.
- FP Cost: 10
- Use Cases: Trade hits against harder enemies, avoid stagger from multiple mobs.
- Examples: Battle Axe, Great Club.
- Effect: Roar that increases your attack power by 10% for 30 seconds. Replaces light attack with a charged multi-hit combo (spinning attack). Spinning attack consumes stamina.
- FP Cost: 15 (for roar), no cost for spinning attack.
- Use Cases: Stunlock enemies, burst damage in PvE.
- Examples: Butcher Knife, Giant's Halberd.
- Effect: Activates a parry window (about 0.5 sec active frames). Successful parry stuns enemy for a riposte critical hit.
- FP Cost: 0
- Use Cases: Against predictable enemies, PvP parry baits.
- Moonlight Greatsword: L2 increases magic damage for 60 seconds (adds magic AR). R2 fires energy waves that cost 0 FP?
- Farron Greatsword: L2 initiates breakdance combo (L1 for standard combos). The L2 jump attack can stagger.
- Wolf Knight's Greatsword: L2 performs a spinning slash that flips forward (Old Wolf Curved Sword also has similar).
- Fume Ultra Greatsword: L2 drops sword onto ground, creating a shockwave (deals damage).
- Spell Caster Weapons? Some weapons have arts that buff the weapon or cast spells (Immolation Tinder?).
- FP Cost: 0
- Effect: Provides a dark shield that absorbs dark damage and allows lifesteal on humanoid enemies (grab attack). Grab attack recovers HP per hit.
- Use Cases: Early game dark build, healing without Estus.
- Effect: Replaces dodge roll with a quick hop that has more invincibility frames and faster recovery. Costs 8 FP per use.
- Synergy: Use with rotten pine resin for poison dagger builds.
- When to Use: Evading through attacks, positioning for backstabs.
- Effect: Spin the weapon around you. Can be held for multiple spins. Combos into a final bash. Very good for crowd control.
- FP Cost: 10 (initial), 0 per spin.
- Use Cases: Clearing groups, stunlocking single enemies.
- For weapons like the Estoc, the Hold art increases range and provides a fast thrust.
- Effect: L2/Parry actually parries? Cestus can parry. Also some fist weapons have a quick jab.
- Pyromancy Flame has its own skill: L2 performs a quick flame swipe (damage scales with Pyromancy Flame level).
- Strength Builds: Use weapons with Perseverance or War Cry. Great Club with Perseverance allows tanking boss hits.
- Dexterity Builds: Use weapons with Stance (Uchigatana) or Quickstep (Bandit Knife) for evasion.
- Faith Builds: Use Lightning Blade buff on a weapon with good native scaling, or use Canvas Talisman's Unfaltering Prayer to cast miracles.
- Sorcery Builds: Use staff's Steady Chant (Sage's Crystal Staff) to boost sorcery damage by 50% for 20 seconds. Then cast Crystal Soul Spear.
- Pyromancy Builds: Use Parting Flame (Weapon Art: Flame Surge) for close combat.
- 10 ATT: 1 slot
- 14 ATT: 2 slots
- 18 ATT: 3 slots
- 24 ATT: 4 slots
- 30 ATT: 5 slots
- 40 ATT: 6 slots (max needed for most builds)
- Sorceries: Buy from Orbeck of Vinheim (after giving him scrolls). He appears in Firelink Shrine if you have 10 INT.
- Miracles: Buy from Irina of Carim (after giving her brailles) or Karla (for dark miracles).
- Pyromancies: Buy from Cornyx of the Great Swamp (after giving him tomes).
- Weapon Arts: Native to each weapon. Some weapons require upgrade materials to unlock full potential.
- Homing Soulmass + Soul Spear: Cast Homing, then immediately Spear while moving. Both hit at same time.
- Farron Flashsword into Great Soul Arrow: Use Flashsword to stagger, then roll away and cast arrow.
- Sunlight Spear point-blank + Double Hit: Use Unfaltering Prayer, stand next to boss, cast. Both lightning bolt and melee explosion hit.
- **Tears of Denial +
---
1. Sorceries (Intelligence-Based Spells)
Sorceries scale primarily with Intelligence and the spell buff of your staff. They are cast using a staff (Sage's staff, Heretic's staff, etc.). FP cost varies; higher cost typically means more damage or utility.
Key Sorceries
#### Soul Arrow (Base)
#### Great Soul Arrow
#### Heavy Soul Arrow
#### Soul Spear
#### Crystal Soul Spear
#### Farron Flashsword (Utility)
#### Magic Shield (Buff)
- Correction: Magic Shield (sorcery) requires 10 INT. No faith.
#### Hidden Body (Stealth)
#### Spook (Silent Steps)
#### Soul Greatsword
#### Homing Soulmass
#### White Dragon Breath
Sorcery Build Tips
---
2. Miracles (Faith-Based Spells)
Miracles focus on healing, lightning damage, and buffs. They scale with Faith and use talismans or chimes. Many miracles have high FP cost but provide excellent support.
Key Miracles
#### Heal (Base)
#### Great Heal
#### Lightning Spear
#### Great Lightning Spear
#### Sunlight Spear
#### Tears of Denial
#### Bountiful Sunlight
#### Dark Blade (Weapon Buff)
#### Lightning Blade (Weapon Buff)
#### Darkmoon Blade (Weapon Buff)
#### Wrath of the Gods
#### Force
#### Seek Guidance
Miracle Build Tips
---
3. Pyromancies (Intelligence/Faith Hybrid)
Pyromancies require both Intelligence and Faith. They are cast with the Pyromancy Flame (or Parting Flame). They feature fire and dark damage, with many utility spells.
Key Pyromancies
#### Fireball (Base)
#### Great Fireball
#### Chaos Fireball
#### Chaos Bed Vestiges
#### Great Chaos Fire Orb
#### Black Fire Orb
#### Black Flame
#### Fire Surge
#### Rapport
#### Carthus Beacon
#### Power Within
#### Carthus Flame Arc (Weapon Buff)
#### Great Soul Dregs (Dark Sorcery from DLC)
Pyromancy Build Tips
---
4. Weapon Arts (Skills)
Weapon Arts are special moves tied to weapons. They consume FP and provide unique effects such as stance attacks, parries, powerful overheads, or buffs. Each weapon has one Weapon Art, activated by pressing L2 (or LT) while two-handing (or with a shield that has the weapon art ability). Many weapons can be infused to change scaling, but Weapon Arts remain the same unless the weapon is unique.
Weapon Art Categories
#### Stance (Straight Swords, Greatswords, Katanas)
#### Perseverance (Hammers, Great Hammers, Axes)
#### War Cry (Axes, Maces, Some Hammers)
#### Parry (Small Shields, Parrying Daggers, Some Fist Weapons)
#### Weapon Art: L2/R2 combos (Unique Weapons)
Many boss weapons have unique arts. Examples:
Detailed Weapon Arts for Popular Builds
#### Dark Hand (Dark Skill)
#### Quickstep (Dagger, Bandit Knife, Footwork?)
#### Spin Bash (Halberds, Glaives)
#### Hold (Axes, Swords with special stance?)
#### Punishment (Cestus)
#### Flame Art (Pyromancy Flame?)
Weapon Art Synergies & Best Builds
---
5. Upgrading Skills & Spells
Spells do not have traditional upgrades. Instead, you upgrade your catalyst (staff, talisman, pyromancy flame) to increase spell buff. This scaling improves damage, healing, and buff potency. Weapon Arts also improve with weapon upgrade level (damage, poise). To unlock more spell slots, increase Attunement stat:
Some spells require multiple slots (e.g., Crystal Soul Spear requires 2 slots; Tears of Denial requires 2).
How to Obtain All Skills
---
6. Combos & Synergies
Sorcery Combos
Miracle Combos
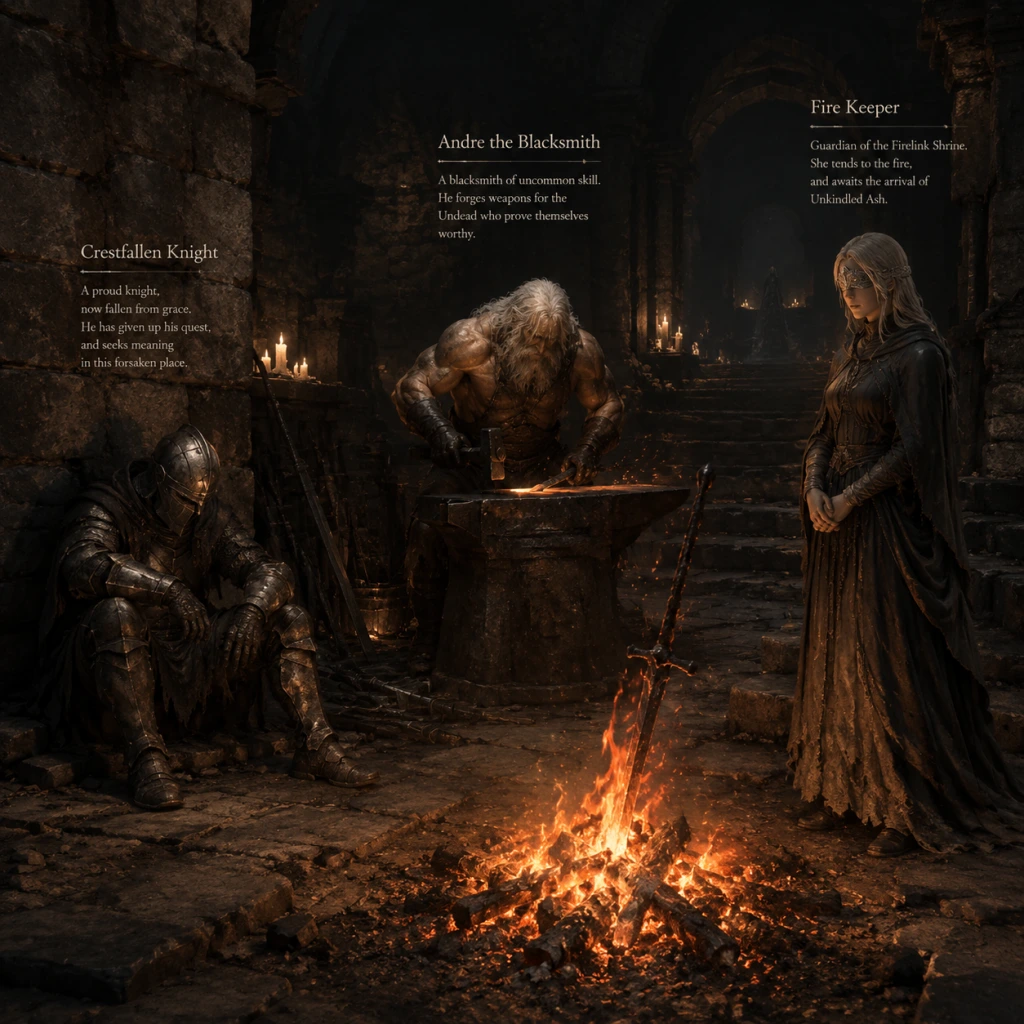
Characters & Roles
"content": "## Characters & Roles Guide for Dark Souls III
This guide covers every major character and playable role in Dark Souls III. Dark Souls III does not have traditional playable heroes with distinct backstories; instead, you create your own character (the Ashen One) and choose a Starting Class which defines your initial stats, gear, and playstyle. Additionally, numerous Non-Player Characters (NPCs) provide quests, services, and lore. This guide is divided into:
---
Each class begins the game with specific stats, equipment, and spells. Your choice heavily influences your early game experience and can be built into any direction later through stat investment. Below is a breakdown of every class, including strengths, weaknesses, and recommended builds.
Background: The Knight is a classic warrior, trained in the use of straight swords and shields. They are the most balanced starting class, with high starting Vigor (health) and Vitality (equip load), allowing heavy armor early.
Strengths:
Team Synergy: Knight works as a front-line tank in co-op. Use the leader–follower dynamic: draw aggro with a shield and heavy attacks, and let mages or archers deal damage from safety.
---
Background: The Warrior is a brute-force fighter, wielding an axe and focusing on raw Strength. Lower starting level means more room for customization.
Strengths:
Team Synergy: High damage melee dealer. In co-op, use heavy attacks to stagger enemies and create openings for teammates. Avoid tanking hits; let a Knight or Cleric draw aggro while you flank.
---
Background: The Herald is a support-oriented melee fighter, wielding a spear and a miracle for minor healing. They are a hybrid class with Faith investment.
Strengths:
Team Synergy: Excellent support role in co-op. Stay behind the tank, heal allies when needed, and use Lightning Spear to chip from range. The spear’s reach allows you to hit safely while others draw aggro.
---
Background: The Thief is a nimble, luck-based class with a focus on critical attacks. The Bandit’s Knife has built-in bleed. Highest starting Luck.
Strengths:
Team Synergy: Flanker and executioner. In co-op, use stealth (if applicable) or bait enemies to expose backs. Parry enemies that teammates distract. The Thief deals massive damage on ripostes but cannot sustain prolonged fights.
---
Background: The Assassin is a hybrid melee/sorcerer. They wield a thrusting sword (Estoc) that can attack from behind a shield, and they possess the Spook sorcery that silences footsteps and negates fall damage.
Strengths:
Team Synergy: Scout and utility caster. Use Hidden Body to pull enemies or bypass areas. Spook allows you to jump off ledges without damage, useful for shortcuts. In combat, use sorceries from a distance while melee allies engage.
---
Background: The Sorcerer is a pure magic user with high Intelligence. They have two spells and a staff, and a weak dagger for backup.
Strengths:
Team Synergy: Glass cannon artillery. Stay behind tanky allies and cast powerful spells. Use Pestilent Mist for area denial. Avoid ever being the target – draw aggro with spells then roll away. Co-op partners can distract bosses while you nuke.
---
Background: The Pyromancer wields fire magic, using a hand for a catalyst. They have balanced Intelligence and Faith (14 each) – the only class with dual investment.
Strengths:
Team Synergy: Versatile caster/melee. Can adapt to any situation with different pyromancies. In co-op, use Great Chaos Fire Orb for crowd control, Black Flame for melee burst, and Warmth to heal allies (slowly). Works well with any team composition.
---
Background: The Cleric is a faith-based healer and support. They start with the Heal miracle, a mace, and a chime. High Luck aids item discovery.
Strengths:
Team Synergy: Dedicated healer and buffer. In co-op, keep allies alive with Heal miracles. Use Lightning Spear to punish bosses from a safe distance. Can also use Blessed Weapon to buff ally’s weapon. The mace’s Perseverance can be used to poise through attacks when reviving fallen teammates (though not possible). Great for support-heavy party compositions.
---
Background: The Deprived is a blank slate with all stats at 10. Starting level 1, no armor, and a weak club and plank shield. The ultimate challenge or sandbox class.
Strengths:
This guide covers every major character and playable role in Dark Souls III. Dark Souls III does not have traditional playable heroes with distinct backstories; instead, you create your own character (the Ashen One) and choose a Starting Class which defines your initial stats, gear, and playstyle. Additionally, numerous Non-Player Characters (NPCs) provide quests, services, and lore. This guide is divided into:
- Starting Classes – The 10 playable roles at character creation.
- Major NPCs – Key allies, merchants, and quest-givers.
- Playstyle & Role Synergies – How your class choices affect team play in co-op.
---
Starting Classes
Each class begins the game with specific stats, equipment, and spells. Your choice heavily influences your early game experience and can be built into any direction later through stat investment. Below is a breakdown of every class, including strengths, weaknesses, and recommended builds.
1. Knight
| Attribute | Value |
|---|---|
| Starting Level | 9 |
| Vitality | 15 |
| Attunement | 10 |
| Endurance | 11 |
| Strength | 13 |
| Dexterity | 12 |
| Intelligence | 9 |
| Faith | 9 |
| Luck | 7 |
| Starting Equipment | Longsword, Knight Shield, Knight Helmet, Knight Armor, Knight Gauntlets, Knight Leggings, Estus Flask x3, Ashen Estus Flask x1 |
| Starting Spells | None |
Strengths:
- High starting health and stability (from the shield) make early game forgiving.
- Strong melee damage output with the Longsword, a versatile weapon.
- High Vitality means you can wear heavy armor without fat-rolling.
- Excellent for beginners.
- Low Luck reduces item discovery.
- No access to spells or ranged options initially.
- Slightly slower roll due to higher equip load until you level Endurance.
- Weapons: Straight swords (Longsword, Broadsword), greatswords (Claymore), or maces. Infuse with Heavy Gem for Strength scaling.
- Shields: The starting Knight Shield is excellent; later upgrade to a medium shield like the Dragon Crest Shield or a greatshield if you invest in Strength.
- Armor: Knight set is fine; upgrade to heavier armors as you level Vitality.
- Build path: 40+ Vigor, 40 Endurance, 40 Strength, some Dexterity for weapon requirements (quality builds also viable).
- Spells: Not necessary; use resins or bundle items for buffs.
Weaknesses:
Playstyle: Tanky melee. Block with the shield, counter-attack, and occasionally use a heavy two-handed swing. Focus on Strength and Endurance early.
Recommended Equipment & Build:
Team Synergy: Knight works as a front-line tank in co-op. Use the leader–follower dynamic: draw aggro with a shield and heavy attacks, and let mages or archers deal damage from safety.
---
2. Warrior
| Attribute | Value |
|---|---|
| Starting Level | 7 |
| Vitality | 11 |
| Attunement | 8 |
| Endurance | 12 |
| Strength | 16 |
| Dexterity | 9 |
| Intelligence | 8 |
| Faith | 9 |
| Luck | 11 |
| Starting Equipment | Battle Axe, Warrior Shield, Warrior Helm, Warrior Armor, Warrior Gauntlets, Warrior Leggings, Estus Flask x3, Ashen Estus Flask x1 |
| Starting Spells | None |
Strengths:
- Highest Starting Strength (16) – excellent for heavy weapons quickly.
- Good Endurance for stamina.
- Higher Luck than Knight helps item drops.
- No wasted points in Intelligence or Faith if going pure physical.
- Low Vitality means lighter armor early or fat-rolling if not careful.
- Shorter weapon reach than the Knight’s longsword.
- No shield stability – the Warrior Shield is smaller.
- Weapons: Axes (Battle Axe, Butcher Knife), great axes (Greataxe), or clubs. Infuse with Heavy Gem.
- Shields: Optional; use a small shield for parrying or two-hand the weapon.
- Build path: Focus on Vigor and Endurance to medium levels (20-30), then push Strength to 66. Endurance around 30-40.
- Spells: None.
Weaknesses:
Playstyle: Aggressive melee. Two-hand the axe for extra damage and use rolling attacks. Rely on dodging rather than blocking.
Recommended Equipment & Build:
Team Synergy: High damage melee dealer. In co-op, use heavy attacks to stagger enemies and create openings for teammates. Avoid tanking hits; let a Knight or Cleric draw aggro while you flank.
---
3. Herald
| Attribute | Value |
|---|---|
| Starting Level | 9 |
| Vitality | 12 |
| Attunement | 10 |
| Endurance | 10 |
| Strength | 12 |
| Dexterity | 11 |
| Intelligence | 8 |
| Faith | 13 |
| Luck | 11 |
| Starting Equipment | Spear, Herald Shield, Herald Helm, Herald Armor, Herald Gauntlets, Herald Leggings, Estus Flask x3, Ashen Estus Flask x1 |
| Starting Spells | Heal Aid (Miracle) |
Strengths:
- Starts with a healing miracle (Heal Aid), useful for extending your Estus.
- Spears allow poking from behind a shield – safe melee playstyle.
- Decent Strength and Dexterity for many weapons.
- Good Luck for item discovery.
- Low Vigor (12) means less health than Knight.
- Low Intelligence – can’t use sorceries without investment.
- Spear damage output is moderate; requires patience.
- Weapons: Spears (Spear, Partizan, Dragonslayer Spear), other thrusting weapons like rapiers can also work. Infuse with Lightning or Blessed later.
- Shields: The Herald Shield is good; upgrade to a medium shield with high stability.
- Build path: Level Vigor to 27 (soft cap), Endurance to 20-30, Faith to 40-60. Strength and Dexterity only to meet weapon requirements (spears often scale with Dexterity). Attunement to 14-24 for more spell slots.
- Miracles: Great Heal, Blessed Weapon, Lightning Spear.
Weaknesses:
Playstyle: Defensive poke. Use the shield and spear combo; attack with thrusts from a distance. Use Heal Aid to recover chip damage. Later expand into Faith for more miracles (heals, buffs, lightning).
Recommended Equipment & Build:
Team Synergy: Excellent support role in co-op. Stay behind the tank, heal allies when needed, and use Lightning Spear to chip from range. The spear’s reach allows you to hit safely while others draw aggro.
---
4. Thief
| Attribute | Value |
|---|---|
| Starting Level | 5 |
| Vitality | 10 |
| Attunement | 11 |
| Endurance | 10 |
| Strength | 9 |
| Dexterity | 13 |
| Intelligence | 10 |
| Faith | 8 |
| Luck | 14 |
| Starting Equipment | Bandit’s Knife, Target Shield, Leather Armor set (Thief Mask, Leather Armor, Leather Gloves, Leather Boots), Estus Flask x3, Ashen Estus Flask x1 |
| Starting Spells | None |
Strengths:
- Highest Luck (14) – best for item farming and bleed builds.
- Starts with a parry shield (Target Shield) – can parry to open enemies for ripostes.
- Bandit’s Knife has quickstep (Weapon Art) for evasion.
- Low starting level (5) offers a lot of customization.
- Very low Vigor (10) – squishy; one hit can be fatal.
- Low Strength limits heavy weapons.
- Requires skill to parry and use critical damage effectively.
- No healing miracles or spells.
- Weapons: Bandit’s Knife (early), later bleed-infused weapons like the Uchigatana (requires 16 Dexterity), or the Hollowslayer Greatsword for human enemies. Infuse with Hollow Gem for Luck scaling (after achieving Hollowing).
- Shields: Target Shield or a small parry shield; also good for parrying. Optionally, a caestus for parrying while two-handing the weapon.
- Build path: Prioritize Vigor to 27, Endurance to 30, Dexterity to 40 for faster casting/attacks, Luck to 40-50 for bleed and Hollow damage. Attunement not needed.
- Rings: Hornet Ring (increases critical damage), Flynn’s Ring (light equipment), Carthus Milkring (improves bleed/dodge).
Weaknesses:
Playstyle: Agile, critical-focused. Use the knife’s quickstep to dodge and attack from behind. Parry enemy attacks and follow up with ripostes. Bleed buildup works on most enemies. Use bows for ranged pulls.
Recommended Equipment & Build:
Team Synergy: Flanker and executioner. In co-op, use stealth (if applicable) or bait enemies to expose backs. Parry enemies that teammates distract. The Thief deals massive damage on ripostes but cannot sustain prolonged fights.
---
5. Assassin
| Attribute | Value |
|---|---|
| Starting Level | 10 |
| Vitality | 10 |
| Attunement | 12 |
| Endurance | 11 |
| Strength | 10 |
| Dexterity | 14 |
| Intelligence | 11 |
| Faith | 9 |
| Luck | 10 |
| Starting Equipment | Estoc, Sorcerer’s Staff, Assassin Helm, Assassin Armor, Assassin Gloves, Assassin Boots, Estus Flask x3, Ashen Estus Flask x1 |
| Starting Spells | Spook (Sorcery) |
Strengths:
- Spook is excellent for sneaking past enemies and exploring dangerous ledges.
- Estoc is a fast, damaging thrusting sword with good range.
- Balanced Intelligence (11) allows early use of many sorceries with a few levels.
- Decent Dexterity.
- Low Vigor (10) – very fragile.
- Low Faith and Luck.
- Requires both Int and Dex investment, causing stat spread.
- No healing spells unless you invest in Faith.
- Weapons: Estoc (early), Moonlight Greatsword (if you go Int), or other thrusting swords with Crystal infusion. The sellsword twinblades (Dex) also work.
- Catalysts: Sorcerer’s Staff; upgrade to Court Sorcerer’s Staff later.
- Spells: Spook, Hidden Body, Pestilent Mist, Homing Soulmass, Soul Spear.
- Build path: Vigor to 20-27, Attunement to 18-24, Dexterity to 40 (for spell casting speed via DEX), Intelligence to 60. Endurance to 20.
- Rings: Young Dragon Ring, Bellowing Dragoncrest Ring, Sage Ring (for faster casting, though Assassin already has decent DEX).
Weaknesses:
Playstyle: Sneaky melee caster. Use Spook to avoid detection and reach positions for backstabs. The Estoc can shield-poke. Later, use Hidden Body and Pestilent Mist for even more utility. Can transition into a pure sorcerer or a stealth-oriented fighter.
Recommended Equipment & Build:
Team Synergy: Scout and utility caster. Use Hidden Body to pull enemies or bypass areas. Spook allows you to jump off ledges without damage, useful for shortcuts. In combat, use sorceries from a distance while melee allies engage.
---
6. Sorcerer
| Attribute | Value |
|---|---|
| Starting Level | 6 |
| Vitality | 9 |
| Attunement | 16 |
| Endurance | 9 |
| Strength | 7 |
| Dexterity | 12 |
| Intelligence | 16 |
| Faith | 7 |
| Luck | 12 |
| Starting Equipment | Sorcerer’s Staff, Mail Breaker, Sorcerer Hood, Sorcerer Robe, Sorcerer Gloves, Sorcerer Boots, Estus Flask x3, Ashen Estus Flask x1 |
| Starting Spells | Soul Arrow (Sorcery), Heavy Soul Arrow (Sorcery) |
Strengths:
- Highest Intelligence (16) – strong early magic.
- High Attunement (16) – good FP and spell slots.
- Two starting sorceries for sustained ranged damage.
- Low starting level (6) – room to grow.
- Very low Vigor (9) – extremely fragile.
- Low Strength means weak melee options.
- Limited FP early; must carefully manage Estus allocation.
- No melee prowess; enemies that close distance are dangerous.
- Weapons: Mail Breaker (starting), but you will rely on spells. Use a simple infused dagger for FP regen. Optionally, upgrade to a Crystal-infused short sword for backup.
- Catalysts: Sorcerer’s Staff -> Court Sorcerer’s Staff (best for high Int) or Sage’s Crystal Staff.
- Spells: Soul Arrow, Heavy Soul Arrow, Homing Soulmass, Soul Spear, Crystal Soul Spear, Crystal Magic Weapon (for melee buff), Pestilent Mist.
- Build path: Vigor to 20-27, Attunement to 24-30, Endurance to 20, Dexterity to 15-20 (for casting speed), Intelligence to 60. Keep Strength at starting 7.
- Rings: Young Dragon Ring, Bellowing Dragoncrest Ring, Sage Ring, Crown of Dusk (headgear) for magic boost.
Weaknesses:
Playstyle: Pure ranged caster. Keep distance, cast Soul Arrow series. Use Heavy Soul Arrow for armored foes. Later, acquire powerful spells like Soul Spear, Crystal Soul Spear, and Homing Soulmass. Use a dagger as a last resort only.
Recommended Equipment & Build:
Team Synergy: Glass cannon artillery. Stay behind tanky allies and cast powerful spells. Use Pestilent Mist for area denial. Avoid ever being the target – draw aggro with spells then roll away. Co-op partners can distract bosses while you nuke.
---
7. Pyromancer
| Attribute | Value |
|---|---|
| Starting Level | 8 |
| Vitality | 11 |
| Attunement | 14 |
| Endurance | 12 |
| Strength | 12 |
| Dexterity | 9 |
| Intelligence | 14 |
| Faith | 14 |
| Luck | 7 |
| Starting Equipment | Pyromancy Flame, Hand Axe, Round Shield, Pyromancer Crown, Pyromancer Garb, Pyromancer Wrap, Pyromancer Trousers, Estus Flask x3, Ashen Estus Flask x1 |
| Starting Spells | Fireball (Pyromancy) |
Strengths:
- Pyromancies scale with the sum of Int and Faith (soft cap 40/40). This class is ready for a powerful caster early.
- Decent starting Vigor and Endurance – sturdier than Sorcerer.
- Fireball is a good ranged nuke with area damage.
- Hand Axe is a viable early melee weapon.
- Low Luck hurts item drops.
- Fire damage is ineffective against some early enemies (e.g., fire-resistant demons) and in later areas like the Demon Ruins.
- Requires high stat investment across two stats, delaying Vigor.
- No healing magic.
- Weapons: Hand Axe (early), later any weapon infusable with Dark or Fire gems. The Onyx Blade (from DLC) is excellent for Dark builds. Chaos infusions scale with Int/Fai.
- Pyromancies: Fireball, Great Chaos Fire Orb, Chaos Bed Vestiges, Black Flame, Toxic Mist, Warmth (heals, requires Covenant).
- Build path: Vigor to 27, Attunement to 18-24, Endurance to 20, Strength/Dexterity to minimum requirements for chosen weapon, Intelligence and Faith to 40/40 (or 45/45 for absolute max). No need to exceed 40/40 unless using certain spells.
- Rings: Great Swamp Ring, Witch’s Ring, Sage Ring, Fire Clutch Ring.
Weaknesses:
Playstyle: Hybrid caster/melee. Use Fireball as opening attack, then switch to Hand Axe or other melee weapons. Pyromancies can be used at close range with the flame. Rely on dodge rolling; shield is light.
Recommended Equipment & Build:
Team Synergy: Versatile caster/melee. Can adapt to any situation with different pyromancies. In co-op, use Great Chaos Fire Orb for crowd control, Black Flame for melee burst, and Warmth to heal allies (slowly). Works well with any team composition.
---
8. Cleric
| Attribute | Value |
|---|---|
| Starting Level | 7 |
| Vitality | 12 |
| Attunement | 12 |
| Endurance | 10 |
| Strength | 12 |
| Dexterity | 8 |
| Intelligence | 7 |
| Faith | 16 |
| Luck | 13 |
| Starting Equipment | Mace, Cleric’s Sacred Chime, Round Shield, Cleric Helm, Cleric Armor, Cleric Gloves, Cleric Leggings, Estus Flask x3, Ashen Estus Flask x1 |
| Starting Spells | Heal (Miracle) |
Strengths:
- Heal miracle provides sustainability – can heal without Estus blue flasks.
- Mace is surprisingly good (strike damage) and has Perseverance weapon art.
- Highest Faith (16) – strong miracles early.
- Decent Vigor and Attunement.
- Good Luck.
- Low Intelligence – cannot use sorceries.
- Mace has short range.
- Starting miracles are only healing; no offensive miracles until later (e.g., Lightning Spear can be found in Farron Keep).
- Low Endurance limits stamina.
- Weapons: Mace (early), later large weapons that scale with Faith (e.g., Lothric Knight Greatsword with Lightning Infusion, or the Cleric’s Candlestick? Actually, best is the Dragonslayer Greataxe for massive lightning damage). Infuse with Lightning or Blessed.
- Chimes: Cleric’s Sacred Chime -> Canvas Talisman (best for miracles with poise) or Yorshka’s Chime (best spellbuff). Use the Talisman weapon art for Unfaltering Prayer to cast through hits.
- Miracles: Heal, Great Heal, Bountiful Light, Lightning Spear, Great Lightning Spear, Sunlight Spear (requires covenant), Tears of Denial (saves death once), Dark Blade (dark buff, but requires Int/Fai).
- Build path: Vigor to 27, Attunement to 18-24, Endurance to 20, Faith to 60. Strength/Dexterity to meet weapon requirements (e.g., 16 Strength for Dragonslayer Greataxe).
- Rings: Ring of the Sun’s First Born (boosts miracles), Morne’s Ring (boosts miracles), Ring of Favor, Chloranthy Ring.
Weaknesses:
Playstyle: Defensive support. Use Heal to top off HP. The mace’s Perseverance poise through attacks. Later, acquire offensive miracles like Lightning Spear to contribute damage. Can transition into a tanky paladin with lightning buffs.
Recommended Equipment & Build:
Team Synergy: Dedicated healer and buffer. In co-op, keep allies alive with Heal miracles. Use Lightning Spear to punish bosses from a safe distance. Can also use Blessed Weapon to buff ally’s weapon. The mace’s Perseverance can be used to poise through attacks when reviving fallen teammates (though not possible). Great for support-heavy party compositions.
---
9. Deprived
| Attribute | Value |
|---|---|
| Starting Level | 1 |
| Vitality | 10 |
| Attunement | 10 |
| Endurance | 10 |
| Strength | 10 |
| Dexterity | 10 |
| Intelligence | 10 |
| Faith | 10 |
| Luck | 10 |
| Starting Equipment | Club, Plank Shield, Loincloth set (Loincloth only), Estus Flask x3, Ashen Estus Flask x1 |
| Starting Spells | None |
Strengths:
- All stats equal (10) – can become any build without wasted points.
- Lowest starting level (1) – the only class that can achieve SL 1 challenge runs (no leveling up).
- The club is actually decent for early game (strike damage, good for hollows).
- No armor – extremely vulnerable.
- Plank shield has terrible stability and 100% physical block only.
- No spells or healing.
- Hardest start for new players.
- Weapons: Club (early), upgrade to whatever weapon your chosen build dictates. The club can be infused raw for early damage.
- Shields: Replace Plank Shield as soon as possible with a better medium shield (e.g., Silver Eagle Kite Shield from High Wall of Lothric).
- Build path: Deprived is for players who know exactly what they want. For a quality build, aim for 40 VIG, 40 END, 40 STR, 40 DEX. For pure caster, dump everything into Int or Fai. The flexibility is the strength.
- Armor: Find a merchant or loot armor early – the Loincloth set provides no protection.
- Level Up: Spend souls to increase attributes.
- Fire Keeper Eyes: If you give her the Eyes (found in Untended Graves), you unlock the “End of Fire” ending, and she will offer to heal the dark sigil (cure hollowing).
- You can also purchase items from her after certain milestones (e.g., Tower Key, etc.).
- Weapon Reinforcement: Upgrade weapons with Titanite to +10.
- Infusion: Apply gems for scaling changes (requires appropriate coal).
- Repair: Fix broken equipment.
- Undead Bone Shard: Burn at Bonfire to strengthen Estus.
- Estus Shards (early game)
- Undead Bone Shards (early)
- Various keys and consumables.
- Ashes: Give her Undead Bone Shard? No, that’s different. She accepts “Ashes” from various locations (e.g., Paladin’s Ashes, Cornyx’s Ashes, etc.) to unlock new items.
- Transposition: Boss Soul + souls cost = new item. Only one item per soul (unless you duplicate souls).
- Talk to him after killing the Abyss Watchers to receive the “Path of the Dragon” gesture.
- Later, he may be summoned for the Champion’s Gravetender? Not sure. He appears as a phantom in Archdragon Peak after you use the gesture. He can be fought as a dark spirit there.
- Save him in the Undead Settlement (patrols on that rooftop area).
- Help him in Cathedral of the Deep (near the giant).
- Rescue him in Irithyll (in the kitchen area).
- Fight Yhorm with him – he wields the Storm Ruler and can stagger the boss.
- Meet at Halfway Fortress (road of sacrifices).
- Meet at Church of Yorshka bonfire.
- Summon for Pontiff Sulyvahn fight.
- Later, if you have the Usurpation of Fire questline (from Yuria), you can find Anri in the dark tomb of Anor Londo and perform a marriage ritual, killing them for the Dark Sigil.
- Sells items: Dark Hand (weapon), Dark miracles, and special items like the Londor Braille Divine Tome.
- She triggers the Usurpation of Fire ending: you must draw out your true strength (from the Fire Keeper) then level up with Yuria to obtain Dark Sigils.
- She will leave if you heal the dark sigil or offer the Fire Keeper eyes.
- Give her standard and dark miracles tomes. If you give her a dark miracle tome, she will become corrupted and eventually either die (if you buy too many dark miracles) or you must kill Eygon. Alternatively, if you give her only standard tomes, she remains pure and later becomes a Fire Keeper (if you buy all miracles).
Weaknesses:
Playstyle: Dependant on player skill. Rely on dodging and two-handed club attacks. Must upgrade quickly, find armor, and choose a build direction immediately.
Recommended Equipment & Build:
Team Synergy: Variable based on build. As a SL1 character in co-op, you will be extremely fragile and rely on perfect dodging while others tank. If you level up normally, your team role is whatever build you create. Not recommended for newcomers in co-op.
---
Major NPCs (Non-Player Characters)
Dark Souls III is filled with NPCs that serve various functions: merchants, blacksmiths, quest-givers, and summonable allies. Below are the most important ones.
Fire Keeper
Location: Firelink Shrine (central hub).
Role: Leveling up, restoring humanity, and serving as the hub’s protector.
Background: The Fire Keeper is a blind woman who tends to the fading flame. She allows the Ashen One to level up by spending souls. She can also draw out your true strength (if you offer her the Fire Keeper’s Soul from the Undead Settlement).
Interactions:
Team Synergy: Not directly in combat, but essential for progression.
Andre of Astora
Location: Firelink Shrine (blacksmith area).
Role: Blacksmith – upgrades weapons and armor.
Background: A famed blacksmith from Astora, Andre survived the ages and now serves the Ashen One.
Services:
Team Synergy: None in combat, but his services are vital for all players.
Shrine Handmaid
Location: Firelink Shrine (throne room).
Role: Merchant – sells common items, consumables, and some equipment.
Background: An old woman who runs the shop in the shrine. She initially sells basic wares, but her inventory expands as you progress and give her certain items (e.g., the Grave Key, Tower Key, and various ashes).
Key Items:
Team Synergy: None.
Ludleth of Courland
Location: Firelink Shrine (near the throne).
Role: Transposition – crafts boss weapons and items from boss souls.
Background: A small, enigmatic man who sits in a chair. He can transpose the souls of mighty bosses into unique weapons, rings, or spells.
Services:
Team Synergy: None.
Hawkwood the Deserter
Location: Firelink Shrine (standing near the bonfire after certain progression).
Role: Invader? Actually, he gives you the “Path of the Dragon” gesture and later can be summoned or fought.
Background: A deserter from the Undead Legion of Farron. He questions the purpose of linking the fire. He can be summoned for boss fights (farron keep? Actually he can be summoned for the Abyss Watchers fight). He also gives you the Dragon Torso Stone if you complete his questline (symbol of avarice? No).
Questline:
Team Synergy: As a summonable phantom, he is a decent melee ally with a greatsword. Good for distracting bosses.
Siegward of Catarina
Location: Multiple (Undead Settlement, Cathedral of the Deep, Irithyll, Profaned Capital).
Role: Quest NPC – gives you the Storm Ruler, helps with Yhorm the Giant boss fight.
Background: A jovial knight of Catarina who wears the iconic onion helmet. He is on a personal quest to honor a promise. He has a long questline that culminates in assisting you against Yhorm.
Questline:
Team Synergy: In co-op, if you summon him for Yhorm, he is invaluable because his Storm Ruler damages Yhorm greatly. For other fights, he is a decent tank.
Anri of Astoria
Location: Multiple (Halfway Fortress, Church of Yorshka, Anor Londo).
Role: Quest NPC – a silent knight seeking the Lord of Hollows. Can be summoned for boss fights (e.g., Pontiff Sulyvahn) and later married in the Usurpation of Fire ending.
Background: Anri is a knight from Astora (or actually a pilgrim from Londor) destined to become a Lord of Hollows. They are of the same gender as your character. Their quest involves…
Questline:
Team Synergy: As a summon, Anri wields a straight sword and shield, similar to a Knight. Reliable but not exceptional.
Yuria of Londor
Location: Firelink Shrine (after killing the Sword Master outside).
Role: Merchant and questgiver for the Lord of Hollows ending.
Background: A sorceress from Londor who seeks to usurp the flame. She sells dark miracles and sorceries, and demands you collect Dark Sigils to become a true Lord of Hollows.
Services:
Team Synergy: Not a combat ally, but essential for a specific ending.
Irina of Carim
Location: Firelink Shrine (after rescuing her from the Undead Settlement sewers).
Role: Miracle vendor – can teach you miracles if you give her tomes.
Background: A blind woman who is a devout follower of the Gods. She can learn miracles from tomes. She shares her cell with Eygon, a knight who protects her.
Interaction:
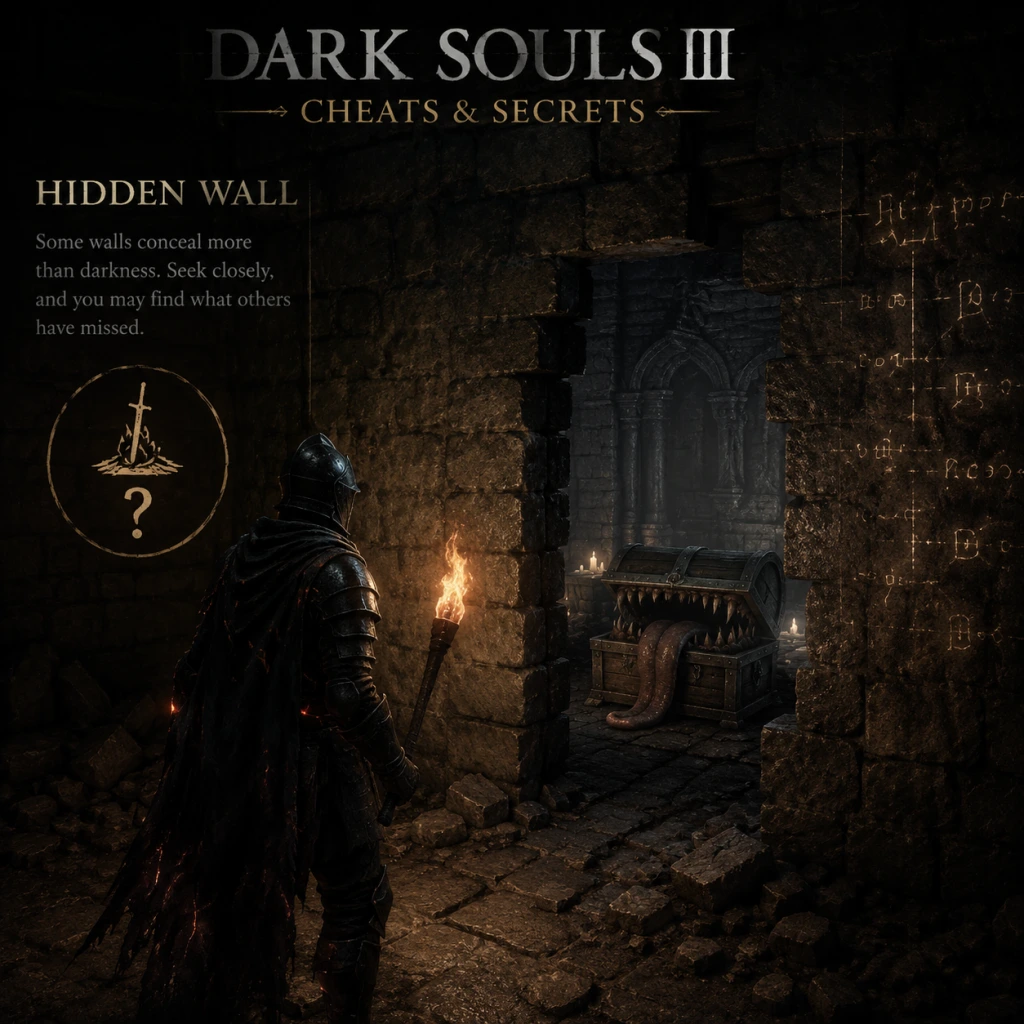
Cheats & Secrets
Dark Souls III Cheats & Secrets Guide
Dark Souls III does not have conventional cheat codes, console commands, or unlock codes on any platform (PC, PlayStation 4/5, Xbox One/Series X|S). However, the game is filled with developer-intended secrets, hidden areas, Easter eggs, and obscure mechanics that reward thorough exploration. This guide documents all known legitimate hidden content and secrets.
Important Note on Cheating
Using third-party tools, save-file editors, or memory manipulation on PC can result in a softban (being placed on a separate server with other cheaters). This guide covers only in-game secrets accessible without external modifications.
---
Hidden Areas & Optional Zones
#### 1. Untended Graves
- Location: After defeating Oceiros, the Consumed King in the Garden of the Consumed King. Behind the boss room, there is a hidden wall near the throne. Roll or attack the bookshelf to reveal a path to Untended Graves.
- Significance: This area is a dark version of the Cemetery of Ash, featuring the Champion Gundyr boss fight and the Eyes of a Fire Keeper item (used to unlock the “End of Fire” ending).
- Location: Use the Path of the Dragon gesture in front of the altar at Irithyll Dungeon (after the room with two giants). You must first obtain the gesture by visiting the Dragon-Shrined area in the DLC or from the Dragon Torso Stone.
- Significance: A massive optional area with multiple bosses: Ancient Wyvern (requires a plunging attack), Nameless King (hidden boss), and many loot items.
- Location: After defeating the Dancer of the Boreal Valley, go to the Cleansing Chapel bonfire in Cathedral of the Deep. Near the bonfire, interact with the painting (it glows) to enter the DLC.
- Significance: Full optional zone with bosses: Gravetender Greatwolf, Sister Friede (and Father Ariandel).
- Location: After defeating the Soul of Cinder (final boss) or via a bonfire warp at the end of the Ashes of Ariandel DLC. Alternatively, use the Dreg Heap bonfire after defeating the Demon Prince.
- Significance: Final DLC area, concluding the series’ story. Contains bosses: Demon Prince, Halflight, Spear of the Church, Darkeater Midir (optional), Slave Knight Gael.
- Requirement: Follow Yoel of Londor’s questline until he dies, then summon Yuria of Londor. Keep a Dark Sigil (from Yoel’s free levels) to trigger Yuria’s dialogue. Marry Anri at the hidden rite at the Church of Yorshka (after killing the Pontiff). Do not kill the assassin (the disguised pilgrim).
- Result: Unlocks “Usurpation of Fire” ending.
- Steps:
- Secret: If Siegward survives, you can get his armor and weapon.
- Steps: Help her at the Irithyll bridge (summon sign). Do not join Rosaria’s Fingers covenant before completing her questline. After defeating the Twin Princes, talk to her at Firelink Shrine to receive the Silvercat Ring and Sunless Talisman.
- Secret Interaction: If you collect the Dark Soul (from Gael) and give it to the painter girl, she creates a new painted world. This is the finale of the series lore.
- How to Obtain: Trade the Soul of Oceiros (Consumed King) with Ludleth at Firelink Shrine. Oceiros himself is an optional boss.
- How to Obtain: Transpose the Soul of the Old Demon King for the Chaos Bed Vestiges pyromancy OR the Chaos Blade (katana). Requires the Great Swamp Pyromancy Tome.
- How to Obtain: Transpose the Soul of the Nameless King. Requires the Dragonslayer Oath gesture? No – just transpose at Ludleth.
- How to Obtain: Transpose the Soul of Dark Sun Gwyndolin (from Aldrich, Devourer of Gods) – but you get the soul after defeating Aldrich. Wait… Aldrich’s soul can be made into the Darkmoon Longbow (actually it’s the Darkmoon Bow). Yes.
- Location: In the Farron Keep area, near the Stray Demon boss (the bridge). After defeating the demon, loot the corpse near the cliffside for Havel’s Ring. Havel’s armor set is obtained by finding Havel’s secret room in the same area: there is an illusory wall next to the bonfire after the Stray Demon, leading to Havel’s gear.
- Reference: In Anor Londo (Irithyll), you can find the corpse of the Giant Blacksmith from Dark Souls 1 (his hammer and ember are nearby). This is a direct callback.
- Appearance: Patches appears at the Cathedral of the Deep (as a spider-legged creature holding a large cross) and later at Firelink Shrine. He also appears in the Ringed City DLC. Kicking him off a cliff yields the “Patches Squat” gesture later.
- The Painted World of Ariandel contains references to the original Painted World of Ariamis from Dark Souls 1 (including the same type of enemies and layout hints).
- Secret Message: In the Untended Graves, near the Champion Gundyr boss fog, there is an illusory wall that reveals a message saying “Try holding with both hands”. Not a real hint, just a developer joke.
- Item Description: The description of the “Small Envoy Horn” (dropped by the Angels in Dreg Heap) says “When the King’s decisive rejection became a cosmic truth, the gods had no choice but to bow.” This references Gwyn’s rejection of linking the fire.
- Secret Mechanic: Poise stat is less effective for normal attacks but very important for hyper armor during weapon arts and heavy weapon attacks. This is not explained in-game.
- Secret: Some weapon arts (like Farron Greatsword’s L1 combo) can parry. The parry frames are different from shields – requires testing.
- Blue Sentinel / Darkmoon Blade: Summoned automatically when invaders appear in Way of Blue host’s world. The hidden reward: obtain the Darkmoon Blade miracle and the Darkmoon Ring.
- Mound-Makers: The mad phantom covenant’s purpose is not fully explained – you can help the host or invade, and you get a Vertebra Shackle for killing phantoms or hosts.
- Tip: A parry just before an attack lands (1–2 frames) results in a “critical parry” that leaves the enemy vulnerable longer. This is the same as DS1/DS2 but with tighter window.
- The Ariamis Painting from DS1 (replaced by Ariandel).
- Boss armor sets for Dancer, Oceiros, etc. are not present as wearables.
- Mound-Maker NPC types were cut (like the “Mad Knight” enemy).
- Mimic Chase: Use the “Undead Hunter Charm” (Lloyd’s Talisman) on mimics to put them to sleep and steal their item without fighting. This is an intended mechanic.
- Poisoning Bosses: Some bosses can be poisoned or bled, but this is not a bug – it’s a tactical option.
#### 2. Archdragon Peak
#### 3. The Painted World of Ariandel (Ashes of Ariandel DLC)
#### 4. The Ringed City (The Ringed City DLC)
---
Secret Quests & NPC Storylines
#### 1. Anri of Astora’s Marriage (Usurpation of Fire Ending)
#### 2. Siegward of Catarina’s Quest
1. Rescue him from the well at Undead Settlement (after defeating Greatwood).
2. Talk to him in the Irithyll kitchen (after Pontiff’s area).
3. Find him in the Profaned Capital (near the toxic swamp).
4. Summon him for the Yhorm the Giant boss fight – use the Storm Ruler weapon for an easy kill.
#### 3. Sirris of the Sunless Realms
#### 4. The Painter in the Painted World (DLC)
---
Hidden Weapons & Equipment
#### 1. Moonlight Greatsword
#### 2. Chaos Blade
#### 3. Dragonslayer Spear (Ornstein’s Spear)
#### 4. Darkmoon Bow
#### 5. Havel’s Set & Havel’s Ring
---
Easter Eggs & References
#### 1. The Giant Blacksmith (Anor Londo)
#### 2. Patches the Hyena
#### 3. The Painted World’s Reference to DS1
#### 4. “Try Holding with Both Hands” Message
#### 5. The King’s Decisive Rejection
---
Developer-Intended Hidden Mechanics
#### 1. Poise and Hyper Armor
#### 2. Weapon Art Parry Timing
#### 3. Covenants and Hidden Rewards
#### 4. The “Perfect” Parry
---
Cut Content (Non-Exploitable)
Some items are not obtainable without mods:
---
Safe Exploits (Respectful to the Spirit of the Game)
---
Final Words
Dark Souls III rewards players who explore every corner, read item descriptions, and experiment with obscure gestures. There are no actual cheat codes, but the secrets listed above provide a rich and rewarding experience for completionists.