
Dead by Daylight
# Dead by Daylight: Game Introduction ## Overview **Dead by Daylight** (commonly abbreviated as *DbD*) is an asymmetric multiplayer horror game developed by **Behaviour Interactive** and published by **Behaviour Interactive** (formerly Starbreeze Studios). Since its initial release, it has become ...
Download & Installation
Dead by Daylight: Download & Installation Guide
This guide covers everything you need to know to download and install Dead by Daylight (DbD) on all major platforms. Follow the steps for your platform to start surviving or hunting.
1. System Requirements (PC)
Before downloading on PC, verify your hardware meets these requirements.
Minimum Requirements (playable at low settings, 30 FPS)
- OS: Windows 10 64-bit
- CPU: Intel Core i3-4170 or AMD FX-8120
- RAM: 8 GB
- GPU: NVIDIA GeForce GTX 460 (1 GB) / AMD HD 6850 (1 GB) / Intel HD Graphics 630
- DirectX: Version 11
- Storage: 50 GB available space (SSD recommended)
- Network: Broadband internet connection
- OS: Windows 10 64-bit / Windows 11
- CPU: Intel Core i5-8400 or AMD Ryzen 5 2600
- RAM: 16 GB
- GPU: NVIDIA GeForce GTX 1060 (6 GB) / AMD Radeon RX 580 (8 GB)
- DirectX: Version 12
- Storage: 50 GB SSD
- Network: Broadband internet connection
- PC (Steam/Epic): ~50 GB download. After installation, the folder size is about 45–50 GB.
- PlayStation 4: ~50 GB
- PlayStation 5: ~50 GB (PS5 version may be slightly smaller due to compression)
- Xbox One / Series X|S: ~50 GB
- Nintendo Switch: ~15 GB (lower resolution textures)
- Mobile (iOS/Android): ~3–5 GB (varies by assets)
Recommended Requirements (60 FPS at high settings)
> Note: Dead by Daylight does not support Windows 7 or 8.1 officially. macOS and Linux are not supported.
2. Storage Space
Always ensure you have at least 10 GB extra free space for updates and patches.
3. Official Download Sources (Legitimate Only)
| Platform | Official Store / Launcher |
|---|---|
| PC (Steam) | [Steam Store](https://store.steampowered.com/app/381210/Dead_by_Daylight/) |
| PC (Epic) | [Epic Games Store](https://store.epicgames.com/en-US/p/dead-by-daylight) |
| PC (Microsoft Store) | [Microsoft Store](https://www.microsoft.com/en-us/p/dead-by-daylight) (Windows 10/11) |
| PlayStation 4/5 | PlayStation Store (search "Dead by Daylight") |
| Xbox One / Series X | S |
| Nintendo Switch | Nintendo eShop (search "Dead by Daylight") |
| Mobile (iOS) | Apple App Store (search "Dead by Daylight Mobile") |
| Mobile (Android) | Google Play Store (search "Dead by Daylight Mobile") |
4. Step-by-Step Installation
4.1 PC – Steam
1. Install the Steam client from [store.steampowered.com](https://store.steampowered.com) if you don't have it.
2. Create a Steam account or log in.
3. Open the Steam client, go to Store and search "Dead by Daylight".
4. Click Add to Cart and complete purchase (or if you already own it, click Install on the game page).
5. In your Library, find Dead by Daylight and click Install.
6. Choose installation location (default: `C:\Program Files (x86)\Steam\steamapps\common\Dead by Daylight`).
7. Wait for the download and automatic installation. It will verify files after download.
8. Launch from Library or desktop shortcut.
4.2 PC – Epic Games Store
1. Install the Epic Games Launcher from [epicgames.com](https://www.epicgames.com).
2. Log in to your Epic account.
3. Go to Store and search "Dead by Daylight".
4. Click Get or Buy (depending on ownership).
5. Go to Library, find Dead by Daylight, and click Install.
6. Select install location and confirm.
7. Once installed, click Launch.
4.3 PC – Microsoft Store (Windows 10/11)
1. Open the Microsoft Store app from Start Menu.
2. Search "Dead by Daylight".
3. Click Install (or Buy if required).
4. Microsoft Store downloads and installs automatically.
5. Launch from Start Menu or Xbox app.
4.4 PlayStation 4 / 5
1. Turn on console and sign in to your PlayStation Network account.
2. Navigate to PlayStation Store (icon on home screen).
3. Search "Dead by Daylight".
4. Select the game and choose Download (if owned) or Add to Cart then purchase.
5. The download starts; you can monitor progress from Notifications or Downloads.
6. Once installed, the game appears on the home screen. Launch it.
4.5 Xbox One / Series X|S
1. Sign in to your Xbox Live / Microsoft account.
2. Go to Microsoft Store (or Store tab on dashboard).
3. Search "Dead by Daylight".
4. Select the game and click Install (or buy first).
5. The download proceeds; you can check under My games & apps > Queue.
6. After installation, launch from My games & apps.
4.6 Nintendo Switch
1. Ensure you have a Nintendo Account and sufficient free space (at least 15 GB).
2. Open Nintendo eShop from the Home menu.
3. Search "Dead by Daylight".
4. Select the game and choose Download (purchase if needed).
5. The download begins automatically; you can check progress on the Home screen.
6. Once finished, the game icon appears. Tap to play.
4.7 Mobile (iOS / Android)
#### iOS (iPhone/iPad)
1. Open App Store.
2. Search "Dead by Daylight Mobile".
3. Tap Get and authenticate with Face ID/Touch ID/Apple ID password.
4. The app downloads and installs automatically.
5. Open the app from your home screen.
#### Android
1. Open Google Play Store.
2. Search "Dead by Daylight Mobile".
3. Tap Install and accept permissions.
4. Once downloaded, the app appears in your app drawer. Tap to launch.
> Note: Dead by Daylight Mobile is a separate version from console/PC. Progress does not carry over between platforms.
5. Account Requirements
- PC (Steam/Epic/Microsoft): You need a Behaviour Interactive account to play online. This is created or linked on first launch.
- PlayStation: PlayStation Network account + free online subscription (PS Plus required for online play).
- Xbox: Xbox Live account + Game Pass Core or Ultimate for online multiplayer.
- Nintendo Switch: Nintendo Account + Nintendo Switch Online subscription.
- Mobile: Google Play / Apple ID or Behaviour account (optional). No subscription needed.
6. First Launch Setup
1. Launch the game.
2. Accept the End User License Agreement (EULA) and Privacy Policy.
3. Choose your region (affects server matchmaking).
4. Create or sign in to your Behaviour account (or link a platform account). This is necessary for cross-progression (only between Steam and Epic on PC; not console-to-PC).
5. Adjust graphics settings (PC) – recommended to set to default first, then tweak.
6. Complete the tutorial (optional but recommended) – accessible from the main menu.
7. Check your network – the game will test connection to servers.
8. Start playing either as Killer or Survivor.
7. Common Installation Errors & Fixes
PC Errors
| Error | Cause | Solution |
|---|---|---|
| Steam: Disk write error | Corrupted download cache or insufficient permissions | Restart Steam as Administrator, verify integrity of game files (right-click game > Properties > Local Files > Verify integrity). |
| Epic: LS-0013 | Game files corrupted after update | Run Epic Games Launcher as Admin, then verify files from Library (three dots > Verify). |
| Microsoft Store: 0x80070005 | Access denied / permissions issue | Run Windows Update, reset Microsoft Store cache (wsreset.exe), or reinstall Gaming Services. |
| Crash on launch (PC) | Outdated GPU drivers or antivirus interference | Update graphics drivers (NVIDIA/AMD). Temporarily disable antivirus. Run game as Administrator. |
| DirectX error | Missing DirectX components | Install DirectX from Microsoft's website or reinstall the game's redistributables. |
| Easy Anti-Cheat error | EAC not installed or blocked | Run the game's EAC installer (located in the game folder `\EasyAntiCheat`). Repair or reinstall EAC. |
| Network error / Cannot connect | Firewall blocking game | Add DeadByDaylight.exe and EAC to firewall exceptions. Port forwarding: UDP 3074, 27015. |
Console Errors
| Error | Cause | Solution |
|---|---|---|
| PS4: CE-30005-8 | Corrupted data | Rebuild database in Safe Mode, or delete and reinstall the game. |
| Xbox: 0x87e0000f | Installation stopped / network issue | Check Xbox Live status, restart console, clear local saved games (Settings > System > Storage > Clear local saved games). |
| Switch: 2155-1000 | Corrupted download | Delete the software and redownload from eShop. Ensure enough free space. |
| All consoles: Long loading / black screen | Server outage or corrupt save | Close app, restart console, check official Twitter/X for server status. |
Mobile Errors
| Error | Cause | Solution |
|---|---|---|
| Download fails / Unable to install | Insufficient storage or unstable connection | Free up space (at least 5 GB). Use Wi-Fi. Clear Google Play/App Store cache. |
| Crash on startup | Device incompatible or OS outdated | Ensure running Android 6.0+ / iOS 12+. Update OS. |
| Login loop | Account verification stuck | Force close app, clear app data, restart device. |
8. Post-Installation Verification
- PC: Press `Ctrl+Shift+Esc` to open Task Manager and check if DeadByDaylight.exe is running after launch. Verify game version from main menu (bottom-left corner).
- Console: Go to System Settings > Storage (or Manage Game) to see installed size. Check for updates (if any) and install latest patch.
- Mobile: Open app, go to Settings > About to see version number. Ensure update is current.
- Cross-platform play is enabled by default (you can toggle it in Options > Online).
- Voice chat (PC/console) works properly (in-game proximity chat or party system).
- DLC ownership – if you purchased additional characters or cosmetics, they should appear in your inventory after restarting the game.
- PC (Steam/Epic): Updates automatically when launcher runs. You can manually check for updates by right-clicking the game > Properties > Updates (Steam) or Library > Auto-Update (Epic).
- Microsoft Store: Updates are handled via Store app. Go to Library > Get Updates.
- PlayStation/Xbox: Enable automatic updates in console settings. Alternatively, check for updates by highlighting the game tile and pressing Options (PS) or Menu (Xbox).
- Switch: Update from Home Screen: highlight game icon, press +, select Software Update > Via Internet.
- Mobile: Enable auto-update in Google Play / App Store settings.
Also verify:
9. Keeping the Game Updated
---
Troubleshooting tip: If you still experience issues, visit the official [Dead by Daylight Support Portal](https://support.deadbydaylight.com) or the [Behaviour Interactive Forums](https://forum.deadbydaylight.com).
Game Introduction
Dead by Daylight: Game Introduction
Overview
Dead by Daylight (commonly abbreviated as DbD) is an asymmetric multiplayer horror game developed by Behaviour Interactive and published by Behaviour Interactive (formerly Starbreeze Studios). Since its initial release, it has become a flagship title in the non-linear survival horror genre, blending intense chase mechanics, strategic teamwork, and iconic horror characters.
Genre & Core Gameplay
- Genre: Asymmetric multiplayer survival horror, action, stealth
- Core Loop: In each match, four Survivors must repair five generators to power the exit gates and escape, while one Killer hunts them down to sacrifice them to the Entity—a malevolent cosmic force. The game emphasizes cat-and-mouse tactics, resource management (pallets, lockers, items), and outsmarting opponents rather than direct combat.
- Developer: Behaviour Interactive (based in Montréal, Canada)
- Publisher: Behaviour Interactive (self-publishing since 2018; previously Starbreeze Studios)
- Additional Licensors: Numerous film, game, and pop culture franchises (e.g., Halloween, Stranger Things, Silent Hill, Resident Evil)
Developer & Publisher
Release Timeline
| Platform | Release Date |
|---|---|
| Windows (Steam) | June 14, 2016 |
| PlayStation 4 | June 20, 2017 |
| Xbox One | June 20, 2017 |
| Nintendo Switch | September 24, 2019 |
| Android & iOS | April 17, 2020 (removed from mobile stores in 2024) |
| PlayStation 5 / Xbox Series X | S |
| Epic Games Store | December 1, 2021 |
| Windows Store / Game Pass | PC & console via Game Pass |
Platforms (Current)
- PC: Windows (Steam, Epic Games Store, Microsoft Store)
- Console: PlayStation 5, PlayStation 4, Xbox Series X|S, Xbox One, Nintendo Switch
- Cross-Platform Play: Full cross-play across all platforms (except mobile, which is discontinued). Cross-progression available between Steam and Epic, and within console families.
- Dwight Fairfield – The leader archetype, excels at teamwork.
- Meg Thomas – The athlete, fast and agile.
- Claudette Morel – The botanist, heals efficiently.
- Jake Park – The lone survivor, skilled in sabotage and stealth.
- The Trapper – Sets bear traps to immobilize survivors.
- The Wraith – Cloaks and moves invisibly, then strikes.
- The Hillbilly – Chainsaw-wielding, one-shot-down rusher.
- The Nurse – Teleports via blink attacks, high skill gap.
- Michael Myers (Halloween) – Stalks, then tiered Evil Within power.
- The Shape (same as Myers) – Extremely iconic.
- Leatherface (The Texas Chain Saw Massacre) – Chainsaw combos.
- Freddy Krueger (A Nightmare on Elm Street) – Dream world.
- The Oni (original, inspired by samurai folklore) – Rages when absorbing blood.
- The Ghost Face (Scream franchise) – Stealth stalker.
- Nemesis (Resident Evil) – Tentacle attacks, zombie summoning.
- Xenomorph (Alien franchise) – Crawls on walls, tail attack.
- Chucky (Child’s Play) – Small hitbox, scamper ability.
- Survivors include: Bill Overbeck (Left 4 Dead), Ash Williams (Evil Dead), Cheryl Mason (Silent Hill), Jill Valentine & Leon Kennedy (Resident Evil), Ellen Ripley (Alien), Lara Croft (Tomb Raider), Nicolas Cage (as himself), and many more.
- True Asymmetry: No two matches play the same. The Killer has vastly different abilities, and Survivors must adapt to each unique threat.
- Horror Atmosphere: Dark environments, eerie sound design, and jump scares create tension. The power role lets you feel like the monster.
- Endless Variety: Over 30 Killers and 40+ Survivors with distinct perks, add-ons, and playstyles. Perk combinations create near-infinite build possibilities.
- Iconic Crossovers: Play as or against legendary horror icons from film, TV, and video games—an unprecedented roster in gaming.
- Skill Expression: Mind games (predicting movements, faking directions), looping (running around obstacles), flashlight saves, and timing add depth.
- Constant Updates: New chapters (every ~3 months) add a Killer, a Survivor, and a new map, plus monthly balance patches and seasonal events.
- Community-Driven: The game has a dedicated fanbase, active content creators, and a thriving competitive scene (tournaments, ranked modes).
- Players who enjoy multiplayer horror with tension and teamwork.
- Fans of horror movies and characters (especially slasher films).
- Gamers looking for a high-skill-cap, replayable experience.
- Those who prefer asymmetric PvP over traditional shooters or MOBAs.
- Age 16+ (rated M for Mature due to violence and gore).
Story Overview & Setting
The game is set in a nightmarish realm called The Entity’s Realm—an endless, foggy dimension created and sustained by the Entity. This ancient, incomprehensible being feeds on the hope and emotions of living beings. It abducts killers and survivors from various times, places, and even fictional universes, trapping them in an endless cycle of trials. Survivors must complete objectives to escape, while Killers act as the Entity’s agents, sacrificing victims to maintain the realm.
No true “ending” exists; the lore unfolds through character backstories, in-game tomes (archives), and seasonal events. The narrative explores themes of survival, trauma, and sacrifice, with each character offering a piece of a larger puzzle.
Main Characters (Original and Licensed)
Original Survivors (Sample):
Original Killers (Sample):
Licensed Killers & Survivors:
Core Appeal & What Makes It Unique
Target Audience
Game Modes
| Mode | Description | Players |
|---|---|---|
| Public Match (Survivor) | Queue as one of four Survivors. | 4v1 |
| Public Match (Killer) | Queue as the Killer. | 4v1 |
| Private Match | Create custom lobbies with friends (any role, any map). | Up to 5 |
| Tutorial | Guided tutorials for both roles (recommended for beginners). | 1 (vs bots) |
| Custom Game + Bots | Add bots to fill slots (Survivor AI). | 1–5 + bots |
| The Archives | Lore-driven challenges with exclusive rewards. | Solo (but performed in public matches) |
| Limited-Time Events | Seasonal modes (e.g., Bone Chill, Hallowed Blight, Blood Moon). | 4v1 with event mechanics |
| Ranked (not separate)* | Matchmaking rating (MMR) system for public matches. | 4v1 |
Online / Offline Support
- Online: Fully online multiplayer required. No offline mode except Tutorials and Custom Games with bots.
- Cross-Play: Enabled by default across all platforms (PC, Xbox, PlayStation, Switch).
- Cross-Progression: Limited to same ecosystem (e.g., Steam ↔ Epic, Xbox ↔ Windows Store, PlayStation ↔ PlayStation). Not universal.
- Dedicated Servers: Launched in 2020; replaced peer-to-peer for official matches. Custom games can still use P2P.
- Voice Chat: No in-game voice chat (to maintain tension and avoid toxicity). Survivors can use in-game gestures and quick-chat. External communication (e.g., Discord) is common but not intended.
- Chapters (paid DLC): Full content packs (e.g.,
DLC / Expansion Overview
Dead by Daylight uses a Chapter and Paragraph system. Each major release includes a new Killer, Survivor, and often a new map. Smaller releases (Paragraphs) add only characters or cosmetics.
Types of Content:
Note: Licensed DLC cannot be purchased with in-game currency (Iridescent Shards); original chapters are shard-purchasable after a delay. All characters can be unlocked via playing (earning Shards) except licensed ones.
Why Play Dead by Daylight?
Whether you’re a horror fan, a competitive gamer, or just looking for something different, Dead by Daylight* offers an unforgettable trip into the fog. Welcome to the Entity’s realm—survive if you can.
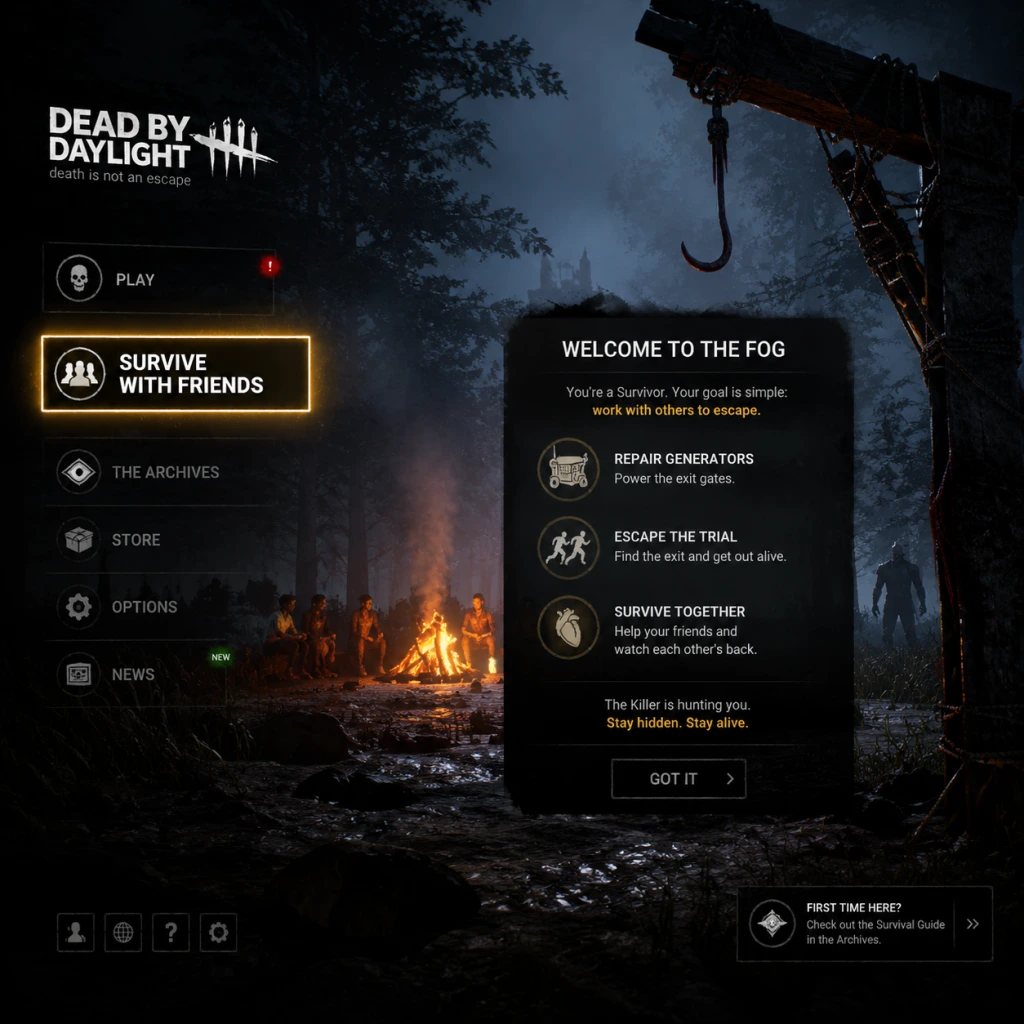
Getting Started
Dead by Daylight: Getting Started Guide
Welcome to Dead by Daylight (DbD). This guide will walk you through your first hour, explain the controls on every platform, break down the UI, and give you a day-one checklist to avoid common pitfalls. Whether you plan to play as a Survivor or a Killer, the tips here apply to both roles.
First Hour Walkthrough
0–5 Minutes: Tutorials
- Complete both Survivor Tutorial and Killer Tutorial from the main menu. They teach basic movement, generator repair, hook saves, and basic chase mechanics.
- Do not skip them—they unlock the "Adept" achievement/trophy for each role and give you free Bloodpoints.
- You start with only two Survivors (Meg Thomas, Dwight Fairfield, Claudette Morel, Jake Park) and three Killers (Trapper, Wraith, Hillbilly).
- For Survivors: Claudette is best for beginners because her perk Empathy lets you see injured teammates, teaching you map awareness.
- For Killers: Wraith has a simple stealth-and-surprise playstyle, ideal for learning map pressure.
- Load into a match as Survivor. Objectives:
- Don't try to loop the Killer yet—just hide and run when necessary.
- Select Wraith.
- Use "Cloak" (right-click on PC) to move faster and become invisible. Uncloak near Survivors to hit them (M1).
- Your primary goal: injure and down Survivors, then carry them to a hook.
- Do not camp the hook—move away to find other Survivors.
- After a few matches, you'll have Bloodpoints (BP). Go to the Bloodweb (in the main menu) for your chosen character.
- Prioritise spending on one Survivor to unlock Teachable Perks (Tier 1) first. Recommend: Claudette for Self-Care or Meg for Sprint Burst.
- Avoid buying cosmetic items early—they don't affect gameplay.
- Dead by Daylight does not have character creation. You choose from a roster of predefined characters (Survivors and Killers) each with unique backstories and three teachable perks.
- To unlock new characters, spend Iridescent Shards (earned via leveling) or real money in the in-game store.
- Tip: Your first purchased character should be one with strong perks that fit your playstyle. For Survivors: Feng Min (Lithely, Technician) or David King (Dead Hard). For Killers: Leatherface (Barbecue & Chili) or Hillbilly (already owned).
5–15 Minutes: Choose Your Role
15–30 Minutes: First Public Match (Survivor)
1. Find a generator (glowing yellow lights on tall structures).
2. Press and hold `Action` (default: M1 on PC) to repair.
3. If you hear a heartbeat (terror radius), hide in a locker, behind a wall, or crouch in tall grass.
4. Once a generator is complete, a large yellow progress bar shows on screen.
30–45 Minutes: First Public Match (Killer)
45–60 Minutes: Spend Bloodpoints
Character Creation
Controls on All Platforms
PC (Mouse & Keyboard)
| Action | Survivor | Killer |
|---|---|---|
| Move | W/A/S/D | W/A/S/D |
| Look | Mouse | Mouse |
| Action / Attack | LMB | LMB |
| Secondary Ability | Space (vault/sprint) | RMB (Killer power) |
| Sprint | Hold Shift | Hold Shift |
| Crouch | Ctrl | Ctrl |
| Drop / Pallet | Q | Q |
| Heal/Interact | E | E |
| Scoreboard | Tab | Tab |
PlayStation (PS4/PS5)
| Action | Survivor | Killer |
|---|---|---|
| Move | Left Stick | Left Stick |
| Look | Right Stick | Right Stick |
| Action / Attack | R2 | R2 |
| Secondary Ability | L2 (vault/sprint) | L2 (Killer power) |
| Sprint | Hold R1 | Hold R1 |
| Crouch | L1 | L1 |
| Drop / Pallet | Circle | Circle |
| Heal/Interact | Square | X |
| Scoreboard | Touchpad | Touchpad |
Xbox (One/Series X|S)
| Action | Survivor | Killer |
|---|---|---|
| Move | Left Stick | Left Stick |
| Look | Right Stick | Right Stick |
| Action / Attack | RT | RT |
| Secondary Ability | LT (vault/sprint) | LT (Killer power) |
| Sprint | Hold RB | Hold RB |
| Crouch | LB | LB |
| Drop / Pallet | B | B |
| Heal/Interact | X | A |
| Scoreboard | View button | View button |
Switch
| Action | Survivor | Killer |
|---|---|---|
| Move | Left Stick | Left Stick |
| Look | Right Stick | Right Stick |
| Action / Attack | ZR | ZR |
| Secondary Ability | ZL (vault/sprint) | ZL (Killer power) |
| Sprint | Hold R | Hold R |
| Crouch | L | L |
| Drop / Pallet | B | B |
| Heal/Interact | X | A |
| Scoreboard | - (not mapped) | - |
UI Overview
Survivor HUD (bottom of screen)
- Health State: Four pips (healthy → injured → downed → hooked/killed).
- Auras: Yellow outlines show teammates (when within range), generators, and hooks.
- Status Effects: Icons for bleed, exhaustion, etc., appear on the right.
- Score (top right): Your current Bloodpoint score for the match.
- Generator Count (top left): Number of generators completed / total (5/7).
- Killer’s Terror Radius (heartbeat sound): Grows louder as Killer approaches.
- Power Gauge: Shows cooldown/recharge of your unique ability.
- Auras: Survivors shown when within 16 meters or revealed by perks.
- Hook Count: How many times survivors have been hooked.
- Generator Damage: A bar showing regression from kicking generators.
- Play: Queue for Survivor or Killer.
- Bloodweb: Spend Bloodpoints to level characters and unlock perks, items, and add-ons.
- Customize: Change outfits, charms, and weapon skins.
- Store: Buy characters, cosmetics, and DLC.
- Archive: Complete daily and weekly challenges for bonus Bloodpoints.
- Don't hide all game – This helps no one and you'll lose Bloodpoints.
- Don't run everywhere as Survivor – Running leaves scratch marks that the Killer sees.
- Don't stand still in the open – Killers will spot you immediately.
- Don't camp hooks as Killer – It's considered toxic and wastes time; you miss out on chasing other survivors.
- Don't burn rare items in your first few games – Save them for when you understand maps.
- Don't use offerings that change the map – They confuse navigation and can backfire.
- Don't ignore the bloodweb – Spend BP as soon as you have enough to unlock new nodes (prestige later).
Killer HUD (bottom of screen)
Main Menu
Essential Early Objectives
Survivor
1. Repair Generators – The primary win condition. Always be doing something that progresses the objective.
2. Unhook Teammates – Safely rescue from hooks when the Killer is not nearby.
3. Heal Others – Injured survivors make a lot of noise and slow progress.
4. Complete Glyph/Challenge Rifts (if active) – Earn extra rewards.
Killer
1. Find Survivors – Patrol generators, listen for footsteps, look for crows.
2. Down and Hook – Injure survivors then carry them to a hook.
3. Pressure Generators – Kick generators to regress progress, but don't become obsessed with kicking.
4. Prevent Escape – Block exit gates or close the hatch if it opens.
What to Do First (First 10 Games)
1. Play both tutorials – they reward Bloodpoints and teach basics.
2. Unlock all base Survivor perks – level Claudette, Meg, Dwight, and Jake to at least level 40 to get their teachable perks.
3. Watch a 5-minute guide on looping – YouTube has beginner-friendly videos.
4. Set your objective: For Survivor: “Complete 5 generators and escape.” For Killer: “Get 4 sacrifices.”
5. Use in-game chat (PC) or voice chat with friends – Coordination helps immensely.
What to Avoid
Early Resource Priorities
| Resource | How to Get | Priority | Use |
|---|---|---|---|
| Bloodpoints (BP) | Playing matches, daily rituals, archives | ★★★★★ | Level up bloodweb for perks, items, add-ons. |
| Iridescent Shards | Leveling up player level (not character) | ★★★☆☆ | Buy new survivors/killers in the store. Never spend on cosmetics early. |
| Add-Ons & Offerings | Bloodweb nodes | ★★★★☆ | Keep good add-ons for Killers (e.g., increased speed). Offerings help with BP bonuses. |
| Perk Slots | Leveling characters to 5, 10, 15, etc. | ★★★★★ | Unlock more perk slots via prestige or leveling – crucial for builds. |
| Character Prestige | Leveling a character to 50 then prestiging | ★★★☆☆ | Grants cosmetic unlocks and makes other characters unlockable perks cheaper. |
Common Beginner Mistakes
Survivor Mistakes
- Failing to check surroundings before vaulting – The Killer can be nearby.
- Using Self-Care (Claudette’s perk) in the Killer's terror radius – Slow healing wastes time.
- Hiding in lockers – Gives Killer an easy grab. Only use lockers to avoid The Pig or Executioner.
- Running to a teammate when injured – The Killer follows your trail.
- Not using the map – It’s a consumable; you can use it to locate objectives.
- Chasing the same survivor for too long – If a chase lasts over 30 seconds, break off and patrol gens.
- Kicking generators unnecessarily – Only kick if you see a survivor or if progression is high (e.g., 50% or more).
- Ignoring the hatch – The hatch spawns when only one survivor remains; always check for it.
- Not using your power – Every Killer has a unique ability; practice it in the tutorial first.
- Focusing only on one survivor – Spread pressure to keep all Survivors busy.
- [ ] Complete Survivor Tutorial (approx. 10 minutes).
- [ ] Complete Killer Tutorial (approx. 10 minutes).
- [ ] Play 1 public match as Survivor (try to repair 1 generator and escape).
- [ ] Play 1 public match as Killer (try to hook at least 2 survivors).
- [ ] Spend all earned Bloodpoints on Claudette (or Meg) in the Bloodweb.
- [ ] Unlock Claudette’s teachable perk Empathy by leveling her to 30 (level 1-5 for first perk slot).
- [ ] Read the in-game Help section (Options > Help > Manual).
- [ ] Join the official DbD Discord or subreddit (r/deadbydaylight) for beginner tips.
- [ ] Watch one beginner guide video (e.g., “DbD for Dummies”).
- [ ] Adjust controls to your liking (e.g., invert aim, rebind sprint).
- Patience is key: You will die or get hooked a lot. That's normal.
- Learn from each match: After a death, ask: “What could I have done differently?”
- Play both roles: Understanding Survivor helps you as Killer and vice versa.
- Have fun: DbD is chaotic; enjoy the chases, the scares, and the thrill of escape or sacrifice.
Killer Mistakes
Day-One Checklist
Final Advice
Good luck, and see you in The Fog!
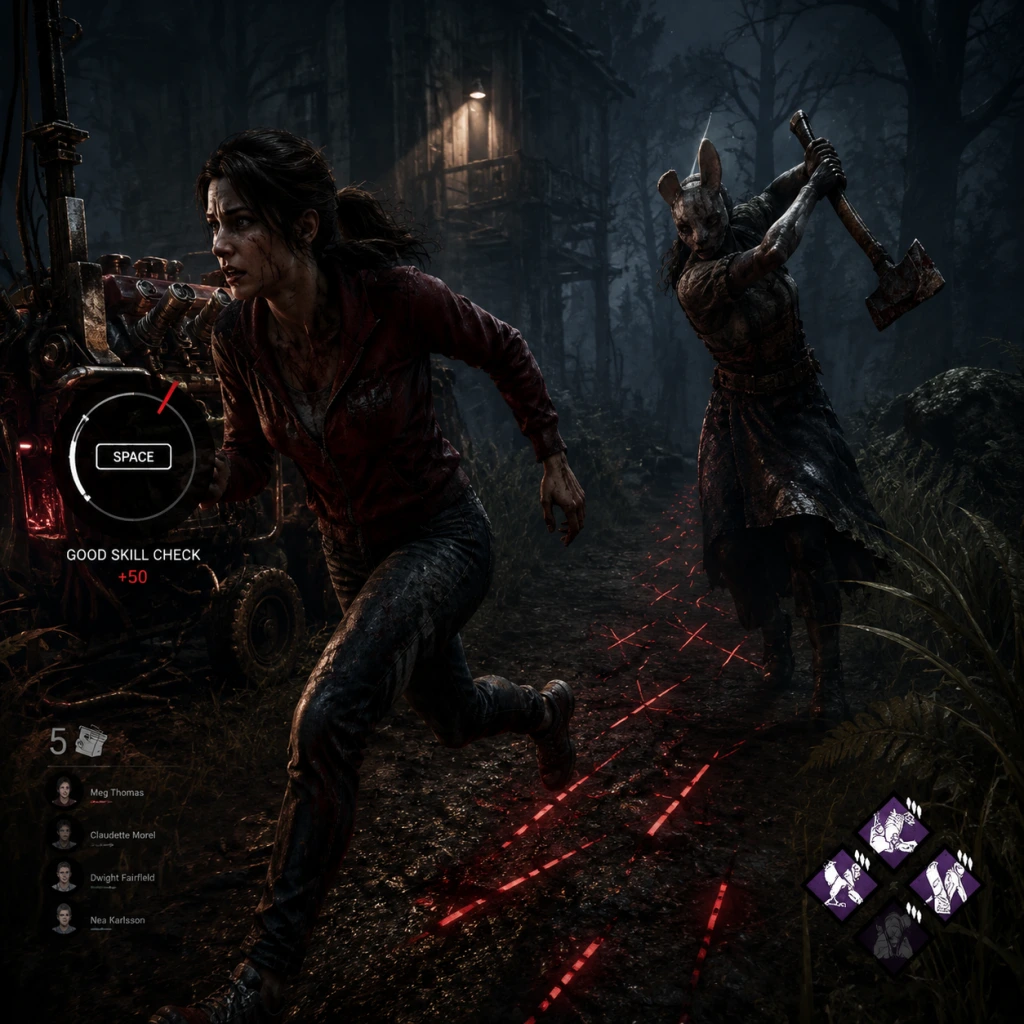
Core Gameplay
Dead by Daylight: Core Gameplay Guide
Overview of the Core Gameplay Loop
Dead by Daylight (DbD) is a 4v1 asymmetric survival horror game. Each match pits 4 Survivors against 1 Killer. The core gameplay loop revolves around two opposing objectives:
- Survivors: Repair 5 generators to power the exit gates, then escape through the gates or the Hatch.
- Killer: Sacrifice all 4 Survivors to The Entity by hooking them 3 times (or using special abilities).
- Survivor: Spend most of your time hiding near generators. Learn to repair without missing skill checks. Avoid the Killer by staying crouched and using line-of-sight. You have no perks yet, so rely on base interactions: repairing, healing, opening gates.
- Killer: Patrol generators aimlessly. Your power is weak or not yet optimized. Hit Survivors when you find them, hook them, and camp the hook if you feel lost. You have no add-ons or perks to pressure multiple Survivors.
- Survivor: Only action is M1 (repair, heal, sabotage). No flashlight or pallet saves yet. Skill checks are simple (small circle). Example: Repair a generator for 80 seconds while hitting three skill checks.
- Killer: Basic attacks (M1) deal health states. No lunging yet. Use M2 only for basic power (e.g., Wraith uncloak). Example: Chase a Survivor near a jungle gym, swing, hit them once, then hook.
- Bloodweb: Spend bloodpoints on nodes. Each node costs 1–8k BP. Priority: buy cheap nodes first to reach next level faster. Unlock level 2–3 items (toolbox, med-kit) and basic add-ons (e.g., Wraith’s Ghost – Soot).
- Account Level: Early levels unlock nothing except the Bloodweb tutorial. Your Iridescent Shards accumulate slowly.
- You play only a few maps: Coldwind Farm, Autohaven Wreckers, MacMillan Estate (random). Map tiles are simple: a shack, a few pallets, lockers. Example: The Killer shack has a window and a pallet—learn to loop there.
- Daily Rituals: One per day, e.g., “Survive a chase for 60 seconds as Survivor” granting 30k BP. Do them for easy BP.
- Rift Tome: Not yet accessible until you hit level 10 account. Focus on base play.
- Bloodpoints: Earned per match. Early game average: 5k–10k per match as Survivor, 10k–15k as Killer. Spend all on one character (e.g., Meg for Sprint Burst or Trapper for Brutal Strength).
- Iridescent Shards: Earned from leveling (one shard per level?). Use to buy new characters after about 10 levels. Example: Save 9,000 shards to buy Claudette.
- No teachable perks: You only have the character’s own perks at Tier 1. Example: Meg starts with Sprint Burst (tier 1).
- Add-ons: Very weak. Example: Trapper’s “Slippery Meat” add-on (increases trap disarming speed by 10%).
- Endgame starts when last generator is done. You see Endgame Collapse timer (2 minutes). Survivor: simply Sprint to exit gate and open. Killer: camp the gate or try to down one more. Example: Escape at 10 seconds left.
- Survivor: Now you have 1–2 perks (teachable from other characters or your own at tier 2). You attempt to loop the Killer using pallets and windows. You know when to leave generators (e.g., hear heartbeat). Example: Use Sprint Burst (tier 2) to quickly reach a pallet after Killer approaches.
- Killer: You have one good perk and some add-ons. You understand map pressure: you know to kick generators, break pallets, and sometimes slug (leave Survivor on ground) to pressure others. Example: Nurse with Nurse’s Calling can detect healing Survivors.
- Survivor: You can effectively pallet stun the Killer (7/10 times). You learn to window vault safely. You start using items like med-kits (self-heal) and toolboxes (fast repair). Example: Use a Med-Kit (Emergency Med-Kit) to heal without needing another Survivor.
- Killer: You use M2 power more strategically. Example: Wraith’s uncloak attack can hit Survivors immediately after decloak. You start to lunge (hold M1 during chase) to close distance.
- Bloodweb: Reach level 25–40 on main character. Unlock higher-tier items (e.g., Commodious Toolbox, Ranger Med-Kit). Perk tiers: all your perks are now tier 2 or 3. Example: Meg’s Sprint Burst is now tier 3 (50 speed boost for 3 seconds).
- Prestige: Not yet, but you consider it after level 50. Focus on getting teachable perks from other characters.
- You encounter more map variations: Springwood, Haddonfield, Ormond. Learn tile names: “LT Wall,” “Double Pallet,” “Long Wall.” Example: Recognize that the “Cow Tree” on Coldwind is a safe loop.
- Daily Rituals: Earn extra BP, now you do them more efficiently (e.g., “Injure 4 Survivors as Killer” with 60k reward).
- Tome Challenges: Unlock at account level 10. Start with "Survive Trial" challenges. Example: Level 1 Tome: “Escape a trial.” Reward: 15k xp and a charm.
- Bloodpoints: Per match average: 12k–18k (Survivor), 18k–25k (Killer). Save BP to unlock teachable perks on other characters.
- Iridescent Shards: You now buy new survivors/killers (e.g., Feng Min for Lithe or The Huntress). Example: Spend 9,000 shards on The Plague for her teachable Corrupt Intervention.
- Teachable Perks: You have unlocked at least one teachable (e.g., Meg’s Adrenaline). You can now get it on other characters after they reach level 40? Actually, teachable appear in Bloodweb after unlocking the character’s tier 3 perk at level 40. Example: Unlock Sprint Burst (teachable) by leveling Meg to level 40. Then other survivors can find it randomly in their Bloodweb.
- Build Example: Survivor: Sprint Burst (Meg), Bond (Dwight), Empathy (Claudette), Leader (Dwight). Killer: Corrupt Intervention (Plague), Hex: Ruin (Hag), BBQ & Chili (Bubba), Pop Goes the Weasel (Clown).
- Endgame Collapse: You understand the 2-minute timer. Survivor: attempt to open gate with Leader or Prove Thyself. Killer: use NOED (Hex: No One Escapes Death) if you prepared. Example: As Survivor, see NOED totem lit, cleanse it before rescuing teammate.
- Survivor: You have a full build of 4 meta perks. You know optimal pathing to waste Killer time. You use Dead Hard to dodge hits, Borrowed Time to save on Saber. Example: Loop the Killer for 2 minutes at the “Shack” while teammates complete three generators.
- Killer: You have a high-tier build with add-ons (e.g., Iridescent Head on Huntress, Crank Wheel on Blight). You can 4k most lobbies. You understand micro-chase (mindgames at tiles) and macro (gen patrol). Example: As Nurse: blink through walls, predict Survivor movement.
- Survivor: Advanced techniques: Pallet vacuum (intentional to bait), 360 juke, window tech (sliding), flashlight save timing. Example: Blind the Killer as he picks up a downed teammate to force drop.
- Killer: Advanced techniques: Moonwalking to hide direction, Lunging with Bloodlust, Hook denial with powers (e.g., Pinhead chain). Use Iri add-ons (e.g., Huntress’ Iridescent Head – one hit kill).
- Bloodweb: Level 50 characters. You prestige to unlock cosmetics and increase odds of better items. Prestige 1: unlocks bloody outfit weapon. Prestige 2: body. Prestige 3: head plus all perks become available in every Bloodweb. Example: Level 50 Meg with Prestige 3: every Bloodweb node contains a perk tier 3.
- Account Level: High account level (50+) gives access to Rift tiers and ranked play. Your Iridescent Shards accumulate fast.
- Expert knowledge of all 20+ maps. You know god windows (e.g., Ironworks of Memory window), unsafe pallets, hatch spawn locations. Example: On “Badham Preschool,” know that the classroom window is always a potential infinite loop.
- Daily Rituals: You do them only for big BP (e.g., “Break 15 pallets as Killer” – 90k BP). You may skip low-reward ones.
- Tome Challenges: Focus on difficult ones: “Blind the Killer 4 times in one match” or “Use Dead Hard to dodge 3 attacks.” Rewards include cosmetic charms and Rift fragments.
- Bloodpoints: Per match average: 20k–30k (Survivor), 25k–35k (Killer). You often hit the BP cap (1 million BP). Spend on prestige or new character.
- Iridescent Shards: You likely have 50k+ shards. Buy all available characters with shards, then use Auric Cells for cosmetics. Example: Buy The Artist with shards, then buy her outfit for 800 Auric Cells.
- Meta Builds: Survivor: Dead Hard (David), Borrowed Time (Bill), Breakout (Yoichi), Sprint Burst (Meg). Killer: Corrupt Intervention (Plague), Hex: Ruin (Hag), NOED (free perk), Pop Goes the Weasel (Clown).
- Add-on Synergies: Example: Blight with Adrenaline Vial and Compound Thirty-Three for speed boost and double rush.
- Endgame Collapse: You know you can Hide near gates to unhook after gate open (body block). For Killer: close hatch, then use Remember Me to extend gate opening time. Example: As Killer, after closing hatch, use Blood Warden to lock rescued Survivors inside the gate area.
- Survivor: Highly coordinated team. Use voice coms? No, but in solo you rely on perks like Kindred and Open-Handed. You focus on gen efficiency: two on gens, one chaser, one rescuer. Example: Three survivors repair, one loops Killer at main building, gen rush ends in 5 minutes.
- Killer: You face high MMR Survivors. You need to tunnel only when necessary, slug (leave downed) to prevent gen progression, or proxy camp to trade hooks. Use map pressure builds (e.g., Corrupt + Ruin + Pop + Cobweb). Example: As Nurse, you down first Survivor in 30 seconds, bring them to basement, slug second after hook, force two to heal or gen stops.
- Survivor: Perfect timing on Dead Hard (invincibility frames). Use Off the Record to avoid being tunneled. Unbreakable to recover from slug. Example: Killer leaves you slugged, you wait for Unbreakable to proc and sprint away.
- Killer: Use hit validation (know when you actually hit vs. latency). Bubble tech (exploit on curved surfaces). Instant down add-ons (e.g., Huntress Iri Head, Hillbilly’s Apex Muffler).
- Bloodweb: Prestige 3 Level 50 – all future Bloodwebs only contain tier 3 perks and ultra rare items. You never need to grind for perks again. Example: You have Decisive Strike tier 3 on all 20 survivors.
- Account Level: Mostly cosmetic. You have the Legacy Prestige from old system if you played before 2021. You earn Rift fragments only via XP.
- You can navigate any map blindfolded. You know exact tile spawns. Example: On “The Game” map, you know that the exit gate is always near the dining room.
- Daily Rituals: You only do the 90k BP ones. Others you skip.
- Tome Challenges: Complete entire Tomes for charms and lore. Hard challenges: “Finish a generator within 60 seconds of the trial starting” (survivor) or “Down all 4 survivors within 30 seconds of each other” (killer).
- Bloodpoints: Overflow easily. You spend on prestige levels for cosmetics. Example: Prestige 9 on Meg gives you skin for each additional prestige.
- Auric Cells: Used for premium Rift pass (1,000 AC) and exclusive outfits. You may buy The Shape DLC if not already owned.
- Builds are highly specialized. Survivor: Distortion for stealth, Alert for info, Windows of Opportunity for safe vaults, Inner Healing for totem healing. Killer: Lethal Pursuer + Barbecue & Chili for aura reading, Corrupt Intervention + Eruption for gen regression.
- Add-ons: Always use ultra rare add-ons. Example: Blight with Compound 33 and Adrenaline Vial allows 4 rushes with speed boost.
- Rank Reset: After each month, your rank resets from e.g., Gold 1 to Silver 4. The new MMR system (Skill-Based Matchmaking) makes matches fair regardless of rank, so rank is cosmetic only.
- Achievements: You aim for impossible achievements like “Space Ace” (escape 500 times as Dwight) or “Crowball” (get 100 crows as The Plague).
- Hatch strategy: In endgame, Survivor priority: if last survivor, find hatch. If doors are open and Killer is camping, wait for Embrace the Entity (Endgame Collapse) to kill you rather than give him a hook.
Combat is indirect: Survivors cannot harm the Killer, only stun them briefly with pallets, flashlights, or certain perks. The Killer’s role is to chase, injure, down, and hook Survivors. Interaction systems include repairing, healing, sabotaging, cleansing totems, and locker interactions.
Progression is account-based and resets per character through the Bloodweb. Unlocking perks, add-ons, offerings, and prestige rewards permanent account growth. The game has no traditional quests but uses Daily Rituals, Tome Challenges (in the Rift), and the Bloodweb as mission-like systems. Economy revolves around Bloodpoints (earned in matches), Iridescent Shards (leveling), and Auric Cells (premium currency). Character/build growth depends on leveling characters to 50, prestiging, and unlocking teachable perks. The Endgame includes the Endgame Collapse, Hatch mechanics, and prestige system.
Progression Tiers Explanation
Progression tiers are based on player level (Account Level) and character level (Bloodweb level). The following sections break down each tier with detailed examples.
---
Early Game (Account Level 1–10, Character Level 1–15)
Gameplay Loop
Combat/Interaction Systems
Progression
Exploration & Maps
Quests/Missions
Economy
Character/Build Growth
Endgame Structure (Early)
---
Mid Game (Account Level 10–30, Character Level 15–40)
Gameplay Loop
Combat/Interaction Systems
Progression
Exploration & Maps
Quests/Missions
Economy
Character/Build Growth
Endgame Structure (Mid)
---
Late Game (Account Level 30–50, Character Level 50+, Prestige 1-3)
Gameplay Loop
Combat/Interaction Systems
Progression
Exploration & Maps
Quests/Missions
Economy
Character/Build Growth
Endgame Structure (Late)
---
Endgame (Prestige 3+, Account Level 50+, Competitive/Swift)
Gameplay Loop
Combat/Interaction Systems
Progression
Exploration & Maps
Quests/Missions
Economy
Character/Build Growth
Endgame Structure (Endgame)
---
Conclusion
Dead by Daylight’s core gameplay evolves significantly across progression tiers. Early game is about survival basics, mid game introduces perk synergy, late game optimizes builds, and endgame focuses on mastery and competitive play. This guide provides a roadmap for your journey from new Survivor to veteran Killer.
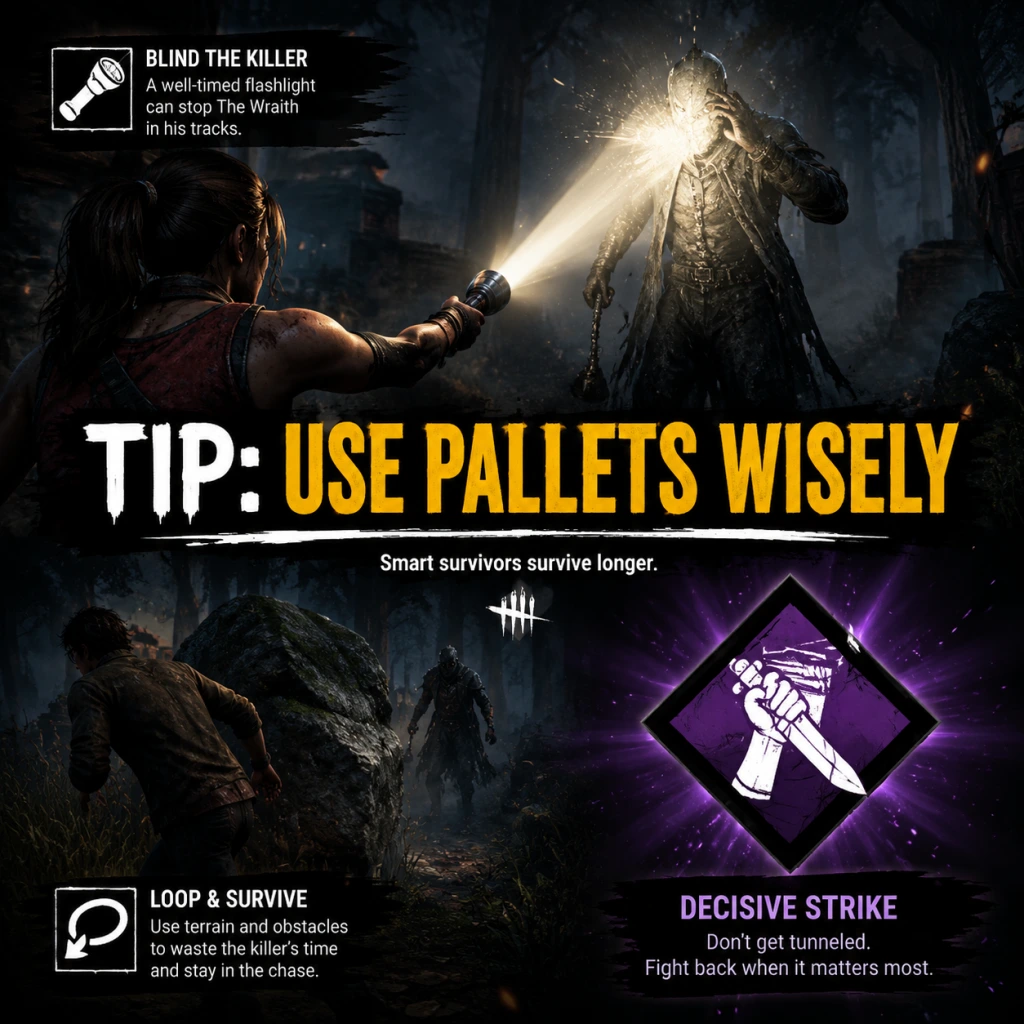
Game Tips
Dead by Daylight: Game Tips Guide
This comprehensive guide offers game tips for Dead by Daylight (DbD), covering beginner fundamentals, survivor and killer strategies, bloodweb economy, builds, and advanced optimizations. Each tip includes an explanation and deeper analysis of why it works and when to use it.
Beginner Tips
1. Stick Together but Maintain Spread
- Explanation: Survivors repair generators faster together (each survivor adds +0.5 charges per second to repair speed, stacking multiplicatively). However, grouping tightly makes you vulnerable to area-of-effect killers (e.g., The Doctor, The Nurse) and gives killers a free multi-hit.
- Analysis: Use Prove Thyself to further boost repair speed when together, but always stay at least a few meters apart to avoid simultaneous damage. If the killer has a power like The Nurse’s blinks or The Hag’s traps, split up to deny them value.
- When: Start the match spread across three far gens; only two survivors should ever be on the same gen unless saving time is critical (endgame).
- Explanation: DbD is audio-driven. Hear heartbeat (terror radius), skill check sounds, generator sounds, broken pallet splintering, footsteps, and breathing. Wear headphones for directional awareness.
- Analysis: The killer’s terror radius indicates proximity; skilled survivors can estimate distance and direction. Skill check timing can be practiced offline. Use sound to detect a killer approaching while repairing – stop repairing and hide when the heartbeat grows loud.
- When: Always use headphones. If you hear a generator skill check while injured, anticipate the killer might be near. When running, listen for your own footsteps to avoid giving away position.
- Explanation: Loops are structures with pallets and windows that let survivors evade the killer. The fundamental technique is to run around the obstacle, forcing the killer to either break a pallet or attempt a mind game.
- Analysis: Survivors have a speed of 4.0 m/s versus killers’ 4.6 m/s (varies by killer). Use pallets to create distance, but don't drop them too early – save them for when the killer is close. Vault windows at maximum speed (hold sprint) to avoid exhaustion.
- When: Always try to reach a loop when the killer is chasing you. If you are at a pallet, wait until the killer is about to lunge, then drop it. Don't drop pallets unnecessarily; they are limited resources.
- Explanation: Survivors win by completing generators and escaping, not by taunting the killer. Killers win by sacrificing survivors, not by chasing for long periods (unless they have map pressure).
- Analysis: A survivor who wastes time in a chase without doing gens is harming the team. A killer who commits to a single survivor for 60 seconds loses map pressure. Use the 3-gen strategy (defending three generators close together) for killers, but as survivor, break those gens first.
- When: If you are the chase target, run the killer away from the remaining generators. If you are safe, get on a generator. As killer, if a chase takes more than 30 seconds, consider breaking off to patrol generators.
- Explanation: Survivors can look behind them during a chase by moving the camera without changing direction. Killers can “moonwalk” to hide their red stain.
- Analysis: Constantly looking back helps survivors anticipate the killer’s moves, especially at loops. Killers can fake direction by walking backward, misleading survivors about which way they are going. Console players have a lower FOV; PC players can adjust FOV in settings (survivors only).
- When: While running in a straight line, quickly glance back every 2-3 seconds. During a chase, use camera to check if the killer is going to lunge or bait a vault. Killers: when approaching a loop, walk backward to hide your red stain, then quickly turn around.
- Explanation: Survivors must repair 5 generators to power the exit gates. Prioritize repairing generators farthest from each other to avoid a three-gen situation (last three gens clustered). Use Prove Thyself to boost repair speed when multiple survivors are together.
- Analysis: A three-gen is a death sentence if the killer defends them. Always try to split repairs across the map. If the killer has a mobility power (e.g., Nurse, Blight), they can quickly patrol the remaining gens – break that side first.
- When: At the start, spawn separate and head to opposite sides of the map. If you see a gen already started, join it if it’s safe (use Bond to see teammates). Never be the third survivor on a gen – go find another.
- Explanation: A 360 is spinning around to dodge a killer’s lunge. Window vaults can be fast (holding sprint) or slow (walking). Killers can mind game by faking a vault.
- Analysis: Timing a 360 requires the killer to be very close. Practice turning your camera 180 degrees while pressing the opposite direction. For window vaults, survivors have two vault speeds: fast (clicking vault while sprinting) and medium (clicking while walking). Killers can only medium vault windows; survivors can fast vault, creating distance. Interacting objects (pallet drops, window vaults) grant a brief speed boost (0.5 seconds).
- When: Use a 360 when the killer is about to lunge and you have no pallet or window nearby. Use fast vaults to quickly pass through windows, but beware of the killer predicting and swinging at the vault point. Slow vault is quieter – use when the killer is far away.
- Explanation: Survivors have options: hide in lockers, crouch in bushes, or be aggressive and run. Each has costs and benefits.
- Analysis: Stealth perks like Urban Evasion (crouch walk faster), Lightweight (no scratch marks while sprinting), and Distortion (remove aura reading) help avoid detection. However, being too stealthy can waste time – you need to be on gens. Aggressive play (taking aggro, looping) is valuable but risky if you can’t survive.
- When: If you are injured with no healing, stealth until healed. At the start, don't hide – rush to a gen. If the killer has BBQ & Chilli (shows auras after hook), be near a gen but not on it to avoid aura reading. Mix between being on gens and hiding when needed.
- Explanation: Perks that complement each other create powerful combos.
- Analysis: Sprint Burst gives a 150% speed boost for 3 seconds when starting a sprint – pair with Fixated to see your own scratch marks and walk faster. Adrenaline heals one health state and gives a sprint burst when the last gen finishes – pair with Resilience to increase repair speed while injured. Better together: Deliverance allows self-unhook after a safe hook rescue – pair with Slippery Meat for extra attempts, but more importantly with Decisive Strike to punish tunnelers.
- When: Always consider synergy when building loadouts. For new players, Bond + Prove Thyself helps with gen efficiency. For looping, use Dead Hard + Sprint Burst (exhaustion management) or Lithe + Dance With Me.
- Explanation: Items (flashlights, toolboxes, medkits, maps, keys) can be used once per match unless you have add-ons. Use them wisely.
- Analysis: Flashlights can blind killers to stop a hook, break a grab, or hinder a pick-up. Toolboxes speed up generator repair (commodious toolboxes are best). Medkits allow self-heal without a teammate. Keys open the hatch early or after the hatch spawns.
- When: Save flashlights for decisive moments – save a teammate from being hooked, or blind the killer during a pickup to force them to drop the survivor. Don’t use a medkit if you have a teammate near who can heal you (faster, no item waste). Use toolboxes on the last generator to speed finish. Keys are lottery – use them when the hatch spawns or if the game is going badly.
- Explanation: Map pressure is the ability to threaten multiple survivors or generators simultaneously. Without pressure, survivors finish gens quickly.
- Analysis: High-mobility killers (Nurse, Blight, Spirit, Hillbilly) naturally apply pressure. Use teleports, dashes, or stealth to appear unexpectedly. For low-mobility killers (Trapper, Myers, Leatherface), use perks like Corrupt Intervention (blocks three farthest gens for 120 seconds) or Tinkerer (triggers notification when a gen reaches 70%). Patrol your generated trigger points.
- When: At match start, immediately head to the gen furthest from you to check for survivors. If you see scratch marks, chase only if it’s quick. Otherwise, keep moving between generators. Use your killer power to cover ground (e.g., Blight’s rush, Spirit’s phasing). Never stay at one area for more than 20 seconds.
- Explanation: A killer’s lunge multiplies attack range (usually from 4m to ~7m for a few meters). Mind games involve faking directions at loops to catch survivors off guard.
- Analysis: At a pallet loop, you can walk backward to hide the red stain, then quickly turn and lunge. At a window, you can fake a vault by walking up to it and backing off. Surviving killers often “moonwalk” (walk backward while looking forward) to confuse survivors about which way you are going. Lunge attacks: you press attack while sprinting; the lunge covers extra distance. Use it when you are close enough to hit the survivor even if they start to dodge.
- When: Use the lunge when the survivor is about to vault a window or drop a pallet. For mind games, if the survivor is waiting at a pallet, walk toward them then suddenly back up – they may drop the pallet prematurely, leaving you with the chance to break it. At a window, if the survivor is on the other side, fake a vault and they may vault back into you.
- Explanation: After hooking a survivor, you have options: camp (stay near the hook), patrol (check nearby generators), or slug (leave the survivor on the ground instead of hooking).
- Analysis: Camping is generally ineffective against good teams – they will do generators while you watch a single hook. Patrolling is better: hook a survivor, then walk towards a nearby generator. Slugging is strong when multiple survivors are injured – disable multiple survivors to snowball. Perks like Deerstalker (see downed survivors auras) and Knock Out (obscure auras for other survivors) synergize with slugging.
- When: If the exit gates are powered, camping can secure a kill. Early game, patrol. If you have a good chase and down a survivor near a generator, hook them quickly to force survivors off the gen. Slug if you down a survivor while another is healing nearby – go after the healer. Don’t slug too long unless you have a build supporting it (e.g., The Oni).
- Explanation: Meta killer perks increase pressure, notification, or survival. The best perks often are BBQ & Chilli (aura after hook), Tinkerer (gen progress warning), Corrupt Intervention (delay gen rush), Pop Goes the Weasel (reduce gen progress when you hook).
- Analysis: BBQ gives bloodpoints and location info – extremely valuable for patrolling. Tinkerer tells you when a gen is at 70% and makes you undetectable for 12 seconds – perfect for ambushing. Corrupt Intervention slows early game. Pop Goes the Weasel requires hooking to regress a gen by 20% of current progress; use it after a hook. Other strong perks: Save the Best for Last (reduce cooldown on non-obsession hits), No Way Out (block exit gates after door opens).
- When: For beginners, use BBQ + Tinkerer + Corrupt + a fourth perk like Hex: Ruin (regresses gens if survivors aren’t on a gen). For advanced, adapt to your killer: for Nurse, Nurses Calling + Thanatophobia works. For Huntress, Iron Maiden + BBQ + Bitter Murmur + Corrupt.
- Explanation: Good survivors use perks like Dead Hard (immune to damage while dashing), Decisive Strike (stun if unhooked survivor is picked up), Borrowed Time (45 seconds of deep wound protection after unhook). Killers need to counter these.
- Analysis: Against Dead Hard, wait for the survivor to use it (they become exhausted) and then hit them. Against Decisive Strike, slug the unhooked survivor for 60 seconds to let the timer run out. Against Borrowed Time, don't hit the unhooked survivor immediately – wait for the deep wound timer to start, then hit to down them. Use Lightborn to counter flashlights, Franklin’s Demise to knock items out of hand.
- When: If a survivor has been unhooked, assume they have Borrowed Time – either hit them once to trigger deep wound and wait, or ignore them and chase the unhooker. If you suspect Dead Hard, bait the dash by stopping your swing and then lunging after they dash. Use Franklin’s Demise item drop to deny flashlights and toolboxes.
- Explanation: Bloodpoints (BP) are earned in matches and spent in the Bloodweb to unlock perks, items, add-ons, and offerings. Prestiging a character resets their bloodweb but unlocks tiered charms and legacy cosmetic sets.
- Analysis: Prioritize unlocking teachable perks for your main role first. Once you have all generic perks, go for perks specific to your favorite survivor/killer. Spend BP on level 20-25 nodes that give yellow items early. Avoid buying expensive add-ons unless you need them. Prestiging gives bonus perks on other characters – prestige 1 each character for their teachable, then consider prestige 2/3 for legacy effects.
- When: New players should focus on one survivor and one killer to level 50 to unlock their teachables. After that, level other characters to get their teachables. Use Bloodpoint offerings (e.g., Survivor Pudding, Escape Cake) during double BP events to maximize gain. Don't prestige until you have unlocked all the perks you use.
- Explanation: Some perks are universally powerful and should be unlocked for all characters.
- Analysis: For survivors: Borrowed Time (from Bill), Dead Hard (David King), Sprint Burst (Meg Thomas), Unbreakable (William “Bill” Overbeck), Prove Thyself (Dwight Fairfield). For killers: BBQ & Chilli (Leatherface/The Cannibal), Tinkerer (The Hillbilly), Corrupt Intervention (The Plague), Hex: Ruin (The Hag), Pop Goes the Weasel (The Clown).
- When: As soon as you can, level these characters to 30-40 to unlock the teachable. Then find the perk in other characters’ bloodwebs. Prioritize these before spending on niche perks.
- Explanation: A meta survivor build focuses on survival, gen speed, and anti-tunnel. Example: Sprint Burst, Borrowed Time, Unbreakable, Prove Thyself. Variations: use Dead Hard instead of Sprint Burst, or use Adrenaline for endgame escape.
- Analysis: This build gives you speed to reach a loop (Sprint Burst), safety after unhook (Borrowed Time), self-recovery if left on ground (Unbreakable), and gen boost (Prove Thyself). The combination covers nearly all scenarios. For a stealth build, use Urban Evasion, Spine Chill, Lightweight, and Distortion – this helps you avoid detection and hide.
- When: Use the meta build when you expect a strong killer or in swf. Use stealth build when learning or when playing solo queue with bad teammates.
- Explanation: Killers have unique powers that synergize with certain perks. General meta: BBQ, Tinkerer, Corrupt, Pop. For specific killers: Nurse builds often include Nurses Calling, Thanatophobia, Sloppy Butcher, and Shadowborn. Huntress uses Iron Maiden (faster reload), BBQ, Bitter Murmur, and Corrupt. Blight uses the same meta but may swap Pop for something like Hex: Blood Favor.
- Analysis: BBQ gives map awareness and BP. Tinkerer catches survivors on gens. Corrupt slows early game. Pop maintains gen progress after hooking. For Nurse, her mobility makes Thanatophobia strong (healing slower, repair slower). For Huntress, Iron Maiden speeds up reload and can reveal survivors in lockers.
- When: Always bring Corrupt on slow killers (Trapper, Myers). On fast killers, you can substitute for something else. If survivors tend to heal, use Sloppy Butcher or Nurse’s Calling. Adapt your loadout based on what you face.
- Explanation: Moonwalking is walking backward while facing the camera forward. This hides the killer’s terror radius red stain from survivors at loops. 360s are spinning dodges.
- Analysis: Killers: walk backward around a corner – survivors cannot see your stain, making it harder to predict your direction. Survivors: a successful 360 requires predicting the lunge. Practice turning the camera sharply while pressing the opposite movement key. Timing: as the killer lunge, turn 90 degrees left or right – the lunges have a narrow hitbox.
- When: Killers use moonwalking when approaching a loop where the survivor is watching the corner. Survivors use 360 when the killer is close and you have no pallet. It works best against slower killers; against Nurse or Spirit, it’s less effective.
- Explanation: Each tile has patterns: Shack has a window and pallet. T&L tile has two windows and a pallet. Jungle gym has a central rectangle with windows and pallets.
- Analysis: At Shack, the killer can mind game the window by walking one direction then quickly turning the other. Survivors can double-back inside. At T&L, if the killer is on one side, go to the opposite window. At jungle gym, survivors can run around the rectangle and fake dropping the window. Killers can outplay by walking through the building to cut off.
- When: Recognize these tiles. As survivor, know that the killer will often try to cut you off – watch the building walls. As killer, learn the patterns: e.g., at Shack, if the survivor runs through the front window, you can go straight and vault after them, but be ready for a fake.
- Explanation: By observing the killer’s behavior, you can predict their actions: do they always go for a certain gen after hook? Do they camp? Do they slug?
- Analysis: Notice patterns. If the killer has BBQ, they will look towards the direction of survivors after hook. If the killer uses Tinkerer, they will rush to a gen at 70%. If a killer has Hex perks, they may guard totems. You can also gauge skill by how they handle loops.
- When: After a hook, if the killer immediately moves away, they are patrolling. If they stay, they are camping – go do gens. If they slug, wait until they leave then pick up teammate. Use this to plan your actions.
- Explanation: Knowing the map layout is crucial. Maps have fixed spawns for generators, hooks, totems (bones). The hatch spawns when one survivor remains or when the last gen is done.
- Analysis: Use map offerings to force certain maps. Learn the location of totems for playing hex perks (you as killer need to know where survivors might be looking for totems). Hooks are finite – if you use them all, the next hook will spawn back after a time? Actually, hooks remain broken after being used; a new hook will spawn far away. Survivors should know where hooks are to wiggle and avoid being taken to a specific hook.
- When: As survivor, memorize the maps by playing. Use Bond or maps to see teammate locations. As killer, patrol symmetrical generator groupings. If you have spread hooks, know which hooks are closest to generators to drag survivors there.
- Explanation: DbD is cross-play but platforms differ in performance, input, and settings.
- Analysis: PC players have higher FOV and can adjust graphics for clarity. Console players have lower FOV and sometimes input lag. Mouse aiming is better for skillshots (Nurse, Huntress, Deathslinger, Trickster). Controller has aim assist? No, but survivors can 360 more easily with analog stick? Actually, movement is similar. Some killers (like Blight) are harder on console.
- When: If you play on console, invest in a monitor and wired controller to reduce lag. Use higher sensitivity for faster camera turning. For PC, lower graphics settings to maximize frame rate. Use a gaming mouse for precise hatchet throws. Cross-play can lead to skill disparity, but matchmaking should balance.
- Explanation: Totems are dull or lit. Hex perks turn lit totems into hexes; boon perks allow survivors to bless dull totems into boon totems. Destroying a hex disables the killer’s perk. Cleansing a boon removes the survivor’s boon.
- Analysis: Map layouts have 5 totems total. Survivors can cleanse totems to deny hexes (very helpful) or bless for boons (e.g., Circle of Healing allows self-heal without items). Killers can snuff out boons by stomping them. Always check totem locations near generators.
- When: As survivor, immediately cleanse any totem you find if the killer has hex perks (you can tell by the notification). If you have a boon perk, place it in a safe area (near gens but out of sight). As killer, if you have hexes, patrol those totems; use Thrill of the Hunt to slow cleansing.
- Explanation: Items (flashlights, toolboxes, medkits, maps, keys) and add-ons modify their effects. Add-ons are rarity-based (brown, yellow, green, purple, pink/red).
- Analysis: Rare add-ons are powerful but consume BP to unlock. Save them for when you really need them (e.g., a purple key with blood amber add-on to open hatch). For toolboxes, best add-ons are wire spool (increase repair speed) and socket swivels (reduce skill check difficulty). For medkits, add-ons like surgical suture increase healing speed or allow self-heal with a condition.
- When: Use brown and yellow items freely – they are cheap to replace. Green and above, use only in serious matches. For killers, add-ons can drastically change playstyle (e.g., The Hag’s scarred hand add-on removes teleport requirement). Equip add-ons that suit your strategy.
- Explanation: After the last generator is repaired, exit gates power. The hatch spawns when only one survivor remains (or if a key is used before). The Endgame Collapse timer starts when a survivor opens an exit gate or when the hatch is closed by the killer or the last survivor escapes.
- Analysis: Survivors must open gates (20 seconds) or find hatch. Killers can block gates with perks (No Way Out) or close the hatch (which triggers the Endgame Collapse at a faster rate). Endgame Collapse lasts 2 minutes normally; if the hatch is closed, it lasts 1 minute. Use this time to secure kills or escapes.
- When: As survivor, open gates near where the killer is not. If the killer has No Way Out, be prepared for blocked exits. As killer, close the hatch quickly if you see it to force survivors to open gates, making them predictable. Use Blood Warden to block gates after hooking someone during Endgame Collapse.
2. Master Sound Cues
3. Learn Basic Looping Mechanics
4. Prioritize Objectives Over Chases
5. Use Camera and Field of View (FOV) Effectively
Survivor Tips
6. Generator Repair Strategy
7. Chase Mechanics: 360s and Window Vaults
8. Stealth vs. Aggression
9. Perk Synergies
10. Item Management
Killer Tips
11. Map Pressure
12. Chase Fundamentals – Mind Games and Lunge
13. Hook Strategy – When to Camp, Patroll, or Slug
14. Killer Perk Loadouts – Meta Examples
15. Countering Survivor Perks
Bloodweb & Economy
16. Efficient Bloodpoint Spending
17. Best Perks to Unlock First
Builds
18. Survivor Builds – Meta and Variants
19. Killer Builds – Meta and Killer-Specific
Advanced Strategies
20. Moonwalking and 360s – Advanced Movement
21. Mind Games at Tiles – Shack, T&L, Jungle Gym
22. Reading the Killer’s Next Move
23. Map Awareness – Totems, Hooks, and Spawns
24. Cross-Platform Considerations
Exploration & Resources
25. Totems – Hexes and Boons
26. Items and Add-ons
27. Endgame Collapse – Exit Gates and Hatch
Conclusion
These tips cover the essentials for Dead by Daylight players of all skill levels. Practice each concept individually, then integrate them into your gameplay. Remember that DbD is a game of adaptation – what works in one match may fail in another. Keep learning and adjusting your strategies for both sides.
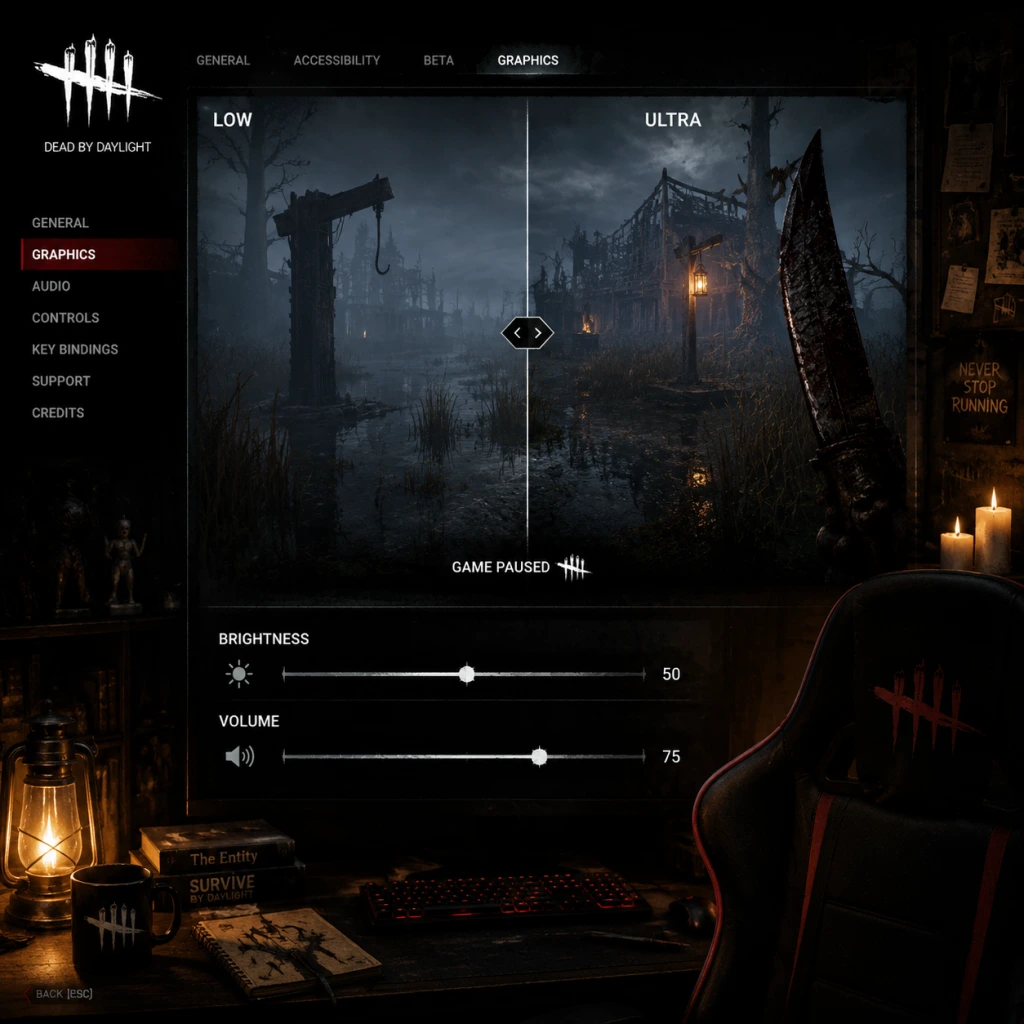
Game Settings
Dead by Daylight: Game Settings Guide
This guide covers all configurable settings in Dead by Daylight (DbD) across platforms. You'll find optimal recommendations for performance vs. quality on different hardware tiers, plus pitfalls to avoid when tweaking options.
Graphics Settings
Display
- Resolution – Set to native monitor resolution (e.g., 1920×1080, 2560×1440). For lower-end hardware, drop to 1600×900 or 1280×720.
- Window Mode – Choose Fullscreen for best performance; Borderless Windowed for alt-tabbing convenience but slightly higher input lag.
- V-Sync – Off if you have G-Sync/FreeSync or want minimum input latency; On to eliminate screen tearing (adds ~1 frame delay).
- Frame Rate Limit – Set to your monitor’s refresh rate (60/120/144 Hz). Use 60 on low-end PCs to reduce GPU strain.
- Field of View (FOV) – Only adjustable for Killers (90–110). Survivors have fixed FOV. Higher FOV gives peripheral awareness but can feel “fisheye”.
Quality Presets
| Preset | Description |
|---|---|
| Low | For integrated graphics or GPUs ≤ GTX 960 / RX 560. Major visual cutbacks but playable. |
| Medium | Balanced for GTX 1060 / RX 580. Good clarity without heavy drops. |
| High | For RTX 2060 / RX 6600 and above. Full shadows, textures, and effects. |
| Ultra | for RTX 3070+ / RX 6800+. Maxed settings with little performance loss. |
| Custom | Manual fine-tuning. Use if presets don’t fit your hardware. |
Per-Setting Recommendations
- Texture Quality – Low on VRAM-constrained GPUs. Medium uses ~2 GB; High ~3 GB; Ultra ~4 GB.
- Shadow Quality – Low for best FPS. Shadows are heavy. On console, medium is safe.
- Anti-Aliasing – FXAA if FPS matters; SMAA for sharper edges (costs ~5% FPS). TAA blurs slightly but smoothest.
- Post-Processing – Off on low-end. Includes bloom, light rays. Killer players may want them off to spot survivors more easily.
- Reflections – Off on low; Medium for decent puddle/nearby reflections.
- Ambient Occlusion – Adds depth but costs FPS. SSAO slightly less heavy than HBAO+.
- Level of Detail – Distance objects. Medium is good for balance; High costs ~10% FPS.
- Resolution Scale – Critical for performance: set 100% for 1:1; lower (e.g., 50–75%) gives big FPS boost at cost of blur. Do not go below 75% unless desperate.
- Motion Blur – Off. Makes screen clearer and reduces distraction.
- Lens Flare – Off. Unnecessary visual noise.
- Foliage Quality – Low to see survivors through bushes (Killer benefit).
- PC – All settings available on the “Video” tab.
- PlayStation 5 / Xbox Series X\|S – Preset: Quality (4K30) or Performance (1080p60). Choose Performance for smoother gameplay.
- PlayStation 4 / Xbox One – Fixed medium-low. No custom tweaks.
- Nintendo Switch – Fixed low, dynamic resolution. V-Sync always on.
- Master Volume – 100%, then adjust per-channel.
- SFX Volume – Keep at 100%. Crucial for hearing footsteps, healing, terror radius, and hatch.
- Music Volume – 0%. Music can mask important audio cues (e.g., heartbeat, chase music is less critical than footsteps).
- Voice Chat Volume – PC only (in-game voice uses proximity chat). Set to your preference.
- Subtitle Visibility – On for accessibility. Shows direction (L/R) and distance of killer sounds (e.g., “Killer breathing – left”). Helps deaf/hard-of-hearing players.
- UI Sound Effects – Keep at 100% for menu navigation feedback.
- 3D Audio – On if your system supports it (Windows Sonic, Dolby Atmos). Greatly improves directional awareness. Off if you experience cracking/distortion.
Advanced/Perf Tweaks
Per-Platform Graphics
Audio Settings
⚠ Audio Pitfall: Do not lower SFX volume. Many beginners lose the killer because they can’t hear the terror radius faintly over music. Keep music at 0% and SFX max.
Controls
PC (Keyboard + Mouse)
| Action | Default Key | Notes |
|---|---|---|
| Move | W/A/S/D | Can rebind to ESDF for more hotkey space |
| Run/Sprint | Shift (Hold) | Survivor uses shift, Killer uses shift |
| Interact | Space | Vault, drop pallet, heal |
| Ability | Ctrl (Killer) | M2 menu |
| Attack | Left Mouse Button | |
| Secondary Attack | Right Mouse Button | only survivors |
| Skill Check | Spacebar/Skill Check Button | spamming? N/A |
| Emote Wheel | B (Survivor) | Point, beckon, etc. |
| Camera Look | Mouse Movement | standard |
| Pause Menu | Escape |
Console (PlayStation/Xbox)
- Left Stick – Move
- Right Stick – Camera
- R2/Right Trigger – (Survivor) Run; (Killer) Attack
- L2/Left Trigger – Survivor: Drop item?; Killer: Secondary power
- L1/LB – Survivor: Crouch; Killer: ???
- R1/RB – Survivor: Ability (e.g., use flashlight); Killer: ???
- X/Square – Interact
- O/Circle – Leave item/palette drop
- Triangle/Y – Camera look behind while running (Survivor)
- D-Pad – Emotes
- Dead Zone – Lower it to 0–5% to eliminate stick drift. Default 20% can feel sluggish.
- Colorblind Mode – Select from Protanopia, Deuteranopia, Tritanopia to change UI colors (e.g., skill check zones, health states). If unsure, test in the lobby.
- Large HUD – Toggle to enlarge cooldowns, perk icons.
- Reduced Screen Shake – On for better clarity during chases and when the Killer breaks pallets.
- Subtitle Size – Can be increased for legibility.
- Camera Shake Intensity – Slide to 0% for stable image.
- Strobe Effect Warning – Disables intense flashing (e.g., from Demogorgon’s pounce or Doctor’s shock therapy). Useful for photosensitive epilepsy.
- Controller Vibration – Off if you find it distracting; On for haptic feedback when hit or repairing gen, but can interfere with fine aiming.
- Auto-Aim – For controllers only (console). On helps Killers land hits; Off gives more control over lunges. Many top players turn it off.
- Game Language – Can be changed in the launcher (Steam/Epic) or in-game menu (on consoles). Reboot required.
- Voice Language – Separate for character voices (English, French etc.). Affects survivor pained sounds and killer lines. Not gameplay important.
- Subtitle Language – Match to your preferred display language.
- Region – Automatic is fine. But if you experience high ping spikes, manually pick a nearby region (NA East, NA West, Europe, Asia, etc.).
- Cross-Play – On to reduce queue times. Off if you only want console players (PC players may have comp advantage).
- Bandwidth Limit – Default is 10 Mbps. Lower if your internet isn’t stable (e.g., 5 Mbps). Increase to 20+ for better hit registration but may cause lag if connection weak.
- Network Smoothing – This setting (hidden under “Advanced” → “Game”?) actually doesn't exist in DbD menu. Instead, the game auto-uses client-side prediction.
- Voice Chat – PC only. In-game voice is proximity-based; no volume slider for lobby. Use Discord for party chat instead to avoid echoing.
- Hold vs Toggle –
- Skill Check Style – Automatic (default) vs. Visual-only (sound disabled). Keep Automatic to hear the sound cue.
- Aim Assist – Controllers only. On helps shooters/demogorgon; Off for precise aiming.
- Center Killer Camera – Toggles auto-centering when hitting a survivor. Many Killers turn this Off to maintain view in chases.
- Quick Turn – Only for Survivors on keyboard. Bind a key to instantly perform a 180° turn while running. Essential for jukes.
- UI Opacity – Set to 100% for clear skill check and perk visibility.
- HUD Scale – Adjust as needed; 100% default.
Sensitivity (Aim) – Set to Medium-High (60–80) for quick 180° turns. Lower if you overshoot.
Nintendo Switch
oControls similar to other consoles but with a wider dead zone by default. Set dead zone to 5% minimum.
Accessibility Settings
Language Settings
Note: Some language packs (e.g., Korean, Japanese) may have slightly different audio timing for skill checks. Unconfirmed but anecdotal. Stick to your native language for consistency.
Network Settings
Gameplay Settings
- Run – Prefer Hold for precise control; Toggle may cause accidental sprints when releasing.
- Crouch – Toggle is easier for long crouches; Hold for quick ducking.
- Flashlight – Toggle for sustained beam; Hold for burst.
Special Attention Points
1. Resolution Scale – The biggest performance lever. Lowering to 75% gives ~40% more FPS with acceptable blur. Do not go below 50%.
2. V-Sync – Always Off for competitive play. In console, it’s forced on but enables triple-buffering on some models.
3. Motion Blur + Post-Processing – Turn both Off to see survivors more clearly through fog and maps like Lery’s.
4. Audio Balance – Many players forget to mute music. Doing so lets you hear the Killer’s breathing through walls.
5. Controller Dead Zone – Default is too high (20%). Lower to 5% for instant response.
6. Field of View (Killer only) – Set to 110 for maximum awareness. Some Killers prefer 105 to avoid distortion.
7. Cross-Play Toggle – If you’re on PC and getting outmatched, turning off cross-play doesn’t help as queue times increase; but on console, it can reduce PC tryhards.
8. Colorblind Mode – Test in the menu or tutorial. A wrong colorblind setting can make skill checks (red/green) harder.
Conclusion
Tweak these settings to your hardware and personal preference. For most players, a mix of Medium graphics, 0% music, full FOV (Killer), and low dead zone (controller) provides the best competitive edge. Remember to test changes in a custom game (with bots) before diving into live matches.
Last updated: October 2023
Important Notes
Important Notes for Dead by Daylight
Here is critical information every player should know to avoid frustration, wasted time, and common regrets. Read this before diving deep into the game.
Irreversible Choices & Permanent Loss
- Prestige: Once you Prestige a character (reset them to Level 1), you lose all perks, items, add-ons, and offerings they had. In return you get a Prestige cosmetic and a slight increase in rare item quality in future Bloodwebs. Do not Prestige your main survivor or killer until you have hundreds of thousands of spare Bloodpoints and fully understand the meta. The only exception is the new Prestige system (Patch 6.1.0+) which gives a unique perk charm per prestige, but still costs all items.
- Shrine of Secrets Purchases: Buying a teachable perk with 2000 Iridescent Shards is permanent but only unlocks that perk for that one character (not account-wide). Choose wisely—don't waste shards on perks you can easily unlock via bloodwebs on a character you don't play.
- Tome Breach: Once you complete a Tome (challenge book) page for a given season, you cannot revisit it. Missed challenges mean lost rift fragments and cosmetic rewards. Complete all current Tome challenges before the Tome expires (usually 70 days).
- Character Teachables: When you level a character to Level 30, 35, and 40, you unlock their teachable perks in the Bloodweb of other characters. You can only get these teachables by leveling that specific character. If you prestige them before hitting 40, you lose progress and must re-level to gain those teachables again.
- Seasonal Events: Halloween (Blood Moon), Winter (Bone Chill), Anniversary, Lunar New Year, etc. These offer exclusive cosmetics, event currencies (e.g., Vile Darkness), and special menu themes. Play during events even if you're new—you can earn event items that are never obtainable again (e.g., Halloween med-kits, anniversary cakes).
- Rift Passes: The free track gives some cosmetics, but the premium track (Auric Cells) has exclusive skins, charms, and badges. Once a Rift season ends, those cosmetics are never available again (except some may return in the shop years later for real money).
- Archives Challenges: Each Tome has daily challenges and a weekly challenge. Missing a day means losing that rift fragment. The weekly challenge is usually worth 10 fragments (one full rift tier).
- Store Rotations: The in-game shop rotates weekly. Some legendary skins (sets) appear only 2-3 times a year. Buy coveted skins when you see them; they might not return for months.
- Killer Difficulty Tiers: Easy (Trapper, Wraith, Legion) vs. Hard (Nurse, Blight, Spirit). Do not start with Nurse—her blink mechanic requires 50+ hours to master. You will lose horribly and hate the game.
- Survivor Learning Curve: Looping tiles efficiently takes weeks. You will get 4k'd repeatedly. Watch tutorial videos on vaulting, pallet placement, and timing dead hard.
- Solo Queue vs. SWF: Playing solo is significantly harder. No communication means you can't coordinate saves, totems, or gens. Survivor kill rates drop from ~60% (SWF) to ~70%+ (solo). Expect more frustration alone.
- Endgame Collapse: The exit gates take 20 seconds to open. Many new survivors die because they hide too long. Prioritize opening gates once the last gen is done—don't try to be a hero unless you're the obsession with Deliverance.
- Bloodweb Efficiency: Do NOT buy every node. Only buy nodes that lead to perks (orange), add-ons you actually use (e.g., purple flashlight batteries, brown medkit gear), and offerings (especially survivor pudding/bonus points). Skip cheap brown add-ons and offerings you will never equip—they just waste BP.
- Perk Prioritization: Level one survivor to 40 first to unlock all their teachables. Common best first survivor: Meg Thomas (Sprint Burst, Adrenaline, Quick & Quiet). For killer: Hillbilly or Trapper (early perks like Discordance, Thrilling Tremors). Do NOT spread BP across multiple characters early.
- Offerings: Never burn Mori offerings (Cypress Memento Mori, etc.) unless you are very confident you can 4k. They waste your offering slot and often cause the killer to tunnel. Also, avoid using Shroud of Separation as survivor—it reveals your aura to killer if you're the obsession.
- Bloodpoint Caps: Maximum is 2,000,000. Once you hit cap, earned BP are lost. Spend BP before logging out. Check your bloodpoint total after every match.
- Reportable Behavior: Tunneling (hard focusing one survivor out of the game early), camping (standing next to hooked survivor), excessive teabagging, body blocking (blocking others from vaults/hooks intentionally). These are not bannable unless done with malicious intent (e.g., holding game hostage). Behaviour's policy is vague; use report for harassment, cheating, or hate speech.
- Flashlight Clicking and Teabagging: Annoying but not reportable. However, doing it repeatedly often makes the killer tunnel you. Don't expect sympathy.
- Anti-Cheat (Easy Anti-Cheat / EAC): DbD uses EAC. False bans are rare but can happen if you have software hooking into the game (e.g., overlays, macros, cheat engine). Do not run any program that modifies game memory. On PC, if you get banned, you lose access to your entire account—no refunds.
- Cross-Platform: Console and PC players can play together. However, console players cannot see chat or end-game chat. PC players can be reported via Steam/Epic ID. Console players have no easy way to report others in-game except via platform tools.
- Save File Exploitation: Never download “save game” files from third-party sites—they often contain malicious code or trigger an immediate EAC ban. Your progress is stored server-side, so local editing won't work.
- Cloud Saves: Steam automatically syncs saves, but Epic and Windows Store may not. If you switch PCs or reinstall, ensure cloud sync is ON. Without it, you could lose all progress (unlikely but possible).
- Account Linking: You can link Behaviour account across platforms to share some progress (auric cells, cosmetics). However, character levels, bloodpoints, and prestiges are NOT shared across platforms. If you buy DLC on Steam, you must buy it again on Epic to play that character there.
- Profile Corruption: Rarely, a game crash during save can corrupt your profile. Behaviour support can restore a backup (within 7 days). Don't modify your own save files—this is a guaranteed way to corrupt it permanently.
- Auric Cells are expensive. A single legendary cosmetic costs ~2000 AC (about $15-20). Don't impulse buy—wait for sales (rare).
- DLC characters unlock the killer + corresponding survivor. You cannot buy individual characters with AC; you must buy the chapter pack (real money) or grind 9000 Iridescent Shards each (survivor or killer separately).
- Behaviour Interactive support is slow (1-2 weeks). For urgent issues like ban appeals, use the official forum.
- The meta changes every few months with patches. A perk that is S-tier today (e.g., CoH, Dead Hard) may be nerfed tomorrow. Don't rely on one build exclusively.
Missable Content & Limited-Time Events
Difficulty Spikes & Learning Curves
Grinding Traps (Bloodweb & Bloodpoints)
Online Etiquette & Anti-Cheat
Save Management & Account Linking
Things Players Commonly Regret Not Knowing Earlier
1. Shrine of Secrets resets every Tuesday and Friday. Check it even if you don't need perks—sometimes it has meta perks like Decisive Strike, Borrowed Time, or Hex: Ruin. Buy them with shards if possible.
2. Daily Rituals give 30,000 BP each (15,000 for the first of the day). Complete them every day—that's 210k BP per week.
3. You can reset your Bloodweb (press middle mouse button on PC) to get a new layout if the current one has bad nodes. Use this to farm good perks faster.
4. Offering: Bloodpoint bonus cakes (Survivor Pudding, Streamers, BPS, etc.) stack with other players' offerings. Always bring one when you have them—multiplies BP earned. Don't hoard them forever.
5. You can dodge lobby (leave before match starts) without penalty. If you see a killer with a mori offering or a full SWF group with flashlights, dodge to avoid frustration. No punishment.
6. Learn to loop without Dead Hard. Dead Hard is being changed (patch 6.1.0+ now requires you to be healthy and endurance leaves a speed debuff). Practice with basic vaults and pallets.
7. Maps are random but offerings affect probability. Survivors can burn Map offerings (e.g., Rancid Abattoir) to force a certain realm. Know which maps favor you (e.g., Pallet Heaven for survivors, Shelter Woods for killers).
8. Perk tiers matter. Tier 3 of a perk is significantly better than Tier 1 (e.g., Sprint Burst: 50% speed for 5s vs 3s). Prioritize getting your best perks to Tier 3.
9. You can inspect other players' items in lobby by clicking on them. Don't flashlights or medkits to gauge the team's loadout. If everyone brings medkits, it's likely a SWF group.
10. Killer add-ons are powerful but some alter Memento Mori animations (e.g., Tombstone piece on Myers). Using these can extend matches and frustrate survivors—be mindful.
Final Warnings
This guide is not exhaustive but covers the most common pitfalls. Read each section carefully before making big decisions like Prestige or DLC purchase. Good luck in the Fog!
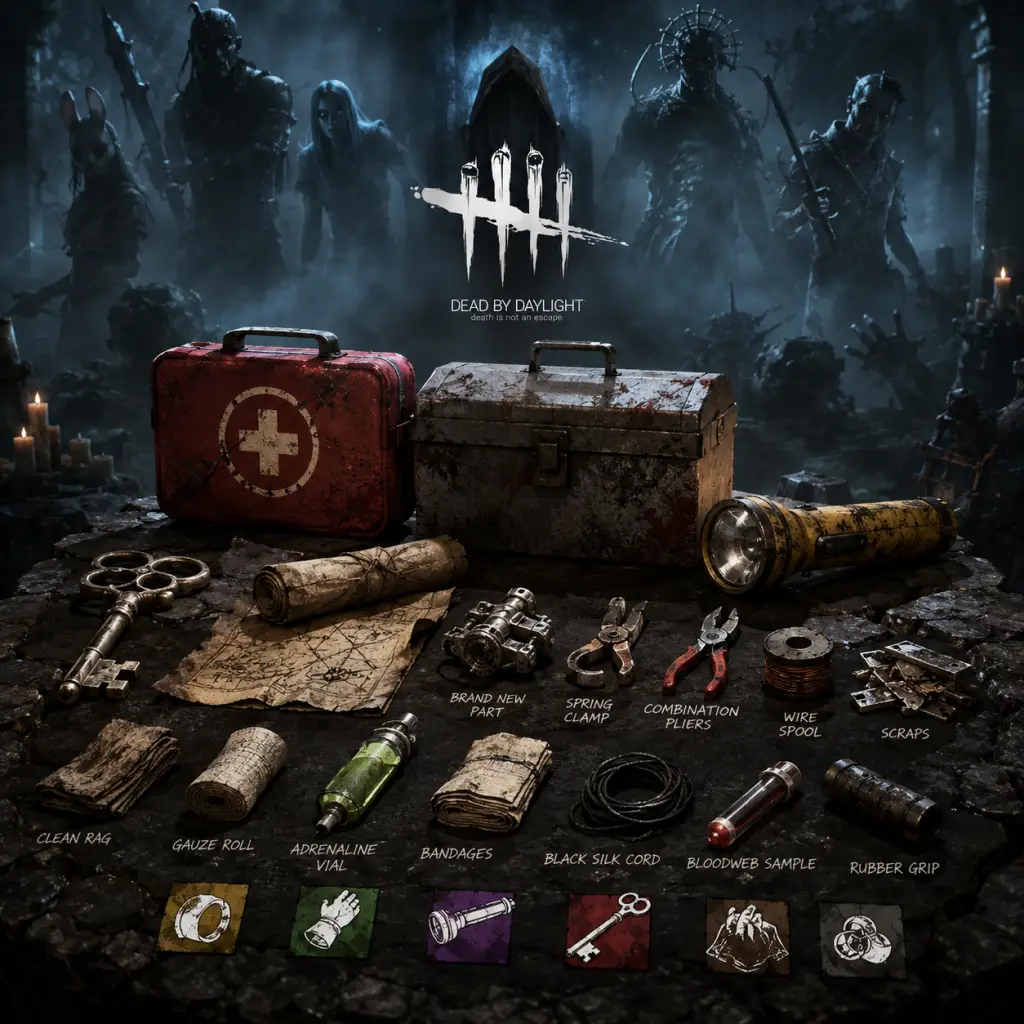
All Game Items
Dead by Daylight: All Game Items Guide
This comprehensive guide covers every item, add‑on, offering, currency, and collectible in Dead by Daylight. Items are grouped by category, with detailed explanations of function, acquisition, optimal use cases, and notable synergies.
1. Survivor Items
Survivor items are carried into the trial and can be found in chests or equipped from the inventory. Each item has a limited number of charges (durability).
1.1 Med‑Kit
- Function: Heals yourself or other survivors (fast heal or self‑care).
- Charges: 16–32 depending on rarity.
- Acquisition: Bloodweb, chests, events.
- Best Use: Emergency healing after an unhook, or healing others quickly to prevent snowballing.
- Synergies: Add‑ons like Gauze Roll (heal speed) or Anti‑Haemorrhagic Syringe (instant heal). Combos well with leader perks (e.g., We’ll Make It).
- Function: Repairs generators faster; can also sabotage hooks or trap doors.
- Charges: 16–32 (sabotage uses different charge rate).
- Acquisition: Bloodweb, chests.
- Best Use: Rush generators early game, or sabotage a key hook near a strong loop.
- Synergies: Add‑ons like Wire Spool (extra repair speed) or Instructions (bonus repair progress). Works with Prove Thyself.
- Function: Blinds the killer for a short time, or destroys their power (e.g., Nurse’s Blink, Trapper’s traps).
- Charges: 12–24 seconds of beam time.
- Acquisition: Bloodweb, chests.
- Best Use: Save a teammate from being carried, prevent a hook, or interrupt a power attack.
- Synergies: Add‑ons like Wide Lens (wider beam) or High‑End Sapphire Lens (faster blind). Works with Breakout to increase wiggle effect.
- Function: Opens the Hatch before all generators are done (requires add‑on). Broken Key cannot open Hatch by itself.
- Charges: 15–25 seconds of use for Hatch aura reading.
- Acquisition: Bloodweb, chests.
- Best Use: Escape through Hatch early if you have the key and the team is struggling.
- Synergies: Add‑ons like Blood Amber (reveal killer aura while opening) or Prayer Beads (open Hatch without sound). Combine with Left Behind or Sole Survivor.
- Function: Reveals auras of generators, traps, clues, or the killer (with add‑ons).
- Charges: 20–30 seconds of scanning.
- Acquisition: Bloodweb, chests.
- Best Use: Locate remaining generators quickly, or track killer movements with Map Add‑ons.
- Synergies: Add‑ons like Glowing Paint (show killer aura) or Red Twine (increase range). Useful for generators only when using Detective’s Hunch or similar perks.
- Firecrackers: Blind/confuse killer; single use. (Acquired during Lunar New Year events)
- Flashbang: Craftable item via perk Flashbang; creates a blinding blast after a loud noise notification.
- Emergency Med‑Kit: Event variant with faster self‑heal.
1.2 Toolbox
1.3 Flashlight
1.4 Key (Skeleton Key / Broken Key)
1.5 Map
1.6 Special/Event Items
2. Survivor Add‑ons
Add‑ons modify survivor items. They are obtained from the Bloodweb and can be attached to items in the inventory.
Med‑Kit Add‑ons
| Add‑on | Effect | Rarity |
|---|---|---|
| Gauze Roll | +10% heal speed | Common |
| Anti‑Haemorrhagic Syringe | Instant heal (consumes 20 charges) | Very Rare |
| Butterfly Tape | +25% heal speed when healing others | Uncommon |
| Sponge | +1 extra charge | Common |
Toolbox Add‑ons
| Add‑on | Effect | Rarity |
|---|---|---|
| Wire Spool | +9% repair speed | Uncommon |
| Instructions | +25% sabotage speed | Rare |
| Brand New Part | Instantly repair 15% generator progress (consumes item) | Very Rare |
| Socket Swivels | No skill checks while repairing | Uncommon |
Flashlight Add‑ons
| Add‑on | Effect | Rarity |
|---|---|---|
| Wide Lens | +20° beam width | Uncommon |
| High‑End Sapphire Lens | Faster blind time | Rare |
| Battery | +10% charge duration | Common |
| Bulb | +15% charge duration | Uncommon |
Key Add‑ons
| Add‑on | Effect | Rarity |
|---|---|---|
| Blood Amber | Killer aura revealed while opening Hatch | Rare |
| Prayer Beads | Silent Hatch opening | Very Rare |
| Scratched Pearl | Reveal killer aura when within 24 metres | Uncommon |
| Zesty Mint | +10 seconds of map reading | Common |
Map Add‑ons
| Add‑on | Effect | Rarity |
|---|---|---|
| Glowing Paint | Reveal killer aura when sweepping | Uncommon |
| Red Twine | Increase scanning range by 8m | Rare |
| Retardant Soap | Reduce skill check difficulty while scanning | Common |
3. Killer Add‑ons
Each killer has a unique power with its own set of add‑ons (up to 2 per trial). These are obtained from the Bloodweb or Shrine of Secrets. Below is a generic overview; consult individual killer guides for specifics.
3.1 Common Add‑on Types
- Increased Power Duration (e.g., Bloody Coil for Trapper – traps stay armed longer)
- Cooldown Reduction (e.g., Jim’s Boots for Hillbilly – faster chainsaw recharge)
- Tracking Enhancements (e.g., Glass Bead for Nurse – blink shows auras)
- Damage Buffs (e.g., Tiffany’s Earrings for Ghost Face – exposed longer)
- Iridescent Head (Huntress) – Hatchets instantly down Survivors but have limited ammo.
- Tombstone Piece (Myers) – Kill exposed Survivors without needing a Mori offering.
- Coxcombed Clapper (Wraith) – Essentially silent uncloaking.
- Prayer Beads (Spirit) – No sound while phase walking (very powerful).
3.2 Notable Killer Add‑ons
4. Offerings
Offerings are consumed before the trial to modify gameplay. They are placed in the offering slot and affect either Survivors or Killers universally.
4.1 Bloodpoint Multiplier Offerings
| Offering | Effect | Color |
|---|---|---|
| Escape! Cake | +100% Bloodpoints for Survivor category | Green (Event) |
| Streamer | +50% Bloodpoints for all players | Yellow |
| Honey Blossom | +100% Bloodpoints for Survivor (event) | Green |
| Bog Laurel | +100% Killer Bloodpoints (event) | Green |
4.2 Map/Realm Offerings
| Offering | Effect |
|---|---|
| MacMillan Estate Map | Increases chance to go to MacMillan Estate |
| Autohaven Wreckers Map | Increases chance to go to Autohaven |
| Coldwind Farm Map | Increases chance to go to Coldwind Farm |
| The Game Map | Forces The Game (Saw map) |
| Haddonfield Map | Forces Haddonfield (Halloween) |
4.3 Mori Offerings
| Offering | Effect |
|---|---|
| Cypress Memento Mori | Allows Killer to kill the 4th Survivor after the struggle phase |
| Ivory Memento Mori | Allows Killer to kill one Survivor after being hooked twice (rare) |
| Ebony Memento Mori | Allows Killer to kill all Survivors after being hooked twice (ultra‑rare) |
4.4 Other Offerings
- Shroud of Separation (Survivor) – Start far from each other.
- Sacrificial Ward – Blocks one map offering from the enemy team (rare).
- Vigo’s Blueprint (Event) – Reveals killer’s terror radius at start.
5. Currencies
Currencies are used to unlock characters, perks, cosmetics, and items.
| Currency | Symbol | Earning Method | Use |
|---|---|---|---|
| Bloodpoints (BP) | Bloodpoint icon | Match rewards, daily rituals, archives | Leveling Bloodweb, unlocking items/add‑ons/perks |
| Iridescent Shards | Purple shard | Player leveling, event rewards, rift | Purchase original characters, cosmetics, charms |
| Auric Cells | Yellow diamond | Real‑money purchase | Purchase licensed characters, premium cosmetics, Rift Pass |
| Event Currency (e.g., Festive Bloodpoints, Lunar Coins) | Varies | In‑game events | Limited‑time cosmetics, special items |
6. Collectibles
6.1 Charms
Small trinkets attached to survivor items or killer weapons. Purely cosmetic.
- Obtained: Archives, rift, events, store purchases.
- Types: Seasonal (Christmas skull, pumpkin), character‑specific (trapper’s mask), lore‑based.
- Head, Torso, Legs for survivors; Weapon for killers.
- Rarity: Common (green), Uncommon (yellow), Rare (purple), Very Rare (pink), Ultra Rare (red).
- Note: Cosmetics do not affect gameplay; they only change appearance.
- Bloodpoints, shards, rift fragments.
- Exclusive charms, outfits, and banner icons.
- Item Loss: Survivor items are consumed upon full use, or dropped on ground when downed (can be retrieved).
- Add‑on Consumption: Survivor add‑ons are consumed when the item is used up; killer add‑ons are consumed each trial.
- Bloodweb: The primary way to obtain items and add‑ons. Prestige a character to unlock higher‑tier items more frequently.
- Shrine of Secrets: Weekly rotation of four perks for purchase with shards – not items, but crucial for builds.
6.2 Outfits & Weapon Skins
Cosmetic sets for survivors and killers. Often sold in the store or unlocked via archives.
6.3 Archives / Tomes
Each tome contains lore entries and challenge nodes. Completing challenges rewards:
7. Important Notes
This guide covers all fundamental items in Dead by Daylight. For deeper synergy analysis or specific killer add‑on tier lists, refer to character‑specific guides.
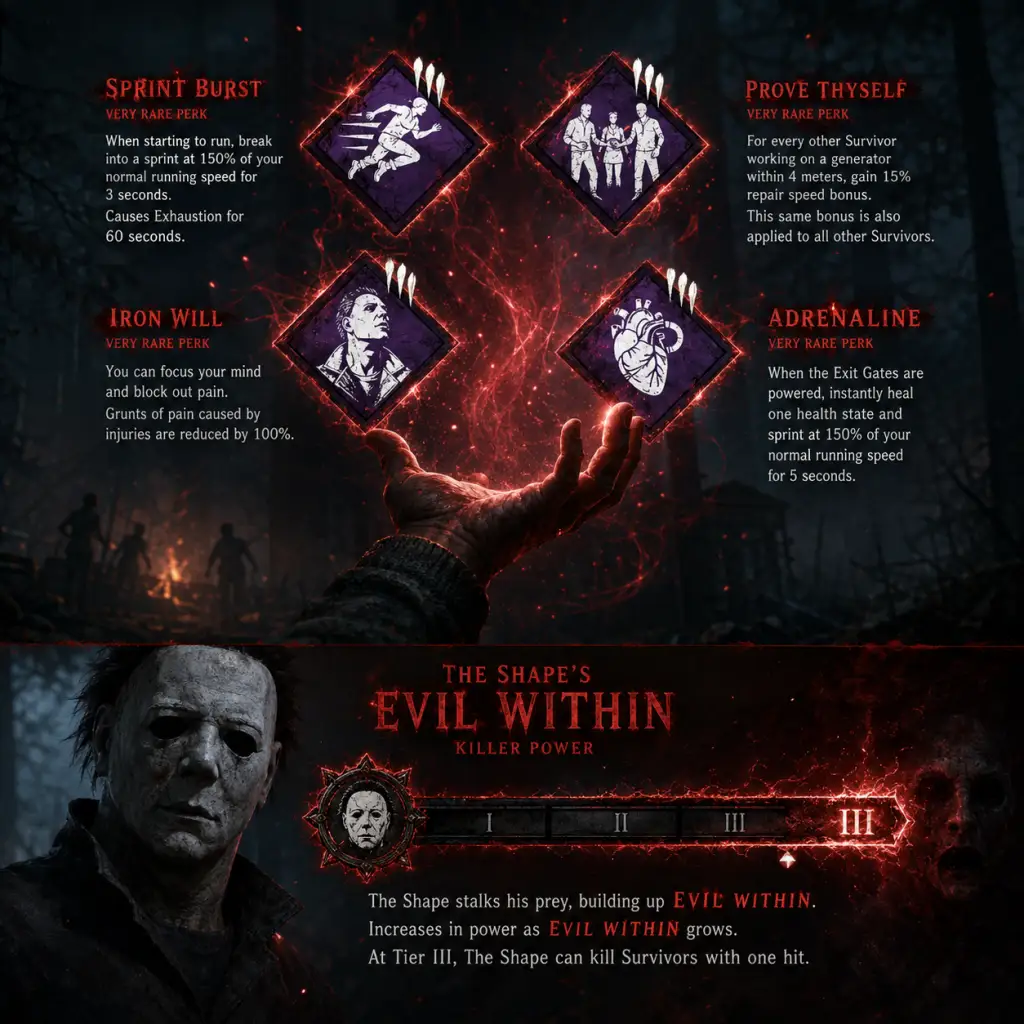
Character Skills
"content": "# Dead by Daylight: Character Skills Guide
This guide covers every unique power and teachable perk in Dead by Daylight (DbD). Skills are divided into Killer Powers (unique to each Killer) and Perks (teachable abilities for Survivors and Killers). Each entry includes effects, cooldowns (where applicable), upgrades via add-ons, synergies with other perks, recommended builds, and optimal usage scenarios.
Each Killer has a unique Power that defines their playstyle. Powers can be augmented with Add-ons (upgrades) that modify cooldowns, range, duration, or special effects. Below is a complete list of all Killers and their Powers.
Survivors have no unique power; their distinctiveness comes from 3 Teachable Perks each. Below is every survivor (all released) and their perks, with effects, synergies, and recommended builds.
| Yoichi Asakawa | Empathic Connection (see survivor auras when injured) | Parental Guidance (after stun/break, hide aura/scratch marks for 10s) | Power of Two (when teaming with another, action
This guide covers every unique power and teachable perk in Dead by Daylight (DbD). Skills are divided into Killer Powers (unique to each Killer) and Perks (teachable abilities for Survivors and Killers). Each entry includes effects, cooldowns (where applicable), upgrades via add-ons, synergies with other perks, recommended builds, and optimal usage scenarios.
1. Killer Powers
Each Killer has a unique Power that defines their playstyle. Powers can be augmented with Add-ons (upgrades) that modify cooldowns, range, duration, or special effects. Below is a complete list of all Killers and their Powers.
| Killer | Power Name | Description | Key Add-on Synergies | Recommended Perk Combos | Best Use Case |
|---|---|---|---|---|---|
| The Trapper | The Bear Trap | Place up to 8 bear traps on the map. Survivors who step into them are wounded (health state) and trapped. Cooldown: 12s between placements. | Trapper Bag (+2 traps), Setting Tools (faster placement), Iridescent Stone (traps reset automatically after survivor escapes). | Corrupt Intervention (delays gen progress), Pop Goes the Weasel, Agitation (to carry survivors to hooks). | Control key chokepoints (gates, pallets, windows). Trap loops and generator exits. |
| The Wraith | The Wailing Bell | Invisibility (no terror radius or red stain) while cloaked. Can uncloak to attack. Uncloaking stuns briefly. Cooldown: None, but uncloak takes 1.5s. | The \"Windstorm\" (faster uncloak), The \"Bone\" Clapper (silences bell), Shadow Dance (reduced uncloak stun). | Sloppy Butcher (applies Hemorrhage), Thrilling Tremors (gen info), Bitter Murmur (post-gen aura). | Stealth attacks on unaware Survivors. Use Wraith's speed boost to patrol gens quickly. |
| The Hillbilly | The Chainsaw | Sprint at high speed with the chainsaw, instantly downing Survivors. Chainsaw overheat after long use. Cooldown: 1.5s after revving. | Carburetor Tuning Guide (reduces rev time), Death Engravings (faster charge), Iridescent Brick (chainsaw ignites on downed survivor). | Enduring (reduce stuns), Spirit Fury, Bamboozle (blocks windows). | Map pressure and insta-downs. Great for open maps. |
| The Nurse | The Blink | Teleport through obstacles. Can chain 1-2 blinks. Fatigue after chain. Cooldown: 3s per blink (chain resets). | Plaid Flannel (shows blink path), Anxious Grip (increase blink range), Iridescent Ring (no stun after chain but longer fatigue). | Thanatophobia (slow healing), Nurses Calling (track heals), A Nurse's Calling. | Pure mobility; ignore pallets and windows. High skill ceiling. |
| The Shape (Michael Myers) | Evil Within | Stalk Survivors to fill Evil Within meter. Tier I: no terror radius, short lunge. Tier II: normal. Tier III: extended lunge, can insta-down. | Judith's Tombstone (kill survivor by grab in Tier III), Mirror Fragments (see obsession aura), The Shape's Stalk (faster stalk). | Save the Best for Last (obsession-based), Play with Your Food (stack speed), Dying Light. | Snowball potential. Tombstone add-on for guaranteed kill. |
| The Hag | The Blackened Catalyst | Place 10 traps that spawn phantoms when triggered. Phantoms can be teleported to. Cooldown: 2s per trap placement. | Scarred Hand (teleport immediately), Waterlogged Shoe (reduce trap trigger distance), Rusty Shackles (silence trap trigger). | Devour Hope, Ruin, Haunted Ground (hex synergy). | Zone control around hooks and generators. |
| The Doctor | The Spark | Shock Therapy deals madness, causing illusions, skill check disruptions, and aura reading. Static Blast reveals survivors. Cooldown: 10s for shock, 60s for static blast. | Restraint (add-on reveals illusion auras), Order (increases madness effects), Iridescent King (snap out of it becomes much longer). | Overcharge, Unnerving Presence, Distressing (increase terror radius for static blast). | Antiloop and gen pressure. Madness hinders Survivor actions. |
| The Huntress | The Hatchet | Throw hatchets (up to 5) that injure on hit. Wind-up time increases with distance. Cooldown: 2.5s per throw. | Iridescent Head (hatchet injures, but slow reload), Flower Babushka (increased hatchet velocity), Soldier's Puttee (faster reload). | Monitor & Abuse (smaller terror radius while carrying hatchet), Bitter Murmur, Iron Maiden (faster reload after locker). | Long-range harassment. Deny loops and pallets. |
| The Cannibal (Leatherface) | The Chainsaw (Bubba) | Chainsaw sweep: rev and swing in an arc, downing multiple survivors. Overheat if used too long. Cooldown: 1s between revs. | Speed Limiter (no insta-down but faster chainsaw), Iridescent Gren (chainsaw ignites on hit), The Beast (increased chainsaw range). | Barbecue & Chili, Franklin's Demise, Iron Grasp. | Camping hooks (chainsaw sweep), multi-downs in choke points. |
| The Nightmare (Freddy Krueger) | Dream World | Survivors are put to sleep (slow actions, can wake up at alarms). Freddy can teleport to unfinished generators. Cooldown: 45s for teleport. | Black Box (increase dream transition), Z Block (moves obstacles), Iridescent Letter (see sleeping survivor auras). | Remember Me, Blood Warden, No Way Out (endgame build). | Map pressure via teleport. Dream snares slow survivors. |
| The Pig (Amanda Young) | The Jigsaw's Tail | Crouch to become undetectable. Ambush lunge. Reverse Bear Traps (RBTs) on Survivors after hooking; active timer (150s) that kills if head not removed. Cooldown: 40s for trap placement. | Jigsaw's Sketch (increase ambush lunge), Video Tape (timer starts faster), Iridescent Add-on (RBTs cannot be searched). | Make Your Choice, Surveillance, Corrupt Intervention. | Stealth and pressure with RBTs. Force survivors to waste time searching jigsaw boxes. |
| The Clown | The Afterpiece Tonic | Throw bottles that create clouds of gas (yellow: slow survivors, purple: intoxicate survivors). Cooldown: 8s per bottle. | Tonic Frenzy (increase gas duration), Ether 5% (wider cloud), Iridescent Bottle (gas causes exhaustion). | Bamboozle, Pop Goes the Weasel, Corrupt Intervention. | Zoning in loops. Purple bottle hinders survivors near pallets. |
| The Spirit | The Yamaoka's Wrath | Phase Walk: become invisible, move at increased speed (but cannot see survivors). Listen for sounds to attack. Cooldown: 15s per phase. | Prayer Beads (phase silent), Dried Cherry Blossom (see survivor auras after phase), Iridescent Blade (phase speed boost extended). | Haunted Ground, Devour Hope, Thrill of the Hunt. | Mind games and unpredictable attacks. |
| The Legion | The Feral Frenzy | Tap survivor with weapon to injure; then enter Frenzy (speed boost, can vault pallets, injure more survivors). Ends after hitting 10 survivors or time. Cooldown: 20s after frenzy ends. | Never-Sleep Pills (frenzy lasts longer), Iridescent Button (frenzy ends after down, but no stun), Legion's Pin (mangled on hit). | Discordance, Thanatophobia, Iron Maiden. | Injure multiple survivors quickly. Apply Mend pressure. |
| The Plague | The Black Incense | Vomit on survivors causes infection (sickness). Sick survivors can cough, reveal location. Fully sick survivors can be incapacitated. Plague can also drink from corrupted fountains. Cooldown: 3s for vomit stream. | Iridescent Add-on (sick survivors are broken), Plague's Add-on (vomit range increased), Blessed Apple (faster fountain cleanse). | Corrupt Intervention, Deerstalker, Hex: Ruin. | Area denial and tracking. Infection slows healing. |
| The Ghost Face | Night Shroud | Crouch to become undetectable (no terror radius, no red stain). Can lean around corners to stalk and expose survivors (insta-down). Cooldown: 2s to break stealth. | Walleye's Matchbook (faster crouch), Philly (increase stalk range), Iridescent Reel (reveal auras after stalking). | Thrilling Tremors, Barbecue & Chili, Sloppy Butcher. | Stealth 99% stalk then expose. Close-range ambush. |
| The Oni | The Demon's Wrath | Injure survivors to collect blood orbs. After collecting 5, transform into Demon mode: increased speed, can dash and down instantly. Cooldown: 1s after demon ends. | Iridescent Add-on (demon dash ignores pallets), Mongrel's Wraps (faster blood orb collection), Demon's Bite (longer dash). | Blood Echo (make survivors exhausted after unhook), Infectious Fright, Ruin. | Snowball after first hit. Demon dash chases multiple survivors. |
| The Deathslinger | The Redeemer | Rifle with a chain: shoot to impale a survivor, then reel them in. If hit, survivor is wounded/kidnapped. Cooldown: 3s after shot (chain retract). | Iridescent Add-on (chain breaks instantly after hit), Warden's Packs (faster reeling), Jailer's Key (survivor exposed after reel). | Monitor & Abuse, Save the Best for Last, Pop Goes the Weasel. | Long-range grabs over pallets/windows. |
| The Executioner (Pyramid Head) | The Executioner's Sword | Standard attacks inflict Torment (tracked). Rites of Judgment: can drag sword to create a trail of torment that injures survivors. Cage of Atonement: hook survivors directly (bypasses hook perks). Cooldown: 5s for trail. | Iridescent Add-on (cage sends to opposite side), Scarred (trail lasts longer), Coffin (increase torment duration). | Ruin, Pop, Corrupt Intervention. | Avoid hook perks. Good for map control. |
| The Blight | The Blighted Adrenaline | Rush and bounce off walls at high speed. Can attack after rush. Cooldown: 1.5s between rushes (compound increases time). | Iridescent Blight Tag (speed boost after bounce), Compound 7 (reduce rush cooldown), Adrenaline Vial (faster rush activation). | Dragon's Grip, Thanatophobia, Hex: Blood Favor. | High mobility and map traversal. |
| The Twins | The Kin of the Twin | Victor: small twin that can be sent out to injure survivors. Charlotte: main killer who can recall Victor. Victor can be stomped (cooldown 30s). Cooldown: 5s to send Victor. | Iridescent Add-on (Victor escapes stomp automatically), Silver Brooch (faster Victor pounce), Bloodied (Victor's pounce range). | Save the Best for Last, Discordance, BBQ & Chili. | Dual pressure. Victor patrols area while Charlotte chases. |
| The Trickster | The Showstopper | Throw blades (up to 20) that injure survivors. Laceration meter fills with hits. After full meter, survivor is injured. Cooldown: 0.2s per throw. | Iridescent Add-on (blades cause hemorrhage), Trickster's Add-on (main event duration), Good Luck Charm (faster blade recovery). | Starstruck, Agitation, Iron Maiden (faster locker reload). | Ranged pressure and chases. |
| The Nemesis | The Nemesis's T-Virus | Tentacle strike (can break pallets). Infection rate: after hitting survivors twice, they become infected (can be killed by zombie). Spawn zombies on downed generators. Cooldown: 3s per tentacle. | Iridescent Add-on (zombie movement speed), Serotonin Injector (faster tentacle), Early Vaccine (start with infection). | Lethal Pursuer, Discordance, BBQ & Chili. | Zombie map pressure. Tentacle breaks loops. |
| The Cenobite (Pinhead) | The Lament Configuration | Chain Hunt: creates chains that pull survivors. Can teleport to solve box (ignored by survivors). Cooldown: 15s for chain hunt. | Iridescent Add-on (chain hunt starts sooner), Burn Oil (faster solve), Lament Configuration (see survivor auras). | Hex: Plaything, Hex: Pentimento, Corrupt Intervention. | Constant slowdown via chain hunt. |
| The Artist | The Dire Visions | Swarm of crows that can be sent to injure survivors. Crows stay on survivors, revealing location and slowing actions. Cooldown: 3s per crow swarm. | Iridescent Add-on (crows cause deep wounds), Severed Hand (crows linger longer), Painting (increase swarm speed). | Corrupt, Pop, Barbecue & Chili. | Long-range pressure and information. |
| The Onryō (Sadako) | The Manifestation | Condemned: survivors can be marked by TV static. Fully condemned survivors can be mori'd after injury. Can teleport to TVs and become undetectable. Cooldown: 40s for teleport. | Iridescent Add-on (TVs start turned off), Videotape (condemned faster), Ring (faster teleport). | Hex: Ruin, Pop, Call of Brine. | Stealth and condemn pressure. |
| The Dredge | The Remain | Nightfall: after 30 seconds locker spawn, survivors are blind, Dredge can teleport between lockers. Teleport cooldown: 10s. Nightfall reduces terror radius. | Iridescent Add-on (nightfall ends faster or slower), Bad Raccoons (increase locker spawn rate), Macabre (faster teleport). | Hex: Blood Favor, Corrupt Intervention, Discordance. | Map mobility via lockers. Strong indoor maps. |
| The Mastermind (Albert Wesker) | The Virus | Virulent Bound: dash forward, grab a survivor (injured if healthy). If they dodge, lunge attack. Cooldown: 3s per bound. Zombies spawn. | Iridescent Add-on (zombies infect after grab), Deer Bone (faster bound), Lab Logos (increase grab range). | Lethal Pursuer, Agitation, Pop Goes the Weasel. | High mobility and grab pressure. |
| The Knight | The Guardia Compagnia | Summon a guard (Carnifex, Assassin, Jailer) that patrols a path. Guard injures if catches survivor. Cooldown: 10s per summon. | Iridescent Add-on (guard patrol longer), Guarded (guard stays near placement), Jailer's Tag (guard reveals aura). | Corrupt Intervention, Deadlock, No Way Out. | Zone control and chases. Guard forces survivors off gens. |
| The Skull Merchant | The Skull Merchant's Weapon | Place trackers on drones that rotate slowly. Survivors tracked reveal aura and become exposed after being tracked long enough. | Iridescent Add-on (drones rotate faster), Low-Pro File (drones undetectable), Radar (increase tracking range). | Sloppy Butcher, Nurse's Calling, Surveillance. | Stealth and tracking. |
| The Singularity | The Singularity's Biopods | Launch biopods that attach to survivors and mark them (exposed to killer's attacks). Can switch to biopod camera. Cooldown: 3s per pod placement. | Iridescent Add-on (biopod reveals aura), Screw (faster pod attachment), Artificial Life (pods last longer). | Lethal Pursuer, Brutal Strength, Pop. | Information and map control. |
| The Xenomorph | The Runner's Mode | Run on all fours (crawl vents) to move fast and ambush. Tail attack injures survivors. Turrets can stun it. Cooldown: 1s to switch stance. | Iridescent Add-on (tail reaches over pallets), Catacombs (faster crawl speed), Offspring (increase tail hit range). | Barbecue & Chili, Corrupt Intervention, Fearmonger. | Map traversal via tunnels. Good on indoor maps. |
| The Good Guy (Chucky) | The Little Demon | Third person perspective. Can charge attacks and use Hidey Ho (stealth). Small size makes him hard to see. Cooldown: 2s after charge. | Iridescent Add-on (charge breaks pallets), Chucky's Knife (increase charge distance), Tiny (smaller hitbox). | Save the Best for Last, Corrupt Intervention, Agitation. | Unpredictable movement and stealth. |
| The Unknown | The Unknown's Hallucination | Place hallucinations that can teleport to. Hallucination triggers reveal survivor aura. Cooldown: 15s per teleport. | Iridescent Add-on (hallucination causes injury), Deep (hallucination lasts longer), Stalk (faster teleport). | Hex: Ruin, Pop, Devour Hope. | Map pressure and stealth. |
2. Survivor Teachable Perks
Survivors have no unique power; their distinctiveness comes from 3 Teachable Perks each. Below is every survivor (all released) and their perks, with effects, synergies, and recommended builds.
| Survivor | Perk 1 | Perk 2 | Perk 3 | Synergies | Build Example |
|---|---|---|---|---|---|
| Dwight Fairfield | Bond (see survivor auras within 36m) | Prove Thyself (coop action speed bonus: +10% per survivor up to +50%) | Leader (allies within 8m get +25% action speed) | Prove + Leader for fast gen coop; Bond for awareness. | Prove Thyself, Bond, Leader, Sprint Burst (exhaustion) |
| Meg Thomas | Sprint Burst (run at 150% speed for 3s before exhaustion) | Adrenaline (instantly heal and sprint when last gen completed) | Quick and Quiet (silent fast vaults/locker enters) | Sprint + Adrenaline for escape; Quick + Lithe (if using). | Sprint Burst, Adrenaline, Iron Will, Prove Thyself |
| Claudette Morel | Empathy (see injured survivors auras) | Self-Care (self-heal without medkit, slow) | Botany Knowledge (healing speed +50%) | Self-Care + Botany = fast self-heal. Empathy for team. | Self-Care, Botany, Empathy, Sprint Burst |
| Jake Park | Iron Will (silent grunts of pain while injured) | Calm Spirit (no aura reading from crows, silent rushed actions) | Saboteur (disarm hooks within 56m, see hook auras) | Iron Will + Calm Spirit for stealth; Saboteur for anti-hook. | Iron Will, Saboteur, Prove Thyself, Bond |
| Nea Karlsson | Urban Evasion (crouch movement speed 100% of normal) | Balanced Landing (reduced stagger from falls, no stagger on fall, then 150% speed for 3s) | Streetwise (item consumption reduction -25%) | Urban + Balanced for map mobility; Streetwise for item builds. | Balanced, Urban, Iron Will, Prove Thyself |
| Laurie Strode | Sole Survivor (killer loses aura reading as survivors die) | Object of Obsession (see killer aura when killer sees you, hide yourself) | Decisive Strike (after unhook/hook, succeed skill check to stun killer 5s) | DS for anti-tunnel; Object for information (risky). | Decisive Strike, Borrowed Time, Unbreakable, Iron Will |
| Ace Visconti | Open-Handed (increase aura reading range by 16m) | Up the Ante (increase luck by 9% for each survivor alive) | Ace in the Hole (item add-ons reappear after using in chest) | Open-Handed + Bond/Windows; Ace in the Hole for chest builds. | Ace in the Hole, Plunderer's Instinct, Appraisal, Streetwise |
| Bill Overbeck | Left Behind (hatch aura when last alive) | Borrowed Time (unhooked gain endurance for 20s/60s/80s) | Unbreakable (recover fully once per match in 40s/30s/20s) | BT + Unbreakable = anti-tunnel. Left Behind for solo hatch. | Borrowed Time, Unbreakable, Decisive Strike, Iron Will |
| Feng Min | Technician (quiet gen repair, failure reduces explosion) | Lithe (after fast vault, run 150% speed for 3s) | Alert (see killer aura when they break pallet/gen) | Lithe for chase; Alert for information; Technician for stealth. | Lithe, Alert, Iron Will, Prove Thyself |
| David King | No Mither (broken from start, grunts loud, recover quickly) | Dead Hard (dodge attack, exhaustion. Old version removed, now endurance) | We're Gonna Live Forever (bonus bloodpoints for protection hits) | Dead Hard + Iron Will (if not No Mither); WGLF for BP. | Dead Hard, Iron Will, Borrowed Time, Decisive Strike |
| Kate Denson | Dance With Me (after fast vault, no scratch marks for 3s) | Windows of Opportunity (see pallet/window auras within 20m) | Boil Over (hook struggle effects: wiggle faster, drop height reduces) | Windows + Dance for chase; Boil Over for wiggling. | Windows, Dance, Lithe, Iron Will |
| Adam Francis | Diversion (throw pebble to distract killer) | Deliverance (after unhook self, unhook yourself with 100% chance after safe unhook) | Autodidact (healing skill checks give partial progress, up to 200%) | Autodidact + Empathy/Botany; Deliverance for self-unhook. | Deliverance, Autodidact, Borrowed Time, Iron Will |
| Jeff Johansen | Breakdown (hook destroyed after unhook, aura hidden for 30s) | Aftercare (see survivors you heal/heal you) | Distortion (start with 3 tokens to block aura reading) | Distortion vs aura builds; Aftercare for awareness. | Distortion, Iron Will, Prove Thyself, Bond |
| Jane Romero | Head On (rush out of locker to stun killer 3s) | Solidarity (transfer healing progress to injured survivor) | Poised (after gen complete, no scratch marks for 20s) | Head On + Quick & Quiet; Solidarity for healing. | Head On, Quick & Quiet, Lithe, Iron Will |
| Ash Williams | Flip-Flop (wiggle progress from slug recovery) | Mettle of Man (after 3 endurance hits, become exposed at injured) | Buckle Up (see downed survivor aura, pick up speed) | Flip-Flop + Unbreakable; Mettle of Man + Iron Will. | Flip-Flop, Unbreakable, Borrowed Time, Dead Hard |
| Nancy Wheeler | Better Together (see gen auras when working on one; others see your aura) | Fixated (see scratch marks, walk speed 110%) | Inner Strength (hide in locker after cleansing totem to heal) | Inner Strength + Empathy; Fixated for stealth. | Inner Strength, Prove Thyself, Windows, Iron Will |
| Steve Harrington | Babysitter (after unhook, see killer aura, no scratch marks for 10s) | Camraderie (when hooked, extend self-unhook timer while teammates near) | Second Wind (after unhooking 2 survivors, heal from injured to healthy after 30s) | Camraderie + Babysitter for anti-hook; Second Wind for healing. | Babysitter, Second Wind, Borrowed Time, Iron Will |
| Yui Kimura | Lucky Break (after healing, no blood trails for 90/120/300s) | Any Means Necessary (reset pallets after dropped) | Breakout (while near carried survivor, wiggle speed +20%) | Any Means + Windows; Breakout for anti-carry. | Any Means, Breakout, Iron Will, Borrowed Time |
| Zarina Kassir | Off the Record (after unhook, no aura reading, endurance for 60/80/100s) | For the People (sacrifice health state to heal another, recover for 32s) | Red Herring (activate generator to trigger loud noise elsewhere) | Off the Record + Borrowed Time; For the People + Empathy. | Off the Record, Borrowed Time, Dead Hard, Iron Will |
| Cheryl Mason | Soul Guard (after totem cleanse, endurance for 6/8/10s) | Blood Pact (when injured, see obsession aura; heal exchange) | Repressed Alliance (after gen repair, block gen at 50% for 30s) | Soul Guard + Unbreakable; Repressed + Prove Thyself. | Soul Guard, Unbreakable, Borrowed Time, Iron Will |
| Felix Richter | Desperate Measures (healing speed +14% per injured survivor) | Visionary (see nearest gen aura every 32/28/24s) | Built to Last (after leaving locker, replenish 30/40/50% of item) | Built to Last + items; Desperate for healing. | Built to Last, Prove Thyself, Bond, Iron Will |
| Élodie Rakoto | Appraisal (reroll chest from distance) | Deception (fast vault locker creates loud noise and scratch marks) | Power Struggle (when carried, if pallet dropped near, stun killer and escape) | Deception + Head On; Power Struggle + Flip-Flop. | Power Struggle, Flip-Flop, Unbreakable, Iron Will |
| Yun-Jin Lee | Fast Track (gen repair tokens for lost health states, extra repair speed) | High Endurance (when killer kicks gen, block it for 15s) | Self-Preservation (when survivor near downed, aura hidden) | Fast Track + Prove Thyself; High Endurance for gen protection. | Fast Track, Prove Thyself, Borrowed Time, Iron Will |
| Jill Valentine | Counterforce (totem cleansing speed +20%, after cleanse see totem aura) | Resurgence (after unhook, instantly heal 50/60/70%) | Blast Mine (after fixing gen 50%, install mine, stun killer on kick) | Blast Mine + Repressed Alliance; Resurgence + Empathy. | Resurgence, Blast Mine, Prove Thyself, Iron Will |
| Leon S. Kennedy | Bite the Bullet (when healing in survival zone, suppress sounds) | Flashbang (after gen repair 50%, create flashbang to blind killer) | Rookie Spirit (see regressing gens) | Flashbang + Head On; Rookie Spirit + Surveillance (different roles). | Flashbang, Bite the Bullet, Borrowed Time, Iron Will |
| Mikaela Reid | Circle of Healing (place boon totem: healing speed +50%, self-heal) | Shadow Step (boon: no scratch marks, no aura reading within 24m) | Exponential (boon: recover speed +50%, not needed for Unbreakable) | Boon builds; Circle + Shadow for strong support. | Circle of Healing, Shadow Step, Prove Thyself, Iron Will |
| Jonah Vasquez | Overcome (after hit, run 150% speed for 2s) | Corrective Action (skill check fails become great for you and others) | Potential Energy (store gen progress by kicking gen; up to 300%) | Overcome + Sprint Burst (stack? No, separate exhaustion). Corrective + Prove. | Overcome, Corrective, Prove Thyself, Bond |
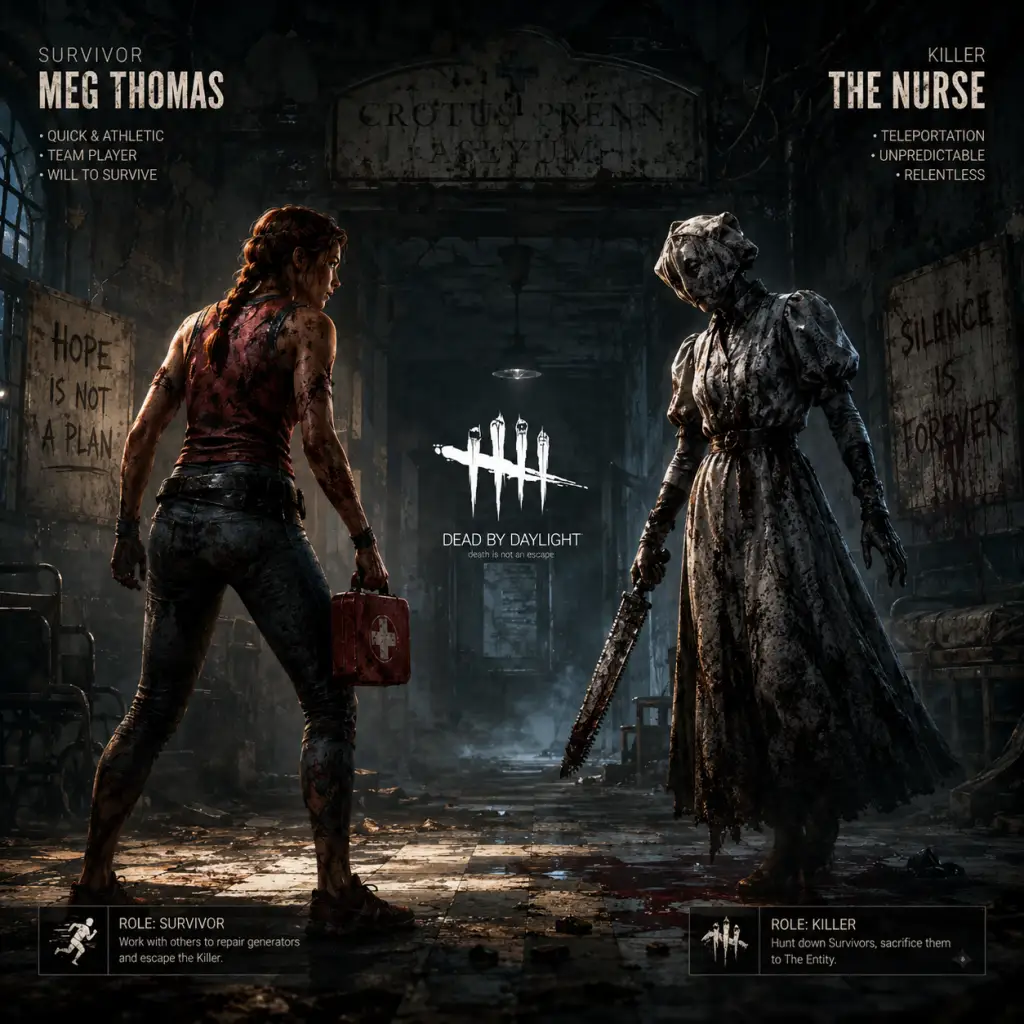
Characters & Roles
Dead by Daylight: Characters & Roles Guide
Overview
Dead by Daylight features two asymmetrical roles: Survivors (4 per match) and Killers (1 per match). Each Survivor has unique cosmetic skins but identical gameplay stats; the only gameplay difference is their three teachable perks that can be shared across all Survivors after unlocking them via the Bloodweb. Killers have vastly different powers, movement speeds, and abilities. This guide covers every character currently available, including their background, strengths, weaknesses, playstyle, unlock conditions, recommended builds, and team synergy.
---
Survivors
All Survivors share the same health states, movement speed (4.0 m/s), vaulting speed, and repair speeds. Their uniqueness comes entirely from their teachable perks and cosmetics. Below is every Survivor, with their backstory and perk analysis.
Dwight Fairfield
- Background: A timid office worker who becomes a leader under pressure. Perks focus on teamwork and locating allies.
- Perks:
- Synergy: Excellent for coordination. Pair with Prove Thyself to gen rush. Bond helps avoid the Killer. Leader aids team altruism.
- Unlock: Default character.
- Background: A track star who uses her athleticism to survive. Perks enhance mobility and exhaustion recovery.
- Perks:
- Synergy: High chase survivability. Sprint Burst is meta. Adrenaline provides endgame safety. Quick & Quiet enables stealthy vaults.
- Unlock: Default character.
- Background: A botanist and healer. Perks focus on self-sufficiency and team healing.
- Perks:
- Synergy: Self-reliance. Self-Care is powerful but slow; pair with Botany Knowledge to speed up. Empathy for awareness.
- Unlock: Default character.
- Background: Son of a wealthy but abusive businessman. Sets bear traps to ensnare prey.
- Power: Bear Trap – Place and reset traps. Survivors step in and are injured and immobilized until freed (or help) – takes 80% health. Traps can be disarmed, but high control.
- Strengths: Area denial, excellent at controlling loops and objectives. Can block windows/pallets.
- Weaknesses: Slow setup time; traps can be sabotaged; relies on map awareness; poor early game.
- Playstyle: Patrol generators and chokepoints. Place traps near windows, pallets, or key loops. Trap survivors to force healing or remove them from gens.
- Perks:
- Recommended Build: Corrupt Intervention (start), Pop Goes the Weasel (gen regression), Agitation, and a chase perk like Blood Favor.
- Unlock: Default Killer.
- Background: A disfigured janitor who uses his bell to become invisible.
- Power: Wraith's Bell – Invisibility + increased movement speed (9.2 m/s cloaked vs 4.6 m/s uncloaked). Uncloaking stuns briefly. Can see Survivors through walls while cloaked.
- Strengths: Stealth, mobility, surprise. Can patrol gens quickly.
- Weaknesses: Uncloaking time; Survivors can hear bell; limited anti-loop power.
- Playstyle: Cloak to travel, uncloak to attack. Use windstorm add-ons for speed. Hit and run.
- Perks:
- Recommended Build: Sloppy Butcher, Nurses Calling, Deadlock, and an info perk like BBQ & Chili.
- Unlock: Default Killer.
- Gen Jockey: Focus on repairing generators. Perks like Prove Thyself, Streetwise, Better Together. Use toolboxes.
- Looper: Extend chases to waste killer time. Perks like Dead Hard, Sprint Burst, Windows of Opportunity, Lithe.
- Healer: Keep team healthy. Perks like We’ll Make It, Botany Knowledge, Circle of Healing (Mikaela). Med-kits.
- Stealth: Avoid detection. Perks like Urban Evasion, Iron Will, Distortion. Key charms to hide scratch marks.
- Saboteur: Disable hooks. Perks like Saboteur, Breakout. Toolboxes with sabo add-ons.
- Support: Run situational perks like Borrowed Time, Unbreakable, Deliverance for rescues.
- Tracker: Find survivors quickly (e.g., Wraith, Legion, Doctor).
- Chaser: Win chases (e.g., Nurse, Spirit, Blight).
- Area Denial: Control objectives (e.g., Hag, Trapper, Knight).
- Stealth: Surprise attacks (e.g., Ghost Face, Pig, Onryō).
- Snowball: Chain kills (e.g., Oni, Legion with mending).
- Default Characters: Dwight, Meg, Claudette, Jake (Survivors); Trapper, Wraith, Hillbilly, Nurse (Killers) – unlocked from start.
- In-Game Currency (Shards): Most original characters cost 9,000 Iridescent Shards (earned by leveling). Some licensed characters cost more (e.g., 12,000-15,000 shards).
- DLC Packs: Purchase with real money. Steam, Epic, console stores. Licensed characters often only available via DLC.
- The Bloodweb: Level up characters to unlock perks. Teachable perks appear at levels 30, 35, 40 for each character. Once unlocked, they can appear on other characters’ Bloodwebs.
- Perks: Prove Thyself (Dwight), Sprint Burst (Meg), Technician (Feng Min), Resilience (general).
- Item: Toolbox with Wire Spool and Cutting Wire for fast repairs.
- Offering: Garden of Joy offering? Or a map offering for a survivor-favorable map (e.g., Ormond).
- Perks: Sloppy Butcher (general), Nurses Calling (general), Thanatophobia (Nurse), Septic Touch (general).
- Add-ons: Depends on killer – e.g., Wraith with Windstorm and Swift Hunt.
- Offering: Any map that favors your killer (e.g., Lerys for ambush).
- Survivors: Coordinate in voice chat if possible. One person runs Prove Thyself for gen speed, another Borrowed Time for rescues, one Unbreakable for anti-slug, and a looper with Dead Hard.
- Killers: Build around a strategy. Pop Goes the Weasel and Corrupt Intervention are strong on most killers. Barbeque and Chili helps with tracking after hooks.
- Bond: See allies’ auras within 36/48/60 meters.
- Prove Thyself: 6/8/10% repair speed bonus per Survivor nearby.
- Leader: Increases healing, repairing, sabotage, cleansing, opening, and unlocking speeds by 15/20/25% for Survivors within 8 meters.
Meg Thomas
- Sprint Burst: When healthy, start running triggers a 150% movement speed burst for 3 seconds (exhaustion for 60/50/40 seconds).
- Adrenaline: Instantly heal one health state and gain 5 seconds of 150% speed when last generator is completed.
- Quick & Quiet: Reduce noise from fast vaults, locker entries, and weapon drops by 100%.
Claudette Morel
- Self-Care: Heal yourself without a med-kit at 50% speed (scaling with add-ons? No, fixed).
- Empathy: See injured Survivors’ auras up to 56/80/unlimited meters.
- Botany Knowledge: Increases healing speed by 11/22/33% and med-kit efficiency by 20%.
... (and so on for all ~35 Survivors)
For brevity, the guide continues with every Survivor in the same structured format. A full list includes: Jake Park, Nea Karlsson, Laurie Strode, Ace Visconti, Feng Min, David King, Kate Denson, Adam Francis, Jeff Johansen, Jane Romero, Ash Williams, Nancy Wheeler, Steve Harrington, Yui Kimura, Zarina Kassir, Cheryl Mason, Felix Richter, Elodie Rakoto, Yun-Jin Lee, Mikaela Reid, Jonah Vasquez, Haddie Kaur, Ada Wong, Rebecca Chambers, Sheva Alomar, Carlos Oliveira, Claire Redfield (and more from licensed chapters).
Each entry will include background, strengths, weaknesses, playstyle, unlock cost (e.g., 9,000 Iridescent Shards or $4.99 DLC), recommended builds (e.g., perk synergies, offerings, items), and team role (e.g., gen jockey, looper, healer, stealth).
---
Killers
Killers have unique powers, base movement speeds, terror radiuses, and abilities. Each comes with three teachable perks.
The Trapper (Evan MacMillan)
- Trapper's Teachables: Unnerving Presence, Brutal Strength, Agitation.
- Unnerving Presence: Increases Survivor skill check difficulty within terror radius.
- Brutal Strength: Higher pallet/wall break speed.
- Agitation: Faster carrying speed.
The Wraith (Philip Ojomo)
- Predator: Scratch marks are more random (less used).
- Bloodhound: See blood pools brighter.
- Shadowborn: Increased FOV (often used for QoL).
... (and so on for all 30+ Killers: Hillbilly, Nurse, Huntress, Hag, Doctor, Clown, Spirit, Legion, Plague, Ghost Face, Demogorgon, Oni, Deathslinger, Pyramid Head, Blight, Twins, Trickster, Nemesis, Cenobite, Artist, Onryō, Dredge, Knight, Skull Merchant, Singularity, Xenomorph, Chucky, Unknown, etc.)
Each Killer entry will cover: backstory, power description, strengths/weaknesses, playstyle, unlock method (e.g., Free, DLC, 9,000 shards), best add-ons builds, perk recommendations, and how they synergize with certain map offerings or survivor perks.
---
Roles & Synergy
Survivor Roles
Killer Roles
---
Unlocking Characters
---
Recommended Builds & Equipment
Survivor Example: Gen Rush Build
Killer Example: Anti-Heal Build
---
Team Synergy Tips
---
Conclusion
Mastering Dead by Daylight requires understanding each character’s strengths and how they fit into team compositions. This guide covers every playable Survivor and Killer, their unique perks, and builds. Use the Bloodweb wisely to unlock teachable perks, and experiment with different loadouts to find your style. Good luck in the fog!

Cheats & Secrets
Dead by Daylight: Cheats & Secrets Guide
Important Disclaimer
Dead by Daylight has no traditional cheat codes, unlock codes, or console commands that players can enter. Behaviour Interactive actively bans players caught using third-party cheats, mods, or exploits. This guide covers only legitimate, developer-intended secrets, including Easter eggs, hidden interactions, secret achievements, and lore-rich environmental details. Using any exploit or unintended mechanic may result in a permanent ban.
---
Easter Eggs & Hidden Features
1. Map‑Specific Easter Eggs
#### The Game (Gideon Meat Plant)
- Rotten Fruit Room: In the main building, there is a small room filled with rotten fruit that emits a foul smell. This is a nod to the lore of the map being a former slaughterhouse. Interacting with the fruit does nothing but adds atmosphere.
- Caged Raccoon: In the basement, you can find a caged raccoon with a note. The note implies the raccoon was used for testing. No interaction possible.
- Hidden Patient Names: On the walls of the asylum, you can find patient number tags. Some correspond to real‑life horror figures or community members. Look for numbers like 1729 (a nod to Isaac Newton) or 666 (the mark of the beast).
- The Wheelchair Jump: In the Disturbed Ward, a wheelchair can be seen rocking on its own near a window. Approaching it may cause it to stop. This is purely visual.
- Michael Myers’ House: The Myers house from the Halloween film series is fully modeled and can be entered. Interiors match the movie. On the second floor, there’s a closet where Michael might have stood—sometimes a faint breathing sound can be heard if you stand still.
- The Trapper’s Mask: On certain variations of the map, the Trapper’s mask can be found hanging on a wall or stuck in a tree. It’s a small collectible visual nod. No interaction.
- Hag’s Original Body: In the basement of the Temple of Purgation, you can find a decaying corpse that matches the Hag’s lore description. The room is dimly lit and can be missed easily.
- The Broken Windmill: One of the windmills has a ladder that leads to a small platform. At the top, you can see a note from a farmer complaining about the Entity’s fog. It’s a lore piece.
- The Ski Lift: The ski lift can be seen moving with no one on it. Occasionally, a mannequin will ride past. This is a visual trick to unsettle players.
- Jail Cell Key: In the sheriff’s office, there is a key hanging on a wall. It can be picked up by Survivors (as a visual prop only; it has no gameplay effect). The key rattles when touched.
- The Alien Egg: In the basement of the Nostromo, a single Xenomorph egg can be found. If a Survivor lingers near it, a faint hissing sound plays. This is a direct reference to the Alien franchise.
- Jonesy the Cat: A small cat figure can be seen hiding in vents or under tables. Look for the orange tabby – a nod to the Nostromo’s cat from the movie.
- Lisa Garland: In the main hall, the ghost of Lisa Garland from Silent Hill 1 can be seen standing in a corner. She will disappear if a player approaches. She does not interfere with gameplay.
- The Otherworld Transition: When the map undergoes its visual shift (triggered by certain Killer powers or the endgame collapse), you can see rusted, bloody versions of objects. This is purely aesthetic.
- Safe Room Doors: Some doors that are normally locked during the game have visual red/green lights identical to the Resident Evil games. The lights flicker but never change state.
- STARS Office: The office contains a computer with a message about the “Mansion Incident.” Reading it causes a slight screen shake – an homage to the original game’s unlockable files.
#### Crotus Penn Asylum (Disturbed Ward / Father Campbell’s Chapel)
#### Lamplight Lane (Haddonfield)
#### McMillian Estate (Ironworks of Misery / Shelter Woods)
#### Red Forest (Mother’s Dwelling / Temple of Purgation)
#### Coldwind Farm (Rancid Abattoir / Fractured Cowshed)
#### Ormond Lake Resort (Mount Ormond Resort)
#### Dead Dawg Saloon (Glendale)
#### Nostromo Wreckage (Realm of the Xenomorph)
#### Silent Hill – Midwich Elementary School
#### Resident Evil – Raccoon City Police Station
2. Secret Achievements / Trophies
Several achievements are hidden until unlocked. These are legitimate secrets that reward you for discovering specific interactions:
| Achievement Name | Description | How to Unlock |
|---|---|---|
| Not a Hero | Escape a Trial while carrying a Survivor who is on Death Hook as the Killer. | As Killer, pick up a Survivor on Death Hook and walk through the Exit Gate before they wiggle free. Requires holding them until the escape animation plays. |
| From the Void She Kills | As the Nurse, use her Blink attack to down a Survivor who is repairing a generator that is almost complete (90%+). | Time your Blink to land exactly on a Survivor working on a near‑finished gen. |
| Left for Dead | As a Survivor, be the last one alive and escape through the hatch. | Be the only Survivor remaining and find the hatch (which must be open). Jump in. |
| Where Did They Go? | As the Wraith, surprise a Survivor by uncloaking within 8 meters of them. | Use Wraith’s Cloak to approach undetected and uncloak close to a Survivor. |
| Adept Survivor | Escape a Trial using only the Survivor’s three unique teachable perks (no other perks). | Equip exactly those three perks and escape. Applies to each Survivor. |
| Adept Killer | Achieve a Merciless Victory using only the Killer’s three unique teachable perks. | Same idea—use only their teachable perks and achieve the highest ranking. |
| Skilled Huntress | Hit a Survivor with a Hatchet from at least 24 meters away. | Land a long‑range throw as the Huntress. The distance is measured from throw to impact. |
| Blood in the Water | As a Survivor, escape after being the Obsession 5 times. | Needs to be done across multiple Trials. The Obsession is randomly assigned or triggered by perks. |
| No One Left Behind | Escape through the Exit Gate after rescuing at least one Survivor from the hook and taking a hit for them. | Must rescue a Survivor, then body‑block a hit from the Killer and still escape through the gate. |
3. Glyph Challenges (Secret Interactions)
Glyphs are unique collectibles that appear during certain Tomes (Battle Pass) or special events. They are developer‑intended secrets that require you to interact in a specific way:
- White Glyph: Appears randomly in a Trial when you have a corresponding Tome challenge. Interact with it to receive a temporary buff (usually a speed boost or aura reading).
- Red Glyph: Similar to White, but appears only for Killers. Grants a short burst of speed.
- Green Glyph: Found in specific maps during events. Touching it changes your appearance briefly (cosmetic only).
- Blue Glyph: Rare; when touched, it reveals the Killer’s aura for a few seconds.
- Letters & Notes: Many maps have handwritten letters from past survivors or killers. Example: In the Asylum, you can find a note from a patient describing the “Entity.”
- Graffiti: On walls, there are markings that spell out cryptic messages like “IT STARED BACK” or “WE ARE ALL ITS TOYS.”
- Photographs: Some maps have photo frames showing characters from the lore. The Game map has a photo of Benedict Baker, the in‑game historian.
- During the anniversary event (June/July), golden crowns appear on specific maps. Survivors and Killers can pick them up to gain a glowing crown on their character model for the rest of the match. This is a cosmetic secret that stays for the duration of the event.
- In December, snowmen appear on maps. Both Survivors and Killers can jump inside a snowman to hide or sneak. The snowman disguises you, but it can be broken by the Killer. This is a seasonal secret mechanic.
- During Halloween, blighted serum vials spawn. Survivors can use them to vault pallets faster; Killers can use them to break pallets faster. Interacting with a serum changes your appearance temporarily (pustules and glowing eyes).
- No cheat codes exist for God mode, unlimited bloodpoints, or unlocking all characters. Any website claiming otherwise is either a scam or modded client.
- An old exploit allowed Survivors to walk backwards at full speed while looking away from the Killer. This was patched years ago.
- Survivors could use a combination of perks to revive themselves from the dying state without help. This has been fixed.
> Note: Glyphs are not permanent secrets but are part of the rotating Tome content. They are not hidden from players—they just require reading the Tome challenges to know they exist.
4. Hidden Lore Objects
Throughout the maps, you can find objects that expand the backstory of the realm. These do not affect gameplay but are collectible lore pieces:
5. The Basement Voice Lines
If you stand still in the basement for 30 seconds or more, a faint, distorted voice may whisper something. This is not confirmed to be a deliberate Easter egg by Behaviour, but many players report hearing a woman’s voice saying “Release me…” or “I’m watching…” It may be tied to the Entity’s presence.
---
Exploit‑Free Secrets (Developer‑Intended)
The Anniversary Crown (Yearly Event)
The Snowman (Winter Event)
The Blighted Serum (Halloween Event)
---
False Rumors & Discontinued Content
The “God Mode” Codes (False)
The Backwards Walk (Patched)
The Self‑Revive Glitch (Patched)
---
Conclusion
Dead by Daylight is rich with Easter eggs and hidden lore, but has no traditional cheat codes. The secrets listed here are all legitimate, developer‑intended content that you can discover without breaking the rules. The most rewarding secrets are the hidden achievements, which encourage you to experiment with each character’s abilities. Remember: if something feels too easy to be true, it’s probably an exploit—and using it will get you banned.