Dead Space
## Introduction **Dead Space** is a landmark survival horror franchise that redefined the genre with its atmospheric sci-fi setting, strategic dismemberment combat, and relentless tension. Originally released in 2008 by EA Redwood Shores (now Visceral Games) and published by Electronic Arts, the se...
Download & Installation
Overview
This guide covers the download and installation of Dead Space for all major platforms where the game is officially available. We focus on the two most widely played versions:
- Dead Space (2023 Remake) – available on PC (Steam, Epic Games Store), PlayStation 5, Xbox Series X|S.
- Dead Space (2008 Original) – available on PC (Steam, GOG, Origin) and legacy consoles (PS3, Xbox 360) via physical or digital backward compatibility (not covered in detail here).
There is no official mobile version of Dead Space (the 2011 iOS game was removed and is no longer downloadable).
---
Official Download Sources
PC (Steam, Epic Games Store, Origin, GOG)
| Version | Store | URL | DRM | Notes |
|---|---|---|---|---|
| Remake (2023) | Steam | https://store.steampowered.com/app/1693980/ | Steam + EA App | Requires EA Account linked to Steam |
| Remake (2023) | Epic Games Store | https://store.epicgames.com/en-US/p/dead-space | Epic + EA App | Requires EA Account |
| Remake (2023) | EA App (Origin) | https://www.ea.com/games/dead-space/dead-space | EA App | Direct purchase via EA |
| Original (2008) | Steam | https://store.steampowered.com/app/17470/ | Steam DRM | Also includes Dead Space 2 & 3 separately |
| Original (2008) | GOG (Good Old Games) | https://www.gog.com/en/game/dead_space | DRM-free | Old version, runs on modern Windows |
| Original (2008) | Origin (legacy) | (no longer available new) | EA DRM | Only for existing owners |
PlayStation
- Dead Space (2023 Remake): Available on PlayStation Store for PS5.
- Dead Space (2008 Original): Not natively available on PS4/PS5. Only playable via PS Now streaming (now part of PlayStation Plus Premium) or backward compatibility on PS3.
- Dead Space (2023 Remake): Available on Microsoft Store for Xbox Series X|S.
- Dead Space (2008 Original): Backward compatible on Xbox One and Xbox Series X|S via disc or digital purchase on the Xbox 360 marketplace (still accessible on modern consoles).
- None. The 2011 iOS game “Dead Space” was delisted in 2016 and cannot be downloaded legally. Avoid unofficial APKs.
- OS: Windows 10 64-bit
- CPU: Intel Core i5-8600 / AMD Ryzen 5 2600x
- RAM: 16 GB
- GPU: NVIDIA GeForce GTX 1070 / AMD Radeon RX 5700 (8 GB VRAM)
- Storage: 50 GB SSD (NVMe recommended)
- DirectX: 12
- Network: Broadband internet for download and EA Account login
- OS: Windows 10/11 64-bit
- CPU: Intel Core i7-8700K / AMD Ryzen 7 3700X
- RAM: 16 GB
- GPU: NVIDIA GeForce RTX 3080 / AMD Radeon RX 6800 XT (10 GB VRAM)
- Storage: 50 GB SSD (NVMe strongly recommended)
- DirectX: 12
- Network: Broadband internet
- OS: Windows XP/Vista/7 (32-bit)
- CPU: Intel Pentium 4 2.8 GHz or AMD equivalent
- RAM: 1 GB (2 GB for Vista)
- GPU: NVIDIA GeForce 6800 / ATI Radeon X1600 (256 MB VRAM)
- Storage: 9 GB (original) – GOG version ~7 GB
- DirectX: 9.0c
- OS: Windows 7/8/10 64-bit (though not officially supported, most modern systems run fine)
- CPU: Intel Core 2 Duo 2.6 GHz / AMD Athlon 64 X2 2.6 GHz
- RAM: 2 GB
- GPU: NVIDIA GeForce 8800 GT / ATI Radeon HD 3870
- Storage: 9 GB
- DirectX: 9.0c
- Dead Space (2023 Remake):
- Dead Space (2008 Original):
- Cause: Antivirus or firewall blocking EA App installation.
- Fix: Temporarily disable antivirus and Windows Defender, run the installer as Administrator. Alternatively, reinstall EA App from https://www.ea.com/ea-app.
- Cause: Overlay interference.
- Fix: Disable Steam overlay for Dead Space (Library -> Right-click -> Properties -> General -> Disable Steam Overlay). Also disable Discord overlay.
- Cause: GPU driver issues or insufficient RAM/VRAM.
- Fix: Update GPU drivers to latest. Lower graphics settings before launching (use configuration file: %LOCALAPPDATA%\Dead Space (2023)\Saved\SaveGames\). Increase Windows virtual memory (16+ GB).
- Cause: Incorrect free space detection or hidden files.
- Fix: Clean temporary files (Disk Cleanup). Ensure at least 60 GB free for Remake (some platforms require extra buffer). Restart client.
- Cause: Missing DirectX 12 runtime.
- Fix: Install the latest DirectX from Microsoft (DirectX End-User Runtime Web Installer). Also update Windows 10/11 to latest build.
- Cause: Incompatibility with Win 10/11.
- Fix: Run in Windows 7 compatibility mode. Disable fullscreen optimizations. If using GOG version, ensure you have the latest community patch (e.g., Dead Space 1 widescreen fix).
- Cause: Store cache or network issue.
- Fix: Power cycle console (hold power button for 10 seconds). Clear Xbox store cache: Settings -> System -> Storage -> Clear local saved games. Try installing via mobile Xbox app (remote install).
- Cause: Network or storage.
- Fix: Rebuild database: Turn off PS5, hold power button until two beeps -> boot in Safe Mode -> select “Rebuild Database”. Ensure storage is healthy.
- Verify game files (to ensure no corruption):
- Check for updates – ensure latest patch by launching the store client.
- Go to Game Library -> Dead Space -> press Options button -> Check for Update.
- If download incomplete, go to Settings -> Storage -> Console Storage -> Games and Apps -> check size (should be ~50 GB).
- Press Xbox button -> My games & apps -> See all -> Manage -> Updates -> Check for updates.
- Verify storage: Settings -> System -> Storage -> Manage storage -> confirm Dead Space size (~50 GB).
- Performance issues (Remake): Lower graphics settings, disable ray tracing, use DLSS/FSR. Ensure Windows Game Mode is enabled.
- Audio sync issues (Original): Set audio quality to 16-bit, 44100 Hz in Windows sound settings.
- Controller not working: For PC Remake, use USB connection for DualSense features. For Original, install third-party drivers (e.g., DS4Windows).
- Multiplayer? Dead Space is single-player only; no online connectivity required after download except EA account check.
- Save game backup:
- EA Help: https://help.ea.com/
- Steam Discussion: https://steamcommunity.com/app/1693980/discussions/
- Reddit: r/DeadSpace
- URL: https://store.playstation.com/en-us/concept/10003870
Xbox
- URL: https://www.xbox.com/en-US/games/dead-space-remake
Mobile
---
System Requirements
Dead Space (2023 Remake)
Minimum
Recommended
Dead Space (2008 Original)
Minimum
Recommended
> Note: The 2008 version may need compatibility tweaks (e.g., running in Windows 7 compatibility mode) on Windows 10/11.
---
Step-by-Step Installation
PC – Steam (Remake or Original)
1. Download and install the Steam client from https://store.steampowered.com/about/
2. Create or log in to your Steam account.
3. Purchase the game from the Steam Store (Remake or Original).
4. Initiate installation:
- Go to your Library.
- Find Dead Space in your list.
- Click Install.
- Choose installation directory (ensure at least 50 GB free for Remake, 9 GB for Original on an SSD).
5. Wait for download (Remake ~50 GB, Original ~7-9 GB). Steam will verify files automatically.
6. First launch:
- For the Remake, Steam will prompt you to install the EA App (required). Follow the prompts to link your EA account (or create one if needed).
- For the Original, launch directly from Steam. No extra launchers needed.
PC – Epic Games Store (Remake Only)
1. Download and install the Epic Games Launcher from https://store.epicgames.com/
2. Log in to your Epic account.
3. Purchase Dead Space (2023 Remake) on the Epic Store.
4. Install:
- Open your Library in the launcher.
- Click on Dead Space.
- Click Install and choose a destination folder (SSD required).
5. First launch:
- The EA App will be installed automatically if not present.
- Sign in to your EA account (or create one).
- The game will launch after authentication.
PC – EA App (Origin) (Remake Only)
1. Download and install the EA App from https://www.ea.com/ea-app
2. Log in to your EA account.
3. Purchase the game from the EA App store.
4. Install:
- The game will appear in My Library.
- Click Download and select installation path.
5. Launch directly from the EA App.
PC – GOG (Original Only)
1. Download and install the GOG Galaxy client or use direct download.
2. Purchase Dead Space on GOG (OR use offline installer from your account).
3. Install:
- If using GOG Galaxy: go to Owned Games, click Install.
- If using offline installer: run the `.exe` file and follow setup wizard.
4. Launch directly (no extra launchers). The GOG version is DRM-free.
PlayStation 5 (Remake)
1. Sign in to your PlayStation Network account.
2. Purchase Dead Space from the PlayStation Store on console or via web (https://store.playstation.com).
3. Automatic download: The game will start downloading to your PS5 storage.
- Ensure you have at least 50 GB free on your internal SSD or a compatible M.2 expansion.
- You can check progress in Downloads/Uploads from the control center.
4. Installation completes automatically.
5. Launch from the home screen. The game runs natively on PS5.
Xbox Series X|S (Remake)
1. Sign in to your Xbox Live / Microsoft account.
2. Purchase Dead Space from the Microsoft Store (console or web).
3. Download:
- The game will appear in My games & apps.
- Select Install (or it may start automatically).
- Ensure at least 50 GB free on your internal SSD or expansion card.
4. Wait for installation.
5. Launch from the home screen.
---
Account Requirements
- EA Account (free) – required on all platforms (PC, PS5, Xbox).
- Steam users: EA account is linked during first launch.
- Epic users: Same requirement.
- Playstation/Xbox: Must sign in to EA account (or create one) when prompted.
- No EA account required for Steam or GOG versions. DRM-free on GOG. Steam version uses only Steamworks.
- Origin version (if owned) requires EA account (legacy).
---
First Launch Setup
Dead Space (2023 Remake)
1. Graphics settings: The game autodetects hardware. You can adjust from the main menu:
- Resolution, vsync, ray tracing (if supported), FOV, HDR, etc.
2. Audio settings: Adjust volume, language, subtitles.
3. Control options: Remap keyboard/mouse or controller (includes DualSense features on PC over USB).
4. EA Account Link: On PC, a browser window may open to authenticate your EA account – follow instructions.
5. Shader compilation: The first launch may take a few minutes to compile shaders (this happens once per hardware/driver change).
Dead Space (2008 Original)
1. Resolution: Set in the launcher or in-game via Options.
2. Field of view: Not adjustable natively – mods available if needed.
3. Controller support: Xbox 360 controller works natively; PS controller may need third-party tools.
4. Compatibility mode: If crashes occur, right-click DeadSpace.exe -> Properties -> Compatibility -> run as Windows 7 or Vista.
---
Common Installation Errors and Fixes
“EA App failed to install” / “Error -324” (PC Remake)
“Steam overlay conflicts with EA App” (PC Remake)
“Shader compilation stuck” (PC Remake)
“Not enough disk space” (any platform)
“DirectX error” (PC Remake)
“Game crashes on launch” (2008 Original on modern Windows)
“Xbox installation stuck” / “Queue error”
“PlayStation download paused”
---
Post-Installation Verification
PC Platforms
- Steam: Right-click game in Library -> Properties -> Installed Files -> Verify integrity of game files.
- Epic: Library -> Click the three dots on Dead Space -> Manage -> Verify.
- EA App: Library -> Click Dead Space -> Manage -> Repair.
- GOG Galaxy: Click game -> Manage Installation -> Verify/Repair.
PlayStation 5
Xbox Series X|S
---
Troubleshooting Tips
- Remake saves are in `Documents/Dead Space (2023)/Saved/SaveGames/` (PC).
- Original saves are in `Documents/EA Games/Dead Space/`.
- Cloud saving supported on Steam, Epic, EA App, PlayStation Plus, Xbox Live. Always enable cloud sync.
For further assistance, visit:
Game Introduction
Introduction
Dead Space is a landmark survival horror franchise that redefined the genre with its atmospheric sci-fi setting, strategic dismemberment combat, and relentless tension. Originally released in 2008 by EA Redwood Shores (now Visceral Games) and published by Electronic Arts, the series has become a cult classic, spawning sequels, spin-offs, and a highly praised 2023 remake. The game plunges players into the depths of space aboard a nightmarish mining ship overrun by grotesque alien creatures known as Necromorphs.
Genre and Developer
- Genre: Survival horror, third-person shooter, science fiction
- Developer: Visceral Games (original series), Motive Studio (2023 Remake)
- Publisher: Electronic Arts (EA)
- Dead Space (2008) – PC (via Steam/Origin), PlayStation 3, Xbox 360
- Dead Space 2 (2011) – PC, PS3, Xbox 360
- Dead Space 3 (2013) – PC, PS3, Xbox 360
- Dead Space (Remake) – Released January 27, 2023
- Platforms: PC (Steam, EA App), PlayStation 5, Xbox Series X|S
- Note: The remake replaces the 2008 original on current-gen consoles and introduces ray tracing, 3D audio, DualSense features, and overhauled gameplay systems.
- Isaac Clarke – The silent (later voiced) protagonist, a systems engineer who becomes an unlikely hero. In the remake, Isaac is fully voiced and more expressive, adding depth to his struggle.
- Nicole Brennan – Isaac's love interest and a medical officer aboard the Ishimura. Her mysterious fate drives much of the plot.
- Zach Hammond – The security chief who accompanies Isaac.
- Kendra Daniels – A computer specialist with her own agenda.
- Dr. Terrence Kyne – A scientist who understands the Marker's true nature.
- Fans of survival horror (Resident Evil, Silent Hill)
- Players who enjoy sci-fi horror with strategic combat
- Those seeking a challenging, atmospheric experience
- Gamers who appreciate detailed environmental storytelling and lore
- Single-player campaign: 10–15 hours (original); 12–18 hours (remake). Fully offline play required.
- No multiplayer or online co-op in the main Dead Space (2008 or 2023 Remake). Dead Space 3 had optional co-op, but the original and remake are strictly single-player.
- New Game Plus: Available after first completion, carrying over upgrades and weapons.
- Achievements/Trophies: Both versions include a full set of challenges.
- Dead Space: Extraction – A prequel rail-shooter (Wii, PS3) not included in the remake.
- DLC Packs: Limited weapon skins and suits (no story expansions).
- No story-based DLC or expansion packs. The remake is a complete experience with all original content (plus new lore) integrated.
- Pre-order bonuses (e.g., unique suit skins) are no longer available for purchase separately.
Visceral Games was known for its cinematic storytelling and immersive world-building, while Motive Studio brought modern technology and technical polish to the 2023 remake, maintaining the original's core identity.
Release Timeline and Platforms
Original Trilogy
2023 Remake
Story Overview and Setting
The story is set in the 26th century, where humanity has exhausted Earth's resources and turned to interstellar mining. The USG Ishimura, a massive Planet Cracker-class starship, has mysteriously gone silent. Engineer Isaac Clarke is sent with a small repair crew to investigate. Upon arrival, they find the ship overrun with Necromorphs—mutated corpses reanimated by an alien artifact called the Marker. Isaac must fight for survival, uncover the truth behind the outbreak, and confront his own traumatic past.
The setting is the claustrophobic, industrial corridors of the Ishimura, a ship designed like a grotesque cathedral of metal and blood. The environment is a character itself, with flickering lights, distant screams, and audio logs that slowly unveil a tragic narrative.
Main Characters
Core Appeal
Dead Space's core appeal lies in its strategic dismemberment combat. Unlike traditional shooters where headshots are key, Necromorphs can only be killed by severing their limbs. This forces players to aim carefully under pressure, using the iconic Plasma Cutter and other tools. The game excels at building tension through sound design, limited resources, and sudden scares. The remake enhances this with revamped AI, zero-gravity sections, and a unified Ishimura that rewards exploration.
Target Audience
Dead Space is designed for:
It is rated M for Mature (ESRB) / 18+ (PEGI) due to graphic violence, gore, and disturbing imagery.
Game Modes and Online/Offline Support
DLC and Expansions
Original Dead Space
2023 Remake
What Makes Dead Space Unique
Dead Space stands apart due to its diegetic interface – health, ammo, and objectives are displayed directly on Isaac's suit and weapons, never breaking immersion. The strategic dismemberment system forces players to think tactically rather than rely on headshots. The Isolation is amplified by the ship's industrial horror and the disturbing transformation of Necromorphs. The 2023 remake modernizes the classic with seamless level transitions, improved Zero-G mechanics, and a deeper narrative, making it the definitive way to experience this iconic horror game.
Whether you are a long-time fan or a newcomer, Dead Space offers an unforgettable journey into the heart of cosmic terror.
Getting Started
Overview
Dead Space (2023 Remake) is a third-person survival horror game where you play as engineer Isaac Clarke aboard the USG Ishimura. There is no character creation – Isaac’s appearance, name, and backstory are fixed. Your only choices are difficulty mode (Story, Medium, Hard, Impossible) and gameplay options like aim assist and subtitles. For beginners, Medium is recommended: it offers a fair challenge without being punishing.
First Hour Walkthrough (Spoiler-Free)
1. Prologue – USG Ishimura
- The game opens with Isaac and his crew docking. A distress beacon leads to chaos. Follow the linear path: walk through the hangar, witness the first Necromorph attack, and receive the Plasma Cutter from your companion, Zach Hammond.
- Tip: The Plasma Cutter is your best weapon for the entire game. Use it liberally.
2. Tutorial – Combat Basics
- Your first enemy is a lonely Slasher. The game teaches dismemberment: aim for the limbs (arms/legs) to kill quickly. Shooting the torso wastes ammo and enrages enemies.
- Use Stasis (L2/LT/Right-Click) to slow down fast enemies – it’s invaluable.
- Kinesis (R2/RT/Left-Click) lets you grab objects; later you can impale Necromorphs with sharp debris.
3. First Objective – Reach the Tram
- Follow the objective marker to the tram station. Along the way, you’ll find lockers, save stations, and a store. Always check corners – loot and ammo are scarce.
- Save often (save stations are glowing blue holograms). The game has no autosave during combat sequences.
4. Arrival at the Medical Deck
- The tram drops you on the Medical Deck. Here you get a Security Stasis Module and your first real puzzle (rotating the gravity panel). The Oxygen Timer appears when you enter vacuum segments – always look for oxygen refill stations (large blue cylinders).
Controls on All Platforms
| Action | PC (Mouse+Keyboard) | PlayStation 5 | Xbox Series X/S |
|---|---|---|---|
| Move | W/A/S/D | Left Stick | Left Stick |
| Look/Aim | Mouse | Right Stick | Right Stick |
| Shoot | Left Mouse Button | R2 | RT |
| Alternate Fire | Right Mouse Button | L2 (Aim) then R2 | LT then RT |
| Melee | V | R3 (press right stick) | R3 |
| Stasis | Q | L2 + R2 (hold) | LT + RT (hold) |
| Kinesis | E | R1 (press) toggle | RB (press) toggle |
| Use/Interact | F | Square | X |
| Reload | R | Triangle | Y |
| Switch Weapon | 1-4 | D-Pad Up/Down | D-Pad Up/Down |
| Inventory/Map | Tab | Touchpad (hold) | View button (hold) |
| Sprint | Left Shift | Click Left Stick | Click Left Stick |
UI Overview
- Health Bar (RIG): Blue spine down Isaac’s back. Green = full, yellow = caution, red = critical. Flashing arrows point to damage source.
- Oxygen Gauge: Only appears in vacuum or underwater; slowly depletes. Turn back when it reaches 25%.
- Stasis Energy: Blue bar under the health RIG. Recharges automatically over time or at recharge stations.
- Weapon & Ammo: Bottom-right corner shows current weapon, ammo count, and fire mode.
- Objective Marker: Yellow diamond on the floor/wall. Follow it for main story; optional markers are blue.
- Map & Inventory: Hold Tab/View/Touchpad to open the detailed map (shows locked doors, loot). Press to open inventory for healing, ammo, and schematics.
- Save Station: Glowing blue hologram disc. Interact to save; you can also heal here for free (if health is low).
- Explore thoroughly. Every corridor might hide credits, ammo, or health packs. Break wooden crates and search ventilation shafts.
- Stomp every dead body. After killing a Necromorph, stomp on it (R3/Melee on ground) to make it drop additional loot. This is called "loot stomping" and is 100% intentional.
- Use Stasis frequently. It recharges over time. Freeze a charging Slasher to buy seconds.
- Upgrade your Plasma Cutter first. Spend the first two Power Nodes on its Damage and Capacity. This weapon can carry you to the end.
- Purchase the Large Med Pack from the first store. It costs 3,000 credits, but emergency health is precious.
- Check every monitor and audio log. They add lore and sometimes reveal safe codes or hidden rooms.
- Don't shoot the arms off explosive enemies too close. Exploders detonate when their glowing arm is severed – back away first.
- Don't waste ammo on limbs that are already severed. Focus on the remaining limbs or head (though headshots are less effective).
- Don't sell your Plasma Cutter. It’s the most versatile weapon. You can always buy back sold items at a store, but it’s a waste of credits.
- Don't ignore oxygen. In vacuum zones, you have about 30 seconds of oxygen. If you run out, you die quickly. Memorize refill locations.
- Don't rush through doors without checking. Necromorphs can pop out of vents or grab you from behind.
- Don't hoard Health Packs. You can carry a maximum of 5 Small + 3 Medium + 1 Large. Use them before reaching the cap.
Essential Early Objectives (Chapters 1–3)
1. Acquire the Plasma Cutter – It’s given to you in the first 5 minutes. Do not sell or discard it.
2. Upgrade Your RIG – At the first store (kiosk), buy a Node (Power Node) and upgrade your health or weapon damage at a Bench (found in safe rooms).
3. Find the Security Stasis Module – Necessary for progressing through the Medical Deck.
4. Activate the Tram – Required to reach other decks. Complete the tram alignment puzzle.
5. Collect the first Weapon Schematic (Line Gun or Pulse Rifle) – Optional but helpful. The Line Gun offers vertical or horizontal alt-fire for crowd control.
What to Do First & What to Avoid
✅ Do First
❌ Avoid
Early Resource Priorities (Chapters 1–3)
| Resource | Priority | Notes |
|---|---|---|
| Credits (Credits) | High | Buy Power Nodes (5,000 credits each) first and Large Med Packs. Save 10,000 for the Circuit Breaker upgrade later. |
| Power Nodes | Very High | Use every node on Plasma Cutter damage/capacity and your RIG health. Never spend on non-essential weapons early on. |
| Ammo | Moderate | Plasma Cutter ammo is abundant. Only buy ammo if you fall below 30 rounds. |
| Health Packs | High | Always keep at least 2 Large Med Packs. Use Small ones quickly since they have lower capacity. |
| Schematics | Low initially | Only buy the Stasis Module Upgrade (unlocks later) and the Schematic for Pulse Rifle if you want a backup weapon. |
Common Beginner Mistakes
1. Panic Shooting – Spraying bullets into a Necromorph’s torso does very little damage and wastes ammo. Always aim for legs or arms.
2. Ignoring Stasis – The game gives you a tool to slow enemies. Use it! Especially against the first Brute (Chapter 2).
3. Not Looting Bodies – Stomping corpses yields extra credits and items. The game encourages this; it’s not a glitch.
4. Selling the Plasma Cutter – You might think another weapon is better. It’s not. Keep it until you get the Force Gun or Contact Beam.
5. Running past enemies – Some corridors are arena-style; the door locks. You must kill everything. Check for vents where enemies spawn.
6. Forgetting to Save – The game has no autosave during combat. You can lose 30–60 minutes of progress if you die between saves. Use every yellow save station.
Day-One Checklist
- [ ] Complete the prologue (first 15 minutes).
- [ ] Take the tram to Medical Deck.
- [ ] Upgrade the Plasma Cutter’s damage with a Node.
- [ ] Purchase a Large Med Pack.
- [ ] Learn to stomp every dead Necromorph.
- [ ] Master Stasis usage on at least one Slasher.
- [ ] Find the first save station and create a manual save.
- [ ] Collect the Security Stasis Module (Chapter 2).
- [ ] Read the first three log files (they unlock lore achievements).
- [ ] Check the map for any missed loot rooms (red dots).
- [ ] Set difficulty to Medium for a balanced experience.
- Play with headphones. Sound design is critical – you’ll hear enemies in vents.
- Explore the ship’s lore. The story is revealed through logs, holograms, and environmental storytelling.
- Don’t be afraid to die. Death is common; reload your last save and try a different approach (use Stasis!).
- Save every Power Node until you decide what to upgrade. A safe bet: Plasma Cutter damage → RIG health → Plasma Cutter capacity.
- When in doubt, cut off their legs. A legless Necromorph slides on the ground, easy to finish with a stomp.
Final Tips for Your First Playthrough
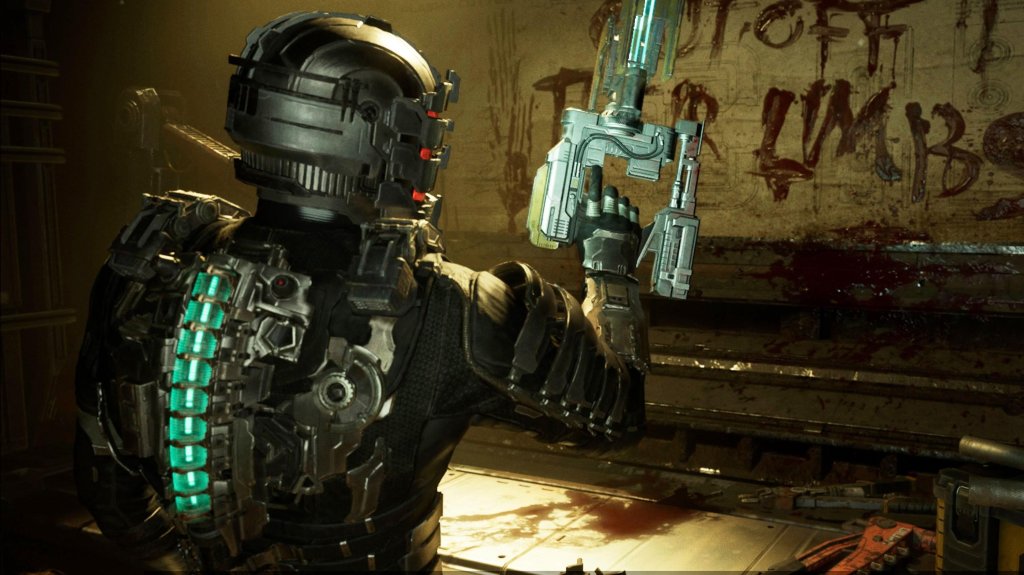
Core Gameplay
Overview
Dead Space (2023 Remake) is a third-person survival horror game focused on strategic dismemberment, resource management, and atmospheric exploration. You play as Isaac Clarke, an engineer stranded on the infested USG Ishimura. The core gameplay loop is simple: explore→survive→upgrade→progress. Combat is deliberate, requiring you to sever Necromorph limbs rather than aim for the head or center mass. Progression is linear but with moderate backtracking and optional areas. Upgrades are tied to nodes, credits, and schematics. There is no traditional leveling system; growth comes from weapon upgrades, suit upgrades, and acquiring new tools (Stasis, Kinesis, weapons). Endgame offers New Game+ and a Chapter Select for cleanup.
This guide breaks down the gameplay into four tiers based on typical player progression: Early Game (Chapters 1–3), Mid Game (Chapters 4–8), Late Game (Chapters 9–11), and Endgame (Chapter 12 + New Game+). For each tier we cover gameplay loop, combat, interaction systems, progression, exploration, missions, economy, and character growth.
---
Early Game (Chapters 1–3)
Main Gameplay Loop
The early game establishes the survival horror rhythm. You enter a new area (e.g., the Hangar Bay or Medical Deck), explore corridors for supplies (ammo, credits, health packs, nodes), fight small groups of Necromorphs (Slashers, Leapers), solve simple puzzles (use Kinesis to move objects, use the Locator to find objective), and then proceed to the next objective marker. Resources are scarce; you will often have to decide whether to buy a node or save credits for a weapon schematic.
Combat / Interaction Systems
- Plasma Cutter (starting weapon): Best for early game. Fire horizontally to sever arms, legs, and tentacles. Requires 2-3 shots to kill a Slasher. Aim for limbs to conserve ammo.
- Kinesis (acquired Chapter 1): Pick up environment objects (pipes, explosive canisters) and launch them at enemies. Use to grab faraway items or solve puzzles (e.g., pull a crate to reach a vent).
- Stasis (acquired Chapter 2): Slows enemies down. Use on fast enemies (Leapers) or in tough situations. Recharge stasis at certain stations or find stasis packs.
- Melee: Stomp (alt-fire on controller) to crush fallen enemies. Use stomp to break containers and loot. Melee attacks are weak; avoid using in combat except for finishing off downed Necromorphs.
- Zero-Gravity (first encountered Chapter 3): Jump from platform to platform using magnetic boots. You can shoot while floating. No evasion except moving to cover.
- Linear path with occasional locked doors (requires later upgrades like Level 3 clearance or a new weapon). Early game progression is strictly chapter-based; you cannot backtrack to previous chapters until Chapter Select after beating the game.
- Objectives are shown on a holographic trail (press Right Stick or hold F on PC). Follow the blue line to the main mission.
- Main quests: Each chapter has one primary objective (e.g., "Find Dr. Mercer" in Chapter 2). No side quests per se, but there are optional crew logs, text logs, and schematic pickups.
- Side objectives: Some areas have optional objectives like "Retrieve the RIG of ..." or "Access a locked locker" that require backtracking later with upgraded clearance. Early game only has a few such items (e.g., the Level 1 Lockbox on the Bridge).
- Credits are scarce: 200–500 per chapter. Spend on nodes (10,000 credits) or weapon upgrades at the Bench. Early game: save credits for the Line Gun schematic (Chapter 3) or the Rotary Saw? Actually the Line Gun is found, not bought. The Force Gun appears later. Focus on buying nodes for your Plasma Cutter.
- Nodes are rare; you find 2-3 per chapter. Use them on the Plasma Cutter first (Damage > Reload Speed > Capacity).
- Suit upgrades: First suit upgrade (Level 2) found late Chapter 3 (crew quarters). Increases inventory slots from 6 to 9. No other suits until mid game.
- Weapon upgrades: Only have Plasma Cutter until Chapter 3 (you can pick up the Line Gun near the end of Chapter 3). Upgrade paths: Damage (most important), Reload Speed, Capacity, Special (optional).
- Controller users: Remap Stasis to LB/L1 for quick access. PC: bind Kinesis to mouse side button.
- Aim for the legs first – Slashers become crawlers, easier to stomp.
- Always carry at least 6 ammo for your primary weapon; stockpile health packs for later.
- Platforms: All platforms play identically; PC has higher framerate (60+), but controls are equally responsive.
- Weapon variety:
- Stasis becomes critical: use on multiple enemies or to stop charging Brute (tank enemy).
- Kinesis for combat: impaling enemies with pipes kills weaker ones instantly.
- Necromorph variants: Lurkers (tentacles on walls) – shoot the yellow sacs. Infectors (flying, reanimate corpses) – prioritize with Stasis + Plasma Cutter.
- Zero-G areas increase (Chapter 4, 6, 8). Aim for Necromorphs' limbs while airborne. Use boost (B button or R2) to dodge.
- Clearance levels: You acquire Level 2 clearance in Chapter 5 (from the Bridge). This opens earlier locked lockers and doors. Level 3 comes in Chapter 7.
- Plot advancement: Each chapter adds a new area (Engineering, Hydroponics). The ishimura is interconnected; you will revisit previous locations to access new rooms.
- Upgrade stations: Benches appear frequently. Stores (vending machines) sell ammo, health, nodes, and sometimes new weapon schematics.
- Optional logs: Over 70 logs total. Mid game you can find signature examples: "Mercer's Log" in Chapter 5, "Kendra's log" early Chapter 6.
- Side objectives: "You Can't Run" achievement – complete all optional zero-gravity jumps (3 in mid game). Also find the Peng treasure (Chapter 6) for credits.
- Lockers: Many require Level 2 clearance; contain nodes, credits, and schematics.
- Credits per chapter: 800–1200. Spend wisely: prioritize nodes (10k each) and upgrade your primary weapon. The store sells Ammo Packs for weaker weapons (Pulse Rifle) – avoid buying unless desperate.
- Schematics: You can buy the Contact Beam (Chapter 7) for 60,000 credits – expensive but powerful. Usually skip until late game.
- Suit upgrades: Level 3 Suit (Engineering RIG) available in Chapter 6; costs 50,000 credits. Increases inventory to 12 slots and provides more armor. Save credits for this.
- Weapon specialization: You should have 2-3 weapons upgraded. Focus on your favorite. Upgrade Plasma Cutter fully first, then Line Gun for crowd control.
- Stasis and Kinesis upgrade: Buy nodes in the Stasis tree to increase duration and recharge speed. Kinesis tree increases damage for thrown objects and pull distance.
- Always carry a damage node – if you find a bench, upgrade immediately.
- Use the environment: Explosive canisters (red) are plentiful – shoot them near enemies for one-shot kills.
- Reserve Stasis for Brutes and Lurkers – don't waste on basic enemies.
- Backtrack to previous areas after getting Level 2 clearance to find nodes and credits.
- Weapon pairings:
- Stasis duration maxed out lasts about 8 seconds. Use on Nest enemies (spawners) to shut them down.
- Kinesis used to move explosive pods away or pull ammo from dead enemies.
- Boss fights: Chapter 10 has the Hive Mind (first phase) – shoot yellow sacs while dodging tentacles. Chapter 11 has The Valor's Nest – wave-based with multiple Hunters (regenerators).
- Plot chapters: Linear but with some back-and-forth within the same chapter (e.g., Chapter 9: return to the Bridge).
- Clearance Level 3 opens everything. Late game you can access all locked doors from earlier chapters if you backtrack via Chapter Select later.
- Final weapon upgrade: Capacitor (special upgrade) for your primary weapon can be found or bought.
- All optional content is accessible if you have the clearance. Late game is the best time to grab any missed logs or collectibles, but you cannot return to Chapter 11 after leaving until postgame.
- The Peng collectible chain completes in Chapter 9 (if you started mid game).
- Text logs for lore: especially those concerning Marker symbol interference.
- Credits are abundant: 2,000–4,000 per chapter. You can afford most upgrades. Save at least 100k credits for New Game+ suit (Level 6).
- Nodes: 4-6 per chapter. Spend on Stasis and Kinesis if not already done.
- Suit upgrades: Level 4 Suit (Vintage Suit) available in Chapter 9 for 100,000 credits. Best defensive suit with 15 inventory slots. You can also find the Level 5 Suit (Advanced) in Chapter 11 hidden area – gives 18 slots and best armor.
- Weapon upgrades: Max out one weapon; second weapon partially. The Plasma Cutter + Contact Beam combination is powerful for late game.
- Special upgrades: Use the Explorer's Kit (found) to increase weapon capacity without nodes? No, that's only in Dead Space 2.
- For the Hunter (regenerator) in Chapter 11: Use Stasis then slice off its legs; it will crawl and you can ignore it while escaping.
- When fighting the Hive Mind: Shoot the glowing tentacles and the main bulb when exposed. Use contact beam alt fire for massive damage.
- Save before entering the Centrifuge puzzle (Chapter 9) – it's a maze with constant enemy spawns.
Progression
Exploration & Quests/Missions
Economy
Character / Build Growth
Actionable Advice
---
Mid Game (Chapters 4–8)
Main Gameplay Loop
Areas become larger, with more backtracking (e.g., returning to Medical from the Bridge). You have multiple weapons (Plasma Cutter, Line Gun, maybe Pulse Rifle or Force Gun). The loop expands: explore, fight mixed enemy types (Slashers, Leapers, Infectors, Lurkers), solve environmental puzzles (use Stasis to freeze fans, Kinesis to pull power cores), manage ammo and health more carefully because enemies are more numerous.
Combat / Interaction Systems
- Line Gun – horizontal primary fire for crowd control, alternate fire (proximity mine) for traps.
- Pulse Rifle (buy from store Chapter 5) – rapid fire, good for Swarmers, but ammo hungry.
- Force Gun (Chapter 6) – knockback, breaks limbs on contact, secondary fire is a kinetic blast.
Progression
Exploration & Quests/Missions
Economy
Character / Build Growth
Actionable Advice
---
Late Game (Chapters 9–11)
Main Gameplay Loop
Pacing intensifies. Enemies include Divider (splits into many pieces), Guardian (stationary, shoots pods), and Tentacle enemies (giant ones in vents). Areas are linear but have combat arenas (e.g., the Government Sector, the Crew Quarters revisited). Resource management becomes easier if you have upgraded weapons; you'll have more ammo but enemies take more hits. The loop: enter arena → waves of Necromorphs → use Stasis and Kinesis strategically → loot bodies → move forward.
Combat / Interaction Systems
- Plasma Cutter (fully upgraded) is still viable.
- Contact Beam (if purchased) – alt fire is a laser that stuns or kills any non-Boss enemy in one shot with full upgrade.
- Ripper (found in Chapter 8) – primary fire launches a blade that flies in a circle; great for tight corridors.
Progression
Exploration & Quests/Missions
Economy
Character / Build Growth
Actionable Advice
---
Endgame (Chapter 12 + New Game+)
Main Gameplay Loop
Chapter 12 is the final, linear gauntlet. You face endless waves of Slashers, Brutes, and the final boss (the Hive Mind full form). The loop is pure survival: move through corridors, kill everything, use all resources. After beating the boss, you can start New Game+ (same difficulty, retain all upgrades, weapons, and credits) or Chapter Select to finish collectibles.
Combat / Interaction Systems
Final boss: Hive Mind has a weak point on its head and body. Use Stasis on its tentacle slams. Contact Beam or Line Gun with detonation modules work best.
No new weapons in Chapter 12. You have your full arsenal.
Environmental hazards: Fire, vacuum (suit oxygen), and explosive clouds. Use Kinesis to pull oxygen tanks.
Progression
No further upgrades during the final chapter. The game ends after the last cutscene.
New Game+: Start a fresh playthrough on the same difficulty. You keep all weapons, upgrades, credits, nodes, and suit level (Level 5). Enemies are slightly stronger (same health pool, but more spawns).
Chapter Select: After finishing, you can replay any chapter to find missed logs, schematics, or achievements. Your upgrades persist.
Exploration & Quests/Missions (Postgame)
Completionist objectives: Find all 74 logs, 13 schematics, 10 Peng collectibles. Unlock "Max Overdrive" achievement (max all upgrades).
No new economy in postgame. You can farm nodes by replaying chapters with high enemy density (e.g., Chapter 6 Hydroponics).
Character / Build Growth
Level 6 Suit (New Game+ only) – found in the first store after Chapter 1. Costs 200,000 credits. Provides maximum inventory (18 slots) and highest armor. Equivalent to the Level 5 suit from the original.
Max upgrades: You can fully upgrade all weapons by the end of New Game+ (need ~80 nodes). Suit upgrades also maxed.
No new abilities – all tools obtained in first playthrough.
Endgame Structure
Chapter 12 is short (~30 min). After credits, you get a Summary screen with completion percentage.
New Game+ offers the same experience but with increased difficulty (more Necromorphs per encounter, sometimes faster enemies). You can choose to skip puzzles you already solved (e.g., the asteroid mining puzzle).
Platinum trophy / 100% requires full clear on impossible? Actually there's an Impossible difficulty mode (one life) – not tied to New Game+. Play on lower difficulty first to learn.
Actionable Advice
For New Game+, prioritize the Level 6 suit first – it makes the early chapters trivial.
Save stasis and contact beam ammo for the final boss – you don't want to run out.
Use Chapter Select after your first playthrough to grab any missed nodes – nodes are finite per playthrough, but farming them in New Game+ is more efficient.
Platforms**: On PC, enable vsync to avoid screen tearing during boss fights. Console players should use performance mode (60 FPS) for best responsiveness.
---
Summary Table: Key Differences by Tier
| Aspect | Early Game (Ch1-3) | Mid Game (Ch4-8) | Late Game (Ch9-11) | Endgame (Ch12+NG+) |
|---|---|---|---|---|
| Enemy Types | Slashers, Leapers, Infectors | Lurkers, Brutes, Guardians | Dividers, Hunters, Tentacles | All (final boss) |
| Weapons Available | Plasma Cutter, Line Gun | Pulse Rifle, Force Gun, Contact Beam | Ripper, Contact Beam (upgraded) | All maxed |
| Suit Level | 1–2 | 2–3 | 3–5 (best | 5–6 (max) |
| Credits per Chapter | 200–500 | 800–1200 | 2000–4000 | 4000+ (farming) |
| Node Droprate | 1–2 | 2–3 | 4–6 | 4–6 (NG+ more) |
| Clearance | Level 1 | Level 2 | Level 3 | All |
| Exploration Backtrack | Limited | Some | Extensive | Full (via Chapter Select) |
Conclusion
Dead Space's core gameplay is a masterclass in survival horror. By understanding the progression tiers, you can optimize your resource use and combat strategy. Remember: always dismember, conserve ammo, upgrade your Plasma Cutter first, and never underestimate the power of Stasis + Kinesis. Good luck, Engineer.
Game Tips
Combat & Dismemberment
Aim for Limbs, Not the Body
- Explanation: Necromorphs only die when you sever all four limbs or decapitate them. Shooting the torso or head is inefficient and wastes ammo.
- Why: Limbs are the most vulnerable hitboxes. The Plasma Cutter (horizontal vs vertical) lines up perfectly with arms and legs. Once you cut off two limbs, the enemy is crippled and can be finished with a stomp.
- When: Use this from the very first enemy. Always prioritize legs first to slow them down, then arms to stop their attacks.
- Explanation: Press the melee button while aiming down to stomp. Does no damage but knocks enemies away and can crush limbs on downed foes.
- Why: Stomping is the most resource-efficient way to finish off a crippled Necromorph. It also creates distance and staggers small enemies.
- When: After cutting off at least two limbs, stomp the body repeatedly until the enemy stops moving. Also use to break boxes and vents.
- Explanation: Kinesis grabs objects (explosive canisters, severed limbs) and flings them at enemies. Stasis freezes enemies in place temporarily.
- Why: Kinesis lets you pick up environmental weapons (explosive tanks, pipes) that deal massive damage or dismember limbs without ammo. Stasis immobilizes fast enemies like Leapers or groups, giving you time to aim and reload.
- When: Always grab explosive canisters in combat arenas. Use Stasis on the toughest enemy in a group (e.g., Brute) or to stop a charging Leaper. Recharge Stasis at stations when low.
- Explanation: The Plasma Cutter is a precise, ammo-efficient weapon that handles 90% of enemies.
- Why: It has two firing modes (horizontal/vertical) that cut limbs perfectly. Ammo is abundant. Secondary fire (sustained beam) is weak but useful for small groups.
- When: Use as your primary weapon until you acquire the Pulse Rifle or Line Gun for specific situations. Upgrade damage and capacity first.
- Explanation: Many rooms have breakable vents or wall panels that hide supplies. Use Kinesis to pull them open or stomp/punch them.
- Why: These often contain credits, ammo, or health packs. In late game, some hide upgrade nodes and schematics.
- When: Every time you enter a new area, inspect vents (especially those with visible moving airflow) and dark corners. Listen for humming or clicking sounds.
- Explanation: The Ishimura is filled with explosive barrels, gas canisters, and electrical panels. Use them against Necromorphs.
- Why: Explosions can sever multiple limbs in one blast, saving ammo. Gas canisters cause area denial. Electrical panels stun enemies.
- When: Lead enemies near hazards before engaging. Use Kinesis to pick up explosive tanks and throw them into groups.
- Explanation: In zero-G, you can boost in any direction. Enemies can ambush from all angles. Use your boots to land on surfaces.
- Why: Boost sparingly to avoid wasting air. Always have a weapon ready. The Pulse Rifle is excellent in zero-G because it has no recoil and hits accurately at range.
- When: When entering a zero-G room, locate the nearest surface first. Use Stasis on enemies before they reach you. Remember to recharge air at stations.
- Explanation: You can buy and sell weapons, ammo, health packs, and nodes at stores (benches). Prices vary slightly between chapters.
- Why: Selling unwanted items (e.g., extra weapons, unused ammo types) provides credits. Buy only essentials: medium health packs, Plasma Cutter ammo, and nodes. Avoid wasting credits on Pulse Rifle ammo if you don't use it.
- When: At the start, buy nodes over everything. After upgrading your suit and weapons, stockpile ammo of the two weapons you use most.
- Explanation: The RIG (suit) has health upgrades. Each tier increases HP and unlocks inventory slots.
- Why: More inventory means more ammo, health, and nodes. Higher HP lets you survive mistakes. Always prioritize suit upgrades.
- When: As soon as you have 10,000 credits, buy the next suit level. Do this before buying weapon upgrades.
- Explanation: Nodes are rare. Upgrading multiple weapons dilutes your power.
- Why: A fully upgraded Plasma Cutter can carry you through the entire game. The damage and capacity upgrades are critical. Once maxed, consider the Line Gun for crowd control.
- When: For the first 3 chapters, put all nodes into the Plasma Cutter and suit. Then diversify.
- Explanation: You can carry up to 4 small health packs (or equivalent). Large packs refill more but take more space.
- Why: Using a medium health pack when you have 3 small ones is wasteful. Always combine small packs to save inventory slots. Sell excess large packs if you need credits.
- When: Use health only when your HP is below half. If you have more than 6 packs, sell some.
- Explanation: Carry only 2 weapons (Plasma Cutter + one situational). The game drops ammo for weapons you have equipped.
- Why: If you carry 4 weapons, the ratio of ammo drops is diluted, making you run dry on all of them. Stick to two weapons to ensure consistent ammo supply.
- When: Sell all other weapons immediately. Keep only the Plasma Cutter and one other (e.g., Line Gun for crowds or Pulse Rifle for zero-G).
- Explanation: These are faster, more aggressive versions with blue veins. They appear in later chapters.
- Why: They dodge and rush quickly. Stasis is essential to slow them down. Aim for legs first.
- When: Use Stasis as soon as you see a Twitcher. Then cut one leg, then arms. They drop more credits.
- Explanation: Large, armored enemies that charge. They have a weak spot: the yellow growth on their back.
- Why: Shooting the back deals massive damage. Stasis them, then circle around. If you can't reach the back, shoot the legs to slow them.
- When: In tight corridors, use Stasis and Line Gun mines to control approach. Avoid frontal confrontations.
- Explanation: Fast, insect-like enemies that leap and grapple. They have two pairs of legs.
- Why: They are very vulnerable to Stasis. Cut off one leg to immobilize them. They are also affected by stomp.
- When: When you hear the skittering sound, prepare Stasis. Keep your distance and aim for legs.
- Explanation: Small, spitter-like enemies that cling to walls and shoot projectiles.
- Why: They are hard to hit while moving. Use Stasis to freeze them, then shoot their legs. Alternatively, use Kinesis to throw objects at them.
- When: Prioritize Lurkers in a group because they disrupt aim. Use Pulse Rifle to spray them down.
- Explanation: Stasis recharges slowly over time, but you can instantly refill at any Stasis recharge station.
- Why: These stations are plentiful. Always top up Stasis before entering a combat area. Use Stasis liberally, then recharge immediately after.
- When: After every major encounter, recharge Stasis. Before boss fights, make sure Stasis is full.
- Explanation: In zero-G, your boost has a cooldown. You can also hold boost to move quickly.
- Why: Boosting in short bursts conserves air and lets you dodge enemies. Use walls to push off for free momentum.
- When: When being chased by Swarmers, boost away in a straight line, then fire behind you.
- Explanation: You can cancel the reload animation by quickly switching to another weapon and back.
- Why: This shaves off a fraction of a second, useful in tight situations.
- When: Only if you are very comfortable with weapon switching. Not recommended for beginners.
- Explanation: Hard difficulty forces you to use all tools (Stasis, Kinesis, accuracy) and rewards careful play.
- Why: Lower difficulties make enemies bullet sponges that trivialize the horror. Hard is balanced and fair, with ample resources if you manage well.
- When: If you are experienced with shooters, start on Hard. If new, start on Medium and never play Easy.
- Listen to Isaac's Breathing – When you are low on health, Isaac breathes heavily. Use this as a cue to use a health pack.
- Always Check Corpse Loot – After killing enemies, walk over them to collect items. Some enemies drop ammo or credits only when stomped.
- Use the Map Frequently – Press M to open map. Rooms highlighted in blue are unexplored. Green are safe. Red are dangerous. Plan your route.
- Don't Run Past Enemies – It's tempting to sprint to the next door, but enemies can grab you from behind. Turn and fight.
- Save Your Credits for Nodes – Do NOT buy weapons at the store until you have upgraded your starting gear. The Plasma Cutter is free and sufficient.
- Master the Kinesis Grab – In combat, grab severed limbs and throw them back at enemies. This deals moderate damage and dismembers. It's effectively free ammo.
- Use the Pulse Rifle for Swarms – When facing groups of small enemies (Lurkers, Swarmers), switch to Pulse Rifle. Its high fire rate and spread clear them quickly.
- Line Gun for Crowd Control – Place Line Gun mines (laser tripwires) in doorways and corridors. They will instantly dismember any Necromorph that passes.
- Manage Inventory Slots – Keep 2 weapons, 2-3 health packs, 1-2 Stasis packs, and the rest ammo. Sell anything else.
- Stasis Duration Upgrades – Prioritize upgrading Stasis duration . Even one level makes a huge difference, freezing Brutes for 4+ seconds.
- Kinesis Damage Upgrades – Upgrading Kinesis damage turns thrown objects into one-hit kills on most enemies. Saves massive ammo.
- Zero-G Slide Canceling – In zero-G, you can slide on magnetic surfaces. Press jump while sliding to launch yourself. Great for speedrunning or dodging.
- Weapon-Specific Strategies – The Contact Beam is excellent for boss fights because it deals massive single-target damage but slow fire rate. Use it only against bosses or Brutes.
- Endgame Economy – In the final chapters, nodes become scarcer. Sell all unused weapon ammo and health packs to buy the last suit upgrade. Store all nodes for the final weapon.
Stomp (Melee) Is Free and Powerful
Kinesis & Stasis Are Your Best Tools
Plasma Cutter Is the Best All-Rounder
Exploration & Navigation
Always Check for Ventilation Grates & Hidden Caches
Map Hazards Are Your Friends
Zero-Gravity Sections Require Careful Movement
The Store Is Your Only Stable Economy
Resource Management & Economy
Upgrade the Suit Early
Node Investment: Focus on One Weapon First
Health Packs: Collect but Don't Hoard
Ammo Management: Two Weapon Rule
Enemy Strategies
Twitchers (Enhanced Necromorphs)
Brutes (Heavy Enemies)
Leapers (Crawling Enemies)
Lurkers (Wall-Crawling Enemies)
Advanced Techniques & Optimizations
Efficient Stasis Recharge
Zero-G Boost Timing
Weapon Reload Cancel
Minimum Difficulty: Choose Hard for Best Experience
Beginner Tips
Intermediate Strategies
Advanced Optimizations
Conclusion
Dead Space rewards patience, precision, and resourcefulness. Always dismember limbs, use the environment, and never hoard supplies. With these tips, you will conquer the Ishimura and survive the necromorph outbreak.
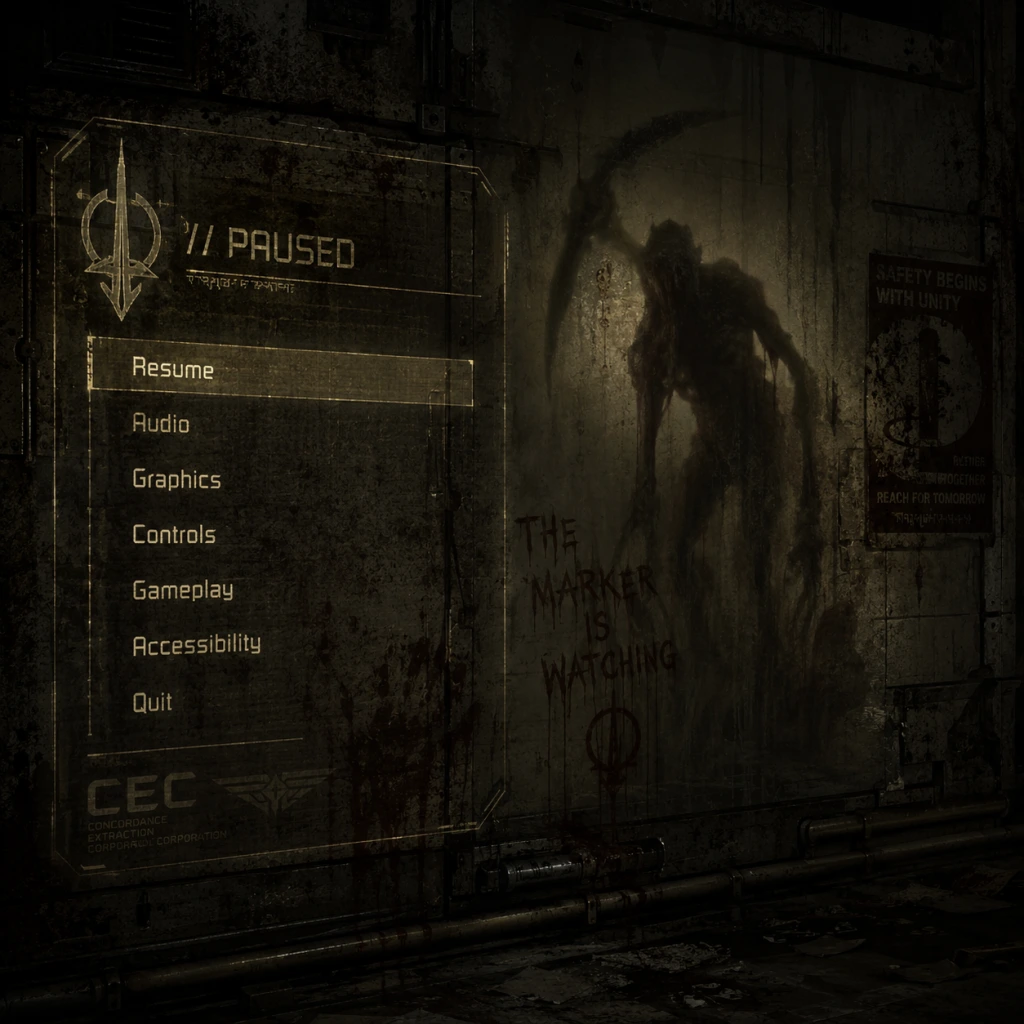
Game Settings
Overview
Properly configuring your settings in Dead Space (2023 Remake) is essential for both performance and immersion. This guide covers every settings category—graphics, audio, controls, accessibility, language, network, and gameplay—and provides optimized presets for different hardware tiers. We also highlight commonly misconfigured options and special attention points to ensure the best possible experience.
---
Graphics Settings
Key Options & Recommendations
| Setting | Description | Recommendation |
|---|---|---|
| Resolution | Native monitor resolution. | Set to your monitor’s native resolution. For lower-end PCs, use 1080p or 1440p. |
| V-Sync | Synchronizes frame rate with monitor refresh rate. | Turn On if you notice screen tearing; Off reduces input lag (use with G-Sync/FreeSync). |
| Anti-Aliasing | Reduces jagged edges. Options: TAA, FXAA, SMAA. | TAA (best quality), FXAA for performance. |
| Texture Quality | Detail of surface textures. | High/Ultra for VRAM ≥ 4GB; Medium for 2-3GB. |
| Shadow Quality | Shadow resolution and draw distance. | High (balanced) or Medium (performance). |
| Ambient Occlusion | Adds realistic shading in crevices. SSAO, HBAO+, RTXAO. | HBAO+ (good balance), RTXAO for ray tracing GPUs. |
| Volumetric Lighting | Simulates light rays and fog. | Medium/High; Low/Off for performance gains. |
| Motion Blur | Blurs image during camera movement. | Off (many players prefer clarity; can cause dizziness). |
| Depth of Field | Blurs distant/close objects for cinematic effect. | Off (improves clarity, especially in combat). |
| Ray Tracing | Adds realistic reflections, shadows, and lighting. | Off on mid-range GPUs; On (Low/Medium) on RTX 3060+ or RX 6700+. |
| Field of View (FOV) | Horizontal viewing angle. Default 45° (narrow). | Increase to 65°–75° for comfort; wider angles may introduce fisheye distortion. |
| HDR | High Dynamic Range for brighter whites and deeper blacks. | Enable if your monitor/TV supports HDR; calibrate brightness. |
Easy to Misconfigure
- Field of View (FOV): The default is quite narrow (45°), which can cause eye strain or motion sickness. Most players should increase it to 65°–75°. However, very high FOV can distort the image and make distant enemies harder to spot.
- Motion Blur & Depth of Field: Both are enabled by default for cinematic effect but often reduce clarity during fast movement. Turning them off is a common optimization for competitive play and personal comfort.
- V-Sync: If you have a G-Sync or FreeSync monitor, disable V-Sync and cap your frame rate to just below your monitor’s refresh rate (e.g., 141 FPS for 144Hz) to avoid input lag.
- Ray Tracing: Even on high-end GPUs, enabling ray tracing can halve your frame rate. Use the “RT Low” preset if you want some reflections without sacrificing too much performance.
---
Audio Settings
| Setting | Description | Recommendation |
|---|---|---|
| Master Volume | Overall volume level. | 70–80% as a starting point; adjust per preference. |
| SFX Volume | Sound effects (weapons, footsteps, necromorphs). | Keep at 100% for immersion. |
| Dialogue Volume | Voice lines of Isaac and crew. | 100% (critical for story). |
| Music Volume | Background music. | 80% – music sets tension but shouldn’t overwhelm audio cues. |
| 3D Audio / Spatial Sound | Options: Off, Windows Sonic, Dolby Atmos, DTS Headphone:X. | Windows Sonic (free, good for headphones) or Dolby Atmos (paid, best surround). |
| Audio Output Device | Select speakers or headphones. | “Headphones” mode for earphones; “Speakers” for TV/monitor speakers. |
| Dynamic Range | Compression for loud/quiet sounds. | “Wide” for full dynamic range (headphones); “Medium” for speakers. |
Special Attention
- Use Headphones if possible: Dead Space relies heavily on directional audio for enemy awareness. Spatial sound enhances this dramatically.
- Dialogue Volume should never be lower than SFX – story beats and environmental audio are equally important.
---
Controls Settings
| Category | Option | Recommendation |
|---|---|---|
| Controller / Keyboard | Aim Assist | Medium (removes some stickiness) or Low (if you prefer manual aim). |
| Invert Look | Off (unless you’re used to flight sims). | |
| Sensitivity | Start at 5/10 for look and ads; adjust up or down. | |
| Dead Zone | 0.10–0.15 to avoid drift while maintaining responsiveness. | |
| Vibration | On (adds immersion) or Off (competitive). | |
| Keyboard Mapping | Crouch | Default Ctrl (recommended) or rebind to a side mouse button for ease. |
| Interact | Default E (fine). | |
| Stasis | Default Q – easy to reach. | |
| Kinesis | Default F – accessible. | |
| Reload | Default R – standard. | |
| Quick Weapon Switch | Number keys 1-4. |
Easy to Misconfigure
- Aim Assist Strength: If set to High, the aim will magnetize to limbs excessively, making precision shots difficult. Low or Medium is recommended for experienced players.
- Controller Dead Zone: Too low (<0.05) can cause stick drift; too high (>0.20) makes aiming sluggish. Test in a safe area.
- Key Bindings for Stasis/Kinesis: If you rebind these to hard-to-reach keys, you may fumble during combat. Keep them on Q and F or thumb buttons.
---
Accessibility Settings
| Setting | Description | Recommendation |
|---|---|---|
| Subtitle Size | Small, Medium, Large. | Large for readability from a distance. |
| Subtitle Background | Solid box, semi-transparent, or none. | Semi-transparent (doesn’t block screen). |
| Colorblind Mode | Protanopia, Deuteranopia, Tritanopia. | Enable if needed; changes reticle and UI colors. |
| Camera Shake | Intensity of screen shake. | Reduce to 50% or Off if motion-sensitive. |
| HUD Opacity | Percent of HUD transparency. | 100% (always visible) or 70% (fades away). |
| Screen Reader | Narrates menu options for visually impaired. | On/Off. |
| Auto-Aim | Full auto-aim for low motor skills. | On/Off (separate from aim assist). |
Special Attention
- Camera Shake is set to 100% by default and can disorient some players. Reducing it helps comfort without losing immersion.
- Auto-Aim is a separate toggle that automatically locks onto targets; use it only if manual aiming is too challenging.
- Text Language: Choose between available localizations (English, French, German, etc.).
- Audio Language: Most versions include English and sometimes Japanese/German. Changing audio language does not affect subtitles.
- Note: Language settings are saved per profile. If you encounter missing translations, ensure your platform is set to the correct region.
- Cloud Saves: Enabled by default if you use Steam/EA App. Keep them on to prevent loss of progress.
- Automatic Updates: On – ensures you have the latest patches. Off for limited bandwidth.
- Telemetry: You may disable data collection in the Privacy settings menu.
---
Language Settings
---
Network Settings
Dead Space is a purely single-player game with no online multiplayer. The only network-related options are:
No latency, matchmaking, or server settings exist.
---
Gameplay Settings
| Setting | Description | Recommendation |
|---|---|---|
| Difficulty | Story, Medium, Hard, Impossible. | Medium for first playthrough; Hard for challenge; Impossible after completing once. |
| Aim Assist | Separate from controller aim assist; affects mouse as well. | Medium (balanced) or Low (more manual). |
| Auto-Reload | Automatically reloads when magazine empties. | On (convenient) – but note you cannot interupt with weapon switch. |
| Quick Select | Hold weapon wheel or tap keys for immediate switch. | Tap keys (like 1-4) – faster in combat. |
| HUD Layout | Classic (corner) or Modern (centered). | Personal preference; Classic saves screen space. |
| Reticle Type | Circular crosshair or dot. | Dot for accurate aiming; crosshair for larger target area. |
Special Attention
- Auto-Reload is on by default. If you prefer manually reloading to maintain ammo control, turn it off. However, Isaac will not auto-reload when the weapon is stored – only when the clip is empty.
- Reticle Type – The default crosshair can obscure small limbs. Switching to a simple dot may improve precision.
---
Recommended Settings by Hardware Level
| Component | Low-End (GTX 1060 / RX 580) | Mid-Range (RTX 2060 / RX 5600 XT) | High-End (RTX 3070 / RX 6800) | Ultra+RT (RTX 4080 / RX 7900 XT) |
|---|---|---|---|---|
| Resolution | 1080p | 1440p | 1440p or 4K | 4K |
| Preset | Low + manual tweaks | Custom Medium/High | High | Ultra + RT Low |
| Texture Quality | Medium | High | Ultra | Ultra |
| Shadow Quality | Low | Medium | High | High |
| Ambient Occlusion | Off | SSAO | HBAO+ | HBAO+ or RTXAO |
| Volumetric Lighting | Off | Low | Medium | High |
| Anti-Aliasing | FXAA | TAA | TAA | TAA |
| Motion Blur | Off | Off | Off | Off |
| Depth of Field | Off | Off | Off | Off |
| Ray Tracing | N/A | N/A | Off | RT Low (Reflections) |
| FOV | 70 | 70 | 70 | 70 |
| Target FPS | 30–45 | 60 | 60+ | 60+ |
- Lower-end GPUs may need to cap FPS at 30 for consistent performance, or use FSR 2.0 (if available via mods or game update).
- For 4K on high-end, reduce shadows/volumetrics to High if frame rate dips below 60.
- First Launch: Always run the game’s built-in benchmark (if available) to test stability before tweaking. Adjust resolution and preset first, then fine-tune per-setting.
- HDR Calibration: If you enable HDR, use the in-game calibration tool (brightness/contrast slider) – incorrect values can wash out dark areas essential for horror.
- Audio for Horror: Use headphones with spatial sound. The Ishimura’s ambient noises and necromorph footstep cues are critical for survival.
- Save Profile: The game may reset settings after updates. Backup your config file (e.g., `%USERPROFILE%\Documents\My Games\Dead Space (2023)`) periodically.
- Performance Over Quality: In Dead Space, frame drops during combat can be fatal. Prioritize a stable 60 FPS over Ultra textures.
---
Easy to Misconfigure Settings Checklist
1. FOV – Change from default 45° to 65-75°.
2. Motion Blur & Depth of Field – Turn Off for clarity.
3. V-Sync – Disable if using adaptive sync; enable only for tearing issues.
4. Aim Assist – Set to Medium or Low; High can be detrimental.
5. Controller Dead Zone – Set to 0.10-0.15 to avoid drift.
6. Auto-Reload – Decide early (on/off) based on playstyle.
7. Camera Shake – Reduce to 50% if sensitive.
8. Ray Tracing – Only on powerful GPUs; start with RT Low.
---
Special Attention Points During Setup
---
This concludes the comprehensive settings guide for Dead Space. Use the hardware recommendations as a starting point and adjust based on your performance goals and personal comfort. Good luck surviving the Ishimura, Isaac.
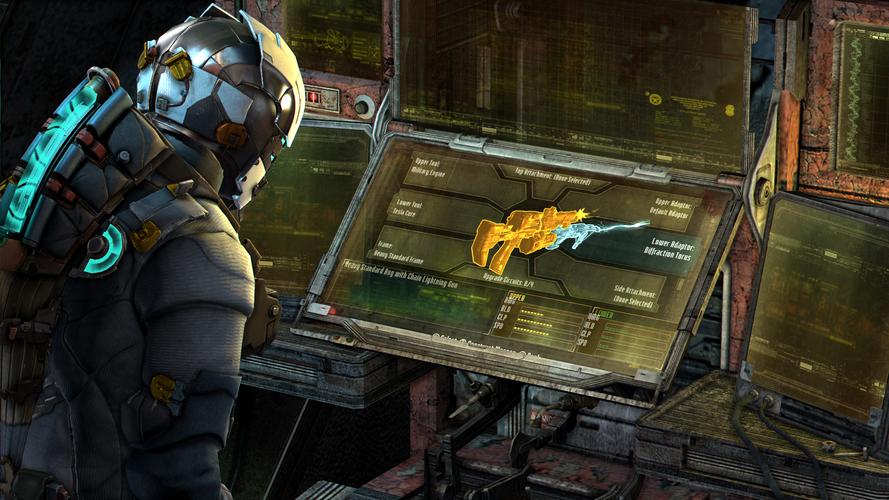
Important Notes
Important Notes
Before diving into the USG Ishimura, read these crucial warnings and tips to avoid common frustrations, missed content, and permanent regrets. This guide covers pitfalls, irreversible decisions, missable items, difficulty spikes, save management, anti-cheat policies, and general advice that veterans wish they had known from the start.
---
Warnings & Pitfalls
1. No Manual Saves: Use Save Stations Only
- There is NO manual save option. You must use the Save Stations (glowing blue hologram terminals) found in safe rooms and occasionally in corridors. If you die or quit without using a station, you lose all progress since your last save.
- Tip: Always remember the location of the nearest Save Station before heading into a new area; they are often right before or after a major fight.
2. Consumable Resources Are Extremely Limited
- Ammo, health packs, and stasis packs do not respawn. Enemies drop loot, but RNG can be cruel. Over-reliance on the Plasma Cutter (the starting weapon) is safe, but switching weapons mid-game may leave you starved for ammo.
- Pitfall: Selling all weapon parts early to buy health packs leaves you unable to upgrade weapons later.
3. Dying Resets Enemy Positions and Loot
- If you die and reload, all dead enemies in the area respawn, and any loot you didn't pick up is gone. This can make backtracking dangerous if you die after clearing an area but before reaching a Save Station.
4. The Security Clearance System Is Potentially Missable
- Upgrading your RIG's security clearance (Level 1, 2, 3) is tied to story progression. If you leave a locked door behind, you may never return to open it later. The game’s backtracking is limited; many rooms become inaccessible after a certain story beat.
- Tip: As soon as you obtain a new security level, immediately return to previous areas to open locked containers and doors. Use the tram system to revisit earlier chapters, but note that some chapters are one-way.
---
Irreversible Choices
1. Chapter Progression Blocks Backtracking
- After completing Chapter 6: Environmental Hazard, the Hydroponics area becomes permanently sealed. Similarly, the Executive Quarters (Chapter 9) is inaccessible later. Many collectibles (text logs, schematics) and upgrades are tied to these areas.
- What to do: Before advancing to the next main chapter, check your mission log and ensure you have completed all optional objectives and collected everything possible in the current chapter.
2. Weapon Upgrades Use Permanent Nodes
- Each Power Node is a one-time use item. You cannot refund nodes spent on a weapon or RIG upgrade. Plan your build early: the Plasma Cutter is viable for the entire game (and earns you an achievement if used exclusively).
- Node farming is impossible: Enemies don’t drop nodes; they are found only in containers or as specific loot. Spending nodes frivolously leaves you underpowered later.
3. One Shot at the “One Gun” Achievement
- The “One Gun” achievement (or trophy) requires finishing the game using only the Plasma Cutter. Do not equip any other weapon in your inventory. If you accidentally pick up a second weapon (including the Pulse Rifle in Chapter 2), the achievement is void. You must start over or reload a save from before picking it up.
- Mitigation: You can pick up other weapons but must immediately drop them and never fire them. However, even picking a weapon up may invalidate the achievement depending on platform. Safest is to avoid all other weapons entirely.
4. Suit Upgrades Are One-Way
- You can only sell old suits at the store, not store them. Once you buy a higher-tier suit, the previous one is lost. There is no cosmetic-only system – the suit upgrade is permanent in terms of inventory slots.
---
Missable Content
1. Collectibles: Logs, Schematics, and Nodes
- Many text logs, audio logs, and schematics are in areas that become inaccessible after a chapter ends. Use a chapter-by-chapter guide if you aim for 100% completion.
- Schematics (for new weapons and suits) can only be found once. If you miss a schematic, you cannot craft that item in New Game+.
2. Side Quests (Optional Objectives)
- Dead Space (2023 Remake) includes side quests like “The Marked” (about Markers) and “Premeditated Malpractice” (about the crew's crimes). These are time-gated; if you advance the main story too far, the quests become unavailable.
- Example: The side quest “You Are Not Authorized” requires you to collect certain logs in Chapter 4 and 5; if you complete Chapter 6 first, the logs may be locked in a sealed area.
3. Necromorph Encounters That Don’t Spawn Again
- Some unique Necromorph variants (e.g., the Brute or Enhanced Slashers) only appear once during specific scripted encounters. Killing them grants rare loot (like nodes or high-tier ammo). If you die and reload, the encounter might not respawn the same way.
---
Difficulty Spikes & Grinding Traps
1. Chapter 6: Environmental Hazard
- The zero-gravity sections with asteroids and exploding tanks are brutal on Hard or Impossible difficulty. Enemies spawn in tight corridors with no cover. Tip: Use Stasis liberally and keep the Pulse Rifle (for crowd control) or Force Gun (for knockback) upgraded.
2. Chapter 11: Alternate Solutions
- The final gauntlet before the ending spawns constant waves of enemies including Lurkers and Dividers. Ammo conservation here is critical. Trap: Many players blow all their ammo on early waves, leaving them helpless against the final boss.
- Tip: Save at the Save Station right before the final boss room. Use Stasis on the boss and unload with the Contact Beam (if upgraded) or the Plasma Cutter’s alt-fire.
3. Impossible Difficulty (New Game+)
- Unlocked after beating the game once, this is a permadeath mode. Death = restart entire game. The difficulty spike is harsh: enemies do more damage, ammo is scarcer, and checkpoints save less often. Grinding trap: Trying to impossible-mode on your first playthrough is unwise – you miss out on learning enemy patterns and upgrade paths.
4. No XP or Skill Points
- There is no leveling system. Your power comes solely from weapon upgrades and suit improvement. Spending nodes incorrectly can softlock you: you might reach an area where enemies are bullet sponges because you ignored key upgrades like Damage or Capacity.
---
Online / Multiplayer & Anti-Cheat
- Dead Space (2023 Remake) is a single-player only game with no multiplayer, co-op, or leaderboards. Therefore:
- No anti-cheat software is present on PC (though EA App may have its own DRM, but mods are allowed).
- Mods: The PC community has created various mods (graphics tweaks, QoL improvements). Installing mods does not trigger bans because there is no online component. However, mods may cause crashes or corrupt saves – always backup your save files before modding.
- Save files location (PC): `%USERPROFILE%\Documents\My Games\Dead Space (2023)`. Back up the entire folder before any modification.
---
Save Management Advice
1. Rotate Save Slots
- Use at least two different save stations. If you save only in one slot and later discover you missed a collectible or made an irreversible choice, you cannot go back. Keep one save at the start of each chapter and one for current progress.
2. New Game+ is a New Save File
- When you beat the game, you can start New Game+ which carries over upgrades and inventory. This creates a separate save slot from your normal completion file. Do not overwrite your original clear save if you want to replay chapters for achievements.
3. Cloud Saves
- Console players: Cloud saves are automatic (PS Plus, Xbox Live). PC players: EA App and Steam offer cloud sync. However, cloud saves can sometimes overwrite local saves – disable cloud sync if you are manually backing up saves or using mods.
---
Things Players Commonly Regret Not Knowing Sooner
1. You Can Store Items in the Shop’s Shipment Box
- Any weapon you don’t want to carry can be stored in the shop’s “Shipment” tab. This frees up inventory space without losing the item. Useful if you want to save a weapon for New Game+ but don’t need it now.
2. Stasis Can Be Used on Moving Objects, Not Just Enemies
- Use Stasis to freeze fans, conveyor belts, or environmental hazards. This can make platforming puzzles trivial (e.g., Chapter 4’s rotating laser room).
3. Kinesis is a Weapon, Too
- You can launch sharp objects (like Necromorph limbs, pipes, or explosive canisters) at enemies using Kinesis. This is highly ammo-efficient and one-shots many basic enemies on lower difficulties.
4. The Map Shows Unlocked Doors
- Pressing the map button (default M on PC) will show which doors are locked and require higher security clearance. Use this to plan efficient backtracking routes before story progression seals areas.
5. You Can Run, but Not Forever
- Sprinting (hold Shift on PC) depletes your RIG stamina bar (the orange ring around your health). If it runs out, you slow to a crawl. Don’t sprint into unknown areas without enough stamina to escape.
6. In-Game Difficulty Affects Loot Drops
- On Hard and Impossible, enemy drop rates for ammo and health are reduced, but you find more credits from containers. On Easy/Medium, ammo is plentiful, so feel free to use your favorite weapon more.
7. Subtitle Languages Are Separate from Audio
- The game supports separate language settings for audio, subtitles, and menus. If you want English audio with Japanese subtitles, you must set both correctly in the options – many players miss this and wonder why subtitles match audio.
---
Final Piece of Advice
Take your time. Dead Space is designed to be explored slowly. Rushing through leads to missing key upgrades and story logs that enrich the lore. Use headphones for full immersion – the 3D audio reveals enemy locations long before they attack. And always, always aim for the limbs.
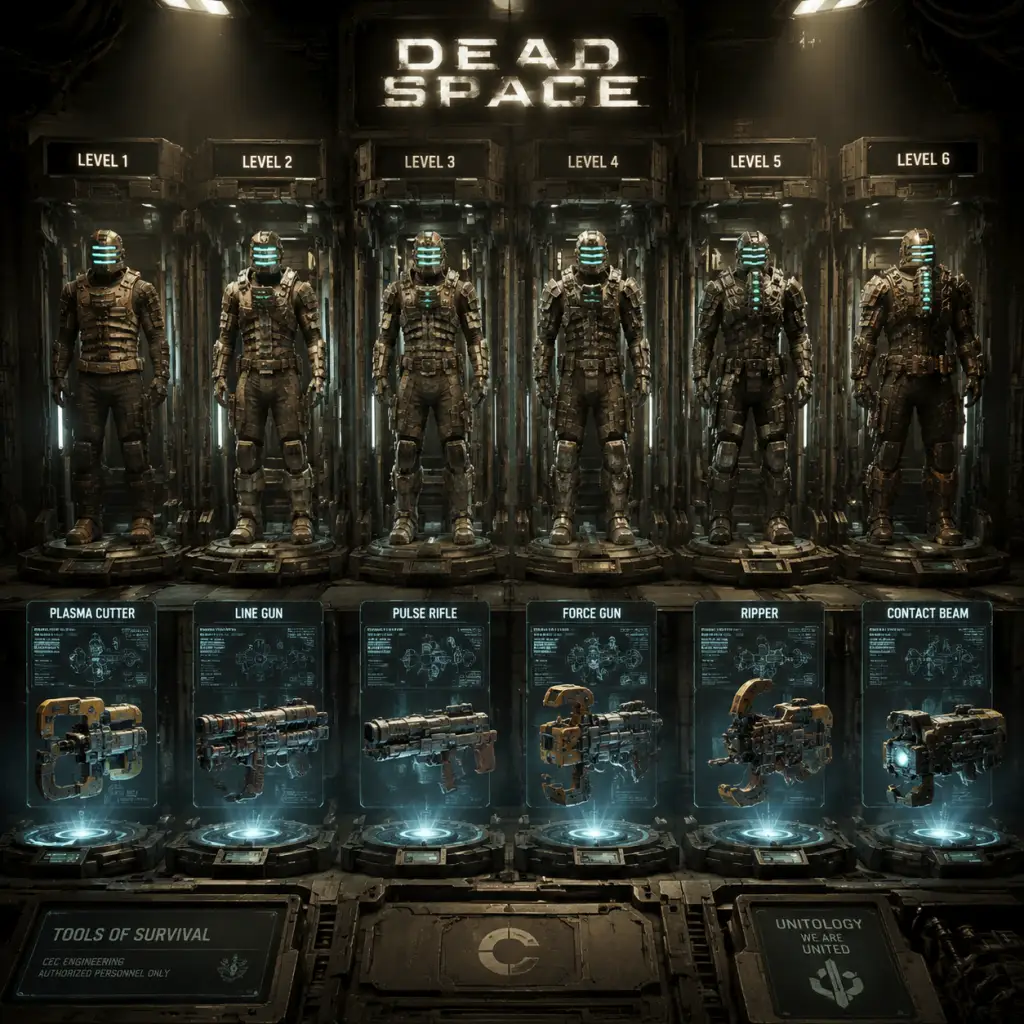
All Game Items
Overview
This guide covers every major item in Dead Space (2023 Remake), including weapons, suits (armor), consumables, crafting materials, currencies, collectibles, and key quest items. Each entry explains what the item does, how to obtain it, when it is most useful, and any important synergies or upgrades. Items are grouped logically for easy reference.
---
Weapons
Weapons are Isaac's primary tools for dismembering Necromorphs. Each weapon has unique firing modes, upgrades (via Power Nodes), and some can be found or purchased at shops. All weapons can be upgraded at workbenches using Power Nodes.
Plasma Cutter
- Description: Isaac's signature mining tool; fires horizontal or vertical plasma bolts. Best for precise limb removal. Infinite ammo base? No – needs ammo pickups.
- How to Obtain: Given at the start of Chapter 1 during the first encounter.
- When Useful: Effective against all Necromorphs; essential for headshots and limb targeting. Ammo is plentiful.
- Synergies/Upgrades: Upgrading damage and capacity early is recommended. The alternate fire (rotate) helps with different limb placements.
- Description: Rapid-fire assault rifle with high rate of fire but low damage per bullet. Alternate fire launches proximity mines.
- How to Obtain: Found in Chapter 4 (Medical Deck) in the morgue.
- When Useful: Good for crowd control and hitting fast enemies like Swarmers. Mines are great for traps.
- Synergies/Upgrades: Upgrade clip size and damage to make it viable against stronger enemies. Not recommended as primary due to ammo scarcity.
- Description: Short-range weapon that sprays napalm, causing fire damage over time. Alternate fire drops a sticky grenade.
- How to Obtain: Chapter 5 (Crew Quarters) in the locker room.
- When Useful: Excellent against Swarmers and small groups; fire disorients enemies. Grenade is powerful against tough foes.
- Synergies/Upgrades: Upgrade capacity and damage. Works well with Fire-based stasis effects? No stasis synergy, but stagger enemies.
- Description: Fires a horizontal laser beam that can cut multiple limbs or enemies at once. Alternate fire places a timed proximity mine.
- How to Obtain: Chapter 7 (Mining) in the Centrifuge room.
- When Useful: Ideal for groups or enemies lined up. Mines can be placed at chokepoints.
- Synergies/Upgrades: Upgrade damage and capacity. Powerful against Brute-types.
- Description: Fires a spinning saw blade that can ricochet off surfaces. Alternates to a horizontal saw that can be used while moving.
- How to Obtain: Chapter 8 (Hangar) or purchased from shop in Chapter 7? Actually found in Chapter 8 - Hangar bay.
- When Useful: Great for tight corridors; saw blade can hit multiple limbs. Alternate fire is accurate.
- Synergies/Upgrades: Upgrade damage and duration of blade.
- Description: Fires a wide kinetic blast that pushes enemies back. Alternate fire creates a gravity well that pulls enemies in.
- How to Obtain: Chapter 9 (Cargo Bay) in the storage area.
- When Useful: Excellent for crowd control and creating distance. Gravity well can combo with other weapons.
- Synergies/Upgrades: Upgrade damage and radius. Pairs well with Stasis.
- Description: Charged sniper-like beam that deals massive damage. Secondary fire fires a small projectile that can be detonated.
- How to Obtain: Chapter 11 (Crew Deck?) Actually found in Chapter 10 (Crew Deck) - security room.
- When Useful: For boss enemies or heavily armored Necromorphs like Brutes. One-shot potential.
- Synergies/Upgrades: Upgrade damage and charge speed. Ammo is rare.
- Description: Long-range precision rifle with a scope. Alternate fire fires a single shot with piercing.
- How to Obtain: Chapter 11 (Crew Quarters) or purchase from shop in Chapter 10.
- When Useful: For sniping distant enemies and hitting weak points. Not essential.
- Synergies/Upgrades: Upgrade damage and clip size.
- Description: Default suit. Basic protection and 1 inventory row (10 slots).
- How to Obtain: Starting suit.
- When Useful: Beginning of the game; upgrade as soon as possible.
- Description: Adds slight armor and 1 extra inventory row (15 slots total). Classic look.
- How to Obtain: Purchase from shop in Chapter 3 for 10,000 credits.
- When Useful: Early upgrade for extra inventory.
- Description: Improved damage resistance, 2 inventory rows (20 slots).
- How to Obtain: Shop in Chapter 5 for 20,000 credits.
- When Useful: Mid-game.
- Description: Good armor, 2 inventory rows (25 slots).
- How to Obtain: Chapter 7 shop for 30,000 credits.
- When Useful: Mid-late game.
- Description: Best armor, 3 inventory rows (30 slots). Also increases oxygen capacity for zero-G areas.
- How to Obtain: Chapter 10 shop for 50,000 credits.
- When Useful: Endgame; crucial for final areas.
- Description: Cosmetic suits with same stats as EVA suit. Examples include the Burnished Suit, Bloody Suit, etc.
- How to Obtain: Pre-order or deluxe edition.
- When Useful: Aesthetic only; no gameplay benefit.
- Small Med Pack: Restores ~25% health. Found often.
- Medium Med Pack: Restores ~60% health. Crafted or looted.
- Large Med Pack: Restores full health. Rare. Crafted from Small + Medium.
- Description: Refill oxygen for zero-G sections. Found occasionally or bought.
- How to Obtain: Loot or shop.
- Description: Replenishes Stasis module's energy. Found in stasis recharge stations or as pickups.
- How to Obtain: In the environment or crafted.
- Flashlight Battery: No consumable batteries; flashlight is infinite.
- Weapon Wheel: Not a consumable but toggle.
- Description: Main currency. Used to buy items from shops, unlock upgrade nodes.
- How to Obtain: Looted from containers, sold items, completing objectives.
- When Useful: Everywhere.
- Description: Used to unlock upgrades on weapons and suits at workbenches. Each node activates one upgrade node.
- How to Obtain: Found in hidden rooms, purchased for 10,000 credits, or as rewards.
- When Useful: Essential for progression. Prioritize weapon damage and suit inventory.
- Description: Blueprints that unlock crafting recipes for ammo, health packs, and stasis packs. Only in Remake.
- How to Obtain: Found throughout the ship.
- When Useful: Allows crafting at benches.
- Description: Common crafting material. Used to craft ammo and small health packs.
- How to Obtain: Looted from boxes, enemies.
- Valuables: Gold watches, semiconductors, etc. Purely for selling to shop.
- Description: Audio logs, text logs, emails. Provide story background.
- How to Obtain: Scattered throughout the ship.
- When Useful: For lore completionists and achievements.
- Description: Permanent upgrades that increase health, stasis duration, etc. Actually those are the Skill Points? Wait, in Dead Space, there are no skill trees; only Power Nodes for weapons and suits. But there are Skill Points? No. The RIG upgrades (health/stasis/oxygen) are also done via Power Nodes? No, those are separate "upgrade nodes" found as collectibles. Actually in the remake, upgrades are tied to the suit and there are no permanent health upgrades except via suits. So collectible nodes are Power Nodes themselves.
- Description: Hidden statues that unlock a trophy/achievement. Not functional.
- Description: Plot-related collectibles that unlock an alternative ending (if all 12 collected).
- How to Obtain: Hidden in each chapter (except one).
- When Useful: For an extra cutscene at the end.
- Description: Allows Isaac to grab and move objects (including shooting sharp objects).
- How to Obtain: Chapter 1, after first Necromorph encounter.
- When Useful: Essential for solving puzzles and combat.
- Description: Slows enemies and certain objects in time.
- How to Obtain: Chapter 2, in the Crew Deck after meeting Hammond.
- When Useful: Freezes fast enemies, opens doors.
- Description: Opens various locked doors. Multiple variants (Level 1, 2, 3).
- How to Obtain: Story progression.
- When Useful: Access side rooms with loot.
- Description: Level 2, 3, 4 clearance items (sometimes as keycards).
- How to Obtain: Find or purchase.
- When Useful: Unlock lockers and rooms with better loot.
- Description: Not an item but part of suit upgrades.
- Description: Each level adds a segment to health bar. Obtained by upgrading suit to next tier.
- Description: Not directly upgradeable except via suits and Power Node upgrades on Stasis module? Actually Stasis module itself can be upgraded at workbench with Power Nodes to increase duration and recharge speed.
- Description: Increased by wearing higher-level suits or upgrading the oxygen node on the suit at a workbench (some suits have oxygen nodes).
- Description: Valuables sold for credits.
- How to Obtain: Found in lockers, desks.
Pulse Rifle
Flamethrower
Line Gun
Ripper
Force Gun
Contact Beam
Seeker Rifle (Remake only)
Note on Weapon Upgrades
All weapons can be upgraded at workbenches using Power Nodes (see Resources). Each weapon has a branching upgrade path affecting damage, capacity, reload speed, and special effects (e.g., more dismemberment chance). Prioritize damage and capacity for your main weapon.
---
Suits (Armor)
Suits provide Isaac with damage resistance, inventory space, and occasionally special abilities. Each suit is an upgrade over the previous one. All suits can be purchased from the shop once unlocked.
Engineering Suit (RIG Level 1)
Vintage Suit (Level 2)
Advanced Suit (Level 3)
Deep Dig Suit (Level 4)
EVA Suit (Level 5)
Special Suits (Pre-order / DLC)
---
Consumables
Consumables are single-use items that restore health, ammo, oxygen, or provide buffs. Found throughout the Ishimura or crafted from resources.
Health Packs
Ammo
Each weapon has its own ammo type: Plasma Cutter ammo, Pulse Rifle ammo, etc. Ammo pickups are color-coded (white for Plasma Cutter, green for Pulse, etc.). Craftable from scrap metal.
Oxygen Tanks
Stasis Energy
Special Consumables
---
Resources and Materials
Resources are used for crafting ammo, health packs, and at workbenches for upgrades. Also used to purchase items at shops.
Credits
Power Nodes
Weapon Parts & Suits? Not in original, only in remake? Actually Remake has weapon parts? No, only Power Nodes.
Schematics
Scrap Metal
Tissue Samples? Not present.
Salvageable Items (Selling)
---
Collectibles
Collectibles provide lore, achievements, and sometimes permanent upgrades.
Logs (Audio/Text)
Nodes (Upgrade Nodes)
Circuitry / Weapon Upgrade Modules? Not present.
Peng Treasure
Marker Fragments
---
Key Items (Quest Items)
These are plot-essential items needed to progress. They cannot be discarded.
Plasma Cutter (already weapon)
RIG (Rig Information Gear) – Not an item but Isaac's HUD.
Kinesis Module
Stasis Module
Captain's Keycard
Mining Tools (Line Gun, etc.) Already weapons.
Security Clearance Upgrades
Oxygen Module (suit upgrade)
---
Upgrades (Permanent)
Upgrades are applied via Power Nodes or suit purchases.
Health Upgrades
Stasis Duration / Energy
Oxygen Capacity
---
Miscellaneous Items
Semiconductors, Gold Watches, etc.
Nodes (upgrade nodes) – See Resources.
---
Conclusion
Mastering the items in Dead Space is key to survival. Prioritize upgrading your Plasma Cutter and suit inventory. Collect all Marker Fragments for the alternative ending. Craft ammo and health packs when you have excess scrap. Always carry a Stasis pack for emergencies. Refer to this guide whenever you encounter a new item.
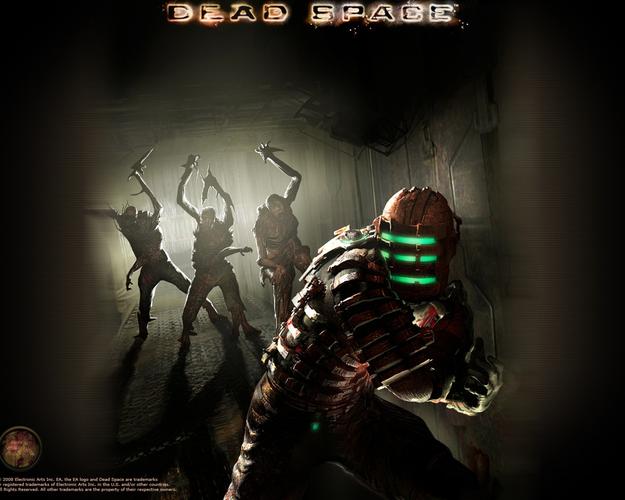
Character Skills
Character Skills Guide
Dead Space (2023 Remake) features one playable character: Isaac Clarke, an engineer with access to specialized tools and abilities. This guide covers every skill, upgrade, and special move available to Isaac, including weapon-specific abilities, suit upgrades, and core modules.
---
1. Core Abilities (Modules)
#### Stasis Module
- Effect: Slows enemies and objects in a targeted area for a short duration. Affected enemies move 90% slower, making them easy to dismember or avoid.
- Cooldown: No cooldown, but uses Stasis Energy (shown as a blue bar). Recharges automatically over time (about 4 seconds from empty) or instantly by picking up Stasis Packs.
- Upgrades:
- Combos & Synergies:
- When to Use:
- Effect: Grabs and throws objects (barrels, crates, severed limbs, etc.). Thrown objects deal moderate damage based on weight and speed.
- Cooldown: No cooldown; uses Kinesis Energy (yellow bar). Recharges quickly after release (about 2 seconds). No packs needed.
- Upgrades:
- Combos & Synergies:
- When to Use:
- Duration Increase: Extends slow effect by 25% per upgrade (max +100% duration).
- Recharge Rate: Speeds up natural recharge by 20% per upgrade (max +60%).
- Use Stasis on fast enemies (e.g., Leapers, Lurkers) before aiming for limbs.
- Freeze a Necromorph then stomp it with the melee attack for instant kills on weakened foes.
- Kinesis + Stasis: Throw a sharp object into a frozen enemy for massive damage.
- Against overwhelming groups: Freeze one to reduce pressure.
- On bosses or mini-bosses (e.g., Brutes) to buy time for weak-point shots.
- In panic situations when surrounded.
#### Kinesis Module
- Damage Multiplier: Increases thrown object damage by 30% per upgrade (max +90%).
- Range: Extends grab distance by 20% per upgrade (max +60%).
- Environmental Kills: Grab explosive canisters (red/green) and shoot them mid-air for area damage.
- Limb Throwing: Severed Necromorph limbs are high-damage projectiles. Use Kinesis to throw them back at enemies.
- Puzzle Solving: Move obstacles, grab distant items, or activate switches.
- Crowd control: Throw a heavy object into a group to stagger multiple enemies.
- Out-of-ammo situations: Kinesis never runs out.
---
2. Suit Upgrades (Passive Skills)
Isaac's Engineer Suit (and its upgrades) provide passive abilities. Each suit level improves stats and adds cosmetic changes.
| Suit Level | Health | Air (Oxygen) | Inventory Slots | Special Bonus |
|---|---|---|---|---|
| Level 1 (Default) | 3 bars | 60 sec | 8 | None |
| Level 2 (Vintage) | 4 bars | 75 sec | 10 | +5% damage resistance |
| Level 3 (Security) | 5 bars | 90 sec | 12 | +10% damage resistance |
| Level 4 (Soldier) | 6 bars | 120 sec | 14 | +15% damage resistance |
| Level 5 (Advanced) | 7 bars | 150 sec | 16 | +20% damage resistance, +10% speed |
| Level 6 (Riot) | 8 bars | 180 sec | 18 | +25% damage resistance, +15% speed |
- Recommended Build: Always upgrade suit ASAP for survivability and inventory.
- Primary Fire: Horizontal or vertical energy blast (toggle with R2/RT). Does moderate damage; best for dismemberment.
- Alt-Fire: None (swap orientation only).
- Upgrades: Damage (+15% per upgrade), Fire Rate, Reload Speed, Capacity.
- Special Move: None.
- Combos: Stasis + Plasma Cutter shots to limbs = fastest kills.
- When to Use: Always keep as backup; best for precision dismemberment.
- Primary Fire: Full-auto projectile (low per-shot damage, high DPS).
- Alt-Fire: Grenade Launcher (uses 10 ammo) – explosive AoE damage.
- Upgrades: Damage, Fire Rate, Magazine Size, Reload Speed.
- Combos: Spray limbs with primary, then use grenade on grouped enemies.
- When to Use: Crowds, weak enemies (Slashers), or when precision isn't needed.
- Primary Fire: Spinning saw blade that hovers in front of Isaac (holds direction). Damages any enemy that touches it. Consumes ammo slowly.
- Alt-Fire: Deploy saw blade as a stationary trap (lasts 10 seconds).
- Upgrades: Blade Duration, Damage, Focus Time, Capacity.
- Combos: Trap chokepoints with alt-fire, then shoot at enemies with other weapon.
- When to Use: Tight corridors, doorways, vs. multiple enemies at once.
- Primary Fire: Horizontal laser beam (cuts limbs in a line).
- Alt-Fire: Deploys a mine that triggers when enemies walk over it. Mine lasts 15 seconds.
- Upgrades: Damage, Beam Width, Mine Duration, Capacity.
- Combos: Place mines near vents or spawn points; use primary for limb severing.
- When to Use: Area denial, immobile enemies, boss fights.
- Primary Fire: Jet of fire (short range) – ignites enemies, causing damage over time (DoT).
- Alt-Fire: Oil slick on ground – enemies slip and burn.
- Upgrades: Damage, Fire Duration, Range, Capacity.
- Combos: Oil slick + ignition spreads fire to groups.
- When to Use: Tight spaces, enemies that resist bullet damage (e.g., Swarmers), thinning crowds.
- Primary Fire: High-damage energy beam (slow charge). One-hit kills many non-boss enemies if aimed at weak points.
- Alt-Fire: Pulse blast – wide-area knockback, no damage.
- Upgrades: Damage, Charge Speed, Capacity.
- Combos: Use primary on Brutes or Guardians; alt-fire to push enemies away.
- When to Use: Bosses, tough enemies, when you need instant kill.
- Primary Fire: Medium-range kinetic burst – staggers and pushes enemies back. Low damage but high knockback.
- Alt-Fire: Gravity well – pulls enemies together and holds them for 3 seconds.
- Upgrades: Knockback Power, Gravity Well Duration, Capacity.
- Combos: Alt-fire to group enemies, then throw in a grenade or use Contact Beam.
- When to Use: Crowd control, pushing Necromorphs off ledges, disrupting attacks.
- Melee Attack (Stomp): Press melee button (R3 on controller) to stomp grounded enemies. Does minimal damage but can finish off weakened Necromorphs. Use after Stasis for safe kills.
- Kick (while sprinting): Press melee while running to kick enemies away – creates distance.
- Conservation of Limbs: Always target limbs first. Severing two limbs kills most enemies.
- Ammo Efficiency: Use Kinesis for free damage; switch weapons according to enemy type.
- Core: Plasma Cutter (always), Stasis (upgraded duration), Kinesis (damage).
- Suit: Level 3 or higher for survivability.
- Secondary Weapon: Pulse Rifle or Force Gun for crowds.
- Playstyle: Use Stasis defensively, Plasma Cutter for main damage, Kinesis for ammo-free kills.
- Core: Force Gun (alt-fire), Flamethrower (oil + fire).
- Suit: Max speed and inventory.
- Secondary Weapon: Ripper for traps.
- Playstyle: Group enemies with Force Gun gravity well, then ignite with Flamethrower. Use Ripper to block doorways.
- Core: Contact Beam (max damage), Stasis (max duration), Line Gun mines.
- Suit: Max health and damage resistance.
- Playstyle: Activate Stasis on boss, line up Contact Beam shot, place mines to interrupt attacks.
---
3. Weapon Abilities & Special Moves
Each weapon has a primary fire (ammo-based) and an alt-fire (often uses a power cell or no ammo). Upgrades are available via the bench.
#### Plasma Cutter
#### Pulse Rifle
#### Ripper
#### Line Gun
#### Flamethrower
#### Contact Beam
#### Force Gun
---
4. Combat Techniques (Moves & Tactics)
---
5. Recommended Builds & Skill Synergies
#### Balanced Engineer Build
#### Crowd Control Build
#### Boss Slayer Build
---
6. When to Use Each Skill – Quick Reference
| Skill | Situation |
|---|---|
| Stasis | Fast enemies, group control, boss fights, emergency escape |
| Kinesis | Ammo conservation, environmental kills, puzzle solving |
| Plasma Cutter | Precision dismemberment, general combat, vs. slashers |
| Pulse Rifle | Crowds, weak enemies, suppressing fire |
| Ripper | Chokepoints, doorways, multiple enemies in line |
| Line Gun | Area denial, traps, limb cutting from range |
| Flamethrower | Swarmers, tight spaces, DoT against tough foes |
| Contact Beam | Bosses, Guardians, one-shot kills |
| Force Gun | Pushing enemies off edges, gravity well combos, interrupting attacks |
| Melee/Stomp | Finishing stomps, kicking to create space |
7. Important Notes
- Skills do not have traditional cooldowns but rely on energy or ammo pools. Manage resources carefully.
- Stasis and Kinesis are infinite use (recharge) – never sell Stasis Packs as they are rare.
- Weapon upgrades require Power Nodes – prioritize one or two weapons to max early.
- Suit upgrades are always worth the credits for inventory slots alone.
This guide covers all skills available to Isaac Clarke in Dead Space (2023 Remake). Master these abilities to survive the Ishimura nightmare.
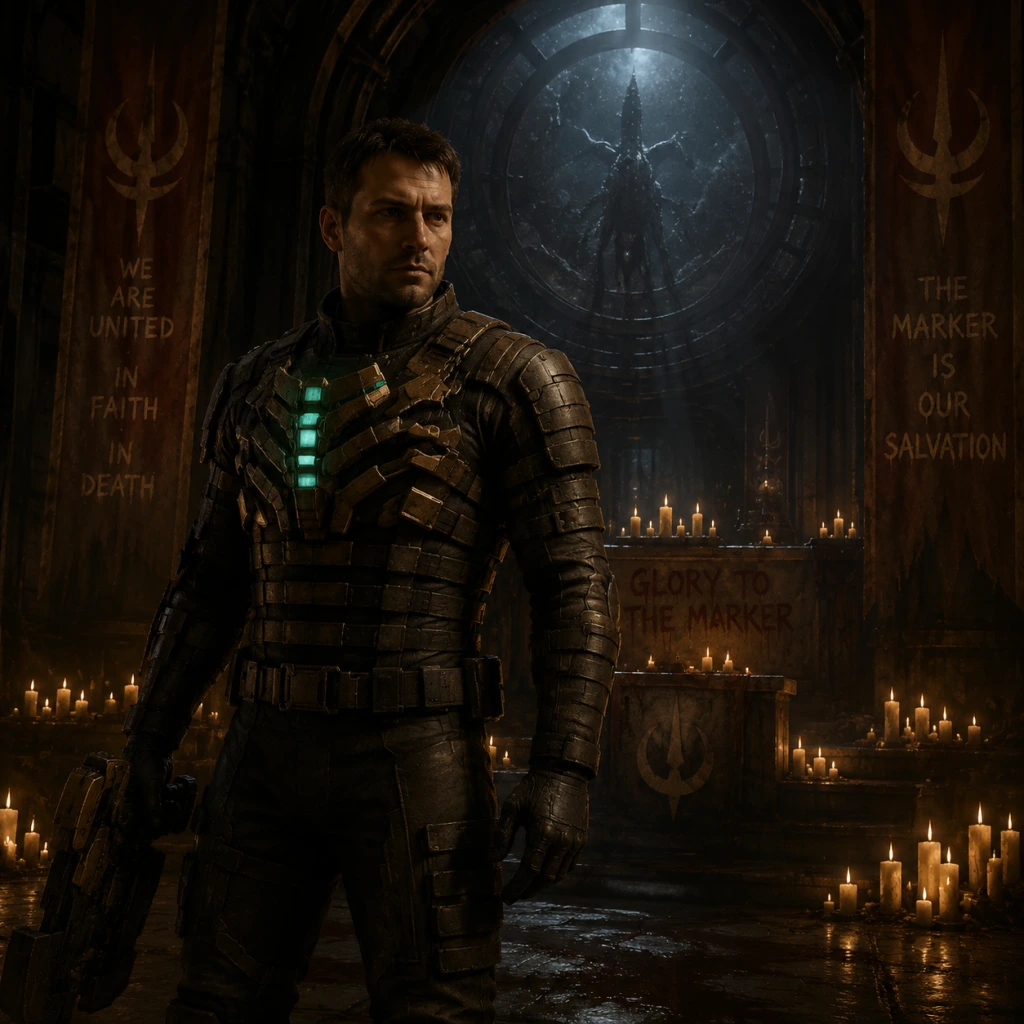
Characters & Roles
Characters & Roles
Dead Space (2023 Remake) is a single-player survival horror game with one playable character: Isaac Clarke. The game features a cast of non-playable characters (NPCs) that drive the story, provide objectives, and shape Isaac's journey. This guide covers every major character, their background, narrative role, and how they interact with gameplay.
---
Playable Character: Isaac Clarke
#### Background
Isaac Clarke is a CEC (Concordance Extraction Corporation) systems engineer stationed on the USG Ishimura, a planet-cracking starship overrun by a parasitic alien infection called the Necromorph outbreak. He joins the rescue team sent to investigate the ship's distress signal, only to become trapped and must fight for survival. Isaac is a silent protagonist in the original 2008 game, but the 2023 Remake gives him full voice acting and emotional depth, especially regarding his relationship with his girlfriend Nicole Brennan.
#### Strengths & Weaknesses
| Aspect | Details |
|---|---|
| Strengths | High engineering aptitude (can upgrade weapons and suits), versatile combat using plasma cutter and other tools, resourcefulness under pressure, ability to use stasis and kinesis modules effectively. |
| Weaknesses | Vulnerable to panic and psychological trauma, no formal combat training (reliance on mining tools), limited mobility in heavy suits, must manage oxygen and health resources carefully. |
Isaac is a methodical survivor. Combat revolves around strategic dismemberment—aiming for necromorph limbs to incapacitate them. Use stasis to slow enemies, kinesis to impale them with debris, and plasma cutter as the reliable all-rounder. Stealth is rarely an option; instead, you control space by managing ammunition, health packs, and environmental hazards (explosive canisters, electrical panels). Expect tense encounters in tight corridors and zero-gravity sections where you must use suit thrusters to navigate.
#### Unlock Conditions
Isaac is the only playable character in the main campaign. He is available from the very start of the game with no unlock requirements. There are no alternate characters or classes.
#### Recommended Equipment & Builds
- Primary Weapon: Plasma Cutter (best balance of damage, ammo efficiency, and dismemberment capability). Upgrade: increase damage, capacity, and reload speed. Pair with Pulse Rifle for crowd control or Force Gun for knockback/exploding limbs.
- Stasis Module: Essential for slowing fast necromorphs (e.g., Lurkers, Sprawlers). Upgrade duration and recharge rate.
- Kinesis Module: Use to grab sharp objects (pipes, blades) and throw with lethal force. Upgrade range and damage.
- Suit: Start with Engineering Suit (Level 1). Upgrade to Vintage Suit (Level 2) for extra inventory slots and health, then Security Suit (Level 3) for more protection. In New Game+, you can obtain the Patrol Suit with even higher stats.
- Build Strategy: Focus early nodes on Plasma Cutter damage and capacity. Later invest in Stasis duration and Suit health. Avoid upgrading weapons you never use. In hard mode, max out the Plasma Cutter first, then add the Contact Beam for boss fights.
- Nicole Brennan: Provides emotional motivation and unlocks access to certain areas via her security clearance (e.g., her lab). Finding her logs reveals the truth about the Marker.
- Kendra Daniels: Occasionally gives mission updates and helps open doors via remote hacking. Betrays Isaac late-game.
- Zach Hammond: Provides combat support via turrets in one section, and his death impacts the story.
- Dr. Terrence Kyne: Offers lore about the Marker and directs you to the hydroponics and shuttle bay.
- Challus Mercer: Antagonist; his experiments with necromorphs create unique enemy variants (e.g., Brute, tendril obstacle).
- Background: A medical officer on the Ishimura and Isaac's girlfriend. She is dead before the game begins, but Isaac receives messages from her—revealed to be hallucinations created by the Marker. Her role is to guide Isaac psychologically and to uncover her fate through story logs.
- Narrative Role: Nicole appears as a ghostly figure leading Isaac deeper into the ship. Her notes and audio diaries detail the Marker's effects and the outbreak's origin. In the remake, she has a more active presence through flashbacks and hallucinations.
- Gameplay Impact: Nicole's security clearance allows Isaac to access her secured office (contains a Logan suit schematics and a text log). Interacting with her phantom is mandatory for story progression in key chapters (e.g., after the Leviathan boss).
- Background: A hacker and technician sent by CEC to disable the Marker's signal. She is cold, pragmatic, and secretly works for EarthGov. She operates from the ship's comms room and guides Isaac remotely.
- Narrative Role: Kendra initially helps Isaac with door hacks and provides strategic advice. She betrays Isaac near the end, stealing the Marker key, and reveals she was under orders to retrieve the Marker for EarthGov. She is killed by Isaac after a final confrontation in the shuttle bay.
- Gameplay Impact: Kendra unlocks several doors throughout the ship (indicated by a locked hack icon). After her betrayal, Isaac must fight her via a brief boss encounter (she uses a rifle from a catwalk; you must shoot her with the plasma cutter). Her death provides the final key to the shuttle.
- Background: The chief security officer of the rescue team. A gruff, experienced soldier who distrusts Kendra and worries about the Marker's influence. He eventually succumbs to Marker madness.
- Narrative Role: Hammond leads the team (Isaac, Kendra, and a marine unit) until the squad is decimated. He serves as a moral anchor until his descent into paranoia. He sacrifices himself to allow Isaac to progress, activating a gravity tether but getting impaled.
- Gameplay Impact: Hammond provides combat support in Chapter 2 (he mans a turret to clear necromorphs while Isaac repairs the tram). His death in Chapter 6 is a set piece; after that, you lose access to his weapon (he drops a Pulse Rifle but it's not exclusive).
- Background: A scientist and one of the original researchers of the Marker on Aegis VII. He is mentally broken by guilt over the outbreak and wants to return the Marker to its pedestal to stop the infection.
- Narrative Role: Kyne appears later in the game, hiding in the med lab or hydroponics. He provides crucial information about the Marker's origin and how to stop it. He helps Isaac construct a shuttle to escape, but dies in the process (either killed by necromorphs or by Kendra).
- Gameplay Impact: Kyne gives Isaac the Security Clearance Level 3 (red keycard) needed to access the hangar bay. He also provides coordinates for the shuttle. His death scene is interactive: you must protect him from necromorphs while he works on the shuttle controls.
- Background: A psychopathic chief medical officer on the Ishimura who experiments on necromorphs. He believes the outbreak is a form of divine evolution and tries to create a “perfect” necromorph.
- Narrative Role: Mercer is the primary antagonist of the middle chapters. He leaves audio logs describing his grotesque experiments. He eventually turns himself into a Hive Mind-like creature (the Brute) that Isaac must kill.
- Gameplay Impact: Mercer's experiments create unique enemy spawns (e.g., the Brute boss in Chapter 7, the Swarmers from his lab). He also sets traps (e.g., the zero-gravity tentacle sequence). Killing him ends his influence and provides a key card to the crew deck.
- Captain Benjamin Matthius: The Ishimura's captain who recorded warning logs before being killed. No direct gameplay impact but provides lore.
- Jacob Temple: A minor engineer who appears in audio logs; he sabotages the ship's systems before dying. His actions affect story events (e.g., causing hull breaches).
- Dr. Harris: A minor character who appears in a recording; he is the first to become infected. His transformation is seen in a security video.
- The Unitologists: A religious cult (Challus Mercer is a member) that influences the plot. They appear as background logs.
#### Team Synergy
Isaac interacts with NPCs through audio logs, video calls, and story events. While you never fight alongside them, their actions directly influence gameplay:
---
Non-Playable Characters (NPCs)
#### Nicole Brennan
#### Kendra Daniels
#### Zach Hammond
#### Dr. Terrence Kyne
#### Dr. Challus Mercer
#### Other Notable NPCs
---
Conclusion
While Dead Space has no character classes or multiple playable characters, Isaac Clarke's single-player journey is enriched by a cast of well-written NPCs. Understanding their roles and motivations helps unlock story-specific items, navigate the ship, and contextualize the horror. Focus your upgrades on Isaac's engineer skills, listen to every audio log, and trust no one—including the dead.
---
This guide applies to Dead Space (2023 Remake) on PC, PlayStation 5, and Xbox Series X|S. The original 2008 version has identical characters but differs in voice acting and some story details.
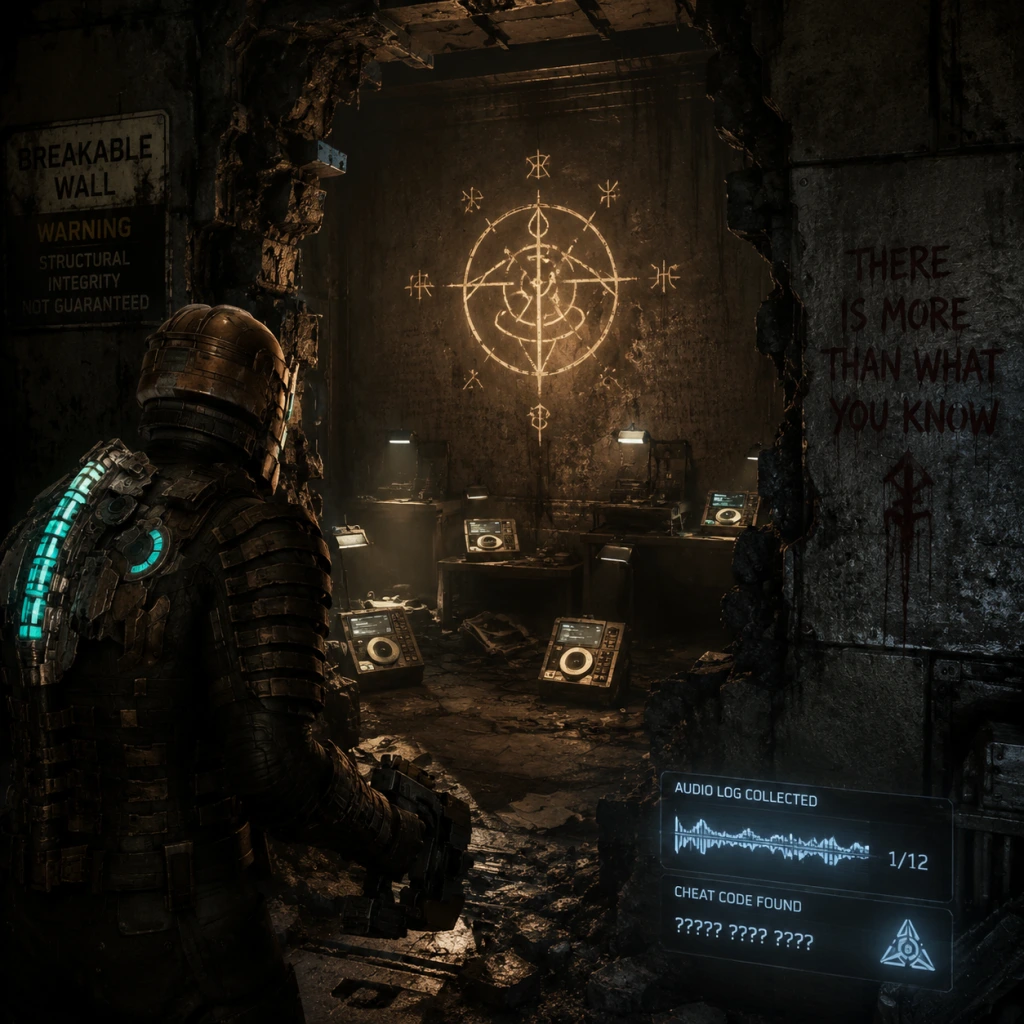
Cheats & Secrets
Overview
Dead Space (2023 Remake) and the original Dead Space (2008) do not feature traditional cheat codes such as invincibility, infinite ammo, or level skips. However, both games contain numerous developer-intended secrets, hidden features, Easter eggs, and unlockable content. This guide covers all legitimate hidden content for the 2023 Remake (primary focus) and notes any notable secrets from the original where applicable.
Cheat Codes
Dead Space (2023 Remake)
- No official cheat codes exist. All content is unlocked through normal gameplay, achievements, or New Game+ progression. There is no in-game console, no Konami code, and no button sequence that grants cheats.
- No official cheat codes exist on any platform (PC, Xbox 360, PS3). The PC version lacks a developer console; third-party mods exist but are not official. The game does not accept any key combos for cheats.
- Unlocked after completing the story once on any difficulty. Carries over all weapons, upgrades, credits, and most collectibles. Enables New Game+ Exclusive RIG colors (including the original Isaac suit colors from 2008).
- Complete a playthrough on Impossible difficulty without changing the difficulty setting. Unlocks:
- Classic Weapon Skins – Unlocked by completing the game on any difficulty. Apply to the Plasma Cutter, Pulse Rifle, etc.
- Aegis VII (platinum) skins – Awarded for scanning 100% of logs and text logs.
- All six suit levels (RIG 1 through 6) are found in the store as upgrades, not secret pickups. No hidden suits exist in the remake.
- Location: Chapter 2 – “The Medical Deck”. After entering the first elevator, look for a door marked “Auxiliary Systems” (right side). Inside, interact with the keypad on the far wall and enter the code 918 (based on the number of the first known Necromorph event? Actually the code is 918 from the original). This opens a hidden compartment containing a small Marker replica and an audio log. Referred to as the “You Are Not Worthy” Easter egg.
- Location: Chapter 8 – “The Crew Deck”. In the quarters of Dr. Nicole Brennan, interact with her computer console. A hidden log titled “Personal Log – Nicole” reveals a coded message referencing the Marker. This is missable—return after completing Chapter 10 for a different text.
- How to trigger: Stomp (melee with the Stasis/Kinesis module down) on any 10 breakable items (e.g., boxes, glass, debris) within a single area. A sound cue plays after the 10th stomp. No reward, but it’s a nod to the original game’s “Stomping Boots” achievement.
- Location: Chapter 3 – “The Mining Deck”. A hallway near the tram station has a wall covered with graffiti that reads “Rest in Pieces” in blood—a classic Dead Space phrase.
- Location: Chapter 4 – “The Bridge”. In the Captain’s quarters, a datalog titled “Plasma Cutter Only” mentions an engineer who only used the Plasma Cutter. This directly references the “One Gun” achievement/trophy.
- The remake includes 3 audio logs that are extremely well-hidden and not marked on the map. They are required for the “Full Clearance” and “Archivist” achievements. Key locations:
- Location: Chapter 2 – ”Medical Deck”, in the nursery. A small spinning Marker toy can be found on a shelf. Interact with it to make it glow and play a distorted lullaby.
- In certain highly reflective surfaces (e.g., polished metal doors in Chapter 3), Isaac’s reflection shows his original 2008 model (with the helmet on even if unequipped). This is a subtle Easter egg for veterans.
- Location: Chapter 6 – “The Crew Quarters”. A rare Necromorph called the “Infector” (the bat-like enemy) can be encountered. If you manage to kill it before it reaches a corpse, its corpse turns white instead of red. No gameplay effect.
- Throughout the game, certain environmental objects (like the Marker itself) emit a faint Morse code. Translating it reveals the phrase “MAKE US WHOLE” repeated endlessly.
- While not a cheat, there is a safe exploit to avoid soft-locking: If you run out of ammo and cannot defeat a Necromorph, use Stasis and then stomp repeatedly (your foot deals no damage but can stun-lock). This is intentionally balanced by the developers to prevent soft-locks.
- In Chapter 4 zero-gravity section, if you are about to die from oxygen deprivation, pause and use your last Med Pack. This is a legitimate tactic, not a cheat.
- How to start: After Chapter 5, look for a datalog titled “Alternator Schematic” in the Bridge. This triggers a hidden objective to craft a unique modification for the Pulse Rifle (increases rate of fire). The reward is an achievement and a lore log.
- Location: After the giant tentacle fight in the Valor (Chapter 10), instead of leaving through the main door, backtrack to the cargo bay and use the vent on the ceiling. This leads to a room with a Legendary Weapon Part (the “Precision Core” for the Contact Beam). This is intentionally hidden but not required for progression.
Dead Space (2008)
Unlockable Content
New Game+
Impossible Mode Rewards
- Burnished Suit (a gold/copper variant)
- Plasma Cutter Burnished skin
- Hand Cannon (a joke weapon that fires foam fingers – available in New Game+ after Impossible completion)
Weapon Skins
Suit Upgrades
Hidden Features & Secrets
1. Secret Room – The “Engine Room” Marker Replica
2. Hidden Message in the Crew Quarters
3. The “Slam Dunk” Achievement / Easter Egg
4. The “Rest in Pieces” Graffiti
5. Dead Space 2 Reference – The “One Gun” Log
6. Hidden Audio Logs
- Chapter 1: In the first tram room, behind a loose grate (use Kinesis).
- Chapter 5: In the hydroponics water room, underwater—swim to the far corner.
- Chapter 11: In the final zero-gravity section, floating near the engine core.
Easter Eggs
7. “The Marker” Toy
8. Isaac’s Face Reflection
9. The “White” Necromorph
10. “The Call of the Marker” Morse Code
Exploit-Safe Secrets
11. The “No Ammo” Glitch Bypass
12. Impossible Mode Mid-Air Save
Developer-Intended Hidden Content
13. “The Alternator” Side Quest
14. The “Secret Exit” in Chapter 10
Summary of Missable Secrets
| Secret | Type | Chapter | Missable? |
|---|---|---|---|
| Secret Room (918 door) | Easter egg | 2 | Yes – if you leave the area |
| Nicole’s hidden log | Lore | 8 | Yes – after returning to Crew Deck later, the log changes |
| Hidden audio logs | Collectible | Various | Yes – must collect before finishing the chapter |
| The Alternator side quest | Crafting | After 5 | Yes – if you miss the datalog |
| Legendary Part in Valor | Gear | 10 | Yes – only accessible during the chapter |
| Impossible Mode rewards | Unlockable | After beating Impossible | No – once earned, permanently unlocked |
Final Notes
- No cheat codes exist in Dead Space (both original and remake). The game is designed to be played without cheats to preserve the horror experience.
- All hidden content is discoverable through exploration, reading logs, and trying unusual interactions. The list above covers all known developer-intended secrets without mods or external tools.
- For the original Dead Space (2008): The only hidden content is the secret room (code 918) and the alternate ending (if you collect all Marker fragments? Actually the original had no alternate ending; the remake added one). The original had a hidden suit (Level 6) but it was purchased. No cheat codes.
This guide applies to Dead Space (2023 Remake) unless otherwise specified.