
Deathloop
## Overview **Deathloop** is a stylish and inventive first-person shooter developed by **Arkane Studios** (the acclaimed team behind *Dishonored* and *Prey*) and published by **Bethesda Softworks**. Released initially on **May 21, 2021** for **PC** and **PlayStation 5**, the game arrived on **Xbox ...

Download & Installation
Overview
Deathloop is an immersive first-person shooter developed by Arkane Studios and published by Bethesda Softworks. It is available on PC (Steam, Epic Games Store), PlayStation 5, and Xbox Series X|S. This guide provides step-by-step instructions for downloading and installing the game on each platform, along with system requirements, troubleshooting tips, and post-installation verification.
---
Platform Availability & Legal Sources
- PC: Steam (store.steampowered.com), Epic Games Store (store.epicgames.com), and Microsoft Store (for Game Pass PC – requires a subscription).
- PlayStation 5: PlayStation Store (digital) or physical disc. The game is a console exclusive (timed) for PS5.
- Xbox Series X|S: Microsoft Store (digital) or physical disc. Included in Xbox Game Pass (Ultimate, Console, PC).
- Nintendo Switch / Mobile: Not available. Do not download from unofficial sources.
- OS: Windows 10 (64-bit, version 1909 or newer)
- CPU: Intel Core i5-8400 @ 2.8 GHz or AMD Ryzen 5 1600
- RAM: 12 GB
- GPU: NVIDIA GeForce GTX 1060 (6 GB) or AMD Radeon RX 580 (8 GB)
- DirectX: Version 12
- Storage: 40 GB (SSD strongly recommended)
- Additional: Broadband internet connection (for first-time activation and updates)
- OS: Windows 10 (64-bit, version 1909 or newer) or Windows 11
- CPU: Intel Core i7-9700K @ 3.6 GHz or AMD Ryzen 7 3700X
- RAM: 16 GB
- GPU: NVIDIA GeForce RTX 3060 (12 GB) or AMD Radeon RX 6700 XT (12 GB)
- DirectX: Version 12
- Storage: 40 GB SSD
- Steam: Steam account
- Epic Games Store: Epic Games account
- PlayStation 5: PlayStation Network (PSN) account
- Xbox Series X|S: Microsoft account (Xbox Live / Game Pass)
- Game Pass (PC or Console): Active Game Pass subscription (Ultimate, PC, or Console)
- PC: Open the Xbox app (comes with Windows 10/11). Sign in with your Microsoft account (Game Pass subscription active). Search Deathloop, click Install, choose the folder. The app uses the same files as the Microsoft Store version.
- Console: As above, but from My Games & Apps > Game Pass.
- Stuck on "Preparing" or Download Stops: Restart the platform launcher (Steam/Epic/Xbox app). Clear download cache: In Steam: Settings > Downloads > Clear Download Cache. Epic: Settings > Troubleshooting > Verify Game Files.
- Error "Insufficient Disk Space": Even if you think you have space, Windows may reserve space for restore points. Free up at least 40 GB. Run Disk Cleanup.
- Installation Hangs at 99% / Disk Write Error: Run the launcher as Administrator. Temporarily disable antivirus (Windows Defender real-time protection). Verify game files after installation.
- Missing DLL / DLL Errors: Install the latest Visual C++ Redistributables from Microsoft and DirectX runtime. The game requires VC++ 2019 and DirectX 12.
- Game Crashes on Launch: Update graphics drivers from NVIDIA or AMD. Disable overlays (Steam overlay, Discord, GeForce Experience). Run the game in windowed mode to troubleshoot.
- Game Pass PC Error 0x80073D02: Run the Windows Store Apps Troubleshooter. Reset the Microsoft Store cache: `wsreset.exe` in Command Prompt as admin.
- PS5: Download Stuck: Restart the console (Hold power button until fully off, then reboot). Ensure you have enough free space (under Settings > Storage). Try rebuilding database (Safe Mode option 5).
- Xbox: Installation Stopped / Error: Go to Settings > System > Console info > Reset > Reset and keep my games & apps. Or cancel and restart the download. Check if the game needs an update.
- Disc Read Error (Both): Clean the disc with a soft cloth. Disc scratches may cause installation failure; consider digital switch.
- Game Saves: Located on PC at `%LOCALAPPDATA%\Deathloop\Saved\SaveGames` (Steam) or similar for Epic. Back up manually if needed.
- Mod Support: Deathloop does not officially support mods. Modding may affect multiplayer and is not recommended.
- Uninstall: On PC, use the launcher's uninstall option. On console, delete from storage settings.
- Re-download: If issues persist, uninstall and reinstall. Ensure you have a stable internet connection and enough free space.
---
System Requirements (PC)
Minimum Requirements (for 1080p / Low settings / 30 FPS)
Recommended Requirements (for 1080p / High settings / 60 FPS)
Important: The game heavily relies on fast storage to stream open-world areas. An SSD is highly recommended. Ray tracing requires a compatible GPU (RTX 2000 series or higher, AMD RX 6000 series or higher) and may impact performance.
---
Account Requirements
For all platforms, you need a user account to purchase and download the game.
No additional Bethesda.net account is required for standard play, but you may need one for certain online features or cloud saves (optional).
---
Download & Installation Steps by Platform
PC (Steam)
1. Install Steam: Go to [store.steampowered.com](https://store.steampowered.com) and download the Steam client. Install and log in.
2. Search for Deathloop: In the Store, search "Deathloop" and select the game page.
3. Purchase (if not owned): Click "Add to Cart" and complete the purchase. If you already own it (e.g., via a key), click "Activate a Product on Steam" from the Games menu.
4. Initiate Download: On the game library page, click "Install". Choose the installation directory (ensure at least 40 GB free).
5. Wait for Download: The client will download and decrypt the game files. This may take 1–2 hours depending on internet speed.
6. Optional: Install on SSD: During installation, you can change the folder. Arkane recommends installing on an SSD for optimal performance.
PC (Epic Games Store)
1. Install Epic Games Launcher: Go to [epicgames.com](https://www.epicgames.com) and download the launcher. Install and log in.
2. Get Deathloop: In the Store, search for Deathloop. If you have a free copy or purchased, it will be in your library. Otherwise, buy it.
3. Start Download: Click the game tile in your Library, then click "Install". Select the installation path (SSD recommended).
4. Download & Verify: The launcher downloads the game. It may take a while. After download, it will automatically verify files.
5. Play: Click "Launch".
PlayStation 5 (Digital)
1. Power on PS5 and sign in to your PSN account.
2. Go to PlayStation Store: Navigate to the Store from the home screen.
3. Search: Use the search function to find "Deathloop".
4. Purchase or Download: If you own it (from purchase or PS Plus), click "Download". The game will start downloading. You can view progress from the Downloads/Uploads section.
5. Wait for Completion: The PS5 SSD ensures fast download and installation. You can play after the initial portion downloads (around 20%) for the “PlayGO” feature.
6. Disc Version: Insert the disc; the console will automatically install. You may still need to download a patch.
Xbox Series X|S (Digital)
1. Sign in to your Microsoft account on the Xbox console.
2. Open Microsoft Store (or Game Pass app if subscribing).
3. Search: Find Deathloop. If you have Game Pass, it will show as “Install” without additional cost. Otherwise, purchase.
4. Click Install: Choose your installation drive (internal SSD or expansion card). The game is optimized for Xbox Series X|S and requires the internal SSD for full performance.
5. Download: The game will download and install. You can play a portion after the initial download (Smart Delivery ensures the correct version).
6. Disc Version: Insert the disc, and the console will install. Ensure you have the Xbox Series X|S compatible disc (Xbox One version is not compatible).
Xbox Game Pass (PC or Console):
---
First Launch Setup
1. Display Settings: On first launch, the game will auto-detect your hardware and set graphics defaults. You can adjust resolution, refresh rate, HDR (if supported), and graphics quality in the Options menu.
2. DLSS / FSR: On PC, you can enable NVIDIA DLSS (if compatible) or AMD FSR to improve performance. This is found in Graphics > Upscaling.
3. Controller or M&K: The game fully supports controller (Xbox, PlayStation) and mouse/keyboard. Plug in before launching.
4. Save Sync: Steam, Epic, Xbox, and PSN automatically sync cloud saves. Ensure cloud save is enabled in your platform settings.
5. Language: Choose your language in the settings; voice language may be separate from text.
6. Online Features: Deathloop has optional online invasions (Julianna). You can toggle online mode in the game settings or play offline. Requires internet for initial activation and leaderboards.
---
Common Installation Errors & Fixes
PC Errors
Console Errors
---
Post-Installation Verification
After installation, verify that the game is correctly installed:
1. Platform Check: In your library, see if the game icon appears and shows "Play" instead of "Install".
2. File Size: On PC, navigate to the game folder (e.g., `C:\Program Files (x86)\Steam\steamapps\common\Deathloop`). Right-click folder > Properties > Size should be approximately 40 GB.
3. Verify Integrity (PC):
- Steam: Right-click Deathloop in Library > Properties > Installed Files > Verify Integrity of Game Files.
- Epic: In Library, click the three dots next to Deathloop > Manage > Verify Files.
- Xbox app: In game page > [...] > Manage > Files > Verify and Repair.
4. Launch the Game: Double-click or hit Play. The first load may take a bit. If you get intro logos and the main menu, installation is successful.
5. Check for Updates: After initial install, the launcher may have a patch. Apply it before playing.
6. Performance Check: If you observe stuttering or low FPS, adjust settings. On PC, monitor temps and usage via Task Manager or MSI Afterburner.
---
Additional Tips
By following this guide, you will have Deathloop installed correctly and ready to play. Enjoy looping through Blackreef!

Game Introduction
Overview
Deathloop is a stylish and inventive first-person shooter developed by Arkane Studios (the acclaimed team behind Dishonored and Prey) and published by Bethesda Softworks. Released initially on May 21, 2021 for PC and PlayStation 5, the game arrived on Xbox Series X|S on September 20, 2022. It is also available on PC via Steam and the Epic Games Store.
Story Overview
Players step into the role of Colt Vahn, a legendary assassin trapped in a perpetual time loop on the mysterious island of Blackreef. Every day resets at midnight, but Colt retains his memories. To break the loop once and for all, he must eliminate eight Visionaries—the brilliant and eccentric architects of the time loop—before the day resets. But there’s a twist: Colt is relentlessly hunted by Julianna Blake, a deadly rival assassin who can invade his game at any moment to preserve the loop. The narrative unfolds through clever environmental storytelling, radio logs, and player-driven discovery across multiple loops.
Setting
Blackreef Island is a stunning, retro-futuristic paradise frozen in the 1960s aesthetic—a blend of mid-century modern architecture, psychedelic colors, and cutting-edge (for the era) technology. The island is divided into four distinct districts: Updaam (a beachfront resort and mansion district), Fristad Rock (industrial and urban), Karl’s Bay (port town), and The Complex (a secret military research facility). Each district changes over the course of the day (Morning, Noon, Afternoon, Evening), affecting enemy positions, events, and item availability—a core mechanic for solving the intricate assassination puzzle.
Main Characters
- Colt Vahn: The gruff, memory-bleeding protagonist who must assassinate the Visionaries. Voice-acted by Jason Kelley.
- Julianna Blake: The stylish, sadistic rival who delights in killing Colt to keep the loop active. Voiced by Ozioma Akagha. She can be controlled by the AI in single-player or by another player in online invasions.
- The Visionaries: Each is a distinct personality with special abilities and daily routines. Key Visionaries include:
- Time Loop Mechanic: Retain knowledge and some gear between loops; discover new paths and secrets each cycle.
- Slabs: Supernatural abilities gained by defeating Visionaries, including Aether (invisibility), Shift (teleport), Karnesis (telekinetic throw), and Nexus (connect enemy fates).
- Weapons & Trinkets: Collect and customize a variety of pistols, shotguns, rifles, and experimental guns with unique perks. Trinkets add passive boosts like faster reloads or reduced fall damage.
- Reprise: Colt can die up to two times per district before the loop resets (unless he uses special items to gain extra lives).
- Invasion System: In online mode, Julianna can invade Colt’s game (or players can choose to play as Julianna to hunt others). The invader is a real player armed with their own loadout, making each encounter unpredictable.
- Online: An internet connection is required for player invasions. The game supports both being invaded and invading others. Cross-platform play is not available.
- Offline: The entire campaign is fully playable offline with Julianna controlled by AI. No online features are required beyond the initial download.
- New Weapons: The Fourpounder pistol and CH-17 combat shotgun.
- New Trinkets: Including Pyromania (damage resistance from explosions) and Better To Be Thought (less detection noise).
- Extended Endings: Additional narrative depth and an enhanced final sequence.
- Quality-of-Life Features: New game modifier options (e.g., disabling invasions or limiting lives) and improved UI.
- Weapon and Slab Balancing: Adjustments to improve gameplay variety.
- Time Loop as a Creative Sandbox: Unlike roguelites that randomize levels, Deathloop’s world is handcrafted and predictable once you learn it. The loop is a puzzle, not a grind.
- Single-Player with Optional PvP: The asymmetrical invasion system pairs a master-of-your-own-loop player (Colt) with a chaotic, player-controlled assassin (Julianna), creating emergent stories.
- Stylized 1960s Retrofuturism: The art direction, music, and fashion are a love letter to mod-era aesthetics, contrasting with the high-concept sci-fi premise.
- No Manual Saves: You cannot save mid-day; the loop is your file. This forces you to commit to decisions and adapt, but also removes the “save-scumming” temptation.
- Narrative Discovery: The story reveals itself naturally as you explore the same events from different angles—like a time-loop detective story where you are the protagonist and the detective.
- Wenjie Evans (genetic engineer)
- Harriet Morse (cult leader)
- Aleksis “The Wolf” Dorsey (obsessed survivalist)
- Charlie Montague (paranoid inventor)
- Fia Zborowska (artillery leader)
- Egor Serling (energy physicist)
- Ramsey Langston (suave spymaster)
- Dr. Mikhail (unhinged elevator mechanic)
Core Appeal & Gameplay
Deathloop combines the immersive simulation freedom of Arkane’s previous titles with a roguelite structure. Each day is a fresh attempt; you choose a district and time of day, explore, gather intelligence, upgrade your loadout (weapons, trinkets, and powers called Slabs), and piece together the perfect assassination plan. The ultimate goal is to kill all eight Visionaries in a single day—but that requires meticulous planning. The game rewards experimentation, creative use of abilities (like teleportation, invisibility, and kinetic blasts), and learning from repeated failures.
Key Gameplay Features:
Target Audience
Deathloop appeals to fans of immersive sims, first-person shooters with depth, players who enjoy puzzle-solving and replayability, and anyone who loved Dishonored or Prey. Its blend of action, stealth, and time-loop strategy also attracts rogue-like enthusiasts. The game is rated M for Mature (blood, violence, suggestive themes, language).
Game Modes
1. Campaign (Single-Player): The main story mode, where you control Colt. Julianna is AI-controlled unless you enable online invasions.
2. Online Mode: Allows other players to invade your game as Julianna, or you can queue up to play as Julianna and invade someone else’s session. This adds dynamic, competitive tension.
3. Offline Mode: Julianna is AI-only; no player invasions. All progress and story content is the same.
Online/Offline Support
DLC & Expansions
Deathloop has not received any paid expansions or story-driven DLC. Instead, Arkane released the Goldenloop Update (free for all players) on September 20, 2022, which added:
The update was included with the Xbox launch and is free for existing PC/PS5 owners. No further post-launch content is planned.
What Makes Deathloop Unique?

Getting Started
Overview
Deathloop is a game of time loops, where you play as Colt, an assassin trapped on the island of Blackreef, forced to relive the same day over and over. Your ultimate goal: break the loop by assassinating eight key targets (the Visionaries) in a single day. Unlike many open-world games, Deathloop is a carefully designed puzzle box where knowledge and gear persistence are your greatest weapons. This guide will get you through your first hour, explain the controls on all platforms, decode the UI, and set you on a path to loop mastery.
First Hour Walkthrough (No Spoilers)
Your first experience in Deathloop is a linear tutorial disguised as a chaotic escape.
Opening Minutes (0–10 min)
- You wake up on a beach. Do not skip the opening cutscene; it sets the story and establishes your main antagonist, Julianna.
- Follow the on-screen prompts to move, look around, and sprint. You have no weapons yet.
- Reach the bunker (the tunnel door). Inside, you’ll find your first pistol. Pick it up and shoot the training dummies.
- The door locks behind you — this is a scripted sequence. Listen to the radio transmission for lore.
- Exit the bunker into the complex called The Complex (one of four districts). You’ll encounter your first Eternalists (the island’s hapless cultist guards). They are tough for a new player — use cover, aim for headshots, and don’t spam fire.
- Follow the objective marker to a radar dish. You’ll encounter a Visionary named Dr. Wenjie (but she is not your target yet). The tutorial forces you to die to her or her guards to teach you about Reprise (your respawn mechanic).
- Reprise: You have two “lives” per loop. Die once, you respawn nearby with a brief window to reclaim your dropped loot. Die twice, and you lose all loop-specific gear and restart the day. You keep Residuum (the currency for permanently unlocking gear) and any trinkets you’ve infused.
- After your first death, you’ll respawn at the Updaam district (a stylish, noisy area). Here you’ll meet 2-Bit, a talking machine that gives you your first real mission: find a way to kill all eight Visionaries in one day.
- You’ll receive your Hackamajig (a device that lets you interact with hackable objects). Use it on the locked armory door to claim a submachine gun and a shotgun.
- Practice the controls: aim down sights (ADS), reload, melee, and use your power (Shift, the teleport ability earned later). You don’t have Shift yet; this section is just weapons.
- Explore the small hub area. Speak to the glowing radio (mission giver). You’ll be directed to kill a minor target for Intel — a simple assassination of a named Eternalist.
- After you complete the kill, you’ll be prompted to end the loop by using a “Loop Waver” (a glowing panel). Do so.
- The day resets, and you’re back on the beach with a clean slate, but now you have Residuum and knowledge.
The First Firefight (10–20 min)
Introduction to the Arsenal (20–30 min)
First Loop Completion (30–60 min)
Note: There is NO character creation in Deathloop. You play as Colt Vahn — a preset protagonist with voice and appearance. All customization comes from gear, trinkets, and your playstyle.
Controls on All Platforms
Deathloop offers standard FPS controls. Here is the default layout for each platform:
PlayStation 5 (DualSense)
| Action | Controller Input |
|---|---|
| Move | Left Stick |
| Look | Right Stick |
| Jump | ✕ (Cross) |
| Sprint | L3 (click left stick) |
| Crouch/Slide | ◯ (Circle) |
| Interact/Hack | □ (Square) |
| Reload | △ (Triangle) |
| Weapon Wheel / Ability | R1 (hold) |
| Fire | R2 |
| Aim Down Sights | L2 |
| Melee | R3 (click right stick) |
| Use Slab (power) | L1 |
| Switch Weapon | D-Pad Up/Down |
| Use Item (Nade, Health) | D-Pad Left/Right |
| Map | Touch Pad left |
| Objectives | Touch Pad right |
| Pause | Options button |
Xbox Series X|S
| Action | Controller Input |
|---|---|
| Move | Left Stick |
| Look | Right Stick |
| Jump | A |
| Sprint | Left Stick (click) |
| Crouch/Slide | B |
| Interact/Hack | X |
| Reload | Y |
| Weapon Wheel / Ability | RB (hold) |
| Fire | RT |
| Aim Down Sights | LT |
| Melee | Right Stick (click) |
| Use Slab (power) | LB |
| Switch Weapon | D-Pad Up/Down |
| Use Item (Nade, Health) | D-Pad Left/Right |
| Map | View button (left of Xbox logo) |
| Objectives | Menu button (right) |
| Pause | Start (≡) |
PC (Keyboard & Mouse)
| Action | Key |
|---|---|
| Move | W, A, S, D |
| Look | Mouse movement |
| Jump | Space |
| Sprint | Shift |
| Crouch/Slide | Ctrl |
| Interact/Hack | E |
| Reload | R |
| Weapon Wheel / Ability | Q (hold) |
| Fire | Left Mouse Button |
| Aim Down Sights | Right Mouse Button |
| Melee | V |
| Use Slab (power) | F |
| Switch Weapon | Mouse Wheel |
| Use Item (Grenade, Health) | 4 (or assign via inventory) |
| Map | M |
| Objectives | Tab |
| Pause | Escape |
UI Overview
The HUD is minimal but conveys critical information:
- Health Bar (bottom left): Red bar with small white segments — each segment is one Reprise life. Losing all health depletes a life.
- Reprise Lives (above health): Two diamond icons. You start with two lives per loop. When empty, next death ends the loop.
- Ammo/Equipment (bottom right): Shows current weapon, ammo count, grenade type, and trinket slot (if any).
- Compass (top center): Objective markers and direction to points of interest. Colored dots: Red (enemies), Yellow (quest items), White (collectibles).
- Minimap (top left, when toggled): Shows your immediate surroundings. Can be expanded via the Map screen (hold Tab/M).
- Slab Cooldown (bottom center, middle of screen): When you have a Slab (power), a circular icon shows its cooldown.
- Objective Tracker (top left): Current mission objective, updated dynamically.
- Notifications (center screen): Temporary pop-ups for kills, loot, and discovery.
- Map (M/Touch Pad): Shows all four districts (Updaam, Karl’s Bay, Fristad Rock, The Complex) and time of day. Each district can be visited in morning, noon, afternoon, or evening. You must plan routes based on time.
- Loadout Screen (Tab/Menu): Before entering a district, you can equip weapons, trinkets, and Slabs. Gear acquired during a loop is NOT kept unless you Infuse it with Residuum at the end of the day.
- Journal (Pause > Journal): Massive lore documents, quest clues, and Visionary intel. Use it to solve puzzles.
- Talk to 2-Bit (the machine) in Updaam. He gives you the mission “The Long Game” that explains the loop structure.
- Hack all jammed doors you encounter. The Hackamajig is your best friend early on.
- Read your journal entries. They often contain passwords or hints to locked rooms. For example, a document might reveal a safe combination.
- Use headphones. Audio cues matter a lot — enemies whisper, machines hum, and Julianna (the player-controlled invader) has a distinct sound.
- Die intentionally in a safe place (like the tutorial) to learn Reprise without penalty. The game expects you to fail.
- Don’t rush. Deathloop favors stealth and planning. Charging into a firefight with multiple Eternalists will drain your Reprise lives quickly.
- Don’t ignore your surroundings. Many secrets, shortcuts, and lore notes are hidden on walls, under tables, or behind breakable objects.
- Don’t waste Residuum on low-tier gear. Only infuse items with high rarity (purple or orange) or that significantly help your current build.
- Don’t skip the tutorial. Skipping dialogue or cutscenes will leave you confused about mechanics like Reprise and the Nexus (a power you get later).
- Don’t kill Julianna early. If you see Julianna (the rival assassin) in your world, don’t engage unless you’re experienced. She is highly aggressive and can end your loop. Run away or hide until you have better gear.
- Don’t use the same district at the same time repeatedly. Changing the time of day changes enemy placements and events. Experiment.
Important Screens:
Essential Early Objectives
Your first few loops should focus on building a foundation. Ignore complex assassination puzzles for now.
1. Complete the Tutorial Loop (as described in the first hour). You must die at least once to understand Reprise.
2. Reach the “Safe House” in Updaam (the hub building with 2-Bit). This becomes your home base.
3. Unlock the Arsenal Door (inside the armory in Updaam). The shotgun and submachine gun are your first reliable weapons.
4. Kill the first “Mule” target (a named Eternalist carrying a key) — this is part of the tutorial chain to gather Intel.
5. Collect your first Slab (power). After your first murder of a Visionary (the quest will guide you to kill one), you’ll obtain the Shift Slab (teleport). This is essential for mobility.
6. Save Residuum. After your first few deaths, you’ll have a small amount. Spend it only on infusing Shift (if you haven’t yet) or a weapon you love (e.g., the LIMP-10 submachine gun). Do NOT waste on cosmetic trinkets.
7. Explore The Complex (the first district you visited). Find the power station and the secret lab — these hold upgrades.
What to Do First vs. What to Avoid
DO These First
AVOID These Mistakes
Early Resource Priorities
Your most valuable resources in the first 1–3 hours:
| Resource | Priority | Why |
|---|---|---|
| Residuum | High | Used to Infuse (permanently keep) gear after a loop. Focus on getting at least enough to Infuse your first Slab or a good weapon. |
| Weapons (Blue or higher) | High | A green-tier silenced pistol (like the Rapier) or a shotgun is a huge advantage. Hunt for them in locked rooms or from named Eternalists. |
| Trinkets | Medium | Equip trinkets that boost health, reduce weapon spread, or increase stealth. Don’t infuse them yet — use temporary ones found in the world. |
| Slabs (Powers) | High | Your first Slab (Shift) is mandatory. Later you’ll get others like Nexus (chain damage). Infuse them immediately. |
| Ammo | Low (plentiful) | Ammo is scattered everywhere. Don’t hoard; pick up from dead enemies. |
| Health Kits | Medium | Health is scarce. Always carry at least one. Use them only when your health is critical (below 20%). |
Common Beginner Mistakes
1. Treating it like a shooter: Deathloop is a puzzle game first, shooter second. Standing in the open gets you killed. Use stealth, listen for patrols, and reposition often.
2. Ignoring time of day: Each district has different events at morning, noon, afternoon, and evening. If a door is locked at noon, try visiting in the morning when a guard might be there with the key.
3. Not using the Hackamajig: Many turrets, mines, and security cameras can be disabled or turned on enemies. Practice hacking during the tutorial.
4. Saving all Residuum for big items: If you die and lose your gear, you’ll have no backup. Infuse at least one good weapon early so you always have a reliable backup.
5. Fighting Julianna without preparation: Julianna is a real or AI player who hunts you. In your first few loops, avoid open conflict. If you hear her music (a distinct piano melody), hide or leave the district via the tunnel.
6. Forgetting to use Reprise: Dying once isn’t the end — you can reclaim your dropped items. But if you die a second time, everything in that loop is lost. Sometimes it’s better to retreat and end the loop early than risk a second death.
7. Not reading clues: Many assassination routes require information from multiple loops. If you’re stuck, open your journal and read every document. Look for highlighted keywords.
Day-One Checklist
After completing the first loop and exiting the tutorial area, follow this checklist to set yourself up for success:
- [ ] Play the full tutorial (first ~45 minutes) until you reach the safe house in Updaam and receive the mission “The Long Game”.
- [ ] Hunt for a silenced weapon – Visit Karl’s Bay (morning) and find the “Heritage Shotgun” near the party room. Alternatively, pick the silenced pistol from the dead Eternalist in the armory in Updaam.
- [ ] Collect your first Slab – Follow the objective markers to kill a Visionary (likely Dr. Wenjie or Harriet Morse). Infuse the Slab you get (Shift) with Residuum.
- [ ] Learn the four districts – Open your map and note which districts have what at each time of day. For example, Updaam in the morning is a party; The Complex in the afternoon is heavily guarded.
- [ ] Save 2,000 Residuum – That’s the cost to Infuse a single orange-tier weapon. Don’t spend any Residuum until you have a weapon or trinket you truly want permanent.
- [ ] Explore The Complex (any time) – Investigate the underground tunnels and the nuclear reactor area. This district contains many upgrade stations and a shortcut to other areas.
- [ ] Die at least twice on purpose – Get comfortable with losing gear and restarting. The loop is a tool, not a punishment.
- [ ] Adjust your settings – Go to Options > Accessibility: enable “Hold to Sprint” (if on PC), disable camera shake if it bothers you, and set subtitles to on. Also look into HUD opacity.
- [ ] Watch a combat tutorial video (optional) – The game’s combat isn’t fully explained — understanding how to slide, shoot, and hack quickly will save many deaths.
With this foundation, you’ll be ready to start solving the puzzle of Blackreef. Remember: every death teaches you something about the world. Good luck, Colt.

Core Gameplay
Core Gameplay
Deathloop revolves around a time-loop mechanic where you play as Colt, an assassin trapped on the island of Blackreef. Each day resets at midnight unless you break the loop by assassinating all eight Visionaries in a single day. This guide breaks down the core gameplay by player progression tiers, explaining the main loop, combat and interaction systems, progression, exploration, quests, economy, build growth, and endgame.
---
Early Game (First 1–3 Hours)
Gameplay Loop
- Wake up on the beach with basic gear (a PSI-7 pistol, a machete, and the Reprise slab that gives two extra lives per loop). Your first objective is to escape—but you quickly learn that you cannot leave Blackreef; you must understand the loop.
- Explore The Complex (the initial district) during the Morning. Combat is limited here; you encounter eternalists (guards) and a few Visionaries like Dr. Wenjie (optional early exposure). You learn basic gunplay, stealth kills, and hacking.
- Residuum is first encountered: it’s the currency used to infuse items so they carry over between loops. Kill enemies, break trinkets, and find residuum nodes. Infusion is unlocked after about 30–60 minutes when you meet the “Infusion Machine” in the tunnels.
- Leads are your quests. The game introduces the “Visionary Leads” tab. Early leads include “The First Map” and “The Spy’s Notes.” Completing leads gives you residuum and unlocks new areas or equipment.
- Stealth vs. Loud: Early game, stealth is encouraged. You have a silent machete for backstabs and a pistol with a suppressor (if you find the blueprint). Alerting enemies triggers alarms and makes the district more dangerous. Use hacking on turrets and doors via the Hackamajig (press the interact key on hackable objects).
- Reprise is your safety net: you die twice per loop without resetting the day the third time. Use it to learn enemy patterns.
- Weapons: You find simple weapons like the Nathalie submachine gun or Strelak 50-50 shotgun. Each weapon has stats (damage, fire rate, accuracy, range, class) and can have a Perk (e.g., “Eagle Eye” for scoped rifles). Perks are randomized on pickups.
- Slabs: Your first slab is Reprise (always active). The first Visionary you can kill (often Charlie or Julianna) drops a slab you can infuse. For example, killing Charlie in his Fizzle Machine event gives you the Shift slab (teleportation). Infusing slabs costs residuum (50–100).
- Trinkets: Personal trinkets (slotted on Colt) boost speed, health, power regeneration, etc. Weapon trinkets modify guns. Sacrifice unwanted trinkets for residuum.
- Weapon upgrades: You can infuse weapons to keep them. Initially you only have a few slots; you earn more weapon slabs by finding “Weapon Upgrade Kits” hidden around the maps.
- Four districts: The Complex, Fristad Rock, Updaam, Karl’s Bay, each with four time slots (Morning, Noon, Afternoon, Evening). Early game you can only access Morning and Noon because you lack the leads to trigger later time shifts.
- Collectibles: Documents, audio logs, and paintings provide lore and sometimes unlock new leads. Look for “Visionary Intel” that reveals assassination methods.
- Residuum from kills, trinket sacrifices, and breaking objects. Early infusion costs are low (10–50 for common items). Focus on infusing a primary weapon and the Shift slab as soon as possible.
- No traditional currency—only residuum matters. Ammo and health are found on enemies and crates.
- Initial build: Use the machete for stealth kills, keep the default PSI-7 pistol for range, and rely on Reprise for mistakes. Once you get Shift, you can reach high ledges and escape danger.
- Example goal: Infuse Shift, find a silenced submachine gun or spear (the Sepsis LMG is a good early power weapon), and acquire at least one personal trinket that increases sprint speed or health.
- You now have a few infused slabs and weapons. The loop becomes more strategic: you plan which districts to visit at which time to set up the perfect assassination chain. For example, you might kill Aleksis at Updaam’s Evening party, but you need to first learn his mask code from a document in the Noon party.
- Lead progression: The leads map reveals multiple steps. You can now complete longer quest chains. The core leads all converge on the Golden Loop—a single day where all eight Visionaries are vulnerable.
- Julianna invasions become more frequent (either AI-controlled or real players if online). Killing Julianna gives massive residuum and a chance to harvest her weapons and slabs.
- Slab combinations: You can equip two slabs and switch between them (press the slab switch button). Common mid-game combos: Shift + Nexus (teleport and link enemies for shared damage) or Havoc + Aether (invulnerability and invisibility). Power management is key—each slab has a cooldown.
- Advanced hacking: You can hack turrets to fight for you, disable security cameras, and open shortcut doors. The Hackamajig upgrades are found by completing leads (e.g., the “Hackamajig Upgrades” lead from The Complex).
- Weapon diversity: You now find weapons with higher-tier perks. For example, the Explosive Headshot perk on a sniper rifle, or Stun on the Shotgun Negotiator. Infuse a loadout that suits your playstyle: silent (suppressed SMG), aggressive (shotgun + Havoc), or ranged (sniper + Shift).
- Unlock all four districts and time slots: You must complete specific leads to open Afternoon and Evening. For example, completing the “Track the Weather” lead in Karl’s Bay unlocks the Afternoon slot there.
- Slab upgrades: Each slab has three upgrade tiers. For Shift: Reach Upgrades 1 and 2 cost residuum (100–150 total) and require completing conditions like killing certain Visionaries while the slab is equipped. Example: Shift Upgrade 1 (Reach) lets you teleport further; Upgrade 2 (Air Dash) adds a mid-air jump.
- Weapon infusion slots: You unlock a third weapon slot by finding the “Weapon Slab” upgrade from a hidden chest in Fristad Rock (requires a lead).
- Secret areas: Many locked doors require code solutions from documents or environmental clues. For example, the “Egor’s Computer” lead in Fristad Rock requires you to find his computer password (in a nearby office).
- Shift puzzles: Some high ledges are only reachable with Shift. Explore every building—there are often leftover residuum caches, rare weapons, or trinket nodes.
- Residuum flow: By mid-game, you can farm Julianna invasions for 200–500 residuum per kill. Also, breaking every trinket can yield 50–100 per district. Save residuum for infusions of legendary weapons (e.g., The Heritage, Constable).
- Trinket optimization: Personal trinkets become crucial. Look for “Double Jump” – allows an extra jump without Shift, freeing a slab slot. “Hacked” trinkets appear on Julianna or special enemies; they grant powerful effects like “Power Regeneration” or “Slow Fall.”
- Typical mid-game build: Equip Shift and Nexus (for crowd control), a silenced automatic rifle (like the Limelight), and a shotgun for emergencies. Personal trinkets: Sprint speed + Health boost + Power regeneration.
- Example goal: Complete the “Birthday Party” lead for Aleksis Dorsey (kill him at his party in Updaam Evening). Acquire his Havoc slab and infuse it. Then pair Havoc with a lightweight melee build to rush enemies.
- You have most slabs and upgrades. The loop is now optimized: you know where to go and when. The focus shifts to executing the perfect loop—a single run through all four districts at appropriate times that kills all eight Visionaries. This requires careful timing and ordering.
- For example, you might start Morning in The Complex to kill Dr. Wenjie (and slip her slab), then teleport to Fristad Rock Noon to assassinate Egor (using his lab sequence), then head to Karl’s Bay Afternoon to kill Frank (at his music festival), etc. Each district has a specific Visionary availability per time slot.
- Leads completed: All major leads are done. The final lead “The End of the Loop” outlines the Golden Loop strategy.
- Maximized power: You likely have all four slab slots unlocked (via the “Slab Expansion” upgrade from a lead in Updaam). Equip four slabs: e.g., Shift, Havoc, Aether, and Nexus for ultimate versatility.
- Weapon loadouts: Each weapon is fully upgraded with top-tier perks. For example, the Heritage shotgun with Stun and Wide Spread, a Constable rifle with Eagle Eye and Suppressor, and a Sepsis LMG with Shredder. Use weapon trinkets to boost damage, fire rate, or accuracy.
- Julianna invasions are constant (if online). She becomes a major threat. Use the Duck and Cover perk to hide, or simply kill her quickly. Killing Julianna in late game rewards huge residuum (500+).
- All areas are accessible: You can now open every locked door, hack every computer. Focus on finding the last few trinkets or weapon blueprints. There is a unique weapon, the Triump of the People (a nail gun), hidden in Karl’s Bay Evening.
- Secret ending content: Some interactions with Julianna mid-game can lead to a different ending (her side quest). Completing the “Conditional Truth” lead gives you the Aether slab upgrade that makes you completely silent in movement.
- Residuum overflow: You likely have 1000+ residuum. Spend it on trivial infusions or upgrade all remaining slab tiers. Each slab upgrade after tier 2 costs 200 residuum.
- Infuse everything: Infuse every legendary item you find. By now you should have all weapon slots filled with your favorite guns.
- Your build is almost complete. Example late-game build: Shift + Havoc + Aether + Nexus. Weapons: Constable (sniper, silenced), Heritage (shotgun), SEP-62 (pistol for style). Personal trinkets: Double Jump, Sprint Speed, Power Regen (two slots of power increase). Weapon trinkets: Damage, Fire Rate, Accuracy.
- Example goal: Complete the Golden Loop preparation: place explosive charges on the doors in Updaam, hack the party system to disable security, and set timed explosives on all eight Visionaries’ routes.
- The final run: You execute the perfect loop. After killing all eight Visionaries in one day, a sequence at the beach initiates. You meet Julianna and must choose: “Break the Loop” (ending the cycle, cut to credits) or “Join the Loop” (an alternative ending where you take over the loop with Julianna). Both are achievements.
- Post-credits: The game saves your state before the final run. You are now in New Game+ mode (officially called “Loop Loop” mode). Your gear and slabs are retained, but the world resets—visionaries return, leads are completed again (though you can skip). The difficulty is increased: more enemies, tougher Julianna AI, and the invasion timer starts earlier.
- New Game+ challenges: Try different builds or weapon combinations. The game does not have traditional endgame raids or dungeons; instead, it encourages replayability through experimentation. Seek the “Golden Loop” achievement (kill all visionaries in a single loop without dying more than twice).
- All achievements: Endgame is also the time to hunt for collectibles (all documents, all trinkets, all weapons). Some achievements require completing the game without using firearms (knife only), or completing the game without using powers (slabs). These are more approachable after you are familiar with all maps.
- Julianna’s side: If you played online, you can also play as Julianna in a separate mode (invasion mode). Endgame players often switch to invading other players, which offers a separate progression track (Julianna levels, unlocks her own trinkets and weapons).
- Everything is available: You have all slabs fully upgraded, all weapons infused, and all trinkets. Mix and match to create absurd builds: e.g., a Havoc build with near-invulnerability, Shift to teleport everywhere, and Nexus to wipe out crowds with a single pistol shot.
- Weapon mastery: Learn the best weapons for each scenario. For example, the Automatic Carbine with Silencer and Double Tap for stealth, or the Shotgun Negotiator with Stun for rushing.
- Residuum becomes inconsequential because you have everything. Still, collecting residuum from kills can be used to infuse items in a new save if you start over, but not in New Game+ (you keep everything).
- Speedrun the loop: Try to kill all eight Visionaries within one game hour (real time). Use Shift to bypass most enemies.
- Glass cannon build: Equip only a sniper rifle and Aether slab; no other weapons or trinkets. Test your stealth skills.
- 100% completion: Find every document and audio log for the “Knowledge” achievement. Some are hidden in well-guarded rooms.
Combat / Interaction Systems
Progression
Exploration
Economy
Build Growth
---
Mid Game (Approximately 4–10 Hours)
Gameplay Loop
Combat / Interaction Systems
Progression
Exploration
Economy
Build Growth
---
Late Game (Approximately 10–15 Hours)
Gameplay Loop
Combat / Interaction Systems
Exploration
Economy
Build Growth
---
Endgame (After Breaking the Loop Once)
Gameplay Loop
Endgame Structure
Build Growth (New Game+)
Economy (Endgame)
Example Endgame Activities
---
Summary of Core Gameplay Systems
| System | Early Game | Mid Game | Late Game | Endgame |
|---|---|---|---|---|
| Gameplay Loop | Learn basics, escape | Plan multi-step assassinations | Execute perfect loop | Replay with alternate builds |
| Combat | Stealth only | Slab combos, power usage | Optimized loadouts | Experimental builds |
| Progression | Infuse first slab | Unlock time slots, upgrades | All slabs and upgrades | No further progression |
| Exploration | Linear paths | Secret areas | All accessible | Collectible hunting |
| Quests | Tutorial leads | Visionary leads chain | Final leads | Optional side achievements |
| Economy | Scarce residuum | Farm from Julianna | Overflow | Irrelevant |
| Build Growth | Shift + basic weapon | Two slabs + perks | Four slabs + legendaries | Any combination |
| Endgame Structure | N/A | N/A | N/A | New Game+, invasion mode |
This core gameplay foundation ensures that each time you loop, you learn more about the world, its residents, and the best ways to eliminate them. The tiered progression keeps you engaged from the first beach awakening to the final choice on the shore.
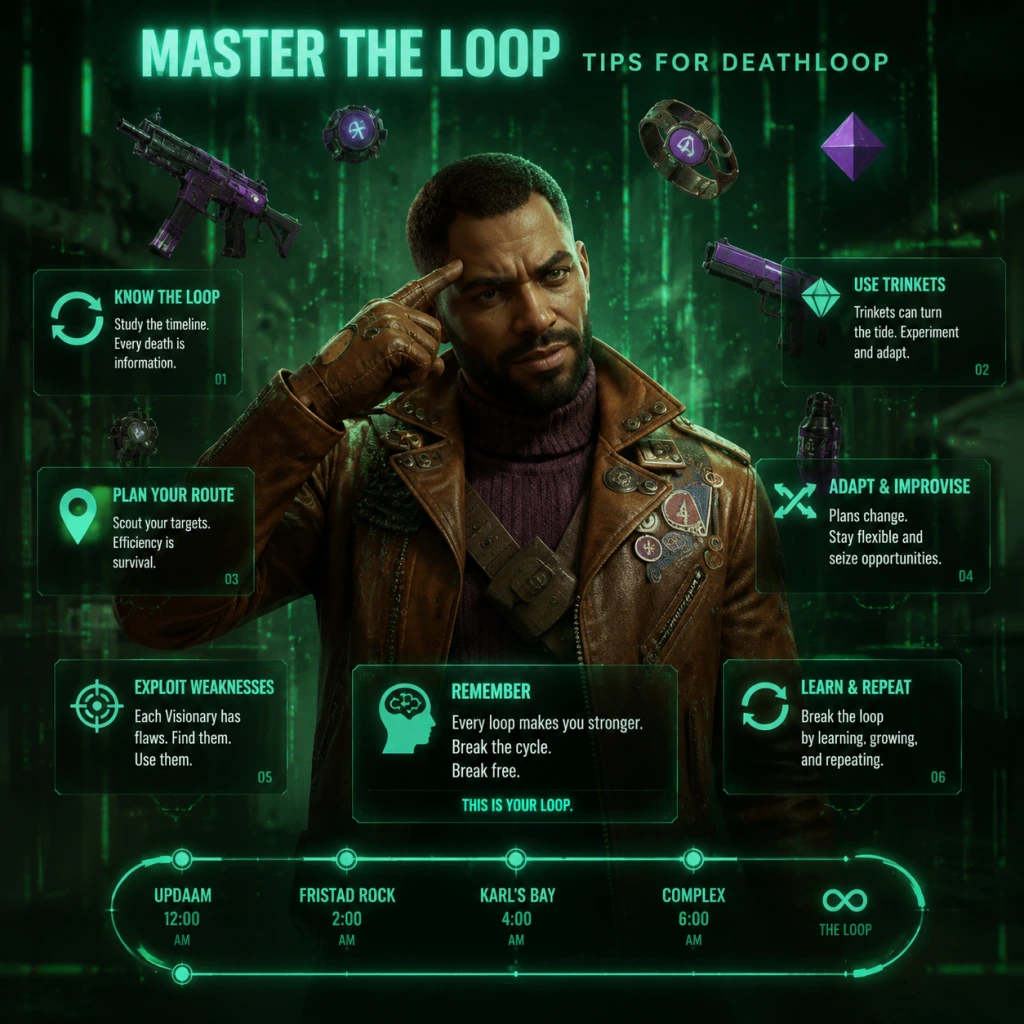
Game Tips
Game Tips: Deathloop – Master the Loop
This guide covers everything from essential beginner advice to advanced optimizations, grouped by category. Tips are practical, game-specific, and include deeper analysis on why they work.
---
General / Foundation
#### 1. Always Save Infused Gear Before Ending a Loop
- Explanation: You can only keep items permanently by infusing them with Residuum at the end of a loop (after killing Wenjie or using the infusion machine). If you don’t infuse a weapon, slab, or trinket, it’s gone next loop.
- Why it works: Early on, you’ll find many versions of the same gun. Only the one you infuse stays. Prioritize infusing one reliable weapon (e.g., the LIMP-10 or Tribunal) and then focus on slabs (Shift is top priority).
- When to use: Every loop before resetting—check your loadout and infuse anything you’ve used repeatedly and liked.
- Explanation: If you die and have no Reprise charges left, you can respawn once per loop at the cost of losing all unpicked loot from that area. This is controlled by a slider in Gameplay settings.
- Why it works: Avoid relying on this crutch. Losing loot slows progression. Better to save and restart from the last safe area (e.g., a hidden tunnel) or use Reprise charges wisely.
- When to use: Only toggle on when you’re farming a specific item in a dangerous area and accept the risk of losing items.
- Explanation: The day is split into Morning, Noon, and Afternoon. Each area (The Complex, Karl’s Bay, Fristad Rock, Updaam) has its own schedule of events and enemy density. You can change time at the map menu before entering a zone.
- Why it works: Some visionaries only appear at certain times. For example, Harriet Morse is always in the Complex at Noon. Planning your route by time saves hours of aimless wandering.
- When to use: Before each mission, check the map for the “Lead” icon indicating a visionary’s location. Reschedule if needed.
- Explanation: Throughout Blackreef, you can overhear Julianna’s broadcasts and conversations between Eternalists. These often provide direct clues to slab locations, shortcuts, or visionary weaknesses.
- Why it works: The game hides information in audio logs. Missing one can lock you out of an easier assassination path. For example, Julianna might mention that Wenjie’s clone ritual makes her vulnerable.
- When to use: Whenever you see a radio or a group talking, stop and wait. Use headphones for positional audio hints.
- Explanation: Havoc grants short-term invulnerability and health regeneration while dealing damage to nearby enemies. It’s acquired from Egor Serling in The Complex (Morning) after completing his lead.
- Why it works: Acts as a panic button—pop it when you’re overwhelmed by multiple Eternalists or during a visionary fight. The health regen lets you tank hits and continue offense.
- When to use: Any situation where you’re outnumbered or facing a tough enemy like a Juliana invasion. Combine with a shotgun for devastating rush tactics.
- Explanation: Nexus links enemies together. Damage one, and all linked take the same damage. Killing one linked enemy kills all linked ones.
- Why it works: Effectively clears groups of 3+ Eternalists with a single headshot. Saves ammo and time. Also pairs with emotional state (e.g., confuse) to spread status effects.
- When to use: In areas with clumped enemies (e.g., Charlie’s gambling hall in Updaam, Noon). Link three or more, then fire one bullet.
- Explanation: Headshots deal 2x damage with most weapons (and 3x with sniper rifles). Eternalists and visionaries die much faster.
- Why it works: Many enemies can survive multiple body shots. A single headshot with a silenced Tribunal pistol will kill most standard Eternalists while they’re unaware. Conserves ammo and keeps stealth.
- When to use: Always try to aim for the head, especially when initiating an attack or using a sniper from distance.
- Explanation: A kick (R3 on controller, V on PC) pushes enemies back and staggers them for a moment. You can follow up with a headshot or a machete kill.
- Why it works: Breaks their attack and creates an opening. Useful when an Eternalist gets too close or when your gun is empty.
- When to use: When outnumbered and need to create distance, or to execute a “machete finisher” (one-hit kill from behind).
- Explanation: Each area has multiple hidden tunnels (marked by green glowing vents) that serve as fast travel points across the map. Unlocking them allows instant movement between sections.
- Why it works: Saves walking time and avoids dangerous areas. For example, in Updaam, the tunnel near the library takes you directly to Charlie’s casino.
- When to use: In early loops, prioritize finding tunnels in each zone. Use the map to spot closed vents (showing a lock icon).
- Explanation: Reprise (the respawn ability) gives you two extra lives per loop (unless you’re invaded). Each death costs one charge and resets your position to where you last used a safe area (bed, tunnel, or certain doors).
- Why it works: If you lose both charges, you die for real and lose all uninfused loot. So use safe areas frequently—especially after clearing a tough room or looting valuable items.
- When to use: After each major fight, find a safe spot (e.g., a locked room, tunnel interior) to “save” your progress. Then continue exploring.
- Explanation: The map shows small icons (like a detective’s magnifying glass) that indicate active leads—clues that progress a visionary’s assassination plan. Following leads is the main way to unlock shortcuts and new gadgetry.
- Why it works: Completing a lead often reveals a weakness (e.g., “Wenjie will be alone if you sabotage her machine”) or grants access to a new area.
- When to use: Before each loop, check the map and select the lead you want to pursue. This prevents aimless roaming.
- Explanation: Shift allows short-range teleportation (like Blink from Dishonored). Upgrades add distance and the ability to teleport through thin walls.
- Why it works: Reaching elevated ledges, crossing gaps, or escaping combat quickly. Excellent for stealth—skip ground-level enemies entirely.
- When to use: Always equip Shift. It’s the most versatile movement slab. Use to reach sniper perches, to flank visionaries, or to escape grenades.
- Explanation: Residuum is the resource used to infuse items. It appears as glowing purple wisps from dead enemies (especially visionaries) and from special containers.
- Why it works: A single visionary can drop 100–200 Residuum. Without infusion, you lose all your gear. Prioritize collecting Residuum in every area, especially when you plan to end the loop early.
- When to use: After every fight, scan the ground for purple particles. Use the “Harvest” trinket (increases Residuum pick-up range) if you can.
- Explanation: The Hackamajig is a handheld device that lets you hack turrets, trip mines, and security cameras. It can be upgraded to disable alarms and turn turrets friendly.
- Why it works: Turbets are lethal; allies (friendly turrets) can win fights for you. Hacking cameras stops alerts. Very useful in The Complex (heavy security).
- When to use: As soon as you find the Hackamajig blueprint (from a lead in Karl’s Bay), infuse it and upgrade it. Use it to bypass entire security rooms.
- Explanation: Trinkets are permanent stat boosts (increased health, ammo capacity, etc.) that you can socket into your loadout. There are four slots (two for Colt, one for weapon + one for weapon).
- Why it works: A good trinket (e.g., “Kickback” for faster weapon swap) benefits every loop. Weapons become more effective with trinkets, but a single well-trinketed weapon is better than three bad ones.
- When to use: Once you have a decent primary weapon (e.g., LIMP-10 with silencer), infuse utility trinkets like “Spring Heeled” (more jump height) or “Ravenous” (health on kill).
- Explanation: The “Double Jump” trinket (actually called “Second Chance” – no, it’s “Double Jump” from a specific chest) is hidden in Updaam (Morning) inside a locked room above the library. You need to hack a door or use Shift to get it.
- Why it works: Double jump opens many shortcuts and makes vertical movement much easier without needing Shift. frees up a slab slot for combat slabs.
- When to use: As soon as you can, grab this trinket and infuse it. It’s a game-changer for exploration.
- Weapon: Silenced Tribunal pistol + Machete (or suppressed SMG).
- Slabs: Shift (teleport) + Nexus (link enemies) + Aether (invisibility).
- Trinkets: Sprint silently, faster crouch walking, increased awareness range.
- Why it works: Allows you to kill entire rooms without ever being detected. Aether + Shift makes you untouchable. Nexus lets you kill groups silently with one headshot.
- When to use: Ideal for clearing visionaries with minimal alarms, especially in areas with many Eternalists like Fristad Rock (Noon).
- Weapon: Suppressed LIMP-10 with large magazine + Heritage Shotgun.
- Slabs: Havoc (invincibility) + Shift (utility) + Karnesis (push enemies).
- Trinkets: Increased health, reduced Havoc energy cost, faster health regen.
- Why it works: Havoc reduces damage by 90% and heals on kill. You can run into a group of Eternalists, blast them with shotgun, tank machine gun fire, and survive. Karnesis lets you throw enemies off ledges.
- When to use: When you want to brawl openly, deal with Juliana invasions, or in missions where stealth is impossible (e.g., after triggering alarms).
- Weapon: Three Shotgun (EVERY time) + Mind Leech assault rifle.
- Slabs: Nexus + Shift or Havoc.
- Trinkets: Extra grenade capacity, increased explosion radius, grenade arc trajectory.
- Why it works: Grenades are abundant. With increased radius and capacity, you can clear a room with one well-placed explosive. Nexus links enemies so one grenade can kill a group.
- When to use: Against clustered visionary fights or for fun chaos. But be careful: explosives can hurt you too.
- Explanation: At the infusion station, you can break down any weapon, slab, or trinket you own into Residuum. The amount is roughly 1/3 of its infusion cost.
- Why it works: Rather than let duplicates accumulate (you can only infuse one of each unique item), break them down for raw currency to buy other items.
- When to use: End of every loop, before infusion. Check your inventory and scrap anything you have a better version of (e.g., two LIMP-10s; keep the one with best stat roll).
- Explanation: Slabs unlock new abilities (Shift, Nexus, Havoc, Aether, Karnesis). Losing a slab resets your build potential. Weapons can be replaced more easily.
- Why it works: Once you have all slabs, you can create many builds. Shift and Nexus are especially critical for efficient play.
- When to use: First four loops: focus on getting and infusing each slab. Then start infusing weapons.
- Explanation: The Fourpounder is a fast-firing pistol that appears in Updaam (evening) from a specific Eternalist. It has a high fire rate and decent damage.
- Why it works: Excellent for cleaning up headshots after knockdowns. Its high rate of fire helps against multiple approaching enemies.
- When to use: As a backup to a slower primary (like a sniper or shotgun). Infuse a purple or gold version with a good perk (like ‘Hurry Up’ for fast reload).
- Explanation: Walking (not sprinting) reduces noise. Crouching eliminates footsteps completely but slows you down.
- Why it works: Eternalists can hear you sprint from a room away. Crouching and moving deliberately prevents alerting groups before you can set up kills.
- When to use: In tight corridors or when approaching a patrol pattern. Combine with Aether for ghost-like movement.
- Explanation: Visionaries have unique protection (e.g., Charlie is always with his gang; Harriet has a gas mask). Entering their arenas without a plan triggers a full-scale fight.
- Why it works: Direct confrontation is dangerous and wastes time. Instead, use the leads to find weaknesses (e.g., sabotage Charlie’s machine so his gang leaves).
- When to use: For every visionary except possibly Egor (who is weak alone). Always complete at least one lead before attacking.
- Explanation: Cameras go to “alerted” status if you walk into their cone. Turrets fire on sight unless you hack them. But Shift teleport can pass through their line of sight instantly.
- Why it works: You don’t need to hack everything; just teleport past trigger points. Saves time and avoids alarms.
- When to use: In security-heavy zones like The Complex (especially at Noon). Teleport from one shadow to another.
- Explanation: To break the loop, you must kill all eight visionaries in one day. The order matters because some become inaccessible if you don’t follow a lead chain. For example, Wenjie’s clones disintegrate if you destroy her machine in the morning.
- Why it works: A common route: Morning → Updaam (kill Charlie and possibly Fia), Noon → The Complex (Harriet, sometimes Wenjie), Afternoon → Fristad Rock (Egor, then Alex), Evening → Karl’s Bay (Wenjie again or others). This minimizes back-and-forth.
- When to use: When you’re ready to attempt the final blow. Practice repeatedly before the real run.
- Explanation: Dying in a loop (if you have Reprise charges) does not end the game; you respawn at the last safe area. This lets you explore dangerous areas risk-free as long as you keep safe points.
- Why it works: Great for learning enemy patterns and visionary weaknesses without losing your gear (since deaths don’t cost infusion materials unless True Death).
- When to use: Early loops: explore every corner, trigger alarms, learn combat. It’s okay to die; you keep all knowledge.
- Explanation: Many Eternalists are optional. Killing them yields minimal Residuum and wastes time. Focus on visionaries and specific patrols that block your path.
- Why it works: Stealth ghost builds let you skip 90% of enemies. Saves time for completing multiple leads per loop.
- When to use: Once you have decent movement slaps, avoid fights unless you need Residuum or loot.
- Explanation: The machete (found in Karl’s Bay, Noon in a certain bandit leader’s stash) can one-shot any Eternalist or even a distracted visionary when attacking from behind.
- Why it works: Silent, no ammo cost, immediate. Great for stealth cleans. Combine with Shift to close distance on a target.
- When to use: For isolated visionaries (e.g., Egor alone in his lab) or to quickly silence a single guard.
- Explanation: Several visionaries rely on machines: Wenjie’s cloning machine, Charlie’s gambling machines, Harriet’s gas control, etc. Hacking these can weaken or kill them indirectly.
- Why it works: Instead of a direct fight, you can set up a trap that does the work. For example, hacking Harriet’s gas valve makes her room fill with poison, killing her.
- When to use: For any visionary whose lead involves a device. Always fully investigate leads before engaging.
- Explanation: You can equip multiple trinkets of the same category (e.g., two “Increased Health” trinkets). Their effects stack multiplicatively.
- Why it works: Two +50% health trinkets = +125% health (1.5 x 1.5 = 2.25). You can become incredibly tanky or have huge magazine capacity.
- When to use: For a tank build, equip two health trinkets and two resistances. For ammo hogs, use two ammo capacity trinkets.
- Explanation: Aether makes you invisible, but movement and actions break invisibility. Upgrades allow you to remain invisible while moving slowly or while holding breath.
- Why it works: Perfect for repositioning in the middle of a fight. Pop Aether when enemies are searching after you kill someone. They lose sight and return to routine.
- When to use: After a loud kill, immediately use Aether and move to a new shadow. Also great for crossing open areas.
- Explanation: When you attempt to leave after killing all eight, Julianna confronts you with extreme aggression. She uses all slabs (Havoc, Aether, etc.) and is relentless.
- Why it works: Kill her first (while she’s in the reactor room) or use the environment. After the fight, you have a chance to extract—do not delay.
- When to use: During the final loop, save a Havoc charge for her. Try to shoot her from distance; avoid melee.
- PlayStation 5: Use DualSense adaptive triggers for weapon feedback—pulling the trigger fully on a pistol gives a satisfying click. Enable gyro aiming in settings for extra precision (good for sniping).
- PC: Rebind Shift to a side mouse button for easier teleportation. Lower mouse sensitivity to 2-3 for accurate headshots. Use the ‘Hold to Crouch’ setting for quicker cover slides.
- Xbox Series X|S: Quick Resume works well—you can jump back into a loop instantly. Use the d-pad shortcuts for weapon switching.
#### 2. Use the “Revenant” Respawn Ability Minimally (if enabled)
#### 3. Understand the Three Timelines
#### 4. Listen to Radio Eavesdrop Conversations
---
Combat
#### 5. Master the “Havoc” Slab for Aggressive Plays
#### 6. Use the “Nexus” Slab for Crowd Control
#### 7. Headshots Are Critical
#### 8. Stagger Enemies with Melee (Kick) to Set Up Kills
---
Exploration & Navigation
#### 9. Discover All Tunnel Entrances Early
#### 10. Use the Reprise Charge Wisely
#### 11. Look for “Lead” Icons on the Map
#### 12. Use the “Shift” Slab for Verticality
---
Resources & Upgrades
#### 13. Collect All Residuum from Body Piles
#### 14. Upgrade the “Hackamajig” Early
#### 15. Prioritize Infusing “Trinkets” Over Duplicate Weapons
#### 16. Learn the “Double-Jump” Trinket Locations
---
Builds & Loadouts
#### 17. The “Stealth Ghost” Loadout
#### 18. The “Havoc Tank” Loadout
#### 19. The “Grenadier” Loadout
---
Economy & Infusion
#### 20. Always Break Down Duplicate Items into Residuum
#### 21. Prioritize Infusing “Slabs” Over Weapons in Early Loops
#### 22. Use the “Gold-Gun” (Example: Fourpounder) as a Reliable Secondary
---
Stealth & Movement
#### 23. Use “Cautious Stride” to Slow Down Alert Recruiting
#### 24. The “Golden Rule” of Deathloop: Never Engage a Visionary Directly Until You Have a Plan
#### 25. Use “Shift” to Bypass Security Cameras and Turrets
---
Time Loop Manipulation
#### 26. Plan Your “Perfect Day” Route
#### 27. Use the “Reprise” Mechanic to Practice Without Penalty
#### 28. Ignore “Kill Every Eternalist” Mentality
---
Advanced Strategies
#### 29. Use the “Machete” for Instant Kills from Behind
#### 30. Exploit the “Hacking” Weakness on Visionaries with Devices
#### 31. Trinket Stacking for ‘Godlike’ Combos
#### 32. The “Aether” Slab: How to Use Effectively
#### 33. Final Boss Tip: Julianna’s “Final Stand”
---
Platform-Specific Tips
---
These tips should elevate your Deathloop experience from confused first-looper to a loop-breaking assassin. Remember: knowledge persists even when loot does not. Every loop teaches you something new. Good luck on Blackreef!
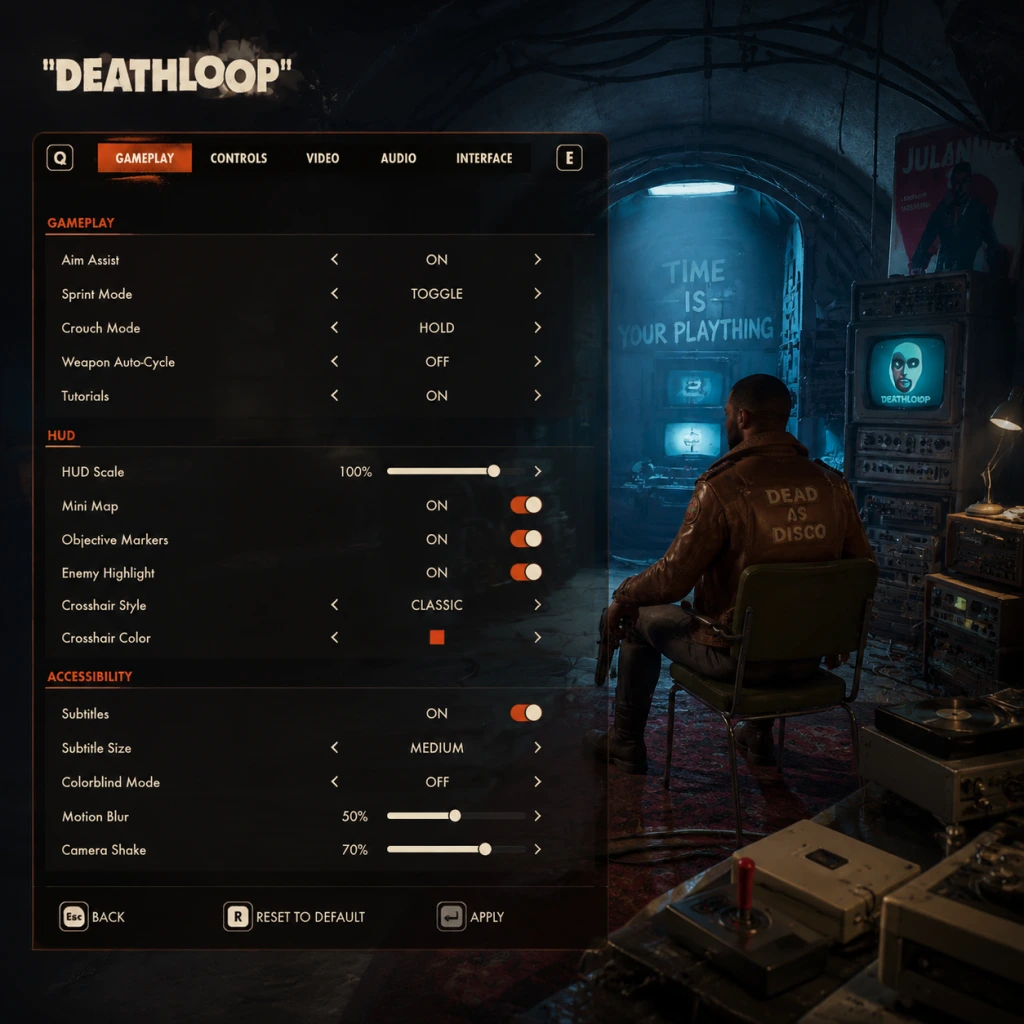
Game Settings
Overview
Deathloop offers a comprehensive settings menu across its platforms (PC, PlayStation 5, Xbox Series X|S). Proper configuration can drastically improve performance, visual fidelity, and playability. This guide covers every settings category—graphics, audio, controls, accessibility, language, network, and gameplay—with recommended options for different hardware levels. Pay special attention to potentially misconfigured settings (e.g., auto-resolution scaling, mouse acceleration) and setup pitfalls unique to Deathloop.
---
Graphics Settings
Display Modes (PC)
- Fullscreen (Recommended): Best performance, lowest input lag.
- Borderless Windowed: Useful for alt-tabbing, but may incur slight performance loss.
- Windowed: Lowest performance; use only for troubleshooting.
- Resolution: Set to your monitor’s native resolution. For 1440p, use 2560×1440; for 4K, use 3840×2160.
- Render Scale: Adjusts internal resolution. Use 100% for native quality. Below 100% improves performance (e.g., 70% for low-end PCs).
- Upscaling Methods:
Resolution & Scaling
- FSR (AMD cards): Use Quality preset; avoid Ultra Performance (degraded image).
- Temporal Upsampling: Alternative upscaler, slightly less sharp than DLSS/FSR.
Advanced Graphics Options
Use this table for recommended settings per hardware tier:
| Setting | Low-End (GTX 1060, RX 580) | Mid-Range (RTX 2060, RX 6600) | High-End (RTX 3080, RX 6800 XT) | Ultra (RTX 4090, Extreme) |
|---|---|---|---|---|
| Overall Quality Preset | Low | Medium | High | Ultra |
| Texture Quality | Medium (2GB VRAM) | High (4GB VRAM) | Ultra (6GB+ VRAM) | Ultra |
| Model Detail | Low | Medium | High | High |
| Shadow Quality | Low | Medium | High | Ultra |
| Ambient Occlusion | Off | SSAO | HBAO+ | HBAO+ |
| Post Processing | Low | Medium | High | High |
| Reflections | Off | Screen Space (Medium) | Screen Space (High) | Ray Traced (High) |
| Volumetric Lighting | Low | Medium | High | Ultra |
| Anti-Aliasing | TAA Low | TAA Medium | TAA High | TAA High + FXAA |
| Ray Tracing | Off | Off | On (Reflections only) | On (Full) |
| DLSS/FSR | Off (or FSR Performance) | DLSS/FSR Balanced | DLSS/FSR Quality | DLSS/FSR Quality |
| Motion Blur | Off | Off | Off or Low | Off |
| Depth of Field | Off | Off | On | On |
| FOV | 80-90 | 90-100 | 100-110 | 100-110 |
Easy-to-Misconfigure Settings
- Auto Resolution Scaling: Enabled by default on PC, but often sets render scale too low. Disable it and set manually.
- V-Sync: Turn Off for lower input lag (use an in-game or driver-level frame cap instead). On PS5/Xbox, match to display refresh rate.
- HDR: Enable only if your monitor/TV supports true HDR (10-bit, high nits). Improper calibration can wash out colors. Use system HDR calibration first.
- Master Volume: 70-80% (adjust based on speakers/headphones).
- SFX Volume: 100% – crucial for hearing enemy footsteps and weapon sounds.
- Dialogue Volume: 90-100% – Deathloop’s voice lines (Colt, Julianna, Visionaries) are key to understanding the story.
- Music Volume: 60-80% – music is atmospheric but can mask important audio cues.
- Ambient Volume: 80-100% – environment sounds help with immersion and detection.
- Sound Device: Select your default output (speakers/headphones).
- Audio Output Mode:
- Dynamic Range:
- Subtitles: Enable if you want to read dialogue during combat.
- Audio Lag: If sound is out of sync, check your display’s audio processing mode (Game mode vs Movie mode). On PC, ensure audio output sample rate matches system setting (48000 Hz recommended).
- Keyboard & Mouse or Controller. Deathloop supports simultaneous input – you can seamlessly switch.
- Sensitivity: Adjust mouse DPI and in-game sensitivity to achieve 35-50 cm/360 for precise aiming (set in `Controls > Mouse`).
- Aiming Sensitivity (Scoped): Reduce to 0.5-0.7 of hip-fire sensitivity for consistency.
- Mouse Smoothing: Disable – this causes input lag and inconsistency.
- Mouse Acceleration: Off – always off for raw input. (Easy to misconfigure: Xbox Game Bar or Razer Synapse can inject acceleration; check those.)
- Invert Y: Personal preference; default off.
- Vibration: On (offers haptic feedback for weapons and environmental interactions).
- Trigger Effect: On PS5, adaptive triggers for resistance when firing (immersion). On Xbox, impulse triggers similar effect.
- Look Sensitivity: Start at 50%; adjust by ±5% increments.
- Aim Assist: On – helps with target acquisition, especially for controller users.
- Toggle vs Hold for Aim: Many prefer ‘Hold’ for snappier aiming.
- Vertical Sensitivity: Often set too low or too high. Ensure vertical sensitivity matches horizontal (use same value).
- Key Bindings for Abilities: Shift is default for sprint; consider rebinding to something like Left Alt for easier access during combat (e.g., hold shift to sprint, but you may accidentally toggle).
- Quick Melee: Default ‘V’ on PC – rebind to a mouse thumb button if available.
- Colorblind Modes: Three options (Protanopia, Deuteranopia, Tritanopia). Affects UI colors (minimap icons, enemy indicators). Enable if needed.
- UI Scale: Increase to 150% for better readability on large monitors/TVs.
- Crosshair Visibility: Change color (white, red, green, blue) to contrast against environments.
- Camera Shake: Disable for motion sickness prevention.
- Subtitle Size: Normal or Large.
- Subtitle Background: Adding a dark background improves readability.
- Mono Audio: Enable if one ear is impaired (combines left/right channels).
- Difficulty: Deathloop has three difficulty levels – Easy, Normal, Hard. Recommend Normal for first playthrough. Easy reduces enemy awareness and damage.
- Always Show Objectives: On – keeps quest markers visible.
- Minimap Rotation: Set to ‘Compass Mode’ (objective relative) or ‘Rotating Map’ (north fixed).
- Auto-Climb: On – Colt automatically vaults over low obstacles. Prevents frustration.
- Aim Down Sights (ADS) Sensitivity: Separate from hip-fire sensitivity, but not heavily advertised. Set a comfortable value (e.g., 0.7x).
- Response Curve (Controller): Linear vs Exponential. Linear is more direct, Exponential has a smoother acceleration. Try both in the tutorial.
- Text Language: Choose from supported languages (EN, FR, DE, ES, IT, JP, KO, PL, PT-BR, RU, ZH-CN, ZH-TW).
- Audio Language: Usually defaults to English voice acting. Some versions may include Japanese or French dubs.
- Voice Overrides: If you want English voices with translated subtitles, set text language to desired language and keep audio language as English.
- Note: On Steam, language is set via properties; in-game settings may be limited. Change via Steam client if options are grayed out.
- Invasion Mode: Controls whether other players can invade your game as Julianna. Options:
- Crossplay: Between PC, PS5, and Xbox – toggle on/off. Note: Crossplay is enabled by default; disable if you experience matchmaking delays.
- Streamer Mode: Hides player names to avoid stream sniping. Enable if streaming.
- Network Connection: Ensure wired connection for stable invasions. Wi-Fi may cause desync.
- Matchmaking Region: Select closest region for lower latency. (Set in console network settings, not in-game.)
- Frame Rate Cap: Set to match your monitor’s refresh rate (e.g., 60, 120, 144). Uncapped can cause jitter in online play.
- Invasion Lag: If Julianna teleports or desyncs, reduce graphics settings, enable V-Sync, or switch to offline mode temporarily.
- Respawn at Same Location (on death): Off – when off, you respawn at earlier checkpoint; on resets you to start of the level. Beginners may prefer ‘On’ to maintain progress.
- Auto-Equip Items: On – automatically equips the best weapon/trinket from inventory when picking up. Saves time.
- Quick Slot Cycling: Set to ‘All Weapons’ or ‘Favorite Only’. Prevents cycling through junk items.
- Always Show Reprises: Shows remaining lives on HUD. On for clarity.
- HUD Size: Scale from 50% to 150%. Default 100%. Increase if you play at high resolution.
- Minimap Size: Small, Medium, Large. Choose Medium for balance.
- Damage Numbers: On – helpful for gauging weapon effectiveness.
- Enemy Awareness Indicator: ‘Directional’ (shows enemy direction) or ‘Radial’ (proximity ring). Directional is more precise.
- Manual Saving: PC only – use F5 (quick save) and F9 (quick load). Important: Deathloop’s auto-save overwrites frequently; manual saves are temporary (per session). Don’t rely on them for permanent progression.
- Difficulty Sliders (advanced): After unlocking some powers, you can adjust damage multipliers in Gameplay Options. Only recommended for experienced players.
- Graphics Preset: Low
- Resolution Scale: 70%
- Upscaling: FSR Performance (if AMD) or Off
- Shadows/Reflections: Minimal
- Ray Tracing: Off
- V-Sync: Off
- Motion Blur: Off
- FOV: 80
- Graphics Preset: Medium
- Resolution Scale: 100%
- Upscaling: DLSS/FSR Balanced
- Shadows: Medium, Ambient Occlusion SSAO
- Ray Tracing: Off
- V-Sync: Off (cap frames via driver or in-game to 120)
- FOV: 90
- Graphics Preset: High
- Resolution Scale: 100%
- Upscaling: DLSS/FSR Quality (4K) or Off (1440p)
- Ambient Occlusion: HBAO+
- Reflections: Screen Space High (or Ray Traced Reflections if VRAM >8GB)
- Ray Tracing: RT Reflections only
- Motion Blur/Depth of Field: Off (competitive) or On (cinematic)
- FOV: 100-110
- Graphics Preset: Ultra
- Resolution Scale: 100%
- Upscaling: DLSS/FSR Quality or Balanced
- Ray Tracing: Full (Reflections + Ambient Occlusion)
- All other settings maxed
- FOV: 110
---
Audio Settings
Master & Volume Levels
Audio Output & Features
- Stereo – best for headphones.
- 7.1/5.1 Surround – for home theater setups.
- Headsets: Low (compresses dynamic range, reduces loudness spikes).
- Speakers: High (more natural, but explosions can be loud).
Common Pitfall
---
Controls Settings
Input Method (PC)
Keyboard & Mouse Customization
Controller (PS5/Xbox/PC)
Common Misconfigurations
---
Accessibility Settings
Deathloop includes several features to aid different playstyles and needs.
Visual Accessibility
Audio Accessibility
Gameplay Accessibility
Special Attention Points
---
Language Settings
---
Network Settings
Multiplayer & Online Features (Always On DRM?)
- Online: Enables player invasions (default; may cause lags if connection is poor).
- Friends Only: Only friends can invade.
- Offline: AI-controlled Julianna only.
Bandwidth & Connectivity
Common Issue
---
Gameplay Settings
Essential Toggles
HUD Customization
Save & Difficulty
---
Recommended Settings Presets by Hardware
Low-End (60fps target at 1080p)
Mid-Range (60fps at 1440p or 90-120fps at 1080p)
High-End (120+ fps at 1440p or 60fps at 4K)
Ultra (60fps with full RT at 4K, or >120fps at 1440p)
---
Final Tips & Special Attention Points
1. Save Settings Before Changing Resolution: On PC, change resolution first then apply other graphics. Sometimes the game forgets after switching modes – restart if needed.
2. Disable Auto-Resolution Scaling: This is often overlooked and tanks performance on mid-range PCs.
3. Mouse Input: Ensure Windows mouse pointer speed is set to 6/11 (default) and ‘Enhance pointer precision’ is Off. In-game, disable mouse smoothing and acceleration.
4. Controller Users: On PC, if using a DualSense, wired connection enables haptic feedback and adaptive triggers; wireless loses those features.
5. Stuttering Issues: If you experience stutter, try limiting VRAM usage (reduce texture quality) and disable ray tracing. Also, update GPU drivers.
6. HDR Calibration: Use the in-game calibration tool (in Graphics menu) to adjust luminance and paper white. A good starting point: 800 nits for SDR-to-HDR conversion, 1000+ for native HDR displays.
7. Network: If invasions are laggy, lower graphics settings to reduce CPU overhead, which helps with online responsiveness.
By following this guide, you can tailor Deathloop to run smoothly on your hardware while preserving the game’s unique visual style and tight gameplay. Adjust settings gradually and test in the opening beach area (low stress) before diving into full missions.

Important Notes
Important Notes
This section contains critical warnings, pitfalls, and facts that can save you from frustration or permanently missing content. Read carefully before diving into Deathloop.
Warnings & Pitfalls
- Time Loop Resets Almost Everything: Each loop (day) resets your position, weapons, and progression—except for permanently infused items (using Residuum). If you don’t infuse a weapon or trinket before midnight, it’s lost forever.
- Death Kills Your Day: If you die as Colt, the entire day resets. You lose all uninfused loot you acquired during that loop. However, you keep any infused items and unlocked leads.
- Julianna Invasions (Online & Offline): If you play online, other players can invade as Julianna to kill you. This can happen at any time during a level. Offline, an AI controls Julianna but is much less threatening. If you’re frustrated, switch to single-player mode in settings.
- Don’t Waste Residuum Early: Residuum is hard to earn early on. Only infuse items you are sure you’ll use repeatedly. Blowing Residuum on a common SMG is a rookie mistake.
- Visionaries Can Be Killed Repeatedly: You can kill the same Visionary on different days, but you only get one slab per loop. If you already own that slab, you’ll get a duplicate upgrade instead.
- Avoid Killing Everyone Needlessly: Killing non-Visionary enemies doesn’t permanently help; it can alert others or waste time. Stealth is often faster.
- Infusion of Items: Once you spend Residuum to infuse a weapon, trinket, or slab upgrade, that Residuum is gone. You cannot sell or trade infused items. Choose wisely.
- Story Lead Progress: Once you discover a lead and update it, you cannot undo it. But leads carry over between loops, so this is fine.
- Killing a Visionarian in a Specific Way: Some achievements require specific methods (e.g., killing all Visionaries during “The Class” event). If you miss these, you must replay the loop. No way to revert a previous loop.
- Character Dialogue Choices: Occasionally you’ll have dialogue prompts (e.g., with Juliana during the ending). These do not permanently affect the story outcomes, but the ending tone changes. You can reload a save before the final choice if needed.
- Achievements & Trophies: Several achievements are missable if you don’t complete specific actions in the same loop. For example:
- Lore Documents & Audio Logs: Many documents appear only if you follow specific leads or are in certain locations at the right time. If you skip an area, you might miss lore that explains the story. Replayable, but it’s easy to miss.
- Special Weapon Variants: Some unique weapons (e.g., “Heritage Gun”) are only rewards for finishing specific side quests or killing a Visionary under special conditions. Check the Arsenal shortcuts.
- Julianna’s Drops: If you kill Julianna (AI or player), she drops high-level trinkets. If you ignore her invasions, you lose that loot.
- First Few Loops (No Upgrades): Early game is hardest because you have no powers and weak weapons. Use stealth, avoid unnecessary fights.
- Player-Invading Juliannas: If you play online, experienced Julianna players can be devastating. Stick to offline if you’re struggling.
- The Final “Golden Loop”: Killing all eight Visionaries in one day is extremely challenging. You must plan a route, use abilities like “Shift” (teleport), and have full loadout. Save often before major encounters.
- Boss Battles: Each Visionary has a unique combat style. For example, Egor (if you confront him in his lab) summons Wenjie clones. Learn patterns and use the environment.
- Farming Residuum on Repeat: You can earn Residuum by killing Visionaries and grabbing their earrings, but it’s slow. A better method is to complete leads that reward large Residuum infusions (e.g., the “Rak” quest). Don’t spend hours killing the same enemies for 200 Residuum.
- Over-Farming Weapons: Once you have a solid loadout (e.g., a silenced SMG, a strong shotgun, and grenade launcher), there’s no need to keep collecting new weapons. Infuse your favorites and ignore drops.
- Repeating the Same Route: Doing the same area over and over is inefficient. Mix up your objectives—use the map to plan which Visionaries to kill each day.
- Invasion Respect: If you invade as Julianna, don’t resort to cheap tactics (e.g., camping spawns). It’s more fun for both players if you engage dynamically.
- No Cheating: Deathloop uses a modified version of the Void engine; no official anti-cheat is enforced for single-player, but online invasions rely on peer-to-peer connections. Use of mods that give infinite health or ammo ruins the experience for others. Report toxic players via the Bethesda support.
- Offline Mode: If you prefer no invasions, go to Settings → Gameplay → “Online Mode” and set it to Offline. This disables player Juliannas but also blocks you from invading others (which is fine).
- Save Scumming: You can manually back up your save files on PC to avoid losing progress, but this is not supported officially. Save manipulation may corrupt your game if done incorrectly.
- Auto-Save: The game auto-saves at checkpoints: entering a new area, opening a safe, after killing a Visionary, and at the start of each morning segment. You cannot manually save the game; you must rely on these auto-saves.
- Exiting Without Saving: If you quit the game, the auto-save from your last checkpoint will be loaded. If you die and want to revert to an earlier point, you can’t—you must restart the loop.
- Backup Saves (PC): To safeguard against corruption, navigate to your save folder (typically `%USERPROFILE%\Documents\My Games\Deathloop\save`) and copy the `save_*.sav` files to another location. Replace them later if needed. This can be used to attempt different endings without replaying.
- PS5 Save Restore: On consoles, you can use cloud saves (PS Plus) to revert, but this is cumbersome. Better to be careful with decisions.
- You Can Rebind Powers: Deathloop lets you assign each slab (power) to a different key or button (PC) or controller face button. Don’t keep the default layout; customize it for quick access.
- Shift (Teleport) Is the Best Power: The “Shift” slab, obtained from Wenjie, is arguably the most useful for mobility and escaping bad situations. Get it early and upgrade it (e.g., to “Reach” for longer range).
- Nerf (Hack) Turrets: The “Nerf” slab lets you hack turrets and mines. This trivializes many areas. Find it in the “Complex” area early.
- Sprinter Trinket Doubles Sprint Speed: Equip the “Sprinter” trinket (found on some Julianna kills or in loot rooms) to move faster and cover more ground.
- You Can Parry Melee Attacks: When an enemy swings with a melee attack, press the melee button at the right time to parry and instantly kill them. Practice with Wenjie’s Egor clones.
- Residuum Can Be Obtained by Sacrificing Unused Items: When you leave a loop, you can sacrifice weapons and trinkets to gain Residuum. Don’t just leave good items behind—sacrifice them if you don’t want to infuse.
- The “Class” Ability: Finding Eva L’Étoile’s shared memory can unlock the “Class” ability, which lets you disguise as enemy soldiers. This changes stealth gameplay completely.
- Collect All Lead Clues: Ignoring side leads means you might miss important information or weapon upgrades. Even if you think you know the puzzle, explore all leads.
- Quick Travel Between Safe Rooms: Each district has underground tunnels (e.g., “Karla’s Door”, “Mineshaft”). Opening them from inside gives shortcuts for later loops. Don’t forget to unlock them.
- You Can Fast-Travel the Map: At the start of each morning segment, you can choose where to go. Use the map button to see all possible locations and restrict yourself to a few objectives per day to stay manageable.
- The Ending Choice: The final decision (whether to ally with Juliana or shoot her) leads to different cutscenes and achievements. Save before the final area if you want to see both endings without another playthrough.
Irreversible Choices
Deathloop’s loop structure makes most decisions reversible after a reset, but a few things are permanent:
Missable Content
- “Ensemble” – Kill all 8 Visionaries in one day (must be done in a single loop).
- “Rift Runner” – Complete a level without killing anyone (stealth-only).
- “Waste Not Want Not” – Kill a Visionary with a specific environmental hazard (e.g., crushing with a rock).
Difficulty Spikes
Grinding Traps
Online Etiquette & Anti-Cheat
Save Management
Things Players Commonly Regret Not Knowing Earlier
All Game Items
Overview
In Deathloop, items are the tools of your trade as Colt, the eternal assassin trapped on Blackreef. The island is littered with guns, trinkets, consumables, and collectibles, all of which can be used to break the time loop. Because the day resets at midnight, most items are lost each loop — unless you Infuse them using Residuum, a special currency that allows you to permanently keep weapons and trinkets across resets. This guide covers every major item category, including detailed stats, acquisition methods, optimal usage, and important synergies.
---
1. Weapons
Weapons in Deathloop fall into several classes: melee, pistols, submachine guns (SMGs), shotguns, rifles, and unique special weapons. Each weapon has standard rarity (grey, blue, purple, orange) indicated by color, but more importantly, weapons can also carry perks (special bonuses) that drastically change their performance. You can loot weapons from enemies, find them scattered around levels, or unlock them permanently by Infusing.
1.1 Melee Weapons
| Weapon | Description | How to Obtain | Notes |
|---|---|---|---|
| Machete | Standard melee weapon. Quick slashes, can one-hit kill unalerted enemies. | Default equipment; always spawns in your loadout. | No perk variants. Can be thrown for a short-range silent kill. Use when out of ammo or for stealth takedowns. |
1.2 Pistols
| Weapon | Description | Perk Examples | How to Obtain |
|---|---|---|---|
| Tribunal | Semi-automatic pistol. High accuracy, moderate damage, low ammo capacity (8 rounds). | Snap Shot (increased hip-fire accuracy), Wrecking Ball (bonus damage against objectives) | Common drop from Eternalists; found in weapon crates. |
| MG-1 Constable | Full-auto pistol. Fast fire rate but worse accuracy. 15-round magazine. | Juiced Up (increased movement while firing), Lightning Strike (faster reload after kill) | Drops from Eternalists, especially in Updaam. |
| Sepulchra Breteira | Unique silenced pistol. Extremely quiet, high damage, but slow rate of fire. | None (fixed stats) | Unlock by completing Egor Serling's questline (kill him in the Complex and loot his body). Best stealth weapon. |
1.3 Submachine Guns (SMGs)
| Weapon | Description | Perk Examples | How to Obtain |
|---|---|---|---|
| Strelak Verso | Special SMG that can be split into dual-wielded pistols. Full auto when combined, rapid fire when split. | None (unique mechanic) | Obtain by defeating Charlie Montague in his party at Updaam (evening). Loot from his body. |
| Kubrik | Standard SMG. High rate of fire, low damage per shot. Large magazine (30 rounds). | Shockwave (bullets slow enemies), Shadow Strike (silenced bullets, rare) | Common drop; found in weapon lockers. |
| Vopat | SMG with a drum magazine (50 rounds). Less accurate but good for suppressive fire. | Deep Impact (penetrates walls slightly), Quickdraw (faster weapon swap) | Drops from heavy Eternalists. |
1.4 Shotguns
| Weapon | Description | Perk Examples | How to Obtain |
|---|---|---|---|
| Heritage Shotgun | Powerful double-barrel shotgun. Slow reload but immense damage up close. | Sundance (increased range), High Rolling (critical chance on headshots) | Found on weapon racks; dropped by Juliana. |
| Ripper | Semi-automatic shotgun. Faster fire rate but lower damage per shot. 6-round tube magazine. | Scattergun (wider pellet spread), Shell Game (chance to not consume ammo) | Drop from Visionary guards. |
1.5 Rifles
| Weapon | Description | Perk Examples | How to Obtain |
|---|---|---|---|
| LIM-10 | Lightweight assault rifle. Full-auto, good accuracy and damage. 30-round magazine. | Juiced Up, Lightning Strike | Common drop; also sold by Wenjie (if you hack her delivery). |
| PT-6 Spiker | Semi-automatic rifle with very high damage per shot. 6-round magazine. Best for mid-range precision. | Mind Leech (empty enemy slab energy), Soul Survivor (heal on kill) | Loot from Wenjie's labs or her personal guard. |
1.6 Special Weapons (Unique)
| Weapon | Description | How to Obtain | Notes |
|---|---|---|---|
| Strelak Verso (also listed above) | Two-in-one SMG. Press Y/Triangle to switch between combined and dual-wielded modes. | Charlie Montague (Updaam evening) | Extremely versatile; use dual pistols for close-range, combined for mid-range. |
| Harriet's Poison Blade | A knife that applies lethal poison on hit. One hit kills anything. | Harriet Morse’s bunker (Complex afternoon) | Silent, but requires careful timing. Poison will spread to nearby enemies. |
| Egor's Ray Gun | A laser pistol that fires energy beams. Inaccurate but ignores armor. | Egor Serling’s lab (Complex morning) | Good against Juliana because it staggers. |
2. Trinkets
Trinkets are equippable items that grant passive bonuses or activate special abilities. There are two types: Slab Abilities (active powers) and Personal Trinkets (passive upgrades). Both can be Infused.
2.1 Slab Abilities (Active Powers)
| Slab | Description (Base) | Upgrade Path (Sacrifice duplicates) | How to Obtain | Usage Tips |
|---|---|---|---|---|
| Reprise | Revive twice per loop. | — (upgraded via story) | Default power. Always active. | Essential for survival. Save revives for emergencies. |
| Aether | Turn invisible for a short time. | Ghost: No movement speed penalty while invisible. Flicker: Faster activation. | Harriet Morse (Complex, afternoon) | Use for stealth through heavily guarded areas. Combine with Kunai for silent kills. |
| Havoc | Become a tank – reduce damage taken and increase damage dealt. | Wrecking Ball: Enemy melee attacks knock them down. Persona: Enemies fear you. | Charlie Montague (Updaam, evening) | Activate before charging into groups. Pairs well with shotgun. |
| Karnesis | Telekinetic push or pull enemies. | Suspension: Hold enemies in mid-air. Impact: Enemies explode on walls. | Egor Serling (Complex, morning) | Great for environmental kills (push off cliffs) or to disable Juliana. |
| Shift | Short-range teleport (blink). | Range: Increased distance. Airborne: Can teleport mid-jump. | Frank Spicer (Karl’s Bay, noon – party) | The best mobility power. Use to bypass obstacles or escape combat. |
| Nexus | Link multiple enemies; damage spreads. | Pairing: Link without line of sight. Mimicry: Enemies linked to you will act as decoys. | Wenjie Evans (Complex, afternoon – lab) | Powerful for crowd control. Shoot one linked enemy to kill all. |
2.2 Personal Trinkets
Personal Trinkets provide passive bonuses to Colt’s attributes. Each trinket has a cost (number of bars), and your limit is 3 bars (later increased to 5 via Hackamajig upgrades).
| Trinket | Effect | Cost | How to Obtain | Synergies |
|---|---|---|---|---|
| Spring Heeled | Double jump. | 1 | Loot from Eternalists; found in certain lockers. | Combine with Shift for extreme verticality. |
| Wingsuit | Slow fall after dropping from height. | 1 | Updaam, on roof of Charlie’s mansion. | Use with Karnesis to float over gaps. |
| Bomb Lance | Explosive throwing knives (replaces standard kunai). | 2 | Karl’s Bay, in Frank’s bunker (afternoon). | Synergizes with Karnesis (push enemies into bombs). |
| Turtle Shell | Take reduced damage when not moving. | 2 | Complex, on storage container near Wenjie’s lab. | Useful when tanking with Havoc. |
| Energist | Increased slab energy regeneration. | 1 | Drop from Juliana or Visionary guards. | Essential for heavy Slab users. |
| Unstoppable Force | Immune to enemy Karnesis pushes while sprinting. | 1 | Loot from a specific Eternalist in Updaam (evening). | Counter Juliana’s push. |
| Juiced Up | Move faster while firing. | 2 | Found in various lockers. | Pairs with SMGs or shotguns for aggressive play. |
| Steel Sight | Hold breath longer while aiming (rifles). | 1 | Loot from sniper Eternalists. | Useful with PT-6 Spiker or LIM-10. |
| Glass Cannon | Take double damage but deal double damage. | 1 | Hidden in the Complex, behind a painted wall. | High risk/reward; use only if confident in avoiding hits. |
| Sprinter | Sprint for longer duration. | 2 | Common drop. | Good for traversal. |
3. Consumables
Consumables are single-use items that provide immediate benefits. They are never infused — you craft or pick them up fresh each loop.
| Item | Effect | How to Obtain | When to Use |
|---|---|---|---|
| Health Injector | Instantly heal 50 HP. | Crafted (2 scrap metal + 1 residuum), looted from enemies. | After taking heavy damage. Can hold up to 3. |
| Shield Injector | Temporarily makes you invulnerable for 4 seconds. | Crafted (2 scrap metal + 1 residuum), looted from Juliana. | Before engaging multiple enemies. Combos with Havoc for extreme tanking. |
| Focus Injector | Restores some Slab energy. | Crafted (2 scrap metal + 1 residuum), found in some offices. | When using Slab abilities heavily. |
| Grenade (Frag) | Standard explosive; L2 to toss. | Looted from Eternalists, weapon lockers. | Crowd control or clearing rooms. |
| Proximity Mine | Stick to walls; detonates when enemies are near. | Crafted (1 scrap metal + 1 residuum), looted from traps. | Set ambushes, block doorways. |
| Sprinkler | Area-of-effect gas that makes enemies dizzy and vulnerable. | Looted from Harriet’s area. | Non-lethal option for stealth. |
| Turret | Deployable auto-turret. Fires at enemies. | Crafted (2 scrap metal + 1 residuum), found in Charlie’s mansion. | Distract or cover flanks. |
| Nullifier | Creates a field that disables enemy Slabs (including Juliana’s). | Looted from Wenjie’s lab. | Essential for fighting Visionaries with powerful slabs. |
---
4. Materials & Currencies
| Name | Description | Use | How to Obtain | Notes |
|---|---|---|---|---|
| Residuum | Purple glowing substance. Primary currency. | Infuse items (weapons, trinkets) to keep them permanently. | Killing Visionaries, recycling infused items, looting from residuum deposits. | The only thing that persists across loops. Do not waste on low-tier items. |
| Scrap Metal | Grey metal chunks. | Craft consumables, update items at Fabricators. | Looting containers, weapons disassembly (via ‘Recycle’ option). | Abundant; always gather. |
| Trinket Dust | From dismantling unwanted trinkets. | Used to craft trinkets at Fabricators (requires recipe). | Recycled from trinkets you don’t want. | Save dust for rare trinkets. |
| Keycards | Various colored cards (green, blue, purple, gold). | Open locked doors and safes. | Loot from Eternalists, Visionaries, or found in specific locations. | Keep them; some doors require multiple cards. |
| Documents | Lore items – no in-game benefit. | Provide story background and puzzle clues. | Scattered across maps. | Essential for solving the Visionary sequence puzzle. |
| Audio Logs | Audio recordings. | Play from inventory for story. | Same as documents. | No gameplay effect. |
5. Key Equipment & Tools
| Item | Function | How to Obtain | Notes |
|---|---|---|---|
| Hackamajig | Multitool for hacking turrets, doors, traps. Default equipment. | Given at start of first loop. | Upgradable via trinket slots (find Hackamajig Upgrades throughout Blackreef). |
| 2-BIT | Hackable radio; provides code for one safe per loop. | Pick up at various radio towers. | Only works once per loop. Use with the safe codes you find. |
| RADIO (tower) | Gives current map and time. | Built into UI. | Not an item. |
| Antenna | Used to communicate with Visionaries or trigger events. | Found in mission areas. | Example: to call a rocket. |
6. Collectibles (For Trophy/Achievement Hunting)
| Category | Description | Count | Reward | Notes |
|---|---|---|---|---|
| Documents | All lore papers. | 12 | Trophy: “Full Deck” | Missable if you don’t pick up before certain events. |
| Audio Logs | Recordings. | 9 | Trophy: “Sound and Fury” | Generally well-hidden. Use maps. |
| Weapon & Trinket Collection | All weapon types and all trinkets. | 12 weapons, 15 trinkets | Trophy: “All for One” | Must Infuse at least one of each. |
| Slab Upgrades | All fully upgraded Slabs. | 6 Slabs × 2 upgrades each | Trophy: “Nowhere to Hide” | Requires killing Visionaries multiple times. |
| Foci of the Loop | Destroy all eight Visionaries in one loop. | 8 | Trophy: “Golden Loop” | The final objective. |
7. Infusion System
Infusion is the core mechanism allowing you to keep items after a loop reset. Only Residuum can be used.
- How to Infuse: Pause menu → Infusion tab → select item → spend Residuum.
- Cost: Depends on rarity: Grey (5), Blue (10), Purple (20), Orange (30).
- Strategy: Prioritize infusing Orange weapons with great perks and key Slab upgrades. Low-tier items are easy to re-loot.
- Bonus: Killing Juliana (the invading Colt) yields a massive Residuum drop (300-500). Always hunt her for quick infusion capital.
- Shift + Spring Heeled: Unmatched mobility; triple-jump style traversal.
- Nexus + PT-6 Spiker: Link enemies, then shoot one. The high damage spreads to all linked, wiping a room.
- Havoc + Bomb Lance: Activate Havoc, run in, throw Bomb Lance at your feet. Enemies cluster and die, you survive due to damage reduction.
- Aether + Sepulchra Breteira: Perfect silent assassination tool. Invisibility makes you untargetable while you line up headshots.
- Karnesis + Proximity Mine: Push enemies onto mines for hilarious kills.
- Energist + any Slab: Faster regen lets you spam abilities more.
---
8. Important Synergies & Upgrades
This guide covers every item you'll encounter. Use the Infusion system wisely, experiment with trinkets, and always have a backup plan for loop failure. Blackreef is your playground — now break the loop.

Character Skills
Overview
Colt is the sole playable character in Deathloop. His abilities are split into two categories: Innate Abilities (passive traits you always have) and Slabs (active supernatural powers you acquire by killing Visionaries and infusing them with Residuum). You can equip up to two Slabs at once, and each Slab has three upgrade tiers that alter or enhance its effect. This guide covers every skill in detail, including effects, cooldowns, upgrades, combos, synergies, recommended builds, and optimal use cases.
---
Innate Abilities (Always Available)
Reprise
- Effect: You have two "lives" per loop. Upon dying for the first time, you respawn at the last safe location (e.g., a tunnel entrance) but lose all Residuum gained in that district. Upon dying a second time, the loop resets completely and you lose everything not infused. The number of deaths before loop reset can be extended with Trinkets.
- Cooldown: None – passive. The two deaths are granted per new district entry; leaving and returning resets your Reprise charges.
- Upgrades (via Trinkets):
- When to use: Always active; manage your deaths carefully. Use your first death aggressively to test dangerous areas.
- Effect: Jump again while airborne for extra height and distance. Essential for navigation and ambush positioning.
- Cooldown: None.
- Upgrades: Cannot be upgraded.
- When to use: Constantly; chain with Shift for long-range movement.
- While not a skill, the Hackamajig allows you to hack turrets, mines, and security panels. It complements your slab loadout and is carried as a gadget.
- Obtained from: Egor Serling (The Complex – Lab, any time of day) or killed at the party.
- Effect: Turn nearly invisible for a short time. Enemies lose sight of you, but movement and noise still attract attention.
- Base Duration: ~8 seconds.
- Cooldown: ~15 seconds (starts after invisibility ends).
- Upgrades:
- Synergies:
- Recommended Build: Ghost upgrade + Shift slab + silenced gun + Extended Duration trinket = ultimate stealth assassin.
- When to use: Infiltrating heavily guarded areas, bypassing enemies, setting up multi-kills. Best for a pacifist or ghost playstyle.
- Obtained from: Aleksis "The Wolf" Dorsey (Karl’s Bay – night, party).
- Effect: Enter a rage mode that drastically reduces incoming damage (up to 75% with upgrades) and increases melee attack damage. Also knocks back nearby enemies when activated.
- Base Duration: ~10 seconds.
- Cooldown: ~20 seconds.
- Upgrades:
- Synergies:
- Recommended Build: Tank + Nexus + Octrans helmet (electrified melee) for a full-on brawler.
- When to use: When you need to survive heavy fire, clear rooms, or take on multiple enemies at close range. Excellent for boss Visionaries.
- Obtained from: Fia Zborowska (Conditions: Usually at the Complex – Afternoon, may need to set up).
- Effect: Throw enemies or objects with telekinetic force. Can lift single targets and slam them into walls or off ledges.
- Base Cooldown: ~10 seconds (short cooldown).
- No duration – instant cast. The lift lasts ~2 seconds before slam.
- Upgrades:
- Synergies:
- Recommended Build: Long Reach + Slam + Faster Cooldown trinket for constant disruption.
- When to use: Crowd control, environmental kills (railings/mines), separating tough enemies, disabling turrets by lifting them. Extremely versatile.
- Obtained from: Charlie Montague (Fristad Rock – Evening, condition: find the password).
- Effect: Link up to 3 enemies (base) so that damage or status effects apply to all linked targets simultaneously. Headshots from a single bullet can kill the entire group.
- Base Duration: ~10 seconds of link.
- Cooldown: ~12 seconds.
- Upgrades:
- Synergies:
- Recommended Build: Ripple + Aether + silenced SMG = chain-kill entire rooms without a sound.
- When to use: Groups of patrols, crowded parties (e.g., Aleksis's mansion), before triggering alarms. Best crowd-control slab.
- Obtained from: Wenjie Evans (The Complex – Morning / Afternoon, after disabling her security).
- Effect: Teleport to a targeted location within line of sight. Can be used for instant repositioning, climbing, or escaping.
- Base Range: ~15 meters.
- Cooldown: ~8 seconds (very short).
- Upgrades:
- Synergies:
- Recommended Build: Airborne + Reach + Sidewinder trinket (tighter aim while moving) for mobile gunplay.
- When to use: Always valuable for exploration, flanking, escaping tight spots, and creating vertical advantage.
- Reprise Charge (increases from 2 to 3 deaths before loop reset).
- Reprise Bonus (grants extra health or power on revive).
Double Jump
Slab/Hackamajig (Gadget, not a skill)
---
Slabs (Active Powers)
Each Slab is obtained by killing a specific Visionary and infusing it. You can then spend Residuum to unlock upgrades at the Sacrificial Sink in your bunker. All Slabs have a short cooldown after use (usually 15–30 seconds) and consume Power (the blue bar on your HUD). Upgrades either reduce cooldown, increase duration, or add new mechanics.
1. Aether (Invisibility)
- Ghost: Moving while invisible does not reduce duration. (Highly recommended – enables full stealth movement.)
- Phase: Become completely intangible, passing through enemies and laser tripwires without detection.
- Flicker: Briefly become visible when you attack, then instantly re-cloak. Useful for hit-and-run tactics.
- Shift (teleport) to reposition while invisible.
- Nexus (link enemies) for mass assassination from stealth.
- Trinkets: Swift Cloak (faster movement while invisible), Extended Duration (increases Aether up-time).
2. Havoc (Super Strength & Damage Reduction)
- Absorptive: Health and Power are restored for each enemy killed while Havoc is active.
- Withdrawal: Upon activation, create a shockwave that disorients and damages nearby foes.
- Tank: Increase damage reduction even further; melee kills cause area-of-effect explosions.
- Nexus (link enemies) so that melee kills chain damage across linked targets.
- Karnesis (telekinetic throw) to lift and slam enemies for synergy.
- Trinkets: Everlasting (increases Havoc duration), Hard Landing (damage on landing).
3. Karnesis (Telekinesis)
- Long Reach: Increases range of the grab.
- Slam: Enemies thrown take extra damage and explode on impact with the ground.
- Raid: Pull enemies toward you instead of throwing them away. Useful for close-quarters kills.
- Havoc (melee-enhanced) – lift then melee.
- Nexus – lift a linked enemy to affect all linked.
- Shift (teleport above crowd) + lift/slam for area damage.
4. Nexus (Enemy Linking)
- Ripple: After killing a linked enemy, the link jumps to nearby unlinked enemies automatically.
- Influence: Increases the number of enemies you can link (up to 5).
- Anchor: Linked enemies are slowed and cannot move as effectively.
- Aether (invisible massacre) – link then execute with silenced weapon.
- Havoc (linked enemies take melee explosion damage).
- Karnesis (lift linked enemies to damage all).
- Trinkets: Brain Boost (faster power regen) to spam Nexus.
5. Shift (Teleportation)
- Airborne: Aim and teleport while in midair (allows double Shift during a single jump).
- Reach: Doubles teleport range.
- Hover: Briefly slow time in midair after teleporting, allowing easier aiming.
- Aether (teleport while invisible for silent approach).
- Nexus (teleport above linked enemies for aerial assault).
- Karnesis (teleport behind a lifted enemy).
---
Recommended Slab Builds
| Build Name | Slabs | Upgrades | Playstyle |
|---|---|---|---|
| Ghost Assassin | Aether + Shift | Ghost, Airborne | Silent, invisible, highly mobile |
| Chain Reaper | Nexus + Aether | Ripple, Ghost | Kill entire rooms with one bullet |
| Brawler’s Rampage | Havoc + Nexus | Tank, Ripple | Melee-focused, explosive crowd control |
| Telekinetic Chaos | Karnesis + Havoc | Slam, Absorptive | Lift, slam, then tank through survivors |
| Speed Demon | Shift + Karnesis | Reach, Long Reach | Fast mobility with disruption |
Trinkets & Passive Boosts
While not skills, Trinkets significantly enhance your slab performance. Key trinkets for each:
- Extended Duration (Aether/Havoc): +30% duration.
- Swift Cloak (Aether): Move faster while invisible.
- Everlasting (Havoc): +50% duration.
- Brain Boost (All): +40% Power regeneration rate.
- Faster Cooldown (All): Slab cooldown -30%.
- Sidewinder (Mobility): Tighter hip-fire while moving/shifting.
- Infuse your favorite slabs early; Residuum is scarce at first.
- Each slab can be used offensively or defensively; experiment with upgrades.
- The Hackamajig is not a skill but is invaluable for turning turrets against enemies – pair with Aether for safe hacking.
- Reprise charges refresh when entering a new district (tunnel). If you die once, you can still retreat and return to reset charges.
- Remember that Slabs consume Power; use Trinkets like Brain Boost to keep your blue bar full.
---
General Tips
---
This guide covers every character skill in Deathloop for Colt. Mastering these abilities is the key to breaking the loop efficiently.

Characters & Roles
Overview
Deathloop features a unique cast of characters, each playing a distinct role in the time-loop narrative. While Colt Vahn is the only playable character, the game’s world is populated by eight Visionaries (key assassination targets), the enigmatic Juliana Blake (both an AI-controlled stalker and a player-controlled invader), and a handful of other notable NPCs. This guide covers every major character, their background, strengths, weaknesses, playstyle considerations, unlock conditions for their unique powers (Slabs), recommended equipment for facing them, and any relevant team synergy (i.e., how a player’s loadout complements the battle).
---
1. Colt Vahn – The Assassin (Playable Character)
Background
Colt is the protagonist, a former Eternalist operative who was once part of the AEON Program on Blackreef. He suffers from amnesia caused by the time loop and is determined to break the cycle by assassinating all eight Visionaries in a single day. His journey is one of rediscovery and rebellion against his former allies.
Strengths
- Reprise Power: Colt can cheat death twice per loop, respawning at the last safe location with partial health and ammo. This gives him a forgiving margin for error.
- Versatile Skills: He can equip up to two Slabs (active powers) and three trinkets (passive buffs), allowing extensive customization.
- Full Arsenal: Access to any weapon in the game, from silenced pistols to shotguns and snipers, plus grenades and mines.
- Movement Freedom: Can double-jump, slide, and use a “shift” slab for teleportation or dashes, making evasion and verticality easy.
- Only One Life (Eventually): Reprise only works twice; a third death sends him back to the morning with all progress lost (except for items infused with Residuum).
- Low Base Health: Without trinkets, Colt is fragile. He relies on mobility and surprise.
- Alert System: Enemies become more aggressive if Colt is detected, and heavy fire can overwhelm him quickly.
- No Passive Regeneration: Health only recovers via Reprise or consumables (healing injectors).
- Stealth Build: Suppressed Sepulchra Breteira (sniper), silenced LIMP-10 SMG, Aether (invisibility slab), Sprint or Faster Hack trinkets.
- Combat Build: Heritage Gun (shotgun double-fire), Strelak 50-50 (explosive rounds), Havoc (damage resist slab), Turtle Shell, Juiced Up trinkets.
- Mobility Build: Shift slab with range upgrade, Karnesis (telekinesis) for crowd control, Spring Heeled trinkets (extra jump), Double Jump trinket.
- High Awareness: Juliana can track Colt through sound and sight, and uses the same movement abilities (double-jump, slide, slabs).
- Slab Copy: She can use any slab Colt has unlocked, but with limited charges.
- Tactical Mind: Player-controlled Juliana is unpredictable, setting ambushes, using gadgets, and adapting to Colt’s loadout.
- Spawn Interference: She can appear anytime after Colt’s first major action and will attempt to hunt him down.
- Limited Lives: Juliana only has one life per invasion; if defeated, she is ejected from the loop (or respawns if AI). For player Juliana, a kill means she gets Residuum and rewards.
- No Reprise: Unlike Colt, Juliana cannot cheat death – one hit kills her (for player invaders, they must be careful).
- Awareness of Location: Colt can use the “Hack App” to reveal Juliana’s position periodically, turning the tables.
- Silenced Weapons: Use a silenced pistol or SMG to stay undetected while shooting Colt from afar.
- Shift Slab: Essential for closing distance or escaping after a failed ambush.
- Nexus Slab: Link Colt to nearby Eternalists to expose his location or cause chain damage.
- Trinkets: Speed-related trinkets (e.g., Swift Haste, Double Jump) to catch Colt off guard.
- Clone Army: Wenjie can summon up to three clones that mimic her appearance and movements, making it hard to identify the real one.
- Defensive Tech: She uses tripwires and automated turrets heavily.
- Slab: Nexus: She can link Colt to other targets, causing damage to spread.
- Clones Die Easily: Clones are weaker than the real Wenjie and die with a few shots. Killing all clones leaves the real one vulnerable.
- Predictable Paths: Wenjie often follows a set route around her base, allowing you to set traps.
- Vulnerable to Stealth: If you can eliminate her without alerting her clones, it’s much easier.
- Weapons: Heritage Gun (explosive shells) or Tribunal (sniper) for long-range headshots on the real Wenjie.
- Slabs: Aether (invisibility) to slip past clones; Nexus (once obtained) to link Wenjie to her clones for chain damage.
- Trinkets: Faster Sniper Zoom, Increased Health, or Mind Leech (to slow her special ability recharge).
- High Armor: Dorsey wears heavy armor that can withstand many shots.
- Karnesis Slab: Can throw Colt across the room, causing fall damage or disorientation.
- Aggressive AI: He actively hunts Colt, often charging head-on.
- Turrets: He has robotic spiders that attack on sight.
- Slow Movement: His armor makes him sluggish; Colt can outrun him.
- Weak to Precision: Headshots with a sniper rifle can bypass armor and deal massive damage.
- Can Be Stunned: If Colt uses a stun grenade or gas, Dorsey is briefly vulnerable.
- Weapons: Sepulchra Breteira (sniper) for headshots; a suppressed submachine gun for close range if needed.
- Slabs: Shift (to avoid being thrown); Havoc (to tank damage if caught).
- Trinkets: Eagle Eye (reduced sway), Swift Haste (speed), Resilience (reduce stagger from Karnesis).
- Gas Grenades: Harriet’s weapon poisons large areas, forcing Colt out of cover.
- Havoc Slab: When activated, she becomes highly resistant to damage and heals from enemies she kills.
- Guards: She is surrounded by Eternalists who are immune to her gas.
- Traps: The area is filled with gas leaks and explosive canisters.
- Gas Backfire: If Colt triggers a gas leak, Harriet can be caught in the explosion too.
- Vulnerable to Stealth: If you approach from the ventilation shaft, you can assassinate her silently before she activates Havoc.
- Predictable Routine: She stays in a central chamber; you can plan an ambush.
- Weapons: A suppressed sniper or silenced pistol for a pre-emptive headshot. A shotgun can finish her quickly if she gets close.
- Slabs: Aether (invisibility) to bypass guards; Shift to teleport across gas clouds.
- Trinkets: Gas Immunity (if you infuse a gas mask trinket), Faster Climb, Sound Suppression.
- Mobility: Charlie can teleport short distances and climbs quickly, making him hard to catch.
- A.I. Control: He can activate turrets, lock doors, and call reinforcements via 2-Bit.
- Vulnerability to Hacking: He is easily distracted by hacking terminals.
- Slab: Shift: He can dodge attacks and reposition.
- Low Health: Charlie has no armor; a well-placed headshot kills him instantly.
- Predictable Hiding Spots: He always retreats to his secure room if alerted. You can wait for him there.
- Weak to Gas and Explosives: The room can be flooded with gas or grenades.
- Weapons: Suppressed LIMP-10 SMG for quick kills; sniper for long-range headshots before he teleports.
- Slabs: Aether to remain hidden while hacking; Karnesis to yank him from safety.
- Trinkets: Advanced Hack (faster hacking), Battery Boost (longer power in Aether).
- Invisibility: Egor can become invisible when damaged or alert, making it difficult to track him.
- Tripwires: His lair is filled with tripwires that alert him.
- Cautious AI: He hides often, forcing Colt to hunt him down.
- Fragile: Egor is slow and has very low health; a single headshot kills him.
- Predictable Escape Routes: He always heads to a specific safe room; you can cut him off.
- Weak to Detection: Use the Hack app to reveal his location even when invisible.
- Weapons: A silent pistol (Tribunal) for a clean headshot.
- Slabs: Shift to quickly close distance; Aether (once obtained) to become invisible yourself.
- Trinkets: Increased Move Speed, Double Jump, Fall Damage Reduction.
- Self-Revive: Fia can revive herself twice (similar to Colt’s Reprise), making her very durable.
- Healing Aura: She can heal nearby allies and herself over time.
- Defensive Setup: Her area is fortified with turrets and medkits.
- Slab: Reprise – She can cheat death.
- Needs Time to Heal: If you can disrupter healing sources, she becomes vulnerable.
- Can Be Overwhelmed: Continuous damage prevents her from using Reprise effectively.
- Weak to Explosives: A well-placed grenade can destroy her healing stations.
- Weapons: Explosive shotgun (Heritage Gun) or flame thrower to destroy healing gear.
- Slabs: Nexus to link her to guards; Karnesis to throw her away from health packs.
- Trinkets: Extra Health, Armor, Damage Reduction.
- Loud Music: The music covers Colt’s footsteps, but also makes it hard to hear Ramón’s movements.
- Havoc Slab: Same as Harriet’s – damage reduction and leech.
- Mook Swarms: Lots of Eternalists who dance and block bullets.
- High Ground: He controls the rooftop and can see approaching enemies.
- Distracted: Ramón is often focused on his set; he won’t notice Colt until he is attacked.
- Fragile: Without Havoc active, he has low health.
- Easily Thrown: The Karnesis slab can yeet him off the balcony for an instant kill.
- Weapons: A suppressed pistol for silent kills on guards; a shotgun for close-range takedown of Ramón.
- Slabs: Aether to bypass crowd; Shift to reach balcony quickly.
- Trinkets: Sound dampening, Increased Sneak, Double Jump.
Weaknesses
Playstyle
Colt can be played as a stealthy ghost, a guns-blazing berserker, or a tactical planner using gadgets and powers. The time loop encourages experimentation: try different loadouts each day to discover the best approach for each Visionary.
Unlock Conditions
Colt is the default character; no unlock required. His abilities (Slabs) are unlocked by defeating Visionaries and infusing them. His trinkets are found as loot or purchased from the underground network.
Recommended Equipment / Builds
Team Synergy
Deathloop is a single-player game, but Colt can “team up” with himself via time-loop knowledge: he can set up traps, leave notes for future loops, and use the lessons from past deaths. There is no cooperative multiplayer, but Player vs. Player invasions (Colt vs. Juliana) can be considered a temporary competitive synergy where Colt must outsmart another human.
---
2. Juliana Blake – The Invader (Antagonist / Player-Controlled)
Background
Juliana is an Eternalist and Colt’s former friend, now tasked with protecting the loop. She is highly skilled, obsessive, and personally invested in keeping Colt trapped. In multiplayer, she can invade Colt’s game as a player-controlled character; otherwise, she appears as an AI stalker.
Strengths (as Enemy)
Weaknesses
Playstyle (as Invader)
When playing as Juliana, the goal is to assassinate Colt before he completes his objectives. Use stealth, ambush tactics, and the element of surprise. Camp near Colt’s likely routes or interference points (e.g., antennas, tunnels). Listen for gunfire or hacking sounds to pinpoint his location.
Unlock Conditions
Juliana is automatically available for player invasion after a certain point in the story (when colt first uses the “Array” to open the loop). AI Juliana appears from the beginning. Player-controlled Juliana can be accessed from the main menu after completing the introductory missions.
Recommended Equipment / Builds (for Juliana)
Synergy with Colt’s Build
Since Juliana cannot choose her loadout options freely (she inherits Colt’s progress), synergy is not applicable. Instead, learn Colt’s habits and counter them.
---
3. The Visionaries (Targets)
Each Visionary is a unique boss-like enemy who must be killed to break the loop. They have distinct personalities, locations, abilities, and weaknesses. Killing them drops their unique Slab, which Colt can infuse and use. Below is a detailed breakdown of each Visionary, their background, combat characteristics, and recommended strategies.
---
3.1. Wenjie Evans – The Antique Collector
#### Background
Wenjie is a brilliant but paranoid inventor who has created multiple clones of herself to guard her secrets. She resides in The Complex (morning) or Updaam (noon), often accompanied by her clones. She is obsessed with preserving the loop.
#### Strengths
#### Weaknesses
#### Playstyle (vs. Colt)
Colt should use area-of-effect weapons (grenades, shotguns) to kill multiple clones quickly. The Aether slab (invisibility) helps bypass detection. Alternatively, use the Karnesis slab to throw clones or the real Wenjie off cliffs.
#### Unlock Conditions
Defeat Wenjie in any district/time to obtain the Nexus Slab. She appears in The Complex (morning) and Updaam (noon). You can also find clues to lead you to her exact location.
#### Recommended Equipment / Builds
#### Synergy
Combining Nexus with a high-damage weapon can kill Wenjie and her clones in a single burst. Team synergy is irrelevant in single-player, but using her own slab against her is poetic.
---
3.2. Dr. Aleksis Dorsey – The Stalker
#### Background
Aleksis Dorsey is a paranoid inventor who resides in Updaam (night). He has constructed a massive, dangerous contraption called “The Machine” and is obsessed with stalking his victims. He is heavily armored and uses a unique slab: Karnesis (telekinesis).
#### Strengths
#### Weaknesses
#### Playstyle (vs. Colt)
Use hit-and-run tactics. Stay at range, use the environment for cover, and aim for the head. The Shift slab helps dodge his Karnesis throws. If you have Karnesis, you can throw Dorsey into the sea or off ledges for an instant kill.
#### Unlock Conditions
Defeat Dorsey in Updaam (night) to get the Karnesis Slab. He is the only Visionary with this slab.
#### Recommended Equipment / Builds
#### Synergy
Pairing Karnesis with a high-damage finisher (e.g., headshot while Dorsey is stunned) is lethal. Alternatively, use Nexus to link him to nearby turrets and watch them destroy each other.
---
3.3. Harriet Morse – The Egotist
#### Background
Harriet Morse is a vain and cruel visionary located in The Complex (noon). She is known for torturing Eternalists with a poison gas device called “The Ritual.” She is armed with a toxic gas grenade launcher and has a slab: Havoc (damage reduction and health leech).
#### Strengths
#### Weaknesses
#### Playstyle (vs. Colt)
Use gas masks (found in the area) to become immune. Try to stealth kill her before she triggers Havoc. If detected, use long-range weapons to break her Havoc buff (it has a duration). The Aether slab helps escape her gas clouds.
#### Unlock Conditions
Kill Harriet Morse in The Complex (noon) to obtain the Havoc Slab. She is the only Visionary with this slab.
#### Recommended Equipment / Builds
#### Synergy
Using Havoc on Colt allows you to tank damage during a direct confrontation, but stealth is more reliable. If you already have Havoc from a previous loop, you can out-tank Harriet.
---
3.4. Charlie Montague – The Prodigy
#### Background
Charlie Montague is a young genius and inventor who resides in Updaam (morning). He has created an intelligent A.I. called “2-Bit” that controls the district. Charlie is paranoid and often hides in a secure room. He uses a slab: Shift (teleportation dash).
#### Strengths
#### Weaknesses
#### Playstyle (vs. Colt)
Hack the A.I. terminals to disable turrets and open doors. Use a silenced weapon to pick off guards, then corner Charlie. The Karnesis slab can throw him out of his hiding spot. Alternatively, use the Shift slab chase him down.
#### Unlock Conditions
Defeat Charlie Montague in Updaam (morning) to get the Shift Slab. This is one of the most useful mobility slabs.
#### Recommended Equipment / Builds
#### Synergy
Combining Shift with other slabs allows for high-mobility combat. For example, Shift into position, then use Havoc to survive a direct fight.
---
3.5. Egor Serling – The Collector
#### Background
Egor Serling is an elderly collector and historian who lives in Fristad Rock (noon). He is obsessed with artifacts and uses audio-logs to tell his story. He is accompanied by a few guards and has a slab: Aether (invisibility).
#### Strengths
#### Weaknesses
#### Playstyle (vs. Colt)
Use the Hack app to track him. Silenced weapons are ideal. If you can catch him unaware, an assassination is trivial. If he goes invisible, use a trinket like “Mind Leech” to reveal his slab usage, or throw a grenade at his last known position.
#### Unlock Conditions
Kill Egor Serling in Fristad Rock (noon) to acquire the Aether Slab. This slab is essential for stealth runs.
#### Recommended Equipment / Builds
#### Synergy
Aether on Colt allows you to walk past all guards and assassinate Egor without raising an alarm, a perfect synergy for stealth approaches.
---
3.6. Fia Zborowski – The Healer
#### Background
Fia Zborowski is a combat medic and scientist located in Fristad Rock (afternoon). She specializes in healing and support, using a slab: Reprise (self-revive). She has multiple health stations and is surrounded by loyal soldiers.
#### Strengths
#### Weaknesses
#### Playstyle (vs. Colt)
Destroy the health stations first. Use high-damage weapons to burn through her Reprise charges quickly. The Karnesis slab can interrupt her healing animations. Alternatively, use Nexus to link her to guards; killing a guard transfers damage to her.
#### Unlock Conditions
Defeat Fia Zborowski in Fristad Rock (afternoon) to get the Reprise Slab. Colt already has Reprise, but this slab allows you to upgrade it or give it more charges (though usually redundant).
#### Recommended Equipment / Builds
#### Synergy
Reprise is a passive that all Colts have; defeating Fia doesn’t give a new active slab but allows you to infuse an upgraded version of Reprise for more charge.
---
3.7. Ramón Yáñez – The Raver
#### Background
Ramón Yáñez is a DJ and party animal who controls the nightlife in Updaam (night). He uses a sound-based slab: Havoc (damage and health leech) and is surrounded by dancing Eternalists. He is often on his balcony, playing loud music that masks Colt’s movements.
#### Strengths
#### Weaknesses
#### Playstyle (vs. Colt)
Use the music to your advantage; sneak up to his balcony and assassinate him. If you prefer guns, a silenced sniper works from across the roof. In a fight, use Aether to hide and wait for his Havoc to expire, then strike.
#### Unlock Conditions
Kill Ramón Yáñez in Updaam (night) to get the Havoc Slab (duplicate of Harriet’s – but you can only have one Havoc slab; killing both gives you an infusion point).
#### Recommended Equipment / Builds
#### Synergy
Havoc is the same as Harriet’s; if you already have it, this kill is just for extra Residuum.
---
3.8. The Visionaries’ Encounter Order
There is no fixed order for killing the Visionaries, but a recommended path for first playthrough is:
1. Wenjie Evans (morning) – get Nexus
2. Egor Serling (noon) – get Aether
3. Harriet Morse (noon) – get Havoc
4. Charlie Montague (morning) – get Shift
5. Dr. Aleksis Dorsey (night) – get Karnesis
6. Fia Zborowski (afternoon) – get upgraded Reprise
7. Ramón Yáñez (night) – duplicate Havoc
8. Julianna Blake (varies) – she appears at random; killing her gives a unique slab (Version of Reprise? Actually she drops the “Juliana’s Reprise” slab that gives an extra life.)
---
4. Other Notable Characters
4.1. 2-Bit (A.I. System)
2-Bit is Charlie Montague’s A.I. that controls Updaam (morning). It can be hacked to disable turrets, open doors, or even betray Charlie. It is not a physical enemy but a system to interact with.
4.2. The Eternalists (Generic Enemies)
These are the island’s inhabitants, brainwashed by the loop. They are not major characters but vary in difficulty: some are heavily armed, others are arrogant. They serve as obstacles and can be used tactically (e.g., link them with Nexus).
4.3. The “Peppermint” Variants
Some Eternalists have special abilities (e.g., snipers, shotgunners). Treat them as mini-bosses.
---
5. Summary Table of Visionaries
| Visionary | Location / Time | Slab Dropped | Weakness | Recommended Weapon | Playstyle Advice |
|---|---|---|---|---|---|
| Wenjie Evans | The Complex (AM) / Updaam (Noon) | Nexus | Clones are fragile | Explosive shotgun | Stealth around clones, kill real one first |
| Dr. Aleksis Dorsey | Updaam (Night) | Karnesis | Slow, headshot weak | Sniper rifle | Stay mobile, avoid being thrown |
| Harriet Morse | The Complex (Noon) | Havoc | Gas can be used against her | Suppressed sniper | Stealthkill before Havoc activates |
| Charlie Montague | Updaam (Morning) | Shift | Low health, predictable hiding | SMG | Hack A.I., corner him |
| Egor Serling | Fristad Rock (Noon) | Aether | Fragile, visible briefly | Silenced pistol | Use Hack app to track |
| Fia Zborowski | Fristad Rock (Afternoon) | Reprise | Healing stations | Explosives | Disrupt healing first |
| Ramón Yáñez | Updaam (Night) | Havoc (duplicate) | Distracted, fragile | Suppressed pistol | Sneak to balcony, assassinate |
| Juliana Blake | Any district / time | Juliana’s Reprise | One life | Any | Be unpredictable, camp objectives |
6. Roles in the Game
- Assassin (Colt): The primary role – to kill Visionaries and break the loop. Requires adaptability, loadout planning, and knowledge of enemy patterns.
- Invader (Juliana): An optional PvP role – hunt Colt to protect the loop. Requires stealth, ambush tactics, and map knowledge.
- Target (Visionaries): AI-controlled enemies with unique abilities. They are challenges to be studied and overcome.
- Support (2-Bit, Environment): The A.I. and world itself can be hacked or used as tools – a secondary role of infiltration and sabotage.
---
Conclusion
Understanding the characters and their roles is crucial to mastering Deathloop. Colt is the jack-of-all-trades assassin; Juliana is the relentless predator; each Visionary presents a unique puzzle. By exploiting their weaknesses and using the right slab synergies, you can systematically dismantle the loop. Remember: every death is a lesson, and every loop brings you closer to victory.

Cheats & Secrets
Overview
Deathloop does not feature traditional cheat codes, console commands, unlock codes, or developer debug menus. The game is designed as a tight, loop-based experience with no built-in cheats. However, it is rich with hidden content, Easter eggs, developer-intended secrets, and unlockable bonuses that reward exploration and clever play. This guide covers all known secrets, including hidden weapons, Easter eggs referencing other Arkane games, alternative endings, and secret areas.
---
Hidden Weapons & Equipment
The Fizzy Pop Gun (Secret SMG)
- Location: The secret armory in The Complex at The Complex – Morning time period.
- How to unlock: While exploring The Complex, find the locked door with a keypad near the entrance. The code is 7329 (found on a note in the same area near a corpse). Inside the armory, you will find the Fizzy Pop, a unique submachine gun that fires rapid-fire blue projectiles. It is one of the most powerful automatic weapons in the game.
- Note: You must have Hackamajig or the Turret Hack slab to disable the turrets inside the armory, or be very fast.
- Location: Hidden inside a safe in Updaam at Noon during the mission "The Rendezvous."
- How to obtain: Inside the beer hall (where Aleksis Dorsey holds his party), there is a locked safe behind the bar. The safe code is 7734 (found on a note in the same building). The Fourpounder is a silenced pistol with excellent accuracy.
- Tip: You can also find this pistol by killing the Visionary Harriet and looting her body, but the safe version is a guaranteed drop.
- Location: Hidden in Karl's Bay at Morning in a locked room near the hangar.
- How to obtain: Need the Hackamajig or Codebreaker slab to open the security door. Inside, a chest contains the Vopat Trencher, a devastating pump-action shotgun with a wide spread.
- Location: On a wall in The Complex – Morning, near the entrance to the reactor core.
- What it is: A faint drawing of the Outsider's Mark from Dishonored. This is a direct nod to Arkane's previous franchise.
- Interaction: Simply observe it.
- How to trigger: During the final confrontation with Julianna, if you choose not to shoot her after defeating her in combat, she will perform a scripted reaction. After a brief standoff, she will say something and then leave. This does not change the ending but is a hidden character moment.
- Note: This is a developer-intended Easter egg to show character depth.
- How to achieve: Complete the main story by killing all eight Visionaries in one loop and then escaping via the tunnel. After the credits, if you have all four of Julianna's personal notes (hidden in various levels), a secret post-credits scene plays where Julianna questions the loop.
- Note: The notes are found in:
- Location: In Updaam – Evening, inside the beer hall, look above the bar. There is a wall covered in graffiti cannily referencing internet memes and other Arkane games, including a Prey 2017 reference (the Mooncrash poster).
- How to access: During the Morning phase, go to The Complex and look for a locked door with a keypad near the main entrance. Code is 0314 (found on a note inside the complex). This leads to a small lab with a unique weapon and lore notes.
- Contents: Contains the Fizzy Pop (as above) and a note revealing the origin of the loop.
- Location: Fristad Rock – Afternoon, near the beach. There's a hatch in the ground that can be opened with Hackamajig or by solving a nearby puzzle.
- What's inside: A secret room with a Hackamajig upgrade (increases range) and a note referencing the Dishonored universe (mention of "The Void").
- Location: Updaam – Evening. After entering the mansion, go to the second floor and find a balcony. Jump across to a ledge on the adjacent building to reach a rooftop hideout with a unique trinket.
- Trinket: Contains the "Never Say Die" trinket that revives you once per loop (if you have the Reach slab).
- How to unlock: Complete the main story once. This unlocks a new mode called "Masquerade" (also known as New Game+), which allows you to keep all your slabs, weapons, and trinkets from the previous save.
- Note: This is not a cheat but an official secret feature – it is not explicitly advertised in the menu.
- Gold Colt: Complete the main story and then finish a loop where you kill all eight Visionaries again with no deaths. A new skin appears in the menu.
- Red Julianna: Collect all 45 audio logs (also called "Poppable" notes) and then defeat Julianna in combat on your next meeting. A red variant for Julianna's outfit is unlocked.
- Trench Coat Colt: Found by completing all side missions and then checking the wardrobe in the bunker.
- How to get: Visit the same location in three different time periods without dying. This triggers a hidden dialogue and grants the achievement.
- Example: Go to The Complex at Morning, then Noon, then Afternoon in subsequent loops (not in the same loop) – must be from the same save file.
- Weapon Duplication Glitch: Equip a weapon with a trinket, then unequip it while inside the Residue Residuum menu. The weapon may duplicate in some rare cases. This works only on PC and is not guaranteed.
- Loop Reset Abuse: If you die after killing a Visionary but before leaving the area, the game may spawn a duplicate of their slab in the next loop. This is a known, unintended bug, not a recognized secret.
The Fourpounder (Unique Pistol)
The Vopat Trencher (Unique Shotgun)
---
Easter Eggs & References
Dishonored Reference – The Outsider's Mark
The "I'm Not Going to Kill You" Scene
The Secret Ending (Golden Loop Ending)
1. Karl's Bay – Morning – on a desk in the hangar.
2. The Complex – Noon – in the control room.
3. Fristad Rock – Afternoon – in the bunker.
4. Updaam – Evening – in the party mansion.
The Meme Wall
---
Secret Areas & Hidden Locations
The Bunker in The Complex (Underground Lab)
The Abandoned Bunker in Fristad Rock
The Party Mansion Rooftop
---
Unlockable Content & Post-Game Secrets
New Game+ Mode (Masquerade)
Unlockable Character Skins
The Secret Trophy/Achievement – "Déjà Vu"
---
Developer-Intended Exploits & Safe Glitches
No game-breaking exploits are officially recognized, but some intended behavior can be exploited:
---
Conclusion
Deathloop may lack classic cheat codes, but its hidden content is abundant. From secret weapons and Easter eggs to alternative endings and post-game unlockables, the game rewards thorough exploration. For the best experience, play without looking up everything – but when you want to discover every secret, this guide gives you the map.