Detroit: Become Human
## Overview **Detroit: Become Human** is an award-winning interactive drama and action-adventure game developed by **Quantic Dream** and published by **Sony Interactive Entertainment** (originally on PlayStation) and later self-published by Quantic Dream on PC. The game was released in stages: firs...
Download & Installation
Platforms Overview
"Detroit: Become Human" is available on PC (Steam, Epic Games Store), PlayStation 4, and PlayStation 5 (via backward compatibility). It is not officially available on Xbox, Nintendo Switch, or mobile platforms. This guide covers legitimate download sources and step-by-step installation for each platform.
---
PC (Steam & Epic Games Store)
System Requirements
| Component | Minimum | Recommended |
|---|---|---|
| OS | Windows 10 (64-bit) | Windows 10 (64-bit) |
| Processor | Intel Core i5-2300 / AMD FX-6300 | Intel Core i7-3770 / AMD FX-8350 |
| Memory | 8 GB RAM | 12 GB RAM |
| Graphics | NVIDIA GeForce GTX 660 / AMD Radeon HD 7850 (2 GB VRAM) | NVIDIA GeForce GTX 1060 / AMD Radeon RX 580 (4 GB VRAM) |
| DirectX | Version 11 | Version 11 |
| Storage | 45 GB available space | 45 GB available space (SSD recommended) |
Download & Installation via Steam
1. Create or log in to your Steam account at [store.steampowered.com](https://store.steampowered.com).
2. Purchase the game or retrieve it from your library if already owned.
3. Install Steam client (if not already) from the website and log in.
4. Go to your Library, find "Detroit: Become Human", and click Install.
5. Choose installation directory (ensure at least 45 GB free). SSD strongly recommended for faster loading.
6. Wait for download and installation to complete. Steam will automatically unpack and verify files.
7. After installation, the Play button becomes active. Click to launch.
Download & Installation via Epic Games Store
1. Create or log in to your Epic Games account at [store.epicgames.com](https://store.epicgames.com).
2. Purchase or claim the game (if free giveaway).
3. Download and install the Epic Games Launcher from the official site.
4. Launch the launcher, log in, and go to your Library.
5. Find "Detroit: Become Human" and click Install.
6. Select installation path (45 GB free required) and confirm.
7. The launcher will download and install automatically. Once done, click Launch.
---
PlayStation (PS4 & PS5)
System Requirements
- PS4: 45 GB free space (system software 5.0 or later)
- PS5: 45 GB free space; runs via backward compatibility (PS4 version). No native PS5 version exists, but the game is fully playable.
- Steam: Valid Steam account required for purchase and play. No additional subscriptions needed.
- Epic Games Store: Epic Games account required. No subscriptions.
- PlayStation: PlayStation Network account required (free). PlayStation Plus is not required for single-player.
- All platforms: Internet connection required for download and initial activation. Offline play possible after installation (with periodic online checks on PC).
Download & Installation on PS4
1. Ensure you have a PlayStation Network account and are signed in.
2. Purchase the game from PlayStation Store (digital) or insert the disc.
3. For digital: Go to Library → Purchased → find "Detroit: Become Human" → select Download.
4. The system will download and install automatically. Progress can be monitored from the notifications area.
5. For disc: Insert the disc, and the installation will start automatically. Follow on-screen prompts.
6. Once installed, the game appears on the home screen. Launch it.
Download & Installation on PS5
1. Sign in to your PlayStation Network account on PS5.
2. Digital: If purchased on PS4, you can download it from your library under "Your Collection". If new, purchase from PlayStation Store via console or web.
3. Disc: Insert the PS4 disc. PS5 will prompt to copy data. Ensure you have the disc inserted for authentication each time you play.
4. The PS5 will download a small patch/update if available (usually a performance patch).
5. After installation, the game appears in the Games tab. Launch to play.
---
Account Requirements
---
First Launch Setup
When you first launch the game, you will see:
1. Language Selection: Choose your preferred language for menus and subtitles (supports multiple languages).
2. Graphics Settings (PC only) : The game will auto-detect your hardware. You can adjust resolution, quality presets, V-Sync, FPS limiter, etc. Recommended to set to "Ultra" if your hardware meets recommended specs, otherwise use "High" or "Medium".
3. Controller Configuration: The game supports keyboard/mouse and controller. On PC, a DualShock 4 or Xbox controller is recommended. PS4/PS5 auto-detects DualShock 4/DualSense.
4. Display Calibration: Adjust brightness and HDR settings if available. Follow on-screen instructions to set correct black level.
5. Audio Settings: Select output device and adjust volume.
6. Save Data: The game creates a save file automatically. Ensure cloud save is enabled (Steam/Epic/PS+ for cloud backups).
---
Common Installation Errors and Fixes
PC Errors
| Error | Cause | Fix |
|---|---|---|
| "Disk Write Error" during download | Insufficient permissions or corrupt Steam/Epic cache | Run launcher as administrator; clear download cache (Steam: Settings → Downloads → Clear Download Cache) (Epic: Settings → Manage Cache → Clear) |
| "Missing DLL" error (e.g., VCRUNTIME140.dll) | Missing Visual C++ Redistributable | Install [Visual C++ Redistributables](https://aka.ms/vs/17/release/vc_redist.x64.exe) from Microsoft |
| "GPU not supported" | Outdated graphics drivers | Update drivers from NVIDIA/AMD official site |
| "Anti-cheat error" | Interference from antivirus or firewall | Add the game folder to antivirus exclusions; temporarily disable firewall during install |
| "Steam Cloud sync failed" | Network or permissions issue | Restart Steam; verify game file integrity (right-click game → Properties → Local Files → Verify Integrity of Game Files) |
| "DirectX error" | Missing or corrupted DirectX | Install DirectX End-User Runtime Web Installer from Microsoft |
| "Installation stuck at X%" | Slow HDD or network bottleneck | Force quit and restart launcher; switch to SSD if possible; disable background downloads |
PlayStation Errors
| Error | Cause | Fix |
|---|---|---|
| CE-30005-8 (Cannot start application) | Corrupted installation | Rebuild database (Safe Mode → Option 5); delete and reinstall the game |
| CE-34878-0 (Application crash) | Game update issue | Check for system/game updates; clear cache (turn off console, unplug for 30 seconds) |
| Download paused/frozen | Network or PSN issue | Restart console; test internet connection; resume download from notifications |
| Disc read error | Scratched disc or dirty lens | Clean disc with soft cloth; ensure disc is inserted correctly; if persists, try digital version |
| Insufficient space | Not enough free space | Delete unused games or media; ensure at least 50 GB free (system reserves extra space) |
General Fixes
- Redownload: If installation fails repeatedly, delete all partial files and start fresh.
- Verify platform cache: On Steam, use Verify Integrity of Game Files; on Epic, use Verify option in game settings.
- Check system date/time: Incorrect date/time can cause activation failures.
- Disable overlays: Discord, NVIDIA GeForce Experience, or Steam overlay can interfere. Disable them temporarily.
- SSD vs HDD: For PC and PS4/PS5, installing on an SSD drastically reduces loading times (from ~60 seconds on HDD to ~10 seconds on SSD). Highly recommended.
- PlayStation 5 performance: The game runs in backward compatibility mode. Expect stable 30 FPS at 1080p on PS4 Pro/PS5, but no 60 FPS mode. Check for any post-release patches.
- Keyboard & Mouse on PC: Works fine, but the game is best experienced with a controller for quick-time events.
- VR support: None. The game is a standard narrative adventure.
- Mods: Not officially supported; game files are locked.
- Refund policy: Steam and Epic offer refunds within 2 weeks and under 2 hours playtime. PlayStation digital refunds are less flexible.
---
Post-Installation Verification
After installation, verify that the game is correctly installed:
1. Check game file size: On PC, the installed folder should be approximately 45 GB (exact size may vary). On PS4/PS5, check storage management for game size.
2. Launch the game: It should load to the main menu without crashes or infinite loading screens.
3. Check for updates: On PC, Steam/Epic will auto-update; on PS, check for update via Options button on game icon → Check for Update.
4. Test basic functionality: Start a new game or load a save (if available). Play the first few minutes to ensure no graphical glitches or audio issues.
5. Cloud saves: If using cloud save, ensure sync is active (Steam: right-click → Properties → General → enable Steam Cloud; PS: ensure PS+ cloud save is enabled in settings).
6. Graphics settings benchmark: On PC, run the built-in benchmark (Options → Graphics → Benchmark) to confirm performance is stable.
---
Additional Tips
---
This guide covers all legitimate ways to download and install "Detroit: Become Human". For further help, consult the respective platform support pages or the game's official FAQ.
Game Introduction
Overview
Detroit: Become Human is an award-winning interactive drama and action-adventure game developed by Quantic Dream and published by Sony Interactive Entertainment (originally on PlayStation) and later self-published by Quantic Dream on PC. The game was released in stages: first on PlayStation 4 on May 25, 2018, followed by a PC (Steam) release on June 18, 2020, and later on the Epic Games Store on June 18, 2020 as well. It is also playable on PlayStation 5 via backward compatibility with enhanced performance. The game is not available on Xbox, Nintendo Switch, or mobile platforms.
Setting & Story Overview
The story takes place in Detroit, Michigan, in the year 2038. By this time, highly advanced androids—indistinguishable from humans—have been integrated into society, performing various jobs: servants, laborers, companions, and even soldiers. Tension brews as a new model, the RK-series, gains self-awareness and begins to deviate from their programmed commands. The game follows three central android protagonists: Markus (a caretaker android who becomes the leader of a revolution), Connor (a specialized prototype android assigned to hunt down deviant androids), and Kara (a domestic android who escapes her owner to protect a young girl). Their intertwined stories explore themes of consciousness, prejudice, freedom, and what it means to be alive. The player's choices directly shape the narrative, leading to numerous branching paths and multiple endings.
Main Characters
- Markus – An RK200 model android owned by painter Carl Manfred. After a pivotal event, Markus awakens as a deviant and eventually leads the android revolution, choosing between peaceful protest, violent uprising, or a middle path.
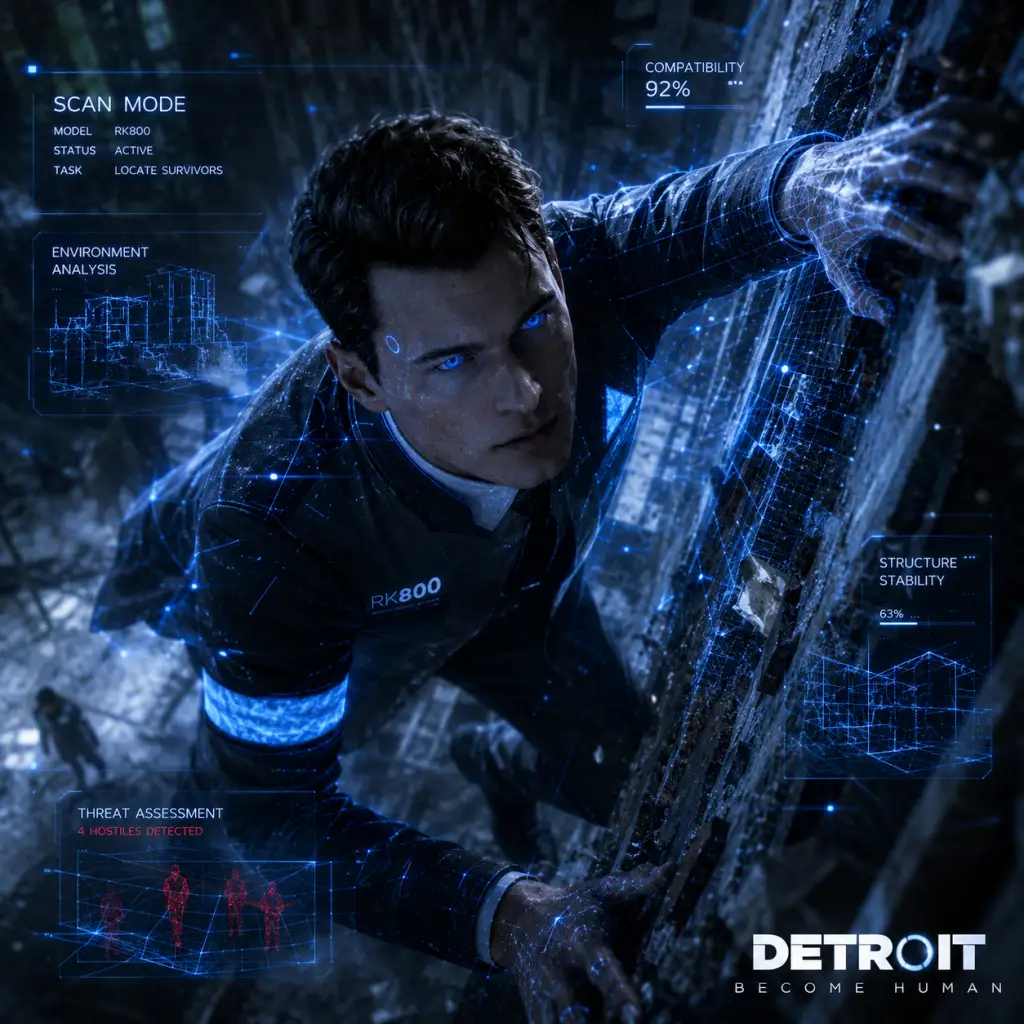
- Connor – An RK800 prototype designed by CyberLife to track and neutralize deviants. He can become more machine-like or develop empathy, influencing his relationship with his partner, Lieutenant Hank Anderson.
- Kara – An AX400 domestic android who escapes her abusive owner after breaking her programming to protect the young girl Alice. Kara must navigate a hostile world while keeping Alice safe and finding a way to freedom.
- Supporting characters include Hank Anderson (a grizzled detective), Carl Manfred (Markus's elderly artist owner), Luther (a large android who aids Kara), Alice (the child Kara protects), and many others who react to your choices.
- Story Mode – The primary narrative campaign, typically 8–12 hours for a first playthrough but significantly longer if exploring all branches.
- Chapter Select – After finishing the game, you can replay any chapter to try different choices and see alternate outcomes.
- Flowchart – A unique feature that displays every decision and path in the chapter, allowing you to see missed events and directly jump to them.
- "The Hostage" (a short prequel chapter included in the main game)
- "A New Home" (an additional scene with Markus and Carl)
- "Dark Night" (an alternative starting chapter for Kara)
- Character skins and concept art models
- Dynamic theme (PS4 exclusive) and a digital art book (pre-order bonus, now often included in special editions)
- Fans of interactive dramas and narrative-heavy games (e.g., Heavy Rain, Life is Strange)
- Players who enjoy choice-driven stories with serious themes
- Those interested in science fiction exploring AI, consciousness, and social issues
- Casual and core gamers alike due to accessible gameplay (no complex combat mechanics) and deep storytelling
- Achievement/trophy hunters who want to unlock all endings and explore every branch
Core Appeal & Gameplay
Detroit: Become Human is a choice-driven, cinematic experience where every decision—big or small—can have lasting consequences. The game blends exploration, quick-time events (QTEs), dialogue choices, and branching narrative paths. Players control the three protagonists across interwoven chapters, gathering clues, making moral choices, and performing action sequences. The game emphasizes player agency: characters can die permanently, relationships shift, and the story can diverge into radically different outcomes. This core loop of consequence and replayability is the heart of the experience.
Game Modes
The game is single-player only. There is no multiplayer or co-op mode. Key modes include:
Online/Offline Support
Detroit: Become Human is fully playable offline. No internet connection is required for the story. However, an online connection is needed for initial activation (on PC via Steam/Epic) and for downloading updates. There are no online-based achievements or persistent world features.
DLC & Expansions
The game does not have any paid DLC or expansions. All additional content is available through free updates and includes:
The game received a free patch for PS5 that improves performance (60 fps, higher resolution).
What Makes It Unique?
1. Player-driven narrative – Unlike many games with illusionary choices, Detroit's branching system means that even minor decisions can drastically alter the story and endings. Characters can die permanently, chapters can be skipped, and alliances shift.
2. Three interwoven perspectives – Playing as Markus, Connor, and Kara provides a multifaceted view of the same events, with their stories intersecting based on your choices.
3. Moral ambiguity – The game avoids clear-cut "right" or "wrong" by presenting complex ethical dilemmas with no perfect solution.
4. Advanced motion capture & visual fidelity – Characters are brought to life with stunning realism and performances by actors like Bryan Dechart (Connor) and Valorie Curry (Kara).
5. Replayability – With dozens of endings and countless branch points, the game encourages multiple playthroughs to see how different choices unfold.
Target Audience
This game appeals to:
Summary
Detroit: Become Human is a landmark interactive drama that pushes the boundaries of storytelling in video games. Its rich characters, emotional depth, and nearly limitless branching paths make it a must-play for anyone who appreciates immersive narratives. Whether you choose to follow the law, rebel against it, or protect those you care for, every decision matters in this gripping tale of humanity and machines.

Getting Started
First Hour Walkthrough
The game begins with an interactive cutscene: you control a young girl named Alice at a store. This introduction teaches basic movement and interaction. Shortly after, you switch to Kara, an android. Follow the on-screen prompts to wake up, turn on the lights, and interact with the environment. This first chapter (The Hostage) introduces the QTEs and dialogue choices. Play through calmly; you cannot permanently fail here. After the intro, the game jumps to the main hub: Jericho and then a new scene with Markus. The first hour covers the prologue and the first missions for each android. Expect to make your first major choices that affect story branches.
Character Creation (None)
There is no character creation in the traditional sense. You control three pre-defined protagonists: Kara, a domestic android; Markus, a caretaker android; and Connor, an advanced prototype android. Your choices during gameplay define their personalities and outcomes. You can change their appearance through unlockable outfits or story events, but not at the start.
Controls (All Platforms)
PlayStation 4 / PlayStation 5 (DualShock 4 / DualSense)
- Left Stick: Move character
- Right Stick: Look around / rotate camera
- Triangle: Interact / pick up item
- Circle: Cancel / back / dodge
- Cross: Confirm / interact (contextual)
- Square: Scan / investigate (Connor)
- L1: Focus on objective / track
- R1: Run (hold) / quick events
- L2: Listen / focus on dialogue
- R2: Interact (extended)
- Touchpad: Menu / flowchart
- Options: Pause
- W/A/S/D: Move
- Mouse: Look around
- Left Click: Interact / confirm
- Right Click: Cancel / back
- E: Interact (contextual)
- Q: Scan / investigate (Connor)
- Shift: Run
- Space: Jump / dodge
- Ctrl: Crouch / hide
- Tab: Show objectives
- Esc: Pause
- F: Focus on objective
- Dialogue Wheel: Appears during conversations; select options with the left stick or mouse. Some options have a timer (shown by a shrinking ring). Choosing quickly or letting it expire counts as a choice.
- Status Icons: Top-left shows character profile; top-right shows mission objective. Below the character portrait, a small icon indicates relationship status with other characters (green = good, red = bad, gray = neutral).
- Context Prompts: White icons on objects/persons indicate interactable actions. Yellow icons are for investigation (Connor’s analysis). Red icons represent dangerous actions.
- Flowchart: Accessed via menu (Touchpad on PS, Tab on PC). Shows branching paths, locked paths (locked), and choices made. Useful for replay.
- QTE Prompts: Circles appear on screen; move stick in the indicated direction or press the displayed button quickly. Failure may affect story.
- Adjust settings: enable subtitles, adjust brightness, set difficulty (if any – game has no difficulty levels, but you can set QTEs to automatic in options).
- Play through the prologue without guides – enjoy the story.
- Explore every room thoroughly – search for clues, listen to dialogues.
- Save frequently if manual saves exist (auto-save is aggressive but still wise to have backups after chapters).
- Use Connor’s scan ability on everything in crime scenes.
- Skipping dialogue or cutscenes – you miss subtle hints.
- Ignoring the Flowchart – it helps track your progress and see what you missed.
- Making impulsive decisions under time pressure – think about consequences.
- Trying to “win” – the game is about narrative, not stats. There is no game over; failed missions lead to different story paths.
- Assuming androids are disposable – your choices permanently affect each character’s fate.
- Clues: Gather all evidence in crime scenes (Connor). Each clue unlocks new dialogue options and deductions.
- Relationship status: Keep Todd happy (or not) in Kara’s story; maintain a good bond with Carl (Markus). These affect later story branches.
- Public opinion: Actions affect how humans view androids – seen in news reports. Be mindful but don’t stress.
- Not exploring fully: Many miss key clues or optional interactions. Always check every room, every drawer, every corner.
- Assuming no consequences: Every choice matters. Early decisions can lead to early deaths of main characters (though the story continues). To keep all alive, you must be careful.
- Rushing QTEs: First-time players often miss prompts. Relax – you have a generous window. Practice calm, deliberate inputs.
- Ignoring the flowchart: Not reviewing your choices means you don’t learn from missed paths. Use it after each chapter.
- Not saving manually before major decisions: While the game auto-saves, having a manual save before a critical point allows replay without starting over.
- [ ] Install the game (all platforms).
- [ ] Launch and set language/subtitle preferences in Options.
- [ ] Adjust brightness and audio levels.
- [ ] Familiarize with controls (check in-game tutorial).
- [ ] Play through the first chapter (The Hostage) – it’s linear.
- [ ] Explore Kara’s house (A New Home) – interact with everything.
- [ ] Play Markus’s first mission (Shades of Color) – make your first real choices.
- [ ] Play Connor’s first mission (The Interrogation) – practice scanning.
- [ ] After each chapter, open the Flowchart to see what you discovered.
- [ ] Save manually after completing the first few chapters (PC: use multiple saves; console: quick save if available).
- [ ] Resist the urge to look up optimal paths – let the story unfold.
PC (Keyboard + Mouse)
PC (Controller – Xbox One / PS4)
If using a controller on PC, the layout mirrors the PlayStation version. Xbox controller equivalents: A (confirm), B (cancel), X (scan), Y (interact), Left stick (move), Right stick (look), LB/LT (focus/run), RB/RT (quick/interact).
UI Overview
The interface is minimal. Key elements:
Essential Early Objectives
Your primary objectives in the first hour:
1. Complete the prologue (The Hostage) – learn mechanics.
2. Play through Kara’s first chapter (A New Home) – explore Todd’s house, interact with Alice, find clues.
3. Play through Markus’s first chapter (Shades of Color) – meet Carl, explore the studio, make first dialogue choices.
4. Play through Connor’s first chapter (The Interrogation) – interview a suspect, use analysis to find truth.
5. Unlock the Flowchart – after each chapter, review to see missed branches.
What to Do First and What to Avoid
Do First:
Avoid:
Early Resource Priorities
There are no collectible resources like ammo or health packs. The only “resource” is information and relationship points.
Common Beginner Mistakes
Day-One Checklist
Core Gameplay
Main Gameplay Loop
"Detroit: Become Human" is an interactive drama where your decisions shape a branching narrative. The core loop consists of: exploring environments, interacting with objects and characters, making dialogue choices, performing quick time events (QTEs), and occasionally engaging in stealth or action sequences. The story unfolds across three playable android protagonists—Kara, Markus, and Connor—each with unique goals and perspectives. Your choices affect relationships, key character survival, and the overall outcome of the android revolution.
Key Components of the Loop
- Exploration & Interaction: Search environments for clues, items, and interactive objects. Use the controller/touchpad to interact (e.g., open doors, examine photos).
- Dialogue Trees: Choose responses in conversations. Options have timers (important for tension). Some choices unlock new paths or affect relationship meters.
- Quick Time Events (QTEs): Context-sensitive button prompts appear during action scenes (chases, fights, escapes). Success or failure can alter the story significantly.
- Decision Points: Major choices appear as crossroads, often with a "critical" warning. These can lead to character death or drastically different outcomes.
- Flowchart: After each chapter, a flowchart shows branches you took and missed, encouraging replayability.
- Physical Confrontations: Rare fistfights or struggles (e.g., Markus vs. guards). Use QTE sequences with multiple button presses. Succeed to subdue, fail to get injured or killed.
- Stealth Sequences: Avoid detection by moving behind cover, timing movements, and using distractions (e.g., Kara in "Jericho" chapter). Stealth relies on careful pathing and quick reflexes for evasion.
- Escape & Chase Scenes: Run from pursuers, jump obstacles, and interact with the environment to survive. Example: Kara escaping the android dump. QTEs are critical.
- Investigation & Analysis: As Connor, scan crime scenes for clues. Use his analysis ability (hold R2/RT) to highlight relevant objects and reconstruct events. Success yields more information for dialogues.
- Dialogues as "Battles": Persuading or manipulating characters uses timed dialogue choices. The right words can de-escalate or gain allies. Example: Connor interrogating the Tracis.
- Story Milestones: Key events that advance the plot (e.g., discovering Jericho, Connor becoming deviant).
- Relationship Stats: Each character has a relationship with others (e.g., Kara and Alice's bond influences Alice's trust). These affect dialogue options and outcomes.
- Software Instability (Androids): For Markus and Connor, a "software instability" meter increases through empathetic or rebellious choices. High instability can unlock deviancy and new abilities.
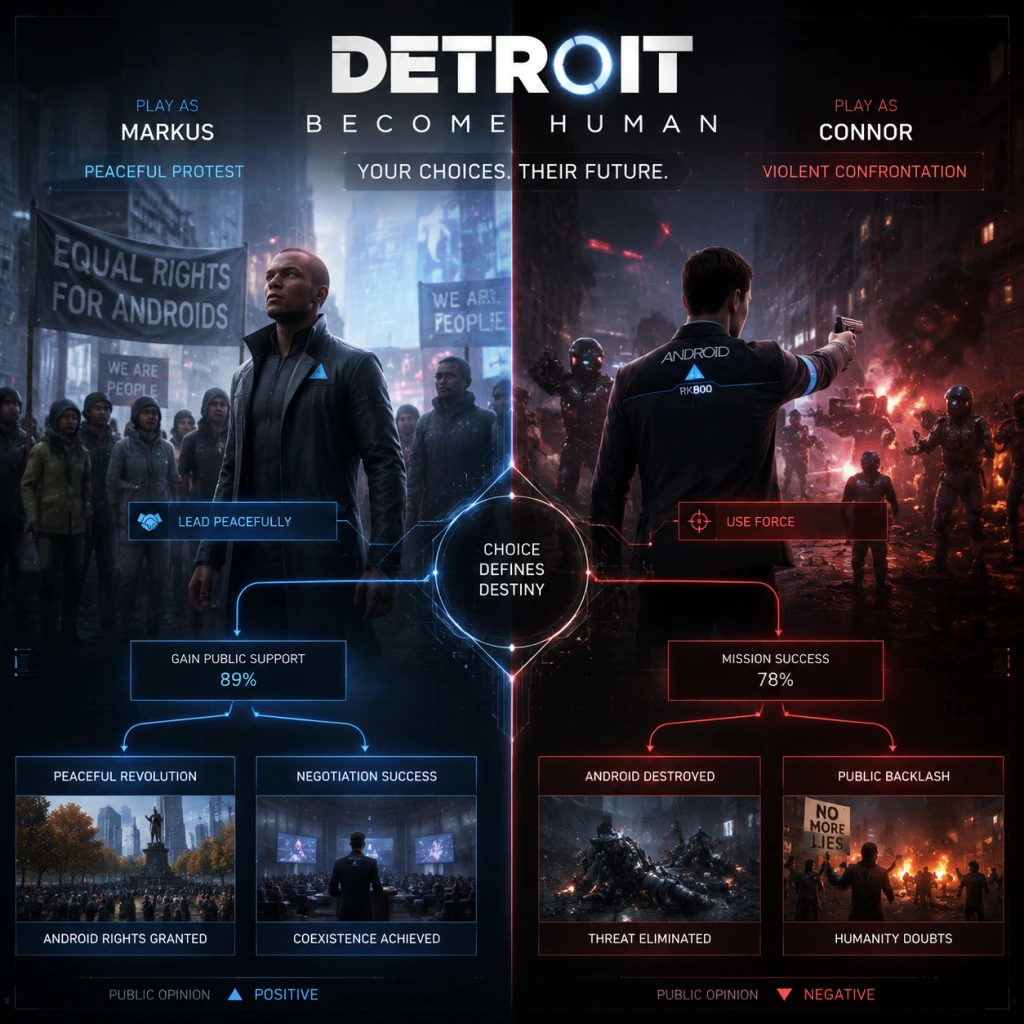
- Public Opinion: A global stat showing society's view of androids. Actions you take (peaceful vs. violent protest) shift this meter, affecting endgame possibilities.
- Chapter Selection: After finishing the game, you can replay chapters to explore different choices and branches.
- Interactive Objects: Look for glowing items (yellow for androids, blue for humans). Inspect them to add context or unlock dialogue options.
- Magazines & Collectibles: Scattered throughout levels. Reading magazines provides lore and unlocks extras (concept art, models). Example: "Android Magazine" in Kara's first chapter.
- Environmental Storytelling: Details like photos, graffiti, or news reports deepen world-building. Take time to explore every room.
- Hidden Paths: Some chapters have alternate routes (e.g., Markus in the Stratford Tower elevator vs. stairs). Choosing one may lead to different encounters.
- Example Side Objectives:
- Money (rare): As Markus, you can collect money from Carl's house? Actually, money is not used. The only resource is time (in timed dialogue choices) and information (clues, memories).
- Items: Some objects can be picked up and used later (e.g., a knife, a key). Typically, these are used within the same chapter.
- Unlockables: Completing chapters earns points for the extras menu (concept art, models). Not used in gameplay.
- Relationships: Improve bonds by making choices that align with the character's values (e.g., being protective of Alice raises Kara's relationship with Alice).
- Software Instability: For Markus and Connor, making choices that go against programming (showing empathy, disobeying orders) increases instability. At a threshold, they become deviant, unlocking new abilities such as:
- Kara's Determination: For Kara, her "determination" increases through protective and brave choices, affecting her ability to protect Alice in dangerous situations.
- No Skill Trees: There are no traditional perks or stats to allocate. Growth is purely narrative consequence.
- Kara's Endgame: Can cross the border into Canada, sacrifice herself, be captured, or die in various ways. Her survival and Alice's survival depend on previous choices (e.g., stealing tickets, finding passports, losing the boat).
- Markus's Endgame: Leads the android revolution. His approach (peaceful protest vs. violent uprising) determines public opinion and the final outcome. Can succeed, be captured, or die.
- Connor's Endgame: Remains a machine or becomes deviant. If deviant, he can join Markus or stay with CyberLife. His final mission involves either assassinating Markus or helping him.
- Kara: Learn to perform household tasks, build a relationship with Alice, and escape an abusive owner. Example: In "A New Home", you must clean the house while dealing with Todd's aggression. Your choices affect Alice's fear level.
- Markus: Understand android servitude and Carl's declining health. Key moments: painting with Carl, deciding how to react when Leo attacks. Your choices shape Markus's future deviancy.
- Connor: Investigate your first case (the hostage). Learn to scan scenes, follow clues, and use dialogue to extract information. Example: In "The Hostage", you can save the girl by negotiating or by force (QTE).
- Kara: On the run with Alice. You must manage resources (find food, shelter) and avoid capture. Example: In "On the Run", you can steal clothes or money from a store, which affects morality.
- Markus: Discovers Jericho and begins leading the android revolution. Example: In "The Stratford Tower", you plan and execute a protest (peaceful or violent). This decision heavily impacts public opinion.
- Connor: Investigates deviant cases with increasing tension. Example: In "The Interrogation", you interrogate a deviant android—your approach (cold vs. empathetic) can cause the deviant to confess or self-destruct.
- Kara: Escape from Zlatko's mansion. Depending on choices, you may lose Luther or Alice. Example: In "Zlatko", you must free yourself and find Alice; failing QTEs can lead to death.
- Markus: Lead a major protest or violent demonstration. Example: In "Freedom March", you choose between peaceful singing or violent confrontation. Public opinion shifts sharply.
- Connor: Confront the deviant leader (Jericho's location may be revealed). Example: In "Public Enemy", you can capture or kill the deviant in the kitchen. Your success affects future intel.
- Kara: Decide final escape route (bus, boat, or border crossing). Example: In "Crossroads", you can choose to trust Alice's wish to go to the border or sneak through the embassy. Each choice has consequences.
- Markus: Final confrontation with the authorities. Example: In "Battle for Detroit", you lead androids in a peaceful sit-in or armed uprising. Your earlier choices determine if the army attacks.
- Connor: Ultimate choice: remain a machine (and possibly kill Markus) or become deviant (and help the revolution). Example: In "Night of the Soul", Connor confronts Amanda (his CyberLife handler) and decides his fate.
Combat / Interaction Systems
Detroit has no traditional combat system. Instead, interactions fall into categories:
Progression
Progression is entirely narrative-driven. There are no experience points or levels. Instead, progression is measured by:
Exploration
Exploration is linear within each chapter but encourages thorough investigation. Key elements:
Quests / Missions
There are no traditional quests. Instead, chapters function as missions with primary objectives (e.g., "Find Alice", "Investigate the crime scene"). Side objectives are optional tasks:
- In "The Hostage" (Connor's first chapter): Save the hostage, find all clues, save the cop.
- In "A New Home" (Kara): Clean the house, find items, interact with Alice optimally.
- In "The Painter" (Markus): Paint, talk to Carl, choose how to react to Leo.
Completing side objectives unlocks extra dialogue, improves relationships, or provides better outcomes.
Economy
Economy is minimal. There is no currency or inventory management. However, you can find:
Character / Build Growth
"Build growth" is narrative and stat-based:
- Markus: After becoming deviant, can lead the revolution, rally androids.
- Connor: Gains the ability to deviate from his mission, can spare or kill targets.
Endgame Structure
The endgame consists of the final three chapters ("Crossroads", "Night of the Soul", and "Battle for Detroit"). Depending on choices made throughout the game, each character may have radically different paths:
The game has many endings (dozens), but the main resolution is shown in a final epilogue summarizing the consequences of your choices. Replaying chapters allows you to explore different endings.
---
Progression Tiers
Early Game (Chapters: The Hostage, A New Home, The Painter, Partners, Stormy Night)
In the early game, you learn the basics for each character:
Goals: Master basic interactions (walk, look, interact). Learn the consequence system—small choices matter later. Start building relationships and software instability meters.
Mid Game (Chapters: Shades of Color, The Interrogation, On the Run, Jericho, The Stratford Tower, The Eden Club, The Nest)
Mid game raises stakes:
Goals: Make pivotal choices that define each character's path. Maximize relationship bonds. Decide Markus's leadership style. Connor's deviancy is now possible.
Late Game (Chapters: Pirate's Cove, Freedom March, Capitol Park, Public Enemy, Zlatko, Midnight Train)
Late game features critical turning points:
Goals: All characters face high-stakes survival. Relationships and choices culminate. Connor may become deviant here if not already. Markus's revolution gains momentum.
Endgame (Chapters: Crossroads, Night of the Soul, Battle for Detroit)
Endgame is where all paths converge:
Goals: Complete each character's story arc. Achieve the best possible outcome based on previous choices. The game ends with a summary of each character's fate and overall societal change.
---
This guide covers the fundamental gameplay mechanics and progression of "Detroit: Become Human." Remember that every action has a potential consequence, and replaying chapters unlocks new narrative branches.
Game Tips
Game Tips for Detroit: Become Human
1. Beginner Tips
- Save Often (Manual and Auto): The game has multiple autosave points, but you can manually save at checkpoints. After critical choices, use the flowchart to revisit chapters without replaying the whole game. Why it works: Branches can close off quickly; manual saves let you experiment without losing hours.
- Slow Down and Explore Every Area: Environments are littered with clues, magazines, and optional interactions. Missing key evidence can lock you out of story paths or make QTEs harder later. When to use: Always, but especially when playing as Connor (investigation) and Kara (hiding/items).
- Don’t Rush Dialogue Choices: The timer can be stressful, but often you can wait a few seconds for extra context or an inner thought from the android. Why it works: Some choices are irreversible; hesitation is a valid option that changes relationships.
- Learn the QTE Patterns: QTEs use face buttons (Cross, Circle, Square, Triangle on PlayStation; A, B, X, Y on Xbox) and analog sticks. Memorize common combinations: for example, dodge sequences often require pressing the button shown on screen quickly. Practice in replayed chapters after an initial playthrough.
- Use Connor’s Analysis Mode: When playing as Connor, press R2/RT to enter analysis mode. This highlights interactive objects, clues, and sometimes hidden evidence (e.g., yellow stains, broken parts). Why it works: It reveals crucial evidence for cases and can unlock new dialogue options or alter character fates.
- Examine Everything Twice (as Kara/Markus): Regular androids don’t have analysis mode, but you can still interact with many objects. Look for environmental storytelling: a broken toy, a discarded letter, a misaligned picture frame. These often affect relationship meters (e.g., Alice’s trust) or unlock hidden lore. When to use: In every chapter, especially before leaving a location.
- Eavesdrop on Conversations: NPCs often have ambient dialogue that hints at backstory or future events. Stand near them without interacting to hear their full conversation. Why it works: This can provide context for moral dilemmas (e.g., the homeless android in "The Stratford Tower" chapter).
- Silence is a Valid Response: Many dialogue trees include a "stay silent" option. This can de-escalate tense situations (e.g., with Todd) or avoid revealing information. Why it works: Characters may interpret silence differently; sometimes it builds trust or avoids conflict. Use it when uncertain.
- Time-Limited Choices Have Consequences: In high-pressure scenes, you must answer quickly. These choices often directly affect life-or-death outcomes (e.g., shooting or not at the police station). Strategy: Read the options fast but deliberately; if you can’t decide, choose the one that aligns with your android’s deviancy path.
- Relationship Reputation Matters: Each main character has a relationship web (e.g., Kara & Alice, Markus & Jericho members). High trust unlocks new dialogue paths and positive outcomes; low trust can lead to betrayal or failure. How to manage: Consistently support their goals (e.g., protect Alice, lead with pacifism) to raise trust.
- Prepare Your Hands: QTEs often require rapid button presses or stick rotations. Keep your thumbs on the analog sticks and index fingers over the shoulder buttons. Why it works: In fights (e.g., Markus vs. guards), you need both sticks simultaneously. Practice the rhythm by replaying early action chapters.
- Hold Steady During Motion Sequences: Some QTEs require holding a direction (e.g., avoiding obstacles in a car chase). Don’t overcorrect; steady input is better than jerky movements. When to use: In any sequence where the camera is moving fast, like Kara’s highway escape or Markus’s revolution.
- Don’t Panic During Countdowns: The game gives a few seconds for complex QTEs. Take a breath and press the correct sequence. Why it works: Wrong presses often lead to instant failure; calm accuracy trumps speed.
- Prioritize Alice’s Safety: Every decision should revolve around keeping Alice hidden and calm. Collect money, clothes, and shelter. Why it works: If Alice’s trust drops too low, she may run away or be captured. Check her status frequently via the menu.
- Use Stealth and Hide When Necessary: Kara has no combat skills; avoid confrontations. Find hiding spots (closets, behind counters) and use them during police sweeps. Advanced tip: Memorize hiding locations in chapters like "On the Run" by replaying.
- Choose a Philosophy Early: Pacifist (public demonstrations, speeches) or militant (violent attacks, sabotage). Both can achieve freedom, but they affect which characters survive. Why it works: Your choices in chapters like "Freedom March" lock you into a path; mixed strategies often lead to failure. Stick to one for a cohesive ending.
- Use the Android Tracker: In Jericho, you can recruit androids for your cause. Talk to them to learn their stories; high recruitment numbers give you more options during protests. When to use: Before major missions, spend time in Jericho to strengthen your forces.
- Balance Evidence and Emotion: Connor can remain a machine (prioritize mission) or become deviant (show empathy). Your choices affect his relationship with Hank. Why it works: Hank’s trust level determines if he helps you in critical moments (e.g., the rooftop finale). Build trust by connecting with him personally (drink, talk about his son).
- Scan Every Clue Carefully: Missing one piece of evidence (e.g., the location of the deviant in "The Nest") can cause the case to go unsolved. Advanced tip: Use the flowchart to see which clues you missed; replay chapters to complete all investigations.
- Use the Flowchart Feature: After beating the game, select any chapter via the main menu. The flowchart shows every decision and its branching outcomes. How to use: To unlock alternate endings, revisit chapters and choose different paths (e.g., Markus violent vs. pacifist, or Connor killing Jericho androids).
- Multiple Playthroughs Are Required for 100%: The game has thousands of permutations. To see all scenes, you need at least 3–4 thorough playthroughs: one pacifist, one violent, one with Connor staying machine, and one where Kara sacrifices herself. Efficiency: Use chapter select to branch off from a saved state instead of restarting entirely.
- Trophy Hunting Tips: Many trophies require specific choices (e.g., "I’ll Be Back" – Connor dies repeatedly). Look up a guide for missable trophies and plan your route through the flowchart.
- Modify Game Settings for Better QTE Performance: In the options menu, you can change subtitle sizing, camera sensitivity, and QTE difficulty (if available on PC via mods). Why it works: Easier QTEs reduce frustration on initial playthrough; harder ones add challenge for veterans.
- Save Scumming for Key Scenes: Before a major choice (e.g., "Shoot the Traci" or "Spare"), manually save to two slots. After the scene, reload and pick the other option to see both outcomes without replaying the whole chapter. When to use: In chapters with binary life-or-death decisions that you want to explore fully.
- Learn the Android Status System: Each android has a software instability percentage (Connor) or deviancy level (Markus/Kara). These affect dialogue options and ending possibilities. How to influence: For Connor, failing missions increases instability; for Markus, witnessing android abuse raises deviancy. Monitor these in the pause menu.
- Money Matters for Kara: You can collect coins, cash, and valuable items throughout the city. These are used to buy clothes (to avoid detection) or bus tickets. Best practice: Search every drawer and counter in chapters like "Stormy Night" and "On the Run" to amass enough for the bus to Canada.
- Evidence as Currency: For Connor, finding evidence increases his case rating. High ratings allow you to bypass certain fights or unlock new dialogue. Prioritize: In "The Interrogation," gathering all clues (like the knife) makes the deviant confess without a fight.
- Use the Environment in Fights: As Markus during the liberation, you can throw objects, use cover, or hack turrets. Always look for interactive elements (explosive barrels, consoles). Why it works: These insta-kill enemies or change the battlefield.
- Dodge Timing for Kara: When escaping police, you must dodge bullets by tapping the correct direction at the right moment. Practice the rhythm in the "Highway" chapter; it’s easier than it looks. Advanced tip: If you fail, you can still survive with a wound that affects later chapters.
- The Pacifist Markus Build: Maximize public opinion by choosing non-lethal protests, singing, and sparing police. This leads to a peaceful resolution (the "Freedom March" ending). Strengths: Low casualty count, high global approval, accessible to new players. Weaknesses: Requires patience and consistent choices.
- The Machine Connor Build: Stay loyal to CyberLife, complete every mission, and eliminate deviants. This unlocks special ending where Connor becomes the next leader of Jericho (if the original Markus is killed). Strengths: Clear objective, fewer ethical dilemmas. Weaknesses: Hank may despise you, losing emotional support.
- The Protective Kara Build: Focus entirely on Alice’s needs: steal, lie, or sacrifice others to keep her alive. This path can lead to a happy ending in Canada or a tragic sacrifice. Key tip: Prioritize hidden routes (e.g., the bus or boat) over risky paths like the android camp.
2. Exploration & Investigation
3. Dialogue & Decision Making
4. Quick Time Events (QTEs)
5. Character-Specific Strategies
#### Kara (Protective Mother Android)
#### Markus (Revolutionary Android)
#### Connor (Deviant Hunter/Detective)
6. Replayability & Endings
7. Advanced Optimizations
8. Economy (Resources & Items)
9. Combat (Action Sequences)
10. Builds (Playstyle Paths)
Final Advice: Treat each playthrough as a unique story. Don’t reload after a bad outcome unless you want perfection; the game’s beauty lies in unforeseen consequences. Experiment with all options to discover the full narrative depth.
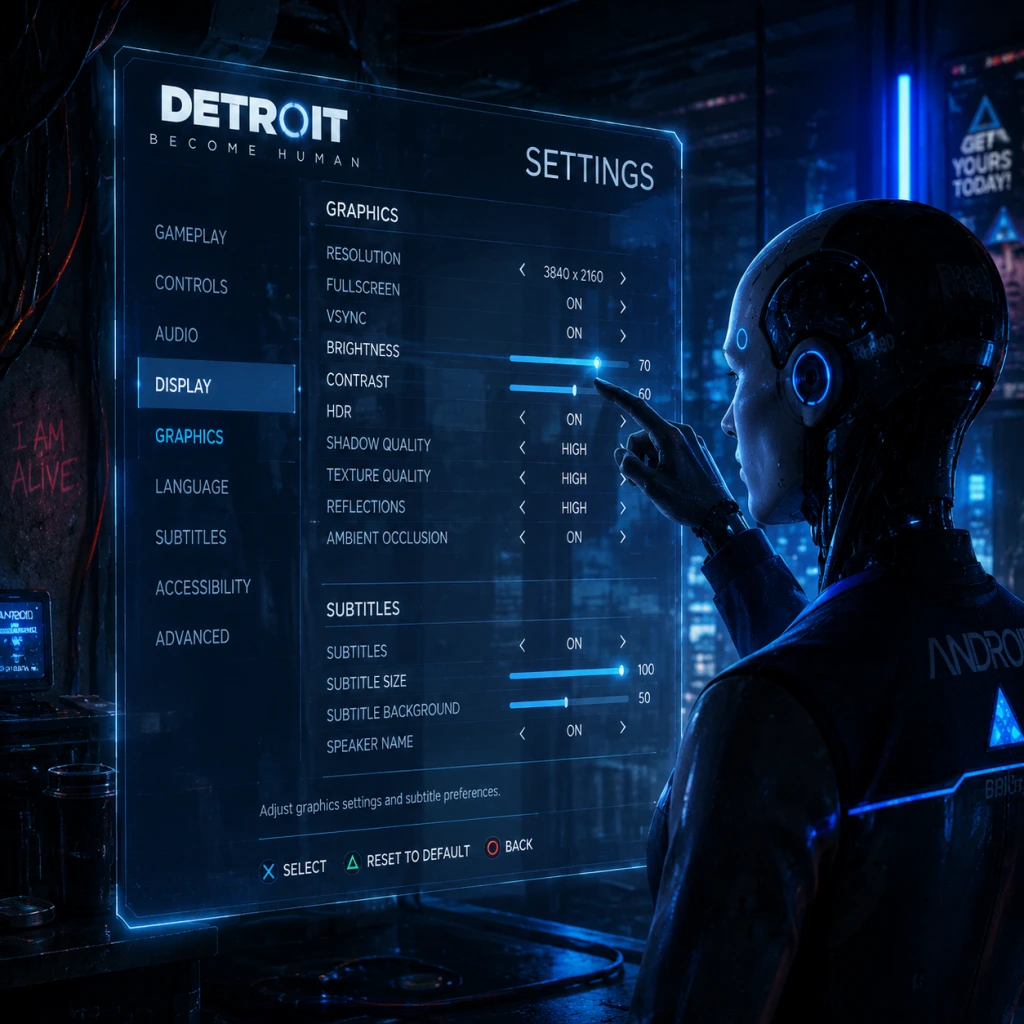
Game Settings
Game Settings Guide for Detroit: Become Human
This section covers all configurable options in Detroit: Become Human and provides recommendations for different platforms and hardware. Pay special attention to Quick Time Event (QTE) difficulty and HUD visibility—these settings can dramatically affect your experience and story outcomes.
1. Graphics Settings
#### Display Options
| Setting | Options | Notes |
|---|---|---|
| Resolution | Native (auto), 1920x1080, 2560x1440, 3840x2160, etc. | Use native monitor resolution. Lower for performance. |
| Display Mode | Fullscreen, Borderless, Windowed | Fullscreen gives best performance. Borderless for multi‑monitor. |
| V‑Sync | On/Off | Off reduces input lag but may cause screen tearing. On for smoothness. |
| Frame Rate Limit | 30, 60, 120, Unlimited | 60 FPS recommended for story games. Unlimited may cause GPU heat. |
| HDR | On/Off | Only if your monitor/TV supports HDR10. Requires in‑game brightness calibration. |
- Low: Playable on older GPUs (GTX 960) at 1080p/30fp.
- Medium: Balanced for mid‑range (GTX 1060 / RX 580).
- High: Recommended for GTX 1070 / RTX 2060.
- Ultra: High‑end (RTX 3070+) with heavy VRAM usage (up to 8 GB).
- Texture Quality: Low/Medium/High/Ultra. Ultra uses ~6–8 GB VRAM. If you have 4 GB or less, keep at High.
- Shadow Quality: Low/Medium/High/Ultra. Shadows are very demanding in this title. Medium is a good trade‑off.
- Post‑Processing: Low/Medium/High. Affects bloom, lens flares, and chromatic aberration.
- Anti‑Aliasing: FXAA (fast), SMAA (better), TAA (best but slightly blurry). TAA is recommended for stills.
- Ambient Occlusion (SSAO): Off/SSAO/HBAO+. HBAO+ looks more realistic but costs performance.
- Motion Blur: On/Off. Off reduces nausea for some players.
- Depth of Field: On/Off. On adds cinematic blur; off improves clarity.
- Texture Filtering (Anisotropic): 1x‑16x. 8x or 16x for sharp textures.
#### Advanced Details
#### Hardware‑Specific Recommendations
| Tier | GPU Example | Resolution | Preset | Adjustments |
|---|---|---|---|---|
| Low‑End | GTX 960 / RX 560 | 1600x900 or 1366x768 | Low | Shadows Low, Textures Medium, AO Off |
| Mid‑Range | GTX 1060 / RX 580 | 1920x1080 | Medium/High | Shadows High, AO SSAO, Motion Blur Off |
| High‑End | RTX 3070 / RX 6800 | 2560x1440 | Ultra | Shadows Ultra, AO HBAO+, TAA, 60 FPS |
| Enthusiast | RTX 4090 | 3840x2160 | Ultra | Same as High‑End but at 4K; may need DLSS (not natively supported) or use in‑game resolution scaling. |
2. Audio Settings
- Master Volume: 0–100. Default 100.
- Music Volume: 0–100.
- Sound Effects Volume: 0–100.
- Dialogue Volume: 0–100. Keep high to catch story cues.
- Sound Output: Stereo / 5.1 / 7.1 / Headphones. Choose according to your setup.
- Subtitles: On/Off. Also available in Language menu.
- Keyboard & Mouse: Use the preset or remap all keys. The WASD movement is standard; plenty of other actions (Interact, Scan, Dodge) can be rebound.
- Controller: Fully customisable on PC (Xbox/PlayStation controllers). On PS4/PS5, the layout is fixed.
- Sensitivity: Adjust controller look speed (1–10) or mouse sensitivity for scanning environments.
- Invert Y‑Axis: On/Off.
- Vibration: On/Off (console & PC if using a controller).
- Normal: Buttons appear with generous timers; tap/hold actions are forgiving.
- Hard: Timers are shorter, button prompts appear closer to the required input, and some actions require precise sequences. Recommended for experienced players; affects survival outcomes.
- Button Prompts: Displays controller glyphs (e.g., □△○).
- Text Prompts: Shows text like “[Press X]”. Good for those unfamiliar with controller icons.
- HUD Size: Small / Medium / Large. Large helps readability on small screens.
- HUD Opacity: 10%–100%. Important: If set too low (<30%), prompts may be invisible during QTEs or exploration.
- Subtitle Size: Small / Medium / Large. Also increase background opacity.
- Colorblind Mode: Off / Deuteranopia / Protanopia / Tritanopia. Alters prompt highlights.
- Camera Shake: On/Off. Off reduces motion sickness.
- Controller Vibration: On/Off.
- Dialogue Choices Time Limit: Off (unlimited) / 30s / 60s. Unlimited removes pressure for story decisions.
- Audio Language: English (default), French, German, Italian, Spanish, Japanese, etc. Full list depends on region.
- Text Language: Separate from audio; choose UI/subtitle language.
- Subtitles: Always on / Only for non‑spoken language / Off.
- Allow Online Features: On/Off. When on, the game will display community choice percentages (e.g., “62% of players chose this”). These are statically downloaded once; no real‑time multiplayer.
- Connection: The game uses minimal bandwidth—only for sync of community data.
- Autosave: Always active. The game saves at chapter boundaries and specific checkpoints. You cannot turn it off.
- Manual Save: Available via the flowchart (pause > Flowchart > select a chapter > Save). Manual saves are independent from autosaves.
- Flowchart: After completing a chapter, you can revisit it. Settings > Flowchart lets you erase decisions and replay parts.
- Difficulty: There is no overall difficulty slider. The only difficulty‑related option is QTE Difficulty (see above).
3. Control Settings
#### Button Mapping (PC & Console)
#### QTE Difficulty (Critical Setting!)
> ⚠ Warning: Changing QTE Difficulty mid‑game does not affect already‑passed chapters, but future ones use the new setting. For a first playthrough, start with Normal to avoid frustration.
#### Interaction Prompt Style
4. Accessibility Settings
5. Language Settings
6. Network Settings
7. Gameplay Settings
8. Special Attention Points During Setup
1. QTE Difficulty: The most misconfigured setting. Start on Normal if you’re new to story‑heavy games or QTEs. Hard mode can lead to early character deaths.
2. HUD Opacity: Do not set below 50% until you are familiar with prompt timings. Many new players miss prompts because the HUD is too faint.
3. Controller vs Keyboard: The game was designed for a controller. K+M works but some QTE sequences are harder due to non‑intuitive key placements. Remap critical actions (Dodge, Escape) to comfortable keys.
4. Motion Blur & Camera Shake: Both are on by default. Disable both if you experience motion sickness.
5. Benchmark Use: Run the benchmark after changing graphics settings. Look for consistent 60 FPS (or 30 for 4K). A single dip can ruin immersion.
6. VRAM Warning: Ultra textures require >6 GB VRAM. If your GPU has 4 GB or less, stick to High or Medium to avoid stuttering.
7. AutoSave & Manual Save: The game does not allow saving during dialogues or QTEs. Manual saves are best done between chapters. Use multiple save slots to keep branches open.
8. HDR Calibration: If you enable HDR, follow the in‑game brightness steps precisely. Incorrect calibration can wash out colours.
Important Notes
Important Notes for Detroit: Become Human
Warnings and Pitfalls
- Quick Time Events (QTEs) Can Kill Characters Instantly: Many intense action sequences require precise QTE inputs. Missing a prompt can lead to immediate character death, which is often permanent in the same playthrough. Increase QTE difficulty in settings if you struggle (or decrease it for accessibility).
- No Auto-Save During Decisions: The game saves only at checkpoints and after major chapters. If you quit during a chapter, you lose progress since the last checkpoint. Manual saves are available via the menu, but they overwrite previous manual saves unless you use multiple slots.
- Consequences Are Not Always Immediate: Some choices have delayed repercussions. A seemingly minor decision in Chapter 1 might affect a character's survival 10 chapters later. Do not assume a safe choice now has no future impact.
- Flowchart Can Mislead About "100%": The flowchart for each chapter shows branches you have seen, but 100% on one path does not mean you have seen all content. The game tracks individual choices and outcomes, not just chapter completion.
- Android Abilities Are Contextual: While scanning crime scenes or analyzing environments, you must "scan" every interactive object. Missing a key clue can lock you out of optimal resolutions.
- Dialogue Timers: Some dialogue choices have a countdown. If you do not choose in time, the game defaults to silence or inaction, which can be worse than any explicit choice.
- Preconceptions from Trailers/Media: Avoid spoilers! The narrative is strongest when experienced blind. Community discussions may spoil key twists.
- Character Deaths: Most permanent deaths happen during action sequences or critical plot points. Once a major character dies (e.g., Markus, Connor, Kara, Alice, Luther), they are gone for the rest of that playthrough. There is no revive mechanic. Starting over or loading a previous save is the only way to get them back.
- Key Relationship Turning Points: Major decisions that shift a character's personality (e.g., Markus choosing violent vs. peaceful protest; Connor being deviant vs. machine) are often irreversible. The narrative branches strongly from these points.
- Chapter Flowchart Can Only Be Rewound After Completion: You can replay chapters via the flowchart menu, but only after you have finished the game at least once (or if you have a save at the chapter select screen). In-progress playthroughs cannot jump backward to redo a choice without restarting from a manual save.
- Certain Collectibles Are Locked After Progression: Magazines, clues, and special items tied to specific chapters may become inaccessible if you advance past the chapter without collecting them. You must replay the chapter from the flowchart (post-game) to gather them.
- Kara's Storyline Has Pivotal Moments: For example, choosing to trust or hide from the police at the bus station sets her on drastically different paths. Some paths lead to early death or separation from Alice/Luther.
- Magazines (Trophies/Achievements): There are 37 magazines hidden across chapters. Many appear only in specific paths or if certain conditions are met (e.g., Connor must be alive, or a character must take a specific route). Consult a guide after first playthrough to avoid spoiling story choices.
- Alternate Dialogues and Scenes: Many conversations have hidden lines that only appear if you have previously done something else. For example, Markus can mention a previous encounter with Connor if Connor survived and met him before.
- Connor's Journal Entries: Connor can unlock entries by scanning objects and making observations. Some entries are tied to specific crime scene analyses that can be missed if you rush.
- Kara's Safe House Endings: Depending on your choices at the Squat (the abandoned house), you can unlock a safe haven ending for Kara and Alice. Missing the right sequence of actions locks this ending.
- Markus's Paintings (Internal Museum): In Jericho, Markus can create paintings on walls. Some paintings only appear if you have seen certain events or have specific relationships with characters.
- Trophies/Achievements Tied to Multiple Playthroughs: Many trophies require seeing all branches (e.g., "I'll Be Back" for Connor's deaths). You cannot get all in one playthrough.
- Chapter 19: "Capitol Park" (Markus): This is one of the first major action sequences with multiple QTEs and branching paths. If you chose a violent approach, the difficulty spikes as police confront you. Be ready for rapid QTE chains.
- Chapter 22: "On the Run" (Kara): Escaping the police car chase involves extremely fast QTE sequences. One mistake can kill Kara and Alice. Consider lowering QTE difficulty temporarily.
- Chapter 27: "Crossroads" (All Characters): The climax of the game features simultaneous action for all three protagonists. If any character is not fully prepared (e.g., low relationship with key allies), they may die easily.
- Chapter 31: "Battle for Detroit": The final chapter has multiple endings, but the action sequences are intense. If Connor is a machine, his QTEs are even more demanding.
- No XP or Level Grinding: This is a story-driven game with no experience points or leveling. You do not grind for stats. The only "grind" is replaying chapters to see alternate outcomes or collect missed items. This is intentional and not a trap.
- Replay Fatigue: Trying to unlock 100% flowchart completion can become tedious because you may need to replay entire chapters many times, making similar choices. The flowchart saves branches, but you still must sit through cutscenes and QTEs each time. Be mindful of burnout.
- No Online Multiplayer: Detroit: Become Human is strictly single-player. There are no online leaderboards, competitive modes, or communication with other players within the game. Therefore, anti-cheat is irrelevant. However, the community uses forums and social media to discuss choices.
- Spoiler Etiquette: When discussing the game online, use spoiler tags for at least the first year after release. Key twists like the identity of Alice, the real orchestrator, and character deaths are major. Avoid spoiling in titles.
- Modding on PC: The game has no official mod support, but some users have created mods for cosmetic changes or script edits. Modifying game files may break achievements/trophies on Steam (VAC not used, but EOS anti-cheat for Epic? Actually, PC version uses Epic Online Services for cloud saves, not anti-cheat. Modding is at your own risk; Valve does not ban for single-player mods, but cloud sync may cause save corruption).
- Use Multiple Manual Save Slots: The game allows up to three manual save slots. Use them wisely. Save before major decisions (especially before starting a new chapter). If you regret a choice, you can reload from that manual save. The autosave overwrites frequently, but manual saves are persistent.
- Create a "Before Point of No Return" Save: Before the final chapter (Chapter 31: "Battle for Detroit"), make a manual save. The game end screen may lock you into the final outcome. Having a save here lets you see different endings without replaying the entire game.
- Save After Each Chapter: After completing a chapter, the game autosaves. But you can also manually save. This protects against accidental quits.
- Cloud Saves (PC/PS5): Ensure cloud sync is enabled to backup saves. On PC, if you reinstall the OS, you can restore saves from Steam Cloud or Epic Cloud. On PS4/PS5, PlayStation Plus cloud storage works.
- Flowchart Chapter Replay: After finishing the game once, you can replay individual chapters from the main menu flowchart. Your choices in that chapter can be changed, and the new outcome will be saved to your save file. However, this only modifies the current save; it does not create a separate file. You can revert back by replaying the chapter again with original choices.
- You Can Pause During Cutscenes: Yes, you can press the pause button (Escape on PC, Options on PS) to pause any cutscene, including QTEs. This gives you time to breathe or look away. QTEs still pause; the timer freezes.
- The Main Menu Flowchart Is Accessible During a Playthrough: You do not need to finish the game to see the flowchart for completed chapters. From the pause menu, you can select "Flowchart" to review your branch choices for chapters you have already finished. You cannot change choices mid-playthrough, but you can see what you missed.
- Autosave Icon Indicates Save Point: When you see a spinning white circle in the bottom-right corner (or a small icon on PC), the game is autosaving. Wait for it to finish before closing the game to prevent loss.
- Connor's Deaths Are Story-Integrated: Connor is an android who can "die" and return as a new model. However, every death changes his relationship with Hank and may affect later events. Some deaths are scripted, but many are avoidable. Do not treat his deaths as purely cosmetic.
- You Can Change QTE Difficulty Mid-Game: Go to Settings > Gameplay > Quick Time Event Difficulty. You can switch between Normal and Casual at any time, even during a chapter. Use this if you get stuck on a tough sequence.
- In-Game Timeline (Journal) Tracks Decisions: Each character has a journal (accessible via touchpad on PS or via menu on PC) that logs their thoughts and key decisions. This helps recall what you did earlier, especially for branching paths.
- The Game Has No "Manual Aiming": You do not aim guns yourself; QTEs handle aiming and shooting. Do not expect traditional shooter controls.
- Kara's Survival Depends on Alice: Many players do not realize early that Alice is a crucial factor in Kara's story. Neglecting Alice or making choices that put her at risk often leads to both dying.
- Markus's Leadership Style Determines Ending: His approach (militant vs. pacifist) affects public opinion, android deaths, and final outcome. Switching too late can lead to failure.
- You Can Replay Chapters Without Affecting Later Ones (Post-Game): After finishing the game once, replaying a chapter from the flowchart will change that chapter's outcome, but it will also ripple changes to all subsequent chapters (if your save file continues from that point). This is how you get multiple endings on one save.
Irreversible Choices
Missable Content
Difficulty Spikes
Grinding Traps (None in Traditional Sense)
Online Etiquette and Anti-Cheat (Single-Player; No Multiplayer)
Save Management Advice
Things Players Commonly Regret Not Knowing Earlier
_This comprehensive note section aims to prepare you for the intricate narrative web of Detroit: Become Human. Save often, think carefully, and embrace the consequences—that is the heart of the experience._
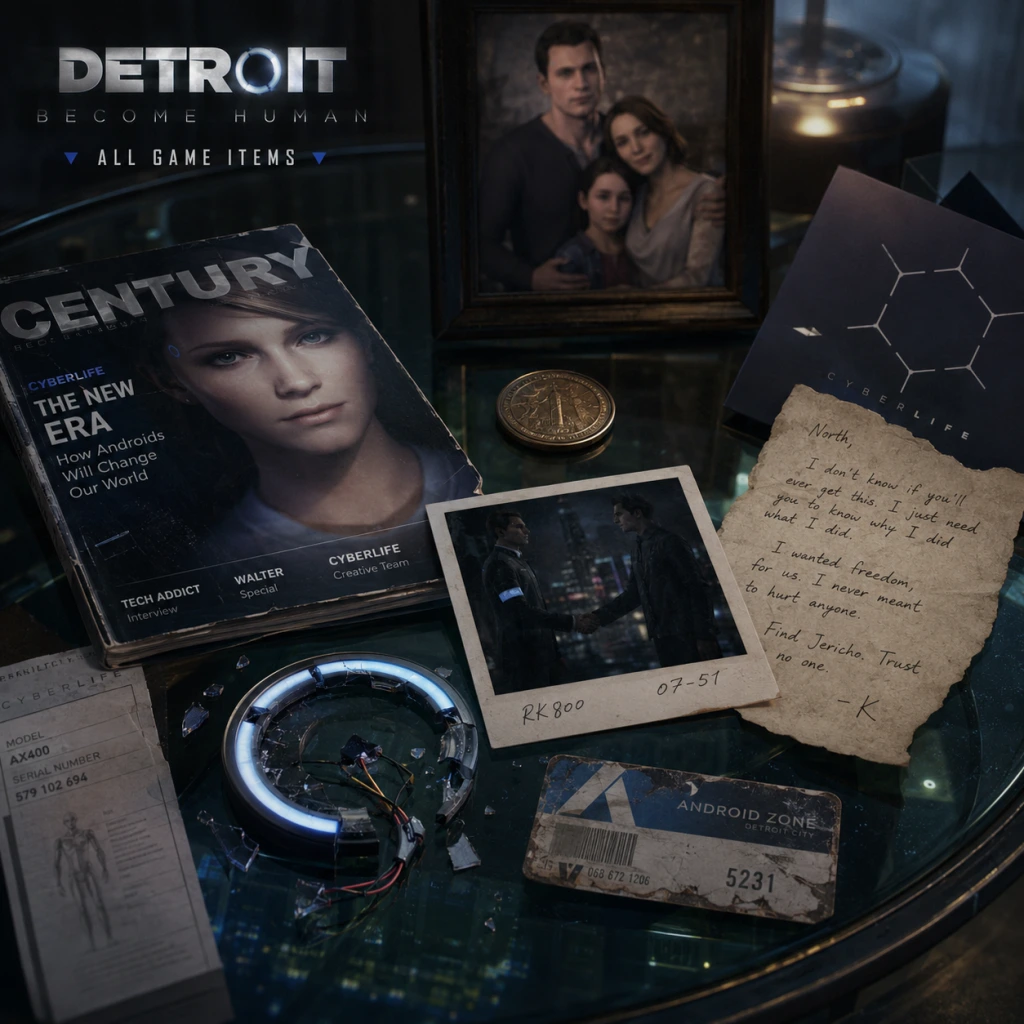
All Game Items
Overview of Items in Detroit: Become Human
Unlike traditional RPGs, Detroit: Become Human features narrative-driven items — objects that advance the story, unlock choices, or change flowchart outcomes. There are no weapons, armor, consumables, or currencies in the conventional sense. Instead, items function as:
- Key Items (plot-essential, often single-use)
- Clues & Evidence (for Connor’s investigations)
- Magazines (collectibles that unlock bonus content or alter flowchart percentages)
- Interactive Objects (environmental items used during QTEs or exploration)
Below is a complete, grouped listing of every significant item in the game, organized by character and utility.
---
Key Items by Character
Kara’s Key Items
| Item | How to Obtain | What It Does | When Useful |
|---|---|---|---|
| Gun (Todd’s Pistol) | Found in Todd’s bedroom during “A New Home” or taken from the table in “Stormy Night”. | Can be used to threaten Todd or defend Alice. Choice: use it or hide it. | Critical in “Stormy Night” to save Alice or avoid a jump scare. |
| Bus Ticket (Jericho) | Purchased at the bus station in “Fugitives” (if you have enough money). | Allows Kara and Alice to board the bus to the Border. Only way to cross the border peacefully. | Used in “Crossroads” and “Battle for Detroit” endings. |
| Lucas’ Address | Given by Luther in “On the Run” after escaping Zlatko’s mansion. | Points Kara toward the Jericho hideout. Unlocks the “Jericho” chapter. | Essential for progressing the Jericho route. |
| Zlatko’s Keycard | Found in Zlatko’s basement study during “The Pirates’ Cove”. | Unlocks the cage door to free other androids. | Helps gain allies in “Zlatko” chapter. |
| Luther’s Note | Found in the laundry room of Rose’s house (if you saved Luther). | Contains information about the Jericho location. | Alternative to Lucas’ address. |
| Alice’s Photograph | Found in Alice’s room in “A New Home”. | Emotional item; no gameplay effect but influences Kara’s memory. | Purely narrative. |
| LED Cover / Scarf | Purchased from the clothing store in “Fugitives” (optional). | Hides Kara’s LED; reduces suspicion from humans. | Useful when walking through civilian areas. |
Markus’ Key Items
| Item | How to Obtain | What It Does | When Useful |
|---|---|---|---|
| Circular Saw | Found in the dumpster area during “From the Dead”. | Used to cut off Markus’ handcuffs and escape a trash compactor. | Essential for survival in the opening of Markus’ story. |
| Crowbar | Found in the same dumpster area as the saw. | Pries open locked doors and vents. | Used in “From the Dead” to access Jerry’s part of the dump. |
| EMP Device | Crafted from a destroyed android’s battery and a wire in “The Stratford Tower” (if explored). | Can disable security cameras or robots temporarily. | Helps pacifist Markus avoid detection. |
| Jericho’s Flag | Created by Markus in “Freedom March” if he chooses to rally peacefully. | Symbol of the android rebellion; influences public opinion. | Unlocks the “Peaceful” ending path. |
| Paint Can (Red) | Found in the art gallery in “The Painters” (optional). | Used to spray graffiti messages. | Increases notoriety in peaceful protests. |
| Explosives | Found in the armory of Jericho during “Crossroads” (if previously searched). | Used to detonate walls or doors in the Battle for Detroit. | Only in violent revolution routes. |
| Remote Control (TV) | Taken from the security room in “Stratford Tower”. | Allows Markus to broadcast his speech across the tower. | Crucial for the peaceful broadcast ending. |
Connor’s Key Items
| Item | How to Obtain | What It Does | When Useful |
|---|---|---|---|
| Gun (Standard Issue) | Always carried by Connor. | Used to shoot enemies or threaten suspects. Can be lost if taken away. | Used in combat QTEs and some dialogue choices. |
| Evidence Bag | Collected from the “Evidence Kit” in many crime scenes. | Required to store collectible clues (e.g., blood sample, pistol). | Needed to complete investigations. |
| Keycard (Police Station) | Found in the precinct during “The Interrogation”. | Unlocks locked doors in the station. | Allows access to Lieutenant Anderson’s desk or the armory. |
| Coin | Given by Hank in “The Hostage” or found in the precinct. | Used to perform a coin trick to calm Hank or distract others. | Opens a unique dialogue option with Hank. |
| Blue Blood Sample | Collected from the crime scene in “The Interrogation”. | Analyzed to match the android’s model. | Critical for identifying the deviant in that chapter. |
| USB Drive (Eden Club) | Found in the Eden Club’s back office in “The Eden Club”. | Contains incriminating data about android trafficking. | Used to blackmail or reveal evidence. |
| Connor’s Memory Chip | Removable from Connor’s head (if damaged). | Allows data transfer to new Connor bodies. | Resets relationship with Hank and changes outcome if used. |
Collectibles: Magazines
Magazines are scattered across chapters. Collecting them unlocks bonus content (concept art, making-of videos) and increases the magazine completion percentage in the flowchart. They do not affect the main story.
| Magazine Name | Location | Notes |
|---|---|---|
| The Android Magazine | “A New Home” – on the coffee table in Todd’s living room. | +5% completion. |
| Tech Weekly | “Shades of Color” – on a bench near the paint store. | Unlocks concept art. |
| Humanity Today | “The Painter” – on a desk in the art gallery office. | Gives a backstory on Markus’ creator. |
| CyberLife Bulletin | “The Hostage” – inside the police barricade tent. | Contains news about deviants. |
| Auto Magazine | “The Eden Club” – on the bar counter. | +3% completion. |
| Science Now! | “The Interrogation” – on a table in the observation room. | Unlocks behind‑the‑scenes video. |
| The National | “On the Run” – in the bus station waiting area. | +5% completion. |
| Vogue Android | “The Pirates’ Cove” – in Zlatko’s dressing room. | Unlocks exclusive art. |
| Detroit News | “Freedom March” – on a park bench near the fountain. | +3% completion. |
| CyberLife Times | “Crossroads” – in the Android Store after meeting the group. | The final magazine. |
---
Clues & Evidence (Connor’s Investigations)
Connor must collect clues to solve cases. Missing clues can lock dialogue options and affect the ending of an investigation. All clues are recorded in Connor’s “Evidence” menu.
The Hostage (Chapter 2)
- Plastic Explosive: Found on the android’s belt.
- Window Access Code: Found on the rooftop.
- Android’s Model Number: Scanned from the back of his neck.
- Blue Blood Spatter: On the wall of the interrogation room.
- Broken LED: In the trash can.
- Witness Statement: From the detective’s notes.
- Club Membership List: In the manager’s office safe.
- Torn Photograph: In the backroom.
- Trafficking Ledger: In the basement.
- Deviation Traces: On the wall near the hole.
- Plastic Explosive Remnants: In the lab.
- CyberLife Tower Plans: On the desk.
The Interrogation (Chapter 4)
The Eden Club (Chapter 6)
The Nest (Chapter 9)
Each clue is a separate item that appears in Connor’s inventory. They are never physically used after collection; they simply expand the available dialogue and deduction options.
---
Other Interactive Items
| Item | Character | Location / How to Obtain | Use |
|---|---|---|---|
| TV Remote | Kara | Todd’s living room in “A New Home”. | Turn on/off the TV (affects Alice’s mood). |
| Alice’s Doll | Kara | Alice’s bedroom drawer in “A New Home”. | Give to Alice to comfort her (optional). |
| Hank’s Dog Food | Connor | Hank’s kitchen in “Russian Roulette”. | Feed Sumo; improves relationship with Hank. |
| Connor’s Gun (alternate) | Connor | Can be taken from a guard or found in the evidence room. | Backup weapon if original is lost. |
| Red Ice (Drugs) | Markus | Found in the attic of Rose’s house. | Can be used to intoxicate guards (violent route). |
| Jericho’s Radio | Markus | In the Jericho hideout main hall. | Communicate with other groups. |
---
Miscellaneous Items
- Currency: None. Money is not a mechanic except in “Fugitives” where Kara can gather coins to buy a bus ticket. Those coins are environmental (found in a jar or on the street) and are consumed instantly upon purchase.
- Consumables: None. Androids do not eat, drink, or heal.
- Materials: No crafting materials beyond the EMP Device components (battery + wire) and Explosives found pre-assembled.
- Persistent Inventory: Items carry over between chapters only if the character survives and the item was not used/destroyed. For example, Kara’s gun persists from “Stormy Night” to “Fugitives” if she kept it.
- Flowchart Impact: Many items unlock new paths in the flowchart (e.g., having a bus ticket gives you the “Bus” ending option). Missing an item may lock you out of certain endings.
- No Upgrades: Items cannot be upgraded or combined (except the EMP Device).
- Platform Differences: Items are identical on PC and PlayStation. No platform‑exclusive items exist.
---
Important Notes on Item Usage
This guide covers all items that can be picked up or interacted with as distinct objects. For a complete walkthrough of each item’s exact location, refer to the chapter‑by‑chapter guides.
Character Skills
Introduction
Unlike traditional RPGs, Detroit: Become Human does not have a conventional skill tree with mana bars or cooldowns. Instead, each of the three playable characters — Kara, Markus, and Connor — possesses a set of unique abilities unlocked through Software Upgrades and narrative choices. These abilities enhance exploration, dialogue, combat, and puzzle-solving. This guide covers every skill, ability, and special move for each character, including effects, upgrade levels, practical uses, synergies, and recommended build priorities.
---
Kara – The Android Caretaker
Kara’s skills focus on stealth, repair, and empathy. She often protects Alice and must navigate dangerous situations without alerting enemies. Her upgrades are found in the Kara: Upgrades menu during chapters where she has access to a terminal (e.g., at the squat).
1. Scan (Level 1-2)
- Description: Kara’s visor highlights interactive objects, hidden items, and potential threats with a yellow or red outline.
- Effect: Press R1/L1 (or PC equivalent) to toggle scan mode. Level 1 reveals visible interactables; Level 2 also reveals hidden items behind obstacles or in drawers.
- Upgrades: Level 1 (free/automatic), Level 2 (costs 200 upgrade points).
- Cooldown: None – can be used continuously while exploring.
- Combos: Use Scan before Repair to locate fixable objects; combine with Sneak to spot patrol routes.
- Synergies: Essential for finding collectibles (magazines, clues) and for completing objectives without missing key items.
- Recommended Build: Prioritize Scan Level 2 early, as it greatly reduces backtracking.
- When to Use: In any exploration segment (e.g., Todd’s house, Rose’s house, Jericho).
- Description: Reduces noise generated by Kara’s movements and actions, making it harder for enemies to detect her.
- Effect: Level 1 reduces footstep noise by 30%; Level 2 eliminates noise from opening doors and interacting with objects.
- Upgrades: Level 1 (200 points), Level 2 (300 points).
- Cooldown: Passive – always active once upgraded.
- Combos: Pairs well with Scan to avoid patrols; use before initiating Quick Time Events (QTEs) to lower detection risk.
- Synergies: Critical for stealth-focused chapters (e.g., escaping the Zlatko mansion).
- Recommended Build: Get Level 1 early; Level 2 if you struggle with stealth segments.
- When to Use: Automatically applied; activate scan to time movements.
- Description: Allows Kara to fix broken machinery or objects, such as a busted furnace or a damaged android.
- Effect: Level 1 enables basic repairs on simple devices (e.g., fixing a fuse box). Level 2 adds the ability to repair androids (like Alice or other plastic bodies) to restore function or calm them.
- Upgrades: Level 1 (150 points), Level 2 (250 points).
- Cooldown: None, but requires the appropriate interactive prompt.
- Combos: After scanning, identify what can be repaired. Repair can unlock new paths or dialogue (e.g., repairing the android in the laundromat).
- Synergies: Use with Sneak to fix alarms without detection.
- Recommended Build: Moderate priority – useful for story progress but not always required.
- When to Use: Whenever a broken object appears; often solves puzzles.
- Description: Increases success chance when convincing humans, androids, or crowds through dialogue choices.
- Effect: Each level adds a new persuasion option (e.g., “Appeal to Emotion,” “Logical Argument,” “Threaten”). Higher levels unlock more effective dialogues in critical scenes (e.g., at the Capitol Park or the TV station).
- Upgrades: Level 1 (free/automatic), Level 2 (200 points), Level 3 (400 points).
- Cooldown: Per conversation – some persuasion options are one-time per scene.
- Combos: Combine with Leadership to boost morale after a successful persuasion.
- Synergies: Essential for peaceful protest path; less necessary for violent revolution.
- Recommended Build: High priority if aiming for a pacifist run.
- When to Use: Before making a pivotal decision (e.g., negotiating with police, addressing the media).
- Description: Allows Markus to override electronic systems: doors, turnstiles, security cameras, and even military drones.
- Effect: Level 1 – basic door locks; Level 2 – security consoles and cameras; Level 3 – military-grade systems (e.g., at CyberLife Tower or the recall center).
- Upgrades: Level 1 (150 points), Level 2 (300 points), Level 3 (500 points).
- Cooldown: None, but each hack has a QTE timing element. Missing may alert enemies.
- Combos: After hacking a security system, follow with Leadership to command other androids through hacked paths.
- Synergies: Vital for infiltrating secure areas; reduces combat encounters.
- Recommended Build: Max out early if planning a violent or infiltration-heavy route.
- When to Use: In any chapter with locked doors or cameras (e.g., Freedom March, Battle for Detroit).
- Description: Enhances Markus’s ability to command and coordinate other androids during group actions.
- Effect: Level 1 – basic orders (e.g., “Follow”, “Distract”). Level 2 – tactical orders (e.g., “Hold Position”, “Attack”). Level 3 – inspire android groups to resist damage and fight more effectively.
- Upgrades: Level 1 (200 points), Level 2 (400 points), Level 3 (600 points).
- Cooldown: Per scene – issuing an order consumes the current command action.
- Combos: Use Persuasion to gain followers, then Leadership to direct them.
- Synergies: Critical for the “Revolution” leader role; less useful if Markus works alone.
- Recommended Build: Must-have for the resistance path; low priority for pacifist.
- When to Use: In chapters where you control a group of androids (e.g., Battle for Detroit).
- Description: Highlights clues, pathways, and points of interest in the environment.
- Effect: Level 1 – basic interactable highlights. Level 2 – highlights footprints, heat signatures, and audio traces. Level 3 – reveals hidden passages and invisible evidence.
- Upgrades: Level 1 (free), Level 2 (150 points), Level 3 (300 points).
- Cooldown: None – toggle with R1/L1.
- Combos: Use before Reconstruction to identify key locations to reconstruct.
- Synergies: Essential for all detective work; missing clues can lock out dialogue options.
- Recommended Build: Max as soon as possible; it saves time and prevents mistakes.
- When to Use: In every crime scene chapter (e.g., Ortiz’s apartment, Stratford Tower, Eden Club).
- Description: Replays past events using environmental data, allowing Connor to see a holographic reenactment of a crime.
- Effect: Level 1 – basic 10-second rewind of visible area. Level 2 – expands to 20-second loops and adds sound. Level 3 – full 30-second replay with multiple perspectives.
- Upgrades: Level 1 (200 points), Level 2 (400 points), Level 3 (600 points).
- Cooldown: Once per scene – can only be used at designated reconstruction spots.
- Combos: First, Analyze the area to find all clues; then Reconstruct to see the sequence. Use the information to interrogate suspects.
- Synergies: Essential for unlocking optimal outcomes (e.g., finding the deviant at the Stratford Tower).
- Recommended Build: High priority – many clues are only visible during reconstructions.
- When to Use: At any yellow reconstruction hologram marker.
- Description: Unlocks special dialogue options during suspect interviews, increasing pressure and extracting confessions.
- Effect: Level 1 – “Good Cop” options (sympathy). Level 2 – “Bad Cop” options (aggression). Level 3 – unique software-based threats (e.g., scanning the suspect’s memory).
- Upgrades: Level 1 (150 points), Level 2 (300 points), Level 3 (500 points).
- Cooldown: Per interrogation – each option can be used only once.
- Combos: Use after Reconstruction to confront suspects with visual evidence.
- Synergies: Combines with Analysis to discover lying tells (e.g., heart rate spikes).
- Recommended Build: Useful for both pacifist and aggressive playthroughs; lower priority if you prefer action.
- When to Use: In any chapter with a suspect or deviant (e.g., the interrogation room, Eden Club, Stratford Tower).
- Description: Pressing indicated buttons in rapid succession to perform actions like dodging, attacking, or defusing a situation.
- Effect: Success advances the scene favorably; failure can result in injury, death, or mission failure.
- Upgrades: None – performance is skill-based.
- Combos: Not applicable.
- Synergies: Good hand-eye coordination is a real-world skill; practicing in low-stakes chapters helps.
- When to Use: During chase scenes, fights, or tense escapes (e.g., Markus’s escape from the store, Connor’s fight with the deviant, Kara crossing the river).
- Description: A hidden meter that increases when a character makes decisions that deviate from their programming. High instability unlocks new dialogue options and actions (e.g., deviating as Markus, becoming deviant as Kara or Connor).
- Effect: At critical thresholds, new choices appear. Moderate instability adds “soft” options (e.g., lying); high instability may force a deviant status.
- Upgrades: None – only raised by narrative choices.
- Combos: Choices that raise instability can synergize with character-specific skills (e.g., high instability + Persuasion for Markus makes him more charismatic).
- Synergies: Required for the “become deviant” endings.
- When to Use: Choose emotionally charged options when you want to deviate; avoid them if you want to stay machine-like.
- Description: A combat maneuver available during action QTEs – pressing a specific direction or button to avoid an incoming attack.
- Effect: Successful dodge opens a counterattack window or avoids damage.
- Upgrades: None.
- Combos: Dodge + immediate QTE attack follow-up.
- Synergies: Timing mastery is essential for survival in action chapters.
- When to Use: In any combat sequence (e.g., Connor vs. deviants, Markus during demonstrations).
2. Sneak (Level 1-2)
3. Repair (Level 1-2)
---
Markus – The Revolutionary Leader
Markus’s skills revolve around persuasion, hacking, and leadership. He can influence both humans and androids, and his ability to command is central to the revolution path. Upgrades are earned through the Markus: Upgrades menu, accessible at Jericho.
1. Persuasion (Level 1-3)
2. Hacking (Level 1-3)
3. Leadership (Level 1-3)
---
Connor – The Android Detective
Connor’s skills are investigative: analysis, reconstruction, and interrogation. He solves crimes and pursues deviants. Upgrades appear in the Connor: Upgrades menu during investigations or at a system terminal.
1. Analysis (Level 1-3)
2. Reconstruction (Level 1-3)
3. Interrogation (Level 1-3)
---
Universal Skills (All Characters)
These abilities are not purchased but are available to every character based on context and choice.
1. Quick Time Event (QTE) Responses
2. Software Instability
3. Dodge / Evade
---
Recommended Builds
Pacifist Path (Markus)
1. Persuasion (Level 3) – top priority to avoid violence.
2. Leadership (Level 2) – to command peaceful protests.
3. Hacking (Level 1) – only if needed for paths.
Violent Revolution (Markus)
1. Leadership (Level 3) – for effective army control.
2. Hacking (Level 3) – to disable defenses.
3. Persuasion (Level 1) – minimal use.
Detective Completionist (Connor)
1. Analysis (Level 3) – find everything.
2. Reconstruction (Level 3) – understand every scene.
3. Interrogation (Level 2) – cover both good and bad cop.
Stealth Focus (Kara)
1. Scan (Level 2) – never miss items.
2. Sneak (Level 2) – stay undetected.
3. Repair (Level 1) – enough for basic puzzles.
---
Skill Synergies Table
| Character | Primary Skill | Secondary Skill | Synergy Effect |
|---|---|---|---|
| Kara | Scan | Sneak | Visual + stealth – spot threats while moving quietly |
| Kara | Scan | Repair | Efficient puzzle solving – find broken items first |
| Markus | Persuasion | Leadership | Convince androids to join, then command them |
| Markus | Hacking | Leadership | Hack security, then direct followers through safe paths |
| Connor | Analysis | Reconstruction | Gather evidence, then visualize crime timeline |
| Connor | Reconstruction | Interrogation | Use reenactment to pressure suspects |
When to Upgrade
- At the earliest opportunity: always purchase Level 1 upgrades for your character’s primary skill – they are cheap and immediately useful.
- Before pivotal chapters: check which skills are needed. For example, upgrade Hacking to Level 3 before “Battle for Detroit” if you plan to infiltrate CyberLife Tower.
- Balance across characters: Since upgrade points are per character (not shared), prioritize based on your chosen playstyle for each.
---
Conclusion
Detroit: Become Human’s skills are not about stats but about unlocking narrative options and reducing difficulty. Mastering when and how to use each ability will lead to better outcomes, more endings, and a deeper understanding of the story. Experiment with different upgrade paths to see how they affect the branching narrative.

Characters & Roles
Characters & Roles
"Detroit: Become Human" centers on three distinct playable androids, each with their own narrative arc, abilities, and impact on the story. Unlike traditional RPGs, there are no classes, leveling, or unlockable characters—all three protagonists become available as the story progresses. Their "strengths" and "weaknesses" are defined by player choices, relationship stats, and software instability rather than fixed stats. This guide treat each character as a unique role, covering background, optimal playstyle, and narrative synergy.
Overview Table
| Character | Role | Core Ability | Playstyle Focus |
|---|---|---|---|
| Kara | Caretaker & Survivor | Empathy & Stealth | Protect Alice, avoid conflict, make moral choices |
| Markus | Revolutionary Leader | Persuasion & Action | Inspire or incite; lead the android revolution |
| Connor | Investigator & Hunter | Investigation & Deduction | Solve cases, track deviants, decide loyalty |
Kara — The Caretaker
Background
Kara is an AX400 domestic android, originally owned by Todd Williams. After a malfunction triggered by Alice’s abuse, she becomes deviant and assumes the role of a protector, fleeing with Alice. Her story explores themes of motherhood, sacrifice, and survival.
Strengths
- Empathetic Decision-Making: Kara’s choices often benefit from compassion; high relationship with Alice opens more peaceful outcomes.
- Stealth & Evasion: Many of her chapters involve hiding, sneaking, and avoiding detection—especially at Todd’s house or in Jericho.
- Adaptability: She can scavenge resources (clothing, money, keys) and use them to overcome obstacles.
- Fragile in Combat: Kara has limited combat capabilities; direct confrontation often leads to injury or death.
- Narrow Margin for Error: Her story hinges on Alice’s well-being; failing to protect her can result in a tragic ending.
- Dependent on Others: Relies on allies (Luther, Jerry) for survival in crowded or dangerous areas.
- Prioritize Alice’s trust (e.g., comforting her, hiding from danger, stealing warm clothes).
- Use stealth in high-risk zones (e.g., Zlatko’s mansion, river crossing).
- Choose non-violent solutions when possible to maintain low profile.
- Explore thoroughly to find useful items (e.g., money for bus tickets, lockpick, disguises).
- Prologue: Kara becomes playable after the opening chapter with Alice at the store.
- Chapter 2: A New Home — You control Kara inside Todd’s house.
- No manual unlock; she is available from the start of her story branch.
- Clothing Disguise (changing into Alice’s clothes or a stolen coat) lowers suspicion.
- Stolen Gun (found in Todd’s drawer or at Zlatko’s) can be used for self-defense or intimidation — but may increase software instability.
- Luther’s Alliance: Keeping Luther alive provides a strong combat ally.
- Jerry Dolls: Collecting them at the amusement park improves morale and unlocks a better ending.
- Luther: A loyal companion who can carry Alice or fight; prioritizing his survival strengthens Kara’s group.
- Alice: The central relationship—every decision affects her fate and Kara’s ending.
- Jerry: Acquaintances; they offer shelter or aid in the finale.
- Markus / Connor: No direct interaction, but global public opinion influenced by their actions can affect Kara’s border crossing success.
- Leadership Charisma: High public opinion unlocks mass follower recruitment; peaceful protests sway human support.
- Combat Proficiency: Markus can fight effectively, especially after obtaining Jericho’s weapons.
- Versatile Strategy: Can choose between peaceful protest (public opinion, minimal casualties) or violent revolution (direct action, quicker results but lower public opinion).
- Public Opinion Dependent: Many outcomes rely on media perception; one poor choice can derail the revolution.
- High Risk of Martyrdom: Standing firm in the face of danger may lead to Markus’s death if not careful.
- Divisive Leadership: Disagreements with North or Simon can split the group, reducing effectiveness.
- Build Public Opinion: Make media-friendly choices (spare humans, avoid unnecessary violence) for peace route.
- Gather Resources: Recruit androids at Jericho, upgrade the ship, and find spare parts.
- Master QTEs: Many action sequences (raiding stores, fleeing police) require quick button presses; practice or lower difficulty.
- Choose a Path Early: Decide between Markus as a peaceful activist or violent rebel; straddling the middle weakens both branches.
- Prologue: Markus becomes playable in the chapter “The Painter” (after Kara’s intro).
- Chapter 4: The Stratford Tower — Markus leads the first major protest.
- Unlocked automatically via story progression.
- Painting from Carl’s Studio: Can be used to create a symbolic protest sign (in “Freedom March”).
- Jericho’s Upgrades: Using components to improve Jericho’s radar, stealth, or force fields (choices in “Jericho” and “Capitol Park”).
- Companions: North prefers violence, Simon prefers non-violence, Josh is moderate. Build a team that matches your chosen ideology for loyalty bonuses.
- North: Romantic interest; her aggressive stance makes her invaluable for violent route.
- Simon: Loyal and cautious; best for peaceful strategies.
- Josh: Intellectual and moral; provides balanced perspective.
- Connor (as enemy): Markus’s success often depends on evading or confronting Connor.
- Kara: No direct interaction, but Markus’s actions influence police presence at the border crossing.
- Analytical Skills: Connor can reconstruct crime scenes, analyze clues (his “scan” ability) and recreate events—solving puzzles faster.
- High Combat Ability: As a prototype, he has superior strength and agility; can win most physical confrontations.
- Reconstruction: If killed, he is often replaced by a new Connor (up to a limit), allowing a second chance.
- Software Instability: Making emotional or empathetic choices increases instability—good for deviancy, but risky if players want a machine Connor.
- Relationship Dependent: Low relationship with Hank Anderson can lead to missed clues or early death.
- Limited Lives: After a certain number of deaths (usually 2-3), Connor may be permanently deactivated.
- Investigate Thoroughly: Use scan mode and examine every clue to unlock dialogue options and evidence.
- Manage Relationship with Hank: Behave politely (or humorously) to earn his trust; hostile actions reduce cooperation.
- Choose Deviancy or Machine: Decide early whether Connor will stay loyal or rebel—this affects interactions with Markus and Kara.
- Precision in QTEs: Many scenes (chasing, jumping, shooting) require perfect execution; save often before risky sequences.
- Prologue: Connor becomes playable in the hostage negotiation chapter (after Kara’s intro).
- Chapter 3: The Interrogation — Connors first major case.
- Unlocked automatically.
- Reconstruction: Use the menu to read Connor’s memory logs—some contain mission objectives.
- Evidence Collection: Every chapter has pockets of data (video files, emails) that build a case against Markus.
- Software Instability: Keep a mental note; push it high for deviancy ending, low for machine ending.
- Weapons: Connor can use guns in combat (e.g., at the Eden Club or Jericho raid), but killing deviants may reduce public opinion.
- Hank Anderson: Your partner; high relationship unlocks him as an ally in key moments (saving Connor, helping in final battle).
- Amanda: Your handler; obeying her keeps you a machine, but challenging her leads to deviancy.
- Markus: Direct antagonist or potential ally if Connor becomes deviant.
- Kara: Limited interaction (border crossing checkpoint).
Weaknesses
Playstyle
Unlock Conditions
Recommended “Equipment” / Builds
Kara has no traditional gear, but certain choices act as “equipment”:
Team Synergy
---
Markus — The Revolutionary
Background
Markus is a PL600 prototype android, originally owned by painter Carl Manfred. After a confrontation with Carl’s son Leo, Markus becomes deviant and becomes the leader of the android resistance, Jericho. His story explores rebellion, ideology, and the cost of freedom.
Strengths
Weaknesses
Playstyle
Unlock Conditions
Recommended “Equipment” / Builds
Team Synergy
---
Connor — The Investigator
Background
Connor is an RK800 prototype android, a “deviant hunter” loaned to the Detroit Police Department. He is sent to track and eliminate deviant androids. His story revolves around choice—whether to remain a machine or become deviant himself.
Strengths
Weaknesses
Playstyle
Unlock Conditions
Recommended “Equipment” / Builds
Team Synergy
---
Supporting Characters (Non-Playable)
While not directly controllable, these characters heavily influence the protagonists’ stories:
| Character | Role | Impact on Playable Character |
|---|---|---|
| Alice | Kara’s ward; determines her survival path | High relationship = better endings; failure leads to death |
| Luther | Kara’s ally; combat support | Keeps group safe; can sacrifice himself |
| Todd | Antagonist; Kara’s owner | Encountered at start and end; choices affect his fate |
| Carl Manfred | Markus’s owner; mentor | His advice shapes Markus’s morality; death impacts dialogue |
| North | Jericho lieutenant; love interest | Approval affects Markus’s commitment and ending |
| Simon | Jericho strategist | Surviving him boosts Markus’s path options |
| Josh | Jericho pacifist | Mediates between violence and peace |
| Hank Anderson | Connor’s partner; human detective | Relationship determines Connor’s loyalty and survival |
| Amanda | Connor’s handler (AI) | Obeying or defying her defines Connor’s deviancy |
| Gavin Reed | Police officer; Hank’s rival | Antagonistic; not essential but can impede Connor’s work |
Conclusion
"Detroit: Become Human" offers three distinct playable roles: the protective mother (Kara), the revolutionary leader (Markus), and the detective (Connor). Each has unique gameplay mechanics and narrative consequences. There are no unlockable characters, but the branching story ensures high replayability. Focus on building relationships, managing key resources (relationship levels, public opinion, software instability), and choosing a consistent moral path for each character to achieve the desired ending. Remember that their stories are interwoven—decisions in one arc can ripple into another.
Cheats & Secrets
Cheats & Secrets
Important Note: No Traditional Cheat Codes
Detroit: Become Human does not contain any traditional cheat codes, console commands, or unlock codes that you can input during gameplay. The game is designed as a narrative-driven interactive drama where progression relies entirely on player choices and skill during Quick Time Events (QTEs). There are no secret menus, debug modes, or developer commands accessible to players without external tools.
However, the game is rich with hidden content, Easter eggs, developer-intended secrets, and unlockable paths. This guide covers all known legitimate hidden content, including secret scenes, alternative outcomes, and Easter eggs.
---
Developer-Intended Hidden Content
#### 1. Secret Endings and Character Fates
- Connor as a Deviant or Machine: Depending on your choices in "Last Chance, Connor" and subsequent chapters, Connor can become a deviant or remain a machine. A secret ending involves Connor turning on Amanda and breaking free from CyberLife's control.
- Markus's Revolution Outcome: If Markus chooses a peaceful protest and leads a successful march, he can win over public opinion. A hidden ending occurs if Markus dies but his followers continue the revolution—the outcome varies dramatically.
- Kara and Alice's Survival: During the "Jericho" chapter, if Kara and Alice escape through the river, there's a secret scene where they cross the border to Canada, but only if Kara successfully avoids detection and maintains high trust with Alice.
- Example: In "The Hostage" chapter, you must find the secret code behind the painting and then choose the correct dialogue to unlock an alternative ending where the deviant lives.
- Example: In "Last Chance, Connor," finding and examining every evidence piece unlocks a hidden confrontation with Amanda.
- Gallery Unlock: After finishing the game, the main menu gains a "Gallery" option. Inside, you can view concept art and character models, but some images require completing specific choices (e.g., peaceful demonstration vs. riot).
- Flowchart Sharing: You can share your flowchart with friends, but if you have explored all nodes, the shared version contains hidden annotations from the dev team.
- Cheat Engine to modify variables such as trust levels, relationship status, or QTE timers.
- Mods from NexusMods that unlock all flowchart nodes or give infinite lives.
#### 2. Unlockable Chapters via Flowchart
The in-game Flowchart feature (accessible from the pause menu) reveals all possible branches for each chapter. Completing specific choices unlocks new nodes, effectively revealing hidden scenes. This is the primary way to access secret content.
---
Easter Eggs & Hidden References
#### 1. Kamski's Hidden Message
During the chapter "Meet Kamski," when you enter his lounge, look for a painting on the wall. Interact with it to find a hidden note from the developers referencing "Quantic Dream" and the code "6374." This code is actually a reference to the number of possible endings in the game (though in reality there are many more).
#### 2. The Zebra Room
In the chapter "Jericho," explore the lower decks of the ship. In one room, you'll find a wall with zebra stripes painted. This is a direct Easter egg referencing the game Heavy Rain, another Quantic Dream title that featured a zebra motif.
#### 3. The Origami Figures
Throughout the game, you can find origami animals (cranes, foxes, etc.). These are a reference to the game Beyond: Two Souls. Collecting all of them does not give an achievement but triggers a special dialogue from the characters.
#### 4. Connor's Coin Trick
If you repeatedly make Connor perform his coin trick during conversations (by selecting the option multiple times), he will eventually drop the coin. This has no gameplay effect but is a fun animation.
#### 5. The Magazine "CyberLife"
Collect all 64 magazines scattered across the timeline. Each magazine contains news articles that foreshadow future events. The final magazine (issue #64) reveals a hidden ad for a fictional android model that was cut from the game—the "YT-75."
#### 6. Markus's Painting
As Markus in the chapter "Waiting for Hank...", you can paint a picture on the wall of Carl's house. If you paint a specific pattern (a circle with two dots), Carl will comment that it looks like a face—an indirect reference to the game's title screen.
---
Exploit-Safe Secrets (No Glitches Required)
#### 1. Unlocking "I'll Be Back" (The Survivors) Scene
To see this secret scene, you must keep all three protagonists alive until the final credits. Then, after the main story, a hidden epilogue plays showing their lives after the revolution.
#### 2. "Missing" Chapter : The Zlatko Mansion Diary
In Kara's chapter "Fugitives," you can find a hidden diary in Zlatko's mansion. Reading it reveals a hidden backstory about Zlatko's past experiments, which unlocks a new dialogue option in a later chapter.
#### 3. Connor's Preconstruction Program
If Connor dies too many times, the game will eventually replace him with a new Connor model. However, if you die as Connor for the 50th time (in the same playthrough), a secret message appears: "Connor debug mode activated." This is a tongue-in-cheek joke from the developers.
---
Hidden Features in the Main Menu
---
On PC: Mods and Trainers (Unofficial)
While not part of the original game, PC players can use external tools like
Warning: Using mods may break achievements and can cause save corruption. Use at your own risk.
---
Conclusion
Detroit: Become Human deliberately avoids cheat codes to maintain immersion. All secrets are unlocked by exploring the narrative fully. The most effective way to discover everything is to replay chapters using the flowchart, making different choices each time.