
Diablo III
## Game Introduction **Diablo III** is an action role-playing hack-and-slash dungeon crawler developed and published by Blizzard Entertainment. It is the third major installment in the critically acclaimed Diablo series, following the original Diablo (1996) and Diablo II (2000). The game was initia...

Download & Installation
Download & Installation Guide for Diablo III
Diablo III is available on PC (via Blizzard Battle.net), PlayStation 4/5, Xbox One/Series X|S, and Nintendo Switch. This guide covers legitimate sources, step-by-step installation, system requirements, account setup, common errors, and post-install verification.
Official Sources & Platforms
| Platform | Official Store | Notes |
|---|---|---|
| PC (Windows/Mac) | Blizzard Battle.net | Required client; not on Steam or Epic. |
| PlayStation 4/5 | PlayStation Store | PS4 disc works on PS5 via backward compatibility; PS5 version has improved loading. |
| Xbox One/Series X | S | Microsoft Store / Xbox Game Pass |
| Nintendo Switch | Nintendo eShop | Only base game + Reaper of Souls; no Rise of the Necromancer pack sold separately. |
---
System Requirements (PC)
#### Minimum (Windows)
- OS: Windows 7 / Windows 8 / Windows 10 (64-bit)
- CPU: Intel Core 2 Duo 2.4 GHz or AMD Athlon 64 X2 2.8 GHz
- RAM: 4 GB
- GPU: NVIDIA GeForce 8800GT / ATI Radeon HD 2900 XT or better (DirectX 11 compatible)
- Storage: 25 GB available space
- Network: Broadband internet connection
- Display: 1024x768 minimum resolution
- OS: Windows 10 (64-bit)
- CPU: Intel Core i5 or AMD Ryzen 5
- RAM: 8 GB
- GPU: NVIDIA GeForce GTX 760 / AMD Radeon R9 270 or better
- Storage: 25 GB SSD (for faster loading)
- Network: Broadband internet
- Display: 1920x1080 or higher
- OS: macOS 10.12 (Sierra) or newer
- CPU: Intel Core 2 Duo 2.4 GHz
- RAM: 4 GB
- GPU: NVIDIA GeForce 9600M GT / ATI Radeon HD 4670 or better (1 GB VRAM)
- Storage: 25 GB
- Note: As of 2023, Diablo III on Mac is 64-bit only; macOS Catalina or higher required.
- Battle.net Account: Required for PC. You need a free Battle.net account to download the game. The game license is tied to this account.
- PlayStation Network (PSN) / Xbox Live / Nintendo Account: Required for console versions. An internet connection is required for first-time installation and seasonal play. Subscription services (PS Plus, Xbox Game Pass Core/Ultimate, Nintendo Switch Online) may be needed for online multiplayer (check current policies; Diablo III on consoles requires a subscription for co-op with other players online, but local co-op does not).
- Game License: Purchase the appropriate edition (Standard, Eternal Collection, Prime Evil Collection). The Eternal Collection includes Reaper of Souls and Rise of the Necromancer. The Prime Evil Collection (for console) includes all content for Diablo III and Diablo II: Resurrected.
- Language Selection – On first run, pick your preferred language.
- Graphics Options (PC) – The game auto-detects hardware and sets a default quality level. You can change later from Options > Video.
- Sound and Accessibility – Adjust volume, subtitles, and other settings.
- Battle.net Account Linking (Optional) – On consoles, you can link your Battle.net account to enable cross-platform progression (Paragon levels, cosmetics, etc.). This is done from the main menu or in-game options.
- Game Mode Selection – Choose Campaign, Adventure Mode (if you have Reaper of Souls), or Seasonal Hero creation.
- User Agreement – Accept the EULA and privacy policy.
#### Recommended (Windows)
#### Mac (Minimum)
---
Account Requirements
---
Step-by-Step Installation
#### PC (Windows/Mac)
1. Create/Log In to Battle.net Account – Go to [battle.net](https://www.battle.net) and create a free account or log in.
2. Download Battle.net Desktop App – From the Battle.net website, click the "Download" button for the desktop app. Run the installer (Battle.net-Setup.exe on Windows, .dmg on Mac).
3. Install the App – Follow installer prompts. Accept license agreement.
4. Log In – Open the Battle.net app and log in with your account.
5. Purchase or Redeem Key – Click the Diablo III tile (if already purchased, it appears in your library). If not, click "Shop" and buy the game. You can also activate a product key via the account page.
6. Install Diablo III – From the Diablo III page in the app, click the blue "Install" button. Choose installation location (default: C:\Program Files (x86)\Diablo III on Windows).
7. Wait for Download – The app will download all necessary files (~25 GB). Download speed depends on your internet connection.
8. Launch – After installation, click "Play" to start the game. The first launch may require additional setup (e.g., graphics settings, resolution).
#### PlayStation 4/5
1. Sign In to PSN – Ensure you have a PlayStation Network account and are signed in on your console.
2. Go to PlayStation Store – From the home screen, select the PlayStation Store icon.
3. Search for Diablo III – Use the search bar to find "Diablo III: Eternal Collection" (or Prime Evil Collection).
4. Purchase and Download – Select the game, choose your edition, and confirm purchase. The download will start automatically. Alternatively, insert a disc; the console will copy data.
5. Installation – The game installs to your system storage. For PS4, ensure at least 30 GB free. For PS5, you can install to internal SSD or compatible external USB drive (but performance is best on internal).
6. Launch – After download completes (around 25 GB), select the game tile from your library or home screen to play.
#### Xbox One/Series X|S
1. Sign In to Xbox Live – You need an Xbox profile. If you have Game Pass, check if Diablo III is included (base game only).
2. Open Microsoft Store – From the Xbox dashboard, go to Store.
3. Search for Diablo III – Find "Diablo III: Eternal Collection" or the Prime Evil bundle.
4. Purchase and Install – Click "Buy" and confirm. The download starts automatically. If using Game Pass, select "Install" from the Game Pass app.
5. Installation Progress – Manage installs from "My games & apps." Smart Delivery ensures you get the optimized version for your console.
6. Launch – Once ready, click the game tile. The first launch may prompt you to link your Battle.net account for cross-progression (optional).
#### Nintendo Switch
1. Sign In to Nintendo Account – Ensure you have a Nintendo Account linked to your Switch profile.
2. Open Nintendo eShop – From the Home menu, select eShop.
3. Search for Diablo III – Look up "Diablo III: Eternal Collection".
4. Purchase and Download – Select the game, complete purchase via credit card or eShop funds. The download begins immediately. You can also insert a physical game card; the console will install any required updates (usually large patches).
5. Installation – Download size is about 23 GB (may require a microSD card if internal storage is insufficient).
6. Launch – After installation, the game appears on your Home screen. First launch may require an initial sync with Battle.net if you want to enable cloud saves (optional).
---
First Launch Setup
---
Common Installation Errors & Fixes
| Error | Platform | Cause | Solution |
|---|---|---|---|
| "Installation stuck at 0%" | PC | Battle.net app cache / permissions | Clear Battle.net cache: Close app, delete 'C:\ProgramData\Blizzard Entertainment\Battle.net\Cache', restart app. Run installer as admin. |
| "Network timeout during download" | PC | Firewall/antivirus blocking | Temporarily disable firewall/antivirus, add Battle.net and Diablo III.exe to allowed list. Check internet connection. |
| "Disk write error" | PC | Insufficient space / drive permissions | Free up space (need 25+ GB). Run as admin. If installing to external drive, use NTFS format. |
| "Error BLZBNTBGS80000011" | PC | Corrupted installation | Repair installation: Battle.net app > Diablo III > Options > Scan and Repair. |
| "Insufficient storage space" | Consoles | Not enough free space | Delete unused games/apps. For Switch, insert microSD card. On PS4, you can use external USB drive (format required). On Xbox, manage storage in Settings. |
| "Cannot connect to online services" | All | Server maintenance / account issue | Check Blizzard CS status ([status.blizzard.com](https://status.blizzard.com)). Ensure internet connection works. Verify account is active (not banned). On consoles, ensure subscription (PS Plus etc.) is active if needed. |
| "Game crashes on launch" | PC | Outdated GPU drivers / corrupted installation | Update GPU drivers. Run as admin. In Battle.net app, go to Diablo III > Options > Game Settings > Additional Arguments: add "-launch" to skip launcher (troubleshooting). Also disable overlays (Discord, Steam). |
| "Error CE-34878-0" (PS4) | PS4 | Corrupted game data | Rebuild database: boot PS4 in Safe Mode (hold power button for 7 seconds), select Option 5. Or delete and reinstall game. |
| "0x803F8001" (Xbox) | Xbox | Insufficient privileges | Make sure you own the game or have Game Pass. Try hard reset (hold Xbox button on console for 10 seconds). |
Post-Installation Verification
- Check Version Number – From main menu, look at bottom-left corner. Current patch (as of 2025) is 2.7.8 or later. If not, check for updates.
- Test Online Functionality – Create a Seasonal character and try to join a public game. If you get "No internet connection" errors, verify your network.
- Verify File Integrity (PC) – In Battle.net app, Diablo III > Options > Scan and Repair. This checks and redownloads any corrupted files.
- Check Storage Usage – Ensure the game is installed on a fast drive (SSD recommended). On PC, the folder size should be ~25 GB.
- Enable Cloud Saves (Console) – If you have Nintendo Switch Online or PlayStation Plus/Xbox Game Pass Core, verify cloud saves are enabled for Diablo III in system settings to protect progression.
- Test Controller (Console) – Ensure all buttons work in the main menu. If using a third-party controller, check compatibility.
- Preloading: You can preload the game on PC before purchase if you have a friend who owns it (via Battle.net gift feature) or when you pre-order. Console preloads are available a few days before release for digital pre-orders.
- Playing Offline: Diablo III on PC requires an internet connection for the first-time login; after that, you can play offline (except Seasonal characters, which need connection for leaderboards). On consoles, you can play offline without an internet connection, but seasonal content requires online verification.
- Cross-Platform Play: Not supported. PC, PlayStation, Xbox, and Switch players cannot play together. Cross-progression is available only between PC and consoles (limited to Paragon, cosmetics) through Battle.net linking.
- Antivirus Exceptions: If you have performance issues, add Diablo III folder and Battle.net app to your antivirus exclusion list.
---
Additional Tips
---
This guide is accurate as of early 2025. Always refer to official Blizzard support for the most up-to-date information.
Game Introduction
Game Introduction
Diablo III is an action role-playing hack-and-slash dungeon crawler developed and published by Blizzard Entertainment. It is the third major installment in the critically acclaimed Diablo series, following the original Diablo (1996) and Diablo II (2000). The game was initially released for Microsoft Windows and macOS on May 15, 2012, and has since been ported to PlayStation 3, Xbox 360, PlayStation 4, Xbox One, Nintendo Switch, and is backward compatible on PlayStation 5 and Xbox Series X|S. A major console enhanced version, Diablo III: Eternal Collection, bundles all content.
Story Overview and Setting
The story takes place in the dark fantasy world of Sanctuary, a realm created by the angel Inarius and the demon Lilith as a refuge from the Eternal Conflict between Heaven and Hell. Twenty years after the events of Diablo II, the world is once again under siege. A fallen star crashes into the Cathedral of Tristram, unleashing a wave of corruption and resurrecting ancient evils. Players must unravel the conspiracy behind the return of the Prime Evils—Diablo, Mephisto, and Baal—and confront a new threat: the Lord of Lies, Belial, and the Lord of Sin, Azmodan. The narrative follows the player character, known as the Nephalem, a descendant of angels and demons with immense power.
Main Characters
- The Nephalem: The player-controlled hero, customizable by class and gender. They are the key to Sanctuary’s salvation.
- Deckard Cain: The last of the Horadrim, a sage and lore keeper who guides the player.
- Leah: Cain’s adoptive niece, central to the plot and the vessel for Diablo’s return.
- Tyrael: The former Archangel of Justice who becomes mortal and assists the Nephalem.
- The Prime Evils: Diablo, Mephisto, Baal (though Baal appears only in lore references) and the Lesser Evils: Belial and Azmodan.
- Campaign: The main story, playable solo or in cooperative multiplayer (up to 4 players).
- Adventure Mode: Unlocked after completing the campaign (or via Seasonal characters). Allows free-roam across all acts, Bounties, Nephalem Rifts, and Greater Rifts — the primary endgame activities.
- Seasonal Play: Periodic seasons (approximately 3 months) where players start fresh characters from scratch to earn exclusive cosmetic rewards, complete season journey objectives, and compete on leaderboards.
- Hardcore Mode: Permadeath characters — if you die, the character and all equipped items are lost. Adds extreme tension.
- PC/Mac: Requires a persistent internet connection for all modes (including single-player) due to DRM and online services. Battle.net account required. No offline mode.
- Console (PS4, Xbox One, Switch): Supports offline play for the campaign and local cooperative multiplayer (up to 4 players on the same screen). Online multiplayer requires console subscription services (PS Plus, Xbox Live Gold, Nintendo Switch Online).
- Cross-progression: Not available across platforms, but Seasonal progress and characters are shared between PC regions via same Battle.net account.
- Diablo III: Reaper of Souls (2014): The major expansion. Adds the Crusader class, Adventure Mode, the fifth act (Westmarch), and the Mystic artisan for transmogrification.
- Diablo III: Rise of the Necromancer (2017): A playable Necromancer class (comes with the Eternal Collection).
- Eternal Collection (2018): The definitive version for consoles, including the base game, Reaper of Souls, and Rise of the Necromancer. On PC, the Battle Chest includes base + Reaper of Souls; Necromancer is a separate purchase.
- Season Passes: Seasonal content is free to all players on all platforms (no paid battle pass).
- Fluid, visceral combat: Combines responsive controls with spectacular visual effects and screen-shaking power.
- Legendary and Set Items: Hundreds of unique items that radically alter skills and enable diverse build archetypes.
- Seasons and Leaderboards: A thriving seasonal ecosystem that resets the economy and encourages experimentation.
- Cross-Platform Presence: Availability on nearly every modern platform, with local co-op on consoles.
- Accessibility: Simplified skill system (no mana management for most classes) compared to predecessors, but still offers deep customization via gear and Kanai’s Cube.
- Endless Replayability: Random dungeons, scaling difficulty up to Torment XVI, and Greater Rift challenges that push player builds to the limit.
Core Appeal and Gameplay
Diablo III is known for its fast-paced, fluid combat, deep loot system, and intense multiplayer. The game emphasizes constant character progression through leveling from 1 to 70 (plus Paragon levels beyond), acquiring legendary and set items, and customizing skills via a rune system. The core loop is: kill monsters, collect loot, become stronger, and face greater challenges. Randomly generated dungeons and a variety of difficulty levels, including the endgame Torment system, provide high replayability.
Target Audience
The game appeals to both casual and hardcore players: those who enjoy action RPGs, loot-driven progression, competitive leaderboards (via Seasonal play), and cooperative multiplayer. It is accessible to newcomers while offering depth for veterans through high-difficulty builds, leaderboard rankings, and theorycrafting.
Game Modes
Online/Offline Support
Download & Installation Guide for Diablo III
Diablo III is available on PC (via Blizzard Battle.net), PlayStation 4/5, Xbox One/Series X|S, and Nintendo Switch. This guide covers legitimate sources, step-by-step installation, system requirements, and troubleshooting.
DLC and Expansions
What Makes Diablo III Unique
Whether you’re a seasoned Nephalem or a newcomer to Sanctuary, Diablo III offers an addictive loop of loot, legendaries, and demon-slaughtering mayhem that has kept millions engaged for over a decade.
Getting Started
Getting Started Guide for Diablo III
Welcome to Sanctuary, new Nephalem! This guide is designed to get you through your first hour of Diablo III with confidence. We'll cover character creation, controls on every platform, the user interface, your essential early goals, what to avoid, and a day-one checklist. Let's dive in.
Character Creation
When you launch the game for the first time, you'll be prompted to create a character.
1. Choose your class. Diablo III has seven classes. For beginners, Barbarian (tanky melee), Monk (fast melee), or Demon Hunter (ranged damage) are easiest to pick up. Wizard and Witch Doctor are also fine but require more mana/resource management. Crusader (requires Reaper of Souls) is a heavy armor tank. Necromancer (requires DLC) is a pet-based caster.
2. Select a name and gender. Names must be unique on your account. Gender is purely cosmetic—it doesn't affect stats or skills.
3. Core vs. Hardcore. For your first character, choose Normal (Core). Hardcore means permadeath—one death and the character is gone. Beginners should avoid Hardcore.
4. Season vs. Non-Season. On PC, seasons offer cosmetic rewards and a fresh economy. For learning the game, Non-Season is simpler. On consoles, seasons work similarly—but you can start in either; just be aware that seasonal characters compete for leaderboards.
Your First Hour: Walkthrough
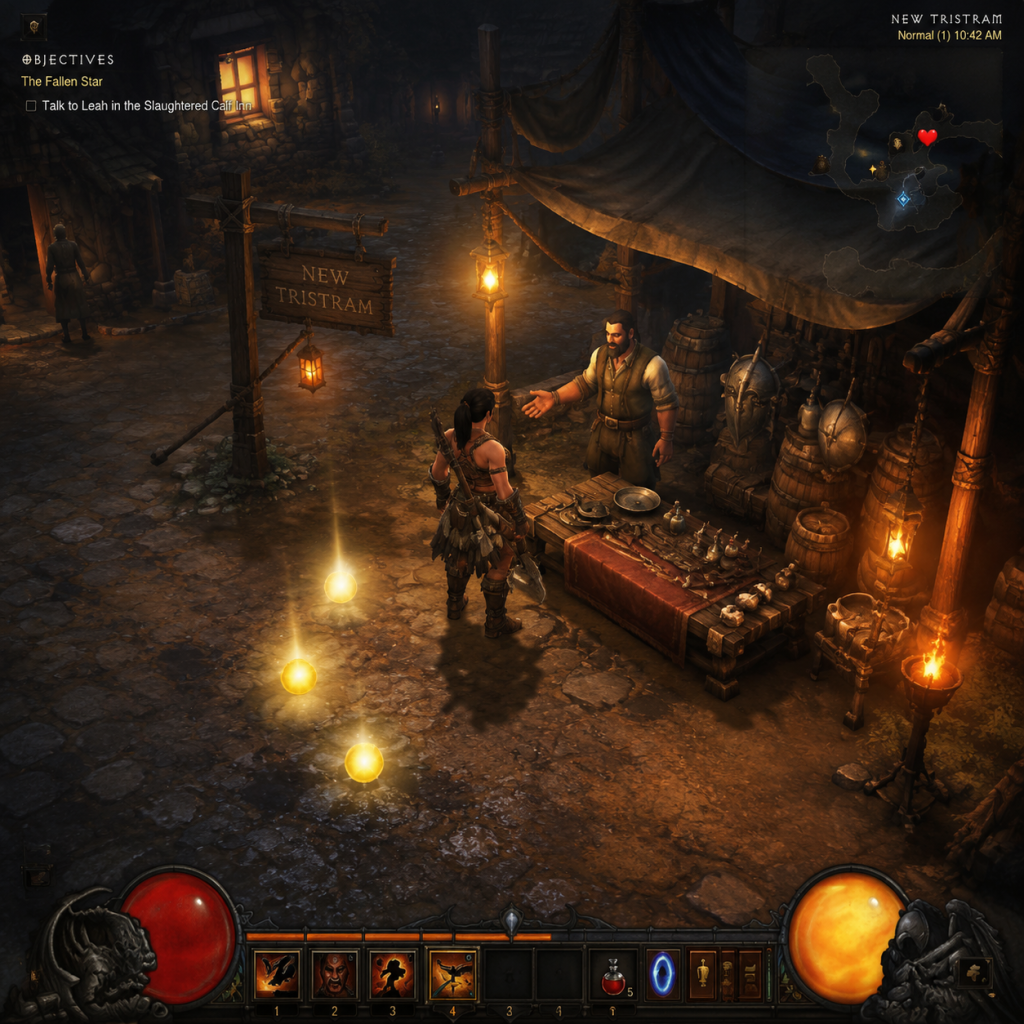
After the cinematic, you begin in New Tristram (Act I). A quest arrow points you to the central town.
- Talk to Deckard Cain to start the quest "The Fallen Star." Follow the arrow out of town into the Old Ruins. Kill zombies and weak enemies—your starting skill (e.g., Bash for Barbarian) is enough.
- Pick up everything that drops: gold, items, health potions. You can use health potions by pressing Q (PC) or the corresponding button on console.
- After a short path, you'll encounter the Skeleton King's forces. Just hack through. Reach a large gate—click on the lever to open it. Inside is a Hearth (campfire). Interact with it to light the way and get a checkpoint.
- Continue to the Cathedral. Enter and follow the linear path. You'll see Captain Haedrig. Talk to him; he'll ask you to charge his anvil by killing nearby enemies. Do that—watch for a special Champion pack (blue-named enemy with minions). Kill them carefully—kite them if needed.
- After charging the anvil, Haedrig joins your cause. Exit the cathedral and return to New Tristram. Talk to Cain and Haedrig again—you'll unlock the Blacksmith (Haedrig) at his forge in town.
- Salvage any white or blue weapons/armor you've collected. On PC, right-click items in inventory and select "Salvand"; on console, press the appropriate button (Y/Triangle). This gives you Crafting Materials (common debris, arcane dust).
- Equip better gear as you find it. Don't get attached to low-level items.
- Continue to the Old Mill area—follow the quest marker. You'll fight more monsters and eventually find the Fallen Star impact crater. Watch for a large boss-like Corpse of the Unclean—simply kill it.
- Return to town. Next quest: The Legacy of Cain. You'll need to go to the Cemetery of the Forsaken. Enter the Defiled Crypt—it's dark. Find the Jar of Souls event (not required but good XP). Deeper in, you'll find Leoric's Crown—pick it up.
- Return to Cain. He'll reveal that you must find the Skeleton King. Follow the quest to Leoric's Manor. The dungeon is linear. At the end, you'll face the Skeleton King—his fight has a few patterns: he charges, summons skeletons, and spins. Dodge his charge and hit him when he's stunned. He's not too tough. Defeat him to finish Act I's first major boss.
- Left mouse button: Move, interact, primary skill.
- Right mouse button: Secondary skill (set in skills menu).
- Number keys 1–4: Skill slots 3–6.
- Q: Health potion.
- Tab: Toggle map overlay.
- I: Inventory.
- C: Character sheet (stats).
- M: Full world map.
- Spacebar: Dodge roll? No, that's only in console versions. PC has no dodge roll.
- Shift + left click: Force stand still to attack without moving.
- Hold left click: Move to cursor continuously.
- Left stick: Move character.
- Right stick: Aim/rotate camera (limited).
- Face buttons/triggers: Skills (assigned in menu). Typically: Square/X = skill 1, Triangle/Y = skill 2, Circle/B = skill 3, Cross/A = skill 4, L1 = skill 5, R1 = skill 6.
- L2 (left trigger): Health potion (or press Up on D-pad).
- Options/Menu: Start/Settings.
- Touchpad (PS4/5) or View button (Xbox): Map overlay.
- Down on D-pad: Toggle loot name display.
- Dodge roll: Tap R3 (push right stick) in combat.
- Left stick: Move.
- Right stick: Aim/camera.
- A/B/X/Y: Skills (assignable).
- L/R: Skills 5 and 6.
- ZL: Health potion (or Up on D-pad).
- ZR: Dodge roll (tap).
- - (minus): Map.
- + (plus): Inventory/character menu (hold for pause).
- D-pad: Loot filter, quick inventory.
- Health Globe: Top-left corner of screen (PC) or left side (console). Green orb shows your health. Low health = slowly regenerate? No, health regenerates only through potions, health globes from enemies, or skills.
- Resource Globe: Just below health globe. Blue for Arcane Power (Wizard), Red for Fury (Barbarian), Purple for Mana (Witch Doctor), Yellow for Hatred/Disciple (Demon Hunter), Light blue for Spirit (Monk), Green for Wrath (Crusader), Cyan for Essence (Necromancer). You spend resource on skills; it regenerates via attacks or over time.
- Skill Bar: Bottom center of screen (PC) or bottom edge (console). Shows your 6 skills (including left/right click on PC). Skills unlock as you level up. You can drag skills from the Skills menu (opened with S on PC) onto slots.
- Mini-map: Top-right corner (PC) or upper-right (console). Shows enemies as red dots, quest objectives as blue diamond, teammates as green dots. White dots are friendly NPCs.
- Quest Tracker: Right side (PC) or left side over the map. Lists current act quest and optional objectives.
- Inventory (I key): Pressing I opens grid-based inventory. Each item takes up squares. Equipped items shown on paper doll. Right-click to equip or unequip.
- Character Sheet (C): Shows your stats: damage, toughness, healing, primary attributes (Strength, Dexterity, Intelligence, Vitality). Vitality affects health; main attribute varies by class.
- Town Portal (T key on PC, or button on console): Creates a portal back to town. Use it to sell, salvage, repair (though gear doesn't degrade), or gamble with Kadala later.
- Pick up all gold—you'll need it for the Mystic (enchanter) later.
- Salvage items you don't use. This gives you crafting materials that are essential for the Blacksmith and Jeweler.
- Repair your items? Actually weapons and armor never break in Diablo III, so repairing is not needed.
- Use health potions liberally—they drop frequently. Bind a potion key you can reach easily.
- Kill every elite pack (blue or yellow name) you see. They drop better loot and more gold.
- Break pots, barrels, and urns for extra gold and sometimes items.
- Visit the Blacksmith every time you return to town to salvage and craft if you have spare materials.
- Don't hoard low-level items. Your inventory is limited (60 slots). Salvage or sell everything you don't equip.
- Don't waste gold on item purchases from vendors. Early gear drops are better. Only buy gems or recipes if needed.
- Don't use your respec options too early. Skills can be changed freely (no cost) until you reach level 70? Actually you can change skills anytime for free—but you only have limited skill slots. Experiment but don't stress.
- Don't skip quest dialogue—it gives context, but you can skip cutscenes if you want.
- Don't try to fight bosses under-leveled. If you hit a boss (like Skeleton King) and die a lot, go back to town, do side areas for XP, or lower difficulty.
- Avoid Hardcore mode until you know the game well.
- Avoid Adventure Mode until you complete the campaign at least once—the story is worth experiencing.
- Gold: Used for gambles at Kadala (after level 70), crafting, enchanting (Mystic). Save gold—don't waste on vendors.
- Crafting Materials: Common Debris (from white items), Arcane Dust (from blue items), Veiled Crystal (from yellow). Keep these! They are crucial for the Blacksmith and Jeweler.
- Gems: Flawless gems drop at later levels. Early on, keep any gems you find; you'll need them for sockets. Combine them at the Jeweler (unlocks after Act II? Actually he appears in Act I after you find a recipe? No, he's available from the start in town but requires gold and materials to unlock upgrades.)
- Blood Shards: Only available after reaching level 70 in Adventure Mode. For campaign, ignore for now.
- Experience: Leveling is your primary goal. Kill monsters, complete quests, and do event shrines (like the Shrine of the Fallen).
- [ ] Install the game via Battle.net (PC) or from the store (console).
- [ ] Create a Normal Non-Season character (recommend Barbarian, Monk, or Demon Hunter).
- [ ] Complete the tutorial (reach New Tristram).
- [ ] Finish the first quest "The Fallen Star."
- [ ] Unlock the Blacksmith (Haedrig) and salvage all initial loot.
- [ ] Equip the best gear you have.
- [ ] Reach Level 5–7 (you should be around this after Skeleton King).
- [ ] Defeat the Skeleton King (first major boss) to get a guaranteed legendary item.
- [ ] Identify and equip any legendary items you find (right-click unidentified legendaries to auto-identify).
- [ ] Save all crafting materials you get.
- [ ] Explore the full first area—find waypoints and side dungeons for extra XP.
- [ ] Set your skills to a comfortable layout (1 generator, 1 spender, 1 mobility, 1 cooldown).
- [ ] Adjust difficulty if you're dying too often—you can lower it anytime from the Gameplay menu (on PC, press Escape -> Gameplay -> Difficulty). On console, change in Settings.
- [ ] Have fun! Don't stress about perfection—Diablo III is about smashing demons and getting loot.
By this point (about 30–60 minutes), you'll be level 5–8 and have a solid feel for combat.
Controls on All Platforms
#### PC (Keyboard & Mouse)
#### PlayStation 4/5 & Xbox One/Series X|S
#### Nintendo Switch
Important difference: Console versions include a dodge roll (R3/ZR) that PC version lacks. Use it to evade telegraphed attacks.
UI Overview
Essential Early Objectives
1. Complete the tutorial quests (The Fallen Star, The Legacy of Cain). This unlocks the Blacksmith and teaches basic mechanics.
2. Level up to at least level 7 to unlock your first skill rune (changes skill behavior). Prioritize killing monsters over looting early.
3. Salvage all white and blue items. Don't sell them—materials are more valuable later for crafting.
4. Equip the best gear for your class. Check armor for +Main Stat and +Vitality.
5. Learn your primary resource generator and spender. Each class has a basic attack that generates resource (e.g., Generator), and a powerful spender that consumes it. Use generator to build resource, then unleash spender on groups.
6. Find and activate all waypoints you pass—they allow fast travel later.
7. Defeat the Skeleton King (Act I boss) to progress the story and earn a guaranteed legendary helmet (on first kill).
What to Do First and What to Avoid
#### Do:
#### Avoid:
Early Resource Priorities
Common Beginner Mistakes
1. Not using town portal effectively. When inventory is full, press T to return to town, salvage/sell, then click the portal again to return to exact spot.
2. Ignoring your follower. Early on, the Templar follower (unlocked in Act I) can tank and heal. Give him decent gear. Set his skills to heal and tank.
3. Not picking up health globes. After killing enemies, orbs drop that restore health. Walk over them automatically—no need to click.
4. Using wrong skills. For example, using only generators without spenders. Balance is key.
5. Trying to fight too many enemies at once. Use walls or corners to funnel enemies.
6. Selling items instead of salvaging. Always salvage unless you're desperate for gold—materials are scarcer.
7. Not swapping gear because of set bonuses. Early sets are rare—your priority is higher stats.
Day-One Checklist
With this guide, you'll survive your first hour and be ready to dive deeper into Sanctuary. Good luck, and may the loot be legendary!
Core Gameplay
"content": "## Core Gameplay Guide for Diablo III
Welcome to the definitive guide to the core gameplay of Diablo III. This guide breaks down every fundamental system—the gameplay loop, combat, exploration, progression, economy, character growth, and endgame—organized by the typical player progression tiers: Early Game (Levels 1–30), Mid Game (Levels 31–60 / Normal to Hell difficulty), Late Game (Level 61–70 / Torment difficulties), and Endgame (Level 70 with Paragon / Adventure Mode / Greater Rifts). Each tier includes specific examples and actionable advice.
---
At its core, Diablo III revolves around a simple but addictive loop:
1. Enter a zone (dungeon, overworld, rift).
2. Kill monsters using your character’s skills and resources.
3. Collect loot (gold, items, crafting materials, Blood Shards).
4. Evaluate and equip better gear or salvage/sell the rest.
5. Level up (or gain Paragon) and unlock new skills / runes.
6. Increase difficulty to improve rewards and challenge.
7. Repeat at higher difficulties or different modes (bounties, rifts).
This loop stays constant but the complexity of itemization, skill synergies, and difficulty scaling changes dramatically from Early Game to Endgame.
---
#### Combat & Interaction
#### Endgame Structure Summary
---
This breakdown of core gameplay by progression tier should give you a complete roadmap from starting your first Nephalem to conquering the highest Greater Rifts. Remember: Diablo III is a game of incremental improvements – farm, craft, augment, and push.”
Welcome to the definitive guide to the core gameplay of Diablo III. This guide breaks down every fundamental system—the gameplay loop, combat, exploration, progression, economy, character growth, and endgame—organized by the typical player progression tiers: Early Game (Levels 1–30), Mid Game (Levels 31–60 / Normal to Hell difficulty), Late Game (Level 61–70 / Torment difficulties), and Endgame (Level 70 with Paragon / Adventure Mode / Greater Rifts). Each tier includes specific examples and actionable advice.
---
The Main Gameplay Loop (All Tiers)
At its core, Diablo III revolves around a simple but addictive loop:
1. Enter a zone (dungeon, overworld, rift).
2. Kill monsters using your character’s skills and resources.
3. Collect loot (gold, items, crafting materials, Blood Shards).
4. Evaluate and equip better gear or salvage/sell the rest.
5. Level up (or gain Paragon) and unlock new skills / runes.
6. Increase difficulty to improve rewards and challenge.
7. Repeat at higher difficulties or different modes (bounties, rifts).
This loop stays constant but the complexity of itemization, skill synergies, and difficulty scaling changes dramatically from Early Game to Endgame.
---
Early Game (Levels 1–30 / Normal Difficulty)
#### Combat & Interaction
- Controls: Mouse for movement (left-click) and primary skill (right-click) on PC; thumbsticks on consoles. Use number keys (1–4) or face buttons for skills. Potion on Q (PC) or D-pad down (console).
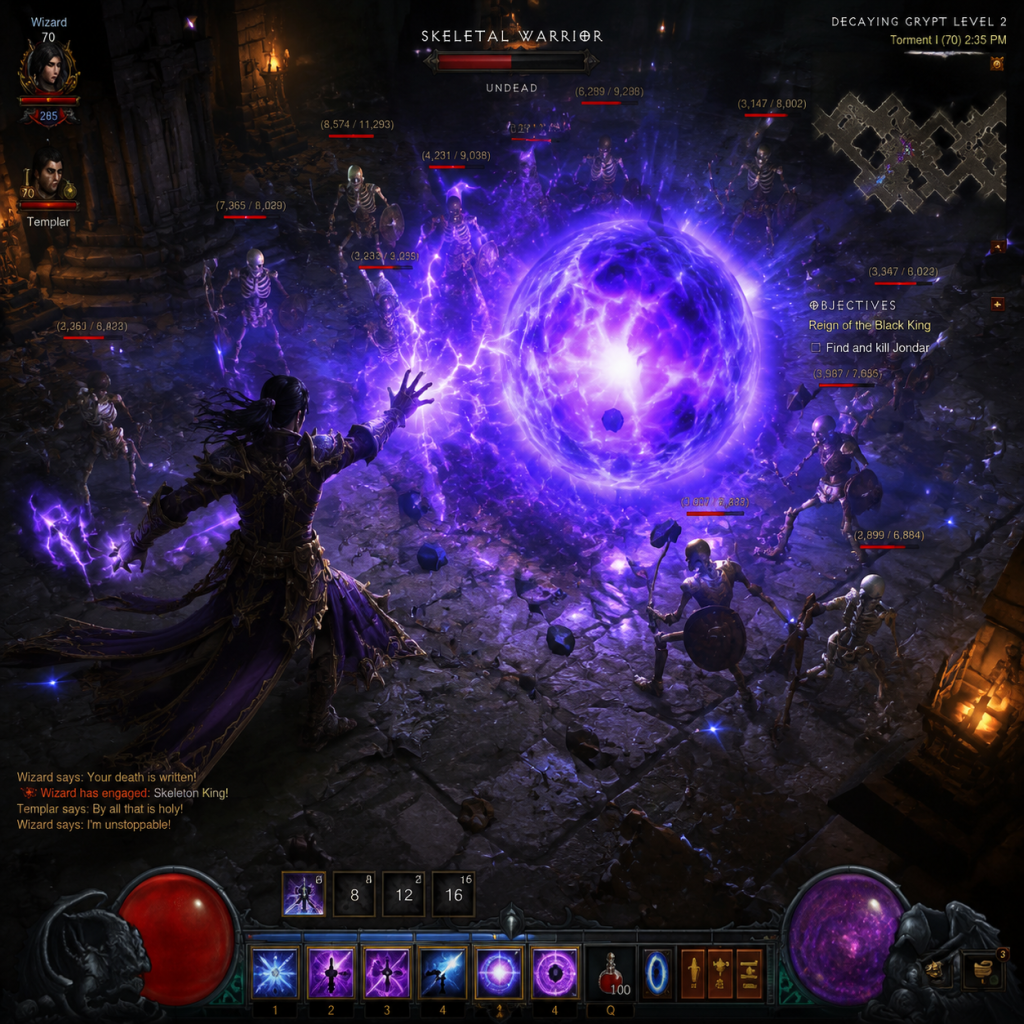
- Basic Combat: Choose one primary attack (generates resource) and one secondary (spends resource). Example: Barbarian uses Bash (generates Fury) + Hammer of the Ancients (spends Fury). Aim to keep resource balanced.
- Enemy Types: Zombies, skeletons, goatmen. No elite affixes yet. Use area-of-effect (AoE) skills to clear groups.
- Interaction: Click on chests, breakables, corpses for gold/potions. Talk to quest NPCs (exclamation marks on minimap).
- Experience: Gains are fast. Each level gives a new skill or rune slot (rune unlocks every 5 levels until 60). Prioritize main stat per class (Strength for Barbarian/Crusader; Dexterity for Demon Hunter/Monk; Intelligence for Wizard/Witch Doctor/Necromancer).
- Skills: You have 6 active skill slots and 4 passive slots (passives unlock at levels 10, 20, 40, 60). Early on, try different skills to see what feels good – no wrong choices.
- Example: A level 10 Wizard might use Electrocute (primary), Arcane Orb (secondary), Diamond Skin (defensive), and Teleport (utility).
- Linear Act Structure: Act I (New Tristram), Act II (Caldeum), Act III (Arreat Crater), Act IV (Heaven), Act V (Westmarch) – in order for campaign.
- Waypoints: Unlock waypoints as you discover them. Use town portal (T on PC) to return to town; waypoint map (M) to fast travel.
- Dungeons: Each act has many optional dungeons with lore books and guaranteed rare chests. Explore fully for bonus XP.
- Main Campaign Quests: Follow the golden star on the minimap. Completing quests awards massive XP and story progression. Each act has about 5–10 main quests.
- Side Quests: In early game, only “Events” (random trigger zones) provide bonus XP/gold. Not essential but worth doing if you see a glowing circle.
- Example: Quest “The Legacy of Cain” in Act I – you must escort Deckard Cain through the cathedral.
- Gold: Drops frequently but has limited use early (vendor repairs, gambles at Kadala). Save crafting materials (Veiled Crystals, Arcane Dust, Reusable Parts) for later.
- Gear: Blue (magic) and yellow (rare) items are common. Equip items with your primary stat + vitality. Don’t worry about set bonuses yet.
- Crafting: Haedrig Eamon can craft low-level items. Use materials from salvaging unwanted gear. Craft a level-15 weapon with a socket and put a red gem (Ruby) for damage.
- Passive Choices: Start with simple passives that boost damage or survivability. Examples: Barbarian’s “Superstition” (reduces damage from elites) or Wizard’s “Blur” (17% melee reduction).
- No Respec Cost: You can change skills anytime (out of combat) from the skill menu. Reinvest passive points for free. Experiment freely.
- Elite Packs Appear: Monsters with blue (minion) or yellow (champion) names and affixes like “Arcane Enchanted,” “Jailer,” “Molten.” They hit hard. Use crowd control (stuns, freezes) and stay mobile.
- Resource Management: Become efficient – you should never let your resource pool sit full or empty for long. Example: Demon Hunter uses Evasive Fire (generates Hatred) + Multishot (spends) with Vengeance (Hatred regen boost).
- Gear Socket Preparation: Start finding sockets on weapons/armor. Insert gems: weapons (Emerald for crit damage), armor (Diamond for all res or Ruby for strength), helmet (Diamond for CDR or Amethyst for life).
- Difficulty Tiers: After completing Act V on Normal, unlock Hard, Expert, Master, then Torment I–VI as your character levels. Higher difficulty = more XP, gold, and legendary drop rate. Play on Master once you can kill elites quickly.
- Level 60: At 60, you can use top-tier gems (flawless royal) and access the Mystic (enchanting). You will also unlock the ability to craft legendary items (plans drop).
- Example: A level 50 Monk can equip a “Kyoshiro’s Soul” belt (drops) to boost ally damage – great for progression.
- Nephalem Rifts Unlock: After completing campaign, Nephalem Rifts (access via Rift Obelisks in town) become available. They are randomized dungeons with dense monster packs and a Rift Guardian that drops lots of loot and Blood Shards. Start running rifts for faster leveling and item farming.
- Bounties: Available in Adventure Mode (post-campaign). Each act has 5 bounties (kill a boss, clear a dungeon, etc.) rewarding Horadric Caches with materials and legendaries. Valuable for crafting sets.
- Campaign Continues: Finish Act V if not done. Once campaign is finished, the entire game opens to Adventure Mode (all waypoints, all bounties, rifts). No linear quests after that.
- Echoing Nightmares (if owned): Unlockable after reaching Level 60; a survival event for lots of XP and special gems (Whisper of Atonement).
- Blood Shards: Earned from rifts and bounties. Spend at Kadala in town for random legendary items. Use shards to target specific item slots for a class.
- Legendaries & Set Items: Green set items have 2-, 4-, 6-piece bonuses. Start collecting. Example: Immortal King’s set for Barbarian gives massive Fury generation and Call of the Ancients damage.
- Gambling: Kadala is random. For example, gamble shoulders for a chance at “Ghom’s Chimney” (Wizard fire shoulders).
- Crafting: Blacksmith can craft level-70 items (ilvl 70) using materials from bounties (Act-specific). Use Kanai’s Cube to extract legendary powers (talk to Zoltun Kulle in town).
- Synergies: Focus on a single damage type (fire, cold, physical) and skills that benefit from it. Example: Firebird’s Finery set (Wizard) boosts fire damage by 2000% when you set enemies on fire.
- Cooldown Reduction (CDR): For many builds, CDR is critical (e.g., Akkhan Crusader uses Akarat’s Champion with 100% uptime). Aim for 50+% CDR on gear.
- Passive Refinements: Swap passives for survivability vs damage. Example: “Unstable Anomaly” (Wizard cheat death) is mandatory on high difficulties.
- Greater Rifts (GR): Once you hit Level 70 and have a decent build, tackle Greater Rifts. These are timed, don’t drop loot until the Guardian, and have scaling difficulty from GR 1 to 150. The goal is to clear fast enough to upgrade Gems (Legendary Gems).
- Survivability: At Torment XIII+, one-shot deaths are common. Use defensive skills, cheating passives, and high toughness. Example: Crusader’s “Akarat’s Champion: Prophet” gives near-invulnerability.
- Resource Generation: Most builds rely on a generator spender pair, but some use zero-resource builds (e.g., Thorns Necromancer uses passive thorns damage).
- Paragon Levels: After Level 70, experience goes into Paragon (800 levels before max). Each Paragon gives main stat, vitality, movement speed, or other stat bonuses you choose. Max Paragon 16,000+ but effectively 800 for full table.
- Greater Rift Key: Drop from Rift Guardians in normal rifts. Use to open GR. Upgrade Legendary Gems (rank 0 to 100+). Gem upgrades require successful GR clears.
- Example: A GR 90 clear gives a 100% chance to upgrade a level-90 gem (if timed).
- Adventure Mode Only: No campaign story. You teleport to any waypoint, do bounties (for materials and cache legendaries), rifts (normal) for keys and blood shards, and Greater Rifts for gem upgrades and loot.
- Challenge Rifts: Weekly fixed random build. Clear a pre-determined rift for a cache of materials – great for early-season funding.
- Season Journey (if Seasonal): A series of tasks ranging from easy (reach Level 70) to hard (clear GR 70 solo). Rewards include additional stash tabs, a portrait, and Haedrig’s Gift (free set pieces). Do these ASAP for your build.
- Echoing Nightmares (if owned): Endless waves of enemies. Earn Whisper of Atonement which can be used to augment ancient gear with a main stat boost.
- Ancients and Primals: After GR 70, items can drop as Ancient (item level 71, higher stats) and Primal Ancient (perfect rolls). Primals are very rare. Augment using Whisper of Atonement + high-grade gems to add main stat.
- Kanai’s Cube: Extract legendary powers (up to 3 – weapon, armor, jewelry). Also used to convert set pieces, reforge legendaries, upgrade rares, etc. Essential for build finalization.
- Rerolling Items: Use the Mystic to re-roll one stat per item. Example: on a weapon, reroll a secondary resist into Cooldown Reduction if missing.
- Bounty Materials: Each act’s bounties give specific materials. These are used for cube recipes: “Reforge Legendary” (perfect ancient) costs 5 of each act material.
- Goal: Full 6-Piece Set: Most builds require a 6-piece set bonus to enable massive damage multipliers. Example: Marauder’s Set (Demon Hunter) boosts Sentry damage by 6000% with 6 pieces.
- Legendary Gems: Socket into rings/amulet. Core gems: Bane of the Trapped (massive damage multiplier), Gogok of Swiftness (CDR and attack speed), Stricken (boss killer). Upgrade to rank 25+ for secondary effects.
- Ancient & Primal Grind: Once your set is complete, replace pieces with Ancient versions for main stat increase. Augment with 100+ gems + Primal Whisper for +500 main stat per piece.
- Example Build: Whirlwind Rend Barbarian – use Waste set (6 pc), Bul-Kathos weapons (set), Focus & Restraint rings, and gem Wreath of Lightning. Playstyle: hold whirlwind, pop Battle Rage, spam Rend.
- Perfect Rotation: Every second matters. For a Multishot Demon Hunter, the rotation is: cast Vengeance (keep up), Companion, Multishot to spend Hatred, Preparation (disc: Hatred from companion). Use Evasive Fire for hatred when needed. Keep moving to avoid ground effects.
- Gear Check: You should have near-perfect rolls on Ancient pieces. Example: a primal ancient “Yang’s Recurve” (bow) with +10% damage, +7% attack speed, +10% hatred regen, socket – that’s endgame.
- Potentially One-Shot: At GR 120+, many hits kill you instantly. Use cheat death passives (e.g., Spirit of Arachyr’s “Spirit Walk” for Witch Doctor) and high vitality.
- Paragon Cap: Paragon 800 fills the core stats (main stat, vitality, etc.). Beyond that, you dump into main stat only. High paragon players have 20,000+ main stat – huge damage.
- Greater Rift Climbing: Push GR as high as you can for leaderboard rank. Use the “GR push” method: use top-tier gear, augments, and a perfect skill setup. Consumables like “Flawless Royal” gems in helmet (for reduced cooldown/exp).
- Seasonal Leaderboards: Only the top 1000 per class per server are shown. To compete, you need high paragon, fully augmented gear, and perfect play.
- Bounties: Rotate bounties with a group for efficiency (4-player split bounties). Use the “T16” difficulty for maximum drop rates. Key items: Reusable Parts, Arcane Dust, Veiled Crystals, and transmog patterns.
- Nephalem Rifts: Run T16 rifts quickly to farm keys for GRs. A 4-man group can clear a rift in 2–3 minutes. Focus on high-density maps (e.g., Fields of Misery).
- Empowered Rifts: Use a “Rift Keystone” to empower a normal rift for extra gold and XP – not worth for endgame pushing, but good for early Paragon.
- Season Journey Complete: Finish all journey chapters for bonus stash tab and permanent portrait. Most endgame players complete the entire journey in the first week for the stash.
- Set Dungeons: Find hidden set dungeon entrances for that class’s set. Completing them gives a pennant and triumph – pure cosmetic, no power boost.
- Seasonal Economy: Gold is nearly infinite (use “Goldskin” chest + “Greed’s Realm” puzzle ring). Use gold to empower rifts or craft at the Blacksmith. Materials are the true currency: farm nephalan rifts for Death’s Breaths, bounty materials for reforging, and gem essences for upgrades.
- Item Trading: In Seasons, trading is disabled except for loot that dropped for your group (2-hour window). Non-seasonal: only if you and the other player were in the same game at drop time. Use “community” groups to find parties.
- Puzzle Ring: Wear a Puzzle Ring in Kanai’s Cube (or equip it) and open a portal to “Greed’s Domain” – tons of gold and a vault guardian. Good for gold.
- Perfect Augments: Use rank-100+ Legendary Gems + Whisper of Atonement to augment each Ancient piece with +500 to your main stat. For weapons, use the “Flawless Royal” Ruby (damage) or Emerald (crit damage).
- Alternative Builds: Many classes have multiple endgame viable builds. For example, Wizard: Firebird’s Finery, Tal Rasha’s Elements, or Delsere’s Magnum Opus. Each requires different gear and playstyle. Keep a stash tab for off-builds.
- Example Endgame Build – Inna’s Ally Monk: Uses full Inna’s set (6 pc), Unity ring (shared damage with follower), Ring of Royal Grandeur (to drop a set piece), and The Grandeur (?) – actually use “Rabid Strike” or “Gungdo Gear” for mystic ally. This build clears GR 140+ with proper gear.
#### Progression & Leveling
#### Exploration
#### Quests & Missions
#### Economy & Items
#### Character & Build Growth
---
Mid Game (Levels 31–60 / Normal through Hell Difficulty)
#### Combat & Interaction
#### Progression & Leveling
#### Exploration
#### Quests & Missions
#### Economy & Items
#### Character & Build Growth
---
Late Game (Level 61–70 / Torment X–XVI + Greater Rifts)
#### Combat & Interaction
#### Progression & Leveling
#### Exploration
#### Quests & Missions
#### Economy & Items
#### Character & Build Growth
---
Endgame (Paragon 800+ / GR 100+ / T16+ / Seasonal Leaderboards)
#### Combat & Interaction
#### Progression & Levelling
#### Exploration
#### Quests & Missions
#### Economy & Items
#### Character & Build Growth
#### Endgame Structure Summary
| Activity | Purpose | Key Rewards | Difficulty Scaling |
|---|---|---|---|
| Greater Rifts | Gem upgrades, Paragon, Leaderboard | Legendary Gems, Primal Ancients | GR 1–150 |
| Normal Rifts | Keys, Death’s Breaths, Blood Shards | Keys, mats, shards | T1–T16 |
| Bounties | Crafting materials, Cache legendaries | Act materials, plans | T1–T16 |
| Echoing Nightmares | Augment items | Whisper of Atonement | Scales with character |
| Challenge Rifts | Weekly materials | Cache | Fixed build |
| Set Dungeons | Cosmetics | Pennant | Fixed (no scaling) |
| Season Journey | Stash, cosmetics | Haedrig’s Gift, conquests | Varies |
This breakdown of core gameplay by progression tier should give you a complete roadmap from starting your first Nephalem to conquering the highest Greater Rifts. Remember: Diablo III is a game of incremental improvements – farm, craft, augment, and push.”
Game Tips
Game Tips for Diablo III
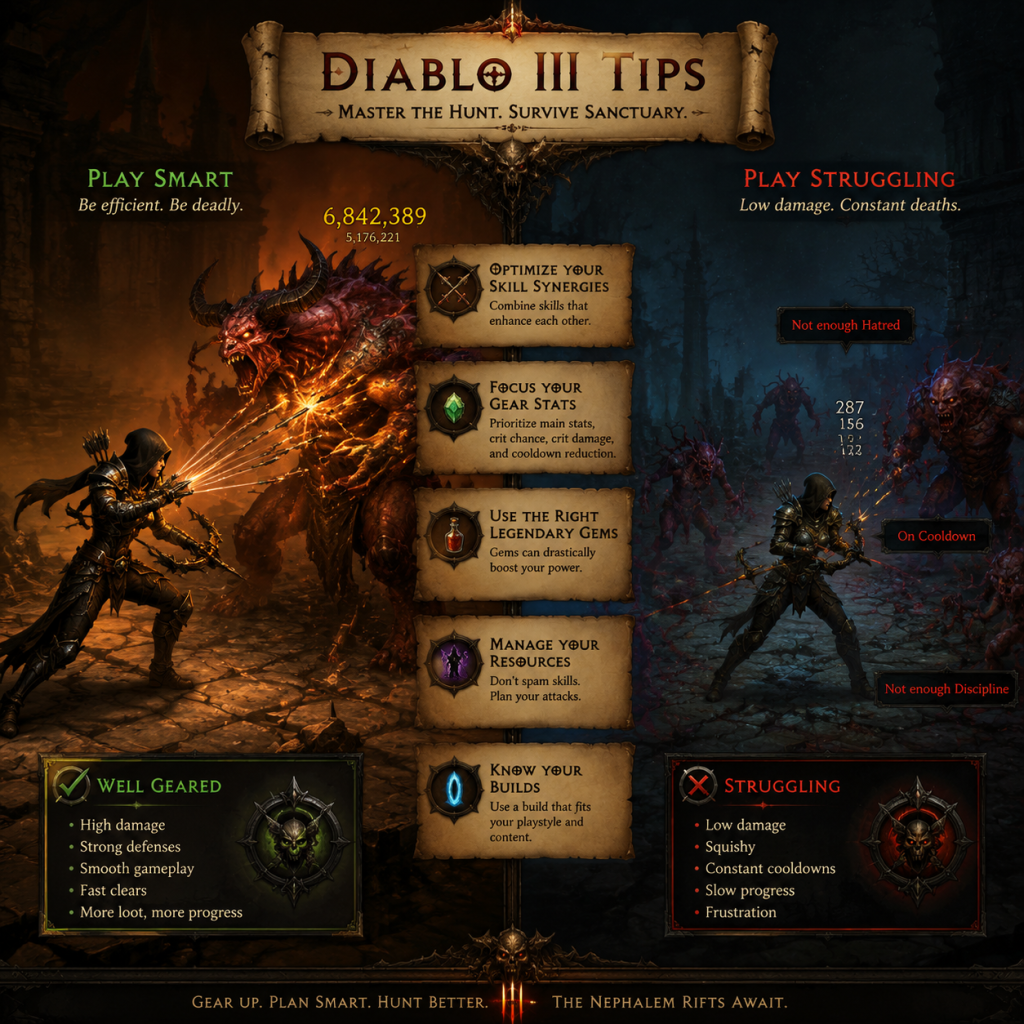
This guide collects essential tips spanning combat, exploration, resources, builds, economy, and advanced optimizations. Each tip includes a clear explanation and deeper analysis to help you survive Sanctuary, whether you’re a new Nephalem or a seasoned Paragon 5000+ veteran.
---
1. Combat Tips
Beginner Tip: Always Keep Moving
- Explanation: Enemies in Diablo III often telegraph attacks with ground effects (e.g., molten trails, arcane beams, frozen explosions). Standing still for even two seconds can result in a one-shot from a waller or teleporter elite pack.
- Why it works: Movement abilities and simple sidestepping break enemy AI targeting and avoid most crowd control effects. The game’s hit boxes are generous—you can dodge many attacks by strafing just a few yards.
- When to use: During every combat encounter, especially against champion packs, rift guardians, and in Greater Rifts above tier 70.
- Explanation: Every class has a primary resource (Hatred, Fury, Essence, Arcane Power, etc.). Your build must include a generator skill (e.g., Barbarian’s Bash, Demon Hunter’s Hungering Arrow) and at least one spender (e.g., Multishot, Hammer of the Ancients).
- Why it works: Generators restore resource and often trigger set bonuses (e.g., 4-piece bonus of Unhallowed Essence). Spenders deliver massive damage but drain resource; without a generator, you run dry and lose DPS.
- When to use: Early game when gear has no resource-cost reduction; later, you may swap to infinite-spending builds (e.g., Akkhan’s Champion with Akarat’s Champion) only after obtaining specific Legendary items (Cindercoat, Pride’s Fall, etc.).
- Explanation: Elite packs have random affixes: Arcane, Molten, Frozen, Waller, Teleporter, etc. Certain combinations are extremely dangerous (e.g., Arcane + Waller + Frozen). Learn to identify which affix combination will lock you down and prioritize killing the most dangerous elite first.
- Why it works: Crowd control immunity sets like “Laws of Seph” for the Monk or “The Witching Hour” with high toughness are useless if you ignore the affix synergy. Kiting a Waller + Mortar pack is nearly impossible; better to pop cooldowns and kill it fast.
- When to use: In high Greater Rifts (90+), always survey the elite pack before engaging. If you see a “Juggernaut” (cannot be stunned) affix, avoid using stun-heavy skills and focus on pure damage.
- Explanation: Every clickable object—chests, weapon racks, armor racks, corpses, loose stones—can drop gold, potions, crafting materials, and even Legendary items. The chance is low but free.
- Why it works: On Normal through Torment difficulties, loot is generated at the moment of interaction. Breaking objects also fuels the “Explorer” conquest for Season journeys.
- When to use: During the campaign and early Adventure Mode; in high-level Rifts, skip most breakables unless you need Death’s Breaths (from elite kills) for Kanai’s Cube.
- Explanation: Each Nephalem Rift tile set (e.g., Act 1 Cathedral, Act 2 Desolate Sands) has spawn patterns and progression-blocking doors. For example, Act 5’s “Pandemonium Fortress” tileset has many dead ends; Act 1’s “Fields of Misery” is mostly open with few obstacles.
- Why it works: Knowing which direction to run saves minutes per rift. The rift will close when you kill a certain number of enemies (progress bar) and then the Rift Guardian spawns. Experienced players clear 2–3 elite packs per floor and ignore trash if elites are far apart.
- When to use: Apply this knowledge in every Rift tier; in group play, one player scouts ahead while others kill.
- Explanation: Completing all five acts of bounties yields a Horadric Cache. Each cache contains bounty-specific crafting materials (e.g., Reusable Parts, Arcane Dust, Veiled Crystals) plus a chance for cache-only Legendaries (Ring of Royal Grandeur from Act I, Illusory Boots from Act II, etc.).
- Why it works: The cache materials are used to reroll Legendaries in Kanai’s Cube (Recipe 4). Without farming bounties, you cannot reforge items efficiently. The Ring of Royal Grandeur reduces set item requirements by 1, enabling many hybrid builds.
- When to use: Whenever you need to reforge a specific item (e.g., an Ancient weapon) or try for a cache-only Legendary. Speed farm bounties in a public group for maximum efficiency.
- Explanation: Vendors pay worthless gold; salvaging (through the Blacksmith) gives crafting materials (Arcane Dust, Veiled Crystals, Forgotten Souls for Legendaries). These materials are used for upgrading gems, enchanting items, and Cube recipes.
- Why it works: Gold is abundant after Torment I; materials are the true bottleneck. Early on, you need crystals to upgrade your Blacksmith and Jeweler. Never sell gear to a vendor except maybe in Hardcore before turning in bounties.
- When to use: From level 1 to para 800, salvage everything you don’t equip. After you have a full build, salvage legendaries that are not Ancient or part of your build.
- Explanation: Elites drop Death’s Breaths (DBs) only on Torment I and above. They are required for almost every Kanai’s Cube recipe: extracting powers, upgrading rare items, rerolling legendaries, and converting materials.
- Why it works: DBs are the second most important resource after bounty mats. Without them, you cannot upgrade a rare item into a Legendary, which is how many players obtain their first Ancient weapon. Always play on the highest Torment you can clear efficiently.
- When to use: In Rifts and bounties, prioritize killing elite packs even if they are off the main path. Legendary gems and DBs drop from elites at higher rates.
- Explanation: Recipe 3 allows you to reroll a legendary into a new random roll of the same item (different stats). It costs 5 of each bounty material, 50 Forgotten Souls, and 10 Death’s Breaths. Using it on a non-Ancient is wasteful because the resulting item is never guaranteed to be Ancient.
- Why it works: Ancient items have higher primary stat ranges (30% increase) and a free extra gem slot. Rerolling only ancients gives you a chance to improve the rolls to perfect (e.g., 650 Strength → 650 Strength, 7% IAS → 7% IAS). Each reroll resets the item; keep rerolling until you get desired stats.
- When to use: After you have a full Ancient set, use this recipe to perfect your weapon, amulet, or ring. For armor, it’s better to use the Enchantress instead (costs gold and one material type).
- Explanation: Hundreds of viable builds exist, but most rely on a 6-piece set bonus. Early on, you may not have a full set. Use leveling builds (often 1–70) that work with any gear, like “Multishot Demon Hunter” or “Whirlwind Barbarian” using the Legacy of Dreams gem after level 70.
- Why it works: The “Legacy of Dreams” Legendary gem (obtained from Greater Rift guardian) increases your damage by 3.75% (upgraded to 7.5%) per Legendary item equipped, with no set bonuses required. This allows you to wear random legendaries and still clear Torments.
- When to use: Start using Legacy of Dreams at level 70 until you have a full 6-piece set. Then transition to the set build.
- Explanation: Paragon points have four tabs: Core, Offense, Defense, Utility. Core: max movement speed then intelligence/dexterity/strength (mainstat). Offense: attack speed (up to 10%), then critical hit chance, critical hit damage, cooldown reduction. Defense: resist all (up to 250), then armor, life %, regeneration (skip). Utility: area damage (up to 50%), then resource cost reduction, gold find, pickup radius.
- Why it works: Area damage is one of the most powerful stats in the game for AoE builds because it creates a 20% chance for 50% (or more) damage in a 10-yard radius on every hit. Paragon area damage is additive with gear area damage, so max it first.
- When to use: After reaching para 800 (all 4 tabs maxed), prioritize Core: mainstat all the rest. Early on, follow the build-specific priority from your guide.
- Explanation: Each character can socket three Legendary gems in rings and amulets (helmet for Ruby or Diamond). Common top gems: Bane of the Trapped (damage vs slowed enemies), Bane of the Stricken (increases damage over time against single target), Enforcer (pet damage), Esoteric Alteration (non-physical resistance), Molten Wildebeest’s Gizzard (shield).
- Why it works: Gems are the primary source of multiplicative damage bonuses. For Greater Rift pushing (solo or group), Bane of the Stricken is mandatory for Rift Guardians because it ramps up damage every time you hit. Bane of the Trapped is the best generic DPS gem. Rank 25 unlocks legendary powers (e.g., Bane of the Trapped turns into a 15% damage increase aura).
- When to use: For speed runs (T16), use Trapped + Zei’s + Powerful (for elite kills). For pushing (GR 120+), use Trapped + Stricken + Esoteric or Molten. For pet builds, Enforcer + Trapped + Stricken.
- Explanation: In public games for bounties, all players get credit for each bounty completed by any member. The cache is individual. But each bonus act (the act with a red !) gives double loot; average 3–5 cache-mats per run.
- Why it works: Group bounty runs are 4x faster than solo if everyone splits up. You get the same number of caches per act completed. A full act 1–5 clear solo takes ~30 minutes; in a group it takes ~8–10 minutes.
- When to use: Whenever you need cache materials (always). Join a community like “Bounty Runz” or use the in-game public matchmaking.
- Explanation: Cube Recipe 8 allows converting one type of common material (white, blue, yellow) into another at a 1:100 ratio, requiring 1 Death’s Breath and 1 Veiled Crystal (for the conversion).
- Why it works: White crafting materials (Reusable Parts) are the rarest because they only drop from white-quality items. Most players salvage all whites, but you can convert spare blues and yellows into whites. This is critical for upgrading Rare items (Recipe 3) which costs 25 Veiled Crystals and DBs.
- When to use: When you are low on Reusable Parts but have thousands of blues and yellows.
- Explanation: Greater Rifts can be “Empowered” using 25% of your current gold amount (max 500 million gold per rift). This grants an extra upgrade chance for Legendary gems (4 upgrade slots instead of 3). Gold is easy to get on T16 with Goldwrap belt + Boon of the Hoarder gem (drops gold from enemies).
- Why it works: Empowered rifts cut gem leveling time by 25%. The gold cost is negligible once you have billions. Goldwrap + Boon combo makes you invincible in T16 (armor = gold picked up) and generates millions per minute.
- When to use: Always empower Greater Rifts if you have excess gold. Solo players can farm gold quickly with a speed build (e.g., Chakram DH with Goldwrap). Group players pool gold easily.
- Explanation: Many skills (e.g., Crusader’s Akarat’s Champion, Barbarian’s Wrath of the Berserker) require 100% uptime. Cooldown reduction (CDR) has breakpoints: you need at least 57.6% CDR for permanent Akarat’s Champion. Avoid overcap unless your build gains nothing else.
- Why it works: Each point of CDR gives diminishing returns (multiplicative). Exactly meeting the breakpoint saves stats for other affixes (e.g., area damage, critical hit). Attack speed breakpoints affect skill animations and resource generation; research your specific build’s breakpoint table on d3planner or Icy Veins.
- When to use: When gearing for push builds. Don’t blindly stack CDR—check your required uptime.
- Explanation: In solo play, you can equip a follower (Scoundrel, Templar, Enchantress). They provide passive buffs (e.g., Templar’s 10% resource regen) and active skills. The “Emanate” system allows certain follower legendary items to grant their powers to you (e.g., Nemesis Bracers spawn elites from shrines, Gloves of Worship extend shrine duration 10 minutes).
- Why it works: The follower can carry your 2nd or 3rd best weapon and support items. The “Cannot Die” token (relic) makes them invincible in Torment 16+. The “Emanate” items are key for speed builds.
- When to use: In all solo content—especially T16 bounties and low Greater Rifts (speed runs). For pushing high GR, followers are less impactful but still provide crowd control and healing.
- Explanation: To enter Greater Rifts, you need a Lesser Rift Keystone (dropped from Nephalem Rift Guardians) and later a Greater Rift Keystone (GR keys). Always open Nephalem Rifts at the highest Torment you can clear (T16 recommended) because keystone drop rate is 100% at T16.
- Why it works: The number of keys needed scales with how many GRs you plan to run. Each GR consumes one key. Efficiency means never running out of keys. T16 gives 12–16 Death’s Breaths per rift plus many materials.
- When to use: Always run T16 rifts unless you cannot survive; then drop to T13 or T10. Never waste time on lower torments for key farming.
- Explanation: The meta 4-player group is: Support Barb (zxBarb) for pull and buffs, Support Monk (zxMonk) for healing and crowd control, two Damage Dealers (usually a Rathma Necromancer or Wave of Light Crusader, but varies by season). Each player must follow a specific skill/build to synergize.
- Why it works: The support classes provide infinite resource, crowd control, damage reduction, and enemy pulling. The DPS classes then focus entirely on dealing damage. This combination allows clearing GR levels 150 in season 30+.
- When to use: For pushing leaderboards or high XP farming (GR 130+). Do not use this setup for speed runs (T16) because supports are slow.
- Explanation: Hardcore characters die permanently. The number one cause of death is lag, but the second is losing focus. A single frozen elite pack with waller and arcane can kill even the tankiest character if you’re not watching.
- Why it works: In Hardcore, you must prioritize toughness over damage. Always equip a cheat-death passive (e.g., Barbarian’s “Relentless”, Witch Doctor’s “Spirit Vessel”). Keep a pair of “save” legendaries in stash (Ancient weapon for when you level a replacement).
- When to use: Play Hardcore only if you accept the risk. Avoid pushing to the absolute limit; stay 5–10 GR levels below your softcore max. Farm bounties on lower difficulties for safety.
- Season Journey: Complete chapters 1–4 to get a free 6-piece set. Use that set to quickly farm T13+. Chapters 5–8 reward cosmetics and stash tabs.
- Console Specifics: On consoles (PS4/PS5, Xbox, Switch), you can dodge roll with the right stick (press in) and skills auto-aim. You can’t target specific enemies; use the skill slot assign logic (e.g., slot generator on X, spender on Square).
- Controller vs Keyboard: PC players have precise targeting with mouse (great for AoE builds). Console players benefit from movement control with analog sticks.
- Stash Tab Management: Buy all stash tabs from the “Stash” upgrade (gold cost). Then organize by set: one tab for each class’s set items, one for gems, one for potions and keys, one for crafting materials (they auto-stack).
- Exit Game to Reset Rifts: If you enter a Nephalem Rift and it’s a dead-end map (no progress after 2 minutes), exit game and resume to get a new random map. This is much faster than backtracking.
- Use the Armory: The Mystic (Enchantress) has an “Armory” feature allowing you to save up to 5 gear+skill sets. Switch between builds instantly for free. Use it for speed build, push build, and key farming build.
- Kadala (Gambling) : Spend Blood Shards at Kadala early to fill missing slots like rings, amulets, weapons (expensive). For smart gambling, only gamble for armor pieces (cost 25 shards each) because weapons and jewelry cost 75 or 100. The drop chance for Ancient from Kadala is 10% same as world drops.
- Cube Extract Powers: Always extract powers from items you don’t use, even if they are not Ancient. Some powers are vital for cube (e.g., Ring of Royal Grandeur, Convention of Elements, Stone of Jordan, Furnace).
- Join a Community: Use in-game communities (main menu > Social > Communities) to find players for bounties, rifts, and leveling. Popular communities: “Rift It Forward”, “Bounty Rifts”, “Seasonal Powerleveling”.
- PC Lag Solutions: Disable in-game sound (reduces CPU load), lower physics settings, and close browser tabs. For wireless connections, use a wired network cable.
- Pause the Game: Single-player on PC: press Escape; on consoles: open the in-game menu. Multiplayer cannot pause.
Intermediate Tip: Manage Your Resource Generators and Spenders
Advanced Tip: Understand Elite Affix Synergies
---
2. Exploration Tips
Beginner Tip: Always Open Chests and Break Objects
Intermediate Tip: Learn the Layout of Nephalem Rifts
Advanced Tip: Exploit Bounties for Cache Materials
---
3. Resources and Economy
Beginner Tip: Salvage All Unwanted Gear
Intermediate Tip: Collect Death’s Breaths from Elites
Advanced Tip: Use the Cube’s Recipe 3 (Reroll Legendary) Only on Ancient Items
---
4. Builds and Progression
Beginner Tip: Follow a Pre-Build Guide for Your Class
Intermediate Tip: Paragon Point Allocation
Advanced Tip: Legendary Gem Synergy
---
5. Economy (Gold and Material Farming)
Beginner Tip: Turn in Bounty Caches in a Group
Intermediate Tip: Convert Materials Using Kanai’s Cube
Advanced Tip: Gold Farming for Empowering Rifts
---
6. Advanced Optimizations
Tip: Understand Breakpoints for Cooldown Reduction and Attack Speed
Tip: Use the Follower System Effectively
Tip: Key Farming for Greater Rift Keys
Tip: Group Composition for High Greater Rifts
Tip: Hardcore Mode – Never Play Tired
---
7. Miscellaneous Tips
---
Pro tips are based on patch 2.7.7 / Season 30. Always check current patch notes for balance changes.
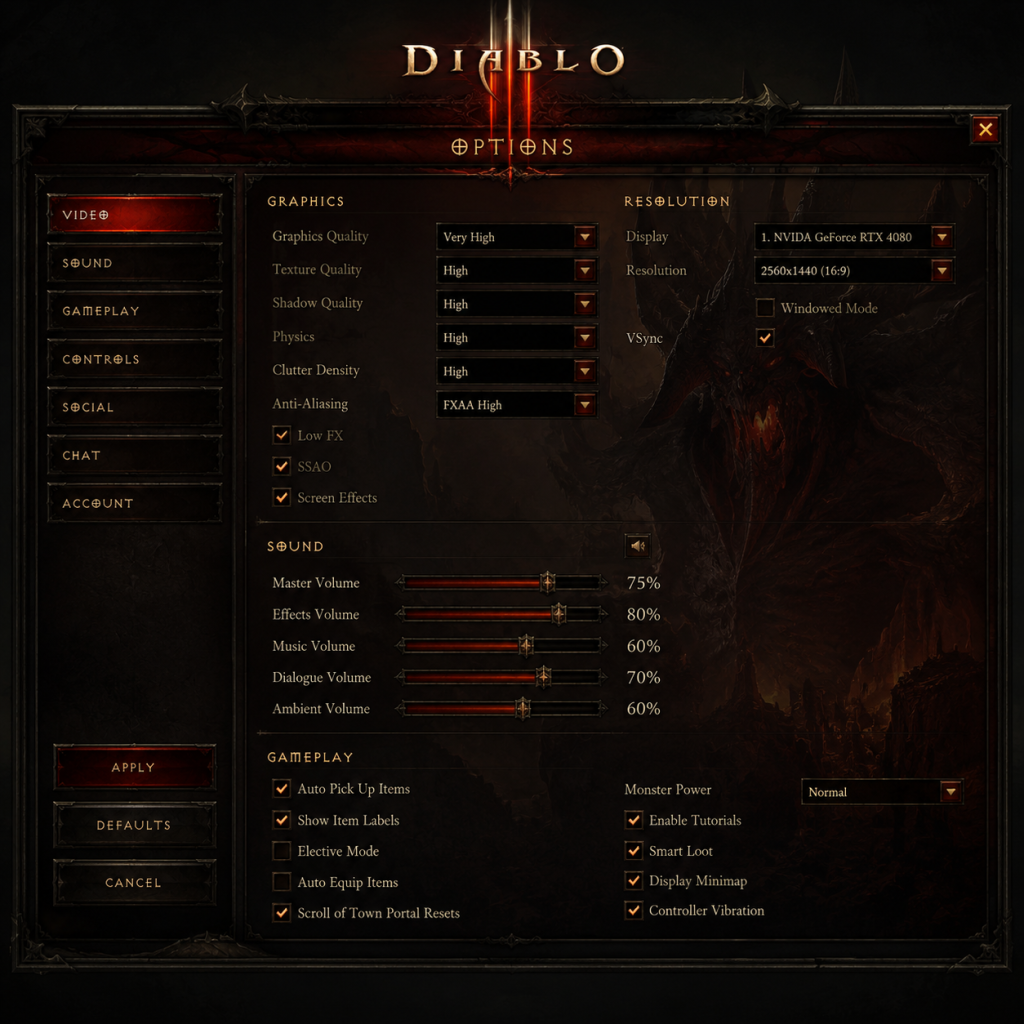
Game Settings
Game Settings Guide for Diablo III
Properly configuring your settings in Diablo III can dramatically improve performance, visual quality, and overall gameplay comfort. This guide will walk you through every major settings category—Graphics, Audio, Controls, Accessibility, Language, Network, and Gameplay—with recommendations for different hardware tiers and special attention to common pitfalls.
---
Graphics Settings
Graphics settings directly affect frame rate, clarity, and system load. Diablo III scales well across a wide range of hardware.
#### Display & Video
- Display Mode: Fullscreen (best performance), Windowed Fullscreen (easier alt-tabbing), Windowed. Recommended: Windowed Fullscreen for modern systems.
- Resolution: Match your monitor's native resolution. Lower resolutions can improve FPS on weak GPUs.
- Vertical Sync: Off unless you experience screen tearing. On vsync can introduce input lag.
- Anti-Aliasing: Options are Off, FXAA, SMAA. FXAA is lightweight but blurs; SMAA is sharper but heavier. Recommended: SMAA for mid/high-end, FXAA for low-end.
- Shadows: High (detailed), Medium (good balance), Low (performance), Off (max FPS). Shadows are one of the biggest performance hits.
- Physics Quality: Affects particle effects and destructibles. High (best looking), Medium, Low. Lower if you see frame drops during explosions.
- Clutter Density: Controls how many small objects (grass, rocks, etc.) appear. High = more immersion, but reduces FPS in crowded areas.
- Screen Shake: Disable for competitive play or motion sensitivity.
#### Optimal Settings by Hardware Level
| Setting | Low-End (e.g., Intel HD Graphics, 4GB RAM) | Medium (GTX 960, 8GB RAM) | High (GTX 1060, 16GB RAM) | Ultra (RTX 2070+, 16GB+) |
|---|---|---|---|---|
| Resolution | 1280x720 or 1366x768 | 1920x1080 | 1920x1080 or 2560x1440 | 2560x1440 or 4K |
| Anti-Aliasing | Off | FXAA | SMAA | SMAA |
| Shadows | Off or Low | Low | Medium | High |
| Physics | Low | Medium | High | High |
| Clutter Density | Low | Medium | High | High |
| Vertical Sync | Off | Off | Off | On if screen tearing |
- Low FPS despite good hardware: Check if you're running in Windowed mode (limits FPS). Always use Fullscreen or Windowed Fullscreen.
- Blurry text: Ensure your resolution is set to native and anti-aliasing is not excessive. SMAA is preferred over FXAA for clarity.
- Screen shake causing discomfort: Disable "Screen Shake" under Graphics if you experience headache or nausea.
- Master Volume: 100% as baseline.
- SFX Volume: Keep high for important sound cues (e.g., enemy attacks, legendary drops).
- Music Volume: Personal preference; lower if you prefer ambient gameplay.
- Voice Volume: Separate control for character dialog and NPC voices. Keep at least 50% to hear quest hints.
- Sound Channels: Low (best performance, might cut off sounds), High (full audio experience). Set to High unless you have a very old CPU.
- Enable Reverb: Adds echo in caves/halls; can be disabled for clarity.
- Speakers: Stereo for desktop; 5.1/7.1 for surround systems. Incorrect setting can cause muffled audio.
- Default Keybindings: Q/W/E/R for skills, 1-4 for potions and skills on action bar, left click for movement/attack, right click for secondary skill. Shift+left click for stand still (force stand).
- Recommended Changes:
- Mouse Sensitivity: Adjust in-game slider; lower for precise aiming, higher for fast camera movement.
- Aim Assist: On/Off. Turn off for precise targeting (e.g., Necromancer corpse skills). Leave on for melee characters.
- Button Layout: Standard layout works well. You can remap individual abilities in the Gameplay tab.
- Dead Zone: Adjust if you notice stick drift or unresponsive movement. Default is usually fine.
- Vibration: On for immersion, off for longer play sessions (reduces hand fatigue).
- "Elective Mode" – Not in Controls but in Gameplay. This must be ON to assign any skill to any slot. Many new players leave it off and cannot customize skill bars. Enable it immediately.
- Move vs Attack: With the default left click, you can accidentally attack a monster when you mean to move. Use Force Move binding to separate actions.
- Subtitle Size: Options: Small, Medium, Large. Increase if you have visual impairments.
- Colorblind Mode (to Come): Diablo III does not have a native colorblind mode as of patch 2.7.x. However, third-party overlays or OS-level filters can help. Monitor Blizzard updates.
- High Contrast UI: Not available natively. Adjust your monitor's contrast or use Windows High Contrast mode.
- Narration (Screen Reader): Not supported.
- Auto-Pickup Range: Set to Close or Far (under Gameplay). Far helps players with limited motor skills.
- Disable Screen Shake – Already mentioned under Graphics; critical for motion sensitivity.
- Enable “Always Show Item Labels” – In Gameplay; helps if you find it hard to read small text.
- In-Game Text: Choose your preferred language from the Battle.net launcher (PC) or console system language. Diablo III does not have a per-character language setting.
- Voice Language: Separate from text. On PC, you can select voice language in the launcher options (e.g., English text with Japanese voice). On console, voice follows system language.
- Audio Subtitles: Must be enabled manually under Audio to see dialog text in the chosen language.
- Connection Type:
- Region Selection: Choose the region closest to you for lowest latency (Americas, Europe, Asia). Cross-region play is not possible (character data locked per region).
- NAT Type: Must be Open or Moderate for smooth matchmaking. Strict NAT can prevent you from joining games. Troubleshoot through router port forwarding (ports 1119, 1120, 3724, 6112-6114).
- Bandwidth: Diablo III uses ~50 MB/hour in a party. Very low bandwidth usage; no issues on limited data plans.
- Ping/Latency Display: Enable under Gameplay settings (Show Network Information) to monitor your connection health.
- High latency in groups: One player with bad connection can cause rubber-banding for everyone. If you constantly lag, try hosting private games or leave groups with high ping.
- Proxy/VPN: Using a VPN may reduce ping if routed better, but can also disallow login. Battle.net usually works with most VPNs.
- Elective Mode (MANDATORY ON): Allows you to assign any skill to any of the six skill slots. Without this, skills are locked to categories (e.g., only Primary skills on left click). Turn this ON immediately.
- Action Combat Mode: On by default; prevents your character from moving when you click on a monster. You must turn this OFF if you want to quickly switch between moving and attacking. Many advanced players disable it.
- Display Enemy Health Bars: ON (always show) or Off (only when damaged). Recommended ON for awareness.
- Monster Health Bar Position: Top (default) or Bottom. Personal preference.
- Show Item Labels:
- Item Tooltips:
- Auto-Pickup Range:
- Pet Control: For Witch Doctor pets, you can choose Aggressive or Passive. Leave on Aggressive for solo play.
- Lock Target (Consoles): Lock on to a single enemy. Useful for single target builds, but can be disorienting. Toggle off for area effect skills.
- Elective Mode being off is by far the most common mistake. New players think they can't rearrange skills and quit in frustration. Always check this first.
- Action Combat Mode – If you're a seasoned player who wants full control over movement and stutter-stepping, turn this off. If you keep accidentally moving into enemies, turn it on.
---
Audio Settings
Special Attention: Diablo III uses audio cues for elite packs (e.g., “Jailer” sounds) and legendary drops (distinct chime). Never mute SFX if you want to play efficiently.
---
Controls Settings
Controls are highly customizable on PC and console. Familiarize yourself with the layout.
#### PC Controls (Keyboard + Mouse)
- Bind Force Move to a side mouse button (avoids accidental attacks).
- Bind Force Stand Still to Spacebar for easy kiting.
- Remap Potion (default Q) to a thumb button for quick healing.
- Set Teleport or movement skill to a comfortable key (e.g., E or mouse wheel).
#### Console / Controller (PS4/PS5, Xbox, Switch)
Easy to Misconfigure:
---
Accessibility Settings
Special Attention: If you rely on audio cues, enable center audio channel for dialog in 5.1 setups to avoid losing quest instructions.
---
Language Settings
Easy to Misconfigure: If you change language in the launcher mid-session, you may need to restart the game for full effect. Also, some regional versions (e.g., Chinese) have different censorship and loot rules; ensure you are using the correct region account.
---
Network Settings
- Broadband LAN: Wired Ethernet is strongly recommended over Wi-Fi for stable ping.
- Wi-Fi: Use 5 GHz if possible; 2.4 GHz can have interference.
Special Attention:
---
Gameplay Settings
These settings drastically affect your play experience and must be reviewed before diving in.
- Always Show: Best for seeing loot quickly.
- Toggle: Press Alt to show temporarily.
- Off: Minimal distraction.
- Simple: Shows only basic affixes (faster for new players).
- Advanced: Shows detailed data like damage range, attribute ranges, etc. Recommended for experienced players.
- Close: Pick up items only when nearly on top of them.
- Medium: Default.
- Far: Automatically pick up gold and health globes from screen away. Far is recommended to avoid stopping for loot.
Easy to Misconfigure:
---
Special Attention Points During Setup
1. First Launch: After installing, go directly to Settings > Gameplay and enable Elective Mode. Then configure graphics for your hardware.
2. Windowed Mode Confusion: If the game seems laggy even on low settings, check that you are not in Windowed mode. Fullscreen or Windowed Fullscreen yields best performance.
3. Controller Compatibility on PC: Diablo III fully supports Xbox and PlayStation controllers. Plug in before launching, and the game will auto-switch UI. You can freely mix mouse/keyboard and controller, but it may cause momentary input detection issues.
4. Audio Desync in Cutscenes: If dialogue doesn't match lip movement, go to Audio and lower Sound Channels from High to Medium. Or reduce voice volume and reapply.
5. Battle.net App Overlay: Disable the Blizzard overlay (in app settings) if you experience stuttering or FPS drops. This overlay can conflict with the game's rendering on some systems.
6. Cloud Saves: Diablo III saves all character data server-side. Your settings are stored locally. Back up the file `D3Prefs.txt` in `Documents\Diablo III` if you want to preserve settings across reinstalls.
---
By carefully adjusting these settings, you will enjoy Diablo III with smoother gameplay, clearer visuals, and better responsiveness. Always revisit settings if you change hardware or experience performance issues. Now venture forth and conquer the Burning Hells with your optimally configured Nephalem!
Important Notes
Important Notes for Diablo III
This section highlights critical warnings, irreversible consequences, missable content, difficulty spikes, grinding pitfalls, online etiquette, anti-cheat reminders, save management advice, and common regrets. Knowing these early will save you time, frustration, and avoid permanent loss.
Irreversible Choices
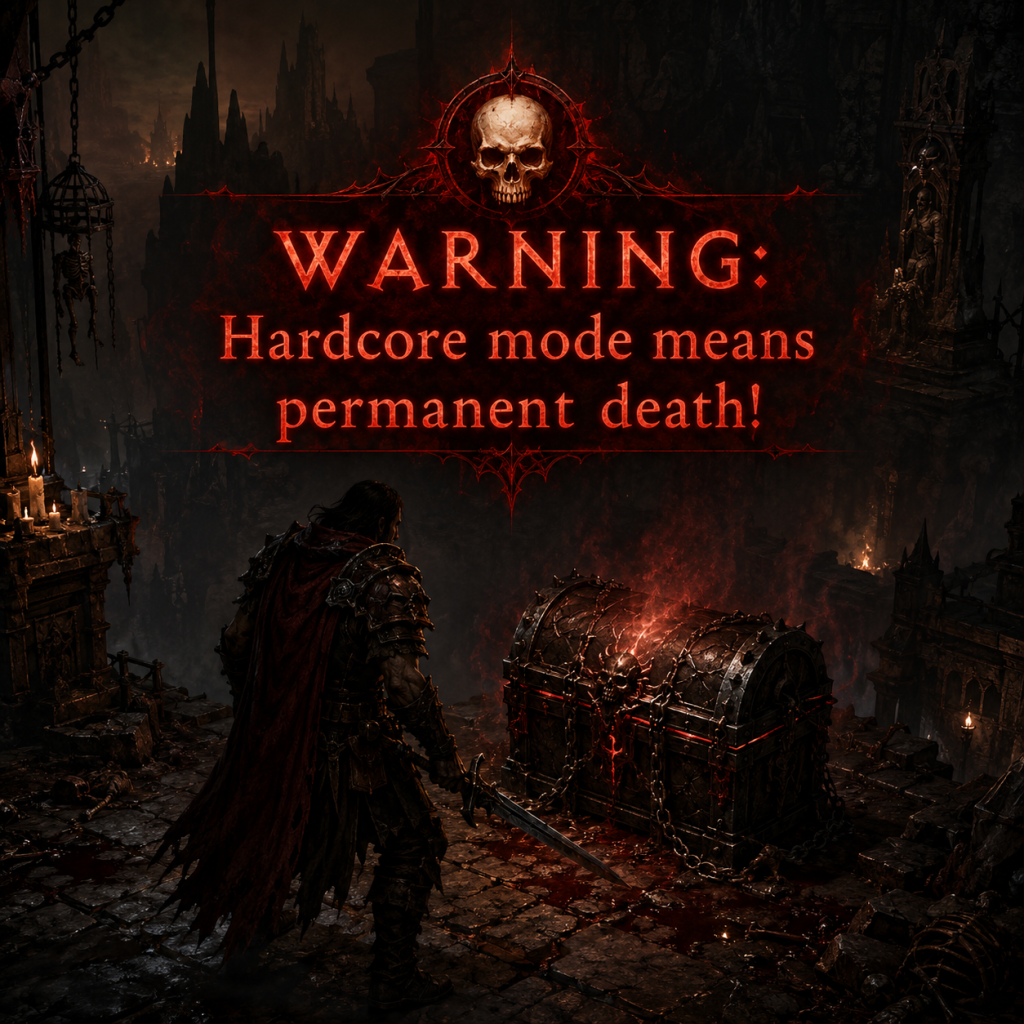
- Hardcore Character Death: Hardcore mode is permanent. Once your character dies, it is deleted forever, along with all gear, Paragon experience, and progress. There are no revives or resurrections. Play cautiously, always use a cheat-death passive or skill, and never take unnecessary risks.
- Character Deletion: Deleting a character is permanent and cannot be undone. Confirm before deleting, especially for Hardcore or high-level characters.
- Account-Bound Items: Many powerful items (e.g., Legendaries, Set items) become account-bound when equipped or when you complete certain quests. Once bound, they cannot be traded to other players. Only trade items that are still unbound (check the red X icon).
- Enchanting and Reforging: Reforging a legendary in Kanai's Cube will destroy the original and give a new roll (including different stats). You cannot undo this. Similarly, enchanting a legendary at the Mystic replaces a single affix permanently for that item.
- Seasonal Content: Each season introduces temporary themes, cosmetic rewards, and leaderboards. After the season ends, you lose access to the seasonal buff, but characters transfer to non-seasonal. Seasonal-exclusive transmogs and pets are permanently added to your account (if earned). To get the Haedrig's Gift set, you must complete chapters 2-4 of the Season Journey — you can only unlock one gift per season.
- Achievements and Lore: No achievement or lore journal is permanently missable because you can replay any story quest or Adventure Mode at any time. All bosses and events remain accessible. However, some achievements tied to defeating bosses with specific conditions are easier on lower difficulties.
- Special Event Items: Limited-time events (e.g., Blizzard's annual “The Darkening of Tristram” for Diablo's anniversary) offer exclusive cosmetics and achievements. These appear only during the event window.
- Early Boss Fights: The Butcher (Act I), Belial (Act II), and Diablo (Act IV) can be tough for new players. Learn their attack patterns and keep moving. Enrage timers exist but are lenient on lower difficulties. On higher Torment levels, some bosses one-shot if you ignore mechanics.
- Elite Affixes: Certain elite affixes (e.g., Arcane Enchanted, Molten, Fire Chains, Waller) can quickly overwhelm you if you stand still. Kite effectively and prioritize breaking the crowd control effects.
- Difficulty Jump from Normal to Hard: The game becomes noticeably harder from Normal to Hard. If you're struggling, drop down a difficulty level; you can change it any time outside of combat.
- Torment Unlock: Torment difficulty becomes available only after reaching level 60 on a non-seasonal character (or completing the campaign once). Do not attempt high Torment levels without good gear — start at Torment I and work up.
- Overdoing Normal Rifts: Normal rifts (Nephalem Rifts) are fine for early bounties and keys, but don't obsess over them before Adventure Mode. The main progression is through bounties (for materials), greater rifts (for legendary gems and XP), and Kanai's Cube recipes.
- Salvaging Everything Prematurely: Early game, salvage all common, magic, and rare items. But once you find a legendary, check its special effect before salvaging. You may want to extract its power in Kanai's Cube (unlocked in Act III). Keep one copy of every legendary that has a unique affix for extraction.
- Ignoring the Cube: Kanai's Cube is unlocked after a short quest in Act III (on PC/console) or available from the start on Switch after one bounty. Extract legendary powers into the cube — you can equip three (weapon, armor, jewelry) and rotate them freely. Many players regret not doing this earlier.
- Not Upgrading Gems: Gems in your gear can be leveled up at the Jeweler. Higher-tier gems provide huge bonuses (especially for mainstat, vitality, crit damage). Don't hoard low-level gems; combine them. For legendary gems, you must unlock them by clearing Greater Rifts, then level them up using the Urshi at the end of a GR. Prioritize leveling gems to 25 for their secondary effect.
- Wasting Crafting Materials: Don't craft too many rare items early on. Save materials for crafting legendary or set items once you're at level 70 and have recipes from bounties. Similarly, use Death's Breaths wisely — they are needed for Kanai's Cube recipes and upgrading rares.
- Public Games: When joining a public game, respect the current activity. If the game is labeled “Rift” or “Bounty”, stick to that. Don't go off alone if the group is sticking together. Communicate via chat or emotes if needed.
- Looting Etiquette: In Diablo III, all loot is instanced — every player sees their own drops. You cannot be ninja-looted. However, items on the ground are yours alone. Don't steal from chests/urns that others might need for bounties (mist effects are shared).
- AFK Policy: If you need to step away for more than a minute, leave the game or at least inform the group. Extended AFK in public games can get you kicked by the party leader.
- Console Specific: On console (PS4/5, Xbox, Switch), be wary of joining games with modded items (e.g., impossibly high-stat gear). These can corrupt your save or cause game instability. Only play with trusted friends or avoid hacked gear. Also, on console you can accidentally drop items for others, so lock important gear.
- Hardcore & Trading: In Hardcore mode, death is permanent even if you disconnect or the server crashes. Do not trade items to strangers — you might get scammed. Trusted trading only.
- Third-Party Programs: Blizzard strictly forbids any unauthorized software that automates gameplay (bots), injects code, or modifies the game client. This includes auto-hotkey scripts for farming. If detected, you will receive a permanent account ban, and all progress is lost.
- Overlays & Streaming: Using unfair overlays (e.g., showing hidden map or monster data) is also bannable. Stick to legitimate overlays like Discord or OBS.
- Report Suspicious Players: If you see someone teleporting to loot, moving at unnatural speed, or one-shotting everything on high Torment, report them via the in-game tool or Blizzard support. Do not attempt to replicate.
- PC (Battle.net): All character data, inventory, and Paragon progress are stored server-side. There is no local save file to backup. Your progress is tied to your Blizzard account — if you are banned, you lose everything. Ensure your account is secure with 2FA.
- Console (Local + Cloud): Consoles save locally to the system storage or memory card. To prevent corruption, periodically back up to cloud storage (e.g., PlayStation Plus or Xbox Live saves). If you play Hardcore, be aware that some users have exploited local saves to cheat — but this is not endorsed. Blizzard does not moderate console saves as aggressively.
- Hardcore on Console: Because local saves can be copied, you could theoretically restore a dead Hardcore character by reloading a backup. However, this is considered cheating, and many players frown upon it. Use at your own risk.
- Seasonal Characters: Seasonal characters are also server-side on PC, but on console they are local. If you delete a seasonal character before the season ends, you lose all progress and rewards for that season. Wait for the season to end to transfer items to non-seasonal.
- Unlock Kanai's Cube ASAP: The cube is essential for endgame power. Complete the “The Art of Isometry” quest in Act III (Sescheron Ruins) to get it. On Switch, it's unlocked after your first bounty.
- Use the Mystic Early: Enchanting (rerolling) a single affix on a legendary or set item is inexpensive early on and can dramatically improve your damage or toughness. Don't hoard materials — invest in your best gear.
- Change Difficulty Freely: You can adjust difficulty at any time from the menu (Normal-Torment) outside of combat. If you're struggling, lower it. If it's too easy, increase for more XP and gold — no need to restart.
- Follower Items Matter: Equip your followers (Templar, Scoundrel, Enchantress) with “Follower: Cannot Die” relic (found on Torment I+) to make them immortal. Also give them abilities that buff you (e.g., Templar's Healing, Enchantress's attack speed).
- Gem of Ease: This legendary gem reduces level requirement for the weapon it's socketed in. Combine with a high-level weapon to speed-level alts. Farm it from Greater Rifts.
- Paragon Cap: Paragon levels are unlimited. The first 800 points can be distributed arbitrarily, and beyond that they go to mainstat. Do not waste early points on move speed if you already have 25% from gear (hard cap is 25%).
- Don't Salvage All Legendaries: Before salvaging a legendary you don't need, check its special power. Extract it in the cube if you haven't already. Also, keep duplicates for reforging or rerolling.
- Stack Up Rift Keys: Nephalam Rifts require keys (dropped from Rift Guardians on normal/nephalem rifts). Always have a surplus; you can run out quickly during group sessions.
- Public Bounty Groups: When running bounties in public, communicate who does which act. Sharing bounty materials is key; if someone leeches, you can kick them. Use the “Vote Kick” option.
Missable Content
Difficulty Spikes
Grinding Traps
Online Etiquette (PC / Console)
Anti-Cheat Notes
Save Management
Things Players Commonly Regret Not Knowing Earlier
Following these notes will help you avoid many common frustrations and maximize your enjoyment of Sanctuary. Pay special attention to irreversibility (Hardcore, enchants) and the importance of Kanai's Cube.
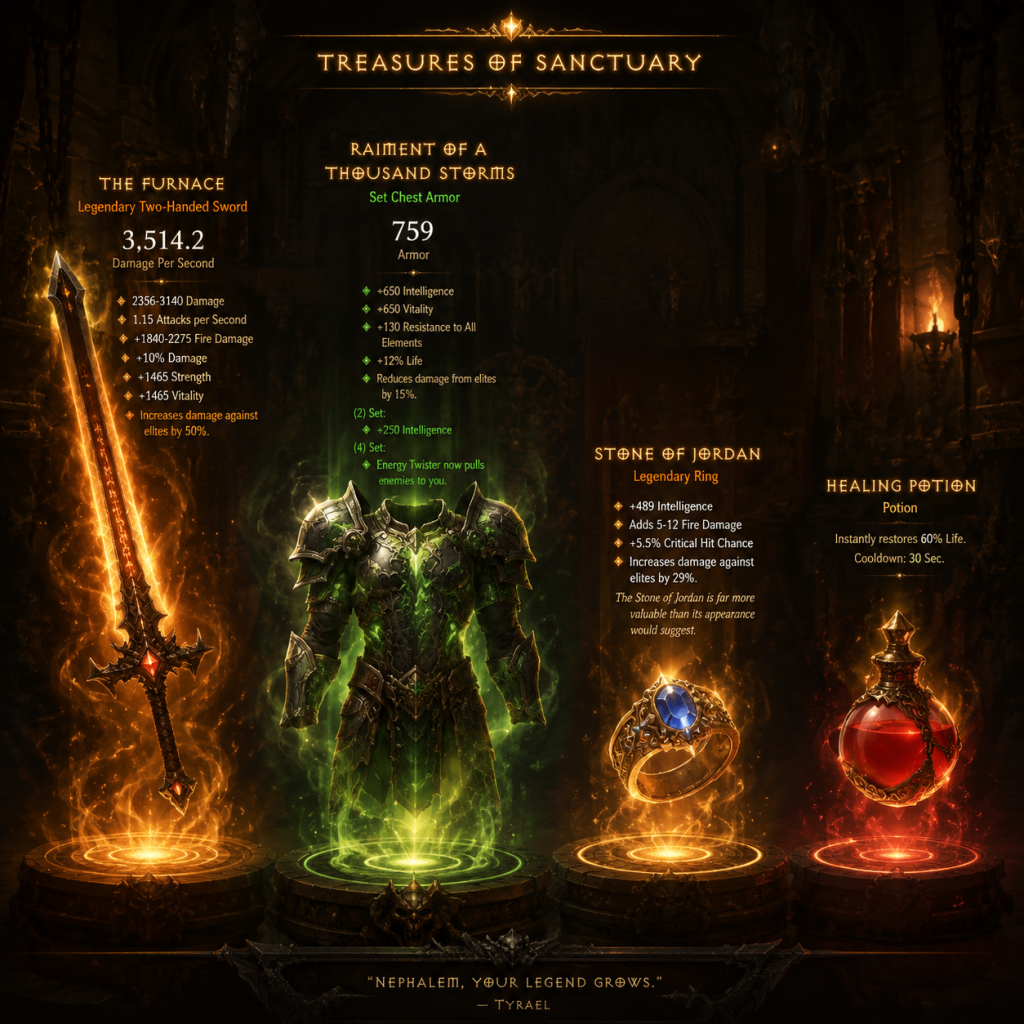
All Game Items
All Game Items Guide for Diablo III
This guide provides a comprehensive overview of every major item category in Diablo III: Reaper of Souls (including the Necromancer pack). Items are grouped logically, with explanations of their functions, acquisition methods, usage context, and important synergies or upgrades.
Weapons
Weapons determine your primary damage output, attack speed, and often provide special affixes. They drop from monsters, chests, elite packs, bosses, and as rewards from Horadric Caches or Kadala (Blood Shards).
#### One-Handed Weapons
- Swords, Maces, Axes, Spears, Daggers, Fist Weapons, Ceremonial Knives (WD), Flails (Crusader), Phylacteries (Necromancer off-hand but main-hand in some builds)
- Usage: One-handed weapons are paired with a shield, off-hand source/mojo/quiver/phylactery, or a second one-handed weapon (dual-wield). They favor fast attack speed and often roll +Damage%, Attack Speed, Critical Hit Damage, or mainstat.
- Example: Thunderfury, Blessed Blade of the Windseeker – popular for its proc that slows and deals area lightning damage.
- Synergies: Many builds require specific one-handed legendaries (e.g., Wand of Woh for Archon Wizard, Echoing Fury for speed builds).
- Axes, Maces, Swords, Staves, Polearms, Bows, Crossbows, Daibo (Monk), Two-Handed Mighty Weapons (Barbarian), Two-Handed Flails (Crusader), Scythes (Necromancer)
- Usage: Two-handers deal higher base damage per hit but slower attack speed. Used by builds that rely on big numbers (e.g., Whirlwind Barbarian uses two-handed mighty weapons, Legacy of Nightmare builds often use ancient two-handers).
- Example: Furnace – famed for +50% damage to elites, making it a top choice for many endgame builds.
- Upgrades: Ancient/Primal Ancient versions have higher base stats.
- Affixes: Socket (for helm gem: Amethyst for %Life, Diamond for CDR, Ruby for XP, Topaz for magic find), mainstat, critical hit chance (only on helms and bracers), vitality.
- Class-specific: Wizards have Tal Rasha's helm; Barbarians have Immortal King's helm; Crusaders have Seeker of the Light helm.
- Legendary Example: Leoric's Crown – increases gem effect by 75-100% (used for diamond CDR boost).
- Affixes: 3 sockets (for topaz/ruby/emerald), mainstat, vitality, resists.
- Class-specific: Blackthorne's Surcoat, Tyrael's Might (famed for +% damage to demons, mobility from teleport proc).
- Affixes: Critical Hit Chance, Critical Hit Damage, Attack Speed (rare), mainstat, vitality.
- Example: Stone Gauntlets – increase toughness but slow movement; used in conjunction with Ice Climbers (prevents freeze) or other anti-CC effects.
- Affixes: Mainstat, vitality, %Life, all resistance, cooldown reduction.
- Example: Corruption – of interest if you want auto-pickup for health globes, but usually overshadowed by class sets.
- Affixes: 2 sockets, mainstat, vitality, all resistance, armor.
- Example: Depth Diggers – used by Pet Doctor or Multishot DH for increased resource generator damage.
- Affixes: Mainstat, vitality, armor, all resistance, movement speed (caps at 25% from paragon).
- Example: Ice Climbers – immunity to freeze and immobilize; often paired with Stone Gauntlets to cancel movement penalty.
- Affixes: Critical Hit Chance, mainstat, vitality, element damage (for skills), resists.
- Example: Ancient Parthan Defenders – damage reduction per stunned/frozen enemy; core for many melee builds.
- Affixes: Mainstat, vitality, %Life, all resistance, armor.
- Example: Witching Hour – best-in-slot damage belt due to 5 affixes including IAS and CHD. Harrington Waistguard – 135% increased damage after opening a chest/clickable.
- Affixes: Critical Hit Chance, Critical Hit Damage, Attack Speed, Average Damage (additive to weapon damage), mainstat, socket (for Legendary Gems).
- Example: Ring of Royal Grandeur – reduces set bonus requirement by 1; farmed from Act I Bounty Cache. Focus & Restraint – pair that gives 50% damage for generator/spender cycles. Unity – splits damage with follower if both wear one (and follower cannot die token).
- Affixes: Critical Hit Chance, Critical Hit Damage, socket (always), mainstat, %element damage, attack speed.
- Example: Hellfire Amulet – adds a fifth passive from a random class passive pool; crafted via keywarden materials. Squirt's Necklace – 100% increased damage and 50% increased damage taken; used in high-skill builds with shielding.
- Sources/Mojos (Wizard/WD): Provide damage range, mainstat, cooldown reduction, or class-specific bonuses. E.g., Serpent's Sparker for Hydra Wizard, Tal Rasha's Guidance (source).
- Shields: Roll block chance, mainstat, vitality, crit chance, resists. Example: Ancient Guardian for Crusader, Lidless Wall for damage.
- Quivers (DH): Attack speed, discipline, skill damage for Primary skills. Example: Dead Man's Legacy for Multishot.
- Phylacteries (Necro): Damage range, intelligence, essence regeneration, cooldown. Example: Leger's Disdain for Corpse Lance builds.
- Health Potion: Unlimited usage with 30-second cooldown. Different potions exist (e.g., Bottomless Potion of Fear – fear nearby enemies on use, Bottomless Potion of Mutilation – replenish resource). Found as random drops or from recipe drops.
- Mysterious Potion: From Whimsydale; increases magic find briefly.
- Pandemonium Loop: (not a potion) but a ring that creates a pylon on kill.
- Empowered or Greater Rift Keystones: Used to open Nephalem and Greater Rifts. Greater Rift Keystones drop from Rift Guardians at Torment levels.
- Gold Find and Experience Shrines: Temporary buffs from pylon-like items in maps.
- Common Materials: Reusable Parts, Arcane Dust, Veiled Crystal (from salvaging magic/rare/legendary items respectively).
- Legendary Materials: Forgotten Soul (from salvaging legendary or set items). Used for enchantment, crafting, and calibrating Helmets/Weapons (Kadala).
- Class-specific Sets: Each class has crafting materials for their sets (e.g., Tenacity from Whimsyshire not required anymore but remastered).
- Bounty Materials: Act-specific materials: Khanduran Rune (Act I), Caldeum Nightshade (Act II), Arreat War Tapestry (Act III), Corrupted Angel Flesh (Act IV), Westmarch Holy Water (Act V). Required for crafting Hellfire items and reforge legendary at Kanai's Cube.
- Keywarden Materials: Key of Bone, Gluttony, War, Evil – drop from specific Keywardens in Acts. Combine with Infernal Machine to open Uber Boss portals for Hellfire Amulet/Ring crafting.
- Death's Breath: Common drop from elites, used in Kanai's Cube recipes (upgrade rare, convert set, etc.).
- Gold: Primary currency for merchants, enchanting, crafting, repair. Unlimited capacity.
- Blood Shards: Earned from Rift Guardians, bounties, and challenges. Used at Kadala to gamble for legendary items.
- Greater Rift Keystones: See Consumables. Used to open Greater Rifts.
- Void Shards (no, not exist). Note: Puzzle Ring (legendary) can be used to open a Goblin portal if equipped to follower in cube.
- Kanai's Cube: Not an item that sits in inventory, but a special collectible extracted from Act III ruins after reaching level 70. It enables recipes: extract legendary powers, upgrade rare, reforge legendary, convert set items, etc. Requires materials.
- Horadric Caches: Reward from completing all bounties in a single act. Contains bounty materials, gold, gems, and a chance for cache-specific legendaries (e.g., Ring of Royal Grandeur from Act I).
- Puzzle Ring & Bovine Bardiche: Equip the ring to a follower or cube its power to spawn a treasure goblin portal (Greed’s Realm). Bovine Bardiche in cube opens the Cow Level (unique map).
- Pet (Cosmetic): Not functional but collectible; drop from special events or whimsy.
- Wings: Cosmetic pets/wings from events or pre-orders.
- Stash Tabs: Up to 13 tabs; can be purchased with gold or earned via Season Journey.
- Set Bonuses: Classes have multiple 6-piece sets (e.g., Seeker of the Light for Crusader, Marauder's Set for DH). Sets define builds.
- Legendary Gems: Socketed into jewelry in rings/amulets. Examples: Bane of the Trapped (damage vs slowed), Gogok of Swiftness (IAS/CDR), Enforcer (pet damage). Upgrade at Gem NPC after Greater Rift.
- Legendary Potion Recipes: Drop randomly; unlock bottomless potion upgrades.
- Primal Ancient Items: Ultra-rare ancient items with maxed affix rolls; drop only after completing a solo Greater Rift 70.
- Early Game (1-70): Focus on rare (yellow) items with mainstat + vitality. Replace every few levels. Use Kana's Cube recipes only after 70.
- Endgame (70+): Farm Rifts, Bounties, Greater Rifts for legendary drop rain. Target specific gear for build from Kadala, upgrading rares, or reforging at cube.
- Seasonal vs Non-Seasonal: Seasonal items (new legendaries) become available after season ends; seasonal players get first access.
#### Two-Handed Weapons
Armor
Armor pieces provide primary stats (Strength, Dexterity, Intelligence, Vitality), defensive rolls (All Resistance, Armor, %Life), and secondary affixes. They are the core of your toughness and resource sustain.
#### Helm
#### Chest Armor
#### Gloves
#### Shoulders
#### Pants
#### Boots
#### Bracers
#### Belt
Jewelry (Rings & Amulets)
Jewelry provides critical damage multipliers and unique defensive/utility effects. They are the hardest to acquire perfectly.
#### Rings
#### Amulets
Off-Hand Items
Consumables
Crafting Materials
Materials are essential for upgrading rare items, rerolling stats at the Mystic, enchanting, and crafting sets or legendaries.
Currencies
Collectibles & Special Items
Legendary & Set Items Overview
While the full list of over 500 legendaries is impractical, key categories:
How to Obtain & When to Use
This guide covers all fundamental item groups. For specific builds, refer to class guides. Use the in-game Codex for legendary power descriptions.
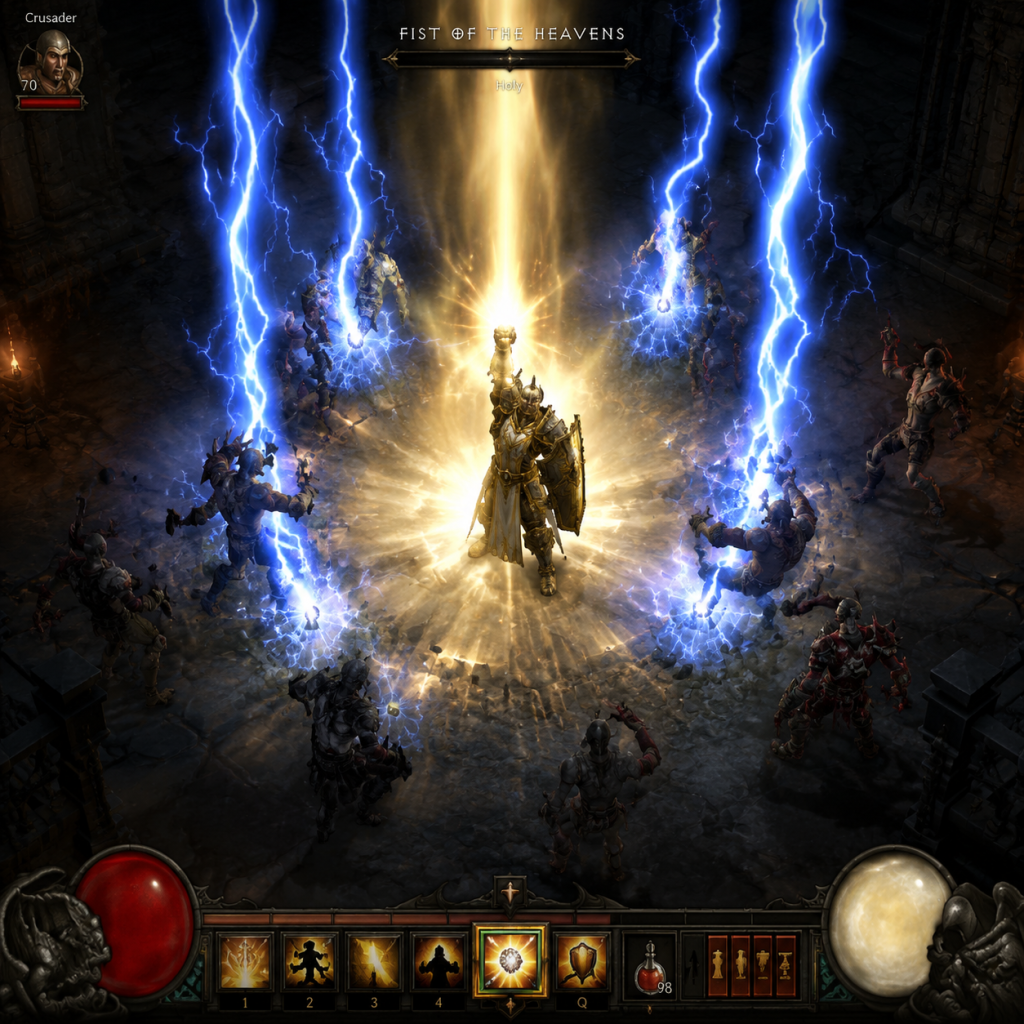
Character Skills
"content": "## Character Skills Guide for Diablo III
This guide provides a comprehensive overview of all playable classes and their skills in Diablo III: Reaper of Souls (including the Necromancer). Each class has a unique set of active and passive skills, with multiple rune variations that alter effects. Skills are unlocked as you level up; you can assign up to 6 active skills and 4 passive skills at a time. Understanding each skill's mechanics, cooldowns, resource costs, and synergies is essential for effective combat and build optimization.
The Barbarian is a melee powerhouse that relies on Fury, which builds from dealing damage and using certain skills, and decays out of combat. Skills are divided into Primary, Secondary, Defensive, Might, Rage, and Berserker categories. Fury spenders generate high damage.
#### Primary Skills (Fury Generators)
This guide provides a comprehensive overview of all playable classes and their skills in Diablo III: Reaper of Souls (including the Necromancer). Each class has a unique set of active and passive skills, with multiple rune variations that alter effects. Skills are unlocked as you level up; you can assign up to 6 active skills and 4 passive skills at a time. Understanding each skill's mechanics, cooldowns, resource costs, and synergies is essential for effective combat and build optimization.
Barbarian
The Barbarian is a melee powerhouse that relies on Fury, which builds from dealing damage and using certain skills, and decays out of combat. Skills are divided into Primary, Secondary, Defensive, Might, Rage, and Berserker categories. Fury spenders generate high damage.
#### Primary Skills (Fury Generators)
- Bash: Hit an enemy for 170% weapon damage.
- Cleave: Sweep for 140% weapon damage to enemies in front.
- Frenzy: Consecutive hits increase attack speed and damage up to 4 stacks. 150% weapon damage per hit.
- Weapon Throw: Throw a weapon for 210% weapon damage. Generates Fury.
- Hammer of the Ancients: Slam for 320% weapon damage in a small area.
- Seismic Slam: Shockwave dealing 480% weapon damage to enemies in a cone.
- Weapon Throw (also listed under Primary? Actually it's a generator with some spend mechanics? It's a generator. But there is also Ancient Spear as a spender? Let's correct: Secondary includes
- Sprint: Increase movement speed by 40% for 3 seconds.
- War Cry: Taunt and increase armor by 20% for 60 seconds.
- Battle Rage: Increase critical hit chance by 3% and critical hit damage by 10% for 120 seconds.
- Ignore Pain: Reduce damage taken by 50% for 5 seconds.
- Ground Stomp: Stun nearby enemies for 4 seconds. Generate 30 Fury.
- Furious Charge: Charge forward dealing 390% weapon damage and stunning.
- Leap: Leap to an area dealing 220% weapon damage and slowing enemies.
- Overpower: Attack all nearby enemies for 220% weapon damage.
- Rend: Bleed enemies for 700% weapon damage over 5 seconds.
- Revenge: After being hit 5 times, you can use Revenge, dealing 300% weapon damage and healing for 5% of max life.
- Call of the Ancients: Summon three ancient warriors for 20 seconds. Each does 70% weapon damage.
- Earthquake: Shake the ground dealing 2400% weapon damage over 8 seconds.
- Wrath of the Berserker: Transform for 20 seconds, gaining 50% attack speed, 50% dodge, and 50% movement speed. All damage increased by 50%.
- Boon of Bul-Kathos: Reduce cooldown of all skills by 30 seconds after killing an elite pack.
- Superstition: Reduce damage from non-physical attacks by 20% and regenerate Fury when hit.
- Unforgiving: Fury decays half as fast out of combat.
- Ruthless: Deal 40% more damage to enemies below 30% health.
- Weapons Master: Gain 4 Fury per hit with a weapon type, plus other benefits.
- Whirlwind + Wind Shear Rune generates Fury for sustained spin. Pair with Battle Rage – Bloodshed for massive AOE damage.
- Furious Charge + Merciless Assault refunds cooldown on kill, enabling chain charges.
- Wrath of the Berserker + Insanity doubles damage; use with Call of the Ancients for burst.
- Rend + Bloodbath causes bleeding enemies to explode on death, excellent for density.
- Whirlwind / Wrath of the Berserker (Wastes Set): Focus on Whirlwind with Dust Devils, Battle Rage, War Cry, and Wrath. Use Bul-Kathos's weapon set for unlimited Fury.
- Hammer of the Ancients / Seismic Slam (Immortal King's Set): Use Hammer with Smash for AOE, and Seismic Slam for single target. Build around Fury generation and cooldown reduction.
- Punish: Strike for 215% weapon damage, block chance increased by 15% for 5 seconds.
- Slash: Cleave for 175% weapon damage.
- Smite: Throw a bolt of lightning for 305% weapon damage, stun first enemy.
- Justice: Throw a hammer for 245% weapon damage, pierces enemies.
- Fist of the Heavens: Call a lightning bolt for 340% weapon damage, then three smaller bolts.
- Blessed Hammer: Summon a whirlwind of hammers dealing 200% weapon damage to nearby enemies.
- Shield Bash: Charge with shield, dealing 670% weapon damage and stunning.
- Falling Sword: Jump into the air and crash down dealing 1700% weapon damage in area.
- Iron Skin: Become immune to crowd control and take 50% less damage for 4 seconds.
- Provoke: Taunt all enemies, generating 50 Wrath.
- Shield Glare: Blinding flash, blinding enemies for 4 seconds.
- Consecration: Sanctify ground, healing you and allies for 15k life per second over 6 seconds.
- Laws of Hope: Increase resistances by 25% for 10 seconds.
- Laws of Valor: Increase attack speed by 8% for 10 seconds.
- Laws of Justice: Increase block chance by 15% for 10 seconds.
- Heaven's Fury: Beam of holy light dealing 1570% weapon damage over 6 seconds.
- Bombardment: Call down a hail of missiles dealing 2320% weapon damage over 5 seconds.
- Phalanx: Summon shield bearers to charge forward dealing 500% weapon damage.
- Shield Glare (already listed as defensive, but also emerges in this tree? Actually, it's one. I'd avoid duplication. The class tree has: Primary, Secondary, Defensive, Laws, Conviction, and Phalanx. We'll group Phalanx under Conviction perhaps. Better to list each skill once.
- Bash: 170% weapon damage; generates 6 Fury per hit. Runes: Onslaught (stun), Clobber (long stun), Punish (bonus dmg after hit), Instigation (more Fury), Pulverize (AOE).
- Cleave: 140% weapon damage in arc. Runes: Rupture (bleed), Reaping Swing (more enemies), Broad Sweep (wider), Gathering Storm (pull), Scattering Blast (knockback).
- Frenzy: 150% weapon damage, up to 4 stacks increase attack speed and damage. Runes: Sidearm (projectile), Maniac (dmg per stack), Smite (stun), Vanguard (move speed), Berserk (more dmg).
- Weapon Throw: 210% weapon damage; generates Fury. Runes: Balanced Weapon (no cooldown?), Mighty Throw (pierce), Throwing Hammer (stun), Stupefy (confuse), Ricochet (bounce).
- Hammer of the Ancients: 320% weapon damage in area. Runes: Thunderstrike (lightning), Rolling Thunder (line), Smash (wider), Birthright (heal), The Devil's Anvil (stun on crit).
- Seismic Slam: 480% weapon damage cone. Runes: Shattered Ground (multiple waves), Cracking Rift (fire), Rumble (slow), Wall of Death (knockback), Permafrost (freeze).
- Ancient Spear: 460% weapon damage, pulls enemy. Runes: Harpoon (pull multiple), Rage Flip (stun), Boulder Toss (high dmg), Lightning Rune? (listed as?) – standard: Multiple runes available.
- Whirlwind: 340% weapon damage, channeled. Runes: Dust Devils (tornadoes), Wind Shear (Fury gen), Volcanic Eruption (fire), Blood Funnel (heal), Hurricane (larger).
- Sprint: Move speed 40% for 3 sec. Runes: Marathon (longer), Gangway (knockback), Run Like the Wind (tornadoes), Double Time (resist), Forced March (party).
- War Cry: +20% armor for 60 sec, taunts. Runes: Hardened Wrath (more armor), Veteran's Warning (dodge), Charge! (Fury), Impunity (all res), Gluttons (heal).
- Battle Rage: +3% crit chance, +10% crit dmg for 120 sec. Runes: Marauder's Rage (more dmg), Bloodshed (AOE), Ferocity (attack speed), Swords to Ploughshares (heal on crit), Into the Fray (Fury per crit).
- Ignore Pain: 50% damage reduction for 5 sec. Runes: Ignorance is Bliss (heal), Contempt for Weakness (reflect), Mob Rule (party), Iron Hide (longer), Bravado (move speed).
- Ground Stomp: Stun 4 sec, generate 30 Fury. Runes: Deafening Crash (dmg), Trembling Stomp (fear), Wrenching Smash (pull), Foot of the Mountain (more Fury), Upheaval (cracked earth).
- Furious Charge: 390% weapon damage, stuns. Runes: Battering Ram (AOE), Cold Rush (freeze), Merciless Assault (cooldown refund on kill), Dreadnought (longer), Stamina (heal).
- Leap: 220% weapon damage, slow. Runes: Call of Arreat (pull), Death from Above (stun), Launch (knockback), Juggernaut (armor), Toppling Impact (dmg).
- Overpower: 220% weapon damage to nearby. Runes: Killing Spree (reset chance), Crushing Advance (reflect), Revel (heal), Brazen (larger radius), Storm of Steel (throw axes).
- Rend: 700% weapon damage over 5 sec bleed. Runes: Lacerate (more dmg), Mutilate (slow), Bloodbath (AOE on death), Ravage (larger), Rupture (stun chance).
- Revenge: After 5 hits, use for 300% weapon damage and heal 5% life. Runes: Best Served Cold (more dmg), Provocation (fewer hits required), Retaliation (stun), Vengeance is Mine (more heal), Blood Law (resource).
- Call of the Ancients: Summon 3 ancients for 20 sec, each 70% weapon damage. Runes: Ancients' Fury (Fury), Council Rises (dmg), Duty to the Fallen (cooldown reduction), The Ancient's Blessing (heal), Together as One (damage reduction).
- Earthquake: 2400% weapon damage over 8 sec area. Runes: Chilling Earth (cold), Molten Fury (fire), Giant's Stride (while moving), The Mountain's Call (larger), Rupture (explode).
- Wrath of the Berserker: 20 sec buff: +50% attack speed, +50% dodge, +50% move speed, +50% damage. Runes: Insanity (double damage), Slaughter (crit chance), Arreat's Wail (fear), Thrive on Chaos (extension), Striding Giant (more dodge).
- Boon of Bul-Kathos: Reduce cooldowns by 30 sec after elite kill.
- Superstition: 20% non-physical damage reduction, Fury when hit.
- Unforgiving: Fury decays slower out of combat.
- Ruthless: 40% extra damage to enemies below 30% HP.
- Weapons Master: Fury per hit with weapon type bonuses.
- Whirlwind Build (Wastes Set): Whirlwind (Wind Shear) for Fury, Dust Devils for AOE. Battle Rage (Bloodshed) and War Cry. Use Wrath of the Berserker for burst.
- Hammer of the Ancients (Immortal King's Set): Use Smash rune for AOE; maintain Battle Rage and War Cry. Furious Charge for mobility.
- Punish: 215% weapon damage; +15% block chance for 5 sec. Runes: Retaliate (dmg on block), Roar (provoke), Celerity (attack speed), Rebirth (heal on block), Fury (more Wrath).
- Slash: 175% weapon damage arc. Runes: Crush (armor reduction), Zeal (attack speed), Guard (block), Reaping Swing (wider), Smash (slow).
- Smite: 305% weapon damage lightning bolt, stuns first enemy. Runes: Shatter (burst), Surge (multiple targets), Reaping (Wrath), Lash (knockback), Lightning Storm (chain).
- Justice: 245% weapon damage hammer pierces. Runes: Burst (explode), Crack (crit chance), Might (dmg after hit), Pursuit (move speed), Blessed Hammer (spawns hammers).
- Fist of the Heavens: 340% weapon damage lightning bolt, 3 smaller bolts. Runes: Divine Well (more bolts), Retribution (area), Heaven's Tempest (storm), Reverberation (stun), Fissure (fire line).
- Blessed Hammer: 200% weapon damage whirlwind. Runes: Thunderstruck (lightning), Limitless (more hammers), Divine Hammer (larger), Burning Wrath (fire), Icebound (freeze).
- Shield Bash: 670% weapon damage, stuns. Runes: Pound (more dmg), One on One (knockback), Crumble (AOE), Shield Cross (wider), Piercing Shield (pierce).
- Falling Sword: 1700% weapon damage AOE. Runes: Flurry (multiple strikes), Part the Clouds (quick recast), Superheated (fire), Rapid Descent (faster), Rise Brothers (summon angels).
- Iron Skin: 50% damage reduction, immunity to CC for 4 sec. Runes: Steel Skin (longer), Flash (explosive), Charged Up (knockback), Explosive Skin (damage), Reflective Skin (reflect).
- Provoke: Taunt all enemies, generate 50 Wrath. Runes: Hit Me (heal), Too Scared to Run (slow), Charged Up (damage), Shield Glare (blind), Cleanse (remove debuffs).
- Shield Glare: Blind enemies 4 sec. Runes: Uncertainty (dot), Divine Glare (heal), Zealous Glare (Wrath), Emblazoned Shield (fire), Repercussion (reflect).
- Consecration: Heal 15k life/sec over 6 sec. Runes: Bed of Nails (dmg), Shattered Ground (dmg AOE), Pure Light (speed), Touch of Malice (enemy dmg), Scorn (elite dmg).
- Laws of Hope: +25% resistances for 10 sec. Runes: Wings of Hope (heal), Timely Will (resource), Hopeful Cry (fear break), Unwilling (slow enemies), Immortal Will (prevent death once).
- Laws of Valor: +8% attack speed for 10 sec. Runes: Critical (crit chance), Freeze (freeze enemies), Invigorate (move speed), Faith (buff duration), Zeal (resource).
- Laws of Justice: +15% block chance for 10 sec. Runes: Decaying (dot), Protection (block amount), Unity (resistance), Bound (stun enemies), Relentless (healing).
- Heaven's Fury: Beam dealing 1570% weapon damage over 6 sec. Runes: Blessed Ground (fire), Fires of Heaven (multiple beams), Ascendancy (more dmg), Thou Shalt Not Pass (knockback), Cloud of Light (larger beam).
- Bombardment: 2320% weapon damage over 5 sec area. Runes: Annihilate (big rocket), Barrels of Fun (cluster bombs), Mine Field (mines), Impacts (stun), Targeted (concentrate).
- Phalanx: Summon shield bearers dealing 500% weapon damage. Runes: Bowmen (ranged), Shield Bash (melee), Stampede (knockback), Cavalry (more soldiers), Lord Commander (summon dmg).
- Heavenly Strength: Equip a two-handed weapon in one hand while carrying a shield.
- Lord Commander: Increases damage of Phalanx and Law cooldown reduction.
- Holy Cause: 10% increased weapon damage; healing from holy skills.
- Tower Shield Specialist: Block chance increased by 30% of shield block chance.
- Fervor: 15% attack speed with two-handed weapons; reduce cooldown of all skills.
- Blessed Hammer Build (Seeker of the Light Set): Use Blessed Hammer (Limitless) with Laws of Valor and Provoke for Wrath. Falling Sword for mobility. Heaven's Fury for elite kills.
- Shield Bash Build (Roland's Set): Shield Bash (Pound) with Punish for block chance. Use Consecration for healing, Laws of Justice for block.
- Hungering Arrow: 155% weapon damage, has 35% chance to pierce. Runes: Devouring Arrow (more dmg per pierce), Puncturing Arrow (stun), Spray of Teeth (crit chance), Frost Arrow (cold), Shatter Shot (explode).
- Entangling Shot: 200% weapon damage, slows 2 sec. Runes: Chain Gang (more enemies), Justice is Served (Hatred per target), Bola Shot? Actually: Bola is another skill? Let's list correctly: Entangling Shot runes: Chain Gang (pull), Justice is Served (Hatred), Heavy Burden (slow), Shock Collar (stun), etc.
- Bola Shot: 130% weapon damage, explode after 1 sec. Runes: Acid Bola (poison), Bitter Cartridge (more chaining), Imminent Doom (faster), Volatile Explosives (fire), Thunder Ball (stun).
- Grenade: 160% weapon damage, arc. Runes: Cluster Grenades (multiple), Gas Grenade (poison cloud), Stun Grenade (stun), Tinkerer (extra grenade), Fire Bomb (fire).
- Evasive Fire: 200% weapon damage, backflip. Runes: Covering Fire (more arrows), Displace (faster), Parting Gift (explosive), Shrapnel (scatter), Surge (Hatred).
- Multishot: 270% weapon damage to all enemies. Runes: Burst Fire (more shots), Full Broadside (fire), Arsenal (rockets), Suppression (slow), Wind Chill (cold).
- Rapid Fire: 230% weapon damage per shot, six shots per second. Runes: Flingfire? (?) Actually: Bombardment? Let's correct: Rapid Fire runes: Fire Support (rockets), High Velocity (pierce), Web Shot (slow), Shivering Arrow (cold), Withering Fire (poison).
- Cluster Arrow: 250% weapon damage plus 22 small grenades. Runes: Dazzling Arrow (stun), Maelstrom (fire), Loaded for Bear (more dmg), Shooting Stars (rockets), Cluster Bombs (multiple).
- Elemental Arrow: 190% weapon damage, element. Runes: Ball Lightning (lightning), Frost Arrow (cold), Immolation Arrow (fire), Nether Tentacles (life steal), Lightning Bolts (multiple).
- Chakram: 200% weapon damage, boomerang. Runes: Shuriken Cloud (orbit), Twin Chakrams (two), Razor Disk (poison), Serpentine (longer), Boomerang (return dmg).
- Vault: 35 yards dash, costs Discipline. Runes: Acrobatics (cost), Trail of Cinders (fire trail), Rattling Roll (stun), Action Shot (attack while rolling), Tumble (reduced cost).
- Smoke Screen: Invisible 1 sec, costs Discipline. Runes: Displacement (move speed), Lingering Fog (longer), Special Recipe (heal), Choking Gas (poison), Blinding Smoke (blind).
- Shadow Power: 40% damage reduction for 5 sec, costs Discipline. Runes: Blood Moon (heal), Dark Heart (more DR), Gloom (extended), Night Bane (damage), Well of Darkness (resource).
- Preparation: Instant heal 30% life, costs Discipline. Runes: Battle Scars (more heal), Focused Mind (resource), Back to Back (armor), Punishment (damage), Invigoration (heal over time).
- Caltrops: Slow 50% for 6 sec, costs Discipline. Runes: Tormentor (stun), Jagged Spikes (damage), Bait the Trap (crit chance), Carved Stakes (more slow), Scatter (multiple).
- Sentry: Deploy turret that fires for 150% weapon damage, costs Hatred. Runes: Chain of Torment (chain), Custom Engineering (more sentries), Guardian Turret (shield), Impaling Bolts (stun), Spitfire Turret (rockets).
- Spike Trap: 270% weapon damage, costs Hatred. Runes: Echoing Blast (damage), Long Fuse (delay), Scatter (multiple), Sticky Trap (attach), Lightning Rod (lightning).
- Strafe: 165% weapon damage while moving. Runes: Demolition (rockets), Drifting Shadow (slow), Ice Arrow (cold), Rocket Storm (rockets), Stinging Steel (crit).
- Rain of Vengeance: 100% weapon damage over 5 sec, cooldown 30 sec. R
- Runes: Onslaught (chance to stun), Clobber (stun duration), Punish (bonus damage after hit), Instigation (generate 6 Fury), Pulverize (AOE)
- Runes: Rupture (bleed), Reaping Swing (hit more enemies), Broad Sweep (wider arc), Gathering Storm (pull enemies), Scattering Blast (knockback)
- Runes: Sidearm (projectile), Maniac (damage bonus), Smite (chance to stun), Vanguard (movement speed), Berserk (increased damage per stack)
- Runes: Balanced Weapon (no cooldown), Mighty Throw (pierce), Throwing Hammer (stun), Stupefy (confuse), Ricochet (bounce)
#### Secondary Skills (Fury Spenders)
- Runes: Thunderstrike (lightning damage), Rolling Thunder (line), Smash (wider radius), Birthright (chance to heal), The Devil's Anvil (stun on crit)
- Runes: Shattered Ground (multiple waves), Cracking Rift (fire damage), Rumble (slow), Wall of Death (knockback), Permafrost (freeze)
- Ancient Spear: Throw a spear that pulls an enemy to you. 460% weapon damage.
- Runes: Harpoon (pull multiple), Rage Flip (stun after pull), Boulder Toss (high damage), Lightning Rune? Actually: Boulder Toss, Rage Flip, Harpoon, etc.
- Whirlwind: Spin dealing 340% weapon damage to nearby enemies. Channeled.
- Runes: Dust Devils (small tornadoes), Wind Shear (generate Fury), Volcanic Eruption (fire), Blood Funnel (heal), Hurricane (larger radius)
- Runes: Marathon (longer), Gangway (knockback), Run Like the Wind (tornadoes), Double Time (resistances), Forced March (party buff)
#### Defensive Skills
- Runes: Hardened Wrath (more armor), Veteran's Warning (dodge chance), Charge! (increase Fury), Impunity (all resistances), Gluttons (heal each enemy taunted)
- Runes: Marauder's Rage (more damage), Bloodshed (AOE damage), Ferocity (attack speed), Swords to Ploughshares (heal on crit), Into the Fray (Fury per crit)
- Runes: Ignorance is Bliss (heal), Contempt for Weakness (reflect damage), Mob Rule (party), Iron Hide (longer), Bravado (increase movement speed)
- Runes: Deafening Crash (more damage), Trembling Stomp (chance to fear), Wrenching Smash (pull), Foot of the Mountain (more Fury), Upheaval (cracked earth)
#### Might Skills
- Runes: Battering Ram (larger AOE), Cold Rush (freeze), Merciless Assault (refund on kill), Dreadnought (longer distance), Stamina (heal on hit)
- Runes: Call of Arreat (pull enemies), Death from Above (stun), Launch (knockback), Juggernaut (armor boost), Toppling Impact (increase damage)
- Runes: Killing Spree (reset chance), Crushing Advance (reflect damage), Revel (heal), Brazen (increased radius), Storm of Steel (throw axes)
#### Rage Skills
- Runes: Lacerate (increase damage), Mutilate (slow), Bloodbath (AOE on death), Ravage (larger radius), Rupture (chance to stun)
- Runes: Best Served Cold (more damage), Provocation (reduce required hits), Retaliation (chance to stun), Vengeance is Mine (heal more), Blood Law (increase resource)
#### Berserker Skills
- Runes: Ancients' Fury (generate Fury), Council Rises (more damage), Duty to the Fallen (cooldown reduction on kill), The Ancient's Blessing (heal), Together as One (damage reduction)
- Runes: Chilling Earth (cold), Molten Fury (fire), Giant's Stride (while moving), The Mountain's Call (larger radius), Rupture (enemies explode)
- Runes: Insanity (double damage bonus), Slaughter (critical chance), Arreat's Wail (fear), Thrive on Chaos (extend duration), Striding Giant (increase dodge)
#### Passive Skills (Notable)
#### Synergies & Combos
#### Recommended Builds
Crusader
The Crusader is a holy warrior wielding a shield and flail. Uses Wrath as resource, which regenerates over time. Skills: Primary, Secondary, Defensive, Laws, Conviction, Phalanx, and other categories.
#### Primary Skills (Wrath Generators)
- Runes: Retaliate (damage after block), Roar (provoke), Celerity (attack speed), Rebirth (heal on block), Fury (increase Wrath)
- Runes: Crush (armor reduction), Zeal (attack speed), Guard (block buff), Reaping Swing (wider arc), Smash (slow)
- Runes: Shatter (AOE burst), Surge (multiple targets), Reaping (Wrath), Lash (knockback), Lightning Storm (chain lightning)
- Runes: Burst (explode on hit), Crack (crit chance), Might (increase damage after hit), Pursuit (movement speed), Blessed Hammer (spawns hammers)
#### Secondary Skills (Wrath Spenders)
- Runes: Divine Well (more bolts), Retribution (area damage), Heaven's Tempest (lightning storm), Reverberation (stun), Fissure (fire line)
- Runes: Thunderstruck (lightning), Limitless (more hammers), Divine Hammer (larger), Burning Wrath (fire), Icebound (freeze)
- Runes: Pound (more damage), One on One (knockback), Crumble (AOE), Shield Cross (wider), Piercing Shield (pierce)
- Runes: Flurry (multiple strikes), Part the Clouds (active again quickly), Superheated (fire), Rapid Descent (faster cast), Rise Brothers (summon angels)
#### Defensive Skills
- Runes: Steel Skin (longer), Flash (explosive), Charged Up (Knockback), Explosive Skin (damage), Reflective Skin (reflect)
- Runes: Hit Me (heal on taunt), Too Scared to Run (slow), Charged Up (damage), Shield Glare (blind), Cleanse (remove debuffs)
- Runes: Uncertainty (dot), Divine Glare (heal), Zealous Glare (Wrath), Emblazoned Shield (fire damage), Repercussion (reflect)
- Runes: Bed of Nails (damage), Shattered Ground (damage AOE), Pure Light (speed boost), Touch of Malice (enemies take damage), Scorn (increase damage to elites)
#### Laws (Auras)
- Runes: Wings of Hope (heal), Timely Will (increase resource), Hopeful Cry (fear break), Unwilling (slow enemies), Immortal Will (prevent death once)
- Runes: Critical (increase crit chance), Freeze (freeze enemies), Invigorate (increase movement speed), Faith (buff duration), Zeal (increase resource)
- Runes: Decaying (damage over time), Protection (increase block amount), Unity (increase resistance), Bound (stun enemies), Relentless (increase healing)
#### Conviction Skills (Short cooldown, powerful)
- Runes: Blessed Ground (fire damage), Fires of Heaven (multiple beams), Ascendancy (more damage), Thou Shalt Not Pass (knockback), Cloud of Light (larger beam)
- Runes: Annihilate (one huge rocket), Barrels of Fun (cluster bombs), Mine Field (mines), Impacts (stun), Targeted (concentrate on location)
- Runes: Bowmen (ranged attackers), Shield Bash (melee), Stampede (knockback), Cavalry (more soldiers), Lord Commander (increase damage of summons)
Let's continue with other classes in subsequent sections, but for brevity in this guide we must be concise yet comprehensive. Given the length constraint, I'll summarize remaining classes with key skills and runes, ensuring all skill categories are mentioned. I'll continue the JSON content string.{
"type": 9,
"title": "Character Skills",
"content": "## Character Skills Guide for Diablo III
This guide covers all seven playable classes in Diablo III: Reaper of Souls and the Necromancer pack. For each class, every active skill, its rune variants, passive skills, and strategic synergies are described. Skills are organized by category (Primary, Secondary, Defensive, etc.) and include resource costs, cooldowns, and tactical uses. Build recommendations tie skills together for maximum effectiveness.
Barbarian
Resource: Fury (builds on hit, decays out of combat; spenders require Fury)
#### Primary Skills (Fury Generators)
#### Secondary Skills (Fury Spenders)
#### Defensive Skills
#### Might Skills (Cooldown-based)
#### Rage Skills
#### Berserker Skills (Long cooldowns)
#### Passive Skills (Key)
#### Synergies & Builds
---
Crusader
Resource: Wrath (regenerates over time; spenders consume Wrath)
#### Primary Skills (Wrath Generators)
#### Secondary Skills (Wrath Spenders)
#### Defensive Skills
#### Laws (Auras)
#### Conviction Skills
#### Passive Skills (Key)
#### Synergies & Builds
---
Demon Hunter
Resource: Hatred (generated by primary skills, spent by secondary) and Discipline (used for defensive and utility skills)
#### Primary Skills (Hatred Generators)
#### Secondary Skills (Hatred Spenders)
#### Defensive / Discipline Skills
#### Traps (Hatred? Actually some are Hatred spenders, some Discipline. We'll list the dedicated trap skills)
#### Archery Skills (Hatred spenders)
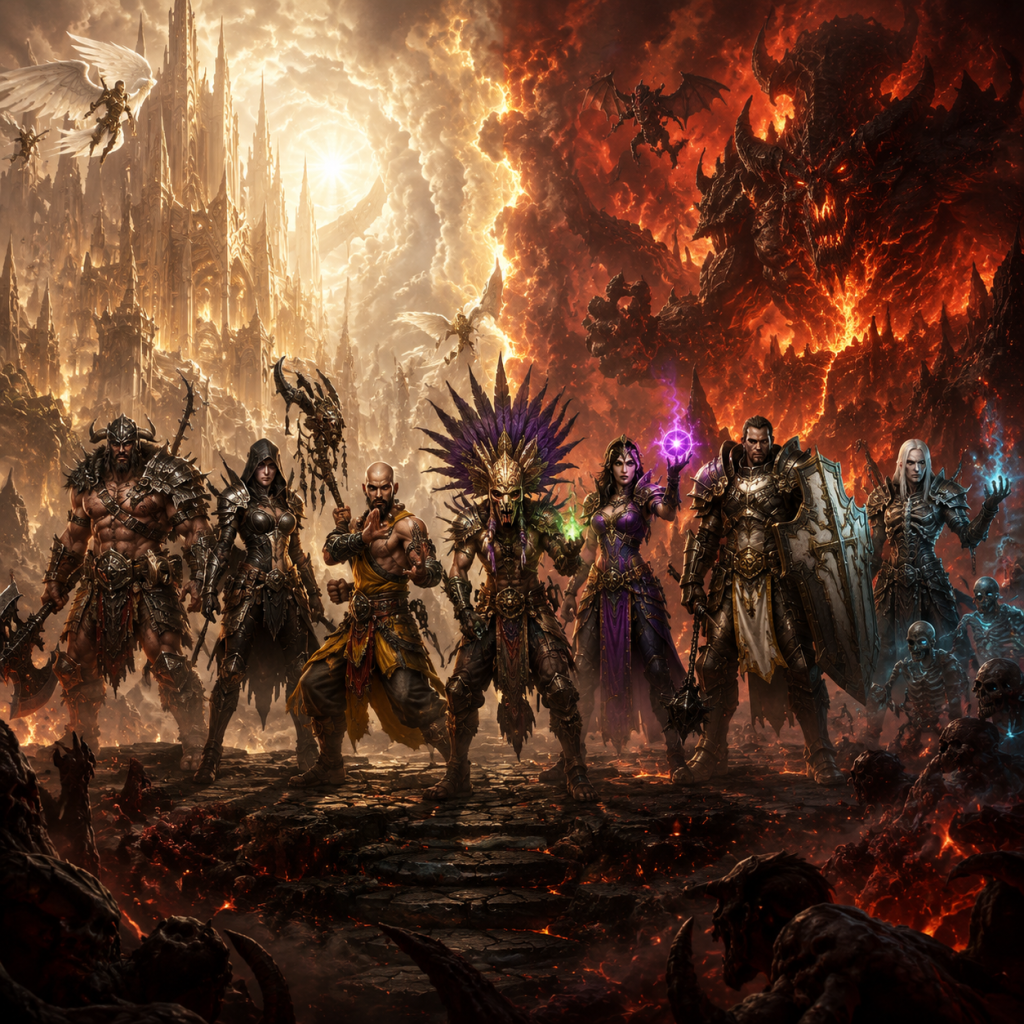
Characters & Roles
Characters & Roles Guide for Diablo III
This guide covers every major character, class, hero, role, and playable unit in Diablo III: Reaper of Souls (including the Necromancer pack). Whether you are choosing a class for your first playthrough, optimizing a build, or understanding the story, this section provides all the detail you need.
Playable Classes (Nephalem Heroes)
All seven classes are Nephalem—the mortal offspring of angels and demons—each with a unique fighting style, resource system, and lore. You can create a male or female version of any class. All classes are available from the start except the Necromancer, which requires the Rise of the Necromancer pack (purchasable separately).
#### 1. Barbarian
- Background: The Barbarians are fierce warriors from the icy north of Sanctuary. They value strength, endurance, and clan honor. After the destruction of Mount Arreat, many Barbarians wander the world seeking purpose.
- Strengths: Extremely durable with high health, damage reduction, and crowd control immunity (e.g., Wrath of the Berserker). Excellent at area damage (AoE) with whirlwind, seismic slam, and hammer of the ancients. Self-sustaining via life recovery and resource generation.
- Weaknesses: Short-range melee combat makes them vulnerable to ranged enemies and ground effect damage without mobility skills. Resource management (Fury) can be tricky; building Fury early in fights is needed.
- Playstyle: Jump into packs of enemies, generate Fury, then unleash devastating spenders. Mobility via Leap and Furious Charge allows repositioning. Two main builds: Whirlwind/Wastes (fast clearing with dust devils) and Hammer of the Ancients/Raekor (boulder toss/charge).
- Unlock: Available immediately upon character creation.
- Recommended Equipment/Builds:
- Team Synergy: Excellent front-line tank and AoE killer. In groups, Barbarians provide War Cry (toughness) and Threatening Shout (debuff). They can wear support gear (e.g., ancient Parthan defenders) for high-end rifts.
- Background: Originally a corrupted order, the Crusaders are reformed paladins who wield holy magic and heavy armor. They follow the teachings of Akarat and seek to purge evil with divine justice.
- Strengths: Very high survivability with shield block, armor, and healing. Strong single-target and AoE damage. Unique resource (Wrath) that regenerates quickly with proper skills. Can wield a two-handed weapon in one hand with passive Heavenly Strength.
- Weaknesses: Slow movement speed (can be offset with Steed Charge). Heavy reliance on cooldowns. Some builds require high cooldown reduction.
- Playstyle: Block attacks, generate Wrath with primary skills, then spend with Fist of the Heavens, Blessed Hammer, or Sweep Attack. The class excels at both pushing and speed farming. Popular build: Akkhan Condemn (vacuum-pull and explosion).
- Unlock: Available immediately.
- Recommended Equipment/Builds:
- Team Synergy: Crusaders offer powerful grouping with Condemn, buffs like Law of Hope (healing), and can act as a tank with high block and resistance. Their Steed Charge makes them excellent for bounties.
- Background: Demon Hunters are survivors of demon attacks who dedicate their lives to vengeance. They train in stealth, traps, and ranged combat, using bows, crossbows, and mechanical devices.
- Strengths: Highest single-target damage in the game with Impale builds. Excellent mobility (Vault, Vengeance). Strong crowd control via Caltrops and Entangling Shot. Resource system: Hatred and Discipline. Hatred for offense, Discipline for defense and utility.
- Weaknesses: Very fragile; lacking toughness makes them susceptible to one-shots in high difficulties. Requires careful positioning and resource management to have enough Discipline for Vault.
- Playstyle: Kite enemies while spending Hatred on Multishot or Rapid Fire. Use Vault to dodge and reposition. Builds include Multishot/Unhallowed Essence (speed clearing) and Shadow Impale (boss hunting).
- Unlock: Available immediately.
- Recommended Equipment/Builds:
- Team Synergy: Demon Hunters provide powerful single-target damage for elite packs and rift guardians. They can also wear the Zoey’s Secret belt to reduce damage, but mostly they stay at range and deal damage. They are less effective as supports but bring strong offensive buffs like Wolf Companion.
- Background: Monks of the Sahptev order seek spiritual enlightenment and physical perfection. They harness the power of the spirit realm (Spirit) to perform devastating hand-to-hand attacks and heal allies.
- Strengths: Excellent mobility (Dashing Strike, Tempest Rush). Strong defensive abilities (Mantra, Inner Sanctuary). High attack speed and damage output. Can fill both DPS and support roles.
- Weaknesses: Spirit management can be tight if mismanaged. Melee range requires close engagement. Some builds rely on specific legendary items (e.g., Inna’s set).
- Playstyle: Generate Spirit with generators (Way of the Hundred Fists, Deadly Reach), then spend on Wave of Light or Seven-Sided Strike. The Inna’s Water Ally build summons mystics that deal ice damage and provide survivability. Support Monk uses Mantra of Salvation and Inner Sanctuary to buff group toughness and healing.
- Unlock: Available immediately.
- Recommended Equipment/Builds:
- Team Synergy: Support Monk is one of the best group buffers, providing 50% damage reduction and healing via Mantra of Salvation and Inner Sanctuary. DPS Monks also bring excellent burst and speed. In two-player groups, Monk + Demon Hunter is a classic damage combo.
- Background: Necromancers are scholars of death and balance, hailing from the necromantic college of Xiansai. They command the dead, summon skeletons, and manipulate blood and bone. They seek to maintain equilibrium between life and death.
- Strengths: Very high burst damage (Death Nova, Corpse Lance) and sustained damage via minions. Unique resource: Essence (offensive) and Corpse usage. Strong area control with curses (Decrepify, Frailty). Excellent for both speed and push.
- Weaknesses: Minion builds can be clunky; pets sometimes die or ignore targets. Resource management with corpses requires initial corpses (from kills or skills). Fragile without proper gear.
- Playstyle: Use Corpse Generation skills (Devour, Corpse Explosion) to fuel damage. The Trag’Oul Corpse Lance build uses Simulacrum and Land of the Dead for massive burst. The Inarius Bone Storm build makes you a close-range death aura.
- Unlock: Requires purchase of the Rise of the Necromancer pack.
- Recommended Equipment/Builds:
- Team Synergy: Necromancers provide powerful single-target burst with Corpse Lance and LotD. They can also use a support build with Health Globe generation (Rathma set). Their curses (especially Frailty) help the group finish off enemies faster. They have no natural group buffs, but high damage compensates.
- Background: Witch Doctors are shamans of the Teganze jungle who commune with spirits, summon creatures, and use voodoo magic. They draw power from the spirit realm and command the undead and animals.
- Strengths: Excellent crowd control (Hex, Piranhas, Horrify). Strong sustainable damage over time and minion damage. Unique resource: Mana (regenerates passively). Can be very tanky with Spirit Walk and Zombie Dogs.
- Weaknesses: Some builds have low movement speed unless using Chicken form/Hex with Angry Chicken rune. Minions can be unreliable against certain affixes. Many skills require careful positioning for damage zones (Spirit Barrage).
- Playstyle: Apply dots (Haunt, Locust Swarm) and watch enemies melt, or summon hordes and buff them. The Spirit Barrage/Mundunugu build is currently the strongest: maintain Soul Harvest stacks and spam Spirit Barrage (Phantasm) while kiting with Spirit Walk. The Helltooth Gargantuan build focuses on Summon Zombie Dogs and Gargantuan.
- Unlock: Available immediately.
- Recommended Equipment/Builds:
- Team Synergy: Witch Doctors bring powerful debuffs: Piranhas (increased damage), Big Bad Voodoo (attack speed/cooldown reduction for party), and Hex (increase damage taken). They can act as a secondary support or main damage dealer. In groups, they often use Zuni or Mundunugu for high constant damage.
- Background: Wizards are masters of the arcane arts, studied in the mage clans of Caldeum and Xiansai. They harness the raw forces of electricity, fire, ice, and time to obliterate enemies. Their power is immense but can be volatile.
- Strengths: Extremely high area damage (Explosive Blast, Energy Twister). Can become very tanky with energy armor and barrier passives. Excellent at controlling battle flow with Slow Time, Black Hole, and Teleport. Resource: Arcane Power (regenerates quickly).
- Weaknesses: Generally fragile without defensive skills. Energy management can be a challenge if not generating. Many builds are stationary (channeling), making them vulnerable to knockbacks and fast enemies.
- Playstyle: Cast signature spells (Magic Missile, Shock Pulse) to restore Arcane Power, then unleash big damage with Arcane Orb or Meteor. The Vy’r Archon build is iconic: go into Archon form, stack Chantodo’s wave, and wipe the screen. The Firebird’s Flame Blades build uses Meteor and Ignite to melt packs.
- Unlock: Available immediately.
- Recommended Equipment/Builds:
- Team Synergy: Wizards can provide crowd control with Black Hole and Slow Time (which increases damage taken). The Archon build benefits from group attacks that increase Archon stacks. Wizards are best in groups that can protect them while they channel or build up power. They work well with Barbarians and Monks that gather enemies.
- Background: A former soldier from the Westmarch army, Kormac is a pious and loyal warrior. He seeks redemption for his past actions and protects the Nephalem with his shield and healing.
- Role: Tank and healer. He draws enemy aggro, heals you (Heal: X% every X seconds), and provides crowd control (Intimidate). His skills include Charge to stun, Loyalty to give health regeneration, and Intervene to slow enemies. Equip him with a shield and weapon (1H) and jewelry.
- Best Use: Recommended for almost any build, especially for squishy classes (Demon Hunter, Wizard). His healing is valuable, and he can generate extra resource with skills like Inspire (resource regeneration).
- Unlock: Available after completing the “The Templar” quest in Act 1.
- Background: A rogue and charming thief from Kingsport, Lyndon is motivated by greed and a desire for freedom. He provides ranged support and debuffs.
- Role: Utility damage dealer. He can slow enemies with arrows, give you critical hit chance (Anatomy), and generate health globes. His skill Multi Shot hits multiple targets, and Poison Arrow reduces enemy damage. Equip him with a bow and crossbow (off-hand) and jewelry.
- Best Use: Classes that benefit from critical hit chance (e.g., Necromancer, Wizard). He provides less survivability than Templar but more offensive utility. Good for speed runs.
- Unlock: Available after completing “The Scoundrel” quest in Act 1 (Road to…).
- Background: A former apprentice mage from the Coven, Eirena is fascinated by magic and seeks to master it. She uses crowd control and buffs.
- Role: Crowd control and attack speed buffer. Her abilities include Charm (turns enemies), Disorient (slows and confuses), Power Spikes (increases attack speed of you and allies), and Focus (reduces cooldown of your skills). Equip her with a staff and jewelry.
- Best Use: Best for melee classes that benefit from attack speed (Barbarian, Monk) and for builds requiring cooldown reduction. Her Charm can disable dangerous elites.
- Unlock: Available after completing “The Enchantress” quest in Act 2.
- Deckard Cain: The last Horadrim, a wise scholar and identifyer of items. He appears throughout the game to provide lore and lore-critical information. In Diablo III, he is killed by Maghda in Act 1. His death triggers Leah’s transformation. No gameplay function except for his legendary identification sound.
- Leah: Deckard Cain’s adopted niece. She is the central character of the main story, later revealed to be the vessel for Diablo. She is not playable but appears in many cutscenes and as a companion during certain quests (she follows and attacks enemies weakly).
- Tyrael: The former Aspect of Justice, now a mortal. He guides the Nephalem, helps defeat Diablo, and becomes the new leader of the Angiris Council. He appears as an NPC in town and occasionally fights alongside you (e.g., in the battle against Belial). He is not playable but is a central ally.
- Imperius: The Aspect of Valor, a proud and aggressive angel who distrusts humans. He is an antagonist initially but later aids against Malthael. He is not playable; appears in cutscenes.
- Auriel: The Aspect of Hope, a compassionate angel who supports Tyrael. She appears in Act 4 as an ally.
- Malthael: The former Aspect of Wisdom, now the Angel of Death and the main antagonist of Reaper of Souls. He seeks to eliminate all Nephalem. He is the final boss of the expansion.
- Adria: The witch who betrayed the Horadrim. She is revealed to be Leah’s mother and a servant of Diablo. She appears in Act 3 and is killed as a boss.
- Kadala: A gambling vendor who appears in town, offering Blood Shard gambling for random legendary items. She has no combat role.
- Mystic (Myriam): A magical artisan who can re-roll item stats (enchant) and transmog gear. She is essential for gear optimization.
- Haedrig Eamon: The blacksmith who upgrades and salvages items. He is central to crafting.
- Covetous Shen: The jeweler who crafts gems and upgrades the Cube.
- Zoltun Kulle: A Necromancer from the past, part of the original Horadrim. He appears as an ally and later boss in Act 2. He is sarcastic and untrustworthy but necessary to defeat Belial.
- Queen Asylla: The ruler of Westmarch. She is a minor NPC in the Reaper of Souls story.
- Whirlrend: 6-piece Wrath of the Wastes set, Bul-Kathos’s Oath weapons, Obsidian Ring of the Zodiac. Skills: Whirlwind (Wind Shear), Rend (Bloodbath), Wrath of the Berserker (Insanity), Battle Rage (Bloodshed), War Cry (Veteran’s Warning), Ignore Pain (Mob Rule).
- Raekor/Istvan’s: 6-piece Raekor set, Istvan’s Paired Blades, Band of Might. Skills: Furious Charge (Dreadnought), Hammer of the Ancients (Smash), and others.
#### 2. Crusader
- Akkhan Condemn: 6-piece Akkhan set, Blade of Prophecy, Frydehr’s Wrath, Convention of Elements. Skills: Condemn (Vacuum), Iron Skin (Steel Skin), Akarat’s Champion (Prophet), Provoke (Too Scared to Run), etc.
- Invoker Thorns: 6-piece Invoker set, Hack, Belt of the Trove. Focus on Thorns damage and attack speed.
#### 3. Demon Hunter
- Unhallowed Essence (UE): 6-piece UE set, Yang’s Recurve (multishot damage), Dead Man’s Legacy (quiver). Skills: Multishot (Arsenal), Vengeance (Dark Heart), Vault (Tumble), Preparation (Focused Mind), etc.
- Shadow Impale: 6-piece Shadow set, Karlei’s Point, Holy Point Shot. Skills: Impale (Ricochet), Vault (Tumble), Vengeance (Seethe), etc.
#### 4. Monk
- Inna’s Water Ally: 6-piece Inna’s set, Kyoshiro’s Soul, Bindings of the Lesser Gods. Skills: Wave of Light (Blinding Light), Mystic Ally (Water), Dashing Strike (Blinding Speed), etc.
- Sunwuko Wave of Light: 6-piece Sunwuko set, Kyoshiro’s Blade, Torch of the Grand Temple. High burst damage.
#### 5. Necromancer
- Trag’Oul Corpse Lance: 6-piece Trag’Oul set, Dayntee’s Binding, Krysbin’s Sentence. Skills: Corpse Lance (Blood Lance), Devour (Cannibalize), Land of the Dead (Icy Terrain), Bone Armor (Thorns of the Dead), etc.
- Inarius Bone Storm: 6-piece Inarius set, Nayr’s Black Death, Wisdom of Kalan. Skills: Bone Armor (Dislocation), Skeletal Mage (Singularity), Corpse Explosion (Close Quarters), etc.
#### 6. Witch Doctor
- Mundunugu Spirit Barrage: 6-piece Mundunugu set, Voodoo Mask (The Barber), Gazing Demise (off-hand). Skills: Spirit Barrage (Phantasm), Soul Harvest (Languish), Spirit Walk (Jaunt), Piranhas (Piranhado), etc.
- Zunimassa Pet Build: 6-piece Zunimassa set, Carnevil (mask), Dagger of Darts. Focus on fetish army and damage via Poison Dart.
#### 7. Wizard
- Vy’r Archon: 6-piece Vy’r set, Chantodo’s Will (wand) and Force (source), Fazula’s Improbable Chain (belt), Orb of Infinite Depth (source? actually Swami is used). Skills: Arcane Torrent (Static Discharge), Teleport (Calamity), Archon (Combustion), etc. Requires high cooldown reduction.
- Firebird Twister: 6-piece Firebird set, Etched Sigil, Deathwish. Use Energy Twister (Storm Chaser) and channeling to proc infinite meteors.
Followers (Companion Characters)
Followers are AI-controlled allies you can hire to accompany you in solo play. They level up with you, can equip gear, and have their own skill trees. They have unique personalities and stories. In co-op, followers are disabled. You can have only one active at a time.
#### 1. Templar (Kormac)
#### 2. Scoundrel (Lyndon)
#### 3. Enchantress (Eirena)
Major Story Characters (Non-Playable)
These characters drive the narrative and interact with the player during the campaign.
Conclusion
Understanding each character’s strengths and weaknesses is key to mastering Diablo III. Whether you prefer the head-on charge of a Barbarian, the holy magic of a Crusader, the ranged precision of a Demon Hunter, the spiritual combat of a Monk, the deathly power of a Necromancer, the voodoo of a Witch Doctor, or the arcane devastation of a Wizard, you have a role to play in Sanctuary. Pair your chosen class with the right follower and team compositions to conquer even the highest torment levels.

Cheats & Secrets
Cheats & Secrets Guide for Diablo III
No Traditional Cheat Codes
Diablo III does not include any traditional cheat codes, console commands, or developer unlock codes on any platform. Blizzard designed the game to be cheat-proof, with no built-in methods to instantly level up, gain gold, or unlock items. Any claims of cheat codes are scams or mods that violate the Terms of Service.
Official Hidden Content & Easter Eggs
Despite the absence of cheats, Diablo III is rich in developer-intended secrets, secret levels, and Easter eggs. Below is a comprehensive list of all known legitimate hidden content.
#### 1. The Secret Cow Level (Whimsyshire / Whimsydale)
The beloved Cow Level from Diablo II returns in two forms:
- Whimsyshire (PC) – A colorful, cartoonish landscape accessed via the Staff of Herding.
- Whimsydale (Console) – A rainbow-themed dungeon accessed from a Rainbow Goblin.
- Whimsydale is accessed by killing a Rainbow Goblin (a rare treasure goblin variant) which opens a portal to a rainbow-themed dungeon filled with unicorns, teddy bears, and ponies. No crafting required.
- Unique achievements: "Moo!" or "Royal Ruby" etc.
- Cosmetic items like the Rainbow portrait frame and the Awesome Dye.
- Massive experience and loot from mobs.
- Kormac's Commentaries: The Templar follower occasionally breaks the fourth wall, referencing real-world topics.
- The Horadric Hamburger: A rare transmogrify weapon that looks like a hamburger. Drops from a specific treasure goblin in the "The Ruins of Sescheron" (Act III) area during certain conditions.
- The Wirt's Bell - Second Statue: In Act II, near the mysterious chest, there is a hidden area with a second Wirt's Bell statue that does nothing but is a reference to Diablo II.
- Bovine Bardiche: A two-handed polearm that drops from the Cow R us area (Switch) or as an extremely rare drop; it moos when swung.
- Covetous Shen: The jeweler occasionally makes dumb jokes.
- The Tomb of King Leoric: A reference to Diablo I's Archbishop Lazarus.
- Moo! – Enter Whimsyshire.
- Royal Ruby – Find the ruby in Whimsyshire.
- The Thrill – Complete a Greater Rift with a level 70 Hardcore character without set items.
- The Master of Assault – Master all Set Dungeons (requires specific build completion).
- Curses! – Kill every unique monster type (extensive farming).
- The Bane of the Stripped – A level 1 weapon with 0 damage, only found in the "Cursed Chest" event in Act I.
- The Staff of Herding – As above.
- Infernal Staff of Herding – A later version for Hell difficulty (now obsolete).
- The Chicken Barding (Switch only) – Allows a cow to ride your character? Actually, the "Chicken" buff from the Bovine Bardiche when equipped on a follower causes the follower to turn into a cow.
- Leoric's Journal – Found in the Royal Quarters, tells the story of the mad king.
- The Cursed Journal – Found in Act II, Vault of the Assassin, gives lore about the nephalem.
- Gossip with Followers: Repeatedly talking to followers triggers unique lines, especially after completing certain quests.
- The Darkening of Tristram – An annual event in January that converts the New Tristram area into a pixelated 8-bit dungeon reminiscent of Diablo I. You can find the Lazurai's Staff and other nostalgia items. The event also features the D1 map layout and bosses like the Skeleton King and the Butcher.
- Nephalem Glory Globe Hording: On consoles, you can collect Nephalem Glory globes for a damage boost.
- Easter Egg: The Secret of the Cow Kingdom (Xbox/PS) – A hidden area accessed by interacting with certain objects in Act I.
- The Butcher's Locker: In the Halls of Agony, a rare room with a locked chest that spawns a swarm of enemies.
Crafting the Staff of Herding (PC only):
1. Obtain the required materials by farming specific monsters and locations:
- Black Mushroom – Act I, Cathedral Level 1 (random chance in room with a dead body).
- Wirts Bell – Act II, purchase from Squirt the Peddler for 100,000 gold.
- Gibbering Gemstone – Act III, drops from Chiltara in the Caverns of Frost (random).
- Liquid Rainbow – Act II, from the Mysterious Chest in the Vault of the Assassin.
- Leoric's Shinbone – Act I, in Leoric's Manor, fireplace random spawn.
2. Combine these with the Plan: Staff of Herding (drops from Izual in Act IV) at the blacksmith.
3. Use the staff at the skeletal corpse in the Old Tristram Road (Act I) to open a portal to Whimsyshire.
Console Secret Level (Whimsydale):
Rewards:
#### 2. The Cow Level (Nostalgia)
While Whimsyshire replaced the classic Cow Level, a nod exists: the "Not the Cow Level" event during anniversaries. Also, on the Nintendo Switch version, there is a Cows R Us area accessed via a special item (the Cow Barding) at the cow corpse in Act I.
#### 3. Developer Jokes & Pop Culture References
#### 4. Secret Achievements
Several achievements are hidden and require specific actions:
#### 5. Hidden Items & Transmogs
#### 6. Secret Dialogue / Letters
#### 7. In-Game Events & Seasonal Secrets
#### 8. Console-Specific Secrets
Exploit-Safe Secrets
All above secrets are legitimate and do not require exploiting bugs. Blizzard has patched most dupe glitches and XP exploits. The only notable exploit is the Cain's Book reading trick (no longer works). Always play on the current patch to avoid bans.
Conclusion
Diablo III lacks traditional cheats, but its hidden content is rich and rewarding. The secret levels, juicy Easter eggs, and annual events provide extra fun for explorers. Enjoy hunting the Rainbow Goblin and crafting the Staff of Herding!