Diablo IV
## Diablo IV – Game Introduction **Genre:** Action Role-Playing Game (ARPG) / Hack-and-Slash / Dark Fantasy **Developer & Publisher:** Blizzard Entertainment (a division of Activision Blizzard) **Release Timeline:** - **Announced:** November 1, 2019 (BlizzCon) - **Early Access (Deluxe/Ultimate ...

Download & Installation
Diablo IV – Complete Download & Installation Guide
This guide covers everything you need to download, install, and launch Diablo IV on all officially supported platforms: PC (Battle.net & Steam), PlayStation 4|5, Xbox One|Series X|S. Note: Diablo IV is not available on Nintendo Switch or mobile devices.
---
1. Official & Legitimate Download Sources
Only download Diablo IV from these authorized storefronts to avoid malware or account bans:
- PC (Battle.net): [Battle.net Desktop App](https://www.blizzard.com/download) → purchase/install via Blizzard account
- PC (Steam): [Steam Store](https://store.steampowered.com/app/2344520/Diablo_IV/) – requires Battle.net account linking
- PlayStation 4/5: PlayStation Store (PSN account required)
- Xbox One / Series X|S: Microsoft Store (Xbox Live account required)
---
2. System Requirements (PC)
Minimum Requirements (1080p, low settings, 30 FPS)
| Component | Specification |
|---|---|
| OS | Windows 10 64-bit (latest update) |
| CPU | Intel Core i5-2500K / AMD FX-8100 |
| GPU | NVIDIA GeForce GTX 660 / AMD Radeon R9 280 – 2GB VRAM |
| RAM | 8 GB |
| Storage | SSD with 90+ GB free space |
| Internet | Broadband connection |
Recommended Requirements (1080p, medium, 60 FPS)
| Component | Specification |
|---|---|
| OS | Windows 10/11 64-bit |
| CPU | Intel Core i5-4670K / AMD Ryzen 3 1300X |
| GPU | NVIDIA GeForce GTX 970 / AMD Radeon RX 470 – 4GB VRAM |
| RAM | 16 GB |
| Storage | SSD with 90+ GB free space |
High-End (4K, ultra, 60 FPS)
| Component | Specification |
|---|---|
| OS | Windows 10/11 64-bit |
| CPU | Intel Core i7-8700K / AMD Ryzen 7 2700X |
| GPU | NVIDIA GeForce RTX 3060 / AMD Radeon RX 6600 XT |
| RAM | 32 GB |
| Storage | NVMe SSD with 90+ GB free space |
---
3. Platform Installation Steps
3.1 PC – Battle.net
1. Download and install the [Battle.net desktop app](https://www.blizzard.com/download).
2. Log in with your Blizzard account (create one if necessary).
3. Click the All Games tab → find Diablo IV → click Install.
4. Choose installation location (ensure at least 90 GB free on an SSD).
5. Click Start Install. The app will download ~85–90 GB.
6. After download, click Play.
3.2 PC – Steam
1. Open Steam → log in.
2. Go to Store → search Diablo IV → click Add to Cart → purchase.
3. Go to Library → find Diablo IV → click Install.
4. Select drive (SSD recommended) → click Next → Install.
5. Steam will download the game. After completion, click Play.
6. On first launch, you must authenticate with your Battle.net account (a browser window will open).
3.3 PlayStation 4/5
1. Turn on console → navigate to PlayStation Store.
2. Search for Diablo IV → select the version (Standard, Deluxe, Ultimate).
3. Purchase or redeem a code → click Download.
4. The console will install the game automatically. Download size ~85 GB (PS4) / ~95 GB (PS5).
5. After installation, the game appears in your Library or Home screen.
3.4 Xbox One / Series X|S
1. Press Xbox button → go to Microsoft Store.
2. Search Diablo IV → select edition → Buy or Install (if owned).
3. Choose install location (internal or external storage).
4. The download will start. Size ~85 GB (Xbox One) / ~95 GB (Series X|S).
5. After install, launch from My Games & Apps.
---
4. Storage Space Requirements
| Platform | Approximate Download Size | Final Install Size (with patches) |
|---|---|---|
| PC (Battle.net) | 85–90 GB | 90+ GB |
| PC (Steam) | 85–90 GB | 90+ GB |
| PlayStation 4 | 85 GB | 95 GB (with updates) |
| PlayStation 5 | 95 GB | 100+ GB (with updates) |
| Xbox One | 85 GB | 95 GB |
| Xbox Series X | S | 95 GB |
---
5. Account Requirements
- Battle.net account is mandatory on all platforms. You must link your platform account (PSN, Xbox Live, Steam) to a Battle.net account.
- PlayStation: Requires a PlayStation Plus subscription for online multiplayer (not needed for solo play).
- Xbox: Requires Xbox Game Pass Core or Ultimate for online multiplayer.
- PC (Steam): No separate subscription needed for multiplayer; only internet connection and Battle.net account.
---
6. First Launch Setup
1. Language & Region: Select your language and time zone.
2. Graphics Settings: On PC, the game sets defaults based on your hardware. You can adjust in Options > Graphics.
3. Accessibility Options: Configure subtitles, colorblind modes, and controller layout (if applicable).
4. Network Connection: Ensure stable internet (the game is always online).
5. Character Creation: Create your first character (any class) after the opening cinematic.
6. Shader Compilation (PC): On first launch, the game compiles shaders. This may take 5–15 minutes and may appear frozen – do not close the app.
---
7. Common Installation Errors & Fixes
| Error / Issue | Cause | Solution |
|---|---|---|
| “Disk write error” (Battle.net) | Insufficient permissions or drive corruption | Run Battle.net as Administrator; check disk health (chkdsk); install to a different SSD/HDD. |
| “Not enough free space” | 90 GB requirement not met | Free up space, or move other games. Install on a drive with >100 GB free. |
| “Can’t install because of missing dependencies” (PC) | Missing Visual C++ Redistributables or outdated .NET | Install the latest Visual C++ Redistributable (from Microsoft); run Windows Update. |
| “Corrupted files” / “File mismatch” (Steam) | Partial download corruption | In Steam, right-click Diablo IV → Properties → Local Files → Verify integrity of game files. |
| “Server connection failed” (all platforms) | Internet issue or server maintenance | Check Blizzard [Server Status](https://blizzard.status.io/); restart router; disable VPN. |
| “Stuck at 99%” (Battle.net) | Patching issues | Pause/resume download; restart Battle.net app; clear cache (Battle.net settings → Downloads → Clear cache). |
| “You already own this product” but can’t install (Steam) | Battle.net linking not completed | Launch once, then sign in to Battle.net when prompted. If persisted, re-link accounts via Battle.net website. |
| “Update Required” loop (console) | Insufficient storage | Free up space or use an external drive. |
| “Disc read error” (Xbox/PS) | Damaged disc (if physical) or HDD issue | Clean disc; if digital, delete and reinstall. |
8. Post-Installation Verification
1. Launch the game to ensure it opens without crashes.
2. Check version number: In the main menu, look at the bottom-left corner. The latest version should match the current patch (e.g., 1.4.3).
3. Run the benchmarking tool (PC only): Options → Performance → Benchmark. Ensures stable FPS.
4. Test online connectivity: Enter the main world (Kyovashad) and see if other players appear.
5. Verify integrity (PC):
- Battle.net: In game settings in the app, click Scan and Repair.
- Steam: Right-click game → Properties → Local Files → Verify integrity… – this checks all files.
6. Console: If you experience graphical glitches, go to Settings → Console Storage → Clear Cache (PS: rebuild database; Xbox: power cycle).
---
9. Additional Tips
- Pre-load: Always pre-order digital versions to download days before release.
- Cross-play & Cross-progression: Account is shared across platforms (requires linking).
- External storage on console: Games run fine from Xbox external USB 3.0 or PS4 external drive, but loading times are longer. For PS5, recommended to install on internal SSD to utilize fast loading.
- High-resolution texture pack (PC): Download separately in Battle.net under Options → Modify Installation (adds ~30 GB). Only for high-end GPUs.
- Official Blizzard Support: [https://us.battle.net/support](https://us.battle.net/support)
- Diablo IV Forums: [https://us.forums.blizzard.com/en/d4](https://us.forums.blizzard.com/en/d4)
- Reddit: r/diablo4
---
10. Need Help?
---
Last updated: October 2023. Always check official sources for the latest patch notes and requirements.

Game Introduction
Diablo IV – Game Introduction
Genre: Action Role-Playing Game (ARPG) / Hack-and-Slash / Dark Fantasy
Developer & Publisher: Blizzard Entertainment (a division of Activision Blizzard)
Release Timeline:
- Announced: November 1, 2019 (BlizzCon)
- Early Access (Deluxe/Ultimate Edition): June 1, 2023
- Official Launch: June 6, 2023
- Steam Release: October 17, 2023 (season 2)
- PC (Battle.net & Steam)
- PlayStation 4
- PlayStation 5
- Xbox One
- Xbox Series X|S
- Lilith – The primary antagonist, daughter of Mephisto and creator of Sanctuary. She seeks to reshape the world in her image, often employing seduction and manipulation alongside raw demonic might.
- Inarius – An angel who once loved Lilith and helped create Sanctuary. Now a broken figure, he wanders the world with his own agenda.
- Donan – A Horadrim scholar and key ally, struggling with past failures.
- Neyrelle – A determined young sorceress from Scosglen, obsessed with hunting Lilith.
- Lorath Nahr – A Horadrim survivor carrying the burden of previous demonic encounters.
- Elias – A fallen prophet who serves Lilith, acting as her right hand.
- Longtime Diablo fans seeking a return to darker themes and deeper RPG systems.
- ARPG enthusiasts who enjoy theorycrafting, endgame farming, and cooperative play.
- Newcomers drawn by the cinematic story, polished presentation, and modern open-world design.
- Players aged 17+ due to gore, horror, and mature themes.
- Campaign (Story Mode): Playable solo or with up to 3 friends in a party. Linear questline with cutscenes and lore.
- Endgame Activities:
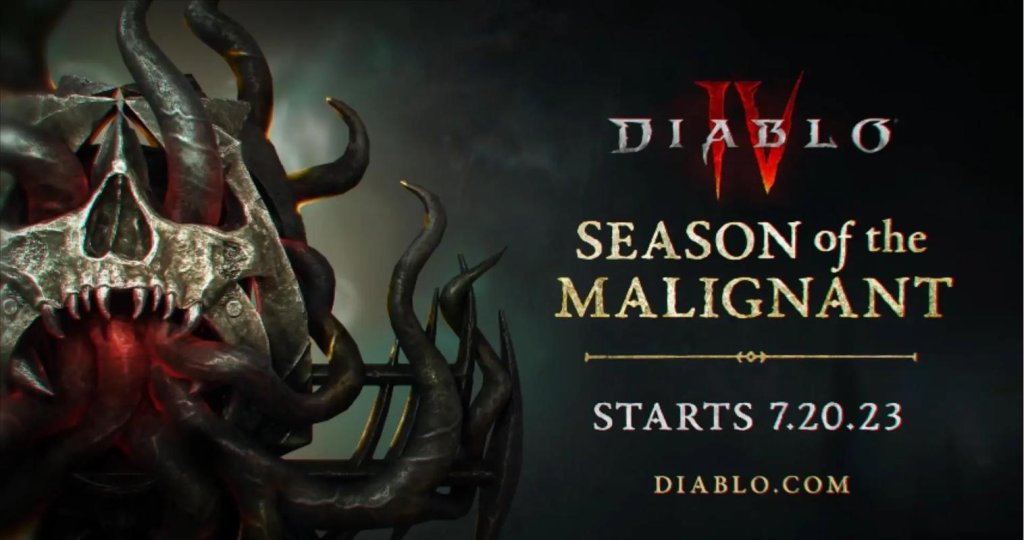
- Seasonal Content: Every three months, a new Season introduces a gameplay twist (e.g., Season of the Malignant, Season of Blood), a battle pass, cosmetic rewards, and a fresh challenge.
- PvP (Fields of Hatred): Designated areas where players can fight each other and collect Shards of Hatred for unique cosmetics and currency.
- Hardcore Mode: Permadeath characters with separate leaderboards.
- Always-Online Required: Diablo IV is an online-only game. A stable internet connection is mandatory even for single-player campaign progression. No offline mode.
- No Peer-to-Peer: All gameplay is hosted on Blizzard’s servers.
- Seasonal Passes (included with base game, optional Battle Pass for cosmetics).
- Expansion – “Vessel of Hatred” (announced for late 2024): Adds a new region (Nahantu), a new class (Spiritborn), new story content set after the base campaign, and additional endgame systems. Further expansions are planned to support a “story arc over multiple years.”
Platforms:
Cross-play and cross-progression are fully supported across all platforms (requires linking a Battle.net account).
Story Overview
Diablo IV is set many years after the events of Diablo III: Reaper of Souls. The world of Sanctuary remains scarred by the eternal conflict between the High Heavens and the Burning Hells. In the absence of the Prime Evils, a new threat rises: Lilith, the Daughter of Hatred, has been summoned back to Sanctuary. Her return triggers a cascade of chaos, drawing all factions—human, demonic, and angelic—into a desperate struggle for control. The player, a wandering adventurer, must uncover the source of Lilith’s power, forge alliances, and decide the fate of Sanctuary.
Setting
The game takes place in the dark, gothic continent of Sanctuary, specifically the region of Scosglen, Fractured Peaks, Dry Steppes, Kehjistan, and Hawezar. Each zone is a vast, interconnected open world with dynamic weather, day/night cycles, and a grim medieval aesthetic. Dungeons, strongholds, and world bosses are scattered throughout, encouraging exploration and emergent encounters.
Main Characters
Core Appeal
Diablo IV stays true to the series’ iconic click-to-move, skill-heavy combat while introducing a more open-world structure, deeper character customization, and a gritty, visceral tone reminiscent of Diablo II. It offers an endless loop of slaying monsters, collecting loot, and optimizing builds.
Target Audience
Game Modes
- Nightmare Dungeons (repeatable, scaling difficulty with affixes)
- Whispers of the Dead (bounty-like system)
- World Bosses (large-scale events with up to 12 players)
- Helltide (timed zones with high-density demon spawns)
- The Tree of Whispers (collect Grim Favors for rewards)
Online / Offline Support
DLC / Expansion Overview
What Makes Diablo IV Unique
1. Open-World Sanctuary: The first fully connected, non-linear overworld in the series, with seamless transitions between zones.
2. Skill Tree & Paragon Board: Reinvention of the classic skill tree with a new point-based system, plus a sprawling Paragon board for advanced character customization.
3. Live-Service Model: Continuous seasonal updates, events, and a monetized Battle Pass (cosmetics only, no pay-to-win).
4. Cinematic & Lore-Rich: Blizzard’s trademark CGI cinematics and a darker, more psychological story driven by the villain Lilith.
5. Cross-Play & Cross-Progression: Play on any platform, keep your progress, and team up with friends regardless of system.
6. Endless Replayability: With randomized dungeons, a deep loot system, and seasonal rotations, each playthrough can offer a different experience.
Diablo IV is Blizzard’s most ambitious ARPG to date, blending old-school action-RPG fundamentals with modern design principles. Whether you’re a series veteran or a newcomer, Sanctuary awaits—but be wary: the darkness has never been deeper.
Getting Started
Getting Started with Diablo IV
Welcome to Sanctuary, newcomer. Diablo IV is an action RPG that demands quick reflexes, smart resource management, and a willingness to die and learn. This guide will get you from character creation to your first few hours with confidence.
First Hour Walkthrough (Spoiler-Free)
1. Starting cinematic & class selection – After a brief, stunning cinematic, you'll create your character (see below).
2. Prologue: The Necromancer's Rise – Your character awakens near the town of Kyovashad. Follow the glowing quest marker to speak with Archivist Croft. She'll quickly teach you basic movement and combat.
3. First combat – You'll fight a few fallen (zombie-like enemies). Use your first skill (assigned to mouse/keyboard or controller button).
4. Enter Kyovashad – The main hub. You'll meet Innkeeper Ean, the Blacksmith, and the Healer. Accept the first main quest: "A Cold and Iron Faith."
5. First dungeon – The game guides you to a small dungeon, "The Defiled Catacomb." You'll fight a boss (The Skeletal Priest) and loot gear.
6. Return to town – Turn in quest, equip upgrades, and unlock your next skill point. You'll also meet the Sorcerer trainer (Neyrelle) who sets you on the main campaign.
7. Open world – After the first dungeon, you're free to explore the Fractured Peaks. The main questline is marked with a golden leaf icon. Side quests are blue circles. Stick to the main quest for now.
Character Creation: The 5 Classes
Diablo IV has five classes, each with unique playstyles. No wrong choices, but beginners often find these easiest:
| Class | Playstyle | Beginner-friendly? | Special Resource |
|---|---|---|---|
| Barbarian | Melee, high damage, shouts | Yes – tanky, straightforward | Fury (builds with attacks, spent on skills) |
| Druid | Shapeshifter, nature magic | Medium – complex passive tree | Spirit (generated by skills, spent on powerful ones) |
| Necromancer | Summoner, blood/dark magic | Yes – minions tank for you | Essence (generated by basic attacks, spent by core skills) |
| Rogue | Agile, ranged/melee, traps | Medium – requires positioning | Energy (regens quickly, but limited) |
| Sorceress | Ranged elemental magic | Yes – huge AoE, teleport | Mana (regens slowly, requires efficiency) |
Class selection tips:
- If you want to face-tank enemies: Barbarian or Druid (with bear form).
- If you want to kill from a distance: Sorceress or Rogue (ranged build).
- If you want a pet army: Necromancer.
Controls on All Platforms
PC (Mouse & Keyboard)
| Action | Default Key |
|---|---|
| Move / Interact | Left click |
| Basic Skill (slot 1) | Right click |
| Skills (slots 2-6) | 1, 2, 3, 4, 5, 6 |
| Skill 1 alternative | S (click) |
| Potion | Q |
| Town Portal | T |
| Map | M |
| Inventory | I |
| Skill Tree | P |
| Journal/Quest Log | J |
| Evade (dodge) | Space |
| Interact | F |
| Force Move | Left Shift + left click |
| Force Stand Still | Left Ctrl |
| Action | Default Button |
|---|---|
| Move | Left stick |
| Interact / Loot | A (Xbox) / X (PlayStation) |
| Skill 1-4 | Y, B, X, A (face buttons) |
| Skill 5-6 | Left bumper + face buttons |
| Potion | Right bumper |
| Evade | Left thumbstick click |
| Map | Select/Share button |
| Inventory | Menu button |
| Skill Tree | Up on D-pad |
| Town Portal | Down on D-pad |
Same layout as above with PlayStation button names.
Xbox One / Series X|S
Same as controller layout above.
General Tips:
- Remap keys/buttons in Options > Controls.
- On controller, enable "Skill Toggle" if you want skills to stay active until you press again (useful for auras).
- Console players can use keyboard and mouse if desired (plug into USB).
- Top-left: Health orb (red), Resource orb (blue/purple/green depending on class). Below that: Potion count (up to 9 charges).
- Top-center: Experience bar (when leveling, shows progress to next level). After level 50, it turns into Paragon Points.
- Top-right: Map current zone name, world tier (difficulty), and compass.
- Bottom-center: Skill bar – 6 slots (basic, core, 4 others).
- Bottom-left: Chat (PC only).
- Bottom-right: Minimap (fourth quadrant). Shows nearby enemies (red dots), allies (blue), quest markers (yellow).
- Hovering over enemies: Health bar above enemy. Elite enemies have unique bar colors (blue = cold, yellow = lightning, etc.).
- HUD elements for multiplayer: Party frames (top-left), world boss timer (top-center when active).
- Equipment: Head, Chest, Gloves, Legs, Boots, Amulet, 2 Rings, Weapon(s). Stats shown.
- Consumables & Materials: Elixirs, herbs, ore, gems.
- Aspects: Special affixes you can imprint on gear.
- Stash: Shared between all characters on same realm (account-wide).
- Follow the main story questline (golden leaf) until you hit level 15+. This unlocks the Mount at level 15 through a specific quest.
- Collect every Altar of Lilith you see. Use a map overlay (or third-party map) to find them.
- Salvage (break down) unwanted gear at the Blacksmith for materials – do NOT sell early, as materials are scarce.
- Visit the Healer in Kyovashad to craft Memory of the First (elixir) or buy healing potions.
- Unlock waypoints (fast travel points) – they look like blue circles on map. Activate them by clicking.
- Do not skip the main quest. Side quests are fine but won't advance the campaign.
- Do not craft gear at the Blacksmith early – it's expensive. Only upgrade potions.
- Do not purchase items from vendors – loot from enemies is better.
- Do not refund skill points repeatedly unless you have a specific plan – respec costs gold and gets expensive.
- Do not ignore your potion charges. Always pick up potions from dead enemies.
- Do not fight enemies 10+ levels above you – you'll deal reduced damage and take increased damage.
- Have at least one elixir active at all times for bonus XP.
- Gems – you'll find them after level 20. Socket into armor/weapons for stats. Save uncut gems.
UI Overview
Your screen is packed with information. Here's the layout:
Inventory Screen (I / Menu)
Essential Early Objectives (First 10 Levels)
1. Complete the prologue quests – They teach mechanics and give first gear.
2. Unlock the Skill Tree (level 2) – Spend your first point. Pick a core skill (the second row) – it's your main damage dealer.
3. Equip better gear – Compare item power (number on item). Items with green upward arrow are improvements.
4. Learn to dodge – Evade (Space/left stick click) is vital. I-frames exist, but timing is tight. Use it to avoid boss attacks.
5. Collect Altars of Lilith – These are statues found in the open world. Each gives +2 to a stat (Strength, Intelligence, Willpower, Dexterity) and +1 Paragon Point per region. They are account-wide, so even a new character benefits. Prioritize them early.
6. First World Boss – Not mandatory at low level, but you can attempt at level 10+. Look for world boss icon on map (giant skull). Join public groups for better loot.
What to Do First vs What to Avoid
Do First:
Avoid:
Early Resource Priorities
1. Gold: Spend on potion upgrades only. Save gold for later re-speccing and imprinting aspects.
2. Veiled Crystals: From salvaging rare (yellow) gear. Used for upgrading gear at the Blacksmith.
3. Herbs (e.g., Biteberry, Gallowvine): Used for crafting elixirs (bonus XP, stats). Gather every herb node.
4. Rawhide & Iron Chunks: From salvaging common (white) and magic (blue) gear. Used for early upgrades.
5. Angelbreath (rare) – Drops from elite enemies. Used for better potions and elixirs. Save for later.
Common Beginner Mistakes (and How to Avoid Them)
| Mistake | Why It's Bad | How to Avoid |
|---|---|---|
| Ignoring Altars of Lilith | Missed permanent stat boosts and Paragon points | Use an online map to collect all 160+ Altars on your first character. |
| Selling gear instead of salvaging | Missing crafting materials for upgrades | Salvage everything. Gold is easy to get from selling consumables. |
| Not upgrading potions | Healing becomes insufficient | Upgrade potion at the Healer every 10 levels (costs gold + herbs). |
| Spreading skill points thin | Weak damage output | Specialize in one or two core skills. Max them out before branching. |
| Skipping defensive skills | Die frequently | Every class needs at least one defensive or mobility skill (e.g., Teleport, Evade, Shout). |
| Fighting at high world tier early | Enemies are too tough, slow progress | Stay on World Tier 1 (Adventurer) until level 50+. World Tier 2 (Veteran) is only slightly better XP but harder. |
| Ignoring gear upgrades for slot | Lower survivability | Check gear every 2-3 levels. Replace if item power is 20+ higher. |
| Not using potions during fights | Unnecessary deaths | Press potion (Q/RB) when health drops below half. Always keep a full stack. |
Day-One Checklist (Before Level 10)
- [ ] Create your character and start campaign.
- [ ] Complete "A Cold and Iron Faith" quest.
- [ ] Reach level 5.
- [ ] Unlock and spend first skill point.
- [ ] Equip at least one rare (yellow) item.
- [ ] Find and activate at least 3 Altars of Lilith.
- [ ] Upgrade your healing potion once (if you have enough herbs).
- [ ] Salvage all white and blue items.
- [ ] Learn to use Evade to dodge attacks.
- [ ] Bind a town portal key/button and use it to return to town quickly.
- [ ] Set difficulty to World Tier 1.
- [ ] Join a clan or play solo – both fine.
- The first 15 levels are a tutorial. Experiment with skills.
- Don't be afraid to die – you respawn at last checkpoint with no penalty (except lost time).
- The world scales with you (level 1-50), so you can explore anywhere.
- Always have fun. The real endgame starts after the campaign (level 50+).
Final Advice
Welcome to Diablo IV. May your loot be legendary.
Core Gameplay
Core Gameplay Overview
Diablo IV is an action role-playing game (ARPG) that revolves around a core loop of exploring, killing, looting, and upgrading. The entire experience is structured across four distinct progression tiers, each introducing new mechanics, activities, and challenges. This guide breaks down the core gameplay systems as you advance through Early Game (Levels 1–25), Mid Game (Levels 25–50), Late Game (Levels 50–70), and Endgame (Level 70+ & World Tiers 3–4).
---
Early Game (Levels 1–25) – The Tutorial & Foundation
Main Gameplay Loop
- Explore the Fractured Peaks – Complete the Prologue and Act I. Follow the main story questline (priority) while picking up side quests as you encounter them.
- Kill monsters & gather loot – Combat is simple: use your basic skill (generates resource) and core skill (spends resource). Experiment with other skill slots (defensive, mobility, etc.).
- Visit towns – Turn in quests, sell junk items to vendors, repair gear, and stash items you want to keep.
- First Skill Points (up to level 25) – Every level gives 2 skill points until level 50. Use them to unlock and rank up skills. Your build is very flexible – respec costs are low (gold only) early on.
- First World Tier – Always play on World Tier 1 (Adventurer) for story efficiency. World Tier 2 (Veteran) gives +20% XP but slower clears; not recommended until you know the game.
- Basic Attack – Left-click (PC) or assigned button (console). Spams your basic skill to generate primary resource (e.g., Fury, Mana, Energy).
- Core Skill – Your main damage dealer; spends resource. Example: Barbarian's Upheaval (generates Fury when hitting multiple enemies).
- Cooldown Skills – Defensive (e.g., Sorcerer's Ice Armor), Mobility (e.g., Rogue's Dash), or Ultimate (unlocked at level 8 – e.g., Barbarian's Call of the Ancients).
- Potions – Default key Q (PC). Heals 35% HP initially; upgrade via side quests. Use Healing Potion during combat – don't wait until low health.
- Dodge – Spacebar (PC) or assigned button. Grants brief invulnerability frames. Essential for avoiding boss attacks.
- Interact – E key (PC), A button (Xbox), etc. Opens doors, picks up items, talks to NPCs.
- Mount – Not available until level 25+ after a specific quest in Act IV. Before that, walk or use waypoints.
- Skill Tree – Unlock skills, enhance them with passive nodes. Example: Druid gets a passive that gives +X% damage while in Werewolf form. Early focus: pick one core skill and max it, then utility passives.
- Paragon Board – Not available until level 50. Ignore for now.
- Gear Stats – Prioritize: Damage (to core skill, to close enemies, etc.), Main Stat (Strength for Barb/Druid, Dexterity for Rogue, etc.), and Life. Don't worry about perfect rolls.
- Codex of Power – Unlocked regionally via Dungeon Completion. Early game: complete the Light's Watch dungeon (Fractured Peaks) for an offensive aspect. Apply to gear via Occultist.
- Waypoints – Activate every waypoint you see. They serve as fast travel points; click on map to teleport.
- Side Quests – Fill in region progress and reward reputation, XP, and sometimes skill points (via Renown tiers). Do them only if you enjoy them; main quest progression is faster for leveling.
- Dungeons – Unlock Codex aspects and reward a skill point (first completion per dungeon). Aim to complete all dungeons in a region for the Renown bonus.
- Renown – Each region (Fractured Peaks, Scosglen, etc.) has Renown tiers. Level 1–3 are easy early game: uncover 5 areas, complete 20 side quests, open 10 altars of Lilith. Rewards include skill points, potion charges, and XP.
- Gold – Plentiful early on. Spend on potions, repairs, salvaging low-quality gear, and occasional respecs.
- Materials – Salvage rare (blue) and magic (yellow) items at blacksmith for iron, leather, etc. Save legendary items with good aspects for later extraction.
- Obols – Earned by completing world events. Can gamble at Purveyor of Curiosities for random gear. Early game: gamble for upgrades in your slot (e.g., weapon).
- Finish Acts II–VI – Follow main story; by level 45-50 you should complete the campaign. Skip side quests unless needed for Renown.
- Unlock World Tier 3 – After beating the campaign (final boss: Lilith) at level 50, complete the Cathedral of Light Capstone Dungeon (Kyovashad) to unlock World Tier 3 (Nightmare).
- Begin Paragon Board – At level 50, you get your first Paragon board and start earning Paragon points. Each level after 50 gives 4 Paragon points until level 100.
- Aspect Extraction & Imprinting – Use Occultist to extract legendary aspects from unwanted legendaries (costs materials). Imprint onto gear with better stats. Start building toward a specific build guide (e.g., Ice Shards Sorcerer, Rend Barbarian).
- Ultimate Skill – Unlocked at level 8, but becomes crucial midgame – use it on cooldown during tough fights.
- Resource Generation – Optimize by using basic attacks or specific skills that generate resource. Look for gear with resource generation affixes.
- Crowd Control (CC) – Stuns, slows, freeze, etc. become vital. Enemy packs have modifiers (e.g., Cold Enchanted). Learn to dodge, interrupt, or use unstoppable skills (like Rogue's Shadow Step).
- World Bosses – Spawn on map timer (every few hours). Join public event; very rewarding for loot. Example: Ashava the Pestilent.
- Paragon Board – Choose a starting board (many builds suggest starting with a board that provides damage to a specific element or damage type). Connect boards via Glyph sockets – place Glyphs you find from Nightmare Dungeons (unlocked at World Tier 3).
- Glyphs – Drop from Nightmare Dungeons (or from Tree of Whispers later). Socket into Paragon board for radius boosts. Level them by completing Nightmare Dungeons with the glyph equipped.
- Gear Optimization – Now you must consider item power (breakpoints: 625 for upgrade to Sacred, 725 for Ancestral). Upgrade gear at blacksmith (increase item level up to +5).
- Build Focus – Settle on a primary damage type and skill. Respec costs rise (gold scaling), but still manageable. Example: Poison Rogue focuses on poison imbue and core skills.
- Unlock Mount – Complete a specific side quest in Act IV (approx. level 30-35). After that, press Z (PC) to summon. Mount speed varies; use gallop (shift key) for bursts.
- Tree of Whispers – Unlocked after campaign completion. Provides daily bounties in each region. Rewards include XP, gold, and Grim Favors -> turn in for cache of loot (including legendary items, aspects, etc.).
- World Events & Legions – World events (orange circle on map) happen randomly – complete for XP and Obols. Legion events (purple marker) are timed group fights with high rewards.
- Helltide – Unlocked at World Tier 3. Region-wide demonic incursion (visible on map). Kill monsters, open tortured chests (costs Cinders – drops from enemies). Best source of early Sacred gear and Forgotten Souls.
- Gold – Still important but you'll start needing millions for respecs and rerolling stats at the Enchanter. Don't waste gold on unnecessary gear upgrades.
- Materials – Salvage most items. Start stockpiling Veiled Crystals (from legendary rares) for future enchanting. Forgotten Souls drop from Helltide – save for endgame crafting.
- Obols – Still gamble for gear, but now you can buy from Purveyor with better odds at Sacred items.
- Unlock & Run Nightmare Dungeons – Use Sigils (crafted at Occultist or dropped) to turn regular dungeons into Nightmare versions. These have affixes (e.g., increased monster damage, poison puddles). They are your primary XP source.
- Farm World Tier 3 (Nightmare) – You are here until you reach level 70+ and can handle the next capstone dungeon (Fall of the Sorcerer's Keep, level 70+) for World Tier 4 (Torment).
- Complete Renown Fully – If not done, finish all region Renown tiers to earn permanent stat bonuses (max obols, skill points, paragon points). Essential for any build.
- Build Refinement – Now you must have a coherent build with synergies. Example: Bone Spear Necromancer uses specific aspects (Bone Spear shatters, extra essence on corpse consumption, etc.).
- Nightmare Dungeon Affixes – Learn to read them. Some affixes make certain builds unviable (e.g., “Lightning Storm” vs melee). Adjust strategy or choose a different sigil.
- Monster Density – Nightmare Dungeons have increased packs. Use area-of-effect skills to clear efficiently.
- Boss Fights – Nightmare dungeon bosses are harder. Use potions, elixirs (from alchemist), and know mechanics (e.g., avoid standing in poison).
- Paragon Leveling – Prioritize unlocking key nodes that boost your main damage type. Connect 4-5 boards by level 70. Use Glyph XP to level them to level 15 (for radius increase).
- Gear Replacement – Upgrade to Sacred gear only if it drops with high item power (680+). Don't waste materials on low-item power Sacred items.
- Enchanting – Reroll one affix per gear piece at the Enchanter. Use Occultist to change legendary aspects if you have duplicates. Cost increases each reroll.
- Aspect Management – Collect multiple copies of your key aspects. You can extract and store them for later use.
- Helltide – Still active. Now you can open Tortured Gift of Mysteries chests (costs 250 Cinders) for high chance of Sacred legendary. Use Helltide for forgotten souls.
- World Bosses – Kill them whenever they spawn – they drop high item power Sacred gear and occasionally Uber unique materials (Duriel materials).
- Tree of Whispers – Continue doing bounties; the cache can drop aspects and even unique items. Priority: the 10-Grim Favor cache gives the best loot.
- Side Dungeons – If you missed some for Renown, run them now for extra Paragon points.
- Gold – Start selling unwanted legendary items for gold (5k-20k each). Salvage only rare and magic for materials. Enchanting costs skyrocket (300k+ gold per roll).
- Forgotten Souls – Primarily from Helltide chests. Use for enchanting and crafting high-tier Nightmare Sigils (NMD Tier 40+).
- Fiend Rose – From Helltide; used to craft higher-tier Nightmare Sigils.
- Abstruse Sigil – Crafted at Occultist from Sigil Powder (salvage unwanted sigils).
- Unlock World Tier 4 (Torment) – Complete the Fall of the Sorcerer's Keep capstone dungeon (recommended level 70+). After that, all content scales to your level up to max (100). Monster levels cap at 100. You can now farm Ancestral items (highest quality).
- Run Nightmare Dungeons (NMD) – Target the highest tier you can comfortably clear (Tier 60+ by level 85). Glyph XP increases per tier. Aim to level all 5+ glyphs to level 21 (max radiance).
- Helltide Refinement – On Torment, Helltides drop Forgotten Souls and Ancestral items. Always open Tortured Gift of Mysteries chests for optimal loot.
- Uber Bosses – After completing the campaign and reaching level 75+, you can summon endgame bosses:
- Leveling to 100 – After level 70, XP slows. Focus on NMDs (best XP per hour), Helltides, and Tree of Whispers bounties. Use the highest NMD tier that grants +10 levels above you for max XP.
- Co-op & Parties – Join a party for faster clears. Endgame dungeons have scaling; each additional player increases monster health but also loot drops. Use group finder or Discord.
- Stagger Mechanic – Bosses have a stagger bar (applies to all bosses). Applying crowd control (freeze, stun, slow, etc.) fills the bar. When full, boss is stunned for ~5 seconds and takes increased damage. Crucial for burst windows.
- Elite Affixes – Watch for dangerous combos: Fire Enchanted + Poison Enchanted (creates pools you must avoid). Use defensive skills or potions.
- World Bosses (Torment) – Now drop high-level Ancestral uniques and materials for summoning Duriel. Participate with a group.
- Max Level (100) – At level 100, all Paragon points are earned (200 total, including 4 from Renown, but max 200? Actually 200 from levels + 20 from Renown = 220? Check: 50-100 gives 200 paragon points, plus 20 from Renown = 220 total). Wait, correct: Level 50->100 gives 200 points, plus 20 from Renown = 220 Paragon points. That's the maximum.
- Paragon Board Mastery – Unlock every rare node. Connect 5-6 boards. Adjust boards based on glyphs – e.g., use the “Exploit” glyph for vulnerable damage bonus.
- Uber Uniques – Extremely rare items with unique powers. Example: Doombringer (sword) – chance to deal shadow damage and reduce enemy damage. Farm Duriel for best chance.
- Build Perfection – Your gear must have 3-4 perfect affixes (e.g., Crit Chance, Crit Damage, Vulnerable Damage, Core Skill Damage). Enchant until satisfied, then temper (through Tempering system introduced later? Actually Tempering came in Season 4 – if not installed, ignore; but base game has no tempering). Focus on rerolling stats and upgrading to +25 on gear via Blacksmith.
- Aspects – Equip your best-rolled aspects. Store duplicates in stash for future builds or trading (if allowed).
- Whispers – Tree of Whispers now rewards Grim Favors that can be turned in for caches containing summoning materials for Varshan (e.g., Mucus-Slick Egg for Duriel). Prioritize completing 10-Grim Favor caches.
- Helltide Legions – Participate in Legion events during Helltide for guaranteed boss spawn and loot.
- World Bosses – Schedule matters; they spawn every 3-4 hours. Join a public group via the Clan or Discord.
- Seasonal Content – If playing a Season, follow the Season Journey for unique rewards, seasonal mechanics, and cosmetics.
- Gold – You will need billions of gold for perfect enchants and rerolls. Sell Ancestral items that are not useful; salvage only for materials you need (Veiled Crystals, Forgotten Souls).
- Forgotten Souls – Primarily from Helltide chests and Whisper caches. Use for enchanting and crafting High Tier Nightmare Sigils (Tier 90+).
- Runes & Gems – Gem socketing: use Royal or higher gems in gear for stat bonuses. For example, Ruby in weapon for +damage, Topaz in armor for resistance.
- Sigil Powder – Salvage low-tier Nightmare Sigils to craft higher ones. Target NMD tiers that have beneficial affixes (e.g., extra damage to elites, increased XP).
- Materials from Bosses – Varshan drops Varshan's Tormented Soul – used for summoning Duriel. Grigoire drops Shard of Agony. Lord Zir drops Exquisite Blood. Combine with Mucus-Slick Egg (from Varshan) to summon Duriel.
Combat & Interaction Systems
Progression & Build Growth
Exploration & Quests
Economy & Resources
---
Mid Game (Levels 25–50) – Campaign Completion & Paragon Prep
Main Gameplay Loop
Combat & Interaction Systems
Progression & Build Growth
Exploration & Quests
Economy & Resources
---
Late Game (Levels 50–70) – Transition to Endgame Systems
Main Gameplay Loop
Combat & Interaction Systems
Progression & Build Growth
Exploration & Quests
Economy & Resources
---
Endgame (Level 70+ & World Tier 4) – The True Endgame
Main Gameplay Loop
- Varshan (requires summoning materials from Whisper Caches) -> drops specific unique items (like Ring of the Starless Skies).
- Grigoire (requires Living Steel from Helltide chests) -> drops damage-related uniques.
- Lord Zir (requires Exquisite Blood from Legion events and World Bosses).
- Duriel (requires Mucus-Slick Egg and Shard of Agony from Varshan/Grigoire) -> drops ultra-rare Uber Uniques (e.g., Harlequin Crest, Grandfather).
Combat & Interaction Systems
Progression & Build Growth
Exploration & Quests
Economy & Resources
---
Summary Table: Core Gameplay by Tier
| Tier | Levels | Main Activities | Key Unlocks | Loot Focus |
|---|---|---|---|---|
| Early | 1–25 | Main quest, side quests, dungeons | Skills, Codex of Power, potion upgrades | Normal items, early legendary aspects |
| Mid | 25–50 | Finish campaign, unlock WT3, Nightmare Dungeons | Mount, Paragon Board, Helltide, Tree of Whispers | Sacred legendaries, Paragon glyphs |
| Late | 50–70 | Nightmare Dungeons, Helltide, Renown, World Bosses | Capstone to WT4, Glyph leveling, Enchanting | High-item-power Sacreds, early Ancestrals |
| Endgame | 70+ | Nightmare Dungeons (high tier), Helltide, Uber Bosses (Varshan, Duriel, etc.) | All Paragon nodes, Uber Uniques, Gear perfection | Ancestral items, Uber Uniques, max-rolled aspects |
Final Tips
- Join a Clan – Clans provide easy party finding, advice, and often shared materials for boss runs.
- Use Build Guides – Websites like Maxroll.gg, Icy Veins, or YouTube (e.g., Raxxanterax) provide optimized tier lists and step-by-step progression.
- Never Stop Moving – Diablo IV is about constant movement; standing still gets you killed. Use dodge and movement skills.
- Stockpile Resources – Gold, Veiled Crystals, Forgotten Souls, and crafting materials are essential. Don't waste them on temporary gear.
- Have Fun – Diablo IV offers deep customization; experiment with different skills, but refine one build for endgame efficiency. The core gameplay loop rewards persistence and smart choices. Good luck, wanderer.
Game Tips
"content": "## Diablo IV – Game Tips: Combat, Exploration, Resources, Builds, Economy & More
This guide collects essential tips for all players—from your first steps into Sanctuary to endgame optimization. Tips are grouped by category and tagged with Beginner, Intermediate, or Advanced so you know where to focus.
---
#### 1.1. Always Keep Moving (Beginner)
Standing still is a death sentence. Strafing, dodging, and kiting are essential. Use your Dodge (Spacebar / Circle / B) even off cooldown to reposition between attacks.
Remember: Diablo IV is about having fun while killing demons. Experiment with builds, ignore meta pressure, and enjoy the world of Sanctuary.
This guide collects essential tips for all players—from your first steps into Sanctuary to endgame optimization. Tips are grouped by category and tagged with Beginner, Intermediate, or Advanced so you know where to focus.
---
1. Combat Tips
#### 1.1. Always Keep Moving (Beginner)
Standing still is a death sentence. Strafing, dodging, and kiting are essential. Use your Dodge (Spacebar / Circle / B) even off cooldown to reposition between attacks.
- Why it works: Many enemy attacks have telegraphed AoEs. Movement breaks enemy targeting and avoids crowd-control effects that instantly kill.
- Example: A Sorcerer can freeze a pack with Frost Nova, then unload Ice Shards for multiplied damage.
- Why it works: Almost every build has a damage multiplier against CC’d enemies (passive skills, Paragon nodes, legendary aspects).
- Why it works: Staying alive allows you to leech or regenerate; dying resets your progress and drops XP. Over time, using potions early becomes second nature.
- Why it works: Movement in Diablo IV interrupts attack animations only after the damage frame. This technique is mandatory for high attack speed builds on ranged classes like Rogue or Sorcerer.
- Why it works: Eliminating the threat that disables your build or creates unavoidable damage simplifies the fight. This is crucial in Nightmare Dungeons with high density.
- Why it works: Altars of Lilith grant permanent stat bonuses and Murmuring Obols capacity; hidden events reward crafting materials and XP. Skipping them slows long-term progression.
- Why it works: You can see which dungeons have Aspects you need and where World Bosses are spawning. No more wandering aimlessly.
- Why it works: The game shows the nearest objective on your minimap with a small pointer. Pinning multiple keeps you from forgetting side goals.
- Why it works: The open world is huge; running on foot dramatically extends playtime. The mount also has a quick dismount attack that can stun enemies.
- Why it works: Certain modifiers negate your build’s core mechanics. A bad sigil can make a T100 dungeon impossible. Re-roll at the Occultist to a better one.
- Why it works: Early game you need Veiled Crystals and Iron/Leather for upgrades; gold is plentiful. In the endgame, upgrading gear costs tens of millions, so selling junk items becomes necessary.
- Why it works: With limited stash space (4 tabs base, +5 via Season Journey), being organized prevents wasting time hunting for that specific ring with +3 to Core Skills.
- Why it works: Obols can drop Legendaries with high item power up to 925. Gambling is the fastest way to fill missing slots outside of Uber bosses.
- Why it works: Avoid conversion early; you’ll naturally get all types. Late game, converting low-value Fragments (like Skulls for Armor) into Royal Topaz for resource generation is worth it.
- Why it works: In high density Nightmare Dungeons, you get a flat +5% per Elixir and up to +5% per Incense, totaling ~15% more XP. This speeds up leveling from 90 to 100 significantly.
- Why it works: Damage calculations multiply mods of the same type. Spreading across two elements halves your scaling. For example, a Lightning Sorcerer stacks Lightning Critical Strike Damage, not Fire Damage.
- Why it works: Crowd control and defensive cooldowns allow you to survive bursts. Many builds require a movement skill to dodge boss mechanics.
- Why it works: In-game numbers are unreliable; dummies give stable outputs. You can see if a change increases DPS or lowers it before committing resources.
- Why it works: Activating the secondary bonus often gives +100% to a specific damage type (e.g., +X% Physical Damage). Missing this defeats the purpose of the Glyph.
- Why it works: You can complete any content without an Uber unique. Chasing them will burn you out. Trade gold to buy them if you have millions to spare, but not before you have a full build.
- Why it works: The Aspect is reusable via the Codex of Power. The raw gold from vendoring is better than keeping a useless item.
- Why it works: Lower cost means more gambles per Obol, increasing chance of hitting a desired Aspect. Boots and gloves also roll movement speed and ranks to skills generously.
- Why it works: Boss rotation is tedious; trading cuts time by 50%. Prices fluctuate, so check Diablo.trade or the official Discord for current rates.
- Why it works: Re-rolling a single affix is cheaper than crafting a new item from scratch. Budget around 5-10 re-roll attempts per item.
- Why it works: Shrines provide temporary immunity or massive damage. Using them prematurely on trash wastes their potential.
- Why it works: Solo tackling a World Boss is nearly impossible past Torment; the group splits aggro and provides resurrection safety.
- Overworld: Whispers (Obols), Helltide (Forgotten Souls, Living Steel), Nightmare (Glyph XP, better loot).
- Prioritize: Nightmare Dungeons for leveling (Glyph XP > item drops). Helltides for materials to summon bosses.
- Why it works: Mixing activities is inefficient. Dedicate sessions to one type to maximize specific currencies.
- Why it works: This prevents a death loop where enemies camp your body. Only use if you’re sure you can’t retrieve safely.
- Level 1-50: Follow the campaign. Do all Strongholds in each zone. Unlock all Waypoints.
- Level 50-70: Finish the campaign. Start Tree of Whispers. Farm Helltides for gear and materials.
- Level 70-100: Nightmare Dungeons for Glyph XP and Paragon levels. Target-farm unique bosses (Duriel, Andariel) for specific uniques.
- Endgame: Push Nightmare Dungeon Tier 100. Defeat Uber Lilith. Optimize gear affixes. Trade for perfect rolls.
#### 1.2. Exploit Crowd Control (Beginner)
Apply Slow, Stun, Freeze, or Knockdown to enemies before using high-damage abilities.
#### 1.3. Use Your Potion on Cooldown (Intermediate)
Don’t hoard health potions. Drink whenever you drop below 50% HP in combat. The cooldown is short, and you can find more potion charges from slain enemies or shrines.
#### 1.4. Stutter-Step for Ranged Characters (Intermediate)
Between each attack, take a tiny step. This cancels the end of your attack animation, allowing faster repositioning without delaying your next attack.
#### 1.5. Elites: Single Out the Most Dangerous (Advanced)
Packs of Elite monsters have unique affixes. Identify and burst down the one with Suppressor, Stormbane’s Wrath, or Avenger first. Suppressor negates your skill projectiles; Stormbane leaves expanding pools; Avenger buffs nearby non-elite enemies.
---
2. Exploration Tips
#### 2.1. Always Check Dead-Ends (Beginner)
Every zone has hidden events, Legendary chests, or Altars of Lilith. Take a few seconds to explore branches that don’t lead to the main objective.
#### 2.2. Use the Map Legend (Intermediate)
Open the full map (M / Touchpad) and click the legend button to see icons for all dungeon entrances, Waypoints, and whisper targets. This helps plan efficient routes.
#### 2.3. Pin a Quest to Track Multiple Zones (Intermediate)
You can pin up to five quests/objectives on the map at once. This is vital when juggling Seasonal Journey, Tree of Whispers, and a dungeon run.
#### 2.4. Unlock Mount Early (Beginner)
Complete the Donan’s Favor quest (roughly level 30 in Act 4). Once you have a mount, you can unlock Mount Speed upgrades (from the Stable Master) to make travel 15-20% faster.
#### 2.5. Nightmare Dungeon Sigils: Check for Codex Effects (Advanced)
Before using a Sigil, read the modifiers. Avoid “Monster Critical Resist” (crit damage penalties) if you rely on crits. Also avoid “Vulnerability Duration Reduction” for mana- or resource-starved builds.
---
3. Resources & Inventory Tips
#### 3.1. Salvage vs. Sell (Beginner)
Up to level 70, Salvage Everything except gear you equip. After that, sell rare items for gold.
#### 3.2. Stash Tab Organization (Intermediate)
Label each tab by usage: “Equip,” “Aspects,” “Gems,” “Seasonal,” “Trade.” Use the search bar to find items quickly.
#### 3.3. Murmuring Obols: Spend Early, Spend Often (Intermediate)
Complete Whispers to earn Purveyor of Curiosities (gambling). Spend your Obols as soon as you have 500-1000. Don’t cap at 1000 (wasting potential).
#### 3.4. Gem Fragment Conversion (Advanced)
You can convert Gem Fragments of one color to another at the Jeweler, but it costs 10:1 ratio and gold. Only convert if you’re desperate for a specific gem.
#### 3.5. Stack Elixirs and Incense (Advanced)
You can have one Elixir active (provides stats and +5% XP on kill) plus one Incense of each duration (20, 30, 60 min). The XP bonus stacks multiplicatively with other sources.
---
4. Build & Skill Tips
#### 4.1. Pick a Core Damage Type (Beginner)
Choose one damage type (Physical, Fire, Cold, Lightning, Shadow, Poison) and focus all gear affixes, Paragon nodes, and skills on it.
#### 4.2. Always Keep an Unlockable Skill Slot (Intermediate)
Your Skill Bar has 6 slots. Keep one open for a Buff (like Barbarian’s Shouts) or Mobility (Druid’s Trample). Don’t fill all 6 with damage abilities.
#### 4.3. Test Builds on the Practice Dummy (Intermediate)
In Kyovashad, there are training dummies. Use them to compare damage numbers after swapping aspects or skills. Split-screening a parse (damage over 10 seconds) helps validate changes.
#### 4.4. Paragon Board: Glyph Ranges (Advanced)
When placing a Glyph, check its range radius (usually 3 or 4 nodes). Aim to activate the secondary bonus by surrounding the Glyph with enough Magic nodes of that type (e.g., Dexterity nodes for a Dexterity-based Glyph).
#### 4.5. Uber Uniques: Don’t Prioritize Them (Advanced)
Uber Uniques (like Shako, Grandfather) have drop rates below 1% even from Tormented bosses. Focus on farming regular uniques with better stats and Aspects first.
---
5. Economy & Trading Tips
#### 5.1. Sell Legendaries with Wrong Affixes (Intermediate)
If a Legendary item has good item power but affixes that don’t match your build (e.g., +Thorns for a Fire Sorcerer), salvage it for the Aspect, then sell or vendor the material.
#### 5.2. Buy in Bulk from the Purveyor (Intermediate)
When gambling Obols, buy the cheapest item slot (usually boots or gloves) because they cost fewer Obols. You can then extract the Aspect if you get a good one.
#### 5.3. Trade for Runes & Boss Materials (Advanced)
Season 5 introduced Trade Chat. Use it to trade duplicate boss materials (like Stygian Stones, Exquisite Blood) for the ones you need. Also trade gold for Duriel summons.
#### 5.4. Gold Sink: Re-roll Affixes Cheaply (Advanced)
The Occultist can re-roll one affix per item. The cost increases exponentially with each re-roll (up to millions). Re-roll only the most important affix (e.g., Critical Strike Chance) and stop if you hit a mediocre roll.
---
6. Miscellaneous Advanced Tips
#### 6.1. Stun Grenades and Shrines (Beginner)
Shrines are powerful but have a 30-second duration. Plan to pop a Shrine just before entering a large pack of elites or a boss room. Stun Grenade shrines are excellent for clearing rooms.
#### 6.2. World Bosses: Stay in Group (Intermediate)
When fighting World Bosses like Ashava, stay within the group marker. The boss’s AoE attacks are easier to dodge when you have multiple escape angles. Also, rezzing allies is faster.
#### 6.3. Overworld vs. Helltide vs. Nightmare (Advanced)
Each activity gives different rewards:
#### 6.4. Exit Strategy (Intermediate)
If you die in a Nightmare Dungeon and your corpse is in a bad spot, Teleport to Town from the menu (not by dying). Wait 10 seconds, then re-enter. You’ll respawn at the dungeon entrance instead of at your corpse.
---
Final Progression Path (Quick Reference)
Remember: Diablo IV is about having fun while killing demons. Experiment with builds, ignore meta pressure, and enjoy the world of Sanctuary.
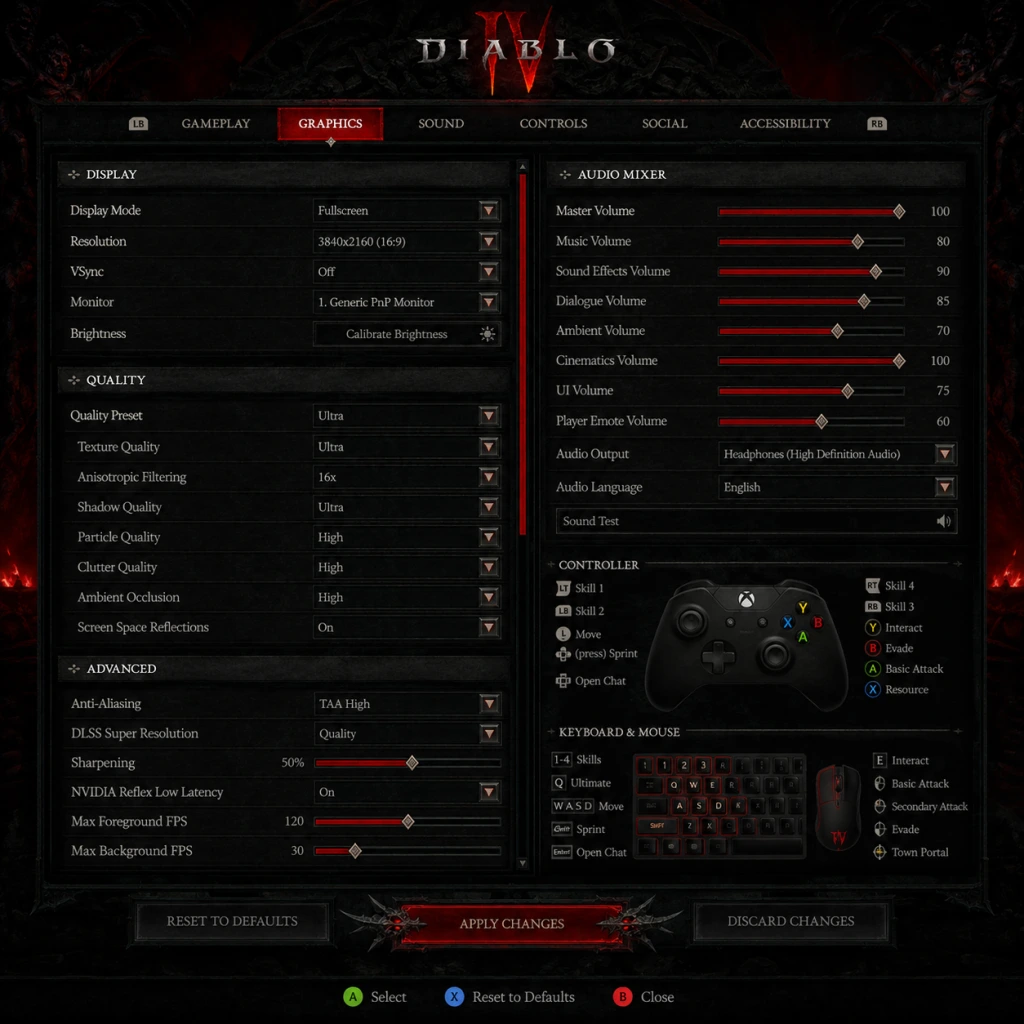
Game Settings
Diablo IV – Game Settings Guide
This guide details every settings category in Diablo IV, with platform-specific notes (PC, PlayStation 4|5, Xbox One|Series X|S) and hardware-level recommendations. Pay special attention to the misconfiguration traps highlighted throughout.
---
1. Graphics Settings
#### 1.1 Display & Resolution
- Display Mode: Fullscreen (dedicated GPU control, lowest input lag), Windowed Fullscreen (alt-tab convenience), Windowed (not recommended due to desktop compositing overhead).
- Resolution: Native monitor resolution is best. On 4K screens, DLSS/FSR can upscale from lower internal resolutions.
- HDR: If your monitor supports HDR, enable and calibrate brightness/black level in HDR settings. Misconfiguring HDR can wash out colors; use the calibration tool.
- Vertical Sync (V-Sync): Off for highest FPS (use Reflex Low Latency instead), On to eliminate screen tearing (slight input lag).
- Framerate Cap: Set to your monitor’s refresh rate (e.g., 144 Hz → 144 FPS) or unlimited for benchmark. Consider capping 10% below refresh rate for smoother input.
- NVIDIA Reflex Low Latency: Enable + Boost (reduces render queue, recommended for competitive play).
#### 1.2 Quality Presets & Individual Toggles
| Setting | Low (60 FPS) | Medium (60 FPS) | High (60 FPS) | Ultra (60+ FPS) | Ray Tracing (High End) |
|---|---|---|---|---|---|
| Texture Quality | Low | Medium | High | Ultra | Ultra |
| Shadow Quality | Low | Medium | High | Ultra | High |
| Dynamic Shadows | Off | On | On | On | On |
| Soft Shadows | Off | Off | On | On | On |
| Shader Quality | Low | Medium | High | Ultra | Ultra |
| Lighting Quality | Low | Medium | High | Ultra | High |
| Reflection Quality | Low | Low | Medium | High | High (with Ray Traced Reflections) |
| Terrain Geometry | Low | Medium | High | Ultra | Ultra |
| Water Quality | Low | Low | Medium | High | High |
| Volumetric Fog | Off | Low | Medium | High | High |
| Particle Density | Low | Medium | High | Ultra | Ultra |
| Ambient Occlusion | Off | SSAO | SSAO/HBAO+ | HBAO+ | HBAO+ |
| Distortion | Off | Off | On | On | On |
| Anti-Aliasing | TAA Low | TAA Medium | TAA High | TAA High | TAA High + FXAA (optional) |
| DLSS / FSR / XeSS | Off (or Performance) | Off (or Balanced) | Off (or Quality) | Off | Off (native) or Quality |
| Ray Tracing | Off | Off | Off | Off | On (set to Medium/High) |
| Reshade / HBAO+ | N/A | N/A | N/A | N/A | N/A |
- Budget PC (GTX 1650/1060, 16 GB RAM): Use "Low" preset, turn off Ray Tracing, enable FSR 2.0 in Performance mode.
- Mid-Range PC (RTX 3060/3070, 16-32 GB RAM): Use "High" preset with DLSS Quality (if 4K) or Off at 1440p. Shadows=Medium, Volumetric Fog=Low.
- High-End PC (RTX 4080/4090, 32+ GB RAM): Use "Ultra" preset; enable Ray Tracing at Medium (High for RTX 4090). Reflex On.
- PlayStation 5 / Xbox Series X: Use default Quality Mode (30 fps) with Ray Tracing or Performance Mode (60 fps, lower shadows/reflections). No individual graphics toggles on console.*
- PlayStation 4 / Xbox One: Only Performance Mode available (30-60 fps). No Ray Tracing.
- Cursor Contrast: Under Accessibility, there is a setting to enlarge and change the cursor color. If you keep default small cursor, it can be hard to spot in crowded fights. Enable "Large Cursor" and choose a high-contrast color (e.g., neon green).
- Screen Shake: Under Gameplay (not Graphics), can cause disorientation. Set to 0-20% for sustained play.
- Frame Generation (DLSS 3): Only available on RTX 40 series; introduces input lag penalty. Use only if your GPU can’t maintain 60 fps otherwise.
- FOV (Field of View): Not adjustable on console; PC has a slider. Higher FOV reduces target visibility but increases peripheral awareness. Default 80 is safe.
- Weapon Trail & Impact Particles: Can cause visual clutter. Lower in Graphics > Particle Density if needed.
#### 1.3 Special Attention Points (Easy to Misconfigure)
---
2. Audio Settings
#### 2.1 Volume Mix
| Setting | Recommended Level | Notes |
|---|---|---|
| Master Volume | 70-100% | Use as main control. |
| Sound Effects (SFX) | 80% | Skill sounds, footsteps, monster noises. |
| Music | 40-60% | Ambiance; low enough to hear cues. |
| Dialogue | 80% | Important for quest/character lore. |
| Environment | 60% | Wind, ambient noises; optional. |
| Voice Chat | 100% (if used) | Adjust in-game or in OS. |
| Cinematic Music | 80% | No gameplay impact. |
- Speaker Configuration: Stereo for headphones/speakers, 5.1/7.1 for surround setups. Dolby Atmos supported on Xbox/PC with Atmos license.
- Spatial Audio: Windows Sonic (Xbox/PC) or Dolby Atmos for Headphones. Provides directional enemy sounds; strongly recommended.
- Dynamic Range: Choose "Night" for low volume environments (compresses loudest sounds), "Full" for typical setups.
- Subtitle Mode: Always enable (Accessibility). Allows reading when sound is off.
- Master Volume vs. SFX: New players often mute Master but keep SFX low, missing crucial dodge cues. Use balanced mix above.
- Key Bindings: Default 1-4 for spells, Q for Potion, E for Evade, F for Interact, R for Ultimate. Rebind to comfortable keys (e.g., mouse side buttons for Evade/Potion).
- Move/Attack: Left click moves, right click attack. You can rebind "Force Move" to Space to avoid accidental attacks.
- Skill Rebind: Each skill slot is customizable. Create keys for different builds (e.g., Shift for channeling, Mouse Wheel Up for potion).
- Controller on PC: Plug in Xbox/PS5 controller; game auto-detects. May prefer for relaxed play.
- Button Layout: Face buttons (A/B/X/Y) assigned to skills; triggers for basic attack/potion. Customize via Options > Controls > Controller Layout.
- Stick Sensitivity: Aim Smoothness (0-10). Lower = more responsive. Default 5. Increase for twitch aiming.
- Auto-Aim: On by default; helps with mobs. Turn off if you want precision targeting (e.g., boss weakpoints).
- Vibration: Can be turned off for battery life or focus.
- Cursor Contrast (KBM): Already mentioned; also affects target highlighting.
- Quick Cast vs. Normal Cast: In Options > Gameplay, you can choose to cast skills on button press (Quick Cast) or on release (Normal). Quick Cast is faster for experienced players; Normal gives you a targeting reticle. Misconfiguring can lead to missed skills.
- Avoid Misclicking with Left Click: Rogue players may want to bind "Move Only" to a separate key to prevent attacking empty air while repositioning.
- Subtitle Size: Small, Medium, Large. Choose Large for easier reading.
- Subtitle Background: Black box or transparent. Black box improves readability on bright backgrounds.
- Screen Reader: Available on Xbox/PC (Narrator integration). Reads menus, items, and chat. Turn on in System > Accessibility.
- Colorblind Modes: Options for Deuteranopia, Protanopia, Tritanopia. Affects health bars and skill colors. Test in Sanctuary to confirm.
- High Contrast Mode: Makes HP/Potions easier to see. Consider enabling.
- Text Chat Size: Adjustable in Social > Chat.
- Visual Cues for Sounds: "Audio Visualization" setting (PC/Xbox) shows directional arrows for enemy sounds (footsteps, projectiles). Enable if hard of hearing.
- Damage Sound Indicator: Turn on "Damage Numbers" and "Critical Hit Effects" to see instead of hear.
- Toggle Sprint: None in Diablo IV (always running); but you can toggle "Auto-Run" in Gameplay.
- Aim Assist: On gamepad, aim assist strength 0-4. 3 works well for most.
- Button Remapping: Full remap for both KBM and controller.
- Screen Shake (Gameplay): Default 100% can cause nausea. Set to 0%.
- Camera Shake (same setting): Also in Graphics > Camera Shake (identical). Default on.
- Game Speed: Not present in Diablo IV (fixed speed).
- Set in: Options > Language > Text Language.
- Effect: All menus, tooltips, quest text. Does not affect voiceover.
- Available: English (US/UK), French, German, Italian, Spanish (EU/LA), Japanese, Korean, Chinese (Simplified/Traditional), Russian, Portuguese (Brazil), Polish.
- Set in: Options > Language > Voice Language.
- Download Required: On first change, game downloads voice pack (~2-5 GB). Must be done before playing.
- Note: Some languages (e.g., Japanese) have exclusive voice actors; English cast is primary.
- In Battle.net/Console: Choose America, Europe, Asia. Affects server, friends list, and store.
- Cross-Platform Play: Works across all regions, but latency may be high if far from server.
- Language Mismatch: If you change text but not voice, dialogues will be mismatched (e.g., English subtitles with Japanese audio). Set both to same language unless specifically wanting dub/sub combo.
- Connection Type: Wired Ethernet recommended over Wi-Fi for stable latency.
- Show Ping: Enable in Options > Network > Show Network Latency. Helps diagnose lag.
- Bandwidth Limit: Options > Network > Download/Upload Speed. Set to 0 (unlimited) or cap if other devices use internet.
- Packet Loss: Display in same menu. Green=good, red=bad.
- Required Ports: TCP 1119, 1120, 3724, 6112-6119, 6881-6999 (for P2P chat/voice). UDP 1119, 1120, 3724, 5060, 5062, 6250, 12000-64000.
- UPnP: Enable in router settings; auto-opens ports.
- Cross-Platform Play: Off by default. Turn on if you want to play with friends on other platforms. Disabling can reduce matchmaking pool for World Bosses.
- Appear Offline: In Social > Online Status. If you don't want random invites, set to Offline.
- World Tier Selection: You choose before entering the world (Tier 1 Adventurer – T4 Torment). Cannot be changed mid-game without returning to town and resetting dungeon.
- Hardcore Mode: Character death = permanent deletion. Separate checkbox in Character Creation. Not reversible.
- Show Damage Numbers: On. Critical hits show larger numbers.
- Auto-Pickup Radius: Options > Gameplay > Loot > Pickup Radius. Increase to grab nearby gold/items faster; default 3 (out of 1-5). Setting to 5 may grab items behind walls.
- Auto-Potion: Default on at 35% HP. Change in Options > Gameplay > Potions > Auto-Potion Threshold (20%-50%). Misconfigure low threshold = deaths.
- Skill Toggle/Charged: For skills like Flurry or Whirlwind, you can set to "Toggle" (press once to keep channeling) or "Hold". Default Hold; Toggle reduces finger fatigue.
- Lock On Target: On console, press R3 to lock onto a single enemy. Useful for boss fights but can be disorienting in mobs. Turn off if you prefer free aim.
- Movement Mode: "Click to Move" (mouse) or "Move to Cursor" (auto-adjust). Stick to default.
- Chat Bubbles: Show above characters. Can be disabled for cleaner screen.
- Trade Chat: Filter in Options > Social > Chat Channels. Disable to avoid spam.
- Friend Requests: Set to "Everyone" or "Friends Only". Misconfigure to Everyone can lead to unwanted groups.
- Auto-Potion Threshold: Many players die because they keep it at the default 35% and are bursted. Set to 50-60% for early levels, 30% for skilled players.
- Enable PVP (Dueling): Options > Social > Enable Dueling. Default Off. Turn On if you want to duel in Fields of Hatred.
- Appear Offline: As above, can prevent clan invites.
#### 2.3 Easy-to-Miss Audio Setting
---
3. Controls
#### 3.1 Keyboard & Mouse (KBM)
#### 3.2 Gamepad (Console & PC)
#### 3.3 Special Attention Points
---
4. Accessibility
#### 4.1 Visual Accessibility
#### 4.2 Auditory Accessibility
#### 4.3 Motor Accessibility
#### 4.4 Easy-to-Misconfigure Accessibility Settings
---
5. Language & Region
#### 5.1 Text Language
#### 5.2 Voice Language
#### 5.3 Region Selection
#### 5.4 Special Attention
---
6. Network Settings
#### 6.1 Connection & Ping
#### 6.2 Port Forwarding (PC Only)
#### 6.3 Easy-to-Misconfigure Network Setting
---
7. Gameplay Settings
#### 7.1 Difficulty & World Tier
#### 7.2 Combat & UI
#### 7.3 Social & Chat
#### 7.4 Special Attention Points
---
8. Summary of Most Overlooked Settings
| Settings Category | Specific Setting | Why Overlooked | Recommendation |
|---|---|---|---|
| Graphics | Cursor Contrast | Default cursor small | Enable Large + Bright Color |
| Graphics | Screen Shake | Causes nausea | Set to 0% |
| Audio | Dynamic Range | Not adjusted for headset | Use "Full" |
| Controls | Quick Cast vs Normal | Not obvious in menus | Choose Quick Cast for speed |
| Accessibility | Audio Visualization | Hidden in menus | Enable for directional cues |
| Network | Cross-Platform Play | Off by default | Turn on for larger pool |
| Gameplay | Auto-Potion Threshold | Default 35% is death | Increase to 50% |
| Gameplay | Loot Pickup Radius | Low default | Increase to 3-4 |
9. Final Setup Checklist
Before diving into Sanctuary, verify these settings:
- [ ] Graphics preset matches your hardware (Low, High, Ultra, or custom)
- [ ] Cursor contrast enabled and color changed
- [ ] Screen shake set to 0%
- [ ] Audio mix balanced per recommendations
- [ ] Subtitle mode On with large size
- [ ] Control bindings comfortable (especially Evade and Potion)
- [ ] Network latency displayed
- [ ] Auto-Potion threshold raised to 50% (or lower after level 80)
- [ ] World Tier correctly selected (T1 for casual, T2 for challenge, T3 for endgame)
- [ ] Cross-Platform Play enabled (if needed)
If you experience stuttering, lower Shadow Quality to Low or Medium (largest performance impact). If audio lags, reduce Dynamic Range to Night mode and disable Spatial Audio temporarily.
Adjust settings in a safe zone (Kyovashad) before entering combat to avoid dying during tweaks.
Important Notes
Diablo IV – Important Notes: Warnings, Pitfalls & Essential Knowledge
This section compiles crucial warnings, common mistakes, and things players wish they had known before diving into Sanctuary. Read this before or during your first playthrough to avoid major headaches.
1. Irreversible Choices & Missable Content
#### Campaign Progression & World Tiers
- World Tier selection is NOT permanent. You can switch between World Tiers 1–4 at any time from the character select screen or by visiting the World Tier statue in Kyovashad. However, you must complete a capstone dungeon to unlock higher tiers (Tier 3: Cathedral of Light at level 50-ish; Tier 4: Fallen Temple at level 70-ish). Do not rush to Tier 3 or 4 too early – enemies become significantly tougher and grinding will be painful.
- Campaign skip: After completing the campaign once, you can skip it on new characters. This is irreversible for that character – you cannot replay the campaign story on that character afterward. If you care about story and quests, don't skip unless you’ve already done it on another character.
- Renown is shared across all characters of the same realm (Eternal vs Seasonal). Unlocking Renown rewards (skill points, potion charges, paragon points, obols) makes every subsequent character stronger. Max out Renown in each region as early as you can stomach – it's a huge long-term benefit.
- Altars of Lilith grant permanent stats to all characters on the same realm. They are scattered across the map. Missing them is a major loss. Use an interactive map (e.g., from Diablo4.life) to find them all. Collecting all Altars on one character unlocks the achievements and boosts for all others.
- Seasonal characters are separate from Eternal Realm. When a new season starts, you must create a new character to experience seasonal content. Your Eternal characters remain but cannot access seasonal mechanics (e.g., malignant hearts in Season 1, vampiric powers in Season 2). All seasonal characters become Eternal at season end – you keep gear and renown but lose seasonal powers.
- Battle Pass progress is account-wide but not shared between platforms unless you have cross-progression enabled. If you buy the Battle Pass, complete it on one character – don't split effort.
- World Boss spawns are on a 6-hour timer (often at :00, :30, etc.). They drop unique loot and are required for some achievements. Check the in-game world boss timers or community Discord servers. If you miss one, you must wait for the next spawn.
- Whisper of the Dead bounties rotate every 60 minutes. Some zones have unique reward caches (e.g., Helltide caches). Always pick up the caches after completing 10 Whisper objectives; they contain valuable gear and materials.
- Limited-time cosmetic rewards from Battle Pass or events (e.g., Twitch drops) are often never obtainable again. Don't ignore them.
- Sanctuary scales to your level (within a range). Don't be fooled into thinking you can outlevel a zone – you can't. Instead, focus on gear upgrades and build synergy.
- The first major spike occurs around level 25–30, when your build may start feeling weak if you haven't specialized. Follow a leveling build guide (e.g., from Maxroll.gg or Icy Veins) to avoid frustration.
- Capstone dungeons (Cathedral of Light, Fallen Temple, etc.) are significant spikes. Go in at least the recommended level with good gear and a properly built skill tree. Dying is expected; don't waste repair costs – just restart.
- Farming normal monsters is inefficient. Focus on completing dungeons, Helltides (after level 50), Nightmare Dungeons (after unlocking Tier 3), and Whispers for best XP and loot per hour.
- Selling or salvaging everything early on: Salvage for materials (especially for upgrading gear) but keep legendary items for aspects. Do not sell gear for gold until you have a surplus – you need gold for enchanting and imprinting.
- Over-farming of one aspect early without imprinting on a good base: Imprinting costs rare materials and gold. Save your best aspects for top-tier item upgrades.
- Ignoring the Codex of Power: The Codex stores imprintable aspects from completing certain dungeons. Unlock them all to have a baseline of useful aspects for build experimentation.
- Diablo IV supports cross-play and cross-progression (if you link the same Battle.net account). You can play with friends on PC, PlayStation, Xbox, or even Switch (if you use cloud streaming). Be mindful of platform differences – console players have aim assist and simplified inventory management.
- No official trading system for most gear; you can only trade items retrieved within a party for a short window. High-end gear (Ancestral uniques, Uber uniques) is account-bound. Don't expect a full economy like Path of Exile.
- What happens when you drop out? You can rejoin a party via the “Recent Players” list if you disconnect within a minute. Your character stays in the game for a few seconds (dying possible). Keep your gear repaired.
- Diablo IV uses the Warden anti-cheat client (same as other Blizzard games). Do not run cheat overlays, automation tools, or scripts. First offense often results in a temporary ban; repeated offenses lead to permanent account closure. No appeals – the ban is final.
- Third-party loot filters are not officially supported. Using them may trigger Warden. Blizzard has stated they plan to add official loot filter options in future patches – wait for that.
- Boosting services: If you pay someone to power-level your character, beware. Account sharing violates ToS and can get your account locked. Blizzard tracks IP logins.
- Trade chat and general chat can be toxic. You can disable global chat in settings (Gameplay → Chat → Disable General).
- Clan recruitment is done through the Clan menu or official forums. Be cautious of scams – never share your account password.
- PC (Battle.net/Steam): Character saves are stored on Blizzard servers, not locally. You cannot manually backup characters. However, your account is linked to your Battle.net ID – if you uninstall the game, your characters remain. Cross-progression means you can play on any device (PC, console, etc.) with same progress.
- Consoles (PlayStation, Xbox): Characters are saved on Blizzard servers as well, but you must have an active internet connection (always-online requirement). If you lose internet, you cannot play. No offline mode.
- No local save files to copy. If you want to reroll a character, you must delete them from the character select screen – there is no way to recover a deleted character.
- Diablo IV is GPU-intensive, especially at 4K. The minimum spec (GTX 970) will struggle with large crowds. Adjust settings: disable “NVIDIA Reflex Low Latency” if you get stutters; set “Texture Quality” to Medium if you have 4GB VRAM. The game is well-optimized but can still have memory leaks – restart the game every 2-3 hours to avoid crashes.
- HDR support is broken on many monitors; disable HDR in Windows if you see washed-out colors. Use in-game brightness calibration instead.
- Enable two-factor authentication (2FA) via Battle.net. Many account hacks happen due to weak passwords. Blizzard will not restore lost items or characters.
- Don’t share your account with family or friends – if they get banned, your entire collection is gone.
- Renown is per region – you must complete all side quests, dungeons, and find all Altars for each zone. Doing this after level 50 feels tedious. Start early: as you explore the map, do all side quests and dungeons in a region before moving on. It saves hours later.
- Extracting aspects costs a rare currency (Sigil powder from later game, or gold early on). Don't extract every legendary aspect – many are useless. Instead, salvage legendaries to get the aspect automatically stored in your Codex? No – aspects from loot are not automatically added to Codex. You must extract or find the dungeon version. Tip: Only extract aspects that are perfect rolls or that you will use soon. For low rolls, just salvage or sell the item.
- Enchanting (rerolling a stat) becomes very expensive after the first few attempts. The cost increases exponentially with each reroll on the same item. Never waste gold rerolling a low-level item – save for endgame gear. Also, note that you cannot reroll the same stat multiple times; you choose a new stat from a list.
- Salvage all white/blue/yellow gear for materials (especially veiled crystals, iron chunks, etc.). Sell only if you need gold urgently, but gold comes easily from selling uniques you don't need later. Early on, salvage everything.
- If you die to a World Boss, you cannot respawn at the same fight unless a party member resurrects you. Bring a Scroll of Escape if you're squishy or have a reliable revive skill. Stay near the edges of the arena to avoid lethal AoE.
- Hardcore characters die permanently.** Even if you disconnect, your character may die. Do not play Hardcore unless you have a stable internet connection and are comfortable with the possibility of losing everything. There is no way to revive.
- [ ] Link your Battle.net account across platforms if you plan to play on multiple devices.
- [ ] Complete the campaign on at least one character to unlock skip for alts.
- [ ] Collect all Altars of Lilith on your first character – it’s a massive quality-of-life boost.
- [ ] Max out Renown in all regions before level 70 to unlock all rewards.
- [ ] Don't skip side quests and dungeons – they contribute to Renown and codex.
- [ ] Keep your gear upgraded with the blacksmith (upgrade items at least to 3/5 early on).
- [ ] Join a clan or community discord for world boss timers and group runs.
#### Renown & Altars of Lilith
#### Seasonal Characters & Battle Pass
#### Missable Items & Events
2. Difficulty Spikes & Grinding Traps
#### Leveling & Zone Scaling
#### Grinding Traps to Avoid
3. Online Etiquette & Anti-Cheat Notes
#### Cross-Platform Play & Groups
#### Anti-Cheat (Blizzard’s Enforcement)
#### Social & Chat
4. Save Management & Technical Pitfalls
#### Cloud Saves & Platforms
#### System Requirements & Performance
#### Account Security
5. Things Players Commonly Regret Not Knowing Earlier
#### Renown Grind Frustration
#### Aspect Management Chaos
#### Enchanting Misteps
#### Salvaging vs Selling
#### World Boss Warning
#### Hardcore Mode
Final Checklist Before You Start
By avoiding these pitfalls, you’ll have a smoother journey through Hell and back. Good luck, Wanderer.
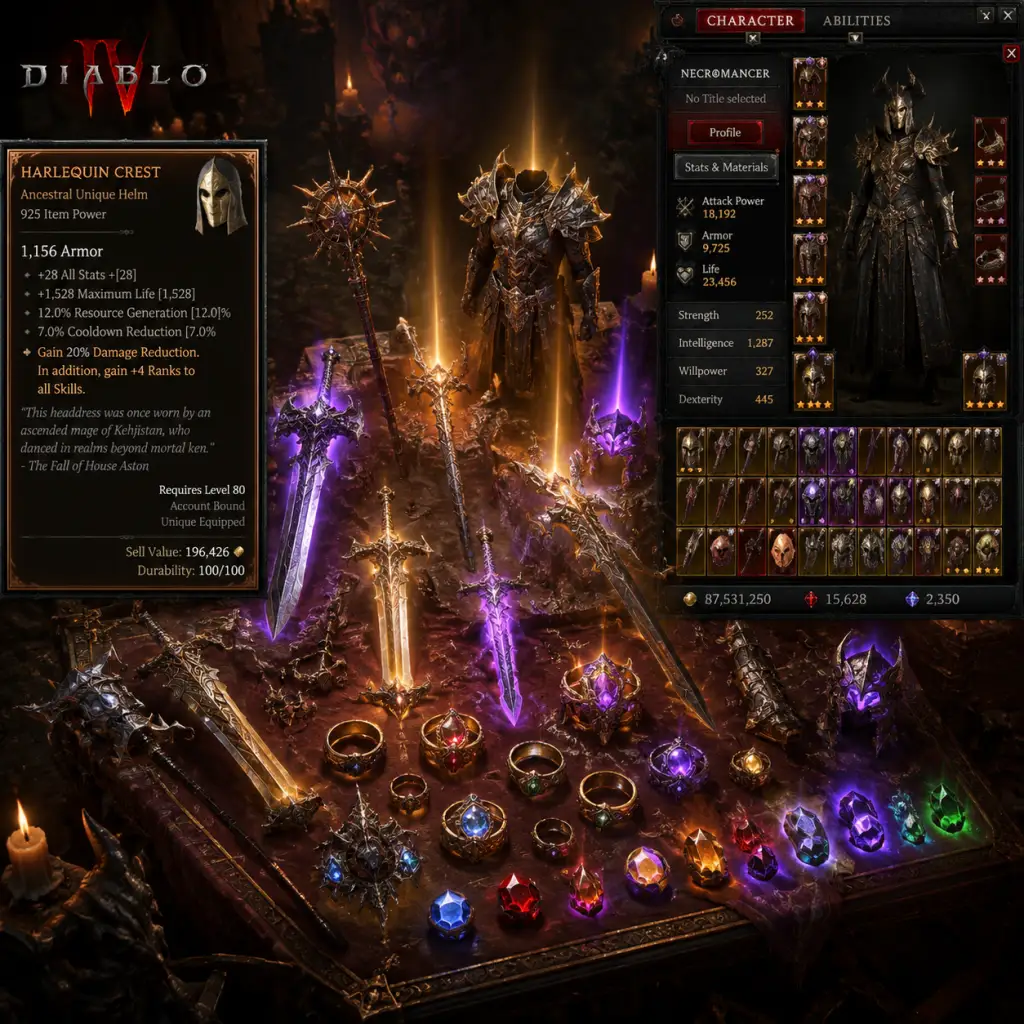
All Game Items
Diablo IV – All Game Items Guide
This guide provides a comprehensive overview of all major item categories in Diablo IV, including weapons, armor, consumables, materials, currencies, collectibles, and key equipment systems. Items are grouped logically with explanations on what each does, how to obtain them, when they are useful, and important synergies or upgrades.
Item Rarity and Tiers
Items in Diablo IV have six rarity tiers:
- Normal (white) – basic stats, no affixes.
- Magic (blue) – 1-2 affixes.
- Rare (yellow) – 2-5 affixes, can be upgraded to Legendary via imprinting.
- Legendary (orange) – includes a Legendary Aspect with a unique power.
- Unique (gold) – fixed affixes and a unique power; cannot be enchanted or tempered but can be upgraded and socketed.
- Mythic Unique (purple) – extremely rare, with multiple fixed affixes and a game-changing power (e.g., Harlequin Crest).
Additionally, items have Item Power ratings (1–925+). Higher item power means higher base stats and affix ranges. In World Tiers 3 and 4, items can drop as Sacred (requires level 60) or Ancestral (World Tier 4), providing even higher stats.
Weapons
Each weapon type has a base damage, attack speed, and inherent affix (e.g., critical strike damage, overpower damage). Class restrictions and specializations apply.
| Weapon Type | Inherent Affix | Classes | Notes |
|---|---|---|---|
| Swords | Critical Strike Damage | Barbarian, Rogue, Necromancer | Fast, balanced |
| Axes | Critical Strike Chance | Barbarian, Druid, Necromancer | High damage, slow |
| Maces | Overpower Damage | Barbarian, Druid, Necromancer | Highest single hit damage |
| Polearms | Damage to Healthy/Injured | Barbarian, Necromancer | Long reach |
| Scythes | Damage to Healthy/Injured | Necromancer only | High damage for minions |
| Bows | Damage to Distant Enemies | Rogue only | Ranged, fast |
| Crossbows | Vulnerable Damage | Rogue only | Higher damage, slow |
| Staves | Damage to Crowd-Controlled | Sorcerer, Druid | Two-handed, high damage |
| Wands | Lucky Hit Chance | Sorcerer, Necromancer | Fast, low damage |
| Daggers | Damage to Close Enemies | Rogue, Necromancer | Fast attack speed |
| Focus (Offhand) | Cooldown Reduction | Sorcerer, Necromancer | Not a weapon but equippable in offhand |
| Totem (Offhand) | Resource Generation | Druid | Offhand for shapeshifting builds |
When useful: Weapon choice depends on your build. Example: a Bone Spear Necromancer benefits from a high-damage two-handed scythe or sword; a Rogue uses a bow or crossbow for ranged or daggers for melee.
Armor
Armor reduces damage taken and provides defensive affixes. Pieces include:
- Helm – Defensive, cooldown reduction, lucky hit chance, resource affixes.
- Chest Armor – High armor, damage reduction, defensive stats.
- Gloves – Attack speed, critical strike chance, lucky hit, ranks of core skills.
- Pants – Maximum life, damage reduction, resistances.
- Boots – Movement speed, evade charges, damage reduction while injured.
- Shield (Barbarian, Necromancer, Druid?) – Actually shields are for Barbarian and Necromancer? In Diablo IV, shields are exclusive to Necromancer and Barbarian? Let's confirm: Shields drop for Barbarian and Necromancer. They provide block chance and armor.
- Offhands (Foci, Totems) – Not armor but offhand items that grant offensive/utility affixes.
- Rings – One slot, provide offensive/defensive affixes such as critical strike chance, vulnerable damage, max resource, resistance.
- Amulets – One slot, higher affix rolls, can grant +3 to a passive skill, movement speed, cooldown reduction.
- Healing Potions – Restore health. Potion quality improves with potion upgrades at the Alchemist (e.g., Light Healing Potion → Super Healing Potion).
- Elixirs – Temporary buffs (30 minutes): Elixir of Ironbark (armor), Elixir of Shadow Resistance, Precision Elixir (critical chance), etc. Crafted or dropped.
- Incense – Party-wide buffs (30 minutes) that persist after death: Song of the Mountain (resistances), Chorus of War (damage). Crafted with materials.
- Sigils – Used to start Nightmare Dungeons. Dropped from regular dungeons, Helltides, or crafted at the Occultist.
- Scrolls – Escape Scroll (teleport out of a dungeon), Town Portal (instant teleport), Amnesia Scroll (reset paragon board). Dropped or purchased.
- Helltide Enigmatic Chest Keys – Used to open specific Helltide chests.
- Greed’s Splendor Caches – Opened for gold and materials (from Whispers).
How to obtain: Same as weapons; enemies, dungeons, gambling, crafting.
Synergies: Set bonuses do not exist, but Legendary Aspects on armor can drastically change a build (e.g., Aspect of the Protector on pants grants a shield when damaging an elite).
Jewelry
Unique examples: Ring of Starless Skies (spend resource to reduce cost), Melted Heart of Selig (health becomes resource shield).
Consumables
How to obtain: Potions from Alchemist; Elixirs crafted or drop; Incense from Alchemist; Sigils from dungeons/Occultist; Scrolls from vendors or random drops.
Materials
Crafting materials are used to upgrade, imprint, enchant, and craft items.
| Material | Use | Source |
|---|---|---|
| Veiled Crystal | Enchanting, upgrading (Tier 1-4) | Salvaging rare items |
| Abstruse Sigil | Upgrading armor/weapons (Tier 5) | Salvaging legendary items |
| Baleful Fragment | Upgrading jewelry (Tier 5) | Salvaging legendary jewelry |
| Coiling Ward | Upgrading weapons (Tier 5) | Salvaging legendary weapons |
| Forgotten Soul | Enchanting, upgrading, tempering | Helltides, salvaging legendaries, Whispers |
| Fiend Rose | Alchemist elixirs/incense | Helltides |
| Angelbreath | Alchemist elixirs/incense | Dungeons, Helltides |
| Iron Chunk | Basic upgrade material | Salvage weapons/armor (white/blue) |
| Rawhide | Basic upgrade material | Salvage armor (white/blue) |
| Silver Ore | Upgrade jewelry | Salvage jewelry (white/blue) |
| Gem Fragments | Upgrade gems | Dropped from elites, goblins, world events |
| Scattered Prism | Socketing items (adds socket) | Dungeon reward, Helltide, Whisper cache |
| Looted Scepters/Sigils of Power | Temper manuals | Nightmare Dungeons, world bosses |
Currencies
- Gold – Primary currency for vendors, crafting, enchanting, upgrading. Farmed from enemies, salvaging, selling items.
- Murmuring Obols – Gambling currency at the Purveyor of Curiosities. Earned from events, dungeons, world bosses. Caps at 500 (can be increased with potion upgrade? Actually capacity is 500, but you can hold up to 5000 via Obol caches? No, cap is 500 for base, but some rewards increase cap? Double-check: Obol cap is 500, but you can spend to hold less.
- Seal of the Primal – Used in World Tier 4 to access Tormented bosses? Actually Seals are for opening Grace of the Mother doors. More precisely: Dust of the Fallen? Not.
- Wandering Soul – Seasonal currency used with Alchemist for specific seasonal content.
- Sorcerer’s Elemental Cores – Not a global currency; class-specific resource.
- Paragon Points – Not a currency but rewarded on level-up and via renown. Used in Paragon Board.
- Altars of Lilith – Permanent stat boosts (max life, paragon points, etc.). Found across Sanctuary. Account-wide once collected.
- Renown Rewards – Complete zone activities (waypoints, dungeons, strongholds, side quests). Reward skill points, paragon points, potion capacity, obol capacity, and gold.
- Waypoints – Fast travel points, unlocked by proximity.
- Dungeon Aspect Codex – Complete a dungeon to unlock a guaranteed Legendary Aspect that can be imprinted an unlimited number of times (but with minimum stats).
- Scosglen Statues – Small collectible statues that grant a short buff when activated.
- Demonic Fortune Chest – Rare spawn in Helltides with high-value loot.
- Legendary Aspects – Found on legendary items or unlocked via Codex. Can be imprinted onto a rare item at the Occultist, turning it into a legendary. Aspects from items are consumed; Codex aspects are reusable.
- Unique Items – Fixed affixes and powers. Cannot be tempered. Can be upgraded and socketed. Examples: Harlequin Crest (Mythic Unique), Temerity (pants that turn healing into barrier).
- Mythic Unique Items – Extremely rare, powerful, and class-agnostic (e.g., The Grandfather, Doombringer). Only drop in World Tier 4 from level 85+ enemies and bosses.
- Tempering (Introduced in Season 4) – Modify affixes on equipment using Temper Manuals. Requires special materials (Neathiron, Ingolith).
- Upgrading – At the Blacksmith, increase item power up to 5 times using materials (Veiled Crystals, Abstruse Sigils, etc.). Higher item power raises base stats and affix values.
- Enchanting – At the Occultist, reroll one affix on a non-unique item using Gold and Forgotten Souls.
- Socketing – Add a socket to an unsocketed item using Scattered Prisms (max one per item). Gems (Ruby, Sapphire, Emerald, Topaz, Skull) provide additional stats (e.g., Ruby adds armor, Skull adds life on kill).
- Build-focused gearing: Always prioritize affixes that match your core damage type. Example: a Rogue using Twisting Blades wants Damage to Close Enemies, Critical Strike Chance, Basic Skill Damage.
- Aspect synergy: Combine aspects for multiplicative effects. E.g., Aspect of the Umbral (resource on crowd control) + Exploiter’s Aspect (damage to unstoppable enemies).
- Upgrading priority: First upgrade weapons for damage, then armor for survivability. Jewelry upgrades are less impactful but still useful for affix scaling.
- Gems: Use the highest-grade gem available. Rubies in armor for max life, Emeralds in weapons for critical strike damage (if using vulnerable), Sapphires for crowd control builds.
- Sigil for Nightmare Dungeons: Use appropriate sigil level for your power. Higher tiers drop better item power gear.
- Helltides: Farm Forgotten Souls and Fiend Roses for high-end crafting.
How to obtain: Gold from drops and selling; Obols from events; seasonal from seasonal activities.
Collectibles
Key Equipment Systems
Important Synergies and Upgrades
This concludes the comprehensive overview of all game items in Diablo IV. For specific class builds or seasonal changes, refer to the GameIntroduction and CoreGameplay sections of this guide.
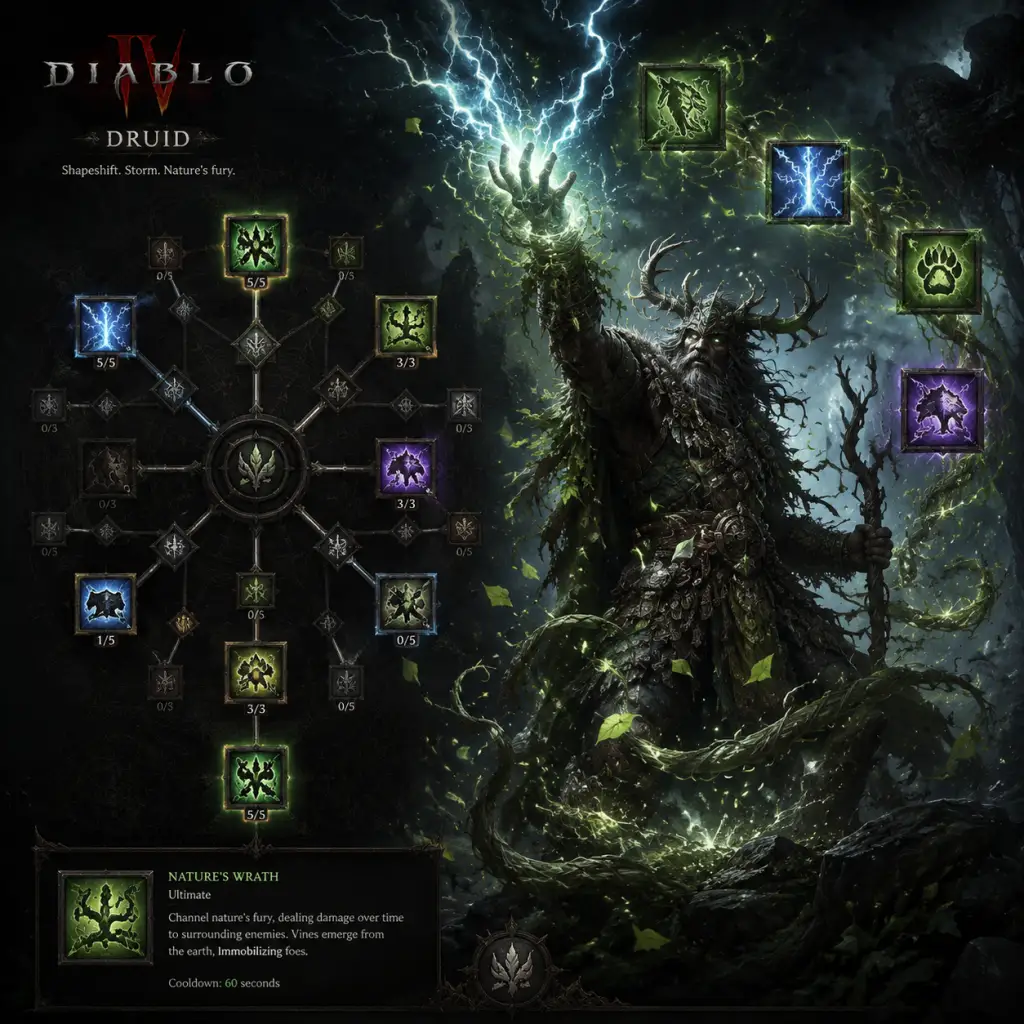
Character Skills
Diablo IV – Character Skills Guide
This guide covers all five playable classes—Barbarian, Druid, Necromancer, Rogue, and Sorcerer—and every skill in their trees. Each skill is detailed with effects, cooldowns, upgrades, combos, synergies, recommended builds, and usage tips. Class-specific mechanics (Arsenal, Spirit Boons, Book of the Dead, Combo Points, Enchantments) are integrated.
---
Barbarian
Class Mechanic: Arsenal System – Barbarians equip four weapons (two-handed bludgeoning, two-handed slashing, and two one-handed) and dynamically swap between them with certain skills. Each weapon type grants bonus damage or effects based on the weapon’s inherent stats.
Skill Tree Overview
- Basic Skills: Generate Fury.
- Core Skills: Spend Fury, primary damage dealers.
- Defensive Skills: Survival and crowd control.
- Brawling Skills: Mobility and utility.
- Weapon Mastery Skills: Weapon-specific attacks and passives.
- Ultimate Skills: High-cooldown, powerful abilities.
- Effect: Frontal strike that deals damage and generates Fury. Upgrades: Enhanced Bash (grants Fortify), Battle Bash (increases damage based on Fortify amount).
- Usage: Early game Fury generator; good for building Fortify in tankier builds.
- Effect: Lunge forward and strike, generating Fury. Enhanced adds damage if you hit an enemy in a vulnerable state.
- Usage: Mobile generator for closing gaps; pairs with Crowd Control.
- Effect: Slash that inflicts Bleeding. Upgrades increase bleed damage or grant Vulnerable.
- Usage: Bleed-centric builds; synergizes with Rupture and Rend.
- Upheaval: Slam ground sending a shockwave. Slow but high damage. Upgrade: Furious Upheaval knocks back. Recommended for area clearing.
- Double Swing: Quick dual-wield strikes. Upgrade: Vicious Double Swing refunds Fury if hitting a Vulnerable target. Great for single-target burst.
- Rend: Cleave that causes Bleeding. Upgrade: Violent Rend increases bleed duration. Core bleed skill.
- Whirlwind: Channeled spin with AoE damage. Upgrade: Endless Whirlwind costs less Fury as it spins. Iconic Barb skill, requires Fury management.
- Hammer of the Ancients: Single-target slam with large AoE splash. Upgrade: Ancestral Hammer increases damage based on Fury. Top endgame damage.
- Steel Grasp: Throw chains, pulling enemies and generating Bones. (Unlocked via passive)
- Rallying Cry: Increases movement speed and resource generation. Upgrade: Strategic Rallying Cry grants Unstoppable. Essential for Fury generation and crowd control break.
- Ground Stomp: AoE stun. Upgrade: Tactical Ground Stomp generates Fury. Good crowd control.
- Tough as Nails: Passive; increases Thorns and armor.
- Iron Skin: Heals and grants a Barrier. Upgrade: Supreme Iron Skin increases damage reduction.
- Kick: Push back enemies and stun. Upgrade: Enhanced Kick deals bonus damage if hitting a wall.
- Leap: Jump and deal AoE damage. Upgrade: Mighty Leap slows enemies. Used for mobility and initiating.
- Charge: Rush forward knocking enemies aside. Upgrade: Power Charge stuns first enemy hit. Excellent for positioning and interrupting.
- War Cry: Increases damage for self and nearby allies. Upgrade: Tactical War Cry grants Fortify. Core damage buff.
- Rupture: Cleanse bleeding and cause explosion. Upgrade: Warrior’s Rupture refunds Fury. Key for bleed builds.
- Death Blow: High damage execute on low-health enemies or if you kill. Upgrade: Warrior’s Death Blow resets cooldown on kill. Strong finisher.
- Iron Maelstrom: Ultimate-equivalent; uses all three weapon slots for powerful hits. Upgrade: Prime Iron Maelstrom reduces cooldown per enemy hit.
- Call of the Ancients: Summons three ancients who taunt and attack. Upgrade: Prime Call increases their damage.
- Wrath of the Berserker: Transforms into a berserker, increasing damage, speed, and resistance. Upgrade: Supreme Wrath increases duration per kill. Top choice for many builds.
- Unconstrained: Increases Berserking duration.
- Gushing Wounds: Bleeding enemies explode on death.
- Tempered Fury: Increases Fury cap.
- Whirlwind Barbarian: Whirlwind (Core) + Shouts (Rallying Cry, War Cry) + Call of the Ancients. Use lunging strike for Fury.
- Hammer of the Ancients (HOTA): Hammer + Ground Stomp + Rallying Cry + Wrath of the Berserker. Stack Overpower and Fury.
- Bleed Barbarian: Flay + Rend + Rupture + Death Blow. Use bleed-related passives.
- Basic Skills: Generate Spirit.
- Core Skills: Spend Spirit.
- Defensive Skills: Crowd control and survival.
- Companion Skills: Summon wolves, ravens, or vines.
- Wrath Skills: Powerful elemental attacks (earth, storm, werewolf/werebear).
- Ultimate Skills: Transform-based or summon ultimates.
- Passives: Shape-shifting bonuses and elemental synergies.
- Storm Strike: Teleport to enemy, deal lightning damage, and dodge attacks. Upgrade: Enhanced Storm Strike grants damage reduction. Great opener.
- Maul (Werebear): Heavy slam, generate Spirit, and Fortify. Upgrade: Enhanced Maul increases damage based on Fortify.
- Claw (Werewolf): Quick slash that poisons. Upgrade: Enhanced Claw heals. Synergizes with poison builds.
- Wind Shear: Ranged wind attack. Upgrade: Enhanced Wind Shear reduces damage from enemies.
- Earth Spike: Ranged earth attack that stuns. Upgrade: Enhanced Earth Spike increases damage in a line.
- Pulverize (Werebear): Slam the ground, AoE. Upgrade: Raging Pulverize has chance to knock down. Core werebear skill.
- Shred (Werewolf): Dash and slash, hits multiple times, causes Poisoning. Upgrade: Raging Shred spreads poison. Key for werewolf builds.
- Lightning Storm: Channeled storm, strikes multiple targets. Upgrade: Raging Lightning Storm reduces Spirit cost.
- Tornado: Spiraling projectile, can crit multiple times. Upgrade: Raging Tornado increases size.
- Landslide: Pillars of earth erupt from ground. Upgrade: Raging Landslide causes second eruption. Excellent single-target.
- Boulder: Large rolling boulder that knocks back. Upgrade: Raging Boulder leaves trail of earth spikes.
- Earthen Bulwark: Earth barrier, absorbs damage and grants unstoppable. Upgrade: Preserving Earthen Bulwark grants Fortify. Essential survival skill.
- Cyclone Armor: Reduces damage from distant enemies and can knock back nearby. Upgrade: Preserving Cyclone Armor makes Unstoppable.
- Blood Howl (Werewolf): Heals and increases attack speed. Upgrade: Innate Blood Howl generates Spirit. Good for werewolf builds.
- Debilitating Roar (Werebear): Reduces enemy damage and slows them. Upgrade: Innate Debilitating Roar grants Fortify.
- Ravens: Passive damage from above. Active: swoops to stun. Upgrade: Ferocious Ravens mark enemies for additional damage.
- Wolves: Summon two wolves that attack. Active: command them to pounce. Upgrade: Ferocious Wolves cause bleed.
- Poison Creeper: Slows enemies, then active makes them poison. Upgrade: Ferocious Poison Creeper roots enemies.
- Hurricane: AoE storm follow you, slows and damages. Upgrade: Prime Hurricane increases duration.
- Cataclysm: Ultimate storm that chases enemies. Upgrade: Supreme Cataclysm increases duration and damage. Top for storm build.
- Petrify: Shockwave that stuns and increases crit chance against stone enemies. Upgrade: Supreme Petrify roots bosses. Earth build ultimate.
- Grizzly Rage (Werebear): Transform into werebear increasing size and damage. Upgrade: Supreme Grizzly Rage reduces damage taken. Core werebear ultimate.
- Lacerate (Werewolf): Dash repeatedly hitting enemies. Upgrade: Supreme Lacerate increases duration.
- Nature’s Reach: Increase damage to distant enemies.
- Resonance: Increase damage after using a storm or earth skill.
- Lupine/ Ursine Ferocity: Werewolf/Werebear bonuses.
- Electric Shock: Lightning skills have chance to stun.
- Werebear Pulverizer: Pulverize + Earthen Bulwark + Debilitating Roar + Grizzly Rage. Stack Fortify and Overpower.
- Storm Wolf (with Tempest Roar unique): Shred + Lightning Storm + Cyclone Armor + Lacerate. Use spirit boons for attack speed.
- Earth Spell Caster: Landslide + Earthen Bulwark + Petrify + Hurricane. Use nature’s synergy passives.
- Basic Skills: Generate Essence.
- Core Skills: Spend Essence.
- Corpse & Macabre Skills: Utilize corpses for damage or utility.
- Curse Skills: Debuff enemies.
- Mist & Decay Skills: Movement and dark magic.
- Ultimate Skills: Powerful summon or necrotic spells.
- Reap: Scythe sweep, generates essence, leaves a corpse. Upgrade: Enhanced Reap heals. Good generator.
- Decompose: Channeled, deals damage and creates a corpse. Upgrade: Enhanced Decompose slows enemies.
- Sever: Long-range slash that returns. Upgrade: Enhanced Sever increases damage to Vulnerable. Good for essence generation at range.
- Hemorrhage: Blood balls that burst. Upgrade: Enhanced Hemorrhage grants Fortify when hitting enemies.
- Blood Surge: Nova of blood around you. Upgrade: Supernatural Blood Surge causes healing and overhealth. Core AoE.
- Bone Spear: Piercing spear. Upgrade: Supernatural Bone Spear splinters into shards. Top single-target.
- Blight: Shadow pool that damages over time. Upgrade: Supernatural Blight increases pool size.
- Corpse Explosion: Detonate corpses. Upgrade: Plagued Corpse Explosion adds shadow damage. Signature ability.
- Bone Spirit: Homing projectile that explodes. Upgrade: Ossified Bone Spirit increases damage based on essence spent. Boss killer.
- Corpse Tendrils: Tendrils erupt damaging and pulling enemies. Upgrade: Plagued Corpse Tendrils makes enemies Vulnerable. Excellent grouping and setup.
- Blood Mist (Mist & Decay): Transform into mist, immune, heal over time. Upgrade: Blighted Mist leaves a blight trail. Survivability and repositioning.
- Decrepify (Curse): Slow enemies and curse them. Upgrade: Abhorrent Decrepify reduces cooldowns when enemies hit. Utility.
- Iron Maiden (Curse): Cursed enemies take damage when they attack. Upgrade: Abhorrent Iron Maiden returns essence on kill.
- Bone Storm: Storm of bones around you. Upgrade: Prime Bone Storm increases duration per enemy killed. Top ultimate.
- Army of the Dead: Summon a large group of skeletons that explode. Upgrade: Prime Army of the Dead spawns more. Great for minion builds.
- Blood Wave: Massive blood wave that pushes enemies. Upgrade: Supreme Blood Wave knocks down.
- Golem Active: Each golem type has unique active (taunt, slam, etc.).
- Skeletal Warriors: Configurable as Skirmishers (damage), Defenders (tank), Reapers (AoE). Sacrifice for damage reduction or crit benefit.
- Skeletal Mages: Shadow (damage), Cold (vulnerable), Bone (essence). Sacrifice for shadow resistance.
- Golem: Bone (taunt), Blood (life), Iron (thorns). Sacrifice for cooldown reduction.
- Bone Spear Necromancer: Bone Spear + Corpse Tendrils + Bone Storm + Decrepify. Use Minions for essence generation or sacrifice for damage.
- Blood Necromancer: Blood Surge + Blood Mist + Blood Wave. Focus on Overpower and Fortify.
- Shadow Summoner: Blight + Corpse Explosion + Army of the Dead + Decompose. Use minions with shadow damage passives.
- Basic Skills: Generate Combo Points.
- Core Skills: Spend Combo Points for enhanced effects.
- Agility Skills: Movement and trickery.
- Subterfuge Skills: Stealth and debuffs.
- Imbuement Skills: Infuse weapons with Shadow, Poison, or Cold.
- Ultimate Skills: High-cooldown finishers.
- Passives: Trap synergy, critical damage, mobility.
- Blade Shift: Dash through enemies, dealing damage. Upgrade: Enhanced Blade Shift makes enemies Vulnerable. Good movement generator.
- Puncture: Throw blades, pierces and slows. Upgrade: Enhanced Puncture increases combo point generation.
- Forceful Arrow: Knock aside enemies. Upgrade: Enhanced Forceful Arrow knocks back.
- Invigorating Strike: Generate energy and heal. Upgrade: Enhanced Invigorating Strike grants damage reduction.
- Twisting Blades: Throws blades that return to you. Upgrade: Advanced Twisting Blades slows enemies. High single-target, mobility.
- Barrage: Spread shot of arrows. Upgrade: Advanced Barrage returns energy per enemy hit. AoE clear.
- Penetrating Shot: Powerful piercing arrow. Upgrade: Advanced Penetrating Shot leaves a shadow pool.
- Rapid Fire: Multiple arrows. Upgrade: Advanced Rapid Fire increases crit chance. Boss DPS.
- Flurry: Sweep around you hitting multiple enemies. Upgrade: Advanced Flurry dazes enemies. Group killer.
- Dash (Agility): Dash striking enemies along path. Upgrade: Disciplined Dash leaves a shadow clone. Mobility and damage.
- Shadow Step (Agility): Teleport behind enemy, stuns. Upgrade: Disciplined Shadow Step increases damage to that enemy.
- Poison Trap (Subterfuge): Place trap that explodes poison. Upgrade: Countering Poison Trap reduces enemy damage.
- Dark Shroud (Subterfuge): Grant multiple shadow shields. Upgrade: Countering Dark Shroud reduces damage taken per shield. Defense.
- Smoke Grenade (Subterfuge): Stuns and blinds. Upgrade: Countering Smoke Grenade increases its duration. Crowd control.
- Poison Imbuement: Adds poison damage over time. Upgrade: Enhanced Poison Imbuement spreads poison on kill. Key for DoT builds.
- Shadow Imbuement: Adds shadow damage that can chain explosions. Upgrade: Enhanced Shadow Imbuement increases explosion AOE. Top for clearing.
- Cold Imbuement: Adds cold damage and chills. Upgrade: Enhanced Cold Imbuement freezes enemies. Crowd control.
- Death Trap: Place a trap that explodes after time. Upgrade: Prime Death Trap resets cooldown of other skills. Trap builds.
- Rain of Arrows: Barrage of arrows over area. Upgrade: Prime Rain of Arrows increases size. AoE ultimate.
- Shadow Clone: Summon a clone that mimics your moves. Upgrade: Prime Shadow Clone increases damage.
- Imbuement Mastery (Passive): Increases imbuement potency.
- Combo Points: Basic skills generate points; core skills enhanced.
- Inner Sight: Fill gauge by attacking marked enemies, then gain unlimited energy and attack speed.
- Preparation: Ultimate cooldowns reduce when you use core skills.
- Twisting Blades Rogue: Twisting Blades + Dash + Shadow Step + Shadow Imbuement. Use Combo Points or Inner Sight. High mobility and burst.
- Rapid Fire Rogue: Rapid Fire + Poison Imbuement + Dark Shroud + Rain of Arrows. Use Preparation. Boss killer.
- Flurry Trap Rogue: Flurry + Poison Trap + Death Trap + Shadow Imbuement. AOE and trap synergy.
- Basic Skills: Generate Mana.
- Core Skills: Spend Mana.
- Defensive Skills: Barriers, teleports.
- Conjuration Skills: Summon hydras, ice blades, lightning spear.
- Mastery Skills: Powerful elemental attacks.
- Ultimate Skills: High cooldown spells.
- Passives: Elemental affinity, damage types.
- Frost Bolt: Chills enemies. Upgrade: Enhanced Frost Bolt increases mana generation against frozen.
- Spark: Lightning bolts that can chain. Upgrade: Enhanced Spark generates crackling energy.
- Fire Bolt: Burns enemies. Upgrade: Enhanced Fire Bolt spreads burning. Good for burning builds.
- Arc Lash: Lightning whip that generates mana and can stun. Upgrade: Enhanced Arc Lash increases chance to stun. Melee mana generator.
- Incinerate (Core? Actually Incinerate is channeled core): But basics are above.
- Fireball: Explosive projectile. Upgrade: Enhanced Fireball increases crit damage. Great AoE.
- Frozen Orb: Orb that moves and explodes with ice shards. Upgrade: Enhanced Frozen Orb reduces mana cost. Popular.
- Chain Lightning: Bounces between enemies. Upgrade: Enhanced Chain Lightning increases crit chance. Good clear.
- Ice Shards: Fires multiple shards, can pierce frozen enemies. Upgrade: Enhanced Ice Shards increases damage to frozen. Top single-target.
- Charged Bolts: Spread of lightning bolts. Upgrade: Enhanced Charged Bolts stun. AoE.
- Incinerate: Channeled fire beam. Upgrade: Enhanced Incinerate increases damage over time. Boss DPS.
- Teleport: Move to location, can stun on arrival. Upgrade: Enhanced Teleport reduces damage taken after. Essential mobility.
- Ice Armor: Barrier that chills attackers. Upgrade: Enhanced Ice Armor increases duration.
- Fire Shield: Barrier that turns damage into mana. Upgrade: Enhanced Fire Shield resists fire.
- Frost Nova: Freeze nearby enemies. Upgrade: Enhanced Frost Nova increases frozen duration. Best crowd control.
- Flame Shield (Uh, which is it?) There's also Flame Shield (immune and heal). Upgrade: Enhanced Flame Shield increases duration.
- Hydra: Summon hydra that shoots fireballs. Upgrade: Enhanced Hydra increases number of heads. Good turret.
- Ice Blades: Summon floating blades that attack. Upgrade: Enhanced Ice Blades reduce cooldowns of other skills.
- Lightning Spear: Summon spear that zips around stunning. Upgrade: Enhanced Lightning Spear increases duration. Crowd control.
- Familiar (Unlocks later) – not covered here.
- Meteor: Summon meteor that burns. Upgrade: Enhanced Meteor makes enemies Vulnerable. High AoE.
- Blizzard: AoE ice storm that chills. Upgrade: Enhanced Blizzard increases duration. Crowd control.
- Ball Lightning: Orb that moves randomly, hitting enemies. Upgrade: Enhanced Ball Lightning increases size. Good for Crackling Energy builds.
- Firewall: Wall of fire that burns. Upgrade: Enhanced Firewall increases duration. Area denial.
- Deep Freeze: Become immune, heal, and freeze enemies. Upgrade: Prime Deep Freeze freezes bosses. Survivability.
- Inferno: Large cone of fire damage. Upgrade: Prime Inferno burns enemies. Top AoE.
- Unstable Currents: Randomly cast shock skills. Upgrade: Prime Unstable Currents increases duration.
- Conduit (Passive? there is a Conduit ultimate) Actually Unstable Currents is the shock ultimate; Deep Freeze is cold; Inferno is fire; Conduit is not a skill, it's a passive? Wait, Sorcerer ultimates are: Inferno (fire), Deep Freeze (cold), Unstable Currents (lightning), and Conduit is a passive that boosts crackling energy. So we list only those three active ultimates? Also there is Freeze? No.
- Many more.
- Always read the upgrade nodes (Enhanced, etc.) to decide if a skill fits your build.
- Unlock your class mechanic early (Level 15 for Enchantments, Level 20 for Arsenal/Boons/etc.).
- Synergize skills with the same damage type or status effect (e.g., Bleed, Vulnerable, Crowd Controlled).
- Use defensive skills generously—every class has at least one. Map them to easily accessible keys.
- For leveling, prioritize a single Core skill and its upgrades, then focus on passives that boost it.
- Endgame builds often revolve around one Ultimate and one Core skill, with supporting skills for utility.
Basic Skills
#### Bash
#### Lunging Strike
#### Flay
Core Skills (Fury Spenders)
Defensive Skills
Brawling Skills
Weapon Mastery Skills
Ultimate Skills
Key Passives
Recommended Builds:
---
Druid
Class Mechanic: Spirit Boons – Unlock passive bonuses from four spirit animals (Deer, Eagle, Wolf, Snake) by offering Spirit Offerings. Each boon provides unique bonuses like damage reduction, attack speed, or resource generation.
Skill Tree Overview
Basic Skills
Core Skills (Spirit Spenders)
Defensive Skills
Companion Skills
Wrath Skills
Passive Skills
Recommended Builds:
---
Necromancer
Class Mechanic: Book of the Dead – Manage skeletal warriors, skeletal mages, and golem. Each has three configurations (e.g., sacrifice for buff or sacrifice for different minion type).
Skill Tree Overview
Basic Skills
Core Skills (Essence Spenders)
Corpse & Macabre Skills
Ultimate Skills
Minion Management (Book of the Dead)
Recommended Builds:
---
Rogue
Class Mechanic: Combo Points – Basic skills generate combo points (up to 3). Core skills have bonus effects based on combo points spent (e.g., extra arrows, vampiric strike, higher crit). Specialization: choose between Combo Points, Inner Sight, or Preparation.
Skill Tree Overview
Basic Skills
Core Skills (Combo Spenders)
Imbuement Skills
Ultimate Skills
Specializations:
Recommended Builds:
---
Sorcerer
Class Mechanic: Enchantment System – Skills can be placed into two enchantment slots, granting passive bonuses (e.g., Fireball explodes on kill automatically). Unlocked at level 15.
Skill Tree Overview
Basic Skills
Core Skills (Mana Spenders)
Defensive Skills
Conjuration Skills
Mastery Skills (Passive buffs / active? Actually they are passives like glass cannon, elemental attunement. But there are also active Mastery skills like Meteor, Blizzard, Ball Lightning, etc. Wait: Diablo IV Sorcerer Mastery are actually active skills? Let's check: In-game skill tree: Mastery includes Meteor, Blizzard, Ball Lightning, etc. They are core mana spenders but categorized as Mastery? Actually Diablo IV Sorcerer skill tree branches: Basic, Core, Defensive, Conjuration, Mastery, Ultimate. Mastery Skills are: Chain Lightning (Core), Meteor (Mastery), Blizzard (Mastery), Ball Lightning (Mastery), Firewall (Mastery), Ice Shards (Core). Wait I'm mixing. The official categories: Basic, Core, Defensive, Conjuration, Mastery (Meteor, Blizzard, Ball Lightning, Firewall), Ultimate. So we list them under Mastery.)
Mastery Skills:
Ultimate Skills
Enchantments:
Fireball Enchantment: Fireball explodes on kill.
Frozen Orb Enchantment: Frozen Orb creates explosions on hitting.
Ice Shards Enchantment: Cast Ice Shards on frozen enemy kill.
Teleport Enchantment: Dodge replaced by short teleport.
Recommended Builds:
Ice Shards Sorcerer: Ice Shards + Frost Nova + Teleport + Deep Freeze. Use Frozen Orb Enchantment. Stack Crowd Control damage.
Chain Lightning Sorcerer: Chain Lightning + Teleport + Unstable Currents + Lightning Spear. Use Crackling Energy passives.
Firewall Sorcerer: Firewall + Meteor + Teleport + Inferno. Use Fire Bolt basic. Focus on Burning damage over time.
Arc Lash Melee Sorcerer: Arc Lash + Teleport + Frost Nova + Unstable Currents. Build for close range.
---
Synergies and Combos Across Classes
Barbarian + Sorcerer: Barbarian keeps enemies grouped with Charge/Ground Stomp, Sorcerer AoE them.
Druid + Rogue: Druid can root enemies with Poison Creeper, Rogue applies high burst damage.
Necromancer + Any: Minions tank, curses debuff, Corpse Explosion with any group.
Cross-class combos* are less direct but effective in group play.
General Tips for Skill Usage
---
This guide covers all skills as of Season 7. Skill balance and new aspects may change; always check current patch notes.*
Characters & Roles
Diablo IV – Characters & Roles Guide
This guide covers all playable classes and their roles in Diablo IV. Each class is a distinct hero with unique mechanics, strengths, and weaknesses. You can choose any class at character creation—no unlock conditions apply. We also briefly mention key story NPCs who accompany you.
---
Barbarian
Background: Barbarians are fierce warriors from the harsh lands of the Scosglen. They wield a massive arsenal of weapons (up to four at once) and channel their fury into devastating physical attacks. Their mastery of weapon swapping allows them to adapt to any combat situation.
Strengths:
- Highest base survivability (high Life and Fortify generation)
- Excellent area-of-effect (AoE) damage, especially with Whirlwind or Hammer of the Ancients
- Strong crowd control (Stuns, Knocks Down, Taunts)
- Great mobility through Leap and Charge
- Can generate up to four weapon aspects, enhancing build versatility
- Relies heavily on Fury generation; can feel slow without proper resource management
- Limited ranged options (Long Throw is the only ranged skill)
- Lower single-target burst compared to Rogue or Sorcerer (though specialized builds can compete)
- Whirlwind Barbarian: Core skill Whirlwind with the Dire Whirlwind aspect, paired with Lunging Strike as generator. Gear focuses on critical strike chance and resource cost reduction. Unique: Temerity (pants) grants barrier on overheal.
- Hammer of the Ancients (HOTA) Barb: Maximize overpower damage using Earthstriker's Aspect and Overkill two-handed mace. Shouts: Rallying Cry, War Cry, Challenging Shout. Prioritize strength and overpower damage.
- Bleed/Thorns Barb: Uses Rend to stack bleed, with Death Wish and Needleflare aspects for thorns. Good for tanking.
- Provides party-wide damage buffs via War Cry and Rallying Cry.
- Taunts and stuns disrupt enemy groups, protecting squishier allies.
- Can pull enemies together with Leap or Charge for AoE combos.
- Synergizes well with Necromancer and Sorcerer who benefit from grouped enemies.
- Extreme versatility: can be tank, damage dealer, or support
- Very high single-target damage with Shred or Pulverize builds
- Excellent sustain through life stealing and Fortify
- Access to both physical and elemental damage types
- Spirit Boon system grants powerful passive bonuses (choose 4 from 16 spirits)
- Resource management (Spirit) can be tricky; switching forms costs Spirit
- Requires legendary aspects to unlock full potential for most builds (aspect-heavy)
- Melee builds are vulnerable if not built with Fortify
- Some skills have long cooldowns (e.g., Grizzly Rage)
- Werebear Pulverize (Tank/DPS): Core skill Pulverize with Vasily's Prayer (helmet) to make Earth skills bear-form. Aspect of Ursine Horror for shockwaves. Use Insatiable Fury chest for +2 to werebear skills.
- Storm Wolf (Crit DPS): Use Nighthowler's Aspect and Tempest Roar unique helm (turns tornado into werewolf skill). Stack critical strike damage and lucky hit. Excellent speed farming.
- Landslide Caster: Use Crone Staff unique (adds stormstrike) with Aspect of the Unsatiable for extra Spirit. Spam Landslide with crit bonuses.
- Provides party buffs via Cyclone Armor (damage reduction) and Nature's Resolve (spirit boon).
- Can group enemies with Boulder or werewolf howls.
- Support builds (e.g., Wolves + Blood Howl) give healing and vulnerability.
- Works well with any class that needs damage reduction or vulnerable application.
- Summons provide a meat shield and consistent damage
- Excellent single-target burst with Bone Spear or Bone Spirit
- High survivability through life leech and Fortify from Bone skills
- Strong crowd control (Decrepify, Corpse Tendrils, Bone Prison)
- Corpse generation enables powerful offhand casts
- Squishy without minions; careful positioning needed
- Minion AI can be unpredictable; requires active management
- Resource (Essence) generation can be slow without Decompose or Reap
- Vulnerable to AoE attacks that wipe minions quickly
- Some builds are heavily gear-dependent (e.g., Ring of Mendeln for minions)
- Bone Spear (Ranged Burst): Core skill Bone Spear, with Shattered Bone aspect for extra projectiles. Use Boneweave set aspects and Deathless Visage helm for extra procs. Sacrifice all minions for Crit damage.
- Summonmancer (Minion Army): Max out Skeletal Warriors, Mages, Golem, with Ring of Mendeln unique (minions lucky hit). Use Howl from Below for exploding corpses. Aspects: Blighted for shadow damage, Hardened Bones for minion defense.
- Blood Lance (Overpower): Use Blood Artisan's Cuirass unique and Tidal Wave aspects. Stack overpower chance and fortify. High sustain.
- Minions tank and distract, allowing allies to deal damage safely.
- Decrepify slows enemies and reduces damage, benefiting entire party.
- Corpse Tendrils pull enemies together for AoE combos.
- Blood Lance can heal allies when upgraded (Transfusion aspect).
- Best paired with Barbarian or Druid who can gather enemies; good with Sorcerer for AoE clear.
- Highest sustained single-target damage (especially Twisting Blades)
- Excellent mobility with Dash, Shadow Step, and Caltrops
- Strong burst damage from Imbued attacks (Shadow, Poison, Cold)
- Versatile: can play ranged or melee, or both
- High innate critical strike chance via skill tree
- Very squishy; one mistake can be lethal
- Requires precise positioning and cooldown management
- Energy resource runs out quickly; must manage generators
- Poor AoE compared to Sorcerer or Barbarian (though builds like Flurry exist)
- Twisting Blades (Melee Burst): Core skill Twisting Blades with Aspect of Imitated Imbuement and Condemnation dagger. Use Word of Hakan unique amulet for Rain of Arrows. Use Dark Shroud for defense.
- Penetrating Shot (Ranged): Core skill Penetrating Shot with Trickshot aspect. Use Eaglehorn unique bow for ricochet. Stack critical strike damage. Best for clearing screens.
- Shadow DoT (Poison/Shadow): Use Poison Imbuement and Shadow Imbuement with Grasp of Shadow gloves. Apply vulnerable and poison, then shadow explosions.
- Applies Vulnerable to enemies (Puncture, Shadow Imbuement) for party damage bonus.
- Can peel for allies with Shadow Step (stuns) or Caltrops (slow).
- High burst helps finish off elites quickly.
- Works well with any group that can provide crowd control (Barbarian shout, Necro Decrepify).
- Avoid bringing alongside another squishy class without a tank.
- Exceptional AoE clear with skills like Ice Shards, Fireball, Chain Lightning
- High mobility via Teleport (with cheap cooldown)
- Strong crowd control from Frost skills (Chill, Freeze)
- Barrier generation (Ice Armor) and extra survivability
- Enchantment system adds powerful passive effects (e.g., Ice Shards fire automatically)
- Extremely fragile; positioning is critical
- Mana management can be tight without proper gear
- Fire builds lack mobility (though Fireball Enchant helps)
- Single-target damage less than Rogue unless built specifically (e.g., Firewall)
- Ice Shards (Ranged Single-target/AoE): Core skill Ice Shards, with Glacial aspect and Frostburn gloves (freeze). Use Blue Rose ring for chill explosions. Prioritize lucky hit and vulnerable damage.
- Chain Lightning (AoE): Core skill Chain Lightning with Recharging and Unbroken Tether aspects. Use Staff of Endless Rage unique. Stack crit chance for mana refund.
- Firewall (Dot): Use Firewall with Mage-Lord's Aspect and Flamewalker's unique boots. Maximize burning damage and damage reduction while standing in fire.
- Freezes enemies (Ice Shards) for party-wide crowd control.
- Provides Barrier (Ice Armor) and Conjuration supports.
- Teleport can be used aggressively to group enemies with Frost Nova.
- Vulnerable application via Frost Nova or Meteor aspect.
- Best paired with a tank (Barbarian or Druid) to hold aggro while they cast.
- Lorath Nahr: A Horadrim, former player in Diablo III. He is a survivalist and scholar, assisting with knowledge of the Prime Evils.
- Neyrelle: A young Horadrim protege, eager and brave. She wields the Horadric magic and helps you track the main antagonist, Lilith.
- Donan: An older Horadrim and father figure. He provides lore and occasional combat support.
- Elias: A former ally turned foe; acts as a miniboss in some quests.
Weaknesses:
Playstyle: Barbarians rush into battle, apply pressure with shouts, and cleave through hordes. They excel at holding the front line for a party. Typical gameplay involves building Fury with basic skills, then unleashing core spenders while weaving in shouts for buffs.
Recommended Builds & Equipment:
Team Synergy:
---
Druid
Background: Druids are primal shapeshifters who draw power from nature. They can transform into werebear or werewolf forms, summon storm and earth magic, and command companions (wolves, ravens, poison creeper). They are the most versatile class, blending melee and spellcasting.
Strengths:
Weaknesses:
Playstyle: Druids choose a focus: werebear (tank), werewolf (fast/high crit), or caster (ranged). Many builds hybridize. For example, a Pulverize Druid shifts into werebear, slams the ground, while a Shred Druid dashes between enemies. Caster builds rely on Hurricane, Landslide, and Cataclysm.
Recommended Builds & Equipment:
Team Synergy:
---
Necromancer
Background: Necromancers manipulate the forces of life and death. They raise skeletons, command golems, and use blood, bone, and shadow magic. They are masters of sustain and minion management, able to debuff enemies while their army deals damage.
Strengths:
Weaknesses:
Playstyle: Necromancers build a skeleton army, apply curses, and spam their core skill (Bone Spear, Blight, Blood Lance) from range. They must maintain corpses to power Corpse Explosion or tendrils. Book of the Dead lets customize minion type (e.g., Sacrifice minions for big personal buffs).
Recommended Builds & Equipment:
Team Synergy:
---
Rogue
Background: Rogues are agile infiltrators and ranged experts. They use bows, crossbows, daggers, and swords, and specialize in dealing rapid physical damage with both ranged and melee attacks. Their Combo Points resource system rewards planning their rotation.
Strengths:
Weaknesses:
Playstyle: Rogues typically use a "builder-spender" rotation: basic attacks generate Combo Points, then cost 3 points to empower a core skill. Many builds add Imbuement skills for extra damage types. They rely on movement to avoid damage, using concealment or shadow step for escape.
Recommended Builds & Equipment:
Team Synergy:
---
Sorcerer
Background: Sorcerers are masters of elemental magic—fire, lightning, and ice. They can teleport, create barriers, and unleash devastating spells from a distance. Their Enchantment System allows equipping up to two skills for passive effects, enabling unique build customization.
Strengths:
Weaknesses:
Playstyle: Sorcerers cast from distance, kiting enemies while laying down area denial. They cycle cooldowns for burst windows. Most builds rely on a single core element, but can hybridize via enchantment slots. Teleport is used both for repositioning and initiating.
Recommended Builds & Equipment:
Team Synergy:
---
Major Non-Playable Characters (Story NPCs)
While not playable, these heroes accompany you through the campaign and provide context:
These NPCs do not have roles or builds but are integral to the story.
---
Choosing Your Class: Summary Table
| Class | Role(s) | Difficulty | Solo Viability | Party Synergy |
|---|---|---|---|---|
| Barbarian | Tank, AoE DPS, Support | Medium | High | Excellent (shouts, grouping) |
| Druid | Tank, DPS, Support, Hybrid | Hard | High | Good (utility, buffs) |
| Necromancer | DPS (ranged/melee), Summoner | Medium | High (minions) | Good (crowd control, tanking) |
| Rogue | Single-target DPS, Burst | Hard | Medium-High | Fair (vulnerable application) |
| Sorcerer | AoE DPS, Control | Easy | Medium | Good (crowd control, barriers) |
---
Final Tips for Character Choice
- Start with Sorcerer if new to ARPGs – forgiving rotation, strong AoE.
- Choose Barbarian if you want to feel unstoppable and lead the charge.
- Pick Rogue if you enjoy high-skill, high-reward gameplay with mobility.
- Select Druid if you like variety; you can respec easily but gearing is complex.
- Play Necromancer if you want a minion army and sustainable gameplay.
No class is strictly better—Diablo IV encourages multiple characters. Experiment with different builds and roles to find your favorite.
Cheats & Secrets
Diablo IV – Cheats & Secrets Guide
Important Note: No Traditional Cheat Codes
Diablo IV is a modern online-only action RPG with a strict anti-cheat system (Blizzard's Warden). There are no conventional cheat codes, console commands, or unlock codes that can be entered within the game to grant invincibility, infinite resources, or instant progression. Attempting to use third-party trainers, memory editors, or mods will result in a permanent account ban. All secrets listed below are legitimate, developer-intended content that can be discovered through normal gameplay.
---
Hidden Features & Developer-Intended Secrets
#### 1. The Butcher (Random Encounter) – Not a Cheat, But a Secret Boss
- What it is: A recurring secret boss from the original Diablo. He spawns randomly in dungeons (not cellars) across all world tiers. He is a massive, chainsaw-wielding demon who shouts "Fresh meat!" upon aggro. He is extremely powerful for your level and drops high-quality loot.
- How to trigger: No guaranteed method. He appears randomly. Higher density of elite packs may increase spawn chance. Listen for a loud roaring sound and chainsaw revving. He can appear in any dungeon (except Whispers of the Dead dungeons). He has a small chance to drop the unique cosmetic mount trophy "Butcher's Cleaver" and a rare unique axe called "The Butcher's Cleaver".
- Tips: Always be prepared. He has a stagger bar—crowd control (stun, freeze, slow) can interrupt his charge. Kite around pillars. He hits extremely hard.
- What it is: A hidden area accessible only by completing a specific series of steps. It is NOT a full dungeon like in Diablo 3, but a small, humorous event area called "The Wandering Dead Cow."
- How to unlock:
- Note: This is a one-time event per character. It does not drop infinite loot or experience. It is a homage to the classic Cow Level.
- What it is: A hidden transmog cosmetic that can only be obtained by finding a specific, very rare item: "The Eye of the Damned" (unique jewel). Its flavor text references a line from Diablo 2's Sorceress. While not a cheat, it's a well-hidden secret.
- How to get: Random drop from Treasure Goblins in World Tier 4 (Torment) only. Extremely low drop rate (less than 0.1%). The item itself is a unique jewel that grants a powerful (but not build-defining) effect. Once picked up, it unlocks a transmog appearance for the sorcerer's head slot called "Wanderer's Gaze."
- What it is: Certain dungeons have secret events that are not required for the main quest or Renown. Completing them grants additional XP and loot. These are marked by a cursed chest or a ritual circle that appears only after killing a specific rare mob.
- Example: In the Ghoa Ruins dungeon (Scosglen), after defeating the floor guardian, there is a hidden switch behind a bookshelf that opens a room containing a cursed treasure chest. Looting it triggers a mini-boss and rewards a guaranteed legendary.
- What it is: A piece of art in the game (a statue) in the Fractured Peaks region, near the waypoint of Kyovashad. If you approach it and use the "Inspect" emote (bound to a key by default), a unique voice line from the character comments on its... anatomy. This is a reference to the Diablo community's long-running jokes about Lilith's design.
- No console can be activated in Diablo IV. There is no developer mode or debug menu available to players. All game settings are controlled via the options menu. There are no cheat codes like "god mode" or "give gold."
- Hidden PTR (Public Test Realm) commands exist for Blizzard employees only. Players cannot access them. Attempting to inject commands via network traffic or memory editing will result in a ban.
- Spawn schedule: World bosses spawn every 4-6 hours (exact times vary per week). Blizzard publishes the schedule on their official website or via in-game whispers from the Tree of Whispers. Farm them for unique cosmetics and high-tier loot.
- Cost: 175 Aberrant Cinders (the Helltide currency).
- Location: They are not shown on the map. Their locations are marked only by a faint pulsating aura on the ground. They always spawn in a fixed set of potential locations (e.g., under bridges, behind rock formations). Learning these spots allows you to get more loot per Helltide.
- Secret: You can target-farm a specific Nightmare Dungeon for its unique loot table (e.g., "The Butcher's Cleaver" drops only in certain dungeons). Check third-party databases for exact drop locations. This is not a cheat, but community-discovered data.
#### 2. Secret Cow Level – Not the Same as Diablo 3, but There Is a Cow-Level Easter Egg
1. Obtain the "Wandering Souls" item from a random drop in the Hawezar zone (drops from any enemy, very rare).
2. Travel to the Girsha waypoint in Hawezar, then go to the Ramshackle Temple (southwest of the waypoint).
3. In the temple, find a locked gate. Use the "Wandering Souls" item to unlock it.
4. Inside, you will find a dead cow. Interact with it to start a short boss fight against "The Cow King" (a ghostly cow). Defeat it to earn a unique cosmetic item (Cursed Cow Head trophy).
#### 3. The Secret of the Transmog "The Wanderer's Granddaughter" (Reference to Diablo 2)
#### 4. Hidden Dungeon Events (No Spoilers, but Complete Guide)
#### 5. The "Lilith's Embrace" Easter Egg (Lewd Reference)
---
Unlock Codes & Console Commands – None Exist
---
Exploit-Safe Secrets (Developer-Intended, Not Bugs)
#### 1. World Bosses: Ashava, Avarice, and Wandering Death – Not a secret, but knowing their spawn times is a secret of efficiency.
#### 2. Helltide Mystery Chests – Hidden loot caches that appear only during Helltide events.
#### 3. Nightmare Dungeons – Sigil Crafting Secrets
---
Easter Eggs (Hidden Pop Culture & Game References)
| Easter Egg | Description | How to Find |
|---|---|---|
| "The Godfather" Reference | A quest in Hawezar involves a horse head in a bed. | Complete the side quest "The Festering" in the Fields of Desecration. |
| "Stranger Things" Reference | A boy named "Dustin" can be found in Kehjistan who says duplications of his friends are attacking. | Talk to Dustin near the Altar of Zoltun Kulle (Wejinhani). |
| "Diablo 1" Hidden Sound | In a random cellar in Fractured Peaks, you can hear the original Diablo 1 "Skeleton King" theme if you stand near a specific skeleton pile. | Cellar near Menestad – requires crouching near the pile for 10 seconds. |
| "Vasily's Prayer" (Diablo 2 Reference) | A hidden poem about the Sorceress from Diablo 2 is inscribed on a wall in Scosglen, near the Tur Dulra waypoint. | Look for a cracked wall behind a waterfall. Interact with it. |
| "The Butcher's Toy" | A small stuffed animal resembling the Butcher's hook appears in a child's room in Kyovashad. | In the orphanage building, second floor, in a chest. |
Summary: What Is Really a Secret vs. What Is Not
- Real secrets: Hidden cosmetic items, Easter egg events (Cow King), rare encounters (Butcher).
- Not secrets: Renown rewards, World Tier unlocks, Capstone Dungeons (all are part of the main progression path).
- Do not exist: Cheat codes, unlock-all-skills commands, item spawning, infinite resource glitches (the latter are bugs and get patched).
Final Warning
Diablo IV is a live-service game. Blizzard aggressively bans players using third-party tools that modify the game client or intercept network traffic. The only legitimate secrets are those that require time, skill, and knowledge to discover—not cheat codes.