
Dishonored 2
## Game Introduction: Dishonored 2 **Dishonored 2** is a first-person action-adventure stealth game developed by **Arkane Studios** and published by **Bethesda Softworks**. Released on **November 11, 2016** for PlayStation 4, Xbox One, and PC (Windows), the game is a direct sequel to the critically...
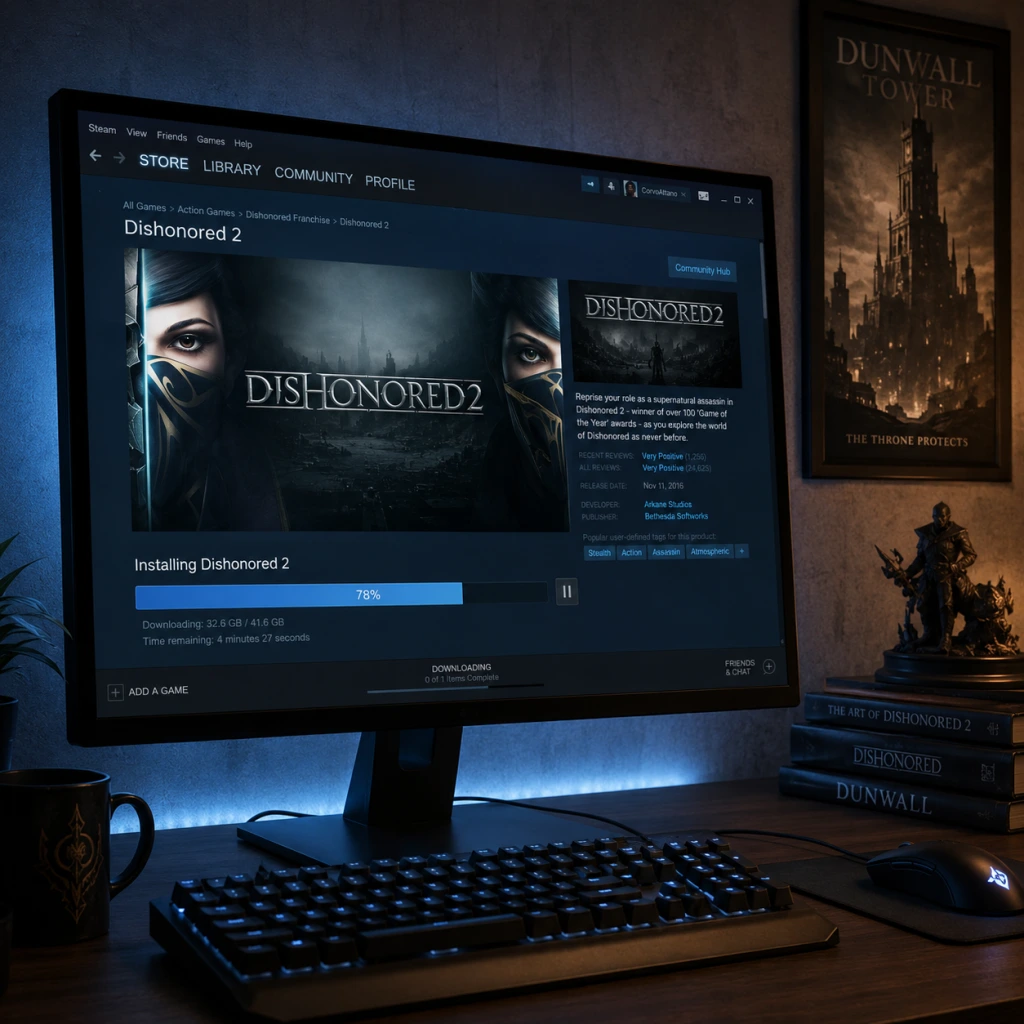
Download & Installation
Overview
This guide covers how to legally download and install Dishonored 2 (Arkane Studios, 2016) on all supported platforms. The game is available on PC (Steam, Epic Games Store, Microsoft Store), PlayStation 4 (backward compatible on PS5), Xbox One (backward compatible on Xbox Series X|S), and via cloud streaming on Nintendo Switch (subscription required, not a native download). Mobile versions do not exist officially.
---
System Requirements (PC)
Minimum
- OS: Windows 7/8/10 (64-bit)
- CPU: Intel Core i5-2400 / AMD FX-8320
- RAM: 8 GB
- GPU: NVIDIA GTX 660 2GB / AMD Radeon HD 7970 3GB
- DirectX: Version 11
- Storage: 60 GB available space
- Sound: DirectX compatible
- OS: Windows 10 (64-bit)
- CPU: Intel Core i7-4770 / AMD FX-9590
- RAM: 16 GB
- GPU: NVIDIA GTX 1060 6GB / AMD Radeon RX 480 8GB
- DirectX: Version 11
- Storage: 60 GB SSD
- Sound: DirectX compatible
- Steam: Steam account.
- Epic Games: Epic Games account.
- Microsoft Store/Xbox/Game Pass: Microsoft account.
- PlayStation: PlayStation Network account.
- Nintendo Switch (cloud): Nintendo account + subscription to streaming service.
Recommended
Note: The game benefits greatly from an SSD for faster loading times. Laptop equivalent hardware may perform worse.
---
Platform-Specific Download & Installation
PC – Steam
1. Create/Login to your Steam account: [store.steampowered.com](https://store.steampowered.com)
2. Search for "Dishonored 2" in the store.
3. Purchase the game or use an existing license.
4. Install:
- Click "Install" on the game's store page or go to your Library > Right-click "Dishonored 2" > Manage > Install.
- Choose installation directory (ensure at least 60GB free).
- Wait for download and automatic installation.
5. Launch from Library after completion.
PC – Epic Games Store
1. Install the Epic Games Launcher from [epicgames.com](https://store.epicgames.com).
2. Login and go to the Store tab.
3. Search for "Dishonored 2" and purchase if not owned.
4. Install:
- Click Get (if free) or Install.
- Select drive, confirm.
- The launcher downloads and installs automatically.
5. Launch from Library.
Note: Epic versions may require the Bethesda.net launcher for initial authentication, but as of updates, it runs via Epic without additional accounts.
PC – Microsoft Store / Xbox App
1. Open Microsoft Store (or Xbox app) on Windows 10/11.
2. Search for "Dishonored 2".
3. Buy and Install:
- Click Install to download.
- Choose drive (can be changed in Windows Settings > Storage).
4. Launch from Start menu or Xbox app.
Requirement: Microsoft account. Game is part of Game Pass for PC subscription as of 2025 (check current catalog).
PlayStation 4 & 5
1. Ensure you have a PlayStation Network account.
2. On PS4/PS5:
- Go to PlayStation Store.
- Search "Dishonored 2".
- Purchase or Download (if already owned or via PS Plus Extra/Premium).
3. Install:
- The download starts immediately after purchase.
- On PS5, you may choose PS4 or PS5 version (only PS4 version exists, but runs via backward compatibility).
4. Launch from the home screen.
Storage: Requires ~55GB (PS4) or ~60GB (PS5 due to additional BC data).
Xbox One & Series X|S
1. Sign in to your Xbox Live / Microsoft account.
2. On console:
- Open Microsoft Store.
- Search "Dishonored 2".
- Buy or Install if you own it or have Game Pass.
3. Install:
- The console downloads the game automatically.
- You can choose to install on internal or external drive.
4. Launch from My Games & Apps.
Backward Compatibility: Runs natively on Xbox Series X|S with FPS Boost (60fps) and Auto HDR.
Nintendo Switch (Cloud Version Only)
Dishonored 2 is not available as a native download on Nintendo Switch. It can be played via cloud streaming (e.g., via Ubisoft Connect+ or similar services, but check availability; as of 2025, it is not officially on Switch eShop). If you have a subscription to a cloud gaming service that supports Switch (like GeForce NOW), you can stream the PC version. No installation required – just a stable internet connection.
---
Account Requirements
No Bethesda.net account is necessary for standalone PC purchases anymore (previously required, now optional for some features).
---
First Launch Setup
1. Language selection (can be changed later in options).
2. Calibration: Brightness, contrast, HDR (if supported).
3. Graphics Preset (PC): Options range from Low to Very High. Auto-detect is available.
4. Key bindings (PC): Customize controls or load defaults.
5. Audio: Adjust master volume, music, SFX, and subtitle options.
6. Display: Resolution, fullscreen/windowed, V-Sync, FPS limit.
7. Account linkage (optional): Bethesda.net for cloud saves between PC platforms (if you wish).
8. Play: Start a new game or load a save.
---
Common Installation Errors and Fixes
| Error | Platform | Cause | Fix |
|---|---|---|---|
| Disk write error | PC (Steam/Epic) | Corrupt download cache or insufficient permissions | Run launcher as Administrator; clear download cache (Steam: Settings > Downloads > Clear Cache). |
| Missing DLL files (e.g., MSVCR120.dll) | PC | Missing Visual C++ redistributables | Install DirectX and Visual C++ packages from the game’s _CommonRedist folder in install directory. |
| “Application failed to start” | PC | Outdated graphics drivers | Update GPU drivers (NVIDIA/AMD). |
| Insufficient storage space | All | Game requires exactly 60GB free; temporary download files may need more | Free up space (at least 80GB recommended). On consoles, delete unused games. |
| Stuck at “Preparing” on Steam | PC | Corrupted update files | Verify integrity of game files (Steam: Right-click > Properties > Local Files > Verify). |
| Fatal error on launch | PC | Antivirus blocking | Add the game folder to antivirus exceptions; disable real-time scanning temporarily. |
| PS4/PS5 download stuck | PlayStation | Network issues or corrupt cache | Reboot console; go to Settings > Network > Test Internet Connection; rebuild database (safe mode). |
| Xbox installation stops | Xbox | Background app conflict | Press the Xbox button, go to My Games & Apps, highlight Dishonored 2, press Menu > Manage > Clear reserved space. |
| Cloud streaming lags | Switch | Slow internet | Use wired connection; close other apps; ensure subscription is active. |
Post-Installation Verification
PC
1. Verify game files (Steam: Properties > Local Files > Verify; Epic: Settings > Manage Games > Verify).
2. Check for updates: Launcher should auto-check.
3. Test launch: If crash occurs, update drivers and check integrity again.
4. Benchmark: Use in-game options to test performance; adjust settings if needed.
PlayStation & Xbox
1. Check for updates: Highlight game icon, press Options/Start > Check for Update.
2. Launch game: Should reach main menu without error.
3. Test save functionality: Create a new save and load it.
4. Check storage usage: Settings > Storage to confirm size (~55-60GB).
Switch (Cloud Streaming)
- Ensure stable internet (25 Mbps minimum).
- Launch the cloud app and verify input latency is acceptable.
- No local verification possible.
- Mods: PC version supports mods via manual installation (e.g., from Nexus Mods). Back up original files.
- Save Data: Cloud saves are supported on Steam, Epic, Xbox, and PS+. Manually back up local saves (PC: `%USERPROFILE%\Saved Games\Arkane Studios\Dishonored2`).
- Performance PC: If you encounter stutter, disable V-Sync and cap FPS to 60 via GPU control panel. The game has a known issue with memory management; using a pagefile on an SSD helps.
- Console Performance: PS4 Pro and Xbox One X run at 30fps. Xbox Series X|S get 60fps via FPS Boost (enable in compatibility settings). PS5 runs PS4 code at 30fps unless using Boost Mode (still 30fps but more stable).
---
Additional Tips
---
Conclusion
Following this guide ensures a smooth download and installation of Dishonored 2 on your preferred platform. Always obtain the game from official sources to guarantee support and security. If you encounter issues, refer to the error table or contact platform support.
Game Introduction
Game Introduction: Dishonored 2
Dishonored 2 is a first-person action-adventure stealth game developed by Arkane Studios and published by Bethesda Softworks. Released on November 11, 2016 for PlayStation 4, Xbox One, and PC (Windows), the game is a direct sequel to the critically acclaimed Dishonored (2012). It supports both single-player and offline play, with no online multiplayer component. Later, a free next-gen upgrade and backward compatibility allowed it to run on PlayStation 5, Xbox Series X|S, and modern PC hardware.
Story Overview
Set 15 years after the first game, Dishonored 2 follows Empress Emily Kaldwin (the child from the original) or her father, Corvo Attano, the Royal Protector. The tale begins when a coup orchestrated by the supernatural witch Delilah Copperspoon and her ally Duke Luca Abele usurps the throne of the island empire of Gristol. Players must choose one of the two protagonists, each with their own unique powers, voice, and perspective, as they navigate the plague-ridden, industrial city of Karnaca to reclaim the crown and uncover the conspiracy.
The narrative is driven by player choice: the level of chaos (high vs. low) determined by killing or sparing enemies directly impacts the ending, world state, and character interactions. Themes of family, legacy, loyalty, and political corruption are woven into a dark, Victorian-era steampunk and dieselpunk aesthetic.
Setting & Atmosphere
- Karnaca - a coastal, Mediterranean-inspired city in the southern region of Serkonos. Unlike the rainy, oppressive Dunwall of the first game, Karnaca is sun-drenched but equally grim, with dusty streets, ornate architecture, and a heavy atmosphere of oppression under a brutal regime.
- The world blends magic (the Void, an otherworldly dimension) with advanced technology: whale-oil-powered machinery, arcane bone charms, electro-pistols, and clockwork soldiers.
- Environments include mansions, distilleries, archives, a royal conservatory, a clockwork mansion, and shipyards, all densely packed with vertical exploration and multiple pathways.
- Empress Emily Kaldwin – Now a young woman trained in stealth and swordsmanship by her father. She can use powers like Far Reach (a grappling hook-like ability) and Domino (linking enemies’ fates).
- Corvo Attano – The legendary Royal Protector from the first game. Returns with his own set of powers, including Blink (teleportation) and Bend Time.
- The Outsider – The mysterious, god-like entity who grants powers to both protagonists. Now voiced by an older actor, he remains a cynical observer.
- Delilah Copperspoon – Antagonist witch who usurps the throne. She possesses reality-warping powers and a deep grudge.
- Meagan Foster – A smuggler and ship captain who aids the protagonists.
- Duke Luca Abele – The corrupt Duke of Serkonos, Delilah’s puppet ruler.
- Anton Sokolov & Piero Joplin – Returning characters (Piero only in notes) who assist with technology and inventions.
- Agent of Chaos – The game fully supports lethal or non-lethal playthroughs. Every mission can be completed by silent stealth, direct combat, or a mix, with the world reacting accordingly.
- Creative Problem-Solving – Levels are designed as open sandboxes with multiple routes, hidden secrets, and interactive systems. Players can use powers, gadgets, environmental hazards, and NPC behavior to their advantage.
- Replayability – Two protagonists, each with distinct power sets and upgrades, plus branching outcomes, encourage at least two playthroughs.
- Immersive Sim DNA – Physics, AI, and systems all interact. For example, you can shoot a gas pipe to create an explosion, destroy a power switch to disable lights, or possess a rat to crawl through vents.
- Art Style & Soundtrack – The painterly art direction by Sergei Karchavchuk and the haunting, Latin-tinged score by Daniel Licht contribute to a deeply atmospheric experience.
- Gamers who enjoy stealth, tactical gameplay, and emergent storytelling.
- Fans of immersive sims (e.g., Deus Ex, Thief, Prey).
- Players looking for a single-player, story-driven experience with high replay value.
- Mature audiences due to violence, blood, and dark themes.
- Single-Player Campaign – The only game mode. No multiplayer or co-op.
- Offline – Fully playable without an internet connection after installation (except for updates/downloads).
- Online – Not required for gameplay; only for leaderboards in the optional “Mission Select” scoring mode (no longer supported on all platforms).
- Pre-Order Bonus – The Royal Spymaster (a side mission set in a distillery).
- Free Updates – New Game+, mission replay, custom difficulty options, and a Mission + mode (called “Mission Select” with scoring).
- Expansion (standalone) – Dishonored: Death of the Outsider (2017) serves as a standalone sequel/spin-off following a new character, Billie Lurk, and concludes the story arc of the Outsider.
- Dual Protagonist Powers – Unlike most games where the character choice is cosmetic, here each protagonist has completely different supernatural abilities, transforming how you approach every encounter.
- “No-kill” Options – Every major target can be dealt with through a unique non-lethal method, often with far-reaching consequences (e.g., branding, exile, or faking death).
- Clockwork Mansion – Widely regarded as one of the best-designed levels in gaming history, a shifting, mechanical fortress that changes layout in real time.
- A Cracked Sequel – Rare for a game to double down on choice and consequence so thoroughly while also introducing a new, equally compelling setting and cast.
- Penguin Iceberg Illustration – Dishonored 2 is often cited as a pinnacle of the “immersive sim” genre, where systems create emergent stories that no single scripted path can match.
Main Characters
Core Appeal
Target Audience
Game Modes & Online/Offline Support
DLC & Expansions Overview
Dishonored 2 itself does not have major paid story DLC (unlike the first game’s The Knife of Dunwall and The Brigmore Witches). However, it received:
What Makes Dishonored 2 Unique
In summary, Dishonored 2 is a masterclass in player-driven storytelling, world-building, and level design, offering an unforgettable adventure for those who crave freedom, creativity, and a richly detailed dystopian world.
Getting Started
Getting Started Guide for Dishonored 2
Welcome to Karnaca! This guide will help you survive your first hours in Dishonored 2. Whether you're a veteran of the first game or a complete newcomer, these tips will set you on the path to becoming a deadly sneaky assassin.
Character Creation (or the Lack Thereof)
At the very start, after the opening cutscene, you are given one choice: Play as Emily Kaldwin (the Empress) or Corvo Attano (her father and former Royal Protector).
- No stat differences; both have the same health, mana, and movement speed.
- Power differences: Emily has Far Reach (a telekinesis grab) and Domino (link enemies), while Corvo has Blink (teleport) and Possession. Both are excellent. For beginners, Corvo may feel more familiar if you played Dishonored 1; Emily’s powers are more versatile for creative players.
- Recommendation: Pick Emily if you want a fresh experience; pick Corvo for a more classic stealth-powerset. You can’t change later, so choose wisely!
Controls on All Platforms
#### PC (Keyboard + Mouse) – Default Layout
| Action | Key |
|---|---|
| Move | W/A/S/D |
| Look | Mouse |
| Jump | Space |
| Crouch | Left Ctrl |
| Sprint | Left Shift |
| Interact/Pick Up | E |
| Attack (Sword) | Left Mouse Button |
| Aim (Crossbow/Pistol) | Right Mouse Button |
| Shoot | Left Mouse Button (while aiming) |
| Switch Weapon | Q |
| Use Power (Primary) | Mouse Button 3 (middle click) |
| Use Power (Secondary) | F |
| Quick Save | F5 |
| Quick Load | F9 |
| Consume Mana Potion | C |
| Heart | H (when equipped) |
| Map | M |
| Journal | J |
| Lean | Q/E (hold) |
| Drop Down | S (on ledge) |
| Blink/Parachute | Space (while in air for Corvo) |
| Action | Button |
|---|---|
| Move | Left Stick |
| Look | Right Stick |
| Jump | X |
| Crouch/Slide | Circle (hold to slide) |
| Sprint | L3 (click left stick) |
| Interact | Triangle |
| Attack (Sword) | R1 |
| Aim (Crossbow) | L2 |
| Shoot | R2 |
| Switch Weapon | R3 (click right stick) |
| Use Power | L1 |
| Quick Save | Options -> Save Game (manual) |
| Quick Load | Options -> Load Game |
| Consume Mana/Health Potion | D-pad Up (health) / D-pad Right (mana) |
| Heart | D-pad Down (when equipped) |
| Map | Touchpad (swipe) |
| Journal | Options |
| Lean | L2+R3? Actually, lean is automatic near corners |
| Action | Button |
|---|---|
| Move | Left Stick |
| Look | Right Stick |
| Jump | A |
| Crouch/Slide | B (hold to slide) |
| Sprint | L3 (click left stick) |
| Interact | Y |
| Attack (Sword) | RB |
| Aim (Crossbow) | LT |
| Shoot | RT |
| Switch Weapon | R3 (click right stick) |
| Use Power | LB |
| Quick Save | Menu button -> Save Game |
| Quick Load | Menu button -> Load Game |
| Consume Health Potion | D-pad Up |
| Consume Mana Potion | D-pad Right |
| Heart | D-pad Down (when equipped) |
| Map | View button (back) |
| Journal | Menu button |
User Interface (UI) Overview
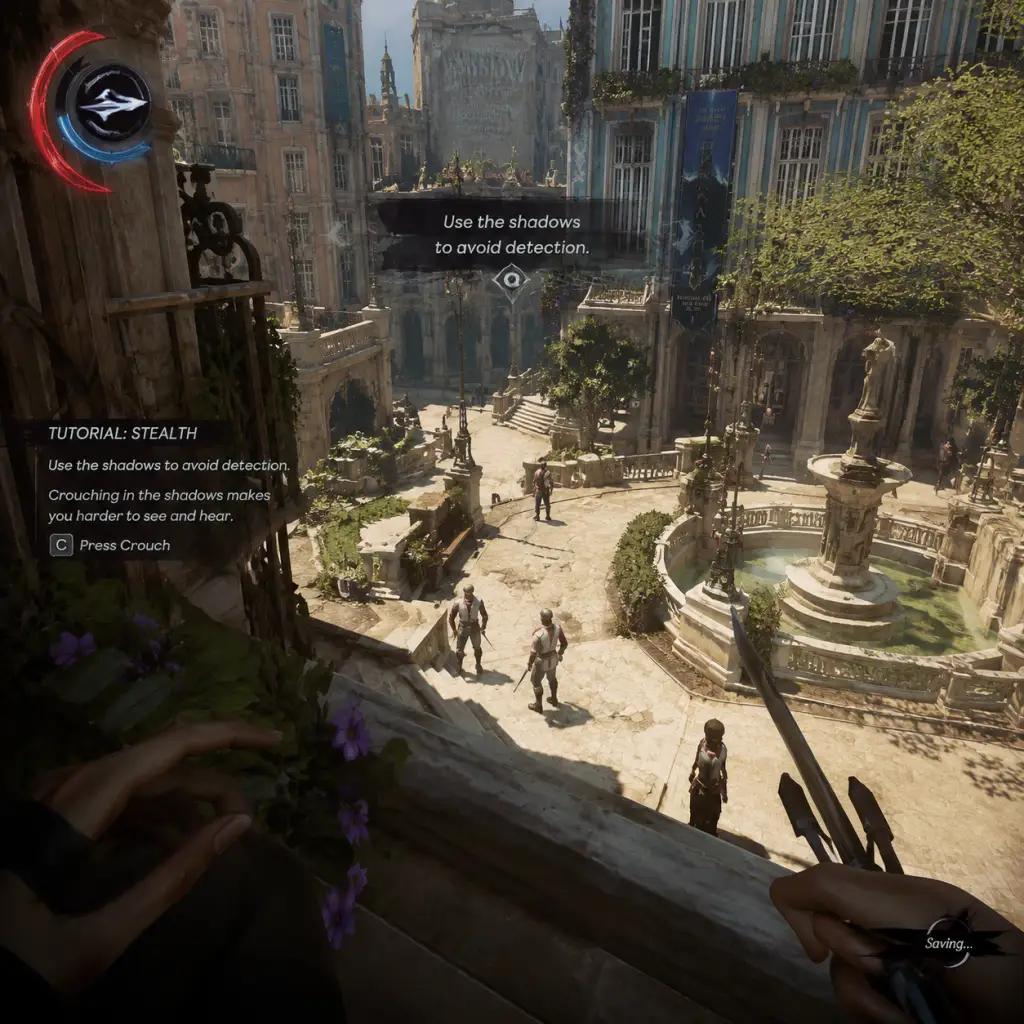
Your HUD in Dishonored 2 shows:
- Top center: Objective marker (golden diamond), distance, and optional waypoint.
- Top left: Health bar (red), Mana bar (blue). A full mana bar allows casting most powers.
- Bottom left: Weapon/equipment wheel indicator (shows current item: sword, crossbow, pistol, etc.).
- Bottom center: Ammo count for crossbow/pistol.
- Bottom right: Runes (small icons) indicating your current power cooldown or active effects.
- Crosshair: Dynamic – widens when running, narrows when sneaking. White when neutral, red when enemy is alert nearby.
- Compass/Map: Press M (PC) or Touchpad (PS4) to open full map with objective markers, explored areas, and important points like black markets, shrines.
- Journal: Press J (PC) or Options to see mission details, notes, and objectives.
- Acquire the Heart: It’s essential for finding loot and secrets.
- Find a Black Market: Buy the map – it marks runes, bonecharms, and side objectives.
- Collect Runes and Bonecharms: These permanently upgrade your powers and give passive bonuses.
- Learn your power: Use your main movement power (Blink/Far Reach) to reach high ledges and avoid ground-level enemies.
- Complete the first mission: Unlocks the Dreadful Wale as a hub with crafting and mission selection.
- Save often – Quick Save (F5 or manual) before you enter a new area, before fights, and after picking up important loot.
- Explore thoroughly – Rooftops, vents, open windows. Dishonored rewards curiosity.
- Read books/notes – They contain codes, safes, and lore.
- Use non-lethal takedowns – You can choke out enemies (hold attack from behind while sneaking). This lowers chaos, making the ending better and reducing enemy count later.
- Use the Heart often – It reveals hidden items and lore about people (also helps track runes).
- Buy the crossbow upgrade – The crossbow with sleep darts is a silent ranged downer. Prioritize this.
- Don’t rush into combat – You are fragile; a few hits can kill you. Stealth is king.
- Don’t ignore the wind – In Karnaca, wind currents can mask sneaking footsteps. Use them.
- Don’t waste springrazors on early trash – Save for later tough enemies like Clockwork Soldiers.
- Don’t forget to refill mana – Use mana potions or drink from whale oil tanks (green glowing barrels) to refill.
- Don’t kill civilians – It increases chaos and gives negative outcomes.
- Don’t ignore the black market – They offer useful gear and sometimes unique bonecharms.
- Not using Quick Save: You will die suddenly. Use F5 (PC) religiously.
- Forget to equip the Heart: Missed runes and bonecharms can cost you precious upgrades.
- Alarming guards too early: In the first mission, if you alert everyone, you’ll face a firefight. Sneak around back alleys.
- Using powers in front of guards: Far Reach and Blink are silent, but if seen, guards will become suspicious. Use them only when hidden.
- Skipping side areas: The first mission has a safe with 200 coins behind a painting – easy to miss.
- Not checking the Dreadful Wale after mission: Between missions, you can upgrade gear, get new abilities from the blackboard, and rest to recover health.
- [ ] Complete Prologue (choose character, escape Dunwall)
- [ ] Arrive at the Dreadful Wale, talk to Meagan
- [ ] Complete first mission “Edge of the World”
- [ ] Find and equip the Heart
- [ ] Buy the map from the Black Market
- [ ] Collect at least 2 Runes (one from the sewer, one from a guard’s desk in the clocktower)
- [ ] Find at least 1 Bonecharm (in the alley near start)
- [ ] Learn to use Quick Save/Load
- [ ] Practice non-lethal takedown on a guard
- [ ] Save game before entering the clocktower (boss fight checkpoint)
- [ ] Unlock the Dreadful Wale blueprint station (teaches you how to craft upgrades)
First Hour Walkthrough: From the Coup to the Dreadful Wale
1. Prologue: You start as Emily in Dunwall Tower. Follow the linear corridor to see the Outsider’s prophecy. No enemies here. After the cutscene, you witness the coup.
2. Escape: After Delilah takes the throne, you regain control of Emily (or Corvo) in the Tower basement. Your objective is to get to the streets.
- Pick up the Blink rune (Corvo) or Far Reach (Emily) – it’s on a table.
- Follow the sewer path, using stealth to avoid or kill a few guards. Use the power to reach ledges.
3. The Dreadful Wale: You meet the supernatural boat captain Meagan Foster. She explains: head to Karnaca to stop the usurpers. You set sail, and the game transitions to the first real mission.
4. First Mission: Edge of the World:
- Arrive in Karnaca. Talk to Meagan. You are on a small island. Follow the road to the city gates.
- Do: Explore the street, find a coin purse, and buy a map from the Black Market shop (first building on left). This reveals all mission objectives.
- Do: Locate the Heart (given by Meagan before you leave the ship) – equip it via the weapons wheel. Use Heart to find runes and bonecharms (glowing outlines).
- Main objective: Meet your contact at the Addermire Institute (the big clocktower building). To get there, cross the bridge (heavily guarded) or sneak through the sewers.
- Optional: Find the bone charm in the first alley, and a Rune in the sewer grate near the Black Market.
5. Key moment: After crossing the bridge, you’ll trigger a cutscene. Follow the golden objective marker to the Institute roof. The first mission ends with you using the Spectral (a device) to disable the Grand Guardian’s shield.
Time estimate: 30-45 minutes for the entire prologue and first mission (if you take it slow).
Essential Early Objectives
What to Do First (and What to Avoid)
#### ✅ Do This
#### ❌ Avoid These Mistakes
Early Resource Priorities
1. Runes – Each rune unlocks a new power or upgrades an existing one. Early on, focus on upgrades that help movement (e.g., Blink range, Far Reach speed) or survival (Bonecharm crafting from Corvo’s powers).
2. Bonecharms – Collectable passive buffs. Examples: increases mana, reduces fall damage, etc. Equip 4 initially (max 5 without upgrades).
3. Coins – Spend on:
- Map from Black Market (first purchase)
- Crossbow (if you choose not to take the free one – but you start with crossbow, so buy sleep darts)
- Pistol upgrades (optional – only for high chaos runs)
- Capacity upgrades (increase ammo carry)
4. Mana Potions – Always carry 2-3. Use sparingly; drink from whale oil tanks when possible.
5. Health Elixirs – Rare, keep for emergencies. Alternatively, find food (apples, fish) to heal slowly.
Common Beginner Mistakes
Day-One Checklist
Your first play session (2-3 hours) should accomplish:
Once you’ve crossed off that checklist, you’re ready to set sail for the heart of the conspiracy. Welcome to Karnaca, and may the Outsider watch over you.
Core Gameplay
Core Gameplay Guide for Dishonored 2
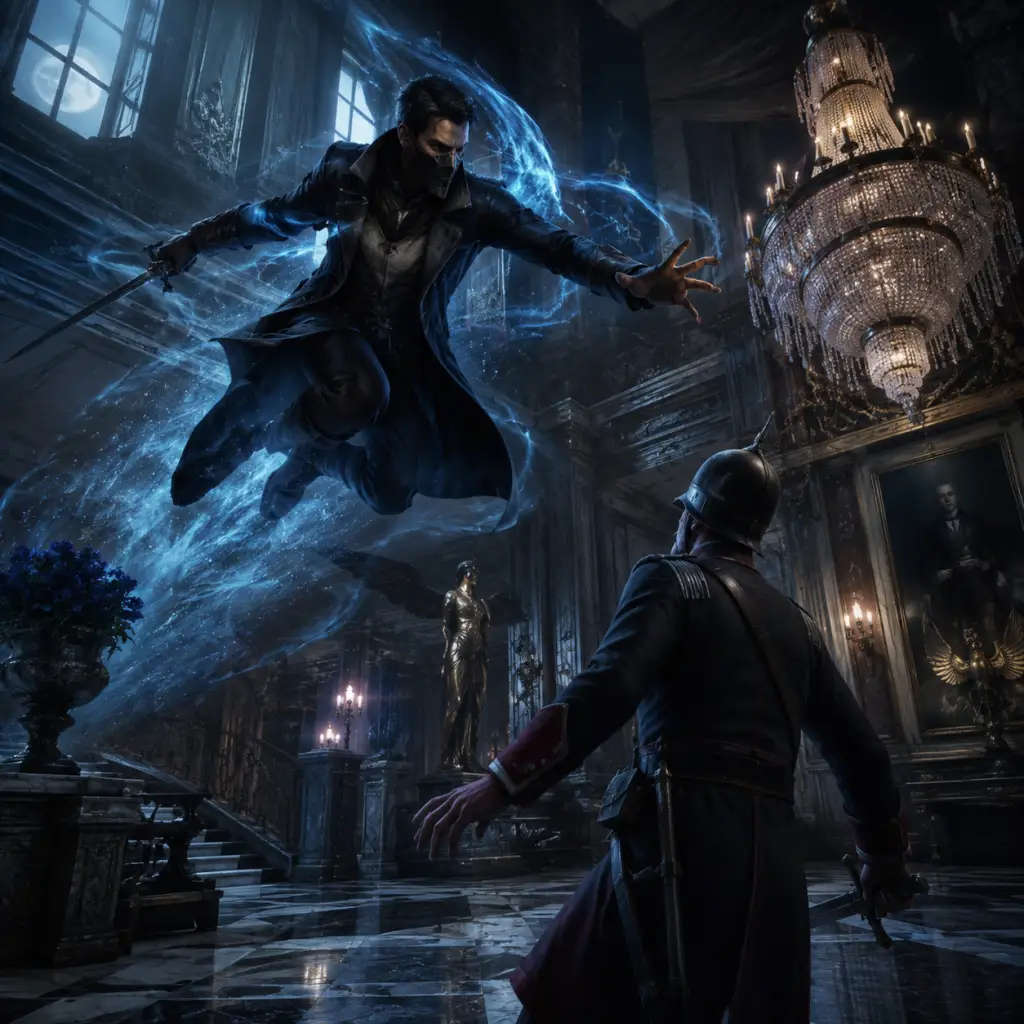
This guide breaks down the core gameplay loop and systems of Dishonored 2 across four progression tiers: Early Game, Mid Game, Late Game, and Endgame. Each section covers the main gameplay loop, combat/interaction systems, progression, exploration, quests/missions, economy, character/build growth, and endgame structure tailored to that tier.
---
Early Game (Chapters 1–3: Karnaca Arrival up to The Clockwork Mansion)
Main Gameplay Loop
- Explore the streets of Karnaca, complete your first mission objectives (e.g., find Meagan Foster, eliminate the Crown Killer).
- Use stealth or direct action to bypass or eliminate guards and threats.
- Acquire basic resources (coins, runes, bonecharms) from safes, hidden caches, and enemies.
- Return to the Dreadful Wale between missions to upgrade equipment, manage inventory, and accept new contracts.
- Melee: Sword swings (left mouse/right trigger) can parry enemy attacks if timed correctly. Basic guards fall in 1–2 hits, but alerted enemies require careful timing.
- Ranged: Pistol (low ammo early on) and crossbow (sleep darts, regular bolts). Use sleep darts to non-lethally incapacitate.
- Stealth: Crouch (Ctrl/L3) to move silently, stay out of sight (bushes, shadows, above ground). Peek through keyholes and use dark vision (if you have it) to track enemies.
- Blink: Corvo’s basic ability allows short-range teleportation. Use it to reach ledges, evade sight, or distract.
- Interaction: Pick locks (use lockpicks), hack walls of light (wire puzzles), activate levers, carry unconscious bodies to hide them.
- Character Abilities: Runes are used to purchase and upgrade powers. Early game you can afford 1–2 basic upgrades: Corvo gains Bend Time (slow or stop time briefly) or Possession (take over small creatures); Emily gains Far Reach (pull objects/enemies) or Mesmerize (distract enemies).
- Equipment Upgrades: Bonecharms provide passive bonuses (e.g., faster movement while crouched). Use bonecharms found in the world or crafted at the black market shop.
- Levels are semi-open hubs with multiple vertical paths. Early game areas like the Addermire Institute have hidden rooms, alternate entry points, and side objectives (e.g., saving Doctor Alexandria Hypatia).
- Pay attention to notes, audiographs, and environmental clues to find secret areas and lore.
- Use heart (acquired after the first mission) to sense hidden runes and bonecharms.
- Main missions: “A Long Day in Dunwall” (prologue), “Edge of the World” (free roam Karnaca), “The Good Doctor” (Addermire Institute).
- Side missions: Usually optional assassination or sabotage contracts found in the world (e.g., kill a specific guard leader). Complete for extra coins and sometimes a bonecharm.
- Objective variety: Assassinate, non-lethal neutralize, or steal. Each mission has a main target and often a secondary optional target.
- Coins: Found in loot, safes, and from pickpocketing. Spend at black market shops for ammo, keys, maps, and special items (e.g., the Masterful Refined Spring that increases crossbow bolt capacity).
- Runes: Limited supply early on (around 8–10 per level). Prioritize a core power (e.g., Bend Time or Far Reach) and a passive (e.g., Vitality for health).
- Bonecharms: Randomly generated early, but you can craft your own by sacrificing runes at a bonecharm altar (unlocked after a few levels).
- Start with no powers. Decide whether to play low chaos (non-lethal stealth) or high chaos (lethal combat). Early choices shape dialogue and world changes.
- Example build: Low-chaos Emily: Far Reach + Mesmerize + Shadow Walk (unlock later). High-chaos Corvo: Bend Time + Windblast + Devouring Swarm.
- After completing “The Clockwork Mansion” (chapter 3), you unlock more abilities and access to the black market shop. End of early game prepares you for the tougher mission “The Royal Conservatory”.
- Juggle multiple mission objectives across larger, interconnected maps (e.g., Dust District has several factions).
- Use upgraded powers to bypass more complex enemy types (Witch Coven, Clockwork Soldiers).
- Engage with faction quests (e.g., assist the Howlers or the Abbey of the Everyman).
- Recurring trips to the Dreadful Wale to upgrade gear and receive new missions.
- Advanced enemies: Clockwork Soldiers are immune to sleep darts and most physical attacks; require disabling via their back panel (lethal) or rewiring (non-lethal). Witches have powerful ranged attacks and teleport.
- New powers: Mid-game you can afford mid-tier upgrades like Domino (Emily) linking enemies so actions affect multiple, or Windblast (Corvo) for crowd control.
- Gadgets: Use stun mines, spring razors, and howling bolts (distract enemies). Combine gadgets with powers: e.g., drop a stun mine then use Far Reach to pull a guard into it.
- Stealth improvements: Dark Vision (if not already) now shows enemy vision cones and lootable items.
- Skill trees: Runes now cost more (4–6 per upgrade). Focus on tier 2 abilities (e.g., Domino, Shadow Walk).
- Equipment upgrades: Upgraded crossbow (rapid fire or precision), more pistol ammo capacity, bonecharm crafting now viable with 3–4 crafting materials found per level.
- Chaos system: Your actions affect the world: high chaos causes more bloodflies, more aggressive guards; low chaos makes civilians helpful and less security.
- Levels have multiple overlapping zones (e.g., Dust District splits into Howler hideout, Overseer outpost, abandoned mines). Use wall of light bypasses via rewired security panels.
- Secret areas often contain runes, bonecharms, and blueprints. Example: in the Dust District observatory, find a hidden passage with a bonecharm.
- Use heart regularly—it can detect secret doors and lootable objects.
- Main missions: “The Royal Conservatory” (eliminate Breanna Ashworth), “The Dust District” (find Stilton and deal with Jindosh’s riddle), “A Crack in the Slab” (time-manipulation level with shifting house).
- Side missions: Each district has multiple optional objectives, such as destroying a painting, stealing a specific item, or rescuing prisoners.
- Mission branching: In Dust District, you can side with the Howlers (get a shortcut) or the Overseers (gain access to Stilton’s manor). Choice affects rewards and NPC reactions.
- Coins: More abundant, but expensive upgrades (e.g., a powered wall of light override costs 300 coins). Black market sells rare bonecharm recipes for 200–400 coins.
- Runes: 10–12 per level. Spend wisely; respec is not available until late game via a special item (tonic of reversal, found rarely).
- Crafting: Bonecharm crafting becomes key. Combine traits (e.g., Strong Arms + Swift Potion) for powerful combos. Use runes to unlock more crafting slots.
- Build specialization solidifies. Example: Low-chaos Emily with Domino (3 links), Mesmerize (radius upgrade), and Shadow Walk speed. Build allows non-lethal group knockdowns.
- High-chaos Corvo: Bend Time (upgrade to stop longer), Windblast (area), and Blood Thirst (increase damage). Prioritize combat-focused bonecharms (e.g., +damage from stealth).
- Completing “A Crack in the Slab” reveals the time-manipulation gimmick and a major plot twist (Stilton’s fate). End of mid game leads to the mission “The Grand Palace” where you face Duke Abele.
- Finish remaining side objectives in prior levels (some can be revisited via the Dreadful Wale world map for a short window).
- Confront major bosses: Duke Abele (lethal or non-lethal via his body double), Delilah Copperspoon.
- Use fully upgraded powers and high-level bonecharms to deal with elite enemies (Overseer Elites, Bloodfly nests).
- Chaos level determines the state of Karnaca: high chaos leads to more infected districts; low chaos shows civilians rebuilding.
- Boss mechanics: Delilah’s statue-army fight requires using her own power (Domino) or the Amulet of the Outsider (if collected). Duke Abele fight is standard but with lots of guards.
- Advanced techniques: Stack multiple powers (e.g., Shadow Walk then Possession through a keyhole). Use bonecharms like “Void Favor” to reduce mana cost.
- Allied NPCs: Some missions allow you to bring a companion (e.g., Anton Sokolov in The Good Doctor). They provide distractions but limited combat ability.
- Maxed abilities: By late game you should have at least 3–4 core powers fully upgraded and 5–6 bonecharms equipped. To get all powers requires ~40 runes total; you may need to scavenge every level and do side quests.
- Equipment fully upgraded: Masterful crossbow (rapid fire + 3 bolt types), Max pistol ammo (12 shots), 2 grenade types.
- Chaos system: Final chaos level influences the post-credit scene and certain NPC fates (e.g., Meagan’s arm, Jessamine’s ghost).
- Levels are more linear but still have verticality (e.g., The Grand Palace has many rooftops and balconies).
- In “Death to the Outsider” (if you have it), new areas like the Void are abstract and require platforming.
- Use heart extensively in the final palace; it reveals hidden passageways in Delilah’s throne room.
- Main missions: “The Grand Palace” (infiltrate the Duke’s mansion), “Death to the Outsider” (venter into the Void to confront Delilah).
- Side missions: Few new ones; instead, loose ends from earlier levels (e.g., returning a key to a shopkeeper) can be completed now.
- No real side quests after endgame begins; once you progress past a certain point, you cannot go back.
- Coins: You’ll have excess by now (1000+). Buy the last few upgrades if any.
- Runes: If missing some, use heart in earlier levels (you can replay missions from main menu after beating the game, but not during playthrough). Prioritize one final power upgrade.
- Bonecharms: Craft the best combinations. Example: “Strong Spikes” (increases unconscious carry speed) + “Light from Darkness” (recover mana in shadows).
- At this point, build is finalized. For Emily, a strong late-game build includes Domino (full 4 links), Mesmerize (extended duration), and Shadow Walk (stealth kill). Corvo may go Bend Time (freeze multiple), Possession (upgrade to humans), and Summon Rats (for chaos).
- Consider a hybrid if you have many runes: e.g., Emily with Far Reach and Domino, plus a few Corvo-like powers if you have Favor (you don’t, but similar effects via bonecharms).
- After defeating Delilah (lethal or non-lethal), the final cutscene shows the consequences of your chaos level. The game ends, and credits roll. No postgame sandbox; you reload to before the last mission or start New Game+.
- No free roam after final mission. Once you finish “Death to the Outsider” (or the alternate final), the game ends. You can reload a save from before the final mission to explore any remaining side content, but not continue the story.
- New Game+ (unlocked after beating the game once): Start a new playthrough with all powers unlocked from the beginning. Choose to play as the other protagonist (if you played Corvo first, now play Emily and vice versa). Chaos carries over? No, but you keep all powers regardless of chaos. This allows you to experiment with different builds from the start.
- Mission replay: From the main menu, you can replay any mission with your current loadout (including powers from New Game+). This is useful for achievements, experimenting, or finding missed collectibles. Chaos choices in replays do not affect your main save.
- DLC content: “Dishonored: Death of the Outsider” is a standalone expansion but shares mechanics. Not part of base game endgame, but adds new powers (e.g., Displace) and missions.
- Same as early game but with full power sets. You can breeze through early missions with high-level abilities, but combat is still challenging if you rush.
- Try opposite chaos level: if you played low chaos, now go high chaos to see different outcomes.
- Collect all runes and bonecharms to craft ultimate builds (e.g., all passive slots filled).
- With all powers, you can chain combos like: stop time, throw 10 grenades, possess a guard, kill everyone, then blink away. This trivializes most encounters.
- Use bonecharms from the start; craft them immediately for massive bonuses.
- No traditional progression since you already have everything. But you can still upgrade equipment by finding blueprints again (if you want). Runes are useless except for crafting bonecharms.
- Chaos system still applies; you can shape the world’s final state differently.
- With all powers, you can reach previously inaccessible areas earlier. For example, use Far Reach to skip entire sections.
- Use Heart from the start; find all runes efficiently.
- Same main and side missions. No new quests in New Game+.
- You can complete all side objectives more easily, unlocking achievements like “Clean Hands” (no kills) or “Ghost” (never detected).
- Coins are still needed for black market upgrades? Actually, you already have infinite starting ammo? No, you still need to buy ammo; but you have many coins from previous run. Not a constraint.
- Runes are plentiful but not needed for powers; use them for crafting bonecharms.
- No further growth beyond maxing all abilities. You can reset? Not in base game; but you can start another New Game+ with different protagonist.
- The ultimate endgame is to complete all achievements, find all lore, or challenge yourself (e.g., no powers run, only crossbow, speedrun). The game does not have a traditional endgame like raids; the replayability comes from stort branching and playstyle freedom.
Combat/Interaction Systems
Progression
Exploration
Quests/Missions
Economy
Character/Build Growth
Endgame Structure (Early Game)
---
Mid Game (Chapters 4–6: The Royal Conservatory, Dust District, and A Crack in the Slab)
Main Gameplay Loop
Combat/Interaction Systems
Progression
Exploration
Quests/Missions
Economy
Character/Build Growth
Endgame Structure (Mid Game)
---
Late Game (Chapters 7–9: The Grand Palace, Death to the Outsider related content, and Final Mission before Endgame)
Main Gameplay Loop
Combat/Interaction Systems
Progression
Exploration
Quests/Missions
Economy
Character/Build Growth
Endgame Structure (Late Game)
---
Endgame (Post-Mission Completion and New Game+)
Endgame Structure
Gameplay Loop in New Game+
Combat/Interaction Systems
Progression in New Game+
Exploration
Quests/Missions
Economy
Character/Build Growth
Endgame Structure (Endgame)
---
Summary Table of Tiers
| Tier | Chapters | Key Powers | Main Enemy Types | Economic Focus |
|---|---|---|---|---|
| Early | 1–3 | Blink/Far Reach, 1-2 basic powers | Guards, Dogs, Howler thugs | Basic ammo, first rune purchases |
| Mid | 4–6 | Domino, Shadow Walk, Bend Time + upgrades | Witches, Clockwork soldiers, Howler leaders | Advanced upgrades, bonecharm crafting |
| Late | 7–9 | Maxed powers | Duke’s guards, Delilah’s statue army | Last upgrades, high-end gear |
| Endgame | Post-game | All powers (NG+) | Revisit any enemy type | Crafting, achievement hunting |
Tips for Each Tier
- Early: Save sleep darts for tough enemies. Explore thoroughly for runes.
- Mid: Choose a faction in Dust District wisely – it affects the path to Stilton.
- Late: During the Duke’s palace, use the body double to avoid a fight.
- Endgame: In New Game+, try a pure stealth run with no kills for the Clean Hands achievement.
This core gameplay guide covers all essential systems across the progression of Dishonored 2. Adapt your playstyle to the tier and use the environment to your advantage.
Game Tips
General / Meta Tips
1. Understand Chaos and How It Affects the World
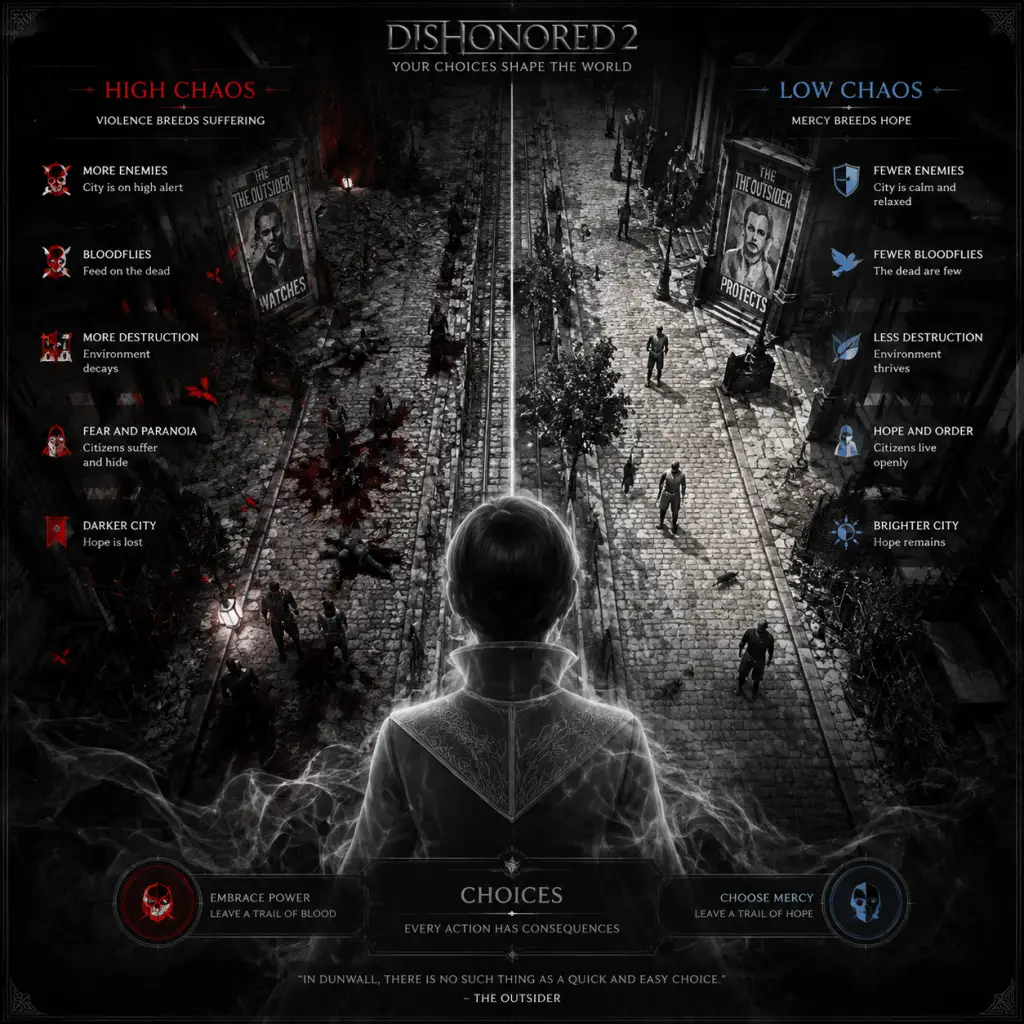
Chaos is a global variable that tracks your lethal vs. non‑lethal actions. High Chaos (many kills, especially civilian deaths) makes levels darker, adds more bloodflies and rats, increases city guard aggression, and leads to a darker ending. Low Chaos (few kills, stealthy non‑lethal takedowns) results in brighter environments, fewer plagues, and a more hopeful conclusion. Plan your run based on the ending you want. For a first playthrough, try low chaos to see more of the story and avoid punitive guard spawns.
2. Save Often and Use Multiple Slots
Dishonored 2 auto‑saves only at checkpoints. Manual quick‑saving (F5 on PC, or the save button on consoles) lets you redo tricky sections without replaying large chunks. Use three or four rotation slots to avoid losing progress if a save becomes corrupted. Before entering a heavily guarded area or attempting a risky maneuver, press quicksave.
3. Read Everything You Find
Books, notes, and audiographs are not just flavor; they often contain passcodes, secret room locations, side‑quest hints, and lore that unlocks optional objectives. Some NPCs give code words that open special dialogue options. The more you read, the more optional content you unlock.
Combat Tips
Beginner Combat Tips
1. Use Thrown Objects to Distract
Bottles, cans, and even severed heads can be thrown to make noise. Guards will investigate the impact point, giving you a clear path to slip past or perform a stealth takedown. This works even in open combat—throw a bottle behind an enemy to break their aim.
2. Parry and Counter‑Attack
When an enemy swings at you, press the block/parry button (right mouse button on PC, or the assigned controller button) just before the hit lands. A successful parry staggers the enemy, leaving them open for a one‑hit kill (or non‑lethal choke). Practice timing on single guards before taking on groups.
3. Use the Environment
Water pools electrocute enemies if you throw a live wire or shoot a whale oil tank. Oil slicks can be ignited with a pistol shot or a grenade. Chandeliers, hanging signs, and loose stone blocks can be shot or pulled down to crush enemies. Always scan the room for interactable elements before engaging.
Intermediate Combat Tips
1. Domino (Corvo’s/Emily’s Power) Combos with Grenades or Sleep Darts
Domino links up to four enemies. If you tag multiple guards and then shoot a sleep dart at one, all linked targets fall asleep simultaneously. Alternately, if you throw a sticky grenade at the linked group, the explosion kills or knockos all of them. Use Domino on patrols to wipe them out silently.
2. Blink (Corvo) vs. Far Reach (Emily) for Combat
Blink is instant and can stop time when fully upgraded, making it ideal for chain‑kill combos. Far Reach can pull enemies toward you (if upgraded) or allow you to yo‑yo around the battlefield. In combat, use Far Reach to yank a sniper off a ledge or to quickly close distance to a ranged enemy.
3. Use Shadow Walk (Emily) for Ambushes
Shadow Walk turns you into a shadow that can phase through grates and small gaps. While in shadow form, you can perform a powerful lunging attack that kills most enemies instantly. Combine with Domino: tag enemies while invisible, then use Shadow Walk’s attack on one to kill all linked targets.
Advanced Combat Tips
1. Slide and Assassinate
Running then sliding (crouch while sprinting) lets you cover ground while staying low. As you slide into an enemy, press the attack button to perform a special slide assassination. This is faster than a standing takedown and can be chained if multiple enemies are close.
2. Use Stop Time (Corvo) for Impossible Kills
Fully upgraded Stop Time freezes all enemies and projectiles. You can place a springrazor trap near a frozen enemy, then release the spell—the trap detonates instantly. Alternatively, shoot multiple enemies in the head while time is frozen to clear a room before they react.
3. Mesmerize (Emily) for Crowd Control
Mesmerize makes all enemies in a radius stop and stare at a glowing orb for several seconds. This gives you free reign to walk behind them and choke them out, or set up a multi‑kill. Upgrade it to increase duration and radius.
Exploration Tips
Beginner Exploration Tips
1. Always Look Up and Down
Many shortcuts, bonecharms, runes, and secret rooms are hidden above eye level (on rooftops, hanging from ceilings) or below (in sewers, basements, and under floors). Regularly pan your camera vertically.
2. Use Dark Vision to Reveal Secrets
Dark Vision (Corvo/Emily power) highlights enemies, loot, and interactable objects through walls. The fully upgraded version reveals the exact location of all collectibles (runes, bonecharms, blueprints, paintings). Whenever you enter a new area, pop Dark Vision for a few seconds.
3. Check All Doors and Windows
Some doors are locked but can be opened from the other side via a lever or a window. If a locked door has a window, try shooting it out or breaking it with a weapon to reach the lever. Peek through keyholes to scout without opening.
Intermediate Exploration Tips
1. Search for Grate Vents and Pipe Tunnels
Small vents and pipe tunnels are often overlooked. They lead to alternate paths, loot rooms, and guard barracks. Crouch and slowly move through them. Some have pressure plates or alarms—disable them before proceeding.
2. Use Hacking and Rewire Tools
Many levels have security systems (walls of light, arc pylons, watchtowers). Using a rewire tool on these can turn them against enemies or disable them for passage. Hack clockwork soldiers to make them fight the guards. Always carry a rewire tool and a couple of hacks.
3. Listen to Guard Conversations
Guards often discuss patrol routes, secret codes, or locations of valuables. Eavesdrop for clues. For example, in the Clockwork Mansion, guards talk about a hidden safe combination. You won’t find that code anywhere else.
Advanced Exploration Tips
1. Use Possession (Corvo) on Rats and Fish
Small animals can access areas too tight for humans. Possess a rat to crawl through small holes, then exit on the other side to open a door from within. In the Royal Conservatory, you can possess a fish to swim through pipes into a sealed room.
2. Combine Doppelganger (Emily) with Switch Teleport
Place a Doppelganger on a high ledge, then use Far Reach to swap places with it. This lets you reach seemingly inaccessible heights or cross large gaps without using Blink. The Doppelganger also draws enemy fire.
3. Reach Impossible Heights with Missing Persons Side Quest
In the Dust District, you can help a character named Stilton to unlock a different timeline version of the mansion. There, many collectibles become reachable that are otherwise blocked. Complete all side quests to open exploration opportunities.
Resources & Crafting
Beginner Resource Tips
1. Loot Everything, but Manage Inventory
Coins, ammo, health potions, and crafting materials (bone charnel fragments, whale oil) are scattered everywhere. You have limited inventory space for elixirs and potions (max 12 of each). Don’t hoard—use them early to free space. Craft a bonecharm early to understand the system.
2. Save Whale Oil for Rewire Tools
Whale oil is scarce early on. Use it primarily for rewire tools and grenades, not for crafting useless items. In the first few levels, avoid wasting whale oil on springrazors you won’t use.
3. Blueprints Improve Crafting
Blueprints (found around the world) upgrade your inventory capacity for potions, elixirs, and grenade types. They also unlock new crafting recipes for bonecharms. Always search for blueprints; they permanently improve your effectiveness.
Intermediate Resource Tips
1. Craft Bonecharms from Fragments
Four bonecharm fragments make one random bonecharm. You can break down unwanted bonecharms at a workbench for fragments. Focus on crafting bonecharms that suit your playstyle: stealth players want “Swift Shadow” (move faster while crouching), combat players want “Bloody Mist” (kill enemies make them explode into bloodflies).
2. Use the “Spirit Water” or “Voltaic Conversion” Bonecharms
Spirit Water: picking up a small health or mana potion also restores the other resource partially. Voltaic Conversion: taking electrical damage (from arc pylons) restores mana. These provide infinite sustain in certain areas.
3. Automate Crafting with Workbenches
Each mission has at least one workbench. You can craft bonecharms, upgrade equipment (bow, pistol, crossbow) using coins and whale oil. Upgrading your crossbow to shoot armored enemies is a high priority for stealth runners.
Advanced Resource Tips
1. Farm Whale Oil from Arc Pylons
Arc pylons and walls of light contain whale oil tanks. If you disable them (using rewire tool or destroying the power source), you can loot the whale oil for crafting. This gives you a steady supply without exploring dangerous rooms.
2. Duplicate Bonecharms via Void Shrines
After completing certain side objectives (like the “Dr. Galvani” quest), a Void Shrine may offer to duplicate a bonecharm you own. This allows stacking identical strong effects (e.g., two “Swift Shadow” charms). Use this to create overpowered combinations.
3. Use “Blood Flight” from Bonecharm to Gain Height
If you craft a bonecharm that lets you jump higher (e.g., “Agility” upgrade), combine it with Blink or Far Reach to reach almost any spot. This eliminates the need for alternate paths and saves time.
Builds & Upgrades (Runes & Powers)
Beginner Build Tips
1. Choose a Character and Stick to a Power Set
Corvo has Blink, Possession, Stop Time, and Windblast. Emily has Far Reach, Domino, Shadow Walk, Doppelganger, and Mesmerize. Sam playthrough? Focus on one character’s powers first. For stealth, Emily’s Domino + Shadow Walk is forgiving. For direct combat, Corvo’s Stop Time + Blink is devastating.
2. Prioritise Upgrade of Movement Powers
Blink’s upgraded range (Blink Range I/II) and Far Reach’s reach and pulling ability drastically improve navigation. Spend your first runes on these. Being able to escape or reposition easily saves you more trouble than any combat power.
3. Get Dark Vision Early
Dark Vision is indispensable for stealth. The first upgrade reveals loot, the second reveals living beings. Buy it with your first runes. It prevents detection and helps you find all secrets.
Intermediate Build Tips
1. Domino + Shadow Walk is a Stealth Killer Combo
Tag a group of enemies with Domino (up to 4). Activate Shadow Walk, walk up to one, and perform the lunging attack. All tagged enemies die instantly, and since Shadow Walk is active, you remain invisible during the kill. No bodies, no alarms.
2. Stop Time + Grenade + Blink Escape
Corvo: cast Stop Time (fully upgraded), place a sticky grenade on each frozen enemy’s chest, then Blink to a high vantage point. When time resumes, the grenades explode simultaneously. This clears entire rooms without alerting other floors.
3. Doppelganger + Mesmerize for Crowd Control
Emily: drop a Doppelganger in a hallway, then cast Mesmerize. Enemies will stare at your decoy while you backstab them from behind. Upgrade Doppelganger to explode on death (for fun) or to possess enemies.
Advanced Build Tips
1. Optimise Bonecharm Loadouts
Stack multiple copies of the same beneficial bonecharm. For example, “Swift Shadow” (move faster while crouched) stacks; three of these make you walk at full speed while hunched. “Agility” (jump height) stacks; two of these let you jump over walls. “Bloody Mist” (explosive kills) can chain-kill enemies in a crowd. Plan your build before a mission.
2. Use “Void Favor” to Save Runes
Some Void Shrines offer a “Void Favor” that grants a random bonecharm or rune for free if you complete a challenge (e.g., no kills in this area). Accept these to accelerate your power growth without spending resources.
3. Hybrid Build: Combat+Stealth
If you want to handle both, invest in Far Reach/Blink for mobility, Domino (Emily) or Stop Time (Corvo) for crowd control, and always keep Dark Vision. Use any remaining runes on passive upgrades like Vitality (max health) and Bonecharm Divination (increase bonecharm drop rate).
Economy & Coin Tips
Beginner Economy Tips
1. Sell Unwanted Items Every Mission
Black Market shops appear in each level. Sell surplus whale oil, ammo you won’t use, and extra health potions. Coins are used to buy upgrades and services (like keys or safe codes). Always carry at least 200 coins for emergencies.
2. Collect All Coins, Even Small Amounts
Coins are hidden everywhere: inside drawers, under beds, on dead bodies. Looting every container might net you 200 extra coins per level—enough for a bonecharm from the Black Market.
3. Donate to Beggars for Alternate Paths
In some missions (e.g., Dust District), giving a beggar 50 coins opens a shortcut door or reveals a secret stash. Keep spare change for these interactions.
Intermediate Economy Tips
1. Invest in “Bonecharm Divination” Early
This passive power (requires runes) increases the chance of finding bonecharm fragments on enemies and in containers. More fragments = more bonecharms = more coin from selling duplicates. It pays for itself quickly.
2. Use the Black Market Purchases Wisely
Black Markets often sell special items: keys that open new areas, maps revealing collectible locations, or exclusive bonecharms. If you can afford the map, buy it—it shows all runes and bonecharms on the level map, saving hours of searching.
3. Trade Runes for Coins with the Outsider’s Shrines?
Actually, you cannot trade runes directly. But more runes mean more powers, which let you complete missions faster and loot more coins. Focus on missions with high coin potential (e.g., The Clockwork Mansion has many safes).
Advanced Economy Tips
1. Abuse the Invisibility+Pickpocket Combo
Use Dark Vision to locate guards with coin pouches. Use Shadow Walk or Possession + Blink to get next to them without detection. Pickpocketing yields 20-100 coins per guard. There are over 30 guards in some levels; you can harvest 2000+ coins this way.
2. Craft and Sell Bonecharms
After completing a mission, break down any bonecharms you don’t need and craft new ones. You can sell crafted bonecharms to Black Market dealers for a profit, as some rare charms fetch high prices. Focus on crafting charms with “Spirit Water” or “Swift Shadow” because they are universally useful.
3. Complete Side Objectives for Bonus Coins
Side objectives often reward large sums (e.g., recovering the Duke’s safe key gives 500 coins). Always do side quests before leaving a level. The payout helps buy late‑game upgrades.
Difficulty & Chaos Management
Beginner Difficulty Tips
1. Play on Normal First
Normal difficulty offers fair enemy HP and damage. Harder difficulties give enemies more health and sharper awareness, punishing mistakes. Learn the mechanics on Normal, then try a higher difficulty for achievements.
2. Use Quick Save Before Risky Actions
If you are about to attempt a complex jump or a multi‑kill, quicksave. If you fail, reload instantly. This saves frustration and allows experimentation.
3. Manage Chaos Systematically
If you want a low chaos ending, never kill civilians, avoid killing guards unless absolutely necessary, and don’t be seen. Non‑lethal takedowns are always possible. Use sleep darts, chokeholds, and the non‑lethal methods for special targets.
Intermediate Difficulty Tips
1. “No Kills” Run Requires Patience
To achieve the “Clean Hands” achievement, you must not kill any human or bloodfly (bloodflies count as kills if they die from your influence). Use non‑lethal takedowns, Domino+Choke, and avoid fall damage kills. If an enemy falls off a ledge while unconscious, that counts as a kill. Be careful with body placement.
2. “Ghost” Run (Never Detected) Needs Perfect Dark Vision Usage
To get the “Ghost” achievement, you must never be spotted by enemies. Use Dark Vision constantly to check enemy cones of vision. Wait for patrols to move. Use Far Reach/Blink only when no enemy is looking at your landing spot.
3. Higher Chaos Means More Enemies
As chaos increases, guard patrols become more frequent and more aggressive. Areas that were empty become filled with enemies. This can make exploration harder but also more rewarding for combat builds. If you’re stuck, try reducing chaos by non‑lethal methods.
Advanced Difficulty Tips
1. Chain Non‑Lethal Takedowns with Domino + Choke
Tag four enemies with Domino. Walk up to one and press choke. All four are choked simultaneously. This is the only way to non‑lethally neutralize a group quickly. Requires upgrade to Domino for 4 targets.
2. Use Stop Time to Avoid Detection
Even if you are about to be seen, casting Stop Time (Corvo) freezes the moment. You can then walk behind the guard and choke him before time resumes, and he never registers you. This is a “cheat” for Ghost runs.
3. Speedrun Techniques: “Blink Cancel” and “Far Reach Slide”
Learn to cancel Blink’s landing animation by pressing crouch immediately. With Far Reach, use the pull to slide across gaps while maintaining momentum. These techniques let you traverse levels in under 30 seconds, bypassing all guards. Practice in the first level.
Platform‑Specific Tips
1. PC: Remap Keys for Easy Access
Default controls can be awkward. Remap powers to Q or mouse thumb buttons, and quicksave to F5 or a convenient key. Consider using a gaming mouse with extra buttons for quick power cycling.
2. PlayStation/Xbox: Use Controller Vibration for Stealth
Controller vibration intensifies when you are near an enemy or an explosive hazard. Use this to feel guards through walls—if the left half of the controller vibrates, an enemy is to your left. This is helpful for blind fire.
3. PlayStation 5 Backward Compatibility: Enable Performance Mode
If playing on PS5, make sure to select Performance Mode in the game’s options (if available via patch). This runs the game at 60 FPS, making combat and power usage smoother.
Miscellaneous Advanced Tips
1. Use the “Double Jump” from Bonecharm “Agility”
Craft a bonecharm that adds +20% jump height. Two of these let you jump almost as high as a Blink. Save on mana for other powers.
2. Combine “Spirit Water” with Health Elixirs
If you have Spirit Water equipped, drinking a small health elixir also refills 25% of your mana. In areas with abundant potions, you never need to visit a touchstone.
3. Destroying Walls of Light with an Arc Pylon Battery
You can pick up a whale oil battery from a disconnected pylon and throw it at another Wall of Light; it will explode and disable the barrier temporarily. Useful for nonspecialist builds.
4. Listen to the Heart’s Whispers
The Heart (given to you by the Outsider) can be held to listen to secrets about locations and NPCs. Use it near a corpse to learn the person’s name and relevance. This helps with lore and sometimes reveals hidden side undercovers.
5. Use the Environment to Hide Bodies
Never leave unconscious bodies in plain sight; patrolling guards will find them and raise the alarm. Dump bodies in dumpsters, behind large furniture, or in high ledges. In the Dust District, you can drop bodies into the river to dispose of them permanently.
6. Endgame: Use the “Void Gorgers” to Refill Mana
Void Gorgers (green glowing plants) are rare but fully restore mana. Memorise their locations in each level to sustain power usage. They respawn after a while (not during same mission).
7. Final Boss Tips
The final boss (Delilah) has three phases. First phase: she is invincible; you must destroy the painting of her. Use Far Reach/Blink to reach the painting platform while dodging her attacks. Second phase: after destroying painting, she becomes vulnerable for a few seconds; attack with Domino + grenades or Stop Time + sword. Third phase: she summons multiple shadow copies; use Dark Vision to identify the real one. Keep moving and use Mesmerize to freeze copies.
Summary
Mastering Dishonored 2 requires blending stealth, powers, and environmental awareness. Start with low chaos on Normal difficulty, focus on one character, and gradually try advanced power combos. Save often, explore thoroughly, and listen to the world—it rewards patience. Whether you choose Corvo’s time‑bending abilities or Emily’s shadowy dominion, each playthrough can be vastly different. Good luck in Karnaca!
Game Settings
Game Settings Guide for Dishonored 2
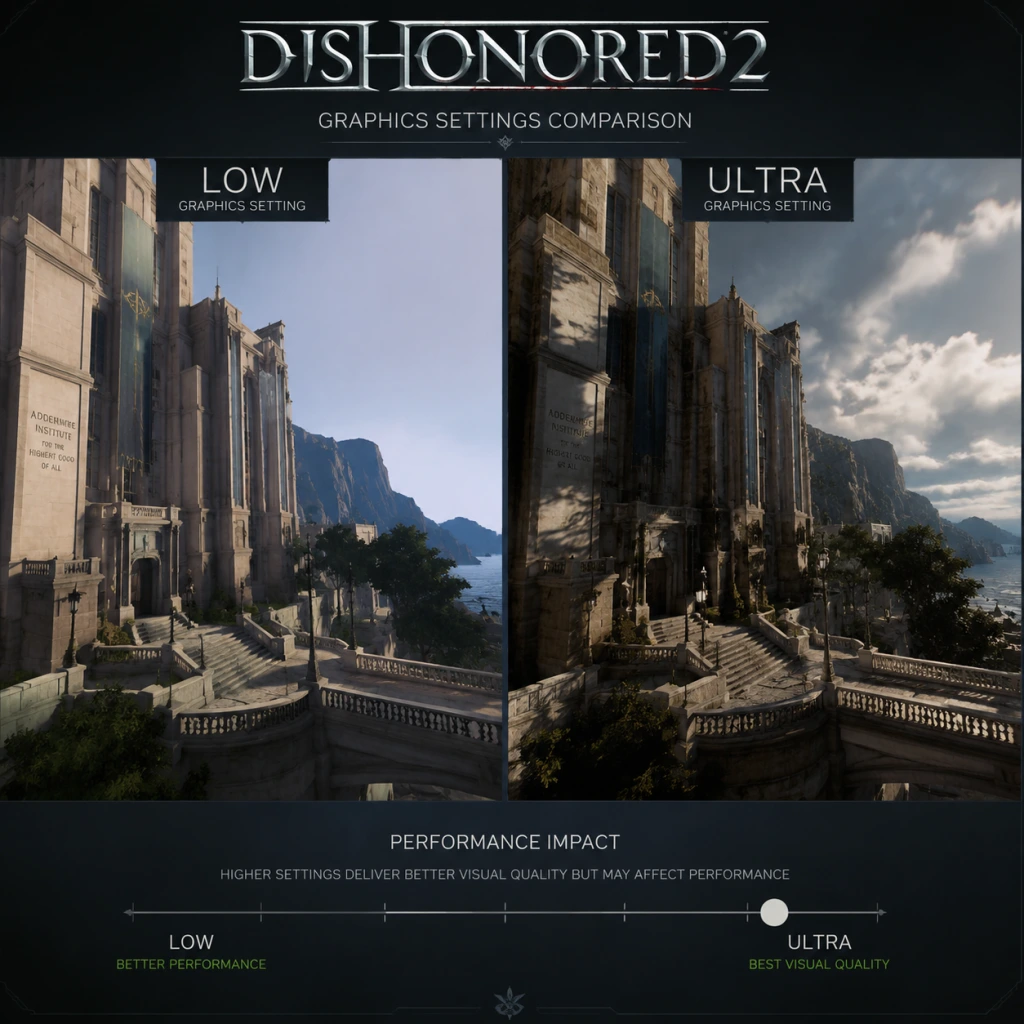
Properly configuring your settings in Dishonored 2 can significantly impact performance, visual fidelity, and gameplay responsiveness. This guide covers every settings category and provides optimal recommendations for different hardware tiers on PC as well as console-specific tips.
---
Graphics Settings (PC)
Dishonored 2 uses Arkane's custom Void Engine (id Tech 5 derivative), which is heavily CPU-bound, especially in complex areas like the Clockwork Mansion. The game also runs at a mandatory 60 FPS cap on consoles, but PC players can unlock it (requires tweaking a config file).
#### Recommended Graphics Presets by Hardware Tier
| Hardware Tier | Preset | Key Adjustments |
|---|---|---|
| Low-End (GTX 960 / RX 460 / 4GB RAM) | Low | 720p resolution, disable V‑Sync, set Texture Quality to Low, Shadow Quality to Low, turn off Depth of Field, Tessellation off. |
| Mid-Range (GTX 1060 / RX 580 / 8GB RAM) | Medium | 1080p, Texture Quality Medium, Shadow Quality Medium, V‑Sync off (use Fast Sync if tearing appears), enable TAA, keep Tessellation on Low. |
| High-End (RTX 2060 / RX 5700 / 16GB RAM) | High | 1440p, Texture Quality High, Shadow Quality High, enable HBAO+ (ambient occlusion), Depth of Field on Medium, TAA on, Tessellation on Medium. |
| Ultra (RTX 3080 / RX 6800 XT / 16GB+ RAM) | Very High | 4K, Texture Quality Very High, Shadow Quality Very High, HBAO+ Ultra, Depth of Field on Cine, TAA (High Quality), Tessellation on High. |
- V‑Sync: Enabling in-game V‑Sync adds significant input lag. Disable it in the menu and force Fast Sync (NVIDIA) or Enhanced Sync (AMD) through your GPU driver. Alternatively, enable V‑Sync only if you can't stand tearing and are willing to accept latency.
- Texture Quality: Adjusts VRAM usage. High textures require ~4GB VRAM at 1080p; Very High can exceed 5GB. Monitor your GPU memory usage; if you get stuttering, reduce this setting first.
- Shadow Quality: Extremely CPU-intensive. On mid-range CPUs, drop this to Medium even if GPU can handle higher. The Clockwork Mansion and the Dust District are notorious for CPU spikes.
- Adaptive Resolution: On consoles this dynamically drops resolution to maintain 60 FPS. On PC it's off by default; leave it off unless you have a very weak GPU.
- TAA (Temporal Anti-Aliasing): The only AA option that handles the game's fine details well. It may cause slight blur, but turning it off results in shimmering edges. Consider using Reshade SMAA if you dislike TAA.
- Depth of Field: Disable for competitive play or clarity; it blurs distant objects. On low-end PCs, turn it off entirely.
- Tessellation: Provides extra geometry detail on surfaces like stone floors. Very GPU demanding; low/medium offers 90% of the visual benefit.
- PS4 / PS4 Pro: The game runs at 1080p (PS4) or 1800p checkerboard (Pro) at 30 FPS. On PS5 via backward compatibility, it stays at 30 FPS with no performance patch. Set Motion Blur to Low to reduce the perception of choppiness.
- Xbox One / Xbox One S: 1080p 30 FPS. Xbox One X offers 1440p 30 FPS. No 60 FPS mode exists on any console.
- Field of View (FOV): Can be adjusted on all platforms (80–120). A higher FOV (90–100) helps situational awareness but lowers performance slightly. Console players should stay at default 80 to maintain stable frame rate.
- Master Volume: Default 100%, adjust as needed.
- Music Volume: Keep at 70–80% to not overpower ambient sounds that reveal enemy positions.
- SFX Volume: Set to 100% – all crucial gameplay sounds (footsteps, gear clanking, clockwork sounds) are here.
- Dialogue Volume: 100% to catch story dialogue and enemy conversations.
- Voice Language: English, French, German, Italian, Spanish, Japanese, etc. Can be changed independently of text language. If you want original voices, keep as is.
- Subtitles: Enable for all dialogue (including NPC ambient lines). Very helpful in noisy environments.
- 3D Audio / Headphone Mode: On PC with a stereo headset, enable Headphone Mode (if available – check config files). On consoles, system-level 3D audio (Tempest 3D on PS5, Windows Sonic on Xbox) works well. Set to Wide or Cinematic for better spatial awareness.
- Mouse Sensitivity: Default 5.0 – too slow for most players. Recommended: 8–10 for normal gameplay, 4–6 for stealth. Adjust DPI accordingly.
- Mouse Smoothing: CRITICAL TO DISABLE. This setting is ON by default and adds significant input lag. Go to Settings → Controls → Mouse Smoothing and set it to 0. The game will feel much more responsive.
- Invert Mouse Y: Optional, disabled by default.
- Key Bindings: Predefined bindings are functional but not optimal. Consider remapping:
- Controller Vibration: Disable for better aim accuracy (especially when using crossbow).
- Look Sensitivity: Default 50% is too low. Increase to 70–80% for faster turning.
- Aim Down Sights Sensitivity: Set to 50% (slower when aiming) for precise shots.
- Controller Deadzone: Default is fine, but some players prefer lowering to 5% for finer control.
- Vibration: Keep on for immersive feedback (footsteps, powers), but off for competitive stealth.
- Button Layout: The default layout is standard. If you play other Arkane games (Prey, Deathloop), consider customizing to be consistent. For example, map Blink to LB (L1) instead of A for faster teleporting.
- Subtitles: As mentioned, enable All Dialogue subtitles. The game also has a Subtitle Background option – enable for readability in bright areas.
- Colorblind Mode: Not natively supported. No in-game colorblind filters. On PC, you can use third-party overlays like Reshade to apply colorblind-friendly LUTs. On consoles, use system-level color filters (Windows Color Filters on Xbox, iOS-style on PS?). Neither is ideal.
- Difficulty Settings: Four levels – Easy, Normal, Hard, Very Hard. Affects enemy damage, detection speed, and resource availability. Easy or Normal recommended for first playthrough to avoid frustration.
- Audio Cues: The game relies heavily on audio (enemy footsteps, clockwork ticks, etc.). If you have hearing difficulties, consider using special headphones or increasing SFX volume.
- Screen Shake: Can be reduced via a hidden config file edit (search for PostProcessing= in Dishonored2Config.ini and set bCameraShakeEnabled=False). Not accessible in menus.
- Text Language: Can be changed independently from voice language. Available in: English, French, German, Italian, Spanish, Japanese, Polish, Russian, Chinese (Simplified), and more.
- Voice Language: Separate selection – you can have English text with Japanese voices, for example. Change this in Settings → Audio → Voice Language.
- Console Language: For consoles, language is tied to system language unless you change it in the game's settings. Some platform versions may lack certain language options (e.g., Japanese audio is only on the Japanese release disk).
- PC Steam Language: The Steam client language determines the default, but you can override via game launch options. For example, to force English: `-language english` in launch options.
- Bethesda.net Login: On PC and consoles, the game may prompt you to log in to Bethesda.net for cloud saves and sharing screenshots. This is optional. If you encounter crashing, skip login.
- In-Game Store: Unavailable; all DLC (e.g., Dishonored 2: Death of the Outsider) is separate and not accessed via in-game menus.
- No Leaderboards or Online Features: Therefore, no network settings to adjust. Leave everything at default.
- Difficulty: As noted earlier, choose from Easy to Very Hard. The game's Chaos system is unaffected by difficulty, so play at a level that allows you to enjoy the story.
- Auto-Aim: On all platforms, a slight aim assist is present for controllers. Turn it off for more rewarding manual aiming; leave on for casual play.
- Crosshair: Choose between Dynamic (changes size when aiming at enemies) or Static. Dynamic offers more feedback for stealth (e.g., crosshair turns red when enemy is targetable).
- Interaction Prompt Size: Small/Medium/Large. Increase if you have trouble seeing prompts on screens.
- Quick Save / Quick Load: Active on all platforms. On PC, F5 and F9 work instantly. On consoles, you can only access via menu (save/load). Use frequently, as the game has no checkpoint spacing.
- Bonuses / HUD: Customize which HUD elements appear: objective markers, enemy awareness indicator, mana/bloodthirst display, etc. You can hide everything for an immersive experience. Recommended: keep Enemy Awareness and Objective Marker on for direction.
- Automatic Weapons Sheath: On by default – your weapon goes away if you don't use it for a while. Disable if you want to stay ready.
- Hold vs Toggle Actions: Crouch, Sprint, Lean. Toggle for Crouch and Sprint are less fatiguing for long sessions. Lean is typically hold only.
#### Console-Specific Graphics Notes
---
Audio Settings
---
Controls Settings
#### Keyboard & Mouse (PC)
- Blink / Far Reach to Mouse Button 4 (thumb button) for quick use.
- Quick Save to F5 (default), Quick Load to F9 – extremely useful.
- Weapon Wheel to Q (hold) – allows instant power selection.
- Crouch to Ctrl (toggle) – toggle is more ergonomic than hold.
#### Controller (PC & Console)
---
Accessibility Settings
Dishonored 2 has limited built-in accessibility options, but the following are available:
---
Language Settings
---
Network Settings
Dishonored 2 is a single-player only game. There is no multiplayer, co-op, or online component that affects gameplay. However:
---
Gameplay Settings
---
Special Attention Points & Easy-to-Misconfigure Settings
1. Mouse Smoothing (PC): Always turn this to 0. Many players don't notice it at first but later wonder why aiming feels sluggish. Check it before playing.
2. V‑Sync: Disable in-game to reduce input lag. If you must cap FPS, use an external limiter (RTSS, NVIDIA Control Panel).
3. Texture Quality on Low VRAM GPUs: Setting to Very High on a 4GB card can cause stuttering as textures are swapped out. Monitor VRAM usage with tools like MSI Afterburner.
4. Shadow Quality on CPUs: The default “High” is punishing for quad-core CPUs. Lower to Medium if you experience massive frame drops in the Clockwork Mansion.
5. FOV for Performance: Increasing FOV reduces performance by ~5% per 10 degrees. Keep at 90 if you want a balance between awareness and frames.
6. Auto-Save Frequency: The game autosaves only at checkpoints. Use Quick Save manually every few minutes – especially after completing a difficult stealth sequence.
7. Controller Aim Assist: On PC, if you use a controller, aim assist is quite strong. Turn it off to develop better aim for higher difficulties.
8. Language Mismatch on Steam: If you see the wrong language, go to game properties → Language tab and select your preferred language, then verify integrity of game files.
9. Fullscreen vs Borderless: Use Exclusive Fullscreen for best performance. Borderless Windowed adds input lag and can reduce FPS by 3–5%. Console players have no choice.
10. Hide HUD Elements: The game allows toggling HUD off entirely via a keybind (default F12 on PC). This can be accidentally pressed during tense moments and hide critical info. Rebind it if you play with minimal HUD.
---
Conclusion
Tweak these settings before you dive into the streets of Karnaca. Remember: Dishonored 2 rewards patience and experimentation. A smooth 60 FPS with responsive controls will make your stealth or combat efforts far more satisfying. If you hit performance walls, lower Shadow Quality and Texture Quality first – they have the biggest impact on both CPU and GPU. Enjoy the game!
Important Notes
Warnings & Pitfalls
1. The Chaos System
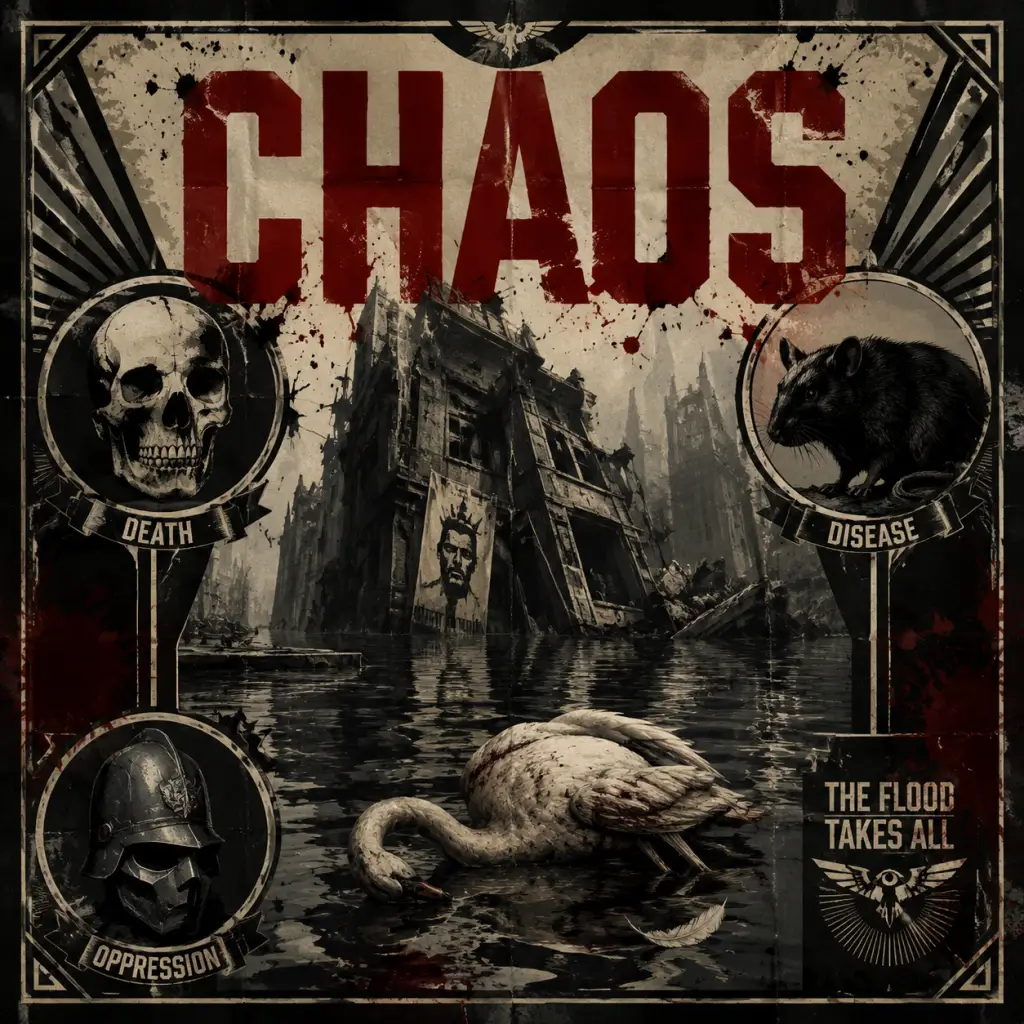
Every lethal kill (including animals and unconscious bodies left in water) increases Chaos. High Chaos results in a darker story, more bloodflies, and the death of Corvo/Emily's allies, including Meagan Foster. Low Chaos is required for the best ending and for achievements like "Clean Hands" (no kills) and "Ghost" (never detected).
- Tip: If you want Low Chaos, never kill civilians, and use non-lethal takedowns (choke, sleep darts, drop knockouts) on enemies. Check your stats in the pause menu.
- Create multiple manual saves before major decisions or entering new areas. Because some choices are irreversible (e.g., selecting a mission target's fate), you can reload to try both paths.
- Do not overwrite your only save during the final mission—if you get stuck in high chaos, you might lose the low chaos ending.
- Use quick saves frequently during stealth sections; a single mistake can alert the entire level.
- Corvo retains his abilities from Dishonored 1 (Blink, Devouring Swarm, etc.) and can use his old gear.
- Emily has new powers (Far Reach, Domino, Mesmerize).
- Irreversible: You cannot switch characters mid-playthrough. Choose based on preferred playstyle and story perspective (Emily sees her city; Corvo is more detached).
- Missable content: Each character has unique dialogue and some interactions (e.g., with the Crown Killer or Stilton). Consider two playthroughs.
- Runes and Bonecharms: Each mission has a fixed number of Runes (used to upgrade powers) and Bonecharms (equippable buffs). They are hidden in mission-specific locations and cannot be returned to after you leave. Use the Heart to detect them—it pulses faster when near a charm.
- Siderian & Delilah’s paintings: Paintings by Siderian are missable if you don’t collect them (they are in mission-specific rooms). They are required for the “Dishonored 2” achievement and the “Mindful” achievement (collect all paintings).
- Contracts: In mission 6 (The Dust District), you can pick up contracts from an NPC (the “Howler” or “Overseer” depending on your choices). These are optional side objectives that give bonus coins and sometimes unique loot. Once you leave the district, they are gone.
- The Clockwork Mansion (Mission 4): The main challenge is navigating the moving rooms and avoiding Clockwork Soldiers (they are deadly and require special tactics). If you’re under-upgraded, this mission can be brutal.
- The Grand Palace (Mission 8): Heavy enemy density, tight patrols, and many alarms. Approach carefully.
- Final Boss (Delilah): She can destroy or nullify your powers if you rely too heavily on them. Stock up on grenades, crossbow bolts, and antihistamine for the bloodfly section.
- Hoard coins unnecessarily: Coins are plentiful; you only need enough to buy gear from black market shops (which have limited stock per mission). Pickpocketing or robbing the shop sometimes opens shortcuts, but you can always find alternate routes.
- Chasing every bonecharm in a single playthrough: Some are in traps or require tricky platforming. If you’re not a completionist, don’t spend 20 minutes on one—you can replay missions via mission select.
- Over-using the Heart: The Heart can be used to detect secrets, but using it too often slows down gameplay. Only use when you see a visual cue (sparkling) or hear a faint chime.
- Single-player only: No multiplayer, so no anti-cheat concerns. Achievements can be earned in any difficulty.
- Modding: Unofficial mods (e.g., “New Game Plus” or overhaul mods) may disable achievements. PC players should back up saves before modding.
- Leaderboards: None exist. No worries about speedrun comparisons affecting experience.
- Mission 2 (Edge of the World): You can kill or spare the Crown Killer (one appears later if spared). Doing so influences the Royal Conservatory’s state.
- Mission 6 (The Dust District): Siding with the Howlers or Overseers determines which faction helps you and what rewards you get. You cannot change later.
- Mission 7 (The Bank Job): You can choose to blow the safe door or lockpick it. The lockpick path gives you more loot but is harder.
- Endgame: Delilah’s fate (kill, non-lethal, or leave) affects the final cinematic. If you spare her, she remains imprisoned in Stilton’s mind—this is the best for low chaos.
- Manual saves before every mission and before major encounters (e.g., entering the Clockwork Mansion for the first time). Label them with the mission number.
- Keep a separate save at the start of the final mission (Death to the Empress) to replay without restarting the whole game.
- If you are aiming for “Clean Hands” or “Ghost,” save after every major objective and reload if you accidentally kill or get detected.
- The game has a limited number of autosave slots (10-15). Over time, old autosaves get deleted. Manual saves persist until you delete them.
- Play at your own pace. Dishonored 2 rewards exploration but punishes rushing. Save often, experiment with gadgets and powers, and don’t be afraid to reload a save to avoid a mistake.
- If you are on PC, disable V-Sync and frame limiting for smoother input. The game can have stutter on certain hardware.
- Remember: there is no “wrong” way to play, but understanding Chaos and collectibles will make your experience more satisfying.
2. Save Management
Dishonored 2 autosaves at checkpoints, but manual saves are your best friend.
3. Character Choice (Corvo vs. Emily)
4. Missable Collectibles & Side Content
5. Difficulty Spikes
6. Grinding Traps (Mistakes That Waste Time)
7. Online Etiquette & Anti-Cheat Notes
8. Things Players Commonly Regret Not Knowing Earlier
1. You can drop down on enemies from above to perform a non-lethal (or lethal) takedown without spending mana. This works on any enemy below.
2. Re-wire Walls of Light and Arc Pylons to kill enemies instead of yourself. (Requires a rewiring tool found in the world.)
3. Bloodflies are attracted to corpses. If you leave bodies lying around, bloodflies will spawn and create nests that grow over time. Dispose of bodies in containers, dumpsters, or use the “Devouring Swarm” (Corvo) to eat them.
4. Your level of Chaos affects your ending cinematic and the health of the city (more weepers, more bloodflies). You can change chaos mid-game, but it’s cumulative.
5. The “Foreshadowing” painting in mission 1 is actually a quest item for a side mission later—don’t sell it.
6. You can upgrade powers with Runes at any writing desk (like shrines) in each level. You don’t need to wait until the mission ends.
7. Emily’s “Domino” power can link enemies to a sleeping or unconscious target—great for non-lethal stealth.
8. Corvo’s “Stop Time” (Bend Time) can be upgraded to freeze enemies indefinitely—very powerful for capture runs.
9. The “Clockwork Soldier” enemies can be disabled by knocking off their heads (shoot the helmetless head with a crossbow) or using the “Stalker” bonecharm combo.
10. Your chosen character’s starting gear (Corvo’s sword, Emily’s folding blade) cannot be swapped, but you can find upgrades for each in the world.
9. Irreversible Choices Summary
10. Save Management Best Practices
11. Missable Content by Mission
Mission | Missable Items/Events
--- | ---
1 - A Long Day in Dunwall | - Painting of Delilah’s past (collectible) – found in the bar after the first vision.
2 - Edge of the World | - Rune at the top of the building with the guard tower. - Side contract from Black Eye (if you rescue her).
3 - The Good Doctor | - Paintings in Dr. Galvani’s office. - Rune in the safe behind the painting.
4 - The Clockwork Mansion | - Bonecharm in the room with the moving walls (requires timing). - Jindosh’s blueprint for achievement.
5 - The Royal Conservatory | - Rune on the roof (accessible from balcony). - Astrid’s doll (for an achievement).
6 - The Dust District | - Both faction side quests; you can only do one. - The “Underground” entrance to the Conservatory’s vault.
7 - The Bank Job | - One painting in the manager’s office. - Rune in the vault (requires solving puzzle).
8 - The Grand Palace | - Two bonecharms in the sub-basement (after draining the water). - The “Shadow” achievement (complete without killing anyone).
9 - Death to the Empress | - No new collectibles, but you can loot Delilah’s tower for extra coins.
12. Final Advice

All Game Items
Overview
_Dishonored 2_ features a diverse array of items that enhance stealth, combat, and exploration. They are organized into seven main categories: Weapons, Equipment & Powers, Consumables, Materials & Currencies, Collectibles, Key Items, and Bonecharms. Each item has specific uses, acquisition methods, and synergies. This guide covers all significant items, including upgrades and alternatives based on character (Corvo vs. Emily).
---
1. Weapons
Melee Weapons
| Weapon | Damage | Special | How to Obtain |
|---|---|---|---|
| Folding Blade (sword) | High | Can be upgraded; basic melee weapon | Starting equipment for both Corvo and Emily |
| Assassin’s Blade | Same as above | No special effect; can be upgraded to perform assassinations | Automatically obtained after the first mission (if Corvo is chosen) |
| Sword of the Outsider (Corvo only) | Same | Inflicts extra damage to enemies with high Chaos; enchanted | Obtained from the Outsider’s void during the mission "A Crack in the Slab" (Corvo path) |
| Emily’s crossbolt (not melee) | - | Ranged weapon; see below | Starting equipment for Emily |
- The Folding Blade can be upgraded at the black market or via blueprints: Increased damage, faster swing, or non-lethal takedown capability.
- For a non-lethal run, always equip the Folding Blade with the "Stun" upgrade or use Chokehold (bonecharm).
- Fires crossbow bolts (standard, incendiary, poison, explosive, stun).
- Bolt types are unlocked via blueprints or purchased from black markets.
- Ammo is finite, but can be crafted from whalebone and metal scraps.
- High damage but noisy. Can be upgraded with scope and increased ammo capacity.
- Obtained from the guard captain in the first mission (Corvo path) or found in the Clockwork Mansion.
- Silent ranged weapon; fires arrows that can be recovered. Can be upgraded with greater draw speed and charm chance.
- Starting equipment.
Ranged Weapons
Crossbow (shared by both characters):
Pistol (Corvo only):
Hand Bow (Emily only):
Special Weapons / Gadgets
| Item | Effect | How to Get |
|---|---|---|
| Springrazor Trap | Proximity mine that deploys a blade; lethal | Blueprint or purchase |
| Stun Mine | Non-lethal; knock out enemies in a small radius | Blueprint or purchase |
| Smoke Grenade | Obscures vision; allows escapes | Blueprint or purchase |
| Howling Bolt | Crossbow bolt that creates a decoy sound | Blueprint |
| Charming Arrow (Emily only) | Forces an enemy to become docile temporarily | Upgrade path |
| Voltaic Bolt (Corvo only) | Stuns electronics and enemies | Upgrade path |
- All gadgets require crafted components (whalebone, spring parts, metal, etc.).
- Blueprints for gadgets are found in safes, black markets, and hidden rooms.
- Used to unlock and upgrade supernatural powers.
- Found in secret shrines, quest rewards, or purchased from black markets (rarely).
- Total of ~24 runes per playthrough.
- Equippable passive upgrades (up to 3-5 slots).
- Can be crafted at the Bonecharm table from whalebone and raw bonecharms.
- Unique bonecharms have special effects (e.g., "Shadow Kill" turns bodies to ash).
- See the Bonecharms section below for a list.
- Blink (teleport short range)
- Dark Vision (see through walls, highlight guards)
- Time Bend (slow time)
- Possession (inhabit humans/animals)
- Devouring Swarm (rat summon)
- Bend Time (stop time entirely)
- Windblast
- Far Reach (telekinetic pull/grapple)
- Mesmerize (stun multiple enemies)
- Shadow Walk (invisible, can pass through grates)
- Doppelgänger (create a clone to distract)
- Domino (link enemies: act on one affects all)
- All powers can be upgraded with additional runes (e.g., Blink II allows combat use).
- Unlock via the main quest or exploration.
- Found in the Dreadful Wale (hub ship) and in some safe rooms.
- Requires whalebone (for elixir and bonecharms) and coins for blueprint crafting.
- Upgrades increase capacity, damage, or add special effects.
---
2. Equipment & Powers
Runes
Bonecharms
Powers (By Character)
Corvo’s Powers (same as Dishonored 1):
Emily’s Powers (unique):
Upgrades (Weapon/Power stations)
---
3. Consumables
| Item | Effect | How to Obtain |
|---|---|---|
| Elixir (White) | Restores mana | Crafted from whalebone or found in world |
| Health Elixir (Red) | Restores health | Found, purchased, or crafted |
| Pierro’s Spiritual Remedy | Restores both health and mana | Rare; found in special locations |
| Sack of Coins | Adds 10 coins to inventory | Loot from guards, tables, etc. |
| Raw Whalebone | Material for crafting elixir/bonecharms | Found in nests, dead whales, shops |
| Spring Parts | Craft gadget components | Scavenged from machines, guards |
- Elixirs are essential for spell usage. Mana regenerates slowly without them.
- Health elixirs can be bought from black marketers or found in medical cabinets.
- All consumables have weight? No, inventory is weightless but limited by slot (max 10 of each item).
---
4. Materials & Currencies
Currencies
| Currency | Use | How to Get |
|---|---|---|
| Coins | Purchase items from black market, upgrade weapons, bribe | Loot, safes, painting rewards |
| Runes | Unlock/powers | Shrines, quest rewards (8-10 per playthrough) |
| Whalebone | Craft elixir, bonecharms, upgrades | Whaling industry areas, dead whales, black market |
- Coins are abundant; high Chaos yields more coin drops from bodies.
- Runes are limited; prioritize powers that fit your playstyle.
- Whalebone is rare early game; search docks and slaughterhouse.
Crafting Materials
| Material | Used In | Source |
|---|---|---|
| Metal Scraps | Gadgets, crossbow bolts | Dismantled mines, machines |
| Spare Parts | Gadgets, bolt upgrades | Scavenge from patrols, warehouses |
| Raw Whalebone | Elixir, bonecharms | Whale carcasses, alchemist shops |
| Charm Rune (raw) | Crafting bonecharms | Found in nature, black market |
- Scavenging is key. Use the "Find Materials" bonecharm to highlight nearby sources.
---
5. Collectibles
| Type | Count | Purpose |
|---|---|---|
| Blueprints | ~30 | Unlock gadgets, upgrades at workbench |
| Paintings | 7 | Side quest (reward: coins and bonecharm) |
| Audiographs | ~20 | Lore; some give safe combinations |
| Notes / Diaries | Numerous | Lore, clues for missions |
| Safes | 12+ | Contain runes, coins, whalebone |
| Rune Shrines | 24 | Runes for powers |
| Black Market Valuables (e.g. coin sacks, antiques) | Per level | Can be sold for coins |
- Finding all blueprints allows full weapon/gadget upgrades.
- Paintings must be returned to the collector in the Royal Conservatory.
- Audiographs can be used to decode safe codes (listen to background audio).
---
6. Key Items (Quest/Story)
| Item | Mission | Purpose |
|---|---|---|
| The Crown Killer (audiol graphic) | Edge of the World | Identifies Delilah’s agent |
| Jindosh’s Safe Code | Clockwork Mansion | Opens the safe containing rune and plans |
| Sokolov’s Painting | The Royal Conservatory | Used to infiltrate the Conservatory |
| Anton Sokolov’s Recipe | Various | Crafting elixirs |
| Meagan’s Key | The Dreadful Wale | Opens her cabin (contains rune) |
| Corroded Man’s Skull | A Crack in the Slab | Used to alter the past |
| Stilton’s Safe Key | The Dust District | Opens a safe with valuable loot |
- All key items are mission-specific; they cannot be retained after completion.
- Some are needed for trophies/achievements (e.g., "Flesh and Steel" requires no powers).
---
7. Notable Bonecharms
Bonecharms are passive modifiers with varying rarities. Here are key ones:
| Name | Effect | Location |
|---|---|---|
| Spirit Water | Mana regen from drinking water | Royal Conservatory |
| Bend of the River | Reduced fall damage | Dust District |
| Shadow Kill | Killed enemies turn to ash | Crafted or found (unique) |
| Swift Shadow | Faster movement while crouched | Crafted |
| Tough Skin | Reduced damage from all sources | Black Market reward |
| Grip of the Void | Blink/Far Reach uses less mana | Crafted |
| Charming Scent | Enemies less likely to spot you | Crafted |
| Heart of the Outsider | Highlights runes and bonecharms on map | Side quest |
- Bonecharms can be crafted using a raw bonecharm and whalebone at the workbench.
- Each duplicate bonecharm increases its effect (stack up to 3 times).
- Unique bonecharms cannot be crafted.
- Weapon Upgrades: Increase damage, capacity, or add silencer (pistol).
- Gadget Upgrades: More trap damage, longer stun duration.
- Bolt Types: Craft incendiary, explosive, stun, poison bolts.
- Bonecharm Crafting: Requires raw bonecharm and 2-4 whalebone.
- Loot everything. Coins and whalebone are needed for upgrades.
- Prioritize blueprints for gadgets that match your style (stealth players: stun mines and howling bolts; combat players: explosive bolts).
- Bonecharms with "Spirit Water" and "Tough Skin" are universally useful.
- Runes are scarce; plan your power purchases. For non-lethal, Domino (Emily) or Possession (Corvo) are key.
- Chaos affects item availability? Not directly, but more guards in high Chaos means more lootable bodies.
---
8. Crafting & Upgrades System
At the workbench aboard the Dreadful Wale:
Upgrade costs increase with tier. Post game, all upgrades are available if you have materials.
---
Final Tips
This guide covers all major items in _Dishonored 2_. For specific locations of blueprints, runes, or bonecharms, consult mission-specific guides.
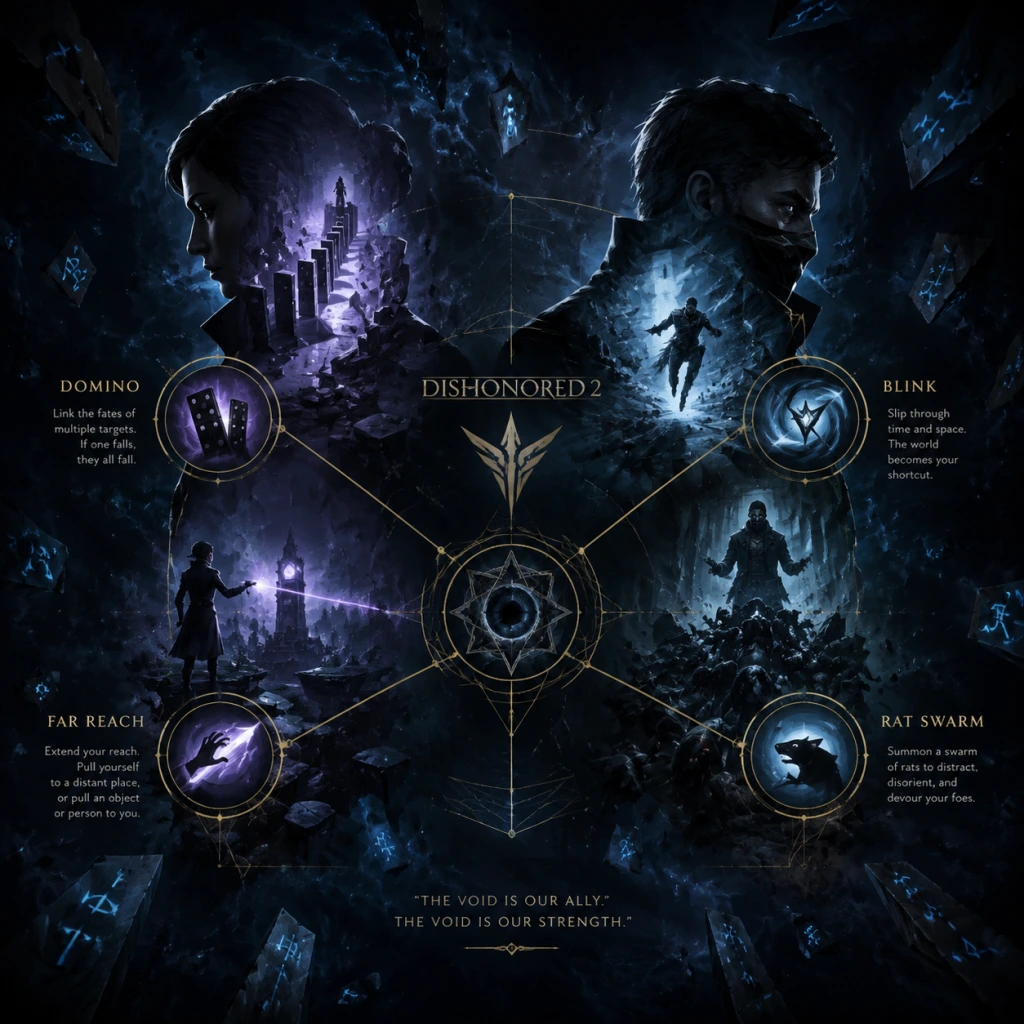
Character Skills
Overview
_Dishonored 2_ features two playable characters: Corvo Attano and Emily Kaldwin. Each has a unique set of supernatural powers, but both share access to passive upgrades (via Runes) and bone charm effects. This guide covers every ability, its effects, upgrades, combos, synergies, and recommended builds for both characters.
Core Mechanics
- Runes: Used to unlock and upgrade powers. Found throughout levels or crafted (see Crafting Guide).
- Bone Charms: Equippable trinkets that grant passive bonuses. Some are crafted, others found; they can be swapped anytime.
- Chaos: Affects world state, enemy density, and NPC behavior. High chaos yields more aggressive enemies, more bloodflies, and darker dialogue. Lethal actions increase chaos; non‑lethal reduces it.
- Mana: Consumed by powers. Regenerates slowly; can be restored with elixirs (mana potions).
- Black Magic: Certain powers have an offensive upgrade that adds a lethal component.
- Cooldown: None (free, limited by range).
- Upgrades:
- Combos: Blink behind an enemy for instant assassination; combine with Bend Time for multiple kills.
- Best Use: Traversal, silent repositioning, and quick escapes.
- Cooldown: ~8 seconds after effect ends.
- Upgrades:
- Combos: Use before Blink to scope enemy patrols; combo with Domino (Emily only) but not cross‑character.
- Best Use: Reconnaissance, planning stealth routes, locating targets.
- Cooldown: Starts after ability ends; ~30 seconds base.
- Upgrades:
- Combos: Use with Blink to chain assassinations; drop a spring razor before activation for instant kills.
- Best Use: Eliminate multiple enemies in high‑chaos runs; escape detection; steal items unnoticed.
- Cooldown: ~25 seconds after possession ends.
- Upgrades:
- Combos: Possess a guard to walk through security doors; possess a rat to reach small vents.
- Best Use: Infiltration, bypassing tight security, non‑lethal movement.
- Cooldown: ~10 seconds.
- Upgrades:
- Combos: Use to blow enemies off ledges or into traps; clear groups.
- Best Use: Crowd control, breaking cover, high‑chaos encounters.
- Cooldown: ~15 seconds after rats dissipate.
- Upgrades:
- Combos: Use in conjunction with Bend Time to swarm a crowd; or use as a distraction while sneaking.
- Best Use: Area denial, corpse disposal (rats eat bodies), creating chaos.
- Upgrades:
- Combos: Essential for high‑chaos runs to hide bodies – prevents discovery and alertness.
- Best Use: Ghost/clean hands runs (but note: kills still count for chaos).
- Cooldown: ~6 seconds after use.
- Upgrades:
- Combos: Pull a guard to you for a quick chokehold; use to retrieve keys from afar.
- Best Use: Traversal, non‑lethal removal, vertical mobility.
- Cooldown: ~15 seconds after effect ends (links break when target dies or sleeps).
- Upgrades:
- Combos: Use with Mesmerize to put a group to sleep; or with a spring razor to kill multiple at once.
- Best Use: Non‑lethal crowd control; synchronized takedowns.
- Cooldown: ~20 seconds after clone dies or expires.
- Upgrades:
- Combos: Use clone to draw guards away; then Blink/Far Reach past them. Combine with Shadow Walk to attack from clone’s distraction.
- Best Use: Diversion, creating openings, non‑lethal misdirection.
- Cooldown: ~20 seconds after effect ends.
- Upgrades:
- Combos: Use with Domino to affect a linked group instantly.
- Best Use: Non‑lethal takedowns, avoiding combat.
- Cooldown: ~30 seconds after transformation ends.
- Upgrades:
- Combos: Activate Shadow Walk to bypass detection fields, then emerge behind a key target. Combine with Doppelgänger for confusion.
- Best Use: Stealth infiltration, escaping combat, vertical mobility in shadow.
- Cooldown: ~25 seconds after disguise ends.
- Upgrades:
- Combos: Use Semblance on a guard to walk past a checkpoint; then switch to Shadow Walk to bypass a second area.
- Best Use: Social stealth, accessing restricted areas, avoiding combat entirely.
- Agility: Unlock double jump. (2 Runes)
- Vitality: Increase health by +50%. (2 Runes)
- Bonecharm Crafting: Create your own bone charms at a shrine (requires raw whalebone and blueprint).
- Shadow Kill: Only Corvo (see above).
- Reflexes: Slow time while aiming (default for both). Improves with Runes? No, but crouch sliding and sprinting can be enhanced via bonecharm traits.
- Swift Shadow: Move faster while crouched.
- Strong Arms: Chokeholds and assassinations are faster.
- Spirit Water: Mana recovers faster when in water.
- Undertaker: Bodies you carry disappear after a short time (non‑lethal).
- Bloody Death: Enemies explode on kill (stealth break).
- Corvo: Blink (L3) for mobility, Dark Vision (L2), Bend Time (L2 for duration), Possession (L3 for forced movement), Agility, Vitality. Avoid Windblast and Devouring Swarm (chaos risk).
- Emily: Far Reach (L3 for pulling), Domino (L3 for linking objects), Mesmerize (L3), Dark Vision (L2), Shadow Walk (L3), Agility, Vitality. Use sleep darts and chokeholds.
- Corvo: Blink (L3), Bend Time (L3 for time stop), Windblast (L3 for disintegration), Devouring Swarm (L3 for persistent rats), Shadow Kill, Vitality.
- Emily: Far Reach (L3), Domino (L3 with spring razors), Doppelgänger (L3 for blinding flash), Shadow Walk (L3 for lethal finisher), Dark Vision (L2).
- Prioritize core traversal (Blink/Far Reach) to level 2, Dark Vision level 1, then invest in one crowd control power (Bend Time for Corvo, Domino for Emily). Fill remaining runes with passives.
- Bend Time + Blink: Teleport to multiple enemies and assassinate while time is slowed. With Time Stop, kill all without raising alarm.
- Windblast + Rat Swarm: Blow enemies into a swarm for instant consumption.
- Possession + Shadow Kill: Possess a guard, walk into a fire, then Shadow Kill the ash – no body left.
- Domino + Mesmerize: Link a group, then Mesmerize one – all fall asleep.
- Far Reach + Doppelgänger: Pull a guard while clone distracts others; then choke the pulled guard.
- Shadow Walk + Semblance: Use Semblance to walk past outer guards, then Shadow Walk to bypass inner defenses.
- Dark Vision + Any Power: Pre‑scan before using an ability.
- Bone Charm Combo: Stack movement speed (Swift Shadow + Zephyr) for insane stealth agility.
Corvo Attano's Powers
Corvo’s abilities are inherited from the first game, focused on aggressive stealth and direct combat.
Blink
Base Effect: Teleport short distances instantly. Silent, does not break stealth if unseen. Can be aimed at ledges, rooftops, and behind cover.
- Level 2 (2 Runes): Increased range and can slow time while aiming (hold F on PC).
- Level 3 (3 Runes): Blink leaves a short‑lived clone that distracts enemies.
Dark Vision
Base Effect: See enemies and objectives through walls for ~5 seconds. Enemies appear as glowing silhouettes. Highlights loot, traps, and bloodflies.
- Level 2 (2 Runes): See enemy awareness state (calm, suspicious, alerted).
- Level 3 (3 Runes): Highlight all interactive objects (e.g., levers, doors, bottles).
Bend Time
Base Effect: Slows time for 6 seconds. Enemies move at 10% speed. Corvo moves normally.
- Level 2 (2 Runes): Increased duration (+3 seconds).
- Level 3 (3 Runes): Time stop – enemies freeze completely but can still take damage; you can assassinate frozen enemies.
Possession
Base Effect: Inhabit a living creature (human, rat, wolfhound) for 6 seconds. Can move, but cannot attack. Enemies may notice if you possess a friendly? No, if you possess an enemy, they become passive.
- Level 2 (2 Runes): Increase duration (+4 seconds).
- Level 3 (3 Runes): Can possess humans and force them to walk to a location or commit suicide (if high chaos).
Windblast
Base Effect: Fires a powerful gust of wind that knocks enemies backward and destroys wooden doors. Can deflect projectiles.
- Level 2 (2 Runes): Increased force and blast radius.
- Level 3 (3 Runes): Windblast now disintegrates enemies in a small area (lethal).
Devouring Swarm
Base Effect: Summon a swarm of rats that attack and devour nearby enemies. Rats persist for ~15 seconds. Can also be used to distract.
- Level 2 (2 Runes): Rats last longer (+10 seconds) and can travel further.
- Level 3 (3 Runes): Summon a rat swarm that follows you until dismissed or until all rats are killed.
Shadow Kill (Passive Ability)
Base Effect: When you kill an enemy, their body disintegrates into ash, leaving no evidence.
- Level 1 (2 Runes): Always active once purchased.
Emily Kaldwin's Powers
Emily’s abilities are unique and emphasize misdirection, crowd control, and creative stealth.
Far Reach
Base Effect: A telekinetic arm that pulls Emily to a targeted location or object. Can also grab items and enemies from range. Silent.
- Level 2 (2 Runes): Increased range and can grab human‑sized objects (e.g., crates, barrels) to throw.
- Level 3 (3 Runes): Can pull enemies toward Emily, stunning them briefly (non‑lethal).
Dark Vision (shared with Corvo)
Same effect and upgrades as Corvo. Unlocked separately with Runes.
Domino
Base Effect: Links 2 enemies together. If one is killed, unconscious, or affected by a power, the linked enemies suffer the same fate (e.g., sleep dart one, all sleep).
- Level 2 (2 Runes): Link up to 4 enemies.
- Level 3 (3 Runes): Link can now include objects (e.g., a bottle dropped will trigger the same effect on linked targets).
Doppelgänger
Base Effect: Create a ghostly copy of Emily that walks forward and distracts enemies. Lasts ~8 seconds. The copy can be attacked and destroyed.
- Level 2 (2 Runes): Clone now mimics your movements (you control direction) and can trigger alarms.
- Level 3 (3 Runes): When clone is destroyed, it emits a blinding flash that stuns nearby enemies.
Mesmerize
Base Effect: Emit a hypnotic aura that puts nearby enemies into a trance. They stand still, vulnerable to attack. Duration 5 seconds. Does not affect alerted enemies.
- Level 2 (2 Runes): Increased radius and duration (+3 seconds).
- Level 3 (3 Runes): Mesmerized enemies can be pickpocketed or set up for a non‑lethal chokehold.
Shadow Walk
Base Effect: Transform into a shadowy form that is invisible while moving slowly. You can attack from this form (lethal slash) or pass through grates/gaps. Lasts 8 seconds.
- Level 2 (2 Runes): Move faster in shadow form; can climb walls.
- Level 3 (3 Runes): While in shadow form, you can perform a non‑lethal knockout (pouncing).
Semblance
Base Effect: Temporarily steal the identity of a dead or unconscious human. Wear their face and walk among enemies without alerting them (unless you act suspiciously). Lasts 10 seconds.
- Level 2 (2 Runes): Extended duration (+5 seconds).
- Level 3 (3 Runes): Enemies of the same faction (e.g., all guards) will not become suspicious even if you run or bump into them.
Passive Abilities & Bone Charms
Both characters can invest Runes into passive upgrades that improve general gameplay:
Bone Charm Traits (not exhaustive, but most impactful):
Recommended Builds
Low Chaos / Ghost (Non‑lethal, Undetected)
High Chaos / Lethal
Mixed Playstyle
Synergies & Combos
Corvo Combos
Emily Combos
Universal
When to Use Each Skill (Quick Reference)
| Skill | Situation |
|---|---|
| Blink | Traversal, silent repositioning, escape |
| Dark Vision | Recon, planning routes, finding loot |
| Bend Time (Corvo) | High‑chaos group elimination, escaping |
| Windblast (Corvo) | Breaking doors, crowd control, deflecting projectiles |
| Devouring Swarm (Corvo) | Area denial, corpse disposal, chaos |
| Possession (Corvo) | Infiltration, bypassing security, non‑lethal puzzles |
| Far Reach (Emily) | Traversal, pulling items/enemies, rope arrow replacement |
| Domino (Emily) | Non‑lethal crowd control, synchronized takedowns |
| Doppelgänger (Emily) | Distraction, creating diversions, triggering alarms |
| Mesmerize (Emily) | Non‑lethal group control, pickpocketing setup |
| Shadow Walk (Emily) | Stealth movement, wall climbing, lethal/non‑lethal pounce |
| Semblance (Emily) | Social stealth, bypassing identity checks |
Final Notes
- Experiment with all powers; each level offers new tactical options.
- Runes are finite per playthrough (max ~45–50 without New Game+). Invest wisely.
- New Game+ unlocks all powers from both characters (Corvo can use Emily’s powers and vice versa).
- Bone charms can dramatically alter playstyle; craft or find ones that complement your chosen abilities.
For more details on bone charm effects and crafting, see the Bone Charms & Crafting section of the All Game Items guide.
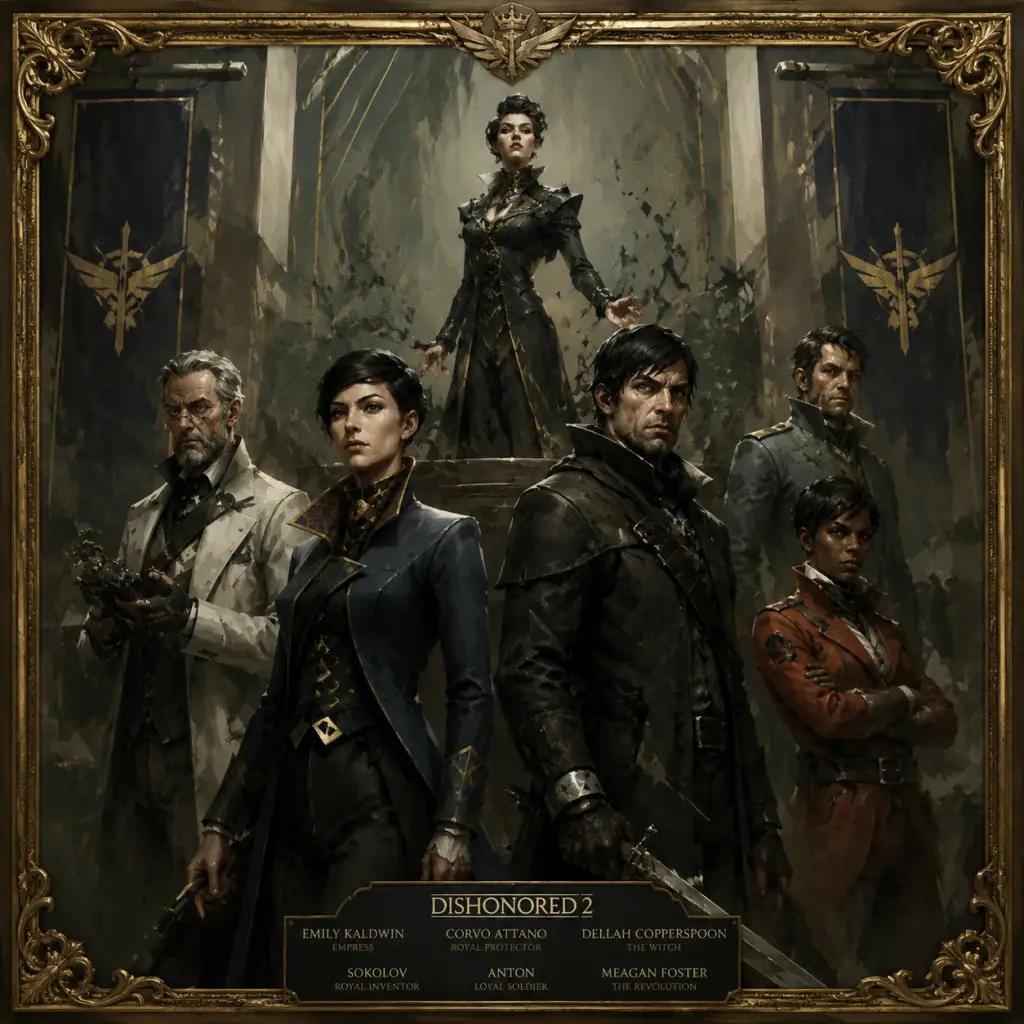
Characters & Roles
Characters & Roles in Dishonored 2
This guide covers all major characters in Dishonored 2, with a focus on the two playable protagonists—Corvo Attano and Emily Kaldwin—and key supporting characters. For each playable character, you'll find background, strengths, weaknesses, playstyle advice, unlock conditions, recommended builds, and synergy tips. Supporting characters are described in terms of their role in the story and gameplay.
---
Playable Characters
1. Corvo Attano
Background:
Corvo Attano is the legendary Royal Protector of the Empress, Emily Kaldwin. Framed for the murder of Empress Jessamine Kaldwin, he cleared his name with the help of the Loyalists and the Outsider. Now, 15 years later, he returns to protect Emily from a coup by Delilah Copperspoon. The Outsider grants him powers again (or for the first time, if you choose Corvo in a new game).
Strengths:
- Blink – Short-range teleportation. Silent, instant, and essential for verticality.
- Devouring Swarm – Summons rats to distract or kill enemies; great for chaos.
- Dark Vision – See enemies and items through walls (upgraded to highlight valuables).
- Possession – Take over animals or humans; very useful for bypassing tight spaces.
- Bend Time – Slow or stop time; extremely powerful for combat or stealth.
- Windblast – AOE push; can break doors and knock enemies off ledges.
- Lower mana pool than Emily if not upgraded; Blink costs mana per use.
- No long-range non-lethal crowd control (Emily has Domino).
- Rat swarm can cause unintended chaos if enemies are consumed.
- Possession of humans is expensive and requires line of sight.
- Low Chaos Stealth Build: Prioritize Blink (Agility upgrade), Dark Vision, Possession, Bend Time (upgrade to stop time). Equip bone charms that increase mana regen, reduce Blink cost, or extend Dark Vision duration. Weapons: Non-lethal bolts, choking, sword only for breaking objects. Runes: Spend on Blink (Agility), Dark Vision (Glimpse), Possession (Extended), Bend Time (Stopped).
- High Chaos Combat Build: Focus on Devouring Swarm (Rat Tide), Windblast (upgraded push), Bend Time (Stop and Slow). Bone charms for increased rat damage, faster mana regen, and reduced power cost. Use pistol with explosive bullets, crossbow with incendiary bolts, and sword with aggressive upgrades.
- Mixed Build: A balance of stealth and crowd control. Get Blink, Dark Vision, Domino? (No, Domino is Emily's). Actually Corvo lacks Domino, so use Possession to isolate enemies and Bend Time for critical moments.
- Far Reach – A grappling hook-like power that pulls Emily toward a point or pulls objects/enemies toward her. Can be upgraded to stop time while aiming.
- Domino – Link up to 4 enemies; actions (kill, choke, knock unconscious) affect all linked targets simultaneously. Excellent for non-lethal takes.
- Mesmerize – AOE area that hypnotizes enemies and slows time for affected targets.
- Shadow Walk – Transform into a shadow creature that cannot be seen in darkness; allows silent movement and quick kills.
- Dark Vision (shared with Corvo) – Same effect, but Emily can also see through walls and detect objects.
- Doppelgänger – Create a clone to distract enemies; can be upgraded to mimic actions or explode.
- No short-range teleport like Blink (Far Reach has a short travel delay and is less precise).
- Domino requires mana and foresight; linking the wrong enemies can ruin a stealth run.
- Shadow Walk is loud when uncloaking and consumes mana quickly.
- Doppelgänger can be destroyed, drawing attention.
- Less combat-focused; few direct damage powers (except upgraded Far Reach pulls).
- Non-Lethal Stealth Build: Max out Domino (3 links, then 4), Mesmerize, Dark Vision (Glimpse, Oracle), Far Reach (upgrade to stop time). Bone charms: reduce mana cost for Domino, increase choke speed, extend Mesmerize duration. Equipment: Non-lethal bolts, sleep darts, springrazor traps (for distraction). Use shadow walk only when necessary.
- High Chaos / Aggressive Build: Focus on Far Reach (upgrade to pull enemies and smash), Shadow Walk (upgrade to assassinate), Doppelgänger (upgrade to explode). Bone charms: faster mana regen, increased Shadow Walk damage, extended Doppelgänger duration. Weapons: pistol, crossbow with explosive or incendiary bolts, sword upgraded for damage.
- Boss Killer Build: Use Domino to link Delilah's sisters or guards, then take one down to affect all. Far Reach can yank enemies off ledges. Combine with Mesmerize to stop groups while you dispatch them.
Weaknesses:
Playstyle:
Corvo is a balanced stealth/combat character. His Blink allows rapid traversal, and his powers support both lethal and non-lethal approaches. For high chaos, use Devouring Swarm + Rat Swarm bone charms. For low chaos, rely on Blink + Possession + Bend Time. His combat is straightforward with sword and pistol, but powers can turn any fight.
Unlock Conditions:
Corvo is selectable from the very beginning of the game (mission selection screen). Choosing him locks Emily's powers for that playthrough.
Recommended Equipment / Builds:
Team Synergy:
Since you control only one character, "team" refers to NPC allies. Corvo works well with Meagan Foster (who provides transportation and mission intel) and Anton Sokolov (who can craft upgrades). In terms of power synergy, Corvo's Bend Time can be used to set up perfect headshots or non-lethal takedowns. Pair with choke and sleep darts for a quiet run. His Possession can carry him through areas with guards without killing.
---
2. Emily Kaldwin
Background:
Empress Emily Kaldwin, daughter of Jessamine and Corvo (or Jessamine and a noble, depending on player choice). She was deposed by Delilah and forced to flee. Now she must reclaim her throne. The Outsider marks her with a new set of powers distinct from her father's.
Strengths:
Weaknesses:
Playstyle:
Emily excels at crowd control and non-lethal gameplay. Domino allows you to neutralize multiple guards at once. Far Reach enables vertical mobility but requires more planning than Blink. Mesmerize is invaluable for bypassing patrols. For combat, rely on weapons and timing; Shadow Walk can be used for assassinations.
Unlock Conditions:
Selectable from the start of the game, same as Corvo. Choosing Emily prevents using Corvo's powers.
Recommended Equipment / Builds:
Team Synergy:
Emily benefits greatly from Meagan's boat upgrades (e.g., increased mana capacity, equipment slots). Sokolov's inventions like the rewire tool and upgraded bone charms enhance her powers. In terms of her own powers, Domino + Mesmerize is a devastating combo: Mesmerize holds enemies still, then Domino-linked chokes take out the whole group. Far Reach can be used to retrieve items or pull enemies into shadows.
---
Major Supporting Characters
3. Meagan Foster (The Boat Captain)
Role: Ally, transport, mission hub.
Background: Meagan Foster is the captain of the Dreadful Wale, a custom ship that serves as your mobile base. She is a former Royal Guard and smuggler with a personal grudge against the Duke of Serkonos. She provides transport between missions, offers side missions, and upgrades your gear.
Strengths/Weaknesses: Meagan is not playable. She is reliable but can be wounded if you cause high chaos (affecting her availability). She gives you important intel and a rewire tool.
Gameplay Impact: She upgrades your crossbow capacity, mana refills, and bomb crafting. Complete her side tasks for more upgrades.
4. Anton Sokolov
Role: Ally, inventor, upgrade provider.
Background: The world's greatest inventor and natural philosopher. He created the rewire tool, improved scopes, and many gadgets. He is captured early in the game and must be rescued. He then joins your crew.
Strengths/Weaknesses: Not playable. He can craft upgrades and enhancements for your equipment using resources you collect. His sanity degrades if you kill around him; angry Sokolov gives less upgrades.
Gameplay Impact: Bring him whalebone and coins to upgrade weapons and gadgets. Also, he provides commentary on characters and lore.
5. Delilah Copperspoon
Role: Main antagonist, final boss.
Background: A powerful witch and painter who once tried to take the throne during the events of Dishonored: The Corroded Man. She has returned with a coven of witches and usurped the throne using her supernatural abilities (granted by the Outsider). She can paint reality into existence.
Strengths/Weaknesses: Immensely powerful with magic: she can teleport, summon spectral claws, create duplicates, and slow time. She is vulnerable to Domino (Emily) or Bend Time (Corvo) combos. High chaos makes her fight harder.
Gameplay Impact: Boss fight in A Crack in the Slab. You can kill her or spare her. Defeating her ends the game. She has minions and traps in her throne room.
6. Mortimer Ramsey
Role: Secondary antagonist, loyalist.
Background: A Royal Spymaster loyal to Delilah. He betrays Emily and Corvo at the beginning. He is encountered in several missions.
Strengths/Weaknesses: A skilled swordsman but not supernatural. Can be found alone or with guards.
Gameplay Impact: Killing or sparing him affects the end credits and chaos level. He is a boss encounter in The Royal Conservatory.
7. The Outsider
Role: Neutral supernatural entity, power giver.
Background: A mysterious god-like being who marks individuals with powers. He appears at key moments to comment on your choices. He does not directly participate but grants runes and bone charms.
Gameplay Impact: By collecting runes you unlock powers. Bone charms found in the world provide passive bonuses. He also judges your actions.
8. Billie Lurk / Meagan Foster (Spoilers)
Note: It is later revealed that Meagan Foster is actually Billie Lurk, a former assassin from the first game. This changes her backstory but not her gameplay role.
---
Summary Table
| Character | Playable | Role | Unique Powers | Best For |
|---|---|---|---|---|
| Corvo Attano | Yes | Protector/Assassin | Blink, Devouring Swarm, Possession, Bend Time | High mobility, versatile stealth/combat |
| Emily Kaldwin | Yes | Empress-in-hiding | Far Reach, Domino, Mesmerize, Shadow Walk, Doppelgänger | Crowd control, non-lethal aggression |
| Meagan Foster | No | Boat captain / ally | None | Transport, upgrades, lore |
| Anton Sokolov | No | Inventor / ally | None | Equipment upgrades, crafting |
| Delilah Copperspoon | No | Antagonist | Teleportation, spectral claws, time manipulation | Boss fight, final challenge |
| Mortimer Ramsey | No | Antagonist | None (swordsman) | Mini-boss, chaos influence |
Final Thoughts
Choosing between Corvo and Emily dramatically changes your approach. Corvo's Blink and Bend Time reward precision and timing, while Emily's Domino and Far Reach enable creative group takedowns. Neither is strictly better; both can complete the game in any style. Experiment with both to find your preference. Supporting characters like Meagan and Sokolov enhance your capabilities, so protect them through low chaos decisions and complete their side quests for maximum upgrades.
Cheats & Secrets
Cheats & Secrets for Dishonored 2
_Dishonored 2_ does not include traditional cheat codes or unlock codes (like Konami codes) on consoles. However, the PC version grants access to a developer console that enables powerful commands. Additionally, the game is packed with hidden content, Easter eggs, and developer-intended secrets that reward exploration. This guide covers everything: console commands (PC), unlockable modes, Easter eggs, and the deepest hidden features.
Important Note for Console Players
If you play on PlayStation 4 or Xbox One, there are no built‑in cheat codes. However, you can still find all secrets, Easter eggs, and hidden content described below. For the best treasure‑hunting experience, equip the Heart — it whispers locations of runes, bonecharms, and interesting lore.
---
1. PC Developer Console Commands
On the PC version, press the tilde key (`~`) to open the developer console. Type commands exactly as shown (case‑sensitive). The console must be enabled via the game’s launch options or config file.
Enabling the Console
- Steam: Right‑click Dishonored 2 in Library → Properties → General → Launch Options. Add `-console`.
- Epic Games Store: Add `-console` to the game’s command‑line arguments in the platform settings.
- Microsoft Store: The console is not officially supported, but some users have reported success by editing the game’s executable shortcut.
Useful Console Commands
| Command | Effect | Example |
|---|---|---|
| `GiveAll` | Adds all weapons, gear, runes, and bonecharms to your inventory. | `GiveAll` |
| `ResetFOV [number]` | Changes field‑of‑view (default 80). | `ResetFOV 90` |
| `ToggleFly` | Enables noclip/fly mode. | `ToggleFly` |
| `AddRune [amount]` | Adds the specified number of runes. | `AddRune 5` |
| `AddBonecharm [id]` | Adds a specific bonecharm (use IDs from game files). | `AddBonecharm bc_health01` |
| `AddCoin [amount]` | Adds coins to your purse. | `AddCoin 1000` |
| `UnlockAllPowers` | Unlocks all powers (works with Corvo or Emily). | `UnlockAllPowers` |
| `UnlockAllUpgrades` | Unlocks all weapon/equipment upgrades. | `UnlockAllUpgrades` |
| `Chaos [0/1/2]` | Sets Chaos level: 0=Low, 1=Medium, 2=High. | `Chaos 2` |
| `God` | Toggles god mode (invulnerability). | `God` |
| `Ghost` | Toggles invisibility to enemies (not true stealth). | `Ghost` |
| `KillAll` | Kills all enemies in the current area. | `KillAll` |
| `CompleteMission` | Marks the current mission as completed (skips to end). | `CompleteMission` |
| `Teleport` | Teleports to your current crosshair location. | `Teleport` |
| `OpenMission [name]` | Loads a specific mission by its internal name. | `OpenMission M01` |
---
2. Unlockable Modes & Content
New Game Plus
- How to unlock: Complete the game once with either character.
- What it does: Start a new playthrough with all of your previously unlocked powers, bonecharms, and upgrades. You can also play as the other protagonist with their full power set from the start.
- How to unlock: Finish the game on any difficulty.
- What it does: From the main menu, choose “Mission Select” to replay any completed mission with your end‑game inventory. Great for finding missed secrets or achieving specific feats (e.g., “Ghost,” “Clean Hands”).
- Custom Difficulty: After unlocking New Game Plus, you can enable “Custom Difficulty” from the options menu – adjust enemy alertness, damage multipliers, mana regeneration, and more.
- Location: Mission 6 – The Clockwork Mansion. In Jindosh’s parlor, look for a small painting of a wolf’s head. Shoot or throw an object at it to reveal a hidden lever. This opens a secret panel containing the Wolfenstein (2009) “Medal of Duty: Bravery” poster – a nod to the Wolfenstein series, also published by Bethesda.
- Location: Mission 8 – The Grand Palace. In the Duke’s office, a bookshelf on the far right holds a book titled “Return to the Void” – a playful reference to Return to Arkham (Batman).
- In Mission 2 – Edge of the World, you can find a hidden note referencing Pierro Joplin and Samuel Beechworth, characters from the first game.
- In Mission 3 – The Brain of Karnaca, the Heart will whisper about Daud if you aim it at the statue outside the Addermire Institute.
- Location: Mission 4 – The Royal Conservatory. In Breanna Ashworth’s private quarters, activate the arcane device in the center of the room. A giant, harmless jellyfish will spawn and float for a few seconds before disappearing.
- Location: Mission 5 – The Dust District. In the Howler hideout, look for a small plush toy resembling the “Nite Owl” from the Watchmen comic – a nod to the game’s art director Sébastien Mitton’s previous work.
- Location: Mission 3 – The Brain of Karnaca. In the Addermire Institute’s morgue, there is a cardboard box that you can hide inside. Using it near a guard triggers a brief comment: “Huh? Just a box…” – a direct homage to Metal Gear Solid’s stealth mechanics.
- Corvo/Emily (your own character) – the Heart speaks about your past.
- The Outsider – it whispers his true name.
- Delilah’s portrait – reveals the secret of her immortality.
- The statue of the Outsider in the Void – tells the story of his creation.
- Mission 2 – Edge of the World: Look for a loose board in the alley behind the shop. Break it to find a safe containing 200 coins.
- Mission 3 – Brain of Karnaca: In the basement of the doctor’s apartment, there is a false wall near the furnace. Behind it: a rune.
- Mission 5 – Dust District: In the electrical room next to the black market, flip the switch to open a hidden compartment with a bonecharm.
- Mission 8 – Grand Palace: Inside the shop, climb the shelves and break a vent. Crawl through to a room with a painting and gold.
- Location: Mission 6 – Clockwork Mansion. After solving the lock puzzle in Jindosh’s office (the correct solution is the date of the Empress’s assassination: 18th day, 8th month, or simply look up the answer online), a hidden door opens to a laboratory containing:
- Find an elixir stash in the present by observing where a guard hid it in the past.
- Open a safe in the past (code: 386 from a note) that contains a rune in the present.
- Save a civilian from the past (the “Faithful” servant) to get a key to a locked room in the present with a bonecharm.
Mission Select
Difficulty & Custom Options
---
3. Easter Eggs & Pop‑Culture References
The “Wolfenstein” Secret
The “Return to Arkham” Reference
“Dishonored 1” Callbacks
The “Jellyfish” Easter Egg
The “Imsomniac” Cameo
The “Metal Gear Solid” Box
---
4. Developer-Intended Hidden Content
The Heart’s Whispers
Throughout the game, the Heart reveals hidden lore about almost every NPC, including main characters. Aim it at:
Black Market Shops & Hidden Stashes
Each black market has a hidden loot stash that can be accessed via the following methods (per mission):
Jindosh’s Secret Lab Room
- A rune
- A bonecharm
- A gold amulet (worth 500 coins)
- Jindosh’s personal journal with story lore
The Timepiece Secrets (Mission 7 – A Crack in the Slab)
The timepiece allows you to shift between past and present. Use it to:
The Crown of the Duke (Mission 8)
In the Duke’s bedroom, there is a safe hidden behind a painting. The combination is found in a book near the bed: 417. Inside: a Corvo’s Mask blueprint (cosmetic item).
The “Delilah” Painting Riddle (Mission 9)
In the final mission (Death to the Empress), you can find a painting of Delilah in the void. Destroying it will cause her to scream and lose a portion of her health in the boss fight. There are three such paintings scattered through the void level; destroying all three significantly weakens her.
---
5. Exploit-Safe Secrets & Advanced Tricks
These are not bugs but intentional game systems that can be exploited for advantage.
Bonecharm Crafting Exploit (No Loot Required)
Crafting bonecharms normally costs raw whalebone and runes. However, if you save and reload after a failed craft (you lose materials), the game restores your used materials – but the crafting result remains. This is a “safe” exploit (no console needed). Steps:
1. Craft a bonecharm (you will lose the raw whalebone).
2. If you don’t like the result, immediately load the autosave that happens right before the craft.
3. The raw whalebone is back in your inventory, and you can try again.
Infinite Mana via Bloodfly Swarms
Bloodfly nests can be harvested for raw whalebone. If you shoot a bloodfly nest (or break it) and then immediately use Mesmerize (Emily) or Bend Time (Corvo) before the animation finishes, the nest will drop extra whalebone – sometimes double. Useful for farming mana regeneration upgrades.
The “No Kill, No Detection” Run Completion
Completing the game with zero kills (except scripted ones) and never being detected triggers unique dialogue from the Outsider during the final scene. This is not a cheat, but a secret narrative reward.
The “Flesh and Steel” Achievement
If you refuse the Outsider’s mark at the start of the game (first Void sequence), you play through the entire game with no supernatural powers. This unlocks the Flesh and Steel achievement/trophy. It also causes minor changes to NPC dialogue.
---
6. Hidden Achievements / Trophies
| Achievement/Trophy | Description | How to Unlock |
|---|---|---|
| Ghostly | Finish a mission without being detected | Complete any mission with zero detections |
| Clean Hands | Complete the game without killing anyone | Zero kills (including indirect deaths) across all missions |
| Flesh and Steel | Complete the game without any supernatural powers | Refuse the Outsider’s mark |
| Dishonored | Finish the game in High Chaos | Kill many people, cause high chaos |
| Royal Protector | Finish the game in Low Chaos | Minimal kills, low chaos |
| Art Collector | Collect all paintings for the black market | Find and retrieve all 10 paintings (one per mission) |
7. Final Notes
While Dishonored 2 lacks classic cheat codes on consoles, the PC developer console offers god‑mode freedom. The game’s true secrets are its rich narrative Easter eggs, hidden rooms, and the clever use of the Heart and timepiece. For the fullest experience, play through the game at least twice — once with powers for fun, once without for the achievement. The low‑chaos ending and the high‑chaos ending both have hidden scenes that aren’t revealed on a single playthrough.
Remember: Using console commands may disable achievements. Always create a manual save before experimenting.