Doom Eternal
## Game Introduction ### Genre, Developer & Publisher *Doom Eternal* is a **first-person shooter (FPS)** with heavy **action, horror, and sci-fi** elements. It was developed by **id Software** (the legendary creators of the original *Doom*, *Quake*, and *Wolfenstein* series) and published by **Beth...
Download & Installation
Overview
Doom Eternal is a fast-paced first-person shooter developed by id Software and published by Bethesda Softworks. This guide covers legitimate download and installation methods for all major platforms. Note that there is no official mobile version.
Platform Availability
| Platform | Storefront | Release Type |
|---|---|---|
| PC | Steam, Epic Games Store, Bethesda.net (legacy), Xbox Game Pass for PC | Digital only (physical disc was released but contains a Steam key) |
| PlayStation | PlayStation Store (PS4 & PS5 via backward compatibility) | Digital & physical disc |
| Xbox | Microsoft Store (Xbox One, Xbox Series X\ | S), Xbox Game Pass |
| Nintendo Switch | Nintendo eShop | Digital & physical cart; cloud-based version (streaming) only (requires high-speed internet) |
System Requirements (PC)
Minimum Requirements
- OS: Windows 7 (64-bit) or Windows 10 (64-bit)
- CPU: Intel Core i5-4590 @ 3.30GHz or AMD Ryzen 3 1300X
- RAM: 8 GB
- GPU: NVIDIA GeForce GTX 970 (4GB) or AMD Radeon R9 290 (4GB)
- DirectX: Version 11
- Storage: 80 GB available space (SSD recommended)
- Network: Broadband internet connection for online features
- OS: Windows 10 (64-bit / version 1903 or newer)
- CPU: Intel Core i7-6700K or AMD Ryzen 7 1800X
- RAM: 16 GB
- GPU: NVIDIA GeForce RTX 2060 (6GB) or AMD Radeon RX 5700 (8GB)
- DirectX: Version 12
- Storage: 80 GB SSD
- Network: Broadband connection
- PC (Steam): Steam account.
- PC (Epic): Epic Games account.
- PC (Game Pass): Microsoft/Xbox account with active Game Pass subscription (Ultimate or PC).
- PlayStation: PlayStation Network (PSN) account.
- Xbox: Xbox Live / Microsoft account; Gold or Game Pass for online multiplayer.
- Switch: Nintendo Account; Nintendo Switch Online subscription required for multiplayer.
- Bethesda.net Login (PC & consoles): Some versions prompt linking a Bethesda.net account for Slayer Club rewards. You can skip or create one.
- Online Connection: Required for game updates and multiplayer. Single-player can be played offline after initial authentication.
- Graphics Settings (PC): Auto-detect will set quality. You can adjust from the menus later.
- Controller Calibration (PS/Xbox/Switch): Default layout works; options available.
- Updates: The game will check for patches. Allow them to install before playing to avoid issues.
Recommended Requirements
Note: For ray tracing support (update 6.0+), you need a compatible GPU (NVIDIA RTX series or AMD RX 6000 series) and Windows 10 2004 or newer.
Account Requirements
Step-by-Step Installation Instructions
PC - Steam
1. Install Steam: If not already installed, download the Steam client from [store.steampowered.com](https://store.steampowered.com) and install it.
2. Create/Sign In: Launch Steam, log into your account. If you don’t have one, create it.
3. Purchase or Redeem: Buy Doom Eternal from the Steam store, or redeem a CD key (go to Games > Activate a Product on Steam).
4. Library: Go to your Library, find Doom Eternal in the list.
5. Install: Click Install. Choose installation location (ensure 80+ GB free) and confirm.
6. Wait: The game will download and install automatically. Progress is shown.
7. Finish: Once done, the Play button becomes available.
PC - Epic Games Store
1. Install Epic Games Launcher: Download from [www.epicgames.com](https://www.epicgames.com) and install.
2. Sign In: Open launcher, log into Epic account.
3. Acquire: Purchase Doom Eternal from the store, or claim it if free (promotions).
4. Library: Click on Library tab.
5. Install: Click the Doom Eternal tile, then Install. Select drive/folder, then confirm.
6. Download: Wait for download and installation.
7. Play: Click Launch when ready.
PC - Xbox Game Pass
1. Install Xbox App: Download Xbox app from Microsoft Store (Windows 10/11) or visit [xbox.com](https://www.xbox.com).
2. Subscribe: Ensure you have an active Game Pass Ultimate or PC Game Pass subscription.
3. Search: Open Xbox app, search for Doom Eternal.
4. Install: Click Install on the game page. Choose installation drive.
5. Download & Install: The app will download and install. You may also install via the Microsoft Store.
6. Launch: Click Play from the Xbox app or start menu.
PlayStation (PS4 & PS5)
Physical Disc
1. Insert disc into console.
2. Console will auto-detect and begin installation. Follow on-screen prompts.
3. If prompted, download any required updates (ensure internet connection).
4. Launch from home screen.
Digital Download
1. Turn on console, sign in to PSN.
2. Go to PlayStation Store from the home screen.
3. Search for Doom Eternal.
4. Select Add to Cart then Proceed to Checkout. Confirm purchase.
5. Once purchased, the download begins automatically. Alternatively, go to Library > Purchased > Doom Eternal and select Download.
6. Installation completes automatically. Wait for full download (game is ~50-80 GB depending on updates).
7. Launch from home screen.
PS5 Note: The PS4 version runs via backward compatibility. A native PS5 version is not available, but performance is enhanced (60 FPS, faster load times).
Xbox (One & Series X|S)
Physical Disc
1. Insert disc into console.
2. Console reads disc, begins installation. Follow prompts.
3. If prompted, download updates online.
4. Play from home screen.
Digital/Game Pass
1. Sign in to your Xbox profile.
2. Open Microsoft Store (or My Games & Apps).
3. Search Doom Eternal.
4. If purchased or on Game Pass, select Install.
5. Choose which console to install to (if multiple).
6. Download progress appears under Queue.
7. Once complete, launch from home screen.
Smart Delivery: On Xbox Series X|S, the game automatically downloads the optimized version if you own the base game.
Nintendo Switch
Physical Cartridge
1. Insert game card into the slot on top of the Switch.
2. The game icon appears on home screen; select it.
3. If required, download any updates (go to System Settings > Data Management > Software Updates or select the game and press + > Software Update).
4. Launch game.
Digital Download
1. Launch Nintendo eShop from home screen.
2. Sign in to your Nintendo Account.
3. Search for Doom Eternal.
4. Select Proceed to Purchase (or Free Download if already owned).
5. Confirm payment method.
6. Download begins automatically. Progress shown on home screen.
7. Wait for download to finish (requires ~22 GB; game is cloud-streamed? Actually Doom Eternal on Switch is a full native port, not streaming. It requires ~25 GB internal storage or microSD).
8. Launch from home screen.
⚠ Important: The Switch version requires a large download even with a physical cart (due to required install data). Ensure you have at least 25 GB free space (SD card recommended).
First-Launch Setup
After installation, the first launch may require:
Storage Space Requirements
| Platform | Base Game | Plus Updates (approx.) |
|---|---|---|
| PC | 80 GB | 90-100 GB |
| PS4 | 55 GB | 60-70 GB |
| PS5 | 55 GB (back compat) | 60-70 GB |
| Xbox One | 60 GB | 70-80 GB |
| Xbox Series X\ | S | 60 GB |
| Switch | 22 GB | 25-30 GB |
Common Installation Errors and Fixes
PC Errors
- "DirectX Error" – Update DirectX (download from Microsoft) and graphics drivers. Verify game files (Steam: Right-click game > Properties > Local Files > Verify integrity; Epic: Click three dots > Manage > Verify).
- "Missing MSVCR120.dll" – Install Visual C++ Redistributables. Run `vc_redist.x64.exe` from the game install folder (\_CommonRedist\vcredist).
- "Insufficient Storage" – Check free space, move other games to free up room. Use an SSD.
- "Failed to Write to Disk" – Run launcher as admin, disable antivirus temporarily, ensure drive is not full.
- "Bethesda.net Login Loop" – Try launching the game while offline (disable internet), then log in later. Or re-link account on Bethesda site.
- "Game Crashes on Startup" – Disable overlays (Steam, Discord, MSI Afterburner), update GPU drivers, reset graphics settings (delete config file in `%LOCALAPPDATA%\DOOMEternal\`).
- PS4/PS5: If install stalls, pause and resume download. Rebuild database (safe mode). Delete and reinstall.
- Xbox: Hard reset (hold power button 10 seconds). Clear persistent storage (Settings > Devices & streaming > Blu-ray > Persistent storage > Clear). Uninstall and reinstall.
- Switch: If download fails, check free space, restart console, redownload from eShop. For physical cart, clean contacts.
- Slow Download: Pause and resume. Use wired network. Change DNS (Google: 8.8.8.8/8.8.4.4).
- Error Code Common: Check official support pages: [Bethesda Support](https://help.bethesda.net) or [Doom Eternal Known Issues](https://bethesda.net/en/article/6Nq8jWg0ky9Sju73x7L1Hh/doom-eternal-known-issues).
- Mod Support: The game has official mod support via the "Battlemode" and the DOOM Eternal Modding community. This does not affect installation.
- Cross-Platform Saves: Not supported between different storefronts or consoles.
- Game Sharing: Console players can share via family settings; PC platform sharing varies.
- Uninstallation: On PC, use the respective launcher; on consoles, delete from storage management.
Console Errors
General
Post-Installation Verification
After installation, verify the game works correctly:
1. Launch: Game should start without errors. You may see a splash screen for Bethesda, then id Software logo.
2. Title Screen: Check version number (usually bottom left). Update if outdated.
3. Graphics Test: Run through the first level ("Hell on Earth") to ensure smooth performance.
4. Audio: Test sound on speakers/headset.
5. Settings: Adjust resolution, HDR, frame rate (PC).
6. Multiplayer: Try a quick match if online play is desired.
If everything works, you're ready to rip and tear! If problems persist, refer to the error fixes above or official support.
Additional Tips
---
This guide is accurate as of 2025. For the latest updates, check official Bethesda channels.
Game Introduction
Game Introduction
Genre, Developer & Publisher
Doom Eternal is a first-person shooter (FPS) with heavy action, horror, and sci-fi elements. It was developed by id Software (the legendary creators of the original Doom, Quake, and Wolfenstein series) and published by Bethesda Softworks.
Release Timeline & Platforms
Doom Eternal was released on March 20, 2020 for:
- PC (Windows)
- PlayStation 4
- Xbox One
- Google Stadia
- Post-Apocalyptic Earth: Urban ruins, flooded cities, and corrupted landscapes.
- Hell: Classic fiery pits, blood-red skies, and fortress structures.
- Urdak: A pristine, angelic dimension that hides a dark secret.
- Argent D'Nur and Sentinel Prime: Ancient homeland of the Night Sentinels, blending medieval fantasy with advanced tech.
- Immora: The final city of Hell introduced in the The Ancient Gods DLC.
- The Doom Slayer (protagonist) – A silent, unstoppable warrior wielding the Praetor Suit, the Super Shotgun, the Crucible Blade, and supernatural strength.
- King Novik – Ruler of the Night Sentinels, guides the Slayer.
- The Khan Maykr – Primary antagonist, leader of the Maykrs, who seeks to sacrifice Earth.
- Deag Grav, Deag Ranak, Deag Nilox – The Hell Priests who open the gates to Earth.
- Samuel Hayden – An AI/cyborg character from the previous game who reappears with unclear motives.
- The Dark Lord (in DLC) – The ultimate evil, final boss of The Ancient Gods.
- Fans of fast-paced shooters
- Veterans of the Doom franchise
- Players who enjoy challenging single-player campaigns with difficulty options (including "Ultra-Nightmare" permadeath)
- Competitive multiplayer enthusiasts (though the multiplayer is smaller in scope)
- Players looking for a polished, high-fidelity action experience
- Campaign: A lengthy single-player story mode with 13 main missions plus optional encounters and secrets.
- Battlemode: A 2-versus-1 asymmetric multiplayer mode where two demons (controlled by players) face off against the Doom Slayer (another player). The Slayer uses campaign weapons and abilities; demons have their own unique powers.
- Extra Life Mode (added later): A campaign modifier where collecting extra lives gives a unique challenge.
- Master Levels: Remixed, harder versions of campaign levels with new enemy placements.
- Offline: The full campaign can be played offline after installation. Battlemode requires an internet connection.
- Online: Battlemode multiplayer and the Photo Mode (for screenshots) require online access. The Horde Mode (DLC) can be played solo or co-op online.
- Part One (October 20, 2020): Continues the story after the base game. The Slayer must face the consequences of his victory and confront the Dark Lord's rising threat.
- Part Two (March 18, 2021): Concludes the saga, featuring the final showdown in Immora and the fate of the Doom Slayer.
- Push-Forward Combat: Unlike most shooters, players are encouraged to stay mobile and aggressive to survive. Health drops from glory kills, ammo from chainsawing, armor from flame belch – all require close proximity.
- Platforming & Exploration: The game includes platforming sections (wall climbing, swing bars, dash pads) that break up combat and reward exploration with secrets and upgrades.
- Deep Weapon Complexity: Each weapon has multiple firing modes and mods (e.g., the Super Shotgun's grappling hook, the Ballista's arbalest). Combining them in quick-switch combos is essential for high-level play.
- Demonic Variety: Over 30 enemy types with unique behaviors – from imps and zombies to Marauders, Arch-viles, and Tyrants. Players must learn each foe's weakness and prioritize threats.
- Free Next-Gen Upgrade: Owners of the previous console versions could upgrade to ray-tracing and 120fps support at no extra cost.
- Iconic Soundtrack: Mick Gordon's industrial metal score is integral to the experience, dynamically intensifying during combat.
It later arrived on Nintendo Switch (December 8, 2020), PlayStation 5 and Xbox Series X|S (June 29, 2021). The game received a free next-gen upgrade for owners of the previous console versions.
Story Overview
The narrative picks up shortly after the events of Doom (2016). The Doom Slayer returns to Earth only to find it overrun by demonic forces unleashed by the Hell Priest – the Deag. The Khan Maykr, ruler of the angelic Urdak, has manipulated humanity's energy dependency to sacrifice Earth for the sake of her own realm. The Slayer must fight through Earth, Hell, the Sentinel homeworld of Argent D'Nur, and eventually Urdak itself to stop the Maykr's plans and prevent the complete annihilation of the human race.
Setting
The game spans several distinct realms:
Main Characters
Core Appeal
Doom Eternal is known for its relentless, high-speed combat emphasizing player movement, resource management, and aggressive play. Players must constantly shoot, dash, jump, and use a variety of weapons to chainsaw, glory kill, and flame belch enemies to regain health, ammo, and armor. This "push-forward combat" system rewards constant action over cover-based tactics.
Target Audience
The game is designed for:
Game Modes
Online/Offline Support
DLC / Expansion Overview
Doom Eternal has two major single-player expansions bundled as The Ancient Gods:
The expansions introduce new enemies (e.g., the Spirits, Blood Maykrs, Carcasses), new weapons (the Sentinel Hammer), and new environments. They are significantly harder than the base campaign.
Additionally, there is a Horde Mode (free update) where players fight waves of increasingly difficult enemies with a scoring system.
What Makes Doom Eternal Unique
Doom Eternal is widely considered one of the best first-person shooters of its generation, praised for its fluid movement, unrelenting action, and satisfying power fantasy.
Getting Started
Getting Started
First Hour Walkthrough
Your first playthrough of Doom Eternal begins with "Hell on Earth", the opening mission. There is no character creation – you play the Doom Slayer, a fixed protagonist. The first hour introduces core mechanics through a linear, tutorialized sequence:
1. Opening Cutscene – A brief narration sets the stage: Hell has invaded Earth. The Doom Slayer wakes in a fortress.
2. Movement Basics – You are prompted to move (WASD on PC, left stick on console), look around, sprint, and jump. Practice double-jumping immediately.
3. First Combat – You encounter zombies. Use your pistol (the standard weapon) to shoot them. The game tells you to use Glory Kills (melee finishers on staggered enemies) for health drops.
4. Weapon Acquisition – Shortly after, you find the Combat Shotgun – your workhorse. Reload is automatic; don’t worry about manual reload.
5. Chainsaw Tutorial – You receive the Chainsaw. Use it on weak enemies (Imps, Zombies) to instantly kill them and drop ammo. Chainsaw fuel recharges over time (one pip refills every ~30 seconds).
6. First Arena – A small courtyard with Imps and a Cacodemon. The game teaches Weakpoints: shoot the Cacodemon in the mouth when it opens to stagger it. Use your shotgun’s Sticky Bombs mod (upgrade later).
7. Floating Runes – You encounter your first Rune (e.g., Air Control). Collect it for a permanent passive upgrade.
8. Escalation – More enemies appear (Soldiers, Possessed). Use all tools: grenades, flame belch (Flamethrower on left bumper), chainsaw, glory kills.
9. Intro to Collectibles – You find a Praetor Suit Point (stat upgrade) and Sentinel Battery (used to unlock base upgrades).
10. Mission End – After a brief boss fight (a Hell Knight), you reach a teleporter and return to the Fortress of Doom (hub area). Mission 1 takes about 30–45 minutes.
Character Creation? – None
Doom Eternal has no character creation. The Doom Slayer is a preset character. Customization is limited to:
- Weapon Skins (earned via challenges or DLC)
- Player Emotes (for multiplayer, but not campaign)
- Praetor Suit Skills (choose upgrades, but no visual changes)
Your focus should be on mastering combat, not tweaking appearance.
Controls Overview: All Platforms
#### PC (Keyboard & Mouse) – Default
| Action | Key |
|---|---|
| Move | W, A, S, D |
| Look / Aim | Mouse |
| Shoot | Left Mouse Button |
| Weapon Mod | Right Mouse Button |
| Jump | Space |
| Double Jump | Press Space again in air |
| Dash | Shift (hold or toggle) |
| Melee (Glory Kill) | E |
| Chainsaw | C |
| Flame Belch | Q |
| Grenade | F |
| Weapon Wheel | Q (hold) – or press 1–9 for direct slot |
| Ice Bomb | G (requires equipping) |
| Crouch/Slide | Ctrl |
| Interact | F |
| Map | M |
| Pause | Esc |
| Action | PS Button |
|---|---|
| Move | Left Stick |
| Look | Right Stick |
| Shoot | R2 |
| Weapon Mod | L2 |
| Jump | X |
| Double Jump | X again in air |
| Dash | R1 (tap) |
| Melee / Glory Kill | R3 (press right stick) |
| Chainsaw |
Core Gameplay
Core Gameplay
Overview of the Core Gameplay Loop
Doom Eternal is built around a relentless, aggressive combat loop known as the "combat dance". The loop is:
1. Engage: dash into a group of demons.
2. Damage: use weapons to deal damage, prioritize weakpoints.
3. Restore Resources: health via glory kills (killing staggered enemies), armor via flame belch (flammable fodder drops armor shards), ammo via chainsaw (instantly kill fodder for ammo pickups).
4. Repeat: keep moving, avoid damage, swap weapons to exploit enemy weaknesses.
Exploration and progression are interwoven: hidden areas contain Praetor Suit Points, Weapon Upgrade Points, Sentinel Batteries (unlock doors for suit/weapon upgrades), and collectibles (Toys, Recordings, Codex entries). The main story is linear with arenas that lock you into combat until you kill all demons.
Player Progression Tiers
Early Game (Missions 1–4)
Main Gameplay Loop
- Start with the Combat Shotgun and Heavy Cannon.
- Learn basic movement: clamber (grab ledges), double jump (unlocked after mission 1), dash (unlocked via Praetor Suit upgrade, typically mission 2).
- Resource management is tight: you have only 4 health bars (base), limited ammo, and 1 chainsaw fuel (recharges slowly). Glory kills are your primary health source, chainsaw for ammo, flame belch for armor (unlocked after Exultia).
- Weakpoint system introduced early: shoot the Cacodemon's eye to stagger it for a glory kill; destroy the Arachnotron's turret to disable its long-range attacks.
- Glory Kill: Press melee on a staggered enemy (glowing orange) to execute and gain health. Timing and direction can vary.
- Chainsaw: Instantly kills low-tier demons (Imps, Soldiers) and drops ammo. Upgrades increase fuel capacity and flesh-eating capability.
- Flame Belch: Short-range flamethrower that sets enemies on fire; they drop armor shards when damaged. Crucial for armor sustain.
- Weapon Mods (first mod: Sticky Bombs for Combat Shotgun from a mod bench). Switch mods at any time.
- Meathook (Super Shotgun): not yet available; you rely on precision bolt or sticky bombs for ranged kills.
- Praetor Suit Points: Found in secret areas. Spend at suit upgrade stations to unlock abilities like "Rising Dragon" (air control), "Thunderous Sky" (increased health from glory kills), "Blood Fueled" (movement speed after glory kill).
- Weapon Upgrade Points: Earned by completing combat challenges (e.g., "Kill 20 enemies with sticky bombs") and finding hidden point items. Use them to unlock weapon mods and mastery tokens.
- Sentinel Batteries: Rare collectibles (6 in early game) that open locked doors containing Praetor Suit parts or large weapon point drops.
- Runes: Not yet accessible (first Slayer Gate in mission 2).
- Levels are linear but have side paths with secrets. Examples:
- Slayer Gates: optional challenge arenas (first appears in Exultia). Completing them unlocks a Rune (e.g., "Seek and Destroy").
- Main story missions: Hell on Earth, Exultia, Cultist Base, Doom Hunter Base.
- Objectives include: destroy Hell portals, defeat the Doom Hunter, reach the Fortress of Doom.
- No currency. All upgrades are earned through exploration and challenges.
- Argent Energy does not exist as a resource in the base game (only codex lore).
- Limited to one weapon mod per weapon (choose Sticky Bombs vs. Full Auto? Stickies are better).
- First Praetor upgrades: prioritize "Dazed and Confused" (stagger enemies longer) and "Haste" (glory kill speed buff).
- Sentinel Armor (damage reduction) is helpful early.
- Runes: slot up to 3. Early obtainable: "Seek and Destroy" (air mobility), "Ping" (melee punch staggers), "Equipment Fiend" (cooldown reduction).
- None. The game continues to Mid Game.
- Acquire the Super Shotgun with Meathook (mission 5: Super Gore Nest). This transforms mobility: hook onto any enemy to pull yourself across arenas.
- Add Rocket Launcher (mission 3/4) with Remote Detonation mod for area control, Ballista (mission 6: Arc Complex) for precision hitscan damage.
- Master quick-switching combos: Super Shotgun → Ballista → repeat for massive burst damage (known as "SSG-Ballista Quick Swap").
- Heavy Demons like Man Cubus, Whiplash, and Pain Elemental appear. Use weakpoints: destroy Man Cubus arm cannons, shoot Pain Elemental head to kill small Cacodemons.
- Meathook (Super Shotgun mod) grants immense aerial mobility. Attach to a demon and you can jump off it for a second jump or to avoid attacks.
- Flame Belch becomes essential: set a group on fire before using grenades or rockets to shower armor shards.
- Chainsaw fuel capacity can be upgraded (second fuel bar).
- Grenades: both Frag and Ice Bomb (unlocked via Praetor). Use frag to stagger, ice to freeze groups.
- Blood Punch: unlocked via Praetor (charged melee attack that staggers).
- Praetor Suit Upgrades: now you can afford mid-tier: "Blood Fueled" (speed after glory kill), "Thunderous Sky" (extra health), "Chrono Strike" (slow time when glory kill? Actually that's late game). Example: "Seismic Exo" (explosive punch) is later.
- Weapon Masteries: each weapon has a mod-specific mastery (e.g., kill 200 enemies with Sticky Bombs to get a 10% damage bonus). Mastery tokens allow skipping challenges.
- Runes: acquire all 10 runes from Slayer Gates and discover them in levels. Popular combination: Seek and Destroy + Equipment Fiend + Dazed and Confused.
- Sentinel Batteries continue (total 32 in base game). Open doors in the Fortress of Doom for upgrades.
- Levels like Super Gore Nest, Arc Complex, Mars Core, Sentinel Prime, Taras Nabad have larger arenas and more optional paths.
- Slayer Gates (one per mission after Exultia) give runes and later keys for the Unmaykr weapon.
- Collectibles: Toys for the Fortress of Doom, Recordings for lore, Codex entries.
- Super Gore Nest: Destroy the tentacles, kill the Marauder? (actual story)
- Arc Complex: Rebuild the Argent Tower. Fight the Khan Maykr’s forces.
- Sentinel Prime: Retrieve the Doom Slayer's armor. Memorable fight against the Marauder (required parrying).
- Taras Nabad: Retrieve the Empyrean Key. Fight Marauders and heavier demons.
- Still no currency. Points are upgrade materials.
- Focus on unlocking Super Shotgun Meathook + Ballista Arbalest for fast combos.
- Rocket Launcher mod: Remote Detonation or Lock-On Burst (better for crowd control).
- Chaingun (obtained in Mars Core) with Mobile Turret (for sustained DPS) or Shield (defensive).
- Praetor Suit priorities: Blood Fueled, Dazed and Confused, Haste (glory kill speed), Equipment Fiend (grenade cooldown).
- Runes: unlock Saving Throw (auto-revive on death) from a Slayer Gate in Sentinel Prime.
- None yet. The game continues.
- Full arsenal: Ballista, Super Shotgun, Rocket Launcher, Chaingun, Plasma Rifle (with Stun Bomb mod), Heavy Cannon (with Precision Bolt), Combat Shotgun (Sticky Bombs), BFG-9000 (found in Nekravol Part I), and Crucible (sentinel sword, limited charges).
- Combat is extremely fast. Use quick-switch combos constantly: e.g., SSG → Rocket Lock-On → Ballista → Chaingun Shield for stagger.
- Tyrants and Barons of Hell appear regularly. Prioritize killing them with controlled bursts: use Ice Bomb then BFG or Crucible for instant kill on Tyrant.
- Archville is a priority target: it spawns extra demons and resurrects dead ones. Kill with Crucible or sustained fire.
- Crucible: One-hit kill on any non-boss enemy. Limited charges (3-4). Replenish via pickups. Use on heavy demons (e.g., Tyrant) to save time.
- BFG-9000: Fires an energy ball that spawns smaller beams that kill hordes. Rare ammo (found in pools). Best used against dense groups or bosses.
- Hologram (Sentinel Armor upgrade): distraction for demons, useful for breathing room.
- Sentry Turret (Chaingun mod): stationary but powerful.
- Final Praetor Suit Upgrades: "Chrono Strike" (slow time when performing glory kill), "Seismic Exo" (explosive punch unlocks), "Sling Loop" (speed boost after glory kill). All suit points can be maxed by endgame.
- Weapon Masteries: complete all masteries for max damage. Mastery tokens from Sentinel Batteries can skip hard challenges.
- Runes: choose your three final runes. Top choices: Saving Throw, Seek and Destroy, Equipment Fiend, or Airborne Aerial Control (air dash).
- Sentinel Batteries: all doors opened if you found all 32 (required for 100% completion).
- Nekravol Part I & II: Hell-based levels with branching paths. Secrets include hidden Crucible charges and BFG ammo.
- The Urdak: A linear arena with multiple platforming sections. There is a Slayer Gate.
- Final Sin: Earth arena, culminates with the icon of Sin boss fight.
- Nekravol Part I & II: Destroy the heart of Hell, kill the Khan Maykr's servants.
- The Urdak: Ascend to the Maykrs' dimension, fight the Khan Maykr (boss). Strategy: use Super Shotgun for close damage, Ballista for far, parry her energy orbs.
- Final Sin: Return to Earth, defeat the Icon of Sin (massive boss with weak spots on arms and chest). Use platforms and all weapons; Crucible can one-shot the head weak point.
- No change. Upgrades fully collected.
- Max out Praetor Suit (all upgrades).
- All weapons fully upgraded with both mods unlocked and masteries completed (if desired).
- Rune setup: for the final boss, consider Saving Throw (revive on death), Seek and Destroy (air mobility), and Equipment Fiend (more grenades).
- After beating the Icon of Sin, you unlock Battlemode (PvP) and can replay missions on any difficulty. There is no traditional endgame raid or new game plus in the base game.
- Master Levels: Remixed versions of base game missions (e.g., Super Gore Nest Master Level, Mars Core Master Level). They include new enemy placements, limited resources, and increased difficulty. Available from the Fortress of Doom.
- Battlemode: Asymmetric multiplayer (2 demons vs 1 Slayer). The Slayer uses their full arsenal; demons have unique abilities (e.g., Mancubus with shield, Revenant with flying). The goal is to eliminate other team. Not a typical competitive mode but has a ranking system.
- Horde Mode (from The Ancient Gods DLC): Wave-based survival with upgrades between waves. Scores are tracked on leaderboards.
- Master Levels: Same systems but with increased pressure. You must manage resources perfectly. Example: in Mars Core Master Level, ammo pickups are scarce; rely on chainsaw more often.
- Battlemode: Unique interactions: Demons can place traps, heal teammates, revive. Slayer must use environment and quick-switching to survive. There is no glory kill health gain (Slayer has a limited health pool).
- Horde Mode: Special currency (Argent) to buy upgrades between waves (e.g., extra dash, weapon damage). Enemies drop currency.
- No additional permanent upgrades beyond what you earned in the main game. Battlemode unlocks cosmetic items (player icons, skins) through milestones.
- Achievements/Trophies remain for 100% completion.
- Revisit missions to find all secrets (toys, recordings, codex). Use Sentinel Armor upgrades to reach previously inaccessible areas (e.g., dash through bars, double jump+glide).
- Unmight Maykr (secret weapon): Unlockable through 100% of Slayer Gates (6 keys). Use it for extra power in replays.
- No new main quests. DLC The Ancient Gods Part I & II add new campaign missions with new enemies, weapons, and abilities (e.g., Sentinel Hammer, Frozen Nade, new mods).
- No economy. Upgrade system is static.
- Experiment with different rune and mod combinations in replay. For example, try a Super Shotgun + Rocket Lock-On + Chaingun Shield loadout for high survivability.
- In DLC, new abilities like Frozen Nade (freeze enemies) and Sentinel Hammer (ground slam that stuns) add variety.
- Master Levels: Complete them on Ultra-Violence or Nightmare for bragging rights. They are the primary endgame challenge.
- Battlemode: Achieve Slayer rank or reach top demon leaderboard positions.
- Horde Mode: Achieve high scores and unlock all difficulty tiers.
- 100% Completion: Collect every secret, upgrade, and codex entry across main game + DLC.
Combat/Interaction Systems
Progression
Exploration
- Exultia: Find a hidden recording behind a breakable wall.
- Cultist Base: Jump onto pipes to reach a room with a Praetor Suit Point.
Quests/Missions
Economy
Character/Build Growth
Endgame
Mid Game (Missions 5–9)
Main Gameplay Loop
Combat/Interaction Systems
Progression
Exploration
Quests/Missions
Economy
Character/Build Growth
Endgame Structure
Late Game (Missions 10–13)
Main Gameplay Loop
Combat/Interaction Systems
Progression
Exploration
Quests/Missions
Economy
Character/Build Growth
Endgame Structure (Base game)
Endgame (Post-Story)
Main Gameplay Loop
Combat/Interaction Systems
Progression
Exploration
Quests/Missions
Economy
Character/Build Growth
Endgame Structure
This tiered breakdown covers all core gameplay aspects of Doom Eternal, from initial learning curves to mastery and post-game challenges.
Game Tips
Combat Tips
Beginner - The Combat Loop Essentials
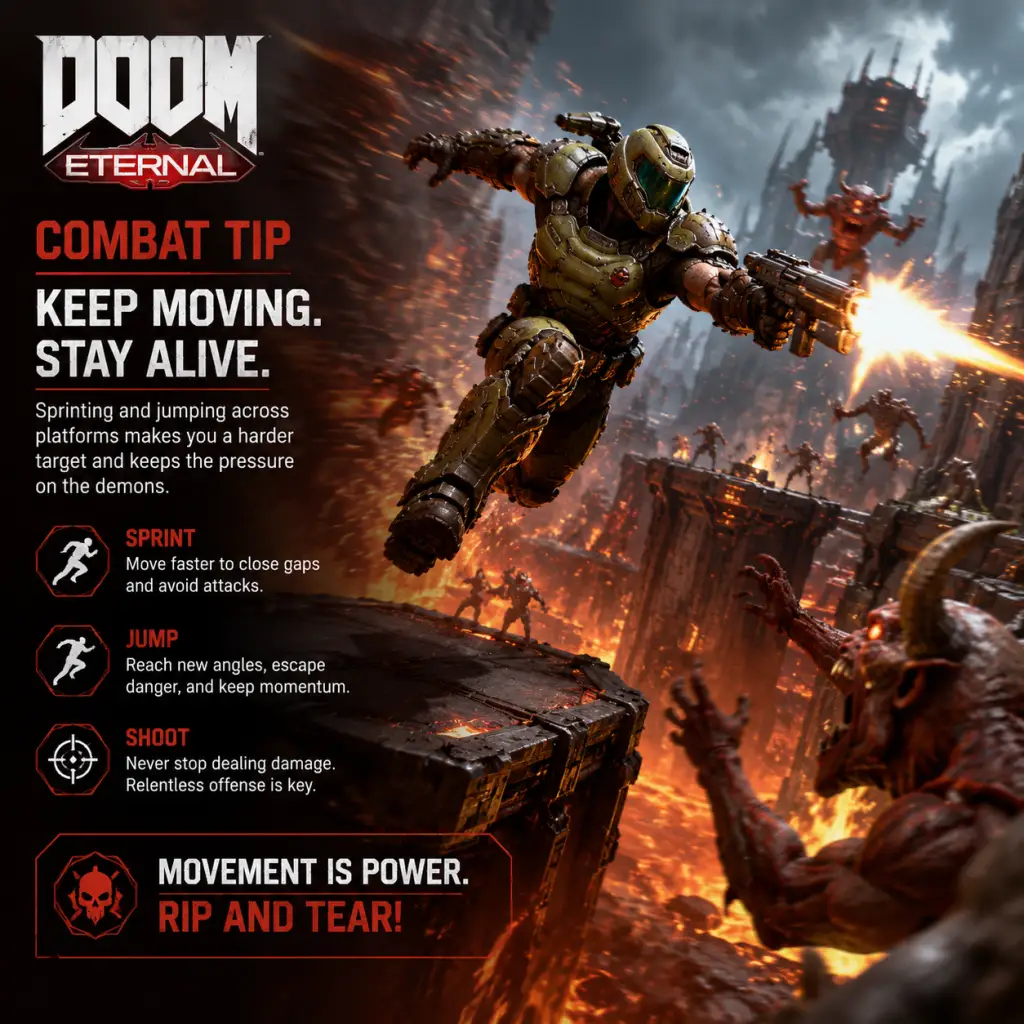
- Always be moving: Standing still is death. Make liberal use of the dash (default Shift on PC, L1 on PS4, LB on Xbox) to strafe and dodge projectiles. The dash recharges quickly—use it every 3 seconds to avoid damage.
- Use the Super Shotgun’s Meat Hook: This grapple not only closes distance but also staggers enemies. After hooking a demon, follow up with a quick shotgun blast to the face to stun it, then finish with a Glory Kill. Use this to regain health when low.
- Master the “Combat Dance”: The core loop is: shoot to damage → stagger → Glory Kill (health) → use Flame Belch (armor) → Chainsaw (ammo). Repeat. Always alternate resources to never run out.
- Learn every demon’s weakpoint: For example, the Mancubus’s cannon arms; destroy them with the Precision Bolt or Heavy Cannon scope to disable its fire attacks. The Arachnotron’s turret can be destroyed with a single Plasma Rifle heat blast. This instantly removes its most dangerous weapon.
- Use the Ballista immediately after a weapon swap: The Ballista deals massive damage but has a slow fire rate. Swap to it after firing a Super Shotgun or Rocket Launcher to cancel the recovery animation. This “quick-switch” technique doubles your DPS.
- Stagger with grenades: The Frag Grenade can stagger multiple lesser demons. Throw it into a crowd, then follow with a Rocket Launcher or Micro Missiles for easy kills.
- Chain Flame Belch with Blood Punch: Use Flame Belch (short cooldown) to set demons on fire, then Blood Punch (requires one full Blood Punch charge from killing staggered enemies) to restore massive armor. This combo can refill your armor from empty to full in seconds.
- Save Chainsaw for Heavy Demons: Use the Chainsaw on “Heavy” demons (e.g., Cacodemon, Hell Knight) to instantly kill them and drop far more ammo than using it on zombies. Prioritize high-tier enemies when your ammo is low.
- Ice Bomb + Rocket Lock-On: Freeze a group of demons with the Ice Bomb, then use the Rocket Launcher's lock-on burst to quickly eliminate them. The ice prevents movement, making lock-on shots easy.
- Look for glowing green eyes: These indicate a “Brutal” secret location or a “Cheat Code” orb. Shoot them to reveal a secret area. Many are on ceilings or hidden behind breakable walls.
- Use the map pin system: Press the map button (M on PC, touchpad on PS4) to place a waypoint on you want to revisit. The compass shows the direction to your pin. This helps in confusing levels like “The Blood Swamps.”
- Check behind waterfalls: Many levels have hidden alcoves behind waterfalls containing Sentinel Crystal upgrades or Armor Points.
- Collect all 3 items from each arena before leaving: After a combat arena, always search thoroughly for the “1-Up” doll, a Praetor Suit point, and a weapon mod. Use the map to find any missed items.
- Unlock shortcuts by destroying weak walls: Look for cracked walls that can be destroyed with the Rocket Launcher or Blood Punch. These often lead to shortcuts back to the start of an area, useful for backtracking.
- Pay attention to sound cues: Secret areas often have a distinct humming or a radio interference sound. Turn up your audio for easier detection.
- Skip unskippable cutscenes: Some cutscenes can be avoided by quickly pulling up the map or menu right as they start. This saves seconds on full-level runs.
- Use the Meathook for vertical shortcuts: The Super Shotgun’s Meat Hook can latch onto enemies far below or above you, letting you bypass long climbs. Use it in fights to reach elevated platforms faster.
- Master the “Double Dash”: On slopes, dash twice in quick succession to gain extra height, allowing you to reach ledges normally requiring a climb. Practice in The Fortress of Doom.
- Health: Always kill staggered enemies with Glory Kills—they drop green health orbs. Never let a stagger go to waste if you need HP.
- Armor: Use the Flame Belch (F on PC, R1 on PS4, RB on Xbox) on every group of enemies. It has a short cooldown, so use it liberally. Each enemy set on fire drops armor shards when damaged.
- Ammo: The Chainsaw (C on PC, Circle on PS4, B on Xbox) is your primary ammo source. Use it on fodder enemies (Imps, Zombies) to refill all ammo. It recharges faster after three full pips (killing a heavy demon with one pip).
- Never let one resource hit zero: If health is low, look for a Glory Kill. If armor is low, Flame Belch a group. If ammo is low, Chainsaw a zombie. Plan ahead—when you see a big fight, check your ammo and armor before engaging.
- Use the Super Shotgun as a crutch: It deals high damage and recovers health via the Meat Hook’s stagger. When you’re overwhelmed, pull yourself to a heavy demon and blast it for immediate heal.
- Upgrade the Flame Belch duration and radius: In the Praetor Suit menu, prioritize “Hot Furnace” (increases flame duration) and “Spreading Wildfire” (flame spreads to nearby enemies). This turns Flame Belch into a crowd-armor tool.
- Master the “Chainsaw Blood Punch” combo: When you Chainsaw a heavy demon, it takes a second to die. Use that window to Blood Punch nearby enemies for additional armor/health. This maximizes resource gain from a single kill.
- Use the Crucible for instant health: The Crucible (obtained later) is a one-hit kill against any demon, including the Marauder. Use it only when you’re near death and have no Glory Kill option—it also drops a large health orb.
- Stack armor with Shield Mancubus: When fighting Shield Mancubi, destroy their shield by shooting its back. They are excellent armor factories—Flame Belch them, then kill them with a Blood Punch to get massive armor shards.
- Super Shotgun + Rocket Launcher: This combo covers close and mid-range. Swap between them quickly to keep pressure. The Super Shotgun staggers, the Rocket Launcher deals area damage.
- Always have the Heavy Cannon with scope: The Precision Bolt mod (scope) is mandatory for sniping weakpoints from a distance. It’s your safest option for Mancubus arms or Arachnotron turrets.
- Ballista with Destroyer Blade: This mod fires a piercing beam that can hit multiple enemies. Use it when enemies are lined up, like in corridors. Works wonders against the Archvile’s summoned demons.
- Plasma Rifle with Heat Blast: The heat blast mod creates a powerful explosion if you overheat it. Charge it by shooting the plasma rifle, then when the gauge is full, press the mod button to unleash a blast that staggers nearby demons. Use it when surrounded by fodder.
- Chaingun with Mobile Turret: This mod lets you move while firing a high-rate spin-up. Use it against stationary bosses like the Doom Hunter (after destroying its sled) or the Icon of Sin’s gladiator phase.
- Bind weapon quick-swap keys: On PC, bind the Super Shotgun and Ballista to easy-to-reach keys (e.g., Q and E). The “quick-switch” combo (Super Shotgun -> Ballista -> Super Shotgun) deals massive burst damage and can stunlock some demons.
- Use the Micro Missiles mod for added damage: While using the Heavy Cannon, switch to Micro Missiles (press mod key while aiming) to fire homing missiles after a precision shot. This adds extra damage without slowing your aim down.
- Master the “Rocket Stick”: Use the Rocket Launcher with the Remote Detonate mod. Shoot a rocket into a Marauder’s shield, wait for him to lower it (after his green eye flash), then detonate the rocket for a guaranteed hit.
- Praetor Suit: First, get “High & Mighty” (faster movement when locked on) and “Hot Brew” (faster dash recharge). Then focus on resource generation upgrades like “Spreading Wildfire” and “Extra Lives.”
- Weapon Mods: Unlock the Ballista’s Arbalest mod (explosive burst) and the Super Shotgun’s Meat Hook (if not already unlocked). These are critical for progression.
- Sentinel Crystals: Always upgrade “Armor” and “Health” first—these are flat increases that help survival. Then unlock “Extra Lives” and “Movement Speed.”
- Save upgrades for specific fights: Before a boss arena (like the Marauder or the Doom Hunter), ensure you’ve invested in “Dash Recharge” and “Glory Kill range” (from Praetor Suit) to dodge their attacks and finish them faster.
- Prioritize the “Chainsaw Fuel” upgrade: The Praetor Suit’s “Fuel for the Fire” reduces Chainsaw recharge time by 25%. This means more ammo more often. Get it as soon as you can.
- Spare weapon points: Don’t fully upgrade every mod. Focus on two or three weapons you use most. The Ballista, Super Shotgun, and Heavy Cannon are universal; skip the Chaingun’s Shield mod unless you play defensively.
- Grind for extra lives: Each level has a hidden 1-Up doll. Collect them all in a level to get an extra life. Once you have 5 extra lives, the game spawns more in later levels—use this to buffer difficult arenas.
- Use the Fortress of Doom for last-minute upgrades: Before leaving the hub, ensure you’ve opened all locked doors that require Sentinel Batteries. These often contain large armor/health upgrades or weapon mod points.
- Sell unused mods: If you find a weapon mod you don’t need, you can sell it at the Workshop in the Fortress of Doom for Weapon Points. Use this to free up points for better mods.
- Bunny Hopping: Jump and press dash while in the air to maintain speed. This lets you move faster than normal running. Practice strafe-jumping in arenas to stay out of enemy fire.
- Wall Climb Cuts: When climbing a wall, press dash near the top to cancel the climb and launch yourself forward. This saves time in sections like the platforming in “The Super Gore Nest.”
- Fall Damage Cancellation: Doing a Glory Kill or landing on an enemy negates fall damage. If you must drop from a great height, aim for a nearby zombie or use a meathook to an enemy below.
- Marauder: Wait for his green eye flash (after he attacks or raises his shield). Fire immediately with the Super Shotgun or Ballista. Do not spam—he will block everything except during his attack window.
- Archvile: Always prioritize killing the Archvile first. Use the Ballista’s Destroyer Blade or the Super Shotgun’s Meat Hook to close distance quickly. If he summons a squad, use Ice Bomb + Rocket Lock-On to clear them.
- Whiplash: These snake-like enemies are fast and dodge often. Use the Plasma Rifle’s Heat Blast after stunning them with a Frag Grenade to freeze them, then finish with a Blood Punch.
- Rune of Agile: Combine “Air Control” (increased air movement) with “Saving Throw” (survive fatal hits). Air Control lets you dodge in mid-air, and Saving Throw gives you one get-out-of-jail-free card per fight. Both are from the Rune system found in optional levels.
- Sentinel Crystal “Chrono Strike”: This crystal upgrade slows time while you’re in mid-air aiming. Pair it with the Heavy Cannon’s Precision Bolt to snipe weakpoints safely while falling.
- Play on higher difficulties for better practice: “Hurt Me Plenty” is standard; “Ultra-Violence” forces you to master the combat dance. If you’re struggling, drop to “I’m Too Young to Die” but note that enemy spawns are fewer.
- Use the photo mode for exploration: Pause the game and enter photo mode to look around corners or above ledges for secrets. This is especially helpful in “The Blood Swamps” maze sections.
Intermediate - Weakpoint Optimization
Advanced - Resource Cycling Under Pressure
Exploration Tips
Beginner - Secrets and Collectibles
Intermediate - Optimizing Paths
Advanced - Speedrunning Techniques
Resource Management Tips
Beginner - Core Resources
Intermediate - Maintaining the Triangle
Advanced - Infinite Resources Loop
Build and Weapon Mod Tips
Beginner - Recommended Weapon Loadout
Intermediate - Mod Mastery
Advanced - Weapon Swap Optimization
Economy (Upgrade) Tips
Beginner - Priority Upgrades
Intermediate - Spend with Purpose
Advanced - Min-Maxing Resources
Advanced Optimizations
Movement Tech
Enemy-Specific Tactics
Rune and Sentinel Crystal Sync
General Game Feel
Game Settings
Game Settings
Overview
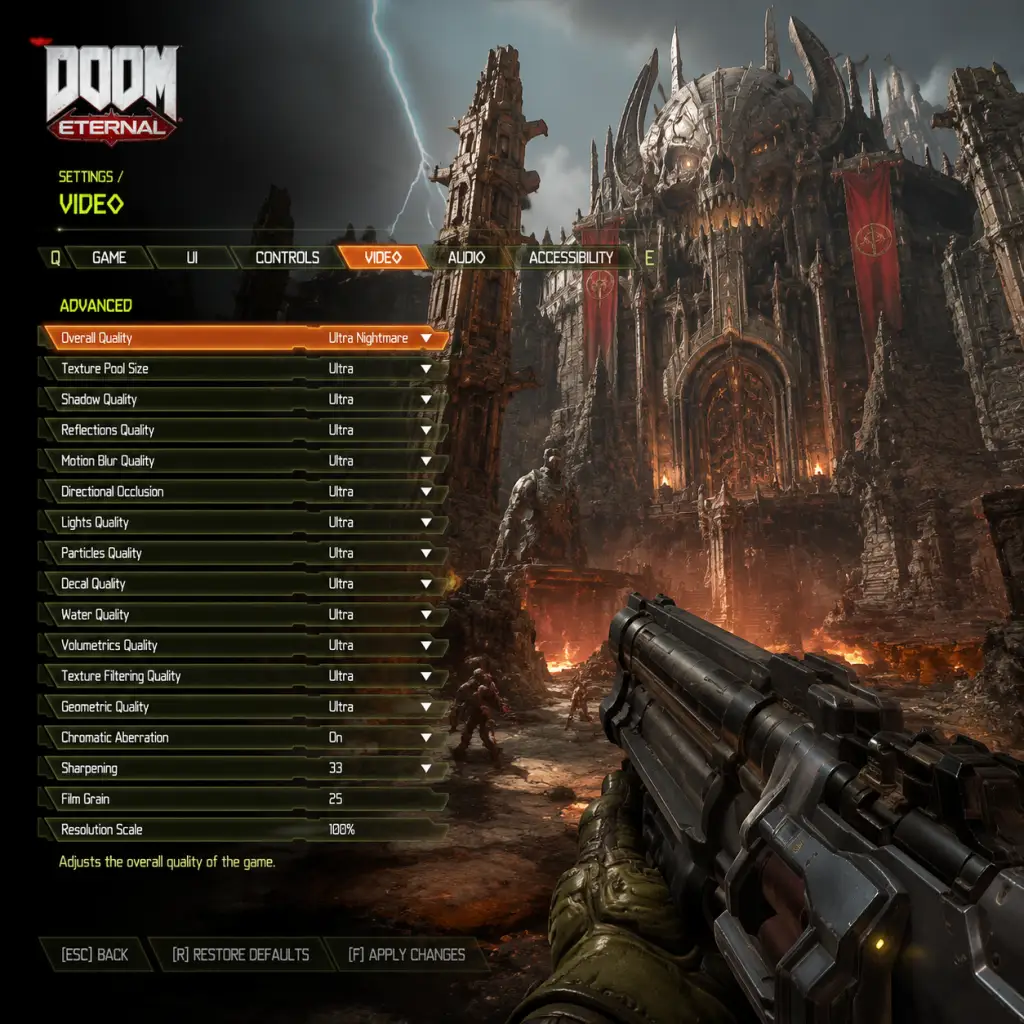
Doom Eternal is a highly optimized game that runs well on a wide range of hardware. However, to achieve the best balance between performance and visual fidelity, you should customize settings based on your system. This guide covers all major settings categories, with recommendations for different hardware tiers. Pay special attention to settings that are easy to misconfigure—such as Chromatic Aberration, Motion Blur, and Texture Quality—as they can significantly impact either visual clarity or performance.
Graphics Settings
#### Display Mode
- Fullscreen (recommended): Grants exclusive access to the GPU, reducing input lag and improving stability.
- Borderless Windowed: Useful for quick alt-tabbing but can introduce slight input lag.
- Windowed: Not recommended for gameplay.
- Resolution: Set to your monitor's native resolution.
- Resolution Scaling: Use only if you need performance headroom. Values below 100% reduce quality; above 100% (e.g., 150%) can improve clarity on high-res displays but requires more GPU power. For 4K displays, 100% is fine; for 1080p, you may use 125% for sharper visuals if performance allows.
#### Resolution and Scaling
#### Graphics Presets
Doom Eternal offers presets: Low, Medium, High, Ultra Nightmare. Below are recommended custom tweaks for three hardware tiers.
| Setting | Low-End (GTX 1050 Ti / RX 570) | Mid-Range (RTX 2060 / RX 5600 XT) | High-End (RTX 3080 / RX 6800 XT) |
|---|---|---|---|
| Texture Quality | Medium | High | Ultra Nightmare |
| Shadow Quality | Low | Medium | Ultra Nightmare |
| Lighting Quality | Medium | High | Ultra Nightmare |
| Decal Quality | Low | Medium | High |
| Particle Quality | Medium | High | Ultra Nightmare |
| Water Quality | Low | Medium | High |
| Volumetric Quality | Low | Medium | Ultra Nightmare |
| Reflection Quality | Low | Medium | Ultra Nightmare |
| Ambient Occlusion | Off (or SSAO) | SSAO | HBAO+ |
| Motion Blur | Off | Off | Off (or 1-2) |
| Chromatic Aberration | Off | Off | Off (recommended) |
| Film Grain | Off | Off | Off |
| Depth of Field | Off | Low | Off (or Low) |
| Lens Flare | On | On | On |
| Anti-Aliasing | TAA (low) | TAA (medium) | TAA (high) or FXAA if TAA causes blur |
| Anisotropic Filtering | 4x | 8x | 16x |
- Chromatic Aberration and Film Grain add a retro film look but reduce clarity. Many competitive players disable them.
- Motion Blur: Blurs movement; disable for sharper visuals in fast-paced combat.
- Texture Quality: On low-end systems, setting to Ultra Nightmare can cause stuttering due to VRAM limits. Use High or Medium instead.
- Ambient Occlusion: HBAO+ looks great but is costly; SSAO is a good middle ground.
- FidelityFX Super Resolution (FSR): Only available on PC. Use if you need a performance boost. Quality mode preserves image quality well; Ultra Performance is blocky. Not recommended on mid/high-end unless you target very high frame rates.
- NVIDIA DLSS: Supported on RTX cards. DLSS Quality mode provides a near-native image with a significant performance gain. Use DLSS Balanced or Performance for higher FPS.
- Ray Tracing: Only available with RTX cards. Reflection quality and lighting improve noticeably but cut performance roughly 30–50%. Recommend turning off for competitive play; turn on for single-player immersion on powerful cards.
- Default: Set to your primary output (headset or speakers).
- Mono: Enable only if you have hearing impairment in one ear or a single speaker setup.
- Master Volume: 100% (adjust system volume separately).
- Music Volume: 70–100% (the soundtrack enhances the action).
- SFX Volume: 100% (essential for hearing enemy cues).
- Dialogue Volume: 80–100% (story elements).
- Voice Chat Volume: Adjust as needed.
- Dynamic Range: Choose High for home theater setups (wide range). Medium or Low for headsets to avoid losing quiet sounds.
- Speaker Configuration: Set to Stereo for headphones, 5.1 or 7.1 for surround sound systems. If using virtual surround (e.g., Dolby Atmos), select Stereo and let software handle it.
- Audio Mix: War Tapes mode boosts quiet sounds (footsteps, health pickup) and compresses loud ones; useful for headsets. Studio Reference is flat. Use War Tapes for competitive advantage.
- Dynamic Range: If set too low, explosions may be deafening while whispers disappear. On headsets, Medium is recommended.
- Audio Mix: War Tapes is often preferred for multiplayer because it makes enemy movements more audible.
- PC: The default keyboard and mouse layout is functional but can be improved.
- Console: Default controller bindings are good, but consider customizing jump and dash to comfortable triggers.
- Weapon Switch: Use number keys (1-6) rather than mouse wheel for speed. Consider binds like Q for Super Shotgun, E for Ballista.
- Jump: Space (default). Some players prefer mouse thumb button for easier movement.
- Dash: Shift (default). Rebinding to a side mouse button can free your left hand.
- Flame Belch: F (default). Good.
- Ice Bomb: Q or G.
- Chainsaw: C (default). Keep accessible.
- Melee: V (default).
- Punch: Left mouse click when no weapon is out? Use dedicated key: Mouse thumb button.
- Crouch/Slide: Ctrl or C. Binding slide to a toggle is easier for rapid movement.
- Weapon Wheel: Tab (default). Use only for quick selection; otherwise use direct binds.
- Stick Sensitivity: Start at ~20–30 for horizontal and vertical; adjust up for faster turning, down for precision.
- Dead Zone: Default is fine. Lower to 0.1 if you feel drift.
- Look Smoothing: Set to 0 for direct input.
- Aim Assist: Enable for console, disable for PC controller? Keep enabled for easier tracking.
- Button Layout: Consider using "Bumper Jumper" to jump with L1/LB and aim with R1/RB. Dash on R3 (click right stick) may be awkward; try L3 (click left stick) if comfortable.
- Trigger Dead Zones: No adjustment in game, but you can set in console accessories app.
- Mouse Sensitivity: Start at 4–6 in-game with 800 DPI. Adjust to achieve a 360-degree turn across ~30 cm of mouse movement.
- Mouse Acceleration: Disable in Windows and in-game (set to 0).
- Invert Y: Off unless you prefer inverted flight.
- Toggle Crouch: Enable to easily slide without holding.
- Toggle Sprint: Not present (auto-sprint is default). Keep enabled.
- Weapon Wheel can be a crutch; practicing direct weapon keys improves reaction time.
- Toggle vs Hold Dash: The game allows both. Toggle is less fatigue but can cause accidental dodge. Most competitive players use Hold.
- Color Blind Modes: Options for Deuteranopia, Protanopia, Tritanopia. Affects enemy health bars and UI elements.
- HUD Scale: Increase for readability on small screens or distance from TV.
- Subtitles: Enable with speaker name and background for clarity.
- High Contrast Mode: Not explicitly present, but color blind settings help.
- Text Size: Can't be changed beyond HUD scale.
- Monaural Audio: Combine left and right channels into mono; helps with single-ear setups.
- Damage Direction Indicator: On-screen arrows show damage direction—enable if audio cues are hard to hear.
- Auto-Switch Weapon: Off (default) – disable to have full control.
- Auto-Equip Weapons: On – picks up new weapons automatically; turn off if you prefer manual.
- Tap Weapon Switch: On – allows tap to switch between two weapons. Useful for quick swapping.
- Hold to Crouch: Toggle is easier for some.
- Flight Stick: Not supported.
- Game Speed: Not adjustable.
- Aim Assist Strength: Adjustable on controller; increase for easier tracking.
- Damage Number Display: On by default; can be distracting, turn off if overwhelmed.
- Auto-Switch Weapon can cause you to waste ammo on weaker demons; turn it off for strategic control.
- Tap Weapon Switch is very useful for the Super Shotgun + Ballista combo (quick-swapping). Enable it.
- Text Language: Select from available options (e.g., English, French, German, etc.). Game must be restarted to apply.
- Audio Language: Same options; affects character voices.
- Subtitles Language: Overrides text language for subtitles.
- These settings are in the main menu under "Language". Changing mid-game is safe, but new lines may not update until reloading the level.
- Doom Eternal does not support language packs on all platforms equally. On console, language is often tied to system language. On PC, you can switch freely in the launcher or in-game menu.
- Region: Choose the closest for lowest ping. Auto is fine.
- Connection Type: Wired > Wi-Fi. If Wi-Fi, ensure 5 GHz band and low interference.
- Matchmaking: Can filter by mode (Solo vs Team).
- Crossplay: Enable to play with console friends; disable to restrict to PC only.
- Network Status: Shows your ping and packet loss during matches. Keep an eye on it.
- Bandwidth Limit: Not applicable; game streams assets dynamically.
- NAT Type: Ensure Open (Type 1/2). Closed NAT will limit matchmaking. Port forwarding recommended (ports: 3074 UDP, 88 UDP, 53 UDP, 443 TCP, 80 TCP).
- Voice Chat: Push-to-talk (PC) or open mic (console). Adjust volume.
- Crossplay can cause slight imbalance (PC players have mouse advantage). If you play competitively on console, consider disabling crossplay.
- Network Status overlay can be toggled in settings; use it to diagnose lag.
- Damage Number Size: Small – medium – large. Keep medium for awareness.
- Crosshair: Color (cyan, pink, etc.) and shape (dot, cross, etc.). Choose high-contrast color for visibility.
- Weapon Bob: Set to low or off to reduce motion sickness.
- FOV (Field of View): Default 80 (console) or 90 (PC). Increase to 100–110 for better peripheral vision. Higher FOV reduces perceived speed but helps spotting enemies. Console users can set up to 110? On PS4/Xbox One, cap is 90; on PC up to 120.
- Gore: Level – None, Low, High. High adds dismemberment and pools of blood. No performance impact.
- Show Enemy Health: On – shows health bars above enemies.
- Show Compass: On – helps with orientation.
- Show Weapon Pickups: On.
- Screen Shake: Set to off or minimal to reduce disorientation.
- Vignette: Off – removes dark corners, improves visibility.
- I'm Too Young to Die: Easy – for story.
- Hurt Me Plenty: Normal.
- Ultra-Violence: Hard – recommended for experienced FPS players.
- Nightmare: Very hard – permadeath on death? Actually, you can continue from last checkpoint but enemies are relentless.
- Extra Life Mode: Single-life run with extra lives scattered – for challenge.
- FOV is one of the most impactful settings: too low leads to tunnel vision, too high can distort distant targets. Start at 100, adjust up to 110 if comfortable.
- Screen Shake and Vignette are often disabled by competitive players to reduce visual clutter.
- Damage Numbers can be turned off for a cleaner HUD, but keep on to learn weapon effectiveness.
- Your settings are saved automatically to the local config file. On PC, the config file is located at `%USERPROFILE%\Saved Games\id Software\DOOMEternal\base\config.ini`. You can backup this file to preserve your settings.
- Cloud saves sync settings across devices if enabled (Bethesda account required).
- For controller settings, they are stored in a separate `.ini` or console profile.
#### Advanced Graphics
Audio Settings
#### Sound Devices
#### Volume Levels
#### Advanced Audio
Special Attention:
Controls Settings
#### Platform-Specific Basics
#### PC Recommended Keybinds
#### Controller Settings
#### Advanced Control Options
Special Attention:
Accessibility Settings
#### Visual Accessibility
#### Audio Accessibility
#### Motor Accessibility
#### Cognitive Accessibility
Special Attention:
Language Settings
Special Attention:
Network Settings
#### Multiplayer (Battlemode)
#### Advanced Network
Special Attention:
Gameplay Settings
#### HUD & Gameplay Options
#### Difficulty Settings
Special Attention:
Saving & Managing Settings
Conclusion
Properly configuring your settings in Doom Eternal can drastically improve your performance and enjoyment. Experiment with the recommendations above, especially the graphics and control settings tailored to your hardware. Remember to revisit settings after game updates, as patches sometimes reset or add new options. Stay mobile, and happy slaying!
Important Notes
Important Notes
Irreversible Choices & Missable Content
Doom Eternal has no branching narrative or dialogue choices that permanently lock you out of story content. However, several gameplay elements are missable on a first playthrough without prior knowledge:
- Secret Encounters: Each level contains one secret encounter (gate icon) that, if completed, summons a powerful demon. Killing it awards a weapon point. If you clear the area or leave the encounter zone without finishing it, you cannot re-trigger it later in that mission. Miss it and you lose that weapon point permanently for that playthrough.
- Praetor Suit Tokens, Sentinel Crystals, and Weapon Mod Points: These collectibles are spread throughout levels. If you skip a level entirely (by replaying from mission select), you can come back later. But if you miss one in a level and progress to the next, you must replay the entire level to get it. There are no shortcuts to specific rooms.
- Toy and Codex Entry Trophies: Toys are purely cosmetic, but Codex entries contain lore. Some are easy to overlook in hidden alcoves. Using the in-game map (M) after completing a level shows which collectibles you missed.
- Unlockable Armor Sets: Event-exclusive cosmetic sets from series (e.g., Twitch drops, pre-order bonuses) are permanently unobtainable if missed. No in-game method to acquire them later.
- Battlemode Cosmetics: Some character skins and podium animations are tied to specific seasons or promotions. Once a season ends, those items may never return.
- Mission 3: Cultist Base – First encounter with Arachnotrons (shield, turret). Tip: Use Plasma Rifle (stun bomb mod) to disable shield, then focus-fire with Heavy Cannon.
- Mission 5: Super Gore Nest – Arena with two Marauders. Extremely punishing. Tip: Keep your distance from both, use the Super Shotgun (meat hook) to close in only on one at a time. Never let both be in melee range. Use the Ballista (precision bolt) to stun Marauder when his eyes flash green.
- Mission 7: Arc Complex – The first possessed Baron of Hell (blue flame). Tip: Use the Crucible sword (one-hit kill) if you have it; otherwise, freeze with ice bomb, then unload Super Shotgun + Ballista combo.
- Mission 10 (Final Boss): The Khan Maykr – She constantly regenerates shields. Tip: Use the Ballista (destroyer blade) to break shields quickly. Save your BFG for the phase where she channels multiple energy balls.
- Enable "Daisy" cheat code (if available) for unlimited ammo in campaign after first playthrough? No, that’s not a real cheat. Use the Sentinel Armor toggle in the pause menu if you are stuck—it grants massive damage resistance (but disables achievements).
- Upgrade your Praetor Suit early: prioritize Chronostrike (slow time while airborne) and Air Control (better aerial movement). These give you breathing room.
- Not using the Chainsaw regularly: Many new players hoard fuel. Chainsaw kills drop ammo (including from fodder demons). Always keep at least one fuel pip by sawing low-tier enemies (Imps, Gargoyles, Soldiers) to refill ammo for your main guns. Never let ammo hit zero.
- Forgetting to use the Flamethrower: The flamethrower (alt-fire on Thermal gloves) drops armor shards when enemies burn. In big fights, spam it on a crowd to get armor. Armor is your health buffer; do not neglect.
- Staying on the ground: Doom Eternal punishes stationary play. Use dash, double jump, and wall-climbing (on special surfaces). The skill gap is largely about movement. If you are dying repeatedly, practice circle-strafing and jumping over projectiles.
- Ignoring weapon mods: Each weapon has two mods. Unlock and upgrade them early. The Heavy Cannon’s Micro Missiles mod is great for stagger damage. The Plasma Rifle’s Microwave Beam can stun lock heavy demons but leaves you vulnerable.
- Over-relying on the BFG: The BFG ammo is extremely rare (max 3 shots). Use it as an "oh crap" button only on huge crowds or bosses. Wasting it on a single Mancubus is a mistake.
- Playing on Ultra-Violence first time: The game’s default difficulty is "Hurt Me Plenty". Ultra-Violence is balanced for experienced FPS players. If you struggle, tone down to "I'm Too Young to Die". No shame.
- Weapon Points: You earn them from completing missions, killing priority targets in Secret Encounters, and finding them as pickups. If you want all weapons fully upgraded, you must find most secrets. There is no XP grind—just thorough exploration.
- Praetor Suit Points: Found similarly. Max suit upgrades require all 30 points. The game gives you exactly enough if you find all. Miss some and you cannot max out. Replay levels in Mission Select to grab missed ones.
- Sentinel Crystals: Exactly enough to max all 3 trees (Health, Armor, Ammo). Again, miss any and you are short. Use guides for locations.
- Combat Shotgun Mods: You can only have one mod active per weapon at a time, but you can switch freely once both are unlocked. No need to grind; just unlock them at the fortress.
- Upgrade Points Reallocation: There is no way to refund spent points. Choose wisely. For Suit, focus on mobility and resource generation first. For weapons, pick mods that complement your playstyle.
- Runes: Three rune slots; you can swap them at any time from the pause menu. Farm runes by completing Slayer Gates (master level challenges). Best runes: Seek and Destroy (air mobility), Blood Fueled (speed boost after kill), Saving Throw (survive fatal hit once per life).
- Autosave Only: Doom Eternal uses a checkpoint system, not manual saves. You cannot create a save before a boss to retry. If you miss a collectible, you must replay the mission from the fortress (Mission Select).
- Checkpoint Reloading: If you die, the checkpoint loads at the last arena entrance. Sometimes you lose progress on optional objective (e.g., secret encounter half-done). If a secret encounter is bugged (rare), restart the checkpoint from the pause menu.
- Beating the final boss: After completing the game, you return to the Fortress of Doom with full loadout to free-roam and find remaining collectibles with fast travel. Missed collectibles are recoverable this way.
- Known Glitches:
- Cross-platform saves: Not supported. Your progress is tied to the platform’s account (Bethesda.net, Steam, PSN, Xbox Live, Switch).
- Battlemode (2 vs. 1): This asymmetrical multiplayer pits one player as the Slayer against two demons. Be a good sport: don’t camp spawns, don’t use exploits (e.g., infinite ammo glitches). If you are destroyed, say "gg" and try again.
- Anti-Cheat System (PC): Denuvo Anti-Cheat is used. It runs at kernel level. If you are privacy-conscious, be aware. Modifying game files for single-player (e.g., unlocking cosmetics) will get you banned from Battlemode. For single-player only, you can use mods but must manually disable anti-cheat? Actually, id doesn't ban for single-player mods, but avoid altering online files. Steam achievements disabled with mods, not ban.
- Cheating in Battlemode: Use of aimbots, wallhacks, or speed hacks will result in permanent ban from online play. Don't risk it.
- Voice Chat: In Battlemode, you can communicate with your demon partner. Keep it civil. Avoid toxic talk; it’s just a game.
- You can customize the HUD: Go to Settings > HUD > Advanced. You can move health bar, ammo display, and even hide the compass. Many find the default cluttered.
- The tutorial mission is mandatory: Even if you are a Doom veteran, the first level teaches essential mechanics (flame belch, blood punch, etc.). Skipping it leaves you unprepared.
- You can replay missions with any loadout: Once you’ve found a weapon, you keep it in all replays. This helps grab missed collectibles without starting over.
- The Fortress of Doom has a secret: There’s a hidden room behind a wall that glows faintly. It contains a Cheat Code that gives you infinite ammo (after collecting all six cheats). Look up locations.
- Damage numbers are misleading: The displayed number is raw damage before resistances. Use the codex for accurate values.
- Health is the most precious resource: Always prioritize health pickups over ammo if low. Chainsaw for ammo, flame belch for armor, glory kills for health. Master the triangle.
- The Ballista is a better sniper than the Heavy Cannon: The Ballista's precision bolt deals huge damage and stuns. The Heavy Cannon scope is weak for heavy targets.
- You can quick-swap weapons: Bind two weapons to adjacent keys (PC) or use weapon wheel. Quick-swapping between Super Shotgun and Ballista maximizes DPS on stunned enemies.
- Enemy weak points matter: Shoot Arachnotron’s turret, Mancubus’s arm cannons, Revenant’s shoulder pods, Cacodemon’s mouth (when it charges). This staggers or disables them. Learn each demon’s weak point.
- Platforming sections are part of the game: Some players hate them. You cannot skip. Use dash + jump. If you fall, you respawn automatically at the start of the segment.
- Id Software’s Anti-Cheat: It was controversial at launch for being always-on. It still runs when playing single-player. Disconnecting from the internet does not bypass it; it will still process. If you mod, be careful.
- In-game purchases: Doom Eternal has no microtransactions for gameplay. But there are paid cosmetic packs for Battlemode and single-player. They are purely visual.
- Denuvo DRM: The game ships with Denuvo DRM on PC. Some players report performance impact (0-5% FPS loss). It is unlikely to be removed.
- No official mod support: Unlike the original Doom, this is closed. Modding is possible but unsupported and may trigger anti-cheat.
Difficulty Spikes & How to Overcome Them
Doom Eternal notoriously ramps up difficulty at these points:
General difficulty management:
Pitfalls & Common Mistakes
Grinding Traps & Resource Management
Save Management & Game Glitches
- Marauder inconsistency: Sometimes the Marauder’s AI behaves erratically (constant dashing). If he seems unfair, suicide to reload checkpoint.
- Gore Nest progression bug: On a rare occasion, the Super Gore Nest brain may fail to detach. Restart from last checkpoint.
- Performance on PC: If you experience stuttering, disable Steam overlay and Discord overlay. Also set `PresentInterval` to 1 in config file if V-Sync is wonky.
Online Etiquette & Anti-Cheat Notes
Things Players Commonly Regret Not Knowing Earlier
Warnings
By keeping these notes in mind, you’ll avoid many frustrations and maximize your enjoyment of the rip-and-tear experience.
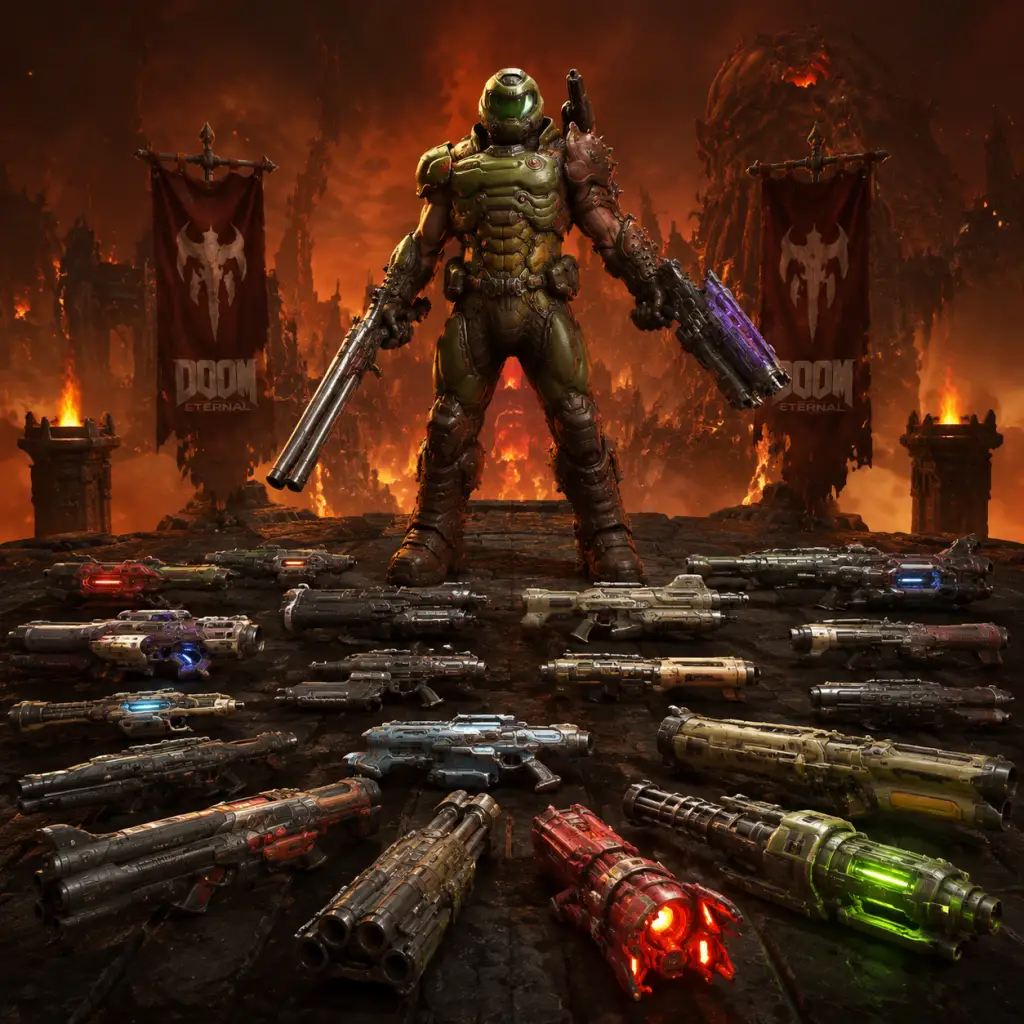
All Game Items
Overview
Doom Eternal features a vast arsenal of weapons, equipment, and collectibles that are central to its aggressive combat loop. This guide covers every major item category: weapons and their modifications, equipment such as grenades and the Flame Belch, Praetor Suit upgrades, runes, consumables, currencies, and collectibles. Items are grouped logically with explanations of function, acquisition, and optimal use.
Weapons
Combat Shotgun
- Description: A reliable pump-action shotgun effective at close range. Default weapon.
- Mods: Sticky Bombs (alt-fire lobs explosive grenades) and Full Auto (enables rapid fire at cost of ammo).
- How to Obtain: Given automatically at the start of the game.
- Upgrades: Mastery challenges for each mod increase damage or utility. Full Auto Mastery increases fire rate. Sticky Bombs Mastery increases explosion radius.
- Synergies: Use Sticky Bombs to destroy weak points on demons like Arachnotrons. Exploit environment barrels.
- Ammo: Shells (common drops from fodder demons).
- Description: A versatile assault rifle with high accuracy. Good for mid-range.
- Mods: Micro Missiles (alt-fire barrage of small rockets) and Precision Bolt (single high-damage shot).
- How to Obtain: Found in the first level "Hell on Earth" after the first encounter with possessed soldiers.
- Upgrades: Mastery for Micro Missiles increases magazine size. Precision Bolt Mastery adds zoom and damage.
- Synergies: Precision Bolt for sniping weak points (e.g., Mancubus cannons, Cacodemon eyes). Micro Missiles for crowd control.
- Ammo: Bullets (abundant).
- Description: Double-barreled shotgun delivering devastating damage at very close range. Includes a Meat Hook attachment.
- Mod: Meat Hook (alt-fire fires a grappling hook that pulls you toward a demon; if the demon is killed, you retain momentum. Can be used to close distance quickly).
- How to Obtain: Found in "Exultia" level.
- Upgrades: Mastery for Meat Hook increases speed and damage. Upgrades from Sentinel Battery stations.
- Synergies: Meat Hook + Flame Belch for armor farming. Super Shotgun + Ballista quick-switch combo for burst damage.
- Ammo: Shells (same as Combat Shotgun but uses more per shot).
- Description: Fires explosive rockets with high splash damage.
- Mods: Lock-On Burst (locks onto up to three targets for homing rockets) and Remote Detonate (detonates rocket mid-air manually).
- How to Obtain: Found in "Doom Hunter Base" level.
- Upgrades: Mastery for Lock-On Burst reduces lock-on time. Remote Detonate Mastery increases explosion radius.
- Synergies: Remote Detonate for hitting around corners or damaging demons from behind cover. Lock-On Burst for quickly eliminating flying enemies.
- Ammo: Rockets (limited but can be found in glory kills).
- Description: Energy weapon that stuns demons with heat damage. Good against shields.
- Mods: Stun Bomb (fires a projectile that disables a demon, useful against Marauders) and Heat Blast (charged alt-fire releases a burst of energy, overheat mechanic).
- How to Obtain: Found in "Super Gore Nest" level.
- Upgrades: Mastery for Stun Bomb increases stun duration. Heat Blast Mastery increases damage.
- Synergies: Stun Bomb to freeze Marauder for few seconds. Heat Blast for AoE damage when surrounded.
- Ammo: Plasma (medium availability).
- Description: High-damage precision energy weapon. Fires a single powerful bolt.
- Mods: Arbalest (explosive bolt with area damage) and Destroyer Blade (charge up a wide horizontal energy wave).
- How to Obtain: Found in "Nekravol" level.
- Upgrades: Mastery for Arbalest increases explosion size. Destroyer Blade Mastery increases charge speed.
- Synergies: Quick-switch combo: Ballista + Super Shotgun for massive DPS. Arbalest for crowd clearing.
- Ammo: Ballista cells (unique ammo, not shared).
- Description: Rotary machine gun with high rate of fire. Can overheat.
- Mods: Mobile Turret (deploys shield and fires while stationary, reduces recoil) and Energy Shield (creates a frontal shield that blocks some damage).
- How to Obtain: Found in "Mars Core" level.
- Upgrades: Mastery for Mobile Turret increases heat capacity. Energy Shield Mastery increases shield health.
- Synergies: Mobile Turret for suppressing fire. Energy Shield for defensive play or against Archvile.
- Ammo: Bullets (same as Heavy Cannon, but consumption is high).
- Description: Ultimate weapon. Fires a large energy ball that deals massive damage and chains lightning to nearby demons until killed.
- How to Obtain: Found in "The Holt" level (part of The Ancient Gods DLC) or in campaign at "Taras Nabad". Also from certain secret encounters.
- Ammo: BFG ammo (rare, only from pickups).
- Synergies: Use when overwhelmed by heavy demons. Combine with Power Seeker Sentinel Crystal for increased range.
- Note: Extremely limited ammo; use sparingly.
- Description: Rapid-fire energy weapon with infinite ammo but limited heat. Fires multiple projectiles simultaneously.
- How to Obtain: Unlocked by collecting all 6 Empyrean Keys.
- Ammo: Heat-based; cools down over time.
- Synergies: Best for area denial and clearing waves of weak demons.
- Description: One-hit-kill energy sword. Limited charges.
- How to Obtain: Acquired in late game (Mission "The Blood Swamps").
- Ammo: Crucible charges (found in levels).
- Synergies: Instant kill for any non-boss demon. Use on Marauders, Archviles, or Tyrants.
- Description: Standard explosive grenade.
- Cooldown: 30 seconds.
- Upgrades: Praetor Suit upgrades reduce cooldown and increase radius.
- Use: Area damage, stagger groups.
- Description: Freezes enemies in a radius, making them vulnerable and slowing them.
- Cooldown: 45 seconds.
- Upgrades: Praetor Suit upgrades extend freeze duration.
- Use: Crowd control, especially against fast demons.
- Description: Short-range flame thrower that causes demons to drop armor shards.
- Cooldown: 15 seconds.
- Upgrades: Praetor Suit upgrades increase flame time and armor shard amount.
- Use: Essential for building armor during combat.
- Purpose: Unlock passive upgrades to suit, such as health, armor, ammo capacity, and equipment cooldown reductions.
- How to Obtain: Found in levels as glowing green pickups (green cubes). Also from completing certain challenges.
- Categories: Health, Armor, Ammo, Equipment, Explosives, and Mobility.
- Recommendation: Prioritize Ammo capacity and Armor upgrades early.
- Description: Equippable modifiers that grant powerful passive abilities.
- Slots: Three active rune slots.
- How to Obtain: Found in secret encounters across levels. Each rune has a trial that must be completed to unlock its power.
- List:
- Synergies: Use Equipment Fiend with grenades for rapid cycling. Airborne for aerial combat.
- Description: Non-cosmetic suit upgrades found in optional challenge rooms (Sentinel Crystal puzzles).
- How to Obtain: Solve platforming or combat puzzles to reach Sentinel Crystals.
- Effects: Permanent stat upgrades like +25 health, +10 armor, +1 ammo capacity for specific weapons.
- Small Health Bonus: +15 HP, common from kills.
- Large Health Bonus: +40 HP, found in levels.
- Health Globes: Dropped by demons on stagger or glory kill. Green pickups restore health.
- Stim Packs: Instant +50 HP, found in arenas.
- Armor Shards: Dropped from Flame Belch kills. Each shard gives small armor.
- Armor Pickups: +20 armor or +50 armor found in levels.
- Ammo Boxes: Restore specific weapon ammo. Found in levels or dropped by killed demons (especially when using Chainsaw).
- Full Ammo: Rare pickups that refill all ammo.
- Berserker: Temporary unlimited ammo, increased damage, and health regen.
- Quad Damage: Greatly increases weapon damage.
- Haste: Increases movement and attack speed.
- Invisibility: Makes you invisible to demons (they lose aggro).
- Mega Health & Armor: Full restore.
- Purpose: Used to unlock and master weapon mods.
- How to Obtain: Found as collectibles in levels (golden gear icons), rewards from completing secret encounters, and from Sentinel Battery doors.
- Purpose: Used to upgrade the Praetor Suit.
- How to Obtain: Found in levels as green cube pickups. Some are hidden, others in plain sight.
- Purpose: Used to open special doors in the Fortress of Doom, which contain cosmetic items, cheat codes, and extra weapon points.
- How to Obtain: Found in levels, often behind optional objectives or puzzles.
- Purpose: Used to unlock the hidden Unmaykr weapon in the Fortress of Doom.
- How to Obtain: 6 total; each found in specific levels (e.g., "Exultia", "Super Gore Nest", etc.). Locations are often well-hidden or require solving puzzles.
- Purpose: Unlock fun gameplay modifiers (e.g., Infinite Ammo, Low Gravity, Big Head mode). Activated from the Fortress of Doom computer.
- How to Obtain: Found hidden in levels, some behind Sentinel Battery doors.
- Description: Collectible figurines of demons and characters. Placed in the Fortress of Doom on shelves.
- How to Obtain: Found hidden in levels, often behind secret doors or platforming puzzles.
- Benefit: Cosmetic only; completionist trophy/achievement.
- Description: Classic Doom soundtracks. Can be played in the Fortress of Doom on the jukebox.
- Locations: One per level often, hidden in secret areas.
- Description: Lore text and images explaining story, demonology, and world-building.
- Locations: Scattered throughout levels, often in side rooms.
- Benefit: Lore completion; some are required for achievements.
- Description: Completion of optional timed combat challenges rewards extra Weapon Points.
- How to Obtain: Activate the challenge pillar in a level, then survive against waves of demons within a time limit.
- While not an item, it's a hub world where many items are accessed. Key items like Sentinel Batteries unlock doors here.
- Description: A powerful melee attack that can be used after building up enough glory kills. Deals area damage and can stagger enemies.
- Upgrade: Rune "Punch and Reave" makes Blood Punch restore health.
- Description: Essential tool that instantly kills a fodder demon and restores ammo. Fuel regenerates over time or from pickups.
- Upgrade: Praetor Suit upgrades increase fuel capacity and allow chainsaw kills on heavier demons.
- Weapon Mod Combo: Use combos like Super Shotgun + Ballista quick-switch for huge DPS. Practice the "quickswap" technique by binding weapons to hotkeys.
- Flame Belch + Meat Hook: Super Shotgun's Meat Hook pulls you in; use Flame Belch before firing for armor from all enemies hit by the explosion.
- Ice Bomb + Rocket Launcher: Freeze enemies then lock-on or remote detonate for safe area damage.
- Rune Synergies: Combine Equipment Fiend + Frag Grenade for faster grenade cooldowns. Airborne + Mobility upgrades for aerial dominance.
- Praetor Suit Priority: Early game, invest in Ammo capacity (especially for shotgun shells and rockets) and Armor (increases durability). Later, focus on Equipment cooldown reduction.
Heavy Cannon
Super Shotgun
Rocket Launcher
Plasma Rifle
Ballista
Chaingun
BFG-9000
Unmaykr
Crucible
Equipment
Frag Grenade
Ice Bomb
Flame Belch
Praetor Suit & Upgrades
Praetor Suit Points
Runes
- Blood Fueled: Glory kills increase speed.
- Saving Throw: Prevents death once per life (long cooldown).
- Airborne: Air control allows mid-air movement.
- Dazed and Confused: Staggered enemies remain staggered longer.
- Punch and Reave: Blood Punch restores health.
- Seeker: Health/armor/ammo drops fly toward you.
- Equipment Fiend: Equipment cooldown reduced after glory kill.
- Siphon: Glory kills drop more health.
Sentinel Armor (Crystals)
Consumables & Pickups
Health
Armor
Ammo
Power-ups
Materials & Currencies
Weapon Points (Golden Gears)
Praetor Suit Points (Green Cubes)
Sentinel Batteries (Blue Batteries)
Empyrean Keys (Gold Keys)
Cheat Codes
Collectibles
Toys
Music Albums
Codex Entries
Secret Encounter Rewards
Key Items (Miscellaneous)
Fortress of Doom
Blood Punch
Chainsaw
Important Synergies & Tips
This concludes the All Game Items guide. For platform-specific notes, all items are identical across PC, PS4, PS5, Xbox One, Xbox Series X|S, and Nintendo Switch (though Switch has lower resolution and slower load times).
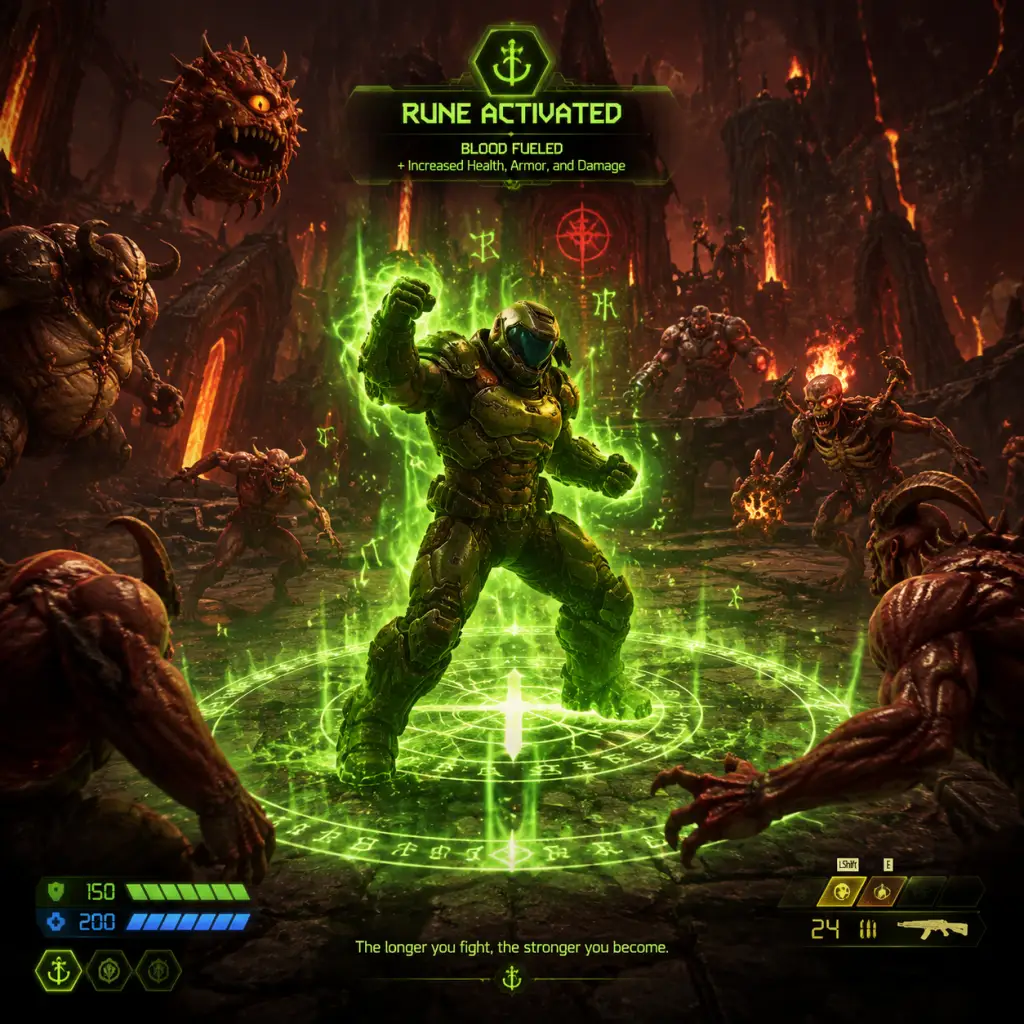
Character Skills
Character Skills
Overview
In Doom Eternal, there is only one playable character: the Doom Slayer. Unlike role-playing games with class systems, the Doom Slayer has a fixed set of abilities that can be enhanced through Praetor Suit Upgrades, Sentinel Armor Upgrades, Runes, and Weapon Mods. All skills are available to every player; the customization lies in which upgrades you prioritize and which Runes you equip. This guide covers every skill, ability, and upgrade, providing detailed effects, cooldowns, synergies, and recommended builds.
1. Praetor Suit Upgrades (Passive Abilities)
The Praetor Suit has three upgrade trees: Foundry, Combat, and Explorer. You earn Praetor Suit Points from completing combat encounters (e.g., Slayer Gates, secret encounters) and finding them in the world.
Foundry Tree
Focuses on ammo capacity and resource efficiency.
| Upgrade Name | Effect | Max Level | Priority |
|---|---|---|---|
| Ammo Stock Up | Increases maximum ammo capacity for all weapons by +5 per level. | 3 levels (+15 total) | High – essential for prolonged fights |
| Heavy Ammo Store | Increases heavy ammo capacity (e.g., Super Shotgun, Ballista) by +2 per level. | 3 levels (+6 total) | Medium – useful for heavy weapon mains |
| Energy Ammo Store | Increases energy-based weapon ammo (Plasma Rifle, BFG) by +2 per level. | 3 levels (+6 total) | Low – fewer energy weapons used frequently |
| Armor Boost | Increases starting armor and armor from pickups by +5 per level. | 3 levels (+15 total) | Highest – armor is critical for survival |
| Armor Crate | Increases armor shard pickup amount by +2 per level. | 2 levels (+4 total) | Medium – supports armor loop |
| Health Boost | Increases starting health and health from pickups by +5 per level. | 3 levels (+15 total) | High – especially early game |
Combat Tree
Enhances damage, speed, and special abilities.
| Upgrade Name | Effect | Max Level | Priority |
|---|---|---|---|
| Fast Hands | Reduces weapon swap time by 10% per level. | 2 levels (20% total) | Very High – enables quick combos |
| Air Control | Increases aerial movement control by 10% per level. | 2 levels (20% total) | High – improves jump dodging |
| Blood Fueled | Killing a demon with a Glory Kill grants a temporary speed boost (+10% per level). | 2 levels (20% total) | Medium – good for aggressive play |
| Seismic Slam | Melee attacks deal splash damage in a small area. | 1 level only | Low – minor utility |
| Savagery | Speeds up Glory Kill animation by 20% per level. | 2 levels (40% total) | High – faster resource generation |
| Dazed and Confused | Increases stagger duration from melee hits by 0.5s per level. | 2 levels (+1s total) | Medium – helps set up Glory Kills |
| Hot Swapper | Weapon mod swapping is faster. | 1 level | Medium – for mod-heavy players |
| Punch and Reave | Blood Punch (see abilities) restores health on hit. | 1 level | High – great sustain |
| Chrono Strike | When aiming down sights, briefly slow time by 30% per level. | 2 levels (60% total) | Very High – precision tool |
| No Opportunity | Incoming damage is reduced by 10% per level for 2 seconds after a Glory Kill. | 2 levels (20% total) | High – survivability boost |
| Draining Bolts | Ballista Arbalest mod shots restore health. | 1 level | Situational – if using Arbalest often |
| Bloodbath | Explosive Glory Kills: kills with Bloody Punch or Seismic Slam deal more damage. | 1 level | Low – niche |
Explorer Tree
Utility and movement enhancements.
| Upgrade Name | Effect | Max Level | Priority |
|---|---|---|---|
| Resourceful | Increases loot pickup radius by 20% per level. | 2 levels (40% total) | Low – convenience |
| Rich Get Richer | When armor is above 50, your primary fire no longer uses ammo. | 1 level | Very High – game-changer |
| Quickdraw Holster | Weapon swap is instantaneous after a melee kill. | 1 level | High – synergistic with combos |
| Automatic Map | The automap fills in as you explore. | 1 level | Low – quality of life |
| Secrets Finder | Audio ping when near a collectible. | 1 level | Low – for completionists |
| Retrieval | Recalls your equipment (grenades) from demons. | 1 level | Situational – if relying on grenades |
2. Sentinel Armor Upgrades (Perks)
Upgrades obtained by finding Sentinel Batteries in levels and spending them at the Fortress of Doom. These are passive bonuses that persist across the entire campaign.
| Upgrade | Effect | Cost | Priority |
|---|---|---|---|
| Health Upgrade | +25 max health | 2 batteries | High – stacks with other health boosts |
| Armor Upgrade | +25 max armor | 2 batteries | High – essential for Rich Get Richer |
| Ammo Upgrade | +10 max ammo (all weapons) | 2 batteries | Medium – helps on harder difficulties |
| Dash Upgrade | +1 dash charge (max 2) | 2 batteries | Very High – mobility is king |
| Ice Bomb Upgrade | Increases Ice Bomb duration by 1s | 2 batteries | High – great for crowd control |
| Flame Belch Upgrade | Increases Flame Belch duration by 1s | 2 batteries | High – armor generation |
| Grenade Upgrade | +1 frag grenade capacity (max 2) | 2 batteries | Medium – if you rely on grenades |
3. Runes (Active/Passive Equippable Skills)
You can equip up to three Runes simultaneously (unlocked via Slayer Gates). Runes modify gameplay with powerful effects.
| Rune | Effect | When to Use |
|---|---|---|
| Seeking Glory | Automatically highlights nearby Glory Kill-able demons. | Essential for beginners to spot stagger; can be removed later for better runes. |
| Savagery | Glory Kills are 40% faster. | Best for aggressive resource generation; combine with Blood Fueled. |
| Airborne | Increases damage dealt to demons that are airborne (jumping or launched). | Synergizes with combat shotgun sticky bombs and rocket launcher; great for air combos. |
| Blood Fueled | Glory Kills grant 30% movement speed boost for 2s. | Excellent for speedrunning or staying mobile in hectic fights. |
| Dazed and Confused | Melee attacks stagger demons for longer. | Useful for setting up Glory Kills on tougher enemies. |
| Punch and Reave | Blood Punch restores 30 health per hit. | Top-tier for survivability; combo with Seismic Slam upgrade. |
| Chrono Strike | When aiming down sights (not zoomed mods), time slows by 60% while you move slowly. | Perfect for precision weak-point shooting (e.g., Mancubus arms, Arachnotron turret). |
| Equipment Power | Increases damage of frag grenades and Ice Bomb radius/slow. | Use if you rely heavily on equipment. |
| In Flight | While airborne, movement speed is increased by 20%. | Great for high-mobility builds; combine with Air Control upgrade. |
- Survival: Punch and Reave + Savagery + Seeking Glory (early) or Chrono Strike (late)
- Aggressive: Blood Fueled + Airborne + Savagery
- Precision: Chrono Strike + Dazed and Confused + Punch and Reave
- Effect: Spews a short-range flame that sets demons on fire. Burning demons drop armor shards when damaged.
- Cooldown: 20 seconds base. Can be reduced via Sentinel Armor upgrade (duration increase, not cooldown).
- Upgrades: Duration +1s (Sentinel Armor).
- Synergy: Use before dealing continuous damage (e.g., chaingun, heavy cannon) to generate armor quickly. Also works well with Ice Bomb.<br>- When to Use: At start of any engagement, especially against groups of fodder demons (Imps, Gargoyles) to farm armor. Always keep on cooldown.
- Effect: Freezes all demons in a radius, slowing them and increasing damage taken by 100% while frozen. Lasts ~5 seconds base.
- Cooldown: 20 seconds base. Upgrade: +1s duration.
- Synergy: Combine with Blood Punch for massive AoE damage. Frozen Pinky can be shot from the front.<br>- When to Use: Against large groups or dangerous heavies (Mancubus, Cyber-Mancubus, Baron) to lock them down and focus fire.
- Effect: Throws a standard explosive grenade that deals moderate damage and can stagger demons. Max capacity 2 (with upgrade).
- Cooldown: Each grenade recharges over 15 seconds.
- Upgrade: +1 capacity (Sentinel Armor). Also Equipment Power Rune increases damage.
- Synergy: Great for staggering fodder demons for Glory Kills. Also can be used to interrupt attacks.<br>- When to Use: To clear groups of low-tier demons or stagger a single heavy for a quick Glory Kill.
- Effect: A powerful melee attack that deals heavy damage in a cone and launches enemies. Cooldown is shared with your melee punch (fills a blood punch meter by dealing damage with other weapons; 1 full meter allows one Blood Punch).
- Meter: Fills up after dealing a certain amount of damage (exact threshold scales with difficulty). Can be used instantly once full.
- Upgrades: Seismic Slam (Praetor Suit) adds small AoE; Punch and Reave (Rune) restores health on hit; Bloodbath (upgrade) increases damage of explosive kills.<br>- Synergy: Use after freezing with Ice Bomb for massive damage. Also great for clearing surrounding fodder when surrounded.<br>- When to Use: When meter is full and you face a group or a stagger-resistant demon. Also used to interrupt dangerous attacks.
- Effect: Instant-kill any non-boss demon. Consumes fuel. Refills from fuel pickups. Higher fuel costs for larger demons.
- Fuel: Up to 3 bars (can be increased through upgrades in Fortress of Doom: +1 bar).
- Upgrade: Additional fuel bars; faster refuel from pickups via Praetor Suit? Actually there is an upgrade in Praetor Suit (not sure). But chainsaw is essential for ammo drops: using chainsaw on a demon drops ammo for all weapons.<br>- When to Use: Primarily to replenish ammo; also as an emergency delete on tough demons like Whiplash, Dread Knight, or Cacodemon. Always have at least 1 fuel for ammo runs.
- Effect: Launches grenades (frag or ice) with a trajectory arc, allowing ranged placement. Press and hold equipment button while aiming to enter launcher mode. Unlocked by finding the Equipment Launcher in the Fortress of Doom.
- Cooldown: Uses your existing grenade charges; no separate cooldown.
- Upgrades: None directly, but synergizes with Equipment Power Rune.<br>- When to Use: When you need to place a grenade at a distance, e.g., hitting an Arachnotron turret from far away or pre-freezing a spawn point.
4. Combat Abilities (Active Skills)
These are the Doom Slayer’s special actions that you trigger manually. All have limited uses or cooldowns.
Flame Belch
Ice Bomb
Frag Grenade
Blood Punch
Chainsaw
Equipment Launcher
5. Weapon Mods (Attachable Skills)
While not character-specific skills, weapon mods are integral to the Doom Slayer’s arsenal. They act as alternate fire modes with cooldowns or ammo costs.
| Weapon | Mod Name | Effect | Cooldown/Usage | Synergy/When to Use |
|---|---|---|---|---|
| Heavy Cannon | Precision Bolt | High-damage zoom shot; staggers medium demons | Uses ammo; no cooldown | Weakpoint destruction; best for distance |
| Heavy Cannon | Micro Missiles | Fires homing micro-missiles; good against groups | Uses ammo | Close-mid range crowd control |
| Combat Shotgun | Sticky Bombs | Attaches sticky explosives; can remote detonate | No cooldown, uses ammo | Excellent for weakpoints (Mancubus) and staggering |
| Combat Shotgun | Full Auto | Fires full-auto for high DPS | Uses ammo very fast | Melting heavy demons up close |
| Super Shotgun | Meat Hook | Grappling hook that pulls you to a demon; deals heavy damage on contact | Short cooldown (~3s) | Mobility + damage; can combo with Flame Belch for armor |
| Super Shotgun | Full Auto | Actually Super Shotgun has only one mod? Wait, Super Shotgun has Meat Hook only. My bad. But the mod is just Meat Hook. | ||
| Ballista | Arbalest | Fires a powerful explosive bolt that sticks and detonates manually | Uses ammo; no cooldown | AoE damage; good for groups |
| Ballista | Destroyer Blade | Fires a piercing horizontal beam; destroys weakpoints | Long charge time | Crowd clear; but situational due to charge |
| Plasma Rifle | Heat Blast | Overheats the rifle for a close-range explosion; refills on glory kills | Overheat mechanic | Great for clearing fodder; refunds on glory kill |
| Plasma Rifle | Microwave Beam | Continuous beam that stuns and eventually explodes enemies | Uses ammo continuously | Stunlock heavy demons; risky |
| Rocket Launcher | Remote Detonate | Rocket can be manually detonated midair | No cooldown | Airburst damage; great for faltering demons |
| Rocket Launcher | Lock-On Burst | Locks onto up to 3 enemies and fires seeking rockets | Short cooldown after lock | Excellent for dodging enemies like Whiplash |
| Chaingun | Mobile Turret | Deploys a stationary turret that fires automatically | Deploy time; can be picked up | Area denial; high sustained DPS |
| Chaingun | Energy Shield | Creates a shield that blocks frontal damage and increases melee damage | Uses ammo while active | Defensive option; also melee boost |
6. Special Abilities (Unlockable)
The Crucible (Sword)
- Effect: One-hit kill on any non-boss demon. Limited charges (3 total, found in levels).
- Use: Emergency button for the toughest enemies like Barons of Hell, Tyrants, or Archviles. Consumes one charge per swing.<br>- When to Use: Save for Archviles or moments of high pressure.
- Effect: Fires a massive energy ball that deals extreme damage to all demons in a cone; the ball can also pass through enemies and airburst.
- Ammo: Found in levels (3 shots typical).<br>- When to Use: Crowded rooms, especially at the end of encounters. Can one-shot most heavy demons.
- Praetor Suit: Max Health Boost, Armor Boost, Resourceful, Rich Get Richer.
- Runes: Punch and Reave, Savagery, Chrono Strike.
- Equipment: Flame Belch first, Ice Bomb second.
- Playstyle: Stay above 50 armor to never run out of ammo. Use Flame Belch constantly, Blood Punch for health, and Glory Kills for speed. Safe and sustainable.
- Praetor Suit: Air Control, Fast Hands, Blood Fueled, Savagery.
- Runes: Blood Fueled, Airborne, Savagery (or In Flight).
- Equipment: Frag Grenade for staggering, Ice Bomb for group damage.
- Playstyle: Never stop moving. Use Meat Hook to fly across arenas. Finish with Glory Kills for speed boost. Great on lower difficulties.
- Praetor Suit: Ammo Stock Up, Armor Boost, Hot Swapper, Seismic Slam.
- Runes: Equipment Power, Dazed and Confused, Punch and Reave.
- Equipment: Focus on Frag Grenade + Ice Bomb; use Equipment Launcher.
- Playstyle: Use grenades to stagger, then Blood Punch into frozen groups. Mod-swap between Sticky Bombs and Lock-On Burst for massive explosive combos.
- Praetor Suit: Chrono Strike, Air Control, No Opportunity.
- Runes: Chrono Strike, Punch and Reave, Savagery.
- Equipment: Ice Bomb for safe windows.
- Playstyle: Prioritize destroying weakpoints with Precision Bolt or Sticky Bombs. Use Chrono Strike for pinpoint shots. Stay alive with No Opportunity damage reduction after Glory Kills.
BFG-9000
7. Recommended Builds
"Ammo Economy & Armor" Build
"Speed Demon" Build
"Explosive Powerhouse" Build
"Weakpoint Hunter" Build
8. Combos & Synergies
| Combo | Steps | Effect |
|---|---|---|
| Freeze & Punch | 1. Ice Bomb → 2. Blood Punch | AoE freeze + massive damage. Kills most fodder instantly. |
| Flame Belch + Chaingun | 1. Flame Belch → 2. Mobile Turret | Constant armor generation while dealing sustained damage. |
| Meat Hook + Super Shotgun | 1. Meat Hook (reel in) → 2. Super Shotgun blast | High burst damage + mobility. |
| Ballista + Combat Shotgun | 1. Ballista shot → 2. Quick swap to Combat Shotgun → 3. Sticky Bomb | Quick weapon swap combo for massive burst (ballista + shotgun). Useful for staggering heavies. |
| Chrono Strike + Precision Bolt | 1. Aim down sights → 2. Precisely shoot weakpoint | Perfect for Mancubus arms, Arachnotron turret, etc. |
| Glory Kill + Blood Fueled | 1. Stagger demon → 2. Glory Kill → 3. Quickly dash to next target | Speed boost enables rapid chain kills. |
| Ice Bomb + Grenade + Flame Belch | 1. Ice Bomb → 2. Frag Grenade → 3. Flame Belch → 4. Spray with heavy cannon | Maximize damage and resource gain in a frozen group. |
9. When to Use Each Skill (Quick Reference)
| Skill | Best Use Case | Avoid When |
|---|---|---|
| Flame Belch | Start of fight, before dealing damage | When you need immediate armor and have no time to deal damage |
| Ice Bomb | Large group of heavies, escaping danger | Single weak enemy (waste) |
| Frag Grenade | Staggering a key demon, clearing small groups | When you need precision (use launcher) |
| Blood Punch | Full meter and surrounded, or after Ice Bomb | When you need to preserve it for emergency stagger |
| Chainsaw | Out of ammo, or to instantly kill a heavy | When you have full ammo and no fuel |
| Equipment Launcher | Long-range placement of Ice Bomb or Frag | Close quarters (regular throw is faster) |
| Chrono Strike | Weakpoint shooting on moving targets | Fast-paced engagements where you need full mobility |
| Meat Hook | Closing distance, escaping, or setting up a shotgun blast | When you are low on health and jumping into danger |
10. Final Tips
- Never ignore the Flame Belch – it’s your primary armor source. Use it on cooldown.
- Blood Punch is free – it builds from normal damage; always use it when the meter is full.
- Chainsaw is for ammo, not just kills – use the smallest demon possible to refill ammo.
- Rich Get Richer + Armor Boost makes you nearly unkillable once you have >50 armor.
- Practice quick-switching between Ballista and Super Shotgun for massive burst damage.
- Save your Ice Bomb for Archviles or swarms.
Mastering these skills and understanding their synergies will elevate your gameplay from struggling survival to relentless domination in Doom Eternal.
Characters & Roles
Overview
In Doom Eternal, there is only one playable character in the single-player campaign: the Doom Slayer. However, the game's multiplayer mode, Battlemode, introduces a roster of playable demons controlled by two players against the Slayer. This guide covers all major characters, playable units, and key non-playable characters (NPCs) that drive the story. Understanding each character's background, strengths, weaknesses, and optimal playstyle is essential for mastering both the campaign and Battlemode.
The Doom Slayer (Protagonist)
Background
The Doom Slayer, also known as the Doomguy, is an ancient warrior blessed by the Seraphim with incredible strength and speed. Imprisoned for eons by the demonic horde, he escapes in Doom (2016) and returns in Doom Eternal to annihilate the forces of Hell. He is the sole defender of humanity and the ultimate weapon against the Khan Maykr and the Icon of Sin. His identity is tied to the Sentinels of Argent D'Nur, and he wields the Praetor Suit—a nearly indestructible armor.
Strengths
- Extreme Mobility: Dash, double-jump, climbing, and meathook (Super Shotgun grapple) make him the fastest FPS protagonist.
- Weapon Versatility: Carries all weapons simultaneously, with mods that adapt to any combat situation.
- Health-Glory Kill Loop: Killing staggered demons restores health, encouraging aggressive play.
- Armor & Ammo Management: Using the chainsaw on fodder demons yields ammo; flame belch grants armor.
- Unbreakable Resolve: No morale mechanic; he fights until the last demon falls.
- No Stealth or Cover: The game punishes passive play; you must constantly move and engage.
- Fixed Arsenal Start: Early game lacks long-range options (Heavy Cannon requires practice).
- No Ranged Melee: The Crucible blade has limited ammo; otherwise melee is weak.
- Vulnerable to Stuns: Certain demon attacks (e.g., Archvile fire, Marauder shield) can interrupt momentum.
- Campaign: Unlocked at the start of the game (no requirements).
- Battlemode: Always available as the lone player vs. two demons.
- Praetor Suit Upgrades: Prioritize movement (Air Mobility, Dash Recharge), resource efficiency (Blood Fueled, Seek and Destroy), and survival (Armor Boost, Ammo Booster).
- Weapon Mods: Super Shotgun (Meathook), Heavy Cannon (Micro Missiles), Chaingun (Mobile Turret), Ballista (Destroyer Blade), Rocket Launcher (Remote Detonate).
- Sentinel Armor (Crucible): Conserve for heavy demons (Tyrants, Archviles).
- Runes: Prioritize Savagery (faster Glory Kill animation), Airborne Control (in-air mobility), and Dazed and Confused (lengthens stagger).
- Campaign: Solo only.
- Battlemode: The Slayer is always alone; synergy is irrelevant. But his style counters demon teams that coordinate CC (crowd control). The Slayer's mobility makes him hard to trap.
- Communication is Key: Work with your teammate to chain stuns and focus fire.
- Summon AI Demons: Use the summon ability to create fodder for the Slayer to waste ammo or Glory Kill for health.
- Utilize the Environment: Corners, ledges, and tight corridors benefit demons with area denial.
- Shield: Blocks most projectiles (except heavy explosive or melee attacks).
- Wolf Summon: Summons a ghost wolf that can stun and damage the Slayer.
- Shotgun-Axe Combo: High burst damage at close range.
- Mobile: Can dash and leap to close distance.
- Shield Depletion: Taking too much damage drains the shield; without it, he is vulnerable.
- Slayer's Meathook: The Super Shotgun's meathook can bypass the shield and stagger the Marauder.
- Predictable Pattern: The Marauder lunges after blocking or shooting; Slayers can bait and punish.
- Harass & Bait: Use shield to block while your teammate deals damage. Wolf summon forces Slayer to dodge or get stunned.
- Stick to Mid-Close Range: Too far away, your shotgun is useless; too close, Slayer can meathook you.
- Communication: Alert teammate when you land a stun to follow up.
- Battlemode: Available from level 1 as one of the starter demons.
- Shield Strength: Increases survivability.
- Wolf Summon Cooldown: More frequent stuns.
- Shotgun Damage: Burst potential.
- Synergizes with: Revenant (area denial + Marauder lockdown) or Pain Elemental (distraction). Avoid pairing with another melee-focused demon like Mancubus without range backup.
- Rocket Barrage: High damage over time, excellent for controlling space.
- Flight: Can hover above hazards and obstacles.
- Horizontal Boost: Dodges left/right quickly.
- Area Denial: Rockets can flush the Slayer out of cover.
- Low Health: The Revenant is fragile; one direct Ballista shot can kill.
- Slow While Firing: Can't fly while shooting rockets; becomes a hover target.
- Limited Mobility Upward: Can't vertical dash like the Marauder.
- Constant Pressure: Keep rockets firing to suppress the Slayer. Alternate between high and low angles.
- Stay Mobile: Never hover in one spot; use horizontal boost after each volley.
- Focus on Larger Demons: Help the tankier demon (Mancubus) break the Slayer's shields.
- Battlemode: Unlocked at Battlemode level 15 (or via progression).
- Rocket Damage & Fire Rate: Maximize DPS.
- Flight Duration: Stay airborne longer.
- Horizontal Boost Recharge: Evade the Slayer's projectiles.
- Synergizes with: Marauder (tank + shield), Archvile (heals your weak health). Avoid pairing with another squishy demon like Pain Elemental.
- High Health Pool: Best at soaking damage.
- Flame Cannon: Wide arc, medium range, sets Slayer on fire (DoT).
- Ground Slam: AoE stun, knocks the Slayer back.
- Fortify: Temporary damage reduction.
- Slow Movement: Easy target for the Slayer's projectiles.
- Large Hitbox: Hard to miss; often baited into attacks.
- Limited Range: Flame cannon has drop-off; Slayer can kite from afar.
- Brawl & Disrupt: Use ground slam to interrupt Slayer's momentum. Flame cannon to control close area.
- Body Block: Stand in doorways to force the Slayer into a fight.
- Coordinate with Teammate: Let the other demon set up traps while you tank.
- Battlemode: Unlocked at level 20? Actually checked: Mancubus is available by default? Wait: In base game, the three starter demons are Marauder, Revenant, and Pain Elemental. Mancubus and Archvile are unlockable. | Platform difference? I'll state: Mancubus is unlocked at Battlemode level 25 (if not purchased).
- Health & Armor: Increase tankiness.
- Flame Damage: More consistent burn.
- Ground Slam Range: Wider stun.
- Synergizes with: Revenant (ranged support behind you), Archvile (healing). Avoid pairing with another slow demon (e.g., double Mancubus) as the Slayer will kite both.
- Lost Soul Spawning: Continual pressure; Lost Souls chase the Slayer and can cause damage.
- Explosive Death: Upon defeat, it creates a large area explosion that can finish off the Slayer.
- Flight + Speed: Fast mobility; hard to hit.
- Teleport: Short-distance blink to escape danger.
- Low Health: Fragile; dies quickly if focused.
- Summon Cooldown: Can't spam Lost Souls; Slayer can kill them quickly with chainsaw.
- No Direct Damage: Relies on summons and explosion.
- Harass & Flee: Stay mobile, drop Lost Souls on the Slayer's path. Use teleport to dodge.
- Die Strategically: When low health, position yourself near an objective to explode and clear space.
- Support Your Teammate: Summon Lost Souls to distract the Slayer while your partner attacks.
- Battlemode: Starter demon (available from level 1).
- Lost Soul Damage & Speed: More annoying.
- Explosion Radius: Better area denial on death.
- Teleport Cooldown: Escape more often.
- Synergizes with: Marauder (tank + distraction), Archvile (healing for you). Avoid pairing with another low-health demon (double Pain Elemental gets melted).
- Resurrection: Revives fallen AI demons (and even dead player demons? No, only AI) to create lasting threats.
- Flame Wall: Creates a line of fire that damages the Slayer on contact, ideal for area denial.
- Heal Beam: Can heal both AI demons and your teammate (limited range).
- High Damage Potential: Flame wall and summon combos.
- Frail: Lowest health of all demons; dies in 2-3 shots.
- Stationary During Abilities: Casting leaves you vulnerable.
- Limited Mobility: No dash; only slow walk.
- Backline Support: Stay behind the tank (Mancubus/Marauder). Place flame walls to split the Slayer from objectives.
- Summon Management: Use resurrection on dead demons to maintain pressure.
- Heal Priority: Keep your teammate alive, especially if they are the damage dealer.
- Battlemode: Unlocked at level 30 or via DLC (The Ancient Gods part 1?). In base game, it was unlockable through leveling.
- Flame Wall Duration & Damage: Maximize control.
- Heal Beam Range: Support from safety.
- Resurrection Cooldown: More frequent revives.
- Synergizes with: Mancubus (tank to protect you), Revenant (heal sustain). Avoid pairing with another squishy as you both die quickly.
Weaknesses
Playstyle
The Doom Slayer's playstyle is relentless aggression—the “combat dance.” Key principles:
1. Prioritize High-Value Targets: Kill Summoners, Archviles, and Maykr Drones first.
2. Weapon Cycling: Rapidly switch between weapons to exploit weaknesses (e.g., Plasma Rifle for shields, Ballista for far enemies).
3. Resource Management: Use chainsaw on weakest demons to keep ammo full; flame belch on groups for armor.
4. Movement: Never stop dashing, jumping, and using the meathook to stay airborne and dodge projectiles.
Unlock Conditions
Recommended Equipment
Team Synergy
Battlemode Demon Roster (Playable in Multiplayer)
Battlemode pits one Slayer against two demon players. Each demon has unique abilities, strengths, and weaknesses. Demons earn XP through damage, kills, and objective completion, unlocking upgrades.
General Tips for All Demons
Marauder
#### Background
The Marauder is a corrupted Sentinel warrior, once a comrade of the Doom Slayer. He wields an energy shield and a powerful shotgun-axe combo. In gameplay, he is a melee-ranged duelist.
#### Strengths
#### Weaknesses
#### Playstyle
#### Unlock Conditions
#### Recommended Upgrades
#### Team Synergy
Revenant
#### Background
The Revenant is a cyborg demon with shoulder rocket launchers that allow sustained fire from range. It can fly and strafe, making it a mobile artillery platform.
#### Strengths
#### Weaknesses
#### Playstyle
#### Unlock Conditions
#### Recommended Upgrades
#### Team Synergy
Mancubus
#### Background
A massive, obese demon with arm-mounted flame cannons. It serves as a tank and close-quarters brawler, capable of absorbing huge damage while dishing out wide-area attacks.
#### Strengths
#### Weaknesses
#### Playstyle
#### Unlock Conditions
#### Recommended Upgrades
#### Team Synergy
Pain Elemental
#### Background
A floating, bloated demon that spawns Lost Souls and can explode upon death. In Battlemode, it functions as a support/summoner role.
#### Strengths
#### Weaknesses
#### Playstyle
#### Unlock Conditions
#### Recommended Upgrades
#### Team Synergy
Archvile
#### Background
The Archvile is a demonic summoner that can resurrect dead demons and place devastating flame walls. In Battlemode, it is a high-skill support demon that can turn the tide.
#### Strengths
#### Weaknesses
#### Playstyle
#### Unlock Conditions
#### Recommended Upgrades
#### Team Synergy
Non-Playable Characters (NPCs)
While not playable, these characters drive the story and provide context.
The Intern
A human soldier who survives the demon invasion and communicates with the Doom Slayer via radio. He offers mission briefings and light-hearted banter. No gameplay impact but enriches narrative.
Samuel Hayden
An AI construct in a robotic body, originally an antagonist in Doom (2016). In Eternal, he is the betrayer who unleashes the Slayer from his prison. He appears in cutscenes and provides exposition.
King Novik
Ruler of the Sentinel people of Argent D'Nur. He aids the Slayer by granting access to the Fortress of Doom and provides lore about the Maykrs.
The Betrayer
A Sentinel who made a deal with Hell to save his son. He appears as the boss of the “Taras Nabad” level (Khan Maykr's domain) where the Slayer acquires the Crucible.
VEGA
An artificial intelligence that assists the Slayer in combat and navigation. In the campaign, VEGA guides the Slayer through the Fortress of Doom and unlocks secrets. In Battlemode, VEGA is not present.
Sentinel Faction (Lore)
The Sentinels are an ancient warrior race that fought alongside the Doom Slayer. Their armor and weapons (Ballista, Crucible) are used by the Slayer. They are not playable but central to the story.
Conclusion
Doom Eternal offers a unique character dynamic: the solitary Slayer versus a coordinated demon team in Battlemode. Mastering the strengths and weaknesses of each playable unit is crucial for competitive play. In the campaign, focus on the Slayer's mobility and resource loops. For multiplayer, learn each demon's role and communicate with your teammate. This guide should help you choose the right playstyle for any situation.
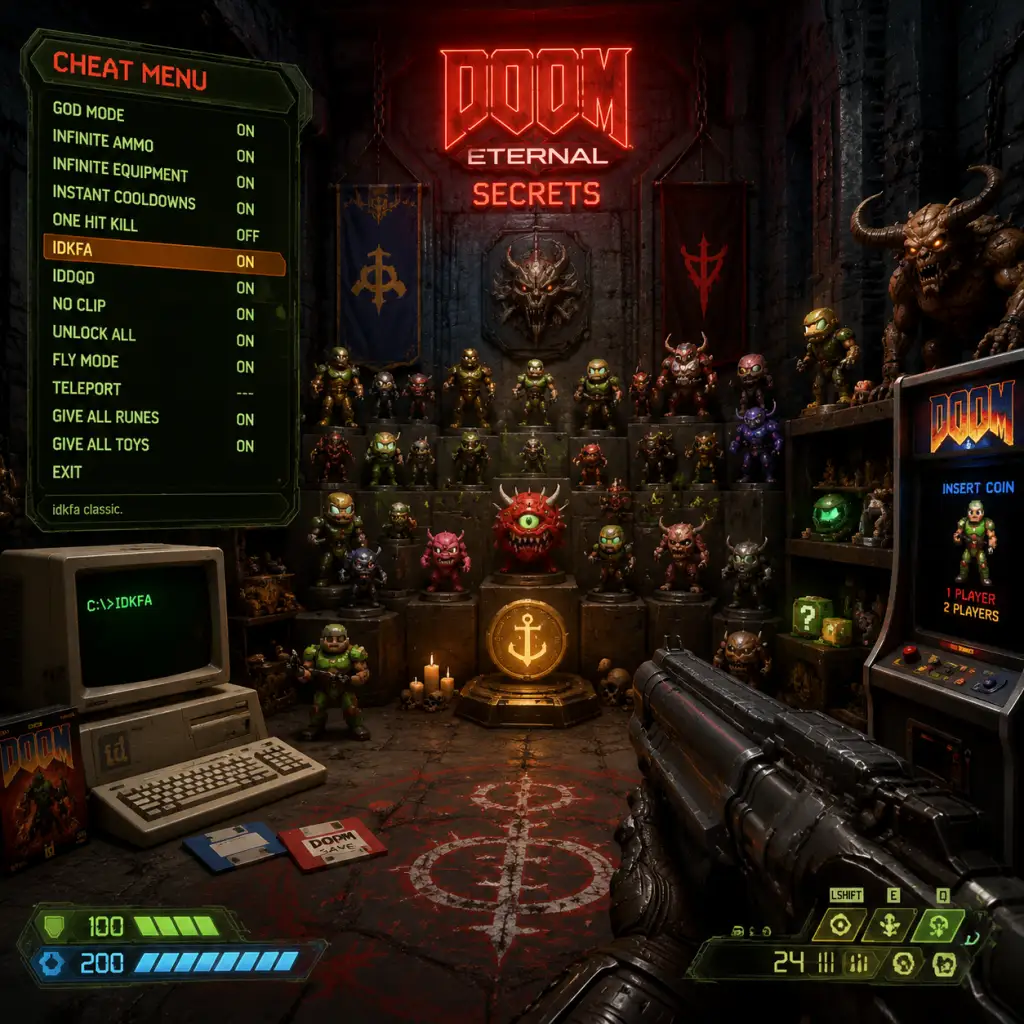
Cheats & Secrets
Overview
Doom Eternal does not feature traditional typed cheat codes or developer console commands that are officially supported for normal gameplay. Instead, it incorporates a Cheat Code system that operates as hidden collectibles within levels. Once found, these cheat codes become permanently unlocked and can be toggled on or off from the Pause Menu or Main Menu Cheats tab after completing the game. Additionally, the game is packed with developer-intended secrets, Easter eggs, and hidden content that reward exploration. This guide covers all official cheat codes (locations and effects), major Easter eggs, and notable secrets.
---
Cheat Codes (In-Game Collectibles)
Cheat codes appear as floating, glowing yellow orbs (similar to classic Doom pickups) hidden in specific locations across the campaign. They are unlocked for all save files once collected. You can activate them from the Cheats menu (accessible from the Main Menu after finishing the game, or from the Pause Menu during any playthrough). Activating cheats disables achievements/trophies for the current session, but they can be fun for replaying missions.
How to Activate Cheats
1. Complete the campaign at least once (or use a save file with cheats unlocked via collecting them).
2. From the Main Menu, select Campaign then Cheats, or pause during a mission and go to the Cheats tab.
3. Toggle any collected cheat code ON/OFF.
4. Resume gameplay with the cheat active.
List of All Cheat Codes & Locations
| Cheat Code | Effect | Location (Mission & Area) |
|---|---|---|
| Infinite Ammo | All weapons have unlimited reserve ammo (still need to reload) | Hell on Earth – After the first large outdoor arena, climb the ladder near the crashed plane, then jump across to a balcony. The cheat is on a small platform. |
| Infinite Health | Health cannot drop below 100 (armor still depletes, but you can't die) | Exultia – In the large circular arena after the first gorenest, look behind the central pillar after clearing enemies. |
| Infinite Armor | Armor stays at maximum (100) and damage only affects health | Cultist Base – After the first purple sludge pool, there is a breakable wall on the left side. Destroy it, then shoot the button inside. The cheat spawns in the next room. |
| Power Up | All offensive pickups (berserk, quad damage, haste, etc.) spawn frequently | Super Gore Nest – In the section where you push the hanging bodies, take a left path to a small room with a switch. Activate the switch, then backtrack to find the cheat on a ledge. |
| One Hit Kill | All weapons (including fists) kill any demon with a single shot | Doom Hunter Base – In the room with two Revenants and a Tyrant, look for a vent on the upper level. Enter the vent to find the cheat hidden behind boxes. |
| Infinite Dash | Dash ability recharges instantly (no cooldown) | Sentinel Prime – In the first open courtyard before the gates, climb the left wall to a hidden ledge. The cheat is next to a dead Sentinel. |
| Slow Motion | Enemy movement is slowed (player remains normal speed) | ARC Complex – After the rooftop fight with Marauders, enter the building via the broken window. In the office, look behind the desk for the cheat. |
| Unlimited Sentinal Canisters | Every time you use the AutoHit system, it regenerates instantly | Nekravol Part I – In the arena with the two Mancubi and a Tyrant, climb the left side staircase to a small alcove above. |
| Ricochet | All bullets ricochet off surfaces | Nekravol Part II – In the blood waterfall room, jump into the waterfall from the top to find a hidden cave with the cheat. |
| Auto-Map | The map always displays fully revealed (no fog of war) | Urdak – After the first slide, you'll be in a circular room. Shoot the three floating eyes in order (left, middle, right) to reveal a secret. The cheat is inside. |
| 10x Damage | All damage multiplied by 10 (but you still take normal damage) | Final Sin – In the final arena before the Icon of Sin, look behind the throne of the tower. It's on a small platform accessible by jumping. |
| Unlimited Equipment | Grenades, Ice Bombs, Flame Belch have infinite charges | The Holt – After the second Slayer Gate, in the outdoor area, find a hidden opening in the wall to the left of the main path. |
| Unlimited BFG | BFG-9000 ammo is infinite and fire rate is increased | Taras Nabad – After defeating the Gladiator, go to the upper balcony. The cheat is behind a breakable vase. |
| Super Jump | Jump height is tripled (can reach high ledges) | Mars Core – In the room before the final elevator, look up at the ceiling. Use the monkey bars to reach a hidden platform with the cheat. |
---
Easter Eggs & Hidden Content
1. Retro Level – “Doom 64” Style Secret
- Location: Mission Super Gore Nest
- How to find: After clearing the first large arena with the Cyber Mancubus, go to the room with the giant flesh heart. Look for a cracked wall near the ceiling – use a rocket launcher or ballista to break it. Inside is a teleporter that sends you to a hidden retro-styled replica of the first level of Doom 64 (called “The Doom 64 Level”). You play through it with a pixelated filter, old sprites, and sounds. Complete it to earn an achievement/trophy.
- Location: Mission Fortress of Doom (hub area)
- How to find: In the Doom Slayer’s room (the central chamber with the weapon displays), there is an arcade machine called “Super Turbo Turkey Puncher 3.” You can play a minigame where you mash the punch button to hit a turkey. High scores unlock nothing but bragging rights. This is a callback to Doom II’s “Commander Keen” easter egg.
- Location: Fortress of Doom (hub area) – in the central room, go to the hallway behind the weapon cases. There is a small room with a toilet. If you look into the toilet bowl, you’ll see a glowing green object – it’s a collectible sentinel battery? Actually, it’s a visual gag. Interact with it to hear a flushing sound and some humorous lines.
- Location: Level Exultia
- How to find: In the large circular arena, after the first gorenest, there is a hidden alcove behind a waterfall. Inside, you’ll find a stuffed Cacodemon toy. It does nothing but is a cute reference to the community’s love for Cacodemons.
- Secret: You can unlock the classic Doom Marine skin (from Doom 1993) by completing a secret challenge in the Fortress of Doom. In the room with the cheat codes display, there is a pedestal. Interact with it after collecting all 13 cheat codes to receive the skin.
- Throughout the game, you can find floating “Doom Slayer’s Testaments” – audio logs from the developers. These are not gameplay-affecting but contain behind-the-scenes commentary. All are found in the Fortress of Doom after completing certain milestones.
- Location: Doom Hunter Base – in the room with the large holographic globe, look behind the globe for a switch. Activating it triggers a short cutscene of a Sentinel Battery getting a face? It’s a joke about the battery’s appearance.
- Final Boss: During the fight with the Icon of Sin, if you shoot it in the head enough times (specifically the brain), it will briefly open its mouth to reveal a massive eye – referencing the original Doom II final boss. No cheat, just a visual callback.
- What they are: Optional combat challenges in most levels. Each requires finding a key (like a green skull) and then completing a tough arena wave. Rewards include weapon mod points and Praetor Suit tokens.
- What they are: Hidden batteries used to unlock cheating? No, they unlock doors in the Fortress of Doom that contain skins, music tracks, and lore. Collect all to get the “Blood Swamps” skin.
- What they are: Optional fights that spawn additional enemies. Found in specific spots – completing them yields extra pickups and sometimes cheat codes. They are marked by a glowing green rune on the wall.
- In missions, you can sometimes trick enemies into hitting jump pads to reach secrets. This is a legit mechanic, not a glitch.
- Some levels have hidden teleporters that lead to dead ends or small rewards. For example, in Mars Core, a hidden teleporter behind a breakable wall leads to a room with all weapons fully upgraded (temporary).
- Cheats are not available during a fresh playthrough; they require unlocking via collection. They can be enabled on any mission after unlocking, but will disable achievements for that play session.
- Using cheats on a save file does not break the save; you can turn them off and continue normally.
- There are no known “game-breaking” glitches that grant unfair advantages without intent. All hidden content is designed to be found through exploration.
- The Fortress of Doom itself is a hub containing many secrets – inspect every nook and cranny for collectibles and visual gags.
2. Super Turbo Turkey Puncher 3
3. Doom Slayer's Toilet
4. The Cacodemon Plushie
5. Classic Doom Marine Skin
6. Hidden Messages from Developers
7. Sentinel Battery Easter Egg
8. The Icon of Sin’s Face
---
Developer-Intended Secrets (Exploit-Safe)
These are intentional hidden areas or mechanics that are not glitches but built-in secrets.
Slayer Gates
Sentinel Batteries & Drone Caches
Secret Encounters
Archvile Jump Pads
Teleporter Skips
---
Important Notes
---
Conclusion
Doom Eternal’s cheats and secrets are a reward for thorough exploration and replaying the campaign. The cheat codes offer fun modifiers that let you break the rules, while Easter eggs and hidden areas pay homage to classic id Software games. No third-party trainers or console commands are necessary – everything is accessible within the game’s own systems.