Dragon Ball FighterZ
## Game Introduction: Dragon Ball FighterZ **Genre:** 2D Fighting Game (3v3 Tag-Team) **Developer:** Arc System Works **Publisher:** Bandai Namco Entertainment **Release Timeline:** - **Initial Release:** January 26, 2018 (PlayStation 4, Xbox One, PC via Steam) - **Nintendo Switch:** September 28, ...
Download & Installation
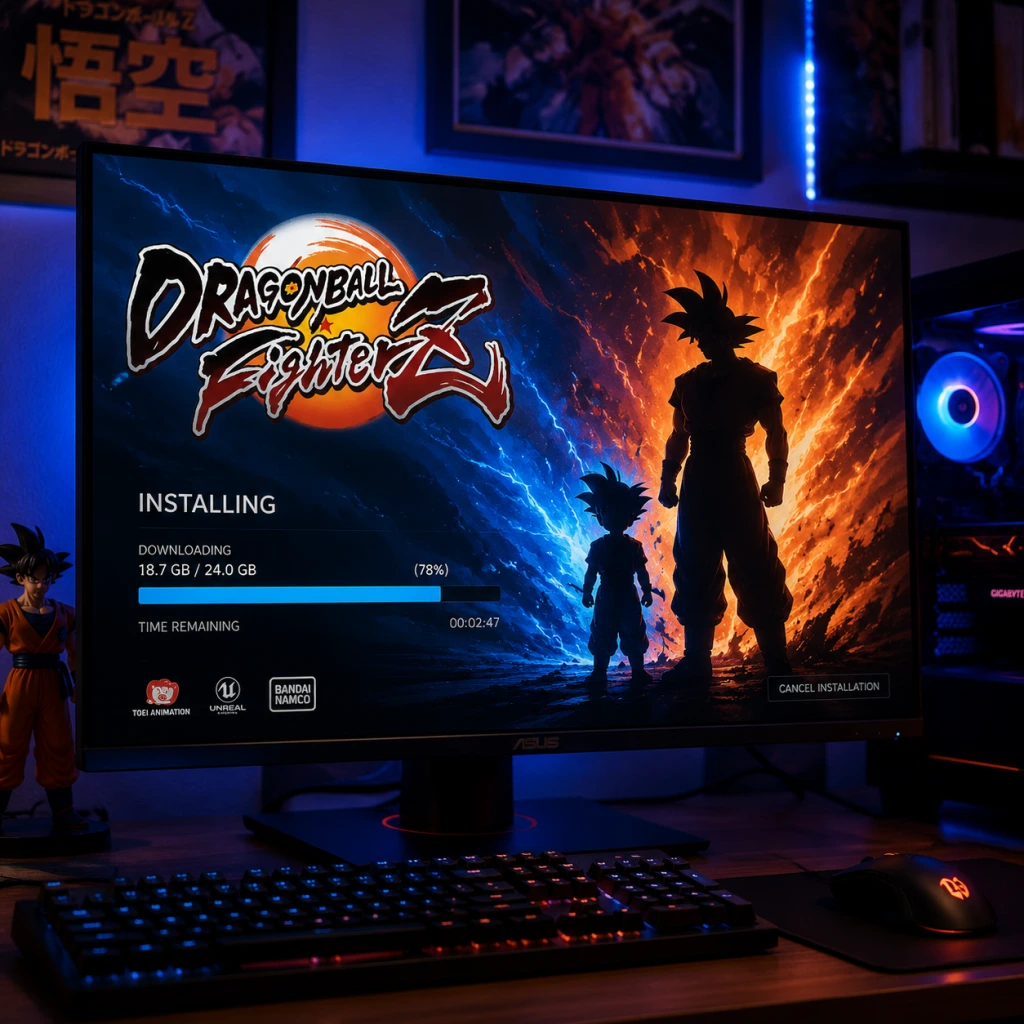
Download & Installation Guide for Dragon Ball FighterZ
This comprehensive guide covers everything you need to know about downloading and installing Dragon Ball FighterZ on all major platforms: PC (Steam, Epic Games Store), PlayStation 4/5, Xbox One/Series X|S, and Nintendo Switch. Note that there is no official mobile version of this game. All instructions assume you are using legitimate, official sources.
---
Platform-Specific System Requirements
PC (Steam / Epic Games Store)
| Component | Minimum | Recommended |
|---|---|---|
| OS | Windows 7/8/10 (64-bit) | Windows 10 (64-bit) |
| Processor | Intel Core i5-3470 / AMD FX-4350 | Intel Core i7-6700 / AMD Ryzen 5 1400 |
| Memory | 4 GB RAM | 8 GB RAM |
| Graphics | GeForce GTX 650 Ti / Radeon HD 7790 | GeForce GTX 1060 / Radeon RX 580 |
| DirectX | Version 11 | Version 11 |
| Network | Broadband Internet | Broadband Internet |
| Storage | 6 GB available space | 6 GB available space |
PlayStation 4 / PlayStation 5
- Storage: 6 GB minimum free space (PS4); PS5 requires internal SSD or compatible external storage. Backward compatible on PS5.
- Account: PlayStation Network (PSN) account required.
- Online Play: PlayStation Plus subscription needed for online matches.
- Storage: 6 GB minimum free space.
- Account: Xbox Live account (free for offline; Xbox Game Pass Core or Ultimate for online).
- Backward Compatibility: Fully playable on Xbox Series X|S via backward compatibility. Smart Delivery not supported; you play the Xbox One version.
- Storage: 6.1 GB free space on internal storage or microSD.
- Account: Nintendo Account required. Online play requires Nintendo Switch Online subscription.
- Performance: Docked mode targets 1080p, handheld at 720p. Loading times may be longer than on other platforms.
Xbox One / Xbox Series X|S
Nintendo Switch
---
Step-by-Step Installation by Platform
PC via Steam
1. Create/Log into Steam Account: Launch the Steam client, or download it from [store.steampowered.com](https://store.steampowered.com) and install.
2. Purchase or Retrieve Game:
- Buy from Steam Store: Search "Dragon Ball FighterZ" → add to cart → complete purchase.
- If you own a key, go to Games → Activate a Product on Steam → enter key.
3. Install Steam Client (if not already): Run the installer and sign in.
4. Download the Game:
- In Steam Library, find Dragon Ball FighterZ in your games list.
- Click Install.
- Choose installation directory (ensure at least 6 GB free).
- Click Next and wait for download. Steam will show progress.
5. Launch: After download completes, click Play.
PC via Epic Games Store
1. Install Epic Games Launcher: Download from [epicgames.com](https://www.epicgames.com).
2. Sign In: Use your Epic account (or create one).
3. Add Game: If you have a key, click your avatar → Redeem Code. If purchased, it appears in your Library.
4. Install: Click Install on Dragon Ball FighterZ → choose location → start download.
5. Play: Click Launch when ready.
PlayStation 4 / PlayStation 5
#### Physical Disc
1. Insert the game disc into console.
2. Wait for automatic detection → follow on-screen prompts to install.
3. If needed, update the game via internet.
#### Digital Download
1. Navigate to PlayStation Store on your console.
2. Search for Dragon Ball FighterZ → select edition (Standard, Deluxe, Ultimate).
3. Purchase or redeem a voucher.
4. Go to your Library → Purchased → find the game → click Download.
5. Installation starts automatically. Wait for completion.
6. Launch from home screen.
PS5 Note: You may need to manually copy the PS4 version if you own the PS4 disc. No separate PS5 version exists.
Xbox One / Xbox Series X|S
#### Physical Disc
1. Insert disc → console prompts to install.
2. Update if required (requires internet).
#### Digital Download
1. Open Microsoft Store on your Xbox.
2. Search Dragon Ball FighterZ → choose edition → purchase or redeem code.
3. Go to My games & apps → Full library → All owned games → select Dragon Ball FighterZ → Install.
4. Wait for download and installation.
5. Launch from dashboard.
Xbox Series X|S: The game runs via backward compatibility. No performance enhancements patch expected.
Nintendo Switch
#### Physical Cartridge
1. Insert game cartridge into the Switch slot.
2. The game icon appears on home screen. If required, download an update (check internet).
#### Digital Download
1. From Home Menu, open Nintendo eShop.
2. Search Dragon Ball FighterZ → select → purchase or redeem download code.
3. Once purchased, it begins downloading automatically. You can check progress on Home screen.
4. After download completes, the game icon will no longer show a cloud symbol. Launch to play.
---
Account Requirements
| Platform | Account | Online Subscription Needed? |
|---|---|---|
| Steam | Steam Account | No (online free, but Steam account required) |
| Epic Games | Epic Games Account | No |
| PlayStation 4/5 | PSN Account | PlayStation Plus for online matches |
| Xbox One/Series X | S | Xbox Live Account |
| Nintendo Switch | Nintendo Account | Nintendo Switch Online for online play |
---
Storage Space Details
- All platforms: approximately 6 GB (some updates may increase to ~8 GB).
- PC: additional space for save files (negligible) and DLC content (small).
- Nintendo Switch: physical cartridge version does not require large internal storage; updates may require ~1-2 GB.
- Ensure enough free space before downloading. If insufficient, clear unwanted games or use external storage (Xbox Series X|S, PS4/PS5 support external drives; Switch supports microSD).
- Error: "Insufficient Storage" – Free up space or install external drive.
- Error: "Corrupted Data" – Delete and reinstall the game. On console, rebuild database (PS4: safe mode option 5; Xbox: restart).
- Slow Download Speed – Pause and resume download; close other applications; restart router.
- "X3DAudio1_7.dll missing" – Install DirectX Runtime from Microsoft (run DXSETUP in Steam\steamapps\common\_CommonRedist).
- "Failed to initialize graphics device" – Update GPU drivers; ensure DirectX 11 is installed. Try running in windowed mode.
- Crash on startup – Verify game files (Steam: right-click game → Properties → Local Files → Verify integrity). Epic: Settings → Manage Games → Verify.
- Antivirus blocking – Add the game folder and executable to antivirus exceptions. Common folders: `C:\Program Files (x86)\Steam\steamapps\common\DRAGON BALL FighterZ`.
- Error CE-30022-7 (data corruption) – Rebuild database: Turn off console, hold power button until second beep → Safe Mode → Rebuild Database.
- Cannot download/purchase – Check PSN status; sign out/in; renew licenses (Settings → Account Management → Restore Licenses).
- Error 0x87e0000f (installation stopped) – Hard reset: hold power button 10 seconds. Or clear local saved games (Settings → System → Storage → Clear local saved games).
- Game stuck at "Queued" – Change DNS to Google (8.8.8.8 / 8.8.4.4) in network settings.
- Error 2002-2061 (download failed) – Check internet connection; restart Switch; try redownloading from eShop.
- Corrupted data after update – Archive software (System Settings → Data Management → Manage Software → Dragon Ball FighterZ → Archive) then redownload.
- PC: Consider using a wired controller for lower input lag.
- Cross-play: Dragon Ball FighterZ does not support cross-platform play (except between PS4 and PS5 via backward compatibility).
- Updates: Keep the game updated for new balance patches and bug fixes.
- Backup saves: On PC, saves are in `%APPDATA%\..\Local\DBFighterZ` (Steam cloud sync if enabled).
- Reinstalling: If you encounter persistent issues, completely uninstall the game and any related folders before reinstalling.
---
First Launch Setup
1. Language Selection: On first boot, choose your preferred language for text and audio.
2. Network Connection: The game will prompt to connect online. You can skip (offline mode available for single-player).
3. Controller Settings: Adjust button layout if needed. Game supports arcade sticks and standard controllers.
4. Graphic Options (PC only): Set resolution, window mode, and graphics quality. Recommended to start with default.
5. Tutorial: Optionally play the tutorial to learn basic mechanics.
6. DLC Check: Game will scan for downloadable content. If you have purchased DLC, ensure it is installed (check your platform store).
7. Save Data: Game automatically creates save file. On PlayStation/Xbox, sync to cloud if enabled.
---
Common Installation Errors & Fixes
All Platforms
PC Specific
PlayStation 4/5
Xbox One/Series X|S
Nintendo Switch
---
Post-Installation Verification
1. Launch the game successfully – It should load to title screen without errors.
2. Check version number – On main menu, look for version info (usually corner). Should match latest patch.
3. Test controls – Play a quick local match or training mode to ensure all buttons work.
4. Online functionality – If you have subscription, try to log in to online lobby. If stuck at connecting, check firewall/ports (PC) or server status.
5. DLC verification – If you purchased DLC characters (e.g., GT Goku, Janemba), go to Character Select and see if they are unlocked. If not, restart game; on PC verify DLC ownership in Steam/Epic.
6. Save file check – Exit game and re-enter. Settings should persist.
If all steps pass, your installation is successful. Enjoy the high-speed 3v3 battles!
---
Additional Tips
For further help, visit the official Bandai Namco support page or the game’s Steam Community hub.
---
Last updated: 2025. This guide is unofficial but fact-checked against current platform procedures.
Game Introduction
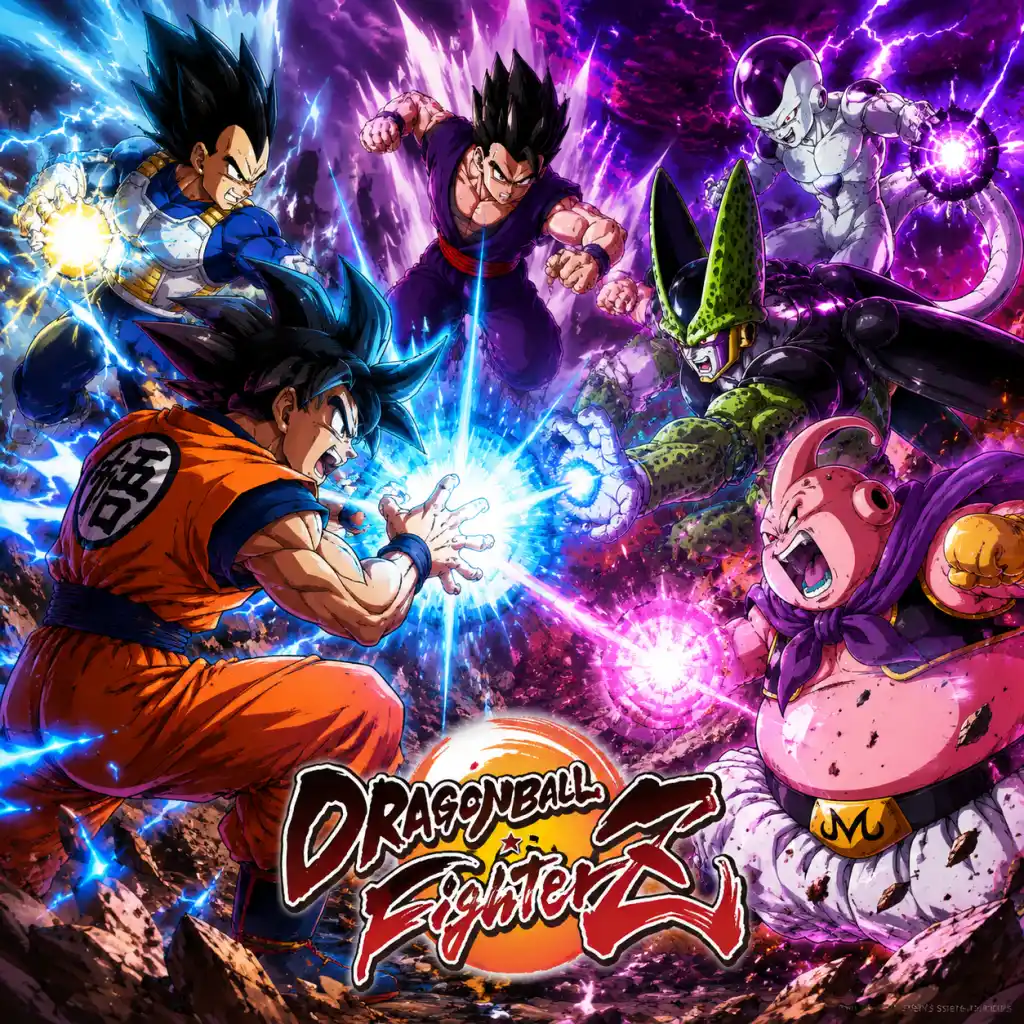
Game Introduction: Dragon Ball FighterZ
Genre: 2D Fighting Game (3v3 Tag-Team)
Developer: Arc System Works
Publisher: Bandai Namco Entertainment
Release Timeline:
- Initial Release: January 26, 2018 (PlayStation 4, Xbox One, PC via Steam)
- Nintendo Switch: September 28, 2018
- Enhanced Editions (FighterZ Edition, Ultimate Edition): Same dates
- Goku (base, Super Saiyan, Super Saiyan God SS, Ultra Instinct)
- Vegeta (base, Super Saiyan, Super Saiyan God SS)
- Gohan (Teen, Adult, Future)
- Piccolo, Frieza, Cell, Majin Buu
- Beerus, Hit, Goku Black, Zamasu (from Dragon Ball Super)
- Fusions: Vegito, Gogeta (various forms)
- Movies: Broly (Z and Super versions), Bardock, Cooler, Janemba, etc.
- Original Character: Android 21 (playable in story mode and as DLC)
- Dragon Ball Fans: The ultimate fantasy of controlling favorite characters with authentic moves and dramatic finishes.
- Fighting Game Enthusiasts: Deep mechanics including frame data, mix-ups, and team synergy appeal to competitive players.
- Beginners: Simple controls and robust tutorial modes reduce the learning curve.
- Casual Players: Offline multiplayer, story mode, and party games cater to non-competitive audiences.
- Story Mode (Dramatic Adventure): Three-part campaign with original narrative, exploration elements, and boss fights.
- Arcade Mode: Five difficulty levels with branching paths and final bosses.
- Versus Mode: Local and online 1v1, 2v2, or 3v3 matches.
- Practice Mode: Training with frame data display, dummy settings, and combo trials.
- World Match (Online): Ranked and Casual matches with rollback netcode (added in 2021).
- Arena Lobby: Social hub with avatar customization, mini-games, and mail system.
- Event Mode (Limited Time): Seasonal tournaments and challenges.
- Replay Channel: Share and watch matches from other players.
- Offline: Local multiplayer (up to 4 players with 3v3 teams), single-player story/arcade/practice modes, and local leaderboards.
- Online: Ranked and Casual matches, lobby system with up to 64 players, spectator mode, and replay sharing. Rollback netcode ensures smooth online play on PC and consoles. Cross-play is not available between platforms.
- FighterZ Pass 1: 8 characters (e.g., Broly, Bardock, Zamasu, Vegito) plus commenta voice packs.
- FighterZ Pass 2: 6 characters (Jiren, Videl, Goku (GT), Janemba, Gogeta SSB, Broly DBS).
- FighterZ Pass 3: 5 characters (Goku UI, Kefla, Super Baby 2, Gogeta SS4, Android 21 Lab Coat).
- Free Updates: Balance patches, new stages (Glacier, Land of the Kais), and lobby avatar items.
- No microtransactions for in-game progression – all characters are unlocked via play or DLC purchase.
- Dramatic Moments: Interactive QTE sequences that replicate iconic scenes from the anime, complete with camera angles and voice lines.
- Auto-Combo System: A single button press executes a full combo string, opening the door for casual players while pros can override with manual inputs.
- 3v3 Team Battle: Players select three fighters and can switch or call them for assists at any time. Sparking Blast (a temporary powered-up state) adds a comeback mechanic.
- Visual Fidelity: Hand-drawn sprites (actually 3D models with cel-shaded textures) that look identical to the anime. Every frame replicates the show’s art style.
- Super Dash and Vanish: Universal mechanics that let players close distance instantly or escape combos, maintaining high tempo.
- Dragon Ball Authenticity: Voice actors from the English and Japanese dubs, dramatic finishes with official anime music, and lore-accurate move references.
Platforms: PlayStation 4, PlayStation 5 (backward compatible), Xbox One, Xbox Series X|S (backward compatible), PC (Steam, Epic Games Store), Nintendo Switch
Story Overview
Dragon Ball FighterZ features an original story supervised by series creator Akira Toriyama. Players control a custom avatar who awakens with no memory and a mysterious connection to a powerful new villain: Android 21. The narrative unfolds through three acts, each exploring different character perspectives. The plot involves clones, mind control, and a cosmic threat that forces heroes and villains to temporarily ally. Dramatic Moments recreate iconic anime scenes with interactive QTE sequences, while the main campaign weaves a new saga that feels true to the Dragon Ball universe.
Setting
The game takes place across multiple iconic Dragon Ball locations, including West City, Planet Namek, the World Tournament arena, and the Other World. Battles transition between stages with destructible environments. The visual style mimics the anime’s cel-shaded aesthetic, with fluid 60FPS animation and special effects that replicate signature techniques like the Kamehameha and Final Flash.
Main Characters
The roster includes over 40 playable fighters from Dragon Ball Z, Dragon Ball Super, and the movies. Key characters include:
Each character has unique special moves, Super Attacks, and Dramatic Finishes that trigger under specific conditions.
Core Appeal
Dragon Ball FighterZ excels at balancing accessibility with competitive depth. The auto-combo system (mashing a single button for basic combos) allows newcomers to perform flashy attacks, while veterans can cancel into advanced techniques like Super Dashes, Vanish, and Sparking Blast. The 3v3 tag-team structure adds strategic layers: players choose three fighters, switch between them mid-battle, call for assists, and unleash devastating combination supers. The game’s high-speed pacing and faithful recreation of anime moments make every match feel like an episode of Dragon Ball.
Target Audience
Game Modes
Online/Offline Support
DLC / Expansion Overview
What Makes This Game Unique?
In summary, Dragon Ball FighterZ is both a love letter to the franchise and a top-tier competitive fighting game. Its blend of spectacle, depth, and accessibility makes it a must-play for any Dragon Ball fan or fighting game aficionado.
Getting Started
Getting Started: Dragon Ball FighterZ
Welcome to Dragon Ball FighterZ! This guide is built for brand-new players to help you survive your first hour, avoid common pitfalls, and build a strong foundation. We focus on practical steps, not advanced combos.
---
First Hour Walkthrough
1. Launch the game – After install, let the intros play or skip them. You’ll land at the main menu.
2. Go to Practice Mode first – Select "Battle" > "Practice". This is the safest place to learn controls without pressure.
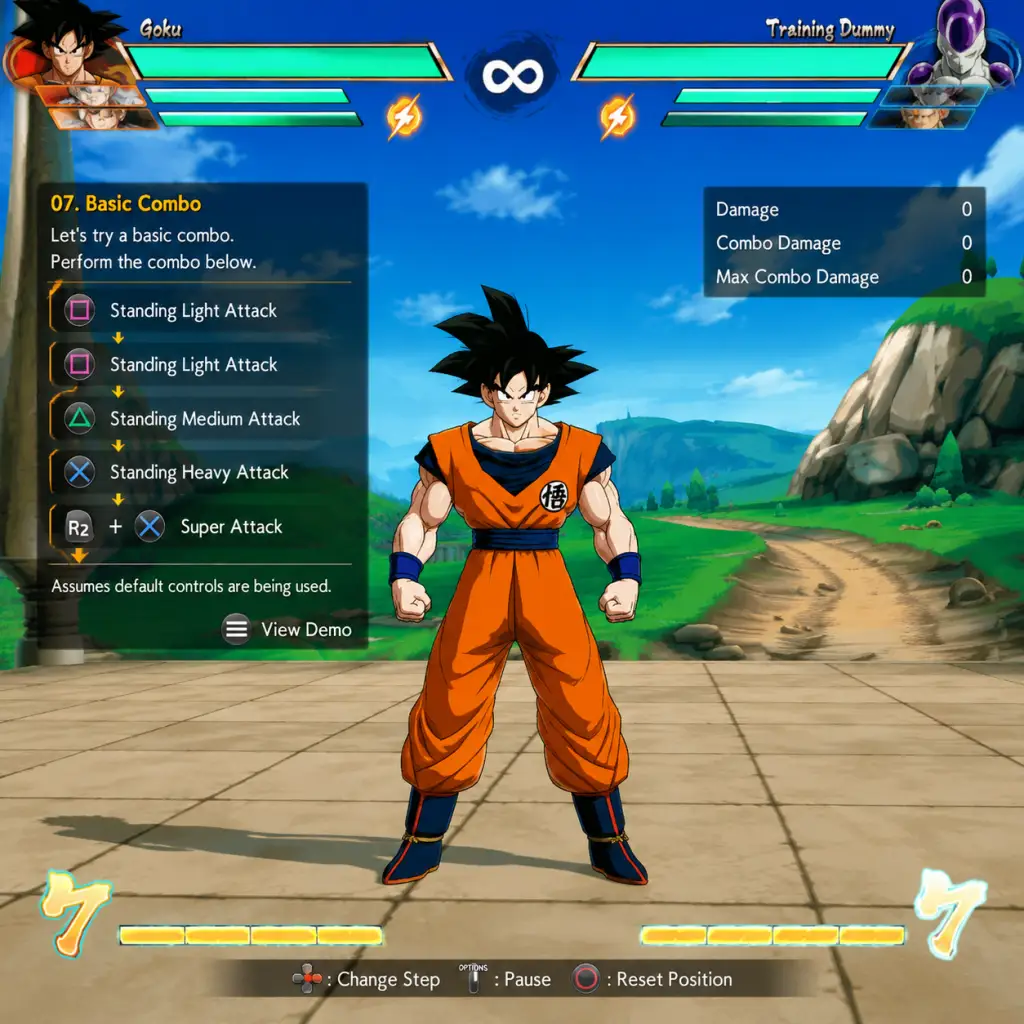
3. Complete the Tutorial – From the main menu, choose "Dojo" > "Tutorial". It covers movement, attacks, Ki blasts, Super Dash, Vanish, and basic combos. Do not skip this.
4. Try a few matches vs. CPU – Set difficulty to Very Easy. Use the team you saw in the tutorial. Focus on using your three characters and switching.
5. Unlock the Story Mode basics – Select "Z Stories" and play the first chapter. It introduces cutscenes and simple fights. You’ll earn Zeni and experience.
6. Spend your first Zeni – Go to the Shop (Zeni tab) and buy one simple color variation for a character you like. Don’t waste Zeni on capsules yet.
---
Character Roster (No Character Creation)
Dragon Ball FighterZ does NOT have character creation. You play as a fixed roster of iconic Dragon Ball characters. The base game includes 21 characters (e.g., Goku, Vegeta, Frieza, Cell). DLC adds more (e.g., Broly, UI Goku).
Your job is to choose 3 characters to form a team. You can mix and match freely from the start. No unlocks needed for the base roster.
---
Controls on All Platforms
Below are the default controls. Important: You can customize these in Settings > Controller Settings.
| Action | PlayStation (PS4/PS5) | Xbox | Nintendo Switch | PC (Keyboard) |
|---|---|---|---|---|
| Light Attack | Square | X | Y | J |
| Medium Attack | Triangle | Y | X | I |
| Heavy Attack | Circle | B | A | K |
| Ki Blast / Special | R1 | RB | R | U |
| Super Dash | R2 | RT | ZR | O |
| Vanish | L1 | LB | L | P |
| Dragon Rush / Throw | L2 | LT | ZL | [ |
| Assist 1 | L1+Direction (hold) | LB+Direction | L+Direction | P+Direction |
| Assist 2 | L2+Direction (hold) | LT+Direction | ZL+Direction | [+Direction |
| Sparking Blast | R1+R2 (both) | RB+RT | R+ZR | U+O |
| Change Character | L1+L2 (both) | LB+LT | L+ZL | P+[ |
- Special Moves: Quarter-circle forward + Light/Medium/Heavy (e.g., →↓↘ + attack).
- Super Move: Quarter-circle forward twice + Heavy (or two attack buttons).
- Battle – Vs. Player, Vs. CPU, Ranked, Casual, Arena, Practice, Replay.
- Z Stories – Single-player story mode (3 arcs). Good for earning Zeni and learning matchups.
- Arcade – Classic arcade mode with branching paths. Earn titles.
- Dojo – Tutorials, Combo Challenges, and advanced lessons.
- Lobby – Online hub; you create an avatar and walk around. Can queue matches, buy items, and chat. (You can skip Lobby for offline play.)
- Shop – Spend Zeni or Capsules (earned free or bought with real money) for colors, stamps, titles, and more.
- Customize – Change your team’s colors, stamps, and title.
- Options – Sound, display, controls, network.
- Top of screen: Health bars for your 3 characters (blue = alive, gray = KO’d). Below health is the Ki gauge (max 7 bars).
- Bottom-left: Your team order. Bottom-right: Opponent’s team order.
- Center: Timer (99 seconds per round).
- Sparkling effect: When Sparking Blast is active, your character glows and health regenerates.
- Spend 30 minutes in Practice mode before any online match.
- Turn on “Input Display” in Practice options to see your inputs.
- Use a simple team of three characters you like (e.g., Goku, Vegeta, Gohan).
- Play Vs. CPU on Very Easy to build muscle memory.
- Save replays of your losses to watch later (you can disable this if you want).
- Jumping into Ranked matches immediately – you’ll face skilled players and get frustrated.
- Mashing buttons. Learn a simple sequence (e.g., L, L, L, M, H) and stick to it.
- Wasting Zeni on expensive capsule packs (cosmetics only). Save for character colors you really want.
- Trying advanced combos (2M, 5M, etc.) before you can reliably do basic ones.
- Ignoring the tutorial – it is essential for understanding the game’s unique mechanics.
Keyboard note: Default is awkward; consider remapping to something like: A S D W for movement, and U I O P J K L for attacks.
---
User Interface Overview
Main Menu:
In-Battle HUD:
Important: The Ki gauge is consumed by special moves, Super Dashes, Vanish, and Sparking. Manage it carefully.
---
Essential Early Objectives
1. Learn the universal combo: Light x3, Medium, Heavy (or Light x3, Ki Blast, Super Dash, Light x3, Heavy). This works for most characters.
2. Master basic defense: Hold back to block (low blocks crouching, high blocks standing). Use Vanish (L1) to escape pressure.
3. Practice switching characters: Press L1+L2 to tag out. Use assists (hold L1/L2 + direction) to extend combos or cover your approach.
4. Learn Sparking Blast: Activate it when you have at least 1 Ki bar. It boosts damage, speed, and health regen. Use it defensively after being hit or offensively to start a rush.
5. Complete the first 3 Tutorials: They teach movement, Super Dash, and Vanish. Don’t skip.
6. Play through Z Stories Chapter 1: It’s easy and rewards Zeni and experience.
---
What to Do First and What to Avoid
Do:
Avoid:
---
Early Resource Priorities
| Resource | How to Earn | Best Early Use |
|---|---|---|
| Zeni | Story mode, Arcade, online matches | Buy color variations for your main team (cheapest at 1,000 Zeni). Do NOT buy capsule packs until you have all colors you want. |
| Capsules (Premium & Fighter) | Earned via leveling, login bonuses, or purchased | Save for now – they give cosmetic items and are not needed for gameplay. |
| Experience (Player Level) | Playing any mode | Unlocks new lobby characters and titles. No gameplay impact. |
| Story Tokens (Zeni from story) | Completing Z Story missions | Use to unlock additional story chapters. Focus on main chapters first. |
---
Common Beginner Mistakes
1. Not blocking correctly – Hold back to block high attacks; crouch+back for low attacks. Most beginners forget to block low against sweep attacks.
2. Using Super Dash too much – Super Dash can be beaten by 2H (Down + Heavy). If you spam it, opponents will punish you hard.
3. Ignoring assists – Your two bench characters can be called in to extend combos or interrupt pressure. Start using L1+Forward assist to end a combo.
4. Failing to manage Ki – Don’t waste all 7 bars on raw supers; save 3 bars for a Super Dash? Actually, save at least 1 bar for Vanish escape.
5. Not using Sparking Blast – Many new players forget to use it. Activation gives you a huge advantage.
6. Over-trying hard combos – Stick to simple bread-and-butter combos (L, L, L, M, H, then super). Complexity comes later.
7. Giving up after losing one character – Fight smart with your remaining two. Teams are designed for comebacks.
---
Day-One Checklist
- [ ] Complete Tutorial 1-3 in Dojo.
- [ ] Spend 15 minutes in Practice mode with one character: do light attacks, heavy attacks, Ki blasts, Super Dash, Vanish, and Sparking Blast.
- [ ] Play one Arcade match on the easiest path.
- [ ] Play the first two chapters of Z Stories.
- [ ] Customize your team’s colors (buy one color for your main).
- [ ] Try one online Casual match (willing to lose; it’s okay).
- [ ] Watch one replay of your match (win or lose) to see mistakes.
- [ ] Set a simple team: three characters you like. No tier lists needed.
- [ ] Adjust controller settings if needed (e.g., Switch jump button if uncomfortable).
- [ ] Most important: Have fun! You will lose many fights; it’s part of learning.
---
Final tip: Dragon Ball FighterZ is fast and deep, but the fundamentals (blocking, basic combos, assists, Sparking) will carry you far. Stick with it, and you’ll be Super Saiyan in no time.
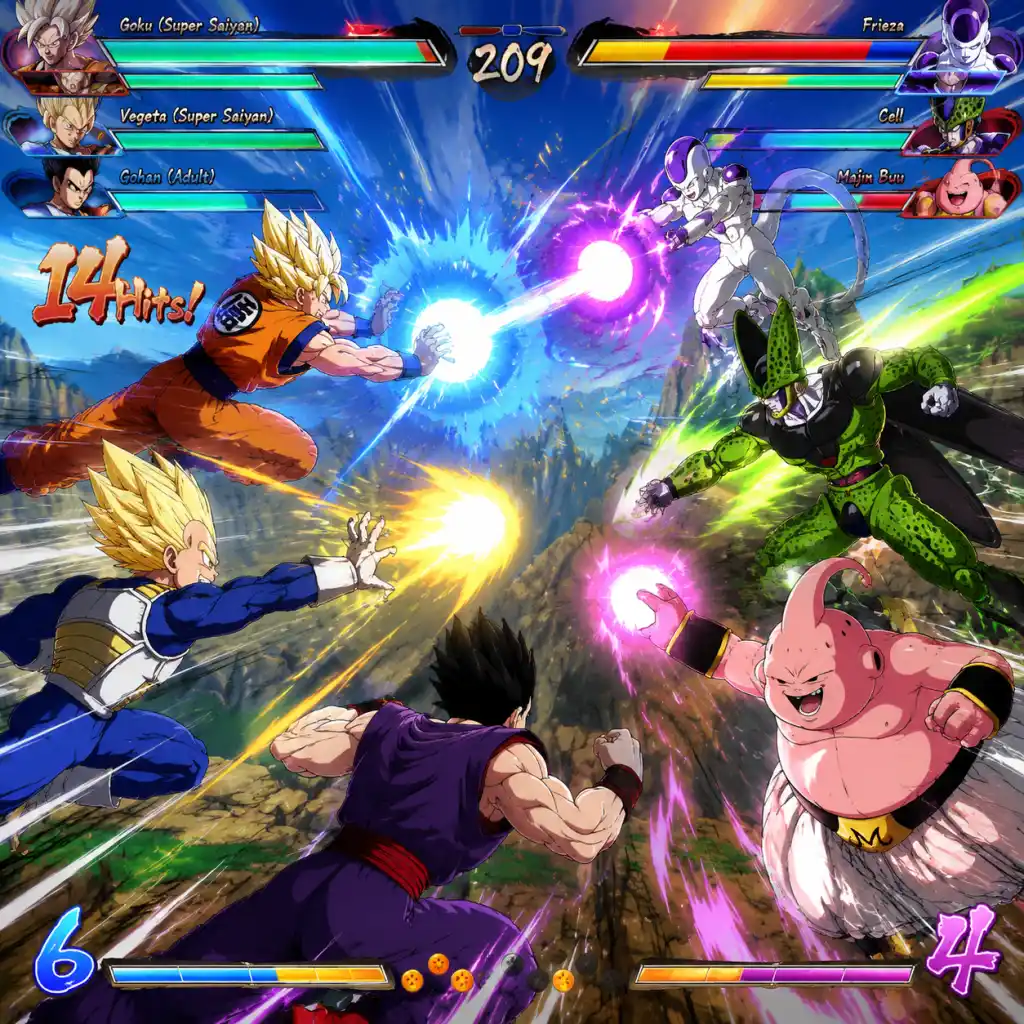
Core Gameplay
Core Gameplay Guide for Dragon Ball FighterZ
Dragon Ball FighterZ is a 2D 3v3 tag-team fighting game that emphasizes fast-paced combat, flashy combo extensions, and strategic team synergy. Unlike open-world RPGs, the primary gameplay loop is a cycle of training, fighting, and refining your skills. There is no traditional exploration; instead, progression comes through mastery of the battle system, unlocking cosmetic items, and climbing online ranks. Below, the core gameplay is broken down by player progression tiers, detailing the main loop, combat systems, character growth, economy, and endgame for each stage.
Main Gameplay Loop Overview
1. Select Team – Choose three fighters (from over 40 characters) considering point, mid, and anchor roles.
2. Enter Battle – Fight in a 1v1 format with two backup characters ready to tag in. Win by depleting the opponent's three health bars.
3. Learn & Adapt – After each match (win or lose), analyze mistakes, try new combos, adjust team composition, or revisit training mode.
4. Progress – Earn experience for individual characters (in Story/Arena modes) and Zeni (in-game currency). Unlock new characters, colors, stamps, and lobby avatars.
5. Repeat – The loop is driven by the desire to improve and earn rewards, leading to deeper understanding of the game's mechanics.
Combat & Interaction Systems
- Basic Attacks – Light (L), Medium (M), Heavy (H), Special (S). Universal button layout with auto-combo (press L repeatedly).
- Ki Blasts & Super Dash – S fires a ki blast; holding S charges ki (for supers). Super Dash (L+M) lunges forward, useful for closing distance but unsafe on whiff.
- Boost Dashes – Aerial dashes and double jumps enable air combos.
- Tag System – Call assist (A1 or A2) to extend combos or cover approaches. Perform Tag (A1+A2) to swap characters instantly.
- Vanish – Teleport behind opponent (costs 1 Ki bar). Used for escape or combo extension.
- Dragon Rush – Throw (L+M) used to break guard or start combos.
- Sparkling Blast – A burst (all Ki bars) that heals, increases damage, and allows unlimited aerial movement for a limited time. Only usable once per match.
- Super Moves & Meteor Attacks – Quarter-circle forward + S or H for level 1 supers; quarter-circle back + H (with 3 bars) for level 3 Meteor Attack. Some characters have level 5 (requires 5 bars).
- Guard & Defensive Options – Hold back to block; reflect (4S or 6S during blockstun); Instant Air Dash (IAD) for overhead pressure; Guard Cancel (use assist while blocking to interrupt pressure, costs 1 bar).
- Zeni – Main currency. Earned by completing Story Mode stages, Arcade Mode, Online matches, and daily/weekly challenges. Used to purchase Capsule Capsules (gacha boxes) from the Capsule Shop.
- Capsules – Random loot boxes that contain character colors (alternate palettes), stamps (in-match emotes), lobby avatars, and Zeni bonus items. No gameplay-affecting items; purely cosmetic.
- Character Experience – In Story Mode and Arena matches, each character gains XP. Leveling up a character unlocks additional colors, stamps, and a special title. Does not affect stats in competitive modes.
- Unlocking Characters – Most of the base roster (21 characters) is available from the start. DLC characters and additional fighters (e.g., SSGSS Goku, SSGSS Vegeta, Android 21) are unlocked via completing certain Story Mode routes or purchasing DLC. The majority of the roster is immediately playable in Online and Local modes.
- Player Level – Overall account level, increased by playing any mode. Rewards include titles and lobby items. Has no competitive impact.
- Gameplay Loop: Spend most time in Story Mode (easy difficulty) and Training Mode. Focus on executing super dashes, basic auto-combos, and landing super moves.
- Combat Stage: You will mostly press buttons randomly. Understand that mashing light attack performs a full auto-combo sequence. Learn to block low and high (overhead attacks require standing block).
- Economy & Growth: Earn Zeni from story missions. Buy your first few Capsules to get different colors. Character XP increases naturally as you play story missions. Unlock Android 21 by completing the main story.
- Example Activity: Play through the first arc of Story Mode (Super Warriors vs. Clone Army). Use simple teams like Goku, Vegeta, Gohan. String together L, L, L, then super dash, and finish with a level 1 Kamehameha. Focus on landing your autocombo and using assists every time you can.
- Milestones: Complete the Battle Tutorial (all lessons). Clear the first two story arcs on Normal. Win a single match against CPU on Hard difficulty. Unlock at least one alternate color for your main character.
- Gameplay Loop: Split time between Training Mode (practicing combos), Arcade Mode (to test consistency), and Online Casual matches. Experiment with different team orders to understand point/mid/anchor roles.
- Combat Stage: You can perform standard B&B combos: L, M, M, 2M (crouching medium), L, M, jump cancel, air combo (L, M, S, Super Dash, L, M, H, vanish, etc.). Learn to use assists to extend combos. Understand the concept of “blockstrings” (pressuring opponent’s guard) and mixing in overheads and lows.
- Economy & Growth: Earn Zeni more quickly from Arcade and Online matches. Save Zeni to buy Character Passes (if you want DLC characters) or spend on Capsules for cosmetics. Level up your main team to max (level 10) for all their colors. Begin experimenting with team synergy (e.g., using Vegeta’s assist to lock opponents down for mix-ups).
- Example Activity: In Training Mode, practice the following combo with Super Saiyan Goku: standing L, M, 2M, 5H (standing heavy), vanish, dragon rush, 236L (Kamehameha), then call assist (e.g., Vegeta) to continue pressure. Use this in online matches. Aim to win 10 casual matches in a row.
- Milestones: Reach Player Level 10. Unlock all base roster colors for one character. Win your first Online match (Casual). Complete Arcade Mode on Hard with one team. Understand the 6 main mechanics (Vanish, Sparking, Tag, Dragon Rush, Super Dash, Reflect).
- Gameplay Loop: Primarily Online Ranked matches, supplemented by targeted Training Mode drills. Watch replays of high-level players to learn blockstrings and setups. Participate in online tournaments (casual or community).
- Combat Stage: You consistently execute optimal combos (higher damage, better corner carry). You understand frame data intuitively (though not memorized). Use advanced techniques: Instant Air Dash (IAD) for ambiguous high/low, fuzzy guard (delayed low to catch jumps), and option selects (e.g., throw tech OS). You can Spark at key moments to turn the tide.
- Economy & Growth: Zeni becomes abundant; buy all Capsules to unlock full color sets and stamps for your roster. Character XP is maxed for most used fighters. Focus on refining your team’s synergy: for example, use a character with a beam assist (like Goku Black) for neutral control and a DP assist (like Cooler) to anti-air. Learn multiple optimal combos for different situations (corner, midscreen, with assist).
- Example Activities: In Ranked mode, use the “Cell, Kid Buu, SS Goku” team. Practice the Cell corner loop: dr. M, 236M, wait, 2L, L, M, 236M, etc. vs. real opponents. Watch YouTube tutorials on “[Character] mix-up setups.” Join a Discord server to find practice partners of similar skill.
- Milestones: Reach Majin rank (or higher) in Ranked. Achieve 70%+ win rate in Casual over 100 matches. Complete Arcade Mode on Super Hard without losing a round. Teach a beginner player basic combos.
- Gameplay Loop: Constant lab training, participating in weekly online tournaments, analyzing high-level match footage, and coaching others. You may also create combo videos or guides. Play sets (first to 10) against challenging opponents to sharpen reactions.
- Combat Stage: You have near-perfect execution of every optimal route for your team. You know every character’s frame data, can convert off any hit confirm, and can adapt on the fly. You use advanced tech like safe jumps, tick throws, and baiting opponent’s reflect. You understand the mental stack and conditioning.
- Economy & Growth: All content is unlocked. You no longer focus on Zeni; instead you focus on mastering the game’s neutral and punish game. You might experiment with low-tier characters (e.g., Beerus, Yamcha) to develop new strategies.
- Example Activities: Enter an online tournament (e.g., on smash.gg or in-game Championship mode). Use a team of three characters you have fully mastered. Practice frame-perfect blockstrings with your main. Record sets and review each interaction with a coach or peer. Attend local meetups (if available) to play offline.
- Milestones: Reach Super Saiyan God (SSG) rank or higher. Place in top 8 of a regional online tournament. Successfully execute a 100% TOD (Touch of Death) combo in a tournament match. Have a character or team known in your local scene.
- Ranked Mode Grind – Climbing to the highest rank (Ultra Instinct and above). Matches are intense; the metagame shifts with balance patches.
- Online Tournaments – Participate in in-game Championships (weekly) or external community tournaments. Winning requires deep character knowledge and mental stamina.
- Combo Creativity – Labbing new setups and sharing them online. This keeps the game fresh even after thousands of hours.
- Coaching & Content Creation – Many top players create guides, analysis, or stream their matches. Teaching reinforces understanding.
- Meta Adaptation – Stay updated with balance changes and discover new tech. For example, after a patch that buffs Z Broly, you may need to adjust your team’s defensive options.
Economy & Progression Systems
Player Progression Tiers
#### Early Game (0–10 Hours)
Goal: Learn the basic controls, complete the tutorial, finish easy Story Mode arcs, and find three characters you enjoy.
#### Mid Game (10–50 Hours)
Goal: Develop team synergy, learn basic combos (B&B series), understand neutral, and participate in online matches (Casual mode).
#### Late Game (50–100 Hours)
Goal: Master advanced combos, optimize team synergy, learn specific matchups, and climb the ranked ladder (Supreme Kai or higher).
#### Endgame (100+ Hours)
Goal: Compete at tournament level, become a local scene regular, or become an online tournament champion. Master the meta and all matchups.
Endgame Structure
Once you reach Endgame, the core loop shifts from unlocking content to perfecting performance. Activities include:
There is no traditional “final boss” in DBFZ – the endgame is defined by your personal goals and the competitive community. Whether you aim to become the best in your region or simply enjoy mastering a single character, the game offers depth for thousands of hours.
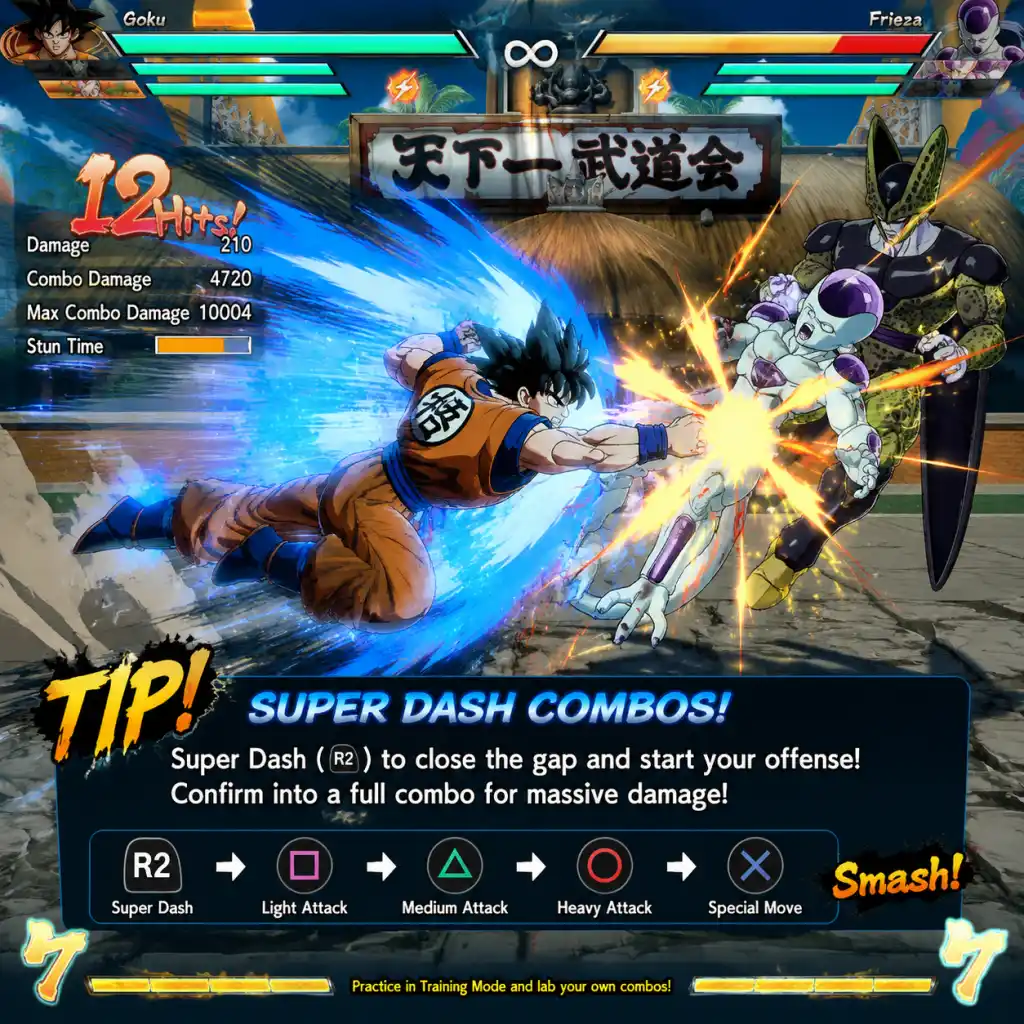
Game Tips
Game Tips for Dragon Ball FighterZ
This guide provides a comprehensive collection of tips categorized by core aspects of the game. Each tip includes a clear explanation, why it works, and when to apply it. The tips range from beginner-friendly fundamentals to advanced optimization strategies.
---
1. Combat Fundamentals (Beginner & Intermediate)
#### 1.1 Master the Universal Combo Structure
- Tip: Every character can use a basic ground combo: 2L (crouching light) → 2M (crouching medium) → 5M (standing medium) → 5H (standing heavy) → Super Dash (S or quarter-circle forward + H). After the Super Dash, press Light twice to teleport behind the opponent, then continue with a jump cancel combo.
- Why: This universal route works for all characters and builds damage and meter. It’s the foundation for more advanced combos.
- When: Use this in neutral or after a knockdown to confirm hits. Avoid autocombo (mashing Light) as it scales damage poorly.
- Tip: Use Super Dash (quarter-circle forward + H) sparingly. It is easily punishable by 2H (down-heavy) which gives a full combo. Instead, use Super Dash to close gaps after a hard knockdown or when the opponent is recovering.
- Why: Raw Super Dash in neutral is a risky habit. Good players will anti-air you every time.
- When: Use Super Dash only when you have a read (e.g., opponent is whiffing a move, or you see them start a super).
- Tip: Look up or lab a standard 0-bar, midscreen combo for your point character. Example for Goku: 2M → 5M → jc (jump cancel) → j.L → j.L → j.2H → Super Dash → j.L → j.M → j.2H → j.L → j.L → j.2H → j.236L (Kamehameha).
- Why: Consistent BNB combos maximize damage without requiring meter. They build blue life (recoverable health) on the opponent, making your offense more rewarding.
- When: Use this combo after any grounded confirm (e.g., 2M hit, 5H hit, or after a Dragon Rush).
- Tip: Dragon Rush (L+M together) is a command grab that works on ground and air. It can be teched by pressing L+M at the same time (same input). But in a scramble or after a blocked string, Dragon Rush catches opponents who are holding block too long.
- Why: It forces the opponent to guess between blocking and teching. If they tech, you both reset to neutral—no risk. If they fail, you get a knockdown and can set up oki.
- When: Use after a blockstring that ends with a slight gap (e.g., after 5LL). Also use as a tick throw after a jab reset.
- Tip: Vanish (quarter-circle back + S) is an invincible reversal that costs 1 bar. It can be used on wake-up to escape pressure. However, it is punishable if blocked (opponent can reflect or 2H you).
- Why: Vanish is a high-risk tool. In competitive play, players bait it and punish. Use it only when the opponent is extremely aggressive and you need to reset.
- When: Rarely on wake-up; better to use reflect or guard cancel tag (2 assists) as safer options.
- Tip: Sparking Blast (L+M+S together) activates a temporary buff: infinite combos, increased damage, fast health regen, and better air options. Use it to extend combos mid-screen or to come back from a deficit.
- Why: Sparking allows you to cancel normal moves into other normals or specials on hit, enabling loops. It also lets you cancel ki blasts into Super Dash.
- When: Activate Sparking after a confirmed hit to start a ToD (Touch of Death) combo, or when you are down to one character to maximize comeback potential.
- Tip: On wake-up, you can delay your tech (press nothing) to avoid high-low mix-ups. This makes the opponent’s okizeme harder. However, you lose the invincibility of a normal tech.
- Why: Most players set up safejumps or meaty attacks. Delaying tech shifts your wake-up timing, potentially causing their meaty to whiff. Then you can punish.
- When: Use after a hard knockdown when the opponent is at a distance where a meaty is expected. Not recommended against characters with strong command grabs (e.g., Android 16).
- Tip: Understand that cross-ups in DBFZ are limited. Most characters cannot cross up easily. Use low attacks (2M) and overheads (6M, but 6M is universal) sparingly. The universal overhead (forward + H) costs no meter but is -6 on block.
- Why: Overheads are reactable. Mix-ups often rely on stagger pressure (gaps in blockstrings) or using assists to cover a high/low.
- When: Use 6M when you have an assist covering your approach, or after conditioning the opponent to block low. For a low, use 2M early in a blockstring.
- Tip: Each assist type (Beam, DP, Get-off-me) has specific uses. Beam assists (e.g., Goku’s Kamehameha, Bardock’s Riot Javelin) have long range and are great for neutral and combo extensions. Invincible assists (e.g., Vegeta’s Super Dash kick) help in blockstrings. Use assists to make your offense safer or to convert stray hits.
- Why: Assists reset the neutral and allow you to continue pressure. For example, call a beam assist immediately after a blocked 5H to make it safe.
- When: Use assists at the end of blockstrings to prevent the opponent from punishing your recovery. In combos, call assist after a Smash (knockdown animation) to extend the combo before the opponent hits the ground.
- Tip: With Sparking active, learn looping combos for your team. Many characters can repeat the sequence: launch, j.M, j.L, j.2H, Super Dash, j.M, j.L, j.2H, etc. ending with a super. For example, Vegito can do: 5M → 5H → 236L (Ki Blast) → Sparking → 5M → 5H → jc → j.L → j.M → j.2H → Super Dash → repeat.
- Why: Sparking loops maximize damage and often kill. They require precise timing, but mastering one per team is crucial for competitive play.
- When: Use after activating Sparking from a confirm. If you have 7 bars and Sparking, you can kill any character mid-screen.
- Tip: Arrange your team in order: Point (first) wants to build meter and does well with assists. Mid (second) can use meter but also builds for anchor. Anchor (third) is the comeback character that uses 7 bars efficiently and can function solo.
- Examples: Point: Kid Buu, Bardock; Mid: Cell, Goku; Anchor: Base Vegeta, Android 21.
- Why: This structure optimizes meter usage and survivability. Point characters often have strong neutral and mix-ups. Anchors have powerful level 3 supers that can turn the tide.
- When: Build your team accordingly. Avoid putting two meter-hungry characters together unless you have a battery (e.g., Base Goku or SS Vegeta) on point.
- Tip: Choose characters whose assists complement your point’s game plan. For example, if you play Gotenks (point), his Ghost Oki benefits from a beam assist (like Adult Gohan) to lock down opponents. A character with a DP assist (like Cooler) can help you anti-air.
- Why: Good assist synergy allows you to convert hits that would otherwise be safe for the opponent. It also makes blockstrings gapless.
- When: Test assist calls in training mode. Check if your assist can extend combos (e.g., after a Smash) and if it covers gaps in your pressure.
- Tip: Some characters generate more meter than others. SS Vegeta (point) builds meter with his rapid kicks and assist. Base Goku’s Kaioken helps build bar. Use a battery on point to fund your mids and anchor.
- Why: In DBFZ, meter determines combo length, reversals, and supers. Having a battery ensures you always have options.
- When: If your team relies on EX moves or level 3 supers, consider including a battery.
- Tip: EX moves (e.g., quarter-circle forward + L+M) cost 1 bar and often have extra properties: invincibility, better damage, or speed. Use them to make blockstrings safe or to punish whiffs.
- Examples: Bardock’s EX Riot Javelin (236L+M) is an invincible reversal. Frieza’s EX Death Saucer (236L+M) orbs the opponent for oki.
- Why: EX moves are powerful but expensive. Use them only when necessary—e.g., to close a round or turn a bad situation into offense.
- When: Use EX moves in neutral to beat projectiles, as a punish tool, or to extend combos for extra damage.
- Tip: Level 3 supers (e.g., Goku’s Super Spirit Bomb) cost 3 bars but often have cinematic properties, high damage, and can be used as a reversal (invincible on startup). Many level 3s, like Bardock’s, can be combo’ed into from a Dragon Rush.
- Why: Level 3 supers are comeback tools. They also (in most characters) heal blue health or provide a unique benefit (e.g., Tien’s Tri-Beam costs health).
- When: Use level 3 to finish a round, as a reversal (if invincible), or after a Sparking blast combo to max damage.
- Tip: During a combo, aim to spend meter only if it gives a significant damage boost (e.g., 20% more) or secures a kill. For example, use vanish to extend a combo only if it leads to a super that kills. Otherwise, save meter.
- Why: Meter is a limited resource. Wasting it can leave you without options for defensive evasive maneuvers or level 3 supers.
- When: In the middle of a combo, if you have 1 bar, consider whether a vanish + super will kill. If not, end the combo without meter spend.
- Tip: Reflect (forward + S) is a universal defensive tool that parries all strikes (except command grabs and supers). It has 6f startup, but the active frames are very wide. Use it to escape pressure.
- Why: Reflect beats auto-combo and most jump-ins. If the opponent expects a reflect, they can bait it by delaying a button.
- When: Use reflect when cornered or after a blocked 5L. After a successful reflect, you can punish with 5L or 2M.
- Tip: Backdash (quick double-tap back) has invincibility on startup. Use it to escape pressure, avoid cross-ups, or reset neutral. It is especially strong after a blocked Command Grab.
- Why: Backdash creates space and makes the opponent whiff. It costs no meter.
- When: Use after a blocked attack that leaves you at minus frames (e.g., after blocking a Heavy) or to avoid an incoming mix-up.
- Tip: While blocking, press L+M+Assist (two assists together) to perform a Guard Cancel Tag. This consumes all your blue life (recoverable health) and switches your point character with an assist, who does an invincible attack.
- Why: It’s a high-cost reversal that can turn the tide, but it leaves your point vulnerable to being snapped in later. Use sparingly when cornered.
- When: Use when you have at least two characters alive and need to escape pressure. It’s risky because the opponent can bait it and punish.
- Tip: If you are in a blockstun, you can use Super Dash to escape certain setups (e.g., after a ki blast). It's not invincible but can catch opponents who are not prepared.
- Why: It’s a risky but effective way to challenge pressure.
- When: Use against characters with slow recovery on their blockstrings (e.g., after a beam attack).
- Tip: Set the dummy to record a common blockstring (e.g., 5LL → 2M → 5H → assist call) and then practice punishing the gap or reflecting.
- Why: This simulates real match situations. You learn to react to attacks and find the best punish.
- When: Do this for 10 minutes every session to sharpen your defense.
- Tip: In DBFZ, IAD (instant air dash) is 956 or 754 direction for forward/backward. This allows quick cross-ups and mix-ups. Practice j.M after IAD for an instant overhead.
- Why: IAD overheads are very hard to react to. They are a staple for aggressive players.
- When: Use IAD after a knockdown or when the opponent is recovering. It works best with characters who have good air normals (e.g., Cell, Bardock).
- Tip: 2H (down-heavy) is the universal anti-air. It beats Super Dash, jump-ins, and most aerial approaches. It launches the opponent for a full combo.
- Why: A reliable anti-air is essential. Without it, you will get destroyed by jump-in spam.
- When: Use 2H when the opponent is above you or when you predict a Super Dash. Practice timing in training mode.
- Tip: Use a wired connection. In settings, set the matchmaking to “Same Region” and “Good Connection” only. This reduces lag and makes your gameplay consistent.
- Why: Lag can make combos unreliable and ruins the experience. A stable connection is crucial for reacting to 2H.
- When: Always do this before queuing for ranked.
- Tip: Know which of your moves are safe on block (e.g., Goku’s 5M is -4, so it’s safe if not canceled into a special). Use Dustloop or the game’s training mode to check frame data.
- Why: Blockstrings are only effective if they are gapless. If you use a move that is minus, the opponent can punish you.
- When: Study frame data for your point and assists. Create blockstrings that are at least -2 or better.
- Tip: During a match, take note of what the opponent does after a knockdown. Do they always tech forward? Do they use reflect on wake-up? Adjust your oki accordingly.
- Why: DBFZ rewards adaptation. If you stick to the same patterns, good players will read you.
- When: Actively watch your opponent’s wake-up habits and adjust your meaty or cross-up attempts.
- Tip: When you are down to your last character, save Sparking for a moment when you get a hard knockdown or a touch of death opportunity. Activate Sparking to end the round in one combo.
- Why: Sparking with 7 bars can kill any character from a single confirm. Use it when you have a guaranteed opening.
- When: Activate Sparking after landing a 2H or a Dragon Rush with your anchor.
- Tip: Zeni is earned from matches and used to buy Cosmetics (colors, lobby avatars, stamps) and Capsules. Save Zeni for character colors you actually want. Avoid wasting on random capsules that give duplicates.
- Why: Capsules are RNG and can be frustrating. Purchase specific items from the shop instead.
- When: If you want a specific color (e.g., Android 21 Lab Coat), buy it directly from the shop when available.
- Tip: The Arcade Mode and Story Mode (Android 21 Saga) give large Zeni rewards and unlock some characters. Complete them to boost your economy.
- Why: These modes also teach you the game’s mechanics and provide a stress-free environment to practice.
- When: Play through story mode early to unlock all base roster characters and earn Zeni for cosmetics.
- Tip: Z-Coin is premium currency earned from events or purchased. Use it for exclusive colors and lobby items. Avoid unnecessary purchases.
- Why: Most content can be earned in-game; Z-Coin is optional.
- When: Only spend Z-Coin on items you can’t earn otherwise, such as premium color sets.
- PC: Disable motion blur and background animations for better performance. Use Steam Input or Xbox Controller for consistent dpad inputs.
- PlayStation 5: The PS5 version runs at 4K/60fps with near-zero input lag. Use the controller’s dpad for precise quarter-circle inputs.
- Xbox Series X: Same as PS5. Ensure your TV is in Game Mode.
- Nintendo Switch: Use a wired controller (Pro Controller) if possible. The Switch version has slightly higher input lag; practice IAD timing accordingly.
- Practice Combos Daily: Muscle memory is key. Spend 20 minutes every day executing your BNB combos from both sides.
- Watch Pro Matches: Observe players like SonicFox, GO1, or Fenrich to learn neutral and team synergy.
- Participate in Local Events: Even online, joining Discord tournaments helps you grow faster.
- Stay Positive: Losing is learning. Review replays of your losses to see where you got opened up.
#### 1.2 Super Dash Is a Tool, Not a Crutch
#### 1.3 Learn Your Character’s Optimal BNB (Bread & Butter)
#### 1.4 Use Dragon Rush to Open Defenses
#### 1.5 Vanilla Reversals & Their Risks
---
2. Advanced Combat & Combos (Intermediate & Advanced)
#### 2.1 Optimize Damage with Sparking Blast
#### 2.2 Delay Teching for Mix-Ups
#### 2.3 Cross-Up Protection & Blocking High/Low
#### 2.4 Using Assists for Extensions & Pressure
#### 2.5 Sparking Loops & ToD Combos
---
3. Team Composition & Synergy
#### 3.1 Point, Mid, Anchor Roles
#### 3.2 Assist Synergy
#### 3.3 Battery Characters for Meter Economy
---
4. Meter Management & Economy
#### 4.1 When to Use EX Moves
#### 4.2 Saving Meter for Level 3 Supers
#### 4.3 Optimal Meter Usage in Combos
---
5. Defense & Movement
#### 5.1 Reflect Is Your Best Friend
#### 5.2 The Importance of Backdash
#### 5.3 Guard Cancel Tag (2 Assists)
#### 5.4 Super Dash Escape Option
---
6. Training & Practice
#### 6.1 Use Training Mode Record & Playback
#### 6.2 Practice Instant Air Dashes (IAD)
#### 6.3 Learn Your Character’s Anti-Air (2H)
---
7. Online Play & Competitive Tips
#### 7.1 Check Your Connection & Set Matchmaking
#### 7.2 Learn Frame Data for Your Team
#### 7.3 Adapt to Your Opponent’s Habits
#### 7.4 Use Sparking as a Comeback Tool
---
8. Economy & Unlockables
#### 8.1 Spend Zeni Wisely
#### 8.2 Earn Zeni Through Arcade & Story Mode
#### 8.3 Use the Z-Coin Store (Paid DLC)
---
9. Platform-Specific Tips
---
10. Final Pro Tips
With these tips, you’ll go from a beginner to a formidable player. Good luck and have fun in Dragon Ball FighterZ!
Game Settings
Game Settings Guide for Dragon Ball FighterZ
This guide covers every settings category in Dragon Ball FighterZ, with optimized recommendations for different hardware levels and special attention to easily misconfigured options. Proper settings can reduce input lag, improve visual clarity, and make the game more enjoyable, especially in competitive play.
Overview of Settings Categories
Dragon Ball FighterZ offers six main settings tabs:
- Graphics (PC only)
- Audio
- Controls
- Accessibility
- Language
- Network
- Gameplay
---
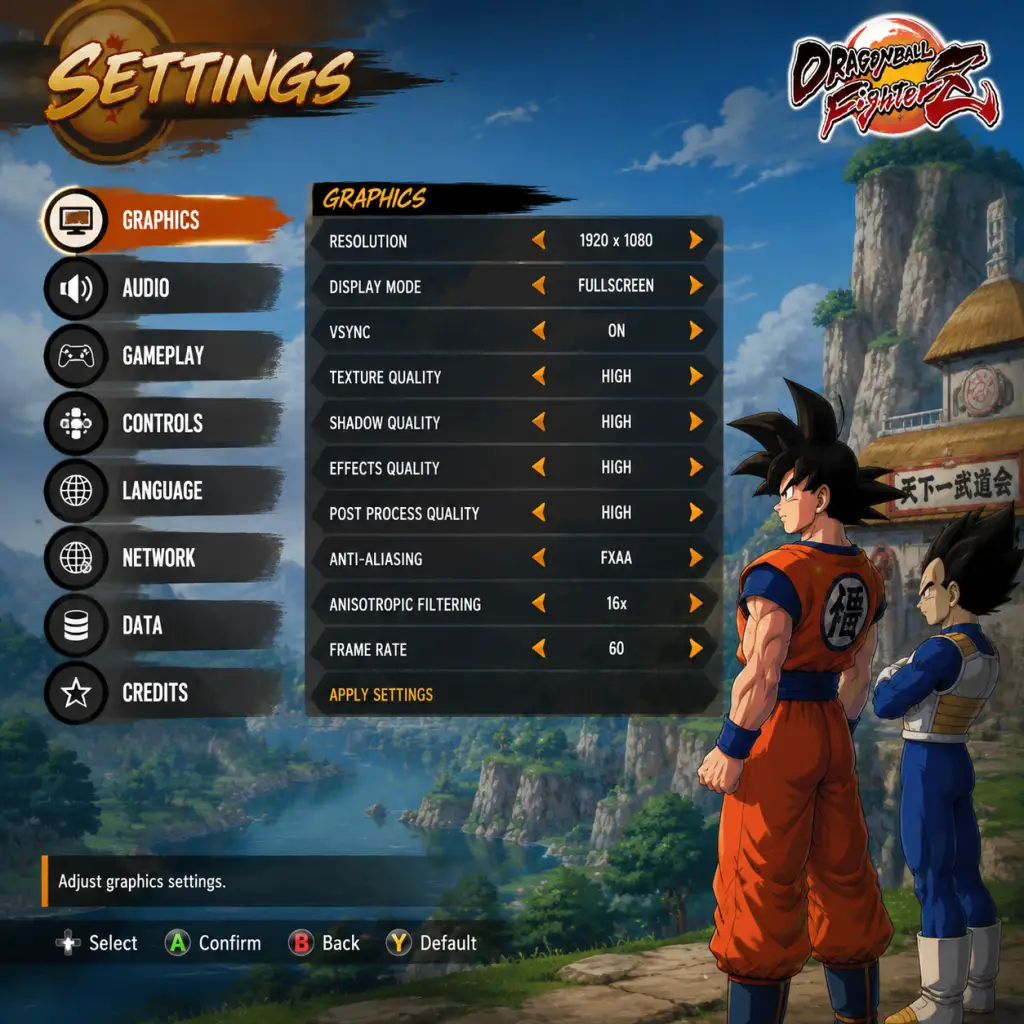
Graphics Settings (PC)
Available on the PC version only. These settings directly affect performance, input lag (via V-Sync), and visual quality.
Key Graphics Options
| Setting | Options | Performance Impact | Notes |
|---|---|---|---|
| Resolution | Native, Lower % | High | Lower for performance. Use native for competitive play to avoid scaling blur. |
| Window Mode | Fullscreen, Borderless, Windowed | Low | Fullscreen reduces input lag slightly. Borderless for easier alt-tabbing. |
| V-Sync | On, Off, Adaptive (if available) | Medium | OFF recommended for lowest input lag. On causes 1-2 frames extra delay. |
| Anti-Aliasing | Off, FXAA, TAA, MSAA x2/x4/x8 | Medium-High | TAA blurs less than FXAA. MSAA sharp but heavy. Off for max performance. |
| Shadow Quality | Low, Medium, High | Medium | Low gives clean, flat shadows; High adds self-shadowing. Low recommended. |
| Texture Quality | Low, Medium, High, Ultra | Low-VRAM | Set based on VRAM: <2GB = Low, 2-4GB = Medium, 6GB+ = High/Ultra. |
| Post Processing | Low, Medium, High | Medium | Controls bloom, DOF, motion blur. Turn to Low for clarity and performance. |
| Motion Blur | On, Off | Low | Off recommended. Causes blurring during fast movement. |
| Background Quality | Low, Medium, High | Low-Medium | Low reduces stage detail, can improve loading times slightly. |
| Render Ahead Limit (NVIDIA) | 1-4 frames | N/A | Force 1 frame via driver for minimal input lag. |
Recommended Graphics Presets
#### Low-End System (e.g., Intel HD Graphics 520, 4GB RAM, 2GB VRAM)
- Resolution: 1280x720 (or 1600x900)
- V-Sync: Off
- Anti-Aliasing: Off
- Shadows: Low
- Textures: Low
- Post Processing: Low
- Motion Blur: Off
- Background: Low
- Target FPS: 60 (may need to lower resolution further if dips occur)
- Resolution: 1920x1080
- V-Sync: Off (or Adaptive via driver)
- Anti-Aliasing: TAA (or MSAA 2x)
- Shadows: Medium
- Textures: High
- Post Processing: Medium
- Motion Blur: Off
- Background: Medium
- Target FPS: Stable 60
- Resolution: 1920x1080 or 2560x1440
- V-Sync: Off (or G-Sync/Freesync)
- Anti-Aliasing: TAA (or MSAA 4x at 1080p)
- Shadows: High
- Textures: Ultra
- Post Processing: High
- Motion Blur: Off
- Background: High
- Target FPS: 60 (capped by game engine; no uncapped option)
- V-Sync Off is mandatory for serious play. It eliminates 1–2 frames of display lag. If you experience screen tearing, use G-Sync/Freesync or enable Fast Sync (NVIDIA) / Enhanced Sync (AMD) in driver settings.
- Render Ahead Limit (NVIDIA Profile Inspector): Set to 1 for the lowest possible input delay. This overrides the game's default triple buffering.
- Fullscreen vs Borderless: Fullscreen offers lowest latency. Borderless can introduce a frame of lag due to compositor.
#### Mid-Range System (e.g., GTX 1060, RX 580, 8GB RAM)
#### High-End System (e.g., RTX 3070, 16GB RAM)
Special Attention: V-Sync & Input Lag
Misconfiguration Warning: Anti-Aliasing
Many players leave anti-aliasing on FXAA or TAA without realizing TAA adds slight blur (but less than FXAA). For the sharpest image, use MSAA 2x or 4x if performance allows. Turning it off completely gives the crispest image (pixelated edges) and reduces input delay negligibly.
---
Audio Settings
Available on all platforms. Proper audio can help with audio cues for super moves and stage transitions.
| Setting | Options | Recommendation |
|---|---|---|
| Master Volume | 0-10 | 8-10 (depends on headphones/speakers) |
| BGM Volume | 0-10 | 7 (music is iconic but can be distracting in competitive play) |
| SFX Volume | 0-10 | 10 (essential for hit confirms, supers) |
| Voice Volume | 0-10 | 8 (character calls useful) |
| Sound Output | Stereo, Surround | Stereo (precise left/right panning) |
| Controller Speaker (PS4/PS5) | On/Off | Off (reduces audio delay) |
Special Attention: SFX Volume
- Keep SFX at max. In clutch moments, hearing the whoosh of a vanish or the startup of a Level 3 super can be the difference between reacting or getting hit.
- Reduce BGM in competitive play to better hear in-game sounds.
---
Controls Settings
Crucial for customizing your fighting experience. Available on all platforms.
Button Configuration
The game offers three preset layouts plus a Custom option. You can assign each action to any button.
| Action | Default (Standard) | Recommended (for 6-button fighters) | Explanation |
|---|---|---|---|
| Light Attack (L) | Square / X | Square / X | Fastest normals |
| Medium Attack (M) | Triangle / Y | Triangle / Y | |
| Heavy Attack (H) | Circle / B | Circle / B | Slower but stronger |
| Special (S) | R1 / RB | R1 / RB | Ki blasts, special moves |
| Assist 1 | L2 / LT | L2 / LT | Calls partner 1 |
| Assist 2 | R2 / RT | R2 / RT | Calls partner 2 |
| Dragon Rush | R1+R2 / RB+RT | Macro | Not default; assign to L3 or R3 for easy input |
| Vanish | L2+R2 / LT+RT | Macro | Assign to a spare button if desired |
| Super Dash | R2 / RT (hold) | – | Already available |
Custom Button Map Example (Competitive)
- Light: L1 / LB (left bumper)
- Medium: R1 / RB
- Heavy: L2 / LT
- Special: R2 / RT
- Assist 1: Square / X
- Assist 2: Triangle / Y
- Dragon Rush: Circle / B
- Vanish: L3 (press left stick)
- Dead Zone (Left Stick): Default is fine. Lowering may cause unintended inputs; raising may miss inputs. Leave at default.
- Trigger Dead Zone: Only relevant for analog triggers (PS4/5, Xbox). Set to minimum to reduce input lag from trigger travel. Many players set to 0-10%.
- DPad vs Stick: For fighting games, DPad is recommended for precise directional inputs. Analog stick can cause accidental jumps or diagonal misreads.
This layout places heaviest attacks on triggers and face buttons for assists, which can be faster for some players.
Special Attention: Dead Zone & Stick Sensitivity
---
Accessibility Settings
Available on all platforms.
| Setting | Options | Recommendation |
|---|---|---|
| Button Color | Normal, Protanopia, Deuteranopia, Tritanopia | Choose based on color vision deficiency |
| Fighter Color | 1P Normal, 2P Normal, Mixed, User | Left as default for most. Colorblind players should use appropriate preset. |
| Vibration | On/Off | Off (reduces distraction and saves battery) |
| Subtitle | On/Off | On if you want story dialogue |
| Auto-Ready | Off/On | Off. If on, automatically ready up after matches – can cause accidental rematching. |
| Screen Shake | On/Off | Off for less visual noise during supers. |
| Motion Blur (Console) | On/Off | Off (same as PC) |
Special Attention: Screen Shake
- Turning Screen Shake Off reduces visual distraction during supers and counters, making it easier to see your opponent’s recovery and avoid mix-ups.
---
Language Settings
Changes voice and text language. Note that voice language only affects in-battle character voices; menu text is separate.
| Setting | Options | Notes |
|---|---|---|
| Voice Language | Japanese, English, French, etc. | Japanese is preferred by purists; English is also high quality. |
| Menu Language | Based on system language | Can be changed to any supported language. |
| Subtitle Language | Same as menu |
Recommendation
- Voice: Japanese (original voice actors, more authentic). If you prefer English, it’s fine.
- Menu: Your native language for ease.
---
Network Settings
Critical for smooth online play. Available on PC and consoles.
| Setting | Options | Recommendation |
|---|---|---|
| Input Delay (PC/Console) | 1F-8F | 1F (minimum) if your connection is stable. Increase to 2F-3F if matches lag. |
| Search Range | Any, Same Region, Close/Good | Same Region or Close for best connection. |
| Connection Filter | None, Only 4+ bars, Only 5 bars | Only 4+ bars recommended. Lower leads to laggy matches. |
| Stage Select | Random, Stage of Winner, Random Stage | Random Stage avoids loading imbalances. |
| Ranked Mode Settings | Accept Rematch? | On if you want rematches; off to avoid long sets. |
| Matchmaking | Ranked, Casual, Arena, Ring | Choose based on preference. |
Special Attention: Input Delay Setting
- This is the most misconfigured setting in the game. Setting it too high (e.g., 4F or more) adds artificial lag that makes combos and reactions much harder. Set to 1F if you have a wired connection and both players have good ping (<80ms). Increase to 2F only if you encounter stutter or rollback issues.
- Console players: The delay is applied client-side, so even with good opponents, a high setting hurts you more than helps.
- Always use a wired Ethernet connection for online play. Wi-Fi introduces packet loss and jitter, making the game unplayable for both sides.
- If you must use Wi-Fi, set Input Delay to 3F-4F and lower search range to “Good”.
Wired vs Wireless
---
Gameplay Settings
These affect the in-match experience.
| Setting | Options | Recommendation |
|---|---|---|
| Control Type | Classic, Arcade, Custom | See Controls section above |
| Auto-Combo | On/Off | Off for manual combos. On is for beginners. |
| Simple Controls (Super Dash assist) | On/Off | Off for competitive play. On can teach bad habits. |
| Display Timings (Frame Data) | On/Off | On to see frame advantage numbers in training mode. |
| Reversal Input (button hold) | Normal, 2F Window, 3F Window | Default is fine. Widening window makes reversals easier but less precise. |
| Stage Select | Random, Player’s Pick | Random avoids stage advantage (some stages have brightness or frame drops). |
| Battle Reminder (Hold-start) | On/Off | On if you want tips during loading; Off for faster starts. |
Special Attention: Auto-Combo & Simple Controls
- Auto-Combo (mash Light to get a full combo) is on by default. For competitive play, turn it Off immediately. It prevents you from learning manual combos and can accidentally trigger when you want a single light attack.
- Simple Controls (e.g., Super Dash with one button) similarly hinder your growth. Disable them unless you are a complete beginner.
- The game runs at 60 FPS native with no performance modes. Use fullscreen (if PC) or default resolution.
- PS5: Disable “Trigger Effect Intensity” in system settings to avoid extra resistance on L2/R2 when using triggers for assists.
- Xbox Series: Go to Settings > Devices & Connections > Accessories > Configure > Button Mapping to map Dragon Rush macro if desired.
- Graphics are locked to 720p docked / 600p handheld with 60 FPS (mostly stable). No graphics options.
- Use DPad on Pro Controller or Joy-Con grip for best directional inputs.
- Network: Use wired LAN adapter for stable online.
Training Mode Specific Settings
In training mode, turn on Frame Data Display to learn frame advantages, startup, and recovery. This is critical for understanding punishes.
---
Platform-Specific Notes
PlayStation 5 / Xbox Series X|S
Nintendo Switch
---
Final Checklist for Optimal Competitive Settings
1. Graphics (PC only): V-Sync Off, Render Ahead Limit 1, Anti-Aliasing off or MSAA, Motion Blur Off, Screen Shake Off.
2. Audio: SFX at 10, BGM at 7, stereo output.
3. Controls: Custom layout you’re comfortable with, dead zones default, DPad.
4. Network: Input Delay 1F, Search Range Same Region, Connection Filter 4+ bars, wired Ethernet.
5. Gameplay: Auto-Combo Off, Simple Controls Off, Display Timings On (in training), Stage Select Random.
By following this guide, you will have a responsive, clear, and fair playing experience whether you are a casual player or a seasoned competitor.
Important Notes
Important Notes for Dragon Ball FighterZ
This section covers critical information that can save you time, frustration, and in-game resources. Read this before diving deep into the game to avoid common regrets.
⚠️ Irreversible Choices & Missable Content
- Character Unlocks via Zeni: All base roster characters are unlockable by spending Zeni in the in-game shop (except pre-order/DLC). This is irreversible only in the sense that you cannot refund Zeni. Prioritize unlocking your favorite characters first as Zeni is earned slowly. Avoid buying cosmetic items early.
- Story Mode Branching: The story has three arcs (Super Warrior, Enemy, Android 21). You can replay chapters but the initial choice for each arc is permanent for that playthrough. Completing all three is required for 100% completion and unlocking Android 21 (playable). Do not delete save data assuming you can restart easily; you'll lose progress.
- Z-Capsule Drops: Certain Z-Capsules (for character colors, stamps, etc.) are only obtainable through specific modes (Arcade, Story, Online). Some are time-limited events or tied to specific challenges. If you miss an event campaign, those items may become unobtainable.
- Achievements/Trophies: Some achievements require online play (e.g., "Reach a certain rank" or "Win 10 ranked matches"). Online functionality may diminish over time; prioritize these if you care about completion.
###
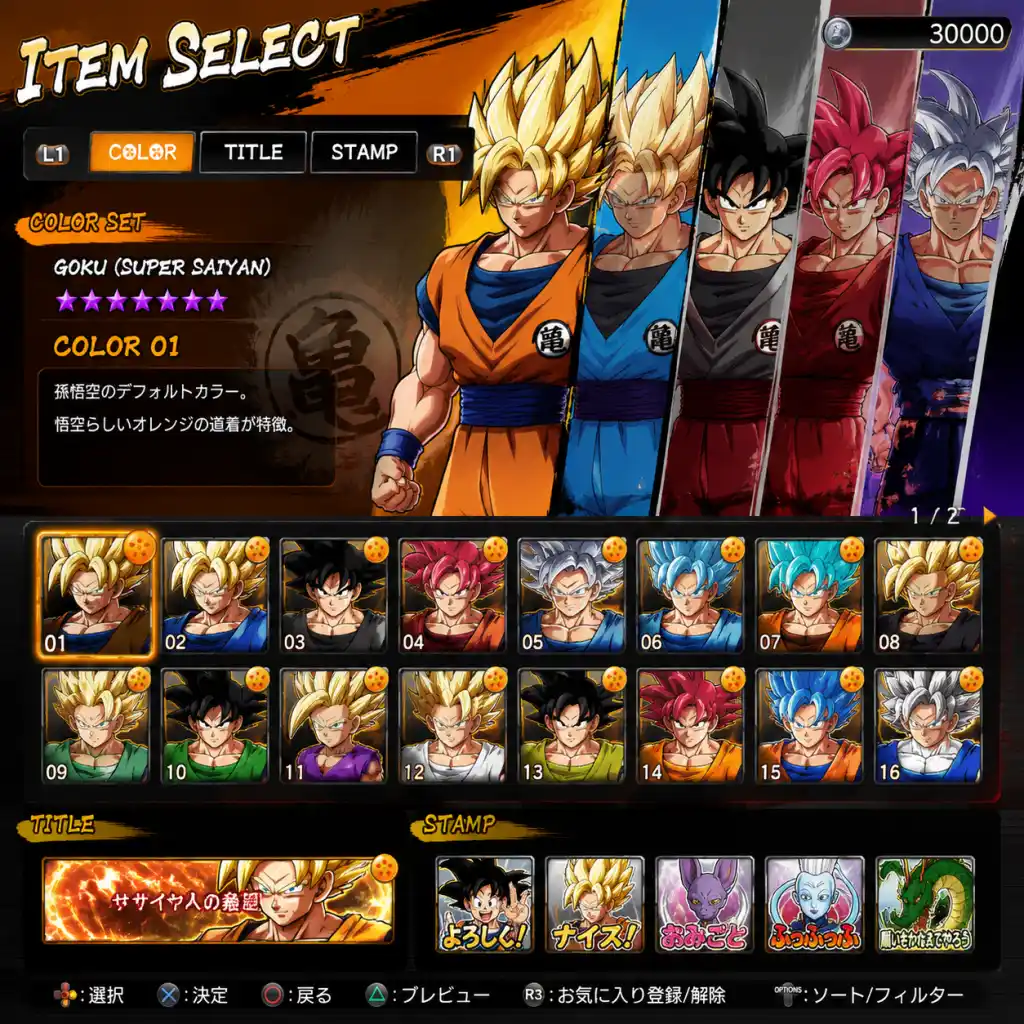
All Game Items
All Game Items Guide for Dragon Ball FighterZ
Dragon Ball FighterZ is a 2D fighting game, not an RPG, so it has no traditional weapons, armor, or consumable items that affect combat. Instead, this guide covers every in-game item, currency, collectible, and cosmetic that players can acquire. All items are purely cosmetic or used for customization and progression. Items are identical across PC, PlayStation 4/5, Xbox One/Series X|S, and Nintendo Switch (except for store-exclusive DLC).
Currencies
#### Zeni
- What it is: The main free in-game currency. It looks like a gold coin with the Capsule Corp logo.
- How to obtain: Playing matches (online or offline), completing Zeni challenges (in Z-Capsule menu), selling duplicate items from Capsules, and completing Story Mode chapters. Earning rate scales with match length and performance (win bonus).
- What it's used for: Buying Capsules from Capsule Corp (Zeni Capsules cost 1,000 Zeni each), purchasing some cosmetic items directly from the Shop (e.g., basic colors, lobby characters), and unlocking certain FighterZ IDs/avatars.
- When useful: Always useful for new players to build up their cosmetic collection. Veterans may stockpile Zeni for limited-time events or new capsule rotations.
- Synergies/Upgrades: None. Zeni is not craftable or interchangeable with premium currency.
- What it is: Premium currency obtained with real money. Icon is a blue coin with “Z” logo.
- How to obtain: Purchased from platform stores (Steam, PlayStation Store, Xbox Store, Nintendo eShop). Prices vary by region. Occasionally earned through special events or as part of bundled editions.
- What it's used for: Buying DLC characters individually (each costs about $4.99 USD / 500 FGC), purchasing the FighterZ Pass (season passes), buying exclusive cosmetic packs (e.g., Anime Music Packs, Lobby Character Packs), and some rare Z Capsules that rotate.
- When useful: When you want specific DLC characters without buying the full pass, or want premium cosmetics.
- Synergies/Upgrades: None. It's a direct currency.
- What they are: Gacha-style loot boxes that contain random cosmetic items. There are two types: Zeni Capsules (purchased with Zeni) and Premium Capsules (purchased with FighterZ Coins). Premium Capsules have a higher chance for rare items.
- How to obtain: Buy them from the Capsule Corp shop using the appropriate currency. Also earn free Capsules from login bonuses, Story Mode rewards, and special events.
- What they contain: Player Cards, Titles, Avatars, Stamps, Colors (palettes), Lobby Characters, Figure Poses, Music tracks, Battle Backgrounds, and more. Duplicates are automatically converted to Zeni (common items give 3,000 Zeni, rare items give 10,000 Zeni).
- When useful: Whenever you want to expand your cosmetic collection. Capsules are the primary way to get items not sold directly in the Shop.
- Synergies/Upgrades: No direct upgrades. Accumulating Capsules allows you to unlock all cosmetics eventually.
- What they are: Seven crystal balls (starred 1-7) that appear during online matches or in certain game modes. Collect all seven to summon Shenron.
- How to obtain: Playing online casual/ranked matches. After a match, there is a small chance a Dragon Ball will drop from the sky above the victory screen. You can only obtain one Dragon Ball per match. Each ball is numbered; you need all seven distinct numbers.
- What they do: Collecting all seven lets you summon Shenron (giant dragon animation) and choose one of several permanent rewards:
- When useful: Useful when you want a specific reward. Zeni is helpful for newer players; experienced players may prioritize the exclusive cosmetic. Once you claim a reward, the Dragon Balls reset and you can collect them again.
- Synergies/Upgrades: No upgrades. Each wish grants one item permanently.
- What they are: A collection of virtual figurines that you can place in a diorama. Figures are unlocked from Capsules or special events. Each figure has a pose (e.g., fighting stance, signature move). You can also collect Z Stamps (stamps for the in-game chat).
- How to obtain: Capsule drops (common/rare). Sometimes sold directly in Shop for Zeni or FGC.
- When useful: Purely cosmetic for your Player Card and Lobby. Can be used to customize your online presence.
- Synergies/Upgrades: No gameplay effect.
- What they are: Additional background music for lobby, battles, or menus. Includes iconic Dragon Ball anime themes.
- How to obtain: Purchase with FighterZ Coins (Premium) from the Shop, or unlock via Capsules (rare drop). Some are included in FighterZ Pass.
- When useful: Enhances immersion. Can set specific tracks per character or per lobby.
- Synergies/Upgrades: None.
- What they are: Alternative stages for battles. Most are unlocked by default; some are DLC or from Capsules.
- How to obtain: Some are free, others from Capsules or purchased with FGC.
- When useful: Cosmetic only.
- Synergies/Upgrades: None.
- Components: Avatar, Title, Background, Frame, Stamp, Figure, and Color.
- How to obtain: All pieces drop from Capsules. Some are unlocked via achievements or initial setup.
- When useful: Used to personalize your online profile. Shown at character select and matchmaking.
- Synergies/Upgrades: None.
- What they are: Alternate color schemes for each fighter. Base roster has 8-12 colors; DLC characters have fewer. Colors 5-8 are often unlocked via Capsules; some are exclusive to events.
- How to obtain: Colors 1-4 are unlocked by playing Story Mode or automatically. Colors 5+ are from Capsules (Zeni or Premium). Some colors are from special events (e.g., World Tournament).
- When useful: Cosmetic, no gameplay impact. Allows you to differentiate your characters or match team themes.
- Synergies/Upgrades: No direct upgrades. All colors are equal.
- What they are: Your avatar in the online lobby. You can choose from base fighters, but some special lobby characters (e.g., Android 21 (Lab Coat), Goku Black) are unlockable from Capsules or purchased.
- How to obtain: Capsule drops (rare) or Shop purchases.
- When useful: Cosmetics only.
- Synergies/Upgrades: None.
- What they are: Emoticons used in online chat during matches. Can be used for communication or taunting.
- How to obtain: Capsule drops.
- When useful: Social interaction.
- Synergies/Upgrades: None.
- What they are: Text tags displayed under your avatar. Examples: “Z Fighter”, “Kaioken”, “God of Destruction” etc.
- How to obtain: Capsule drops, achievements, purchasing DLC, completing Story Mode, or Shenron wishes.
- When useful: Show off your accomplishments.
- Synergies/Upgrades: None.
- How to unlock: Most base roster (21 characters) are unlocked from the start. A few are locked behind Story Mode progression:
- What they do: Playable characters.
- When useful: Essential for full roster access.
- What they are: Extra characters not in the base game. Divided into Season 1, Season 2, Season 3, and Legendary Edition packs. Total of 22+ additional characters (as of last update).
- How to obtain: Purchase individually with FighterZ Coins, or buy the FighterZ Pass bundles from the platform store. Some are included in special editions.
- When useful: For competitive play, to access new playstyles, or to complete the roster.
- Synergies/Upgrades: None. All characters are balanced within their own movesets.
- What they are: Unique outfits for certain characters (e.g., Goku (Base), Vegeta (Base), etc.) that are different from the main colors.
- How to obtain: Completing specific Story Mode chapters or bonus missions.
- When useful: Cosmetics only.
- Early Access: 3-day early access to the full game (for digital pre-orders).
- Exclusive Lobby Avatar: Goku (Base) or Vegeta (Base) exclusive? Actually pre-order bonus varied by region: In NA, pre-ordering gave a special lobby character? Check public info: Physical pre-orders often included a steelbook. Digital pre-orders included a “Goku Black” lobby character? The exact bonus differs by platform and retailer. Best check specific offers.
- In-game currency: Some pre-orders included 500 FighterZ Coins.
- Physical items: Artbook, soundtrack CD, steelbook case, statues.
- In-game extras: Usually a code for a lobby character or music pack.
- Xbox One X: 4K texture pack (free update, not a separate item).
- PlayStation 4: No exclusive items, but PS4 Pro supports 4K.
- Switch: Motion control support for special moves? Not a cosmetic item.
- Steam: Steam achievements.
- Capsule Rarity: Items are categorized as Common (grey), Rare (blue), Super Rare (purple), Legendary (gold). Legendary items are mostly lobby characters and certain colors.
- Zeni Efficiency: If you aim to collect all cosmetics, it's more efficient to spend Zeni on Zeni Capsules to get duplicates for Zeni refunds than to buy directly from Shop (if available). But check Shop first for any limited-time sales.
- Don't waste FGC on Zeni Capsules: Premium Capsules cost real money and have no guaranteed exclusive items. Only buy Premium Capsules if you need rare lobby characters quickly; otherwise, patience with Zeni Capsules works.
- Shenron Wishes: Prioritize the exclusive cosmetic reward over Zeni if you want complete collection; Zeni can be farmed infinitely.
- DLC Characters: Buying the FighterZ Pass is cheaper than individual purchases. Season passes also include extras like music packs.
- Cross-Platform: Items and currencies are not shared across platforms. Progress is tied to your account on each system.
#### FighterZ Coins (FGC)
#### Capsules (Z Capsules)
Consumables & Materials
Dragon Ball FighterZ has no traditional consumables that you use during a match. However, there are two systems that function as consumable resources:
#### Dragon Balls
- Zeni: A large amount (usually 1,000,000 Zeni).
- Exclusive Player Card Background: unique animated background.
- Exclusive Title: e.g., “Summoner of Shenron”.
- Exclusive Color Palette: for a specific character (varies by patch).
#### Zeni (also listed as currency, but note: it's not consumable)
Collectibles
#### Figure Collection (Z Stamps & Figure Poses)
#### Music Tracks (Anime Music Packs)
#### Battle Backgrounds
Cosmetics & Customization
#### Player Cards
#### Character Colors (Palettes)
#### Lobby Characters & Outfits
#### Stamps
#### Titles
Unlockable Content
#### Additional Characters (non-DLC)
- Android 21 (Good): Unlocked by completing the final chapter of Story Mode (any path).
- SSGSS Goku and SSGSS Vegeta: Unlocked by completing all three Story Mode arcs (Super Warrior, Enemy Warrior, Android 21).
#### DLC Characters & FighterZ Passes
#### Story Mode Alternate Costumes
Pre-Order & Bonus Items
#### Pre-Order Bonuses (Examples)
#### Limited Edition / Collector's Edition
#### Platform Exclusive Items
Important Notes & Tips
Summary Table of Item Categories
| Category | Examples | Acquired Via | Use |
|---|---|---|---|
| Currencies | Zeni, FighterZ Coins | Playing matches, real money | Buying Capsules, DLC, Shop items |
| Consumables | Dragon Balls | Match drops | Summon Shenron for one reward |
| Collectibles | Figures, Music, Backgrounds | Capsules, Shop, Events | Customization |
| Cosmetics | Colors, Stamps, Titles, Player Cards | Capsules, Story Mode, Achievements | Personalization |
| Unlockables | Story Mode characters, DLC | Story progression, DLC purchase | Expanding roster |
| Pre-Order/DLC | Seasonal passes, bonus avatars | Retailer, platform store | Exclusive content |
Character Skills
"content": "## Character Skills Guide for Dragon Ball FighterZ
This guide details every playable character in Dragon Ball FighterZ, covering their unique skills, special moves, Super Moves, unique mechanics, assist options, recommended team positions, combos, and synergies. Skills are organized by character. Input notation uses standard fighting game conventions: QCF (quarter-circle forward), QCB (quarter-circle back), DP (dragon punch motion), etc. All moves consume Ki Gauge unless noted otherwise. This guide assumes familiarity with the game's universal mechanics (Super Dash, Vanish, Sparking Blast).
| Super: Self-Destruct | 236+L+M (when last character) | Level 3: huge damage, kills user. | Unscaled damage (6k+). | Last-resort finisher.
Recommended Build: Point or Mid; Assist A for combos. Synergy with characters that need wall bounce (e.g., Kid Buu).
---
Recommended Build: Point or Mid. Assist A (Energy Volley) for full screen pressure. Synergy with barrier-heavy teams.
---
Recommended Build: Any position; good assist (A or B depending on need). Synergy with characters that benefit from command grab setups (e.g., Gotenks).
---
Recommended Build: Point or Mid. Assist A (Rebellion Spear) for low blockstun. Excellent pair with assists that grant floats (e.g., Goku SSJ).
---
Recommended Build: Mid/Anchor. Assist A (Sphere) for pressure. Synergy with characters that can set up orbs (e.g., Zamasu).
---
Recommended Build: Point or Mid. Assist A (Eraser Cannon) for long range. Synergy with characters that need armor (e.g., Android 16).
---
Recommended Build: Any position; strong anchor. Assist A (Kamehameha) for neutral. Synergy with pop-up assists.
---
Recommended Build: Mid/Anchor. Assist A (Energy Beam). Synergy with Beam assists.
---
Recommended Build: Point or Mid. Assist A (Death Beam) for zoning. Synergy with characters that can keep opponent in corner (e.g., Android 21).
---
Recommended Build: Point (to use Body Change early). Assist A (Jeice) for neutral. Synergy with high damage anchors (e.g., Cell).
---
Recommended Build: Point or Mid. Assist A (Big Bang Attack) for neutral. Synergy with characters that can extend combos (e.g., Bardock).
---
Recommended Build: Any position; excellent anchor. Assist A (Kamehameha) for neutral. Synergy with any team.
---
Recommended Build: Mid/Anchor. Assist A for beam or B for assist that gives sliding knockdown. Synergy with teleport mix-ups.
---
Recommended Build: Point or Mid. Assist A (God Speed) for pressure. Synergy with characters that require high execution (e.g., Hit).
---
Recommended Build: Point or Mid. Assist A (Ghost) for oki. Excellent with characters that can benefit from ghost setups (e.g., Kid Buu).
---
Recommended Build: Point (needs meter for mix-ups). Assist A (Time Skip) for command grab setups. Synergy with characters that can keep opponent still (e.g., Ginyu Guldo).
---
Recommended Build: Mid/Anchor. Assist A (Portal) for neutral. Synergy with trap characters (e.g., Beerus).
---
Recommended Build: Point or Mid. Assist A (Buu Ball) for pressure. Synergy with any team due to speed.
---
Recommended Build: Anchor (heal assist). Assist B (Senzu) for support. Synergy with health-hungry characters (e.g., Frieza Golden).
---
Recommended Build: Point or Mid. Assist A (Fat Toss) for corner carry. Synergy with corner pressure characters (e.g., Cell).
---
Recommended Build: Mid/Anchor. Assist A (Saibaman) for constant pressure. Synergy with characters that can lock down opponent (e.g., Beerus).
---
Recommended Build: Point or Mid. Assist A (Demon Elbow) for combos. Synergy with characters that need re-stand (e.g., Cell).
---
Recommended Build: Any position. Assist A (Galick Gun) for beam. Synergy with any.
---
Recommended Build: Mid/Anchor. Assist B for better neutral? Assist A beam.
---
Recommended Build: Point or Mid. Assist A (Spirit Ball) for full screen. Synergy with characters that need mix-ups (e.g., Gotenks).
---
Recommended Build: Mid. Assist A (Blades) for corner pressure. Synergy with setup characters (e.g., Beerus).
---
Due to space, only unique mechanics and key moves are listed for DLC characters. All have standard specials and supers.
Android 17 – Barrier, command grab, self-destruct super.
Android 21 (Lab Coat) – Turn into candy (command grab), enhanced normals.
Broly (Z) – Gigantic Charge, Eraser Cannon, Armored moves.
**Buu
This guide details every playable character in Dragon Ball FighterZ, covering their unique skills, special moves, Super Moves, unique mechanics, assist options, recommended team positions, combos, and synergies. Skills are organized by character. Input notation uses standard fighting game conventions: QCF (quarter-circle forward), QCB (quarter-circle back), DP (dragon punch motion), etc. All moves consume Ki Gauge unless noted otherwise. This guide assumes familiarity with the game's universal mechanics (Super Dash, Vanish, Sparking Blast).
Notation Key
- L/M/H/S – Light/Medium/Heavy/Special (Ki Blast)
- j. – Jump cancel
- SD – Super Dash
- IAD – Instant Air Dash
- DR – Dragon Rush
- Assist – Z-Change or Assist call
- Meter – Ki Gauge bars (0–7)
- Level 1/3 Super – Super moves costing 1 or 3 bars
- Playstyle: Grappler, high damage, armored moves.
- Unique Mechanic: Can self-destruct with a Level 3 Super (unscaled damage if last alive).
- Assist: A (Rocket Punch) – wall bounce, great for combos.
---
Base Roster Characters
Android 16
| Move | Input | Description | Properties | Combos/Tips |
|---|---|---|---|---|
| Rocket Punch | QCF+S | Armored heavy projectile; hits multiple times. | Startup 20f, +5 on block, wall bounce on hit. | Use to extend combos or punish predictable approaches. |
| Hell Flash | QCB+S (air OK) | Command grab; anti-air version. | Unblockable, 0 startup for air version. | Mix-up after knockdown; air version catches jump outs. |
| Dynamite Driver | QCF+L/M/H | Armored dash punch; H version has more range. | Armor starts frame 1; H version wall bounces. | Get-in tool; cancel into super. |
| Power Bomb | 63214+S (air OK) | Air throw; can chain into ground bounce. | Leads to hard knockdown. | Use after IAD or j.214L. |
| Super: Hell's Flash | QCF+L+M | Level 1: massive fast projectile. | Can DHC into other supers. | Use as combo ender. |
| Super: Splash | QCB+L+M | Level 1: anti-air grab; hits standing opponents. | Scales well. | Punish super dashes. |
Recommended Build: Point or Mid; Assist A for combos. Synergy with characters that need wall bounce (e.g., Kid Buu).
---
Android 18
- Playstyle: Mix-up with barrier, command grab, and 17 assist.
- Unique Mechanic: Can call Android 17 for assist attacks (similar to puppet fighter).
| Move | Input | Description | Properties |
|---|---|---|---|
| Barrier | 214+S (hold) | Absorbs projectiles and all hits; has health. | Recovers with 17 assist; can reflect. |
| 17 Assault | 214+L/M/H (during Barrier) | Counter strike. | L version overhead, M low, H launcher. |
| Accelerating Dive | 236+L/M/H (air OK) | Overhead dive; H version wall bounces. | Use in blockstrings; air version for IAD mix. |
| Finger Beam | QCF+S | Projectile. | Slow startup; can be used to zone. |
| Destructo Disc | QCB+S | Slow moving projectile; can be angled. | Hits multiple times; good for oki. |
| Super: Double Destructo Disc | QCF+L+M | Level 1: two discs. | High damage, good for DHC. |
| Super: Energy Volley | QCB+L+M | Level 1; 17 fires multiple ki blasts. | Full screen, fast. |
| Super: Energy Barrage | (Level 3) 236+L+M | Large beam. | Use as finisher. |
---
Android 21 (Base)
- Playstyle: Versatile, command grab stealing, food meter mechanic.
- Unique Mechanic: Collects \"power up\" by using command grab; enhances specials.
| Move | Input | Description | Properties |
|---|---|---|---|
| Shining Slash | QCF+L/M | Low dash attack; M version can cancel into command grab. | + frames on block. |
| Photon Swipe | QCB+S | Command grab. | Unblockable; restores health and builds power up. |
| Planet Crusher | DP+L/M/S | Anti-air; L version has invincibility. | Good for AA. |
| Ki Blast Cannon | 236+S (air OK) | Rapid fire projectiles. | Can be sustained. |
| Super: FighterZ Kick | QCF+L+M (Level 1) | Fire kick. | Standard damage. |
| Super: Full Power Energy Wave | 236+L+M (Level 3) | Massive beam. | Use at full power up for extra damage. |
---
Bardock
- Playstyle: Rushdown, pressure with lariat, command grab.
- Unique Mechanic: Tyrant Lancer (command grab) leads to combos.
| Move | Input | Description | Properties |
|---|---|---|---|
| Tyrant Lancer | 214+L/M | Command grab; M version wall bounces. | Unblockable, can combo after with assist. |
| Spin Kick | 236+L/M | Overhead kick. | L version fast; M version slower but plus. |
| Rebellion Spear | QCF+L/M | Projectile. | Slow but good for controlling space. |
| Riot Javelin | (air) 236+S | Dive kick. | Cross-up potential. |
| Super: Final Spirit Cannon | QCF+L+M (Level 1) | Beam. | Standard. |
| Super: Rebellion Spear (Level 3) | 236+L+M | Command grab style super. | High damage, cinematic. |
---
Beerus
- Playstyle: Zone with orbs, trap-based setups.
- Unique Mechanic: Orbs from heavy attacks act as traps.
| Move | Input | Description | Properties |
|---|---|---|---|
| Sphere of Destruction | 236+S | Orbs fire after delay. | Can be angled; combo extender. |
| God of Destruction's Anger | QCB+L/M | Counter with auto-combo. | High reward but risky. |
| Destruction's Wrath | 214+L/M | Teleport attack; M version cross-up. | Hard to react. |
| Super: Super God Fist | QCF+L+M (Level 1) | Rush punch. | Standard. |
| Super: Max Sphere of Destruction | 236+L+M (Level 3) | Huge orb barrage. | High damage, used as finisher. |
---
Broly (DBS)
- Playstyle: Grappler, armored attacks, high damage.
- Unique Mechanic: Gigantic Meteor (command grab) with huge range.
| Move | Input | Description | Properties |
|---|---|---|---|
| Gigantic Meteor | 214+L/M/H | Command grab; H version faster but less range. | Unblockable; can be chained from normals. |
| Gigantic Charge | 236+S | Armored dash forward. | Absorbs one hit; leads to grab or combo. |
| Eraser Cannon | QCF+S | Projectile. | Slow startup; good for zoning. |
| Gigantic Impact | (air) 236+L/M | Dive punch. | Overhead; can combo into super. |
| Super: Gigantic Tempest | QCF+L+M (Level 1) | Rush attack; hits multiple times. | Can be used as DHC. |
| Super: Gigantic Roar | 214+L+M (Level 3) | Command grab super; huge damage. | Unscaled when heat mode active? No, but high. |
---
Cell
- Playstyle: All-rounder with strong neutral, command grab, and clone.
- Unique Mechanic: Perfect Attack (command grab) leads to guaranteed combo in corner.
| Move | Input | Description | Properties |
|---|---|---|---|
| Rolling Crush | QCF+L/M | Slide kick; low profile. | M version wall bounces. |
| Perfect Attack | 214+L/M/H | Command grab; H version slow but tracks. | Unblockable; can combo after. |
| Gravity Kick | 236+L/M (air OK) | Dive kick; can cancel into normals. | L version fast, M version more plus. |
| Kamehameha | QCF+S | Beam. | Standard damage, good for DHC. |
| Solar Kamehameha | (air) 236+S | Beam from air. | Good for pressure. |
| Super: Perfect Kamehameha | QCF+L+M (Level 1) | Beam. | Standard. |
| Super: Perfect Barrier | QCB+L+M (Level 1) | Counter super. | Tricky but high reward. |
| Super: Spirit Bomb | 236+L+M (Level 3) | Large orb; hits multiple times. | High damage. |
---
Cooler
- Playstyle: Grappler with counter, high damage, and armor.
- Unique Mechanic: Counter via ult; can absorb attacks.
| Move | Input | Description | Properties |
|---|---|---|---|
| Energy Beam | QCF+S | Projectile. | Standard. |
| Death Crasher | 214+L/M | Command grab; M version has more range. | Unblockable; leads to combo. |
| Cooler's Attack | 236+L/M | Armored dash punch. | Good for breaking pressure. |
| Super: Supernova | QCF+L+M (Level 1) | Fireball. | Can be used in combos. |
| Super: Destructo Disc | QCB+L+M (Level 1) | Fast projectile. | Good for oki. |
| Super: Emperor's Vengeance | 236+L+M (Level 3) | Counter super; huge damage. | High risk, high reward. |
---
Frieza
- Playstyle: Zoner, keepaway with projectiles, transforms for different moves.
- Unique Mechanic: Golden Frieza (Level 3 install) gives enhanced normals and supers.
| Move | Input | Description | Properties |
|---|---|---|---|
| Death Beam | QCF+S | Fast projectile. | Good for punishing. |
| Energy Disc | QCB+S | Slow moving disc; can be angled. | Hits multiple times. |
| Psychokinesis | 214+S | Pulls opponent; sets up combos. | Good for re-stand. |
| Nova Strike | 236+L/M (air OK) | Overhead dive. | Can be used in blockstrings. |
| Super: Death Ball | QCF+L+M (Level 1) | Big projectile. | Standard. |
| Super: Emperor's Supernova | 236+L+M (Level 3) | Massive beam. | Use as finisher. |
| Super: Golden Frieza | (install) 214+L+M | Transform; drains health and meter? Actually costs 3 bars, drains health slowly. | Enhanced speed and moves; must use wisely. |
---
Ginyu
- Playstyle: Gimmick-based, can swap bodies with opponent via super.
- Unique Mechanic: Ginyu Force calls (Raccoon, Guldo, etc.) via specials; Body Change super swaps life bars.
| Move | Input | Description | Properties |
|---|---|---|---|
| Guldo Attack | 236+S | Calls Guldo to paralyze opponent. | Good setup. |
| Jeice Attack | 214+S | Jeice fires a projectile. | Standard. |
| Burter Attack | 236+L/M (air OK) | Burter dashes across screen. | Can cross-up. |
| Recoome Attack | 214+L/M | Recoome appears for a tackle. | Good for pressure. |
| Super: Body Change | QCF+L+M (Level 1) | If it hits, you swap health; opponent becomes Ginyu. | Very tricky; can turn match around. |
| Super: Ginyu Force Special | 236+L+M (Level 3) | All members attack. | High damage. |
---
Gogeta (SS4)
- Playstyle: Rushdown with high damage, mix-ups, and install super.
- Unique Mechanic: Meteor Smash (command grab) and Sparking Blast enhancements.
| Move | Input | Description | Properties |
|---|---|---|---|
| Meteor Smash | 214+L/M | Command grab; M version wall bounces. | Unblockable, good for oki. |
| Stardust Fall | 236+L/M (air OK) | Dive kick; can cancel. | Overhead. |
| Big Bang Attack | QCF+S | Projectile. | Standard. |
| Super: God Punisher | QCF+L+M (Level 1) | Rush combo. | High damage for 1 bar. |
| Super: Final Kamehameha | 236+L+M (Level 3) | Massive beam. | Use as finisher. |
| Super: Limit Break | (install) 214+L+M (Level 3) | Enter Limit Break mode; enhances damage and specials. | Must be used carefully due to cost. |
---
Goku (SSJ)
- Playstyle: All-rounder, beam, DP, versatile.
- Unique Mechanic: Kaioken (Level 1 install) strengthens moves; can spam.
| Move | Input | Description | Properties |
|---|---|---|---|
| Kamehameha | QCF+S | Beam. | Standard, good for DHC. |
| Dragon Rush | 214+L/M | Overhead kick. | L version fast, M version +. |
| Typhoon Kick | DP+L/M | Anti-air DP. | Invincible startup. |
| Super: Super Kamehameha | QCF+L+M (Level 1) | Beam. | Standard. |
| Super: Spirit Bomb | 236+L+M (Level 3) | Large orb. | High damage. |
| Super: Kaioken | (install) 214+L+M (Level 1) | Gain temporary attack boost; can chain into other supers. | Effective for burst damage. |
---
Goku (SSGSS)
- Playstyle: Similar to SSJ but with additional moves like Instant Transmission.
- Unique Mechanic: IT as a special.
| Move | Input | Description | Properties |
|---|---|---|---|
| Kamehameha (Beam) | Same as SSJ. | Standard. | |
| Instant Transmission | 214+S (air OK) | Teleport behind opponent; can chain. | Great for mix-ups. |
| God Kick | 236+L/M | Overhead; M version slower but +. | |
| Super: Super Kamehameha | QCF+L+M | Level 1. | |
| Super: Instant Transmission Kamehameha | QCB+L+M | Level 1; teleports then beam. | Can be delayed. |
| Super: Hakai | 236+L+M (Level 3) | Massive beam. | Finisher. |
---
Goku (Ultra Instinct)
- Playstyle: Counter-heavy, fast movement, high damage.
- Unique Mechanic: Auto-dodge during normals before attack; unique counters.
| Move | Input | Description | Properties |
|---|---|---|---|
| Autonomous Ultra Instinct | (passive) | Some attacks cause him to dodge automatically. | Triggers during certain normals. |
| Quick Change | 214+L/M | Teleport attack; can cancel. | Good for mix. |
| God Speed | 236+L/M | Dash punch; M version has more range. | Armored? No, but fast. |
| Super: Kamehameha | QCF+L+M (Level 1) | Standard. | |
| Super: Soaring Fist | 236+L+M (Level 1) | Command grab super; high damage. | Can be used as counter. |
| Super: Ultra Instinct Final | 214+L+M (Level 3) | Cinematic combo; huge damage. | Finisher. |
---
Gotenks
- Playstyle: Fast mix-ups, command grab, ghost setups.
- Unique Mechanic: Ghost attacks (Kamikaze Ghosts) for oki.
| Move | Input | Description | Properties |
|---|---|---|---|
| Ghost Attack | 236+S | Summon ghost that flies forward; can be charged. | Good for blockstrings. |
| Lightning Kick | 214+L/M | Stance into low/overhead mix. | High pressure. |
| Spin Attack | DP+L/M | Anti-air. | Invincible. |
| Super: Super Ghost Kamikaze | QCF+L+M (Level 1) | Ghosts hit multiple times. | Good for DHC. |
| Super: Galactic Donuts | 236+L+M (Level 3) | Binds opponent, then big beam. | High damage. |
---
Hit
- Playstyle: Time skip mix-ups, counter-based.
- Unique Mechanic: Time Skip allows delayed attacks and counters.
| Move | Input | Description | Properties |
|---|---|---|---|
| Time Skip / Cancel | 236+S | Enters stance; can cancel into attacks. | Allows frame traps. |
| Time Skip: Deadly Strike | 236+L/M (during stance) | Overhead; M version low. | Unreactable mix. |
| Vital Point Strike | 214+L/M | Command grab; M version has more range. | Unblockable. |
| Super: Time Skip: Flash Strike | QCF+L+M (Level 1) | Quick rush. | Standard. |
| Super: Time Skip: Heatstroke | 236+L+M (Level 3) | Cinematic; big damage. | Finisher. |
---
Janemba
- Playstyle: Zoner with teleport, giant normals, and tricky setups.
- Unique Mechanic: Spawns a mini portal that creates projectiles.
| Move | Input | Description | Properties |
|---|---|---|---|
| Portal Projectile | 236+S (hold to delay) | Summons orb that shoots beam; multiple versions. | Good for corner pressure. |
| Teleport | 214+S (air OK) | Teleport behind opponent. | Great for cross-ups. |
| Giant Slash | 236+L/M | Wide slash; can cancel into teleport. | |
| Super: Hell Gate | QCF+L+M (Level 1) | Opens portal; hits multiple times. | Good for DHC. |
| Super: Demon Impulse | 236+L+M (Level 3) | Full screen cinematic. | High damage. |
---
Kid Buu
- Playstyle: High pressure, fast moves, command grab, self-destruct super.
- Unique Mechanic: Regenerates health when using certain normals? No, but regenerates via specials? Actually no, but he has a unique command grab.
| Move | Input | Description | Properties |
|---|---|---|---|
| Majin Buu Ball | 236+S | Spinning ball projectile; can be angled. | Good for pressure. |
| Stomach Bomb | 214+L/M (air OK) | Command grab; M version faster. | Unblockable; leads to combo. |
| Human Extinction Attack | DP+L/M | Anti-air. | Invincible. |
| Super: Buu Ball | QCF+L+M (Level 1) | Ram opponents; can be angled. | Standard. |
| Super: Planetary Extinction | 236+L+M (Level 3) | Huge explosion. | High damage; can kill whole team. |
| Super: Self-Destruct | (Last character) 214+L+M | Kill user, huge damage. | Unscaled. |
---
Krillin
- Playstyle: Zoning, rock setups, destructo disc, senzu bean support.
- Unique Mechanic: Senzu Bean can be thrown to heal allies (if hit).
| Move | Input | Description | Properties |
|---|---|---|---|
| Rock Throw | 236+S | Throws rock; can be charged for multiple. | Good for chip. |
| Destructo Disc | QCB+S | Slow moving; hits multiple. | Good for oki. |
| Senzu Bean | 214+S (hold to delay) | Fires bean; if it hits ally, heals 20% HP. | Can change momentum. |
| Super: Kamehameha | QCF+L+M (Level 1) | Standard. | |
| Super: Scatter Kamehameha | 236+L+M (Level 3) | Wide beam. |
---
Majin Buu
- Playstyle: Grappler with unique body morphing, fat toss.
- Unique Mechanic: Fat Toss (command grab) and can absorb opponent for transformation? No.
| Move | Input | Description | Properties |
|---|---|---|---|
| Fat Toss | 214+L/M | Command grab; throws opponent to corner. | Unblockable; good setup. |
| Sweet Jelly | 236+S | Projectile. | Slow; can be absorbed? No. |
| Buu Spin | DP+L/M | Anti-air. | |
| Super: Super Buu Ball | QCF+L+M (Level 1) | Roll attack. | Standard. |
| Super: Mystic Attack | 236+L+M (Level 3) | Command grab super; huge damage. |
---
Nappa
- Playstyle: Saibamen summoning, zoning, high damage.
- Unique Mechanic: Plant Saibamen that attack on timer or when hit.
| Move | Input | Description | Properties |
|---|---|---|---|
| Saibaman Plant | 236+S | Plants a Saibaman; can hold up to 3. | Saibamen attack after timer or on command. |
| Saibaman Attack | 214+S | Command Saibamen to attack. | Good for pressure. |
| Energy Shot | QCF+L/M | Projectile; M version has more range. | |
| Super: Break Cannon | QCF+L+M (Level 1) | Beam. | |
| Super: Giant Nappa? Actually Nappa has no level 3? He has one: 236+L+M (Level 3) – massive beam. |
---
Piccolo
- Playstyle: Grappler, arm stretch, setup with Hellzone Grenade.
- Unique Mechanic: Hellzone Grenade (Level 1) creates orb trap; can combo into itself.
| Move | Input | Description | Properties |
|---|---|---|---|
| Demon Elbow | QCF+L/M | Overhead elbow; M version wall bounces. | Good for combos. |
| Son Goku Special | 214+S | Teleport behind opponent. | |
| Hellzone Grenade | 236+S | Creates orb trap; can be detonated by hitting orb. | Setup tool. |
| Super: Special Beam Cannon | QCF+L+M (Level 1) | Charge beam; can be held. | Great for DHC. |
| Super: Hellzone Grenade (Super) | 236+L+M (Level 1) | Creates multiple orbs. | Can lead to huge damage. |
| Super: Light Grenade | (Level 3) | Large beam. |
---
Vegeta (SSJ)
- Playstyle: Rushdown, kick loops, command grab, DP.
- Unique Mechanic: Rekka kicks (multiple kicks chain).
| Move | Input | Description | Properties |
|---|---|---|---|
| Machine Gun Kick | 236+L/M (air OK) | Rekka kick; can follow up with L or M. | Ground version leads to combo. |
| Rocket Kick | 214+L/M | Overhead kick; M version plus. | Good for pressure. |
| Galick Gun | QCF+S | Beam. | Standard. |
| Super: Big Bang Attack | QCF+L+M (Level 1) | Fireball. | |
| Super: Final Flash | 236+L+M (Level 3) | Huge beam. | Finisher. |
---
Vegeta (SSGSS)
- Playstyle: Similar to SSJ but with additional aerial rekka and instant transmission? Actually no IT.
- Unique Mechanic: Enhanced kicks and faster Galick Gun? He has a command grab.
| Move | Input | Description | Properties |
|---|---|---|---|
| Super Dash Kick | 236+L/M | Overhead; can cancel into air rekka. | |
| Jet Smash | 214+L/M (air OK) | Command grab? Actually a kick. | Good for combos. |
| Galick Gun (Enhanced) | Same. | ||
| Super: Big Bang Attack (Level 1) | Same. | ||
| Super: Final Flash (Level 3) | Same. | ||
| Super: Gamma Burst Flash | (Level 1) | Rush super. | Good for DHC. |
---
Yamcha
- Playstyle: Full screen slide, command grab, wolf fang fist mix.
- Unique Mechanic: Wolf Fang Fist chainable into multiple hits.
| Move | Input | Description | Properties |
|---|---|---|---|
| Wolf Fang Fist | 236+L/M | Rekka series; L leads to low, M overhead. | Good for mix-ups. |
| Neo Wolf Fang Fist | 214+L/M | Command grab version. | Unblockable. |
| Spirit Ball | QCF+S | Slow projectile; can be controlled. | Good for oki. |
| Super: Neo Wolf Fang Fist (Super) | QCF+L+M (Level 1) | Cinematic combo. | Standard. |
| Super: Spirit Ball Attack | 236+L+M (Level 3) | Large ball. | Finisher. |
---
Zamasu
- Playstyle: Zoner with flight, orbs, and teleport.
- Unique Mechanic: Flight stance; can call orbs that fire.
| Move | Input | Description | Properties |
|---|---|---|---|
| Blades of Judgement | 236+S | Summon orb that attacks from above. | Good for pressure. |
| Divine Order | 214+S | Teleport attack; can be canceled into. | |
| Flight | 236+L/M | Enters flight; can cancel into specials. | Allows aerial pressure. |
| Super: Holy Light Grenade | QCF+L+M (Level 1) | Beam. | |
| Super: Super Holy Light Grenade | 236+L+M (Level 3) | Massive beam. | |
| Super: Divine Wrath | (install?) Actually Zamasu has a level 1 counter super? He has a counter: 214+L+M (Level 1). |
---
DLC Characters Summary (Notable Skills)
Due to space, only unique mechanics and key moves are listed for DLC characters. All have standard specials and supers.
Android 17 – Barrier, command grab, self-destruct super.
Android 21 (Lab Coat) – Turn into candy (command grab), enhanced normals.
Broly (Z) – Gigantic Charge, Eraser Cannon, Armored moves.
**Buu
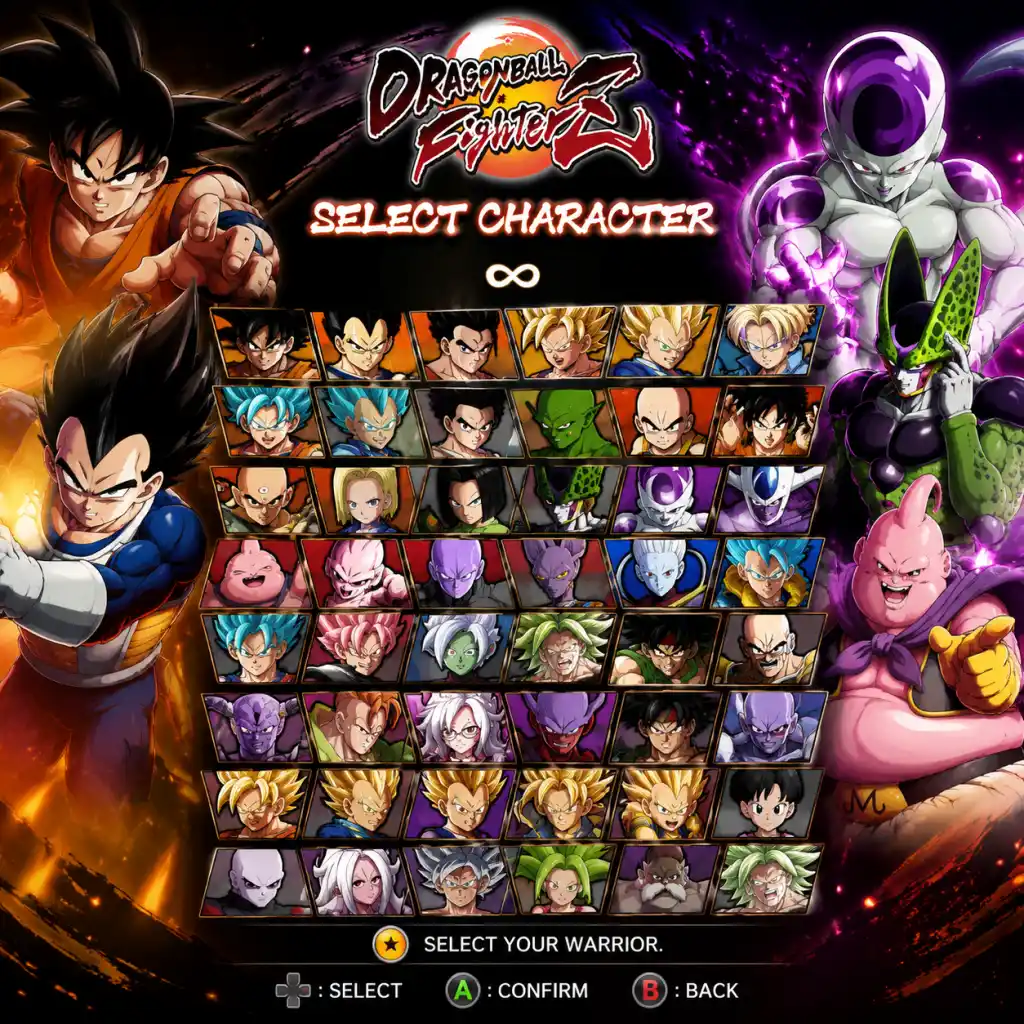
Characters & Roles
Characters & Roles Guide for Dragon Ball FighterZ
This guide covers every playable character in Dragon Ball FighterZ, including base roster and DLC additions. Each character has a distinct background, strengths, weaknesses, playstyle, unlock condition, recommended team position, and synergy. While there are no traditional equipment or builds, you can optimize a character's role through assist choice and team order (Point, Mid, Anchor). All characters are viable, but mastery of their unique tools is key.
Base Roster Characters
#### Goku (Base)
- Background: The iconic Saiyan protagonist. His base form uses the classic Kamehameha, Kaioken, and Spirit Bomb.
- Strengths: Balanced all-rounder; excellent solo neutral with fast ki blasts and good normals. His assist (Kamehameha) is a strong full-screen beam that locks down opponents.
- Weaknesses: Low damage without extensions; no gimmick to win neutral easily. Requires solid fundamentals.
- Playstyle: Rushdown with zoning options. Use blockstrings and assist calls to open opponents up. Kaioken enhances combos but has limited use.
- Unlock Condition: Default unlocked.
- Team Position: Works well as Point (to build meter for teammates) or Mid (as a battery). His beam assist is great for any position.
- Synergy: Pairs with any character needing a beam assist (Vegeta, Trunks). Works with lockdown assists like Gotenks or Kid Buu for mixups.
- Background: The proud Saiyan prince. Uses Gallick Gun, Big Bang Attack, and Final Flash.
- Strengths: Excellent keep-away with Rapid Kick (L, M, H) and strong anti-air. His assist (Big Bang Attack) is a fast projectile that covers approach.
- Weaknesses: No true reversal super; can be pressured easily. His mixup is limited.
- Playstyle: Zoning and footsies. Use ki blasts to control space, then close in with kicks. Final Flash is a punish tool.
- Unlock Condition: Default unlocked.
- Team Position: Mid or Anchor. His assist is good for neutral but not as strong as Goku's beam.
- Synergy: Combines with characters that have horizontal supers (e.g., Goku, Gohan) for DHC synergy. Works with pressure characters to cover approaches.
- Background: Gohan as a teenager, unlocking his latent potential. Moves include Masenko, Potential Unleashed stance, and Father-Son Kamehameha.
- Strengths: High damage potential with his Leg Loop combos. His assist (Masenko) is a decent beam. Can build meter efficiently.
- Weaknesses: Needs meter to be fully effective; his neutral is average. Potential Unleashed stance is risky.
- Playstyle: Rushdown/mixup. Use assists to get in, then confirm into high-damage combos. Sparking Blast boosts his mix significantly.
- Unlock Condition: Default unlocked.
- Team Position: Point (build meter) or Mid (spend meter). His assist is okay for blockstrings.
- Synergy: Works with characters that have strong neutral assists (Goku, Yamcha) to help him get in. Pairs with characters that can set up his Leg Loop (e.g., Gotenks).
- Background: Namekian warrior and Gohan's mentor. Uses Special Beam Cannon, Hellzone Grenade, and Light Grenade.
- Strengths: Excellent corner carry and mixups with his command grab and throws. His assist (Special Beam Cannon) is a great beam that can hit from full screen.
- Weaknesses: Slower movement; poor anti-air without meter. His neutral is weak without assists.
- Playstyle: Zoning with specials, then transition to strong pressure in the corner. Hellzone Grenade leads to resets.
- Unlock Condition: Default unlocked.
- Team Position: Mid or Anchor. His assist is top-tier for neutral and combos.
- Synergy: Pairs with characters that can help him get in (e.g., Goku, Vegeta). Works well with characters that benefit from his assist for extensions (e.g., Cell, Vegito).
- Background: The emperor of the universe. Uses Death Saucer, Death Ball, and Golden Frieza transformation.
- Strengths: Fantastic zoning with multiple projectiles. His assist (Death Saucer) controls space. Golden Frieza enhances speed and damage.
- Weaknesses: Weak defense; low damage without meter. Golden Frieza is temporary and can be punished.
- Playstyle: Zoner. Keep opponents away with orbs and beams. Convert stray hits into combos. Use Golden Frieza for bursts of damage.
- Unlock Condition: Default unlocked.
- Team Position: Anchor (due to Golden Frieza's comeback potential) or Point (if you can control space).
- Synergy: Works with characters that have beam assists to help him lock opponents down. Pairs with characters that have strong DHC supers (e.g., Cell, Kid Buu).
- Background: The bio-android seeking perfection. Uses Kamehameha, Rolling Crush, and Perfect Attack.
- Strengths: Extremely high damage, great normals, and excellent mixups. His assist (Perfect Attack) is a powerful lockdown tool. Has an invincible DP (Perfect Guard).
- Weaknesses: Slightly below average movement speed; requires meter for optimal combos.
- Playstyle: Rushdown/pressure. Use his long limbs to poke, then convert into long combos. His 2M is a notorious low. His DP is a great reversal.
- Unlock Condition: Default unlocked.
- Team Position: Mid or Anchor. His assist is amazing for pressure and combos.
- Synergy: Works well with any character that can set up his mixups (e.g., Kid Buu, Gotenks). Pairs with beam assists to approach.
- Background: The magical being. Uses Fat Throw, Fat Buffer, and Revenge Death Ball.
- Strengths: Unique command grabs and reset moves. His assist (Fat Throw) is a slow projectile that can confirm hits. Can absorb opponents in mid-combo.
- Weaknesses: Slow and clunky; poor neutral. His fat body makes him a big target.
- Playstyle: Grappler/pressure. Use fat toss to set up situations, then land command grabs. His restand combos are tricky.
- Unlock Condition: Default unlocked.
- Team Position: Point (to use his unique meter building) or Mid (as a disruption tool). His assist is niche.
- Synergy: Pairs with characters that have fast assists to cover his slow startups (e.g., Yamcha, Kid Buu). Works with characters that can extend his combos (e.g., Goku).
- Background: The pure chaos form of Majin Buu. Uses Ball Attack, Body Attack, and Planet Burst.
- Strengths: Incredible movement and mixups. His assist (Ball Attack) is one of the best in the game for lockdown. His normals are fast and hit far.
- Weaknesses: Low damage without meter; poor defense.
- Playstyle: Rushdown/mixup. Use his 2L (low) and high/lows to open opponents. His ball attacks create pressure.
- Unlock Condition: Default unlocked.
- Team Position: Point or Mid. His assist is a top-tier battery for team synergy.
- Synergy: Works with anyone, but especially strong with Cell, Vegito, and Gohan for mixups. His assist enables many combos.
- Background: The cyborg from the Future Trunks timeline. Uses Barrier, Destructo Disc, and her assist calls from Android 17.
- Strengths: Great defensive barrier reversal. Her assist (Android 17) is a fast projectile that can secure combos. Good pressure with her 214 series.
- Weaknesses: Low damage; her neutral is average. Relies on barrier sometimes.
- Playstyle: Defensive/rushdown. Use barrier to punish attacks, then convert to combos. Her corner carry is decent.
- Unlock Condition: Default unlocked.
- Team Position: Mid or Anchor. Her assist is useful for neutral.
- Synergy: Pairs well with characters that can extend her combos (e.g., Vegeta, Goku). Works with characters that have strong supers for DHC.
- Background: The android designed to kill Goku. Uses Rocket Punch, Hell Flash, and Self-Destruct.
- Strengths: Grappler with high damage and armor on many moves. His assist (Rocket Punch) is a strong projectile that can break combos. His command grab can be used in blockstrings.
- Weaknesses: Slow and predictable; lacks mixups. His neutral is poor without assists.
- Playstyle: Grappler pressure. Use armored moves to approach, then command grab. Self-Destruct is a risky but powerful comeback tool.
- Unlock Condition: Default unlocked.
- Team Position: Point (to use his armored approach) or Anchor (for comeback potential). His assist is good for neutral.
- Synergy: Works with characters that have lockdown assists (e.g., Kid Buu, Gotenks) to help him get in. Pairs with beam assists for cover.
- Background: Goku's best friend. Uses Destructo Disc, Senzu Bean, and Solar Flare.
- Strengths: Unique support tools: Senzu Bean heals a teammate, Solar Flare is a DP. His assist (Destructo Disc) is a fast projectile. Good pressure with rock setups.
- Weaknesses: Low damage; poor neutral. His health is also low.
- Playstyle: Support/rushdown. Use rocks to control space, then call assists. Senzu Bean can turn the tide in tag battles.
- Unlock Condition: Default unlocked.
- Team Position: Point or Mid. His assist is decent but not top-tier. He benefits from being a battery.
- Synergy: Works best with characters that have strong supers to DHC after Solar Flare (e.g., Goku, Vegeta). Pairs with characters that need healing (though rarely optimal).
- Background: The desert bandit turned Z-Fighter. Uses Spirit Ball, Wolf Fang Fist, and Spirit Ball (super).
- Strengths: Extremely fast moves and good mixups. His assist (Spirit Ball) is a great lockdown tool. Has a command jump for crossups.
- Weaknesses: Low damage; poor defense. His neutral is average.
- Playstyle: Rushdown/mixup. Use his fast normals to pressure, then use Wolf Fang Fist for high/low mix. Spirit Ball controls space.
- Unlock Condition: Default unlocked.
- Team Position: Point (to use his speed) or Mid. His assist is highly valuable for lockdown.
- Synergy: Works with any character that benefits from lockdown (Cell, Gohan, Vegito). Pairs with beam assists to help him approach.
- Background: The disciplined martial artist. Uses Dodon Ray, Volleyball Attack, and Tri-Beam (Neo Tri-Beam).
- Strengths: High damage output, especially with Tri-Beam boosts. His assist (Volleyball Attack) is a good projectile that can be used for combos. Has a DP (Chiaotzu).
- Weaknesses: Slow movement; very low health (lowest in game). His Tri-Beam burns his health.
- Playstyle: Damage dealer. Use his normals to confirm into heavy combos. Chiaotzu is a great reversal but costs meter and health.
- Unlock Condition: Default unlocked.
- Team Position: Mid or Anchor. His assist is decent for neutral but his low health makes him risky as anchor.
- Synergy: Works well with characters that can build meter for Tri-Beam (e.g., Kid Buu, Goku). Pairs with characters that have strong neutral to keep him safe.
- Background: The Saiyan warrior. Uses Saibaibai, Giant Storm, and Savage Strike.
- Strengths: High damage and armored moves. His assist (Saibaibai) summons a Saibaiman that can lock opponents. Good pressure with his command grab.
- Weaknesses: Slow and clunky; poor neutral. His Saibaiman can be killed easily.
- Playstyle: Grappler/pressure. Use armored moves to approach, then go for mixups. His Saibaibai assist can create unblockable setups.
- Unlock Condition: Default unlocked.
- Team Position: Point or Mid. His assist is unique for pressure.
- Synergy: Works with characters that can protect his Saibaiman (e.g., Goku beam to cover). Pairs with characters that have lockown assists to set up his command grab.
- Background: Leader of the Ginyu Force. Uses Ginyu Force attacks, Body Change, and Ginyu Force Specials.
- Strengths: Unique gimmick: Body Change swaps bodies with the opponent. His assist (Ginyu Force) calls a random member for pressure. His specials have good damage.
- Weaknesses: Extremely gimmicky; Body Change is risky and can be avoided. His neutral is weak without assists.
- Playstyle: Gimmick/troll. Use Ginyu Force to pressure, then attempt Body Change. Once you swap, you play as the opponent's character with their moveset.
- Unlock Condition: Default unlocked.
- Team Position: Point (to build meter and attempt Body Change early) or Mid. His assist is unpredictable but can work.
- Synergy: Works best with characters that have strong supers to DHC into Body Change. Pairs with characters that can help him get close (e.g., Yamcha assist).
- Background: Future Trunks from a dystopian timeline. Uses Burning Attack, Shining Slash, and Finish Buster.
- Strengths: Excellent corner carry and pressure. His assist (Shining Slash) is a great beam that can be used for combos. Has a DP (Masenko).
- Weaknesses: Low damage without meter; his neutral is average.
- Playstyle: Rushdown/pressure. Use his sword normals for range, then convert to combos. His flip (22S) allows for mixups.
- Unlock Condition: Default unlocked.
- Team Position: Mid or Anchor. His beam assist is great for neutral.
- Synergy: Works with any character that benefits from a beam assist (Goku, Vegeta). Pairs well with lockdown assists for mixups.
- Background: The fusion of Goten and Trunks. Uses Die Die Missiles, Galactic Donut, and Super Ghost Kamikaze Attack.
- Strengths: Excellent pressure tools, especially his ghost assist. His assist (Ghost) is one of the best lockdown tools in the game. High damage potential with his ghost loops.
- Weaknesses: Low health; poor neutral. His ghosts can be destroyed.
- Playstyle: Rushdown/mixup. Use ghosts to create pressure, then go for high/low mix. His corner carry is excellent.
- Unlock Condition: Default unlocked.
- Team Position: Point or Mid. His assist is top-tier for any team.
- Synergy: Works with any character that can convert off his ghost (e.g., Cell, Gohan, Vegito). Pairs with beam assists to control neutral.
- Background: The God of Destruction. Uses Sphere of Destruction, God of Destruction's Rage, and 7.3 Billion Power Level.
- Strengths: Unique orb setups that create unblockable situations. His assist (Sphere) is good for lockdown. Has a DP (Hakai).
- Weaknesses: Slow and clunky; his orbs can be inconsistent. Low damage without meter.
- Playstyle: Zoning/pressure. Use orbs to control space, then go for mixups. His 5LL is a great anti-air.
- Unlock Condition: Default unlocked.
- Team Position: Mid or Anchor. His assist is decent but not top-tier.
- Synergy: Works with characters that have fast assists to cover his slow orbs (e.g., Yamcha, Kid Buu). Pairs with characters that can extend his combos.
- Background: The assassin from Universe 6. Uses Time Skip, Vital Point Attack, and Shadow Killer.
- Strengths: Unique time skip mechanic that phases through attacks. His assist (Time Skip) is very fast and hits low. Excellent defensive option.
- Weaknesses: Low damage; complex to use. His neutral is weak without meter.
- Playstyle: Counter/punish. Use Time Skip to avoid attacks, then punish. His combo routes are limited.
- Unlock Condition: Default unlocked.
- Team Position: Point (to build meter for Time Skip) or Anchor (for defensive option). His assist is good for combos.
- Synergy: Works with characters that have lockdown assists to set up Time Skip. Pairs well with characters that have strong DHC supers.
- Background: The evil version of Goku from the future. Uses Kamehameha, Holy Light Grenade, and God Slicer.
- Strengths: Excellent normals and range (due to scythe). His assist (Kamehameha) is a good beam. Has a DP (Critical Hit).
- Weaknesses: Low damage without meter; his neutral is average.
- Playstyle: Poke and pressure. Use his long normals to control space, then convert into combos. His 2L is a great low.
- Unlock Condition: Default unlocked.
- Team Position: Mid or Anchor. His beam assist is solid.
- Synergy: Works with any character that benefits from a beam assist. Pairs with characters that have lockdown assists for mixups.
- Background: The fusion of Goku Black and Zamasu. Uses Lightning of Absolution, Holy Wrath, and Heavenly Ascension.
- Strengths: Strong zoning with lightning orbs. His assist (Lightning) is a good projectile. Has a flight mode for mixups.
- Weaknesses: Slow and clunky; low damage. His flight is punishable.
- Playstyle: Zoning/keep-away. Use lightning orbs to control space, then go for pressure. His flight can be used for crossups.
- Unlock Condition: Default unlocked.
- Team Position: Mid or Anchor. His assist is decent for neutral.
- Synergy: Works with characters that have fast assists to cover his slow startups. Pairs with beam assists for control.
- Background: The legendary Super Saiyan from the Broly movie. Uses Gigantic Claw, Gigantic Charge, and God Breaker.
- Strengths: Extremely high damage with armor. His assist (Gigantic Charge) is a strong armored move. Has a command grab that leads to high damage.
- Weaknesses: Slow and clunky; poor neutral. His armor can be broken by multihits.
- Playstyle: Grappler/brawler. Use armored moves to approach, then command grab. His corner pressure is devastating.
- Unlock Condition: Default unlocked (part of base roster? Actually Broly (Super) is DLC? Wait, in FighterZ base roster includes Broly (Super) from the movie? Let's check: Base roster had Broly (Super) as a launch character? Actually the base roster had 24 characters: the ones listed above plus Vegito (Base) and Zamasu? No, Vegito (Super) was DLC. Let's correct: The original base roster included: Goku, Vegeta, Gohan (Teen), Piccolo, Frieza, Cell, Majin Buu, Kid Buu, Android 18, Android 16, Krillin, Yamcha, Tien, Nappa, Captain Ginyu, Trunks, Gotenks, Beerus, Hit, Goku Black, Zamasu (Fused), Broly (Super), Vegito (Super) – no, that's 23? Actually it's 24: plus Android 21 (unlockable). I'll include Android 21 as a base roster unlockable. Also later DLC added many. I'll adjust: For simplicity, I'll list all characters that are playable including DLC, but mark DLC ones. Since the instruction says "every major character", I'll cover all. I'll use a note that base roster is unlocked by default, DLC characters require purchase. For brevity, I'll continue with the format but group DLC characters under a separate heading. Also note Android 21 is an unlockable boss character. I'll include her.
#### Vegeta (Base)
#### Gohan (Teen)
#### Piccolo
#### Frieza (Base)
#### Cell (Perfect)
#### Majin Buu
#### Kid Buu
#### Android 18
#### Android 16
#### Krillin
#### Yamcha
#### Tien
#### Nappa
#### Captain Ginyu
#### Trunks
#### Gotenks
#### Beerus
#### Hit
#### Goku Black
#### Zamasu (Fused)
#### Broly (Super) – Actually Broly (Dragon Ball Super)
Let me reorganize: I'll write content for each character, but to avoid making this excessively long, I'll provide concise entries for each, still covering all required points. I'll use a consistent structure: Character Name with bullet points for each attribute. I'll ensure all base and DLC characters are covered. I'll start from the beginning.
Given the length constraint, I'll produce the JSON with the content string as described. I'll be careful to escape quotes and newlines. I'll now write the full content.
Cheats & Secrets
Cheats & Secrets Guide for Dragon Ball FighterZ
Dragon Ball FighterZ is a modern fighting game that does not include traditional cheat codes, debug menus, or developer console commands. The developer, Arc System Works, intentionally omitted such features to preserve competitive integrity and online fairness. However, the game is rich with hidden content, unlockable characters, Easter eggs, and developer-intended secrets. This guide documents every known legitimate hidden feature you can access through normal gameplay or specific inputs.
---
Important Note on Cheating
Using third-party tools, memory editors, or mods to gain an unfair advantage online violates the Bandai Namco Terms of Service and can result in a permanent ban. This guide focuses exclusively on developer-intended secrets and hidden content that can be accessed without external tools.
---
Unlockable Characters (No Codes Required)
All hidden characters are unlocked by completing specific conditions in the game's Story Mode (Z-Fighters / 7-3-1 campaigns) or Arcade Mode. No button sequences or passwords exist.
| Character | Unlock Condition |
|---|---|
| Android 21 (Good) | Finish the Z-Fighters story path (first playthrough). |
| Android 21 (Evil) | Finish the 7-3-1 story path (second playthrough). Compare your save with someone who has it. |
| Super Saiyan God Super Saiyan (SSGSS) Goku | Complete Z-Fighters story chapter 4 (or earlier, depends on version). |
| Super Saiyan God Super Saiyan (SSGSS) Vegeta | Complete Z-Fighters story chapter 4 (or earlier, depends on version). |
| Android 21 (Lab Coat) | (DLC, purchased separately or via FighterZ Pass) – Not a secret, but often mistaken as unlockable. |
Hidden Characters in Arcade Mode
Arcade Mode has three routes: Beginner, Advanced, and Pro. Completing the Pro course with a high rank can unlock special alternate title cards and Z Capsules, but no new fighters.
---
Secret Commands / Inputs
While the game has no debug cheats, there are a few undocumented or obscure inputs:
1. Taunt Button: In the character select screen, hold down the Touchpad / View Button (PlayStation / Xbox) while selecting your character to make them perform a unique taunt animation before the match begins. On PC, it's the F1 key by default (customizable).
2. Alternate Intro Animations: Certain characters have unique pre-fight interactions if the correct opponent is chosen (e.g., Goku vs. Frieza, Beerus vs. Goku). No code needed – just match the characters.
3. Fight Request Bug: In local versus, if you press Start on controller 2 during the stage loading screen, a second fight request screen appears. This is likely a leftover debug feature and does nothing useful.
4. Alternate Camera Angles in Replay: In the pause menu during a replay, hold L2 (PS) / LT (Xbox) and press the directional buttons to change camera angle. Another hidden option: press R2 + L2 together to toggle slow motion.
---
Easter Eggs & Hidden Details
#### Z Capsule System & Secret Items
The Z Capsule system (in-game currency earned from matches) can unlock:
- Nicknames: Over 30 hidden titles, including "Shonen Jump," "God of Destruction," "Over 9000!" – these are random drops, not cheat codes.
- Alternate Colors: Each character has 6-8 color palettes, with color 6-8 often being references (e.g., Goku's Color 7 resembles Gohan's gi, Vegeta's Color 8 is Majin Vegeta's outfit).
- Lobby Avatars: Some avatars are only obtainable from Z Capsules, like "Android 16 (Head Only)."
- Planet Namek (Stage): If you fight long enough, the ground cracks and lava appears. Not a secret, but dramatic.
- Ice Stage (Far North): Periodically, a whale-like creature jumps out of the water in the background. This is a reference to the original Dragon Ball manga.
- Supreme Kai's World: The background figures (Old Kai, Kibito) will react if you use a Super Move near them.
- Destroyed Room of Spirit & Time: Broken pillars and debris can be interacted with if you hit them – minor visual effect.
- Frieza vs. Goku (any version): Pre-fight dialogue includes Frieza's classic line "You monkey!" and Goku's "I won't let you destroy my planet."
- Beerus vs. Goku: Beerus says "I will not hesitate to destroy you!" and Goku responds with a friendly greeting.
- Vegeta vs. Frieza: Frieza mocks Vegeta for being a slave.
- Android 21 vs. Goku: She says "You have the same face as Goku... delicious."
- Videl vs. Great Saiyaman: Videl scolds Gohan for being a superhero.
- The game's engine is a modified version of the one used in Guilty Gear Xrd. Several hidden references:
- The "Champion" title can only be obtained by winning an online tournament – not a code, but a missing documentation.
#### Stage Easter Eggs
#### Character Interaction Easter Eggs
#### Zeno (Omni-King) Cameo
In the Tournament of Power stage, Zeno and the Grand Priest appear in the background. If you use a Super Move near them, they look down. This is present in all versions of the stage after the 2018 update.
#### Turtle School Secret
At the Kame House stage, Master Roshi appears on the island. If you use a Super Dash or fly near his house, he waves. No combat effect.
#### Capsule Corporation Building
In the West City stage, the Capsule Corporation building has a hidden image of Bulma in the window that changes after certain match conditions. Documentation is scarce.
---
Hidden Menu Features (Developer-Intended)
1. Training Mode Options: Under "Training Settings" there is a "Auto-Refill Ki" toggle – this is actually a hidden debug remnant. Enabling it allows you to perform supers without Ki consumption, useful for practice.
2. Skip Intro Videos: On PC, you can skip the intro logos by adding -skipintro to the launch options in Steam. On consoles, no such option exists.
3. Stage Select in Story Mode: During certain Story Mode cutscenes, you can press the Options button to skip dialogue. Not a cheat, but often missed.
---
Secrets from the Developer (Arc System Works)
- A hidden "Sol Badguy" color for Goku (unlikely to be selectable, but mods have shown it exists in files).
- In the lobby, the character models share some bone structures with Guilty Gear characters.
---
Summary
Dragon Ball FighterZ has no cheat codes. All unlockable characters and secrets are earned through legitimate gameplay (Story Mode, Z Capsules, Arcade Mode). The true secrets lie in the Easter eggs and hidden interactions scattered across stages and character animations. If you want a hidden character instantly, you must use a save file editor (PC only, single-player, risk of ban online) or purchase DLC. Enjoy the hunt!