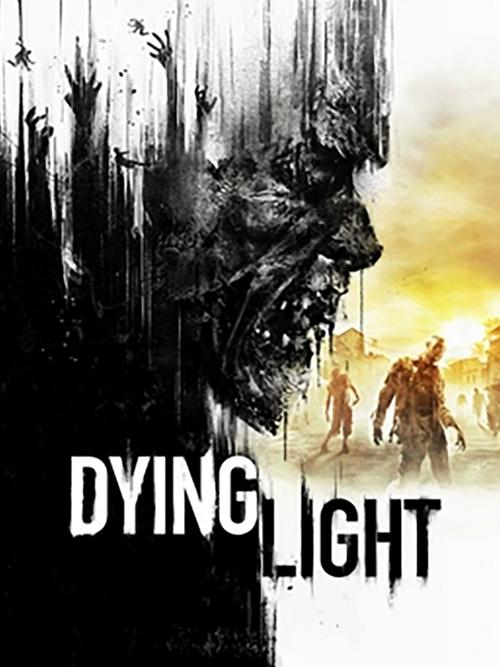
Dying Light
## Game Introduction for *Dying Light* ### Genre - **Action Role-Playing Game (RPG)** with **survival horror** and **first-person parkour** elements. - Often described as **“Dead Island meets Mirror’s Edge”** due to its open-world zombie combat fused with fluid free-running mechanics. ### De...
Download & Installation
Download & Installation Guide for Dying Light
This guide covers legitimate ways to download and install Dying Light on PC (Steam, Epic Games Store, GOG), PlayStation 4/5, Xbox One/Series X|S, and Nintendo Switch. The game is not available on mobile platforms.
---
1. Official Sources & Platforms
| Platform | Store / Service | Notes |
|---|---|---|
| PC | Steam, Epic Games Store, GOG.com | Each store offers the same game; GOG is DRM-free. |
| PlayStation | PlayStation Store | PS4 & PS5 (backward compatible, free upgrade on PS5). |
| Xbox | Microsoft Store, Xbox Game Pass | Xbox One & Xbox Series X\ |
| Nintendo Switch | Nintendo eShop | Cloud version (requires internet streaming). |
---
2. System Requirements (PC)
#### Minimum Requirements
- OS: Windows 7 64-bit
- CPU: Intel Core i5-2500 @3.3 GHz / AMD FX-8320 @3.5 GHz
- RAM: 4 GB
- GPU: NVIDIA GeForce GTX 560 / AMD Radeon HD 6870 (1 GB VRAM)
- DirectX: Version 11
- Storage: 40 GB available space
- Sound: DirectX compatible
- OS: Windows 10 64-bit
- CPU: Intel Core i5-4670K @3.4 GHz / AMD FX-8350 @4.0 GHz
- RAM: 8 GB
- GPU: NVIDIA GeForce GTX 780 / AMD Radeon R9 290 (2 GB VRAM)
- DirectX: Version 11
- Storage: 40 GB available space (SSD recommended)
- Sound: DirectX compatible
- PC Steam/Epic/GOG: A respective store account. No additional accounts needed for single-player; multiplayer requires internet connection and store account.
- PlayStation: PlayStation Network account (free).
- Xbox: Microsoft account. Xbox Game Pass Core/Ultimate required for online multiplayer.
- Nintendo Switch: Nintendo Account (free). Online multiplayer requires Nintendo Switch Online subscription.
#### Recommended Requirements
Note: For 4K or high-framerate, more powerful hardware is needed.
---
3. Platform-Specific Download & Installation Steps
#### 3.1 PC – Steam
1. Install the Steam client from [store.steampowered.com](https://store.steampowered.com) and log in.
2. Purchase Dying Light (or Dying Light: The Following – Enhanced Edition) from the store.
3. Go to Library → find Dying Light → click Install.
4. Choose installation location (ensure at least 40 GB free).
5. Wait for download and verification (may take 1-2 hours on standard internet).
6. Once installed, click Play.
#### 3.2 PC – Epic Games Store
1. Install the Epic Games Launcher from [epicgames.com](https://www.epicgames.com) and log in.
2. Purchase the game from the Epic Store.
3. Go to Library → find Dying Light → click Install.
4. Select installation directory; ensure 40 GB free.
5. Wait for download; launcher will install automatically.
6. Launch from Epic Library.
#### 3.3 PC – GOG.com
1. Install GOG Galaxy from [gog.com](https://www.gog.com) or use offline installers.
2. Purchase Dying Light on GOG.
3. In GOG Galaxy, go to Owned games → click Dying Light → Install.
4. Alternatively, download offline backup installers from your account and run them manually.
5. After installation, launch from Galaxy or directly from the install folder.
#### 3.4 PlayStation 4/5
1. Ensure console is connected to internet and signed into PlayStation Network.
2. Go to PlayStation Store → search Dying Light.
3. Purchase and download. On PS5, you’ll get the PS4 version with free upgrade via backward compatibility (performance mode available).
4. The game will appear in your library. Download size ~30-40 GB.
5. Once installed, launch from home screen.
Tip: If you own the PS4 disc, insert it, and the PS5 will prompt you to download the digital upgrade.
#### 3.5 Xbox One / Xbox Series X|S
1. Sign into Xbox Live (Gold may be required for multiplayer).
2. Open Microsoft Store (or Game Pass app if subscribed).
3. Search Dying Light → purchase or install via Game Pass.
4. Smart Delivery ensures you get the best version for your console.
5. Download ~40 GB. Install automatically.
6. Launch from My games & apps.
#### 3.6 Nintendo Switch
1. Connect Switch to the internet and sign into Nintendo Account.
2. Open Nintendo eShop → search Dying Light.
3. Purchase and download. Note: This is the cloud streaming version (requires stable internet; no offline play).
4. After purchase, download the streaming app (~200 MB). The game is streamed.
5. Launch the app and sign in with your Techland account (optional for cloud saves).
6. Enjoy with good Wi-Fi (5 GHz recommended).
---
4. Account Requirements
Optional but recommended: Create a Techland account for cross-platform save sync (Switch cloud version) and exclusive rewards.
---
5. First Launch Setup
1. Language & Display Settings: On first run, the game may detect system language. You can change text/audio languages in Options.
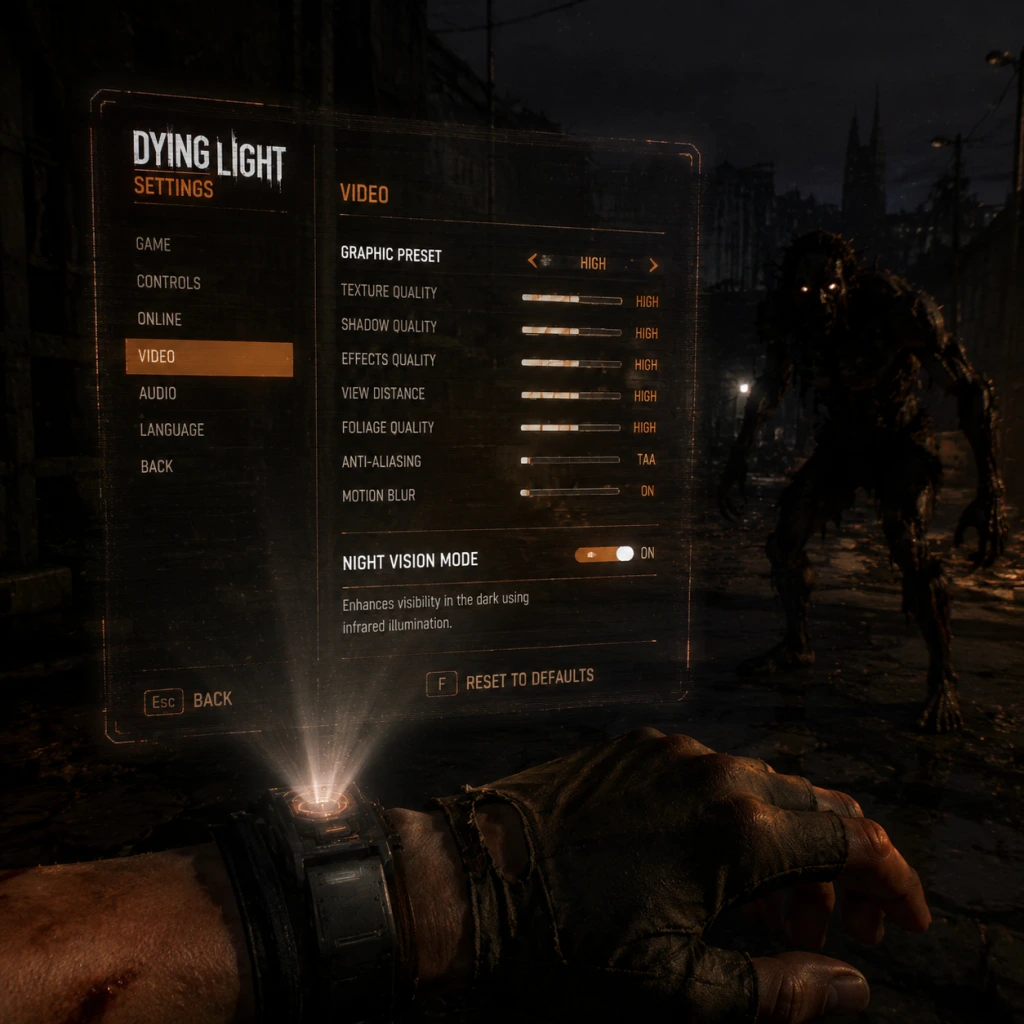
2. Graphics Calibration: PC – Launch the game; go to Options → Video → adjust resolution, V-Sync, quality presets. Use the benchmark tool if available (PC only).
3. Controller Setup: The game supports mouse/keyboard and most controllers (Xbox, PlayStation, Switch Pro). On PC, switch between inputs in Settings.
4. Difficulty: Choose from Normal, Hard, or Nightmare. You can change later.
5. Network Permissions: On Windows, allow the game through firewall if prompted (required for co-op).
6. Save Game: The game creates auto saves and manual saves. Cloud saving enabled by default on all platforms (sign in required).
7. Multiplayer: To play co-op, start the campaign and invite friends via the pause menu. Cross-play is not supported across different platforms.
---
6. Common Installation Errors & Fixes
#### 6.1 PC Errors
| Error | Cause | Fix |
|---|---|---|
| “Missing DLL” (e.g., xinput1_3.dll) | Microsoft Visual C++ or DirectX not installed. | Install latest DirectX and VC++ redistributables from Microsoft. |
| “Unable to initialize Steam” | Steam not running or permission issue. | Launch Steam as administrator; verify game files. |
| “Low disk space” despite having space | Incorrect drive partition or hidden files. | Run “Disk Cleanup” or free up at least 50 GB. |
| “The application was unable to start correctly (0xc000007b)” | 32-bit vs 64-bit conflict. | Install 64-bit DirectX and VC++ packages; reinstall game. |
| Anti-virus blocking installation | False positive. | Disable real-time protection temporarily during installation. |
| Game crashes on launch | Outdated GPU drivers or corrupted install. | Update drivers; verify game files (Steam: Properties → Local Files → Verify Integrity; Epic: Manage → Verify; GOG: Manage → Verify/Repair). |
- PS4/PS5: “Cannot start the application” – Rebuild database (Safe Mode → Option 5). Reinstall if persistent.
- Xbox: “Installation stopped” – Clear local saved games or perform a power cycle (hold power button 10 sec).
- Switch (Cloud): “Poor streaming quality” – Use 5 GHz Wi-Fi; minimize network congestion; move closer to router.
- Ensure your platform is updated to the latest firmware.
- Reboot your device/router.
- Reinstall the game if all else fails (backup saves first).
- Go to Settings → Storage → System Storage → Applications → find Dying Light → check file size (~35-40 GB). Corruption rarely occurs; if issues, delete and reinstall.
- In My games & apps → highlight Dying Light → press Menu button → Manage game and add-ons → check “Install status”. Use “Verify & repair” if available.
- Since it’s a streaming app, no large files to verify. Ensure the app is up to date via eShop or System Settings → Software Update.
- Storage: The base game is ~30 GB; with The Following DLC included, total ~40 GB. An SSD greatly reduces load times.
- Mods: PC players can install mods via Steam Workshop or manually. Always back up original files.
- Co-op: Friend invites work only on the same platform. No cross-play.
- Physical copies: PS4/Xbox discs require a mandatory download of updates (and on PS5, the digital version is needed if you have the disc drive).
- Game Pass Xbox: If your subscription lapses, you can’t play until renewed or purchased.
#### 6.3 General Fixes
---
7. Post-Installation Verification
#### PC
1. Steam: Right-click game → Properties → Local Files → Verify Integrity of Game Files.
2. Epic: In Library, click three dots on Dying Light → Manage → Verify Files.
3. GOG: In GOG Galaxy, click the game → Manage → Verify / Repair.
#### PlayStation
#### Xbox
#### Nintendo Switch
After verification, launch the game. You should see the intro cutscene and be able to start a new game. If you encounter problems, refer to the [official Techland support page](https://techlandgg.com/support) or community forums.
---
8. Additional Tips
---
Enjoy your time in Harran, and watch your step at night!
Game Introduction
Game Introduction for Dying Light
Genre
- Action Role-Playing Game (RPG) with survival horror and first-person parkour elements.
- Often described as “Dead Island meets Mirror’s Edge” due to its open-world zombie combat fused with fluid free-running mechanics.
- Developer: Techland (Polish video game studio, also known for Dead Island and the Call of Juarez series).
- Publisher: Originally published by Warner Bros. Interactive Entertainment (January 2015); later re‑released as a standalone enhanced edition. Techland now publishes the Dying Light series.
- Base Game: January 27, 2015 (Windows, PlayStation 4, Xbox One)
- Enhanced Edition (includes The Following DLC): February 9, 2016
- Dying Light: Platinum Edition (bundles all content): later in 2016
- Nintendo Switch: October 19, 2021 (cloud version) / December 1, 2022 (native port)
- Next-Gen Updates: Free 60 FPS / 1080p upgrades for PlayStation 5 and Xbox Series X|S (December 2021)
- PC: Steam, Epic Games Store, GOG (DRM-free)
- Consoles: PlayStation 4, PlayStation 5 (backward compatible with enhancements), Xbox One, Xbox Series X|S (optimized), Nintendo Switch (native port, no cloud streaming required)
- Note: No mobile versions; the game is not available on Amazon Luna or GeForce Now as of 2025.
- Locating Dr. Zere (the scientist with the file)
- Protecting the Antizin supply (a temporary suppressant for the infection)
- Confronting Rais and his army
- Choosing between escape and a cure (especially in the expansion The Following)
- Location: Harran, a fictional city in Turkey (though culturally and architecturally Middle Eastern).
- Atmosphere: A sprawling urban environment divided into two main zones:
- Day/Night Cycle: The game’s most defining feature. During the day, Infected are slow and avoid sunlight. At night, they become aggressive Volatiles—fast, deadly predators that hunt you with unrelenting ferocity. Night missions force players to rely on stealth, agility, and UV light to survive.
Developer & Publisher
Release Timeline
Platforms
---
Story Overview
Dying Light is set in the fictional, quarantined city of Harran (inspired by real‑world Middle Eastern locales). A mysterious global pandemic has turned most of the population into vicious, zombie‑like creatures—the “Infected.” You play as Kyle Crane, an undercover Global Relief Effort (GRE) agent sent into Harran to retrieve a highly sensitive file from a rogue scientist.
Crane’s mission quickly spirals into a fight for survival, forced alliances, and moral dilemmas. He must navigate the desperate factions of survivors (the Tower, led by Harris) and the brutal, power‑hungry warlord Rais, who controls the city’s weapons and resources. The story explores themes of sacrifice, humanity’s resilience, and the cost of playing hero in a world that has already fallen.
Key plot points revolve around:
---
Setting
- Slums – Dense, decaying residential areas with tight alleyways and vertical climbing opportunities.
- Old Town – More affluent district with historic buildings, wider streets, and open plazas.
---
Main Characters
| Character | Role | Description |
|---|---|---|
| Kyle Crane | Protagonist | GRE operative with a mysterious past. His actions shape the fate of Harran. |
| Jade Aldemir | Ally | Tough, resourceful survivor who runs supply missions for the Tower. Early love interest and moral anchor. |
| Rais | Antagonist | Charismatic warlord who controls the city’s water and weapons. His tactical brilliance makes him a threatening foil. |
| Dr. Zere | Scientist | Creator of the Antizin. Holds the key to a potential cure—or a weapon. |
| Harris Brecken | Tower leader | Pragmatic leader of the largest survivor group, focused on order and protection. |
Core Appeal
- Fluid Parkour: The movement system is the star of the game. Crane can climb walls, slide under obstacles, vault over fences, and zip across rooftops with seamless transitions. Mastery of parkour is essential for survival, especially at night.
- Brutal Combat: Fight Infected and human enemies using a vast array of melee weapons (pipes, machetes, axes) and firearms. Weapons degrade and need repair, encouraging scavenging and crafting. Combat is visceral, with dismemberment and blood spatter.
- Day/Night Dynamic: The game completely shifts tone after dark. Stealth becomes paramount. The introduction of Night Hunter mode (PvP) adds a competitive layer where one player controls a powerful Volatile.
- Crafting & Progression: Level up skills in three skill trees (Power, Agility, Survivor). Unlock new parkour moves (like the khopesh throw and vault kick) and combat abilities. Craft medkits, throwables, and weapon modifications.
- Fans of open‑world first‑person games (especially those who enjoyed Dead Island, Far Cry, or Mirror’s Edge).
- Zombie lore enthusiasts who appreciate a gritty, realistic apocalypse with a day/night twist.
- Co‑op gamers who want to play through a campaign with up to three friends.
- Parkour and movement‑focused players (the free‑running system is a major selling point).
- Age rating: M for Mature (ESRB 17+) due to violence, gore, and strong language.
---
Target Audience
---
Game Modes
1. Single‑Player Campaign: Fully offline, story‑driven experience with all cutscenes and side quests. Difficulty scales with player skill. New Game+ available.
2. Co‑operative (Online): Up to 4 players can join the host’s game. Progress is shared (but each player keeps their own inventory/ XP). Cross‑platform play is not supported.
3. The Following – Expansion Campaign: A massive new map (rural Harran countryside) with a drivable buggy, new story lines, and multiple endings.
4. Bozak Horde: A challenge mode with timed arena trials (can be played solo or co‑op).
5. Be the Zombie (PvP): One player becomes the Night Hunter, a powerful Volatile, and invades another player’s game. The survivor defends against waves, while the Hunter tries to eliminate them. This mode can be toggled on/off.
6. New Game+ (post‑2019 update): Carry your gear and skills into a second playthrough with increased difficulty.
---
Online / Offline Support
| Feature | Online | Offline |
|---|---|---|
| Single‑player story | ✓ (optional) | Full support |
| Co‑op | Required | Not available |
| Be the Zombie (invasion) | Required | Not available |
| Leaderboards (challenges) | Required | Not available |
| Cloud saves | Must sign in to platform account | Supported locally |
- Always‑online DRM? No. The base game and all expansions can be played entirely offline once installed. Only multiplayer and cloud saves require internet.
- The Following (Feb 2016) – The largest expansion, effectively a new game. Adds a huge rural region, drivable buggies (with upgrades), new enemies (such as the Demolisher and Volatiles on the open road), and multiple endings. Very highly recommended.
- Cuisine & Cargo – Two quarantine zones with extra missions.
- The Bozak Horde – A challenge arena with 16 trials, rewards a unique bow.
- Ultimate Survivor Bundle – Cosmetic outfits and weapon blueprints.
- Harran Ranger Bundle – A bow and arrow set plus an outfit.
- Platinum Edition – Bundles the base game + all DLC (The Following, Bozak, Cuisine & Cargo, plus all weapon packs and skins).
---
DLC & Expansions Overview
Major Expansions
Smaller DLC Packs
Note: All DLC is included in the Enhanced Edition and Platinum Edition. No “pay‑to‑win” items; all DLC is purely cosmetic or adds gameplay content.
---
What Makes Dying Light Unique
1. Dynamic Day/Night Cycle: No other zombie game has such a drastic shift in gameplay between day and night. Day is cautious exploration; night is a frantic stealth horror where your only hope is to outrun the Volatiles.
2. True Parkour in an Open World: The movement system is not just traversal; it’s a combat tool, a puzzle, and a survival skill. Wall‑running, ledge grabs, and slide‑kicks make you feel like a zombie‑apocalypse ninja.
3. Weapon Degradation & Crafting: Every weapon has a limited lifespan, forcing you to constantly scavenge, repair, and upgrade. This creates a tension between using powerful gear and conserving it for dire situations.
4. Seamless Co‑op: Up to four players can explore the entire Harran without loading screens or lobby restrictions. Story progress is shared, and co‑op quests are available.
5. The Following Expansion’s Buggy: A customizable, drivable vehicle with its own skill tree—unique among its peers. It transforms the rural landscape into a high‑speed zombie‑stomping sandbox.
---
Final Verdict
Dying Light remains a benchmark for first‑person zombie games nearly a decade after its release. Its mix of parkour, survival crafting, and terror‑induced night missions creates a loop that is both addictive and terrifying. With the Enhanced Edition and Platinum Edition now widely available, you get a complete package of content. Whether you’re a solo player, a co‑op group, or a PvP enthusiast, Harran will keep you coming back long after the credits roll.
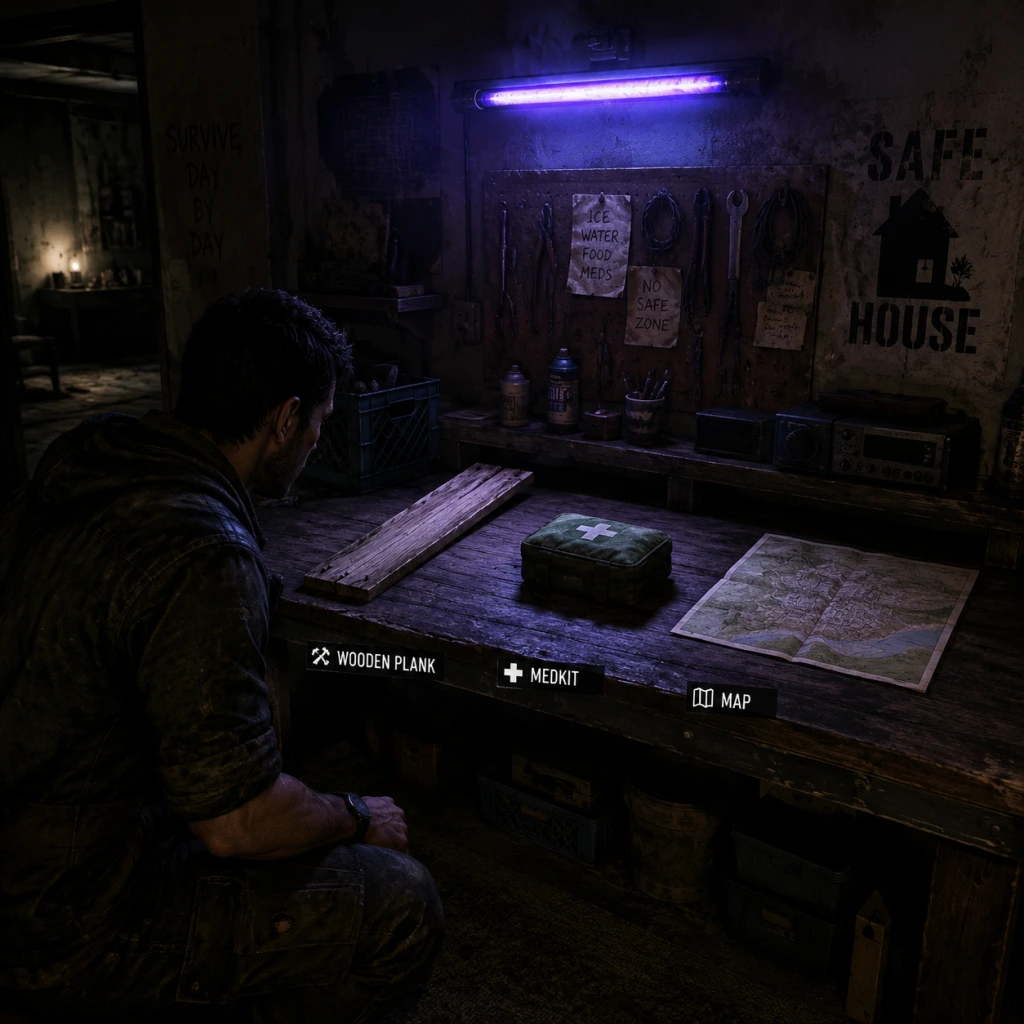
Getting Started
Getting Started Guide for Dying Light
This guide is designed for brand-new players who have just installed Dying Light and want to survive their first day in the zombie-infested city of Harran. We'll cover everything from your first hour to key priorities and common mistakes. Since there is no character creation—you play as Kyle Crane, a GRE operative dropped into the quarantine zone—you can jump straight into the action.
First Hour Walkthrough
Prologue: The Crash and the Slums
1. Game start: You're on a crashing helicopter. The opening cinematic ends with you waking up in an apartment near the Tower (the main safe house).
2. Learning the ropes: Follow the linear tutorial sequence. You'll be taught:
- Basic movement (sprint, jump, climb)
- Melee combat (light attack, heavy attack, block)
- Using the Survivor Sense (Q on PC, Right Bumper on console)
- First aid (crafting bandages from cloth)
3. First task: Find your way to the Tower. Use rooftops—avoid the streets where Volatiles lurk.
4. Meet the cast: You'll encounter Jade Aldemir and Harris (early allies). They'll guide you to the Tower and give you your first real mission: find a vial of antizin (the immunity drug) for a sick survivor.
5. First combat tutorial: You'll fight a few slow biters (shamblers) and learn how to use pipes and planks. Finishing moves are unlocked later.
6. Reaching the Tower: Once inside, you'll meet Spike, Brecken, and other survivors. The Tower becomes your hub.
First Real Mission: Awakening
- Objective: Reach the Bazaar (a market area) and get antizin.
- Key moment: You'll face your first viral (fast zombies) near the Bazaar. Use parkour to evade until you find the item.
- After returning to the Tower, you'll unlock the safe house fast travel and the crafting system.
Controls Summary (All Platforms)
PC (Keyboard & Mouse)
| Action | Key |
|---|---|
| Move | WASD |
| Look/Sprint | Mouse / Shift |
| Jump | Space |
| Crouch/Slide | C |
| Melee Attack | Left Click |
| Heavy Attack | Hold Left Click |
| Block | Right Click |
| Throw Weapon | Q |
| Survivor Sense | Q (tap) |
| Interact | E |
| Inventory | I |
| Map | M |
| Grappling Hook (later) | F |
| Use Item | 1-5 |
| Crafting | Tab > Crafting |
PlayStation 4/5
| Action | Button |
|---|---|
| Move | Left Stick |
| Look | Right Stick |
| Sprint | L3 (press left stick) |
| Jump | X |
| Crouch/Slide | Circle |
| Melee Attack | R2 |
| Heavy Attack | Hold R2 |
| Block | L2 |
| Throw Weapon | R1 |
| Survivor Sense | R1 (tap) |
| Interact | Square |
| Inventory | Touchpad left side |
| Map | Touchpad right side |
| Use Item | Directional up |
| Quick Weapon Switch | L1 + face buttons |
Xbox One/Series X|S
| Action | Button |
|---|---|
| Move | Left Stick |
| Look | Right Stick |
| Sprint | LSB (press left stick) |
| Jump | A |
| Crouch/Slide | B |
| Melee Attack | RT |
| Heavy Attack | Hold RT |
| Block | LT |
| Throw Weapon | RB |
| Survivor Sense | RB (tap) |
| Interact | X |
| Inventory | View button (two squares) |
| Map | Menu button (three lines) |
| Use Item | D-pad up |
| Quick Weapon Switch | LB + face buttons |
Nintendo Switch
| Action | Button |
|---|---|
| Move | Left Stick |
| Look | Right Stick |
| Sprint | Press left stick |
| Jump | B |
| Crouch/Slide | A |
| Melee Attack | ZR |
| Heavy Attack | Hold ZR |
| Block | ZL |
| Throw Weapon | R |
| Survivor Sense | R (tap) |
| Interact | Y |
| Inventory | Minus (-) |
| Map | Plus (+) |
| Use Item | D-pad up |
| Quick Switch | L + face buttons |
UI Overview
HUD Elements (From top left to bottom right)
- Health bar: Red bar in top-left corner. Takes damage from zombies, falls, and bites.
- Stamina bar: Green bar under health. Depletes when sprinting, climbing, or heavy attacking. Recharges when you stop.
- Quest tracker: Top-right shows current objective and distance.
- Compass: Top-center shows cardinal directions and marker symbols.
- Weapon & Inventory: Bottom-right shows currently equipped weapon, its durability, and quick item slots (1-5).
- Survivor Sense pulse: When you tap the sense button, zombies and lootables glow white/orange briefly.
- XP bars: Occasionally shown for Survival, Agility, and Power skills—leveling these unlocks abilities.
- Backpack: Tab/Button to open inventory. Categories: Weapons, Items, Crafting, Quest Items, Map.
- Crafting: Access via Tab > Crafting or from a workbench. Shows recipes you have materials for.
- Map: Overworld map with safe houses, quests (yellow diamonds), and discovered locations.
- Skills: Submenu shows three skill trees: Survivor (parkour, zipline, etc.), Agility (sprinting, climbing), and Power (combat moves).
- Explore rooftops: They are safe zones from ground-level zombies.
- Loot everything: Even if you don't need it right now, stockpile metal parts, cloth, alcohol, gauze, and duct tape.
- Complete all early side quests: They give XP and gear. The best early side quests are from Spike (weapons) and Gazi (free skill points).
- Parkour everywhere: Stamina increases with use. Practice wall runs, slides, and jumps.
- Craft and repair: Repair weapons using metal parts at workbenches. Don't throw away blue/green quality weapons—repair them.
- Don't fight groups: Early weapons break fast. Lure zombies one at a time or simply run.
- Don't stay in the streets at night: Volatiles can one-shot you. Head to a safe house or climb high.
- Don't ignore the tutorial: Button prompts and objective markers are your friend.
- Don't hoard weapons without considering durability: A broken weapon is useless. Use them before they break, or repair if you have parts.
- Don't sell crafting materials: You'll need cloth, metal, and chemicals for medkits, lockpicks, and later upgrades.
- Don't waste lockpicks on red locked chests: They require higher lockpicking skill. Only attempt white (easy) or green (medium) locks early on.
True Inventory UI
Essential Early Objectives
1. Complete the Prologue – Unlocks the Tower and basic systems.
2. Unlock the first safe house – The Tower is a safe zone; sleep to advance time.
3. Learn to craft medkits – Requires 2 bandages + 1 alcohol or antiseptic. You'll find these in medicine cabinets.
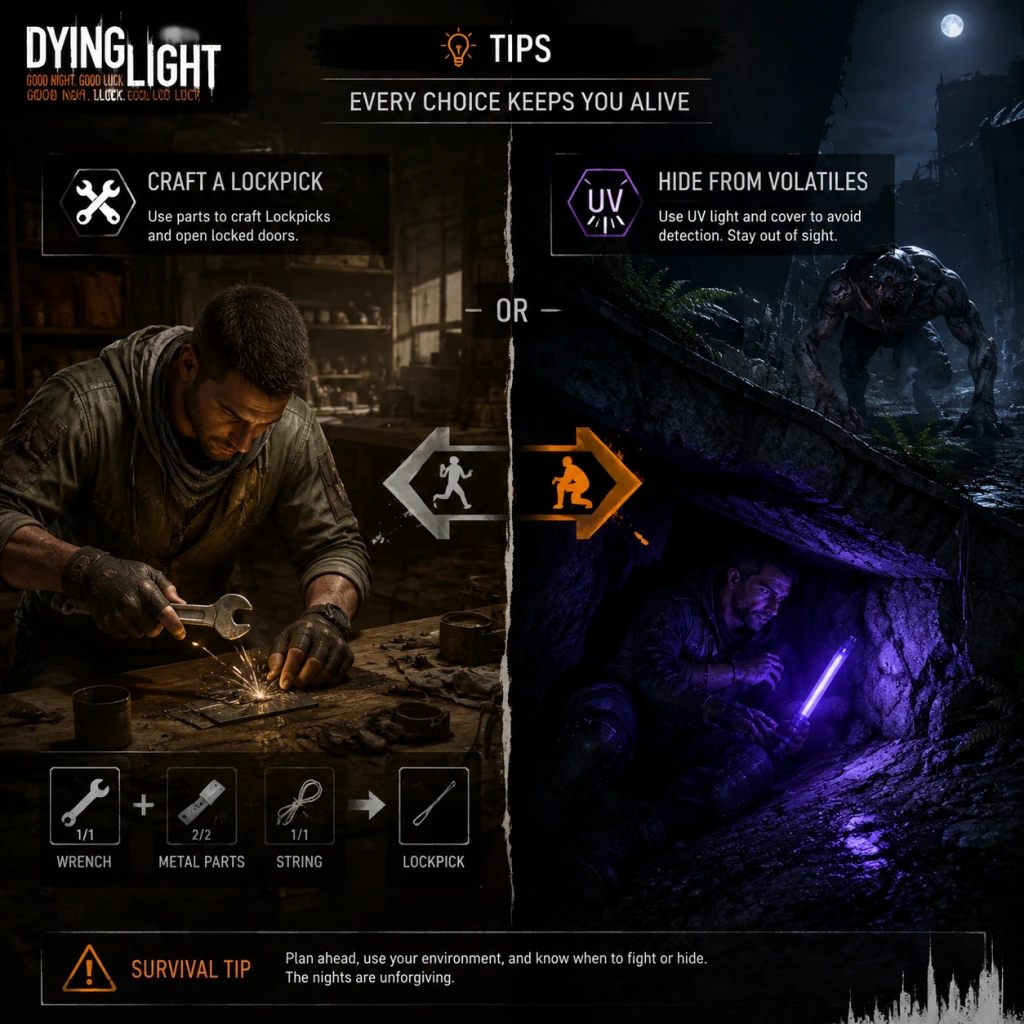
4. Craft lockpicks – You'll need 1 metal part. Lockpicks open many doors and containers early on.
5. Complete side quest “The First Assignment” (from Spike) – Gives you a blueprint for a better weapon.
6. Reach Survivor Rank 2 – Unlocks new recipes (e.g., firecrackers, molotovs).
7. Stay inside at night – Until you have decent gear and a firearm, avoid the dark.
What To Do First and What To Avoid
Do First
Avoid
Early Resource Priorities
| Resource | Use | Early Acquisition | Priority |
|---|---|---|---|
| Cloth | Medkits, bandages | Loot from medical cabinets, trash bins | High |
| Metal Parts | Weapon repair, lockpicks | From blueprints, desks, toolboxes | High |
| Alcohol / Antiseptic | Medkits | Medicine cabinets, pharmacies | High |
| Gauze | Medkits (alternate) | Same as cloth | Medium |
| Duct Tape | Weapon upgrades, repair | Hardware stores, workbenches | Medium |
| Chemicals | Firecrackers, molotovs | Chemistry labs, garages | Medium |
| Nails / Scrap | Weapon mods (e.g., shock) | From boxes, construction sites | Low early |
| Coins | Buying ammo/weapons from traders | Only purchase if you have extra | Low |
Common Beginner Mistakes
- Sprinting everywhere: Drains stamina, and you can't attack. Walk or jog until you need to escape.
- Not using Survivor Sense: Tap it every few seconds to highlight enemies and loot.
- Fighting at night: Even with a good weapon, Volatiles are tough. Sleep until morning (press sleep at safe house).
- Ignoring the parkour upgrade paths: Agility skills like “Rope Swing” and “Wall Run” change gameplay. Invest early points there.
- Using the same weapon for too long: We have durability. Switch weapons mid-fight.
- Forgetting to repair: Weapons can be repaired up to their durability value. Use a workbench (press Tab > Crafting > Repair).
- Selling rare weapon mods: Blueprint mods (like fire, electricity) should be applied to weapons, not sold.
- [ ] Complete the prologue and reach the Tower.
- [ ] Accept and complete “Awakening” main quest.
- [ ] Collect 2 cloth, 1 alcohol/antiseptic to craft first medkit.
- [ ] Collect at least 2 metal parts to craft 2 lockpicks.
- [ ] Unlock the first safe house (Tower) and sleep to set daytime.
- [ ] Complete “The First Assignment” side quest from Spike for weapon blueprint.
- [ ] Explore the immediate rooftops around the Tower to find hidden loot (white glowing objects).
- [ ] Locate a workbench (in the Tower basement) and repair your first weapon.
- [ ] Use Survivor Sense to identify threats before moving.
- [ ] Avoid entering the sewers or staying outside after sunset (check your watch—red/black colors).
- [ ] Practice parkour: climb the water tower next to the Tower, slide down, wall run.
- [ ] Save your game by sleeping in the safe house (main menu save also works).
- Dying Light is about movement. The better you parkour, the easier the game becomes.
- Side quests are not optional—they give skill points and valuable gear.
- Don't rush the main story. Take time to loot, upgrade, and learn the map.
- Switch to the following DLC later—it has a vehicle and a different map, but complete the main game first for context.
Day-One Checklist
Final Advice
Good luck, survivor. The night is long… but the rooftops are free.
Core Gameplay
Core Gameplay Guide for Dying Light
This guide breaks down the fundamental gameplay systems of Dying Light and organizes them into player progression tiers: Early Game, Mid Game, Late Game, and Endgame. Each tier describes the core loop, combat, exploration, quests, economy, and character growth specific to that stage.
Core Gameplay Loop (All Tiers)
1. Day Cycle: Loot buildings, complete missions, fight standard zombies (Biters, Virals).
2. Night Cycle: Night brings more dangerous infected (Volatiles, Night Walkers); use stealth, UV lights, and stamina management to survive. Rewards: double XP for night activities.
3. Scavenge → Craft → Upgrade: Collect materials (metal, fabric, chemicals) to craft medkits, lockpicks, weapon parts. Upgrade weapons with blueprints.
4. Combat & Parkour: Melee and ranged combat fused with parkour movement (climb, slide, vault, swing).
5. Quest Progression: Main story quests advance the plot; side quests and random encounters provide XP, loot, and faction reputation.
6. Leveling: Three primary skill trees (Survivor, Agility, Power) plus Legend levels in Endgame.
Combat & Interaction Systems
- Melee: Left click attacks, right click blocks (timed block stuns), space + left click for stomp on downed enemies. Weapons have durability; repair limited times.
- Parkour Moves: Sprint + jump to climb, crouch to slide, grapple hook (mid-game), drop kick (skill), crane swing.
- Ranged: Guns (pistols, rifles, shotguns), throwable weapons (knives, axes), grenades, molotovs. Ammo is scarce.
- Special Moves: Kick (knocks back, saves durability), vault over enemies, tackle (unlocked later).
- Interaction: Search containers, open locked doors (lockpicking mini-game), use crafting stations, talk to NPCs, activate UV lights.
- Night Tools: UV flashlight (stuns Volatiles), flares (create safe zones), camouflage consumable (distract viruses).
- Core Loop: Start in the Slums. Learn basics: looting, basic combat, parkour climbing. Avoid night at all costs.
- Combat: Use pipes, planks, wrenches. Stamina low. Focus on hit-and-run tactics. Kick to create space. Use environmental traps (spikes, explosive barrels).
- Exploration: Stick to rooftops and safe zones. Unlock safe houses (sleep to pass time). Find airdrops and collect valuables.
- Quests: Main story up to "The Pit" or "Pact with Rais" (Act I). Side quests like "The Prologue" and "Saving Dr. Camden".
- Economy: Cash scarce. Sell valuables (gold watches, electronics). Buy only essential crafting materials (fabric, metal parts). Save cash for later weapon blueprints.
- Character Growth:
- Build Tip: Allocate early points to Survivor tree for "Grappling Hook" and lockpicking efficiency. Agility tree for stamina recovery.
- Example: Use a crafted Pipe Wrench (blueprint from safe house) with electrical mod to stun biters. Hit once, backpedal, repeat.
- Core Loop: Move to Old Town after unlocking fast travel. More vertical parkour, tougher enemies (Goons, Demolishers, Volatile introduced). Day/night cycles become manageable.
- Combat: Obtain blue/purple weapons (e.g., Volatile Hunter Bat, Khopesh). Use crafting mods (Circuit Board + Metal Parts) for fire/shock damage. Begin using firearms sparingly.
- Exploration: Unlock grappling hook (Survivor level 12) – huge mobility upgrade. Explore rooftops, mystery interiors, Quarantine Zones.
- Quests: Main story Acts II-III (e.g., "A Gathering of Parties", "Ground Control"). Side quests for survivors/GRE (e.g., "The Incident", "Radioactive Zone"). Locked missions require night runs.
- Economy: Start selling surplus weapons. Buy blueprints from quartermasters (e.g., Angel Sword XP). Flashlights and UV bars become necessary. Invest in buggy parts if playing The Following DLC.
- Character Growth: Focus on Survivor tree for Grappling Hook Mastery (pull enemies, faster traverse). Agility tree for Air Drop (reduce fall damage) and Slide. Power tree for Tackle and Ground Pound.
- Build Tip: Hybrid build – invest in Survivor for grappling, Agility for stamina, and Power for damage. Use boosters (speed, stamina) from looted chemicals.
- Example: In Old Town, use Grappling Hook to pull a Demolisher off a ledge, then finish with Dropkick and stomp. Craft an Electric Machete (blueprint from side quest) to stun groups.
- Core Loop: With Survivor maxed (level 20), focus on final story missions and The Following expansion if owned. Buggy gameplay becomes central.
- Combat: Gold-tier weapons (e.g., Korek Machete from easter egg, Death’s Touch). Use King modification slots for maximum damage. Firearms: silenced pistols for stealth, shotguns for crowds. Camouflage consumable for Volatile avoidance.
- Exploration: The Following introduces a semi-open countryside with buggy. Upgrade buggy with UV lights, nitro boost, spikes. Crawler dungeons and boss Volatiles.
- Quests: Main story finale ("The Awakening" or "The End"). In The Following, complete “The Trust” and “The Heist”. Side missions: “Uncle Jack’s Dairy”, “Lost Patrol”.
- Economy: Cash abundant. Buy gold-tier weapon blueprints from vendors (e.g., Volatile Hunter Bat with King mod). Trade surplus valuables for materials. Buggy parts cost but critical.
- Character Growth: Max all three trees (Survivor 24, Agility 24, Power 24). Begin earning Legend levels (XP from any action). Legend levels provide passive boosts: +50% melee damage, +25% stamina regen, etc.
- Build Tip: Pure Legend grind: equip Volatile Hunter Bat (crafted with King mods) and spam tackle/dropkick for Power XP. Use grapple + stomp combo for Agility XP. Night runs for double XP.
- Example: In The Following, drive buggy with UV lights into a Volatile nest, exit, use Camouflage, then Molotov + Dropkick to clear. Grapple away when surrounded.
- Core Loop: After completing main story and The Following (or both), the goal is to reach Legend level 250 (max). Engage in repeatable challenges, Prison Heist speedruns, Bozak Horde, Hellraid (DLC), and Be the Zombie PvP.
- Combat: All weapons legendary (gold). Use Korek Machete (infinite durability via secret code) or Death’s Touch. Legend skills provide critical hits, stagger chance, resistance.
- Exploration: New Game+ resets story but keeps all gear and levels. Revisit all locations for high-difficulty loot. The Following New Game+ increases Volatile spawns.
- Endgame Quests/Activities:
- Economy: Infinite money via selling DLC weapons or duplicating (glitch). Ammo and materials irrelevant; buy everything from quartermaster.
- Character Growth: Legend trees (Melee, Ranged, Parkour, Survival). Prioritize Melee damage + Stamina. At Legend 250, you are essentially a god: one-hit kill most enemies, infinite stamina with boosters.
- Build Tip (Ultimate):
- Example: Prison Heist run – use Grappling Hook + Dropkick to secure hallways, Buggy (if in The Following) to speed through, use King-modded Bat to one-shot Demolishers in final arena. Finish under 15 minutes for top rewards.
---
Player Progression Tiers
Early Game (Levels 1–8, Slums)
- Survivor rank: Unlocks basic skills like grapple hook (level 12) and camouflage (later).
- Agility: Increase by parkour actions (climbing, sliding). Gives stamina boosts and parkour moves.
- Power: Increase by melee kills. Unlocks power attacks and dropkick.
Mid Game (Levels 9–15, Old Town)
Late Game (Levels 16–20, The Following DLC & Final Story)
Endgame (Legend Levels, New Game+, Activities)
- Prison Heist: Timed dungeon, rewards gold-tier weapons and King mods. Requires efficient parkour and combat.
- Bozak Horde: Challenge arena, rewards Bows (crossbow, normal bow) and unique blueprints.
- Hellraid: (DLC) Co-op dungeon crawl with loot and new weapon types.
- Be the Zombie: 1v4 PvP where one player controls a Night Hunter, others survive.
- Sable’s Stash: NPC in Old Town, farm rewards.
- Weapon: Volatile Hunter Bat + 3 King mods (damage, handling, durability).
- Skills: Maxed Legend Melee (crit chance, damage), Maxed Legend Survival (health regen, resistance).
- Consumables: Always have Military Medkits, Boosters (speed + stamina), Flares.
- Tactic: Spam dropkick + stomp for instant kills, grapple hook to reposition, use camouflage to bypass night hordes.
---
Summary Table
| Tier | Levels | Key Location | Main Activity | Core Equipment |
|---|---|---|---|---|
| Early | 1-8 | Slums | Learn parkour, avoid night | Pipes, planks, pipe wrench blueprint |
| Mid | 9-15 | Old Town | Grappling hook mobilité, side quests | Blue/purple weapons, electric machete |
| Late | 16-20+ | The Following / Final story | Buggy upgrades, story finale | Gold weapons, King mods, full skills |
| Endgame | Legend | Any (NG+, Prison) | Legend grind, challenges, PvP | Korek Machete, maxed Legend perks |
Game Tips
Game Tips for Dying Light
This guide collects essential tips for every stage of your journey in Harran, from your first nightfall to mastering the hardest challenges. Tips are grouped by category and include explanations of why they work and when to use them.
---
Combat Tips
#### Beginner: Use Your Environment to Stun Zombies
- Tip: Kick zombies into walls, cars, or off ledges. A well-aimed kick (default Q on PC) sends them stumbling, leaving them open for a ground-pound or a head stomp.
- Why: It costs no stamina, can be chained, and stuns multiple enemies if they line up. It also prevents damage from random swipes.
- When: Always in early game; later when conserving weapon durability against weak foes.
- Tip: After unlocking power moves, use the dropkick (sprint + kick) to send single zombies flying, knocking down groups. Ground pound (jump + heavy attack while aiming down) crushes prone enemies.
- Why: Dropkick is excellent for clearing ledges or buying space. Ground pound deals area damage and can instantly kill biters on lower difficulties.
- When: Use dropkick when surrounded or facing a viral. Ground pound when you’ve knocked a group over (e.g., after a dropkick).
- Tip: Apply shock (electric weapon, star mod) then hit with a fire weapon (or throw a firecracker into a puddle of water.) The resulting stun + burn chain multiplies damage over time.
- Why: Electricity stuns, fire deals DoT. Together, they stack damage and prevent the zombie from attacking for several seconds.
- When: Against spitters, virals, or groups of biters. Avoid using on flammable surfaces if you’re standing in them.
- Tip: In the Slums and Old Town, rooftops are your safe zones. Before entering a new area, scan for yellow paint, dangling wires, and ledges. Practice chaining jumps without touching ground.
- Why: Zombies on ground are slower and can be avoided. Volatiles only spawn at night, but even during day, high ground gives you a tactical advantage and avoids hordes.
- When: Every time you move between objectives. Make it a habit to never run on ground level.
- Tip: Once unlocked (Survivor Rank 12), keep a grappling hook in your inventory. It can be used to quickly ascend buildings, cross large gaps, or escape from volatile packs.
- Why: The hook has no cooldown and can be spammed to travel faster than running. It also breaks fall damage if you hook just before landing.
- When: Expeditions across the map, escaping night chases, or reaching high platforms for air drops.
- Tip: When an airdrop lands at night, it attracts volatiles. Plan a route that uses safe houses as checkpoints. Grapple to the nearest building, drop down, grab the crate, then immediately use a UV flashlight + grapple to escape.
- Why: Airdrops at night give superior loot (weapons, rare crafting materials), but volatiles are drawn to the landing site. A prepared escape route ensures you survive.
- When: Once you have max stamina and a grappling hook. Ideal for farming gold-tier weapons.
- Tip: Pick up all metal parts, electronics, duct tape, and alcohol. They are used for crafting medkits, lockpicks, and weapon modifications. Weapons themselves are plentiful; don't hoard low-tier ones.
- Why: Medkits are the most critical consumable. Duct tape + metal parts = repair kits; alcohol + gauze = medkits. Lockpicks are essential for police vans and chests.
- When: Always loot containers, dead bodies, and lockers. Early game, focus on blueprints and crafting materials over money.
- Tip: Never let a weapon break completely. Repair it before it hits zero durability (costs fewer resources) or junk it for parts. Use cheap weapons against trash mobs and save high-damage ones for human enemies or big zombies.
- Why: Weapon repairs cost materials that scale with durability remaining. Repairing a 5% durability weapon costs nearly full materials; repairing at 20% costs less. Junking gives you back some materials.
- When: After each fight, check durability. Use rusty pipes and wrenches on biters; use korek machetes or gold-tier weapons on demolishers and human enemies.
- Tip: In old game versions, you could repair a weapon infinitely by stripping the mod and re-applying it. This was patched. However, the King mod (obtainable from DLC or certain events) adds +75 durability and +75% damage. Stack King mods on a single weapon for extreme longevity.
- Why: A single King mod drastically extends weapon life. Combined with the “Repair” skill, you can restore durability indefinitely by using consumable repair kits.
- When: Once you have King mods (found in Bozak Horde or from Quartermaster rewards). Replace other mods with King to make a weapon last forever.
- Tip: Survivor rank determines the quality of items you find in the world (including weapons, mods, and crafting materials). Agility and Power levels only affect movement and combat perks.
- Why: Higher survivor rank means better loot from airdrops, police vans, and GRE containers. If you rush survivor xp (by completing quests and turning in airdrops), you’ll quickly get blue/purple/orange weapons.
- When: Early game, prioritize the “Survivor Sense” ability and “Lockpick” skill. Always grab free survivor xp from turning in airdrops at the Tower.
- Tip: If playing “Be the Zombie” mode, invest in skills that counter the Hunter: max UV flashlight duration, increased stamina, and the “Tackle” skill to knock the Hunter off walls. Carry flares and camouflage.
- Why: PvP requires you to survive long enough to turn in the antizin. The Hunter can oneshot you if you’re stationary. Mobility and UV light are your best friends.
- When: Only when invading or being invaded. Swap to a general parkour build for solo play.
- Tip: Equip weapons with the “Frenzy” mod (from The Following DLC) which increases attack speed as you kill enemies. Combine with “Brawler” skill (increases damage per consecutive hit). Use warrior potions (+50% damage for 60 seconds) and attack boosting from “Tough” booster.
- Why: Attack speed + damage multipliers stack multiplicatively. In late game, a single volley can kill a demolisher in seconds.
- When: Only for players who have completed main story and are farming legendary enemies. Not recommended for early game due to resource cost of potions.
- Tip: Vendors sell low-tier weapons at high prices. Instead, rely on looting from bodies and containers. Spend your money only on crafting materials (metal parts, electronics) and ammo (if using firearms).
- Why: The game gives you enough weapons for free. Buying is a waste of cash that could be used to buy king mods or safe zone upgrades.
- When: If you must buy something, purchase blueprint upgrades from Quartermaster – they are permanent.
- Tip: In the Slums, the vendor “Sahir” near the Tower will restock his inventory if you save and reload (quit to main menu). He sometimes sells legendary weapons or rare mods. Check him frequently.
- Why: Vendor inventories are random but fixed on first load. Reloading refreshes them. This lets you farm for god-tier items without cheating.
- When: Once you have surplus cash, spend it on his high-tier items. Reload until you see King mods or gold weapons.
- Tip: In the Harran Prison (Following DLC), you can duplicate cash and items by using the “store all” and “withdraw” glitch with the prison vendor. Step-by-step: deposit items, then withdraw one stack, then immediately quit game. Reload and you’ll have original items plus withdrawn stack.
- Why: This is an exploit that can generate infinite money and crafting materials. Useful for players who want to bypass grind.
- When: Only if you’re okay with cheating. Otherwise, stick to normal farming.
- Tip: At night, volatiles roam but regular zombies are reduced in number. If you stay near UV lights (safe zones), you can loot chests and run between safe houses. You can also outrun volatiles if you keep moving and don’t trip.
- Why: Night gives bonus XP for everything you do (1.5x to 2x). With careful routing, you can level up quickly without dying.
- When: Once you have a decent stamina bar and know the safe house locations. Avoid open fields; stick to rooftops.
- Tip: When a volatile spots you, immediately run to the nearest UV light (street lamp with yellow glow) or into a building interior (houses, parking garages). If you get pinned, use a flare to create a temporary UV bubble, then climb.
- Why: Volatiles cannot enter UV-lit zones. Flares buy you 30 seconds of safety. During a chase, your minimap shows volatile positions in red; anticipate their path.
- When: When you accidentally trigger a chase during night or while looting GRE crates. Always carry 3-4 flares on your quick slot.
- Tip: At max level, volatiles drop legendary XP and rare materials. To farm them safely: go to the “Stuffed Turtle” quarantine zone, stand on the high scaffolding, and shoot them with an upgraded shotgun. They can’t reach you, but you can hit their heads.
- Why: This method yields massive XP per hour – several hundred thousand. Also earns you king mods from volatile guts.
- When: Only after completing main game and unlocking legendary levels (100+). Requires a high-tier shotgun and unlimited ammo from crafting.
- Tip: Always upgrade your grappling hook to max tier (through the Quartermaster) – it becomes faster and uses less stamina.
- Tip: The “Cracked” throwable (firecrackers + metal parts) attracts zombies but does no damage. Use to clear areas or distract for stealth.
- Tip: When fighting human enemies (raise the health bar), use camouflage (from zombies) to walk past them, then strike. They cannot detect you if you are covered in zombie guts.
- Tip: If you see a Volatile nest in the countryside (The Following), destroy it with grenades or a truck to permanently disable spawns in that area.
- Tip: Do not sell rare crafting materials like “Sapphire” or “Ruby” – they are used for high-end weapon upgrades in The Following DLC.
- Tip: For the “Axiom” achievement, play on Nightmare difficulty, but only after you have fully upgraded your character and weapons – it doubles damage taken.
#### Intermediate: Master the Dropkick and Ground Pound
#### Advanced: Electric and Fire Combined with Melee
---
Exploration & Parkour Tips
#### Beginner: Learn the Verticality – Always Look Up
#### Intermediate: Use the Grappling Hook to Skip Danger Zones
#### Advanced: Air Drops & Night Airdrops – Route Planning
---
Resource Management Tips
#### Beginner: Scavenge Everything, but Prioritize
#### Intermediate: Weapon Durability Management
#### Advanced: Infinite Repair Glitch (Patch 1.0 – 1.3 only)
---
Build & Skill Optimization Tips
#### Beginner: Focus on Survivor Levels First
#### Intermediate: The Ultimate Night Hunter Build (PvP)
#### Advanced: Min-Max Melee Damage Build
---
Economy & Trading Tips
#### Beginner: Never Buy Weapons – Loot Them
#### Intermediate: The Gambling Vendor Trick
#### Advanced: The “Dying Money” Glitch (Single Player Only)
---
Night & Survival Tips
#### Beginner: Night is Not Always Scary – Use Safe Houses
#### Intermediate: How to Survive a Volatile Chase
#### Advanced: Farming Volatiles for Legend XP
---
General & Miscellaneous Tips
---
Final Words
Remember: Dying Light rewards creativity. The most powerful tactic is not brute force but using the environment, your parkour skills, and resource knowledge. Adapt these tips to your playstyle, and Harran will become your playground – even at night.
Game Settings
Game Settings Guide for Dying Light
This guide covers every settings category in Dying Light (including The Following expansion where applicable) and recommends optimal configurations for different hardware tiers. Proper setup—especially graphics and controls—can dramatically improve your performance, comfort, and survival success in Harran.
---
Graphics Settings
Adjusting graphics correctly balances visual fidelity with smooth gameplay. Dying Light is CPU-intensive in the city; view distance and shadows are the biggest performance hogs.
Display Options
| Setting | Recommendation | Notes |
|---|---|---|
| Resolution | Native monitor resolution | Lower resolution if struggling for FPS, but keep aspect ratio correct. |
| Display Mode | Fullscreen (exclusive) | Borderless windowed can cause input lag and V-Sync issues. |
| V-Sync | Off (use in-game framerate limit if needed) | V-Sync introduces measurable input lag; only enable if screen tearing bothers you. |
| Framerate Limit | 60 (or monitor refresh rate) | Uncapped can cause coil whine and unnecessary GPU load. |
| Field of View (FOV) | 90-100 (slider) | Higher FOV reduces motion sickness and aids parkour awareness; performance cost is minimal. |
| Motion Blur | Off | Can cause nausea and hides details; no performance benefit either way. |
| Ambient Occlusion | Medium/High (see table below) | Adds depth but impacts GPU heavily. |
| Anti-Aliasing | FXAA or SMAA (low) | MSAA is expensive; SMAA provides good edge smoothing with low cost. |
| Depth of Field | Off | Visual effect; no gameplay benefit. |
| Nvidia HairWorks | Off (if available) | Cripples performance on most cards; only use on top-end RTX cards if you love hairy zombies. |
| View Distance | Medium-High (50-70%) | Critical for parkour—shorter distance hides platforms and ledges at night; too high kills FPS. Adjust based on hardware. |
| Texture Quality | Low/Medium/High/Ultra | VRAM dependent: 2GB→Low, 4GB→Medium, 6GB+→High/Ultra. |
| Shadow Quality | Medium (low on low-end) | Shadows are a heavy CPU/GPU drain. Low shadows still provide enough occlusion without looking flat. |
| Post-processing | Low-Medium | Includes bloom, lens flare, chromatic aberration. Disable if you dislike the style. |
| Rain Quality | Medium (low on low-end) | Rain effects can drop FPS in heavy storms. |
Recommended Presets by Hardware Tier
Low-End (e.g., GTX 1050 / RX 560 – 2GB VRAM)
- Preset: Custom (Low with medium textures/medium view distance)
- Resolution: 900p or 720p
- View Distance: 30-40%
- Shadows: Low
- Target FPS: 30-45
- Preset: High
- Resolution: 1080p
- View Distance: 60%
- Shadows: Medium
- Target FPS: 60
- Preset: Very High (custom)
- Resolution: 1440p
- View Distance: 80%
- Shadows: High
- Nvidia HairWorks: Off
- Target FPS: 60+ (use Framerate Limit)
- Preset: Maximum (custom)
- Resolution: 4K or 1440p ultra-wide
- View Distance: 100%
- Nvidia HairWorks: On (careful: still heavy)
- Target FPS: 60 capped
- View Distance: Setting too low (e.g., 20%) makes night navigation dangerous as platforms fade in. Too high (100%) can halve framerate on mid-range hardware. Find the sweet spot for your GPU: start at 50% and adjust +10% until FPS drops below 45.
- Nvidia HairWorks: This toggle appears in the Advanced menu. If you see it, leave it OFF unless you own an RTX 2080 Ti or better. It causes massive framerate dips in cutscenes and during hordes.
- Motion Blur: Many players turn it off for motion sickness, but it also hides visual stuttering. If your FPS dips often, keep it off to reduce the illusion of smoothness.
Mid-Range (e.g., GTX 1060 / RX 580 – 6GB VRAM)
High-End (e.g., RTX 2070 / RX 5700 XT – 8GB VRAM)
Ultra (e.g., RTX 3080 / RX 6800 XT – 10GB+ VRAM)
⚠️ Settings That Are Easy to Misconfigure
---
Audio Settings
Good audio is crucial for detecting zombies at night and hearing spitball attacks.
| Setting | Recommendation | Notes |
|---|---|---|
| Master Volume | 80-100% | Keep high to hear footsteps and zombie growls. |
| Music Volume | 50-70% | Music can mask ambient audio; lower is often better for immersion. |
| SFX Volume | 100% | Essential – weapon swings, traps, volatiles. |
| Voice Volume | 80% | Dialog, NPC shouts, and your own character’s cues. |
| 3D Audio | On (if supported) | Use Windows Sonic or Dolby Atmos for spatial awareness. |
| Speaker Configuration | Stereo or Headphones | 5.1/7.1 can spread audio too thin for directional cues. |
| Controller Vibration | Off/On | Personal preference; vibration can drain batteries and distract during combat. |
---
Controls Settings
Dying Light relies heavily on smooth parkour and quick weapon switching. Customize controls to your muscle memory.
Keyboard & Mouse
| Action | Recommended Key | Notes |
|---|---|---|
| Move | WASD | Standard. |
| Jump | Space | No change needed. |
| Crouch | Left Ctrl | Keep for sliding and hiding. |
| Sprint | Left Shift | Toggle or hold? Use Hold for better control. |
| Interact | E | Open doors, pick items. |
| Melee Attack | Left Mouse | Primary. |
| Ranged Attack | Right Mouse | Aim down sights. |
| Throw Weapon | Middle Mouse | Quick throw. |
| Parkour Assist (Auto-vault, climb, slide) | On (toggle) | Highly recommended: enables automatic vaulting over small obstacles and clinging to ledges. Without it, you must manually press jump near every ledge. |
| Sensitivity (Mouse) | 5-10 (progress) | Lower for precision aiming, higher for parkour flicks. |
| Invert Y | Off | Personal. |
Controller (Xbox/PlayStation)
- Sensitivity: 50-70% (lower for aiming, higher for melee).
- Dead Zone: Leave at default (0.10-0.15). Only increase if drifting occurs.
- Auto-Aim Assist: On (Partial) – helps with targeting volatile heads without feeling like cheating.
- Invert Cursor: Off.
- Setting: “Parkour Elements” → “Automatic”
- Risk: If you turn this OFF (manual), you must press jump at every small ledge – slows down chases and increases fall damage. We strongly advise keeping it ON unless you are an expert speedrunner who wants full manual control. Manual mode also disables the convenient “grab edge” mechanic when dropping off a ledge.
⚠️ Special Attention: Parkour Assist
---
Accessibility Settings
Dying Light offers limited accessibility options, but the following can help:
| Setting | How to Enable | Notes |
|---|---|---|
| Subtitles | Gameplay → Subtitles (On) | Shows dialog and ambient speech. Size is not adjustable (fixed). |
| Colorblind Modes | Not natively available | Use Windows/console system-level tritanopia/deuteranopia filters. |
| HUD Size | Not adjustable | Entire HUD is fixed. You can toggle individual elements (minimap, health bar) in Gameplay settings. |
| Closed Captions | Audio → Closed Captions | Shows sound effects like “Door creaks” and “Volatile scream”. Useful for deaf/hard-of-hearing players. |
| Controller Vibration | Controls → Vibration | Can help with haptic feedback for damage and traps. |
| Text Size | None | UI text is small; use Windows scaling or zoom. |
| Quick-Time Events (QTEs) | Gameplay → QTE Mode (Hold vs. Tap) | Hold is more accessible – removes the need for rapid tapping. |
---
Language Settings
Accessible from the main menu or in-game pause menu → Options → Language.
- Text Language: Choose your UI language (available in 12+ languages).
- Voice Language: Choose voiceover language (usually English, German, French, Italian, Spanish, Polish, Russian).
- Subtitle Language: Overrides text language for subtitles only.
> Note: Changing voice language requires a game restart. Text language changes immediately in the menu.
---
Network Settings
Dying Light offers both cooperative and competitive (Be the Zombie) modes. Proper network settings reduce latency and matchmaking issues.
| Setting | Recommendation | Notes |
|---|---|---|
| Online Mode | Enabled (for co-op/events) | You can play offline entirely. |
| Co-op Matchmaking | Invite Only (or Friends Only) | Public can attract griefers; use password for private games. |
| Be the Zombie Mode | On/Off | Toggle if you want to be invaded as survivor. Off disables PvP. |
| Network Quality | High (if LAN) or Low (if on slow internet) | Actually, there’s no such explicit setting; but you can limit players in co-op. |
| NAT Type | Open (in router) | Essential for hosting. If you cannot connect, forward ports: UDP 30000-30009 or enable UPnP. |
| Voice Chat | Push-to-Talk (PC) or On (console) | Avoid open mic background noise. |
| Region | Auto (or closest) | Manual selection may be available in some versions (PC: set via Steam download region). |
⚠️ Common Network Pitfall
- “Failed to Join Session” error: Usually caused by strict NAT. Set your console/PC IP in router DMZ or forward required ports. If you use a VPN, disable it for Dying Light.
- Be the Zombie Mode remains On in menus: Even if you turn it off, some versions re-enable it after updates. Double-check before starting a new game if you want only co-op.
---
Gameplay Settings
These affect difficulty and HUD behavior.
| Setting | Recommendation | Notes |
|---|
Hard (veterans)
Nightmare (Hard + permadeath? Actually Nightmare in DL is a separate mode, not difficulty) | Dying Light has 3 difficulties: Normal, Hard, and Nightmare (unlocked after first playthrough). Nightmare makes zombies tougher and disables fast travel. Start on Normal to learn parkour and combat. Hard+ increases XP rewards but also damage. |
| QTE Mode | Hold | Tap mode requires fast button pressing; Hold is comfortable. |
| Auto-Equip Best Items | Off | Prevents accidentally equipping low-durability weapons from inventory. |
| Show Tutorial Hints | On (first playthrough) | Helpful reminders; turn off after learning. |
| Minimap Rotation | Rotate (heads-up) vs. Fixed (north always up) | Rotate is easier for navigation. |
| Show Quest Markers | On (unless doing immersive run) | Keeps you on track. |
| Subtitles | On (for dialog) | Also helps with ambient voice lines that give clues. |
| Radar Enemy Indicator | On | Shows direction of threats; crucial at night. |
| Camera Shake / Head Bobbing | Off (if you get motion sick) | Disabling Head Bobbing reduces nausea during fast movement. |
| Auto-Equip Lantern | Off | Manually equip using quick inventory; auto may waste battery. |
| Loot Highlight | On | Items glow when you look at them; speeds up scavenging. |
| Crosshair | On | Essential for ranged weapons. |
⚠️ Difficulty Misconception
Many players mistakenly think Nightmare is just a difficulty slider. It is actually a separate game mode that resets your inventory and survival rank, making zombies extremely tough and limiting resources. Do not select Nightmare for your first playthrough; choose Normal and later try Hard for higher challenge.
---
Summary of Settings to Double-Check
1. View Distance – too low (dangerous), too high (lag). Find balance.
2. Parkour Assist (Automatic) – enable unless you are a masochist.
3. QTE Mode – change to Hold for accessibility.
4. Motion Blur + Head Bobbing – disable if motion sickness.
5. Nvidia HairWorks – disable unless you have flagship GPU.
6. Online Mode & Be the Zombie – ensure they match your preferred playstyle.
7. Subtitles – enable if you play with low volume or language mismatch.
After adjusting settings, play the first 15 minutes (day and night) to verify everything feels right. Revisit Graphics if FPS dips below 30 during night sequences with volatiles.
---
Optimize, survive, and enjoy Harran.
Important Notes
Important Notes for Dying Light
This section covers critical knowledge that can save you from frustration, lost progress, or missed opportunities. Read carefully before diving deep into Harran.
⚠️ Warnings & Pitfalls
- Fall Damage is Real: Even a short fall can kill you early on. Always aim to roll (press crouch just before landing) to reduce damage. Until you unlock the Ragdoll skill, treat every rooftop gap as deadly.
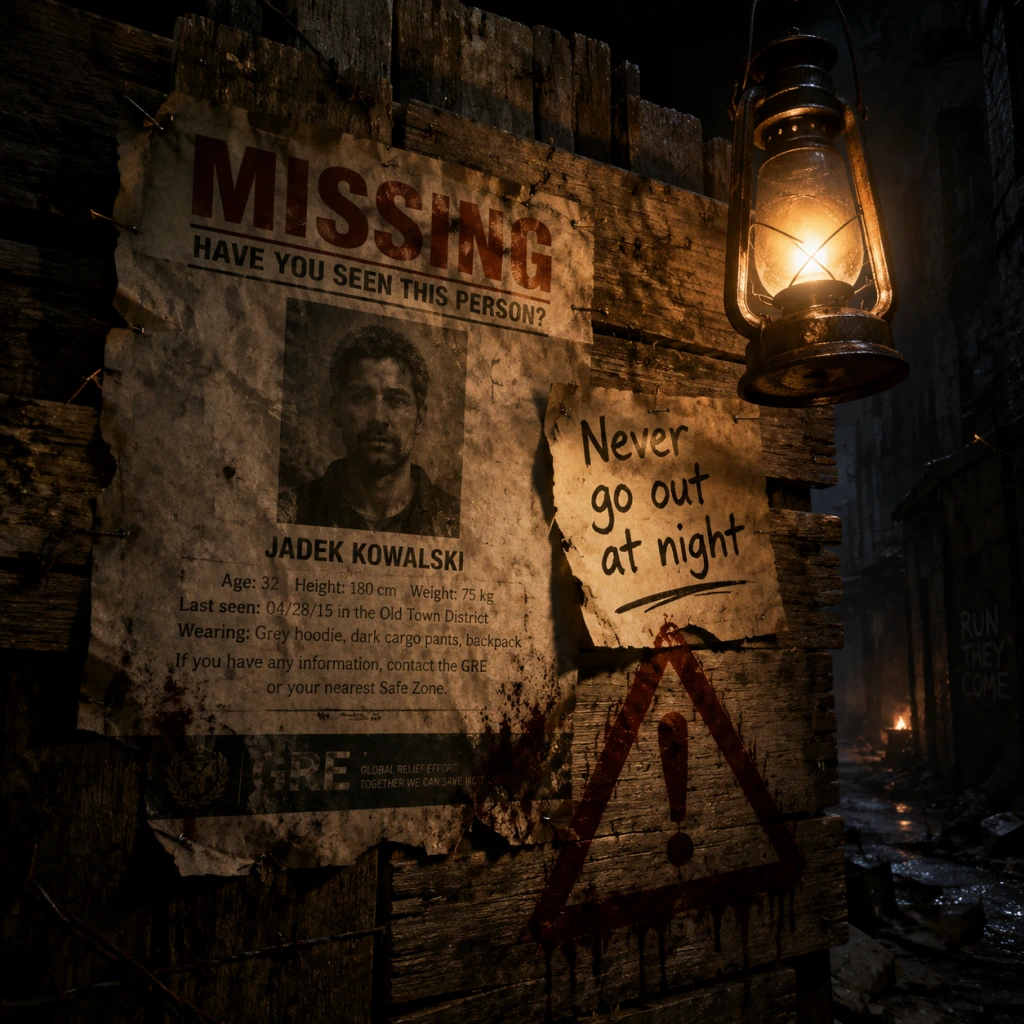
- Night is Not Optional: Volatiles are nearly invincible early game. If you absolutely must go out at night, stay on rooftops, use survivor sense constantly, and keep a UV flashlight charged. Avoid ground level at all costs.
- Spikes from Explosions: Explosive barrels, gas tanks, and car fuel tanks deal massive damage and can one-shot you. Never melee them. Use firearms or throwables from a safe distance.
- Lockpicks are Limited: You only get a finite number of lockpicks in the world (though they respawn at certain locations). Don't waste them on easy chests; save for Hard or Very Hard locks that contain rare loot.
- Weapon Durability: All melee weapons degrade and break. Don't use your best weapon on regular biters. Repair them at a workbench using metal parts, but repairs get more expensive over time. Consider recycling broken weapons for parts.
- Zombie AI Cheats: Volatiles can spawn behind you if you linger too long in one area at night. They can also hear you from far away if you sprint. Use stealth crouch when near them.
- Vehicle Traps: In The Following expansion, driving into water instantly destroys your buggy. Also, hitting large spikes or fences at high speed can critically damage the vehicle.
- The Following Final Choice: At the end of the expansion, you must choose between two endings (Mother’s or the Scientist’s). This is a permanent story decision that locks you out of the other ending on that save. Save before the final conversation if you want to see both.
- Side Quests That Disappear: A few side quests become unavailable after certain main story milestones. For example:
- Faction Choices: In some side quests (e.g., "The Bomb" in Old Town), you can choose to help one faction over another. This permanently alters NPC availability and reward types. Weigh which blueprint or weapon you want more.
- Blueprint Upgrades: Upgrading a blueprint at the workbench uses rare materials (e.g., alcohol, gauze) and cannot be undone. Only upgrade blueprints you intend to use frequently.
- Character Skills: You cannot respec skill points. Choose carefully between Survivor, Agility, and Power skill trees. Once a skill is unlocked, you’re stuck with it. Focus on parkour and movement first.
⛔ Irreversible Choices
- "Bringing Down the Howl" (unlocked after reaching the Tower) must be completed before the mission "The Pit".
- "The Hunter" (given by a survivor in the Slums) must be done before leaving for Old Town.
- "A Father's Son" (Old Town) is missable if you advance too far into the story. Always check your quest log for timed objectives.
###
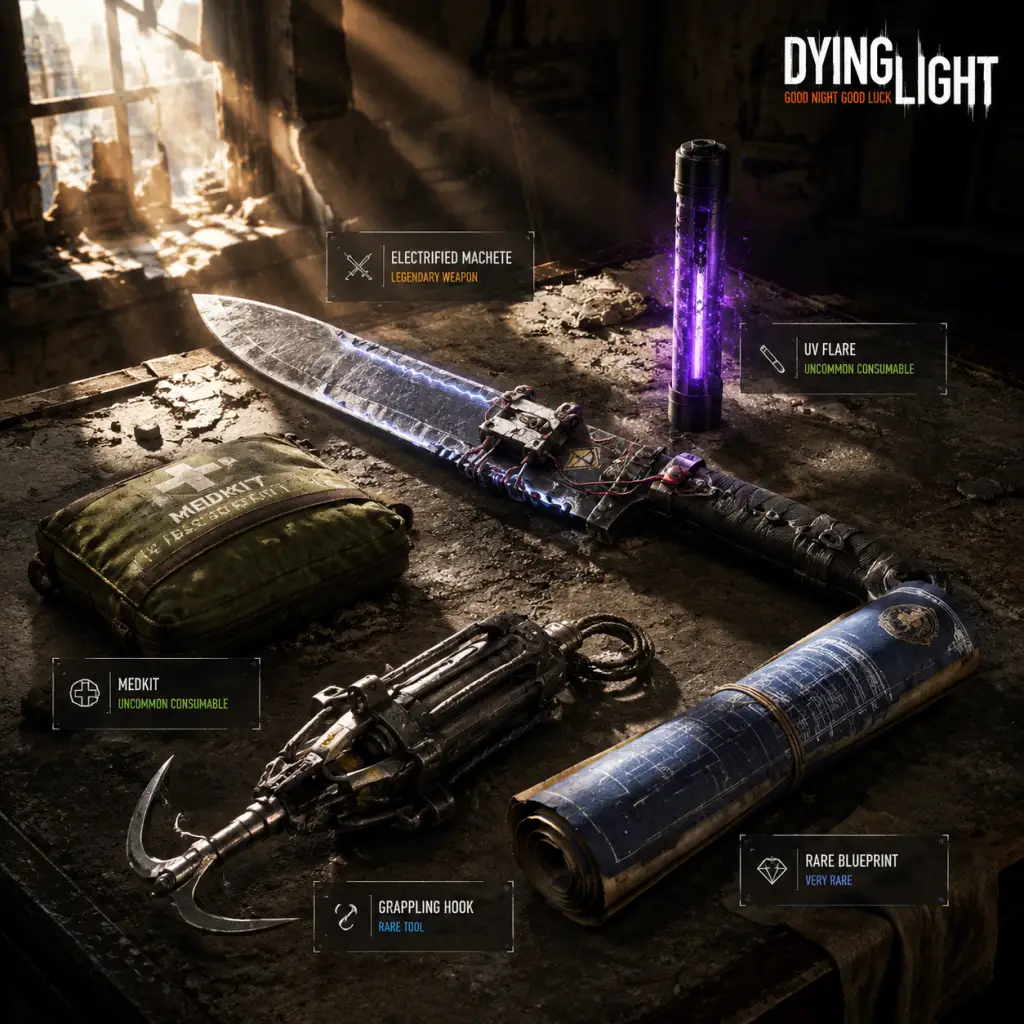
All Game Items
All Game Items Guide for Dying Light
This guide catalogs every major item type in Dying Light (including the The Following expansion), grouped logically. For each item category, we explain what the items do, how to obtain them, when to use them, and any important synergies or upgrades. Platform-specific differences (e.g., PC, console, Switch) are noted where relevant.
1. Weapons
Weapons in Dying Light are divided into melee and ranged. They have rarity tiers: Gray (Common) → Green (Uncommon) → Blue (Rare) → Purple (Legendary) → Orange (Gold-tier). Higher rarity means better base damage, durability, and more upgrade slots.
#### 1.1 Melee Weapons
Melee weapons are your primary tools. They can be one-handed (fast) or two-handed (slow, heavy). They degrade with use and can be repaired or replaced.
| Weapon Type | Subtypes | Key Characteristics |
|---|---|---|
| Blunt | Pipe, Wrench, Baseball Bat, Crowbar, Hammer | High stamina damage, good for stunning zombies. Crowbar is excellent for prying locked containers. |
| Bladed | Machete, Katana, Axe, Saber, Sword, Knife | Higher lethal damage, can dismember. Katanas are rare but excellent. |
| Two-Handed Blunt | Sledgehammer, Two-Handed Pipe, Heavy Mace | Very slow but massive damage, one-hit kill for many enemies. High stamina cost. |
| Two-Handed Bladed | Great Axe, Long Sword, Claymore | Slow but deadly. Great for crowd control if you time swings. |
| Fist Weapons | Knuckles, Claws (The Following) | Very fast, low damage per hit but high DPS. Often have special effects like bleeding. |
- Obtaining: Looted from containers, killed zombies (especially Rais's men), purchased from vendors, crafted using blueprints, or earned from quests and DLC. Higher rarity weapons appear in Hard and Nightmare mode.
- When Useful: Melee is your go-to for most encounters, especially indoors where guns attract virals. Use bladed for fast kills, blunt for stamina-breaking stronger enemies.
- Synergies & Upgrades:
- You can repair a melee weapon a limited number of times (usually 3-5) using a repair kit.
- Upgrading your Power and Combat skill trees reduces stamina cost and increases damage.
- The Following adds special Combat Blueprints that allow crafting legendary weapons with unique effects (e.g., Blessed Nagant, Volkan's Carbine).
#### 1.2 Ranged Weapons
Ranged weapons are rarer and ammo is scarce. They attract noise-sensitive Volatiles at night. Include firearms and throwing weapons.
| Type | Examples | Notes |
|---|---|---|
| Pistols | Semi-Auto Pistol, Revolver | Moderately accurate. Revolver has higher damage but slower reload. |
| Rifles | Assault Rifle, Military Rifle, Police Rifle | Good range, can fire in bursts. |
| Shotguns | Pump Shotgun, Double-Barreled Shotgun | Devastating at close range. Double-barrel has two shots then long reload. |
| Submachine Guns | SMG, Grease Gun | High fire rate, low accuracy. Good for sweeping. |
| Special | Compound Crossbow (The Following), Harran Ranger Bow | Silent, reusable bolts/arrows. No noise, ideal for night. |
| Throwing | Throwing Stars, Molotov Cocktails, Grenades, Decoys | Quick area damage or distraction. Extremely useful against groups. |
- Obtaining: Looted from police vans, bandit camps, locked chests. Some are quest rewards. Ammo is found in police cars, military crates, bought from vendors (limited).
- When Useful: Firearms are best for daytime high-risk situations or for taking down Rais's men. At night, use crossbow or throwing weapons to avoid attracting Volatiles. Throwing stars are cheap and quiet.
- Synergies & Upgrades:
- Night Booster (portable UV light): Not armor, but essential for survival.
- Military Survival Kit (adds toughness).
- DLC Outfits (e.g., Volkan Combat Outfit, Harran Prisoner Outfit): Provide small buffs like +10% damage or +5% speed. Obtainable from premium packs or in-game events.
- The Following introduces Electrical Relay and Reinforced Suit (through quests) that reduce electricity damage.
- Gas Mask (story item) – required for some side quests in toxic zones.
- Gun damage scales with Survivor rank. Higher rank = higher damage.
- Upgrade your guns through blueprints (e.g., Volatile Hunter Baton – not a gun scope, but some mods exist).
- Crafting ammo requires materials: metal parts, gunpowder, etc.
- The Following crossbow bolts can be crafted with electric, fire, or explosive tips.
2. Armor & Outfits
Crane doesn't wear armor in the traditional sense; outfits are purely cosmetic (except for a few stat-boosting DLC outfits). The game's damage reduction comes from equipment like the Grappling Hook and Tackle upgrades, but primarily from health and skill. However, there are a few items that affect survivability:
When Useful: Outfits are mostly cosmetic but can provide minor benefits. Prioritize using consumables like Toughness Potion or Night Booster for real defense.
3. Consumables
Consumables are crafted or found. They heal, give stamina, provide resistance, or affect gameplay.
#### 3.1 Healing
| Item | Effect | Crafting / Acquisition |
|---|---|---|
| Medkit | Restores 50/75/100 HP (size varies). | Crafted from gauze and medical supplies. Common loot. |
| Bandage | Restores 25 HP (lesser). | Loot from medical cabinets. |
| Regeneration Booster | Slowly heals over time, also cures infection. | Crafted from herbs and alcohol. Rare. |
| Military Medkit (The Following) | Instant full heal. | Found in military crates. |
| Item | Effect | Crafting / Acquisition |
|---|---|---|
| Energy Drink | Restores stamina over time. | Loot, vendors. |
| Night Vision Booster | Increases night vision duration. | Crafted from herbs and plant chemicals. |
| Stamina Booster | Instant stamina restore + slight boost. | Crafted from herbs and caffeine. |
| Item | Effect | Crafting / Acquisition |
|---|---|---|
| Antizine | Cures infection and prevents turning after bite. | Crafted from herbs and alcohol. Story essential. |
| UV Light Flare | Temporarily deters Volatiles. | Crafted from flares and chemicals. |
| Night Hunter Potion (The Following) | Temporarily become a zombie to pass through infested areas. | Crafted from rare zombie parts. |
| Gas Mask Filter | Required in toxic gas zones. | Loot from police stations or craft. |
| Item | Effect | Crafting |
|---|---|---|
| Molotov Cocktail | Ground fire area, distracts zombies. | Rag + Alcohol + Nail (optional). |
| Grenade | Large explosion, lethal to groups. | Metal parts + Gunpowder + Casing. |
| Throwing Star | Low damage, silent, reusable (pick up). | Metal shards (crafted). |
| Decoy (Firecracker) | Attracts zombies by sound. | Paper + Gunpowder. |
| C4 (The Following) | Remote detonated explosive, high damage. | Compound + Detonator + Metal. |
- Always carry medkits for emergencies.
- Use stamina boosters during long parkour runs.
- Antizine is mandatory after zombie bites—craft and keep stock.
- UV flares are lifesavers during night chases.
4. Materials
Materials are used for crafting and repairs. They are everywhere in the world.
| Category | Examples | Used For |
|---|---|---|
| Scrap | Metal Parts, Plastic, Metal Shards | Melee upgrades, throwing stars, repair kits. |
| Chemicals | Alcohol, Hydrogen Peroxide, Gauze, Herbs | Medkits, Antizine, boosters. |
| Electronics | Cables, Circuit Boards, Batteries | Grappling hook, gadgets, C4. |
| Explosives | Gunpowder, Flares, Rocket Fuel | Grenades, Molotovs, ammo crafting. |
| Rare | King Mods (orange-tier weapon mods), Gold-tier weapons parts (The Following) | Legendary upgrades. |
- Obtaining: Loot from containers, dismantle unwanted weapons, purchase from quartermasters.
- When Useful: Always collect everything—you never know when you need more metal parts or alcohol.
- Synergies: Higher survivor rank increases loot quality.
5. Currencies
Dying Light has multiple currencies.
| Currency | How to Earn | Spent On |
|---|---|---|
| Survivor Points (XP) | Completing missions kills, parkour. | Leveling up Survivor, Agility, and Power trees. |
| Money (Dollars) | Loot, sell items, quest rewards. | Weapons, ammo, materials from vendors, safe-zone upgrades. |
| Influence Points (The Following DLC) | Driving, completing quests for factions. | Unlocking car upgrades, blueprints, and perks for the buggy. |
| Tokens (Be the Zombie mode) | Playing as human or hunter. | Unlock exclusive blueprints, outfits. |
| Event Tokens (limited-time) | Special challenges. | Unique cosmetic items. |
- When Useful: Spend money on medkits early, save for better weapon blueprints later. Influence points are essential for buggy customization in The Following.
6. Collectibles
Collectibles are scattered throughout Harran and the countryside.
| Type | Count | Reward for Collection |
|---|---|---|
| Notes & Letters | 50+ | Lore, sometimes side quest triggers. |
| Statues (Bunny, Troll, etc.) | 10 (Bunny) / 5 (Troll) | Weapon blueprints (e.g., Bunny Knuckle Dusters). |
| Audio Logs | 10 | Story insights. |
| Flags (in The Following) | 15 | Unlocks fast travel points. |
| Trophy Items (zombie ears, heads) | N/A | Traded to quartermaster for reputation? Actually, they are used in crafting some items. |
| Viral Samples | N/A | Crafting antizine. |
| Volatile Hunter Badges (DLC) | 10 | Exclusive weapon. |
- How to Obtain: Explore thoroughly. Check rooftops, vents, locked buildings. Use survivor sense to highlight collectibles (if within range).
- When Useful: Collecting all flags in The Following gives fast travel—very helpful. The Bunny Statues reward with a unique weapon blueprint great for early game.
7. Key Equipment
These are special items that are not weapons or consumables but crucial for progression.
| Item | Function | Acquired |
|---|---|---|
| Grappling Hook | Pulls you to ledges or zombies; allows quick vertical movement. | Story quest “The Pit” (mid-game). |
| Crane’s Radio | Communicates with allies, receives mission updates. | Starting item. |
| Night Vision Goggles (The Following) | Allows seeing in dark without UV light? Actually, you have night vision boosters; but the Following has a Buggy Night Vision upgrade. | Upgraded buggy. |
| UV Light Attachment (buggy) | Emits UV light to repel Volatiles while driving. | Buggy blueprint. |
| Buggy (The Following) | Main vehicle for countryside. Has upgrade slots. | Early in The Following. |
| Tachometer / Speedometer | Displays stats? Not really an item. | N/A. |
| Key Cards | Access locked rooms (police, military). | Found in story or hidden locations. |
| Gate Keys | Open specific gates in The Following. | Rewards from faction quests. |
- When Useful: Grappling hook changes the game—use it to escape Volatiles quickly. Buggy is essential for traversing the huge countryside map.
- Synergies: Pair grappling hook with stamina boosters for infinite climbing. Buggy with UV light makes night driving manageable.
8. Weapon Mods & Add-ons
Mods are crafted via blueprints and applied to melee or ranged weapons.
#### Melee Mods
| Mod | Effect | Example Blueprint Location |
|---|---|---|
| Fire | Adds burn damage over time. | Burning Star – found in Old Town. |
| Electricity | Stuns enemies, chains to nearby. | Electric Knuckles – side quest. |
| Bleeding | Causes enemies to bleed, slowly draining health. | Bleeding Edge – vendor. |
| Poison (The Following) | Poisons enemies, spreads to others. | Volatile nest loot. |
| King (all-purpose) | Increases damage by a flat amount. | DLC or high-level trophies. |
| Mod | Effect | Example Blueprint |
|---|---|---|
| Silencer | Reduces noise of guns (rare). | Police station blueprints. |
| Extended Magazine | Increases clip size. | Military crate loot. |
| Reflex Sight | Improves accuracy (pistol/rifle). | Technology parts. |
- Obtaining: Blueprints are found in chests, from quests, or purchased. Mods can be crafted repeatedly after learning.
- When Useful: Fire mods are excellent against spitters and virals. Electricity is great for crowd control. Use silencers for stealth at night.
- Survivor: Unlocks grappling hook, buggy perks, and general survival abilities.
- Agility: Improves parkour, climbing speed, and evasion.
- Power: Increases melee damage, stamina, and combat moves (kicks, stomps, takedowns).
- How to Level: Each tree requires XP from relevant actions.
- Synergy: Maxing Agility first is recommended for mobility.
9. Upgrades & Skill Trees
Your character progression is through three skill trees, which grant passive abilities and active moves, not items per se. But these are core:
10. Rare & Special Items
| Item | Effect | Notes |
|---|---|---|
| Volatile Hunter Baton | Legendary melee, electric damage. | Reward from The Following finale? |
| Korek Machete | Extends reach, good damage. | Trick: manually set date on device to unlock easter egg. |
| Weapons from DLC (e.g., Harran Prisoner Outfit, V21 Shotgun) | Unique stats. | Part of bundles. |
| Gold-tier Weapon Cases (The Following) | Guaranteed gold weapon. | Found in military convoys. |
- Obtaining: Some via secret easter eggs, others through premium DLC or reaching max level and replaying on Nightmare.
- When Useful: Gold-tier weapons are the best in the game, but require high survivor rank to wield effectively.
- Always loot everything – materials are key.
- Store excess items in safe-zone storage (your stash in the Tower).
- Craft medkits and Antizine before venturing out, especially at night.
- Weapons degrade; repair them only if they have good mods. Replace low-tier ones frequently.
- In The Following, save influence points for buggy upgrades that boost fuel efficiency and UV light.
Quick Tips for Item Management
This guide covers all major item types. For definitive locations of specific blueprints or collectibles, consult dedicated maps or quest walkthroughs within this guide series.
Character Skills
Character Skills Guide for Dying Light
This guide covers all playable character skills in Dying Light (including The Following expansion). The protagonist, Kyle Crane, progresses through three distinct skill trees: Agility, Power, and Survivor. Each tree unlocks passive and active abilities that define your playstyle. There is no character class selection—your skills depend solely on how you play. This guide details every skill, its effects, cooldowns, upgrades, synergies, and provides recommended builds for each tree.
Note: Skill names, levels, and mechanics are based on the latest version of Dying Light: The Following – Enhanced Edition. Some skill names differ between platforms (e.g., PC vs console button prompts), but functionality is identical.
---
1. Agility Skills
Agility skills enhance movement, parkour, and climbing. They are unlocked by earning Agility experience (parkour actions, free-running, climbing, and sliding).
#### 1.1 Sprint
- Unlock: Default (Level 0)
- Effect: Hold Shift (PC) / left stick click (console) to sprint. Increases horizontal movement speed by ~30%. Drains stamina.
- Cooldown/Stamina: Consumes stamina continuously; stops when stamina depletes or when you release the button.
- Upgrades: None directly; stamina management improved via other Agility skills.
- When to use: Chases, exploring open areas, escaping hordes.
- Synergies: Combine with Kick (Power) to shove zombies while sprinting.
- Unlock: Agility Level 1
- Effect: While sprinting, press Crouch (Ctrl / B on console) to slide. Sliding covers ~5 meters and lets you pass under low obstacles. Reduces fall damage if you slide off a ledge.
- Cooldown: None; can be chained repeatedly.
- Upgrades: Slide speed and distance increase slightly with Agility level, but no explicit upgrade.
- When to use: Quickly transition from sprinting to low profile, evade grabs, or pass under barriers.
- Synergies: Follow slide with jump for a speed boost; slide into tackle (Power) for knockdown.
- Unlock: Agility Level 2
- Effect: While sprinting toward a low obstacle (railing, car hood, small wall), press Jump (Space / A) to vault over it. Momentum continues. Can vault over zombies if you approach them from the front.
- Cooldown: None; press at the right moment.
- Upgrades: Vault height and success window increase with Agility level.
- When to use: Traversing cluttered environments, jumping over small fences, or dodging zombie attacks mid-combo.
- Synergies: Vault into a dropkick (Power) or stomp.
- Unlock: Default (Level 0)
- Effect: Press Jump near a vertical surface (wall, ledge) to grab and climb. Hold forward and press Jump repeatedly to scale walls. Stamina drains while climbing.
- Upgrades: Climbing speed and stamina efficiency improve with higher Agility levels. Skills like "Fast Climber" (see below) further enhance.
- When to use: Reaching high vantage points, escaping zombies, exploring.
- Unlock: Agility Level 3
- Effect: Press Jump while climbing a wall to perform a small upward leap, climbing faster than normal. Costs extra stamina.
- Cooldown: None; can be used repeatedly as long as stamina allows.
- Upgrades: None.
- When to use: Escaping a pursuer or quickly scaling a tall building.
- Synergies: Combine with Climb + Vault for vertical parkour.
- Unlock: Agility Level 4
- Effect: While holding a throwable (e.g., throwing star, grenade), hold the aim button (right mouse button / LT) to enter a precision aiming reticle. Press throw to release with better accuracy. Distance and drop affected.
- Cooldown: None; uses item inventory.
- Upgrades: No skill upgrades, but accuracy improves with practice.
- When to use: Sniping distant Volatiles, landing elemental throwables, or tossing firecrackers precisely.
- Synergies: Use with Camouflage (Survivor) to throw items while hidden.
- Unlock: Agility Level 5
- Effect: While sprinting, press Crouch + Jump (Ctrl+Space / B+A) to perform a powerful two-footed kick. Launches zombies backward, knocking them down. Can break wooden barricades. Deals moderate damage.
- Cooldown: 2 seconds after landing.
- Upgrades: Damage and knockdown distance increase slightly with Agility level.
- When to use: Clearing a path through a crowd, stunning a Viral, or kicking a zombie off a ledge.
- Synergies: Vault into dropkick for aerial attack; dropkick into finishing move (Power).
- Unlock: Agility Level 12 (Base game story reward; also obtainable via the "Grappling Hook" blueprint)
- Effect: Equip the grappling hook (weapon slot). Aim at a surface (walls, ledges, ceilings) and press fire to attach and pull yourself toward it. Can be used to swing, zip up, or pull enemies close (though limited). No cooldown but consumes stamina per use.
- Cooldown: None; stamina cost ~20% of bar.
- Upgrades: None; but higher Agility improves stamina regen for repeated use.
- When to use: Rapid traversal, escaping overwhelming encounters, reaching high ledges, or creating distance.
- Synergies: Use with parachute (The Following) for extended flight; grapple then dropkick for aerial combat.
- Unlock: Agility Level 7
- Effect: While airborne and above an enemy, press Crouch (Ctrl / B) to stomp downward. Deals heavy damage and knocks down nearby zombies. Can be performed from any height.
- Cooldown: None; requires being above an enemy.
- Upgrades: Stomp radius and damage increase with Agility level.
- When to use: From a small jump or drop to instantly incapacitate a lone zombie; excellent for cluster of prone enemies.
- Synergies: Vault + stomp; dropkick into stomp.
- Unlock: Agility Level 8
- Effect: While locked on to an enemy (aim button), press a direction + Jump (Space / A) to perform a backflip or side roll, evading attacks. Grants brief invincibility frames (i-frames).
- Cooldown: None; can be chained with stamina cost.
- Upgrades: Repeat dodges cost increasing stamina; no direct upgrade.
- When to use: Avoiding Viral lunges, Volatile grabs, or charged attacks from human enemies.
- Synergies: Dodge into attack (Power) for counter-attack; dodge behind an enemy for stealth kill.
- Unlock: Agility Level 10
- Effect: When throwing a weapon (e.g., knife, axe) while locked on, if you release the throw button at the exact moment the reticle turns red, the throw becomes a perfect throw. The weapon arcs and hits with extra damage and a chance to stagger. If the enemy dies, the weapon may stick for retrieval.
- Cooldown: None; timing-based.
- Upgrades: Perfect throw window slightly larger with higher Agility.
- When to use: Conserving throwing weapons, taking out distant Imps or Toads, or finishing off enemies in style.
- Synergies: Use with Aimed Throw for precision; combine with Power weapon throw skills (if any).
- Unlock: The Following story reward (escaping the Antenna)
- Effect: Equip parachute (utility slot). Jump from heights and press action button to deploy. Glide with directional control. Can be cut by pressing crouch or landing safely.
- Cooldown: None; can be used as long as you have height.
- Upgrades: None; but speed and control improve with practice.
- When to use: Extreme vertical drops, crossing large gaps, or escaping pursuers.
- Synergies: Grappling hook + parachute for long-distance travel.
- Unlock: Default (Level 0)
- Effect: Press Melee Attack while not holding a weapon (or with weapon, performs a weapon swing). Kicks push zombies back and can stagger. Deals 0 damage but good for spacing.
- Cooldown: ~0.5 seconds.
- Upgrades: None; kick strength increases slightly with Power level.
- When to use: Pushing zombies off ledges, creating distance, interrupting lunges.
- Synergies: Kick + weapon swing for safe combos; kick + dropkick for big knockback.
- Unlock: Power Level 1
- Effect: While in midair (from a jump), press Melee Attack to smash downward with your weapon. Deals area damage and knocks down enemies in a small radius. Damage based on weapon.
- Cooldown: None; requires being airborne.
- Upgrades: Radius and damage increase with Power level.
- When to use: From a short jump to hit multiple zombies clearing a room; powerful if using a heavy weapon.
- Synergies: Vault into Ground Pound; slide into Ground Pound.
- Unlock: Power Level 2
- Effect: While standing over a prone or staggered enemy, press Melee Attack to stomp on their head. Instant kill on regular and biters; damages goons. Deals 100% damage based on weapon's base damage (no weapon needed).
- Cooldown: None; can be chained as long as an enemy is on the ground.
- Upgrades: No explicit upgrades, but faster execution speed with higher Power.
- When to use: Finishing downed enemies instantly—most efficient kill method.
- Synergies: Dropkick or ground pound -> stomp; kick -> stomp.
- Unlock: Power Level 4
- Effect: When an enemy is low health (below ~15% HP), hold Melee Attack while facing them to perform a cinematic kill animation. One-hit kill. Animation length varies by enemy type.
- Cooldown: None; only triggers on eligible enemies.
- Upgrades: Finisher speed increases; later finishers (Power level 6) unlock for stronger enemies.
- When to use: To execute dangerous zombies quickly (Virals, volatile runners) or to conserve weapon durability.
- Synergies: Use after a stagger or knockdown to initiate quickly.
- Unlock: Power Level 5
- Effect: Hold Melee Attack for a charged swing. Deals 1.5x weapon damage and increased stagger. Drains stamina. Longer charge time = more damage (up to ~2x). Can break wooden doors.
- Cooldown: None; stamina cost.
- Upgrades: Charged time reduces slightly; damage bonus scales with Power.
- When to use: Breaking open locked crates, dealing heavy damage to a Demolisher, or finishing a Goon.
- Synergies: Power Attack after a dodge to counter; follow with stomp.
- Unlock: Power Level 7
- Effect: Hold Aim + Quick Throw (or dedicated throw button) to hurl your melee weapon at an enemy. Deals weapon damage plus bonus (1.2x). Weapon will stick and can be retrieved if not lost. If the enemy dies, weapon returns to inventory (with durability loss).
- Cooldown: None; uses weapon (one at a time).
- Upgrades: Throw damage and range increase with Power; skill "Combat Throw" (Level 12) reduces stamina cost.
- When to use: Ranged finish on a fleeing enemy, hitting a distant bomb barrel, or disarming a human enemy (if they block, weapon may be deflected).
- Synergies: Combine with Perfect Throw (Agility) for increased accuracy.
- Unlock: Power Level 3 (also requires Survivor level 1 for Camouflage? No, standalone)
- Effect: While sneaking behind a human enemy (not zombie), press Melee Attack to perform a silent kill. No sound alert. Works only on unaware humans or those in Camouflage from zombies.
- Cooldown: None; requires stealth approach.
- Upgrades: Speed of takedown increases with Power; later upgrades allow takedowns on biters (Power level 8).
- When to use: Clearing human outposts silently, avoiding alarms.
- Synergies: Camouflage (Survivor) for stealth on zombies; use Boomerang instead of attacking.
- Unlock: Power Level 9
- Effect: When an enemy attacks (melee or projectile), press Block (right mouse button / R2) at the correct timing to parry. Temporarily stuns the enemy and leaves them open for a counter (quick attack). Works against humans, Virals, and some special infected.
- Cooldown: 1 second after a successful parry (if you follow up).
- Upgrades: Parry window widens with Power level.
- When to use: Against human raiders with weapons, or Volatile swipes; essential for high-level combat.
- Synergies: Parry -> Power Attack -> Stomp; Parry -> Finisher.
- Unlock: The Following story quest "The Gate" reward
- Effect: Press a hotkey (default Q on PC) to enter Frenzy mode. For 10 seconds, attacks are faster, stamina regenerates, and you take 50% less damage killing zombies. Can be activated once per 60 seconds (cooldown).
- Cooldown: 60 seconds.
- Upgrades: Duration increases to 15s with Power level 13 (The Following); damage bonus 20%.
- When to use: Surrounded by a horde, fighting Volatiles, or finishing a difficult encounter.
- Synergies: Use before entering a nest; combine with UV flashlight (Survivor) for night safety.
- Unlock: Survivor Level 0 (default blueprint)
- Effect: Craft firecrackers from 1 Alcohol + 1 Paper. Throw to attract zombies within a radius for 5 seconds. Loud noise. Draws attention.
- Cooldown: None; uses inventory item.
- Upgrades: Survivor level increases crafting yield (craft 2 per materials at Level 4, 3 at Level 8).
- When to use: Distracting zombies from a path, grouping them for a single explosion, or escaping a pursuer.
- Synergies: Use with Gas Tanks for area damage; follow with a grenade or Molotov.
- Unlock: Survivor Level 0 (default blueprint)
- Effect: Craft medkit from 2 Herbs + 1 Alcohol. Heals 25% health over 3 seconds. Can be used while moving. Starts healing immediately.
- Cooldown: None; uses inventory.
- Upgrades: Survivor level increases medkit healing percentage (35% at Level 5, 50% at Level 10). Faster heal speed.
- When to use: During combat, after taking heavy damage, or before a tough fight.
- Synergies: Keep several crafted; use with UV flashlight (night) to survive.
- Unlock: Survivor Level 1
- Effect: Craft camouflage consumable (1 Herbs + 1 Alcohol). When applied, zombies ignore you for 30 seconds (does not affect Volatiles or Rais's men). Walking near zombies will not trigger attacks. Attacking breaks camouflage.
- Cooldown: None; uses inventory.
- Upgrades: Duration increases (1 minute at Level 6, 2 minutes at Level 12); allows moving faster while camouflaged.
- When to use: Sneaking through infested areas, looting dangerous zones, or passing a horde without fighting.
- Synergies: Use for stealth takedowns on humans (they see through it, but zombies ignore you); combined with firecrackers to distract zombies away.
- Unlock: Survivor Level 2 (blueprint)
- Effect: Craft UV flashlight from 1 Battery + 1 Scrap Metal. Attaches to your weapon (melee). When activated, emits a bright UV cone that stuns Volatiles and prevents their attacks. Drains batteries quickly (1 battery per ~5 seconds).
- Cooldown: None; uses battery charge. Can toggle on/off.
- Upgrades: Survivor level reduces battery consumption (twice as long at Level 8).
- When to use: Nighttime exploration, fighting a Volatile or Volatile horde, opening doors near nests.
- Synergies: Use with Frenzy (The Following) for night combat; combine with flare gun to blind.
- Unlock: Survivor Level 3 (blueprint)
- Effect: Craft from 1 Herbs + 1 Alcohol + 1 Antizine (?), actually: 1 Herbs + 1 Alcohol. Activates a green-tinted night vision for 60 seconds. Allows better visibility in darkness. Not as effective as a flashlight but less attracting.
- Cooldown: None; uses inventory.
- Upgrades: Duration increases (90s at Level 7, 2 min at Level 11).
- When to use: Navigating dark interiors without alerting enemies, or when flashlight batteries are low.
- Synergies: Use with Camouflage for stealth night movement.
- Unlock: Survivor Level 4 (blueprint)
- Effect: Craft from 1 Scrap Metal + 1 Alcohol. Fires a bright flare that sticks to surfaces and burns for 10 seconds. Can ignite zombies and cause panic among Virals. Also useful for signaling.
- Cooldown: None; uses item.
- Upgrades: Burn duration increases (15s at Level 9); crafting yield doubles.
- When to use: Crowd control, creating a safe zone (zombies avoid fire), or setting up traps.
- Synergies: Combine with Oil Canisters for explosions; use before entering a fight to create barrier.
- Unlock: The Following story: "The Gates of Hell"
- Effect: Craft from 1 Herbs + 1 Alcohol + 1 Honey (?). Spray on yourself to repel zombies for 30 seconds. They will not approach within a small radius. Does not work on Volatiles.
- Cooldown: None; uses inventory.
- Upgrades: Radius increases with Survivor level (The Following).
- When to use: Looting in enclosed spaces, when overwhelmed, or during daytime exploration.
- Synergies: Use with UV light for all-around protection.
- Unlock: The Following story: "The Boiling Point"
- Effect: Craft from 1 Alcohol + 1 Herbs + 1 Scrap Metal. Injection grants +50% movement speed and +25% stamina regen for 20 seconds. Overdose penalty if used twice in short succession (damage).
- Cooldown: None; uses inventory; delayed use penalty.
- Upgrades: Duration increases (30s at Level 10).
- When to use: Emergency escape, running during night, or completing time-sensitive challenges.
- Synergies: With Frenzy for maximum speed and damage.
- Unlock: Survivor Level 6 (blueprint)
- Effect: Craft from 1 Scrap Metal + 1 Alcohol + 1 Gas Canister. Primed grenade that explodes on impact or after 3 seconds. Massive damage and knockback. Can destroy barriers.
- Cooldown: None; uses inventory.
- Upgrades: Blast radius increases; crafting yield.
- When to use: Clearing large groups, destroying nests, or hitting Demolishers.
- Synergies: Use with firecrackers to group enemies; follow with Molotov for lingering fire.
- Unlock: Survivor Level 8 (blueprint)
- Effect: Craft from 1 Copper Wire + 1 Scrap Metal + 1 Gunpowder. Place a tripwire bomb that detonates when an enemy passes. One-time use. Can be placed on walls or ground.
- Cooldown: None; uses inventory.
- Upgrades: Damage and trigger radius increase.
- When to use: Setting traps during defense missions, protecting a position, or killing Volatiles at a bottleneck.
- Synergies: Combine with firecrackers to lure enemies into minefield.
- Unlock: The Following story: "The Prodigal Son"
- Effect: Craft from 1 Battery + 1 Scrap Metal + 1 Copper Wire. Place a device that creates an electric shockwave, stunning enemies in a large radius. Lasts 5 seconds.
- Cooldown: None; uses inventory.
- Upgrades: Stun duration increases; rechargeable? No, single use.
- When to use: Crowd control in a pinch, especially against Volatiles.
- Synergies: Follow with Power Attack or explosive.
- Core Skills: Sprint, Vault, Dropkick, Grappling Hook, Air Downward Stomp, Dodge.
- Support Skills: Fast Climber, Aimed Throw, Perfect Throw, Parachute.
- Playstyle: Constantly moving, using verticality and tightropes. Rely on dropkicks and stomps to deal damage. Escape easily. Use grappling hook for repositioning.
- Weapon: Light weapons (knives, machetes) to maintain speed.
- When to use: Night missions, exploring ruins, fleeing overwhelming odds.
- Synergy: Dodge + dropkick = safe offensive; Vault + stomp = mini ground pound.
- Core Skills: Kick, Ground Pound, Stomp, Finisher, Power Attack, Weapon Throw, Counter Attack.
- Support Skills: Stealth Takedown (for humans), Frenzy (The Following).
- Playstyle: Aggressive, upfront combat. Use power attacks to break defenses, ground pound to knock down groups, stomp to finish. Counter attack for high-risk high-reward.
- Weapon: Heavy weapons (sledgehammers, two-handed axes) for maximum damage.
- When to use: Daytime clearing, boss fights, horde engagements (with Frenzy).
- Synergy: Counter -> Power Attack -> Stomp = kill combo; Ground Pound -> Stomp = area kill.
- Core Skills: Firecrackers, Camouflage, UV Light, Explosive Grenades, Claymore, Turbo Booster, Night Vision Booster.
- Support Skills: Medkit, Flare Gun, Zom Repellent.
- Playstyle: Prepared, resourceful. Use CC and traps to control battles. Prefer stealth and gadgets over direct combat. Use Camouflage for safe looting. Use explosives for area denial.
- Weapon: Any, but leverage firecrackers for grouping.
- When to use: Infested areas, prisoner missions, night expeditions with UV.
- Synergy: Firecrackers + Explosive Grenade = massive chain; Camouflage + Stealth Takedown (Power) = silent human elimination.
- Core Skills: Mix: Dropkick (Agility), Stomp (Power), Medkit & Firecrackers (Survivor).
- Playstyle: Versatile. Adapt to situation. Good for general progression.
- Leveling: Try to keep all three trees roughly equal.
- When to use: First playthrough, story missions, exploring.
- Early Game (Levels 1-5): Prioritize Agility points to unlock Vault and Dropkick for mobility. In Power, get Stomp for instant kills on fallen zombies. Survivor: craft medkits and firecrackers.
- Mid Game (Level 6-12): Unlock Grappling Hook (Agility 12) -> game changer for speed. Power: Counter Attack and Finisher are huge. Survivor: Camouflage and UV Light for night survival.
- Late Game (Level 13+): Power: Frenzy (The Following) for insane damage. Survivor: Explosive Grenades and Claymores for heavy enemies. Agility: Parachute for verticality.
#### 1.2 Slide
#### 1.3 Vault
#### 1.4 Climb
#### 1.5 Fast Climber
#### 1.6 Aimed Throw
#### 1.7 Dropkick
#### 1.8 Grappling Hook
#### 1.9 Air Downward Stomp
#### 1.10 Dodge
#### 1.11 Perfect Throw
#### 1.12 Parachute (The Following Expansion)
---
2. Power Skills
Power skills enhance combat, weapon handling, and physical attacks. Earned by killing zombies and performing combat actions.
#### 2.1 Kick
#### 2.2 Ground Pound
#### 2.3 Stomp
#### 2.4 Finisher
#### 2.5 Power Attack
#### 2.6 Weapon Throw (also called "Savage Throw")
#### 2.7 Stealth Takedown
#### 2.8 Counter Attack (also called "Parry")
#### 2.9 Frenzy (The Following Expansion)
---
3. Survivor Skills
Survivor skills focus on crafting, resource management, and special tools. Earned by completing missions, side quests, and general survival actions.
#### 3.1 Firecrackers
#### 3.2 Medkit
#### 3.3 Grappling Hook (see Agility)
#### 3.4 Cloak (Camouflage)
#### 3.5 UV Light (Flashlight)
#### 3.6 Night Vision Booster
#### 3.7 Flare Gun (Pistol Flare)
#### 3.8 ZOMBIE REPELLENT (The Following)
#### 3.9 Turbo Booster (The Following)
#### 3.10 Explosive Grenade
#### 3.11 Claymore (Land Mine)
#### 3.12 Typhoon (Shockwave) / Blast (The Following)
---
4. Skill Tree Synergies & Recommended Builds
#### 4.1 Parkour Master (Agility Focus)
#### 4.2 Brawler (Power Focus)
#### 4.3 Tactician (Survivor Focus)
#### 4.4 Hybrid Build (Balance)
---
5. Skill Unlock Order & Tips
---
6. Cooldown Table (Active Skills)
| Skill | Cooldown | Stamina Cost | Notes |
|---|---|---|---|
| Sprint | None | Continuous | Stops if stamina depletes |
| Slide | None | None | – |
| Vault | None | None | – |
| Fast Climber | None | Extra | – |
| Dropkick | ~2s | Moderate | – |
| Grappling Hook | None | ~20% bar | – |
| Air Downward Stomp | None | None | – |
| Dodge | None | Stamina per roll | – |
| Perfect Throw | None | None | Timing-based |
| Parachute | None | None | Requires height |
| Kick | ~0.5s | None | – |
| Ground Pound | None | None | Requires air |
| Stomp | None | None | – |
| Finisher | None | None | – |
| Power Attack | None | Medium | Charged |
| Weapon Throw | None | Low | Uses weapon |
| Stealth Takedown | None | None | – |
| Counter Attack | ~1s after parry | None | – |
| Frenzy | 60s | None | Duration 10-15s |
| Firecrackers | None | None | Inventory item |
| Medkit | None | None | Inventory item |
| Camouflage | None | None | Inventory item |
| UV Light | None | Battery drain | Toggle |
| Night Vision | None | None | Inventory item |
| Flare Gun | None | None | Inventory item |
| Zom Repellent | None | None | The Following |
| Turbo Booster | None | None | Injection |
| Explosive Grenade | None | None | Inventory |
| Claymore | None | None | Tripwire |
| Typhoon/Blast | None | None | The Following |
7. Summary
Mastering the three skill trees in Dying Light is key to surviving Harran. Agility makes you untouchable, Power makes you a killer, and Survivor makes you prepared. Mix and match skills to suit your playstyle, and always keep your skill levels balanced unless you have a specific role in co-op. The real power lies in synergies between trees—use Camouflage (Survivor) + Stealth Takedown (Power) or Dropkick (Agility) + Ground Pound (Power) for devastating combos. Good luck, runner.

Characters & Roles
Characters & Roles Guide for Dying Light
This guide covers every playable character, major non-playable character (NPC), and the distinct playable roles (skill specializations) available in Dying Light (including the The Following expansion). Although the game features only one protagonist—Kyle Crane—the supporting cast, factions, and skill tree paths define your experience. We break down each character’s background, strengths, weaknesses, recommended playstyles, unlock conditions, and team synergy in co-op.
---
1. Main Protagonist: Kyle Crane
Background: Kyle Crane is a Global Relief Effort (GRE) agent sent to the quarantined city of Harran to retrieve a sensitive file from a rogue agent. He quickly becomes embroiled in the struggle between the peaceful survivors of the Tower and the brutal bandit leader, Rais. Crane is resourceful, athletic, and determined, but he is not a superhuman—he must scavenge, craft, and earn his skills.
Strengths:
- Highly adaptable: Can specialize into parkour, combat, or survival crafting.
- Parkour excellence: Can climb, slide, and vault over obstacles, making him the most mobile character in the city.
- Versatile combat: Can use melee weapons, firearms, throwables, and environmental kills.
- Crafting potential: Can create medkits, lockpicks, weapon upgrades, and electrical traps.
- Low starting stats: Very vulnerable at low levels; takes heavy fall damage and is easily grabbed by Virals.
- Limited stamina early on: Can’t sprint or climb for long without exhausting.
- No inherent damage reduction: Must rely on armor and skill upgrades to survive direct combat.
- Early game: A basic pipe or plank, a handful of throwing stars, and a lockpick. Prioritize a stamina booster (e.g., Grapple Hook later).
- Mid game: Blue-tier machete or katana, reinforced police rifle, UV flashlight to repel Volatiles, and the Grapple Hook from the Dying Light: The Following expansion (or side quests).
- Late game: Gold-tier weapons with elemental mods (e.g., fire, electricity). Use the Kuai Dagger for speed. Equip a silenced pistol for human enemies. Carry multiple medkits, flares, and boosters.
- Role: The Tower’s quartermaster and early quest giver.
- Background: A former runner who now manages supplies. He trains new survivors.
- Provides: Side quests, basic weapon blueprints, and crafting tips.
- Player interaction: Essential for unlocking the core survivor skill line.
- Role: Key story NPC, daughter of Dr. Zere, and a skilled runner.
- Background: A brave survivor who works with Crane to uncover Rais’s plans.
- Provides: Story progression, emotional motivation, and occasional aid in missions.
- Player interaction: Mostly dialogue and scripted sequences; not a playable character.
- Role: The scientist searching for a cure.
- Background: Father of Jade, former colleague of Rais. He possesses the file Crane is after.
- Provides: Critical story information and access to the Antizin (the cure drug).
- Player interaction: Key to the main story. He tasks Crane with retrieving samples and data.
- Role: Leader of the Tower survivor base.
- Background: A pragmatic and caring leader who holds the Tower together.
- Provides: Main story assignments, safe zone upgrades, and morale.
- Player interaction: Frequently gives missions to strengthen the Tower’s position.
- Role: Primary antagonist.
- Background: A former military officer turned bandit king, controlling the supply of Antizin.
- Provides: Conflict, difficulty spikes, and boss fights.
- Player interaction: Enemy NPC; Crane fights his men and eventually kills him.
- Role: Comedic duo and side quest givers.
- Background: Two eccentric scientists who conduct bizarre experiments.
- Provides: Hilarious side missions, unusual weapon blueprints (e.g., the ExpCalibur), and zany gadgets.
- Player interaction: Optional but recommended for unique rewards.
- Role: Leader of the Children of the Sun cult in the countryside.
- Background: A mysterious woman who believes in a different form of survival.
- Provides: The buggy vehicle, new story missions, and access to the countryside map.
- Player interaction: Main quest giver for The Following expansion.
- Grapple Hook (Agility rank 12): Pulls you toward ledges or enemies.
- Takedown (Agility rank 6): Stealth kill from above or behind.
- Vault Kick (Agility rank 4): Knock zombies over while jumping over them.
- Air Kick (Agility rank 8): Kicks enemies while airborne.
- Ultimate Agility (Agility rank 14): Reduces stamina cost for all parkour moves.
- Extreme mobility; can escape any situation.
- Can safely traverse rooftops and avoid ground combat.
- Stealth kills from height are powerful.
- Low damage output in direct confrontation.
- Weak against large groups of human enemies.
- Relies on stamina management.
- Lightweight weapons: knives, machetes, or the Kuai Dagger (fast attack speed).
- High-impact boots for kicks.
- The Grapple Hook (must be unlocked).
- Night Vision Boosters to see in darkness while moving.
- Power Stance (Power rank 10): Increased damage with two-handed weapons.
- Ground Pound (Power rank 8): Slam the ground to stun nearby enemies.
- Flourish (Power rank 12): Knockback enemies with a finishing move.
- Strong Attack (Power rank 6): Charged heavy hit.
- Ultimate Power (Power rank 14): Increases damage of all melee attacks.
- High single-target and area damage.
- Can stagger or knock down zombies with ease.
- Effective against Volatiles with powerful weapons.
- Slower movement and attacks.
- Vulnerable to swarms if not careful.
- Stamina drains quickly with heavy swings.
- Two-handed weapons: sledgehammers, battle axes, or the ExpCalibur.
- Weapon mods: fire, electricity, or bleeding for extra damage.
- Toughness Booster to reduce damage.
- Shield? Not available, but a heavy weapon with knockback serves as pseudo-defense.
- Chemist (Survival rank 6): Increases duration of boosters.
- Crafting Expert (Survival rank 4): Unlocks new blueprints.
- Medic (Survival rank 8): Medkits heal more and can revive allies.
- Field Medic (Survival rank 10): Can heal teammates from range.
- Ultimate Survival (Survival rank 14): Reduces crafting costs.
- Excellent resource management; can craft medkits, lockpicks, and elemental grenades.
- Can use firearms effectively (pistols, rifles) thanks to the Survival tree’s accuracy perks.
- Provides team healing and crowd control via traps.
- Low direct combat damage with melee.
- Dependent on scavenged materials.
- Firearms are loud and attract zombies.
- Any reliable melee weapon for emergencies.
- Pistol with silencer (requires blueprint from quests) for silent kills.
- Cluster mine and explosive traps for choke points.
- Medkit blueprints, UV flares, and stamina boosters.
- 1 Parkour Master: Scout ahead, mark enemies, and distract.
- 1-2 Brawlers: Frontline damage and crowd control.
- 1 Survival Crafter: Provide medkits, boosters, and trap support.
- Optional: A second Parkour Master or Brawler depending on map.
- Harran Ranger Outfit (pre-order bonus).
- Rais’s Gang Outfit (from the Following expansion).
- Bozak Horde Outfit (challenge mode reward).
- Role: Mobile base and combat platform.
- Strengths: Fast travel, can run over zombies, can be upgraded with weapons (e.g., UV lights, electric cages, machine gun).
- Weaknesses: Takes damage and can get stuck; attracts Volatiles if loud.
- Playstyle: Use the buggy to traverse long distances and mow down zombies. Park it strategically before entering buildings.
- Mother: Already covered above.
- The Old Man: Provides story clues.
Weaknesses:
Playstyle: Crane is a blank slate. In the early game, a stealthy, hit-and-run approach is recommended because resources are scarce. As you level up, you can become a full brawler, a parkour ninja, or a support crafter (see Roles below).
Unlock Conditions: Always available at the start of a new game. No special unlock required.
Recommended Equipment:
Team Synergy (Co-op): In co-op, multiple Cranes can work together. One Crane can focus on distraction and parkour flanks while another provides heavy melee cover. A third can act as a support crafter, dropping medkits and repairing weapons. Crane’s versatility means any team composition works.
---
2. Major Supporting Characters (NPCs)
2.1 Spike
2.2 Jade Aldemir
2.3 Dr. Imran Zere
2.4 Brecken
2.5 Rais
2.6 Tolga & Fatin
2.7 The “Mother” (The Following expansion)
---
3. Playable Roles / Skill Specializations
Although there are no formal classes, Kyle Crane’s skill tree system allows you to define a role. There are three skill trees: Agility, Power, and Survival. Each tree can be leveled independently, and you can mix skills, but pure specialization creates distinct playstyles. Below are three archetypal roles based on heavy investment in one tree.
3.1 The Parkour Master (Agility Specialist)
Focus: Movement, evasion, and environmental kills.
Key Skills:
Strengths:
Weaknesses:
Recommended Equipment:
Best for: Players who enjoy speed, verticality, and evasion.
3.2 The Brawler (Power Specialist)
Focus: Melee combat, heavy weapons, and crowd control.
Key Skills:
Strengths:
Weaknesses:
Recommended Equipment:
Best for: Players who want to fight head-on and feel powerful.
3.3 The Survival Crafter (Survival Specialist)
Focus: Crafting, traps, boosters, firearms, and team support.
Key Skills:
Strengths:
Weaknesses:
Recommended Equipment:
Best for: Players who enjoy crafting, support, and tactical gameplay.
---
4. Co-op Roles & Team Compositions
In co-op (up to 4 players), you can combine the above roles. Effective teams often include:
No pure “tank” role exists because damage avoidance is better than absorption. Teamwork is about synergy: the Parkour Master lures zombies into traps set by the Survivor, while Brawlers finish them.
---
5. Unlockable Bonus Characters (Cosmetic Only)
Dying Light has no unlockable playable characters beyond Kyle Crane. However, some special editions or DLCs provide alternative outfits:
These are purely cosmetic; they do not change abilities. The same applies to the Hellraid DLC, which uses a separate character in the arcade mode but still reflects Crane.
---
6. The Following Expansion – Unique Additions
The Following expansion introduces a new open-world countryside map and a drivable Buggy. While you still play as Kyle Crane, the vehicle effectively becomes a secondary character.
The Buggy:
New NPCs in The Following:
---
7. Summary Table of Characters & Roles
| Character / Role | Type | Strengths | Weaknesses | Unlock Condition |
|---|---|---|---|---|
| Kyle Crane | Playable Protagonist | Versatile, parkour, crafting | Low early stats, fall damage | Always available |
| Parkour Master | Role (Agility Tree) | Max mobility, stealth kills | Low direct damage | Skill point investment |
| Brawler | Role (Power Tree) | High melee damage, crowd control | Slow, stamina hungry | Skill point investment |
| Survival Crafter | Role (Survival Tree) | Team support, traps, firearms, cheap crafting | Weak melee, noisy guns | Skill point investment |
| Spike | NPC Quartermaster | Gives early quests and blueprints | Not combat-relevant | Story progression |
| Jade Aldemir | NPC Ally | Emotional motivation, story driver | Cannot be controlled | Story progression |
| Brecken | NPC Leader | Provides missions, safe zone upgrades | Same as above | Story progression |
| Rais | NPC Antagonist | Challenges, boss fights | Enemy; no benefit | Story progression |
| The Buggy (Following) | Vehicle | Speed, zombie crushing, upgrades | Vulnerable to damage, loud | Unlocked in expansion |
8. Final Tips for Character Progression
- Prioritize Agility early for the Grapple Hook (level 12) – it drastically changes traversal.
- Don’t ignore Survival – even a few points in Chemist and Medic help immensely.
- Respec? Not possible in base game; use a mod or start a new save if you want to change specialization.
- The Following expansion allows you to carry progress, so your build remains.
- Co-op is encouraged: different roles complement each other, and XP is shared.
---
This guide covers all characters and roles in Dying Light. Whether you choose to be a silent parkour shadow, a brute force brawler, or a crafty survivalist, Harran demands you to adapt and survive.
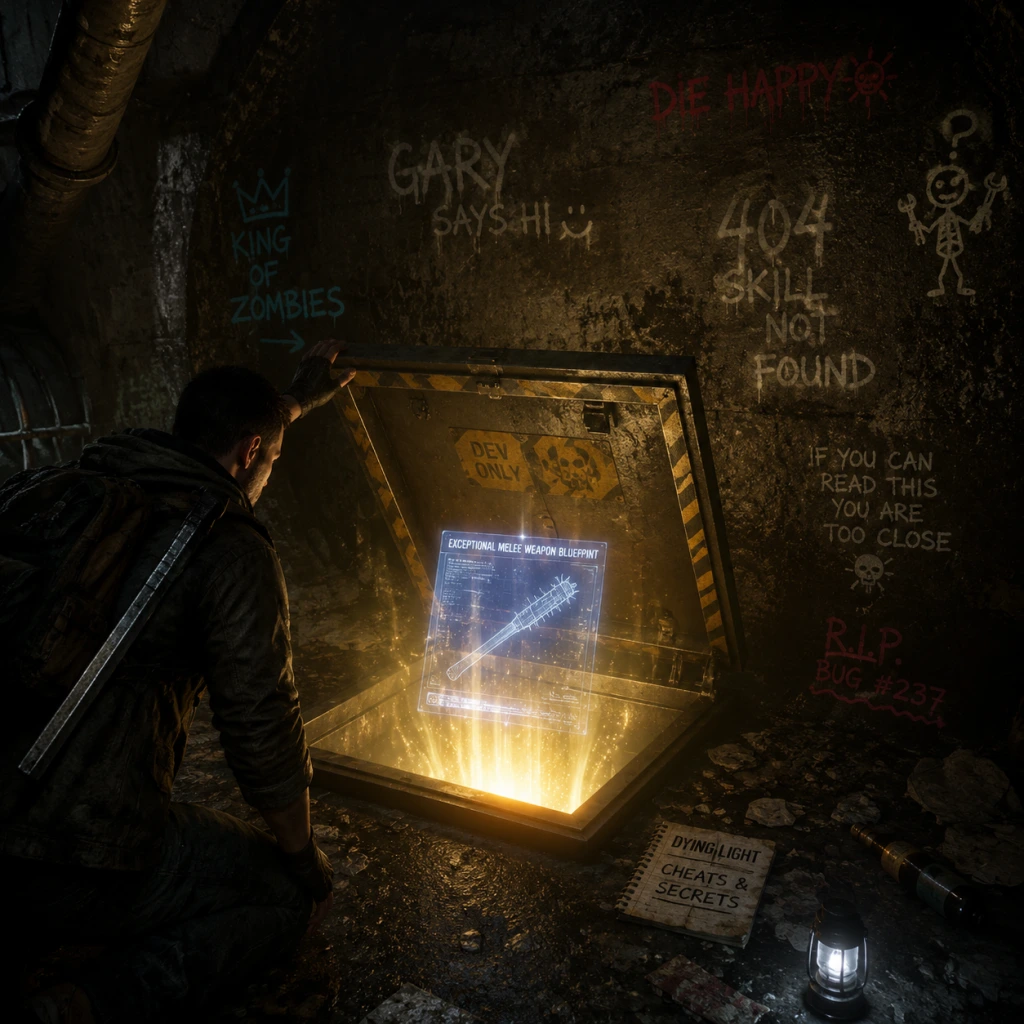
Cheats & Secrets
Cheats & Secrets Guide for Dying Light
This guide covers all known cheat codes, developer-intended secrets, Easter eggs, and hidden content in Dying Light (including The Following expansion). Note that the game has no official in-game cheat console for consoles; PC users can access a developer debug menu, but use it at your own risk (may disable achievements or corrupt save data). Focus here is on legitimate, safe hidden content.
---
⚠️ Important Notes
- No Traditional Cheat Codes: Dying Light does not have cheat codes like invincibility or infinite ammo. The developer debug menu (PC only) can be enabled but is not officially supported.
- Online Play: Using debug menu or exploits in co-op/PvP may result in bans. Single-player only for debug menu.
- Patched Exploits: Many glitches (e.g., infinite XP duplication) have been patched. We list only current, working secrets and Easter eggs.
---
##