
Elden Ring
## Elden Ring: Game Introduction ### Genre & Developer **Elden Ring** is an action role-playing game (ARPG) developed by **FromSoftware** (known for *Dark Souls*, *Bloodborne*, *Sekiro*) and published by **Bandai Namco Entertainment**. It combines the studio's signature challenging combat and intri...

Download & Installation
Download & Installation Guide for Elden Ring
This guide covers official ways to download and install Elden Ring on all supported platforms: PC (Steam), PlayStation 4 & 5, and Xbox One & Series X|S. The game is not available on Nintendo Switch, mobile platforms, or the Epic Games Store. All methods below are legitimate and provided by the publisher (Bandai Namco Entertainment) or platform holders.
---
1. System Requirements (PC Only)
Elden Ring is a demanding open-world title. Ensure your PC meets at least the minimum specs to run the game.
| Component | Minimum (720p / Low) | Recommended (1080p / High) |
|---|---|---|
| OS | Windows 10 64-bit (ver. 1909 or newer) | Windows 10 64-bit (ver. 1909 or newer) / Windows 11 |
| CPU | Intel Core i5-8400 or AMD Ryzen 3 3300X | Intel Core i7-8700K or AMD Ryzen 5 3600X |
| GPU | NVIDIA GeForce GTX 1060 3GB or AMD Radeon RX 580 4GB | NVIDIA GeForce GTX 1070 8GB or AMD Radeon RX Vega 56 8GB |
| RAM | 12 GB | 16 GB |
| Storage | 60 GB available space (SSD recommended) | 60 GB available space on SSD |
| DirectX | Version 12 | Version 12 |
---
2. Account Requirements
- PC (Steam): A free Steam account. No subscription required for single-player, but online features (co-op, PvP) require a free Steam account. No additional pay‑to‑play subscription.
- PlayStation 4 & 5: A PlayStation Network (PSN) account. Online multiplayer requires a PlayStation Plus subscription (Essential tier or higher).
- Xbox One & Series X|S: A Microsoft account. Online multiplayer requires Xbox Game Pass Core (formerly Xbox Live Gold) or a Game Pass Ultimate subscription.
---
3. Download & Installation – Step by Step
#### 3.1 PC (Steam)
1. Install Steam if not already present: Download the Steam client from [store.steampowered.com](https://store.steampowered.com) and install it.
2. Log in to your Steam account (create one if needed – free).
3. Purchase Elden Ring – either via the Steam store page or a legitimate key from authorized retailers (e.g., Humble Bundle, Fanatical). Avoid grey-market resellers.
4. Navigate to your Library – the game will appear under “Games” after purchase.
5. Click “Install” – choose a destination drive with at least 60 GB free. An SSD is highly recommended.
6. Wait for download – Steam will download and decrypt the files. The game is approximately 48–52 GB compressed, then expands to 60 GB.
7. Launch the game – once installed, click “Play”.
> Optional: After installation, right‑click the game in Library → Properties → Installed Files → “Verify integrity of game files…” to ensure no corruption.
#### 3.2 PlayStation 4 & 5
1. Connect your console to the internet and sign in to your PSN account.
2. Purchase Elden Ring – either from the PlayStation Store (digital) or insert a physical disc (downloads update patches).
3. For digital: Go to Library → Purchased → find Elden Ring → Start download. The PS5 version requires ~50 GB; the PS4 version ~40 GB.
4. For disc: Insert the disc → installation begins automatically. If not, highlight the game tile on the home screen and press “Options” → “Check for Update” to download the latest patch (typically 10–15 GB).
5. Wait for installation – the game will show a progress bar. On PS5 you can also choose “Download PS4 Version” (if you bought the cross‑gen bundle) – be careful to select the correct one for your console.
6. Launch – once complete, the game icon will be active.
> Note: The PS5 version takes advantage of the console’s SSD and DualSense features. The PS4 version runs via backward compatibility on PS5 but without the enhanced features.
#### 3.3 Xbox One & Series X|S
1. Connect your console to the internet and sign in to your Microsoft account.
2. Purchase Elden Ring – from the Microsoft Store (digital) or insert a physical disc.
3. For digital: Go to My games & apps → Full library → Owned games → select Elden Ring → “Install to” (choose internal or external storage).
4. For disc: Insert the disc → installation begins. You must have storage space for the game (≈50 GB for Series X|S, ≈45 GB for Xbox One) plus any pending updates.
5. Update – if a day‑one patch is available, it will download automatically. You can also manually check: highlight the game → press Menu button → “Manage game and add‑ons” → “Updates”.
6. Launch – the game will appear on your home screen when ready.
> Smart Delivery: Xbox One users who later upgrade to Series X|S will automatically receive the enhanced version free of charge. Ensure you are signed in with the same Microsoft account.
---
4. Storage Space & Installation Sizes
| Platform | Installation Size (approx.) | Notes |
|---|---|---|
| PC | 60 GB (SSD recommended) | Compressed download + unpack |
| PS5 | 50 GB | Includes all patches |
| PS4 | 40 GB (plus patches ~10 GB) | Physical disc users need extra space for patches |
| Xbox S/X | 50 GB | Series X |
| Xbox One | 45 GB | Includes HDR texture pack |
---
5. First Launch Setup
1. Language selection – choose on‑screen text and voice‑over language (supports English, French, German, Italian, Spanish, Japanese, Korean, Simplified/Traditional Chinese, etc.).
2. Online connectivity – on PC, the game will prompt you to confirm online access to enable messages, phantoms, and invasions. You can disable it via “Play Offline” in the menu at any time.
3. Settings adjustments – recommended before starting:
- Graphics (PC): Set resolution to native monitor, VSync On, Texture Quality High (if GPU > 4 GB VRAM), Anti‑aliasing Low or Off for performance. Tweak shadows and volumetric clouds based on your GPU.
- Controls: Standard layout. You can remap buttons in the System → Controls menu.
- Difficulty: Elden Ring uses no difficulty slider; prepare to learn the combat.
4. Start a new game – character creation begins after the title screen.
---
6. Common Installation Errors & Fixes
| Error/Issue | Platform | Cause / Fix |
|---|---|---|
| “Not enough disk space” | All | Free up space (uninstall unused games, delete temporary files). On PC, ensure drive has > 60 GB. |
| “Disk write error” / “Corrupt files” | PC | Verify game files via Steam → Properties → Installed Files → Verify. Also run `chkdsk` on the drive. |
| Game crashes on launch | PC | Update GPU drivers, disable overlays (Discord, Nvidia GeForce Experience), run as admin. |
| Stuck on “Preparing to launch” | PC | Restart Steam, clear download cache (Steam → Settings → Downloads → Clear Download Cache). |
| “Unable to connect to server” | All | Check internet connection. On PC, disable Windows Firewall temporarily or add Elden Ring to exceptions. On consoles, test network settings. |
| Install stuck at 99% | PS4/PS5 | Pause and resume download, or restart console. If using disc, check for scratches. |
| Xbox slow download | Xbox | Pause other downloads, ensure console is set to “Instant‑On” (to download in background). |
| “Corrupted data” on PlayStation | PS4/PS5 | Delete the game and reinstall. If using disc, clean it and try again. |
- Restart the platform (PC, console) completely.
- Ensure the latest system software/firmware is installed.
- Disable any antivirus or firewall temporarily for PC installations.
---
7. Post‑Installation Verification
After installation, confirm the game runs correctly by:
1. Launching the game – you should see the Bandai Namco / FromSoftware logo, then a title screen with “Press Any Button / Start”.
2. Check the version number (usually shown in the main menu or system tab) – update to the latest patch (v1.12 as of writing).
3. Test basic controls – move the character, attack, and open the menu. If everything responds without lag or error, installation is successful.
4. Online check – if you intend to play online, enter a “Bloodstain” or messages area to verify connections. A “Online session established” message will appear.
5. Save file creation – after character creation, the game auto‑saves. Verify by checking the save data location:
- PC: `%appdata%\EldenRing\[steam_id]\`
- PS4/PS5: Settings → Storage → Saved Data on system storage
- Xbox: My games & apps → Manage → Saved Data
If the game runs without errors and you can access the tutorial area, you are ready to explore the Lands Between!
---
Last updated: October 2024. Always refer to the official Bandai Namco support page for the latest patches and known issues.

Game Introduction
Elden Ring: Game Introduction
Genre & Developer
Elden Ring is an action role-playing game (ARPG) developed by FromSoftware (known for Dark Souls, Bloodborne, Sekiro) and published by Bandai Namco Entertainment. It combines the studio's signature challenging combat and intricate world design with a vast open-world structure.
Release Timeline & Platforms
- Release Date: February 25, 2022
- Platforms: PC (Steam), PlayStation 4, PlayStation 5, Xbox One, Xbox Series X|S
- Cross-Generation Support: Yes, with free upgrades from PS4 to PS5 and Xbox One to Series X|S (digital versions).
- The Tarnished – Your custom protagonist, a resurrected exile seeking the throne.
- Queen Marika the Eternal – The goddess who shattered the Elden Ring; her body is imprisoned within the Elden Throne.
- Radagon – Marika's male form and the final boss before the Elden Beast.
- Godfrey, First Elden Lord – A powerful warrior and one of the final bosses.
- Malekith, the Black Blade – Guardian of the Rune of Death.
- The Demigods – Rulers of each region (e.g., Godrick the Grafted, Rennala of the Full Moon, Radahn, Morgott, Mohg, Malenia, Miquella).
- Melina – A mysterious maiden who aids you by offering the ability to level up at Sites of Grace and later torches the Erdtree.
- Freedom & Exploration: An open world that rewards curiosity with hidden caves, secret bosses, and legendary loot.
- Deep Combat: fluid melee, magic, and ranged combat with dozens of weapon types, Ashes of War (special moves), and Spirit Ashes (summonable allies).
- Tough but Fair Difficulty: The hallmark FromSoftware challenge—enemies punish mistakes but every death is a learning opportunity.
- Rich Lore: A world built in collaboration with George R.R. Martin (author of A Song of Ice and Fire), offering a mythic, cryptic narrative.
- Customization: Hundreds of weapons, armor sets, spells, incantations, and builds (Strength, Dexterity, Intelligence, Faith, Arcane).
- Core fans of action RPGs and FromSoftware titles (Dark Souls veterans).
- Players seeking a vast, non-linear open world with high replayability.
- Those who enjoy challenging combat, deep lore, and player-driven storytelling.
- Suitable for both solo players and cooperative/competitive players.
- Single-Player: Complete offline with NPC summons and no invasions from other players.
- Online Multiplayer:
- Asynchronous Multiplayer: Bloodstains (death replays), messages (player-written hints), and phantoms (transparent player ghosts).
- Offline Mode: Play entirely solo with NPC summons only. No invasions, no messages, no bloodstains.
- Online Mode: Requires internet connection but optional via in-game menu. Online features use a dedicated server for matchmaking, social features, and anti-cheat (EasyAntiCheat on PC).
- Shadow of the Erdtree (released June 21, 2024) – The only major expansion. Adds a new map region called the Land of Shadow, accessible from a cocoon in Mohgwyn Palace. Includes new weapons, armor, spells, bosses (e.g., Messmer the Impaler, Romina, Saint of the Bud), and a deeper story about Miquella's connection to the Erdtree. Priced at $39.99 (USD) and requires the base game.
- No other paid DLC or microtransactions.
Story Overview
Set in the Lands Between, a realm shattered by the shattering of the Elden Ring—a cosmic artifact that governs the natural order. The game begins after the destruction of the Ring and the disappearance of its fragments, the Great Runes, claimed by demigods who now rule warring regions. You play as a Tarnished, an exile of no renown, summoned back to the Lands Between to become the Elden Lord by collecting the Great Runes and defeating the Elden Beast. The narrative is delivered through fragmented lore, item descriptions, NPC dialogues, and environmental storytelling.
Setting
A sprawling, interconnected world of six major regions: Limgrave (starting grassland), Liurnia of the Lakes (mystical swamps), Caelid (scarlet rot-blighted wasteland), Altus Plateau (golden capital), Mountaintops of the Giants (frozen peaks), and Siofra River/Deeproot Depths (underground civilizations). Each region features distinct biomes, dungeons, castles, and roaming bosses. The world is seamless—no loading screens between areas (except fast travel).
Main Characters
Core Appeal
Target Audience
Game Modes
- Co-op: Summon up to two other players to help with areas and bosses (via Furlcalling Finger Remedy).
- PvP Invasions: Players can be invaded by hostile phantoms; also supports duels via red summon signs.
Online/Offline Support
DLC / Expansion Overview
What Makes Elden Ring Unique?
1. Open-World Soulslike: It's the first FromSoftware game to blend the classic Souls formula with a truly open, seamless world, offering unparalleled exploration freedom.
2. Martin's Lore Foundation: The collaboration with a renowned fantasy author gives the world a mythic depth rarely seen in video games.
3. Spirit Ashes System: Instead of traditional co-op only, players can summon AI-controlled spirits during boss fights, offering solo players tactical options.
4. Random Encounters & Hidden Paths: The world is packed with secrets—illusory walls, teleporter traps, mini-dungeons, and roaming field bosses that surprise even veteran players.
5. Build Diversity: Stat-based builds (e.g., pure faith caster, bleed Arcane, dual-wield Greatswords) each feel distinct, with dozens of viable playstyles.
6. No Handholding: The game offers minimal direction, trusting players to discover its secrets and overcome obstacles through persistence and experimentation.

Getting Started
Getting Started in Elden Ring: A Newcomer's Guide
Welcome to the Lands Between. This guide is designed to help brand-new players survive the first few hours, avoid common pitfalls, and build a solid foundation for your journey. Follow this step-by-step to make your start as smooth as possible.
1. Character Creation: Your First Decision
When you start a new game, you'll go through a brief cinematic and then the Character Creation menu. This allows you to customize your appearance, but more importantly, choose a Starting Class and a Keepsake (starting gift).
#### Starting Classes (Recommended for Beginners)
| Class | VIG | MND | END | STR | DEX | INT | FAI | ARC | Weapon | Key Stats | Best For |
|---|---|---|---|---|---|---|---|---|---|---|---|
| Vagabond | 15 | 10 | 11 | 14 | 13 | 9 | 9 | 7 | Longsword + Heater Shield | STR/DEX, high VIG | Easiest start: tanky, good shield, versatile sword |
| Warrior | 11 | 12 | 11 | 10 | 16 | 10 | 8 | 9 | Scimitar (dual) | DEX, good stamina | Fast dual-wielding; requires rolling skill |
| Hero | 14 | 9 | 12 | 16 | 9 | 7 | 8 | 11 | Battle Axe | STR, high VIG | Strong early damage, simple playstyle |
| Samurai | 12 | 11 | 13 | 12 | 15 | 9 | 8 | 7 | Uchigatana + Longbow | DEX, reach, ranged option | Great starting weapon (bleed), solid all-rounder |
| Astrologer | 9 | 15 | 9 | 8 | 12 | 16 | 7 | 9 | Glintstone Staff + Short Sword | INT, ranged spells | Magic from the start; careful with low HP |
| Prisoner | 11 | 12 | 11 | 11 | 14 | 14 | 6 | 9 | Estoc + Glintstone Staff | INT/DEX hybrid, magic + melee | Flexible but requires managing two stats |
| Confessor | 10 | 13 | 10 | 12 | 12 | 9 | 14 | 9 | Broadsword + Finger Seal | FAI, incantations, stealth | Good for faith builds; balanced |
| Wretch | 10 | 10 | 10 | 10 | 10 | 10 | 10 | 10 | Club (no armor) | None, all stats 10 | Hard mode; not recommended for first playthrough |
#### Keepsake (Starting Gift)
Choose Golden Seed. This gives you an extra Flask charge for healing, which is invaluable early on. Other options like Stonesword Keys (unlock fog doors early) are good but less critical. Do not pick the Imp's Head or Bewitching Branch – they're niche and won't help a beginner.
#### Appearance
You can change your appearance later with a rare item (Rennala's Rebirth), so don't stress. Just make something you like and move on.
2. First Hour Walkthrough (Spoiler-Free)
After creation, you awaken in the Chapel of Anticipation. Follow the path, fight the first enemy (very easy), then go outside. A massive boss, the Grafted Scion, will appear. Do not fight it. You are meant to die here – that triggers a cutscene that transports you to Limgrave. Accept death; you lose nothing.
You'll wake up in the Cave of Knowledge. This is the tutorial area. Follow these steps:
1. Interact with the corpse on the ground to get your first weapon and shield (if you didn't start with them).
2. Proceed forward – a glowing message tells you how to attack (R1/RB).
3. Kill the single enemy ahead. Then stop at the Site of Grace (golden glowing tree) – interact with it to rest and trigger a message explaining how to use Flasks.
4. Continue: you'll see a narrow hallway with a message reading "Try jumping". Jump over the gap (press L3 on controller while running).
5. Further on, you'll encounter a spectral tree sentinel – sneak past or kill it (it's weak).
6. At the end, a golden fog door leads to the first real boss: Soldier of Godrick. This is a basic enemy; learn to block, dodge, and attack. Defeat him easily.
7. Exit the fog door into the open world. You'll see a massive golden tree ahead. Follow the path to meet your first Merchant and eventually reach the First Step Site of Grace.
Tip: Loot every corpse and glowing item you see. Collect Runes (currency/XP) from defeated enemies.
3. Controls (All Platforms)
Elden Ring uses a similar control scheme across platforms. Here's a quick reference. Customize in Settings > Controls.
| Action | PlayStation (PS4/PS5) | Xbox (One/Series X | S) | PC (Keyboard + Mouse) |
|---|---|---|---|---|
| Move | Left Stick | Left Stick | W/A/S/D | |
| Camera | Right Stick | Right Stick | Mouse movement | |
| Light Attack | R1 | RB | Left Mouse Button | |
| Heavy Attack | R2 | RT | Hold Left Mouse + release OR Shift + Left Click | |
| Guard / Block | L1 (hold) | LB (hold) | Right Mouse Button (hold) | |
| Weapon Skill / Parry | L2 | LT | Shift + Right Mouse Button | |
| Interact | Triangle | Y | E | |
| Use Item (D-Pad up) | D-Pad Up | D-Pad Up | 1-4 keys as assigned | |
| Use Flask (Quick Pouch) | Square + D-Pad? Actually default Flask is on D-Pad Down | D-Pad Down | Assigned key (default not set; use Pouch) | |
| Jump | L3 (press left stick) | L3 | Space | |
| Sprint / Dodge | Circle (hold) / Circle (tap) | B (hold) / B (tap) | Shift (hold) / Space (tap) | |
| Lock-On / Switch Target | R3 (press right stick) | R3 | Middle Mouse Button (click scroll wheel) | |
| Two-hand Weapon | Triangle + R1/L1 (hold) | Y + RB/LB | E + Left/Right Mouse | |
| Open Map | Touchpad (hold) | View Button (two overlapping squares) | G | |
| Pouch (holds Flask, Torrent whistle) | Triangle + D-Pad direction | Y + D-Pad direction | F + 1-4 (set in Options) | |
| Inventory | Options | Menu Button | Esc |
4. UI Overview
Your screen has:
- Top-left: HP bar (red), FP bar (blue, for spells/skills), Stamina bar (green). Below those are equipped weapons/items.
- Bottom-left: Rune count (currency/XP) and equipped Talismans (if any).
- Bottom-right: Quick Items (D-Pad up/down cycles them; Flask is usually on D-Pad Down). Also shows equipped weapons.
- Center: Lock-on reticle, compass with markers (Sites of Grace, etc.).
- Explore Limgrave thoroughly. Stick to the starting area (Limgrave) before going to the Weeping Peninsula or Caelid.
- Follow the golden arrows on the map (guiding light) towards the first major dungeon – Stormveil Castle. But don't rush inside; clear the surrounding areas first.
- Collect Golden Seeds (look like glowing golden saplings on the ground) and Sacred Tears (found in churches). Use these at Sites of Grace to upgrade your Flask of Crimson Tears (HP) and Flask of Cerulean Tears (FP).
- Summon help: Use co-op by consuming a Furlcalling Finger Remedy (crafted from Erdleaf Flowers) to see summon signs. NPC summons are often near boss fog doors.
- Upgrade your weapon. Find the Smithing Table at the Church of Elleh (behind the merchant) or, better, find the Smithing Master Iji in Liurnia (later). Use Smithing Stones to upgrade weapons at a site of grace (select "Upgrade Weapon"). Focus on one main weapon.
- The Tree Sentinel – the golden knight on horseback near the First Step. He will destroy you at low level. Skip him and come back later (level 30+).
- The Dragon Agheel – in the lake north of Limgrave. Also a high-level area; avoid until you have the horse and some levels.
- The Caelid region (east of Limgrave) – enemies are far stronger. The giant dogs and birds will one-shot you. Stay out until at least level 40+.
- Using Larval Tears to respec before understanding your build – you get limited respecs, so experiment later.
- Killing NPCs – especially merchants and quest givers (e.g., Melina, Roderika, Alexander). They offer vital services and quests. If you accidentally hit one, run away and visit the Church of Vows (later) to absolve sins.
- Runes: Use them to level up frequently. Don't hoard them – you will die and lose them. Spend them at Sites of Grace.
- Smithing Stones: Found in mines (marked by small orange circles on the map). Prioritize upgrading your weapon to +3 as soon as possible.
- Golden Seeds: There are 30+ in the game. Find at least 3-4 in Limgrave to increase your Flask charges to 4-5.
- Sacred Tears: 12 total. Find at least 1 from the Third Church of Marika (northwest Limgrave) to improve heal amount.
- Crafting Materials: Erdleaf Flowers (craft Furlcalling Finger Remedies for co-op), Rowa Fruit (craft boluses for status cures), Thin Beast Bones (useful later for arrows). Always pick them up.
- [ ] Complete Cave of Knowledge (tutorial).
- [ ] Defeat Soldier of Godrick.
- [ ] Reach the First Step Site of Grace.
- [ ] Buy the Crafting Kit from the Merchant (Kale) at Church of Elleh.
- [ ] Get the Spirit Calling Bell from Renna (at night at Church of Elleh).
- [ ] Get Torrent (the horse) by resting at three Sites of Grace.
- [ ] Find at least 2 Golden Seeds: one near the First Step (behind the ruined church) and one in the Stormfoot Catacombs or near Gatefront Ruins.
- [ ] Find the Flask upgrade item (Sacred Tear) at the Third Church of Marika (northwest of Limgrave, past the lake).
- [ ] Level up Vigor to at least 15-18.
- [ ] Upgrade your starting weapon to +2 or +3 using Smithing Stones from the Limgrave Tunnels (north of the lake, near the dragon – careful! You can sneak in).
- [ ] Explore the Weeping Peninsula (south of Limgrave) – a relatively easy area with many useful items and a boss.
- [ ] Do NOT enter Stormveil Castle yet; save it for after you're level 20-25 and have a +3 weapon.
- [ ] Set up your quick pouch: map flask to an easy button combo (e.g., Triangle + Up on PS, Y + Up on Xbox).
- [ ] Map your controls: make sure jump is easily accessible (L3/left stick click by default). If uncomfortable, rebind.
- [ ] Save often? No manual saving: the game autosaves constantly. Just quit via menu.
- Death is a learning tool. You will die a lot. Each death teaches you something: enemy patterns, hazardous terrain, or a hidden ambush.
- Follow the NPC quests for unique rewards and story. Talk to every NPC until they repeat dialogue.
- Use the map markers to note points of interest (buildings, imp statues, merchants).
- Experiment with different weapons, but once you find one you like, stick with it and upgrade. Respec options come later.
- Take breaks. The game is intense. Frustration leads to mistakes.
HUD can be toggled (hold Touchpad on PS, View on Xbox, default key? Check Options) to hide for screenshots.
5. Essential Early Objectives
Your primary goal for the first two hours: Learn the basics and reach the first major hub – Roundtable Hold.
1. Find the First Merchant: From the First Step Site of Grace, head down the path towards a large ruin (Gatefront Ruins). A merchant (Kale) sits by his campfire. Buy the Crafting Kit (essential) and Torch (for caves).
2. Activate Sites of Grace: Interact with every golden tree you see. They serve as checkpoints, fast travel points, and allow leveling up (talk to Melina).
3. Get the Spirit Calling Bell: After resting at a Site of Grace at night (or after acquiring your horse), a witch named Renna may appear. If not, go to the Church of Elleh (near the First Step) at night. She gives you the Spirit Calling Bell and Lone Wolf Ashes – crucial for summoning spirit allies in boss fights.
4. Get Torrent (the horse): After resting at three Sites of Grace outside the tutorial cave (any three), Melina will appear and offer you the Spectral Steed Whistle. Accept it. This allows fast travel on a mount and double jumping.
5. Level Up: You can level up at any Site of Grace by selecting "Level Up" (after Melina gives you the ability). Prioritize Vigor (HP) until you have around 25-30. This makes the early game much more forgiving. Then bring Endurance (stamina) to 15-20. After that, invest in your primary damage stat (Strength/Dexterity/Intelligence/Faith).
6. What to Do First – And What to Avoid
#### Do:
#### Avoid:
7. Early Resource Priorities
8. Common Beginner Mistakes
1. Rushing through areas. Elden Ring rewards exploration. Take your time, read item descriptions, and pay attention to environmental clues.
2. Ignoring Vigor. Leveling HP is the #1 mistake new players make. Don't invest heavily in damage stats early; survive first.
3. Not using summons. Ashes (spirit summon) and co-op help tremendously. The game expects you to use them.
4. Getting greedy in combat. One or two hits then dodge away. Stamina management is key – never drain to zero.
5. Heading straight for the red glowing area (Caelid). The game's open world is non-linear, but Caelid is a trap for low-level characters.
6. Trading blows with bosses. Learn their tells and dodge into their attacks (rolling has invincibility frames). Block if you have a shield, but dodging is safer.
7. Not reading messages. Some player messages are helpful (though many are trolls). "Try jumping" almost always means there's a hidden path or item.
9. Day-One Checklist
Final Tips
Welcome to the Lands Between. Good luck, Tarnished.

Core Gameplay
Core Gameplay Guide for Elden Ring
Elden Ring’s core gameplay is a seamless blend of open-world exploration, methodical combat, deep character customization, and cryptic storytelling. The central loop is: Explore the Lands Between → Defeat enemies and bosses → Gain Runes (XP/currency) → Level up or upgrade gear → Conquer new areas → Face legacy dungeons and Shardbearers → Eventually reach the Elden Throne. This guide breaks down every major system across four progression tiers: Early Game (Limgrave & Weeping Peninsula), Mid Game (Liurnia & Caelid), Late Game (Altus Plateau, Mountaintops, etc.), and Endgame (post-Maliketh, Ashen Capital, optional superbosses).
Combat & Interaction Systems
Basic Controls (All Platforms)
- Attack: R1/RB (light), R2/RT (heavy).
- Block: L1/LB (with shield or two-handed weapon).
- Dodge Roll: Circle/B (tap to roll, hold to sprint).
- Jump: Square/X (opens up vertical combat, jump attacks).
- Interact: Triangle/Y (to open doors, pick up items, talk to NPCs).
- Use Flask: D-pad down (to heal with Crimson Tears or restore FP with Cerulean Tears).
- Spell/Ash of War: L2/LT (if equipped in left or right hand with appropriate catalyst/weapon).
- Stamina Management: Almost every action (attacking, blocking, sprinting, dodging) consumes stamina. Letting it hit zero leaves you vulnerable. Learn to pace actions.
- Poise: Determines your resistance to being staggered. Heavy armor and certain talismans increase poise. Large weapons also grant hyper armor during attacks.
- Guard Counter: Block an enemy attack, then immediately press heavy attack (R2/RT) to perform a powerful riposte that breaks stance. Great against humanoid foes.
- Critical Hits: When you break an enemy’s stance (via repeated attacks, jump attacks, or guard counters) or backstab them, you can perform a devastating critical hit (press R1/RB in front of them).
- Ash of War & Weapon Skills: Each weapon has a unique skill (e.g., Bloodhound’s Step, Lion’s Claw). You can swap them at Sites of Grace using Whetblades and different affinities (e.g., Keen, Heavy, Magic).
- Spirit Ashes: Summonable allies from items like the Lone Wolf Ashes. Use them during boss fights (summoning icon appears on left side of screen). Requires FP to summon. Upgrade at Roderika.
- Torrent: Your spectral steed. Summon with the Spectral Steed Whistle (in inventory). Can double-jump, dash, and heal with your own flasks. Use for exploration and certain boss fights (e.g., Flying Dragon Agheel).
- Co-op: Use Furlcalling Finger Remedy (crafted from Erdleaf Flowers) to see summon signs. Summon other players (or NPCs) to help with bosses/areas.
- Invasions: Use Recusant Finger or Bloody Finger to invade other players’ worlds. Hosts can use Taunter’s Tongue to attract invaders.
- Duels: Use Duelist’s Furled Finger to place a red sign for honorable 1v1 fights.
- Runes: Currency and XP. Defeat enemies, use consumable Runes (e.g., Gold Runes found in the world), or sell items to obtain them. Spend at Sites of Grace to level up.
- Leveling Attributes: Each level costs a certain amount of Runes. The primary attributes: Vigor (HP), Mind (FP), Endurance (Stamina & Equip Load), Strength, Dexterity, Intelligence, Faith, Arcane. Softcaps exist (e.g., Vigor up to 40 is useful, then falls off after 60).
- Weapon Upgrades: Use Smithing Stones (up to +25 regular) or Somber Smithing Stones (up to +10 unique weapons) at a blacksmith (e.g., the Roundtable Hold blacksmith). Scaling improves with upgrades and attribute increases.
- Incantations & Sorceries: Purchase or find from teachers (e.g., Sorceress Sellen, Brother Corhyn) and equip in Memory Slots (obtained from using Memory Stones or exploring). Cast using a Sacred Seal (Faith) or Glintstone Staff (Intelligence).
- Talismans: Equip up to 4 (more with Talisman Pouches found from bosses). Boost various stats or abilities (e.g., Radagon’s Soreseal raises stats but increases damage taken).
- Wondrous Physick: A customizable flask that can be mixed with different Crystal Tears (found from Minor Erdtrees or Evergaols) for a temporary boost (e.g., +15% damage, infinite FP for 15 seconds).
- Respec: After defeating Rennala, Queen of the Full Moon (Mid Game), you can rebirth using a Larval Tear (limited per playthrough). Allows reallocation of all levels except starting class base stats.
- Sites of Grace: Checkpoints that restore HP/FP/Flask charges but respawn enemies. Find them via golden light trails (Guidance of Grace).
- Map Fragments: Pick up from obelisk-like stones to reveal map areas.
- Dungeons: Catacombs, caves, mines, and tunnels often contain valuable upgrade materials, unique weapons, or boss fights.
- Evergaols: Small arenas with an imprisoned boss (e.g., Crucible Knight). Rewards usually are talismans or spells.
- Legacy Dungeons: Large, interconnected areas with multiple paths, shortcuts, mini-bosses, and a major boss (Shardbearer). Examples: Stormveil Castle, Raya Lucaria Academy, Leyndell, Royal Capital.
- Hidden Areas: Jumping puzzles, illusionary walls (roll or attack them), invisible walkways (use rainbow stones to test). The Haligtree and Mohgwyn Palace are entirely optional endgame zones.
- NPC Encounter Tracking: Note the locations of merchants, quest givers, and named enemies. Many quests span multiple regions and have multiple outcomes.
- Vargram the Raging Wolf (optional endgame invasion).
- Ranni the Witch – her questline unlocks the Age of Stars ending and leads to the Moonlight Greatsword.
- Millicent – questline tied to the Malenia boss fight and the Unalloyed Gold Needle.
- Alexander the Iron Fist – warrior jar found in several locations, rewards the Warrior Jar Shard talisman.
- Patches – tricksy NPC who surrenders and offers a quest.
- Exhaust all dialogue.
- Return to NPCs after major boss kills or after obtaining certain items.
- Some NPCs invade you at fixed spots – defeat them to advance their story or get equipment.
- Use a guide for NPC questlines if you want all endings and secret loot.
- Runes – Primary currency. Earned from kills, selling items (e.g., golden runes, unwanted gear). Use for leveling and buying consumables/gear.
- Smithing Stones – Upgrade weapons. Found in mines (tunnel dungeons) and sold by merchants (e.g., Twin Maiden Husks at Roundtable Hold after giving them Bell Bearings).
- Glovewort – Upgrade Spirit Ashes. Found in catacombs and sold with specific Bell Bearings.
- Sacred Tears & Golden Seeds – Upgrade your Flask of Wondrous Physick (Sacred Tears increase healing amount; Golden Seeds increase number of charges). Found in churches (Sacred Tears) and near Erdtree saplings (Golden Seeds).
- Crafting Materials – Gather flora and animal parts to craft arrows, boluses, throwing knives, etc. Crafting kits are available from the merchant in the Church of Elleh (Starting Area) or at Roundtable Hold.
- Bell Bearings – Give to Twin Maiden Husks to unlock infinite purchase of certain items (e.g., Smithing Stone Bell Bearing [1] unlocks infinite Smithing Stone [1] and [2]).
- Merchant Locations – Isolated merchants (marked on map after discovering) sell unique items; some move locations (e.g., the merchant in Liurnia’s lakes).
- Mohg, Lord of Blood – Found in Mohgwyn Palace. Requires a special teleport (Pureblood Knight’s Medal from Varre’s quest) or navigating the hidden path in the Consecrated Snowfield.
- Malenia, Blade of Miquella – She resides in Elphael, Brace of the Haligtree (accessible from the Consecrated Snowfield). One of the hardest bosses in the game.
- Placidusax – Hidden boss in Crumbling Farum Azula. Reached by lying down in a specific arena behind a secret path.
- Boss Remembrances – Each major boss drops a Remembrance that can be duplicated at a Walking Mausoleum (only one per mausoleum) and then turned into a unique weapon, spell, or incantation at Roundtable Hold.
- Goal: Survive, learn combat basics, gather early upgrades, defeat first Shardbearer (Godrick).
- Vigor: Prioritize to 20–25. Endurance to 15–18 for better stamina/equip load. Pick one damage stat (Strength or Dexterity) to 20–25.
- Weapons: Starting weapon +3 to +6. Find a Smithing Stone Bell Bearing [1] in Raya Lucaria Crystal Tunnel (Caelid) to buy infinite +1/+2 stones from Twin Maiden Husks.
- Key Items: Flask of Wondrous Physick (from Third Church of Marika in Limgrave), Spirit Calling Bell (from Renna at Church of Elleh at night), Torrent whistle.
- Bosses: Tree Sentinel (optional), Margit, the Fell Omen (gatekeeper to Stormveil), Godrick the Grafted (first Great Rune). Between them, explore all caves, catacombs, and ruin sites.
- Economy: Save Runes for leveling. Buy a crafting kit from Merchant Kalé. Farm golden runes from trolls near Gatefront Ruins or beast men in the Dragon-Burnt Ruins.
- Goal: Gain access to more upgrade materials, defeat Rennala and Radahn, open path to Altus Plateau.
- Attributes: Vigor to 30–35. Increase primary damage stat to 30–40. If casting, invest in Mind to 20–25.
- Weapons: +10 to +15 regular, +4 to +6 somber. Find Bell Bearings for higher tier stones (e.g., for +3/+4 from Sealed Tunnel in Altus Plateau accessible via a route from Liurnia? Or deeper Caelid mines).
- Exploration: Complete Caria Manor for the Royal Greatsword and access to Ranni’s quest. Explore Siofra River (underground zone) for powerful talismans and upgrade materials. Defeat Radahn in Redmane Castle to unlock Nokron, Eternal City (a major underground area).
- Bosses: Rennala (Raya Lucaria), Radahn (Caelid), optional: Ancestor Spirit, Regal Ancestor Spirit, Dragonkin Soldier of Nokstella, Crucible Knight Ordovis.
- Economy: Sell duplicate weapons or gear (unwanted). Use Rune farming spots like the Palace Approach Ledge-Road (Mohgwyn Palace) – but that’s technically late/endgame. Mid-game farming at Bestial Sanctum (Caelid) for low-level beastmen.
- Goal: Defeat two Shardbearers (Morgott, Rykard optional, Fire Giant), access Crumbling Farum Azula.
- Attributes: Vigor to 40–50. Damage stat to 50–60. Endurance to 25–30 for armor/weapon stamina.
- Weapons: +20 to +24 regular, +8 to +9 somber. Collect final Somber Smithing Stone [10] (e.g., in Crumbling Farum Azula or from a hidden chest in Leyndell Sewers).
- Exploration: Leyndell, Royal Capital – massive legacy dungeon with many secrets (including the Frenzied Flame Proscription). Mountaintops has a hidden boss (Borealis the Freezing Fog) and the Haligtree Medallion halves. Explore Consecrated Snowfield (access via both halves) to reach optional areas.
- Bosses: Morgott, the Omen King (Leyndell), Fire Giant (Mountaintops), optional: Mohg, Lord of Blood, Malenia (Haligtree), Godskin Duo (Crumbling Farum Azula), Beast Clergyman/Maliketh.
- Economy: Use Golden Runes from farming Albinaurics at Palace Approach Ledge-Road (Mohgwyn Palace) – most efficient Rune farm. Also sell duplicate Rune Arcs (though Rune Arcs are limited – better to keep for Great Rune activation).
- Goal: Defeat Maliketh, Godfrey, Radagon/Elden Beast, and any remaining optional bosses. Achieve your chosen ending.
- Attributes: Vigor 60 (softcap). Damage stat 80 if melee, 60 int/fth/arc + 40 mind if caster. Endurance to taste (30–40 for heavy armor).
- Weapons: Fully upgraded +25/+10. Use Ancient Dragon Smithing Stones (only 1 per game) from quests or hidden locations (e.g., after defeating the Dragonlord Placidusax, or from completing Millicent’s questline).
- Exploration: Finalize NPC quests (e.g., Ranni, Fia, Dung Eater, Goldmask). Clean up any remaining dungeons, catacombs, or world bosses (e.g., Putrid Avatar, Death Rite Bird). Collect larval tears for respec.
- Bosses: Maliketh, Godfrey/Hoarah Loux, Radagon/Elden Beast. For optional: Malenia, Dragonlord Placidusax, Lichdragon Fortissax (in Deeproot Depths), Astel, Naturalborn of the Void (if not yet killed).
- Economy: Runes become less important for leveling past ~150 (PvP meta is 125/150). Spend remaining Runes on upgrading multiple weapons or buying all consumables. Use any leftover Larval Tear for a final respec before entering NG+.
- Pure Strength: Use Colossal weapons like the Greatsword (Guts sword) with Heavy affinity. Jump attacks break poise. Pair with an offhand shield for guard counters.
- Dexterity/Arcane: Use bleed builds (e.g., Rivers of Blood or Naginata with Seppuku Ash). Arcane boosts blood build-up.
- Pure Intelligence: Moonveil Katana for fast Magic damage. Use Dark Moon Greatsword for projectiles. Spells like Comet Azur + Cerulean Hidden Tear Physick for infinite FP beam.
- Faith/Strength: Use Blasphemous Blade (Taker’s Flames skill heals on kill). Lightning incantations for extra range.
- Quality (Str/Dex): Use the Bloodhound’s Fang (dexterity/strength scaling, bleed). Versatile but less specialized.
Core Mechanics
Multiplayer Interactions
Progression & Character/Build Growth
Exploration
The world is dense with secrets:
Quests & Missions
Elden Ring does not have a traditional quest log. Instead, NPCs provide cryptic dialogue, and their quests progress based on specific triggers (e.g., exhausting dialogue, killing a certain boss, using a particular item). Important NPCs include:
Key Tips:
Economy & Resources
Endgame Structure
After defeating the fourth Shardbearer (Godrick, Rennala, Radahn, Rykard or Mohg?), the path to the Mountaintops of the Giants opens. The endgame sequence:
1. Forge of the Giants – Defeat Fire Giant to burn the Erdtree.
2. Crumbling Farum Azula – After burning the Erdtree, teleport to this floating area. Defeat Maliketh, the Black Blade to unlock the ability to turn Runes into Remembrance weapons (at Roundtable Hold).
3. Leyndell, Ashen Capital – Leyndell is transformed after Maliketh’s death. New enemies and a final area before the last boss.
4. Elden Beast – Final boss sequence: first fight Godfrey/Hoarah Loux, then Radagon/Elden Beast. Defeating them triggers an ending based on your choices (e.g., Age of Fracture, Age of Stars, Lord of Frenzied Flame).
Optional Endgame Content:
New Game Plus (NG+) – After completing the game, you can start NG+ at the Roundtable Hold, keeping all levels, armor, weapons, and most items (except key items like Great Runes). Enemy health and damage scale up significantly. NG+ cycles continue indefinitely.
Progression Tier Breakdown
#### Early Game (Levels 1–40, Limgrave, Weeping Peninsula)
#### Mid Game (Levels 40–80, Liurnia of the Lakes, Caelid, Siofra River)
#### Late Game (Levels 80–120, Altus Plateau, Leyndell, Mountaintops of the Giants)
#### Endgame (Levels 120–150+, Crumbling Farum Azula, Ashen Capital, Optional Bosses)
Build Optimization Tips:
Interactive Maps & Walkthroughs: Use community resources like the Fextralife wiki interactive map to track every item, boss, and NPC location. Remember that exploration is key – you can approach the game in any order you choose (except some locked areas).
By understanding these core systems and tier progression, you can master the Lands Between and forge your own legend. May the Guidance of Grace always light your way.
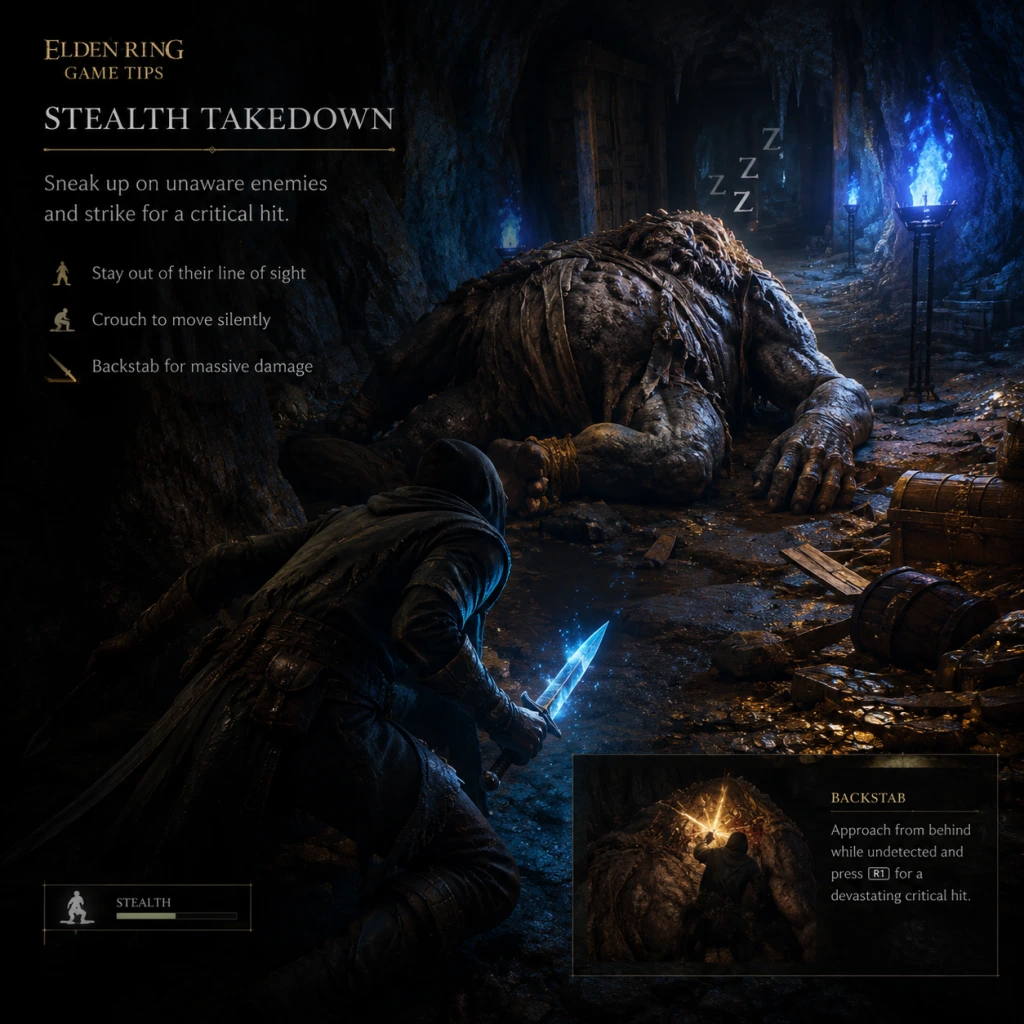
Game Tips
Game Tips for Elden Ring
This guide covers essential tips for players of all skill levels, from beginner to advanced. Tips are grouped by category for easy reference. Each tip includes an explanation and deeper analysis of why it works and when to use it.
---
Beginner Tips
1. Level Vigor First
- Explanation: Vigor increases your HP and is the most important stat early on. Most enemies can one-shot or two-shot you if Vigor is too low.
- Analysis: Pumping Vigor to at least 30-40 before heavily investing in other stats gives you a much larger margin for error. This is especially critical in open-world encounters where you face unpredictable groups or bosses. Focus on Vigor until you feel comfortable surviving multiple hits.
2. Learn to Use Guard Counters
- Explanation: After blocking an attack with a shield, immediately press R2/RT to perform a guard counter—a powerful, staggering follow-up strike.
- Analysis: Guard counters break enemy poise easily, allowing critical hits. This is a core mechanic for new players who rely on shields. Use it against slow, heavy attacks, but beware of stamina drain.
3. Explore the Starting Area (Limgrave) Thoroughly
- Explanation: Do not rush to the first main boss (Margit). Instead, roam Limgrave and the Weeping Peninsula. Complete dungeons, find golden seeds, sacred tears, and upgrade materials.
- Analysis: Early upgrades drastically ease the difficulty curve. The Weeping Peninsula is a low-level zone designed for new characters—it’s full of essential items and teaches you mechanics like spirit summons and weapon upgrades.
4. Always Summon for Bosses (If Stuck)
- Explanation: Use Spirit Ashes (e.g., Lone Wolf Ashes) and NPC summons if you’re struggling. These distractions let you heal and attack safely.
- Analysis: Many bosses are balanced around summons. Using them is not cheating—it’s part of the game design. Even for veterans, summons can create openings for heavy attacks or spells.
5. Don’t Neglect Torrent’s Upgrades
- Explanation: Torrent, your mount, can be healed with Rune Arcs or by resting at Sites of Grace. His survivability increases with your Flask upgrades (number of flasks).
- Analysis: Torrent is invaluable for exploring and escaping tough fights. Upgrading your Flask of Crimson Tears directly increases his HP. Always carry at least one Rune Arc for emergency horse healing.
---
Combat Tips
1. Master Jump Attacks
- Explanation: Jumping + R2/RT is a high-damage, high-poise-breaking attack that can be performed from a sprint or neutral position.
- Analysis: Jump attacks are faster than charged heavy attacks and often catch enemies off guard. Use them against shield-wielding enemies to break their guard, or to punish bosses during their attack recovery animations. They also build up stagger quickly with great hammers or greataxes.
2. Utilize Weapon Ash of War Movesets
- Explanation: Ash of War can be applied to weapons to change their skill and affinity (e.g., Heavy, Keen, Quality). Each Ash of War has a unique active skill (e.g., Bloody Slash, Hoarfrost Stomp).
- Analysis: Experiment with different Ashes of War to find one that complements your playstyle. For example, Bloody Slash is excellent early game for bleed builds, while Flame of the Redmanes (fire AoE) is great for staggering tough enemies. The right Ash of War can trivialize certain encounters.
3. Use Status Effects Strategically
- Explanation: Bleed, Frostbite, Poison, Scarlet Rot, and Madness can be inflicted with weapons, spells, or consumables. These dot effects deal % of max HP or debuff enemies.
- Analysis: Bleed is strong early and scales with Arcane. Frostbite reduces damage negation and deals burst damage. For bosses with massive health pools (e.g., Fire Giant), applying a status effect can significantly speed up the fight. Craft or buy greases to apply statuses to weapons without infusions.
4. Understand Poise and Hyper Armor
- Explanation: Poise determines your resistance to being staggered. Heavy armor and some weapons (colossal swords/great hammers) grant hyper armor on certain attacks.
- Analysis: If you use large weapons, you can trade hits and stagger enemies. For light weapon users, avoid trading—use speed and mobility. High poise allows you to heal through light attacks, but heavy enemy combos will still stagger you. Manage your weight load (equip load) to stay mobile or tanky.
5. Parry Timing Varies by Enemy
- Explanation: Parrying using a buckler (more frames) or a small shield/medium shield (fewer frames) requires pressing L2/LT just before an enemy’s weapon hits you.
- Analysis: Practice on humanoid enemies like soldiers or knights. Parrying is high-risk, high-reward—successful parries open enemies for critical ripostes but failed parries leave you vulnerable. Use the Buckler Parry Ash of War for easier timing. Against fast enemies, dodge instead.
---
Exploration Tips
1. Use the Map Markers and Stakes of Marika
- Explanation: Press Y/Triangle on the map to place markers (beacons, stamps). Stakes of Marika are respawn points near boss arenas—activate them automatically when you rest.
- Analysis: Mark dungeons, important merchants, or farming spots. Stakes of Marika remove runs of shame after boss wipes. Always check for a Stake of Marika before a boss fog gate—resting at Grace resets them, but they remain active once touched.
2. Follow the Light of the Guidance of Grace
- Explanation: Sites of Grace emit golden light trails pointing toward main objective paths (usually legacy dungeons).
- Analysis: These trails guide you to critical progression areas like Stormveil Castle or Raya Lucaria. However, they don’t show side content. Use them as a compass when you feel lost, but don’t ignore side paths—hidden secrets often diverge from the main grace trail.
3. Upgrade Flask Uses Before Flask Amount
- Explanation: Golden Seeds increase total flask uses (Crimson and Cerulean combined). Sacred Tears increase flask healing amount.
- Analysis: More flask uses is more valuable than stronger heals early on, because you can survive more mistakes. In later game, you want both. Explore churches (for Sacred Tears) and small golden trees (for Golden Seeds) in each region.
4. Use Torrent’s Double Jump to Avoid Ground AoEs
- Explanation: Torrent can double jump, which makes you momentarily airborne, avoiding ground-based attacks like fire pools, shockwaves, or poison.
- Analysis: This is critical in open-world encounters with dragons or giant bears. Double jump over their breath attacks or ground slams. Also useful for reaching elevated ledges without fall damage.
5. Check Every Corner for Illusions and Hidden Walls
- Explanation: Some walls and floors are illusions—hit them or roll into them to reveal secret rooms. Enemies may also be hidden.
- Analysis: In catacombs and legacy dungeons, try hitting suspicious walls (e.g., bookcases, loose stones) with a weapon. Rolling works too but costs stamina. Often hidden walls contain loot, shortcuts, or even optional bosses. Use the ‚Rolling‘ method if you’re low on stamina.
---
Resources & Economy Tips
1. Farm Runes Efficiently
- Explanation: Early game: the trolls near Stormhill Shack (5 trolls drop ~1000 runes each). Mid game: the Vulgar Militiamen in Caelid (Beast Eye area) give ~1000 each. Late game: the Albinaurics at Mogwyn Palace (Palace Approach Ledge-Road) give ~1500 each with the Golden Scarab talisman.
- Analysis: Rune farming is optional but can speed up leveling. Use the Gold Scarab talisman (found in Caelid) to boost rune gain by 20%. Pop a Golden Rune (consumable) before farming for extra. The Albinauric wave (using Radahn’s Great Rune or a bow) is the best late-game farm.
2. Sell Unwanted Items for Runes
- Explanation: You can sell weapons, armor, and crafting materials at merchants for runes.
- Analysis: Early on, sell duplicate gear or low-level weapons you won’t use. Also sell valuables like ‘Rune Arcs’? No—use Rune Arcs for boss buffs. Generally, don’t sell rare materials like Somber Smithing Stones; they’re better used for upgrades.
3. Prioritize Bell Bearings
- Explanation: Bell Bearings are given to the Twin Maiden Husks in Roundtable Hold, unlocking infinite purchase of smithing stones and upgrade materials.
- Analysis: This removes the need to farm upgrade materials. Key ones: Smithing Stone [1]-[4] Bell Bearing (Raya Lucaria Crystal Tunnel, Sealed Tunnel, etc.) and Somber Bell Bearings. Always give bearings immediately—they are tied to the merchant’s inventory permanently.
4. Crafting is Underrated
- Explanation: You can craft arrows, bolts, greases, curing items, and throwables using materials found in the wild. Recipes are purchased from merchants or found.
- Analysis: Fire arrows and sleep arrows are especially useful. Crafting heals with ‘Furlcalling Finger Remedy’ for co-op is cheap. If you’re low on runes, craft ammo instead of buying it. Also craft ‘Starlight Shards’? Actually, you cannot craft Starlight Shards—they are environmental.
5. Don’t Hoard Runes
- Explanation: Runes are both currency and XP. Holding large amounts risks losing them on death. Spend them as soon as you can.
- Analysis: If you have enough runes to level up, go back to a Grace and level up immediately. If you’re near a Merchant and need items, buy what you need. Hoarding runes only invites loss—especially in dangerous zones.
---
Build & Character Optimization Tips
1. Focus on One Damage Stat Early
- Explanation: Choose between Strength, Dexterity, Intelligence, Faith, or Arcane as your primary damage stat. Spread too thin = weak damage.
- Analysis: For example, a pure Strength build with heavy weapons (Greatsword, Giant-Crusher) scales entirely off Strength. You can later respec by defeating Rennala. Hybrid builds (e.g., Str/Faith) require more points but payoff later. Beginners: pick one damage stat and meet minimum requirements for weapons, then pump Vigor.
2. Understand Weapon Scaling Letters
- Explanation: Weapons have letter grades (S, A, B, C, D, E) for each stat. Better letters mean more damage from that stat. Infusions change scaling.
- Analysis: ‚S‘ scaling is best, but rare. A weapon with C Strength and B Dexterity is a quality weapon (requires both). If you have low stats, use a weapon with good base damage and low scaling (e.g., early Longsword). Upgrade your weapon—scaling improves slightly with upgrade levels, but infusions matter more.
3. Use a Fast & Heavy Armament
- Explanation: Carry one fast weapon (e.g., straight sword, katana) for quick hits and a heavy weapon (e.g., great hammer, colossal sword) for poise breaks.
- Analysis: This covers multiple situations. For example, use a katana against fast humanoids and a greathammer against armored foes. Swap between them via quick menu. The fast weapon also works for applying status effects while the heavy weapon punishes openings.
4. Invest in Endurance for Stamina and Equip Load
- Explanation: Endurance increases stamina and maximum equip load. Equip load determines roll speed: light (<30%), medium (30-70%), heavy (70-100%).
- Analysis: Stamina is vital for attacking, blocking, dodging, and running. Having enough Endurance to equip medium armor and a big weapon without fat-rolling is key. For casters, stamina allows multiple spells. Level Endurance to at least 20-25 by mid-game.
5. Consider Prisoner or Vagabond for Optimized Starts
- Explanation: Starting class affects base stats. Prisoner has high Int for magic builds, Vagabond has high Vig/Str/End for melee. Wretch is only for challenge runs.
- Analysis: If you plan a specific build, pick a class that minimizes wasted points. For example, a pure mage benefits from Astrologer (high Int, low Str). A paladin might pick Confessor. Respec (Rennala) can adjust but can’t lower primary starting stat below base class level.
---
Intermediate Strategies
1. Use Rune Arcs to Activate Great Runes
- Explanation: After defeating a shardbearer (e.g., Godrick, Rennala), equip their Great Rune at a Divine Tower, then use a Rune Arc to activate its buff (e.g., Godrick’s Great Rune gives +5 to all stats).
- Analysis: Rune Arcs are rare—save them for tough boss fights. Godrick’s Great Rune is excellent early because +5 to all stats is like 20 extra levels. For arcane builds, use Mohg’s Great Rune. Rune Arcs are consumed on death, so only use before a difficult encounter.
2. Master the Art of Jumping Over Sweeping Attacks
- Explanation: Many bosses have ground-level sweep attacks (e.g., Margit’s cane sweep). Jumping over them avoids damage and sets up a jump attack.
- Analysis: Timing is tight—practice on Godrick’s sweeping axe. This is especially useful for heavy weapon users who can then punish with a jump heavy. Light weapon users can also use jumps to dodge and counter.
3. Use the ‚Barely-Not-Stagger‘ Window
- Explanation: When you get hit but are not knocked down, you have a brief window of invincibility (iframes) during the stagger animation. You can also roll out of stagger early.
- Analysis: After being hit, your character can still roll before the stagger ends. Mash dodge to avoid follow-up attacks. This is crucial against enemies with combo chains. Practice on Crucible Knights.
4. Target Weaknesses with Elemental Damage
- Explanation: Enemies have resistances and weaknesses. For example, undead take more damage from holy weapons, crystalians from strike damage, dragons from lightning.
- Analysis: Use the environment to deduce weaknesses: undead in catacombs? Bring a sacred weapon. Crystalians? Use a mace or hammer. Swap your Ash of War to fire for tree spirits, etc. Check enemy lore/physical appearance for hints.
5. Spirit Ashes: Upgrade Them
- Explanation: Spirit Ashes can be upgraded at the Twin Maiden Husks using Grave Glovewort (for standard ashes) or Ghost Glovewort (for legendary ashes). Upgraded spirits have more HP and damage.
- Analysis: Some spirits (e.g., Mimic Tear, Tiche) are extremely powerful when upgraded. Even early ones like the Lone Wolf become viable if upgraded. Only upgrade ashes you plan to use long-term. Legendary ashes require high FP to summon.
---
Advanced Optimizations
1. Buffer a Roll Out of Attack Animation
- Explanation: Heavy weapons have long animations. You can input a dodge during the attack animation (right before it ends) to roll immediately after the attack finishes.
- Analysis: This reduces recovery time. Practice on the training golems at Gatefront Ruins. This technique is essential for colossal weapon users to avoid being punished after whiffing.
2. Use Hard Swaps for Instant Weapon Changes
- Explanation: You can change weapons in the equipment menu without pausing if you keep the menu open? Actually, hard swapping refers to changing weapons mid-combat by opening inventory and equipping different gear quickly.
- Analysis: Advanced players map different weapons to their quick slots (pouch) or use menu memory. Change between a fast weapon and a heavy weapon during boss fights to adapt to openings. For example, during Malenia’s Waterfowl Dance, swap to a shield to block, then swap back to a katana for punish.
3. Chain Staggers with Certain Weapons
- Explanation: Some weapons have high poise damage and can chain stagger enemies. For example, the Greatsword (Colossal) can stagger-lock basic enemies and many bosses if you time attacks.
- Analysis: Use the crouch attack (R1 out of crouch) for a fast horizontal swing with good poise damage. Against large enemies, aim for the legs or weak spots to break poise repeatedly. This is how speedrunners kill bosses without letting them attack.
4. Use the ‚Corpse Piler‘ (Rivers of Blood) for Bleed Spamming
- Explanation: Rivers of Blood’s weapon skill, Corpse Piler, does rapid bleed buildup in a wide arc. It can stun lock many enemies.
- Analysis: This is a known overpowered strategy. When facing aggressive enemies, spam Corpse Piler from a safe distance. It drains FP quickly, so bring Cerulean flasks. For maximum damage, stack Arcane to 45+ and use White Mask, Lord of Blood’s Exultation talisman.
5. Optimize Flask Ratio
- Explanation: Your Flask of Crimson Tears and Cerulean Tears share a total number of flasks (up to 14). Assign them via ‚Assign Flask‘ at Sites of Grace.
- Analysis: Early game: 4 Crimson, 0 Cerulean for pure melee. For casters, split 6/6 eventually. Adjust based on your FP consumption. If you rarely use FP, allocate more to Crimson. Many bosses demand many heals, so keep at least 6-8 Crimson flasks until you learn their patterns.
---
Economy & Shopping Tips
1. Buy Upgrade Materials Early
- Explanation: After obtaining Bell Bearings, you can buy unlimited Smithing Stones. Spend runes to max out your main weapon before leveling up.
- Analysis: Weapon level matters more than character level. A +12 weapon with low stats can outdamage a +3 weapon with high stats. Always prioritize weapon upgrades over leveling damage stats if you’re struggling.
2. Sell Duplicate Talismans
- Explanation: Some enemies drop talismans you already have. Sell them for runes.
- Analysis: Talismans are rare—only sell if you already have two? But you can only equip one talisman per slot. Selling duplicate talismans gives a good rune boost (3000+ for later ones). Never sell unique talismans you might need later (e.g., Radagon’s Soreseal).
3. Check Merchant Inventories for Rare Items
- Explanation: Some merchants sell exclusive items like ‚Crystal Release‘ or ‚Starlight Shards‘? Actually, Starlight Shards are only found. Check merchants for cookbooks (crafting), Ashes of War, and upgrade materials. Notable: Isolated Merchant (Dragonbarrow) sells Radagon’s Soreseal? No, that’s from a chest. But many merchants sell unique weapons (e.g., the Dectus Medallion half).
- Analysis: As you explore, always talk to merchants. They often have valuable consumables like ‚Preserving Boluses‘ (cures Scarlet Rot) which are essential for certain areas. Buy limited stock items that you can’t craft, like ‚Furlcalling Finger Remedy‘.
4. Use the Silver Scarab Talisman for Item Discovery
- Explanation: Silver Scarab increases Item Discovery by 75. It’s found in the Hidden Path to the Haligtree.
- Analysis: Item Discovery affects drop rates of gear and resources. Equip it when farming for rare drops (e.g., Noble’s Estoc, Magma Blade). Combine with a Silver-Pickled Fowl Foot (crafted or found) for maximum drop rates until you have the needed item.
5. Don’t Buy Rune Arcs from Merchants
- Explanation: Rune Arcs cost 5000+ runes. You can find them occasionally as loot or by invading/summoning.
- Analysis: It’s cheaper to help others as a summon or invade to earn Rune Arcs. If you just want the buff, it’s better to use a Rune Arc only when you really need it. The merchant price is too high for casual use.
---
Multiplayer Tips
1. Use Password System for Co-op with Friends
- Explanation: Set a multiplayer password in Settings under Multiplayer. It bypasses level restrictions for summoning.
- Analysis: This allows friends of any level to join you, but their stats may be scaled down. Use it to summon high-level friends for early bosses, or to play together. Also enable ‚Cross-Region Play‘ if playing with someone in another region.
2. Invade Strategically with Prepared Builds
- Explanation: Invasion matches you against hosts with similar rune level and weapon upgrade. Use the ‚Taunter’s Tongue‘ to invite invaders while solo.
- Analysis: For PvP, keep your level at meta (125-150) and weapon upgrade at +25/+10. Use consumables like ‚Warming Stones‘ and ‚Furlcalling Finger Remedy‘. Always use the ‚Hunter‘ ring if you want backup.
3. Use ‚Furlcalling Finger Remedy‘ to See Summon Signs
- Explanation: This consumable allows you to see gold summon signs on the ground. You can craft it with two Erdleaf Flowers.
- Analysis: Always have a stack of Remedies before boss areas. Summoning phantoms makes fights easier. Also, if your own sign is down, help others to earn Rune Arcs and runes without risk.
4. Use ‚Small Red Effigy‘ for Co-op?
- Explanation: Actually, the Red Effigy is for invasions. For co-op, use the ‚Tarnished‘s Furled Finger‘ to put down a gold sign.
- Analysis: To help others, place your sign near summoning pools (activate them with the ‚Summoning Pool‘ item). This is the best way to farm Rune Arcs.
5. Beware of ‚Gank Squads‘
- Explanation: Some hosts summon two phantoms to overwhelm invaders. If you invade and see a group, consider using stealth or attrition.
- Analysis: Invasions are often unfair. Use ‘Host of the Hunt’? No. Instead, use ‘Phantom Bloodring’? No. Use environment and mobs to your advantage. If outnumbered, retreat and use ranged attacks.
---
Final Pro Tips
- Always Have a ‚Sunbeam‘? Actually, use ‚Sturdy Greens?‘ No. - Use the ‚Radagon Icon‘ Talisman to shorten spell cast times if you’re a caster (found in Raya Lucaria). This makes spells like Comet Azur more practical.
- For boss fights, consider using ‚Swaddling‘? No - Use ‚Opaline Bubbletear‘ in your Flask of Wonderous Physick to absorb one big hit (helps survive one-shots). Combine with ‚Crimsonwhorl Bubbletear‘ for full HP heal on damage.
- Stockpile ‚Smithing Stones‘ before NG+ because Bell Bearings reset. Upgrade all weapons you want to test before journey 2.
- The ‚Turtle Shield‘ is the best early shield (found in Weeping Peninsula) due to its high stamina regen.
- Always keep a ‚Dagger‘ with ‚Quickstep‘ or ‚Bloodhound Step‘ for high-mobility dodge through attacks. This can trivialize many boss moves.
- If you’re stuck on a boss, leave and explore elsewhere. The open world is full of power-ups. Return later with higher level, better gear, and more experience.
---
Remember: Elden Ring is about persistence, learning, and adaptation. Use these tips, but find your own playstyle. Good luck, Tarnished.
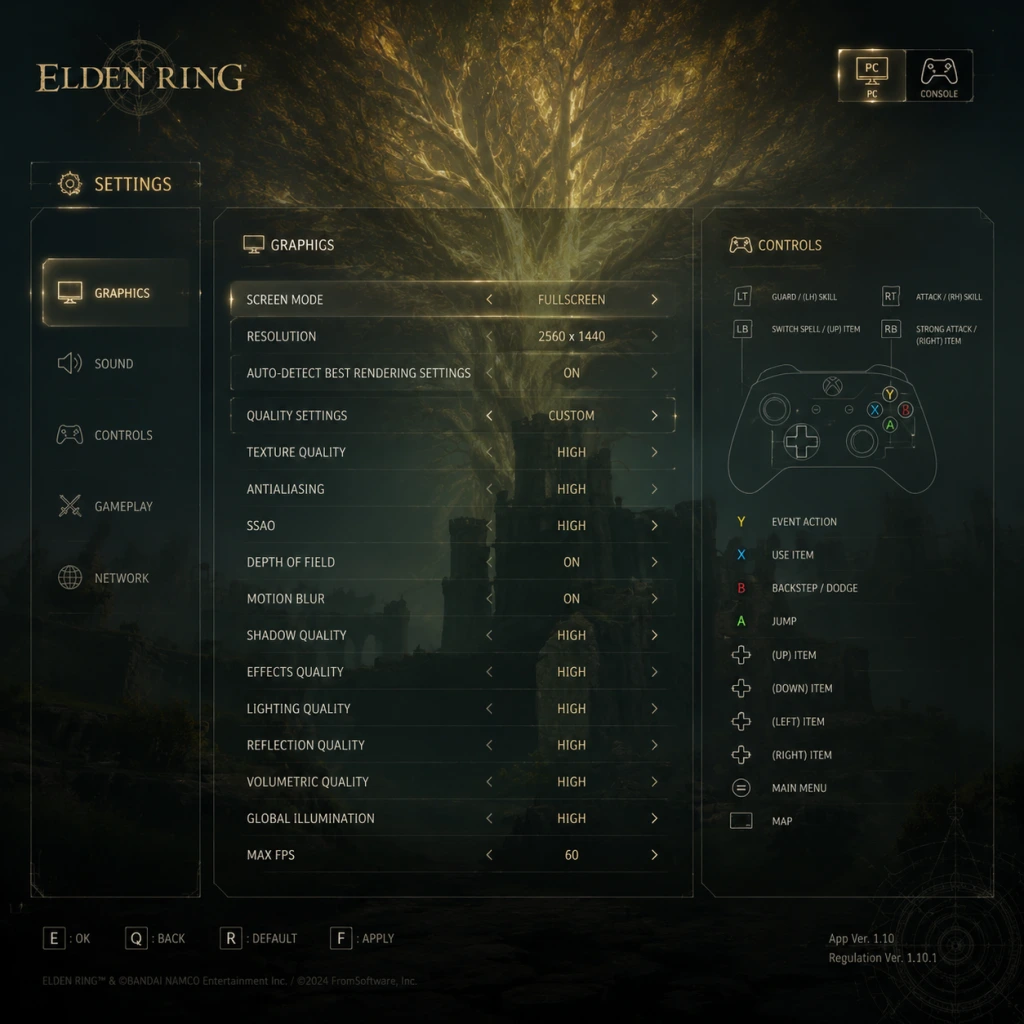
Game Settings
Game Settings Guide for Elden Ring
This guide covers every settings menu in Elden Ring for PC (Steam), PlayStation 4/5, and Xbox One/Series X|S. We explain each option, give optimal values for performance and quality across different hardware tiers, and highlight the settings most commonly misconfigured by new players. All references to controller actions use Xbox layout (A/B/X/Y); PlayStation equivalents are listed in parentheses.
---
Graphics Settings (PC Only - Also Present on Consoles, but Limited)
Elden Ring uses the same engine as Sekiro (DirectX 12). The graphics menu is identical on all platforms, but PC offers more granular controls. Consoles have fixed presets (Performance or Quality Mode on PS5/XSX).
#### Setting Descriptions & Recommendations
| Setting | Options | Purpose | Recommendation |
|---|---|---|---|
| Screen Mode | Fullscreen, Windowed, Borderless | Fullscreen provides best performance; Borderless is best for multi-monitor setups. | Fullscreen |
| Resolution | Based on monitor/TV | Native resolution matters most for clarity. | Native; avoid upscaling unless necessary. |
| Graphics Quality Preset | Minimum, Low, Medium, High, Maximum | Quick set for all sub-settings. | Start here, then fine-tune. |
| Texture Quality | Low – Maximum | Affects sharpness of surfaces. VRAM dependent. | High (4GB VRAM) or Maximum (8GB+ VRAM) |
| Antialiasing Quality | Low, Medium, High, Maximum | Smooths jagged edges. | High (TAA) – best balance. Maximum adds SMAA but blurrier. |
| SSAO | Off – High | Ambient occlusion adds depth to shadows. | Medium – subtle but important for immersion. |
| Depth of Field | Off – High | Blurs distant objects; can cause headaches. | Off (recommended for clarity; many turn this off) |
| Motion Blur | Off – Strong | Blurs during movement; hides low framerate but nauseates some. | Off (most players disable for precision) |
| Shadow Quality | Low – Maximum | Resolution and distance of shadows. | High – good balance. Maximum expensive. |
| Lighting Quality | Low – Maximum | Affects dynamic light sources. | High – noticeable improvement. |
| Effects Quality | Low – Maximum | Particle effects, magic, fire. | Medium or High – lower for performance. |
| Volumetric Quality | Low – Maximum | Fog, mist, smoke. | Medium – heavy performance cost at High+. |
| Reflection Quality | Low – Maximum | Screen-space reflections on water and shiny surfaces. | Medium – high cost for little gain. |
| Water Surface Quality | Low – Maximum | Ripples, reflections on water. | Low – performance eater; small visual impact. |
| Shader Quality | Low – Maximum | Overall shader complexity. | High – keep. |
| Global Illumination Quality | Low – Maximum | Bounces light; costly. | Medium – balanced. |
| Grass Quality | Low – Maximum | Density of grass/foliage. | Medium – low for performance (looks sparse). |
| Ray Tracing | Not present | No ray tracing in Elden Ring. | N/A |
| Hardware Tier | Example GPU | Resolution | Preset | Key Manual Tweaks |
|---|---|---|---|---|
| Low-End | GTX 1060 6GB, RX 580 | 1080p | Low | Set Shadows to Low, Volumetrics to Low, Grass to Low. Turn off Motion Blur and Depth of Field. |
| Medium-End | RTX 2060, GTX 1080 | 1440p / 1080p | Medium | Set Volumetrics to Medium, Shadows to High. Keep Motion Blur Off. |
| High-End | RTX 3080, RX 6800 XT | 1440p / 4K | High (or Maximum) | Turn off Motion Blur and Depth of Field. Set Volumetrics to Medium for stable 60 FPS at 4K. |
| Ultra-End | RTX 4090 | 4K | Maximum | All on Max, but still turn off Motion Blur. Expect 60 FPS; frame rate cap is 60. |
- Stay in Fullscreen mode.
- Disable Steam Overlay (right-click game in library → Properties → uncheck Enable Steam Overlay).
- Run the game from a fast SSD.
- PS4 / Xbox One: Fixed 30 FPS, no Quality/Performance toggle. Locked to 1080p.
- PS4 Pro / Xbox One X: Option to prioritize Framerate (target 60 FPS) or Resolution (target 4K checkerboard). Choose Framerate for smoother play.
- PS5 / Xbox Series X|S: Two modes:
- Series S: Only Performance mode (1440p 60 FPS) with minor visual cuts.
Console Graphics Options:
- Performance: 60 FPS prioritization (dynamic resolution ~1800p-2160p). Recommended.
- Quality: 4K native at 30 FPS with ray-traced-like lighting (no RT; improved AO/shadows). Avoid for action-heavy game like Elden Ring.
---
Audio Settings
| Option | Purpose | Recommendation |
|---|---|---|
| Master Volume | Overall volume | 70-80% to avoid ear fatigue during loud boss screams. |
| Music Volume | Background music | 100% – music is integral to atmosphere. |
| SFX Volume | Sound effects (combat, footsteps etc.) | 100% – important for hearing enemy attacks. |
| Voice Volume | NPC dialogue, cutscenes | 100% – but you may lower if subtitles are on. |
| Audio Output Mode | Headphones, TV, or Surround | Headphones – gives excellent spatial awareness. TV introduces small surround simulation. |
| Subtitles | On/Off | On – many NPC lines are crucial for lore. |
| Subtitle Background | Off, Low, High | High – makes text readable over bright backgrounds. |
| Narrator Audio Language | English, Japanese, etc. | Choose per preference; Japanese voice acting is widely praised. |
| Text Language | Multiple languages | Set to your preferred language. |
---
Controls Settings
#### Controller (Recommended)
Elden Ring was designed for a controller. The default layout is classic FromSoftware: RB (R1) = light attack, RT (R2) = heavy attack, LB (L1) = block/parry, LT (L2) = weapon skill. A (X) = jump, B (O) = dodge/roll/sprint, X (Square) = use item, Y (Triangle) = two-hand weapon.
Customizable Options:
- Camera Sensitivity (X & Y) – Default 5. Increase to 8+ for quicker target switching. Decrease if you feel nauseous.
- Invert Y Axis – Off (unless you prefer pull stick down to look up; classic flight sim style).
- Auto-Lock Target – On (recommended). When you press lock-on (R3), it automatically picks the nearest enemy. Off requires manually cycling with right stick. Most players prefer On.
- Camera Auto-Adjust – On (default). Camera centers behind you after a delay. Off gives full manual control. On is less disorienting.
- Lock-On Switch – Closest vs Current. When you press R3 again, Closest switches to the nearest enemy; Current keeps the same target. Closest is usually better for chaotic fights.
- Dodge Button – B (O) default. Some may prefer A (X) for Souls veterans. Change if uncomfortable.
- Confirm Button – A (X) for accept / B (O) for back. This can be swapped in settings (yes, a rare option). Ensure consistency.
- Controller Vibration – Off (recommended) – reduces rumble distraction and preserves battery. Some like it for immersion.
- Strong Attack – default is Shift+Left Click. Change to a side mouse button for quicker combos.
- Jump – default Spacebar. Fine.
- Dodge/Roll – default Ctrl. Many rebind to Spacebar (but then jump is Space too? Actually jump is Space by default; hold Space to sprint?). Ensure no conflicts.
- Item Use – default E. Safe.
- Two-Hand Weapon – default F. Good.
- Map – default M.
- Toggle Lock-On – default Middle Mouse Button. Good.
- Subtitles – On. Background opacity High.
- Colorblind Mode – Three options: Protanopia (red-blind), Deuteranopia (green-blind), Tritanopia (blue-blind). This changes UI tints (health bar, stamina bar, item icons). Enable if you have trouble distinguishing colors. No preview, so try all three.
- Text Size – Not adjustable (fixed small text). On PC, you can increase UI scale via config files, but not in game.
- Audio Cues – No settings; but the game does have distinct sound for item pickups, enemy aggro, etc. Important for those with visual impairments.
- Voice Language – choose between English and Japanese (and other regional dubs depending on your game version). Many prefer Japanese for more emotional acting.
- Text Language – sets all menus, items, descriptions, and subtitles. Switch freely.
- Subtitles Language – if different from text language. Example: Japanese voices with English subtitles.
#### Keyboard + Mouse (PC Only)
The game allows full key remapping in the Controls menu. Important bindings to consider:
Crucial: Set Disable Mouse Controls in Menus to On if your mouse cursor accidentally clicks and closes menus.
---
Accessibility Settings
Elden Ring has limited accessibility options, but a few are vital:
Note: There is no difficulty slider. The game’s challenge is part of the design. Use Summoning and Spirit Ashes as an unofficial easy mode.
---
Language Settings
---
Network Settings
| Option | Description | Recommendation |
|---|---|---|
| Play Online | Enable/disable multiplayer features. | On to see messages, bloodstains, and get invaded. Off for pure single-player. |
| Cross-Region Play | Perform Matchmaking (allow all regions) or No Matchmaking (only your own region). | Perform Matchmaking – larger pool for summoning/invading. |
| Password for Multiplayer | Set a password to restrict co-op/invasions to friends with same password. | Leave empty for random matchmaking. |
| Launch Setting | Play Online vs Play Offline. Same as above, but appears at title screen. | Choose Play Online for full experience. |
| Send Summon Sign / Invasion | Controlled in-game via items, not settings. | N/A |
---
Gameplay Settings
| Option | Description | Recommendation |
|---|---|---|
| Brightness | Adjust gamma until the icon on the right is barely visible. | Set per your display; do not make too dark. |
| HUD Display | Always On, Auto-Hide (HUD fades when idle), or Off. | Auto-Hide – reduces clutter; works well. |
| HUD Opacity | 0-100%. | 70-80% – clear but not intrusive. |
| Auto-Equip Items | When picking up a weapon/armor, automatically equip it if slot is empty. | Off (recommended) – prevents accidental equips of heavy gear. |
| Camera Auto-Adjust | Camera slowly rotates behind you when standing still. | Off – prevents unwanted camera swings; gives full control. |
| Auto-Lock Target | Explained earlier. | On – makes locking onto nearest enemy easier. |
| Lock-On Switch | Closest vs Current. | Closest – helps in crowds. |
| Confirm Button Mapping | Switch between A/B as confirm. | Depends on your platform muscle memory. On PlayStation, X is default confirm; O cancel. |
| Item Toggle | Default is hold down D-pad to switch items? Actually Elden Ring uses a quick pouch system for items. Not a setting. | - |
| Rune Level Display | Those who care about PvP level ranges. Not a setting. | - |
---
Special Attention Points
1. Motion Blur and Depth of Field – Many players hate these. They make the image blurry during combat, reducing clarity. Turn both Off immediately.
2. Auto-Lock Target – Default is On. If you find yourself targeting wrong enemies (e.g., locked onto a deer while fighting a boss), try switching to Current instead of Closest. Or practice manually cycling.
3. Audio Output Mode – Failing to set to Headphones ruins directional sound. This is the #1 misconfiguration in audio.
4. Brightness Calibration – Use the in-game calibration screen. A too-dark setting will make caves and night areas unplayable. Don't trust your monitor's default.
5. HUD Auto-Hide – Great for immersion, but if you need to constantly check HP/FP/Stamina, set to Always On.
6. Confirm Button Swapping – Only exists on console/PC with controller. If you switch between Souls games (which use circle/B as dodge), be consistent. Elden Ring allows swapping confirm/cancel; many prefer Dark Souls muscle memory (X=confirm, O=cancel on PlayStation).
7. Network Password – Do not leave a password if you want random co-op/invasions. And remember that passwords do not block invasions.
8. Console Performance vs Quality – On PS5/XSX, always select Performance mode for 60 FPS. The Quality mode's 30 FPS plus blurred motion makes boss fights much harder.
---
Quick Reference: Recommended Starting Settings
- Graphics: Use preset for your hardware, then turn Off Motion Blur and Depth of Field.
- Audio: Headphones mode, subtitles On.
- Controls: Auto-Lock On, Camera Auto-Adjust Off, Controller Vibration Off.
- Accessibility: Subtitles High Background, Colorblind mode if needed.
- Gameplay: Auto-Equip Items Off, HUD Auto-Hide On, Brightness calibrated.
- Network: Online, Cross-Region Matchmaking On, no password.
Apply these once before entering the Lands Between for a smoother, clearer journey. Good luck, Tarnished!

Important Notes
Important Notes for Elden Ring
This section contains critical information every player should know before diving deep into the Lands Between. Ignoring these notes can lead to irreversible mistakes, wasted hours, or a frustrating experience. Read carefully.
⚠️ Warnings & Pitfalls
- Do NOT attack NPCs indiscriminately. Aggroing a friendly NPC like the Merchant at the Church of Elleh or the blacksmith at Roundtable Hold will make them hostile permanently (unless you absolve sins at the Church of Vows, which costs a rare item). Killing key NPCs can lock you out of quests, items, or endings.
- Beware of traps disguised as items. Sparkly items on the ground are sometimes bait for traps (e.g., chest mimics, spike traps, or teleport traps). Always be cautious, especially in dungeons.
- Fall damage is lethal. The game does not have a safety net. A drop that looks survivable might kill you instantly. Test short drops first, or use the "Soft Cotton" item to reduce fall damage temporarily.
- Beware of "Grafted Scion" at the start. The tutorial boss after the first grace is very tough for a new player. It is intentionally difficult; you can choose to die to it to progress, or defeat it for a good early weapon. Dying is the intended path.
- Do not rush to fight the Tree Sentinel. The golden knight on horseback outside the first church is a classic FromSoftware bait. He is level 40+ difficulty. Skip him and return later.
###
All Game Items
All Game Items Guide for Elden Ring
This guide covers every major item category in Elden Ring. Items are grouped logically, with detailed descriptions, how to obtain them, when they are useful, and any important synergies or upgrade paths. All information applies to the latest patch (1.xx) on all platforms.
1. Weapons
Weapons are the primary tool for dealing damage. Each weapon belongs to a weapon class and scales with different stats. They can be upgraded with Smithing Stones or Somber Smithing Stones.
#### 1.1 Melee Weapons
| Weapon Class | Examples | How to Obtain | Use & Synergies |
|---|---|---|---|
| Straight Swords | Longsword, Lordsworn's Straight Sword | Longsword: purchased from Twin Maiden Husks in Roundtable Hold. Lordsworn's: dropped by Guards in Limgrave. | Balanced moveset, low stat requirements. Good for early game. Infusable and buffable. Synergizes with shield & spell buffs. |
| Greatswords | Claymore, Bloodhound's Fang | Claymore: found in a chest in Castle Morne. Bloodhound's Fang: dropped by Bloodhound Knight Darriwil in Limgrave (summoned by Blaidd). | Versatile moveset, heavy damage. Bloodhound's Fang inflicts bleed build-up. Scales with Strength/Dex. Useful for quality builds. |
| Colossal Swords | Guts' Greatsword (The Greatsword), Maliketh's Black Blade | The Greatsword: found in a chest in Caelid (near the Colosseum). Maliketh's Black Blade: Remembrance of the Black Blade (from Maliketh). | Extremely high damage, slow swing. Good for stagger-lock. Maliketh's Black Blade has unique weapon art. Requires high Strength. |
| Katanas | Uchigatana, Moonveil | Uchigatana: starting weapon for Samurai class or found in Deathtouched Catacombs (Limgrave). Moonveil: dropped by Magma Wyrm in Gael Tunnel. | Fast, bleed build-up, unique weapon arts. Moonveil’s Transient Moonlight does magic damage. Excellent for Dexterity/Intelligence builds. |
| Daggers | Reduvia, Black Knife | Reduvia: dropped by Bloody Finger Nerijus (invader) in Limgrave. Black Knife: dropped by Black Knife Assassin in Deathtouched Catacombs. | Fast, critical damage, backstab bonus. Reduvia inflicts bleed; Black Knife reduces enemy max HP temporarily. Good for stealth and ripostes. |
| Fists & Claws | Caestus, Hookclaws | Caestus: purchased from Twin Maiden Husks. Hookclaws: found in Stormveil Castle. | Fast strikes, low range. Some have bleed (e.g., Hookclaws). Caestus can parry. Useful for pure Strength or Dex builds with fast aggression. |
| Axes | Battle Axe, Winged Scythe | Battle Axe: purchased from Twin Maiden Husks. Winged Scythe: found in the Tombsward Ruins (Weeping Peninsula). | Good damage for low weight. Winged Scythe inflicts bleed and has a unique skill. Scales with Strength/Faith. Useful for Faith builds early. |
| Hammers | Mace, Nightrider Flail | Mace: purchased from Twin Maiden Husks. Nightrider Flail: dropped by Night's Cavalry (Bridge near Limgrave). | Excellent poise damage. Nightrider Flail has bleed. Mace is reliable for Strength builds. Combine with shield for guard counters. |
| Spears & Great Spears | Partisan, Serpent-Hunter | Partisan: dropped by common soldiers. Serpent-Hunter: found at the bottom of Volcano Manor (for Rykard fight). | Good reach, thrust damage. Serpent-Hunter has a special effect against Rykard (makes the fight trivial). Useful for shield-poking builds. |
| Halberds | Commander's Standard, Golden Halberd | Commander's Standard: dropped by Commander O'Neil in Swamp of Aeonia. Golden Halberd: dropped by Tree Sentinel in Limgrave. | Great range, bonus damage. Golden Halberd has Golden Vow weapon art (damage & defense buff). Useful for heavy builds. |
| Reapers | Scythe, Grave Scythe | Scythe: found in the Church of the Plague (Caelid). Grave Scythe: dropped by Skeletons with scythes. | R2 attack has phantom reach. Good for Dex/Faith. Grave Scythe can have Bloodhound's Step ash of war. |
| Whips | Urumi, Hoslow's Petal Whip | Urumi: found in the Mt. Gelmir. Hoslow's Petal Whip: dropped by Juno Hoslow (invasion quest). | Ignores shields, long range. Good for status buildup. Urumi has a unique charged R2 that arcs lightning (if infused). |
| Colossal Weapons | Giant-Crusher, Fallingstar Beast Jaw | Giant-Crusher: found in Outer Wall Phantom Tree (Altus Plateau). Fallingstar Beast Jaw: dropped by Full-Grown Fallingstar Beast. | Highest poise damage and stagger. Giant-Crusher is the heaviest hammer. Fallingstar Beast Jaw has gravity magic on weapon art. |
| Twinblades | Twinblade, Godskin Peeler | Twinblade: found in the Dragon-Burnt Ruins (Limgrave). Godskin Peeler: dropped by Godskin Apostle in Windmill Village. | Fast attacks with good reach. Godskin Peeler has a unique R2. Infusible. Great for status effects (bleed, frost, poison). |
| Thrusting Swords | Rapier, Estoc | Rapier: purchased from Twin Maiden Husks. Estoc: found in the Roundtable Hold (after first invasion) or from a merchant. | Good critical, fast attacks. Works with shields. Synergizes with quickstep or bloodhound step. |
| Curved Swords | Scimitar, Moonveil (categorised as katana, but similar) | Scimitar: starting weapon for Warrior or found in the world. | Fast slashes, decent damage. Good for dual-wielding with bleed builds. |
| Curved Greatswords | Bloodhound's Fang, Dismounter | Dismounter: dropped by Kaiden Sellswords. Bloodhound's Fang (already mentioned). | Heavy, sweeping attacks. Bloodhound's Fang best in class. Great for jump attacks. |
- Bows (Shortbow, Longbow, Pulley Bow): Obtained from merchants or drops. Use arrows. Useful for pulling enemies, sniping, or applying status from distance. Synergize with status arrows (bleed, rot, poison).
- Greatbows (Greatbow, Lion Greatbow): High damage, slow. Used to knock enemies off ledges. Lion Greatbow obtained from Radahn fight. Use Radahn's Spear arrows for special effect.
- Crossbows (Light Crossbow, Arbalest, Pulley Crossbow): Found or purchased. Use bolts. Can be used in off-hand. Works with status bolts. No scaling, so good for low-stat builds.
- Ballistas (Hand Ballista, Jar Cannon): Large crossbows. Dropped by enemies. Very high damage but heavy. Good for strength builds.
- Glintstone Staff (Sorcery): Used to cast sorceries. Examples: Meteorite Staff (found in Caelid, scales with Intelligence, boosts gravity sorceries), Carian Regal Scepter (from Rennala's Remembrance). Upgraded with Somber Smithing Stones.
- Sacred Seal (Incantations): Used to cast incantations. Examples: Finger Seal (starting or purchased), Erdtree Seal (best scaling at high Faith, found in Leyndell), Godslayer's Seal (boosts Godslayer incantations).
- Small Shield (Parry): Some shields can parry. Examples: Buckler (bought from Gostoc, best parry frames), Parrying Dagger (Ash of War can give parry).
- Regular weapons: +1 to +25 using Smithing Stones (1-8).
- Special weapons: +1 to +10 using Somber Smithing Stones (1-10).
- Ancient Dragon Smithing Stone: max upgrade for regular (1 max).
- Somber Ancient Dragon Smithing Stone: max upgrade for special (1 max).
Catalysts (for casting spells, incantations, etc.)
#### Weapon Upgrades
---
2. Armor
Armor provides damage negation, poise, and status resistance. Weight affects movement speed and roll type. Each set has a different stat distribution.
#### Light Armor
| Set Name | Weight | Poise | Negation | Where to Find | Use Case |
|---|---|---|---|---|---|
| Astrologer Set | Very Light | Low | Magic negation | Starting set for Astrologer class. | Best for spellcasters wanting low equip load for fast rolls. |
| Bandit Set | Very Light | Low | Standard, Strike | Starting set for Bandit class. | Good for stealth. Low protections. |
| Traveler's Set | Light | Low | All-around low | Found in a chest at the Church of Elleh. | Early game light armor. |
| Set Name | Weight | Poise | Negation | Where to Find | Use Case |
|---|---|---|---|---|---|
| Knight Set | Medium | 24 | Good all-around | Purchased from Twin Maiden Husks after giving them the Knight Set item (found in Stormveil). | Best early medium set. Good for melee builds. |
| Lionel Set | Heavy-Medium | 48 | High physical | Found in the Fortified Manor (Leyndell). | High poise for medium weight. Great for Strength weapons. |
| Blaidd's Set | Medium | 32 | Magic & Physical | Buy from Finger Reader after completing Ranni's quest. | High poise and magic defense. Good for mixed damage areas. |
| Set Name | Weight | Poise | Negation | Where to Find | Use Case |
|---|---|---|---|---|---|
| Bull-Goat Set | Very Heavy | 100 | Highest physical | Locked behind quest (Patches). Obtained by invading and killing Great Horned Tragoth. | Maximum poise; can tank hits. Requires high endurance. |
| Tree Sentinel Set | Heavy | 60 | Good holy negation | Dropped by Tree Sentinel (Leyndell). | High holy damage defense. Good for endgame areas. |
| Radahn Set | Heavy | 70 | High all | Purchased from Finger Reader after Radahn festival. | High poise and magic defense. |
- Mix and match for aesthetic or stat optimization.
- Poise is essential for not being staggered during attack animations. Aim for 51 poise (to survive one hit from small weapons) or 101 (to survive a greatsword hit).
- Some helmets give stat boosts: e.g., Crown of Sunken (Arcane), Imp Head (Fang) (Strength), etc.
- Certain armor sets are needed for certain quests (e.g., Blackguard's Armor for Rya).
---
3. Consumables
Consumables are single-use items that provide temporary effects. They can be crafted if you have the Cookbook and materials.
| Category | Examples | Effect | Obtain | Useful When |
|---|---|---|---|---|
| Healing Items | Flask of Crimson Tears (charges), Rune Arcs, Warming Stones | Crimson Tears restore HP. Rune Arcs activate Great Rune effects. Warming Stones create a healing area. | Flasks upgraded with Sacred Tears. Rune Arcs found everywhere. Warming Stones crafted. | Always needed. Rune Arcs for boss fights with Great Runes. Warming Stones for co-op. |
| Status Recovery | Boluses (Stanching, Neutralizing, Thawfrost, etc.) | Cure specific status effects: bleed, poison, frost, etc. | Crafted from materials or bought from merchants. | When facing enemies that cause those statuses. |
| Buff Items | Exalted Flesh, Bloodboil Aromatic, Flask of Wondrous Physick | Temporary stat boosts. Bloodboil raises damage but reduces defense. Physick can have 2 effects (mixed before grace). | Crafted or found. Physick components found in Minor Erdtrees. | Before tough boss fights. Physick is reusable; choose effects like damage negation, mana regen, etc. |
| Damage Items | Fire Pots, Lightning Pots, Holy Water Pots | Throwable that deal elemental damage. | Crafted with cracked pots and materials. | Good for ranged damage without FP. Useful on enemies weak to that element. |
| Status Items | Festering Bloody Finger, Recusant Finger, Taunter's Tongue | Used for invasions or summoning adversaries. | Festering from early invader (Yura quest). Recusant from Volcano Manor. Taunter's Tongue bought from merchant. | For PvP or co-op mechanics. |
| Tools | Lantern, Torch, Beast-Repellent Torch, etc. | Light sources. Beast-Repellent reduces agro of beasts. | Lantern bought from Isolated Merchant (Liurnia). Torches from merchants or drops. | For dark dungeons (e.g., Catacombs). Beast-Repellent for Caelid. |
4. Materials
Materials are used for crafting or upgrading. They are gathered from the world, enemies, or purchased.
| Material | Description | Location | Use |
|---|---|---|---|
| Rune Arc | Activates Great Rune effects. | Drops from rats, giants, and bell bearing hunters. | Post-boss buffs. |
| Golden Rune (1-13) | Consumable for Runes (experience). | Found everywhere. | Quick runes to level up. Larger ones give more. |
| Smithing Stone (1-8) | Upgrade regular weapons. | Mines, sold by merchants. Upgrade bell bearing to unlock unlimited purchase. | Weapon upgrade. |
| Somber Smithing Stone (1-9) | Upgrade special weapons. | Found in mines, some enemies, and ghost-carrying snails. | Special weapon upgrade. |
| Ancient Dragon Smithing Stone | Max upgrade for regular weapons. | Found in very few locations (e.g., Crumbling Farum Azula). | One-time max upgrade. |
| Somber Ancient Dragon Smithing Stone | Max upgrade for special weapons. | Same as above. | One-time max upgrade. |
| Glintstone | Used for some unique upgrades (e.g., staff upgrades). | Dropped by certain enemies. | Rarely used directly. |
| Sacred Tears | Upgrade Flask of Crimson/Cerulean Tears. | Found in churches. | Increases flask potency. |
| Mushroom | Crafting ingredient. | Caelid swamps, caves. | Used for boluses, pots. |
| Fallen Hawks | Crafting. | Mountaintops. | Rare. |
| Gravel Stone | Removes weapon scaling to base damage (for somber weapons). | Not used in this way; actually an item for Dragon Communion incantations. | Used to get Dragon Hearts. |
5. Currencies
Elden Ring has multiple currencies used for different purposes.
| Currency | Purpose | How to Earn | Storage |
|---|---|---|---|
| Runes | Main currency; used to level up, buy items, upgrade weapons. | Killing enemies, using Golden Runes, selling items. | Stored in inventory; lost on death unless retrieved. |
| Rune Arcs | Activate Great Rune effects. | Drops, chests, farming rats. | Stored in inventory. |
| Flask of Wondrous Physick (refillable) | Once per rest, provides two buffs. | Upgraded by finding Tears in Minor Erdtrees. | Reusable. |
| Bell Bearings | Trade to Twin Maiden Husks to unlock merchant items. | Found in the world (e.g., from dead merchants). | Given to Husks. |
| Memory Stones | Increase spell slots. | Found in towers and certain quests. | Equip in inventory. |
| Talisman Pouches | Increase talisman slots. | Defeating shardbearers, finding in the world. | Obtain as items. |
| Golden Seeds | Increase flask charges. | Found near Erdtrees, minor Erdtrees. | Used at sites of grace. |
| Stonesword Keys | Unlock imp-sealed doors. | Found in the world, purchased from merchants. | Consumable. |
| Lantern (tool) | Not currency, but used for light. | Buy from merchant. | Equipped. |
6. Key Items & Collectibles
These are unique items that often trigger events, open areas, or progress quests.
| Item | Description | How to Obtain | Importance |
|---|---|---|---|
| Torch | Light source. | From merchants or starting equipment. | Essential for dark areas. |
| Spirit Calling Bell | Summons spirit ashes. | Given by Renna at Church of Elleh after getting horse. | Must have for spirit summons. |
| Lone Wolf Ashes | Summon wolves. | Found in a chest at the Witch's House in Limgrave. | Early spirit ash. |
| Flask of Wondrous Physick (obtained early) | Customizable buff flask. | Found at Third Church of Marika after stumbling past the Tree Sentinel. | Very useful before tough fights. |
| Medallion (Dectus) | Two halves that open Grand Lift of Dectus. | One half in Fort Haight (Limgrave), other in Fort Faroth (Caelid). | Required to reach Altus Plateau via lift. |
| Medallion (Rold) | Opens Grand Lift of Rold to Mountaintops. | Given by Melina after defeating Morgott. | Progression to endgame areas. |
| Cursemark of Death | Used for Ranni's questline. | Found in the Divine Tower of Liurnia after defeating Godfrey's shade. | Required to complete Ranni's ending. |
| Mending Runes | Used to alter the ending. | Found from various questlines (e.g., Dung Eater, Gold Mask). | Changes final cutscene. |
| Assassin's Prayerbook | Teaches incantations. | Found in Carian Study Hall (inverted). | Unlocks stealth spells. |
| Great Runes | Dropped by main bosses (Godrick, Rennala, Radahn, etc.) – actually you need to activate them at Divine Towers. | After defeating shardbearers. | Equip at grace, use Rune Arc to activate. |
| Scarab Ashes | Summon scarabs. | Found in Ainsel River. | Fun niche. |
7. Talismans
Talismans provide passive buffs. They are equipped in slots unlocked by Talisman Pouches. There are over 100 talismans in the game. Here are key ones:
| Talisman | Effect | How to Obtain | Best For |
|---|---|---|---|
| Radagon's Soreseal | +5 Vigor, Endurance, Strength, Dexterity; +15% damage taken. | Found in Fort Faroth (Caelid). | Early to mid-game stat boost. |
| Erdtree's Favor | +HP, Stamina, Equip Load. +2%, +3%, +4% for +0/+1/+2. | +0: chest in Fringefolk Hero's Grave. +1: Leyndell. +2: after Maliketh. | All builds. |
| Green Turtle Talisman | Increases stamina recovery speed. | Found in Summonwater Village. | For any build that uses stamina heavily. |
| Claw Talisman | Increases jump attack damage by 15%. | Found in the Forbidden Lands. | Strength builds using jump attacks. |
| Godfrey Icon | Increases charge skill damage by 15%. | Dropped by Godefroy the Grafted. | Casters and charge attacks. |
| Magic Scorpion Charm | Increases magic damage by 12%, but decreases damage negation. | Given by Preceptor Seluvis (quest). | Sorcery builds. |
| Dragoncrest Greatshield Talisman | Reduces physical damage taken by 20%. | Found in Leyndell (after beating a boss). | Essential for physical defense. |
| Rotten Winged Sword Insignia | Increases attack power with successive hits. | From Millicent's quest (upgraded version). | Fast weapons, status builds. |
| Blessed Dew Talisman | Slowly restores HP over time. | Found in the Lake of Rot. | Passive healing out of combat. |
| Sacrificial Axe (not talisman but weapon) | Restores FP on kill. | Dropped by Deathbirds. | Casters. |
8. Spirit Ashes
Summonable allies for tough fights. Upgraded with Grave Glovewort and Ghost Glovewort.
| Spirit Ash | Cost (FP) | Effect | Location | Best For |
|---|---|---|---|---|
| Lone Wolf Ashes | 34 | Summons 3 wolves. | Limgrave (Witch's House). | Early game, distraction. |
| Mimic Tear Ashes | 660 HP | Summons a copy of you. | Nokron, Eternal City (after Radahn). | Best in slot for most fights; copies build and spells. |
| Black Knife Tiche | 100 | Summons a nimble assassin that does % health damage and reduces max HP. | Ranni's quest (evergaol in Liurnia). | Boss killers, especially Malenia. |
| Lhutel the Headless | 55 | Tanky, teleports. | Tombsward Catacombs (Weeping Peninsula). | Early to mid game tank. |
| Ancient Dragon Knight Kristoff | 71 | Extremely tanky, lightning attacks. | Sainted Hero's Grave (Altus Plateau). | High endurance, draws aggro. |
9. Upgrade Materials & Bell Bearings
To unlock unlimited purchase of upgrade materials, find Bell Bearings and give them to Twin Maiden Husks at Roundtable Hold.
| Bell Bearing | Unlocks | Location |
|---|---|---|
| Smithing-Stone Miner's Bell Bearing [1] | Smithing Stone [1] & [2] | Raya Lucaria Crystal Tunnel (boss drop). |
| Smithing-Stone Miner's Bell Bearing [2] | Smithing Stone [3] & [4] | Sealed Tunnel (Altus Plateau). |
| Smithing-Stone Miner's Bell Bearing [3] | Smithing Stone [5] & [6] | Zamor Ruins. |
| Smithing-Stone Miner's Bell Bearing [4] | Smithing Stone [7] & [8] | Crumbling Farum Azula (Godskin Duo area). |
| Somberstone Miner's Bell Bearing [1] | Somber Smithing Stones [1] & [2] | Sellia Crystal Tunnel (Caelid). |
| Somberstone Miner's Bell Bearing [2] | Somber Smithing Stones [3] & [4] | Ainsel River Well (site of grace). |
| Somberstone Miner's Bell Bearing [3] | Somber Smithing Stones [5] & [6] | Mountaintops of the Giants (Guardian's Garrison). |
| Somberstone Miner's Bell Bearing [4] | Somber Smithing Stones [7] & [8] | Crumbling Farum Azula (near Dragon Temple). |
| Glovewort Picker's Bell Bearing [1] | Grave Glovewort [1-3] & Ghost Glovewort [1-3] | Various catacombs (e.g., Tombsward Catacombs). |
| Glovewort Picker's Bell Bearing [2] | Grave Glovewort [4-6] & Ghost Glovewort [4-6] | Road's End Catacombs (Liurnia). |
| Glovewort Picker's Bell Bearing [3] | Grave Glovewort [7-9] & Ghost Glovewort [7-9] | Giant's Mountaintop Catacombs. |
10. Crafting Cookbooks
Found throughout the lands. They expand your crafting options at the Sites of Grace.
| Cookbook | Unlocks | Location |
|---|---|---|
| Nomadic Warrior's Cookbook [1] | Basic arrows, fire arrows, throwing dagger, etc. | Limgrave (coastal cave). |
| Nomadic Warrior's Cookbook [13] | Exalted Flesh, Bloodboil Aromatic | Mountaintops of the Giants (Castle Sol). |
| Armorer's Cookbook [1] | Boluses (poison heal, etc.). | Weeping Peninsula (Church of Marika). |
| Perfumer's Cookbook [1] | Perfume items (Uplifting Aromatic, etc.). | Altus Plateau (Perfumer's Grotto). |
| Missionary's Cookbook [1] | Immunizing Cured Meat, etc. | Liurnia (Bellum Church). |
11. Memory Stones & Spell Slots
Memory Stones increase the number of spells/incantations you can attune. Found at specific towers.
| Memory Stone | Location |
|---|---|
| Memory Stone | Tower of Return (Weeping Peninsula). |
| Memory Stone | Converted Tower (Liurnia). |
| Memory Stone | Seluvis's Rise (Liurnia). |
| Memory Stone | Oridys's Rise (Liurnia). |
| Memory Stone | Testu's Rise (Caelid). |
| Memory Stone | Lenne's Rise (Caelid). |
| Memory Stone | Heretical Rise (Mountaintops). |
| Memory Stone | After completing Ranni's quest (from Renna's Rise). |
12. Important Notes on Item Management
- Inventory weight: Only equipped items count toward equip load. Stored items have no weight. Use the Chest at Sites of Grace to store unneeded items.
- Selling: You can sell items to merchants for runes, but most items are better kept or used for crafting.
- Upgrading: Prioritize upgrading one or two weapons fully rather than spreading resources. Ancient Dragon Smithing Stones are very limited per playthrough.
- Multiplayer: Items like Festering Bloody Finger and Rune Arcs are essential for PvP and co-op. Save them.
- Quest items: Many key items are missable. Check quest guides if you want all endings.
- Ash of War: Most weapons can have Ash of War changed (except special weapons). This changes weapon art and sometimes scaling. Experiment.
---
This concludes the comprehensive All Game Items guide for Elden Ring. Use it to plan your build, find the best gear, and understand the importance of each item category. May the guidance of grace lead you true.
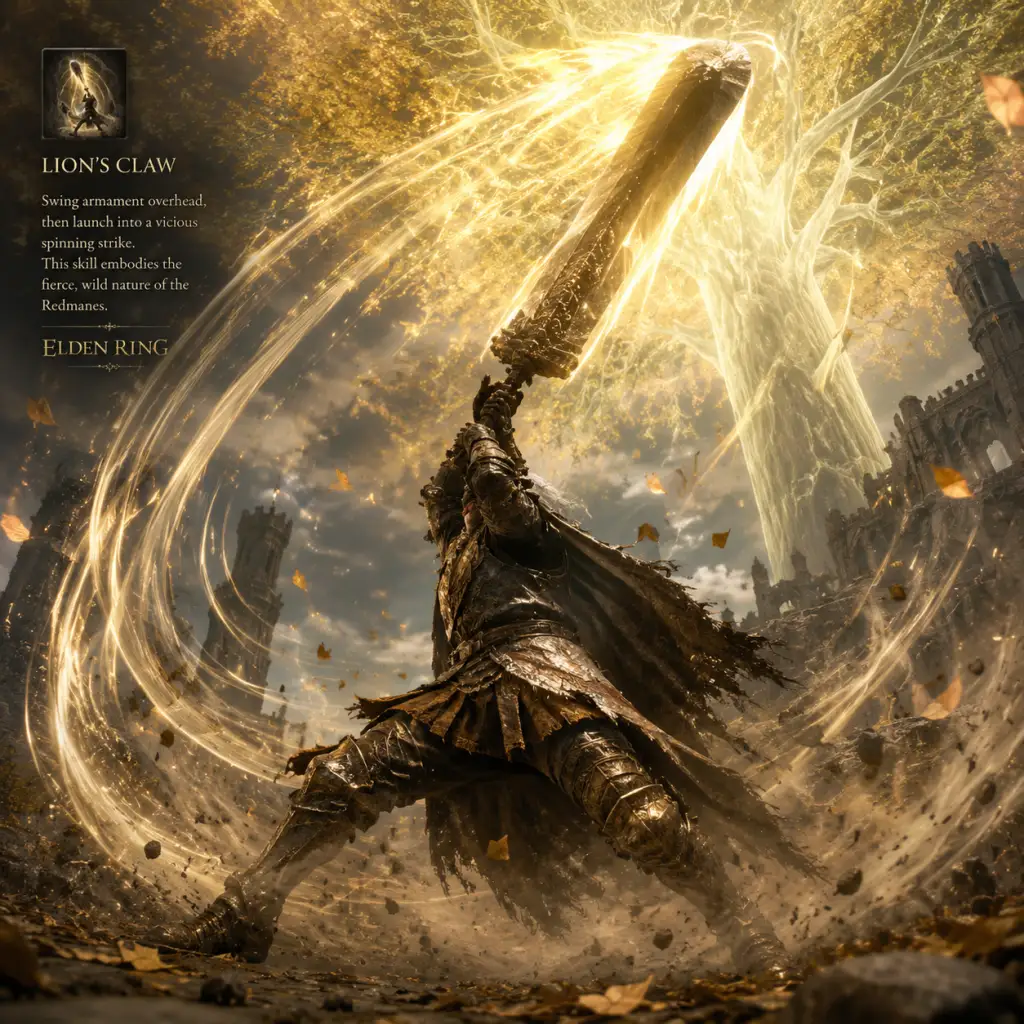
Character Skills
Character Skills Guide for Elden Ring
This guide covers every major skill category in Elden Ring: Weapon Skills (Ashes of War), Sorceries, Incantations, Unique Weapon Skills, Spirit Ashes, and Flask of Wondrous Physick. Each entry includes effects, costs, scaling, synergies, recommended builds, and when to use the skill.
---
1. Weapon Skills (Ashes of War)
Ashes of War are equippable skills that replace your weapon's default skill. They can be swapped freely at Sites of Grace. Skill damage scales with weapon upgrade level and your stats (usually Strength, Dexterity, or both). There are no cooldowns—only FP costs and stamina consumption.
#### Key Examples
##### Lion's Claw
- Type: Physical, Poise-breaker
- FP Cost: 20
- Stat Requirements: None
- Scaling: Weapon damage (str/dex)
- Effect: Leap forward and slam the weapon with a spinning overhead strike. Deals heavy poise damage and knocks down most enemies.
- Use Cases: Against large bosses or enemies that can be staggered. Excellent for interrupting attacks.
- Combos: Follow with a charged heavy attack or another Lion's Claw.
- Synergies: High poise weapons (Greatswords, Colossal weapons). Best on Strength builds with high endurance for stamina management.
- Recommended Builds: Pure Strength, Quality (Str/Dex), or Strength/Faith with heavy weapons.
- Type: Utility, Evasion
- FP Cost: 8
- Stat Requirements: None
- Scaling: N/A
- Effect: Quick and long-distance dodge with extended invincibility frames. Leaves a blue afterimage. Can be used to bypass enemies or escape combos.
- Use Cases: Evading boss attacks, repositioning, or avoiding multi-hit combos. Essential for glass cannon builds.
- Combos: Spam repeatedly for near-continuous invincibility. Pair with critical hits after evading.
- Synergies: Light armor (keeps fast roll), low-commitment weapons (daggers, katanas).
- Recommended Builds: Any build that needs mobility; especially useful for mages and rogues.
- Type: Fire, AOE
- FP Cost: 16
- Stat Requirements: None
- Scaling: Weapon damage + Faith (if weapon has Faith scaling) or base fire damage
- Effect: Slams the weapon into the ground, creating a fire wave. Brief follow-up the weapon is coated with fire.
- Use Cases: Crowd control, against ice enemies, or applying fire damage.
- Combos: Use the fire wave to stagger, then follow with a jump attack or heavy.
- Synergies: Weapons with inherent fire damage or high AR. Faith builds can further boost fire damage.
- Recommended Builds: Strength/Faith, Quality, or any melee build needing fire.
- Type: Utility, Counter
- FP Cost: 0
- Stat Requirements: None (but weapon must be a parry tool)
- Scaling: N/A
- Effect: Deflect an incoming attack, staggering the enemy and allowing a riposte. Timing is crucial.
- Use Cases: Against humanoid enemies and bosses (e.g., Crucible Knights, invaders).
- Combos: Riposte with a dagger (for critical damage) or a high-damage weapon.
- Synergies: Small shields (buckler, small shield) have the largest parry windows. Use with Dagger talisman for higher crit damage.
- Recommended Builds: Any skill-based build; parry is a high-risk, high-reward technique.
- Type: Projectile
- FP Cost: 7
- Int Requirement: 10
- Scaling: Intelligence
- Effect: Fires a single blue pebble. Fast, low damage, but spammable.
- Use Cases: Default ranged attack for early game. Chip damage from safe distance.
- Combos: Chain multiple pebbles quickly; or use as a finisher.
- Synergies: Staffs that boost Glintstone spells (e.g., Academy Glintstone Staff).
- Recommended Builds: Pure Intelligence mage, or battle mage with a melee weapon.
- Type: Beam
- FP Cost: 40
- Int Requirement: 60
- Scaling: Intelligence
- Effect: Fires a continuous beam of blue energy. Incredibly high damage but long cast time and high FP consumption.
- Use Cases: Boss melting, especially when supported by the Cerulean Hidden Tear (no FP cost for a brief time).
- Combos: Use Flask of Wondrous Physick with Cerulean Hidden Tear, then cast Comet Azur. Can one-phase many bosses.
- Synergies: Lusat's Glintstone Staff (increased damage but more FP). Terra Magicus spell increases magic damage if standing in the sigil.
- Recommended Builds: Pure Intelligence glass cannon. Requires high Mind for FP.
- Type: Melee
- FP Cost: 4
- Int Requirement: 14
- Scaling: Intelligence
- Effect: Forms a magic sword that slashes downward. Very fast, low FP cost, high damage for its speed.
- Use Cases: Close-range combat, stun-locking enemies, or finishing off weakened foes.
- Combos: Alternate Carian Slicer with Carian Greatsword (another spell) for mix-ups.
- Synergies: Staffs that boost Carian spells (e.g., Carian Glintstone Staff).
- Recommended Builds: Battle mage (Int with melee), or pure mage in close quarters.
- Type: Buff
- FP Cost: 20
- Int Requirement: 20
- Scaling: N/A
- Effect: Creates a glowing sigil on the ground. While inside, your magic damage is increased by 35% (multiply by 1.35). Lasts 30 seconds.
- Use Cases: Before boss fights or tough enemies. Place sigil before casting high-damage sorceries.
- Combos: Cast immediately before Comet Azur or Stars of Ruin.
- Synergies: Any high-damage spell. Can be stacked with other buffs like Flask of Wondrous Physick (Magic Shrouding Cracked Tear).
- Recommended Builds: Every sorcery build, especially ones relying on single powerful spells.
- Type: Fire, Melee
- FP Cost: 7
- Fth Requirement: 8
- Scaling: Faith
- Effect: Releases a burst of fire from your hand. Extremely fast, low FP cost, decent damage.
- Use Cases: Quick close-range attack, interrupting enemy combos, or as a finisher.
- Combos: Can be chained quickly; use after a roll to punish.
- Synergies: Fire damage boosting seals (Godslayer's Seal) or Fire Scorpion Charm talisman.
- Recommended Builds: Faith melee (e.g., Strength/Faith), or pure Faith for early game.
- Type: Lightning, Projectile
- FP Cost: 18
- Fth Requirement: 17
- Scaling: Faith
- Effect: Hurls a bolt of lightning. Long range, good damage, can be charged for more damage.
- Use Cases: Ranged damage against all enemies, especially those weak to lightning (dragons, heavy armor).
- Combos: Charge for extra damage; follow with melee attack after landing.
- Synergies: Gravel Stone Seal boosts lightning incantations. Use with Lightning Scorpion Charm.
- Recommended Builds: Pure Faith caster, or Strength/Faith with a lightning infusion weapon.
- Type: Utility, Heal
- FP Cost: 14
- Fth Requirement: 12
- Scaling: N/A
- Effect: Cures Scarlet Rot, Poison, and Frostbite. Does not heal damage.
- Use Cases: Essential for Lake of Rot or against Scarlet Rot enemies. Must-have for those areas.
- Combos: Use before or after taking status damage.
- Synergies: None specific; purely utility.
- Recommended Builds: Any build with 12 Faith (can be achieved with two fingers talisman).
- Type: Frost, Breath
- FP Cost: 32
- Fth Requirement: 15 (also requires Dragon Hearts to purchase)
- Scaling: Faith and Arcane (if Dragon Communion Seal)
- Effect: Breathes a stream of ice that builds up frostbite. Frostbite reduces damage negation and deals chunk damage when procs.
- Use Cases: Against bosses weak to frost or to apply status quickly.
- Combos: Use to proc frostbite, then switch to a fire weapon to reset the status and proc again.
- Synergies: Dragon Communion Seal (scales with Arcane). Frost damage boost items.
- Recommended Builds: Arcane/Faith hybrid (Dragon Communion build).
- Weapon: Moonveil Katana
- FP Cost: 26 (heavy) / 14 (light)
- Stat Requirements: 12 Str, 18 Dex, 23 Int
- Effect: Sheathes the blade and performs a quick slashing draw, releasing a magic wave. Light version is faster; heavy version deals more damage and poise.
- Use Cases: Versatile skill for both melee and ranged combat. Excellent for PvE and Invasion.
- Combos: Use heavy version to stagger, then follow with R1 attacks.
- Synergies: Intelligence/Dexterity build. Magic Scorpion Charm and Shard of Alexander (skill damage boost).
- Recommended Builds: Int/Dex hybrid (spellblade).
- Weapon: Blasphemous Blade
- FP Cost: 32
- Stat Requirements: 22 Str, 15 Dex, 21 Fth
- Effect: Plunges the sword into the ground, creating a fiery explosion that heals the user for 10% of max HP per enemy hit. High damage and stagger.
- Use Cases: Clearing groups or healing mid-fight. Excellent against slow bosses.
- Combos: Use when surrounded or when health is low.
- Synergies: Faith/Strength build. Fire damage boosters. Shard of Alexander.
- Recommended Builds: Strength/Faith (Paladin).
- Weapon: Rivers of Blood Katana
- FP Cost: 39 (full combo)
- Stat Requirements: 12 Str, 18 Dex, 20 Arc
- Effect: Unleashes a series of blood slashes that build up Bleed quickly. Can be performed multiple times with successive inputs.
- Use Cases: Bleed builds; melts bosses vulnerable to bleed (e.g., Fire Giant, Malenia).
- Combos: Spam L2 until out of FP. Use with Lord of Blood's Exultation talisman.
- Synergies: Arcane/Dexterity build. White Mask and Blood Lord's Exultation boost damage when bleed procs.
- Recommended Builds: Pure Arcane (Dex secondary) for maximum bleed buildup.
- Type: Tank, Teleporting
- FP Cost: 104
- Effect: Summons a headless knight wielding a spear. She can teleport to avoid damage, taunt enemies, and deal decent physical and holy damage.
- Use Cases: Drawing aggro from bosses. Good for casters or bow users.
- Upgrades: +10 offers good survivability.
- Recommended Builds: Any, but especially squishy builds.
- Type: Copy of the player
- FP Cost: 660 HP (not FP)
- Effect: Creates a copy of your character with your current equipped weapons, armor, and items. The copy uses consumables and skills.
- Use Cases: Utterly broken for most bosses. The mimic draws aggro and deals damage. Best used with high FP builds where the mimic can spam spells.
- Upgrades: +10 gives high HP and damage.
- Recommended Builds: All, but especially casters benefit from mimic using AoW or spells.
- Type: Assassin, Dodging
- FP Cost: 132
- Effect: Summons a Black Knife assassin that moves quickly, dodges often, and uses the Blade of Death skill which reduces max HP and deals damage over time.
- Use Cases: Against bosses that are fast or have high HP pools. Tiche can avoid many attacks.
- Upgrades: +10 gives high survivability and damage.
- Recommended Builds: Any, but excels against Malenia.
- Cerulean Hidden Tear: Eliminates all FP cost for 15 seconds. Perfect for Comet Azur spam.
- Magic Shrouding Cracked Tear: Boosts magic damage by 20% for 3 minutes.
- Spiked Cracked Tear: Boosts charged attack damage by 15%.
- Stonebarb Cracked Tear: Increases poise damage by 30%.
- Skill Management: You can only have one Ashes of War and one set of spells equipped per weapon. Memorize spells carefully based on situation.
- FP Management: Invest in Mind stat to increase FP pool. Use Cerulean Flasks to restore FP.
- Weapon Scaling: Skills that do elemental damage can be buffed with corresponding Scorpion Charms or Shard of Alexander (skill damage).
- Upgrade Path: Weapons and seals/staves upgrade separately. Priority depends on your primary damage source.
- Cooldowns: There are no cooldowns in Elden Ring; only FP and stamina costs. Thus, skill spam is viable as long as resources permit.
##### Bloodhound's Step
##### Flaming Strike
##### Parry
---
2. Sorceries
Sorceries are Intelligence-based magic spells cast using a staff. They must be memorized at a Site of Grace. Spells scale with Intelligence and staff upgrade level. FP cost varies.
#### Key Sorceries
##### Glintstone Pebble
##### Comet Azur
##### Carian Slicer
##### Terra Magicus
---
3. Incantations
Incantations are Faith-based spells cast using a Sacred Seal. They encompass healing, buffing, and offensive magic (fire, lightning, holy). Scaling is with Faith and seal level.
#### Key Incantations
##### Catch Flame
##### Lightning Spear
##### Flame, Cleanse Me
##### Dragonice
---
4. Unique Weapon Skills
Some weapons (often Legendary Armaments) have unique skills that cannot be changed. They are powerful and define the weapon's identity.
#### Key Examples
##### Transient Moonlight (Moonveil)
##### Taker's Flames (Blasphemous Blade)
##### Corpse Piler (Rivers of Blood)
---
5. Spirit Ashes (Summons)
Spirit Ashes are consumable summons that assist in combat. They cost FP or HP (if using certain ashes). They can be upgraded using Grave Glovewort or Ghost Glovewort. Each has unique abilities.
#### Key Spirit Ashes
##### Lhutel the Headless
##### Mimic Tear
##### Black Knife Tiche
---
6. Flask of Wondrous Physick (Special Item)
This is not a skill but a consumable item that can be mixed with two tears to create a one-time use potion with powerful effects. Essential for optimized builds.
#### Example Tears
How to Use: Equip at a Site of Grace. Use the flask (hold down use button) to activate. Effects last until duration or death. Can only be used once per rest.
Synergies: Combine with corresponding damage type spells or skills. For example, Magic Shrouding + Terra Magicus + Comet Azur.
---
General Tips
This guide covers the most impactful skills across all categories. Experiment and adapt to your playstyle. The Lands Between offer endless possibilities—master your skills and become the Elden Lord.

Characters & Roles
Characters & Roles Guide for Elden Ring
This guide covers every major character and role in Elden Ring. In a game with deep RPG customization and no fixed hero roster, “characters” break down into two categories: Starting Classes (your initial build), and Key NPCs (story figures who offer quests, items, or services). We also touch on Spirit Ashes (summonable allies) as they fill a pseudo-player role. Team synergy is discussed in terms of co-op partners and summon choices.
---
Starting Classes (Your First Hero)
You choose one of 10 classes at character creation. This sets your starting stats, equipment, and early playstyle. You can later re-spec (after defeating Rennala), so class only determines your early experience. Each class is a viable starting point for any final build.
#### 1. Warrior
- Background: A fighter skilled in dual-wielding and agility. Far from the Lands Between, a warrior who relies on speed and dexterity.
- Strengths: Highest starting Dexterity (16); excellent for status-build (bleed, frost) and fast weapons; light equip load for mobility.
- Weaknesses: Low Endurance (11) and Mind (11); minimal starting FP for skills; very light armor.
- Playstyle: Fast-paced, aggressive. Dodge, attack quickly with dual scimitars, apply pressure. Good for learning timing.
- Recommended Equipment/Builds: Dual katanas or curved swords; keen infused; later invest in Arcane for bleed (e.g., Rivers of Blood). Prioritize Dexterity and Endurance.
- Starting Gear: Two Scimitars, Leather Armor set, Buckler.
- Background: A knight who lost his way but kept his armor. Sturdy and reliable.
- Strengths: High vigor (15) and endurance (13); starts with a 100% physical block shield; all-around stats.
- Weaknesses: Low Intelligence (9) and Arcane (7); heavy armor (equip load burden early).
- Playstyle: Defensive, tanky. Block and counter, use longsword or halberd. Good for beginners.
- Recommended Equipment/Builds: Quality or strength builds; later heavy armor, greatswords. Can pivot to any physical build.
- Starting Gear: Longsword, Heater Shield, Halberd, Vagabond Knight Armor set.
- Background: A rugged barbarian from the northlands. Pure strength.
- Strengths: Highest starting Strength (16); high Vigor (14); excellent for large weapons.
- Weaknesses: Very low Mind (9), Intelligence (7), Faith (8), Arcane (11); limited FP for skills; poor magic defense.
- Playstyle: Slow, heavy hits. Two-hand a greataxe or club; rely on poise and high damage per swing. Trade hits.
- Recommended Equipment/Builds: Colossal weapons (e.g., Great Club, Giant-Crusher); heavy armor and Endurance; buff with Strength-scaling incantations if Faith later.
- Starting Gear: Battle Axe, Large Club, Leather Armor set, Wooden Shield.
- Background: A thief who relies on stealth and critical hits. Quick and cautious.
- Strengths: Highest starting Arcane (14); good Dexterity (13); excellent for parry/backstab; light roll.
- Weaknesses: Low Vigor (10) and Endurance (10); fragile; poor starting weapon damage.
- Playstyle: Stealth, backstabs, parry with Buckler, then riposte. Use daggers or claws. Frost/bleed builds excel.
- Recommended Equipment/Builds: Daggers (e.g., Reduvia) or curved swords; focus on Dexterity and Arcane; use Parry Ash of War. Later, items like Black Knife.
- Starting Gear: Knife, Shortbow, Buckler, Bandit Armor set.
- Background: An intellect-prisoner from a distant land. Starts with a magic staff and a rapier. Hybrid combat.
- Strengths: High Intelligence (14) and Dexterity (14); starts with Glintstone Pebble for ranged magic; good for sorcery/dex builds.
- Weaknesses: Low Strength (9) and Vigor (11); armor is poor; requires split stats.
- Playstyle: Use rapier for melee, sorcery from range. Mix close-quarters thrusts with swift magic. Good for spellblade builds.
- Recommended Equipment/Builds: Moonveil (katana) or Wing of Astel; upgrade both magic and melee. Invest in Intelligence and Vigor.
- Starting Gear: Rapier, Glintstone Staff, Prisoner Armor set, Iron Roundshield (optional).
- Background: A scholar of the stars. Pure mage.
- Strengths: Highest starting Intelligence (16); high Mind (15); starts with staff and three sorceries (Pebble, Arc, Glintblade). Great FP pool.
- Weaknesses: Very low Strength (8), Dexterity (12), and Vigor (9); extremely fragile; poor in melee early.
- Playstyle: Stay at range, cast spells, kite enemies. Use summons to distract. Manage FP with flasks.
- Recommended Equipment/Builds: Full sorcery build. Upgrade staff (Lusat’s or Azur’s later). Get Rock Sling early. Later spells: Comet Azur, Stars of Ruin.
- Starting Gear: Glintstone Staff, Astrologer Armor set, Short Sword.
- Background: A spy of the church. Balances melee with faith incantations. Good starter for paladins.
- Strengths: Balanced stats; starts with a decent shield, a broadsword, and two incantations (Urgent Heal, Assassin’s Approach). High Faith (14) for early heals.
- Weaknesses: No real weakness, but not min-maxed for any single style.
- Playstyle: Hybrid melee/faith. Heal, buff, use holy weapons. Can cast offensive incantations later.
- Recommended Equipment/Builds: Sacred infused weapons (e.g., Claymore with Sacred Blade). Later, incantations like Lightning Spear or Golden Vow. Strength/Faith build.
- Starting Gear: Broadsword, Blue Crest Heater Shield, Confessor Armor set, Finger Seal.
- Background: A seer who foresaw the Shattering. Pure faith caster.
- Strengths: Highest starting Faith (16); high Mind (14); starts with three incantations (Heal, Flame Sling, Catch Flame). Great early support.
- Weaknesses: Low Strength (11), Dexterity (9); weak in melee; armor is light cloth.
- Playstyle: Ranged incantations, healing, and support. Use faith scaling weapons like the Cipher Pata or a Sacred Greatshield later.
- Recommended Equipment/Builds: Pure faith caster. Get Godslayer’s Seal or Erdtree Seal. Pyromancy or holy spells. Also viable for dragon incantations with Arcane.
- Starting Gear: Short Spear, Finger Seal, Prophet Armor set.
- Background: A warrior from a distant land of reeds. Expert with katana and bow.
- Strengths: High Dexterity (15), good Endurance (13); starts with a powerful katana (Uchigatana) and a Longbow. Excellent bleed potential.
- Weaknesses: Low Intelligence (9) and Faith (8); heavy starting armor may slow roll if not adjusting.
- Playstyle: Fast, precise cuts from katana; use bow for ranged pulls; unsheathe skill for high damage. Classic samurai.
- Recommended Equipment/Builds: Dual katanas (Uchigatana + Moonveil or Nagakiba); keen ash of war; rapid bleed; use Unsheathe. Focus on Dexterity and Vigor.
- Starting Gear: Uchigatana, Longbow, 20x Arrows, Samurai Armor set, Red Thorn Roundshield.
- Background: A naked, amnesiac prisoner. The true blank slate.
- Strengths: All stats at 10—perfectly balanced. No starting advantages but can be anything.
- Weaknesses: No armor, no weapon, no shield, no items. Extremely hard early game.
- Playstyle: Pure challenge start. You must find a weapon immediately. High adaptability later.
- Recommended Equipment/Builds: Any direction; you decide. Best for experienced players wanting full customization from scratch.
- Starting Gear: Club, no armor, no shield.
- Background: A spectral woman who offers you the power to turn runes into strength (level up). She also gives you the Spectral Steed Whistle for Torrent. Her motives are veiled.
- Role: Level-up service, mount, lore exposition. She is the equivalent of the Fire Keeper.
- Questline: She asks you to take her to the base of the Erdtree (Mountaintops). She can also be sacrificed or saved—multiple endings.
- Synergy: All players rely on her. No direct combat role.
- Background: Two conjoined merchants in the Roundtable Hold. They sell items, sorceries, incantations, and ashes of war once bell bearings are turned in.
- Role: Shop, bell bearing receptacle.
- Notes: Not a single character but an essential merchant.
- Background: A creepy white-masked figure at the First Step. He directs you to the Tree Sentinel and later invites you to serve the Lord of Blood.
- Role: Quest giver, leads to Mohgwyn Palace and the Varre’s Bouquet weapon. Also offers invasion item.
- Synergy: If you want bleed build, his quest gives you early access to the best rune farming spot.
- Background: A mysterious witch, daughter of Rennala. She gives you the Spirit Calling Bell and a key quest leading to one of the game’s best endings.
- Role: Quest giver, lore central. You meet her in Caria Manor after the academy.
- Rewards: Dark Moon Greatsword, Ranni’s Greatsword, Lunar Princess ending.
- Synergy: Magic and intelligence builds benefit greatly from her quest (spells and staffs).
- Background: Ranni’s loyal shadow. A giant wolf-man warrior. He helps in two boss fights.
- Role: Friendly NPC summon for Darriwil (Evergaol) and later Radahn’s Festival. Also invades for a key item.
- Synergy: Melee players appreciate his tanking. His quest ties to Ranni’s.
- Background: Head of Raya Lucaria Academy. She is a boss but later becomes a friendly NPC offering respec (Rebirth).
- Role: Boss (you must defeat her), then service provider: you can reallocate stats using a Larval Tear.
- Location: Grand Library of Raya Lucaria.
- Synergy: All characters eventually need her to respec.
- Background: A powerful glintstone sorceress living in Limgrave. She teaches sorceries and later becomes a key figure in a quest.
- Role: Sorcery teacher, quest giver for Lusat and Azur secrets.
- Synergy: Sorcerers should seek her immediately.
- Background: A female warrior, adopted daughter of Gideon the All-Knowing. She helps in a boss fight and later becomes ruler of Limgrave if quest completed.
- Role: Summonable for Godrick; gives access to Arsenal Charm. Alternate ending for Stormveil Castle.
- Synergy: Strength builds get her talisman; she is a strong ally in Godrick fight.
- Background: A nobleman seeking to reclaim Fort Haight. He gives the Golden Seed if you clear it.
- Role: NPC who later can become part of the Limgrave throne ending.
- Synergy: Everyone needs Golden Seeds; his quest is simple.
- Background: A friendly, talkative jar warrior. He gets stuck in holes and you help him out multiple times. He becomes a summonable for Fire Giant and then a boss.
- Role: Comic relief, optional boss fight (you can fight him for a talisman). Summonable for Radahn and Fire Giant.
- Synergy: Great tank for any boss fight; his quest gives a powerful Shard of Alexander talisman (increases weapon skill damage).
- Background: A mysterious woman infected by Scarlet Rot. You can help her complete her quest. She is a possible ally in the Malenia fight.
- Role: Quest giver, invader turncoat, summon for Malenia (gold sign). Gives a prosthetic talisman.
- Synergy: For bleed or dex builds, the talisman boosts attack power. Her summon distracts Malenia.
- Background: A cowardly, treacherous thief. He appears in several locations, often pretending to be a merchant or friend then kicking you into traps.
- Role: Merchant (sells some unique items), quest giver for Volcano Manor. He also provides a key item (Patches’ Emporium).
- Synergy: No direct combat synergy but his quests give early access to some weapons and the “Unable” gesture.
- Background: A knight who teleports. Excellent for drawing aggro.
- Role: Tank, decoy. Can teleport to avoid hits.
- Synergy: Great for glass cannon builds (mages, archers).
- Background: A replica of yourself. It uses your equipped gear, items, and spells. Extremely powerful.
- Role: Your copy; doubles your damage output and tanking.
- Unlock: Found in Nokron, Eternal City, in the Night’s Sacred Ground.
- Synergy: Works with any build, especially ones with high HP and strong projectiles.
- Background: A Black Knife assassin from the Night of Black Knives. Fast, uses Destined Death attack which reduces enemy max HP.
- Role: DPS, mobility. Very aggressive and dodges well.
- Synergy: Boss fights, great for applying death status. Excellent for any build that needs a distraction.
- Background: A dragon knight with lightning attacks. He can tank and deals good damage.
- Role: Tank, moderate damage. Uses lightning bolts.
- Synergy: Good against dragons and large enemies weak to lightning.
- Background: A cursed puppet of the Dung Eater. Very tanky with healing debuff.
- Role: Immense tank, inflicts curses. But may debuff enemies’ healing.
- Synergy: For aggressive builds who want a super tank.
- Tank: High HP, heavy armor, taunting abilities (like Shield Bash). Equip Shabriri’s Woe or Distinguishing Eye. Examples: Vagabond, Hero, or any strength build with greatshield.
- DPS (Melee): High damage output, fast weapons with status. Examples: Warrior, Samurai, Bandit (bleed). Prioritize Riposte and critical strikes.
- Mage (Ranged): Sorcerer or incantation caster. High FP, kiting. Examples: Astrologer, Prisoner (int), Prophet (faith). Need space to cast.
- Support/Healer: Faith builds using healing incantations, Golden Vow, and Lord’s Heal. Prophet or Confessor are ideal. Use the Erdtree Seal for best scaling.
- Spellblade: Dexterity/Int hybrid using magic-infused weapons (e.g., Moonveil). Prisoner or Astrologer (with some dex). Good at both ranges.
- Parry Specialist: High dexterity, dagger, and buckler. Can parry bosses for huge riposte damage. Bandit or Warrior.
- Never duplicate roles. One tank, one healer, one DPS works best.
- Mages should stay at the back, tanks keep boss attention.
- Use Shabriri’s Woe on a dedicated tank to pull aggro.
- Healers need to keep line-of-sight and avoid boss stomps.
- Parry specialists must communicate cooldowns.
#### 2. Vagabond
#### 3. Hero
#### 4. Bandit
#### 5. Prisoner
#### 6. Astrologer
#### 7. Confessor
#### 8. Prophet
#### 9. Samurai
#### 10. Wretch
---
Key NPCs & Their Roles
These major characters drive the story, grant power, or offer quests. Interacting with them is optional but rewards are significant.
#### Melina (The Maiden)
#### René (The Twin Maiden Husks)
#### White Mask Varré
#### Ranni the Witch
#### Blaidd the Half-Wolf
#### Rennala, Queen of the Full Moon
#### Sorceress Sellen
#### Nepheli Loux
#### Kenneth Haight
#### Alexander the Iron Fist
#### Millicent
#### Patches
---
Spirit Ashes (Pseudo-Characters)
Spirit ashes are summonable allies. They fill roles similar to a support hero. Here are the most notable:
#### Lhutel the Headless
#### Mimic Tear
#### Black Knife Tiche
#### Ancient Dragon Knight Kristoff
#### Dung Eater Puppet
---
Roles & Team Synergy in Co-op
If you summon other players or NPCs, your role matters. Builds fall into archetypes:
Co-op Synergy Tips:
---
Unlock Conditions for Key Characters & Services
| Character/Service | Unlock Condition |
|---|---|
| Melina (level up) | Rest at any Site of Grace outside tutorial |
| Torrent (mount) | Talk to Melina at Gatefront Grace |
| Roundtable Hold | Get to the surface (Leyndell or after Godrick) |
| Rennala (respec) | Defeat Rennala at Raya Lucaria |
| Spirit Summoning | Get Spirit Calling Bell from Ranni or purchase from Twin Maiden Husks |
| Sorcery/Incantation Vendor | Meet Sellen (sorcery) or Brother Corhyn (incantations) in Roundtable |
| Ranni quest | After killing Radahn, explore Caria Manor |
| Volcano Manor | Join via invitation or go to Mt. Gelmir |
| Mimic Tear | Defeat Radahn, then descend to Nokron |
Recommended Early Game Builds per Class
| Class | Recommended Starting Build | Key Items to Pursue |
|---|---|---|
| Warrior | Dex/Bleed | Uchigatana (found early), Bloody Slash AoW |
| Vagabond | Quality (Str/Dex) | Claymore, Knight Greatshield |
| Hero | Pure Strength | Great Club (Limgrave), Heavy infused weapon |
| Bandit | Parry/Dagger | Reduvia (Yura quest), Buckler |
| Prisoner | Int/Dex Spellblade | Moonveil (Gael Tunnel), Glintstone Pebble |
| Astrologer | Pure Sorcery | Rock Sling (Street of Sages Ruins), Meteorite Staff |
| Confessor | Str/Faith Paladin | Sacred Blade Ash, Golden Vow, Clawmark Seal |
| Prophet | Faith Caster | Lightning Spear (Altus Plateau), Erdtree Seal |
| Samurai | Dex Bleed | Nagakiba (Limgrave large sword), Unsheathe |
| Wretch | Any | Find a weapon immediately—e.g., Zweihander at Weeping Peninsula |
This guide covers all characters and roles of Elden Ring. Remember: every starting class is viable for the entire game; only your skill and stat allocation matter. For more on skills, spells, and items, refer to the respective guides.

Cheats & Secrets
Cheats & Secrets Guide for Elden Ring
Elden Ring does not include traditional cheat codes (e.g., pressing a button combination for infinite health) or a developer console. FromSoftware games rely on organic discovery rather than built‑in cheats. However, the game is packed with secrets, Easter eggs, hidden content, and developer‑intended surprises that reward thorough exploration. This guide covers all known legitimate secrets—no mods or third‑party tools required. All content is safe and intended by the developers.
###