Escape from Tarkov
## Game Introduction: Escape from Tarkov **Genre:** Hardcore Realistic First-Person Shooter / MMO Survival / Tactical Looter-Shooter **Developer & Publisher:** Battlestate Games (independent studio based in Russia) **Release Timeline:** - Closed Alpha: July 2016 - Closed Beta: July 2017 - Open Be...
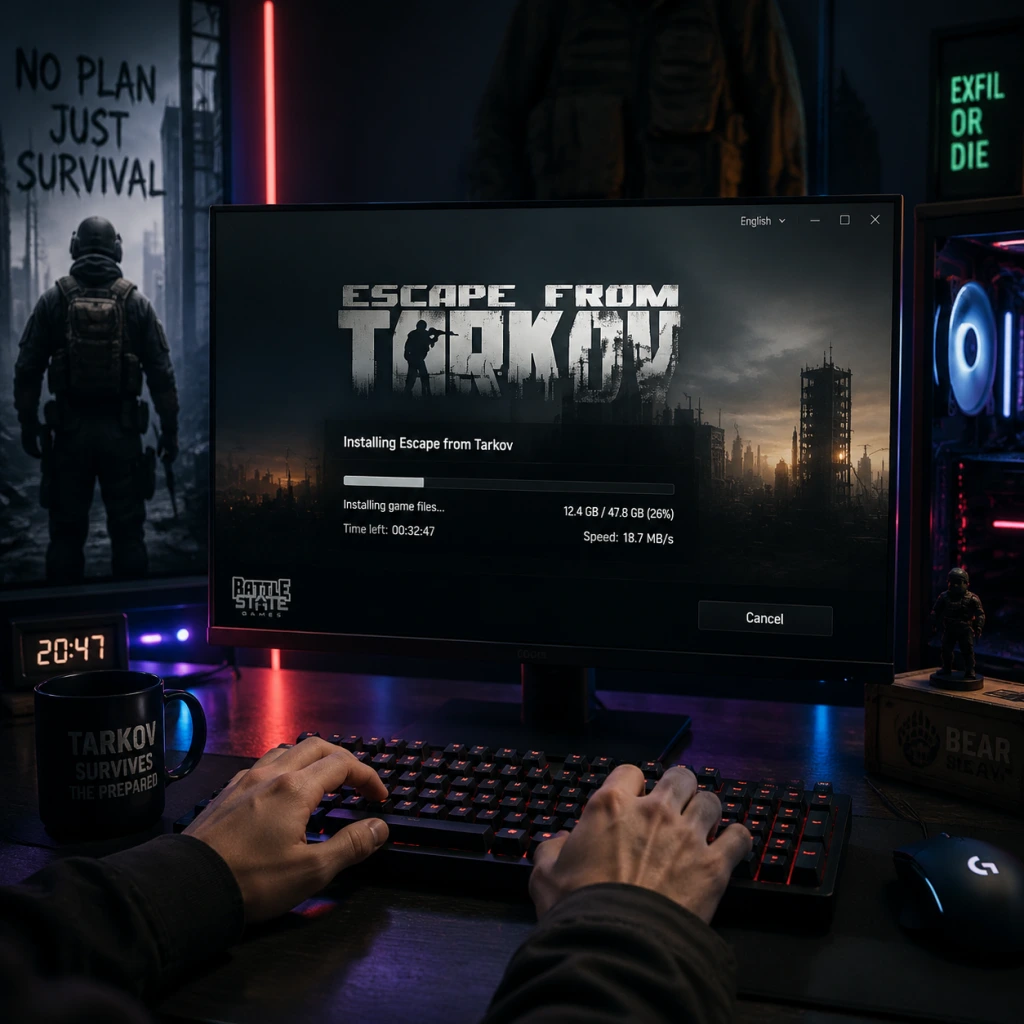
Download & Installation
Download & Installation Guide for Escape from Tarkov
Important Note on Platform Availability
Escape from Tarkov is available exclusively on Windows PC. It is not available on PlayStation, Xbox, Nintendo Switch, or mobile devices. The game is not sold through Steam, Epic Games Store, or any other third-party digital storefront. The only official and legitimate source is the [Battlestate Games website](https://www.escapefromtarkov.com).
Official Download Source
1. Visit the official website: [https://www.escapefromtarkov.com](https://www.escapefromtarkov.com)
2. Click on "Pre-order" (or "Buy Now" if you already own a copy).
3. Choose your edition (Standard, Left Behind, Prepare for Escape, Edge of Darkness). Each edition grants access to the game and different starting gear/ stash size. After purchase, you will receive a confirmation email with instructions.
4. Alternatively, you can log into your profile on the website and download the BSG Launcher from the "Profile" page > "Install Game".
Step-by-Step Installation (Windows PC Only)
#### Step 1: System Requirements
Before downloading, ensure your PC meets the following specifications:
| Component | Minimum Requirements | Recommended Requirements |
|---|---|---|
| OS | Windows 7/8/10 (64-bit) | Windows 10/11 (64-bit) |
| CPU | Intel Core i5-2500K or AMD FX-8350 | Intel Core i7-4790K or AMD Ryzen 5 1600 |
| RAM | 8 GB | 16 GB (32 GB for Streets of Tarkov) |
| GPU | NVIDIA GeForce GTX 660 2GB or AMD Radeon HD 7850 2GB | NVIDIA GeForce GTX 1060 6GB or AMD Radeon RX 580 8GB |
| Storage | 40 GB free space (SSD recommended) | 50 GB free space (SSD required) |
| DirectX | Version 11 | Version 12 |
| Network | Broadband internet connection | Low latency connection (ping < 100 ms) |
| Sound | DirectX-compatible | DirectX-compatible |
1. Log into your account on the [official website](https://www.escapefromtarkov.com).
2. Go to your Profile page.
3. Click the "Install Game" button. This will download the `BsgLauncher_Setup.exe` file (approximately 1 MB).
#### Step 3: Install the Launcher
1. Run the downloaded installer (`BsgLauncher_Setup.exe`).
2. Follow the on-screen instructions. The launcher will install to a default location (typically `C:\Users\[YourUsername]\AppData\Local\BsgLauncher`). You can change the installation folder if desired.
3. Once installation completes, the launcher will open automatically.
#### Step 4: Log in and Download the Game
1. In the BSG Launcher, enter your email and password used during purchase.
2. Click "Login".
3. The launcher will detect that you own Escape from Tarkov and will show a "Install" button.
4. Choose your installation directory (ensure at least 50 GB free space on an SSD for best performance).
5. Click "Install". The launcher will download and verify the game files (approximately 40–45 GB).
6. Wait for the download to complete. Time depends on your internet speed.
#### Step 5: First Launch Setup
1. Once installation finishes, click "Play" in the launcher.
2. The game will start and you may see a "Shaders Compilation" window. This is normal and may take a few minutes on first launch.
3. You will be prompted to select a server region (choose the one closest to you for lower ping).
4. Configure in-game settings:
- Graphics: Set resolution to your monitor's native, choose quality presets (Low, Medium, High, Ultra).
- Audio: Select speaker configuration (Stereo, 5.1, 7.1).
- Controls: Customize keybindings if desired.
- Game: Enable/disable auto-optimization, set field of view (FOV).
5. Accept the EULA if prompted.
6. You will then enter the main menu. From here you can access PMC (main game mode), Scav (secondary mode), Hideout, Flea Market, etc.
Common Installation Errors and Fixes
| Error | Cause | Solution |
|---|---|---|
| Launcher won't start | Antivirus blocking | Add `BsgLauncher.exe` and `EscapeFromTarkov.exe` to antivirus exclusions. Also disable real-time protection temporarily during install. |
| Download stuck at 0% | Corrupted download cache | In launcher settings (gear icon) > "Clear cache". Then restart launcher. |
| Missing DLL files (e.g., msvcp140.dll) | Missing Visual C++ Redistributables | Download and install [Microsoft Visual C++ 2015-2022 Redistributable (x64)](https://aka.ms/vs/17/release/vc_redist.x64.exe). |
| "The game encountered an error during installation" | Disk write error or permissions | Run launcher as Administrator. Also ensure install drive is NTFS and not full. |
| Anticheat (BattlEye) not loading | Outdated or blocked BattlEye | Navigate to `[InstallFolder]\\EscapeFromTarkov\\BattlEye` and run `BEService_Install.bat` as Administrator. Then restart PC. |
| Low FPS / stuttering after installation | Graphics settings too high or outdated drivers | Update GPU drivers (NVIDIA/AMD). Set graphics to Medium or Low and enable DLSS/FSR if available. |
| Account not recognized | Wrong region or used trial token | Ensure you purchased the game on the correct website (region lock). Contact Battlestate Games support if needed. |
| Connection timeout on start | Firewall blocking | Add `EscapeFromTarkov.exe` to Windows Firewall exception list. Also check if VPN is enabled (disable it). |
Post-Installation Verification
1. Check game file integrity (optional but recommended):
- Open BSG Launcher and go to Settings (gear icon).
- Under "Integrity Check", click "Check". The launcher will scan all game files and re-download any corrupted ones.
2. Test audio and microphone:
- Launch the game and go to Settings > Audio. Speak into your mic; the voice activation indicator should move. Adjust volume.
3. Perform a network test:
- In-game, open the console (`~` key) and type `fps 1` to see FPS and ping. Wait for a match to ensure stable connection.
4. Update drivers:
- Ensure your graphics, audio, and network drivers are up-to-date. Outdated drivers are a common cause of crashes.
5. Create a backup (optional):
- You can copy the game folder (`EscapeFromTarkov`) to an external drive to avoid re-downloading in case of OS reinstall. The launcher allows you to point to the existing folder.
Final Notes
- Escape from Tarkov is a persistent online game; you do not need to own it on any other platform.
- The BSG Launcher is required to launch the game; you can minimize it to the system tray.
- For support, visit the official [support portal](https://support.escapefromtarkov.com).
- Always download from the official website to avoid malware or scams. Never trust third-party sites offering "free" copies.
By following this guide, you will have a clean installation and be ready to raid in the Norvinsk region. Good luck, and watch your head!
Game Introduction
Game Introduction: Escape from Tarkov
Genre: Hardcore Realistic First-Person Shooter / MMO Survival / Tactical Looter-Shooter
Developer & Publisher: Battlestate Games (independent studio based in Russia)
Release Timeline:
- Closed Alpha: July 2016
- Closed Beta: July 2017
- Open Beta (Early Access): July 2017 (still ongoing)
- Full Release: No official date; regular major updates continue to expand the game
- Location: The fictional city of Tarkov and its surrounding areas — industrial zones, suburbs, forests, a terminal, a medical facility, a small military base, and a shoreline resort. The maps are interconnected lore-wise but played separately.
- Atmosphere: Dark, gritty, post-apocalyptic urban warfare. Realistic weather cycles, dynamic lighting, and high-fidelity audio make every raid immersive and tense.
- USEC (United Security): A Western-based private military contractor. Skilled in urban combat, often using Western weaponry. Default faction for English-speaking setting.
- BEAR (Battle Encounter Assault Regiment): A Russian-based private military company, loyal to local interests. Use Russian weaponry and equipment.
- Scavs (Scavengers): AI-controlled (or player-controlled as Scavs) local inhabitants and deserters who are hostile to all PMCs and each other. They hold loot, can be allies temporarily, but also deadly.
- Traders: NPC merchants who provide quests, gear, and currency exchange. Key traders include Prapor (Russian military supply), Therapist (medical supplies), Fence (black market), Jaeger (survivalist), Skier (criminal), Peacekeeper (UN peacekeeper), and Mechanic (weapon mods).
- Complex Health System: Every limb has individual hit points, fractures, bleeds, dehydration, energy, and contamination. You must treat wounds with proper meds, splints, and even surgery.
- Ballistics & Weapon Customization: Hundreds of realistic weapon parts, ammo types with different penetration and damage values, ergonomics, recoil, and malfunction probabilities. Your weapon can jam, degrade, or be repaired.
- Loot Persistence: Gear you bring into a raid is lost on death (except secured container slots). Anything you extract with is kept.
- No HUD / Minimalist UI: No mini-map, enemy highlight, kill cam, or radar. Only a few icons for health and ammo. Sound and visibility are paramount.
- Hybrid Scav Mode: Players can join a raid as a Scav with random gear, fight AI Scavs and other PMCs, and extract with loot for their main character.
- Trading & Flea Market: Players can list found items on a dynamic auction market, controlled by player-driven economy.
- Quests & Reputation: Traders offer dozens of quests that unlock better gear, new items, and even access to hideout upgrades.
- Hardcore tactical FPS enthusiasts who enjoy realistic simulations over arcade shooters.
- Players who appreciate inventory management, gear variety, and risk-reward systems.
- Competitive players looking for a high-stakes extraction shooter with meaningful consequences.
- Note: Extremely steep learning curve; not recommended for casual or pain-averse gamers.
- PMC (Player vs Player vs Environment): Main mode. You deploy as your PMC with your own gear, complete quests, fight other PMCs and Scavs, and extract.
- Scav Mode: Play as a randomly equipped Scav for a no-risk raid. You keep what you extract with.
- Offline Mode (Practice): Play any map alone with AI Scavs to learn layout, spawns, and mechanics, but no loot is saved.
- Arena (Standalone, coming soon): Team-based PvP mode set in Tarkov’s environments, focusing on pure combat without the loot extraction.
- Online only for standard PMC raids. Fully persistent player data, no offline single-player with progress.
- Offline Mode exists for practice, but it does not save any experience, skills, or loot. It’s purely a training tool.
- No dedicated servers available for private use; the game uses Battlestate’s official servers worldwide.
Platforms: Exclusive to Windows PC. Not available on any console or mobile device.
Story Overview
Set in the fictional Norvinsk Region of Russia, Escape from Tarkov takes place in the aftermath of a political scandal and subsequent armed conflict. The region became a border closed to the outside world, and the city of Tarkov fell into chaos. Private military companies (PMCs) — USEC (United Security) and BEAR (Battle Encounter Assault Regiment) — are locked in a violent struggle for survival and control. Players take on the role of a single PMC operative, contracted to escape the city, but must first complete missions from mysterious traders, fight off other players (Scavs and PMCs), manage injuries, and survive the harsh conditions.
Setting & Environment
Main Characters & Factions
Core Appeal & What Makes It Unique
Escape from Tarkov stands out for its uncompromising realism and depth. Unlike other shooters:
Target Audience
Game Modes
Online/Offline Support
DLC / Expansions
Battlestate Games has not released traditional DLC packs, but the game receives frequent major updates (e.g., Streets of Tarkov map, Unity engine upgrade, new weapons, hideout expansion). A future Arena mode may be sold separately. The base game currently provides all content; no expansions are required to access core features.
Final Thoughts
Escape from Tarkov is not just a game — it’s a survival simulator disguised as a tactical shooter. Its punishing difficulty, deep realism, and adrenaline-fueled raids create an experience unmatched in the genre. If you thrive on challenge, crave meaningful loot, and can tolerate steep losses, Tarkov awaits.
---
Note: This information is based on the latest publicly available updates as of early 2025. Always refer to official Battlestate Games announcements for the most accurate details.
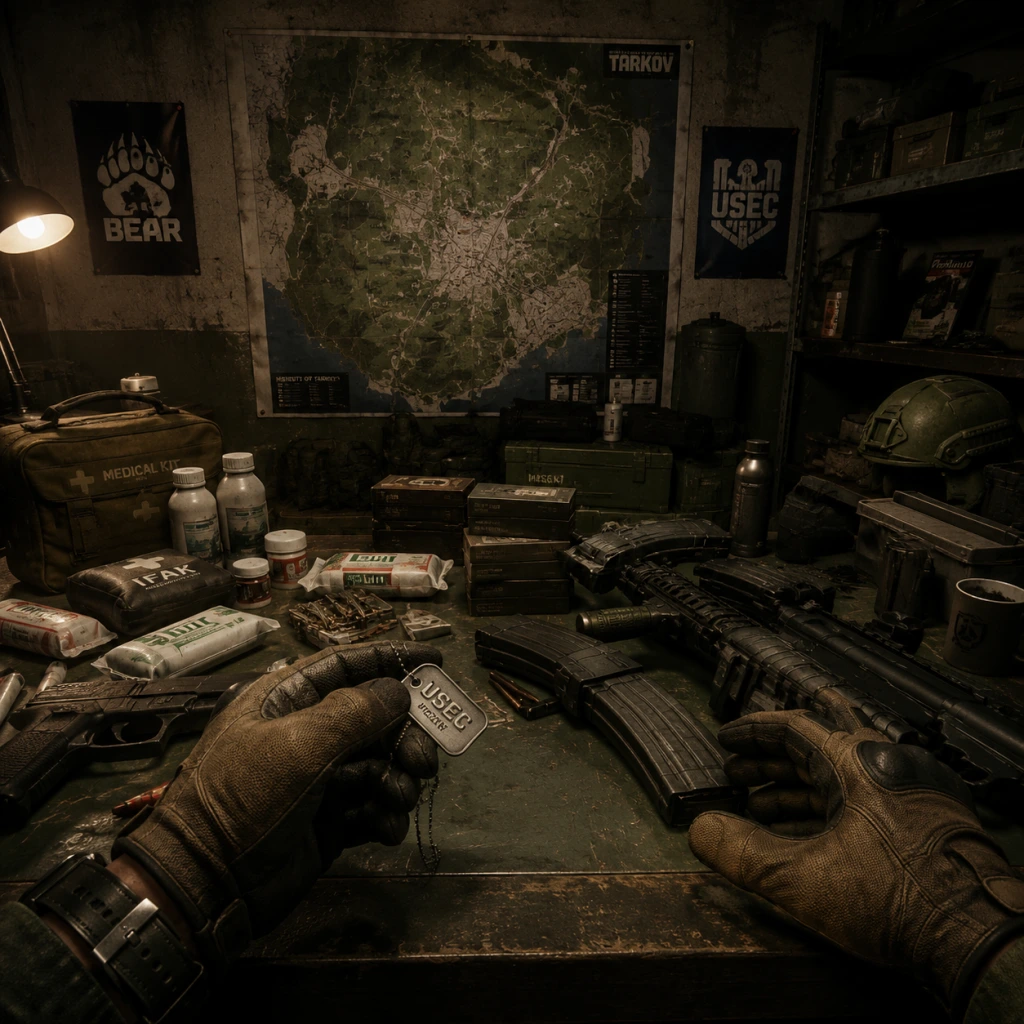
Getting Started
Getting Started Guide for Escape from Tarkov
Introduction
Escape from Tarkov is a hardcore, realistic tactical shooter that punishes mistakes harshly. As a brand-new player, expect to die frequently, lose gear, and feel confused. Patience is your most important tool. This guide will walk you through your first hour, explain the UI, controls, and give you a clear day-one checklist to minimize frustration.
First Hour Walkthrough
1. Buy the Game & Create Account – Purchase from the official website (battlestategames.com). After payment, create a BattleState account and link it. Download the launcher (~10 MB) and install the game (full download ~15-20 GB).
2. Choose Your Character – On first launch, you’ll select a faction:
- USEC – English-speaking; starting gear includes an M4A1 (better for early quests).
- BEAR – Russian-speaking; starts with an AK series. Faction affects voice lines and some quests. Both are viable. Choose USEC if you want slightly easier early game weapon mods.
- Name & Appearance – Pick a name (two words, Latin letters) and customize your face/voice. These are purely cosmetic and don’t affect gameplay.
3. First Raid (Offline) – Before going online, practice in Offline Mode:
- From main menu click Raid > Map: Factory (small), Raid Mode: Offline, Enable PvE (optional).
- Learn basic movement (WASD, sprint with Shift, crouch with C, prone with X).
- Practice looting (F on items), healing (use medkits with left-click from inventory), and shooting (mouse1).
- Kill scavs (AI enemies) and find extracts (green flares or extraction points shown by double-tapping O).
4. First Online Raid – After you feel comfortable, play as your Scav (Scavenger) – a random character with free gear that has a 20-minute cooldown. This is risk-free and lets you learn maps without losing your own gear. Pick a simple map like Customs or Woods.
Character Creation Details
There is no deep character creator. You choose:
- Faction & Appearance: Select USEC or BEAR. Then pick head type, face, skin tone, and voice. These do NOT affect stats.
- Starting Gear: You receive a “Standard Edition” stash (10x28 grid) and starting equipment (Pistol, armor, backpack, meds, food/water). Upgrading editions (Left Behind, Prepare for Escape, Edge of Darkness) gives larger stash, better starting gear, and a secure container (Alpha, Beta, Gamma). Standard players get an Alpha container (2x2).
Controls (PC Only)
Escape from Tarkov is exclusively on PC. Essential keyboard/mouse controls:
| Action | Key |
|---|---|
| Move | W A S D |
| Sprint | Shift + W |
| Walk (slow) | Caps lock (toggle) or Alt + W (hold) |
| Crouch | C (toggle) |
| Prone | X (toggle) |
| Jump | Space |
| Vault | Space + W over obstacles |
| Interact / Loot | F |
| Quick loot (move item) | Ctrl + Left-click |
| Discard | Delete |
| Check weapon / inspect | Alt + T (first equip) |
| Tactical device toggle | L |
| Change fire mode | B |
| Reload | R |
| Check magazine | Ctrl + R (hold) |
| Heal in raid | Open inventory (Tab), right-click meds, use (or hotkey 4-9) |
| Map (double tap) | O (shows extracts & timer) |
| Voice lines | Y (emotes) |
| Free look | Middle mouse button (hold) |
| Grenade throw | G (pull pin, then left-click to throw) |
UI Overview
#### Main Menu / Stash View
- Top bars: Health (hydrated, energy) and time. Your character must eat/drink in raid.
- Stash Grid: Your inventory container. Items take up real space (1x1, 1x2, etc.). Keep organized.
- Bottom: Quick slots (1-6) for weapons, meds, grenades.
- Left side: Character (click PMC tab) to equip armor, helmet, backpacks, etc.
- Trader tabs (top right): Therapist, Prapor, Skier, etc. You unlock them after first raid.
- Tasks (bottom right): Active quests, daily/weekly.
- Raid Menu (top left): Launch raid, choose PMC or Scav, map, time (day/night).
- Bottom Center: Health status (limbs color coded). Right side: stamina bar (yellow), weight indicator.
- Top Right: Raid time remaining.
- Bottom Left: Minimap (if you have compass? Not default).
- Ammo Counter: On your weapon when ADS.
- Extract Points: Shown by double-tap O (list of named locations).
- Play Offline Raids – Practice with your PMC without gear loss. Enable PvE to fight scavs, learn extracts.
- Use Every Scav Raid – Cooldown is short. Treat scav runs as free money runs. Loot everything, sell to traders.
- Insure Your Gear – Always insure cheap guns and armor. If you die but no one takes it, you get it back after 24 hours.
- Bind Medical Items – Put a bandage, AFAK, Splint, and Hemostat in your pouch/container. Use hotkeys (4-9).
- Check Quests in Raid – Press Q to open task list. Always know what you need to find.
- Don’t fight every PMC – You will die. Avoid gunfights; let players pass. Noise attracts others.
- Don’t hoard everything – Your stash is tiny. Sell broken guns, low-tier armor, and excess ammo to traders.
- Don’t waste money on expensive gear – Use SKS (7.62x39) with PS ammo; it’s cheap and powerful. Avoid modded weapons early on.
- Don’t ignore healing – Bleeding or blacked limbs will kill you. Always carry a Car Kit or AFAK.
- Don’t run everywhere – Loud footsteps attract scavs and players. Walk (Caps Lock or Alt+W) in open areas.
- Don’t use bad ammo – Check ammo penetration values (e.g., 7.62x39 PS good; 9x19 Pst gzh decent). Avoid 5.45 BT or 7.62x39 HP for armor.
- Moving too fast – Slow down, listen, spot enemies. Use shift to sprint only in danger.
- Not using audio – Tarkov is about sound. Wear headphones (real life) and in-game headset (e.g., Sordin).
- Overweight – If your weight is >40kg, you move slowly and make noise. Drop backpack in cover while looting.
- Wrong ammo for weapon – Use the correct caliber! 5.45 doesn’t fit 7.62.
- Ignoring extract points – Always have a map open. Learn landmarks: Customs: dorms, construction, old gas station.
- Selling items to wrong trader – Check on wiki: Prapor pays for guns, Therapist for meds, Skier for gear. Always sell to highest value.
- Not using secure container – Put your best loot inside (e.g., flash drives, keys). If you die, they stay with you.
- Scav on solo all the time – You can group with friends or random players (but randoms may betray). Solo is harder but common.
- [ ] Purchase and install Escape from Tarkov.
- [ ] Create BattleState account and log in.
- [ ] Select faction (USEC recommended for standard edition).
- [ ] Play at least 3 offline raids on Factory (PvE enabled) to practice movement, looting, healing, and extracting.
- [ ] Learn all extracts for Customs (look up map).
- [ ] Complete Prapor’s first quest “Debut” – Go to Customs, find Salewa (in lockers or med bags), survive. Hand over to Prapor.
- [ ] Play as your Scav as soon as it’s ready (Factory or Interchange). Loot everything and extract.
- [ ] Organize stash: sell broken guns and low-tier items to traders. Keep only what you need.
- [ ] Bind medical items to hotkeys (4-9).
- [ ] Insure your starting gear before first PMC raid.
- [ ] Set graphics settings: low shadows, TAA high, fullscreen. Turn off V-sync.
- [ ] Review keybindings and remap if necessary (e.g., push-to-talk for VoIP).
- [ ] Read the Tarkov Wiki for beginner quests (Debut, Search Mission, etc.).
- [ ] Watch a beginner guide on YouTube (e.g., Pestily’s Raid series).
#### In-Raid HUD
Essential Early Objectives
1. Complete Prapor’s first quest “Debut” – Survive a raid on Customs and hand over a Salewa (medical kit) or find it in raid. This rewards XP, money, and reputation.
2. Learn one map thoroughly – Customs is the most common early map (quests). Learn extracts: Smuggler’s Boat, ZB-1011, RUAF Roadblock, etc. Use map tools (second monitor or mobile app like Tarkov Wiki).
3. Survive as a Scav – Every 20 minutes, play a scav run on Factory or Interchange to loot free gear and learn combat.
4. Save every FIR (Found In Raid) item – Many early quests require specific items (e.g., Salewa, Dry Fuel). Keep at least one of each.
5. Unlock Flea Market – Reach level 15 to buy/sell any item. Focus on questing to level up fast.
What to Do First
What to Avoid
Early Resource Priorities
1. Secure Container – Upgrade to Beta (from Prapor quests) or Gamma (Edge of Darkness). Always put keys, expensive meds, and valuable loot inside.
2. Keys – Reserve your best keys for high-traffic maps (e.g., Customs marked room, Interchange tech stores).
3. Medical Supplies – AFAK, bandages, splints, hemostats, and propital/alum. Always keep at least 2 of each in stash.
4. Ammo – Stockpile 7.62x39 PS (SKS/AK) and 5.45x39 BT (AK-74). Check caliber vs armor.
5. Backpacks & Vests – Keep at least one MBSS or Berkut backpack and a cheap rig (e.g., M1, Voice Activated).
6. Food & Water – Have some MREs or crackers in stash for scav runs. You need them to heal hydration/energy.
7. Tools & Tech – Keep screws, bolts, nuts, capacitors for hideout upgrades (generator, water collector).
Common Beginner Mistakes
Day-One Checklist
Remember: Death is learning. Each raid teaches you map knowledge, spawns, and player habits. Don’t get discouraged. Good luck, and welcome to Tarkov.
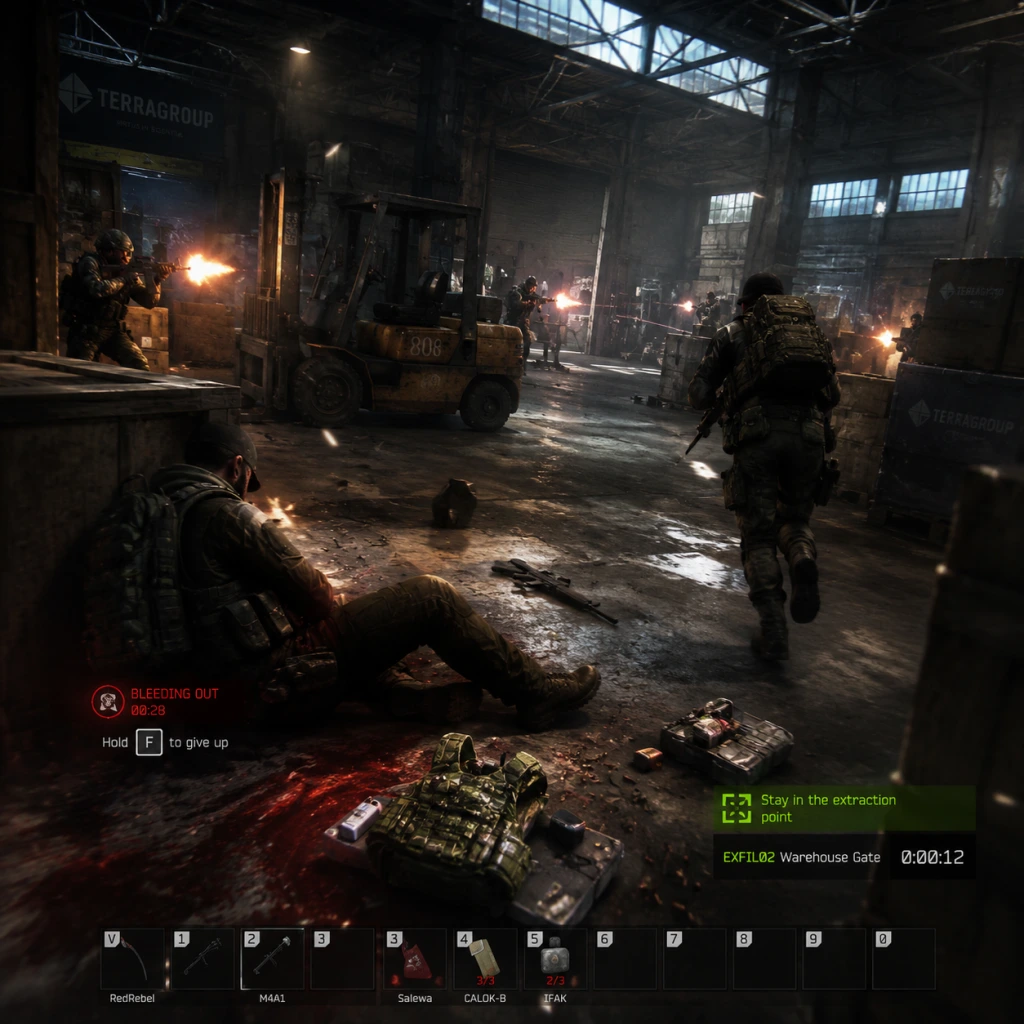
Core Gameplay
Core Gameplay Guide for Escape from Tarkov
Overview of the Core Gameplay Loop
The primary gameplay loop in Escape from Tarkov revolves around Raid → Scavenge → Survive → Extract → Manage Stash → Prepare for Next Raid. You begin as a PMC (Private Military Contractor) with limited starting gear. Each raid, you enter a map (e.g., Customs, Woods, Interchange) with a specific goal: complete quests, loot valuable items, eliminate other players (PMCs) and AI Scavs, and ultimately reach an extraction point to keep what you found. If you die, you lose nearly everything you brought in (unless it's in your secure container). Between raids, you manage your stash, repair gear, heal your PMC, buy/sell on the Flea Market (unlocked at level 15), complete quests from traders, level up skills, and build weapons and equipment.
Combat and Interaction Systems
- Realistic Ballistics: Bullets have travel time, drop, and penetration values. Armor class (1-6) matters; ammo penetration is key. Headshots are often lethal regardless of helmet. Limb damage causes blacked-out limbs, pain, and bleeding.
- Weapon Modding: Deep system with hundreds of parts (barrels, handguards, stocks, optics, grips, etc.). Recoil control, ergonomics, and MOA accuracy are affected. Example: An M4A1 can be built as a close-range CQB gun (short barrel, red dot) or long-range DMR (long barrel, variable scope).
- Health System: Detailed: each limb has separate health (e.g., thorax, head, arms, legs). Fractures, bleeding (light, heavy), dehydration, energy depletion. Use medkits, splints, painkillers, hemostats, surgery kits to survive.
- Sound: Critical – footsteps, weapon handling, gunshots, voice lines. Stealth movement vs. sprinting. Using headsets (like Comtacs) amplifies ambient sound.
- AI Scavs: Parkour behavior? They patrol, react to sounds, call out. Player Scavs (Pscavs) can be hostile or friendly.
- Extraction vs. Death: Extracting requires reaching a specific point (often multiple per map) after a raid timer (usually 20-45 minutes). If you die, you lose all gear (except secure container). If you survive, you keep loot unless MIA (failed to extract before timer end or extraction closed).
- PMC Level: Experience (XP) from kills, quests, looting. Each level unlocks new trader loyalty levels and hideout modules.
- Trader Loyalty: Each trader (Prapor, Therapist, etc.) has levels (1-4). You need level, money spent, and quest completion to unlock higher tiers and buy/sell better items. Example: To reach LL2 Prapor, you need PMC level 15, 1.5 million roubles spent, and complete 'Delivery from the Past' and 'Grenadier' quests.
- Skills: Endurance, strength, perception, memory, etc. (up to level 51 elite). Example: Max endurance reduces stamina drain, elite level gives marathon effect (no heavy breathing).
- Hideout: A personal base with modules (e.g., Workbench, Medstation, Lavatory, Bitcoin Farm). Upgrading with found-in-raid (FIR) items provides crafting, passive income, and skill bonuses.
- Flea Market: Unlocked at level 15. Players list items for roubles. Prices fluctuate; FIR status required for listing (except for some event exceptions).
- Open-ended Maps: No minimap; use landmarks, extracts are fixed but random (some require payment, cooperation, or item keys).
- Loot Spots: Marked rooms (e.g., dorms marked room on Customs), hidden caches, technical crates, jackets, filing cabinets, shelves. Learn spawns and high-value areas.
- Dynamic Spawns: PMCs spawn at random locations on the map edge; you never know exact player positions. Rotation points (e.g., dorms, resort) become hotspots.
- Weather and Time: Day/night cycle (NVGs/thermal optional). Rain affects sound. Fog reduces visibility.
- Traders Give Quests: E.g., Therapist's 'Shortage' requires you to find specific meds. Prapor's 'Operation Aquarius' requires securing a water station and extracting. Many quests are multi-part, requiring items or kill conditions.
- Progression-focused: Quests unlock trader levels, reward unique items (e.g., 'Ice Cream Cones' gives Alexas?). Some locked behind Fence rep.
- Kappa Container Questline: Endgame quest chain culminating in unlocking the Kappa secure container (2x4 slots replace standard Alpha/Gamma). Required for true endgame completion.
- Currencies: Roubles (RUB), Dollars, Euros. Roubles used by traders and flea. Dollars/Euros needed for specific trades.
- Flea Market Economy: Supply/demand. Items like LEDs, military tech, armors fluctuate. Players engage in market flipping, tax reduction via Inte Core skill.
- Barter Trades: Traders offer items in exchange for other items. Sometimes more efficient than buying with roubles.
- Loot Values: Learn high-value items per map. Interchange has electronics and tech stores; Reserve has military tech; Labs has high-tier gear but hostile raiders.
- Hideout Crafting: Convert junk to useful items (e.g., mags to AP ammos, green gunpowder). Bitcoin Farm generates passive income.
- Weapon Builds: Customize for situation. Example 'Meta' M4 build: 14.5" barrel, MOE stock with buttpad, Rk-1 foregrip, variable scope (e.g., TA31). Armor: Class 5/6 (Hexgrid, Slick, etc.). Helmets: Airframe with chops and faceshield.
- Skill Grid: Focus skills based on playstyle: Endurance+Strength for rangers, Perception+Vitality for survivors, Stress Resistance for heavy traders.
- Playstyles: Rats (stealth, low gear), Chads (aggressive, high gear), Rat+ (hybrid).
- Kappa Container: Requires completing many tough quests (Collector task chain), high trader loyalty, and tons of raids.
- Labs Access: Full endgame map requires keycards (400k each), high risk/reward. Contains raiders (tough AI) and player PMCs.
- Hideout Max: Upgrading all modules to max level (e.g., Bitcoin Farm level 3), crafting rare items, passive money via Bitcoin.
- PvP Focus: After quests, many players hunt for fights, high-tier loot, or compete in Arena (future DLC). Late wipes push community to engage in high stakes.
- Wipe Cycle: Every 6-8 months, accounts reset, progression wiped. Endgame is about finishing quests and collecting rare items before wipe.
Progression Systems
Exploration and Maps
Quests/Missions
Economy
Character/Build Growth
Endgame Structure
---
Core Gameplay by Progression Tiers
Early Game (Levels 1-15)
Main Loop: Survive raids with basic gear, learn maps, complete starter quests, build hideout basics. Die often; each death can be devastating.
Gear: SKS with PS ammo, VEPR with HP, PACA armor, 6B47 helmet. Secure container: Alpha (2x2). Limited weapon modding – focus on durability and cheap attachments.
Combat: Engage scavs tactically; avoid player fights unless ambushed. Learn to loot quickly and prioritize extraction over kills.
Quests: Prapor's 'Debut' (kill 5 Scavs), Therapist's 'Shortage' (find Salewa kits), Mechanic's 'Gunsmith Pt.1' (mod a weapon). These give XP, roubles, gear, and trader rep.
Economy: Sell to Therapist (meds), Skier (gun parts), Prapor (ammo). Flea Market locked, so trader price is needed. Save money for stash upgrades and key tools.
Hideout: Build basic modules: Generator (fuel needed), Water Collector, Med Station, Workbench. Craft meds like Salewa, ammo conversion (e.g., stainless steel to igolnik).
Survival Tips: Use offline raids to learn extracts. Pre-map extracts on phone. Wear headsets; they are dirt cheap and crucial. Stay out of open areas. Use compass (Fence loyalty level 2).
Example Raid (Customs): Spawn near Smugglers Boat. Loot nearby jackets for keys. Move quietly towards new gas station, kill a Scav with headshot, check the office safe (if key). Extract at ZB-1011 (requires paying 3000 roubles) or Trailer Park if you spawned on opposite side. Leave if you have valuable loot (e.g., a graphics card in a PC block).
---
Mid Game (Levels 15-30)
Main Loop: Unlocked Flea Market enables buying better gear and selling high. You now run better kits, start tackling tougher quests, and engage in PvP more.
Gear: Level 4-5 armors (e.g., Trooper, Gen4, Korund); good helmets (LZSh, FAST MT); weapon builds become serious: AK-74N with modded handguard, foregrip, suppressor (e.g., PBS-1), red dot scope. Ammo: BS/BP for 5.45, M856A1 for 5.56. Secure container upgraded to Beta (2x3) via quests.
Combat: Active PvP allowed. Learn map flow, chokepoints, third-party fights. Use nades frequently. Bring meds like AFAK plus surgery kit.
Quests: 'The Cult' (kill cultists on Shoreline), 'Peacekeeping Mission' (kill 15 Scavs on Interchange), 'Delivery from the Past' (put a folder in the basement). These often require running to dangerous areas.
Economy: Flea Market trading: buy low, sell high. Focus on high-profit items: military electronics, Hoses, Corrugated Hose, lots of tech loot. Build Bitcoin Farm level 1 to generate passive income (requires Graphics Cards and fuel).
Hideout: Upgrade Workbench to level 2, Medstation to level 2, Lavatory to level 2. Craft items widely used in quests (e.g., 60-round AK mags, red gunpowder for M995?). Unlock Scav Case (gives random loot every few hours).
Exploration: Venture into harder maps: Reserve (lots of tech, raiders, player Scavs), Interchange (Kiba store, OLI, tech stores), Shoreline (Resort high loot, but contested).
Example Raid (Reserve): Bring moderate kit (6B13 armor, AK-105). Spawn in underground garage. Loot technical crates and file cabinets. Move to heating pipe extract (requires using RB-OP keycard). Engage raiders in bunker; loot their weapons. Extract at RR over hermetic door. Sell found items on Flea.
---
Late Game (Levels 30-45)
Main Loop: Focus on completing remaining quests, especially those needed for Kappa container. High-tier gear is standard. Labs is a common destination. Hideout nearing max.
Gear: Class 5-6 armors (Slick, Hexgrid, Zabralo with faceshield). Helmets: Airframe+chops+mandible, Exfil with slider. Weapons: Fully modded M4, HK 416, MCX, .308 DMR like RSASS. Ammo: M995, AP SX, M80, 7N31. Secure container: Beta or Gamma (if you had EOD). Use night vision or thermal (if wealthy).
Combat: Skill levels high - you can sprint longer, heal faster, see farther (perception). Engagements are fast and lethal. Use peekers advantage, pre-fire angles.
Quests: 'The Huntsman Path' (kill 15 Scavs with MP-18), 'Shooter Born in Heaven' (headshots on each map over 100m), 'Guide' (survive all maps in order without dying). These are extremely challenging.
Economy: Money surplus. Buy expensive keys (e.g., Marked keys, RB-keys, Shoreline 310). Invest in labs keycards. Trade for high-tier gear. Bitcoin Farm level 3 generates passive income (2 BTC per ~20 hours).
Hideout: Maxed Generator, Solar Power (discounts fuel consumption), Bitcoin Farm level 3, Library (passive skill gain), Stadium (ironically, not yet implemented permanently?). Craft ammo like M995, AP ammo, grenade launcher ammo.
Exploration: Labs is the ultimate test: kill raiders, loot ledx, keycards. Player count is limited, but gear is highest. Reserve underground is also high-risk.
Example Raid (Labs): Equip Hexgrid, Airframe, HK with M995, spare mags, lots of nades. Go to keycard door with blue keycard. Inside a room with a weapon crate and safe. Fight raiders, loot, extract using elevators (requires double tap). If you survive, sell LEDX and intelligence folder for massive profit. Expect PvP.
---
Endgame (Level 46-62+; Kappa Questline)
Main Loop: The ultimate challenge: complete 'The Collector' to earn Kappa container (2x4). After that, many players bet on PvP, hunt for rare achievements, or prepare for next wipe. Endgame is about mastery.
Gear: Best in slot everything: The most expensive armor (e.g., Hexgrid with faceshield), the ultimate weapon builds (e.g., 30+ recoil M4, 60+ ergo HK), nade launcher. Secure container: Kappa (2x4).
Combat: You have elite skills: Elite endurance (don't breathe heavy while sprinting), elite strength (super jump?), elite stress resistance (no pain effects?). You instantly know enemy weapon from sound. You can solo squads.
Quests: 'The Collector' - requires over 50 FIR items (LEDX, Graphics Cards, Military Power Filter, etc.) and completion of many prior quests. It's the final boss of questing.
Economy: In the month before wipe, economy fluctuates. Players sell off stash. Flea can become crazy. Endgame players hoard hundreds of millions. They buy cases, containers, keycards to run labs endlessly.
Hideout: Maxed 100%. Bitcoin farm produces 2 BTC in under 10 hours with max Bitcoin Farm and Solar Power. Ensure fuel is always on.
Exploration: New maps added via DLC less frequently. Labs boss Glukhar and raiders are farmed. Some players try to survive on Factory with just a knife to prove dominance.
Example Raid (Factory at night): Bring a 153 shotgun with AP-20, a NVG, class 5 rig. Sprint to office, loot dead Scav bodies, fight a 5-stack squad, wipe them, extract at Gate 3. That's endgame PvP.
Wipe Cycle: With wipes occurring every ~6 months, endgame is ephemeral. Enjoy the power, then prepare to start fresh. Many veteran players appreciate the cycle because it keeps the economy fresh and the game interesting.
Game Tips
Game Tips for Escape from Tarkov
Importance of the Offline Mode
Tip: Before your first real raid, play offline mode with PvE enabled on maps like Customs or Woods.
Explanation: Offline mode lets you practice against Scavs (AI enemies) without risking your gear. You learn map layouts, extraction points, and combat basics.
When to use: Always start here. Spend at least 5-10 offline raids to build muscle memory and map familiarity.
Scav Runs are Free Money
Tip: Use your Scav (S.T.A.L.K.E.R. scavenger) role every time it’s off cooldown (usually 20 minutes).
Explanation: As a Scav, you spawn with random gear. If you die, you lose nothing. You can loot high-value items, kill PMCs, and extract to transfer items to your main stash.
Why it works: Risk-free profit and chance to find rare gear. Also helps learn maps without losing your own weapons.
Never Sprint Near Fighters
Tip: Avoid sprinting when you hear gunfire or suspect enemies nearby. Walk or crouch-walk to reduce noise.
Explanation: Sprinting creates loud footsteps audible from 40+ meters. Sound is critical - enemies will hear you coming and ambush you.
When to use: Any time you’re in a building or near known hot zones (e.g., Resort on Shoreline, dorms on Customs).
Cheat the Scav AI with Peeker’s Advantage
Tip: Peek corners quickly and pre-fire if you know a Scav is behind cover.
Explanation: The Scav AI has a reaction delay of ~0.5-1 second. If you peek and shoot immediately, you’ll often kill them before they fire back.
When to use: Clearing rooms, looting near Scav spawns. Works best with high-RPM weapons.
Use the ‘Hold Breath’ Mechanic
Tip: Press Shift (default) to hold breath when aiming down sights for a few seconds. This steadies your aim.
Explanation: Holding breath reduces weapon sway and improves accuracy, crucial for long-range shots or precision kills.
When to use: Before firing at distant enemies or when aiming at a small target (head exposed). Replenish breath by resting between shots.
Always Bring at Least a Pistol
Tip: Even if you plan to sneak, carry a backup pistol or knife in your secure container.
Explanation: Many deaths happen when you’re caught unarmed. A pistol can kill a Scav or wounded PMC, allowing you to loot their gear.
Why it works: Your secure container keeps items on death. Even if you die, you keep the pistol; but you can also throw it in your backpack mid-raid if needed.
---
Beginner Tips
Start with the ‘Prapor’ Quest Line
Tip: Complete Prapor’s first tasks (e.g., “Debut” - find and hand over the bronze pocket watch) as soon as possible.
Explanation: These quests give early XP, rubles, and unlock better gear from Prapor. The watch is found in a warehouse on Customs – use a map online.
Analysis: Early reputation with traders is vital; faster unlocks = better guns and armor at lower costs.
Manage Your Stash Space
Tip: Sell unnecessary items to therapists or on the Flea Market. Keep only valuable barter items, keys, and quest items.
Explanation: Stash space is limited. Clutter delays looting efficiency. Use backpacks inside backpacks (packing) to save space.
When to do: After every raid, reorganize. Use the sort function by “Required for Quests” filter.
Don’t Hoard Bad Gear
Tip: If you have a broken armor (below 50% durability) or a cheap gun (like a Saiga-9), sell it or use it in a Scav run.
Explanation: Low-durability armor stops less bullets and makes you heavier. Cheap guns often jam or have poor accuracy. Better to sell and buy fresh.
Learn 1-2 Maps Perfectly
Tip: Focus on Customs and Shoreline first. Know all extracts, hot spots, and stash locations.
Explanation: These maps are common for early quests. Mastery reduces confusion and improves survivability.
Tools: Use offline mode with map open on second monitor or phone.
Listen Carefully to Footsteps
Tip: Use decent headphones (real life) and enable in-game stereo sound. Different surfaces (metal, wood, grass) produce distinct sounds.
Explanation: Sound is your most important sense in Tarkov. You can determine if enemy is above/below, moving slowly or running.
Advanced: Learn to distinguish between PMC (loud boots) and Scav (quiet sneakers) footsteps.
---
Combat Tips
Aim for the Legs (Leg Meta)
Tip: If your ammo can’t penetrate armor, shoot at exposed legs.
Explanation: Legs have no armor and low HP (100 total). Damaging them causes blackout (fracture) and massive pain, severely slowing the enemy.
Why it works: Even cheap ammo (like 9x19mm Pst gzh) can kill a fully armored enemy in 5-6 leg shots. Best with SMGs or shotguns.
Use the Shoulder Swap Trick
Tip: Quickly ADS (aim down sights) from right side, then tap the lean key before fully aiming to swap shoulder instantly.
Explanation: The game defaults to right shoulder. Peeking left exposes more body. Quickly aiming left triggers a shoulder swap, making you expose less.
How: While standing, press Q then immediately ADS. Your character will switch to left shoulder for that peek.
Control Recoil with Burst Fire
Tip: Don’t hold the trigger. Fire 3-5 round bursts, resetting aim between bursts.
Explanation: Tarkot has realistic recoil patterns with large vertical climb. Full-auto will send bullets skyward after the first few shots.
When to use: Medium range (15-40m). For close ambushes, full-auto is fine, but control with drag down.
Prefire Common Angles
Tip: When entering a building or rounding a corner where enemies often camp, start shooting before you fully see them.
Explanation: Prefiring decreases reaction time advantage for the defender. Even if they hide, you might hit them through walls (penetration) or scare them.
Where: Same spots (dorm room windows, hallway ends, bush corners).
Use Grenades to Flush Enemies
Tip: Throw a VOG-25 or F-1 grenade into a room before entering, then push immediately after explosion.
Explanation: Frag grenades have a large radius and kill in confined spaces. Post-explosion, enemies are deafened, disoriented, and often injured.
Advanced: Cook grenades (hold to delay) to prevent enemy from throwing it back; time it so it explodes 1-2 seconds after reaching them.
Armor Penetration vs. Damage
Tip: Balance your ammo choice. Penetrating high-level armor (Class 5-6) requires high-pen rounds like M855A1 or M61, but they deal less damage to flesh. Use high-damage rounds (like RIP) for leg meta.
Explanation: Always check ammo charts online. Knowing that 7.62x51mm M80 can penetrate class 4 but not class 6 helps you target unarmored areas.
---
Exploration & Map Knowledge
Use Third-Party Maps
Tip: Always have a map open on a second monitor or phone. The in-game map is useless.
Explanation: Third-party maps show exact extraction points, loot spawns, cache locations, and danger zones. Without them, you’ll get lost.
Popular: The Tarkov Wiki map or interactive maps from mapgenie.io.
Learn Hidden Stash Locations
Tip: On maps like Customs and Woods, memorize the “hidden” ground caches (typically duffel bags under bushes).
Explanation: These stashes are often overlooked and contain high-value loot like tetriz, military cables, and rare keys.
Why it works: They add safe, low-risk looting routes away from PvP hot spots.
Extract Camping Awareness
Tip: Check all common extract points before approaching. Use grenades or look for unusual details (open doors, dead bodies).
Explanation: Extract campers hide near popular extracts like RUAF Roadblock or ZB-1012. They wait for you to linger or move carelessly.
Prevention: Don’t run directly to extract; sweep the area, use bushes, or wait until last minute to move.
Use the ‘Jump-Peek’ Over Obstacles
Tip: When behind a low wall, jump to quickly see and shoot the enemy, then crouch.
Explanation: The jump combined with lean gives you a momentary view without exposing your full body. Works best in CQC like Factory.
Learn the Scav AI Patrols
Tip: Scavs have set paths on every map. Learn where they walk and stand. Avoid those routes during quiet times.
Explanation: Scavs often bunch in groups around loot spawns (e.g., gas station on Customs). Surprising them is easier if you know their patrol schedules.
---
Resources & Looting
Loot Priority: Tetriz > LEDX > IFAK > Silencers
Tip: Always grab high-value items that take 1x1 space (like Tetriz, Virtex, LEDX) first. Heavy weapons or armor often not worth the space.
Explanation: Value-per-slot is key. A Tetriz (60-100k) takes one slot, while a full armor (Often 2x3) may be worth 40k but takes 6 slots. Downside: armor can save your life.
Balance: If you have a backpack, pick up armor if you plan to wear it; otherwise, prioritize small expensive items.
Check Containers Thoroughly
Tip: Open every crate, jacket, toolbox, and filing cabinet. Even if they appear empty, click inside to check all compartments.
Explanation: Items can be hidden in sub-inventories (e.g., key spawns in jacket pockets). Filing cabinets often have keys or Sanitar’s labs.
Use the ‘Screwed’ Search Trick
Tip: When looting bodies quickly, right-click the corpse and select “Search” except check each pocket individually. This speeds looting and reduces exposure.
Explanation: Default “Loot All” takes longer and may cause you to miss items in rigs. Manual selection is faster for experienced players.
Ammo Cases and Magazine Cases
Tip: Save ammo types you might need for different quests (e.g., 5.45x39 BP, 7.62x39 PS). Use an ammo case in your stash to organize.
Explanation: Ammo cases free space and prevent accidental selling of rare ammo. Quest items require specific calibers.
Secure Container for Emergencies
Tip: Always put your most valuable found item (like a LEDX or military tech) into your gamma container (secure container). That item survives if you die.
Explanation: Secure container keeps 1-2 items regardless of death. Use it for “insurance” of high-value items.
---
Economy & Flea Market
Buy Low, Sell High – Flea Market Basics
Tip: Check Flea Market prices for common loot items (bolts, nuts, toilet paper) before selling to traders. Often Flea Market pays 2-3x more.
Example: A pack of screws sells to therapist for 5k, but on flea market can go for 15k. Check current price listing.
When to sell: Post-raid, quickly check Flea before listing.
Use Barter Trades
Tip: Some trader barters (e.g., 2x dry fuel for a 6B13 armor with Prapor) are cheaper than buying directly. Compare costs.
Explanation: Barter trades often require items that are common loot. If you have extra dry fuel, trade for armor instead of spending cash.
Avoid Paying Full Price for Keys
Tip: Most keys (e.g., Factory key, Marked key) are better obtained through quest rewards or intelligent looting. Buying them on Flea can cost hundreds of thousands.
Alternative: Run Scav runs on Customs and Shoreline to find keys in jackets and filing cabinets. Patience saves money.
Track the Market Trends
Tip: Certain items fluctuate based on daily quests or events. For example, “Sugar” prices spike during the raiding event “The Director’s Office”. Check discord or market watch sites.
Strategy: Buy low during off-peak hours (early morning server time) and sell during peak (evening) for 10-20% profit.
Hideout Upgrades Pay Off
Tip: Invest in upgrading your hideout (Generator, Workbench, Lavatory) early. They provide passive bonuses like crafting ammo, faster skill gain, and currency generation.
Why it works: Crafting high-value ammo (like M995) from cheap materials yields profit even if you don’t use it yourself.
---
Builds & Gear
Budget Build: PP-19-01 Vityaz + PST gzh
Tip: For early game, use the PP-19-01 SMG from Prapor (LL1) with PST gzh ammo. It’s cheap, effective against unarmored scavs and low-tier armor.
Gear: Buy a cheap rig (like the balaclava rig), no helmet, minimum backpack.
Why it works: Low recoil, high fire rate, ammo cost is minimal. Perfect for new players learning basic mechanics.
Mid-Game: AK-74N + BS ammo
Tip: When you can afford it, use a standard AK-74N (5.45x39) with BS ammo (or BT). Add a foregrip and red dot sight.
Specialization: BS ammo penetrates class 4 armor reliably. Good for medium ranges. Budget variant: use BT (less pen but still decent).
Advanced: M4A1 + M995 for CQC
Tip: Load M4A1 with M995 ammo (class 6 penetration) and a suppressor. Use a PK-06 reflex sight for fast target acquisition.
Ergonomics: Focus on high ergonomic parts (buffer tube, pistol grip). High ergo = faster ADS, less stamina drain.
Usage: Dominate close-quarter maps like Factory or Labs. One-tap headshots through most helmets.
Armor Choice: Ceramic vs. Steel vs. Titan
Tip: Ceramic armor is lightest but degrades quickly from hits. Steel lasts longer but heavier. Titanium balanced.
Recommendation: For first major raid, buy ceramic (e.g., 6B13) for weight savings. For longer raids, steel (e.g., Gzhel-K) to survive multiple engagements.
Helmet Considerations
Tip: Only wear a helmet if you have money left. Many helmets only protect from low-caliber ricochets and shrapnel. A good face shield adds weight but protects against splash.
Bare minimum: Use a Sfera helmet (class 4) that covers head and ears – affordable.
---
Survival & Healing
Always Bring a CMS/Surgury Kit
Tip: Carry a CMS kit or SURV12 kit in your secure container to fix blacked-out limbs mid-raid.
Explanation: A blacked limb causes intense pain and movement penalties; using CMS allows painkillers to work normally.
How to use: When a limb goes black, quickly use CMS to restabilize it, then apply painkillers.
Use Medical Items Efficiently
Tip: Use the FAST (Salewa) or IFAK for healing bleeding and fractures. Reserve CAR or AI-2 for small healing. Apply bandages only when bleeding is heavy.
Trick: Right-click med item and “Apply” directly to a wounded body part; don’t use the slow menu if under fire.
Painkillers: The Lifesaver
Tip: Always run with at least one bottle of painkillers (e.g., Vaseline, Golden Star) in your pockets or container.
Effect: Taking painkillers removes the ability to limp or suffer stagger from damage for a few minutes. Vital for surviving a firefight after taking hits.
Recognize Limb States
Tip: On your screen, body part icons show status. White = healthy, yellow = damaged, red = blacked, purple = fractured. A skull icon means that limb is blacked.
Response: If leg is blacked, you cannot run. Use splint (if fractured) or CMS to fix before moving.
Use Water and Food Shortages
Tip: If you start a raid dehydrated or hungry, your stamina regen slows. Bring a bottle of water or a can of food if you plan to stay long (>10 min).
Where to find: Food items are common in duffel bags, Scav pockets, and on tables.
---
Advanced Strategies
‘Wiggle’ Friendly PMCS? – Not Reliable
Tip: Some players wiggle to signal friendliness, but many will betray you. Only trust if you are in a group.
Assessment: In Tarkov, trust is rare. If you see a PMC and they wiggle, they may still shoot you. Always maintain distance and cover.
Use Night Raids for Stealth
Tip: Run night raids on Shoreline or Woods with a night vision scope or flashlight. Alternatively, use cheap night vision goggles (NVG) from Jaeger.
Advantage: Fewer PMCs, easier to move unnoticed, loot undisturbed. Scavs have limited vision range at night.
Counter: If you see a group using lasers, they likely have NVG too.
Call an Extraction Overheating
Tip: When at extract, listen for player footsteps. If you suspect campers, wait 10-15 seconds before moving to the exit. Pop a painkiller to be ready.
Advanced: Use the “Extract Camping” counter: throw a grenade near the exit before approaching; if someone is there, they’ll likely run or reveal position.
Dominate with Sound Whoring
Tip: Equip a headset (ComTac 4, Sordin). They amplify footsteps significantly. You can hear movement from 60+ meters.
How to exploit: In a building, listen to which floor footsteps are on; pinpoint location based on surface sound (metal vs concrete). Pre-fire through corners.
Grenade Cooking Timing
Tip: To perfectly time a cooked grenade, hold left-click and count: F-1 (5s fuse) cook for 3 seconds, throw so it explodes 1 second after hitting ground. VOG-25 (1.5s) cook for 1 second.
Practice: Use offline raid to train. This ensures enemy can’t pick up and throw back.
Reposition After Each Kill
Tip: After killing one enemy, immediately move to a new spot, even if you think it’s clear. The player may have teammates who will pre-aim your last location.
Why it works: In Tarkov, a dead player’s friends often rush to his body. Staying mobile prevents being traded.
---
Miscellaneous
Use Auto-Sorting in Stash
Tip: Press the ‘Sort’ button (gear icon) in stash to automatically organize items. It groups similar weapons, ammo, and attachments.
Benefit: Saves time; also shows you missing items for quests.
Repair Weapons and Armor with Kits
Tip: Use weapon repair kits (e.g., Gun Lube) to restore durability to guns mid-raid. Armor repair kits can fix damaged ceramic armor partially.
When to repair: Only repair if chance of survival is high; otherwise, sell broken gear to traders.
Avoid Over-Encumbrance
Tip: Stay below 45kg (heavy - yellow indicator). Over-encumbered (-25% movespeed, loud footsteps, slower actions) makes you an easy target.
Strategy: Drop items that don’t fit; use larger backpack if needed. Always prioritize lighter high-value items.
Interact with Environmental Objects
Tip: You can open doors; hide in dumpsters; climb ladders. Use these for tricks: let the enemy run past a closed door, then open it and shoot them from behind.
Join a Community (Discord/Reddit)
Tip: Tarkov has a steep learning curve. Join communities like the official Discord, Reddit, or Sherpa program for help.
Benefits: Find teammates (big survival boost), get map callouts, learn advanced tricks from veterans.
Game Settings
Game Settings Guide for Escape from Tarkov
Overview
Escape from Tarkov’s settings menu is deep and can drastically affect both performance and gameplay. Many options are easy to misunderstand, leading to poor visuals or lost advantages. This guide covers every category—graphics, audio, controls, accessibility, language, network, and gameplay—with recommended values for low, mid, and high-end systems, plus common pitfalls.
Graphics Settings
Key Principle: Tarkov is CPU-bound, especially on Streets of Tarkov and Lighthouse. Lowering CPU-intensive settings (e.g., shadow distance, LOD) often helps more than lowering resolution.
#### Overall Quality Preset (Quick Start)
- Low-End (e.g., GTX 1060, Ryzen 5 1600, 8GB RAM): Set to Low or Medium. Then manually tweak below.
- Mid-End (e.g., RTX 2070, Ryzen 3700X, 16GB RAM): Medium or High.
- High-End (e.g., RTX 3080, i7-12700K, 32GB RAM): High or Ultra (but disable SSR for competitive clarity).
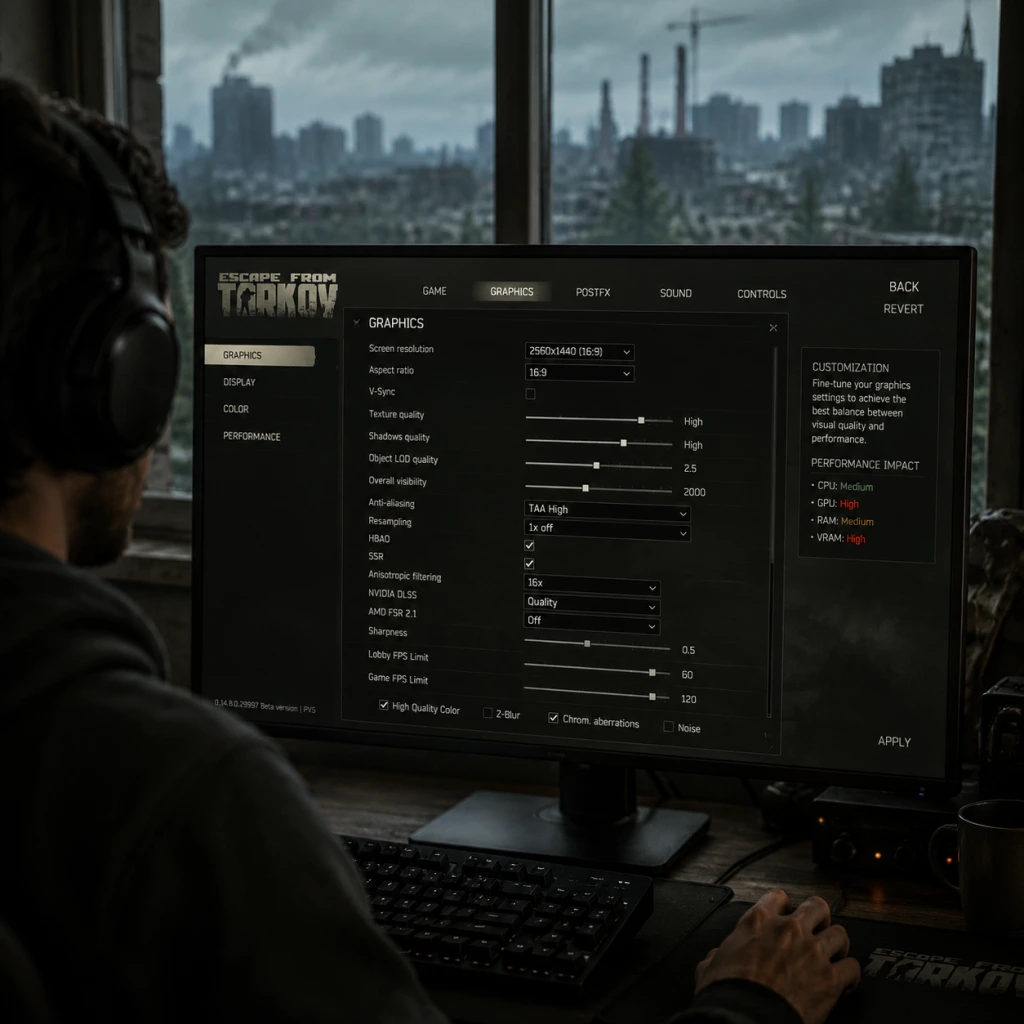
#### Detailed Graphics Settings
| Setting | Low-End Recommendation | Mid-End Recommendation | High-End Recommendation | Notes |
|---|---|---|---|---|
| Texture Quality | Medium | High | High / Ultra | GPU VRAM dependent: 4GB → Medium, 8GB+ → High, 12GB+ → Ultra. |
| Shadow Quality | Low (crisper edges, better FPS) | Medium | High | High shadows soften but cost FPS; low makes enemies stand out in dark areas. |
| Object LOD Quality | 1.5 | 2.0 | 2.5 | LOD controls detail at distance. Lower = better FPS, but distant objects disappear. |
| Overall Visibility | 1500 | 1500 | 2000 | Higher = see farther, but heavy FPS hit. Streets map: keep at 1000–1500 even on high-end. |
| Grass Shadows | OFF | OFF | OFF | Major performance eater. OFF improves FPS and visibility of prone enemies. |
| SSR (Screen Space Reflections) | OFF | OFF | OFF | Creates distracting flicker and kills FPS. Almost never needed. |
| SSAO (Screen Space Ambient Occlusion) | OFF | OFF | Low or Medium | Adds depth but costs FPS. Low is fine. |
| Antialiasing (FXAA) | OFF | OFF or Low | TAA High (if FPS permits) | FXAA blurs edges; TAA creates ghosting. Many competitive players turn AA off for clarity. |
| Resampling | OFF (1x off) | OFF | OFF | Forces resolution scaling; always leave 1x off unless you need downsampling for screenshots. |
| HBAO | OFF | OFF | OFF | Very heavy, minimal visual gain. |
| NVIDIA Reflex Low Latency | ON + Boost | ON | ON | Reduces input lag, barely costs FPS. Always enable. |
| DLSS | N/A (none) | Balance or Performance | Quality or Balanced | Supported on RTX cards. For high-end, use Quality; mid-end use Performance to boost FPS. |
| FSR | Ultra Performance | Performance | Quality | For AMD cards or any GPU without DLSS. Ultra Performance is very blurry but huge FPS boost. |
| Sharpening (Optional) | 0.5 | 0.5 | 0.0 | If using TAA or upscaling, add sharpening (Nvidia Control Panel or in-game slider). |
Audio Settings
Crucial for situational awareness – footsteps, gunshots, and loot sounds are key.
- Binaural Audio: OFF initially. While realistic, it can be confusing and cause echo/distance inaccuracies. Many competitive players turn it off for clearer directional cues. Test both ON and OFF.
- Stealth Audio: ON – makes walking quiet; necessary for sneaking.
- Head Related Transfer Function (HRTF): If using stereo headphones, ON improves directional sound. If using virtual surround (e.g., Dolby Atmos), keep OFF to avoid double-processing.
- Master Volume: ~70% to avoid ear pain from sudden shots.
- Effects Volume: 100% – footsteps and gunshots are effects.
- Music Volume: 0% – music only masks important sounds.
- Voice Volume: 100% – for Scav voicelines and teammate comms.
- Lean – rebind to Mouse 4/5 (side buttons) for easy peeking.
- Check Chamber – unbind or rebind to a key you rarely press (default L-Ctrl+alt+L? Actually check). Prevent accidental weapon inspection during firefights.
- Discard (delete key) – keep accessible but far from movement keys (e.g., Delete).
- Mumble (in-game VoIP) – set to a comfortable button (e.g., V).
- General Sensitivity: 0.30 – 0.50 (400 DPI). Lower = better aim but need larger mousepad. Pro players often use 0.25–0.40 at 400 DPI.
- ADS Sensitivity Multiplier: 0.25 – 0.40 – reduces sensitivity when aiming down sights.
- Scoped Sensitivity: Adjust per scope (1x, 4x, etc.) so that long-range scopes don’t feel sluggish.
- Aim (ADS): Toggle is common, but hold can be more responsive if you have precise finger control.
- Sprint: Toggle is default; many prefer hold for instant stop. Experiment.
- Crouch/Prone: Toggle recommended to avoid accidental stance switching.
- Crosshair Color: Change from white (default) to a bright color (cyan, orange) to see it against snowy backgrounds like Woods.
- HUD Scale: Set to 0.8 or 0.9 if you have small monitor or want less screen clutter.
- FOV: Default is 50 (vertical). Values between 58–65 are common. Higher FOV = wider view but targets appear smaller. Never go below 50 (motion sickness) or above 70 (fish-eye effect). 60 is a good balance.
- Subtitles: Enable for Scav voicelines and quest dialogue (limited use, but helps understand audio cues).
- Colorblind Modes: Three presets (Protanopia, Deuteranopia, Tritanopia) – useful if you struggle differentiating loot rarities (green/blue/purple items).
- Interface Language: Choose your system language. Changes persist after restart.
- Subtitles Language: Independent selection – set to English for clarity if Russian is not your native language.
- Text Language: Same as interface.
- Internet Connection: Wired Ethernet strongly recommended over Wi-Fi. Tarkov desyncs and lag peaks are common with wireless.
- In-Game Ping Limit: Set to 200 (maximum) to avoid being kicked from lobbies with variable ping. Lower limits (e.g., 100) will cause frequent disconnects if you play on distant servers.
- Reconnect Timeout: Default (30 seconds) is fine.
- Region Selection: In the launcher, manually select the server region closest to you with the lowest ping. Avoid selecting all regions to prevent joining high-ping raids.
- Auto-Equip Items: OFF. prevents accidental equip when spam-clicking bodies.
- Auto-Fold Stock: OFF unless you like folding/unfolding stock automatically (lowers recoil but reduces accuracy when unfolding).
- Auto-Open Doors: ON (you will run through doors quickly).
- Throw Grenade Over Arm / Under Arm: Set to distinct keys (e.g., G for over, Z for under) to avoid wrong-throw deaths.
- Fast Throw Key: Default is double-tap G – many rebind to a single key (e.g., T) for faster grenade deployment.
- Weapon Reload Mode: Tactical (retain magazine if partially used) vs Combat (drop mag). Most players use Tactical to preserve expensive magazines. Change via bindings.
- Inspect Weapon: Unbind or rebind to a rarely-used key – accidentally pressing this during a firefight gets you killed.
- Interact vs Search: Separate keys? Default is same key (F) – you can differentiate by holding vs tapping. Many use F for interact and Middle Mouse for quick search.
Special Attention: In Tarkov, audio occlusion (sound through walls) is poor. A player on the other side of a thin wall may sound like they are right next to you. Always rely on visual confirmation too.
Controls Settings
#### Key Bindings
Tarkov has many actions bound by default; you will want to customize:
#### Mouse Sensitivity
#### Hold vs Toggle
Common Mistake: Not disabling the "Auto-Equip Items" option in controls – causes pain when accidentally picking up gear. Set Auto-Equip Items to OFF.
Accessibility Settings
Escape from Tarkov has limited built-in accessibility options. However, the following are vital:
Special Attention: Tarkov has no separate “ADS FOV” setting; weapon optics actually zoom differently depending on FOV. A higher FOV makes scopes appear less magnified but gives better peripheral vision.
Language Settings
Note: Changing language does not affect game audio (Scavs always speak Russian). It only changes UI text and subtitles.
Network Settings
Important: Tarkov runs on Battlestate Games’ servers. You cannot change network code, but you can adjust bandwidth limits.
Common Issue: "Network connection lost" during loading – often caused by ISP routing. Use a VPN like Mudfish or ExitLag to stabilize connection to Tarkov servers (especially for non-EU/NA players).
Gameplay Settings
Important for fairness and comfort
Special Attention: The "Slilent" walk (Ctrl+W) is mislabeled in controls? Actually it’s a bug – the game calls it “Slilent” (typo). It’s bound to “Walk (toggle)” by default. Enable it on a thumb mouse button for quick stealth movement.
Special Attention Points – Easy to Misconfigure
1. Grass Shadows – If ON, tanks FPS and hides prone enemies in grass. OFF gives a performance and competitiveness boost.
2. Overall Visibility – Setting above 2000 on Streets or Lighthouse will cause micro-stutters even on high-end PCs. Stay at 1500 or lower.
3. Antialiasing – Many players keep it OFF for sharper image, but TAA reduces visual noise at long distances. Experiment in offline raids.
4. Binaural Audio – It’s turned ON by default after a patch, causing audio disorientation. Many competitive players turn it OFF.
5. Auto-Equip Items – Default ON leads to accidental gear swaps when looting dead players. Turn OFF immediately.
6. Ping Limit – If set too low, you will be kicked from raids. Set to 200.
7. FOV – Changing FOV affects the perceived speed of movement and weapon sway. Don’t copy other players blindly; adjust to your comfort.
Conclusion
Optimizing settings in Escape from Tarkov is a continuous process. Start with the recommendations above, then fine-tune in offline raids with AI. Remember: FPS over eye candy – a consistent 60-100 FPS is far more valuable than ultra shadows. Regularly check for settings resets after game updates (common bug). Stick to these guidelines, and you’ll eliminate many technical headaches.
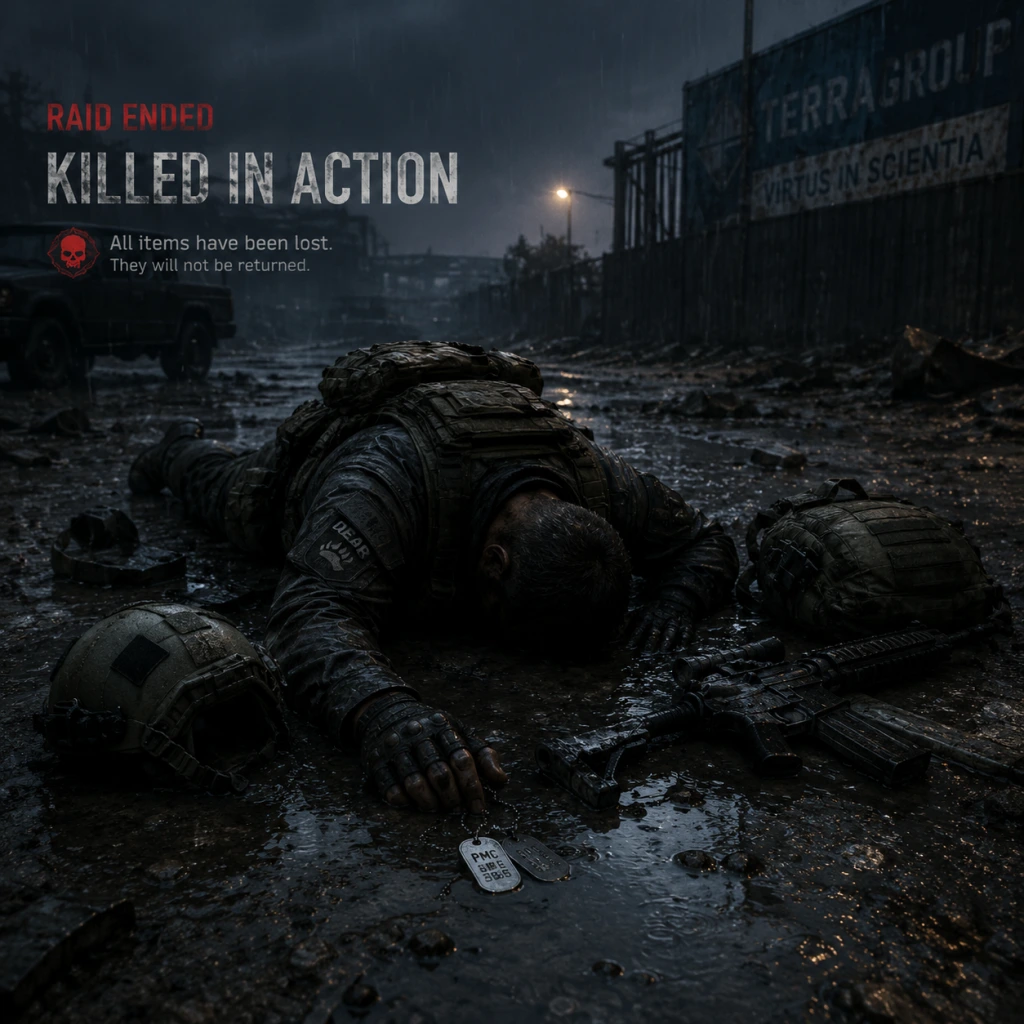
Important Notes
Important Notes Guide for Escape from Tarkov
Warnings and Pitfalls
1. Permanent Gear Loss on Death
- In Tarkov, if you die in a raid, you lose everything you brought in (unless it’s in your secure container). This includes weapons, armor, backpack, and quest items. Never bring gear you cannot afford to lose. As a new player, expect to lose many kits. Use cheap loadouts (e.g., SKS with PS ammo, PACA armor) until you learn maps and combat.
- Playing as a Scav (player-controlled AI) is a great way to earn free gear. However, if you kill other player Scavs (friendly fire), you lose Scav karma. At low karma, you will face longer cooldowns (up to 25 minutes) and hostile AI Scavs. Always check if a Scav is a player before shooting. Wiggle or voice line to confirm.
- Your progress is tied to your account on Battlestate Games servers. There are no manual saves or backups. If you lose a quest item due to a bug or disconnect, it’s gone. Secure your valuable quest items in your gamma/secure container before extracting.
- Tarkov uses BattlEye anti-cheat. Report suspicious players via the death screen (right-click their name) or through the launcher. Cheaters can steal items from your stash via some hacks; if you suspect foul play, contact support. Avoid trading with unknown players who offer too-good-to-be-true deals.
- In group play, friendly fire is enabled. Accidental teamkills are common. Use distinctive cosmetics (armbands, helmets) and communicate clearly. Killing a teammate intentionally is considered toxicity and can lead to bans if reported.
- Your standing with Fence affects Scav cooldown and AI behavior. Killing player Scavs as a Scav lowers rep permanently (though you can slowly regain it by using car extracts and killing hostile PMCs). Once you fall below ~2.0 rep, your Scav cooldown becomes very long. Avoid killing other Scavs unless they shoot first.
- Several quests ask you to choose between rewards (e.g., giving an item to Mechanic vs. Skier). These choices affect trader loyalty and unlock future quests. For example, in the quest "The Cult Part 1" you must give a flash drive to either Skier or Therapist. Check the Tarkov wiki before choosing, as some choices lock you out of other quests or hideout upgrades.
- Irreversible: Once you select a reward, you cannot undo it. Plan ahead for which trader levels you need.
- Upgrading the hideout costs rare items and resources. Some upgrades (like Bitcoin Farm level 3) are massive investments. You cannot downgrade or refund materials. Only upgrade what you will actively use. For example, the Workbench is essential for crafting, but the Vents can be prioritized later.
- At account creation, you choose USEC or BEAR. This affects starting gear, some voice lines, and which Scavs are hostile? (BEAR is considered “Russian” and may be more often shot by players of the opposite faction). This choice is permanent and cannot be changed later. USEC is generally recommended for Western players due to better communication compatibility.
- Tarkov occasionally runs events (e.g., Christmas, Halloween) with exclusive items, quests, or bosses. These are time-limited and may never return. Participate during the event window.
- If you die and your gear is lost (not insured), it’s gone forever. Insurance returns gear that was not looted by other players. But if someone picks up your weapon, it’s gone. You can’t recover it later. Always insure your important loot if you can, but understand that popular maps like Factory and Customs have high loot theft rates.
- High-tier loot spawns (e.g., LEDX, military tech) are not guaranteed. Bosses like Killa (Interchange) and Reshala (Customs) have a spawn chance. If you don’t see a boss, you missed that raid’s chance. There’s no way to force them.
- Some quests are prerequisites for entire quest lines. For example, "Debut" (Prapor) must be completed before receiving many other Prapor tasks. If you fail a quest or sell a quest item, you may delay progress. Check the Tarkov quest tree to avoid missing a critical step.
- Factory is a small, close-quarters map with high PvP density. New players often get spawn-killed or cornered. Avoid Factory as a first map. Start with Customs or Woods for learning.
- Labs requires a keycard (70k+ rubles) and is infested with heavily geared players and raiders (high-tier AI). It’s a death trap for beginners. Only go when you have good gear and map knowledge.
- The Resort area of Shoreline contains high-value loot but is a PvP hotspot. Expect teams of three or more. Solo players face a steep challenge.
- Bosses like Killa (Interchange), Tagilla (Factory), and the Goons (Knight, Big Pipe, Birdeye) are extremely dangerous. They can one-tap you from across the map. The Cultists on Night variant are silent and lethal. Don’t engage unless you have a plan and good ammo.
- Many new players try to complete every task immediately, leading to frustration and lost gear. Focus on a few critical quests first (e.g., Debut, Gunsmith parts) to unlock trader levels. Skip tedious tasks like “Shooter Born in Heaven” until you are confident at long range.
- Upgrading hideout to level 3 costs millions of rubles. The Bitcoin farm is not profitable for most players until you have a steady income. Build your Workbench and Medstation first for crafting, but avoid sinking all your money into vents and solar power until you have strong gear.
- Many barter items (e.g., flash drives, gas analyzers, fuel conditioners) are needed for quests or hideout. Early on, you might sell them for quick cash. Later, you’ll struggle to find them again. Keep at least one of every rare item until you check the quest requirements.
- Don’t spend your life savings on a meta M4 or thermal scope if you lack the skill to survive. Stick to budget loadouts (e.g., VPO-136 with PS ammo, 6B47 helmet) until you can consistently extract.
- In team raids, use in-game VoIP or Discord, but be aware that voice carries in-game and enemies can hear you. Call out positions clearly. Don’t loot dead teammates without permission – it’s considered theft.
- As a Scav, you are expected by the community to act cooperatively. Killing other player Scavs (unless they shoot first) is seen as toxic and will tank your Fence rep. Use the wiggle emote or voice line to signal peace.
- If you die suspiciously (impossible shots, flying, instant head-eyes through walls), report the player. After death, right-click their name and select “Report”. Don’t abuse the report system – false reports are ignored.
- Your stash has limited space. Organize items, merge stacks, use backpacks inside backpacks (nested). Selling junk early frees room but be sure it’s not needed for quests.
- All progress is server-side. If you uninstall the game, your account remains. There is no save file to back up. Your only backup option is to screenshot your trader reputation and stash value for reference, but it won’t restore data. Never delete your account unless you are sure.
- Tarkov experiences periodic wipes (usually every 6-9 months) that reset all progress except your account level and skills. Hideout, quests, and stash are wiped. Plan accordingly: don’t hoard items you won’t use before a wipe announcement. Wipes are usually announced on the official website and Discord.
- Do not use third-party software that claims to “back up” your account or offer cheats. Such tools can steal your credentials or trigger a ban. Tarkov’s anti-cheat detects most external overlays.
- Your secure container (gamma/kappa) retains items even on death. Always fill it with valuable loot (keys, meds, quest items). Never put loose ammo or cheap meds in it – use that slot for high-value items like LEDX, flash drives, or expensive keys.
- New players die because they don’t know extraction points, chokepoints, or spawns. Spend your first 10-20 raids in offline mode on each map, learning the layout. Use interactive maps on a second monitor or phone.
- A cheap gun with armor-piercing ammo (e.g., PS ammo for 7.62x39) is far better than an expensive gun with bad ammo. Check the ballistics chart on the wiki. Penetration values are critical against armored players.
- Insure your gear, but know that very expensive items (e.g., thermal scopes, high-tier armor) are often looted and never returned. Insure mid-range kits; the cost is minimal.
- Sound is crucial for survival. Wear headsets (headphones) in-game – they amplify footsteps. Avoid running on metal or wood. Use slow, quiet movement when near enemies.
- The flea market unlocks at level 15. Until then, you must rely on traders and found loot. Buy the cheapest meds and ammo from traders. Don’t spend your rubles on player-marked items; they are often overpriced.
- Play your Scav every time it’s off cooldown. You get free gear, and any loot you survive with transfers to your PMC stash. Use Scav raids to learn maps stress-free.
- Early on, you’ll collect barter items like bolts, nuts, and wires. Check which ones are needed for hideout upgrades vs. just vendor trash. Sell duplicates to traders or the flea market once you can. Too much junk clogs your stash.
- Use the official Tarkov wiki for quest guides, maps, and ammo charts. Join the official Discord or subreddit for live advice. Other players have already solved every puzzle.
- Tarkov is brutal. You will die to things you cannot control: desync, cheaters, bad spawns, or a lucky grenade. The key is to learn from each death and improve. Never get emotionally attached to gear. It’s all temporary until the next wipe.
2. The Scav Cooldown and Karma System
3. No Save Slots – Everything Is Live
4. Cheaters and Anti-Cheat
5. Teamkilling and Friendly Fire
---
Irreversible Choices
1. Fence Reputation
2. Quest Reward Choices
3. Hideout Upgrades
4. Faction Choice (USEC vs. BEAR)
---
Missable Content
1. Seasonal Events and Limited-Time Tasks
2. Weapon Presets and Insurance
3. Dynamic Loot and Boss Spawns
4. Quests That Lock Other Quests
---
Difficulty Spikes
1. Factory Rush
2. Labs
3. Shoreline Resort
4. Bosses and Cultists
---
Grinding Traps
1. Chasing All Tasks Early
2. Over-investing in Hideout Too Early
3. Selling Quest Items Too Soon
4. Buying Expensive Gear You Can’t Replace
---
Online Etiquette and Anti-Cheat
1. Communication and Teamwork
2. Scav-on-Scav Violence
3. Reporting Cheaters
4. No Manspreading – Keep Your Loot Storage Organized
---
Save Management
1. No Local Saves
2. Server Wipes
3. Avoid Scam External Tools
---
Things Players Commonly Regret Not Knowing Earlier
1. Secure Container Is Your Lifeline
2. Map Knowledge > Gear
3. Ammo Matters More Than Gun
4. Insure Everything – Except Your Most Expensive Stuff
5. Sound Is Everything
6. You Can Use the Flea Market Later – Don’t Rush
7. Scav Raids Are Free Money
8. Don’t Hoard Useless Junk
9. The Wiki and Community Are Your Best Friends
10. Patience, Patience, Patience
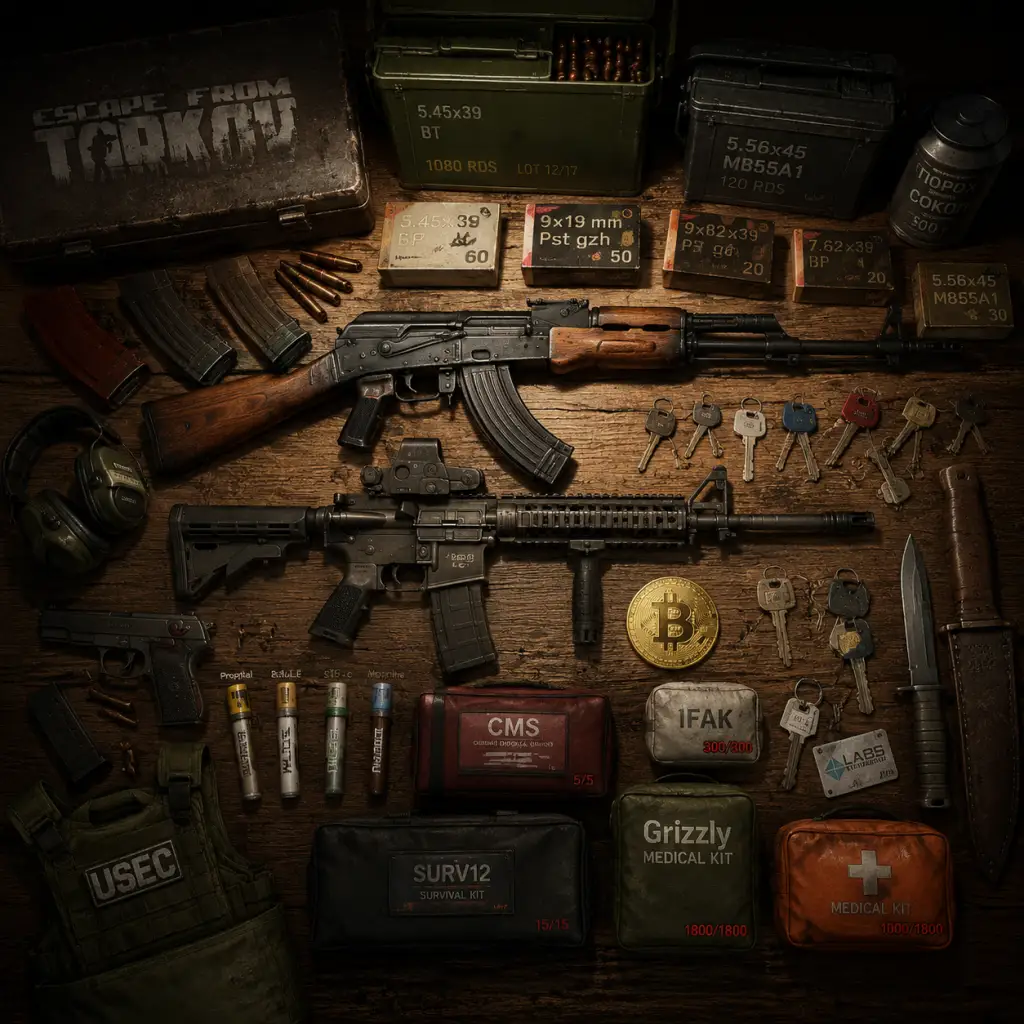
All Game Items
All Game Items Guide for Escape from Tarkov
Overview
Escape from Tarkov features hundreds of items categorized into functional groups. Understanding each item's purpose, acquisition method, and optimal usage is critical for survival, progression, and quest completion. This guide covers all major item categories with practical details.
---
Weapons
Weapons in Tarkov are highly customizable with attachments (mods). Performance depends on caliber, ergonomics, recoil, and ammo type.
Primary Weapons
#### Assault Rifles & Carbines
- AK-74N: 5.45x39mm, common, reliable. Obtain from Prapor (LL1) or Scavs. Use with PP or BT ammo early.
- AKM: 7.62x39mm, higher damage but more recoil. Often found on Scavs or from Mechanic barters.
- M4A1: 5.56x45mm, low recoil, high rate of fire. Peacekeeper (LL2) or USEC Scavs. Needs good attachments to shine.
- HK 416A5: 5.56x45mm, premium AR. Peacekeeper (LL4) or high-tier loot. Best with M995 ammo.
- ADAR 2-15: Semi-auto 5.56, often found on Scavs. Good budget DMR.
- RFB: 7.62x51mm semi-auto DMR. Peacekeeper (LL3). Versatile for mid-to-long range.
- SR-25: 7.62x51mm semi-auto DMR, high ergonomics. Peacekeeper (LL4) or as loot.
- MP5: 9x19mm, low recoil, common. Peacekeeper (LL1) or Scavs. Use with AP 6.3 ammo for early penetration.
- MP9: 9x19mm, compact, high fire rate. Mechanic (LL2) or Scavs. Good for close quarters.
- Vector 9x19: Extremely high fire rate, controllable. Peacekeeper (LL4) or FIR loot. Best with 7N31 ammo.
- P90: 5.7x28mm, high capacity mag. Peacekeeper (LL3). Use SS190 ammo for armor penetration.
- MP-153: 12ga semi-auto, common. Jaeger (LL1). Reliable for scav hunting.
- Remington 870: Pump-action 12ga. Available from Jaeger or Scavs. Slower but cheap.
- Saiga-12: Semi-auto 12ga with detachable box magazine. Skier (LL1) or as loot. Useful with Magnum Buckshot or Flechette.
- KS-23M: 4ga pump-action, rare but powerful. Obtain from Scav Raiders or on Reserve. Fires powerful projectiles like Shrapnel-10.
- SVD: 7.62x54mmR semi-auto. Prapor (LL3). High damage, good with SNB or LPS ammo.
- Mosin Infantry: Bolt-action 7.62x54mmR. Available from Prapor (LL1) as cheap sniper. Use 7N1 for one-taps.
- DVL-10: Bolt-action 7.62x51mm, very quiet. Mechanic (LL3). Great for stealth.
- RSASS: Semi-auto 7.62x51mm. Peacekeeper (LL4). High ergonomics but expensive.
- PKP Pecheneg: 7.62x54mmR belt-fed. Rare, found on Killa or in marked rooms. High rate of fire, heavy recoil.
- M249: 5.56x45mm belt-fed. Extremely rare, found on bosses or event loot.
- PM (Makarov): 9x18mm, cheap, weak. Obtain from Prapor (LL1). Use only as last resort.
- Glock 17: 9x19mm, reliable. Peacekeeper (LL1). Accepts many attachments.
- Five-seveN: 5.7x28mm, good penetration with SS190. Peacekeeper (LL2). Excellent sidearm.
- Desert Eagle: .50 AE, high damage, huge recoil. Obtain from Skier (LL3). One-shots to thorax (class 4 and below) with appropriate ammo.
- APB: 9x18mm suppressed pistol. Prapor (LL2). Integrated suppressor useful for stealth.
- Knife: Default, no special effect.
- Sledgehammer: Larger hitbox but same functionality.
- Shovel: Same. All melee are interchangeable for gameplay.
- PACA Soft Armor: Class 2, cheap, light. Protects against pistols and low-cal SMGs. Obtain from Ragman (LL1).
- 6B3TM-01M: Class 4, heavy, common. Good early-mid game. Ragman (LL2) or Scavs.
- Gen4 Assault: Class 5, heavy, protects full body. Ragman (LL3). High durability.
- Slick: Class 6, best protection, but only front/back (no sides). Extremely rare, from bosses or high-tier loot.
- Zhuk-6a: Class 6, full coverage, very heavy. Ragman (LL4). Top tier but expensive.
- Corinthian/Armor Sandals: Not armor; joke items.
- SSh-68: Class 3 steel helmet. Common, protects against fragmentation and low-caliber bullets. Ragman (LL1).
- 6B47: Class 3, good coverage, low ergonomics penalty. Obtain from Scavs or Ragman (LL2).
- MICH 2000: Class 3, allows headset attachment. Peacekeeper (LL1).
- TC-2002 (Team Wendy): Class 3, lightweight, but rigid. Peacekeeper (LL3).
- Vulkan-5 (Heavy): Class 5, protects entire head and face. Rare, from Killa or certain loot spawns.
- Kiver-M: Class 3, with face shield. Ragman (LL2). Protects lower face.
- Ceramic Plates: Cheap but break after few hits.
- UHMWPE Plates: Light, high durability, but more expensive.
- Combination Plates: Light, durable, but rarity levels vary.
- AKS-74U Bandage: Heals light bleeds. Cheap, craftable from cloth.
- Surv12: Surgical kit, restores lost body parts. Rare, found in medical loot. Essential for raid survival.
- Grizzly: Heals most damage types but slow. Common.
- IFAK: Heals light bleeds and health. Cheap emergency.
- Propital: Stimpack that slowly heals over time. Craftable or found.
- Adrenaline: Increases health recovery rate and reduces tremor. Rare.
- M.U.L.E.: Stimpack that increases weight capacity temporarily. Useful for heavy loot runs.
- Water Bottle: Restores 50 water. Common.
- TarCola: Restores energy but lowers hydration slightly.
- Rye Croutons: Restores energy.
- Condensed Milk: Restores energy and hydration.
- Squad Goons Energy Drink: Restores energy and hydration. Can be turned in for quest.
- Pineapple Juice: High hydration restore.
- 5.45x39mm: PP (good pen for early), BT (tracer, balanced), BS (high pen), Igolnik (highest pen).
- 5.56x45mm: M855 (low pen), M855A1 (good pen), M995 (excellent pen), SSA AP (craftable top tier).
- 7.62x39mm: PS (cheap), BP (good pen), MAI (high flesh damage).
- 9x19mm: Pst gzh (low pen), AP 6.3 (good pen), 7N31 (high pen).
- 12 gauge: Buckshot (flesh), Flechette (high pen), AP-20 (slug, excellent pen).
- 5.7x28mm: SS190 (good pen), SS198LF (hollow point for flesh).
- Bolts & Screws Nuts: Used for many barter trades and hideout modules.
- Corrugated Hose: Found in industrial areas; needed for generator.
- Wires: Electrical components.
- Capacitors: Electronics.
- CPU Fan: Computer parts.
- GPU: Rare, needed for Bitcoin Farm.
- Ammo Box: Used to craft certain meds.
- Paracord: Needed for some hideout levels.
- Armor Steel Sheet: Used in workbench.
- Vitamin: Part of "Blood of War" quest line.
- Marked Key: Keys for high-loot rooms.
- BX-1 "Shamrock": Quest item for Mechanic.
- Kedr-B Draw: For Jaeger quest.
- XM3 Antique Book: For quest "The Cult - Part 1".
- Flash Drive: Required for early quests. Hard to find.
- FireKlean gun lubricant: Barter for weapon repair kit.
- Marked Key: Open locked rooms with high loot (e.g., dorms 214 on Customs).
- RB-MP11 Key: For medical room on Reserve.
- TerraGroup Labs Access Card: Activates elevator extract on Labs.
- Red Keycard: Extremely rare; opens room with ledx spawns.
- M4A1 magazine: Used for M4. Can be found in boxes.
- Ammo Box: Holds ammo in stash.
- PVS-14: Monocular night vision. Peacekeeper (LL3).
- N-15: Night vision goggles, better FOV.
- REAP-IR: Thermal scope, expensive. Found or traded.
- FLIR: Thermal scope, slower refresh but good clarity.
- Tactical Headset Sordin: Amplifies footsteps, reduces gunshot noise. Essential.
- Comtac 4: Similar but more expensive.
- RAC Integrated: Headsets built into certain helmets.
- MBSS: Small 10x10, cheap, from Fence.
- Pilgrim: Massive 9x13, heavy, common.
- Attack 2: 6x13, large, common.
- Beta 2 Tactical Backpack: 8x12, good size.
- Ammo + Armor: Always pair high-penetration ammo with a gun that can use it effectively. For example, M995 in HK 416 makes short work of class 5 armor.
- Suppressor + Night Vision: Use suppressed weapons with NVG to remain undetected at night.
- Surv12 + IFAK: Carry both for limb restoration and quick heal.
- Stimulant combos: M.U.L.E. + Propital lets you carry heavy loads and heal simultaneously.
- Hideout upgrades: Bitcoin Farm (requires GPUs) generates passive income; workbench allows ammo crafting; med station lets you craft high-tier meds.
#### Submachine Guns (SMGs)
#### Shotguns
#### Designated Marksman Rifles (DMRs) & Sniper Rifles
#### Machine Guns
Secondary Weapons (Pistols)
Melee Weapons
Melee used only for scavenging (no combat advantage).
---
Armor
Armor protects against ballistic and melee damage. Class determines protection level (class 1-6). Armor plates can be swapped in some vests.
Body Armor (Vests & Plate Carriers)
Helmets
Armor Plates
Plates are inserted into plate carriers (e.g., M1A, Slick, GUNSLINGER). They degrade independently.
---
Consumables
Medical Items
Food & Drink
Ammo Types
Ammo is the most important weapon factor. Each caliber has armor-penetrating and flesh-damage variants.
---
Materials & Barter Items
Used for quests, hideout upgrades, and crafting.
Common Materials
Rare Crafting Components
Key Items (Quest/Specific Use)
---
Currencies
Roubles ₽
Main currency used for all trader purchases, flea market, and scav case barters.
Dollars $ & Euros €
Accepted by certain traders (Peacekeeper for dollars, Ragman for dollars, Mechanic for both). Can be exchanged for roubles.
Bitcoin
Crypto used in high-tier barter trades (e.g., from Mechanic). Minted in Hideout with Bitcoin Farm. Value fluctuates with real BTC price.
Gold & Silver Chain
Used as barter currency with some traders or sold for roubles.
---
Collectibles
Dogtags
Collected from killed PMCs. Show player level and faction (BEAR/USEC). Turn in to Prapor or Skier for tasks. Higher level tags worth more.
Found In Raid (FIR) Status
Items found in raid (not brought in) are marked with a checkmark. Required for many quest turn-ins and flea market listings.
Special Keys & Keycards
Magazines & Ammunition Boxes
---
Key Equipment
Secure Containers
Keeps items on death. Higher tiers (Alpha, Beta, Gamma, Epsilon, Kappa) have more slots. Obtain through quests or edition.
Night Vision & Thermal Optics
Headwear & Headsets
Backpacks
Armor Plates (standalone)
As previously described.
---
Synergies & Upgrades
---
Acquisition Methods Summary
| Method | Description |
|---|---|
| Trader Purchase | Buy from NPC traders with cash and reputation level. |
| Scav Loots | Found in raid on killed Scavs or Scav Raiders. |
| Loot Spots | Static containers, duffle bags, jackets, toolboxes. |
| Crafting | Create at Hideout workbench or med station. |
| Barter | Trade specific items to traders for equipment. |
| Flea Market | Player-to-player market, requires level 15+. |
| Quest Rewards | Completing tasks yields gear. |
| Boss Drops | Defeat bosses like Killa, Reshala, etc. |
This guide provides a comprehensive overview. Remember that Tarkov's meta changes with patches, so always consult in-game ammo charts and testing for current best choices.
Character Skills
Character Skills Guide for Escape from Tarkov
Introduction
Escape from Tarkov features a robust skill system that develops passively as you perform actions. There are no classes or character roles; all players (BEAR or USEC) share the same skill progression. Skills are divided into Physical, Combat, Mental, Practical, and Special categories. Each skill levels from 0 to 51 (Elite), granting increasingly powerful bonuses. Skills do not have cooldowns, spells, or active abilities; they are always active and improve through repeated use.
---
Skill Categories & Detailed Breakdown
#### 1. Physical Skills
These govern movement, stamina, and raw physical capability.
- Endurance
- Strength
- Vitality
- Health
- Assault Rifles (and other weapon-specific skills like SMG, Shotgun, DMR, Sniper, Pistol, Revolver)
- Recoil Control
- Weapon Maintenance
- Perception
- Search
- Magazine Drills
- Covert Movement
- Attention
- Charisma
- Stress Resistance
- Memory
- Metabolism
- Throwing
- Health (covered above in Physical, but sometimes classified under Practical; keep consistent with earlier placement)
- Hideout Management
- Drivers (Added in later wipes, often tied to vehicle extraction)
- Intelligence
- Effect: Increases maximum stamina pool, stamina regeneration rate, and reduces stamina drain while sprinting and jumping.
- Leveling: Running, sprinting, jumping, and walking long distances.
- Elite Bonus: Infinite sprint (sprint does not drain stamina) and +50% stamina regen.
- Synergies: Works with Strength to reduce overall stamina cost for heavy loads.
- Recommendation: Prioritize in early wipe by always sprinting between cover. High Endurance lets you outlast opponents in chase or escape.
- Effect: Increases carrying capacity, throwing distance for grenades, melee damage, and reduces weapon ergonomics penalty from low stamina or being overweight.
- Leveling: Carrying heavy loads (above 90% of capacity), sprinting while overweight, throwing grenades, and performing melee hits.
- Elite Bonus: +50% melee damage, +25% grenade throw distance, and ability to jump while overweight.
- Synergies: High Strength reduces stamina penalty from armor, allowing more aggressive movement.
- Recommendation: Deliberately overpack your backpack while running to train Strength early. Essential for extract camping and carrying high-value loot.
- Effect: Increases maximum health, reduces bleeding chance, improves healing speed, and lowers penalty from pain.
- Leveling: Taking damage (especially to limbs), surviving with low health, and using meds.
- Elite Bonus: Auto-bandaid (bleeding stops after a short time) and +30% bonus health regen.
- Synergies: Pairs with Stress Resistance to reduce long-term damage penalties.
- Recommendation: Naturally levels through combat; no need to farm. Elite Vitality makes you a tank in prolonged fights.
- Effect: Speeds up overall healing, reduces penalty from broken bones and dehydration/hunger, and increases effectiveness of medical items.
- Leveling: Using medical items, surviving with fractures/blood loss, and keeping hydration/energy high.
- Elite Bonus: +50% healing speed and automatic fracture splinting.
- Synergies: With Vitality, creates a near-unbreakable survivor.
- Recommendation: Stay healthy in hideout to passively gain Health XP.
#### 2. Combat Skills
These affect weapon handling, aiming, and shooting.
- Effect: Increases weapon ergonomics, reduces recoil, improves aiming speed, and reduces weapon sway. Each weapon type has its own skill (e.g., Assault Rifles, SMGs, etc.).
- Leveling: Landing hits and kills with that weapon type.
- Elite Bonus: +30% ergonomics for that weapon type and reduced jamming chance.
- Synergies: High skill makes even low-tier weapons viable.
- Recommendation: Focus on one or two weapon types early to maximize effectiveness. For example, main an assault rifle (AK series) to build skill quickly.
- Effect: Reduces overall recoil (horizontal and vertical) for all weapons.
- Leveling: Shooting any weapon, especially full-auto.
- Elite Bonus: +100% recoil control (massive reduction).
- Synergies: Stack with weapon-specific skills for laser-like accuracy.
- Recommendation: Always fire in controlled bursts; full-auto leveling is fastest but costly in ammo.
- Effect: Slows weapon degradation, reduces jamming chance, and increases durability repair effectiveness.
- Leveling: Repairing weapons in hideout, using weapon maintenance kits.
- Elite Bonus: Weapons never jam and self-repair over time.
- Synergies: Essential for long raids and budget gear.
- Recommendation: Repair weapons regularly to train this skill; it pays off in raid reliability.
- Effect: Increases hearing range, footstep loudness detection, and reduces penalty from wearing helmets/ears.
- Leveling: Listening to enemy sounds, using headsets, and surviving with auditory cues.
- Elite Bonus: You can hear sounds twice as far and cannot be sneak attacked from sound alone.
- Synergies: Pairs with Attention to locate enemies.
- Recommendation: Always wear a headset (Comtac or Sordin) in raid to train Perception passively.
- Effect: Speeds up looting (container search speed), makes weapon/armor inspection faster, and increases chance to find rare items in containers.
- Leveling: Opening and searching containers, looting bodies.
- Elite Bonus: Instant search of all containers.
- Synergies: With Attention, becomes a loot-gathering monster.
- Recommendation: Search every container you see to level Search efficiently.
- Effect: Increases magazine reload speed (tactical and empty reload) and improves weapon handling during reload.
- Leveling: Performing reloads, especially tactical reloads (partial mags).
- Elite Bonus: -50% reload time.
- Synergies: With weapon skills, makes you a rapid-fire powerhouse.
- Recommendation: Always use tactical reloads when possible to level faster.
- Effect: Reduces footstep noise, especially when walking or crouch-walking, and decreases chance of being heard by enemies.
- Leveling: Moving slowly (walk/crouch), sneaking around players/Scavs.
- Elite Bonus: Silent movement (no footsteps even while sprinting).
- Synergies: With Perception, you can hear others while they cannot hear you.
- Recommendation: Sneak often in high-traffic areas to train; vital for rat playstyle.
#### 3. Mental Skills
Involving attention, memory, and survival awareness.
- Effect: Increases visual detection range, highlights enemy movement slightly, improves scavenge loot quality from containers, and reduces blur when turning quickly.
- Leveling: Spotting enemies, looting, and using binoculars.
- Elite Bonus: X-ray vision (enemies are outlined through thin walls).
- Synergies: With Perception, creates ultimate awareness.
- Recommendation: Use binoculars regularly and keep your head on a swivel.
- Effect: Reduces prices at traders (buy and sell), improves fence reputation gain, and increases chance to get quest items from Fence.
- Leveling: Buying and selling from traders, completing quests.
- Elite Bonus: +50% trader loyalty gain and permanent discount.
- Synergies: High level saves millions of rubles over a wipe.
- Recommendation: Buy and sell frequently (even small items) to boost Charisma XP.
- Effect: Reduces tremor, pain effects, and aim shake from falls or being shot. Also increases tolerance for low health/hunger/thirst.
- Leveling: Taking damage, surviving dangerous situations, getting shot by scavs/players.
- Elite Bonus: Immune to pain and tremor entirely.
- Synergies: With Vitality, you shrug off wounds faster.
- Recommendation: This levels naturally; no farming needed. Elite makes you a terminator.
- Effect: Increases skill point gain for all skills (accelerates progression) and reduces de-sync in skill leveling.
- Leveling: Leveling any other skill (passive bonus via overall skill XP).
- Elite Bonus: +15% bonus XP to all skills.
- Synergies: Always beneficial; high Memory makes all other skills level faster.
- Recommendation: Train Memory by leveling other skills; it’s a virtuous cycle.
#### 4. Practical Skills
For survival and hideout activities.
- Effect: Slows down hunger and dehydration rate, increases effectiveness of food/drink, and reduces penalty from using stimulants (e.g., morphine).
- Leveling: Eating, drinking, using meds/stims.
- Elite Bonus: You never need to eat or drink (stays 100%).
- Synergies: With Vitality, allows marathon raids without provisions.
- Recommendation: Always bring food/drink and consume them mid-raid to train.
- Effect: Increases grenade throwing accuracy, distance, and reduces cooking time.
- Leveling: Throwing grenades (frags, stuns, smokes).
- Elite Bonus: Grenades explode on contact (no delay).
- Synergies: With Strength for distance, becomes a tactical nuke.
- Recommendation: In offline mode or safe runs, toss grenades to train. Can be deadly in combat.
- Effect: Reduces construction time for hideout modules, speeds up Bitcoin Farm cycles, and improves scav case returns.
- Leveling: Upgrading hideout modules, using workbench, crafting.
- Elite Bonus: +50% hideout production speed.
- Synergies: Pairs with Charisma for trading efficiency.
- Recommendation: Constantly craft items and upgrade hideout; it pays for itself.
#### 5. Special Skills
Miscellaneous but crucial.
- Effect: Increases vehicle extraction speed and reduces chance of failure.
- Leveling: Using vehicle extracts (e.g., Customs car extract).
- Elite Bonus: Instant extraction.
- Synergies: With high Attention and Search, you can quickly exit.
- Recommendation: Use vehicle extracts whenever possible to train; it’s rare but valuable.
- Leveling: Leveling other skills, completing quests, using maps.
- Elite Bonus: +100% XP from all sources.
- Synergies: With Memory, creates exponential skill growth.
- Recommendation: Focus on quest completion to boost Intelligence.
---
Recommended Build & Synergies
There are no strict “builds” due to passive leveling, but you can prioritize certain playstyles:
| Playstyle | Focus Skills | Why |
|---|---|---|
| Chad (Aggressive) | Endurance, Strength, Combat Skills, Vitality | Dominate in fights, outmaneuver enemies, carry heavy gear. |
| Rat (Stealthy) | Covert Movement, Perception, Stress Resistance, Search | Sneak past threats, loot quickly, survive ambushes. |
| Loot Goblin | Strength, Search, Attention, Metabolism | Carry maximum loot, find rares, stay fed for long raids. |
| Trader Merchant | Charisma, Intelligence, Memory, Hideout Management | Maximize profit from traders, craft efficiently, accelerate progression. |
---
When to Use Each Skill
All skills are always active—they are passive. Use is automatic based on actions. However, you can deliberately adopt behaviors to train desired skills:
- Early wipe: Sprint everywhere for Endurance; overpack for Strength; repair all weapons for Weapon Maintenance.
- Mid wipe: Focus on economy skills (Charisma, Hideout Management) while maintaining combat skills.
- Late wipe: Elite skills become game-changing; prioritize Endurance and Stress Resistance for raids with high tier gear.
- Skills reset on each wipe. Plan accordingly.
- Hideout upgrades can speed up skill leveling (e.g., Library, Fitness Center).
- Stims (e.g., SJ6, Propital) temporarily boost skill effects but do not grant XP.
- Offline raids do not count toward skill progression.
---
Important Notes
---
This guide covers all skills in Escape from Tarkov. Use the tables and recommendations to tailor your raiding style and accelerate your survival rate.
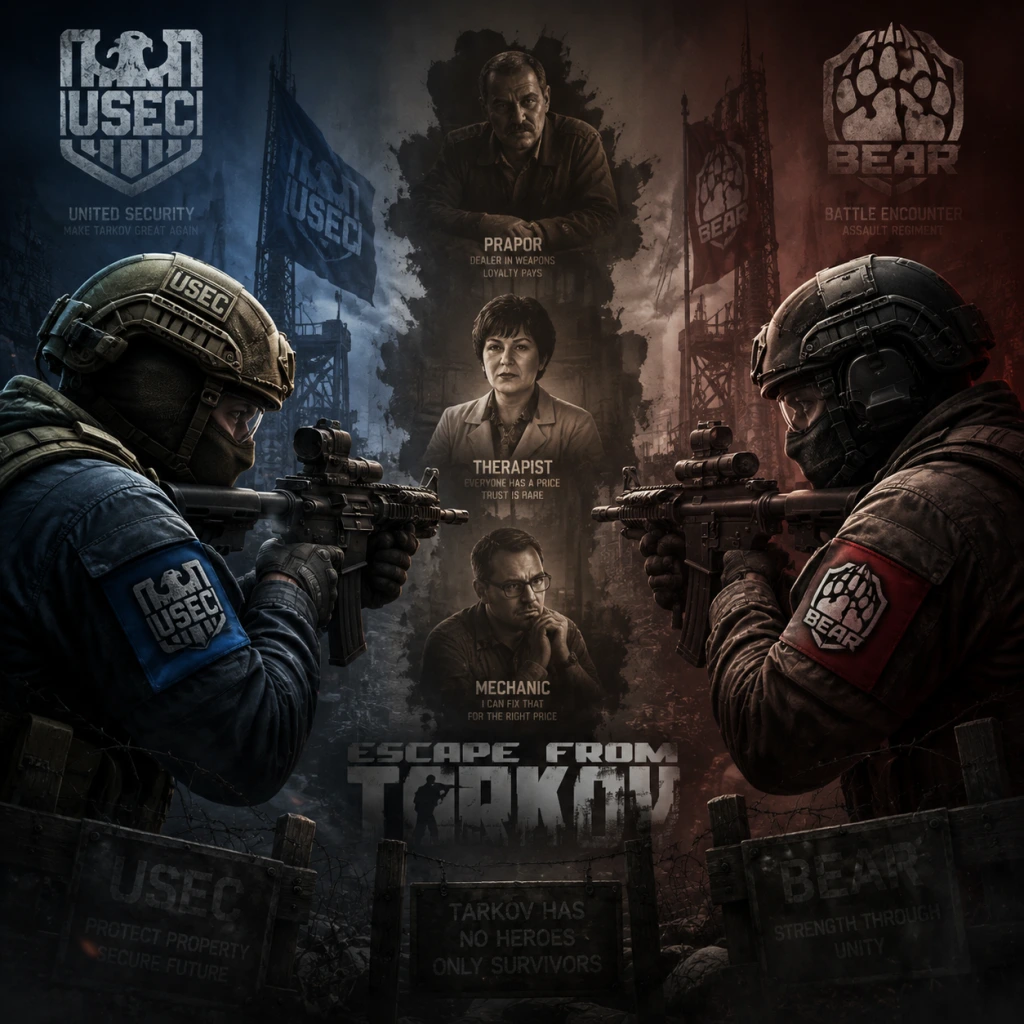
Characters & Roles
Characters & Roles Guide for Escape from Tarkov
Overview
Escape from Tarkov does not feature traditional character classes, heroes, or unlockable roles. All players share the same skill system and can use any equipment. However, the game offers two PMC (Player Main Character) factions—BEAR and USEC—and a separate Scav role. Your choice of faction affects your starting equipment, background lore, and voice lines, but not gameplay mechanics. Below is a detailed breakdown of each playable unit.
---
1. BEAR (Player Main Character)
#### Background
BEAR (Beta-Exoskeleton Armored Rig) is a faction of Russian ex-military and security personnel contracted by the Russian government to infiltrate Tarkov and neutralize USEC operatives. They are depicted as rugged, patriotic fighters with ties to the local underworld.
#### Strengths
- Default Russian Voice Lines – Can communicate in Russian, which may confuse or blend with AI Scavs (but Scavs do not speak Russian exclusively).
- Starting Gear – BEARs start with a PP-19-01 "Vityaz" SMG or similar Russian weapons, plus a 6B2 armored vest and a Kolpak helmet (varies by edition).
- Lore Consistency – Many quests from Russian traders (e.g., Prapor) feel more natural for a BEAR character.
- No Mechanical Advantage – The choice is purely cosmetic and audio-based; no stat bonuses or penalties.
- Higher Profile – Some players believe BEARs are slightly easier to spot in certain maps due to their darker uniforms, but this is negligible.
- Available from the start by selecting BEAAR during character creation (first launch). Cannot be changed later without resetting account.
- Default English Voice Lines – Easier to communicate with English-speaking teammates (though in-game VoIP is language-agnostic).
- Starting Gear – USECs start with an M4A1 carbine or similar Western weapons, plus a PACA soft armor and a baseball cap (varies by edition). The M4 is generally considered a superior starter weapon compared to the Vityaz.
- TerraGroup Lore – Quests from USEC-associated traders (e.g., Peacekeeper) may feel more immersive.
- No Mechanical Advantage – Same as BEAR.
- Starting Armor – PACA is less protective than the 6B2 vest, but both are cheap and quickly replaced.
- Free Gear – You enter raid with a random loadout that costs nothing. If you survive, all loot and gear can be transferred to your PMC stash.
- AI Scav Allies – AI Scavs are initially neutral to you (unless you attack them). They will fight hostile PMCs and other player Scavs who turn rogue.
- Low Risk – Dying as a Scav only loses your scav loadout; your PMC stash remains untouched.
- Cooldown Timer – Scav runs reward patience and learning maps without risking your main gear.
- Random Loadout – You cannot choose your weapons or armor. Often you get a poor weapon with no armor, making fights against geared PMCs very difficult.
- Hostile to Traitor Scavs – If you attack another Scav (AI or player), you become "Traitor Scav" (scav on scav violence) and all AI Scavs turn hostile for the rest of that raid and potentially future raids if reputation drops.
- Limited Control – You cannot bring your own items; you must rely on what you find.
- No Skill Progression – Scav runs do not contribute to PMC skill levels (except for a small amount of weapon mastery if using same weapon type).
- Pure Looting – Focus on collecting high-value items and extracting quickly.
- Opportunistic PvP – Engage unsuspecting PMCs or other player Scavs if you have the upper hand.
- Traitor Scav – Some players intentionally kill other Scavs for their gear, but this harms your reputation with Fence (the Scav trader).
- Unlocked from the start (after initial tutorial). Accessible via the "Scav" button on the main menu when the timer is available (default cooldown is 20-25 minutes, reduced by Fence reputation).
- None – You cannot choose. However, you can equip found items during the raid by looting and equipping better gear.
- Secure Container – Scavs do not have a secure container (except the official game mode "Scav Raid" where you can earn one – but normally no). So any loot on your Scav is lost on death.
- Friendly Scavs – Cooperate with other player Scavs to increase survival. Voice lines and gestures help.
- Traitor Strategy – Betraying other Scavs can give you their loot, but you risk being killed by AI and reducing Fence reputation, which increases your cooldown and reduces scav box quality.
#### Weaknesses
#### Playstyle
BEARs can be played any way: aggressive, stealthy, sniping, etc. There is no class restriction. The faction only affects roleplay and immersion.
#### Unlock Conditions
#### Recommended Equipment / Builds
No faction-specific recommendations. Refer to the general equipment guide for optimal loadouts.
#### Team Synergy
Works seamlessly with USEC teammates. Voice lines are different but do not affect gameplay. Some players prefer mixed factions for immersive story reasons.
---
2. USEC (Player Main Character)
#### Background
USEC (United Security) is a private military company contracted by the TerraGroup corporation to secure their assets in Tarkov. They are international mercenaries, often English-speaking, and are the primary antagonists in the lore from the Russian perspective.
#### Strengths
#### Weaknesses
#### Playstyle
Identical to BEAR – no restrictions. Use any weapon or tactic.
#### Unlock Conditions
Selected at character creation. Cannot be changed post-launch.
#### Recommended Equipment / Builds
No faction-specific builds. Prioritize gear based on map and playstyle.
#### Team Synergy
Mixes well with BEARs. The choice is mainly for personal preference.
---
3. Scav (Playable Role)
#### Background
Scavs (Scavengers) are the local population of Tarkov – civilians, bandits, deserters, and other survivors who scavenge the city for supplies. They are AI-controlled but can also be played by human players in Scav Mode.
#### Strengths
#### Weaknesses
#### Playstyle
#### Unlock Conditions
#### Recommended Equipment / Builds
#### Team Synergy
---
4. Bosses (Non-Playable)
#### Overview
Escape from Tarkov features several high-level AI bosses that spawn on specific maps. They are powerful, well-armored, and accompanied by guards. They are not playable units, but understanding them is crucial for survival and quest completion.
#### List of Major Bosses
| Boss Name | Map(s) | Description | Loot |
|---|---|---|---|
| Reshala | Customs | Leader of the Scav army, carries a golden TT pistol and often a decked-out AK. | Keycard, golden pistol, high-value loot |
| Killa | Interchange | Heavy armored Russian, uses a modified RPK machine gun. | Killa’s helmet, armor, and weapon with rare attachments |
| Shturman | Woods | Sniper boss with a suppressed SVDS, guarded by two followers. | Shturman’s key (leads to a stash), rare weapons |
| Glukhar | Reserve | Raider boss with a team of six highly aggressive guards. | Glukhar’s armored vest, rare ammo, and weapon parts |
| Sanitar | Shoreline | Chemically-weaponized boss, uses a custom VSS and grenades. | Sanitar’s key, stimulants, rare medical items |
| Tagilla | Factory | Tank-like boss with a sledgehammer or shotgun. | Tagilla’s welding mask, armor, and unique shotguns |
| Kaban | Lighthouse (added in 2024) | Newest boss, heavily armored with a unique machine gun. | Kaban’s armor and weapon |
Bosses are aggressive towards all PMCs and Scavs (except Reshala’s guards sometimes ignore Scavs). They have unique AI patterns and are extremely dangerous. Engaging a boss is high-risk, high-reward.
---
Summary: Playable Units at a Glance
| Aspect | BEAR | USEC | Scav |
|---|---|---|---|
| Unlock | Start | Start | Start (timer-based) |
| Gear | Starting kit (random?) | Starting kit | Random free loadout |
| Skills | Same as all PMCs | Same | No skill progression |
| Voice | Russian | English | Random (Russian/English) |
| Risk | Lose all brought gear | Lose all brought gear | Lose only scav loadout |
| Trader Reputation | No effect | No effect | Affects Fence rep |
Final Notes
- There are no classes or roles in the traditional sense. Your character's effectiveness depends entirely on gear, skills (passive progression), and player skill.
- The BEAR vs USEC choice is permanent but has negligible impact on gameplay. Choose based on aesthetic preference or starting weapon preference.
- Scav Mode is an essential tool for new players to learn maps and earn money risk-free.
- Bosses are not playable but are key threats and loot sources.
For more detailed equipment builds, consult the "All Game Items" guide and the general tips sections.
Cheats & Secrets
Cheats & Secrets Guide for Escape from Tarkov
Disclaimer: No Official Cheat Codes or Unlocks
Escape from Tarkov is a hardcore, online-only PvPvE game with no built-in cheat codes, unlock codes, or secret commands. Battlestate Games enforces BattlEye anti-cheat aggressively – using unauthorized third-party tools results in an immediate permanent ban. This guide instead covers legitimate hidden content, developer-intended secrets, Easter eggs, and exploitative but safe techniques that do not violate the game's terms.
Easter Eggs and Developer References
Despite its realism, Tarkov contains subtle humor and nods to internet culture:
- T H I C C Case: A large, rare item case whose name is a meme inspired by a viral video. It is a legitimate item from traders (level-dependent) or found in raid.
- Toilet Paper: A junk item with no practical use, often found in bathrooms. It is a humorous commentary on hoarding supplies.
- Adik Tracksuit: The outfit worn by Killa, the boss on Interchange, is a reference to the Russian street fashion brand “Adidas” (the in-game version is “Adik”).
- BEAR vs USEC Radio Banter: In the main menu, your character occasionally mutters funny lines. USEC may reference “paperwork” or “coffee”; BEAR mentions “vodka” and “cheeki breeki.”
- Interchange’s “Emercom” Unit: The emergency responder unit on the map is named after the Russian Ministry of Emergency Situations (EMERCOM).
- Factory’s Hidden Messages: On the Factory map, scrabbled text on walls sometimes reads “Help me” or “Don’t trust the doctors,” adding lore depth.
- Secure Containers: Alpha, Beta, Gamma, Kappa – these let you keep items inside upon death. Always store high-value small items (keys, keycards, bitcoins, sugar) in your secure container.
- Hideout Upgrades: The Bitcoin Farm can generate cryptocurrency passively. The Scav Case (in hideout level 2) yields random loot from raids. These are end-game secrets only visible after building the hideout.
- Dynamic Loot Spawns: While not random, loot locations shift. For example, the same jacket may spawn different items each raid. Learning spawn points for keys (e.g., on Customs for Marked Room) gives you an edge.
- Cultist Circle: On Woods, at night, a small clearing near the scav bunker occasionally spawns a ritual site with loose loot (e.g., rare keys, ledx). This triggers only during specific in-game time and weather conditions. Map: Woods, near the sunken village.
- Marked Rooms: Certain rooms on Customs (dorms), Reserve (basement), and Woods (cabin) require special keys and contain high-tier loot (weapons, bitcoins, rare attachment). The keys are hidden in various locations (e.g., body of Scav boss, random containers).
- Shoreline Hidden Caches: Over 10 hidden caches buried in the ground or under logs. Visual clue: a small mound of dirt or a bush that is slightly different. These yield barter items, keys, and ammo.
- Interchange Kiba Arms Store: A locked fan shop that requires two keys (Kiba Arms Grille Key and Kiba Arms Store Key). Both keys are found rarely in jackets or file cabinets. Inside are weapon mods and M4 rifles.
- The Door (Customs): A hidden extract behind the big red shipping container near the construction site. Only works if you are injured (pain status).
- Reserve D-2 Extract: A secret underground bunker extract that requires a condenser, power switch, and (sometimes) a key. It leads to a painful tunnel but rewards with hidden loot spawns.
- Labs Keycard Rooms: The Terragroup Labs map has special rooms (e.g., Medical Block, Green Room) that require colored keycards (violet, green, blue, red). These keycards are rare finds from bosses, quests, or the Scav Case. The rooms contain top-tier loot like military armor, rare stims, and weapons.
- Kappa Secure Container: The ultimate container (4×3 grid) obtained by completing the quest “The Guide” (survive all maps in sequence). This is the biggest hidden achievement; no other container comes close.
- Boss Behavior Trees: Bosses like Reshala (Customs), Glukhar (Reserve), and Shturman (Woods) have hidden AI routines. For example, Reshala’s guards will call out his name before engaging, or Shturman always reloads his SVD after firing three shots – tiny secrets for skilled players.
- `spawn_bot` : Spawn a Scav or boss.
- `set_time` : Change in-game time (e.g., `set_time 12:00`).
- `give_item` : Spawn any item by ID (e.g., `give_item 5d1b5c743c64b6313f0f0b5a` for a facemask). These are for testing only and offer no advantage in live raids.
Hidden Gameplay Features (Legitimate and Discoverable)
These are intentional mechanics that are not immediately obvious but are not cheats:
Exploit-Free Secrets: Hidden Caches and Extracts
These are map-specific secrets that can be used without exploiting:
Developer-Intended Hidden Content
Note on Console Commands (Offline Only)
The game has a developer console (press F1 in offline mode) with debugging commands. Do not attempt to use these online – they are disabled and attempting to enable them will trigger BattlEye. In offline mode only, you can:
Final Warning
There are no legal cheat codes for Escape from Tarkov. Any website or video claiming otherwise is selling hacks that will get you banned. The secrets listed above are intended by the developers to be discovered through gameplay and exploration. Respect the game’s challenge and avoid shortcuts.