Factorio
## Game Introduction ### Overview **Factorio** is a critically acclaimed top-down factory simulation and automation game developed and published by the Czech studio **Wube Software**. First released in early access on February 25, 2016, the full version 1.0 launched on August 14, 2020, after over ...
Download & Installation
Platform Availability
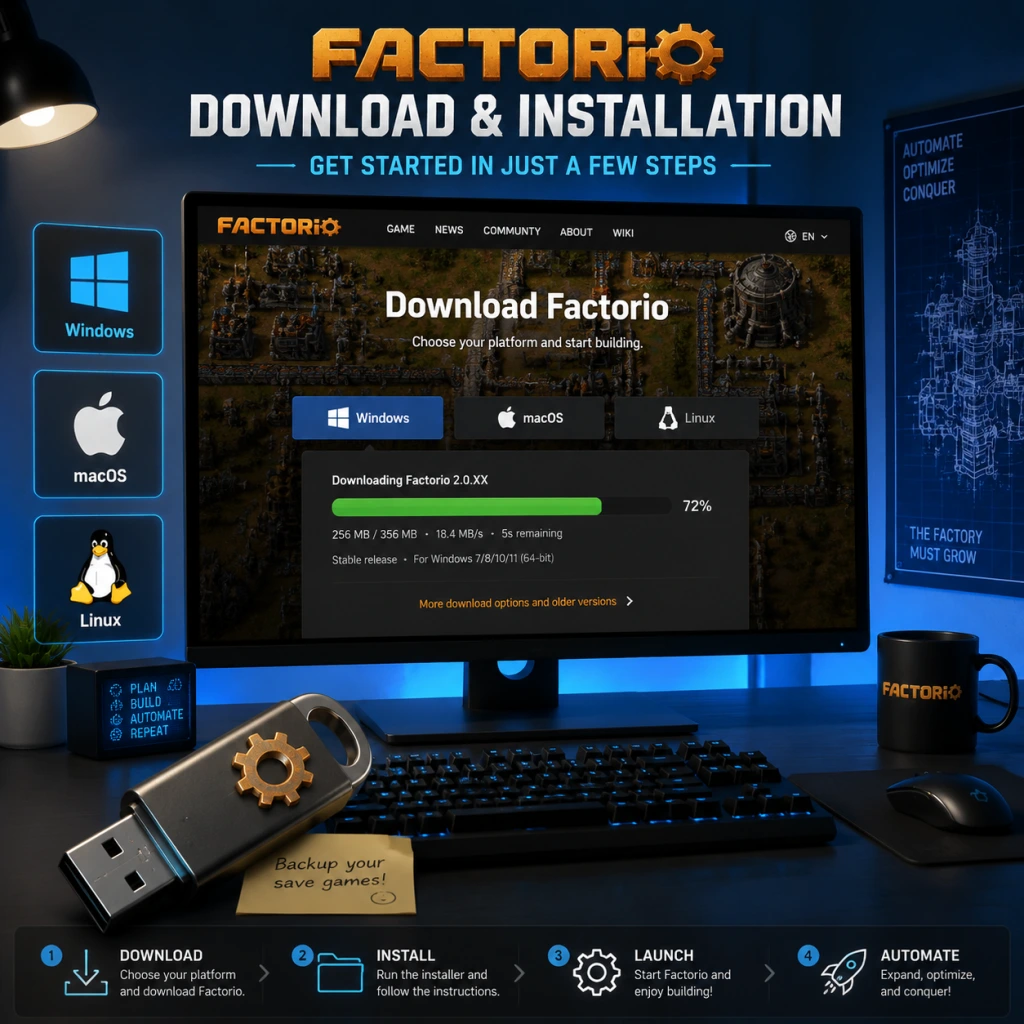
Factorio is officially available on the following platforms:
- PC: Windows (7/8/10/11), macOS (10.12+), Linux (glibc 2.18+, 64-bit)
- Nintendo Switch: Available via Nintendo eShop
- Not available on PlayStation, Xbox, or mobile devices.
- Steam (PC): [store.steampowered.com](https://store.steampowered.com/app/427520/)
- GOG.com (PC, DRM-free): [gog.com](https://www.gog.com/game/factorio)
- Humble Store (PC): [humblebundle.com](https://www.humblebundle.com/store/factorio)
- Factorio Official Website (PC, DRM-free standalone): [factorio.com/download](https://www.factorio.com/download) – Requires a purchased account.
- Nintendo eShop (Switch): Search „Factorio“ on the console.
- OS: Windows 7 64-bit / macOS 10.12 / Linux 64-bit
- CPU: Dual-core 3.0 GHz (e.g., Intel Core 2 Duo)
- RAM: 4 GB
- GPU: DirectX 10.1 capable (any integrated or dedicated) with 512 MB VRAM
- Storage: 3 GB free space
- Resolution: 1280x720
- OS: Windows 10/11 64-bit / macOS 11+ / Linux 64-bit (recent distro)
- CPU: Quad-core 3.5 GHz (Intel i5 or AMD Ryzen 3+)
- RAM: 8 GB (16 GB for very large megabases)
- GPU: Dedicated with 1 GB+ VRAM (NVIDIA GTX 660 / AMD Radeon HD 7850 or better)
- Storage: 3 GB SSD (faster load times for large mods)
- Resolution: 1920x1080
- Steam version: A Steam account (free) and connection to the Steam servers during installation.
- GOG version: A GOG account (free) to download the installer; no internet required after installation.
- Humble Store version: A Humble account to download; provides a Steam key (requires Steam) or a standalone installer.
- Official website version: A factorio.com account (requires purchase) to download the standalone zip or installer.
- Nintendo Switch: A Nintendo Account (free) and internet connection to download from eShop.
- Game installation: ~2.5 GB (may increase with mods)
- Saves and mods: Typically under 500 MB, but could grow with many mods.
- Temporary space: During installation, extra ~1 GB is needed.
Official Download Sources
Always purchase or download from legitimate sources to ensure updates, multiplayer compatibility, and support:
> Warning: Do not download from third‑party sites like torrents or cracked versions. They may contain malware, lack updates, and you will miss multiplayer and mod support.
System Requirements
Minimum (for stable 60 FPS at low settings, small bases)
Recommended (for large bases, many mods, 60+ FPS)
> Note: Factorio is CPU-heavy and scales poorly on many cores; a few fast cores are better than many slow ones.
Account Requirements
Storage Space
Step-by-Step Installation
Installing on PC via Steam
1. Download and install the Steam client from [store.steampowered.com](https://store.steampowered.com/).
2. Create or log in to your Steam account.
3. Purchase Factorio on the Steam Store (or redeem a gift/key).
4. Click „Install“ on the Factorio page or from your library (Library > Factorio > Install).
5. Choose installation path (default: `C:\Program Files (x86)\Steam\steamapps\common\Factorio` on Windows).
6. Wait for download – size is ~2.5 GB (may be smaller with partial downloads).
7. Launch through Steam Library.
Installing on PC via GOG
1. Download GOG Galaxy client from [gog.com/galaxy](https://www.gog.com/galaxy) (optional, you can also use standalone offline installers).
2. Log in to your GOG account.
3. Purchase Factorio on GOG.
4. In Galaxy client, go to Library, find Factorio, click „Install“.
5. Or download the offline installer from your GOG account (My Collection > Factorio > Download Backups > download the installer + bonus content).
6. Run the installer (.exe for Windows, .app for macOS, .sh for Linux) and follow prompts.
7. Launch from Galaxy or directly from the installation folder.
Installing on PC via Official Website (Standalone)
1. Go to [factorio.com](https://www.factorio.com/) and create an account (or log in).
2. Purchase the game if not already owned (one-time purchase for all future updates).
3. Download the appropriate version for your OS from the Downloads page (Windows: .exe, macOS: .dmg, Linux: .tar.gz).
4. On Windows: Run the installer (.exe). Choose installation location. Check „Create desktop shortcut“ if desired.
5. On macOS: Open the .dmg and drag Factorio to Applications folder.
6. On Linux: Extract the .tar.gz (`tar -xzf factorio_linux.tar.gz`), then run `./factorio/bin/x64/factorio` from the terminal, or create a shortcut.
7. Launch from the location you installed/extracted.
> Note: The standalone version does not auto-update. You must download new versions manually from the website.
Installing on Nintendo Switch
1. Turn on your Switch and connect to the internet.
2. Open the Nintendo eShop from the home screen.
3. Search for „Factorio“ using the search function.
4. Select Factorio and click „Proceed to Purchase“ (requires Nintendo Account with sufficient funds or linked payment method).
5. Download the game (size ~1.8 GB).
6. Installation happens automatically; you can monitor progress on the home screen.
7. Launch from the home screen.
> Note: The Switch version is slightly behind PC in updates; it receives patches but not as frequently.
First Launch Setup
1. Language: Select your language on first launch.
2. Graphics settings: The game auto-detects optimal settings. You can adjust later in Settings > Graphics. Recommended: Keep at „Medium“ or „High“ if your PC meets recommended specs.
3. Multiplayer account: Optionally log in to your factorio.com account to access multiplayer (not required for single player). This is the same account if you bought from the official website; for Steam/GOG you can link or create a new one.
4. Tutorial: On first launch, the game offers a campaign/tutorial series. It is highly recommended to play the „New Hope“ campaign for beginners.
5. Mods: You can browse and install mods from the main menu under „Mods“. They require an internet connection the first time you download.
Common Installation Errors and Fixes
| Error | Cause | Solution |
|---|---|---|
| “Failed to initialize renderer” | GPU driver too old or missing DirectX/Vulkan support. | Update your graphics drivers. Ensure DirectX 10.1 or Vulkan is available. On Linux, install `libvulkan1`. |
| “Corrupted download” | Network interruption or corrupt Steam/GOG cache. | Verify game files: Steam – right-click Factorio > Properties > Installed Files > Verify integrity of game files. GOG – click the cog icon > Manage Installation > Verify/Repair. |
| “Missing DLL” (Windows) | Missing runtime libraries like Visual C++ Redistributable. | Install the latest Visual C++ Redistributable from Microsoft (both x86 and x64). |
| “Could not create a new save” (Switch) | Insufficient free storage on console. | Delete unused games or data. Factorio requires ~2 GB free. |
| “Can’t connect to online services” for multiplayer | Firewall or router blocking ports. | Add exception for Factorio in firewall. Ensure UDP ports 34197 and 34198 are open. |
| “Low FPS / stuttering” | Hardware below minimum, or background processes. | Lower graphics settings (especially „Sprite resolution“ and „Enable GPU light effects“). Close other programs. Disable mods if applicable. |
Post-Installation Verification
- Check version: Launch the game and look at the main menu top-left corner (e.g., „1.1.110“). Ensure it matches the latest stable release (check factorio.com or Steam).
- Test basic functionality: Start a new freeplay map on default settings. Confirm:
- Audio works (background music, sound effects).
- Save and load: Create a save from the pause menu, exit to main menu, and load it.
- If using mods: Go to Mods menu, enable a few mods, restart and verify they load without errors.
- Steam/GOG: Updates are automatic by default.
- Official website: No auto-update. Subscribe to the Factorio newsletter or check the blog. Download new zips and overwrite the old installation (your saves are in a separate folder: `%appdata%/Factorio/saves` on Windows, `~/Library/Application Support/factorio/saves` on macOS, `~/.factorio/saves` on Linux).
- Nintendo Switch: Updates are downloaded automatically when you have internet connected, or manually check for update via the square (“+”) menu on the game icon.
- Steam: Right-click Factorio in Library > Manage > Uninstall.
- GOG Galaxy: Right-click Factorio > Manage Installation > Uninstall.
- Official website standalone: Delete the installation folder. Saves and config remain in appdata if you want to keep them.
- Switch: Go to System Settings > Data Management > Manage Software > Factorio > Delete Software.
- Portable version: The official website’s Linux and Windows downloads are portable – you can run the game from a USB stick (saves still go to the user folder).
- Multiplayer: All PC versions are cross-compatible (Steam players can join GOG players via IP address). Switch players are isolated on their own network.
- Demo: A free demo is available on Steam and the official website. It is a time-limited full version of the early game (no base destruction).
- Mods: Bought from any PC store – mods work the same. They are not available on Switch.
- Movement (WASD)
- Mining (left-click on ore)
- Building (select a building from menu, left-click to place)
- Crafting (click on an item in the crafting menu)
Keeping the Game Updated
Uninstalling Factorio
> Save preservation: Before uninstalling, back up saves from `<user data>/Factorio/saves` and `<user data>/Factorio/mods` if you want to reuse them later.
Additional Tips
This guide covers all legitimate methods to download and install Factorio. If you encounter issues not listed, visit the official forum or the subreddit r/factorio for community help.
Game Introduction
Game Introduction
Overview
Factorio is a critically acclaimed top-down factory simulation and automation game developed and published by the Czech studio Wube Software. First released in early access on February 25, 2016, the full version 1.0 launched on August 14, 2020, after over four years of community-driven development. The game is available on Windows, macOS, Linux, and Nintendo Switch. It is not available on PlayStation or Xbox consoles. Factorio has sold over 3.5 million copies worldwide and is widely regarded as one of the finest examples of the automation genre.
Genre
- Primary Genre: Factory Simulation / Automation
- Sub-genres: Real-time Strategy, Resource Management, Sandbox, Tower Defense (limited)
- Themes: Engineering, Logistics, Optimization, Systems Thinking
- Developer: Wube Software (an independent studio based in Prague, Czech Republic)
- Publisher: Wube Software (self-published)
- Alpha / Early Access: February 25, 2016 (Steam, GOG, Humble Store, official website)
- Full Release (1.0): August 14, 2020
- Nintendo Switch Launch: October 28, 2021
- Current Version: 1.1.x (stable as of 2025), with continuous minor updates
Developer & Publisher
Release Timeline
Platforms
| Platform | Availability | Notes |
|---|---|---|
| Windows | Yes | Windows 7/8/10/11 (64-bit recommended) |
| macOS | Yes | macOS 10.12+ (Intel & Apple Silicon) |
| Linux | Yes | glibc 2.18+, 64-bit |
| Nintendo Switch | Yes | eShop download; supports touchscreen in handheld mode |
| PlayStation | No | Not planned |
| Xbox | No | Not planned |
| Mobile | No | Not available |
Story Overview
You are an engineer who crash-lands on a remote, alien planet after your spaceship suffers a catastrophic failure. With no hope of immediate rescue, your only way off the planet is to build and launch a rocket capable of carrying you back into space. However, the planet is uninhabited by intelligent life but teeming with aggressive alien creatures called Biters. To achieve your goal, you must construct an ever-growing factory that mines raw resources, refines them into intermediate products, and assembles complex machinery—all while balancing production lines, managing power, and defending your base from Biter attacks.
Setting
- World: An unnamed, procedurally generated planet with diverse biomes—deserts, forests, grasslands, and water bodies. The terrain is rich in iron, copper, coal, stone, uranium, and oil deposits.
- Time Period: Near-future sci-fi, but technology is grounded in realistic engineering principles.
- Atmosphere: Isolated and industrial. The only sounds are the hum of machines, the hiss of steam, the rattle of conveyor belts, and the occasional roar of alien creatures. The game emphasizes a solitary focus on building and optimization.
- Biters: Hostile alien creatures that come in several forms—small biters, spitters, and larger variants (e.g., behemoths). They evolve and become more aggressive as pollution spreads from your factory.
- Aliens (passive): There are no friendly or neutral creatures; all fauna is hostile.
- Seeing your factory grow from a messy spaghetti of belts to a beautifully organized, high-throughput machine.
- Solving logistical puzzles: How to supply 1,000 red circuits per minute? How to balance train networks? How to avoid bottlenecks?
- Continuous learning: The game rewards systematic thinking and teaches principles of throughput, ratios, and supply chains.
- Freedom and creativity: The sandbox nature allows for infinite designs—there is no single "correct" way to build a factory.
- Emergent gameplay: Biters attack when pollution clouds reach their nests, forcing you to balance expansion with defense.
- Engineers, programmers, and systems thinkers who love optimization and efficiency.
- Fans of simulation games like Dyson Sphere Program, Satisfactory, or Mindustry.
- Players who enjoy open-ended, non-linear sandbox games with high replayability.
- Modding enthusiasts (Factorio has a thriving modding community).
- Not suitable for players seeking narrative-driven experiences, fast-paced action, or casual gameplay.
- Offline Single-player: Fully playable without internet connection. No DRM on the standalone version (the Steam version requires Steam Client in offline mode).
- Online Multiplayer: Requires internet for joining servers or hosting headless servers. Player-hosted games can be public or private.
- Cross-platform play: Windows, macOS, and Linux players can play together. The Nintendo Switch version is not cross-platform with PC.
- Mods: Community mods are downloaded via the in-game mod portal (requires internet for first download, but can be used offline once installed).
- Factorio: Space Age (announced in February 2024, expected 2024–2025): A paid expansion that adds space platforms, interplanetary logistics, and new planets with unique resources and challenges. It is intended to extend the game beyond rocket launch into a whole new endgame.
- The base game does not have any paid DLC or microtransactions. All updates are free. The expansion will be a one-time purchase and will require the base game.
- Incredible depth and scalability: Factories can reach sizes where you are managing hundreds of trains, thousands of belts, and tens of thousands of assemblers. The game performs efficiently even with massive bases.
- No hand-holding: The game teaches through its simple interface and tooltips but never forces a specific path. The challenge is self-imposed and emergent.
- Multiplayer optimization: Factorio's multiplayer is famously smooth, with advanced latency hiding and deterministic simulation that allows thousands of players on a single server.
- Community and modding: The most mod-friendly game in its genre. Thousands of mods are available, from quality-of-life tweaks to total conversions like Space Exploration, Bob's/Angel's mods, Industrial Revolution, and Krastorio.
- Blueprints and circuit networks: Players can save and share blueprints of their factory designs, and use advanced circuit conditions to create logic gates, automated train schedules, and even Turing-complete computers within the game.
- Pollution and biter evolution: A dynamic ecosystem where your factory's pollution triggers aggressive alien evolution. This forces you to consider environmental impact or face escalating threats—a unique blend of automation and survival.
Main Characters
Factorio does not feature traditional story-driven characters. The player character is an unnamed engineer who serves as the sole human presence. There are no NPCs, dialogue, or cutscenes. The only other entities are:
Core Appeal
Factorio captivates players by offering an endless loop of planning, building, and optimization. The satisfaction comes from:
Target Audience
Game Modes
Factorio offers several official modes:
1. Freeplay (Default): The main sandbox mode. You crash-land on a procedurally generated map and must build a rocket. All technologies, resources, and enemies are present. You can customize map settings (resource richness, biter aggression, start area size, etc.).
2. Campaign: A series of scripted scenarios that teach core mechanics. There are six levels (tutorials) and three story-based missions (the original campaign was reworked for version 1.0).
3. Sandbox / Creative Mode: No enemies, unlimited resources, and all technologies unlocked from the start. Ideal for testing designs and blueprints without pressure.
4. Scenario Pack: Included with the game, offering predefined challenges like "Tight Spot" (limited space), "Wave Defense" (survive endless biter waves), and more.
5. Multiplayer: Cooperative (default) or PvP via optional mods. Supports up to hundreds of players on dedicated servers.
Online / Offline Support
DLC / Expansions Overview
As of 2025, Factorio has one major expansion announced but not yet released:
What Makes Factorio Unique
Factorio stands apart from other factory games due to several key features:
In summary, Factorio is the definitive factory simulation game—a masterpiece of game design that rewards patience, planning, and creativity. Whether you build a sleek mega-factory or a chaotic spaghetti belt mess, the journey is endlessly satisfying.
Getting Started
Getting Started
Overview
Factorio is a top-down factory simulation and automation game by Wube Software. You play as an engineer stranded on an alien planet, and your goal is to build increasingly complex factories to launch a rocket into space—while surviving hostile biters. The game is available on PC (Windows, macOS, Linux) and Nintendo Switch. There is no character creation; you start as a generic engineer. The core loop is: mine resources → smelt into plates → craft components → assemble machines → automate everything. This guide will help you survive the first hour and avoid common pitfalls.
Character Creation
Factorio has no character creation. You play as a default engineer with a blue jumpsuit. You can change your character's color in the game settings (under Interface) by toggling “Player color” to personal preference, but this is purely cosmetic and has no gameplay effect.
Controls (All Platforms)
| Action | PC (Keyboard & Mouse) | PC (Gamepad) | Nintendo Switch (Handheld/Docked) |
|---|---|---|---|
| Move | WASD | Left stick | Left stick |
| Interact / Pick up | Left click (on object) | A | A |
| Mine / Remove | Hold left click on resource/building | X (hold) | X (hold) |
| Open inventory | E | Y | Y |
| Craft menu | E + click tabs | D-pad left | D-pad left |
| Place blueprint / building | Q (to select) + left click | B (open build menu) + A | B (open build menu) + A |
| Cancel / Close | Right click / Escape | B | B |
| Rotate building | R | R shoulder | R |
| Pipette tool (copy building) | Q while hovering over a built machine | Right stick click | Right stick click |
| Run | Hold Shift + move | Hold left stick click | Hold left stick click |
| Toggle map | M | Select | Select |
- On PC, you can rebind keys in Settings → Controls. Gamepad is fully supported on PC.
- On Switch, motion controls can be enabled/disabled. Pro Controller works identically to Joy-Cons.
- Always check the Control menu for advanced shortcuts like crafting from filtered slots.
- Toolbar (hotbar): Bottom row of 10 slots (1-0). Right-click a slot to assign a filter (e.g., iron plate). Items placed here are quickly accessible via number keys.
- Quick panel: Above hotbar, shows items you can craft with current resources.
- Health & armor: Top-left, green bar is health. Grey bar is armor (if equipped).
- Mini-map: Top-right corner. Red dots = hostile biters, green = friendly, yellow = resources.
- Character screen: Press E to open. Left side shows equipment grid (armor, tools), right side is inventory (30 slots initially). Below inventory: crafting window with tabs (Logistics, Production, Intermediate Products, Combat, etc.).
- Main menu bar (PC only): At top of screen – Production stats (P), Technology (T), Map (M), Blueprints (B), etc.
- Notifications: Alerts at top center – e.g., “Biter attack detected” or “Research complete.”
- Goal 1: Automate iron plate production. Get at least 2-3 burner drills on iron ore, feeding into stone furnaces via belts.
- Goal 2: Automate copper plate production. Similar setup.
- Goal 3: Produce red science packs. Craft assembling machine 1 (or hand-craft). Aim for 1-2 labs continuously researching.
- Goal 4: Automate gear production. Hand-craft gears initially, but soon build a dedicated assembler.
- Goal 5: Set up coal mining. Coal is used as fuel for drills/furnaces and later for power. Have at least one drill on coal with a belt to your furnaces.
- Goal 6: Research Basic Automation. Unlocks more advanced recipes (green science later).
- Goal 7: Build a small wall (if needed). Only if biters are aggressive. Otherwise postpone.
- Scout your surroundings. Look for a lake or water near ore patches (needed for steam power later).
- Build everything close together initially. Walking long distances wastes time.
- Use burner inserters to feed fuel into boilers/steam engines later.
- Save often (F5 quicksave on PC, manual save on Switch).
- Don’t hand-mine for too long. The first thing you should do is place burner drills. Hand mining is inefficient after the first minute.
- Don’t build on ore patches. Keep resource fields clear for drills. Build factories next to them.
- Don’t ignore pollution. The game shows a red cloud on map; biters attack when pollution reaches them. Minimize early pollution by using efficiency modules? Not yet – just stay small.
- Don’t start with green science. Focus on red science first. Green science requires more complex infrastructure (inserters, belts) that you can hand-craft initially.
- Don’t build too many boilers/steam engines early. You don’t need electricity until you start using electric miners (research needed). Burner miners work fine for the first hour.
- Not using shift-click to quickly move items between inventories (works in chests, labs, furnaces).
- Running out of coal for furnaces. Always have a belt feeding coal to your furnaces. Use a splitter to share coal between iron and copper.
- Overbuilding belts before needing them. Start with a simple belt from drill to furnace; later you can expand.
- Crafting too many items by hand. Automate as soon as you have the resources. Hand-crafting is a time sink.
- Forgetting to fuel burner inserters. Burner inserters need coal to move items. Electric inserters are better but require power.
- Placing furnaces too far from drills. Keep them adjacent or short belt runs.
- Ignoring the map. Always know where biters are. Use radar (unlocked after red science) to reveal the area.
- Building a 'main bus' too early. Beginners often try a main bus (horizontal belts for multiple resources) before understanding ratios. For first hour, spaghetti is fine.
- [ ] Place 2-3 burner mining drills on iron ore.
- [ ] Place 1-2 burner mining drills on coal.
- [ ] Place 1-2 burner mining drills on copper ore.
- [ ] Build 4-5 stone furnaces (2 for iron, 2 for copper, 1 for stone).
- [ ] Feed coal to furnaces via belts and burner inserters.
- [ ] Craft a lab and place it near furnaces.
- [ ] Hand-craft 10 red science packs (5 copper plates + 5 iron gears).
- [ ] Research Automation technology.
- [ ] Set up a simple belt line from iron drill to furnace.
- [ ] Craft an assembling machine 1 (needs 3 iron plates, 5 iron gears, 6 circuits? Actually: cost is 3 circuits + 5 iron gears + 9 iron plates – but circuits require copper wire. Better to hand-craft red science packs until you have a circuit setup).
- [ ] Manually craft some ammunition (5 mags) and a pistol (if biters are visible).
- [ ] Find a water source (lake) within reasonable distance (for future power).
- [ ] Save the game (F5 on PC, press – on Switch and select save).
UI Overview
After spawning, you see the main game screen:
First Hour Walkthrough (Step-by-Step)
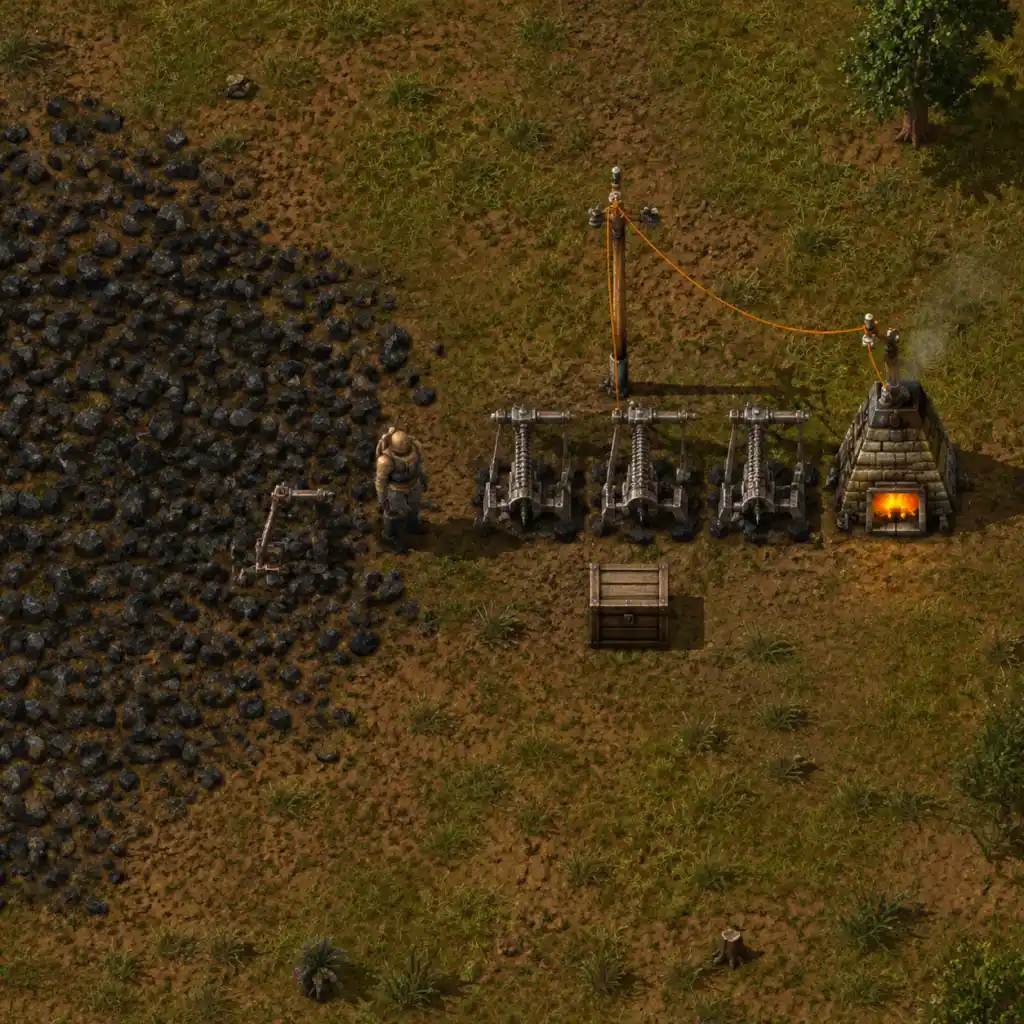
1. Spawn and assess your surroundings. You appear near your crash site. Look for iron ore, copper ore, stone, coal, and water. These are essential. The crash site itself contains some starter items (burner mining drills, stone furnaces, etc.).
2. Collect resources manually. Mine iron ore, coal, and stone by holding left click (PC) or X (Switch) on the resource patches. Also pick up any loose items (iron plates, gears) near the wreckage.
3. Place your first burner mining drill. Open inventory (E), go to “Logistics” tab, place a burner mining drill on an iron ore patch. Fuel it with coal (drag coal into its fuel slot). It will start mining automatically.
4. Build a stone furnace. Craft a stone furnace (costs 5 stone). Place it near the mining drill. Run a belt? Not yet – just feed iron ore from your inventory into the furnace by right-clicking it and adding ore.
5. Gather more resources. While the drill mines, manually mine copper and stone. Craft a second burner drill for copper.
6. Research automation. Click the Technology button (T) and start researching Automation (requires 10 red science packs). To craft red science packs: 1 copper plate + 1 iron gear wheel. You need a lab (craft from 10 iron plates + 10 iron gear wheels). Place the lab near your furnaces. Feed red science packs into it manually.
7. Expand your power (not needed yet). Early game, burner drills and furnaces only need coal fuel. Later you'll need steam engines. Ignore electricity for now.
8. Hand-craft basic items. Use the crafting window (E) to make: assembling machine 1 (needs for automation), inserters, belts, pipes.
9. Automate belt transportation. Craft transport belts and inserters. Place a belt line from your iron ore drill to the furnace, and an inserter to move ore from belt to furnace. This is the core of automation.
10. Defend yourself (if needed). If biters are near, craft a pistol and ammo (from iron plates + copper plates). Don’t overbuild walls yet.
Essential Early Objectives
What to Do First / What to Avoid
Do:
Avoid:
Early Resource Priorities
1. Iron ore – used for everything: plates, gears, pipes, structures.
2. Copper ore – for circuits, red science, later green science.
3. Stone – for furnaces, walls, and later for rails.
4. Coal – fuel for burner machines and later for plastic (but not in first hour).
5. Water – for steam power, not needed immediately but locate a source.
6. Wood – only useful for poles or early fuel. Not a priority; you can chop trees to clear space.
Priority order for automation: Iron plates → Copper plates → Coal → Red science packs.
Common Beginner Mistakes
Day-One Checklist
By following this checklist, you'll have a solid start and be ready to transition into the next phase: automating green science and scaling up.
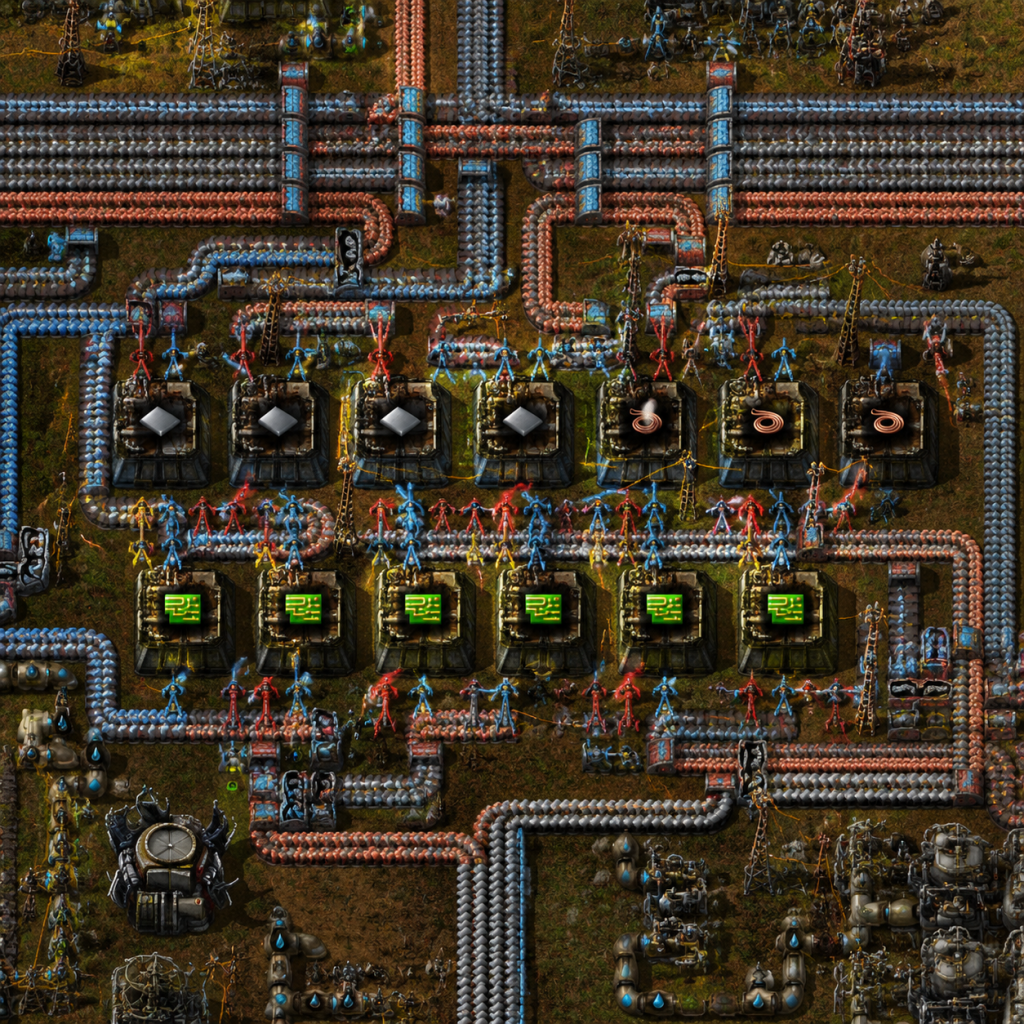
Core Gameplay
Core Gameplay Overview
Factorio's core gameplay revolves around the automation loop: gather resources → craft items → build machines → automate processes → research technologies → scale up production → launch a rocket. You play as an engineer stranded on an alien planet, with the primary goal of building a rocket to escape. The game is a top-down real-time factory simulation with survival elements (biters attack).
Core Systems
- Main Gameplay Loop: Manually mine resources (early) → build automated miners and belts → craft intermediate products (plates, gears, circuits) → assemble advanced items (science packs, modules) → research technologies → unlock new machines → expand factory → repeat.
- Combat/Interaction: Enemy creatures (biters, spitters, worms) defend their nests. You fight using turrets, guns, grenades, tanks, and later artillery. Pollution from your factory triggers attacks. Combat is primarily defensive, but you can clear nests to expand.
- Progression: Technology tree (red/green/blue/yellow/purple/white science) unlocking new buildings, recipes, and logistics.
- Exploration: Procedurally generated map with resource patches (iron, copper, coal, stone, oil, uranium) and terrain types. Exploration is essential to find new resource deposits and chokepoints.
- Quests/Missions: No traditional quests. You set your own goals, though the game provides a tech tree and the ultimate objective: build a rocket (or megabase). The built-in tutorial and campaign have scripted missions.
- Economy: Resource extraction and production chains are the economy. No currency; you trade with yourself by using trains, belts, and bots. Resources are finite but abundant.
- Character/Build Growth: Your character upgrades via armor, exoskeleton, personal roboport, etc. No skill trees; growth is through equipment and technology (bots, speed modules).
- Endgame: After launching the rocket, you can continue expanding to build a megabase (1k science per minute or more), achieve infinite research, or complete modded scenarios.
- Manual Mining: Start by hand-mining iron and copper ore, coal, and stone.
- Handicrafting: Craft burner miners, stone furnaces, and assembly machines to automate smelting and basic production.
- Automation: Build a simple belt system to feed furnaces and assembly machines. Automate iron plates, copper plates, steel, gears, and circuits (red/green).
- Science: Feed red science packs into labs to research early tech (automation, logistics, military). Green science unlocks more advanced items.
- Power: Burn coal in boilers to produce steam for steam engines. Manage coal supply by automating coal mining.
- Biters: Initially passive but will attack if pollution cloud reaches their nests. Build a few gun turrets and ammo production to defend your base.
- Manual combat: Use a pistol and later submachine gun. Kill nests manually to secure space.
- Pollution management: Minimize early pollution by not overbuilding and by using efficiency modules (unlocked later).
- Radar: Build radar to reveal the map. Prioritize scanning areas near your factory to find resource patches.
- Scouting: Walk or drive (after building a car) to locate iron, copper, stone, coal, and especially oil.
- No currency: Economy is purely physical resource flows.
- Character upgrades: First priority is researching and building a car for faster movement and inventory. Later craft an armor (iron or light armor) for protection.
- 2-3 electric miners on iron ore → belt 1 → stone furnaces (smelter row) → belt 2 → assembly machines making iron gears and copper wire.
- Similarly for copper.
- Build a small mall: produce belts, inserters, assembly machines, power poles.
- Oil processing: Pump oil → refinery (into petroleum gas, light oil, heavy oil) → crack heavy/light to produce more gas. Use gas to make plastic and sulfur → batteries (for blue science).
- Blue science: Requires engines (steel + iron gears) and red circuits (plastic + copper wire + electronic circuits).
- Rail system: Build a main bus (centralized belt lines) or a rail-based logistics network. Train stations for ore outposts and oil fields.
- Battery and advanced circuits: Automate batteries, processing units (blue chips) later.
- Electric network: Expand power with accumulators and solar panels (optional) or nuclear power (unlocked later).
- Defense upgrades: Research military science (gray) and build walls, dragon's teeth, laser turrets, flamethrower turrets. Design kill zones.
- Offensive: Clear nests using a tank with explosive shells or a personal weapon. Use poison capsules and grenades.
- Biter evolution: As you pollute and destroy nests, evolution increases, spawning bigger biters (big, behemoth).
- Rail world: Use trains to connect distant ore patches. Build radars at outposts.
- Resources: Look for high-yield patches (100k+ ore) and uranium (for nuclear).
- Scalability: Expand your main bus to 4 belts of iron/copper. Use red belts (fast) and blue belts (express) later.
- Character upgrades: Research modular armor and equip exoskeleton legs (speed), personal roboport (construction bots), and energy shield. Craft a fusion reactor for power.
- Purple science: Requires production modules (unlocked via blue science), electric engines, and advanced circuits.
- Yellow science: Requires low-density structures (copper/steel/plastic), processing units, and electric mining drills.
- Rocket silo: Build and supply with rocket parts (low-density structures, rocket fuel, processing units). Each rocket requires 100 of each (plus satellite for space science).
- Logistics bots: Upgrade to requester chests and passive provider chests to fully automate supply chains.
- Nuclear power: Set up reactors, heat exchangers, steam turbines. Single reactor outputs 40 MW; neighbor bonus increases output.
- Artillery: Research artillery and shells to automatically clear biter nests from long range. Build an artillery wagon and designate autofire zones.
- Spider tron: Build a spidertron (remote-controlled mech) with rockets and shields for clearing nests.
- Infinity builds: Use laser turrets with high power supply, or gun turrets with uranium ammo.
- Map control: Use artillery to claim large areas. Place a grid of radars.
- Mining outposts: Connect multiple ore fields via train network. Use circuit conditions to balance supply.
- Beacon setups: Use speed beacons and productivity modules to massively increase output. For example, smelting with productivity modules in electric furnaces and speed beacons.
- Megabasing: Start planning for 100+ SPM (science per minute). Use a city block or grid layout.
- Space science: Attach a satellite to each rocket. Rocket launches give 1000 space science packs (with satellite).
- Infinite research: Use space science to research infinite upgrades like mining productivity (up to thousands of levels).
- Megabasing: Aim for 1k SPM (science per minute) of each type including space. Optimize UPS (frames per second) by minimizing entities—use direct insertion, beltless builds with bots.
- Modular designs: Train-in / train-out system for each science pack. City blocks with 4-6 rail segments.
- Uranium processing: Build Kovarex enrichment for infinite U-235. Use nuclear power extensively.
- Terraforming: Use landmines and walls to permanently secure borders. Artillery automatically clears new nests.
- Biter expansion: When you're far from base, biters expand. Use radar coverage and artillery to suppress them.
- Map generation: Once you launch a rocket, the map is fully explored via radar. You can route trains across the entire world.
- Infinite resources: With high mining productivity, small ore patches become effectively infinite. Train networks become the bottleneck.
- Character perfection: Equip spidertron with full defenses and follow you around. Use personal roboport with construction bots for rapid building.
- Platform differences: On Nintendo Switch, controls are adapted for controller, but gameplay loop is identical. Performance may limit megabase size. PC is primary platform.
- Mods: Factorio has a large modding community (e.g., Bob's mods, Angel's mods, Space Exploration). They drastically change progression and add new tiers.
- Tutorial: The in-game tutorial and campaign teach basic automation. New players should complete the tutorial first.
- Tips: Always leave room for expansion. Use a main bus design until you understand trains. Automate everything possible—handicrafting is inefficient.
---
Core Gameplay by Progression Tiers
Early Game (First ~2-3 hours)
Goal: Automate basic science packs (red and green) and establish a stable power supply.
#### Gameplay Loop
#### Combat & Interaction
#### Exploration
#### Economy & Growth
Example early layout:
---
Mid Game (~3-10 hours)
Goal: Automate blue science (oil processing), build a rail system, and defend against increasing biter attacks.
#### Gameplay Loop
#### Combat & Interaction
#### Exploration
#### Economy & Growth
Example mid-game project: Set up a dedicated train line bringing iron ore from a distant patch to smelters near your base. Unload into chests and belt to furnaces.
---
Late Game (~10-30 hours)
Goal: Automate yellow and purple science (high tech), build a rocket silo, and launch the rocket.
#### Gameplay Loop
#### Combat & Interaction
#### Exploration
#### Economy & Growth
Example late-game task: Build a blue circuit production facility with 15 assembly machines, each surrounded by beacons with speed modules, and fed by belts or bots.
---
Endgame (Post-Rocket / Megabase)
Goal: After launching the first rocket, continue to expand indefinitely. Infinite research (mining productivity, bot speed, etc.) requires space science from rocket launches with satellites.
#### Gameplay Loop
#### Combat & Interaction
#### Exploration
#### Economy & Growth
Example endgame build: A dedicated 1k SPM base using a main bus design with 16 blue belts of iron and copper, 8 belts of green circuits, and a rail network supplying ore from patches 5000 tiles away.
---
Additional Notes
Game Tips
Game Tips
Beginner Tips
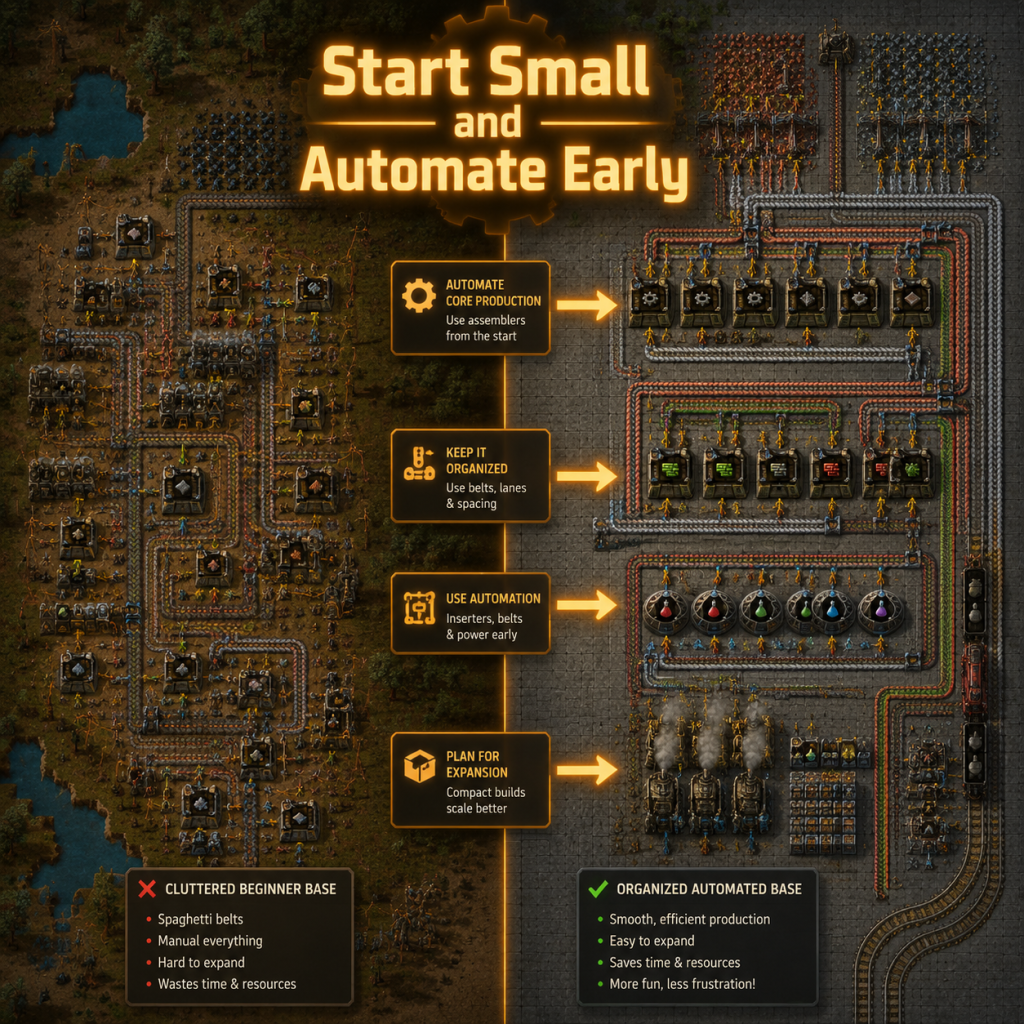
#### Start Small and Automate Early
- Tip: As soon as you have a few iron and copper plates, build an automated setup for red science packs (automation science). Use a single assembler for gears, then feed those into assemblers for science.
- Why: Hand-crafting everything becomes a bottleneck. Automating science from the start lets you research faster, unlocking belts, inserters, and other essentials that dramatically speed up expansion.
- When: Immediately after your first 10-20 iron plates are smelted.
- Tip: Create a centralised "bus" of belts carrying key resources (iron plates, copper plates, steel, circuits, plastic) in one direction, then pull off what you need for each production block.
- Why: A main bus simplifies scaling and troubleshooting. You can easily see what’s running low and add more smelting or production lines without rebuilding everything.
- When: Once you unlock splitters and underground belts (red/green science). For beginners, 4-8 lanes initially; later expand to 16+ lanes.
- Tip: Learn basic production ratios. For example, 1 stone furnace smelts 1 iron/copper ore per second. To fully saturate a yellow belt (15 items/s), you need 15 furnaces per side.
- Why: Overbuilding or underbuilding wastes resources and space. Correct ratios ensure smooth flow without backups or shortages.
- When: Start applying from mid-game (green science) onward. Use the Factorio Calculator website or in-game crafting speed tooltips.
- Tip: Keep an eye on your pollution cloud. It triggers biter attacks. Build walls and turrets (gun turrets with yellow ammo first) around your base perimeter, especially near pollution sources (smelters, boilers, steam engines).
- Why: Biters attack only when pollution reaches their nests. Containing pollution buys you time; active defense prevents destruction of key structures.
- When: As soon as you start burning coal for power (steam engines).
- Tip: Transition to a modular base layout. Use a grid of rail-supported blocks (e.g., 3x3 chunks) each dedicated to a single product (green circuits, red circuits, etc.). Use trains to move materials between blocks.
- Why: This design is highly expandable and future-proof. You can add new blocks without tearing down existing ones. Perfect for mid-game when iron/copper patches deplete.
- When: After you have construction robots and rails unlocked (blue science). Start with a small 100x100 block pattern.
- Tip: Use chain signals before junctions and rail signals after. Build stackers (parking bays) at each unloading station so trains queue without blocking the main line.
- Why: Proper signals prevent deadlocks and increase throughput. Stackers ensure continuous ore delivery even when multiple trains arrive simultaneously.
- When: When you have more than two trains on a shared rail network. Use 1-4 trains (1 locomotive, 4 wagons) for bulk ore.
- Tip: Replace steam power with solar panels and accumulators once you have advanced circuits. Build solar fields in large arrays (e.g., 24 solar panels + 20 accumulators per roboport coverage area).
- Why: Solar is pollution-free and requires no fuel logistics. Accumulators sustain night operation. The initial cost is high but pays off in infinite free energy.
- When: After you have construction bots (blue science) and a steady supply of green circuits. Use a blueprint book with optimal ratios (0.84 accumulators per panel).
- Tip: Use requester and provider chests with logistic bots to automate repair packs, turret ammo, and construction supplies at your defenses. Also use blueprints to quickly expand smelting arrays.
- Why: Logistic networks dramatically reduce manual travel. Bots automatically deliver items to repair packs, refill turrets, and rebuild destroyed walls. Blueprints allow you to copy/paste entire sections.
- When: After unlocking logistics network (yellow science). Start with a small personal roboport and a few hundred construction bots.
- Tip: For assemblers consuming multiple ingredients, position them so that one assembler outputs directly into another (e.g., copper wire→green circuit assembler). Use long-handed inserters or stack inserters with bonus capacity.
- Why: Direct insertion reduces belt traffic and improves UPS (updates per second) performance. It’s critical for end-game megabases where belt congestion becomes a bottleneck.
- When: On megabases (>1k science per minute) where UPS is precious. For example, directly feed copper wire to green circuit assemblers with a 3:2 ratio.
- Tip: Surround productivity-3 module assemblers with speed-3 beacons to get massive output per machine. Use 8 or 12 beacons per assembler (two rows of 4 or 6).
- Why: Productivity modules reduce resource consumption, but they slow the machine. Beacons with speed modules counteract that, resulting in net resource savings and higher throughput per machine. For example, 12 beacons + prod modules gives ~2.5x output for half the resources.
- When: After you have purple and yellow science and advanced module production. Best applied to expensive recipes like blue circuits, rocket fuel, and rocket control units.
- Tip: Use a mod like LTN (Logistic Train Network) or CyberSyn to dynamically assign trains to stations based on demand. Create depots and use requester/provider stations.
- Why: Vanilla train logic can starve or overflow stations. LTN optimizes train assignments, reduces number of trains needed, and allows easy scaling. Great for bases with many different ores and intermediates.
- When: You’re struggling with vanilla train schedules. Works best with a city block layout and a central depot.
- Tip: For extremely large bases (10k+ SPM), avoid using splitters excessively, minimise belt merging, use direct insertion, and prefer nuclear power (single reactor = 40MW, but use 2x2 layouts for neighbor bonus) over solar for UPS efficiency. Also, limit biters and pollution by disabling expansion or using peaceful mode.
- Why: Factorio’s simulation of belts, inserters, and enemies consumes CPU. Reducing belt length and inserters per item moves UPS. Nuclear power has fewer entities per MW than solar.
- When: When your base runs below 60 UPS, or when planning a megabase from the start.
- Tip: Use the map preview to ensure your starting area has a mix of resources (iron, copper, coal, stone, water) within easy walking distance. Avoid starting too close to large biter nests.
- Why: Starting on poor resources forces you to expand early, which can be dangerous. Water is essential for power and later for oil processing.
- When: In game settings, set resource richness to "very good" for easier early game, or "rail world" for reduced biter expansion.
- Tip: Place radars at regular intervals (every 3-5 chunks) to reveal the map. Build a car or tank equipped with grenades/power armor to scout for new resource patches.
- Why: Radars prevent black spots where biters can expand unnoticed. Active scouting helps you claim rich patches before biters settle on them.
- When: After red/green science, build a few radars. For exploration, use a car with a personal defense laser if possible.
- Tip: If biters are close, attack their nests early (with machine gun/fish/turrets) before they evolve too much. Use turret creep: place a few gun turrets ahead loaded with ammo, then push closer.
- Why: Biter evolution increases with pollution and time. Early clearance gives you safe expansion room and access to larger ore patches. Turret creep is safe and cost-effective.
- When: As soon as you have a dozen turrets and 200 yellow ammo.
- Tip: Build double-layer walls with a gap (dragon’s teeth) in front. Place gun turrets behind the wall, spaced every 2-3 tiles, with piercing ammo.
- Why: Dragon’s teeth slow down biters, making them easy targets. Double walls buy time for turrets to fire. Piercing ammo is essential for medium+ biters.
- When: After red science for walls, but strengthen when you see big biters (green/blue science).
- Tip: Place flamethrower turrets behind walls, fed with light oil or crude oil via pipes. Also put landmines outside the walls.
- Why: Flamethrowers deal area damage and set biters on fire, killing groups efficiently. Landmines are cheap and trivial to replace. Combination is extremely effective against large swarms.
- When: Once you have oil processing (blue science). Flamethrower turrets last forever with minimal maintenance.
- Tip: Build a separate power grid for laser turrets using a switch (connect a power switch to a red wire from a combinator detecting local damage). Only turn on the laser grid when biters attack.
- Why: Lasers drain enormous power even when idle. Switching them off except during attacks saves power and reduces pollution. Use an accumulator charge detector to trigger.
- When: After you unlock lasers (blue science) and have a nuclear or large solar farm.
- Tip: Build an artillery cannon and use it to clear biter nests beyond your pollution cloud. Use an artillery wagon with a dedicated train for remote clearing.
- Why: Artillery can destroy nests from far away, reducing attacks. It also triggers biter rage, so be ready to defend the train with a spidertron or turrets.
- When: After yellow science. Pair with radar to target.
- Tip: Use high-yield ore patches first (e.g., >5M iron/copper) for smelting. Reserve small patches for outposts or immediate needs. Use productivity modules in miners to stretch resources.
- Why: High-yield patches last longer, reducing need to relocate mines frequently. Productivity modules in miners give free ore over time.
- When: Mid-game onward. Use speed modules only if ore is plentiful.
- Tip: When moving fluids long distances, use underground pipes (max 10 per section) to reduce pipe length and pressure drop. Use pumps at regular intervals on very long runs.
- Why: Long pipes reduce flow rate dramatically. Underground pipes count as a single segment for length calculations. Pumps restore pressure.
- When: For oil outposts or water to boilers. Keep pipe segments under 60 tiles without pump.
- Tip: Automate stone brick early for walls and furnaces. Use electric furnaces for smelting steel (2:1 iron:steel ratio). For high volume, use steel furnaces early then electric after solar/ nuclear.
- Why: Stone bricks are needed for concrete and walls. Electric furnaces can be beacon-moduled later. Steel is a key ingredient in many advanced items.
- When: Start making bricks manually or with a small stone smelter right after red science.
- Tip: Save your best designs (smelting arrays, science setups, mall) as blueprints. Use the blueprint library (in-game) to sync across saves via the Factorio.com account.
- Why: Blueprints accelerate building and ensure consistency. You can share designs with others or reuse them in future runs.
- When: Start using blueprints as soon as you have construction bots.
- Tip: Create a central area that supplies all building materials: belts, inserters, assemblers, furnaces, pipes, power poles, rails, etc. Use requester chests to feed assemblers and provider chests to store outputs.
- Why: A mall eliminates the need to hand-craft items for expansion. You can grab stacks of everything you need and go build.
- When: After logistics network (yellow science). Start small with just belts and inserters.
- Tip: For extremely large bases (1k+ SPM), avoid using too many splitters; prefer direct insertion. Use a single belt for many items (mixed sushi belt) only if necessary. Use the entity count limiter mod or limit biters completely.
- Why: Each splitter and belt segment adds computational load. Sushi belts require complex combinators that drain UPS. A cleaner design reduces UPS footprint.
- When: When your base is above 5k SPM or you notice UPS drops below 55.
- Tip: Use decider combinators to turn on/off production based on resource thresholds (e.g., enable iron gear production only when iron plates > 10k). Use programmable speakers to alert when a buffer runs low.
- Why: Prevents buffer bloat and ensures resources are used efficiently. Also allows priority systems (e.g., send coal to plastics before power).
- When: After you understand basic circuit logic. Start with simple enable/disable conditions on inserters.
- Tip: Equip a car or tank with a personal roboport and a few construction bots. Drive to a new mining outpost, place blueprints, and the bots (from your inventory) will build everything.
- Why: Speeds up outpost construction dramatically. No need to bring materials by belt; you carry them in chests.
- When: After you have a personal roboport (yellow science) and a vehicle.
- Tip: Use the spidertron remote to control multiple spidertrons simultaneously. Set a group of spidertrons to follow each other and give them a remote. They can auto-repair and clear nests.
- Why: The spidertron is a mobile fortress that can navigate rough terrain. Multiple spidertrons with rockets can destroy massive biter bases without risk to the player.
- When: After spidertron research (yellow/purple science). Build 4+ and arm with rockets.
- Tip: Consider quality-of-life mods like:
- Why: These mods reduce tedious micromanagement and help you focus on design.
- When: After a vanilla playthrough, or immediately if you prefer. Most are safe for achievements.
- Tip: Don’t place too many steam engines on one boiler. One boiler (1.8MW) supports up to 2 steam engines (0.9MW each). Use power switch to isolate a steam backup battery. Avoid hand-crafting green circuits past early game—automate them immediately.
- Why: Overloading boilers causes brownouts. Hand-crafting circuits wastes time. Power switches prevent blackouts from solar/accumulator dips.
- When: Learn these early to avoid rebuilding.
#### Build a Main Bus
#### Use Ratios Wisely
#### Manage Pollution
Intermediate Strategies
#### City Block or Bootstrap Base
#### Train Signalling and Stackers
#### Modular Power with Solar Accumulators
#### Bot-Based Construction and Repair
Advanced Optimizations
#### Direct Insertion for High-Throughput
#### Beacon Overlays and Speed Modules
#### Balanced Train Network with LTN or CyberSyn
#### UPS-Friendly Building Techniques
Exploration Tips
#### Map Away From Starting Area
#### Radar Coverage and Recon
#### Early Aggression for Space
Combat Tips
#### Walls and Dragon’s Teeth
#### Flamethrower Turrets and Landmines
#### Laser Turrets with Power Switches
#### Artillery for Clearing Nests
Resource Management
#### Ore Patch Prioritization
#### Fluid Handling Tricks
#### Stone and Brick Production
Build & Economy
#### Blueprint Library
#### The "Mall"
#### Managing UPS in Megabases
Additional Advanced Tips
#### Circuit Network for Dynamic Control
#### Car and Tank with Personal Roboport
#### Spidertron Remote Control
#### Mods to Enhance Experience
- Bottleneck (shows machine status)
- Helmod or Factory Planner (plan production ratios)
- Squeak Through (walk between machines)
- Even Distribution (quickly fill multiple buildings)
- Vehicle Snap (better car/tank handling)
#### Avoiding Common Mistakes
By following these tips, you’ll progress from a struggling engineer to a master of automation. Remember: The factory must grow!
Game Settings
Game Settings
Overview
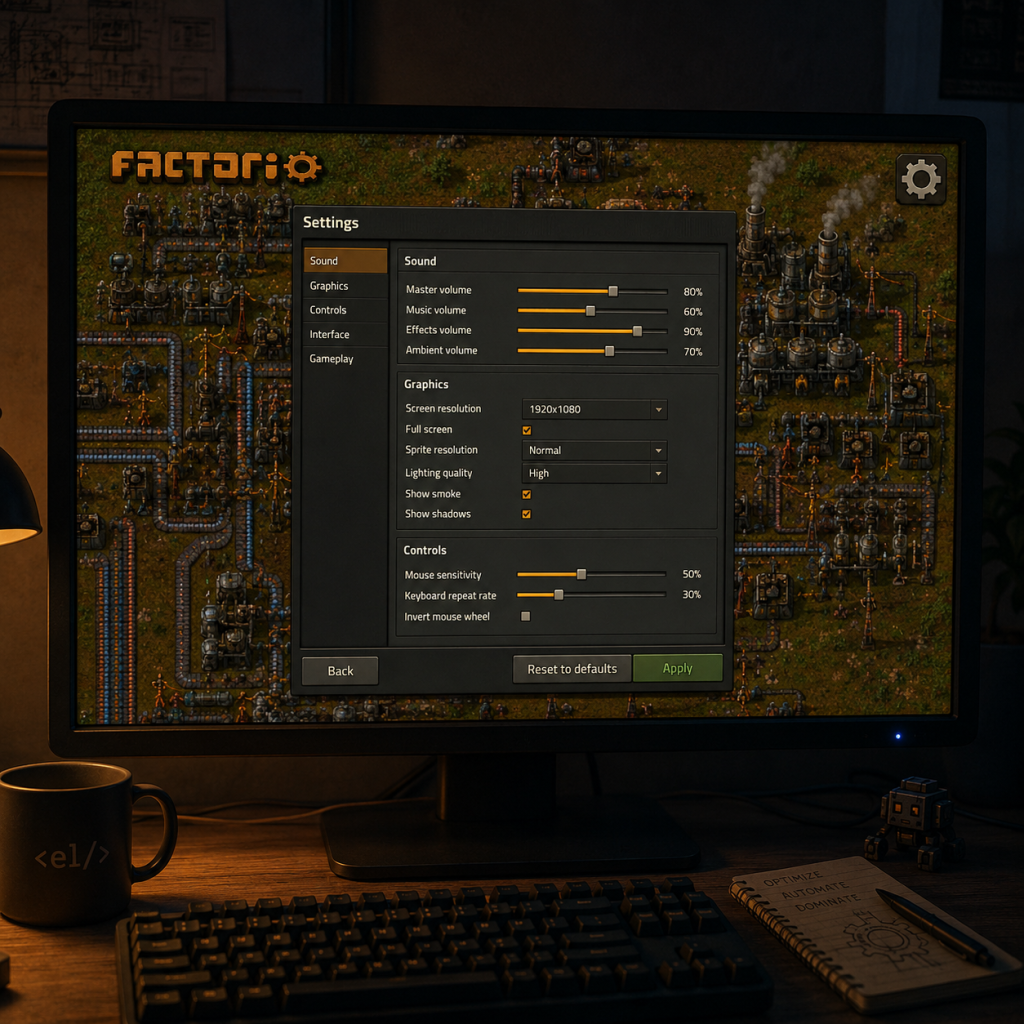
Factorio offers a comprehensive settings menu that allows you to tailor the game to your hardware, preferences, and playstyle. Proper configuration can significantly improve performance, especially on lower-end machines, while also enhancing the quality of life for accessibility and multiplayer. This guide covers all major categories: Graphics, Audio, Controls, Accessibility, Language, Network, and Gameplay. It also provides recommended settings for different hardware levels and highlights settings that are easy to misconfigure.
---
Graphics Settings
Factorio’s graphics settings primarily affect visual fidelity and VRAM usage. The game is CPU‑bound (driven by the simulation update rate, UPS), so reducing graphical load can free up resources for smoother factory operation.
| Setting | Options | Description | Recommendation |
|---|---|---|---|
| Fullscreen | Windowed, Fullscreen, Borderless | Windowed mode may reduce input lag. Borderless is good for alt‑tabbing. | Use Fullscreen for best performance. Borderless if you frequently switch windows. |
| Resolution | List of supported resolutions | Higher resolutions require more GPU power. | Match your monitor’s native resolution. On low‑end, use 1280×720 or 1366×768. |
| VSync | On/Off | Synchronizes frames with monitor refresh. Can introduce input lag. | Off for lower input lag; enable only if you experience screen tearing. |
| Sprite Resolution | High, Normal, Low | Controls the texture quality of sprites. High uses more VRAM. | Low on low‑end/VRAM‑limited systems. Normal is a good balance. High only if you have 2+ GB VRAM. |
| Texture Compression | High, Normal, Low, Off | Compresses textures to save VRAM. Lower quality = less VRAM usage. | Low for 1 GB VRAM or less. Normal for most systems. Off only if you have abundant VRAM (4 GB+). |
| Light Quality | High, Normal, Low | Determines the quality of dynamic lights. Low casts less demanding shadows. | Low for performance. Normal is a good compromise. High only on high‑end systems. |
| Smooth Lighting | On/Off | Enables smoother light gradients. Off reduces GPU load. | Off for performance. On if you don’t notice a drop. |
| Smoke and Clouds | On/Off | Adds animated smoke and cloud particles. Off improves UPS. | Off on low‑end; on for immersion if you have spare CPU cycles. |
| Animated Water | On/Off | Animates water surfaces. Off can give a large performance boost on slow CPUs. | Off on low‑end; on only if you have a strong CPU. |
| Pollution Graphics | On/Off | Shows colored pollution overlay and particles. Off reduces GPU load. | On for gameplay feedback; turn off only if you need extra FPS. |
| Inventory Icons | High, Normal, Low | Quality of item icons in inventories. Low saves VRAM. | Normal by default; Low on very low‑end systems. |
| Graphics Quality Sub‑presets | Very Low, Low, Medium, High, Very High, Ultra | Overrides many individual settings. | Use Medium for most systems; Low or Very Low for low‑end; High/Ultra only for powerful GPUs (e.g., GTX 1060+). |
---
Audio Settings
Audio settings are mostly personal preference but can affect clarity during gameplay.
| Setting | Description | Recommendation |
|---|---|---|
| Master Volume | Overall game volume | Adjust to comfortable level. |
| SFX Volume | Sound effects (machines, combat, alerts) | Keep at 100% for important audio cues. |
| Music Volume | Background music | Reduce or mute if you prefer your own playlist. |
| Ambience Volume | Environmental sounds (wind, water, etc.) | Leave at 50% or reduce – can be repetitive. |
| Play Sound on Error | Plays a sound when a building is missing inputs/outputs | On – helps with troubleshooting. |
| Use Alt View Toggle Sound | Sound when toggling alt mode (recipe icons) | On – provides clear feedback. |
Controls Settings
Factorio allows extensive key rebinding. Some settings are commonly overlooked.
| Key / Setting | Default | Notes |
|---|---|---|
| Move | WASD | – |
| Pick items | Left click | – |
| Open inventory | E | – |
| Craft | Q (empty hand) or click | – |
| Rotate | R | Hold to rotate multiple times. |
| Alt Mode | Alt | Toggles detailed info on buildings (recipes, items inside). Keep this bound – it’s essential. |
| Quickbar slots | 1–0 / Shift+1–0 | Assign items for quick access. |
| Copy/Paste Settings | Shift+Right click / Shift+Left click | Extremely useful for blueprinting. |
| Undo | Ctrl+Z | – |
| Map Zoom | Mouse wheel | – |
| Turbo Speed (Debug) | ` (backtick) | Opens debug menu (not for normal play). |
| Toggle Personal Roboport | P | Enables/disables your construction bots. |
| Screenshot Mode | F12 | Hides UI for clean screenshots. |
---
Accessibility Settings
Factorio provides several settings to improve visibility and readability.
| Setting | Description | Recommendation |
|---|---|---|
| UI Scale | Scales the entire interface (min 50%, max 200%) | 100% is default. Increase to 125% or 150% if you have a high‑DPI monitor or difficulty reading small text. |
| Message Font Size | Size of chat/log messages | Increase if you often miss alerts. |
| Rich Text | Allows colored and stylized text in chat/blueprints | On – helpful for organizing notes. |
| Color Blind Mode | Changes icon colors to be distinguishable (e.g., circuit network colors) | On if you have color vision deficiency. |
| Show Detailed Entity Info | Always shows info (items per second, etc.) | On – provides essential data. |
| Automatic Tooltips | Shows tooltip when hovering over an entity | On – reduces confusion. |
| Minimap | Size / Position | Increase size if you rely heavily on the minimap. |
| FPS/UPS Display | Shows frames per second and updates per second | Enable (via Debug menu) to monitor performance. Press F4 or ` (backtick) then activate "show-fps". |
Language Settings
| Setting | Description | Recommendation |
|---|---|---|
| Game Language | Changes UI, tooltips, and hints. Does not affect mod‐added content. | Select your preferred language. Factorio supports many languages (English, German, French, Japanese, Chinese, Russian, etc.). |
| Font | Substitutes the game font for another installed on your system | Only needed if you have display issues with default fonts. Leave as default. |
Network Settings (Multiplayer)
These settings affect online and LAN gameplay. Incorrect values can cause desyncs or lag.
| Setting | Default | Description | Recommendation |
|---|---|---|---|
| Maximum Upload Speed (kbps) | 10000 | Bandwidth limit for sending commands to other players. | Start with 10000. If you experience lag, lower to 5000. For slow connections (DSL), try 2000. |
| Latency Smoothing (tick) | 3 | How many ticks of input delay to smooth out network jitter. Higher = smoother but more input lag. | Keep at 3 for most connections. Increase to 5–8 if you see frequent stutters. Decrease to 1 only on very low latency LAN. |
| Server Save Frequency | 5 minutes | Auto‑saves for dedicated servers. | Adjust based on your risk tolerance. Too frequent can cause stutter. |
| Steam Networking | Enabled | Uses Steam relays for NAT traversal. | Leave on for public games; turn off for direct LAN connections. |
| Show Network Icons | On | Displays ping and latency on the HUD. | Keep on – helpful to diagnose lag. |
---
Gameplay Settings
These affect automation behavior and quality of life.
| Setting | Default | Description | Recommendation |
|---|---|---|---|
| Autosave Interval | 5 minutes | How often the game autosaves. | Keep at 5 minutes for safety. Increase to 10–15 minutes if saves stutter on slow disks. |
| Show Pollution on Map | On | Displays red pollution cloud on the map. | Off slightly improves performance (less map redraw). Turn off only if you don’t need pollution feedback. |
| Expand Resource Patches | On | Merges ore patches that are close together. | On – makes mining easier. |
| Enemy Settings (in Map Generator) | Default | Controls biter bases, evolution rate, expansion. | For new players, reduce Starting Area Size to small (easier early game) and disable Enemy Expansion. |
| Map Editor Mode | Off | Allows free editing and testing. | Only enable for creative play. |
| Automatic Trash Filter | On (when using logistic slots) | Automatically pushes items from your inventory to the trash slots when you have too many. | On – reduces manual sorting. |
| Always Show Quickbar | On | Keeps quickbar visible even when inventory is open. | On – improves workflow. |
| Mining Drill Breakdown | On | Shows when drills run out of resources. | On – prevents surprise shortages. |
---
Optimized Settings by Hardware Level
#### Low‑End Systems (e.g., Intel HD Graphics, 4 GB RAM, dual‑core CPU)
- Graphics Quality Preset: Very Low or Low
- Resolution: 1366×768 or 1280×720
- Sprite Resolution: Low
- Texture Compression: Low
- Light Quality: Low
- Smooth Lighting: Off
- Smoke and Clouds: Off
- Animated Water: Off
- Pollution Graphics: Off (only if FPS is still low)
- Update Speed (UPS): Limit FPS to 30 via launch option `--max-fps 30` if needed
- Autosave Interval: Increase to 10 minutes to reduce save stutter
- Graphics Quality Preset: Medium or High
- Resolution: 1920×1080
- Sprite Resolution: Normal
- Texture Compression: Normal
- Light Quality: Normal
- Smooth Lighting: On
- Smoke and Clouds: On
- Animated Water: On (turn off if UPS drops below 55)
- Pollution Graphics: On
- Autosave Interval: 5 minutes
- Graphics Quality Preset: Ultra or Very High
- Resolution: 2560×1440 or higher
- Sprite Resolution: High
- Texture Compression: Off (or High)
- Light Quality: High
- Smooth Lighting: On
- Smoke and Clouds: On
- Animated Water: On
- Pollution Graphics: On
- Autosave Interval: 3 minutes (no stutter on fast SSDs)
- First Launch: After installation, the game will ask for language and graphics preset. Choose the preset appropriate for your hardware. You can fine‑tune later.
- Alt Mode: Permanently enable Alt Mode by pressing Alt (the key). This reveals what every building is making – vital for factory management. If you accidentally turn it off, press Alt again.
- Quickbar Customization: Drag items from your inventory to the quickbar (top of screen). You can mirror this for both the toolbar and the main bar. This saves constant menu opening.
- Debug Info: Press F4 (or backtick) to open the debug menu. Enable show‑fps and show‑ups to monitor performance. If UPS drops below 60, reduce graphical settings or simplify your factory.
- Multiplayer Setup: Before hosting, ensure your router forwards port 34197 (UDP) for direct connections, or use Steam/Nat punch‑through. Check Max Upload Speed and Latency Smoothing before inviting players.
- Mod Settings: After installing mods, each mod may add its own settings in the mod settings menu. Check there for per‑mod toggles.
- Map Generator Settings: Spend time here. A common mistake is setting Water too high or Cliffs too frequent, making early expansion frustrating. Adjust Starting Area Size (larger = safer), Iron/Copper/Coal/Stone/Water frequency and richness, and Enemy bases. Presets are available for different difficulty levels.
- Saving Settings: All settings (including keybinds) are stored in `%AppData%/Factorio/config/` (Windows) or `~/.factorio/config/` (Linux/macOS). You can back up this folder to preserve your setup.
#### Mid‑Range Systems (e.g., GTX 1050/RX 560, 8 GB RAM, quad‑core CPU)
#### High‑End Systems (e.g., RTX 2060 Super+, 16+ GB RAM, 6+ core CPU)
---
Easy to Misconfigure Settings
1. Maximum Upload Speed (Network) – Setting too low can cause desyncs when you connect multiple players or place many entities. Too high may flood your connection. Use a speed test and set to ~80% of your upload.
2. Autosave Interval – Setting to 1 minute can cause frequent stuttering on old HDDs; setting to 30 minutes risks losing progress. 5 minutes is safe.
3. Enemy Expansion (Map Generator) – New players often leave this on and get overwhelmed. Disable it on your first playthrough.
4. Rich Text and Color Blind Modes – These are easily overlooked but can dramatically improve readability for users with vision issues.
5. VSync – Many leave it off and notice screen tearing; enable only if you see tearing. Off reduces input lag.
6. Texture Compression – Setting to Off on low‑VRAM systems will cause heavy stuttering or crashes.
---
Special Attention Points During Setup
---
By carefully tuning these settings to your hardware and playstyle, you can enjoy Factorio with smooth performance and minimal frustration. Remember to revisit settings if you add heavy mods (like AngelBob’s or Krastorio 2) as they may require additional optimizations.
Important Notes
Important Notes
Warnings & Pitfalls
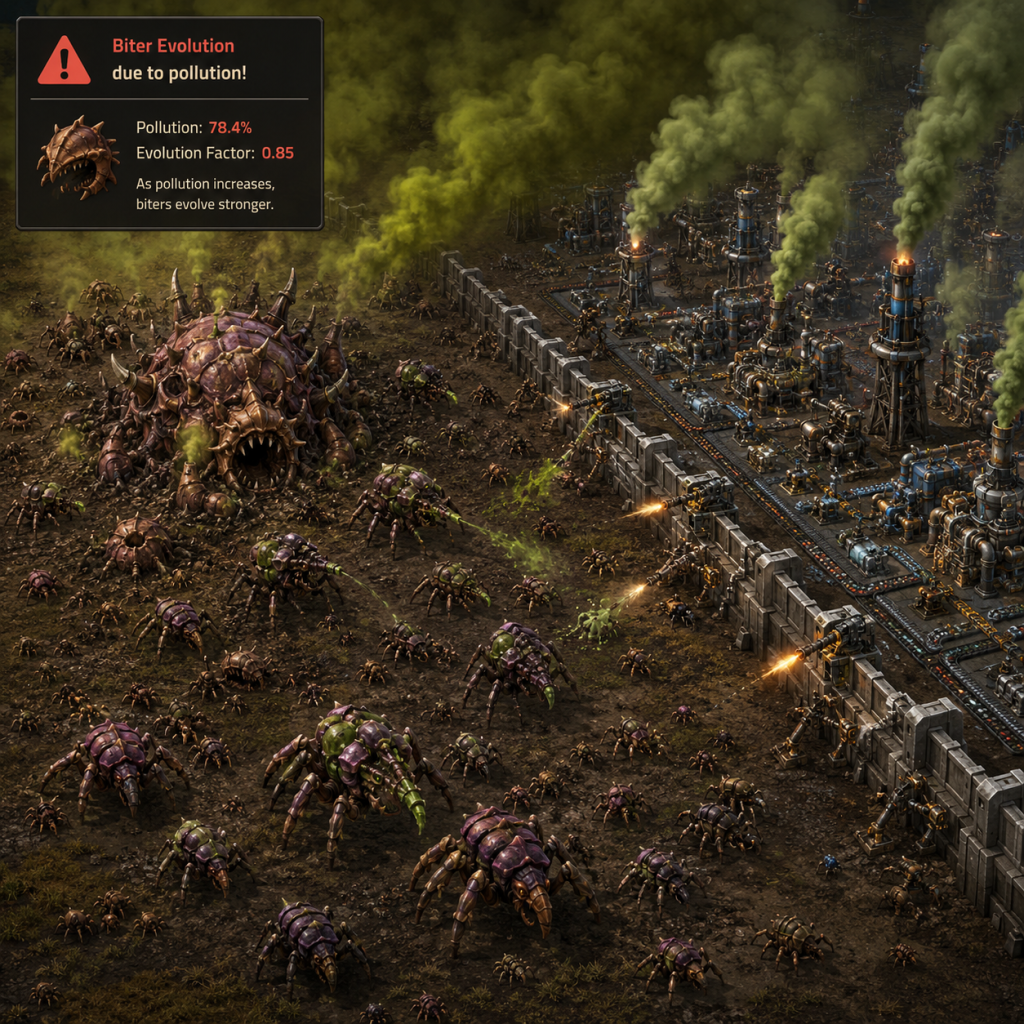
- Biter Evolution: Biters evolve over time based on global pollution and time. If you pollute heavily early on, they will become stronger faster. Build defenses early and consider using efficiency modules or solar power to reduce pollution.
- Cliff Explosives: Cliffs block expansion and can only be removed with cliff explosives (researched later). Plan your base layout to avoid getting trapped by cliffs, or enable 'no cliffs' in world generation to avoid headaches.
- Spitter Ranges: Spitters have longer range than biters. Turret creep (placing turrets forward) can be risky if spitters are present. Use walls and dragon's teeth to slow them.
- Train Collisions: Trains can kill you instantly. Always be aware of rail crossings and signals. Use rail signals properly to prevent collisions.
- Power Outages: A brownout or blackout can cascade: miners slow down → less coal → boilers run dry → more power loss. Always have a backup power source (solar/accumulators) or a separate fuel line for power.
- Resource Patch Depletion: Ore patches deplete over time. You will need to expand and secure new resource outposts. Don't rely on a single patch for late game.
- Uranium Processing: Uranium processing produces U-235 and U-238. U-235 is rare (0.7% chance). If you only get U-238, you'll need to start a Kovarex enrichment process to produce more U-235. Do not discard U-238; you need it for ammo and fuel cells.
- Terrain Changes: Once you place landfill or concrete, you cannot undo it easily. If you fill in water, it's permanent (unless you use mods). Plan water access for nuclear power and oil processing.
- Research Choices: Most research is reversible by building science packs, but some technologies (like 'Automation 2' for assembler 2) unlock recipes that require careful balancing. Not irreversible, but poor order can slow progress.
- Mod Enable/Disable: Mods can alter game mechanics drastically. Enabling mods mid-save is allowed but can break mod compatibility. Disabling mods that added items will remove those items from your factory, potentially breaking your base. Test mods in a copy of your save.
- Multiplayer Settings: Once a multiplayer game is started, settings like password, biters, and map exchange string cannot be changed without restarting the server or using commands (which disable achievements).
- Achievements: Using console commands (press ~) or mods that alter gameplay (like 'infinite resources') disables Steam achievements permanently for that save. To get achievements, use a vanilla save or the 'vanilla+' mods that do not enable 'cheat mode'.
- Achievements: Some achievements are time-sensitive or condition-sensitive. For example, 'There Is No Spoon' (launch rocket in 8 hours) requires speedrunning. 'Raining Bullets' (destroy 10k biters) can be missed if you disable biters. Check the achievement list before starting.
- Special Events: Factorio has no limited-time events. However, the campaign and tutorial missions have story elements that are not repeated in freeplay. Play them for lore.
- Modded Content: Wube Software releases experimental versions (0.18, 0.19, etc.) that become stable. New features like 'Spider Vehicle' were added in a major update. If you skip updates, you miss new content. Always update to the latest stable version.
- First Biter Attack: The first biter attack often catches new players off guard. It usually happens after you build your first pollution-creating machines (burner miners, boilers). Prepare with at least a few gun turrets and magazines.
- Oil Processing: Oil is the first major complexity jump. You must understand fluid mechanics, cracking, and heavy/light/petroleum balancing. Watch tutorials or experiment with tanks to buffer.
- Blue Science (Chemical Science Pack): Requires oil products, which introduces sulphuric acid and batteries. This is often the first bottleneck for many players.
- Purple & Yellow Science: These require massive amounts of circuits, engines, and low-density structures. If your base is not scalable, you'll hit a wall.
- Biter Evolution Mid-Game: Around the time you research military science, biters may start sending larger waves with big biters/spitters. Upgrade to red ammo and flame turrets.
- Nuclear Power Setup: Building a nuclear reactor requires complex piping, heat exchangers, steam turbines, and Kovarex enrichment. Mistakes can lead to overheating or waste of resources. Follow a blueprint from the community.
- Handcrafting Everything: Early on, you may be tempted to handcraft many items. This is slow and inefficient. Automate circuits, inserters, belts as soon as possible. Handcrafting is only for quick tasks.
- Overbuilding Early: Building huge arrays of furnaces or miners before you have the infrastructure to power them or transport materials will create idle machines and waste time. Scale gradually.
- Manual Ore Collection: Mining by hand is only viable for the first few minutes. Build burner miners immediately and connect them to a furnace.
- Running to Resources: If your base is far from resources, build a train or belt network early. Running back and forth is a huge time sink.
- Defense Micro-management: Relying on manually repairing walls or refilling turrets is unsustainable. Automate ammo production and use repair packs with robots (logistic bots) for advanced defense.
- Factorio Multiplayer: Factorio has no official anti-cheat system. However, server admins can enable 'whitelist' or 'password' to control access. Most public servers have rules against griefing (destroying other players' entities) and stealing resources. Be respectful.
- Modded vs Vanilla Servers: Joining a modded server without the required mods will fail. Ensure you have the exact same mod list and version as the server.
- Headless Server: To run a dedicated server, download the headless version from the official site. It does not require a GUI.
- Console Commands: Using commands (like /c game.player.blueprint_to_force()) in multiplayer often requires admin permission. Typing commands without permission may kick you.
- Anti-Cheat for Speedruns: For leaderboards (like Speedrun.com), you must play vanilla without any mods or console commands. Even using 'alt-mode' is allowed, but not any script mods.
- Frequent Saves: Factorio auto-saves every few minutes (configurable). However, manual saves are crucial before major expansions, new tech unlocks, or risky actions (e.g., exploring near a huge biter nest).
- Limit Save Number: The game can handle many saves, but autosave count is limited to prevent storage issues. Increase the autosave count in settings if you want more backups.
- Separate Saves for Experiments: If you want to try a new base design or mod, copy your save file (in the 'saves' folder) to a new name. This avoids corrupting your main progress.
- Cloud Save: Steam Cloud syncs saves across devices. However, if you play on Nintendo Switch or multiple PCs, be aware of potential conflicts. Turn off cloud sync for Factorio if you frequently switch saves.
- Blueprint Library: Blueprints are stored in a separate file (`blueprint-storage.dat`). Back this up separately if you spend much time designing blueprints.
- Map Exchange String: When creating a new game, you can copy the map exchange string at the start. Save this string somewhere; it allows you to recreate the exact same world (including terrain and resource placement) in another save or for multiplayer.
- Main Bus: A main bus (centralized belt highway for iron, copper, green circuits, steel, etc.) simplifies expansion and organization. New players often build spaghetti buses and later wish they had a main bus.
- Ratios: Understanding ratios simplifies planning. For example, 1 gear assembler supports 10 red science assemblers. Use online calculators or the Factorio cheat sheet.
- Alt Mode: Press Alt to toggle display of item icons on machines and chests. This helps immensely in identifying assemblers and belts. Many beginners don't use it.
- Copy/Paste Settings: Shift+right-click on a machine to copy its recipe/configuration, then shift+left-click to paste onto another. This speeds up setup of multiple machines.
- Undo: You can press Ctrl+Z to undo blueprint placement or deconstruction. Limited but helpful.
- Train Signals: Train signals split the track into blocks. Only one train per block. Chain signals prevent deadlocks. Use chain signals before intersections and rail signals after. For two-way tracks, ensure signals are paired.
- Solar Power Ratios: 0.84 accumulators per solar panel (in vanilla) during daylight to provide constant power overnight. Build in multiples of that ratio.
- Roboport Coverage: Construction robots can only reach items within your personal roboport range (orange). If you place a blueprint outside range, robots will not build it. Use the 'roboport' in the blueprint or build a network of roboports.
- Module Usage: Efficiency modules reduce pollution and power drain, useful in early/mid game. Speed modules increase output but consume more power and pollution late game. Productivity modules are king for infinite resource savings (place in assemblers making circuits and science).
- Beacon Overlap: Beacons can affect multiple machines if placed in a grid pattern. The optimal layout for speed beacons is often a 'bacon sandwich' (row of assemblers, row of beacons, row of assemblers).
- Spidertron: The spidertron is a versatile vehicle that can walk over cliffs, small bodies of water, and has a large equipment grid. Research it early for exploration (needs yellow science).
Irreversible Choices
Missable Content
Difficulty Spikes
Grinding Traps
Online Etiquette & Anti-Cheat Notes
Save Management Advice
Things Players Commonly Regret Not Knowing Earlier
All Game Items
All Game Items
Factorio features a vast array of items, each serving a specific role in automation, defense, or progression. This guide categorizes every essential item, from raw materials to endgame equipment, with details on acquisition, utility, and important interactions.
Raw Materials
| Item | Source | Primary Uses | Notes |
|---|---|---|---|
| Iron Ore | Mining iron patches | Smelted into iron plates. | The backbone of early automation. Rich patches near starting area. |
| Copper Ore | Mining copper patches | Smelted into copper plates. | Used for circuits and wires. |
| Coal | Mining coal patches | Fuel, plastic, grenades, coal liquefaction. | Also used in furnaces and boilers. |
| Stone | Mining stone patches | Smelted into stone bricks; also used for rail, walls, and landfill. | Unlimited resource via mining drills. |
| Uranium Ore | Mining uranium patches | Processed into uranium-235 and uranium-238. | Requires sulfuric acid to mine. Unlocked via military science. |
| Crude Oil | Pumpjacks on oil patches | Refined into petroleum gas, light oil, heavy oil. | Found in patches; requires blue science to research. |
| Water | Offshore pumps on water tiles | Used in boilers, steam engines, chemical plants (e.g., sulfuric acid, advanced oil processing). | Infinite, but location matters. |
Intermediate Products
#### Plates and Bricks
- Iron Plate – Smelted from iron ore. Used everywhere: belts, assemblers, iron gear wheels, etc.
- Copper Plate – Smelted from copper ore. Essential for copper cables, circuits, pipes.
- Steel Plate – Created by smelting iron plates (5 iron plates → 1 steel plate). Stronger, used for advanced machines, rails, walls.
- Stone Brick – Smelted from stone. Used for furnaces, walls, concrete, rails.
- Concrete – Crafted from stone brick, iron ore, and water. Speeds up walking and driving, used for sturdy floors.
- Electronic Circuit (Green) – Iron plate + copper cable. Basic circuit, used in almost every advanced item.
- Advanced Circuit (Red) – Electronic circuit + copper cable + plastic. Used in more complex machines, modules, and science packs.
- Processing Unit (Blue) – Electronic circuit + advanced circuit + sulfuric acid. The highest tier circuit, needed for high-tier items, modules, and yellow science.
- Iron Gear Wheel – 2 iron plates. Used in belts, assemblers, inserters, and many machines.
- Pipe – 1 iron plate. Transport fluids; also used to craft pipe-to-ground.
- Pipe to Ground – 10 pipes + 5 iron plates. Underground pipes for fluid logistics.
- Storage Tank – 20 iron plates + 5 pipe. Holds 25,000 units of any fluid.
- Plastic Bar – Coal + petroleum gas. Used for advanced circuits, low-density structures, red/green/yellow science.
- Sulfur – Water + petroleum gas. Used for explosives (sulfur + coal) and sulfuric acid.
- Sulfuric Acid – Iron plate + sulfur + water. Needed for uranium mining and processing units.
- Explosives – Coal + sulfur. Used for rockets, explosive cannon shells, and cliff explosives.
- Rocket Fuel – Light oil + solid fuel (or heavy oil processing). Used in rocket launch and vehicles (spidertron, tank).
- Low Density Structure – Copper plate + steel plate + plastic. Required for rocket silo and rocket parts.
- Processing Unit (mentioned above) – also considered intermediate.
- Petroleum Gas – From oil refining. Used for plastics, sulfur, and other gas-using recipes.
- Light Oil – From oil refining. Used for solid fuel, lubricant, rocket fuel.
- Heavy Oil – From oil refining. Used for lubricant, solid fuel, and cracking to light oil.
- Lubricant – Heavy oil + water. Required for electric engines and blue belts.
- Boiler – Heats water using fuel (coal, solid fuel). Outputs steam to a steam engine.
- Steam Engine – Generates electricity from steam. 1 engine needs ~1.8 boilers to run full capacity.
- Steam Turbine – Advanced steam engine; uses high-temperature steam from heat exchangers (nuclear power).
- Solar Panel – Generates 60 kW during day. Combine with accumulators for stable power.
- Accumulator – Stores up to 5 MJ of electricity. Charges from solar/discharges at night.
- Nuclear Reactor – Burns uranium fuel cells to produce immense heat. Requires heat exchangers and turbines.
- Heat Exchanger – Converts heat from reactor into 500°C steam.
- Heat Pipe – Transports heat from reactor to heat exchangers.
- Uranium Fuel Cell – Crafted from uranium-235 + uranium-238. One cell lasts 200 seconds in a reactor.
- Used Up Uranium Fuel Cell – Byproduct; can be reprocessed (with Kovarex) into uranium-238.
- Pistol – Starting weapon. Very weak.
- Submachine Gun (SMG) – Requires military science. Better than pistol.
- Shotgun – Good damage up close. Ammo: shotgun shells, piercing shotgun shells.
- Combat Shotgun – Upgraded shotgun with higher damage and fire rate.
- Rocket Launcher – Fires rockets (explosive rocket, atomic bomb). Area damage.
- Flamethrower – Fires fire at enemies. Uses crude oil or light oil as ammo. Very effective against groups.
- Artillery Cannon – Placeable defensive structure? Actually, it's a train wagon or turret: Artillery Turret and Artillery Wagon. Long-range, high damage, manual or automatic targeting.
- Gun Turret – Early turret, fires pistol or SMG ammo. Cheap and effective for a while.
- Laser Turret – Uses electricity. High range, accurate, no ammo cost. Heavy power drain.
- Flamethrower Turret – Uses fluid, great for clearing groups.
- Artillery Turret – End-game area defense. High explosion range, long range.
- Artillery Shell – Ammo for artillery turret/wagon.
- Shell – Ammo for tank cannon.
- Cannon Shell – Explosive variant.
- Explosive Cannon Shell – Extra AoE.
- Atomic Bomb – Crafted from uranium-235 and blue circuit. Massive explosion. Only use far from base.
- Land Mine – Explodes when enemies walk over. Deals area damage.
- Discharge Defense – Vehicle equipment that zaps enemies in a radius.
- Light Armor – 400 HP, 2 equipment slots.
- Heavy Armor – 650 HP, 5 equipment slots. Researched early.
- Modular Armor – 750 HP, 10 equipment slots. Allows power armor grids.
- Power Armor – 1000 HP, 15 equipment slots. Unlocked with blue science.
- Power Armor MK2 – 1250 HP, 25 equipment slots. Endgame armor.
- Personal Battery – Stores 100 kJ. Small.
- Personal Battery MK2 – Stores 1000 kJ. Larger.
- Portable Solar Panel – Generates 10 kW during day.
- Exoskeleton – Increases movement speed by 30% (stacks). High power drain.
- Personal Roboport – Allows the player to build from a distance with construction robots. Ranges: Roboport (orange), Roboport MK2 (blue, larger range, faster charging).
- Energy Shield – Absorbs damage (life). Recharges from personal battery. MK1 (50 shield HP), MK2 (100 shield HP).
- Night Vision – Improves visibility at night.
- Personal Laser Defense – Shoots lasers at nearby enemies. High power drain.
- Discharge Defense – Emits a shockwave; requires remote to activate.
- Belt Immunity Equipment – Prevents the player from being moved by belts (but not transport belts). Useful for building over belts.
- Car – Fast ground transport. Can mount a machine gun. Requires fuel.
- Tank – Heavy armored vehicle with cannon and machine gun. Can destroy trees and rocks. High fuel consumption.
- Spidertron – Four-legged walker. Climbs over obstacles, carries rocket launcher, and has a personal roboport. Can be equipped with exoskeletons and shields. The ultimate combat vehicle.
- Locomotive – Rail vehicle. Couple with cargo wagons or fluid wagons.
- Cargo Wagon – Carries items.
- Fluid Wagon – Carries fluids.
- Artillery Wagon – Mobile artillery.
- Transport Belt – Yellow belt. Carries items at 15 items/sec (per belt side).
- Fast Transport Belt – Red belt, 30 items/sec.
- Express Transport Belt – Blue belt, 45 items/sec.
- Underground Belt – Yellow, red, blue variants. Move items underground for up to a certain distance.
- Splitter – Yellow, red, blue variants. Splits belts, filters, balances.
- Loader – (Vanilla doesn't have loaders unless modded) Use inserters.
- Burner Inserter – Uses fuel (coal). Slow, but self-powered. Can grab from ground.
- Inserter – Electric. 0.6 cycle time.
- Long-handed Inserter – Longer reach.
- Fast Inserter – 0.25 cycle time.
- Filter Inserter – Uses circuits to filter items.
- Stack Inserter – Moves up to 12 items at once.
- Stack Filter Inserter – Combines stacking and filtering.
- Bulk Inserter (mod?) Not in vanilla; instead stack inserters.
- Stone Furnace – Smelts 1 ore at a time.
- Steel Furnace – Faster, 2x speed.
- Electric Furnace – No fuel, uses electricity. 2x speed, can use modules.
- Assembling Machine 1 – Basic 1.5x crafting speed, 2 module slots. Can only craft with 2 ingredients.
- Assembling Machine 2 – 0.75 crafting speed? Actually 0.75? Wait: AM1 speed 0.5, AM2 speed 0.75, AM3 speed 1.25. AM2 has 2 module slots, AM3 has 4.
- Assembling Machine 3 – Highest tier, 4 module slots.
- Chemical Plant – For fluid reactions. 3 module slots.
- Oil Refinery – Processes crude oil into fractions.
- Centrifuge – Processes uranium ore into isotopes. Also for Kovarex enrichment.
- Electric Mining Drill – Mines resources using electricity. Can be equipped with modules.
- Pumpjack – Extracts crude oil.
- Offshore Pump – Extracts water.
- Logistic Robot – Flies between chests to satisfy requests. Needs roboport network.
- Construction Robot – Builds and repairs items within roboport coverage.
- Roboport – Provides logistic/construction network coverage, charges robots, and stores them.
- Storage Chest – For logistic network: stores items for robots to deliver.
- Requester Chest – Requests items from logistics network.
- Passive Provider Chest – Provides items to network (robots can take from it).
- Active Provider Chest – Actively empties its contents into storage chests when connected to network (robots immediately move items away).
- Buffer Chest – Acts both as requester and provider.
- Automation Science Pack (Red) – Iron gear wheel + copper plate.
- Logistic Science Pack (Green) – Inserter + transport belt.
- Military Science Pack (Gray) – Piercing round magazine + grenade + turret.
- Chemical Science Pack (Blue) – Advanced circuit + engine unit + sulfur.
- Production Science Pack (Purple) – Electric furnace + production science? Actually: Electric mining drill + electric furnace + processing unit? Wait: Production pack = Electric furnace + Productivity module 1 + Electric mining drill? No – It's electric mining drill + electric furnace + productivity module (mod? Actually vanilla: Production science pack = 1 electric mining drill + 1 electric furnace + 2 productivity module 1? Check: Recipe: 1 electric mining drill + 1 electric furnace + 1 productivity module 1 + 1 pistol? No. Accurate recipe: 1x Electric Mining Drill + 1x Electric Furnace + 1x Productivity Module 1 + 1x Pistol? No, it doesn't need pistol. Real: 1 Electric Mining Drill + 1 Electric Furnace + 1 Productivity Module 1 = 2 Production Science Packs. (Source: game wiki).
- Utility Science Pack (Yellow) – Processing Unit + Electric Engine Unit + Low Density Structure + Speed Module 1? Actually: 1 Processing Unit + 1 Electric Engine Unit + 1 Low Density Structure + 1 Speed Module 1 = 2 Packs.
- Space Science Pack (White) – From rocket launches. 1000 each launch.
- Speed Module – Increases crafting speed but increases power consumption and pollution. Tiers 1-3.
- Productivity Module – Adds chance to produce extra output without extra materials. Increases pollution and reduces speed. Tiers 1-3. Not allowed in drills or other machines that produce raw resources (except ore? Actually can be used in electric mining drills but not in pumpjacks? Allowed in electric drills? With restrictions.)
- Efficiency Module – Reduces power consumption and pollution. Tiers 1-3. Great for early green builds.
- Beacon – Transmits module effects to nearby machines. Allows stacking bonuses from multiple beacons.
- Iron Axe – Starting tool. Cannot be upgraded; replaced by electric mining drills.
- Steel Axe – Researched? Actually no; you can manually craft a steel axe if you have steel? Not in game. In Factorio, you cannot craft tools; you use assemblers and the player's hand strength is constant. The only consumable tools are repair packs and construction robots.
- Repair Pack – Repairs damaged structures. Used by player or construction robots.
- Blueprint – Created by clicking the blueprint tool. Records a selection of structures.
- Deconstruction Planner – Select objects to deconstruct by robots.
- Upgrade Planner – Upgrade belts, inserters, etc. to higher tiers.
- Blueprint Book – Stores multiple blueprints.
- Red / Green / Blue / Yellow / Purple / White Signal – These are constant combinators, but also items in the logistic system.
- Combinators – Decider, Arithmetic, Constant. Used for circuit networks.
- Power Switch – Connect/diconnect sections.
- Programmable Speaker – Plays sound when circuit condition met.
- Radar – Scans terrain, reveals map. Requires power.
- Cliff Explosives – Destroys cliffs. Once per cliff.
- Landfill – Converts water to land. Crafted from stone.
- Rocket Part – Assemble in rocket silo. 100 needed per launch.
- Satellite – Place inside rocket silo to enable launching (also used for infinite research, but not necessary for win).
- Fish – Found in water. Can be used to fill health for player? Actually fish can be placed in a furnace to produce something? No, fish are useless except as a crafting material? In Factorio, fish can be consumed by a player? Not originally; they are only used in mods. In vanilla, fish are decorative and can be used in labs? No, they have no function. They can be picked up and placed as decoration.
- Wood – From trees. Used for chests and small power poles early. Later obsolete. Can be burned as fuel.
- Raw Wood – Trees give raw wood, then you process? Actually trees drop wood directly.
- Wooden Chest – 10 wood. Early storage.
- Iron Chest – 8 iron plates. Larger.
- Steel Chest – 28 steel plates. Largest vanilla chest.
- Storage Tank – Holds fluids.
- Barrel – Used to transport fluids in barrels. Filled and emptied in assemblers.
- Empty Barrel, Crude Oil Barrel, Heavy Oil Barrel, etc. – Barreling fluids for belts/trains.
- Productivity Modules + Speed Beacons in high-end assemblers (blue circuits, rocket parts) drastically reduce resource consumption.
- Efficiency Modules in early miners reduce pollution, delaying biter aggression.
- Personal Roboport + Construction Robots allows rapid building from blueprints.
- Laser Turrets + Accumulators + Solar create a self-sustaining defense line.
- Nuclear Power + Kovarex Enrichment ensures infinite fuel.
- Spidertron with Exoskeletons and Shields makes exploring and clearing nests easy.
#### Circuits
#### Gears & Pipes
#### Plastics & Explosives
#### Fluids
Power & Energy Items
Defense Items (Weapons, Ammo, Turrets, Walls)
#### Ammo & Turrets
#### Armor & Equipment
#### Armor Modules (Equipment)
#### Vehicles
Logistics & Automation Items
#### Belts & Transport
#### Inserters
#### Assemblers & Machines
#### Robotics
Science Packs & Research
Modules (Upgrades for Machines)
Consumables & Tools
Other Notable Items
Tips for Synergies
Remember to secure your logistic network chests from clogging by limiting storage chest slots and using passive providers appropriately. For further details on specific recipes, consult the in-game Recipe Browser (Alt+R or the crafting menu).
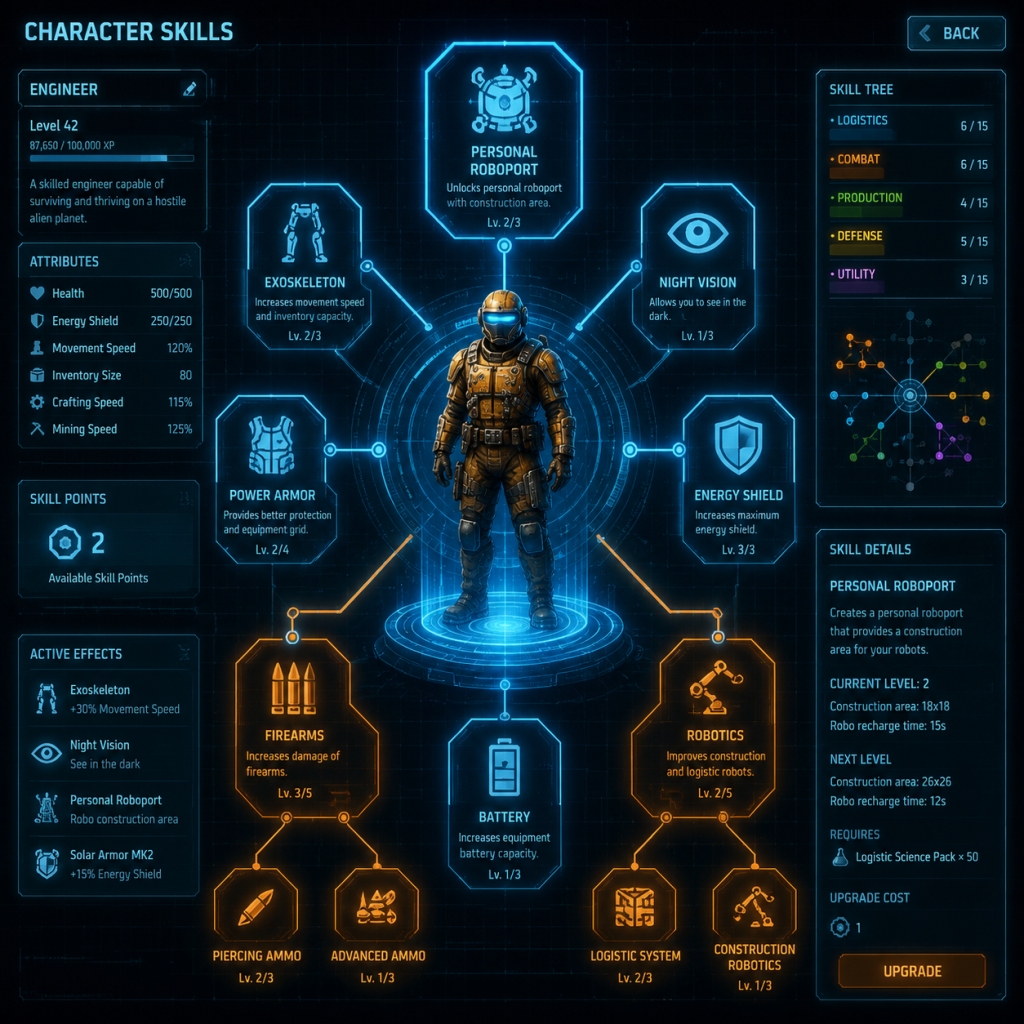
Character Skills
Character Skills
Overview
In Factorio, the engineer is the sole playable character. Instead of a traditional skill tree, abilities are unlocked through technology research and equipment crafting. This guide categorizes every active and passive skill, including combat, movement, construction, and utility abilities. Each entry describes the skill's effects, cooldowns (where applicable), upgrades, combos, synergies, recommended builds, and optimal usage scenarios.
---
Combat Skills
Combat skills range from basic weapons to advanced capsules and remote tools. All weapons benefit from damage upgrades researched in the "Combat" tech tree (e.g., Bullet Damage, Shotgun Shell Damage, Rocket Damage). Ammunition and energy required for weapon usage are not considered cooldowns but resource constraints.
#### 1. Hand Mining
- Unlock: Default.
- Effect: Pick up resources, ores, or items from entities. Slow and inefficient.
- Cooldown: None (continuous action).
- Upgrades: None.
- Combos/Synergies: Used only in the first few minutes; automate quickly.
- Recommended Build: None – avoid relying on it.
- When to Use: Only when no burner miner or electric miner exists.
- Unlock: Starting equipment.
- Effect: Fires pistol magazines. Low damage, slow fire rate.
- Cooldown: Fire rate ~3.33 per second.
- Upgrades: Magazine damage upgrades.
- Combos/Synergies: Early game defense against small biters.
- Recommended Build: Replace with submachine gun as soon as possible.
- When to Use: First few wanderer attacks, emergency defense.
- Unlock: Military tech (requires red/green science).
- Effect: Fires piercing or standard magazines rapidly. High fire rate, moderate damage.
- Cooldown: Fire rate ~10 per second.
- Upgrades: Magazine damage, piercing ammo (better damage, armor penetration).
- Combos/Synergies: Use with energy shield and heavy armor for mid-game combat.
- Recommended Build: Piercing rounds + heavy armor + personal laser defense.
- When to Use: Primary weapon until combat shotgun or rocket launcher.
- Unlock: Military tech.
- Effect: Fires a spread of pellets. High close-range damage, poor accuracy at distance.
- Cooldown: Fire rate ~1.8 per second.
- Upgrades: Shotgun shell damage, piercing shells.
- Combos/Synergies: Effective against worms and groups. Use with slowdown capsules.
- Recommended Build: Piercing shotgun shells + energy shield + exoskeleton (to close distance).
- When to Use: Clearing nests before rocket launcher is available.
- Unlock: Military tech (requires blue science).
- Effect: Faster fire rate and larger spread than basic shotgun. Best for run-and-gun.
- Cooldown: Fire rate ~2.5 per second.
- Upgrades: Same as shotgun.
- Combos/Synergies: Pair with personal defense laser and exoskeleton for mobile assault.
- Recommended Build: Full heavy armor + 2 exoskeletons + energy shield + fusion reactor.
- When to Use: Mid-game nest clearing and biter waves.
- Unlock: Military tech (requires blue science).
- Effect: Fires rockets (explosive, atomic). High area damage, slow fire rate.
- Cooldown: Fire rate ~1 per second.
- Upgrades: Rocket damage, rocket speed (for accuracy). Atomic bomb is a late-game upgrade.
- Combos/Synergies: Atomic bomb can one-shot large biter nests. Use with poison capsules for crowd control.
- Recommended Build: Atomic bombs + personal roboport for repairs + spidertron artillery.
- When to Use: Late-game biter base removal, atomic artillery support.
- Unlock: Military tech (requires blue science).
- Effect: Sprays fire over a cone. Damage over time and area denial. Uses crude oil or heavy oil.
- Cooldown: Continuous stream; no cooldown but consumes fuel.
- Upgrades: Fire damage, range.
- Combos/Synergies: Ineffective against biters that can avoid flames; combine with slowdown capsules or walls.
- Recommended Build: Heavy armor + legs (exoskeleton) for mobility; use from behind walls or turrets.
- When to Use: Clearing trees, denying biter approaches, controlling nest regrowth.
- Unlock: Military tech (requires red/green science).
- Effect: Thrown explosive, 2-second fuse. Area damage, destroys cliffs and trees.
- Cooldown: Throwing animation ~1 second, then 0.5 seconds before next throw. Max stack 20.
- Upgrades: Grenade damage, cluster grenade (splits into multiple explosions).
- Combos/Synergies: Clear large biter clusters quickly. Pairs with slowdown capsules to keep enemies grouped.
- Recommended Build: Use as primary early anti-nest weapon. Carry 2-3 stacks.
- When to Use: Early nest clearing, clearing trees for new builds.
- Unlock: Military tech (requires blue science).
- Effect: Creates a cloud of poison gas dealing damage over time. Does not damage structures or worms immediately (worms take damage). Lasts ~30 seconds.
- Cooldown: No cooldown, but limited by capsule count (100 per stack). Requires poison capsule item.
- Upgrades: Capsule damage (affects poison), capsule range.
- Combos/Synergies: Throw multiple to stack damage. Immune to poison yourself? (No, you take damage if in cloud). Use with slowdown or defender capsules.
- Recommended Build: Bomb nests from distance; use with vehicle to throw while driving.
- When to Use: Clearing nests safely from range, especially effective against worms.
- Unlock: Military tech (requires blue science).
- Effect: Slows enemies in area by 50% (or more with upgrade). Lasts ~20 seconds.
- Cooldown: No cooldown.
- Upgrades: Capsule range, slowdown effect duration.
- Combos/Synergies: Essential for defensive turret lines; combine with flamethrower or destroyer capsules.
- Recommended Build: Always carry 1-2 stacks in mid-game combat loadout.
- When to Use: When facing fast biters (spitters, behemoth), before throwing explosive capsules.
- Unlock: Military tech (requires blue science).
- Effect: Spawns a flying combat bot that attacks nearby enemies. Lasts ~30 seconds, then self-destructs. Max active defenders limited by follower count (from upgrades).
- Cooldown: No cooldown (but each capsule spawns one follower).
- Upgrades: Follower count (up to 100), follower damage, follower speed.
- Combos/Synergies: Use with distractor capsules to draw aggro, or with destroyer capsules for damage. Good for personal defense.
- Recommended Build: Max follower count + exoskeleton + personal laser for a mobile army.
- When to Use: Early to mid-game offensive pushes; patrol defense.
- Unlock: Military tech (requires blue science).
- Effect: Spawns a stationary bot that emits a loud noise to attract enemies. Bots fight but mainly serve as decoys.
- Cooldown: No cooldown.
- Upgrades: Follower count, bot health.
- Combos/Synergies: Combine with defender/destroyer capsules to protect your bots. Use while approaching nests.
- Recommended Build: Pair with destroyer capsules for crowd control.
- When to Use: Drawing biters away from turrets or while clearing with artillery.
- Unlock: Military tech (requires purple/yellow science).
- Effect: Spawns a powerful combat bot that deals high damage. Max followers are separate from defender/distractor pool.
- Cooldown: No cooldown.
- Upgrades: Follower count (up to 100 combined with others? Actually separate pool – check).
- Combos/Synergies: Best offensive capsule. Combine with personal lasers and exoskeleton.
- Recommended Build: Max destroyer followers, use with shield and armor.
- When to Use: End-game biter clearing, especially behemoths.
- Unlock: Requires personal discharge defense equipment.
- Effect: Fires an electric shock to nearby enemies when activated. Stuns and damages. Cooldown based on energy supply.
- Cooldown: Energy recovery dependent on battery/fusion reactor.
- Upgrades: None.
- Combos/Synergies: Emergency escape tool; use with energy shield.
- When to Use: When surrounded by biters; get out of tight spots.
- Unlock: Military tech (requires red/green science).
- Effect: Placeable explosive mine. Triggered by enemy stepping on it. Does area damage.
- Cooldown: Placing one at a time; no cooldown but consumes item.
- Upgrades: Mine explosion damage, range.
- Combos/Synergies: Lay corridors for biters; combine with walls and slow effect.
- Recommended Build: Use for defensive perimeter rather than active skill.
- When to Use: As a defensive layer around base.
- Unlock: Requires artillery turret and remote research.
- Effect: Targets a location; then artillery fires shells automatically if ammo is present.
- Cooldown: Fire rate of turret; remote just designates target.
- Upgrades: Artillery range, shell damage.
- Combos/Synergies: Use to clear biter bases from far away; pair with radar for remote viewing.
- Recommended Build: Essential for megabase expansion.
- When to Use: Late-game biter base suppression.
- Unlock: Spidertron vehicle research.
- Effect: Control a remotely piloted Spidertron. Click on map to move; right-click for attack commands.
- Cooldown: None.
- Upgrades: Spidertron equipment grid (personal roboport, lasers, exoskeleton, etc.).
- Combos/Synergies: Use multiple spidertrons as a mobile army. Equip with rockets and shields.
- Recommended Build: One Spidertron with personal roboport and construction bots for automated building; another with lasers for combat.
- When to Use: End-game base building and exploration; biter clearing without personal risk.
- Default speed: ~3.2 tiles/second.
- Upgrades: Exoskeleton (each adds +50% speed); up to 2 in armor Mk2, 4 in Mk3 (with modular armor? Actually armor grid size increases).
- Synergies: Speed is crucial for evading biters and quick construction.
- Recommended Build: Always equip at least one exoskeleton after unlocking.
- Unlock: Research Car (red/green), Tank (blue), Spidertron (purple/yellow).
- Effect: Ride inside vehicle. Car fast but fragile; Tank durable with ranged weapon; Spidertron can walk over cliffs and water.
- Cooldowns: None (fuel consumption).
- Upgrades: Vehicle armor, weapon upgrades (machine gun, cannon, rockets).
- Combos: Tank used for early biter clearing; Spidertron for end-game.
- Recommended Build: Tank with personal defense lasers; Spidertron with exoskeleton and roboport.
- When to Use: Traveling long distances, biter base clearing.
- Unlock: Research Construction Robotics and Personal Roboport (blue science).
- Effect: Enables construction and repair bots to deploy from your inventory to build/repair items in range (upgradable range).
- Cooldown: Only limited by bot availability and recharge rate.
- Upgrades: Roboport range, bot speed, number of bots.
- Combos/Synergies: Use with ghost building – place ghosts and bots will build automatically.
- Recommended Build: Essential for mid-game and beyond; equip in armor grid.
- When to Use: All construction tasks; repair during combat.
- Unlock: Research Automation (starting).
- Effect: Mark entities for deconstruction (bots will remove them).
- Cooldown: None.
- Upgrades: Filter mode (only specific items).
- Combos/Synergies: Use with blueprints to rebuild layouts.
- Recommended Build: Always in inventory.
- When to Use: Reorganizing base, removing old builds.
- Unlock: Research (free).
- Effect: Save a copy of a structure layout; place ghosts for instant building.
- Cooldown: None.
- Upgrades: Advanced blueprint (include circuit conditions, logistics).
- Combos/Synergies: Pair with personal roboport for instant construction.
- Recommended Build: Use for mega-base design.
- When to Use: Repeating identical build patterns.
- Unlock: Research (terraform – red/green).
- Effect: Place landfill tile over shallow water, creating land.
- Cooldown: None (consumes stone).
- Upgrades: None.
- Combos/Synergies: Use with cliff explosives to flatten terrain.
- Recommended Build: Essential for base expansion near water.
- When to Use: When base space is limited by water.
- Unlock: Research (requires blue science).
- Effect: Blow up a cliff tile, removing it permanently.
- Cooldown: None (consumes explosives).
- Upgrades: None.
- Combos/Synergies: Clear paths for belts and trains.
- Recommended Build: Carry stack for base layout.
- When to Use: When cliffs obstruct factory expansion.
- Unlock: Research Railway (red/green).
- Effect: Enter locomotive; accelerate and brake. Can switch to automatic driving via schedule.
- Cooldown: None.
- Upgrades: Fuel types (coal, solid fuel, rocket fuel, nuclear fuel) affect speed and acceleration.
- Combos/Synergies: Use remote train control with signals.
- Recommended Build: Use nuclear fuel for max speed.
- When to Use: Transporting resources long distances; personal train travel.
- Unlock: Research Logistics network (yellow/purple).
- Effect: Set personal logistic requests: bots will bring items to your inventory when you are in range of a roboport.
- Cooldown: None.
- Upgrades: Larger request slots.
- Combos/Synergies: Setup requester chests to supply construction bots.
- Recommended Build: Essential for mid-game to maintain inventory without manual picking.
- When to Use: Always active – ensures you have needed items for building.
- Effect: Automatically attacks enemies within range. Requires energy.
- Upgrades: Mk2 (more damage).
- Synergies: Pairs with exoskeleton and energy shields; conserves ammo.
- Recommended Build: Use in heavy armor for constant DPS.
- When to Use: Any combat situation; reduces need for manual shooting.
- Effect: Absorbs damage before health; recharges over time.
- Upgrades: Mk2 (more capacity).
- Cooldown: Recharge delay after hit (1 second), then regen ~3 seconds.
- Synergies: Essential for survival in heavy combat.
- Recommended Build: Always use as many shields as possible; balance with batteries.
- When to Use: All biter attacks; essential for deathworld.
- Effect: Stores energy for shield and lasers. Needs to be charged by solar or fission reactor.
- Upgrades: Mk2 (larger capacity).
- Synergies: Pair with solar panels or fusion reactor.
- Recommended Build: At least one battery in early game until fusion reactor.
- When to Use: When energy demand exceeds supply.
- Effect: Increases movement speed by 50% each. Stack up to 4 (with Mk3 armor).
- Upgrades: None (single version).
- Synergies: Essential for kiting enemies and quick base building.
- Recommended Build: At least two exoskeletons for combat mobility.
- When to Use: Always equip for general movement; remove only for extreme combat tank builds.
- Effect: Removes darkness effect; enables clear vision at night.
- Upgrades: None.
- Synergies: Useful for base building during night cycle.
- Recommended Build: Optional; can replace with solar-powered lamps.
- When to Use: If you dislike darkness or need to see without lighting.
- Effect: Extends range for construction bots (Mk1: 30x30 area, Mk2: 50x50 area; also 10 bots max vs 25).
- Upgrades: Mk2 from Space science.
- Synergies: Use with blueprint ghosts.
- Recommended Build: Upgrade to Mk2 as soon as possible.
- When to Use: Any building project.
- (Note: There is no official active defense module; the Discharge Defense is considered active defense.)
- Effect: Generates 750kW (Mk1) or 1.5MW (Mk2) of power for equipment.
- Upgrades: Mk2 from space science.
- Synergies: Powers shields, lasers, exoskeleton; essential for heavy combat build.
- Recommended Build: Use Mk2 in end-game armor.
- When to Use: When multiple exoskeletons and shields are equipped.
- Effect: Toggle satellite view. Can place blueprints and issue commands (artillery, spidertron) from map.
- Cooldown: None.
- Upgrades: Radar coverage reveals map.
- Combos: Use with remote control for long-distance building.
- When to Use: Planning expansions, scouting without traveling.
- Effect: Quick access to items; placement of buildings or equipment.
- Cooldown: None.
- Upgrades: More quickbar rows (via inventory upgrade).
- When to Use: Efficient building.
- Effect: Place ghost of an item without building it; bots will construct later.
- Cooldown: None.
- When to Use: When personal roboport is active or planning ahead.
- Effect: Connect circuit network wires automatically when placing combinators/poles.
- Cooldown: None.
- When to Use: Complex automation.
- Effect: Adjust camera zoom level.
- Cooldown: None.
- When to Use: Always.
- Effect: Manual crafting. Limited to personal inventory crafting speed (base 0.5 per second; upgraded with crafting speed research? No, only assemblers).
- Cooldown: Continuous.
- When to Use: Early game only; automate ASAP.
- Skills: Hand mining, pistol, grenades.
- Equipment: Iron armor, stone furnaces.
- Build: Focus on gun turrets and wall construction; use grenades for nests.
- Skills: Combat shotgun, defender capsules, slowdown capsules.
- Equipment: Heavy armor (or modular armor with 1 shield, 1 laser, 1 battery).
- Build: Use walls and gun turrets; personally lead assault with shotgun and defenders.
- Skills: Spidertron remote, atomic bombs, artillery remote.
- Equipment: Power armor Mk3 with 2 fusion reactors, 2 exoskeletons, 4 energy shields, 2 personal defense lasers, personal roboport Mk2.
- Build: Let spidertron and artillery clear while you construct remotely.
#### 2. Pistol
#### 3. Submachine Gun (SMG)
#### 4. Shotgun
#### 5. Combat Shotgun
#### 6. Rocket Launcher
#### 7. Flamethrower
#### 8. Grenades
#### 9. Poison Capsules
#### 10. Slowdown Capsules
#### 11. Defender Capsules
#### 12. Distractor Capsules
#### 13. Destroyer Capsules
#### 14. Discharge Defense Remote
#### 15. Land Mines
#### 16. Artillery Remote
#### 17. Spidertron Remote
---
Movement & Utility Skills
#### 1. Running
#### 2. Vehicle Operation (Car, Tank, Spidertron)
#### 3. Personal Roboport
#### 4. Deconstruction Planner
#### 5. Blueprints
#### 6. Landfill
#### 7. Cliff Explosives
#### 8. Train Driving
#### 9. Logistics System (Personal Logistics)
---
Equipment-Based Abilities
Equipment modules are placed in the armor’s equipment grid. They provide passive or active abilities.
#### 1. Personal Defense Laser
#### 2. Energy Shield
#### 3. Battery
#### 4. Exoskeleton
#### 5. Nightvision
#### 6. Personal Roboport Mk1 & Mk2
#### 7. Active Defense Modules
#### 8. Fusion Reactor
---
Special Moves & Interface Skills
#### 1. Map Mode (M key)
#### 2. Quickbar Usage (1-9, Q, etc.)
#### 3. Ghost Building (Shift + Click)
#### 4. Auto-Connect Wires (Red/Green)
#### 5. Zooming (Scroll wheel)
#### 6. Crafting Menu (E)
---
Recommended Builds
#### Early Game (First 2 hours)
#### Mid-Game Deathworld
#### End-Game Megabase
---
Conclusion
Every skill in Factorio has its place, but the true power lies in automating them. Focus on early upgrades for weapons and capsules, and invest in exoskeletons and personal roboports for mobility and construction efficiency. Adapt your skill usage to the current threat level and factory size. The engineer is a versatile tool; use your abilities wisely to conquer the planet.
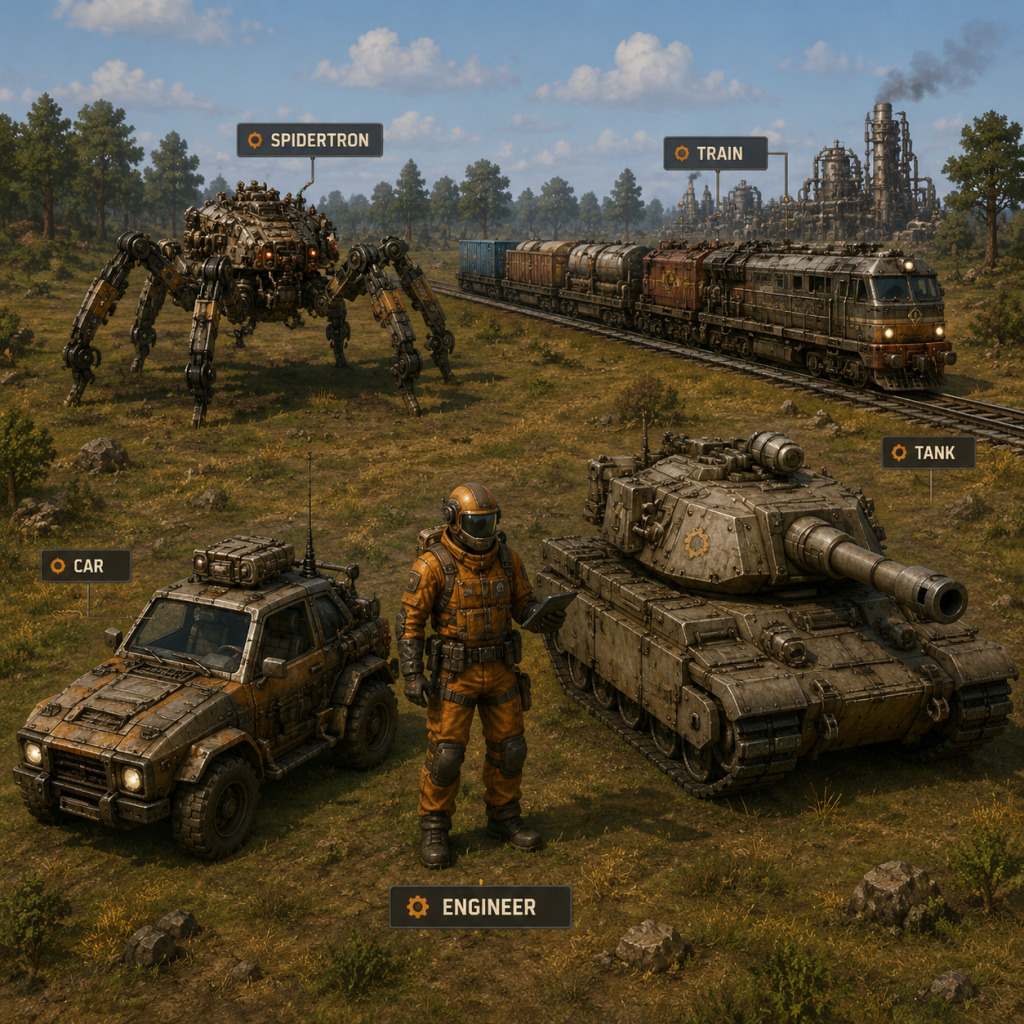
Characters & Roles
Characters & Roles
Factorio features a single playable character—the Engineer—but offers a variety of vehicles and equipment that effectively define different roles and playstyles. This guide introduces every player-controlled unit, their background, strengths, weaknesses, unlock conditions, recommended builds, and team synergy in multiplayer.
1. The Engineer (Default Character)
#### Background
You are an engineer who crash-lands on an alien planet. With nothing but your wits and a portable crafting interface, you must build an automated factory from scratch. You are a lone survivor, but in multiplayer multiple engineers can cooperate.
#### Strengths
- Versatility: Can mine, craft, build, fight, and drive all vehicles.
- Personal Crafting: Can craft items manually (slowly) without machines.
- Equipment Grid: Can be upgraded with modules (exoskeletons, shields, batteries, personal roboports) that drastically enhance capabilities.
- Research-driven: All upgrades are unlocked via technology, not leveling.
- Fragile: Low base health (75 HP). Dies quickly without armor or shields.
- Slow: Base movement speed is modest; vehicles or exoskeletons are needed for fast travel.
- Limited Inventory: Base inventory space is finite, expandable through toolbelt research and armor upgrades.
- Cannot Fight Swarms Alone: Without weapons and armor, easily overwhelmed by even small biter groups.
- Early Game: Focus on hand-mining, building first furnaces and assemblers. Use pistol for defense.
- Mid Game: Research armor (e.g., Heavy Armor, Modular Armor), shotgun, car. Automate belts and inserters. Drive the car for scouting and resource collection.
- Late Game: Equip Power Armor MK2 with exoskeletons, personal roboports, fusion reactors, and shields. Use tank or spidertron for combat. Deploy construction and logistics bots from your armor.
- Early: Iron Armor, Pistol, small power pole.
- Mid: Heavy Armor, Shotgun, Car (with fuel). Modular Armor with basic batteries and solar panels.
- Late: Power Armor MK2 with:
- Weapons: Combat Shotgun or Rocket Launcher for mid-range; Flamethrower for clearing nests; Destroyer capsules (combat bots) for swarms.
- Division of Labor: One engineer focuses on mining/smelting, another on science/defense. Use shared blueprints.
- Complementary Builds: Engineer A runs a combat build (tank + shields), Engineer B a builder build (exoskeletons + roboports).
- Shared Resources: All engineers share the same research and economy.
- Vehicle Pool: Share a single train network; use multiple tanks or spidertrons for coordinated attacks.
- High Speed: The car can outrun most biters and is excellent for exploration.
- Weapon Mount: Equipped with a machine gun that fires forward (fuel-limited but infinite ammo with automation).
- Storage: Has a small trunk (80 slots) for carrying resources.
- Terrain: Handles grassy plains and desert well; poor on water (cannot cross).
- Fragile: Low durability; can be destroyed by biter attacks or trees (crashes).
- Off-road Handling: Slows down in forests and on rough terrain. Easily stuck on rocks or cliffs.
- Turning Radius: Wide turns; not agile in tight spaces.
- No Passenger Armament: Only the driver can shoot; passengers cannot fire.
- Fuel: Solid fuel or rocket fuel for best acceleration and top speed.
- Upgrade: Research Automobile Cannon (damage upgrade).
- Add-ons: Cannot be equipped with modules or armor; only the built-in machine gun.
- Defensive Driving: Keep a repair pack in trunk; avoid biters when possible.
- Scout Role: One player drives the car to explore map and share radar vision.
- Resource Transport: Use multiple cars to ferry materials between bases before train network is built.
- Escort: Combine with a tank for combat support; car stays behind tank.
- High Durability: 500 HP plus damage reduction; can withstand significant punishment.
- Area Damage: Cannon fires explosive shells that deal splash damage to groups of enemies.
- Machine Gun: Secondary weapon for smaller enemies.
- Ramming: Can crush small trees and biters without slowing down.
- Storage: 80-slot trunk for ammo and loot.
- Slow Speed: The tank is slower than the car and on foot (without exoskeletons).
- Fuel Consumption: High fuel usage; needs frequent refueling.
- Cannon Range: Short range; enemies can hit you before you fire.
- Ammo Reliance: Requires cannon shells and machine gun ammo; must be automated.
- Cannot Cross Water: Same as car.
- Fuel: Rocket fuel for best acceleration.
- Ammo: Carry a stack of cannon shells (explosive for groups, regular for spawners) and plenty of piercing rounds.
- Upgrades: Research Physical Projectile Damage and Cannon Shell Damage repeatedly.
- Repair Packs: Carry repair packs in trunk; a second player can repair from outside.
- Tank + Engineer: Engineer on foot repairs tank while driver shoots.
- Multiple Tanks: Coordinate attacks from different angles to split biter aggro.
- Spidertron Support: Spidertron can cross cliffs and repair tanks from above.
- Speed: Trains are the fastest travel method on straight tracks.
- Capacity: Cargo wagons can hold up to 40 stacks; fluid wagons up to 25,000 fluid units.
- Range: Unlimited; can travel across the map as long as tracks are laid.
- Automation: Can be set to automatic mode with schedule; player can also drive manually.
- Defense: Locomotive can be armored (via upgrades) and can ram biters on tracks.
- Track Dependency: Requires extensive rail network. Cannot maneuver off-track.
- Turn Radius: Long trains need large loops or roundabouts.
- Crash Risk: Player-driven trains can collide with obstacles or other trains, causing damage and destruction.
- No Weapons: Locomotive has no built-in weapons; defenseless unless armed wagons (e.g., artillery wagon) are attached.
- Fuel Requirement: Locomotives consume fuel (coal, solid fuel, rocket fuel, nuclear fuel).
- Fuel: Nuclear fuel (from uranium processing) provides massive acceleration and top speed.
- Train Composition: For manual driving, use 1 locomotive + 1 cargo wagon (for supplies). For combat, attach an artillery wagon (requires Artillery technology, Yellow + Purple science).
- Signals: Place chain signals before intersections to prevent player collisions.
- Personal Protective Equipment: When driving a train through biter territory, wear power armor with shields (in case of derailment).
- Shared Rail Network: All players use the same tracks, signals, and stations. Designate specific stations for each resource.
- Train Builder: One player specializes in laying rails and building the train network; others supply materials.
- Artillery Train: Combine with radar and repair packs to have a mobile base clearing unit (requires teamwork to defend while artillery fires).
- Climbing: Can traverse cliffs, water shallows (though it slows down), and rough terrain. No need for bridges.
- Equipment Grid: Has a large grid (up to 8×8 = 64 slots) for personal equipment like shields, exoskeletons, roboports, fusion reactors, batteries. This makes it extremely customizable.
- Armament: Three rocket launchers that can fire rockets, explosive rockets, atomic bombs, or other ammo. Can switch between ammo types.
- Remote Control: Can be ordered to move autonomously (via the Spidertron remote or map view) even without a player inside.
- Passenger Capacity: Can carry one passenger (another player) in addition to the pilot.
- High HP: 1000 HP (plus shields from equipment). Very durable.
- Expensive: Requires a lot of resources, including processing units, electric engines, and low-density structures.
- Slow Without Boost: Base movement speed is slower than a car; exoskeletons are essential for decent speed.
- Ammo Hungry: Rockets and especially atomic bombs are complex to produce.
- Large Hitbox: Bigger than car/tank, can be hit by more spitters in swarms.
- Cannot Drown: Can walk over water at normal speed? Actually, it moves slower in water, but cannot sink. Still, water is a minor obstacle.
- Power Generation: 3 Portable Fusion Reactors (or 4 for high consumption builds).
- Speed: 2 Exoskeletons for decent speed; more if you want very fast (but drains power).
- Shields: 2–4 Energy Shields MK2 for near-invincibility.
- Roboport: 1 Personal Roboport MK2 for building; 2 if you want larger construction range.
- Batteries: Fill remaining grid with batteries (if needed) or additional exoskeletons.
- Weapons: Fill rocket launchers with explosive rockets for general combat; keep a stack of atomic bombs for emergencies (but beware area damage).
- Leg Upgrades: Research Spidertron legs (from military tech) to increase movement speed (each level adds 15% speed).
- Scout and Commander: One player uses Spidertron to scout and mark biter nests; others follow with tanks.
- Construction Partner: The Spidertron's roboport can deploy bots while another player supplies items via logistic requests.
- Passenger Role: A second player rides in the Spidertron to repair, reload ammo, or use their own personal roboport to build.
- Ranged Support: The Spidertron can stand on cliffs while allies on ground engage; with atomic bombs, it can clear areas before ground troops advance.
- Extreme Range: The artillery shell range is huge (up to 7 chunks away) and can automatically target nests revealed by radar.
- Area Damage: Shells explode on impact, damaging all enemies within radius.
- Manual Control: Player can aim and fire manually from the wagon's seat.
- Autonomous Fire: When on automatic train schedule, it will fire at any revealed nests within range.
- Requires Train Track: Can only be used on rails; stationary mode also needs a placed Artillery Turret (different entity).
- Ammo Intensive: Artillery shells are expensive (steel, explosives, processing units).
- Slow Reload: Rate of fire is slow; need multiple wagons for continuous barrage.
- Provokes Biters: Firing attracts overwhelming biter attacks; need extensive defenses around the train.
- Train Setup: 2 locomotives facing both directions (to reverse), 2–4 Artillery Wagons, 1 Cargo Wagon full of rails and repair packs, 1 Cargo Wagon with ammo.
- Defense: Place a personal roboport in the lead locomotive to deploy builder bots for repairing track damage. Have a supply train with repair packs and rails.
- Fuel: Nuclear fuel for fast acceleration to escape after firing.
- Artillery Train Crew: One player drives, one rides shotgun to repair, one operates manual fire for precision.
- Combined Arms: Use Spidertrons or tanks to mop up the biters that rush in after artillery fire.
- Base Defense Integration: Connect Artillery Wagon to circuit network (via circuit condition) to fire only when enough ammo is present.
#### Weaknesses
#### Playstyle
The Engineer is the core unit. Early game, you run between resources and machines, manually crafting. Mid-to-late game, you rely on automation and rarely craft manually. Your playstyle evolves from a hands-on builder to a manager, using vehicles for transport and personal roboports for construction.
#### Unlock Conditions
The Engineer is available from the start—no unlock required. All upgrades are researched via the technology tree.
#### Recommended Equipment / Builds
- 2–4 Exoskeletons (for speed)
- 2 Portable Fusion Reactors (power)
- 4 Energy Shields (survivability)
- 1 Personal Roboport MK2 (construction range)
- 1 Night Vision (optional)
- Batteries (if not enough power)
#### Team Synergy (Multiplayer)
---
2. The Car
#### Background
A 4-wheel drive vehicle that provides fast ground transportation. Powered by solid fuel, liquid fuel, or rocket fuel. Unlocked through the Automotive technology (requires Red & Green science).
#### Strengths
#### Weaknesses
#### Playstyle
Use the car for early-to-mid game scouting, resource gathering, and quick travel between outposts. Avoid direct combat with medium or big biters—ramming is risky. Best used as a transport and occasional hit-and-run vehicle.
#### Unlock Conditions
Research Automotive (Red + Green science packs). Then craft a Car at an assembler (requires engine, iron plates, steel, etc.).
#### Recommended Equipment / Builds
#### Team Synergy
---
3. The Tank
#### Background
A heavily armored combat vehicle armed with a cannon and machine gun. Designed for clearing biter nests and heavy combat. Unlocked via the Tank technology (requires Blue science).
#### Strengths
#### Weaknesses
#### Playstyle
The tank is your primary combat vehicle for clearing biter bases mid-to-late game. Drive into nests and fire cannons to destroy spawners, run over small biters, and use machine gun for spitters. Highly effective when supported by personal shields and repair packs.
#### Unlock Conditions
Research Tank technology (Blue science + Red + Green). Craft at an assembler (requires engine, steel, gear wheels, etc.).
#### Recommended Equipment / Builds
#### Team Synergy
---
4. The Locomotive & Wagon (Trains)
#### Background
Trains are not single characters but a modular vehicle system consisting of locomotives and cargo/fluid wagons. They are essential for bulk transport over long distances. Unlocked via Railway technology (Red + Green science).
#### Strengths (as a player-operated unit)
#### Weaknesses (as a player-operated unit)
#### Playstyle
Trains are primarily for automated resource transport. As a player-controlled unit, you can ride a train manually to quickly travel across the factory. Use trains to reach remote outposts or for combat by attaching an artillery wagon or flamethrower turret wagon (via mods). In vanilla, trains are fragile and not ideal for direct combat.
#### Unlock Conditions
Research Railway (Red + Green) to unlock rails, locomotives, cargo wagons. Fluid wagon requires Fluid Handling (Blue science).
#### Recommended Equipment / Builds
#### Team Synergy
---
5. The Spidertron
#### Background
A large spider-like walking vehicle equipped with four legs, three rocket launchers, and an equipment grid. It can climb over cliffs, trees, and other obstacles. The ultimate endgame combat and utility vehicle. Unlocked via Spidertron technology (requires Yellow + Purple science).
#### Strengths
#### Weaknesses
#### Playstyle
The Spidertron is a mobile command center. Use it to explore the far reaches of the map, clear massive biter nests, build outposts via personal roboport, and reposition quickly. With a full equipment grid, it becomes a fearsome war machine. Also useful as a mobile construction platform: equip a personal roboport and construction bots to build blueprints remotely.
#### Unlock Conditions
Research Spidertron technology (Yellow + Purple science packs). Requires 2500 of each? Actually requires 1000 red/ green/ blue/ gray? The technology requires 1000 each of Automation science (red), Logistic science (green), Chemical science (blue), Military science (gray), Production science (purple), Utility science (yellow), and Space science (white) – total 7000 packs. Then craft a Spidertron at an assembler.
#### Recommended Equipment / Builds
#### Team Synergy
---
6. The Artillery Wagon (Vehicle Attachment)
#### Background
Not a standalone character but a wagon that can be placed on rails and optionally attached to a train. It autonomously fires artillery shells at biter nests within range when in automatic mode. Player can also manually fire it when driving. Unlocked via Artillery technology (requires Yellow + Purple science, as well as Military).
#### Strengths
#### Weaknesses
#### Playstyle
Use the Artillery Wagon as an endgame tool to clear large swaths of biter expansion without direct engagement. Best used in a dedicated Artillery Train that goes from outpost to outpost, supported by repair packs and personal shields. Always keep a repair train nearby because biters will attack the train aggressively.
#### Unlock Conditions
Research Artillery (requires Yellow + Purple + Space science? Actually: Artillery requires 1000 of each: Automation, Logistic, Chemical, Military, Production, Utility, and Space – total 7000 packs). Then craft the wagon at an assembler.
#### Recommended Equipment / Builds
#### Team Synergy
---
7. The Rocket Silo (Interactive Structure, not a unit)
While not a character or vehicle, the Rocket Silo is the ultimate goal of the game. It is not player-controlled but is built and supplied by the player. It launches a rocket with a satellite, completing the game. No further details required here.
---
Summary Table of Player-Controlled Units
| Unit | Unlock Science | Key Use | Combat | Storage | Equipment Grid |
|---|---|---|---|---|---|
| Engineer | From start | All-purpose | Yes (equipment) | Evolving | Yes (armor) |
| Car | Red + Green | Transport / Scout | Light (machine gun) | 80 slots | No |
| Tank | Blue | Combat / Nest clearing | Heavy (cannon + MG) | 80 slots | No |
| Locomotive (Train) | Red + Green | Long-distance transport | No (unless artillery wagon) | Varies (wagons) | No |
| Spidertron | Yellow + Purple | Combat / Utility / Building | Very heavy (3 rockets) | 0? (cannot carry items, only equipment) | 8×8 grid |
| Artillery Wagon | Yellow + Purple | Long-range nest clearing | Extreme range | 0 (ammo in separate wagon) | No |
Roles & Playstyles Summary
Even though there is only one character class, different phases and equipment allow distinct roles:
1. Builder: Focus on rapid construction using personal roboport, exoskeletons, and blueprints. Use Spidertron for remote building.
2. Miner / Supplier: Manage outposts, drive trains, use cars for quick resource hauls.
3. Defender: Build walls, turrets, and use tanks or Spidertron for active defense.
4. Explorer: Scout map in a car, place radars, and find resources.
5. Commander: Use Spidertron remote to control a squad of spidertrons or lead teammates in battles.
In multiplayer, players naturally fall into these roles to optimize efficiency. There is no restriction, and any player can switch roles at any time by changing their equipment loadout and vehicle.
---
Conclusion
Factorio's characters and roles revolve around the adaptable Engineer and his expanding garage of vehicles. Master each vehicle's strengths and weaknesses, and coordinate with your team to conquer the alien planet. Remember: the most powerful character is the one with a well-designed factory behind them.
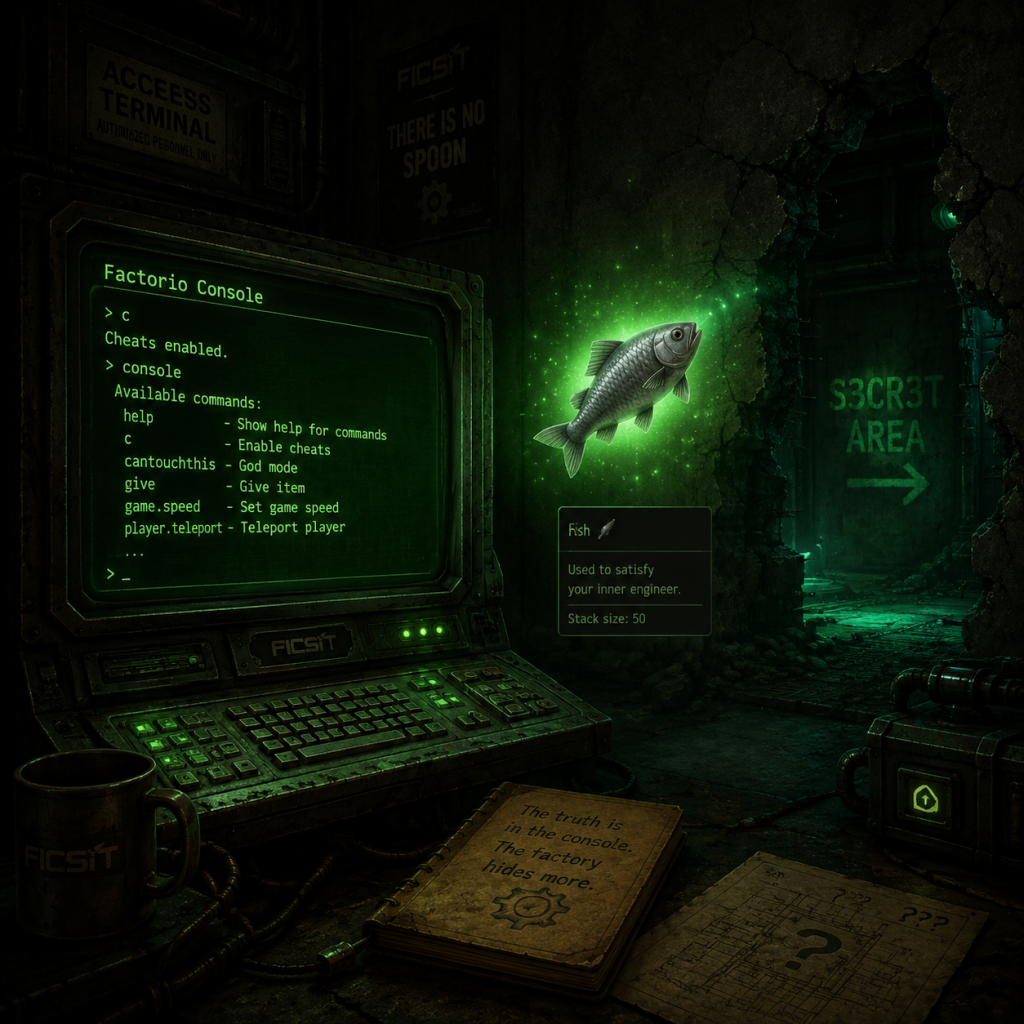
Cheats & Secrets
Overview
Factorio does not feature traditional cheat codes like those found in console games. Instead, it offers a powerful built-in console (accessible by pressing `~` or `/`) that allows you to execute Lua commands for debugging, cheating, or modifying the game world. Additionally, the game includes several Easter eggs, hidden achievements, and developer-intended secrets that reward exploration and creativity. This guide covers all known cheats, commands, secret features, and Easter eggs in the vanilla game.
---
Console Commands (Cheats)
Accessing the Console
- Press ` (tilde) or / (slash) to open the console.
- Type a command and press Enter.
- Use the up arrow to recall previous commands.
- Commands are not saved between sessions unless added to `data-base` via mods.
Enabling Cheat Mode
```
/c game.player.cheat_mode = true
```
This grants infinite health, infinite ammo (for the pistol), and allows instant crafting without resources. Use `/c game.player.cheat_mode = false` to disable.
Useful Cheat Commands
| Command | Effect |
|---|---|
| `/c game.player.insert{name="iron-plate", count=100}` | Adds 100 iron plates to player inventory. Replace `iron-plate` with any item name. |
| `/c game.player.force.research_all_technologies()` | Unlocks all technologies instantly. |
| `/c game.player.force.technologies["automation"].researched=true` | Researches a specific technology (replace `"automation"` with the tech name). |
| `/c game.player.force.disable_research_queue()` | Prevents further research from starting (useful for pausing progress). |
| `/c game.player.manual_mining_speed_modifier = 100` | Increases player mining speed by a factor of 100. |
| `/c game.player.character_running_speed_modifier = 10` | Makes the player run 10x faster. |
| `/c game.survivors = {game.survivors[1]}` | Wipes all other players/survivors (multiplayer). |
| `/c game.player.force.kill_all_enemies()` | Destroys all enemy units on the map (biters, spitters, worms, nests). |
| `/c game.player.force.rechart()` | Reveals the entire map (fog of war removed). |
| `/c game.difficulty_settings.technology_price_multiplier = 0.1` | Sets research cost multiplier to 10% (faster research). |
| `/c game.map_settings.enemy_evolution.time_factor=0` | Stops biter evolution over time. |
Debug Mode (F4/F5)
- Press F4 to open the debug menu. Check boxes to overlay information: `show-player-info`, `show-enemy-expansion-candidates`, `show-pollution`, `show-electric-network`, etc.
- Press F5 to cycle through debug overlays (useful for performance stats like UPS/FPS).
- Factorio automatically saves a replay file in the save folder (e.g., `_autosave3.dat.replay`). You can replay any save by selecting "Replay" in the Load Game menu. This is a developer tool that players can use to review their factory builds.
- In the game files, there is a hidden item called "coffee-mug" (used only in a single unused recipe). It cannot be obtained normally, but using the console command `/c game.player.insert{name="coffee-mug"}` will place a coffee mug in your inventory. Using it gives a brief caffeine boost (no actual effect). It's a nod to the developer's own coffee addiction.
- Fish are normally used as a healing item (5 health each). However, if you equip a fish in your hand and click on a Spidertron (the spider-like vehicle), the Spidertron will play a unique voice line: "A fish! For me? Thanks!" or "I love fish!" (randomly selected). This is a reference to the game's early access days when fish were a meme.
- There is a hidden achievement: "So long and thanks for all the fish" – awarded for launching a rocket with a fish in your inventory. The name is a reference to Douglas Adams' The Hitchhiker's Guide to the Galaxy.
- Zoom out as far as possible in the map view (press M) and look at the sky. You will see a small moon that rotates slowly. This is purely cosmetic and has no gameplay function.
- Trains in Factorio produce a horn sound when passing through a train stop with the "Horn" checkbox enabled. If you listen carefully, the horn sometimes plays a fragment of the classic song "The Entertainer" (the first few notes). This is a subtle reference to old-timey train shows.
Replay System (Hidden Feature)
---
Easter Eggs & Secrets
The Engineer's Coffee Mug
The Fish
The Moon
Train Horn Easter Eggs
Hidden Achievements
| Achievement Name | Requirement | Notes |
|---|---|---|
| So long and thanks for all the fish | Launch a rocket while having at least one fish in your inventory. | Hidden. |
| You Are the Cargo | Let a train run over you while you are in a car or tank. | Hidden. |
| No Time for Chitchat | Launch a rocket within 15 hours of starting a new game. | Hidden. |
| Smoke Me a Kipper | Die from pollution (suffocation) by staying in a highly polluted area without a filter. | Hidden. Reference to Red Dwarf. |
| There is no spoon | Launch a rocket within 8 hours. | Actually visible, but included for completeness. |
The "Credits" Easter Egg
- If you type `/c game.show_credits()` in the console, the game will play the credits sequence as if you just launched a rocket. This is a developer shortcut to test the credits.
- `iron-stick` – a leftover from an old version (no longer used in any recipe).
- `heavy-oil-barrel` – removed in 0.17, but still exists in the game files.
- `assembling-machine-1` with the `burner-source` (the old burner assembler) – spawnable via `/c game.player.surface.create_entity{name="burner-assembling-machine"}`.
- `alien-artifact` – from the pre-0.17 days when biters dropped alien science. Spawning it does nothing.
- On the official Factorio website and in loading screen tips, the game is sometimes jokingly referred to as "Cracktorio" due to its addictive nature. This is not an in-game secret but a community-embraced term.
- When starting a new game, you can enable Peaceful Mode in the map settings. This prevents biters from ever attacking you unless you attack them first. While not a secret, it is often considered a "cheat" for beginners who want to avoid combat entirely.
- As mentioned above, Factorio automatically records replays. This feature is primarily for debugging but is accessible to players. To view a replay, simply select the `.dat.replay` file in the Load Game screen and choose "Replay". You can fast-forward, rewind, and watch your factory evolve.
- This is a developer tool that exposes game internals. While not a secret, many players don't know about it. It can show entity counts, collision boxes, pathfinding data, and more.
- Factorio's console exposes the full Lua API. Players familiar with Lua can script custom actions, from spawning enemies to modifying terrain. This is the same API used by mods.
- `/c game.players["PlayerName"].teleport({x=0, y=0})` – Teleport a player by name.
- `/c game.players["PlayerName"].force.respawn_character()` – Respawn a dead player.
- `/c game.auto_save_disabled = true` – Disable autosaves (useful for reducing lag during massive builds).
- Console commands are case-sensitive and use exact item/technology names. Use the in-game help (`/help`) or the Factorio Wiki for a full list of prototypes.
- Using cheats will disable achievements for that save (permanently). If you want achievements, do not use any `/c` commands.
- Some commands (like `kill_all_enemies()`) can cause performance spikes on large maps.
- The debug overlays (F4) are safe to use and do not disable achievements.
Unused Items & Entities
Using console commands, you can spawn items that are not normally obtainable:
The "Cracktorio" Joke
Peaceful Mode (Map Setting)
---
Developer-Intended Hidden Content
The Replay System
The Debug Menu (F4)
The Lua API Console
---
Multiplayer Cheats (Administrator Only)
If you are the host (or have admin privileges) in multiplayer, you can use the console commands listed above. Additionally, you can use:
---