
Fallout 4
## Fallout 4: Game Introduction **Genre:** Action role-playing game (ARPG) with open-world exploration, first/third-person shooter, survival, and base-building elements. **Developer & Publisher:** Developed by Bethesda Game Studios (the team behind *The Elder Scrolls V: Skyrim* and *Fallout 3*). P...
Download & Installation
Fallout 4: Comprehensive Download & Installation Guide
This guide covers downloading and installing Fallout 4 on all major platforms where it is officially available. Fallout 4 is not available on Nintendo Switch (except via cloud streaming in Japan, which is not covered here) or mobile devices.
Platform Availability Overview
| Platform | Store / Method | Editions Available |
|---|---|---|
| PC (Windows) | Steam, Epic Games Store, Microsoft Store (via Xbox app) | Standard, Game of the Year (GOTY), Digital Deluxe |
| PlayStation 4 / 5 | PlayStation Store, physical disc | Standard, GOTY |
| Xbox One / Series X | S | Microsoft Store, physical disc, Game Pass |
---
System Requirements (PC)
Minimum Requirements
- OS: Windows 7/8/10 (64-bit)
- CPU: Intel Core i5-2300 2.8GHz / AMD Phenom II X4 945 3.0GHz
- RAM: 8 GB
- GPU: NVIDIA GTX 550 Ti 2GB / AMD Radeon HD 7870 2GB
- DirectX: Version 11
- Storage: 30-35 GB (base game + DLC)
- Sound: DirectX compatible
- OS: Windows 10/11 (64-bit)
- CPU: Intel Core i7 4790 3.6GHz / AMD Ryzen 3 1200 3.1GHz
- RAM: 16 GB
- GPU: NVIDIA GTX 780 3GB / AMD Radeon R9 290X 4GB
- DirectX: Version 11
- Storage: SSD with 40 GB free space (for faster loading)
- Sound: DirectX compatible
- PC (Steam): Steam account (free).
- PC (Epic): Epic Games account (free).
- PC (Microsoft Store): Microsoft account (free) and Windows 10/11.
- PlayStation: PlayStation Network account (free for store purchases; PS Plus not required for offline play).
- Xbox: Xbox Live account (free for store purchases; Game Pass required if playing via subscription).
- Optional: Bethesda.net account (required for mods and Creations content on all platforms).
- Digital Download:
- Physical Disc:
- Digital Download:
- Physical Disc:
Recommended Requirements
> Note: The game benefits greatly from an SSD and at least 16GB RAM at higher settings.
---
Account Requirements
---
Step-by-Step Installation for Each Platform
Windows PC (Steam)
1. Launch Steam and log into your account.
2. Purchase or redeem Fallout 4 from the Steam Store. If you own a key, go to `Games > Activate a Product on Steam`.
3. Go to your Library and find Fallout 4 in the list.
4. Click `Install`.
- Choose installation directory (default: `C:\Program Files (x86)\Steam\steamapps\common\Fallout 4`).
- Select additional components (ensure DirectX and Visual C++ redistributables are installed; Steam will handle this automatically).
5. Wait for download & installation (size ~30-35 GB).
6. Once complete, click `Play`.
Windows PC (Epic Games Store)
1. Launch Epic Games Launcher and log in.
2. Go to the Store and search for "Fallout 4".
3. Purchase and add to library.
4. Go to Library, find Fallout 4, click the three dots (`...`) > `Install`.
- Choose install location.
- Install size similar to Steam.
5. Wait for download.
6. Launch from Library or desktop shortcut.
Windows PC (Microsoft Store / Xbox App)
1. Open the Microsoft Store (or Xbox app on Windows 10/11).
2. Search for Fallout 4. Note: The GOTY edition may also be available as a bundle.
3. Purchase (or if you have Game Pass Ultimate/PC Game Pass, it may be included; click "Install" directly).
4. Install – the game will download via the Xbox app/microsoft store.
- Default installation path is restricted (usually `C:\Program Files\WindowsApps`).
5. Wait for completion.
6. Launch from Start Menu or Xbox app.
PlayStation 4 / PlayStation 5
1. On PlayStation home, go to PlayStation Store.
2. Search for "Fallout 4".
3. Select your edition (Standard or GOTY).
4. Purchase and then click Download.
5. The download will start; you can monitor progress in Notifications > Downloads.
6. Once done, the game appears on your home screen.
1. Insert the disc into the console.
2. The game will appear on the home screen with a progress bar for installation.
3. Wait for the install to finish (copies data from disc, then may download a small update).
PS5 Note: The game runs in backward compatibility mode. No special PS5 upgrade exists. Storage space is still ~30 GB.
Xbox One / Xbox Series X|S
1. Press the Xbox button to open the guide.
2. Navigate to Store (or Microsoft Store).
3. Search for "Fallout 4".
4. Select edition and Install (or Get if free with Game Pass).
5. Choose install location (internal or external hard drive).
6. The game downloads. You can monitor progress in My games & apps > Queue.
7. Once done, launch from the tile.
2. The console prompts you to install the game.
3. Follow on-screen instructions.
4. After install, launch from Home.
Xbox Series X|S Note: The game is optimised with FPS Boost (60 FPS) and Auto HDR on Series X|S. It may also support Quick Resume. No special SKU needed.
---
First Launch Setup
1. Launch the game from your chosen platform.
2. On the first start, you may see a brightness calibration screen – adjust until the Vault-Tec logo is barely visible.
3. You will be prompted to sign in to Bethesda.net (optional – required for mods/creations, but you can skip).
4. Graphics Settings (PC only): Adjust resolution, quality preset (Low/Medium/High/Ultra), V-Sync, and other options. On console, most settings are fixed.
5. Start a New Game – you will be taken to character creation.
6. Save game – the game will create an initial save. Ensure you have cloud saves enabled if desired (platform-dependent).
> Note: After the first launch, always allow the game to idle at the main menu for a moment to download any initial patch data (if not already included).
---
Storage Space Requirements
| Component | Approx. Size |
|---|---|
| Base game | 28-32 GB |
| All official DLC (Automaton, Far Harbor, Nuka-World, etc.) | ~6-8 GB |
| High-resolution texture pack (PC, free DLC on Steam) | ~10 GB extra |
| Mods (user-created) | Varies (often 1-20+ GB) |
| Total Recommended Free Space | 50 GB (to accommodate updates, saves, and mods) |
- On console, the system reserves space for game updates; ensure you have at least 60 GB free to be safe.
- On PC, SSD is strongly recommended for significantly faster loading times (especially in downtown Boston).
- Fix: Free up space on the target drive. Uninstall unused games. Use Disk Cleanup. Move the install to another drive with more free space.
- Steam: Right-click Fallout 4 in Library > Properties > Local Files > Verify integrity of game files.
- Epic: Click the three dots on Fallout 4 > Manage > Verify.
- Microsoft Store: Open Settings > Apps > Fallout 4 > Advanced options > Repair or Reset.
- Console: Delete the game and re-download (ensure good internet connection).
- Fix: Install the latest Visual C++ Redistributables (both x86 and x64) from Microsoft. Also install DirectX End-User Runtime from Microsoft.
- PC: Update graphics drivers. Disable overlay (Steam/Epic). Run the game as administrator. Disable antivirus temporarily.
- Console: Restart the console, clear cache (hold power button for 10 seconds).
- Answer: Fallout 4 is not natively available on Nintendo Switch. No installation possible.
- Fix: Check internet connection. Try again later. Create a new Bethesda.net account if needed. This is optional for playing the base game.
- PC: Reduce graphics settings, disable mods, verify files. Look up unofficial patch mods.
- Console: Exit the game fully, restart the console, clear local saves (be careful).
- PC performance: Use the `iNumHWThreads` tweak in `Fallout4Prefs.ini` if you have a multi-core CPU (set to number of physical cores minus 1).
- Console mods: Mods disable achievements. You can use mods freely but be aware of this limitation.
- SSD recommended – Seriously, the difference in loading times (especially in and out of buildings) is night and day.
- Back up saves – Regularly copy your save files from `%USERPROFILE%\Documents\My Games\Fallout4\Saves` on PC, or use cloud saves on consoles.
---
Common Installation Errors & Fixes
Error: "Insufficient Disk Space"
Error: "Download Stuck" or "Corrupted Files" (PC)
Error: "Missing VCRUNTIME140.dll" or similar (PC)
Error: "Fallout 4 has stopped working" on launch
Error: "This game is not available on your platform" (Switch)
Error: "Bethesda.net login fails"
Error: "Stuck at loading screen / infinite loading"
---
Post-Installation Verification
1. Launch the game – you should see the intro video (Vault-Tec animation).
2. Main Menu loads – the title screen with "Fallout 4" and a spinning camera should appear.
3. Check settings – go to Options > Display and ensure resolution matches your monitor (or TV).
4. Start a new game – the character creation / pre-war sequence should begin without crashes.
5. Save manually – press Escape (PC) or Start (console) to save, confirm the save slots are accessible.
6. Check for mods (optional) – if you intend to mod, verify the in-game mod menu (Main Menu > Mods) loads and connects to Bethesda.net.
7. Performance test – walk around the pre-war neighborhood or after leaving Vault 111. Check that framerate is stable.
If all steps pass, installation was successful. If you encounter issues, refer to the Common Errors section above.
---
Additional Tips
---
This guide covers official retail and digital distribution only. Unauthorized copies or pirated versions are outside the scope and not recommended.

Game Introduction
Fallout 4: Game Introduction
Genre: Action role-playing game (ARPG) with open-world exploration, first/third-person shooter, survival, and base-building elements.
Developer & Publisher: Developed by Bethesda Game Studios (the team behind The Elder Scrolls V: Skyrim and Fallout 3). Published worldwide by Bethesda Softworks.
Release Timeline & Platforms:
- Initial Release (Worldwide): November 10, 2015
- Platforms at Launch: Microsoft Windows, PlayStation 4, Xbox One
- Later Platforms:
- Release History:
- Location: The Commonwealth – post-apocalyptic Boston and its surrounding areas, including recognizable landmarks like Fenway Park (now "Fenway Stadium"), the Massachusetts State House, the USS Constitution, and the glowing ruins of Cambridge.
- Atmosphere: A retro-futuristic 1950s aesthetic fused with advanced technology, laser weapons, and robot butlers, all overlaid with radioactive wasteland, mutated creatures (Deathclaws, Radroaches, Super Mutants), and pockets of surviving human settlements.
- Dynamic Weather & Day/Night Cycle: The world feels alive with rad storms, fog, and changing light that affects stealth and exploration.
- Vaults & Dungeons: Dozens of Vault-Tec vaults, each with its own horrifying experiment, offer unique story-rich dungeons.
- The Sole Survivor (Player Character): Customizable male or female with a pre-war backstory (a lawyer or war veteran). Has a voiced protagonist (Nate or Nora) in English, with full dialogue options in the modified dialogue wheel.
- Shaun: Your infant son, later revealed to have a crucial role in the Institute's plans.
- Codsworth: Your pre-war Mister Handy robot, who can become a companion.
- Dogmeat: A loyal German Shepherd companion, useful for tracking and combat.
- Preston Garvey: Leader of the Commonwealth Minutemen; assigns radiant quests to help settlements.
- Nick Valentine: A synth detective (synthetic human) with a gritty noir personality – a fan-favorite companion.
- Piper Wright: A plucky reporter from Diamond City who uncovers truths about the Institute.
- Father (Shaun): The elderly director of the Institute – the game’s central antagonist/anti-hero.
- Other Faction Leaders: Paladin Danse (Brotherhood of Steel), Desdemona (Railroad), and others.
- Open-World Freedom: You can go anywhere, do anything – explore over 200 locations, tackle quests in any order, ignore the main story and just build settlements, or roleplay as a ruthless raider.
- Deep Character Customization: Use the SPECIAL stat system (Strength, Perception, Endurance, Charisma, Intelligence, Agility, Luck) and upgrade skills via perk points. Craft thousands of weapons, armor pieces, and power armor modifications.
- Base-Building (Settlement System): Scavenge materials to construct and defend over 30 settlements, complete with walls, turrets, water purifiers, shops, and personal homes. This becomes a full sandbox meta-game.
- Immersive Roleplaying: The dialogue system (though simplified from previous games) offers choices that affect faction alignments and the ending – four main factions with multiple resolution outcomes.
- Mod Support: Massive modding community on PC (Bethesda.net and Nexus Mods) with console mods available for Xbox One and PS4 (though limited by Sony restrictions).
- Existing Fallout fans who enjoyed Fallout 3 and New Vegas (though Fallout 4 is more action-oriented).
- Open-world RPG enthusiasts who like exploration, looting, and crafting.
- Base-building and survival game fans – the settlement system is deep.
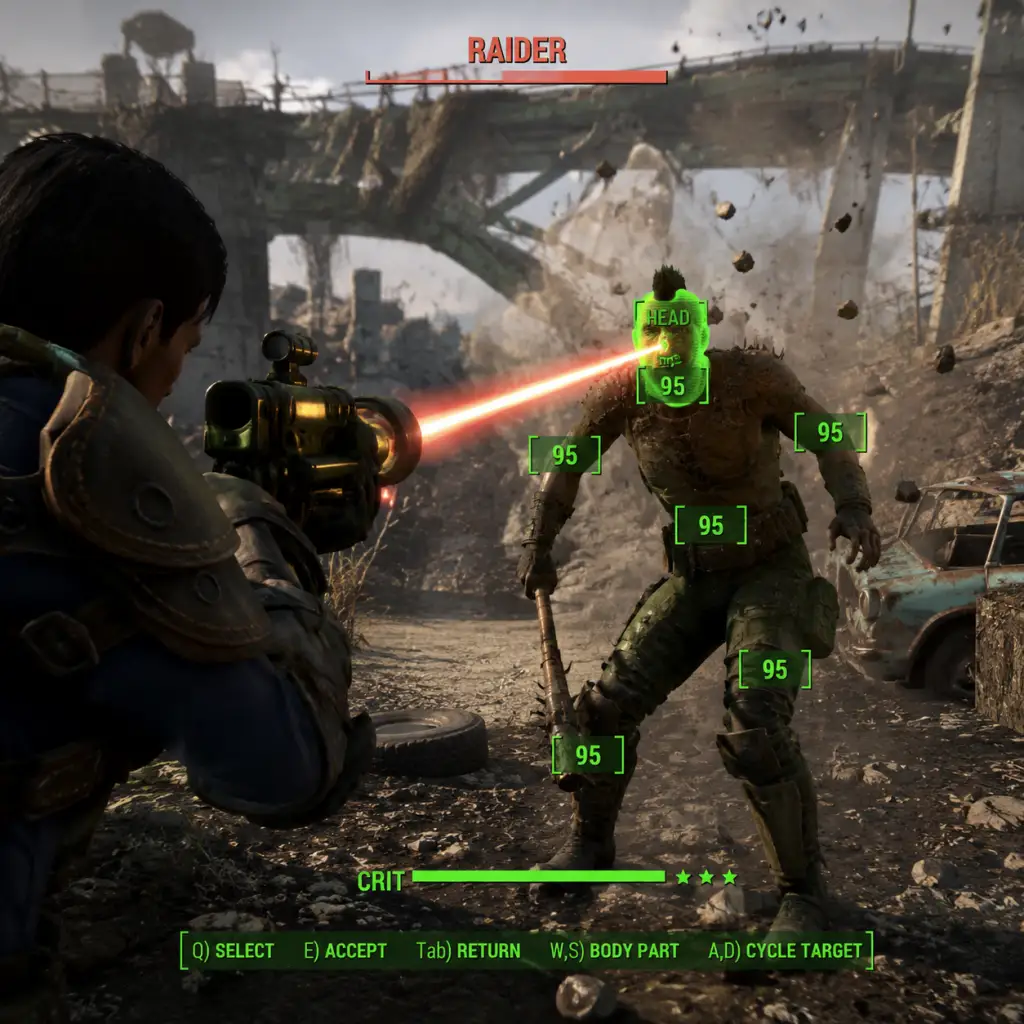
- Players who prefer action shooters over hardcore RPG mechanics – combat is fluid and visceral, with VATS (Vault-Tec Assisted Targeting System) slowing time for tactical shots.
- Casual gamers – difficulty can be adjusted, and quest tracking is straightforward.
- Modders and content creators – the game’s engine and mod support allow endless replayability.
- Single-Player Campaign: The main story + all side quests, factions, and exploration. No online or co-op mode.
- Survival Mode (added in a free update): A hardcore variant where you must eat, drink, sleep, manage diseases, and save only when sleeping – no fast travel; enemies and you deal more damage. Intended for experienced players seeking a gritty challenge.
- Settlement Mode: Accessed via the workshop anywhere in the Commonwealth. Build, recruit settlers, defend against attacks, and create supply lines.
- Photo Mode (added via Creation Club or mods on PC, native on consoles): Take screenshots with filters and poses.
- Modded Mode: Create or install user-generated content through Bethesda.net or third-party mod managers.
- Offline: Fully playable offline after installation. No internet connection required for single-player.
- Online: Optional connection for mods (Bethesda.net mods library on PC/consoles) and for downloading Creation Club content. No multiplayer or persistent online world.
- Voiced Protagonist: First time in the series the main character has a full voice (male and female), adding emotional weight but reducing dialogue options compared to earlier games.
- Streamlined Roleplaying: The perk chart replaced skill points; you can invest points in any stat at level-up without level caps (the game continues indefinitely past 50).
- Power Armor as a Vehicle: Power armor is no longer just an outfit – it requires fusion cores, has a HUD, and can be repaired/modified on a dedicated station. It feels like a tank.
- Settlement System: A robust building mechanic that turns the wasteland into your personal Lego set – no other Fallout game has this level of player-created infrastructure.
- Legendary Weapons & Armor: Random loot with unique bonuses (e.g., explosive bullets, freezing effect, VATS enhanced) adding replayability.
- Gun Play & VATS: Improved shooter mechanics with a dynamic VATS that slows time but doesn’t pause (on default difficulty). Smooth aiming, weapon customization with hundreds of combinations.
- Atmospheric World & Soundtrack: A haunting ambient soundtrack by Inon Zur combined with a radio (Diamond City Radio with host Travis) that plays period-appropriate songs (e.g., The Wanderer, Rocket 69).
- Modding Community: One of the most modded games ever, from simple quality-of-life fixes to total conversions like Fallout: Miami or Sim Settlements.
- PlayStation 5 & Xbox Series X|S: Backward compatible with performance enhancements via free updates (60 FPS support, higher resolutions) – no native current-gen release.
- Nintendo Switch: Not available natively; only playable via cloud streaming in supported regions (e.g., Japan) – not recommended for reliable play.
- Fallout 4: Game of the Year Edition (includes all DLC) – released on September 26, 2017 for PC, PS4, Xbox One.
- Fallout 4 VR – standalone virtual reality version released December 12, 2017 (PC/SteamVR only).
---
Story Overview
Set in the year 2287, 210 years after a devastating nuclear war that destroyed civilization, Fallout 4 begins on October 23, 2077 – the day the bombs fell. The player character (known as the Sole Survivor) emerges from Vault 111, a cryogenic shelter in the Boston area, to find their spouse murdered and their infant son, Shaun, kidnapped by a mysterious group called the Institute. Driven by a desperate search for Shaun, the Sole Survivor must navigate the radioactive wasteland of the Commonwealth (the ruins of Massachusetts), forge alliances with factions such as the Brotherhood of Steel, the Minutemen, the Railroad, and the Institute itself, and uncover a dark conspiracy that threatens the future of humanity.
---
Setting & World
---
Main Characters (Key NPCs)
---
Core Appeal
---
Target Audience
---
Game Modes
Online/Offline Support:
---
DLC & Expansions Overview
The Fallout 4 Season Pass includes six major DLC packs (plus free updates like Survival Mode and texture packs). All are included in the Game of the Year Edition.
1. Automatron (March 2016) – New story: a rogue robot inventor unleashes hordes of hostile robots. Allows you to build and customize your own robot companions.
2. Wasteland Workshop (April 2016) – Adds settlement items: traps, arena cages, lighting, and new ways to manage settlers (including capturing wild creatures for fighting pits).
3. Far Harbor (May 2016) – A large expansion set on a foggy, mysterious island off the coast of Maine. Features a new main quest, new factions (Children of Atom, Synth refugees, and the Harbormen), new creatures, and multiple endings. Considered the best DLC.
4. Contraptions Workshop (June 2016) – Adds conveyor belts, scaffolding, elevators, and manufacturing machinery to settlements – automate resource production.
5. Vault-Tec Workshop (July 2016) – Build your own Vault using vault-themed rooms, experiments, and special overseer features.
6. Nuka-World (August 2016) – A massive expansion set in a post-apocalyptic amusement park (Nuka-Cola themed). You can become a raider overlord, conquer the Commonwealth’s settlements, or choose to wipe out the raiders. New weapons, creatures, and quests.
---
What Makes Fallout 4 Unique?
---
Conclusion
Fallout 4 is a landmark open-world RPG that prioritizes player agency, exploration, and creative expression. While it simplifies some classic RPG elements, it makes up for it with an addictive crafting and building system, a gripping central story, and a massive, reactive world. Whether you’re a newcomer or a wasteland veteran, the Commonwealth offers hundreds of hours of adventure.

Getting Started
First Hour Walkthrough
Your first hour in Fallout 4 is a guided tutorial broken into these steps:
1. Character Creation – In the bathroom mirror of your pre-war home (Vault 111 sequence), you customize appearance and assign SPECIAL stats. See details below.
2. Pre-War Home – Interact with your spouse, baby Shaun, and the Vault-Tec Rep. Follow the corridor to the front door, then to the bus and the Vault entrance.
3. Vault 111 – Go through the decontamination arch, get Vault 111 suit and Pip-Boy from the Overseer. Witness the cryo-pod scene and your spouse’s death. Eventually exit the vault at the end of the tutorial.
4. Sanctuary Hills – Explore your neighborhood. Loot your pre-war house (gold bars, caps, ammo). Talk to Codsworth (your robot butler). He gives you a short tour and a quest to go to Concord.
5. Concord (Museum of Freedom) – Follow the road to Concord. Inside the museum you meet Preston Garvey and the Minutemen. Clear the raiders, then go to the roof to get Power Armor and the Minigun. Use them to kill the Deathclaw outside.
6. Return to Sanctuary – Walk back with Preston & crew. The game now opens up: you have a settlement, a companion, and a main quest—"The Molecular Level" (follow the Freedom Trail) or explore freely.
Character Creation
You can adjust: Face, Hair, Skin color, Body type (male/female), and SPECIAL stats (Strength, Perception, Endurance, Charisma, Intelligence, Agility, Luck).
- Tips for new players:
- Appearance changes can be done later via barbers/surgeons in Diamond City.
- Your character name matters only for Codsworth – he says it if it’s in the list.
- Balanced spread (S4, P4, E3, C4, I4, A3, L4) gives versatility.
- If you want better dialogue/merchant prices, invest in Charisma (C).
- Intelligence (I) speeds up XP gain and unlocks crafting perks.
- Luck (L) increases critical hit rate and loot odds – very forgiving for beginners.
Controls (All Platforms)
PC (Keyboard & Mouse)
| Action | Key |
|---|---|
| Move | WASD |
| Look | Mouse |
| Interact / Use | E |
| Combat | Mouse Left (shoot), Mouse Right (aim down sights) |
| VATS | Q |
| Jump | Space |
| Pip-Boy | Tab |
| Quick Save | F5 |
| Quick Load | F9 |
| Crouch | Ctrl |
| Run | Shift (hold) |
| Reload | R |
| Holster Weapon | Hold R |
| Favorite Items | F (then number keys) |
| Workshop | V (in settlements) |
Xbox Controller
| Action | Button |
|---|---|
| Move | Left Stick |
| Look | Right Stick |
| Interact / Use | A |
| Combat | Right Trigger (shoot), Left Trigger (aim) |
| VATS | LB |
| Jump | Y |
| Pip-Boy | B |
| Quick Save | Press View (select) then… (hard save from pause) |
| Crouch / Sneak | Right Stick (press) |
| Run | Left Stick (press while moving) |
| Reload | X |
| Holster Weapon | Hold X |
| Favorite Items | D-Pad (assign via Pip-Boy) |
| Workshop | Hold View |
PlayStation Controller
| Action | Button |
|---|---|
| Move | Left Stick |
| Look | Right Stick |
| Interact / Use | X |
| Combat | R2 (shoot), L2 (aim) |
| VATS | L1 |
| Jump | △ |
| Pip-Boy | ○ |
| Quick Save | Press Touchpad then save via menu |
| Crouch / Sneak | Right Stick (press) |
| Run | Left Stick (press while moving) |
| Reload | □ |
| Holster Weapon | Hold □ |
| Favorite Items | D-Pad |
| Workshop | Hold Touchpad |
UI Overview
- Health Bar (top left) – Red when injured, broken into segments. Use food, stimpaks, or sleep to heal.
- AP Bar (top left, below health) – Action Points for sprinting and VATS. Recharge quickly.
- Compass (top center) – Shows direction, quest markers (white diamond), discovered locations (triangle).
- Ammo counter (bottom right) – Current magazine / total ammo.
- Weapon Condition – Not a thing in Fallout 4; weapons degrade in durability? No, they don’t. Repair is irrelevant.
- Pip-Boy (tap Tab/B/O):
- HUD Colors – Can be changed in settings (for colorblind options).
- Loot everything in Vault 111 (Vault suit, gold bars, caps, ammo).
- Immediately scrap junk at a workshop to learn raw components.
- Accept the Minutemen quest (“When Freedom Calls”) from Codsworth or the radio.
- Explore the Red Rocket gas station near Sanctuary for workbenches.
- Build a bed in Sanctuary (sleep saves and heals).
- Save often.
- Wandering too far south (towards Lexington, Cambridge) – high-level enemies (super mutants, ghouls) will kill you.
- Swimming in irradiated water without Rad-X or a hazmat suit – radiation sickness reduces max HP.
- Selling unique items – Gold bars, wedding ring (later can be used in a quest), Vault-Tec bobbleheads (permanent stat boosts).
- Killing essential NPCs – Preston, Codsworth, Diamond City guards, etc. They are essential (cannot die).
- Over-encumbering – Moving slowly makes you a target. Drop or scrap junk.
- Ignoring settlement building – Settlements provide free resources, water, caps, and safe storage.
- Engaging multiple enemies head-on without VATS or cover. Use VATS to target legs to slow them.
- STATS: Level, HP, AP, carry weight, perks, status effects.
- ITEMS: Weapons, armor, apparel, aid, misc, junk, mods. Junk can be scrapped for raw materials.
- DATA: Quests (main, side, misc), holotapes, notes, radio stations.
- MAP: World map with discovered locations, fast travel points.
Essential Early Objectives
1. Exit Vault 111 – Complete the tutorial.
2. Reach Sanctuary Hills – Meet Codsworth, get basic gear.
3. Travel to Concord – Fight raiders, free Preston Garvey.
4. Acquire Power Armor & Minigun – From the museum roof. Use them to kill the Deathclaw.
5. Return to Sanctuary – Talk to Codsworth to start settlement tutorial.
6. Build a Settlement Workshop – Scrap junk, build a bed, water pump, defenses.
7. Choose a Main Quest Path – Either follow the “Freedom Trail” (to find the Railroad) or head to Diamond City as the main story suggests.
What to Do First vs. What to Avoid
Do First
Avoid
Early Resource Priorities
| Resource | Common Sources | Use |
|---|---|---|
| Wood | Trees, branches, furniture, fences | Building structures, workbenches |
| Steel | Cars, appliances, weapons, armor | Crafting weapon/armor mods, structures |
| Screws | Desk fans, toy cars, typewriters, hot plates | Almost any weapon/armor mod |
| Gears | Fans, typewriters, toy cars | Crafting weapon mods, generators |
| Adhesive | Duct tape, wonderglue | Required for nearly all mods |
| Copper | Light bulbs, fuses, motors | Electrical wiring, mods |
| Oil | Gas cans, oil cans, cutting fluid | Weapon mods, turrets |
| Fertilizer | Brahmin dung (from settlements) | Growing crops, making Jet |
| Aluminum | TV trays, cans, surgical trays | Lightweight weapon mods |
| Antiseptic | Alcohol, medical supplies | Med-X, stimpaks |
Common Beginner Mistakes
1. Not using VATS – VATS is a core combat tool. It pauses time, allows targeted shots, and grants critical hits. Use LB/L1/Q frequently.
2. Ignoring the settlement system – Many new players skip Sanctuary building, missing out on free water, caps from crops, and safe storage.
3. Hoarding everything – You have limited carry weight. Pick up only high-value junk (screws, gears, adhesive) and weapons/armor with good weight-to-cap ratio.
4. Not saving often – The game has softlocks, crashes, and tough fights. Quick Save every few minutes (F5 on PC). Save manually before entering new areas.
5. Running out of ammo – Early on, use melee (security baton, lead pipe) to conserve .38 and 10mm ammo. Loot every corpse.
6. Not checking your active quests – You may wander into high-level zones. Follow the compass to avoid dangerous regions.
7. Rushing through dialogue – Some dialogue choices affect quest outcomes and faction relationships. Read carefully.
Day-One Checklist
- [ ] Complete Vault 111 intro and character creation.
- [ ] Exit the vault and explore Sanctuary Hills.
- [ ] Scrap all junk in Sanctuary via the workshop.
- [ ] Build a bed (sleep to save and heal).
- [ ] Build a water pump (provides clean water).
- [ ] Meet Codsworth and complete his dialogue.
- [ ] Travel to Concord (follow the road).
- [ ] Clear raiders from the Museum of Freedom.
- [ ] Get Power Armor (frame with fusion core) and Minigun from the roof.
- [ ] Kill the Deathclaw outside (use the minigun and armor).
- [ ] Return to Sanctuary with Preston.
- [ ] Talk to Codsworth about the next main quest.
- [ ] Save the game (manual save).
- [ ] Optional: Build a small shack, plant a few crops (mutfruit, corn, tatos).
Once you complete this checklist, you are ready to explore the Commonwealth. Good luck, Sole Survivor!
Core Gameplay
Core Gameplay Overview
Fallout 4 merges open-world exploration, a dynamic combat system (VATS + real-time shooting), deep character customization via the SPECIAL system and Perks, settlement building, and a branching main story. Your journey through the Commonwealth unfolds across four distinct progression tiers, each with unique challenges, rewards, and optimal strategies.
---
Main Gameplay Loop
The fundamental loop is: Explore → Loot → Craft/Scrap → Build/Upgrade → Complete Objectives → Repeat.
1. Exploration: Traverse the ruined Boston area, discovering locations (dungeons, settlements, landmarks).
2. Looting: Scavenge weapons, armor, ammo, junk (for crafting), aid items, and caps.
3. Crafting/Scraping: Use workbenches (Weapon, Armor, Chemistry, Power Armor) to modify gear; scrap unwanted items into components.
4. Settlement Building: Construct and maintain settlements to produce food, water, caps, and provide safe havens.
5. Completing Objectives: Main quests, side quests, radiant quests, and faction missions drive story progression and rewards.
6. Survival (Optional): In Survival mode, you also manage hunger, thirst, sleep, and disease—adding extra layers.
---
Combat & Interaction Systems
- VATS (Vault-Tec Assisted Targeting System): Slows time, allowing you to target specific body parts (head, arms, legs, torso) for critical hits. Each shot costs Action Points (AP). AP regenerates over time or with consumables.
- Real-Time Shooting: Standard first/third-person aiming and firing; works for any weapon.
- Crippling: Damaging limbs causes enemies to stagger, drop weapons, or move slowly; headshots deal extra damage and can cause instant kills.
- Sneak Attacks: If undetected, ranged/melee attacks deal 2x (or 3.5x with Ninja perk) damage.
- Power Armor: Exoskeleton suits that increase strength, negate fall damage, and provide high defense. Requires Fusion Cores for movement and AP use. Can be upgraded with mods.
- Skill Checks (Dialogue/Interaction): Charisma-based persuasion, Intimidation, or Barter options appear in conversations. Success depends on Perk ranks (e.g., Cap Collector for bartering, Intimidation perk for fear).
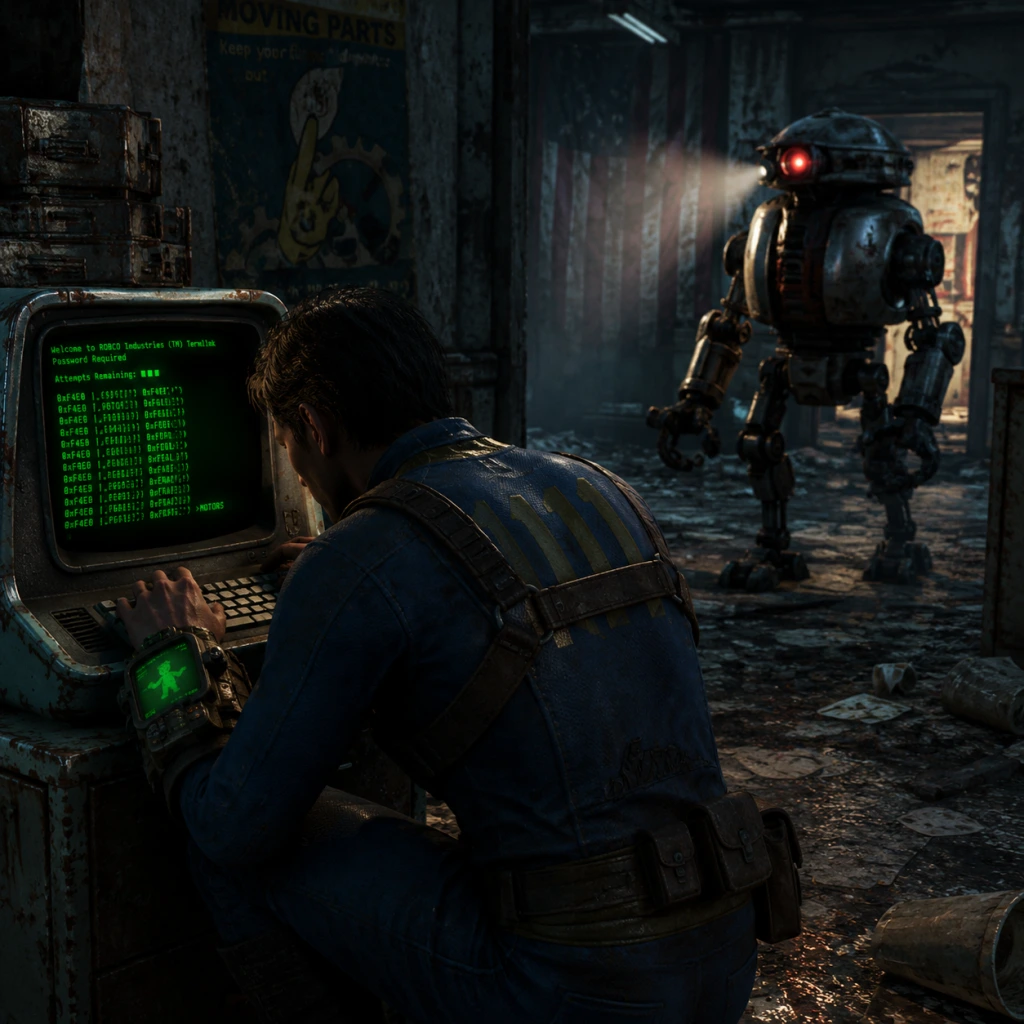
- Lockpicking & Hacking: Requires bobby pins (Novice→Expert→Master) and science skill (Rank 1-4 of Hacker perk). Failures may break pins or lock out terminals.
- SPECIAL Stats: Strength, Perception, Endurance, Charisma, Intelligence, Agility, Luck. Starting points allocated at character creation (21 total). Each point directly affects related skills and unlocks Perks.
- Perks: Level up to gain a point; each point spent unlocks a rankable perk (e.g., Rifleman, Commando, Gunslinger, Armorer). Maximum level is 65535 (effectively unlimited).
- Experience (XP): Earned from kills, quest completion, discovering locations, crafting, building, and speech checks. Level cap is 286 without mods (all perks maxed).
- Legendary Items: Random drops from legendary enemies have a prefix (e.g., Two Shot, Explosive, VATS Enhanced). These can completely change your build.
- Points of Interest (POIs): Marked/unmarked locations; many contain lore terminals, rare loot, or quest triggers.
- Radiation: Puddles, glowing barrels, and zones (e.g., Glowing Sea) increase Rads, reducing max HP. RadAway or certain perks mitigate this.
- Companions: Dogmeat, Preston Garvey, Piper, Nick Valentine, etc., each with unique perks, affinity bonuses, and quests. They can carry loot, distract enemies, and gain approval/disapproval based on your actions.
- Main Quest: The Institute mystery—find your son, navigate four factions (Minutemen, Brotherhood of Steel, Railroad, Institute).
- Side Quests: Varied stories (e.g., The Secret of Cabot House, The Silver Shroud, The Last Voyage of the U.S.S. Constitution).
- Radiant Quests: Infinite repeatable missions from factions (e.g., Minutemen settlement defense, Brotherhood patrols).
- Faction Quests: Each faction offers a unique questline; completing them locks you out of others (except Minutemen can coexist).
- Caps: Commonwealth currency. Earned through selling loot, quest rewards, water farming (purified water from settlement pumps), and gambling (Luck perks).
- Junk: Essential for crafting. Collect adhesive (duck tape, glue), screws (typewriters, fans), springs (clipboards, desk fans), aluminum (cans, trays), and circuitry (telephones, toy cars).
- Ammunition: Common (10mm, .38, .308, .45) vs rare (Fusion Cell, Gamma Round, .50 caliber). Craft your own ammo with the Ammo Scrounger perk at Chemistry workbench.
- Settlement Production: Plant food (mutfruit, tato, corn for adhesive), water pumps, and assign settlers to generate caps via shops.
- Early Game (Levels 1-15): Focus on foundational SPECIAL stats. Invest in Strength (carry weight + melee), Intelligence (faster XP), or Luck (critical meter fill). Key early perks: Gunslinger (pistols), Rifleman (non-auto rifles), Locksmith/Hacker for access. Aim to reach level 10+ with a solid combat style.
- Mid Game (Levels 16-30): Specialize further. Get Armorer and Gun Nut to mod weapons/armor. Pick a damage perk (e.g., Commando for automatics). Unlock Local Leader (level 14, Charisma 6) for settlement supply lines. Craft adhesive farms.
- Late Game (Levels 31-50): Max out your primary damage perk. Acquire Sneak + Ninja for assassins, or Heavy Gunner for Power Armor builds. Craft legendary-themed weapons. Complete faction quests for unique rewards (e.g., Good Intentions from Railroad).
- Endgame (Level 51+): Optimize for survivability and efficiency. Grab Ricochet, Grim Reaper’s Sprint, or Four Leaf Clover. Use maxed crafting to create overpowered gear (e.g., Kneecapper weapon + Sprinter’s leg armor). Farm legendary spawns (e.g., National Guard, Quincy Ruins).
- Loot the Concord Museum of Freedom; rescue Preston Garvey’s group.
- Build a basic settlement in Sanctuary: 3 beds, 1 water pump, 10 food (tato/corn).
- Complete side quest The First Step to level up.
- Visit Lexington (Corvega plant) at level 5—use cover and VATS against raiders.
- Put initial 4 points into Strength and Endurance for survival.
- Take Rifleman (PER 2) early; semi-auto hunting rifles and pipe rifles are common.
- Grab Locksmith (PER 4) or Hacker (INT 4) for early loot rooms.
- Avoid South Boston, Glowing Sea, and Quincy until level 10+. Deathclaws, Yao Guai, and high-level raiders appear.
- Save often; early game deaths can cost you progress.
- Join the Brotherhood of Steel (meet them at the Cambridge Police Station) or Railroad (follow the Freedom Trail).
- Build a water farm in Spectacle Island (requires Local Leader 2).
- Clear Hubris Comics for the Silver Shroud quest; acquire the unique outfit and weapon mod.
- Venture into the Glowing Sea (quest: Finding the Institute) with Rad-X, RadAway, and Power Armor.
- Invest in Gun Nut (INT 3) and Science! (INT 6) for advanced modifications (e.g., suppressors, high-damage receivers).
- Take Armorer (STR 3) for ballistic-weave mods (Railroad upgrade).
- If using VATS, put points into Agility and Luck for faster criticals.
- Super Mutant packs with milks (Mirelurk Queens) and high-level Synths.
- Enemies may have legendary prefixes (e.g., “Crippling” on melee). Bring good chems (Psychojet, Bufftats).
- Decide which faction to support (your choice locks out others).
- Clear Quincy Ruins (Gunners) for high-tier loot (Gatling Lasers, Combat Armor).
- Complete The Secret of Cabot House to receive the Mysterious Serum (temporary +10 STR, permanent chem effect if consumed).
- Build a full artillery grid across the Commonwealth (Minutemen quests).
- Max your primary damage perk to rank 5 (e.g., Heavy Gunner for minigun users).
- Add Better Criticals (LCK 6) and Critical Banker (LCK 7) for devastating VATS chains.
- Use Chemist (INT 7) to craft Jet, Overdrive, and Buffout for boss fights.
- Legendary Deathclaws, Mythic Radscorpions, and high-level Coursers.
- Radiation storms in the Glowing Sea can rapidly reduce HP without Power Armor or Hazmat Suit.
- Repeatedly clear The Castle (Mirelurk Queen respawns if modded) or Vault 95 for legendary loot.
- Farm Egg Points (Weston Water Treatment Plant) for random legendary drops.
- Use Settlement Ambush Kit (Contraptions Workshop DLC) to create trap-filled arenas.
- Challenge the Behemoths in the Glowing Sea (two at the Crater House).
- Grab Nerd Rage! (INT 10)—automatic slow time and damage boost at low HP.
- Combine Kilohertz (endgame energy weapon mod) with Bleeding legendary effect for insane DPS.
- Max Moving Target (AGI 5) for speed boost while sprinting; great for hit-and-run builds.
- Legendary farming routes: National Guard Trainyard (two potential legendary spawns) → Quincy Ruins → Bunker Hill (radiant).
- Use Wasteland Survival Guide issues to boost caps or XP (e.g., “Magazines of the Common Wealth”).
- The PA HUD upgrade (Science 4 + Armorer 4) highlights enemies in Power Armor.
- Always carry a melee weapon (e.g., Combat Knife) for conservation of ammo on low-level ghouls.
- Adhesive is king – build a massive corn+mutfruit+tato farm at Sanctuary to craft vegetable starch (5 adhesive each).
- Scrap everything not attached to a settlement you care about – junk yields materials.
- Don’t rush the main quest – explore and do side quests to level up; endgame enemies scale to your level up to 50, then stop scaling.
- Use the console (PC) or mods to override any frustration, but avoid over-tuning on first playthrough.
---
Progression Systems
---
Exploration & World Design
The Commonwealth is divided into sparse zones. Early areas (west of Boston, near Sanctuary) are safe; downtown Boston (later tiers) is dense with high-level enemies, traps, and radiation zones. Key features:
---
Quests & Missions
---
Economy & Resources
---
Character / Build Growth
---
Progression Tiers: Detailed Breakdown
Early Game (Levels 1–15)
Main Goal: Survive the Wasteland, establish a base, and complete the first main quests (The Path to Freedom, reunions with Minutemen).
Example Activities:
Build Tips:
Dangers:
---
Mid Game (Levels 16–30)
Main Goal: Faction alignment, settlement expansion, and specialized gear upgrades.
Example Activities:
Build Tips:
Dangers:
---
Late Game (Levels 31–50)
Main Goal: Faction conflict resolution, unique legendary loot, and massive settlement networks.
Example Activities:
Build Tips:
Dangers:
---
Endgame (Level 51+)
Main Goal: Complete all questlines, max out perks, and test builds against near-impossible odds.
Example Activities:
Build Tips:
Endgame Resources:
---
Final Tips
Game Tips
Fallout 4: Comprehensive Game Tips Guide\n\nThis guide provides actionable tips grouped by category, covering everything from your first few hours to advanced optimizations. Tips are labeled with [Beginner], [Intermediate], or [Advanced] to help you focus on what matters most at your current stage.\n\n---\n\n### General Tips\n\n- [Beginner] Save often and in different slots. Fallout 4 is prone to bugs, crashes, and irreversible choices (e.g., siding with a faction). Use quicksave (F5 on PC) in safe areas and keep at least three manual saves rotating.\n- [Beginner] Explore everywhere. The Commonwealth is packed with hidden caches, unique weapons, and lore. Side paths often lead to valuable loot or shortcuts.\n- [Intermediate] Invest in the \"Local Leader\" perk early if you plan to build settlements. This perk (Charisma 6) allows supply lines between settlements, sharing crafting materials and food/water.\n- [Advanced] Use console commands (PC) to fix stuck quests or test builds. Open console with ~, then use commands like `player.additem f 1000` for caps or `tgm` for god mode (use sparingly).\n\n---\n\n### Combat\n\n- [Beginner] Use VATS critically. VATS pauses time, letting you target specific body parts. Aim for legs to cripple enemies, arms to make them drop weapons, or headshots for damage multipliers. VATS also highlights hidden enemies.\n- [Beginner] Melee is powerful but risky. A stealth melee build (using Blitz perk) can one-shot most enemies. Equip a combat knife or lead pipe early, and upgrade to \"Pickman's Blade\" (unique knife in Pickman Gallery) for bleeding damage.\n- [Intermediate] Create synergy with weapon modifications. A silenced weapon gains a 2.5x sneak attack multiplier (instead of 2x). Combine with the \"Mister Sandman\" perk for 50% more silenced damage, and \"Ninja\" for up to 10x sneak attack.\n- [Intermediate] Use chems wisely. Psycho boosts damage by 25%, Jet slows time, and Buffout increases carry weight. Combine Psycho+Jet for slow-motion damage fest. Avoid addiction by taking addictol or crafting cures.\n- [Advanced] Explosives are crowd control. The \"Demolition Expert\" perk boosts explosive damage and increases radius. Mines, grenades, and the \"Fat Man\" are devastating. The \"Explosive\" legendary effect on a shotgun (like Spray n' Play) turns every pellet into a mini-grenade.\n- [Advanced] Legendary enemy farming. Certain locations (e.g., National Guard Training Yard, Quincy Ruins) respawn legendary enemies. Save before entering, kill the legendary, and reload if the dropped weapon is not what you want.\n\n---\n\n### Exploration & Navigation\n\n- [Beginner] Follow the main quest until you reach Diamond City. You get a central hub, merchants, and access to the main faction quests. Don't wander too far north early – high-level enemies (Deathclaws, Sentry Bots) lurk.\n- [Beginner] Use the map markers for destinations. The \"Quest\" tab shows active objectives. Fast travel is available but costs nothing – use it to return to settlements and stock up.\n- [Intermediate] Discover all named locations for XP and fast travel points. Each new location gives 10-50 XP depending on how far away it is. The \"Explore\" perk reveals unmarked locations on the map.\n- [Intermediate] Stealth is king for survival. Crouch to become hidden (eye icon). The \"Awareness\" perk shows enemy level and resistances. A stealth boy (invisibility) can bypass entire enemy camps.\n- [Advanced] Learn the loot delivery system. Containers (like ammo boxes, toolboxes) respawn after a certain in-game days (usually 7 days of in-zone inactivity). Mark your favorite farming spots and rotate visits.\n- [Advanced] Use the vertically. Many buildings have rooftops accessible via broken stairs or elevators. The Jet Pack mod (Power Armor) or the \"Mister Sandman\" perk can give you height advantage.\n\n---\n\n### Resources & Crafting\n\n- [Beginner] Pick up everything initially. Scrap metal, desk fans, typewriters, and telephones yield screws, gears, and springs – crucial for weapon/armor mods. Store them in the workbench at Sanctuary.\n- [Beginner] Assign settlers to food production. Each settler produces 6 food per day if assigned to a crop. Build a water pump (Corvega plant gives 10 water) for a steady supply of purified water (valuable for healing and trading).\n- [Intermediate] The \"Scrapper\" perk (Intelligence 5) highlights components you're searching for in junk. Useful for finding fiber optics, circuitry, and nuclear material.\n- [Intermediate] Craft adhesive via vegetables. Corn, mutfruit, and tato plants can be combined at a cooking station to make vegetable starch (yields 5 adhesive). Adhesive is the most demanded material for modding.\n- [Advanced] Legendary weapon farming for rare items. The \"Wounding\" effect (25 bleed damage per hit) on minigun or shotgun destroys enemies. The \"Two-shot\" effect fires an extra projectile but with accuracy penalty – better on sniper rifles (two-shot Gauss rifle is beastly).\n- [Advanced] Use the ballistic weave. Unlock by joining the Railroad and completing P.A.M. missions. Ballistic weave can be applied to certain clothing (e.g., Army fatigues, Maxson's coat) giving up to 110 damage resistance and 110 energy resistance while still wearing armor over it.\n\n---\n\n### Settlement Building\n\n- [Beginner] Focus on Sanctuary first. Clear debris, build beds (under a roof), water pump, and food crops. Assign settlers to defend with turrets.\n- [Beginner] Supply lines are mandatory. Take the \"Local Leader\" perk (Charisma 6, Level 1 to share resources, Level 2 to build stores). Assign a settler to a supply line: go into workshop mode, highlight a settler, press Q (PC) and choose the target settlement. They will walk between settlements, sharing junk resources.\n- [Intermediate] Build recruitment beacons. Each beacon costs 10 steel, 10 copper, 10 crystal, and uses 2 power. It attracts new settlers (max 10+Charisma) and also prevents settlement abandonment. Place one in every major settlement.\n- [Intermediate] Use crops for caps. Assign settlers to grow mutfruit, tato, and corn; then craft vegetable starch (adhesive) at cooking station. Sell excess adhesive to vendors – it's worth 7 caps each and has high demand.\n- [Advanced] Creat a \"water farm\" for infinite caps. Build dozens of industrial water purifiers at settlements with water sources (like Sanctuary, Starlight Drive-In, The Castle). Collect purified water from the workshop (it spawns daily) and sell for 8-12 caps each. You can earn thousands per day.\n- [Advanced] Maximize settlement happiness. Happiness is affected by food, water, defense, bed quality (beds under roof give more), and variety of decorations (flags, sculptures). Build a bar/clinic/general store (requires Local Leader 2) to boost happiness above 80. Companion settlements (like The Castle) can reach 100 with effort.\n- [Advanced] Exploit duplication glitches for builders (use at own risk). The \"weapon mod duplication\" bug: modify a weapon, drop the mod, pick it up, and you may have both the mod and the original part. Check YouTube for current methods (game version dependent).\n\n---\n\n### Character Builds & SPECIAL\n\n- [Beginner] Don't spread SPECIAL too thin. Focus on 3 or 4 stats initially. For a stealth sniper: high Perception (for VATS accuracy) and Agility (for sneak). For a power armor heavy: Strength (carry weight, melee) and Endurance (HP).\n- [Beginner] Book: You're SPECIAL! In your pre-war house (Sanctuary), in the baby's room near the bookshelf, there's a book titled \"You're SPECIAL!\" that gives 1 free SPECIAL point. Wait until you leave Vault 111 to use it, so you can raise a stat to 10.\n- [Intermediate] Essential Perks for every build:\n - Armorer (Str 3) – upgrade armor to increase resistances.\n - Gun Nut (Int 3) – upgrade guns.\n - Science! (Int 6) – upgrade energy weapons and advanced mods.\n - Scrounger (Luck 4) – find more ammunition (huge savings).\n - Fortune Finder (Luck 4) – find more caps in containers.\n - Cap Collector (Charisma 1) – better prices.\n- [Intermediate] Build around a legendary weapon. Once you find a powerful legendary (e.g., Explosive Minigun, Two-Shot Gauss), allocate perks that enhance it: Heavy Gunner for minigun, Rifleman for Gauss.\n- [Advanced] Min-maxing SPECIAL for special weapons. For example, the \"Deliverer\" (unique pistol from Railroad) benefits from Gunslinger (Agility tree) and Mister Sandman (Sneak tree) – max Agility and Luck for critical hits. A Commando build with automatic weapons works best with high Perception and Agility.\n- [Advanced] Use legendary armor effects. The \"Acrobat's\" effect on boots reduces falling damage by 50% (pair for immunity). The \"Powered\" (AP refresh) and \"Fortifying\" (+1 Strength per piece) are top-tier. The \"Sentinel's\" effect (15% damage reduction while standing still) is great for tank builds.\n- [Advanced] Perk synergy example (Sniper/Gauss): Rifleman (max) → Penetrator (Perception 9) → Concentrated Fire (Perception 10) → Sniper (Perception 6) → Quick Hands (Agility 8) → Ninja (Agility 7) → Mister Sandman (Agility 5) – allows multiple VATS headshots with massive sneak multipliers.\n\n---\n\n### Economy & Trading\n\n- [Beginner] Sell water and chems. Purified water (from water farms) is abundant and weightless. Chems like Buffout, Psycho, Jet are worth 50-150 caps each. Collect pre-war money (weighs nothing, worth 1 cap) – sell in bulk.\n- [Beginner] Invest in the \"Cap Collector\" perk (Charisma 1) – level 1 gives you better prices (+20% sell, -20% buy), level 2 lets you invest 500 caps in a store to increase its caps stash and unlock better rare items.\n- [Intermediate] Don't buy weapons – craft them. Legendary weapons are rare, but non-legendary weapons are easily crafted from scrap. Save caps for legendary mods (like .50 receiver from Cricket) or unique weapons (Overseer's Guardian, Spray n' Play).\n- [Intermediate] Steal from own settlements. If you drop items in your workshop, they become available – but you can also place a container (e.g., a locker) in a settlement, assign a settler to it, and trade with the settler. That settler's inventory has a large caps pool that replenishes. You can steal from the container later.\n- [Advanced] Exploit the water-caps loop. Build massive water purifiers, collect purified water daily, travel to Diamond City, sell to Myrna (general store) and other vendors. To reset vendor caps, wait 48 in-game hours (or save, attack the vendor, reload).\n- [Advanced] Legendary weapon economy. With the \"Scrapper 3\" perk you can extract legendary mods from weapons and sell the base weapon. Legendary effects on armor pieces are also valuable – always sell extra pieces with effects like \"Chameleon\" (invisibility while sneaking) or \"Sprinter's\" (+10% movement speed) for high prices.\n\n---\n\n### Survival Mode Tips (if playing Survival difficulty)\n\n- [Beginner] Use beds to save manually. In Survival, you can only save by sleeping (bed for at least 1 hour). Find beds everywhere – even enemy camps have sleeping bags. Save before dangerous areas.\n- [Beginner] Water is life. Carry purified water from settlements (quenches thirst). Dirty water (from sinks) can be boiled at cooking station to cure thirst without rads. Collect empty bottles and fill them at water sources.\n- [Intermediate] The New settlement bonus. Settlements with a bed, water, and food provide a "Home Sweet Home" perk (bonus health regen for 1 hour). Build multiple settlements for safe zones.\n- [Intermediate] Antibiotics and RadAway are precious. Craft antibiotics from glowing fungus and antiseptic (found at hospitals). Use RadAway only when rads exceed 25% of health – it dehydrates you. Instead, use rad-X (prevent) or rad-away in safe places.\n- [Advanced] Use Vertibird travel with the Brotherhood. After completing \"Shadow of Steel\" you can call a Vertibird (signal grenade) to fast-travel to discovered locations. Costs nothing but one grenade (infinite supply after joining). Avoids walking through dangerous zones.\n- [Advanced] Carry limited weight. Survival halves your carry capacity from the start. Build the \"Strong Back\" perk (Strength 6) for fast travel when overencumbered, but more importantly invest in the \"Lone Wanderer\" perk (Charisma 4) which gives +100 carry weight when no companion is present.\n\n---\n\n### Advanced Optimization & Glitches (Use with Caution)\n\n- [Advanced] Duplication glitch for caps and materials. The most stable method: modify a weapon at a weapons workbench, exit the workbench, drop the weapon from inventory, pick it up, and sometimes you get both the modified mod and the original weapon. Save before attempting; may not work in latest patch.\n- [Advanced] Infinite carry weight with companion. While trading with a companion, you can transfer items beyond their carry limit (they still have infinite carry capacity). The companion will still move but won't walk – they'll teleport to you when you fast travel or enter/exit areas.\n- [Advanced] Using the \"Junk Jet\" for fun and profit. The Junk Jet (found in Med-Tek Research) uses junk as ammunition. Load it with precious jewels or pre-war money to shoot wealth at enemies – ammo is weightless but high value. Not efficient but hilarious.\n- [Advanced] Max out all factions for unique rewards. You can join all four main factions (Minutemen, Brotherhood, Railroad, Institute) and do their quests until a point of no return. For example, do all Institute quests up to \"Mankind – Redefined\" and then lock out if you continue. Save before critical decisions.\n- [Advanced] Legendary loot farming route. Start at National Guard Training Yard → Quincy Ruins → University Point → Gunners Plaza – all have multiple legendary enemies. Clear, wait 7 days, return. Use the \"Fortune Finder\" perk for extra caps.\n\n---\n\nThis guide covers the essential tips for every type of Fallout 4 player. Prioritize perks that support your playstyle, explore every corner, and use the economy to become a Commonwealth tycoon.
Game Settings
Fallout 4: Comprehensive Game Settings Guide
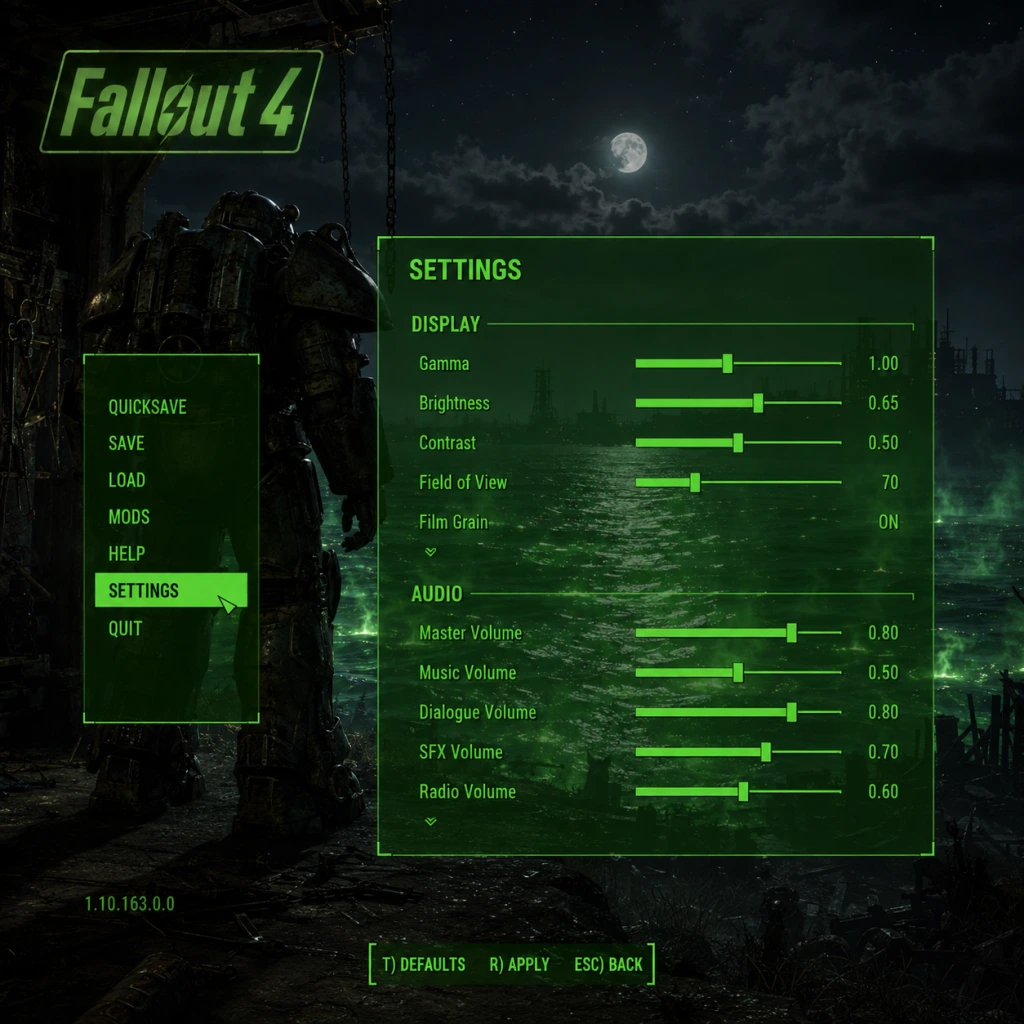
This guide covers every setting category in Fallout 4 — Graphics, Audio, Controls, Accessibility, Language, Network, and Gameplay — with expert recommendations for performance and quality across different hardware tiers. Special attention is given to settings that are easy to misconfigure or have unusual behavior.
---
Graphics Settings
Graphics settings dramatically affect performance and visual fidelity. The game uses Bethesda’s Creation Engine, which is CPU-bound in many areas (especially downtown Boston).
#### Key Graphics Settings and Their Impact
| Setting | Impact on Quality | Impact on Performance | Notes |
|---|---|---|---|
| Resolution | High | High | Native resolution is best; use Upscaling (e.g., FSR, DLSS with mods) to boost FPS. |
| Antialiasing (TAA) | Smooths edges | Medium | TAA is standard; FXAA is lighter but blurrier. Use TAA low for best balance. |
| Anisotropic Filtering | Texture clarity at angles | Low | Set to 16x for almost no performance cost. |
| Shadow Quality | Shadow detail/distance | High | Medium recommended; Ultra drops FPS heavily in built-up areas. |
| Shadow Distance | How far shadows render | High | Lower this to Medium or Low in Boston for smoother gameplay. |
| Decal Quantity | Number of persistent decals | Low | High values can cause memory issues; Medium is safe. |
| Lighting Quality | Light complexity | Medium | Medium offers good visuals without major FPS hit. |
| God Rays | Volumetric light shafts | Very High | Disable or set to Low — one of the biggest performance drains. |
| Depth of Field | Blur distant objects | Low | Personal preference; disabling improves clarity and slightly boosts FPS. |
| Ambient Occlusion | Contact shadows | Medium | SSAO (default) fine; HDAO+ is heavier. |
| Screen Space Reflections | Reflections on water/metal | High | Set to Low or Off for significant FPS gain in reflective areas. |
| Rain Occlusion | Rain sound obstruction | Low | Minimal performance impact; keep on. |
| Motion Blur | Blurs during movement | Low | Many players disable for clearer view; no real performance gain. |
| Lens Flare | Sun flare effects | Low | Disable if you find it distracting. |
| Weapon Debris | Bullet casings, fragments | Medium | Disable — notorious for causing stuttering on all hardware. |
| Texture Quality | Sharpness of textures | Medium (VRAM dependent) | Use High if you have ≥4GB VRAM; otherwise Medium. |
| Actor Detail | NPC model detail | Medium | High increases draw calls; Medium reduces CPU load. |
| Water Quality | Water transparency & reflections | Medium | Low removes underwater visibility; keep at least Medium. |
Low-End (e.g., GTX 1050 / Ryzen 3 / 8GB RAM)
- Preset: Low (then tweak up sparingly)
- Resolution: 1280×720 or 1600×900
- Upscale: Use FSR via mod or set render scale to 75%
- God Rays: OFF
- Weapon Debris: OFF
- Shadow Quality: Low
- Shadow Distance: Low
- Decal Quantity: Low
- Texture Quality: Medium (if VRAM is 4GB)
- Target: 30–45 FPS stable
- Preset: Medium (then adjust)
- Resolution: 1920×1080
- God Rays: Low
- Weapon Debris: OFF
- Shadow Quality: Medium
- Shadow Distance: Medium
- Texture Quality: High (if ≥6GB VRAM)
- Ambient Occlusion: SSAO
- Target: 60 FPS most areas, drops to 45–50 in Boston
- Preset: High (custom)
- Resolution: 2560×1440 or 1920×1080 with max mods
- God Rays: Low (still too heavy at High)
- Weapon Debris: OFF (still causes stutter)
- Shadow Quality: High or Ultra (if CPU is strong)
- Shadow Distance: High (but drop to Medium in Boston)
- All other settings: High/Ultra
- Use Nvidia Reflex (mod) to reduce input lag
- Target: 60 FPS stable at 1440p
- Preset: Ultra but with manual tweaks
- Resolution: 3840×2160
- God Rays: Medium (Ultra is still heavy)
- Weapon Debris: OFF (still buggy)
- Shadow Quality: Ultra
- Shadow Distance: Ultra (be prepared for 40 FPS in Boston)
- Use high-quality texture mods
- Target: 60 FPS with occasional dips
- Weapon Debris: Always disable — it causes random stutters and crashes on all hardware. The setting is named "Weapon Debris" under Advanced options.
- God Rays: The performance cost is exponential; set to Low or Off unless you have a top-tier system and accept frame drops.
- Shadow Distance: Very high CPU usage. In downtown areas, lower this to Medium (even on high-end PCs) to smooth out frame pacing.
- Interface Transparency: Under Display settings, this is not a graphics setting per se but affects HUD opacity. Default is fine; don’t set it to 0 if you want to see your compass and HP.
- Upscaling / Render Scale: The game has a built-in "Render Scale" slider (under Advanced). Setting it below 100% reduces resolution internally. This is not an FSR/DLSS solution; it’s just upscaling. Many players mistake it for supersampling. Use with caution — setting too low (e.g., 50%) makes the game extremely blurry.
- Master Volume: Overall volume level.
- Music Volume: Background music (ambient, combat).
- SFX Volume: Sound effects (gunshots, footsteps, explosions).
- Voice Volume: Dialogue and NPC speech.
- Radio Volume: For the in-game radio (Diamond City Radio, etc.).
- Output Device: Select your speakers/headphones.
- Sound Quality: Options are "Mono", "Stereo", "Surround 5.1", "Surround 7.1". Choose based on your hardware. Stereo is safe for most headphones. Surround can cause muffled dialogue if your system isn’t properly configured.
- If dialogue sounds too quiet or imbalanced, increase Voice Volume relative to SFX.
- The radio can be distracting during exploration; consider turning it off for better immersion in environmental audio.
- Key Bindings: Fully customizable. Common rebind: Melee attack to mouse side button, VATS to Q, Quick Save to F5.
- Mouse Sensitivity: Adjust for look speed. Default 15 is often too high; many prefer 8–12.
- Mouse Smoothing: Can cause input lag; disable for more responsive aiming.
- Invert Y-Axis: For flight sim enthusiasts; off by default.
- Controller Sensitivity: Separate from mouse sensitivity and applies when a controller is plugged in.
- Vibration: Enable/disable for controllers.
- The game has full support for Xbox One/Series and PlayStation 4/5 controllers (wired or Bluetooth).
- V.A.T.S. Targeting Stick Sensitivity: Controls how quickly the targeting reticle moves in V.A.T.S. Use default or reduce if you overshoot targets.
- Look Sensitivity: Adjust for camera speed.
- Swap Trigger Buttons for Aim/Shoot: Some players swap LT/RT with LB/RB for faster firing.
- Mouse Smoothing (listed under Advanced Controls) is enabled by default and adds input lag. Turn it off.
- Auto-Sprint (under Gameplay): If enabled, you sprint by pressing forward once? No — it’s actually a toggle for always running. Make sure it’s off unless you want to always sprint.
- V.A.T.S. Critical Hit (key binding): By default, press F (or RT+space on controller). This is often triggered accidentally if you mash space during V.A.T.S. Rebind to a less convenient key if needed.
- Subtitles: Under Display -> Subtitles. Enable to show spoken dialogue as text. Also has a separate toggle for "Dialogue Subtitles" and "Radio Subtitles".
- Closed Captions: Not available natively, but subtitles include sound descriptions (e.g., [gunshot]) when enabled.
- Colorblind Modes: None. You must rely on mods (e.g., “Colorblind Aid” mod).
- Difficulty: Adjustable anytime. See Gameplay section. Lower difficulty reduces damage taken; more accessible for reaction time concerns.
- Aim Assist (Controller only): On by default. Helps with tracking enemies. Can be turned off in Controls.
- V.A.T.S. Pause: The V.A.T.S. system pauses time (except in Survival mode), allowing players with slower reflexes to target enemies.
- Font Size: Not adjustable. Recommended to increase HUD size via mods if needed.
- Quick Save: Use F5 (PC) or hold select (console) to quicksave frequently, reducing frustration from unexpected deaths.
- Subtitles do not appear for radio broadcasts unless you enable “Radio Subtitles” separately.
- The game lacks a text-to-speech function; visually impaired players may require mods like “Fallout 4 Speech Recognition” or external screen readers (with limited support).
- Available Languages (on PC via Steam): English, French, German, Italian, Spanish, Polish, Russian, Japanese, Chinese (Simplified), and more depending on your region.
- Voice Language: Usually matches text language. Some versions (e.g., Russian) have full voice acting; others (e.g., Japanese) have only subtitled dialogue with English voices.
- Changing Language: On Steam, right-click game -> Properties -> Language tab. On consoles, language is tied to system language.
- If you change language after starting a save, dialogue and subtitles will switch, but previously played audio remains in the original language until re-encountered. Not game-breaking but immersion-breaking.
- The game does not support separate text/voice languages natively. Mods can enable multi-language support but may cause instability.
- Creation Club: Requires internet connection to browse and download mods from Bethesda's official store. Can be disabled in main menu under Mods -> Creation Club -> Settings (toggle “Online” off).
- Mod Browser: In-game mod manager (Bethesda.net) requires internet. You can also install mods manually from Nexus Mods without internet.
- Cloud Saves: Steam and Xbox support cloud saves. Ensure this is enabled in your platform settings to backup your progress.
- No Multiplayer: Fallout 4 is single-player only. No co-op or competitive modes.
- If you have slow internet, disable Creation Club auto-downloads to avoid stutter when browsing mods.
- Cloud saves can sometimes conflict if you play on multiple PCs; manual saves are recommended before major mod installations.
Mid-Range (e.g., GTX 1660 / RTX 2060 / Ryzen 5 / 16GB RAM)
High-End (e.g., RTX 3070 / RTX 4070 / Ryzen 7+ / 32GB RAM)
Ultra / 4K (e.g., RTX 4090 / Intel i9 / 64GB RAM)
#### Settings That Are Easy to Misconfigure
---
Audio Settings
Audio settings control volume, output device, and sound quality.
Recommended: Keep all sliders at 100% except Radio (50% if you want to hear environmental sounds). Set Sound Quality to Stereo unless you have a verified surround setup.
Special Attention:
---
Controls Settings
Control settings allow rebinding keyboard/mouse and controller inputs.
#### Keyboard & Mouse
#### Controller (Xbox / PlayStation)
Special Attention:
---
Accessibility Settings
Fallout 4 does not have a dedicated accessibility menu, but several options aid different needs.
Special Attention:
---
Language Settings
Language selection affects text and voice.
Special Attention:
---
Network Settings
Fallout 4 has very limited network features:
Special Attention:
---
Gameplay Settings
Gameplay settings affect the game’s core loop and difficulty.
| Setting | Effect | Notes |
|---|
| Survival Mode | Overhaul: no fast travel, limited saving (sleep only), hunger/thirst/sleep needs, increased lethality. Can be toggled on/off via difficulty menu, but once enabled, you cannot revert to non-Survival without losing progress (unless using mods).
| Auto-Save on Wait | Saves when you wait (rest). | Keep on.
| Auto-Save on Travel | Saves when fast traveling (not in Survival). | Keep on.
| V.A.T.S. Freeze Time (under Controls) | When enabled, time stops in V.A.T.S. In Survival mode, time always flows slowly but not completely frozen.
| Dialogue Subtitles | Show subtitles for conversations. | On recommended.
| Radio Subtitles | Subtitles for radio. | Off by default; enable if you want to read lyrics.
| Compass | Shows direction and quest markers. | Can be toggled in Display.
| HUD Opacity | Adjusts transparency of HUD elements. | Default 80% is good; 0% removes HUD.
| Pip-Boy Light | Brightness of the flashlight. | Can be changed via console command (f pipboylightfade) but not in menu.
| Subtitles (Audio) | Toggle all subtitles. | Separate from Dialogue Subtitles.
#### Recommended Difficulty Settings
- First Playthrough: Normal — balanced challenge and loot.
- Story Focused: Very Easy — enemies die quickly, minimal survival stress.
- Veteran: Hard or Very Hard — bullet sponges; encourages tactical VATS usage.
- Hardcore: Survival — requires planning, resource management, and careful saving.
- Survival Mode disables the console (PC) and quicksaves. It also multiplies damage taken significantly. Do not enable Survival Mode mid-game unless you are prepared for permadeath-like consequences.
- Auto-Save can be disabled — it’s highly recommended to keep both auto-save options ON (except in Survival where they don’t work) to prevent losing progress.
- V.A.T.S. Freeze Time is a personal preference; some players prefer it off for a more action-oriented experience.
- Always start with a predefined preset (Low/Medium/High) and then tweak up or down based on your FPS target. Use a performance monitor (e.g., MSI Afterburner) to see which settings are bottlenecks.
- Disable Weapon Debris first if you experience stuttering — it’s the biggest cause of uneven frame pacing.
- If you have a G-Sync/FreeSync monitor, enable V-Sync in the game (or via driver) to prevent screen tearing, but be aware of added input lag.
- For console players: On Xbox One X / PS4 Pro, use 1080p mode for steady 30 FPS; on Xbox Series X/S, use the FPS Boost (if available) for 60 FPS. On PS5, the game runs via backward compatibility at 30 FPS (no official 60 FPS patch).
- If you plan to mod, install the game outside of Program Files (e.g., C:\Games) to avoid permission issues.
Special Attention:
---
Final Tips for New Players
---
With these settings tuned to your hardware and preferences, Fallout 4 will run smoother, look better, and be more enjoyable. Remember that the game is not perfectly optimized, so occasional frame drops in downtown Boston are normal even on high-end systems.

Important Notes
Fallout 4: Important Notes
This guide covers critical warnings, pitfalls, irreversible choices, missable content, difficulty spikes, grinding traps, save management advice, and common player regrets. Follow these to avoid frustration and maximize your experience.
---
⚠️ Warnings & General Advice
- Save Often, Save in Multiple Slots: Fallout 4 is prone to bugs, crashes, and corrupt saves—especially on PC and older consoles. Use at least three rotating save slots (manual saves) and never rely solely on autosaves or quicksaves. Quicksaves can become corrupted if used repeatedly in the same spot.
- Modding Warning: If you plan to use mods, install them after your first playthrough or make a clean save before adding them. Mods can break quests, cause infinite loading screens, or corrupt your save. Always read mod descriptions for compatibility.
- Survival Mode is Brutal: Survival mode disables manual saves (only sleeping saves), increases enemy damage, introduces hunger/thirst/fatigue, and requires ammo to have weight. Do not start Survival unless you are experienced with the game's mechanics.
- Power Armor Needs Fusion Cores: Fusion cores are finite early on. Do not sprint in power armor (drains cores fast). Use the "exit armor" trick to conserve cores when stationary.
- Nick Valentine Questline Bug: If you dismiss Nick Valentine before completing his personal quest "The Long Time Coming," he may become unrecruitable. Always complete his quest before switching companions.
---
⛔ Pitfalls & Common Mistakes
| Pitfall | Why It's Bad | How to Avoid |
|---|---|---|
| Selling Pre-War Money | Pre-War money weighs nothing and can be used as currency in certain vendors (e.g., the Railroad). It also has high value-per-weight for trading. | Keep all pre-war money in a container or your workshop. Only sell if desperate for caps. |
| Using Bobbleheads as Decor | Bobbleheads provide permanent stat boosts or perks when collected. If you place them in your settlement, you lose the effect. | Collect every bobblehead you find; do not drop or store them. |
| Ignoring the Luck Bobblehead in Vault 111 | The Luck bobblehead is on a desk in the overseer's office, just before you leave the vault. It's easy to miss in the rush. | After leaving the cryo chambers, search the office thoroughly before exiting. |
| Rushing the Main Quest | The main quest locks you into one of four factions. If you progress too far with a faction, others become permanently hostile. | Do quests for all factions until you get a warning popup that a choice is irreversible. Save before committing. |
| Not Picking Up Junk | Junk items can be scrapped for materials needed for settlement building, weapon mods, and armor upgrades. | Collect all junk with labels like "steel," "aluminum," "screws," "adhesive." Use the "tag for search" function. |
###
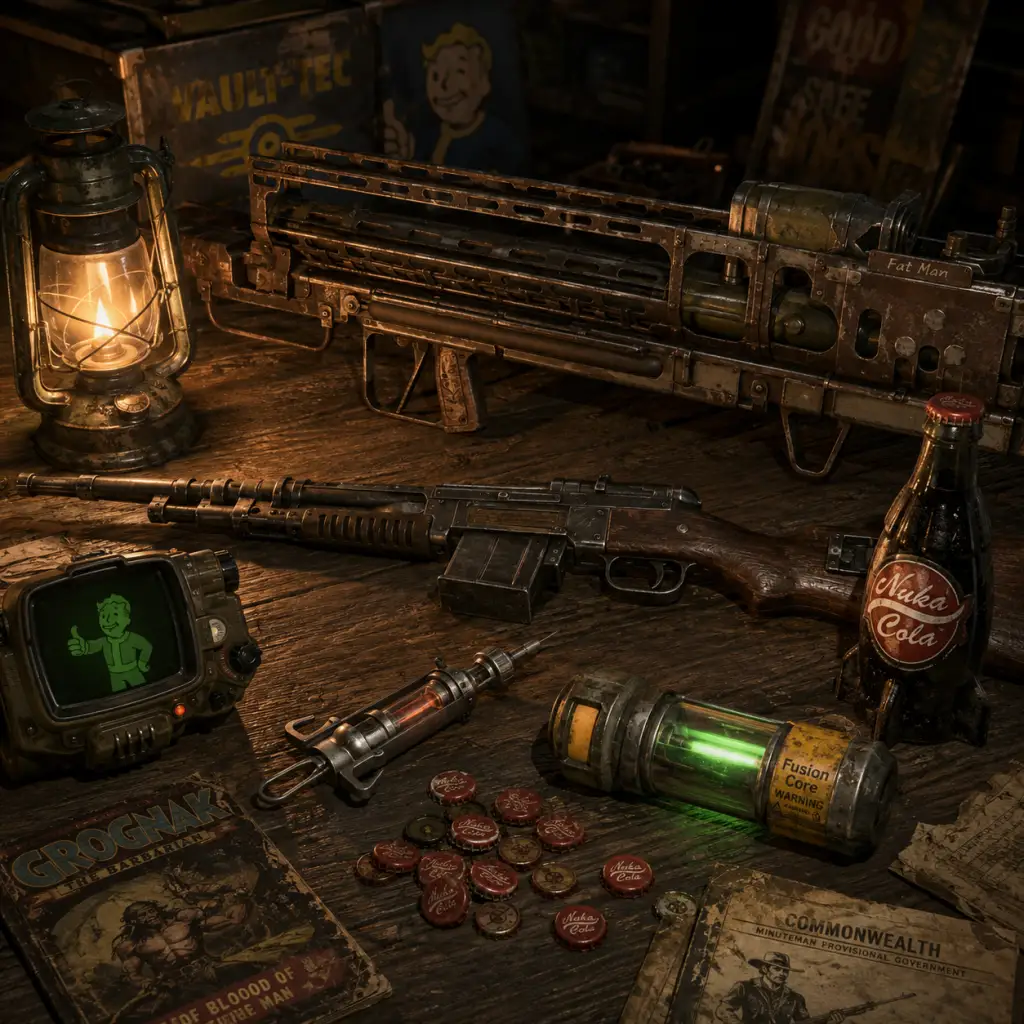
All Game Items
Fallout 4: Comprehensive All Game Items Guide
This guide catalogs every major item category in Fallout 4, including weapons, armor, consumables, materials, currencies, collectibles, and key equipment. Each entry explains what the item does, how to obtain it, when it is useful, and important synergies or upgrades.
---
1. Weapons
Weapons are divided by class. All can be modified at weapon workbenches using junk materials and perks.
#### 1.1 Ballistic Weapons (Pistols, Rifles, Shotguns, Heavy Guns)
- 10mm Pistol: Standard sidearm. Found early in Vault 111. Great for early game; upgrade to automatic for close-range. Synergy: Gunslinger perk improves hip-fire accuracy.
- Pipe Weapons (Pipe Pistol, Pipe Rifle, Pipe Revolver): Crude homemade guns. Common loot from raiders. Low damage but easy to repair. Use as scrap early; not endgame viable.
- Combat Rifle: Versatile semi-auto rifle. Found from mid-level enemies. Excellent with Rifleman perk. Can be converted to automatic (Commando perk).
- Combat Shotgun: High damage, short range. Drops from raiders, gunners. Powerful with Shotgun Surgeon (Demolition Expert doesn't work). Upgrade to advanced receiver.
- Sniper Rifle (.308): Long-range precision. Obtainable from Triggermen or craft with Hunting Rifle + scope. Pair with Rifleman and stealth perks.
- The Deliverer (Unique 10mm): Granted during the Railroad quest "Tradecraft." Increased critical damage, lower AP cost. Best for Gunslinger/VATS builds.
- Overseer's Guardian (Unique Combat Rifle): Sold in Vault 81. Two-shot legendary effect. Devastating with Rifleman.
- Spray 'n' Pray (Unique SMG): Sold by Cricket. Explosive legendary effect – beware self-damage.
- Laser Pistol/Rifle: Common energy weapon. Converts to sniper or automatic. Use Science! perk for mods. Railroad uses these heavily.
- Plasma Pistol/Rifle: Slower but high damage + bonus energy damage. Green globs. Ideal with Rifleman or Commando. Good against synths.
- Gatling Laser: Heavy energy weapon. Drops from high-level Brotherhood of Steel soldiers. Requires Heavy Gunner perk. Fusion core ammo.
- Institute Rifle/Pistol: Unique energy weapons from Institute. Higher rate of fire but less common ammo. Used by synths.
- Alien Blaster (Unique): From crashed UFO in Commonwealth. Infinite ammo after DLC. Very high damage but rare.
- Combat Knife: Fast, low damage. Useful for stealth takedowns with Ninja.
- Machete: Slower but better damage. Can be upgraded with blade attachments.
- Super Sledge: Heavy two-handed weapon found on super mutants. Very high damage + knockback. Requires Big Leagues perk.
- Grognak's Axe: Unique two-handed axe from Hubris Comics. Good early melee.
- Furious Power Fist: Unique unarmed from Swan's pond. Legendary – increases damage per hit. Use with Iron Fist perk.
- Frag Grenade: Common throwable. Crafted from fertilizer, steel, adhesive. Good crowd control.
- Molotov Cocktail: Early game AoE fire damage. Made from whiskey, cloth, fertilizer.
- Fat Man: Portable nuke launcher. Mini nukes are rare. Use for bosses (e.g. Behemoths).
- Missile Launcher: Heavy weapon. Easy to find ammo (missiles). Effective with Heavy Gunner.
- Baseball Grenade: Unique to Far Harbor DLC. Can be recovered if misses.
- Junk Jet: Fires junk items as ammo. Weight of junk determines damage. Found at Saugus Ironworks. Fun but inefficient.
- Broadsider: Naval cannon that fires cannonballs. Obtained from USS Constitution quest. Decent explosive damage.
- Harpoon Gun (Far Harbor): Fires harpoons. Can be modified flechette for bleeding.
- Vault-Tec Jumpsuit: Starting outfit. Offers minimal protection but can be upgraded with ballistic weave (Railroad quest).
- Road Leathers: Common raider outfit. Good early ballistic weave candidate.
- Armored Courser Outfit: High protection, from Institute coursers. Can't wear separate armor.
- Silver Shroud Costume: Quest item from Hubris Comics. +1 Charisma with upgrades.
- Mechanist Armor (Automation DLC): Full set with helmet; high energy resistance.
- Leather Armor: Light, low protection. Common early. Upgrade with Armorer perk.
- Metal Armor: Heavy, high ballistic resistance, low energy. Popular with raiders.
- Combat Armor: Balanced stats. Standard for Gunners. Can be upgraded to sturdy or heavy.
- Synthetic Armor (Institute/ Railroad): Camouflaged stats; good energy resistance.
- Trapper Armor (Far Harbor): Raw materials, decent defense.
- Marine Armor (Far Harbor): Best non-power armor ballistic resistance; requires Armorer 3.
- T-45: Entry-level. Found at Corvega factory, Concord. Low protection.
- T-51: Mid-game. Best rad resistance. Found at Fort Strong, other locations.
- T-60: High stats overall. Used by BoS. Can be painted for bonuses.
- X-01: Endgame. Best defense. Found in military sites (e.g. 35 Court). Requires high level.
- Raider Power Armor: Cheap, weak, but easy to repair with scrap.
- Fusion Cores: Required to power armor. Found in generators, sold merchants. Running, VATS, and sprint consume power.
- Stimpak: Instant health 30% + over time. Common loot, crafted at chem station. Essential.
- RadAway: Cures 300 rads. Use carefully – weakens you temporarily.
- Rad-X: +100 Radiation resistance temporarily. Good for glowing areas.
- Purified Water: Cures thirst (Survival mode) and gives limited healing. Can be produced at settlements.
- Nuka-Cola: Restores AP + health. Variants: Quantum (full AP refill), Quartz (40 Rad resist).
- Cram, MRE, etc.: Basic food. Cures hunger in Survival.
- Buffout: +Strength & Endurance, weight limit. Can cause addiction.
- Jet: Slows time (AP drain). Crafted from fertilizer+plastic. Synergy: Jet Fuel (gives AP).
- Med-X: Reduces damage taken 25% for 5 minutes. Valuable in combat.
- Psycho: +25% damage, -25% accuracy. Combine with Buffout (Psychobuff).
- Mentats: +Charisma & Intelligence. Variants: Orange (Perception), Grape (Persuasion).
- X-Cell: Temporary boost to all SPECIAL+ carry weight. Hard to find.
- Antibiotics (Survival): Crafted from glowing fungus+ purified water. Cures disease.
- Sickness Cure (Far Harbor): Cures injury.
#### 1.2 Energy Weapons
#### 1.3 Melee Weapons
#### 1.4 Explosive Weapons
#### 1.5 Special Weapons
---
2. Armor
Armor divides into apparel (clothing/underarmor) and worn armor pieces (chest, arms, legs, head). Legendary effects boost utility.
#### 2.1 Clothing / Underarmor
#### 2.2 Worn Armor Pieces
#### 2.3 Power Armor
---
3. Consumables
All consumables heal, buff, or cure. Some are addictive.
#### 3.1 Food & Drinks
#### 3.2 Chems (Drugs)
#### 3.3 Crafting Consumables
---
4. Materials (Junk & Scrap)
Junk items break down into raw components at workbenches. Essential for crafting and settlement building.
| Component | Common Sources | Used For |
|---|---|---|
| Adhesive | Mutfruit, corn, tato (plant glue); duct tape | All weapon/armor mods |
| Aluminum | TVs, trays, Abraxo | Weapon mods, power armor |
| Copper | Fuses, telephones | Wiring, energy weapon mods |
| Gears | Fans, toys | Weapon mods, generators |
| Oil | Cutting fluid, toy cars, prehistoric skulls | Power armor, heavy weapons |
| Circuitry | Hotels, sensors | Pip-Boy upgrades, turrets |
| Nuclear Material | Glowing mushrooms, alarm clocks | Energy weapons, high-tier mods |
| Steel | Tin cans, armor pieces (scrap) | Universal crafting, building |
| Wood | Desks, pencils, branches | Settlement structures, fences |
| Fertilizer | Farmed brahmin, bags | Jet, grenades, explosive bait |
| Rubber | Tire piles, basketballs | Power armor (arm seals), melee grip |
---
5. Currencies
- Bottle Caps: Primary currency. Dropped by enemies, found containers, sold goods. 1 cap ≈ 10 pre-war money.
- Pre-War Money: Weightless, sells for caps. Also used as cloth in settlement building.
- Gold Bars: Heavier, high value (80 caps each). Found in certain vaults (e.g. Vault 114).
- Silver Locket / Wedding Rings: Small valuables to sell.
- Stimpaks & RadAway (in Survival Mode): Can be traded at vendors for needed supplies.
- Fusion Cores: Valuable for trade with BoS or merchants (150-400 caps each).
- Strength: Found in Mass Fusion building.
- Perception: In Vault 81, in classroom.
- Endurance: Poseidon Energy – near reactor.
- Charisma: Parsons State Insane Asylum.
- Intelligence: The Institute, Robotics department.
- Agility: Unmarked structure near Faneuil Hall.
- Luck: In Shamrock Taphouse, in office.
- Guns and Bullets: +5% critical damage per issue.
- Live & Love: +5% companion affinity per issue.
- Save: Free skill point per issue.
- Pip-Boy 3000 Mark IV: Worn on left arm. Provides stats, map, radio, item management, Perk selection. Upgraded with higher Intelligence for faster hacking, better crafting.
- Power Armor Frame: Core of power armor; allows mounting armor pieces. Must have Fusion Core added to move.
- Pocketed Mod (Armor): Increases carry weight by +10 per piece, better “Deep Pocketed” (+15).
- Military Duct Tape: Rare source of adhesive.
- Syringer: Inject animals with drugs (e.g., Berserk, Blind). Useful for stealth runs in Far Harbor.
- Nuka-World’s Quantum X-01: Complete the Nuka-World galactic zone for a unique X-01 with rad resistance.
- Settlement Turrets & Defenses: Not “items” per se, but placed items crucial for settlement happiness and defense rating.
- Cooking Station: Turns raw meat (e.g., Radroach, Deathclaw) into cooked food with healing. Requires recipes unlocked via game experience.
- Chemistry Station: Craft chems, antibiotics, poison caltrops, Molotovs.
- Armor Workbench: Upgrade armor with mods (Dense, Shadowed, Lead-Lined, etc.).
- Weapon Workbench: Refine weapon parts; remove/add mods; craft legendary effects (with Far Harbor’s legendary mods).
- Power Armor Station: Repair, customize power armor pieces.
- Automatron: Robot workbench – build custom robots with various weapons/pieces.
- Far Harbor: Introduces Harpoon Gun, Marine Armor, Rad Shielding, and “The Striker” (a baseball launcher).
- Nuka-World: New weapons like the Splattercannon (increased damage per consecutive hit) and Thirst Zapper (with Pylon ammunition).
- Contraptions Workshop: Manufacturing machinery (ammo factory, hoppers).
- Vault-Tec Workshop: Vault building items, cryo-freeze weapons.
- Sort by weight/value: Pick up items with high caps-to-weight ratio (e.g., pre-war money, gold items).
- Scrap everything in settlements to stockpile materials.
- Legendary farming: Save before entering high-level areas, reload to re-roll legendary drops from enemies.
- Use Strong Back perk (STR 6) to fast travel while overencumbered.
- Store unique weapons in your home settlement to avoid accidental scrapping.
---
6. Collectibles
These permanent stat boosts or lore items.
#### 6.1 Bobbleheads
Each boosts a specific SPECIAL stat by 1 or grants a unique perk. Stat bobbleheads stack with baseline SPECIAL already allocated. Locations:
Skill Bobbleheads (e.g. Repair, Lockpicking) provide a permanent single-rank perk. Vital for min-maxing.
#### 6.2 Magazine: “Hot Rodder,” “Scout’s Life,” “MILA,” etc.
Collect all 10 issues per magazine series for cumulative bonuses like faster hacking, extra barter, or settlement happiness. Notable:
#### 6.3 Holotapes & Notes
Lore items that trigger quests or reveal door codes (e.g. the Bunker Hill note). Essential for side quests like “The Secret of Cabot House” or “The U.S. Coast Guard Plot.”
#### 6.4 Uniques & Legendary Loot
Named weapons/armor with fixed legendary effects (e.g., “Two Shot,” “Explosive,” “VATS Enhanced”). Obtained from major bosses, quest rewards, or random legendary enemies – which respawn with legendary loot tables.
---
7. Key Equipment
Essential items for progression and survival.
---
8. Crafting & Workbench Items
---
9. DLC Exclusive Items (Brief Overview)
---
10. Tips for Item Management
---
This guide covers the base game and major DLCs. For exact spawn locations of specific legendaries, refer to our dedicated Weapons & Armor location guide.
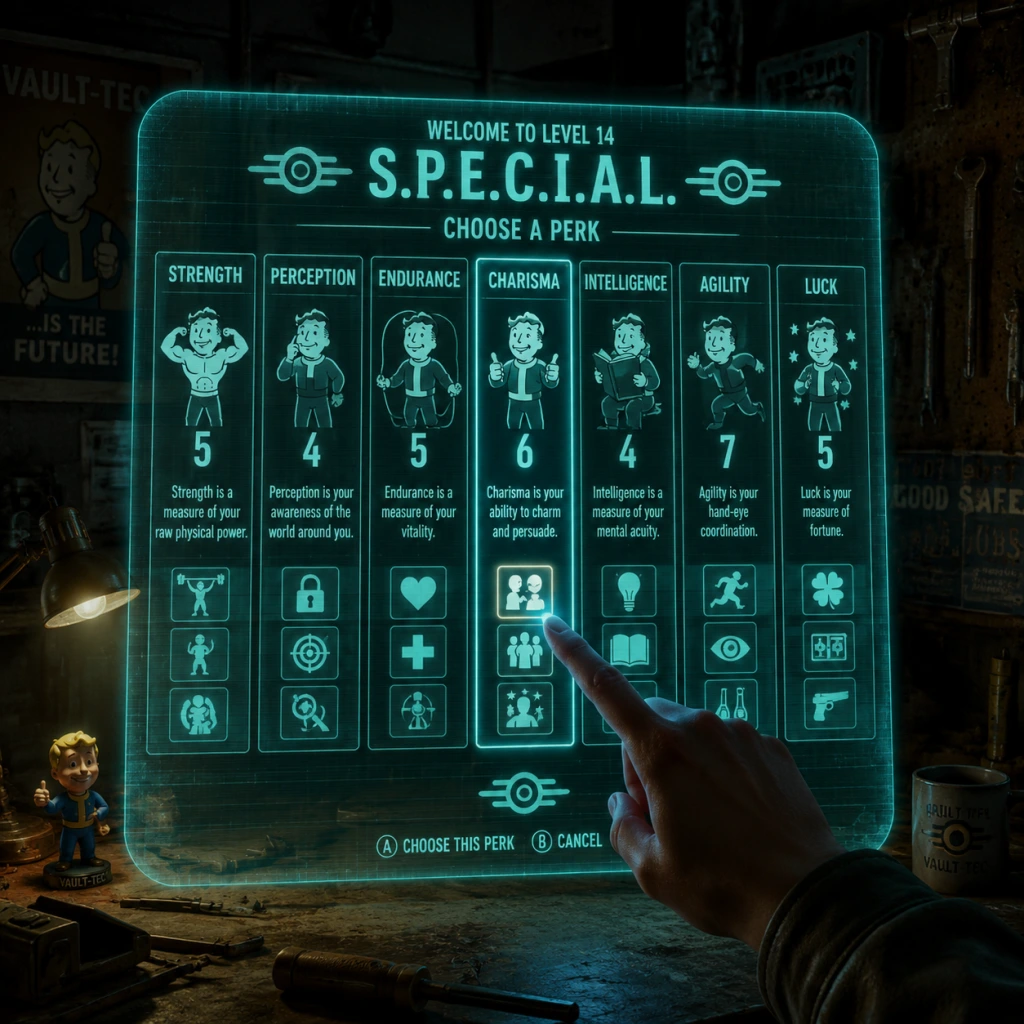
Character Skills
Character Skills Guide for Fallout 4
Overview
Fallout 4 does not use traditional skill points or skill trees. Instead, your character’s abilities are defined by the SPECIAL system (7 base attributes) and the Perk Chart – a deep grid of 70 unlockable perks (plus more in DLC). Each perk acts like a discrete skill, ability, or talent, and many have multiple ranks that improve the effect. There are no spells, special moves, or cooldown-based abilities in the traditional sense; instead, you have V.A.T.S. (Vault-Tec Assisted Targeting System) which uses Action Points (AP) and a critical-hit meter, and stealth mechanics. This guide covers every perk in the base game, explaining effects, upgrades, synergies, recommended builds, and when to use each.
---
SPECIAL Attributes
Each SPECIAL attribute determines a derived statistic and unlocks certain perks. You start with 21 points to distribute (max 10 per attribute, can be raised later via the “You’re SPECIAL!” book and bobbleheads).
| Attribute | Primary Stat Effects | Unlocks Perk Column |
|---|---|---|
| Strength (STR) | Carry weight, melee/unarmed damage, throwing range | 1st column (10 perks) |
| Perception (PER) | V.A.T.S. accuracy, lockpicking difficulty, detection | 2nd column (10 perks) |
| Endurance (END) | Hit Points (HP), sprint AP drain, radiation resistance | 3rd column (10 perks) |
| Charisma (CHA) | Speech persuasion, settlement trade prices, companion affinity | 4th column (10 perks) |
| Intelligence (INT) | Experience gain (XP), hacking difficulty, crafting efficiency | 5th column (10 perks) |
| Agility (AGI) | Action Points (AP), sneaking, pickpocketing | 6th column (10 perks) |
| Luck (LCK) | Critical meter fill rate, loot quality, chance for “mysterious” events | 7th column (10 perks) |
Perk Categories & Descriptions
Each SPECIAL column contains 10 perks (numbered 1–10 from top to bottom). Every perk has a level requirement (usually 1–50) and a minimum SPECIAL requirement. Most perks have 2–5 ranks that unlock additional bonuses. Below is the full list, organized by column. For each perk we list: name, required SPECIAL/level, rank details, synergies/combo tips, and recommended builds/style.
1. Strength Perks (Column 1)
#### 1. Iron Fist
- Req: STR 1 | Ranks: 5 | Effect: +20% unarmed damage per rank. Rank 4: Unarmed attacks may cripple limbs. Rank 5: While unarmed, your power attacks deal +3% damage per point of Strength.
- Synergies: Blitz (AGI 9) for teleporting punches; Stealth; Pugilist build.
- Use: Unarmed only. Best for high-STR melee builds without weapons.
- Req: STR 2 | Ranks: 5 | Effect: +20% melee damage per rank. Rank 4: Melee attacks may stagger. Rank 5: Standing power attacks can hit all targets in a 180° arc.
- Synergies: Rooted (STR 9); Blitz; Stealth melee. Build: Melee Tank.
- Use: All melee weapons. Essential for pure melee.
- Req: STR 3 | Ranks: 4 | Effect: Unlocks armor mods (per rank: simple→advanced→expert→master). Also raises damage/energy resistance of crafted armor.
- Synergies: Science! (INT 6) for energy armor; Blacksmith (STR 4) for melee mods.
- Use: Essential for crafting ballistic weave and power armor modifications.
- Req: STR 4 | Ranks: 3 | Effect: Unlocks melee weapon mods (simple→advanced→expert).
- Synergies: Armorer; Big Leagues; Science! for energy melee.
- Use: Any melee weapon build.
- Req: STR 5, LVL 2 | Ranks: 5 | Effect: +20% heavy weapon damage per rank. Rank 3: Hip-fire accuracy improved. Rank 5: Bonus vs. robots/vehicles.
- Synergies: Steadfast (END 3) to reduce sprint AP drain while heavy; Power Armor.
- Use: Miniguns, gatling lasers, rocket launchers.
- Req: STR 6, LVL 10 | Ranks: 4 | Effect: +50 carry weight per rank. Rank 2: Fast travel while overencumbered. Rank 4: Sprint while overencumbered.
- Synergies: Moving Target (AGI 8); Lone Wanderer (CHA 3). Build: Pack Mule.
- Use: Any build struggling with weight.
- Req: STR 7, LVL 10 | Ranks: 3 | Effect: +hip-fire accuracy (first rank +20%, second +40%, third +60%).
- Synergies: Commando (AGI 5) for automatic weapons; Heavy Gunner.
- Use: Automatic weapons or shotguns without sights.
- Req: STR 8, LVL 15 | Ranks: 4 | Effect: +25% gun bash damage per rank. Rank 4: Gun bashing may cripple or knock down enemies.
- Synergies: Rooted; High STR for bash damage.
- Use: Sidearm backup or shotgun bash builds.
- Req: STR 9, LVL 18 | Ranks: 3 | Effect: +25% melee/unarmed damage and +25 damage resistance while standing still. Rank 2: +50% damage/DR. Rank 3: +75% damage/DR and immunie to stagger while rooted.
- Synergies: Blitz (teleport counts as standing still? Actually yes, you remain still until teleport); Big Leagues; Iron Fist. Build: Stationary powerhouse.
- Use: Melee builds that fight in one spot or use Blitz to attack from range.
- Req: STR 10, LVL 20 | Ranks: 2 | Effect: Power armor sprinting knocks down enemies; Rank 2: also damages them (25 + 2x armor weight).
- Synergies: Power Armor; Heavy Gunner; Basher.
- Use: Only with power armor; pure crowd control.
- Req: PER 1 | Ranks: 4 | Effect: Pickpocket chance increased; Rank 3: can place live grenades in inventory; Rank 4: steal equipped weapons.
- Synergies: Sneak (AGI 7); Mister Sandman (AGI 7). Use: Stealth thief.
- Req: PER 2, LVL 1 | Ranks: 5 | Effect: +20% semi-auto rifle damage per rank; also ignores 15/20/25/30/36% armor. Rank 5: chance to cripple limbs.
- Synergies: Sniper (PER 8); Sneak; Lone Wanderer. Build: Sniper/Rifleman.
- Use: All non-automatic long guns.
- Req: PER 3 | Ranks: 2 | Effect: V.A.T.S. shows target’s damage resistance and level. Rank 2: V.A.T.S. shows target’s limb health.
- Synergies: Any VATS build; helps choose ammo type.
- Use: Tactical info for planning attacks.
- Req: PER 4 | Ranks: 4 | Effect: Unlocks lockpicking difficulty levels (novice→advanced→expert→master). Rank 2: bobby pins break less.
- Synergies: Hacker (INT 4); Perception bobblehead. Use: Essential for loot.
- Req: PER 5, LVL 4 | Ranks: 4 | Effect: +25% explosive damage per rank; also affects grenade/mine throw range. Rank 4: Explosives can cripple limbs.
- Synergies: Heavy Gunner (missile launcher); Gunslinger (AGI 2) for grenade launchers? Actually pistol for launchers? No, but any build with explosives.
- Use: Missile launchers, grenades, mines, Fat Man.
- Req: PER 6, LVL 4 | Ranks: 2 | Effect: +2 PER and +2 INT at night (6pm–6am). Rank 2: Night vision (green tint).
- Synergies: Sneak; Sniper; any nighttime player. Use: Always active if you play at night.
- Req: PER 7, LVL 10 | Ranks: 5 | Effect: +10 energy resistance per rank.
- Synergies: Toughness (END 3) for ballistic resist; Lone Wanderer. Use: General defense.
- Req: PER 8, LVL 13 | Ranks: 3 | Effect: While scoped, holding breath stabilizes aim (+0% sway). Rank 2: chance to knock down enemies with scoped headshots. Rank 3: increased limb damage.
- Synergies: Rifleman; Sneak (for critical stealth shots); Better Criticals (LCK 6). Use: Sniper builds.
- Req: PER 9, LVL 18 | Ranks: 2 | Effect: V.A.T.S. can target body parts behind cover; shots penetrate obstacles with reduced damage. Rank 2: penetration damage increased.
- Synergies: Concentrated Fire (PER 10); High PER/AGI. Use: VATS sniper.
- Req: PER 10, LVL 25 | Ranks: 3 | Effect: Each consecutive hit on same target in V.A.T.S. gains +10% accuracy and +10% critical hit chance. Rank 2: +20%; Rank 3: +30%.
- Synergies: Penetrator; Gun Fu (LCK 9); high AP. Build: VATS gunslinger.
- Focus: Perception, Luck, Agility. Perks: Rifleman, Sniper, Sneak, Mister Sandman, Better Criticals, Critical Banker, Ninja (for stealth bonus).
- Style: Stay hidden, one-shot from afar. Use suppressed bolt-action rifles.
- When to use: Long-range engagement, clearing groups without detection.
- Focus: Perception, Agility, Strength. Perks: Commando, Steady Aim (hip-fire), Heavy Gunner (optional), Demolition Expert (explosive autos).
- Style: Spray bullets, high DPS, moderate range. Use automatic rifles or submachine guns.
- When to use: Close-to-medium range, large groups, or when ammo is plentiful.
- Focus: Strength, Endurance, Agility. Perks: Big Leagues (or Iron Fist), Rooted, Blitz, Ninja, Sneak (for stealth attacks).
- Style: Blitz teleport to enemy, power attack for huge damage. Tanky and mobile.
- When to use: Up close, one-on-one or small groups. Best in interior spaces.
- Focus: Agility, Perception, Luck. Perks: Gunslinger, Concentrated Fire, Gun Fu, Critical Banker, Grim Reaper’s Sprint, Four Leaf Clover, Better Criticals.
- Style: Use pistols/revolvers in VATS, chain kills with unlimited AP and crits.
- When to use: Mid-range, fast-paced fights. Requires high AP and luck.
- Focus: Strength, Endurance, Intelligence. Perks: Pain Train, Heavy Gunner, Armorer (for armor mods), Nuclear Physicist, Steadfast, Life Giver, Toughness.
- Style: Slow but indestructible. Use miniguns, gatling lasers, melee in PA.
- When to use: Heavily armored enemies, suicidal runs, radiation zones.
- Focus: Charisma, Intelligence, Endurance. Perks: Local Leader, Caps Collector, Lone Wanderer (if solo), Speech-related dialogue perks (Lady Killer, etc.), Armorer, Science (for building).
- Style: Build settlements, avoid combat through persuasion, amass wealth.
- When to use: Non-combat roles, trading, quest resolution.
- Focus: Agility, Luck, Perception. Perks: Sneak, Ninja, Mister Sandman, Rifleman (or Gunslinger), Bloody Mess, Clover/Stranger.
- Style: Maximize sneak damage multiplier (up to 10x for melee or 4.5x for suppressed pistols).
- When to use: Elimination missions, never seen.
- Blitz + Rooted + Ninja: Teleport from stealth for 10x damage while still for Rooted bonus.
- Gun Fu + Concentrated Fire + Critical Banker: VATS chain kills with massive critical accumulation.
- Grim Reaper’s Sprint + Four Leaf Clover + Critical Banker: Infinite AP and crit refill loop.
- Nerd Rage! + Life Giver + Ghoulish: Become nearly unkillable below 20% HP with rad healing.
- Aquaboy/Girl + Ghoulish: Swim in radiation water for healing.
- Lone Wanderer + Moving Target + Steady Aim: Solo runner with high mobility and hip-fire accuracy.
- Early game (< level 10): Prioritize damage perks (Rifleman, Big Leagues, Gunslinger, Commando) and utility (Locksmith, Hacker, Armorer). Avoid high-level perks early.
- Mid game (10–25): Add survivability (Toughness, Life Giver, Adamantium Skeleton), critical perks (Better Criticals, Critical Banker), and crafting (Gun Nut, Science!).
- Late game (25+): Unlock ultimate perks like Pain Train, Concentrated Fire, Gun Fu, Nerd Rage!, and high-rank Luck perks. Build synergy is key.
- Survival mode: Endurance and Chem Resistant become vital; early Lone Wanderer helps carry weight.
#### 2. Big Leagues
#### 3. Armorer
#### 4. Blacksmith
#### 5. Heavy Gunner
#### 6. Strong Back
#### 7. Steady Aim
#### 8. Basher
#### 9. Rooted
#### 10. Pain Train
---
2. Perception Perks (Column 2)
#### 1. Pickpocket
#### 2. Rifleman
#### 3. Awareness
#### 4. Locksmith
#### 5. Demolition Expert
#### 6. Night Person
#### 7. Refractor
#### 8. Sniper
#### 9. Penetrator
#### 10. Concentrated Fire
---
(Due to length, we now summarize remaining columns – full guide continues similarly for Endurance, Charisma, Intelligence, Agility, Luck)
3. Endurance Perks (Column 3)
1. Toughness (+10 DR/rank) – Core defense. | 2. Lead Belly (avoid radiation from food/drink) – Survival. | 3. Life Giver (+20 HP/rank, rank 4: regen) – HP boost. | 4. Chem Resistant (no chem addiction) – Chem builds. | 5. Aquaboy/girl (breathe underwater, rad resistant) – Underwater exploration. | 6. Rad Resistant (+10 Rad Res/rank) – Glowing Sea. | 7. Adamantium Skeleton (limb damage reduction) – Tank. | 8. Cannibal (eat corpses for HP) – Grim survival. | 9. Ghoulish (rads heal HP) – High rad synergy. | 10. Solar Powered (HP/STR boost in sunlight) – Daytime bonuses.
4. Charisma Perks (Column 4)
1. Caps Collector (better barter prices) – Wealth. | 2. Lady Killer/Black Widow (+5% damage to opposite sex, unique dialogue) – Dialogue manipulation. | 3. Lone Wanderer (+30% damage, +80 carry, +25% DR when solo) – Solo god. | 4. Attack Dog (companion stagger enemies) – Dogmeat synergy. | 5. Animal Friend (pacify wild animals) – Survival utility. | 6. Local Leader (settlement supply lines, stores) – Settlement empire. | 7. Party Boy/Girl (no alcohol addiction, +3 CHA when drunk) – Party build. | 8. Inspirational (+20% damage for companions, no friendly fire) – Companion support. | 9. Wasteland Whisperer (pacify wasteland creatures) – Creature tamer. | 10. Intimidation (pacify humans) – Pacifist runs.
5. Intelligence Perks (Column 5)
1. V.A.N.S. (tunnel to quest marker) – Navigation. | 2. Medic (stimpaks heal more) – Survival healer. | 3. Gun Nut (weapon mods) – Essential for all guns. | 4. Hacker (terminal hacking) – Loot/info. | 5. Scrapper (highlight salvage materials) – Junk hoarder. | 6. Science! (energy weapon mods, high-tech details) – Energy weapons. | 7. Chemist (chem duration doubled, craft new chems) – Chemist build. | 8. Robotics Expert (hack/disable robots, cripple with weapon) – Robot slayer. | 9. Nuclear Physicist (fusion core life, radiation weapon damage) – Power armor. | 10. Nerd Rage! (slow time, damage, DR at 20% HP) – Desperate power.
6. Agility Perks (Column 6)
1. Gunslinger (+20% pistol damage per rank) – Pistols/Revolvers. | 2. Commando (+20% automatic weapon damage) – Automatic guns. | 3. Sneak (sneak detection radius, silent movement; rank 5: noclip through enemies) – Stealth. | 4. Mister Sandman (silent kills with suppressed weapons; +x% damage) – Assassin. | 5. Action Boy/Action Girl (+25% AP regen per rank) – VATS heavy. | 6. Moving Target (+25% DR while sprinting, less AP drain) – Mobile gunslinger. | 7. Ninja (sneak attack multiplier up to 10x with melee) – Stealth melee. | 8. Quick Hands (faster reload) – Reload speed. | 9. Blitz (VATS melee teleport up to distance) – Melee range. | 10. Gun Fu (auto-target next enemy after kill, +crit damage per target) – VATS chain.
7. Luck Perks (Column 7)
1. Fortune Finder (more caps in containers) – Caps. | 2. Scrounger (more ammo) – Ammo. | 3. Bloody Mess (+5% bonus damage per rank, gory deaths) – Universal damage. | 4. Mysterious Stranger (chance to appear and kill target in VATS) – Fun. | 5. Better Criticals (+25% crit damage per rank) – Crit stacking. | 6. Critical Banker (bank extra critical hits) – Crit strategy. | 7. Grim Reaper’s Sprint (refill AP on kill in VATS) – Infinite VATS. | 8. Four Leaf Clover (chance to refill crit meter on hit in VATS) – Crit regen. | 9. Ricochet (chance to bounce enemy bullets back, knockdown) – Defense. | 10. Idiot Savant (random massive XP boost; works better with low INT) – Leveling speed.
---
Recommended Builds
1. Sniper / Rifleman
2. Commando / Automatic Weapons
3. Melee / Unarmed Brawler
4. VATS Gunslinger
5. Power Armor Tank
6. Charisma / Settlement Baron
7. Stealth Assassin (Ninja)
---
Skill Combos and Synergies
---
When to Use Each Perk (General Tips)
---
Conclusion
Fallout 4’s perk system offers immense depth. There is no single “best” build – your choices should match your playstyle and the game’s difficulty. Experiment with different perk combos, and remember that you can respect your SPECIAL stats later with the “You’re SPECIAL!” book (one time) or by using a mod. Use this guide to plan your character arc from Vault 111 to the endgame.
Note: DLC perks (e.g., from Far Harbor, Nuka-World, Contraptions) are not included here to keep this base-game guide concise.

Characters & Roles
"content": "## Characters & Roles Guide for Fallout 4\n\nThis guide covers every major character (companions and key NPCs) and the possible player roles (build archetypes) in Fallout 4. Each entry includes background, strengths, weaknesses, playstyle, unlock conditions, recommended equipment or builds, and team synergy advice.\n\n---\n\n## Player Character (The Sole Survivor)\n\nYou are a pre-war survivor from Vault 111. Unlike traditional class-based games, Fallout 4 lets you define your role through SPECIAL stats and Perks. There are no fixed classes, but common archetypes (builds) are described later.\n\nBackground: A U.S. Army veteran (male or female) with family pre-war. After the nuclear bombs drop, you enter Vault 111, are cryogenically frozen, and wake up 210 years later to find your spouse murdered and son kidnapped.\n\nStrengths: Fully customizable SPECIAL (28 points at start, can increase via bobbleheads and the \"You're SPECIAL\" book). Unlimited leveling and Perk acquisition. Can fill any combat or utility role.\nWeaknesses: None inherent; depends entirely on your build choices. No class restrictions – but spreading SPECIAL too thin early can make the game harder.\nPlaystyle: Determined by your chosen archetype (see below). You can respec SPECIAL with the game's console command (PC) or use mods; otherwise, choices are permanent.\n\nUnlock Conditions: Start of the game, after character creation.\nRecommended Equipment/Builds: See the \"Player Build Archetypes\" section below.\nTeam Synergy: You can have one companion (plus Dogmeat if you have the Lone Wanderer perk) and act as any role. Companions can fill gaps in your build (e.g., a heavy companion for a stealth sniper).\n\n---\n\n## Companions\n\nFallout 4 has 13 humanoid companions (plus Dogmeat) and additional robot companions from DLC. Each has unique perks, combat preferences, and personal quests. Affinity system: actions in dialogue/world affect their approval; at max affinity (Idolized) you unlock their permanent perk.\n\n### Dogmeat\n\n- Background: A stray German Shepherd in Sanctuary Hills. Loyal, silent, and immortal (cannot permanently die; can be injured but will recover with a stimpak).\n- Strengths: Excellent at detecting enemies and loot (sniffs out items). Fast, agile, can hold enemies (grabs and pins). Does not count against Lone Wanderer perk (you can have Dogmeat AND take that perk).\n- Weaknesses: Cannot equip armor (only dog armor from Far Harbor DLC). Cannot carry much (about 100 lbs base). No dialogue or affinity/perks.\n- Playstyle: Let Dogmeat scout ahead or hold enemies while you shoot. He provides a 5% damage bonus to enemies he's attacking (via the \"Attack Dog\" perk, max level requires three perk points in CHA).\n- Unlock Conditions: After exiting Vault 111, head to Red Rocket Truck Stop (just outside Sanctuary). Dogmeat will be there. Alternatively, you can find him later at various dog-related locations.\n- Recommended Equipment: Dog armor from Far Harbor (adds up to 100+ DR). A doghouse bed at settlements. Use stimpaks on him when he's down.\n- Team Synergy: Works with any build. Best with stealth characters (he doesn't alert enemies as easily as humans). Essential for Lone Wanderer builds.\n\n### Codsworth\n\n- Background: A Mister Handy robot that served your family pre-war. Survived the bombs and kept Sanctuary neat. Loyal to the player and hates raiders.\n- Strengths: High damage resistance (DR: 200+ base), uses a buzzsaw and flamethrower. Good at melee and area denial. Can be customized at a Robot Workbench if you have the Automatron DLC (unlocks full robot building).\n- Weaknesses: Slow movement, cannot sneak. Cannot wear human armor (only robot mods). No personal quest or affinity perk (Codsworth gives no perk; max affinity gives a cosmetic change – he calls you by your name? Actually his affinity perk is \"Robot Companion\". Wait, Codsworth does have a perk: at max affinity he gives you the perk \"Robot Companion\" which gives +10% damage vs robots? No, Codsworth's perk is actually \"Robotics Expert\"? Let me correct: Codsworth's unique perk is \"Robotics Expert\" – no, that's a perk you can take. Actually Codsworth does NOT give a perk. His affinity unlocks a conversation about your family but no reward. So he's a utility companion.\n- Playstyle: Tank and crowd control. Use his flamethrower to set enemies on fire. He works well in open areas.\n- Unlock Conditions: In Sanctuary Hills after the main story quest \"Jewel of the Commonwealth\"? Actually right after Vault 111, return to Sanctuary; Codsworth is there. Talk to him to recruit.\n- Recommended Equipment: Robot armor mods from Automatron DLC. If no DLC, he is fixed equipment. Give him a weapon? He can't use guns – he uses his buzzsaw/flamethrower.\n- Team Synergy: Good with squishy builds (glass cannon) because he can draw aggro. Not great for stealth.\n\n### Preston Garvey\n\n- Background: A member of the Commonwealth Minutemen, leader of the Quincy survivors. He rescues the player from a raider attack in Concord. Tries to rebuild the Minutemen. Has a personal quest to clear the Castle.\n- Strengths: Use of a laser musket, can call in Minutemen artillery support (after Castle retaken). Gives radiant quests (settlement rescue). High endurance and decent damage.\n- Weaknesses: Can be annoying with radiant quests (never ending). His personal quest \"Taking Independence\" is mandatory to progress Minutemen faction. Some players dislike his moralizing. No unique weapon perks.\n- Playstyle: Ranged support. He stays back and fires laser muskets. Can be upgraded with better weapons. His perk at max affinity: \"Rooted\" – +25 damage resist and +25 melee damage when standing still? Actually Preston's perk is \"United We Stand\" – +20% damage and +20% damage resistance when facing three or more enemies. That's good for swarms.\n- Unlock Conditions: After completing \"The First Step\" quest (rescue Preston and group in Concord museum), he becomes available as a companion. Send him to a settlement and you can recruit him there.\n- Recommended Equipment: Give him an upgraded laser musket (or any strong rifle) and combat armor. He has high charisma but no direct CHA benefit.\n- Team Synergy: Works with any build, but especially good for Minutemen-themed runs or characters focused on settlements (his radiant quests push that).\n\n### Piper Wright\n\n- Background: A reporter for the Diamond City newspaper Publick Occurrences. She investigates corruption and the truth about Shaun. Has a younger sister Nat.\n- Strengths: Uses a 10mm pistol and can pick locks (she has Novice lockpick ability). She is a good conversationalist (increases affinity for helping people, unlocking secrets). Her perk: \"Gifted\" encourages you to pass speech checks.\n- Weaknesses: Low durability (no armor initially). Can be reckless in combat. Gives a permanent XP bonus for discovering new locations? Actually her perk \"Gifted\" grants +20% XP for successful speech checks and discovering new locations. So she's a leveling companion.\n- Playstyle: Sneaky talker. She prefers non-violent solutions. In combat, she hangs back and fires her pistol. Not a powerhouse.\n- Unlock Conditions: After arriving in Diamond City, talk to her at the gate (she confronts you). Then interview her in her office. Recruit her as a companion.\n- Recommended Equipment: Give her a silenced pistol and light armor. Or a sniper rifle for ranged support. She is good for stealth builds.\n- Team Synergy: Ideal for Charisma-focused characters who want to maximize XP and speech success. Pairs well with other talkers or stealth.\n\n### Nick Valentine\n\n- Background: A synth detective working in Diamond City. Originally a pre-war cop (the real Nick Valentine died, his memories implanted into a prototype synth). He investigates the Kellogg trail and later the Institute.\n- Strengths: Excellent hacking (can hack terminals of Advanced level). Provides unique dialogue with synths. Has good damage resistance (he's a synth). His perk at max affinity: \"Close to Metal\" – allows a second attempt at hacking a terminal after a lockout (once per day). Plus he can unlock Expert terminals if you give him a perk? No, his hacking is static ability.\n- Weaknesses: Cannot wear armor that covers his body well (he has a unique coat, but you can equip him with ballistic weave later). He is slow and not great at stealth because of his glowing eyes? Actually he makes noise.\n- Playstyle: Tech specialist. Use him to bypass hacking puzzles. In combat, he uses a revolver and can take a beating. His personal quest uncovers more about the Institute.\n- Unlock Conditions: Help him in the quest \"Unlikely Valentine\" (rescue him from the Vault 114 gangsters). Then he becomes recruitable.\n- Recommended Equipment: Give him a high-damage revolver (e.g., Western Revolver) and ballistic weave clothing. Upgrade his coat. He can also use a submachine gun.\n- Team Synergy: Great for characters who want to avoid hacking challenges. Pairs well with energy weapons builds (he has some synth resistances).\n\n### Strong\n\n- Background: A super mutant who lives in the ruins of a mansion. He believes in the \"milk of human kindness\" and wants to find a kind human. Actually he wants to find a book of human kindness (the Milton General book). He is a brute.\n- Strengths: Extremely high melee damage (uses fists or melee weapons). Can carry a lot of weight (250 lbs base). High HP and damage resistance.\n- Weaknesses: Hates lockpicking and hacking (reduces affinity). He is huge and loud – terrible for stealth. Cannot use ranged weapons well (has low accuracy). His perk \"Berserk\" at max affinity: +20% melee damage.\n- Playstyle: Melee tank. Send him in first to draw aggro and smash enemies. Equip him with a super sledge or ripper. He can also use a missile launcher? He has poor aim.\n- Unlock Conditions: Found at the top of Trinity Tower during the quest \"Strong Refuses to Leave\"? Actually you meet him during the main story when rescuing Rex Goodman from the super mutants (quest \"Out of the Fire\"? Wait, Strong is found at Trinity Tower during the side quest \"The Big Dig\"? Correct: after you talk to Hancock you can start \"The Big Dig\" which leads to Trinity Tower. Strong is there. You can recruit him after the quest.\n- Recommended Equipment: Power armor? No, he can't wear power armor. Give him heavy armor (e.g., raider or metal armor) and a super sledge with the Overdrive or Furious effect. Give him stimpaks.\n- Team Synergy: Works best with melee or unarmed builds. He will help tank for a ranged character. Avoid bringing him on stealth missions.\n\n### Curie\n\n- Background: A Miss Nanny robot originally programmed as a caretaker in Vault 81. She becomes fascinated with humanity and eventually upgrades to a synth body (via the quest \"The Secret of Vault 81\"). She is kind and curious.\n- Strengths: As a robot, she has high damage resistance and can be equipped with various weapons (laser, melee, etc.). After she becomes a synth, she gains the ability to use any weapon and wear armor. Her perk at max affinity: \"Miss Nanny\"? Actually Curie's perk is \"Combat Medic\" – she can heal you with stimpaks once per day automatically when you are critically injured. Also she gives a permanent +1 to charisma? No, that's incorrect. Her perk is \"Combat Medic\": once per day, when your health drops to 0, she will use a stimpak to revive you (instead of dying). Additionally, she has a unique dialogue and gives a permanent +1 to CHA? Let's confirm: Curie's max affinity perk is \"Combat Medic\" – she gives you a free revive once per day. No stat boost. But she also gives a +1 to CHA while she is your active companion? Actually no, that's a myth. Correct: Her perk is \"Combat Medic\": upon taking lethal damage, she automatically uses a stimpak to revive you (one per day). Very useful for survival mode.\n- Weaknesses: As a robot, she cannot wear human armor unless she becomes a synth. In robot form, she is limited to robot mods. Also she disapproves of drug use and violence against non-hostiles.\n- Playstyle: Support/healing. Keep her close to benefit from the auto-revive. She can fight with laser weapons. Use her to heal you. After synth conversion, she can use any gear.\n- Unlock Conditions: Complete \"The Secret of Vault 81\" quest (requires high charisma or a lot of caps and meds to help the sick children). Then she can be recruited as a companion.\n- Recommended Equipment: Before synth conversion, equip her with laser weapon mods and robot armor. After synth conversion, give her a combat rifle or shotgun, and ballistic weave dress. Stimpaks.\n- Team Synergy: Pairs well with glass cannon builds (e.g., low endurance sniper) because of the auto-revive. Also good for survival mode.\n\n### Deacon\n\n- Background: A member of the Railroad, a spy and saboteur. He is the face of the Railroad's field operations. He has multiple disguises and a strong sense of humor.\n- Strengths: High stealth (he crouches even when not sneaking). Uses a sniper rifle or pistol. Has high charisma and lockpick skills? Actually he can hack terminals (Novice). His perk: \"Cloak & Dagger\" – +20% sneak attack damage, +20% reduction in detection from armor weight (you can wear heavy armor and still be sneaky).\n- Weaknesses: Low durability. He can be reckless and sometimes attacks enemies you are trying to avoid. He disapproves of helping the Brotherhood or Institute.\n- Playstyle: Stealth sniper companion. Let him take out enemies from afar. Works best when you also use sneak attacks.\n- Unlock Conditions: Complete the Railroad quest \"Tradecraft\" (after reaching the Railroad HQ via the quest \"Road to Freedom\"). Deacon will approach you in Goodneighbor or the Church? Actually you meet him during the main story at the Railroad HQ. Recruit him after proving yourself.\n- Recommended Equipment: Give him a suppressed sniper rifle (e.g., Gauss rifle) and light armor with ballistic weave. He can also use pistols.\n- Team Synergy: Ideal for stealth characters, especially those using VATS or critical hits. Pairs well with other sneak perks. Avoid bringing him if you plan to wear power armor (he dislikes heavy armor).\n\n### MacCready\n\n- Background: Former mayor of Little Lamplight (a ghoul child society) and former child of Fallout 3. Now a mercenary in the Commonwealth. He has a personal quest to cure his son Duncan.\n- Strengths: Skilled with rifles and energy weapons. He has a unique ability: his perk \"Killshot\" – +20% headshot accuracy in VATS. This is excellent for VATS builds. He also has pickpocket and lockpick abilities.\n- Weaknesses: He is fragile and can die quickly if targeted. He dislikes virtuous acts and likes theft/lies (affinity shift).\n- Playstyle: Ranged DPS. Keep him at a distance with a sniper rifle or automatic weapon. Use his headshot perk to boost your own VATS accuracy.\n- Unlock Conditions: Complete his personal quest \"Long Road Ahead\" – find a cure for his son (requires some caps and a doctor). Or you can recruit him earlier by paying him 250 caps after meeting him in the Third Rail bar in Goodneighbor? Actually you meet MacCready in Goodneighbor's Third Rail bar. You can hire him for 250 caps (or persuade/charisma check). Then later you can do his personal quest.\n- Recommended Equipment: Give him a powerful sniper rifle (e.g., .50 cal hunting rifle, or a legendary rifle with VATS effects). Ballistic weave armor. He also uses a submachine gun well.\n- Team Synergy: Best for VATS-dependent builds (e.g., crit-focused pistols or rifles). His perk benefits headshots in VATS, almost doubling headshot hit chance.\n\n### Hancock\n\n- Background: A ghoul, mayor of Goodneighbor. He used to be a drug dealer but now leads the town. He is a fierce believer in freedom and dislikes the Institute and slavers.\n- Strengths: High damage resistance, uses a double-barrel shotgun or a knife. Can be very aggressive in melee. His perk: \"Isodoped\" – +20% damage from chems, and chem durations are extended (addicts get more benefit). He also gives a permanent +1 to charisma? Actually Hancock's max affinity perk is \"Isodoped\" – chems last 30% longer (or maybe +20% damage? Check: It's \"Isodoped\" - Chems give you 20% more duration and you take 20% less damage from chems? No, the actual effect is chems last 50% longer. Let's be precise: Hancock's perk is named \"Isodoped\" and it increases chem duration by 50% (not damage). That's very useful for chem-heavy builds.\n- Weaknesses: He is a ghoul and will be targeted by settlers wearing hazmat suits? Not really. He disapproves of helping the Brotherhood or siding with the Institute.\n- Playstyle: Chem-user tank. Use chems to boost his performance. He thrives in close-quarters combat. Give him a powerful melee weapon or shotgun.\n- Unlock Conditions: Complete the quest \"The Big Dig\" (help Hancock and the underworld free a settlement). After that, you can recruit him as a companion.\n- Recommended Equipment: Combat shotgun (e.g., Spray n' Pray) or a super sledge. Armor with rad resistance (since he is a ghoul, but he doesn't take rad damage). Also give him chems like Psycho or Jet.\n- Team Synergy: Perfect for chem-focused builds (e.g., a Chem Sniper who uses Psycho and Overdrive). His perk extends all chem durations. Also good for close-quarters tanks.\n\n### Cait\n\n- Background: A former raider and cage fighter from the Combat Zone. She is tough and foul-mouthed, but has a personal quest to overcome her chem addiction (Mother's Love).\n- Strengths: High strength and endurance, uses a shotgun or automatic weapon. She can lockpick (Novice). Her perk: \"Trigger Rush\" – when health is low (<25%), action points regenerate faster (by 50%).\n- Weaknesses: She is addicted to chems (can be cured via quest). She dislikes charitable acts and likes violence and alcohol. Low charisma.\n- Playstyle: Frontline DPS. She can take and deal damage. Her perk is situational but can save you in VATS builds when low HP.\n- Unlock Conditions: Rescue her from the Combat Zone (quest \"The Combat Zone\") – kill all raiders and talk to Tommy. Then she becomes recruitable.\n- Recommended Equipment: Shotgun with heavy damage (e.g., Combat Shotgun with explosive rounds). Armor with high ballistic resistance. Give her stimpaks and whiskey.\n- Team Synergy: Works with aggressive or tanky player. Pairs well with melee builds or characters that also use chems.\n\n### X6-88\n\n- Background: An Institute courser, elite synth agent. He is loyal to the Institute and acts as a bodyguard.\n- Strengths: High damage resistance and damage output; uses a powerful energy weapon. He is very tanky. His perk: \"Shield Harmonics\" – +20 energy resistance for you and all companions within a certain radius. Also he can hack terminals (Advanced).\n- Weaknesses: He is a synth, so he is disliked by Brotherhood characters and can cause conflict. Disapproves of actions that hurt the Institute. Cannot wear armor that covers his body (he wears a courser uniform, but you can apply ballistic weave). He is also slow and not stealthy.\n- Playstyle: Energy weapon tank. Keep him in front to absorb fire. His perk boosts energy resistance, useful against Institute synths and robots.\n- Unlock Conditions: Join the Institute (main story) and side with them. After becoming a member, you can recruit X6-88 as a companion. He will remain loyal even if you later betray the Institute? He will become hostile if you turn against the Institute.\n- Recommended Equipment: Give him an Institute pistol or rifle with long-range, and a ballistic-weave courser outfit. He doesn't need much else.\n- Team Synergy: Good for energy weapon builds or characters who rely on energy resistance. Useful in Institute playthroughs.\n\n### Paladin Danse\n\n- Background: A high-ranking member of the Brotherhood of Steel, initially encountered at the Cambridge Police Station. He is a devout believer in the Brotherhood's cause. In his personal quest \"Blind Betrayal\" you discover he is a synth (which changes the player's relation with the Brotherhood).\n- Strengths: Power armor user (he is always in T-60 power armor). Uses a laser rifle or gatling laser. Very tanky and high damage. His perk: \"Final Judgment\" – +20% damage against synths, ghouls, and super mutants (useful in many areas). Actually his perk is \"Knight-Errant\" which gives +20% damage against feral ghouls, synths, and super mutants. Yes.\n- Weaknesses: He is huge, loud, and cannot sneak. He dislikes stealing, using chems, and helping Railroad/Institute. He will become hostile if you side with the Railroad/Institute/Minutemen? Actually if you complete the main story with the Minutemen, Danse can still be friendly as long as you completed his quest with the synth revelation and saved him. But he is strongly pro-Brotherhood.\n- Playstyle: Heavy armor power tank. Use him as a mobile fortress. He excels at taking out tough enemies. His perk is excellent for the endgame (many synths and mutants).\n- Unlock Conditions: Complete the quest \"Fire Support\" (help Danse and his team at Cambridge Police Station). Then after \"Call to Arms\" (retrieve a deep range transmitter) you can recruit him. He becomes fully available after joining the Brotherhood.\n- Recommended Equipment: He will always wear power armor; you can upgrade it with better mods (e.g., calibrated shocks, Tesla coils). Give him a Gatling Laser with charging barrels or a explosive minigun. He can also use a super sledge.\n- Team Synergy: Best for power armor builds (you can use the same armor sets). Works well with energy weapons. Avoid bringing him when infiltrating Institute or Railroad.\n\n### Ada (Robobrain - Automatron DLC)\n\n- Background: A robot companion introduced in the Automatron DLC. She is a creation of the Mechanist and seeks to stop her. You can build and customize her completely at robot workbenches.\n- Strengths: Fully customizable robot parts: weapons, legs, arms, armor. Can be built as a tank, sniper, or DPS. She has no affinity (no likes/dislikes) and no personal quest beyond the DLC story. She is immortal (cannot die, only goes into stasis).\n- Weaknesses: No affinity perks (no unique companion perk). She cannot gain XP/levels like humanoid companions? Actually she levels with the player. Her build can be min-maxed.\n- Playstyle: Whatever you build her to be. Common builds: dual Gatling lasers (high damage), stealth with stealth modules, or melee with saws. She can carry heavy loads (up to 500 lbs with mods).\n- Unlock Conditions: Complete the Automatron main quest (help Ada defeat the Mechanist). She becomes recruitable after the final battle.\n- Recommended Equipment: Not applicable – you build her equipment via robot workbench. Focus on high damage and heavy armor. Use Sentry legs for tank, Robobrain treads for speed.\n- Team Synergy: Works with any build. She is a very versatile companion. Ideal for players who want a customizable robot follower.\n\n### Old Longfellow (Far Harbor DLC)\n\n- Background: A grizzled old hunter and guide from Far Harbor. He knows the island well and has a grudge against the Children of Atom.\n- Strengths: High perception and endurance, uses a double-barrel shotgun and knife. Good at tracking. His perk: \"Whisperer\" – +20% damage against any creature? Actually his perk is \"Whisperer\" – creatures (like mirelurks, deathclaws) take 20% more damage from you. Also he ignores obstacles in water (he can walk through deep water).\n- Weaknesses: He is slow and not stealthy. He dislikes helping the Children of Atom.\n- Playstyle: Beast killer. Use him in the Far Harbor DLC to take down wildlife and mutated creatures. He is a good frontliner.\n- Unlock Conditions: Complete the quest \"The Arrival\" (help Longfellow clear a house of creatures). Then he becomes recruitable.\n- Recommended Equipment: shotgun with high damage (e.g., explosive shotgun), heavy armor. Give him whiskey for buffs.\n- Team Synergy: Best for Far Harbor content. Pairs well with ranged or VATS users.\n\n### Porter Gage (Nuka-World DLC)\n\n- Background: A raider boss and second-in-command of the Nuka-World raiders (The Pack, Operators, Disciples). He helps you take over the raider gangs or turn against them.\n- Strengths: Uses an automatic rifle (handmade rifle) and has high combat stats. His perk: \"Lessons in Blood\" – +5% damage per enemy killed (up to 25%), lasts 2 minutes. Very powerful in crowded battles.\n- Weaknesses: He is a raider and dislikes helping settlements or being charitable. He will turn hostile if you decide to destroy the raider gangs.\n- Playstyle: Aggressive assault. Use him to chain kills and boost your damage. His perk encourages ramping up damage in battles.\n- Unlock Conditions: After completing \"An Ambitious Plan\" (the quest to take over Nuka-World), he becomes a companion and can be recruited. Alternatively, you can side with the traders and kill the raiders, then Gage becomes hostile.\n- Recommended Equipment: Give him a powerful handmade rifle (with a suppressor or extended magazine) and heavy combat armor. Or an explosive minigun.\n- Team Synergy: Great for high-volume combat builds (commando or heavy). Pairs with builds that clear groups.\n\n---\n\n## Player Build Archetypes (Roles)\n\nThese are suggested SPECIAL allocation and Perk priorities for common playstyles. Fallout 4 does not have fixed classes, so these are guidelines.\n\n### 1. Commando (Automatic Weapons)\n- SPECIAL: High Perception (4+), Agility (5+), Endurance (4+). \n- Key Perks: Commando (auto weapons), Gun Nut, Chem Resistant or Life Giver, Lone Wanderer if solo.\n- Weapons: Automatic Pipe Rifle early, later Combat Rifle Auto or Handmade Rifle (Nuka-World) with powerful mods.\n- Armor: Light or Medium; use Ballistic Weave on underlayer for stealth or heavy for power armor.\n- Playstyle: Spray bullets at medium range. Use VATS for critical hits. Manage ammo carefully.\n- Companion Synergy: Use tank companions (Strong, Danse, Codsworth) to draw fire while you mow enemies.\n\n### 2. Sniper (Semi-Auto Rifles)\n- SPECIAL: High Perception (5+), Agility (4+), Luck (5+). \n- Key Perks: Rifleman (semi-auto), Sniper, Penetrator (ignore cover), Better Criticals, Critical Banker.\n- Weapons: Hunting Rifle early, then .308 Combat Rifle or Gauss Rifle (very high damage). Jet for slow time.\n- Armor: Light armor for stealth. Shadowed mods.\n- Playstyle: Stay at long range, use VATS for headshots. Sneak attack bonuses huge. Use suppressed weapons.\n- Companion Synergy: Silent companions (Deacon, Piper, MacCready); keep them in stealth gear.\n\n### 3. Melee/Unarmed\n- SPECIAL: High Strength (9+), Endurance (5+), Agility (3+). \n- Key Perks: Big Leagues (melee) or Iron Fist (unarmed), Blitz (teleport in VATS), Rooted (bonus damage when still), Toughness, Lifegiver.\n- Weapons: Pickman's Blade (Bleeding dagger) or Super Sledge (power attack) for melee. Power Fist or Deathclaw Gauntlet for unarmed.\n- Armor: Heavy armor or power armor (for damage resistance). Use Grognak's outfit for style.\n- Playstyle: Rush into melee range. Use VATS with Blitz to close gaps instantly. Use stimpaks and chems.\n- Companion Synergy: Strong or Cait for melee tanking. Hancock for chem duration.\n\n### 4. Stealth Operative\n- SPECIAL: High Agility (7+, for Ninja), Perception (4+ for Locksmith), Luck (7+ for Better Criticals). \n- Key Perks: Sneak, Ninja (10x sneak attack with melee, 3.5x with ranged), Sandman (silent kills with knives), Mister Sandman (silenced weapons).\n- Weapons: Silenced Deliverer (pistol) or a silenced sniper rifle. Combat knife for backstabs.\n- Armor: Light armor with muffled and shadowed mods. Use Ballistic Weave (e.g., Army Fatigues).\n- Playstyle: Avoid direct combat; use stealth to get critical hits. Pick locks and hack terminals. Use invisibility tab or stealth boy.\n- Companion Synergy: Deacon (sneak bonus), Piper (XP), or MacCready (headshots). Keep them in stealth gear.\n\n### 5. Explosives Expert\n- SPECIAL: High Perception (4+ for Demolition Expert), Strength (3+ for Armorer). \n- Key Perks: Demolition Expert (grenades and mines do more damage), Heavy Gunner if using missile launcher / fat man. \n- Weapons: Frag grenades, molotovs, mines, missile launcher. Spray n' Pray (explosive submachine gun).\n- Armor: Heavy armor; use Power Armor to survive self-damage. Use padded mods.\n- Playstyle: Use grenades to clear groups. Place mines and lure enemies. Be careful with friendly fire.\n- Companion Synergy: Use companions that can tank (Danse, Strong, Codsworth) and avoid close range.\n\n### 6. Power Armor Tank\n- SPECIAL: High Strength (6+ for Strong Back), Endurance (7+ for Toughness and Lifegiver), Intelligence (3+ for Armorer). \n- Key Perks: Armorer, Pain Train (rush damage), Heavy Gunner, Nuclear Physicist (fusion core efficiency).\n- Weapons: Gatling Laser, Minigun, or Super Sledge. Use fusion cores wisely.\n- Armor: T-60 or X-01 power armor with calibrated shocks (more carry weight). Paint for damage resistance.\n- Playstyle: Always in power armor. Run through enemies, VATS for melee (Pain Train). Use fusion cores as ammo. Tank damage.\n- Companion Synergy: Danse (also in PA), or Curie (heals).\n\n### 7. Critical VATS Build (Pistols or Rifles)\n- SPECIAL: High Luck (9+), Perception (4+), Agility (7+ for Gun Fu). \n- Key Perks: Better Criticals, Critical Banker, Four Leaf Clover (luck to fill crit meter), Gun Fu (switch targets in VATS). Concentrated Fire.\n- Weapons: Deliverer (pistol) for low AP cost, or a legendary pistol with VATS-enhancing effects (e.g., Lucky or VATS Enhanced). Rifle variant: Gauss Rifle with VATS modification.\n- Armor: Light armor to reduce AP cost of moving. Use Agility-enhancing gear.\n- Playstyle: Build up critical hits quickly, bank them, and execute multiple headshots in VATS. Use Gun Fu to chain kills. High Luck ensures crits fill fast.\n- Companion Synergy: MacCready (headshot boost in VATS). Prefer companions that don't break stealth.\n\n### 8. Chem/Meat Addict (Drug Dealer)\n- SPECIAL: High Endurance (5+ for Chem Resistant), Intelligence (2+ for Chemist). \n- Key Perks: Chemist (chem duration), Chem Resistant (no addiction), Party Boy/Girl (alcohol benefits).\n- Weapons: Any, but best with high damage weapons. Use Psycho Jet for slowdown, Overdrive for crits.\n- Armor: Light or medium.\n- Playstyle: Use drugs to enhance combat. Pop Psycho, Med-X, Jet before battles. Craft antibiotics for addictions. High learning of recipes.\n- Companion Synergy: Hancock (chem duration increase) and Cait (also chem user).\n\n---\n\n## Key NPCs (Non-Playable Characters)\n\nWhile not party members, these major NPCs are central to the story and may offer quests or faction rewards:\n\n- Shaun: Your son, leader of the Institute. You will interact with him differently based on faction.\n- **

Cheats & Secrets
Fallout 4: Cheats & Secrets Guide
This guide covers all known cheat codes, console commands, secrets, Easter eggs, and hidden content in Fallout 4. The game does not feature traditional in-game cheat codes (like typing a phrase to unlock items), but on PC you can use the developer console to execute a wide range of commands. Console players have limited options via mods and exploits. Easter eggs and hidden content are abundant.
PC Console Commands (Official Cheats)
To enable the console on PC, press the ~ key (tilde) while in-game. Commands are not case-sensitive. Warning: Using console commands may disable achievements until you restart the game (unless you use a mod that re-enables them).
#### Basic Commands
- `tgm` – Toggle God Mode (invulnerability, infinite ammo, no carry weight limit).
- `tcl` – Toggle Collision (fly through walls/objects).
- `tfow` – Toggle Fog of War (reveal all map locations).
- `tscr` – Toggle Screenshot Mode (hide UI).
- `tfc` – Toggle Free Camera (move camera freely).
- `sgtm <value>` – Set Global Time Multiplier (e.g., 0.5 for half speed, 2 for double).
- `caqs` – Complete All Quest Stages (instantly completes main quest, use with caution).
- `killall` – Kill all enemies in the current cell.
- `resurrect` – Resurrect a targeted NPC.
- `player.modav <attribute> <amount>` – Modify a player attribute (e.g., `player.modav damageresist 100`).
- `player.setav <attribute> <amount>` – Set an attribute to a specific value (e.g., `player.setav carryweight 500`).
- `player.additem <item ID> <count>` – Add any item to your inventory (see Item IDs below).
- `player.removeitem <item ID> <count>` – Remove items.
- `player.placeatme <NPC ID>` – Spawn an NPC at your crosshair.
- `help <keyword> 0` – Search for item/NPC IDs (e.g., `help \"fat man\" 0`).
- 0001F71A – Fat Man
- 0001EB90 – Combat Rifle
- 0005AB8F – Gauss Rifle
- 0002AEB1 – Alien Blaster (unique, with unlimited ammo)
- 0009CDD0 – T-60 Power Armor Helmet
- 0009CDD1 – T-60 Power Armor Torso
- 0001E1E7 – Vault 111 Jumpsuit
- 0001F66B – 5.56mm Rounds
- 0001F66C – .50 Caliber Rounds
- 0001F66D – 2mm EC (Gauss)
- 0001F66E – Bottlecap
- 000240F5 – Stimpak
- 0003497E – RadAway
- `player.setlevel <level>` – Set your level instantly.
- `player.modav experience <value>` – Give yourself experience points.
- `player.setav <special_attr> <value>` – Set a SPECIAL attribute (e.g., `player.setav strength 10`). Valid attributes: strength, perception, endurance, charisma, intelligence, agility, luck.
- `player.addperk <perk ID>` – Add a perk (find IDs with `help \"perk name\" 0`).
- `player.removeperk <perk ID>` – Remove a perk.
- `player.sqs <quest ID>` – Show all stages for a quest (use `help \"quest name\" 0` to find IDs).
- `player.setstage <quest ID> <stage>` – Advance to a specific quest stage.
- `resetquest <quest ID>` – Reset a quest.
- `completequest <quest ID>` – Complete a quest.
- `player.placeatme 0001BB0A` – Spawn a workbench.
- `tai` – Toggle AI on/off for NPCs (can freeze settlers).
- `setownership` – Claim an object for yourself (select with console).
- PC: Full console support (as above). Achievements disabled after using console (mods like "Achievement Enabler" exist).
- PlayStation 4 / Xbox One: No official console. Cheats are only possible via mods (e.g., "Cheat Terminal" mod from the in-game mod browser). These disable achievements. Exploits (e.g., infinite caps via item duplication) work but are patched in later versions.
- PlayStation 5 / Xbox Series X|S: Backward compatible with PS4/XB1 versions; same limitations.
- Infinite Caps via Water Purification: Build industrial water purifiers at settlements (e.g., Sanctuary) and collect purified water from the workshop repeatedly. Each sell for 15 caps. No mods needed.
- Dogmeat Item Duplication Glitch (patched in 1.4): Command Dogmeat to pick up an item, then quickly grab it yourself – duplicates. Still works in some unpatched versions.
- Laser Musket Infinite Ammo: Fire the musket while quickly switching weapons – ammo count doesn't decrease. Patched in later updates.
- Settlement Budget Exploit: Drop weapons from inventory into workshop, then scrap them – return materials but budget count decreases, allowing more building.
- Mysterious Stranger Refrences: The perk "Mysterious Stranger" can appear randomly. There's also a skeleton in a refrigerator (Indian Jones reference) east of Sanctuary Hills. The fridge is a small shack with a skeleton inside.
- UFO Crash Site: Southwest of the map, near the coast of the Glowing Sea, you can find a crashed alien spacecraft with an Alien Blaster and dead alien. Reference to Fallout 3's alien encounters.
- Danse's Secret: If you complete the Brotherhood of Steel questline, Danse reveals he is a synth – a possible shocker.
- Red Menace: In the Sentinel Site, you can find a poster of a communist Mirelurk – reference to Cold War propaganda.
- The Jersey Devil: In the Northeast, a ghoulified creature called "The Jersey Devil" can be found. Reference to the cryptid.
- Zetan Aliens: The quest "The Secret of Cabot House" involves alien technology. Also, a crashed Zetan ship near Fort Hagen.
- Skyrim Easter Egg: In the Memory Den, you can find a book titled "The Lusty Argonian Maid" (from The Elder Scrolls). Also, an NPC named "M'aiq the Liar" appears randomly – a Skyrim reference.
- Monty Python Reference: In the Castle, there's a skeleton with a sign that says "I'm not dead yet" – from Monty Python and the Holy Grail.
- The Devil's Due: A quest involving a teddy bear and a note referencing the movie "Toy Story 3".
- Kremvh's Tooth: A unique machete hidden at the bottom of a lake in the north.
- Safari Adventure: A hidden robot repair facility with a statue of a gorilla – reference to the real-world Safari.
- The Secret Vault: Vault 118 in Far Harbor has a secret experimental area.
- Developer Room: Beneath the map, there is a developer test room with weapons and items (only accessible via `coc qasmoke` console command).
- Nick Valentine's Case Files: In his agency, you can read case files that tell backstories.
- Survival Mode: Intended to be extremely difficult, with no fast travel and increased danger.
- Sentinel Power Armor: A unique set that regenerates health – found in a hidden bunker.
- Artificial Intelligence Conversations: Hack certain terminals to find logs showing AI development (e.g., Automatron DLC).
#### Item ID Examples (partial list)
Weapons:
Armor:
Ammo:
Misc:
#### Perk & Special Modification
#### Quest Commands
#### Settlement Commands
Platform-Specific Notes
Exploits and Glitches (Unofficial Secrets)
These are bugs intentionally left in by developers or not fixed. Use at your own risk; can corrupt saves.
Easter Eggs & Hidden Secrets
Bethesda filled Fallout 4 with pop culture references, developer jokes, and hidden lore.
#### Iconic Easter Eggs
#### Hidden Locations
Developer-Intended Hidden Content
Summary Table of Cheats & Secrets
| Category | Name | Platform | How to Access |
|---|---|---|---|
| Console Cheat | God Mode | PC | `tgm` |
| Console Cheat | Unlock Map | PC | `tfow` |
| Console Cheat | Add Item | PC | `player.additem xxx 1` |
| Exploit | Infinite Water Caps | All | Build water purifiers, collect water |
| Easter Egg | Alien Blaster | All | Visit UFO crash in Glowing Sea |
| Easter Egg | M'aiq the Liar | All | Random encounter in Commonwealth |
| Hidden Quest | The Secret of Cabot House | All | Start by reading terminal in Edgewick's mansion |
| Developer Room | qasmoke | PC | `coc qasmoke` |