
Far Cry 5
## Game Introduction **Far Cry 5** is a first-person action-adventure shooter developed by **Ubisoft Montreal** and published by **Ubisoft**. It is the fifth main installment in the Far Cry series (and the twelfth overall including spin-offs). The game was released worldwide on **March 27, 2018** f...

Download & Installation
Download & Installation Guide for Far Cry 5
This guide covers legitimate download and installation methods for Far Cry 5 on all supported platforms: PC (via Ubisoft Connect, Steam, Epic Games Store), PlayStation 4/5, and Xbox One/Series X|S. Note: Far Cry 5 is not officially available on Nintendo Switch or mobile devices. Streaming services like GeForce Now or Stadia (discontinued) are not covered here.
---
1. Platform Availability & Where to Buy
| Platform | Store / Service | Digital Availability | Physical Disc |
|---|---|---|---|
| PC | Ubisoft Connect (Uplay) | ✅ | ❌ (no disc, but retail keys available) |
| PC | Steam | ✅ | ❌ |
| PC | Epic Games Store | ✅ | ❌ |
| PlayStation 4 | PlayStation Store | ✅ | ✅ |
| PlayStation 5 | PlayStation Store (backward compatible) | ✅ | ✅ (PS4 disc works on PS5) |
| Xbox One | Microsoft Store | ✅ | ✅ |
| **Xbox Series X | S** | Microsoft Store (backward compatible) | ✅ |
---
2. System Requirements (PC)
#### Minimum Requirements
- OS: Windows 7 SP1, Windows 8.1, Windows 10 (64-bit versions only)
- CPU: Intel Core i5-2400 @ 3.1 GHz / AMD FX-6300 @ 3.5 GHz
- RAM: 8 GB
- GPU: NVIDIA GeForce GTX 670 / AMD Radeon R9 270 (2 GB VRAM)
- DirectX: Version 11
- Storage: 40 GB free space (HDD recommended; SSD beneficial)
- Sound: DirectX 9.0c compatible
- Network: Broadband internet connection for activation and updates
- OS: Windows 10 (64-bit)
- CPU: Intel Core i7-4770 @ 3.4 GHz / AMD Ryzen 5 1600 @ 3.2 GHz
- RAM: 16 GB
- GPU: NVIDIA GeForce GTX 970 / AMD Radeon R9 290X (4 GB VRAM) or better
- DirectX: Version 11
- Storage: 40 GB SSD (for faster loading)
- Sound: DirectX 9.0c compatible
- Network: Broadband internet connection
- Ubisoft Account: Required on all platforms for activation, online features, and cloud saves. Even if you buy on Steam or Epic, you will be prompted to link/ sign into an Ubisoft account.
- Steam Account: Required if purchasing on Steam.
- Epic Games Account: Required if purchasing on Epic Games Store.
- PlayStation Network (PSN) Account: Required for PlayStation store purchase and online playing.
- Xbox Live / Microsoft Account: Required for Xbox store purchase and online playing.
#### Recommended Requirements
Note: For 4K or high refresh rate, a GTX 1080 / RTX 2060 or equivalent is recommended.
---
3. Account Requirements
---
4. Installation Steps (Per Platform)
#### 4.1 PC – Ubisoft Connect
1. Download and install Ubisoft Connect from [ubisoft.com/connect](https://ubisoft.com/connect).
2. Launch Ubisoft Connect and log in with your Ubisoft account.
3. Go to the Store section and search for “Far Cry 5.”
4. Purchase (or redeem a key from third-party retailer) and click Download.
5. Choose a installation directory (ensure at least 40 GB free).
6. The download will begin; wait for completion (file size ~ 40 GB).
7. Once downloaded, the game will install automatically. Click Play to launch.
#### 4.2 PC – Steam
1. Install Steam from [store.steampowered.com](https://store.steampowered.com) and log in.
2. In the Steam store, search for “Far Cry 5” and purchase.
3. Go to your Library, select Far Cry 5, and click Install.
4. Choose installation directory and ensure 40 GB free.
5. Steam will download the game. After completion, the game will install.
6. On first launch, Steam will prompt you to link your Ubisoft account. Follow the on-screen instructions.
7. The game will open Ubisoft Connect overlay; sign in if needed. Then game launches.
#### 4.3 PC – Epic Games Store
1. Install Epic Games Launcher from [epicgames.com](https://www.epicgames.com) and log in.
2. In the Epic store, search for “Far Cry 5” and purchase.
3. Go to your Library, find Far Cry 5, and click Install.
4. Choose installation path (40 GB free).
5. Download and installation proceed automatically.
6. First launch will require linking your Ubisoft account (similar to Steam).
#### 4.4 PlayStation 4 & 5
##### Digital Download
1. On PS4/PS5, go to PlayStation Store.
2. Search for “Far Cry 5” and purchase (or redeem code from retail).
3. Click Download. The game will start downloading to your console’s storage.
4. Wait for download and installation to finish (game size ~ 30-35 GB on PS4; PS5 uses same file).
5. Launch from the home screen.
##### Physical Disc
1. Insert the disc into your console.
2. The installation process should start automatically. Follow on-screen prompts.
3. If not, navigate to the disc icon on the home menu and press Options > Install.
4. Wait for installation. You may need a large day-one patch (download required).
5. After installation, the game is ready to play. Keep disc inserted for verification.
PS5 Note: Runs via backward compatibility. No PS5-specific upgrade or enhanced version exists (but can run with higher frame rate via PS4 Pro mode).
#### 4.5 Xbox One & Xbox Series X|S
##### Digital Download
1. On Xbox, go to Microsoft Store on your console or via web.
2. Search for “Far Cry 5” and purchase.
3. Click Install (choose which console to install on if multiple).
4. The game downloads and installs automatically.
5. Launch from My games & apps.
##### Physical Disc
1. Insert the disc into the Xbox.
2. Installation begins automatically. If not, select the disc tile from the dashboard and choose Install.
3. Apply any required updates.
4. Play with disc in drive.
Xbox Series X|S Note: Backward compatible. Will run with improved performance (60 FPS, auto HDR) on Series X|S. No Smart Delivery upgrade given it’s an older title, but it benefits from faster load times on the SSD.
---
5. Storage Space
| Platform | Download Size | Installed Size (approx.) |
|---|---|---|
| PC (all stores) | ~ 40 GB | Up to 45 GB (with updates) |
| PlayStation 4/5 | ~ 35 GB | 35–40 GB |
| Xbox One/Series | ~ 40 GB | 40–45 GB |
- Notes: Values may vary slightly after patches and DLC. Always ensure at least 10 GB additional free space for temporary files during installation.
- External Drives: Supported on all consoles and PC. For best performance on PC, use an SSD.
---
6. First Launch Setup (All Platforms)
1. Language Selection: You may be prompted to choose in-game language (text and/or audio). This can usually be changed later in settings.
2. Brightness Calibration: Adjust the brightness slider until the logo is barely visible (follow on-screen instructions).
3. Graphics Settings (PC only): The game will auto-detect your hardware. You can manually adjust resolution, texture quality, anti-aliasing, etc., in the Options menu before starting a new game.
4. Sign into Ubisoft Connect: On PC, even if you launched through Steam/Epic, the Ubisoft Connect overlay will appear. Ensure you are signed in for cloud saves and online features.
5. Online Features: Accept the online services agreement if prompted. Multiplayer/co-op requires an active internet connection.
6. Update: The game may check for updates on first launch. Allow it to download any patches.
7. New Game: From the main menu, select New Game to begin. You can also adjust accessibility options (subtitles, colorblind modes) before starting.
---
7. Common Installation Errors & Fixes
#### 7.1 PC Errors
| Error | Cause | Solution |
|---|---|---|
| “Game failed to launch” / “Ubisoft Connect error” | Ubisoft service interruption or corrupt install | Verify game files via Ubisoft Connect (Library > Far Cry 5 > Properties > Verify Files). Also restart launcher and PC. |
| “The file is too large” when copying to external drive | FAT32 file system (max 4GB) | Reformat drive to NTFS. |
| “DirectX Error” | Outdated graphics drivers or missing DirectX files | Update GPU drivers (NVIDIA GeForce Experience or AMD Adrenalin). Install/repair DirectX from Microsoft. |
| “Insufficient storage” despite free space | Hidden system or recovery partitions | Check actual free space using Disk Management. Move game to another drive. |
| Steam download stuck / slow | Server congestion or cache issues | Exit Steam, delete download cache (Settings > Downloads > Clear Download Cache), restart. |
| Epic Games Launcher error “LS-0013” | Account authentication loss | Log out and log back in to Epic Launcher. |
| Error | Cause | Solution |
|---|---|---|
| PS4 “Cannot install” (CE-30002-5) | Corrupted data or disc issue | Rebuild database (Safe Mode option 5). If disc, clean and try again. |
| PS5 “Cannot start game” | Backward compatibility glitch | Restore licenses (Settings > Users and Accounts > Other > Restore Licenses). |
| Xbox “0x87e107f0” | Missing license or account sync | Go to Settings > Account > Remove account and re-add. Hard restart console. |
| Update fails repeatedly | Low disk space or network issue | Free up space (check Storage settings). Try wired connection or alternate DNS. |
| Disc read error | Dirty or scratched disc | Clean disc with microfiber cloth. If persists, contact retailer for replacement. |
- Disable antivirus temporarily during installation (some AV may interfere with game installers).
- Run launchers as Administrator (right-click > Run as Administrator).
- Close background applications (especially overlay progs like Discord, GeForce Experience) before first launch.
- Check system date/time incorrect date can cause authentication failures.
- Pre-loading: Far Cry 5 supported pre-load on all platforms before release. Currently, you can still pre-purchase and pre-load before a set launch date if buying a new DLC/expansion. For the base game, it’s already released, so pre-load is not applicable.
- Uninstalling:
- Reinstalling: Simply download again from your library; no extra purchase needed.
---
8. Post-Installation Verification
After a successful installation, perform these checks to ensure the game is fully operational:
1. Launch the game and ensure the main menu loads without error.
2. Check the version number (usually displayed in the lower-right corner of the main menu or under Options > General). Compare with latest patch notes from Ubisoft.
3. Test gameplay – start a new game and complete the intro sequence (the plane crash). If controls work and visuals appear correctly, the installation is sound.
4. Verify DLC – if you purchased the Gold Edition or season pass, check if the DLC missions (Hours of Darkness, Lost on Mars, Dead Living Zombies) are available in the menu.
5. Online functionality – attempt to connect to online services (Arcade mode or co-op). If it fails, ensure your firewall/ router allows the game through.
6. Save game – manually save at a save point (church or safe house) and then load that save to confirm cloud sync works.
7. Benchmark (PC) – optional: run the in-game benchmark to see if performance meets expectations.
---
9. Additional Notes
- PC: Use the launcher (Ubisoft Connect, Steam, Epic) to uninstall; or use Windows Control Panel.
- PlayStation: Highlight game icon > Options > Delete.
- Xbox: My games & apps > Highlight game > Menu > Manage game & add-ons > Uninstall.
---
10. Frequently Asked Questions
Q: Do I need an internet connection to play Far Cry 5 single-player?
A: An initial internet connection is required for activation (first launch). After that, single-player can be played offline. However, some updates and DLC may require online check-ins. On consoles, offline mode works after the initial license check.
Q: Can I transfer my save between platforms?
A: No, save files are platform-specific. Cloud saves are per platform (Ubisoft Connect for PC, PSN for PlayStation, Xbox Live for Xbox). Cross-progression is not supported.
Q: Why is my installation taking so long?
A: Large game size and slow download speeds are common. Use a wired connection, pause other downloads, and check your internet speed. On consoles, installation from disc can be slower if the reading is slow; ensure disc is clean.
Q: I bought the game on disc but it still requires a huge download. Why?
A: The disc contains only a base version without updates and patches. A day-one patch (often 10-20 GB) must be downloaded to ensure compatibility and bug fixes.
---
If you encounter an error not listed, consult the official Ubisoft Support page at [support.ubisoft.com](https://support.ubisoft.com) or visit community forums. Remember to always download from official sources to avoid malware and ensure activation.

Game Introduction
Game Introduction
Far Cry 5 is a first-person action-adventure shooter developed by Ubisoft Montreal and published by Ubisoft. It is the fifth main installment in the Far Cry series (and the twelfth overall including spin-offs). The game was released worldwide on March 27, 2018 for PC (Windows), PlayStation 4, and Xbox One. It is backward compatible on PlayStation 5 and Xbox Series X|S, with performance improvements and faster load times. A standalone expansion, Far Cry 5: Hours of Darkness, was released in June 2018, followed by two more story expansions: Far Cry 5: Lost on Mars (July 2018) and Far Cry 5: Dead Living Zombies (August 2018). A major PvP mode, Far Cry Arcade, was included at launch and later expanded with additional content.
Story Overview
Set in the fictional rural county of Hope County, Montana, Far Cry 5 pits players against a doomsday cult known as Eden’s Gate (the Project at Eden’s Gate). The cult is led by the charismatic and ruthless preacher Joseph Seed, who believes he is a prophet chosen to save humanity from an impending apocalypse. As the junior deputy of the Hope County Sheriff’s Department, the player is sent to arrest Joseph at the beginning of the game. The attempt fails, and the deputy becomes stranded in a county now under the complete control of Seed and his three siblings: Jacob (a military strategist), Faith (a master manipulator), and John (a ruthless enforcer). The player must rally the remaining resistance forces—led by locals such as Mary May Fairgrave, Pastor Jerome Jeffries, Nick Rye, and Grace Armstrong—to free the county from the cult’s grip. The story explores themes of faith, fanaticism, resistance, and the price of survival.
Setting
Hope County is a vast, open-world region inspired by the real-world American Northwest (specifically Montana). The environment is highly varied, including dense forests, snowy mountains, flowing rivers, lakes, farmland, small towns, and industrial sites. The world is dynamic with day/night cycles, weather effects, and wildlife, including bears, wolves, cougars, and bison. The player can explore freely on foot, by vehicle, by boat, or by aircraft (including planes and helicopters). The map is divided into three main regions, each controlled by one of the Seed siblings: Holland Valley (John), Henbane River (Faith), and Whitetail Mountains (Jacob). The world is filled with side activities, cult outposts, civilian rescues, and environmental storytelling.
Main Characters
- The Deputy (Player Character): A silent protagonist whose gender, appearance, and background can be customized. The deputy is a new recruit to the Hope County Sheriff’s Department.
- Joseph Seed (The Father): The primary antagonist and leader of Eden’s Gate. He is a calculating, manipulative, and deeply charismatic cult leader.
- John Seed: Joseph’s brother and the “herald” of Holland Valley. He is a lawyer and enforcer who uses fear and torture to convert locals.
- Faith Seed: Joseph’s sister and the “herald” of the Henbane River region. She uses persuasion and hallucinogens to indoctrinate followers.
- Jacob Seed: Joseph’s brother and the “herald” of the Whitetail Mountains. A former soldier who runs a paramilitary training program.
- Key Allies: Mary May Fairgrave (bar owner), Pastor Jerome Jeffries (preacher and fighter), Nick Rye (pilot), Grace Armstrong (sniper), along with various other side characters and resistants.
- Single-Player Campaign: The main story campaign can be played entirely solo. The player controls the Deputy and can switch between weapons, abilities, and vehicle at will. The campaign includes main story missions, side missions, and various optional activities.
- Co-op Campaign: The entire campaign can be played in 2-player online co-op (drop-in/drop-out). The second player controls a customizable character called “Peach” (or another resistance member) and receives their own progression for weapons and perks. Co-op enables shared exploration, combined tactics, and shared rewards.
- Far Cry Arcade: A separate game mode that allows players to create, share, and play custom maps and missions. It includes both PvE (versus AI) and PvP (versus other players) modes. Maps can be made using assets from Far Cry 5 and other Ubisoft games (like Assassin’s Creed, Watch Dogs, etc.). Arcade offers a nearly infinite variety of user-generated content, with competitive leaderboards.
- Online/Offline Support: The game requires an internet connection for initial installation, updates, and optional online features. However, the single-player campaign can be played offline after the game is installed. Co-op and Arcade require an online connection and a Ubisoft account. On PC, the game is available via Ubisoft Connect, Steam, and Epic Games Store, each requiring its own client.
- American Religious Cult Setting: Unlike previous Far Cry games set in exotic tropical islands or prehistoric lands, Far Cry 5 is set in a realistic, contemporary American setting—a rural county overtaken by a homegrown doomsday cult. This grounded yet terrifying premise resonates with modern themes of extremism and survivalism.
- Silent Protagonist & Storytelling: The player character is a silent, customizable deputy, which immerses the player into the world but also is a point of debate; the lack of voice can feel less personal than previous protagonists. The story is driven by cutscenes and environmental storytelling.
- Resistance Mechanic: The game replaces traditional mission structure with a resistance meter. Freed from linear progression, players can choose which regions to liberate and how to approach the main story, though some story points are triggered by reaching certain resistance levels, potentially leading to unexpected, forced progression.
- Dual Stance on Player Freedom: The game emphasizes freedom but also imposes “wrath” events when resistance reaches certain thresholds—for example, being hunted by the region’s herald. This balances open-world sandbox with narrative pressure.
- Companion System & Animal Allies: The “Fangs for Hire” system allows players to recruit and bond with animals, each with distinct abilities (e.g., Boomer can mark enemies, Peaches can stealth assassinate, Cheeseburger tanks damage). This adds a tactical layer and emotional connection to open-world combat.
- Far Cry Arcade: This user-generated content platform is unique among AAA shooters at the time, offering a dedicated map editor that rivals LittleBigPlanet in scope. Players can create, share, and play thousands of community-made missions, significantly extending replayability.
- Soundtrack & Atmosphere: The game features a curated soundtrack including original hymns and Americana music (e.g., “Oh the Bliss”) that enhances the creepy, cult-like atmosphere. The ambient sound design and dynamic music change based on the player’s actions.
- PC (Windows): Available on Ubisoft Connect, Steam, and Epic Games Store. Supports a wide range of hardware, ultrawide monitors, and uncapped framerates. Requires moderate to high-end GPU (e.g., GTX 970 or better) for high settings at 1080p/60fps.
- PlayStation 4 / 4 Pro: Runs at 30fps (1080p) on base PS4, 30fps (1440p upscaled to 4K) on PS4 Pro. Backward compatible on PS5 with 60fps via boost mode.
- Xbox One / One X: Runs at 30fps (1080p) on base Xbox One, 30fps (native 4K) on Xbox One X. Backward compatible on Xbox Series S|X with 60fps and improved resolution.
- Cloud Streaming: Far Cry 5 is also available via Ubisoft+ and cloud streaming services like GeForce Now (with a purchased copy).
Core Appeal
Far Cry 5 offers a deeply immersive open-world experience with a focus on player freedom, emergent gameplay, and over-the-top action. Players can tackle objectives in any order, use a wide variety of weapons and vehicles, and engage with a world that reacts to their actions. The “Fangs for Hire” system allows players to recruit animal companions (e.g., Boomer the dog, Peaches the cougar, Cheeseburger the bear) and human guns for hire for tactical support. The game also introduces a resistance meter—by completing missions, liberating outposts, and helping civilians, players gradually reduce the cult’s influence, triggering story events and harder “wrath” encounters with the Seed siblings.
Target Audience
The game is targeted at players aged 17 and up (M for Mature) due to blood, intense violence, strong language, and suggestive themes. It appeals to fans of open-world shooters, narrative-driven action games, and the Far Cry series. It also attracts players who enjoy emergent gameplay, sandbox freedom, and the ability to approach missions with any playstyle (stealth, loud, tactical, etc.).
Game Modes
DLC / Expansion Overview
Three story-focused DLC expansions were released after launch, each offering a self-contained adventure with unique mechanics and settings:
1. Far Cry 5: Hours of Darkness – A prequel set during the Vietnam War, putting the player in the boots of a soldier named Wendell “Red” Redler. It features stealth, survival, and a jungle setting. (Available standalone or as part of the Season Pass.)
2. Far Cry 5: Lost on Mars – A sci-fi adventure where the player is abducted by aliens and must survive on Mars using experimental weapons and gadgets. (Included in Season Pass.)
3. Far Cry 5: Dead Living Zombies – A parody of zombie B-movies, featuring seven distinct movie scenarios with different gameplay twists. (Included in Season Pass.)
Additionally, a Season Pass grants access to all three DLCs and includes the base game’s pre-order bonus (the “Doomsday Prepper” pack) and additional content for Far Cry Arcade. Far Cry 5 also received several free updates post-launch, such as the “Summer Vacation” themed mission and live events.
What Makes This Game Unique
Platforms & Performance
---
This introduction serves as the foundation for players new to Far Cry 5, providing essential context before diving into the detailed guides that follow.
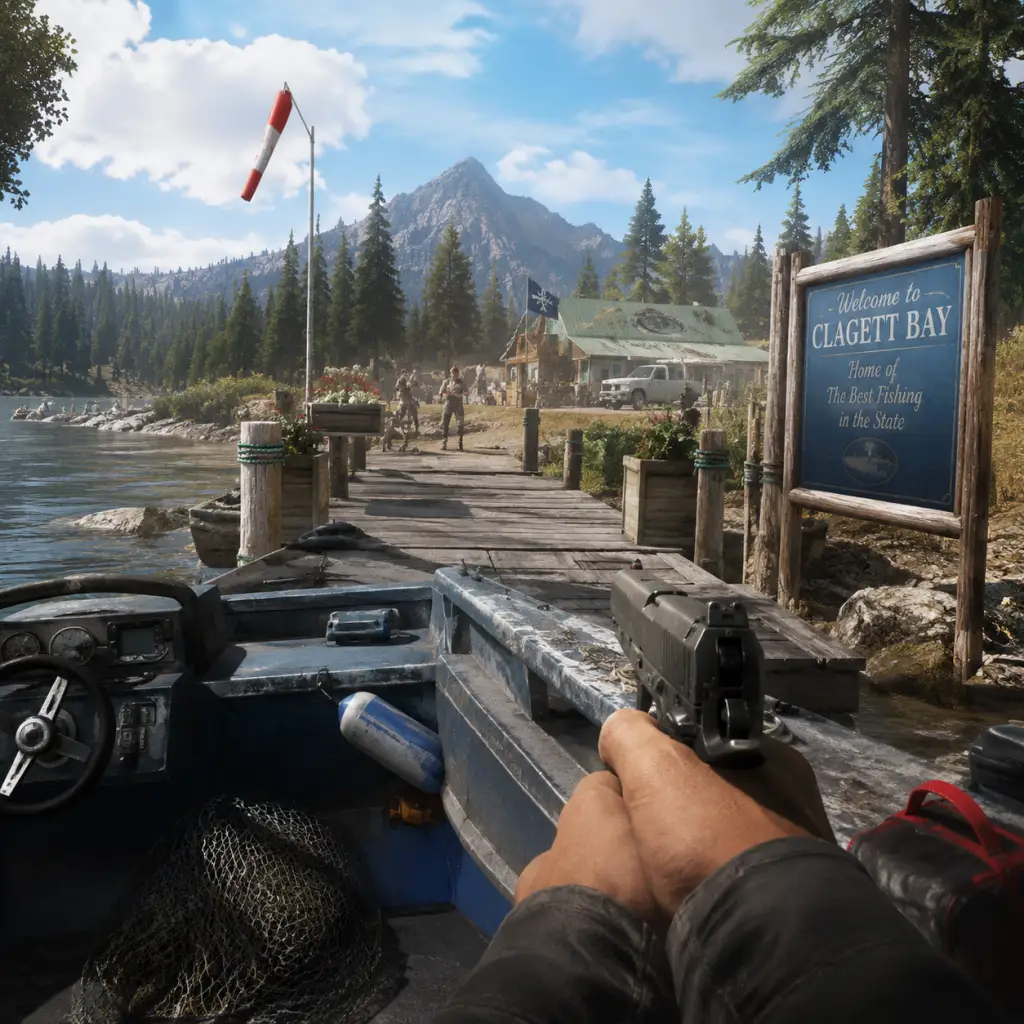
Getting Started
Getting Started with Far Cry 5
Welcome to the wilds of Hope County, Montana. This guide is designed to get you from zero to confident within your first hour, so you can enjoy the chaos without getting stuck. Far Cry 5 has no character creation—you play as the default “Deputy” (first-person, no customization). The game is available on PC (Ubisoft Connect, Steam, Epic), PS4/5, Xbox One/Series X|S. This guide covers all platforms with platform-specific controls.
---
First Hour Walkthrough – The Prologue
The game begins with a cutscene: you (the Deputy) and your fellow law enforcement officers are flown into Hope County to arrest cult leader Joseph Seed. After the chopper ride, you’ll be in the back of a truck with other deputies. Follow these steps:
1. Open the truck door (press the interact button – see controls below).
2. Walk toward the church – follow your partner, Marshal Burke.
3. Experience the ambush – the cult attacks. You’ll be knocked unconscious and wake up tied to a chair.
4. Escape the barn – after a short cutscene, shake free of the straps. A cultist will come in; press the melee attack (F on PC, R3 on consoles) to punch him.
5. Grab a weapon – pick up the pistol from the table (use interaction button).
6. Follow the on-screen prompts to shoot the locks on the door, then shoot the cultists outside.
7. Meet Dutch – a friendly survivalist will open the gate and guide you to his bunker. Follow him, pick up a rifle and ammo along the way.
8. Get inside the bunker – you’ll learn basic crafting and see a tutorial for the Resistance Meter.
9. Complete “The First Step” – your first real mission: go to the Ranger Station to find help. Follow the road, kill a few cultists, and use the outpost capture tutorial.
10. Return to Dutch’s Bunker – he’ll give you the “Grace” sniper rifle mission (optional, but recommended).
That’s your first ~30-45 minutes. Don’t skip any tutorials; they cover loot, crafting, and vehicles.
---
Character Creation (None)
Far Cry 5 has no character creation. You are a pre-designed male or female Deputy (the model differs slightly based on your choice of gender during the intro? Actually, you cannot choose; the game automatically assigns a male Deputy named “Deputy” – but you can change outfits later via the “Outfit” slot in the menu, accessed by opening the Map and pressing Options/Start. There is no gender choice, only a default protagonist. Don’t spend time looking for customization; it’s limited to clothing unlocks from gameplay.
---
Controls Overview
Below are the default controls for each platform. You can rebind in Options > Controls.
PC (Keyboard & Mouse)
| Action | Key |
|---|---|
| Move | W,A,S,D |
| Look | Mouse |
| Jump | Space |
| Crouch | C |
| Sprint | Shift (hold) |
| Interact (pick up, open) | E |
| Fire | Left Mouse |
| Aim Down Sights | Right Mouse (hold) |
| Reload | R |
| Melee Attack | F |
| Throw/Cycle Throwables | 4 (hold) or G? Actually default is 4 for grenades; cycle with 4 repeatedly. Better: press 4 to equip throwable, then left click to throw. |
| Weapon Slot 1-4 | 1,2,3,4 (or mouse wheel up/down) |
| Map | M |
| Pause/Inventory | Escape |
| Quick Menu (heal, craft) | Tab |
| Use Medkit | 5 (or hold Q?) Default: 5 for medkit, Q for camera? Check: Quick menu (Tab) then use. |
PlayStation (PS4/PS5)
| Action | Button |
|---|---|
| Move | Left Stick |
| Look | Right Stick |
| Jump | X |
| Crouch | O |
| Sprint | L3 (click left stick) |
| Interact | Triangle |
| Fire | R2 |
| Aim Down Sights | L2 |
| Reload | Square |
| Melee | R3 (click right stick) |
| Throwable | Hold L1 then press R2 to throw; cycle with L1 + R1? Actually: Press L1 to open throwable wheel, select with right stick, release L1. |
| Weapon Slot | D-Pad Left/Right (cycle) |
| Map | Touchpad (tap) or Options button? On PS4/5, touchpad opens map; Options opens pause. |
| Quick Menu | Hold Touchpad? No, it’s D-Pad Down for healing? Let’s use default: D-Pad Down uses Medkit. To craft: Open Inventory (Options) then Crafting tab. Or from Map you can craft? Mostly you craft using the item wheel. |
Xbox (Xbox One/Series X|S)
| Action | Button |
|---|---|
| Move | Left Stick |
| Look | Right Stick |
| Jump | A |
| Crouch | B |
| Sprint | LS (left stick click) |
| Interact | Y |
| Fire | RT |
| Aim Down Sights | LT |
| Reload | X |
| Melee | RS (right stick click) |
| Throwable | Hold LB then press RT; cycle with RB while holding LB? Use D-Pad Up? Better: Hold LB to open wheel, select with right stick, release. |
| Weapon Slot | D-Pad Left/Right |
| Map | View button (select) |
| Pause/Inventory | Menu button (start) |
| Quick Heal | D-Pad Down (uses Medkit) |
| Quick Craft | Open Map and navigate to Inventory? Actually, from Map you can hold a button to craft? Best to use Inventory menu. |
---
UI Overview
The Heads-Up Display (HUD) is customizable in Settings > Gameplay > HUD Elements. Default elements:
- Health Bar – bottom center, red bar. When damaged, you see a red vignette. Medkits heal you to full.
- Crosshair – center screen. Changes size with movement. Red when aiming at a hostile target.
- Weapon/Equipment – bottom center: shows current weapon, ammo count (magazine/total). Left side shows throwable item (grenade, molotov, etc.) and medkit count.
- Mini-map – top-right corner. Shows nearby enemies (if they are alerting), points of interest, and your objective marker. Can be toggled with M on PC or holding Touchpad/View? On consoles, mini-map is always visible.
- Objective Tracker – top-left. Shows current mission name and directions. Yellow diamond is main mission; white/grey are side activities.
- Compass – top-right (if mini-map is off). Shows cardinal directions and objective markers.
- Resistance Meter – top-center when active. Shows progress toward liberating a region (John, Jacob, Faith). Fills when you do resistance activities.
- Vehicle Controls – when driving, you get a speedometer and vehicle health bar bottom right.
- Detection Indicator – when enemies see you, an eye icon appears on screen. If it turns yellow/orange they are suspicious; red means they’ve spotted you.
- Ammo/Action Indicators – when near an object (e.g., car door), a prompt appears.
- Do NOT start the main story missions for Joseph Seed (the final confrontation) until you have high resistance in all regions (you can’t anyway until you progress). Avoid directly assaulting heavily fortified cult compounds early.
- Do NOT waste money on cosmetic items early. Spend on ammo, medkits, and weapon upgrades.
- Do NOT ignore the tutorial for hunting and fishing – they provide materials for crafting ammo bags and holsters.
- Perk Points – Spend first 3 on “Holster” (sidearm slot), then “Grenade Belt” or “Extra Medkit” (in Perks > Combat tab). You earn perk points from completing challenges, side missions, and finding magazines.
- Money – Sell animal skins (especially wolf, deer, bear) to general stores. Buy the Basic Medkit recipe (from shop) and the Baseball Bat or a simple melee weapon if you like. Don’t buy expensive weapons until you have two weapon slots.
- Crafting Materials – Collect plants like “Blooms” (flower icon) for crafting health and stamina boosts. Animal skins are used for upgrading holsters and ammo pouches at the workbench. Early on, focus on deer and wolf hides for the first holster upgrade (needs 2 deer hides, 2 wolf hides).
- Ammo – Scavenge from enemies. Buy if low. Always carry some for your primary weapon.
- [ ] Complete the prologue up to meeting Dutch.
- [ ] Complete “The First Step” mission (Ranger Station).
- [ ] Capture the Fall’s End outpost (first safe house).
- [ ] Talk to Grace Armstrong (get sniper rifle).
- [ ] Find the fishing rod (buy from store or loot) – fish for money.
- [ ] Hunt at least 2 deer and 2 wolves for holster upgrade.
- [ ] Spend first perk points on “Holster” (slot) and then “Extra Medkit” or “Takedown Master” (for stealth kills).
- [ ] Recruit Boomer (dog) from his mission near the starting area.
- [ ] Open your map and fast travel to a capture point to get familiar with the system.
- [ ] Save your game manually (press Escape and select Save) before a big fight.
- [ ] Adjust control sensitivity and HUD settings to your liking.
---
Essential Early Objectives (First Few Hours)
You have three main regions: Holland Valley (John), Whitetail Mountains (Jacob), and Henbane River (Faith). Each has a resistance meter. Focus on the following in order:
1. Complete “The First Step” – unlocks crafting and shows you how to capture outposts.
2. Capture the Fall’s End Outpost (southwest of Dutch’s bunker) – liberate the town to get a safe house and fast travel point.
3. Complete Grace’s mission (sniper rifle reward) – talk to Grace Armstrong at her church near the eastern edge of Holland Valley. This gives you a powerful weapon early.
4. Get the Fishing Rod – buy from a shop (General Store) or find in a fishing spot – fishing gives money and health items early.
5. Find the first Prepper Stash – look for yellow icon with a suitcase. These give perk points and money.
6. Purchase the “Holster” perk (for two guns) – costs 3 perk points. Vital for carrying a rifle and a close-quarters weapon.
7. Recruit a specialist (e.g., Boomer the dog, Peaches the cougar, or Hurk) – they help in combat. Boomer is easy: complete his mission near the Holland Valley starting area.
What to Avoid:
---
Early Resource Priorities
Resources in Far Cry 5 are: Money ($), Perk Points, Crafting Materials (skins, plants), and Ammo. Prioritize:
---
Common Beginner Mistakes
1. Not using the environment – climb towers to spot enemy locations, use binoculars (hold Q on PC, up on D-Pad on consoles) to tag enemies. This marks them on your minimap and through walls.
2. Ignoring stealth – You can often clear outposts without raising an alarm by using a silenced weapon and takedowns (sneak up behind enemy, press melee button). Alarms call reinforcements.
3. Wasting money on vehicle repairs – If your car is damaged, just steal another one (press Y or Triangle near any car). You can also call in a vehicle from the “Vehicles” menu (on map).
4. Not using your companions – Follower (like Boomer or Peaches) can be directed to attack or distract. Press the command button (default `F` for attack, `E` for disengage on PC; left/right on D-Pad on consoles). They can also revive you if downed.
5. Overcomplicating fishing – When a fish bites, hold the reel button (R2/RT) and don’t let go. The fish will tire. Easy money.
6. Skipping side quests – Side missions give perk points and resistance progress. Do them.
7. Not completing Prepper Stashes – They give money, perk points, and sometimes unique gear. Always do them when you see the icon.
---
Day-One Checklist
Use this to ensure you start off strong:
Once you’ve checked these, you’re set for the open world. Focus on exploring, doing side missions, and building resistance. Good luck, Deputy!
---
Pro Tip: If you own Far Cry 5 on PC, consider using a controller for driving and flying, as keyboard controls for aircraft can be tricky. You can switch seamlessly between mouse/keyboard and controller in settings.
Remember: The game auto-saves frequently, but if you make a critical mistake (like killing a friendly NPC), you can reload from the last save. Also, you can restart a mission from the pause menu without losing too much progress.

Core Gameplay
Core Gameplay Guide for Far Cry 5
Far Cry 5 is an open-world first-person shooter set in Hope County, Montana. You play as an unnamed Deputy Sheriff tasked with arresting the doomsday cult leader Joseph Seed and his lieutenants. The core gameplay loop revolves around exploration, combat, liberation, and progression. The entire world is split into three regions—Holland Valley (John’s territory), Whitetail Mountains (Jacob’s territory), and Henbane River (Faith’s territory)—each tied to a Resistance Meter that drives the story forward. Below, we break down every system by player progression tiers: Early Game, Mid Game, Late Game, and Endgame. Each tier explains the main loop, combat, interaction, progression, exploration, quests, economy, character growth, and endgame content.
Early Game (Resistance 0–30%)
#### Main Gameplay Loop
Your first few hours are spent in Holland Valley (John’s region). The loop: explore the countryside → find Prepper Stashes for cash and Perk Points → liberate small outposts → complete side missions to raise Resistance → confront John’s forces → eventually trigger the first boss battle against John Seed.
#### Combat & Interaction Systems
- Basic Weapons: Start with a pistol and a rifle (e.g., AR-C). Ammo is scarce early on; use melee takedowns and stealth to conserve bullets.
- Stealth vs. Guns Blazing: The game encourages freedom. Early on, stealth is safer—use silenced pistol and bow (unlockable from store) to clear outposts without alarms.
- Vehicles: Steal cars, trucks, or ATVs from roads. First plane (the “Gunship” helicopter) is not available until you rescue an NPC pilot or buy one from the store.
- Companions (Guns for Hire): Early companions include Boomer (dog, marks enemies) and Peaches (cougar, silent killer). Recruit them by completing their NPC quests in Holland Valley. They follow you and aid in combat.
- Interaction: Use the weapon wheel (hold weapon switch button) to select items, gadgets, and companions. Interact with civilians to receive clues or side quests.
- Perk Points: Earned from completing challenges (e.g., “Kill 10 enemies with headshots”), finding Prepper Stash magazines, or ranking up Resistance. Spend them in the perk menu.
- Key Early Perks:
- Resistance Points (RP): Each mission/activity gives RP. When the meter fills partially, you unlock new main story missions and upgrades.
- World Layout: Open, with farms, forests, rivers, and small towns. Points of interest (POIs) are shown on the map as grey icons (undiscovered).
- Fast Travel: Unlocked after liberating an outpost. You can fast travel to any liberated outpost, safe house, or major town.
- Collectibles: Lighters, comic books, and other items scattered. They grant XP or perk points but are optional.
- Fishing & Hunting: Rivers and lakes contain fish (e.g., Trout, Salmon). Hunting animals (deer, bears, wolves) for skins and meat which you can sell or craft bait. Fishing minigame: press button when prompt appears.
- Main Story: Find and arrest John Seed. Early missions include “The First Step” (escape the cult), “Something to Prove” (liberate a gas station), and “Bad Mister Seeds” (attack John’s ranch).
- Side Missions: “Prepper Stashes” are small puzzle locations that give cash/ammo. “Civilian Rescues” free hostages for RP. “Clutch Nixon” (stunt driving) gives vehicle upgrades.
- Cult Outposts: Enemy-held bases. Liberate them by killing all cultists inside (stealth or assault). Liberated outposts become fast-travel points and generate income (fees from survivors).
- Story Boss: John Seed’s confrontation triggers after reaching roughly 30% Resistance in his region. You must survive a plane chase and then defeat him in a church shootout.
- Cash: Earned from looting bodies, selling skins/fish, completing missions, and outpost liberation bonuses (first-time bonus).
- Vendors: Buy weapons, attachments, vehicles, and cosmetics from shops in any safe house. Early budget: ~$5,000–$10,000 can buy a silenced pistol, bow, and a basic assault rifle.
- Hunting Economy: Early money: hunt deer for $50 per skin, bears for $100. Better: hunt bison or elk (around $150). Sell at any store.
- No Class System: Instead, you build your Deputy by choosing perks. Early game, focus on stealth (silent movement, increased stealth takedown damage) and basic survival (health, ammo capacity).
- Weapon Customization: Attachments (scopes, suppressors, extended mags) are purchased with cash. Early priority: suppressor for your primary rifle.
- Companion Synergy: Boomer (marks enemies) is excellent for stealth. Peaches gives a stealth kill option. Recruit both before tackling the first outpost.
- Weapons: Access to assault rifles with scopes, LMGs, shotguns, rocket launchers. Arc (bow) becomes viable for stealth with explosive arrows. Shovel Launcher (unique weapon) available from a side quest.
- Vehicles: Unlock helicopters (e.g., the “Gunship”) and attack planes (with bombs/missiles) via missions or purchase ($30,000+). Planes change exploration and combat dynamics.
- Companions: Unlock advanced companions like Sharky Boshaw (flamethrower), Hurk Drubman Jr. (explosives), and Grace Armstrong (sniper). Each has unique abilities and dialogue. You can have two companions active at once.
- Stealth & Chaos: Enemies now include heavier cultists with armor (need AP rounds or headshots). Alarms at outposts call reinforcements. Use disabling gadgets like EMP grenades to silence alarms.
- Interaction: Gesture wheel (emotes, taunts) is available but mostly for co-op. You can call in air strikes or vehicle drops using the “Call for Support” feature (unlocked via perks).
- Mid-Game Perks:
- Resistance Meter: Each region has its own Resistance Meter. Filling it progresses the story of that region. Mid-game you’ll be alternating between regions to avoid hitting 100% too fast (which forces the final boss of that region).
- Skill Points: More expensive upgrades—some require 2–3 perk points. Focus on combat or traversal based on playstyle.
- New Regions: Whitetail Mountains (snowy, cliffs, caves) and Henbane River (swampy, dense forests, islands). Each has unique enemies and wildlife (e.g., wolves in mountains, alligators in swamps).
- Air Travel: Unlock airplanes and helicopters. Use them to fast travel between regions or reach high mountain peaks. The wing suit allows you to glide from helicopter to remote POIs.
- Hidden Stashes: Many prepper stashes require solving physics-based puzzles (e.g., using explosives to blast open doors, using grapple to reach high ledges). Rewards include high-end weapons (e.g., “The Bull’s Head” shotgun) and cash bundles ($2,000+).
- Hunting Challenges: “Big Game” hunts for rare animals (e.g., “Bison” in plains, “Moose” in mountains). Killing them yields premium skins that sell for $500+ and unlock unique gear at the store.
- Region Story Arcs: Each lieutenant has a unique progression. For Jacob (Whitetail): hunt and rescue kidnapped soldiers, survive his “trials”. For Faith (Henbane): destroy bliss-producing plants, rescue addicts. For John (Holland): already mostly done.
- Major Side Quests:
- Fortresses: Major cult strongholds (e.g., “John’s Ranch”, “Jacob’s Gate”, “Faith’s Compound”). Clearing them requires multi-phase combat (destroy generators, kill commanders). Reward: large RP boost, unique weapons.
- Unexpected Events: “The Blessed” – random NPC fights with cultists; rescue civilians for RP. “Outpost rebuild” – occasional attacks on liberated outposts; defend them for cash.
- Cash Flow: By mid-game you can earn $5,000–$10,000 per hour through missions, selling loot, and outpost income.
- Weapon Purchases: Buy specialized weapons like RAT4 (rocket launcher) for $5,000, SA-50 (sniper) for $7,000. Attachments cost extra.
- Vehicle Purchases: Tanks (e.g., “Battering Ram”) cost $50,000+; aircraft $30,000+. Not essential but fun.
- Fishing Economy: Sell fish to vendors. The most valuable is the Montana Paddlefish ($150 each) found in deep lakes.
- Specialization: Decide if you want a stealth sniper (Grace + silenced pistol), explosives expert (Hurk + RPG), or run-and-gun (Peaches + LMG). Spend perk points accordingly.
- Weapon Mastery: Each weapon class has challenges (e.g., “50 kills with sniper rifles” unlocks improved handling). Mid-game is a good time to focus these.
- Vehicle Upgrades: Purchase performance upgrades for your favorite vehicle (speed, armor, weapon mounts) at the vehicle shop. Expensive but makes a big difference in combat.
- Top-Tier Weapons: All weapons unlocked in shops. Use MG42 (LMG), M-16 (burst fire), Flare Gun (area denial). Special weapons like the Shark Launcher (explosive) and M79 (grenade launcher) are obtained via specific missions.
- Enemy Variety: Elite cultists (heavy armor, miniguns), Angels (mind-controlled civilians that explode on death), and Bliss-infected animals. Use fire or explosives to counter.
- Vehicles: Best ones—Helicopter with homing missiles, Attack Plane with cluster bombs, Armored Truck with turret. Buy or steal.
- Companions: Fully upgraded companions. Example: Sharky (flamethrower) + Boomer (spotting) for clearouts. Or Grace (sniper) + Peaches (stealth) for long-range approach.
- Interaction: The “Call for Backup” perk lets you summon a random fighter jet strike every few minutes. Use it to soften fortresses.
- Late-Game Perks:
- Resistance Meter at 100%: Once a region’s Resistance hits 100%, you are forced into the final boss mission for that lieutenant. For John, you chase him in a plane. For Jacob, you face his mental conditioning trials. For Faith, you fight her in a bliss-induced hallucination. Completing all three unlocks the path to Joseph.
- New Eden Region: The center of the map controlled by Joseph Seed. It’s a large complex with bunkers, a church, and many cult soldiers. Access restricted until all lieutenants are defeated.
- Secret Areas: There are hidden bunkers with high-tier loot (e.g., “The Bunker” under a waterfall). Use the map clues to find them.
- Fishing & Hunting: Still available, but no longer necessary for economy. Completing all fishing challenges rewards the “Grand Slam” trophy.
- Final Lieutenant Missions: Expect multi-stage battles. Example – Jacob’s final mission: “The Last Task” involves surviving waves of cult soldiers. Then you kill Jacob in a scripted sequence.
- Joseph Seed Showdown: After all three lieutenants are dead, you storm Joseph’s church. The finale is a mix of stealth and combat, culminating in a choice—arrest him or kill him? (Spoiler: the canonical ending is arrest; credits roll then a post-credits scene reveals a nuclear apocalypse.)
- Side Missions Late-Stage: Some side quests become unavailable if the region is fully liberated? Actually, most persist; you can still do them after the main story.
- Cash Overflow: You’ll likely have $50,000+. Spend it on upgrades for New Game+ (if you plan to replay).
- Max Weapon Upgrades: All attachments bought; buy all cosmetics if desired.
- Outpost Income: Each liberated outpost gives periodic cash; you can collect from a board in the safe house. Not huge but adds up.
- Fully Specialized: You have all perks available. Focus on the final three-tier perk branch that gives ultimate abilities (e.g., “Complete Stealth” makes you invisible to enemies when moving slowly).
- Weapon Perfection: Use the best weapon for each situation: silenced sniper for stealth, rocket launcher for vehicles, shotgun for close quarters.
- Companion Endgame Combo: For Joseph’s compound, bring one heavy hitter (Sharky with flamethrower) and one support (Boomer for spotting). Use Grace from rooftop sniping positions.
- No Story Changes: The map is now “Resistance-controlled” with friendly NPCs everywhere. Cultists only spawn in designated outpost replay areas or Ambushes.
- Outpost Master: Unlockable from the pause menu. Allows you to re-liberate any outpost with increased difficulty (more enemies, alarms). Rewards: unique weapons, money, and perk points.
- New Game+: Available after beating the game once. Start fresh but keep all perk points, weapons, and cash. Enemies are scaled to post-game difficulty.
- All Perks Unlocked: If not already, max out every perk. There are enough perk points from completed challenges to get all skills. No further progression.
- Challenge Completion: Achieve 100% in each category (exploration, combat, hunting, fishing, driving). Unlocks golden weapon skins and trophies.
- Collectibles Hunting: Use the in-game map to find all Lighters, Comic Books, and Confessionals. Completing sets unlocks special items (e.g., “Mars” comic book gives a key for Lost on Mars DLC).
- Fishing Records: Catch every fish species in each region for the “The Fisherman” award.
- Photographic Challenges: Use your camera to take pictures of landmarks or animals (side activity).
- No New Story: After the final mission, only side quests remain. Some NPCs may have dialogue updates, but no major new content.
- Repeatable Activities:
- Maximum Wealth: Money is no longer an issue. Invest in vehicle upgrades for fun (e.g., flame thrower on a truck).
- Purchase Everything: Buy all weapons, attachments, vehicles, outfits, and ultimate packs (like the “Villain Pack”).
- Maxed Out: At this stage you are essentially a god in Hope County. Use any weapon, any companion, any tactic. Experiment with ridiculous loadouts: e.g., only shovels and throwable teddy bears.
- New Game+ Build: If starting over, build a specific overpowered character from the beginning – e.g., fast stealth + explosive arrows.
- Arcade Mode: Custom maps created by the community or Ubisoft. Play solo or co-op for endless variety. Earn perk points and currency that transfer to the main game (account-wide).
- Story DLCs:
- Live Events: Although no longer updated, some events (e.g., “The Hunt”) may still be active if playing on PC with online features enabled.
- PC: Mouse/keyboard offers precise aiming for stealth; you can bind quick-select keys. Mods available to fix FOV or add QoL.
- PlayStation 4/5 & Xbox One/Series X|S: Controllers have aim assist (can be adjusted). PS5/Xbox Series X runs at 60 FPS (backwards compatibility). No exclusive content.
- Cloud Saves: Supported via Ubisoft Connect; sync between PC and other platforms only if using Ubisoft+ subscription on PC.
- Early Cash: Hunt bison in the Plains of Holland Valley – valuable skins.
- Stealth Power: Get the Grappling Hook perk within first 2 hours to reach secret stashes.
- Companion Switching: Don’t stick to one; each region has specific companions that help (e.g., Grace in Jacob’s mountains for sniping).
- Fast Travel Wisely: Use fast travel only when necessary; roaming gives XP and loot.
- Endgame Planning: Finish all side quests before finishing the main story – some become inaccessible (e.g., “The Lost Pets” if you kill John too early? Actually, they remain).
#### Progression (Perks & Skills)
- Grappling Hook (Tier 1) – enables vertical traversal.
- Parachute (Tier 1) – survive falls from heights.
- Health Boost – increase max health.
- Extra Magazine – carry more ammo.
#### Exploration
#### Quests & Missions
#### Economy & Loot
#### Character/Build Growth
Mid Game (Resistance 30–70%)
#### Main Gameplay Loop
By now you have likely liberated most of Holland Valley and started exploring the other two regions (Whitetail Mountains, Henbane River). The loop expands: travel between regions → tackle larger outposts (fortresses) → complete region-specific story missions → collect better weapons and perks → face the second lieutenant (Jacob or Faith depend on progression).
#### Combat & Interaction Systems
#### Progression (Perks & Skills)
- Wing Suit – soar across large distances (essential for mountain traversal).
- Fast Hands – quicker reloads.
- Lockpick – open wooden crates (gives cash/ammo).
- Improved Repairs – faster vehicle fixes.
- Double Ammo – carry more magazines.
#### Exploration
#### Quests & Missions
- The Highway – help a resistance member fix a transport truck.
- The Lost Pets – find exotic animals for a zookeeper (unlocks companions).
- Challah Challenges – stunt mission strings that reward vehicle unlocks.
#### Economy & Loot
#### Character/Build Growth
Late Game (Resistance 70–100%)
#### Main Gameplay Loop
With two regions nearly liberated, you enter the final stretch. The Resistance meter is almost full, triggering the final showdown with Joseph Seed. The loop shifts to relentless assault on the Cult’s inner circle: complete the final missions of each lieutenant, then go to Joseph’s compound (the “New Eden” region).
#### Combat & Interaction Systems
#### Progression (Perks & Skills)
- Leader of the Pack – carry three companions instead of two.
- Resilience – faster healing and resistance to fire/poison.
- Stealth Complete – totally silent running and no detection footsteps.
- Vehicle Expert – drive/fly vehicles even faster.
#### Exploration
#### Quests & Missions
#### Economy & Loot
#### Character/Build Growth
Endgame (Post-Main Story & Replayability)
#### Main Gameplay Loop
After the credits, you are returned to the world of Hope County with the cult effectively wiped out (though some random cultist encounters may still exist). The loop becomes: complete any remaining side content → tackle challenges → replay outposts in Master mode → dive into the Arcade mode → enjoy story DLCs.
#### Combat & Interaction Systems
#### Progression & Skills
#### Exploration (Post-Game)
#### Quests & Missions (Post-Game)
- Outpost Master – replay outposts for better rewards.
- Free Roam – just wander, kill straggling cultists, and enjoy the world.
- Co-op – invite a friend (online or split-screen on consoles) to help with leftover missions.
#### Economy & Loot
#### Character/Build Growth
#### Endgame Content & DLC
- Hours of Darkness – Play as a Vietnam War soldier in a survival scenario.
- Lost on Mars – Off-world adventure with alien weapons.
- Dead Living Zombies – Over-the-top zombie movie scenarios.
Cross-Platform Notes
Final Tips
This guide covers every core gameplay system in Far Cry 5, broken down by progression tier. Whether you’re a beginner or a completionist, these insights will help you master Hope County.

Game Tips
Game Tips for Far Cry 5
This section provides a comprehensive collection of tips for Far Cry 5, grouped by gameplay category. Use these to survive Hope County, outsmart the cult, and become a master of chaos.
---
Beginner Tips
1. Take It Slow at First
- Why: Far Cry 5 throws you into an open world immediately. Rushing into missions without upgrades or awareness leads to frustration.
- Action: Complete the first two or three story missions in John’s Region (Holland Valley) to unlock basic weapons, the grappling hook, and the wing suit early. This gives you mobility and firepower.
2. Always Carry a Silenced Weapon
- Why: Stealth is king in the early game. You can clear outposts undetected and avoid attracting overpowered reinforcements.
- Action: The Sawed-Off Shotgun with a suppressor is poor; instead buy a Silenced Sniper Rifle (e.g., .308 Carbine) or use the Silenced Pistol (from the starter pack or found later). Headshots one-shot most humans.
3. Heal Before Every Engagement
- Why: Health does not regenerate automatically – you must use medkits or syringes. Getting caught mid-fight with low health is fatal.
- Action: Craft or loot medkits (1 cloth + 1 medical herb). Always have at least 3 on hand. Use a syringe for instant health bonus before charging.
4. Use the Fishing Pole for Early Cash
- Why: Fishing is a reliable and safe way to earn money. Fish sell well and are easy to catch.
- Action: Visit any lake or river, equip the fishing rod (unlocked after the first story mission). Catch medium or large fish – they sell for $50-$150 each. A half-hour can net you $1000+.
5. Liberate Outposts to Unlock Fast Travel
- Why: Fast travel points are only available at liberated outposts. More fast travel = less walking.
- Action: Clear any outpost you encounter (even low-level ones) by killing all cultists. Once captured, you can fast travel there from anywhere on the map.
---
Combat Tips
1. Master the “Pebble” Distraction
- Why: Throwing a rock (pebble) makes a noise that attracts enemies if they are nearby. It creates an opening for stealth takedowns.
- Action: Press the melee button while unarmed (or hold weapon swap) to throw a rock. Use it to lure one enemy away from a group, then perform a silent takedown.
2. Explosive Arrows and Fire Arrows Are Overpowered
- Why: They bypass bullet damage falloff and cause area-of-effect damage. Fire arrows set enemies on fire, disabling them instantly.
- Action: Craft explosive arrows (1 arrow + 1 animal fat). Use them against vehicles, heavy enemies, or groups. Fire arrows (1 arrow + 1 alcohol) are great for clearing bunkers.
3. Use the Wing Suit to Enter Combat
- Why: The wing suit gives you an altitude advantage and lets you land silently on top of buildings or behind enemies. It also reduces fall damage.
- Action: When approaching an outpost, jump off a nearby cliff or helicopter and glide in. While gliding, you can shoot (but not aim down sights). Use a silenced pistol for precision.
4. Call in Air Support
- Why: Your hired guns (e.g., Nick Rye) can provide helicopter support with rockets or a minigun. This turns any tough fight into a one-sided slaughter.
- Action: Recruit Nick Rye (from his house in Holland Valley). In combat, use the radial menu (hold weapon wheel) to call “Air Strike” – Nick will fly in and strafe the area. Cooldown is ~2 minutes.
5. Exploit Enemy Weaknesses
- Fighters: Headshots with any weapon kill instantly. Use armor-piercing rounds on armored guys (yellow nametags).
- Animal Chasers: Snipers and fangs-for-hire (like Boomer) are easy kills with one body shot.
- Flame Enemies: They explode when shot in the tank on their back – use a pistol to trigger a chain reaction.
- Cult Choppers: Shoot the pilot through the window, or use a rocket launcher/RPG. A simple .50 cal sniper round to the engine can also bring it down.
---
Exploration Tips
1. Always Scan with Binoculars
- Why: Binoculars mark enemies, loot boxes, and intel items on the map. This removes guessing and helps plan routes.
- Action: Purchase the Binoculars from any shop or find them early. Press the zoom button to use. Mark every enemy before entering a combat zone – they stay highlighted for a while.
2. Find Prepper Stashes for Free Gear
- Why: These hidden caches contain skill points, weapons, crafting materials, and even cash. They are scattered across the map.
- Action: Look for yellow bunker doors in cliffsides or under houses. Many require solving a simple puzzle (e.g., following wires, shooting locks, using explosives). The rewards are substantial.
3. Collect Clutch Nixon Trophies
- Why: These stunt missions (wing suit, ATV, etc.) give perk points (skill points) upon completion. Perk points unlock essential abilities like double jump, increased health, and faster reload.
- Action: Grab the starting Clutch Nixon mission from radio towers or signs. Complete the timed challenges – they are forgiving once you learn the route.
4. Use Vehicles to Traverse Rough Terrain
- Why: Hope County has mountains, rivers, and dense forests. Foot travel is slow and dangerous. Vehicles provide speed and safety.
- Action: Always steal or call in a pickup truck or ATV from the “Call Vehicle” option (available after completing a few story missions). For water, use the boat or jet ski. For air, helicopters are best – they land anywhere and can hover.
5. Unlock All Radio Towers
- Why: Towers reveal the entire map, marking outposts, shops, and points of interest. This is essential for exploration efficiency.
- Action: There are 12 towers (4 per region). Climb each one and activate the console. Some require platforming or using a helicopter to reach the top. Always bring a grappling hook.
---
Resource Tips
1. Prioritize Crafting Material Hoarding
- Why: Crafting is the only way to make medkits, explosives, and specialty ammo. Running out mid-mission is disastrous.
- Key Materials:
- Cloth: Loot from houses, outposts, and civilian clothing. Used for medkits and armors.
- Medical Herbs: Found near water sources, gardens, and forests. Essential for syringes.
- Animal Fat: From hunting bears, wolves, boars. Used for explosive arrows and bait.
- Alcohol: From barns and stills. Used for fire arrows and Molotovs.
- Action: Every time you enter a populated area, loot everything. Hold the interact button to quickly pick up all items in a radius.
2. Hunt Predators for Best Recipes
- Why: Bear and cougar pelts unlock the best gear upgrades (like ammunition pouches and armor) when sold to the store.
- Action: Equip a high-damage weapon (shotgun or .50 cal) and hunt in forests. Skin the animal. Then sell the pelt to any general store – you’ll see new crafting options appear.
3. Use the “Loot” Perk for Extra Resources
- Why: The Loot perk (costs 3 perk points) doubles the amount of money and materials you find from containers and enemies.
- Action: Buy it as soon as possible from the skill tree. It pays for itself within an hour.
4. Scrap Unwanted Weapons for Parts
- Why: Weapon parts are used to upgrade your own guns (silencers, scopes, extended mags). You collect them from dismantling found weapons.
- Action: At any workbench, select a weapon you don’t use and click “Scrap” – you’ll get 1-3 parts depending on rarity. Better to scrap than sell for a few dollars.
5. Campfire Spots Offer Free Heals
- Why: Campfires (marked on map with a fire icon) allow you to rest for free and instantly heal to full. They also save your game.
- Action: Use them as safe respawn points. If you are low-health near a campfire, simply rest for 5 seconds instead of using a medkit.
---
Builds and Perks Guide
1. Early Perk Recommendation: “Double Jump”
- Why: Unlocks a second jump in mid-air. This is vital for reaching ledges, avoiding fall damage, and escaping enemies.
- Cost: 3 perk points. Only unlock after getting “Health Regeneration” (optional but helpful).
2. Essential Combat Perks
- “Stealth Takedown”: Allows silent kills from any direction (not just behind). Unlocks at 2 points. Critical for stealth builds.
- “Faster Reload”: +20% reload speed (3 points). Reduces downtime in firefights.
- “Armor” (various levels): Increases damage resistance. Stack with armor vests for tankiness.
- “Medic”: Doubles the healing effect of syringes and medkits (5 points). Great for survival.
3. Best Weapon Loadouts by Playstyle
- Stealth Sniper: Silenced .308 Carbine (sniper) + Silenced 9mm Pistol + Bow (for zero sound). Perks: Stealth Takedown, Faster Reload, Sniper Scope.
- Heavy Assault: LMG (e.g., M60) + Sawed-Off Shotgun + RPG. Perks: Armor, Damage Resistance, Heavy Weapons Ammo.
- Explosive Engineer: Rocket Launcher + Proximity Mines + Fire Arrows. Perks: Explosive Damage, Improved Grenades.
- All-Rounder: AR-C (assault rifle) with suppressor + A.J.M. 9 (silenced pistol) + Baseball Bat (melee). Perks: Balanced mix of health, reload, and movement.
4. Fangs-for-Hire Combos
- Boomer (dog): Marks enemies automatically and retrieves animals. Pair with stealth builds.
- Peaches (cougar): Silent killer that can take down multiple enemies silently. Great for clearing outposts.
- Cheeseburger (bear): Tanky and loud. Use for frontal assaults where you want chaos.
- Hurk (explosive expert): Throws grenades and uses rocket launchers. Perfect for area denial.
5. Vehicle Upgrades
- Why: Upgrading your vehicles (extra armor, fuel, speed) makes travel safer.
- Action: At any garage, spend $1000-$2000 per upgrade. Prioritize Heavy Armor (survives crashes) and Nitro Boost (escape pursuits).
---
Economy Tips (Money & Resources)
1. Sell Pelts, Buy Gear
- Why: Selling animal pelts is the fastest early-game income. A single bear pelt sells for $150-$300.
- Action: Hunt bears, cougars, and elks. Make sure you skin them properly. Store pelts at your safehouse (bunkers) to avoid losing them if you die.
2. Invest in the “Money Per Capita” Perk
- Why: Increases money from containers by 50% (costs 2 points). Combined with the Loot perk, you double the cash.
- Action: Get both perks early. Within a few hours, you’ll have thousands for weapon purchases.
3. Do Not Sell Weapon Parts
- Why: Parts are rare and needed for upgrades. At most, you can sell them for $10 each – not worth it.
- Action: Save all parts for your favorite weapons. If you have duplicates, scrap them (not sell).
4. Rescue Civilians for Cash Rewards
- Why: When you encounter civilians being attacked by cultists, saving them yields instant cash and sometimes perk points.
- Action: Always intervene in random events (marked with red circles on mini-map). The rewards are quick and easy.
5. Complete Side Missions for Perks
- Why: Side missions from NPCs (like “Ronald” or “Pastor Jerome”) reward perk points and unique weapons. They are often short.
- Action: Check your mission list for any side quest you haven’t done. Prioritize ones that give 2-3 perk points.
---
Intermediate Strategies
1. Use the “Parachute + Wing Suit” Combo for Air Travel
- Why: This allows you to cover vast distances without a vehicle. Jump from a high point, deploy parachute, then hold the wing suit button (LB/L1) to glide.
- Action: After unlocking the wing suit (early story), practice gliding from the highest mountain peaks. You can cross half the map without landing.
2. Coordinate with Friends in Co-op
- Why: Co-op doubles firepower and allows revives. The game scales enemies for two players, but it’s still easier.
- Action: Assign roles: one stealth, one assault. Use the same VIP for close coordination. Both can drive vehicles.
3. Use the Marking System for Intel
- Why: Enemies marked with binoculars stay visible through walls for a few seconds (even while aiming). This is crucial for planning paths.
- Action: Before any outpost assault, spend 30 seconds marking every enemy with binoculars. Prioritize alarms (red boxes) – shoot them immediately.
4. Layer Your Defenses When Escorting NPCs
- Why: Many missions require protecting a character. They often ignore cover and die quickly.
- Action: Place mines or C4 on likely approach paths. Stay between the NPC and enemies. Use the “Heal” syringe on them if they go down.
5. Exploit Elevation for Unlimited Ammo
- Why: You can call in an ammo drop using $500 resources. But it’s cheaper to loot dead enemies.
- Action: Always finish looting the area after a fight. Cultists often carry ammo for your current weapon. Swap weapons to pick up ammo for both.
---
Advanced Optimizations
1. “New Game+” and Difficulty Modifiers
- Why: After completing the story once, you unlock Infamous difficulty (enemies are bullet sponges, no regenerating health). This is the ultimate challenge.
- Action: Before starting a hard run, stockpile all perks and weapons via New Game+. On Infamous, use explosive spam and heavy weaponry.
2. Speedrun Techniques
- Why: If you want to beat the game quickly, learn the optimal route.
- Action: Skip every side mission except those that unlock essential gear (wing suit, grappling hook). Go directly to Joseph Seed’s location in the center of the map after liberating only one region. Use helicopters to bypass roadblocks.
3. Maximize Perk Point Gain
- Why: Perk points cap at 50 (plus missions). You need them all for max builds.
- Action: Complete all 9 Clutch Nixon challenges (each gives 1 point). Find all 30+ Prepper Stashes (most give perk points). Complete the “Blessed” and “Cult” side missions.
4. Zero Kill Run (Non-Lethal)
- Why: The game allows knockouts instead of kills (e.g., melee attacks, baseball bat, takedowns). This is a self-imposed challenge.
- Action: Equip the Stun Gun (from preorder or DLC) or use the Baseball Bat with a takedown. Avoid using guns. Note: Main story bosses must be defeated, but you can use non-lethal methods on all regular enemies.
5. Use the “Ammo Recycling” Glitch (Patched in some versions)
- Why: In older patches, you could drop weapons and pick them up to refill ammo without paying. Check your version.
- Action: Equip a weapon with low ammo, drop it, then pick it up. The ammo count resets to full. This saves thousands on ammo purchases. Not available on current-gen patches.
---
Final Tips
- Save Often: Manual save (via pause menu) prevents losing progress due to sudden death or crashes.
- Play with Sound: Audio queues (e.g., cultist radio broadcasts, enemy chatter) reveal enemy positions.
- Adjust Difficulty in Options: You can change difficulty mid-game without penalty.
- Use the Environment: Explosive barrels, gas cans, and animal cages (like wolves) are deadly traps. Lure enemies into them.
This guide covers the essential strategies to thrive in Far Cry 5. Whether you are a rookie Deputy or a veteran Shepherd of Hope County, these tips will help you bring down the Seed family with style.
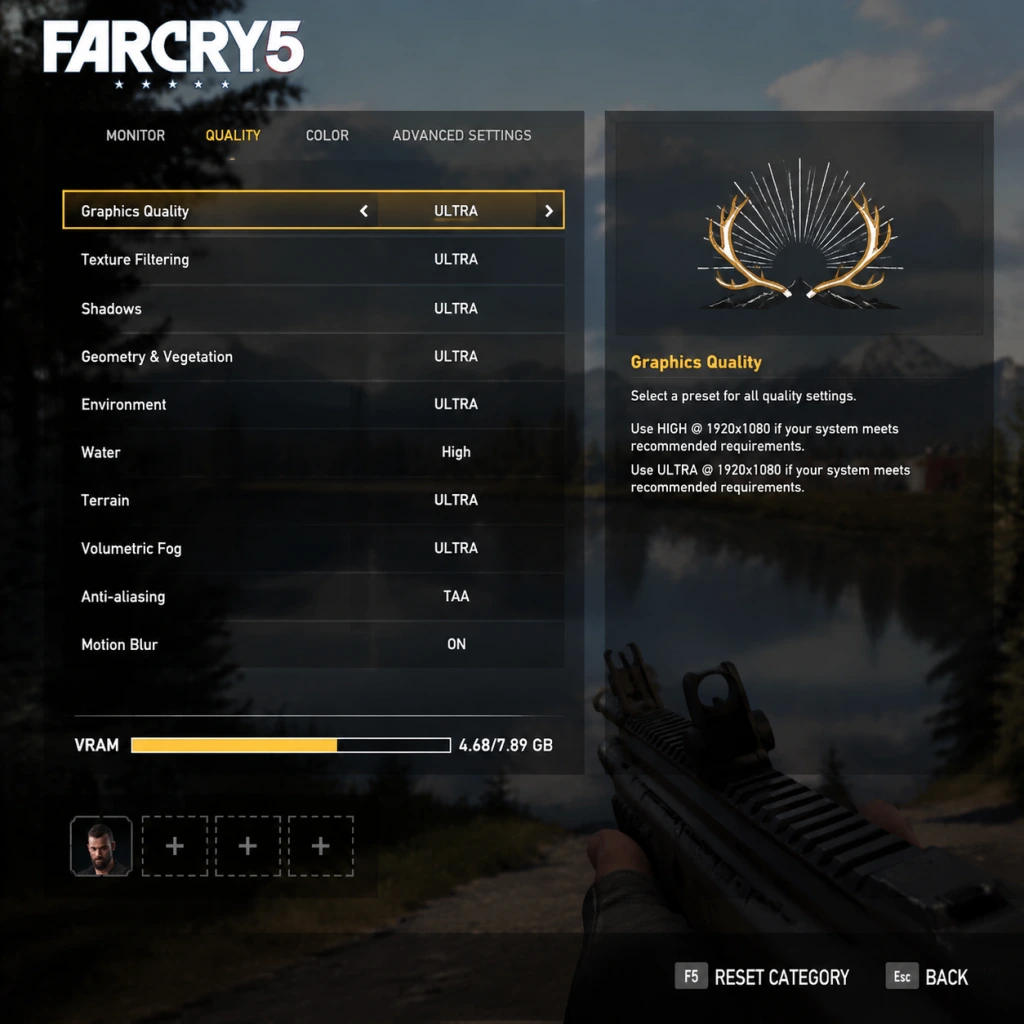
Game Settings
Game Settings Guide for Far Cry 5
Properly configuring your settings in Far Cry 5 can dramatically improve your experience—whether you’re aiming for smooth performance on a modest PC, crisp visuals on a high‑end rig, or the best accessibility options. This guide covers every setting category and provides recommendations for different hardware levels.
---
1. Graphics Settings
Far Cry 5 uses the Dunia Engine 2 (a heavily modified version of CryEngine). It offers a wide range of options, but some are more impactful than others.
#### 1.1 Display
| Setting | Recommended Value | Notes |
|---|---|---|
| Monitor | Your primary display | If you have multiple monitors, ensure the correct one is selected. |
| Display Mode | Fullscreen (for best performance) | Borderless Windowed can reduce FPS slightly; Fullscreen exclusive (if available) is preferred. |
| Resolution | Native monitor resolution | Lowering resolution improves performance but reduces clarity. |
| Aspect Ratio | Auto (matches monitor) | Manually set only if you have a non‑standard ratio. |
| Refresh Rate | Maximum supported by monitor | Ensure your monitor’s refresh rate is selected (e.g., 60Hz, 144Hz). |
| V‑Sync | Off (unless screen tearing bothers you) | Turn on if you experience tearing; Off to reduce input lag. |
| FOV (Field of View) | 75–90 (default 65) | Higher FOV increases awareness but reduces performance slightly. Adjust to comfort. |
Ubisoft provides four presets: Low, Medium, High, and Ultra. We recommend starting with the appropriate preset for your hardware, then tweaking individual options.
Hardware Level Recommendations:
| Level | GPU | CPU | RAM | Preset | Notes |
|---|---|---|---|---|---|
| Low‑end (30–40 FPS) | GTX 960 / RX 460 | i5‑2400 / Ryzen 3 1200 | 8 GB | Low | Lower resolution scaling if needed (e.g., 900p). |
| Mid‑range (50–60 FPS @1080p) | GTX 1060 / RX 580 | i5‑7600 / Ryzen 5 2600 | 16 GB | High | Turn off shadows and water quality to Very High if stable. |
| High‑end (60+ FPS @1440p/4K) | RTX 2070 / RX 5700 XT | i7‑9700 / Ryzen 7 3700X | 16 GB | Ultra | Fine‑tune anti‑aliasing and resolution scaling for 4K. |
| Enthusiast (120+ FPS @1440p) | RTX 3080 / RX 6800 XT | i9‑10900K / Ryzen 9 5900X | 32 GB | Ultra | Optional: Enable NVIDIA Ansel or AMD FSR if desired. |
- Resolution Scaling (`Render Scale`): Reduces internal resolution while keeping UI crisp. Warning: Setting below 100% blurs the image; above 100% for supersampling can tank performance. Use 80–90% on low‑end systems, 100% otherwise.
- Anti‑Aliasing (`SMAA` / `TAA`): TAA (Temporal Anti‑Aliasing) is best for performance but can cause ghosting. SMAA is sharper but more taxing. Recommendation: TAA on mid‑range, SMAA on high‑end if you dislike ghosting.
- Shadows: Ultra shadows are very expensive. Medium is a good balance on mid‑range hardware.
- Water Quality: Set to High or below; Ultra adds expensive reflections.
- Terrain Quality: Controls draw distance of ground detail. High is fine on most systems; Ultra only for high‑end 4K.
- Texture Quality: Limited by VRAM. Use Ultra if you have 6+ GB VRAM; High if 4 GB; Medium if 2 GB.
- Ambient Occlusion (`SSAO`): High impact on performance. Off or Low on low‑end; High on mid‑range; Ultra on high‑end.
- Motion Blur: Personal preference – turn Off for clarity, On for cinematic feel.
- Depth of Field: Off recommended for gameplay clarity.
- Chromatic Aberration: Off – adds visual noise and can cause eye strain.
- Lens Flare: Optional – can obscure vision in bright scenes.
Special Attention Point: The FOV setting is extremely easy to mis‑set. A very high FOV (over 100) can cause fish‑eye distortion and reduce performance. A very low FOV (under 60) can cause motion sickness. Test in the game’s opening area.
---
2. Audio Settings
Audio in Far Cry 5 is crucial for immersion (ambient sounds, gunfire, cult radio broadcasts).
| Setting | Recommended | Notes |
|---|---|---|
| Master Volume | 80–100% | Adjust to taste, ensure you can hear dialogue. |
| Music Volume | 70% | The soundtrack is excellent; don’t turn it too low. |
| SFX Volume | 100% | Essential for hearing enemy footsteps and gunshots. |
| Dialogue Volume | 100% | Mission-critical dialogue can be missed if too low. |
| Voice Chat | On or as needed | Online co-op: set to Push-to-Talk to avoid background noise. |
| Sound Mode | Stereo (headphones) / 5.1/7.1 (surround) | Select according to your audio setup. |
| Dynamic Range | Wide (for headphones) / Normal (TV speakers) | Wide increases immersion but can cause clipping on weak speakers. |
| Subtitles | On | Helpful for understanding cult propaganda and NPC chatter. |
| CC (Closed Captions) | Optional | Useful for hearing‑impaired players. |
---
3. Controls Settings
Customizable keybindings and controller settings are essential for comfort. Far Cry 5 supports both keyboard + mouse and gamepad (Xbox/PlayStation).
#### 3.1 Keyboard & Mouse
| Setting | Recommended | Notes |
|---|---|---|
| Mouse Sensitivity | 10–15 (default 10) | Adjust to your DPI. Lower for precision, higher for quick turns. |
| Aim Down Sights (ADS) Sensitivity | 0.5–0.7 (multiplier) | Lower than hip‑fire for better aim. |
| Invert Mouse Y | Off (unless you prefer inverted) | Personal preference. |
| Mouse Smoothing | Off | Can introduce input lag. |
| Key Bindings | Customize as needed | Highlights: T for tagging, F for action, Q for weapon wheel. Change melee (V) to a mouse button if you prefer. |
| Quick Key Settings | Enable for quick select | Allows tapping numbers to instantly equip weapons. |
| Setting | Recommended | Notes |
|---|---|---|
| Vibration | On | Provides tactile feedback on damage and vehicle handling. |
| Controller Sensitivity | 50–70% | Lower for precision aiming. |
| Aim Assist | High (for casual) / Low (for skilled) | Game offers strong aim assist; you can reduce or turn off. |
| Trigger Effect (Xbox One/Series) | On | Enhanced rumble in triggers (only on supported controllers). |
| Button Layout | Default or Tactical (crouch on right stick) | Tactical allows crouching without removing thumb from aim stick. |
---
4. Accessibility Settings
Ubisoft has included several options to help players with various needs.
| Setting | Recommended | Notes |
|---|---|---|
| Subtitles | On + Background opacity | Increases readability. |
| Colorblind Mode | Choose type (Protanopia, Deuteranopia, Tritanopia) | Adjusts HUD colors and map markers. |
| Camera Shake | Off (if prone to motion sickness) | Dramatically reduces screen shake from explosions. |
| Hold vs Tap (Interact) | Default (Tap) | Change to Hold if you accidentally trigger interactions. |
| Toggle Crouch | On (if you prefer toggle) | Reduces need to hold a button during stealth. |
| Quick Time Event (QTE) Mode | Single Button (instead of mashing) | Accessible for players with limited dexterity. |
| High Contrast Mode | Off (can be enabled for UI) | Raises contrast of important elements; may be distracting. |
---
5. Language Settings
| Setting | Options | Notes |
|---|---|---|
| Spoken Language | English, French, German, etc. | Affects voice acting. English is original. |
| Subtitles Language | Select separately from spoken | Useful for learning a language. |
| Text Language | Menu/UI language | Must match Ubisoft Connect settings on PC. |
| Audio Language | Same as spoken? | Some platforms separate menu audio from voice. |
---
6. Network Settings
For co‑op and online features, network settings are crucial.
| Setting | Recommended | Notes |
|---|---|---|
| Online Permissions | Friends Only or Public | Private if you don’t want randoms joining. |
| Co‑op Mode | Invite Only (prevent unwanted help) | Can change in game menu. |
| Matchmaking Region | Automatic | Manually set to closest region for lower ping. |
| Voice Chat | Push to Talk (PC) / Open Mic (console) | Reduces background noise. |
| Network Statistics | On (show ping/packet loss) | Helps diagnose connection issues. |
---
7. Gameplay Settings
These affect the core experience, including difficulty and HUD.
| Setting | Recommended | Notes |
|---|---|---|
| Difficulty | Normal (first play) / Hard (experienced) | Easy is forgiving; Hard increases enemy damage and reduces health pickups. |
| Auto‑save Frequency | Frequent | Prevents loss of progress. |
| HUD Presets | Minimal (immersive) or Full (informative) | Minimal hides most elements; use Compass mode for direction without clutter. |
| Quick HUD | On | Shows ammo and health only when needed. |
| Crosshair | On | Essential for aiming. Some prefer dot or cross. |
| Mission Log Marker | On | Guides you to objectives. |
| Fast Travel | Enabled | Saves time; can be disabled for immersion. |
| Photo Mode | Unlocked | Not a setting but a feature; bind to F3 (PC) or press both sticks (console). |
---
8. Performance Tweaks (PC Only)
Beyond in‑game settings, a few system‑level adjustments can help:
1. Update GPU drivers (NVIDIA Game Ready or AMD Adrenalin).
2. Disable overlays from Ubisoft Connect, Steam, or Discord while playing.
3. Set Windows power plan to High Performance.
4. Close background apps (browsers, streaming software).
5. Use NVIDIA Reflex (if available) to reduce latency – enable in graphics settings.
6. Adjust resolution scale instead of lowering overall resolution for a sharper image.
Bonus: Far Cry 5 has a built‑in benchmark tool. Run it after changes to verify stability.
---
9. Save & Cloud Settings
| Setting | Recommended | Notes |
|---|---|---|
| Cloud Saves (Ubisoft Connect) | Enabled | Syncs progress across multiple PCs. |
| Save Slots | Manual saves every hour | Game auto‑saves, but manual saves prevent overrides. |
| Backup Saves | Copy files from `%USERPROFILE%\Documents\My Games\Far Cry 5` | Useful before major changes. |
Conclusion: Spend 10 minutes adjusting these settings before starting the game. The biggest performance gains come from turning down Shadows, Water, and Ambient Occlusion. For the best visual experience on high‑end hardware, keep everything at Ultra with SMAA T2X anti‑aliasing. Always test with the benchmark after significant changes.
Important Notes
Important Notes for Far Cry 5
This section covers critical warnings, pitfalls, irreversible choices, missable content, difficulty spikes, grinding traps, online considerations, and save management advice. Reading this before you play will save you from common frustrations and help you make informed decisions.
---
Irreversible Choices & Consequences
#### Story Branching (No Hard Resets)
- Three Key Cutscenes: During the main story, you will be captured by each of the Seed family lieutenants (John, Faith, Jacob) three separate times. Each capture triggers a forced cinematic. While you cannot avoid them, they do not permanently lock you out of content—they only advance the region's resistance meter.
- Ending Choices: The game has multiple endings, all reachable from the final encounter. One ending is available at the very start (yes, you can refuse to arrest Joseph Seed at the beginning). The “secret ending” is a joke ending; the other endings are determined by your final actions. No forced permanent locks aside from narrative flow.
- Weapons are always retrievable from any vendor or the shop menu. You never permanently lose a purchased weapon.
- Outfits and vehicles are unlocked permanently via challenges or purchases. Lost vehicles respawn at garages.
- Most side missions remain available until you finish the region’s story. Some vanish after the final confrontation in that region. Priority: Complete any side quest that has a timer or is marked “urgent” in the menu (though very few have actual timers).
- Prepper Stashes are not missable—they’re permanent locations. However, if you leave a stash unopened, you can return later. No time limit.
- Lighter, Comic Books, Skill Magazines, Music Players, Letters, Vintage Parts, Boomer’s Photos, Glacier Grizzlies – all persist even after finishing the main story. You can collect them freely in post-game free roam.
- Vehicles: Some special vehicles (e.g., the “Doomsday Prepper” truck) are one-time rewards from specific side missions. If you fail or ignore them before completing the region, they are gone. Check the mission log for unique vehicle rewards.
- Resistance members (e.g., Grace, Sharky, Boomer) offer faction missions that reward unique weapons and outfits. These missions are time-sensitive per region. If you leave a region before completing them, they become unavailable once the region’s story is done. Always finish the ally missions for each region before defeating the Lieutenant.
- First 2 hours: You have few skills, weak weapons, and low health. The cult patrols are aggressive. Tip: Focus on stealth and avoid head‑on fights. Craft makeshift weapons (bait, molotovs) early.
- John’s Region (Holland Valley) : The first “boss” fight with John Seed can be tough if you’re under‑leveled. Recommended: have at least 4 health bars and a silenced rifle.
- Faith’s Region (Henbane River) : Her hallucination sequences require careful platforming. Tip: Save before entering any drug‑induced area—the fall damage is instant death.
- Jacob’s Region (Whitetail Mountains) : Jacob’s “trials” (forced stealth sequences) are frustrating. You must pass them to progress. Tip: Memorize the patrol paths and use the environment (tall grass, rocks). Restart checkpoints if spotted.
- Final Mission: The final assault on Joseph Seed’s compound has no difficulty spike if you have a good loadout and plenty of medkits. Enemies are numerous but not extreme.
- Arcade Mode: Custom maps vary wildly—some are user‑made nightmares. If you attempt the Arcade for achievements, expect some maps to be very hard.
- Don’t buy every weapon: You’ll find plenty of weapons on enemies and in stashes. Only purchase those you actually need.
- Sell excess: Animal skins, fish, and crafting materials can be sold. Keep a moderate stash (50 of each) and sell the rest.
- Use the “Sell All” option at vendors for junk items. You rarely need more than 20 of any resource.
- No real grind: Skill magazines scattered around the map provide permanent skill points. Prioritize finding them over killing enemies for XP.
- Do side missions: They give substantial XP. Never feel forced to grind XP – the game is generous.
- Ammo: Always loot enemies. If you run low, fast travel to any outpost and restock from the chest.
- Health: Medkits are abundant. Don’t waste materials crafting them—buy them cheaply from stores.
- Manual saves are allowed anytime, except during certain cinematics. Use them frequently, especially before:
- Only one manual save slot: The game overwrites your manual save when you make a new one. Keep multiple saves by copying the save file outside the game (PC: save folder in Documents/My Games/Far Cry 5). On consoles, backup to cloud manually.
- The game auto‑saves frequently at checkpoints, but not during all activities. If you quit without a manual save, you may lose 5–10 minutes of progress. Manual save is safer.
- Ubisoft Connect uses cloud saves. On PC, ensure cloud sync is enabled to prevent loss. If you play on multiple systems, cloud saves can sync progress (but be careful: overwriting can happen).
- Coop is drop‑in/drop‑out for the entire campaign. Your partner gets their own progress? No – only the host’s story advances. The guest keeps all loot, XP, and currency they earn during the session, but story progress is not shared. Good for helping friends, not for playing your own story concurrently.
- Behavior: Don’t steal the host’s kills/vehicles. Stick together to avoid triggering story events solo. Communication is helpful for stealth.
- Arcade has leaderboards for custom maps. Some maps may have unintended skips/exploits. Using them can get your leaderboard scores flagged. Avoid obvious glitches if you care about rankings.
- Anti‑cheat: Far Cry 5 does not have a kernel‑level anticheat. Cheating in single‑player is possible but not recommended – it can corrupt your save. In Arcade, cheating may lead to a ban from online features.
- No competitive PvP – only co‑op PvE maps. Be respectful: don’t shoot teammates’ vehicles, don’t block doors, and don’t farm kills on respawning enemies while your partner waits.
#### Weapon & Outfit Loss
Missable Content
#### Side Missions & Prepper Stashes
#### Collectibles
#### Unique Weapons & Outfits from Faction Missions
Difficulty Spikes & How to Avoid Them
#### Early Game
#### Mid Game
#### Late Game
Grinding Traps & How to Avoid Them
#### Money (Eliminating the Need to Grind)
#### Skill Points
#### Crafting (Health, Ammo, Attachments)
Save Management Advice
#### Manual Saves
- Accepting a new region’s story mission (in case you need to reload).
- Entering a “trial” or hallucination sequence.
- Attempting risky stunts (e.g., flying a helicopter into a canyon).
#### Auto‑Saves
#### Cloud Saves
Online Etiquette & Anti‑Cheat Notes
#### Coop Mode
#### Arcade Mode
#### Multiplayer (Far Cry Arcade)
Things Players Commonly Regret Not Knowing Earlier
1. You can unlock the entire map by flying a helicopter – use the “liberate” aircraft at any cleared outpost to reveal all locations on you map. Saves hours of running.
2. Use “Call for Backup” (hold Q on PC) to summon a fighter plane or attack helicopter. Build a garage first.
3. Fishing is not mandatory – but it’s a good way to earn money early. Don’t waste time fishing for rare fish unless you enjoy it.
4. The best early game weapon is the silenced sniper rifle from the “Hunting Rifle” – buy it at any weapon shop and attach a silencer. It one‑shots headshots most enemies.
5. You can carry multiple weapons of the same type – but you don’t need to. Stick to a sniper, AR, shotgun, and sidearm.
6. Resistance points are shared across all regions – you don’t need to grind individually. Focus on one region at a time to avoid leaving a region half‑cleared.
7. Don’t ignore the “Guns for Hire” – each companion has unique abilities. Peaches (the cougar) can help you detect enemies. Boomer (the dog) marks animals and enemies. Grace (sniper) is invaluable for long range.
8. The “Slow Motion” (bullet time) skill is activated by landing a headshot while aiming down sights. It’s game‑changing for combat.
9. You can buy the “Laser Sight” attachment early – it improves hip‑fire accuracy. Really helpful for close quarters.
10. The final confrontation with Joseph Seed can be ended early by refusing to fight – you’ll see a different ending. Save before the final dialogue!
---
Summary
| Category | Key Takeaway |
|---|---|
| Irreversible Choices | None truly permanent except story flow. The only permanent consequence is missing side missions after a region is locked. |
| Missable Content | Ally missions and region‑specific vehicles. Complete them before defeating each lieutenant. |
| Difficulty Spikes | First region (Holland Valley) and Jacob’s trials. Prepare accordingly with health and stealth skills. |
| Grinding Traps | Money is easy to earn; don’t hoard. Skill magazines are plentiful. |
| Save Management | Manual save often. One manual slot only – backup externally on PC. |
| Online Etiquette | Respect coop partner. Avoid exploits in Arcade. |
| Regret Factors | Unlock map early, use companion abilities, and buy silenced weapons ASAP. |
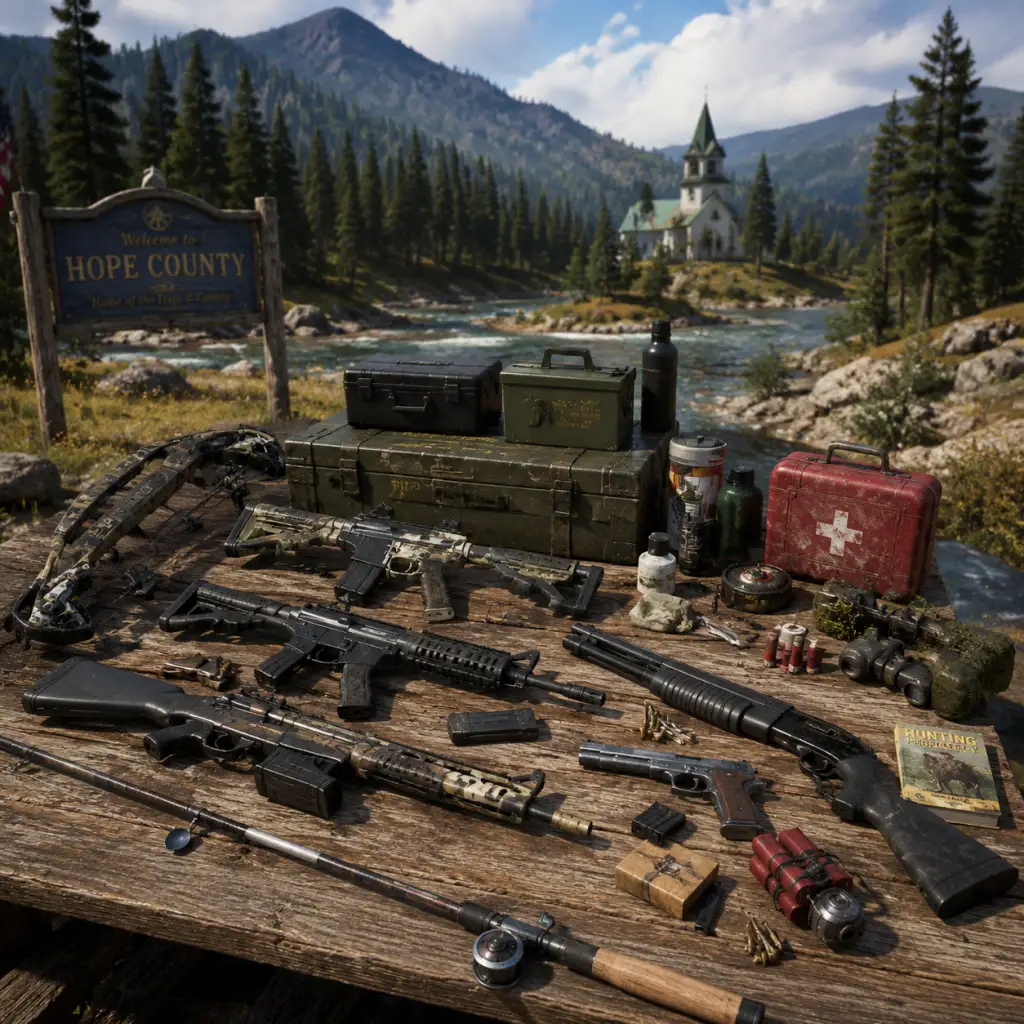
All Game Items
All Game Items Guide for Far Cry 5
This guide catalogs every major item class in Far Cry 5, from weapons and equipment to consumables, materials, currencies, and collectibles. Each section explains what the item does, how to obtain it, when it is useful, and any important synergies or upgrades.
---
Weapons
Weapons in Far Cry 5 are divided into categories based on primary use. Most can be purchased from Vendors (found at safe houses, outposts, and towns) after the corresponding weapon rank is unlocked via story progress. Weapons can also be found in Prepper Stashes, looted from enemies, or earned as mission rewards. Every weapon can be customized with attachments (scopes, suppressors, magazines, grips) purchased from the same vendor menu. Ammo types (Armor-Piercing, Incendiary, Explosive) are bought from the Ammo tab.
Pistols
| Weapon | Description | Obtain | When Useful |
|---|---|---|---|
| 1911 | Standard semi-auto pistol, reliable and accurate. | Vendor (unlocked early), loot. | Backup weapon for finishing off injured enemies. Suppressed for stealth. |
| M9 | Higher capacity than 1911, moderate damage. | Vendor, Prepper Stash. | General-purpose sidearm. |
| .44 Magnum | High stopping power, penetrates armor. | Vendor (after liberating John’s region), Prepper Stash. | Effective against heavy units and vehicles. Pair with scope for long-range pistol kills. |
| D50 | Semi-auto desert eagle, high damage, slow fire rate. | Late-game vendor, mission reward. | One-shot kills on unarmored enemies. Excellent for takedowns with a silencer. |
| Rattlesnake (Gold Pistol) | Unique skin, same stats as 1911. | Prepper Stash “Rattlesnake”. | Cosmetic only. |
Rifles
| Weapon | Description | Obtain | When Useful |
|---|---|---|---|
| AR-C | Full-auto assault rifle, balanced stats. | Vendor (early), common drop. | Primary weapon for most engagements. Customize with reflex sight and suppressor for stealth. |
| AK-47 | High damage, moderate recoil. | Vendor (mid-game), found in cult bases. | Excellent for medium range; use AP ammo to shred armor. |
| MS16 | Semi-auto marksman rifle, good accuracy. | Vendor (early), Prepper Stash. | For accurate headshots at range. Add a silencer for stealth sniping. |
| .45 Rifle | Amped semi-auto, uses .45 ammo. | Special mission reward. | High damage but limited ammo capacity. Use as a loud, high-hitscan option. |
| SPAS-12 (Shotgun) | Actually classified under shotguns, but here for completeness. | ||
| Signature Weapons (Unique variants) | e.g., AK-MS (suppressed AK), Driller (bladed AR-C). | Unlock via side missions, then buy from vendor. | Provide built-in attachments or special perks. |
Shotguns
| Weapon | Description | Obtain | When Useful |
|---|---|---|---|
| SPAS-12 | Semi-auto shotgun, high fire rate. | Vendor (mid-game). | Excellent for close quarters; use with slug rounds for mid-range. |
| SBS | Short-barreled pump shotgun. | Prepper Stash, vendor. | Compact, good for vehicle takedowns. |
| Bullpup Shotgun | Magazine-fed, fast reload. | Late vendor, reward. | High ammo capacity, devastating against groups. |
| Double-Barrel | Two powerful shots, slow reload. | Early world pickup. | High damage per shot, ideal for ambush. |
Submachine Guns
| Weapon | Description | Obtain | When Useful |
|---|---|---|---|
| MP5 | Fast fire rate, low recoil. | Vendor (early). | Suppressed for stealth; great with Extended Mags. |
| Vector | High RPM, controllable. | Vendor (mid). | Excellent for hip-fire and run-and-gun. |
| MAC-11 | Very high rate of fire, small magazine. | Prepper Stash. | Use for close combat; pair with AP rounds to drop armored enemies quickly. |
Light Machine Guns
| Weapon | Description | Obtain | When Useful |
|---|---|---|---|
| M249 | Belt-fed LMG, high capacity. | Vendor (after liberating Jacob’s region). | Suppressive fire; effective against vehicles and groups. Slow movement while firing. |
| MG42 | Very high fire rate, powerful. | Prepper Stash, world loot. | Melts through enemies but heavy. Use bipod for control. |
Sniper Rifles
| Weapon | Description | Obtain | When Useful |
|---|---|---|---|
| .308 Sniper | Bolt-action, high damage. | Vendor (early). | Long-range stealth kills. AP rounds penetrate helmets. |
| SA-50 | Semi-auto sniper. | Vendor (mid-game). | Faster follow-up shots; great for taking out multiple targets. |
| Bushman | Unique suppressed sniper. | Side mission reward. | Combines sniper range with stealth. |
Bows (Recurve, Compound)
| Weapon | Description | Obtain | When Useful |
|---|---|---|---|
| Recurve Bow | Basic bow, quiet, one-hit kills on unarmored. | Starting equipment, can buy upgrades. | Excellent for stealth and hunting animals for bait. |
| Compound Bow | Faster draw, more damage, scope option. | Vendor (mid-game). | Better for long-range silent kills. Use Explosive Arrows for vehicles. |
Special Weapons & Explosives
- Flamethrower: Short-range, ignites enemies and vegetation. Obtain: vendor after liberating Faith’s region. Use: crowd control, clearing foliage.
- Rocket Launcher: Takes out vehicles and groups. Use: heavy targets. Obtain: Prepper Stash, late vendor.
- Grenade Launcher: Lob explosive rounds. Use: area denial.
- Thrown Explosives: Grenades, Molotovs, C4, Remote Explosives. Obtain: vendor, loot. Use: demolition, surprise attacks.
- Bee Bomb: Releases bees that attack enemies. Obtain: world pickup/vendor. Use: distraction or chaos.
- Silencer + Stealth Perks: Headshots clear outposts silently.
- Armor-Piercing Rounds vs. Armored Enemies (Angels, heavy cultists).
- Incendiary Rounds vs. Flammable objects (tanks, gas barrels).
- Explosive Arrows for vehicle takedowns.
- Signatures like “The Whitetailer” (unique rifle) often have built-in silencer or scope, saving attachment points.
Weapon Synergies
---
Equipment
Equipment items are non-weapon tools that aid traversal, reconnaissance, and interaction. Most are unlocked via the Skills (Perks) menu or through specific story events.
| Item | Function | How to Obtain | When Useful |
|---|---|---|---|
| Grappling Hook | Allows climbing to ledges and zipline traversal. | Unlocked automatically after liberating any region (John’s or early story). | Reach high ground, secret areas, and skip enemy paths. |
| Parachute | Deploy from height to slow descent. | Given during intro sequence. | Escape falls, combine with Wingsuit. |
| Wingsuit | Glide through the air for long distances. | Unlocked via Prepper Stash (“Jump to the music”?) or purchased from a vendor? Actually unlocked via a mission “The Flight” from Nick Rye. | Fast travel between areas, bypass terrain, and evasive movement. |
| Binoculars | Zoom in, mark enemies, wildlife, and collectibles. | Starting equipment. | Essential for scouting outposts; hold [E/View] to tag enemies. |
| Camera | Identical to binoculars but also used for “Selfies” and photo missions. | Already in inventory. | Same as binoculars. |
| Fishing Rod | Used to fish any body of water. | Unlocked via the “Fishing” mission from Ham M. Fisher at any fishing spot. | Catch fish for bait or fun; fish sell for money. |
| Whistle | Calls your equipped companion (Fang or Human) or lures enemies. | Bound to a key (by default Q). | Distract enemies for stealth, summon pet. |
| Repair Tool | Repairs damaged vehicles. | Purchased from vendors (consumable). | Keep your ride running; use on helicopters, boats. |
| Spud Gun | Fires potatoes; non-lethal. | Prepper Stash (Rattlesnake area?). | Fun, but no practical use. |
Consumables
Consumables are single-use items that provide immediate effects. They can be bought from vendors, looted from bodies, or found in containers.
| Item | Effect | How to Obtain | When Useful |
|---|---|---|---|
| Health Syringe | Restores a portion of health instantly. | Vendors, loot, world containers. | Use when low; you can carry up to 5 syringes. |
| Bait (Herring) | Attracts predators (bears, cougars, wolves) to a location. | Vendors, fishing. | Lure animals to distract enemies or for combat help. |
| Grenade | Thrown explosive with timed fuse. | Vendors, loot. | Clear groups, destroy vehicles. |
| Molotov Cocktail | Ignites area on impact. | Vendors, craftable? Possibly from gas cans. | Crowd control, fire propagation. |
| C4 | Remote-detonated explosive. | Vendors, Prepper Stashes. | Place on vehicles or objectives; detonate from distance. |
| Remote Explosive | Same as C4 but with short timer? Actually remote. | Vendors. | Same as C4. |
| Sticky Bomb | Explosive that sticks to targets. | Rare loot. | Stick to armored enemies or vehicles. |
| Repair Tool | Consumable that fully repairs a vehicle. | Vendors. | Keep vehicles operational during long drives or after heavy damage. |
| Alcoholic Drink | Distracts enemies? Actually used for a perk? Not a major consumable. | Prepper Stash. | Can be used to affect NPC behavior? Mostly collectible. |
- Bait + Stealth: Throw bait into a group of enemies to attract an animal that attacks them.
- C4 + Remote Explosive: Stack on vehicle for massive damage.
- Health Syringe + Perk “Syringe Boost” (increases healing).
- Vehicle Repair: Scrap metal (from vehicles) used to craft repair tools? Actually repair tools are bought, but scrap can be sold for cash.
- Upgrades: Perk Points are a material-like resource (see Currencies).
- Ammo: No crafting of ammo; you buy ammo packs from vendors.
- Collectible Items: Comic books, lighters, postcards become “materials” for completing collections.
---
Materials
Materials in Far Cry 5 are not used for crafting traditional items. Instead, they serve for:
| Resource | Use | Acquisition |
|---|---|---|
| Money ($) | Purchase weapons, ammo, vehicles, cosmetics. | Loot enemies, Prepper Stashes, sold items, mission rewards. |
| Perk Points | Unlock skills in the perk tree. | Earned by completing Prepper Stashes (magazines), side missions, challenges, resistance milestones. |
| Resistance Points | Progress the story per region; triggers confrontations. | Liberate outposts, complete missions, destroy cult property. |
| Scrap Metal | Sell for small cash. | Destroy vehicles, loot. |
| Precious Metals | Sell for high cash (gold bars, jewelry). | Prepper Stashes, loot. |
| Fishing (Fish) | Sell for cash or use as bait. | Catch with fishing rod. |
Currencies
There are three main currencies in Far Cry 5. They are not spent together; each has a distinct role.
Money ($)
- Earned: Looting bodies, selling valuables, Prepper Stashes, mission rewards, destroying cult supplies.
- Spent: Vendors (weapons, attachments, ammo, consumables, vehicles, clothing/outfits).
- Notes: Always useful; can be farmed by fishing or selling unwanted weapons.
- Earned: Found in Prepper Stashes (as “Perk Magazines”), reward for completing certain challenges (e.g., kill 50 enemies with a bow), side missions, and reaching Resistance thresholds.
- Spent: In the Skill (Perk) menu to unlock new abilities like faster reload, silent running, increased health, double jump, etc.
- Notes: Invest in stealth and traversal perks early (e.g., “Grapple Hook” is free, but “Silent Takedown” costs points). You cannot refund points, so choose wisely.
- Earned: Liberating outposts, destroying cult property, completing main and side missions, killing lieutenants’ underlings.
- Spent: Not spent; they unlock story progression events (e.g., “The Father’s” confrontation) and grant Perk Points at certain thresholds (e.g., every 5000 Resistance Points gives a Perk Point).
- Notes: Each region (John’s, Jacob’s, Faith’s) has its own Resistance bar. Filling a bar triggers the boss fight in that region. You can avoid triggering the boss by not completing the final resistance milestone.
- Description: Watered vaults containing cash, perk magazines (Perk Points), and sometimes unique weapons or vehicle keys.
- How to find: Yellow icons on map after revealing with binoculars; often require puzzle solving (e.g., shooting locks, using grapple).
- Reward: $500–$2000, 1–3 Perk Points, sometimes gear.
- Notable: “The Prisoner” stash gives a unique weapon.
- Description: Collect 11 lighters hidden in the world.
- Reward: Cash and a unique vehicle (the “Truck” of some kind).
- How to find: Look for glowing lighters near outposts or buildings.
- Description: 10 issues of “The Father” comic. Each gives a Perk Point.
- Reward: All collected gives a unique weapon (?) – actually gives the “Temporary” vehicle? I think it gives a skin.
- How to find: In houses, basements, hidden shelves.
- Description: 10 postcards from Hope County landmarks.
- Reward: Cash and a cosmetic outfit.
- Find: Near viewpoints and scenic locations.
- Description: 10 cards for the “Resistance” side quest. Give story logs and money.
- Find: In enemy camps.
- Grapple Upgrades: Not collectibles per se, but the grappling hook is given automatically.
- Wingsuit: From Nick Rye's mission.
- Fishing Rod: From Ham M. Fisher.
- Special Vehicles: Some Prepper Stashes unlock unique vehicles like the “Truck” or “Plane” that can be purchased.
- Stealth Build: Use silenced weapons (MP5, bows) + “Silent Takedown” perk + “Increased Movement Speed” perk. Binoculars to mark enemies. Bait to distract animals.
- Heavy Combat: Use LMG (M249) + Armor-Piercing rounds + “Heavy Ammo” perk (more ammo capacity). Throw C4 on vehicles.
- Traversal: Wingsuit + Parachute + “Fast Recover” perk reduces fall damage. Use grapple to reach stashes.
- Economy: Farm fish for cash; use cash to buy better weapons; use Prepper Stashes for bulk money and perk points.
Perk Points
Resistance Points
---
Collectibles
Collectibles are hidden items that reward money, perk points, or cosmetic items. They are marked on the map after using binoculars or purchasing maps from vendors.
Prepper Stashes
Lighter Collection (Testament Packs)
Comic Book Collection
Postcard Collection
Memory Cards
Key Equipment from Collectibles
---
Synergy Summary
---
This concludes the comprehensive items guide for Far Cry 5. Refer to the sections above to understand how each item fits into your strategy and progression.
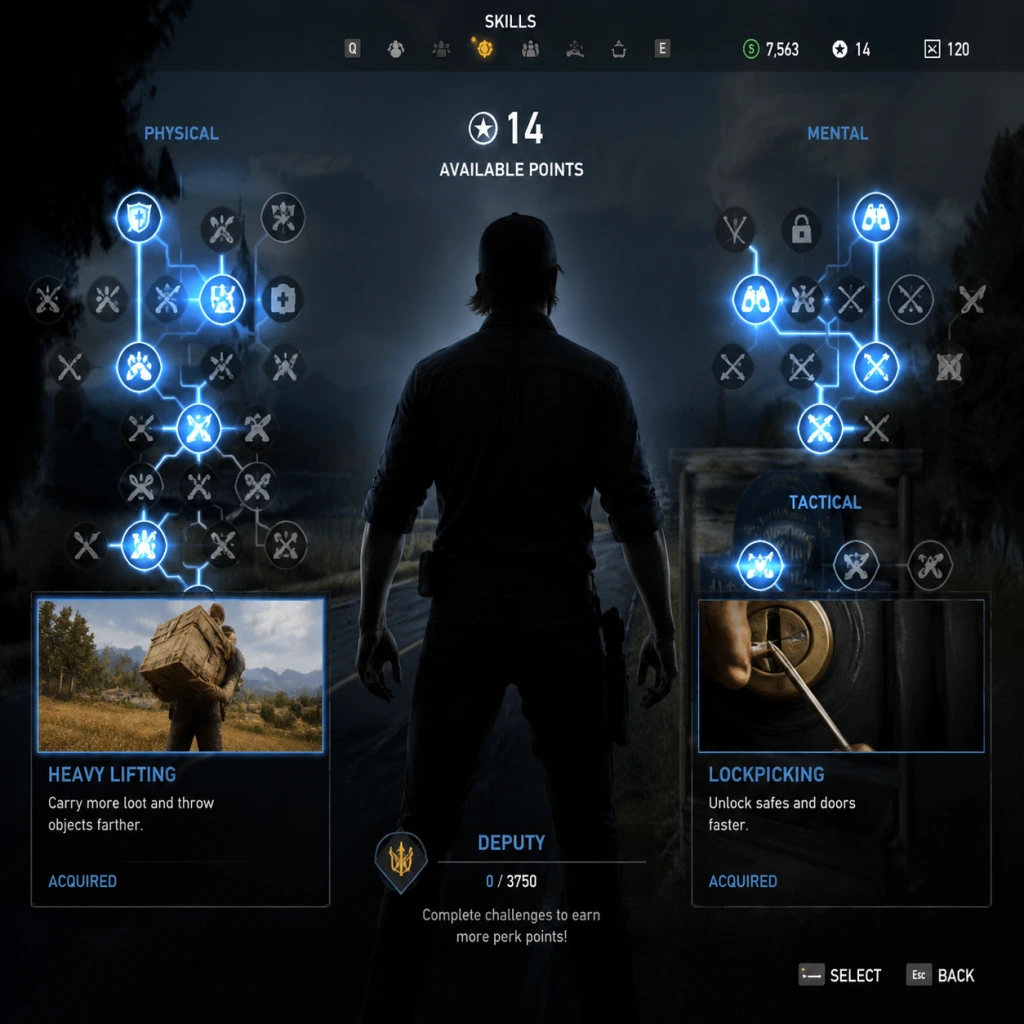
Character Skills
Character Skills Guide for Far Cry 5
In Far Cry 5, the player character—an unnamed Deputy Sheriff—does not have classes or distinct playable roles. Instead, all skills are learned by spending Perk Points, which are earned by completing challenges, finding skill magazines, or exploring the world. Skills are organized into three trees: Brawler, Sharpshooter, and Survivor. Each tree offers passive bonuses, active abilities, and combat maneuvers. This guide covers every skill in detail, including effects, upgrades, combos, recommended builds, and optimal usage.
---
Skill Categories Overview
| Tree | Focus | Typical Playstyle |
|---|---|---|
| Brawler | Melee combat, health, hand-to-hand takedowns, animal taming | Aggressive close-quarters, using fists and melee weapons, taking down enemies silently or brutally |
| Sharpshooter | Ranged weapons, precision, stealth headshots, vehicle combat | Sniper, stealth archer, precision shooter, using scoped rifles and pistols |
| Survivor | Mobility, crafting, explosives, wingsuit, resistance | Runner, bomber, survivalist, using explosives and gadgets to control battles |
---
Brawler Tree
1. Chain Takedown
- Cost: 3 Perk Points
- Description: After performing a melee takedown on a single enemy, you can immediately perform another takedown on a nearby enemy with a single button press. Works within a short range.
- Upgrades: None, but effectiveness increases with awareness of enemy positions.
- Cooldown: No cooldown; chain limit: 2 takedowns per activation (grab one, then immediately grab the next).
- Combos/Synergies: Pairs with Grapple Takedown (unlocked later) to pull enemies from cover and chain kills. Also great with stealth outfits and silenced weapons to clear outposts quietly.
- Recommended Build: Essential for stealth assassins who clear compounds silently. Use when enemies are close together (2-3 meters apart).
- When to Use: When you are behind two or more unaware enemies in a line or within range. Common in outposts and during stealth missions.
- Cost: 2 Perk Points
- Description: If you are falling or gliding and land on top of an enemy, you can perform a takedown by pressing the melee button, killing the enemy instantly.
- Upgrades: None.
- Cooldown: Takedown cooldown about 0.5 seconds; need to be above enemy.
- Combos/Synergies: Works perfectly with the Wingsuit (Survivor tree) or from any high vantage point. Combine with Grapple Takedown for rooftop kills.
- Recommended Build: Any, but especially useful for vertical gameplay.
- When to Use: When you see an enemy below a ledge, while flying in a wingsuit, or after parachuting onto a cultist.
- Cost: 1 Perk Point
- Description: Your first heavy melee attack after a sprint deals increased damage and can stagger or kill weaker enemies in one hit. Activates when you sprint and press the melee button.
- Upgrades: None.
- Cooldown: None; requires sprinting for ~1 second to charge.
- Combos/Synergies: Use with Brawler perks like Fists of Justice (increases fist damage). Also good for breaking through doors quickly.
- Recommended Build: Good for early game or aggressive brawling builds.
- When to Use: When closing distance on a single enemy or opening a fight by taking out the nearest threat.
- Cost: 2 Perk Points
- Description: Increases damage dealt by fist attacks by 50%.
- Upgrades: No further upgrades.
- Cooldown: Passive.
- Combos/Synergies: Essential for any Brawler build. Pairs with Gauntlet for massive sprint punch damage. Also works with Chain Takedown if you need to soften an enemy before takedown.
- Recommended Build: Core for melee-focused players.
- When to Use: Always active.
- Cost: 3 Perk Points
- Description: While aimed at an enemy and within a short range (about 5-7 meters), you can use the grappling hook (L1/LB) to pull the enemy toward you and perform a lethal takedown. Enemy will be stunned momentarily.
- Upgrades: None.
- Cooldown: About 2 seconds between uses.
- Combos/Synergies: Combines with Chain Takedown to grab one enemy, kill, then chain to another. Also great for pulling enemies out of vehicles or off ledges.
- Recommended Build: Stealth and aggressive builds alike. Allows safe kills from behind cover.
- When to Use: When an enemy is slightly separated from a group, or when you are hidden behind low cover. Also useful for taking down enemies near edges.
- Cost: 4 Perk Points
- Description: Allows you to choose between a Silent Takedown (no noise) or Heavy Takedown (louder, but can sometimes take down two enemies if triggered correctly). Actually, in Far Cry 5, this perk enables the ability to perform a takedown while sprinting, and also allows you to perform takedowns on heavy enemies (flamethrower, shotgun, etc.) without needing a knife.
- Upgrades: None.
- Cooldown: None, but requires opportunity.
- Combos/Synergies: Use with Chain Takedown for a sprinting chain kill. Essential for taking down heavy cultists (Bruisers) without alerting others.
- Recommended Build: Mandatory for stealth takedown specialists.
- When to Use: When approaching from a distance in a sprint, or when facing heavy enemies that cannot be normal-takedowned.
- Cost: 2 Perk Points
- Description: Allows you to whistle to attract an enemy to your position. Press the interaction button while aiming at an enemy to make a short whistle. Enemy will investigate the sound.
- Upgrades: None.
- Cooldown: About 2 seconds.
- Combos/Synergies: Use to lure enemies into ambush areas or for Grapple Takedown kills. Works well with Chain Takedown as enemies come one by one.
- Recommended Build: Stealth and outpost clearing.
- When to Use: When an enemy is out of range for a direct takedown and you want to bring them closer.
- Cost: 3 Perk Points
- Description: When your health is critically low, you enter a slow-motion effect for a short duration, during which you deal increased melee damage and can survive one extra hit. (Effectively a temporary berserker state.)
- Upgrades: None.
- Cooldown: Triggers once per life? It recharges after you heal or revive.
- Combos/Synergies: Use with Fists of Justice and Gauntlet for powerful comeback kills. Also pairs with the Survivor perk Iron Lung to sprint longer while low.
- Recommended Build: High-risk brawlers.
- When to Use: When you are overwhelmed and health is red, use it to finish off nearby enemies.
- Cost: 1 Perk Point
- Description: Increases maximum health by 25%.
- Upgrades: Can be upgraded to Brawler’s Vitality II (additional 25%) later in the tree.
- Cooldown: Passive.
- Combos/Synergies: Essential for tank builds; combine with Brawler’s Armor (another perk) for more durability.
- When to Use: Always active.
- Cost: 2 Perk Points
- Description: Reduces damage taken from melee attacks by 30%.
- Upgrades: None.
- Cooldown: Passive.
- Combos/Synergies: Works with Brawler’s Vitality for melee tanking.
- When to Use: Always active.
- Cost: 1 Perk Point
- Description: Reduces crosshair sway by 20% when aiming down sights.
- Upgrades: None.
- Cooldown: Passive.
- Combos/Synergies: Use with Sniper skills. Essential for precision builds.
- When to Use: Always active.
- Cost: 2 Perk Points
- Description: When you kill an enemy with a headshot, there is a chance (around 20%?) to instantly regain one bullet from your current weapon’s ammo reserves. Actual effect: 25% chance to not consume a bullet on a headshot kill.
- Upgrades: None.
- Cooldown: Passive per kill.
- Combos/Synergies: Great with snipers and rifles. Effective for long firefights when ammo is scarce.
- When to Use: Always active for headshot specialists.
- Cost: 2 Perk Points
- Description: When unseen and crouched, you move 15% faster.
- Upgrades: None.
- Cooldown: Passive.
- Combos/Synergies: Use with Aimed Shot for faster repositioning during stealth sniping. Also pairs well with Silent Takedowns (requires Takedown Master in Brawler).
- Recommended Build: Stealth/ranged hybrid.
- When to Use: Always active when crouched and undetected.
- Cost: 3 Perk Points
- Description: While aiming down sights (ADS) with a ranged weapon, you can hold the focus button (right stick click or middle mouse) to highlight enemies and objects within a certain range. Lasts about 3 seconds after releasing.
- Upgrades: Can upgrade to Eagle Vision II (longer range and duration) later.
- Cooldown: About 10 seconds after activation.
- Combos/Synergies: Pairs with Aimed Shot for easier headshots. Use before engaging to mark targets.
- Recommended Build: Hunters, snipers, stealth players.
- When to Use: Before entering a combat zone or when you lose track of enemies.
- Cost: 3 Perk Points
- Description: Allows you to perform a takedown while wielding a sidearm (pistol/revolver) by pressing the melee button. The takedown uses the pistol as a blunt instrument, but is slightly louder than a normal takedown. Also unlocks the ability to sprint and slide into a takedown while using a sidearm.
- Upgrades: None.
- Cooldown: None, but requires sidearm equipped.
- Combos/Synergies: Works with Chain Takedown if you switch quickly? Actually, chain takedown only works if you have a melee weapon or fists. However, you can use a sidearm takedown then switch to melee for chain.
- Recommended Build: Gunslinger builds that use pistols as primary.
- When to Use: When you need a quick silent kill while holding a pistol and don't have time to switch to fists.
- Cost: 2 Perk Points
- Description: While aiming down sights with a handgun, you can dodge by tapping the sprint button, performing a quick sidestep. Reduces incoming damage by 30% during the dodge animation.
- Upgrades: None.
- Cooldown: 2 seconds.
- Combos/Synergies: Use with high-damage revolvers or machine pistols. Essential for aggressive gunslinging.
- Recommended Build: Pistol-focused players.
- When to Use: When an enemy is shooting at you and you need to evade while maintaining aim.
- Cost: 2 Perk Points
- Description: When you stay still and crouch for 3 seconds, you gain a damage reduction of 25% from incoming bullets. Resets if you move.
- Upgrades: None.
- Cooldown: Takes 3 seconds to activate, lasts indefinitely until movement.
- Combos/Synergies: Perfect for snipers camping on hills. Combines with Aimed Shot for stable aim and low damage intake.
- Recommended Build: Long-range snipers.
- When to Use: When holding a position and taking fire from distance.
- Cost: 3 Perk Points
- Description: While aiming down sights with a rifle (including sniper rifles), you can press the focus button to enter a slow-motion effect for a few seconds, allowing easier long-range shots. Duration about 4 seconds.
- Upgrades: Can upgrade to Sharpshooter’s Focus II (longer duration) later.
- Cooldown: 20 seconds.
- Combos/Synergies: Use with Eagle Vision to mark targets first. Essential for precise long shots under pressure.
- When to Use: When engaging multiple faraway targets or needing to hit a moving enemy.
- Cost: 2 Perk Points
- Description: When airborne (parachuting, wingsuit, falling), your bullet damage is increased by 25% and spread is reduced.
- Upgrades: None.
- Cooldown: Passive while airborne.
- Combos/Synergies: Pair with Death From Above (Brawler) for aerial takedowns or with a sniper rifle for midair kills. Also fun with rocket launchers.
- Recommended Build: Players who enjoy wingsuit combat.
- When to Use: Any time you are jumping off a cliff or using a wingsuit.
- Cost: 1 Perk Point
- Description: Increases maximum health by 15%.
- Upgrades: Can upgrade to Sharpshooter’s Vitality II (additional 15%) later.
- Cooldown: Passive.
- Combos/Synergies: Provides survivability for ranged players who stay back.
- When to Use: Always active.
- Cost: 1 Perk Point
- Description: Increases sprint duration by 20%.
- Upgrades: Can upgrade to Iron Lung II (additional 30%) later.
- Cooldown: Passive.
- Combos/Synergies: Essential for hit-and-run builds and escape tactics. Pairs with Runner perk (additional sprint speed).
- When to Use: Always active.
- Cost: 2 Perk Points
- Description: Increases sprint speed by 10%.
- Upgrades: None.
- Cooldown: Passive.
- Combos/Synergies: Combine with Iron Lung for maximum mobility.
- Recommended Build: Players who like to outrun enemies.
- When to Use: Always active.
- Cost: 2 Perk Points
- Description: Unlocks the parachute, which you can deploy by pressing the jump button while in midair. Allows you to descend safely from any height.
- Upgrades: None.
- Cooldown: None; re-equip after landing.
- Combos/Synergies: Essential for wingsuit use (need parachute to land). Use with Death From Above (Brawler) for air takedowns.
- When to Use: Any time you are falling from a great height, or after using a wingsuit.
- Cost: 3 Perk Points
- Description: Unlocks the wingsuit, which can be deployed by holding the jump button while in midair (after a fall of sufficient height). Gives you the ability to glide long distances.
- Upgrades: After unlocking, you can upgrade to Wingsuit II (increases speed and maneuverability) later.
- Cooldown: No cooldown, but need height to deploy.
- Combos/Synergies: Combine with Aerial Support (Sharpshooter) for combat effectiveness while gliding. Also works with Grapple Takedown if you land on an enemy? You can perform Death From Above while wingsuiting.
- Recommended Build: Free-roam explorers and quick travel enthusiasts.
- When to Use: To travel quickly across the map, escape pursuers, or reach high perches.
- Cost: 2 Perk Points
- Description: Unlocks the grappling hook, which can be used to climb up certain surfaces or pull objects (ziplines already present). Press action button on grapple points.
- Upgrades: None.
- Cooldown: None; can use on any valid surface.
- Combos/Synergies: Essential for reaching high ground. Pairs with Grapple Takedown (Brawler) for pulling enemies.
- When to Use: Anytime you see a grapple point (usually yellow) on cliffs or buildings.
- Cost: 2 Perk Points
- Description: Reduces explosion damage taken by 40%.
- Upgrades: None.
- Cooldown: Passive.
- Combos/Synergies: Useful for players who use explosives or fight many cultists using explosives. Combine with Explosives Expert (increased throw distance) for safe usage.
- Recommended Build: Demolition experts.
- When to Use: Always active.
- Cost: 2 Perk Points
- Description: Increases the throw/carry distance for grenades, dynamite, and C4 by 30%.
- Upgrades: Can upgrade to Explosives Expert II (additional range) later.
- Cooldown: None.
- Combos/Synergies: Use with Bomb Squad for safer explosive play. Also works with Molotov Cocktails.
- When to Use: When using any throwable explosives.
- Cost: 2 Perk Points
- Description: When you loot enemies, you have a chance to find additional resources (ammo, health, explosives, crafting materials). Approximately 20% more loot.
- Upgrades: None.
- Cooldown: Passive per loot.
- Combos/Synergies: Good with Headshot Luck (Sharpshooter) for ammo conservation.
- Recommended Build: Any, but especially for crafting-heavy runs.
- When to Use: Always active.
- Cost: 2 Perk Points
- Description: Allows you to craft more items from plants. Specifically, increases the yield when harvesting plants (e.g., Slips, Slap, etc.) by 1 extra per plant.
- Upgrades: None.
- Cooldown: Passive.
- Combos/Synergies: Use for crafting medicines (health syringes) and explosives. Essential for survival mode.
- When to Use: Always active when harvesting plants.
- Cost: 1 Perk Point
- Description: Increases maximum health by 15%.
- Upgrades: Can upgrade to Survivor’s Vitality II (additional 20%) later.
- Cooldown: Passive.
- Combos/Synergies: For overall survivability.
- When to Use: Always active.
- Unlock: Requires Brawler tree perk Fangs for Hire (cost: 2 Perk Points) and the ability to interact with neutral animals.
- Description: Allows you to tame wild animals such as wolves, bears, cougars, and more. Tamed animals fight alongside you. You can dismiss or command them.
- Upgrades: Trained Animal perk (cost: 2 Perk Points) increases animal damage by 30% and health by 50%.
- Combos/Synergies: Use an animal as a distraction or attack from a different direction. Combos with Chain Takedown to kill while animal occupies enemies.
- Recommended Build: Stealth + animal support.
- When to Use: When you need extra firepower or a scout.
- Unlock: Progress through the campaign (Hurk, Grace, Nick, etc.). Each specialist has unique abilities (e.g., Hurk throws grenades, Grace provides sniper cover). They are not skills but companions.
- Recommendation: Always bring a Guns for Hire that complements your skill loadout.
- Key skills: Chain Takedown, Grapple Takedown, Takedown Master, Human Whistle, Eagle Vision, Silent Takedown (Brawler), Sidearm Takedown, Stealth’s Friend.
- Weapons: Silenced pistol, bow, and knife.
- Playstyle: Clear outposts without alarms. Use animal companions to distract.
- Order: First unlock Brawler essentials (Chain Takedown, Takedown Master), then Sharpshooter stealth skills.
- Key skills: Fists of Justice, Gauntlet, Brawler’s Vitality I&II, Brawler’s Armor, Brawler’s Final Stand, Chain Takedown, Grapple Takedown.
- Weapons: Melee weapon, shotgun, flamethrower. Use heavy armor.
- Playstyle: Run in, punch and takedown everything. Use animal for backup.
- Order: High health perks first, then brawling damage.
- Key skills: Aimed Shot, Stealth’s Friend, Eagle Vision, Sharpshooter’s Focus, Sniper’s Hunker, Headshot Luck. From Survivor: Running, Iron Lung, Parachute, Wingsuit for positioning.
- Weapons: Any sniper rifle, suppressed sniper, sidearm.
- Playstyle: Stay at range, reposition after each kill. Use focus for moving targets.
- Order: Sharpshooter skills first for accuracy, then Survivor for mobility.
- Key skills: Bomb Squad, Explosives Expert, Iron Lung, Runner. From Brawler: Brawler’s Vitality, Fists of Justice for up-close cleanup.
- Weapons: Grenade launcher, rocket launcher, C4, dynamite.
- Playstyle: Blast groups from distance, then finish survivors with melee.
- Order: Survivor explosives first, then Brawler for survivability.
2. Death From Above
3. Gauntlet
4. Fists of Justice
5. Grapple Takedown
6. Takedown Master
- More precisely: Unlocks sprint takedowns (assassinate while running) and takedowns on heavy enemies.
7. Human Whistle
8. Brawler’s Final Stand
9. Brawler’s Vitality
10. Brawler’s Armor
Note: The Brawler tree also includes Fangs for Hire (unlock ability to tame animals) and Trained Animal (improves animal companion). These are covered in the Special Abilities section.
---
Sharpshooter Tree
1. Aimed Shot
2. Headshot Luck
3. Stealth’s Friend
4. Eagle Vision
5. Sidearm Takedown
6. Gunslinger’s Dodge
7. Sniper’s Hunker
8. Sharpshooter’s Focus
9. Aerial Support
10. Sharpshooter’s Vitality
---
Survivor Tree
1. Iron Lung
2. Runner
3. Parachute
4. Wingsuit
5. Grapple
6. Bomb Squad
7. Explosives Expert
8. Scavenger
9. Bushcraft
10. Survivor’s Vitality
---
Special Abilities (Guns for Hire & Animal Companions)
Fangs for Hire – Animal Taming
Specialist Guns for Hire
---
Recommended Builds
Stealth Assassin (Brawler + Sharpshooter)
Heavy Brawler (Brawler only)
Sniper (Sharpshooter + Survivor mobility)
Explosives Demolitionist (Survivor + Brawler)
---
Tips for Skill Progression
1. First skill priority: Parachute (Survivor) – essential to survive falls; Grapple (Survivor) for navigation. Then Chain Takedown (Brawler) for stealth.
2. Earn Perk Points efficiently: Focus on challenges under the Journal menu (e.g., perform 50 stealth takedowns to earn 3 perk points).
3. Respec? No respec in Far Cry 5; all skills can be eventually purchased. Plan which tree to max first based on playstyle.
4. Skill Magazine Locations: Scattered across Hope County, each gives 1 free perk point. Collect them early (e.g., the one at the Ranger Station).
5. Companion synergy: If you take animal taming perks, invest in Trained Animal early for a powerful pet.
---
This comprehensive guide should cover all possible skills and how to use them effectively in Far Cry 5. Master your chosen path and liberate Hope County!

Characters & Roles
Characters & Roles Guide for Far Cry 5
While Far Cry 5 does not feature traditional classes or playable heroes like in a multiplayer shooter, it offers a rich cast of major story characters, allies (Guns for Hire), and antagonists. This guide covers every significant figure—their backgrounds, strengths, weaknesses, playstyles, unlock conditions, recommended equipment, and synergy with the player character (the Deputy). Even the Deputy, though a silent blank slate, has a defined role and growth path through Perk Points.
---
1. Player Character: The Deputy
- Background: You are a newly appointed Deputy Sheriff in Hope County, Montana. Initially unnamed and customisable only by gender and appearance (no gameplay impact). You are thrust into the conflict when you attempt to arrest Joseph Seed, the charismatic leader of the doomsday cult Eden’s Gate.
- Role: Flexible combatant and problem solver. You can specialise through Perk Points in stealth, guns blazing, survival, or a hybrid. There are no locked classes—your playstyle evolves as you unlock perks.
- Strengths: High adaptability; silent protagonist allows player immersion; access to all weapons and vehicles; ability to hire up to two companions (Guns for Hire) and use Fangs for Hire (animals).
- Weaknesses: No unique abilities that other characters don’t have; lacks innate healing or special attacks until perks are unlocked; early game can feel fragile.
- Playstyle: Fully customisable. Stealth players should invest in Sneak and Lockpicking; assault players should prioritise Health, Ammo Capacity, and Sliding. For a balanced loadout, focus on Grenade Harasser, Automatic Weapons, and Boomer (dog companion).
- Unlock Conditions: Immediate at game start.
- Recommended Equipment:
- Team Synergy: Works with any combination. The Deputy should fill gaps: if your Guns for Hire are long-range, go close-quarters; if they are heavy gunners, pick a sniper or stealth approach.
- Background: Former preacher who founded Eden’s Gate. Believes he is chosen to save humanity from an impending collapse. He leads the cult with fanatical charisma. His three adult children (Jacob, John, Faith) control separate regions.
- Role: Main villain and final boss. Appears throughout the story to taunt the player. Not directly fought until the end.
- Strengths: Inspires loyalty; manipulates events from behind; uses brainwashing and Bliss (a hallucinogenic drug) to control people. Has a massive cult army.
- Weaknesses: Overconfident; relies on his lieutenants; vulnerable to direct confrontation after they are eliminated.
- Playstyle (as enemy): Avoids direct combat until very end. In the final confrontation, he attacks with a knife in close quarters; it’s more of a QTE sequence than a traditional fight.
- Unlock Conditions: You fight him only after defeating all three lieutenants and triggering the endgame. No special equipment needed—just survive his melee attacks and press prompts.
- Recommended Equipment: None specific—stock up on health syringes because the fight is short but tense. Use a shotgun during the initial stages (while cultists are present).
- Team Synergy: Not applicable as a companion.
- Region: Whitetail Mountains (north).
- Background: Ex-military, survivalist. He runs a training regimen called “The Judgement” where he brainwashes captives into becoming “wolves” (elite soldiers). He uses conditioning and puzzle-like mind games.
- Strengths: Tactical genius; leads elite Wolf soldiers; uses snipers, ambushes, and booby traps. His region is densely forested and mountainous, favouring long-range combat.
- Weaknesses: Arrogance; his own conditioning backfires when players break free; weak to stealth and headshots (he doesn’t have superhuman durability).
- Playstyle (facing him): He triggers a unique boss fight involving a blizzard, limited visibility, and waves of Wolves. Use cover, listen for his footsteps, and shoot him quickly (he is not heavily armoured).
- Recommended Equipment: Silenced sniper rifle, shotgun for close-range, flares to see in snowstorm. Perk: Takedown Master to silently kill Wolves.
- Unlock Conditions: Complete all main missions in Whitetail Mountains; he is confronted in the bunker at the end. Requires Jacob’s resistance meter to be filled.
- Region: Holland Valley (central west).
- Background: A lawyer and former prosecutor. He runs the cult’s legal and economic operations in Hope County. He is sadistic and enjoys tormenting people through “the Reaping” (asset seizure and psychological torture).
- Strengths: Charismatic and manipulative; controls the region’s economy; uses heavy vehicles (trucks, planes) and hired thugs. His outposts are well-defended.
- Weaknesses: Pride and need for control; physically average; weak in direct combat—relies on his plane and then a small army.
- Playstyle (facing him): First, a dogfight in the sky (you in a plane, he in an attack helicopter/plane). Use the plane’s machine guns to disable his vehicle. After crashing, he fights on foot with a pistol. He can be shot easily but his cultists swarm.
- Recommended Equipment: Grab a plane from a runway; upgrade its armour and guns via the shop. For the ground fight, bring an LMG or assault rifle with a drum magazine to clear his minions.
- Unlock Conditions: Complete main missions in Holland Valley; resistance meter maxed.
- Region: Henbane River (south).
- Background: The only non-blood sibling; she was a drug addict recruited by Joseph. She produces the Bliss drug that keeps followers placid. She appears innocent but is deeply manipulative and psychologically unstable.
- Strengths: Excels at psychological warfare; uses Bliss to create illusions, clones of herself, and hallucinations. Her cultists are often sprayed with Bliss, making them erratic.
- Weaknesses: Physically frail; relies on illusions and hit-and-run tactics; can be countered by anti-hallucination measures (wearing sunglasses? Not in game—just shoot the real one).
- Playstyle (facing her): A three-phase boss fight where she spawns multiple copies. Only one is real. Shoot the one that laughs or glows. Also, waves of Bliss-fueled cultists attack. Use fire (flamethrower, Molotovs) to burn illusion-based enemies?
- Recommended Equipment: Shotgun or SMG for close quarters; health upgrades to survive her damage over time. Use the camera to tag the real Faith.
- Unlock Conditions: Complete Henbane River main missions.
- Background: Pilot and farmer. He owns an airfield and uses his plane (named “The Wrath”) to bomb cult positions. He’s patriotic, sarcastic, and protective of his family.
- Role: Air support Guns for Hire. He flies overhead and strafes enemies or parachutes into combat.
- Strengths: Excellent crowd control; can bomb groups of enemies; high damage output; good against vehicles.
- Weaknesses: Vulnerable on the ground (he doesn’t wear heavy armour); his plane can be shot down; not available indoors.
- Playstyle: Summon him when you are outdoors facing many enemies. He provides airstrikes on your marked targets. He also carries a sidearm if he lands.
- Unlock Conditions: Complete his introductory mission at the Rye & Sons Aviation airfield early in Holland Valley. Then, after completing his personal story, he becomes a permanent Guns for Hire.
- Recommended Equipment: Give him a weapon? He uses only his plane and a pistol. No customisation.
- Team Synergy: Pairs well with Grace (sniper) for long-range support or Boomer (dog) for spotting. Use him to soften up outposts before you breach.
- Background: Former Olympic biathlete and hunter. She lives in a remote cabin and uses a custom sniper rifle. She’s stoic, efficient, and a crack shot.
- Role: Long-range sniper Guns for Hire.
- Strengths: Exceptional accuracy; stays at range and picks off enemies silently; provides cover from a distance.
- Weaknesses: Melee weakness; slow to reposition; can be flanked. Not useful in close quarters.
- Playstyle: Position her on a hill or rooftop before you approach an outpost. Let her eliminate priority targets (snipers, heavies). She can also take out alarms from afar.
- Unlock Conditions: Complete her side missions in the Whitetail Mountains region (after meeting her at her cabin).
- Recommended Equipment: She spawns with her own sniper. You cannot change her weapon, but you can upgrade her via the “Guns for Hire” menu (increases health, damage).
- Team Synergy: Best paired with a close-range companion like Sharkey (helicopter) or Peaches (stealth). Avoid pair with Hurk (explosives) because they compete for long-range targets.
- Background: Recurring Far Cry series character. Big, loud, and explosive-obsessed. He carries a rocket launcher and has a passion for blowing things up.
- Role: Explosive demolition expert. He fires rockets at vehicles and groups.
- Strengths: High area damage; effective against armored vehicles and helicopters; very loud and distracting.
- Weaknesses: Low accuracy; friendly fire risk; runs out of rockets quickly; vocal and may alert enemies.
- Playstyle: Summon when you need to destroy a convoy, helicopter, or a heavily fortified building. He will also throw grenades. Keep your distance because his explosions can hurt you.
- Unlock Conditions: Complete his first mission at the beginning of the game (near the starting island). After that, recruit him via the Guns for Hire menu once available.
- Recommended Equipment: No customisation—he uses an RPG and frag grenades.
- Team Synergy: Works well with any companion, but be careful with stealth builds. Pair him with Boomer to mark enemies so Hurk doesn’t waste rockets on nothing.
- Background: A friendly Australian Cattle Dog that belonged to a deceased survivor. He’s highly trained to hunt and retrieve.
- Role: Fangs for Hire (animal companion). He marks enemies, loots items, and attacks on command.
- Strengths: Silent; marks enemies automatically on your HUD; picks up loot (money, ammo) from dead bodies; subtle takedowns on isolated enemies; never alarm unless ordered.
- Weaknesses: Can be killed (if not upgraded); not strong against armoured enemies; cannot drive or use vehicles.
- Playstyle: Use Boomer as your primary scout. He reveals enemy locations even through walls. Send him to loot areas after a fight. He can also fetch items.
- Unlock Conditions: Found early in the game—during the mission “Liberation” or shortly after, you can rescue him from a cultist cage near the beginning area. Once freed, he permanently joins.
- Recommended Equipment: No equipment. Upgrade his health and attack damage via the Guns for Hire menu (under Fangs for Hire).
- Team Synergy: Pairs with any human companion. Especially useful with stealth players or snipers. Boomer + Grace = flawless long-range scouting.
- Background: A mountain lion captured by the cult. After being freed, she becomes a deadly stealth predator.
- Role: Fangs for Hire (animal). Specialises in silent assassinations of human enemies.
- Strengths: Very fast; kills most normal enemies instantly with a neck bite; can be directed to take down targets without alerting others. Regenerates health quickly.
- Weaknesses: Cannot handle large groups; vulnerable to heavy gunfire; does not mark enemies or loot.
- Playstyle: Send Peaches to eliminate isolated guards in outposts. She is excellent for clearing a path. Use her ability to chain takedowns (one per enemy, but she can kill several in quick succession if they are close).
- Unlock Conditions: Found in the Whitetail Mountains region, near the “Peaches” named location. You need to free her from a cage and then complete a short taming mission.
- Recommended Equipment: None.
- Team Synergy: Best with a human companion who can provide cover fire, like Nick Rye or Grace. Avoid using her with Hurk (explosions scare her? Actually no, but she may get killed by friendly fire).
- Background: A helicopter pilot and mechanic. He is laid-back, loves flying, and provides aerial taxi and support.
- Role: Helicopter pilot Guns for Hire. He brings a helicopter armed with rockets and minigun.
- Strengths: Excellent for travel; provides aerial firepower; can drop you off on rooftops; good against ground targets and vehicles.
- Weaknesses: Helicopter can be shot down; useless indoors; cannot assist in stealth situations.
- Playstyle: Call Sharkey when you need to traverse the map quickly or when assaulting a large compound. He will circle above and provide suppression while you clear the area.
- Unlock Conditions: Found in the Henbane River region. Complete his side missions (starting with “Sharkey’s Helicopter”) to unlock him.
- Recommended Equipment: None—he uses a standard attack helicopter with upgrades you can purchase from the shop.
- Team Synergy: Pairs with Boomer for spotting targets or with Hurk for explosive chaos. Avoid pairing with Grace because her sniper is less effective with helicopter noise attracting enemies.
- Background: Hurk’s mother. She is a brash, heavy-drinking woman who operates a helicopter transport service. She’s also a pilot.
- Role: Guns for Hire (helicopter pilot) similar to Sharkey but with a different personality.
- Strengths: Same as Sharkey—provides helicopter support and transport. She also carries a machine gun and can be ordered to land.
- Weaknesses: Same as Sharkey.
- Playstyle: Similar to Sharkey. Summon for air support or quick travel.
- Unlock Conditions: Complete her side missions in Holland Valley (she appears near the Drubman residence).
- Recommended Equipment: None—uses helicopter.
- Team Synergy: Use with long-range companions like Grace to mark targets for her rockets.
- Background: A pastor who lost his church to the cult. He is a leader of the Resistance and a skilled fighter. He uses a double-barrel shotgun.
- Role: Firearms expert Guns for Hire. He fights on foot with a shotgun and works as a close-quarters brawler.
- Strengths: High damage at short range; sturdy; can take a beating; provides moral support (dialogue).
- Weaknesses: Limited range; vulnerable to multiple enemies; not great for stealth.
- Playstyle: Use him as a bodyguard when clearing buildings or tight spaces. He will push aggressively.
- Unlock Conditions: Recruited automatically during the main story after rescuing him from the church. He is a permanent Guns for Hire after his introductory mission.
- Recommended Equipment: No customisation.
- Team Synergy: Works well with Grace (range coverage) or Boomer (scouting). Avoid with Hurk—too much chaos.
- Background: Bartender at the Spread Eagle bar. She lost her family to the cult and now fights with a submachine gun.
- Role: Mid-range skirmisher Guns for Hire.
- Strengths: Good rate of fire; balanced stats; provides healing items occasionally.
- Weaknesses: Mediocre damage; not specialised in any field.
- Playstyle: She is a jack-of-all-trades. Use her when you need a reliable backup that can hold her own in firefights.
- Unlock Conditions: Complete her side missions in the Henbane River region.
- Recommended Equipment: None.
- Team Synergy: Works with any composition. Pair with Boomer for loot, or with Sharkey for mobile support.
- Background: Leader of the Whitetail Militia. He is a confident, tactical fighter who uses an assault rifle.
- Role: Assault infantry Guns for Hire.
- Strengths: Competent with standard rifles; can target enemies effectively; leads militia groups during missions.
- Weaknesses: Not unique; essentially a well-rounded soldier.
- Playstyle: Use him as a regular fighter. He’s reliable but not exceptional.
- Unlock Conditions: Recruited during the story in Whitetail Mountains—after completing several militia missions.
- Recommended Equipment: None.
- Team Synergy: Good with all companions. Fills a generic combat role.
- Guns for Hire: You can recruit generic Resistance fighters from outposts or safehouses. They have randomised names, weapons (pistol, rifle, shotgun, SVD sniper, etc.), and one of three roles:
- Strengths: Cost no money; infinite availability; can be dismissed any time.
- Weaknesses: No unique abilities; lower stats than named characters; generic dialogue.
- Unlock Conditions: Available after liberating any outpost and completing the tutorial.
- Recommended Equipment: You can buy weapons for them from the Shop (in the Perk menu).
- Team Synergy: Versatile; use to fill gaps in your squad.
- Fangs for Hire (animals): In addition to Boomer and Peaches, you can also recruit:
- Strengths/Weaknesses: Each animal excels in different situations—bears for chaos, wolves for speed.
- Unlock Conditions: Rescue them from cages and complete taming missions.
- For Stealth Runs: Hire Boomer (spotting) + Grace (sniper) or a generic sniper. Avoid loud companions.
- For Open Combat: Nick Rye (airstrikes) + Hurk (rockets) + Cheeseburger (tank). Chaos ensues.
- For Versatility: Grace + Sharkey (air support and ground coverage).
- For Loot Farming: Boomer (picks up money and ammo) + Mary May (healing items).
- Weapons: AK-47 (reliable all-rounder) or ARC (sniper/revolver). For stealth: suppressed MBP .50 (sniper). For chaos: LMG or flamethrower.
- Perks: Early picks—Grenade Harasser (more throwables), Medkit Capacity (more heals), Brewery (craft more alcohol for Molotovs). Later—Paraglider and Wingsuit for mobility.
- Companions: Boomer (highlights enemies and loot) or Peaches (stealth takedown) for early game; later, Sharkey (pilot helicopter) or Hurk (explosives expert).
---
2. Antagonists (The Seed Family)
#### 2.1 Joseph Seed (The Father)
#### 2.2 Jacob Seed
#### 2.3 John Seed
#### 2.4 Faith Seed
---
3. Allied Characters (Resistance Members & Guns for Hire)
These characters can be recruited as companions (Guns for Hire) or serve as mission-givers. Each has a unique personality, weapon preference, and special ability.
#### 3.1 Nick Rye
#### 3.2 Grace Armstrong
#### 3.3 Hurk Drubman Jr.
#### 3.4 Boomer (Dog)
#### 3.5 Peaches (Mountain Lion)
#### 3.6 Sharkey (Jesse Sharkey)
#### 3.7 Adelaide Drubman
#### 3.8 Jerome Jeffries
#### 3.9 Mary May Fairgrave
#### 3.10 Eli Palmer
---
4. Generic Guns for Hire & Fangs for Hire
- Sniper: Long-range, can mark enemies.
- Heavy: Carries an LMG, high health, slow.
- Marksman: Balanced.
- Cheeseburger (Bear): Tanky, attracts fire, does heavy damage but is slow and loud. Found in Whitetail Mountains.
- Timber (Wolf): Aggressive, fast, similar to Boomer but less loot-focused. Found in Holland Valley.
---
5. How to Maximise Character Synergy
Remember: You can have two companions active at once (one human + one animal OR two humans). Experiment with combinations to suit your current mission.
---
6. Best Loadouts for the Deputy with Specific Companions
| Companion Pairing | Deputy Weapon Choices | Perk Focus | Playstyle Tips |
|---|---|---|---|
| Boomer + Grace | Silenced sniper + suppressed pistol | Stealth, Takedown, Reduced Noise | Let Boomer mark enemies, Grace eliminates snipers, you clear the rest. |
| Hurk + Nick | LMG + rocket launcher or grenade launcher | Heavy weapons, extra ammo, blast resistance | Call airstrikes then move in with LMG. |
| Sharkey + Peaches | SMG + shotgun + silencer (for backup) | Mobility, grappling hook, parachute | Use Sharkey to travel, then Peaches for stealth kills. |
| Cheeseburger + Jerry | Flamethrower + shotgun | Health regen, armour | Send Cheeseburger to draw fire, Jerry flanks. |
7. Summary Table of All Major Characters
| Character | Type | Role | Unlock Region | Best For |
|---|---|---|---|---|
| Deputy | Player | Flexible | N/A | All situations |
| Joseph Seed | Antagonist | Final Boss | Endgame | End story |
| Jacob Seed | Antagonist | Region Boss | Whitetail Mountains | - |
| John Seed | Antagonist | Region Boss | Holland Valley | - |
| Faith Seed | Antagonist | Region Boss | Henbane River | - |
| Nick Rye | Guns for Hire | Airstrike support | Holland Valley | Open combat |
| Grace Armstrong | Guns for Hire | Sniper | Whitetail Mountains | Stealth/long-range |
| Hurk Drubman Jr. | Guns for Hire | Explosives | Starting area | Vehicle destruction |
| Boomer (dog) | Fangs for Hire | Scout/looter | Starting area | Stealth/info |
| Peaches (cat) | Fangs for Hire | Stealth assassin | Whitetail Mountains | Silent eliminations |
| Sharkey | Guns for Hire | Helicopter pilot | Henbane River | Aerial attack |
| Adelaide Drubman | Guns for Hire | Helicopter pilot | Holland Valley | Aerial attack |
| Jerome Jeffries | Guns for Hire | CQC shotgunner | Henbane River | Close quarters |
| Mary May | Guns for Hire | General fighter | Henbane River | Versatile backup |
| Eli Palmer | Guns for Hire | Assault infantry | Whitetail Mountains | Reliable firepower |
| Cheeseburger (bear) | Fangs for Hire | Tank | Whitetail Mountains | Distraction |
| Timber (wolf) | Fangs for Hire | Aggressive melee | Holland Valley | Fast attack |
Note: Generic Guns for Hire and Fangs for Hire are not listed in detail because they lack unique story backgrounds. However, they are still valuable for filling specific roles (e.g., a generic sniper when Grace is unavailable).
By understanding each character’s strengths and weaknesses, you can build a team that complements your playstyle and dominates Hope County. Remember to upgrade your companions via the Guns for Hire menu (accessible from the Campaign Map) to increase their health, damage, and unlock special abilities.

Cheats & Secrets
Cheats & Secrets Guide for Far Cry 5
Far Cry 5 does not include traditional cheat codes (e.g., invincibility, infinite ammo) that can be entered via a console or menu. However, the game is packed with developer-intended secrets, Easter eggs, unlockable bonuses, and hidden content that reward exploration and experimentation. This guide covers all known legitimate hidden features, Easter eggs, and unlockable secrets.
---
No Cheat Codes / Console Commands
- PC Version: There are no built-in console commands or developer cheats in the retail version of Far Cry 5. Ubisoft does not provide a developer console.
- Console Versions (PS4/PS5, Xbox One/Series X|S): No button sequences or cheat menus exist. Achievements/Trophies are earned normally without using cheats.
- Arcade Mode: Custom maps often allow toggles for infinite health or ammo via map editor triggers, but those are map-specific and not global cheats.
- New Game+: After completing the main story once, a New Game+ mode becomes available. It carries over all weapons, perks, vehicles, cash, and Resistance Points. Enemies scale up, and you can replay the full campaign with your arsenal.
- Infamous Difficulty: Unlocks after beating the game once. New Game+ can be started on Infamous difficulty for a harder challenge.
- Pre-Order / Deluxe Edition Bonuses: These are not secrets but include the Hunting Rifle, M5C Machete, and Unreleased Track. If you have them, they are available from the start.
- Live Event Rewards: Some past limited-time events (e.g., “Neon Lights” skin) are no longer obtainable, but all official promotional items are listed in the game’s store under “Unlockables.”
---
Unlockable Bonuses & New Game+
- How to start: After the credits, return to the main menu. Select Play > New Game+.
---
Hidden Weapons & Outfits
| Item | How to Obtain | Description |
|---|---|---|
| Arcade Machine (Weapon) | Find in the Prospect Shelter (John’s region) inside a barn near the road. It shoots paintballs and does no damage. Purely cosmetic. | A weird novelty weapon referencing the Far Cry 3 Blood Dragon DLC. |
| Yogi & Reggie Outfits | Complete all Yogi and Reggie’s stoner missions (three across the map). Reward: unique character outfits. | These are purely cosmetic and unlock at the end of their side quest chain. |
| SASG-12 (Special Shotgun) | Found in a locked bunker in the Whitetail Mountains region. Requires a key from an NPC nearby. | A powerful semi-automatic shotgun. |
| Bowie Knife | Found in a cave west of Falls End in John’s region, stuck in a tree. | Unique melee weapon with a special skin. |
Easter Eggs & Pop Culture References
1. The “Nope” Sign – Near the Rye & Sons Aviation (John’s region), a sign reads “NOPE” next to a runway. Reference to the movie Nope (2022), though the sign was added via a patch.
2. Teddy Bear on a Cross – In the Faith’s region (Holland Valley), near the “Jesus” statue at St. Francis Veteran’s Center, there is a teddy bear nailed to a cross. A dark joke on cult imagery.
3. “I’m a Duck” – In the Chicken Statue challenge, you can find a hidden duck inside the large chicken statue’s belly after blowing it up. This is part of an achievement/trophy.
4. The “Far Cry 3” Cave – In the Holland Valley, near the river south of Marshall’s Cabin, a cave contains a skeleton with a note referencing the opening of Far Cry 3 (the protagonist’s journal).
5. Skeleton in a Bathtub – At the F.A.C.T. Facility (John’s region), a skeleton sits in a bathtub holding a gun, referencing the Breaking Bad episode “Ozymandias.”
6. Arcade Machine Shootout – In the Prospect Shelter barn (see Hidden Weapons), there is a small arcade machine that plays a retro shooter. Shooting it reveals a secret message: “You are being watched.”
7. The “Moose” References – Throughout the game, radios occasionally play a news report about a moose causing chaos, a running gag in the series.
8. Jake the Dog – At the F.A.C.T. Facility basement, a dog named “Jake” is trapped in a cage. Freeing him gives you a temporary companion. This is a reference to the Adventure Time character?
9. “Old Man” Skull – In the Henbane River region, a cave near the Raccoon Creek contains a skull wearing a top hat. If you shoot it, a ghostly voice says “Boo.”
10. The “Welcome to Hope County” Sign – Near the main bridge into the region, the sign has a hidden message “You’ll never leave” written in small text.
---
Developer-Intended Hidden Content
- The “Secret Ending” – In the first five minutes of the game, when Deputy Sheriff Marshall asks you to arrest Joseph Seed, you can choose to do nothing for about 60 seconds. The game credits roll early, unlocking the “Secrets of the Sanctuary” achievement/trophy. This is a deliberate joke ending.
- Hidden Bunkers – There are 12 prepper stashes (bunkers) scattered across the map. The last one, called “The Doctor’s Bunker,” requires solving a complex puzzle. Inside is a note about the Montana State University research, referencing the Far Cry 5 development team.
- Ghost Story – Near the Ghost House in the Whitetail Mountains, at midnight (in-game time), a ghostly figure appears and disappears. This is an ambient horror secret.
- Radio Song Easter Egg – The song “Only You” by The Platters plays at certain cult outposts when you aren’t near enemies. It’s a reference to Joseph Seed’s brainwashing technique.
- Fishing Without a Rod: If you stand in shallow water and repeatedly press the interact button, you can sometimes “catch” a fish manually. This is a physics exploit but not a cheat; it’s a harmless glitch.
- Infinite Money via Clipping: Not recommended, but some players have reported that selling vehicle parts from destroyed cars in any garage can be repeated via a timing glitch. Ubisoft has never patched this; it might be intentional for sandbox fun.
---
Exploit-Free Secrets (Safe for Normal Play)
---
Summary
Far Cry 5 offers no traditional cheats, but its world is rich with developer Easter eggs, hidden items, and alternate endings. The most notable “secret” is the early ending, which every player should try once. For more hidden content, explore every cave, shed, and radio tower—Ubisoft’s developers left many surprises for the curious.