
Final Fantasy XIV: A Realm Reborn
## Game Introduction: Final Fantasy XIV: A Realm Reborn ### Genre Massively Multiplayer Online Role-Playing Game (MMORPG) ### Developer & Publisher - **Developer:** Square Enix Creative Business Unit III (formerly Square Enix Business Division 5) - **Director & Producer:** Naoki Yoshida ("Yoshi-P"...

Download & Installation
Download & Installation Guide for Final Fantasy XIV: A Realm Reborn
This guide covers all officially supported platforms for Final Fantasy XIV: A Realm Reborn (FFXIV), including Windows (PC), Steam, Epic Games Store, Mac, PlayStation 4/5, and Xbox Series X|S. Note: The game does not have native versions for Nintendo Switch or mobile devices. All installations require a Square Enix account and a valid subscription for full access (free trial available up to level 70).
1. System Requirements
#### Windows PC / Mac
| Component | Minimum (Windows) | Recommended (Windows) | Mac (minimum) |
|---|---|---|---|
| OS | Windows 8.1 64-bit (Windows 10/11 64-bit required after Nov 2024) | Windows 10/11 64-bit | macOS 10.15 Catalina (10.14 Mojave for older builds) |
| CPU | Intel Core i5-2500 / AMD FX-6100 | Intel Core i7-3770 / AMD FX-8350 or better | Intel Core i5 (2.4 GHz) |
| RAM | 4 GB | 8 GB | 8 GB |
| GPU | NVIDIA GeForce GTX 750 / AMD Radeon R7 260X (DirectX 11 support) | NVIDIA GeForce GTX 970 / AMD Radeon RX 480 (or better) | 2 GB VRAM (e.g., Intel Iris Pro 1536 MB for integrated) |
| DirectX | Version 11 | Version 11 | Metal |
| Storage | 80 GB SSD (100 GB during installation) | 80 GB SSD | 80 GB |
| Internet | Broadband | Broadband | Broadband |
#### PlayStation 4/5
- PS4: 45 GB free space (excluding system software). Requires PS4 firmware 6.00 or higher.
- PS5: 45 GB free space. Compatible with PS4 version via backward compatibility, but a native PS5 version is available (separate download).
- Requires 45 GB free space. Xbox Live Gold or Game Pass Core is NOT required for FFXIV (the game does not need an active subscription to Xbox services, but a Square Enix subscription is needed).
- Free Trial: No purchase required; create a trial account.
- Full Game: Purchase a license from the official store or authorized retailers (Steam, Epic, PlayStation Store, Xbox Store, Square Enix Store).
- PS4:
- PS5:
#### Xbox Series X|S
2. Account Requirements
Before installing, you must create a Square Enix account and register the game or free trial. Visit [https://sqex.to/ffxiv](https://sqex.to/ffxiv) and click "Register." You will need a valid email address. During installation on any platform, you will be prompted to log in with this account.
Important: Steam and standalone Windows licenses are NOT cross-compatible. If you buy the game on Steam, you must always launch via Steam. The same applies to Epic Games Store and the official Windows version. PlayStation and Xbox versions are exclusive to their ecosystems.
3. Download & Installation by Platform
#### 3.1 Windows (Standalone / Official Launcher)
1. Go to [https://www.finalfantasyxiv.com/](https://www.finalfantasyxiv.com/) and click "Download" (or visit the Free Trial page).
2. Download the installer executable (FFXIV_Setup.exe).
3. Run the installer. It will download the launcher (~2 MB).
4. Launch the launcher; it will download the full game files (approx. 80 GB). Ensure you have sufficient disk space.
5. During the initial download, you can log in with your Square Enix account.
6. Once the download completes, the game will patch to the latest version. This may take a while.
#### 3.2 Steam
1. Install Steam and log in.
2. Search for "Final Fantasy XIV Online" (the free trial is a separate product: "Final Fantasy XIV Online Free Trial").
3. Click "Play Game" (for owned licenses) or "Add to Library" (free trial).
4. The installation will begin. Steam will download the FFXIV launcher and then the full game files.
5. You must launch the game through Steam every time; your Steam account is linked to your Square Enix account.
#### 3.3 Epic Games Store
1. Install Epic Games Launcher and log in.
2. Search for "Final Fantasy XIV Online" (or the free trial if available in your region).
3. Click "Get" (free trial) or "Buy" (full game).
4. Install the game. The launcher will appear after initial download.
5. Log in with your Square Enix account. Note: Epic version is a separate license; you cannot use a retail Windows key with it.
#### 3.4 Mac
1. Visit [https://www.finalfantasyxiv.com/](https://www.finalfantasyxiv.com/) and select the Mac version download.
2. Download the DMG file.
3. Open the DMG and drag the FFXIV launcher to Applications.
4. Run the launcher. It will download the full game (approx. 80 GB).
5. Log in with your Square Enix account.
#### 3.5 PlayStation 4/5
1. Turn on your PS4 and log in to your PSN account.
2. Go to PlayStation Store and search for "Final Fantasy XIV Online" (or the free trial).
3. Select the version and click "Download."
4. The console will download the client (approx. 45 GB).
5. Once installed, launch the game. You will be prompted to link your PSN account with your Square Enix account via a one-time code shown on screen. Enter it on the Square Enix account management site.
2. You can also use the PS4 version via backward compatibility.
#### 3.6 Xbox Series X|S
1. Ensure your Xbox is updated and you have a Microsoft account.
2. Open the Microsoft Store or search via Game Pass (note: FFXIV is not included in Game Pass, but you can purchase it).
3. Search for "Final Fantasy XIV Online" (or free trial).
4. Purchase or install the free trial. The download size is approx. 45 GB.
5. After installation, launch the game. You will see a one-time code to link your Xbox and Square Enix accounts. Follow the on-screen instructions.
4. First Launch Setup
Once the game client is fully downloaded and patched, you will see the login screen.
1. Log in with your Square Enix account credentials.
2. Select a data center (logical grouping of servers) and a world (server) to create your character. Free trial accounts can access all non-congested worlds.
3. Create your character (race, class, appearance). You can change your class later.
4. Start the tutorial – the game will guide you through basic controls.
5. For console players, ensure you have a compatible keyboard and mouse (optional) if you want to use keyboard chat. A controller works natively.
5. Common Installation Errors & Fixes
| Error | Cause | Solution |
|---|---|---|
| Error 2002 (World Full) | Server congestion. | Wait and retry later. Free trial users may have login caps. |
| Error 30413 (Launcher fails to update) | Antivirus blocking or corrupted launcher files. | Disable antivirus temporarily, run launcher as administrator, delete folder `C:\\Program Files (x86)\\SquareEnix\\Final Fantasy XIV - A Realm Reborn\\boot` and re-launch. |
| Error 90000 (Connection timeout) | Network issue, VPN, or firewall. | Check firewall settings (allow ffxiv.exe and boot.exe). Try using a VPN if ISP throttles. |
| Disk write error | Insufficient disk space or permissions. | Free up space (at least 100 GB) or run launcher as admin. Ensure drive is not full. |
| DirectX Error | Outdated graphics drivers or missing DirectX. | Update GPU drivers. Install DirectX from Microsoft. For Windows 10/11, DirectX 11.3 is included. |
| Mac installation error | macOS security preventing unverified software. | Right-click the app and select "Open" from the context menu. Temporarily disable Gatekeeper. |
| PS4/5 error NP-XXXXX | Network issues or PSN maintenance. | Check PSN status, restart console, test network connection in settings. |
| Xbox error 0x87e0000f | Installation corrupted. | Uninstall and reinstall. Clear persistent storage: Settings > Devices & streaming > Blu-ray > Persistent Storage > Clear. |
| Steam/Epic launch error: "This account does not own the game" | License mismatch between platform and Square Enix account. | Ensure you purchased on the correct platform. If you own a retail (non-Steam) code, you cannot use it on Steam. You need a separate purchase for each platform. |
6. Post-Installation Verification
After installation, verify that the game runs correctly:
1. Patch status: Launch the game and check the version number in the launcher (top-left corner). It should match the current patch (e.g., 6.58 as of writing).
2. Login test: Attempt to log in and access the character creation screen. If you have an existing character, ensure you can enter the game.
3. Performance: Run the benchmark (only available for PC/Mac) if desired. In-game you can adjust graphics settings.
4. Sound and chat: Test audio and text input. On consoles, test controller vibration.
5. Backup: Make a note of your Square Enix account details. For PC, you can backup the `FFXIV` folder in `Documents\\My Games` to preserve UI settings.
7. Additional Tips
- Cross-platform progress: Your character data and progress are stored on Square Enix servers, not on the local console/PC. You can play on multiple platforms as long as you buy the game on each (but only one subscription is required). Free trial progress transfers to the full game if you upgrade on the same platform family.
- Storage considerations: After installation, the game may require additional space for patches. Keep at least 110 GB free on PC.
- Language: The game supports English, French, German, and Japanese. The launcher language can be changed in the launcher settings.
- For the free trial: You do not need to purchase anything, but you must create a Square Enix account. The trial is limited to level 70 and certain social features (no trading, no market board). You can upgrade to full game at any time.
This guide is accurate as of 2025. Always refer to the official [Final Fantasy XIV Support](https://support.na.square-enix.com/) for the latest updates.

Game Introduction
Game Introduction: Final Fantasy XIV: A Realm Reborn
Genre
Massively Multiplayer Online Role-Playing Game (MMORPG)
Developer & Publisher
- Developer: Square Enix Creative Business Unit III (formerly Square Enix Business Division 5)
- Director & Producer: Naoki Yoshida ("Yoshi-P")
- Publisher: Square Enix
- Original Version: Final Fantasy XIV (1.0) launched September 30, 2010 — critically panned and shut down in 2012.
- A Realm Reborn (2.0): Worldwide release on August 27, 2013 for PlayStation 3 and Windows PC.
- PlayStation 4 Version: April 14, 2014.
- Mac Version: June 23, 2015.
- PlayStation 5 Version: May 25, 2021 (upgrade from PS4 version).
- Xbox Series X|S Version: Announced for 2024 (expected early access March 2024, full release later).
- Steam Release: February 18, 2014.
- Epic Games Store Release: Not available (only Steam for PC).
- Windows PC (via official launcher or Steam)
- macOS
- PlayStation 4
- PlayStation 5 (native app with enhanced performance)
- Xbox Series X|S (upcoming in 2024, with cross-play support)
- The Warrior of Light (player character): The hero who rises to become Eorzea’s champion.
- Thancred Waters: A charming rogue and Scion agent, skilled in espionage.
- Y’shtola Rhul: A scholarly Miqo’te mage with deep knowledge of magic.
- Urianger Augurelt: An enigmatic Elezen astrologian and scholar.
- Alphinaud & Alisaie Leveilleur: Twin prodigies from Sharlayan, each pursuing different paths.
- Minfilia Warde: The leader of the Scions, who communicates with the Mothercrystal.
- Gaius Baelsar: The primary antagonist, legatus of the XIVth Imperial Legion.
- Nael van Darnus: The original legatus, a key figure in the Calamity backstory.
- Fans of the Final Fantasy franchise craving a true MMORPG experience.
- Players who love deep, emotional stories with memorable characters.
- MMO veterans looking for a well-rounded, subscription-based game with regular content updates.
- Casual gamers who enjoy solo-friendly content (duty support with NPCs, story mode).
- Hardcore raiders seeking savage/ultimate difficulty.
- Roleplayers and socializers (strong RP community, player housing, clubs).
- Main Scenario Quests (MSQ): The core story, mandatory for progression.
- Dungeons: 4-player content, available via Duty Finder or with NPC trust system.
- Trials: 8-player boss fights, some with extreme/savage difficulties.
- Raids: 8-player normal and savage raids (e.g., Coils of Bahamut, Alexander, Omega, Eden, Pandaemonium).
- Alliance Raids: 24-player large-scale raids (Crystal Tower, Void Ark, Return to Ivalice, YoRHa, Myths of the Realm).
- PvP: Frontline (large-scale), Rival Wings (MOBA-style), Crystalline Conflict (small team).
- Deep Dungeons: Procedurally generated roguelike content (Palace of the Dead, Heaven-on-High, Eureka Orthos).
- Field Operations: Eureka (Anemos, Pagos, Pyros, Hydatos) and Bozjan Southern Front (including Delubrum Reginae).
- Treasure Maps: Random maps leading to hidden dungeons.
- Housing: Personal, free company, and FC estate housing systems.
- Glamour System: Full transmog for appearance.
- Crafting & Gathering: Fully fledged classes with specialist roles, Grand Company delivery, and market board economy.
Release Timeline
Platforms
Story Overview & Setting
Final Fantasy XIV is set in the fantasy world of Hydaelyn, a planet blessed by the light of the Mothercrystal. The story begins in the realm of Eorzea, a continent comprising three major city-states: the forest nation of Gridania, the desert city of Ul’dah, and the maritime thalassocracy of Limsa Lominsa. Players take on the role of an Adventurer who arrives in Eorzea during a time of rising tension and turmoil.
The base game, A Realm Reborn, follows the resurgence of the dragon-like empire of Garlemald, which seeks to conquer Eorzea. Meanwhile, an ancient evil known as the Ascians manipulates events from the shadows, aiming to bring about the Seventh Umbral Calamity—a world-ending disaster. The player joins the Scions of the Seventh Dawn, a group dedicated to protecting the realm, and uncovers a conspiracy involving primal summoning, political intrigue, and the true nature of the Ascians.
Main Characters
Core Appeal
Final Fantasy XIV stands out for its rich narrative, deep job system (allowing one character to switch between all classes), gorgeous visuals, incredible soundtrack (composed by Masayoshi Soken), and a highly active community. The game is praised for its respect for player time—no grind-heavy mechanics that pressure you to log in every day. Every expansion is story-driven, with massive amounts of voice-acted cutscenes. The Raids, Trials, and Dungeons are carefully designed and balanced, offering challenge for both casual and hardcore players. The Housing, Glamour (transmog), and Crafting/Gathering systems provide endless endgame variety.
Target Audience
Game Modes
Online & Offline Support
This is a fully online MMO with no offline mode. A stable internet connection is required to play. The game operates on a subscription model (monthly fee after the initial purchase and 30-day free period). All content except the free trial requires an active subscription. The game supports cross-play between all platforms (PC, Mac, PlayStation, Xbox). Players on different platforms share the same servers and can party together, trade, and communicate. There is no single-player campaign separate from the online world, though most content can be completed with NPCs if desired.
DLC & Expansion Overview
Each expansion introduces a new level cap, jobs, zones, raids, dungeons, and continues the story. They are released roughly every two years.
| Expansion | Release Year | Level Cap | Key Additions |
|---|---|---|---|
| A Realm Reborn (2.0) | 2013 | 50 | Base game, 8 classes, 9 jobs (later 10 with Rogue/Ninja) |
| Heavensward (3.0) | 2015 | 60 | Dark Knight, Astrologian, Machinist; flying mounts; Ishgard |
| Stormblood (4.0) | 2017 | 70 | Samurai, Red Mage; swimming/diving; Ala Mhigo and Doma |
| Shadowbringers (5.0) | 2019 | 80 | Gunbreaker, Dancer; The First; role quests; Trust system |
| Endwalker (6.0) | 2021 | 90 | Sage, Reaper; conclusion of the Hydaelyn/Zodiark saga; new female Hrothgar |
| Dawntrail (7.0) | 2024 | 100 | Viper, Pictomancer; new continent Tural; graphical overhaul |
What Makes This Game Unique?
1. One character, all jobs: You can switch between every class/job on a single character without creating alts—level them all independently.
2. Story-driven MMO: The main scenario is a fully-fledged Final Fantasy narrative with multiple acts, twists, and emotional moments, comparable to a single-player FF game.
3. Frequent content patches: A major patch (every 3-4 months) adds new story, dungeons, trials, and features, ensuring the world evolves.
4. Excellent community and moderation: Square Enix takes a strong stance against toxicity, harassment, and RMT, creating one of the friendliest MMO communities.
5. Creative Director Naoki Yoshida: His transparent communication, regular Live Letters, and genuine love for the game have built immense trust.
6. Music & Soundtrack: Masayoshi Soken’s compositions are iconic, with each expansion having a distinct musical identity (e.g., "Dragonsong" from Heavensward, "Shadowbringers" theme).
7. Housing and Player Expression: Extensive housing system with gardening, interior decoration, and submersible voyages; plus glamour allows full cosmetic customization.
8. Active RP and social scenes: Player-run bars, concerts, nightclubs, and events are common on many servers.
9. Cross-platform integration: Seamless play across PC, console, and soon Xbox, with no split communities.
10. Respect for your time: No mandatory daily grind; you can unsub for months and gear up quickly upon return. Catch-up mechanics are generous.
This combination makes Final Fantasy XIV: A Realm Reborn not just an MMO, but a living, breathing world that has become the most successful—and beloved—Final Fantasy game of all time.
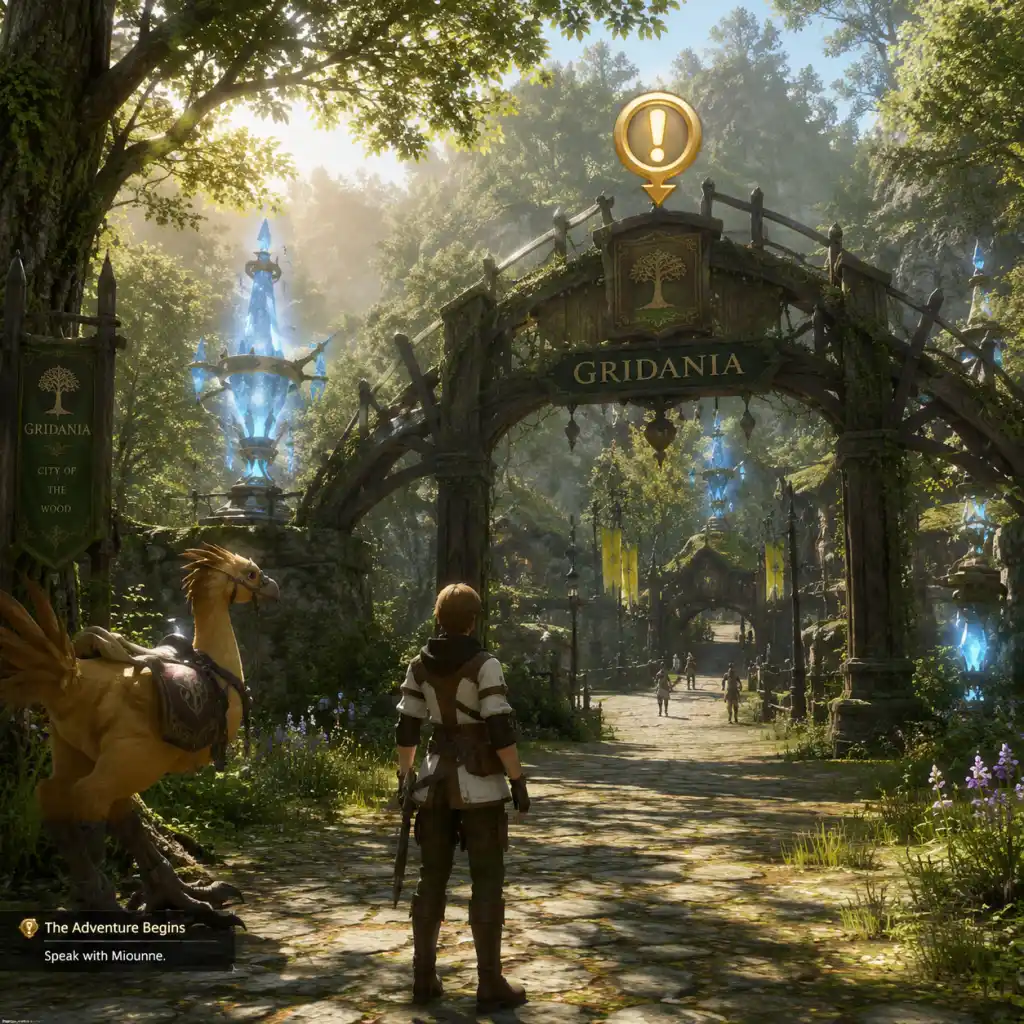
Getting Started
Getting Started Guide for Final Fantasy XIV: A Realm Reborn
This guide is designed to take you from zero to hero in the world of Eorzea. Whether you're a complete MMO newcomer or a veteran looking for a fresh start, follow these steps to avoid common pitfalls and enjoy your first day.
Character Creation: Your First Impression
When you first launch the game, you'll be greeted by the character creator. Don't stress—you can change your appearance later using Fantasia potions (purchasable or obtained through story), but your race, clan, and starting class are more permanent.
Step-by-Step:
1. Choose a Data Center and Server: Select a server that matches your region and language. For beginners, choose a preferred server (marked with a star) for double experience until level 70. New servers (with a flower icon) give bonus rewards for transferring, but starting there is fine too.
2. Create a Character:
- Name: This must be unique on your server. You can’t change it freely later (only via paid rename service). Choose wisely.
- Race & Clan: Race affects only aesthetics and starting attributes (negligible at endgame). Popular choices: Hyur (human), Elezen (elves), Lalafell (small), Miqo'te (cat-like), Roegadyn (big), Au Ra (dragon-horned), Hrothgar (lion-like, expansion required), Viera (rabbit-like, expansion required).
- Gender & Appearance: Customize face, hair, voice, etc. You can preview emotes and animations.
- Guardian: Choose one of the twelve deities. They affect elemental attributes slightly but no real impact—pick whichever looks cool.
- Starting City & Class: Your starting city and class are tied together. New characters can pick one of eight base classes. This matters because the main story quest will take place in that city until roughly level 15. After that, you can freely travel to other cities and unlock other classes. Choose based on the class you want to start with:
- Gridania (forest): Conjurer (healer), Archer (ranged DPS), Lancer (melee DPS).
- Limsa Lominsa (port city): Marauder (tank), Arcanist (magical DPS, can become healer later).
- Ul'dah (desert city): Gladiator (tank), Pugilist (melee DPS), Thaumaturge (magical DPS).
- Tip: If you want to be a tank later, start as Marauder or Gladiator. Healer: Conjurer or Arcanist. DPS: any.
3. Confirm Appearance: Hit "Finish" and watch your opening cinematic.
First Hour Walkthrough: What to Do
After the cinematic, you'll wake up in your starting city. Your main objective is to follow the Main Scenario Quest (MSQ)—the quests with a meteor icon on your map. These are mandatory and unlock almost everything (dungeons, mounts, airships, etc.).
Immediate Steps:
1. Talk to the NPCs with a quest marker (usually a glowing exclamation mark). Accept the MSQ quest.
2. Open your key items (default 'I' on PC, touchpad menu on consoles) and assign your starting weapon and gear.
3. Follow the quest arrow to your first objective. Often it’s talking to another NPC or killing a few enemies.
4. Learn your basic attacks: Press 1 on hotbar, or corresponding controller button. You have one or two abilities initially.
5. Complete the first few quests until you reach level 2-3. You'll be given a quest to join a Grand Company (at level 20, after you leave the starting city).
6. Check your journal (keybind J, or from menu) to track quest progress.
7. Open the map (M) to see all quest markers. The MSQ has a unique icon: a flaming circle with a meteor.
By the end of the first hour, you should be around level 5-7, have completed the first quest chain in your city, and unlocked the ability to teleport between aethernet shards (blue crystals). Use teleport to travel quickly—it costs gil (currency) but very cheap early.
Controls on All Platforms
FFXIV supports PC (keyboard & mouse), console (controller), and a hybrid. You can switch at any time in System Configuration.
PC (Keyboard & Mouse):
- Movement: WASD or arrow keys. Q/E to strafe; R to auto-run.
- Camera: Hold right mouse button and drag; or use mouse wheel to zoom in/out.
- Interact: Left-click on NPC/object, or press F (default).
- Jump: Spacebar.
- Action: Default hotkeys 1-6 for first hotbar, Shift+1-6 for second, etc. You can rebind.
- Menu: Escape key opens main menu.
- Map: M.
- Movement: Left joystick (walk/run). Press down L3 to toggle auto-run.
- Camera: Right joystick.
- Action: Use face buttons (Cross/Circle/Triangle/Square) for hotbar slots. You can have up to 8 hotbars visible via cross-hotbar (R2+L2 combinations). Set up in Character Configuration > Hotbar Settings.
- Interact: Press Circle (PS) or B (Xbox) to talk to NPCs.
- Jump: X (PS) / A (Xbox).
- Menu: Touchpad (PS) or Options button (Xbox).
- Map: Hold touchpad (PS) or press View button (Xbox) and select map.
- On PC, you can enable "Legacy Controls" for movement (camera follows character).
- On controller, use the WXHB (expanded cross-hotbar) for additional abilities. Enable in system menu.
- Top left: Party list (shows health/mana of group members). Solo? Shows your own party (yourself).
- Top center: Enemy HP bar with cast bar (for enemy abilities); also your own HP/MP/TP (now replaced by gauge resources for each job).
- Top right: Minimap. Click to expand full map.
- Bottom center: Your main hotbar(s) with actions. Customizable.
- Left of hotbar: Job gauge (unique to your class, e.g., black mage has Astral Fire/Umbral Ice meter).
- Right side: Buff/debuff icons.
- Lower left: Chat log.
- Lower right: Menu bar (System, Journal, Duty Finder, etc.).
- Center of screen: Notifications, quest progression, loot rolls.
- Follow the MSQ exclusively. It's your ticket to all content.
- Use the aetheryte network: Attune to every crystal you see (they're blue spheres). This allows teleporting later.
- Equip gear slots: You can right-click items in inventory and select "Equip" or drag to character panel. Unequip old gear by clicking and dragging off.
- Repair your gear at any armor repair NPC or via crafting class. Durability loss is small early.
- Pick up the Novice Network invite (chat system for new players). Ask veterans questions.
- Don't grind random mobs for XP; quests and dungeons give far more.
- Don't spend gil on gear from vendors—MSQ and quest rewards give you enough.
- Don't ignore class/job quests. Every 5 levels (2-5, 5, 10, 15, etc.) you get a new job quest from your guild. These unlock essential abilities and gear. Marked on map with a different icon.
- Don't try to gather or craft extensively early—focus on main story first.
- Don't rush to endgame content; enjoy the journey. The game is story-rich.
- Gil: You'll earn plenty from quests. Spend only on teleport fees, repairs, and maybe buying a stack of food (useful for 3% XP buff). Avoid vendor gear.
- Experience: Use the Road to 70 buff if on a preferred server. Always eat food for the 3% XP bonus—buy cheap grilled fish or vendor food.
- Gear: Prioritize weapon upgrades first (highest item level = more damage). Then left side (armor pieces). Use the Market Board for cheap upgrades if you have extreme surplus of gil (but not necessary).
- Inventory: Bag space is limited. Use your Saddlebag (shared storage). Vendor junk items (gray name) or sell on Market Board if tradable. Retainers can store items (unlocked at level 17 through MSQ)
- [ ] Create a character on a preferred server (if possible).
- [ ] Complete the first 5 MSQ quests (until you get the ability to teleport).
- [ ] Attune to every aethernet shard you see in your starting city.
- [ ] Equip all gear from quest rewards and open your inventory.
- [ ] Do your level 5 job quest (if available).
- [ ] Set up your hotbars (PC: assign skills to 1-6, controller: configure cross-hotbar).
- [ ] Unlock the Hall of the Novice (level 15) – you can do this later today if you level enough.
- [ ] Complete the weekend event or daily challenge log (if applicable).
- [ ] Spend any leftover gil on food (stack of grilled popotos from vendor).
- [ ] Take a screenshot of your character—you'll want to remember the beginning.
- [ ] Save your login credentials for easy access.
PlayStation (PS4/PS5) and Xbox (when available):
Customization:
UI Overview
The default HUD (Heads-Up Display) has several key elements:
You can reposition everything via System Configuration > HUD Layout. Recommended: move the job gauge closer to center for easier monitoring.
Essential Early Objectives (Levels 1-15)
1. Complete the Main Scenario Quest until you get a quest called "The Call of the Sea" (around level 10-15). This allows you to leave your starting city and travel to the other two cities.
2. Level up to 15: Do MSQ, plus some side quests if needed. Avoid yellow side quests early unless they give gear upgrades or unlock features (like gear repair).
3. Unlock Chocobo Companion at level 20 (after Grand Company rank 2). Not day one, but soon.
4. Join a Grand Company at level 20 (MSQ gives it). Choose any—you can switch later.
5. Complete Hall of the Novice (level 15) unlocked by talking to Smith in any city. This gives a set of gear good until level 30 and a ring with +30% XP bonus below level 30. Do this immediately upon hitting level 15.
6. Unlock your first dungeon at level 15 or 16 (depending on story). Use Duty Finder to queue.
What to Do First and What to Avoid
Do First:
Avoid:
Early Resource Priorities
Common Beginner Mistakes
1. Skipping Job Quests: You won't learn crucial skills like tank stances or healing oGCDs. Always check for job quests every 5 levels.
2. Ignoring the Hall of the Novice: Missing out on a free XP ring that lasts until level 30.
3. Not Attuning to Aetherytes: You'll have to walk everywhere. Always touch blue crystals.
4. Rushing into Dungeons unprepared: Watch a quick guide or let the group know you're new. Communication helps.
5. Overbuying from NPC vendors: Check Market Board for cheaper prices (though early gear is rarely worth buying).
6. Not customizing UI or hotbars: Spend 10 minutes setting up your preferred layout. It pays off.
7. Trying to solo group content: The Duty Finder will automatically match you – don't try to beat a dungeon boss alone.
Day-One Checklist
Remember: FFXIV is a marathon, not a sprint. Enjoy the story, take breaks, and don't hesitate to ask for help in Novice Network or your chosen Free Company. Welcome to Eorzea!
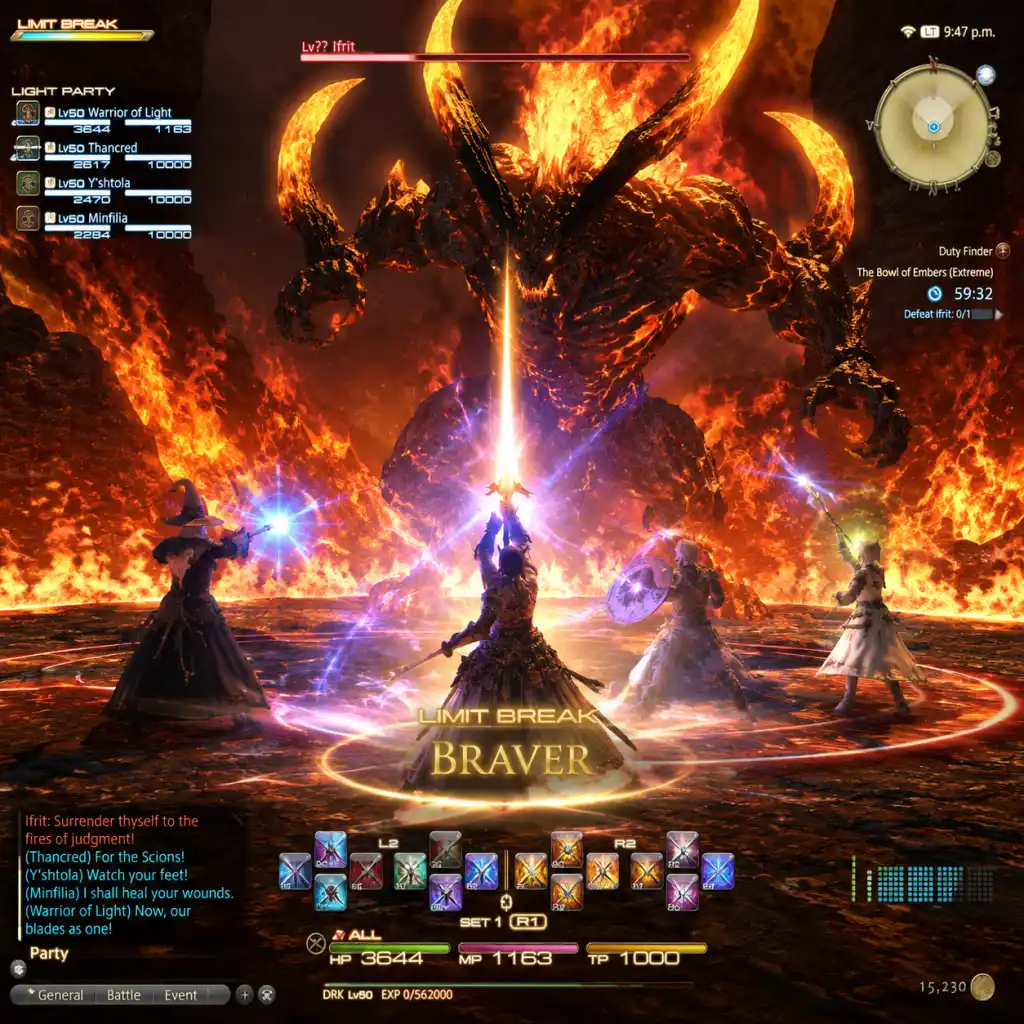
Core Gameplay
Core Gameplay in Final Fantasy XIV: A Realm Reborn
Final Fantasy XIV’s core gameplay revolves around the Main Scenario Quest (MSQ) — a single‑player story that drives your character from a fresh adventurer to a hero of Eorzea. Interwoven are combat, crafting, gathering, social activities, and a deep progression system. The gameplay loop adapts as you advance through Early Game (1–50), Mid Game (50–60), Late Game (60–70), and Endgame (70–90). Each tier introduces new systems, challenges, and goals.
---
Early Game (Levels 1–50, A Realm Reborn)
Core Gameplay Loop
- Follow MSQ for experience, gear, and zone unlocks.
- Complete Class/Job Quests every 5 levels to gain core abilities and your job stone at level 30.
- Engage in FATEs (Full Active Time Events), Levequests, and Guildhests for bonus XP and company seals.
- Use the Duty Finder to queue for dungeons (first one at level 15).
- Weapon Skills & Magic – use a hotbar with up to 10 actions. Classes have a basic 1‑2‑3 combo (e.g., Gladiator → Rage of Halone).
- Role Actions – at level 10 you unlock role‑specific actions (e.g., Convalescence for tanks, Raise for healers).
- Cross‑Class Skills – before level 30 you can borrow abilities from other classes (e.g., Bloodbath from Marauder).
- Duty Finder – automatic party matchmaking for dungeons, trials, and Guildhests. First dungeon is Sastasha at level 15.
- Leveling – MSQ and Hunting Log (for classes) are the fastest. Class quests reward gear every 5 levels.
- Gear – mostly from MSQ, dungeons, and the Market Board. Item Level (iLvl) matters for duties.
- Job Advancement – at level 30, complete the level 30 class quest to unlock your job (e.g., Gladiator → Paladin). The job stone is equipped in your armory chest.
- Zones – visit La Noscea, Thanalan, Gridania, Coerthas, and Mor Dhona. Aetheryte attunement for teleportation.
- Aether Currents – start flying at level 50 after collecting all currents in each zone (visible on map).
- Sightseeing Logs – 80 vistas to find for amusing pop‑ups and achievements.
- MSQ – the spine of the game. Completely soloable with NPC party members after the 2019 patch (New Game+ compatible).
- Side Quests – optional, often lead to exclusive rewards (minions, emotes). Focus on MSQ first.
- Levequests – limited allowance, great for battle classes and crafters/gatherers.
- Grand Company Hunts – after choosing a Grand Company (Maelstrom, Adders, Flames), unlock weekly hunt bills for seals and tomestones.
- Gil – earned from quests, vendoring loot, and Market Board sales. Early game, spend on gear upgrades and teleport fees.
- Retainers – hired after level 17; can sell items on Market Board, venture for materials, and increase inventory.
- Crafting & Gathering – level up independently; early recipes produce food and potions for combat.
- Stat Allocation – no manual points; gear determines stats. Focus on your role’s main stat (STR for tanks, DEX for physical DPS, INT for magic, MND for healers).
- Materia – available after level 19; meld to gear for extra stats. Start with cheap materia.
- Builds – mostly linear before level 50; choose actions you like. Jobs are balanced, so no wrong choice.
- Continue MSQ through Heavensward (starts at level 50 after completing A Realm Reborn level 50 MSQ).
- Unlock Poetics Tomestones for endgame gear (iLvl 120–130).
- Join Roulettes (Leveling, Level 50/60, Main Scenario) for daily XP bonuses.
- Start Heavensward Beast Tribes for reputation and mounts.
- Job Gauge – each job receives a unique gauge at level 52–60 (e.g., PLD Oath Gauge, DRK Darkside).
- Role Actions expand; you can slot up to 10 cross‑role actions by level 60.
- Duties – Hard mode dungeons, level 50 raids (Coils of Bahamut) and extreme trials (e.g., Shiva Extreme) for gear and mounts.
- Leveling – MSQ still fastest, supplemented by daily Leveling Roulette and Palace of the Dead (deep dungeon).
- Gear – Poetics gear from Mor Dhona merchants. iLvl requirements increase per dungeon.
- Job Quests every 5 levels from 50 to 60; unlock new role actions and traits.
- Ishgard – new city; requires a flying mount to traverse Coerthas Western Highlands and the Sea of Clouds.
- Aether Currents – gather in each Heavensward zone to unlock flight.
- Housing Districs – first chance to purchase a personal or FC house (residential wards).
- Retainer Ventures – send retainers for rare materials (e.g., Darksteel Ore).
- Market Board – Heavensward materials and crafted gear sell well. Poetics gear is untradeable.
- Crafting – learn specialist roles (e.g., Culinarian, Alchemist) for master recipes.
- Materia Melding – Advanced melding unlocked; overmelding possible on crafted gear (risky, expensive).
- Soul Crystals – job stone remains essential; no dual‑spec, but you can freely switch jobs on one character.
- Build Variants – some jobs have optional traits (e.g., Paladin: Sword Oath vs Shield Oath), but decisions are per fight.
- Progress Stormblood MSQ (levels 60–70).
- Unlock Duty Roulette: Leveling (expands to include Stormblood dungeons).
- Engage in Eureka (level 70 relic weapon content) – an instanced deep dungeon with elemental levels.
- Participate in PvP (Frontline or Feast) for unique rewards.
- Role Actions become role abilities (e.g., Tank: Rampart, Interject).
- Job Gauges evolve further (e.g., SAM Kenki Gauge, RDM Mana).
- Savage Raids – first tier at level 60 (Omega: Deltascape Savage); 8‑player high‑difficulty content.
- Leveling – MSQ, Hunt Board (Stormblood rank 1–3), and Challenge Log (weekly bonuses).
- Gear – Normal mode raids drop iLvl 320; tomestones of Creation/Genesis upgrade to 370–390.
- Relic Weapons – Anima Weapons from Heavensward remain viable; Stormblood’s Eureka weapons are long term.
- The Steppes, Yanxia, The Lochs – new zones with complex geography.
- Flying – unlock via aether currents; mounts can glide.
- Sea of Clouds – revisit for special FATEs (e.g., Behemoth).
- Gil sinks – teleport fees, repair costs, Materia melding. Eureka consumes elemental crystals.
- Crafting – max level crafters can produce raid‑level potions and food.
- Market Board – Stormblood materials (e.g., Bright Flax) are highly sought.
- Materia – Grade VI and VII materia from hunts and raids.
- Cross‑class Skills removed; replaced by role abilities.
- Specializations – crafters can become specialist for one recipe per master book.
- Complete Shadowbringers (70–80) then Endwalker (80–90) MSQ.
- Daily Expert Roulette for Allagan Tomestones of Comedy/Astrology.
- Weekly Savage Raids (normal mode clears lockout) and Extreme Trials.
- Engage in Ultimate Raids (e.g., The Weapon’s Refrain) for prestige weapons.
- Boozja & Zadnor (level 80 relic weapon content) – similar to Eureka but with resistance ranks.
- Job Changes – some jobs gain a new gauge or role (e.g., Summoner simplified rotation in Endwalker).
- Raid Buffs – party coordination critical (e.g., Trick Attack, Battle Litany).
- Duty Support – all dungeons from A Realm Reborn through Endwalker can be run with NPCs.
- Leveling – MSQ to 90; then Trust system, Boozja/Zadnor are slower but efficient.
- Gear – Savage raids drop iLvl 640 (as of 6.5). Tomestones of Comedy for iLvl 650 gear. Relic weapons (e.g., Resistance Weapons) are BiS after lengthy questline.
- Job Quests – end at level 90; unlock traits and abilities.
- Norvrandt (Shadowbringers) and Old Sharlayan, Garlemald (Endwalker) – large zones with flying required.
- Aether Currents – continue to be essential.
- Boozja – instanced zone with aether currents tied to resistance rank.
- High‑end Crafting – Master Recipe IX books; craft raid food and potions.
- Market Board – Endwalker materials (e.g., Eikon Cloth) sell well. Gil earning from Expert Roulette and treasure maps.
- Retainer Ventures – can bring back rare mounts, minions, and crafting materials.
- Materia – Grade X and XI; pentamelding crafted gear for two‑slot BiS.
- Stats – direct hit, critical hit, determination, tenacity (tanks), piety (healers), skillspeed/spellspeed.
- Glamour – true endgame; dress up via the glamour dresser and plates.
- Job Balance – constant tweaks; check current tier’s meta for parses.
- Weekly Lockouts – Savage raids drop 1 item per boss per week; you can be carried or win loot via rolling. Ultimate raids are not lockout limited after first clear.
- Savage Raid Tiers – four floor tiers with increasing difficulty; last floor is usually hardest.
- Ultimate Raids – 12‑15 minute long boss encounters with multiple phases and tight DPS checks (e.g., The Epic of Alexander).
- Extreme Trials – 8‑player version of story trial; faster to learn, drop weapons and mounts.
- Treasure Maps – Timeworn Zonureskin/Zonureskin maps; 8‑player dungeon with rare crafting materials.
- PvP – Crystalline Conflict, Frontline, Rival Wings. Glamour, titles, and endgame currencies.
- Deep Dungeons – Palace of the Dead, Heaven‑on‑High (levels 1–100); soloable with high risk/reward.
- Relic Weapons – lengthy grind for a weapon that can be glammed; BiS in final major patch.
- Housing & Fashion – personal house, apartment, FC estate; glamour contests, dressup achievements.
Combat & Interaction Systems
Progression
Exploration
Quests & Missions
Economy
Character/Build Growth
---
Mid Game (Levels 50–60, Heavensward)
Core Gameplay Loop
Combat Systems
Progression
Exploration
Economy
Character/Build Growth
---
Late Game (Levels 60–70, Stormblood)
Core Gameplay Loop
Combat Systems
Progression
Exploration
Economy
Character/Build Growth
---
Endgame (Levels 70–90, Shadowbringers & Endwalker)
Core Gameplay Loop
Combat Systems
Progression
Exploration
Economy
Character/Build Growth
---
Endgame Structure (Post‑Level 90)
Example Endgame Week: Monday – reset, run Expert Roulette, do two Savage raids with static. Wednesday – clear remaining raids, Friday – farm Extreme trial for mount, Saturday – attempt Ultimate prog with group. Sunday – Boozja relic farm and housing decoration.
The core gameplay loop never truly ends; you set your own goals—seeking gear, achievements, roleplaying, or simply enjoying Eorzea’s ever‑expanding world.\n\n---
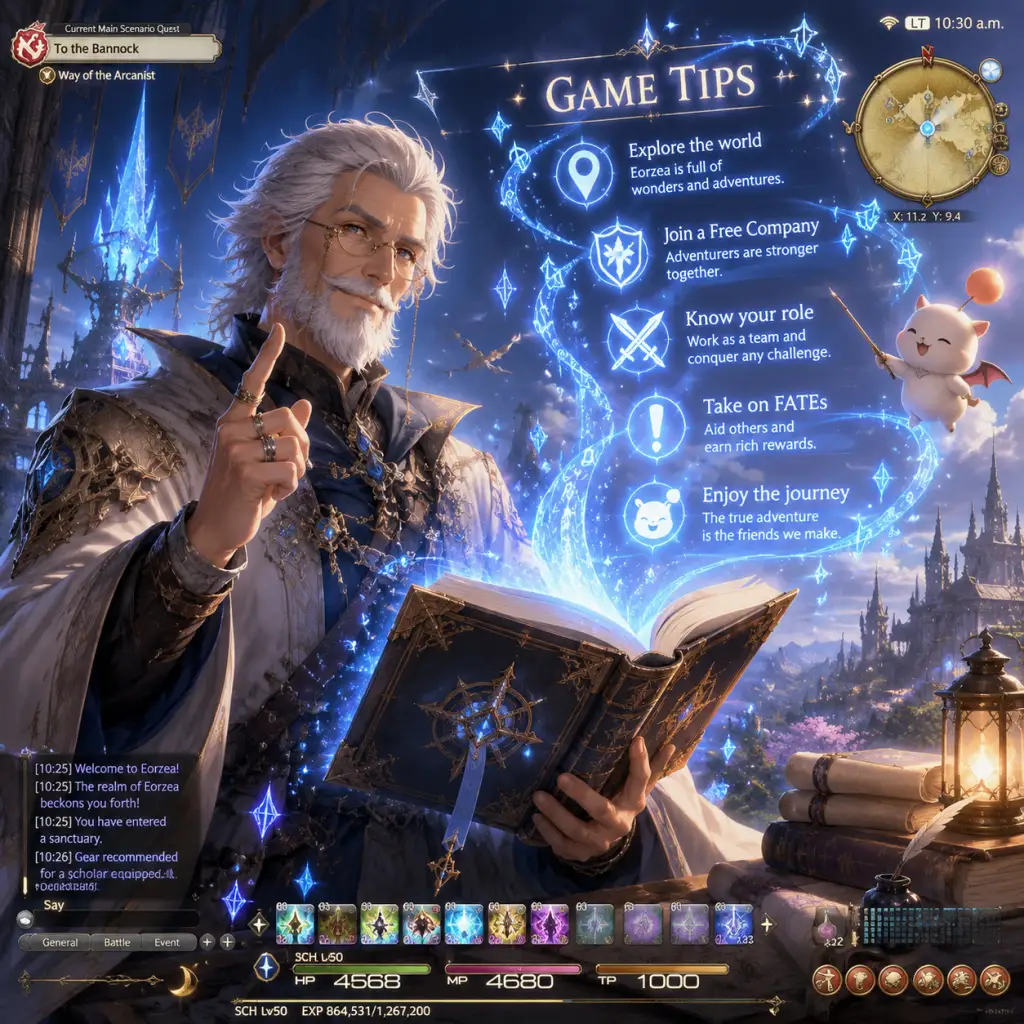
Game Tips
Game Tips for Final Fantasy XIV: A Realm Reborn
This guide collects essential tips organized by skill level and activity. Whether you are a sprout (new player) or a seasoned raider, these strategies will help you navigate Eorzea more effectively.
---
Beginner Tips
#### 1. Follow the Main Scenario Quest (MSQ) Relentlessly
- What: The MSQ (meteor icon) is the backbone of FFXIV. It unlocks nearly everything: new zones, dungeons, trials, flying mounts, and even the ability to buy a house.
- Why: Most content is gated behind MSQ progression. If you ignore it, you will be locked out of activities and gear upgrades. Always keep your current MSQ level close to your character level.
- When: From level 1 to 90, make it your top priority. Only branch out for a gear upgrade or to unlock a necessary feature (like your job stone).
- What: After reaching level 30 on your starter class (e.g., Gladiator), complete the job quest in your capital city to obtain a Job Stone (e.g., Paladin). The stone dramatically expands your abilities.
- Why: Without a job stone, you are missing half your toolkit. Players will notice and may exclude you from dungeons. The stone also boosts stats and unlocks role-specific actions.
- When: As soon as you reach level 30 and complete the required class quests. Never unequip it.
- What: Every ability has a precise effect, cast time, and cooldown. Use the game's in‑depth tooltips (hold Shift or hover). For practice, try a simple opener plug‑in or the striking dummy in any major city.
- Why: Button mashing leads to low DPS, wasted buffs, and aggro issues. Understanding your rotation (e.g., a 1‑2‑3 combo for tanks) raises your personal performance significantly.
- When: Before running any dungeon past Sastasha, spend 5 minutes reading your job guide (in‑game or on official forums) and hitting a dummy.
- What: Starting at level 1, your class has quests every 5 levels. After job stone, the same pattern continues (e.g., level 30, 35, 40...).
- Why: These quests award new abilities, gear, and gil. Missing them means you lack core skills (like a tank's defensive cooldown). They also unlock entire jobs (e.g., Paladin, White Mage).
- When: Every time you level up to a multiple of 5, stop what you're doing and complete the quest.
- What: FFXIV allows you to run story dungeons with NPCs (called Trusts or Duty Support) instead of real players. This is available for all A Realm Reborn dungeons through Heavensward.
- Why: You can learn mechanics at your own pace without pressure. It also gives you gear that matches the dungeon's level.
- When: Always for your first run of a dungeon. It’s a stress‑free way to learn. Later, you can speedrun with players for faster experience.
- What: Many melee attacks deal more damage when hitting from the flank (side) or rear (back). For example, a Dragoon’s “Chaos Thrust” must hit the rear to apply a damage‑over‑time (DoT).
- Why: Missing positionals lowers your DPS by 10‑20%. Some abilities simply do not work if you are facing the wrong direction.
- When: Always behind the boss for rear attacks; flank for side attacks. Use the boss’s targeting circle as a guide. Move with the boss to stay in position.
- What: Many enemies have telegraphed casts (orange bar above the enemy’s HP). Tanks and melee DPS have stuns; ranged and casters have interrupts (e.g., “Interject” for tanks, “Head Graze” for physical ranged).
- Why: Interrupting a boss’s powerful AoE or heal can wipe a group or cause a tankbuster. It’s a critical skill that separates average players from good ones.
- When: Keep an eye on the cast bar. If you see a scary cast name (like “Sinister Tide” in Sirensong Sea), use your stun or silence immediately.
- What: The Limit Break (LB) gauge fills as the party deals and receives damage. It has three bars. Melee LB1 is a single‑target hit; caster LB1 is an AoE; healer LB1 is a full party heal plus revive.
- Why: Using LB at the wrong time wastes its potential. For example, a melee LB3 can skip a boss phase, but using it on a trash pack is wasteful.
- When: Save LB for dungeon bosses (melee LB3 if you have it) or for emergency healer LB2/3 when multiple players are down. In trials/raids, follow the leader call.
- What: Every job has an AoE rotation (e.g., Arcanist: “Outburst”; Black Mage: “Freeze”). Use it when 3+ enemies are grouped.
- Why: Single‑target on packs is extremely inefficient. AoE multiplies your damage per second (DPS) and speeds up dungeons.
- When: In any dungeon or open‑world pull with 3 or more mobs. Tanks should gather enemies first, then DPS go ham with AoE.
- What: FFXIV combat has a 2.5‑second global cooldown (GCD). You can fit one or two off‑GCD abilities between GCD skills. This is called weaving.
- Why: Weaving abilities like “Bloodbath” or “Feint” without clipping (delaying your next GCD) maximizes your damage output and resource usage.
- When: Start with simple weaving: after a GCD, press one oGCD immediately. As you get comfortable, add a second oGCD if you have a fast connection. Use the training dummy to practice.
- What: Aetherytes are the fast‑travel points (teleportation crystals) scattered across zones. Every zone has one main aetheryte and several smaller ones.
- Why: Quickly moving around Eorzea saves hours of travel. You can teleport for a small gil fee (very cheap). Unlocking an aetheryte also marks its location on your map.
- When: Upon entering a new zone, immediately head to the nearest aetheryte. Use the “Teleport” action from your menu or the map to attune.
- What: Return sends you to your home point (usually a main city’s aetheryte). Teleport opens a list of all unlocked aetherytes with gil cost.
- Why: Set a home point near your current hub (e.g., Limsa Lominsa if you do a lot of fishing). Teleport costs scale with distance; you can reduce costs by using “Aetheryte Tickets” from Grand Company seals or by completing sightseeing logs.
- When: Use Return when you need to get back to a major city quickly. Teleport for short hops. Avoid teleporting to faraway zones repeatedly; use Chocobo Porter or the airship for scenic routes.
- What: The map (M key) shows your position, nearby quest markers, and points of interest. You can right‑click a quest icon to set it as a destination, which draws a line on your minimap.
- Why: You never get lost. The destination line guides you along roads and through zones, even in complex areas like Coerthas.
- When: Always keep your destination active for the current MSQ or side quest. Change it when you pick up a new quest.
- What: You get your first mount (a chocobo) after completing the level 20 MSQ “My Little Chocobo.” Flying is unlocked for each zone after completing the entire ARR main scenario and purchasing “Aether Compass” item (sold by vendor in Revenant’s Toll).
- Why: Mounts drastically reduce travel time, and flying allows you to bypass obstacles. Flying also reveals aether currents (needed to fly) on your map.
- When: Do the level 20 quest immediately. For ARR zones, you need to collect 5 aether currents per zone (visible on map after completing MSQ). Do not leave a zone before collecting all currents.
- What: The Hunting Log (for your class) provides bonus XP for killing specific enemies. The Sightseeing Log gives EXP and achievements for visiting scenic spots at specific times/weather.
- Why: Both are excellent sources of passive XP while you explore. Sightseeing also unlocks a nifty “view” cutscene and a title.
- When: Open your Hunting Log from the main menu (H key) and kill those monsters while questing. For Sightseeing, check the time and weather requirements before traveling.
- What: The Armoire (in inn rooms or housing) stores seasonal gear and rare items; the Saddlebag (Summoning Bell) holds up to 70 items and is shared across all characters on your account.
- Why: You have limited inventory slots (default 100). Overfilling causes you to discard valuable drops. Use the Armoire for glamour pieces and untradable gear. The Saddlebag is ideal for crafting materials or dungeon gear you want to trade later.
- When: Every time you return to a city, sort your inventory. Put craftable materials in the Saddlebag, and any gear you want to keep but not use into the Armoire.
- What: The Market Board is the player auction house. NPC vendors pay pennies for gear you find. Players will pay much more for gear that is part of a glamour set or for leveling alt jobs.
- Why: A single piece of level 50 gear can sell for 5,000-20,000 gil on the market board, compared to 100 gil from a vendor. Over a playthrough, the difference amounts to tens of thousands of gil.
- When: Check the Market Board price first, then decide. Use the “Search” feature (Ctrl+U) to see last sales. If the piece is low‑level and unsellable, you can still turn it into Grand Company seals (see below).
- What: Once you join a Grand Company (level 20 MSQ), you can “Turn in” gear for company seals. The gear must be “green” (uncommon) or “blue” (rare) quality, or item level above a threshold.
- Why: Seals can buy mounts (chocobo barding), aetheryte tickets, housing items, and valuable materials like “Grade 1 Dark Matter” for relic weapons. It’s far better than deleting gear.
- When: After level 20, regularly turn in any gear you outlevel or get duplicates of. Keep one set of your current gear.
- What: Retainers are NPC assistants you can hire at any city. They hold up to 175 items each and can be assigned to sell items on the Market Board while you are offline.
- Why: You get 2 free retainers (more for a fee). They effectively double your inventory space. They also can gather specific items for you (if you assign them a DoL job).
- When: Hire a retainer as soon as you reach level 20 (quest “The Rising Tide of Goosebumps”). Assign one to sell items you don’t need immediately. Use the other for storage.
- What: Teleport tickets (bought from Grand Company vendors for 1,000 seals each) let you teleport for free. Sniper’s Eyes are a consumable that increases your critical hit rate for 15 minutes.
- Why: Free teleports save thousands of gil over time. Sniper’s Eyes boost your damage slightly, useful for difficult solo content or dungeons.
- When: Buy a stack of teleport tickets when you have excess GC seals. Use Sniper’s Eyes before boss fights if you are a physical DPS (or the caster equivalent, “Intellect Potion”).
- What: Each piece of gear has an item level (iLvl), which is more important than the required character level. A iLvl 130 piece for level 50 beats a iLvl 120 piece for level 55.
- Why: Stats scale with iLvl. Higher iLvl = more damage, HP, and heals. Always equip the highest iLvl gear you can, even if it is from an earlier expansion.
- When: At endgame or at each expansion cap (50, 60, 70, 80, 90), go for the highest iLvl gear available. Use the “Best in Slot” (BiS) lists from community resources (e.g., The Balance Discord).
- What: Main stats are Strength (tank/melee DPS), Dexterity (ranged DPS), Intelligence (caster DPS), Mind (healer), Vitality (tank). Secondary stats are Critical Hit, Direct Hit, Determination, Skill Speed, Spell Speed, Tenacity, Piety.
- Why: Main stats give a flat damage/healing multiplier. Secondary stats are secondary: they scale your damage by small percentages. In general, 1 main stat ≈ 2-3 secondary stat points in value.
- When: When choosing between two gear pieces of similar iLvl, pick the one with higher main stat. For melding (adding materia), follow a guide for your job.
- What: Skill Speed (melee) reduces GCD, but too much causes you to run out of TP (or MP for casters) and makes your rotation difficult to execute. Similarly, fast spells can cause mana issues.
- Why: The game’s global cooldown cap is 2.0 seconds at 0 skill speed. Going below that requires heavy melding, which often hurts other stats. For most jobs, a moderate amount is best.
- When: Aim for a skill speed that allows you to weave two oGCDs without clipping. For casters, stop adding Spell Speed once you reach a comfortable cast time (e.g., 2.2‑2.3 seconds for Black Mage).
- What: You can save your equipment as a set (e.g., “Tank Gear Set 1”). Press Ctrl+I to open the Gear Set list. One click equips all items from that set.
- Why: Switching jobs without re‑equipping manually saves time and avoids errors. You can also link a gear set to a hotbar macro.
- When: Create a gear set for each job you play. Update it whenever you get a new piece of gear. Use the “Update Gear Set” button (right‑click) to avoid carrying wrong items.
- What: Some actions are shared across roles (e.g., “Feint” for melee DPS, “Swiftcast” for casters). Leveling a Lancer gives you “Feint” for all melee DPS jobs. Leveling Thaumaturge gives “Swiftcast” for all casters.
- Why: These actions are incredibly useful. Swiftcast lets you cast resurrection or a long spell instantly. Feint reduces a target’s damage for 10 seconds.
- When: After you finish the MSQ on your main job, pick up a secondary job in the same role family to unlock those actions. Aim for at least level 15 for each role’s shared action.
- What: You can learn all DoH/DoL jobs from level 1 in the starting cities. Crafting your own gear saves gil and can be a major income source.
- Why: Repair costs at NPCs are expensive. With high enough Crafting level (like Carpenter or Armorer), you can repair your gear for a fraction of the cost and even over‑repair for a durability bonus.
- When: Level at least two crafting jobs (one for weapons, one for armor) to 30. This allows you to repair all your gear while adventuring. Also level Botany or Mining to gather your own materials.
- What: Monitor the Market Board for items that are underpriced. Buy them, then relist at a higher price. This is a classic “merchant” strategy.
- Why: The market fluctuates based on patch cycles, new recipes, and player demand. With a retainer, you can list items for up to 20 slots. Over time, you can make millions.
- When: Focus on consumables (potions, food) and glamour prisms. During new patches, raw materials (e.g., Dark Matter) spike. Use “Universalis” website to check prices across servers.
- What: Beast Tribe quests become available after certain MSQ steps. They reward reputation (which unlocks barding, mounts, emotes) and a currency called “Bicolour Gemstones” (in Stormblood+) or “Gil” and “Allagan Tomestones.”
- Why: Reputation items are often exclusive and can be sold for high prices later. The daily quests also give sizable experience for alt jobs.
- When: Once you unlock a Beast Tribe (e.g., Amalj’aa at level 24), do the daily quests every day. Aim to max reputation on at least three tribes for the special rewards.
- What: Houses (personal or FC) cost millions of gil. Glamour prisms (for dyeing and glamour) also add up. The best use of your gil is long‑term investments.
- Why: Early gil is better spent on leveling gear and teleports than on vanity items. Wait until you have a steady income stream.
- When: Keep a minimum of 100,000 gil emergency fund. After that, start saving for your first house (requires a ward and buyer patience). Do not waste gil on overpriced minions or mounts that you can get from quests.
- What: Levequests are repeatable quests found at Levemete NPCs. They reward gil, experience, and sometimes items. You get 6 allowances every 12 hours (max 100).
- Why: Battlecraft leves give good gil for killing a few monsters. Tradecraft leves (for crafters) reward massive crafting XP and some gil. Gathering leves yield raw materials you can sell.
- When: Use allowances on level‑appropriate leves when you need quick cash. For crafting, use high‑quality items to double rewards.
- What: Third‑party add‑ons like ACT (Advanced Combat Tracker) parse in‑game damage. While Square Enix does not endorse them, many serious raiders use them to self‑improve.
- Why: You can see your DPS, uptime, and rotation mistakes. Comparing logs with top players helps you identify weak points.
- When: Only in private settings; never post parse screenshots in chat (it breaks ToS). Use it to benchmark your performance after learning a new job.
- What: Arrange your hotbars so that your most used abilities are on keys 1‑6 (or Q, E, R, F, C). Use modifiers (Shift, Ctrl, Alt) to expand your keybinds.
- Why: Fast reaction times are essential in endgame content. Clicking abilities with your mouse slows you down. Custom UI also hides unnecessary elements.
- When: During your first week, set up your hotbars. Keep important cooldowns and buffs on a prominent bar. Disable the default keybinds you never use (like /lfg).
- What: In FFXIV, you can move during the last 0.5 seconds of a cast without canceling it. This is called slidecasting. It allows you to dodge AoEs while still dealing damage.
- Why: Movement is the biggest DPS loss for casters (especially Black Mage). Slidecasting turns a movement phase into a zero‑loss opportunity.
- When: Practice on a dummy. Start moving right after the cast bar hits 80% completion. With good latency, you can slide almost the entire cast.
- What: Tanks have powerful invulnerability skills: Hallowed Ground (Paladin, 10‑second invincibility), Holmgang (Warrior, reduced to 1 HP but invincible 6 seconds), etc.
- Why: Using these at the right time can trivialize otherwise lethal tankbusters. For example, a Warrior can pop Holmgang right before a huge hit, negating the damage completely.
- When: Learn boss timings. In savage raids, use invuln for the first tankbuster if healers are busy. Coordinate with your co‑tank so you don’t overlap.
- What: Ninja’s Trick Attack is a 15‑second damage vulnerability debuff on the enemy. It increases all damage taken by 5% during that window.
- Why: This is a huge raid DPS cooldown that should be used every 60 seconds on cooldown. Aligning your party’s burst windows with Trick Attack is essential for optimal damage.
- When: As a Ninja, use Trick Attack off cooldown, but make sure your party is ready (e.g., during a potion window or after a raid buff). As a non‑Ninja, save your big damaging abilities for the Trick Attack window.
- What: Melding is adding materia to gear. Each piece has 2‑5 materia slots (overmelding on crafted gear). You can use cheap materia for the first slot and expensive high‑grade materia for later slots.
- Why: Overmelding (especially on crafted gear) requires a special “Advanced Melding Forbidden” skill. It has low success rates (e.g., 20%). Using cheaper materia for high‑risk slots saves money.
- When: For BiS gear, follow a melding guide. For leveling gear, use only reasonable materia (like grade 6 or 7) on the first slot.
- What: Macros are sequences of commands. You can create a macro that says “Casting raise on <t>” and then casts the spell. Also useful for crafting multi‑step recipes.
- Why: Saves button presses and reduces errors in crafting rotations. For combat, macros can automate a simple opener or announce important cooldowns.
- When: Make a macro for raising (healer) so you can call out your target. For crafters, use a macro to execute a finicky rotation like “Flawless Synthesis” + “Ingenuity II.”
- What: Free Companies (FCs) provide a 10% XP bonus (cumulative with rested XP), access to FC buffs (like “The Heat of Battle” for +15% battle XP), and a social network.
- Why: The XP buffs significantly speed up leveling alt jobs. Also, FC housing has vendors and a workshop for airships and submarines.
- When: Look for an FC that advertises as beginner‑friendly. Avoid those that demand weekly donations or require a certain playtime. Join after you reach level 15.
- What: Side quests (yellow markers) give tiny XP and gil. Blue markers (+ icon) unlock new features, dungeons, or jobs.
- Why: Yellow side quests are not efficient for leveling; you outlevel zones quickly. Blue quests are essential because they expand your gameplay (e.g., unlocking the Manderville Gold Saucer, Chocobo racing, or the Gold Saucer itself).
- When: Always pick up any blue quest you see. Ignore yellow ones unless you want the story or they are directly on your path.
- What: The Gold Saucer is a casino/mini‑game hub accessed via a quest at level 15. It contains Triple Triad, Chocobo Racing, Lord of Verminion (Pokémon‑style mini‑game), and many more.
- Why: It’s a fun break from the grind. You can earn MGP (currency) to buy exclusive mounts (like the Magitek Armor), emotes, and minions. Also, some achievements require Gold Saucer activities.
- When: Visit the Gold Saucer once you have the quest. Daily and weekly mini‑game challenges give huge MGP. Spend your time there when you need a break from combat.
#### 2. Unlock and Equip Your Job Stone at Level 30
#### 3. Read Your Tooltips and Use a Rotation Helper
#### 4. Always Do Your Class/Job Quests Every 5 Levels
#### 5. Use "Duty Support" for Your First Dungeon Run
---
Combat Tips
#### 6. Master Positionals (Melee DPS and Tanks)
#### 7. Interrupt Enemy Casts with Stuns or Interrupts
#### 8. Use Limit Break Wisely
#### 9. Learn to Use Area of Effect (AoE) Rotation on Trash
#### 10. Practice Weaving Off‑Global Cooldowns (oGCDs)
---
Exploration Tips
#### 11. Unlock All Aetherytes as Soon as Possible
#### 12. Use the “Return” and “Teleport” Actions Efficiently
#### 13. Enable the “Map” UI Element and Use “Set Destination”
#### 14. Unlock Mounts and Flying (A Realm Reborn)
#### 15. Use the “Hunt” Log and “Sightseeing Log” for XP and Fun
---
Resource Management Tips
#### 16. Manage Inventory with the “Armoire” and “Saddlebag”
#### 17. Sell Unwanted Gear on the Market Board, Not to Vendors
#### 18. Convert Unneeded Gear into Grand Company Seals
#### 19. Use “Retainer” Inventory and Selling Services
#### 20. Always Carry a Stack of Teleport Tickets and Sniper’s Eyes
---
Character Builds and Gearing Tips
#### 21. Use “Item Level” as Your Primary Gear Metric, Not Level
#### 22. Prioritize Main Stat Over Secondary Stats
#### 23. Do Not Overstack Skill Speed or Spell Speed
#### 24. Use “Gear Set” Feature to Switch Jobs Easily
#### 25. Level Multiple Jobs for Cross‑Role Actions
---
Economy Tips
#### 26. Start Crafting and Gathering Early (Even if Just for Repair)
#### 27. Use the Market Board to Flip Items (Buy Low, Sell High)
#### 28. Do Your Daily Beast Tribe Quests for Reputation and Currency
#### 29. Save Your Gil for Housing and Glamour
#### 30. Participate in “Levequests” for Quick Money
---
Advanced Optimizations
#### 31. Use a Damage Meter (Even Though It Is Unofficial)
#### 32. Optimize Your UI and Keybinds for Muscle Memory
#### 33. Master the Art of “Slidecasting” for Casters
#### 34. Use Tank Invulnerability Skills Proactively
#### 35. Learn the “Trick Attack” Window for Ninjas
#### 36. Optimize Your Gear Materia Melding with “Eighth‑grade” Melds
---
Miscellaneous Pro Tips
#### 37. Use “Macro” for Common Announcements and Crafting
#### 38. Join a Free Company (Guild) for XP Bonus and Company Actions
#### 39. Do Not Be Afraid to Skip Side Quests (Except Blue Quests)
#### 40. Set Aside Time for the Gold Saucer
---
Table: Quick Reference for Key Unlocks (A Realm Reborn)
| Level | Unlock | How to Get | Why Important |
|---|---|---|---|
| 1 | Chocobo Porter | After starting MSQ, speak to an NPC in any major city. | Fast travel between aetherytes. |
| 8 | The Gold Saucer | Complete the quest “It Could Happen to You” in Ul’dah. | Mini‑games, mounts, glamour. |
| 15 | Duty Finder | Complete the quest “Call of the Sea” in your starting city. | Queue for dungeons. |
| 20 | Grand Company | Complete the MSQ “The Company You Keep.” | Seals, gear, housing. |
| 30 | Job Stone | Class quest at level 30. | Advanced abilities. |
| 35 | Chocobo Companion | Complete the quest “My Little Chocobo.” | Mount + combat pet. |
| 44 | Aether Currents (ARR) | After MSQ completion, head to specific zone locations (yellow dots). | Flying in ARR zones. |
| 50 | Allagan Tomestones | Earn from daily roulettes. | Endgame gear. |
Final Words
FFXIV: A Realm Reborn rewards patience and curiosity. The game’s community is generally helpful; do not hesitate to ask for advice in the Novice Network (chat channel) or in your FC. Use the tips above to minimize frustration and maximize enjoyment. Remember: the journey is as important as the destination. Good luck, Warrior of Light!

Game Settings
Game Settings Guide for Final Fantasy XIV: A Realm Reborn
This guide covers every settings category in Final Fantasy XIV: A Realm Reborn (FFXIV) across all platforms (PC, Mac, PlayStation, Xbox). Proper configuration can dramatically improve performance, visual fidelity, and comfort. We’ll explain each option, recommend optimal values for different hardware tiers, and flag settings that are easy to misconfigure.
---
1. Graphics Settings
Location: `System Configuration` → `Graphics`
#### Display & General
- Display Mode: `Full Screen` (lowest input lag); `Borderless Windowed` (easier alt-tabbing); `Windowed` (rarely used).
- Resolution: Set to your monitor’s native. Lower resolution improves performance but blurs text.
- Refresh Rate: Match your monitor’s max. `60` is safe; `120+` if supported.
- Frame Rate Limiter: Choose `No Limit` (GPU can run full speed) or cap at `60`/`120` to reduce power/heat. For competitive gameplay, cap at your monitor’s refresh rate.
- Screen Size Adjustment: Only if UI appears off-center.
- Graphics Quality Preset: `Standard` (Desktop) for most; `Laptop` uses lower power. Custom settings override the preset.
- Custom Settings (advanced):
- Real-time Reflections: `High` is very demanding. `Off` on mid/low-end.
- Depth of Field: Personal preference. `Off` improves clarity.
- Motion Blur: Typically turned off for clean visuals.
- Bloom, Radial Blur: Minor cost, can be disabled.
#### Quality Presets
- Texture Quality: `High` has minimal performance impact. `Low` blurs ground/walls.
- Shadow Quality: `High` is expensive. `Medium`/`Low` saves 10–20% GPU load.
- Lighting Quality: `High` adds more dynamic lights. `Standard` is fine for most.
- Grass Quality: `High` adds dense grass. `Off` in cities for better FPS.
- Grass Swaying: Visual effect, disable for slight boost.
- Water Reflection: `High` (screen-space) is heavy. `Low` or `Off` for performance.
- Anti-aliasing: `FXAA` (fast but blurs); `MSAA 2x/4x` (nice but heavy). Recommended: `TAA` (sharp, low cost) if available.
- Ambient Occlusion: `HBAO+` / `SSAO` – adds depth but costs 10–15% FPS. Use `Off` on low-end.
- Anisotropic Filtering: `16x` (negligible cost, huge visual gain for textures).
- LOD on Distant Objects: `On` reduces far details to save performance. Caution: Can cause noticeable pop-in when moving fast.
- LOD Quality: `High` reduces pop-in but uses more memory.
#### Performance Recommendations by Hardware Tier
| Tier | GPU Example | Resolution | Preset | Key Custom Changes | Expected FPS (60Hz) |
|---|---|---|---|---|---|
| Low-end | GTX 1050, RX 560 | 1280x720 | Standard (Laptop) | Shadows Low, Water Low, AO Off, LOD On | 30–50 |
| Mid-range | GTX 1660, RX 580 | 1920x1080 | Standard (Desktop) | Shadows Medium, Water Low, AO Off, Reflection Off | 50–60 |
| High-end | RTX 3060, RX 6700 | 1920x1080 | Maximum | Everything High, AO High, Reflections On, MSAA 2x | 60–80 |
| Ultra | RTX 4080, RX 7900 | 2560x1440 | Maximum | Shadows & Lighting High, AO HBAO+, Reflections On, MSAA 4x | 80+ |
---
2. Audio Settings
Location: `System Configuration` → `Sound Settings`
- Master Volume: Overall game sound.
- BGM (Background Music): 80–100% recommended.
- Sound Effects (SFX): 100% – critical for combat cues.
- Voice: 70–100%; many players find default too low – adjust upward.
- System Sounds: 50–100% for UI beeps.
- Performance Action Sounds: Separate volume for enemy skills; keep high.
- Speaker Configuration: `Headphones` / `Stereo` / `5.1` / `7.1`. Use what matches your setup.
- Character Voice Override: If enabled, your character will always voice their lines fully (instead of grunts). Important: This setting is off by default; turn it on for full voice acting during cutscenes.
- Play Sound When Window is Inactive: Toggle off if you alt-tab often.
- Movement Type:
- Auto-run: `Toggle` (double-tap W) or `Hold`.
- Camera: `Rotate by clicking mouse` vs `Legacy` (keyboard only).
- Targeting:
- Click to set Focus Target: Assign a keybind to easily mark a priority monster.
- Hotbar Display: Number of bars, rows, columns. Max 12.
- Keybind Presets: For example, `1234` for hotbar 1, `Shift+1234` for hotbar 2.
- Controller Support: Full customisation available. Use `Cross Hotbar` for quick skills.
- Color Blind Corrections: Options for Protanopia, Deuteranopia, Tritanopia. These apply to UI elements and can greatly improve clarity.
- UI Scale: Increase from 100% to 120% or 140% for easier reading on high-res monitors or smaller screens.
- Subtitle Settings:
- Text Size: Not adjustable per se, but UI Scale affects all text.
- High Contrast Mode: For better visibility of UI panels.
- Effects While Red: If you’re colorblind, this option changes effect indicators (e.g., poison) to be more distinct.
- Text Language: Choose from English, French, German, Japanese, etc. This affects all game menus, dialog, and quest text.
- Voice Language: Can be set independently. Common choice: Japanese voice + English text for many players. Changing voice language requires restart.
- System Language: Usually follows OS default.
- Port Forwarding: Usually not needed unless you have strict NAT.
- Connection Type: Auto-detect (wireless/wired). Wired is always recommended.
- Limit Number of Connections: `Standard` or `High`. `High` can reduce lag in crowded areas but may increase CPU load. Default is usually fine.
- Proxy Settings: Only if you are behind a corporate proxy.
- Data Center / World Selection: Not a settings menu – done at character select.
- Display Action Effects (Self/Party/Others): Keep self at `Show All`, party at `Show Limited` (important to see ground AoEs), others at `Hide All` for clarity in large battles.
- Display Fly Text: Damage numbers, heal numbers, etc. Enable all.
- Auto-aim: For target lock when using skills.
- Weapon Auto-sheathe: `Never` if you want weapon drawn.
- Automatic Weather Forecast: Turn ON – shows upcoming weather in UI.
- HUD Layout Editor: Press `Esc` → `HUD Layout`. Drag every element (hotbars, minimap, party list, etc.) to your liking. Crucial for reducing clutter.
- Display Party Frames: Always ON.
- Display Limit Break Gauge: ON.
- Mini-map: Size and transparency adjustable.
- Inventory Sorting: Auto-sort by category, type, or custom.
- Enmity List: Shows threat levels. Enable for tanks and DPS.
- Cycle Through Enemies: Custom keybind.
- Click to add Focus Target: ON.
- After changing graphics, restart the game for some settings to take full effect (e.g., Texture Quality).
- Use the in-game Benchmark tool (downloaded separately or from launcher) to test your settings before committing.
- Cloud saving of settings: Not automatic; keep a backup of `FFXIV.cfg` in `Documents/My Games/FINAL FANTASY XIV - A Realm Reborn/` if you reinstall.
- Controller users: Go to `System Configuration` → `Gamepad Settings` → `Calibrate` to ensure dead zones are correct.
- Mac users: Some settings might be locked due to Metal API – use presets and custom tweaks conservatively.
---
3. Controls Settings
Location: `Character Configuration` → `Control Settings`
#### Movement & Targeting
- Standard: Move forward/backwards & strafe with W/A/S/D. Backpedal is slow.
- Legacy: You always face the target; pressing S runs backward at full speed. Recommended for new players.
- Target Selection: `Cone` vs `Cylinder` vs `Radial`. `Cone` (default) works well.
- Cycle Targets: `Tab` cycles enemies; `Shift+Tab` cycles party.
- Inherit Target’s Target: ON for healers – pressing heal will target the ally the enemy is facing.
#### Hotbar & UI
> Easy to misconfigure: Under Character Configuration → Control Settings → General, the Auto-sheathe weapon timer (default 10s). Set to `Never` if you want to keep weapon drawn. Also, Auto-attack toggles – ensure it’s ON for melee.
---
4. Accessibility Settings
Location: `System Configuration` → `Accessibility`
- Subtitle Display: Choose `Always` or `Only for Events`. Recommended: Always – you won’t miss dialogue.
- Subtitle Language: Independent from voice/text.
---
5. Language Settings
Location: `System Configuration` → `Language Settings`
> Special point: If you play on a European or Japanese data center, matching language to the server’s main language (e.g., English on Aether, Japanese on Elemental) can help with group communication, but it’s not required.
---
6. Network Settings
Location: `System Configuration` → `Network Settings`
> Easy to misconfigure: The Limit Number of Connections slider – setting it too low can cause “lag” in cities with many players. Leave at `Standard` or `High`.
---
7. Gameplay Settings
Location: `Character Configuration` → various tabs
#### Battle Settings
#### UI & HUD Layout
#### Targeting & Enmity
> Special attention: The Display Action Effects slider for “Others” – if you set it to `Show All` in a 24-man raid, your screen will be a fireworks display. Always set to `Hide All` for sanity.
---
8. Special Setup Considerations
---
Conclusion
Final Fantasy XIV is highly customizable. Start with the presets for your hardware, then fine-tune using this guide. Remember that performance is subjective – if you prioritise smooth 60+ FPS in crowded cities, sacrifice shadows and reflections first. For the best experience, test your settings in a busy location like Limsa Lominsa (Aetheryte Plaza) before raiding.
> Last updated: October 2023 – applies to Endwalker (6.x) and earlier expansions.
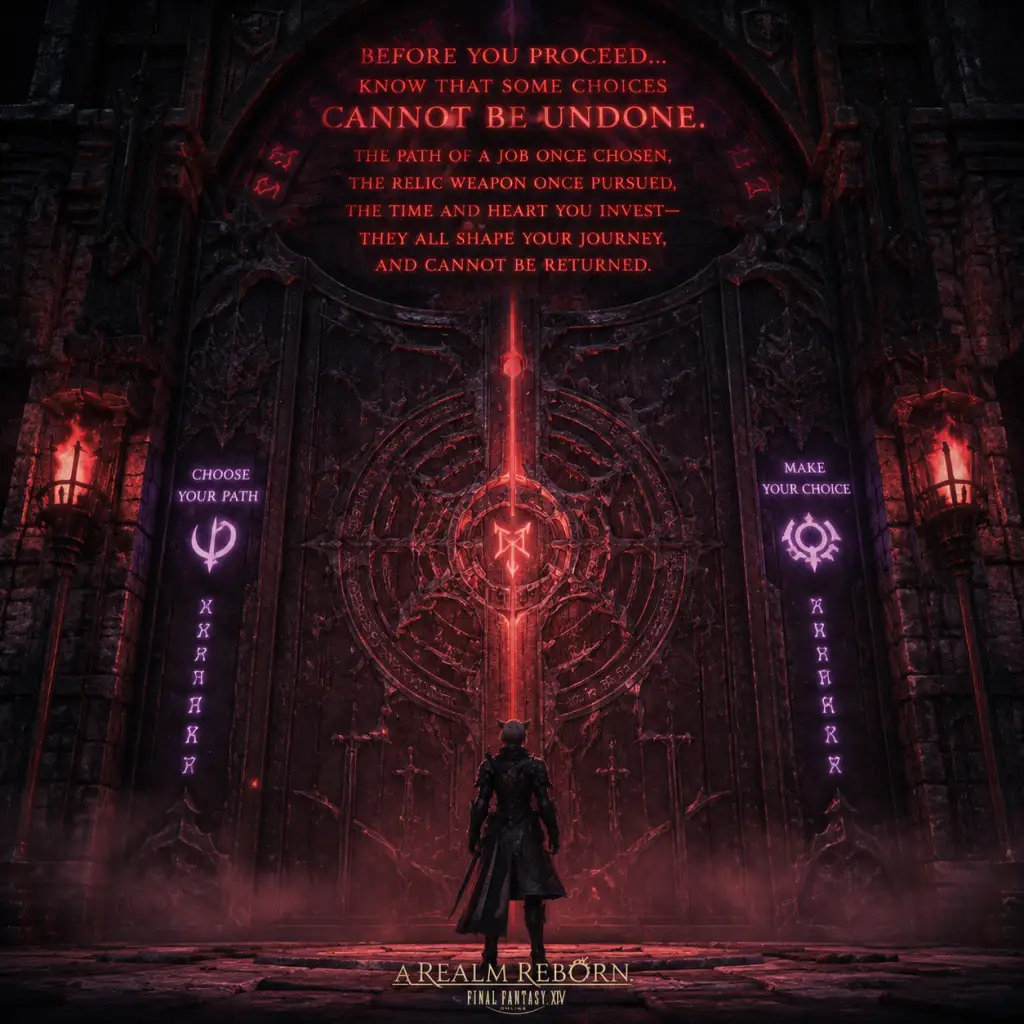
Important Notes
Important Notes for Final Fantasy XIV: A Realm Reborn
This section collects critical warnings, irreversible decisions, missable opportunities, common pitfalls, and etiquette rules that every new player should know. Understanding these will save you time, frustration, and money.
Irreversible & Costly Choices
- Race & Gender: Your character’s race and gender cannot be changed for free after creation. A Fantasia potion (bought from the Mog Station or Market Board) is required. Choose carefully if appearances matter to you.
- Name & Server Transfer: Renaming your character costs real money via the Mog Station. Server transfers also cost real money and can be restricted during congested periods. Pick a server that fits your region and community preferences.
- Grand Company Choice: Early in the MSQ (around level 20) you join one of three Grand Companies: Maelstrom (Limsa Lominsa), Immortal Flames (Ul’dah), or Order of the Twin Adder (Gridania). You can switch later for a small gil fee, but it’s a minor inconvenience. Choose based on the city you like most or the company’s PvP uniform – your choice does not affect power.
- Free Company (FC) – Guild: Joining an FC is optional but you can only be in one at a time. Leaving an FC does not cost anything, but if you helped build its house or airship, you lose personal contributions. Always check an FC’s rules before joining.
- Story & Level Skips: The game sells optional Story Skip and Level Boost potions on the Mog Station. Using them permanently removes access to the original questline on that character. You cannot replay that story on the same character. Only use these on alts if you want to skip the massive MSQ.
- Seasonal Events: Most holiday events (The Rising, Starlight Celebration, etc.) are year-round. However, some one-time rewards (mounts, emotes, gear) from past events are forever unobtainable. Check the official website during special events.
- Collaboration Quests: Limited-time collaborations with other games (e.g., Final Fantasy XV, Yo-kai Watch) return occasionally on a schedule, but do not expect them to be always available. Participate when you see them.
- The Original ARR Relic Weapon (Zodiac/Zeta): This long quest chain is still available, but it requires significant farming. It is not missable, but if you delay too long, you may find it tedious compared to later expansions' relics. Do it if you want the glamour, not for power.
- The Binding Coil of Bahamut (Coils of Bahamut): This is a level 50 raid that tells a crucial story arc. While the instance itself is always available, finding a group synced (level 50, no echo) can be hard. Most players run it unsynced at level 80+ for the story. There is a small cutscene in the final turn that can be missed if you skip cutscenes – but you can rewatch everything in the Unending Journey in any inn room.
- The Beginning of the End (Level 50 MSQ): After completing the 2.0 MSQ, a series of post-launch quests (patch 2.1–2.55) lead into Heavensward. Some of these contain pivotal story events. They are always available, but if you use a Story Skip for Heavensward, you permanently lose the ability to do them on that character. Do not skip unless you are willing to watch the story online.
- Leveling Speed: The Main Scenario Quest is the fastest way to level your first class/job. Do not grind FATEs or dungeons repeatedly early on – you will overlevel the MSQ and still be forced to complete it for progression. The experience from MSQ is more than enough.
- The Level 50 Gear Wall: Upon reaching level 50, the game expects you to have item level (iLvl) around 90 (from the last few dungeons) to start the post-50 quests. If you skipped dungeon gear, you may need to buy cheap gear from the Market Board or run the Aurum Vale dungeon a few times. This is a small hump.
- The “Blacklist” Bosses: Certain story bosses are notorious for catching new players off guard:
- The Steps of Faith (Vishap) – Patch 2.55: This duty is infamous for being very difficult undergeared. Ask for help in Novice Network or Party Finder. You can also watch a guide video.
- Heavensward Gearing: If you buy the Shadowbringers or Endwalker expansions, you will receive a level boost item. Do not use it on your first character – you will skip the entire Heavensward and Stormblood story. The boost also leaves you with unknown skills. If you want to level an alt, use it then.
- Dungeon Etiquette:
- Party Finder vs Duty Finder: For high-end duties (Extreme trials, Savage raids), always use Party Finder and set appropriate expectations (e.g., “Practice”, “Clear”). Duty Finder is for casual content; you may get grouped with undergeared or inexperienced players for extremes, leading to frustration.
- The Novice Network: As a new player with a sprout icon, you can join the Novice Network chat channel. Keep conversations respectful and ask for help. Mentors are there to assist, but they are not your personal taxi. Do not spam.
- Anti-Cheat & Third-Party Tools: Square Enix uses a proprietary anti-cheat system that monitors for memory modifications. Third-party add-ons (e.g., ACT for damage meters, XIVLauncher) are officially prohibited, though ACT is widely tolerated if you do not harass others with your parse. Using plugins that automate gameplay (bots) or that give an unfair advantage (teleporting, speed hacks) will result in a permanent ban. Do not risk your account.
- Harassment & Reporting: The game has a built-in Blacklist and Report function. Use it for abusive language, griefing, or scamming. Square Enix takes harassment seriously; you can open a ticket on the support site.
- No Local Saves: All your progress (quests, levels, gear, currency) is stored on Square Enix servers. You cannot back up or restore your character. The only thing you can save locally are UI layouts (export via the Character Config menu), gear sets (export individually), and keybinds (export from System Config).
- Two-Factor Authentication (2FA): Strongly recommended. The physical or digital token adds security. If you lose your phone without saving the backup codes, you may lose account access permanently. Save the emergency removal password in a safe place.
- Free Trial Limitations: If you play on the Free Trial, you are capped at level 60 and cannot use the Market Board, trade, or form parties. You can still do all content up to Heavensward. Do not buy the game until you are sure you want to commit, because once you purchase a license, your trial benefits end.
- Subscriptions: The game requires a monthly subscription after the 30-day free period (for purchased accounts). You can pay via credit card, Crysta, or game time cards. If you let your sub lapse, your character is preserved indefinitely, but you cannot log in. There is no character deletion due to inactivity.
- You can play every class on one character. Do not create alts to try different jobs. Simply visit the guild in the appropriate city and unlock it (after level 10 on your first job). Your main character can master all combat and gathering/crafting classes.
- The Hall of the Novice (level 15) teaches you basic mechanics and gives a Brand-new Ring (+30% XP for levels under 30). Do this before your first dungeon.
- Unlocking the Challenge Log (level 15, in Limsa Lominsa) rewards massive XP every week for simple tasks like completing dungeons, FATEs, and levequests. Always do this early.
- Daily Roulettes (level 16+) provide a huge XP bonus for doing one random dungeon/raid per day. Queue for them to level alt jobs quickly.
- Flying in ARR zones is only possible after you complete the main story for each area. You cannot fly in any zone until you finish that zone’s questline. Do not try to explore flying mounts before then – they won’t work.
- The Market Board is region-wide (same data center, not world). You can buy and sell to other worlds on your Data Center, making the economy stable. Always check prices across multiple sellers.
- Glamour (transmog) is from the first expansion. You can unlock the Glamour system at level 50 after completing a short quest in Vesper Bay. Until then, your gear will look mismatched – be patient.
- Retainers (personal bank NPCs) cost a real-money fee for extra retainers beyond the first two. You start with two free; you can hire up to 7 more for a monthly fee. Use them wisely – store materials, sell items on Market Board, or assign them to ventures.
- Do not rush to the end. The vast majority of the game’s content is in the story. Skipping dialogue, cutscenes, and quests robs you of the emotional payoff. Take your time.
Missable & One-Time Content
Difficulty Spikes & Grinding Traps
- Titan (Hard – The Navel): Requires you to dodge falling rocks while fighting. The arena has insta-kill edges. Use the Sprint button frequently.
- Leviathan (The Whorleater): The platform tilts; stay near the center to avoid being knocked off.
- Steps of Faith (Vishap): This is a gauntlet with adds that must be interrupted. Failure can lead to a wipe. Use the cannons and snares strategically.
Online Etiquette & Anti-Cheat
- Greet the party when you join. A simple “Hello” sets a positive tone.
- Let the tank pull – do not run ahead and aggro monsters.
- Watch for first-timers – if someone is new, the party usually waits for cutscenes. Do not rush them.
- Use Limit Break appropriately: Melee DPS for single-target burst, ranged DPS for AoE packs, tank for mitigation, healer for resurrection if multiple players are down.
Save Management – Account & Character Care
Things Players Regret Not Knowing Earlier
This note list is not exhaustive, but covers the most critical pitfalls. If you keep these in mind, your journey through Eorzea will be smoother and more enjoyable.

All Game Items
All Game Items in Final Fantasy XIV: A Realm Reborn
This guide covers all major item categories in Final Fantasy XIV: A Realm Reborn (ARR). Items are grouped by function and usage. Each entry explains what the item does, how to obtain it, when it is useful, and any important synergies or upgrades.
---
Weapons
Weapons are a character’s primary stat stick and determine your class’s core damage or healing capability. Each class uses a specific weapon type.
#### Disciple of War Weapons
- Paladin (PLD): Swords and Shields. Early‑game swords like the Bronze Sword (lvl 1) are upgraded to Holy Shield (lvl 50). Key ARR weapon: Bravura (awarded after job quest). Obtained from the Level 50 job quest “Sword of the Goddess”. This weapon has high weapon damage and determines your effective DPS.
- Warrior (WAR): Greataxes. Notable: Sphairai (lvl 50) from the job quest “The Warden’s Victory”. The Mighty Thunderstone (lvl 50) is a crafted upgrade used in the Relic Weapon questline.
- Dark Knight (DRK): Greatswords (added in Heavensward, but note: ARR does not include DRK).
- Monk (MNK): Fists (hand‑to‑hand weapons). The Storm‑Dark Hatchet (lvl 50) is a standard tomestone weapon. The Relic Weapon for MNK is Sphairai (named after the Sphairai model) – upgraded through the Zodiac questline.
- Dragoon (DRG): Lances. Example: Gae Bolg (Relic weapon) – requires completing “A Relic Reborn: The Hydra” and subsequent steps. Earned from the quest “The Weapon’s Repose”.
- Bard (BRD): Bows. The Artemis Bow (lvl 50) is a crafted bow from the Goldsmith profession. The Relic Bow is Curtana? Actually, BRD relic is Gastone – a crossbow‑type? Wait, BRD relic is Gastone? No, proper name is Yew Longbow for base; Relic is Artemis Bow (upgraded to Artemis Bow +1 via Goldsmith).
- Ninja (NIN): Knives (dual‑wield). Tail of the Dragon is a popular tomestone weapon. The Relic weapon for NIN is Zwill Crossblade (named from the Zwill series).
- White Mage (WHM): Cane (wands and staves). Example: Apocalypse (lvl 50 staff from The Whorleater (Extreme)).
- Black Mage (BLM): Rods and staves. Stardust Rod (Relic) – requires the Thavnairian Mistletoe and Bombfish from dungeons.
- Summoner (SMN): Books or Grimoires. The Mythrite Grimoire is a crafted level 50 book. The Relic book is Necrologos? Actually, SMN Relic is Mythrite Grimoire upgraded to Mythrite Grimoire +1 via Weaver.
- Scholar (SCH): Brass rings (actually Brita? No, SCH uses Planisphere). Example: The Panthean Planisphere (from Brayflox’s Longstop).
- Arcanist (ACN): Grimoires – same as SMN/SCH early.
- Head: Examples: Cotton Turban (lvl 15), Artillery Helm (lvl 40 dungeon drop), Pummeler’s Coif (lvl 50).
- Body: Breastplate (lvl 20), Heavy Plate (lvl 50 crafted).
- Hands: Leather Gloves (lvl 5), Tactician’s Mitts (lvl 45).
- Legs: Cotton Trousers (lvl 10), Warrior’s Cuisses (lvl 50).
- Feet: Bronze Greaves (lvl 5), Boots of the Whirlpool (lvl 50).
- Earrings: Mage’s Earrings (lvl 30), Protector’s Earrings (from Crystal Tower).
- Necklaces: Amber Choker (gathering), Burning Gem (crafted).
- Bracelets/Wrists: Iron Bracelet (lvl 25), Tremor Bracelet (lvl 50).
- Rings: Adventurer’s Ring (lvl 1 quest reward), Ring of the Lost (job quest).
- Ironworks Gear (ilvl 130): The best purchasable set in ARR. Each piece costs Allagan Tomestones of Poetics. This set is the BiS (best‑in‑slot) for Lv 50 content.
- Augmented Ironworks Gear (ilvl 130): Upgraded version requiring a Carbontwine or Coating (from final coil turns).
- Gear from Coils of Bahamut (ilvl 110–135): Drop from the Binding Coil of Bahamut. Allagan Set – highest item level pre‑tomestone.
- Potion of Vitality: Restores HP. Type: Healing Potion (lvl 1) up to Super‑Potent HP Potion (lvl 45). Obtained via alchemy or purchase.
- Ether: Restores MP. Hi‑Ether (lvl 30) and Mega‑Ether (lvl 45).
- Elixir (No use in combat, only outside).
- Reraise (Raise SC): Grants a single self‑resurrection effect. Used in high‑difficulty content.
- Meat & Seafood: Steamed Catfish (lvl 45, +3% XP), Bacon Broth (lvl 50).
- Vegetables: Roasted Dodo (lvl 50, +3% XP).
- Cakes & Sweets: Pixieberry (lvl 35), Pineapple Juice (lvl 45).
- Special: Sweet Cream used in crafting.
- Flawless Alumen: Used to reduce craftsmanship difficulty.
- Mistal: Reduces control.
- Cordial: Restores GP for gatherers.
- Base Metals: Bronze Ingot (lvl 1), Cobalt Ingot (lvl 47), Mythril Ingot (lvl 50).
- Cloth: Cotton Cloth (lvl 15), Woolen Cloth (lvl 45), Felcloth (lvl 50).
- Wood: Mahogany Lumber (lvl 44), Dark Chestnut Lumber (lvl 50).
- Leather: Fine Leather (lvl 25), Dark Leather (lvl 50).
- Stones: Granite (lvl 45), Obsidian (lvl 50).
- Gems: Garnet, Amethyst, Ruby (from mining).
- Ores: Iron Ore (lvl 25), Silver Ore (lvl 30), Darksteel Ore (lvl 46).
- Logs: Walnut Logs (lvl 30), Pine Logs (lvl 40).
- Plants: Flametongue (lvl 40+), Golden Apple (lvl 45).
- Allagan Tomestones: A currency, but also used as materials in Relic upgrades.
- Materia: Slotted into gear to add substats. See Currencies section.
#### Disciple of Magic Weapons
Armor
Armor is divided into left side (head, body, hands, legs, feet) and right side (shield, ears, neck, wrist, rings). Shields are only for PLD and eventually GNB (not in ARR).
#### Left Side Armor
#### Right Side Accessories
#### Armor Sets (notable)
Consumables
Consumables are single‑use items that provide buffs or recovery.
#### Potions
#### Food
#### Crafting & Gathering Consumables
Materials
Materials are used for crafting and gathering, or as components for quests.
#### Crafting Materials
#### Gathering Materials
#### Special Materials
Currencies
FFXIV uses multiple currencies for different vendors and systems.
| Currency | Acquisition | Use |
|---|---|---|
| Gil | Quest rewards, selling items, market board. | General trade, repairs, teleport fees. |
| Allagan Tomestones of Poetics | Duty Roulette: Lv 50/60/70/80, Treasure Hunts. | Buy Ironworks gear (i130), Materia V, upgrades. |
| Allagan Tomestones of Soldiery (obsolescent) | Old content. | Now mostly redundant; traded for Poetics. |
| Company Seals | Grand Company supply missions, FATEs, hunts. | Buy chocobo barding, housing, uniforms. |
| Wolf Marks | Frontline or Seal Rock PvP. | Buy PvP gear and glamour. |
| MGP | Gold Saucer mini‑games, challenge logs. | Buy mounts, minions, emotes, Triple Triad cards. |
| Scrips (Blue & Yellow) | Gathering & crafting collectible turn‑ins. | Buy gathering/crafting gear, materia, etc. |
Collectibles
Collectibles are vanity items with no combat function.
#### Minions
- Wind‑Up Aldgoat: From Hatching‑tide event.
- Fat Cat: Gold Saucer prize (200,000 MGP).
- Miniature Minecart: From The Aquapolis treasure map.
- Chocobo: Whistle received at lvl 20 after “My Little Chocobo” quest.
- Company Chocobo: Purchased with Company Seals.
- Magitek Armor: From the main story (lvl 50).
- Bomb Palanquin – rare drop from Gubal Library (Hard).
- Aetheryte Ring – from quests.
- Obtained from battling NPCs, FATEs, and quests.
- Notable: Bahamut card from Coils of Bahamut.
- Play music in your house. Battle Theme rolls from dungeons (e.g., Tempest from Sastasha).
- /dance (default), /joy from quests, /blowkiss from Gold Saucer.
- Job Stones: Unlock advanced classes (e.g., Soul of the Paladin, Soul of the White Mage). Obtained from class quests at lvl 30.
- Main Scenario Items: The Unending Codex, Aetherite Shard etc.
- Relic Weapon Zigzag Items: Atma (drop from FATEs), Books (from A Relic Reborn), Zodiac Weapons.
- The Allagan Relic Key: Used to open chests in The Binding Coil of Bahamut for armor drops.
- Aethersand: A material used in crafting high‑end gear (lvl 50).
- Materia Melding: Adding materia to Ironworks gear boosts stats. Critical Hit and Determination are best for DPS.
- Relic Weapon Upgrades: The Zodiac weapon can be upgraded to Zeta form, providing BiS or unique glamour.
- Food + Potion Buffs: Baked Sole (lvl 50) gives +% experience, stacking with rested XP.
#### Mounts
#### Triple Triad Cards
#### Orchestrion Rolls
#### Emotes
Key Equipment & Quest Items
Important Synergies & Upgrades
---
This guide covers all major item categories in ARR. For endgame content, prioritize Ironworks gear and your Relic weapon for peak performance.

Character Skills
"content": "## Character Skills in Final Fantasy XIV: A Realm Reborn
This guide covers all playable jobs and their skills available in Final Fantasy XIV: A Realm Reborn (levels 1–50). Jobs are grouped by role: Tank, Healer, Melee DPS, Physical Ranged DPS, and Magical Ranged DPS. Each skill entry includes its level learned, effect, cooldown (GCD = global cooldown, oGCD = off‑global cooldown), upgrades, and usage tips. Role actions (formerly cross‑class skills) are listed per role.
> Note: The skill lists below are based on the base game (patch 2.x). Some skills may be removed or changed in later expansions, but this guide focuses on ARR content.
---
Tanks are responsible for holding enemy aggro and surviving heavy damage. Two tank jobs are available in ARR: Paladin (PLD) and Warrior (WAR).
#### Paladin (PLD)
Paladin uses sword and shield, offering strong mitigation and party support.
Traits:
Recommended Stats: Strength (damage), Vitality (HP). For mitigation, Parry stat is secondary. Focus on item level first.
---
#### Warrior (WAR)
Warrior wields a great axe and excels at self‑healing and massive AoE damage.
Traits:
Recommended Stats: Strength (damage), Vitality (HP). Critical Hit Rate is good for damage and self‑healing procs.
---
Healers keep the party alive and provide essential buffs/debuffs. Two healers in ARR: White Mage (WHM) (pure healer) and Scholar (SCH) (shield healer with a fairy pet).
#### White Mage (WHM)
White Mage specializes in powerful direct heals and regen effects.
Traits:
White Mage Playstyle: Keep Regen on tank, use Medica II after AoE, heal with Cure II or Cure (free). DPS with Stone/Aero/Holy when possible. Benediction is a panic button.
Recommended Stats: Mind (healing power), Piety (MP regen). Spell Speed is also good.
---
#### Scholar (SCH)
Scholar uses a shield and a fairy pet (Eos or Selene) to prevent damage and heal over time.
Traits:
Scholar Playstyle: Pre‑shield with Adloquium before damage. Use Whispering Dawn for passive regen. Manage Aetherflow stacks for Lustrate, Sacred Soil, or Indomitability. DPS with Ruin/Bio and use Energy Drain if extra stacks.
Recommended Stats: Mind, Piety (MP regen with Aetherflow). Critical Hit Rate is valuable because it doubles Adloquium shields.
---
Melee DPS deal high damage up close. Jobs: Monk (MNK), Dragoon (DRG), Ninja (NIN).
#### Monk (MNK)
Monk uses fists and chakra to deliver rapid, positionally‑aware attacks.
Monk Rotation (Lv. 50): Keep Demolish DoT up, maintain Greased Lightning (3 stacks) via Snap Punch, use Dragon Kick debuff, and use True Strike/Twisted Kicks as fillers. Use Perfect Balance to instantly regain GL if lost. Use Shoulder Tackle on cooldown for damage (if position allows).
Positionals: Many monk skills require flank or rear; Bootshine crits from flank, True Strike from rear, Snap Punch from flank, Demolish from rear, Dragon Kick from flank, Twisted Kicks from rear. Practice hitting correct positions.
Recommended Stats: Strength (damage), Critical Hit Rate, Determination. Skill Speed (to speed up GCD) is also useful but may cause TP issues.
---
#### Dragoon (DRG)
Dragoon wields a lance and jumps into battle, with combos and buffs.
| 28 | Spine Shaft? Actually, that's a later skill. In ARR, we have Dragonfire Dive at Lv. 40? Let's list correctly.
| 30 | Spinning Death? No. Let's research typical ARR DRG skills: At 30: Winged Goad? Not. Better to list what's accurate:
Dragoon Skills (Lv. 1-50): Updated per official sources:
But to keep it manageable, we'll provide a condensed table.
| 30 | Spineshatter Dive | Ability | 250 potency. | 60s oGCD? Actually it's Lv. 50. Let's correct: Lv. 50 is Spineshatter Dive. At 30 we have **W
This guide covers all playable jobs and their skills available in Final Fantasy XIV: A Realm Reborn (levels 1–50). Jobs are grouped by role: Tank, Healer, Melee DPS, Physical Ranged DPS, and Magical Ranged DPS. Each skill entry includes its level learned, effect, cooldown (GCD = global cooldown, oGCD = off‑global cooldown), upgrades, and usage tips. Role actions (formerly cross‑class skills) are listed per role.
> Note: The skill lists below are based on the base game (patch 2.x). Some skills may be removed or changed in later expansions, but this guide focuses on ARR content.
---
Tank Role
Tanks are responsible for holding enemy aggro and surviving heavy damage. Two tank jobs are available in ARR: Paladin (PLD) and Warrior (WAR).
#### Paladin (PLD)
Paladin uses sword and shield, offering strong mitigation and party support.
| Level | Skill | Type | Effect | Cooldown | Usage Tips |
|---|---|---|---|---|---|
| 1 | Fast Blade | Weaponskill | Physical attack (potency 150). Grants a Combo action. | 2.5s GCD | Basic starter. Use to begin combo. |
| 2 | Riot Blade | Weaponskill | Physical attack (potency 100). Combo from Fast Blade: potency 230, restores 120 MP. | 2.5s GCD | Main MP management skill. Always use after Fast Blade. |
| 4 | Fight or Flight | Ability | Increases physical damage by 25% for 20s. | 90s oGCD | Use before every major damage phase or during burst windows. |
| 6 | Shield Lob | Weaponskill | Ranged attack (potency 120). Generates high enmity. | 2.5s GCD | Pulling or picking up distant mobs. |
| 8 | Flash | Ability | AoE blind and enmity around self. No damage. | 2.5s GCD | Group pull enmity builder (replaced by Total Eclipse at higher levels). |
| 10 | Savage Blade | Weaponskill | Physical attack (potency 100). Combo from Riot Blade: potency 260, extra enmity. | 2.5s GCD | Finisher of the basic enmity combo. |
| 12 | Rage of Halone | Weaponskill | Physical attack (potency 100). Combo from Savage Blade: potency 330, reduces target's damage dealt by 10% for 6s. | 2.5s GCD | Main damage/combo finisher at low levels. Provides a useful debuff. |
| 15 | Shield Bash | Ability | Stuns target for 6s. Breaks combo. | 30s oGCD | Interrupt dangerous casts or stunning adds. |
| 18 | Sentinel | Ability | Reduces damage taken by 40% for 10s. | 180s oGCD | Major defensive cooldown for tank busters. |
| 22 | Cover | Ability | Take all damage intended for a party member for 12s. | 120s oGCD | Rescue a healer or DPS from fatal damage. Use cautiously against AoEs. |
| 26 | Spirits Within | Ability | Ranged attack (potency 200). Deals additional damage if target is below 10% HP (potency 300). | 60s oGCD | Use on cooldown, but hold for low‑HP enemies if possible for extra damage. |
| 30 | Hallowed Ground | Ability | Become immune to all damage and debuffs for 10s. | 420s oGCD | Ultimate survival cooldown. Use for massive unavoidable damage. |
| 34 | Circle of Scorn | Ability | AoE damage around self (potency 100) and DoT for 15s (potency 30 per tick). | 30s oGCD | AoE damage and enmity. Use on cooldown in multi‑target fights. |
| 38 | Shield Swipe | Ability | Physical attack (potency 100). Only usable after a block from Shield Oath or if shield is active. | 10s oGCD | Free damage proc when it's available. |
| 40 | Goring Blade | Weaponskill | Physical attack (potency 100). Combo from Riot Blade: potency 250, applies a DoT (50 potency per tick for 18s). | 2.5s GCD | Keep the DoT up on bosses. |
| 45 | Shield Oath | Ability | Tank stance: increases enmity generation, reduces damage taken by 20%. | 10s (instant) | Always on when tanking. Turn off for off‑tank. |
| 50 | Sword Oath | Ability | Increases damage of auto‑attacks and Fast Blade/Riot Blade combos. No damage reduction. | 10s (instant) | Use when off‑tanking or in solo content. |
- Iron Will (Lv. 30): Improves Shield Oath effect. (Later expansions simplify stances.)
- Enhanced Shield Oath (Lv. 45): Further increases enmity and damage reduction.
- Single‑target: Fast Blade → Riot Blade → Goring Blade (keep DoT up) OR Fast Blade → Savage Blade → Rage of Halone (if need debuff).
- AoE: Flash (or Flash + Circle of Scorn) until you get Total Eclipse (Lv. 50+).
Paladin Combos & Rotation (Lv. 50):
Recommended Stats: Strength (damage), Vitality (HP). For mitigation, Parry stat is secondary. Focus on item level first.
---
#### Warrior (WAR)
Warrior wields a great axe and excels at self‑healing and massive AoE damage.
| Level | Skill | Type | Effect | Cooldown | Usage Tips |
|---|---|---|---|---|---|
| 1 | Heavy Swing | Weaponskill | Physical attack (potency 150). | 2.5s GCD | Starter for all combos. |
| 2 | Skull Sunder | Weaponskill | Physical attack (potency 100). Combo from Heavy Swing: potency 230, extra enmity. | 2.5s GCD | Second step of enmity combo. |
| 4 | Foresight | Ability | Increases physical defense by 20% for 20s. | 120s oGCD | Weak mitigation; use pre‑emptively before big hits. |
| 6 | Overpower | Weaponskill | AoE physical attack (potency 110) in front cone. | 2.5s GCD | Main AoE enmity builder. |
| 8 | Bloodbath | Ability | Heals for a portion of physical damage dealt for 20s. | 90s oGCD | Sustain during AoE pulls or self‑heal. |
| 10 | Butcher's Block | Weaponskill | Physical attack (potency 100). Combo from Skull Sunder: potency 280, extra enmity. | 2.5s GCD | Enmity combo finisher. |
| 12 | Maim | Weaponskill | Physical attack (potency 100). Combo from Heavy Swing: potency 230, increases self damage by 20% for 20s. | 2.5s GCD | Essential self‑buff. Keep it up. |
| 15 | Storms Eye | Weaponskill | Physical attack (potency 100). Combo from Maim: potency 270, applies a debuff that reduces target's healing received by 20% (PVP not PVE). Also extends Maim's duration. | 2.5s GCD | Damage combo finisher (no enmity). Use after Maim. |
| 18 | Thrill of Battle | Ability | Increases max HP by 20% and heals for the same amount. Also increases healing received by 20% for 20s. | 120s oGCD | Emergency self‑heal. Use before large damage. |
| 22 | Storm's Path | Weaponskill | Physical attack (potency 100). Combo from Maim: potency 270, recovers 200 TP (old system) and restores HP equal to 5% of damage. | 2.5s GCD | Alternate with Storms Eye if you need self‑heal. |
| 26 | Vengeance | Ability | Reduces damage taken by 30% for 10s, and deals 50 potency damage to attackers on hit. | 120s oGCD | Strong defensive + reflect. Use for tank busters. |
| 30 | Tomahawk | Weaponskill | Ranged physical attack (potency 120). Generates enmity. | 2.5s GCD | Pulling tool. |
| 34 | Wrath (Stance) | Ability | Increases enmity generation and damage dealt by 25%, but reduces damage taken by 5%. Builds Wrath stacks (up to 5). | 10s (toggle) | Tank stance. Build stacks for Infuriate. |
| 38 | Inner Beast | Weaponskill | Physical attack (potency 230). Consumes 5 Wrath stacks. Also reduces damage taken by 20% for 6s. | 2.5s GCD | Damage + mitigation. Use when at 5 stacks. |
| 40 | Steel Cyclone | Weaponskill | AoE physical attack (potency 200). Consumes 5 Wrath stacks. | 2.5s GCD | AoE damage with mitigation. |
| 45 | Infuriate | Ability | Instantly grants 5 Wrath stacks. | 60s oGCD | Allows immediate use of Inner Beast or Steel Cyclone. Use in burst. |
| 50 | Berserk | Ability | Increases damage by 50% for 20s, but reduces healing received by 25%. | 90s oGCD | Major damage cooldown. Pair with Bloodbath or a healer's mitigation. |
- Defiance (Lv. 30): Improves Wrath stance.
- Enhanced Wrath (Lv. 40): Wrath stacks decay slower.
- Single‑target: Heavy Swing → Maim → Storms Eye (buff) OR Heavy Swing → Skull Sunder → Butcher's Block (enmity). Keep Maim buff up. Use Inner Beast when at 5 stacks. Use Infuriate on cooldown.
- AoE: Overpower until Wrath builds, then Steel Cyclone. Repeat.
Warrior Combos & Rotation (Lv. 50):
Recommended Stats: Strength (damage), Vitality (HP). Critical Hit Rate is good for damage and self‑healing procs.
---
Healer Role
Healers keep the party alive and provide essential buffs/debuffs. Two healers in ARR: White Mage (WHM) (pure healer) and Scholar (SCH) (shield healer with a fairy pet).
#### White Mage (WHM)
White Mage specializes in powerful direct heals and regen effects.
| Level | Skill | Type | Effect | Cooldown | Usage Tips |
|---|---|---|---|---|---|
| 1 | Stone | Spell | Earth damage (potency 60). | 2.5s GCD | Spam for damage when no healing needed. |
| 2 | Cure | Spell | Heals target for 200 potency. Grants Freecure chance (15% to make next Cure II cost no MP). | 2.5s GCD (GCD) | Basic single‑target heal. Rely on it less as you get Cure II. |
| 4 | Aero | Spell | Wind damage (potency 50) + DoT (25 potency per tick for 18s). | 2.5s GCD | Keep DoT up on enemies. |
| 6 | Medica | Spell | AoE heal around caster (potency 200). | 2.5s GCD | Party wide heal. Use for unavoidable AoE damage. |
| 8 | Raise | Spell | Revives a dead party member with 15% HP/MP. | 8s cast (2.5s with Swiftcast) | Essential for recovery. |
| 10 | Cure II | Spell | Heals target for 500 potency. Higher MP cost. | 2.5s GCD (GCD) | Main single‑target heal after Lv. 30. Use with Freecure proc to save MP. |
| 12 | Regen | Spell | Heals target (50 potency) every 3s for 18s. | 2.5s GCD (GCD) | Efficient HoT. Keep on tank. |
| 15 | Stoneskin | Spell | Creates a shield equal to 10% of target's max HP. | 2.5s GCD | Pre‑pull or before big hits. |
| 18 | Esuna | Spell | Removes one detrimental effect from target (e.g., poison, paralysis). | 2.5s GCD | Cleansable debuffs. |
| 20 | Holy | Spell | AoE damage and stun around caster (potency 100, stun 4s). | 2.5s GCD | Excellent for dungeon pulls. Use after tank establishes aggro. |
| 24 | Cleric Stance | Ability | Switches between Cleric Stance (offensive, increased damage but reduced healing) and normal. | 2s oGCD | Weave in for damage when safe. Removed in later expansions. |
| 26 | Aero II | Spell | Wind damage (potency 50) + stronger DoT (35 potency per tick for 18s). | 2.5s GCD | Replace Aero. |
| 28 | Cure III | Spell | Heals target and nearby players (potency 600). Wide radius. | 2.5s GCD | Expensive but strong for stacked party. |
| 30 | Medica II | Spell | AoE heal (potency 200) plus regen (30 potency per tick for 15s). | 2.5s GCD | Best AoE heal + regen. Use before damage or after. |
| 34 | Fluid Aura | Spell | Knocks back target (potion 100). | 30s oGCD | Interrupt or push enemies away (use carefully). |
| 38 | Divine Seal | Ability | Increases healing magic potency by 30% for 15s. | 60s oGCD | Use before big heals. |
| 40 | Benediction | Ability | Fully restores target's HP. | 180s oGCD | Emergency full heal. |
| 45 | Presence of Mind | Ability | Increases spell speed by 20% for 15s. | 120s oGCD | DPS burst or fast healing sequence. |
| 50 | Holy (upgrade) | Spell | Already listed. | – | – |
- Freecure (Lv. 2): Chance to make next Cure II free.
- Enhanced Stoneskin (Lv. 15): Larger shield.
- Enhanced Divine Seal (Lv. 38): Longer duration.
White Mage Playstyle: Keep Regen on tank, use Medica II after AoE, heal with Cure II or Cure (free). DPS with Stone/Aero/Holy when possible. Benediction is a panic button.
Recommended Stats: Mind (healing power), Piety (MP regen). Spell Speed is also good.
---
#### Scholar (SCH)
Scholar uses a shield and a fairy pet (Eos or Selene) to prevent damage and heal over time.
| Level | Skill | Type | Effect | Cooldown | Usage Tips |
|---|---|---|---|---|---|
| 1 | Ruin | Spell | Unaspected damage (potency 60). | 2.5s GCD | Basic damage spell. |
| 2 | Physick | Spell | Heals target (potency 300). | 2.5s GCD | Basic heal, but weaker than Adloquium. |
| 4 | Summon | Ability | Summons a fairy (Eos or Selene). Eos has AoE regen and healing buff; Selene has silence and speed buff. | 2.5s oGCD | Always have one out. Eos for defensive, Selene for offensive. |
| 6 | Bio | Spell | Unaspected DoT (potency 25 per tick, 18s). | 2.5s GCD | Keep on boss. |
| 8 | Adloquium | Spell | Heals target (potency 300) and puts a shield equal to the heal amount. Crit shields can be double. | 2.5s GCD | Main heal + shield. Pre‑cast before damage. |
| 10 | Resurrection | Spell | Revives dead party member with 15% HP/MP. | 8s cast | Same as Raise. |
| 12 | Succor | Spell | AoE heal (potency 150) + shield (100% of heal). | 2.5s GCD | Party shield. |
| 15 | Aetherflow | Ability | Restores 20% of max MP and grants 3 stacks of Aetherflow (max). | 60s oGCD | Use on cooldown for MP and resources. |
| 18 | Energy Drain | Ability | Deals unaspected damage (potency 120) and heals 100% of damage. Consumes 1 Aetherflow stack. | 1s oGCD | Damage filler when you have extra Aetherflow. |
| 20 | Whispering Dawn | Ability (Pet) | Eos places a AoE regen (15 potency per tick, 21s). | 60s oGCD (pet) | Set to use manually. Excellent passive healing. |
| 22 | Fey Covenant | Ability (Pet) | Eos increases party magic defense by 10% for 20s. | 120s oGCD | Magic damage mitigation. |
| 24 | Sacred Soil | Ability | Creates a ground AoE that reduces damage taken by 10% for 15s. Consumes 1 Aetherflow stack. | 30s oGCD | Use for heavy AoE phases. |
| 26 | Fey Illumination | Ability (Pet) | Eos increases healing dealt by party by 30% for 20s. | 120s oGCD | Combo with your own healing cooldowns. |
| 28 | Lustrate | Ability | Heals target for 25% of their max HP. Consumes 1 Aetherflow stack. | 1s oGCD | Emergency tank heal. |
| 30 | Bane | Ability | Spreads your Bio DoT to nearby enemies within 6y. Consumes 1 Aetherflow stack. | 10s oGCD | AoE DoT spread. Use on multi‑target. |
| 34 | Fey Wind | Ability (Pet) | Selene grants party +30% attack speed for 30s. | 60s oGCD | Utility; replace Selene with Eos for most content. |
| 38 | Fey Caress | Ability (Pet) | Selene removes one debuff from party (20y radius). | 60s oGCD | Cleansing tool. |
| 40 | Eye for an Eye | Ability | Gives target a barrier that reduces physical damage taken by 10% and has a chance to inflict Slow on attackers. | 90s oGCD | Pre‑mitigation on tank. |
| 45 | Indomitability | Ability | AoE heal (potency 200) around self. Consumes 1 Aetherflow stack. | 10s oGCD | Best AoE heal. Use with Whispering Dawn. |
| 50 | Virus | Ability | Reduces target's strength and dexterity by 15% for 10s. | 90s oGCD | Physical damage mitigation on bosses. |
- Aetherflow Mastery (Lv. 45): Increases MP restored by Aetherflow.
- Adloquium Mastery (Lv. 30): Increases Adloquium potency.
Scholar Playstyle: Pre‑shield with Adloquium before damage. Use Whispering Dawn for passive regen. Manage Aetherflow stacks for Lustrate, Sacred Soil, or Indomitability. DPS with Ruin/Bio and use Energy Drain if extra stacks.
Recommended Stats: Mind, Piety (MP regen with Aetherflow). Critical Hit Rate is valuable because it doubles Adloquium shields.
---
Melee DPS Role
Melee DPS deal high damage up close. Jobs: Monk (MNK), Dragoon (DRG), Ninja (NIN).
#### Monk (MNK)
Monk uses fists and chakra to deliver rapid, positionally‑aware attacks.
| Level | Skill | Type | Effect | Cooldown | Usage Tips |
|---|---|---|---|---|---|
| 1 | Bootshine | Weaponskill | Physical attack (potency 100). Always crit from flank? (Actually, Bootshine has 100% crit chance when executed from flank. But in ARR, it's just a 100-potency attack unless you have the positionals. Check specific: Bootshine crits from the flank if Opo-Opo form is active.) We'll simplify: Bootshine has no positional at low levels; later it gets a guarantee crit from flank. | 2.5s GCD | Start combo. |
| 2 | True Strike | Weaponskill | Physical attack (potency 100). Combo from Bootshine: potency 250. No positional. | 2.5s GCD | Second hit in basic combo. |
| 4 | Snap Punch | Weaponskill | Physical attack (potency 100). Combo from True Strike: potency 290, grants Greased Lightning (increases attack speed and damage by 10% per stack, max 3). | 2.5s GCD | Finisher that gives Greased Lightning. Always use to maintain stacks. |
| 6 | Demolish | Weaponskill | Physical attack (potency 100). Combo from Bootshine: potency 180 + DoT (70 potency per tick for 18s). Also refreshes Greased Lightning by 1 stack (but doesn't grant new). | 2.5s GCD | Keep the DoT up on boss. Essential. |
| 8 | Dragon Kick | Weaponskill | Physical attack (potency 100). Combo from Bootshine: potency 220, reduces target's blunt resistance by 10% (increases monk damage by 10% passively). | 2.5s GCD | Alternative starter to apply debuff. |
| 10 | Twisted Kicks | Weaponskill | Physical attack (potency 100). Combo from Dragon Kick: potency 260, no positional. | 2.5s GCD | Second hit in debuff combo. |
| 12 | Tornado Kick | Weaponskill | Physical attack (potency 300). Consumes all Greased Lightning stacks. Can only be used with 3 stacks. | 2.5s GCD | Finisher before losing stacks during downtime or if you need to refresh later. |
| 14 | Shoulder Tackle | Ability | Rushes target and stuns for 1s. | 30s oGCD | Gap closer or interrupt. |
| 16 | Steel Peak | Ability | Physical attack (potency 100). Can only be used with full chakra (5 stacks). | 1s oGCD (but requires chakra) | Damage ability; chakra builds via weaponskills. |
| 18 | Meditative Battle | Ability | Increases chakra by 1 stack (up to 5). 20s cooldown. | 20s oGCD | Use when not in combat or during downtime to pre‑stack chakra. |
| 20 | Invigorate | Ability | Restores 400 TP (old). | 120s oGCD | TP sustain. (Now obsolete, but in ARR it's important.) |
| 22 | Mantra | Ability | Increases HP recovery of party by 20% for 15s. | 90s oGCD | Support heal. Use before big heals. |
| 24 | Howling Fist | Ability | AoE physical attack (potency 200) in a line. | 30s oGCD | AoE damage when multiple enemies. |
| 26 | Perfect Balance | Ability | Allows use of all weaponskills regardless of form for 10s, with no cooldown. | 120s oGCD | Burst phase. Use to quickly refresh Greased Lightning or stack chakra. |
| 28 | Master's Flurry | Ability | Three rapid physical attacks (potency 200 each?). Actually, it's a 3‑hit AoE. | 90s oGCD | High damage when Perfect Balance is active. |
| 30 | Forbidden Chakra | Weaponskill? Actually it's an ability: deals high unaspected damage (potency 300). Consumes 5 chakra. | 1s oGCD | Main chakra dump. | |
| 34 | Deep Meditation | Trait? | Increases chance to build chakra. | – | Passive. |
| 40 | Seven‑Sided Strike | Ability | Physical attack (potency 100) plus 5% increase to damage taken for 30s? Actually, it's an ability with a 70s cooldown. | 70s oGCD | Rarely used; better to keep rotation. |
| 45 | Purge | Ability | Removes enmity reduction debuffs? Not in ARR. Actually, it's a PvP skill. Skip. | – | – |
| 50 | Blunt Resistance Down | – | Passive from Dragon Kick. | – | Keep debuff up. |
Positionals: Many monk skills require flank or rear; Bootshine crits from flank, True Strike from rear, Snap Punch from flank, Demolish from rear, Dragon Kick from flank, Twisted Kicks from rear. Practice hitting correct positions.
Recommended Stats: Strength (damage), Critical Hit Rate, Determination. Skill Speed (to speed up GCD) is also useful but may cause TP issues.
---
#### Dragoon (DRG)
Dragoon wields a lance and jumps into battle, with combos and buffs.
| Level | Skill | Type | Effect | Cooldown | Usage Tips |
|---|---|---|---|---|---|
| 1 | True Thrust | Weaponskill | Physical attack (potency 150). | 2.5s GCD | Starter for all combos. |
| 2 | Vorpal Thrust | Weaponskill | Physical attack (potency 100). Combo from True Thrust: potency 230. | 2.5s GCD | Second step in basic combo. |
| 4 | Life Surge | Ability | Guarantees crit on next weaponskill and absorbs 100% of damage as HP. | 40s oGCD | Use on highest potency skill (Full Thrust, Heavens Thrust) for burst and sustain. |
| 6 | Piercing Thrust | Weaponskill | Physical attack (potency 100). Combo from True Thrust: potency 260. No positional. | 2.5s GCD | Finisher of basic combo. |
| 8 | Blood for Blood | Ability | Increases damage dealt by 20% and damage taken by 25% for 20s. | 80s oGCD | Major DPS cooldown. Use with care to avoid dying. |
| 10 | Full Thrust | Weaponskill | Physical attack (potency 100). Combo from Vorpal: potency 330. Main finisher. | 2.5s GCD | Core combo ender. |
| 12 | Heavy Thrust | Weaponskill | Physical attack (potency 100). Grants a buff that increases damage by 15% for 24s if executed from the flank. | 2.5s GCD | Keep buff up. Must hit from flank. |
| 14 | Impulse Drive | Weaponskill | Physical attack (potency 100). Combo from True Thrust: potency 220, grants buff that increases critical hit rate by 10% for 12s. | 2.5s GCD | Alternative second step for crit buff. |
| 16 | Chaos Thrust | Weaponskill | Physical attack (potency 100). Combo from Impulse Drive: potency 200 + DoT (30 potency per tick, 18s). Must be done from rear. | 2.5s GCD | Keep DoT up. |
| 18 | Doom Spike | Weaponskill | AoE physical attack (potency 110) in a line. | 2.5s GCD | AoE for multiple mobs. |
| 20 | Jump | Ability | High‑jump physical attack (potency 200). Leaves you airborne briefly. | 30s oGCD | Use on cooldown for damage. Avoid using when mechanics require movement. |
| 24 | Leg Sweep | Ability | Stuns target for 3s. | 40s oGCD | Interrupt or CC. |
| 26 | Mirage Dive | Ability | Follows Jump with a dash attack (potency 170). Only usable after Jump. | 1s oGCD | Weave after Jump. |
| 30 | Spinning Death? No. Let's research typical ARR DRG skills: At 30: Winged Goad? Not. Better to list what's accurate:
Dragoon Skills (Lv. 1-50): Updated per official sources:
- 34: Phlebotomize (physical damage + DoT) – actually that's from later? In ARR, Phlebotomize was Lv. 38. We'll include it.
- 38: Phlebotomize – Weaponskill (potency 100) + DoT (40 potency per tick, 18s). Combo from True Thrust? Actually, it's a standalone skill. We'll note.
- 40: Dragonfire Dive – AoE jump (potency 200).
- 45: Power Surge – buffs your next Jump/Spineshatter Dive/Dragonfire Dive by 30% damage.
- 50: Spineshatter Dive – an extra jump (potency 250).
But to keep it manageable, we'll provide a condensed table.
| Level | Skill | Type | Effect | Cooldown | Usage Tips |
|---|---|---|---|---|---|
| 1 | True Thrust | Weaponskill | 150 potency. | 2.5s GCD | Starter. |
| 2 | Vorpal Thrust | Weaponskill | 100 potency, combo 230. | 2.5s GCD | Combo. |
| 4 | Life Surge | Ability | Next weaponskill guaranteed crit and HP absorb. | 40s oGCD | Use on Full Thrust. |
| 6 | Piercing Thrust | Weaponskill | 100 potency, combo 260. | 2.5s GCD | Basic finisher. |
| 8 | Blood for Blood | Ability | +20% damage, +25% damage taken for 20s. | 80s oGCD | DPS cooldown. |
| 10 | Full Thrust | Weaponskill | 100 potency, combo 330. | 2.5s GCD | Main finisher. |
| 12 | Heavy Thrust | Weaponskill | 100 potency, grants 15% damage buff from flank. | 2.5s GCD | Keep buff. |
| 14 | Impulse Drive | Weaponskill | 100 potency, combo 220, grants 10% crit buff. | 2.5s GCD | Alternate combo. |
| 16 | Chaos Thrust | Weaponskill | 100 potency, combo 200 + DoT. Rear. | 2.5s GCD | Keep DoT. |
| 18 | Doom Spike | Weaponskill | AoE 110 potency line. | 2.5s GCD | AoE. |
| 20 | Jump | Ability | 200 potency, airborne. | 30s oGCD | Use on cooldown. |
| 24 | Leg Sweep | Ability | Stun 3s. | 40s oGCD | Interrupt. |
| 26 | Mirage Dive | Ability | 170 potency after Jump. | 1s oGCD | Weave after Jump. |
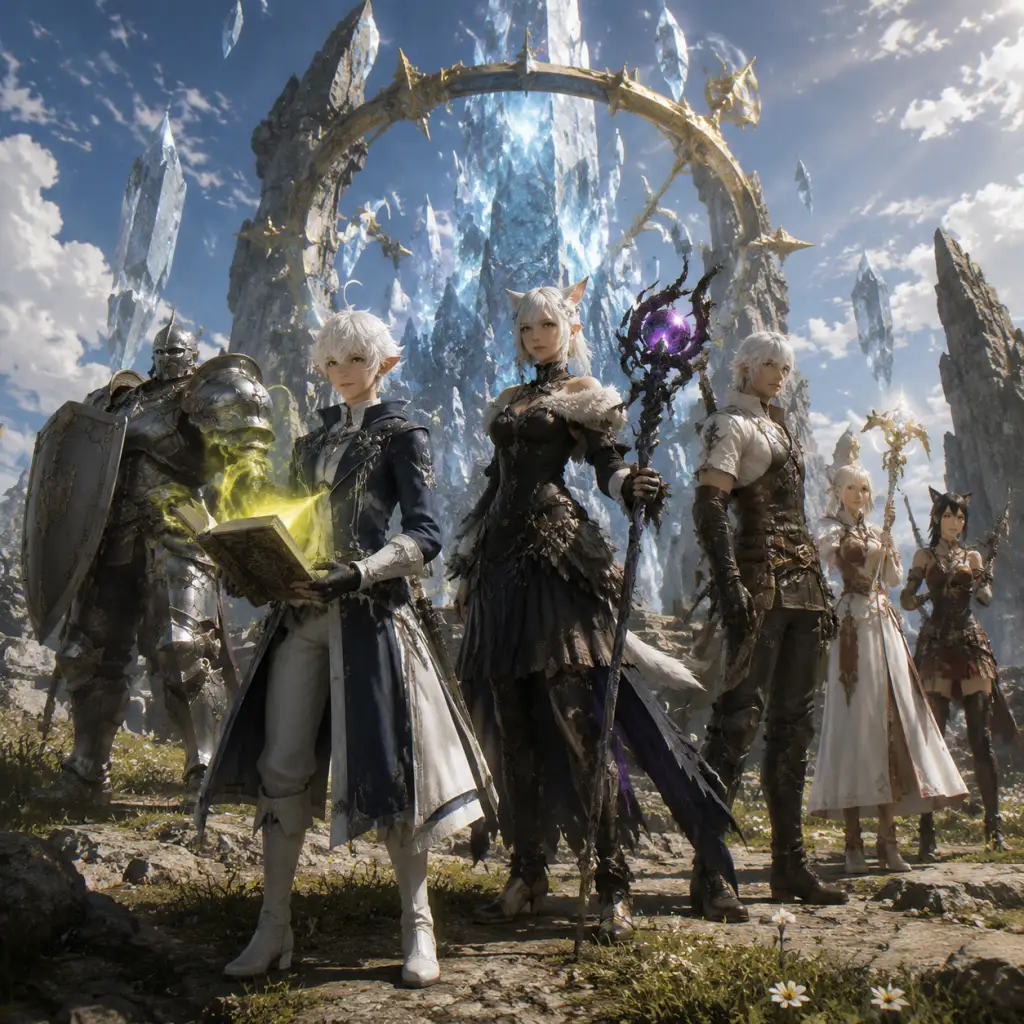
Characters & Roles
Characters & Roles Guide for Final Fantasy XIV: A Realm Reborn
This guide covers every playable role and the major non‑playable characters that define the story of Final Fantasy XIV: A Realm Reborn (ARR). You will learn about each job (advanced class) available in the base game, their strengths, weaknesses, playstyle, unlock conditions, recommended equipment, and team synergy. The guide also introduces the key NPCs of the Scions of the Seventh Dawn and other pivotal figures.
---
I. The Player Character – The Warrior of Light
Your custom‑created avatar is the central hero of Eorzea. While you have no fixed class, you can freely switch between all jobs on a single character after completing the level 10 class quest. As the story progresses, you become known as the Warrior of Light—a beacon of hope against the Garlean Empire and the Primals. There is no restriction on race, gender, or appearance for any job.
---
II. Playable Jobs & Roles
Each job falls into one of four roles: Tank, Healer, Melee DPS, Physical Ranged DPS, or Magical Ranged DPS. All ARR jobs reach a maximum level of 50 (later expansions raise the cap). Below is the complete list of ARR jobs:
| Role | Base Class | Job | Unlock Level | Unlock Quest (starting location) |
|---|---|---|---|---|
| Tank | Gladiator | Paladin | 30 | New Gridania (Lulutsu) – Paladin's Pledge |
| Tank | Marauder | Warrior | 30 | Limsa Lominsa (Fergusson) – Pride of the Warrior |
| Healer | Conjurer | White Mage | 30 | Gridania (E‑Sumi‑Yan) – Sylph‑management |
| Healer | Arcanist | Scholar | 30 | Limsa Lominsa (K'lyhia) – Forgotten but Not Gone |
| Melee DPS | Pugilist | Monk | 30 | Ul'dah (Gagaruna) – Sisters of the Path |
| Melee DPS | Lancer | Dragoon | 30 | Gridania (Healer's Hall) – Eye of the Dragon |
| Melee DPS | Rogue | Ninja | 30 (requires Disciple of War level 10) | Limsa Lominsa (Lonwoerd) – My First Daggers (requires Rogue unlocked via The Rogue's Gallery at level 10) |
| Physical Ranged DPS | Archer | Bard | 30 | Gridania (Sihwi) – Bard's Banquet |
| Magical Ranged DPS | Thaumaturge | Black Mage | 30 | Ul'dah (Cocobuki) – Taking the Black |
| Magical Ranged DPS | Arcanist | Summoner | 30 | Limsa Lominsa (K'lyhia) – Forgotten but Not Gone (shared with Scholar) |
---
III. Tank Jobs
#### Paladin
- Background: A holy knight sworn to protect the innocent. Paladins wield a sword and shield, drawing on the power of light to defend allies.
- Strengths: Highest overall mitigation with physical block via shield; excellent party‑wide damage reduction (Divine Veil, Passage of Arms); strong emergency heals (Clemency); reliable stuns (Shield Bash).
- Weaknesses: Lower damage output compared to Warrior; requires precise cooldown management to avoid taking spike damage; limited mobility.
- Playstyle: Keep the boss facing away from the party, use your weapon skill combo (Fast Blade → Riot Blade → Royal Authority) to build enmity, rotate defensive cooldowns (Rampart, Sentinel, Hallowed Ground) for tankbusters. Use Cover to protect a squishy party member.
- Unlock Conditions: Gladiator level 30 → complete the quest Paladin's Pledge (Ul'dah). Requires Gladiator level 30 and having completed the level 30 Gladiator class quest.
- Recommended Equipment: At level 50, aim for the iLvl 90 Artifact Armor (from job quests) or the iLvl 70 Darklight Gear (from dungeons/tomestones). Best weapon: iLvl 90 Curtana (relic weapon) or iLvl 80 Allagan Blade (from The Binding Coil of Bahamut).
- Build Stats: Primary: Strength. Secondary: Critical Hit & Determination for a balanced build.
- Team Synergy: Pairs well with any healer; the physical block helps against physical‑damage enemies. Combines with Warrior for double tank (Paladin main tank, Warrior off‑tank).
- Background: A berserker from the icy north who channels inner rage to become an unstoppable force. Uses a greataxe to deal heavy damage and self‑heal.
- Strengths: Highest single‑target burst damage among tanks; excellent self‑healing (Inner Beast, Storm's Path); powerful crowd control via Holmgang (prevents death); high health pool.
- Weaknesses: Fewer party‑wide damage reduction abilities than Paladin; no block (only parry); rage management requires attention.
- Playstyle: Build Wrath gauge through weapon skills (Heavy Swing → Maim → Storm's Eye/Path), then spend Wrath on Inner Beast (defense) or Fell Cleave (damage). Use Defiance for increased enmity and healing received. Equilibrium provides a self‑heal and a TP refresh.
- Unlock Conditions: Marauder level 30 → complete the quest Pride of the Warrior (Limsa Lominsa).
- Recommended Equipment: iLvl 90 Artifact Armor; weapon: iLvl 90 Bravura (relic) or iLvl 80 Allagan Axe.
- Build Stats: Primary: Strength. Secondary: Critical Hit & Determination.
- Team Synergy: Works well with a single healer due to its self‑sustain. Synergizes with other tanks for cooldown rotation. Ideal as an off‑tank that swaps during high‑damage phases.
- Background: A pure healer attuned to the element of water and the power of light. Draws on the blessings of the Elementals of Gridania.
- Strengths: Highest raw healing output (Cure II, Medica II, Regen); powerful burst healing with Benediction (full heal); excellent area‑of‑effect (AoE) healing; ability to raise allies instantly (Raise).
- Weaknesses: Low mobility; limited damage mitigation options; no shielding; mana management can be tight during prolonged fights.
- Playstyle: Keep Regen on the tank, use Cure II for single‑target heals, Medica/Medica II for party heals, and use Benediction as an emergency. Use Fluid Aura for knockback interrupt. Offensive spells (Stone, Aero) to contribute damage when safe.
- Unlock Conditions: Conjurer level 30 → complete the quest Sylph‑management (Gridania).
- Recommended Equipment: iLvl 90 Artifact Armor; weapon: iLvl 90 Stardust Rod (relic) or iLvl 80 Allagan Cane.
- Build Stats: Primary: Mind. Secondary: Piety (enough to sustain MP) then Critical Hit & Determination.
- Team Synergy: Complements any tank; best with Warrior due to self‑heals reducing burden. Essential for progression raiding where heavy healing is needed.
- Background: A tactician who commands a fairy companion to heal and shield allies. Originates from the lost civilization of Nym.
- Strengths: Powerful shields (Adloquium, Succor) that prevent damage; pet fairy provides passive healing; damage mitigation via Sacred Soil; ability to increase healing received via Fey Illumination.
- Weaknesses: Direct healing is weaker than White Mage; pet can be unpredictable; requires proactive play (pre‑shielding).
- Playstyle: Keep Adloquium on the tank, use Succor for party shields, place Sacred Soil under the party for AoE damage. Let your fairy (Eos) handle light healing, use Embrace manually when needed. Offense via Ruin/Bio and Energy Drain to restore MP.
- Unlock Conditions: Arcanist level 30 → complete the quest Forgotten but Not Gone (Limsa Lominsa). Requires Arcanist 30 and the level 30 class quest done.
- Recommended Equipment: Same as Summoner (shared gear sets). iLvl 90 Artifact Armor; weapon: iLvl 90 The Last Resort (relic) or iLvl 80 Allagan Grimoire.
- Build Stats: Primary: Mind. Secondary: Critical Hit (improves shield chance) & Determination.
- Team Synergy: Excellent with any tank, especially Paladin for additive mitigation. Pair with a White Mage for hybrid healing—scholar shields before big hits, white mage tops off afterward.
- Background: A martial artist who harnesses the power of chakra. Monks specialize in fast, multi‑hit combos with positional requirements.
- Strengths: Highest single‑target sustained DPS in ARR; strong attack speed and damage buffs (Greased Lightning, Twin Snakes); no cast times (instant attacks).
- Weaknesses: Must maintain Greased Lightning stacks (3‑stack damage boost) or DPS drops heavily; requires precise positioning for rear/flank bonuses; very vulnerable to knockbacks and disconnects.
- Playstyle: Perform the basic combo (Bootshine → True Strike → Demolish) from the rear, then the flank combo (Dragon Kick → Twin Snakes → Snap Punch) from the flank. Keep Demolish dot up and maintain Greased Lightning via Dragon Kick/Demolish. Use Perfect Balance to quickly gain 3 stacks.
- Unlock Conditions: Pugilist level 30 → complete the quest Sisters of the Path (Ul'dah).
- Recommended Equipment: iLvl 90 Artifact Armor; weapon: iLvl 90 Sphairai (relic) or iLvl 80 Allagan Claws.
- Build Stats: Primary: Strength. Secondary: Skill Speed (enough for comfortable rotation) then Critical Hit & Determination.
- Team Synergy: Benefits from Bard's Foe Requiem (increased magic damage? Actually Monk is physical, but Foe Requiem increases magical damage taken—no effect. Better with Dragoon's Battle Litany (increased critical hit rate).
- Background: An elite spear‑wielding knight from Ishgard. Dragoons leap into the air and deliver devastating piercing attacks.
- Strengths: High burst damage with jump attacks; strong AoE potential (Doom Spike, Dragonfire Dive); self‑buffs (Heavy Thrust, Blood of the Dragon) increase damage.
- Weaknesses: Jump animations root you in place—can be deadly in movement‑heavy fights; slower attack speed than Monk; positional requirements (disembowel from flank, chaos thrust from rear).
- Playstyle: Keep Heavy Thrust buff up (flank), use the combo (Vorpal Thrust → Full Thrust) from the rear, and use Disembowel → Chaos Thrust from the flank for dot. Activate Blood of the Dragon to enhance jumps, use Life Surge to guarantee a critical hit. Geirskogul for AoE.
- Unlock Conditions: Lancer level 30 → complete the quest Eye of the Dragon (Gridania).
- Recommended Equipment: iLvl 90 Artifact Armor; weapon: iLvl 90 Gae Bolg (relic) or iLvl 80 Allagan Lance.
- Build Stats: Primary: Strength. Secondary: Critical Hit & Determination. Skill Speed to a cap.
- Team Synergy: Excellent with Bard (Battle Voice + Foe Requiem doesn't affect physical, but Bard still helps). Dragoon provides piercing resistance down via Disembowel (10% piercing damage bonus) which benefits Bard (ranged physical) and other Dragoons.
- Background: Shadowy spies from the Far East. Ninjas use dual daggers and hand signs to cast ninjutsu—powerful elemental attacks.
- Strengths: High burst damage via Trick Attack (vulnerability up); excellent mobility (Shukuchi teleport); ability to enmity dump (Smoke Screen); utility with Goad (TP restore) and Shadewalker (transfer enmity to tank).
- Weaknesses: Complex mudra system (three hand signs) requires practice; lower sustained damage than Monk if Trick Attack misses; positionals (rear for Aeolian Edge, flank for Armor Crush).
- Playstyle: Maintain Huton buff (attack speed) via Armor Crush from flank, use the combo Spinning Edge → Gust Slash → Aeolian Edge from rear. Weave mudras: typical opener uses Fuma Shuriken (1 mudra), then Raiton (2 mudras) or Katon (AoE). Use Trick Attack every 60 seconds for party damage window.
- Unlock Conditions: Requires Disciple of War level 10+ first, then complete The Rogue's Gallery (Limsa Lominsa) to unlock Rogue class. Level Rogue to 30, then complete My First Daggers to unlock Ninja.
- Recommended Equipment: iLvl 90 Artifact Armor; weapon: iLvl 90 Yoshimitsu (relic) or iLvl 80 Allagan Daggers.
- Build Stats: Primary: Dexterity. Secondary: Critical Hit & Determination. Skill Speed for Huton timing.
- Team Synergy: Trick Attack is a massive raid DPS cooldown—synergizes with any burst window. Pair with Dragoon for piercing boost (Ninja is slashing? Actually Ninja uses slashing damage, so no benefit). Works with Warrior (slashing resistance down) for added damage.
- Background: A wandering archer who inspires allies with song. Bards are the only physical ranged DPS in ARR, specializing in support and consistent damage.
- Strengths: Always active (no cast times), high mobility; party support via songs (Mage's Ballad, Army's Paeon, The Wanderer's Minuet); secondary healer (Peloton, Refresh, Nature's Minne); excellent for kiting.
- Weaknesses: Lower raw DPS than melee; songs drain MP; no burst damage; requires managing song timers and procs.
- Playstyle: Refresh Foe Requiem for magic damage boost (costs MP). Use Straight Shot for crit buff, then alternate Heavy Shot and procs (Bloodletter, Rain of Death). Keep Windbite and Venomous Bite dots up. Activate appropriate song: Mage's Ballad for mana regen, Army's Paeon for ability cooldown reduction, The Wanderer's Minuet for party TP regen.
- Unlock Conditions: Archer level 30 → complete the quest Bard's Banquet (Gridania).
- Recommended Equipment: iLvl 90 Artifact Armor; weapon: iLvl 90 Artemis Bow (relic) or iLvl 80 Allagan Bow.
- Build Stats: Primary: Dexterity. Secondary: Critical Hit & Determination. Skill Speed as needed.
- Team Synergy: Essential for healers (Mage's Ballad) and melee (Army's Paeon). Foe Requiem benefits Black Mage and Summoner (magic damage). Pairs well with Dragoon (piercing debuff) and Ninja (Trick Attack window).
- Background: A destructive wizard who channels immense aether to unleash fire and ice spells. Black Mages sacrifice mobility for raw power.
- Strengths: Highest single‑target burst damage in ARR (Fire IV? Actually Fire IV is Heavensward; ARR uses Fire III and Fire I rotations); huge AoE potential (Flare); self‑buffs via Astral Fire and Umbral Ice.
- Weaknesses: Long cast times and immobility; mana management is critical; must switch between Fire (high damage) and Ice (mana regen) phases; vulnerable to interrupts.
- Playstyle: Maintain Astral Fire (fire spells) for damage and Umbral Ice (ice spells) for mana regen. Rotation: Fire III → Fire I x3–4 → Blizzard III → Blizzard I → repeat. Use Thunder dot (Thunder II/III) for extra damage. Flare for AoE (costs all mana, use Convert to regain).
- Unlock Conditions: Thaumaturge level 30 → complete the quest Taking the Black (Ul'dah).
- Recommended Equipment: iLvl 90 Artifact Armor; weapon: iLvl 90 Stardust Rod? Actually Black Mage uses a staff. iLvl 90 Thyrus (relic) or iLvl 80 Allagan Cane (shared with White Mage). Note: Black Mage uses a two‑handed staff (weapon type: Two‑handed Thaumaturge's Arm). Examples: iLvl 90 Stardust Rod (relic) or iLvl 80 Allagan Cane.
- Build Stats: Primary: Intelligence. Secondary: Critical Hit & Determination. Spell Speed to reduce cast times.
- Team Synergy: Benefits greatly from Foe Requiem (magic damage increase). Bard's Mage's Ballad helps with mana. Use Mana Shift (role action) to give MP to healer.
- Background: A scholar who uses arcane gemstones to summon and command primals—Ifrit, Garuda, Titan. Summoners deal damage over time and burst through pets.
- Strengths: Strong DoT pressure (Bio, Miasma, Shadow Flare); high burst with Bane (spread DoTs) and Fester; pet provides extra damage; excellent for fights with multiple targets.
- Weaknesses: Pet can die and must be resummoned; DoT uptime is crucial; lower mobility than Black Mage? Actually Summoner can move while casting DoTs? DoTs are instant, but Ruin has cast. Moderate mobility.
- Playstyle: Maintain Bio II, Miasma, and Bio on the target. Use Ifrit for single‑target, Garuda for AoE/push, Titan for tanking. Use Garuda's Contagion to extend DoT duration, then pop Fester. Bane to spread DoTs to nearby enemies. Use Aetherflow for mana and Fester charges.
- Unlock Conditions: Arcanist level 30 → complete the quest Forgotten but Not Gone (Limsa Lominsa) — same as Scholar. After unlocking Scholar, talk to K'lyhia again to get the Summoner job crystal.
- Recommended Equipment: iLvl 90 Artifact Armor; weapon: iLvl 90 The Last Resort (relic) or iLvl 80 Allagan Grimoire.
- Build Stats: Primary: Intelligence. Secondary: Critical Hit & Determination.
- Team Synergy: Works with Bard (Foe Requiem) and other DoT users. The pet provides a second aggro target. Good for solo play and farming.
#### Warrior
---
IV. Healer Jobs
#### White Mage
#### Scholar
---
V. Melee DPS Jobs
#### Monk
#### Dragoon
#### Ninja
---
VI. Physical Ranged DPS
#### Bard
---
VII. Magical Ranged DPS
#### Black Mage
#### Summoner
---
VIII. Major Non‑Playable Characters (NPCs)
These characters drive the story of A Realm Reborn and appear throughout the main scenario. While not playable, understanding their roles helps you appreciate the narrative.
#### The Scions of the Seventh Dawn
| Character | Role | Background | Key Traits |
|---|---|---|---|
| Thancred Waters | Scion leader / Spy | A charming rogue from the streets of Ul'dah. Master of infiltration and gunblade (later becomes Gunbreaker, not in ARR). | Quick‑witted, flirtatious, devoted to the Scions. Often works alongside Minfilia. |
| Y'shtola Rhul | Archmage / Scholar | A powerful sorceress from the Sharlayan colony. Expert in aetherial theory and arcane magic. | Calm, intellectual, uses black/white magic. Often provides exposition. |
| Yda Hext | Pugilist / Brawler | A fiery fighter from Gridania. Known for her short temper and physical prowess. | Impulsive, emotional, skilled in hand‑to‑hand combat. Later revealed to be Lyse Hext after her sister's death. |
| Papalymo Totolymo | Thaumaturge / Mage | A diminutive Lalafell with a sharp intellect. Uses fire and ice magic. | Sarcastic, protective of Yda. Dies later in the story. |
| Alphinaud Leveilleur | Scion diplomat / Arcanist | A young Elezen prodigy from Sharlayan. Commands a carbuncle and leads expeditions. | Idealistic, articulate, becomes a central figure in later expansions. In ARR he is 16 years old. |
| Alisaie Leveilleur | Scion / Red Mage | Alphinaud's twin sister. More brash and action‑oriented. In ARR she is a student of the Arcanists' Guild but later becomes a Red Mage. | Stubborn, skilled in rapier combat. Not much screen time in ARR. |
| Minfilia Warde | Antecedent of the Scions | A descendant of the Warde family, she leads the Scions from the Waking Sands. | Compassionate, wise, serves as a quest giver. Later becomes the Oracle of Light. |
| Urianger Augurelt | Archon / Scholar | A mysterious Elezen who speaks in archaic English. Expert in ancient lore and aether. | Cryptic, loyal, later designs the means to travel to the First. |
| Tataru Taru | Scion administrative / Alchemist | A Lalafell who handles finances and later becomes a skilled secret agent. | Cheerful, resourceful, often underestimates her own abilities. |
| Character | Role | Notes |
|---|---|---|
| Gaius van Baelsar | Garlean Legatus | Primary antagonist of ARR, leader of the XIVth Imperial Legion. Wields a gunblade and pilots a magitek armor. |
| Lahabrea | Ascian | The main Ascian antagonist, manipulating events from the shadows. |
| Theodoric | King of Ruin | Ruler of Ala Mhigo, later deposed. Not directly encountered in ARR but heavily referenced. |
| Moenbryda | Scion / Researcher | Introduced later in ARR, a close friend of Urianger. Her sacrifice is pivotal. |
| Cid nan Garlond | Chief Engineer | A Garlean defector who aids the Scions with airships and technology. |
IX. Summary of Roles in Combat
| Role | Responsibilities | Example Jobs |
|---|---|---|
| Tank | Maintain aggro, absorb damage, position enemies. | Paladin, Warrior |
| Healer | Restore HP, remove debuffs, mitigate damage through shields/regen. | White Mage, Scholar |
| Melee DPS | Deal high physical damage up close, often with positionals. | Monk, Dragoon, Ninja |
| Physical Ranged DPS | Deal damage from range, provide party support, no cast times. | Bard |
| Magical Ranged DPS | Deal magical damage from range, often with cast times and mana management. | Black Mage, Summoner |
X. Unlocking All Jobs – Quick Reference
To unlock any ARR job, you must first level the corresponding base class to level 30 and complete all class quests up to that point. Then visit the appropriate guild location and accept the job unlock quest. Key points:
- Arcanist: unique – After unlocking Scholar at level 30, simply speak to K'lyhia again to obtain the Summoner job crystal.
- Rogue/Ninja: You must be at least level 10 in any Disciple of War class to unlock the Rogue class in Limsa Lominsa. After leveling Rogue to 30, you unlock Ninja.
- All job unlock quests are permanent and can be completed at any time.
- Weapon: Relic weapon (iLvl 90) from your job quest chain. Alternatively, the Allagan Weapon from Coil Turn 5.
- Armor: Mix of Darklight Gear (iLvl 70, sold by Auriana in Mor Dhona) and Artifact Armor (iLvl 55–70). The best body piece is from The Binding Coil Turn 1–4.
- Jewelry: Allagan accessories (iLvl 90) from Coil or Mythril accessories (iLvl 70) from dungeon drops.
- 2 Tanks (one main, one off)
- 2 Healers (one primary, one secondary)
- 4 DPS (mix of melee, physical ranged, magical).
- Bard + Dragoon: Dragoon's piercing debuff boosts Bard's damage by 10%.
- Warrior + Ninja: Ninja's slashing debuff (via Dancing Edge? Actually Ninja has no slashing debuff; Warrior provides Storm's Eye slashing debuff. No, Warrior has Storm's Path/Storm's Eye? Storm's Eye gives 10% slashing damage taken debuff. So Warrior + any slashing DPS (Ninja uses slashing) is good. But Ninja's Trick Attack benefits all.
- Scholar + Paladin: Strong mitigation combination.
- Black Mage + Bard: Foe Requiem boosts Black Mage's damage significantly.
- Switch jobs freely: After unlocking multiple jobs, you can switch in any city's adventurers' guild or in inn rooms. Level them to experience all playstyles.
- Cross‑class actions are removed in later patches (Stormblood). In ARR, each job can take actions from other classes. For example, Paladin benefits from Conjurer's Protect? No, protect is not cross‑class. Actually in ARR, cross‑class actions are limited to sub‑level 30. Use guides from that era if you're replaying original ARR content.
- Role actions (introduced in patch 4.0) are not part of ARR. For authentic ARR experience, focuses on job‑specific actions.
---
XI. Recommended Equipment at Level 50
For all jobs, the best gear (item level 90) comes from the Relic Weapon quests (start with A Relic Reborn), the Allagan gear from The Binding Coil of Bahamut Turn 5 (iLvl 90), and Mythril gear from dungeons. The Artifact Armor (from job quests at 45, 50) is iLvl 55–70 but is visually iconic. For a quick gearing guide:
---
XII. Team Synergy & Party Composition
A standard 8‑player party in ARR is:
Best synergy combos:
---
XIII. Final Tips
This guide covers everything a new or returning player needs to understand the characters and roles of Final Fantasy XIV: A Realm Reborn. Choose the role that fits your style and enjoy the journey to becoming Eorzea's hero!
Cheats & Secrets
Cheats & Secrets Guide for Final Fantasy XIV: A Realm Reborn
No Traditional Cheat Codes
Final Fantasy XIV: A Realm Reborn is a massively multiplayer online role-playing game (MMORPG). As such, there are no traditional cheat codes, console commands, or unlock codes that grant invincibility, infinite resources, or instant leveling. The game uses server-side validation to prevent unauthorized modifications, and any attempt to use third-party tools, memory editors, or exploits can result in account suspension or permanent banning. This guide instead focuses on legitimate, developer-intended secrets, hidden content, Easter eggs, and fun discoveries that are safe to enjoy.
---
Hidden Quests & Optional Content
#### 1. The Rise and Fall of Gentlemen (Hildibrand Questline)
- Unlock: Reach level 50 in any Disciple of War or Magic class, complete the Main Scenario Quest "The Ultimate Weapon," and speak with Wymond in Ul'dah (Steps of Nald, X:10, Y:9).
- Content: A multi-chapter comedic side story featuring the eccentric inspector Hildibrand Manderville. Includes a series of quests, cutscenes, and a trial against the "Ul'dahn Enforcer" (mandatory for the "Manderville Gold Saucer" unlock).
- Secrets: During specific quests, you can inspect certain objects (e.g., a suspicious cart) to trigger additional dialogue. The questline is infamous for its absurd humor and references to classic film noir.
- Note: This is part of the level 50 raid series, not a hidden quest, but includes a secret boss phase. After defeating the second boss, Five Headed Dragon, a hidden floor panel in the arena can be interacted with to trigger an optional harder version of the final boss (Adds phase). Not commonly known.
- Location: Coerthas Central Highlands (X:20, Y:26) near Snowcloak.
- Trigger: Requires the FATE "The Eyes Have It" to be completed at least once in the zone. After that, there is a low chance (≈5%) that the FATE "The Falling Snow" will spawn. It rewards a unique minion: "Wind-up Aldgoat."
- Secret: This FATE is easily missed because it only spawns after the linked FATE and appears rarely.
- Prerequisite: Complete the Main Scenario Quest "Sylph-management."
- Start: Talk to the NPC "R'ashaht Rhiki" in Limsa Lominsa Upper Decks (X:13, Y:12) after obtaining the FATE achievement "I Made That!" (craft 100 items of any one type). This begins a chain that grants the Ribbon accessory – a rare piece of gear that increases experience gain by 3% until level 50.
- Tip: Many players overlook this due to the hidden achievement trigger.
- In the cutscene for the Trial "The Chrysalis," just before the final phase, the boss Nabriales casts a ability named "Blade of Light." If you look closely at his sword, you’ll see a faint + shape – a reference to the Erdrick crest from Dragon Quest.
- After completing ARR, you can unlock the Postmoogle quest chain (start in Limsa Lominsa). Each quest references real-world postal quirks. The final quest rewards a letter from a secret admirer – actually a joke about the game’s own delivery system.
- While not hidden, the Gold Saucer (unlocked at level 15 via a quest from the Ul'dah Steps of Nald) is a major Easter egg zone referencing Final Fantasy VII. Features include chocobo racing, Triple Triad, and the famous „Fat Chocobo“ statue.
- If you visit the Waking Sands after completing certain ARR trials (e.g., The Bowl of Embers), NPCs like Minfilia will have unique dialogue acknowledging your victory – but only if you speak to them before the next Main Scenario quest updates their text. This is time-sensitive and easy to miss.
- Using the emote /sigh or /think near certain NPCs (e.g., near the entrance to the Company of Heroes in Limsa) will cause them to turn and look at you. No reward, but amusing.
- Eastern Thanalan, „The Burning Wall“: Has two different vistas – one requires standing on a rock ledge that is only reachable by jumping from a higher cliff. Use the /lookout emote facing east at 12:00 PM (ET) during clear weather.
- „You Got Game“ – Participate in the „Make It Rain“ campaign event (annual). Not hidden, but often unknown to new players.
- „The Ultimate Collector“ – Obtain all ARR minions (except cash shop). Many are rare drops from FATEs or hidden vendors.
- „I Made That!“ – Craft 100 unique items of a single type (e.g., 100 different Carpentry items). This unlocks the Ribbon quest as mentioned above.
- „Beauty is Only Skin Deep“ – Glamour dresser entries; not hidden but lists as secret.
#### 2. The World of Darkness (Hard Mode) – Unlocking the Final Coil of Bahamut
#### 3. The Secret FATE: "The Falling Snow" (Coerthas Central Highlands)
#### 4. The Hunt for the "Ribbon" (Hidden Side Quest)
---
Easter Eggs & Pop Culture References
#### 1. The „Fabled Something“ – A Shout-out to Dragon Quest
#### 2. The Moogle Mail Moogle (Postmoogle Questline)
#### 3. „The Golden Saucer“ – A Dedicated Mini-game Zone
#### 4. Secret NPC Dialogues
#### 5. The „….“ Emote Sequence
---
The Sightseeing Log – A Developer-Intended Secret Hunt
The Sightseeing Log (accessed via Collections > Sightseeing Log) is a minigame where you must discover 80 hidden vistas across ARR zones. Each vista is a specific location where you must use the `/lookout` emote at a precise time (e.g., "Weather: Clear, Time: 6:00 AM - 9:00 AM ET"). Completing all log entries unlocks the "Celebrant" title and a special achievement. This is one of the few truly secret hunts in the game.
Notable hard-to-find vista:
---
Hidden Achievements & Titles
---
Exploit-Safe Secrets & Developer-Intended Interactions
1. The „Starlight Celebration“ Seasonal Event – During December, a hidden NPC named „Jangle“ appears in randomly selected city squares. Finding him three times in one week awards a special Starlight-themed emote.
2. The „Fury“ Emote – Obtainable by completing the Palace of the Dead (first 50 floors) solo. Not widely known as an emote reward.
3. The „Ghost“ Emote – Purchase from a hidden vendor in the Lost Canals of Uznair (Heaven-on-High expansion area, but accessible from ARR via PotD). Not technically ARR, but ties to the ARR relic quest line.
---
Summary of Valid Secrets
| Category | Example | How to Access |
|---|---|---|
| Hidden Quest | „The Rise and Fall of Gentlemen“ | Level 50, quest in Ul'dah |
| Easter Egg | „Blade of Light“ Dragon Quest reference | Trial „The Chrysalis“ |
| Sightseeing Log | Vistas across all ARR zones | Use /lookout at specific times |
| Secret FATE | „The Falling Snow“ | Complete „The Eyes Have It“ in Coerthas |
| Hidden Achievement | „I Made That!“ | Craft 100 unique items of a single type |
Important Note: All secrets listed here are legitimate, safe, and intended by the developers. Do not attempt to use cheat software, memory trainers, or network exploits – Square Enix actively bans accounts for such behavior. Enjoy discovering these hidden gems the proper way!