Gears 5
## Overview **Gears 5** is a third-person tactical shooter developed by **The Coalition** and published by **Xbox Game Studios**. It is the fifth main entry in the *Gears of War* series and serves as a direct sequel to *Gears of War 4*. The game launched on **September 10, 2019** for **Xbox One** a...
Download & Installation
Overview
Gears 5 is a third-person shooter developed by The Coalition and published by Xbox Game Studios. It is available on Windows PC (via Microsoft Store, Xbox App, and Steam), Xbox One, and Xbox Series X|S. The game is also playable via Xbox Cloud Gaming (xCloud) on supported devices, including Android, iOS, and browsers. There is no native PlayStation, Nintendo Switch, or mobile version. This guide covers legitimate download sources, step-by-step installation for each platform, system requirements, common errors, and post-install verification.
Platforms
- PC (Windows 10/11): Microsoft Store / Xbox App (Game Pass or purchase) and Steam.
- Xbox One / Xbox Series X|S: Digital download from Microsoft Store on console, or physical disc (installation from disc requires download of updates).
- Cloud Gaming: Stream on Android, iOS, iPadOS, Windows, Mac, or browser via Xbox Cloud Gaming (requires Game Pass Ultimate subscription).
System Requirements (PC)
Minimum Requirements (for 1080p @ 30 FPS, Low settings)
| Component | Specification |
|---|---|
| OS | Windows 10 (version 1909 or later) or Windows 11 |
| CPU | AMD FX-6000 series / Intel i3 Skylake |
| GPU | AMD Radeon RX 560 / NVIDIA GTX 760 |
| RAM | 8GB |
| Storage | 80GB available space (SSD recommended) |
| DirectX | Version 12 |
Recommended Requirements (for 1080p @ 60 FPS, High settings)
| Component | Specification |
|---|---|
| OS | Windows 10 (version 1909 or later) / Windows 11 |
| CPU | AMD Ryzen 3 / Intel i5 Skylake |
| GPU | AMD Radeon RX 5700 / NVIDIA GTX 1660 Ti |
| RAM | 16GB |
| Storage | 80GB SSD |
| DirectX | Version 12 |
Ultra Requirements (for 4K @ 60 FPS, Ultra settings)
| Component | Specification |
|---|---|
| OS | Windows 10 (version 1909 or later) / Windows 11 |
| CPU | AMD Ryzen 7 / Intel i7 |
| GPU | AMD Radeon VII / NVIDIA RTX 2080 |
| RAM | 16GB |
| Storage | 80GB NVMe SSD |
| DirectX | Version 12 |
Storage Space
- PC (Microsoft Store/Xbox App): Approximately 80GB for the base game. Additional space may be required for updates (e.g., the "Hivebusters" DLC adds ~10GB).
- PC (Steam): Same size, but Steam installs may compress slightly differently; still budget ~80GB.
- Xbox One / Xbox Series X|S: Requires ~80GB on internal or external drive. On Series X|S, the game can be installed on the internal SSD or a compatible Seagate expansion card for optimal performance.
- Cloud Gaming: No local storage required (streams over internet).
- Xbox Live Account (free for basic, paid for multiplayer): Required on all platforms. For PC, sign in via the Xbox App (Microsoft Store version) or Steam (connects to Xbox Live).
- Xbox Game Pass (optional): If you subscribe, you can play Gears 5 without purchasing it separately. Game Pass Core or Standard includes multiplayer, but Ultimate includes Cloud Gaming.
- Steam Account (for Steam version): Requires linking to Xbox Live upon first launch.
- Microsoft Account: Needed for Microsoft Store / Xbox App purchases and sign-in.
- On all platforms, the first time you run Gears 5, you will be prompted to sign in to Xbox Live if not already authenticated. This links your progress and multiplayer access.
- You may be asked to adjust graphics settings (PC) or display calibration (console/PC).
- Download any mandatory updates if not done during installation.
- The game will present a main menu with options: Campaign, Versus (multiplayer), Horde, Escape, and Options. You can start the campaign immediately.
- For PC, you may want to configure advanced graphics settings (resolution, V-Sync, frame rate limit, etc.) before playing.
- Error 0x80070005 (Access Denied): Run the Xbox App as Administrator. Right-click the app icon and select "Run as administrator". Also, ensure your Windows account has administrator privileges.
- Error 0x80073D0B (Installation failed): The Windows Store cache may be corrupted. Run `wsreset.exe` from the Start menu (type "wsreset" and press Enter). Restart the app.
- Game won't start after install (black screen or crash): Update your graphics drivers to the latest version. Disable any overlays (Discord, GeForce Experience, etc.). Verify installation via the Xbox App: go to the game's page > ... > "Manage" > "Files" > "Verify and repair".
- Slow download speeds: Pause and resume the download. Ensure no other large downloads are active. Restart the Xbox App.
- Install stuck at 0%: Clear the Microsoft Store cache (wsreset). Try a different drive if available.
- Missing redistributables: Steam usually installs them automatically, but if you get "MSVCP140.dll missing" or similar, install "Visual C++ Redistributable for Visual Studio 2015-2022" from Microsoft.
- Anti-cheat issues: Gears 5 uses Easy Anti-Cheat (EAC). If you get EAC errors, run the game as administrator, or repair EAC by navigating to the game's installation folder (`steamapps\common\Gears 5\EasyAntiCheat`), run `EasyAntiCheat_Setup.exe`, and select "Repair Service".
- Game fails to launch / no response: Verify integrity of game files via Steam (right-click game > Properties > Local Files > Verify integrity of game files).
- Black screen: Disable Windows Game Mode in Settings > Gaming > Game Mode. Also, try launching with `-windowed` command (add to launch options in Steam properties).
- Disc read errors: Clean the disc with a soft cloth. If problem persists, try digital download instead (or request a replacement).
- Installation stuck: Perform a hard reset (hold power button for 10 seconds). Check for system updates.
- Patch download fails: Restart console, ensure stable internet. Clear persistent storage (Settings > System > Storage > Clear local saved games - this only removes temporary data, not saves).
- Error 0x8007045D (I/O error): The game may have file corruption. Uninstall and reinstall. If installing to an external drive, try internal storage.
- Cloud streaming stutters or low quality: Check your internet connection speed (minimum 10 Mbps). Use a wired connection if possible. Close background apps using bandwidth. Lower stream quality in app settings.
- Controller not working (mobile): Ensure Bluetooth is enabled and controller is paired. Xbox Wireless Controller works best; third-party controllers may have partial compatibility.
- PC (both stores): Launch the game. If the intro logos (The Coalition, Xbox Game Studios) appear and the main menu loads, installation is successful.
- Xbox Console: The game should appear in your games list without a yellow "installing" bar. Launch it and check that it doesn't prompt for a download.
- Steam: Confirm in Library that the game status is "Ready to Play". At first launch, you must sign into Xbox Live – this is normal.
- Cloud Gaming: The stream should start within 10-15 seconds. If you see a waiting screen, it's loading.
- Run the game's benchmark (PC only): From the main menu go to Options > Graphics > Benchmark. This tests performance and stability.
- Check for any optional DLC (Hivebusters, Gears 5: Operation 1-8) – they should be installed automatically if purchased or part of Game Pass. If missing, go to the store and install them separately.
- Update drivers and Windows if prompted.
Account Requirements
Step-by-Step Installation
PC - Microsoft Store / Xbox App (Game Pass or Purchase)
1. Open the Microsoft Store (or the Xbox App for Windows, which is recommended for better management). If using Xbox App, download it from the official Microsoft site if not pre-installed.
2. Sign in with your Microsoft account that has an active Game Pass subscription or owns the game.
3. Search for "Gears 5" in the store.
4. Click "Get" (if Game Pass) or "Buy" (if purchasing). If you own it via Game Pass, ensure you are logged in to the correct account.
5. Choose installation location: On the game's page, click the "..." menu and select "Install to a specific drive" to avoid default C: drive if desired.
6. Wait for download and installation. The Xbox App will show progress. The game installs in a protected folder and cannot be moved manually; use the app to change location.
7. Launch from the Xbox App or Start menu.
PC - Steam
1. Open Steam and sign in to your Steam account.
2. Search for "Gears 5" in the store.
3. Purchase the game (or add to library if already owned).
4. Click "Install" on the store page or library entry.
5. Choose installation directory (supports custom paths).
6. Wait for download and installation. Steam will automatically verify files.
7. Launch from Steam Library. On first launch, Steam will prompt you to sign in to Xbox Live (a browser window will open). Complete the authentication.
Xbox Console (Xbox One / Xbox Series X|S)
#### Option A: Digital Download
1. Turn on your console and sign in to your Xbox profile.
2. Go to the Microsoft Store (use the search or browse).
3. Search for "Gears 5".
4. Select the game and choose "Buy" or "Install with Game Pass" if you have a subscription.
5. Confirm installation and choose where to install (internal or external drive). The console will download and install automatically.
6. Once complete, the game appears in your games list.
#### Option B: Disc Installation (Xbox One / Series X|S)
1. Insert the Gears 5 disc into the console.
2. The console will begin copying data from the disc. This may take 10-20 minutes.
3. After copying, you will need to download a large patch (often 20-50GB) to update the game to the latest version. Ensure you have an internet connection.
4. Waite for the patch to download and install.
5. Launch the game from the disc icon or Home screen.
Cloud Gaming (xCloud)
1. Subscribe to Xbox Game Pass Ultimate (required for cloud streaming).
2. On a compatible device (Android, iOS, iPadOS, Windows PC using Xbox app, or browser via xbox.com/play):
- Mobile: Install the Xbox Game Pass app from the official store. Sign in and tap the cloud icon on Gears 5.
- Browser: Go to xbox.com/play, sign in, and select Gears 5.
3. Stream the game – no download or installation needed. Ensure a stable internet connection (minimum 10 Mbps, recommended 20 Mbps for 1080p).
First Launch Setup
Common Installation Errors and Fixes
PC - Microsoft Store / Xbox App
PC - Steam
Xbox Console
General / Cloud Gaming
Post-Installation Verification
After installation, verify the game is ready to play:
Optional:
If you encounter persistent issues after following these steps, consult the official Gears 5 support site at [support.gearsofwar.com](https://support.gearsofwar.com) or the Xbox support forums.
Game Introduction
Overview
Gears 5 is a third-person tactical shooter developed by The Coalition and published by Xbox Game Studios. It is the fifth main entry in the Gears of War series and serves as a direct sequel to Gears of War 4. The game launched on September 10, 2019 for Xbox One and Windows PC (via Microsoft Store, Xbox App, and Steam), and was later enhanced for the Xbox Series X|S generation. It is also available through Xbox Game Pass on both console and PC.
Story & Setting
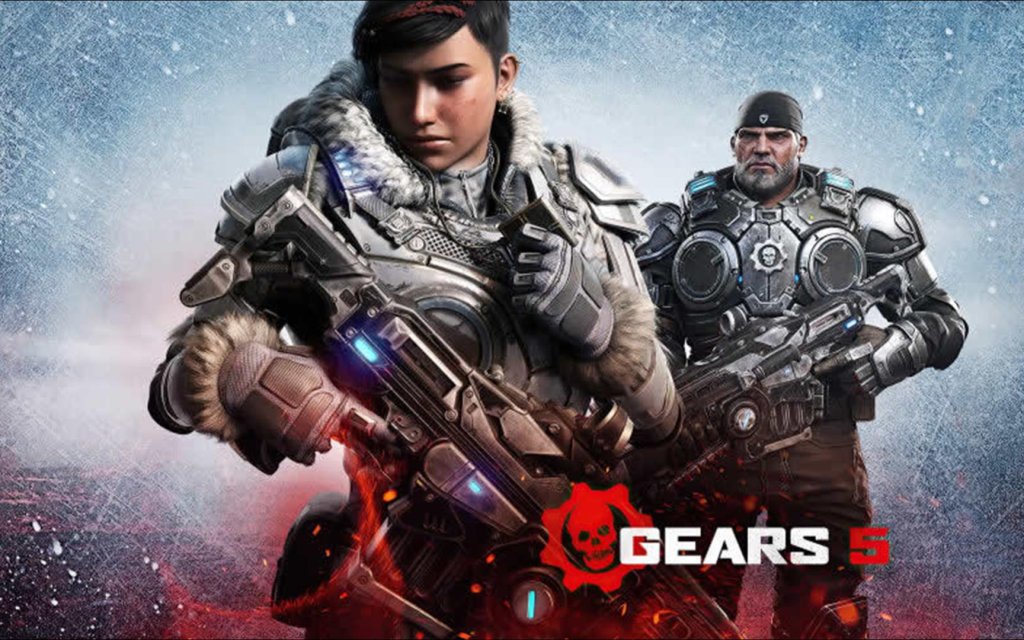
The narrative takes place 25 years after the Locust War on the planet Sera. Humanity has rebuilt after the devastating conflict, but a new threat emerges: the Swarm, a terrifying hybrid race born from the remains of the Locust. The story follows Kait Diaz, a Gear from the Outsider settlement of New Hope, who is haunted by a mysterious connection to the Swarm and the Locust. As she uncovers the truth about her family’s past, she must prevent the Swarm from unleashing a catastrophic weapon.
The campaign spans diverse environments, from frozen mountain peaks and desert ruins to the infested ruins of Nexus and the ancient Tomb of the Unknown. Choices players make in key story moments affect the outcome of certain missions, offering replayability.
Main Characters
- Kait Diaz (playable protagonist) – A strong-willed Outsider turned Gear, searching for answers about her mother’s disappearance and her own connection to the Swarm.
- JD Fenix (playable in some missions) – Son of Marcus Fenix, a COG lieutenant who struggles with loyalty and leadership.
- Delmont “Del” Walker (playable in co-op) – A loyal Gear and friend, known for his technical expertise and calm demeanor.
- Marcus Fenix – The legendary war hero returns to guide Kait and confront his past.
- Jack (playable in some missions) – A reprogrammed Deebee robot with unique abilities like invisibility and shock traps.
- The Speaker – A terrifying Swarm leader with a personal connection to Kait.
- Intense cover-based shooting with a heavy emphasis on positioning and teamwork.
- Satisfying “active reload” mechanics that reward practice.
- Explosive co-op action with up to three players in the campaign.
- A deep competitive multiplayer scene for PvP enthusiasts.
- Rich lore and character drama for narrative-driven players.
Core Appeal & Target Audience
Gears 5 appeals to fans of hardcore third-person shooters, tactical squad-based combat, and the gritty, cinematic universe of Gears. It offers:
The game is rated M for Mature (ESRB) due to blood, gore, intense violence, and strong language. The target audience is primarily young adults and adults (17+) who enjoy mature action games.
Game Modes
| Mode | Description | Player Count | Offline / Online |
|---|---|---|---|
| Campaign | Main story with branching choices and character-specific abilities. | 1–3 players (online co-op, split-screen co-op for 2) | Both |
| Versus (Multiplayer) | Traditional PvP modes like Team Deathmatch, King of the Hill, Escalation, and Arcade. | Up to 10 players (5v5) | Online only |
| Horde | PvE survival mode where players fight waves of enemies, with class-based abilities and fortifications. | 1–5 players | Both (offline with bots) |
| Escape | New PvE mode where a squad of three must fight through Swarm hives and escape before a venomous gas kills them. | 1–3 players | Online only (also available in single-player with AI teammates) |
Online & Offline Support
- Offline: Full campaign co-op (split-screen for 2 players on console), Horde mode with bots, and local multiplayer (split-screen Versus) on Xbox.
- Online: All modes support online play. Requires an internet connection for multiplayer and some features (like map downloads). Cross-play between Xbox and PC is fully enabled.
- Xbox Live Gold / Game Pass Core required for online multiplayer on console; PC online play requires Game Pass Core for Xbox App version, but Steam version can play without additional subscription (though cross-play still works).
- Hivebusters (December 2020) – A separate story expansion featuring new playable characters (Lahni, Mac, and Keegan) and three new Escape maps. It is available as a standalone purchase or via Game Pass.
- Season Pass – Included with the Ultimate Edition, granting access to additional characters, weapon skins, and early unlocks.
- Operation-based content – Free seasonal updates (e.g., Operation: Dark Hour, Operation: Offerings) that added new maps, characters, and modes like Master-at-Arms and Gridiron.
- Terminator and Halo-themed crossover characters (e.g., Sarah Connor, Kat from Halo) were released as premium bundles.
- First female protagonist in the mainline series, offering a fresh perspective.
- Branching narrative choices that alter side missions and character interactions, a series first.
- Jack as a playable character in the campaign – a flying robot that can hack enemies, cloak teammates, and revive downed allies, introducing unique puzzle-solving and stealth sections.
- Escape mode – A roguelike-inspired PvE mode where players must coordinate to survive and escape, with permadeath-like stakes in higher difficulties.
- Open-ended hub areas in the campaign (e.g., the frozen lake segment) that allow exploration and optional objectives, breaking from the linear corridor design of previous entries.
- Superb cross-play integration between Xbox and PC, ensuring a healthy player base regardless of platform.
- Stunning Unreal Engine 4 visuals with optional 60 FPS performance mode on Xbox Series X|S and high-end PC hardware.
DLC & Expansions
The game has received several post-launch content updates:
There are no paid expansion packs for the campaign except Hivebusters. All Versus and Horde maps are included for free to maintain a unified player base.
What Makes Gears 5 Unique?
Gears 5 is not just a continuation of a beloved franchise; it’s a bold evolution that respects its roots while pushing the series forward with meaningful innovations.
Getting Started
Getting Started in Gears 5: A Beginner’s Guide
Welcome to Gears 5! This guide will get you through your first hour, teach you the basics, and help you avoid common pitfalls. You’ll learn controls, UI navigation, early missions, resource management, and have a clear day-one checklist.
Your First Hour Walkthrough
1. Campaign or Multiplayer? Start with the Campaign. It teaches core mechanics, introduces the story, and is less punishing. Avoid Versus multiplayer until you’re comfortable.
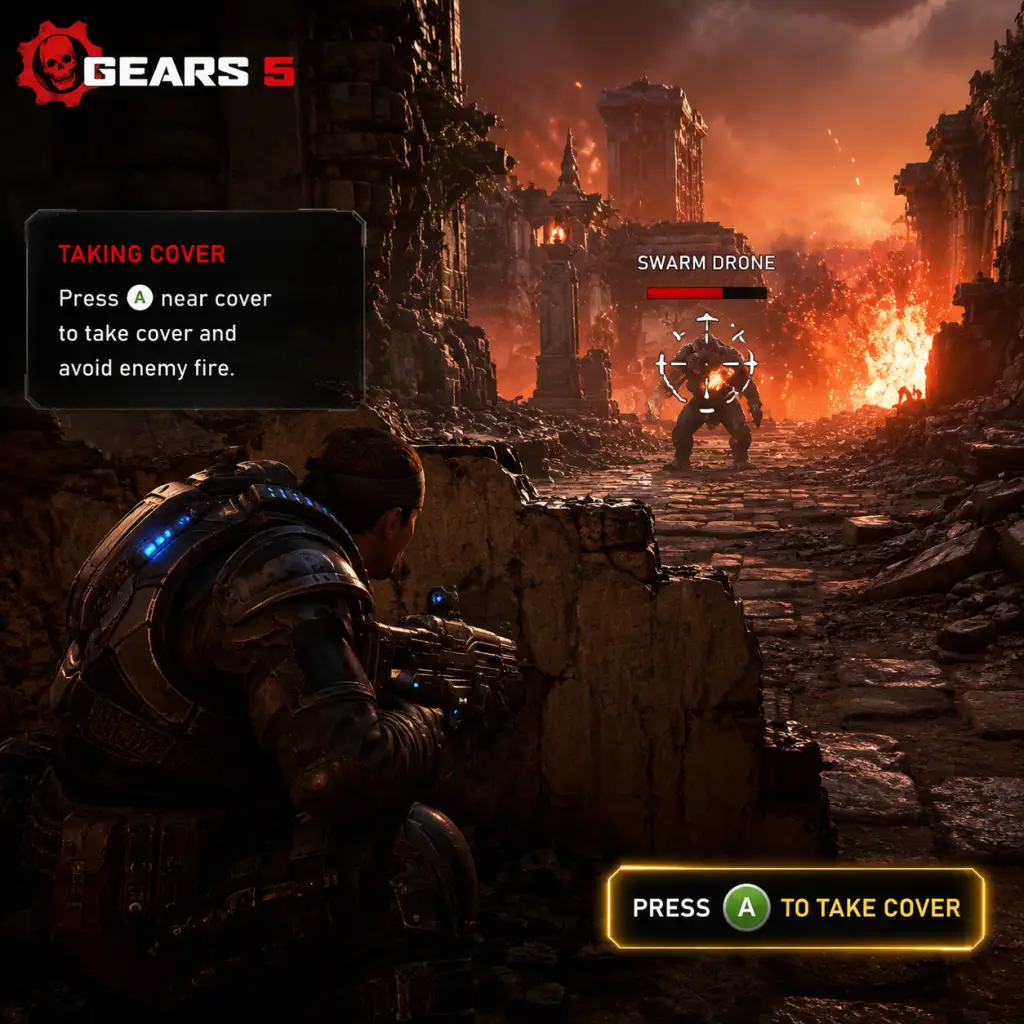
2. Opening Cinematic & Prologue: You begin as Kait Diaz in a flashback. Follow the prompts – move forward, take cover, and shoot a few enemies. This is a tutorial, so experiment with the controls.
3. Select Difficulty: Choose Intermediate if you’re new to shooters; choose Experienced if you’ve played other third-person shooters. You can change it later in the menu.
4. Chapter 1: Into the Wild – You’ll learn roadie run (sprint while crouched), active reload (press Y/▲ at the right time), and using your Lancer rifle (melee with B/○). Kill Swarm enemies, follow Jack (your robot companion), and reach the stranded village.
5. Key Mechanics Learned: Cover system (hold A/× near walls), switching weapons (Y/▲), grenade planting, and reviving teammates (hold X/■ when near downed ally).
6. After ~30 minutes: You reach the first Outpost – here you can buy upgrades using components. Don’t spend everything; save for later.
Character Creation
No character creation exists. You play as Kait Diaz in the campaign. In multiplayer modes (Escape, Horde, Versus), you select from predefined characters unlocked via play or purchases. Customization is limited to skins and banners – not stats.
Controls on All Platforms
#### Xbox Controller (Default)
| Action | Button |
|---|---|
| Move | Left stick |
| Look | Right stick |
| Fire | RT |
| Aim down sights | LT |
| Reload / Active Reload | RB (tap) |
| Roadie run (sprint) | LB (hold) + move |
| Take cover / Mantle | A (near wall) |
| Roll / Dodge | X + move direction |
| Melee | B |
| Weapon swap | Y (hold for wheel) |
| Use / Pick up / Interact | X |
| Spot enemy / Tactical | RS (press) |
| Ping | D-pad Up |
| Grenade | D-pad Left |
| Battle cry | D-pad Down (hold) |
| Action | Key |
|---|---|
| Move | WASD |
| Fire | Left mouse |
| Aim | Right mouse |
| Reload | R |
| Active Reload | R + tap at right moment |
| Roadie run | Left Shift (hold) |
| Cover / Mantle | Space (near wall) |
| Roll | C |
| Melee | V |
| Switch weapon | 1,2,3 (or Q for previous) |
| Interact | E |
| Spot | Middle mouse |
| Ping | Left Alt |
| Grenade | G |
| Battle cry | H |
- On PC, go to Settings > Controls to rebind everything.
- On Xbox, use the Controller mapping in the console’s accessories app.
- Health bar: Bottom center – red when low. Covers regenerate over time (orange segment).
- Weapon & Ammo: Bottom right – shows current weapon, ammo count, and active reload indicator.
- Grenades: Bottom left – small icons for frags or other throwables.
- D-pad commands: Center bottom – icon indicates your active ability (e.g., Jack’s cloak or shock trap).
- Compass / Tac-Com: Top center – hold Tac-Com (RS/ Middle Mouse) to see objective markers and enemy locations.
- Jack’s HUD: Bottom right – shows Jack’s health, abilities cooldowns, and upgrade progress.
- Objective marker: Floating beam of light – follow it for story progression.
- Component pickup: Small gear icon appears when near collectible components. Press interact to collect.
- Play the Campaign (at least through Act I).
- Spend your first 10 components on Jack’s Ability Cooldown upgrade – it’s very helpful.
- Rebind controls if they feel awkward (e.g., move crouch to toggle).
- Toggle aim assist to “On” (Settings > Gameplay) if you struggle with aiming.
- Skip tutorials (pop-ups explain advanced mechanics).
- Waste components on cosmetic skins – they don’t help gameplay.
- Stand still while shooting – always move between covers.
- Ignore Jack’s upgrades – he becomes a powerful tool.
- Rushing into combat – use Tac-Com to see enemy positions first.
- [ ] Install Gears 5 (size ~80 GB).
- [ ] Launch Campaign on Intermediate difficulty.
- [ ] Complete Prologue and Act I, Chapter 1.
- [ ] Collect at least 20 components.
- [ ] Purchase Jack’s Ability Cooldown upgrade.
- [ ] Learn active reload by repeating on training dummy (if you see one).
- [ ] Test each Jack ability at least once.
- [ ] Customize controls if needed (e.g., switch melee and roll).
- [ ] Watch a 5-minute “Beginner Tips” video (optional but helpful).
- [ ] Never stand still in combat – always move to cover.
UI Overview
Essential Early Objectives
1. Complete Act I, Chapter 1-3: This unlocks Jack’s mobile forge and upgrades.
2. Pick up all components you see – they’re used for upgrades and are scarce early on.
3. Learn active reload: Timing the reload bar correctly gives a damage bonus. Practice on immobile objects.
4. Use cover constantly: Gears is a cover shooter. Never stand in the open. Snap to cover (A/Space) to shoot safely.
5. Revive downed teammates quickly – hold interact button near them. If you’re downed, crawl to cover and wait.
6. Experiment with Jack’s abilities – he can stun, cloak, or zap enemies. Use Jack’s shock trap for crowd control.
What to Do First and What to Avoid
#### Do First:
#### Avoid:
Early Resource Priorities
Components are the main currency for Jack’s upgrades. They are found in yellow canisters or dropped by enemies. Prioritize in this order:
1. Jack’s Ability Cooldown (reduces wait times) – 20 components.
2. Jack’s Flash Hijack (can temporarily control enemies) – 40 components.
3. Health Boost for Kait (increases max health) – 30 components.
4. Ammo Capacity – 15 components for your primary weapon.
Avoid buying weapon skins or banners until you have all essential upgrades.
Common Beginner Mistakes
1. Not using cover: Gears punishes run-and-gun. Stick to walls, peek out, and shoot.
2. Skipping active reload: You miss out on bonus damage. Even if you miss the timing, the weapon will reload normally.
3. Ignoring Jack: He can be upgraded to stun groups, heal, or revive you. Use his abilities often.
4. Hoarding components: You can always find more. Spend early to ease combat.
5. Leaving allies downed: They can be revived, but if you ignore them, they eventually die – costing a checkpoint restart.
6. Not adjusting difficulty: If you’re struggling, lower difficulty from the pause menu. No shame.
7. Playing on too high a sensitivity: Lower to 3-4 for better aim. Adjust gradually.
Day-One Checklist
By following this guide, you’ll have a solid foundation to enjoy Gears 5 without frustration. Remember: cover is life, and active reload is your best friend. Good luck!
Core Gameplay
Core Gameplay Overview
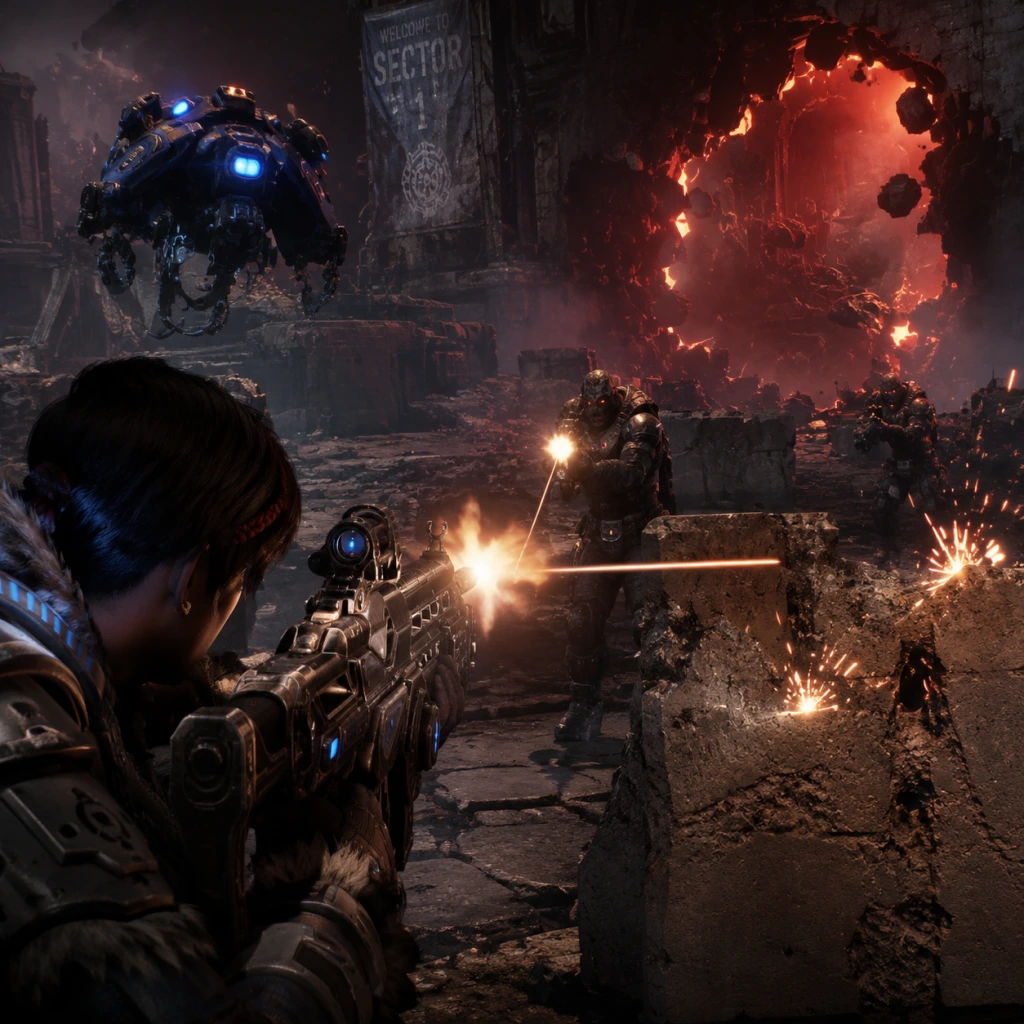
Gears 5 is a third-person tactical cover shooter that blends a linear story campaign with open-world exploration elements. The core gameplay loop revolves around tactical positioning, active reload mechanics, team coordination (solo with AI or co-op), and utilizing Jack, your robotic companion, for traversal and combat support. The campaign is divided into three open-world acts (Acts 2, 3, and 4) separated by linear missions, while Act 1 and Act 5 are linear. Progression spans character leveling, weapon upgrades, Jack skill unlocks, and collectible hunting. The game also features a robust endgame with multiplayer Horde, Escape, and Versus modes.
Core Systems
- Combat: Over-shoulder third-person shooting with a focus on active reload (timed reload that boosts damage) and cover mechanics. Roadie Run allows fast movement while crouched. Weapons include Lancer (assault rifle with chainsaw), Gnasher (shotgun), and heavy weapons like the Mulcher or Dropshot. Melee with weapons, kicks, and executions.
- Interaction: Press A to take cover, roadie run (hold A), roll, vault over cover, and use context-sensitive actions (e.g., interact with objectives, open doors, mount turrets). Jack can be commanded to perform actions like reviving, hacking, or attacking.
- Progression: Character level (1–20) unlocked via XP. Skill cards for Jack (up to 3 slots), component upgrades for weapons, and cosmetic rewards. Campaign progression is story-based with side missions.
- Exploration: In open-world acts, you traverse large environments on foot or in a skiff (a wind-powered vehicle). Skiff can be upgraded with speed and durability. Discover collectibles, components, and optional enemy encounters.
- Quests/Missions: Main story missions advance the plot. Side missions (marked on map) offer additional combat challenges, rewards, and lore.
- Economy: Components (steel, gears, scrap) collected from enemies and containers are used to craft and upgrade weapons at fabricators. Currency earned in multiplayer is separate.
- Character/Build Growth: Jack’s skill trees (e.g., stealth, combat, support) enhance his abilities. Weapon skills like increased damage or clip size can be upgraded. Player skill unlocks via leveling (e.g., improved movement, reload speed).
- Endgame Structure: After completing the campaign, players engage in Horde (co-op wave survival), Escape (co-op gauntlet), Versus (competitive multiplayer), and Tour of Duty (seasonal challenges). Character re-ups (prestige) and medals provide long-term goals.
- Linear shooting galleries with scripted encounters. Learn basic controls: cover, swapping weapons (Y on controller, Q on PC), active reload (RT reload, RT again on right timing). Use Lancer and Gnasher; chainsaw enemies for ammo.
- Introduced to Jack: follow commands (LB to command, RB for special). Use Jack to stun enemies, open shutters, or revive downed allies.
- First open-world section (Act 2, Chapter 1) is limited to an ice valley. The skiff is unlocked but initially slow and fragile.
- Enemies: Swarm (Drone, Grenadier, Scion). Early game teaches covering fire, flanking, and using Jack’s shock trap.
- Active reload: practice timing; perfect active reloads grant bonus damage. Over-hold causes gun jam.
- Roadie Run to move faster between covers. Stampede (melee charge) via B button.
- Use stim gas on Jack to heal, or zap enemies for damage.
- No level system until after Act 1. Experience earned from kills and story checkpoints.
- Jack starts with only basic skills: repair, shock trap, and revive. Unlock first upgrade via story progression (e.g., “Jack’s First Upgrade” in Act 2, Chapter 1).
- Weapon upgrades not available until fabricators are found (first in Act 2, Chapter 2). Components are scarce; focus on upgrading Lancer and Gnasher.
- Act 1 linear; Act 2 open world but small map. Look for collectibles (e.g., Campaign Relics, Components, Weapon Cases). Use Tac-Com (press LB) to highlight nearby items.
- Skiff travel: wind currents affect speed. Early game avoid high-level enemy patrols (skiff can be destroyed easily).
- Main story: “Prologue” and “Act 1” are linear tutorials. “Act 2” introduces side missions (e.g., “Investigate the Tower”, “Rescue Survivors”). Side missions reward components and skill cards.
- Example: “Giant Enemy Scion” side mission in Act 2 gives a Lancer upgrade component.
- Steel and gears drop from enemies and containers. Use at fabricators to craft weapon upgrades (e.g., +ammo capacity, +damage).
- Scrap is used to enhance Jack skills (found in chests or as mission rewards).
- Early game limited options; prioritize damage upgrades for Lancer and Gnasher.
- Player level: reach level 5 by end of Act 2 (unlocks first skill card slot for Jack).
- Jack skill cards: e.g., “Shock Trap Cooldown” or “Repair Speed”. Equip via menu.
- No class selection yet; all characters are the same until multiplayer.
- Full open world: Act 3 (desert) and Act 4 (snowy ruins). Skiff now upgradable at garages (e.g., ramming ability, armor). Side missions abundant.
- Combat intensifies: new enemies like Swarm Grenadier with shield, Pouncer (leaping enemy), and Sire (ranged grab). Jack’s abilities become critical.
- Use fabricators to upgrade weapons to level 4 (max is 5). Craft heavy weapons (e.g., Cryo Cannon, Relic Weapons) using rare components.
- Tactical use of Jack: deploy decoy (drone), launch flashbang, or hijack enemy turrets. Later, Jack can cloak the player for stealth kills.
- Weather effects: desert sandstorms reduce visibility; ice storms slow movement. Use cover against wind.
- Introduce team abilities: each character (Kait, Del, Jack) has unique specials (e.g., Del’s drone decoy, Jack’s stun).
- Active reload mastery: perfect actives now essential for tough enemies (e.g., Scions, Bastions).
- Player level cap 20 reached by end of Act 4. XP bonus from side missions.
- Jack skill tree: unlock third skill slot after a story upgrade in Act 3. Equip three cards (e.g., “Stim Gas Area” + “Revive Range” + “Shock Trap Damage”).
- Weapon upgrades: fabricator now offers tier 4 components. Focus on one primary (Lancer or Gnasher) and one secondary (e.g., Longshot or Boomshot).
- Large maps with hidden caves, abandoned settlements, and collectible caches. Use Jack to scan for secrets (hack terminals, open locked doors).
- Skiff upgrades: purchase from merchants using scrap. Example: Armored Hull reduces damage from collisions with enemies.
- Find Relic Weapons (e.g., Relic Lancer IV) hidden in optional tombs; they have unique skins and minor stat boosts.
- Main story: “Act 3” – locate the Hammer of Dawn, “Act 4” – infiltrate Swarm fortress. Side missions: “Bounty for the Swarm”, “Lost Patrol”, “The Gift” (personal quest for Jack upgrade).
- Each side mission is a discrete combat arena with story context. Rewards include high-value components, skill cards, and lore.
- Example: “The Gift” side mission unlocks Jack’s reviving upgrade, allowing him to bring back dead allies.
- Components: steel (common), gears (uncommon), scrap (rare). Crafting heavy weapons costs up to 100 steel each.
- Merchants and garages: exchange scrap for skiff upgrades or rare materials. Mid game: stockpile scrap for Jack’s late-game skills.
- Collectible items: 50% of campaign collectibles found by mid game; they award XP and cosmetic items (e.g., weapon skins, character banners).
- Player level: abilities like “Reload Speed II” and “Executioner” (increased damage from melee) unlock around level 10–15.
- Jack skill loadouts: specialize for combat (e.g., flash+shock combo) or support (heal+revive). Experiment with different cards to counter enemy types.
- No skill points; all upgrades are card-based. Cards drop from enemies or are found in chests. Rarity: Common, Rare, Epic.
- Linear gauntlet with minimal exploration. Story climax with boss fights and horde-style waves.
- No open world; focus on intense combat with advanced enemies (e.g., Matriarch boss, Swarmak).
- Jack is fully upgraded if you completed side missions. Use all three skill slots effectively.
- Resource management: fabricators are scarce; rely on pre-upgraded weapons and ammo pickups.
- Boss fights: Matriarch requires constant movement, use of Jack’s stun, and active reload on weak spots (glowing orange sacs). Swarmark: shoot exposed legs, then face when it opens mouth.
- Final segment: defend a point while protecting an NPC (e.g., Marcus Fenix or JD). Use fortifications (barriers, turrets) from fabricators.
- Example: In the final encounter, deploy Jack’s flashbang before charging with the Lancer chainsaw to clear clustered Drones.
- Player level cap reached; all skills available. No new level unlocks.
- Weapon upgrades: can reach tier 5 only in specific fabricator stations (e.g., located in final hub area). Upgrade your favorite weapon to maximum (e.g., Gnasher damage +100%).
- Jack: all three skill slots active; equip the best Epic cards found in mid game (e.g., Epic ‘Shock Armor’ reduces damage while shock trap is active).
- Minimal exploration; short linear paths. Last chance to collect missing collectibles; backtracking impossible after certain points.
- One optional side mission in Act 5 (e.g., “The Last Veteran”) that rewards an exclusive banner.
- Only main story missions remain. No new side missions.
- Final mission: “The Fall of the Swarm” – choose between two endings (save Del or JD). The choice affects final cutscene and character survival.
- Resources irrelevant; no further crafting needed. Use leftover scrap for cosmetic items if any merchant available (unlikely in final act).
- Collectibles: ensure you have all 110 collectibles (weapon cases, cog tags, components, etc.) for achievement/trophy.
- Max level (20) and best Jack build locked. No further growth possible in campaign.
- Player skill optimization: use active reloads and executions to maintain ammo. Chainsaw kills restore ammo for Lancer.
- After completing the campaign, the endgame shifts entirely to multiplayer modes: Horde, Escape, and Versus. Progress carries over from campaign (character levels, weapon skins, but not campaign equipment).
- Horde: 1–5 players survive 50 waves of enemies; build fortifications using power (earned per kill).
- Escape: 3 players traverse a hive; use a venom meter; escape within time limit.
- Versus: 5v5 team deathmatch, arcade, escalation, etc. Ranked and casual queues.
- Tour of Duty: Seasonal daily and weekly challenges that reward currency, skins, and medals. Completing all 12 tiers gives a special weapon skin.
- Horde: Each player picks a class (e.g., Soldier, Demolisher, Medic, Tactician). Classes have unique skill cards earned from levels or supply drops. Use cover and team synergy; build barriers, turrets, and decoys.
- Escape: Venom flood forces fast movement. Use Jack-like abilities (play as the Leader, or other hive characters). Team coordination to clear rooms.
- Versus: Competitive balancing; all weapons viable but Gnasher is king. Active reload timing is crucial. Wall-bouncing (advanced movement) allows rapid cover transitions.
- Example: In Horde, a Tactician can drop shock traps to slow enemies, while a Demolisher deletes clusters with GL 2000.
- Character Level: Each mode has its own level (Horde level 1–20, Escape level 1–15). Leveling unlocks class skill cards and cosmetics.
- General Progression: Player rank (1–100) via earnable XP from all modes. Re-up (prestige) up to 5 times, each resetting rank while granting permanent cosmetics (e.g., weapon skins, banners).
- Medals: Long-term achievements (e.g., 10,000 kills with Lancer, 100 Horde waves completed). Each medal tier awards supply drops or currency.
- Supply Drops: Earned via leveling, medals, or purchased with real money. Contain skill cards (multiplayer classes), cosmetics, and permanent items.
- Daily objectives (3 per day) and weekly objectives (e.g., “Get 50 headshots in Versus”). Completing all generates stars; 12 stars fill a tier.
- 12 tiers per Tour of Duty (lasts ~2 months). Rewards include cosmetic sets, bronze/silver/gold skins, and new characters.
- Iron: Premium currency (bought with real money) used for exclusive skins and supply drops.
- Scrap: From supply drops, used to craft specific skill cards for Horde/Escape classes.
- Power: In Horde, power is earned by killing enemies and completing waves; spent on fortifications.
- All currencies are separate from campaign.
- Classes: Each class (e.g., Anchor, Blademaster Jack) has 5 skill slots unlocked via leveling. Equip cards for passives (e.g., increased damage to bosses, reduced cooldown).
- Jack in Horde: Support class can heal teammates or hack enemies. Builds vary: offensive (shock spam) or defensive (revive boost).
- Escape Characters: Unlockable characters (e.g., Mac, Lahni) have unique starting weapons and abilities. Reach level 15 to max each.
- Versus: No classes; all characters have identical stats. Differences are purely cosmetic. Player skill is the only variable.
- Horde Frenzy: 12-wave mini-Horde for quicker sessions (available in both normal and hardcore difficulties).
- Mastery Challenges: Complete Horde/Escape on Master difficulty for special cosmetic set.
- Ranked Versus: Climb ranks (Bronze to Masters) per season; rewards at season end.
- Achievements/Trophies: Many require specific endgame accomplishments (e.g., “Jack of All Trades” – reach level 10 in all campaign classes).
- PC (Steam/Xbox App): Mouse and keyboard controls excel for aiming and active reload. Higher framerates (144 FPS) improve responsiveness. Supports ultrawide monitors.
- Xbox (One/Series X|S): Controller layout optimized; use bumper jumper for easier wall-bouncing. Xbox Series X|S allows 120 FPS in multiplayer.
- Crossplay: Full crossplay between PC and Xbox for all modes. Progress syncs across platforms via Xbox Live account.
- Early Game: Master active reload early. Complete all side missions in Act 2 for components to upgrade your Gnasher.
- Mid Game: Explore every corner of open worlds for Jack skill cards and relic weapons. Upgrade skiff armor before venturing into high-level enemy zones.
- Late Game: Save high-tier Jack abilities (e.g., stunning boss) for critical moments. Use Jack’s cloak to skip non-essential fights.
- Endgame: Focus on one Horde class (e.g., Engineer) first to build fortifications efficiently. Tour of Duty is the best way to earn free cosmetics.
---
Early Game (Acts 1–2: Prologue & Open World Intro)
Gameplay Loop
Combat & Interaction
Progression
Exploration
Quests/Missions
Economy
Character/Build Growth
Endgame Structure (N/A in Early Game)
---
Mid Game (Acts 3–4: Desert Oasis & Ice Ruins)
Gameplay Loop
Combat & Interaction
Progression
Exploration
Quests/Missions
Economy
Character/Build Growth
Endgame Structure (N/A in Mid Game)
---
Late Game (Act 5: Finale)
Gameplay Loop
Combat & Interaction
Progression
Exploration
Quests/Missions
Economy
Character/Build Growth
Endgame Structure (N/A in Late Game)
---
Endgame (Post-Campaign)
Gameplay Loop
Combat & Interaction (Multiplayer Focus)
Progression
Exploration (N/A in Endgame)
Quests/Missions (Tour of Duty)
Economy
Character/Build Growth (Multiplayer)
Endgame Structure (Within Endgame)
---
Platform-Specific Notes
---
Tips for Each Tier
---
Conclusion: The core gameplay of Gears 5 evolves from a tutorial-focused shooter into a rich hybrid of open-world exploration, tactical combat, and deep multiplayer progression. Each tier offers distinct challenges and rewards, ensuring that both campaign and endgame players have clear goals and satisfying loops.
Game Tips
Game Tips for Gears 5
Welcome! This comprehensive guide covers essential tips for mastering Gears 5. Tips are grouped by category and difficulty level (Beginner, Intermediate, Advanced).
---
General Tips
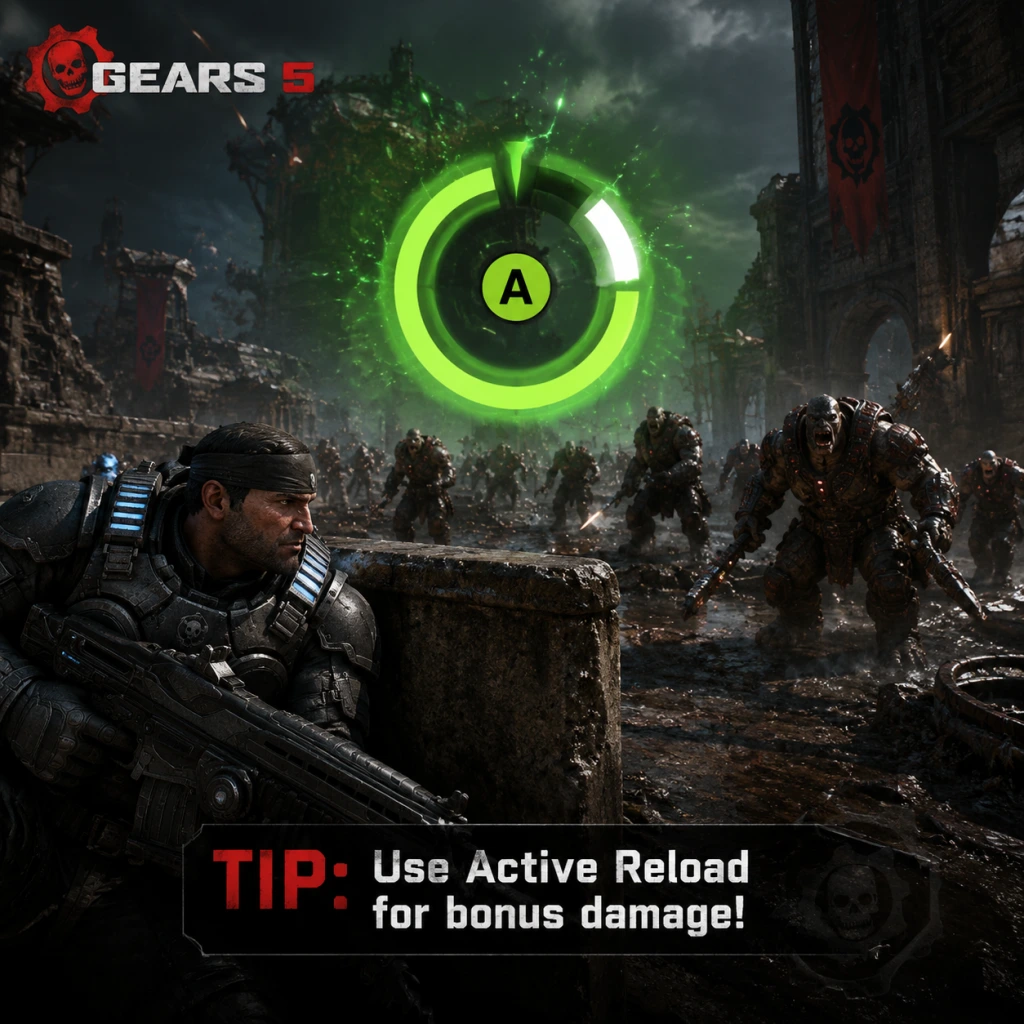
- Master Active Reload: Tap `RB` (or `R` on PC) when the reload indicator hits the white sweet spot. A successful Active Reload gives a temporary damage boost and faster fire rate. Practice this constantly—it’s a game-changer in every mode.
- Use the Tac-Com: Hold `LB` (or `Q` on PC) to see objective markers, enemy highlights, and weapon pickups through walls. In Campaign, this also marks collectibles and side missions. Always use it before entering a room.
- Slide and Cover: Hold `A` (or `Space`) to slide into cover; tap `A` to slide quickly between covers. Never stay in one cover spot for more than a few seconds—enemies flank.
- Melee to Stagger: A quick melee (`B` or `F`) staggers most enemies, allowing you to escape or execute a finishing blow. Use it to break away from a grab.
- Dodge Roll: Press `A` + direction while unholstered to roll. Use it to escape enemy fire or reposition, but avoid rolling in front of heavy weapons.
- Stay in Cover During Firefights: Never stand still in the open. Use cover to block shots and peek out to shoot. Pop out, fire a burst, then duck back.
- Shoot Drones in the Head: Headshots with most weapons instantly kill Swarm Drones. Aim for the head for quick kills.
- Use the Lancer’s Chainsaw Sparingly: The chainsaw is devastating but leaves you vulnerable during the animation. Only use it when enemies are close and unaware.
- Grenade Tagging: Hold `RB` (or `G`) to cook a grenade; release to throw. A stuck grenade on an enemy explodes after a few seconds, often killing nearby enemies. Perfect for grouped enemies.
- Flanking: In combat, don’t stay with your squad in the same cover. Circle around using side paths. Enemies focus on your allies, giving you clean shots from behind.
- Weapon Combos: Use the Lancer to down an enemy’s shield, then switch to a Gnasher shotgun for an instant kill at close range. This combo is effective against Scions and Elite Drones.
- Use Explosive Barrels: Red explosive barrels are everywhere. Shoot them when enemies are near to cause massive area damage. In Campaign, you can also kick them towards enemies.
- Execute Downed Enemies: When you down an enemy, execute them quickly (`X` or `E`) to prevent revival. In multiplayer, this denies the enemy team a revive chance.
- Weapon Swapping Mid-Combat: Keep two weapons: one for range (Lancer or Longshot) and one for close quarters (Gnasher or Overkill). Swap instantly with `Y` or `2`. Practice swapping during active reloads.
- Perfect Active Reload Timing: The damage boost from a Perfect Reload is significant. In high-difficulty Campaign, always reload before engaging a group to get the buff.
- Baiting Grenades: Fake a grenade throw to make enemies move from cover, then shoot them as they run. This works well against aggressive AI.
- Counter-Sniping: When facing sniper enemies (e.g., Snipers or Marksmen), use the Longshot from cover and time your shots between their shots. Follow a pattern: shoot, duck, reload, repeat.
- Follow the Main Path: In Campaign, the objective marker is clear. If lost, hold Tac-Com or check the map (`Tab` on PC, `View` on Xbox).
- Check Corners for Collectibles: Most collectibles (Dog Tags, COG Tags, Components) are in side rooms or dead ends. Always explore before moving on.
- Use Jack’s Abilities (Campaign): Jack can scan for secrets (`X` when in Jack mode). Use him to highlight hidden items and pathways.
- Skiff Navigation (Acts 2-4): The Skiff (wind-based vehicle) has limited oxygen; you can refill at beaches or by destroying poison pods. Plan routes to avoid storms.
- Side Missions: In open-world Acts, side missions appear as green icons. They provide skill points, components, and lore. Do them before main missions for better gear.
- Breakable Walls: Some walls are marked with cracks. Use a grenade or heavy weapon to blow them open for hidden areas.
- Time-Limited Areas: In certain locations, you have limited time before an enemy spawns or the area explodes (e.g., the sinking city). Prioritize looting and exit quickly.
- Hidden Paths: Look for ledges that can be mantled, or gaps that require a slide. These often lead to bonus chests or high-value components.
- Collect Components: These yellow items are used to upgrade Jack’s abilities. Pick up every one you see—they are valuable and often hidden.
- Don’t Hoard Credits: Credits (in-game currency) buy skill cards for Campaign and Horde. Spend them early on core cards (e.g., Ammo Regeneration, Weapon Damage).
- Salvage Components: In Horde mode, salvage is used to build fortifications and upgrade weapons. Collect it from fallen enemies and deposits.
- Prioritize Jack Upgrades (Campaign): Upgrade Jack’s Recon and Combat skill trees first. Recon reveals all collectibles on map; Combat gives offensive abilities like Stun and Zap.
- Crafting in Horde: Use the Fabricator to build barriers, turrets, and sentries. Build a few barriers early to funnel enemies, then upgrade to a turret for area denial.
- Skill Card Rarity: Skill cards have common, rare, epic, and legendary tiers. Equip cards that complement your playstyle (e.g., Sniper-focused cards for a long-range build). Re-roll duplicates at the Skill Card Forge.
- Scrap Duplicate Cards: When you have duplicate skill cards, scrap them at the Forge to earn Scrap, which can be used to level up other cards. This is the most efficient way to strengthen your builds.
- Power Management in Horde: Power is shared among teammates. Communicate who builds what. Typically, one player focuses on barrier upgrades, another on turrets, and a third on lockers.
- Gold Bars in Campaign: These rare collectibles are worth large credit rewards. They are often in hard-to-reach places. Use Jack’s high-jump to get them.
- Jack’s Skill Trees:
- Kait’s Weapons: Upgrade the Lancer and Gnasher first. The Longshot is optional—save components for Jack’s upgrades.
- Class Builds:
- Weapon Upgrade Priority: In Horde, upgrade your starting weapon first (usually Lancer) to level 4, then save for level 3 Gnasher. Turrets are more powerful than base weapons after round 10.
- Learn the Maps: Play private matches or watch killcams to learn spawn points, power weapons, and common routes. Knowledge is key.
- Stick with Teammates: Don’t lone-wolf. Follow a teammate, cross cover, and cover fires. Two players stacking cover is harder to flank.
- Use the Gnasher at Close Range: The Gnasher is the weapon of choice in Versus. For best damage, aim for center mass while moving towards the enemy. Body shots kill in 2-3 hits at close range.
- Wall Bouncing: This advanced movement technique involves rapidly sliding into and out of cover to confuse enemies. Practice in a custom game: slide into cover, then immediately press `A` in another direction. Use it to dodge bullets and close distance.
- Power Weapon Control: Power weapons (e.g., Boltok, Longshot, Boomshot) spawn at set times. Communicate with your team to secure them. Deny the enemy team the weapon by holding the area.
- Nade Placement: Place grenades on walls or floors near common choke points. When enemies walk past, the grenade detonates. Better than throwing because it stays hidden.
- Gibbing: In Versus, if you down an enemy and they are close to death, execute them with a melee or a shot to trigger a gib (explosion of gore). This denies any chance of revival and demoralizes opponents.
- Reading Enemy Patterns: Skilled players often use the same routes. Learn to predict where enemies will come from based on their team’s composition and previous engagements. Use Tac-Com to check for red outlines.
- Shotgun Trading: When two players both have shotguns, whoever aims higher wins. Fire while strafing left/right to avoid damage. If you miss, pop a smoke grenade to break line of sight.
- Save Power for Fabricator: Early rounds (1-10), spend power only on level 1 barriers and a single turret. Don’t waste on weapon lockers until later.
- Stay Together: The entire team should stay near the fabricator area. Splitting up gets you killed by Snipers and Boomshots.
- Kill the Scout First: Scout enemies (yellow glow) call in reinforcements. When you see one, prioritize them to reduce swarm spawns.
- Fortification Layout: Place barriers in a funnel shape leading to a kill zone. Place turrets behind cover or at elevated positions. Use the decoy to distract enemies while you shoot from the side.
- Weapon Lockers: Only build lockers when you have at least one maxed-out weapon. A level 4 locker costs significant power—invest in barriers first.
- Class Synergy: Combine a Demolitions (explosives) with a Mechanic (repair/faster build) and a Tactician (bonus damage to marked targets). This triples efficiency.
- Boss Wave Strategy: Boss waves (e.g., Warden, Matriarch) require special tactics. Save ultimate abilities for these. Use shock traps or sentries to slow them, then focus fire from a distance.
- Cycle Perks: In later rounds, use the Forge to upgrade your perk cards multiple times. Stack damage perks with defense adjustments as needed. For example, increase health perk if you’re being downed often.
- Map Exploits: On levels like "Blood Drive," enemies only come from 2-3 directions. Memorizing spawn points allows you to set up crossfires with minimal blind spots.
- FOV Settings (PC): Increase the Field of View to 90-100 for better peripheral vision. This helps in close quarters and when moving fast.
- Control Customization: Remap cover slide (`A`) to a paddle or mouse button for faster reactions. Many pros use quick slide configurations.
- Audio Cues: Enemies make distinct sounds: Snipers charge up, Boomshots have a loud whistle, and Grenadiers grunt before throwing. Use headphones to locate them.
- Invulnerability Frames: When performing an executed move (e.g., finishing a downed enemy), you are briefly invulnerable. Use this to survive attacks if you can guarantee the kill.
---
Combat Tips
#### Beginner
#### Intermediate
#### Advanced
---
Exploration & Navigation Tips
#### Beginner
#### Intermediate
#### Advanced
---
Resources & Economy Tips
#### Beginner
#### Intermediate
#### Advanced
---
Character Builds & Upgrades (Campaign / Horde)
#### Campaign
- Recon Tree: Prioritize Jack’s Scavenger ability (auto-pickup components) and Reveal All (highlights enemies and items). This makes exploration efficient.
- Support Tree: Flash Freeze and Repair abilities are great for defense and reviving teammates.
- Combat Tree: Zap and Stun are offensive but less useful on higher difficulties where Kait can kill quickly.
#### Horde
- Veteran: Use cards that boost Rifle damage and Active Reload. Good for all-around damage.
- Juggernaut: Focus on health, damage resistance, and heavy weapon damage. Great for tanking.
- Demolitions: Boost grenade damage and capacity. Use Explosive Jack skills for area denial.
---
Multiplayer (Versus) Tips
#### Beginner
#### Intermediate
#### Advanced
---
Horde Mode Tips
#### Beginner
#### Intermediate
#### Advanced
---
Advanced Optimizations
---
With these tips, you’ll improve your K/D ratio, clear Campaign on Insane difficulty, and dominate in Versus. Remember to practice, communicate with your team, and have fun!
Game Settings
Overview
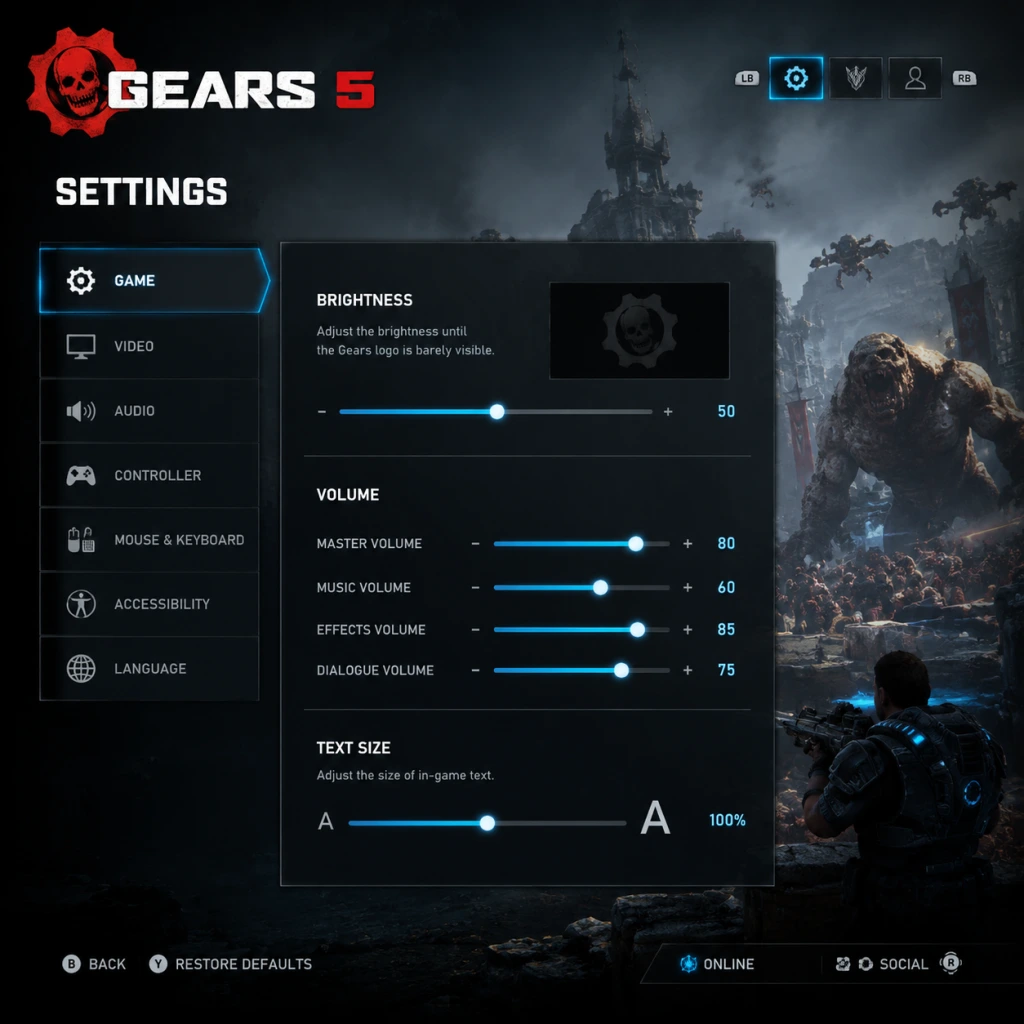
Gears 5 offers a comprehensive suite of settings across Graphics, Audio, Controls, Accessibility, Language, Network, and Gameplay. This guide details each category, provides optimal recommendations for different hardware tiers (Low-End, Mid-Range, High-End, Ultra), and highlights easily misconfigured options that can tank performance or hinder gameplay. Settings are accessible from the Main Menu → Options or the Pause Menu during gameplay.
---
Graphics Settings
Display & Performance Targets
- Resolution: Set to native monitor resolution. Lowering improves performance on weak GPUs.
- Window Mode: Fullscreen is recommended for best performance. Borderless Windowed can cause input lag and reduced framerate. Avoid Windowed unless troubleshooting.
- VSync: Off for lowest input lag. On if screen tearing is visible. Prefer in-game limiter or driver-level frame cap over VSync.
- Frame Rate Limit: Set to match monitor refresh rate (e.g., 60, 120, 144). For weak hardware, 30 or 40 FPS can provide smoothness. Unlimited may cause tearing/stutter.
- HDR: Enable only if your display supports HDR. Calibrate in Windows HDR settings first.
- Field of View (FOV): Default 80 is safe. Increase to 90-100 for better peripheral vision but reduces performance slightly. Too high (110+) can distort.
Quality Presets & Individual Options
| Setting | Low-End (GTX 1050 / RX 560) | Mid-Range (GTX 1660 / RX 580) | High-End (RTX 2070 / RX 6700) | Ultra (RTX 3080 / RX 6800 XT) | Notes |
|---|---|---|---|---|---|
| Overall Quality | Low | Medium | High | Ultra | Start with preset, then tweak below. |
| Resolution Scale | 100% (or 90% if struggling) | 100% | 100% | 100% | Lower (<100) blurs image but boosts FPS. |
| Anti-Aliasing | Low (FXAA) | Medium (TAA) | High (TAA) | High (TAA) or Ultra | TAA is performance-friendly; FXAA cheaper but blurry. |
| Texture Quality | Low (0.5GB VRAM) | High (1.5GB VRAM) | Ultra (3GB+ VRAM) | Epic (6GB+ VRAM) | Lower if VRAM is limited to avoid stutter. |
| Shadow Quality | Low | Medium | High | Ultra | Medium is good balance; High/Ultra marginal gains. |
| Post Processing | Low | Medium | High | Ultra | Includes bloom, lens flare – subtle impact. |
| Ambient Occlusion | Off | Low (SSAO) | High (HBAO+) | Ultra (HBAO+) | Off gives ~10% FPS boost. |
| Reflections | Low (SSR) | Medium | High | Ultra | Screen Space Reflections – medium for performance. |
| Volumetric Fog | Low | Medium | High | Ultra | Heavy on GPU; Medium looks almost same as High. |
| Particle Quality | Low | Medium | High | Ultra | Low reduces explosion effects. |
| Texture Filtering | 2x | 4x | 8x | 16x | Performance impact minimal. |
| Terrain Quality | Low | Medium | High | Ultra | Low flattens ground detail. |
| Async Compute | Off (NVIDIA) or On (AMD) | Off/On | Off/On | Off/On | Misconfig: On AMD cards, enable; on NVIDIA, disable unless troubleshooting. Causes crashes on some NVIDIA drivers. |
| Motion Blur | Off | Off | Off | Off | Personal preference; off gives clarity during movement. |
| Bloom | Off | On | On | On | Subtle – off improves visibility. |
| Camera Sway | Off | Off | Off | Off | Off removes weapon bob; helps with motion sickness. |
| Lens Flare | Off | On | On | On | Off reduces eye strain. |
| Film Grain | Off | Off | Off | Off | Unnecessary visual noise. |
| Chromatic Aberration | Off | Off | Off | Off | Off improves clarity. |
Special Attention Points
- Async Compute: Automatically set based on GPU vendor; manual override can cause instability. Only change if you experience crashes.
- Resolution Scale: Setting below 100% may look blurry. Use only as last resort.
- VSync & Frame Rate Limit: Combining both can cause double buffering issues. Use one or the other.
- Window Mode: Borderless Windowed often forces VSync and reduces performance. Always choose Fullscreen for competitive play.
- FOV: Increasing beyond 100 can cause fish-eye effect and reduce aim accuracy due to distortion. Adjust slowly.
- Master Volume: Adjust to comfortable level. 80-100% recommended.
- Music Volume: Lower to 50% if music masks footsteps/gunfire.
- SFX Volume: Keep at 100% for critical sound cues.
- Voice Volume: 100% for dialogue, but can lower if too loud.
- Dynamic Range: Headphones (for spatial audio) or Home Theater (surround systems). TV may compress dynamic range. Misconfigure: Using 'TV' with headphones can flatten sound and reduce positional cues.
- Spatial Audio: Windows Sonic (Xbox/Windows) or Dolby Atmos (if licensed). Off for standard stereo. Enable for better directional hearing.
- Subtitles: Toggle on/off. Recommended On for story clarity.
- Subtitles Size: Small/Medium/Large – large helps readability.
- Voice Chat Volume: Adjust separately for multiplayer.
- Sound Output: Auto-detect is usually fine, but manually set to correct number of channels if surround is buggy.
- Sensitivity: Default 10. Adjust based on DPI and mouse pad. Start at 5-8, increase gradually. For precise aim, lower sensitivity recommended.
- Vertical Sensitivity Multiplier: 1.0 (equal horizontal/vertical). Some prefer 0.8-0.9 for easier vertical control.
- ADS Sensitivity Multiplier: 0.5-1.0. Lower helps fine aim; higher for flicking.
- Invert Mouse Y: Off (unless used to flight sims).
- Mouse Filtering: Off (no smoothing). On reduces lag but adds latency.
- Mouse Raw Input: On (bypasses OS acceleration). Critical for consistency.
- Key Bindings: Customizable. Popular changes:
- Controller Type: Classic (default) or Tournament. Tournament swaps weapon and action buttons for faster slide-melee. Misconfig: Many players forget to rebind and wonder why actions differ.
- Sensitivity & Dead Zones:
- Aim Assist: High (campaign), Low or Off (multiplayer competitive). On PC with controller, keep Low to avoid overly sticky aim.
- Toggle vs Hold:
- Vibration: Off for better aim control and reduced noise. Misconfig: Vibration can interfere with aim micro-adjustments.
- Active Reload Vibration: Off (since vibration can be distracting; use visual cue instead).
- Controller Layout: Customizable. Common alternative: Tactical swaps melee and crouch (crouch on R3). Useful for sliding and cover.
- Subtitles: On with speaker names for hearing impaired.
- Large Subtitles: Enable for better readability.
- Colorblind Mode: Deuteranopia, Protanopia, or Tritanopia. Alters health bars, weapon HUD, and team colors. Misconfig: If you don't have colorblindness, leave Off; enabled incorrectly can make HUD confusing.
- High Contrast Text: On improves readability.
- Screen Magnifier: Not available in-game. Use system tools (Windows Magnifier, Xbox Narrator).
- Narrator: System-level, not in-game.
- Controller Remapping: Full customization available under Controls. Rebind any action for physical disabilities.
- Input Delay Reduction: Set VSync Off, cap FPS, use Game Mode on Windows.
- Text Language: Choose from available (English, French, German, Spanish, etc.). Changes menu text.
- Audio Language: Separate from text. Can set English voices with Japanese subtitles, etc. Misconfig: Players often think changing 'Language' affects both; check each dropdown.
- Voice Over: Choose your preferred dubbing. Some regions have multiple dubs.
- Subtitle Language: Defaults to audio language. Adjust if different.
- Note: Changing language in-game may require restart. Also affects multiplayer communication (if using region-specific chat).
- Network Status: Shows connection type (NAT Open, Moderate, Strict). Open recommended for seamless matchmaking. If Strict, forward ports (TCP 3074, UDP 3074-3076).
- Region: Choose Auto or manual (e.g., US West, Europe). Misconfig: Setting to wrong region increases ping. Select one closest to you.
- Crossplay: Enabled allows play with Xbox and PC players. Disabled restricts to same platform. Useful if you want console-only or PC-only lobbies.
- Input-Based Matchmaking: Off (matches based on input type? Actually misnamed; it matches controller with controller, KB/M with KB/M). Enable for fair play if using controller on PC. Misconfig: If your party has mixed inputs, disable to find game.
- Telemetry: On helps devs but sends data. Off for privacy.
- Bandwidth: No specific setting; ensure stable internet (wired > Wi-Fi). Use QoS if streaming.
- In-Game Voice Chat: Push-to-Talk (PC) or Open Mic (console). Open mic can cause feedback; use PTT on PC.
- HUD: On or Minimal. Minimal hides ammo/health for immersion. Off severely hinders gameplay.
- Damage Numbers: On for feedback; Off for screen clarity.
- Camera Shake: Off to reduce nausea and improve aim.
- Screen Shake: Off similarly.
- Objective Marker: Keep On to locate mission goals.
- Weapon Holster: On (weapon lowers when not aiming) for clear view; Off for constant readiness.
- Auto Pickup: On (automatically collect ammo/weapons near items). Off requires manual pickup.
- Auto Center Camera: Off (prevents camera from snapping behind after roadie run). Misconfig: Setting to On can cause disorientation when changing directions.
- Mantling: Automatic (default) or Manual (must press space). Manual prevents accidental climbs.
- Sprint Cancel: Off (sprint stops when you stop pushing). On allows cancel with other actions more precisely. On recommended for competitive.
- Tactical Compass: On shows objective markers on compass; Off removes.
- Minimap: On (campaign) for navigation; Off for immersion.
- Health Regen: Not toggleable; it's fixed.
- Difficulty Settings: Separate from Options; chosen at campaign start. Affects enemy damage, aggression, and ammo. Not a settings menu item but worth noting: choose for desired challenge.
- Performance (60 FPS on Low-End PC): Overall Quality Low, Resolution 1080p, Async Compute Off (NVIDIA), VSync Off, FOV 80, Motion Blur Off, Camera Sway Off, Vibration Off, Audio: Headphones, Subtitles On.
- Balanced (60-100 FPS Mid-Range): Overall Quality Medium, Resolution 1080p/1440p, Async Compute Auto, VSync Off, FOV 85, TAA, Shadows Medium, Reflections Medium.
- Quality (60 FPS High-End): Overall Quality High/Ultra, Resolution 1440p/4K, Async Compute Off (NVIDIA) or On (AMD), VSync On (if tearing), FOV 90, all post-processing enabled except Motion Blur/Film Grain.
- Competitive Multiplayer (Any Hardware): Lower settings for max FPS and clarity. Disable Motion Blur, Camera Sway, Lens Flare, Bloom. Set FOV 90-100. Use Low Shadows, Low Volumetric Fog, and disable Ambient Occlusion.
---
Audio Settings
---
Controls Settings
Keyboard & Mouse (PC)
- Crouch: Set to C or Left Ctrl (default is C).
- Roadie Run: Left Shift (default). Consider Toggle Run if finger fatigue.
- Reload: R (default).
- Weapon Swapping: 1-4 or Mouse Wheel. Wheel can be imprecise; prefer number keys.
- Melee: V or Mouse Button 4/5.
- Action (Interact/Execute): E or F (default E).
- Ping: Middle Mouse or ` (tilde) for communication.
Controller (Xbox/PlayStation)
- Horizontal Sensitivity: 30-50 (lower for precision, higher for quick turns).
- Vertical Sensitivity: 20-40 (lower than horizontal for stability).
- Dead Zone (Inner/Outer): Default 10% is safe. Lower to 5% if stick drift occurs. Misconfig: Setting too low causes aim wobble; too high reduces fine aim.
- Crouch: Toggle (tap to crouch/stand) vs Hold (hold to crouch). Toggle preferred for movement.
- Roadie Run: Toggle (tap shift once) vs Hold. Toggle reduces finger strain.
- Aim (ADS): Hold for faster reaction; Toggle for comfort.
---
Accessibility Settings
---
Language Settings
---
Network Settings
---
Gameplay Settings
---
Special Attention Points During Setup
1. Async Compute on NVIDIA GPUs: Disable this setting if you experience crashes or poor performance. It is safe on AMD.
2. Window Mode & VSync: Always use Fullscreen with VSync Off and frame cap for lowest input lag. Borderless Windowed can add up to 30ms latency.
3. Active Reload Vibration: Turn off to avoid unnecessary rumble that can throw off your aim during tense moments.
4. Camera Sway & Screen Shake: Disable both if you suffer from motion sickness or want clearer vision when moving.
5. Controller Dead Zone: Too low leads to drift; too high reduces fine aim. Test with 5-10% inner dead zone and adjust.
6. Crossplay & Input-Based Matchmaking: If you are a controller player on PC, enable Input-Based to avoid KB/M opponents. Similarly, disable if you have mixed-input party.
7. Resolution Scale: Only lower as a last resort – it makes the game blurry. Prefer reducing quality presets first.
8. HDR Calibration: If HDR looks washed out, ensure Windows HDR is on and do in-game calibration. Disable if colors appear off.
---
Summary of Optimal Quick-Start Settings
Important Notes
Important Notes for Gears 5
This section covers crucial warnings, pitfalls, and insider knowledge to save you frustration and regret. Read this before you start playing.
⚠️ Warnings & Pitfalls
- Active Reload Punishment: If you miss the Active Reload (timed tap), your weapon may jam temporarily – avoid spamming reload in combat. Time it carefully.
- Jack's Upgrades Are Permanent (per playthrough): All Components collected for Jack are used to unlock abilities. You cannot respec, so prioritize upgrades that fit your playstyle (e.g., Heal Boost, Flashbang, Shield).
- Campaign Choices Are Irreversible: In Act 2, you must choose between two paths (e.g., help Del or help JD). This affects story scenes and some encounters. You cannot undo this decision in a single playthrough – replay the chapter or start a new game to see the alternative.
- Declassified Missions Are Missable: Each chapter has optional Declassified objectives that often make combat harder but reward bonus Components. If you skip them, you lose the chance to pick up those Components forever (per playthrough).
- Relic Weapons Are Single-Use Per Playthrough: You can find Relic weapons (e.g., Enforcer, Gnasher) in secret locations. They are powerful but break after a limited time. Grab them only when you plan to use them soon.
- Difficulty Spike – Matriarch Boss Fight (Act 2): This boss is significantly harder than regular enemies. Use cover, avoid her charge, and focus fire on her when she reveals weak points. Bring a boltok or longshot for precision damage.
- Optional Side Missions Are Worth It: In Acts 2 and 3, you can explore Skiff stops. These side missions give extra Components, Relics, and lore. Ignoring them means you miss out on upgrades and unique gear.
###
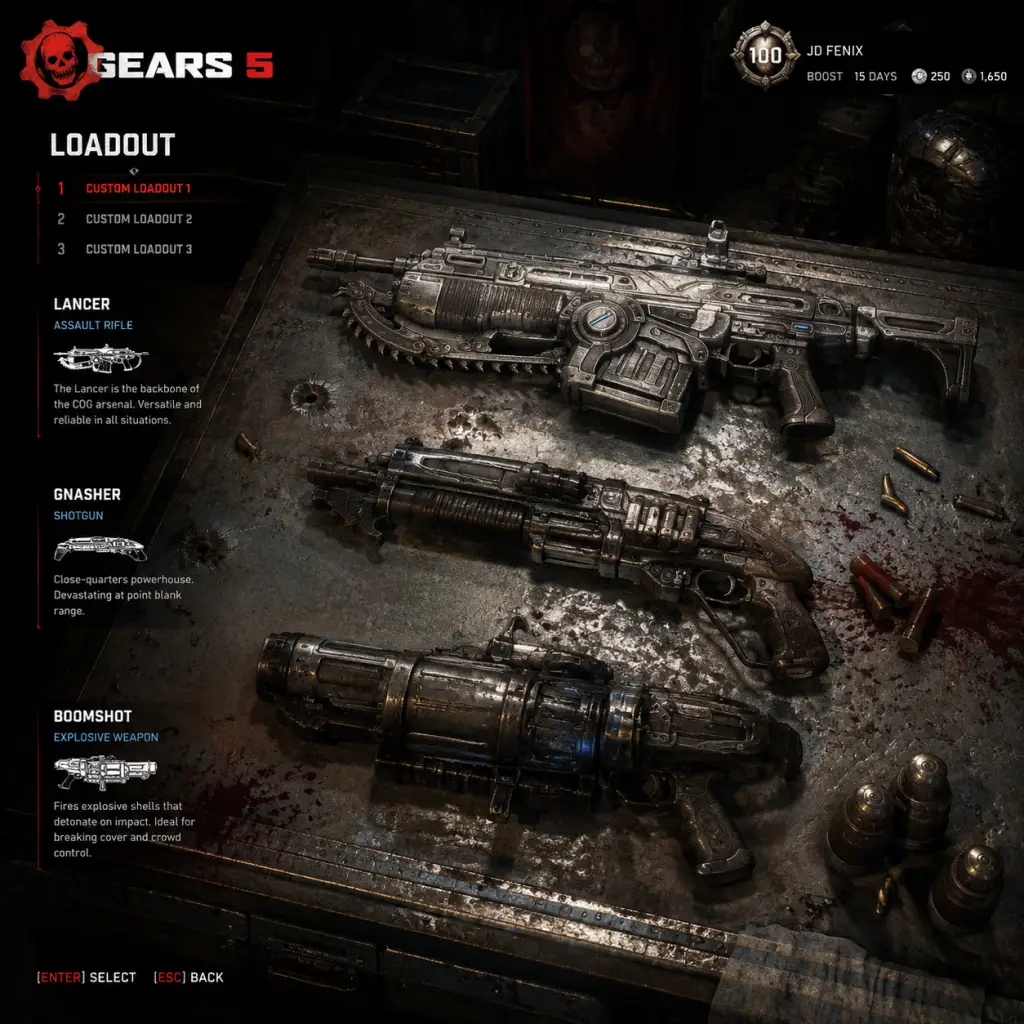
All Game Items
All Game Items in Gears 5
This guide covers every major item category in Gears 5, including weapons, equipment, consumables, currencies, collectibles, and upgrade items. All items are grouped logically with explanations on usage, acquisition, and synergies.
---
Weapons
Gears 5 features a wide arsenal of firearms, explosives, and melee weapons. Most are available in Campaign, Horde, Escape, and Versus, though some are mode-specific. Weapons can be upgraded via Skill Cards in Horde/Escape or crafted in Campaign using Components.
Assault Rifles
- Lancer MK2 – Standard assault rifle with a mounted chainsaw bayonet. Balanced for medium range. Acquisition: Starting weapon for most characters; common drops from enemies. Useful: Everywhere; chainsaw is effective against enemies that stagger. Synergies: Active Reload boosts damage; chainsaw kills grant a small amount of health.
- Retro Lancer – Slower fire rate but higher damage per shot. Can wall-bounce for mobility. Acquisition: Weapon lockers in Campaign; random drops in Horde. Useful: Close-mid range; good for suppressing fire. Synergy: Better accuracy when hip-fired compared to the Lancer.
- Hammerburst – Semi-automatic burst rifle. Accurate at long range when fired in bursts. Acquisition: COG soldier weapon; lootable from Drybot enemies. Useful: Long-range engagements; headshots are lethal.
- Enforcer – Full-auto shotgun-like hybrid with tight spread. Acquisition: Heavy weapon; found in specific campaign segments. Useful: Close-quarters suppression.
- Gnasher Shotgun – Pump-action shotgun; one-shot kill at close range. Acquisition: Ubiquitous; starts with some characters. Useful: The premier close-range weapon; active reload dramatically increases damage. Synergy: Used with cover sliding for pop-shots; Gibs enemies on kill.
- Overkill – Double-barrel shotgun with two rapid shots before reload. Acquisition: Campaign during Act 2; Horde supply drops. Useful: Devastating at point-blank. Synergy: Reload speed cards enhance its burst potential.
- Digger Launcher – Fires a drill projectile that tunnels through cover. Acquisition: Campaign side missions; Horde fabricator. Useful: Flushes enemies out of cover. Upgrades: Damage radius increases with Skill Cards.
- Longshot – Bolt-action sniper rifle. Instant kill on headshots. Acquisition: Weapon lockers, enemy patrols. Useful: Long-range elimination of high-value targets (e.g., Scions). Synergy: Active Reload increases damage; Scope attachment available in Campaign.
- Markza – Semi-auto marksman rifle. Fast fire rate, good for body shots. Acquisition: DeeBees in Campaign; lootable. Useful: Mid-long range without scope glare.
- Ember – Fully automatic heavy sniper. Acquisition: Boss drops; Horde heavy weapon fabricator. Useful: Suppressive fire against groups; penetrates multiple enemies.
- Boomshot – Grenade launcher that fires cluster explosives. Acquisition: Heavy weapon pickups; Fabricator in Horde. Useful: Clearing groups; destroys cover. Upgrades: Capacity and blast radius cards.
- Dropshot – Fires an explosive drill that emerges from terrain. Acquisition: Campaign Act 3; Fabricator. Useful: Bypassing cover; area denial. Synergy: Can shoot through walls after upgrade.
- Triple Shot – Heavy chaingun with three barrels. Acquisition: Campaign set pieces; Horde. Useful: Suppression and crowd control.
- Cryo Cannon – Freezes enemies solid. Acquisition: Campaign side mission in Method area. Useful: Crowd control; frozen enemies can be shattered with melee. Synergy: Combo with explosive weapons for shatter damage.
- Snub Pistol – Standard semi-auto pistol. Acquisition: Starting sidearm for most characters. Useful: Emergency backup; accurate when aimed.
- Talons – Dual automatic pistols. Acquisition: Drops from DeeBees. Useful: High rate of fire; good for close range.
- Boltok – Revolver with powerful shots; one-shot headshot at close range. Acquisition: Random loot; COG Tags collectible reward. Useful: High skill weapon; rewarding headshots.
- Grenade – Thrown explosive; sticky. Acquisition: Pickups, enemies drop. Useful: Clearing rooms; sticky can be attached to enemies. Synergy: With ‘Grenadier’ class abilities in Horde.
- Combat Knife – Default melee attack with any weapon. No separate item. Useful: Downed enemies finishing.
- Chainsaw Bayonet (Lancer family) – Melee attack that cuts through enemies. Useful: Executions; health regeneration on kill.
Shotguns
Snipers and Marksman
Heavy Weapons
Pistols and Sidearms
Melee Weapons
---
Equipment (Jack Upgrades – Campaign)
Jack is the player’s robo-companion with deployable tools. These are unlocked by finding Components across the overworld.
| Item | Description | Acquisition | Synergy/Upgrades |
|---|---|---|---|
| Flash Trap | Deploys a trap that blinds enemies in a radius. | Find Component in Act 1 | Upgrades reduce cooldown; combo with flanking. |
| Shock Trap | Stuns enemies in an area. | Act 2 Component | Upgrades increase duration; works on bosses. |
| Stim | Heals a target ally over time. | Early Component | Upgrades add damage resistance. |
| Cloak | Makes Jack invisible; reduces aggro. | Act 1 Component | Upgrades allow silent movement through enemies. |
| Turret | Deploys a stationary auto-turret. | Act 2 Component | Upgrades increase ammo and damage. |
| Pickup | Jack retrieves items from a distance. | Default ability | Upgrades increase range and speed. |
| Repair | Jack repairs damaged weapons or environments (multiplayer). | Campaign only, certain checkpoints. | N/A |
---
Consumables
| Item | Description | Acquisition | Useful When |
|---|---|---|---|
| Medigel | Restores a small amount of health. | Loot from destroyed objects, cabinets. | During low health; can be used to revive downed ally. |
| Stim Pack | Full heal over time (Horde/Escape). | Purchased from Fabricator, loot. | Before a tough fight; stacks with others. |
| Ammo Box | Refills ammo for current weapon. | Weapon lockers, environmental pickups. | When ammo is low; check before encounters. |
| Deployable Cover | Portable waist-high cover (Horde only). | Fabricator or class ability. | To create cover in open areas; can block enemy paths. |
| Fabricator | Not consumable but provides all Horde structures. | Default in Horde. | Build turrets, barriers, decoys, and weapon lockers. |
| Relic (Campaign) | Collectible that unlocks lore. | Found in overworld. | For 100% completion; gives backstory. |
Currencies & Crafting Materials
| Currency | Description | Acquisition | Uses |
|---|---|---|---|
| Scrap | Common crafting material. | Breaking down Skill Cards, daily challenges. | Crafting Skill Cards in Horde/Escape. |
| Iron | Premium currency (real money). | Purchasing, earn via Tour of Duty. | Buying packs, unlocking certain cosmetics, supply drops. |
| Credits | In-game earned currency from matches. | Versus, Horde, Escape, Campaign operations. | Buying Supply Drops, re-rolling challenges, gifting. |
| Components | Campaign-only upgrade material for Jack. | Found in open-world segments. | Upgrading Jack’s abilities at workbenches. |
| COG Tags | Collectible dog tags. | Hidden across campaign levels, some from side missions. | Unlock weapon skins, character skins, achievements. |
| Concept Art | Collectible pieces of concept art. | Hidden in overworld. | Unlock additional gallery content. |
| Blueprints (Horde) | Schematic for weapon card upgrades. | Earning in Horde matches, supply drops. | Unlock and upgrade specific weapon Skill Cards. |
| Supply Drops | Loot boxes containing random rewards. | Purchase with Credits/Iron, earn from leveling. | Contains skins, emotes, card packs, etc. |
Skill Cards (Horde & Escape)
Skill Cards are equippable modifications that enhance character abilities, weapons, or passives. They are obtained through Card Packs, Scrap crafting, and Supply Drops. Each card can be upgraded via duplicates or Scrap are used to level them.
| Card Type | Examples | Effects | Best Use |
|---|---|---|---|
| Ultimate Ability Cards | Leadership, Clutch, Reflect | Modify the class’s ultimate cooldown/duration. Crucial for high-difficulty Horde. | Equip for your chosen class (e.g., Engineer, Tactician, Demolitionist). |
| Weapon Cards | Spur, Stun Strike, Charged Damage | Improve damage, handling, or status of a specific weapon. | Pair with a class that specializes in that weapon (e.g., Gnasher cards with Infiltrator). |
| Passive Cards | Self-Repair, Surprise, Health Regen | Provide passive bonuses like health regen or damage resistance. | Useful for all classes; equip according to build preferences. |
| Class Specific Cards | Barrier Boost, Heavy Hitter, Resupply | Modify class abilities. Engineer cards improve sentry turrets; Combat Medic cards boost healing. | Only equippable by the corresponding class. |
---
Multiplayer Cosmetics & Unlocks
While not gameplay-affecting in Versus (except for skill-based items), these items are part of the full item database:
- Character Skins – Alternate outfits for Kait, Del, JD, Fahz, Jack, and various DeeBees/COG gear. Unlocked via Supply Drops, Tour of Duty, challenges, or purchasing.
- Weapon Skins – Camouflage patterns for each weapon. Same acquisition methods.
- Executions – Unique finishing moves on downed enemies. Unlocked via Supply Drops or purchased with Iron.
- Bloodsprays – Decals placed on surfaces after kills. Unlocked from Supply Drops.
- Emotes – Taunts or gestures. Unlocked from Supply Drops.
- Components (campaign) are finite per playthrough (about 50 total) – prioritize upgrading Cloak and Stim for easier stealth/combat.
- Scrap is best used on core weapon cards for your main class; avoid crafting low-tier duplicates.
- Iron should be saved for limited-time Supply Drops or high-value card packs during events.
- Weapon synergies: Pair Cryo Cannon with Boomshot to freeze and shatter groups; Lancer flash traps with shock traps for area denial.
- In Horde, the Fabricator is the central item – manage energy (points earned from kills) wisely between barriers, turrets, and weapon lockers.
---
Important Notes & Synergies
---
Conclusion
Gears 5 is packed with items that serve both practical and collectible purposes. Understanding each category—from weapons to Skill Cards—empowers you to build effective loadouts for Campaign, Horde, Versus, and Escape. Prioritize your upgrades based on your preferred mode, and always keep an eye out for Components and COG Tags during exploration.
For further details on specific weapon stats or card builds, refer to the dedicated Weapon and Horde class guides.
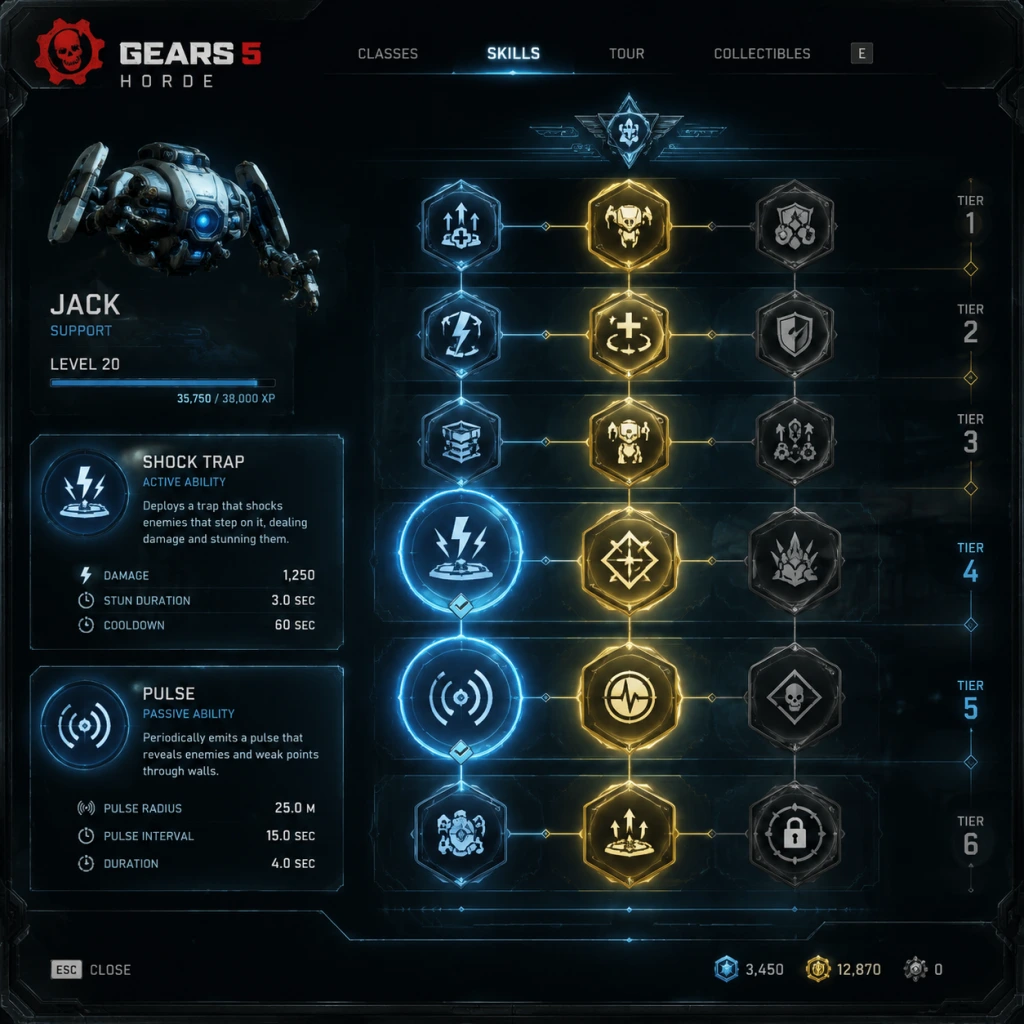
Character Skills
Overview
Gears 5 features multiple modes with distinct character skill systems. In the Campaign, each character has unique Ultimate Abilities and Jack has a full upgradeable skill tree. In Escape, each Hivebuster character has a unique active ability and passive skill cards. In Horde, ten classes each have a class ability and a set of skill cards that determine passive bonuses and tactical options. This guide lists every skill, ability, talent, and special move across all playable characters and roles.
---
Campaign Characters
Kait Diaz
- Ultimate Ability: Blood Resonance
- Ultimate Ability: Tac-Com
- Flash
- Cloak
- Pulse
- Hijack
- Shock Trap
- Juvie Cloud
- Recharge
- Ultimate Cooldown (Passive Ability unique to Jack’s grid)
- Exploration Build: Pulse + Cloak + Recharge + Ultimate Cooldown.
- Combat Support: Shock Trap + Flash + Hijack + Cloak (for revives).
- Boss Fighting: Hijack + Shock Trap + Recharge + Ultimate Cooldown.
- Class Ability: Turret
- Skill Cards:
- Synergies: Stay near Engineer for turret repairs. Pair with Tactician’s Marking for extra damage.
- When to Use: Hold chokepoints during Fabricator defense.
- Class Ability: Heavy Weapon
- Synergies: Engineers can drop ammo boxes; Scout can mark enemies.
- When to Use: Wave clearance, especially against bosses.
- Class Ability: Frag Grenade
- Synergies: Use with Scout’s Mark to amplify explosive damage. Engineer can build Salvo turrets for additional explosives.
- When to Use: Crowded clusters, boss waves, or breaking enemy shields.
- Class Ability: Salvage
- Synergies: Always build sentries, barriers, and weapon lockers. Supply teammates with weapons.
- When to Use: Every wave – focus on base building and repairs.
- Class Ability: Ping
- Synergies: Essential for every team – marks allow Heavy and Soldier to melt enemies.
- When to Use: On every large enemy or boss. Keep marking throughout the wave.
- Class Ability: Stabilizer
- Synergies: Engineer can place weapon lockers for ammo. Scout marks help eliminate targets faster.
- When to Use: Wave 4+ when enemies become tougher. Focus on Scions, Wardens, and bosses.
- Class Ability: Stim
- Synergies: Keep Engineer alive, support Soldier/Hard in frontline.
- When to Use: During intense combat or when multiple teammates are low on health.
- Class Ability: Repair Burst
- Synergies: Pairs with Engineer for rapid base maintenance.
- When to Use: When sentries or barriers are heavily damaged.
- Class Ability: Vanguard
- Synergies: Great for protecting teammates during revives or base defense.
- When to Use: When a teammate is downed or to draw fire from a boss.
- Class Ability: Nightshade
- Synergies: Use with Gnasher shotgun for backstabs. Requires planning.
- When to Use: Flanking priority targets like Wardens or Boomers.
- Active Ability: Static Tackle
- Payload (Chargeable Melee)
- Active Ability: Blitz
- Payload (Chargeable Melee)
- Active Ability: Grapple Shot
- Payload (Chargeable Melee)
- Effect: Kait taps into her connection with the Swarm to emit a high-frequency pulse that reveals all enemies through walls within a large radius (≈30m) for a few seconds. Enemies are highlighted in red and are visible behind cover. Does not damage enemies.
- Duration: 8 seconds (upgradeable via Jack’s upgrades; cannot be upgraded by Kait herself).
- Cooldown: 90 seconds (can be reduced by Jack’s “Ultimate Cooldown” upgrade).
- Upgrades: None directly for Kait. Jack can upgrade “Cooldown Rate” for all campaign Ultimate abilities.
- Combos / Synergies: Perfect for coordinating with Del’s Tac-Com marking for headshots, or for Jack’s shock trap placement. Use before entering a new area to scout turret positions or ambushes.
- Recommended Build: Not applicable (only one ultimate per character). However, pair with team upgrades that reduce cooldown for more frequent use.
- When to Use: Whenever you enter a large room, suspect enemy ambushes, or need to track down fleeing bosses. In open-world sections, use it to locate hidden Swarm pods or loot caches.
Delmont “Del” Walker
- Effect: Del deploys a high-tech targeting system that automatically tags all visible enemies within line-of-sight and a moderate radius (≈20m). Tagged enemies are marked on the HUD for the entire team, and each shot from any team member deals extra damage to marked targets (≈25% increased damage).
- Duration: 12 seconds (upgradeable only by Jack).
- Cooldown: 90 seconds.
- Upgrades: Jack can improve duration and cooldown.
- Combos / Synergies: Pairs extremely well with Kait’s Blood Resonance (reveal enemies so Del can tag them more easily). Also synergizes with Jack’s Shock Trap (marked enemies take extra damage from shock). Great for boss fights like the Matriarch.
- Recommended Build: In campaign, always activate before heavy combat. Use with high-damage weapons like the Gnasher or Longshot.
- When to Use: For crowd control in tight corridors, before ambushing a group, or during boss encounters to maximize team DPS.
Jack (Robot Companion)
Jack has 8 unique abilities that can be unlocked and upgraded throughout the campaign using components found in missions. Each ability has 4 upgrade levels (I, II, III, IV) that enhance effects or reduce cooldown. Jack can equip up to 4 abilities at once (selected via the Component Grid).
#### List of Jack’s Abilities
- Effect: Jack emits a blinding flash that stuns enemies and knocks them out of cover. Stunned duration depends on level.
- Upgrade Levels:
- Level I: Stuns for 2 seconds, cooldown 25s.
- Level IV: Stuns for 4 seconds, cooldown 15s. Also applies a slow effect.
- Combos: Use before charging with Kait or Del; stunning Wardens or Scions stops their attacks. Great for reviving teammates.
- When to Use: Use to break a stalemate, revive a downed teammate, or interrupt a boss’s powerful attack.
- Effect: Makes Jack invisible to enemies for a short duration. While cloaked, Jack can perform actions without breaking stealth (except attacking or picking up items?)
- Upgrade Levels:
- Level I: Duration 8 seconds, cooldown 40s.
- Level IV: Duration 14 seconds, cooldown 25s. Also grants temporary speed boost.
- Combos: Use for safe revives, recharging shields, or placing Shock Traps without being seen.
- When to Use: Stealth sections, flanking large groups, or escaping danger.
- Effect: Jack sends out a pulse that reveals hidden items (collectibles, weapon lockers, upgrade components) in a large radius. Also reveals enemy footprints for a short time.
- Upgrade Levels:
- Level I: Reveals items within 30m, cooldown 60s.
- Level IV: Reveals items within 80m, cooldown 30s. Also marks enemies for 3 seconds.
- When to Use: Exploration, farming components, finding secret areas. Use in every new area to uncover collectibles.
- Effect: Jack takes direct control of a powerful enemy (Scion, Drone, or even a Swarm Boomer) for a short time. Controlled enemy can attack others.
- Upgrade Levels:
- Level I: Control duration 5 seconds, cooldown 90s.
- Level IV: Control duration 10 seconds, cooldown 45s. Also gains damage bonus.
- Combos: Hijack a Boomshot Scion to destroy his comrades. Great for turning the tide in large fights.
- When to Use: Against large groups, especially when outnumbered. Avoid hijacking bosses unless it’s a lower-tier boss like the Snatcher.
- Effect: Jack deploys a proximity landmine that deals shock damage and stuns enemies within a small area.
- Upgrade Levels:
- Level I: Deals 100 shock damage, stun 2 seconds, cooldown 30s.
- Level IV: Deals 300 shock damage, stun 4 seconds, cooldown 20s. Also chains to nearby enemies.
- Combos: Place near active reload stations or chokepoints. Use with Flash for guaranteed stun lock.
- When to Use: Defense missions, holding positions, protecting objectives.
- Effect: Jack releases a group of Juvies (small Swarm creatures) that attack nearby enemies. Juvies are weak but provide distraction.
- Upgrade Levels:
- Level I: Summons 3 Juvies, duration 15 seconds, cooldown 60s.
- Level IV: Summons 6 Juvies, duration 30 seconds, cooldown 35s. Juvies do more damage and move faster.
- Combos: Great for drawing enemy fire while you flank. Use with Hijack to create chaos.
- When to Use: Open battlefield engagements, drawing aggro from heavy weapons.
- Effect: Jack rapidly recharges nearby teammates’ shields and health. Affects all players in a small radius.
- Upgrade Levels:
- Level I: Heals 50 health and full shield, cooldown 60s.
- Level IV: Heals 150 health and full shield, cooldown 30s. Also grants temporary damage resistance.
- When to Use: After intense firefights, before a boss fight, or when a teammate is downed.
- Effect: Reduces cooldown of Kait and Del’s Ultimate abilities. Also reduces Jack’s own ability cooldowns slightly.
- Upgrade Levels:
- Level I: Reduces all cooldowns by 10%.
- Level IV: Reduces all cooldowns by 30%.
- When to Use: Always keep equipped in any combat-focused build.
Jack’s Build Recommendations:
---
Horde Classes (PvE Cooperative)
Each Horde class has a unique Class Ability (active) and a deck of Skill Cards (passive). Players choose 5 skill cards to equip. Below are all base-game classes (including DLC classes unlockable via Tour of Duty).
Soldier
- Effect: Deploy a mounted turret that fires high-damage bullets. Turret has limited ammo and can be picked up and moved. Cooldown: 120 seconds (reduced by skill cards).
- Upgrades: Skill cards affect damage, ammo capacity, movement speed while carrying, and fire rate.
- Perks: Increased Assault Rifle Damage, Increased Turret Damage, Turret Ammo Capacity, Reduced Turret Cooldown, Increased Health.
- Legendary: “The Hammer” – Turret fires explosive rounds (area damage).
Heavy
- Effect: Carry a heavy weapon (Trishot or Mulcher) with unlimited ammo for a short time. Weapon overheats if fired too long. Cooldown: 90 seconds.
- Skill Cards:
- Increased Heavy Weapon Damage, Reduced Overheat, Movement Speed while carrying, Extra Heavy Ammo capacity, Damage Resistance while using heavy weapon.
Demolitions
- Effect: Throws a powerful frag grenade with larger blast radius and guaranteed gibs. Can carry up to 3 at once. Cooldown per grenade: 60 seconds (recover one every 60s).
- Skill Cards:
- Explosive Damage Increase, Explosive Radius, Extra Frag Capacity, Frag Drop on Down, Self-Defense explosives.
Engineer
- Effect: Collect scrap from destroyed enemy fortifications and weapons. Scrap used to build fortifications at the Fabricator. Also: Engineer has cheaper build costs and faster build time.
- Skill Cards:
- Increased Build Speed, Reduced Build Cost (per level), Fortification Durability, Fortification Damage, Upgraded Repair Tool.
Scout
- Effect: Fire a marker that tags enemies and highlights them. Marked enemies take extra damage from all sources (like Del’s Tac-Com). Cooldown: 30 seconds. Mark lasts 10 seconds.
- Skill Cards:
- Increased Mark Damage %, Mark Duration, Faster Cooldown, Extra Damage to Marked Enemies, Sprint Speed.
Sniper
- Effect: Activate to reduce weapon sway and zoom in farther for a few seconds. Perfect for long-range shots. Cooldown: 45 seconds. Duration: 8 seconds.
- Skill Cards:
- Increased Longshot Damage, Headshot Damage Multiplier, Faster Stabilizer Recharge, Explosive Headshots, Increased Magazine Capacity.
Tactician
- Effect: Deploys a healing area that provides health regeneration and damage reduction to all allies. Can be upgraded to revive downed teammates. Cooldown: 120 seconds. Duration: 20 seconds.
- Skill Cards:
- Heal Rate Increase, Damage Reduction %, Stim Duration, Faster Cooldown, Area Size.
Mechanic (DLC)
- Effect: A short-range blast that repairs all fortifications within 5m. Also restores a small amount of shield to teammates. Cooldown: 90 seconds.
- Skill Cards:
- Repair Amount, Increased Burst Radius, Fortification Armor, Cooldown Reduction, Self-Heal on Repair.
Veteran (DLC)
- Effect: A defensive stance that gives damage resistance and lets you taunt enemies to focus on you. Cooldown: 60 seconds. Duration: 10 seconds.
- Skill Cards:
- Damage Reduction %, Vanguard Duration, Health Regen during Vanguard, Cooldown Reduction, Increased Taunt Range.
Infiltrator (DLC)
- Effect: Become invisible and move faster for a short time. Breaking stealth with an attack deals bonus damage. Cooldown: 75 seconds. Duration: 8 seconds.
- Skill Cards:
- Invisibility Duration, Movement Speed, Damage Bonus on Break, Cooldown Reduction, Stealth Kill (instant kill on regular enemies while stealthed).
---
Escape Characters (Hivebusters)
Each Hivebuster has a unique active ability and can equip passive skill cards (similar to Horde). They also have a class-specific Ultimate-like ability called “Payload” which is a charged melee attack? Actually in Escape, each character has a unique ability on a cooldown, plus they have a “Payload” which is a super heavy melee attack that charges over time. Below are the three core Hivebusters:
Lahni Kal
- Effect: Lahni rushes forward a short distance, knocking down enemies in her path and dealing shock damage. Enemies hit are stunned briefly. Cooldown: 12 seconds.
- Skill Cards:
- Passive: Increased Shock Damage, Knockback Distance, Static Tackle Cooldown, Health on Knockdown, Shock Aura (discharge on revive).
- Effect: When fully charged (3 segments), unleash a powerful shockwave that damages and stuns all enemies in a cone. Charge is built by dealing damage.
- When to Use: Crowd control, pushing through tight corridors, interrupting enemies.
Mac Turner
- Effect: Mac activates a short burst of speed and damage resistance. During Blitz, his melee attacks do high damage and can gib enemies. Duration: 6 seconds, Cooldown: 20 seconds.
- Skill Cards:
- Blitz Duration, Damage Resistance during Blitz, Melee Damage Increase, Speed Boost, Blitz Cooldown.
- Effect: When charged, Mac delivers a powerful uppercut that launches enemies into the air, dealing high single-target damage.
- When to Use: Boss killing, breaking enemy formations.
Keegan Price
- Effect: Keegan fires a grappling hook that pulls himself to a target (enemy or location). If used on an enemy, he kicks them, stunning them briefly. Cooldown: 15 seconds.
- Skill Cards:
- Grapple Range, Stun Duration, Kick Damage, Cooldown Reduction, Grapple Pull Speed.
- When to Use: Mobility, escaping danger, or to close distance on a priority target.
---
Versus (Multiplayer) Note
Gears 5’s Versus mode does not have character-specific skills or abilities. All player characters have identical movement and weapon capabilities. The only differentiation is cosmetic via character skins. Some modes like Control have class-like respawn systems (e.g., one player can be a Scout with faster movement), but these are temporary buffs tied to map objectives, not permanent skills. Therefore, no skills guide is provided for Versus.
---
This guide covers all skill-based elements in Gears 5. Use these details to optimize your gameplay in Campaign, Horde, and Escape modes.
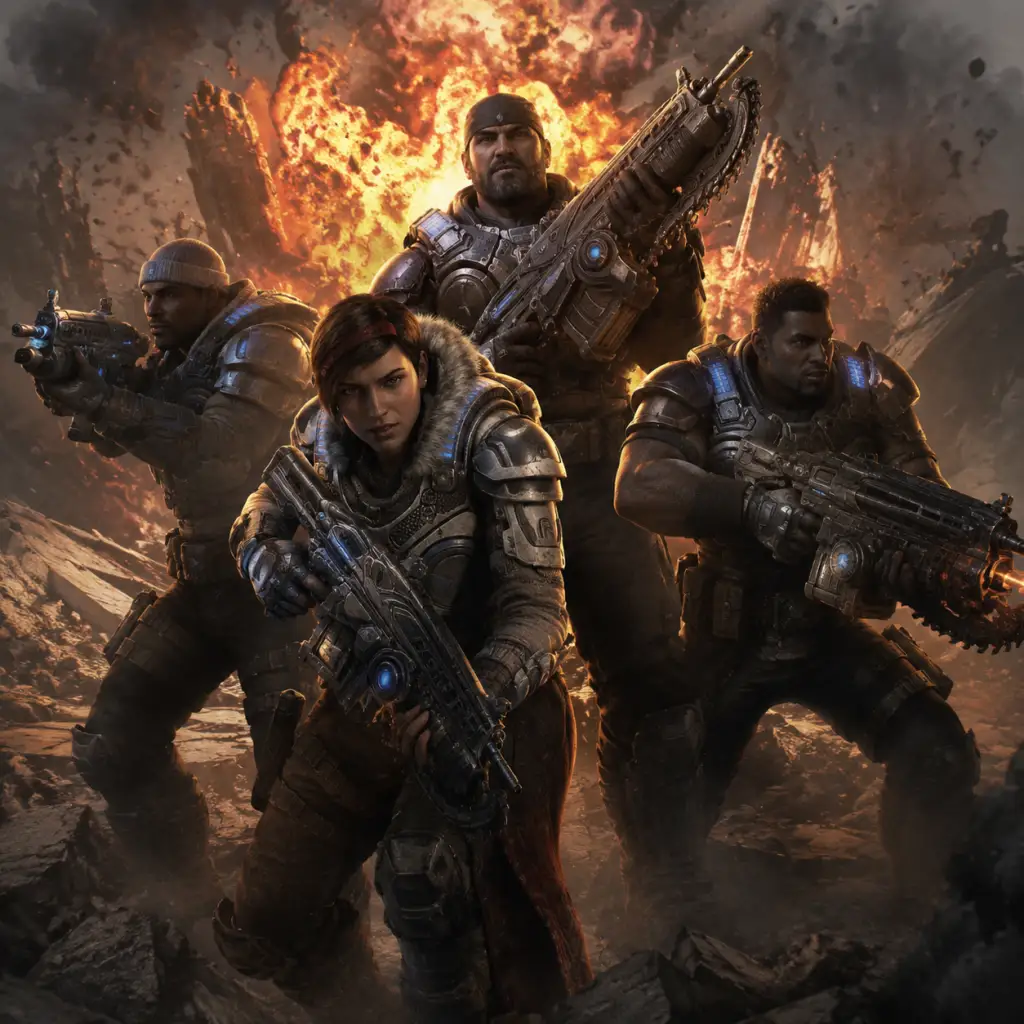
Characters & Roles
Overview
Gears 5 features a diverse cast of playable characters across Campaign, Escape, Versus, and Horde modes. Each character has a unique background, active ability, passive skills, and recommended playstyle. This guide covers every major character, their strengths and weaknesses, unlock conditions, optimal builds, and team synergy. Characters are organized by game mode.
---
Campaign Characters
Kait Diaz
- Background: The daughter of Reyna and Myrrah, Kait is the central protagonist of Gears 5. She seeks to uncover her connection to the Locust Horde.
- Strengths: Versatile in combat, high mobility, strong ultimate ability (Stim Plant – grants temporary invulnerability and health regen to nearby allies).
- Weaknesses: No heavy firepower boost; relies on player skill for positioning.
- Playstyle: Aggressive flanker. Use cover to close distance, then unleash the Stim Plant to push objectives or revive teammates safely.
- Unlock Condition: Unlocked by default in Campaign.
- Recommended Equipment: Gnasher shotgun for close quarters, Lancer for mid-range. Upgrade the Stim Plant duration and cooldown through skill cards.
- Team Synergy: Works well with Del (cover shredding) and Jack (distraction). Kait’s Stim Plant can protect teammates during Jack’s hijack or Del’s turret placement.
- Background: A COG soldier and Kait’s best friend. Del specializes in robotics and defensive tactics.
- Strengths: Deployable turret, shock trap, and passive ammo regeneration from turret kills.
- Weaknesses: Low mobility while setting up turrets; turret can be destroyed easily on higher difficulties.
- Playstyle: Defensive anchor. Place turrets in chokepoints, use shock traps to slow enemies, and provide covering fire.
- Unlock Condition: Unlocked by default.
- Recommended Equipment: Longshot sniper rifle to pick off threats from behind turret. Upgrade turret health and damage.
- Team Synergy: Pairs with Jack (overcharge) to supercharge the turret. Fahz’s recon grenades can reveal enemies for Del’s turret.
- Background: An artificially intelligent robotic companion with hacking and support capabilities.
- Strengths: Most versatile campaign character – can hack enemies, cloak allies, deploy barriers, and heal. Unique flight mechanics grant map mobility.
- Weaknesses: Low damage output; cannot revive downed allies directly (only via upgrade).
- Playstyle: Pure support. Prioritize hacking heavily armored enemies (e.g., Scions, Matriarch) to turn them against the Locust. Use cloak for stealth revives.
- Unlock Condition: Unlocked after completing Act I.
- Recommended Equipment: Upgrades should focus on Flash Charge (area stun) and Hijack duration. Pulse ability for locating enemies.
- Team Synergy: Essential for any team – provides healing, crowd control, and enemy manipulation. Works best with guns-heavy characters like Del and Marcus.
- Background: A smug, elite marksman of the Onyx Guard. Initially antagonistic, later allies with Kait.
- Strengths: Extremely high precision damage with the Markza rifle; passive that highlights enemies through walls; ultimate ability (Recon Grenades) that marks all enemies in a large area.
- Weaknesses: Weak in close-quarters; no defensive tools; reliant on aim.
- Playstyle: Sniper / spotter. Stay at long range, mark targets for the team, and eliminate key threats (Boomers, Snipers).
- Unlock Condition: Playable during Act II (as part of campaign), unlocked permanently after completing Act II.
- Recommended Equipment: Markza with active reload bonus; Longshot for extreme ranges. Upgrade Recon Grenade radius and team damage bonus against marked targets.
- Team Synergy: Complements Jack (cloak) to reposition safely. Del’s turret can protect Fahz from flankers.
- Background: Legendary COG soldier and protagonist of the original trilogy. Now older but still lethal.
- Strengths: Passive – deals extra damage to enemies within 10 meters; ultimate ability (Last Man Standing) – becomes invulnerable and regenerates health during activation, also resets active reload for a brief damage boost.
- Weaknesses: Slow movement; no long-range utility.
- Playstyle: Frontline bruiser. Brawl with shotguns or Lancer, use ultimate to survive heavy fire and revive teammates.
- Unlock Condition: Playable during Act III (prologue and later segments), unlocked permanently after completing Act III.
- Recommended Equipment: Gnasher + Retro Lancer for close-mid range. Upgrade ultimate duration and damage resist.
- Team Synergy: Works with Kait (Stim Plant) for aggressive pushes. Fahz marks high-value targets for Marcus to finish.
- Role: Demolitionist / Area Denial
- Active Ability: Detonator – tosses a timed explosive that can be triggered manually.
- Passive: Explosive damage increases by 20% after active reload.
- Strengths: Best crowd control; can destroy Scion shields easily; strong ultimate for clearing rooms.
- Weaknesses: Slow fire rate; lacks precision.
- Unlock Condition: Unlocked by default in Escape.
- Recommended Build: Skill cards: “Extra Shrapnel” (increased explosive radius), “Armored” (damage resist while placing explosives). Weapon: Dropshot or Boomshot.
- Team Synergy: Combine with Mac’s Fortification to funnel enemies into Keegan’s kill zone.
- Role: Melee / Berserker
- Active Ability: Shocker – unleashes a powerful electrical melee attack that stuns nearby enemies.
- Passive: Melee damage and speed increases as health decreases.
- Strengths: Exceptional in close quarters; can stunlock bosses with proper timing.
- Weaknesses: Fragile; requires aggressive play that risks death.
- Unlock Condition: Unlocked by default.
- Recommended Build: Cards: “Conductor” (Shocker chain lightning), “Vamper” (heal on melee kill). Weapon: Gnasher + Stim grenades.
- Team Synergy: Needs a healer like Lizzie or a tank like Mac to draw aggro.
- Role: Tank / Fortification
- Active Ability: Fortification – deploys a wall that blocks enemy projectiles and can be upgraded to shock enemies.
- Passive: Increases maximum health by 30%; can recover health by executing downed enemies.
- Strengths: Absorbs damage; creates cover in open spaces; excellent at protecting teammates.
- Weaknesses: Low damage output; moves slowly.
- Unlock Condition: Unlocked by default.
- Recommended Build: Cards: “Thick Skin” (more health), “Shocking Wall” (wall stuns). Weapon: Retro Lancer for suppression.
- Team Synergy: Pairs with Keegan (use wall to protect Keegan while he plants explosives).
- Role: Medic / Support
- Active Ability: Heal Burst – emits a healing aura around herself, reviving downed allies and restoring health.
- Passive: Downed allies have 50% longer bleed-out time; she revives faster.
- Strengths: The only reliable healer in Escape; can keep the team alive through intense firefights.
- Weaknesses: No offensive ability; low personal defenses.
- Unlock Condition: Requires 20,000 Escape points or purchase.
- Recommended Build: Cards: “Faster Revives”, “Healing Boost”. Weapon: Any, but prioritize survivability (e.g., Gnasher).
- Team Synergy: Essential with any aggressive team. Keep behind Mac’s wall or use Keegan’s explosives to clear threats before healing.
- Role: Tactician / Utility
- Active Ability: Stun Grenade – tosses a grenade that stuns and blinds enemies in a radius.
- Passive: Active reloads are faster and more forgiving; starts with a Lancer GL.
- Strengths: Excellent crowd control; versatile with grenades; can interrupt dangerous attacks.
- Weaknesses: No direct damage or heal ability; relies on gun skill.
- Unlock Condition: Unlocked via Tour of Duty (Series 3) or purchase.
- Recommended Build: Cards: “Stun Duration”, “Extra Grenade”. Weapon: Lancer GL for area denial.
- Team Synergy: Combo with Lahni’s Shocker – stun enemies then Lahni rushes in.
- Role: Artillery / Overwatch
- Active Ability: Beacon – calls a mortar strike on a targeted area (long cooldown).
- Passive: Marked enemies take 30% more damage from all sources.
- Strengths: Extremely high area damage; passive helps team focus fire.
- Weaknesses: Long cooldown on ultimate; no self-heal.
- Unlock Condition: Unlocked via Tour of Duty (Series 4) or purchase.
- Recommended Build: Cards: “Faster Lock-On”, “Extra Mortar Shells”. Weapon: Longshot for marking enemies.
- Team Synergy: Pair with Mac’s Fortification for protection while calling strikes.
- Ability: “Last Man Standing” – invulnerability + health regen for 5 seconds.
- Passive: “Combat Veteran” – deals 15% more damage when near 2+ enemies.
- Strengths: Best for aggressive play; can survive pushes.
- Weaknesses: Requires being outnumbered for passive to work.
- Unlock Condition: Default.
- Ability: “Combat Knife” – instant melee kill with faster recovery.
- Passive: “Brother’s Keeper” – revives allies 30% faster.
- Strengths: Excellent for reviving in combat; can finish downed enemies quickly.
- Weaknesses: No damage boost.
- Unlock Condition: Default.
- Ability: “Multi-Kill” – consecutive kills grant increased movement speed and damage for a short time.
- Passive: “Heavy Hitter” – melee attacks break shields and stagger enemies easier.
- Strengths: Snowball effect; great for chain kills.
- Weaknesses: No instant survivability; relies on kills.
- Unlock Condition: Default.
- Ability: “Sentry Turret” – deploys a small, low-damage turret that marks enemies.
- Passive: “Engineer” – repair speed +50% for objectives.
- Strengths: Area denial and intel; good for objective modes.
- Weaknesses: Turret is fragile; low damage.
- Unlock Condition: Default.
- Ability: “Stim Pack” – deploys a small pack on the ground that grants temporary shields to anyone who walks over it.
- Passive: “Heavy Armor” – reduces headshot damage by 25%.
- Strengths: Team support; tanky.
- Weaknesses: No offensive ability.
- Unlock Condition: Unlocked via Tour of Duty or purchase.
- Ability: “Heal Burst” (same as Escape) – area heal, but weaker.
- Passive: “Medic” – revive speed +25% and can revive enemies? Actually revive downed enemies? No, only allies.
- Strengths: Best medic for team modes.
- Weaknesses: No damage boost.
- Unlock Condition: Default (added in Operation 4).
- Ability: “Stim Plant” (same as Campaign) – area invulnerability and heal.
- Passive: “Sneak” – footsteps are muffled.
- Strengths: Great for objective pushes and revives.
- Weaknesses: Cooldown long.
- Unlock Condition: Default.
- Ability: “Shock Trap” – places a trap that stuns and damages enemies.
- Passive: “Repair Expertise” – objective interaction speed +20%.
- Strengths: Area control; useful in close-quarters.
- Weaknesses: Trap can be destroyed.
- Unlock Condition: Default.
- Ability: “Recon Grenade” – marks all enemies in a large radius, revealing their position to the team.
- Passive: “Precision Sights” – zoom stability increased.
- Strengths: Intel advantage; counters stealth.
- Weaknesses: No direct damage ability.
- Unlock Condition: Default.
- Ability: “Venom Spit” – fires a ranged blast that poisons enemies.
- Passive: “Locust Resilience” – takes less damage when breaking cover.
- Strengths: Good for harassing; poison damage over time.
- Weaknesses: Low health.
- Unlock Condition: Tour of Duty reward or purchase.
- Ability: “Darkness” – covers a large area in darkness, blinding enemies and reducing their accuracy.
- Passive: “Horde Tank” – grants extra health when nearby multiple enemies.
- Strengths: Area denial and disorienting; great for control points.
- Weaknesses: Long cooldown.
- Unlock Condition: Tour of Duty reward or purchase.
- In Arcade Blitz, choose characters whose abilities complement the map (e.g., Cole for CQB maps, Baird for open areas).
- For Horde, use team compositions with a mix: (e.g., 1 Medic (Lizzie), 1 Engineer (Baird), 1 Tank (Mac), 1 DPS (Marcus), 1 Support (Kait)).
- Unlock characters via Tour of Duty challenges or purchase from the Store.
Delmont “Del” Walker
Jack
Lieutenant Fahz Chutani
Marcus Fenix
---
Escape Mode (Hivebusters)
Escape assigns each character a unique role against the Swarm. All must survive the Hive, complete the generator sequence, and escape.
Keegan
Lahni
Mac
Lizzie Carmine
Carmine "No. 2" (Anthony Carmine)
Baird (Escape variant)
---
Versus Multiplayer (Versus and Horde)
In Versus, each character has a unique Active Ability (triggered by pressing Tactical) and Passive Skill. All characters are purely cosmetic in Classic modes, but in Arcade Blitz and some events, abilities shine. These are the most impactful characters:
Marcus Fenix
Dominic “Dom” Santiago
Augustus “Cole Train” Cole
Damon Baird
Clayton Carmine
Lizzie Carmine (Versus variant)
Kait Diaz (Versus variant)
Delmont Walker (Versus variant)
Fahz Chutani (Versus variant)
Skorge
Raam
General (Versus) Tips
---
Team Synergy Summary Table
| Mode | Best Team Combos |
|---|---|
| Campaign | Kait (aggressor) + Del (defense) + Jack (support) |
| Escape | Keegan (blaster) + Mac (tank) + Lizzie (healer) + Lahni (melee) |
| Versus (Arcade) | Marcus + Dom + Cole + Baird (objective focus) |
| Horde | Lizzie (medic) + Baird (turrets) + Mac (barrier) + Marcus (damage) + Kait (stim) |
Conclusion
Every character in Gears 5 brings a unique flavor to gameplay. Understanding their roles, strengths, and synergies is key to mastering Campaign, surviving Escape, and dominating Versus and Horde. Experiment with different builds using skill cards (Forge) to tailor your playstyle. Unlock characters by completing daily challenges, earning Escape/Horde points, or through Tour of Duty progression. Good luck, and remember: \"Nothin' but the COG!\"
Cheats & Secrets
Cheats & Secrets in Gears 5
Gears 5 does not include traditional cheat codes (e.g., invincibility, ammo, level select). However, the game is packed with developer-intended hidden content, Easter eggs, secret areas, and unlockable features. This guide covers every known secret, Easter egg, hidden mechanic, and safe exploit (patched or unpatched) as of the latest patch. No game-breaking glitches or online cheats are included.
---
###