
Genshin Impact
## Overview Genshin Impact is a free-to-play open-world action RPG developed and published by HoYoverse (formerly miHoYo). The game was initially released on **September 28, 2020**, for PC, PlayStation 4, iOS, and Android, with a PlayStation 5 version launching later on **April 28, 2021**. A Ninten...
Download & Installation
Overview
Genshin Impact is a free-to-play open-world action RPG developed by HoYoverse (formerly miHoYo). The game is available on multiple platforms, but note that cross-save and cross-play are supported between PC, PlayStation, and mobile. Currently, Genshin Impact is not available on Xbox consoles or Nintendo Switch (the Switch version was announced but has not been released as of 2025).
This guide covers official download sources, step-by-step installation, system requirements, account setup, common errors, and post-install verification for all supported platforms.
---
Platform Availability
| Platform | Official Launcher | Epic Games Store | Other Legal Sources |
|---|---|---|---|
| PC (Windows) | Yes (via hoyoverse.com) | Yes | None (avoid third-party sites) |
| PlayStation 4/5 | Yes (via PSN Store) | N/A | None |
| iOS (iPhone/iPad) | Yes (via App Store) | N/A | None |
| Android | Yes (via Google Play or Galaxy Store) | N/A | None (avoid APK sites) |
| Xbox (all) | No | No | Not available |
| Nintendo Switch | No | No | Not released yet |
Official Download Sources (Safe & Legitimate)
- PC (Windows): Download the official launcher from [genshin.hoyoverse.com](https://genshin.hoyoverse.com/) → Click “Download Now” (Windows icon). Alternatively, get it from the Epic Games Store (search “Genshin Impact”). Note: The Steam version does not exist; any Steam installer is fake.
- PlayStation: Go to PlayStation Store (PS4 or PS5), search “Genshin Impact,” and download for free.
- iOS: Open App Store, search “Genshin Impact,” and download the app by HoYoverse.
- Android: Use Google Play Store or Samsung Galaxy Store (for Samsung devices). Avoid APK download sites as they may contain malware.
> Warning: Download only from the sources above. Do not use third-party websites, torrents, or unofficial installers. They often contain viruses or account-stealing malware.
---
System Requirements
PC (Windows)
| Component | Minimum | Recommended |
|---|---|---|
| OS | Windows 7 SP1 64-bit | Windows 10 64-bit |
| CPU | Intel Core i5 (7th gen) or equivalent | Intel Core i7 (8th gen) or equivalent |
| RAM | 8 GB | 16 GB |
| GPU | NVIDIA GeForce GT 1030 or equivalent | NVIDIA GeForce GTX 1060 6GB or better |
| DirectX | Version 11 | Version 11 |
| Storage | 150 GB (SSD strongly recommended) | 150 GB (SSD required for smooth loading) |
| Internet | Broadband connection | Broadband connection |
PlayStation
| Console | Storage Space Required |
|---|---|
| PS4 | ~100 GB (after updates) |
| PS5 | ~90 GB (after updates, with faster loading) |
Mobile (iOS / Android)
| OS | Minimum | Recommended |
|---|---|---|
| iOS | iPhone 8 or newer; iOS 12.0+ | iPhone XS or newer; iOS 14.0+ |
| Android | 8 GB RAM; Android 8.0+; Qualcomm Snapdragon 845 or equivalent | 12 GB RAM; Android 10.0+; Snapdragon 865 or better |
| Storage | 30 GB free space (game + additional resources) | 40 GB (for smoother updates) |
Step-by-Step Installation for Each Platform
1. PC (Official Launcher)
1. Visit [genshin.hoyoverse.com](https://genshin.hoyoverse.com/).
2. Click “Download Now” and choose the Windows version.
3. Run the downloaded `GenshinImpact_installer.exe` (≈150 MB).
4. Choose installation language and accept the EULA.
5. Select installation folder (avoid `C:\Program Files (x86)` for permissions issues; use a custom folder like `D:\Genshin Impact`).
6. The launcher will download the full game (≈90 GB). This may take hours depending on your internet speed.
7. Once downloaded, the launcher will automatically extract and install.
8. Click “Launch” in the launcher to start the game.
2. PC (Epic Games Store)
1. Open Epic Games Launcher (install it if you haven’t).
2. Go to the Store tab, search “Genshin Impact.”
3. Click “Get” to add it to your library (free).
4. Go to Library, find Genshin Impact, and click “Install.”
5. Choose installation directory and start download.
6. After download, the game will appear as playable.
7. Important: When you launch via Epic, it will also open the HoYoverse launcher. You can link your Epic account to your HoYoverse account on first launch.
3. PlayStation 4/5
1. On your console, go to PlayStation Store.
2. Search “Genshin Impact.”
3. Select the game and click “Download” (it’s free).
4. The console will download and install the game automatically.
5. After installation, launch the game from the home screen.
Note: PS4 and PS5 have separate trophy lists but share the same servers.
4. iOS (iPhone/iPad)
1. Open App Store on your device.
2. Search “Genshin Impact” – make sure the developer is HoYoverse.
3. Tap “Get” (download size ~30 GB; may require iOS 12.0+).
4. Wait for download and installation (your device may need to clear space).
5. After installation, tap “Open” to start the game.
5. Android
1. Open Google Play Store (or Galaxy Store for Samsung devices).
2. Search “Genshin Impact” – developer: COGNOSPHERE PTE. LTD. (a subsidiary of HoYoverse).
3. Tap “Install” (size ~30 GB initial, with additional resource downloads).
4. Ensure you have at least 40 GB free space and a strong Wi-Fi connection.
5. After install, tap “Open”.
> Tip: If you have limited mobile data, download over Wi-Fi. The in-game resources can be downloaded in multiple languages; you can choose only the language you need to save space.
---
Account Requirements
- You must create a HoYoverse Account (or log in with Google, Apple, Facebook, Twitter, PlayStation Network, or Epic Games).
- Register at [account.hoyoverse.com](https://account.hoyoverse.com/) or directly in the game.
- On PlayStation, you can use your PSN account or link a HoYoverse account for cross-save.
- On PC and mobile, you can log in via third-party accounts, but linking to a HoYoverse account is recommended for security.
- Fix: Run the installer as Administrator. Right-click the .exe → Run as administrator.
- Alternative: Install in a folder not under `Program Files` (e.g., `D:\Genshin Impact`).
- Fix:
- Fix: Delete the downloaded files in the `Genshin Impact Game` folder (keep the launcher), then re-launch the launcher to redownload. Or repair the game via the launcher settings (gear icon → Repair Game Files).
- Fix: Free up space. Game requires 100-150 GB (PC) or ~30 GB (mobile). On mobile, also clear cache from other apps.
- Fix: Update your GPU drivers (NVIDIA, AMD, or Intel). Also install the latest DirectX runtime from Microsoft.
- Fix: Check server status at [status.hoyoverse.com](https://status.hoyoverse.com/). If online, try changing server region (you can only change in launcher settings, not in-game). Reset your password if needed.
- Fix:
- Fix: Close all background apps. Clear the game cache (Settings → Apps → Genshin Impact → Storage → Clear Cache). Restart device. Use a stable Wi-Fi.
- PC: Launch the game and verify the version number matches the latest on the official site (e.g., v4.5). Check for any pending updates via the launcher.
- PlayStation: From the home screen, check the game version in the options menu (touchpad → Settings → Account → User Center → Version). Ensure it’s up-to-date.
- Mobile: Open the game and go to Settings → Account → User Center → Version. Compare with latest patch notes.
- Sound & Graphics: Play the first cutscene and walk around. If there are stutters, adjust graphics settings.
- Account Linking: Confirm cross-save by logging into [account.hoyoverse.com](https://account.hoyoverse.com/) and seeing linked platforms.
- Storage Space Used: Check the actual folder size:
- Pre-loading Updates: The official launcher often allows pre-loading major patches (e.g., before a new version). Turn on “Pre-Install Resource Package” in launcher settings to save time.
- Backing up the game folder (PC): You can copy the `Genshin Impact Game` folder to another drive or external storage to avoid re-downloading after reinstalling Windows. Just point the launcher to it.
- Mobile Storage Management: In Settings → Language, you can delete voice-over packs for languages you don’t need to free up space (e.g., keep only English voice).
- Fan-made Launchers: Do not use third-party launchers claiming to reduce size; they violate ToS and may get your account banned.
Important: Cross-save requires you to link your HoYoverse account to the platform you want to sync. Read the official guide: [Cross-Save FAQ](https://genshin.hoyoverse.com/en/news/detail/10270).
---
First Launch Setup
After installation, the first launch will guide you through:
1. Language Selection – Choose text and voice-over language (e.g., English, Chinese, Japanese, Korean, etc.). You can change this later in settings.
2. Account Login – Sign in or create an account.
3. Server Selection – Choose your region (Americas, Europe, Asia, TW/HK/MO). This determines your ping and cannot be changed later (your progress is tied to the server).
4. Graphics Settings – The game will auto-detect settings. You can adjust manually:
- PC/PlayStation: Set resolution, frame rate (60 FPS recommended), graphics quality, V-Sync, etc.
- Mobile: Choose between “High” or “Low” settings; 60 FPS may cause overheating on older devices.
5. Download Additional Resources – The game may need to download voice packs or high-quality textures. This is optional but recommended for the best experience.
6. Tutorial – The game will start with the opening cutscene and tutorial. Follow on-screen instructions.
---
Common Installation Errors and Fixes
Error 1: “Installation failed due to insufficient permissions” (PC)
Error 2: “Download stuck at 0%” or “Network error” (PC/Mobile)
- Disable VPN or proxy; the game launcher may block them.
- Check firewall/antivirus – add `GenshinImpact.exe` and the launcher to exceptions.
- Change DNS to Google (8.8.8.8 / 8.8.4.4).
- Restart router or switch to a wired connection.
Error 3: “The file is corrupted” or “CRC error” during download (PC)
Error 4: “Not enough storage space” (All platforms)
Error 5: “Failed to initialize” or “Graphics driver error” (PC)
Error 6: “Login failed” or “Server connection timeout”
Error 7: “Black screen on launch” (PC)
- Run the game in windowed mode (add `-screen-fullscreen 0` to launch options in the launcher settings).
- Disable overlays (Discord, NVIDIA GeForce Experience).
Error 8: “Game freezes during update” (Mobile)
---
Post-Installation Verification
After installation, perform these checks to ensure everything works correctly:
- PC: `Genshin Impact Game` folder should be around 80-90 GB (game files plus launcher cache).
- PS4/PS5: System storage management shows ~100 GB / 90 GB.
- Mobile: App info shows ~25-30 GB.
---
Additional Tips
---
Final Words
Genshin Impact is a large but rewarding game. Installation can be time-consuming due to the high file size, especially on PC. Ensure you have a stable internet connection and enough free storage. If you encounter persistent errors, contact HoYoverse Customer Support via the official website or in-game feedback. Enjoy your adventure in Teyvat!
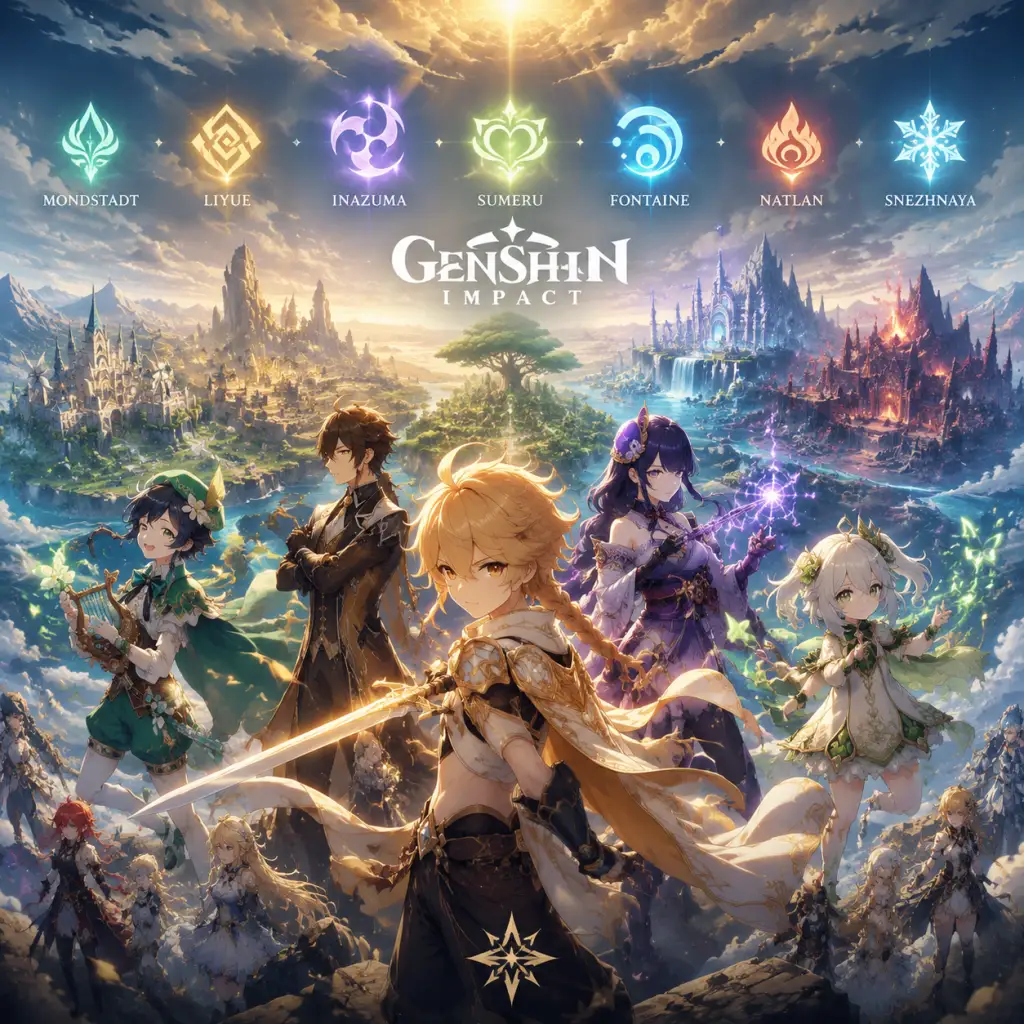
Game Introduction
Overview
Genshin Impact is a free-to-play open-world action RPG developed and published by HoYoverse (formerly miHoYo). The game was initially released on September 28, 2020, for PC, PlayStation 4, iOS, and Android, with a PlayStation 5 version launching later on April 28, 2021. A Nintendo Switch version has been announced but no release date has been confirmed. The game supports cross-save and cross-play across PC, PlayStation, and mobile platforms, allowing you to seamlessly continue your adventure on different devices.
Genre and Developer
Genre: Action role-playing game (ARPG) with gacha mechanics
Developer / Publisher: HoYoverse (miHoYo)
Release Timeline and Platforms
- PC (Windows): September 28, 2020
- PlayStation 4: September 28, 2020
- iOS & Android: September 28, 2020
- PlayStation 5: April 28, 2021 (free upgrade for PS4 owners)
- Nintendo Switch: Announced, no release date yet
- Mondstadt (Germanic / European medieval)
- Liyue (Chinese-inspired)
- Inazuma (Japanese feudal)
- Sumeru (Middle Eastern / South Asian)
- Fontaine (French / steampunk)
- Natlan (Indigenous South American influences, not yet released)
- Snezhnaya (Russian / Soviet, not yet released)
- Aether / Lumine (The Traveler): The protagonist you control. You choose one twin at the start; the other becomes the antagonist (the “Prince/Princess of the Abyss”). The Traveler can attune to different elements, starting with Anemo.
- Paimon: A small, floating companion who acts as your guide, comic relief, and emergency food source. Paimon is the mascot of the game and helps narrate quests.
- Venti: The Anemo Archon of Mondstadt, appearing as a carefree bard.
- Zhongli: The Geo Archon of Liyue, now retired and living as a mortal.
- Raiden Shogun / Ei: The Electro Archon of Inazuma, initially adversarial but later an ally.
- Nahida: The Dendro Archon of Sumeru, the youngest of the seven.
- And many more playable characters, each with unique personalities, backstories, and combat roles (DPS, support, healer, sub-DPS).
- Exploration: A massive, seamless open world with hidden chests, puzzles, enemy encounters, and breathtaking landscapes. The world is packed with secrets and lore.
- Elemental Combat System: The core mechanic revolves around combining elements (e.g., Hydro + Electro = Electro-Charged; Pyro + Dendro = Burning) to trigger reactions that deal extra damage or provide buffs. Team composition is key.
- Gacha Character/Weapon System: New characters and weapons are obtained through a “Wish” system using in-game currency. While free-to-play, this adds a layer of collection and strategic depth.
- Constant Updates: Regular new content, events, and story expansions keep the game fresh. HoYoverse maintains a consistent schedule of major patches.
- High Production Value: Stunning anime-style visuals, a spectacular orchestral soundtrack by HOYO-MiX, and full voice acting in multiple languages (Chinese, Japanese, Korean, English, and more).
- Single Player / Exploration: The main mode. You explore the world, complete quests, solve puzzles, and fight enemies alone.
- Co-op Mode (Up to 4 players): Unlocked at Adventure Rank 16. You can join friends’ worlds to tackle bosses, domains, and exploration together. Domains are instanced dungeons that reward materials for leveling characters and weapons. Co-op is limited in story-related content but excellent for farming.
- Serenitea Pot (Housing System): A personal realm you can customize with furnishings, plants, and companions. Gives small gameplay benefits (resource generation).
- Spiral Abyss: A challenging end-game dungeon with multiple floors and time-based objectives. Resets every two weeks. The ultimate test of combat and team composition, offering premium currency (Primogems) as rewards.
- Events: Time-limited events often introduce new gameplay mechanics, mini-games, and exclusive rewards. These are a major way to obtain free characters and weapons.
- Domain & Boss Fights: Weekly and daily bosses that drop talent materials and artifacts.
- New Regions: Major expansions like Dragonspine (v1.2), The Chasm (v2.6), Enkanomiya (v2.4), and the entire nation of Sumeru (v3.0).
- New Story Chapters: Archon Quests advance the main narrative; Story Quests focus on individual characters.
- New Characters: On average, two new playable characters per update, often with their own story quests.
- New Weapons, Artifacts, and Enemies.
- Limited-Time Events: These act as mini-DLCs with unique mechanics and lore.
The game receives frequent updates (roughly every 6 weeks), adding new characters, regions, events, and story chapters. Version updates are numbered incrementally (e.g., 2.0, 2.1, 3.0, etc.).
Story Overview and Setting
Genshin Impact is set in the fantasy world of Teyvat, a continent divided into seven nations, each ruled by an elemental Archon and associated with one of the seven elements: Anemo (wind), Geo (earth), Electro (lightning), Dendro (nature), Hydro (water), Pyro (fire), and Cryo (ice). Each nation draws inspiration from real-world cultures:
You play as the Traveler, a mysterious being from another world who, along with their twin sibling, becomes separated after a cataclysmic battle against an unknown god. Waking up in the nation of Mondstadt, you begin your journey to reunite with your lost sibling, exploring Teyvat, uncovering its secrets, and eventually confronting the Heavenly Principles that govern this world.
Main Characters
Core Appeal
Target Audience
Genshin Impact appeals to a broad audience: fans of action RPGs, open-world adventures, anime aesthetics, exploration and puzzle-solving, and those who enjoy gacha collection games. The free-to-play model lowers the barrier to entry, and the gentle learning curve makes it accessible to casual players, while the deep combat and team-building mechanics cater to more hardcore gamers. The game is rated T for Teen by the ESRB due to fantasy violence and suggestive themes (some character designs).
Game Modes
Genshin Impact is primarily a single-player experience with optional co-op elements:
Online / Offline Support
Genshin Impact is an always-online game. You cannot play without an internet connection. All game progress is saved on HoYoverse servers, enabling cross-save and anti-cheat. There is no true offline mode. If your connection drops, the game will freeze and eventually kick you out. This also means you cannot mod the game.
DLC / Expansion Overview
All major content updates are free. The game is constantly evolving, with each new version adding:
There are no paid DLC packs; all gameplay content is free. The monetization comes solely from the gacha system (Wishes) and optional Battle Pass / Welkin Moon subscription.
What Makes This Game Unique
Several factors distinguish Genshin Impact from other free-to-play games:
1. Cross-Platform Consistency: Seamless cross-save and cross-play across PC, PlayStation, and mobile with near-identical content and progression.
2. Elemental Reaction System: A deep, intuitive combat system that rewards experimentation and synergy, unlike most ARPGs that rely solely on stats and gear.
3. Gacha as a Feature, Not a Paywall: The game is designed so that free-to-play players can experience all story content and complete all challenges. Wishes are a bonus, not a requirement.
4. Living World: The game world is highly interactive – you can climb any surface, glide, swim, and even cook food for buffs. The environment is filled with hidden stories and puzzles.
5. Live Service Done Right: Frequent, substantial updates that add meaningful content, not just cosmetics. The community is deeply engaged with lore speculation and theorycrafting.
6. Music and Art Direction: The soundtrack is composed for each region with local instrumentation, and the art style blends cel-shaded anime aesthetics with breathtaking vistas.
In short, Genshin Impact is a genre-defining free-to-play RPG that combines the exploration of Breath of the Wild**, the character collection of gacha games, and the live-service model of MMOs, all wrapped in a polished anime package. Whether you're a solo explorer or a co-op enthusiast, Teyvat welcomes you.
Getting Started
First Hour Walkthrough
Your Opening Moments
After the short opening cutscene (where you choose your twin – no permanent difference), you will wake up on the shore of Liyue. Your first task is to follow the floating Seelie (a light blue fairy-like creature) and reach the Statue of The Seven (anemo). Interact with it to unlock a waypoint and receive your first Anemoculus. This is crucial for upgrading your stamina.
Learn the Basics
- Move: WASD (PC), left stick (console/controller), virtual joystick (mobile).
- Attack: Left mouse / R2 / tap the attack button.
- Elemental Skill: E / R1 / hold/tap skill button.
- Elemental Burst: Q / R2 + L2 / hold burst button.
- Sprint: Shift / L3 / sprint button.
- Jump: Spacebar / X / jump button.
- Interact: F / Square / interaction icon.
You will fight a few basic slimes and hillichurls. Use the Anemo Traveler (your starting character) or Amber (given after reaching Mondstadt). Collect drops like Hillichurl Masks and Slime Condensate – keep everything.
Arrive at Mondstadt
After a short path, you reach Mondstadt city. Speak to Kaeya and Amber, who join your party. Then follow the main questline: "The Outlander Who Caught the Wind". This teaches you about domains, teleport waypoints, and the Adventurer's Guild.
Character Creation (No True Customization)
Genshin Impact does not allow you to create your own character. You start with the Traveler who can switch between Anemo and Geo elements later. Your only choice is at the very beginning: Aether (male) or Lumine (female). This choice has no gameplay impact – pick whichever you prefer aesthetically. The twin you see in the cutscenes is the one who leaves with a god; the one you control searches for them.
Controls on All Platforms
| Action | PC (Keyboard + Mouse) | PlayStation | Xbox (via controller on PC) | Mobile (Touch) |
|---|---|---|---|---|
| Move | W/A/S/D | Left stick | Left stick | Virtual joystick |
| Sprint | Hold Shift | L3 | L3 | Sprint button |
| Jump | Spacebar | X | A | Jump button |
| Normal Attack | Left click | R2 | RT | Tap attack icon |
| Aimed Shot (bow) | Hold right click | L2 | LT | Hold and aim |
| Elemental Skill | E | R1 | RB | Tap skill icon |
| Elemental Burst | Q | R1 + L1 (together) | LB + RB | Hold burst icon |
| Interact / Pick Up | F | Square | X | Interaction prompt |
| Open Menu | Escape | Options | Menu button | Menu icon |
| Map | M | Touchpad | Back | Map icon |
UI Overview
- Top-left: Party health bars (up to 4 characters). Above you see your world level, Primogems, Mora, and Resin count.
- Top-center: Quest tracker (current objective) and compass.
- Top-right: Mini-map showing directions, teleport waypoints, and nearby points of interest.
- Bottom center: Action buttons for the active character (attack, skill, burst, sprint, jump).
- Bottom-left: Character switching buttons (tap to swap).
- Bottom-right: Quick access to gadget, inventory, and friends list.
- Paimon Menu (press Esc / Options): Contains settings, co-op, inventory, character screen, and more.
- Elemental Sight (press and hold middle mouse / L2 + R2 / hold eye icon on mobile): Highlights interactable objects, puzzles, and collectibles.
- Resin (moon-shaped symbol top-right): Used to claim rewards from domains and bosses. Max is 160; it regenerates over time. Early on, spend only on Ley Line Outcrops (Blossom of Revelation/Wealth).
- Follow the main story until you reach AR 20 (approx 2-3 hours).
- Collect every chest you see; they give AR XP and resources.
- Pick up every plant, ore, and item – you'll need them for ascension and crafting.
- Do the tutorial domains – they teach elemental reactions and mechanics.
- Talk to every NPC with a quest marker – many side quests grant AR XP.
- Cook dishes – healing food (e.g., "Stir-Fried Fish Noodles") can save you in battle.
- Join the Adventurer's Guild (Katheryne in Mondstadt) to unlock daily commissions.
- Spending Primogems on the standard banner (Wanderlust Invocation) – save for limited banners.
- Upgrading every character to level 20 – focus on 4 main characters.
- Using fragile resin before AR45 – save for max-level artifact domains.
- Ignoring elemental reactions – they multiply damage heavily.
- Rushing to open high-level domains – you'll get destroyed. Check domain level recommendations.
- Wasting enhancement ore on 3-star weapons – keep them for 4-star and above.
- Climbing in rain – wet surfaces increase stamina drain; use platforms or glide.
- Before AR45: Use resin on Ley Line Outcrops (Mora/EXP books) and weekly bosses (Stormterror, Andrius, Childe once unlocked).
- After AR45: Focus on artifact domains for 5-star gear.
- Never let resin cap at 160 – use it or condense it (unlocked at AR40?).
- [ ] Complete the prologue archon quest up to "Farewell, Archaic Lord" (ends at AR 18) – this unlocks events and battle pass.
- [ ] Unlock all Mondstadt teleport waypoints (at least the ones on the main roads).
- [ ] Offer 5+ Anemoculi to the Anemo Statue (unlock stamina bonus).
- [ ] Claim the free Beginners' Wish banner 10-pull – get Noelle.
- [ ] Level your main character (Traveler) to level 20 (use EXP books from chests).
- [ ] Equip artifacts (use the free set from the tutorial; level flower to +4 for HP).
- [ ] Cook at least 10 healing dishes (e.g., Sweet Madame or Stir-Fried Fish Noodles).
- [ ] Complete the Adventurer's Guild tutorial – unlock daily commissions (unlocked at AR 12).
- [ ] Spend your original resin on Ley Line Outcrops (blossom of revelation or wealth). Do not let it sit at 160.
- [ ] Do the "Adventure Rank 10" reward from Katheryne – you get 10 Acquaint Fates.
- [ ] Check your mail for freebies (often includes primogems, fates, and materials).
- [ ] Set up a good early team: Traveler (Anemo), Amber (Pyro), Kaeya (Cryo), and Noelle (Geo) – covers healing, shield, and exploration.
- [ ] Avoid going to Dragonspine until AR 20+ – the sheer cold mechanic is punishing.
Key UI elements to understand early:
Essential Early Objectives
1. Unlock Teleport Waypoints
Every waypoint you touch becomes fast-travel. Prioritize unlocking all waypoints in Mondstadt and Liyue for easy travel.
2. Collect Oculi
Anemoculi (wind) and Geoculi (geo) are floating collectibles. Glide or climb to reach them. Offer them to Statues of The Seven to increase stamina. Don't skip these – stamina is precious.
3. Complete the Archon Quests
Main story quests (Archon Quests) unlock new areas, characters, features, and increase your Adventure Rank (AR). Focus on "Prologue: Act I - The Outlander Who Caught the Wind".
4. Level Up Your Adventure Rank
AR is your progression gate. It unlocks domain difficulties, world level, and main story continuations. You gain AR XP from:
- Daily Commissions (unlocked at AR 12)
- Quest completions
- Opening chests
- Finding Anemoculi/Geoculi (first time offering gives AR XP)
5. Do the Beginners' Wish Banner
The Beginners' Wish banner costs 8 Acquaint Fates (not Primogems) per 10-pull. It guarantees Noelle (claymore geo character) after one 10-pull. This is a great early investment. Use the free Acquaint Fates from ascending characters to roll on this banner.
What to Do First vs. What to Avoid
Prioritize:
Avoid:
Early Resource Priorities
1. Primogems
Use only for Intertwined Fates (pink) for limited event banners. Never convert to Acquaint Fates unless you have excess.
2. Mora (Gold)
You will run out fast. Use it wisely: prioritize character ascension, talent upgrades, weapon enhancements. Avoid buying unnecessary items from shops.
3. Enhancement Ores
Use only on weapons you will keep long-term (e.g., 4-star or craftable weapons). Do not enhance 1-2 star weapons beyond level 20.
4. Character Ascension Materials
Check which materials your main characters need (e.g., Vayuda Turquoise for Anemo characters). Gather world resources accordingly.
5. Talent Books
Available from domains (check which days they drop). Focus on your main DPS character's talents first.
6. Resin
Common Beginner Mistakes
1. Wasting Primogems on standard banner – you get free Acquaint Fates from other sources; don't convert.
2. Leveling too many characters – resources are scarce; pick a main team (1 DPS, 2 supports, 1 healer/shielder).
3. Ignoring the Statue of The Seven – not offering oculi limits stamina, making exploration and combat harder.
4. Not cooking food – healing and stamina dishes are cheap to make and very useful early.
5. Sprinting everywhere – stamina drains quickly; use walking or gliding strategically.
6. Forgetting to equip artifacts – you get free 3-star artifacts from chests; equip them and level them to +4 at least.
7. Skipping daily commissions – they are the main source of Primogems (60 per day).
8. Fighting without understanding elemental reactions – e.g., applying Hydro + Electro causes Electro-Charged; using Pyro + Cryo triggers Melt. Learn the basics.
9. Ignoring the red climate warnings – in Dragonspine (Snezhnaya-like area) you'll freeze if not near a heat source. Avoid until later.
10. Opening high-level world bosses too early – e.g., Oceanid can be very hard without a ranged bow character.
Day-One Checklist
By the end of day one, you should be Adventure Rank 10-12, with a party of four characters, a full set of 3-star artifacts, and a clear path forward. Focus on enjoyment and exploration – Genshin Impact is a marathon, not a sprint.
Core Gameplay
"content": "## Overview
Genshin Impact's core gameplay revolves around exploration, combat, character progression, and daily resource management. Your Adventure Rank (AR) gates most activities. The game is structured in tiers that introduce and emphasize different systems. Below is a tier-by-tier breakdown.
---
1. Follow the Archon Quest – This is the main story. Completing quests grants Adventure EXP, Primogems, and unlocks features.
2. Explore the Overworld – Unlock Teleport Waypoints, Statues of The Seven, and Domain doors. Collect Oculi (Anemoculus/Geoculus) to upgrade Statues.
3. Open Chests & Solve Puzzles – Chests give Primogems, Mora, and low-tier Artifacts. Puzzles teach elemental interaction basics.
4. Complete Daily Commissions – Unlocked at AR 12. 4 commissions per day, each granting 10 Primogems, Adventure EXP, and Companionship EXP. The final reward at the Adventurers’ Guild gives 20 Primogems.
5. Use Original Resin – Spend on Petrified Trees (Ley Line Outcrops) for Mora or Character EXP materials, and on Domains (once unlocked). Early game, prioritize Mora and EXP books over Artifacts.
6. Spiral Abyss Floors 1–4 – Available at AR 20. Easy rewards (Primogems, Mora) but not a focus.
---
---
Genshin Impact's core gameplay revolves around exploration, combat, character progression, and daily resource management. Your Adventure Rank (AR) gates most activities. The game is structured in tiers that introduce and emphasize different systems. Below is a tier-by-tier breakdown.
---
Early Game (AR 1–25)
Main Gameplay Loop
1. Follow the Archon Quest – This is the main story. Completing quests grants Adventure EXP, Primogems, and unlocks features.
2. Explore the Overworld – Unlock Teleport Waypoints, Statues of The Seven, and Domain doors. Collect Oculi (Anemoculus/Geoculus) to upgrade Statues.
3. Open Chests & Solve Puzzles – Chests give Primogems, Mora, and low-tier Artifacts. Puzzles teach elemental interaction basics.
4. Complete Daily Commissions – Unlocked at AR 12. 4 commissions per day, each granting 10 Primogems, Adventure EXP, and Companionship EXP. The final reward at the Adventurers’ Guild gives 20 Primogems.
5. Use Original Resin – Spend on Petrified Trees (Ley Line Outcrops) for Mora or Character EXP materials, and on Domains (once unlocked). Early game, prioritize Mora and EXP books over Artifacts.
6. Spiral Abyss Floors 1–4 – Available at AR 20. Easy rewards (Primogems, Mora) but not a focus.
Combat & Interaction Systems
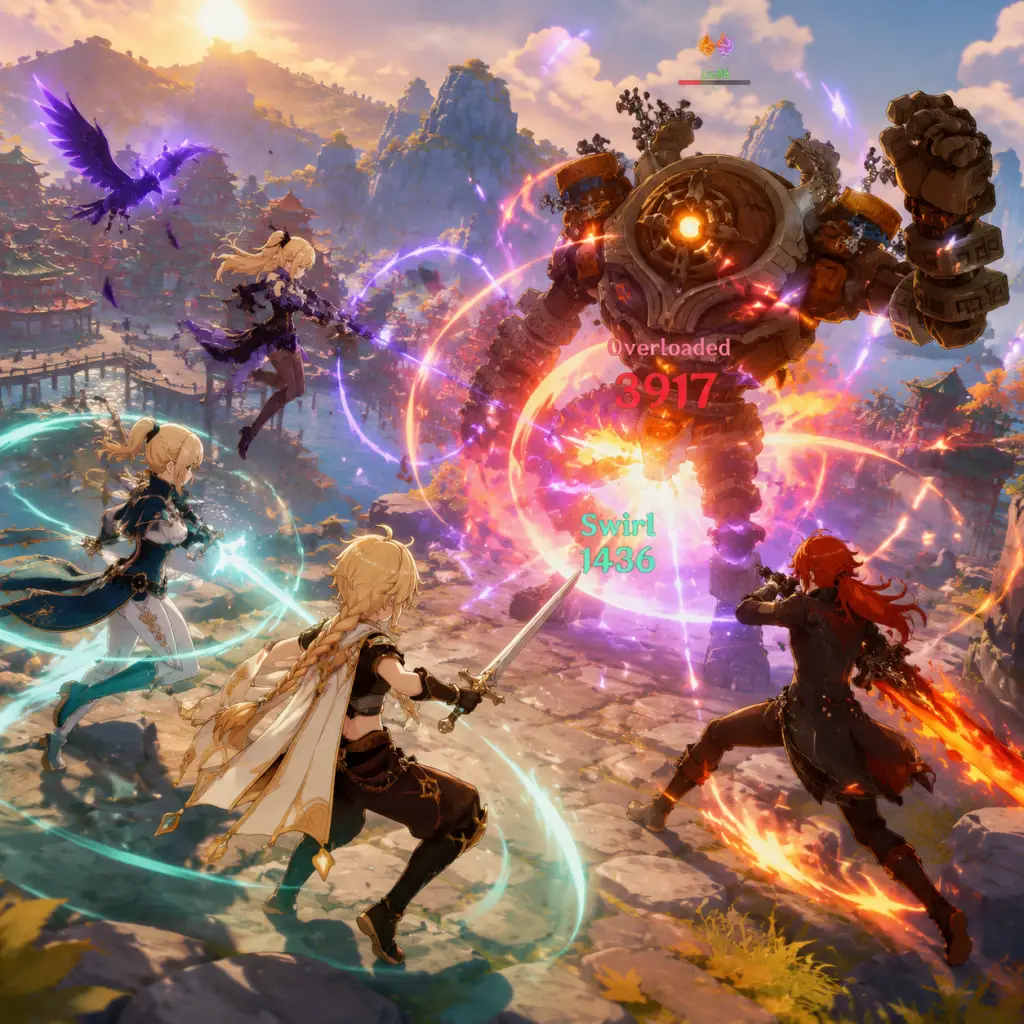
- Elemental Reactions – Core mechanic. Applying elements (Pyro, Hydro, Electro, Cryo, Anemo, Geo, Dendro) to enemies triggers reactions (e.g., Vaporize, Overloaded, Freeze). Early game, reactions are simple; focus on one reaction (e.g., Vaporize using Xiangling + Barbara).
- Stamina (Stamina Bar) – Used for sprinting, climbing, swimming, and charged attacks. Managing stamina is crucial during exploration and fights.
- Skill & Burst – Each character has an Elemental Skill (E) and Elemental Burst (Q). Learn to weave these into combat for crowd control, damage, or healing.
- Adventure Rank (AR) – Primary progression. EXP from quests, commissions, resin spending, and opening chests. AR unlocks new features (Domains, Battle Pass, Reputation, etc.).
- World Level (WL) – Increases automatically every 2–3 AR levels (starting at AR 20). Enemies get tougher but drop better materials. You can lower WL if you’re struggling.
- Character Level – Max level 20 at AR 0; ascends at AR 15, 25, etc. Early game: level your main DPS (e.g., Amber, Kaeya, or Lisa) to 40. Keep others at 20 for elemental resonance.
- Weapon Level – Use Weapon EXP materials from chests/open world. Level the weapon of your main DPS first.
- Artifacts – Do not farm artifact domains until AR 45. Use 3-star and 4-star pieces from chests. Equip set bonuses if available (e.g., 2-piece Berserker for crit rate). Prioritize main stats: ATK% on sands, Elemental DMG% on goblet (if possible), CRIT%/ATK% on circlet.
- Teleport Waypoints – Activate as many as possible. They serve as fast travel points.
- Statues of The Seven – Heal your party, offer Oculi to increase stamina and gain Adventure EXP/ rewards.
- Domains – Unlock them when you see them; most are gated by AR. Early domains are for Talent/Weapon materials (lowest difficulty).
- Seelie Gardens – Follow Seelies to treasure chests. A great source of early Primogems.
- Chests – Common, Exquisite, Precious, and Luxurious. Higher rarity gives more Primogems and Adventure EXP. Use an interactive map (like HoYoLAB) if you want 100% completion later.
- Archon Quests – Main storyline. Complete these first. They unlock regions (Liyue, Inazuma, Sumeru, etc.) and major features.
- World Quests – Side quests, often rewarding Primogems, Mora, EXP materials, and sometimes weapons (e.g., “The World’s Mansion” unlocks the Serenitea Pot).
- Story Quests – Character-specific stories (unlocked via Story Keys from Daily Commissions). Rewards: Primogems, character materials.
- Hangouts – Alternate path stories for 4-star characters. Rewards: Primogems, materials, namecards.
- Mora – Universal currency. Early bottleneck. Spend only on essential upgrades (weapons, characters, talents). Avoid buying food/items from shops.
- Primogems – Premium currency used for Wishes (banners). Earned from chests, quests, achievements, Spiral Abyss, events, and daily commissions. Never use Primogems for Resin refills until endgame. Save for limited character banners.
- Acquaint Fate – Blue fates for Standard Banner. Earned from BP, AR rewards, shop (Starglitter). Use them sparingly.
- Intertwined Fate – Pink fates for Limited Banners. Buy with Primogems. Only spend on banners you want.
- Starglitter & Starglitter – Obtained from pulling duplicate characters/weapons. Starglitter can buy fates (monthly limit of 5 each for Acquaint and Intertwined) or specific characters/weapons in the Paimon’s Bargains shop.
- Original Resin – Caps at 120 (early game). Spend on Ley Lines (Mora/EXP), Weapon Ascension Domains (open on specific days), and Talent Domains. One refresh per day is possible by spending 50 Primogems – skip until AR 45.
- Main DPS – Choose one early damage dealer (e.g., Xiao, Diluc, or even Kaeya). Level their Normal Attack, Skill, and Burst evenly (but prioritize Normal Attack if they are auto-attack based).
- Sub-DPS/Support – Level their Skill/Burst only. E.g., Fischl’s Skill (Oz), Bennett’s Burst.
- Healer – Bennett, Barbara, Noelle. Level their healing talent. No need to level Normal Attack.
- Artifacts – As mentioned, only equip from chests. Substat optimization is not needed.
- Weapons – Use 3-star or craftable 4-star weapons (e.g., Prototype Rancour for physical Keqing). Level to 40–50.
- Constellations – Not a priority. Only consider if you get duplicates.
- Spiral Abyss – Floors 1–4. These are easy and can be cleared with a single team of level 40 characters. Rewards: Primogems, Mora.
- Battle Pass – “Sojourner’s Battle Pass” is free. Complete weekly missions (Battle Pass tasks) for resources. The premium Gnostic Hymn gives more rewards – but only buy after AR 45 if you enjoy the game.
- Events – Occasional limited-time events; even at low AR you can participate for Primogems and materials.
- Team Synergy – Start building elemental reactions intentionally. Common early/mid comps:
- Energy Management – Characters generate Elemental Particles. Use skill on-field to collect particles for the same element. Build Energy Recharge on supports (e.g., 200%+ ER on Bennett).
- Shield – Geo constructs (Noelle, Zhongli) or Cryo shields (Diona). Shields are crucial for survival in higher WL.
- Elemental Resonance – Two characters of same element gives a team buff (e.g., Anemo resonance reduces stamina consumption, Cryo gives extra crit rate).
- AR 30–35 – Ascend your main DPS to 60/70. Weapons to 70. Talents to 4/4/4 for main.
- AR 36–45 – Start farming 4-star artifacts (e.g., Berserker, Instructor, Emblem of Severed Fate from chests or low-level domains). Do not spend Resin on 5-star artifact domains yet.
- Character Ascension – Focus on ascension materials (world bosses, local specialties). Level sub-DPS to 60/70 for their second passive talent (unlocks at 60/70).
- Weapon Ascension – Use ore from expeditions and weekly bosses. Craftable weapons become important (e.g., Prototype Amber for healers, Iron Sting for Sucrose).
- Unlock Teleports in all three nations (Mondstadt, Liyue, Inazuma) if available. Inazuma requires AR 30 and completing Liyue Archon Quest.
- Oculi Collection – All Anemoculus (65) and Geoculus (131) to max Statues for stamina increase and Primogem rewards.
- Electroculus (Inazuma) – wait until AR 30+ to collect safely.
- Achievement Hunting – Many achievements tied to exploration (e.g., “The Outlander Who Caught the Wind”) give Primogems.
- Story Quests – Unlock with Story Keys (8 commissions = 1 Key). Ensure you have enough keys to start them. Rewards: Primogems, character materials.
- Hangouts – Complete all endings for primogems (total 60 per character).
- World Quests – Some offer valuable items (e.g., “Fragmented Ceremony” gives a 4-star weapon billet).
- Commissions – Now reward Companionship EXP (for Battle Pass and namecards).
- Resin Management – Prioritize:
- Condensed Resin – Unlocked at AR 40. Craft at crafting bench using 1 Crystal Core + 40 Original Resin = 1 Condensed Resin (holds 40 Resin worth). Use for artifact domains later. Obtain Crystal Cores by catching crystalflies (glowing insects) in the open world.
- Primogems – Spend only on limited character banners. Save all Acquaint Fates for standard banner. Standard banner is not recommended for pulls, but you get free blue fates from BP and AR rewards.
- Starglitter – Buy monthly fates (both types) if you have 75 Starglitter. Otherwise save for characters (e.g., Bennett, Xingqiu).
- Main DPS Level – Target level 70/80. Weapon 80. Talents 6/6/6 or 6/8/6.
- Sub-DPS – Level 60/70 (unlock second passive). Weapon 70. Talents at least 4/6/6 (if skill is important) or 1/6/6.
- Supports – Healers can stay 60/70, energy recharge high. Shielders (Diona, Noelle) need HP/Def up.
- Artifact Sets – Start collecting sets like Emblem of Severed Fate (AR 45 domain) or Viridescent Venerer (for Anemo supports). But only farm 4-star artifacts for now; 5-star domains are inefficient before AR 45.
- Weapon Refinements – Refine 3-star weapons for early power (e.g., Thrilling Tales of Dragon Slayers R5 very strong on Barbara).
- Constellations – If you get C1 for Bennett, C6 for Noelle, etc., consider adjusting team.
- Spiral Abyss Floor 9–12 – Unlock at AR 45. Requires two well-built teams (level 70+). Rewards include Boreal Wolf's Militia Weapon Billet (random) and Primogems (up to 600 every reset).
- Battle Pass – Levels up to 50; rewards include 680 Primogems, 4 Intertwined Fates, weapon box (choose 1 of 5 4-star weapons). The BP weapon choice is very valuable (e.g., Serpent Spine for claymore users).
- Events – Major events (e.g., Lantern Rite, Windblume) often have a free 4-star character or weapon. Participate consistently.
- Advanced Reaction Teams – Examples:
- Rotation Optimization – Learn optimal skill/burst sequences. Example: Sucrose swirl (E, Q) -> Xiangling Q -> Xingqiu Q -> Hu Tao E + charged attacks. Timebursts to snapshot buffs.
- Energy Recharge Management – Use Energy Recharge main stats on Sands for supports (e.g., 250% on Xiangling).
- Co-op – Many tough bosses (e.g., Signora, Childe) are easier with 4 players. Co-op also allows farming at higher WL without raising your own WL.
- AR 45+ – Unlock World Level 6 (WL6) at AR 45, WL7 at AR 50, WL8 at AR 55. You can lower WL but you’ll lose drop rates. It’s better to stay at highest WL you can handle.
- Character Level – Aim for max ascension (80/90) for your main DPS. Level 90 is usually not needed for reaction-based teams (except Swirl/Electro-charged/Quicken teams where level matters). Supports can stay 80/80.
- Weapon Level – Max level 90 for main DPS weapons. Support weapons at least 80.
- Talent Level – Main DPS talents to 8 or 9. Crown of Insight (rare material) used for level 10. Use only on top-tier talents (e.g., Hu Tao’s Skill, Ayaka’s Burst).
- Artifacts – Farm 5-star sets from domains. Aim for correct main stats: Sands (ATK%/ER/EM), Goblet (Elemental DMG% / Physical DMG%), Circlet (CRIT Rate / CRIT DMG). Substats: prioritize CRIT, ATK%, ER, EM. Use a 2+2 set if a 4-piece is not available (e.g., 2 Emblem + 2 Shim for burst DPS).
- 100% Region Completion – Use interactive map to find all chests, Seelies, time trials, world quests. Achievements often reward Primogems.
- Hidden Quests – Many optional world quests give 5-star artifact sets (e.g., “The Incomplete Series” gives Gladiator/Viridescent).
- Achievement Hunt – Complete “Mora Boom”, “Three Primary Colors” (elemental reactions), “Mechanicus: Endless” etc., for Primogems.
- All Archon Quests completed – (up to current region).
- Story Quests and Hangouts – Finish all available for Primogems and character lore.
- Reputation – Reach max rank in all nations for Namecard and weapon billet at level 6+.
- Primogems – Spend only on limited banners. Save for characters you want (e.g., Raiden Shogun, Kazuha). Do not use on weapon banner unless you have a high pity and guarantee.
- Starglitter – Continue buying monthly fates. If you are F2P, avoid character purchases unless you desperately need a specific 4-star (e.g., Xingqiu).
- Fragile Resin – Save these. Use only during artifact farming events (double drops) or when you need to rush a character build for Abyss reset.
- Battle Pass – Gnostic Hymn is worth it if you play daily. It gives 4 Intertwined Fates, 680 Primogems, valuable resources (Mora, EXP books, Talent materials) and a weapon choice. The weapon is a 4-star with useful stats.
- Build Multiple Teams – For Abyss, you need two teams of four. Common team archetypes:
- Artifact Min-Maxing – After getting correct main stats, focus on substats. Use the strongbox (crafting) for upcycling bad 5-star artifacts into new ones (e.g., Gladiator’s Finale).
- Constellations – Some characters gain huge power spikes at C1 (e.g., Hu Tao C1 reduces stamina cost) or C2 (Raiden C2 ignores 60% DEF). Consider pulling for cons if you main that character.
- Weapon Refinement – Refine 4-star weapons like The Catch (free from fishing) to R5 for maximum effect. For 5-star weapons, refinements are luxury – only for whales.
- Spiral Abyss – The main challenge. Floors 9-12 reset every 1st and 16th of the month. Stars reset. You need to complete each floor with 3 stars each chamber. Common requirements: high damage, elemental application, survivability.
- Farming Ley Lines – Still important for Mora. You’ll need millions of Mora to max characters (around 2 million per character to 90).
- Domain of the Wayward – We do not have this? Actually, new bosses like Apep, Narzissenkreuz Ordo etc. are added over time. Stay updated.
- Teapot – Trust Rank 10 gives 40 Fragile Resin (total). Also daily crafting of furniture yields friendship EXP.
- Fishing – Unlocked at AR 30. Catch fish for The Catch (polearm) and refinement materials. Also needed for some achievements.
- Theorycrafting – Understand damage formulas: ATK × Talent Multiplier × DMG% × Crit × Reaction Multipliers × DEF/Resistance multipliers. Use KQM (KeqingMains) guides for advanced mechanics.
- Team Synergy Optimization – Every artifact set bonus and weapon passive matters. For example, using an EM buffer like Sucrose for reaction teams, or an ATK buffer like Bennett for hypercarry.
- Snapshotting – Some abilities snapshot buffs at the moment they are cast (e.g., Xiangling’s Burst). Learn to snapshot Bennett’s ATK buff or Sucrose’s EM share.
- Enemy AI Manipulation – Know enemy attack patterns to avoid damage. Use invincibility frames from bursts and dashes.
- AR Level – Max AR 60 (currently). Each new region raises cap. At AR 55+, you can ascend characters to 90/90. World Level is maxed (WL8).
- Battle Pass – Usually max out every season. The weapon is still useful; some weapons are best-in-slot for 4-star options (e.g., Serpent Spine for claymore DPS, Solar Pearl for catalyst DPS).
- Tree of Dreams & other region trees – In each new region, collect the local speciality (e.g., Sigils of Reputation) to level up the Tree for rewards like Crowns of Insight, Billets, and Fragile Resin.
- Fishing – Complete The Catch weapon R5. Also fish for achievement (gives a namecard).
- 100% All Regions – Including Dragonspine, Chasm, Enkanomiya, Sumeru rainforest & desert, Fontaine (future). Use interactive map to find every chest, time trial, and Oculi.
- Domain of the Wayward – New map expansions often include hidden domains with lore and loot.
- Seelie & Time Trial – Last few elusive puzzles.
- Reputation – Max in all nations (currently 10 for each). Unlocks namecards and recipes.
- All World Quests completed – Including hidden quests with multiple branches.
- All Story Quests – Use Story Keys. Every permanent story quest gives Primogems.
- Hangouts – All endings unlocked.
- Limited Time Events – Complete to earn exclusive weapons (e.g., Festering Desire, Cinnabar Spindle) and namecards.
- Primogems – Earn roughly 8000–10000 per month from commissions (60/day = 1800), Abyss (600/reset ≈ 600-1200/month depending on performance), events (2000-3000/month), and achievements. Efficiently saving for desired 5-star characters.
- Starglitter – Use for monthly fates. If you have extra, consider buying Blackcliff weapons from the shop if you lack Crit DMG weapons.
- Intertwined Fate – Save for Limited Banners. We generally recommend saving 180 pulls to guarantee a 5-star (soft pity at 75, hard pity at 90). 50/50 chance; you may lose and need another 180.
- Resin – Use Fragile Resins only when needed (e.g., new character release). Save some for resin-exclusive events (e.g., ley line overflow).
- Level 90 All Characters – Useful for reaction teams (EM scaling) and maximizing base stats. Overworld is easy regardless.
- Triple Crown – Level 10 in all three talents on main DPS (e.g., Ayaka, Hu Tao). Use Crowns from events, tree rewards, and Battle Pass (some).
- Artifact Perfection – Min-max substats: 30+ CV (Crit Value = crit rate×2 + crit dmg) on flower/feather. Goal: 70/140 crit ratio for main DPS, 200+ EM for reaction supports, 200%+ ER for burst supports. Use artifact optimizer tools (e.g., Genshin Optimizer) to find best combination.
- Weapon Refinement – 5-star weapons at R1 are strong. Refinement to R5 is a luxury (only for high spenders). For 4-star weapons, R5 is achievable (e.g., The Catch, Crescent Pike).
- Teapot – Trust Rank 10 for Primogems. Use adeptal energy capacity for daily resin-like rewards.
- Namecards – Collect from achievements, battle pass, hangouts, leveling characters to friendship 10, and special events.
- Spiral Abyss – Floor 12 is the hardest. Enemies have high HP and damage. Team compositions must be very refined (meta teams like International, Ayaka Freeze, Raiden National, Alhaitham Spread). 36-stars is the ultimate achievement.
- Weekly Bosses – Still run the 3 weekly bosses for talent materials. At AR 55+, bosses also drop Artifact sets (e.g., Pale Flame from Azhdaha, Heart of Depth from Signora).
- New Bosses – Each new region introduces a new weekly boss (e.g., Narzissenkreuz Ordo in Fontaine). Fight them for new talent materials later.
- Mondstadt, Liyue, Inazuma, Sumeru, Fontaine Reputation – Level to max. Bounties give 30K Mora each (max 3/week). Requests give 10K Mora each (max 3/week).
- Theodevouring Abyssal – Endgame repeatable bosses like the Overworld Bosses (40 resin) are still farmed for ascension materials and Artifact pieces (e.g., Primo Geovishap).
- Housing Realm – You can gift visitors with furniture sets for fame.
- Co-op Help – Many high AR players help lower AR players with tough bosses. It’s a social aspect.
- Seasonal Events – Note: Genshin’s major patches (1.0, 2.0, 3.0, 4.0) bring massive content. Participate in the flagship event for Primogems and unique items (e.g., a free 4-star character from the event shop).
- The Divine Ingenium – (Genius Invokation TCG) Max out Player Level (10) and accumulate weekly winnings. Earn Primogems and decorative cards.
Progression
Exploration
Quests & Missions
Economy & Resources
Character/Build Growth
Endgame Structure (Early Game)
---
Mid Game (AR 25–45)
Main Gameplay Loop
1. Archon Quests continue (Liyue part 2, Inazuma intro). Also World Quests.
2. Domains become routine – Weapon/Talent materials domains at higher tiers. Start doing them regularly based on your characters.
3. Weekly Bosses – Unlocked after certain Archon quests. Bosses like Dvalin, Andrius, Childe drop unique materials and Artifact sets. They cost 60 Resin each (30 for first three per week).
4. World Bosses – Overworld bosses (Regisvines, Hypostases, Oceanid) drop character ascension materials. Kill them as needed.
5. Reputation System – Unlocked at AR 25 in Mondstadt and Liyue (others later). Complete bounties/requests for reputation and rewards (blueprints, daily commissions extra).
6. Battle Pass – Weekly objectives become more efficient (e.g., spend 1200 Resin, complete Domains). Use condensed Resin (unlocked at AR 40) to save time.
7. Spiral Abyss Floors 5–8 – Rewards increase; you’ll need two teams of level 60–70 characters to clear floor 8.
Combat & Interaction Systems
- National Team: Xiangling + Xingqiu + Bennett + Sucrose/Chongyun (uses Vaporize/Melt)
- Freeze: Kaeya + Barbara + Anemo (Sucrose/Lynette) + Chongyun
- Electro-Charged: Fischl + Beidou + Xingqiu + Healer
Progression
Exploration
Quests & Missions
Economy & Resources
1. Weekly bosses (60 Resin each, 3 per week = 180)
2. World bosses (ascension materials) – 40 Resin each
3. Talent/Weapon domains (20 Resin per run, use condensed resin for double loot)
4. Ley Lines (only if low on Mora/EXP)
Character/Build Growth
Endgame Structure (Mid Game)
---
Late Game (AR 45–55)
Main Gameplay Loop
1. Daily Commissions – Still essential for Primogems and Companionship EXP.
2. Resin Farming – Dedicate resin to artifact domains (level 90 domains guarantee at least one 5-star artifact per run). Use Condensed Resin for efficiency.
3. Weekly Bosses – Still important for talent level-up materials and Billets. Prioritize: Childe, Azhdaha, Signora, etc.
4. Spiral Abyss Floors 9–12 – Full clear attempt. Each floor has 3 chambers, each with 3 objectives (star rating). You need 36/36 stars for maximum Primogems (600 per reset). This is the primary endgame challenge.
5. Character Specialization – Build multiple teams to counter different Abyss rotations (e.g., one for AoE, one for single target).
6. World Exploration – Aim for 100% completion in each region. Unlock hidden islands, world quests, and lore puzzles.
7. Teapot Realm – (Serenitea Pot) Unlocked at AR 35. Build furniture to increase Adeptal Energy, which yields Trust Rank rewards (including Resin-like items: Fragile Resin). Also a convienent way to get friendship EXP.
Combat & Interaction Systems
- Melt: Using Cryo (e.g., Ganyu, Ayaka) + Pyro (Xiangling, Bennett). High multiplicative scaling.
- Vaporize: Hydro (Childe, Xingqiu) + Pyro (Hu Tao, Xiangling). Optimal for single target.
- Taser: Electro-charged with Anemo (Sucrose, Kazuha) and Hydro/Electro. For crowd control and chain reactions.
- Quicken/Aggravate/Spread: Dendro + Electro (introduced in Sumeru). Promotes high base damage with EM.
Progression
Exploration
Quests & Missions
Economy & Resources
Character/Build Growth
1. ShatterGeo: Itto + Gorou + Albedo + Zhongli
2. Hyperbloom: Dendro MC + Xingqiu + Raiden/Kuki + Healer
3. Freeze Ayaka: Ayaka + Kokomi + Shenhe + Kazuha
4. National Variants: Chongyun, Xiangling, Xingqiu, Bennett – flexible.
Endgame Structure (Late Game)
---
Endgame (AR 55+)
Main Gameplay Loop
1. Daily Commissions – Still core for Primogems. You may complete them faster using condensed resin.
2. Spiral Abyss – Every two weeks: floor 9-12 full stars (usually within 30 minutes to 2 hours depending on buffs). This is the primary Primogem source (600 per reset).
3. Resin Optimization – Use Resin exclusively for artifact domains (typically Emblem of Severed Fate, Gladiator’s Finale, or specific sets for your main characters). Use Condensed Resin always.
4. Events – Stay updated with new limited-time events. They often offer Primogems, Mora, and unique rewards (like a free 4-star weapon or character).
5. Talent Level Up – Focus on leveling talents to 10 for key characters. Use Crowns of Insight (very rare; obtain from events and the Tree of Dreams in Sumeru).
6. Character Collection – As a veteran, you may pull for new characters for variety, meta, or synergy.
7. Genshin Impact The Genius Invokation TCG – (unlocked at AR 32) optional card game that rewards Primogems and materials each week.
8. Serenitea Pot – Maximize Adeptal Energy for Trust Rank rewards. Also use the pot to craft weekly Transient Resin (limited).
9. Achievement Hunting – Complete all achievements (800+ total) for namecards and Primogems. Some are grindy (e.g., “A Legendary Adventure” requires 800 commissions).
10. Co-op Floor 12 – Optimize rotations and supports. Many players enjoy speed runs or showing off builds.
Combat & Interaction Systems
Progression
Exploration
Quests & Missions
Economy & Resources
Character/Build Growth
Endgame Structure (Endgame)
---
Summary Table: Core Activities by Tier
| Tier | AR Range | Key Activities | Resin Priority | Team Focus | Abyss Focus |
|---|---|---|---|---|---|
| Early Game | 1–25 | Archon Quests, chests, daily commissions, low-level domains, WL bosses | Ley Lines (Mora/EXP), Weapon Domains | Single main DPS, basic reactions | Floors 1–4 (easy) |
| Mid Game | 25–45 | World quests, weekly bosses, reputation, battlse pass, domains, Spiral Abyss up to floor 8 | Weekly bosses, ascension materials, talent domains (using condensed resin at AR40) | Elemental reactions, energy management, two teams | Floors 5–8 (moderate) |
| Late Game | 45–55 | Artifact farming (level 90 domains), Spiral Abyss floor 9–12, all quests, teapot, fishing | Artifact domains (condensed resin), weekly bosses, talent books | Min-max artifact substats, multiple teams | Floors 9–12 full stars |
| Endgame | 55+ | Abyss resets, all events, TCG, achievement hunting, 100% exploration, character maxing | Artifact domains (perfect sets), weekly bosses, event farms | Optimized rotations, perfect artifacts, vertical investment | Floor 12 full stars (36*) every reset |
Progression Tips
- Resin Efficiency – Use condensed resin for artifact domains (saves time). For Ley Lines, use normal resin to avoid missing resource drop
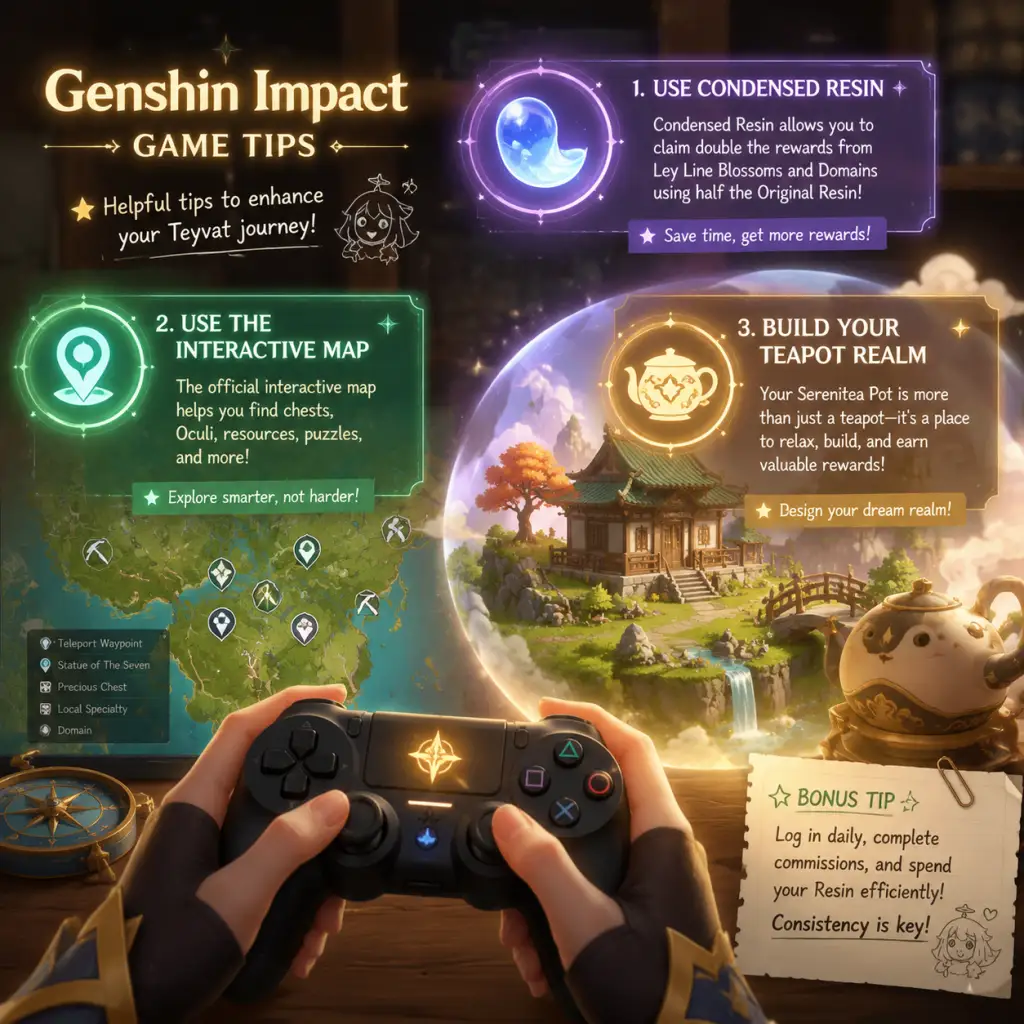
Game Tips
Overview
This guide compiles essential tips for Genshin Impact across all playstyles and progression stages. Whether you're a new Traveler just starting in Mondstadt or a veteran tackling Spiral Abyss, these insights will help you optimize your time, resources, and enjoyment. Tips are grouped by category: Combat, Exploration, Resources, Character & Team Building, Economy & Progression, and Advanced Strategies.
---
Combat Tips
Beginner: Elemental Reactions Are Your Best Friend
- Explanation: The core of combat revolves around triggering reactions (Vaporize, Melt, Overloaded, etc.). For example, applying Hydro then Pyro causes Vaporize, dealing 1.5x or 2x damage.
- Why it works: Reactions scale with character levels and Elemental Mastery, not just attack stats. Even low-level characters can deal massive damage if they trigger reactions.
- When to use: Always. Prioritize team compositions that enable frequent reactions (e.g., Xingqiu + Xiangling for Vaporize).
- Explanation: Dashing has invincibility frames (i-frames). You can dodge through any attack, including bosses like Azhdaha's stomps. Elemental Bursts also grant i-frames during their animation.
- Why it works: Avoid damage entirely, save healing, and create openings for counterattacks.
- When to use: Learn enemy attack telegraphs. Use Burst i-frames to survive unavoidable attacks (e.g., Oceanid's dive).
- Explanation: Each element has an aura gauge strength (1A, 2B, etc.). The reaction tax affects how much aura is consumed. For high-damage reactions (Melt, Vaporize), ensure the trigger element has high gauge to fully consume the aura.
- Why it works: Maximizes damage by preventing leftover aura from interfering with future reactions. For example, applying Pyro with strong gauge (Bennett E) on a Cryo aura for 2x Melt, then reapplying Cryo with Kaeya.
- When to use: Optimizing teams like International Childe (Hydro + Pyro) or Freeze (Hydro + Cryo) to control which character triggers the reaction.
- Explanation: Every region has waypoints that unlock fast travel. Mark them on your map as soon as you see the glow.
- Why it works: Saves immense walking time later. You only need to be near them, not complete a puzzle.
- When to use: As soon as you enter a new area, prioritize climbing to the nearest waypoint.
- Explanation: After collecting most (but not all) Oculi, you can craft Resonance Stones at the Alchemy Bench to locate missing ones.
- Why it works: Completing Oculi upgrades max out your Statue of the Seven, giving stamina and rewards. Stones point you to the exact location.
- When to use: Once you cannot find the last few through visual scanning. Their range is large; use them in areas where the interactive map shows missing Oculi.
- Explanation: Hold sprint (default LShift) to run. Alternate sprinting and walking preserves stamina. Use double anemo characters (e.g., Sayu + Venti) for increased movement speed and reduced stamina consumption. Also, eating stamina-reducing food (e.g., Northern Smoked Chicken) helps.
- Why it works: Enables faster traversal between quests and domains, especially in large regions like Sumeru or Fontaine.
- When to use: For long-distance travel on flat terrain or when climbing/climbing challenges.
- Explanation: Original Resin (180 per day) is used for rewards from domains and bosses. Weekly bosses (Stormterror, Andrius, etc.) cost 30 first time, then 60. They drop valuable materials and billets.
- Why it works: Weekly bosses have limited attempts per week but are the best source of talent level-up materials and weapon billets.
- When to use: Use Condensed Resin (crafted from 40 Resin + 1 Crystal Core) to double rewards from Artifact domains and some bosses. Only use Fragile Resin after Adventure Rank 45 for max-level artifact domains.
- Explanation: Send characters on Expeditions in the Adventurers' Guild for materials like ore, food ingredients, and mora. Completion gives materials and Primogems for daily commissions.
- Why it works: Passive resource income without resin. Helps accumulate ascension materials for characters you haven't built yet.
- When to use: Always assign expeditions daily. Prioritize characters with bonuses (e.g., Fischl reduces time for Mondstadt expeditions).
- Explanation: Stardust (from pulling 3-star weapons) buys Fates, Mora, enhancement ore. Starglitter (from pulling 4-star+ characters/weapons) buys characters, weapons, Fates.
- Why it works: Monthly reset allows purchasing up to 5 Acquaint Fates and 5 Intertwined Fates using Stardust. This is the cheapest way to get Fates.
- When to use: Always buy the monthly Fates first. Only spend leftover Stardust on other materials if you have a surplus (e.g., after reaching AR 55).
- Explanation: Early game, resources are scarce. Focus on a single DPS character (e.g., Diluc, Keqing, or even Kaeya) to level them to the current world level cap.
- Why it works: A strong main DPS can carry you through most content while you build supports gradually.
- When to use: From AR 1-45, pour all experience books, mora, and ascension materials into one carry character. Sub-DPS and healers can stay 10-20 levels lower.
- Explanation: Each character's Elemental Burst requires energy that is gained by picking up particles of their element (and neutral particles). Supports that need high uptime (e.g., Xiangling, Xingqiu) often need 180-200% Energy Recharge.
- Why it works: Without enough ER, your Bursts won't be ready when needed, breaking rotations.
- When to use: Check the character's energy cost (40-80). For 80-cost Bursts, aim for ~200% ER until you get refinements or other energy generation.
- Explanation: Many abilities (e.g., Fischl's Oz, Xiangling's Pyronado) snapshot the stats at the moment of casting. If you use Bennett's Burst before summoning Oz, Oz benefits from the ATK buff for its entire duration.
- Why it works: Snapshotting locks in offensive bonuses like ATK%, Elemental DMG%, and Crit stats, even if the buff expires.
- When to use: Plan rotations such that buffs (Bennett, Sara, Gorou) are applied before snapshot-able abilities. This can increase damage by 30-50%.
- Explanation: Standard Banner (Wanderlust Invocation) has no rate-up and includes weapons and characters. Save Primogems for Limited Character Event Banners, which have a 50/50 system and guarantee.
- Why it works: Ensures you get specific desired 5-star characters. Standard pulls come from free Acquaint Fates from Battle Pass, Ascension, and monthly shop.
- When to use: Always. Only the blue fates are for standard; never convert Primogems to blue fates.
- Explanation: Welkin Moon gives 90 Primogems per day for 30 days (total 2700 + 300 genesis crystals = 3000). Battle Pass (paid tier) gives talent materials, weapon billets, and a 4-star weapon choice.
- Why it works: Welkin is best bang for buck if you only care about Primogems. Battle Pass is better for resin-like resources (books, ore, mora) and optional weapons.
- When to use: If you spend $5/month, always buy Welkin. If you need weapon variants or resources, buy Battle Pass after reaching level 30+ in the free pass.
- Explanation: At AR 45, guarantee a 5-star artifact drop from highest-level domains. Use Condensed Resin to double rewards per run. Only farm one domain until your main team has good main stats (ATK%/DMG%/Crit). Then farm talent/weekly bosses.
- Why it works: Fodder artifacts can be used to level up good ones. Condensed saves time and gives double rewards per 40 resin.
- When to use: Start farming artifacts only when your characters are at least level 80/90 and talents at 6+. Use the Strongbox (Alchemy bench) to recycle bad 5-star artifacts into specific sets (e.g., Gladiator's Finale).
- Explanation: Spiral Abyss requires two teams. Build around reactions that counter floor ley line disorders (e.g., floors that increase Hydro dmg). Typical teams: one team for AoE (Venti, Kazuha), one for single-target (Hu Tao, Ganyu).
- Why it works: Abyss cycles favor specific elements. Check current blessings before building.
- When to use: After AR 45+ with two fully built DPS and supporting characters. Prioritize floors 9-12 for maximum Primogems.
- Explanation: Events often require specific mechanics. Always check the event guide for buffs and enemy lineups. Use provided trial characters if available.
- Why it works: Maximizes event rewards (Primogems, namecards, materials).
- When to use: Spend 20-30 minutes reading event rules before diving in.
- Explanation: Fragile Resin should never be used before AR 45. After that, save for specific farming bursts (e.g., new character release, double drop events).
- Why it works: Using 10-20 Fragile Resin during a Ley Line Overflow event gives massive mora and XP books.
- When to use: Wait for events that double Ley Line rewards. Alternatively, use to instantly level a new 5-star character you pull.
- Interactive Map: Use the official or community interactive map (e.g., Hoyolab) to track all collectibles.
- Daily Commissions: Always do all four. They are the main source of Primogems (60 per day) and Adventure Rank XP.
- Character Constellations: Do not pull for 4-star constellations unless you want the 5-star. Constellations can be obtained over time from standard banner or shop.
- Weapon Refinement: Never refine 5-star weapons unless you have duplicates. 4-star weapons with high refinement (R5) can outperform some R1 5-stars.
Intermediate: Positioning and I-Frames
Advanced: Gauge Theory and Elemental Application
---
Exploration Tips
Beginner: Activate Teleport Waypoints Immediately
Intermediate: Use Geoculus/Anemoculus Resonance Stone Crafting
Advanced: Optimize Movement Speed with Alt-Sprint and Stamina Management
---
Resource Management Tips
Beginner: Spend Resin Wisely - Prioritize Weekly Bosses and Talent Books
Intermediate: Daily Expeditions and Adventure Rank Up Rewards
Advanced: Stardust and Starglitter Exchange - Monthly Reset
---
Character & Team Building Tips
Beginner: Build One Main DPS First
Intermediate: Understand Energy Recharge Requirements
Advanced: Team Rotation Optimization and Snapshotting
---
Economy & Progression Tips
Beginner: Never Use Primogems for Standard Banner
Intermediate: Battle Pass (Gnostic Hymn) vs. Welkin Moon
Advanced: Efficient Artifact Farming After AR 45
---
Advanced Optimizations
Spiral Abyss Team Building
Event Optimization
Saving Fragile Resin
---
Final Tips
Apply these tips across all platforms (PC, mobile, PS5, etc.). Mobile players: adjust graphics to lower for smoother combat. PS5: enable 120fps mode for fluid movement.
Good luck, Traveler! May your pulls be blessed and your rotations flawless.
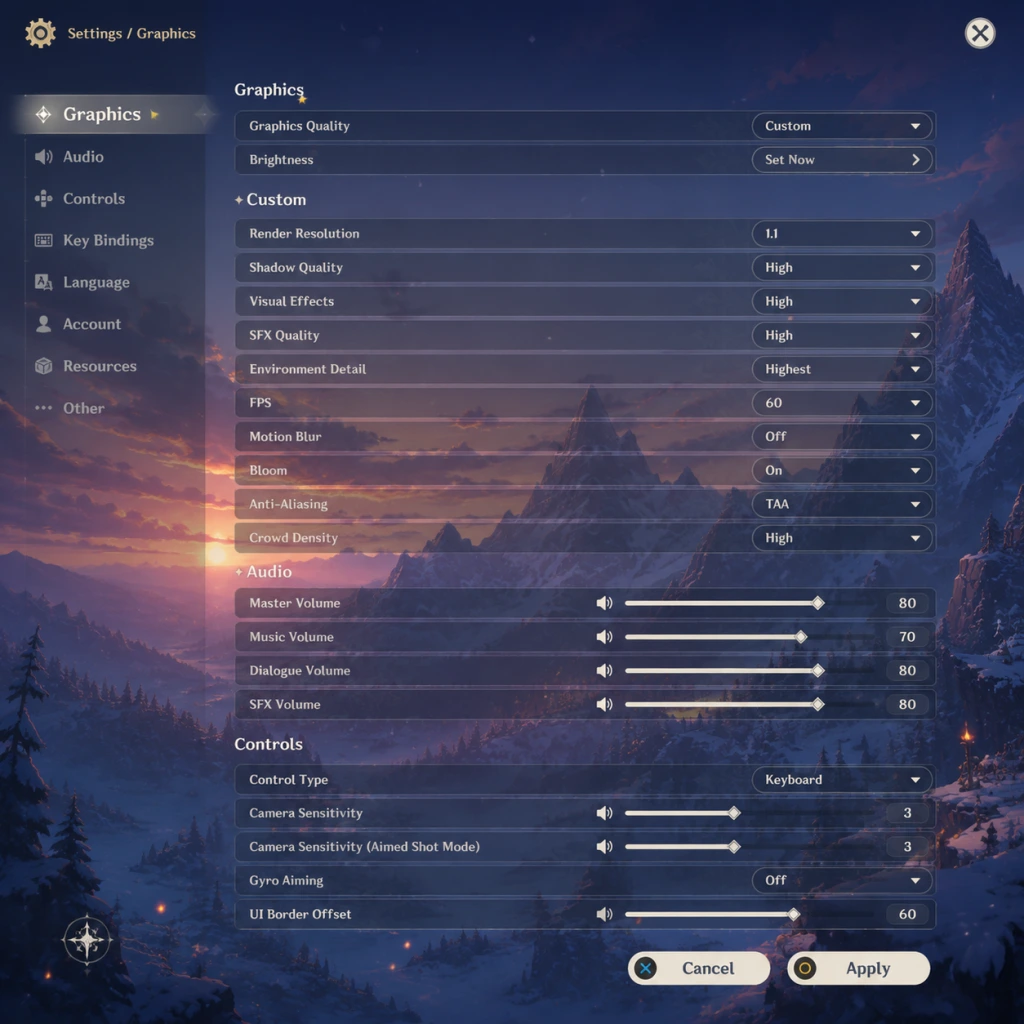
Game Settings
Overview
Genshin Impact provides a wide range of settings to tailor the experience to your platform and preferences. Proper configuration can significantly improve performance, visual clarity, and comfort. This guide covers every setting category, gives hardware-specific recommendations, and flags common pitfalls.
---
Graphics Settings
Main Options
- Graphics Quality: Preset (Lowest, Low, Medium, High, Highest) – adjusts many sub-settings at once. Custom is recommended for fine-tuning.
- Render Resolution: Controls internal resolution scaling. 1.0 = native. Lower values improve performance but reduce sharpness. 0.8 is a good balance for mid-range PCs.
- VSync: On/Off. On prevents screen tearing but can introduce input lag. Off gives lower latency. Recommended to Off if monitor supports G-Sync/FreeSync.
- FPS Limit: 30 / 60 / (120 on some devices). 60 is standard; 120 is only available on PC/PS5 with high-refresh monitors.
- Shadow Quality: Very Low to Highest. Shadows are costly. Low/Medium for performance, High for visual depth.
- Anti-Aliasing: SMAA (low cost), TAA (smoother but softer), FXAA (light). TAA recommended for quality; SMAA for clarity on lower resolutions.
- Volumetric Fog: On/Off. Turning Off improves FPS significantly in areas like Dragonspine.
- Motion Blur: On/Off. Off is recommended for clearer motion.
- Bloom: On/Off. Subtle effect; turning Off can help visibility.
- Reflections: Simple, Environment, or Screen Space. Screen Space is best but costly. Environment is a good middle ground.
- Grass Density: Low, Medium, High. High grass in Liyue plains can drop FPS. Set to Medium if performance fluctuates.
- Texture Quality: Low to Highest. Primarily affects VRAM. High textures are recommended for modern GPUs; Low for older or 2GB VRAM cards.
- Visual Effects: Low to Highest. Controls particle effects during combat. Medium is a good balance.
- Subsurface Scattering: On/Off. Affects skin and leaf translucency. Minimal performance impact, turn On.
- Dynamic Character Hair: On/Off. Slight performance cost; turn Off if FPS drops in crowded scenes.
- Level of Detail (LOD): Low to High. Controls draw distance of objects. High gives more pop-in but costs performance.
Hardware-Specific Recommendations
| Hardware Tier | Recommended Preset / Key Tweaks | Target FPS |
|---|---|---|
| Low-End (Intel UHD, Vega 8, 8GB RAM) | Lowest preset, Resolution Scale 0.8, Shadows Very Low, Volumetric Fog Off, Grass Low, Motion Blur Off, Visual Effects Low | 30 stable |
| Mid-Range (GTX 1650, RX 570, 16GB RAM) | Medium preset, Shadows Medium, Volumetric Fog Off, Grass Medium, TAA, Reflections Environment, Visual Effects Medium | 60 stable |
| High-End (RTX 3060, RX 6600, 16GB+ RAM) | High preset, Shadows High, Volumetric Fog On, Grass High, TAA, Reflections Screen Space, Visual Effects High | 60 / 120 |
| Ultra (RTX 4070+, RX 7800 XT, 32GB RAM) | Highest preset, 1.2x Resolution Scale (if GPU headroom), All maxed | 60/120 stable |
Special Attention Points
- VSync & Frame Limiter: If you experience stutter, turn VSync Off and cap FPS to your monitor's refresh rate via in-game limiter. For 144Hz monitors, try 120 FPS limit if 60 feels sluggish.
- Anti-Aliasing: TAA can cause blurriness on 1080p. Consider SMAA for sharper image at cost of slight jaggies.
- Volume Fog: Especially impactful in Dragonspine and underground areas. Turn Off for competitive advantage in domains.
- Resolution Scaling: Values above 1.0 (e.g., 1.2) improve clarity but severely impact performance. Only for high-end systems.
- Master Volume: 0-100. Set to comfortable level.
- BGM Volume: Background music.
- SFX Volume: Sound effects (combat, UI, environment).
- Dialogue Volume: Voice volume during cutscenes & quests.
- Sound Output: Auto, Speaker, Headphones. Affects spatial audio mixing.
- Subtitles: On/Off. On recommended for non-native language.
- Mic: Only relevant for co-op chat (PC). Ensure correct device selected.
- On mobile, set Master to 80% to avoid distortion on phone speakers.
- Use Headphones mode for better 3D audio positioning in exploration.
- If voice lines are low during cutscenes, increase Dialogue Volume to 70-80%.
- Key Bindings: Fully customizable for movement, combat, interactions, menus. Default Q/E for skill/burst, 1-4 for party. Many players rebind:
- Controller Support: Native support for Xbox, PlayStation, and Switch Pro controllers. Use wired or Bluetooth.
- Mouse Sensitivity: 1-100. Recommended 30-50 for aiming puzzles; 60-70 for combat.
- Invert Y-Axis: On/Off. Off by default.
- Camera Auto-Rotate: On/Off. Off gives more control.
- Aim Sensitivity: Separate from camera; set lower (20-40) for bow characters.
- Custom Layout: Drag & resize buttons. Recommended: move jump and interact buttons closer to thumb zone.
- Camera Sensitivity: 1-10. Set 5-6 for smooth turning.
- Gyroscope: Use for aiming (bow characters). Enable gyro aim with separate sensitivity.
- Fixed Joystick: On/Off. On locks movement joystick position; some prefer Off for flick gestures.
- Controller Sensitivity: Adjust camera and aim speeds.
- Trigger Deadzone: For PS5 adaptive triggers. Set to 10% if triggers feel mushy.
- Vibration Intensity: 0-100. Reduce to 30% to preserve battery.
- Sprint/Crouch Toggle: On PC, default LShift is sprint, LCtrl for walk. Many players rebind sprint to left CTRL to avoid pinky strain.
- Interaction Key: Default F is used for everything (pick up, talk, open). Change to E or a mouse side button to avoid accidental menu opens.
- Mobile: Always enable Gyroscope for bow aiming – it’s a game changer for mobile players. Set gyro sensitivity to 30% of camera sensitivity.
- Voice Language: Available in English, Chinese (CN & JP), Korean, Japanese, and more (depending on region). Can be changed in-game at any time.
- Text Language: Separate from voice. Choose from many languages. Affects UI, quest text, and menus.
- Audio Language: Same as Voice.
- Pick voice language you enjoy (Japanese voice acting is popular for anime immersion).
- Text language can be set to English even if voice is Japanese for better understanding of item names.
- Important: Changing voice language may require a small download (~300-500 MB per language pack).
- Manual DNS: Only for mobile; not recommended unless troubleshooting.
- Proxy / VPN: Not officially supported but can be used; ensure it’s set at OS level.
- Region Selection: On initial login, choose server (America, Europe, Asia, etc.). Cannot change later without starting over. Choose based on your geography for lowest ping.
- Bandwidth Saver: On mobile, options to reduce streaming texture quality.
- Server Region is permanent. You cannot transfer save data between regions. Choose wisely.
- If you experience lag spikes, check your connection; playing on Wi-Fi vs Ethernet can yield 20ms difference.
- For co-op, ensure NAT type is open (PC/console). Mobile typically has no NAT issues.
- Subtitle Size: Small, Medium, Large. Large recommended for readability.
- Colorblind Mode: None, Protanopia, Deuteranopia, Tritanopia. Adjusts UI elements (e.g., elemental reaction indicators).
- Camera Shake: On/Off. Off recommended for motion sickness.
- Audio Feedback: Can’t be disabled entirely, but SFX volume can be reduced.
- Colorblind Mode only affects a few UI icons; does not change world puzzles. Still helpful.
- No text-to-speech or screen reader support.
- If you have difficulty with fast button inputs, use a controller with programmable paddles (e.g., Xbox Elite).
- Auto-Equip Artifacts: On/Off. Off strongly recommended – auto-equip often chooses poor sets.
- Auto-Equip Weapons: Same – turn Off.
- Auto-Play (Cutscenes): On/Off. On skips dialogue automatically. Off lets you click through.
- Skip Cutscene Confirmation: Enable to skip unskippable cuts ones (like domain entry).
- Lock On / Aim Assist: For bow/melee. On helps targeting, but can interfere with manual aim. Set to On initially, turn Off if annoyed.
- Controller Camera Invert: Separate from generic invert.
- Co-op Mode: Invite permission (Anyone, Friends, Off). Set to Friends to avoid random join requests.
- Auto-Equip is a trap – always manually equip artifacts/weapons. It will overwrite your well-balanced sets.
- Lock On can cause unwanted camera pulls in chaotic fights. Many experienced players turn it Off.
- Skip Cutscene Confirmation: Enable after first playthrough to speed up domain runs.
---
Audio Settings
Options
Tips
---
Controls Settings
PC Controls
- Skill: Mouse Button 4 (thumb)
- Burst: Mouse Button 5
- Sprint: Left Ctrl (pinky) or Shift.
Mobile Controls
PlayStation Controls
Special Attention Points
---
Language Settings
Options
Tips
---
Network Settings
Options
Special Attention Points
---
Accessibility Settings
Options (Limited)
Special Attention Points
---
Gameplay Settings
Options
Special Attention Points
---
Quick Reference Table: Easy to Misconfigure Settings
| Setting | Default | Recommended Change | Reason |
|---|---|---|---|
| Voice Language | Region-based | Japanese or preferred | Immersion & performance consistency |
| Server Region | Automatic | Based on location | Permanent; choose closest |
| Auto-Equip Artifacts | On | Off | Prevents stat ruin |
| Anti-Aliasing | TAA | SMAA (1080p) / TAA (1440p+) | Avoid blur |
| Volumetric Fog | On | Off (low-end) | Large FPS gain |
| Camera Shake | On | Off | Reduces motion sickness |
| Aim Sensitivity | 50 | 20-30 (bow char) | Better accuracy |
| Lock On | On | Off (advanced players) | More control |
Final Checklist Before Playing
1. Choose your server region wisely – no take-backs.
2. Set voice language to your preference (JP recommended for anime fans).
3. Disable Auto-Equip Artifacts & Weapons.
4. Tune graphics to your hardware using the table above.
5. If on mobile, enable gyroscope for bow aiming and adjust custom layout.
6. Set subtitles On and size Large.
7. Turn Off motion blur and camera shake for clarity.
8. For PC, rebind Q/E to easier keys (mouse buttons if possible).
9. Test FPS in Liyue Harbor (a demanding area) – if below 30, lower render resolution or grass density.
10. Save your configuration – the game remembers settings per device.
---
Troubleshooting Common Issues
- Low FPS despite good hardware: Check if Windows Game Mode or overlays (Discord, Nvidia GeForce Experience) are interfering; disable them. Also ensure GPU is in high-performance power mode.
- Audio crackling: Reduce Master Volume to 70-80% and turn off 3D audio enhancements.
- Controller not working: On PC, plug in before launching the game. Switch Pro controllers need Steam Input to be disabled.
- Invisible texture glitches: Set Texture Quality to Medium or restart the game.
- Cannot change language: Voice language change requires downloading the pack; text change is instant.
With these settings, you can maximize both performance and visual quality while avoiding common pitfalls. Tweak as needed for your personal preference and hardware.
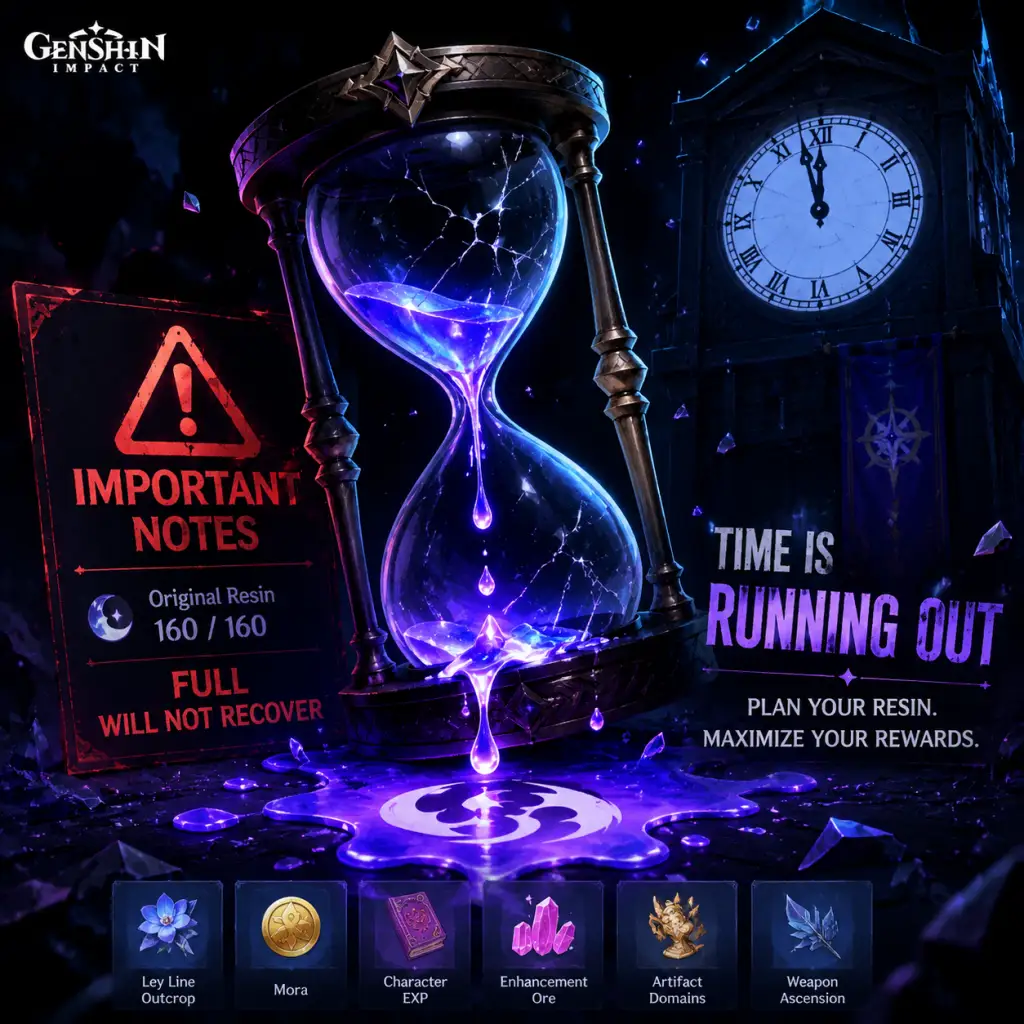
Important Notes
Warnings
Resin System
- Original Resin caps at 160 and refills at 8 minutes per resin. Never let it cap—always spend it before you log off. Use it on Weekly Bosses (first 3 per week cost 30 resin each, reduced to 30 after the first 3, but you can claim rewards weekly), Domains (talent/weapon materials), and Ley Lines (Mora/EXP).
- Fragile Resin is a precious resource that refills 60 resin instantly. DO NOT USE IT BEFORE Adventure Rank 45—once you hit AR45, you unlock the highest level of artifact domains that guarantee 5-star drops. Using Fragile Resin early is a huge regret.
- Condensed Resin can be crafted from 40 resin and 1 Crystal Core. Use it to double domain rewards (max 5 held). Always carry some for efficient farming.
- Never pull on the Standard Banner (Wanderlust Invocation) with Primogems. The standard banner gives no guaranteed rate-up, and you will get free Acquaint Fates from gameplay. Save Primogems for Limited Character and Weapon banners.
- Pity System: Hard pity at 90 pulls for character banner (75 for weapon), soft pity starts at 76 (65 for weapon). Once you hit pity, your next 5-star is guaranteed. Use the Epitomized Path on weapon banner to guarantee your desired weapon after 3 fate points.
- Don't pull on banners you don't understand. Wait for reliable datamines or official announcements.
- Genshin Impact is an online-only game. Bind your account to an email and enable 2FA via Hoyoverse Account settings. Never share your login credentials. Account theft is common.
- Third-party software (mods, cheats, script macros) can trigger the anti-cheat system (mihoyo's protection) and result in a permanent ban. Even cosmetic mods are against TOS.
- Don't level every character equally. Focus on your main DPS first, then sub-DPS, then supports. Resources are scarce.
- Normal Attack talent is only important for characters who use auto-attacks (e.g., Diluc, Hu Tao, Ganyu). For supports like Xingqiu or Bennett, level their Skill and Burst first.
- Crown of Insight is a one-of-a-kind item—only use it on your absolute favorite or meta character's most important talent.
- Don't farm artifact domains before AR45. The drop rates for 5-star artifacts before AR45 are abysmal. Use the 4-star sets you get from world bosses and chests.
- Don't be fooled by main stats only. Sub-stats matter a lot. A 4-star artifact with perfect sub-stats can outperform a 5-star with bad sub-stats early on.
- Don't trash all low-grade artifacts. Use them as fodder to level better pieces.
- Refining weapons is irreversible. Once you refine, you can't retrieve the copies. Only refine weapons you are certain you will use long-term (e.g., 4-star gacha weapons, craftable weapons). If you're unsure, keep the duplicates.
- Choosing the twin at the start: This has no impact on story or gameplay. The unselected twin becomes the antagonist. No stats, no dialogue differences. It's purely cosmetic.
- Spending Crown of Insight: Only 1–2 per patch. Use wisely.
- Refining weapons: As above, cannot be undone.
- Using fragile resin before AR45: Resin is the most precious resource. Wasting it early can delay your endgame progression by weeks.
- Choosing a 5-star from the standard banner: You never get to choose unless you hit a very rare pity. The only way to guarantee a specific standard 5-star is from the Standard Banner's guaranteed 5-star at 90 pulls (random) or from the Paimon's Bargains shop (rotates).
- Name changing: You get one free name change ticket from the early mail. After that, you must purchase a name change card with Genesis Crystals (real money). Plan your nickname carefully.
- Events (e.g., Lantern Rite, Windblume, Summertime Odyssey) offer exclusive weapons, furniture, and lore. Once the event ends, those items are gone forever (some may appear in the shop later, but very rarely). Always prioritize event completion.
- Event weapon refinements often require playing daily. If you miss a single day, you might not reach the last refinement rank.
- Check the Events page in the game menu and set reminders.
- Archon Quests & Story Quests are permanent—you can do them anytime. However, some World Quests (like those in Dragonspine or Enkanomiya) have time-limited mechanics but are not missable. Only event-exclusive story quests are missable.
- Hangout Events are permanent, but they unlock at certain Adventure Ranks. They don't expire, but if you leave them incomplete, you won't get the rewards. Complete them at your leisure.
- Floor 5-8 (early Abyss) requires two teams of level 60+ characters. Floor 9-12 (late Abyss) demands level 80+ and good artifacts. The first major spike is Floor 7, where you need two teams.
- Enemy buffs change every cycle. Some floors require specific elements (e.g., hydro to break pyro shields, cryo for hydro shields). Build a diverse roster.
- Azhdaha (weekly boss) has high HP, multiple phases, and persistent elemental application. Bring a healer and a shielder (Zhongli is ideal).
- The Raiden Shogun boss (Weekly) has a one-shot ult if you don't destroy the elemental shield in time. Coordination in co-op is key.
- World Level Adjust: If you find the open world too hard, you can lower your World Level by 1 via the Paimon menu (unlocked at AR25). You can raise it again later. This doesn't affect domains or Abyss.
- Artifact domains at AR45 require your party to survive constant Elemental damage and crowd control. Use food buffs (Adeptus' Temptation) and bring a shielder/healer until your artifacts improve.
- Low-level talent/weapon domains (levels 1-3) drop mostly 2-star and 3-star materials. Never use resin on these once you can clear the higher levels. Always do the highest domain tier you can.
- Artifact domains before AR45: Only farm if you need a 4-piece 4-star set for a specific character (e.g., Instructor for reaction support). Otherwise, wait until AR45.
- Mora Ley Lines: Only do these when you are below 1 million Mora. Event rewards and battle pass provide plenty.
- EXP Ley Lines: Only do these when you are below level 70 for your main team. Post-AR45, the bottleneck is Mora and talent books, not EXP.
- Don't level artifacts past +12 for anyone but your main DPS until you have a stable farm. +16 is a massive investment. Prioritize correct main stats over sub-stats early on.
- The Battle Pass (Gnostic Hymn) gives a 4-star weapon selection box. These weapons are good but not mandatory. The pass is a good value for resin and resources, but free players can still progress fine.
- Ask before collecting resources: In co-op, world resources (ore, plants, local specialties) are shared. Don't steal without permission.
- Communication: Use the quick chat or text chat. Don't spam. If you need help, be clear about which boss/domain.
- Don't kick people from your world without reason unless they are rude.
- Respect host's domain level: If you join a lower AR player's world, don't overpower everything and trivialize their experience unless they ask.
- Genshin Impact uses mihoyo's anti-cheat system (a form of kernel-level driver). Do not attempt to modify game files, use memory editors, or run the game on emulators with cheat engines. Ban is permanent.
- Account sharing is risky. If someone else gets your account banned, you lose everything.
- Third-party websites claiming free Primogems are scams. Never enter your login info there.
- Genshin Impact is fully online. All progress is saved server-side. There is no backup or manual save. Your progress is tied to your Hoyoverse account.
- Platform cross-save works: PC, PlayStation, mobile, and (future) Switch share the same account, but PSN account linking requires care. If you started on PlayStation, you may need to unlock cross-save via the Hoyoverse website.
- Unlink caution: Unlinking your PSN account from Hoyoverse can cause loss of access or progress—only do it via official customer service.
- If you lose access, you need proof of purchase (receipts) and personal info. Keep your UID and email linked safe.
- Do not use temporary emails for registration.
- Spending Primogems on Standard Banner: Nearly always a disappointment. Save for limited characters.
- Not doing Daily Commissions: 60 Primogems per day + Mission rewards. Skipping them is missing out on 1800 Primogems per month (~11 pulls).
- Ignoring Battle Pass weekly exp cap: You can max out BP without paying, but you must do the weekly tasks efficiently.
- Leveling all characters past level 70: Spreading resources thin leaves you with a weak roster for Abyss. Focus on 8-12 characters.
- Not using the Parametric Transformer: A gadget that converts excess resources into pulls and Mora. Use it once a week (max 3 times? Actually it's once per week).
- Overlooking the Serenitea Pot: Earns Friendship EXP and free realm currency for buying limited furniture. Also gives a small amount of Primogems.
- Not checking the star-shaped symbols on the map (Oculi) before moving to next region: You can track them on the interactive map, but it's easier to systematically collect them early.
- Missing out on free 4-star characters from events (e.g., Xinyan, Fischl, Diona). Always participate at least partially to get the character.
- Not using the Adventurer Handbook for resources: It tracks bosses, domains, and gives rewards. Use it regularly.
- Refusing to lower World Level when stuck: It's a temporary fix that can save frustration.
- Thinking the game is pay-to-win: It is not. All content can be cleared with 4-star characters and free weapons. The gacha only accelerates progression or offers convenience.
Primogem Spending
Account Security
Pitfalls
Talents & Leveling
Artifacts
Weapon Refinement
Irreversible Choices
Missable Content
Time-Limited Events
Story Content
Hangout Events
Difficulty Spikes
Spiral Abyss
World Bosses & Weekly Bosses
Domain Level Spikes
Grinding Traps
Over-Farming Low-Value Domains
Wasting Resin on Ley Lines
Artifact Farming Over-Investment
Battle Pass Consideration
Online Etiquette & Anti-Cheat
Co-Op Etiquette
Anti-Cheat & Fair Play
Save Management
No Local Saves
Account Recovery
Common Regrets
---
This guide covers the most common pitfalls and mistakes. Take your time, plan your resources, and enjoy the journey across Teyvat.
All Game Items
Overview
Genshin Impact features a vast array of items that are essential for character progression, combat, exploration, and resource management. This guide covers all major item categories, including weapons, artifacts, consumables, materials, currencies, collectibles, and key equipment. Each section explains what items do, how to obtain them, when they are useful, and any important synergies or upgrades.
> Note: Items are grouped by type and rarity. Rarity is indicated by stars (★). 5★ items are the rarest and most powerful, while 1★ items are common. Most items can be upgraded or refined using specific materials.
---
Weapons
Weapons are the primary tools for dealing damage and are equipped on characters. Each weapon type (Sword, Claymore, Polearm, Bow, Catalyst) has its own moveset and scaling. Rarity ranges from 1★ to 5★, with higher rarities having better base stats and more substats.
Obtaining Weapons
- Wishes (Gacha): Primarily 3★–5★ weapons from standard and limited banners.
- Forging (Blacksmith): 3★ and 4★ weapons using Northlander Billets and ores.
- Battle Pass (Gnostic Hymn): Selectable 4★ weapon at level 30.
- Events & Quests: Limited-time 4★ or 5★ weapons.
- Chests & Domains: 1★–3★ weapons as rewards.
- Starglitter Exchange: Rotating 4★ weapons and two 5★ standards (Skyward Atlas, Aquila Favonia).
- 5★ Signature Weapons: Many limited 5★ weapons are designed for specific characters (e.g., Staff of Homa for Hu Tao, Mistsplitter Reforged for Ayaka). It is recommended to pull these only if you main that character.
- Elemental Reactions: Some weapons boost reaction damage (e.g., Dragon's Bane for Vaporize/Melt).
- Energy Recharge: Weapons like Favonius Lance and Sacrificial Sword provide team utility by generating particles.
- Refinements: Duplicate weapons can be refined (R1 to R5) to enhance their passive effects. 5★ weapons are very expensive to refine; focus on R1 unless you are a whale.
Important Weapon Synergies
Notable Weapon Types
| Type | Example 5★ | Role |
|---|---|---|
| Sword | Primordial Jade Cutter | DPS/Sub-DPS with CRIT Rate and HP scaling |
| Claymore | Wolf's Gravestone | Main DPS with huge ATK bonus |
| Polearm | Staff of Homa | DPS with HP% scaling and low HP buff |
| Bow | Thundering Pulse | DPS with CRIT DMG and normal attack bonus |
| Catalyst | Lost Prayer to the Sacred Winds | DPS with CRIT Rate and movement speed |
---
Artifacts
Artifacts act as the "armor" system in Genshin Impact. They provide stat bonuses and set effects. Each character can equip five artifact slots: Flower of Life, Plume of Death, Sands of Eon, Goblet of Eonothem, and Circlet of Logos.
Artifact Stats
- Main Stats: Fixed for Flower (HP) and Plume (ATK). Sands: HP%, ATK%, DEF%, Energy Recharge%, Elemental Mastery. Goblet: Elemental DMG% (all elements plus Physical), or other stats. Circlet: CRIT Rate%, CRIT DMG%, Healing Bonus%, Elemental Mastery, etc.
- Substats: Random rolls from a pool including flat HP, ATK, DEF, and percentage versions plus CRIT, ER, EM.
- Set Bonuses: 2-piece and 4-piece effects from over 30 sets.
- Domains of Blessing: The primary source. Use Original Resin (20 per run, or 40 for condensed) to claim rewards. Level and domain determines set rarity drop rates.
- Weekly Bosses: Drop elemental artifacts (e.g., Gladiator's Finale, Wanderer's Troupe).
- World Bosses: Every boss drops 5★ artifacts at AR45+.
- Parametric Transformer: Can convert surplus items into random artifacts.
- Strongbox (Crafting Bench): Convert 3 mediocre 5★ artifacts into 1 from a specific set (e.g., Noblesse Oblige).
How to Obtain Artifacts
Important Artifact Sets
| Set | 2-Piece Bonus | 4-Piece Bonus | Best For |
|---|---|---|---|
| Viridescent Venerer | 15% Anemo DMG | +60% Swirl DMG, -40% enemy resistance to infused element | Anemo supports (Sucrose, Kazuha, Venti) |
| Emblem of Severed Fate | +20% ER | Burst DMG increased by 25% of ER (max 75%) | Sub-DPS (Xiangling, Raiden Shogun, Xingqiu) |
| Tenacity of the Millelith | +20% HP | Skill hit increases party ATK by 20% and shield strength by 30% for 3s | Shield supports (Zhongli, Diona) |
| Blizzard Strayer | +15% Cryo DMG | +20% CRIT Rate against Cryo-affected enemies, +20% more vs Frozen | Freeze team DPS (Ayaka, Ganyu) |
---
Consumables
Consumables include food, potions, and gadgets that provide temporary buffs or healing. They are crafted at cooking stations or alchemy benches.
Food
- Recovery Foods: Heal HP directly or over time (e.g., Sweet Madame, Golden Crab, Adeptus' Temptation heals+ATK).
- Revival Foods: Revive a fallen character (e.g., Teyvat Fried Egg, Matsutake Meat Rolls).
- Stat Boosting Foods: Increase ATK, DEF, CRIT Rate, etc. (e.g., Adeptus' Temptation, Flaming Red Bolognese, Goulash).
- Stamina Foods: Restore or reduce stamina consumption (e.g., Satisfying Salad, Northern Smoked Chicken).
- Elemental Potions: Increase elemental DMG by 25% for 300s (e.g., Frostshield Potion - Cryo). Crafted at alchemy bench, requires 1 Local Specialty + 1 Butterfly Wings.
- Cooking/Mining/Stamina Boost Potions: Forge at alchemy benches (e.g., Adeptus' Sealing Potion increases DEF).
- Local Specialties: Found in specific regions (e.g., Cecilias from Mondstadt, Cor Lapis from Liyue, Sakura Blooms from Inazuma). Each character ascension set requires 168 of a specific specialty.
- Boss Drops: From world bosses (e.g., Juvenile Jade from Primo Geovishap, Storm Beads from Thunder Manifestation).
- Gemstones: Elemental shards, fragments, chunks, and gemstones from world bosses and weekly bosses.
- Common Materials: Dropped by mobs (e.g., Slime Condensate, Treasure Hoarder Insignia, Whopperflower Nectar).
- Ores: Enhance weapon level; use Enhancement Ores (blue for 40 XP, fine for 2000, mystical for 10k).
- Weapon Ascension Crystals: Domain drops specific to region (e.g., Boreal Wolf's Milk Tooth chain from Mondstadt). Two per weapon type.
- Common Materials: Same as character material (mob drops) but often require higher tiers.
- Talent Books: Dropped from domains on specific days (e.g., Freedom series on Monday/Thursday in Mondstadt).
- Weekly Boss Materials: Unique drops from weekly bosses (e.g., Spirit Locket of Boreas, Ring of Boreas).
- Crown of Insight: Rare 5★ item to upgrade Talents beyond level 9. Obtained from events, Battle Pass, and some region rewards.
- Expeditions: Send characters to collect ores, food ingredients, and some local specialties.
- Parametric Transformer: Converts excess materials into random drops (weekly cooldown).
- Crafting Bench: Convert low-tier materials into higher tiers (e.g., 3 Slime Condensate -> 1 Slime Secretions).
How to Obtain: Pick up ingredients from environment, buy from NPCs, or use expeditions. Recipes are learned from quests, reputation, or event shops.
Potions
> Synergy: Potions stack with food buffs (different categories). Use before tough bosses (e.g., Dvalin, Azhdaha) or in Spiral Abyss.
---
Materials
Materials are used for ascending characters, weapons, talents, and forging. They are categorized by type and rarity.
Character Ascension Materials
Weapon Ascension Materials
Talent Materials
How to Farm Efficiently
> Tip: Use the interactive map on HoYoLAB to find all resource locations.
---
Currencies
Genshin Impact has multiple currencies, each with specific uses.
| Currency | Icon | Uses | Acquisition |
|---|---|---|---|
| Primogems | ★ | Most important: used for Wishes (160 per Intertwined/Acquaint Fate). Also for Resin refills (50 primos per 60 resin). | Daily commissions, events, abyss rewards, quests, exploration. |
| Mora | ! | Universal currency: leveling characters/weapons/artifacts, cooking, crafting, buying from shops. | Ley Lines, quests, enemies, expeditions, events. |
| Genesis Crystals |
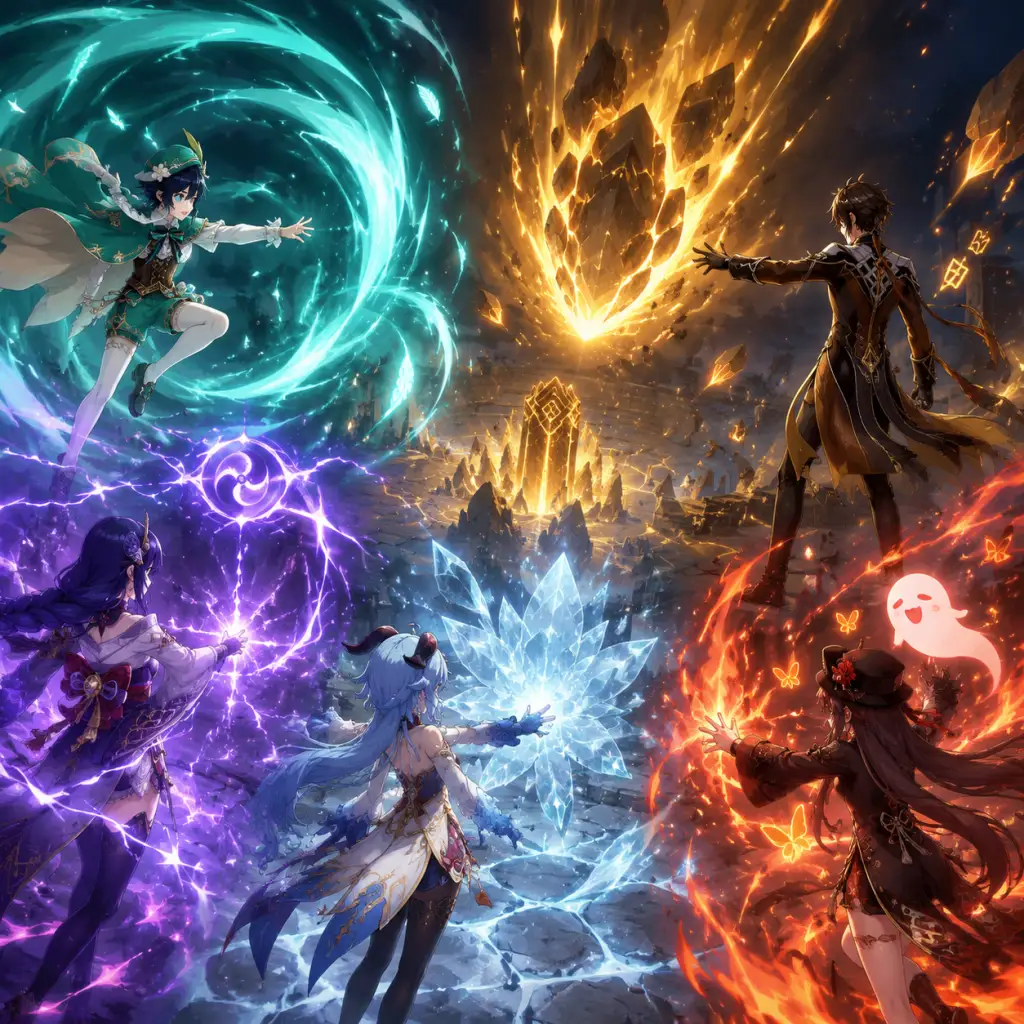
Character Skills
Overview
Genshin Impact's combat system revolves around each character's unique set of skills and talents. Every playable character has three core combat abilities: Normal Attack, Elemental Skill, and Elemental Burst, plus Passive Talents (unlocked at ascension phases) and Constellations (obtained via duplicate pulls). Understanding how to use, upgrade, and combine these skills is essential for maximizing damage, survivability, and team synergy.
This guide covers the universal skill mechanics, then breaks down skill archetypes by role (Main DPS, Sub DPS, Support, Healer, Shielder), and finally provides representative character examples with detailed skill descriptions, cooldowns, upgrades, combos, synergies, and recommended builds. While it is impossible to list every single character in full depth here, the principles apply to all—use the official wiki or in-game menu for exact numbers on any specific character.
---
Universal Skill Mechanics
1. Normal Attack (NA)
- Type: Charged sequence of physical or elemental hits. Press the attack button repeatedly.
- Charged Attack: Hold attack button after a normal attack to use a charged version (often consumes stamina).
- Plunging Attack: While airborne, press attack to plunge downward, dealing AoE damage.
- Scaling: Based on ATK stat and talent level. Some characters convert physical to elemental damage (e.g., Hu Tao with her E skill).
- Best Use: Main DPS builds focus on maximizing NA damage via set bonuses (Gladiator's Finale, Shimenawa's Reminiscence).
- Type: Press or hold (some characters have a hold variant). Grants elemental particles (1–5) on hit, which feed energy for Bursts.
- Cooldown: Varies from 6s (e.g., Bennett) to 15s+ (e.g., Zhongli pillar).
- Damage: Scales with ATK, DEF, or HP depending on character.
- Best Use: Often the primary source of elemental application for reactions. Some skills provide mobility, shields, or healing.
- Type: Ultimate ability that requires energy (40, 60, or 80 max). Deals massive damage, applies powerful effects, or provides team buffs/healing.
- Energy Cost: Lower cost (40) means faster recharge; higher cost (80) often has greater impact.
- Cooldown: 12s–20s, typically.
- Snapshotting: Many bursts snapshot buffs at cast time (e.g., Bennett's ATK buff). Important for team rotations.
- Utility Passives (1st Ascension): Often related to exploration or crafting (e.g., reduced stamina consumption, bonus ore doubling).
- Combat Passives (4th Ascension): Provide bonuses like increased team damage, energy recharge, or healing enhancements.
- Exploration Passives (native): Some characters have unique exploration talents (e.g., Sayu's faster movement during roll).
- Effect: Each constellation (C1–C6) modifies or enhances a skill. Not essential for most characters but can significantly change gameplay (e.g., C6 Bennett turns sword attacks into pyro damage).
- Acquisition: Obtained by pulling duplicate characters from banners or using Starglitter shop (limited rotation).
- Characteristics: High Normal Attack damage, field time heavy, often use reactions.
- Examples: Hu Tao, Ganyu, Xiao, Raiden Shogun (when built as carry), Eula, Ayaka.
- Typical Skills:
- Characteristics: Swap in, use skills, then swap out. They provide continuous elemental damage or utility from off-field.
- Examples: Xiangling, Fischl, Xingqiu, Yelan, Beidou, Albedo.
- Typical Skills:
- Characteristics: Provide buffs, debuffs, crowd control, or healing to the team.
- Examples: Bennett, Sucrose, Kazuha, Zhongli, Venti, Jean, Sayu.
- Typical Skills:
- Characteristics: Dedicated to keeping the team alive.
- Examples: Kokomi, Qiqi, Barbara, Diona, Noelle, Thoma, Layla.
- Typical Skills:
2. Elemental Skill (E Skill)
3. Elemental Burst (Q Skill)
4. Passive Talents
5. Constellations
---
Skill Upgrade Priorities
In general, follow the priority:
1. Main DPS: Normal Attack > Elemental Skill > Elemental Burst (or Burst first if it's the main damage source, e.g., Raiden Shogun, Eula).
2. Sub DPS: Elemental Burst > Elemental Skill > Normal Attack.
3. Support/Healer: Elemental Burst > Elemental Skill > Normal Attack (skip Normal Attack entirely if not used for damage).
Always level talents as high as your resources allow. The game caps talent levels at 10 (can be increased to 13 with Constellations, event items, or weekly boss drops).
---
Roles and Skill Archetypes
Main DPS (On-Field)
- Hu Tao: E skill (Guide to Afterlife) consumes HP to convert attacks to Pyro and increase ATK; Q (Spirit Soother) deals massive AoE Pyro and heals. Passive boosts crit rate when HP low.
- Ganyu: Charged attack (Frostflake Arrow) deals two-tier Cryo damage; E skill (Trail of the Qilin) taunts enemies; Q (Celestial Shower) rains Cryo shards over large AoE.
- Xiao: E skill (Lemniscatic Wind Cycling) dashes forward 2 charges; Q (Bane of All Evil) converts all damage to Anemo, increases jump height, and drains HP over time. Needs a healer.
Sub DPS (Off-Field)
- Xiangling: E (Guoba) summons a Pyro bear that shoots fire; Q (Pyronado) creates a spinning fire wheel that stays on the field even after swapping.
- Fischl: E (Oz) summons a raven that attacks enemies with Electro; Q (Midnight Phantasmagoria) transforms and then leaves Oz on field.
- Xingqiu: E (Fatal Rainscreen) creates rain swords that reduce damage; Q (Raincutter) applies Hydro on attacks and deals off-field Hydro damage.
Support/Enabler
- Bennett: E (Passion Overload) has press/hold variants; Q (Fantastic Voyage) creates an AoE that heals and gives massive ATK buff to characters above 70% HP. (His C1 removes HP restriction).
- Sucrose: E (Astable Anemohypostasis Creation - 6308) pulls enemies; Q (Forbidden Creation - Isomer 75/Type II) deals Anemo damage and spreads elements for crowd control.
- Zhongli: E (Dominus Lapidis) create a Stone Stele, hold variant generates a strong shield; Q (Planet Befall) petrifies enemies.
Healer / Shielder
- Diona: E (Icy Puff) fires a shield that absorbs Cryo damage; Q (Signature Mix) heals and applies Cryo.
- Noelle: E (Breastplate) creates a shield that scales with DEF; Q (Sweeping Time) converts attacks to Geo and heals based on DEF.
---
Elemental Reactions and Skill Synergy
Skills are the primary trigger for reactions. Understanding which skills apply elements and at what frequency is key.
| Reaction | Elements | Effect | Best Skill Application |
|---|---|---|---|
| Vaporize | Hydro + Pyro | 1.5x/2x damage | Fast Hydro (Xingqiu) + Pyro (Hu Tao) |
| Melt | Cryo + Pyro | 1.5x/2x damage | Fast Cryo (Ganyu) + Pyro (Xiangling) |
| Freeze | Cryo + Hydro | Locks enemies | Hydro (Kokomi) + Cryo (Ayaka) |
| Electro-Charged | Electro + Hydro | Continuous Electro damage + stagger | Electro (Fischl) + Hydro (Xingqiu) |
| Overloaded | Electro + Pyro | AoE Pyro explosion | Risk of knocking enemies away |
| Superconduct | Electro + Cryo | Reduces physical RES | Good for physical carries (Eula) |
| Swirl | Anemo + any element | Spreads element, reduces RES with VV set | Sucrose, Kazuha, Venti |
| Crystallize | Geo + any element | Creates shield pieces | Noelle, Zhongli, Albedo |
Recommended Builds and Skill Synergies
Here are some classic team archetypes and how their skills interact:
1. Melt Ganyu
- Ganyu (Main DPS): Focus on charged attack. Use E to taunt, Q for AoE Cryo application.
- Xiangling (Sub DPS): Use E (Guoba) and Q (Pyronado) to apply Pyro. Build energy recharge.
- Bennett (Support): Use Q for ATK buff and healing.
- Zhongli (Shielder): Hold E for shield to avoid interruption; Q for petrify.
- Rotation: Zhongli shield → Bennett Q → Xiangling E+Q → Ganyu charged attacks (melt every shot).
- Hu Tao (Main DPS): Use E to infuse Pyro, then charged attack + jump cancel. Q when low HP for massive damage and heal.
- Xingqiu (Sub DPS): Q followed by E to maintain Hydro application.
- Sucrose (Support): E and Q to swirl Hydro, reduce Hydro RES with 4pc Viridescent Venerer (VV).
- Zhongli or Thoma (Shielder): Shield to protect Hu Tao since she stays low HP.
- Rotation: Sucrose E → Xingqiu Q+E → Zhongli shield → Hu Tao E and spam charge attacks. Use Hu Tao Q when burst is ready.
- Raiden Shogun (Main DPS/Sub DPS): Use E (Transcendence: Baleful Omen) to boost team burst damage; Q (Musou Shinsetsu) deals massive damage and recharges energy.
- Xiangling (Sub DPS): Q (Pyronado) off-field Pyro.
- Xingqiu (Sub DPS): Q (Raincutter) off-field Hydro.
- Bennett (Support): Q (Fantastic Voyage) for ATK buff and healing.
- Rotation: Raiden E (use first) → Bennett Q → Xingqiu Q+E → Xiangling Q → Raiden Q (drive the team's bursts). This maximizes energy recharge and damage.
- Elemental Skill (E): Use to generate energy particles before Burst. If your E has multiple charges (like Xiao, Hu Tao, or mobile characters), use them strategically for mobility or damage.
- Elemental Burst (Q): Use when your team's buffs are active (e.g., Bennett Q, Sucrose VV shred). Do not waste high-cost bursts when enemies are invulnerable or about to phase.
- Normal/Charged Attack: On a dedicated DPS, weave charged attacks for extra damage (e.g., Hu Tao, Ganyu, Ayaka). On supports, generally avoid trivial auto-attacks.
- Plunging Attack: Only relevant for characters like Xiao (during burst) or Keqing, Diluc (mobility). Not a primary damage source for most.
- Hold Variants: Many characters (Zhongli, Bennett, Diona, etc.) have a hold version of E that trades damage for stronger utility (shield stronger, longer, or AoE). In combat, often prefer hold for defense.
- Materials: Common Ascension materials (dropped by bosses or weekly bosses), plus mob drops (slimes, hilichurls, etc.). Character-specific Talent Level-up Materials (from domains on certain days).
- Weekly Boss Drops: Needed for level 6->7 and above. Each character requires a specific drop from a boss (e.g., Dvalin's claw, Childe's shard, Azhdaha's material, etc.).
- Crown of Insight: Extremely rare item used to raise a talent from level 9 to 10. Use only on your favorite character's most impactful talent (e.g., Ganyu's normal attack, Raiden's burst).
- Priority: As above.
2. Hu Tao Vaporize
3. Raiden National Team
---
When to Use Each Skill: General Tips
---
Upgrading Skills (Talents)
---
Conclusion
Mastering character skills in Genshin Impact requires understanding each ability's purpose, cooldown, energy cost, and how they fit into team rotations. Always read the skill descriptions in-game for exact numbers (which change with talents). Build teams around complementary elemental reactions and role synergies. While this guide covers the core framework, every character has unique nuances—so dive into their specific talents and experiment! For full details on over 70 characters, refer to the in-game Archive or community resources like the Genshin Impact Wiki.
---
Note: Skill values, cooldowns, and effects are subject to change with patches. Always verify in-game for the most current information.
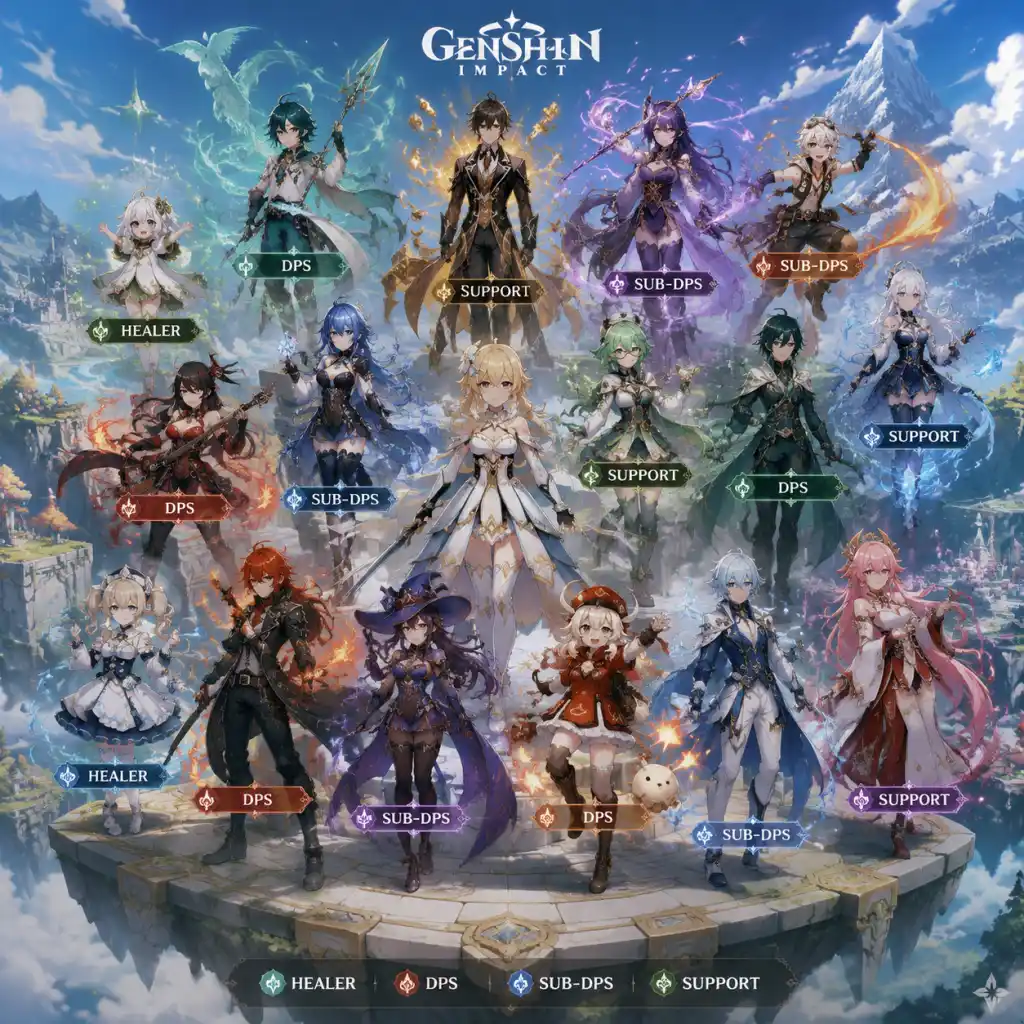
Characters & Roles
Overview
Genshin Impact features a diverse roster of over 80 playable characters, each with a unique combination of Element, Weapon type, and Role. Characters are obtained primarily through the Wish (gacha) system, with a few exceptions like the Traveler (free), Aloy (limited-time collaboration), and occasional free event characters. This guide covers every major character as of Version 5.x, organized by region, detailing their background, strengths, weaknesses, playstyle, unlock conditions, recommended equipment/builds, and team synergy.
Character Basics
Elements
- Pyro (Fire) – High damage, reactions like Vaporize, Melt, Overloaded.
- Hydro (Water) – Enabler for reactions, healing, crowd control.
- Anemo (Wind) – Swirl reactions, crowd control, mobility.
- Electro (Lightning) – Energy regeneration, reactions like Electro-Charged, Superconduct, Aggravate.
- Dendro (Nature) – Bloom, Hyperbloom, Burgeon, Quicken reactions.
- Cryo (Ice) – Freeze, Melt, Superconduct.
- Geo (Earth) – Shields, constructs, Crystallize reactions.
- Sword – Balanced, fast attacks.
- Claymore – Heavy, slow, can break shields.
- Polearm – Medium speed, good reach.
- Bow – Ranged, charged shots for weak points.
- Catalyst – Ranged magic, auto attacks are elemental.
- Main DPS – Primary damage dealer, stays on field.
- Sub-DPS – Off-field damage, skill/burst reliant.
- Support – Healing, shielding, buffing, debuffing.
- Utility – Exploration, energy generation, crowd control.
- Standard Wish – All standard 5-star characters (Diluc, Jean, Mona, Keqing, Qiqi, Tighnari, Dehya) and most 4-star characters are available.
- Limited Character Event Wishes – Most 5-star characters (e.g., Raiden Shogun, Nahida) and some 4-stars are exclusive to their banner.
- Starglitter Exchange – Rotation of 4-star characters (Amber, Kaeya, Lisa, etc.) and some 5-stars (after enough constellations).
- Free Characters – Traveler (all elements), Amber, Kaeya, Lisa (story), Barbara (AR20), Xiangling (Spiral Abyss floor 3), Collei, Lynette (story), and event-exclusive characters like Aloy (expired).
Weapon Types
Roles
Unlock Conditions
Constellations
Constellations (C1-C6) enhance abilities. Some characters drastically improve (e.g., Bennett C1, Xingqiu C6). Not required for viability but offer power spikes.
Regional Character Compendium
Mondstadt (City of Freedom)
| Character | Element | Weapon | Role | Strengths | Weaknesses |
|---|---|---|---|---|---|
| Traveler (Anemo) | Anemo | Sword | Sub-DPS/Support | Free, flexible, crowd control | Low personal damage |
| Amber | Pyro | Bow | Utility/DPS (low) | Free, baron bunny taunt, exploration passive | Weak damage, clunky |
| Kaeya | Cryo | Sword | Sub-DPS/Support | Free, energy refund, good reaction enabler | Low damage scaling |
| Lisa | Electro | Catalyst | Sub-DPS | Free, defense shred, AoE burst | Slow, requires field time |
| Barbara | Hydro | Catalyst | Healer | Free, continuous healing, hydro application | No shield, self-wet |
| Diluc | Pyro | Claymore | Main DPS | High consistent Pyro damage, simple playstyle | Outclassed by newer Pyros |
| Jean | Anemo | Sword | Healer/Support | Healing, crowd control, cleanse | Low damage, split scaling |
| Venti | Anemo | Bow | Support/CC | Largest AoE suction, energy regeneration | Less effective against heavy enemies |
| Klee | Pyro | Catalyst | Main DPS | High burst damage, fun gameplay | Clunky, short range, squishy |
| Razor | Electro | Claymore | Physical DPS | Easy to play, self-sustain | Loses to other DPS, electro not ideal for physical |
| Noelle | Geo | Claymore | Healer/DPS (C6) | Shield, healing, AoE Geo damage at C6 | High energy cost, weak before C6 |
| Fischl | Electro | Bow | Sub-DPS | Oz off-field damage, energy generation | No AoE, reliant on Oz uptime |
| Sucrose | Anemo | Catalyst | Support/EM Share | EM boost, crowd control, cheap | Low personal damage, requires reactions |
| Bennett | Pyro | Sword | Support/Healer | Best attack buff, healing, fast energy | C6 affects some comps, burst circle locked |
| Qiqi | Cryo | Sword | Healer | Strong healing, off-field cryo | No energy recharge, low utility |
| Diona | Cryo | Bow | Healer/Shielder | Shield, healing, cryo application | Low damage, shield can be weak |
| Mona | Hydro | Catalyst | Sub-DPS/Support | Omen debuff, burst damage, hydro application | Energy hungry, slow movement |
| Rosaria | Cryo | Polearm | Sub-DPS | Crit rate share, cryo application, physical support | Low personal damage |
| Albedo | Geo | Sword | Sub-DPS/Support | Off-field Geo damage, EM buff (if C2) | Boring playstyle, geo constructs break |
| Eula | Cryo | Claymore | Physical DPS | Highest physical burst damage | Relies on burst, energy issues |
| Mika | Cryo | Polearm | Support (Physical) | ATK speed, physical damage buff, healing | Niche, only good for physical teams |
Liyue
| Character | Element | Weapon | Role | Strengths | Weaknesses |
|---|---|---|---|---|---|
| Traveler (Geo) | Geo | Sword | Support (constructs) | Free, constructs for puzzles | Low damage, constructs can be annoying |
| Xiangling | Pyro | Polearm | Sub-DPS | Best off-field Pyro, high AoE burst | Energy reliant, requires Bennett |
| Xingqiu | Hydro | Sword | Sub-DPS | Best off-field Hydro, damage reduction | Energy hungry, requires C6 for optimal |
| Beidou | Electro | Claymore | Sub-DPS/DPS | Parry, AoE electro damage, shield | Energy issues, parry timing |
| Ningguang | Geo | Catalyst | Main DPS | High single-target Geo damage, screen | No reactions, stamina hungry |
| Chongyun | Cryo | Claymore | Sub-DPS | Cryo infusion, AoE burst | Infusion can ruin reactions |
| Xiao | Anemo | Polearm | Main DPS | High AoE plunge damage, mobility | HP drain, needs battery |
| Keqing | Electro | Sword | Main DPS | Teleport, fast attacks | Low damage multipliers |
| Qiqi (already in Mond) | Cryo | Sword | Healer | (same as above) | (same as above) |
| Mona (already in Mond) | Hydro | Catalyst | Sub-DPS | (same as above) | (same as above) |
| Hu Tao | Pyro | Polearm | Main DPS | Highest single-target Pyro damage | HP management, stamina issues |
| Ganyu | Cryo | Bow | Main DPS/Sub-DPS | Best charged shot AoE, off-field burst | Aim reliance, interrupt prone |
| Zhongli | Geo | Polearm | Shield/Support | Strongest shield, geo resonance, petrify | Low damage as support |
| Xinyan | Pyro | Claymore | Physical DPS (niche) | Shield, physical damage buff | Split scaling, clunky |
| Yanfei | Pyro | Catalyst | Main DPS | Easy pyro application, stamina management | Squishy, needs shield |
| Shenhe | Cryo | Polearm | Cryo Support | Cryo damage buff, debuff | Niche to cryo teams |
| Yelan | Hydro | Bow | Sub-DPS/DPS | High off-field damage, mobility | Energy hungry with poor hydro application |
| Kuki Shinobu | Electro | Sword | Healer/Sub-DPS | Healing, off-field electro, EM scaling | Low base HP, slow skill |
| Yun Jin | Geo | Polearm | Support (Normal ATK) | Normal attack damage buff, geo resonance | Niche to normal attack teams |
| Yaoyao | Dendro | Polearm | Healer/Support | Healing, dendro application, cheap | Burst leaves field |
| Baizhu | Dendro | Catalyst | Healer/Shielder | Healing, shielding, dendro reactions | No damage, passive shields |
Inazuma
| Character | Element | Weapon | Role | Strengths | Weaknesses |
|---|---|---|---|---|---|
| Traveler (Electro) | Electro | Sword | Battery/Sub-DPS | Energy regeneration, electro application | Low damage |
| Kaedehara Kazuha | Anemo | Sword | Support/Sub-DPS | Elemental damage buff, CC, double jump | Energy issues without C1 |
| Kamisato Ayaka | Cryo | Sword | Main DPS | High burst damage, cryo infusion | Stamina issues, relies on freeze |
| Yoimiya | Pyro | Bow | Main DPS | Fast pyro attacks, single-target | No AoE, misses often |
| Raiden Shogun | Electro | Polearm | Battery/Sub-DPS/DPS | Energy regeneration, burst damage, team buff | Needs team to generate energy |
| Sangonomiya Kokomi | Hydro | Catalyst | Healer/Driver | Healing, hydro application, easy to build | No crit, low personal damage |
| Arataki Itto | Geo | Claymore | Main DPS | High Geo damage, simple combos | Needs geo team, energy hungry |
| Shikanoin Heizou | Anemo | Catalyst | Main DPS (Driver) | AoE damage, EM scaling, good exploration | Requires reactions, short range |
| Kujou Sara | Electro | Bow | Support (ATK buff) | ATK buff, electro crit damage | Clunky buff rotation |
| Gorou | Geo | Bow | Support (Geo) | Geo damage buff, defense buff | Only good in mono-geo |
| Thoma | Pyro | Polearm | Shielder/Support | Shield, pyro application, AoE burst | Weak shield, energy issues |
| Yae Miko | Electro | Catalyst | Sub-DPS | High off-field electro damage | Energy hungry, squishy |
| Kuki Shinobu (already in Liyue) | Electro | Sword | Healer/Sub-DPS | (same as above) | (same as above) |
| Kaedehara Kazuha (already) | Anemo | Sword | Support | (same as above) | (same as above) |
| Kamisato Ayato | Hydro | Sword | Main DPS/Sub-DPS | AoE hydro, flexible | Requires field time, no healing |
| Dori | Electro | Claymore | Healer/Battery | Healing, energy regeneration | Clunky, low damage |
| Cyno | Electro | Polearm | Main DPS | High electro damage, Aggravate teams | Long burst field time, no interruption |
| Nilou | Hydro | Sword | Support (Bloom) | Bloom damage boost, easy to build | Restricted to bloom teams |
| Alhaitham | Dendro | Sword | Main DPS | High dendro damage, flexible | Complicated rotation, energy issues |
| Dehya | Pyro | Claymore | Support/Tank | Damage mitigation, off-field pyro | Low damage, clunky |
| Tighnari | Dendro | Bow | Main DPS | Quick charged shots, dendro application | Relies on reactions, energy hungry |
Sumeru
| Character | Element | Weapon | Role | Strengths | Weaknesses |
|---|---|---|---|---|---|
| Traveler (Dendro) | Dendro | Sword | Support/Sub-DPS | Free, dendro application, EM boost | Low personal damage |
| Collei | Dendro | Bow | Sub-DPS | Free, dendro application, AoE burst | Low damage, clunky |
| Cyno (already in Inazuma) | Electro | Polearm | Main DPS | (same as above) | (same as above) |
| Nilou (already) | Hydro | Sword | Support | (same as above) | (same as above) |
| Alhaitham (already) | Dendro | Sword | Main DPS | (same as above) | (same as above) |
| Dehya (already) | Pyro | Claymore | Support | (same as above) | (same as above) |
| Tighnari (already) | Dendro | Bow | Main DPS | (same as above) | (same as above) |
| Nahida | Dendro | Catalyst | Support/Sub-DPS | Best dendro application, EM share, damage | Squishy, limited range |
| Wanderer | Anemo | Catalyst | Main DPS | High mobility, AoE damage | Interrupt prone, needs shield |
| Faruzan | Anemo | Bow | Support (Anemo) | Anemo damage buff, crowd control | Energy issues before C6 |
| Layla | Cryo | Sword | Shielder/Sub-DPS | Shield, off-field cryo, good for freeze | Low damage |
| Kaveh | Dendro | Claymore | Driver (Bloom) | Bloom damage, self-heal | Niche, low personal damage |
| Scaramouche (Wanderer) | Anemo | Catalyst | Main DPS | (same as above) | (same as above) |
| Baizhu (already in Liyue) | Dendro | Catalyst | Healer | (same as above) | (same as above) |
| Yaoyao (already in Liyue) | Dendro | Polearm | Healer | (same as above) | (same as above) |
Fontaine
| Character | Element | Weapon | Role | Strengths | Weaknesses |
|---|---|---|---|---|---|
| Traveler (Hydro) | Hydro | Sword | Healer/Support | Free, healing, hydro application | Low damage, clunky |
| Lynette | Anemo | Sword | Sub-DPS/Support | Free, taunt, energy regeneration | Low damage, short skill |
| Lyney | Pyro | Bow | Main DPS | High charged shot damage, AoE pyrotechnics | Relies on mono-pyro, clunky |
| Freminet | Cryo | Claymore | Physical/DPS (niche) | Unique pressure system, cryo application | Complicated, low damage |
| Neuvillette | Hydro | Catalyst | Main DPS | High AoE hydro damage, self-heal | Slow charge, requires C1 for full team |
| Wriothesley | Cryo | Catalyst | Main DPS | Fast punches, self-heal, freeze teams | Short CA, can't stop early |
| Furina | Hydro | Sword | Sub-DPS/Support | AoE hydro, damage buff, healing (PN) | HP drain, needs healer |
| Charlotte | Cryo | Catalyst | Healer/Support | Healing, cryo application, freeze | Low damage |
| Navia | Geo | Claymore | Main DPS | High Geo damage, crystalize synergy | Requires crystalize shards |
| Chevreuse | Pyro | Polearm | Support (Overload) | Overload team buff, healing | Niche to overload |
| Xianyun | Anemo | Catalyst | Healer/Support | Plunge buff, healing, exploration | Energy hungry, low personal damage |
| Gaming | Pyro | Claymore | Main DPS | High plunge damage, self-heal | Requires Xianyun, energy issues |
| Chiori | Geo | Sword | Sub-DPS | Off-field geo, coordinated attacks | Niche to geo teams |
| Arlecchino | Pyro | Polearm | Main DPS | High single-target damage, bonds of life | Requires skill management |
| Clorinde | Electro | Sword | Main DPS | High electro damage, Bond of Life synergy | Complicated, squishy |
| Sigewinne | Hydro | Bow | Healer/Support | Healing, hydro application, HP buff | Low damage, clunky |
| Emilie | Dendro | Polearm | Sub-DPS | Off-field dendro, burning team synergy | Niche to burning |
| Kinich | Dendro | Claymore | Main DPS | High dendro damage, grapple | Requires burning, energy hungry |
| Mualani | Hydro | Catalyst | Main DPS | High hydro damage, surfing | Short burst window |
| Kachina | Geo | Polearm | Support (Exploration) | Geo application, climbing buff | Low damage |
Natlan (Version 5.x)
| Character | Element | Weapon | Role | Strengths | Weaknesses |
|---|---|---|---|---|---|
| Traveler (Pyro) | Pyro | Sword | Sub-DPS | Free, Nightsoul's Blessing | Low personal damage |
| Mualani (already in Fontaine) | Hydro | Catalyst | Main DPS | (same as above) | (same as above) |
| Kachina (already in Fontaine) | Geo | Polearm | Support | (same as above) | (same as above) |
| Xilonen | Geo | Sword | Support | Resistance shred, healing, exploration | No shields, split scaling |
| Chasca | Anemo | Bow | Main DPS | Anemo/Elemental damage, mobility | Position reliance |
| Ororon | Electro | Bow | Sub-DPS | Nightsoul, off-field electro, energy refund | Low personal damage |
| Citlali | Cryo | Catalyst | Shielder/Support | Shield, cryo application, EM boost | Low damage |
| Mavuika | Pyro | Claymore | Main DPS/Support | High pyro damage, off-field pyro, exploration | Not yet fully released at time of writing |
Cross-Region Characters
| Character | Element | Weapon | Role | Origin | Unlock |
|---|---|---|---|---|---|
| Traveler | Varies | Sword | Flexible | All regions | Free at start, can resonate with Statues of Seven |
| Aloy | Cryo | Bow | Sub-DPS | Collaboration (Horizon) | Limited event, no longer obtainable |
Team Synergy and Building
Team Composition Basics
- Reaction Focus: Choose two elements that trigger strong reactions (e.g., Vaporize, Melt, Hyperbloom).
- Role Balance: Typically one Main DPS, one Sub-DPS, one Support/Healer, one Flex (can be another support or sub-DPS).
- Energy Requirements: Ensure enough particles for burst uptime; pair characters with same element as batteries (e.g., Raiden with Eula, Fischl with Beidou).
- Resonance: Two same-element characters grant team bonuses (e.g., Pyro resonance gives ATK +25%).
- Artifacts: 4-piece set matching element (e.g., Crimson Witch for Pyro, Blizzard Strayer for Cryo, Husk of Opulent Dreams for Geo).
- Weapons: 5-star signature weapons or 4-star options like Serpent Spine, The Catch, Prototype Rancour.
- Stats: ATK%, Elemental DMG Bonus, CRIT Rate/DMG (or EM for transformative reactions).
- Artifacts: 4-piece Emblem of Severed Fate (burst-heavy) or 2-piece combinations.
- Weapons: Energy Recharge weapons (Favonius, Sacrificial) or damage weapons.
- Stats: Energy Recharge until requirement met, then ATK%/CRIT.
- Artifacts: 4-piece Noblesse Oblige (ATK buff), Tenacity of the Millelith (shield), Ocean-Hued Clam (healing damage), Viridescent Venerer (Anemo shred).
- Weapons: Thrilling Tales of Dragon Slayers (ATK buff), Prototype Amber (healing/energy), Favonius series (energy).
- Stats: HP% (for healers/shielders), Energy Recharge, Healing Bonus.
- Constellations: Not mandatory; many 4-stars are viable at C0. Prioritize Bennet C1, Xingqiu C6, Fischl C6.
- Artifact Farming: Wait until AR45 for guaranteed 5-star drops. Use condensed resin for efficiency.
- Bennett: Avoid C6 if using him with physical or cryo teams; otherwise safe.
- Elemental Mastery: For reaction teams (Vaporize, Melt, Hyperbloom), EM is valuable.
Example Meta Teams
1. National Team (Vaporize): Xiangling (Pyro), Xingqiu (Hydro), Bennett (Pyro), flex (Sucrose/Kaeya).
2. Morgana (Freeze): Ganyu (Cryo), Mona (Hydro), Venti (Anemo), Diona (Cryo).
3. Raiden Hypercarry: Raiden Shogun (Electro), Bennett (Pyro), Kujou Sara (Electro), Kazuha (Anemo).
4. Hyperbloom: Nahida (Dendro), Xingqiu/Yelan (Hydro), Raiden/Kuki (Electro trigger), flex.
5. Neuvillette Hypercarry: Neuvillette (Hydro), Furina (Hydro), Kazuha (Anemo), Baizhu (Dendro)/Zhongli (Geo).
Recommended Builds by Role
#### Main DPS
#### Sub-DPS
#### Support/Healer
Universal Tips
Conclusion
Genshin Impact's character roster offers immense variety. Focus on building a core team that fits your playstyle and the reactions you enjoy. Resources like the Paimon.moe or KQM guides can provide deeper analysis. Always consider your current Adventure Rank and available materials when leveling. Happy adventuring!
Cheats & Secrets
Overview
Genshin Impact is a live-service online game with no traditional cheat codes, unlock codes, or secret console commands. HoYoverse enforces a strict anti-cheat policy, and using third-party tools, memory editors, or unauthorized modifications is a violation of the Terms of Service and will result in permanent account bans.
However, the game is filled with developer-intended secrets, Easter eggs, hidden quests, and clever world references that reward observant and curious Travelers. This guide compiles all known legitimate secrets that are safe to explore without risk of punishment.
---
Easter Eggs & Pop Culture References
"This is Fine" Dog
- Location: Mondstadt, near the fountain in the city plaza.
- Details: A small dog wearing a pyro vision-shaped necklace sits calmly while a nearby campfire is burning—directly referencing the popular "This is fine" meme. Interacting with the dog does nothing special, but it’s a fun nod.
- Location: Liyue Harbor, at the Liyue Food Stall (Liyue’s main street).
- Details: If you stand on a specific spot next to the grill and look through the window frame, the scene mirrors the infamous "No Russian" mission from Call of Duty: Modern Warfare 2. This is a well-known visual Easter egg.
- Details: A crossover character, Aloy, is available for free to all players who reached Adventure Rank 20 (the event has passed, but she may return). She is a 5-star Cryo bow user. This is a legitimate promotional event, not a cheat.
- Location: Various notice boards in Mondstadt and Liyue.
- Details: Posters reference characters from other miHoYo games (e.g., Kong from Honkai Impact 3rd, Bronya, or Seele). These are purely decorative.
- Example: The book series "The Boar Princess" and "Legend of the Shattered Halberd" contain subtle references to Chinese mythology and HoYoverse’s own history. Reading all volumes in a set sometimes gives an achievement.
- Trigger: Drop a Defibrillator item (from the Lost in the Snow event, now unobtainable? Actually, the achievement is earned by breaking a specific number of wooden crates and then talking to an NPC. But a more common method: Throw a live bomb baron bunny at a group of Hilichurls and let it explode. Achievement named after the Hindenburg disaster quote.
- Current Method: Use Amber’s Baron Bunny to blow up a stack of barrels near Hilichurls at the Thousand Winds Temple. Achievement unlocked after multiple explosions.
- Location: The Chasm: Underground Mines.
- Trigger: Find and interact with a lumenstone near a certain rock formation. The quest involves disabling Dark Mud and leads to a hidden chest with a luxurious chest and lore.
- Location: Dragonspine, specifically a cave near the Entombed City – Ancient Palace waypoint.
- Details: There is a hidden domain called "The Snow-Covered Path" that only appears after completing a series of puzzles involving Sheer Cold mechanics. Requires a Crimson Agate offering. The domain contains a Luxurious Chest and a Frostbearing Tree offer again.
- Note: During Version 1.6 and again in Version 2.8, a temporary map called the Golden Apple Archipelago appeared. It contained hidden islands accessible only via waverider or specific wind currents. Many secret chests and puzzles existed. These events are over, but future similar events may occur.
- Location: Liyue – South of the Guyun Stone Forest, there is a tiny island with a single Anemoculus and a ruin guard. It is not marked on the map.
- Method: Use a Kaeya ice bridge or a waverider to cross the water (requires high stamina or a boat). The island contains a Precious Chest after defeating the ruin guard.
"No Russian" – Liyue Restaurant
Aloy from Horizon Zero Dawn
Missing Person Posters
Books with Real-World References
---
Hidden Quests & World Secrets
"Oh, the Humanity!" (Secret Achievement)
"Where the Sun Shines Not" (Secret World Quest)
The "Feather-Winged Serpent" (Hidden Domain)
Secret Islands (Golden Apple Archipelago – Limited Event)
Permanent Hidden Islands
---
Hidden Achievements (Developer-Intended)
Many achievements are "hidden" and not listed in the Achievement screen until unlocked. Here are some notable ones:
| Achievement Name | Trigger | Reward |
|---|---|---|
| ...Is It Now In Vogue? | Equip the Traveler with 5-star artifacts in all slots (not necessarily upgraded). | 5 Primogems |
| A Room of One's Own | Place 2 characters in your teapot (Serenitea Pot) and obtain all companion furnishings. | 5 Primogems |
| That's One Big Crystalfly | Catch a Crystalfly while using a Windcatcher (gadget). | 5 Primogems |
| Brush the Dust Off... | Complete the Dust of Azoth crafting recipe for the first time. | 5 Primogems |
| Personal Foul | Use Geo Traveler's Starfall Sword to hit a falling Hilichurl (knocked into the air). | 5 Primogems |
| The Best Art in the World | Max out a 5-star artifact to Level 20. | 5 Primogems |
| The End?? | Complete the Archon Quest: "The Final Chapter" (not yet released – placeholder). | 5 Primogems |
Exploit-Safe Secrets (Puzzles & Interactions)
Hidden Statue of The Seven Effects
- Location: Starfell Valley, Mondstadt.
- Details: If you climb to the top of the large statue and stand on its hand, a crystal fly will appear after a few seconds, giving you a small amount of Wind Glider stamina recovery. Other statues have similar hidden interactions.
- Location: Inside the Mondstadt Cathedral, on the left side near the organ.
- Details: There is a small statue of a claymore on a pedestal. Interacting with it does nothing visually, but if you attack the statue with a Geo character (like Zhongli or Noelle), a hidden room opens behind the organ containing a Luxurious Chest.
- Location: Dragonspine – around the Snow-Covered Path domain.
- Details: There is a Teleport Waypoint that is initially frozen solid. To unlock it, you must melt the ice by using Pyro attacks or a Warming Bottle gadget. This is not obvious and feels like a secret.
- Details: This is a permanent world quest that rewards a gadget (The Evermotion Mechanical Painting). The quest involves solving a series of hidden puzzles across Teyvat. The final reward is a decorative item for the Serenitea Pot. It’s well-hidden but intended.
- Location: Liyue Harbor, near the docks.
- Details: There is a cat named "Jiji" that you can feed by approaching it with a Fish in your inventory. After feeding it several times, the cat will lead you to a hidden Common Chest near the Souvenir Shop.
- Location: On the roof of the Good Hunter restaurant.
- Details: There is a single pigeon that never moves. If you shoot it with an arrow, a Specialty Dish (grilled fish) will drop from the sky—a reference to the bird being an NPC that steals food.
- Details: When you reach Adventure Rank 60, you automatically unlock a special Namecard that is not listed in the Shop. It features a golden border and is a quiet mark of achievement.
- Details: Some characters, when placed in the Serenitea Pot, have unique dialogue lines that reference hidden lore. For example, Albedo talks about his synthetic humans, and Zhongli comments on the mining history of Liyue. These lines are only triggered under specific furnishing sets.
- No third-party tools: Any software that modifies game files, automates gameplay, or injects code will be detected and can result in permanent account suspension. The in-game anti-cheat system monitors for anomalies.
- Exploits that are patched: Some secrets may have been unintended glitches (e.g., infinite resin bug, item duplication) that were fixed by HoYoverse. Using known loopholes after a patch is considered cheating. This guide only lists developer-intended secrets.
- Event-exclusive secrets: Many secrets are tied to limited-time events. If the event has passed, you may not be able to obtain those rewards. Do not attempt to glitch into event areas.
Claymore Statues – Mondstadt Church
Teleport Waypoint Puzzle
The "Evermotion Mechanical Painting"
---
Miscellaneous Secrets
Secret Feeding Interaction
The "Unlucky" Bird - Mondstadt
Hidden Namecard Style
Teapot Dialogue Secrets
---
Warnings
---
Conclusion
Genshin Impact does not have cheat codes, but its world is full of delightful secrets waiting to be discovered. From pop culture references to hidden domains and achievements, the game rewards exploration and curiosity. Always stay within the boundaries of the game’s intended mechanics to keep your account safe. Happy exploring, Traveler!