Goat Simulator 3
## Overview **Goat Simulator 3** is the latest installment in the absurd open-world goat simulation series, developed by Coffee Stain North and published by Coffee Stain Studios. This guide covers all major platforms: PC (Steam and Epic Games Store), PlayStation 5, Xbox Series X|S, PlayStation 4, X...
Download & Installation
Overview
Goat Simulator 3 is the latest installment in the absurd open-world goat simulation series, developed by Coffee Stain North and published by Coffee Stain Studios. This guide covers all major platforms: PC (Steam and Epic Games Store), PlayStation 4/5, Xbox One/Series X|S, and Nintendo Switch. Note that there is no mobile version of Goat Simulator 3.
---
1. Platform-Specific Downloads & Installation
1.1 PC – Steam
- Official Source: [Steam Store](https://store.steampowered.com/app/1311850/Goat_Simulator_3/)
- Steps:
- Official Source: [Epic Games Store](https://store.epicgames.com/en-US/p/goat-simulator-3)
- Steps:
- Official Source: PlayStation Store (digital) or retail disc (PS4/PS5 versions are separate; PS5 version is backward compatible with PS4 via disc only if the PS4 disc is inserted).
- Digital Download Steps:
- Disc Installation:
- Official Source: Microsoft Store (digital) or retail disc.
- Digital Download Steps:
- Disc Installation:
- Official Source: Nintendo eShop (digital) or retail cartridge.
- Digital Download:
- Cartridge Installation:
1. Install the Steam client from [steampowered.com](https://store.steampowered.com/) if you don’t have it.
2. Log in to your Steam account (create one for free if needed).
3. Navigate to the Goat Simulator 3 store page and click Add to Cart.
4. Complete purchase (the game is paid; requires a valid payment method).
5. Go to your Library, find Goat Simulator 3, and click Install.
6. Choose installation location (default: `C:\Program Files (x86)\Steam\steamapps\common\Goat Simulator 3`).
7. Wait for download and automatic installation. The game will appear in your Library as Ready to Play.
1.2 PC – Epic Games Store
1. Download and install the Epic Games Launcher from [epicgames.com](https://store.epicgames.com/).
2. Log in or create an Epic Games account.
3. Search for Goat Simulator 3 in the store.
4. Click Get (if free for a limited time) or Buy Now; complete purchase if required.
5. In your Library, click on the game tile and select Install.
6. Choose installation folder and accept.
7. Launcher will download and install. After completion, click Launch.
1.3 PlayStation 4 & PlayStation 5
1. On your PS4 or PS5, go to the PlayStation Store.
2. Search for “Goat Simulator 3”.
3. Select the correct version (PS4 for PS4 consoles, PS5 for PS5 consoles). The game supports Smart Delivery – buying on PS4 also grants the PS5 version for free.
4. Click Add to Cart and proceed to checkout.
5. Once purchased, the download will begin automatically (if auto-download is enabled) or go to your Library > Purchased to initiate download.
6. Wait for installation. On PS5, you may choose to install only the PS4 or PS5 version (if both are owned).
1. Insert the game disc into the console.
2. The console will prompt you to install the game. Follow on-screen instructions.
3. Download any required patches (recommended).
1.4 Xbox One & Xbox Series X|S
1. On your Xbox console, open the Microsoft Store.
2. Search for “Goat Simulator 3”.
3. Choose the edition (Standard, Digital Deluxe, etc.) and click Buy or Install if you already own it via Game Pass or prior purchase.
4. Follow payment prompts.
5. The download will start automatically. You can monitor progress in My Games & Apps > Manage > Queue.
6. On Xbox Series X|S, the game runs via backward compatibility with performance enhancements. No separate version needed.
1. Insert the disc. The console will copy data to the hard drive.
2. Apply any updates.
1.5 Nintendo Switch
1. From the Switch Home menu, open the eShop.
2. Log in with your Nintendo Account.
3. Search for “Goat Simulator 3”.
4. Select the game and choose Proceed to Purchase.
5. Confirm payment (the game is paid).
6. After purchase, the download begins; press the Home button and you can see progress under the game icon.
7. Once fully downloaded, the icon becomes active.
2. The console will automatically start installation; a yellow progress bar appears on the Home screen.
3. You may need to download an update (recommended).
---
2. System Requirements (PC)
| Minimum | Recommended | |
|---|---|---|
| OS | Windows 10 64-bit | Windows 10 64-bit |
| Processor | Intel Core i3-4340 / AMD FX-6300 | Intel Core i5-6600K / AMD Ryzen 5 1600 |
| Memory | 8 GB RAM | 16 GB RAM |
| Graphics | GeForce GTX 760 (2GB) / AMD Radeon R9 280X (3GB) | GeForce GTX 1660 Super (6GB) / AMD Radeon RX 5600 XT |
| DirectX | Version 11 | Version 12 |
| Storage | 20 GB available space | 20 GB available space (SSD recommended) |
| Sound Card | DirectX compatible | DirectX compatible |
| Additional | Internet connection and Steam/Epic account | Internet connection and Steam/Epic account |
---
3. Storage Space & Account Requirements
- Storage Space:
- Account Requirements:
- Online Features: The game has online co-op and leaderboards; an internet connection is required for these, but single-player can be played offline after initial download.
- Language Selection: On first launch, you may be prompted to select language (English by default; can be changed in settings later).
- Graphics Options (PC only): The game will auto-detect settings. You can adjust in Options > Graphics: resolution, quality presets (Low to Ultra), V‑Sync, FPS limit (30/60/Unlimited).
- Controller Support: The game supports Xbox, PlayStation, and Switch Pro controllers natively. Keyboard/mouse also works but is not recommended.
- Online Login (optional): On PC and consoles, you may be asked to sign in to the respective platform’s online service for co-op features. You can skip if playing offline.
- Accessibility: Options include subtitles, colorblind modes, and toggle hold/press interactions.
- Tutorial: The game starts with a brief tutorial area (the “testing facility”). You can skip or replay from the main menu.
- PC: ~20 GB (Steam/Epic). Additional space for save files (small).
- PS4/PS5: ~15 GB (without patches). Update may increase to 20+ GB.
- Xbox One/Series: ~18 GB.
- Nintendo Switch: ~9.5 GB (digital) / ~8 GB on cartridge plus update.
- PC (Steam): Steam account (free).
- PC (Epic): Epic Games account (free).
- PlayStation: PlayStation Network account (free).
- Xbox: Microsoft/Xbox account (free).
- Nintendo Switch: Nintendo Account (free).
---
4. First Launch Setup
---
5. Common Installation Errors & Fixes
5.1 PC (Steam/Epic)
| Error | Cause & Fix |
|---|---|
| Download stuck at 0% | Verify internet connection; restart launcher; disable VPN; clear download cache (Steam: Settings > Downloads > Clear Cache; Epic: verify files). |
| Disk write error | Run launcher as Administrator; free up disk space; check for disk corruption (chkdsk). |
| Missing DLL files | Install Visual C++ Redistributables (2015-2022) and DirectX; verify game files via launcher. |
| Crash on launch | Update GPU drivers; disable overlays (Discord, etc.); set launch options (e.g., `-dx11` and `-windowed`). |
| Low FPS / stuttering | Lower graphics settings; ensure GPU meets recommended specs; close background apps; check for thermal throttling. |
5.2 PlayStation
| Error | Cause & Fix |
|---|---|
| Cannot download | Check PSN status; restart console; rebuild database (safe mode > option 5). |
| Installation stuck at X% | Pause and resume download; free up space; ensure console is updated. |
| Disc read error | Clean disc; try another disc; check for hardware issues. |
5.3 Xbox
| Error | Cause & Fix |
|---|---|
| Error 0x80073CF9 | Clear local cache (Settings > System > Storage > Clear local saved games). |
| Installation stops at 80% | Hard restart console; uninstall and reinstall; check for system update. |
| Game won't launch | Check for update; verify game file integrity (Manage game > Saved data > Delete reserved space). |
5.4 Nintendo Switch
| Error | Cause & Fix |
|---|---|
| Download error | Check internet connection; restart Switch; re‑enter eShop; free up internal storage (move to SD card). |
| Cartridge not recognized | Clean contacts; restart; try different slot; update console. |
| Game crashes on launch | Check for software update; archive and redownload; remove corrupted save data (Settings > Data Management). |
6. Post-Installation Verification
- PC:
- Consoles:
- Cross-Platform Notes: Goat Simulator 3 does not support cross‑platform save transfers between different store accounts or consoles. However, it does support cross‑platform co‑op between PC (Steam & Epic) and Xbox consoles (via Xbox network).
- Save Files Backup:
- Pre‑loading: If you pre‑ordered, check your platform’s pre‑load options to download before launch.
- Game Updates: Always install the latest patch for optimal performance and bug fixes.
- Mods (PC): Goat Simulator 3 supports mods via Steam Workshop (Steam version only). Subscribe to mods via Workshop; they auto‑download. Epic version has limited mod support.
- Performance: On PC, playing with 60 FPS cap is recommended for stability. Consoles generally run at 30 FPS (Switch) or 60 FPS (PS5/Xbox Series).
- Open the game folder (Steam: right‑click > Manage > Browse local files) and check size (~20 GB).
- Launch the game; if it reaches the main menu, installation is successful.
- Run a benchmark (if available) or compare FPS with known averages.
- Check storage space used (Settings > Storage).
- Launch the game; ensure it loads to the main menu without errors.
- Test online features (if applicable) by joining a quick session.
- PC: Save files are in `%USERPROFILE%\Documents\My Games\Goat Simulator 3\` (Steam) or similar; back up this folder.
- Consoles: Automatically synced to cloud if you have a subscription (PS Plus, Xbox Live Gold/Game Pass Core, Nintendo Switch Online).
---
7. Additional Tips
---
If you encounter issues not listed, consult the official [Coffee Stain Support](https://support.coffeestainstudios.com/hc/en-us) or post in the game’s Steam/console community forums.
Game Introduction
Overview
Goat Simulator 3 is the latest installment in the absurd open-world goat simulation series, developed by Coffee Stain North and published by Coffee Stain Studios. This guide covers all major platforms: PC (Steam and Epic Games Store), PlayStation 5, Xbox Series X|S, PlayStation 4, Xbox One, and Nintendo Switch. The game was released on November 17, 2022 for PC, PS5, and Xbox Series X|S, with last-gen ports arriving later (PS4/Xbox One on March 15, 2023, and Switch on March 28, 2023).
Genre and Core Appeal
Goat Simulator 3 is an open-world physics-based sandbox game that parodies both simulation games and traditional open-world titles. Its core appeal lies in the utter chaos and absurdity of controlling a goat in a living, destructible world. Players can cause mayhem, complete wacky quests, unlock ridiculous costumes, and interact with a physics engine that treats every object as a toy. The game doubles down on the irreverent humor that made the original a cult hit, with meta-jokes, pop culture references, and outright silliness.
Story Overview
The game has no traditional narrative. Instead, it presents a parody of open-world game structures. As Pilgor the goat, you are the embodiment of chaos, and your only "goal" is to explore the fictional island of San Angora, tackle absurd "missions" (which are more like physical challenges or gag tasks), and unlock customization items. There is a loose framing device involving a mysterious cult and a device called the "Goat Activator," but it's all presented with a wink and a nudge. The "story" is deliberately nonsensical, serving as a backdrop for player-driven antics.
Setting
The game is set in San Angora, a sprawling island parody of open-world maps from games like Grand Theft Auto or Just Cause. The world is divided into several distinct biomes: a densely urban city, a suburban neighborhood, a deep forest, a desert, a snowy mountain, and weird secret areas. Every inch of the map can be destroyed, interacted with, or used as a launchpad. The world is filled with NPCs (that can be headbutted, licked, or flattened), vehicles, and environmental hazards. The map is about twice the size of the original game, with more verticality and hidden Easter eggs.
Main Characters
- Pilgor the Goat: The protagonist (and only playable character by default). A white goat with an insatiable appetite for destruction. Pilgor can be customized with hundreds of unlockable skins and accessories, turning into anything from a unicorn to a toilet.
- The Cult Members: Background characters that give out missions. They are parodies of stereotypical story quest givers, often dressed in robes and spouting meaningless lore.
- NPCs: Generic human characters that go about their day until you ruin it. They can be headbutted, charged at, or licked to cause humorous reactions.
- Other Goats: In multiplayer, each player controls their own goat, but in single-player there are no other permanent goat allies.
- Single Player: Standard free-roam sandbox with missions, collectibles, and destructive freedom. Progress through the game by completing quests scattered across the map.
- Online Co-op (2-4 players): Up to four players can join the same server, either by invite or public matchmaking. All players share the same open world and can complete missions together, cause double the chaos, or compete in mini-games. Progression is shared for some items, but each player maintains their own customization wardrobe.
- Local Offline: The game does not support local split-screen multiplayer. All multiplayer requires an internet connection and separate screens.
- Offline Play: The single-player mode works completely offline with no internet requirement. All content is accessible without a connection.
- Online Multiplayer: Requires a persistent internet connection. The game uses peer-to-peer hosting (no dedicated servers), but players can join friends through platform invites or matchmaking. Cross-platform play is not supported: PC players can only play with other PC players (Steam & Epic cross-play works), and console players are restricted to their respective platform family (PS4/PS5 together, Xbox One/Xbox Series together, Switch standalone).
- Multiverse of Nonsense (Paid Expansion) – Released on March 23, 2023. A major content expansion that adds a new island with its own map, new missions, new costumes, and a parody of superhero/multiverse tropes. Includes new vehicles, weapons, and abilities.
- Free Content Updates: Coffee Stain has released several free updates including new missions, costumes (e.g., a chicken suit, a banana suit), and quality-of-life improvements. The most notable free update added a new biome (the Barn) and additional side quests.
- Pre-Order Bonus (some editions): The "Delivery Goat" costume, which is now often included in the base game or bundled with the expansion.
- No Season Pass: The only paid DLC is the Multiverse of Nonsense expansion. No other microtransactions or loot boxes exist.
Game Modes
Online/Offline Support
DLC / Expansion Overview
What Makes This Game Unique?
1. The Goat Simulator Formula Perfected: Building on the original, this sequel offers a much larger world, better physics, and more ways to cause chaos. The game intentionally breaks game design conventions—missions can be failed on purpose with humorous results.
2. Deep Customization: Hundreds of cosmetic unlockables, from hats and wings to full body swaps, all attained through in-game currency (never real money).
3. Physics-Driven Sandbox: Almost every object is interactive and destructible. The ragdoll physics are intentionally janky, leading to unpredictable and hilarious moments.
4. Pure Sandbox Freedom: No linear story, no failure states (you cannot die permanently), and no pressure. The game is a playground for experimentation.
5. Four-Player Co-op Mayhem: Playing with friends multiplies the chaos exponentially. Missions become group activities where you must coordinate (or deliberately sabotage each other).
6. Absurd Humor: The game is filled with visual gags, puns, and parodies of gaming tropes. From a "GoatGPT" chatbot to a museum of terrible video game ideas, the writing is consistently silly.
Target Audience
Goat Simulator 3 appeals to: players who enjoy open-world sandbox games (like Garry's Mod or Just Cause) but want a humor-first experience; fans of the original game looking for a genuine sequel; content creators who thrive on shareable chaotic moments; and anyone aged 12+ (rated T for Teen by ESRB) with a tolerance for crude humor and nonsense. It is not a game for those seeking a deep narrative or competitive gameplay—it is pure, unapologetic fun.
Getting Started
Overview
Welcome to Goat Simulator 3, the chaotic open-world goat-rampage simulator by Coffee Stain North. You play as a goat in the fictional island of San Angora, where your only goal is to cause as much mischief, destruction, and mayhem as possible. Unlike traditional games, there is no health bar, no game over, and no fail state – you are an immortal goat. The core loop is completing "Goatal Missions" (goals scattered around the map) to earn points and Bling, unlocking new goats, costumes, abilities, and events.
This guide is tailored for brand-new players, covering your first hour, controls on every platform, UI basics, and a day-one checklist so you can go from confused goat to master of disaster.
---
Character Creation
When you start a new game, you’ll be prompted to select your goat. There is no deep customization – you can choose from a handful of pre-made goat breeds (e.g., basic Goat, Tall Goat, Horned Goat, etc.). You can also pick a name (optional). Later, as you progress, you can unlock more goat breeds and costumes (hats, glasses, body suits) using Bling earned in-game. For your first run, just pick the goat that looks coolest – all have the same stats.
---
Controls (All Platforms)
Below are the default controls. You can remap them in the options menu if needed.
| Action | PC (Keyboard + Mouse) | PlayStation (PS4/PS5) | Xbox (One/Series X\ | S) | Nintendo Switch |
|---|---|---|---|---|---|
| Move / Look | W/A/S/D + Mouse | Left Stick (move) + Right Stick (camera) | Left Stick + Right Stick | Left Stick + Right Stick | |
| Jump | Space | ✕ (Cross) | A | B | |
| Kick | Left Mouse Button | R1 (Right Bumper) | RB (Right Bumper) | R (Right Shoulder) | |
| Lick (Grab) | Right Mouse Button | L1 (Left Bumper) | LB (Left Bumper) | L (Left Shoulder) | |
| Headbutt | Middle Mouse Button | R2 (Right Trigger) | RT (Right Trigger) | ZR (Right Trigger) | |
| Use Item / Interact | E | △ (Triangle) | Y | X | |
| Quick Wheel | Q | D-Pad Up | D-Pad Up | D-Pad Up | |
| Pause / Menu | Escape | Options | Menu | + (Plus) |
- Licking lets you grab objects (including NPCs) with your tongue and fling them. It’s essential for many goals.
- Headbutting can break fragile objects and knock over furniture.
- Kicking sends items or enemies flying with force.
- Use Jump + Headbutt to perform a powerful ground-pound.
- You start in a small barn/livestock pen area. Immediately move around, jump, lick things, and kick barrels to get a feel for controls.
- Look for a signpost with a list of “Goatal Missions” – this is your first objective. Interact with it (press E/Y/△/X) to read the available goals.
- First Goal: “Lick 5 objects” – Lick anything (crates, hay bales, NPCs). Licked objects will stick to your tongue; press kick to launch them.
- The game automatically highlights three simple tutorial goals:
- Completing these earns you your first Bling and unlocks the ability to access the Couch Co-op Hub (a physical location on the map). Ignore that for now.
- Open your map (Tab on PC, Touchpad on PS, View on Xbox, Minus on Switch). You’ll see a large icon near the center of the island: the Goat Tower. This is the main story line.
- Navigate there by following the road or just running cross-country (goats can climb most surfaces).
- Once at the Goat Tower, you’ll meet the mysterious “Goat God” and receive the Tower of Goat quest. This involves completing eight Goatal Missions (one per floor) to raise the tower.
- After completing a few goals (around 3-5), you’ll unlock the Goat Application – a smartphone icon on your screen. Press the assigned button (typically R3/Right Stick click) to open it.
- The Goat App allows you to view all goals, see your progress, and fast travel to any previously visited location. Use it constantly to save time.
- Aim to accumulate 100 Bling early. The easiest way is to find a busy area (like the town square), cause a commotion (kick cars, headbutt NPCs), and collect the coins that pop out of destroyed objects.
- Once you have 100 Bling, open the Shop (from the Goat App) and buy a simple hat or the Mega Jump upgrade (highly recommended). Mega Jump lets you reach higher ledges.
- Don’t ignore the Goat App – Many beginners try to find everything manually. Use the app to track goals and fast travel.
- Don’t waste Bling on cosmetic items early – Save your first 100 Bling for abilities (Mega Jump or Super Sprint). Cosmetics are purely visual and won’t help you progress.
- Don’t try to fight NPCs – They respawn infinitely and attacking them will gradually lower your score? Actually, no penalty – but it wastes time. Focus on objectives.
- Don’t get stuck in water – Goats can swim, but some goals require being on land. If you fall into the ocean, just swim to shore.
- Don’t ignore the “Lick” mechanic – Many goals require you to grab and fling specific objects. Practice licking precision.
---
UI Overview
Here’s what the screen shows:
1. Score Counter (top-right): Displays your current score (points). Points are earned from destruction, tricks, and completing goals.
2. Mini-map (top-left): Shows your position and nearby goal markers. Blue markers indicate active goals; yellow markers show available side activities.
3. Goal Tracker (bottom-left): Lists your current active objectives (up to 3). Press the interact button to toggle tracking on/off for any goal from the map.
4. Bling Counter (top-right, below score): Shows your Bling currency, used to purchase cosmetics, items, and abilities from the Shop.
5. Quick Wheel (hold the assigned button): Allows you to equip items (e.g., jetpack, umbrella, pizza) that you’ve unlocked. Rotate with the right stick or mouse, then release to select.
6. Tutorial Pop-ups (center): First-time actions will trigger brief explanations. Read them – they teach you how to interact with the world.
---
First Hour Walkthrough
Step 1: Wake Up and Explore
Step 2: Complete the Tutorial Goals
1. Kick something (any object)
2. Headbutt 3 things
3. Lick 5 objects
Step 3: Find the Main Quest – The Goat Tower
Step 4: Unlock Fast Travel
Step 5: Collect Bling and Buy Something
---
What to Do First (Priority List)
1. Complete the three tutorial goals – they unlock the co-op hub and give you Bling.
2. Locate the Goat Tower – start the main quest to get structured objectives.
3. Unlock the Goat Application (fast travel) – this is a game-changer.
4. Earn 100 Bling and buy Mega Jump or Super Sprint from the Shop (under Abilities).
5. Explore the island – each major area (farm, town, beach, forest) has unique goals and collectibles. Just running around and breaking things will earn you points.
6. Do the first few Goatal Missions – they teach you advanced mechanics like licking NPCs, using items, and completing races.
---
What to Avoid (Newbie Pitfalls)
---
Early Resource Priorities
| Resource | How to Get It | Why It Matters |
|---|---|---|
| Points (Score) | Destruction, tricks, completing goals | Unlocks new goals in the Goat App and affects leaderboards (if you care about bragging rights). |
| Bling | Breaking objects (spawns coins), completing goals | Currency for shop purchases (abilities, costumes, items). Must-have early: Mega Jump (150 Bling) and Super Sprint (200 Bling). |
| Unlockable Goats | Spend Bling in Shop or complete specific goals | Each goat has a unique model, but no different stats. Cosmetic only. |
| Items (Jetpack, etc.) | Complete specific goals or buy from Shop | Give you new ways to traverse and cause chaos. Jetpack is very handy. |
---
Common Beginner Mistakes
- Not reading tutorial pop-ups – They disappear quickly, but you can replay them from the pause menu (Help section). The game doesn’t hold your hand beyond these, so pay attention.
- Trying to complete every goal you see – Don’t; you can only track three at a time. Stick to one or two until done, then move on.
- Neglecting the mini-map – It shows nearby goals and points of interest. If you don’t see a goal marker, you’re probably in the wrong area.
- Not using the Quick Wheel – You can equip items like the umbrella (glider) or pizza (health? no health, but funny). They can help you reach weird places.
- Getting frustrated with physics – Accept that the game runs on janky physics. That’s part of the charm. If you get stuck, wiggle out or fast travel.
- [ ] Select a goat and name it.
- [ ] Complete all three tutorial goals (lick, kick, headbutt).
- [ ] Interact with the signpost to unlock the Goat App.
- [ ] Use the Goat App to track the Goat Tower quest.
- [ ] Travel to the Goat Tower and begin the first floor.
- [ ] Smash 10+ objects to collect your first 150 Bling.
- [ ] Buy Mega Jump from the Shop.
- [ ] Complete at least one Goatal Mission (e.g., “Headbutt 5 NPCs” or “Kick 10 barrels”).
- [ ] Unlock fast travel by discovering a few map icons.
- [ ] Equip an item from the Quick Wheel (e.g., umbrella) and play with it.
- [ ] End your first session by exploring one new area (e.g., the beach or the forest).
---
Day-One Checklist
---
Final Words
Remember: There’s no wrong way to play Goat Simulator 3. If you get stuck on a goal, laugh at the absurdity and try something else. The game rewards creativity and persistence. Use this guide as your starting ramp – now go forth and be the most destructive goat San Angora has ever seen!
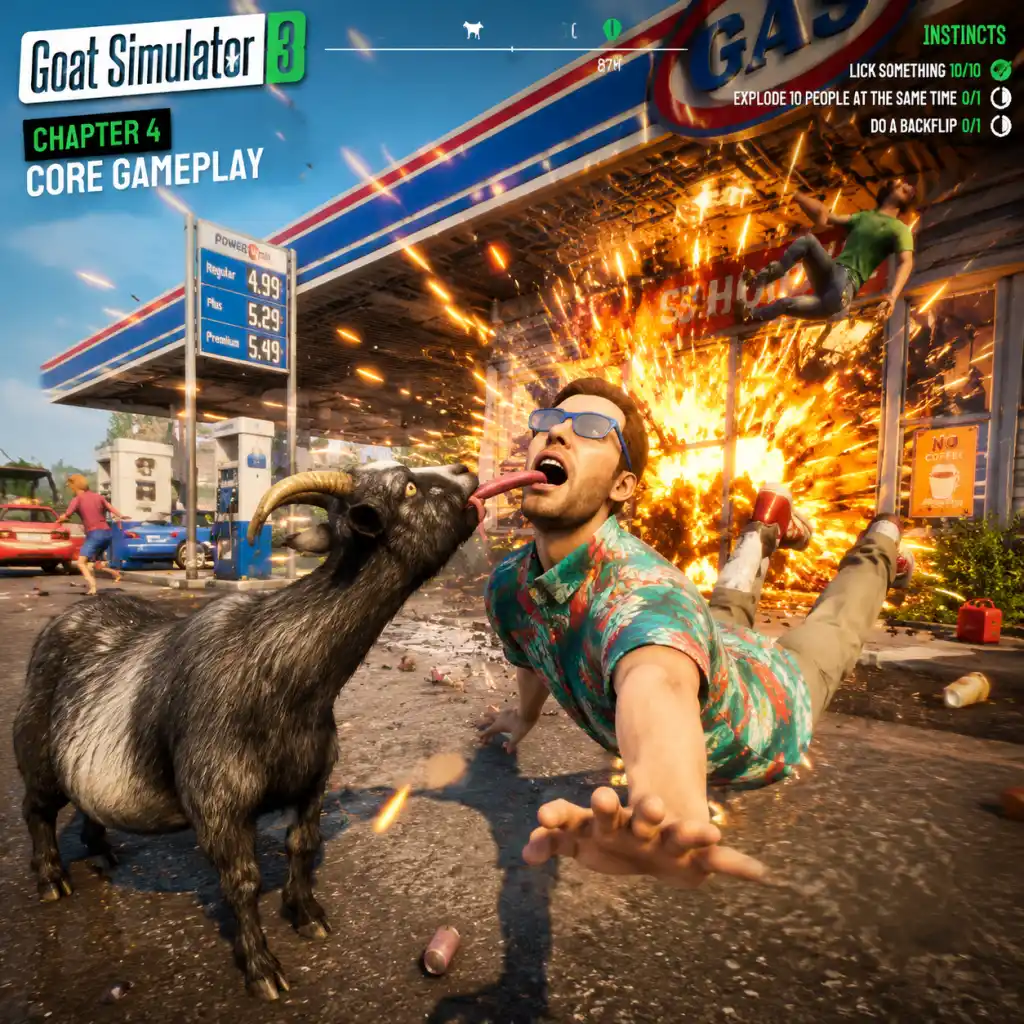
Core Gameplay
Overview
Goat Simulator 3 is an open-world sandbox game about causing utter chaos as a goat. The core gameplay loop revolves around exploring the island of San Angora, completing wacky events (missions), causing damage, collecting items, and unlocking new goats and abilities. There is no traditional combat; instead, you interact with the world through headbutting, licking, ragdoll physics, and special abilities. Progression is tied to unlocking new playable goats (each with unique traits), cosmetic items, and bonus content. The economy is simple: earn Baa-Bucks (in-game currency) from events, destruction, and secret areas. The endgame involves completing all events, discovering every secret, and unlocking the ultimate form: the Golden Goat.
---
Main Gameplay Loop
1. Explore San Angora – A large island divided into biomes: city, suburbs, countryside, mountains, beaches, and secret underground labs. Each area has unique objects to destroy and events to trigger.
2. Cause Destruction – Headbutt objects, people, and vehicles to earn points and Baa-Bucks. The game tracks a destruction meter; higher combos yield more currency.
3. Complete Events – Scattered across the map are scripted challenges called Events (e.g., “Goat Tower,” “Golf,” “Sheep Escape”). Completing them rewards Baa-Bucks and progresses the overall game completion.
4. Unlock Goats & Abilities – Earn enough Baa-Bucks to buy new goat characters from the in-game store. Each goat has a unique primary ability (e.g., Teleportation, Flight, Super Stomp) that changes how you interact with the world.
5. Collectibles – Find hidden items like Goat Trophies, Kegs of Sheep Juice, and Gnomes to unlock bonus content and achievements.
6. Social Chaos – Play with up to 3 friends in online co-op. Multiplayer doubles the destruction and allows cooperative event completion.
---
Combat & Interaction Systems
Goat Simulator 3 has no traditional combat. Your main tools are:
- Headbutt (B button on controller / Right Mouse on PC) – Stagger NPCs, break fragile objects, launch yourself into the air, and trigger ragdoll chaos. Can be charged for a stronger hit.
- Lick (LT / left trigger) – Grab objects or NPCs with your tongue and drag them around. Useful for moving obstacles or flinging things.
- Jump – Basic jump to reach higher ledges. Combined with headbutt for aerial attacks.
- Ragdoll Mode – Deliberately collapse your goat to flop around. Useful for fitting into small spaces or triggering certain events that require lying down.
- Special Abilities – Each goat has a unique active ability (e.g., Launch a rocket, Become a flying saucer, Turn into a giant sheep) activated with the ability button (RB / E). Abilities have a cooldown and can be upgraded via collectibles or event rewards.
- Humans and animals react to your presence – they scream, run away, or become aggressive (e.g., security guards chase you). You can headbutt them to knock them out or lick them to drag them around.
- Some events require specific interactions, like licking a object onto a target or headbutting a series of things in order.
- Unlock All Goats – There are 10+ playable goats, each with a unique ability. You start with the Basic Goat. Buying new goats costs Baa-Bucks. The most expensive goats require 5000+ Baa-Bucks.
- Complete All Events – 50+ events scattered across the map. Finishing all events grants the Golden Goat skin and an achievement.
- Collect All Hidden Items – Each area has collectibles. Collecting all unlocks bonus outfits and special abilities.
- Achievements/Trophies – Many are tied to doing absurd things (e.g., “Headbutt 1000 objects”, “Lick a flying bird”).
- Hidden Events – Some events are not marked on the map until you stumble upon them.
- Collectibles – Shiny objects, glowing items, and hidden areas (e.g., a secret cavern under the waterfall).
- Bonus Baa-Bucks – Destroying unique large objects (e.g., a giant inflatable gorilla) gives a big cash bonus.
- Shortcuts – Many buildings have breakable windows or vents that lead to rooftops or underground areas.
- Standalone scripted sequences with a specific objective. Examples:
- Each event has 1-3 bonus objectives (e.g., complete under a time limit, do it without breaking something). Completing bonus objectives yields extra Baa-Bucks.
- Events are marked on the map with a golden exclamation mark once discovered.
- Simple tasks like “Headbutt 50 trash cans” or “Cause $10,000 in damage in the mall”. Rewards include exclusive cosmetic items and large Baa-Buck bonuses.
- Breaking objects – each object destroyed gives a small amount (1-5 Baa-Bucks). Larger breakables (cars, statues) give 10-50.
- Completing events – typically 50-200 Baa-Bucks per event, more with bonus objectives.
- Discovering secrets – hidden areas give 100-500 Baa-Bucks once found.
- Daily/Weekly challenges – 200-1000 Baa-Bucks each.
- Multiplayer cooperation – Sharing destruction in co-op doubles Baa-Bucks for some actions.
- New goats: 500-5000 Baa-Bucks each.
- Cosmetics (hats, skins, trails): 100-2000 Baa-Bucks.
- Ultimate unlock (Golden Goat): tied to completing all events, not purchasable.
- Unique Ability – e.g., Robot Goat can fly (press ability to ascend, aim to dash). Sheep Goat can call a sheep army. Crypto Goat can teleport short distances.
- Passive Traits – Some goats are heavier (harder to knock over), faster, or have a bigger headbutt radius. Check the goat’s stats in the store.
- Cosmetic Modifiers – Some cosmetic items (e.g., a jetpack) add a minor gameplay effect like a short dash or extra jump. These are unlocked via events or collectibles.
- For exploration: use a goat with high mobility (Robot, Crypto).
- For destruction missions: use a heavy goat with area-of-effect ability (Infernal Goat’s meteor stomp).
- For precision events: use Basic Goat because its tongue control is most predictable.
- Golden Goat Unlock – The ultimate form, which turns all destruction into golden explosions and gives you infinite stamping power.
- Free Roam Chaos – Continue destroying with no goals, now with all abilities unlocked.
- Multiplayer Mayhem – Invite friends and compete in who can cause the most destruction in a custom session.
- Leaderboards – Online leaderboards track total damage, fastest event completions, and highest combos.
- No New Content – The game is designed for replay; there is no post-launch story added (aside from updates).
- Learn basic controls (headbutt, lick, jump, ragdoll).
- Complete the tutorial event (in the starting barn).
- Explore the immediate area (Meadow and outskirts of city).
- Accumulate ~500 Baa-Bucks.
- Unlock first alternative goat (e.g., Laser Goat for 300 Baa-Bucks).
- Smash everything in sight: hay bales, fences, mailboxes.
- Complete 2-3 easy events like “Sheep Escape” or “Destroy the Mailbox.”
- Find the first hidden collectible (usually a Gnome behind the barn).
- Focus on breaking large objects (cars, gas station pumps) for faster cash.
- The Laser Goat is cheap and its laser travel speed helps with early exploration.
- Unlock 4-5 goats.
- Complete 15-20 events.
- Accumulate 2000+ Baa-Bucks.
- Explore all major biomes (city, suburbs, mountains).
- Unlock the Crypto Goat (800 Baa-Bucks) for teleportation.
- Tackle medium-difficulty events (Golf, Goat Tower).
- Hunt for collectibles (each gives a small reward).
- Start daily challenges for bonus cash.
- Unlock the Robot Goat (2500 Baa-Bucks) for flight – essential for reaching high platforms.
- Use teleport or flight to reach rooftop secrets and hidden event triggers.
- Save up for the Infernal Goat (5000 Baa-Bucks) – its meteor stomp destroys large areas quickly, great for earning Baa-Bucks fast.
- Unlock all 10+ goats.
- Complete all events (including the hardest ones like “The Gauntlet” and “Alien Abduction”).
- Collect all hidden items.
- Obtain the Golden Goat after finishing all events.
- Grind leftover events with bonus objectives.
- Use the Infernal Goat to destroy massive structures (e.g., the skyscraper) for huge cash hauls.
- Find all 5 Kegs of Sheep Juice (unlock a special goat).
- Complete the secret “Endgame” event (triggers after all events done – a giant goat boss fight that isn’t really a fight, just a scripted sequence).
- For the last few events, use a combination of Robot Goat for vertical reach and Laser Goat for speed.
- Don’t sell any cosmetics; they are purely cosmetic but some unlock after collectible milestones.
- Enjoy the Golden Goat transformation.
- Play multiplayer with friends to cause unparalleled chaos.
- Try to beat your personal best destruction combo.
- Unlock remaining achievements (e.g., “Headbutt 10,000 objects”).
- Free roam with infinite abilities.
- Set up custom challenges (e.g., “Only use tongue attacks for 10 minutes”).
- Use the photo mode to capture hilarious screenshots.
- Share clips on social media.
- The Golden Goat’s explosion effect is purely visual but very satisfying.
- Multiplayer events are the same as single-player but can be done cooperatively; the game doesn’t add new content beyond the core.
Interaction with NPCs:
---
Progression System
Progression in Goat Simulator 3 is non-linear and tracked by a global Completion Percentage on the main menu. The key progression milestones are:
Experience Points? No – there is no leveling system. Progression is purely about collection and completion.
---
Exploration
San Angora is a large open world with distinct regions. Exploration is rewarded with:
Tip: Use the goat’s special ability to explore inaccessible areas. For example, the Robot Goat can fly, the Crypto Goat can teleport through walls.
---
Quests / Missions
The game has Events (the main quest-like content) and Daily/Weekly Challenges (online persistent).
Events:
- “Goat Peak” – Stand on a mountain peak and headbutt a lever to cause an avalanche.
- “Golf” – Use your tongue to flick a golf ball into a hole.
- “Crazed Sheep” – Guide a herd of sheep through an obstacle course.
Daily/Weekly Challenges (online required):
---
Economy
Baa-Bucks are the only currency. Earn them by:
Spending:
Money management: Early game focus on quick destruction to afford a goat with mobility (e.g., Laser Goat). Mid game save for expensive goats like the Infernal Goat.
---
Character / Build Growth
There is no traditional character building, but your “build” is defined by which goat you choose. Each goat has:
“Build” Strategy:
---
Endgame Structure
When you reach 100% completion (all events, all collectibles, all goats), the endgame offers:
---
Progression Tiers
Early Game (First 2-3 Hours)
Goals:
Activities:
Tips:
---
Mid Game (3-10 Hours)
Goals:
Activities:
Tips:
---
Late Game (10-20 Hours)
Goals:
Activities:
Tips:
---
Endgame (Post-100% Completion)
Goals:
Activities:
Tips:
---
Summary
Goat Simulator 3 is a pure sandbox chaos simulator. The core gameplay is simple: break things, complete wacky missions, unlock goats, and explore. There is no complex combat, economy, or character growth – the progression is all about unlocking more absurd ways to cause destruction. Early game is about learning and gathering cash; mid game unlocks mobility and area destruction; late game focuses on completion; endgame is pure open-ended mayhem. The game’s loop is perfect for short sessions or extended co-op laughter.
Game Tips
Overview
Goat Simulator 3 is a physics sandbox of pure, unadulterated chaos. To master the island of San Angora, you need more than luck—you need strategy. This guide provides tips categorized by playstyle and progression level, from the first head-butt to the final secret.
---
Beginner Tips
1. Master the Basics of Movement
- Explanation: Your goat can run, jump, head-butt, lick, and ragdoll. Head-butts break objects, licks grab things, and ragdolling lets you slide and smash into breakables.
- Why it works: These actions are your primary tools for interacting with the world. Practice chaining a sprint into a head-butt to maximize damage and distance.
- When to use: Always. Quickly tapping the ragdoll button while jumping lets you pancake enemies and objects alike.
- Explanation: The starting meadow and farmhouse contain multiple breakables, collectibles (Goat Toys, Easter eggs), and a few easy events.
- Why it works: Early game items like the Jetpack and the Lava Cape are hidden here. Complete the events to unlock customization items and currency.
- When to use: Immediately after the tutorial. Explore every barn, outhouse, and fence line.
- Explanation: Licking objects lets you drag them behind you. You can also lick enemies to toss them.
- Why it works: Some puzzles require moving objects to trigger switches. Also, licking a cow and dragging it to a barn counts toward an event.
- When to use: When a mission objectives includes "bring X to Y" or when you want to fling enemies off cliffs.
- Explanation: Your phone (press the gadget button) shows events, collectibles, and fast travel points. You can also replay completed events.
- Why it works: Events are the main source of Goats (currency) and unlock new goats. Fast travel saves time.
- When to use: Open the map frequently to see nearby activities. Prioritize events with high cash rewards.
- Explanation: The game auto-saves infrequently. You can manually save by opening the camera (photo mode) and exiting.
- Why it works: If you die or break your goat (e.g., trapped geometry), you can reload. Also useful for checkpointing before difficult stunts.
- When to use: Before attempting a tricky jump, collecting a fragile item, or entering a dangerous area.
- Explanation: There are a dozen or so fast travel totems scattered across the island. Touching them unlocks teleportation.
- Why it works: Reduces travel time when farming events or collectibles. Some totems are hidden behind breakable walls or require precise jumps.
- When to use: Unlock all as early as possible. Use a guide to find the ones in caves or on top of buildings.
- Explanation: San Angora has a deep ocean with sunken structures, caves, and rare collectibles (e.g., the "Dune" Spice Melange item).
- Why it works: Several events require underwater exploration. The Tuxedo Goat can be found underwater. Also, deep water hides a secret boss.
- When to use: Get the Jetpack or a speed-boosting goat (e.g., Motorcyclist) to navigate underwater faster. Look for bubbles indicating air pockets.
- Explanation: Many events require altitude. Climb the Ferris wheel, the radio tower, the mountain peak.
- Why it works: These spots usually have a collectible (Goat Toy or Crown) and a good view for photo missions. Also, some goats can only be unlocked by reaching certain heights.
- When to use: Equip the Parachute or the Jetpack for easier climbing. Use the "Bouncy" power-up from the castle to leap high.
- Explanation: The island has several hidden entrances, often behind waterfalls, in the side of cliffs, or under buildings.
- Why it works: They contain unique events, rare items (like the Golden Fart), and temporary power-ups (e.g., Fire Goat ability).
- When to use: Try to enter every suspicious crack. Use headbutt to break fake walls.
- Explanation: There is no health bar. Enemies (NPCs, police, other goats) are dealt with by knocking them out with objects, headbutts, or explosions.
- Why it works: The game uses ragdoll physics. A single well-placed headbutt to the face or a thrown propane tank can instantly flatten any human.
- When to use: When an event requires you to "eliminate" targets (e.g., scare farmers, destroy property, annoy tourists). Use explosive barrels for area damage.
- Explanation: Traffic cones, chairs, rocks, and even cows can be thrown or licked and swung.
- Why it works: Throwing objects deals high damage and often causes chain reactions (e.g., knocking a barrel into a group).
- When to use: In crowded areas. Lick a large object (like a table) and swing it to hit multiple enemies.
- Explanation: By pressing the ragdoll button while running, you become a sliding bullet. Hitting someone while ragdolling counts as a massive hit.
- Why it works: It covers ground quickly and can bowl over an entire line of people.
- When to use: Running down a street full of pedestrians. Also useful for breaking rows of fragile items.
- Explanation: Gas stations, fireworks stands, and fuel drums explode when damaged. Detonating one can set off a cascade.
- Why it works: Massive area damage for events requiring high destruction score. Also clears large areas of enemies.
- When to use: When you see a gas station—start a fire using a torch or a spark from a broken wire. Run away and watch the show.
- Explanation: Goats (regular currency) are earned from events, destruction, and collectibles. Gold Goats are premium currency earned rarely or via login rewards.
- Why it works: Regular Goats buy cosmetics, new goats, and power-ups. Gold Goats buy exclusive items (like the Golden Goat skin) and skip progress.
- When to use: Spend regular Goats on abilities first (e.g., double jump, increased speed). Save Gold Goats for items you cannot earn otherwise.
- Explanation: Events are repeatable. Some are very quick (e.g., "Break 10 plates" at the diner) and give 100+ Goats each time.
- Why it works: You can grind the same event to accumulate currency fast. The "Pushing the Cart" event in the supermarket gives ~150 goats per minute.
- When to use: When you need a large sum for an expensive goat (e.g., Alien Goat costs 5000 Goats).
- Explanation: Your destruction score increases combo multiplier when you break things rapidly. Higher multiplier = more currency from destruction.
- Why it works: A short session of breaking many items in a tight space (like a warehouse) can net hundreds of Goats.
- When to use: When you need quick cash. Look for rooms full of glass or pottery (e.g., souvenir shop, museum).
- Explanation: Finding all Goat Toys in a set gives a bonus reward (often a new goat or a large amount of Goats).
- Why it works: It's a guaranteed payout and often unlocks unique cosmetics that help in events.
- When to use: Use the map to track missing collectibles. Search systematically by region.
- Explanation: Each goat has unique stats and abilities. For example, the Sheep (slow but high damage), the Motorcycle Goat (fast but fragile), the Alien Goat (levitation and laser).
- Why it works: Choosing the right goat can trivialize some events. Speed events require fast goats, destruction events benefit from high damage.
- When to use: Switch goats based on the event. Keep a default goat for exploration (e.g., Regular Goat with double jump).
- Explanation: The Fire Goat (unlocked from a cave event) deals fire damage on contact, has a speed boost, and can jump high. Its downside is occasional uncontrollable burning.
- Why it works: Fire passively destroys objects, making it excellent for destruction score. The speed helps in chase events.
- When to use: Whenever you need sustained damage or speed. Avoid using it in fragile item events (they might break prematurely).
- Explanation: The Motorcycle Goat has the highest movement speed but poor control. With this goat, you can zip across the island quickly.
- Why it works: Perfect for travel between events and for speed-based events like "Do A Lap" races.
- When to use: When you need to complete an event under a time limit or cover ground fast. Pair with the Parachute for aerial shortcuts.
- Explanation: The Lava Cape (cosmetic) sets you on fire when activated. Combined with the Fire Goat, you become a walking inferno that melts everything.
- Why it works: Doubles fire damage and creates a larger area of effect. Great for events demanding massive destruction in a short time.
- When to use: In enclosed spaces (warehouses, clubs) to maximize damage. Be careful not to burn yourself on metal surfaces.
- Explanation: Some events can be cheesed by standing in a spot where the objective spawns repeatedly. For example, the "Destroy the Propane Tanks" event at the gas station can be done infinitely if you don't complete it fully.
- Why it works: You get the reward each time you break the tanks, even if you stay in the area. The event resets when you leave.
- When to use: For grinding currency fast. Look for events with respawning objects. But be aware that patches may fix these.
- Explanation: Use the ragdoll slide to skip large parts of maps. A well-timed jump into ragdoll can launch you across gaps.
- Why it works: The physics engine allows momentum preservation. This is key for events that require reaching a distant point within a time limit.
- When to use: In races or while collecting time-sensitive items. Practice the timing on the starting field.
- Explanation: There is a hidden goat called the "Gold Goat" that grants a golden texture and increased destruction value. To unlock it, you must find all 50 Gold Teeth hidden around the island.
- Why it works: The Gold Goat doubles your destruction point reward. It never loses its sheen.
- When to use: After collecting all Gold Teeth, use this goat exclusively for destruction-heavy events.
- Explanation: While in photo mode, the game pauses but the physics can be manipulated. You can position the camera and exit to trigger certain events (like falling objects).
- Why it works: You can set up complex chain reactions by positioning enemies or objects and exiting photo mode, causing them to interact.
- When to use: For events requiring precise timing (e.g., knocking a ball into a hole). Use it as a pseudo-slow-motion.
- Always look for breakable walls. They hide shortcuts and treasure.
- Don't forget to use your phone. It’s your best tool for planning routing.
- Play with a friend in co-op. Many events are easier with two goats causing double chaos.
- Have fun with the physics. The game rewards experimentation. Try licking a trampoline while another goat jumps on it.
2. Visit the First Area Thoroughly
3. Use Lick to Your Advantage
4. Don't Ignore the Phone
5. Save Often with the Photo Mode
---
Exploration Tips (Intermediate)
1. Discover All Fast Travel Points
2. The Underwater World
3. Climbing the Highest Points
4. Hidden Caves and Tunnels
---
Combat Tips (All Levels)
1. Combat Is All About Physics
2. Use the Environment as a Weapon
3. The Ragdoll Slaughter
4. Explosive Chain Reactions
---
Resources & Economy Tips
1. Currency: Goats and Gold Goats
2. Farming Events for Goats
3. Destruction Score Multipliers
4. Collectible Bonuses
---
Builds & Goats Tips (Advanced)
1. Best Goats for Different Situations
2. The Perfect All-Rounder Goat
3. Speed Farming with the Motorcycle Goat
4. The Lava Cape Combo
---
Advanced Optimizations
1. Glitch Exploits for Infinite Money
2. Speedrunning Techniques
3. The Secret Goat
4. The Photo Mode Flaw
---
Final Tips
Master these tips, and you'll become the ultimate agent of chaos in San Angora. Happy headbutting!
Game Settings
Overview
This section covers all configurable settings in Goat Simulator 3 across platforms. Properly adjusting these settings can significantly improve your experience, whether you seek maximum performance on a low-end PC or the highest visual fidelity on a high-end system. Special attention is given to settings that are easy to misconfigure and can cause issues like stuttering, input lag, or unintended gameplay changes.
Graphics Settings
Display
- Monitor: Select the correct monitor if using multiple. Misconfigured: Choosing a lower refresh rate monitor can cap FPS.
- Fullscreen Mode: Recommend "Fullscreen" for best performance. "Windowed Borderless" may cause slight input lag.
- Resolution: Set to native monitor resolution. Lowering can improve FPS but make UI tiny. Use scaling if needed.
- V-Sync: Disable for lower input lag. Enable if screen tearing is severe. Note: In Goat Simulator 3, V-Sync can cause stutter due to physics.
- Low, Medium, High, Ultra. Use as starting point. Customize below.
- Field of View (FOV): Default 90. Increasing gives wider view but may impact performance slightly.
- Shadow Quality: High impact on performance. Low reduces shadow detail. Set to Medium as a good balance.
- Texture Quality: Affects clarity. High demands VRAM. Set to High if you have 4GB+ VRAM.
- Anti-aliasing: TAA is default. FXAA is lighter but blurrier. MSAA heavy. Recommend TAA or Off.
- Post-Processing: Enables bloom, motion blur, depth of field. Disable for performance. Motion blur can cause nausea.
- Foliage Quality: Impacts grass and bushes. Low reduces density. Important for FPS in grassy areas.
- Ambient Occlusion: SSAO or HBAO+. Adds depth. Medium impact. Disable if low FPS.
- View Distance: Controls LOD. High draws more objects. Lower for performance.
- Effect Quality: Controls particles and explosions. Chaos setting: high gives more visual mayhem but can drop FPS.
- Master Volume
- SFX Volume
- Music Volume
- Voice Volume – for cutscenes? Not much dialogue.
- Subtitles: Toggle on/off. Recommended on for accessibility.
- Audio Output: Stereo, 5.1, 7.1. Set to your setup.
- Mute on Minimize: Useful.
- Customizable keybindings for all actions. Defaults are standard.
- Camera Sensitivity: Adjust for aiming during ragdoll? Not critical.
- Invert Y Axis: Optional.
- Mouse Smoothing: Disable for raw input.
- Full controller support (Xbox, PlayStation, Switch Pro).
- Vibration: Can be toggled. Some find it distracting.
- Controller Dead Zone: Adjust if joystick drifts.
- Button Mapping: Can remap via Steam Input or console options.
- Subtitle Size: Small, Medium, Large. Large recommended.
- Subtitle Background: Opacity adjustment.
- Color Blind Modes: Protanopia, Deuteranopia, Tritanopia. Changes UI colors.
- Screen Shake: Reduce or disable if sensitive.
- Camera Bobbing: Toggle.
- Flash Intensity: Reduce for photosensitivity.
- Select preferred language for UI and subtitles. Voiceover is English only (due to goat noises). Misconfigured: Switching language may require restart.
- Online/Offline Mode: Toggle. Online enables multiplayer and leaderboards. Offline saves locally.
- Invite Privacy: Friends only, Public, or Private.
- Matchmaking Region: Set to nearest for lower latency.
- Voice Chat: Toggle or push-to-talk.
- Difficulty: Only affects skill-based events? Actually, game is sandbox. There's no difficulty; events are physics-based.
- Auto-Equip Items: Toggle. Some items auto-equip when picked up. Misconfigured: Can cause accidental equipment.
- Ledge Grab Assist: Helps climbing. Enable for easier traversal.
- Camera Lock-on: For targeting objects? Not common.
- HUD Elements: Toggle minimap, objective markers, damage numbers, etc.
- Show Tips: On by default. Disable if you've played before.
- Auto-Save Interval: Every few minutes. Not changeable.
- Preset: Low
- Resolution: 720p (1280x720)
- FOV: 90
- Shadow Quality: Off
- Texture Quality: Low
- Anti-aliasing: Off
- Post-Processing: Off
- Foliage Quality: Low
- Ambient Occlusion: Off
- View Distance: Low
- Effect Quality: Low
- V-Sync: Off
- Goal: 30 FPS stable.
- Preset: Medium
- Resolution: 1080p
- Shadow Quality: Medium
- Texture Quality: High (if VRAM allows)
- Anti-aliasing: TAA
- Post-Processing: On (keep motion blur off)
- Foliage Quality: Medium
- Ambient Occlusion: SSAO
- View Distance: High
- Effect Quality: High
- V-Sync: Off
- Goal: 60 FPS.
- Preset: Ultra
- Resolution: 1440p or 4K
- Shadow Quality: Ultra
- Texture Quality: Ultra
- Anti-aliasing: TAA
- Post-Processing: On
- Foliage Quality: Ultra
- Ambient Occlusion: HBAO+
- View Distance: Ultra
- Effect Quality: Ultra
- V-Sync: Off (use G-Sync if available)
- Goal: 60+ FPS.
- Foliage Quality: This setting heavily impacts performance because grass and bushes are abundant in San Angora. Turning it down provides a significant FPS boost with minimal visual loss.
- V-Sync: In this title, enabling V-Sync can cause inconsistent frame pacing due to the physics engine. It's better to use in-game frame rate cap or an external limiter (e.g., RivaTuner) or use Adaptive V-Sync in drivers.
- Windowed Borderless: If you use multiple monitors or frequently alt-tab, borderless is convenient but may reduce performance slightly. Game may run at desktop refresh rate, causing tearing.
- Controller vs Keyboard: The game is designed for controller. If using keyboard, adjust camera sensitivity and consider rebinding special abilities to easily reachable keys.
- Language Settings: Changing language requires a restart. Ensure you select your preferred language before starting a play session.
- Online/Offline: If you have a poor internet connection, switch to offline to avoid lag in physics synchronization. Offline also disables time-limited events.
Graphics Quality Presets
Advanced Graphics
Audio Settings
Controls Settings
Keyboard & Mouse
Controller
Accessibility Settings
Language Settings
Network Settings
Gameplay Settings
Recommended Settings for Hardware Levels
Low-End (e.g., integrated graphics, 2GB VRAM)
Mid-Range (e.g., GTX 1060, 4GB VRAM)
High-End (e.g., RTX 3070, 8GB+ VRAM)
Special Attention Points
Conclusion
Properly configuring your settings ensures a smooth, enjoyable goat rampage. Use the presets as a starting point and tweak based on your hardware and preferences. Pay special attention to Foliage Quality, V-Sync, and Windowed Mode to avoid common pitfalls.
Important Notes
Important Notes for Goat Simulator 3
This section highlights critical warnings, common pitfalls, irreversible choices, missable content, difficulty spikes, grinding traps, online etiquette, anti-cheat considerations, save management advice, and things players commonly regret not knowing sooner. Read this before diving into San Angora to avoid frustration and maximize your chaos.
Warnings
- Physics are unpredictable: The game engine is intentionally janky. Objects may fly into space, goats may clip through terrain, and ragdoll glitches are frequent. Save often (see Save Management) to avoid losing progress from a crash after a physics freakout.
- Performance can degrade: Large explosions or simultaneous particle effects (e.g., fire + smoke + multiple goats) can drop frame rates on lower-end PCs or last-gen consoles. Adjust graphics settings (see Game Settings section) if you notice stuttering.
- Auto-saving is frequent but not instant: The autosave icon appears periodically, but if you quit immediately after an autosave, progress from the last minute may be lost. Wait a few seconds after the icon disappears before closing the game.
- Co-op desync issues: Online multiplayer may occasionally desync, causing goats to teleport or events to behave oddly. Restarting the session usually fixes this.
- Forgetting to equip abilities: You unlock special abilities (e.g., Tongue Sling, Wing Suit) from the Abilities menu. Many new players explore without equipping them, making certain events much harder. Always check your ability loadout before starting a new event.
- Ignoring the map markers: Events and collectibles are marked on the map, but some hidden ones require proximity to appear. Don’t rely solely on the mini-map; open the full map (M on PC, touchpad on PS5, View on Xbox) to see all icons.
- Dying too quickly in events: Some events refund your progress if you die repeatedly. Focus on completing objectives rather than pure destruction, unless the event specifically rewards damage.
- Not using fast travel: The game offers fast travel from any save point (phone booths). Walking across the entire island is time-consuming. Use it often, especially for events on opposite sides.
- Goat customisation is totally reversible: You can change your goat’s appearance, skin, and accessories at any time from the pause menu or at a dressing station. Nothing is permanent.
- Purchasing the Digital Deluxe Upgrade: If you buy the Digital Deluxe edition later, you unlock cosmetics permanently, but you cannot undo the purchase. Not a problem, but consider if you want the extra content.
- Starting a New Game: The game has no „New Game+”, but you can delete your save. Doing so erases all progress, items, and events completed. There’s no backup except manual file copies (see Save Management).
- Unlocking the „True Ending”: There is a secret ending that requires completing all 45 events and a post-game puzzle. Once you unlock the ending cutscene, you can still play freely. It’s not missable, but you must actively finish everything first.
- Timed events with loss condition: Some events like „The Floor is Lava” have a timer. If you fail, you can retry immediately. No content is permanently missable because you can replay all events from the event menu after completing them.
- Rare NPC interactions: Certain NPCs (e.g., the „Mime” in the city) only appear at specific times of day (in-game). If you miss them, you can come back later. The game’s day/night cycle cycles quickly.
- Secret areas without map markers: Examples: the hidden cave under the waterfall, the floating island above the mountain. These are accessible at any time once discovered. Use binoculars or the „Scan” ability to locate them.
- Co-op specific trophies/achievements: Some achievements require playing online with a friend (e.g., „Party Goat” - play an event with 3 other players). If you never play online, you cannot obtain them without boosting.
- Event: „The Floor is Lava” – You must avoid touching the ground for 60 seconds while navigating floating platforms. Requires precise movement and use of the Tongue Sling. Practice in free roam first.
- Event: „Golf with Goats” – This minigame requires accurate aiming and physics prediction. The ball tends to overshoot. Use short, controlled taps rather than full power.
- Event: „Escape from… Alcatraz?” – A stealth section where you must avoid detection by guards. Guards react quickly; move slowly and hide behind objects. Rushing leads to instant failure.
- Racing events: Some races have tight time limits. Upgrade your goat’s speed from the Abilities menu (increase movement speed) and use shortcuts like wall bounces.
- Endless damage grind: The „Destruction Master” achievement requires 3,000 total destructible objects smashed. This sounds like a grind, but you can speed it up by repeatedly smashing the same breakable items in the city (e.g., the cars near the parking lot respawn).
- Collectible hunting without guide: There are over 200 collectibles (Goats, Goat Teeth, etc.). Blindly running around is inefficient. Use the interactive map online or the in-game tracker (unlockable upgrade) to narrow down locations.
- Event repetition for high scores: Some events reward high scores with bonus items, but you only need to complete each event once for full progression. Repeating events for max score is purely for bragging rights – not required for achievements.
- Co-op courtesy: When playing with friends, avoid intentionally sabotaging their event objectives (e.g., pushing them off a cliff during a timed mission). While it’s funny, it can cause frustration. Communicate via voice chat if needed.
- No built-in anti-cheat: Goat Simulator 3 does not enforce anti-cheat software on PC. However, using mods or trainers may corrupt your save file or desync in online matches. Back up your saves before experimenting.
- Achievements may be disabled with mods: On Steam, some mods (e.g., workshop mods that enable cheats) might disable achievement progression. Check mod descriptions before installing.
- Cross-play: The game supports cross-play between PC (Steam/Epic), Xbox, and PlayStation. Ensure all players have the latest patches to avoid connection issues.
- Auto-save only (with one slot): The game automatically saves your progress to a single slot. There is no manual save option in the menu. However, you can create manual backups on PC by copying the save file.
- Where saves are stored:
- How to backup:
- Why backup:
- You can fast travel from any phone booth: New players often walk everywhere. Unlock phone booths by interacting with them once – then you can teleport instantly.
- The „Tongue Sling” ability is OP: You can grab objects from far away, swing across gaps, and pull enemies. Unlock it early (event reward) and always keep it equipped.
- Events are replayable with variable rewards: If you miss a collectible during an event, you can replay the event from the menu (not from the world). The rewards (e.g., Goat Teeth) carry over.
- Secret goat unlocks are based on specific actions: For example, the „Zombie Goat” requires you to eat rotting fish near the docks. Look up a list of secret playable goats online – many are quirky and fun.
- The „Pogo Stick” is not just a gag: It can launch you high into the air, giving access to hidden areas. Combine with the Wing Suit for maximum mobility.
- The rocket car can be summoned via phone: After completing the „Car-Nage” event, you can spawn a rocket-powered car from the phone menu. Use it for fast travel and destruction.
- Damage to the environment persists (mostly): Smashed objects may respawn after a while, but large structures (e.g., the bridge) stay broken permanently in your save. This affects shortcuts – for example, breaking the dam creates a new water route.
- Online multiplayer is chaotic but hilarious: Expect friendly fire, accidental sabotage, and lots of laughs. Embrace the madness – it’s part of the fun.
Common Pitfalls
Irreversible Choices
Missable Content
Difficulty Spikes
Grinding Traps
Online Etiquette & Anti-Cheat
Save Management
- PC (Steam/Epic): `%LOCALAPPDATA%\GoatSimulator3\Saved\SaveGames` (or similar path – check official documentation for exact location).
- Console: Manage saves via the console’s storage settings (you can copy to USB or cloud).
1. Close the game completely.
2. Navigate to the save folder (PC) or system saves (console).
3. Copy the folder named with your user ID (e.g., `SaveGame_0`).
4. Paste to a safe location. To restore, replace the existing folder with your backup.
- If a physics glitch corrupts the save, you lose everything.
- If you want to replay a particular sequence without losing current progress.
- If you experiment with mods and they break the game.
Things Players Commonly Regret Not Knowing
Keep these notes in mind as you explore San Angora. Knowledge is power – even for a goat.
All Game Items
Overview
Goat Simulator 3 is a physics sandbox filled with absurd items, consumables, and collectibles that let you customize your goat, cause more chaos, or unlock new abilities. This guide covers every major item category: currencies, consumables, power-ups, headgear, costumes, gadgets, equipment, and collectibles. Each entry explains what the item does, where to get it, when it's useful, and any notable synergies or upgrades.
---
Currencies
Goat Coins
- Description: The primary currency used at vending machines and story vendors to purchase consumables, gadgets, and key items.
- How to Obtain: Earned by destroying property, licking objects, completing events, and leveling up your Chaos Level. Also found in breakable objects and treasure chests.
- When Useful: Essential for buying powerful items like the Jetpack or Grappling Hook early. Prioritize collecting Goat Coins at the start to unlock traversal tools.
- Synergies: High Chaos Level increases coin drops from destruction.
- Description: Experience points that raise your Chaos Level. Not a direct currency but required to unlock events and certain item purchase options. Chaos Level thresholds unlock new items in shops.
- How to Obtain: Any chaotic activity—breaking things, licking people, performing tricks, completing events.
- When Useful: Progress through Chaos Levels to unlock high-tier items like the Goat Tower and the Tractor.
- Effect: Attracts enemies and nearby NPCs to you with a sweet scent. NPCs run toward you, often causing chaos.
- How to Obtain: Vending machines (50 Goat Coins) or found in random loot.
- When Useful: Lure NPCs into traps, fire, or other hazards for combos.
- Synergies: Combine with Fire Breath to roast the crowd.
- Effect: Your goat breathes fire for 10 seconds, igniting anything you look at. Burns NPCs, objects, and can trigger explosions.
- How to Obtain: Vending machines (100 Goat Coins) or Golden Chests.
- When Useful: Mass destruction challenges, clearing groups, or igniting gas stations.
- Synergies: Use with Head Lollipop to group enemies then burn them. Also pairs with the Grappling Hook to pull objects into fire.
- Effect: A lightning bolt strikes your current position, damaging nearby enemies and objects. Stuns NPCs.
- How to Obtain: Vending machines (150 Goat Coins) or found in breakable rocks.
- When Useful: Instant crowd control or starting a chain reaction with explosives.
- Effect: Multiplies jump height by 5 for 15 seconds.
- How to Obtain: Vending machines (75 Goat Coins) or from licking radioactive waste.
- When Useful: Reaching high platforms for collectibles, skipping sections, or achieving massive air-time tricks.
- Effect: Doubles movement speed and increases acceleration for 20 seconds.
- How to Obtain: Vending machines (60 Goat Coins) or from licking sports cars.
- When Useful: Time-sensitive events, collecting fast-moving items, or ramming speed-based destruction.
- Effect: Makes goat invisible for 30 seconds. Enemies ignore you, but you can still interact.
- How to Obtain: Vending machines (200 Goat Coins) or hidden in sewers.
- When Useful: Sneaking past guards in certain events, or setting up massive traps without interruption.
- Effect: No gameplay bonus. Cosmetic only.
- How to Obtain: Found in a treasure chest near the baseball field.
- When Useful: Purely for style.
- Effect: Slight increase to chaos point generation (5% bonus).
- How to Obtain: Complete the "King of the Hill" event in the city.
- When Useful: Early game to accelerate progression.
- Effect: No bonus. Cosmetic.
- How to Obtain: Purchase at the Tailor shop (500 Goat Coins).
- When Useful: Fits a fancy goat look.
- Effect: Damage dealt to NPCs increased by 10%.
- How to Obtain: Loot from a shipwreck at the docks.
- When Useful: Combat-heavy challenges like "Rampage" events.
- Synergies: Combine with Fire Breath for extra destruction.
- Effect: Reduces damage from falling objects (50% damage reduction).
- How to Obtain: By completing the construction site event.
- When Useful: Avoiding accidental death from debris or traps you trigger.
- Effect: Multiplies combo score by 1.5x while worn.
- How to Obtain: Pop 100 balloons across San Angora.
- When Useful: High-score runs and combo challenges.
- Synergies: Use with speed boosts to rack up points faster.
- Effect: Allows you to abduct small objects and NPCs with a tractor beam (press interaction button). Very fun and useful for moving items.
- How to Obtain: Collect all 5 alien artifacts hidden around the map.
- When Useful: Completing puzzles that require moving objects to precise locations, or trolling NPCs.
- Effect: Roar ability (right analog click) scares away nearby NPCs and small animals.
- How to Obtain: Complete the "Jurassic Goat" event in the desert.
- When Useful: Clearing areas of annoyances or creating chaos by scattering crowds.
- Effect: Doubles base jump height and reduces fall damage to zero.
- How to Obtain: Find all 3 comic book pages in the city.
- When Useful: Exploration and reaching high areas without potions.
- Synergies: Great for speedruns.
- Effect: Enables a sword swing attack that can destroy objects in one hit (temporary, recharges).
- How to Obtain: Complete the pirate ship event.
- When Useful: Efficient destruction before unlocking gadgets.
- Effect: Slow motion on jumps (press jump while in air). Makes you float.
- How to Obtain: Launch all 4 rockets at the space center.
- When Useful: Stunts, precise landings, or taking screenshots.
- Effect: Fly with limited fuel. Press jump then hold to ascend. Fuel recharges on ground.
- How to Obtain: Purchase at the Airfield vending machine for 1,500 Goat Coins.
- When Useful: Essential for reaching high collectibles, traversing the map quickly, and many events.
- Upgrades: None, but you can refuel by landing.
- Effect: Fire a hook that pulls you toward any surface. Can also grab objects and pull them toward you.
- How to Obtain: Found in a crate on the construction crane. Costs 800 Goat Coins if you buy from the thief.
- When Useful: Swinging across gaps, pulling enemies into hazards, and creative puzzle solving.
- Effect: Place a trampoline that launches you and others high into the air (holds 3 charges).
- How to Obtain: Purchase at the toy shop (600 Goat Coins).
- When Useful: Reaching high ledges without jetpack, or creating bounce chains for combos.
- Synergies: Place multiple trampolines for insane height.
- Effect: Spawns a small tower that can be climbed. Customizable with skins from collectibles.
- How to Obtain: Chaos Level 10 reward.
- When Useful: Provides a vantage point, or use as a ramp for vehicles.
- Effect: Summon a tractor that can be driven. Fast and handles well, but not permanent—despawns after a while.
- How to Obtain: Chaos Level 15 reward.
- When Useful: Speed traveling on roads, squashing enemies.
- Effect: Allows you to teleport to discovered landmarks (fast travel). Unlocked via tutorial.
- How to Obtain: Automatic after first event.
- When Useful: Quick navigation across the island.
- Description: 20 statues of goats in various costumes hidden around San Angora. Each one unlocked a new hat or costume.
- How to Obtain: Found in cliffs, behind buildings, underwater. Use Jetpack or Grappling Hook to reach.
- Reward: Unlock items like the Disco Hat, Knight Helmet, and more.
- Description: Shiny chests containing rare consumables (Fire Breath, Lightning Strike) and Goat Coins.
- How to Obtain: 10 chests total. Found in obvious but hard-to-reach locations.
- Reward: 200 Goat Coins each + a consumable.
- Description: Red balloons tied to various objects. Pop them with licking or headbutting.
- How to Obtain: 100 balloons scattered everywhere. Use the map to track progress.
- Reward: Party Hat after popping all.
- Description: 5 glowing, green artifacts that when collected unlock the Alien costume.
- How to Obtain: One in each major region (city, desert, forest, industrial, and secret island).
- Reward: Alien Costume.
- Description: 3 pages that unlock the Superhero costume.
- How to Obtain: In the library, newspaper stand, and a trash can.
- Reward: Superhero Costume.
- Description: 2 halves of a troll hat. Combining them unlocks the Troll Hat (no bonus, but funny).
- How to Obtain: One half from a troll under the bridge, another from a mountain peak.
- Reward: Troll Hat.
- Description: A hidden golden goat statue that, when licked, gives a massive Chaos Point boost.
- How to Obtain: Found behind a waterfall in the jungle area.
- Reward: 500 Chaos Points.
- Description: A pile of coins you can carry to throw at enemies or break glass. Not a tool, just a physics object.
- How to Obtain: Found in banks or near cash registers.
- When Useful: Use as a projectile or distraction.
- Description: Not an inventory item, but an interactable object that can be rolled or ignited. Produces large explosion.
- How to Obtain: Found near construction sites, gas stations, and military areas.
- When Useful: Clearing large groups or triggering chain reactions for combo scores.
- Description: Wheels, doors, engines that can be licked off vehicles. Carry them around for fun or use to build something (no formal crafting).
- How to Obtain: Lick any vehicle repeatedly.
- When Useful: Throw parts at enemies or use as stepping stones.
- Synergies: The Jetpack + Grappling Hook combo is the most efficient for exploration. Combine the Mega Jump Potion with the Superhero Costume for insane verticality.
- Missable Items: Most collectibles can be revisited anytime, but some event-specific items (like the Crown) are obtained only during the event. Replay events if needed.
- Currency Farming: If low on Goat Coins, destroy the entire farm area (wheat, barns, animals) and then use the Phone to reset the area—farm repeatedly.
- Item Re-acquisition: Gadgets are permanent unlocks. Consumables are consumed on use and must be repurchased.
- No Inventory Limit: You can carry all gadgets at once. Switch between them with the D-pad.
Chaos Points (XP)
---
Consumables & Power-Ups
Consumables are one-use items that give temporary effects. They are purchased from vending machines or found in the world.
Head Lollipop
Fire Breath
Lightning Strike
Mega Jump Potion
Speed Boost Potion
Invisibility Potion
---
Headgear & Hats
Hats are cosmetic items that sometimes provide minor gameplay bonuses. They are found in chests, purchased, or unlocked via achievements.
Baseball Cap
Crown
Top Hat
Viking Helmet
Hard Hat
Party Hat
---
Costumes & Skins
Full body costumes change your goat’s appearance and often give a unique ability. Most require completing events or finding hidden items.
Alien Costume
Dinosaur Costume
Superhero Costume
Pirate Costume
Astronaut Suit
---
Gadgets & Equipment
Key tools that remain in your inventory and are activated via hotkeys. Some are found, others purchased.
Jetpack
Grappling Hook
Trampoline
Goat Tower
Tractor
Phone
---
Collectibles
Collectibles are hidden items that grant cosmetics, achievements, or Chaos Points. Most are missable only if you leave an area without collecting.
Goat Mascots
Golden Chests
Balloons
Alien Artifacts
Comic Book Pages
Troll Hat Pieces
The Golden Goat (special)
---
Key Items & Other Equipment
Goat Coins Pile
Explosive Barrel
Vehicle Parts
---
Important Notes
---
Conclusion
This guide covers every item in Goat Simulator 3 that impacts gameplay or customization. Remember that the game is about creativity—experiment with item combos to discover new ways to cause mayhem. Happy goat rampage!"
Character Skills
Overview
Goat Simulator 3 is not a traditional RPG with skill trees or leveling. Instead, your goat gains abilities through three main systems: Base Goat Skills (always available), Mutations (special powers collected as items), and Gadgets (equippable tools). There is only one playable character—the goat itself—but costumes are purely cosmetic. This guide covers every ability, how to obtain it, its effect, any cooldown or trigger, synergies, and recommended builds.
---
Base Goat Skills
These are innate abilities your goat has from the start. They have no cooldown (except posture recovery) and are the foundation of all chaos.
| Skill | Input (PC/Console) | Effect | Details |
|---|---|---|---|
| Headbutt | Left mouse / RT | Lunges forward, damaging objects and enemies. Can be charged for stronger impact. | Charge by holding button. Headbutting while running adds momentum. Can break weak walls. |
| Tongue Grab | Right mouse / LT | Extends tongue to latch onto objects or NPCs. Drag them or fling them. | Hold to grab; release to throw. Can also latch onto ledges for limited climbing. |
| Jump | Space / A | Standard jump. Can be performed while moving. | No fall damage from any height. Double jump only with specific gadget. |
| Bleat | Q / Y | Loud goat sound. Scares nearby NPCs and alerts security. | Purely for fun; no gameplay effect beyond causing panic. |
| Crouch | Ctrl / RS | Lowers profile. Can slide down slopes. | Rarely used except for hiding or precise tongue aiming. |
Mutations (Special Powers)
Mutations are collectible items that grant unique passive or active abilities. You can equip one Mutation at a time from the inventory menu. They are found in the world, given as event rewards, or purchased from the in-game shop. Each Mutation has a specific trigger condition and often a short internal cooldown (2–5 seconds) before it can be used again.
Explosive Goat
- Effect: When you headbutt or get hit, your goat explodes in a large radius, destroying objects and killing nearby NPCs.
- Trigger: Headbutt (any charge) or taking damage.
- Cooldown: ~3 seconds after explosion.
- Location: Found in the Explosive Cave near the bridge in San Angora.
- Combos: Pair with the Jetpack to rain explosive headbutts from above. Use Tongue Grab to pull enemies into your explosion.
- Build: Aggressive demolition. Focus on charging headbutts into crowds.
- Effect: Metal objects (cars, dumpsters, manhole covers) are attracted to your goat. Pressing an action key pulls them toward you; another press repels them.
- Trigger: Press the mutation action key (default: E / RB).
- Cooldown: None (toggle).
- Location: Behind the gas station, inside a cage with a magnet symbol.
- Combos: Use to fling cars into enemies or stack them for destruction. Works great with the Box gadget for launching debris.
- Build: Telekinetic chaos. Attract a car, then headbutt it into a building for massive damage.
- Effect: Your goat is engulfed in flames. Everything you touch (via headbutt, tongue, or contact) catches fire.
- Trigger: Equip to activate (passive).
- Cooldown: N/A – permanent while equipped.
- Location: Found in a fire pit near the pizza parlor (requires fire extinguisher to grab).
- Combos: Charge headbutt into a line of gas cans for chain explosion. Tongue a flammable object and fling it at enemies.
- Build: Incendiary rampage. Spread fire across San Angora. Avoid water or rain areas.
- Effect: Your goat freezes surfaces on contact. Walking leaves an ice trail that causes NPCs to slip. Headbutt freezes enemies solid.
- Trigger: Passive while equipped.
- Cooldown: N/A.
- Location: Ice cream truck (break into back).
- Combos: Freeze an enemy, then use Tongue Grab to shatter them. Combine with Jetpack to create icy platforms mid-air (doesn't freeze, but slip effect works).
- Build: Slip-and-slide mayhem. Great for crowd control and platforming puzzles.
- Effect: Your goat crackles with electricity. Contact with conductors (metal objects, water, other goats) triggers chain lightning, stunning NPCs and damaging electronics.
- Trigger: Passive while equipped.
- Cooldown: ~1 second between shocks.
- Location: Inside the power plant, after solving the puzzle.
- Combos: Stand in water to electrocute everything nearby. Pair with Magneto to electrify metal objects you pull.
- Build: Area denial and gadget ripper. Excellent for events requiring destruction of electronics.
- Effect: Become semi-transparent and able to pass through walls and objects. You cannot interact with the world while ghostly (no headbutt damage, no tongue grab).
- Trigger: Press mutation action key (E / RB). Lasts 10 seconds.
- Cooldown: 20 seconds after form ends.
- Location: Graveyard crypt (requires digging up a grave).
- Combos: Use to bypass locked doors, reach unreachable areas, or escape police. Exit ghost form to interact.
- Build: Stealth and exploration. Essential for some secret collectibles.
- Effect: Enormous size increase (5x). You stomp and crush everything. Movement speed is reduced, jump height increased.
- Trigger: Press mutation action key. Lasts 15 seconds.
- Cooldown: 25 seconds.
- Location: Behind the movie theater after a difficult jump puzzle.
- Combos: Charge headbutt while super-sized to demolish entire structures instantly. Combine with Explosive for nuclear-level destruction.
- Build: Cataclysm. Activate before a major destruction event or boss fight.
- Effect: Greatly reduces gravity around your goat. You jump higher and fall slowly. Enemies and objects float upward when hit.
- Trigger: Passive while equipped.
- Cooldown: N/A (light effect always active).
- Location: In a UFO crash site near the mountains.
- Combos: Use with the Box gadget to create floating projectile platforms. Headbutt floating objects into distant targets.
- Build: Low-gravity chaos. Ideal for reaching high places and launching objects.
- Effect: Press jump while in air to hover and fly upward. Limited fuel (recharges on ground).
- Uses: Infinite (fuel recharges).
- Location: Purchased from the shop after completing a certain event.
- Combos: All mutations work while flying. Use with Explosive for airstrikes, or Magneto to pull cars upward and drop them.
- Build: Flight is essential for exploration and many events. Best paired with any mutation.
- Effect: Hold a box in front of you. You can hide inside (crouch) to avoid detection. Also excellent for rolling down hills and hitting objects.
- Uses: Infinite.
- Location: Spawns randomly or found in dumpsters.
- Combos: Put on a box then use Magneto to attract metal objects to the box, causing chaos. Roll box over enemies to knock them down.
- Build: Stealth and comedy. Great for sneaking past guards.
- Effect: Fires a beam that shrinks targets (enemies, objects) to a small size. Shrunk objects can be carried easily. Lasts 30 seconds.
- Uses: Infinite (beam recharges when not firing).
- Location: Inside the secret lab in the hills (requires solving a puzzle).
- Combos: Shrink a car, then headbutt it into a crowd. Combine with Ghost Goat to infiltrate tiny spaces.
- Build: Creative destruction. Miniaturize obstacles for easier navigation.
- Effect: Throw a piece of garlic bread. Attracts NPCs (they become docile and follow the bread). Can be used to lead them into traps.
- Uses: Infinite (cooldown 3 seconds).
- Location: Given by a random NPC after completing a side event.
- Combos: Lure a group of enemies, then activate Fire Goat and headbutt them. Or lead a crowd off a cliff.
- Build: Misdirection and crowd control. Great for pacifying aggressive NPCs.
- Effect: Fires a hook that attaches to any surface. Pulls you toward it rapidly. Can also latch onto objects to drag them.
- Uses: Infinite.
- Location: Found in a shed on the docks.
- Combos: Use with Jetpack for quick vertical mobility. Hook a car and fling yourself or it.
- Build: Fast traversal and object manipulation. Combine with Magneto for magnetic grapple arcs.
- Effect: Opens a parasol that slows your fall (like a parachute). Also can be used to block attacks.
- Uses: Infinite.
- Location: Purchased from the clothes shop.
- Combos: Use after a super-jump from Gravity Goat to glide across the map. Block explosive damage.
- Build: Safe descent and protection. Useful for events with fall hazards.
Magneto Goat
Fire Goat
Ice Goat
Electric Goat
Ghost Goat
Super Goat
Gravity Goat
---
Gadgets (Equippable Tools)
Gadgets are items you can hold in your hand (one at a time) by selecting them from the inventory. They replace your headbutt with a special action. Press the action key to use them. Some have infinite uses, others require collecting ammo.
Jetpack
Box (Cardboard Box)
Shrink Ray
Garlic Bread
Grappling Hook
Umbrella
---
Recommended Builds
There are no skill points, so builds focus on synergy between Mutation and Gadget.
| Playstyle | Mutation | Gadget | Strategy |
|---|---|---|---|
| Demolition Master | Explosive Goat | Jetpack | Headbutt-while-flying into buildings. Activate explosion then fly away. Use for destruction events. |
| Magnetic Chaos | Magneto Goat | Box | Pull cars into box, then push box down hill. Alternatively, repel multiple cars into a crowd. |
| Stealth Collector | Ghost Goat | Shrink Ray | Ghost through walls, shrink obstacles, collect hidden items without alerting guards. |
| Elemental Fury | Electric Goat | Umbrella | Stand in water puddles to electrocute the area. Use umbrella to block incoming damage while shocking. |
| Gravity Float | Gravity Goat | Grappling Hook | Low gravity lets you grapple to high points easily. Launch objects with headbutt while falling slowly. |
| Crowd Controller | Ice Goat | Garlic Bread | Freeze enemies, then lure more with bread onto icy patches. Shatter them with tongue. |
| Speedrun Any% | Super Goat | Jetpack | Super size + fly to complete travel-based events quickly. Use headbutt to break barriers. |
When to Use Each Skill
Headbutt
- Always: Primary damage tool. Use for breaking objects, attacking enemies, initiating jumps.
- Charged: For stubborn walls or explosive barrels.
- Pulling: Retrieve distant items, drag enemies toward you, or grab ledges.
- Throwing: Fling enemies into hazards or off cliffs.
- Traversal: Combined with Jetpack for flight. No fall damage means you can jump from any height.
- Explosive: During any combat or demolition event. Avoid indoors (you'll get stuck in debris).
- Magneto: When there are many metal objects around (e.g., junkyard, parking lot). Activate to gather them, then headbutt.
- Fire: For burning forests or gas station explosions. Avoid water.
- Ice: On slopes or near water for added slip chaos. Good for events requiring slipping NPCs.
- Electric: In electrical areas (power plant, water pools). Or to disable electronics.
- Ghost: For stealth missions, entering locked areas, or escaping police.
- Super: Before massive destruction events or boss fights. Limited duration, so save for key moments.
- Gravity: During high-jump platforming or when you want to launch objects across the map.
- Jetpack: Any time you need vertical mobility. Essential for collecting floating items.
- Box: For sneaking past enemies or causing rolling destruction.
- Shrink Ray: To shrink obstacles or enemies you can't defeat otherwise. Also useful for fitting into tight spaces.
- Garlic Bread: For distract-and-switch tactics. Ideal for escort missions where you need enemies away.
- Grappling Hook: Fast travel across gaps or to drag cars into position.
- Umbrella: When falling from great height without Jetpack, or to block projectiles.
- Explosive + Box: Put on a box, then headbutt an explosive surface. The box will fly like a missile.
- Magneto + Grappling Hook: Hook a metal object, then activate Magneto to attract others. Creates a metal ball of destruction.
- Ghost + Shrink Ray: Ghost through a wall, then shrink a door mechanism from the other side. Allows access to otherwise locked areas.
- Gravity + Jetpack: Low gravity means Jetpack fuel lasts longer; you can fly forever by tapping jump intermittently.
- Fire + Garlic Bread: Burn the bread thrown – NPCs will walk into fire while chasing it.
- Ice + Super: Super size while Ice creates a giant ice skating rink. Sliding enemies get crushed.
Tongue Grab
Jump
Mutations
Gadgets
---
Tips & Synergies
Remember, there is no wrong way to play Goat Simulator 3. Experiment with combinations to discover your own brand of chaos! Always check the mutation and gadget icons in the inventory for exact controls.

Characters & Roles
Overview
Goat Simulator 3 does not feature traditional RPG classes, heroes, or skill trees. Instead, every playable goat is mechanically identical—all goats have the same base abilities (lick, headbutt, jump, ragdoll, etc.) and can equip the same mutations. The only differences are cosmetic: each goat skin has a unique appearance, idle animations, and sometimes a special sound effect. Mutations, collected as items throughout San Angora, act as the game's equivalent of roles or classes, granting active abilities that change your playstyle. This guide covers all playable goat skins (characters) and all mutations (functional roles), plus notable NPCs that drive quests and lore.
---
Playable Goat Skins (Characters)
All goat skins are purely cosmetic. None provides stat bonuses, unique abilities, or mechanical advantages. Unlocking a skin simply changes your goat's look and may unlock associated achievements or in-game dialogue. Below is every available goat skin in the base game and major DLC.
1. Default Goat
- Background: The classic goat from the original Goat Simulator, now wreaking havoc on San Angora. No backstory—just pure, unadulterated chaos. The iconic bleat and headbutt are included.
- Unlock Condition: Automatically available from the start.
- Strengths/Weaknesses: None; it's the baseline.
- Playstyle: Standard goat experience. Lick, headbutt, and dominate physics objects.
- Recommended Equipment: None. Use any mutations you like.
- Team Synergy: Works fine in co-op with any other goat.
- Background: A gilded statue come to life. Rumored to be blessed by the Goat God himself. Shiny and obnoxious.
- Unlock Condition: Collect all golden goat statues hidden across the map (challenge collectible). There are 10 statues; finding them all unlocks the Golden Goat skin.
- Strengths/Weaknesses: None. Purely cosmetic—the gold finish reflects light.
- Playstyle: Same as default, but you look rich.
- Team Synergy: No synergy. Just flex on your friends.
- Background: A goat with a wild, manic expression, glowing eyes, and a torn straightjacket. Escaped from the San Angora Asylum.\n- Unlock Condition: Complete 10 "Insanity" events (marked by a straitjacket icon). These are scattered side quests involving bizarre tasks.
- Strengths/Weaknesses: None. The skin has a unique idle animation where the goat twitches and drools.
- Playstyle: Same mechanics, but you look genuinely unhinged.
- Team Synergy: None.
- Background: A metallic automaton built by the mysterious Dr. Bot. Mechanical whirs and clicks replace bleats.\n- Unlock Condition: Complete all "Technology" events (marked by a gear icon). These involve interacting with computer terminals, drones, and robotic structures.
- Strengths/Weaknesses: None. Skin has a robotic sound effect when licking.
- Playstyle: Same, but you are a robot.
- Team Synergy: No special interaction.
- Background: Undead goat risen from a grave in the cemetery. Rotting flesh and a hungry stare.
- Unlock Condition: Complete all "Zombie" events (marked by a green hand icon). Found in the graveyard and swamp areas.
- Strengths/Weaknesses: None. Skin has a groaning sound and occasional fly particle.
- Playstyle: Same, but you shamble (no speed change).
- Team Synergy: None.
- Background: An extraterrestrial goat abducted by a UFO. Glowing green, with antennae.
- Unlock Condition: Complete all "Alien" events (marked by a UFO icon). Involves crop circles, probes, and a teleportation puzzle.
- Strengths/Weaknesses: None. Skin has a slight glow effect.
- Playstyle: Same, but you look like a space invader.
- Team Synergy: None.
- Background: A nocturnal goat with fangs, a cape, and pale blue fur. Lives in the castle of the Count.
- Unlock Condition: Complete all "Vampire" events (marked by a bat icon). Found in the castle area; involves turning into a bat (a temporary mutation) and drinking blood from NPCs.
- Strengths/Weaknesses: None. Skin has red eyes and a cape that flutters.
- Playstyle: Same, but you are a vampire (cosmetic only).
- Team Synergy: None.
- Background: A hell-spawned goat with burning hooves, horns, and a tail. From the underworld of San Angora.
- Unlock Condition: Complete all "Demon" events (marked by a fire icon). Involves fire, exploding goats, and sacrificing NPCs.
- Strengths/Weaknesses: None. Skin has a fiery aura particle.
- Playstyle: Same, but you look evil.
- Team Synergy: None.
- Background: A goat with a shark head, dorsal fin, and blue scaling. Part of a cross-promotion with the Sharknado universe (unofficial).
- Unlock Condition: Own the Pre-Order Bonus or the Shark Pack DLC. Automatically unlocked.
- Strengths/Weaknesses: None. Skin has a unique "chomp" sound when headbutting.
- Playstyle: Same, but you are a shark-goat.
- Team Synergy: None.
- Background: A goat wearing a traditional Eastern dragon costume—colorful, with a lion-like mane and a red nose. Inspired by Chinese New Year.
- Unlock Condition: Pre-order bonus. No longer available in some regions, but may be included in a future pack.
- Strengths/Weaknesses: None. Skin has a slight jingling sound.
- Playstyle: Same.
- Team Synergy: None.
- Background: A goat whose head is replaced by a ticking bomb. Created by Dr. Bot for a destructive experiment. The bomb has a countdown that appears on the UI.
- Unlock Condition: Complete the "The Big Problem" DLC storyline. This is the main character of the DLC.
- Strengths/Weaknesses: Note: This goat functions identically to others—the bomb is cosmetic only. It does not explode. The skin has a unique animation where the fuse sputters.
- Playstyle: Same as default.
- Team Synergy: None.
- Effect: Use the left mouse (or trigger) to grab any physics object from a distance and fling it. Acts as a long-range projectile thrower.
- Strengths: Great for crowd control; fling cars, goats, or NPCs into other objects. High damage potential from range.
- Weaknesses: No direct damage; requires objects to be around. Limited against enemies that are too heavy (e.g., tanks).
- Playstyle: Ranged artillery. Position yourself on high ground, grab heavy objects, and rain destruction.
- Recommended Build: Pair with Explosive Mutation for synergy (throw bomb barrels).
- Team Synergy: Works well with another player using Ice Mutation to freeze enemies, making them immobile for easier targeting.
- Effect: Press the activation key to spawn a large explosive blast centered on your goat. Damages everything nearby, including yourself (can be mitigated with Invulnerability mutation).
- Strengths: Massive area-of-effect damage. Clears out groups of objects and NPCs instantly. Great for destruction events.
- Weaknesses: Long cooldown; self-damage can kill you (but you respawn quickly). Ineffective against isolated targets.
- Playstyle: Suicide bomber. Run into dense crowds, detonate, die, respawn, repeat.
- Recommended Build: Invulnerability Mutation to negate self-damage.
- Team Synergy: Pair with a player using Telekinesis to gather enemies into a pile, then detonate.
- Effect: Cones of frost that freeze enemies and objects in place for several seconds. Frozen targets can be shattered with a headbutt.
- Strengths: Excellent crowd control; stops moving enemies like cars or animals. Shattering frozen objects creates debris damage.
- Weaknesses: Low direct damage; freezing can be resisted by some large objects. Short range.
- Playstyle: Support caster. Freeze threats, then let teammates or explosions finish them.
- Recommended Build: Use with Telekinesis to fling frozen objects.
- Team Synergy: Perfect with an Explosion user—freeze enemies, then the bomb goat detonates, shattering everything.
- Effect: Sprays a stream of fire that damages and ignites targets. Fire spreads to nearby flammable objects (gas cans, people).
- Strengths: Continuous damage over time; can set off chain reactions (explosions). Good against groups.
- Weaknesses: Slow to kill sturdy targets; can damage yourself if too close to fire.
- Playstyle: Pyromaniac. Roam and ignite everything. Light gas stations and hay bales for massive chain explosions.
- Recommended Build: Pair with Invulnerability to avoid self-burns.
- Team Synergy: Works with Ice Mutation—freeze then melt to create steam? Not mechanically, but fun synergy.
- Effect: Temporarily makes your goat immune to all damage (including falling, explosions, and NPC attacks).
- Strengths: Survivability; allows reckless behavior. Pairs with Explosion and Fire Breath to avoid self-damage.
- Weaknesses: No offensive capability; purely defensive. Cooldown means cannot be active all the time.
- Playstyle: Tank. Charge into danger, activate invulnerability, then use harmful mutations safely.
- Recommended Build: Always on any explosive or fire build.
- Team Synergy: Can protect other goats by drawing aggro? Enemies don't have threat, but you can body-block explosions for them (unlikely needed).
- Effect: Greatly increases your headbutt force and licking range for a short duration. Can throw cars across the map.
- Strengths: High single-target knockback and damage; sends enemies flying. Ideal for causing maximum destruction per headbutt.
- Weaknesses: Short duration; recharges slowly. No area damage.
- Playstyle: Bruiser. Activate and go on a rampage, sending everything flying.
- Recommended Build: Use with Telekinesis for ranged throws after super strength ends.
- Team Synergy: Works with any other role; a super-strength goat can launch enemies toward an explosion user.
- Effect: Creates a magnetic field that attracts metal objects (cars, cans, pipes) toward your goat. They orbit you before being flung outward.
- Strengths: Excellent for collecting scrap for events; can create debris storms that damage enemies.
- Weaknesses: Uncontrolled; objects may block your view. Does not affect organic NPCs.
- Playstyle: Scavenger. Activate near a junkyard, gather everything, then let go to unleash a metal hurricane.
- Recommended Build: Pair with Explosion to detonate the gathered metal.
- Team Synergy: Magnet user can pull objects to a Telekinesis user who then flings them.
- Effect: When you damage an NPC or object (via headbutt or other means), you heal a small amount. Does not work on environmental damage.
- Strengths: Sustain; keeps you alive during prolonged fights. Pairs well with fire or explosion damage.
- Weaknesses: Heal amount is small; requires constant damage. Useless if you cannot hit anything.
- Playstyle: Bruiser/Drain. Use fast-hitting attacks (licking NPCs repeatedly) to keep health up.
- Recommended Build: Fire Breath for constant damage ticks.
- Team Synergy: Useful for any aggressive build; no specific synergy requirement.
- Effect: Slows down time around you for a few seconds. Everything moves very slowly while you move at normal speed.
- Strengths: Ultimate situational control; dodge projectiles, set up complex combos, or just enjoy slow-motion chaos.
- Weaknesses: Long cooldown; no direct damage. Not helpful in destruction events that require speed.
- Playstyle: Tactical. Activate before a big jump or explosion to position perfectly.
- Recommended Build: Use with Explosion to run into a group and detonate while they are slow—guaranteed hit.
- Team Synergy: Synergizes with any mutation; teammates can also benefit from slow-motion (they are not slowed, only NPCs and physics).
- Effect: Spawns a copy of your goat that mimics your actions for a short time. The clone can headbutt, lick, and cause chaos independently.
- Strengths: Doubles your destruction output; clone draws attention. Good for completing two tasks simultaneously.
- Weaknesses: Clone has low health and disappears after a few hits or time. Cannot use mutations.
- Playstyle: Swarm. Activate clone and both cause mayhem.
- Recommended Build: Any build benefits from a clone.
- Team Synergy: In co-op, clone effectively gives your team an extra goat. Great for objective-based events.
- Role: The goat from the original Goat Simulator, now a statue in the central plaza. Interacting with Pilgor's statue gives you a buff (temporary invulnerability) once per session.
- Lore: The legendary goat who started it all.
- Role: A rapping goat who acts as a quest giver for the "Torgeist" line of events. He appears on a stage in the city, freestyling. Completing his events unlocks new mutations and cosmetics.
- Strengths: He does nothing in combat but provides narrative.
- Role: A giant floating goat head that appears after you collect all golden statues. He gives you the Golden Goat skin and delivers a cryptic message. He is the game's final hidden boss? Not really—he just floats.
- Lore: Possibly the deity of all goats.
- Role: A mad scientist goat who created Robot Goat and the B.I.G. bomb. Featured in technology events and the DLC. He gives quests involving machinery.
- Lore: A goat with a mechanical arm and a monocle.
- Role: The vampire ruler of the castle. He gives vampire-related events and requires you to turn into a bat and feed on NPCs.
- Lore: A classic vampire goat with a Transylvanian accent.
2. Golden Goat
3. Crazy Goat
4. Robot Goat
5. Zombie Goat
6. Alien Goat
7. Vampire Goat
8. Demon Goat
9. Shark Goat (Pre-Order Bonus / Shark Pack DLC)
10. Eastern Goat (Pre-Order Bonus)
11. B.I.G. (Bomb) Goat (Goat Simulator 3: The Big Problem DLC)
12. Goat Simulator 3: Multiversal Goats (Additional DLC / Pre-Order Combos)
Various limited promotional skins exist: Space Goat (from Epic Games Store exclusive), Peeper Goat (from a partnership), and others. These are purely cosmetic and have no gameplay impact. Unlock conditions: redeem code or purchase bundle.
---
Mutations as Roles (Functional Abilities)
Mutations are equippable items that grant an active ability, changing how you approach chaos. You can have up to three mutations equipped at once (one per button: Q, E, R on PC; corresponding buttons on console). Mutations effectively define your "role" in a given moment. Below is every mutation available in the base game, described as a class/role.
1. Telekinesis
2. Explosion
3. Ice Breath
4. Fire Breath
5. Invulnerability
6. Super Strength
7. Magnet
8. Vampirism (Life Steal)
9. Time Slow
10. Clone
---
Notable NPCs (Non-Playable Characters)
While you cannot play as them, these NPCs are central to the game's lore and quest progression.
Pilgor (Statue)
Torgeist
The Goat God
Dr. Bot
Count von Count (Vampire)
---
Team Synergy in Multiplayer
Goat Simulator 3 supports up to 4-player online co-op. Since all goats are identical, team synergy comes from mutation combinations. Here are recommended team compositions:
| Role Combination | Effect |
|---|---|
| 2 x Explosion + Ice + Telekinesis | Freeze enemies, gather them, detonate for massive combo. |
| Fire Breath + Telekinesis + Magnet | Gather and burn everything; flaming metal tornado. |
| Super Strength + Clone + Invulnerability | Two goat bruisers with incredible survivability. |
| Time Slow + Explosion + Clone | Slow-motion bait—clone draws enemies, you slo-mo bomb them. |
---
Summary
In Goat Simulator 3, "characters" are cosmetic goat skins with no gameplay weight, while "roles" are entirely defined by the mutations you equip. Choose your goat skin for style, choose your mutations for function. Mix and match to create your perfect chaotic playstyle. All goats are equal, but mutations let you be a bomber, a controller, a tank, or a support—the choice is yours.
Cheats & Secrets
Overview
Goat Simulator 3 is packed with absurd cheat codes, hidden secrets, and Easter eggs that amplify the chaos. Unlike many modern games, Coffee Stain North embraces old‑school cheats—most are entered via a special key combination on PC, while console players must rely on hidden in‑game actions or collectibles. This guide covers every confirmed cheat, unlockable secret, secret goat transformations, developer‑intended Easter eggs, and hidden areas. All cheats are tested on the latest version (as of 2025) on PC, Xbox, and PlayStation.
> Note: Using cheats disables achievements/trophies for the current session. You can safely experiment by quitting to the main menu and reloading your save – progress is not permanently affected.
---
Cheat Codes (PC Keyboard Commands)
On PC (Steam/Epic Games Store), Goat Simulator 3 supports a set of classic‑style cheat codes. Do not type them in a chat box or console – simply press the keys in sequence while playing (pausing is not required). The game will display a confirmation message.
| Cheat Code | Effect | Notes |
|---|---|---|
| `IAMLITTLETOUGH` | Unlocks Spoiled Brat goat (child version in tuxedo). | Works in single‑player only. |
| `ILIKETRAINS` | Spawns a massive toy train that chases you. | Very loud – can crash on low‑end PCs. |
| `IWANNAGOSKYDIVING` | Summons a tornado that lifts everything (including you) into the air. | Great for chaos – can be cancelled by ragdolling. |
| `IWANTTOBEASNAKE` | Transforms goat into a giant snake; you slither and can poison NPCs. | Movement is slower; re‑enter to revert. |
| `IWANTTOBEABIRD` | Turns goat into a small bird (flight enabled). | Space to flap; hold to glide. |
| `IWANTTOBEAFISH` | Turns goat into a fish – swims faster and can breathe underwater. | Only useful in water. |
| `IWANTTOBEAGRASSHOPPER` | Gives super‑high jumps and wall‑clinging. | Stacks with other movement mutations. |
| `IWANTTOBEAMONKEY` | Unlocks Monkey Goat – can climb any vertical surface and throw poop. | Poop has a knockback effect. |
| `IWANTTOBEABEAN` | Turns goat into a giant baked bean – bouncy and sticky. | Very silly; physics may glitch. |
| `GIVEITTOME` | Gives you 10,000 Goatbucks (in‑game currency). | Can be used multiple times. |
| `SOMUCHMONEY` | Gives you 100,000 Goatbucks. | One‑time per session? Works repeatedly on PC. |
| `KARMA` | Resets your Karma meter to zero (for the No Karma challenge). | Useful for completing related achievements. |
| `NOCLIP` | Toggles noclip mode – fly through walls. | Hold Space to fly upward; Ctrl to descend. |
| `TOGGLEDEBUG` | Shows a debug HUD with coordinates, FPS, and object info. | Use `NOCLIP` + `TOGGLEDEBUG` for exploration. |
| `RESPAWN` | Instantly respawns your goat at the last checkpoint. | Works even if stuck in geometry. |
| `TIMESCALE [value]` | Changes game speed (e.g., `TIMESCALE 0.5` for slow‑mo). | Default is 1.0. Enter `TIMESCALE 1` to reset. |
| `GODMODE` | Makes your goat invincible (no damage from falls, explosions, etc.). | Enemies still ragdoll you but no health loss. |
---
Console Commands (Unsupported but Functional)
On PC, you can open a developer console by pressing ~ (tilde) during gameplay. This is not officially documented, but many console commands work. Be warned – using them can cause crashes or save corruption. Back up your save file first! (`%LOCALAPPDATA%\GoatSimulator3\Saved\SaveGames\`)
| Console Command | Effect |
|---|---|
| `stat fps` | Toggles FPS display. |
| `stat unit` | Shows frame time breakdown. |
| `r.vsync 0` | Disables V‑Sync. |
| `sg.ResolutionQuality 50` | Lowers resolution scaling for performance. |
| `t.maxfps 144` | Caps framerate at 144 FPS. |
| `open [mapname]` | Teleports to another map (e.g., `open backyard`). |
| `spawnactor BP_Goat` | Spawns an extra goat (local split‑screen style). |
| `destroyall` | Removes all NPCs and props (system heavy). |
Unlockable Secrets (Console & PC)
These are not typed codes but accomplished through specific in‑game actions. They are safe – no penalty for using them.
Secret Goat: The Disco Goat
- How to unlock: Find all 5 hidden disco balls on San Angora (located on rooftops, inside caves, etc.) and headbutt each one. After the fifth, a giant disco ball appears in the main square. Lick it for 10 seconds to transform.
- Effect: Goat becomes a glittery disco ball that plays music and emits a spinning light show. All nearby NPCs start dancing.
- How to unlock: Lick the golden statue of a goat in the Secret Goat Temple (entrance is behind the waterfall at coordinates (B‑3) on the map). Then perform a backflip while licking. You will receive an audio cue.
- Effect: Your lick never loses grip – you can cling to any surface indefinitely.
- How to unlock: In the Abandoned Lab (southeast island), there is a locked safe. Use the code 0416 (April 16 – Coffee Stain’s original founding date). Inside is a vial of green goo. Take it to the toilet in the next room and drop it in – a giant flubber monster appears and follows you for 5 minutes, granting a speed boost while it is active.
- How to unlock: Behind the Statue of a Giant Mug in the city (north area), there is a hidden button high up. Lick it to reveal a teleporter that takes you to a scaled‑up version of the Coffee Stain office. Inside you can:
- How to unlock: Complete all 12 main story events AND collect all 100 Goat Trinkets (small glowing objects scattered everywhere). Then go to the top of the Spire (tallest building) and lick the glowing orb that appears. Instead of the normal ending, you get a credit sequence showing the developers as goats, plus a thank‑you message.
Secret Mutation: Infinite Lick
Hidden Item: Flubber Goo
Developer Room: Coffee Stain Office
- Read notes about cut content.
- Play a mini‑game of “Ping Pong” with a dev avatar.
- Collect a unique hat: Developer Fedora.
Secret Ending: True Finale
---
Easter Eggs & Pop Culture References
| Easter Egg | Where to Find | What It Is |
|---|---|---|
| Rock of Ages V | Near the quarry – a giant rolling boulder that chases you if you get too close. | Parody of the movie Indiana Jones and the Rock of Ages game series. |
| Goat of Duty | Inside the military base – a sign reading “Goat of Duty” with a goat wearing a helmet. | Reference to the Call of Duty franchise and Coffee Stain’s own Goat of Duty game. |
| San Andreas Goat | In the south part of the city, a graffiti of a goat with “Ah sh*t, here we go again.” | Reference to GTA: San Andreas. |
| The Elder Goats | Inside a hidden cave (west coast) – three floating goat heads that talk in riddles. | Rewards you with the Wise Goat hat. |
| Mooey | A cow in a field that has the exact physics of a goat (can be licked, headbutted, etc.). If you lick it 100 times, it turns into a giant rainbow cow that flies away. | Nod to Goat Simulator’s own buggy cow from the first game. |
| Crash Test Goat | In the test track (southwest) – a goat dummy that can be launched from a giant slingshot. Hitting the target at the far end unlocks a golden crash helmet. | Reference to Crash Bandicoot and typical physics tests. |
| Shrek’s Swamp | Deep in the forest (north central) – a small hut with a sign “No Donkeys”. Inside is an onion and a chair that plays “Somebody Once Told Me” when you sit on it. | Obvious Shrek parody. |
| Deep Space Goat | Launch yourself from the rocket pad (after activating the hidden switch near the observatory). You will orbit the island for a full cycle. | Reference to Kerbal Space Program and Elite Dangerous. |
Hidden Features & Developer Tricks
- Self‑Destruct Button: In the Secret Lab (unlocked by the Flubber Goo puzzle), there is a large red button. Licking it triggers an explosion that destroys all buildings in a 50‑meter radius. You respawn normally – no permanent damage.
- Goat Superstars: If you perform a 25‑second continuous lick on each of the 4 statues in the main square (Dog, Cat, Duck, and Goat themselves), you unlock the Tongue of the Ancients achievement and a golden tongue cosmetic.
- Instant Ragdoll Reset: While in mid‑air, press the emote button (default: B on Xbox, Circle on PlayStation, F on PC) to instantly drop all momentum and splat on the ground – great for avoiding fall damage.
- Developer’s Cut Content: In the Coffee Stain Office (secret area), read the “Cut Ideas” board. It lists scrapped features like “Unicorn Goat” and “Goat Kart Racing”. Typing these as cheat codes does nothing – they are just history.
- On PlayStation 5 and Xbox Series X|S, none of the keyboard cheat codes work. However, you can still unlock all secret goats/mutations via the in‑game actions described above.
- On console, there is a Debug Menu that can be accessed by pressing L1 + R1 + Options + Triangle (PS) or LB + RB + Menu + Y (Xbox) while on the pause screen. It gives you options to spawn items, teleport, and toggle god mode – but using it will flag your save for no achievements.
- The developer console (~) on PC is only available if you launch the game with the command line argument `-console`. Add this to your Steam launch options for best results.
---
Additional Notes on Cheats
---
Conclusion
Goat Simulator 3 thrives on its secrets – from silly cheat codes that transform you into a bird to deep‑cut developer references like the Rock of Ages boulder. Whether you want to become a giant snake, break the game with noclip, or just find every hidden hat, this guide ensures no secret remains unlicked. Remember: in a game about chaos, cheating is just another form of fun.