God of War Ragnarök
## Game Introduction: God of War Ragnarök ### Genre Action-adventure, hack-and-slash, third-person action RPG with light puzzle and exploration elements. ### Developer & Publisher - **Developer:** Santa Monica Studio (a first-party Sony studio). - **Publisher:** Sony Interactive Entertainment. #...
Download & Installation
Download & Installation Guide for God of War Ragnarök
This guide covers all legitimate platforms where God of War Ragnarök is available: PlayStation 4, PlayStation 5, and PC (Steam, Epic Games Store). The game is not available on Xbox, Nintendo Switch, or mobile devices. Follow the steps specific to your platform to download, install, and launch the game successfully.
---
1. Platform Availability & Where to Buy
| Platform | Store / Launcher | Purchase & Download Source |
|---|---|---|
| PlayStation 4 | PlayStation Store (PSN) | Directly on console or via web store (store.playstation.com) |
| PlayStation 5 | PlayStation Store (PSN) | Directly on console or via web store |
| PC | Steam | store.steampowered.com |
| PC | Epic Games Store | store.epicgames.com |
---
2. System Requirements (PC)
Minimum Requirements (30 FPS @ 1080p, Low settings)
- OS: Windows 10 64-bit (version 20H2 or newer)
- CPU: Intel i5-4670K or AMD Ryzen 3 1200
- RAM: 8 GB
- GPU: NVIDIA GTX 1060 (6GB) or AMD RX 570 (4GB)
- Storage: 190 GB SSD (NVMe recommended)
- DirectX: Version 12 (Feature Level 12_0)
- Sound: Windows-compatible audio device
- OS: Windows 10 64-bit (version 20H2 or newer)
- CPU: Intel i5-8500 or AMD Ryzen 5 3600
- RAM: 16 GB
- GPU: NVIDIA RTX 2070 (8GB) or AMD RX 5700 XT (8GB)
- Storage: 190 GB SSD (NVMe strongly recommended)
- DirectX: Version 12 (Feature Level 12_0)
- OS: Windows 10 64-bit (version 20H2 or newer)
- CPU: Intel i7-10700K or AMD Ryzen 7 5800X
- RAM: 16 GB
- GPU: NVIDIA RTX 3080 (10GB) or AMD RX 6800 XT (16GB)
- Storage: 190 GB SSD (NVMe)
- DirectX: Version 12
- PlayStation (PS4/PS5): Requires a PlayStation Network (PSN) account. If you buy digitally, you must be signed in to the account used for purchase. Disc versions require the disc to be inserted and the game installed (account needed for online features and updates).
- PC (Steam): Requires a Steam account and the Steam client.
- PC (Epic Games Store): Requires an Epic Games account and the Epic Games Launcher.
- Shader Compilation: On all platforms, the first launch (especially PC) may compile shaders. This is normal and may take 5–20 minutes. Do not interrupt. On PS5, the initial load is faster due to the custom SSD.
- Language Selection: Choose your preferred language for audio and subtitles. (Can be changed later in settings.)
- Difficulty Selection: Choose from Balanced, Grace (easy), No Mercy (hard), or Give Me God of War (extreme).
- Accessibility Options: The game offers extensive accessibility features (subtitles, audio cues, controller remapping). Configure as needed.
- Online Features: If you want to sync saves between PC and PS5, sign in with the same PSN account when prompted. Otherwise, skip.
- Game Updates: Ensure the game is fully updated before playing. On PlayStation, check for updates via Options button > Check for Update. On PC, Steam/Epic automatically update; verify by clicking Properties > Updates.
Recommended Requirements (60 FPS @ 1440p, High settings)
Ultra Requirements (60 FPS @ 4K, Ultra settings)
> Note: The game requires approximately 190 GB of free storage space. An SSD is mandatory; HDDs are not supported due to streaming requirements.
---
3. Account Requirements
> Cross-save: PlayStation save data (PS4/PS5) can be transferred to PC only if you own the game on both platforms and log in with the same PSN account on PC (optional).
---
4. Download & Installation Steps
PlayStation 4
1. Digital Purchase:
- On your PS4, go to the PlayStation Store via the icon on the home screen.
- Search for “God of War Ragnarök” and select it.
- Choose “Buy” (or “Download” if you already own it via pre-order or bundle).
- Confirm purchase (requires PSN account and payment method or wallet balance).
- The download will start automatically. You can monitor progress in Notifications > Downloads.
2. Physical Disc:
- Insert the game disc into the PS4.
- The game will appear on the home screen with an “Install” prompt. Select Install.
- The game data (mandatory installation) will copy to the internal or external storage (you need ~70 GB free for base game; ensure enough space).
- After installation, the disc must remain in the drive to play.
3. Post-Install:
- Launch the game from the home screen.
- The game may prompt for an update – download and install it for the best experience.
- Ensure you have the latest system software (Settings > System Software Update).
PlayStation 5
1. Digital Purchase:
- Go to the PlayStation Store on your PS5.
- Search and select God of War Ragnarök.
- Purchase (or select “Download” if already owned).
- The game will begin downloading. You can check progress via Game Library or Downloads/Uploads.
2. Physical Disc:
- Insert the PS5 disc (or PS4 disc if you have the upgrade version – see note).
- The game tile appears; select Copy or Install.
- The required data installs. For PS5 games, you’ll typically need ~85 GB. For PS4 disc on PS5, it may install the PS4 version; you can optionally download the free PS5 upgrade if applicable (see store).
3. PS5-Specific Note:
- If you own the PS4 disc version, you can insert it into the PS5 and download the free PS5 digital upgrade from the store (requires disc inserted each time). Follow instructions on the game hub.
- To play the PS5 version, you must have the PS5 version installed – the disc serves as a license key.
PC – Steam
1. Install Steam:
- If you don’t have Steam, download the installer from [store.steampowered.com](https://store.steampowered.com/about/). Run it and follow the wizard to install the Steam client.
- Create or log in to your Steam account.
2. Purchase God of War Ragnarök:
- Open Steam and go to the Store tab.
- Search for “God of War Ragnarök” or browse the store.
- Click Add to Cart and proceed through checkout (payment methods accepted).
3. Install the Game:
- After purchase, return to your Library.
- Find God of War Ragnarök in your game list and click Install.
- Choose install location (ensure you have at least 190 GB free on the selected drive). An SSD is required; Steam may warn if you select an HDD.
- Click Next and let the download begin. The game is ~190 GB; high-speed internet recommended.
- Do not put your PC to sleep during download.
4. Post-Install:
- Once installed, click Play in Steam Library.
- The first launch may compile shaders (may take several minutes).
- You may be prompted to sign in to PSN for optional cross-save (not required to play).
- Set graphics settings as desired.
PC – Epic Games Store
1. Install Epic Games Launcher:
- Download from [store.epicgames.com](https://store.epicgames.com/) and run the installer.
- Log in or create an Epic Games account.
2. Claim / Purchase the Game:
- Open the Epic Games Launcher and go to the Store.
- Search for God of War Ragnarök and select it.
- Click Buy Now (or Get if you have a free copy from a promotion).
3. Install:
- After purchase, go to your Library in the launcher.
- Find the game and click Install.
- Choose install directory (again, SSD with 190 GB free).
- The launcher will download and verify the files.
4. Post-Install:
- Click Launch from your Library.
- Similar shader compilation may occur on first launch.
- PSN sign-in may appear (optional).
---
5. First Launch Setup (All Platforms)
---
6. Common Installation Errors & Fixes
| Error / Problem | Platform | Cause | Solution |
|---|---|---|---|
| Insufficient Storage | All | Not enough free space or wrong drive selected | Free up space (delete unused games/files). The game requires ~190 GB. On PS4/PS5, you need free space on internal or extended storage. On PC, ensure the drive is NTFS and has enough room. |
| Download Stuck / Paused | PS4/PS5 | Network issues or corrupted download | Pause and resume download. Restart console and router. Ensure your internet connection is stable. |
| Steam Download Error (Disk Write Error) | PC | Antivirus interference or disk permissions | Temporarily disable real-time antivirus. Run Steam as Administrator. Check disk health (chkdsk). Move install to a different drive. |
| Epic Games Launcher Download Error | PC | Corrupted cache or server issues | Clear Epic Launcher cache: go to `%localappdata%\EpicGamesLauncher\Saved\webcache` and delete contents. Restart launcher. |
| Shader Compilation Crash | PC | Unstable overclocks or outdated drivers | Update GPU drivers (NVIDIA/AMD). Disable CPU/GPU overclock. Lower graphics settings temporarily. Verify game files (Steam: Properties > Local Files > Verify integrity; Epic: Library > three dots > Verify). |
| Game Fails to Launch | PS4/PS5 | Corrupted game data | Rebuild database (PS4: Safe Mode Option 4; PS5: Safe Mode Option 5). Reinstall the game. |
| PSN Sign-In Loop | PC | Conflict with PSN account linking | Launch the game without signing in (choose “Skip”). If already linked, sign out of PSN in-game, then restart and sign in fresh. |
| Controller not recognized | PC | Driver issues or Bluetooth problems | For PS5 DualSense: use wired USB connection for best compatibility. Update controller firmware via official tool. In Steam, enable PlayStation controller support in Settings > Controller. |
| Performance Stutter / Low FPS | PC | Shader cache not fully built or settings too high | Let the game finish shader compilation (check settings; may show progress). Lower graphics settings, especially Texture Quality and Shadows. Ensure Windows Game Mode is on. |
| Disc Read Error | PS4/PS5 | Dirty disc or damaged drive | Clean the disc with a soft cloth. Try restarting console. If error persists, the disc may be defective – contact retailer for replacement. |
7. Post-Installation Verification
After installation, verify that the game is ready to play correctly:
- PlayStation (4/5):
- PC (Steam/Epic):
- Cross-Platform Saves (Optional):
- Use an SSD: Mandatory for PC and highly beneficial on PS4 (faster load times). On PS5, the internal SSD is already super-fast; external SSDs work but may be slower.
- Keep Drivers Updated: Especially GPU drivers. NVIDIA Game Ready drivers and AMD Adrenalin drivers for God of War Ragnarök are released prior to PC launch. Use GeForce Experience or AMD Adrenalin to update.
- Disable Overlays: If you experience crashes, try turning off Steam Overlay, Discord Overlay, or GeForce Experience Overlay.
- Windows Settings: Ensure Windows 10/11 is updated. Enable Hardware-Accelerated GPU Scheduling (Settings > System > Display > Graphics > Default graphics settings).
- PS4/PS5 Storage: If you run out of space, consider upgrading to an internal SSD (PS5: compatible NVMe; PS4: replace or add external USB drive). The game can be installed on extended storage on PS4/PS5, but for PS5, native PS5 games run best from internal.
- [ ] Purchased from official store or have physical disc.
- [ ] Account created (PSN, Steam, Epic) and signed in.
- [ ] Enough free storage (190 GB PC, ~70 GB PS4, ~85 GB PS5).
- [ ] SSD installed (PC) or proper storage type.
- [ ] Internet connection for download (highly recommended: wired, 100+ Mbps).
- [ ] Downloaded and installed successfully.
- [ ] Game updated to latest version.
- [ ] Verification steps (file integrity, first launch) passed.
- [ ] (Optional) PSN account linked for cross-save.
- PlayStation: [support.playstation.com](https://support.playstation.com/)
- Steam: [help.steampowered.com](https://help.steampowered.com/)
- Epic Games: [epicgames.com/help](https://www.epicgames.com/help/)
- Check Settings > Storage to confirm the game is listed (e.g., ~70 GB for PS4, ~85 GB for PS5).
- Launch the game. If it asks for an update, install it. Ensure the game boots to the title screen without errors.
- Test a few minutes of gameplay (opening sequence) to confirm smooth performance.
- In Steam Library, right-click God of War Ragnarök → Properties → Local Files → Verify integrity of game files. This checks for corrupted or missing files. (Epic: Library > three dots > Manage > Verify.)
- Launch the game. The first run will compile shaders. After that, check the main menu. Enable Performance Metrics (Steam overlay shift+tab) or use an FPS counter to ensure stable frame rate.
- Check that audio, controller, and graphics are working.
- Optionally, run the built-in benchmark (found in Graphics Settings) to gauge performance.
- If you own the game on both PS5 and PC, sign into the same PSN account on PC and enable cloud sync. On PS5, ensure auto-upload is on (Settings > Saved Data > Sync). Your saved data will then be available across platforms.
---
8. Additional Tips
---
9. Final Checklist
If you encounter any persistent issues, refer to official support:
Enjoy your journey in Midgard and beyond!
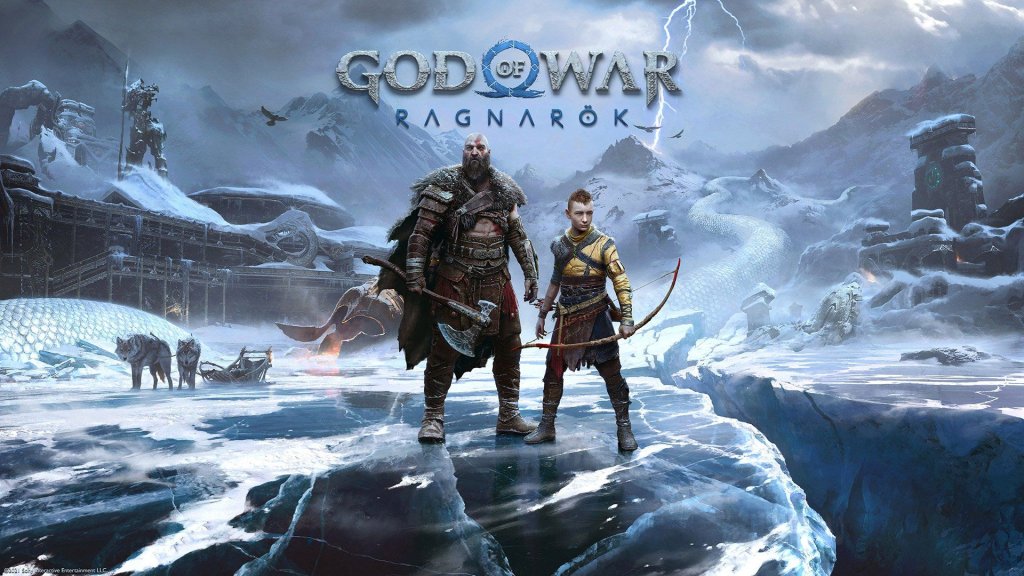
Game Introduction
Game Introduction: God of War Ragnarök
Genre
Action-adventure, hack-and-slash, third-person action RPG with light puzzle and exploration elements.
Developer & Publisher
- Developer: Santa Monica Studio (a first-party Sony studio).
- Publisher: Sony Interactive Entertainment.
- PlayStation 5 & PlayStation 4: November 9, 2022.
- PC (Windows): September 19, 2024 (Steam and Epic Games Store).
- No release on Xbox, Nintendo, or other platforms.
- PlayStation 5
- PlayStation 4
- PC (Windows) via Steam and Epic Games Store
- Kratos: The protagonist, a former Greek god of war burdened by his violent past. Now a father seeking to break the cycle of revenge and protect Atreus.
- Atreus (Loki): Kratos’ son, a teenager discovering his giant heritage and his true name. He is central to the prophecy of Ragnarök.
- Freya: Former queen of the Vanir gods and Atreus’ magical tutor. She becomes an ally after the events of the previous game.
- Odin: The primary antagonist, cunning and ruthless ruler of Asgard. He schemes to prevent Ragnarök and destroy the giants.
- Thor: Odin’s son, the thunder god, a brutal enforcer haunted by his past deeds. A major antagonist with complex motivations.
- Mimir: The severed head of the smartest man alive—a wise companion who provides lore and advice.
- Sindri & Brok: Dwarven blacksmiths who upgrade Kratos’ weapons and gear. Their strained relationship adds emotional depth.
- Týr: The god of war, believed dead, but found imprisoned. He becomes a key ally in the fight against Asgard.
- Angrboda: A giantess from Jotunheim who befriends Atreus and holds secrets about his future.
- Epic Norse Saga: A cinematic, character‑driven story that concludes the Norse arc with emotional weight and high‑stakes drama.
- Visceral Combat: A deep, responsive combat system with the Leviathan Axe, Blades of Chaos, new weapons (e.g., the Draupnir Spear), and customizable skill trees.
- Stunning Visuals: State‑of‑the‑art graphics on PS5 and PC, with seamless realm‑to‑realm transitions and breathtaking set pieces.
- Immersive World: Rich lore, environmental storytelling, and a living world where every realm tells its own story.
- Father‑Son Dynamic: The evolving relationship between Kratos and Atreus remains the emotional core, with branching dialogue and character growth.
- Puzzles & Exploration: Clever puzzles, hidden chambers, and collectibles reward thorough exploration.
- Fans of action-adventure games and the God of War franchise.
- Players who enjoy deep storytelling, character development, and cinematic experiences.
- Those who appreciate challenging combat with tactical depth.
- Mature audiences (rated M for Mature: Blood and Gore, Intense Violence, Strong Language).
- Suitable for both veterans and newcomers (a brief recap of the 2018 story is available).
- Single‑player story campaign only. There are no multiplayer or cooperative modes.
- New Game Plus: After completing the main story, players can start a fresh playthrough carrying over all gear, upgrades, and collectibles (available on all platforms).
- Photo Mode: A robust photo mode for capturing in‑game moments.
- Accessibility Features: Extensive options including controller remapping, subtitle settings, combat assists, and more.
- Offline: The entire single‑player campaign can be played without an internet connection.
- Online: Required for initial download and patch updates. No persistent online connectivity needed for gameplay.
- PC Platform: Steam and Epic Games Store require an account and internet for installation and updates. The game itself is fully offline once installed.
- No paid story expansions or DLC have been released. The base game contains the complete story.
- Free Updates: Patches, bug fixes, and quality‑of‑life improvements were provided post‑launch, but no additional narrative content.
- The Valhalla DLC (December 2023): A free post‑game roguelite mode set in the shores of Valhalla. It offers a combat gauntlet with escalating challenges, character reflections, and unlockable lore. This is a gameplay expansion, not a story DLC. Available on PS5, PS4, and later added to PC.
- One‑Shot Camera Technique: The entire game is presented in a single continuous camera shot with no cuts or loading screens (except fast travel), creating unparalleled immersion.
- Seamless Realm Transitions: Players can travel between realms via the Mystic Gateways without noticeable loading, with real‑time transitions.
- Weapon Versatility: Each weapon has unique elemental properties (frost, fire, wind) and combos. The Leviathan Axe can be thrown and recalled; the Blades of Chaos can grapple and burn; the Draupnir Spear can be planted to explode or use as a traversal tool.
- Character‑Driven Narrative: Unlike many action games, the story is deeply personal, focusing on family, grief, and redemption rather than simple good‑vs‑evil.
- Dynamic Difficulty: The four difficulty settings adjust enemy behavior, damage, and health, to suit different playstyles.
- PC Unique Features: On PC, players enjoy unlocked framerate, Ultra‑wide support, NVIDIA DLSS/Reflex, AMD FSR, and full controller/keyboard customization.
- Cultural Authenticity: The game’s Norse mythology is researched and reimagined with respect, blending myth with fictional depth.
Release Timeline
Platforms
Story Overview
Set three years after the events of God of War (2018), God of War Ragnarök continues the journey of Kratos and his son Atreus. Fimbulwinter, the harsh winter preceding Ragnarök, is drawing to a close, and the prophesied end of the Norse gods is imminent. Kratos, once the Ghost of Sparta, struggles to prevent the cycle of violence while protecting his family. Atreus, now a teenager, is torn between his father’s wishes and the truth of his identity as Loki, the giant-slayer prophesied to usher in Ragnarök. The duo must travel through all Nine Realms, facing gods, monsters, and the looming wrath of Odin himself. The story explores themes of duty, destiny, redemption, and the bond between father and son.
Setting
The game takes place in the Nine Realms of Norse mythology: Midgard, Alfheim, Svartalfheim, Vanaheim, Jotunheim, Niflheim, Muspelheim, Helheim, and Asgard. Each realm is distinct in visuals, culture, and dangers. Midgard is now locked in the frozen grip of Fimbulwinter; Alfheim is a land of light and dark elves at war; Svartalfheim features dwarven mines and volcanic caverns; Vanaheim is a lush, dangerous jungle; Jotunheim is the frosty home of giants; Niflheim is a poison‑filled misty plain; Muspelheim is a volcanic forge; Helheim is the realm of the dead; and Asgard is the golden fortress of the Æsir. Most realms are fully explorable with side quests, secrets, and puzzles.
Main Characters
Core Appeal
Target Audience
Game Modes
Online/Offline Support
DLC/Expansion Overview
What Makes This Game Unique?
---
This introduction provides a complete overview for new players and fans alike, setting the stage for one of the most acclaimed action‑adventure games of its generation.
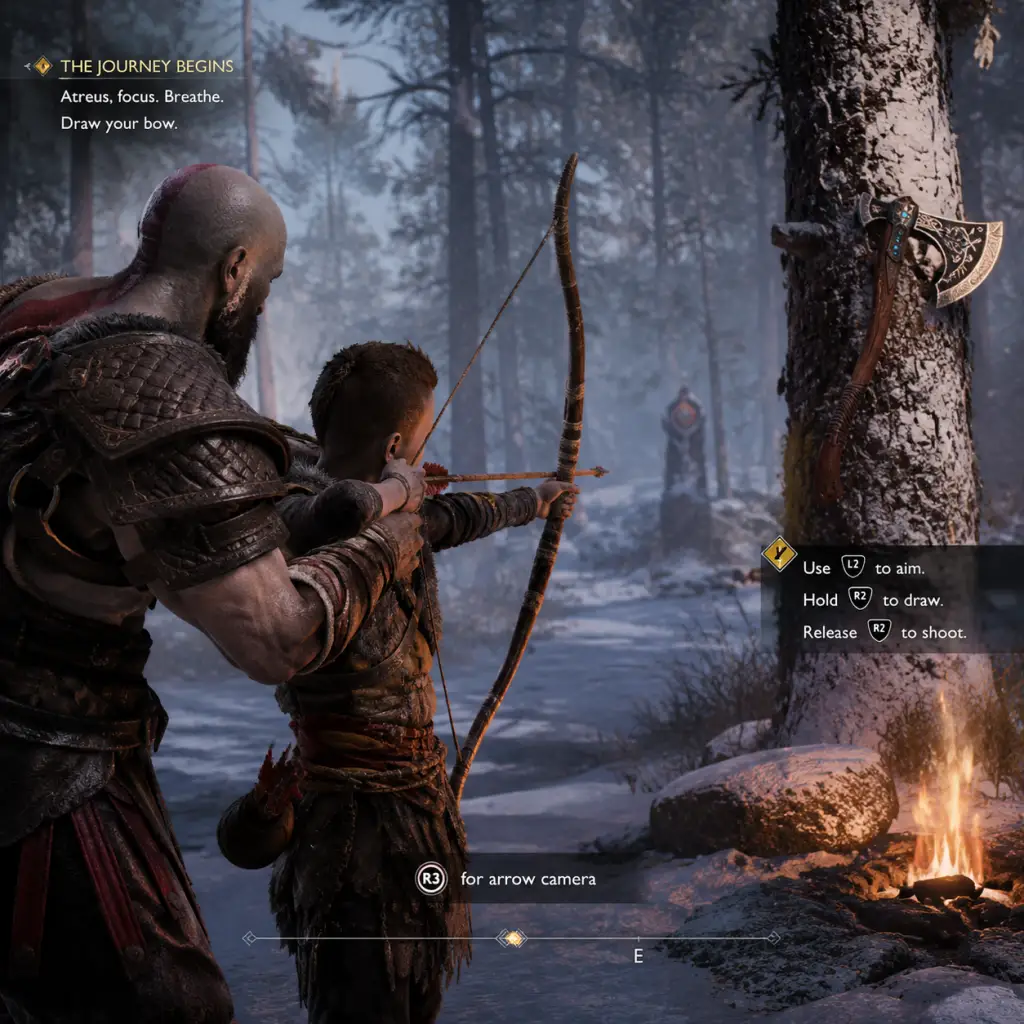
Getting Started
Getting Started Guide for God of War Ragnarök
This guide is tailored for brand-new players. Whether you're playing on PS4, PS5, or PC, the core experience is the same. By the end of this guide, you'll be ready to face the Fimbulwinter.
Introduction to the World and Story
God of War Ragnarök continues where 2018's God of War left off. You play as Kratos, the Greek God of War, now living in Midgard with his teenage son Atreus. Three years have passed since the last game; the world is locked in Fimbulwinter (a prelude to Ragnarök). The Norse gods are hunting them. Your goal: survive, protect Atreus, and confront the prophecy of Ragnarök.
First Hour Walkthrough (No Major Spoilers)
1. The Prologue – You start inside your home in Midgard. Follow the on-screen prompts to walk around, pick up items, and listen to Kratos and Atreus. A brief tutorial teaches basic movement and interaction.
2. Training Sequence – Atreus challenges you to a sparring match. This is a safe environment to practice: light attacks, heavy attacks, blocking (L1), dodging (O), and Atreus's arrow commands (square). Don't worry about losing; it's scripted.
3. The First Threat – A mysterious figure arrives (you'll learn who later). A short combat encounter follows. Use your shield (hold L1) and dodge. The game will prompt you to use Runic Attacks (L1 + R1 or L1 + R2) once you unlock them.
4. Leaving Midgard – You'll travel through a Hidden Path to reach the dwarven realm of Svartalfheim. The journey includes light puzzle-solving (moving chains, lowering bridges). Your first enemy groups outside the mine teach crowd control.
5. Arrival at Sindri's House – After a cutscene, you meet the dwarves Sindri and Brok. This is your first shop. Interact with the table (shop menu). You can now upgrade your Leviathan Axe, buy armor (go for the best you can afford – Steadfast armor is decent early), and purchase resources.
6. Exploring Svartalfheim – From the shop, you have a large open mountain area. Follow the main objective marker (golden trail) to progress the story, but don't rush – check every side path for chests, lore, and crafting materials.
7. First Boss (The Bear) Optional but Recommended? – If you follow the main path, you'll encounter a proto-boss (a large bear-like creature). This is a skill check; use your shield, dodge its lunges, and use Atreus's arrows to stun it. Defeating it rewards a rare resource.
By the end of the first hour, you'll be in Svartalfheim with basic gear, a few skills unlocked, and a clear objective.
Character Creation? No – But You Have Choices
There is no character creation. You control Kratos (fixed appearance, voice, and personality). However, you do customize:
- Difficulty – Choose from: Give Me Story (very easy), Give Me Grace (easy), Give Me Balance (normal – recommended), Give Me No Mercy (hard), Give Me God of War (very hard). You can change it anytime in the pause menu.
- Subtitles and Accessibility – Full options for text size, colorblind modes, audio cues, and control remapping.
- Armor Visuals – Later, you can transmog armor looks from the Gear menu.
Controls: All Platforms
#### PlayStation 5 / PlayStation 4 (DualSense / DualShock 4)
| Action | Button | Notes |
|---|---|---|
| Move | Left Stick | |
| Camera | Right Stick | |
| Light Attack | R1 | |
| Heavy Attack | R2 | Hold to charge. |
| Block / Parry | L1 | Tap parry at right moment. Hold for block. |
| Dodge / Roll | O | Tap to dodge, double-tap + direction to roll. |
| Interact / Pick up | Square | Also for Atreus commands when double-tapped. |
| Atreus Arrow (Stun) | R3 (press right stick) | Mark enemies for Atreus to shoot. |
| Sprint | L3 (press left stick) | |
| Runic Attack (Weapon Special) | L1 + R1 (light) or L1 + R2 (heavy) | Cooldown based. Check UI icons. |
| Spartan Rage | L3 + R3 (press both sticks) | Activated when rage meter full. Powerful attacks. |
| Switch Weapon | D-Pad Right (Leviathan Axe) / D-Pad Down (Blades of Chaos) / D-Pad Left (Draupnir Spear - later) | You get Axe first. Blades after ~2 hours. |
| Use Action Item (e.g., relics) | D-Pad Up | |
| Quick Turn | Circle + Down on Right Stick | e.g., O + R-stick down. Very useful. |
| Climb / Jump | X |
#### PC – Keyboard & Mouse
Default bindings (can be remapped in Settings > Controls):
| Action | Key / Mouse | Notes |
|---|---|---|
| Move | W, A, S, D | |
| Camera | Mouse | Sensitive – adjust in settings. |
| Light Attack | Left Click | |
| Heavy Attack | Right Click | Hold to charge. |
| Block / Parry | Shift | Hold to block, press at impact to parry. |
| Dodge | Space | |
| Interact / Atreus Command | E | Double-tap E for Atreus to stun arrow. |
| Atreus Arrow (Stun) | Middle Mouse Button? Or P on keyboard. Check Settings > Controls for exact. | |
| Sprint | Ctrl | |
| Runic Attack (Light/Heavy) | Q (light) or E (heavy) after unlocking? Actually default is 1 and 2. | Check in Options > Controls. |
| Spartan Rage | V (or Ctrl+Shift?) | |
| Switch Weapon | Tab (cycle) or 3,4,5. | |
| Quick Turn | C (or toggle) | |
| Jump / Climb | F |
If using a controller on PC, layouts are similar to console: Left stick move, right stick camera, A/X jump, etc. The game will auto-detect and show the appropriate button prompts.
User Interface (UI) Overview
- Health Bar (top-left) – Kratos's health. Red segments deplete, green heals.
- Rage Meter (below health) – Fills with attacks; when full, press L3+R3 to activate Spartan Rage (heals, deals damage, staggers enemies).
- Atreus's Health (left side, near Kratos's health) – Small bar. He can be knocked out but revives.
- Weapon Icon (bottom-left of screen) – Shows current weapon. Press D-Pad to switch.
- Runic Attack Icons – Below weapon icon, shows cooldown status for your equipped light and heavy runic attacks.
- Quest Tracker (top-right) – Shows active quest name and optional objectives.
- Compass (top of screen) – Shows direction of main objective (golden marker), side quests (blue), and points of interest (orange/white).
- Hacksilver & Resources (top-right) – Gold coins and materials piling up.
- Enemy Health Bars (above enemies) – Shows damage and stagger state. Yellow means staggered; blue means armored.
- Loot Pop-ups – When you kill enemies or open chests, items appear on screen briefly.
- Stun Indicators – When an enemy has a glowing ring around them, they can be stunned (press R3 or heavy attack).
- Explore thoroughly around Sindri's workshop. Secret caves, climbable walls, and ledge puzzles hide resources.
- Use Atreus's arrows constantly – they stun enemies and reveal interaction points.
- Upgrade your weapon at the shop before leaving for the next area.
- Listen to Kratos and Atreus's conversations for lore hints and puzzle clues.
- Save manually at Mystic Gateways often (especially before big fights).
- Adjust your difficulty if you're not having fun – there's no shame in lowering it to enjoy the story.
- Spending all Hacksilver on cosmetic armor – Early gear upgrades are far more impactful.
- Neglecting to upgrade your Leviathan Axe – It's your main weapon for the first third of the game. Upgrade the Blade and Runic slots when you can.
- Rushing through combat – Enemies are aggressive. Block, dodge, and wait for openings. Button mashing leads to death.
- Ignoring Atreus – He is a powerful ally. Use R3 to mark enemies for stun arrows, and later use his special abilities (like summoning animals) to turn the tide.
- Skipping side content early – The first few side quests give unique upgrades (like the Lunda's armor set) that trivialize early enemies.
- Trying to brute force puzzles – If a puzzle isn't working, you may be missing a required tool. Check your codex for hints or look for glowing interactables.
- [ ] Complete the Prologue (home in Midgard) and the train with Atreus.
- [ ] Reach Sindri's Workshop in Svartalfheim.
- [ ] Upgrade your Leviathan Axe at the shop (spend Hacksilver on the best Handle available).
- [ ] Purchase the Steadfast Armor chest piece (or the best you can afford).
- [ ] Spend XP on at least two key skills: one for the Shield (Countering Stance) and one for the Axe (Frozen Kick).
- [ ] Complete the first Favor: "The Weight of Chains" (optional but strongly recommended).
- [ ] Open all chests in the immediate area near Sindri's (including the Legendary Chest behind a fire gate – use the Blades later if you have them; if not, mark it and return).
- [ ] Practice parry on the first two enemies you fight after the shop (the Nightmares). Try to get at least 3 successful parries.
- [ ] Set your preferred difficulty – I recommend "Give Me Balance" for a balanced challenge. Change in Settings > Game.
- [ ] Adjust accessibility settings – Enable subtitles, area prompts, or auto-pickup if desired.
- [ ] Save manually at the Mystic Gateway (gold rune portal).
- [ ] Explore at least one optional area (e.g., the cliff side to the left of the shop) to find a Nornir chest.
- [ ] Defeat the optional bear boss (The Guardian) if you encounter it; it rewards a good resource and a sense of accomplishment.
- [ ] Read the Codex – Open it and browse the 'Enemies' section to learn about the first few enemy types.
Essential Early Objectives
1. Follow the Golden Path – This leads you to major story beats, new abilities, and critical gear.
2. Learn Combat Fundamentals – Practice parrying smaller enemies (like Nightmares or Draugr). Use your shield! Don't rely on dodging only.
3. Unlock Atreus's Abilities – He learns new arrows (Sigil arrows, later Sonic arrows) and special attacks from skill trees. Experiment.
4. Visit Sindri's Shop – As soon as you can, buy the best armor available (often the Steadfast set or a single piece). Upgrade your Leviathan Axe Handle as early resources permit.
5. Open Every Chest – Especially red chests (offering rare materials) and blue chests hacksilver. Also smash pots and breakables.
6. Complete the First Favors (Side Quests) – After reaching Svartalfheim, a favor called "The Weight of Chains" appears. It rewards great early XP and Hacksilver.
7. Spend XP on Key Skills – Focus on: "Relentless Runic Attack" (speeds up runic cooldowns), "Countering Stance" (parry skill), and "Frozen Kick" (Leviathan Axe heavy attack upgrade). Skills with a shield icon are parry-related.
What to Do First and What to Avoid
#### ✅ Do:
#### ❌ Avoid:
Early Resource Priorities
Resources are tight at first. Prioritize:
1. Hacksilver – Buy the best armor (Steadfast set) and upgrade your weapon when possible. Do not buy cosmetic items until you have a comfortable stock.
2. Dust of Realms – Used for upgrading the Leviathan Axe and Blades. Collect from all chests and from specific resource nodes (glowing blue rocks).
3. Skap Slag – Rare; used for high-level upgrades. You get some from the first boss. Save for now – you'll need it for mid-game gear.
4. Luminous Alloy and Haze Weave – Appear later; once available, prioritize buying these from the shop if you see them.
5. XP (Experience) – Earned from kills, quests, and lore discoveries. Spend early points on:
- Leviathan Axe: "Frozen Kick" (heavy attack that kicks into an enemy, great for breaking shields).
- Shield: "Countering Stance" (allows parries with more forgiveness) and "Guardian's Revenge" (an immediate attack after parry).
- Atreus: "Arrow Shatter" (arrows explode on impact) and "Stun Arrows" (increase stun build-up).
Common Beginner Mistakes
1. Not using the shield properly – Parrying is key. Practice on the first spear-throwing Nightmares. Hold L1 to block, but tap just before an attack hits to parry. Successful parries stun enemies and open them to damage.
2. Forgetting Atreus arrows – The R3 button (or middle mouse) marks an enemy. Atreus will shoot three stun arrows. This builds the Stun meter; when full, you can perform a Stun Grab (press R3 near the glowing enemy) for a devastating finisher.
3. Neglecting gear upgrades – The difference between upgraded and non-upgraded gear is huge. Early on, upgrade your chest armor first (increases defense and runic bonuses).
4. Spamming light attacks – Mix in heavy attacks and runic attacks. Runic attacks (L1+R1/R2) have long animations but huge damage and crowd control. Use them when enemies are grouped.
5. Ignoring puzzles that give permanent health/rage upgrades – Look for Golden Apples (increase max health) and Horn of Blood Mead (increase max rage). They're hidden in optional chests. Don't leave them behind.
6. Not reading the Codex – Press the Touch Pad (PS) or M (PC) to open Codex. It explains enemy weaknesses, puzzle types, and lore. Very helpful.
7. Changing difficulty too often – While you can change anytime, bouncing between difficulties can ruin the intended challenge. Pick one and stick with it for a few hours before swapping.
8. Selling uncommon resources – Never sell crafting materials until you're sure you have excess. They're used for upgrades.
9. Ignoring exploration – The first area in Svartalfheim has several Legendary Chests (Nornir chests) that require solving short rune-puzzles. Try to solve them – they give powerful runic attacks.
10. Frustration with the camera being close – The over-the-shoulder camera is tight. Use quick turn (Circle + down on R-stick) to spot enemies behind you. No lock-on is perfect, but you can press R3 to lock onto a specific target.
Day-One Checklist
Check off each item as you complete it to ensure a strong start:
Once you've completed this checklist, you'll be well-prepared for the treacherous path ahead. Remember, Ragnarök waits for no one – but with patience and practice, you can master both Kratos and Atreus.
Good luck, and welcome to Fimbulwinter.
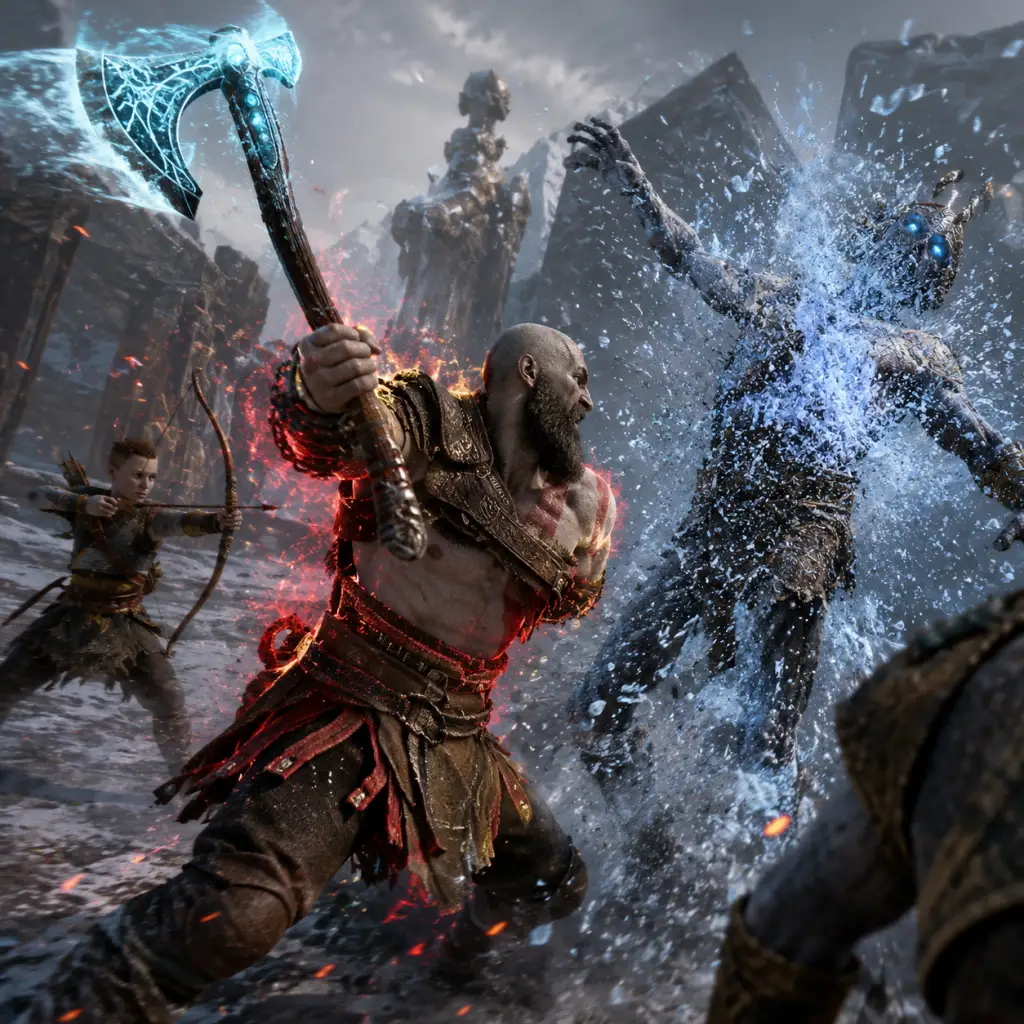
Core Gameplay
Core Gameplay Guide for God of War Ragnarök
This guide breaks down the main gameplay loop, combat and interaction systems, progression mechanics, exploration, quests, economy, character/build growth, and endgame structure by player progression tiers. The tiers reflect the natural flow of the main story and increasing power level.
Overall Gameplay Loop
The core loop of God of War Ragnarök is: Explore → Fight → Solve Puzzles → Advance Story → Upgrade → Repeat. You navigate semi-open regions, engage in real-time combat using Kratos' arsenal, solve environmental puzzles (often involving rune-based mechanics or wind pipes), collect resources and loot, and visit Huldra Brothers' shops to upgrade gear and craft new items. Progression unlocks new abilities, realms, and story beats, culminating in the final confrontation and extensive endgame content.
---
Early Game (Chapters 1–4: The Quest Begins – The Reckoning)
Main Gameplay Loop
- Linear tutorial levels followed by first open area (Svartalfheim).
- Cycle: Travel via Mystic Gateways → Fight groups of Draugr, Grim, and Wulver → Solve simple puzzles (e.g., opening chests by hitting rune bells) → Collect Hacksilver, resources, and gear → Upgrade at shop → Follow story markers.
- Weapons: Leviathan Axe (freeze enemies, heavy throws), Blades of Chaos (fire, crowd control, grapple).
- Shields: Default Stone Wall (block/parry) – can upgrade later. Dauntless Shield available early as well.
- Spartan Rage: Unlocked after first boss fight; temporary health regeneration and powerful attacks.
- Runic Attacks: One light and one heavy attack per weapon, assigned via runic gems (e.g., Hel's Touch – quick stun, 8-second cooldown).
- Atreus: Can be commanded to shoot arrows (stun or shock); his skills unlock gradually.
- Basic Moves: Light/Heavy attacks, sprint attack, dodge roll, parry (L1 at right moment), block break (R2 after shield block).
- Example: Fighting the first troll boss (Svartalfheim) – dodge his ground slams, use Atreus' arrows to stun, then unload with runic attacks.
- Leveling Kratos: Gaining XP unlocks new skills in skill trees: Combo (e.g., Permafrost for axe), Rage, Shield, Ranged.
- Gear Level: Determined by average of equipped armor (Chest, Wrist, Waist) and weapon upgrades. Starting gear is level 1-2.
- Resource Gathering: Hacksilver from enemies/chests; Leather Scraps, Bone Fragments for basic upgrades; Hacksilver used to purchase gear and upgrades.
- Svartalfheim (The Bay of Bounty): Open water area with islands, docked points, Nornir chests (puzzle reward).
- Main path leads through Aurvangar Wetlands, Ridger Passage, etc.
- Secrets: Legendary chests (runics), lore markers, Odin’s Ravens (collectibles).
- Boat travel: Use the canoe to navigate; row to docks, interact with chains, climb gold rim ledges.
- Main Quests: “The Quest for Tyr”, “The Mysterious Orb”.
- Side Quests (Favors): First favor unlocked from Brok – “Favor: The Weight of Chains” (free the Lyngbakr). Others appear as you meet NPCs.
- Primary currency: Hacksilver. Earned from combat, chests, selling resources.
- Shop purchases: Base gear (e.g., Nidavellir Armor set), runic attack gems, enchantments.
- Upgrade costs: Low initially (50-100 Hacksilver, few resources).
- Build Focus: Early game is flexible. Prioritize upgrading either Strength (melee damage) or Runic (elemental damage).
- Example Build: Use Nidavellir Armor (balanced stats), equip Hel’s Touch (light runic) and Ivaldi’s Anvil (heavy runic) for area damage. Upgrade axe to level 2.
- Non-linear exploration across multiple realms (Alfheim, Vanaheim, Midgard).
- Loop: Travel between realms via Mystic Gateways → Clear enemy camps + mini-bosses → Solve more complex puzzles (wind pipes, rune dials) → Collect red/rare resources → Upgrade gear to level 4-6 → Tackle story beats.
- New Weapons: Unlock Draupnir Spear (Chapter 8) – explosive attacks, elemental damage, crowd control.
- Shield Types: Stone Wall, Dauntless, plus Shatter Star (shield with projectiles) available via upgrade.
- Rage: Expanded with Fury, Valor, Wrath (different effects).
- Runic Summons: Unlock Freya as a companion (replaces Atreus for a time) with different arrow types (Sigil, Misted).
- Skill Trees: Deepened with Weapon Mastery (more combo tokens), Runic upgrades, Shield special moves.
- Example: Fighting the Dragon on the Sphere (The Crater) – use Draupnir Spear to detonate elemental pools, dodge tail sweeps, and aim for weak points with Atreus/Companion.
- Leveling: Earn more XP for skills; gear starts reaching level 5-6.
- Gear Tiers: Common → Rare → Epic. Rare armor sets (e.g., Traveler’s, Radiance) available.
- Enchantments: Unlock via Souls of the Lost (side quests) or from bosses – socket into armor.
- Weapon Attachments: Axe grip, Blade pommel, Spear handle – provide stat boosts and unique perks (e.g., increased stun on block).
- New Realms: Alfheim (Barrens, the Canyons), Vanaheim (The Jungle, The Plains), Midgard (Lake of Nine unfrozen areas).
- Discoverables: Berserker Gravestones (tough optional bosses), Crater area in Vanaheim, Niflheim (access later).
- Secrets: Favor: The Lost Treasure leads to rare resources; hidden chambers with Odin’s Ravens.
- Main Quests: “The Runaway” (find Atreus), “The Summons”.
- Favors: Over a dozen available, including “Favor: In Service of Asgard” (kill beasts), “Favor: The Gleaming Bond” (forge weapons).
- Example Favor: “Favor: The Phantom” – clear a cursed ship in Vanaheim for rare upgrade material.
- New Currency: Hacksilver still primary, plus Dust of Realms (from Realm Tears), Dvalin’s Ingots (rare upgrade material).
- Costs: Upgrades cost 500-1000 Hacksilver, plus resources.
- Selling: Excess resources (e.g., Leather Scraps) can be sold for Hacksilver.
- Build Focus: Start specializing. Strength builds favor direct damage; Runic builds cooldown reduction; Defense/Stun builds for tank.
- Example Build: Radiance Armor (increased speed and dodge) + Fury Rage (health regen) + Hel’s Touch (quick stun). Upgrade axe to level 4, blades to level 3.
- All realms unlocked, including Muspelheim, Niflheim, and Helheim (partial).
- Loop: Fast travel extensively → Fight elite enemies (Nightmares, Einherjar, Dark Elves) → Solve final tier puzzles → Collect legendary resources → Upgrade gear to level 7-9 → Complete story chapters.
- Fully Expanded Combat: All weapon skill trees maxed (6+ skill points each). Heavy runic attacks with huge area damage.
- Shield Special: Shield Bash (Dauntless) or Shield Slam (Stone Wall) upgraded.
- Rage Forms: Can switch between Fury (dps), Valor (burst), Wrath (ranged).
- Companion Lv. 2: Both Atreus and Freya have full skill trees – use Sigil arrows (vulnerability debuff) frequently.
- Example: Fighting the Einherjar in Asgard – use spears for detonation comboes, parry shield attacks, and use Atreus’ sonic arrows to break enemy defenses.
- Leveling: Kratos can reach level 7-8 with fully upgraded Epic gear.
- Gear Tiers: Legendary sets (e.g., Surtr’s Scorched Set, Berserker Set) from endgame bosses.
- Enchantments: Legendary quality (e.g., Proteus’ Blossom – increases stun on hit).
- Weapon Attachments: Max level grips (e.g., Grip of the Fallen Alchemist – chance to poison).
- Muspelheim: Completing trials for materials (see Endgame).
- Niflheim: Final variant of “Ivaldi’s Workshop” area for mist echoes.
- Asgard (post-story unlock): Inaccessible until final chapters.
- Complete Nornir Chests: All rewards collected before story ends.
- Main Quests: “The Word of Fate”, “The Path of War”.
- Favors: All remaining side quests, including “Favor: The True Queen” (unlocks after story end).
- Example Favor: “Favor: In Search of Hope” – find and defeat the dragon Gná (endgame boss hint).
- Rare Resources: Purified Crystal, Remnant of Asgard, Dust of Realms (rare from Realm Tears).
- Upgrade Costs: 2000+ Hacksilver, multiple legendary resources.
- Selling: Legendary gear not needed can be sold for 500-1000 Hacksilver each.
- Build Finalization: Choose between Strength/Defense (e.g., Traveler set), Runic (Druga set), Luck (Platinum set).
- Example Build: Berserker Set (amplifies damage after parry) + Valor Rage (instant burst heal) + ‘Whiplash’ heavy runic (axe). Aim for 75%+ damage reduction stack.
- Free Roam: All realms fully explorable indefinitely. New spawns of elites and mini-bosses.
- No new main story – only optional superbosses and trials.
- Berserker Gravestones: 12+ locations in Midgard, Vanaheim, Svartalfheim. Each contains a Berserker boss (e.g., Berserker of the Lava).
- The Crucible (Muspelheim): 6 combat challenges (survival, time limit, etc.). Rewards legendary crafting material for Surtr’s Set.
- Gná (The True Queen): Located in Sanctuary Grove (Midgard). Toughest boss in the game.
- Dragon Quests: Complete “Favor: In Service of Asgard” finally ends with a dragon fight.
- Niflheim: New final trial (collect mist echoes from random maze).
- Farm Resources: Kill bosses for legendary resources (e.g., Dust of Realms, Remnant of Asgard).
- Min-Max Builds: Equip perfect enchantments, fully upgrade all gear to Level 10.
- Challenge Trials: Beat all Crucible challenges for the Zeus Armor (glass cannon).
- Completion: Find all collectibles (Ravens, lore, artifacts) for trophies.
- Max Level: Kratos can reach level 10 (highest) with full Legendary gear, all weapon upgrades, and maxed skills.
- Gear: Zeus Armor (highest damage, lowest defense), Berserker Set (balanced offense).
- Enchantments: ‘Protector of the Realms’ (block chance), ‘Realm Shift’ (slow time on takedown).
- Hacksilver becomes near-infinite from selling common resources.
- Focus: Rare upgrade materials from Berserker Gravestones, Gná, The Crucible.
- Upgrade Costs: 5000+ Hacksilver for final upgrade tier.
- Glass Cannon Build: Zeus Armor (3 pieces) + Strength enchantments + Valour Rage (for instant kill). Use Leviathan Axe with heavy runic ‘Frost Ancient’ – one-shot elites.
- Tank Build: Traveler Set + Stone Wall Shield + Fury Rage (health sustain). Prioritize Defense and Vitality.
- Lucky Build: Platinum set (increased Luck) + high Luck enchantments – trigger random stun, bonus Hacksilver, instant kills.
Combat/Interaction Systems
Progression
Exploration
Quests/Missions
Economy
Character/Build Growth
---
Mid Game (Chapters 5–9: The Mysterious Orb – The Runaway)
Main Gameplay Loop
Combat/Interaction Systems
Progression
Exploration
Quests/Missions
Economy
Character/Build Growth
---
Late Game (Chapters 10–13: The Summons – The Word of Fate)
Main Gameplay Loop
Combat/Interaction Systems
Progression
Exploration
Quests/Missions
Economy
Character/Build Growth
---
Endgame (After Main Story – Post-Game Content)
Structure
Content
Gameplay Loop (Endgame)
Progression
Economy
Build Optimization Examples
---
This tier-based guide should help you understand how the game opens up and where to focus your efforts at each stage. Enjoy the journey, and prepare for a challenge in the endgame!
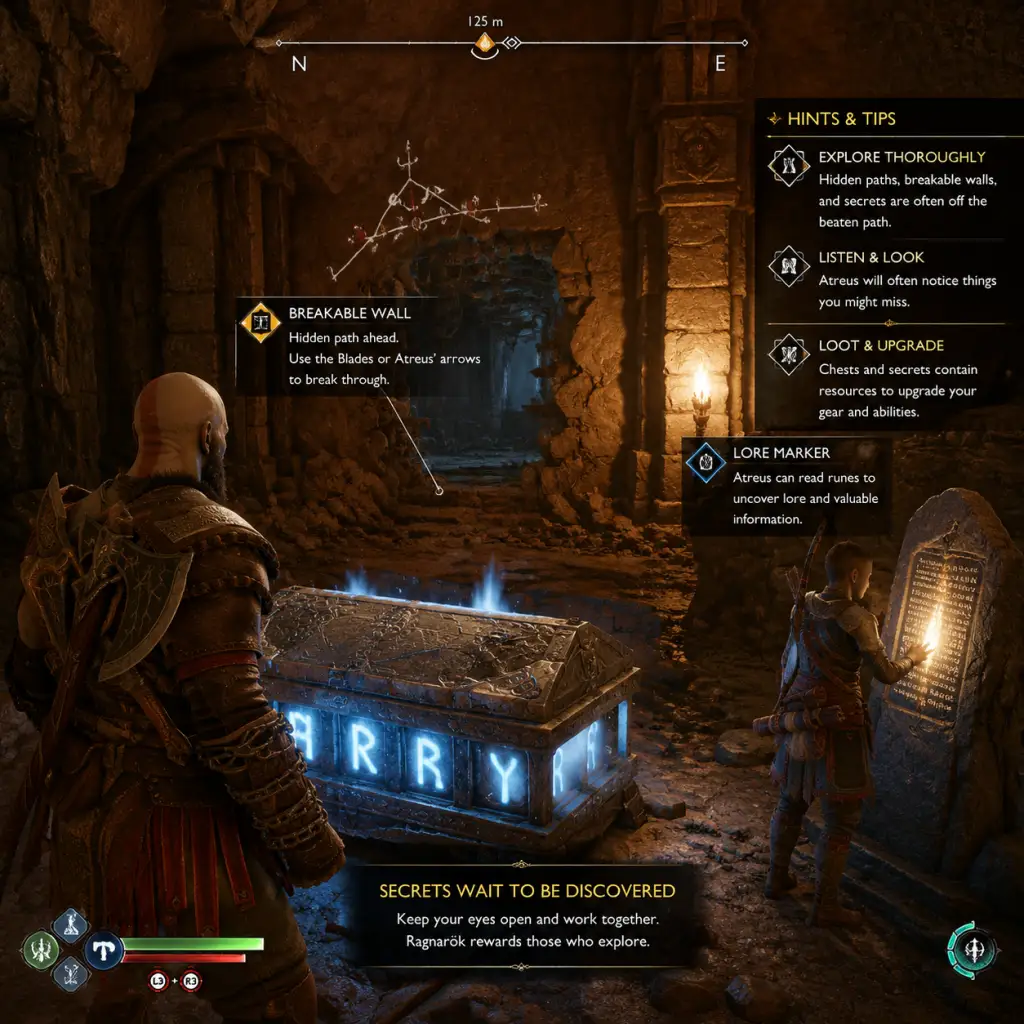
Game Tips
Game Tips for God of War Ragnarök
This guide provides practical, actionable tips organized by category. Whether you are a newcomer, intermediate player, or hardcore completionist, you will find advice to sharpen your skills and optimize your playthrough.
Combat Tips
#### Beginner Combat Fundamentals
- Master the Shield: Kratos has two shields—the Guardian Shield (parry-focused) and the Stone Wall Shield (block-break focused). For beginners, the Stone Wall Shield is more forgiving because it lets you block heavy attacks without perfect timing. Later, switch to the Guardian Shield for parries that stagger enemies and open them to follow-ups.
- Dodge, Don’t Just Block: Many unblockable attacks (red circles) require dodging. A well-timed dodge (double-tap) creates a window for counterattacks. Use the perk that slows time after a perfect dodge for even bigger openings.
- Use Atreus / Companion Abilities: Atreus (or Freya later) can interrupt enemy attacks, apply status effects, and revive you. Map their summon to a convenient button and use it often—especially against crowds or when low on health.
- Runic Attacks Are Your Nukes: Each weapon has two runic attack slots (light and heavy). These have cooldowns but deal massive damage or crowd control. Use them at the start of an encounter or when an enemy is staggered.
- Stagger Lock with Heavy Attacks: The Leviathan Axe’s heavy attack (hold R2) can stagger most small-to-medium enemies. Chain into a follow-up R1 combo to keep them locked. For Draugr and Nightmares, this is an instant win.
- Exploit Elemental Weaknesses: Blue enemies (e.g., Hel-Walkers) take extra damage from frost; red enemies (e.g., Flame Phantom) take extra damage from fire. Use the Blades of Chaos for ice-weak foes and the Leviathan Axe for fire-weak foes. Poison (from Atreus’s sonic arrows) also staggers and deals damage over time.
- Parry Timing Windows: Press L1 just before a yellow-circle attack hits. A successful parry stuns the enemy and sometimes knocks them back. Practice against the training dummy in Sindri’s shop. Even bosses can be parried (e.g., Thor’s unblockable lightning punches can be parried with the Guardian Shield).
- Spartan Rage Tactics: Rage is best saved for emergencies (healing) or for killing dangerous enemies quickly. Use the Fury Mode for raw damage; Valor for health regeneration. Do not waste it on weak mobs.
- Weapon Switching in Combos: By rapidly switching weapons (press left/right on D-pad) during a combo, you can cancel animations and chain different moves. Example: Leviathan Axe heavy throw → switch to Blades of Chaos → perform a charged R2 attack. This deals huge burst damage and applies both frost and fire.
- Realm Shift Builds: Certain armor sets and enchantments trigger a Realm Shift (slow time) on specific actions. For example, the Raven Tree armor set causes a Realm Shift when you perform a finishing move. Combine with the amulet enchantment that extends Realm Shift duration to dominate large groups.
- Stun Grabs on Bosses: Many bosses have a stun bar (yellow gauge above HP). Fill it by parrying, using heavy runic attacks, or hitting them with the shield bash. When full, press R3 to perform a brutal stun grab that deals massive damage and frequently drops health stones.
- Elemental Synergy: The Amulet of Yggdrasil allows you to equip nine enchantments. Stack enchantments that boost the same element (e.g., all frost damage increase) for exponential damage. The “Flawless Flames” set gives fire damage and burning effect chance—perfect for Blades of Chaos.
- Always Check Corners: The game rewards thorough exploration. Hidden chests (Legendary Chests, Nornir Chests, and Opfus) are often tucked away in alcoves or behind breakable walls (use the Leviathan Axe throw to break blue crystal barriers).
- Use the Compass Wisely: The compass at the top of the screen shows objective waypoints. However, if you want to explore, ignore it and look for glowing gold markers (Favors or ??? points).
- Climb Everything: Yellow ledges are traversable. Look up often; many chests are on raised platforms.
- Nornir Chests Puzzles: These chests require you to hit three rune bellows (or spin three rune pillars) within a time limit. Usually, one bellow is easy, but another may be behind a Gate of Hel or require throwing the axe while climbing. If stuck, look for a pattern (e.g., some bells are hit by the Blades of Chaos, others by the axe).
- Odin’s Ravens: There are 48 Odin’s Ravens hidden throughout the realms. Destroying them unlocks a powerful armor set (Raven Tree set) and an amulet piece. Listen for their distinct cry; they are often perched high up or flying in circles. Use the axe throw to hit them from a distance.
- Legendary Chests vs. Nornir Chests: Legendary Chests always give a permanent upgrade (runic attack, weapon attachment, or amulet enchantment). Nornir Chests give a permanent health or rage increase. Prioritize Legendary Chests early.
- Realm Travel Efficiency: The Mystic Gateway allows fast travel to any unlocked location within a realm, but only to the same gateway in another realm. To cross realms, you must use the central hub (the bridge between realms). Unlock all Mystic Gateways early to save backtracking time.
- Hidden Bosses: After the main story, many optional bosses (Berserkers, Dragurholies) appear. Defeating them rewards extremely powerful items like the Berserker armor set and the “Burden” enchantments. These are endgame-level fights; prepare with high-level gear.
- The Crumbling Ruins: In Vanaheim, there is a hidden area called “The Crumbling Ruins” accessible only by lowering the water level twice. Inside is a Legendary Chest with the “Honor the Fallen” runic attack for the Blades of Chaos—a massive AOE fire slam.
- Hacksilver Basics: Hacksilver is the main currency. Earn it by selling unwanted loot, completing quests, and opening chests. Do not buy gear from the shop until you know what you need—early gear from chests is usually sufficient.
- Crafting Materials: Dust of Realms, Hacksilver, and Resource Points (e.g., Smoldering Embers) are for upgrading armor and weapons. Pick up everything you see—even flowers (for “Mustering” favors).
- Loot Rarity: Gear comes in tiers: Common (grey), Uncommon (green), Rare (blue), Epic (purple), and Legendary (gold). Do not upgrade Common gear; save materials for Rare and above.
- Sell Duplicate Runic Attacks: You can get multiple copies of the same runic attack. Sell them to the dwarves for Hacksilver—they are useless otherwise.
- Upgrade Your Weapons First: The Leviathan Axe and Blades of Chaos can be upgraded at the shop using materials from bosses and chests. Higher weapon level increases damage, unlocks new skill tree nodes, and allows equipping stronger attachments.
- Amulet Enchantments: The Amulet of Yggdrasil gets nine slots by endgame. Enchantments drop from chests, boss fights, and Favors. Equip ones that synergize with your playstyle (e.g., “Rage on Enemy Kill” enchantments for aggressive builds).
- Favor Rewards: Many Favors (side quests) give unique enchantments, armor pieces, and materials. Always complete “Forgive the Helpless” (giving materials to the dwarves) to unlock the “Mystic Heirloom” which makes all enemies drop more Hacksilver.
- Armor Sets for Resource Farming: The “Spirit of the Past” set (from the “Unfinished Business” Favor) increases Hacksilver and XP gained. Wear it when doing clean-up side content.
- Buying from Lúnda and Durlin: After completing their respective Favors, the dwarves unlock better gear. Prioritize buying the “Golden Fleece” amulet enchantment (absorbs enemy projectiles) and the “Raven’s Bile” armor set for poison builds.
- Survivability First: For the early game, use the “Sparty’s Garb” (starting armor) upgraded to level 4 or 5. Focus on Vitality (increase health) and Defense. The “Niflheim’s Promise” amulet enchantment (from a Legendary Chest in Niflheim) gives health burst on low health.
- Skill Tree Priority: Unlock “Furious Charge” (Spartan Rage skill) and “Countering Strike” (parry follow-up) first. These offer immediate combat improvements.
- Use the Axe for Range: Early on, the Leviathan Axe’s throw (hold R1, release) is a safe way to damage enemies from afar. Unlock the “Freezing Burst” skill to throw multiple ice shards.
- Elemental Focus Build: Choose either Frost or Fire as your main element. For Frost: use the “Vapor of Frost” enchantment and the “Boreal Bygone” armor set (from Legendary Chests in Alfheim). For Fire: use the “Burning Sky” set and enchantments that spread fire.
- Runic Spam Build: Use the “Runic Recharge” skill and enchantments that reduce cooldowns. Equip the “Plainsong” runic attack (fast cooldown) and the “Hvergelmir’s Flow” armor set (increases runic damage). This allows you to spam runic attacks every few seconds.
- Berserker Build: For high risk/reward, use the full Berserker armor set (obtained from defeating all Berserkers). This increases damage dealt but also damage taken. Pair with the “Berserker’s Lifeblood” enchantment that heals on kills. Only use if you are confident in dodging and parrying.
- Synergy with Amulet Enchantments: The amulet can have up to three sockets (after upgrades). Socket “Boastful” enchants to increase damage when at full health, “Heart of the Valkyrie” to auto-dodge when hit, and “Soul of the Purist” to boost stats with no armor penalties. Experiment to find a synergy that matches your weapon preferences.
- God of War Difficulty Build: On Give Me God of War mode, every mistake is lethal. Use the “Regenerating Barrier” shield (Stone Wall) to block unblockables temporarily. Equip the “Kvasir’s Amulet” enchantment (grants a Realm Shift on perfect dodge) and the “Spartan’s Greed” enchantment (restore rage on kills). Focus on crowd control with the Blades of Chaos and stay mobile.
- Farming Endgame Resources: To max out all gear, you need “Luminous Alloys” from the final boss, “Gleaming Crystal” from the Dwarven Forge favors, and “Pristine Ore” from hidden bosses. Use the “Resource Finder” enchantment (increases rare material drop rate) when farming specific enemies.
- Fast Travel While Over-Encumbered: You cannot fast travel if you are carrying too many items (though this is rarely an issue). If you are stuck, sell or dismantle items at the nearest shop.
- Pause Menu Hotkeys: On PS5, the touchpad opens the map; hold it to bring up the weapon wheel. On PC, default is M for map and Q for weapon wheel. Customize if needed.
- Photo Mode: Access via Options > Photo Mode to capture stunning screenshots. The game pauses automatically, so you can frame shots during combat.
- New Game+: After finishing the story, you can start New Game+ retaining all gear, skills, and upgrades. This is the best way to experience the game with all abilities from the beginning. Also, new enchantments and armor sets are exclusive to New Game+.
- Accessibility Options: Adjust aim assist, auto-pickup, subtitle size, and navigation trails. The game has excellent accessibility features; enable them if you struggle with certain mechanics.
#### Intermediate Combat Strategies
#### Advanced Combat Optimizations
Exploration Tips
#### Beginner Exploration
#### Intermediate Exploration
#### Advanced Exploration
Resources and Economy Tips
#### Beginner Resource Management
#### Intermediate Resource Strategies
#### Advanced Economy Optimizations
Builds and Progression
#### Beginner Build Tips
#### Intermediate Build Strategies
#### Advanced Build Optimizations
General Mechanics & Miscellaneous Tips
Conclusion
Mastering God of War Ragnarök requires patience and practice. Use these tips to tackle every enemy, puzzle, and realm with confidence. Remember: the key to victory is adaptation. Mix and match strategies from each category to suit your personal playstyle. Happy hunting, Spartan!
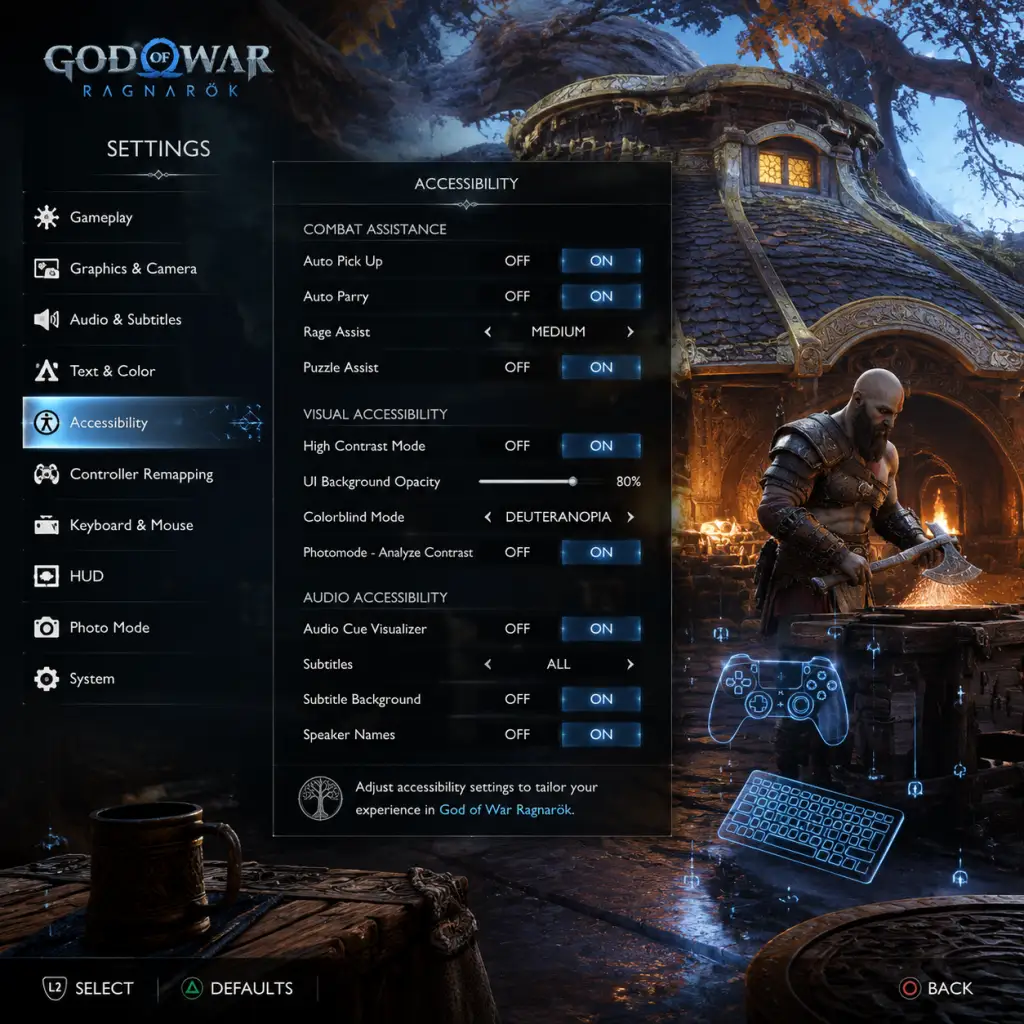
Game Settings
Game Settings Guide for God of War Ragnarök
This guide covers every setting category in God of War Ragnarök across PlayStation 4, PlayStation 5, and PC. Recommended options for performance vs quality are provided per hardware level, along with pitfalls to avoid.
---
1. Graphics Settings
#### PlayStation 5
- Display Mode:
- HDR Calibration: In-game HDR setup is basic. Use system HDR calibration first, then adjust paper white and brightness in-game.
- Film Grain / Chromatic Aberration / Motion Blur: Disable for a cleaner image; motion blur can disorient during fast camera turns.
- Resolution: On PS4 Pro, choose Performance (~1080p-1440p, 45-60 FPS) or Quality (native 4K checkerboard, 30 FPS). Base PS4 runs ~1080p 30 FPS locked; no option.
- Field of View (FOV): Not adjustable on console (PC-only).
- Favor Performance: Targets 60 FPS (dynamic resolution, ~1440p-2160p). Best for smooth combat.
- Favor Quality: 30 FPS native 4K, higher shadow/reflection detail. Use for screenshots or cinematic play.
- Favor Performance (High Frame Rate): Requires 120 Hz display. Unlocks up to 120 FPS with lower resolution/visuals. Only on PS5.
#### PlayStation 4 / PS4 Pro
#### PC (Recommended Settings per Hardware Tier)
| Tier | GPU Equivalent | Preset | Key Tweak | Expected Experience |
|---|---|---|---|---|
| Low | GTX 1060 6GB / RX 580 | Low | 1080p, 60 FPS with FSR Balanced | Stable 60 FPS, medium-low textures, no ray tracing |
| Medium | RTX 2060 / RX 5700 | Medium | 1440p, 60 FPS with DLSS Quality / FSR Quality | High textures, medium shadows, no ray tracing |
| High | RTX 3070 / RX 6800 | High | 1440p, 60 FPS native or DLSS Quality. Enable ray tracing (reflections medium, shadows low) | Mostly 60 FPS with RT, some dips in busy areas |
| Ultra | RTX 4080 / RX 7900 XTX | Ultra + Custom | 4K, 60 FPS with DLSS Performance if needed. Max RT, high textures | 60+ FPS, full ray tracing, heavy GPU load |
- Upscaling: Use DLSS (Nvidia), FSR (AMD/any), or XeSS (Intel). DLSS Quality > FSR Quality for image stability. For best image at lower resolutions, avoid FSR Performance unless needed.
- Ray Tracing: Separate toggles for Reflections and Shadows. RT Reflections is the most impactful; turn off if below 30 FPS. RT Shadows subtle — set to low or off for performance.
- Texture Quality: High/Ultra requires 8-12 GB VRAM. Reduce to medium if stuttering occurs.
- Ambient Occlusion: SSAO (low cost) vs GTAO (better but heavier). On low-end, use SSAO.
- View Distance & Foliage: Medium is fine; high/ultra consumes VRAM with minimal visual gain during gameplay.
- Frame Generation: (DLSS 3 / FSR 3) Only if you have a 40-series Nvidia GPU or RDNA 3+ AMD. Adds input latency; turn off for competitive reaction times.
- Shader Compilation Stutter: First launch after driver update will stutter. Let the game run through all shaders in the menu before playing.
- VRAM Overflow: If you exceed VRAM, expect micro-stutters. Lower texture quality or resolution.
- Windows Settings: Disable Hardware-accelerated GPU scheduling if you encounter latency issues (uncommon).
- Master Volume: Set to comfortable level. Test with a loud combat sequence.
- Music Volume: Keep at 100% for immersive score. Lower if competing with dialogue.
- SFX Volume: 100% recommended. Reduce if explosions mask voice lines.
- Dialogue Volume: 100% essential. Subtitles can help if you lower this.
- Dynamic Range (PS5/PC): Choose Wide for home theater, Wind (Limiting) for small speakers/headphones. Wide sounds more cinematic but may lose quiet details near other sounds.
- 3D Audio (PS5 Tempest 3D / PC Spatial): Enable for directional awareness (footsteps, projectiles). For PS5, calibrate with system 3D audio. For PC, use Dolby Atmos for Headphones or Windows Sonic.
- Controller Speaker (PS5): Use for game sounds; can be distracting in quiet moments. Disable if you prefer all audio through main output.
- Invert Y: For both camera and aiming axes. Default is non-inverted.
- Horizontal/Vertical Sensitivity: Start at 5/5 (default). Increase to 7-8 for faster camera turning. Decrease if precision aiming too twitchy.
- Aim Assist (Ranged Combat): Full assist for casual play; turn off for challenge archery only.
- Vibration: Haptic feedback on PS5 DualSense is nuanced; keep on. On PC with Xbox controller, vibration is generic — reduce or off to save battery.
- Trigger Effect Intensity (PS5): Adaptive triggers for bow draw and heavy attacks. Set to High for immersion, Low if they fatigue your fingers.
- Preset Layouts: Default, Classic (closer to 2018), and Custom. Classic moves R1/R2 for light/heavy attacks, L1/L2 for shield/runic. Try both.
- Custom Mapping (Accessibility): Remap any action. Good for players with limited mobility — e.g., move Attack to L1, Sprint to R3.
- Quick Turn: Double-tap Down on D-pad. Very useful in combat — practice it.
- Sprint & Climb Controls: Default press L3 twice to sprint; can be changed to hold L3 or a different button. Many players accidentally sprint when aiming — set to toggle or hold.
- Auto-Pickup: Enable to automatically collect loot when walking near. Less frantic — you don't miss items.
- Subtitles: Always on with speaker names. Adjust size (small/medium/large) and background opacity (dark, light, transparent).
- Captions: Include audio cues (footsteps, explosions). Good for deaf/hard-of-hearing players.
- Hearing Impaired Mode: Adds visual cues for important sounds (e.g., enemy attacks, treasure prompts).
- High Contrast Mode: Highlights interactive objects and enemies with bright outlines. Essential for low-vision players or chaotic battles.
- Aim Assist Locks: Can be set to full lock-on (snap to nearest enemy) or reduced. Full lock-on trivializes some fights; use as needed.
- Traversal Assist: Automatically parkour over obstacles when running. Enable to reduce thumb strain.
- QTE Timing: If quick-time events are difficult, change to Hold instead of Tap, or extend the timing window.
- Camera Shake & Motion Blur: Reduce or disable for motion sickness sufferers.
- Subtitle Background: Avoid transparent if you have visual difficulties — set to dark for readability.
- Navigation Aiming Assist: When enabled, the camera snaps to enemy direction during combat. Great for beginners but can disorient experienced players. Turn off if you want manual aim.
- Auto-pickup vs Manual: Some players prefer manual to avoid collecting unwanted items (e.g., resources when trying to run).
- Voice Language: Separate from text. Choose from English, French, German, Spanish, etc. (varies by region). The game supports multiple dubs and subtitles.
- Subtitle Language: Independent of voice. Set to match your UI language or a different one for learning.
- Menu Language: System language by default. Change from system settings if needed (e.g., on PC you can override in config file; easier to adjust in-game).
- Auto-Upload Saves (PS5/PS4): Enable to sync saves to cloud. Disable if you don't have Plus or limited data.
- Share Data: Send anonymous gameplay data to Sony. Turn off for privacy.
- Connect My Account (PSN): Optional for bonuses on PC (e.g., early armor). Toggle on if you have an account.
- Photo Mode Uploads: Can share screenshots directly to social media. Requires network permission.
- Difficulty Level: Choose from Give Me Story (very easy), Give Me Grace (easy), Give Me Balance (normal), Give Me No Mercy (hard), Give Me God of War (very hard). You can change in settings at any time (except for God of War mode, which is locked once selected — warning!).
- Auto-Sprint: Useful for exploration — toggle on to sprint automatically after a short run. Combat remains manual.
- Auto-Loot on Aiming: When aiming with the bow, nearby loot highlighted. Enable if you want quick collection.
- Lock-On Targeting: Snap to enemies. Recommended for single-target fights; turn off for crowd control (you can toggle mid-combat).
- Attack Toggle: Hold vs Tap for light/heavy attacks. Most players prefer Tap for responsiveness.
- Quick Turn Sensitivity: Adjust angle or use default.
- Difficulty Change: On Give Me God of War, you cannot lower it. If you start on that difficulty and find it too punishing, you must restart a new game. Choose wisely.
- Combat Cursor Speed (PC Only): For mouse and keyboard, adjust cursor speed for menu navigation. Set lower to avoid accidental selections.
- HUD Opacity: Default 100%. Reduce to 50% or lower for immersion. Critical info (health/rage) can be set to always show or auto-hide during combat.
- Minimap Rotation: Fixed or Follow direction. Follow is more intuitive.
- Objective Marker: Enable always, or only when at a distance. Turn off for exploration.
- Damage Numbers: Toggle on for feedback (default). Off for cleaner screen.
- Compass & Nav Trail: Enable for co-op play (though no co-op). Disable for full immersion.
- PS5: Choose Favor Performance for best gameplay experience. HDR calibration done in system settings first. Subtitles on.
- PS4 Pro: Use Performance Mode if you have a 4K TV; resolution difference is negligible in motion.
- PC (High-End): Ultra preset with DLSS Quality, RT Reflections on medium, RT Shadows off. V-Sync off (use G-Sync/FreeSync).
- PC (Mid-Range): High preset, FSR/DLSS Balanced, no RT. Lock FPS to 60.
- PC (Low-End): Low preset, FSR Performance, 720p/900p, 30 FPS target.
Attention Points (PC):
---
2. Audio Settings
---
3. Controls & Input Settings
#### General Layout
#### Button Mapping
Special Attention:
---
4. Accessibility Settings
God of War Ragnarök offers extensive accessibility options (one of the best in the industry).
Special Attention:
---
5. Language Settings
Attention: On PS4/PS5, voice and subtitle languages are tied to system language unless you download language packs from the store. On PC, you can select from a dropdown in the launcher or config.
---
6. Network & Online Settings
God of War Ragnarök is a single-player game with no multiplayer. Network settings are minimal.
Note: No multiplayer, so no ping or bandwidth concerns.
---
7. Gameplay Settings
Special Attention:
---
8. HUD & Display Settings
---
9. Performance vs Quality Decision Tree
| If you have... | Use this mode...
|---|---|
| 60 Hz display, want smooth gameplay | Performance (console) or Medium/High 60 FPS (PC) |
| 120 Hz display, strong PC | High Frame Rate (PS5) or Ultra with FPS cap 120 (PC) |
| Want prettier screenshots, don't mind 30 FPS | Quality (console) or Ultra with RT (PC) |
| Motion sickness | Disable camera shake, motion blur, lower FOV (PC only) |
| Limited VRAM (PC) | Lower texture quality, disable ray tracing, use upscaling |
---
10. Settings That Are Often Misconfigured
1. Ray Tracing on PC: Set it too high and FPS tanks. Start with Off, then enable Reflections only (medium) if you have RTX 3070+.
2. FOV on PC: Default is very narrow. Increasing to 95-110° drastically changes gameplay feel. Too wide causes fisheye; 90-100 is sweet spot.
3. Motion Blur: Disabling improves clarity during combat — many keep it on by default.
4. Automatic Pickup: Off by default, but most players prefer On to avoid spamming pickups.
5. Difficulty Lock on God of War: New players accidentally choose this and suffer. Read the warning carefully.
6. Aim Assist Lock: Full lock-on can make ranged combat too easy. Try "Partial" for balance.
7. Controller Vibrations on PC: Xbox controllers will rumble with generic feel — turn off if it distracts or kills battery.
---
Final Recommendations Summary
Take time to adjust controls and accessibility features to your comfort — they greatly impact enjoyment.
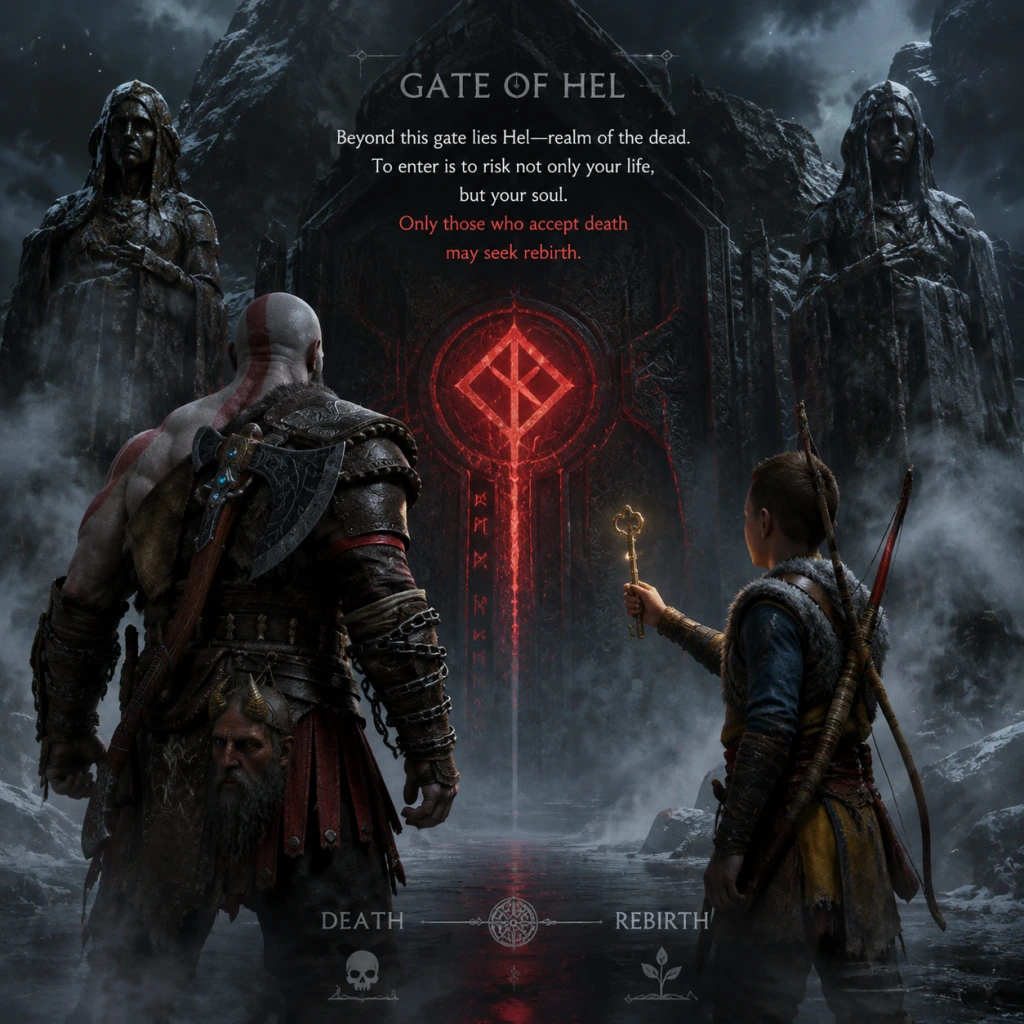
Important Notes
Important Notes
This guide highlights critical things every player should know before diving into God of War Ragnarök—from time‑sensitive choices and missable content to difficulty spikes, resource management, save best practices, and common regrets.
Warnings and Pitfalls
- Story‑Locked Areas: Several regions (especially in Vanaheim, Alfheim, and Midgard) change or become permanently inaccessible after certain main story quests. Always complete active side quests (Favors) before advancing the story.
- Favor Deadlines: Some Favors are time‑sensitive. Notable examples include:
- Treasure Maps & Artifacts: Some treasure maps (e.g., "The Dead Do Not Ride") break if you sell the related artifact before completing the associated side quest. Keep all unique items until you know they are safe to sell.
- No Manual Save After the Final Boss: The game autosaves after the last boss; you cannot go back to before the final fight. Complete all remaining Favors and collectibles before starting the mission The Realms at War.
- No Major Story Branching: Unlike the previous game, Ragnarök has no dialogue choices that lead to drastically different endings. The core narrative is linear.
- Gear & Upgrades: Once you upgrade a gear piece to level 9, you cannot “recycle” it for resources. Plan your upgrades carefully (see Grinding Traps below).
- Frozen Flame & Chaos Flame: These unique upgrade materials each appear only once per playthrough. Use them on the Leviathan Axe and Blades of Chaos immediately; they can never be replaced.
- Odin’s Ravens & Lore Markers: These are NOT missable—they can be collected anytime, even after the credits roll. However, some are hidden in areas that are only accessible during certain story segments. Refer to a collectible guide to avoid backtracking frustration.
- The Legendary Chest in the Temple of Tyr: The chest containing the Rond of Disruption is only openable during the main quest The Path to Jotunheim. Miss it and you lose that shield attachment permanently.
- First Thor Fight (Fimbulwinter Flashback): The very first boss battle is deceptively hard. Use your shield to block his charged attacks and save Rage for the last phase.
- Nidhogg (The Reckoning): This dragon boss requires you to stay mobile, destroy the weak points on its back, and use the environment to stun it.
- Garm (The Sealed Confrontation): The wolf’s ice projectiles can stunlock you. Keep moving and use Atreus’s arrows to interrupt its howl.
- The Final Boss (Odin): He has multiple phases with powerful AoE attacks. Equip the Raven’s Cry armor set or anything that boosts defense against Bifrost damage. Save your Spartan Rage for healing.
- Muspelheim Trials (Endgame): The champion challenges (especially the “Complete 15 trials without being hit”) require perfect reflexes. Use the Boar Root enchantment to boost your stun damage and keep enemies staggered.
- Resource Scarcity: Hacksilver, Dust of Realms, and Luminous Alloys are finite during the first playthrough. Do not waste them on low‑level gear or cosmetic upgrades that do not stat bonuses.
- Upgrade Strategy: Focus on one or two armor sets per run. The best early‑game sets are Lunda’s Lost Armor (high defense with poison immunity) and Surtr’s Scorched Set (for fire‑based builds). Avoid upgrading common or rare gear past level 4.
- Crafting Materials: Do not sell Epic or Legendary resources (e.g., Glint of Bifrost, Platinum Ingot). They are needed for the highest upgrades. Selling them for Hacksilver is never worth it.
- Soul Coins: These are used to buy rare enchantments from the dwarf shop in Niflheim. Spend them wisely; the best enchantments appear only after you complete certain Favors.
- Experience (XP): XP is abundant; you will max out all skills by the end of first playthrough. No need to grind combat encounters just for XP.
- Single‑Player Only: God of War Ragnarök is purely offline. There are no multiplayer or online features that require etiquette beyond normal play.
- PC Mods & Cheats (Steam/Epic Games): Using mods or third‑party tools (e.g., cheat engine) may disable Steam achievements or EOS achievements. No official anti‑cheat is present, but save corruption is a risk if you tamper with game files. Back up saves before modding.
- No Leaderboards: The game does not track speedrun times or kill counts online, so no competitive etiquette applies.
- Always Manual Save: The autosave system is reliable, but it only keeps one active autosave slot. Before any long exploration session or major story decision, manually create a new save.
- Multiple Slots: Use at least three separate manual save slots—rotate through them. This lets you return to a point before a missable favor or area lock if you realize something was missed.
- Cloud Saves (PS5): Enable auto‑sync with PlayStation Plus cloud storage. On PC, ensure Steam Cloud is on, but also perform local backups to a different folder every few hours.
- Endgame Save: After completing the story, the game reloads into the world just before the final quest. Your autosave will be at that point, but you cannot re‑fight the final boss without starting a New Game+ (if available). Make a manual save right before The Realms at War if you want to revisit the final sequence.
- Not Upgrading Leviathan Axe Fully Early: The Axe’s Sigil and Frost Awaken abilities are immensely powerful. Prioritize upgrading the Axe to unlock the Runic and Heavy Runic slots.
- Ignoring Shield Skills: Your shield is not just for blocking; the Guardian Shield (default) can parry, and the Stone Wall Shield offers a heavy block. Invest skill points in the shield tree early to parry incoming red‑ring attacks.
- Not Using Atreus’s Skills: Atreus’s enhanced arrows (e.g., Sonic Arrows for weak points, Hex Arrows for chain explosions) are essential for solving puzzles and breaking enemy stances. Unlock Sonic Arrow as soon as possible.
- Skipping Side Content in the Lake of Nine: The Lake of Nine in Midgard hides several legendary chests, Mystic Gateways, and the first upgrade for the Blades of Chaos. Fully explore the lake before heading to the next realm.
- Not Crafting the Boar Root Enchantment: This enchantment, found in the The Crater of Vanaheim, drastically increases stun damage on enemies. It makes many difficult encounters (especially trolls and bosses) much easier.
- Waiting Too Long to Upgrade Runic Attacks: Runic attacks are your highest damage cooldowns. Buy them from the shop and upgrade them at the workbench; having two strong runic attacks on each weapon drastically improves your damage output.
- Selling Ancient Ruins Artifacts: The Ancient Ruins set (found in the Vanaheim Crater) is required for the Favor of the Ancients side quest. Do not sell any of the four artifacts until you complete the quest—the reward is a unique enchantment.
- Not Killing Odin’s Ravens for the Reward: Destroying all 48 Ravens unlocks a final chest in Niflheim containing the Rond of Purification and a large Hacksilver sum. It’s tedious but worth it for completionists.
- Underestimating the Importance of Food Buffs: Eating Jotnar Pockets or other cooked meals provides temporary buffs (e.g., faster healing, increased damage). Always grab them before entering a boss arena.
- Ignoring the Remnants of Asgard (Berserkers): These optional boss fights drop the best late‑game armor pieces (Berserker’s Set) and are the strongest gear in the base game. Start hunting them as soon as you have access to the Lake of Nine in Midgard.
- The Weight of Chains – becomes unavailable after completing Forging Destiny (the quest to get the second Chaos Flame).
- The Lost Treasure – must be started before leaving the Vanaheim Crater the first time.
- The Reversal of Fate – only available before triggering the endgame sequence.
- A Stroll in the Park – can be missed if you do not talk to Lunda after completing the main story of Alfheim.
Irreversible Choices & Missable Content
Difficulty Spikes
Grinding Traps
Online Etiquette & Anti‑Cheat
Save Management
Common Regrets (What Players Wish They Knew Sooner)
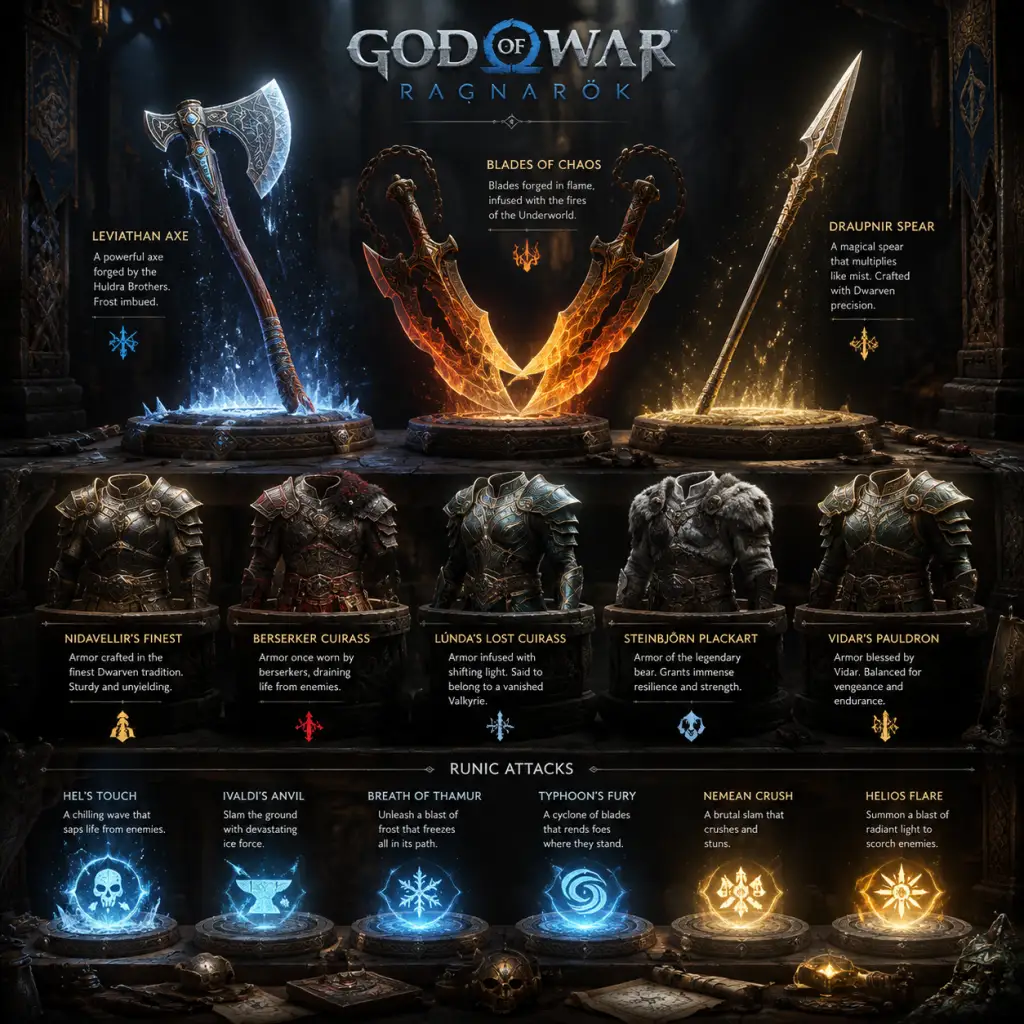
All Game Items
All Game Items Guide for God of War Ragnarök
This guide catalogs every major item category in God of War Ragnarök: weapons, shields, armor sets, enchantments, runic attacks, talismans, consumables, resources, currencies, and collectibles. Each entry explains the item's purpose, how to obtain it, when it's most useful, and any important synergies or upgrade paths. The guide is platform-agnostic (PS4/PS5/PC); all items are identical across versions, though some DLC items may be exclusive to certain editions.
1. Weapons
Kratos wields three primary weapons: the Leviathan Axe, the Blades of Chaos, and the Draupnir Spear. Each has its own skill tree, runic attacks, and upgrade path via resources (Dust of Realms, Petrified Bone, etc.).
#### Leviathan Axe
- Type: Ice-elemental melee/ranged weapon.
- Base Stats: Strength 30, Runic 9, Luck 7.
- How to Obtain: Starting weapon, acquired at the beginning of the game after the prologue.
- Upgrades: Requires Petrified Bone, Dust of Realms, and Hacksilver. Max level is 9 (requires the Frozen Flame from story progression).
- Special Ability: Throw to freeze enemies, recall with L1+Triangle (Frost Awaken) to increase frost damage.
- Best Uses: Crowd control, slowing fast enemies, and hitting distant foes. Synergizes with enchantments that boost Frost damage.
- Pommels: Attachable at The Forge; examples:
- Type: Fire-elemental melee weapon.
- Base Stats: Strength 28, Runic 12, Cooldown 6.
- How to Obtain: Unlocked after completing the second main quest (The Quest for Tyr).
- Upgrades: Requires Dust of Realms, Niðavellir Alloy, and Hacksilver. Max level 9 requires Chaos Flame from story.
- Special Ability: Charged heavy attacks apply Burn (damage over time). L1+Triangle (Flame Whiplash) ignites all nearby enemies.
- Best Uses: AoE damage, breaking shields (especially Wooden and Stone), and applying Burn status. Pairs well with enchantments that increase Burn damage or extend duration.
- Grips: Examples:
- Type: Wind-elemental melee/ranged weapon.
- Base Stats: Strength 20, Runic 16, Defense 7.
- How to Obtain: Acquired during the main quest "The Summoning" (mid-game, roughly after leaving Svartalfheim).
- Upgrades: Requires Dust of Realms, Smoldering Ember, and Hacksilver. Max level 9 requires Lion's Fang from story.
- Special Ability: Throw to create an explosive zone (detonate with R2). L1+Triangle (Windstorm) pulls enemies toward Kratos.
- Best Uses: Burst damage, staggering big foes, and creating traps. Excellent against groups when combined with Runic attacks.
- Handles: Examples:
- Fortified Frost Pommel: +10 Strength, +7 Runic, increases Frost damage after a parry.
- Radiant Pommel: +14 Runic, +5 Luck, activates a Restorative Burst when Axe is recalled with a full Frost Gauge.
#### Blades of Chaos
- Grip of the Fallen Flame: +12 Strength, +9 Runic, increases Burn accumulation on enemy hits.
- Grip of the Rusted Flame: +10 Runic, +6 Cooldown, reduces cooldown of Flame Whiplash attacks.
#### Draupnir Spear
- Handle of the Warlord: +14 Strength, +5 Cooldown, reduces cooldown of Windstorm.
2. Shields
Shields are equipped in the off-hand slot and provide defense, block, and parry mechanics. Each shield type has unique stats and a special ability.
| Shield Name | How to Obtain | Main Stat | Special Ability | Best For |
|---|---|---|---|---|
| Guardian Shield | Starting equipment, never lost. | Defense 60, Runic 10. | Perfect parry stuns the enemy and grants a temporary Strength boost. | Players who can time parries consistently. |
| Stone Wall Shield | Purchased from Huldra Brothers (Brok/Sindri) early game. Cost: 5000 Hacksilver. | Defense 80, Vitality 15. | Blocking builds up a shield charge; releasing L1 unleashes a shockwave. | Aggressive blockers; tanking heavy hits. |
| Shatter Star Shield | Brok quest "The Lost Treasury" (Svartalfheim). | Defense 60, Runic 12, Cooldown 8. | Perfect parry creates a powerful shockwave that damages and staggers nearby enemies. | Counter-attack builds; pairs with high Runic. |
| Onslaught Shield | Sindri quest "The Weight of Chains" (Vanaheim). | Defense 70, Strength 10. | Blocking builds charge; release L1 to shield-bash, breaking enemy stance. | Breaking guards and interrupting combos. |
| Dauntless Shield | Complete the "Favor: The Mysterious Orb" (Alfheim). | Defense 65, Luck 12. | Perfect parry fully fills the Rage gauge (temporarily). | Synergizes with Rage-based builds; high Luck boosts gear drops. |
- Rond of Affliction: +6 Luck, +4 Vitality; on perfect parry, afflicts enemy with random status effect (Burn, Frost, Poison, etc.).
- Rond of the Nine Realms: +8 Defense, +3 Runic; slows time after a perfect parry (similar to Realm Shift).
- How to Obtain: Given automatically in the first hours of the game.
- Bonuses: Increases defense and vitality slightly. No set bonus.
- Best for: The first few zones; replaced quickly.
- Location: Obtained in Vanaheim after completing "The Jungle" favor.
- Chest: Lunda's Lost Cuirass – +10 Strength, +5 Luck. Perk: Unarmed attacks build Poison.
- Wrist: Lunda's Lost Gauntlets – +8 Runic, +4 Defense. Perk: Poisoned enemies take extra damage.
- Waist: Lunda's Lost Belt – +6 Vitality, +4 Strength. Perk: Killing a poisoned enemy heals Kratos.
- Set Bonus (3 pieces): +30% Poison damage, and successful bare-handed hits also apply Weakness status.
- Best For: Stealth builds, especially against animals or groups; pairs with no-weapon attacks and the Venomous enchantment.
- Location: Defeat all Berserker Gravestone bosses (9 total, spread across realms). Each drops a piece.
- Chest: Berserker Cuirass – +15 Strength, +10 Runic. Perk: Landing a runic attack increases Strength by 15% for 5 seconds.
- Wrist: Berserker Gauntlets – +12 Runic, +8 Cooldown. Perk: Using a runic attack reduces cooldown of all other runic attacks by 10%.
- Waist: Berserker Belt – +10 Runic, +6 Luck. Perk: Critical hits have a 25% chance to reset cooldown of the last runic attack used.
- Set Bonus (3 pieces): +20% Runic damage and +15 Luck.
- Best For: Runic-spam builds; high damage rotations. Requires aggressive play.
- Location: Found in the Crater region of Vanaheim after the main story (post-game).
- Chest: Steinbjörn Plackart – +18 Defense, +12 Vitality. Perk: Taking damage builds a barrier that reduces next hit by 30%.
- Wrist: Steinbjörn Gauntlets – +15 Defense, +10 Strength. Perk: Barrier absorb 40% of damage.
- Waist: Steinbjörn Belt – +12 Defense, +8 Vitality. Perk: When barrier is full, you heal for 5% max health per second.
- Set Bonus (3 pieces): +50% barrier efficiency, and using a shield bash restores 10% health.
- Best For: Surviving high-damage encounters like Sigrun or Gná; excellent for New Game+ on harder difficulties.
- Location: Defeat the Dreki bosses (The Crimson Dread) in the Sinkholes of Vanaheim.
- Chest: Dragon Scaled Cuirass – +14 Strength, +9 Luck. Perk: Landing a critical hit grants a 10% chance to drop Hacksilver or a Health Stone.
- Wrist: Dragon Scaled Gauntlets – +10 Strength, +7 Luck. Perk: Kills may spawn a Rage Stone.
- Waist: Dragon Scaled Belt – +8 Strength, +6 Luck, +4 Defense. Perk: Dodging an attack has a 20% chance to trigger a Realm Shift (slow motion).
- Set Bonus (3 pieces): +25% Luck and +20% loot drop radius.
- Best For: Farming resources, Hacksilver, and gear; synergizes with high Luck enchantments.
- Bitter Squirrel: Summons a squirrel that drops Health and Rage stones on a timer. – Found in The Forge after a side quest in Vanaheim.
- Stunning Fang: +12 Strength, +6 Luck; heavy attacks stun faster. – Drops from the Water Warg boss in Alfheim.
- Wing of the Fallen: +10 Runic, +5 Cooldown; reduces cooldown of Runic attacks by 5% per kill. – Reward from defeating the Valkyrie Queen Gná.
- Mist of the Realms: +8 Defense, +4 Vitality; on taking damage, you leave a mist trail that slows enemies. – Found in Midgard near the Lake of Nine.
- Shatterstar: +14 Strength, +7 Runic; shield bash creates a shockwave. – Purchased from Brok after completing a Dwarven quest.
- Frost Aura (Axe): Enemies frozen by the Axe take 20% more damage.
- Fire Aura (Blades): Burn effects last 3 seconds longer.
- Wind Aura (Spear): Explosions from Spear deal 15% more damage.
- Parry Stun (Shield): Perfect parries deal heavy stun damage.
3. Armor Sets
Armor consists of three slots: Chest, Wrist (gauntlets), and Waist (belt). Complete sets provide a Set Bonus when all three pieces are equipped. Many armor pieces can be upgraded at The Forge using resources. Listed below are major sets.
#### Survivor's Set (Early Game)
#### Lunda's Set (Mid Game, Stealth Focus)
#### Berserker Set (Offense Heavy)
#### Steinbjörn Set (Tank/Heavy)
#### Dragon Scaled Set (Strength/Luck Hybrid)
Other notable sets: Raven Tears Set (after Odin's Ravens, post-game), Vidarr's Set (strength/defense), Spiritual Set (Runic/Luck).
4. Enchantments
Enchantments are socketed into gear (armor, weapons, shields) to provide stat boosts and unique effects. They are categorized by type: Amulet Enchantments (equipped in the amulet slots) and Socket Enchantments (in weapons and shields). The Amulet of Yggdrasil has nine slots (increased to 12 in New Game+). Enchantments are obtained from chests, bosses, shop purchases, and side quests.
Key Amulet Enchantments:
Socket Enchantments for Weapons/Shields:
Important Synergies: Combining the Bitter Squirrel with high Luck gear yields near-constant health stones. Stunning Fang + Shatterstar shield bonus makes shield-bash combos devastating.
5. Runic Attacks
Each weapon has two runic attack slots: Light Runic Attack (short cooldown, moderate damage) and Heavy Runic Attack (long cooldown, massive damage). They are obtained from lore markers, chests, bosses, and shops.
| Weapon | Light Runic Attack | Heavy Runic Attack | Notable |
|---|---|---|---|
| Leviathan Axe | Frost Charge (rush forward, freeze) – from "Frost Path" area. | Leviathan's Wake (ice wave) – from Sindri after main quest. | Hel's Touch (quick burst) – shop, cheap. |
| Blades of Chaos | Flame of Twilight (fire whip) – from alfheim tower. | Prometheus' Flame (ground burn) – from the Crate in Vanaheim. | Cyclone of Chaos (AoE) – from Nornir chest in Midgard. |
| Draupnir Spear | Vindgangr (wind lash) – from shop. | Thrust of a Thousand Soldiers (multi-explosion) – from a Berserker gravestone. | Gust of Might (pull) – lore marker. |
6. Talismans
Talismans are equippable items that grant active abilities (activated with L1+Circle). They have a cooldown. Some can be upgraded with enchantments.
- Talisman of the Realms: Activates a Realm Shift (slow time) for 3 seconds. – Found in Alfheim after defeating the Dark Elf King.
- Talisman of Unbound Potential: Resets all weapon cooldowns instantly. – Purchased from Brok after main story.
- Talisman of Betrayal: Deals a heavy single-target damage burst and staggers. – Obtained from a raven chest in Muspelheim.
- Talisman of the Healer: Heals 30% health over 5 seconds. – Early game, from a chest at Brok's shop.
- Health Stone: Restores 50 HP. – Common drops from enemies or breakables.
- Rage Stone: Fills 30% of Rage meter. – Rare drops from bosses or chests.
- Healing Crystals (Regen Crystals): Found in the environment; destroy to create a healing area.
- Phantom Dancer: Increases movement speed and dodge distance for 10 seconds. – Crafted using 5 Hacksilver + 1 Dreamshade.
- Soul Devourer: Next attack deals 50% extra damage but reduces health by 20%. – Crafted from 10 Hacksilver + 1 Lost Pages.
- Mistbourne: Negates poison damage for 15 seconds. – Found in Vanaheim's swamp areas.
- Purpose: Buy gear, upgrade materials, and craft items from dwarven shops.
- How to Obtain: Loot from enemies, sell artifacts/gear, open chests, complete quests.
- Cap: No hard cap; extremely abundant by endgame.
Best Synergies: Talisman of the Realms + high Cooldown gear allows near-constant slow-motion during combat. Unbound Potential + Berserker armor enables multiple runic attack rotations.
7. Consumables
Consumables are used during combat or exploration. Most are crafted at The Forge or found in the world.
Use consumables sparingly; they are most valuable in tough boss fights or when exploring poison zones.
8. Resources & Currencies
#### Primary Currency: Hacksilver
#### Crafting Materials
| Material | Use | How to Get |
|---|---|---|
| Dust of Realms | Upgrading weapons and armor (common). | Destroying floating blue crystals; enemy drops. |
| Petrified Bone | Upgrading Leviathan Axe (mid-game). | Defeating trolls and heavy enemies. |
| Niðavellir Alloy | Upgrading Blades of Chaos and armor (mid-game). | Mining blue-ish ore nodes in Svartalfheim. |
| Smoldering Ember | Upgrading Draupnir Spear (mid-game). | Dropped by fire-based enemies. |
| Asgardian Ingot | Upgrading high-tier armor (post-game). | Defeating Beserkers and Draugr Holes. |
| Beetle Shell | Upgrading Lunda's set and others. | Scattered across Vanaheim. |
| Pristine Ore of the Realm | Upgrading amulet (New Game+). | Defeating Valkyries in New Game+. |
- Frozen Flame (Axe upgrade) – story reward.
- Chaos Flame (Blades upgrade) – story reward.
- Lion's Fang (Spear upgrade) – story reward.
- Dust of Asgard (used in high-end armor upgrades) – post-game from Muspelheim trials.
- Total: 48 (across all realms).
- Reward: Each pair of 6 gives a chest at The Raven Tree (Midgard). Final reward is the Raven Tears Armor Set.
- Tracking: Use the Raven Summon skill (L2+R2 with Axe) to reveal nearby ravens.
- Total: 33 (including some DLC).
- How to Solve: Light specific braziers, destroy seals, or ring bells in a sequence. They always contain either an Enchantment, Runic Attack, or Health/ Rage upgrade.
- Important: Mark chests on map; some are missable after story completion.
- Type: Kvasir's Poems, Hacksilver-filled vessels, etc.
- Total: 78 (multiple categories).
- Purpose: Sell for Hacksilver or turn into the Dwarves for a small reward.
- Location: Usually in hidden corners; use the Artifact Radar skill.
- Total: ~100 (stone tablets, murals, etc.).
- Purpose: Fill the Codex; no mechanical benefit.
- Total: 12 gravestones (9 story + 3 post-game).
- Reward: Each drops a piece of the Berserker Armor Set and Asgardian Ingot.
- Total: 10 (post-game).
- Reward: Defeat waves of Draugr for Asgardian Ingots and relics.
- Amulet of Yggdrasil: Allows socketing enchantments. Upgraded to 12 slots in New Game+ via Pristine Ore of the Realm.
- Mystic Gateway Key: Unlocks fast travel between realm gates (obtained early).
- Artifact Scanner (Skill): Allows seeing artifacts on the compass (unlocked via skill tree).
- Sigil Arrows: Used to create elemental explosions (not an item; Atreus ability).
- Relics (special abilities):
- Runic Nuke Build: Berserker Armor (3 pieces) + Talisman of Unbound Potential + high runic enchantments + Heavy Runic Attack on each weapon. Use to quickly delete bosses.
- Tank Build: Steinbjörn Set + Stone Wall Shield + Vitality/Defense enchantments + Rond of Affliction. Ideal for survival.
- Loot/Exploration Build: Dragon Scaled Set + Bitter Squirrel enchantment + high Luck. Generates tons of drops.
- Parry Master Build: Dauntless Shield + Shatterstar Rond + Parry Stun enchantments. Perfect for counter-based gameplay.
9. Collectibles
Collectibles are optional items that contribute to game progress, lore, or trophies. They are not used in crafting but offer rewards.
#### Odin's Ravens
#### Nornir Chests
#### Artifacts
#### Lore Markers
#### Berserker Gravestones
#### Draugr Holes
10. Key Equipment & Special Items
- Gravestone of the Last Brother: Summons a spectral companion to fight for 10 seconds.
- Gate of the Lost: Teleport to last used gateway (fast travel convenience).
- Hilt of Gramr: Unleash a powerful sword shockwave (from defeating the Valkyrie Queen).
Note on New Game+: All items carry over except key story items. New armor sets and enchantments become available, such as Zeus Armor Set (increased damage, decreased defense) from defeating the Valkyries in New Game+.
Summary of Best Builds Using Items
This guide covers every major item in God of War Ragnarök. Refer to individual item descriptions in-game for exact statistics and upgrade costs.
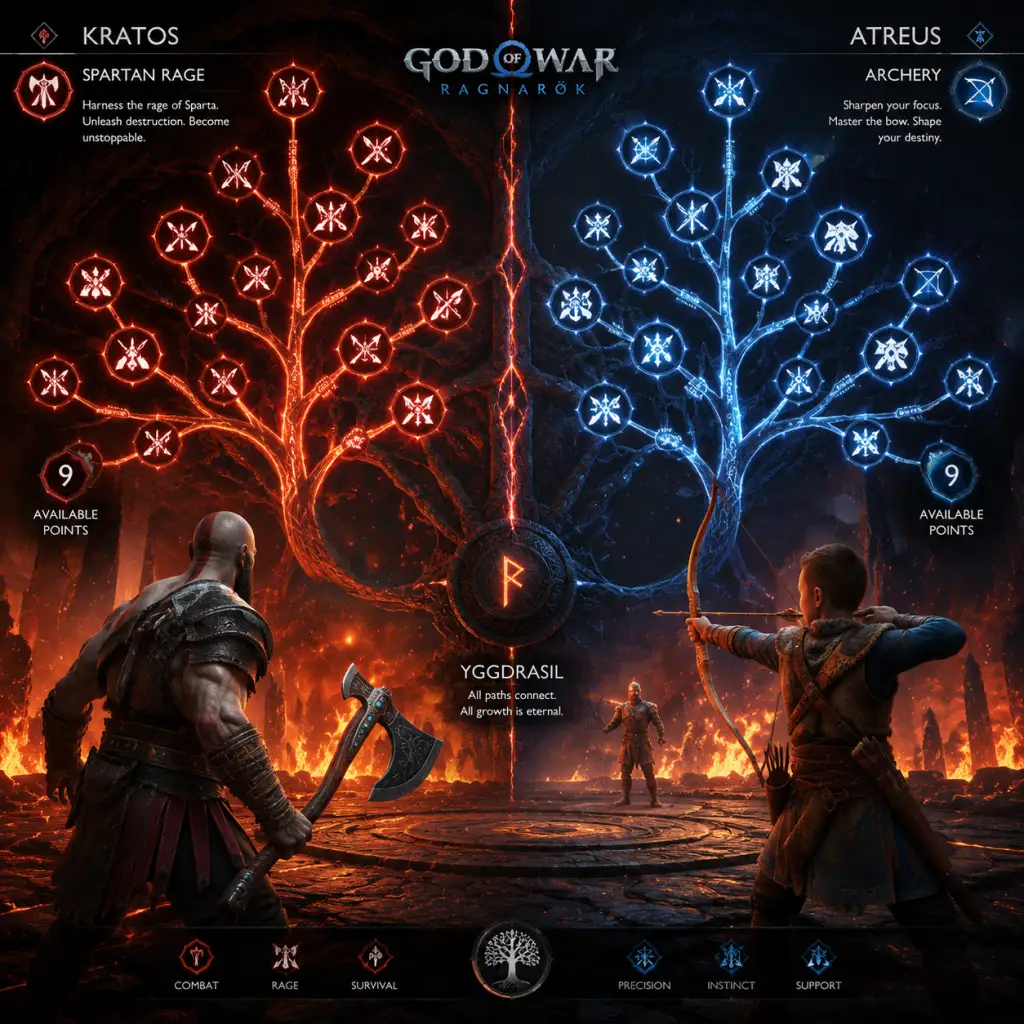
Character Skills
Character Skills Guide for God of War Ragnarök
Overview
God of War Ragnarök features two playable characters: Kratos and Atreus. Each has their own skill trees with abilities unlocked by spending XP (Kratos) and using Atreus’s skill points earned from story progression and side content. This guide covers all skills, upgrades, cooldowns, synergies, and recommended builds for both characters.
Kratos Skills
Kratos’s skills are divided into four trees: General, Leviathan Axe, Blades of Chaos, and Draupnir Spear. Each weapon tree contains combat skills, Light Runic Attacks, and Heavy Runic Attacks. General includes Spartan Rage, Shield skills, and Relic skills. All skills can be upgraded using XP and Hacksilver.
#### General Skills
##### Spartan Rage
- Wrath: (Base) Press L3+R3 to enter rage. Melee attacks deal massive damage and stagger. Duration: 10s. Cooldown: 90s. Upgrades extend duration and add bonus damage.
- Fury: (Alternate) Instead of raw damage, attacks generate a shockwave that stuns enemies. Great for crowd control. Upgrades increase stun radius.
- Valor: (Alternate) Rage heals Kratos and allies (Atreus) on activation and during attack hits. Essential for survival. Upgrades increase heal amount.
- Shield Bash: (Base) Press L1+R1 to bash with shield. Staggers enemies. Stone Wall version also knocks back.
- Shield Charge: Hold L1+forward+R1 to charge, breaking guard. Upgrades add shield damage.
- Parry Reprisal: After a perfect parry, press R1 for a counterattack. Different effects per shield (e.g., Dauntless throws a projectile).
- Hilt of Hofud: Unleash a Bifrost storm that damages and slows enemies. Cooldown: 90s. Upgrades reduce cooldown to 70s and increase Bifrost duration.
- Hilt of Angrboða: Summon spectral wolves that attack enemies. Cooldown: 120s. Upgrades add Poison status.
- Hilt of Skofnung: A single-target heavy strike with high Stun. Cooldown: 100s. Upgrades add Frost damage.
- Frozen Stomp: (Unlocked early) While axe is thrown, press R1 to stomp the axe into the ground, creating a frost explosion. Upgrades increase damage and freeze build-up.
- Glacial Rake: Hold R1 after a third light attack to drag the axe along the ground, creating a frost shockwave. Upgrades add armor breaking.
- Permafrost: (Passive) Landing axe hits builds a Frost meter. When full, all Runic Attacks deal bonus frost damage and have reduced cooldown. Upgrades extend the meter duration.
- Axe Throw Catch: Throw axe (R2 tap) then catch it (R2 again) for a quick follow-up attack. Upgrades add Stun if caught mid-air.
- Leviathan’s Wake: After a heavy attack hold, release for a spinning frost slash. Upgrades increase range.
- Njord’s Tempest: A spinning frost whirlwind around Kratos. Damage: 50. Cooldown: 45s. Upgrades add multiple hits and freeze.
- Hel’s Touch: Quick frost projectile that freezes enemies. Damage: 20. Cooldown: 25s. Upgrades increase freeze duration.
- Frost Ancient’s Fury: Summon an ancient frost spirit that explodes. Damage: 80. Cooldown: 60s. Upgrades add AoE.
- Ivaldi’s Anvil: Slam the axe into the ground creating a frost geyser. Damage: 70. Cooldown: 60s. Upgrades add stun.
- Leviathan’s Revenge: A long-range frost beam. Damage: 90. Cooldown: 90s. Upgrades increase beam width.
- Winter’s Bite: A series of quick frost slashes. Damage: 60. Cooldown: 50s. Upgrades add armor break.
- Whiplash: (Base) Hold R1 after a combo to spin the blades, hitting multiple enemies. Upgrades increase hit count and add Burn.
- Rampage of the Furies: Press L2+R2 while sprinting to launch a fiery dive. Upgrades add explosion on landing.
- Hyperion Grapple: Hold L2+R1 to throw a blade and pull yourself to an enemy (or pull them). Upgrades add Stun.
- Flame Whirl: After a heavy attack hold, release for a wide fire arc. Upgrades add Burn buildup.
- Immolation: (Passive) Build a Burn meter when using Blades. At full, next Runic Attack deals bonus fire damage and applies Burn. Upgrades extend meter.
- Nemean Crush: A fiery slam that creates a shockwave. Damage: 60. Cooldown: 40s. Upgrades add multiple shockwaves.
- Cyclone of Chaos: Spin blades as a projectile. Damage: 40. Cooldown: 30s. Upgrades add homing.
- Prometheus’ Flame: A fire pillar from the ground. Damage: 70. Cooldown: 55s. Upgrades add burn duration.
- Rage of the Titans: A series of heavy fiery strikes. Damage: 100. Cooldown: 80s. Upgrades add stun.
- Spartan Charge: A forward rush with blades spinning. Damage: 80. Cooldown: 70s. Upgrades add knockback.
- Tartarus’ Rift: Open a fiery rift that damages enemies over time. Damage: 50 per tick. Cooldown: 90s. Upgrades increase rift duration.
- Spear Dash: (Base) Press R1 while sprinting to dash with the spear, impaling enemies. Upgrades add bleed.
- Windstorm: Hold R1 after combo to create a tornado of spears. Upgrades add wind damage and pull.
- Impaling Thrust: Hold R2 for a charged thrust. Upgrades add armor break.
- Elemental Infusion: (Passive) The spear can be infused with Frost, Fire, or Bifrost by pressing L1+triangle after a combo. Each infusion adds bonus status effects. Upgrades duration.
- Momentum: (Passive) Landing hits builds a momentum meter. At full, next attack consumes it for bonus damage. Upgrades increase max momentum.
- Huntsman’s Stride: A quick spear spin that throws out projectiles. Damage: 30. Cooldown: 20s. Upgrades add homing.
- Spectral Assault: Summon spectral spears that rain down. Damage: 50. Cooldown: 40s. Upgrades add area coverage.
- Odin’s Wrath: A massive spear slam that creates a shockwave. Damage: 90. Cooldown: 75s. Upgrades add Bifrost explosion.
- Fimbulwinter’s Fury: A multi-stab attack that freezes enemies. Damage: 80. Cooldown: 65s. Upgrades add freeze buildup.
- Sprint Attack: Tap R1 while sprinting to shoot a quick arrow. Upgrades add Stun.
- Sonic Arrow Volley: Hold R1 to fire a spread of Sonic arrows that stun. Upgrades increase stun duration.
- Hex Arrow Rain: Hold R2 to fire a volley of Hex arrows that poison. Upgrades increase poison damage over time.
- Focus: Hold L2 to zoom and fire a single powerful arrow. Upgrades add headshot damage.
- Double Tap: After a roll, press R1 to fire a quick arrow. Upgrades add speed.
- Grapple Arrow: (Unlocked later) Shoot a rope arrow to create a zipline or pull levers. No cooldown.
- Call of the Wild: (Special) Press R3 to command Atreus to perform a unique attack based on equipped summon.
- Wolf Summon (Fenrir): Release a spectral wolf that attacks enemies, dealing Frost damage and slowing. Cooldown: 90s. Upgrades reduce cooldown to 60s and add a second wolf.
- Bear Summon (Björn): Summon a bear that charges and mauls enemies, dealing heavy Stun. Cooldown: 100s. Upgrades increase charge distance.
- Hawk Summon (Sköll): A bird of prey that swoops and applies Hex poison to multiple enemies. Cooldown: 70s. Upgrades add Sonic damage.
- Serpent Summon (Jörmungandr): Summon a venomous snake that poisons a single enemy heavily. Cooldown: 130s. Upgrades spread poison to nearby enemies.
- Valkyrie Summon (Sigrún): (Endgame) Summon a Valkyrie that performs a powerful area attack with Bifrost damage. Cooldown: 150s. Upgrades reduce cooldown to 110s.
- Frost/Bifrost Build: Equip Leviathan Axe with Permafrost, Hilt of Hofud, and Atreus with Wolf summon. Use Njord’s Tempest and Ivaldi’s Anvil for massive freeze, then Bifrost storm to shatter. Good for crowd control.
- Fire/Stun Build: Blades of Chaos with Immolation, Dauntless Shield, and Atreus with Bear summon. Use Rage of the Titans to stun, then shield parry for counter damage. Atreus’s Sonic arrows help break defenses.
- Spear/Mobility Build: Draupnir Spear with Elemental Infusion (Frost), Onslaught Shield, and Atreus with Hawk summon. Use Spear Dash and Windstorm to weave through enemies. Momentum meter boosts each hit.
- Survival Build: Spartan Rage (Valor), Stone Wall Shield, and Atreus with Valkyrie summon. Focus on health recovery and tanking hits. Use heavy runic attacks when safe.
- Frozen Stomp: Use when axe is thrown to create space or freeze small enemies.
- Whiplash: Ideal for clearing groups of weak enemies.
- Spartan Charge: Use to close distance on ranged enemies.
- Atreus’s Focus: Use against bosses for precision damage to weak points.
- Runic Summons: Use cooldowns at the start of hard encounters for crowd control.
- Permafrost/Immolation: Build meters during exploration, then unleash on strong enemies.
- Early game: Unlock Frozen Stomp, Whiplash, and Atreus’s Sonic Arrow Volley for stun.
- Mid game: Focus on Permafrost and Immolation passives, and heavy runic attacks for damage.
- Late game: Upgrade Spartan Rage to Valor for survivability, and unlock all Relic skills.
##### Shield Skills
Each shield has unique block/parry mechanics and associated skills. The four shields are: Stone Wall (heavy block), Dauntless (perfect parry), Shatter Star (ranged parry), Onslaught (charge block). Skills include:
##### Relic Skills
Relics are equippable items with unique active abilities. Notable relics:
#### Leviathan Axe Skills
##### Combat Skills
##### Light Runic Attacks
##### Heavy Runic Attacks
#### Blades of Chaos Skills
##### Combat Skills
##### Light Runic Attacks
##### Heavy Runic Attacks
#### Draupnir Spear Skills
##### Combat Skills
##### Light Runic Attacks
##### Heavy Runic Attacks
Atreus Skills
Atreus has his own skill tree with Bow Skills and Runic Summons. He uses arrows (Sonic, Hex, or normal) that can be toggled. Skills are unlocked by finding Jotnar Shrines and completing quests.
#### Bow Skills
#### Runic Summons
Atreus can equip one summon at a time. Each has an active ability with a cooldown.
Synergies and Recommended Builds
When to Use Each Skill
Upgrades Priority
This guide provides a comprehensive overview. For the full list of every skill node, refer to the in-game skill menu where each skill shows exact numbers and requirements.
Characters & Roles
Characters & Roles Guide for God of War Ragnarök
This guide covers every playable character in God of War Ragnarök: Kratos and Atreus. Each has unique abilities, weapons, skill trees, and playstyles. While companions like Freya, Mimir, Brok, and Sindri are not directly playable, their roles and synergies with the main characters are explained where relevant.
---
Kratos – The God of War
#### Background
Kratos is the protagonist, a former Greek God of War who now lives in Midgard with his son Atreus. After the death of his second wife Faye, Kratos must navigate the Norse realms during the Fimbulwinter and the prophesied Ragnarök. He wields the Leviathan Axe (ice), the Blades of Chaos (fire), and the Draupnir Spear (wind). He is a master of Spartan combat and divine resilience.
#### Strengths
- High durability & health – Can absorb significant damage.
- Versatile weapon switching – Each weapon has distinct runic attacks and elemental effects.
- Powerful runic attacks – High damage cooldown-based abilities.
- Spartan Rage – A temporary super mode that restores health and deals massive damage.
- Shield parries & blocks – Excellent defensive options.
- Slow movement speed – Less agile than Atreus.
- Limited ranged options outside runic attacks – Primarily melee-focused.
- Runic attack cooldowns – Must wait between uses.
- Spartan Rage gauge management – Requires building up.
- Leviathan Axe – Upgrade with Frozen Flames; equip runic attacks like “Leviathan’s Roar” (area frost) and “Mist of Helheim” (projectile).
- Blades of Chaos – Upgrade with Chaos Flames; use “Nemean Crush” (heavy slam) and “Rage of the Titans” (ground eruption).
- Draupnir Spear – Upgrade with Draupnir’s Glass; use “Furious Charge” and “Seismic Slam” for crowd control.
- Survival Set (early game) – Balanced stats, easy to upgrade.
- Fury Set (mid-game) – Boosts Runic damage and cooldown reduction; excellent for runic attack spam.
- Lunda’s Lost Set (late game) – Increases Strength and Defense; perfect for raw damage builds.
- Zeus Armor (post-game NG+) – Glass cannon; massive damage increase with reduced defense.
- “Asgard’s Protection” – Increases defense and vitality.
- “Jotunheim’s Vitality” – Boosts health regeneration.
- “Svartalfheim’s Power” – Increases Strength and Runic.
- Talisman of the Eternal Warrior – Extends Spartan Rage duration.
- Talisman of Misfortune – Increases damage taken but boosts runic damage.
- Talisman of Cursed Protection – Reduces damage while blocking.
- Atreus (Bow & Sonic Arrows) – Can stun enemies, activate runic sigils, and deal light damage. Use his skills to set up enemy weaknesses for Kratos.
- Freya (Valkyrie Abilities) – She can heal Kratos and unleash powerful area attacks. Synergizes well with Kratos’s melee approach.
- High mobility – Quick dodges, rolls, and agile movements.
- Ranged attacks – Can fight from a distance with a bow.
- Sonic & Sigil Arrows – Can stun or weaken enemies, opening them for Kratos.
- Bear Form – Powerful melee transformation with area damage and health recovery.
- Companion synergy – Can issue commands to animal companions (e.g., wolves, bear) or use Giant runic magic.
- Lower health & defense – Riskier in direct melee.
- Limited melee options – Bow damage is weaker per hit than Kratos’s weapons.
- Arrow resource – Arrows must be collected or recharged.
- Bear Form has a cooldown – Cannot be used constantly.
- Atreus’s Bow – Upgrade with Ancient Fragments; unlock skills like “Sonic Arrow Barrage” and “Sigil Trap”.
- Companions – Summoned wolves (“Fenrir’s Heirloom”) or bear (“Bear Call”) for additional damage.
- Sonic Arrow – Max out for stun buildup.
- Sharp Shooter – Increases arrow damage at distance.
- Totem Mastery – Boosts companion effectiveness.
- Bear Strength – Extends Bear Form duration and damage.
- Spectral Wolves – Summon a pack to attack enemies.
- Bear of the Wild – Transform into a bear for massive melee damage.
- Kratos (NPC) – He is controlled by AI and acts as a tank. Use Atreus’s arrows to stun enemies for Kratos’s executions.
- Freya (NPC) – In sections where she is the companion, she provides healing and area control.
- Role: Healer, crowd control, ranged magic.
- Synergy: Best paired with Kratos. She can use healing abilities (e.g., “Midgard’s Mercy”) and slow enemies with “Roots of Yggdrasil”.
- Unlock: Joins Kratos after completing “The Reckoning” main quest.
- Role: Story guide, puzzle assist, lore exposition.
- Synergy: Provides hints and can activate certain environmental mechanics. Not a combatant.
- Role: Blacksmiths, upgrading weapons & armor.
- Synergy: Essential for crafting and upgrading gear. Their shop appears at certain locations.
#### Weaknesses
#### Playstyle
Kratos is a frontline brawler who excels at close-quarters combat. The player must balance weapon switching to exploit enemy weaknesses (e.g., Leviathan Axe for frost, Blades of Chaos for fire, Draupnir Spear for stagger). Use shields to parry and block, then retaliate with heavy combos or runic attacks. Spartan Rage is best used as an emergency heal or to break enemy defenses.
#### Unlock Conditions
Kratos is available from the very start of the game and remains playable throughout the entire story.
#### Recommended Equipment & Builds
Weapons:
Armor Sets:
Enchantments:
Talismans:
#### Team Synergy
While Kratos is the main combatant, his companions (Atreus or Freya) provide support:
---
Atreus – The Giant Son
#### Background
Atreus is Kratos’s teenage son, half-God (Greek) and half-Giant (Jotnar). He possesses the ability to understand and speak all languages, and he wields a magical bow. As the story progresses, he learns to transform into a bear and eventually gains access to ancient Giant magic.
#### Strengths
#### Weaknesses
#### Playstyle
Atreus is a ranged support character who excels at depleting enemy stun bars and controlling crowds. Stay at mid-range, use Sonic Arrows to interrupt enemy attacks, and switch to Sigil Arrows to apply elemental damage. When enemies close in, dodge and use his fast mobility. Bear Form is a great panic button for clearing groups. Atreus’s companion (like wolves) can tank and distract enemies while you attack from range.
#### Unlock Conditions
Atreus becomes playable in specific story sections (e.g., “The Lost Treasury” and “The Giant’s Prophecy”). After the main story, you can revisit these sections via Mystic Gateways, but he is not permanently playable in the open world.
#### Recommended Equipment & Builds
Weapons:
Armor (not customizable) – Atreus has fixed stats; he cannot equip armor. Focus on upgrading his bow and companion abilities.
Skills (spend Yggdrasil Dew):
Runic Summons:
#### Team Synergy
Atreus is designed to assist Kratos, but when playing as Atreus, you must rely on your companion (Kratos or Freya) for heavy lifting:
---
Companions & Their Roles
While not playable, the following characters are essential companions:
#### Freya (formerly Frigg)
#### Mimir (head)
#### Brok & Sindri (Huldra Brothers)
---
Summary Table
| Character | Playable? | Primary Role | Weapon(s) | Key Strengths |
|---|---|---|---|---|
| Kratos | Yes (main) | Frontline brawler | Leviathan Axe, Blades of Chaos, Draupnir Spear | High durability, runic bursts, shield defense |
| Atreus | Yes (limited sections) | Ranged support / crowd control | Bow & Arrows, Bear Form | High mobility, stun buildup, companion summon |
| Freya | No | Healer / magic crowd control | Magic gauntlets | Healing, area denial |
| Mimir | No | Information / puzzle helper | N/A | Puzzle solutions, lore |
| Brok & Sindri | No | Crafting / upgrading | N/A | Gear enhancement |
Final Tips
- Master weapon switching with Kratos – Use the quick-swap shortcuts (R1/RB and L2/LT combos) to cycle through weapons mid-combo.
- Maximize Atreus’s stun potential – Use Sonic Arrows to fill the stun meter, then perform a finishing blow with Kratos or execute with Atreus in bear form.
- Upgrade Talismans and Enchantments – They provide passive bonuses that define your build; don’t neglect them.
- Experiment with different armor sets – The game encourages multiple playthroughs; try a Runic build for Kratos or a pure Strength build for maximum damage.
By understanding each character’s unique role and optimizing their equipment and skill usage, you can conquer every realm and emerge victorious against the gods of Ragnarök.
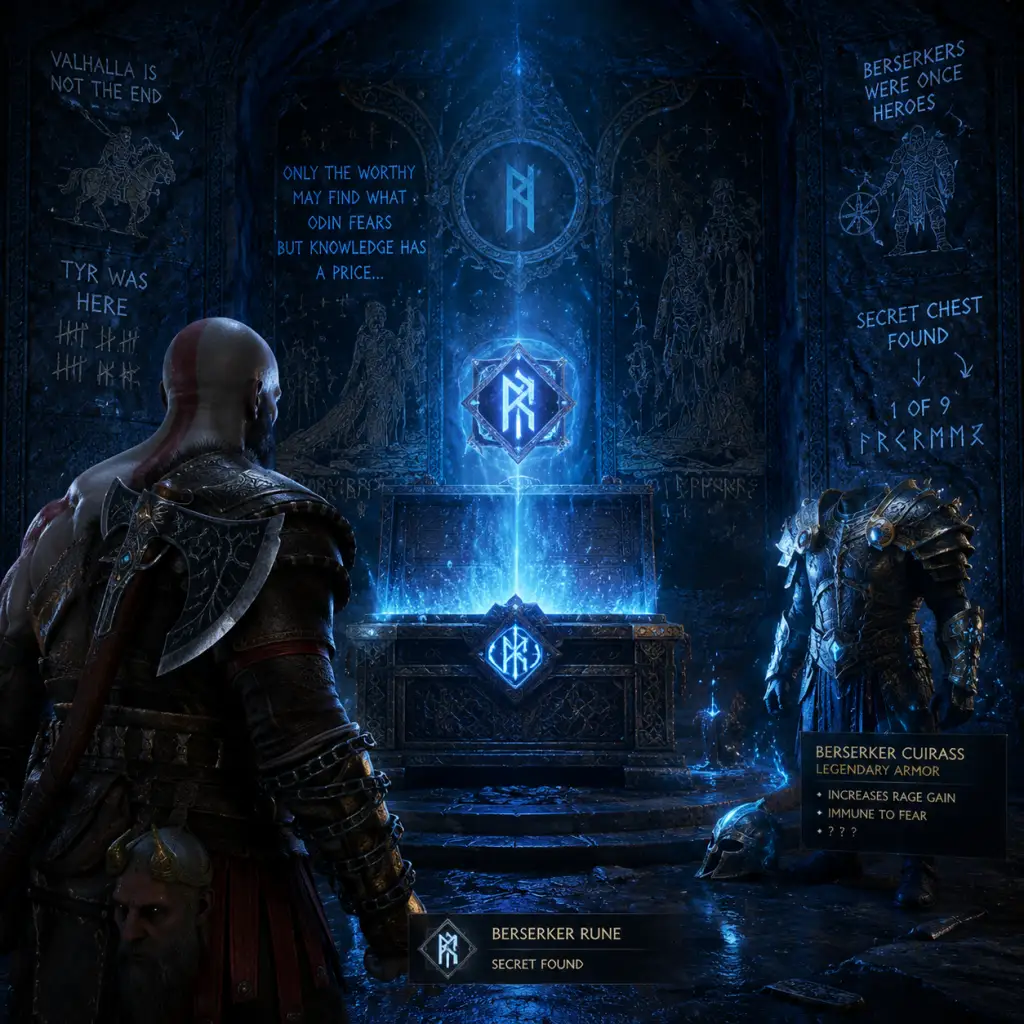
Cheats & Secrets
Cheats & Secrets Guide for God of War Ragnarök
Overview
God of War Ragnarök does not include traditional cheat codes, console commands, or unlock codes. The developers at Santa Monica Studio have not provided any official cheat system. However, the game is rich in hidden secrets, Easter eggs, developer-intended hidden content, and exploit-safe tricks that can enhance your experience. This guide covers all known secrets, including missable content, hidden references, and mechanics that are not immediately obvious.
Notable Secrets & Easter Eggs
#### 1. The “Brok’s Death” Foreshadowing
- Location: Early in the game, during a conversation with Brok near the Huldra Brothers' workshop, he says, “I’ve got a bad feeling about this… like someone’s gonna die.” This is a subtle hint at his later fate.
- Tip: Pay attention to dialogue; many lines foreshadow events.
- Location: In the Vanaheim region, near the River Delta, you can find a small area with two wooden planks and a barrel arrangement that resembles Joel and Ellie from The Last of Us. A note nearby reads “Two survivors,” referencing the post-apocalyptic duo.
- Location: In Svartalfheim, on a wall near the Bay of Bounty, you can find a graffiti tag that reads “Spider-Man” in the style of the Insomniac Games logo. This is a nod to Sony’s other first-party title.
- Several areas and characters from the previous game appear, but one subtle callback is the “Light of Alfheim” puzzle where you must align mirrors—identical to the mechanic from the 2018 game. If you completed that puzzle before, you’ll notice the same sound cues.
- “The Curator” Trophy: Collect all of Odin’s ravens. Secret: One raven is hidden inside the Crater area on a ledge that only appears after completing certain side quests.
- “A Viking Funeral”: Complete all of Rom’s quests. The final secret funeral pyre is missable if you skip side content.
- “Unleashed”: Free all three berserkers from their graves. The location of the third grave is hidden behind a breakable wall in Midgard near the Lake of Nine.
- How to Unlock: You must defeat all 12 berserker souls scattered across the realms. Once done, a new location appears in Midgard (the King’s Grave). This is a super boss with unique mechanics and rewards the Berserker Armor Set.
- Location: In Vanaheim, after completing the main story, return to the River Delta and look for a sinkhole. Inside is the Crater, a large optional area with its own quests and a secret dragon fight.
- Requirement: The Crater is only accessible after the story and requires the Draupnir Spear to break certain walls.
- Location: In Midgard, at the base of the Cliffside Ruins, you can find a hooded figure (a dead body) partly covered by a red cloth. A nearby note mentions “Grandmother’s house,” referencing the fairy tale.
- Location: In the Barrens of Alfheim, there is a rock formation that, when viewed from a specific angle, resembles the Millennium Falcon. Additionally, a sandworm-like creature appears later—nod to the Star Wars sandworm.
- How to obtain: After completing the main story, return to Sindri’s House in Midgard. Look for a secret passage behind a wooden shelf in the workshop. This leads to a room with a chest containing the “Darkdale Armor” (a reskin of the starting Spartan Armor with enhanced stats). This is an intentional developer reward for completionists.
- Location: Freya’s house in the Wildwoods (Midgard). After the main story, return there. A hidden crawlspace behind the bookshelf contains a lore entry and a unique “Fallen Asgardian” relic.
- Location: In Jotunheim, during the final act, there is a shadow of a giant. If you stand on a specific rune circle and throw the Leviathan Axe at a hidden bell, a chest appears containing the “Jotunheim’s Fury” runic attack.
- Note: Early versions of the game allowed unlimited Hacksilver by selling and re-buying certain armor pieces. This was patched in v1.04. No safe exploits exist now.
- Mechanic: While outside combat, you can quickly fill Spartan Rage by repeatedly parrying enemy attacks (e.g., from low-level enemies in the Meadows of Midgard). This is not a bug but an intended design—parrying grants rage build-up.
- Note: You can save manually before opening a legendary chest. If you don’t get the runic attack you want, reload the save. This is a legitimate save-scumming method, not a cheat.
- The “Gow Ragnarok” Themed Phone Wallpaper: By collecting all 100% of the collectibles in the game, you unlock a secret code on the official website that grants a digital wallpaper. This code is printed on a scroll in the secret developer room.
- “Mimir’s Stories” - Secret Dialogue: If you sit on benches in certain locations (e.g., in Alfheim near the Temple of Light), Mimir will tell a unique story that doesn’t appear elsewhere. These are gated by progress and can be missed if you don’t rest.
- “Free Valhalla DLC” Not a Secret: The Valhalla DLC is free but requires completing the main story. It contains its own set of secrets, including the “Echoes of the Past” soundtrack hidden behind a breakable wall.
- Use the “Brok and Sindri” shop: They often drop hints about hidden areas if you talk to them repeatedly.
- Look for golden runes: These often mark hidden passageways or berserker grave locations.
- Check every realm after the story: Many secrets only appear post-game.
- Explore with Atreus’s wolves: They can dig up buried chests in Midgard.
#### 2. “The Last of Us” Reference
#### 3. “Marvel’s Spider-Man” Easter Egg
#### 4. “God of War (2018)” Callbacks
#### 5. Hidden Trophies Related to Secrets
#### 6. Secret Boss: The “Berserker King”
#### 7. The “Crater” Secret Area
#### 8. “Little Red Riding Hood” Reference
#### 9. “Star Wars” Reference in Alfheim
#### 10. Developer Room / Kratos’s Secret Armor
#### 11. The “Witch’s House” Secret
#### 12. “Inside the Giant Shadow” - Hidden Puzzle
Exploit-Safe Secrets (No Cheating)
#### 1. Infinite Hacksilver Glitch (Patched)
#### 2. “Spartan Rage” Recharge Trick
#### 3. Quick Travel Save Exploit
Developer-Intended Hidden Content
Tips for Finding Secrets
Conclusion
While God of War Ragnarök lacks cheat codes, it rewards exploration with numerous secrets, Easter eggs, and hidden bosses. For a true completionist, finding all of these is as rewarding as any cheat. Remember, the developers intended these to be discovered organically—so take your time and explore every corner of the Nine Realms.