Grand Theft Auto: San Andreas
## Grand Theft Auto: San Andreas – Game Introduction **Genre:** Action-Adventure, Open World, Third-Person Shooter **Developer:** Rockstar North (formerly DMA Design) **Publisher:** Rockstar Games **Release Timeline:** - **Original Release:** October 26, 2004 (PlayStation 2) - **Xbox & PC...
Download & Installation
Grand Theft Auto: San Andreas – Complete Download & Installation Guide
This guide covers all official ways to download and install GTA: San Andreas on PC, PlayStation, Xbox, Nintendo Switch, and mobile devices. Follow platform-specific steps carefully to avoid common issues.
---
1. Platform-Specific Download & Installation
PC (Steam / Epic Games Store / Rockstar Games Launcher)
Official Sources:
- Steam – [store.steampowered.com](https://store.steampowered.com/app/12120/Grand_Theft_Auto_San_Andreas/)
- Epic Games Store – [store.epicgames.com](https://store.epicgames.com/en-US/p/grand-theft-auto-san-andreas)
- Rockstar Games Launcher – [socialclub.rockstargames.com](https://socialclub.rockstargames.com/activate) (requires Rockstar Social Club account)
Step-by-Step Installation:
1. Account Setup:
- Steam: Create/Log in to a Steam account.
- Epic: Create/Log in to an Epic Games account.
- Rockstar: Create a Rockstar Social Club account.
2. Purchase & Download:
- Buy the game on your chosen store.
- Install the respective launcher (Steam, Epic Games Launcher, or Rockstar Games Launcher).
- Locate GTA: San Andreas in your library and click Install.
3. Installation Options:
- Choose a destination folder (ensure enough space).
- Let the launcher download and install (typically 4–5 GB).
4. First Launch:
- Click Play in the launcher.
- The game may prompt you to log into Rockstar Social Club (required for cloud saves on Rockstar/Steam versions).
- On first launch, configure graphics, controls, audio, and display settings before starting a new game.
System Requirements (PC):
| Component | Minimum | Recommended |
|---|---|---|
| OS | Windows 2000/XP (32-bit) | Windows 7/8/10 (64-bit) |
| CPU | 1 GHz Pentium III or AMD Athlon | 2.4 GHz Pentium 4 or AMD Athlon XP 3200+ |
| RAM | 256 MB | 1 GB |
| GPU | 64 MB DirectX 9 compatible (e.g., GeForce 3) | 256 MB DirectX 9 compatible (e.g., GeForce 6600) |
| DirectX | 9.0c | 9.0c |
| Storage | 4 GB | 4 GB |
---
PlayStation 4 / PlayStation 5
Official Source: PlayStation Store (PS4 & PS5 via backward compatibility).
Step-by-Step Installation:
1. Account: Ensure you have a PSN account with PlayStation Plus (not required for purchase).
2. Purchase:
- From the PS Store on console or web, search “Grand Theft Auto: San Andreas” (Classic Edition).
- Buy (usually $14.99) or download if already owned via PS Plus Classics or previous purchase.
3. Download:
- On PS4: Game appears in Library > Purchased. Select Download.
- On PS5: Same process; game runs via PS5’s backward compatibility.
4. Install: The system automatically installs after download (approx. 3–4 GB).
5. First Launch:
- Launch the game. It will prompt you to configure brightness and control layout (classic or modern).
- Accept the license and start.
---
Xbox One / Xbox Series X|S
Official Source: Microsoft Store on Xbox.
Step-by-Step Installation:
1. Account: Sign in to your Xbox Live / Microsoft account. Xbox Game Pass Ultimate or Core not required for purchase.
2. Purchase:
- Go to Store > Search “Grand Theft Auto San Andreas – The Definitive Edition” (the original Classic is also available as “GTA: San Andreas” for backward compatibility).
- Buy the version you want (Classic ~$14.99, Definitive Edition ~$29.99).
3. Download:
- After purchase, select Install on the confirmation screen.
- Choose console or external storage.
4. Install: Download size ~3.5 GB (Classic) or ~8 GB (Definitive).
5. First Launch:
- Start the game. On Xbox Series X|S, you may get a Auto HDR/FPS Boost prompt (can be enabled in game compatibility settings).
- Adjust settings as needed.
---
Nintendo Switch
Official Source: Nintendo eShop.
Step-by-Step Installation:
1. Account: Nintendo Account with Nintendo Switch Online not required.
2. Purchase:
- Open eShop > Search “Grand Theft Auto: San Andreas – The Definitive Edition”.
- Purchase (typically $29.99) or download if owned via previous purchase.
3. Download & Install:
- Select Download. Game installs automatically (approx. 7 GB).
- Ensure sufficient space on internal storage or SD card.
4. First Launch:
- Launch from Home menu. Accept prompts. Configure control scheme (default uses Switch layout).
- No cloud saves unless you have Nintendo Switch Online + save data cloud.
---
Mobile (iOS & Android)
Official Source:
- iOS: App Store – “Grand Theft Auto: San Andreas” by Rockstar Games
- Android: Google Play Store – same title. Important: The classic mobile version was removed in 2023 and replaced by a Netflix Games version (for subscribers) on both platforms. As of 2025, the only legitimate way to play on mobile is via Netflix Games.
Step-by-Step Installation (Netflix Games):
1. Prerequisites:
- An active Netflix subscription (any plan).
- A device running iOS 15+ or Android 8.0+.
2. Download:
- On iOS: Open App Store > Search “Grand Theft Auto: San Andreas Netflix” > Install.
- On Android: Open Google Play > Search the same > Install.
3. Install: The game is ~2.5 GB. Wait for download and installation.
4. First Launch:
- Open the game. It will ask you to sign in to your Netflix account.
- After verification, you can play with touch or optional controller (MFi/Bluetooth).
- Configure sensitivity, voice chat, etc.
---
2. System Requirements (All Platforms)
| Platform | Minimum Storage | Recommended RAM | Notes |
|---|---|---|---|
| PC (Classic) | 4 GB | 1 GB RAM | DirectX 9.0c |
| PC (Definitive Edition) | 8 GB | 8 GB RAM | DirectX 12 (Windows 10+) |
| PlayStation 4/5 | 4 GB | – | PS4 Pro enhances resolution |
| Xbox One/Series X | S | 4 GB (Classic) / 8 GB (Definitive) | – |
| Nintendo Switch | 6 GB (Definitive) | – | Handheld mode at 30fps |
| Mobile (Netflix) | 2.5 GB | iOS 15+/Android 8+ | Requires Netflix subscription |
3. Account Requirements
- PC (Steam): Steam account + optional Rockstar Social Club (for cloud saves).
- PC (Epic): Epic Games account + optional Rockstar Social Club.
- PC (Rockstar): Rockstar Social Club account (mandatory).
- PlayStation: PSN account (PS Plus not required).
- Xbox: Microsoft account (Live Gold not required for single-player).
- Nintendo Switch: Nintendo account (Online not required).
- Mobile (Netflix): Active Netflix subscription and account.
- PC Classic: ~4 GB free after download (larger during installation).
- PC Definitive Edition: ~8 GB.
- PlayStation Classic: 3.5–4 GB.
- Xbox Classic: 3.5–4 GB.
- Nintendo Switch Definitive: 6–7 GB.
- Mobile: 2.5–3 GB.
- Error: “Application failed to initialize” (0xc0000142)
- Black screen on startup
- Low FPS stutter on modern hardware
- “Rockstar Social Club is offline” error
- Installation stuck at 99%
- Error CE-30035-1 (corrupted data)
- Download paused/failed
- Error 0x80070422 (install blocked)
- “This game takes too long to start”
- Error 2005-0003 (corrupted download)
- Game crashes after intro
- “Netflix sign-in loop”
- No audio / crackling
- [ ] Game launches without errors.
- [ ] Main menu appears with all options (New Game, Load, Options, etc.).
- [ ] No visual glitches or missing textures (especially in Definitive Edition).
- [ ] Controls respond correctly (keyboard, controller, touch).
- [ ] Audio plays (music, voice, SFX).
- [ ] Save/Load functionality works – start a new game, save quickly, reload.
- [ ] (PC) Frame rate is stable; adjust settings if needed.
- [ ] (Consoles) Cloud saves sync (if online).
- [ ] (Mobile) Netflix account verified.
---
4. Storage Space
Always leave at least 10% extra space for updates/save files.
---
5. First Launch Setup & Configuration
General Steps (All Platforms)
1. Language/Region: Select your preferred language.
2. Brightness/Calibration: Adjust to see in-game darkness.
3. Controls:
- PC: Choose keyboard+mouse or controller. Bind keys in Options.
- Consoles: Choose Classic (original PS2/Xbox) or Modern (updated) control scheme.
- Mobile: Touch or controller. Customize buttons.
4. Graphics (PC only):
- Set resolution, frame limit (30/60), anti-aliasing, draw distance, etc.
- For Classic version: Enable frame limiter (30fps) for stability.
- For Definitive Edition: Adjust quality presets (Low/Medium/High).
5. Audio: Adjust master volume, music, SFX.
6. Save Game: Create a save slot. Cloud saves may sync automatically after exiting.
---
6. Common Installation Errors & Fixes
PC
- Install DirectX 9.0c (included in game folder `_CommonRedist/DirectX`).
- Run the game as administrator.
- Add `-dx9` or `-windowed` to launch options in Steam/Epic.
- Update GPU drivers.
- Enable frame limiter (30fps) in game options.
- Apply community patches (e.g., SilentPatch for Classic version).
- Check your internet connection.
- Temporarily disable VPN/firewall.
- Restart the launcher.
- Clear download cache in Steam/Epic/Rockstar launcher.
- Restart PC and launcher.
PlayStation
- Delete the game and re-download.
- Rebuild database (Safe Mode > Rebuild Database).
- Ensure enough free space.
- Check PSN server status.
Xbox
- Go to Settings > System > Storage > Clear local saved games.
- Check network connectivity.
- Hard reset console (hold power button 10 sec).
Nintendo Switch
- Archive and re-download from eShop.
- Check for system update.
- Ensure enough free storage (minimum 10% extra).
Mobile
- Ensure Netflix app is updated.
- Reinstall game after clearing cache.
- Restart device.
- Disable Bluetooth if connected to audio device.
---
7. Post-Installation Verification
After installation, do a quick checklist:
If any issue persists, refer to the error fixes in §6 or visit the official Rockstar Support: [support.rockstargames.com](https://support.rockstargames.com/).
---
This guide covers all official download methods as of 2025. Unofficial mods or emulation are not included. Enjoy the streets of San Andreas!

Game Introduction
Grand Theft Auto: San Andreas – Game Introduction
Genre: Action-Adventure, Open World, Third-Person Shooter
Developer: Rockstar North (formerly DMA Design)
Publisher: Rockstar Games
Release Timeline:
- Original Release: October 26, 2004 (PlayStation 2)
- Xbox & PC: June 2005
- Xbox 360 (HD port): October 2008 (Xbox Live Arcade), later also physical
- PlayStation 3 (PSN): December 2012
- iOS/Android: December 2013
- Windows Phone: February 2014
- PlayStation 4: December 2015 (PS2 Classics)
- Xbox One: November 2015 (backward compatible)
- Nintendo Switch: November 2021 (via Rockstar Games Launcher port)
- Remastered Edition (Definitive Edition): November 11, 2021 (PC, PS4, PS5, Xbox One, Xbox Series X/S, Switch)
- Los Santos – Based on Los Angeles, with urban sprawl, gang territories, and a gritty downtown.
- San Fierro – Inspired by San Francisco, featuring steep hills, the Golden Gate Bridge stand-in (Gant Bridge), and a tech/art vibe.
- Las Venturas – A parody of Las Vegas, full of casinos, neon lights, and desert landscapes.
- Countryside/Desert – Includes forests, mountains, small towns, a military base (Area 69), and a massive dam.
- Carl “CJ” Johnson – The protagonist. A former gang member trying to re-assert control and protect his family.
- Sweet Johnson – CJ’s older brother, leader of Grove Street Families. Hot-headed but loyal.
- Kendl Johnson – CJ’s sister, who often challenges the gang lifestyle and becomes involved with Cesar.
- Cesar Vialpando – Kendl’s boyfriend and leader of the Varrios Los Aztecas. A key ally.
- Big Smoke – A childhood friend who secretly betrays CJ. Memorable for his fast-food obsession and charisma.
- Ryder – Another longtime friend, volatile and aggressive.
- Officer Frank Tenpenny – Corrupt LAPD officer from C.R.A.S.H. (Community Resources Against Street Hoodlums). The main antagonist.
- Officer Eddie Pulaski – Tenpenny’s equally corrupt partner.
- The Truth – A hippie conspiracy theorist who helps CJ with a government experiment.
- Wu Zi Mu (Woozie) – Blind leader of the Mountain Cloud Boys triad in San Fierro. A friend and ally.
- Ken Rosenberg – An incompetent lawyer and casino manager (returns from GTA: Vice City).
- Madd Dogg – A washed-up rapper CJ befriends and helps rejuvenate.
- Unmatched Freedom: An open world that lets you choose the order of missions or just explore. Go anywhere, steal anything, and cause chaos.
- Deep RPG Mechanics: CJ can gain muscle, fat, and stamina by eating, exercising, and training. Appearance changes based on hairstyle, tattoos, and clothes.
- Customization: Hundreds of vehicles (cars, bikes, planes, boats, helicopters) can be tuned; weapons can be upgraded at Ammu-Nation; properties can be bought.
- Gang Warfare: A dynamic gang territory system where CJ can capture enemy blocks by defeating rival gangs, defending his own turf, and recruiting Grove Street foot soldiers.
- Absurd Humor Mixed with Gritty Drama: The game balances dark themes with over-the-top characters and missions (jetpacks, conspiracy theories, celebrity parodies).
- Soundtrack: One of the most celebrated in gaming—over 200 songs across 11 radio stations, plus original score by Michael Hunter, Dan Houser, and others.
- Side Activities: Gambling, arcade games, pool, basketball, vigilante missions, paramedic missions, firefighter missions, taxi driving, street racing, and more.
- Story Mode (Single-player): The main campaign with over 100 missions across three acts. Optional side missions and activities are available throughout.
- Free Roam: Explore the entire map without mission objectives. Engage in random activities or start your own gameplay.
- Multiplayer (only on PC and mobile via mods/enhanced editions): Original game had no official multiplayer. However, the PC version (especially the 2005 release) includes a “Multiplayer” option via hot-seat or LAN for 2-player minigames like Free Roam, Race, and Deathmatch. The Definitive Edition removed this feature. Unofficial mods like SA-MP (San Andreas Multiplayer) allow thousands of players online.
- Offline: Entirely playable solo. All content is accessible without internet.
- Online (Unofficial): SA-MP (San Andreas Multiplayer) and MTA (Multi Theft Auto) are popular mods that add thousands of concurrent players with roleplay, racing, and deathmatch servers. These require a legitimate PC copy. No official server exists.
- Definitive Edition: No multiplayer component. Cloud saves are supported on PC/Rockstar Games Launcher.
- Hot Coffee mod controversy: An unofficial mod that unlocked a hidden mini-game (sex minigame) which was originally cut from the final game but left on the disc. Rockstar later issued a recalled version (1.01) that removed it. This led to AO rating and legal issues.
- Definitive Edition (2021): A remaster of GTA III, Vice City, and San Andreas with graphical upgrades, updated controls, and modern interface. Not a DLC but a standalone purchase. It includes both original and remastered versions (on PC).
- Soundtrack cuts: In re-releases, some songs were removed due to licensing expiration (e.g., “Love Is A Many Splendored Thing” by The Dave Brubeck Quartet). The Definitive Edition restored a few but removed others.
Platforms: PlayStation 2, PlayStation 3, PlayStation 4, PlayStation 5 (backward compatible), Xbox (Original), Xbox 360, Xbox One, Xbox Series X/S, PC (Windows, macOS, Linux via emulation), Nintendo Switch, iOS, Android, Windows Phone (discontinued).
---
Story Overview
The year is 1992. Carl “CJ” Johnson returns to his hometown of Los Santos after the murder of his mother. He left five years earlier to escape the cycle of gang violence, but now he must reunite with his brother Sweet, sister Kendl, and childhood friends to restore the Grove Street Families to power. As CJ, you’ll navigate a sprawling narrative that spans three major cities—Los Santos, San Fierro, and Las Venturas—and the vast countryside in between. The story tackles themes of family, loyalty, betrayal, corruption, and the American Dream, all while CJ rises from a low-level gangster to a kingpin of the criminal underworld. Key antagonists include corrupt cops like Officer Tenpenny and Pulaski, rival gang leaders, the mafia, and even the government.
---
Setting
San Andreas is a fictional U.S. state that mirrors California and Nevada. The map is one of the largest in gaming history (when released) and is divided into three distinct cities and rural areas:
The world is fully interactive; you can enter many buildings, steal any vehicle, and engage with countless NPCs. The game also features dynamic day/night cycles, weather effects, and a radio with licensed music spanning rap, rock, funk, country, reggae, and talk radio.
---
Main Characters
---
Core Appeal
---
Target Audience
Primarily Mature (17+) gamers who enjoy open-world sandbox experiences, crime narratives, and freedom of choice. Fans of the GTA series, action-adventure titles, and Western RPG-lite mechanics will find it compelling. It also appeals to nostalgia seekers and those interested in 1990s hip-hop culture, gangster movies, and satirical commentary.
---
Game Modes
---
Online/Offline Support
---
DLC/Expansion Overview
Original GTA: San Andreas did not receive any story-based DLC or expansions. However, there are:
---
What Makes This Game Unique
1. Size and Scope: At release, it was one of the largest open worlds ever created—covering three distinct cities and vast wilderness, all seamlessly connected without loading screens (except interior/exterior transitions).
2. Character Customization: CJ’s physical appearance can change in real-time based on diet, exercise, and haircuts—a feature rarely seen in action games of the time.
3. Gang Territory System: A dynamic tactical layer that lets players conquer neighborhoods, recruit gang members, and defend their turf. This added a strategic element missing from other open-world games.
4. Satirical Storytelling: The game parodies 1990s America—gang violence, police corruption, political conspiracies, and celebrity culture—with sharp writing and memorable characters.
5. Modding Legacy: The PC version has one of the most active modding communities, creating total conversions, new maps, and multiplayer servers that keep the game alive decades later.
6. Cultural Impact: Considered a landmark title that pushed the boundaries of what video games could achieve in storytelling, freedom, and immersion. It sold over 27 million copies and is often cited as one of the greatest games of all time.
Getting Started
Grand Theft Auto: San Andreas – Getting Started Guide for New Players
Welcome to San Andreas! This guide will get you through your first hour, explain the controls and UI, and set you up for success. Follow along step-by-step.
First Hour Walkthrough: From the Intro to Grove Street
1. The Opening Cutscene – You’re Carl “CJ” Johnson, returning to Los Santos after five years. Watch the cinematics to understand the story: your mother’s death, your brother Sweet, sister Kendl, and the tensions with the Ballas gang.
2. The Airport – After the cutscene, you control CJ at Los Santos International. Walk forward to exit the terminal. A taxi is waiting – get in automatically by pressing the Enter Vehicle button (see controls below).
3. Ride Home – The taxi takes you to Grove Street. During the ride, you’ll learn about the city through radio and dialogue. You cannot skip this ride, but pay attention to the landmarks.
4. Arriving at Grove Street – You’ll be dropped in front of CJ’s house. Enter it (walk up to the yellow icon). Inside, save your game by walking to the bed and pressing the interact button. This is your first save – do it!
5. First Missions – Exit the house and follow the yellow marker on your mini-map to start “The Introduction” mission series. You’ll meet Sweet, Ryder, Big Smoke, and take out some Ballas. Follow the on-screen prompts. Your first real mission is “In the Beginning…” (bicycle chase) then “Ryder” (drive-by shooting).
Tip: You cannot save freely until you complete the introductory missions. The first few missions are linear but teach you basic controls.
Character Creation? (No – CJ is Fixed)
GTA: San Andreas does not have character creation. You play as Carl Johnson, a preset protagonist. However, you can customize CJ’s appearance later: clothes, haircuts, tattoos, and even body fat/muscle through eating and exercise. But for the first hour, you’re stuck with his default look.
Controls on All Platforms
Here are the default controls for the most common platforms. Note that you can change them in the Settings menu.
#### PC (Keyboard + Mouse)
| Action | Key |
|---|---|
| Move | W, A, S, D |
| Look | Mouse |
| Run (hold) | Shift |
| Jump | Space |
| Enter/Exit Vehicle | F |
| Accelerate (vehicle) | W |
| Brake/Reverse | S |
| Shoot | Left Mouse Button |
| Aim | Right Mouse Button (hold) |
| Change Weapon | Mouse Wheel or 1-9 |
| Pause Menu | Escape |
| Save Game (bed prompt) | F (interact) |
#### PlayStation (PS4/PS5 – via backward compatibility)
| Action | Button |
|---|---|
| Move | Left Stick |
| Look | Right Stick |
| Run (hold) | R2 (while moving) |
| Jump | X |
| Enter/Exit Vehicle | Triangle |
| Accelerate (vehicle) | R2 |
| Brake/Reverse | L2 |
| Shoot | R1 |
| Aim | L1 (hold) |
| Change Weapon | D-Pad Left/Right |
| Pause Menu | Options |
| Interact | X |
| Action | Button |
|---|---|
| Move | Left Stick |
| Look | Right Stick |
| Run (hold) | Right Trigger (RT) while moving |
| Jump | A |
| Enter/Exit Vehicle | Y |
| Accelerate (vehicle) | RT |
| Brake/Reverse | LT |
| Shoot | Right Bumper (RB) |
| Aim | Left Bumper (LB) hold |
| Change Weapon | D-Pad Left/Right |
| Pause Menu | Menu button |
| Interact | A |
#### Nintendo Switch
| Action | Button |
|---|---|
| Move | Left Stick |
| Look | Right Stick |
| Run (hold) | R (shoulder) while moving |
| Jump | B |
| Enter/Exit Vehicle | X |
| Accelerate (vehicle) | R |
| Brake/Reverse | L |
| Shoot | ZR |
| Aim | ZL (hold) |
| Change Weapon | D-Pad Left/Right |
| Pause Menu | + |
| Interact | A |
- Left side: Virtual joystick for movement
- Right side: Swipe to look, tap to shoot, icon for jump, run, enter vehicle, etc.
- Weapon wheel: Tap weapon icon.
- Pause: Three-line menu icon.
- Driving: Tilt device or use virtual steering wheel (configurable).
- Top-left corner:
- Top-right corner:
- Bottom-center:
- Mini-map (bottom-left):
- Radar blips:
- Pause Menu (Escape/Options):
- Save after every mission. Use the bed in your safehouse. If you die or get arrested, you’ll lose weapons and money.
- Stick to story missions until you have a decent weapon and some cash.
- Collect hidden items (horseshoes, oysters, tags) only if you want 100% completion – not essential early.
- Use the map to set waypoints: Right-click on map to place a yellow marker; your mini-map will guide you.
- Roam around Los Santos to learn street layout – runs will be easier.
- Buy a Bicycle from the BMX shop near the beach? Can be fun, not necessary.
- Do not start gang wars (green territory markers) until you’re well-equipped – you’ll get overwhelmed. They appear after a certain mission.
- Avoid killing police or civilians – wanted level escalates quickly. If you get stars, lose the cops by hiding out of sight or getting to a Pay ‘n’ Spray (garage icon on map) to change license plate.
- Do not waste money on clothes or tattoos early – you need cash for armor, weapons, and progress.
- Do not try to swim in the ocean – your swimming skill is low; you’ll drown. Stick to pools (can respawn).
- Do not skip the driving tutorial in the first mission – you need to learn braking and reverse for missions.
- [ ] Complete the opening cutscene and airport walk.
- [ ] Save at Grove Street safehouse (bed).
- [ ] Finish the first three missions: “In the Beginning…”, “Ryder”, “Tagging Up Turf”.
- [ ] Purchase a body armor from Ammu-Nation (west of Grove Street near the Cluckin’ Bell).
- [ ] Do 3-5 taxi missions (green icon near your safehouse) to earn $200+.
- [ ] Buy a cheap meal (Cluckin’ Bell – $10) to eat.
- [ ] Save again after earning money.
- [ ] Learn to drive: steal a car, drive around for 5 minutes, practice braking and reversing.
- [ ] (Optional) Visit a gym – available after mission “Rock?” Not yet. ‘In the Beginning’ unlocks gym? Actually gym unlocks after “Burning Desire”? Not immediate. But check if any gym icon appears. If not, skip.
- [ ] Set a waypoint to the next story mission (yellow marker) and complete it.
- [ ] Save before quitting.
Tip: On mobile, you can connect a Bluetooth controller for better experience; controls then mirror PlayStation/Xbox.
UI Overview: What All Those Icons Mean
The HUD (Heads-Up Display) is split into sections:
- Money – green dollar amount. You start with $0; earn through missions, robbing, etc.
- Respect – a purple bar that fills as you do gang missions or impress others. Needed to recruit gang members later.
- Fat/Muscle/Stamina – visible as bars when you pause (Stats page). Affects speed, health, melee damage.
- Health (green bar) – take damage, it goes down. Die = respawn at hospital with $100 loss.
- Armor (blue bar) – protects health; you can buy body armor at Ammu-Nation (stores). Pick up from police or enemies.
- Weapon icon – shows current weapon. Use mouse wheel or D-pad to cycle.
- Ammo count – bullets remaining / total rounds.
- Shows surrounding area, roads, icons for missions (yellow), safehouses (green), businesses (various). Your character is a small arrow. Enemy gangs appear as red or purple if you’ve started gang wars? Not immediate.
- Yellow markers – main story missions.
- Green markers – side missions (e.g., taxi, ambulance).
- Red markers – rival gang territory (unlocked later).
- $ sign – money-making opportunities.
- Clothing hanger – clothing stores.
- Cross – hospital / police station (respawn points).
- Stats – progress, skill levels (driving, guns, etc.).
- Map – large view, can set waypoints (press right mouse button on map).
- Mission – current objectives.
- Options – graphics, audio, controls.
- Save – only allowed at safehouses (your bed).
Essential Early Objectives: What You Should Do in the First Few Hours
1. Complete the first three missions in order: “In the Beginning…”, “Ryder”, “Tagging Up Turf”. These unlock basic mechanics (bicycle, driving, spray painting) and open the map slightly.
2. Buy or find a safehouse: After “Ryder” you get access to your own house near Grove Street. Save there regularly.
3. Earn your first weapon: After “Tagging Up Turf” you’ll get a pistol from the mission. Also, you can find a baseball bat or knife in backyards. Don’t buy weapons yet – save money.
4. Learn to drive: Steal a car (press enter vehicle button near any car). Practice driving with braking and turning. Avoid crashing into cops – they will give you a wanted level.
5. Do a side hustle: Taxi missions (green icon) earn quick cash. Drive around picking up fares. Start with 5 missions to earn a bit of money and unlock taxis as fast travel (pay phone near safehouse).
6. Eat to maintain health: Your hunger depletes over time. If you don’t eat, health won’t regenerate. Eat at Cluckin’ Bell (fast food) – buy a meal for $10-20. Don’t overeat – if you get fat, stamina suffers.
What to Do First and What to Avoid
DO:
AVOID:
Early Resource Priorities: Money, Weapons, Health
1. Money – Earn at least $500 quickly for a body armor and a good weapon. Missions give $100-200 each. Taxi missions give $50 per fare. Also, you can rob houses (some side quests) or collect money from dead enemies.
2. Weapons – The best early weapon is the Pistol (from the mission or buy at Ammu-Nation for $200). After that, the Micro SMG is excellent but costs $500 – wait until you have armor first. Melee weapons are free but weak.
3. Body Armor – Buy from Ammu-Nation for $150. Pick up from fallen enemies. Armor doubles your survivability.
4. Health Regeneration – Eat food or sleep (save) to restore health. Wanted level prevents health regen? Actually health only regens if you’re not starving? No, health slowly regens over time, but eating full meals speeds it. Better to save at bed to instantly restore health.
5. Vehicle – Steal a cheap car like a Sentinel or a bike. Avoid sports cars – they attract police. Learn to use a car with good handling (e.g., Solair, Premier).
Common Beginner Mistakes and How to Avoid Them
1. Not saving often – You lose progress. Save after every mission or purchase.
2. Using wanted level to drive fast – Chasing cops leads to more stars. Stay under the speed limit? No speed enforcement. Just avoid bumping into cops.
3. Failing to eat – If your stomach icon is red, you can’t regenerate health. Eat at a fast-food place or a restaurant.
4. Skipping main missions for side activities – Some side stuff is locked until you progress. Focus on story until you unlock safehouses with garages.
5. Buying expensive vehicles – Cars are easily stolen. Save money for weapons and armor.
6. Ignoring gym training – After a few missions, you can join a gym (e.g., in Los Santos). Building muscle increases melee damage and stamina. It’s worth a detour.
7. Trying to swim across water quickly – Your swimming skill starts low; you’ll tire and drown. Only swim in shallow pools early on.
8. Running out of ammo – Mission enemies drop ammo. Loot them. Also buy ammo from Ammu-Nation.
9. Getting lost – Use the map’s waypoint. The mini-map is your best friend.
10. Not using the save slot system – Use multiple save slots (max 8). Save before major missions in case you fail and lose money.
Day-One Checklist: Your First Session
Pro tip: If you want a head start, you can find hidden money pickups (e.g., $50 behind The Johnson House, $100 near the basketball court). But honestly, mission rewards are better.
Enjoy your time in San Andreas, CJ! Take it slow, explore, and don’t be afraid to fail. The first few hours set the stage for an epic adventure.
Core Gameplay
Grand Theft Auto: San Andreas – Core Gameplay Guide
This guide explains the fundamental gameplay loop, systems, and progression of GTA: San Andreas, organized by player progression tiers. The game is an open-world action-adventure where you control Carl “CJ” Johnson as he returns to Los Santos, rebuilds his gang’s influence, and uncovers a web of corruption and betrayal. The core loop involves driving, shooting, completing missions, exploring, and investing in skills and properties.
Progression Tiers Overview
GTA: San Andreas’s main story is divided into four distinct acts, each unlocking new regions, missions, and abilities. Your character’s physical stats, weapon skills, and resources grow significantly over time.
| Tier | Approximate Story Progress | Unlocked Areas | Key Milestones |
|---|---|---|---|
| Early Game | Chapters 1–3 (Los Santos) | Los Santos, parts of Red County | First gang warfare, BMX/Driving School |
| Mid Game | Chapters 4–6 (Countryside, San Fierro) | Red County, Flint County, San Fierro | Flying School, Ranch purchase, Kendl’s rescue |
| Late Game | Chapters 7–9 (Desert, Las Venturas) | Bone County, Las Venturas | Plane purchases, casino heist, Madd Dogg’s mansion |
| Endgame | Chapter 10+ (Return to Los Santos) | All areas unlocked fully | Final missions, 100% completion, gang territory domination |
Early Game (Los Santos)
Gameplay Loop
Your daily rhythm in early Los Santos:
1. Wake up at your mom’s house (replaced by Madd Dogg’s mansion after certain missions).
2. Accept a story mission (green marker) from a friend or contact.
3. Travel via car, bike, or on foot to the mission trigger.
4. Complete the objective (drive, shoot, deliver, follow).
5. Earn reward (money, respect, weapon spawns).
6. Spend earnings on food (Burger Shot, Cluckin’ Bell), clothes, tattoos, haircuts, or weaponry.
7. Optionally do side activities: BMX/mountain bike challenges, vigilante missions, paramedic/ambulance side jobs, or explore for items (tags, weapon pickups).
Combat & Interaction Systems
- Fistfight: Use melee with punches (R1/RB to lock on, square/X to strike). Block/counter with L1/LB. Timing matters in gang fights.
- Melee Weapons: Baseball bat, knife, pool cue (can be picked up from enemies). Heavy melee (sledgehammer, shovel) does more damage.
- Firearms: Pistol, Micro SMG, shotgun, Tec-9. Early game you rely on pistol and melee. Aim down sights (L2/LT) for precision.
- Driving Combat: Drive-by shooting (press aim while passenger, or activate drive-by with L2/LT when holding a weapon while driving).
- Lock-on: Auto-aim targets nearest enemy. Essential in crowded shootouts.
- Skill Bars: Stamina (run duration), Muscle (melee damage, appearance), Fat (affected by food/exercise). Increase stamina by running, muscle by gym workouts, fat by overeating.
- Weapon Skills: Use a weapon continuously to level it up. Higher levels give faster reload, tighter aim, dual-wield for pistols (Hitman level). Example: Pistol → 100 hits → Hitman → dual-wield.
- Stats:
- Money: Start with $0. Earn via missions, robberies, ambulance/paramedic, taxi fares, or selling stolen goods to the fence (after unlocking). Early money is tight – save for basic weaponry (pistol, SMG) and essential property (e.g., the Johnston house in Los Santos if you want a safehouse with garage).
- Ganton (CJ’s home turf), Idlewood, Jefferson – gang territories.
- Market – stores (Binco, Pro-Laps), tattoo parlor, barber.
- Los Santos Airport – later you fly from here.
- Red County – accessible via dirt roads; contains farms, a small town (Angel Pine), and the first air strip.
- Collectibles: 100 Spray Tags (spray over rival tags to increase respect). Rewards: new weapons at your safehouse.
- Story Missions: Green markers. Early examples: “In the Beginning” (cutscene), “Big Smoke” (driving tutorial), “Sweet & Kendl” (a run with Sweet), “Ryder” (weed pickup). Mostly low-stakes driving and simple shooting.
- Side Missions:
- Gang Territories: After the mission “Doberman,” you can start capturing territories. Shoot rival gang members until they drop gang tags, then fend off a counter-wave. Early game you can only take a few territories near Grove Street due to limited firepower.
- Money Sources: Mission rewards ($100–$500), robbing stores (point gun at register), selling drugs (after later missions), and gambling (low stakes in casino – unlocked late). Early game: grind side missions (taxi and paramedic) for steady cash.
- Expenditures: Food ($5–$10 each), ammo ($15 for pistol ammo), clothes ($50–$200). Weapon purchases from Ammu-Nation (pistol $100, SMG $500). Save for a pistol and a shotgun.
- Safehouses: You can store weapons at safehouses (garage). The main safehouse is Grove Street. Later you can buy properties (e.g., the Johnson House backyard becomes a save point after completing “Sweet & Kendl”).
- Physical Stats: Focus on running and swimming to increase stamina and lung capacity. Go to the gym (Los Santos Gym) to build muscle – you can then perform strong attacks and intimidate rivals.
- Weapon Proficiencies: Use the pistol repeatedly until you unlock dual-wielding. Switch to SMG for drive-bys – SMG skill improves accuracy.
- Respect: Increase by completing missions, defeating rival gang members in territory wars, and doing gang activities. Higher respect unlocks missions and allows you to recruit up to six gang members for backup.
- Completing Paramedic gives infinite sprint – invaluable later.
- Firefighter grants fire resistance, useful in later missions like “Zeroing In” and casino heists.
- Taxi missions unlock the ability to skip taxis rides (fast travel) and earn $100 bonus per fare.
- Capturing territories early preps you for the endgame territory war.
- Weapon Upgrades: Buy from Ammu-Nation across San Fierro. Unlock silencers for pistols, SMG, sniper rifle (after completing specific missions like “The Meat Business”). Silenced weapons are crucial for stealth approaches.
- Aerial Combat: Helicopters (use with L2/LT to ascend/descend, analog stick to tilt). Attack with mounted machine guns or rockets (e.g., Hunter spawns after top-ranking in Vigilante).
- Water Combat: Swim and shoot – though limited. Boat missions like “Warship” teach you to use speedboats and mounted turrets.
- Team Tactics: Recruit homies (gang members) from neutral turf by walking near them and pressing R1/RB. They will follow and shoot. Useful for missions with heavy fire.
- New Melee: Katana (found in the woods near Mount Chiliad) – allows fast, lethal attacks.
- Driving School: Unlocks after “Race” with Cesar (in Red County). Complete gold medals to get a free Sultan car. Improve driving skill significantly.
- Flying School: Located at the San Fierro airport (prerequisite: after completing “Are You Going to San Fierro?”). Gold medals unlock the Hunter helicopter, Rustler plane, and increase flying skill. Very powerful rewards.
- Bike School: Not mandatory but unlocks BMX tricks and a unique bike (Freeway).
- Boat School: Located in Bayside (northeast San Fierro). Golds unlock a speedboat and improve boat skill.
- Lung Capacity: Max out by swimming underwater – needed for some missions like “The Coast” where you have to retrieve items underwater.
- San Fierro – hilly city with Chinatown, docks, airport.
- Flint County – woods, farms, the “Old Venturas” ranch.
- Bone County – desert (enter late mid-game).
- Mount Chiliad – highest point, cable car, secret path to Las Venturas.
- Collectibles: 50 Oysters (found underwater across San Andreas) – give an early 10% armor and infinite swimming stamina? Actually oysters increase lung capacity and give protection from drowning. Horseshoes (50) in Las Venturas (late mid-game) – give luck boost and an early M4.
- Property Purchase: You can buy several businesses: the Dock Yard (after “Pier 69”) allows shipping/import missions; Driving School (doesn’t require purchase); the McCoy’s in Angel Pine (after mission “The Outrider”) serves as a safehouse; the Boatyard in Bayside (after boat school). Key: Rentable garages (Larson’s Farm, Vinewood) to store vehicles.
- Story Missions:
- Side Missions:
- Money Sources: Story missions ($2,000-$5,000), asset income (after buying businesses, e.g., the Dock Yard yields $2,000 weekly after three import-export runs).
- Businesses: Dock Yard (cost ~$20,000; after completing three heist missions for it, generates $2,000). The King in Exile (casino) later in Las Venturas.
- Weapons: AK-47 $1,500, Combat Shotgun $2,500, Sniper Rifle $5,000. Ammo costs more.
- Safehouses: You can now own multiple safehouses: Angel Pine motel, the small airstrip (after “The Green Sabre” – actually that airstrip has a hangar to save planes), and a few garages.
- Weapon Skills: Focus on AK-47 and Combat Shotgun – they become essential for mid-game shootouts. AK-47 skill unlocks faster fire rate and tighter burst.
- Driving & Flying: Max out driving and flying skills – necessary for several missions (e.g., “Freefall” requires piloting a plane; “Stowaway” requires driving a motorcycle onto a moving plane).
- Muscle & Stamina: Keep exercising – high muscle helps in fistfights and intimidation. Stamina is needed for long chases on foot.
- Completing asset missions unlocks income streams that fund endgame weaponry and property.
- Gaining flight proficiency via Flying School gold is crucial for later air-based missions (e.g., “Bombs away” in Las Venturas).
- Collecting 50 Oysters early gives you infinite swimming stamina and full lung capacity – makes underwater missions much easier.
- Buying the Dock Yard and completing all three import runs unlocks the ability to sell stolen cars at the pier for extra cash (late-game money maker).
- New Weapons:
- Stealth Techniques: Crouching (press R3/Right stick) reduces noise. Assassinate with silenced pistol or katana.
- Driving in Combat: You now have access to tank (if you steal from Fort Carson, but careful with stars) or special vehicles like the Hunter helicopter (rockets + machine gun).
- Pilot Combat: After “Stowaway” you can use the Rustler (gun) or Hunter (chaingun + rockets) for aerial missions like “The Da Nang Thang” alternative.
- Skill Caps: By now, you can max out all skills. Visit training schools:
- Body Stats: Muscle and Fat can be adjusted for optimal appearance (affects women reactions in casinos).
- Weapon Proficiency: Max out M4 (Hitman level) for dual-wield? No, only certain weapons dual-wield. M4 just gets faster reload. SMG hitsman level allows dual-wield.
- Las Venturas – desert city with casinos, airport, military base restricted area.
- Bone County – contains the Area 69 (secret military base), the Big Ear satellite dish (sniper spot), and the Welcome to Las Venturas sign.
- Desert Areas: Open terrain, suitable for off-road races and stunts.
- Collectibles: 50 Horseshoes – after finding all, you get infinite luck? Actually, each horseshoe increases luck (affects casino winnings). Collect all to get a special reward (M4 with advanced scope).
- Secret Areas: The Mount Chiliad mystery has no gameplay reward, but some hidden packages give damage protection.
- Story Missions:
- Heist Mission: “The Caligula’s Palace” – requires high driving skill and a getaway vehicle. Rewards $500,000.
- Races: The Burger Shot Trucking? Actually, “Wheels of Fire” mission (race with truck).
- Side Missions: Pet Control (stealing pets – from the casino? Actually, it’s a sideshow). Boat School remains. Vigilante becomes profitable (use Hunter). Firefighter is still doable.
- Money Sources: Heist ($500,000), casino earnings (Four Dragons Casino yields $2,000 every 24 in-game hours if you complete the first casino heist – actually it’s a passive income stream). You can also bet on races or play blackjack for huge wins (if you hack the casino).
- Properties:
- Weapons: Minigun ($10,000), M4 ($3,000), RPG (free if stolen).
- Vehicle Imports: Buy Super GT (fast), Infernus, Cheetah from import garages (cost $20,000-$50,000).
- Final Stats:
- Respect: At this point, you can recruit up to 8 homies. Use them for territory wars later.
- The Four Dragons Casino heist gives money that funds endgame territory wars (buy heavy weapons, hire homies).
- Completing all Desert races unlocks the M4 at Ammu-Nation (already available).
- Collecting all 50 Horseshoes and 50 Oysters increases luck and swimming – not essential but helpful for 100% completion.
- The Area 69 military base contains the Rhino tank – if you steal it, you can use it in the final missions for easy gang wars.
- Territory Warfare: The main endgame activity. You and your homies vs. the Ballas, Vagos, and San Fierro Rifa.
- Weaponry: You now have access to everything: Minigun, RPG, Heat Seeker, grenades, molotov, katana, etc. Use silenced weapons for stealth in some side missions.
- Vehicles: Best vehicles: Infernus (fast), Bullet (supercar), Rustler (plane), Hunter (helicopter with rocket), Rhino (tank). You can steal a Fighter Jet from Area 69 (the one at the base – it’s the Hydra? Actually the Hydra is a VTOL jet, can be obtained after 100% completion of Flight School).
- All skills at max if you’ve been diligent. If not, now is the time to grind:
- Respect: 1000 max. Important for gang territory defense (higher respect makes homies stronger and easier to recruit).
- All areas fully open. You can explore the entire map – even restricted military bases (though high wanted levels).
- Hidden interiors: Casino backrooms, the Big Ear satellite dish, the Vallejo (underwater tunnels).
- Easter Eggs: The Mount Chiliad ghost car, the Grass Stains (burn out marks), the Homeless (if you stand near the mall).
- Collectibles: All 100 tags, 50 oysters, 50 horseshoes, 50 snapshots (photograph tourist spots – locations on map after completing certain missions). Completing all gives rewards:
- No more story missions. But there are many side missions you may have skipped:
- Co-op modes? Not available in original game.
- Money: By now you likely have millions from heists and asset income. Buy everything: every safehouse (20 total – garages, houses), all weapons, all clothes, all tattoo styles.
- Asset Properties: Each asset (Dock Yard, Four Dragons Casino, the garage business?) yields weekly income. Keep collecting.
- Gambling: With maxed luck from horseshoes, you can win big at blackjack, slot machines, or horse betting. This is a quick way to make money if you run out.
- Selling cars: Import-Export list earns $20,000 per unique car.
- Max out all stats if not done. Use gyms to adjust muscle/fat for appearance.
- Weapon Skills: Hitman for all weapon types – unlock all bonuses (dual SMG, faster reload for M4, etc.).
- Respect: 1000 is the cap after capturing all gang territories.
- Primary Goal: Achieve 100% completion. Requirements:
- Rewards for 100%:
Progression & Skills
- Driving – Improve by driving smoothly and doing driving school. Affects vehicle handling.
- Bike – Similar for motorcycles. Unlocks tricks.
- Flying – Not available until mid-game; early you can only take planes if unlocked later.
- Lung Capacity – Increase by swimming underwater. Needed for some side missions.
Exploration & World
explored area: Los Santos and southern countryside. Key locations:
Quests & Missions
- Paramedic (ambulance icon) – 12 levels to earn infinite sprint.
- Firefighter (fire truck) – extinguish fires for fireproofing.
- Vigilante (police car) – kill criminals for money and respect.
- Taxi (taxi) – earn fare rewards and taxi boost.
Economy
Character Build Growth
Endgame Relevance (Early Game)
Early accomplishments have long-term benefits:
---
Mid Game (Countryside & San Fierro)
Gameplay Loop
After escaping Los Santos (following the death of Big Smoke/ Tenpenny’s frame-up), you move to the countryside. The loop shifts to a wider area:
1. Live at the Angel Pine motel (or later San Fierro safehouses).
2. Accept missions from new contacts: Cesar, Catalina (the woman), The Truth, Jizzy, Toreno.
3. Travel larger distances – use faster cars (e.g., Infernus from imports) or own a plane/Helicopter (after Flying School).
4. Missions become more varied: infiltration, stealth, aerial combat, property defense.
5. Earn larger sums ($1,000–$5,000 per mission).
6. Spend on businesses (dock yard, driving school property, garages), better weapons (AK-47, Combat Shotgun), and upgrading planes.
7. Side activities: Flying School (unlocks aircraft), Trucking, Courier Missions (RS Haul), or Robo missions from Zero.
Combat & Interaction Systems
Progression & Skills
Exploration & World
Unlocked areas:
Quests & Missions
- Catalina’s Missions (part of “Small Town Bank” bank robbery, “Gone Courting” race).
- The Truth’s Missions (steal a green Go-Go car, harvest weed).
- Toreno’s Missions (military escort, flying chopper to smuggle goods).
- Jizzy B.’s Missions (prostitution standoff, pimping, drug deals).
- Ryder’s Revenge? Actually Ryder is killed mid-game.
- Zero’s RC Missions (remote control planes/tanks – you need to destroy enemies with a remote bomb).
- Quarry Missions (drive a large dump truck to carry goods – earn money).
- Courier Missions (on mountain bike – deliver packages quickly).
- Trucking (drive semi-trucks across states; earn high payouts).
- Import-Export (collect specific cars from list; large rewards).
Economy
Character Build Growth
Endgame Relevance (Mid Game)
---
Late Game (Las Venturas & Desert)
Gameplay Loop
After graduating from San Fierro, you move to Las Venturas, where the stakes rise:
1. Reside in the Four Dragons Casino (your main base).
2. Accept missions from Woozie (Mountain Cloud Boys), Ken Rosenberg, Millie, Salvatore Leone (mafia).
3. Missions involve casino heists, racing, plane stunts, stealth assassinations, and infiltrating the Caligula’s Palace casino.
4. Money becomes abundant (heist pays $500,000+).
5. You invest in the casino (Four Dragons) to earn passive income.
6. Buy high-end vehicles (from import garages) and residences (Madd Dogg’s Mansion, etc.).
7. Power-level weapon skills by buying grenades, M4, minigun (check Ammu-Nation after certain missions).
8. Side activities: Gambling (blackjack, roulette, slot machines), Parachute jumps, Vehicle Side Missions (e.g., the Delicious/Patricia?), and the Chiliad Challenge.
Combat & Interaction Systems
- MP5 (alt SMG) – good accuracy.
- M4 – fully automatic rifle with scope; best all-around weapon after AK-47.
- Minigun – devastating but heavy (slows movement).
- Heat Seeking RPG – early unlock via Vigilante or military base.
- Grenades – effective for crowd control.
Progression & Skills
- Advanced Driving School (in Las Venturas) – teaches braking, parallel parking, etc. Gold rewards: Super GT car.
- Flight School (optional, but gold here unlocks the Hunter).
Exploration & World
Quests & Missions
- Woozie’s Missions (the Four Dragons Casino heist – “The Caligula’s Palace” – involves stealing money via a tunnel, needing a driving skill to escape).
- Millie’s Missions (seduction or killing her husband for casino access).
- Ken Rosenberg’s Missions (negotiating with mafia).
- Salvatore Leone’s Missions (loyalty missions, betrayals).
- The Mountains (chasing a train on a dirtbike).
Economy
- Mad Dogg’s Mansion (unlocked after completing “The King of South” – becomes a safehouse with helicopter pad).
- Four Dragons Casino – main base.
- Garages across desert (e.g., at the airstrip, near the fire station).
Character Build Growth
- Driving: Max (needed for heist escape).
- Flying: Max (for some missions like “The Da Nang Thang” half of alternate routes).
- Weapon Skills: Hitman for SMG and rifle (dual SMG or high M4).
- Lung Capacity: Max (underwater sometimes).
- Muscle: Max (for intimidation).
Endgame Relevance (Late Game)
---
Endgame (Return to Los Santos & 100% Completion)
Gameplay Loop
After the events at Las Venturas, you return to Los Santos for the final confrontation with Big Smoke and Officer Tenpenny. The loop becomes a mix of story missions and open-ended sandbox:
1. Live at Madd Dogg’s Mansion (your final safehouse).
2. Accept the final story missions (green): “The Green Sabre” (actually earlier), “End of the Line” – but the final set is “Are You Going to San Fierro?” etc. Actually the final missions are:
- “Robbing Uncle Sam” (in Fort Carson? No, that’s earlier). The final mission is “End of the Line” – a long mission with two parts: chasing Smoke in a fire truck, then escaping from Tenpenny who drives a fire truck, then final firefight at Smoke’s crack palace.
3. After completing the main story, you can freely roam with no missions. You can now focus on 100% completion:
- Capture all 100 gang territories (Green turf).
- Complete all side missions (paramedic, fire, taxi, vigilante, pimping, etc.).
- Collect all items (tags, oysters, horseshoes, snapshots).
- Achieve gold medals in all schools (except some may need alternate characters? Actually you can do them anytime).
- Buy all properties (20+ safehouses, garages).
- Complete unique stunt jumps (36) and all vehicle side missions.
Combat & Interaction Systems (Endgame)
- To attack a territory: walk into enemy turf and kill 3-4 gang members. A wave of enemy players will appear (6-10). Defeat them to capture the zone.
- Defend your territories: enemies sometimes attack; you get a message. Defend within a time limit.
- Use heavy weapons like the Minigun or RPG for quick kills. Or use the Tank (Rhino).
- Homies can be recruited (up to 7) and they carry SMGs, AKs, combat shotguns. They absorb enemy fire.
- Benefits: Capturing all territories gives you infinite ammo (if you have 100% respect? Actually after capturing all territories, you earn a unique reward: the Hydra (Harrier jet) spawns at Verdant Meadows airstrip (if you own the hangar). Also respect maxes to 1000, and you can recruit unlimited homies? Not exactly.
Progression & Skills (Post-Story)
- Driving: Complete all school gold medals.
- Flying: Gold medals – then practice parachuting.
- Bike: Bike school gold gives BMX tricks.
- Boat: Boat school gold unlocks a speedboat.
- Lung Capacity: Swim around the ocean for 10 minutes.
Exploration & World
- Tags: SMG at your safehouse.
- Oysters: Infinite lung capacity.
- Horseshoes: Infinite luck at casinos.
- Snapshots: Shotgun at safehouse.
Quests & Missions
- Blood Bowl (lowrider competitions).
- BMX and Bike Stunts (do tricks near ramps).
- Freight Yard Train (steal or stop trains).
- Chiliad Challenge (mountain bike race down Mount Chiliad; must finish under 4:00 for gold – yields money).
- Helicopter Tours (sightseeing).
- Stunt Jumps (ramp cars onto platforms, earn respect).
Economy (Post-Story)
Character Build Growth (Post-Story)
Endgame Structure & 100% Completion
- Complete all story missions (36).
- Complete all side missions: Paramedic (12 levels), Firefighter (12), Taxi (50 fares), Pimping (10 clients? Actually 10 customers), Vigilante (12 levels – each requires killing criminals; at level 12, you get Inf Reno? Actually infinite health? No, rewards: police uniform and siren).
- Deliver all 100 packages (tags, oysters, horseshoes, snapshots).
- Complete all schools (driving, flying, boat, bike) with at least bronze.
- Capture all 100 gang territories.
- Complete asset missions (all three heists for the casino and dock yard).
- Collect all vehicles for import lists (3 lists of 15 – total 30 vehicles? Actually there are two lists: from import/export garage in Easter Basin (San Fierro) and from the San Andreas Imports in Las Venturas).
- Unique stunt jumps: 36 (some in countryside).
- Other: Complete the Chiliad Challenge (gold) – counted separately? Actually not required for 100% but gives achievement.
- Rhino tank spawns at the military base fortifications.
- Infinite health? Not exactly; you get a special uniform that gives double health? No, the only health benefit is from paramedic infinite sprint.
- Unlimited ammo? No, that’s a cheat code. But you get a satisfying end screen.
Summary of Core Gameplay Loop Across Tiers
| Aspect | Early Game | Mid Game | Late Game | Endgame |
|---|---|---|---|---|
| Territory | Grove Street, Los Santos | Countryside, San Fierro | Las Venturas, desert | All of San Andreas |
| Main Income | Missions ($100-500), side jobs | Asset income, heists ($5k-10k) | Casino heist ($500k) | Passive income, gambling |
| Weapons | Pistol, bat, Micro SMG | AK-47, Combat Shotgun, Sniper | M4, Minigun, RPG, Grenades | Full arsenal |
| Skills focus | Stamina, driving, pistol | Flying, bike, lung capacity | Boat, driving advanced, sniper | All max |
| Vehicles | Bikes, low-end cars | Sports cars, helicopters, planes | Supercars, jet, tank | Collection complete |
| Side attention | Paramedic, fire, taxi | Flying school, quarries | Stunt jumps, chiliad | 100% completions |
| Character goal | Build muscle, respect | Max skills for missions | Cash for properties | Mastery, completion |
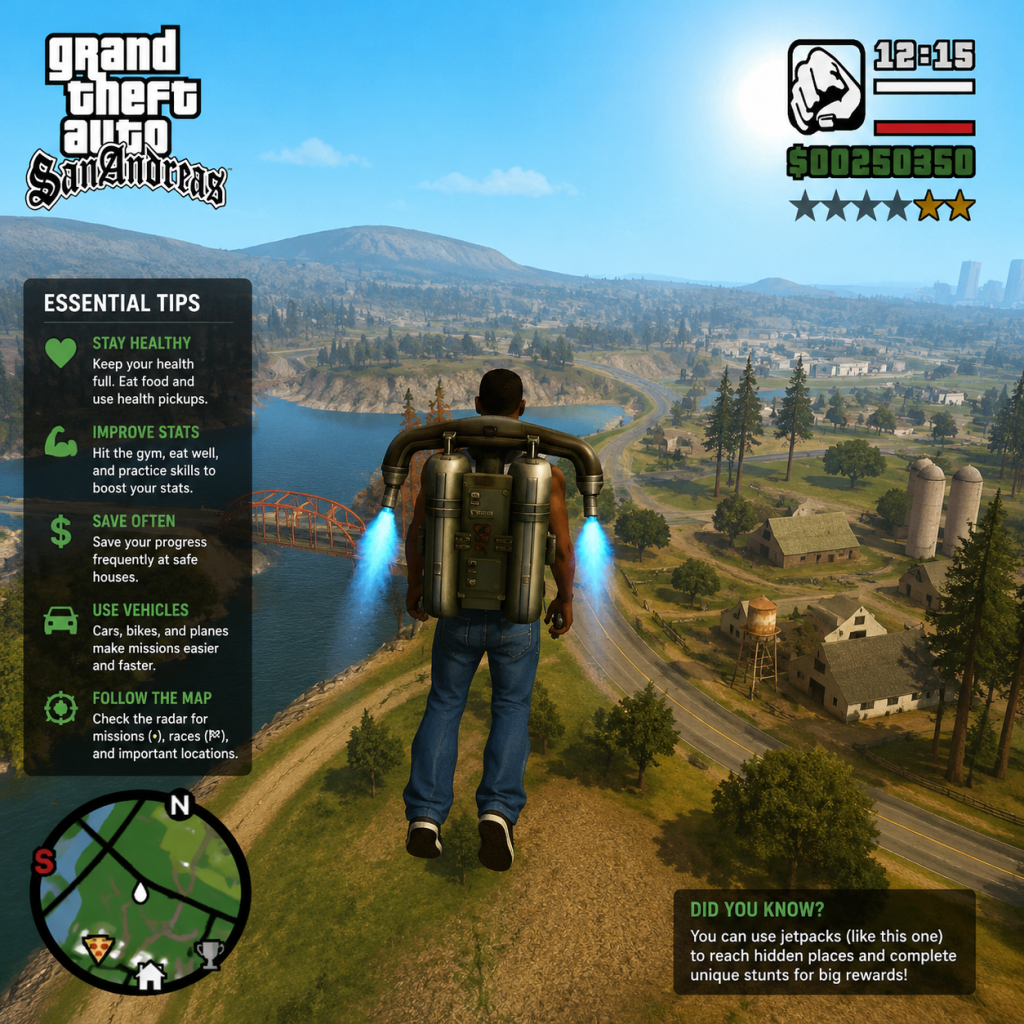
Game Tips
Grand Theft Auto: San Andreas – Comprehensive Game Tips Guide
This guide gathers the most useful tips for GTA: San Andreas, organized by category. Whether you’re a newcomer or a returning player looking to optimize your playthrough, these strategies will help you survive, thrive, and dominate San Andreas.
---
Beginner Tips
1. Save Often and in Different Slots
- Explanation: The game has no autosave. Manual saves are done at safehouses (marked by a floppy disk icon) or via the phone in some versions.
- Analysis: Saving in multiple slots prevents losing progress due to glitches, failed missions, or accidental deaths. Rotate at least three saves: one before tough missions, one for general progress, and one backup.
2. Complete the First “Date” Missions Early
- Explanation: The missions “The Party” and “Burning Desire” unlock the ability to date girlfriends. Dating Denise gives you a pimping income and access to her safehouse.
- Analysis: The pimping side missions are an easy early source of money. Dating also provides benefits like health regeneration when visiting a girlfriend. Prioritize these after the introductory missions.
3. Always Carry a Mech Weave and Body Armor
- Explanation: Health pickups (heart icons) and body armor (kevlar vest icons) are scattered around the map. Buy armor from Ammu-Nation (unlocked after “Cleaning the Hood”).
- Analysis: Armor doubles your survivability, especially during gang wars and police chases. Stock up at the Ammu-Nation in Los Santos early. Health regenerates only to 75% naturally; you need health pickups or food to go to 100%.
4. Learn the Map Layout
- Explanation: The three cities (Los Santos, San Fierro, Las Venturas) are large. Use the in-game GPS (yellow route) on missions, but also memorize fast-travel points like pay-n-sprays and safehouses.
- Analysis: Knowing shortcuts and safe routes helps evade the police and reduces mission failure due to getting lost. For example, the Los Santos freeway is good for fast travel but prone to traffic.
5. Do Not Waste Money on Modding Cars Too Early
- Explanation: TransFender and Loco Low Co. offer visual upgrades and performance boosts, but they are expensive (e.g., $2,000 for a nitro).
- Analysis: Save money for weapons, properties, and mission essentials first. Modding is useful later for the car showroom export missions or simply for style. The only early worth is the “Pimping” car mods to increase boyfriend rating.
---
Combat Tips
1. Master the Drive-By Shooting
- Explanation: Press L1/LB (or left mouse button) while in a car to shoot manually; use the right analog to aim.
- Analysis: Drive-by is the most effective method against enemies on foot or in cars during early missions (e.g., “Drive-Thru”). Use the Tec-9 or Micro Uzi for high fire rate and ammo capacity. Aim for the head or tire at close range.
2. Use the “Dual Wielding” Technique with Certain Weapons
- Explanation: Hold the aim button then pull the trigger; some weapons like pistols and SMGs can be dual-wielded if you equip two of the same type (e.g., two Desert Eagles).
- Analysis: Dual wielding doubles firepower but reduces accuracy. Best used in close quarters (e.g., spray and pray during gang wars). For long range, stick to one-weapon aiming.
3. Exploit the Auto-Aim
- Explanation: By default, tap the aim button to lock onto the nearest enemy. While locked, slightly move the right stick for a headshot.
- Analysis: Auto-aim is very generous. Use it to quickly take down multiple enemies. However, in missions with many enemies (like “The Green Sabre”), you may lock onto the wrong target; practice disengaging aim quickly.
4. Win Melee Fights with Timing
- Explanation: Press the attack button repeatedly for a combo; hold it for a strong punch/attack.
- Analysis: In fistfights (e.g., boxing, street fights), the best strategy is to punch, then back away to avoid retaliation. Use the “Kung Fu” style from the gym for powerful combos. A kick can knock enemies down.
5. Gang Wars: Territory Control Tactics
- Explanation: After “Cleaning the Hood,” you can start gang wars by entering enemy territory (purple on map) and killing three enemy gang members.
- Analysis: To win a gang war, clear the first wave of 10-15 enemies, then defend against two more waves. Stay near cover (cars, walls) and use automatic weapons. Call your own gang members with “recruit” after gaining respect (hold aim near a GTA member and press up or down to recruit). Recruiting two or three makes the fight easier.
---
Exploration Tips
1. Collect Oysters for Lung Capacity
- Explanation: There are 50 oysters around the coastlines. Collecting all increases your lung capacity to maximum and adds a girlfriends with benefits.
- Analysis: Max lung capacity is crucial for underwater missions (e.g., “The Da Nang Thang”) and makes swimming much faster. Use a boat with a searchlight at night to spot their glow. Mark each collection on your map.
2. Find All Horseshoes for Luck
- Explanation: 50 horseshoes are scattered in Las Venturas. Collecting all increases your luck stat, which improves gambling odds.
- Analysis: Luck directly affects casino winnings (slot machines, blackjack). After collecting all, you can easily earn millions at the wheel of fortune. Use a map from the internet or in-game guide; they are often on rooftops and in alleys.
3. Tag Sprays for Respect and Weapons
- Explanation: Spraying 100 gang tags increases your respect, unlocks a weapon spawn at the Ganton safehouse, and awards a new car at CJ’s house.
- Analysis: The weapon spawn (a 9mm pistol and SMG) is very helpful early game. Also, the increased respect allows you to recruit more gang members. Do tag-spraying during daylight to avoid police suspicion.
4. Snapshots for Camera Missions
- Explanation: There are 50 photo opportunities (O symbol) in San Fierro. Taking all unlocks infinite sprint and increases stamina.
- Analysis: Infinite sprint is amazing for running away from police or reaching places quickly. The camera is given during “Photo Opportunity” mission; after that, you can snap them anytime. Look for them on billboards, sides of buildings, and landmarks.
5. Hidden Packages (Skull) for Unique Rewards
- Explanation: 30 hidden packages (skulls) exist. Collecting all gives you $100,000, but more importantly, unlocks a unique vehicle (the Hunter helicopter) spawn at Verdant Meadows.
- Analysis: The Hunter is a powerful attack helicopter with missiles and a minigun. Perfect for later missions or just causing chaos. However, the skulls are hard to reach — often on roofs or under bridges. Use a helicopter or a fast car to get them.
---
Resource & Economy Tips
1. Invest in Properties as Soon as Possible
- Explanation: After reaching San Fierro and Las Venturas, you can buy safehouses and businesses (e.g., the garage, car dealerships).
- Analysis: Properties generate passive income. The most profitable is the “Four Dragons Casino” which pays $10,000 per day (in-game time). Buy it after the casino missions. Also, the San Fierro garage lets you store cars, which is helpful for exporting vehicles to earn cash.
2. Money-Making Side Missions
- Explanation: Feets of strength (ambulance, firefighter, vigilante, pimping, taxi) pay cash per level completed.
- Analysis: For early money, ambulance missions (level 12) give $5,000 and infinite sprint (unrelated). Pimping gives per client. The fastest early money is the “Vigilante” missions (police car) which pay higher per bust/kill. Use the police car from the police station; complete 5 levels for a decent payout.
3. Saving Money on Weapons
- Explanation: Weapons can be picked up from dead enemies, especially gang members.
- Analysis: After gang wars, collect dropped weapons. The best free weapon is the MP5 (from some enemy spawns) and the shotgun. Save money by not buying pistols; instead, use found ones. Ammu-Nation’s better weapons (AK-47, M4, sniper) are worth buying once you have cash.
4. Free Health at the Hospital – But Beware
- Explanation: Dying sends you to a hospital with a $500 fee (with decreasing money).
- Analysis: If you have less than $500, you’ll be revived for free. Use this to avoid paying if you’re low on cash. However, you lose all weapons. For expensive runs, carry a weapon that can be recovered from a previous safehouse stash.
5. Betting on Races
- Explanation: In Las Venturas, you can bet on horse races.
- Analysis: Save before betting; reload if you lose. With high luck (horseshoes), the odds shift in your favor. Bet on the highest or lowest odds depending on your strategy. A common trick: bet $100,000 on a 5-1 horse; with luck, you win big. But be cautious – the game can still randomize.
---
Character Stat/Build Tips
1. Muscle: The Physical Strength Attribute
- Explanation: Muscle improves melee damage and changes CJ’s appearance. It increases by weightlifting (gym) and some activities.
- Analysis: For a melee-focused playthrough, max muscle early. This makes fistfights a breeze and increases the damage of all melee weapons. Also, muscle reduces the chance of being knocked down. The biggest benefit is for the “Boxing” missions and street fights.
2. Stamina: Unlimited Running
- Explanation: Stamina is increased by running on foot, cycling, and swimming. Max stamina lets you sprint indefinitely.
- Analysis: Indefinite sprint is extremely useful for fleeing, exploring, and gaining an advantage in chases. Do the “Snapshots” (San Fierro) to get infinite sprint even faster (collect all 50). Otherwise, practice by running from Los Santos to the other cities.
3. Lung Capacity: Essential for Underwater Missions
- Explanation: Lung capacity determines how long you can hold your breath while swimming underwater. Max level is about 2 minutes.
- Analysis: The mission “The Da Nang Thang” requires diving and planting bombs underwater. If your lung capacity is low, you’ll have to resurface repeatedly, alerting enemies. Collect oysters (50) to max it instantly. Alternatively, swim laps in the pool at the Los Santos beach.
4. Vehicle Skills: Driving, Flying, Cycling
- Explanation: Driving skill improves handling, flying skill reduces plane instability, and cycling skill allows bunny hops and wheelies.
- Analysis: For story progression, driving skill is not mandatory but helpful for races. Flying skill is crucial for “Learning to Fly” and later aerial missions. Practice flying at the San Fierro airport (easy: fly through the rings). Cycling skill unlocks fast travel on a bike and is needed for the “BMX” challenges.
5. Respect: Recruiting and Perks
- Explanation: Respect increases by completing missions, gang wars, and tagging. High respect allows recruiting more gang members (up to 4).
- Analysis: Recruited gang members help in gang wars and story missions (e.g., “The Green Sabre” assault). They also prevent other gangs from attacking you. The easiest way to boost respect is to do drive-bys in enemy territory; each kill gives 1 point.
---
Advanced Strategies & Optimizations
1. Speedrun Quick Tips
- Explanation: Use the “noclip” glitch (PC only) to bypass locked areas. On console, exploit the “ferry glitch” to skip “C.R.A.S.P.” missions.
- Analysis: For story speed, focus on mandatory missions only. Avoid side activities. Use the “flying car” glitch (specific vehicle damage + turning) to fly across the map quickly. Early game, steal a fast car like the “Turismo” from a parked location.
2. The “Wrong Side of the Tracks” Mission Hell
- Explanation: Many players struggle with this mission because the gang members fall off.
- Analysis: The trick is to either stay on the right side of the train to avoid obstacles, or use a motorcycle to jump on the train (requires skill). Alternatively, use the “Friendly fire” glitch: shoot your own gang member to reset the AI behavior. But honest strategy: keep the train at a distance and wait until the gang member shoots; the train will then match speed.
3. Police Evasion Mastery
- Explanation: With maxed wanted level, hide in a pay-n-spray, or run under elevated tracks to lose line-of-sight, then go dark.
- Analysis: The quickest way to lose stars: find a long tunnel (e.g., near Los Santos Forum) or enter a building. If you have a fast car (e.g., Infernus), simply outrun them until they lose sight. Use the radar: the blue cones indicate police vision; avoid them. Also, stealing a police car and doing vigilante missions can reduce wanted level quickly.
4. Exploit the “Rising Sun” Car Export Glitch
- Explanation: Exporting vehicles in the “Garage” delivery missions normally pays, but you can exploit by saving the list, delivering one, then reloading to keep the car and get paid again.
- Analysis: This is a known glitch on PS2 and PC. It yields infinite money. Only use if you want to break the economy. For a legitimate game, just sell cars from the street; the highest value is the “Sandking” (around $40,000).
5. Getting the Jetpack Early
- Explanation: The jetpack is normally obtained late in the story (after “Black Project”). But you can get it early by completing a series of cheats (PC) or by using a mod.
- Analysis: On PC, spawn the jetpack with the cheat code “ROCKETMAN” (works after “The Black Project”). On console, no early jetpack without glitches. The jetpack allows exploring unreachable areas (airports, tall buildings) but is not essential. Use it for fun or to collect hidden packages.
---
Vehicle & Driving Tips
1. Best All-Round Vehicle: The Buffalo
- Explanation: The Buffalo (a sports car) has good speed, handling, and durability. Found commonly in Las Venturas and San Fierro.
- Analysis: For missions requiring speed and mild off-road, choose the Buffalo. Avoid the Sports car (Infernus) because it flips easily. The Buffalo also has a longer life in police chases.
2. Motorcycles for Agility
- Explanation: Bikes like the PCJ-600 and FCR-900 are fast and agile, perfect for weaving through traffic.
- Analysis: Use motorcycles for missions like “The Stowaway” and any race. They are also great for escaping police because they can go off-road easily. The downside: you are vulnerable to bullets. Pair with body armor.
3. Boats: Speed or Durability?
- Explanation: The “Squalo” speedboat is fast but weak; the “Marquis” is durable but slow. For combat, use the “Patriot” with turret (from boat school).
- Analysis: For “The Da Nang Thang” mission, use a fast boat (Squalo) to evade the helicopter and patrol boats. For the asset missions (e.g., boat school), the speedboat is better. Always have a boat nearby when in coastal areas.
4. Flying Tips for Beginners
- Explanation: The game has a steep learning curve for flying. First, practice with the Dodo (small plane) at the airport.
- Analysis: Key controls: push forward to go down, pull back to go up (inverted). Keep speed around 150 knots for landing. For the “Learning to Fly” missions, complete the circling and bombing runs carefully. Use the camera to see the ground. If you fail, don’t worry: you can pay for the lessons.
5. Hijacking Trains
- Explanation: You can stop a train by jumping in front of it (on foot) and pressing the enter button when the door opens.
- Analysis: Trains are useful for quick travel and some missions require you to ride them. You can also drive the train by sitting in the cab and using the throttle. But beware: the police will chase you for train theft.
---
Side Activities & Minigames
1. Gambling: The Rapid Money Maker
- Explanation: After obtaining the Four Dragons Casino (post-casino missions), you can gamble legally.
- Analysis: The best game is the “Slot Machines” with high luck (collect all horseshoes). Place maximum bets for a chance at huge jackpot. Alternatively, play blackjack with a counting strategy: stand on 17+. In the casino, you can also bet on the “Thruster” race (bet on enemy to lose). Save before big bets.
2. Racing Side Missions
- Explanation: There are street races (Las Venturas, Los Santos) and regular races (e.g., “Lowrider” missions).
- Analysis: To win races, drive clean and avoid ramming. Use the slow down button (R1/RB) to brake into turns. The best car for street races is the Sultan (fast and handles well). For the Lowrider races, memorize the course and use hydraulics to hop over low barriers.
3. BMX Challenges
- Explanation: BMX bikes can be ridden for stunts and races in some missions.
- Analysis: The BMX is great for short-distance travel and reaching rooftops. Use the wheelie to climb curbs, and bunny hop (jump button) to overcome obstacles. The challenge “BMX” in Los Santos requires you to do tricks for points: hold left/right while jumping for spins.
4. Vigilante and Paramedic for Rewards
- Explanation: Complete 12 levels of Paramedic for infinite sprint; 12 levels of Vigilante for extra armor capacity (up to 150).
- Analysis: These are tedious but rewarding. For Paramedic, use an ambulance from the hospital; drive carefully to avoid damaging the ambulance too much (it can only take a few hits before catching fire). For Vigilante, use a police car; the most efficient way is to target enemies in cars (ram them to stop).
5. Firefighter for Immunity
- Explanation: Complete 12 levels of Firefighter to become fireproof.
- Analysis: Fireproofing saves you from burning in later missions (e.g., “The Green Sabre” fire). Use the fire truck’s hose to put out fires; don’t let the truck take too much damage. The fires appear mostly in Los Santos.
---
Conclusion
GTA: San Andreas is a deep game with many systems. The tips above should help you navigate the streets of Los Santos, San Fierro, and Las Venturas with confidence. Remember: the key is to save often, invest early in properties, and practice your skills. With these strategies, you’ll become a powerful CJ in no time. Good luck!
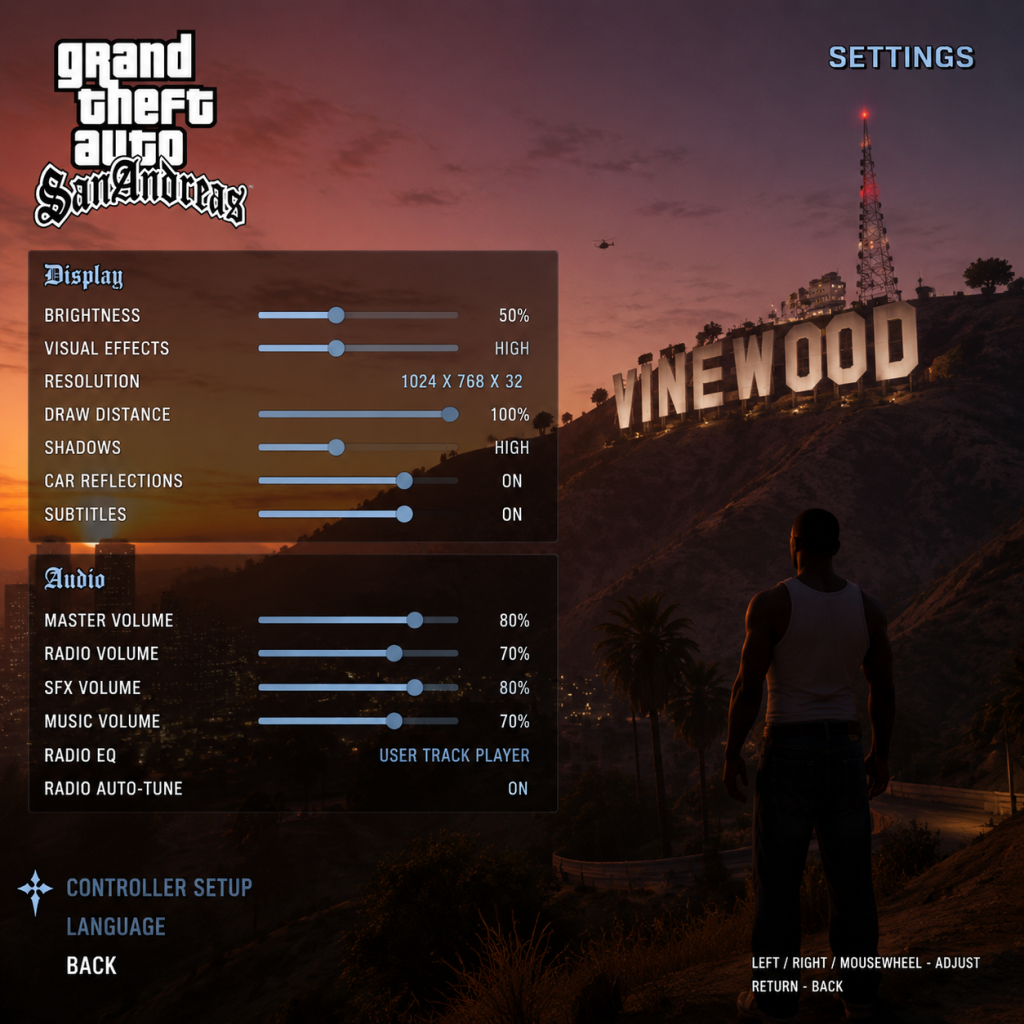
Game Settings
Grand Theft Auto: San Andreas – Game Settings Guide
This guide covers every settings category in Grand Theft Auto: San Andreas, including the original PC release and the Definitive Edition (if applicable). It explains each option, recommends optimal configurations for various hardware tiers (Low, Mid, High, Ultra), and highlights settings that are easy to misconfigure. Follow this guide to fine-tune your experience for performance, visual quality, or a balanced mix.
---
1. Graphics Settings
Graphics settings have the biggest impact on performance and visuals. GTA: San Andreas (original) is fairly lightweight by modern standards, but the Definitive Edition uses the Unreal Engine and requires more power.
1.1 Resolution & Display
- Resolution: Set to your monitor’s native resolution (e.g., 1920×1080, 2560×1440). Lower for performance.
- Refresh Rate: Match your monitor’s maximum refresh rate (60 Hz, 144 Hz, etc.). If you encounter screen tearing, enable VSync.
- Fullscreen vs Windowed: Exclusive Fullscreen offers best performance; Windowed Borderless is good for alt-tabbing.
- Aspect Ratio: Choose 16:9 (widescreen) or 4:3 (original). Use 16:9 for modern monitors.
- Texture Quality: Low (32-bit) / High (64-bit). High looks sharper but uses more VRAM. For 512 MB VRAM or less, choose Low.
- Render Quality: Very Low / Low / Medium / High. Affects overall object quality. Medium is a good balance.
- Draw Distance: Slider from 0 to 100%. Impacts how far objects, cars, and buildings render. For performance, keep below 50%. High values (70%+) cause FPS drops in dense areas like Los Santos.
- Anti-Aliasing: Off / 2x / 4x / 8x (MSAA). Reduces jagged edges. 2x improves visuals with minor performance hit. Higher values consume VRAM.
- Anisotropic Filtering: Off / 2x / 4x / 8x / 16x. Sharper textures at an angle. 4x is negligible performance cost; 16x for best quality.
- Shadows: Off / Low / Medium / High. High shadows render detailed car and character shadows. Low can cause flickering. Medium recommended.
- Reflection Quality: Low / Medium / High. Affects reflections on cars and water. Medium is fine.
- Water Quality: Low / Medium / High. High water looks translucent but can tank FPS near beaches. Low is safe.
- Particles: Low / Medium / High. Controls smoke, fire, and explosion effects. High looks nice but may cause slowdowns during fights.
- Frame Limiter: Off / On (30 FPS cap) / On (60 FPS cap). Important: If you have a high refresh monitor, choose Off and use an external cap (e.g., RTSS). The in-game limiter introduces input lag – a common misconfiguration.
- VSync: On / Off. Prevents screen tearing. Enable if tearing occurs; otherwise Off for lower input lag.
- Resolution Scale: 50%–100%+. Lowering improves performance drastically.
- Texture Quality: Low / Medium / High / Ultra. High requires ~2 GB VRAM.
- Shadow Quality: Low / Medium / High. High casts realistic shadows.
- Post-Processing: Off / Low / Medium / High. Includes bloom, motion blur. Disable for clarity.
- Anti-Aliasing: TAA (Temporal Anti-Aliasing) on/off. TAA smears slightly but removes jaggies. Off for sharper image.
- View Distance: Slider. 40–60% recommended for balance.
- Grass Density: Low / Medium / High. High density in countrysides cripples FPS on low-end.
- Ambient Occlusion: Off / Low / High. Adds depth to objects. Off on low-end.
- Original PC: 1280×720, Texture Low, Draw Distance 30%, Shadows Low, Anti-Aliasing Off, Frame Limiter 30 FPS.
- Definitive Edition: 720p Resolution Scale 50%, Texture Low, Shadows Low, Grass Low, View Distance 30%, Post-Processing Off.
- Original PC: 1920×1080, Texture High, Draw Distance 60%, Shadows Medium, Anti-Aliasing 2x, Anisotropic 4x.
- Definitive Edition: 1080p Resolution Scale 100%, Texture High, Shadows High, Grass Medium, View Distance 60%, TAA On.
- Original PC: 1440p+ 60+ FPS, Texture High, Draw Distance 100%, Shadows High, Anti-Aliasing 4x, Anisotropic 16x.
- Definitive Edition: 1440p or 4K, Texture Ultra, Shadows Ultra, Grass High, View Distance 80%, TAA On, Ambient Occlusion High.
- Master Volume: Overall loudness. Set to 80-100% and adjust speakers/headphones.
- SFX Volume: Effects like gunshots, explosions, car engines. Keep high (80-100%).
- Music Volume: Radio, background music. 50-70% so it doesn’t overpower SFX.
- Voice Volume: Dialogue, cutscenes, radio chatter. 70-100% for story clarity.
- Skip Track Key: Default on PC is `N` (next station) or `B` (previous). Rebind if needed.
- Auto-Select Station: Off if you prefer manual control.
- Sound Device: Choose your playback device (speakers/headphones).
- Surround Sound: Typically Stereo or Headphones. 5.1/7.1 if supported.
- Disable All Sound: Only for troubleshooting.
- Audio Language: Choose English (or other available languages). This changes character voices and radio.
- Menu Language: Separate from audio; can be set independently.
- Bindings: Remap any action (e.g., Sprint, Crouch, Vehicle Enter/Exit). Many players rebind `Sprint` to Space (default is Shift) and `Jump` to Mouse Wheel Up.
- Mouse Sensitivity: Slider (1-100). Start at 50 and adjust. Higher for quick camera turns.
- Invert Mouse (Look): On/Off. Recommended Off.
- Mouse Acceleration: This is a critical setting. In the original PC version, mouse acceleration is enabled by default, causing inconsistent aiming. Disable mouse acceleration in the game’s `.ini` file (see Advanced) or use a third-party tool to force raw input. Without disabling it, aiming feels floaty.
- Supported Controllers: Xbox 360/One/Series, PlayStation 4/5 (via Steam Input or DS4Windows), Nintendo Switch Pro (Steam Input).
- Aim Sensitivity: Separate slider for aiming down sights. Lower (~30) for precision, higher (~70) for speed.
- Look Sensitivity: Same as mouse sensitivity for controller.
- Vibration: On/Off. Turning off saves battery and may improve control.
- Dead Zone: If stick drifts, increase dead zone (default ~0.25).
- Inversion: Invert look axis for piloting or general view.
- Standard (default): Left stick steer, RT accelerate, LT brake/reverse.
- Classic (GTA III style): Left stick steer, `A` accelerate, `X` reverse. Choose based on preference.
- Helicopter Controls: Pitch/Roll sensitivity. Higher for faster response.
- Camera Mode: High (behind car) or Low (bumper view). High is standard.
- Auto-Center Camera: On/Off. When off, camera stays in last position; useful for driving.
- Enable Subtitles: On (shown for cutscenes and dialogue).
- Subtitle Background: Opaque / Semi-Transparent / None. Semi-transparent helps readability without blocking view.
- Subtitle Size: Small / Medium / Large. Large is easier to read on TVs.
- Definitive Edition only: Options for Deuteranopia, Protanopia, Tritanopia. Adjust HUD elements (radar, weapon icons) to more distinguishable colors.
- Aim Assist (Controller): Full / Partial / Off. Full makes aiming sticky – useful for newcomers but trivializes gunfights. For a challenge, set to Off.
- Auto-Aim (PC with controller): Same setting.
- Lock-On Range: Short / Medium / Long. Affects how far auto-aim locks onto targets.
- Original PC has no difficulty slider.
- Definitive Edition: No explicit difficulty; difficulty is influenced by Aim Assist and health pickup availability (not toggleable).
- Choose from available languages (English, French, Italian, German, Spanish, etc.). Affects menus, subtitles, and written hints.
- In original PC, this can be changed to any language available in your install (English usually).
- Definitive Edition: Audio is English-only; subtitles can be in another language.
- Social Club Login: Required for cloud saves and achievements. Always log in.
- Allow Cloud Saves: On – syncs your progress across systems.
- Check for Updates: Automatic on most platforms. Ensure internet connection for patches.
- Online Features: None in base game. Multiplayer mods (SA-MP, MTA) have their own network settings outside this guide.
- Radar: On / Off / Blinking (missions only). Keep On for navigation.
- Weapon Icon: On / Off. Shows current weapon. Useful to leave On.
- Money Display: On / Off.
- Time Display: On / Off.
- Health & Armor Bar: Always visible.
- Camera Vibration: On/Off. Simulates explosions. Off for stability.
- Look Behind Key: Default `C` (hold). Useful to check for pursuing cops.
- Choose a default radio station (e.g., Radio Los Santos, K-DST). Otherwise, radio stays at last tuned station per vehicle.
- Reset to Default: Resets all settings. Use if you experience glitches.
- Save Settings: Always manually save after changes (original PC) – or rely on auto-save (Definitive Edition).
- Test Settings in a Safe Environment: Start a new game or load a save in a quiet spot (e.g., Grove Street) and tweak settings until performance and visuals satisfy you.
- Use Benchmark or Observation: The game has no built-in benchmark. Drive through densely populated areas (Los Santos downtown, Las Venturas strip) to check FPS.
- Keep a Backup: After perfecting settings, back up the configuration file (`gta_sa.set` on PC) so you can restore if corrupted.
1.2 Texture & Rendering Quality (Original PC)
1.3 Advanced Graphics (Original PC)
1.4 Graphics Settings (Definitive Edition – Unreal Engine)
1.5 Hardware Tier Recommendations
#### Low-End (e.g., Intel HD Graphics, 4-8 GB RAM, No dedicated GPU)
#### Mid-Range (e.g., GTX 1050 / RX 570, 16 GB RAM)
#### High-End (e.g., RTX 3060+ / RX 6700+, 16+ GB RAM)
---
2. Audio Settings
Good audio balance enhances immersion and helps you hear footsteps, gunshots, and police sirens.
2.1 Volume Controls
2.2 Radio Settings
2.3 Sound Output
2.4 Language Settings (Original PC)
Special Note: On PC, the original game may have different audio versions (e.g., unmodified vs. censored). The Definitive Edition offers multiple subtitle languages but audio remains English (unless region-specific).
---
3. Controls Settings
Customize keyboard, mouse, and controller bindings to your preference.
3.1 Keyboard & Mouse (PC)
3.2 Controller Support
3.3 Driving Controls
3.4 Camera Settings
---
4. Accessibility Settings
While GTA: San Andreas (original) has limited accessibility options, the Definitive Edition adds some.
4.1 Subtitles
4.2 Colorblind Modes
4.3 Aim Assist
4.4 Difficulty Options
Special Note: Misconfigured auto-aim can ruin the game’s challenge. If you want a skill-based experience, turn Aim Assist to Off in Controls settings (Definitive Edition) or never use the lock-on key (original PC).
---
5. Language Settings
Customize text and audio language separately.
5.1 Interface Language
5.2 Audio Language
Important: If you switch audio language in the original PC version, radio stations also change language (e.g., some stations become spoken in that language). Revert to English if you want the authentic San Andreas radio experience.
---
6. Network Settings
GTA: San Andreas does not have official multiplayer. The network settings are minimal.
6.1 Social Club (Definitive Edition)
6.2 Updates & Connectivity
Note: Users with modded versions may need to disable internet connectivity to avoid launcher conflicts.
---
7. Gameplay Settings
Adjust HUD, camera, and gameplay preferences.
7.1 HUD Configuration
7.2 Camera & Look
7.3 Vehicle Default Radio
7.4 Quick Configurations
---
8. Settings Easy to Misconfigure – Special Attention Points
1. Mouse Acceleration (PC): As mentioned, this is almost always on by default and makes aiming sluggish. To disable it in the original game, open `gta_sa.set` in `Documents\GTA San Andreas User Files\` and set `MPCONFIG` lines to `0`. Alternatively, use a mod like SilentPatch that removes mouse acceleration.
2. Frame Limiter (PC Original): The in-game limiter caps FPS at 30 or 60 but adds noticeable input lag. Leave it Off and cap FPS externally via graphics driver (e.g., NVIDIA Control Panel or Radeon Chill) for smoother input.
3. Draw Distance too High: Setting Draw Distance to maximum on original PC causes massive stuttering in areas like the Las Venturas strip. Keep at 50-70% unless you have a powerful GPU (e.g., GTX 1070+).
4. Auto-Aim (Controller): Some players accidentally enable Auto-Aim when they prefer manual aiming. Double-check under Controls -> Aim Assist and set to Off if you want skill-based combat.
5. Audio Language Change: Changing audio language in original PC also changes radio station voices. If you suddenly hear non-English DJs, revert to English audio.
6. Fullscreen vs Borderless: On multi-monitor setups, Borderless can cause micro-stuttering. Use Exclusive Fullscreen for best performance.
7. VSync + Frame Limiter Combo: Using both VSync and the in-game frame limiter can cause weird frame pacing. Disable one of them.
---
9. Final Recommendations
By following this guide, you’ll avoid common pitfalls and get the best possible experience from Grand Theft Auto: San Andreas, whether you’re playing for nostalgia or modding it to modern standards.
Important Notes
Grand Theft Auto: San Andreas – Important Notes Guide
This guide collects essential warnings, pitfalls, irreversible choices, missable content, difficulty spikes, grinding traps, save management advice, and common regrets. Read this before diving in to avoid losing progress or wasting dozens of hours.
---
General Warnings
- Choose Your Version Carefully: The original 2004 PC version has a vastly different experience from the 2021 Definitive Edition. The original has superior controls, vehicle physics, and modding support, while the Definitive Edition has improved graphics but introduces bugs, changed lighting, and removed some music. If you want the most authentic and stable experience, play the original with the silent patch. The mobile version is also heavily censored (gore, missions).
- Backward Compatibility on Modern Consoles: The original Xbox 360/PS2 versions on Xbox One/Series X|S via backward compatibility run remarkably well with upscaled resolution. The Definitive Edition on consoles has fixed many launch bugs but still has occasional crashes – save often.
- No Official Multiplayer: GTA: San Andreas has no built-in online multiplayer. Third-party mods like SA-MP and MTA exist, but are unofficial and can get your account banned on Steam/Rockstar Launcher if they detect modified executables. Use an alt account for modded play.
- Anti-Cheat Irrelevant: The single-player game has no anti-cheat; you can freely use cheats. However, saving after using cheats permanently marks your save file as "cheated" (a small icon appears), but this has no gameplay effect. Cheats disable achievements/trophies for that session.
- Starting Area Progression: The game is divided into three islands (Los Santos, San Fierro, Las Venturas) that unlock after completing specific story missions. Once you leave Los Santos for the countryside (around mission "The Green Sabre"), you cannot return to Los Santos for most of the first half of the game. Finish all side activities in Los Santos (races, dating, gym training, collectibles) before triggering this event. If you leave early, those activities are locked until very late game.
- Girlfriend Gifts & Properties: Each of the six girlfriends gives unique rewards (vehicle spawns, outfits) after dating them to certain percentages. The rewards are tied to that girlfriend. You cannot get them from anyone else. If you fail to date a girlfriend sufficiently before story events make her unavailable (e.g., Millie dies if you don't romance her before the casino heist), you permanently lose that reward.
- Casino Heist – Millie Perkins: During the mission "Freefall" and later "The Heist", you can either date Millie (the keycard holder) to get her card willingly or kill her. Killing her means you lose the ability to get 100% completion for dating? Actually Millie is one of the girlfriends required for 100% (her reward is not needed, but dating her is). If you kill her, you cannot achieve 100% completion. Always date Millie, then kill her after obtaining the card if you want the XP from her missions? No, you need to date her to 100%? Actually for 100% you need to date all six girlfriends to at least 50% and get their reward vehicles? Check: The 100% requirement includes "Date all girlfriends to 50%" and get their special vehicle. Millie's special vehicle is a Black Panto (a smart car). If you kill her, you lose that. So do not kill her. Date her to 50% before "The Heist".
- Zero's RC Missions: After completing the first set of Zero's missions in Los Santos, you must finish the entire Z campaign before leaving the city. If you start his missions but don't finish them, they remain available. But if you leave Los Santos, you can't return until later – but Zero's missions are available even after returning. Actually they are available anytime until you complete them. No permanent lockout, but time sensitive? For 100% you must do them.
- Vigilante & Paramedic Side Missions: These are always available, but if you start a campaign and fail at a high level, you lose progress for that session (no checkpoints). No irreversible loss.
- Vehicle Export List in Los Santos: The Import/Export garage at the docks requires delivering specific cars. If you sell a rare car before exporting it, you may need to find another. No permanent lockout, just wasted time.
- Oysters, Horseshoes, Snapshots: These collectibles are permanently missable if you finish the game and the world remains open. Actually none are missable; you can collect them at any time after the respective island unlocks. However, if you destroy a collectible in a scripted scene? No, they respawn. All are safe.
- Gym Training: Muscle and stamina from gym can be maxed at any time. No irreversible choice.
- Flight School: If you fail the flight school missions, you can retry anytime. No lockout. However, being terrible at flying will lock you out of the story (you need Gold in at least some tests? Actually you just need to pass all tests with any medal to unlock further story missions in San Fierro. So if you can't fly, you're stuck).
- Gang Territory War Timing: Gang wars (taking over enemy gangs' territories) are only available during a specific story window. After you leave Los Santos (end of Chapter 1), you cannot do gang wars until you return to Los Santos after the main story is complete (post-game). So if you want the rewards (free weapons, respect, territory map, and achievements), you must do them before leaving Los Santos for the first time. They are otherwise locked for most of the game.
- BMX & NRG-500 Challenges: The "BMX" and "NRG-500" challenges in Los Santos are available only after completing certain objectives? Actually the BMX challenge is available from the start at the bike park in Los Santos. The NRG-500 challenge is in San Fierro. They are always available. Not missable.
- Chiliad Challenge: These bike races up Mount Chiliad are only available after you reach San Fierro and complete the mission "Are You Going to San Fierro?" They are always open after that.
- Courier Missions: Each city has courier missions that reward cash and respect. They are always available, but if you ignore them, they stay. Not missable.
- Easter Eggs & Hidden Content: Some easter eggs (like the ghost car, Beat the Cock, etc.) are available throughout the game. No missable.
- Phone Call from The Truth: After you leave Los Santos, you'll get a call from The Truth asking you to steal a combine harvester. That mission is time-sensitive? No, it appears as a mission marker on the map. If you ignore it, it remains. However, if you progress too far in main story, the mission may disappear? I recall that "The Truth is Out There" mission is available only after "Are You Going to San Fierro?" and before certain missions? Actually it can be done anytime before the final heist. I think it's always available. Check: It's part of a chain that leads to the Green Goo mission. That chain must be completed before the final mission? For 100% you need it.
- The First Date with Denise: You can date Denise from the start of the game. If you never initiate dating, you miss out on her reward (a special vehicle and an outfit). But the game doesn't force you, so it's not missable – you can do it at any time.
- Hunting & Shooting Range: The shooting range in Los Santos is available only after completing the mission "Drive-Thru"? Actually it's always available. The hunting mini-game in the countryside is available after "The Green Sabre"?
- Truck Missions: The trucking missions (Long Haul) are available after completing "The Green Sabre"? They are not missable.
- "Wrong Side of the Tracks" – First notorious difficulty. You must shoot down Vagos gangsters from a train while on a motorbike. The AI companion (Big Smoke) is useless. Tip: Drive the bike onto the train tracks ahead of the train, shoot the enemies yourself from a distance, or use the minigun from later? Actually use a Desert Eagle or automatic pistol. Also, you can jump onto the train roof and shoot them from above.
- "Freefall" – You must fly a plane through a hangar, dodge SAMs, and land. The plane controls are sensitive. Save the game before this mission. Practice in flight school.
- "N.O.E." – Fly a plane low under the radar; many players crash into terrain or water. Use the d-pad for pitch sensitivity on console, or mouse on PC. Fly at 50 feet above water, stay calm.
- "The Da Nang Thang" – Long and chaotic mission infiltrating a ship; many enemies and a time limit. Stock up on health and armor before starting.
- "Breaking the Bank at Caligula's" – Requires precise hacking and shooting. The hacking mini-game is strict. Save before entering the casino.
- "Gang War" (Los Santos) – Final gang war can be overwhelming if you haven't built up muscle skill and gang reputation.
- "End of the Line" – The final mission is a multi-stage gauntlet with a fire truck chase, multiple gunfights, and a final boss. Have full health, armor, and the best weapons (M4, minigun, rocket launcher).
- Races: Many racing missions (e.g., "High Stakes, Low-Rider," "Doberman") are tight and require good driving skills. If you fail repeatedly, consider doing the import/export missions to earn enough money to buy a better car? Actually you need specific cars for race missions.
- Flight School: Getting Gold medals is not required for story, but for 100% you do. The helicopter missions (especially the one with the target practice) are tough. Use keyboard shortcuts (NumPad for precision) or practice in the flying school free mode.
- Money Grinding is Unnecessary: You can earn millions through the casino gambling (blackjack, roulette) by saving before betting and reloading after loss. The final missions give you $250,000. Also, the fire truck/paramedic/vigilante side missions pay well but are tedious. Avoid farming money early; the game showers you with cash later.
- Gym Training Overkill: You only need to visit the gym to increase muscle and stamina to maximum (muscle is needed for certain missions? Actually only a few missions require high stamina, like the triathlon? The triathlon is a side activity. Muscle affects melee damage and health regeneration but is not necessary for story completion. Don't spend hours pumping iron early; it's slow. Cheats can bypass.
- Gang Territory Wars (if done wrong): If you start a gang war after the story, enemy gangs are tougher and you may die repeatedly. Wait until you have full health and armor, best weapons, and high respect. Also, only need to conquer 35% of territories for 100%, not all.
- Collectibles (Oysters, Horseshoes, Snapshots): Using a guide is essential; otherwise you'll waste hours backtracking. If you don't care about 100%, skip them entirely (they only give rewards like infinite sprint from oysters, better luck from horseshoes).
- Vehicle Export Challenges: Some vehicles are extremely rare (e.g., the Sanchez dirt bike, the Bullet). If you don't enjoy hunting, skip this for 100%? It is required for 100%. But you can use the vehicle spawner in the Definitive Edition? No, only original.
- Paramedic & Vigilante for 100%: These are extremely tedious in later cities because of traffic. Do them in Los Santos early when the city is smaller and traffic is lighter.
- Courier Missions: Not worth the time for money; only do them for 100%.
- Use Multiple Save Slots: The game has 8 save slots per player (or unlimited in Definitive Edition?). Save every hour and before any major mission. Use separate slots for different points: early Los Santos, before leaving to San Fierro, before final heist, etc.
- Save After Every Mission: Some missions are long and have no checkpoints. If you fail, you restart from the beginning. Save after each successful mission.
- Before Leaving Los Santos: Create a manual save right before the mission "The Green Sabre". This allows you to go back and do any missed side activities.
- Before the Final Mission: Save before "End of the Line" in a new slot. If you beat the game, you can reload that save to free-roam before the end. The game does not have a new game plus, so once you finish, you can continue free-roaming but some characters are gone.
- Auto-Save vs Manual: The Definitive Edition has autosave; the original does not. In the original, always save manually at safehouses or after completing missions (they prompt you to save). Never rely on autosave that may be too recent.
- Save File Corruption: Rare but can happen (especially on modded versions). Backup your save folder (Documents/GTA San Andreas User Files on PC) occasionally.
- Cheats and Saving: Using cheats marks the save as cheated (small icon), but the save works fine. However, if you want legitimate 100% completion, do not use cheats on that save (they disable achievements). If you use a cheat to fix a softlock, that's acceptable, but be aware.
- "I wish I had done gang wars before leaving Los Santos." This is the #1 regret. Players leave Los Santos thinking they can come back, but gang wars are locked until post-game, and by then the territories are harder.
- "I spent hours stealing cars for mod shops, not realizing money is easy later." Modding cars is mostly cosmetic; skip unless you enjoy car shows.
- "I started the game on a hard cheat code like 'Bring it On' and then couldn't turn it off." Avoid permanent cheats like Weather or Traffic density; they are set permanently until you use the same cheat again or reset. But they can be toggled.
- "I didn't save before the plane missions and had to redo several hours of progress." The lack of checkpoints in many missions is punishing. Save often.
- "I killed Millie and then found out I needed her for 100%." Now you can't 100% without restarting.
- "I ignored dating because I thought it was pointless, but now I want the special vehicles." Each girlfriend gives a unique vehicle spawn at safehouses; some are great (e.g., Barbara gives a police car).
- "I wasted time doing the Taxi Driver missions for cash, only to find out it's a huge time sink for little reward." Only do taxi if you want 100% (it's required) or the cruise control reward (car jumps).
- "I didn't know I could sprint by holding X (or Shift) – stamina training makes you run faster." Stamina is essential for long chases. Max it early by running or swimming.
- "I used cheats to pass a mission and then my save got marked as cheated, preventing me from getting 100%." If you care about achievements, avoid cheats completely. If not, ignore.
- "I bought all the safehouses and didn't know I needed to buy the others for 100%." Yes, you need to buy every available safehouse for 100% completion. Some are expensive but you can get money via gambling.
- "I didn't realize you could swim – and that swimming gives stamina and can be used to break into restricted areas." Swimming is a huge advantage in missions like the ones with the boat. Practice early.
- Drug House Missions: After the story, you can do asset missions for the new gang (Grove Street Families). These are optional but needed for 100%. They involve buying weed and crack, which is purely for money. Not critical.
- "The Meat Business" mission: If you fail to deliver meat in a timely manner, you can lose the mission forever? No, it's not missable.
- "Ice Cold Killa" mission: This is a murder mission disguised as a date. It's not missable.
- Modding & Cheat Caution: Using mods or cheats in the Definitive Edition can corrupt your save or lock you out of achievements. Create a separate save for modding.
- Global Achievements: Many achievements are tied to 100% completion, which requires extensive side content. Use a dedicated playthrough for that.
---
Irreversible Choices & Permanent Consequences
---
Missable Content & Time-Sensitive Events
---
Difficulty Spikes & Frustrating Missions
---
Grinding Traps & Waste of Time
---
Save Management Advice
---
Common Regrets Players Have
---
Final Warnings
---
Remember: GTA: San Andreas is a vast game with many branching options, but almost all content can be revisited eventually. The only truly irreversible losses are missable girlfriend rewards and territory wars. Plan accordingly, save often, and enjoy the ride.
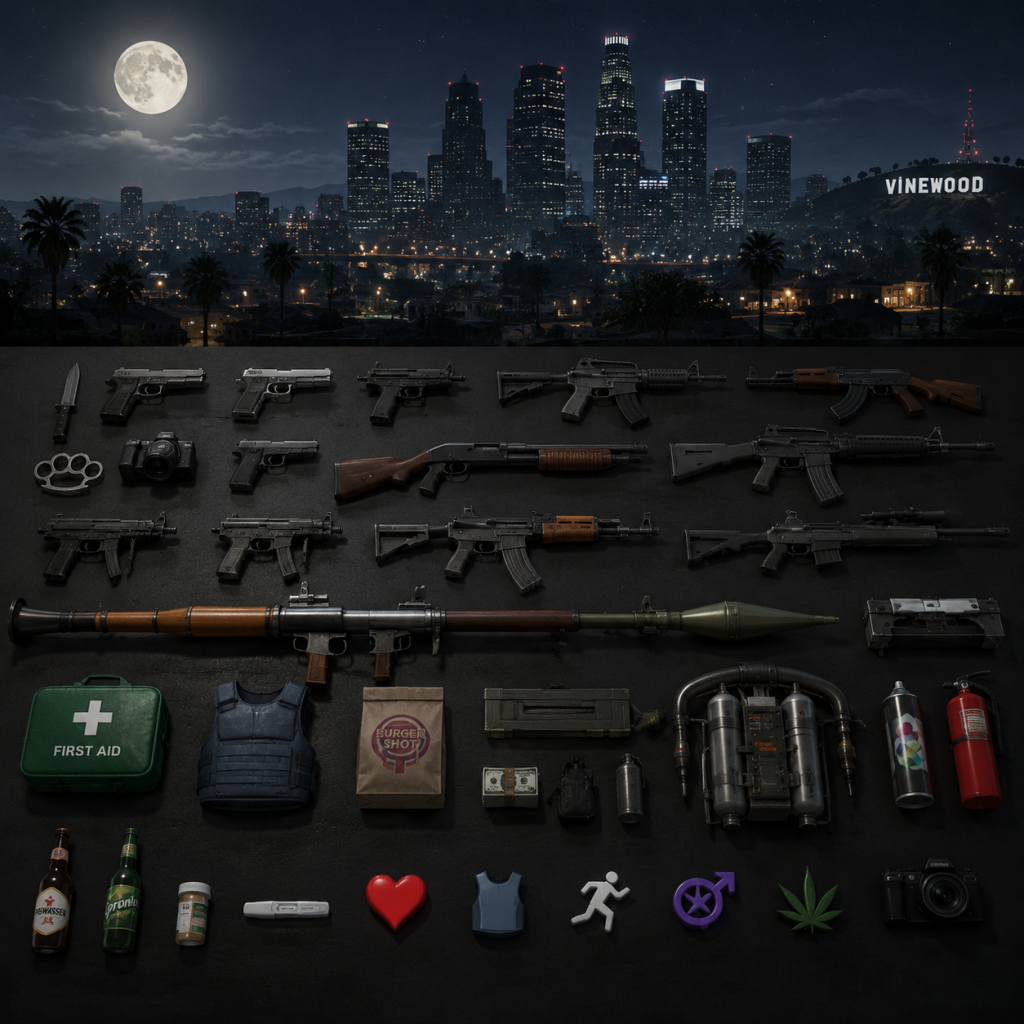
All Game Items
All Game Items in Grand Theft Auto: San Andreas
This guide covers every major item in GTA: San Andreas, including weapons, armor, consumables, currencies, collectibles, and key equipment. Items are grouped logically with descriptions, acquisition methods, practical uses, and notable synergies or upgrades.
---
1. Weapons
Weapons are divided into categories: Melee, Handguns, Submachine Guns, Shotguns, Assault Rifles, Rifles, Heavy Weapons, Thrown, and Special. All weapons can be picked up from the ground, stored at safehouses after collecting, or purchased from Ammu-Nation stores (once unlocked). Weapon skills improve with use, affecting accuracy, damage, and reload speed.
#### Melee Weapons
| Weapon | Damage | Notes | Location Examples |
|---|---|---|---|
| Fists | Low | Default unarmed combat; can be upgraded via gym training. | Always available. |
| Brass Knuckles | Medium | Fast, causes bleeding. | Found in Los Santos: near the beach, behind a house in Jefferson. |
| Knife | Medium | Silent, good for stealth attacks. | Found in Los Santos: behind a house in Idlewood. |
| Baseball Bat | Medium | Good knockback. | Found near Los Santos stadium, also at Ammu-Nation. |
| Shovel | Medium | Slower but decent reach. | Found in the countryside, e.g., at a farm in Flint County. |
| Pool Cue | Medium | Similar to bat, slightly faster. | Found in bars and pool halls in Los Santos. |
| Katana | High | Very fast, high damage, can decapitate. | Found in San Fierro: behind a house in Doherty, also at the martial arts dojo. |
| Chainsaw | Very High | Slow but devastating; use for crowd control. | Found in Los Santos: in a backyard in East Beach, or purchased after “The Green Sabre”. |
---
#### Handguns
| Weapon | Damage | Ammo Type | Location Examples |
|---|---|---|---|
| 9mm Pistol | Medium | 9mm | Found everywhere: police officers, gang members, Ammu-Nation (after first purchase). |
| Silenced 9mm | Medium | 9mm | Obtained from the mission “Madd Dogg's Rhymes” or found at the San Fierro police station roof. |
| Desert Eagle | High | .50 | Found in Las Venturas: on top of a hotel, or purchased after “Yay Ka-Boom-Boom”. |
---
#### Submachine Guns
| Weapon | Damage | Ammo Type | Location Examples |
|---|---|---|---|
| Micro SMG (Uzi) | Low-Medium | 9mm | Common from gangsters, also at Ammu-Nation. |
| SMG (MP5) | Medium | 9mm | Found at certain police stations, or purchased after “Reuniting the Families”. |
---
#### Shotguns
| Weapon | Damage | Ammo Type | Location Examples |
|---|---|---|---|
| Shotgun | Medium-High | Shotgun shells | From police, or Ammu-Nation. |
| Sawn-off Shotgun | High | Shotgun shells | Drop from certain gang members, or found in a barn in Flint County. |
| Combat Shotgun (SPAS-12) | Very High | Shotgun shells | Purchased after “Are You Going to San Fierro?”, or found at Area 51. |
---
#### Assault Rifles
| Weapon | Damage | Ammo Type | Location Examples |
|---|---|---|---|
| AK-47 | Medium-High | 7.62mm | Found in gang hideouts, or purchased after “First Date”. |
| M4 | High | 5.56mm | Purchased after “The Da Nang Thang”, or found at the San Fierro army base. |
---
#### Rifles (Sniper)
| Weapon | Damage | Ammo Type | Location Examples |
|---|---|---|---|
| Hunting Rifle | High | Rifle | Found in the countryside, e.g., at the hill near Palomino Creek. |
| Sniper Rifle | Very High | Sniper | Purchased after “Farewell, My Love...”, or found atop a building in Las Venturas. |
---
#### Heavy Weapons
| Weapon | Damage | Notes | Location Examples |
|---|---|---|---|
| Rocket Launcher | Very High | One shot can destroy vehicles. | Found at the San Fierro airport hangar, or purchased after “Black Project”. |
| Heat Seeking Rocket Launcher | Very High | Locks onto aircraft/lasers. | Found at Area 69 (during “Black Project”). |
| Flamethrower | Medium (fire) | Sets enemies on fire; good crowd control. | Found in a shed in the countryside, or at the “Supply Lines” mission. |
| Minigun | Very High | Spins up; devastating vs. vehicles and groups. | Found at the top of Mount Chiliad (requires parachute), or after “Vertical Bird”. |
---
#### Thrown Weapons
| Weapon | Damage | Notes | Location Examples |
|---|---|---|---|
| Grenades | High | Explodes after timer. | Found on police, or purchased from Ammu-Nation after “The Green Sabre”. |
| Tear Gas | Low (stun) | Blinds and damages over time. | Found in some interiors, or purchased after “First Date”. |
| Molotov Cocktails | High (fire) | Sets area on fire. | Found at certain gas stations, or by completing “Burning Desire” (mission reward). |
| Satchel Charges | Very High | Placeable remote explosive. | Obtained during “Black Project” or found at the Panopticon after completing that mission. |
---
#### Special Weapons
| Weapon | Description | Obtained | Notes |
|---|---|---|---|
| Parachute | Allows safe descent from heights. | Found on top of the Sherman Dam, or at the Los Santos helipad, or purchased from Ammu-Nation after flying school. | Essential for base jumping missions. |
| Night Vision Goggles | See in dark, green tint. | Inside Area 69 (during “Black Project”). | Useful for night missions. |
| Thermal Goggles | See heat signatures. | Same location as Night Vision (Area 69). | Detects enemies through smoke or darkness. |
| Camera | Takes photos for missions. | Obtained from the mission “Photo Opportunity” (given by The Truth). | Needed for snapshot collectibles and some side missions. |
| Spray Can | Used to tag gang territories (graffiti). | Found in Los Santos: behind the house in East Beach (starting area). | Required for territory wars: spray over rival tags. |
2. Armor
Body Armor (also called Kevlar Vest) is the only armor item. It absorbs a portion of damage before health is affected.
- Effect: Reduces damage taken by 50% until depleted. Armor depletes before health. Can be refilled.
- How to Obtain:
- Usefulness: Vital for difficult missions, drive-bys, and gang wars. Always equip before major combat.
- Synergies: None, but combines with health pickups.
- Pick up from the ground (e.g., at the police station in Los Santos, behind the hospital in Idlewood).
- Purchase from Ammu-Nation after completing “The Green Sabre” (requires weapon license).
- Find on dead enemies (e.g., police officers).
---
3. Consumables & Pickups
These are temporary items that appear on the map, usually as glowing icons. They respawn after a period of time.
| Item | Effect | How to Obtain | Notes |
|---|---|---|---|
| Health Pickup | Restores 25 HP (small) or 100 HP (large). | Found in hospitals, burger joints, and scattered across map. | Large health pickups are rare; use food from restaurants if needed. |
| Armor Pickup | Restores 50 armor. | Found at police stations, barbershops? Actually near armor icon locations. | Same as purchasing; respawns. |
| Bribe | Reduces wanted level by 2 stars. | Found in police station parking lots, or as a reward from hidden packages? Actually found as a yellow briefcase icon. | Use when escaping police; also appears after certain events. |
| Adrenaline Pill | Temporarily increases speed, damage resistance, and health regeneration for about 30 seconds. | Found in abandoned buildings, e.g., under the bridge in Los Santos. | Great for tough melee fights or quick escapes. Only one pill per location, respawns later. |
4. Currencies
- Money (Dollars): The primary currency. Used to buy weapons, ammo, properties, vehicles, food, clothes, and pay bribes. Earned through missions, property income, robberies, gambling, and side hustles. Max cap: $999,999,999 (practically unlimited).
- Respect: Not a currency but a gauge. Max respect (1000) unlocks gang followers and bonuses. Increased by completing gang wars, missions, and side activities.
- Effect: Each oyster increases your lung capacity (underwater breathing) by a small amount. Collect all 50 to gain a huge lung capacity boost (can stay underwater indefinitely).
- Location: Sunken underwater across all three cities and the countryside. Use a boat or submersible vehicle; some require diving gear from missions.
- Usefulness: Essential for underwater missions (e.g., “The Da Nang Thang”) and exploring submerged areas. Also increases swimming speed slightly.
- Effect: Increases luck, which affects gambling outcomes (slot machines, horse betting, blackjack) and probably random loot drops. Collect all 50 to unlock a reward: SMG (MP5) spawned at The Four Dragons Casino? Actually the reward is a weapon drop at the casino. Also improves gambling odds.
- Location: All 50 are hidden in Las Venturas (the desert city). Most are on rooftops, in alleys, or inside buildings. Use a helicopter or plane to reach high ones.
- Effect: Taking photos of specific landmarks with the Camera. Each snapshot gives a small reward (money and sometimes a new weapon spawn). Completing all 50 unlocks a Hunter attack helicopter at the Verdant Meadows aircraft s ? Actually the reward is a Hydra jet or Hunter? In the original game, it's a Hunter at the Verdant Meadows hangar. Also provides money.
- Location: Marked on the map after you obtain the Camera (from “Photo Opportunity” mission). You must stand at specific spots and take a picture. Landmarks include statues, buildings, and bridges.
---
5. Collectibles
Collectibles are hidden items that provide permanent stat boosts or rewards when collected.
#### Oysters (50 total)
#### Horseshoes (50 total)
#### Snapshots (50 total) — also called “Photo Opportunities”
---
6. Key Equipment
These are story-progress items that are essential for certain missions but not carried permanently in the inventory (except on foot).
| Item | Purpose | How to Obtain | Notes |
|---|---|---|---|
| Camera | Used to take photos for the Snapshot collectibles and for certain missions (e.g., photograhing drug deals). | Given by The Truth after “Photo Opportunity”. | Stores unlimited photos; accessible from weapon wheel (special). |
| Spray Can | Used to tag gang territories (graffiti). | Found behind CJ's house in East Los Santos at the start. | Must have it to start territory wars; can buy more later? No, one spray can lasts forever. |
| Parachute | Allows skydiving from heights. | Found at helicopter pads or purchased from Ammu-Nation after flight school. | Can be opened and closed; used in missions like “Stowaway” and “Freefall”. |
| Night Vision Goggles | See in the dark. | Inside Area 69 during “Black Project”. | Useful in dark interiors; gives green tint. |
| Thermal Goggles | See heat signatures. | Same location as Night Vision. | Highlights enemies through walls? Only in certain missions; limited range. |
| Bank Card (mission item) | Used to open the bank vault in “Breaking the Bank at Caligula's”. | Received during that mission. | Not usable outside the mission. |
| GPS Device | Used in “The Da Nang Thang” to tag boat? | Not a standalone item. | Many mission-specific items exist but are not kept after mission completion. |
7. Synergies & Upgrades
- Weapon Skill Levels: Each weapon category (pistols, SMG, etc.) has three skill levels: Poor, Average, and High. Higher skill increases accuracy, damage, fire rate, and magazine capacity. Max skill unlocks for the SMG (two guns akimbo) and assault rifles. Level by using the weapon repeatedly.
- Clothing: Some clothing items provide stat buffs (e.g., “Eris” tracksuit increases sex appeal, but no direct item effect). Not considered items.
- Gym Training: Increases strength (melee damage) and stamina. Not items but important for melee weapon effectiveness.
- Gang Territory Weapons: Successfully capturing gang territories may spawn weapons at safehouses.
---
8. Summary Table of All Pickups
| Pickup Type | Map Icon | Example Locations | Respawn Time |
|---|---|---|---|
| Health (small) | Red cross | Behind hospitals, fast food joints | ~5 minutes |
| Health (large) | Red cross (big) | Some hospitals, grove street safehouse | ~15 minutes |
| Armor | Blue vest | Police stations, certain streets | ~10 minutes |
| Bribe | Yellow briefcase | Police station parking lots | ~10 minutes |
| Adrenaline | Yellow pill | Under bridges, abandoned buildings | ~30 minutes |
9. Notes
- All weapons and armor can be stored at any safehouse weapon locker (appears after you buy or unlock a property). You can store multiple copies, but limited by the game's slot system (max 8 weapon types? Actually each category holds one weapon, but you can swap).
- Ammo can be purchased from Ammu-Nation after buying the respective weapon. Some weapons also appear as special spawns after completing certain missions (e.g., “Desert Eagle” at the top of a building).
- The Jetpack is a vehicle, not an item. It can be obtained after the “Black Project” mission and stored in the Verdant Meadows hangar.
- The Bribe icon only appears when you are wanted; it disappears after use.
---
This guide covers all major items in GTA: San Andreas. Use the map and collectible guides to find every item. For more details on mission-specific items, see the Mission Walkthrough guides.
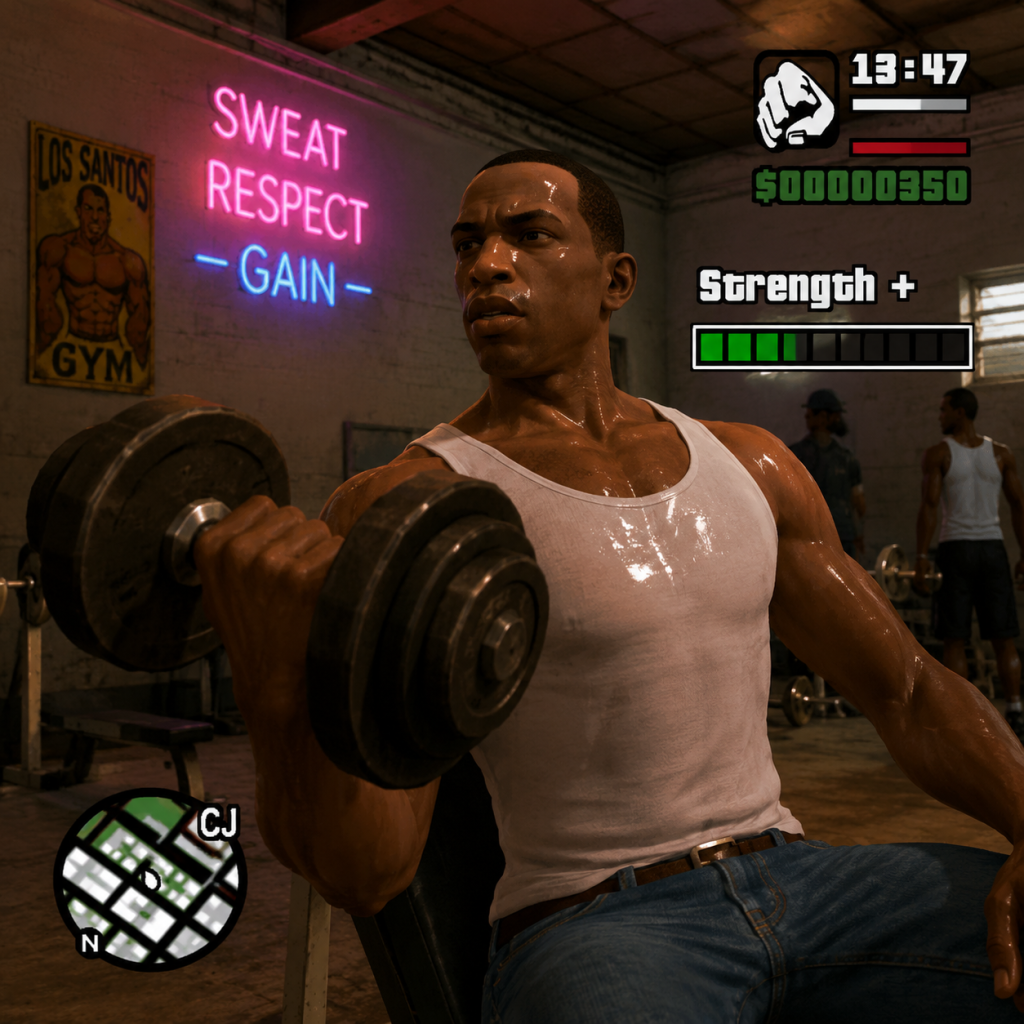
Character Skills
Character Skills Overview
In Grand Theft Auto: San Andreas, the only playable character is Carl “CJ” Johnson. Unlike RPGs with multiple classes, CJ’s skills are defined by attribute progression and weapon/vehicle proficiencies that improve through use. This guide covers every skill, its effects, how to upgrade it, potential synergies, and recommended builds.
---
Primary Attributes
These are core stats visible in the Stats menu. Each affects gameplay directly.
Health
- Effect: Determines maximum hit points. Max is 150% (base 100%). Higher health means surviving more damage.
- How to Increase: Take damage (lose health) repeatedly, complete paramedic missions, eat at restaurants.
- Synergies: Works with armor; high health + armor = tank build.
- Recommended: Always prioritize health upgrades early for survival.
- Effect: Controls how long CJ can sprint before slowing down. At 100% stamina, you can sprint indefinitely.
- How to Increase: Sprinting, cycling, swimming. Swimming laps at the pool or beach is fastest.
- Synergies: High stamina enables relentless pursuit/escape; pairs with bicycle skill.
- When to Use: Always sprint during chases, gym training, or exploring on foot.
- Effect: Increases melee damage, ability to lift weights, and affects Sex Appeal. Higher muscle makes CJ look buff.
- How to Increase: Gym weight training (bench press, bicep curls, etc.). Can also gain slight muscle from fighting.
- Synergies: Boosts melee weapon damage; pairs with Fat to balance Sex Appeal.
- Recommended Build: Brawler – max muscle for melee focus.
- Effect: Affects appearance and Sex Appeal (extreme fat reduces it). High fat slows CJ down and reduces stamina regeneration.
- How to Increase: Eat at Cluckin’ Bell, Pizza Stack, etc. Overeating.
- How to Decrease: Exercise at gym, running, cycling.
- Synergies: Need to balance with Muscle for optimal Sex Appeal.
- Effect: How long CJ can stay underwater. At 100%, you can swim underwater indefinitely.
- How to Increase: Swim underwater repeatedly. Best done during the mission “The Black Project” or at the Santa Maria Beach.
- Synergies: Essential for underwater collectibles (oysters) and certain missions.
- When to Use: Any water traversal; avoid drowning during missions.
- Effect: Determines NPC reactions when CJ is on a date. Affected by muscle, fat, and clothing choices.
- Formula: Ideal is high muscle, low to moderate fat, combined with stylish clothes.
- How to Improve: Purchase outfits at Binco, Didier Sachs, etc., and maintain good muscle/fat ratio.
- Synergies: Only relevant for girlfriend missions. Not a combat skill.
- Effect: Increases melee damage, combo speed, and unlock hit combos (e.g., jab, cross, hook).
- Progression: 0-1000. At max, CJ performs faster knockdowns.
- Dual Wield: Not applicable.
- Special Moves:
- Synergies: High Muscle multiplies damage.
- Build: Brawler – max melee skill + max muscle.
- Effect: Improves accuracy, reduces recoil, increases rate of fire. At max skill, you can dual wield (hold two pistols) by pressing the aim button twice? Actually, dual wield is automatic at high skill when equipping pistols from a weapon pick-up.
- Progression: Firing at enemies increases skill.
- Headshot Bonus: Higher skill makes headshots easier.
- Synergies: None directly, but good for stealth with silencer.
- When to Use: Mid-range engagements; dual wield for chaos.
- Effect: Better accuracy, tighter spread, faster reload. At high skill, CJ can dual wield Micro SMGs (hold two) and fire from a car while driving (drive-by).
- Progression: Use in firefights.
- Special: Drive-by shooting becomes more accurate.
- Build: Wheelman – high driving skill + SMG skill for drive-bys.
- Effect: Reduced spread, faster pump action, increased damage per pellet. Max skill allows quick-fire (no delay between shots) with Combat Shotgun.
- Progression: Blast enemies.
- Synergies: None.
- When to Use: Close quarters, vehicle combat (especially on motorcycles).
- Effect: Better accuracy, less recoil, faster reload. At high skill, CJ can fire from the hip with minimal spread and auto-aim locks on faster.
- Progression: Use consistently.
- Synergies: High Stamina allows sustained fire while moving.
- Recommended Build: All-rounder – balanced skill in rifles for general combat.
- Effect: Increases zoom stability, reduces sway, faster scope-in. At high skill, hold breath time increases (by holding aim button while scoped) to steady the crosshair.
- Synergies: Lung Capacity? Not directly, but breath holding is separate.
- When to Use: Long-range engagements, sniper missions.
- Effect: Faster spin-up, reduced load time, better accuracy. Minigun accuracy improves dramatically.
- Progression: Use on enemies.
- Special: No dual wield, but fire rate improves.
- Build: Demolition – only when using these weapons; not essential.
- Effect: Increased throw distance, arc accuracy, reduced cooking time (holding before throw). At max skill, grenades explode almost immediately on release.
- Synergies: None.
- When to Use: Crowd control, destroying vehicles.
- Effect: Better cornering, faster acceleration, less skidding, ability to perform turns while airborne (for landings). At high skill, the handbrake turn becomes tighter.
- How to Increase: Drive cars, avoid crashes. Best done in a large open area.
- Special Move: Handbrake 180 – hold handbrake and turn while reversing.
- Synergies: High driving skill + SMG skill for effective drive-bys.
- Recommended Build: Wheelman for mission completions.
- Effect: Better lean control, sharper turns, ability to wheelie and stoppie. High skill allows longer wheelies and easier balance. Also reduces damage from falls.
- How to Increase: Ride bikes, perform stunts.
- Special Moves:
- Synergies: Good for courier missions, chase missions, and stunts.
- When to Use: Escape through alleys, off-road terrain.
- Effect: Faster pedaling, better balance, ability to wheelie and bunny hop (jump small obstacles). Max skill allows indefinite wheelie and faster top speed.
- How to Increase: Ride bike, do tricks, complete BMX challenges.
- Special Moves:
- Synergies: High stamina allows longer sprints; good for early game before car access.
- When to Use: Roof jumping, obstacle courses._
- Effect: Improved turning, speed, ability to capsize recovery. High skill reduces damage from collisions.
- How to Increase: Drive boats.
- Special: Do a barrel roll? Not exactly, but you can spin using handbrake.
- When to Use: Missions on water.
- Effect: Better stability, tighter turns, easier landings, and ability to perform stunt rolls. High skill allows hovering in helicopters with minimal drift.
- How to Increase: Fly at flight school, fly any aircraft.
- Special Moves:
- Synergies: None specific, but essential for flight school missions (gaining full skill is required for max reward).
- Recommended Build: All players should max flying for end-game.
- Effect: Run faster than walking. Tied to Stamina attribute.
- When to Use: Always for travel; avoid in firefights due to accuracy penalty? Actually, shooting while moving reduces accuracy, but sprint cancels aim.
- Effect: Stay underwater; controlled by Lung Capacity. Press action to dive, release to surface.
- When to Use: Collect oysters, escape enemies.
- Effect: Deploy parachute from aircraft or high points. Steer with analog stick; can cut chute to freefall. High skill (from skydiving) reduces opening time and improves control.
- How to Increase: Use parachutes at the Las Venturas hotspot or during missions.
- Special Move: Canopy Collapse – press brake to descend faster (emergency).
- Synergies: None.
- When to Use: Airdrop missions, stunts.
- Boxing (developed at Gym in Los Santos): Fast jabs, strong hooks. Best for speed.
- Kickboxing (San Fierro Gym): Powerful kicks, good stun.
- Kung Fu (Las Venturas Gym): Combos with roundhouse kick, sweep.
- Effect: Each style changes attack animations, damage, and combos. All melee skills improve regardless of style, but style affects moveset.
- Synergies: Muscle + style = devastating combos.
- Recommended Build: Kung Fu for crowd control (sweep multiple enemies).
- Hydraulics (Lowrider): Enable bouncing, hopping, and three-wheel motion. Used for dancing missions and fun.
- Nitrous (Various vehicles): Temporary speed boost. No skill associated, but controlled by button.
- Harrier Jet Vertical Takeoff: Unique to Hydra; no skill needed.
- Attributes: Max Health, Stamina, Lung Capacity (optional).
- Weapon Skills: Prioritize Pistol, SMG, Assault Rifle.
- Driving: Moderate (just enough for missions).
- Playstyle: Ranged combat, dual wielding, drive-by.
- When to Use: Open-world shootouts, street warfare.
- Attributes: Max Muscle, Stamina, Health.
- Weapon Skills: Max Melee, Thrown (for molotovs).
- Fighting Style: Kung Fu (for sweep attacks).
- Playstyle: Up-close melee, disarming enemies with punches.
- When to Use: Gang turf wars, early game when ammo is scarce.
- Attributes: Max Stamina, some Health.
- Vehicle Skills: Max Driving, Motorcycle, some Flying.
- Weapon Skills: SMG (for drive-by), sometimes Rifle (for long-range from vehicle).
- Playstyle: Speed and evasion; complete missions with fewer stops.
- When to Use: Courier missions, escaping police, circuit races.
- Attributes: Even progression: Health > Stamina > Muscle > Lung.
- Weapon Skills: Balance across Pistol, Assault Rifle, Shotgun, Melee.
- Vehicle Skills: All to at least 500.
- Playstyle: Adaptable to any situation.
- When to Use: General story progress, exploring, side missions.
Stamina
Muscle
Fat
Lung Capacity
Sex Appeal (Hidden Stat)
---
Weapon Skills
Each weapon category has a skill level (0–1000, invisible in game but shows as “Gangster” at high levels). Higher skill increases accuracy, damage, fire rate, reload speed, and unlocks special abilities like dual wielding or automatic aiming.
Melee (Fist, Knife, Bat, etc.)
- Dodge Counter: Press attack while blocking to counter. Unlocked around skill 300.
- Ground Pound: With brass knuckles, a powerful downwards punch.
Pistol (9mm, Silenced, Desert Eagle)
SMG (Micro SMG, Tec 9, MP5)
Shotgun (Pump, Combat, Spaz)
Assault Rifle (AK47, M4)
Rifle (Sniper Rifle, Country Rifle)
Heavy Weapons (Minigun, Rocket Launcher, Flame Thrower)
Thrown (Grenade, Molotov, Tear Gas)
---
Vehicle Skills
Each vehicle type has a skill level (0–1000) affecting handling, max speed, and stunt ability.
Driving (Cars)
Motorcycle
- Wheelie: Press down while accelerating on rear wheel.
- Stoppie: Accelerate forward then brake hard while leaning back.
- Jump: Use ramps for air; skill affects landing control.
Bicycle
- Bunny Hop: Press jump while holding forward.
- Manual: Lean back without handlebars (hold up).
Boats
Flying (Planes and Helicopters)
- Loop: Pull back on stick while flying forward.
- Barrel Roll: Use rudder and roll.
- Heli Quick Turn: Yaw + bank simultaneously.
---
Special Moves & Abilities
Non-stat-based skills that CJ can perform.
Sprinting
Diving (Swimming Underwater)
Parachuting
Fighting Styles
CJ can learn three fighting styles at different gyms:
Vehicle Special Abilities
---
Recommended Builds
Gunslinger Build
Brawler Build
Wheelman Build
All-Rounder Build (Recommended for First Playthrough)
---
When to Use Each Skill
| Skill | Best Use Cases |
|---|---|
| Stamina | Chases, gym training, long swims |
| Muscle | Melee combat, intimidation (not actually), date appearance |
| Lung Capacity | Underwater exploration, escaping |
| Driving | All ground missions, races |
| Motorcycle | Quick escapes, stunt jumps, courier |
| Flying | Flight school missions, air races, endgame heists |
| Melee | Early game, stealth kills with knife, gang warfare |
| Pistol | General combat (good accuracy) |
| SMG | Drive-by, close quarters |
| Shotgun | Vehicle combat, tight spaces |
| Assault Rifle | Standard firefights |
| Sniper Rifle | Long-range removal of enemies |
| Heavy Weapons | Destruction |
| Thrown | Clearing groups, vehicle ambushes |
| Bicycle | Rooftop stunts, early transport |
| Boat | Water missions (e.g., “The Da Nang Thang”) |
Tips for Skill Progression
- Weapon skills gain XP only when hitting enemies – use gang members or respawning enemies in wait-for-hours areas.
- Vehicle skills increase by driving safely and doing stunts – practicing at the San Fierro Driving School is efficient.
- Flying skill is easiest to max at the Verdant Meadows Flight School (after “Learning to Fly” mission).
- Muscle and Fat can be quickly changed at the gym or by eating. Use the “Fat Muscle” exploit? Not recommended – just play normally.
- Lung Capacity – spend 15 real-time minutes swimming underwater at the Santa Maria Beach pier.
- Health – paramedic missions give permanent health points; do them early.
---
Conclusion
Mastering CJ’s skills transforms him from a street thug into a versatile agent of chaos. Focus on Health and Stamina first for survivability, then specialize based on your preferred combat style. All weapon skills are worth maxing for the dual-wield and accuracy bonuses. Good luck, playa!
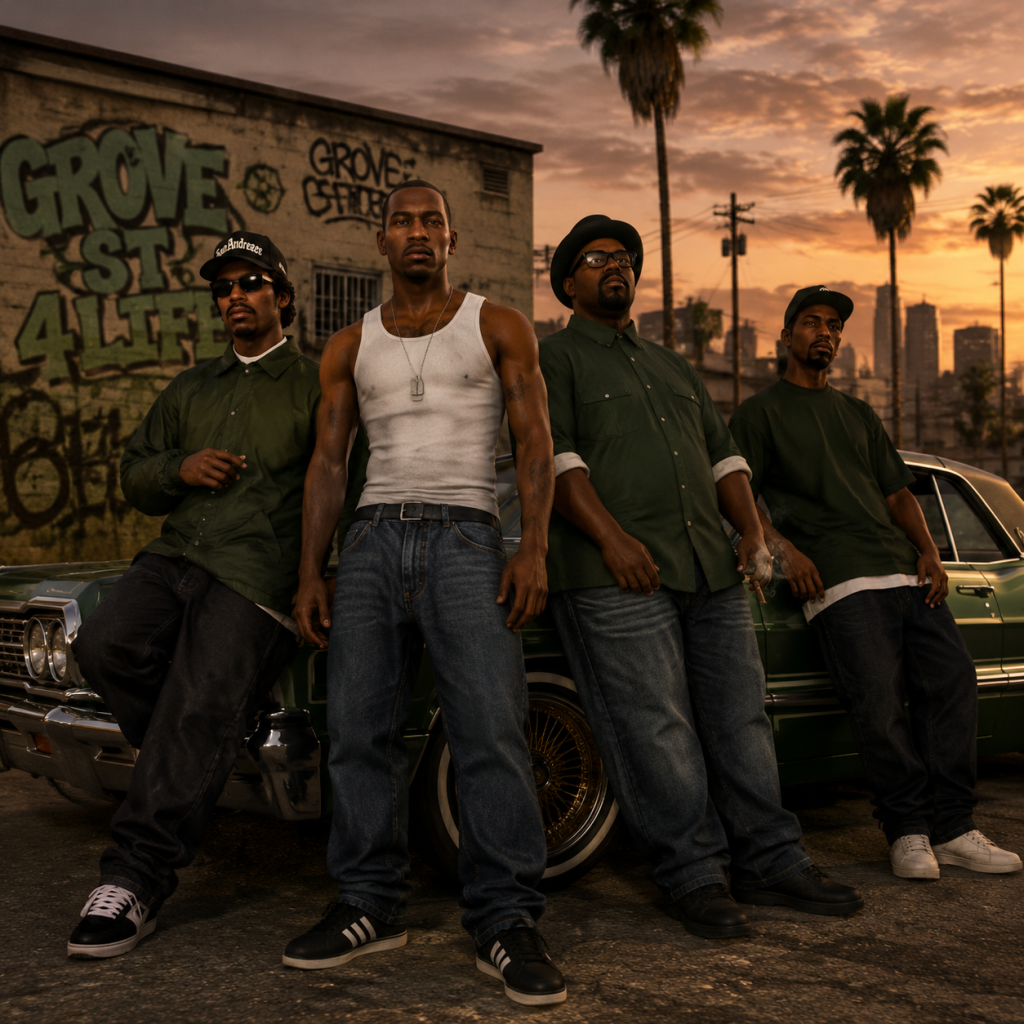
Characters & Roles
Characters & Roles in Grand Theft Auto: San Andreas
This guide covers every major character in GTA: San Andreas, including the sole playable protagonist, key allies, antagonists, and faction leaders. Since the game has a single playable character, Carl “CJ” Johnson, the “roles” refer to his evolving skill sets and the support roles provided by NPCs. Below you’ll find detailed breakdowns of each character’s background, strengths, weaknesses, and how to best utilize them (or counter them) during your journey through San Andreas.
Playable Character: Carl “CJ” Johnson
| Attribute | Detail |
|---|---|
| Background | CJ returns to Los Santos after five years in Liberty City following the murder of his mother, Beverly. He reconnects with his brother Sweet, sister Kendl, and former friends Ryder and Big Smoke, and gets drawn back into gang life with the Grove Street Families. |
| Strengths | Highly adaptable – CJ can master any weapon, vehicle, and physical skill through practice. His stamina can become infinite, lung capacity can last minutes, and muscle/fat can be customized for intimidation or agility. |
| Weaknesses | Starts with very low stats in every attribute – weak weapons skill, poor driving, no stamina. Early missions are harder because CJ is physically weak and has no respect. |
| Playstyle | The game encourages a hybrid approach: stealth for some missions, guns-blazing for others, and races for vehicle skills. CJ’s skill progression is entirely player-driven. |
| Unlock Conditions | CJ is available from the start of the game. No unlock required. |
| Recommended Equipment / Builds | Early game: Pistol, Micro SMG (drive-by), baseball bat. Mid game: Tec-9, silenced pistol, combat shotgun. Late game: M4, AK-47, minigun, rocket launcher. Vehicle: For story missions, a four-door car (e.g., Elegy) for crew pickups; for racing, a sports car (e.g., Cheetah). Skills: Prioritize Stamina → Bike → Weapon skill (especially SMG and Rifle). |
| Team Synergy | CJ alone does everything, but benefits from backup during gang wars and missions with allies (see below). His own progression determines how effective he is in any situation. |
Key Allies and Their Roles
#### 1. Sweet Johnson (Grove Street Families Leader)
- Background: CJ’s older brother, leader of the Grove Street Families. He is fiercely loyal to the neighborhood and wants to restore the gang’s power. |
- Strengths: Excellent driver and shooter in cutscenes; provides missions that increase CJ’s gang respect and unlock gang territory wars. |
- Weaknesses: Can be hot-headed and makes poor strategic decisions (e.g., trusting Big Smoke). |
- Role in Team: Gives orders and moral support. During certain missions (e.g., “The Green Sabre”), he fights alongside CJ but can be killed if not protected. |
- Unlock Requirements: Appears from the first mission (“In the Beginning”). Sweet becomes unavailable after “The Green Sabre” until later in Los Santos. |
- Background: Former childhood friend of CJ, now a reckless and impulsive gang member. |
- Strengths: Good at driving getaways and car modifications; provides missions that introduce CJ to lowrider culture and car stealing. |
- Weaknesses: Unreliable and eventually reveals himself as a traitor working with Big Smoke and the C.R.A.S.H. unit. |
- Role in Team: Early-game mission giver; after his betrayal, becomes an enemy. |
- Unlock Requirements: Available from the start. Ryder disappears after “Ryder” (mission). |
- Background: Another childhood friend, overweight but charismatic. He seems loyal but is secretly working with the Ballas and C.R.A.S.H. |
- Strengths: Good with heavy weapons (e.g., minigun in final battle), provides missions that lead to drug money and weapons. |
- Weaknesses: Traitor; his missions are often traps. |
- Role in Team: Early mission giver; later becomes main antagonist. |
- Unlock Requirements: Available from start. He betrays CJ around the midway point. |
- Background: Kendl’s boyfriend, leader of a friendly Hispanic gang. He is intelligent, resourceful, and becomes CJ’s most reliable ally. |
- Strengths: Provides safe houses, vehicles, and critical intel throughout the game. Drives well and fights competently. |
- Weaknesses: His gang lacks territory and resources compared to Ballas. |
- Role in Team: Mission giver in Los Santos and later in San Fierro. He also assists in the final assault on Big Smoke’s crack palace. |
- Unlock Requirements: Unlocked after the mission “Cesar Vialpando” (early Los Santos). |
- Background: A paranoid, cannabis-growing hippie who lives in the San Fierro countryside. |
- Strengths: Good for unconventional missions (stealing a harvester, blowing up a train). Provides access to the countryside missions. |
- Weaknesses: Unreliable vehicle access; tends to ramble. |
- Role in Team: Mission giver in the Badlands and San Fierro; later helps CJ with a crop-dusting job. |
- Unlock Requirements: Unlocked after leaving Los Santos and going to the Badlands (mission “Are You Going to San Fierro?”). |
- Background: A flamboyant, drug-addicted lawyer who worked for Tommy Vercetti in Vice City. Now in San Fierro, he is desperate and pathetic. |
- Strengths: Provides connections to the criminal underworld of San Fierro. |
- Weaknesses: Cowardly and easily manipulated; his missions often involve fixing his mistakes. |
- Role in Team: Mission giver for various criminal schemes in San Fierro. |
- Unlock Requirements: Unlocked after moving to San Fierro (mission “Wear Flowers in Your Hair”). |
- Background: A psychotic, aggressive woman who forces CJ into robberies. She later becomes CJ’s enemy. |
- Strengths: Good shot and driver, but volatile. |
- Weaknesses: Abusive and eventually betrays CJ for a new boyfriend (Claude from GTA III). |
- Role in Team: Mission giver for the “Heist” side missions earlier in the game. |
- Unlock Requirements: Unlocked after the mission “First Date” (early Los Santos) and remains available until her betrayal. |
- Background: Blind but charismatic leader of the Mountain Cloud Boys triad in San Fierro. He becomes a close ally. |
- Strengths: Provides missions involving casino heists and gambling; his blindness is played for humor but he is highly capable. |
- Weaknesses: Visually impaired (needs help aiming during some missions). |
- Role in Team: Mission giver for the San Fierro portion and later the Las Venturas heist. |
- Unlock Requirements: Unlocked after arriving in San Fierro (mission “The Palomino Blow”). |
#### 2. Ryder (Grove Street Families Member)
#### 3. Big Smoke (Grove Street Families Member)
#### 4. Cesar Vialpando (Varrios Los Aztecas Leader)
#### 5. The Truth (Hippie Hermit)
#### 6. Ken Rosenberg (Lawyer)
#### 7. Catalina (Criminal Ex-Girlfriend)
#### 8. Wu Zi Mu (Woozie) (Triad Leader)
Major Antagonists
| Character | Background | Role in Story | Strengths & Weaknesses |
|---|---|---|---|
| Officer Frank Tenpenny (C.R.A.S.H. leader) | Corrupt LAPD officer, leads a unit called C.R.A.S.H. He frames CJ for murder and manipulates the gang war for personal gain. | Main antagonist throughout the game; constantly harasses CJ. | Strong: Political power, access to police resources. Weak: Underestimated CJ’s resilience. |
| Officer Eddie Pulaski (C.R.A.S.H. member) | Tenpenny’s sidekick, brutal and racist. | Assists Tenpenny in tormenting CJ; killed by CJ in the mission “Misappropriation”. | Strong: Physically imposing. Weak: Lacks strategic intelligence. |
| Big Smoke (former ally) | Betrays Grove Street for money and power. | Final boss of the game; killed in the mission “End of the Line”. | Strong: Heavy weapons, fortified crack palace. Weak: Alone, not a great fighter. |
| Ryder (former ally) | Turns traitor for Big Smoke. | Encountered as an enemy in the mission “Ryder” (actually a cutscene death). | Strong: Fast driver. Weak: Reckless. |
| Catalina (bitter ex) | Betrays CJ for a new man. | Becomes enemy after stealing money from CJ (side mission “Heist”). | Strong: Aggressive, good aim. Weak: Predictable patterns. |
| Madd Dogg (rival rapper) | Initially an enemy after CJ and Ryder steal his rhyme book; later becomes a friend after suicide attempt. | Minor antagonist turned ally (optional). | Strong: Musical talent. Weak: Mentally unstable. |
Important Factions and Their Roles
| Faction | Leader | Role in Gameplay | Benefits to CJ |
|---|---|---|---|
| Grove Street Families | Sweet Johnson | CJ’s home gang; territory wars reclaim Los Santos. | Provides backup during gang wars; gives respect and money. |
| Ballas | Kane (deceased), then various | Rival gang; control much of East Los Santos. | Defeating them earns territory and respect. |
| Varrios Los Aztecas | Cesar Vialpando | Ally gang that controls parts of Los Santos and near San Fierro. | Provides safe houses and vehicle access. |
| San Fierro Triads (Mountain Cloud Boys) | Wu Zi Mu | Ally faction in San Fierro. | Missions lead to casino heist and access to Las Venturas. |
| Loco Syndicate / Crack Dealers | Big Smoke, Ryder (former), Tenpenny (backer) | Drug operation in Los Santos. | No benefits; must destroy them. |
| Leone Family (Las Venturas) | Salvatore Leone | Mafia family with a casino; provide missions in Las Venturas. | Money and safe houses; eventually they betray CJ. |
| Caligula’s Palace Casino | Ken Rosenberg (manager), owned by Leone family | Heist target. | Massive cash reward if successful. |
Roles for CJ (Playstyles Based on Skill Progression)
Since CJ is the only playable character, think of these “roles” as builds you can emphasize:
| Role | Stat Priority | Equipment | Best For |
|---|---|---|---|
| Gang Leader | Respect, Muscle, Weapon Skill (SMG/Rifle) | 9mm SMG, M4, body armor | Territory wars, drive-by shootings. |
| Stealth Operative | Lung Capacity, Stamina, Weapon Skill (Silenced Pistol, Knife) | Silenced 9mm, camera, scuba gear | Missions requiring no alarms (e.g., “Photo Opportunity”). |
| Racer / Stuntman | Driving Skill (Car, Bike, Boat, Plane), Stamina | Sports cars, motorbikes, aircraft | Racing missions, time trials, “Air Raid”. |
| Heavy Weapons Specialist | Muscle, Weapon Skill (Shotgun, Heavy) | Combat Shotgun, Minigun, RPG | Final missions, destroying vehicles. |
Team Synergy Table
| Ally | Synergy with CJ | Recommended CJ Build for Their Missions |
|---|---|---|
| Sweet | Good driver, needs CJ for shooting. | Balanced (SMG + shotguns) for gang wars. |
| Cesar | Provides backup vehicle; fights alongside. | Medium armor, Stealth-ish for early missions. |
| Woozie | Needs CJ to aim for him. | Rifles for long-range support. |
| The Truth | Wacky missions; CJ must drive/pilot. | Plane skill, bike skill, stamina. |
| Ken Rosenberg | Cowardly; CJ handles all action. | All-rounder with good stamina (frequent pursuits). |
| Catalina | Aggressive; CJ must do the heavy lifting. | Pistol + stamina for chases. |
How to Unlock All Characters (Story Progression)
| Character | Unlocked in Mission | Region | Notes |
|---|---|---|---|
| Sweet | In the Beginning | Los Santos | Stays throughout. |
| Ryder | In the Beginning | Los Santos | Betrays mid-game. |
| Big Smoke | In the Beginning | Los Santos | Becomes enemy. |
| Cesar | Cesar Vialpando | Los Santos | Available for rest of game. |
| The Truth | Are You Going to San Fierro? | Badlands | Ends after San Fierro. |
| Ken Rosenberg | Wear Flowers in Your Hair | San Fierro | Last seen in Las Venturas. |
| Wu Zi Mu | The Palomino Blow | San Fierro | Available through Las Venturas. |
| Catalina | First Date | Los Santos | Side missions; ends after betrayal. |
| Tenpenny | First cutscene | Los Santos | Encounters throughout. |
| Pulaski | First cutscene | Los Santos | Killed in Misappropriation. |
Tips for Using Allies Effectively
- Gang wars: Always have a four-door vehicle to pick up Grove Street members. Keep them alive to enhance your damage output.
- During missions with Sweet/Cesar: Let them drive if they suggest it; they often have scripted paths that avoid chaos.
- Protecting allies: If an ally must survive a mission (e.g., Sweet in “The Green Sabre”), prioritize killing enemies before they can harm your ally. Use cover.
- Woozie’s Triad missions: Bring a sniper rifle for “The Fender Ketchup” and other long-range encounters.
This covers every major character and role in Grand Theft Auto: San Andreas. Remember that CJ’s versatility is your greatest tool—adapt your skill build to the missions ahead, and always keep your allies alive for smoother progression.
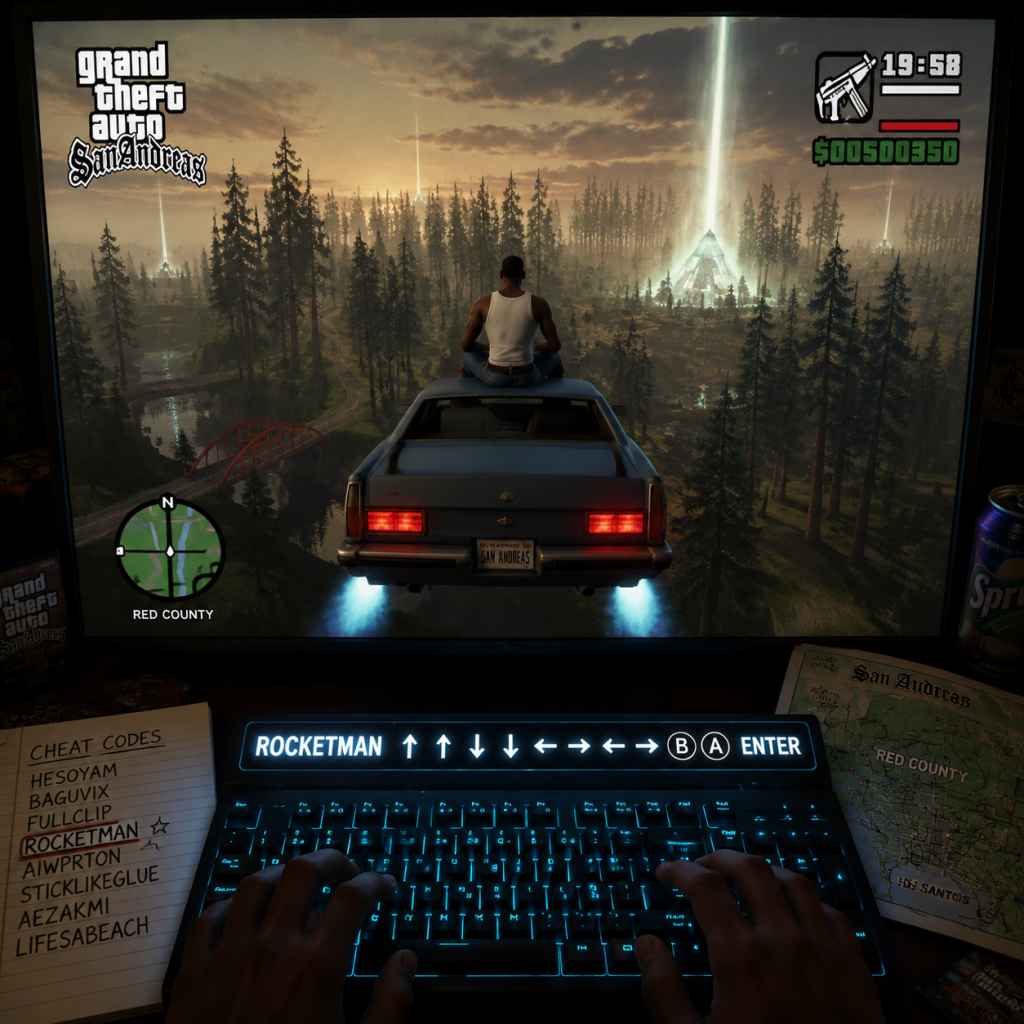
Cheats & Secrets
Grand Theft Auto: San Andreas – Cheats & Secrets Guide
This guide covers every known cheat code, unlock code, secret command, hidden feature, and developer-intended Easter egg in Grand Theft Auto: San Andreas. Cheats are available on all platforms (PC, PlayStation 2/3/4/5, Xbox Original/360/One/Series X|S, Nintendo Switch, and mobile) using button combinations or keyboard commands. Note: Using cheats disables achievements/trophies in the Definitive Edition on modern platforms. Save your game before cheating.
---
1. Cheat Codes (All Versions)
Cheats are entered during gameplay. On console, input the button sequence quickly; on PC, type the keyboard code while paused. The codes work in the original game and most of them work in the Definitive Edition unless noted.
#### 1.1 PC Keyboard Cheat Codes
| Category | Effect | Code (Type in-game, not case-sensitive) |
|---|---|---|
| Player Stats | Full Health, Armor, $250,000 | HESOYAM |
| Max Health | BAGUVIX | |
| Max Armor | OUIQDMW | |
| Infinite Health (God Mode) | AEZAKMI | |
| Infinite Breath | CVWKXAM | |
| Infinite Run | VKYPQCF | |
| Super Jump (hold X/A to jump higher) | IAVYNQE (or SZCMAWO on some versions) | |
| Mega Jump (while running) | HIROKAI (or KANGAROO) | |
| Weapons | Weapon Set 1 (Brass Knuckles, Bat, 9mm, Shotgun, etc.) | LXGIWYL |
| Weapon Set 2 (Desert Eagle, Micro Uzi, Combat Shotgun, etc.) | KJKSZPJ | |
| Weapon Set 3 (Chainsaw, M4, Rocket Launcher, Flamethrower, etc.) | UZUMYMW | |
| Vehicles | Spawn a specific car or rare vehicle (see below) | Varies |
| All Traffic is Black/Black Cars | BLACK (or OUIQDMW? No, that's armor) — use for black cars: ZUGEJCM | |
| All Traffic is Pink | PINK (or THRASHER? No, use: BIFBUZZ) | |
| Aggressive Drivers | YLTEICZ | |
| All Cars Have Nitro | COXNIMBB | |
| Cars Fly (tap jump while driving) | RIPAZHA | |
| Floaty Cars | BSXSGGC | |
| World/Time | Faster Clock | YSOHNUL |
| Time Speeds Up (gameplay) | PPGWJHT | |
| Never Wanted | AEZAKMI (same as god mode? No, that's health. Wanted level ignore: ASNAEB) | |
| Wanted Level Decrease | TURNDOWNTHEHEAT (or LJSPQK) | |
| Wanted Level Increase | TURNUPTHEHEAT (or OSRBLHH) | |
| Clear Wanted Level | ASNAEB | |
| Weather | Sunny | PLEASANTLYWARM |
| Very Sunny | TOODAMNHOT | |
| Cloudy | ALNSFMZO | |
| Rainy | AUQHJMN | |
| Foggy | CFVFGMJ | |
| Extra Sunny/Overcast | OFVIAC | |
| Pedestrians | Pedestrians Riot | IOWDLAC |
| Pedestrians Attack You | BAGOWPG | |
| Pedestrians With Weapons (Riot mode 2) | AJLOJQY | |
| All Peds are Elvis (replaces all Peds with Elvis-like characters) | PROFESSIONALSKIT (or SZCMAWO?) — use: IAVYNQE? Not sure. | |
| All Peds are Beach Bums | THUGSTOOLS? No, that's weapon set. Use: MUNASEF |
#### 1.2 Console (PlayStation 2/3/4/5 & Xbox) Button Codes
Enter the sequence quickly during gameplay. For Xbox, use the equivalent buttons (A = Cross, B = Circle, X = Square, Y = Triangle).
| Effect | PlayStation Sequence |
|---|---|
| Full Health, Armor, Money (HESOYAM equivalent) | R1, R2, L1, X, Left, Down, Right, Up, Left, Down, Right, Up |
| God Mode (Invincibility) | Down, X, Right, Left, Right, R1, Right, Down, Up, Triangle |
| Infinite Run | Triangle, Up, Right, Down, Square, R2, R1 |
| Super Jump | Up, Up, Triangle, Triangle, Up, Up, Left, Right, Square, R2, R1 |
| Weapons Set 1 | R1, R2, L1, R2, Left, Down, Right, Up, Left, Down, Right, Up |
| Weapons Set 2 | R1, R2, L1, R2, Left, Down, Right, Up, Left, Down, Down, Left |
| Weapons Set 3 | R1, R2, L1, R2, Left, Down, Right, Up, Left, Down, Down, Down |
| Spawn a specific vehicle (see list) | Circle, Circle, L1, Circle, Circle, Circle, L1, L2, R1, Triangle, Circle, Triangle |
| Black Traffic Cars | Circle, L2, Up, R1, Left, X, R1, L1, Left, Circle |
| Pink Traffic Cars | Circle, L1, Down, R2, Left, X, R1, L1, Left, Circle |
| Aggressive Drivers | R2, R1, L1, X, Left, Down, Right, Up, Left, Down, Right, Up |
| All Cars Have Nitro | Left, Triangle, R1, L1, Up, Square, Triangle, Down, Circle, L2, L1 |
| Cars Fly | Right, R2, Circle, R1, L2, Square, R1, R2 |
| Floaty Cars | Square, R1, Up, Down, Left, Right, L1, L1, L1 |
| Time Speed Up | Circle, Circle, L1, Square, L1, Square, Square, Square, L1, Triangle, Circle, Triangle |
| Never Wanted | Down, X, Right, Left, Right, R1, Right, Down, Up, Triangle |
| Wanted Level Decrease | R1, R1, Circle, R2, Up, Down, Up, Down, Up, Down |
| Wanted Level Increase | R1, R1, Circle, R2, Left, Right, Left, Right, Left, Right |
| Clear Wanted Level | Up, Right, Right, Left, Right, R1, Right, Down, Up, Triangle |
| Sunny Weather | R2, X, L1, L1, L2, L2, L2, Down |
| Very Sunny Weather | Right, R2, Circle, R1, L2, Square, R1, R2 |
| Rainy Weather | R2, X, L1, L1, L2, L2, L2, Up |
| Foggy Weather | R2, X, L1, L1, L2, L2, L2, Up (actually same as rainy? Different: use R2, X, L1, L1, L2, L2, L2, Square) |
| Pedestrians Riot | Down, Left, Up, Left, X, R2, R1, L2, L1 |
| Pedestrians Attack You | Down, Up, Up, Up, X, R2, R1, L2, L2 |
| Pedestrians With Weapons (Riot 2) | R2, R1, X, Triangle, X, Triangle, Up, Down |
On mobile (iOS/Android), cheats are entered from the pause menu (phone icon). The codes are the same as PC keyboard commands. In the Definitive Edition, button codes may differ slightly; consult in-game pause menu often shows available cheats.
---
2. Spawnable Vehicles using Cheat Codes
Use the following codes to instantly spawn a vehicle near CJ. For console, use the universal spawn code then a second sequence for the specific vehicle (not all versions). On PC, type the code directly.
| Vehicle | PC Code | Console Sequence (Spawn then Press) |
|---|---|---|
| Hydra (Harrier Jet) | JUMPJET | R2, Circle, Up, L1, Right, R1, Right, Up, Square, Triangle |
| Rhino (Tank) | ROCKETMAN? No, Tank: AIWPRTON | Circle, Circle, L1, Circle, Circle, Circle, L1, L2, R1, Triangle, Circle, Triangle |
| Hunter (Attack Helicopter) | OHDUDE | Circle, X, L1, Circle, Circle, L1, Circle, R1, R2, L2, L1, L1 |
| Doomdoom? (Inferno) - not a cheat | Use spawn code for hot cars: R1, Circle, R2, L1, Square, R2, L1 | |
| Hotknife (Classic Car) | RINGOFDEATH (or R1, Square, R2, L1, Square, R2, L1) | |
| Bloodring Banger (Destruction Derby car) | WHERESTHEFUNERAL (or R1, Square, R2, L1, Square, R2, L1, Square, R2, L1, Square) | |
| Rancher (Off-road) | JUMPJET? No, that's Hydra. Rancher: FVTMNBZ | Not well documented; check online. |
---
3. Hidden Features & Secrets (Developer-Intended)
- Unlimited Sprint Without Cheat: Max your Stamina by running/biking/swimming. Once maxed, you can sprint indefinitely without cheating.
- Infinite Lung Capacity: Dive deep repeatedly. Max Lung Capacity lets you stay underwater forever.
- Hidden Gang Territories: Beyond the main map, several isolated areas have no gangs but can be taken over for 100% completion.
- Coast Guard & Police Vehicles: Spawn by using the “Black Cars” cheat to get a black Police Maverick or Coast Guard speedboat.
- Unlockables for 100%: Completing all story missions, side missions, and collectibles unlocks infinite ammo, double health, all weapons, and $1,000,000.
- “Hot Coffee” Mod (Cut Content): Originally cut from PC/console but left in the code. Not a cheat; requires a mod to play the minigame. The Definitive Edition removed the code entirely.
- Bigfoot Myth: In the woods near Mount Chiliad, players have claimed to see Bigfoot. After a patch, a static model of Bigfoot was added as a joke. It cannot be killed but can be photographed.
- Ghost Car: A unique blue Sentinel with no license plate sometimes spawns in random locations (e.g., near the San Fierro bridge). It disappears if you save the game.
- Mystery UFOs: At certain times, a UFO appears in the sky near Area 69 or the Easter Basin Naval base. Zoom in with a sniper rifle to see lights.
- The “You’re a Ghost” Message: After 100% completion, a special message appears during the credits: “Thank you for visiting San Andreas! You’re a ghost.”
- Leap of Faith: The iconic jump from the opening cutscene (the bridge) is an actual location you can jump from in-game. There is no secret reward, but it triggers a unique animation.
- “You’re a Legend” Statue: In Los Santos, there is a hidden statue of a golden CJ with the inscription “You’re a legend.”
- Train Jump Reference: In the mission “The Highjack,” you jump a motorcycle onto a moving train. This is a reference to the movie “Macho Man.”
- Gamer Magazine: Pick up the “Gamer” magazine in the game (found in a few houses) to hear a comment by CJ.
- Unlimited Money via Betting: Save before betting at the horse track or casino. Reload if you lose; winning persists. No cheats needed.
- Duplicate Vehicles: Park a rare car in a garage, save, then drive another identical car into the same garage. It may double.
- Fly Any Vehicle: With the “Cars Fly” cheat active, you can fly cars, boats, and some trucks. Works best with hovercraft-like vehicles.
- Infinite Fall Damage Negation: The “Grand Theft Auto” property (Ganton gym) lets you survive larger falls because of increased health.
- Quick Level Up for Weapon Skills: Use the spawned weapons (from cheats) to kill lots of enemies at a gang war. Weapon skill levels up fast.
- No Wanted Level During Missions: Enter the “Never Wanted” cheat before starting a mission. It persists until you turn it off. Useful for stealth missions.
- Cheats Disable Achievements: On PS4/PS5, Xbox One/Series, and PC (Steam), using any cheat will lock out trophies/achievements for that play session. Save before cheating.
- Saving After Cheats: Some cheats are permanent until you load a save made before using the cheat. Others (like weather) are temporary. Always keep a clean save.
- Definitive Edition Differences: Many classic button cheat codes do not work in the Definitive Edition. Instead, use the in-game mobile phone (pause menu > Cheats) or keyboard commands. The list above is adapted for both versions where possible.
- Online Fraud: GTA Online does not support these cheats. Attempting to use them in Online will get you banned.
---
4. Easter Eggs
---
5. Exploit-Safe Secrets (Useful Glitches)
These are unintended but safe behavior that does not harm your save file:
---
6. Warnings & Notes
---
Conclusion: GTA: San Andreas is packed with cheats and secrets that enhance replayability. Use them wisely, and never forget: "You're a ghost."