
Half-Life 2
## Half-Life 2: Game Introduction ### Genre First-person shooter (FPS) with puzzle and narrative-driven elements, often credited with revolutionizing the storytelling and physics-based gameplay in the genre. ### Developer & Publisher Developed by **Valve Corporation**, an American game developer a...
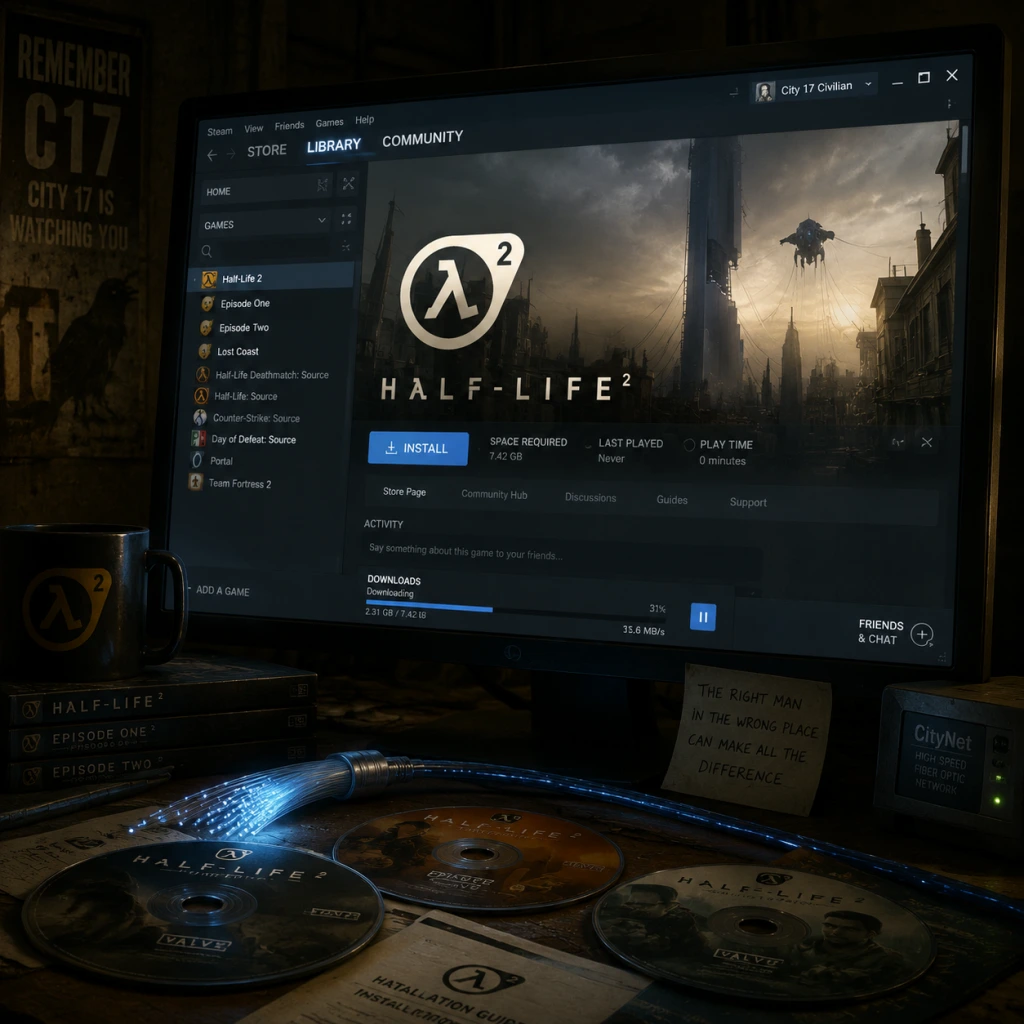
Download & Installation
Half-Life 2 Download & Installation Guide
This guide covers official, legitimate methods to download and install Half-Life 2 across all supported platforms. The game is primarily distributed through Valve's Steam service on PC, with console versions available via The Orange Box compilation. Note that Half-Life 2 requires a free Steam account even for the PC retail version.
---
1. System Requirements (PC)
| Component | Minimum | Recommended |
|---|---|---|
| OS | Windows 7 (32-bit) | Windows 10 (64-bit) |
| Processor | 1.7 GHz | 2.4 GHz dual-core |
| Memory | 512 MB | 1 GB |
| Graphics | DirectX 8.1 compatible (e.g., GeForce 3) | DirectX 9.0c compatible (e.g., GeForce 6600) |
| Storage | 8 GB free space | 8 GB free space (SSD recommended) |
| Internet | Broadband | Broadband |
---
2. Platform-Specific Download Sources
| Platform | Official Store | Account Required | Notes |
|---|---|---|---|
| PC (Steam) | [Steam Store](https://store.steampowered.com/app/220/HalfLife_2/) | Steam account | Primary distribution. Also includes Half-Life 2: Deathmatch, Lost Coast, and Episode One/Two via bundles. |
| PC (Retail DVD) | Retail box (e.g., from Amazon) | Steam account | Must activate CD key on Steam and download the game. |
| PlayStation 3 | The Orange Box (PS3) disc or PSN digital | PSN account | Download from PlayStation Store (The Orange Box includes HL2, HL2:EP1, HL2:EP2, Portal, TF2). |
| Xbox 360 | The Orange Box disc or Xbox Live Marketplace | Xbox Live account | Digital version available via Xbox backward compatibility on Xbox One/Series X |
| **Xbox One / Series X | S** | The Orange Box (360) via backward compatibility | Xbox Live account |
| Nvidia Shield (Mobile/Console) | Nvidia Shield Store | Nvidia account | Exclusive Android port for Shield devices. Requires Tegra processor. |
---
3. Step-by-Step Installation
#### PC (Steam Digital Download)
1. Create/Login to Steam: Go to [steampowered.com](https://steampowered.com) and install the Steam client (Windows/macOS). Create a free Steam account if you don't have one.
2. Purchase Half-Life 2: In the Steam store, search for "Half-Life 2" and purchase it (currently $9.99 USD, often on sale). You can also buy the Half-Life Complete bundle for all classic HL games.
3. Install via Library: Once purchased, open your Steam library, locate "Half-Life 2" in your games list, and click Install. Choose installation directory (default `C:\Program Files (x86)\Steam\steamapps\common`).
4. Download & Verify: Steam will download ~8 GB of files. After download, it automatically verifies the integrity of the game files.
5. Launch: Click Play in Steam library. The game will start with first-launch configuration (see Section 4).
#### PC (Retail DVD / CD Key)
1. Insert the DVD or enter the CD key in Steam: Games > Activate a Product on Steam.
2. Enter the key from your retail package. Steam will add the game to your library.
3. Download and install as above (you still need to download the full game via Steam – the disc may not contain the latest version).
#### PlayStation 3 (The Orange Box)
- Disc version: Insert disc, follow on-screen prompts to install game data (takes ~6-8 GB).
- Digital version: Go to PlayStation Store, search "The Orange Box", purchase/download. Choose from the PS3 XMB menu > Game > The Orange Box.
- Disc version: Insert disc; game runs from disc (optional install to hard drive for faster loading: navigate to game tile, press Y, select Install).
- Digital version: Purchase from Xbox Live Marketplace, download from My Games & Apps.
- Disc version: Insert the Xbox 360 disc into your console. The system will download a backward-compatible digital version (approx. 6 GB download required).
- Digital version: Go to Microsoft Store, search "The Orange Box", purchase and download. (Note: it may not appear in search unless you own it; use the backwards compatibility filter.)
- Video Configuration: The game detects your hardware and sets default graphics. You can adjust resolution, texture quality, anti-aliasing, etc. (Recommended: 1920x1080 or native, all settings on High with HDR enabled if your GPU supports it).
- Audio & Keyboard: Default settings are fine; you can rebind keys through Options > Keyboard.
- Activate Steam Cloud: Saved games sync automatically if enabled (recommended).
- Model Detail Level: The game may ask if you want to use high-detail models (use Yes).
- Update Check: Steam will check for any updates automatically.
#### Xbox 360 (The Orange Box)
#### Xbox One / Series X|S (Backward Compatibility)
#### Nvidia Shield (Android TV / Portable)
1. Open Google Play Store on Shield (or use the Shield Store app).
2. Search for "Half-Life 2" (developed by Nvidia Lightspeed Studios). Purchase and download.
3. Install – game is about 3 GB. Launch with controller or touch.
---
4. First Launch Setup (PC)
When you first launch Half-Life 2 on PC, you will encounter:
For console versions, simply launch the game; no additional setup is needed beyond signing into your console account.
---
5. Common Installation Errors & Fixes
| Error/Issue | Platform | Cause | Fix |
|---|---|---|---|
| "Steam must be running to play this game" | PC | Steam not logged in or not installed | Launch Steam first; ensure your account owns the game. |
| "Failed to load the launcher DLL" | PC | Missing Visual C++ redistributable | Install [VC++ Redistributable 2015-2022](https://aka.ms/vs/17/release/vc_redist.x64.exe). |
| DirectX error or missing d3dx9_xx.dll | PC | DirectX not updated | Install DirectX End-User Runtime from Microsoft. |
| Half-Life 2 crashes on startup | PC (older Windows) | Compatibility mode needed | Right-click hl2.exe > Properties > Compatibility > Run as Windows 7/8. |
| "No suitable graphics device found" | PC | Outdated or missing GPU drivers | Update graphics drivers (NVIDIA/AMD/Intel). For integrated Intel GPUs, try launching with `-dxlevel 81` in launch options. |
| Steam download stuck at 0% | PC | Network issues or corrupted cache | Clear Steam download cache (Steam > Settings > Downloads > Clear Cache). |
| Xbox backward compatibility download fails | Xbox One/Series | Region or licensing mismatch | Ensure you are signed in with the account that purchased the game or inserted the disc. Restart console. |
| PS3 disc not recognized | PS3 | Dirty disc or system software | Clean disc; update PS3 firmware; try rebuilding database (Safe Mode > Option 3). |
| Nvidia Shield: game not launching | Shield | Insufficient storage or permissions | Free up space (>3 GB). Check Google Play Store for updates. |
6. Post-Installation Verification
After installation, verify the game is ready to play:
- PC (Steam): Right-click Half-Life 2 in Steam library > Properties > Local Files > Verify integrity of game files. This ensures all files are intact.
- Check version: In the main menu, look for the build number (e.g., "Version 5135"). Latest update: June 2023 (build 5135).
- Run benchmarks: Press ~ (tilde) to open console, type `timedemo` commands to test performance.
- Console: Launch the game and navigate to the main menu. No file checks possible, but ensure saved games can be loaded.
- Update check: On PC, Steam auto-updates. For console, check for game updates via system settings.
- Backup saves: PC saves are in `C:\Users\[YourUser]\Documents\My Games\Half-Life 2\save`. Copy this folder for backup.
- Mod support: Half-Life 2 has extensive mods (e.g., Garry's Mod, Counter-Strike: Source). Install via Steam Workshop or manual extraction into the `sourcemods` folder. Ensure Steam is set to download mods from Workshop.
- Multiplayer: Half-Life 2: Deathmatch is included (free). Play via Steam Friends or community servers.
- Source SDK: For modding, download Source SDK Base 2013 Singleplayer (free on Steam) alongside Half-Life 2.
- Language packs: If needed, change language in Steam library: Right-click Half-Life 2 > Properties > Language.
---
7. Additional Tips
---
This guide is accurate as of March 2025. Always check official sources for updates.
Game Introduction
Half-Life 2: Game Introduction
Genre
First-person shooter (FPS) with puzzle and narrative-driven elements, often credited with revolutionizing the storytelling and physics-based gameplay in the genre.
Developer & Publisher
Developed by Valve Corporation, an American game developer and digital distribution company. Published by Valve on PC and by Electronic Arts for retail console releases. The game utilizes Valve’s proprietary Source engine.
Release Timeline
- Windows: November 16, 2004
- Xbox: November 15, 2005 (as part of Half-Life 2 and later The Orange Box)
- Xbox 360 / PlayStation 3: October 10, 2007 (via The Orange Box)
- Mac OS X: May 12, 2010 (via Steam)
- Linux: July 25, 2013 (via Steam)
- Android (Nvidia Shield): May 12, 2014
- Steam Deck: February 25, 2022 (verified playable)
- PC: Windows, Mac OS X, Linux (via Steam)
- Consoles: Xbox, Xbox 360, PlayStation 3 (retail or digital), and backward compatibility on Xbox One / Xbox Series X|S
- Mobile: Nvidia Shield (Android)
- VR: Mod support with various VR mods (e.g., Half-Life 2: VR Mod)
- City 17: A bleak, Eastern European-style city under Combine control, featuring towering citadels, brutalist architecture, and pervasive surveillance.
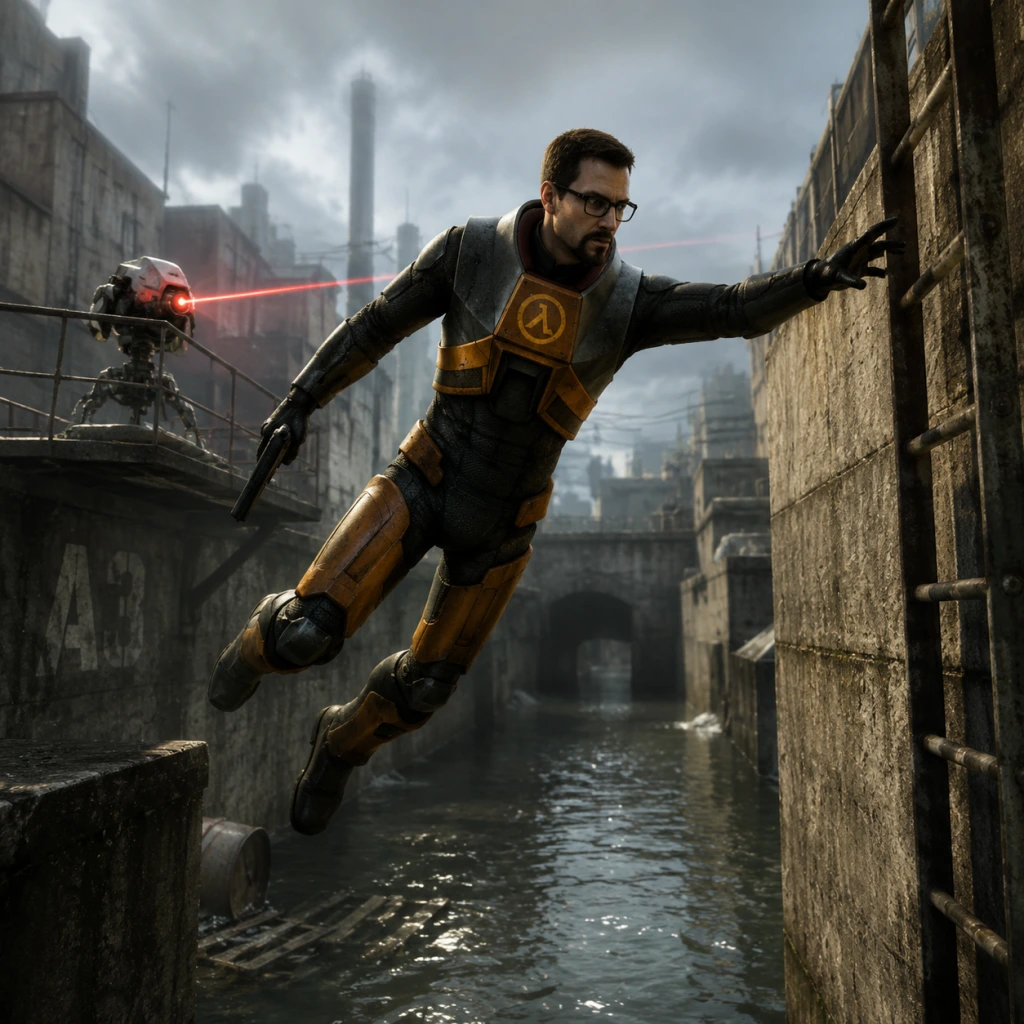
- The Canals & Water Hazard: A network of polluted waterways and industrial ruins.
- Ravenholm: A haunted, zombie-infested town overtaken by the Combine’s headcrab creatures.
- Nova Prospekt: A remote prison facility and Combine research base.
- The Coast & Highway 17: A scenic but dangerous coastal highway leading to Combine strongholds.
- Gordon Freeman: The silent protagonist; a physicist turned freedom fighter, wielding the iconic crowbar, gravity gun, and various firearms.
- G-Man: A mysterious, ever-present figure who manipulates events from the shadows.
- Eli Vance: A brilliant scientist and resistance leader; father of Alyx.
- Alyx Vance: Eli’s daughter and a skilled fighter/hacker; becomes Gordon’s closest ally.
- Isaac Kleiner: Another Black Mesa scientist who aids the resistance.
- Judith Mossman: A scientist with ambiguous loyalties.
- Wallace Breen: The former Black Mesa administrator turned human collaborator and Combine representative.
- Barney Calhoun: A former Black Mesa security guard now working undercover for the resistance.
- Dog: Alyx’s pet robot; a massive, friendly machine used for combat and puzzle solving.
- Physics-based gameplay: The Source engine’s physics allow realistic object interactions, especially with the Gravity Gun, which lets players manipulate objects for combat and puzzles.
- Narrative immersion: The story unfolds without cutscenes or HUD text; players experience events through Gordon’s eyes in real time.
- Setpiece design: Memorable sequences like escaping a crumbling building, fighting a helicopter on a bridge, and navigating Ravenholm.
- Pacing: Perfectly balanced action, exploration, puzzle-solving, and scripted events.
- Atmosphere: Outstanding sound design, environmental storytelling, and a haunting soundtrack by Kelly Bailey.
- FPS enthusiasts looking for a groundbreaking single-player campaign.
- Fans of story-driven games with minimal hand-holding.
- Players interested in physics-based puzzles and emergent gameplay.
- Those who appreciate dark sci-fi dystopian settings.
- Ages: Mature (rated M for blood, violence, and language).
- Single-player: The main campaign, approximately 12–15 hours on a first playthrough.
- Commentary Mode: Unlockable developer commentary tracks throughout the game.
- Multiplayer: No official multiplayer in the base game, but Half-Life 2: Deathmatch (a standalone mode) was included in the Orange Box and is available via Steam. Additionally, Counter-Strike: Source and Day of Defeat: Source share the same engine.
- Offline: The single-player campaign can be played fully offline after the initial Steam installation.
- Online: Steam required for initial download and activation. Online features include achievements (on Steam and console versions), cloud saves, and community content via Steam Workshop.
- Half-Life 2: Lost Coast (2005): A free, standalone tech demo showing HDR lighting and a coastal monastery level. Not part of the main story.
- Half-Life 2: Episode One (2006): Direct sequel to the base game; continues the story immediately after the ending. Length: ~4 hours.
- Half-Life 2: Episode Two (2007): Further continuation, ending on a major cliffhanger. Length: ~5 hours.
- The Orange Box (2007): Bundle including Half-Life 2, Episode One, Episode Two, Portal, and Team Fortress 2. This is the most common way to experience the entire Half-Life 2 saga on modern platforms.
- No paid DLC exists beyond the episodes; the game relies on mods for extended content.
Platforms
Story Overview
Set in a dystopian future approximately 20 years after the Black Mesa Incident, the game follows Gordon Freeman—a theoretical physicist and reluctant hero—who is awakened from stasis by the mysterious G-Man. Gordon finds Earth under the oppressive rule of the Combine, a multidimensional alien empire that has taken over the planet, draining its resources and subjugating humanity. He joins a scrappy resistance movement led by former Black Mesa colleagues and new allies, fighting to liberate humanity. The narrative unfolds through immersive in-game sequences with minimal cutscenes, pushing the player forward with urgency and dramatic set pieces.
Setting
The game world spans several varied environments on Earth’s Eastern European coast and cityscapes:
The atmosphere is oppressive, with constant rain, decay, and authoritarian control, contrasted with moments of hope from the resistance.
Main Characters
Core Appeal
Half-Life 2 is praised for:
Target Audience
Game Modes
Online / Offline Support
DLC / Expansions
What Makes This Game Unique?
Half-Life 2 stands out for its seamless integration of physics and storytelling. The Gravity Gun isn’t just a weapon—it’s a tool for creative problem-solving and improvisational combat. The game introduces the “scripted sequence” as a storytelling device that never takes control away from the player. It also set a benchmark for AI (enemies use cover, flank, and coordinate) and environmental interaction. The absence of cutscenes forces the player to stay engaged in the world. Even two decades later, its level design, pacing, and physics remain influential. The game also spawned a vast modding community, including famous mods like Garry’s Mod and Counter-Strike: Source.
Conclusion
Half-Life 2 is not just a game; it’s a milestone in interactive entertainment. Combining gripping storytelling, revolutionary physics, and unforgettable set pieces, it remains essential playing for any fan of the first-person shooter genre. Whether you’re experiencing it for the first time or revisiting it, the journey through City 17 and beyond is as powerful today as it was in 2004.
---
This guide section is part of a larger project. For details on acquiring and installing the game, refer to the Download & Installation guide.
Getting Started
Half-Life 2 Getting Started Guide for New Players
Welcome to City 17, Dr. Freeman. This guide will get you through the first hour and set you up for success. Half-Life 2 is a first-person shooter with heavy emphasis on physics puzzles and story. There is no character creation—you play as Gordon Freeman, a silent scientist. Below is everything a beginner needs to know.
First Hour Walkthrough: From Train to Lab
You begin in a train car arriving at City 17. Step off and follow the crowd—do not deviate. A Combine soldier will instruct you to “Pick up that can.” Do it. It’s a tutorial for the gravity manipulation mechanic. After dropping the can, proceed through the scanner checkpoint. A voice (G-Man) speaks—ignore it and keep moving.
Exit the station into the plaza. A Breencast will play on screens. Follow the path to a stairwell where a man (Barney) will wave you into a side room. He’ll give you a crowbar. This is your most important tool. Smash wooden crates and boxes to find supplies.
Continue through the hallway, into a bathroom where a headcrab will jump out. Use the crowbar to kill it (jump and swing downward for extra damage). Go through the vent, drop into the canal area. Follow the canal bank, jump over pipes, and climb a ladder into a building. You’ll meet Alyx Vance who leads you through a laboratory. After a sequence with a teleporter (it malfunctions), you’ll emerge on a rooftop—now you must head to Kleiner’s lab. The first hour ends once you receive the HEV suit and Gravity Gun.
Controls on All Platforms
The game supports PC (keyboard+mouse), Xbox 360, Xbox One (backward compatible), PlayStation 3, and mobile (Nvidia Shield, but not relevant here). For simplicity, here are standard bindings:
| Action | PC (Default) | Xbox/PlayStation Controller |
|---|---|---|
| Move | W/A/S/D | Left stick |
| Look | Mouse | Right stick |
| Jump | Space | A (Xbox) / X (PlayStation) |
| Crouch | Ctrl | B (Xbox) / Circle (PlayStation) |
| Use / Pick up | E | X (Xbox) / Square (PlayStation) |
| Fire weapon | Left mouse | Right trigger |
| Alt fire | Right mouse | Left trigger |
| Reload | R | Y (Xbox) / Triangle (PlayStation) |
| Flashlight | F | D-pad Up |
| Sprint | Shift | Left stick click |
| Weapon select | Number keys | D-pad Left/Right or quick menu |
UI Overview
Your HUD (heads-up display) has these elements:
- Health bar (top left, circular). Green bar = health. Yellow/red = critical.
- Armor bar (inside health ring). Blue = suit power. When depleted, health takes full damage.
- Ammo count (bottom right). Shows current clip / total ammo for equipped weapon.
- Weapon icon (above ammo). Image of current weapon.
- Crosshair (center). Red when you can interact, white otherwise.
- Objective log (top right, optional). Press “Tab” for detailed objectives.
- Suit power indicator (top center). Shows energy for flashlight, sprint, zoom (for some weapons).
- Smash everything breakable (crates, barrels, glass) for health, ammo, and batteries.
- Save your game often (F6 quick save on PC, use manual saves before major encounters).
- Listen to NPC dialogue—they give hints.
- Use the crowbar as your primary weapon for early enemies (headcrabs, weak zombies).
- Pick up every health charger and suit battery charger (they restore full health/armor).
- Wasting pistol/shotgun ammo on headcrabs (crowbar is faster).
- Standing still in open areas—Combine soldiers are accurate.
- Ignoring physics objects—barrels, radiators, and furniture can be used as weapons with the Gravity Gun later. For now, use them to block doorways.
- Rushing through environments—search every corner for hidden supplies (health packs often behind boxes).
- Fighting when you can run—many early encounters are designed to be evaded.
- Not saving. The game has no auto-save during combat. Quick save frequently (F6 or menu).
- Not using the gravity gun creatively. After you get it in Chapter 2, use it to pick up objects and fling them at enemies. Even a toilet can kill a soldier.
- Ignoring the flashlight. Many dark areas require it. Keep suit battery charged.
- Trying to kill everything. Sometimes stealth or running is smarter. Example: early sewers with multiple headcrabs—run past them.
- Aiming for headshots only. The crosshair doesn’t show bullet drop—center mass is fine.
- Forgetting to switch weapons. Use crowbar for melee, pistol for range, later shotgun for close quarters.
- [ ] Install Half-Life 2 via Steam (or console store). It’s free to play during some events.
- [ ] Configure controls. Adjust mouse sensitivity (start at 4.0 for PC), enable “Weapon auto-switch” if desired.
- [ ] Set video options. Turn down shader details if lag (old game but can stutter on modern hardware with high settings).
- [ ] Complete Chapter 1: Entanglement. This takes about 40-60 minutes.
- [ ] Learn the basics: crowbar damage pattern, pistol aiming, saving, and using physics objects.
- [ ] Find all health chargers in the early levels (they are marked by a blue plus).
- [ ] Collect at least 4 suit batteries to fully armor up before the first Combine firefight.
- [ ] Do not die to the first turret (Chapter 2). Use thrown objects to block its aim.
Essential Early Objectives (Chapter 1: Entanglement)
1. Get off the train. Follow the crowd and pick up the can.
2. Meet Barney. Receive the crowbar and learn about the Underground Railroad.
3. Survive the first headcrab. Use crowbar, not bullets (save ammo).
4. Meet Alyx. She gives you a pistol—do not waste bullets on early enemies.
5. Operate the teleporter. It’s a cutscene; follow prompts.
6. Find Kleiner’s lab in the old town (after malfunction).
What to Do First and What to Avoid
Do first:
Avoid:
Early Resource Priorities
1. Health. Always top off at wall chargers. Health never regenerates automatically.
2. Suit batteries. Armor absorbs damage. Chargers are limited—use them when health > 50.
3. Pistol ammo. Your first gun. Ammo is common; don’t hoard. Use on Combine soldiers only.
4. Shotgun ammo. Rare early. Save for groups or tough enemies.
5. Pulse rifle ammo. Not obtained until later chapters. Not a priority.
Common Beginner Mistakes
Day-One Checklist
Once you finish the first hour, you’ll have the Gravity Gun and a basic understanding of the game’s flow. Good luck, Gordon. The Resistance needs you.
Core Gameplay
Core Gameplay
Gameplay Loop Overview
Half-Life 2 is a linear, story-driven first-person shooter where you play as Gordon Freeman. The core loop consists of navigate → encounter resistance → solve physics puzzles → fight enemies → advance the narrative → get new tools → repeat. The game tightly paces these elements, alternating between combat, exploration, and puzzle-solving. There is no traditional open world or quest system; the story unfolds through scripted sequences and environmental storytelling. Your "quest" is to survive and reach the next objective marker, often indicated by NPC dialogue or visual cues.
Combat and Interaction Systems
- Weapons: You acquire weapons sequentially: crowbar (melee), pistol, SMG with grenade launcher, shotgun, crossbow, pulse rifle (AR2), RPG, and the Zero Point Energy Field Manipulator (Gravity Gun). Each weapon has alternate fire: pistol (rapid), SMG (grenade), shotgun (secondary fires slower, tighter spread), crossbow (scope), pulse rifle (energy ball), RPG (laser guidance). Ammo is finite but respawns in many areas.
- Physics Interactions: The Gravity Gun is the centerpiece. In early game it only lifts light objects; after acquiring its power upgrade in the mid-game, it can rip out heavy fixtures and launch them as projectiles. This changes combat drastically, allowing you to pick up and throw explosive barrels, radiators, saw blades, and even enemies (via energy balls later).
- Health and Armor: Health starts at 100, can be increased up to 100 (no overshield in base game). Armor comes from HEV suit charges and can reach 100. Medkits and battery chargers are scattered. No regeneration; rely on pickups and wall chargers.
- AI: Enemies are diverse: Combine soldiers (humanoid, use cover and flank), antlions (swarm behavior, can be controlled with pheropods), headcrabs (zombies, cover heads?), and more. NPC allies (rebels) fight alongside you in larger battles.
- Grav Gun (early)
- Crossbow, RPG, Bugbait (mid)
- Gravity Gun upgrade (late)
Progression
Progression is linear and defined by chapters (13 total). You advance by completing each chapter's objectives, which typically involve reaching an exit, disabling a barrier, or defeating a boss. There are no skill trees or experience points. Instead, progression is gated by new tools and weapons obtained at key moments:
Exploration
Levels are linear corridors but include hidden caches with supplies, easter eggs (e.g., the garden gnome achievement), and optional areas for lore. The game encourages exploring every corner for ammo, health, and armor. Some puzzles require finding a specific object (like a barrel) to break a blockade. There are no side quests; all content is mandatory for progression.
Quests/Missions
There are no formal quest logs. The "missions" are implicit: escape City 17, reach Black Mesa East, free the combine-held city, infiltrate Nova Prospekt, return to City 17, and confront Breen. Narrative is driven by NPCs like Eli Vance, Alyx Vance, Dr. Kleiner, and Breen's broadcasts.
Economy
There is no currency, shops, or trading. The economy is strictly resource-based: ammo, health, armor, and weapon pickups. You manage limited inventory (weapons are always carried; ammo is the only constraint). The Gravity Gun circumvents ammo by using environment objects as projectiles.
Character/Build Growth
Gordon Freeman has no stats, levels, or upgrades. The only "growth" is in the player's skill with physics manipulation and weapon handling. The Gravity Gun's upgrade creates a significant power shift. The player must adapt tactics as new enemies appear (e.g., antlions immune to bullets without bugbait? Actually they are vulnerable but bugbait makes them allies). The HEV suit provides protection and integrates oxygen for underwater sections, but no progression.
Endgame Structure
The endgame spans the last few chapters: "Our Benefactors" and "Dark Energy". You fight through the Combine's central hub, using upgraded Gravity Gun to throw energy balls and defeat Strider walkers. The final boss is Dr. Breen in a Combine advisor pod; you must destroy it with RPGs or sustained fire while dodging energy attacks. After the explosion, the G-Man reappears and puts Gordon into stasis. The game ends with a cliffhanger leading to Episode One.
---
Gameplay by Progression Tiers
Early Game (Chapters 1-4: Point Insertion → Water Hazard)
Objective: Escape City 17 and reach Black Mesa East.
Tools: Crowbar, pistol, SMG (after Kleiner's lab), shotgun (acquired on the way to the canal). At the end of this tier, you get the Gravity Gun (at Black Mesa East).
Gameplay Style: Stealth? Not really, but you must avoid Combine patrols in City 17. The first chapter is a walking tutorial. Once you retrieve the pistol, combat is sparse but intentional. The canals chapter introduces vehicle sections with the airboat. You learn basic physics puzzles: using blocks to climb, pushing carts, and floating barrels. The Gravity Gun is acquired but in low-power mode (can only carry light objects).
Key Combat Example: At the train station plaza, you face a few Combine soldiers behind barriers. Use the SMG's grenade launcher to flush them out, or use the shotgun at close range. The airboat's mounted gun is powerful but can overheat.
Tips: Conserve pistol ammo early. Always search for health/armor chargers. After the first crowbar swing on a crate, you can break most wooden objects. Use explosive barrels to kill groups.
Puzzle Example: Raising the bridge in the canal requires using the airboat to hit a valve with the water flow. No manual interaction needed; just drive into it.
---
Mid Game (Chapters 5-8: Black Mesa East → Sandtraps)
Objective: Travel through Ravenholm, join rebels in the city, cross the coast, and reach Nova Prospekt.
Tools: Full arsenal so far: crossbow (Ravenholm), pulse rifle (AR2) with energy ball, RPG (at the coast). The Gravity Gun is still low-power. Pheropods (bugbait) acquired after Black Mesa East? Actually you get bugbait in the chapter "We Don't Go To Ravenholm"? No, bugbait is acquired in "Highway 17" after defeating the Antlion Guard. The bugbait allows you to control antlions to attack enemies.
Gameplay Style: This is the longest section. It features the iconic horror chapter "We Don't Go To Ravenholm" with zombies and headcrabs. Combat becomes more intense with Combine soldiers and snipers. The coast chapters introduce wide-open spaces and vehicle driving with the buggy, which has a pulse turret. The antlion swarm introduces a new faction: you can call them with bugbait to overwhelm Combine patrols.
Key Combat Example: At the bridge in Highway 17, you must cross while Combine snipers shoot from towers. Use the crossbow's scope to take them out, or drive the buggy at high speed. The Antlion Guard boss requires shooting its underbelly when it rears up to spit acid.
Puzzle Example: In Ravenholm, you must use physics objects like saw blades to chop zombie legs, or set traps using explosive barrels. The Gravity Gun can launch these blades.
Tips: Always carry a crossbow for long-range stealth kills; it's silent. In buggy sections, don't be afraid to leave the vehicle to clear out enemies. Use bugbait to distract antlions from attacking you.
---
Late Game (Chapters 9-11: Nova Prospekt → Entanglement)
Objective: Storm the prison, rescue Eli, and return to City 17.
Tools: You have all weapons. The Gravity Gun gets upgraded in the chapter "Anticitizen One" after a scripted explosion in the teleporter. This upgrade allows you to pick up and hurl large metal objects and even Combine energy orbs. The energy orbs, if caught and launched, can destroy groups or enemies in heavy armor.
Gameplay Style: Intense indoor CQC in Nova Prospekt's prison cells. You fight Combine soldiers and new varieties like manhacks and turrets. After escaping, you lead a rebellion in City 17, fighting alongside rebel squads. The final chapters are massive street battles with APCs and Striders. The upgraded Gravity Gun drastically changes combat: you can now instantly kill a Combine soldier by throwing a radiator at them. It becomes your primary weapon for many encounters, conserving ammo.
Key Combat Example: In the Nova Prospekt cafeteria, Combine soldiers rush down the stairs; use the shotgun or the Gravity Gun to throw tables and chairs. After the upgrade, on the streets of City 17, you face a Strider. You must use the RPG (provided) or the Gravity Gun to throw energy orbs at its weak points. The fight is frantic with rebels as cover.
Puzzle Example: In the "Follow Freeman" section, you must navigate a destroyed building by creating bridges with the Gravity Gun using metal grates. No complex logic; just physical positioning.
Tips: Use the upgraded Gravity Gun constantly. It has no ammo cost and is extremely effective against organic and mechanical enemies. However, it cannot kill fast-moving enemies like antlions or snipers. Keep the crossbow for snipers. For Striders, you need the RPG; learn to lead the target and time the laser lock.
---
Endgame (Chapters 12-13: Our Benefactors / Dark Energy)
Objective: Infiltrate the Combine Citadel and stop Dr. Breen.
Tools: Same arsenal, but the Citadel sections heavily favor the upgraded Gravity Gun. It can automatically catch Combine energy orbs and reflect them. Ammo for other weapons is scarce; rely on the Gravity Gun and occasional RPGs.
Gameplay Style: This is the final linear gauntlet. You ascend the Citadel using moving platforms and fight Combine through industrial hallways. The final boss is a Combine Advisor (Dr. Breen's pod). The Advisor is invulnerable to normal weapons; you must use the Gravity Gun to catch energy balls from wall dispensers and hurl them at it while it shoots projectiles. After three hits, the pod explodes and triggers the reactor meltdown. You then escape through a time-slowing sequence and face the G-Man in the void.
Key Combat Example: In the chamber with multiple energy dispensers, you must stand in cover, catch a ball, wait for the Advisor to lower its shields, then fire. The timing is critical. If you fail, you die quickly; the scene is scripted but intense.
Puzzle Example: There are few puzzles here. The main challenge is combat and platforming. One section requires you to use Gravity Gun to remove barriers and progress.
Tips: Memorize the spawn points of energy balls. Stay mobile. Don't waste bullets; use the Gravity Gun for combat and ammo box destruction (but ammo is plentiful in this chapter? Actually ammo is limited, so rely on the Gravity Gun). There is no checkpoint once you start the final battle; you must survive the whole sequence.
---
Post-Endgame
There is no traditional endgame content in the base Half-Life 2. After credits, you can reload a save to explore earlier chapters or play the Episodes (Episode One and Two) which continue the story. The game has no New Game+, difficulty modifiers only at start. Achievements exist for specific challenges (e.g., "One Free Bullet" - complete game using only one bullet; "Gnome Alone" - bring a garden gnome to the end of Episode Two). For replayability, try harder difficulty (Hard mode) and use only the Gravity Gun.
---
Summary Table
| Tier | Chapters | Key Weapons Added | Main Enemies | Central Mechanic |
|---|---|---|---|---|
| Early | 1-4 | Pistol, SMG, Shotgun, Gravity Gun (low) | City patrols, headcrabs, antlions (few) | Basic physics, airboat driving |
| Mid | 5-8 | Crossbow, AR2, RPG, Pheropods | Zombies, Combine, Antlion Guard, snipers | Buggy driving, antlion control |
| Late | 9-11 | Gravity Gun upgrade | Combine soldiers, Striders, turrets | Physics combat, rebellion |
| Endgame | 12-13 | (No new weapons) | Combine Advisors, guards | Energy orb reflection, timed escapes |
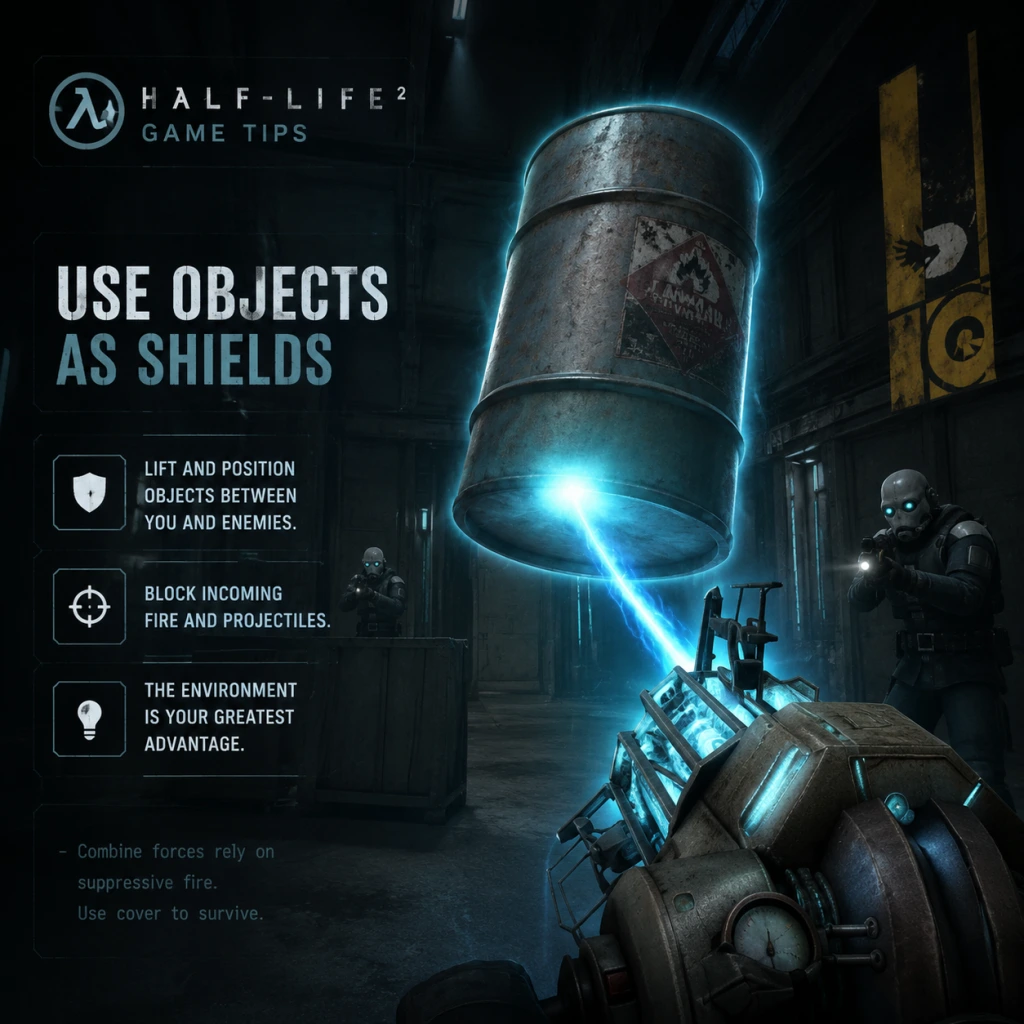
Game Tips
Comprehensive Half-Life 2 Game Tips
This guide covers essential tips for surviving City 17 and beyond. Tips are grouped by category and difficulty level.
Beginner Tips
#### 1. Master the Mouse Wheel for Weapon Switching
- Tip: Use the mouse wheel to quickly cycle through weapons instead of number keys. This is faster in the heat of battle.
- Why it works: Half-Life 2's weapon wheel is heavily used; scrolling forward/back lets you quickly access crowbar (melee), pistol, shotgun, etc. without looking away.
- When to use: Always. Practice in safe areas.
- Tip: Press F6 (default) to quick-save before every major encounter or puzzle.
- Why it works: The game has no autosave in some chapters (e.g., "We Don't Go to Ravenholm"). Manual saves prevent losing progress after a death.
- When to use: Before entering a new area, after solving a puzzle, before a boss fight.
- Tip: Grab a barrel, gas can, or wooden pallet with the Gravity Gun (when obtained) or even by hand. Throw it at enemies or use as a shield.
- Why it works: Many enemies are weak to thrown objects (e.g., Manhacks, Headcrabs). A barrel can kill a Combine soldier in one hit.
- When to use: From the moment you get the Gravity Gun (Chapter 3 onward). In Ravenholm, always carry a sawblade!
- Tip: Enemies make distinct sounds: Combine soldiers shout, Headcrabs screech, Antlions hiss. Use surround sound or headphones.
- Why it works: Sound indicates enemy type and direction before you see them. Prepare the right weapon.
- When to use: Always stay alert; the game often spawns enemies behind you.
- Tip: Hug walls, use crates, and avoid open spaces. Combine soldiers use suppressors and will pin you down.
- Why it works: The AI flanks and throws grenades. Corners give you a safe line of sight and cover from grenades.
- When to use: In firefights, especially against groups of soldiers.
- Crowbar: The best melee weapon for breaking crates and killing Headcrabs silently. Swipe twice for Manhacks.
- 9mm Pistol: Headshots kill standard soldiers in 2 hits. Use for long-range sniping when ammo is scarce.
- SMG (Submachine Gun): Great against fast enemies (Headcrabs, Zombies) but inaccurate at range. Use burst fire to conserve ammo.
- Shotgun: One-shot kills at close range against soldiers. Use alt-fire (double-barrel) for tougher enemies like Elite soldiers or Poison Zombies.
- Crossbow: Silent, one-shot kill on most non-boss enemies. Excellent for stealth sections (e.g., Nova Prospekt). Lead moving targets.
- RPG (Rocket Launcher): Lock on to Gunships and Striders. For groups of soldiers, aim at their feet for splash damage.
- Gravity Gun: Your ultimate tool. In late game, you can pick up and throw Combine energy spheres, turrets, and explosive barrels. Use the alt-fire (pushing) to knock enemies off ledges.
- Headcrabs: Jump when they leap to dodge. Use crowbar or shotgun to kill while airborne.
- Zombies: Aim for their head (the visible Headcrab). Fire is very effective – use flaming barrels or the flare gun from the Gravity Gun.
- Combine Soldiers: Flank them. They take cover and suppress. Use grenades (G key) to flush them out. Headshots from pistol are efficient.
- Manhacks: Let them charge at you, then sidestep and whack with crowbar. Or shoot with shotgun.
- Antlions: Use the Pheropods to command them. Lead them into battle, then call them back to avoid friendly fire.
- Gunships: Use the RPG with lock-on. Fire from behind cover; they will circle and shoot rockets.
- Striders: Use the RPG or (later) the mines and explosives. In sandbox areas, create traps with explosive barrels.
- Breakable Walls: Shoot or crowbar wooden planks, drywall, and vents. Many contain health, ammo, or armor.
- Supply Crates: Always break with crowbar or shoot. They contain ammo more than health.
- Radio Cache: In Chapter 2 ("A Red Letter Day"), there's a hidden radio room above the tram station. Jump on the pipes to reach it.
- Ravenholm: The church has a secret attic with the shotgun. Use the ladder behind the altar.
- Nova Prospekt: Every cell block has hidden grates leading to corridors with supplies.
- "Lambda Locator": Find all hidden lambda symbols to earn achievement. Use a guide; some are behind puzzles (e.g., the one in Chapter 4 requiring moving a platform with a box).
- "Zombie Chopper": Kill a Zombie with a spinning sawblade in Ravenholm. Carry the sawblade with Gravity Gun and toss it at a running zombie.
- "Get Some Griffin": In Chapter 8 ("Sandtraps"), use the crowbar to hit the catwalk guard 3 times without killing him (for a humorous secret scene).
- Health: Max 100 (can exceed with health chargers, but they are rare). Use health stations wisely – they recharge only once. If you're at 95 health, wait until you take damage.
- Armor: Max 200. Armor picks are common; prioritize grabbing them over health when possible. Armor reduces damage.
- Batteries: Look for battery packs on walls in Combine areas. They recharge your suit's energy (used for sprinting and flashlight).
- Flashlight: Use sparingly in dark areas; it drains battery fast. Toggle quickly to spot items.
- Combine soldiers drop: Pistol ammo is most common. Always pick it up.
- RPG ammo is rare; save for Strider fights.
- Crossbow bolts can be retrieved from dead enemies (1-3 per corpse). Reuse them.
- Don't use SMG for sniping; pistol is more accurate and ammo efficient.
- Air Control: While in midair, press forward and strafe left/right to control your trajectory slightly. Essential for platforming.
- Bunny Hopping: Practice by jumping while pressing strafe keys and moving the mouse in the same direction. After landing, release forward? No, keep forward. This preserves momentum. Useful for skipping fights.
- Ledge Grabs: You can jump and grab ledges only if the ledge is at eye level. No climbing; this is a physics engine limitation.
- Ravenholm: You can skip the whole chapter by shooting the bell with a crossbow from the first church rooftop. Requires precise aim.
- Water Hazards: Using the Gravity Gun, you can push a heavy object (like wooden pallet) across a gap to create a bridge.
- Glitch Spots: Some walls can be clipped through with a combination of physics objects and sprinting (e.g., the "turret skip" in Nova Prospekt). Only for advanced players.
- PC: Keyboard + mouse offers best aim and weapon switching. Use Q for last weapon. Bind quick-save to mouse side button.
- Console (Xbox 360/PS3): The controller has slower weapon switching. Use the radial menu (hold Y/Triangle) and memorize weapon positions. Aim assist is strong; let it help.
- Steam Deck: Works perfectly. Use trackpad for precise aiming. Remap quick-save to back buttons.
- Aggressive: Use SMG + shotgun, charge in, rely on armor and health pickups.
- Stealth: Use crossbow and pistol, pick off enemies from distance, avoid confrontation.
- Physics Master: Constantly use Gravity Gun to throw objects, making combat creative and resource-efficient.
- Always carry a heavy physics object when entering a new area; it can instantly kill Headcrabs and break crates.
- Use the suit's zoom feature (default Z) to scout ahead. It zooms slightly and stabilizes your view.
- Break all crates – even empty ones often reveal hidden ammo behind walls.
- When you get the Gravity Gun, practice juggling objects – a single sawblade can kill 5 enemies if thrown well.
- Listen to Breencast announcements – they often hint at upcoming dangers.
- Don't hoard the RPG – if you don't use it against helicopter and striders, you'll waste ammo space. Use it liberally.
#### 2. Save Often – Manual Saves Are Your Best Friend
#### 3. Always Carry a Physics Object
#### 4. Listen to Audio Cues – Enemy Locations
#### 5. Stick to Walls and Use Cover
Intermediate Strategies
#### Combat – Weapon-Specific Tips
#### Enemy-Specific Tactics
Exploration & Secrets
#### Hidden Supplies
#### Hidden Achievements & Easter Eggs
Resource Management
#### Health & Armor
#### Ammo Conservation
Advanced Optimizations (Speedrunning & Efficiency)
#### Movement Techniques
#### Skipping Fights (Speedrunner Tricks)
Platform-Specific Notes
Economy & Builds (Fictional – No In-Game Economy)
Half-Life 2 has no traditional economy or character builds. However, you can think of "resource economy" as managing health, armor, and ammo. There are no skill points, so "builds" refer to playstyle:
Choose your style based on situation; the game rewards adaptability over sticking to one weapon.
Final Pro Tips
Master these tips, and you'll feel like the One Free Man. Good luck, Dr. Freeman.
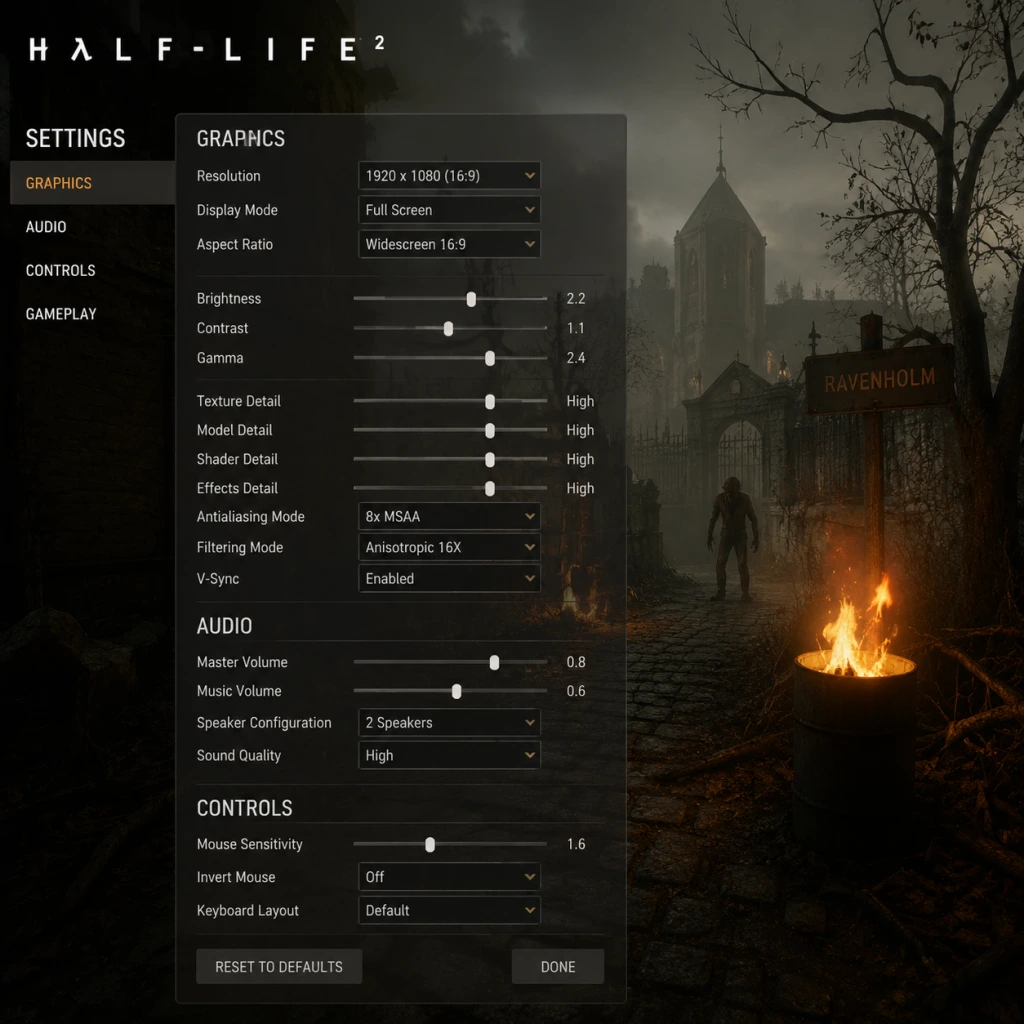
Game Settings
Game Settings Guide for Half-Life 2
This guide covers all settings categories in Half-Life 2: Graphics, Audio, Controls, Accessibility, Language, Network, and Gameplay. It includes optimal configurations for low-end, mid-range, and high-end hardware, plus warnings about settings that are easy to misconfigure.
Graphics Settings
Half-Life 2 uses the Source engine (2004 era), which scales well across hardware. Adjust these in Options > Video.
#### Key Graphics Options
- Resolution: Set to your monitor's native resolution. Lower resolutions (e.g., 1024x768) improve performance but reduce clarity.
- Display Mode: Fullscreen recommended for best performance; Windowed or Borderless for easier alt-tabbing.
- Model Detail: High adds more polygons to characters and objects. Low reduces them, boosting FPS significantly on older GPUs.
- Texture Detail: High uses more VRAM. Low reduces quality but helps on cards with <512 MB VRAM.
- Shader Detail: High enables per-pixel lighting and realistic water reflections. Low makes surfaces flat but greatly improves performance on integrated graphics.
- Shadow Detail: High gives soft, dynamic shadows. Low uses simple blob shadows – big performance gain.
- Antialiasing (AA): 2x, 4x, or off. Off gives most FPS; 2x is a good middle ground. Avoid 8x on low-end hardware.
- Anisotropic Filtering (AF): 2x–16x. Improves texture clarity at angles. 4x is a good balance for mid-range.
- Wait for Vertical Sync (VSync): On prevents screen tearing but caps FPS to monitor refresh rate. Off allows higher FPS but may cause tearing – recommend On if you notice tearing.
- Motion Blur: On/Off. Off improves performance and reduces motion sickness.
- Color Correction: On adjusts color based on map environment. Off gives neutral colors and slight FPS bump.
- Field of View (FOV): Default 75. PC players often increase to 90–110. Not in in-game menu; must be set via console (`fov_desired 90`) or in launch options (`+fov_desired 90`). Be careful – values above 110 can cause fisheye distortion.
#### Optimal Presets by Hardware
| Hardware Level | Example GPU | Resolution | Model Detail | Texture Detail | Shader Detail | Shadow Detail | AA | AF | VSync | Notes |
|---|---|---|---|---|---|---|---|---|---|---|
| Low (integrated) | Intel HD 3000 | 1024x768 | Low | Low | Low | Low | Off | 0x | Off | Expect 30–45 FPS. Turn off motion blur. Reduce resolution further if needed. |
| Mid-range | GTX 1050 / RX 560 | 1920x1080 | High | High | High | Medium | 2x | 4x | Off | Stable 60 FPS. Can enable VSync if no frame drops. |
| High-end | RTX 3060 / RX 6600 | 1920x1080 or higher | High | High | High | High | 4x | 16x | On | Solid 144+ FPS. Enable all eye candy. |
- HDR: Half-Life 2 has an HDR option in some versions (Lost Coast, EP2). If available, set to "Full" or "Bloom" based on preference. Full HDR can dim the image on older monitors – if too dark, switch to Bloom or Off.
- Fast Path: An old option that disables some effects – leave Off.
- Multicore Rendering: Enable for modern CPUs (dual-core+). Disabled by default on old installs; enable it in Advanced Video Options for better CPU utilization.
- Master Volume: 70–80% recommended; avoid 100% to prevent clipping.
- Sound Effect Volume: Keep at 100% to hear combat cues and physics interactions.
- Voice Volume: 100% for character dialogue.
- Music Volume: 50–70% to balance with sound effects – music is good but can mask enemy sounds.
- EAX/Hardware Sound: Off unless you have a dedicated sound card (e.g., Creative X-Fi). Enabling on integrated audio may cause stutter.
- 3D Audio: Off if you experience crackling. On for positional audio with headphones.
- Speaker Configuration: Headphones for best directional audio with stereo headphones. Disable if using surround speakers.
- Key Bindings: Default layout is intuitive: WASD movement, mouse1 shoot, mouse2 zoom/alt-fire, space jump, Ctrl crouch, Shift run. Customize as desired.
- Bind Uncommon Actions: Consider binding "Quick Save" (F6), "Quick Load" (F7), "Flashlight" (F only by default, but rebind to a mouse button for ease).
- Suit Zoom Tier: Bind a key to switch suit zoom levels (num0 default) – useful for long-range aiming.
- Mouse Sensitivity: Start at 3–4 (default is 3). Adjust for your DPI. Lower sensitivity (1–2) gives precision for headshots; higher (5+) for faster turns.
- Invert Mouse: Off for standard up/look up. If you prefer flight sim style, enable.
- Mouse Smoothing: Off – adds input lag. Set to Low or Off for best response.
- Mouse Acceleration: Off – can cause inconsistency. Turn Off in Windows too.
- Joystick/Gamepad: If using controller, enable in Advanced Keyboard options. The game defaults to Xbox 360 layout.
- Subtitles: Enable in Audio > Subtitles. Shows dialogue and sound effects as text. Essential for hearing-impaired players.
- Color Blindness: No native modes. Third-party tools (e.g., reshade) or Windows color filters can help.
- Closed Captions: Not available natively – subtitles are the closest.
- Controller Support: Full remapping possible.
- Text Size: Not adjustable in-game. Use system DPI scaling if needed.
- Quick Save/Load: Frequent saving helps players with short play sessions.
- `cl_showpos 1` – shows position and angle, useful for orientation.
- `hud_fastswitch 1` – allows instant weapon switch without confirming.
- `sv_cheats 1` then `bot_mimic 0` – not needed, but some accessibility mods require cheats.
- Language: Choose from English, French, German, Spanish, etc. Changes dialogue and text.
- Subtitles: Follow language setting; can be set to original audio with translated subtitles.
- Keyboard Layout: Not in-game – change via OS.
- Rate: 30000 (default) for 1 Mbps upload; increase to 100000 if fiber.
- Cl_cmdrate: 66 (default; set to 128 if you have stable connection).
- Cl_updaterate: 66 (default; set to 128).
- Interp: 0.1 (default; lower to 0.01 for less lag compensation, but may cause jitter – recommended 0.025).
- cl_smooth: 1 (smooths interpolation – keep).
- cl_lagcompensation: 1 (keep).
- Net_graph: 1 to display network stats; useful for troubleshooting.
- Low latency (<30ms): cl_cmdrate/updaterate 128, interp 0.01–0.025.
- High latency (>100ms): cl_cmdrate/updaterate 66, interp 0.1 to reduce packet loss.
- Autosave: On – you can disable but not recommended (you lose progress).
- Weapon Auto Switch: When picking up new weapon, auto-equip. On for convenience, Off to keep current weapon.
- Crosshair: Default is default; can change color/size via console (`crosshaircolor`, `crosshairsize`).
- Flashlight: Always on when necessary? No – toggle manually.
- Suit Zoom Level: Controls zoom intensity when using alt-fire of certain weapons. Default 3 levels – adjust to preference.
- Difficulty: Easy, Normal, Hard. Affects enemy health, damage, supplies. Normal recommended for first play.
- Helpful Hints: On – shows tutorial prompts. Off for immersion.
- Launch Options: In Steam > Properties > General, add `-dxlevel 90` for DirectX 9 (default), `-dxlevel 81` for older GPUs (DX8.1 mode), `-high` to give high CPU priority, `-threads X` (X = CPU logical cores) to optimize.
- Config File: Advanced settings can be edited in `.../steamapps/common/Half-Life 2/hl2/cfg/config.cfg`. Backup before editing.
- Can't see options?: If a dropdown shows nothing, verify game files (Steam > Properties > Local Files > Verify Integrity of Game Files).
Audio Settings
Options > Audio.
#### Special Attention: EAX
Enabling Hardware Acceleration or EAX can cause crashes or no sound on modern systems. Always set to Software mode unless troubleshooting.
Controls Settings
Options > Keyboard/Mouse.
#### Keyboard
#### Mouse
#### Special Attention: Mouse Smoothing & Acceleration
These options are off by default but some players accidentally enable them. They break muscle memory – always disable.
Accessibility Settings
Half-Life 2 has limited built-in accessibility options. Options are in the menu under Accessibility or via console.
#### Console Commands for Accessibility
Open console (~) and type:
Language Settings
Set in Steam properties or in-game Options > Audio > Language.
#### Special Attention: Missing Languages
Some languages (e.g., Polish, Russian) may require separate audio packs or a different game version. Verify via Steam before starting.
Network Settings (Multiplayer)
Half-Life 2's multiplayer (HL2: DM, Synergy) uses Source engine net settings.
#### Optimal for Low vs High Latency
Gameplay Settings
Options > Gameplay.
#### Special Attention: Weapon Auto Switch
Some players dislike auto-switching (e.g., when you pick up a weaker weapon). Turn Off if you want to manually choose.
Additional Tips
Important Notes
Important Notes for Half-Life 2
Save Management
- Manual Saves Are Your Lifeline. The auto-save system is decent but not reliable in chaotic firefights or during complex puzzles. Press `F6` (default) to quick-save frequently—before every new area, before a known fight, and after solving a puzzle. Keep at least 3-4 manual save slots in rotation so you can revert if a save becomes corrupted or if you get stuck in a broken state.
- Avoid Overwriting Critical Saves. When you reach a new chapter, create a fresh save. This allows you to replay a specific section without replaying the entire game.
- Don't Rely Only on Auto-Saves. Auto-saves can occur at moments of high danger (e.g., while being shot) leaving you in a losing situation. Always quick-save right after an auto-save if you want a safe point.
- Choices Are Minimal. Half-Life 2 is linear with no branching narrative. However, your weapon choices during combat are irreversible in the sense that ammo is finite. If you waste ammunition on weak enemies, you may run out later. Manage your inventory wisely.
- Hidden Supplies Are Missable. Many secret caches, health kits, and suit batteries are tucked away in vents, behind crates, or off the main path. Check every corner, especially in the early chapters like "Point Insertion" and "A Red Letter Day." Missing them can make later sections harder.
- NPC Interactions Are One-Time. Conversations with characters like Eli Vance, Barney, and Dr. Kleiner provide lore and context but do not affect gameplay. Listen carefully for story details; you cannot rewatch them without reloading a save.
- Chapter "We Don't Go To Ravenholm" – After leaving Ravenholm, you cannot return. If you skipped any supplies or secrets, they are permanently lost.
- The Gravity Gun Upgrade – In "Nova Prospekt," you get the upgraded gravity gun (zero-point energy field manipulator). This is a permanent upgrade that changes how you interact with objects and enemies. You cannot revert; learn to use it effectively.
- Dog's Gift – In "Water Hazard," if you ignore Dog's hint to pick up a specific hidden weapon (the RPG), you miss it until later. Explore thoroughly.
- Ravenholm – The first major difficulty spike. Headcrabs and fast zombies swarm in claustrophobic environments. Conserve your shotgun shells and use the environment (barrels, sawblades) to kill groups. The gravity gun is invaluable here.
- Bridge Puzzle (Highway 17) – A notorious physics puzzle where you must cross a collapsing bridge. Save frequently; falling from the bridge results in instant death. Use the gravity gun to place planks and move the cart.
- Antlion Tunnels (Sandtraps) – The antlions are fast and deadly. Use the pheropods (bug bait) wisely to direct them away from you. Avoid standing in sandy areas because antlions can pop out from below. Save before entering each tunnel.
- Nova Prospekt – Prison Fight – Long, intense combat sequences with Combine soldiers using heavy weapons. Use the upgraded gravity gun to throw objects and metal bars at enemies. Ammo can be scarce; scavenge thoroughly.
- Strider Battle (Anticitizen One) – The Strider in the plaza is tough. Use rocket launchers from rooftops. Do not stay in the open; keep moving and use cover. Save after each rocket hit.
- Citadel Core (Our Benefactors) – The final escape sequence is a frantic gauntlet. You have infinite reviving health and ammo from the suit charger, but enemies are relentless. Master the gravity gun's alt-fire (launch objects) to clear paths.
- Health & Suit Batteries Are Finite. There are no grind mechanics; you cannot farm enemies for drops. Use health packs sparingly. In "Ravenholm," use the environment weapons (sawblades, explosive barrels) to save ammunition.
- Ammo Scarcity – Especially for the .357 Magnum and the Crossbow. Reserve them for tough enemies (Combine Elites, Antlion Guards). Use the pistol and SMG for weaker foes. The shotgun is excellent up close but eats shells quickly.
- Vending Machines – Do not spend all your credits on the vending machine in "Point Insertion." The cans give only 2 health each; it's a trap for the impatient. Save credits for later? No, credits have no other use, but you are better off finding health packs.
- Half-Life 2 is a single-player game with no online multiplayer in the base release. There is no anti-cheat system for single-player. Mods and multiplayer mods (e.g., Garry's Mod, Synergy) are separate and may have their own anti-cheat. This guide focuses only on the base game.
- Achievements are tracked by Steam and are unaffected by any single-player mods. Using console commands or mods may disable achievements. To safely earn achievements, play the vanilla game without developer console cheats.
- Physics Engine Oddities – The Source engine's physics can cause objects to glitch through walls or disappear. If a puzzle piece falls into an unreachable area, reload a previous save. Do not waste time trying to retrieve it.
- Save File Corruption – Old save files can become corrupt, especially if you use many mods or force-quit the game. Regularly back up your save folder (`%USERPROFILE%\Documents\My Games\Half-Life 2\save`).
- Audio Cues Are Critical – Use headphones. The game uses spatial audio for enemy positions, headcrab hisses, and air exchange warnings (oxygen). Missing these cues can lead to cheap deaths.
- Not Using the Gravity Gun Enough – Many players forget to use the gravity gun to manipulate objects in combat and puzzles. It's essential for solving most puzzles and can be a powerful weapon when upgraded.
- Skipping the Tutorial – The first chapter "Point Insertion" teaches basic interactions. Skipping ahead can cause confusion with advanced mechanics later.
- Ignoring Environmental Hazards – Explosive barrels, gas tanks, and hanging chandeliers can be shot or physically moved to kill enemies. The gravity gun makes this easy.
- Hoarding Ammo Too Much – It's better to use powerful weapons on tough enemies than die with a full inventory. Dying resets ammo anyway.
- Not Exploring for Suit Upgrades – The HEV suit can be upgraded with long-fall modules and more health (via the suit charger in "Nova Prospekt"). These are only available in specific story moments; you cannot go back.
- Bind Quick-Save to a convenient key (default F6). Use it every 5-10 minutes.
- Play on Normal first – Hard mode is brutal, especially for first-timers. The difficulty curve is consistent but punishing.
- Use the Flashlight Sparingly – It drains the suit's battery rapidly. Rely on environmental lighting or use flares (found in some levels) to save power.
- Listen to NPCs – They often give hints about upcoming dangers or puzzle solutions. Freeman does not speak, but you can still hear cues.
- The game has no manual but has an in-game help system – Press `F1` for basic controls and tips. Use it if stuck.
Irreversible Choices & Missable Content
Difficulty Spikes & Pitfalls
Grinding Traps & Resource Management
Online & Anti-Cheat Notes
Technical Warnings
Common Regrets & Late Discoveries
Final Tips
By keeping these notes in mind, you will avoid common frustrations and experience Valve's masterpiece as intended.
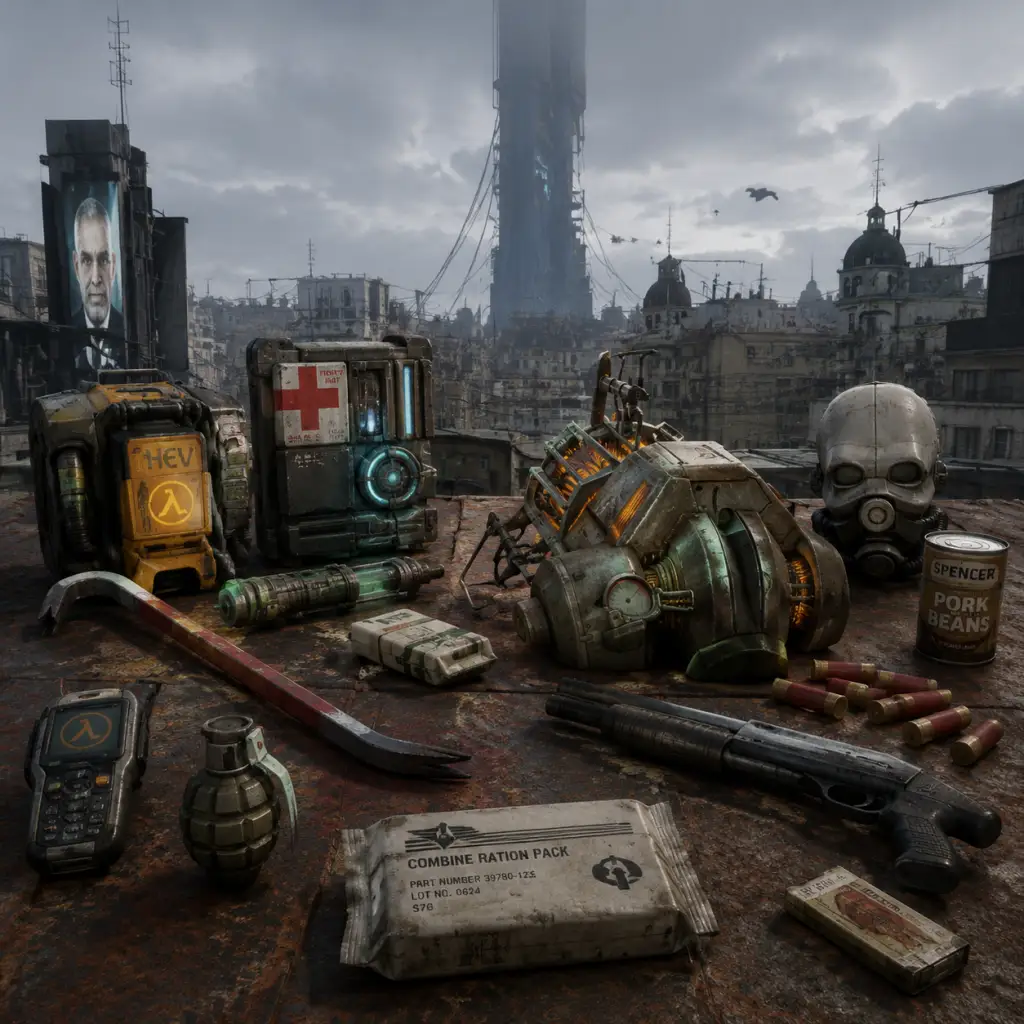
All Game Items
All Game Items
This guide categorizes every item you can acquire or use in Half‑Life 2. Items are grouped by function: weapons, tools, ammo, health/armor, explosives, and key story objects. Note that Half‑Life 2 has no currency, crafting materials, or traditional collectibles.
---
Weapons
Weapons are kept across chapters once found (except the temporary Bugbait). Each has a primary and often a secondary fire mode. All weapons can be selected via the number keys.
#### 1. Crowbar
- How to obtain: First weapon, picked up at the start of Chapter 1: Entanglement (in Kleiner’s lab).
- Primary fire: Swings forward, dealing moderate melee damage. Destroys wooden crates, barrels, and locks.
- Secondary fire: None (except a non‑functional “view” animation).
- Best use: Close combat against Headcrabs, Manhacks, or combine soldiers with no other weapons. Essential for breaking supply crates and solving rudimentary physics puzzles.
- Synergies: Can be used with the Gravity Gun to fling objects farther, but the Crowbar itself is a simple backup.
- How to obtain: In the same room as the Crowbar (Kleiner’s lab).
- Primary fire: Semi‑automatic, 9mm rounds. Accurate at medium range.
- Secondary fire: None (no laser sight, but can be fired faster by tapping).
- Best use: Early game against simple enemies (Headcrabs, Zombies). Reliable when ammo is scarce. Good for picking off distant enemies due to its precision.
- Ammo: Uses the same 9mm as the SMG. Maximum carry: 150 rounds.
- Note: The Pistol’s rate of fire is limited only by your click speed.
- How to obtain: Shortly after the Pistol, from a dead Combine soldier in the Canals chapter (right before the airboat).
- Primary fire: Full‑auto 9mm, high rate of fire, moderate spread. Effective at close to medium range.
- Secondary fire: Attaches a grenade (press R to switch fire mode after equipping grenades). Launches a frag grenade in an arc; uses one grenade from your inventory.
- Best use: Suppressive fire and dealing with groups of weak enemies (e.g., Headcrabs, Zombies). The grenade launcher is extremely valuable for clearing tight corridors or clusters.
- Ammo: Same 9mm as Pistol. Max carry 250 rounds (shared with Pistol).
- How to obtain: Inside a barn during Chapter 4: Water Hazard (after the airboat chase).
- Primary fire: Fires a spread of buckshot. Devastating at point‑blank range; loses effectiveness beyond 15 meters.
- Secondary fire: Fires both barrels simultaneously for double damage. Long reload afterwards.
- Best use: Close quarters combat, especially against fast enemies like Antlion Guards (Sandtraps) or Combine soldiers in tight spaces. One-shot most basic enemies.
- Ammo: Shotgun shells (buckshot). Max carry 120 shells (24 per pickup crate).
- How to obtain: In the church of Chapter 6: We Don’t Go To Ravenholm (on the altar).
- Primary fire: Fires a single bolt with a slight arc. Extremely high damage; kills most humanoid enemies in one shot. Bolt travels slowly but has a laser sight for aiming.
- Secondary fire: Toggles the zoom/scope (2x magnified).
- Best use: Long‑range sniping and silent kills. Bolts pin enemies to walls. Excellent for taking out Combine snipers or distant Overwatch soldiers without alerting the whole area.
- Ammo: Crossbow bolts. Max carry 5 bolts initially; later increased with Suit upgrades? (No upgrades in base game; max carry is always 5). Bolts can be recovered from dead enemies or the ground.
- How to obtain: From a Combine guard tower in Chapter 7: Highway 17 (after the lighthouse).
- Primary fire: Fires a rocket that propels forward with a small flight pattern. Direct hit destroys helicopters, APCs, and large enemies. Explosion radius is generous.
- Secondary fire: None (but you must hold the fire button to lock onto a target if the laser designator is active? Actually the RPG has a laser designator: press and hold the fire button to zoom; release to fire the rocket toward the laser dot. This is the secondary function).
- Best use: Anti‑vehicle (especially Combine helicopters and APCs) and heavy enemies like Antlion Guards or Striders. One rocket often kills or heavily damages major threats.
- Ammo: RPG rockets. Max carry 3 rockets (found in weapon crates).
- How to obtain: In a locked room in Chapter 7: Highway 17 (actually obtained in Chapter 8: Nova Prospekt after being stripped of weapons, then reacquired in the test chamber).
- Primary fire: Grabs objects (press again to pull them toward you) or throws them (release). Can also punt objects with the secondary fire.
- Secondary fire: Hurls the held object with extreme force (no ammo cost). Use to launch explosive barrels, saw blades, bricks, etc. at enemies.
- Best use: Physics puzzles and improvised weaponry. Pick up explosive barrels to throw at groups, or use metal objects to bypass locked doors. The Gravity Gun is also essential for solving many environmental puzzles (e.g., moving platforms, weighting switches).
- Note: In the final chapter “Take Arms!” the Gravity Gun is upgraded to the Super Gravity Gun (see below).
- How to obtain: Automatically obtained at the start of Chapter 12: Our Benefactors (after the Vortigaunts supercharge it).
- Primary/Secondary: Same controls, but now you can grab organic objects (including living enemies) and hurl them. Additionally, you can absorb Combine energy blasts and redirect them.
- Best use: The ultimate weapon for the final battle against Striders and Overwatch. Grab soldiers, throw them into each other, or reflect energy orbs. Extremely powerful and fun.
- No ammo needed.
- Description: A gland from a dead Antlion King, used to control Antlion workers.
- How to obtain: During Chapter 5: Sandtraps, after killing the Antlion Guard and picking up the gland from its body.
- Use: Primary fire (right‑click) squirts pheromones that attract Antlions to a specific point. Secondary fire (left‑click) throws a grenade‑like “bugbait” projectile that, when it hits an enemy, causes Antlions to swarm that target.
- When useful: Only in Sandtraps and the early part of Chapter 6: Nova Prospekt (the prison). Essential for crossing the sand desert and fighting Combine soldiers alongside Antlions. The item is automatically lost after you are captured in the Nova Prospekt chapter.
- Note: No ammo; unlimited use while you possess it.
- Description: Hazardous Environment suit worn by Gordon. Provides health, armor, and a HUD. Not an inventory item, but its features affect gameplay.
- Armor capacity: 100 points. Replenished via Armor Batteries and Suit Chargers (wall units). Armor reduces damage taken before health.
- Auxiliary power: Used for sprinting (default: Shift) and Flashlight. Recharged by Suit Chargers only. You cannot carry battery packs for aux power.
- Visual: The suit’s flashlight is toggleable (F key).
#### 2. Pistol (USP Match)
#### 3. Submachine Gun (SMG)
#### 4. Shotgun
#### 5. Crossbow
#### 6. Rocket Propelled Grenade Launcher (RPG)
#### 7. Gravity Gun (Zero Point Energy Field Manipulator)
#### 8. Super Gravity Gun (Upgraded)
---
Tools & Equipment
These are special items that grant unique abilities or are required for story progression.
#### 1. Bugbait
#### 2. HEV Suit (No pick‑up, integral)
---
Ammunition
Ammo is found in crates, on dead enemies, or in supply caches. The HUD shows current count.
| Ammo Type | Used By | Max Carry | Typical Spawn Locations |
|---|---|---|---|
| Pistol/SMG Ammo (9mm) | Pistol, SMG | 250 (shared) | Small green boxes, Combine soldiers, crates |
| Shotgun Shells (buckshot) | Shotgun | 120 | Small yellow boxes, crates |
| Crossbow Bolts | Crossbow | 5 | Long blue cases, dead Combine snipers |
| RPG Rockets | Rocket Launcher | 3 | Weapon crates (red with star) |
| Frag Grenades | SMG secondary, thrown | 5 | Small grey/green boxes, Combine soldiers |
- Note: The Gravity Gun uses no ammo. The Super Gravity Gun also uses no ammo.
- Tip: Crossbow bolts can be recovered from the ground or walls after shooting. Same for grenades? No, grenades are consumed on explosion.
- Effect: Restores 5 health.
- Appearance: Small white bottle with a red cross.
- Where found: Loose on shelves, medical crates, or from dead Vortigaunts.
- Best use: Topping off small damage. Always pick up even if at full health—they despawn if not collected.
- Effect: Restores 25 health (cannot exceed 100, unless suit upgrade via mods? No, base game max health 100).
- Appearance: Large white box with a red cross.
- Where found: Medical stations, supply closets, or on the ground.
- Best use: Major healing after a fight. Also can be carried? No, you cannot store health kits; they are used immediately upon pickup. Health stations on walls can be refilled indefinitely (press E to use).
- Effect: Increases armor by 5 points (up to 100).
- Appearance: Small yellow rectangle with a lightning bolt.
- Where found: In weapon crates, on Combine corpses, or on shelves.
- Best use: The only portable way to restore armor. Always collect to maintain max armor.
- Effect: Restores armor to 100 and recharges auxiliary power (sprint/flashlight). Can be reused after a cooldown (visual indicator turns green).
- Appearance: Large yellow panel with concentric circles on the wall.
- Where found: Throughout levels, often in safe rooms or near save points.
- Best use: Regular top‑ups of armor and aux power. Essential for heavy combat sections.
- Effect: Restores health to 100 (if below). Can be reused after a cooldown (visual: green light indicates ready).
- Appearance: Similar to Suit Charger but with a red cross symbol.
- Where found: Same locations as Suit Chargers, often adjacent.
- Best use: Healing to full before a tough encounter.
- How to obtain: Found in small grey/green boxes, on Combine soldiers, or via SMG secondary fire (uses the grenade inventory).
- Use: Press G to throw a grenade. Hold the fire button after pulling the pin to “cook” it (detonates on release or after a few seconds).
- Effect: Large explosion, lethal to all non‑boss enemies within 5 meters. Can destroy obstacles.
- Max carry: 5 grenades. Cannot be stored in inventory beyond that.
- Best use: Clearing groups of enemies, flushing out soldiers behind cover, or destroying breakable objects.
- Story relevance: Given to Gordon by Alyx Vance in Kleiner’s lab. Symbolic of his return.
- How to obtain: In Chapter 10: Entanglement, after killing the Combine guard in the interrogation room. Also a second keycard from Eli’s office.
- Effect: Used to open locked doors, particularly the security doors leading to the prison transfer system. The keycard is automatically inserted into card readers when interacting.
- When used: Opens the way to the prison cells and later the teleporter.
- How to obtain: From the dead Combine officer in the main office area (Chapter: Nova Prospekt).
- Effect: Opens the block door leading to the prisoner transport area (the vault).
- When used: Required to reach the teleporter.
- How to obtain: Inherited from the resistance at the beginning of Water Hazard.
- Effect: A fast hovercraft used to navigate canals. Equipped with a mounted SMG (infinite ammo while seated). The airboat is not stored in inventory; you drive it.
- When used: Chapters 4–5 (Water Hazard and part of Sandtraps).
- How to obtain: From the resistance at the start of Highway 17.
- Effect: A dune buggy with an infinite‑ammo Pulse Rifle (Combine weapon) mounted. Fast and durable.
- When used: Chapters 7–8 (Highway 17 and Nova Prospekt).
- Story: Found in the test chamber after you are stripped of weapons; becomes the primary tool for physics puzzles and combat.
- Story: Gained by defeating the Antlion Guard; lost after capture in Nova Prospekt.
---
Health & Armor Pickups
#### Health Vial
#### Health Kit (Big Medkit)
#### Armor Battery
#### Suit Charger (Wall Unit)
#### Health Charger (Wall Unit)
---
Explosives
#### Frag Grenade
---
Key Story Items
These items are required to progress the plot and are usually consumed or discarded after use.
#### 1. Crowbar (also a weapon, listed above)
#### 2. Combine Security Pass (or “Keycard”)
#### 3. Vault Keycard (Nova Prospekt)
#### 4. Airboat (Not an inventory item)
#### 5. Buggy (Nor an inventory item)
#### 6. Gravity Gun (obtained as a tool, but also a story item—see Tools)
#### 7. Bugbait (again, also a tool)
---
Summary of Carry Limits
| Category | Max |
|---|---|
| Health | 100 |
| Armor | 100 |
| Pistol/SMG Ammo | 250 |
| Shotgun Shells | 120 |
| Crossbow Bolts | 5 |
| RPG Rockets | 3 |
| Frag Grenades | 5 |
| Auxiliary Power (Flashlight/Sprint) | 100 (recharge only, no pickups) |
Important Notes
- No currency or crafting: Half‑Life 2 has no shops, upgrades, or crafting system. All items are found or given.
- No collectibles: There are no hidden collectibles like tokens or gems. All pickups serve immediate gameplay functions.
- Weapon switching: The gravity gun has its own slot (slot 4 by default). The bugbait occupies a separate slot but is temporary.
- Ammo conservation: The Crossbow and RPG are limited, so use them wisely. The SMG and Pistol share ammo, so be mindful of your total 9mm count.
- Gravity gun synergy: Explosive barrels, radiator covers, and saw blades become devastating projectiles. Master it early for maximum impact.
---
This completes the list of all items in Half‑Life 2. Weapons and tools are the core of your arsenal; health and armor pickups keep you alive; grenades provide burst damage; key items advance the story. Good luck, Dr. Freeman.
Character Skills
Character Skills Guide for Half-Life 2
Overview
Half-Life 2 is a first-person shooter with minimal traditional skill systems. The player controls Gordon Freeman, a theoretical physicist turned resistance fighter. Instead of a skill tree or character classes, Gordon’s “skills” are the weapons, tools, and innate abilities provided by the HEV (Hazardous Environment) suit he wears. These are unlocked progressively as you advance through the story. There are no cooldowns, talent points, or character levels; instead, mastery comes from understanding each tool’s physics interactions and situational advantages.
This guide treats each weapon and utility as a “skill” with detailed breakdowns of its effects, practical upgrades (when applicable), combos with environmental objects, synergies with other tools, and recommended usage scenarios.
---
1. HEV Suit Passive Abilities
Not a skill in the traditional sense, but the suit provides constant passive benefits:
- Health & Armor Display: Shows current health and armor values on the HUD.
- Fall Damage Reduction: Greatly reduces damage from falls (but not eliminated).
- Hazard Protection: Immune to poison, radiation, and electricity damage (but not fire or explosions).
- Flashlight: Unlimited battery that recharges over time. Toggle with `F` (default). Essential in dark areas.
- Sprint: Hold `Shift` to run faster for a short burst. Sprint depletes a small stamina bar (recharges quickly when not sprinting).
- Auto-aim: No; the game relies on manual aim. The suit does not enhance accuracy.
- Type: Melee Weapon
- Description: Gordon’s iconic tool and melee weapon. Swung with left-click. Infinite ammo.
- Effects: Deals ~15 damage per hit. Can break wooden crates, open sealed doors (some), and kill headcrabs in one hit.
- Upgrades: None. Always the same.
- Combos: Use to shove explosive canisters into enemies (pushes them, then shoot the canister).
- Synergies: Pair with the Gravity Gun to pick up and throw objects, then finish with crowbar close-up.
- When to Use: Conserve ammo early game; break breakables; silent takedown of headcrabs. Not effective against armored Combine soldiers.
- Build Recommendations: Always carry it as a backup melee tool. No ammo cost.
- Type: Firearm (Sidearm)
- Description: Standard semi-automatic pistol. Fires 9mm rounds. Magazine size: 18 rounds.
- Effects: ~10 damage per shot. Moderate accuracy, slow rate of fire. Can be zoomed by pressing `Mouse2` (but only a slight magnification, no scope).
- Upgrades: No direct upgrades; later you find a silencer? No, that’s in Episode Two. Base game only.
- Combos: Use to detonate explosive barrels from a safe distance. Good for softening up enemies before switching to heavier weapons.
- Synergies: Switch to pistol when out of ammo for primary weapons. Combines well with the Gravity Gun: shoot objects you’ve thrown.
- When to Use: Early game until you find SMG or Shotgun. Situational for long-range finishers (headshots do more damage, but still weak).
- Build Recommendations: No build system, but keep pistol handy for precise shots on headcrabs or distant soldiers.
- Type: Automatic Firearm
- Description: Fast-firing SMG with a 45-round magazine. Fires 9mm rounds (shared with pistol ammo pool).
- Effects: ~6 damage per bullet. Full auto. High recoil, moderate accuracy. Can fire underhanded grenades (secondary fire) – the SMG’s underbarrel grenade launcher fires a slow, arcing grenade.
- Upgrades: The underbarrel grenade launcher is always attached. No other upgrades. It eats SMG grenade ammo (found separately).
- Combos: Suppressive fire to flush enemies out of cover, then hit with grenade. Use grenade against groups or Manhacks.
- Synergies: Use SMG for mid-range, then switch to Shotgun for close quarters. The grenade can be shot mid-air with Gravity Gun? Not recommended.
- When to Use: General-purpose, mid-range automatic. Good against fast enemies (Headcrabs, Zombies) and light Combine troops. Not effective at long range due to recoil.
- Build Recommendations: Carry SMG as main auto weapon until you get Pulse Rifle.
- Type: Firearm (Close Range)
- Description: Classic pump-action shotgun. Fires 12-gauge shells. Magazine size: 6 shells. Can fire one shell or two (secondary fire fires both barrels simultaneously).
- Effects: Per shell: ~15 pellets x 5 damage per pellet = ~75 damage at point blank. Double shot does double damage but consumes two shells. Terrible at range.
- Upgrades: None. Two-barrel alt-fire is effectively an upgrade.
- Combos: Blast Zombies into pieces. Use double shot on Fast Zombies or Armored Soldiers. After firing, quickly switch to crowbar for a fast follow-up if enemy is still alive.
- Synergies: Combine with Gravity Gun: pick up a barrel, throw it, then shoot it with shotgun for area damage.
- When to Use: Any close encounter, especially against Zombies, Headcrabs, and Combine soldiers in tight corridors. In open areas, use SMG or Pulse Rifle instead.
- Build Recommendations: Essential close-range tool. Always keep it loaded.
- Type: Automatic Firearm (Rifle)
- Description: Combine assault rifle, high rate of fire, 30-round magazine. Fires energy pulses. Alt-fire launches a high-energy ball (energy orb) that travels slowly and can bounce off walls.
- Effects: Per pulse: ~8 damage. Headshots do triple damage. Energy orb on contact: powerful explosion (lethal to most enemies). Orb can be shot with other weapons to detonate it safely away? Actually, it detonates on contact with any solid surface or enemy after a fixed duration.
- Upgrades: No direct upgrades, but the weapon itself is an upgrade over the SMG. The energy orb is a powerful special attack with limited ammo (energy balls found as ammo).
- Combos: Fire energy orb into a group of enemies for massive damage. Use orb to clear a room. Bounce orb off walls around corners. Shoot orb with Gravity Gun? Not possible. Time your orb to explode while enemies are crossing a bridge.
- Synergies: Use Pulse Rifle for mid-to-long range due to accuracy; switch to Shotgun when enemies get close. The orb can be used to break physics puzzles? Not really.
- When to Use: Best weapon overall. Use it for most combat encounters. Conserve energy orbs for tough groups or armored enemies.
- Build Recommendations: Once acquired, it becomes your primary weapon. Use SMG only when out of pulse ammo.
- Type: Sniper Weapon
- Description: Slow-firing, bolt-action crossbow. Fires metal bolts with a laser sight (secondary fire toggles zoom). Bolts have a slight drop over distance.
- Effects: One-hit kill on unarmored enemies (headshots instant kill on any humanoid). Bolts can pin enemies to walls. Armored soldiers may survive but take heavy damage. Slow reload.
- Upgrades: No scope upgrades, but the built-in laser sight helps aim. No ammo upgrade; bolts are limited throughout the game.
- Combos: Use to remove dangerous enemies from a distance before alerting the whole area. Shoot explosive barrels from range. Impale multiple enemies if they line up? Bolts only hit one.
- Synergies: Pair with the Gravity Gun: pick up a bolt from a dead body? Not practical. Combined with stealth approach: use crossbow to silently kill a guard, then proceed.
- When to Use: Only when you have ample bolts. Ideal for sniping Combine soldiers across water or large spaces. Do not use in close combat due to slow fire rate. Conserve ammo for sequences like the bridge or citadel.
- Build Recommendations: Carry crossbow as a secondary weapon for long-range engagements. Replace with Pulse Rifle if bolts run out.
- Type: Explosive Launcher
- Description: Shoulder-fired single-shot rocket launcher. Reloads after each shot. Alt-fire? No, just fire. Rocket travels straight, has minimal homing? No homing in HL2 base game. Must lead moving targets.
- Effects: Massive damage – kills any ground enemy in one hit. Can destroy armored vehicles (APCs) and certain structures. Explosion radius is large.
- Upgrades: No upgrades. Ammo is rare (rockets found at fixed positions).
- Combos: Shoot a rocket into a group of enemies clustered near an explosive barrel for double damage. Use to destroy breakable walls or windows.
- Synergies: Pair with the Gravity Gun: pick up a rocket? No, rockets cannot be moved. But you can use Gravity Gun to throw barrels at enemies, then RPG if needed.
- When to Use: Against Gunships, helicopters, or hard targets. Also effective against large groups of Soldiers. Do not waste on single headcrabs.
- Build Recommendations: Keep RPG for specific encounters. If fighting a Gunship, prioritize rockets.
- Type: Thrown Explosive
- Description: Standard fragmentation grenade. Cookable (hold fire to release the handle, then throw after a delay).
- Effects: Large explosion, lethal to most enemies within radius. Can be thrown underhand for short distances.
- Upgrades: None.
- Combos: Use Gravity Gun to pick up a live grenade and throw it back? Yes! If an enemy throws a grenade, you can grab it with Gravity Gun and return it. Also can use gravity gun to throw grenades more accurately.
- Synergies: Combine with Pulse Rifle or SMG to suppress enemies, then toss a grenade. Use grenades to flush out enemies behind cover.
- When to Use: Against groups, turrets, or entrenched soldiers. Risk of self-harm if not thrown carefully.
- Build Recommendations: Always carry grenades when available. Use them liberally against Combine soldiers in firefights.
- Type: Physics Manipulation Tool
- Description: The signature Zero-Point Energy Field Manipulator. Can pick up, hold, and launch almost any physics object. Primary fire: picks up objects at medium range. Secondary fire: launches held object with force. Can also grab objects through small gaps.
- Effects: No direct damage except from launched objects (damage depends on mass/speed). Launched objects can kill enemies if heavy (radiators, barrels, sawblades). Cannot pick up living entities (except dead ones).
- Upgrades: Supercharged Gravity Gun – gained near end of game (Citadel). Enhanced version: can pick up and throw larger objects faster, and also can grab and launch Combine soldiers (and even Hunters in Episodes). Gains a blue glow. Also can fire energy balls? No, that’s the supercharged version that can grab and toss Combine soldiers.
- Combos: This is the ultimate combo tool. Classic combos: Pick up a sawblade → launch it at enemies to cut them in half. Pick up explosive barrel → toss into group → shoot with pistol or pulse rifle. Use to throw furniture at manhacks. Use to grab items from inaccessible areas.
- Synergies: Complements every weapon. Use Gravity Gun to set up traps (move barrels into position, stack obstacles). In the Ravenholm section, use it to throw barrels of fuel at zombies.
- When to Use: Constantly. It is the core of Half-Life 2’s physics puzzles and combat. Use to solve environmental puzzles, move obstacles, and as a primary attack tool when ammo is low.
- Build Recommendations: Always keep it out when not actively fighting. Swap to weapons only when needed.
- Type: Pheromone Attractor (Alyx’s ability, but you control it briefly)
- Description: In Chapter 4 “Water Hazard”, Alyx uses Bugbait to command a swarm of Antlions to attack enemies. You never have this ability yourself. It is not a playable skill.
- Type: Placeable Defense (In Episodes, not in base game)
- Airboat: Forward/backward, strafe (using directional keys). No weapons; you rely on mounted Gauss gun (overcharged pulse rifle) – essentially an infinite-ammo pulse rifle. No special moves.
- Buggy: Drive, drift, and operate a mounted pulse rifle (shared ammo). No other skills.
---
2. Crowbar
---
3. 9mm Pistol
---
4. Submachine Gun (SMG)
---
5. Shotgun
---
6. Pulse Rifle (Combine AR2)
---
7. Crossbow
---
8. Rocket-Propelled Grenade (RPG)
---
9. Hand Grenade
---
10. Gravity Gun (Not a Weapon, But a Tool)
---
11. Bugbait (Non-Player Character Controlled Brief Section)
---
12. Turret Control (Scripted Sequence)
Base Half-Life 2 does not have turret placement as a player skill. You can only use fixed mounted guns (e.g., on the boat) which are not skills.
---
13. Vehicle Skills
While driving vehicles (Airboat, Buggy), you have abilities:
---
Summary Table of Skills
| Skill Name | Type | Damage (Approx.) | Ammo | Cooldown/Reload | When to Use |
|---|---|---|---|---|---|
| Crowbar | Melee | 15 per hit | Infinite | 0.4 sec swing | Silent, break crates |
| Pistol | Ranged | ~10 | 9mm (shared) | 0.3 sec between shots | Early game, precision |
| SMG | Auto | ~6 per bullet | 9mm (shared) | 0.1 sec, 2 sec reload | Mid-range suppressive |
| SMG Grenade | Explosive | High | Special ammo | 0.5 sec launch | Groups, Manhacks |
| Shotgun | Close | ~75 per shell | Shells | 0.7 sec pump, 5 sec reload | Close quarters |
| Pulse Rifle | Auto | ~8 per pulse | Energy cell | 0.1 sec, 2.5 sec reload | General |
| Pulse Energy Orb | Explosive | Very High | Special energy ball | Launch delay 0.3 sec | Crowd control |
| Crossbow | Sniper | 100+ | Bolts | 1.5 sec reload | Long-range |
| RPG | Explosive | Instant kill | Rockets | 2.5 sec reload | Vehicles, large groups |
| Grenade | Explosive | Lethal radius ~5m | Hand grenades | Cook time 0-3 sec | Flushing cover |
| Gravity Gun | Tool | Varies | Infinite | Instant | All puzzles and combat |
Recommended Builds
Since there is no skill point allocation, “builds” refer to weapon loadout preferences:
- Stealth Sniper: Crossbow + Pistol. Use crossbow for silent kills; pistol as backup. Avoid loud engagements.
- Brawler: Shotgun + Crowbar. Charge in, blast at close range, finish with crowbar.
- Physics Master: Gravity Gun primary, with Pulse Rifle for backup. Focus on environmental kills.
- Generalist: Pulse Rifle + Shotgun + Gravity Gun. Covers all ranges.
---
Conclusion
Half-Life 2’s “skills” are its arsenal and physics tools. Master each weapon and understand the environment to maximize efficiency. The Gravity Gun is the most versatile tool and should be used constantly. The game rewards creativity over sheer damage output. Experiment with combinations to find your preferred style.
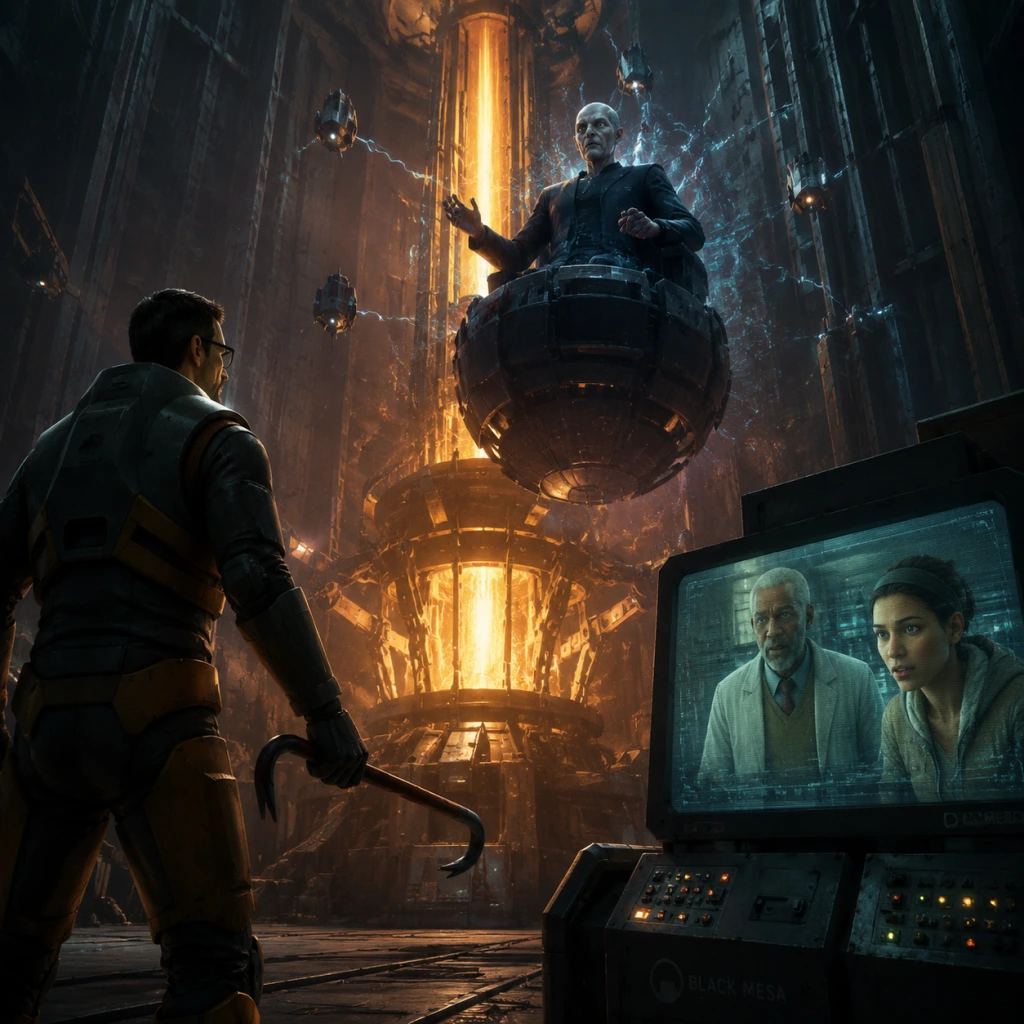
Characters & Roles
Characters & Roles Guide for Half-Life 2
Overview
Half-Life 2 is a single-player first-person shooter where you control Gordon Freeman, the silent protagonist. Unlike traditional games with multiple playable classes, all roles are filled by NPCs (allies and enemies) that interact with Gordon. This guide covers every major character, their background, strengths, weaknesses, behavior in combat, and how they support or oppose your progress.
---
Player Character: Gordon Freeman
- Background: A theoretical physicist from MIT who survived the Black Mesa Incident. Woken from stasis by the G-Man, Gordon is placed on a train to City 17 to lead the resistance against the Combine.
- Strengths: Exceptional problem-solving; proficiency with all weapons (from crowbar to RPG); natural leadership (though silent); the HEV suit provides health, armor, and environmental protection.
- Weaknesses: No innate powers; relies entirely on equipment; silent nature means no dialogue options; cannot communicate directly with allies mid-combat.
- Playstyle: Versatile FPS hybrid. Use the Gravity Gun for puzzles and crowd control, pulse rifle for sustained fire, crossbow for sniping, shotgun for close range, and RPG for vehicles. Always manage health/armor via chargers and supplies.
- Unlock Conditions: Already unlocked from the start.
- Recommended Equipment: HEV suit is mandatory; prioritize armor suits chargers early. Carry a mix of weapons: Gravity Gun, pulse rifle, shotgun, crossbow, RPG. Keep the crowbar for emergency melee.
- Team Synergy: Gordon is the focal point. Resistance members follow his lead, provide covering fire, and open paths. The Vortigaunts heal him and disable turrets. Dog helps with traversal and combat.
- Background: Daughter of Eli Vance, a former Black Mesa scientist. A skilled hacker, mechanic, and combatant. She accompanies Gordon in several chapters.
- Strengths: High agility; accurate with pistols and SMGs; can hack Combine terminals; provides dialogue and moral support; uses a hacking tool to open doors.
- Weaknesses: Limited health (can be killed if left exposed); she will not revive Gordon; her AI sometimes gets stuck.
- Combat Role: Flanking support. She aggressively takes down enemies, especially in Ravenholm and the bridge. She can be ordered to move to specific positions (via G and mouse).
- Unlock Conditions: First encountered in Chapter 2 ("A Red Letter Day") after escaping Kleiner’s lab.
- Recommended Equipment: Alyx uses her own pistol and uses Combine pulse rifles from fallen enemies. No player control over her loadout.
- Team Synergy: Works well with Gordon to clear rooms. Use her to distract enemies while you flank. She can also protect you from behind.
- Background: Former Black Mesa colleague of Gordon, now leads the resistance. A brilliant scientist who lost a leg to the Combine.
- Strengths: Strategic genius; provides critical plot information; develops the teleportation technology.
- Weaknesses: Not combat-capable; disabled; stays in safe locations.
- Role: Quest giver and exposition source. He appears in Black Mesa East and later in White Forest.
- Unlock Conditions: Found in Black Mesa East after Chapter 4.
- Team Synergy: He equips you with the Gravity Gun and gives the mission to retrieve the MVP. Listen to his advice.
- Background: Another Black Mesa alumni. Kind-hearted inventor who built the teleportation device and cares for his pet headcrab, Lamarr.
- Strengths: Clever inventor; creates the teleporter; provides comic relief.
- Weaknesses: Clumsy; forgetful; not a fighter.
- Role: Before and after the teleportation scene, he gives instructions. Appears in White Forest later.
- Unlock Conditions: First encountered in Chapter 2 at his lab.
- Background: Eli’s assistant at Black Mesa East. Later revealed to be a Combine collaborator (though not entirely evil).
- Strengths: Scientific knowledge; resourceful.
- Weaknesses: Betrays you briefly; ambiguous loyalty.
- Role: Provides the connection to Nova Prospekt and Borealis. She appears only in cutscenes and a few gameplay sections.
- Unlock Conditions: Met in Black Mesa East.
- Background: Former Black Mesa security guard turned resistance spy. He works undercover as a Combine Civil Protection (CP) officer.
- Strengths: Expert with Combine weapons; good survival instincts; provides comic banter.
- Weaknesses: Not invincible; can be killed during the escape from City 17.
- Combat Role: Ally in close-quarters indoors. He uses Combine pulse rifles and his own pistol. He can hold positions and call out enemy locations.
- Unlock Conditions: First met in Chapter 1 ("Point Insertion") when he overlooks the train station. Ally after Chapter 6 ("We Don't Go to Ravenholm") and in Chapter 13 ("Our Benefactors").
- Recommended Equipment: Barney uses weapons from fallen enemies. No player upgrades.
- Team Synergy: Great for clearing metro and streets. Use his cover to draw fire while you use the crossbow from range.
- Background: Alyx’s pet robot built by Eli and Kleiner. A large, sentient machine with enormous strength.
- Strengths: Extremely strong; can throw heavy objects; can lift walls and crates; invulnerable to small arms fire; can punch Combine soldiers into the air.
- Weaknesses: Cannot hold ranged weapons; occasionally slow; cannot pass through narrow gaps.
- Combat Role: Boss-level combat support. Dog tears through groups of soldiers and can destroy gunships if used properly. Also used to solve physics puzzles (e.g., lifting gates).
- Unlock Conditions: First appears in Black Mesa East. Becomes controllable ally in Chapter 7 ("Highway 17") during driving sections? No, Dog only appears in scripted sequences. Not directly controllable but stays with you briefly.
- Team Synergy: Stick near Dog in combat; let him handle heavy melee while you shoot from behind. Use his object-throwing to take down armored enemies.
- Background: Alien race enslaved by the Combine. Freed by Gordon during the ending of Half-Life. They now assist the resistance. Speak in cryptic, poetic way.
- Strengths: Can heal Gordon by shocking him (restoring health); can disable Combine turrets; can fire energy pulses; highly loyal.
- Weaknesses: Slow movement; prone to being overrun; limited healing ability (cooldown after healing).
- Combat Role: Support healers and turret-disablers. They use melee and energy attacks against enemies. They also power equipment.
- Unlock Conditions: First encountered in Chapter 8 ("Sandtraps") when they reveal themselves as allies. Later regular allies in White Forest.
- Recommended Equipment: None.
- Team Synergy: Always keep a Vortigaunt near you for emergency healing. Use them to disable turrets before entering rooms. They can distract Hunter-Chargers.
- Background: Ordinary citizens of City 17 turned fighters.
- Strengths: Provide massed firepower; use pistols, SMGs, shotguns. Can hold areas.
- Weaknesses: Low health; unorganized; often die quickly.
- Combat Role: Cannon fodder to soak up enemy attention. Can be useful if you manage them by shouting orders (e.g., "Follow me!").
- Unlock Conditions: Encountered from Chapter 8 onward in various hubs.
- Team Synergy: Use them as a distraction while you flank or snipe. Don’t rely on them for crucial objectives.
- Background: Mysterious interdimensional being who manipulates events from the shadows. Hires and uses Gordon as a pawn.
- Role: Observed throughout the game — appears on trains, in elevators, and after the final credits. Not an active combatant.
- Strengths: Omnipresent; can suspend time; has access to all locations. Impossible to harm.
- Weaknesses: Never appears in combat. His motives unclear.
- Playstyle: None; purely narrative.
- Unlock Conditions: Appears spontaneously, always at the end of chapters and the finale.
- Background: Slug-like alien leadersthat control the Combine occupation. Highly intelligent, telekinetic, and cruel.
- Strengths: Telekinetic powers (can throw objects, crush enemy minds), energy shield, very high health.
- Weaknesses: Slow movement; vulnerable after shield is down; can be killed by explosives or sustained fire.
- Combat Role: Final boss in Episode One and Two, but in Half-Life 2, only encountered in the process of killing Eli? In the base game, Advisors appear only in scripted scenes, not as direct enemies.
- Unlock Conditions: Seen near the end of the game; not fought in Half-Life 2 proper (except in episodes).
- Strategy: Avoid their telekinetic grabs; use cover and RPG/explosives.
- Background: Human volunteers surgically upgraded into elite Combine soldiers. Loyal to the Combine.
- Strengths: Heavy armor; use pulse rifles (fast fire, high accuracy); throw frag grenades; advanced training.
- Weaknesses: Headshots kill quickly; can be flanked; explosive barrels kill instantly.
- Combat Role: Primary humanoid enemy from Chapter 5 onward. They appear in squads and use tactical formations.
- Tips: Use accurate weapons (crossbow, revolver). Use pulse rifle against their armor. Use grenades to flush them out.
- Unlock Conditions: First encountered in Chapter 3 ("Water Hazard") near the dam.
- Background: Combine's Earth-stationed police force, mostly conscripted humans. Barney is an undercover CP.
- Strengths: Use pistols, SMGs (close range); patrol in pairs; call for reinforcements.
- Weaknesses: Light armor; poor accuracy; can be killed easily.
- Combat Role: Trash enemies during early chapters. They set up checkpoints.
- Tips: Use crowbar or pistol. Headshots drop them instantly.
- Unlock Conditions: First encountered in Chapter 1 as you exit the train station.
- Background: Three-legged Combine war machines. Extremely durable, armed with a heavy cannon and a machine gun.
- Strengths: Very high health (requires 4+ RPG hits); devastating cannon fire (one-hit kill on Gordon); machine gun can suppress.
- Weaknesses: Slow turning speed; vulnerable to RPG fire; legs can be damaged to slow it down.
- Combat Role: Boss encounters in Chapter 9 ("Anticitizen One") and Chapter 11 ("Follow Freeman").
- Tips: Use the RPG exclusively; hide behind buildings for cover; time shots after cannon fire. Use the crossbow for leg shots if out of rockets.
- Unlock Conditions: First encounter on the roof during the uprising.
- Background: Combine armored vehicles. Gunships are flying attack helicopters.
- Strengths: APCs have mounted pulse machine guns; Gunships fire homing missiles and can strafe.
- Weaknesses: APCs can be destroyed with pipe bombs, grenades, or pulse rifle bursts. Gunships vulnerable to RPG and sometimes destroyed by Dog.
- Combat Role: Vehicle encounters in Highway 17 and sandtraps.
- Tips: Use cover, RPG for gunships, and grenades for APCs. Use the Magnet Gun to toss barrels at APCs.
- Background: Parasitic alien that latches onto human heads, turning them into zombies.
- Types: Standard (attacks by jumping), Poison Headcrab (green, spits poison, very dangerous), Fast Headcrab (pale, fast, latches quickly).
- Strengths: Can instantly kill Gordon if he has no armor and is caught off-guard; poison reduces health to 1; fast movement.
- Weaknesses: Low health; easy to one-shot with crowbar or pistol; can be avoided by moving sideways.
- Combat Role: Infestation in Ravenholm and later areas. Use crowsong or shotgun at close range. The Gravity Gun can fling objects to kill them at range.
- Background: Human transformed by a Headcrab. Slow but durable.
- Types: Standard Zombie (slow, moderate damage), Poison Zombie (vomits poison, higher durability), Fast Zombie (runs fast, jumps).
- Strengths: Hit hard; poison zombies reduce health to 1 on poison hit; fast zombies close distance quickly.
- Weaknesses: Headshots kill; explosive barrels one-shot; can be set on fire.
- Combat Role: Chaos units in Ravenholm and underground areas.
- Tips: Use pulse rifle or shotgun; use fire via flare or explosive barrel. Keep moving to avoid being surrounded.
- Background: Native Earth insects driven to rage by Combine. They are territorial but can be used by the Vortigaunts.
- Strengths: Rapid burrowing enemies that attack in packs; weak to shields? Actually, they are neutral and will attack Combine if you use pheropods.
- Weaknesses: Vulnerable to shotgun and explosives; can be distracted with pheropods.
- Combat Role: Appear in Sandtraps; Vortigaunts can control them via pheropod pods you can find. With the pheropod, you can summon a swarm to attack Combine enemies.
- Tips: Use the pheropod (item) to release antlions on enemies; they will attack anything nearby. Use shotgun for close encounters. Avoid driving over them in the buggy.
- Unlock Conditions: First encountered in Chapter 8. You obtain a pheropod from a Vortigaunt.
- Background: Small flying Combine reconnaissance drones with spinning blades.
- Strengths: Fast, agile, can fly in and out; cause bleeding damage.
- Weaknesses: Low health; easy to shoot down with pistol or SMG; can be knocked against walls with Gravity Gun.
- Combat Role: Annoying airborne pests. Often accompany soldiers.
- Tips: Shoot them quickly before they attack; use shotgun for easy kill. Use Gravity Gun to catch and throw back.
- Background: Kleiner’s pet headcrab, named after a scientist. It has not attached to a host.
- Role: Comic relief. It steals the teleporter device in Chapter 2, causing Gordon to be teleported to the wrong place (the street).
- Interaction: No combat; you can’t hurt it.
- Unlock Conditions: Seen in Kleiner’s lab.
---
Major Allied Characters
#### Alyx Vance
#### Eli Vance
#### Isaac Kleiner
#### Judith Mossman
#### Barney Calhoun
#### Dog (D0g)
#### Vortigaunts
#### Resistance Members (Generic)
---
Major Enemy Characters
#### G-Man
#### Combine Advisors
#### Combine Overwatch Soldier
#### Civil Protection (CP)
#### Striders
#### APCs and Gunships
#### Headcrab
#### Zombie
#### Antlions
#### Manhacks
---
Neutral/Passive Characters
#### Lamarr (Headcrab)
#### Odessa Cubbage (from Half-Life 2: Episode Two? Not in base game, skip)
---
Conclusion
Half-Life 2’s “characters and roles” are not classes but a rich cast of allies and enemies that dictate how you approach combat and puzzles. Your own role as Gordon Freeman is flexible: you can be a one-man army, a patient sniper, or a Gravity Gun magician. Understanding each NPC’s strengths and weaknesses allows you to exploit their presence (e.g., keep Vortigaunts close for healing, use Dog for heavy lifting, use Resistance members as cannon fodder). The game rewards adaptation and environmental awareness, not character builds.
For further details on specific weapons and items, refer to the All Game Items section.
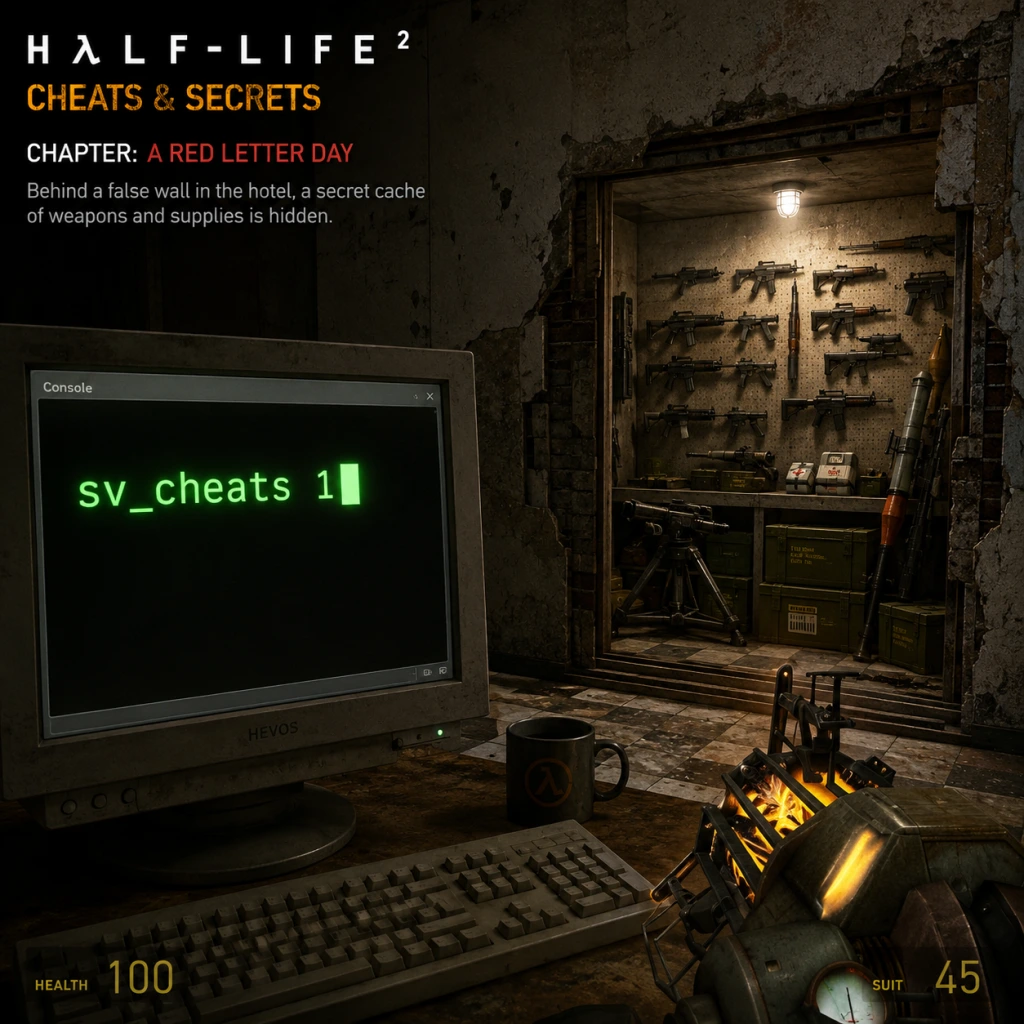
Cheats & Secrets
Half-Life 2 Cheats & Secrets Guide
Half-Life 2 includes a built-in developer console that allows for a variety of cheat codes. These are console commands that must be enabled first. This guide covers all known official cheat codes, unlock codes, Easter eggs, hidden features, and developer-intended secrets across all platforms (PC, Mac, Linux). Console versions (Xbox, PlayStation) do not support these cheats, but some Easter eggs are shared.
Enabling the Developer Console (PC/Mac/Linux)
1. Launch the game via Steam.
2. From the main menu, click Options → Keyboard → Advanced.
3. Check Enable Developer Console and click OK.
4. Press the ~ (tilde) key to open the console during gameplay.
5. Type any cheat command and press Enter. Some cheats require `sv_cheats 1` to be set first.
Note: Cheats disable achievements for that save session. Always manually save before using cheats if you wish to continue earning achievements later.
Required Setup: `sv_cheats`
Most cheat commands require the game to be in developer mode. Type the following in the console:
```
sv_cheats 1
```
This must be entered each time you load a saved game or start a new chapter. Some cheats (like `god` and `noclip`) work without this, but for safety, always set `sv_cheats 1` first.
---
Essential Cheat Commands
| Command | Effect | Example |
|---|---|---|
| `god` | Invincibility (toggles on/off) | Type `god` again to disable |
| `noclip` | Fly through walls (toggles on/off) | Useful for exploring out-of-bounds areas |
| `notarget` | Enemies ignore you (toggles on/off) | Stealth through any encounter |
| `buddha` | You take damage but never die (like invincibility with visible health) | Useful for testing |
| `sv_infinite_ammo 1` | Unlimited ammo for current weapon (set to 0 to disable) | Does not require reloading |
| `impulse 101` | Grant all weapons and full ammo/health/armor (classic HL cheat) | Instant full loadout |
| `give weapon_<name>` | Spawn a specific weapon (see weapon list below) | `give weapon_physcannon` gives the Gravity Gun |
| `map <mapname>` | Load any chapter/map (see map list below) | `map d1_trainstation_01` starts the game |
| `sv_gravity <value>` | Change gravity (default 800; lower = moon gravity) | `sv_gravity 200` for low gravity |
| `host_timescale <value>` | Change game speed (0.1 slow motion, 2 double speed) | `host_timescale 0.5` slows time |
| `mat_wireframe 1` | See the world in wireframe mode (set to 0 to disable) | Debug visual |
| `r_drawothermodels 0` | Hide all character models (set to 1 to restore) | Useful for finding hidden items |
| `kill` | Instantly die | Respawn at last save |
| `restart` | Restart the current chapter | Useful after messing with cheats |
Use `give weapon_<name>` to spawn a weapon. Common weapon names:
- `weapon_crowbar`
- `weapon_pistol`
- `weapon_smg1`
- `weapon_shotgun`
- `weapon_ar2` (OSIPR rifle)
- `weapon_rpg`
- `weapon_physcannon` (Gravity Gun – can be upgraded later in the story)
- `weapon_crossbow`
- `weapon_frag` (grenade)
- `weapon_stunstick` (Combine baton)
- `weapon_357` (Magnum revolver)
- `weapon_bugbait` (used in Chapter 5)
- `d1_trainstation_01` – Chapter 1: Point Insertion
- `d1_trainstation_02` – Chapter 1 continued
- `d1_trainstation_03` – Chapter 1 end
- `d1_canals_01` – Chapter 2: A Red Letter Day
- `d1_canals_02` – Chapter 2 continued
- `d1_canals_03` – Chapter 2 end
- `d1_canals_06` – Chapter 3: Water Hazard (note: gaps in numbering)
- `d1_canals_10` – Chapter 3 end
- `d1_canals_12` – Chapter 4: Black Mesa East (partial)
- `d1_canals_13` – Chapter 4 end
- `d1_eli_01` – Chapter 5: Black Mesa East
- `d1_eli_02` – Chapter 5 end
- `d2_coast_01` – Chapter 6: Highway 17
- `d2_coast_03` – Chapter 6 continued
- `d2_coast_05` – Chapter 6 end
- `d2_coast_07` – Chapter 7: Sandtraps
- `d2_coast_08` – Chapter 7 end
- `d2_coast_10` – Chapter 8: Nova Prospekt (partial)
- `d2_coast_11` – Chapter 8 end
- `d2_prison_01` – Chapter 9: Entanglement
- `d2_prison_02` – Chapter 9 end
- `d2_prison_03` – Chapter 10: Anticitizen One (partial)
- `d2_prison_04` – Chapter 10 end
- `d2_prison_05` – Chapter 11: Follow Freeman (partial)
- `d2_prison_06` – Chapter 11 end
- `d2_prison_07` – Chapter 12: Our Benefactors (partial)
- `d2_prison_08` – Chapter 12 end
- `d3_c17_01` – Chapter 13: Dark Energy (final chapter)
- `d3_c17_02` – Chapter 13 end
- `d3_c17_03` – Final boss area
- `d3_citadel_01` – Citadel start
- `d3_citadel_02` – Citadel interior
- `d3_citadel_03` – Citadel end (credits)
- Xbox 360/PS3: The Orange Box includes the original Half-Life 2, Episode One, and Episode Two, all with the same hidden content.
- The Gnome Achievement: In Episode Two on console, you can earn an achievement by carrying a gnome to the end. This is a legitimate secret.
- Always save manually before using cheats. Many cheats can break scripted sequences or soft-lock the game (e.g., `noclip` in tight corridors).
- Never use `restart` during a crucial cutscene – it may crash.
- The `give` command with incorrect weapon names may crash the game.
- These cheats are developer-intended and do not harm your game. However, they are not allowed in multiplayer (no official multiplayer in HL2 base).
#### Map List (Chapters)
---
Unlock Codes & Hidden Features
#### Unlocking the Developer Commentary Mode
Half-Life 2 includes a developer commentary track. To activate:
1. From the main menu, click Options → Advanced.
2. Check Enable Developer Commentary.
3. During gameplay, look for floating speech bubbles. Interact (press `E`) to hear commentary.
Alternatively, you can enable it via the console: `sv_cheats 1` then `commentary 1`.
#### Unlocking the "Advanced" Options Menu
Already covered above, but note that some settings like Enable Developer Console are hidden in the Advanced options.
#### Unlock All Chapters
To jump directly to any chapter without starting a new game, use the `map` command with the appropriate map name (listed above). This will start that chapter with default items. For story consistency, you may want to use `map <mapname>` at the beginning of a chapter.
#### Disable HUD for Screenshots
`cl_drawhud 0` hides the HUD entirely. Set back to 1 to restore.
`hidehud` also works.
---
Easter Eggs & Developer Secrets
Half-Life 2 is rich with Easter eggs placed by Valve. Here are the most notable:
#### 1. The G-Man Sighting in the Train Station
In Point Insertion (first chapter), as you walk through the train station, look up and to the left near the security checkpoint. You will see the G-Man standing on a balcony watching you. He disappears if you look too long, but it's a classic nod.
#### 2. Hidden HEV Suit Charger in the Canals
In Water Hazard, inside the old canal tunnels, there is a room with a vending machine and a hidden HEV suit recharge station behind a stack of crates. It gives extra armor.
#### 3. The Unused Gravity Gloves
There is a scrapped weapon called the "Gravity Gloves" (similar to Alyx's in HL: Alyx). It is not obtainable without mods, but you can see a model in the files. Use `give weapon_gravityglove` (if available in some modded versions) – does not work in vanilla.
#### 4. The Lab Ringtone (Use the Phone)
In Black Mesa East, after meeting Eli and Alyx, you can use the phone near the entrance. Press `E` on it multiple times to hear different ringtones. If you do this enough, Alyx will comment.
#### 5. Hidden Cats
In Highway 17, in the house near the lighthouse, there is a zombie that is holding a cat toy. In the same chapter, you can find a live cat in a cabinet (close the cabinet and open again – the cat is gone; it's a scripted event).
#### 6. The Gnome Achievement (Half-Life 2: Episode Two and also in HL2 base?)
In the base game, there is no official gnome achievement, but in Half-Life 2: Episode Two there is a hidden gnome you can carry through the entire game. In the original HL2, you can find a small garden gnome in Chapter 6: Highway 17 at the beginning of the coast. It is not tracked but is a nod.
#### 7. The Airboat Engine Sound Easter Egg
In Water Hazard, if you get out of your airboat while the engine is still running, the sound persists for a while. This is a bug but also a fun quirk.
#### 8. The Frozen Combine Soldier
In Nova Prospekt, there is a room where a Combine soldier is frozen in mid-air after being hit with a stunstick. It's a scripted scene but often missed if you rush.
#### 9. The Toilet in the Sky
In Chapter 3: Water Hazard, in the massive pump station, there is a toilet that has been placed on a high ledge. It's visible from the catwalk – a classic Valve easter egg.
#### 10. The Destroyed G-Man Billboard
In City 17 during the early chapters, look at the large propaganda screens. Occasionally, you'll see a brief flicker of the G-Man's face. This is intentional.
#### 11. The Monkey with Cymbals
In Chapter 4: Black Mesa East, in Alyx's room, there is a toy monkey with cymbals. You can shoot it to make it clap. Hidden in the attic area.
#### 12. The "Lambda" Logo Hidden in the Citadel
In the final chapters, while inside the Citadel, look closely at the walls – you can see the Lambda symbol (the resistance logo) carved into some panels. It's a subtle reference.
#### 13. The Unused AK-47 Model
In the game files, there is a model for an AK-47 (called "weapon_ak47") that was cut. It cannot be spawned without modification.
#### 14. The Developer Room (Hidden Map)
There is a hidden map called `testroom` or `test_chamber`. Use `map testroom` to access a gray room with all weapons and items – used for testing. Not an Easter egg per se, but a secret area.
#### 15. The Dog (D0g) Can Be Spawned
If you spawn `npc_dog` in a map, you can interact with him (he will follow and play). In certain chapters, like Black Mesa East, you can add him and watch his physics behavior.
---
Console Version-Specific Secrets (Xbox, PlayStation)
Console versions (Half-Life 2 on Xbox 2005, Xbox 360 via Orange Box, PS3 via Orange Box) do not have console cheats, but they include the same Easter eggs. Additionally:
---
Safety & Exploit Notes
---
Summary
Half-Life 2 offers a robust set of console cheats, powerful for experimentation, skipping chapters, or just having fun. The Easter eggs are plentiful and reward careful exploration. Whether you want god mode, a guided tour of the code, or hidden jokes, this guide covers everything legitimate. Enjoy your enhanced playthrough, Dr. Freeman.