
Halo 3
## Game Introduction **Halo 3** is a first-person shooter (FPS) game developed by **Bungie** and published by **Microsoft Game Studios**. It is the third main installment in the acclaimed *Halo* franchise, serving as the concluding chapter of the original *Halo* trilogy. The game was released to cr...

Download & Installation
Overview
Halo 3 is primarily available on:
- Xbox platforms: Original Xbox 360 disc/digital (backward compatible on Xbox One and Xbox Series X|S) and as part of Halo: The Master Chief Collection (MCC) on Xbox One/Series X|S.
- PC: Exclusively through Halo: The Master Chief Collection on Steam and the Microsoft Store (also available via Xbox Game Pass for PC).
It is not officially available on PlayStation, Nintendo Switch, or mobile platforms.
Official Download Sources (Legitimate Only)
| Platform | Source | Notes |
|---|---|---|
| Xbox (360, One, Series) | Microsoft Store (digital) or disc | Disc required for Xbox 360; digital purchase on Xbox Marketplace for backward compatibility. MCC version on Xbox One/Series contains Halo 3. |
| PC (Steam) | Steam Store – Halo: The Master Chief Collection | Requires Steam account. |
| PC (Microsoft Store) | Microsoft Store – Halo: The Master Chief Collection | Requires Microsoft account. Included with Xbox Game Pass for PC (subscription). |
| Subscription | Xbox Game Pass (Console, PC, Ultimate) | Includes MCC with Halo 3 on both Xbox and PC. |
System Requirements (PC – Halo: The Master Chief Collection)
Minimum Requirements (for Halo 3 Campaign and Multiplayer)
- OS: Windows 7 SP1 64-bit or newer
- Processor: AMD FX-4100 / Intel Core i5-2500K
- Memory: 8 GB RAM
- Graphics: AMD Radeon HD 6850 / NVIDIA GeForce GTS 450 (1 GB VRAM)
- DirectX: Version 11
- Network: Broadband internet connection
- Storage: ~80 GB (for full MCC; but you can install only Halo 3 via selective installation) – Actual Halo 3 alone is ~30-40 GB.
- OS: Windows 10 64-bit
- Processor: AMD FX-8350 / Intel Core i5-4690K
- Memory: 16 GB RAM
- Graphics: AMD Radeon R9 380 / NVIDIA GeForce GTX 970 (4 GB VRAM)
- DirectX: Version 12
- Network: Broadband
- Storage: 80 GB SSD (for faster load times)
- Disc: Insert Halo 3 disc console will automatically download a backward compatibility patch (~5-10 GB).
- Digital: Purchase from Microsoft Store on console or via web. The game will appear in your library.
- Alternatively, install Halo: The Master Chief Collection (recommended):
- If you have Game Pass Core, Console, or Ultimate, go to the Game Pass tile on your dashboard.
- Find Halo: The Master Chief Collection and click Install.
- Once installed, launch and select Halo 3 from the playlist.
- Xbox Live / Microsoft Account: Required for any multiplayer, cloud saves, and cross-save across Xbox and PC. For PC via Steam, you will be prompted to link your Microsoft account on first launch.
- Steam Account: Required for Steam version. Linking Microsoft account is optional for single-player but mandatory for multiplayer.
- Xbox Game Pass Subscription: Necessary only if playing via Game Pass (optional otherwise).
- Full Halo: MCC (all games): ~80 GB.
- Halo 3 alone (via selective install in MCC): ~30-40 GB.
- Original Xbox 360 Halo 3 (Backward Compat): ~5 GB (base game) + ~10 GB (compatibility patch).
- MCC on Xbox One/Series: Similar size as PC (approximately 80 GB full). Series X|S can use faster SSD.
- Fix: Pause and resume download in Steam/Xbox app. If persists, restart the client or your PC.
- Fix: Free up space by deleting unnecessary files. Use Disk Cleanup. Ensure at least 80 GB free, more if installing all games.
- Fix:
- Fix: Ensure your console is connected to the internet and Xbox Live is working. Check status at [support.xbox.com](https://support.xbox.com).
- Fix:
- Fix: Set audio sample rate to 48 kHz in Windows sound settings. Update audio drivers. Disable spatial sound (Windows Sonic/Dolby Atmos) temporarily.
- Play with a Controller: Halo was designed for controller. Xbox One/Series controllers are recommended on PC, but mouse/keyboard works too.
- Cross-Play: Halo 3 in MCC supports cross-play across Xbox and PC (Steam & Microsoft Store). Ensure both platforms are on the same update.
- Optimization: On PC, if you experience frame drops, lower shadow quality and disable anti-aliasing. The game runs well on medium settings on modern integrated GPUs.
- Disc vs. Digital: For Xbox, digital versions allow you to play without swapping discs and include all updates.
- Xbox Support: [support.xbox.com](https://support.xbox.com)
- Halo Support: [support.halowaypoint.com](https://support.halowaypoint.com)
- Steam Community Hub: [steamcommunity.com/app/976730](https://steamcommunity.com/app/976730) (MCC)
Recommended Requirements
Step-by-Step Installation by Platform
1. Xbox (Xbox 360 / One / Series X|S)
#### Xbox 360 (Original Disc or Digital)
1. Insert the Halo 3 game disc (or purchase digitally from the Xbox Marketplace on your console).
2. If using disc, the console will prompt you to install the game to the hard drive (recommended for faster loading). Follow on-screen instructions.
3. Wait for installation. For disc, you will still need the disc in the drive to play.
4. Sign in to Xbox Live (required for multiplayer, achievements, and cloud saves).
#### Xbox One / Series X|S – Backward Compatibility (Disc or Digital)
1. Go to Microsoft Store > Search "Halo: The Master Chief Collection".
2. Select Install (if you own it or have Game Pass).
3. Launch MCC, then inside the game you can manage content and download Halo 3 specifically.
#### Xbox Game Pass
2. PC – Steam
1. Create/Log in to your Steam account. Install the Steam client from [store.steampowered.com](https://store.steampowered.com).
2. In Steam client, go to Store > Search "Halo: The Master Chief Collection".
3. Click Add to Cart and complete purchase (or if you already own it, go to Library).
4. In your Library, right-click Halo: The Master Chief Collection > Install.
5. Choose installation directory (ensure at least 80 GB free).
6. Wait for download and installation. Steam will verify files automatically.
7. After install, click Play. The game will launch. On first launch, it may present a Microsoft account sign-in (required for multiplayer and cross-progression).
3. PC – Microsoft Store / Xbox App (Windows 10/11)
1. Ensure you are logged in with a Microsoft account (the same used for Xbox Live).
2. Open Microsoft Store or Xbox App. Search for "Halo: The Master Chief Collection".
3. Click Install (purchase required, or included with Xbox Game Pass for PC).
4. It will download via the Xbox Game Pass app or Microsoft Store. You can monitor progress in the Xbox app.
5. After download, click Play from the Xbox app (or pin to Start).
6. First launch may prompt for baseline settings.
Account Requirements
First Launch Setup
1. Display & Graphics: The game will auto-detect your hardware. You can manually adjust resolution, refresh rate, graphics quality (Low to Ultra), V-Sync, and field of view (FOV) in settings.
2. Audio: Select speaker configuration, volume levels, and language.
3. Control Configuration: Choose between keyboard/mouse or controller. Customize key bindings if desired.
4. Multiplayer Sign-in: On PC, a pop-up will ask you to sign in to Xbox Live. Use your Microsoft credentials. This enables achievements, fireteam, and progression.
5. Content Management: Within MCC, you can select which games to install. To save space, go to Settings > Manage Contents and uncheck games you don't want (e.g., Halo 1, 2, ODST, Reach). Install only Halo 3 to reduce storage.
6. Bindings: Ensure your controller (Xbox/PS4/PS5 via Steam Input) is recognized. For Xbox controllers, they work natively.
Storage Space
Common Installation Errors and Fixes
Error: "Download Stuck/Hanging" (PC)
Error: "Installation Failed – Insufficient Storage"
Error: "Microsoft Account Sign-in Loop" (PC Steam)
1. Close the game.
2. Open Start menu > Search Credential Manager > Windows Credentials.
3. Remove any entries related to "Xbl" or "Xbox".
4. Restart the game and sign in again.
Error: "You Need to be Online" (Xbox)
Error: "Game Crashes on Launch" (PC)
- Update graphics drivers (NVIDIA/AMD).
- Verify game files: On Steam: right-click MCC > Properties > Local Files > Verify Integrity of Game Files. On Microsoft Store: Use Settings > Apps > Halo MCC > Advanced Options > Repair.
- Disable overlays (Discord, Steam overlays).
- Run the game as Administrator.
Error: "No Sound" or "Audio Crackling"
Post-Installation Verification
1. Launch the Game: On PC, the MCC menu should appear. Select Halo 3 from the game list.
2. Check Version: In the main menu, see the build number (usually latest version). Ensure you have the latest update (Steam will auto-update).
3. Play a Quick Mission: Start a new campaign on "Halo" (first mission) to test controls, audio, and visuals.
4. Multiplayer Test: Go to Matchmaking and try a quickplay match (requires Xbox Live/gold membership on Xbox).
5. Validate File Integrity: For Steam, use the verification tool above. For Xbox, use Settings > System > Storage > Clear local saved games (only if experiencing corrupted data).
6. Check Achievements: If you sign into Xbox Live, achievements should unlock properly.
Additional Tips
Troubleshooting Contact
For persistent issues, contact:
This guide covers all legitimate methods to download and install Halo 3. Enjoy the journey through the Ark!

Game Introduction
Game Introduction
Halo 3 is a first-person shooter (FPS) game developed by Bungie and published by Microsoft Game Studios. It is the third main installment in the acclaimed Halo franchise, serving as the concluding chapter of the original Halo trilogy. The game was released to critical and commercial acclaim on September 25, 2007, exclusively for the Xbox 360. It was later made backward-compatible on Xbox One and Xbox Series X|S, and is also included in Halo: The Master Chief Collection (MCC) for Xbox One/Series X|S and PC (via the MCC release on Windows 10/Steam in 2020).
Story Overview
Halo 3 picks up immediately after the events of Halo 2. The Covenant, a theocratic alien alliance, has discovered a gateway to the Ark—a massive Forerunner installation capable of activating all the Halo rings simultaneously. The Master Chief, alongside the Arbiter (a Sangheili warrior) and the AI Cortana, must stop the Prophet of Truth from activating the Halo Array, which would wipe out all sentient life in the galaxy to contain the parasitic Flood. The narrative weaves through desperate battles on Earth, the discovery of the Ark, and a final confrontation that determines the fate of the galaxy.
Setting
The game spans several iconic locations:
- Earth (Kenya, East Africa) – The opening levels take place in and around New Mombasa, with a large-scale Covenant invasion.
- The Ark – A massive Forerunner construct outside the galactic disk, built to control and repair the Halo rings.
- Installation 04B – A replacement Halo ring being built at the Ark, serving as the final battleground.
- Master Chief Petty Officer John-117 – The player character, a supersoldier Spartan-II. Silent, stoic, and legendary.
- Cortana – An AI construct that has been captured by the Gravemind, the Flood's collective intelligence. She guides the Chief even as she deteriorates.
- The Arbiter (Thel 'Vadam) – A Sangheili (Elite) warrior who once led Covenant forces but now fights alongside humanity. Playable in cooperative campaign missions.
- 343 Guilty Spark – The Monitor of Installation 04, a Forerunner AI with questionable motivations. He becomes an antagonist.
- Prophet of Truth – The leader of the Covenant, manipulating events to activate the Halo rings.
- The Gravemind – The ancient, malevolent intelligence of the Flood, seeking to absorb all life.
- Fans of the Halo series and the sci-fi FPS genre.
- Players who enjoy a deep, narrative-driven campaign with cooperative options.
- Competitive and casual multiplayer gamers seeking classic arena-style shooting with balanced starts.
- Modders and creative players (Forge and Theater modes empower user-generated content).
- Campaign: Play solo or with up to 3 other players via split-screen (2-player) or system link/Xbox Live (4-player online co-op). The story is divided into 9 levels.
- Multiplayer: Supports up to 16 players online or via system link (or 4-player split-screen on a single console). Classic modes include:
- Forge: An in-game level editor that allows players to modify existing multiplayer maps by placing objects, weapons, and vehicles. It introduced many community-driven creations.
- Theater: Playback and recording of recent matches, complete with free camera, filters, and export to video files (Xbox 360 only; on MCC, clips are recorded via console/PC).
- Offline: Fully playable single-player campaign and split-screen multiplayer/co-op (up to 4 players on one console for multiplayer; 2 for co-op campaign).
- Online: Xbox Live support for matchmaking, custom games, and file sharing. The game's original Xbox Live servers were shut down in 2022, but the Master Chief Collection version maintains active online servers across Xbox and PC with cross-play support and dedicated servers.
- Heroic Map Pack (December 2007): Three new multiplayer maps (Foundry, Rat’s Nest, Standoff).
- Legendary Map Pack (April 2008): Three more maps (Avalanche, Blackout, Ghost Town).
- Mythic Map Pack (November 2008, later made free): Three maps (Assembly, Orbital, Sandbox) plus a bonus single-player mission, “The Ark,” remade for Firefight-like survival (though Halo 3 itself didn’t have Firefight—this was a precursor).
- Closure of the Original Trilogy: It delivers an emotional, satisfying conclusion to the story arc started in Halo: Combat Evolved.
- The Golden Age of Console Multiplayer: Halo 3 perfected the balance of weapon sandbox, map design, and online matchmaking, setting a benchmark for the genre.
- Forge and Theater: These tools empowered the community to create, share, and analyze content, fostering a long-lasting creative ecosystem.
- Sandbox Freedom: The game encourages emergent gameplay; from driving a Warthog off a cliff to a spectacular hijack mid-air, possibilities are vast.
- Split-Screen and Co-op: Unmatched for couch gaming, allowing up to 4 players on one screen or 4-player online co-op.
- Thematic and Musical Score: Martin O’Donnell and Michael Salvatori’s iconic soundtrack, including the epic “One Final Effort” and haunting “Never Forget,” elevates every moment.
The environments range from urban ruins and jungle landscapes to massive alien structures and the terrifying Flood-infested interiors of Forerunner ships.
Main Characters
Genre and Core Appeal
Halo 3 is a first-person shooter with strong emphasis on tactical combat, vehicular warfare, and multiplayer mayhem. Its core appeal lies in its balanced sandbox gameplay: a mix of precise gunplay, melee attacks, grenades, and versatile vehicles (Warthogs, Scorpions, Banshees, etc.). The single-player campaign features epic set-pieces, AI-driven allies, and a compelling climax to the trilogy’s story. The multiplayer suite revolutionized online console gaming with its matchmaking system, Forge mode (level editor), and Theater mode (video playback/editing).
Target Audience
Game Modes
- Slayer (free-for-all or team deathmatch)
- Capture the Flag
- Oddball
- King of the Hill
- Territories
- VIP
- Juggernaut
Online and Offline Support
DLC and Expansions
The original Xbox 360 version received three map packs:
The Master Chief Collection includes all these maps plus updated visuals, enhanced matchmaking, and compatibility with modern platforms. It also adds cross-play, input-based matchmaking, and seasonal content (customization, challenges).
What Makes Halo 3 Unique
Halo 3 remains a landmark title in gaming history—a must-play for fans of the series and anyone who appreciates the pinnacle of console FPS design.

Getting Started
Getting Started
Welcome to Halo 3! This guide is designed for brand-new players to help you survive the first hour, understand the basics, and avoid common pitfalls. Whether you’re on Xbox, PC, or playing via the Master Chief Collection (MCC), you’ll find everything you need to hit the ground running.
First Hour Walkthrough
After the iconic opening cutscene, you’ll start Sierra 117. You are Master Chief, and you’re stranded on an unknown jungle planet. Follow the Elite, Thel ‘Vadam, who is your temporary ally.
1. Controls tutorial: A pop-up shows basic controls. Take a minute to move, look around, jump (A on Xbox, Space on PC keyboard), and crouch (press right stick or C).
2. Grab a weapon: You start with a Battle Rifle (BR55) with 36 rounds. Pick up a Plasma Pistol from a dead Marine, or an Assault Rifle from a weapon rack.
3. Combat basics: You’ll face Grunts and Jackals. Use the Battle Rifle for precision (zoom with left trigger/right-click) or the Assault Rifle for close spray. Melee (right bumper/F) is powerful when shields are low.
4. First checkpoint: After crossing a bridge, you’ll encounter a Wraith mortar. Wait for Thel to destroy it. Then fight through a small Covenant camp.
5. Flood encounter: After a cutscene, the Flood (parasitic enemies) appear. Use grenades (left bumper/G) on groups. Keep moving – Flood can swarm quickly. Use the Bubble Shield (equipment, press X/Q) near the crashed Pelican to block incoming fire.
6. End of first hour: You’ll reach a massive Forerunner structure and the mission ends. You should have completed Sierra 117, possibly started the next mission ("Floodgate").
Tip: Play on Normal difficulty your first time. It’s challenging but fair.
Character Creation
There is no character creation in Halo 3. You always play as Master Chief, a super-soldier in MJOLNIR armor. However, in the MCC version (on Xbox One/Series and PC), you can customize your multiplayer Spartan’s armor and colors via the main menu under "Customize". For Campaign, it’s fixed.
Controls
Halo 3 is available on Xbox 360/One/Series (via backward compatibility or MCC) and PC (via MCC). Below are the default control schemes. We recommend adjusting sensitivity to your liking (start at 3-4).
#### Xbox One/Series (MCC Default)
| Action | Button |
|---|---|
| Move | Left Stick |
| Look | Right Stick |
| Sprint | Click Left Stick |
| Jump | A |
| Crouch | Click Right Stick |
| Melee | Right Bumper (RB) |
| Fire | Right Trigger (RT) |
| Aim Down Sights | Left Trigger (LT) |
| Reload | X |
| Switch Weapon | Y |
| Grenade | Left Bumper (LB) |
| Action/Use Equipment | B |
| Zoom (when scoped) | Right Stick click again or tap LT |
| Drop Weapon | Hold X |
| Flashlight | D-Pad Up |
| Action | Key |
|---|---|
| Move | W, A, S, D |
| Look | Mouse |
| Sprint | Left Shift |
| Jump | Space |
| Crouch | Left Ctrl |
| Melee | F |
| Fire | Left Mouse |
| Aim Down Sights | Right Mouse |
| Reload | R |
| Switch Weapon | 1 or 2 (or scroll wheel) |
| Grenade | G |
| Action/Use Equipment | Q |
| Zoom (scoped weapons) | Right Mouse (hold) or mouse wheel click |
| Drop Weapon | Hold R then click? Default: T |
| Flashlight | Caps Lock |
Same as Xbox One scheme. Plug in and the game auto-detects. You can remap in the settings menu.
UI Overview
Your HUD (Heads-Up Display) shows:
- Motion Tracker (radar): Bottom-left circle. Red dots = enemies (if they move within range). Yellow dots = allies. White dots = fallen allies or objective items.
- Shield Bar: Bottom-middle, a blue arc. It recharges after not taking damage for a few seconds (no health bar – shield is your health). If shield goes down, you lose it. Wait for full recharge before engaging again.
- Weapon Slot: Bottom-right shows current weapon (name, ammo count, and magazine). Press Y/1/2 to swap between your two held weapons.
- Grenade Counter: Below weapon slot – shows number of frags and spike grenades (you can carry up to 4 total, 2 of each type).
- Equipment: Top-right – icon for active equipment (e.g., Bubble Shield, Gravity Lift). Use B/Q to deploy.
- Objective Marker: Top of screen – waypoint arrow pointing to next goal. Blue for allies, red for enemies.
- Adjust settings: Sensitivity (3-4 recommended), invert look (if you prefer), subtitles ON, brightness calibration.
- Play the first mission on Normal – don’t jump into Heroic or Legendary.
- Experiment with weapons: Battle Rifle (single-shot, accurate), Assault Rifle (full auto, less accurate), Plasma Pistol (overcharged shot drains shields).
- Stick with your ally (Thel) – he’s tough and will revive you in some modes.
- Save often (checkpoint system is automatic).
- Standing still – You become an easy target. Always strafe and keep moving.
- Wasting ammo – Don’t spray wildly; aim for headshots on Grunts and Jackals (unshielded). For shielded enemies, use plasma weapons to drain shields then switch to kinetic weapons for headshots.
- Ignoring the motion tracker – Red dots mean danger. If you see multiple approaching, prepare grenades or retreat.
- Rushing into melee range – Melee is powerful but risky. Only melee when you’ve dropped the enemy’s shield (blue bar) or if you’re certain you can kill them in one hit. A shield bash from a Brute can one-hit kill you on higher difficulties.
- Over-relying on the Battle Rifle scope – The BR is good at range but up close hip-fire is better. Zooming narrows your field of view.
- Weapons: Your first priority is a Battle Rifle (BR55). It’s versatile and effective at all ranges. Second weapon: a Plasma Pistol for shield draining or a Needler (pink crystalline projectiles that track and explode). Avoid the SMG unless dual-welding.
- Grenades: Always carry at least one type. Frag grenades are good for groups; Spike grenades stick and are good against armored enemies. You can pick up more from dead foes or weapon caches.
- Equipment: The Bubble Shield is common early. Use it to create a safe zone to recharge shields or revive an ally. Later, the Power Drain is great for disabling enemy shields before an assault.
- Vehicles: In later missions, you’ll find Ghosts (fast, plasma cannons) and Warthogs (turret or transport). Don’t drive without a gunner – you’re vulnerable. Use Warthogs to run over Grunts.
- Ammo conservation: You cannot carry infinite ammo. Each weapon has a maximum reserve. If low, swap to a fallen enemy’s weapon. On Normal, ammo is plentiful, but be mindful.
- [ ] Install the game (if physical disc, ensure it’s loaded; if MCC, wait for full download).
- [ ] Adjust settings: Sensitivity (3-4), invert look (if needed), subtitles ON, brightness calibration.
- [ ] Launch Campaign on Normal difficulty.
- [ ] Complete Sierra 117 at least once (about 30-40 minutes).
- [ ] Practice basic controls: Move, jump, shoot, melee, throw grenades.
- [ ] Learn to switch weapons (Y/1-2) and use the Battle Rifle’s zoom.
- [ ] Defeat your first Flood encounter using grenades and melee.
- [ ] Try using equipment – deploy the Bubble Shield once.
- [ ] Set a personal goal: Kill 20 enemies without dying once.
- [ ] If playing multiplayer, start with a few custom games against bots (in MCC) to learn maps.
- [ ] Take a break – Halo 3 can be intense. Come back fresh.
Essential Early Objectives
1. Complete Sierra 117 – This teaches movement, shooting, and using allies.
2. Learn to use grenades – Frags bounce and have a 3-second fuse. Spike grenades stick to surfaces and explode after 2 seconds. Use them to clear grouped enemies or break shields.
3. Master the dual-wield system (optional) – You can carry two one-handed weapons (e.g., Plasma Pistol + SMG). Hold Y/1 to switch to dual-wield when you have two compatible weapons. This halves reload speed but doubles firepower.
4. Understand the Flood – In later missions, Flood forms require specific tactics. Combat forms (infected Elites/Brutes) drop their weapon when killed; you can pick it up. Infection forms (small) are weak but swarm – melee or shoot them quickly.
5. Use equipment wisely – Bubble Shield (defensive), Radar Jammer (hides you from radar), Power Drain (disables enemy shields and drains your own), Gravity Lift (launches you up), etc. You can only carry one piece of equipment at a time.
What to Do First and What to Avoid
Do first:
Avoid:
Early Resource Priorities
Common Beginner Mistakes
1. Not using the scope: The Battle Rifle’s scope (2x zoom) can make long-range kills much easier. Tap LT/right-click to zoom – but don’t walk while zoomed or you’ll move slowly.
2. Ignoring dual-wielding: A plasma pistol (overcharged shot) + SMG (burst fire) is devastating. But remember you can’t throw grenades while dual-welding (you have to drop one weapon or switch to single).
3. Not reloading mid-combat: Reload whenever there’s a lull. In Halo, you can reload while moving.
4. For equipment use: New players forget they have equipment. Assign it to a quick slot (X/Q) and use it actively – Bubble Shield can save your life against turret fire.
5. Panicking against the Flood: Flood forms move erratically. Use the shotgun (found later) or melee. Don’t waste ammo shooting infection forms – stomp them (crouch + melee or just melee when they’re close).
6. Not adjusting brightness: The game can be dark. Go into settings and increase brightness so you can see shadows and enemies.
7. Rushing past checkpoints: Take your time to explore. You might find weapon caches, terminals (lore), or skulls (difficulty modifiers).
Day-One Checklist
Remember: Halo 3 is about mastering the combat rhythm: shoot shields with plasma, finish with headshot, melee when close, and always stay aware of your surroundings. Good luck, Spartan!
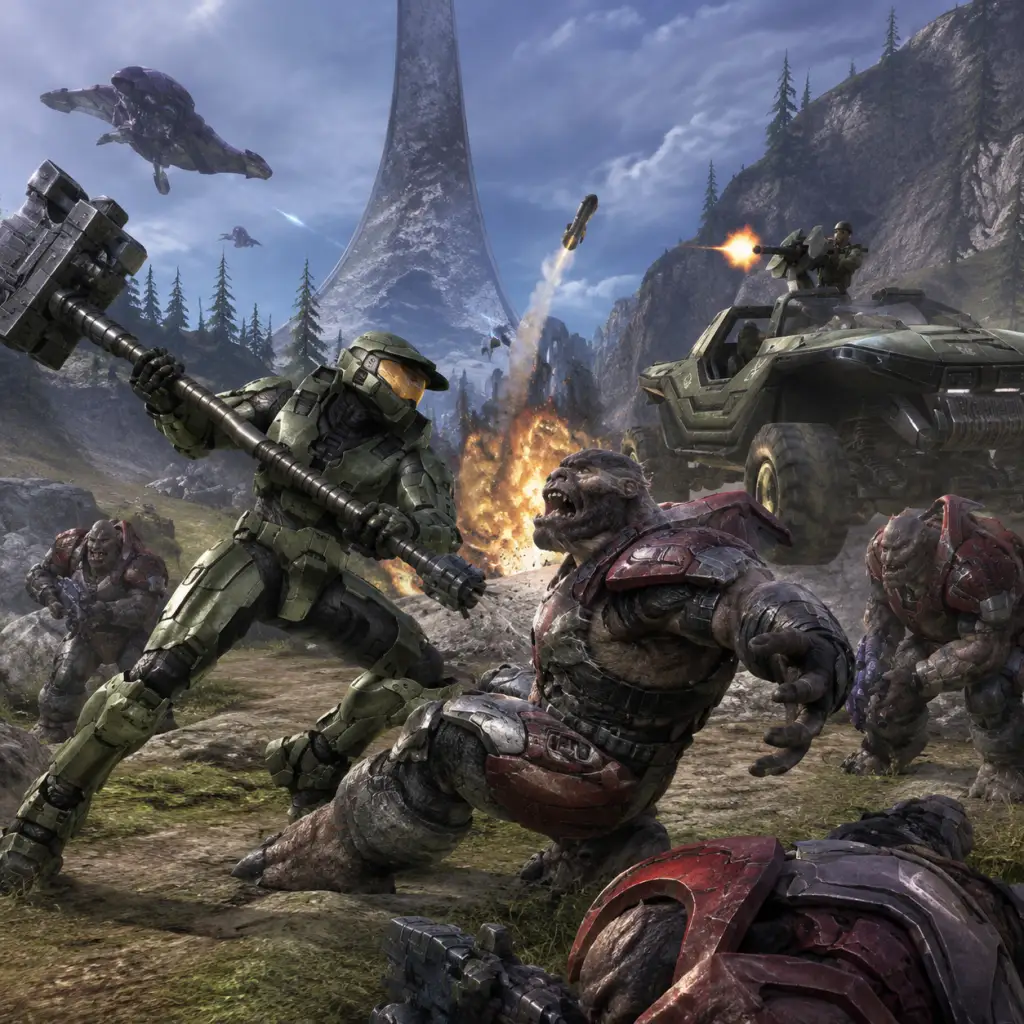
Core Gameplay
Core Gameplay
Halo 3 blends tight first-person shooting with large-scale sandbox battles, a unique ballistic/energy weapon ecosystem, and a dynamic physics engine. Its core loop revolves around engaging enemy forces (Covenant, Flood, and Brutes), managing your two-weapon loadout and grenades, and using equipment to overcome tactical challenges. While the campaign follows a linear path, each encounter offers multiple approaches. This guide breaks down the gameplay by progression tiers, covering early, mid, late, and endgame stages.
Gameplay Loop Fundamentals
The primary loop in Halo 3 is: Locate enemy → engage with weapons/grenades/melee → reposition (using shields, equipment, cover) → neutralize threat → loot or resupply → move to next encounter. This loop repeats throughout the campaign and is further refined by:
- Two-weapon limit: One weapon per hand; you can swap by picking up dropped weapons.
- Dual wielding: Some weapons (pistols, SMGs, plasma rifles) can be held in pairs, doubling firepower but disabling equipment/grenades.
- Recharging shields: Health is split into shield (recharges) and health (does not). Use cover to let shields recover.
- Equipment: One-use gadgets like Bubble Shield, Gravity Lift, Power Drain, etc., that alter the battlefield.
- Vehicle integration: Tanks, Warthogs, Banshees (limited availability).
- Difficulty selection (Easy, Normal, Heroic, Legendary)
- Skull unlocks (hidden collectibles that modify gameplay)
- Weapon mastery (learning each weapon’s role)
- Campaign scoring (for completing levels with multiplier)
- Multiplayer rank (if applicable, but this guide focuses on campaign mechanics; endgame touches on multiplayer meta)
- Set pieces: Jungle, Covenant cruiser interior, Installation 01.
- Encountered enemies: Grunts (low threats), Jackals (snipers with shields), Brutes (armored, aggressive; no shield but high health). Flood not yet introduced.
- Weapon sandbox starters: Mission-provided: Assault Rifle, Battle Rifle, Pistol (dual wield), Plasma Pistol (for overcharge EMP), Frag Grenades. You may find Covenant Carbine, Needler, and Brute Spiker.
Progression Tiers Overview
Halo 3 does not have traditional character levels or skill trees. Progression is driven by:
The following tiers assume you are playing on Normal or Heroic difficulty for the first time, which provides a balanced challenge.
---
Early Game (First 2–3 Campaign Missions)
Environments & Enemies
Combat Strategies
| Goal | Recommended Action |
|---|---|
| Engage Grunts | Use headshots (Battle Rifle/Carbine) or area grenade to scatter. Grunts flee when Brutes are killed. |
| Break Jackal shields | Plasma Pistol overcharge (hold fire to charge) then headshot. Alternatively, aim for unshielded hand. |
| Take down Brutes | Deplete their armour via sustained fire (Assault Rifle/needler) followed by precision headshot. Brutes may go berserk when unarmoured. |
| Manage equipment | Find and use Bubble Shield to revive Marines or outgun Brutes in close quarters. |
Core Loop Example (Mission 1: Sierra 117)
1. Exit jungle tunnel, meet Marines. You carry Battle Rifle and Assault Rifle.
2. Advance down hillside; Grunts and Jackals appear. Use Battle Rifle headshots on Jackals (2 shots to kill). Grenade Grunt clusters.
3. Brute major appears with plasma rifle. Switch to Assault Rifle to burn his armour, then Battle Rifle headshot when armour cracks.
4. Loot area: pick up Needler for fast Brute kill - Needler homing projectiles explode after enough hits.
5. Proceed to bridge; use Frags to clear Brute packs. Bubble Shield protects during bridge fight.
Skill Development Tips (Early Game)
- Practice shield management: Retreat after taking heavy damage; wait 3–4 seconds for full shield recharge.
- Master grenade arcs: Use crosshair angle to predict bounce; stickies (plasma grenades) only available later.
- Learn to dual wield: Hold trigger for two weapons at once; useful for suppressing fire but you lose grenades/equipment. Avoid in tight corridors.
- Look for hidden skulls: In Sierra 117 near the end, a skull (Iron or Black Eye) can be found. Pick it up for achievement; disable skulls in menu if challenge too high.
- Flood: Parasitic enemies that arise about mission 4 (The Flood). They have no shields, hit hard in melee, and come in combat forms (shoot infected weapons) and carrier forms (explode on death).
- Brute Chieftains: Hammer-wielding leaders that require heavy firepower (Fuel Rod Cannon, Spartan Laser) or multiple stickies.
- New equipment: Power Drain (temporarily disable enemy shields/vehicles), Flare (stuns Jackals/Flood in dark areas), Regenerator (heals health gradually).
- Vehicles: Scorpion Tank, Ghost, Warthog often available.
---
Mid Game (Missions 4–7, First Introduction of Flood)
New Elements
Adaptation to Flood
| Flood Type | Threat | Counter |
|---|---|---|
| Combat Form | Shoots your weapons at you, fast melee | Shoot head/body with precision; use Shotgun (found later) for instant kill. Avoid close range. |
| Carrier Form | Bloated, explodes damaging area | Shoot from distance or use shotgun; never let them melee you. |
| Infection Forms (small) | Jump and attach, drain health | Melee or shoot quickly. Keep moving to avoid swarms. |
| Pure Form (later) | Tank-like, can change shape | Use Power Drain to weaken; then heavy weapons or Plasma Pistol/Needler combo. |
Quests/Mission Structure
Campaign missions are linear with occasional open areas. Typically:
- Objective A: Reach point X (e.g., activate a bridge)
- Objective B: Defend or escort (Marines, AI)
- Objective C: Boss fight (Chieftain or Scarab)
- Optional: Find terminals or skulls (affects story/logs)
- Weapon loadout priority: Always carry a precision weapon (Battle Rifle, Carbine) and a power weapon (Rocket Launcher, Spartan Laser, Gravity Hammer when available).
- Skull hunting: In The Flood, a skull is behind a locked door (need Cortana use). Mid-game skulls often boost challenge or disable HUD. Consider collecting for achievements.
- Vehicle handling: Learn Warthog’s momentum - it’s a three-person vehicle (driver, gunner, passenger). Use gunner’s turret for effective support. Scorpion Tank is excellent against Flood swarms.
- The Covenant: Massive Warthog run, then ground battles with multiple Scarabs and Wraiths. You’ll face elite Brute units with power weapons.
- Environment: The Ark Installation - open plains, Forerunner architecture.
- Enemy variety: Flood Pure Forms (Stalker and Tank forms) appear alongside Covenant. Faction battles can be exploited.
Mid-game features the first Scarab fight (The Storm). Strategy: Board via jump from structure or Warthog. Destroy rear power core while avoiding plasma blasts. Use Spartan Laser or Rocket Launcher to disable legs first.
Progression Tips
---
Late Game (Missions 8–10, The Ark and The Covenant)
Difficulty Spike
Weapons & Equipment Meta
| Weapon | Role | Notes |
|---|---|---|
| Spartan Laser | Anti-vehicle heavy | Snipe Wraiths, flying Phantoms, Banshees. Requires charge time. |
| Fuel Rod Cannon | AOE anti-infantry/vehicle | Green plasma balls, large splash. One-shot Grunts, two-shot Brutes. |
| Shotgun | Flood killer | One-hit kill on Flood Combat and Carrier forms. Essential in Cortana mission. |
| Energy Sword | Brute/Flood melee | One-hit kill on most enemies. Limited uses (20 energy). |
| Plasma Grenade | Sticky explosive | Glows blue. Stick to Brutes or vehicles for instant kill. |
Critical Mission: The Covenant
This is the longest and most challenging level. Key steps:
1. Warthog Run: Keep turret gunner alive. Drive left to avoid Scarab beam. Use obstacles for cover.
2. Covenant & Flood fight: Enemies from both sides. Let them fight each other, then mop up.
3. Twin Scarabs: Use Spartan Laser to destroy their legs; board and shoot core. Alternatively, use Hornet (flying vehicle) with fuel rod.
4. Final push: Hold out in tunnel until activation. Turret positions help.
Endgame Preparation
- Save power weapons (Spartan Laser, Rockets) for boss encounters and vehicle-heavy sections.
- Stockpile grenades: Max 4 frags and 4 plasmas (if found). Use dual-wielding for plasma pistols to disable vehicles.
- Learn to hijack: Jump on any enemy vehicle and melee to eject driver (health required). Useful for stealing Wraiths or Ghosts.
- Cortana: Dense Flood corridors, minimal weapons. Rely on Shotgun, Energy Sword, and grenades. Tip: Avoid combat runs; sprint through tight paths. Use Gravity Lift to reach high platforms.
- Halo: The final Warthog run. Drive down the ring’s interior while dodging Flood and Sentinels. Strategy: Stay on the road, use boost, ignore most enemies. Jump the gap at the end. Then, a final boss fight – the Ark activating. Actually, Halo mission is a long drive and then the final structure fight with the Prophet of Truth (Brute Chieftain with invincibility until you lower shield by activating terminals).
- Enemy modifiers: Brutes have more health, increased accuracy, and throw grenades more often. Flood hit harder.
- Recommended loadout: Plasma Pistol (for overcharge to remove shields/disable vehicles) + any precision weapon. Energy Sword backup.
- Key tactics: Use plasma pistol overcharge + Battle Rifle headshot combo on everything. Noob combo. On Legendary, the Warthog run requires perfect driving; enemies one-shot you.
- Skulls to avoid: Black Eye (shield only recharges on melee kills) is brutal; Iron (restart upon death) recommended only for achievements.
- Matchmaking: Slayer, Capture the Flag, Oddball, etc. Each map has weapon spawns and equipment placements (Bubble Shield, Overshield, etc.) that affect meta.
- Forge: Create custom maps via editing forge worlds (Sandbox, Foundry). Use for custom games or testing.
- Campaign scoring: Replay levels with Skulls on for multiplier. Aim for highest score; used for achievements like “Endure” (score 200k on Legendary).
- Terminals & Easter eggs: Find all terminals for story depth or the “Halo 3” ending sequence—hidden items like the Eye of Truth or the Marine Easter egg.
---
Endgame (Missions 10–11, Wraith/Finisher & Legendary Play)
Final Missions: Cortana and Halo
Legendary Difficulty Endgame
Multiplayer & Forge (Endgame Content)
Once the campaign is finished on preferably Heroic or Legendary, consider:
Summary Table: Progression Milestones
| Tier | Key Milestone | Essential Skill |
|---|---|---|
| Early | Sierra 117 | Headshots, grenade placement |
| Early | Crow’s Nest | Vehicle handling (Warthog) |
| Mid | The Flood | Combat vs Flood (shotgun) |
| Mid | The Storm | Scarab takedown |
| Late | The Covenant | Multi-enemy management, Spartan Laser usage |
| Late | Cortana | Close-quarters survival |
| Endgame | Halo | Warthog driving and final boss |
| Endgame | Legendary playthrough | Noob combo mastery |
Final Advice
- Halo 3 rewards experimentation. Use equipment creatively: Bubble Shield to revive, Gravity Lift to reach sniper perches, Power Drain to break Brute Chieftain’s invincibility frames.
- Co-op play allows one player to revive the other (Health Pack; Press X on downed ally). Perfect for Legendary.
- Exploration: Look for hidden paths, often blocked by rocks or vents, containing skulls or weapon caches (like Rocket Launcher in early missions).
Master these systems, and you will dominate the Human-Covenant-Flood war from jungles to ringworlds.
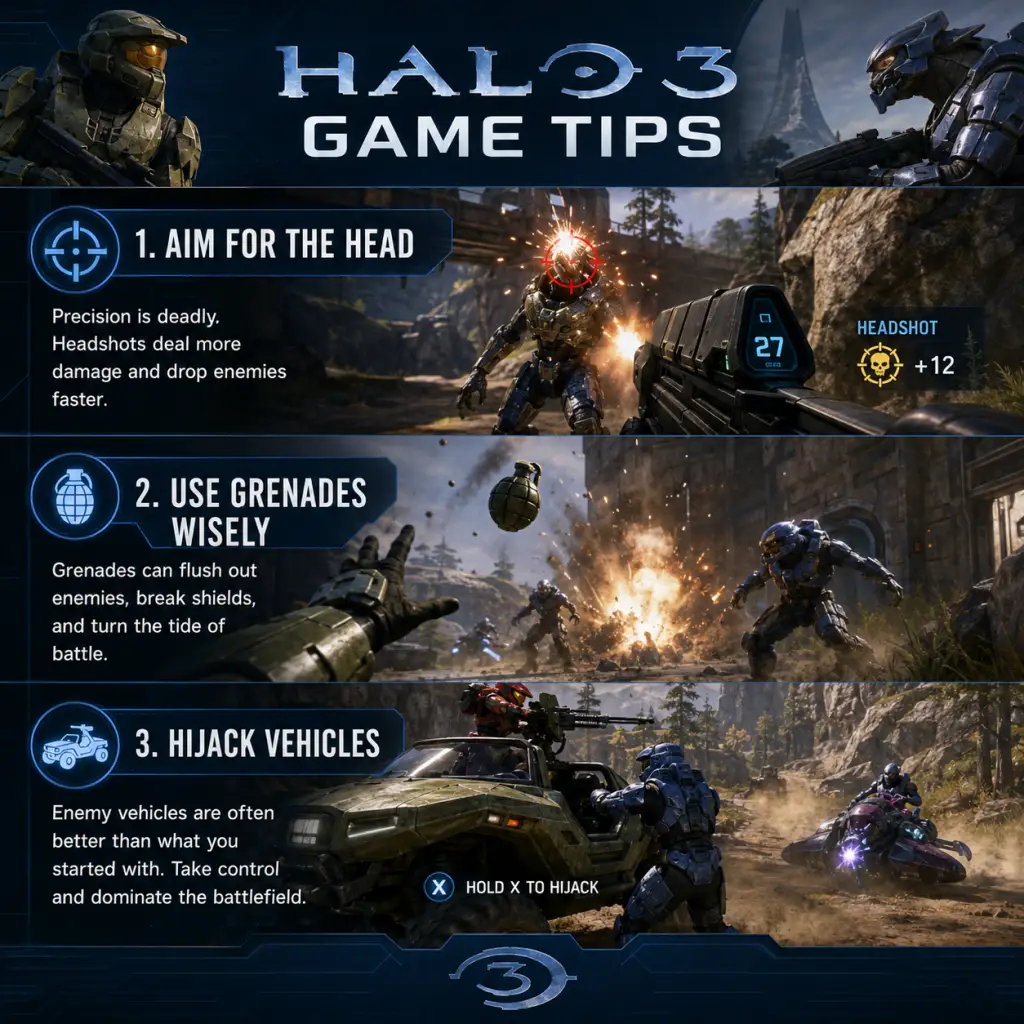
Game Tips
Game Tips
Below is a massive collection of Halo 3 tips organized by category, ranging from beginner fundamentals to advanced optimizations for campaign, multiplayer, and Firefight (if applicable). Every tip includes a clear explanation, analysis, and suggested use cases.
---
General Tips
- Stick and Move: Halo 3 combat is about positioning and angles. Never stand still—strafe, jump, and crouch to make yourself a harder target. The motion tracker (radar) is your best friend; always watch it for enemy blips.
- Learn the Weapon Sandbox: Each weapon has a specific role. Don’t just grab the Battle Rifle (BR) and ignore everything else. Practice with the Plasma Pistol for EMP, the Mauler for close range, the Carbine for mid-range, etc.
- Master the Melee: Melee attacks deal significant damage and can one-hit kill (with a backsmack) or break shields. Combine melee with a quick weapon swap for a faster follow-up (the “melee-swap” technique).
- Use Equipment Wisely: Equipment like the Bubble Shield, Regenerator, and Radar Jammer can turn a fight. Bubble Shield blocks all projectiles and melee from outside—use it to secure a power weapon or revive a teammate.
- Drive the Warthog Like a Pro: The Warthog is a powerful transport/gun platform. The driver should focus on positioning the gunner, not on kills. Keep moving and let the gunner (or passenger with rocket) do the work. Learn to “flip” the Hog back over with the action button (RB/X) to avoid being stranded.
- Vehicle Countering: The Plasma Pistol’s charged shot stops vehicles instantly (EMP). The Missile Pod and Spartan Laser can destroy any vehicle in one hit if aimed properly. The Splaser (Spartan Laser) requires leading on moving targets.
- Grenade Bouncing and Cooking: You can cook frag grenades (hold the throw button) to time detonation for when they reach the enemy. Bounce them off walls/ceilings to hit targets behind cover. Plasma grenades stick to enemies/vehicles—always aim for vehicles or Spartan shields.
- Headshot Awareness: In Halo 3, headshots only matter once shields are depleted. Body shots break shields; then one headshot kills (with a precision weapon like BR, Carbine, or Beam Rifle). Always aim for center mass until shields pop, then snap to the head.
- Communication is Key (Multiplayer): In team modes, call out enemy positions, weapon locations (e.g., “Sniper at top mid”), and power-ups like Overshield or Active Camo. Ping on MCC for quick markers.
- Learn the Maps: Each map has power weapon spawns, grenade locations, and flank routes. Spend time in custom games or theater mode exploring. Memorize the timers (usually 3 minutes for power weapons) to dominate.
- Start with the Battle Rifle (BR): The BR is the most versatile weapon. It has a 3-shot burst that kills in 4 bursts (12 bullets) if all headshots after shields. Practice the “4-shot” kill on bots.
- Use Cover Liberally: Don’t stand in the open. Peek around corners, jump-shot to land shots while moving, and retreat when shields are down (they recharge after a few seconds).
- Combined Arms: Fire a charged Plasma Pistol shot to completely drain shields, then quickly switch to BR for a headshot kill. This combo works on Spartans and Elites.
- Grenade First, Shoot Second: When engaging at mid-range, toss a frag grenade at the enemy’s position to force them to move or take damage, then follow up with precision fire.
- Melee When Close: If an enemy rushes you, time a melee attack just as they enter range. A melee + one BR burst will kill. Alternatively, use the shotgun or Mauler for a quick kill.
- Strafe Patterns: Learn to alternate your strafe direction unpredictably. Crouch-strafe (crouching while moving) throws off aim. Mix in short jumps to avoid grenade splash.
- Weapon Combos:
- Voice of an Enemy: Use the audio cues for shield depletion (beep) and grenade cooking (sound effect). Act on them—push when enemy shields are down.
- Power Weapon Control: In CTF or Slayer, always contest the Sniper Rifle, Rocket Launcher, or Energy Sword. Learn the map-timers to predict spawns. If you hold the power weapon, your team has a huge advantage.
- Brute Shot Utility: The Brute Shot fires a bouncing projectile that can bounce off walls. Use it for indirect fire, or to flush out enemies hiding behind cover. The melee is also a one-hit kill (backsmack).
- BXR (Buttton Glitch): In the original Halo 3 on Xbox 360 (patched in MCC), there was a rapid BR glitch (melee-cancel). For MCC, it’s removed, but the beat-down cancel exists: melee, then instantly swap weapons and back to reduce melee recovery. Practice this to get two attacks quickly.
- Perfect Nade Placement: Predict enemy movement. Throw a frag where they are about to run. For example, if an enemy breaks line of sight, toss a nade at the corner they’ll peek from.
- Double Melee Combo: Melee (shield break) → switch to a weapon like the Plasma Pistol (charged) → melee again for a quick kill. This is faster than a single melee + uncharged shot.
- Stickying: Practice the grenade stick on moving Spartans or vehicles. Plasma stick directly to the target; Frag sticks need a direct impact (rare). Use the training mode in Custom Games to practice.
- Gravity Hammer Timing: The Gravity Hammer has a lunge melee. Time your approach: sprint, jump, and slam at the peak to hit enemies below. The hammer sends vehicles flying—use it to flip enemy Ghosts.
- Campaign Hidden Areas: Many levels have hidden caves, tunnels, and terminals. Use the motion tracker to spot environmental audio cues (e.g., humming of a Forerunner terminal). Explore off the beaten path, especially on The Ark, The Covenant, and Halo.
- Skull Locations: There are 13 Skulls in the campaign. Each alters gameplay (e.g., Grunt Birthday Party, Famine). Find them by doubling back after events or looking in dark corners. Some are only accessible on Legendary difficulty.
- Terminal Collectibles: 7 Terminals in Halo 3 reveal lore. They’re often near major battles or in side rooms. Use a guide for exact locations, but generally look for blue glowing interfaces.
- Vehicles as Exploration Tools: You can drive a Mongoose into areas designed for Warthogs to bypass routes. Use the Hornet (on The Covenant) to reach high ledges and find shortcuts.
- Multiplayer Map Secrets: Each multiplayer map has easter eggs (e.g., The Foundry has a hidden skull, Sandtrap has a submerged elephant). In custom games, enable “empty” vehicles or teleporters to discover hidden areas.
- Walk, Don’t Run: In campaign, walking reduces your motion tracker noise. Use it to sneak past Flood spore rooms or ambush Covenant patrols.
- Environmental Hazards: Look for fusion coils (red explosive canisters) and plasma batteries (blue). Shoot them to create explosions that kill enemies or destroy vehicles. Great for clearing chokepoints.
- Ammo Conservation: Use your starting weapon efficiently. Don’t spray; every bullet counts, especially on higher difficulties. Pick up dropped weapons from enemies—Covenant weapons often have full ammo.
- Weapon Priority: Always carry two weapons that complement each other. Common loadouts:
- Grenade Economy: Always toss grenades before dying—don’t waste them. Use frags to force movement, plasma to EMP vehicles, and spikes (Flood) to slow enemies. Collect grenades from dead enemies.
- Power-up Timing: Overshield and Active Camo spawn at set intervals (e.g., 3 minutes). In multiplayer, time them with the in-game clock (e.g., “Overshield’s up in 30”). Grab them immediately or deny the enemy.
- Vehicle Fuel: Vehicles have limited fuel? Not in Halo 3, but they can be destroyed. Learn to bail out before explosion to save yourself. Keep vehicles repaired? No repairs, but you can flip them back over.
- Weapon Drop Priority: If you find a power weapon, drop your current weapon. Don’t hold two weak weapons. Communicate with teammates if you want to share.
- Campaign Health: On Legendary, health packs (medkits) are finite. Use them sparingly. Instead, wait for shield recharge near resupply points. Co-op players can revive you if they have a medkit? No, revival is automatic on MCC if you have a “Revive” skull? Actually, Halo 3 doesn’t have revive; you respawn at checkpoints. So avoid dying by staying alive.
- Experience and Rank (MCC): In Halo 3 multiplayer on MCC, you earn XP per match based on performance (kills, assists, medals, win/loss). Spend XP to unlock armor permutations, visor colors, and emblems. Focus on daily challenges for bonus XP.
- Medals Lead to XP: Aim for gold medals like “Killing Spree” (5 kills), “Overkill”, “Extermination”. These grant large XP bonuses. Use power weapons to get multi-kills.
- Win to Rank Faster: Winning matches (Slayer, CTF, etc.) gives a significant XP multiplier. Play objective-based modes even if you’re not slayer to contribute and secure wins.
- Seasonal Content: MCC has seasonal passes (e.g., Reach, Halo 3). Spend your season points on items you like; you can grind levels indefinitely. Use double XP weekends to maximize.
- Customs Browser: For the most efficient XP farming, find custom games with high score or fast respawns. However, avoid farming that spoils fun; legit play is more rewarding.
- Halo 3 does not have loadouts in standard multiplayer (you pick up weapons). However, in Custom Games and Forge, you can set weapon spawns and player traits. Use these tips to create effective loadouts for custom game modes.
- Spawn Weapon Strategy: For a balanced slayer map, set two spawn weapons: BR (primary) and Magnum (secondary). Add a power weapon like Sniper in the center. For Flood modes, set Shotgun and Assault Rifle for survivors, and Energy Sword for Flood.
- Player Traits: Adjust movement speed, shield strength, and gravity. For training, increase shields to 200% and reduce gravity to practice jumps. For competitive customs, use default or slightly increased speed (110%).
- Blocking Power Weapon Abuse: In custom games, you can set timers for power weapons (respawn time). Set Snipers to 3 minutes, Rockets to 2 minutes. This forces teams to contest regularly.
- Team Role Setup (For competitive customs):
- Spartan Abilities: In Halo 3, you can’t sprint (no sprint in base game). Use equipment like the Jetpack? No, Jetpack is in Halo: Reach. In Halo 3, you have limited equipment: Bubble Shield, Regenerator, Radar Jammer, Power Drain, Flare, Trip Mine, Grav Lift. Choose depending on game mode: Bubble Shield for CTF defense, Trip Mine for area denial, Grav Lift for vertical map movement.
- BXR and RRX (Legacy): While not available in MCC, some players still use a “beat-down cancel” by double-tapping melee. This is mostly a relic; focus on modern strafe-shooting.
- Timings: In Halo 3, grenade throw arcs are parabolic. Practice cooking a frag for 2 seconds so it explodes right as it hits the ground. Plasma grenades don’t bounce; use the arc to stick a stationary enemy.
- Vehicular Domination: On Sandtrap or The Ark campaign, use the Hornet to “hijack” enemy aircraft by boarding them. In multiplayer, boarding a vehicle requires a melee to the driver’s door. If you board a Scorpion, you can steal it.
- Grenade Jumping: Use a well-timed frag grenade explosion to boost yourself to higher ledges. This is risky but can create shortcuts. On The Covenant, grenade jumping over walls can skip sections.
- Laser Splash Damage: The Spartan Laser also deals splash damage on impact. If you miss the vehicle, the explosion can still kill nearby infantry. Use it as a pseudo-AOE against groups.
- Flood Combat: The Flood are weak to fire (flamethrower) and explosive weapons. The Shotgun is devastating against Flood forms (one hit kill for combat forms). The Plasma Rifle can slow them. Use grenades to clear spawn points.
- Legendary Difficulty: On Legendary, enemies have extremely strong shields and precision aim. Use the “plasma pistol + precision weapon combo” religiously. Stick to cover; never peak twice from the same spot. Brutes in Legendary will charge and melee one-shot you—keep distance.
- Co-op Synergy: In co-op, designate roles: one player focuses on plasma drain, another on headshots. Share power weapons. Vehicles are more effective with a driver and gunner. The passenger can repair? No repair, but you can swap seats quickly to avoid destruction.
- Theater Mode Analysis: After a multiplayer match, go to Theater to watch your gameplay. Look for bad decision points, missed nade opportunities, and aim mistakes. Watch top players’ POV to learn positioning.
- Map Control in Multiplayer: On Guardian, control the sword spawn and top mid. On Narrows, control the rocket spawn and the needler. On Pit, control the center BR and laser. Always push with numbers—don’t feed kills.
- Armor Abilities (MCC): In MCC, Halo 3 does not have armor abilities like Sprint or Jetpack. But in custom games, you can enable “Halo 3” settings with player traits that simulate them (e.g., increased movement speed). Use these for training or unique game types.
- Keep Your Cool: Halo 3 is about outsmarting and out-positioning. Panic leads to missed shots and poor grenade throws. Take a breath and trust your muscle memory.
- Learn from Pros: Watch high-level Halo 3 tournaments (e.g., MLG) or MCC stats leaderboard players. Mimic their routes, callouts, and engagement timings.
- Custom Games Are Your School: Practice specific techniques (4-shot, nade sticks, vehicle hijacking) in custom games with friends or bots. No pressure, just repetition.
- Have Fun: Ultimately, Halo 3 is a game of pure fun. Use the Sandbox to try wacky combos like the Gravity Hammer + Rocket launcher in customs. Don’t take it too seriously—except on Legendary campaign, where you will die a lot.
---
Combat Tips
#### Beginner
#### Intermediate
- Plasma Pistol (charged) + Carbine = instant shield drain + headshot (works great at range).
- Plasma Rifle + Magnum: Overheat the Plasma Rifle to deplete shields, then headshot with Magnum.
- Needler + Melee: Super Combine (needle explosion) after a few hits plus melee to finish.
#### Advanced
---
Exploration Tips
---
Resource Management Tips
- BR + Shotgun (close/mid)
- Carbine + Rocket Launcher (range/power)
- Plasma Pistol + Battle Rifle (shield drain + kill)
---
Economy (Multiplayer Scoring & Progression)
---
Builds / Loadouts (Custom Games & Multiplayer)
- Slayer: BR (main), Frags (for pushes).
- Objective (CTF/Assault): BR + Shotgun for flag carriers, or BR + Plasma Pistol for vehicle disruption.
- Support: BR + Carbine for long-range cover, plus Bubble Shield for defensive plays.
---
Advanced Strategies & Optimizations
---
Final Tips
---
This guide covers tips for both campaign and multiplayer. For more specific strategies on individual missions or maps, refer to the corresponding sections in the full walkthrough.
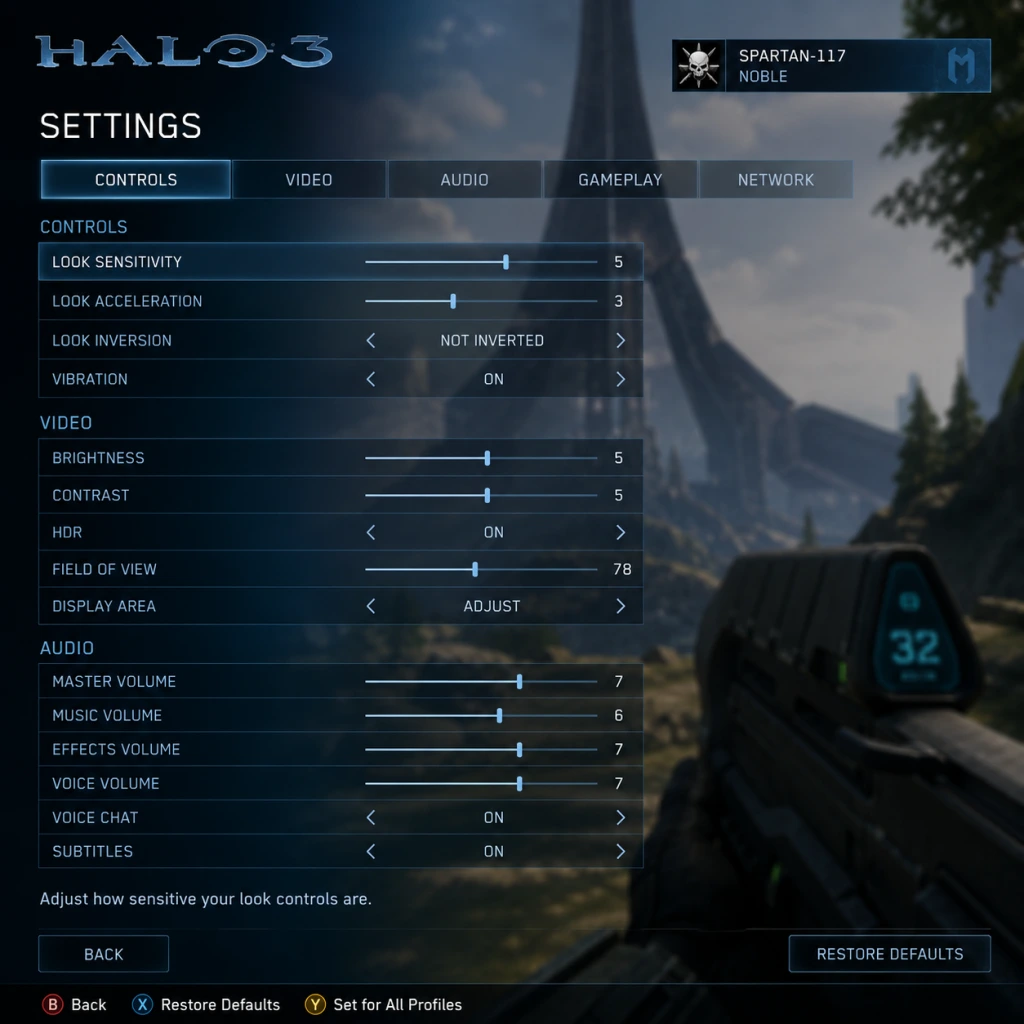
Game Settings
Game Settings Guide for Halo 3
Overview
This guide covers all settings available in Halo 3, whether you're playing the original Xbox 360 version, the backward-compatible version on Xbox One/Series X|S, the Master Chief Collection (MCC) on Xbox or PC, or the standalone Halo 3 for PC (via the MCC or the original Games for Windows Live version, though the latter is obsolete). Every setting is detailed with recommendations for different hardware levels: Low-end PC, Mid-range PC, High-end PC, Xbox One (original/S/X), Xbox Series X|S, and Original Xbox 360. Special attention is given to settings that are easy to misconfigure or that significantly impact performance or visual fidelity.
---
Graphics Settings
Field of View (FOV)
- Available on: PC (MCC only), Xbox Series X|S (MCC only with 120Hz mode), not on Xbox 360 or original backward-compatible.
- Range: 70° - 120° (PC), 70° - 110° (Xbox Series X|S).
- Recommendation: 90°-100° for most players. Higher FOV reduces motion sickness but increases performance cost.
- Misconfiguration trap: Setting FOV too high (>110) can cause fisheye distortion and lower frame rates on weaker hardware.
- PC: Native resolution up to your monitor. Use fullscreen for best performance.
- Xbox Series X|S: Supports 4K with dynamic resolution or 1080p at 120 FPS.
- Xbox One X: 4K (checkerboard) at 30 FPS for MCC; Xbox One S: 1080p.
- Xbox 360: 720p native, outputs up to 1080p via upscaling.
- Recommendation: Match your display’s native resolution. For 120Hz on Xbox Series X|S, enable 120Hz in console settings and select Performance mode in game.
- Available in: MCC for PC.
- Options: Low, Medium, High, Ultra.
- Impact: Controls texture quality, shadow resolution, lighting complexity, post-processing.
- Recommendations:
- Options: Low, Medium, High, Ultra.
- Effect: Controls resolution and draw distance of shadows.
- Note: Ultra shadows significantly impact performance on both CPU and GPU. On Xbox Series X|S, shadows are high by default in quality mode.
- Recommendation: High for most PCs; Medium if CPU-bound.
- Options: Bilinear, Trilinear, Anisotropic 2x-16x.
- Effect: Sharper textures at oblique angles.
- Recommendation: Anisotropic 16x has negligible performance cost on modern GPUs. Always max out.
- Options: Off, FXAA, SMAA, TAA (PC); MCC Xbox uses TAA on One X/Series X|S.
- Recommendation: SMAA for best quality/performance balance; TAA if you prefer motion smoothness. FXAA blurs too much.
- Special note: On Xbox 360, AA is fixed at 2x MSAA (rarely toggles).
- Options: Off, Low, High (PC). On Xbox, toggle only in MCC (off/on).
- Recommendation: Off for clarity in competitive play; Low for cinematic feel.
- Options: Off, On.
- Recommendation: Off for lower input lag (but may cause screen tearing). On if you experience tearing and can tolerate slight lag. Use adaptive V-Sync if available.
- Dynamic Resolution: On Xbox Series X|S, dynamic resolution scaling is automatic. On PC, can be forced via third-party tools but not recommended.
- Texture Streaming: Ensure you have enough VRAM. High texture settings require >4GB VRAM for smooth 1080p.
- Shader Cache: Precompile shaders for smoother gameplay. On first launch, the shader compilation may cause stutter; wait for it to finish.
Resolution & Display Mode
Graphics Quality Presets (PC only)
- Low-end PC (GTX 1050 / RX 560, 8GB RAM): Low or Medium at 1080p to maintain 60 FPS. Disable ambient occlusion and reduce shadow detail.
- Mid-range PC (GTX 1060 / RX 580, 16GB RAM): High at 1080p with 60 FPS; or Medium at 1440p.
- High-end PC (RTX 2070+): Ultra at 1440p or 4K with 60+ FPS.
Shadow Quality
Texture Filtering
Anti-Aliasing (AA)
Motion Blur
V-Sync
Advanced Settings (PC only)
Per-Platform Recommendations Table
| Hardware Level | Resolution | Preset | FOV | Shadows | AA | Motion Blur | V-Sync |
|---|---|---|---|---|---|---|---|
| Low-end PC | 1080p | Low | 90 | Low | Off | Off | Off |
| Mid-range PC | 1080p/1440p | High | 100 | High | SMAA | Off | Off |
| High-end PC | 1440p/4K | Ultra | 110 | Ultra | TAA | Off | Off |
| Xbox One S | 1080p | Auto | 78 | Auto | TAA | Off | On |
| Xbox One X | 4K (CB) | Auto | 78 | High | TAA | Off | On |
| Xbox Series S | 1080p/1440p | Auto | 100 | High | TAA | Off | On (120Hz off) |
| Xbox Series X (Quality) | 4K | Auto | 100 | Ultra | TAA | Off | On |
| Xbox Series X (Performance) | 1080p | Auto | 100 | High | TAA | Off | Off (120Hz) |
| Xbox 360 | 720p | Fixed | 70 | Fixed | 2xMSAA | On | On |
Audio Settings
Master Volume
- Range: 0-100.
- Recommendation: Start at 70 and adjust based on environment (headset vs speakers). Ensure it’s not too high to avoid distortion.
- Recommendation: Keep at 80-100 for campaign; lower to 50 for multiplayer to hear footsteps clearly.
- Misconfiguration: Muting music entirely can reduce emotional impact in campaign.
- Important for gameplay: Footsteps, weapon sounds, explosions. Set to 100.
- Special note: Halo 3’s audio engine uses positional audio. On PC, ensure your output device is set to Stereo or surround as appropriate.
- Range: 0-100.
- Recommendation: 100 for team communication. Misconfiguration: Setting too low can make callouts inaudible.
- Options (PC): Stereo, 5.1, 7.1, Headphones.
- Recommendation: Headphones for best spatial awareness (even with stereo virtual surround). 5.1/7.1 for home theater.
- Xbox: Auto-detects your audio setup. Use Dolby Atmos for Headphones if available (requires app and subscription).
- Affects: Character voices, announcer, weapon chatter.
- Options: English, French, German, Italian, Spanish, Japanese, etc. (depends on game version).
- Recommendation: Set to your preferred language; note that some languages may have different voice actors and emotional tone.
- Available presets: Default, Southpaw, Boxer, Green Thumb, etc.
- Recommendation: Standard settings (Default) work for most. Southpaw for left-handed people. Boxer or Bumper Jumper (popular for competitive) allow jumping without removing thumb from right stick.
- Special note: Bumper Jumper sets jump to LB, melee to RB, grenade to B, and crouch to right stick click. This is highly recommended for advanced movement (e.g., crouch-jumping, grenade throws while aiming).
- Misconfiguration: Accidentally selecting Southpaw can cause disorientation.
- Range: 1-10 (Xbox), 1-20 (PC).
- Recommendation: Start at 3-4 on Xbox, 6-8 on PC. Increase gradually. High sensitivity helps in twitch shooting but can hurt precision.
- Special attention: If you have a high DPI mouse on PC, lower in-game sensitivity to compensate.
- Off by default. Turn on if you prefer flight-sim style (pushing joystick down looks up). Rarely used in FPS.
- Options: On/Off.
- Recommendation: Off for competitive play (saves controller battery, reduces noise). On for immersion in campaign.
- Xbox (MCC): Full remapping via Controller > Button Layout. PC: Steam Input or Xbox Accessories app.
- Recommendation: No need to change generally, but you can assign specific actions like “crouch” to a paddle if using Elite controller.
- Sensitivity: Adjust per weapon type? Unavailable natively; use DPI switch.
- Raw Input: Enable to bypass OS acceleration. Crucial for consistent aim.
- Mouse Smoothing: Disable. Introduces latency.
- Mouse Acceleration: Disable. Halo 3 does not benefit from acceleration.
- Recommendation: Set DPI to 400-800, in-game sens to 2.0-5.0 depending on your mouse space.
- Options: Off, On with audio descriptions, On without descriptions.
- Recommendation: On for campaign, especially if you have hearing difficulties or play in noisy environments. Subtitles include Covenant language translations.
- Misconfiguration: Subtitles off can cause missing story details.
- Available in: MCC only.
- Types: Protanopia, Deutanopia, Tritanopia.
- Effect: Adjusts UI colors (health, shields, ammo, enemy/ally indicators).
- Recommendation: Enable if you have color vision deficiency. Test on a multiplayer HUD.
- Available in: MCC (PC/Xbox One/Series).
- Options: Small, Medium, Large.
- Recommendation: Large for easier reading on 4K displays or if you sit far from screen.
- Available: On Xbox, some accessibility features are system-level (e.g., high-contrast, narrator).
- Game-specific: Halo 3 does not have a dedicated “accessibility” menu beyond subtitles and color blind. Use platform settings.
- Set via: Platform settings (Xbox: System > Language & Region; PC: Steam/Microsoft Store region).
- In-game override (MCC only): Settings > Language. Allows separate UI, voice, subtitle languages.
- Recommendation: Choose a language you understand for voice and UI; subtitles can be in a different language for practice.
- Special note: Changing language may affect matchmaking server region due to mismatch; always keep consistent.
- Separate from voice. For example, you can have English voice but Spanish subtitles.
- Options: Automatic, or manually selected regions (e.g., North America, Europe, Asia).
- Recommendation: Automatic usually best. If you experience high ping, lock to nearest region. Misconfiguration: Selecting a region far away adds latency.
- Recommendation: Use wired Ethernet for lowest latency and packet loss. Wi-Fi can introduce jitter.
- Xbox: Ensure NAT is Open (not Moderate or Strict). Go to Settings > Network > Test NAT type.
- PC: Check firewall/antivirus settings; allow Halo 3 through.
- Not adjustable in-game. The game uses UDP ports 3074 (Xbox) or custom ports (PC). Port forwarding may be required for strict NAT.
- Options: Push-to-talk (PC) or Open mic (Xbox/PC).
- Recommendation: Push-to-talk to avoid background noise. Open mic only if you have a quiet environment.
- Misconfiguration: Leaving push-to-talk bound to an unused key; unbind it to avoid accidental silence.
- Options: On/Off. Affects matchmaking pool.
- Recommendation: On for faster matchmaking and larger community. Off if you want to play only with same-platform users (e.g., console players to avoid PC m+k advantage).
- Special note: Input-based matchmaking is not available; crossplay merges controllers and keyboard/mouse in same lobbies.
- Options: Easy, Normal, Heroic, Legendary.
- Recommendation: Normal for first playthrough; Heroic for challenge; Legendary for achievements and ironman runs.
- Misconfiguration: Starting on Legendary can be extremely punishing for new players; adjust down at any time via in-game menu.
- Unlocked by: Collecting them in campaign.
- Affect: Gameplay difficulty and scoring. Some give double damage, some disable HUD, etc.
- Recommendation: Enable Iron (checkpoint deletion) and Black Eye (melee for shields) only for dedicated challenge.
- Available in: Matchmaking playlist filters.
- Recommendation: Experiment with Warzone (MCC version) or classic Slayer/Objective. Use “Search Preference” in MCC: Balanced or Light for quicker matches.
- Settings: Lives, round timings, skulls.
- Recommendation: 3 lives, no skulls for casual; 1 life + Mythic skull for hardcore.
- Available in: MCC only. Options: Show enemy indicators, motion tracker type (classic vs modern), weapon reticle detail.
- Recommendation: Keep motion tracker on (classic radar). Some competitive players turn off radar for higher difficulty.
- Misconfiguration: Turning off HUD elements accidentally via controls.
- PC First Launch: The shader compilation process may cause stuttering for the first few minutes. Let the game cache shaders (visit the campaign menu or play a quick match) before adjusting settings.
- Xbox Backward Compatibility (original disc): No settings menu for graphics; only resolution and audio are system-level. Use the Xbox guide to turn on FPS boost and Auto HDR for better visuals (if available on Series X|S).
- MCC Cross-Profile Sync: Settings are saved per platform; switching between PC and Xbox may require reconfiguring controls.
- 4K vs Performance Mode (Xbox Series X|S): If you prioritize frame rate over resolution, set the game to Performance mode in the MCC settings (or system-level if using FPS boost). For Halo 3 original via backward compatibility, FPS boost is available on Series X|S – enable it in the game’s manage game menu.
- Audio Delay: If using Bluetooth headphones on PC, audio lag can be significant; use wired or low-latency wireless headsets.
- Controller Dead Zones (Xbox/PC): Not directly adjustable in Halo 3; use Xbox Accessories app or Steam Controller configuration to adjust stick deadzones for finer control.
- Always test new settings in a private match or the training zone (if available) before jumping into ranked multiplayer.
- Use the MCC version for the most granular settings and performance options. The original Halo 3 on Xbox 360 is very limited.
- For competitive play, aim for a stable 60 FPS (or 120 on Series X|S) with minimal input lag: disable V-Sync, motion blur, and use low FOV with high sensitivity.
- For single-player immersion, max out graphics and enable all accessibility features.
Music Volume
Sound Effects Volume
Voice Chat Volume
Speaker Configuration
Language Setting (Voice Language)
---
Control Settings
Controller Layout (Xbox/PC with controller)
Look Sensitivity (Horizontal/Vertical)
Invert Look
Vibration
Button Remapping (Xbox/PC)
Mouse Settings (PC only)
---
Accessibility Settings
Subtitles
Color Blind Mode
Text Size
Controller Vibration for Alerts
---
Language Settings
Game Language
Text & Subtitle Language
---
Network Settings
Matchmaking Region (MCC)
Network Adapter / Connection Type
Bandwidth Settings
Voice Chat
Crossplay (MCC only)
---
Gameplay Settings
Campaign: Difficulty Selection
Skulls (Campaign Modifiers)
Multiplayer: Game Mode Preferences
Firefight (if available – ODST standalone or MCC Firefight)
HUD & Display Options
Invert Movement (already covered in controls)
---
Summary of Easy-to-Misconfigure Settings
1. FOV: Setting too high can cause performance issues and visual distortion. Stick to 90-100.
2. Sensitivity: Too high can make aiming erratic; too low leaves you slow. Tune incrementally.
3. Controller Layout: Accidentally switching to Southpaw or Boxer mid-game can break muscle memory.
4. Audio Balance: Lowering sound effects for music reduces positional awareness.
5. Network Region: Setting a region far from you adds latency; use automatic.
6. Crossplay: Turning off crossplay significantly reduces matchmaking pools, especially on less populated regions.
7. V-Sync (PC): Enabling V-Sync adds input lag; disable for competitive play.
8. Motion Blur: Reduces clarity in fast motion; disable for competitive, enable for cinematic.
9. Subtitles: May be turned off by default; enable for full story comprehension.
10. Difficulty: Starting on Legendary without prior knowledge of the game is not recommended.
---
Special Attention Points During Setup
---
Final Tips
Configure wisely, adjust gradually, and enjoy the legendary campaign and multiplayer of Halo 3!
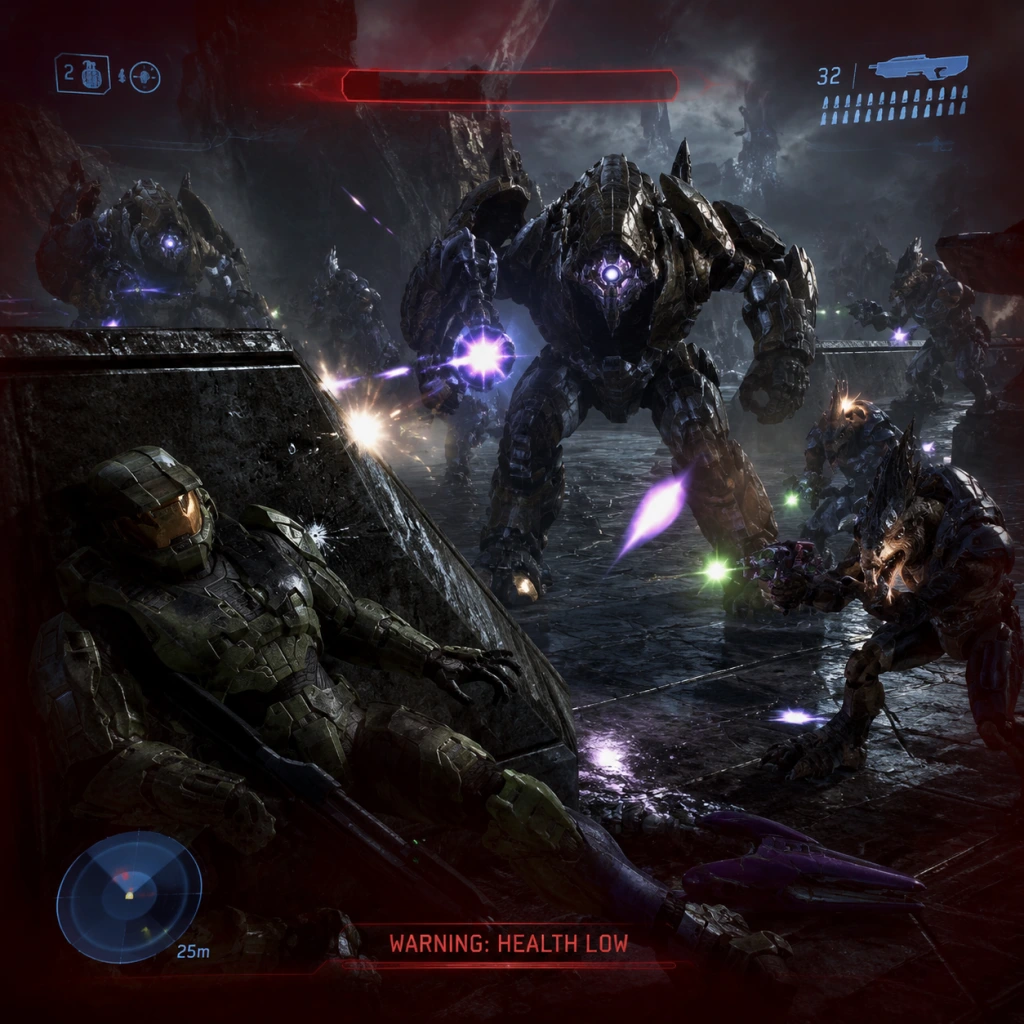
Important Notes
Important Notes for Halo 3
Warnings & Pitfalls
- Legendary Difficulty Is No Joke: The campaign on Legendary sharply increases enemy health, accuracy, and aggression. Jackal snipers can one-shot you even with full shields. Grunt suicide bombers explode instantly. Expect to die often; use cover, equip the Battle Rifle (BR) or Carbine for headshots (Covenant unshielded), and carry a plasma weapon to drain shields before finishing with a headshot.
- The Flood Spore Swarms: In later levels (e.g., The Covenant, Halo), Flood infection forms can leap at you and instantly kill you if you don’t shoot them mid-air. Always listen for their screech and back away while firing.
- Vehicle Physics Can Be Unpredictable: Warthogs and Ghosts can flip or get stuck on geometry. Use the Grav Lift equipment to flip vehicles, or get out and push. Avoid driving off large ledges unless you intend to bail.
- Friendly Fire in Cooperative Campaign: In original Halo 3 and MCC, team damage is enabled by default in co-op. Watch your fire, especially with explosives like the Rocket Launcher or Fuel Rod Gun. Betraying teammates can lead to friendly fire being temporarily disabled (MCC settings) or them booting you.
- Weapon Drops Are Permanent: Once you drop a weapon, it disappears after a few seconds unless another player picks it up. You cannot retrieve it if you leave the area. Plan your loadout carefully, especially when you have a powerful weapon like the Energy Sword or Spartan Laser.
- Skull Collection Is Per-Level, Not Cumulative: If you miss a skull during a mission, you must replay the entire level from the start to collect it. Checkpoints do not carry over for skull pickups. Use the in-game menu to view the skull’s location, or follow a guide via the “Deja Vu” achievement walkthrough.
- Terminal Lore (MCC) Is Missable: Terminals contain story cutscenes tied to the Halo lore. If you skip them, you can only view them by replaying the level. There’s no chapter select. In MCC, you can also access terminals from the Main Menu > Extras after discovering them once.
- Achievement “Too Close to the Sun” (Legendary Only): On the level The Ark, you must survive the explosion of the “2000-pound bomb” without dying. If you die, you can reload checkpoint, but that doesn’t count—you need to complete the entire level on Legendary without dying, or use the specific method. This is often missed because players don’t know about the achievement.
- Equipment Placement: Once you use a piece of equipment (Bubble Shield, Trip Mine, etc.) you cannot take it back. Use them strategically; hoarding equipment is usually worse than deploying it in a tough fight.
- Campaign Skulls: There are 13 skulls in Halo 3. Each can only be found in specific locations during a specific moment in the level. If you miss the exact spot (e.g., the Crow's Nest skull behind a locked door), you have to restart the level. Pro tip: Play on Easy or Normal when hunting skulls because you need to survive long enough to reach them.
- Terminals: 7 terminals are spread across the campaign. They reveal lore about the Forerunners and the Gravemind. Some are tucked away behind secrets (e.g., in The Covenant between the two towers). Use a guide to find them all for the “Terminal” achievement (MCC).
- Achievement “The Road Is Long, The Cost Is High” (MCC): Complete all campaign missions on Legendary without dying. If you die at any point (even during the ending cutscene), you must restart the entire level. This is the hardest achievement and very easy to accidentally ruin.
- Meta-Game Scores in MCC: While not strictly missable, the Par Score and Par Time achievements require you to complete levels quickly or with high efficiency. If you dawdle or die a lot, you won’t earn them on that run. You can replay levels, but the first run might not count for the weekly challenges.
- Weekly Challenges (MCC Multiplayer): Certain seasonal cosmetic items (e.g., nameplates, weapon skins) are only available through weekly challenges. If you miss a week, those items may never return. Check the “Challenges” tab regularly.
- The Ark – Banshee Gauntlet: On Legendary, the section where you fly a Banshee against waves of enemy Banshees and ground AA can be brutal. The Banshee has weak hull armor; learn to dodge and use the fuel rod quickly. Dying here resets a long checkpoint. Tip: Hide behind terrain and pick off enemies one by one.
- The Covenant – Final Tower: The last tower on The Covenant requires you to fight through countless Brutes, Hunters, and Flood. The area is cramped, and Hunters can one-shot you with fuel rod fire. Use a Beam Rifle or Spartan Laser from a distance before entering.
- Halo (Final Level) – Warthog Run: The iconic escape sequence is time-critical. On Legendary, the Flood and covenant fire are extremely accurate. You must drive fast and avoid shots. Dying means restarting the entire run. Pro tip: Use a Gauss Warthog if available; it devastates enemies and is faster.
- Multiplayer Ranking Grind (Original Halo 3): In the original game, reaching a high Rank (e.g., 50) required immense time and skill. The ranking system was strict; losses could lower your rank. In MCC, ranks are seasonal and less punishing. Avoid boosting or cheating because bans are permanent on Xbox Live/MCC.
- Campaign Achievements Grind: Unlocking all achievements can take dozens of hours, especially for Legendary with the “Iron” skull and “Mythic” skull combinations. Don’t burn out—take breaks.
- Do Not Teamkill or Grief: In multiplayer, intentionally betraying teammates or destroying friendly vehicles is reportable. Use the “Boot” vote system if someone is toxic.
- Voice Comms: Use your mic for callouts (enemy position, weapon drops, etc.). Avoid yelling, music, or racial slurs. MCC allows muting, but reports can lead to bans.
- Anti-Cheat on PC: MCC for Windows uses Easy Anti-Cheat (EAC). Do not run mods or hacks in online matchmaking. EAC will flag and ban you from multiplayer permanently. Single-player mods (e.g., campaign tweaks) are allowed only if you launch without EAC.
- Teabagging & Emoting: While not officially bannable, excessive teabagging after kills is considered poor sportsmanship. Many players find it rude. Emotes (weapon posing) are fine.
- Ranked Playlist Behavior: In ranked modes (e.g., Team Slayer, Team Hardcore), leave if your teammate disconnects? Don’t; it ruins the match for others. Instead, play to improve. Quitting early can result in a timeout or XP penalty.
- MCC Cloud Saves: All progress is automatically saved to the cloud on Xbox (requires Xbox Live) and PC (Steam/Windows Store). Do not manually delete save data unless you’re troubleshooting, and then back it up first. Losing cloud save can erase all achievements, unlock progress, and customization.
- Original Xbox 360 Save Files: Halo 3 on 360 saves to the hard drive or memory unit. There is no cross-save. If you switch consoles, you must copy your save via USB or transfer cable. Be aware that certain mods can corrupt saves—avoid using modded game files on official hardware.
- Using Multiple Profiles: If you start a campaign with a guest profile, the guest’s progress is not saved long-term. Always sign in with your own gamertag to unlock achievements and track skulls/terminals.
- Checkpoint System: The game auto-saves after major milestones (e.g., opening a door, beating a boss). You can manually save by leaving the level (MCC) or using the “Save and Quit” option. If you die and don’t reload checkpoint, you may lose progress.
- Skull Collection and Checkpoints: Skulls are not saved when you collect them mid-level; you must finish the level or reach a specific checkpoint that records the skull. If you die after picking up a skull, you may need to pick it up again. Always check if the skull icon appears in your HUD after collecting.
- You Can Dual-Wield Effectively: Many players ignore dual-wielding, but pairing a Plasma Pistol (to overcharge shields) with a Battle Rifle (headshot) is devastating on Normal. On higher difficulties, dual-wielding is weaker because you lose grenade throwing and melee capability—use it sparingly.
- The Battle Rifle Is King: In both campaign and multiplayer, the BR is a 3-shot kill (headshot) if you hit the head. It’s accurate at long range and works for most fights. Learn to lead targets and burst fire.
- Equipment Is Not Just for Defense: The Bubble Shield can block enemy fire but also prevents your own grenades from passing through. The Grav Lift can throw enemies off ledges. The Trip Mine can be placed on walls to kill enemies behind cover. Experiment.
- You Can Melee While Reloading: Press the melee button during a reload to cancel the animation and instantly deliver a hit. This is crucial for close-quarters combat.
- The Energy Sword Lunge Range Is Fixed: The lunge only triggers when you are within a specific distance and moving forward. Just pressing the attack button won’t lunge; you must be sprinting? Actually, Halo 3 has no sprint, so you must walk/run forward while pressing melee. Practice in Forge or Campaign.
- You Can Board Vehicles from the Side: When an enemy vehicle is passing, you can press the melee button near the door to board it. This can hijack Warthogs, Ghosts, and even Banshees. Be careful—enemies will try to shake you off.
- Scoring in Social Playlists (MCC): Social playlists do not affect your rank. Use them to practice without pressure. Ranked playlists track win/loss and individual performance (K/D, assists, etc.).
- Customization Is Purely Cosmetic: Armor pieces, visors, and weapon skins do not affect gameplay. Don’t grind for that one helmet if you don’t enjoy the process.
- The “Halo” Ring Explosion: At the end of the campaign, the ring explodes. You must escape in the Warthog. If you don’t make it, you get the “bad ending” and a lower score. Drive fast and don't stop for enemy fire—just dodge.
- Forge Mode Is Incredible: Halo 3’s Forge mode lets you edit maps and create custom game modes. It’s a fantastic way to extend the game’s life. Learn to use the object placement and budget tools. Many community maps are still played.
- Theater Mode Allows You to Record Clips: After a multiplayer match, you can watch a replay and record clips. Use the “Save Film” option to keep amazing moments. You can also watch from different angles to improve your gameplay.
Irreversible Choices
Missable Content
Difficulty Spikes & Grinding Traps
Online Etiquette & Anti-Cheat (MCC / PC)
Save Management Advice
Things Players Commonly Regret Not Knowing Earlier
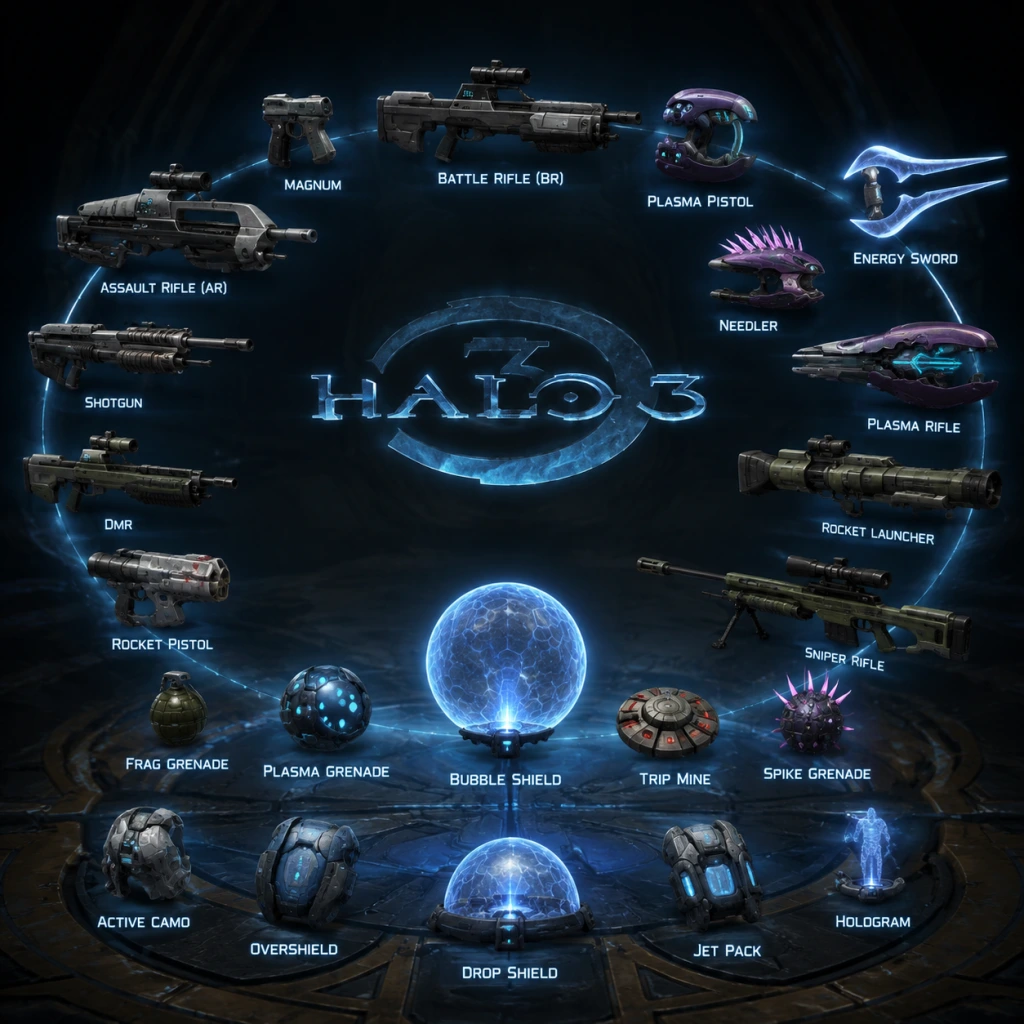
All Game Items
Overview
This guide covers every grabable item in Halo 3’s campaign and multiplayer. Items are grouped by type: weapons, equipment, grenades, vehicles, health items, mission key items, and collectibles. Each entry explains function, acquisition, optimal usage, and any notable synergies. Note that Halo 3 does not have persistent currency or crafting materials; all items are found or dropped in the field.
Weapons
Human Weapons
#### Assault Rifle (MA5C)
- Function: Automatic rifle with a 32-round magazine. Effective at short to medium range.
- Obtain: Starting weapon for many campaign missions; common drop from dead Marines; found on weapon racks in multiplayer.
- Useful when: Suppressing enemy groups, clearing Grunts and Flood infection forms at close range.
- Synergies: Dual-wielding with a Plasma Pistol (to drain shields then finish with the AR). No upgrades.
- Function: 3-round burst rifle with a 36-round magazine. Medium-long range precision weapon; a headshot kills an unshielded enemy instantly.
- Obtain: Common in campaign (Marines carry it, weapon cases); standard starting weapon in ranked multiplayer.
- Useful when: Engaging Jackals, Brutes, and Elites at mid range; any situation requiring accuracy.
- Synergies: Combine with a Plasma Pistol’s overcharged shot for instant shield drop → headshot. No upgrades.
- Function: High-rate-of-fire submachine gun with a 60-round magazine. Very effective at close range but poor accuracy.
- Obtain: Often found paired with a Plasma Pistol on weapon racks; dropped by Marines.
- Useful when: Dual-wielded with another SMG or a plasma weapon for rapid DPS against shields and flesh.
- Synergies: Dual-wielding with Plasma Pistol for shield drain + finish. No upgrades.
- Function: Semi-automatic pistol with a 12-round magazine. High damage per shot; slow fire rate; headshot kills unshielded enemies.
- Obtain: Rare in campaign; appears in certain weapon caches and on some dead Marines. Starter pistol in some multiplayer variants.
- Useful when: As a backup weapon for precise headshots when out of BR ammo; powerful against Flood combat forms.
- Synergies: Can be dual-wielded? No. No upgrades.
- Function: Pump-action shotgun with a 8-shell tube. Devastating at point-blank range; kills most enemies in one shot (including Brutes if close enough).
- Obtain: Common in close-quarters campaign areas (e.g., Cortana, The Covenant); spawns on certain multiplayer maps.
- Useful when: Clear rooms, killing Flood infection forms, one-shotting shielded Brutes and Elites from behind.
- Synergies: Use in tight corridors; no dual-wielding. In campaign, the Shotgun is also effective against Flood Combat Forms’ heads.
- Function: Bolt-action sniper with a 4-round magazine. One-shot headshot on unshielded enemies; very high damage to vehicles.
- Obtain: Found on weapon racks in open areas (e.g., The Ark); dropped by Jackal snipers.
- Useful when: Picking off high-value targets from range, destroying Ghosts or Warthogs with focused fire.
- Synergies: Shoot a vehicle’s fuel tank for explosive kill. No upgrades.
- Function: Two-tube rocket launcher with a 2-round capacity (reloads two rockets). Extremely high splash damage; can lock onto vehicles? No lock-on in Halo 3; manual aim only.
- Obtain: Rare; found in weapon caches and at strategic locations (e.g., The Covenant, The Ark).
- Useful when: Destroying Wraiths, Scorpions, or groups of enemies. One rocket kill on any unshielded infantry.
- Synergies: Lead moving targets; rocket + grenade combo can secure vehicle kills. No upgrades.
- Function: Directed-energy anti-vehicle weapon. Fires a red beam after a 2-second charge; one-shot kill on any vehicle (except maybe Scarab).
- Obtain: Very rare; appears in late campaign missions (The Covenant, Halo) and on certain multiplayer maps.
- Useful when: Destroying Wraiths, Scorpions, Phantoms (if you hit the cockpit). Also effective against Hunters.
- Synergies: Pair with a Spotter for guided hits. No upgrades.
- Function: Continuous-fire weapon that sprays flammable liquid. Ignites enemies and area for a few seconds.
- Obtain: Campaign only; found in specific locations (e.g., “Cortana” mission near the Flood-infested rooms).
- Useful when: Clearing Flood infection forms and combat forms; area denial against Flood wave.
- Synergies: Fuel canisters explode when shot. Not in multiplayer.
- Function: Semi-automatic pistol with two firing modes: regular bolt (slow) and overcharged shot (charged hold) that drains enemy shields completely and stuns vehicles.
- Obtain: Common; dropped by Grunts, Jackals, Elites; found on weapon racks.
- Useful when: Critical for disabling vehicles (especially Banshees and Ghosts) and for stripping shields before headshot.
- Synergies: Overcharge + Battle Rifle headshot is a classic combo. Dual-wield with an SMG or another plasma weapon for rapid shield drain and kill.
- Function: Automatic plasma weapon with a short burst that overheats. Good against shields but less effective against health.
- Obtain: Dropped by Elites, Brutes; common in campaign.
- Useful when: Dual-wielded with another plasma weapon or with a precision weapon for shield drain.
- Synergies: Overheats quickly; swap to another weapon for kill. No upgrades.
- Function: Fires pink homing crystals that track enemies and then supercombine (explode) after enough hits. 7-round burst magazine (variable).
- Obtain: Common; dropped by Grunts, Jackals.
- Useful when: Against groups of lightly armored enemies; the supercombine kills in about 2 bursts. Very effective against Flood combat forms.
- Synergies: The homing makes it useful against strafing enemies. Dual-wield two Needlers for faster supercombine.
- Function: Covenant precision rifle, semi-automatic, 15-round magazine. Similar to Battle Rifle but with a scope and slightly different handling.
- Obtain: Dropped by Covenant marksmen (Elites, Jackals); weapon caches.
- Useful when: Long-range engagements; headshot kills unshielded enemies.
- Synergies: Combine with Plasma Pistol overcharge. Often preferred by players who like the scope.
- Function: Covenant sniper rifle, fires a thin beam with a single shot per charge. One-shot headshot; has a small battery that recharges slowly.
- Obtain: Dropped by Jackal snipers; found on weapon racks in long-range areas.
- Useful when: Same as human Sniper; the beam is harder to dodge but gives away position. Good for vehicle sniping.
- Synergies: Overheats after several shots; wait for cooldown.
- Function: Weapon that fires bouncing explosive discs with a timed detonation. Also has a bayonet for melee.
- Obtain: Dropped by Brutes; common in mid-game missions (e.g., The Storm).
- Useful when: Indirect fire around corners; melee is powerful. Good against groups of infantry.
- Synergies: Can launch grenades or power cores if aimed correctly (physics laughs). No upgrades.
- Function: Covenant shotgun-style weapon that fires a spread of plasma shards. Slower fire rate; high damage at close range.
- Obtain: Dropped by Brutes; rare.
- Useful when: Close-quarters combat against shielded enemies (Brutes, Elites). Can stun opponents.
- Synergies: Dual-wield two Maulers for devastating burst damage, though ammo runs out fast.
- Function: Power weapon that creates a shockwave on impact, launching enemies and dealing heavy damage. Slow windup.
- Obtain: Dropped by Brute Chieftains; found in specific campaign locations (e.g., “The Covenant”).
- Useful when: Area denial; one-shot kills on non-shielded enemies; can destroy vehicles with a direct hit? Not really, but can flip them.
- Synergies: The shockwave can send grenades back at enemies. No upgrades.
- Function: One-hit kill melee weapon. Lunge attack from a short distance; can also block plasma? No block mechanic.
- Obtain: Dropped by Elite Sword-bearers; found in campaign missions (e.g., “The Covenant”) and multiplayer.
- Useful when: Stealth kills; quickly dispatching shielded enemies (Elites, Brutes). Lunge through shields.
- Synergies: Combine with Camouflage (via equipment or active camo pickup) for assassination chains. No upgrades.
- Function: Fires green explosive projectiles that bounce and detonate after a delay. High damage; good against vehicles and groups.
- Obtain: Dropped by Brutes with heavy weapons; found in campaign areas with large battles (e.g., “The Ark”).
- Useful when: Clearing out bunkers; destroying Phantoms or Wraiths if you hit the weak points.
- Synergies: Can be used to trigger explosive barrels. No lock-on.
- Function: Continuous beam weapon from Sentinels. Deals steady damage to shields and health; overheats quickly.
- Obtain: Dropped by dead Sentinels in Forerunner-themed missions (e.g., “The Covenant”, “Halo”).
- Useful when: Against Flood or unshielded Covenant; good for suppressing fire. Not very powerful but can be used as a melee weapon? No.
- Synergies: None notable. Ammo is plentiful but overheats.
- Flood Infection Form: Not an item, but they can be killed by melee or shooting. There are no unique Flood weapons, but Flood Combat Forms carry human or Covenant weapons they possessed when infected.
- Function: Deploys a spherical energy shield that blocks incoming fire (but not grenades or melee from inside). Lasts about 10 seconds.
- Obtain: Found in campaign weapon caches; multiplayer map spawns.
- Useful when: Emergency cover during a firefight; protecting an objective like a flag or hill.
- Synergies: Combine with Shotgun or Sword to hold a point; enemies can enter the bubble and attack you. Use with Power Drain to deplete enemies inside.
- Function: Scrambles enemy radar (motion tracker) within a radius. Also makes you slightly invisible? No, it just jams radar.
- Obtain: Campaign weapon cases; multiplayer spawn.
- Useful when: Flanking in team modes; denying information. Not commonly used.
- Synergies: Use with Active Camouflage (not available as equipment in Halo 3) but can be used with cloak pickups? There is a separate active camo pickup in some missions. No direct synergy.
- Function: Places a laser-triggered explosive mine that detonates when an enemy crosses the beam. Large area damage.
- Obtain: Campaign weapon caches; multiplayer spawn points.
- Useful when: Chokepoints, guarding flanks, objective defense.
- Synergies: Can be set off by your own grenades? Yes, but not recommended. Combine with radar jammer to hide the beam? Not effective.
- Function: Deploys a device that drains shields and slows enemies in a large area. Also damages vehicles and disables them briefly.
- Obtain: Campaign (e.g., “The Ark”); multiplayer spawn.
- Useful when: Stopping a vehicle rush; weakening a group of enemies before pushing.
- Synergies: Follow up with a headshot weapon for easy kills. Combine with Bubble Shield to protect while the drain works. Also effective against Hunters (drains their armor).
- Function: Creates an upward gravity beam that launches players, vehicles, and objects upward.
- Obtain: Campaign (some Forerunner areas); multiplayer map spawn.
- Useful when: Reaching high ledges, launching grenades or fusion coils to create chaos, moving large objects (like power cores) upward.
- Synergies: Place a Grav Lift over a Power Drain to launch enemies into the air for an easy sniper shot. In campaign, use to toss fusion coils into Scarab weak points.
- Function: Deploys a bright flash that blinds enemies and players looking at it. Also reveals cloaked enemies.
- Obtain: Campaign weapon caches; multiplayer spawn (rare).
- Useful when: Disorienting enemies; making an escape; revealing active camo users.
- Synergies: Not strong.
- Function: Standard explosive grenade with a 2.5-second fuse. Good damage, can bounce off walls.
- Obtain: Found on dead Marines, Covenant; weapon racks.
- Useful when: Clearing rooms, area denial, killing groups, destroying vehicles (weaker than plasma).
- Synergies: Can be thrown into enemy-held Bubble Shields to kill them. Can be cooked (hold button) to control detonation timing.
- Function: Blue glowing grenade that sticks to any surface or enemy. After sticking, it detonates after a short delay with high damage. Can also be used as a sticky bomb for vehicles.
- Obtain: Dropped by Grunts, Elites; weapon caches.
- Useful when: Perfect for sticking a Brute Chieftain or a vehicle (will destroy a Ghost or Banshee if stuck). One-hit kill on any unshielded enemy.
- Synergies: Plasma Grenade + Energy Sword lunge? No, but you can stick an enemy and then melee them. Can stick to a Warthog and kill passengers.
- Function: Covenant grenade that fires spikes in all directions on detonation. Can stick to surfaces and enemies. Damage less concentrated.
- Obtain: Dropped by Brutes; rare.
- Useful when: Area denial; the spikes can kill enemies hiding around corners. Sticking to a wall can kill enemies on the other side.
- Synergies: Combine with Brute Shot for indirect fire? Not directly.
- Function: Only appears in the campaign mission “Cortana”. Creates a fire patch that lingers for a few seconds. Can be thrown by Flood combat forms or picked up from dead Flood.
- Obtain: Campaign only; from Flood weapons.
- Useful when: Burning Flood infection forms and slowing down combat forms.
- Synergies: No special synergies.
- Function: Light Reconnaissance Vehicle with a driver, passenger seat, and a gunner seat (machine gun or Gauss cannon in some variants). Fast, off-road capable.
- Obtain: Found at many campaign starting points; can be boarded by enemies.
- Useful when: Transport, hit-and-run attacks, supporting infantry.
- Synergies: The Gauss cannon variant (M68 ALIM) is devastating at long range; one-shot kills on infantry and light vehicles. Driver and gunner teamwork.
- Function: Heavy tank with a main cannon and a machine gun turret. Main cannon one-shots most vehicles and kills infantry with splash.
- Obtain: Campaign checkpoints (e.g., “The Storm”); multiplayer map spawn (rare).
- Useful when: Heavy fire support against Covenant armor and Scarabs.
- Synergies: Machine gunner can clear infantry while cannon hits hard targets. Vulnerable from behind; use friendly infantry as cover.
- Function: Fast off-road ATV with no weapons. Seats two: driver and passenger (who can hold a weapon).
- Obtain: Campaign (e.g., “The Ark”); multiplayer spawns (often in race variants).
- Useful when: Rapid transport; passenger can use a rocket launcher or sniper rifle while moving.
- Synergies: The passenger can use a Spartan Laser or Fuel Rod Gun for poweful mobile fire.
- Function: VTOL aircraft with a primary machine gun and rocket pods. Can hover and drop off passengers? Yes, it can carry two passengers side-by-side (no gunner).
- Obtain: Campaign only (e.g., “The Covenant”); multiplayer? In Halo 3 multiplayer the Hornet appears only in certain maps like “Sandtrap”.
- Useful when: Aerial superiority; strafing ground targets; rapid insertion. The rockets are effective against vehicles and infantry.
- Synergies: Pilots can drop allies onto high ground. The doors can be opened to throw grenades.
- Function: Fast hoverbike with forward-facing plasma cannons. Boost ability for speed.
- Obtain: Common; dropped by Covenant; found in campaign.
- Useful when: Scouting, hit-and-run, running over enemies (splatter kills).
- Synergies: Steal from Covenant and use against them. Plasma cannons overheat quickly.
- Function: Covenant aircraft with twin plasma cannons and fuel rod bombs. Can perform a blue boost for speed.
- Obtain: Common; spawned by Covenant in campaign; can be stolen.
- Useful when: Air superiority; bombarding ground positions. The fuel rod bomb drops a powerful explosive.
- Synergies: Use boost to evade Spartan Laser shots. The Banshee can be used to quickly traverse large maps.
- Function: Covenant mortar tank. Fires a plasma mortar that arcs and creates a large explosion; also has a secondary plasma cannon for self-defense.
- Obtain: Spawned in campaign; rare in multiplayer.
- Useful when: Indirect fire support; destroying fixed positions. The mortar can one-shot infantry and damage structures.
- Synergies: The driver can switch to the main cannon while the passenger operates the plasma turret. Weak at close range.
- Function: Brute motorcycle with a large front blade that can splatter enemies. Fires a plasma turret and can do a boost that flips it? No, it can ram and kill.
- Obtain: Dropped by Brute riders; campaign (e.g., “The Covenant”).
- Useful when: Offensive splatter kills; traversing rough terrain. The chopper can also perform a wheelie to dodge fire.
- Synergies: Nothing special.
- Function: Covenant troop transport with a plasma turret on top. Carries multiple passengers (up to 8?). Slower but more armored.
- Obtain: Campaign only (e.g., “The Covenant”); can be boarded.
- Useful when: Transporting a squad; the turret provides suppressing fire.
- Synergies: Passengers can lean out to shoot.
- Function: Restores a portion of health (up to a maximum). In Halo 3, health does not regenerate automatically; you must find these.
- Obtain: Scattered throughout campaign levels in cabinets, on walls, or dropped by enemies? Not dropped, but found in medical stations.
- Useful when: Your health bar is low (after shield is depleted and you take damage). Prioritize picking them up before large fights.
- Synergies: None; they are essential for survival on Legendary.
- Function: Actually there is no Overshield as a pickup in Halo 3. There are shield boosters? In campaign, there are “Shield Charges” (aka Overshield capsules) that grant a temporary overshield. These appear as glowing blue spheres in some levels (e.g., The Covenant). They double your shield capacity for a limited time.
- Obtain: Rarely; floating in campaign areas near Covenant or Forerunner structures.
- Useful when: Facing bosses like the Brute Chieftain or when you need extra survivability.
- Synergies: Pair with Bubble Shield to hold a position while the overshield lasts.
- Function: Orange glowing cylinder that can be picked up and thrown. Explodes on impact, dealing heavy damage.
- Obtain: Found in many campaign missions; often used to destroy barriers or Scarab legs.
- Useful when: Clearing obstacles; damaging large enemies. In “The Covenant”, you must throw power cores into the Scarab’s core.
- Synergies: Can be launched with a Grav Lift for distance or used as a lightweight bomb. Can be thrown into groups of enemies.
- Function: Not an item you pick up, but she’s a character. However, in the mission “Cortana”, you must carry her (she appears as a wounded AI). That’s scripted.
- No physical item.
- Function: In the mission “The Ark”, you must retrieve a data cartridge to open a door? Actually there is a “shady” informational item. Not a pickup item.
- Function: There are no key items that you pick up and store. The campaign uses prompts and scripting.
- Function: Skulls are optional collectibles that modify gameplay. There are 13 skulls in Halo 3 (the original had 13). They appear as floating skulls in campaign levels. Once collected, they can be activated in the lobby to change game behavior.
- Obtain: Hidden in specific locations (e.g., “IWHBYD” skull on The Covenant, “Sputnik” on The Storm). Locations widely documented.
- Useful when: Unlocking achievements; enabling challenges for Legendary runs. Notable skulls include Mythic (doubles enemy health), Catch (enemies throw more grenades), LASO (Legendary all skulls on).
- Synergies: Combine skulls for extreme difficulty; used in speedrun strategies.
- Function: Interactive objects that provide backstory lore and are part of the “Terminal” achievement list. There are 7 terminals in Halo 3.
- Obtain: Found in specific campaign levels (e.g., “The Ark”, “The Covenant”). They are glowing holographic panels.
- Useful when: Lore enrichment; required for 100% completion. No gameplay effects.
- Helmets: Recon, Scout, EOD, etc.
- Shoulders: Various shapes.
- Chest: Emblems, attachments.
- Effects: Like flames.
- Obtain: Reach certain ranks (original) or buy with season points in MCC. No gameplay impact.
#### Battle Rifle (BR55HB SR)
#### SMG (M7S)
#### M6G Pistol (Magnum)
#### Shotgun (M90A CAWS)
#### Sniper Rifle (S2 AM Sniper)
#### Rocket Launcher (M41 SPNKr)
#### Spartan Laser (M6 Grindell/Galilean Nonlinear Rifle)
#### Flamethrower
Covenant Weapons
#### Plasma Pistol
#### Plasma Rifle
#### Needler
#### Carbine (Type-51)
#### Beam Rifle (Type-50 Sniper Rifle System)
#### Brute Shot
#### Mauler (Type-25)
#### Gravity Hammer
#### Energy Sword (Type-1 Energy Weapon)
#### Fuel Rod Gun
Forerunner Weapons
#### Sentinel Beam
Flood Weapons (Note: Flood use existing weapons, but there is one unique item)
Equipment (Deployable Items)
Each equipment item can be picked up and placed (or activated) by pressing the action button.
#### Bubble Shield
#### Radar Jammer
#### Trip Mine
#### Power Drain
#### Grav Lift
#### Flare
Grenades
#### Fragmentation Grenade
#### Plasma Grenade
#### Spike Grenade
#### Incendiary Grenade (Flood variant)
Vehicles
Human Vehicles
#### Warthog (M12 LRV)
#### Scorpion Tank (M808B)
#### Mongoose (Puma)
#### Hornet (AV-14)
Covenant Vehicles
#### Ghost (Type-32)
#### Banshee (Type-26)
#### Wraith (Type-25)
#### Chopper (Type-52)
#### Prowler (Type-54)
Health & Shield Items
#### Health Pack (Medical Kit)
#### Overshield (Active Camouflage? No)
Mission Key Items
These are items that must be carried or interacted with to complete objectives. They cannot be dropped.
#### Power Core (Fusion Coil)
#### Cortana (AI Chip)
#### Data Cartridge
#### Flood Spores / Keys? No.
#### Skulls (Collectibles)
#### Terminals
Multiplayer Cosmetics (Armor Permutations)
While not functional items, Halo 3 multiplayer features armor permutations that can be unlocked via the Rank system (original) or via Season points in MCC. They include:
Conclusion
Understanding the item ecosystem in Halo 3 is key to mastering both campaign and multiplayer. Memorize spawn locations of power weapons and equipment, learn how to combo weapons and equipment (like Plasma Pistol + Battle Rifle, Power Drain + Grenades), and use vehicles to control the battlefield. Collectibles like skulls add replayability and challenge. Use this guide to make informed decisions in every firefight.
Character Skills
Character Skills Guide for Halo 3
Overview
Unlike traditional role-playing games, Halo 3 does not feature character classes, skill trees, or level-based abilities. Instead, every player—whether playing as Master Chief, the Arbiter, or any multiplayer Spartan/Elite—shares an identical set of innate combat skills and can temporarily gain special equipment-based abilities. This guide covers all player skills and abilities, treating each equipment item as a unique "spell" or "special move." There are no permanent upgrades, combos must be improvised, and synergy comes from smart equipment–weapon pairings.
---
Innate Player Abilities (Always Available)
These are the core actions every player can perform at any time, with no cooldowns or resource costs.
#### 1. Basic Movement
- Walk (default speed).
- Sprint: Halo 3 does not have a sprint button. Movement speed is constant unless slowed by damage or terrain.
- Jump: Press A (Xbox) or Space (PC) to jump. Height is fixed. No double jump or air control beyond standard strafing.
- Crouch: Press B (Xbox) or Ctrl (PC) to crouch. Reduces detection range on motion tracker, improves stability while aiming, and allows access to low pathways.
- Clamber / Mantle: No dedicated clamber ability. You can vault over low obstacles by jumping and moving forward, but there is no "grab ledge" mechanic.
- Your energy shield automatically recharges after 5 seconds of not taking damage.
- Shield is fully recharged in about 4 seconds.
- Any damage (including melee, gunfire, grenades, fall damage) resets the recharge timer.
- Synergy: Use cover to force shield recharge. Never engage with depleted shields.
- Press RB (Xbox) or V (PC) to perform a melee strike with your weapon's butt.
- Damage: 100% of a player's health (shield + health). One-hit kill if the target has no shields.
- Melee hit detection is generous but not lock-on. Successful melee causes knockback.
- Chain: Melee can be followed by a quick shot (pistol or battle rifle) for an instant kill combo (see below).
- Press LB (Xbox) or G (PC) to throw a frag grenade (or plasma grenade if equipped).
- Hold to cook grenade before release. Cooking detonates the grenade 2.5–3 seconds after release.
- Two grenade max per type (frag + plasma). Overfilled grenades are dropped.
- Uses: Area denial, flushing enemies, vehicle destruction.
- Press X (Xbox) or E (PC) to activate the currently equipped item.
- Equipment is picked up from the map (like weapons) and takes the equipment slot (not weapon slot).
- Each piece of equipment is consumed on use (except Power Drain, which stays after activation then vanishes).
- You can carry only one equipment item at a time (except custom games allowing multiple).
- Effect: Deploys a large, semi-transparent dome that blocks all incoming and outgoing fire (like a shield wall). Players inside can shoot out? Actually, the Bubble Shield blocks all projectiles and weapons fire both ways—you cannot shoot out of it, and enemies cannot shoot in. However, melee, grenades, and explosions can pass through? Specifically: bullets and plasma are blocked; explosions (frag/plasma grenades, rockets) detonate on the outer surface, but shockwaves can still kill players inside if close; melee attacks can enter if the attacker is physically inside the dome. Also, vehicles can partially clip through.
- Duration: ~12 seconds before it fades.
- Cooldown / Reuse: None; consumed on deployment. Must find another.
- Upgrades / Talents: None. The shield's integrity is fixed; it cannot be destroyed by damage.
- Combos / Synergies:
- When to Use:
- Recommended Build (Loadout): Not applicable. In matchmaking, you pick up equipment from the map. Prioritize Bubble Shield on objective-based modes.
- Effect: Drops a waist-high, bulletproof barrier that provides one-sided cover. You can shoot over it, but enemies cannot shoot through it. The cover can be destroyed after absorbing moderate damage (equivalent to sustained SMG fire for ~3 seconds).
- Duration: Permanent until destroyed or despawned (after some time, maybe 2 minutes, but often persists).
- Cooldown / Reuse: Consumed on deployment.
- Upgrades: None.
- Combos / Synergies:
- When to Use:
- Tips: Use in pairs to create a mini-fort. Remember that enemy grenades roll under (frag) or stick over (plasma).
- Effect: Launches a bright, blinding flare that detaches from your character and floats in the air for a few seconds. Any player looking directly at the flare gets a partial screen white-out (flare effect). Worse if close. Also briefly reveals cloaked enemies near the flare.
- Duration: Flare lasts ~5 seconds; blinding effect on opponents roughly 3 seconds after first flash.
- Cooldown / Reuse: Consumed.
- Combos / Synergies:
- When to Use:
- Tips: Not commonly used; situational. Best on maps with long sightlines like Valhalla or Sandtrap.
- Effect: Drops a vertical column of antigravity that launches anything (players, vehicles, grenades, items) upward when walked over. The lift lasts ~10 seconds. Multiple uses possible within its lifespan (anyone can activate it repeatedly).
- Duration: ~10 seconds, after which it vanishes.
- Cooldown / Reuse: Consumed, but the lift can be used many times while active.
- Combos / Synergies:
- When to Use:
- Tips: The lift also affects enemy players—use it to throw them off balance or disrupt their aim.
- Effect: Throws down a sphere that instantly drains all shields and disrupts active camo of any player within its radius (including yourself!). It also disables vehicle shields/doors and slows movement. The field lasts ~10 seconds.
- Duration: Once deployed, it stays until its timer expires (it cannot be destroyed).
- Cooldown / Reuse: Consumed; the sphere remains in place.
- Combos / Synergies:
- When to Use:
- Tips: You are vulnerable inside the field too. Drop it just outside the enemy position and peek from outside.
- Effect: Deploys a device that hides all player blips on the motion tracker (radar) within a large area for its duration. Does not mask audible footsteps or gunfire. The jammer can be destroyed by shooting.
- Duration: ~15 seconds. Destroyable if shot.
- Cooldown / Reuse: Consumed.
- Combos / Synergies:
- When to Use:
- Tips: Enemy can still see you if you fire. Destroy the jammer quickly if you're the defender.
- Effect: Drops a device that slowly restores health (but not shields) of nearby friendlies. It pulses healing every few seconds. Shields must recharge naturally. The regenerator lasts until its health pool is exhausted or ~30 seconds.
- Duration: Lasts until it depletes health-restore charges (think 6-8 pulses) or ~30 seconds.
- Cooldown / Reuse: Consumed.
- Combos / Synergies:
- When to Use:
- Tips: Often overlooked; useful in team objective modes.
- Effect: Places a proximity mine on the ground or wall. When an enemy walks within range (or a vehicle drives over), it detonates with a large explosion (lethal to players, damages vehicles). The mine is visible as a small red dot; careful players can avoid it.
- Duration: Permanent until detonated or despawned (like 2 minutes inactive).
- Cooldown / Reuse: Consumed on placement.
- Combos / Synergies:
- When to Use:
- Tips: The mine can also be triggered by your team's vehicles—be careful. You can shoot it to detonate early (giving away position? Only if enemy sees it).
- Plasma Pistol Overcharge: Hold trigger to charge, release to fire a tracking bolt that drains shields and stuns vehicles. This is the closest to a "skill shot" in the game.
- Energy Sword Lunge: When locked onto a target (reticule turns red), melee lunge from distance (up to ~3 meters). One-hit kill.
- Gravity Hammer Slam: Full charge swing creates a shockwave that can kill and knock back multiple enemies.
- Spartan Laser Lock-On: Hold to target, fires a beam that deals massive damage after a brief charge.
#### 2. Shield Recharge
#### 3. Melee Attack
#### 4. Grenade Throwing
#### 5. Equipment Use
---
Equipment Special Abilities ("Skills")
Each piece of equipment acts as a contextual active ability with distinct effects. They have no cooldown per se; once used, you must find another equipment item to get that ability again. Below is the complete list.
#### 1. Bubble Shield
- + Shotgun: Bait enemies to rush you inside the shield; they can't shoot, but you can blast them with the shotgun at point-blank. Be careful of grenades.
- + Sniper (defensive): Deploy shield, then peek out to take shots? Not effective because you can't shoot through it. Better to place shield as cover for teammates reviving or holding an objective.
- + Flag/Power Drain: Use Bubble Shield to protect a flag carrier as they run through open ground.
- Defending key locations (flag, bomb arm, hill).
- Reviving a downed teammate (if playing custom game with revives) or waiting for shield recharge.
- As a temporary blockade to cut off enemy sightlines.
#### 2. Deployable Cover
- + Battle Rifle / Carbine: Crouch behind cover, pop up to land bursts, then duck.
- + Sniper Rifle: Excellent for creating a stable perch, though you'll be exposed from other angles.
- + Plasma Grenade: Stick an enemy behind cover? Not directly synergistic, but good for clearing.
- Creating instant cover in open sightlines.
- Blocking doorways or narrow corridors.
- Providing a head glitch spot for precision weapons.
#### 3. Flare
- + Sniper / Beam Rifle: Blind an enemy sniper, then peak and kill them while they're recovering.
- + Active Camo: Flare reveals camouflaged enemies; pair with a weapon with good scope to spot them.
- Countering snipers.
- Exiting a dark area (e.g., Tunnel) to blind pursuers.
- As a distraction; throw flare in one direction while you flank.
#### 4. Grav Lift
- + Rocket Launcher / Fuel Rod Gun: Lift yourself to gain height advantage, then fire down on enemies.
- + Frag Grenade: Throw a grenade into the lift; it will be launched upward and may detonate in mid-air near enemies.
- + Flag / Bomb: Use to quickly ascend to elevated platforms.
- Reaching high ledges quickly (e.g., on Construct or Epitaph).
- Creating unexpected attack angles.
- Evading vehicles by lifting above them.
#### 5. Power Drain
- + Shotgun / Mauler: After draining shields, enemies are one-hit melee. The shotgun ensures quick kills.
- + Plasma Pistol Overcharge: Pair with Power Drain for complete shield removal and stun—instant kills with any bullet.
- + Sniper: One body shot kills an unshielded enemy.
- Breaking a turtle (enemies behind shield doors or bubble shields).
- Pushing into a well-defended position (flag room, hill).
- Zone control: force enemies to flee or die.
#### 6. Radar Jammer
- + Active Camo (from weapons? Not in Halo 3, but Cloaking is a power-up): Full invisibility + no radar makes for devastating flanks.
- + Shotgun / Sword: Approach unnoticed and secure close-range kills.
- Coordinated team pushes; use comms to compensate for radar loss.
- Sneaking past sentinel beams or into enemy base.
#### 7. Regenerator
- + Overshield (power-up): Use regenerator to heal health, then grab overshield for full shield protection.
- + Bubble Shield: Combine for an impenetrable heal station.
- After surviving a firefight with minimal health but full shields.
- Supporting teammates in a prolonged hold (e.g., defending a hill).
- In campaign or Firefight (MCC) to heal marines.
#### 8. Trip Mine
- + Frag Grenade Bait: Place mine behind a crate, toss a frag to force enemies into the mine.
- + Deployable Cover: Block one approach with cover, mine the other.
- Guarding power weapons (sniper, rocket).
- Protecting flanks during flag runs.
- Denying vehicle ramps (e.g., on Valhalla's mancannon landing).
---
Weapon-Specific "Abilities" (Not Character Skills)
Halo 3 weapons have unique traits, but these are not player skills per se. However, mastering them is essential. Below are the notable weapon mechanics that function similarly to "special moves":
These require practice but are not toggled from a skill menu.
---
Combos & Synergies (Equipment + Weapon + Situation)
While Halo 3 has no formal combo system, certain combinations are exceptionally powerful:
| Combination | How to Execute | Effectiveness |
|---|---|---|
| Power Drain + Shotgun | Drop Power Drain near enemy, step back, shotgun them once shieldless | Instant kills in close quarters |
| Bubble Shield + Shotgun | Deploy shield, stand inside, shoot enemies who enter | Safe close-range dominance |
| Grav Lift + Rocket | Deploy lift, step on to fly up, fire rocket downward | Surprise aerial strike |
| Radar Jammer + Cloak | Jam radar, then activate Active Camo power-up | Sneak into enemy base undetected |
| Trip Mine + Frag Grenade | Place mine in choke point, throw frag to push enemies into mine | Kill confirmation |
Recommended "Builds" (Equipment Preferences by Playstyle)
Since you cannot customize loadouts in Halo 3 multiplayer (equipment is map-pickup), these are guidelines on which equipment to prioritize based on your role:
#### Aggressive Rusher
- Priority equipment: Power Drain (to strip shields and rush) or Trip Mine (to secure your flank).
- Preferred weapons: Shotgun, Energy Sword, or Mauler.
- Tactics: Use Power Drain to clear rooms, then go in for melees/shotgun blasts.
- Priority equipment: Bubble Shield (protect positions) or Deployable Cover (create and hold angles).
- Preferred weapons: Battle Rifle, Sniper, or Spartan Laser.
- Tactics: Set up a shield to hold a flag or oddball, then pick enemies from distance.
- Priority equipment: Grav Lift (reach high speed routes), Regenerator (support teammates holding objectives).
- Preferred weapons: Plasma Pistol (to vehicles), Carbine.
- Tactics: Use Grav Lift to shortcut to bomb arm locations, use Regenerator to heal flag carriers.
- Priority equipment: Radar Jammer (mask movement) or Flare (blind campers).
- Preferred weapons: Energy Sword, Shotgun, or Beam Rifle.
- Tactics: Jam radar, then circle around the enemy team. Flare to disorient snipers before you strike.
- Before engaging: If you have equipment, consider deploying it to gain an advantage. Never run into battle without using your tool.
- During a firefight: Activate Bubble Shield if you're losing; deploy Deployable Cover if caught in open; drop Power Drain if enemy has overshield.
- As a retreat: Throw a Trip Mine behind you while fleeing; use Grav Lift to escape up a ledge.
- When supporting: Regenerator for teammates, Flare for spotting cloaked enemies.
- Equipment does not respawn on the map until after a delay (varies per item; typically 30–60 seconds).
- In Campaign, equipment is scarce; you often have to pick up what enemies drop. Bubble Shield and Flare are most common. Use them to save your shield or reveal Flood spores.
- In Firefight (MCC), equipment is available from ordnance drops. Prioritize Power Drain and Bubble Shield for survival.
- No skill upgrades or talents exist in Halo 3. Mastery comes from timing and map knowledge, not skill trees.
#### Defensive Anchor
#### Objective Specialist
#### Stealth Flanker
---
When to Use Each Skill (Situational Guide)
---
Important Notes
---
Conclusion
While Halo 3 lacks traditional character skills, its equipment system provides a handful of powerful, mission-critical abilities that dramatically shift engagements. Combine them with weapon mastery and map awareness to dominate both campaign and multiplayer. Remember: every piece of equipment is a tool—use it wisely, and it will save your life or win the round.

Characters & Roles
Characters & Roles Guide for Halo 3
Overview
Unlike many shooters, Halo 3 does not feature character classes, skill trees, or unlockable abilities. Instead, the game focuses on a small cast of iconic characters in the campaign and a unified multiplayer experience where all players are mechanically identical. This guide covers every major character from the story, playable units in both campaign and multiplayer, and the implicit roles that emerge from equipment and playstyle choices.
---
Campaign Characters
Master Chief (Spartan-117)
- Background: The last of the Spartan-II supersoldiers, John-117 is humanity's greatest weapon. In Halo 3, he returns to Earth to stop the Covenant from activating the Ark and finishing the fight against the Flood.
- Strengths:
- Weaknesses:
- Playstyle: Rely on hit-and-run tactics. Use cover to let shields recharge. Master Chief excels at mid-range combat with precision weapons like the Battle Rifle or Covenant Carbine. He can also get close with the Shotgun and Energy Sword, but must close distance carefully.
- Recommended Equipment:
- Team Synergy: In co-op, Master Chief acts as the frontline aggressor. Pair with the Arbiter to flank enemies; use bubble shield to protect both during revives.
- Background: Former Covenant Supreme Commander, now allied with humanity to stop the Prophet of Truth and the Flood. The Arbiter is a Sangheili (Elite) with active camouflage as a trademark ability.
- Strengths:
- Weaknesses:
- Playstyle: Identical to Master Chief in campaign. However, the Arbiter's cutscenes emphasize stealth and honor – consider using the Battle Rifle for precision and the Energy Sword for melee ambushes.
- Recommended Equipment: Same as Master Chief. The Active Camouflage is not player-controllable, so rely on equipment like the Radar Jammer for temporary invisibility.
- Team Synergy: In co-op, the Arbiter often takes the secondary role – use him to cover Master Chief's flank or hold defensive positions while Chief pushes.
- Background: The UNSC AI construct who accompanies Master Chief. In Halo 3, she is separated from Chief for most of the game, having been captured by the Gravemind.
- Role: Not playable. She provides mission briefings, tactical advice, and emotional support. Key to the story's resolution.
- Gameplay Impact: None directly, but she appears in cutscenes and audio logs. Her presence drives the player's motivation.
- Background: A veteran marine and ODST, Johnson survives the Halo ring's destruction and fights alongside Master Chief. He is a tough, charismatic leader.
- Role: Non-playable ally. He fights with the player in several missions, wielding a Battle Rifle or Shotgun. He can be killed but has high health and combat effectiveness.
- Strengths: High accuracy, good survivability, uses grenades effectively.
- Weaknesses: Can die permanently in co-op on higher difficulties (if not revived quickly).
- Team Synergy: Keep Johnson alive – he draws enemy fire and provides covering fire. Use him as a distraction while you flank.
- Background: A Monitor (AI construct) of the Halo ring. Initially an ally, later reveals his true, dangerous nature. He helps Chief but with ulterior motives.
- Role: Non-playable. Provides exposition and some puzzle assistance. Eventually becomes an antagonist.
- Background: A sentient, parasitic intelligence that controls the Flood. The Gravemind is the central mind of the Flood, communicating through visions and taunts.
- Role: Primary antagonist. Not playable. Controls Flood forces (Infection Forms, Combat Forms, Pure Forms). The Flood are enemies the player must fight.
- Background: Spartan-IVs (or IIIs/IIs depending on timeline) – augment supersoldiers of the UNSC. In Halo 3 multiplayer, all humans are Spartans.
- Abilities: Identical to campaign: rechargeable shields, two weapon slots, grenades, equipment use, melee, vehicle operation.
- Unlock Condition: Always available. Cosmetic armor permutations unlocked via campaign scoring, multiplayer achievements, or game progression (MCC).
- Strengths/Weaknesses: None – all players are equal. Skill determines effectiveness.
- Playstyle: Varies by weapon loadout and map. Common roles:
- Recommended Builds (loadout is map-specific, no custom classes in classic Halo 3):
- Team Synergy: Coordinate with teammates. Two Spartans with Battle Rifles can crossfire. One uses Bubble Shield to secure a revive.
- Background: Covenent Elites are now allies to humanity in the post-Halo 2 truce. In multiplayer, you can choose to play as an Elite instead of a Spartan.
- Availability: Unlocked by default in some playlists; in others, you must select the Elite race in the pre-game lobby (MCC allows this).
- Abilities: Exactly the same as Spartan. No gameplay differences – no active camouflage, no different movement speed. The only differences are visual and audible: Elites have a slightly different first-person perspective (wider view? Actually the same), a different melee animation, and unique armors.
- Strengths/Weaknesses: None. This is purely cosmetic.
- Playstyle: Identical to Spartan. Some players feel Elites have a larger hitbox, but this is unconfirmed and negligible.
- Team Synergy: No special synergy; treat them as Spartans. However, mixing Spartans and Elites on a team can confuse enemies momentarily (different silhouettes).
- Player 1: Master Chief (always).
- Player 2: The Arbiter (always).
- Player 3 & 4: Generic Spartans (blue and gold armor, respectively). They have no story significance; they are silent backup.
- Extremely durable with rechargeable energy shields and high health.
- Versatile – can use any weapon effectively.
- Carries two weapons and grenades; can swap at will.
- Can melee, throw objects, and drive vehicles.
- No special abilities (no sprint, no double jump).
- Shields can be overwhelmed by sustained fire.
- Requires careful resource management (ammo, grenades, equipment).
- Battle Rifle – bread-and-butter for all ranges.
- Plasma Pistol – overcharge to drop enemy shields.
- Equipment: Bubble Shield for defense, Power Drain for area denial.
- Vehicles: Scorpion tank for heavy assault, Mongoose for fast transport.
Thel 'Vadam (The Arbiter)
- Same core abilities as Master Chief (shields, dual weapons, grenades).
- Unique trait: Can activate Active Camouflage (invisibility) on demand in campaign cutscenes, but not as a gameplay mechanic (in gameplay he is identical to Master Chief in terms of abilities).
- Slightly different first-person view due to Elite head model (no gameplay difference).
- Carries a Plasma Rifle or Energy Sword in cutscenes; can pick up any weapon.
- Exactly the same as Master Chief – no inherent advantage.
- In lore, his armor is less advanced than MJOLNIR, but gameplay is identical.
Cortana (AI)
Sergeant Johnson (UNSC)
343 Guilty Spark
Flood Gravemind / The Flood
---
Multiplayer Playable Units
Spartan (Human)
- Sniper: Use Sniper Rifle or Beam Rifle, camp high ground.
- CQB (Close Quarters): Use Shotgun, Energy Sword, or Mauler.
- Support: Carry Plasma Pistol to disable vehicles, use Brute Shot for area denial.
- Precision: Battle Rifle + Assault Rifle (or Spiker).
- Vehicle Hunter: Plasma Pistol + Rocket Launcher.
Elite (Sangheili)
---
Co-op Campaign Roles
In co-op, up to four players can play through the campaign. The roles are:
All co-op players have identical gameplay abilities. The only role distinction is narrative – Master Chief and Arbiter have unique dialogue. Cooperation is key: revive teammates, share vehicles, and focus fire on tough enemies.
---
Implicit Multiplayer Roles (Playstyles)
While there are no formal classes, effective players adopt distinct roles based on equipment and team composition:
| Role | Weapons | Equipment | Strategy |
|---|---|---|---|
| Sniper | Sniper Rifle, Beam Rifle, Carbine | Radar Jammer or Bubble Shield | Hold sightlines, pick off long-range targets. Communicate enemy positions. |
| CQB Specialist | Shotgun, Energy Sword, Mauler | Power Drain or Trip Mine | Flank through tight corridors, ambush enemies. Be aggressive but cautious of shotguns. |
| Support | Plasma Pistol, Brute Shot, Assault Rifle | Bubble Shield or Regenerator | Disable vehicles, suppress enemies, throw grenades to break defenses. |
| Objective Player | Battle Rifle, SMG | Any (Gravity Hammer for fun) | Focus on capturing flags, planting bombs, or defending objectives. Prioritize survival. |
Summary
Halo 3 does not have RPG-style character classes. Campaign features two main protagonists (Master Chief and Thel 'Vadam) with identical mechanics, supported by non-playable characters. Multiplayer offers cosmetic choice between Spartan and Elite, but no gameplay differences. Success depends on player skill, weapon selection, and teamwork rather than character abilities.
Cheats & Secrets
Cheats & Secrets Guide for Halo 3
Important Note
Halo 3 does not have traditional cheat codes that can be entered via button combos or console commands. However, the game features a robust system of Skulls—difficulty modifiers and gameplay modifiers that can be activated to drastically change the experience (and unlock special achievements or cosmetics). Additionally, there are hidden Easter eggs and secret unlockables tied to specific challenges. This guide covers all officially documented, developer-intended secrets.
---
1. Skulls (Gameplay Modifiers)
Skulls are collectible items hidden throughout the campaign levels. Once found, they can be toggled on/off from the campaign pause menu (or in the Halo: The Master Chief Collection (MCC) from the skull menu). Each skull has a unique effect. Collecting all 13 skulls unlocks the Hayabusa armor for multiplayer, and completing certain skull-activated challenges awards special achievements.
1.1 All Skulls – Locations & Effects
| Skull Name | Campaign Level (Approximate Location) | Effect |
|---|---|---|
| Iron | The Ark – Near the first bridge, on a ridge to the left | Death restarts the entire mission (no checkpoints). |
| Black Eye | The Storm – Inside a building with two rocket launchers after the first bridge | Shields only recharge when you perform a melee attack. |
| Tough Luck | The Covenant – In a cave after entering the structure with the first two Hunters | Enemies never flee, are more aggressive, and throw grenades more often. |
| Catch | Tsavo Highway – On a cliff accessible after the first tunnel | Enemies throw grenades more frequently and with greater accuracy. |
| Fog | The Covenant – On a platform accessible after the bridge section | Removes the motion tracker (radar) from the HUD. |
| Thunderstorm | The Ark – In a structure after crossing the second bridge (where you fight multiple Wraiths) | All Covenant and Flood enemies are upgraded to a higher rank (e.g., Grunts become Ultra, Elites become Zealot, etc.). |
| Tilt | The Covenant – Inside a building near the end of the level | Enemy weaknesses and resistances are amplified (e.g., Plasma weapons are stronger against shields, bullets stronger against armor). |
| Mythic | The Ark – At the end of the level, on a ledge near the final structure | Doubles enemy health. |
| Famine | The Storm – In a tunnel after destroying the first set of anti-air guns | Weapons dropped by enemies and found in the environment have greatly reduced ammunition. |
| IWHBYD (I Would Have Been Your Daddy) | The Ark – In a room with a hologram machine (requires activating the hologram terminal to spawn it) | Unlocks many rare combat dialogue lines from enemies and allies. Also a requirement for the “Vidmaster Challenge: Classic” achievement. |
| Grunt Birthday Party | The Covenant – In a cave behind a waterfall after the section with the two Hunters | Headshots on Grunts cause them to explode in a shower of confetti and a “Yay!” sound. |
| Cowbell | The Storm – On a ledge after the second bridge (near a crashed Pelican) | Increases the explosion force from grenades and other explosives. |
| Blind | The Covenant – On a high tower near the end of the level (requires a Warthog jump or careful climbing) | Removes the entire HUD (health, shield, ammo, crosshair, etc.). |
1.2 Skull Effects on Multiplayer and Firefight
Skulls are primarily designed for campaign use. In Firefight (ODST), skulls from the ODST game are used, not these Halo 3 skulls. On MCC Playlists, enabling skulls can modify custom games and co-op sessions.
1.3 Special Skull Challenges
- LASO (Legendary All Skulls On): Completing the campaign on Legendary difficulty with all 13 skulls enabled is a prestigious challenge. It can be done in co-op or solo and rewards a unique nameplate in MCC.
- Vidmaster Challenges: Certain combinations of skulls (e.g., the “Annual” challenge requires specific conditions) are part of the achievements below.
- Recon armor (helmet, shoulders, chest): Unlocked by completing all four Vidmaster challenges (see Section 4).
- EOD helmet: Unlocked by earning the “Sword Melee” achievement? No, that is not correct. Only Hayabusa and Recon are unlockable through gameplay in the original game; other armors come from DLC or pre-order.
- Grunts saying “I would have been your daddy!” (rare)
- Brutes commenting on your actions
- Marines quoting movies
---
2. Secret Unlockable Armor
Collecting all 13 skulls unlocks the Hayabusa armor set (helmet, shoulders, chest) for use in multiplayer. This is the only armor set that requires in-game collection. Other special armors are unlocked via achievements:
---
3. Hidden Easter Eggs
3.1 The “IWHBYD” Skull’s Secret Dialogue
When the IWHBYD skull is active, many rare enemy and ally voice lines are triggered. These include:
This skull also enables a hidden credit sequence reels during the ending? No—the credit Easter egg is from Halo 2. In Halo 3, the dropped Warthog Easter egg (below) is the most notable.
3.2 The “Warthog Jump” Easter Egg (The Ark)
On the level The Ark, near the end of the mission, there is a large chasm. If you drive a Warthog off the edge and land in a specific area below, you can trigger a special dialogue from Cortana. This requires a co-op partner to survive and drive. The exact method involves jumping from the second bridge onto a lower structure. The dialogue references the events of Halo 2 and is a treat for lore fans.
3.3 The “Ghosts of Halo” – The “Monkey” Easter Egg (Tsavo Highway)
On Tsavo Highway, you can find a hidden “monkey” (a Grunt dressed in a party hat and holding a flag) behind a waterfall. This is purely cosmetic and has no gameplay effect. If you kill the Grunt, you get a small reward of ammo? No, it’s just a visual gag.
3.4 The “Siege of Madrigal” Reference (The Covenant)
In the level The Covenant, there is a hidden terminal that displays a video from the Halo 2 map “Tombstone”? Not really. The most famous Easter egg is the “IWHBYD” skull itself, which is hidden behind a hologram projection.
3.5 The “Assassination” Animation Grunt (Crow’s Nest)
In Crow’s Nest, if you look out a specific window during the opening, you can see a Grunt assassinating a Marine. This is an in-game scripted event that is easy to miss.
---
4. Vidmaster Challenges (Recon Armor Secret)
The Vidmaster series of achievements are secret goals that unlock the Recon armor. These are intended to be found and completed by the community. The four challenges are:
| Achievement | Requirement | Notes |
|---|---|---|
| Vidmaster Challenge: Annual | Complete the level The Covenant (Campaign) on Legendary with 4 players, in a single session, without anyone leaving or dying. | The skulls are not required, but teamwork and communication are essential. |
| Vidmaster Challenge: Endure | Complete 4 rounds of Firefight (Halo 3: ODST) on Legendary with any set of skulls. | This requires ODST, not Halo 3 itself, but it is part of the same achievement set. |
| Vidmaster Challenge: Deja Vu | Complete the level The Covenant (Campaign) on Legendary with 4 players, this time with all skulls enabled except Iron (if you die, you restart from checkpoint). | Also requires all players to survive. |
| Vidmaster Challenge: Classic | Complete the level The Ark (Campaign) on Legendary with 4 players, with the IWHBYD, Famine, Mythic, Tilt, Thunderstorm, and Catch skulls active. | This is the hardest Vidmaster task due to enemy health and ammunition limitations. |
---
5. Other Secrets & Developer Hidden Content
- Terminals: Each campaign level contains a hidden terminal that hints at the Forerunner lore and sets up the story of later games. These are collectibles but not “cheats”; they unlock audio logs and backstory.
- Music Room (Crows Nest): In the level Crow’s Nest, there is a room with a radio playing music. You can interact with the radio to change the track to the classic Halo theme or other songs. This is a subtle Easter egg.
- The “Marathon” Logo: On the level Sierra 117, by looking at the waterfall near the start, you can see a pattern in the rocks that forms the Marathon symbol (a reference to Bungie’s previous game). This is a visual Easter egg.
- Hidden Waypoint on The Ark: If you activate the IWHBYD skull and then look at the sky in a certain spot, a hidden waypoint appears leading to a set of coordinates? This is unconfirmed and may be a myth.
- Must collect 13 skulls for Hayabusa armor and certain achievements.
- Vidmaster challenges require a team of 4 and precise execution.
- IWHBYD skull is crucial for the classic challenge and the rare dialogue.
- No debug menus or developer commands are accessible in the retail version.
---
6. Cheat Codes? None
Halo 3 does not have a cheat code system like entering a button sequence or typing a command. The only way to modify gameplay is through skulls, which are official modifiers. There are no invincibility, infinite ammo, or level skip codes. Any claims of such cheats for the original game are false.
---
7. Summary for Speedrunners and Challenge Hunters
This guide covers all known, legitimate secrets and unlockables in Halo 3 as intended by Bungie.