
Hogwarts Legacy
## Hogwarts Legacy Game Introduction **Hogwarts Legacy** is an immersive, open-world action role-playing game (RPG) set in the Wizarding World first introduced in J.K. Rowling’s Harry Potter books. Developed by **Avalanche Software** and published by **Warner Bros. Games** under the Portkey Games...

Download & Installation
Hogwarts Legacy Download & Installation Guide
This guide covers every major platform where Hogwarts Legacy is officially available: PC (Steam, Epic Games Store), PlayStation 4, PlayStation 5, Xbox One, Xbox Series X|S, and Nintendo Switch. Mobile platforms are not supported.
---
1. System Requirements
PC Minimum Requirements (1080p / 30 FPS, Low Quality)
- OS: Windows 10 64-bit
- CPU: Intel Core i5-6600 (3.3GHz) or AMD Ryzen 5 1400
- RAM: 16 GB
- GPU: NVIDIA GeForce GTX 960 (4GB) or AMD Radeon RX 470 (4GB)
- DirectX: Version 12
- Storage: 85 GB available space (HDD recommended; SSD strongly recommended)
- Internet: Broadband connection for initial activation and updates
- OS: Windows 10 64-bit
- CPU: Intel Core i7-8700 (3.2GHz) or AMD Ryzen 5 3600
- RAM: 16 GB
- GPU: NVIDIA GeForce GTX 1080 Ti or AMD Radeon RX 5700 XT (or NVIDIA RTX 2070 Super)
- DirectX: Version 12
- Storage: 85 GB SSD
- Internet: Broadband connection
- PS5 / Xbox Series X|S: 85 GB free space (SSD required)
- PS4 / Xbox One: 85 GB free space (HDD acceptable, but load times will be longer)
- Nintendo Switch: 16.9 GB free space (internal or microSD card; download only, no physical cartridge included)
- PC (Steam): Steam account, internet connection for activation.
- PC (Epic Games Store): Epic Games account.
- PlayStation (any): PlayStation Network (PSN) account.
- Xbox (any): Xbox Live / Microsoft account.
- Nintendo Switch: Nintendo Account.
- Physical disc: Insert disc, installation will start automatically. (PS5 requires PS5 disc version; PS4 discs are forward‑compatible on PS5, but will install PS4 version.)
- Digital (PS Store):
- Physical disc: Insert disc, console installs game.
- Digital (Microsoft Store):
- Note: Hogwarts Legacy was released on Switch in November 2023 as a cloud‑based version (licensing agreement). Playing requires a stable internet connection at all times.
- Download only (no physical cartridge in retail packages; a download code is included in the box).
- Installation: The game icon will appear on the home screen after download; launch requires an active internet connection.
PC Recommended Requirements (1080p / 60 FPS, High Quality)
PlayStation & Xbox
---
2. Account Requirements
Important: The game requires a persistent internet connection on first launch to verify ownership. After that, single-player can be played offline (except on Switch, which requires online check every 24 hours).
---
3. Download & Installation by Platform
PC – Steam
1. Install the Steam client from [store.steampowered.com](https://store.steampowered.com).
2. Log in to your Steam account.
3. Go to Store and search "Hogwarts Legacy" or use [this link](https://store.steampowered.com/app/990080/Hogwarts_Legacy/).
4. Purchase the game (or redeem a key) and add it to your library.
5. In your Library, select Hogwarts Legacy and click Install.
6. Choose installation location (ensure at least 85 GB free).
7. Wait for download and automatic installation (may take 1–3 hours depending on connection).
8. After install, the game will appear in your library as "Ready to play" once updates are applied.
PC – Epic Games Store
1. Install the Epic Games Launcher from [store.epicgames.com](https://store.epicgames.com).
2. Log in to your Epic Games account.
3. Go to Store and search "Hogwarts Legacy".
4. Purchase the game.
5. Click Library → Hogwarts Legacy → Install.
6. Choose installation directory (85+ GB required).
7. Download and install; launcher will handle updates automatically.
PlayStation 4 & PlayStation 5
1. On console, go to PlayStation Store.
2. Search “Hogwarts Legacy” and purchase (or redeem a code).
3. Select Download. The console will download (typically 85–90 GB).
4. Installation occurs automatically after download completes.
5. On PS5, you can choose between Performance (60 FPS) and Fidelity (30 FPS with ray tracing) modes after install.
Xbox One & Xbox Series X|S
1. Press Xbox button → Microsoft Store.
2. Search “Hogwarts Legacy” and purchase.
3. Select Install. Choose console internal storage (or external, but SSD recommended for Series X|S).
4. The download (85+ GB) and auto‑install will run.
5. Smart Delivery: Buying for Xbox One gives you the optimized Series X|S version for free on the newer console.
Nintendo Switch
1. From the Home menu, open Nintendo eShop.
2. Search “Hogwarts Legacy” and purchase digital version (or redeem download code).
3. Select Download.
4. Download size is ~16.9 GB (the cloud client; the actual game is streamed). You must be connected to Wi‑Fi to play.
---
4. First Launch Setup
After installation, when you start the game for the first time:
1. Shaders Compilation: On PC and console, the game will compile shaders (may take 10–20 minutes). Do not interrupt.
2. Account Link (PC): You may be prompted to link your WB Games account (optional, for cosmetic rewards). Skip or create.
3. Language & Audio: Choose preferred language and subtitles.
4. Graphics Settings (PC): The game will attempt to auto‑detect optimal settings. You can adjust manually in the Settings > Graphics menu.
5. Accessibility: Options for text size, colourblind modes, etc. are in the Settings.
6. Save Game: Create a save slot when prompted. Always exit via the main menu to avoid corruption (do not Alt+F4 or force quit during autosave).
---
5. Common Installation Errors & Fixes
| Error | Cause | Solution |
|---|---|---|
| Disk write error (PC – Steam) | Insufficient permissions or antivirus blocking | Run Steam as Administrator; temporarily disable antivirus; free up space or change install directory. |
| Corrupted download (PC) | Network interruption or hardware issue | Verify game files: Steam → Library → right‑click Hogwarts Legacy → Properties → Installed Files → Verify integrity of game files. Epic: Settings → Manage Games → Verify. |
| PS4/PS5 “Cannot install” error | Corrupted download or system storage | Rebuild database (Safe Mode → Rebuild Database) or delete and re‑download. |
| Xbox “Installation stopped” | Slow connection, storage full, or update required | Pause and resume the download; free up space; ensure console is updated. |
| Switch “Unable to start software” | Cloud streaming connectivity | Restart Switch; check internet speed (minimum 10 Mbps recommended); re‑download if it persists. |
| Black screen after intro logos (PC) | Outdated GPU drivers or incompatible overlays | Update GPU drivers from NVIDIA/AMD website; disable Discord/overlay software; run windowed mode. |
| Crash on launch (all platforms) | Corrupted game files or outdated system firmware | Reinstall game; update console/PC firmware; clear cache (PS5: restart console; Xbox: hold power button 10 sec). |
6. Post‑Install Verification
After installation, confirm everything is ready:
PC (Steam/Epic)
- Check your game library: the game should have no update pending.
- Launch the game; if you see the Avalanche Software logo, installation succeeded.
- Optional: run a benchmark (in settings) to ensure stable FPS.
- From home screen, highlight the game icon → press Options → Check for Update.
- Launch the game; you should see the “Compiling Shaders” screen on first boot.
- Press Xbox button → My games & apps → find Hogwarts Legacy → select Manage game and add‑ons to verify all files installed (should be ~85 GB).
- Launch game; expect the shader compilation on first run.
- From home screen, launch the game. You must be online. The cloud client will run a connection test. If successful, the game loads. If you see an error about poor internet, move closer to your router or use a wired connection.
- PC: Use an SSD for faster load times (especially for the open world). Move the game via Steam (Properties → Installed Files → Move Install Folder) if needed.
- Console: For PS5 / Xbox Series X|S, install to internal SSD. For PS4 / Xbox One, external USB 3.0 HDD works, but expect longer loads.
- Nintendo Switch: Use a high‑speed microSD card (UHS‑I, U3 class) for the download client. The game itself runs from cloud servers.
- Pre‑load: If you pre‑ordered, the download was available days before launch. Post‑launch, a day‑one patch (typically ~5–15 GB) may download automatically.
- Cross‑save: Not available between platforms. Your progress stays on the platform where you played.
- Backup saves: PC saves are in `%LOCALAPPDATA%\Hogwarts Legacy\Saved\SaveGames` — back them up manually. Console saves are automatically uploaded to cloud (PS Plus / Xbox Live Gold / Nintendo Switch Online required).
PlayStation
Xbox
Nintendo Switch
---
7. Storage Management Tips
---
8. Additional Recommendations
---
Disclaimer: All information is correct as of the time of writing. Always check the official support pages or the game’s store page for the most recent updates and requirements.

Game Introduction
Hogwarts Legacy Game Introduction
Hogwarts Legacy is an immersive, open-world action role-playing game (RPG) set in the Wizarding World first introduced in J.K. Rowling’s Harry Potter books. Developed by Avalanche Software and published by Warner Bros. Games under the Portkey Games label, the title arrived after a series of delays and platform-specific staggered releases. The game debuted on February 10, 2023 for PlayStation 5, Xbox Series X|S, and PC (via Steam and Epic Games Store). It later launched on PlayStation 4 and Xbox One on May 5, 2023, and finally on Nintendo Switch on November 14, 2023. This phased rollout allowed the team to optimize for each platform’s capabilities.
Genre and Core Appeal
Hogwarts Legacy is a single-player, open-world action RPG with deep character customization, spell-based combat, and exploration. It is often described as the “Harry Potter RPG fans have always wanted” because it lets players live out their own wizard fantasy – attend classes, brew potions, tame magical beasts, and uncover secrets hidden within Hogwarts Castle and the surrounding Scottish Highlands. The core appeal lies in its faithful recreation of the iconic school and its grounds, combined with a free-form progression system that respects player choice.
Story Overview and Setting
The game is set in the 1800s, long before the events of the Harry Potter books and films. You play as a fifth-year student who transfers to Hogwarts School of Witchcraft and Wizardry under unusual circumstances – you possess a unique connection to an ancient, long-forgotten form of magic. This mysterious ability sets you apart and places you at the center of a conflict between two factions: the well-meaning but rigid Professor Fig (who becomes your mentor) and the dark Goblin Ranrok, who seeks to harness this ancient magic for destructive purposes. The story unfolds across a vast open world that includes Hogwarts Castle, Hogsmeade village, the Forbidden Forest, and many other iconic locations, all expanded with new areas like the coastal hamlet of Feldcroft and the dungeons beneath the castle. The main narrative is driven by your quest to uncover the truth about the ancient magic, while side quests involve helping fellow students, solving house mysteries, and mastering magical skills.
Main Characters
- Your Player Character: A customizable fifth-year student (choose appearance, gender, voice, and House – Gryffindor, Hufflepuff, Ravenclaw, or Slytherin). The character is voiced (either male or female) and can be named. Backstory is kept ambiguous to allow full immersion.
- Professor Eleazar Fig: A kind-hearted, eccentric professor who becomes your main ally and mentor, guiding you through the ancient magic mystery.
- Ranrok: The primary antagonist, a powerful goblin leader who seeks to exploit ancient magic for goblin supremacy. His vendetta against wizards drives much of the conflict.
- Professor Matilda Weasley: The Deputy Headmistress who helps you settle into Hogwarts and assigns early quests.
- Sebastian Sallow: A Slytherin student who befriends you and has his own compelling storyline involving dark magic and a sick sister.
- Natsai Onai: A Gryffindor student from a family of wizards in Africa, who becomes a close friend and quest-giver with a focus on justice and empathy.
- Poppy Sweeting: A Hufflepuff with a deep love for magical beasts, offering quests related to creature rescue and welfare.
- Ominis Gaunt: A blind Slytherin from the infamous Gaunt family (ancestors of Voldemort), who provides insight into Sebastian’s story and the dangers of dark magic.
Target Audience
Hogwarts Legacy is primarily aimed at fans of the Harry Potter universe (both longtime readers and movie viewers) who are aged 12 and up, though its complex themes and moderate violence mean the official ESRB rating is T for Teen (PEGI 12). It also appeals to RPG enthusiasts who enjoy open-world exploration, skill trees, and crafting. The game does not require prior knowledge of the books, but familiarity enriches the experience. There is no multiplayer component, so the audience is strictly single-player.
Game Modes and Online/Offline Support
Hogwarts Legacy is entirely single-player with no multiplayer, co-op, or PvP modes. It requires a one-time internet connection for installation and optional updates, but after that, you can play offline without any issues. The game supports multiple difficulty modes (Story, Easy, Normal, Hard) that can be changed at any time. There are also accessibility options for colorblindness, subtitle customization, and a high-contrast mode. A Photo Mode is included for capturing in-game moments, and the game’s world is fully open and non-linear – you can explore freely between main story beats.
DLC and Expansions
As of writing, Hogwarts Legacy has no major paid DLC or expansions. However, there is a Deluxe Edition that includes the base game plus exclusive cosmetic items (a Dark Arts pack with a Thestral Mount, Dark Arts Cosmetic Set, and Dark Arts Battle Arena). The game received a free update in late 2023 that added the Haunted Hogsmeade Shop Quest (exclusive to PlayStation platforms as timed content, later available on all platforms) and a Photo Mode update. No story-based expansion packs have been announced, but the game’s success leaves the door open for future content.
What Makes This Game Unique
Several factors set Hogwarts Legacy apart from other open-world RPGs:
1. Authentic Wizarding World: The most detailed, interactive version of Hogwarts Castle and its surroundings ever created. Every corridor, portrait, and hidden room feels alive. Players can attend actual classes (e.g., Herbology, Potions, Charms, Defense Against the Dark Arts) and learn spells with realistic wand movements (on consoles with gyro controls).
2. Choice and Consequence: Your dialogue choices and actions influence NPC relationships and the story’s outcome. Certain quests have branching endings, and your House affiliation affects common room access and some side content.
3. Magic System: Over 30 spells (and upgrades) that can be used in combat, puzzles, and exploration. The spell system is dynamic – you assign spells to four quick-slots and can combo them for crowd control (e.g., Accio to pull enemies, then Incendio to burn them).
4. Room of Requirement: A fully customizable hub where you can craft potions, grow plants, and breed magical beasts. This base-building element adds a rewarding loop of gathering resources and personalizing your space.
5. Magical Beasts: You can rescue, care for, and ride over a dozen magical creatures (e.g., Hippogriffs, Thestrals, Graphorns). These beasts provide materials and can be used as mounts.
6. Loot and Gear System: While not a full RPG loot shooter, the game includes gear with stats, set bonuses, and transmogrification (change appearance without losing stats). You can also upgrade gear at shops.
7. House-Specific Content: Each of the four Houses has a unique common room, a house-specific side quest, and access to a special dungeon (the Jackdaw’s Tomb for Gryffindor, etc.). This gives replay value to see all House stories.
In summary, Hogwarts Legacy is a love letter to the Harry Potter franchise that successfully translates the magic of the books into a rich, interactive open world. Its blend of storytelling, exploration, and spellcasting – all within a beautifully realized 19th-century Hogwarts – makes it a must-play for any fan of fantasy RPGs or the Wizarding World.
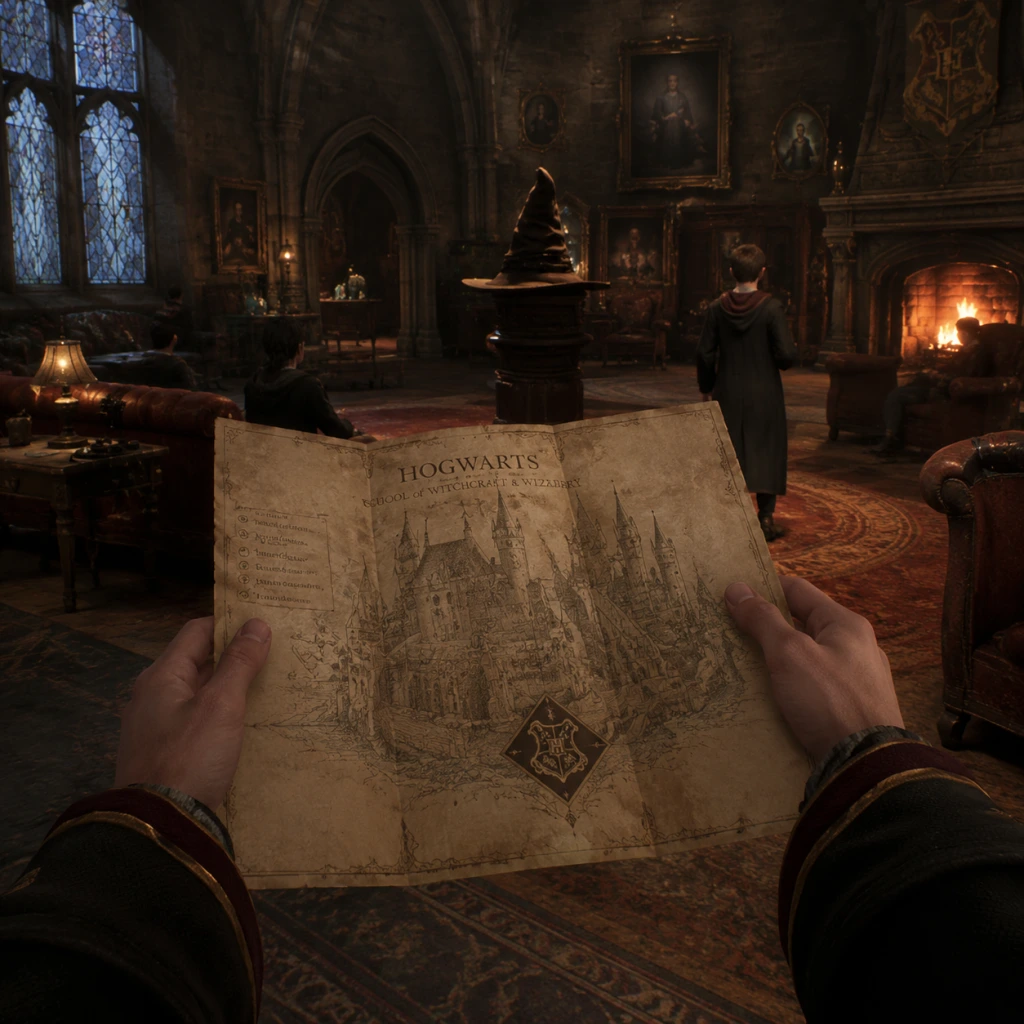
Getting Started
Getting Started with Hogwarts Legacy – First Hour & Beyond
Welcome to Hogwarts Legacy! This guide is tailored for brand-new players. We’ll walk you through the crucial first steps, explain the UI, controls, and early priorities so you can start your magical journey with confidence.
---
1. Character Creation & House Selection
You will create your character immediately after the opening cinematic. This is purely cosmetic – your choices affect nothing mechanical except appearance (and a few dialogue/reputation flags tied to your house).
Character Creator Options:
- Face presets – Choose from several head shapes and facial features.
- Hairstyle & Color – Many options for both.
- Skin tone, Eye color, Eyebrows, Scars, Freckles, etc.
- Voice – Select a pitch and style (affects game dialogue).
- Gender – Choose male, female, or non-binary. This does not lock you out of any romance or quests.
- Hogwarts House – After a short scene with the Sorting Hat (you can answer questions or just select your house directly). Important: Your house determines your common room, some side quests (e.g., Jackdaw for Hufflepuff, Sebastian for Slytherin), and enemy faction alignment. Choose wisely – you cannot change later.
> Pro Tip: If you want a specific house, look up the quiz answers for the Sorting Hat. Otherwise, pick the one that appeals to you most.
---
2. Controls – All Platforms (Defaults)
Here’s a quick reference for essential controls. You can fully remap them in Settings.
| Action | PC (Keyboard + Mouse) | PlayStation 4/5 | Xbox One/Series X | S | Nintendo Switch |
|---|---|---|---|---|---|
| Move | W/A/S/D | Left Stick | Left Stick | Left Stick | |
| Look / Aim | Mouse | Right Stick | Right Stick | Right Stick | |
| Interact / Talk | E | ▲ (Triangle) | Y | A? (Check in-game) | |
| Attack (Basic Cast) | Left Click | R2 | RT | ZR? | |
| Accio (Pull) | Q | L1 | LB | L | |
| Lumos (Light) | F | R1 | RB | R | |
| Spell Wheel (Pause) | Tab | Up on D-Pad | Up on D-Pad | Up on D-Pad | |
| Open Map | M | Touchpad | View | Map button | |
| Inventory | I | Options | Menu | + | |
| Jump | Space | X | A | B | |
| Dodge Roll | Shift | Circle | B | Right Stick Click? |
---
3. First Hour Walkthrough – Step by Step
Minute 0-10: Opening & Character Creation
- Watch the intro cinematic (you can skip after the first view).
- Create your character as described above.
- Witness the Sorting Hat ceremony. You choose your house.
- Walk through the Great Hall (follow the floating wisps).
- You’ll meet Professor Fig and be transported to Gringotts Wizarding Bank.
- Important: This is a tutorial sequence. Follow prompts to learn:
- After escaping, you’ll fly on a Thestral alongside Fig. Just enjoy the cinematic.
- You land near the castle. Follow Fig to the courtyards and corridors.
- Do not explore too much yet – stay on the critical path until you get your wand and map.
- You’ll be sorted again (visually) if you didn’t choose earlier. If you picked on creation, the Sorting Hat still does a quick scene.
- You’ll enter the Great Hall for the Sorting Ceremony (sped up if you already chose).
- Then you’re led to your common room. Take a moment to soak it in – you can return here anytime via Floo Flames.
- Your first real free-roam moment: leave common room, explore the castle.
- Essential: Open your map (M/Touchpad/View/Map button). You’ll see fast-travel points (Floo Flames). Click the “Hogwarts” icon to see the central fast travel point.
- Run to the courtyard where you’ll meet Natty (Natsai Onai) and Sebastian Sallow. This triggers the first main quest.
- You’ll attend your first Charms Class with Professor Ronen. Completing it unlocks Accio. Also unlock the Talents system (press K? On PC, or in menu).
- After class, you’re free to explore. The main quest will encourage you to visit Hogsmeade. Do this as soon as you can – it unlocks vendors, quests, and the Battle Arena.
- First Hogsmeade Visit: Buy the Wand Handle from Ollivanders (optional, cosmetic), but more importantly, visit Spintwitches Sporting Goods to buy a broom for 600 Galleons (you’ll need to complete the main quest “The High Keep” first to unlock broom flying anyway, but you can start saving).
- HUD Elements (Bottom-left): Your health bar (red), focus bar (blue for combat spells, yellow for Ancient Magic), and a mini-map.
- Spell Slots: You have four spell slots on the bottom-center. Press the spell wheel to switch sets (you can unlock up to four sets via talents).
- Quest Tracker: Top-left shows current objectives. Press J (PC) / ? to open quest log.
- Map: Press M (PC), Touchpad (PS), View (Xbox), Map button (Switch). Shows fast travel points, icons for quests, shops, and more. Click on icons to set a waypoint.
- Inventory & Gear: Press I (PC) / Options (PS) / Menu (Xbox) / + (Switch). Here you can equip robes, wands, scarves, etc. Gear has stats; always equip higher-level items.
- Field Guide: Tab (PC) / D-Pad Up (console) opens the magical compendium – lists of enemies, collectibles, and lore pages.
- Interact with everything – glowing objects often yield coins, gear, or field guide pages.
- Talk to all NPCs – many give side quests or hints.
- Plant Mallowsweet Seeds – once you have the Herbology class, plant these in the Room of Requirement after you unlock it. They are needed for combat trials.
- Use Revelio often – it highlights hidden chests, puzzle keystones, and field guide pages. It’s your best invisible tool.
- Brew Potions & Grow Plants – Edurus, Maxima, and Wiggenweld are must-haves. Start growing Fluxweed and Knotgrass when possible.
- Never sell Legendary gear – you may need it for transmog visuals. Instead, keep the highest-level gear of each slot; sell or destroy duplicates.
- Don’t skip the Tutorials – the game teaches you essential spells (Protego, Stupefy) and broom flying. Skipping will make combat harder.
- Avoid fighting trolls until level 10+ – trolls are tough. If you see one early, use Accio and dodge, but don’t engage directly.
- Do not waste gold on cosmetic gear early – save for broom (600) and potion recipes (300 each). Better gear drops from enemies and chests.
- Avoid fast traveling everywhere – walking through Hogwarts and Hogsmeade reveals hidden chests, merlin trials, and lore.
- Earn by: Selling gear you don’t need, completing quests, opening chests.
- Spend on: Broom (600), Potion Recipes (300 each), Seeds for growing (100-500). Avoid spending on random gear at vendors until you have the broom.
- Herbs & Potions: Always collect Fluxweed, Knotgrass, Shrivelfig from the wild or from your Room of Requirement.
- Beast Ingredients: For potions like Frog Legs or Moonstone – you’ll get these later. Don’t stress.
- Feathers: For upgrade materials. Collect as many as you can.
- Your gear has stats. Equip the highest-level items in each slot. Don’t worry about set bonuses early.
- Upgrade at: The Brooms & Loom shop in Hogsmeade after a side quest.
- [ ] Complete character creation and house selection.
- [ ] Finish opening tutorial (Gringotts/Thestral ride).
- [ ] Get sorted and explore common room.
- [ ] Attend Charms Class (unlocks Accio & Talents).
- [ ] Visit Hogsmeade (unlock fast travel there).
- [ ] Buy at least one potion recipe (preferably Wiggenweld).
- [ ] Complete “The High Keep” up to broom acquisition (if time allows).
- [ ] Use Revelio in Hogwarts to find at least 5 field guide pages.
- [ ] Set Talents (e.g., Spell Knowledge I).
- [ ] Equip the best gear you found.
- [ ] Save manually.
- Defeating all side quests.
- Upgrading gear.
- Finding all Merlin Trials.
- Rescuing beasts (that’s mid-game).
- Explore everywhere – Hogwarts is dense with secrets.
- Read the Field Guide pages – they give you XP and lore.
- Use the Room of Requirement for a crafting hub as soon as you unlock it (around level 10).
- Don’t be afraid to change difficulty – you can adjust anytime.
- Remember: This is a story-first game – enjoy the characters and world.
Minute 10-20: Professor Fig & the Gringotts Heist
- Basic movement and camera control.
- Interacting with objects (E/Y/▲).
- Using Lumos (F/R1/RB) in dark tunnels.
- Combat basics: You’ll learn to cast basic spells (the Protego shield and Leviosa). During the troll fight, practice dodging (Space/Circle/B) and blocking.
Minute 20-30: Arriving at Hogwarts
Minute 30-40: Free Roam Begins
Minute 40-60: Early Lessons & Hogsmeade
---
4. User Interface (UI) Overview
---
5. Essential Early Objectives (First 2-3 Hours)
1. Complete the “Welcome to Hogwarts” main quest. This unlocks the fast travel network and your first few spells.
2. Attend Charms Class. Unlocks Accio and the Talents menu. Do this immediately.
3. Visit Hogsmeade. Unlocks shops (potions, gear, ingredients). Buy a wand handle if you like, but save Galleons for broom (600) and potion recipes (300 each).
4. Unlock the Broom. Complete “The High Keep” main quest (requires level ~5 and a few side tasks). Flying is huge for exploration.
5. Start the “Tomb of the Map Room” main quest. This leads to your first ancient magic and the Room of Requirement (personal hub). Unlock it as soon as possible.
6. Spend Talent Points. You get talent points every level. Invest early in Spell Knowledge (unlocking more spell sets) and Core Talents (e.g., Incendio Mastery, Accio Mastery).
---
6. What to Do First & What to Avoid
✅ Do First:
❌ Avoid Until Later:
---
7. Early Resource Priorities
Gold (Galleons):
Crafting Ingredients:
Gear Upgrades:
---
8. Common Beginner Mistakes
1. Ignoring the Talents Menu – You can respec talent points only once (via a special potion). Use them wisely. Start with the Core tree.
2. Not Using Protego/Stupefy – Blocking is vital. Master the timing.
3. Trying to fight every enemy – You can run past many mobs. Focus on main quests early.
4. Hoarding Potions – Use them! They’re easy to craft once you have the recipe.
5. Not Doing Merlin Trials – These unlock extra gear inventory slots (you start very limited). Do them when you see them.
6. Forgetting to Brew or Grow – Set your Room of Requirement to auto-harvest once unlocked.
7. Saving too little or too often – The game auto-saves constantly, but manually save before big boss fights.
---
9. Day-One Checklist (First Play Session)
Goals:
Not Required Day One:
---
10. Final Tips
Now grab your wand, and welcome to Hogwarts!
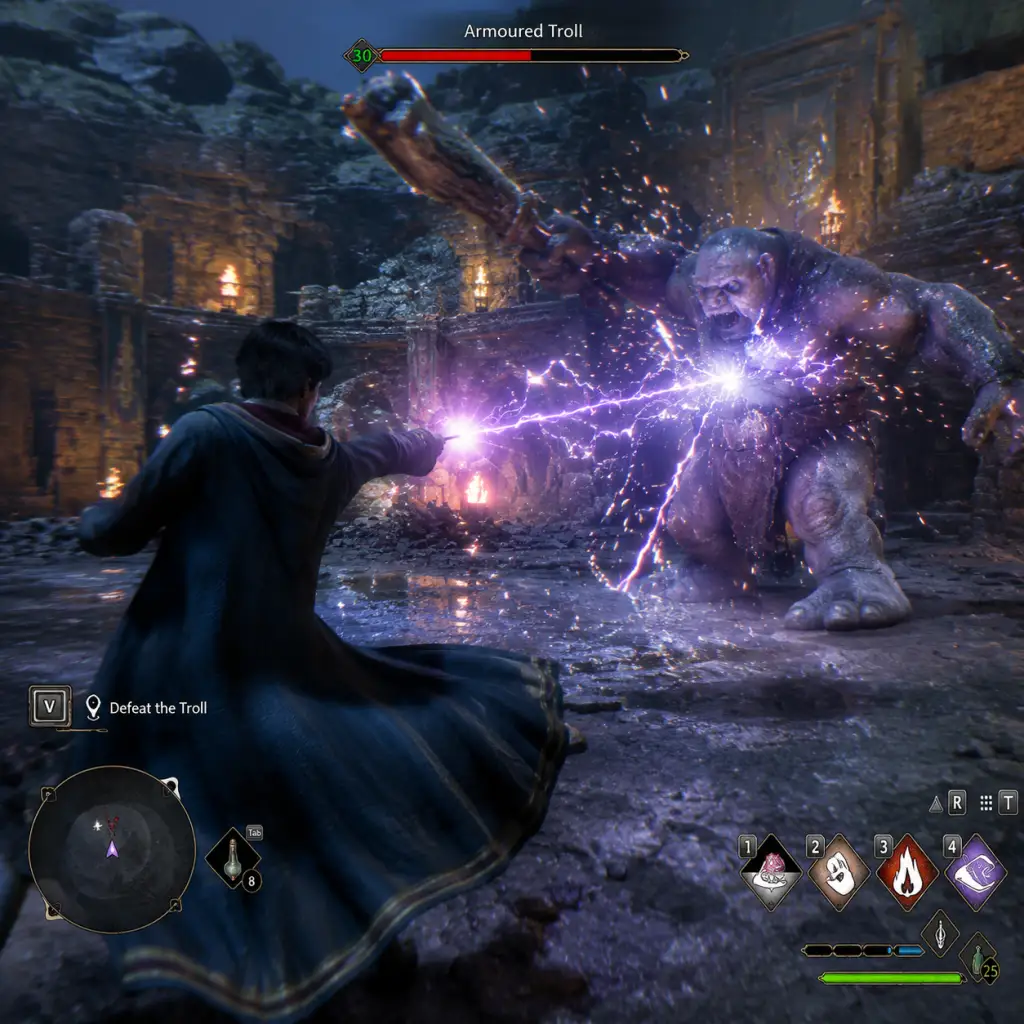
Core Gameplay
Core Gameplay Guide for Hogwarts Legacy
This guide breaks down the core gameplay of Hogwarts Legacy into four progression tiers. Each tier explains the main gameplay loop, combat and interaction systems, progression mechanics, exploration opportunities, quest structure, economy, character/build growth, and endgame content. All examples and advice are specific to the game and apply across platforms (PC, PlayStation, Xbox, Nintendo Switch) unless noted.
Overview of the Main Gameplay Loop
At its heart, Hogwarts Legacy is an open-world action RPG where you play as a fifth-year student who can wield ancient magic. The loop is: Accept and complete quests → Explore the castle and highlands → Fight enemies and solve puzzles → Earn experience (XP), loot, and collectibles → Upgrade your character, gear, and Room of Requirement → Take on harder challenges → Progress the story.
Combat uses a real-time spellcasting system with four spell slots mapped to face buttons (or keyboard keys), plus a Protego block, Stupefy counter, and ancient magic throws. Interaction includes casting spells on objects, Revelio to reveal secrets, and solving Merlin Trials or door puzzles.
Progression is tied to level (up to 40) which unlocks talent points (up to 36). Gear improves stats, and you can upgrade gear via the loom in the Room of Requirement. Exploration is vast – the castle, Hogsmeade, and the Highlands contain dozens of side quests, enemy camps, treasure vaults, and collectibles. The economy uses Galleons earned from loot selling and quests, spent on recipes, gear, and ingredients.
Character builds focus on skill trees (Spells, Dark Arts, Core, Stealth, Room of Requirement). Endgame includes finishing all collections, defeating legendary enemies, clearing all camps, and completing the Field Guide pages.
---
Early Game (Levels 1–15, First ~5–10 hours)
#### Main Gameplay Loop
- Follow the main story through introductory quests: from receiving your letter to arriving at Hogwarts, sorting ceremony, learning basic spells (Revelio, Lumos, Levestosa), and attending classes.
- Complete early side quests in Hogwarts, Hogsmeade, and the nearby Highlands (e.g., “The Lost Astrolabe”, “The Mad Nailer”).
- Engage in low-level combat with spiders, mongrels, and Ashwinders. Use basic cast, Accio, Incendio, and Levioso.
- Collect Revelio pages, Merlin Trials, and Field Guide pages to level up quickly.
- Manage limited inventory (gear slots initially 20). Sell unwanted gear to vendors in Hogsmeade.
- You have four spell slots; use them for damage, crowd control, and utility. Example loadout: Accio (pull), Levioso (lift), Incendio (burn), Basic Cast.
- Learn Protego (block) and Stupefy (stun) during Charms class. Timing is key – a yellow warning means blockable, red means unblockable (dodge).
- Use Revelio frequently to reveal hidden objects, loot, and quest markers.
- Puzzles: simple Lumos lantern platforms, basic door puzzles with arithmetic (e.g., 3 + ? = 12, square and triangle symbols).
- Leveling gives Talent Points – but you cannot use them until Tier 1 talents unlock after the first trial (around level 5–7). Save talent points until then.
- Early recommended talents: “Spells – Incendio Mastery” (adds DoT), “Core – Ancient Magic Focus” (faster focus recovery).
- Gear drops are common; equip higher offense/defense values. Prioritize green (higher level) gear over set bonuses early.
- Room of Requirement is unlocked around level 12 via the quest “The Room of Requirement”. Focus on the Potion Station, Herbology Table, and basic Loom for early upgrades.
- Earn Galleons by selling loot from defeated enemies and looting chests. Each vendor pays standard rates (e.g., common gear ~80–120 Galleons).
- First major purchasable: spellcrafts for the Room (e.g., potting tables) and gear from Hogsmeade shops.
- Spend money on: Potion recipes (Wiggenweld, Edurus, Maxima) and seed packs (e.g., Dittany, Mallowsweet).
- Hogwarts Castle: dozens of hidden rooms, moving staircases, and Field Guide pages. Use Revelio everywhere.
- Hogsmeade: buy early recipes, gear, and ingredient stores (e.g., J. Pippin’s Potions).
- Lower Highlands: complete Merlin Trials (e.g., use Mallowsweet on stone pillars) to increase gear inventory slots.
- Visit the Forbidden Forest cautiously – enemies are tougher.
- Main quests: “The Path to Hogwarts”, “Charms Class”, “Defence Against the Dark Arts Class”, “The Girl from Uagadou” (gets you a new wand handle), “The Room of Requirement”.
- Side quests: “The Lost Astrolabe” (trophy), “The Mad Nailer” (Unforgivable III curse questline start), “The Strange Owl” (get Deek the house-elf).
- Relationship quests: Start Natsai Onai’s “Help Natsai with her quest” (early Stealth training).
- Continue main story through second and third Keeper trials, unlock more powerful spells (e.g., Glacius, Bombarda, Diffindo, Crucio, Imperio, Avada Kedavra).
- Explore the Highlands more thoroughly, unlocking Floo Flames and completing side quests in every region (Feldcroft, Marunweem, North Ford Bog, etc.).
- Engage in larger-scale combat against packs of Dark Wizards, Trolls, and Graphorns. Use combos like Accio → Levioso → Incendio, or Glacius → Diffindo.
- Begin upgrading the Room of Requirement extensively: build large-planters, potions rooms, and Beast habitats for resources.
- Breed and rescue Beasts (Thestrals, Hippogriffs, Kneazles) to get materials for better gear upgrades.
- You now have access to all four spell types (Control, Force, Damage, Utility). Use 4 spell sets (4 slots each) through the spell diamond (hold L1 or LB or Tab).
- Unforgivable Curses (optional) – Crucio (torture), Imperio (control enemy), Avada Kedavra (instant kill). These can be learned via Sebastian Sallow’s questline.
- Advanced combat: use Ancient Magic Throw (Press R3 or F when yellow reticle appears) to deal heavy damage and stagger enemies. Ancient Magic Focus allows more throws.
- Enemies: Dark Wizards use shields (purple, yellow, red) – match spell color (Accio purple, Levioso yellow, Incendio red) or use basic casts to break shields? (Actually, matching color breaks shield faster). Learn to switch spells quickly.
- Puzzles: harder Merlin Trials (e.g., burn giant spider webs, repair statues by Depulso), butterfly puzzles, and door puzzles with higher numbers.
- Unlock Level 3 talents: example “Spells – Bombarda Mastery” (adds fire area), “Stealth – Petrificus Totalus Mastery” (chain stealth takedowns).
- Specialize: choose a build path – “Dark Wizard” (Unforgivable), “Elementalist” (fire/ice), “Stealth” (Invisibility + Petrificus).
- Gear now has traits like “Explosive” (Bombarda damage), “Tracker” (Stealth), “Focused” (spell damage). Use the Loom to apply traits to legendary gear.
- Upgrade gear at the Loom using materials from Beasts (e.g., Thestral hair, Kneazle fur). Each upgrade raises gear level by ~5.
- Complete talents for each spell tier – e.g., “Incendio Mastery” upgrades, “Accio Mastery” (pull bombables).
- Galleons are plentiful from selling unwanted gear (especially after looting enemy camps). Each high-level green gear sells for 500+ Galleons.
- Purchase expensive items: broom upgrades (top speed from Spintwitches Sporting Needs costs 5000+ each), large-potions recipe sets, animal habitats.
- Invest in Seed Packs for magical plants: Venomous Tentacula, Mandrake, Knotgrass – needed for potions.
- Unlock all Floo Flames for fast travel. Most regions have 5-8 Floo points.
- Complete 30+ Merlin Trials to max gear inventory slots (at 24).
- Solve butterfly puzzles (follow butterflies to hidden chests) and Depulso puzzles (both in caves and ruins).
- Find all Demiguise statues for the “The Man Behind the Moons” quest (unlocks Alohomora Level 3).
- Locate treasure vaults – each has a chest with gear; solve a simple puzzle to enter.
- Main quests: “The Trials of Merlin”, “The Helm of Urtkot”, “Lodgok’s Memory”, “The High Keep” (acquires new broom), “The Final Repository” (final).
- Side quests: “The Haunted Hogsmeade Shop” (PS exclusive), “The Tale of Rowland Oakes”, “Sallow’s Last Hope” (end of Sebastian’s questline).
- Relationship quests: Help Poppy Sweeting (Beast-related – rescue dragons, Poachers), help Amit Thakkar (astronomy tables).
- Finish the main story: complete all four Keeper trials, resolve professor Fig’s story, defeat Ranrok’s final dragon form. All main quests available.
- Post-main story: focus on completion – all side quests, relationship quests, and Field Guide pages.
- Combat against high-level enemies (Poachers, Loyalists, Trolls with armor, Wraiths). Use fully upgraded gear with traits. Example: use Ancient Magic III and Spell Intensity III traits.
- Optimize the Room of Requirement for mass production of potions (use Large Potion Station upgrades) and plants (fertilizers).
- Breed Beasts for rare resources: Phoenix feather (Winged creature) for legendary upgrades.
- You have all spells and talents unlocked. Use 4 spell sets effectively – e.g., Set 1: Control (Levioso, Arresto Momentum, Glacius, Depulso), Set 2: Damage (Bombarda, Diffindo, Confringo, Expelliarmus), Set 3: Unforgivable or Utility.
- Unforgivable Curses: Avada Kedavra one-shots most enemies except bosses (reduced damage). Crucio causes DoT and can spread. Imperio makes enemies fight for you.
- Use the final variant of Ancient Magic Focus to chain multiple throws.
- Combat tip: vs. shields, use the correct color spell to break quickly; vs. grouped enemies, use Glacius on one then Bombarda to freeze-explode AoE.
- All Talent Points allocated (36 total). Max out chosen tree: e.g., if Dark Wizard, get all Unforgivable Masteries and “Curse Damage” nodes.
- Legendary gear traits: best in slot include “Ancient Magic III”, “Spell Cooldown III”, “Maximum Health III”, and damage type traits (Incendio damage, Bombarda damage).
- Upgrade gear to Level 3 via Loom using rare materials like Phoenix Feather, Great Spined Graphorn Horn (from Graphorn boss), and Thestral Tail Hair.
- Complete all challenges in the Challenge menu for XP and cosmetic rewards. Each challenge gives a large XP bonus (e.g., defeat 10+ Trolls, capture 10+ Beasts).
- Galleons are abundant – sell all green/blue gear, keep purples and legendaries. A single legendary sells for 1000+ Galleons.
- Buy all broom upgrades (max speed) and broom skins. Purchase all spellcrafts for the Room (e.g., large habitat for Beasts, max potion stations).
- No need to farm money – focus on ingredient stockpiling.
- Full map exploration: find every Bandit Camp (clear for XP and field guides), collect every Astronomy Table (for Ancient Magic traces), and all Demiguise statues (unlock Level 3 locks).
- Complete all Merlin Trials (95 total) to max inventory slots (40).
- All treasure vaults (around 60) – loot legendary gear and Ancient Magic artifacts.
- Collect all Field Guide pages (150 in Hogwarts, 30 in Hogsmeade, rest in Highlands).
- Main story: you will have completed all before Level 40 if you follow the critical path. If not, finish “The Final Repository” and its aftermath.
- Side quests: “A Study in Ancient Magic” (trophy), “The Man Behind the Moons” (final Demiguise), “The Hall of Herodiana” (Depulso puzzle rooms).
- Relationship quests: finish all three characters’ arcs – Natsai (ends with finding a missing artifact), Poppy (ends with fighting a dragon), Sebastian (ends in the catacomb with final Unforgivable choice).
- No main story left; focus is 100% completion (all collections, achievements/trophies).
- Continue clearing remaining Bandit Camps, completing challenges, and collecting all Field Guide pages.
- Replay combat scenarios in the Field Guide pages for fun (no new quests). Use different spell combos.
- Experiment with Beast breeding to get perfect stats (not critical, but completionist item).
- Max out your gear – acquire all Legendary traits (e.g., “Ancient Magic Focus III” from specific bosses).
- Combat is primarily for clearing leftover camps or revisiting areas. Enemies scale with your level? (Enemies have fixed levels but game is easy at max level).
- Use the most powerful loadout: 4 spell sets with all Ancient Magic upgrades. Use Avada Kedavra + Crucio + Imperio for quick clears.
- No new combat mechanics post-story.
- Character is fully leveled. You can respec talent points (not available natively – you cannot refund talents). So plan final build carefully. (Note: There is no respec feature in Hogwarts Legacy as of update 1.0.2 – rely on save backup.)
- Best build example:
- Money becomes meaningless – you'll have thousands of Galleons. Spend on broom skins (cosmetic) and extra potion ingredients.
- No new vendors or shops after story.
- Complete every collectible: Field Guide pages, Revelio pages, Astronomy Tables, Demiguise statues, Merlin Trials, treasure vaults, Bandit Camps, Landing Platforms (for brooms), and Butterflies.
- There are 603 total Field Guide pages? (Actually 603 total collections – check FAQ). Focus on tracking progress via the Collections tab.
- Explore every corner of Hogwarts: there are hidden rooms like the One-Eyed Witch passage, the Restricted Section, and the Ghost’s quest (Nearly Headless Nick).
- No new quests after main story (except optional collectible quests like “The Man Behind the Moons” part 3).
- If you haven’t completed all Relationship quests, do them now – they are missable? (No, they remain available until completed).
- Complete the “House-specific” quests: each house has a unique early quest (e.g., Hufflepuff gets a trip to Azkaban). These must be done early; if missed, reload a save. At endgame, you cannot restart house-specific quests unless you start a new game.
- The only new endgame activity is completing the “Collector’s Edition” achievement/trophy set (e.g., “All Field Guide Pages”, “All Merlin Trials”, “All Treasure Vaults”).
- There is no New Game+ or endgame boss. Once all collections are done, the game is effectively complete.
- For players seeking challenge: replay the game on “Hard” difficulty from scratch, or role-play with restrictions (e.g., no Unforgivable Curses).
#### Combat & Interaction
#### Progression & Build
#### Economy
#### Exploration
#### Quests & Missions
---
Mid Game (Levels 16–30, ~15–30 hours)
#### Main Gameplay Loop
#### Combat & Interaction
#### Progression & Build
#### Economy
#### Exploration
#### Quests & Missions
---
Late Game (Levels 31–40, ~30–50 hours)
#### Main Gameplay Loop
#### Combat & Interaction
#### Progression & Build
#### Economy
#### Exploration
#### Quests & Missions
---
Endgame (Level 40, Post-Story, 50+ hours)
#### Main Gameplay Loop
#### Combat & Interaction
#### Progression & Build
- Spells: Bombarda, Diffindo, Confringo, Glacius (elemental damage build)
- Talents: All mastery nodes for these spells, Core – Ancient Magic Focus III, Dark Arts – Curse damage, Stealth – Assassin’s Approach (speed after kill)
- Gear traits: Spell Intensity III, Ancient Magic III, and Ancient Magic Focus III (on cloak, hat, neck, and outfit).
#### Economy
#### Exploration
#### Quests & Missions
#### Endgame Structure
---
Summary Table of Progression Tiers
| Tier | Levels | Hours | Focus | Key Unlocks |
|---|---|---|---|---|
| Early Game | 1–15 | 5–10 | Main story, basic spells, Room basics | Revelio, Protego, basic talents, Room of Requirement |
| Mid Game | 16–30 | 15–30 | Exploration, side quests, Unforgivable Curses, Beast breeding | All spells, Room upgrades, Legendary gear, traits |
| Late Game | 31–40 | 30–50 | Main story completion, full exploration, high-level gear | Max talents, all broom upgrades, best traits |
| Endgame | 40 | 50+ | 100% completion, all collections, no new story | No major unlocks; completionist tasks remain |
Combat & Interaction Systems Deep Dive
- Spell Casting: Four spell slots per set, up to four sets (16 total spells accessible via hold button). Each spell has a cooldown (1–15 seconds). Use the Spell Diamond (hold L1/LB/Tab) to swap sets.
- Shield Breaking: Enemies have colored shields: Purple (Accio), Yellow (Levioso), Red (Incendio). Cast matching spell to break instantly; otherwise, brute force with Basic Casts (slower).
- Protego and Stupefy: Press block when enemy attacks with yellow indicator. Successful block stuns them; press attack immediately for a powerful counter (Stupefy).
- Dodging: Red indicator means unblockable attack – dodge (Circle/B/O) to avoid.
- Ancient Magic: Build up the Ancient Magic meter (chests, kills, finishers). When full, press R3/F to throw objects (deals huge damage and knockdown). Can be upgraded to hold multiple charges.
- Stealth: Use Disillusionment (spell) to become partially invisible. Sneak behind enemies for Petrificus Totalus instant takedown (one-shot). Stealth talents improve range and chain.
- Brooms: Fast travel alternative; can be upgraded with speed. Cannot fight on broom.
- Talent Points: You cannot respec. Plan your build before level 20. If you want Unforgivable Curses, prioritize Sebastian’s questline early (mid game).
- Gear: Always equip highest level gear (green/blue/purple/orange). Use Loom to add traits – “Ancient Magic Focus” is universally useful. “Explosive” for Bombarda builds, “Tracker” for stealth.
- Room of Requirement: Unlock it early. Set up 4 large potting tables, 2 large potion stations, and at least 4 small beast habitats. Grow Mallowsweet for Merlin Trials; grow Dittany for Wiggenweld potions.
- Beast Resources: Rescue Beasts to get materials. For each beast type, you need 3 to breed (buy from Brood and Peck in Hogsmeade). Essential for upgrade materials.
- Galleons: Max around 99999. Best ways to earn: sell green gear, complete quests with high reward, sell extra potions (maxima potion sells for 250).
- Potions: Craft Wiggenweld (heal), Edurus (defense), Maxima (damage), Focus (cooldown reduction), Invisibility (stealth).
- Plants: Dittany (heal), Mallowsweet (Merlin Trials), Fluxweed (Focus), Venomous Tentacula (damage), Mandrake (AoE stun), Chinese Chomping Cabbage (melee damage).
- Upgrading Gear: Use Loom with materials and a specific ingredient to add traits. Higher ingredient quality (e.g., Graphorn Horn) gives better trait tiers.
- Revelio Pages: 150 in Hogwarts, 30 in Hogsmeade, 20 in the Highlands. Use Revelio near bookshelves, portraits, and objects that glow blue. Some require casting a spell (Incendio on fireplaces, Lumos on moth statues).
- Merlin Trials: 99 total. Each increases gear inventory slot (max 40). Types: use Mallowsweet on pillars, light fires on braziers, repair statues, etc.
- Astronomy Tables: 16 total. Each reveals an Ancient Magic location – visit to get a chest with gear and increase your Ancient Magic meter.
- Demiguise Statues: 30 total. Find them at night (use wait feature). Level up Alohomora: level 1 opens basic locks, level 2 medium, level 3 hard. The quest “The Man Behind the Moons” rewards more.
- Butterfly Puzzles: 8 total. Follow butterflies to hidden chests with legendary gear.
- Main Quests: Follow the narrative of the Ancient Magic, Keeper trials, and Ranrok. There are 31 main quests (including prologue and epilogue).
- Side Quests: Over 50 quests, ranging from simple fetch to extensive dungeon crawls. Some are missable if you don't start them before certain main story points? (No, but progress them before final mission to avoid bugs).
- Relationship Quests: Natsai, Poppy, Sebastian – each has a chain of 5-6 quests. Completing them grants unique spells (e.g., Sebastian gives all Unforgivable Curses if you choose to learn them).
- Hogwarts Legacy has no level gating for quests – but recommended levels exist. Examples: “The Hall of Herodiana” (Level 10), “Solving for a Haunting” (Level 15).
- 100% Completion Checklist:
- Trophies/Achievements: 46 trophies on PlayStation; 43 achievements on Xbox/Steam. Include “Collector’s Edition” for all collection-related trophies.
- Replayability: No New Game+. You can start a new character with a different house for the house-exclusive quest (House Cup, Azkaban visit). Hard difficulty playthrough offers challenge.
---
Progression & Build Growth Tips
---
Economy & Crafting
---
Exploration & Collectibles
---
Quests & Missions Structure
---
Endgame Structure
1. All Field Guide Pages (603 total)
2. All Merlin Trials (99)
3. All Treasure Vaults (60)
4. All Bandit Camps (14+)
5. All Landing Platforms (17)
6. All Butterflies (8)
7. All Demiguise Statues (30)
8. All Astronomy Tables (16)
9. All Beast Dens (complete “Capturing the Beast” side quest for each species? Actually only need to rescue one of each for collections)
10. All Challenges in the Challenge menu (Fighting, Herbalism, Potion, Room of Requirement, Exploration – max rank gives a cosmetic item).
---
This concludes the comprehensive core gameplay guide. For more specific details, refer to the Getting Started and Game Introduction sections.

Game Tips
Hogwarts Legacy Game Tips – Comprehensive Guide
This guide collects essential tips for Hogwarts Legacy covering all phases of the game. Tips are grouped by category and include beginner-friendly advice, intermediate strategies, and advanced optimizations.
---
1. General Beginner Tips
Tip: Complete the Merlin Trials Early
- What it does: Merlin Trials reward increased gear inventory capacity. Each trial completed adds +4 inventory slots.
- Why it works: Inventory quickly fills with gear from chests and enemies. More slots mean less frequent backtracking to sell or dismantle.
- When to use: Begin trials as soon as you unlock the Basic Cast and Revelio (around level 3–5). Focus on trials near Hogwarts and Hogsmeade first.
- What it does: Astronomy Tables increase your Time-Turner (fast travel) points. Each completed table unlocks a new floo flame location.
- Why it works: Fast travel is the primary movement method. More floo flames reduce travel time across the large map.
- When to use: Throughout the main story, whenever you encounter a table. Use Revelio (R1/RB) to spot them from a distance.
- What it does: Reveals collectibles, chests, field guide pages, and interactive objects in a large radius. Also highlights enemy positions.
- Why it works: The world is dense with hidden items. Regular use prevents missing resources for upgrades, cosmetics, and XP.
- When to use: Every 10–15 seconds while exploring. Cast it after every combat encounter to spot loot crates.
- How to do it: Spam basic cast until an enemy’s shield bar turns yellow (stun), then immediately press the Stupefy button (R1/RB or Circle/B).
- Why it works: Basic cast is your fastest spell; Stupefy deals high damage and knocks enemies back. The combo builds combat momentum and crowd control.
- When to use: Against any single enemy or small group. Avoid spamming on shielded enemies – first break their shield with the matching color.
- How to do it: Hold the block button (L1/LB) to raise Protego just before an enemy attack connects (timing). Immediately tap the attack button for a counter-stun.
- Why it works: Perfectly timed blocks stun enemies and recharge your cooldowns faster. Counter-stuns interrupt dangerous attacks (e.g., trolls’ ground pound).
- When to use: Against any enemy whose attack telegraph is obvious. Practice on aggressive creatures like wolves or spiders. Do not hold block – time it.
- How to do it: Build the Ancient Magic meter by using spells (especially combos) and looting purple-glowing objects. Once full, press L3+R3 (or RS+LS) to unleash a powerful attack requiring no cooldown.
- Why it works: Ancient Magic bypasses all shields and hits hard. Combining it with Accio (pull) into Incendio (fire) creates explosive synergy.
- When to use: Save Ancient Magic for enemy groups with mixed shields, or to finish a large troll quickly. Also effective against bosses’ first phase.
- What it does: Avis summons a flock of birds that can interact with distant objects (like switches or levers).
- How to get: Complete the side quest “The Plight of the House-Elf” in the Hogwarts kitchens.
- Why it works: Many high-level chests and secret rooms require triggering a switch from a distance. Avis saves climbing or using Accio.
- How to do it: Open the map and select a floo flame. Use fast travel even to exit dungeons or hogwarts interiors.
- Why it works: Floo travel is instant and costs nothing. You can fast travel from anywhere, not just from a flame point – but you must be standing still.
- When to use: Any time you want to return to Hogsmeade to sell gear or resupply. In combat, avoid fast traveling unless you’re out of combat.
- How to unlock: Complete the main quest “The Room of Requirement” (around level 8–10).
- What it does: Lets you grow plants, brew potions, and upgrade gear.
- Why it works: Potions and plants are essential for combat efficiency. Growing your own reduces reliance on shops.
- When to use: After every major story quest, return to the Room of Requirement to restock potions and check gear traits.
- Where to find: Near the Greenhouses in Hogwarts (exterior) and at the Coastal Mine area.
- Use: Required for Merlin Trials. Without them, you cannot start trials.
- Why it matters: Trials are time-gated by Mallowsweet availability. Stockpile 10+ leaves early.
- Recipe: 1 Horklump Juice, 1 Dittany Leaf. Both can be grown in Room of Requirement.
- Why it works: Healing is limited to potions; you can carry up to 12. Combat in higher difficulties demands frequent heals.
- When to use: Always have at least 6 potions in inventory. Before boss fights, brew 12.
- How to unlock: Complete “The Loom” quest (Room of Requirement).
- Effect: Traits add passive bonuses like increased damage against specific enemy types, reduced spell cooldowns, or defensive boosts.
- Why it works: A well-traited common level 10 gear can outperform a higher-level item with no trait. Prioritize traits over gear level.
- When to use: As soon as you unlock the Loom, apply the Control trait to a piece of gear (+damage to controlled enemies). Change traits based on upcoming enemies.
- Spell Talents: Unlock the Accio Mastery (increased pull damage) and Incendio Mastery (fire spread).
- Why it works: These two spells form the foundation of most combos. Early points here make fights much easier.
- When to use: Spend talent points on spell upgrades until level 10, then branch into Dark Arts or Defensive.
- Key Talents: Unforgivable Curses (Crucio, Imperio, Avada Kedavra) from Sebastian Sallow’s questline. Then invest in Curse Mastery (spread curses) and Enduring Curse (curses last longer).
- Why it works: Curses multiply damage – hitting a cursed enemy with any attack deals bonus damage. Combining Crucio (damage over time), Imperio (turn enemy), and Avada Kedavra (instant kill) clears rooms fast.
- When to use: Unlocked after finishing Sebastian’s quest line (level 14+). Use it for large camps and bosses.
- Talents: Invisibility Potion upgrades (Concentrated Potion), Disillusionment spell upgrades (stealth kill boosts).
- Why it works: Stealth kills deal 3x damage and bypass shields. Combined with Petrificus Totalus (instant petrify), you can clear camps without alerting anyone.
- When to use: Excellent for “kill X enemies” bounties where you need to avoid detection. Also for speed runs of bandit camps.
- Where to sell: Hogsmeade’s Spintwitches Sporting Needs (to the left of the main square) or any vendor.
- Why it works: Money is scarce early game. Selling even common gear funds spellcrafts (for Room of Requirement) and potions.
- When to use: Always check your inventory after each dungeon. Sell gear that is more than 5 levels below your current level, unless it has a trait you want.
- What it does: Gear upgrades via the Loom increase stats but cost precious materials like Moonstone.
- Why it works: Gear you find will quickly outlevel your upgrades. Save materials for endgame gear (level 30+ stats).
- When to use: Resist the urge to upgrade every piece. Only upgrade if you are stuck in a difficult boss fight before level 20.
- Where to get: Boss fights in main story, side quests (e.g., The Keeper’s Quest), and high-level bandit camps.
- Why it works: Legendary items have three trait slots, allowing maximum customization.
- When to use: From level 15 onward, keep legendary pieces even if lower level – you can reroll traits later via the Loom (costs materials).
- What they are: Side quests indicated by a bubble icon on the map. Often from students like Natsai Onai or Cressida Blume.
- Why it matters: They unlock spells, traits, and cosmetics. Many lead to new exploration areas.
- When to use: Complete as soon as available. They are level-scaled and often shorter than main quests.
- How it works: Demiguise Statues are hidden throughout the world. Collect 9 to upgrade Alohomora from Level I to Level II, then 13 more for Level III.
- Why it works: Higher-level Alohomora unlocks high-level chests containing legendary gear and rare crafting materials.
- When to use: Start searching immediately after unlocking Alohomora. Use the Revelio spell; statues glow blue. A guide map is recommended for efficient hunting.
- What they are: Large glowing pillars scattered across the map. Interacting gives you a permanent boost to Ancient Magic meter capacity.
- Why it works: More capacity means you can store up to 3 or 4 Ancient Magic attacks before needing to refill.
- When to use: Collect all 20 early – they are marked on the map after discovering them once. Revisit later with broom to reach elevated ones.
- How to unlock: Complete “Flight Test” quest from Sirona Ryan in Hogsmeade.
- Why it works: Brooms are much faster than walking, and they allow you to bypass enemies entirely. Use the boost (R2/RT) for speed bursts.
- When to use: For long-distance map traversal, especially between regions like Hogwarts, Hogsmeade, and Forbidden Forest. Avoid using broom in combat – you cannot cast spells.
- What they are: Venomous Tentacula plants can be sold for high prices in Hogsmeade.
- Why it works: Farming them in Room of Requirement’s Large Potting Table yields 3–5 plants every 10 minutes of real time. Sell them to any vendor for ~200 galleons per batch.
- When to use: Set up 3–4 tables and harvest every real-time hour. This generates steady income for buying rare crafting materials.
- How to do it: Pause -> Settings -> Gameplay -> Difficulty. Can change at any time (except during cutscenes).
- Why it works: Toggle between Story (easy) and Hard for combat practice, or switch to Normal for balanced loot drops.
- When to use: If stuck on a boss, lower difficulty temporarily. No achievements are tied to difficulty.
- Effect: Reduces all spell cooldowns by 50% for 30 seconds.
- Why it works: In hard fights, you can chain spells faster, allowing constant pressure. Especially useful with Dark Arts curses.
- When to use: Pop before engaging a boss or a large group of trolls/executioners.
- What they look like: Small glowing pads or waterfalls in the open world. Interact to enter a short puzzle room with a gear chest.
- Why it matters: Each vault gives a piece of gear scaled to your level. Good for gearing up.
- When to use: While exploring, cast Revelio frequently near rock formations or ruined buildings.
- How: Open the world map (Touchpad or View button) and select a floo flame. Confirm.
- Why it works: You don’t need to be at a floo flame to fast travel. However, you cannot be in combat or in a restricted area.
- When to use: To quickly exit a long dungeon or return to Hogwarts for restocking.
Tip: Prioritize the Astronomy Tables Early
Tip: Use Revelio Constantly
---
2. Combat Tips
Beginner: Master the Basic Cast + Stupefy Combo
Intermediate: Use Protego and Stupefy Defensively
Advanced: Spell Weaving with Ancient Magic
---
3. Exploration & Travel
Tip: Unlock the Avis Spell (Summoning) for Exploration
Tip: Use the Floo Network Strategically
Tip: The Room of Requirement is Your Base
---
4. Resources & Crafting
Tip: Gather Mallowsweet Leaves Immediately
Tip: Brew Wiggenweld Potions in Bulk
Tip: Upgrade Gear with Traits from Loom
---
5. Character Builds & Talents
Beginner: Focus on Core Talents First
Intermediate: The Dark Arts Tree for Damage
Advanced: Stealth Build for Bounties
---
6. Economy & Gear
Tip: Sell Unwanted Gear Immediately
Tip: Don’t Upgrade Gear Until Level 30+
Tip: Prioritize Legendary Gear from Bosses
---
7. Quests & Secrets
Tip: Do Frogs’ Quests (Temporary Side Quests)
Tip: Find Demiguise Statues for Alohomora Upgrades
---
8. Advanced Optimization
Tip: Use Ancient Magic Hotspots Strategically
Tip: Broom is Faster than Ground Travel
Tip: Plant Potatoes for Passive Income
---
9. Quality of Life & Hidden Mechanics
Tip: Change Difficulty Mid-Game
Tip: Use Focus Potions for Boss Fights
Tip: Revelio Shows Hidden Treasure Vaults
Tip: Fast Travel from Anywhere (Not Just Floo Flames)
---
Final Progression Strategy
1. Level 1–10: Focus on main quests until you unlock the Room of Requirement and broom. Collect Mallowsweet and Demiguise.
2. Level 10–20: Complete side quests for spells (especially from Sebastion and Natty). Upgrade Alohomora to Level II. Start collecting Ancient Magic Hotspots.
3. Level 20–30: Tackle high-level bandit camps and goblin mines for legendary gear. Invest talent points in Dark Arts or Stealth.
4. Level 30–40: Focus on finishing all collections (Field Guide Pages, Astronomy Tables, Demiguise). Brew Focus and Invisibility potions for endgame optional bosses.
Good luck, young witch or wizard! May your spells always find their mark.

Game Settings
Game Settings Guide for Hogwarts Legacy
This guide covers all major settings categories in Hogwarts Legacy: Graphics, Audio, Controls, Accessibility, Language, Network, and Gameplay. We provide optimal recommendations for different hardware tiers (PC) and note console-specific quirks. Key settings that are easy to misconfigure or require special attention are highlighted.
---
Graphics Settings
Graphics have the biggest impact on performance and visual fidelity. The game uses Unreal Engine 4 and offers a wide range of options.
#### Presets Overview
- Low: Minimal shadows, low textures, no ray tracing. Targets 30-60 FPS on low-end hardware.
- Medium: Balanced quality with moderate shadows and effects. Good for mid-range GPUs.
- High: High textures, better shadows, ambient occlusion. Requires a strong GPU (e.g., RTX 2060 or better).
- Ultra: Max detail with ray tracing. For top-tier GPUs (RTX 3080+).
- PC Ultra: Beyond console ultra – adds ultra-quality vegetation and draw distance.
#### Key Individual Settings
| Setting | Recommendation | Misconfiguration Risk |
|---|---|---|
| Ray Tracing (Reflections, Shadows, Ambient Occlusion) | Turn OFF for performance; ON for high-end only (RTX 3070+). | Very heavy – can halve FPS. Always check effect vs. cost. |
| Upscale Type (DLSS, FSR, XeSS, TAAU) | Use DLSS Quality (NVIDIA) or FSR Quality (AMD) for best FPS with minimal quality loss. | Setting to Performance mode may cause blur. TAAU can be soft. |
| Texture Quality | High or Ultra if VRAM ≥ 6GB. Low if ≤ 4GB. | Ultra on low VRAM causes stuttering and texture pop-in. |
| View Distance | High on mid+ GPUs; Medium on low-end. | Low can make distant objects pop in abruptly. |
| Shadow Quality | Medium or High; Ultra is costly. | Low shadows cause flickering on foliage. |
| Post-Processing (Motion Blur, Film Grain, Chromatic Aberration) | Turn OFF all for clarity. | These are subjective but can cause motion sickness or make image muddy. Many players disable. |
| Vsync | OFF unless screen tearing bothers you. Use G-Sync/FreeSync instead. | Enabling Vsync adds input lag. |
| Frame Rate Cap | Set to monitor refresh rate (e.g., 60, 120, 144). | Uncapped can cause overheating on laptops. |
| Field of View (FOV) | PC: 90-100. Console: not adjustable. | Too low causes claustrophobia; too high can warp edges. |
Low-End (e.g., GTX 1060 6GB, RX 580, 8GB RAM)
- Preset: Low
- Textures: Medium (if VRAM >4GB)
- Upscale: FSR / DLSS Performance
- Ray Tracing: Off
- Target: 1080p, 30-40 FPS
- Preset: Medium
- Custom: Textures High, Shadows Medium, View Distance High
- Upscale: FSR/DLSS Quality or Balanced
- Ray Tracing: Off
- Target: 1080p/1440p, 60 FPS
- Preset: High
- Custom: Textures Ultra, Shadows High, Ray Tracing Off (or on for reflections only)
- Upscale: DLSS Quality
- Target: 1440p, 60-90 FPS
- Preset: PC Ultra
- Custom: Ray Tracing on High (All), DLSS Quality/FSR Quality
- Target: 4K, 60+ FPS with DLSS
- PS5/Xbox Series X: Favor Quality mode (30fps, ray tracing) or Performance mode (60fps, lower settings). HDR is automatic – calibrate in TV settings if needed.
- Xbox Series S: 1440p/30fps Quality, 1080p/60fps Performance. No ray tracing.
- Last-Gen (PS4/Xbox One): Locked at 30fps, minimal settings. No FOV adjustment.
- Nintendo Switch: 720p handheld, 900p docked, target 30fps with dynamic resolution. Use performance-focused presets.
- Master Volume, SFX, Voice, Music: Default 100%, but reduce Music slightly (70-80%) if you want clearer dialogue during exploration.
- Audio Output Mode: Choose Stereo (headphones), Surround (5.1/7.1), or Auto. For TV, set to Surround if supported; for headset, Stereo often gives better spatial awareness.
- Subtitles: ON recommended for story clarity. Options: Full subtitles (all speech), or only for foreign languages.
- Narrator Audio: Available for accessibility – reads UI elements and quest objectives.
- 3D Audio Support: PS5 and Xbox Series X|S support Tempest 3D and Dolby Atmos. Enable in console settings, not in-game.
- Haptic Feedback / Controller Speaker: On PS5 you can toggle controller speaker for spell sounds. Can be distracting; many turn off.
- Key Bindings: Fully customizable. Consider rebinding:
- Mouse Sensitivity: Start at 50%; adjust based on mouse DPI. Lower for precision aiming (e.g., 30-40% with 800 DPI).
- Invert Y-Axis: Off unless you prefer flight-sim style.
- Controller Vibration: Available for PC if using controller.
- Layout: Several presets (Standard, Classic, etc.). Standard is fine. You can also customize each button.
- Spell Wheel: Tap R1 (PlayStation) / RB (Xbox) to open wheel; while holding, move right stick to select. Some players remap to L1/LB to keep thumbs on sticks.
- Target Lock: Default R3 (press right stick). Very useful – keep it.
- Aim Assist: Can be set to Low, Medium, High, or Off. Recommended Medium for beginners; Off for precise aiming.
- Difficulty Level: Story, Easy, Normal, Hard. Can be changed anytime.
- Combat Assistance:
- Camera:
- Visual Cues:
- Game Speed: Not adjustable, but pause accessible.
- Navigation:
- Controller Remapping: Full button remapping on all platforms (PS5, Xbox, PC). Take advantage to reduce reach.
- Voice Language: Choose between English, French, German, Spanish, Italian, Japanese, and more (full list in system settings). Voiceovers are fully localized.
- Text Language: Separate from voice. Can mix English voice with local text.
- Subtitles: Choose language for subtitles. Set to same as voice or different if learning.
- Lip Sync: Only available for English voice. For other languages, speech may be out of sync.
- Connection Type: Wired (LAN) recommended for best stability. Wi-Fi works but may cause lag in online features (none required for single-player).
- Online Features:
- Data Collection / Telemetry: You can opt out in system settings. Doesn't affect gameplay.
- Multiplayer: There is none. All settings are for single-player only.
- Tutorial Prompts: ON for first playthrough; can be turned off after introduction.
- Auto-Save Frequency: Every 30 seconds (default). Adjustable: every 5, 10, 15, 30 seconds. Frequent saves reduce progress loss but may cause micro-stutters on slower HDDs (use SSD).
- Quick Select (Spell Slots): Always active. You can toggle spell slots with D-Pad (controller) or number keys (PC).
- Denoui (UI) Options:
- Controls Customization: Saving control profiles is supported (PC only).
- Automatic Pickup: On by default – collect items by walking over them. Off requires manual press. Keep ON.
- Broom Controls: Invert Y for flight can be set separately from land controls.
- Photo Mode: Accessible via pause menu. Not a traditional setting but useful for screenshots.
- First Boot: Always enter the settings menu before starting the game. Adjust FOV, disable motion blur, and set performance preset.
- Console Players: The performance mode (60fps) is strongly recommended over quality (30fps) for smoother gameplay, unless you have a 120Hz display.
- PC Players: Use the in-game benchmark to test settings. Adjust slowly – Ray Tracing is the biggest FPS killer.
- Accessibility: Enable subtitles and adjust camera shake immediately for best comfort.
Mid-Range (e.g., RTX 2060 Super, RX 6600, 16GB RAM)
High-End (e.g., RTX 3070, RX 6800, 16GB RAM)
Ultra (e.g., RTX 4090, RX 7900 XTX, 32GB RAM)
Console-Specific
---
Audio Settings
Misconfiguration Alert: Turning Master Volume very low while leaving SFX high can cause combat sounds to be deafening. Balance all sliders equally.
---
Controls Settings
#### Keyboard & Mouse (PC)
- Spell Slot 1-4 to mouse side buttons (if available).
- Dodge (default: Space) – rebind to a thumb button if you prefer.
- Protego (Parry) default: Q. Consider moving to mouse button for faster reaction.
#### Controller (All Platforms)
Action Mapping for Accessibility – see Accessibility section.
---
Accessibility Settings
Hogwarts Legacy includes robust accessibility options.
- Auto-Target: ON reduces manual aiming; good for accessibility.
- Aim Snap (Magnetism): Helps lock onto enemies.
- Spell Cooldown Reduction: If enabled, cooldowns are halved (Story mode default).
- Camera Shake: OFF to prevent motion sickness.
- Head Bobbing: OFF recommended for comfort.
- HUD Size: Options for Small, Normal, Large. Larger is better for TV viewing.
- Color Blind Modes: Protanopia, Deuteranopia, Tritanopia filters for UI elements.
- Subtitle Background: Darken or solid to improve readability.
- Mini-Map Rotation: Set to North-Locked (preferred) or Player-Oriented.
- Quest Marker Visibility: Always show or only on compass.
Special Attention: The Auto-Target setting can make combat too easy for some – turn off if you want manual aim. Camera Shake and Head Bobbing are ON by default; many players disable immediately for comfort.
---
Language Settings
Misconfiguration: If you set a language for voice that does not match your region, DLC or future updates may cause mismatches. Stick to one consistent language to avoid conflicts.
---
Network Settings
- Merlin Trials & Challenges: No online required.
- Vivarium Sharing: Photo mode pictures can be shared but not necessary.
- Automatic Cloud Save: Enabled by default (check platform settings).
Note: The game does not require an internet connection to play after initial download (except for updates). Disable background downloads to save bandwidth.
---
Gameplay Settings
These settings affect how the game behaves during play.
- Compass: Always show, Auto-hide, or Off.
- Health Bar: Always show or on damage.
- Enemy Health Bars: Show always, on damage, or off.
Easy-to-Misconfigure: Auto-Save Frequency – setting it to 5 seconds may cause constant brief freezing on older systems. Stick to 30 seconds unless you have a fast SSD.
---
Final Recommendations
For more help, see the Hogwarts Legacy Performance Guide (separate resource).
---
Last updated: [date]. Settings may change with patches.

Important Notes
Important Notes for Hogwarts Legacy
This section covers critical warnings, pitfalls, irreversible choices, missable content, difficulty spikes, grinding traps, online etiquette/anti-cheat notes, save management advice, and common regrets. Read this before you start or early in your playthrough to avoid frustration and maximize your experience.
⚠️ Warnings & Pitfalls
- Autosave Overwrites: The game has 5 rotating autosave slots. Manual saves are separate but limited (10 manual slots). If you overwrite a manual save with a new manual save, the old one is gone. Use multiple manual saves before major decisions.
- Early Gear Inventory: You start with very limited inventory space. Sell or dismantle unwanted gear frequently. Don’t hoard low-level gear because you’ll constantly find better items.
- Spell Assignment: You can only assign 4 spells to your action set at a time. Early on, you may forget to swap sets. Use the d-pad (console) or number keys (PC) to quickly switch between your four spell sets. Practice this in the Room of Requirement.
- Field Guide Pages: Many are missable if you progress the main story past certain points (e.g., some pages in Hogwarts become inaccessible after the final story quest). Collect all field guide pages before the endgame.
###

All Game Items
All Game Items Guide for Hogwarts Legacy
This comprehensive guide catalogs every major item in Hogwarts Legacy, grouped by category. Each entry explains the item's function, acquisition method, optimal usage, and any notable synergies or upgrades. All information applies to PC, PlayStation 4/5, Xbox One/Series X|S, and Nintendo Switch.
---
1. Weapons (Wands)
Wands are your primary casting tool. They are purely cosmetic—handled from character creation—and cannot be changed later. All wands function identically in combat; no stats are tied to them.
- Acquisition: Selected during the Ollivanders quest (early game). You choose core (Unicorn Hair, Dragon Heartstring, Phoenix Feather) and wood type. These affect only spell visual effects (e.g., Phoenix Feather produces golden sparks).
- Usefulness: No gameplay impact. Choose based on lore preference.
- Synergies: None.
---
2. Armor & Gear
Gear includes robes, gloves, neckwear, headwear, and facewear. Each piece has a rarity (Common, Fine, Superior, Extraordinary, Legendary) and provides stat bonuses to Offence, Defence, or both.
#### 2.1 Gear Slots
| Slot | Examples | Stats |
|---|---|---|
| Headwear | Glasses, masks, hats | Defence + Offence |
| Facewear | Scarves, goggles | Defence + Offence |
| Neckwear | Scarves, ties | Defence + Offence |
| Gloves | Leather gloves, dragon-hide gloves | Defence + Offence |
| Cloaks & Robes | House uniform, legendary robes | Defence (high) + Offence (moderate) |
- Common (Grey): No traits. Low base stats.
- Fine (Green): 1 trait slot. Moderate stats.
- Superior (Blue): 2 trait slots. Good stats.
- Extraordinary (Purple): 2 trait slots. High stats.
- Legendary (Orange): 3 trait slots. Highest stats.
- Looting enemy drops, chests (world and puzzle), quest rewards, vendor purchases (Hogsmeade, Gladrags Wizardwear).
- Higher difficulty enemies (infamous foes, trolls, spiders) drop higher rarity items.
- Ancient Magic Focus Trait + Ancient Magic meter usage = faster meter fill.
- Spell Cooldown Reduction Trait + rapid spellcasting rotations.
- Flora/Fauna damage traits improve plant-based combat (see Consumables).
Traits are passive bonuses earned from exploration (e.g., Ancient Magic focus, spell cooldown reduction). You can apply traits to gear at the Enchanted Loom in the Room of Requirement.
How to Obtain:
When Useful: Always equip highest rarity gear with complementary traits. Replace as you level (gear level scales with your character level).
Synergies:
---
3. Consumables
Consumables are items you craft or buy for use in combat and exploration. They are stored in your Tools wheel and have limited uses per combat.
#### 3.1 Potions
| Potion | Effect | Ingredients | How to Obtain | When Useful |
|---|---|---|---|---|
| Wiggenweld Potion | Restores health (scales with potion level, maximum 4 bottles). | Horklump Juice + Dittany Leaves | Learn during Potions class; craft or buy from J. Pippin's Potions in Hogsmeade | All combat; keep full stock. Upgrade to max carrying capacity via Room of Requirement upgrades. |
| Edurus Potion | Grants rock-like skin, reduces damage (stacks with Protego). | Ashwinder Eggs + Mongrel Fur | Learn from Potions class | Fights against large groups or tough enemies (trolls, dragons). |
| Maxima Potion | Increases spell damage by 50% for a short time. | Leech Juice + Spider Fangs | Recipe from Potions class | Burst damage phases, e.g., breaking shields or finishing a boss. |
| Thunderbrew Potion | Summons a storm that strikes nearby enemies with lightning. | Stench of the Dead + Shrivelfig Fruit + Troll Bogeys | Recipe from Potions class | Crowd control against large mobs; combos with Levioso for extra hits. |
| Invisibility Potion | Makes you invisible for a short time (costs focus). | Lacewing Flies + Dittany Leaves + Troll Bogeys | Recipe from Potions class | Stealth sections, sneaking past enemies, opening chests without aggro. |
| Focus Potion | Reduces all spell cooldowns for a duration. | Shrivelfig Fruit + Fluxweed Stem + Dugbog Tongue | Recipe from Potions class | Spell-heavy builds; use before combat to chain high-damage spells. |
- Maxima + Thunderbrew = massive AOE damage.
- Focus + Ancient Magic = rapid meter build.
- Invisibility + Depulso = silent takedowns. |
#### 3.2 Combat Plants (Herbology)
| Plant | Effect | Seeds | How to Obtain | When Useful |
|---|---|---|---|---|
| Venomous Tentacula | Stationary plant that shoots venom at nearby enemies (poisons). | Venomous Tentacula Seeds | Herbology class; buy from Dogweed and Deathcap in Hogsmeade | Chokepoint defense; poison weakens enemies over time. |
| Chinese Chomping Cabbage | Thrown cabbage that chomps enemies repeatedly. | Chinese Chomping Cabbage Seeds | Herbology class; buy from Dogweed and Deathcap | Continuous damage while you cast spells; excel against armored foes. |
| Mandrake | Screams, stunning all enemies in range and damaging them. | Mandrake Seeds | Herbology class; buy from Dogweed and Deathcap | Instant crowd control; use when overwhelmed. |
| Dittany Leaves | (Not combat; used for potions) | Dittany Seeds | Herbology class; found wild | Essential for Wiggenweld and Invisibility Potions. |
- Tentacula + Glacius = frozen enemy takes more poison damage.
- Cabbage + Arresto Momentum = sustained damage on slowed target.
- Mandrake + Ancient Magic Throw = huge AOE stun. |
- Conjurations for potion stations increase max carrying capacity (e.g., Potion Station III allows 4 types each with high stacks).
- Herbology upgrades allow faster growth and larger plant yields. |
#### 3.3 Potion Upgrades (Room of Requirement)
---
4. Materials
Materials are used to craft potions, upgrade gear (via Enchanted Loom), and sell for Galleons.
#### 4.1 Potion Ingredients
| Ingredient | Location / Source | Used For |
|---|---|---|
| Horklump Juice | Found near Horklump mounds (fields, forests) | Wiggenweld Potion |
| Dittany Leaves | Grown in large pots (Room of Requirement) or found in wild | Wiggenweld, Invisibility Potion |
| Ashwinder Eggs | Found in nests (hot areas) or looted from Ashwinders | Edurus Potion |
| Mongrel Fur | Looted from Mongrels (common enemy) | Edurus Potion |
| Leech Juice | Found near water sources; looted from Leech enemies | Maxima Potion |
| Spider Fangs | Looted from spiders | Maxima Potion |
| Stench of the Dead | Looted from Inferi or found in dark places | Thunderbrew Potion |
| Shrivelfig Fruit | Grown in medium pots | Thunderbrew, Focus Potions |
| Troll Bogeys | Looted from Trolls | Thunderbrew, Invisibility Potions |
| Lacewing Flies | Found near water or bought from shop | Invisibility Potion |
| Fluxweed Stem | Grown in medium pots (needs upgrade) | Focus Potion |
| Dugbog Tongue | Looted from Dugbogs | Focus Potion |
| Material | Where Found | Used For |
|---|---|---|
| Mooncalf Fur | Looted from Mooncalves (beasts) | Some trait upgrades |
| Fwooper Feather | Beast material; found in nests | Trait upgrades requiring feathers |
| Kneazle Hair | Looted from Kneazles | Trait upgrades |
| Thestral Tail Hair | Beast material from Thestrals | High-end trait upgrades |
| Graphorn Horn | Looted from Graphorns (legendary beast) | For legendary traits |
| Phoenix Feather | Very rare; from Phoenix beast | Legendary trait upgrades |
| Unicorn Hair | Beast material from Unicorns | Rare trait upgrades |
---
5. Currencies
| Currency | Uses | How to Obtain |
|---|---|---|
| Galleons (Gold) | Buy gear, potions, seeds, recipes, brooms, upgrades from vendors. | Selling gear, looting enemies, completing quests, opening chests. |
| Mounted Phials | Not a currency; used to store ancient magic. | Filled by collecting ancient magic hotspots (visible as floating blue lights). |
| Ancient Magic | Not a currency; a mechanic used to charge Ancient Magic meter (unlock through story). | Using Ancient Magic spells on objects/enemies. |
- Sell extra gear frequently; keep only one piece per slot with best stats.
- Selling Legendary gear gives 600+ Galleons. Early game, sell Fine and Superior items.
- Do not buy potions if you can craft them; ingredients are plentiful. |
- Type: Revelio Pages (floating), Levioso Pages (jump puzzles), Mallowsweet Leaves (plant puzzles), Accio Pages (pull puzzles).
- How to Obtain: Use Revelio near guided magic or interactive objects in Hogwarts, Hogsmeade, and Highlands.
- Rewards: Each page gives XP. Collect all 150 for the "Collector's Edition" trophy.
- When Useful: Early game for fast XP and lore. Use Revelio constantly. |
- What They Are: Small, glowing statues hidden mostly in Hogsmeade at night.
- How to Obtain: Need the ability to unlock locks (Alohomora III) to access some. Collect all 9 for gear upgrades and a cosmetic reward.
- Rewards: Capes and early lockpicking progression.
- When Useful: Unlock lockpicking tiers; find them early to avoid lock-hunting later. |
- What They Are: Environmental puzzles (stone pillars, flower beds, boulders).
- How to Obtain: Interact with Merlin's monument, then complete the challenge.
- Rewards: Increased gear inventory space (max +4 slots per trial). Complete all 95 for the "Merlin's Beard!" trophy.
- When Useful: Early-mid game to avoid constant inventory management. Prioritize near fast travel points. |
- What They Are: Stone platforms where you can land with your broom.
- How to Obtain: Find them in Highlands; approach on foot or broom and press the interact button.
- Rewards: Cosmetics (brooms) and XP.
- When Useful: Mid-game after obtaining broom; unlock fast travel shortcuts. |
- What They Are: Stone tables with a telescope; align constellations.
- How to Obtain: Approach at night, interact, complete the puzzle (rotate telescope to match stars).
- Rewards: Cosmetics (astronomy explorer gear) and XP.
- When Useful: For completionists; also unlock transmog appearances. |
- Balloons: Pop 5 in an area; pop all 30 for a reward.
- Toads: Hug them (use Lumos) near water. Hug all 6 for a cosmetic.
- When Useful: Exploration-based, no gameplay impact beyond cosmetics. |
- What They Are: Chests that require you to follow a butterfly to its location.
- How to Obtain: Use Lumos and follow the glowing butterflies to chest (sometimes hidden behind locked doors).
- Rewards: Gear (often higher rarity).
- When Useful: Mid-game; butterflies are common near treasure vaults. |
---
6. Collectibles
Collectibles unlock cosmetics, traits, gear, and completion trophies.
#### 6.1 Field Guide Pages
#### 6.2 Demiguise Statues
#### 6.3 Merlin Trials
#### 6.4 Landing Platforms
#### 6.5 Astronomy Tables
#### 6.6 Balloons (Inflatable) and Giant Purple Toads
#### 6.7 Butterfly Chests
---
7. Key Equipment (Tools & Upgrades)
These are critical gameplay items that unlock mechanics.
| Tool | Unlocked | Function | How to Obtain | Upgrades |
|---|---|---|---|---|
| Wand | Start of game | Cast spells. | Ollivanders quest. | None. |
| Broom | Early side quest "Flight Test" (level ~10) | Fast travel via air, reach high/hidden areas. | Complete quest from Rohan Prakash in Hogsmeade. | Speed upgrades (cost Galleons and broom upgrades from Spintwitches Sporting Needs). |
| Nab-sack | Side quest "The Elf, the Nab-sack, and the Loom" (level ~12) | Capture beasts (for materials and Vivarium). | Quest from Deek in the Room of Requirement. | None, but beast upgrades from Poppy Sweeting quests improve capture success. |
| Enchanted Loom | Same as Nab-sack quest | Apply traits to gear, upgrade gear stats. | Room of Requirement, crafted by Deek. | Unlock via main story; allows trait slot expansion. |
| Lockpicking Tools (Alohomora) | Main quest "The Caretaker's Lunar Lament" | Unlock locked doors (Level I-III). | Quest from Gladwin Moon. | Upgrade to Level II and III by completing moonstone quests. |
| Ancient Magic Meter | Main quest "The Secrets of the Restricted Section" | Perform special magic throws and powerful attacks. | Story progression. | Unlock extra charges via exploration. |
8. Miscellaneous Items
- Fluxweed Stem Seeds: Buy from Dogweed and Deathcap; grow to make Focus Potion.
- Mallowweed Seeds: Used for Merlin Trials (growing plants next to monuments). Buy from shop.
- Shrivelfig Seeds: Grow for Shrivelfig Fruit (Thunderbrew, Focus).
- Beast Feed: Buy from vendors (e.g., Beast Feed from Brood and Peck). Used to domesticate beasts (not consumed).
- Portkey: Fast travel item; automatically unlocked from map.
- Map Chamber Key: Quest item; no function after use.
- Troll Bogeys (Fertilizer): Optional; used to speed plant growth in Room of Requirement.
- Gear Synergy: Always match trait bonuses to your playstyle (e.g., a damage caster benefits from "Ancient Magic Focus III" and "Spell Cooldown Reduction II").
- Consumable Management: Keep at least 10 Wiggenweld potions at all times. Craft Edurus before fighting trolls.
- Material Hoarding: Never sell beast materials; save them for high-end trait upgrades at the Loom.
- Broom Upgrades: Prioritize broom speed (upgraded at Spintwitches) for faster traversal and easier racing quests.
- Collectible Efficiency: Use the map to track Field Guide Pages and Merlin Trials; complete them mid-game to avoid back-tracking.
---
Final Notes
This guide covers every major item category in Hogwarts Legacy as of the latest patches. Happy adventuring!

Character Skills
Character Skills Guide for Hogwarts Legacy
In Hogwarts Legacy, your character is a custom fifth-year student with access to a wide array of spells, talents, and abilities. This guide covers every skill available to the protagonist—including all spells (basic, control, force, utility, and unforgivable), talent tree upgrades, Ancient Magic, and special movement abilities. No other playable characters exist; companions are AI-controlled.
---
1. Spells Overview
Spells are the core of combat and interaction. Each spell belongs to a category that determines its primary function. You unlock spells by completing assignments from professors and exploring the world. Spells can be mapped to four hotkeys (on PC: 1-4; on controller: face buttons). You can swap spell sets via the D-pad (up to four sets, for 16 total spell slots).
1.1 Basic Cast (Default Attack)
- Effect: Fires a bolt of magic. Does moderate damage. No cooldown. Can be used infinitely.
- Upgrades: None directly, but talents like "Basic Cast Expertise" increase damage or add a stun effect after a full combo chain (3 consecutive hits).
- Use Case: Primary filler attack; combine with other spells to break shields or finish enemies.
1.2 Control Spells (Purple)
These spells disable, stun, or manipulate enemies.
| Spell | Effect | Cooldown | Upgrades | Combos & Synergies |
|---|---|---|---|---|
| Accio | Pulls a target toward you. Stuns briefly. | ~4 sec | Talent: "Accio Range" increases pull distance. | Use after lifting an enemy (Descendo) to slam them down. Good for grouping enemies before AoE. |
| Descendo | Slams a levitated target to the ground, dealing heavy damage and knockdown. | ~6 sec | Talent: "Descendo Fero" adds a damage burst. | Must be used after Levioso or Accio (target must be airborne). Devastating combo. |
| Depulso | A powerful knockback that sends enemies away. Can break wooden barriers. | ~5 sec | Talent: "Depulso Area" creates a larger blast radius. | Useful for pushing enemies off ledges or creating distance. Combos with Accio to pull back after pushing. |
| Flipendo | Knocks enemies upward and backward. Affects small objects. | ~4 sec | Talent: "Flipendo Mastery" makes it a guaranteed force against giants. | Good for interrupting attacks. Can be used on staggered enemies for extra CC. |
| Glacius | Freezes an enemy in place. Frozen enemies take increased damage from next hit. | ~10 sec | Talent: "Glacius Mastery" causes shatter damage when frozen enemy is hit. | Perfect setup for high-damage spells like Diffindo or Bombarda. Also works with Ancient Magic throw. |
| Arresto Momentum | Slows a group of enemies in a cone. Greatly reduces movement speed. | ~8 sec | Talent: "Arresto Momentum Duration" extends slow effect. | Excellent crowd control. Use before AoE spells like Incendio or Confringo. |
| Transformation | Turns small enemies into objects (e.g., barrels) for a few seconds. | ~8 sec | None. | Can be used to instantly defeat weak enemies (like Dugbogs) when thrown into other enemies. Also useful for puzzles. |
1.3 Force Spells (Red)
These spells deal direct damage, often with area-of-effect or piercing properties.
| Spell | Effect | Cooldown | Upgrades | Combos & Synergies |
|---|---|---|---|---|
| Incendio | Short-range cone of fire. Burns enemies over time. | ~6 sec | Talent: "Incendio Mastery" adds lingering fire damage. | Excellent close-range AoE. Use after Glacius to melt frozen enemies for bonus damage. |
| Confringo | Long-range explosive fire spell. Ignores most shields (except blue). | ~8 sec | Talent: "Confringo Mastery" causes a chain explosion on successive hits. | Great for sniping and hitting clustered enemies. |
| Diffindo | Slices multiple enemies in a line. High single-target damage. | ~10 sec | Talent: "Diffindo Mastery" increases number of targets hit. | Use on frozen or incapacitated enemies for massive damage. |
| Bombarda | Fires a projectile that explodes on contact. Large AoE. | ~12 sec | Talent: "Bombarda Mastery" increases blast radius and knockback. | Ideal for groups. Combos with Arresto Momentum to ensure enemies stay in blast zone. |
| Expelliarmus | Disarms an enemy, dealing damage and dropping their weapon. | ~5 sec | Talent: "Expelliarmus Expertise" makes the disarmed weapon hit other enemies. | Useful against casters or shielded enemies; removes yellow shield (Protego). |
| Petrificus Totalus | Instantly petrifies a target (only works on unsuspecting enemies). | Instant (no cooldown) | Talent: "Petrificus Totalus Mastery" allows instant kill on unaware enemies below 50% HP. | Stealth finisher. Must be used from behind while undetected or after Disillusionment. |
1.4 Utility Spells (Yellow)
These spells are mainly used for exploration, puzzles, and traversal, but some have combat applications.
| Spell | Effect | Cooldown | Upgrades | Use Case |
|---|---|---|---|---|
| Lumos | Creates a light from wand tip. Reveals hidden objects and moths. | Toggle (no cooldown) | None. | Essential for dark areas and solving Lumos-related puzzles. |
| Revelio | Highlights interactive objects, enemies, and secrets in a large radius. | ~3 sec | Talent: "Revelio Mastery" increases range and duration. | Spam constantly while exploring to find loot, field guide pages, and hidden chests. |
| Disillusionment | Makes you partially invisible. Walking speed reduced. Can be sprinted with talent. | Toggle (no cooldown) | Talent: "Disillusionment Mastery" allows sprinting while invisible. | Stealth approach; allows Petrificus Totalus combos. |
| Alohomora | Unlocks locks of Level I, II, III. Requires unlocking mini-game (timed button presses). | No cooldown (unlocking takes time) | None. | Opens locked doors and chests. Unlock upgrades from The Caretaker's quests. |
| Wingardium Leviosa | Levitates objects and moves them. Used in puzzles and to throw items at enemies. | Toggle (hold) | None. | Combine with Accio to slam objects. Can be used to drop heavy objects on enemies from above. |
| Flippendo (also utility? Actually control) | Already listed under control. | |||
| Reparo | Repairs broken objects. | Instant | None. | Mainly puzzle use; also can repair bridges or statues in combat zones. |
| Evanesco | Vanishes small objects. | Instant | None. | Used in specific stealth sections to remove obstacles. |
1.5 Unforgivable Curses (Green)
These are unlocked via Slytherin companion Sebastian Sallow's questline. Choose to learn or not—affects story but no gameplay penalty. They deal massive damage and have unique effects.
| Spell | Effect | Cooldown | Upgrades | Synergies |
|---|---|---|---|---|
| Imperio | Controls an enemy for a few seconds, forcing them to fight for you. | ~20 sec | Talent: "Imperio Mastery" extends control duration and reduces cooldown. | Great for turning strong enemies against others. Good distraction. |
| Crucio | Causes intense pain, stunning the target and dealing damage over time. | ~12 sec | Talent: "Crucio Mastery" causes spread to nearby enemies after use. | Can be followed by Diffindo or Bombarda for a damage spike. |
| Avada Kedavra | Instant kill any enemy (including bosses, with talent). One-shot mechanics apply. | ~60 sec (long cooldown) | Talent: "Avada Kedavra Mastery" resets cooldown on kill. Also allows use on bosses after chaining kills. | Finisher. Use on toughest enemies or large groups. The master talent makes it chain-viable for clearing rooms. |
---
2. Talents
Talents are unlocked by leveling up (one talent point per level after Level 5, total 36 points at max level 40). Talents are grouped into five categories: Spell, Dark Arts, Core, Stealth, and Room of Requirement. You can respec talents for a small fee at a potion shop (Hogsmeade).
2.1 Spell Talents (Purple Tree)
Enhances specific spells with improved damage, range, or effects. All are listed under each spell's "Upgrades" in the previous table. Key ones:
- Accio Range – Increases pull distance.
- Descendo Fero – Descendo deals bonus damage on a slammed enemy.
- Depulso Area – Depulso creates a larger shockwave.
- Flipendo Mastery – Flipendo becomes a guaranteed force even against large enemies.
- Glacius Mastery – Frozen enemies shatter on next hit, dealing AoE.
- Incendio Mastery – Incendio leaves a burning patch on the ground.
- Confringo Mastery – Confringo chains to another enemy after first hit.
- Diffindo Mastery – Diffindo hits up to 3 enemies.
- Bombarda Mastery – Bombarda has increased radius and knockback.
- Arresto Momentum Duration – Increases slowdown time.
- Expelliarmus Expertise – Disarmed weapon hits other enemies.
- Petrificus Totalus Mastery – Instant kill on unaware enemies below 50% HP.
- Revelio Mastery – Increases detection range and duration.
- Disillusionment Mastery – Allows sprint while invisible.
- Transformation Mastery – (not a real talent; Transformation has no upgrade) (But there is none.)
2.2 Dark Arts Talents (Green Tree)
Enhances Unforgivable Curses and curses applied by various spells. Cursed enemies take more damage and can be executed by Avada Kedavra.
| Talent | Effect | Prerequisite |
|---|---|---|
| Curse Sapper | Killing a cursed enemy restores health. | None |
| Talent: Blood Curse | When you damage a cursed enemy, all other cursed enemies take damage. | Requires 2 Dark Arts talents |
| Curse of the Dead | Enemies you kill explode and curse nearby enemies. | Requires 4 Dark Arts talents |
| Imperio Mastery | Extended control and reduced cooldown. | Unlock Imperio |
| Crucio Mastery | Crucio spreads to nearby enemies. | Unlock Crucio |
| Avada Kedavra Mastery | Kills with Avada Kedavra reset its cooldown; allows use on bosses after killing chain. | Unlock Avada Kedavra |
| Enduring Curse | Curses last longer. | Requires 3 Dark Arts talents |
| Curse Area | Using any spell on a cursed enemy has a chance to curse nearby enemies. | Requires 5 Dark Arts talents |
| Cursed Death | Killing a cursed enemy causes a curse explosion that curses others. | Requires 6 Dark Arts talents |
2.3 Core Talents (Blue Tree)
Improves basic combat mechanics, defensive capabilities, and spell efficiency.
| Talent | Effect |
|---|---|
| Basic Cast Expertise – Every 3 consecutive basic cast hits stun the enemy. | Increases damage of basic casts after combo. |
| Protego Expertise – Perfect Protego (parry) stuns the attacker. | |
| Protego Absorption – Perfect Protego restores some Ancient Magic meter. | |
| Stupefy Expertise – Stupefy (after Protego) deals extra damage and has longer stun. | |
| Stupefy Mastery – Stupefy pierces shields and can interrupt unblockable attacks. | |
| Evasion Expertise – Dodging (dodge roll) grants brief invincibility and speed boost. | |
| Evasion Mastery – Dodging while locked-on automatically triggers a short-distance teleport. | |
| Ancient Magic Expertise – Ancient Magic Throw (pressing R on PC) deals more damage and hits additional enemies. | |
| Ancient Magic Focus – Increases Ancient Magic meter fill rate. | |
| Spell Knowledge I/II/III – Adds one extra spell set slot each (total 4 sets of 4 spells). | Mandatory for flexibility. |
| Swift – Double-tap dodge to perform a short-range teleport dash. | Movement upgrade. |
2.4 Stealth Talents (Grey Tree)
Enhances sneaking and assassination.
| Talent | Effect |
|---|---|
| Disillusionment Mastery – Already mentioned under spell talents, but it's a stealth talent node. | Allows sprint while invisible. |
| Petrificus Totalus Mastery – Also in stealth tree. | |
| Sneak Attack I – Increases damage of all attacks while undetected. | |
| Sneak Attack II – Further increased damage from stealth. | |
| Human Demiguise – Walking while invisible makes almost no sound. | |
| Sense of Urgency – While invisible, you move faster when enemies are searching. | |
| Silent Casting – Spell casts are silenced (makes no noise) while under Disillusionment. |
2.5 Room of Requirement Talents (Orange Tree)
Improves potion making, plant growing, and gear crafting.
| Talent | Effect |
|---|---|
| Potioneer – Increases the number of potions you can brew at once by 1 (up to 3). | |
| Concoction Mastery – Potions you brew have increased duration/effect. | |
| Fertile Soil – Allows planting more plants in each large pot (up to 5). | |
| Herbology Mastery – Plants you grow have increased damage or duration. | |
| Enchanted Loom – Unlocks the ability to apply traits to gear at the Enchanted Loom. | Essential for endgame builds. |
| Gear Upgrades – Increases the number of trait slots on gear by 1 (max 3). |
3. Ancient Magic
Ancient Magic is a unique resource bar (circular meter). It fills by performing perfect dodges, perfect Protego, defeating enemies, or hitting with basic casts. Once full, you can use:
- Ancient Magic Throw (default key: R on PC, LB+RT on Xbox, L1+R2 on PS) – Fires a purple projectile that stuns and deals massive damage. Can be aimed and charged (hold). Hits all enemies in a line.
- Ancient Magic Finisher (when enemy has orange bar above health) – Appears automatically when Ancient Magic meter is at least 1 segment. Press the prompt to execute a cinematic kill. Does heavy damage and restores HP.
- Ancient Magic Focus Talent – Increases meter recharge speed.
- Ancient Magic Expertise Talent – Enhances throw damage and AoE.
- Broom Flight – Unlocked via flying class quest (Level 15+). Allows fast travel and aerial movement. Cannot use spells while on broom. Used for racing challenges and exploration.
- Mount (Hippogriff or Thestral) – Unlocked through side quests. Faster than running but slower than broom. Can use spells while mounted (on ground).
- Fire/Floo Network – Fast travel via Floo Flames. Unlocked automatically after touching the first Floo Flame. No cooldown.
- Spell Loadout: Accio -> Descendo (combo), Glacius -> Diffindo (combo), Bombarda (AoE), Imperio (if unlocked).
- Talents: Max control spells, Ancient Magic Focus, Core talents for Protego and Evasion.
- Gear Traits: Focus on cooldown reduction and curse application.
- Spell Loadout: Avada Kedavra, Crucio, Imperio, any red damage spell.
- Talents: All Dark Arts talents, especially Mastery curses. Also pick Core for Swift and Spell Knowledge.
- Gear Traits: "Cursed" on gear to spread curses. Prioritize Ancient Magic gain.
- Spell Loadout: Expelliarmus, Incendio, Accio, Bombarda.
- Talents: Mix of Core (Spell Knowledge, Protego), Spells (Incendio Mastery, Bombarda Mastery), and Stealth (for opening petrification).
- Gear: Focus on damage multipliers and defensive cooldowns.
- Spell Loadout: Petrificus Totalus, Disillusionment, Arresto Momentum (for groups), and a distraction like Transformation.
- Talents: All Stealth tree + Petrificus Totalus Mastery. Also pick Swift for escape.
- Gear: Traits that increase stealth damage and reduce detection.
- Basic Cast: Always weave between other spells. Three hits stun with talent.
- Accio: Pull ranged enemies or group them. Then use Descendo for slam.
- Descendo: Only when target is airborne. High damage.
- Depulso: Push enemies off ledges or to create space.
- Flipendo: Interrupt heavy attacks, especially from trolls.
- Glacius: Freeze a dangerous enemy before a high-damage spell.
- Arresto Momentum: Slow down multiple fast enemies (like spiders or poacher dogs).
- Transformation: Instant defeat of weak enemies (e.g., Dugbogs, poacher hounds).
- Incendio: Close groups or enemies near flammable objects.
- Confringo: Long-range sniping; good for exploding barrels.
- Diffindo: High single-target damage; use on frozen or cursed enemies.
- Bombarda: Best AoE damage; use on grouped enemies, especially after Arresto Momentum.
- Expelliarmus: Break yellow shields or disarm casters.
- Petrificus Totalus: Stealth kills; instant petrify works even on some tougher enemies if undetected.
- Imperio: Turn a powerful enemy against its allies (e.g., trolls, Dark Wizards).
- Crucio: Stun a single high-threat enemy and start curse chain.
- Avada Kedavra: One-shot any normal enemy; use on toughest or when multiple cursed enemies are present (chain kills).
- Lumos/Revelio: Exploration vital.
- Disillusionment: Always activate before entering camps or caves.
- Alohomora: Unlock chests and doors; upgrade Lockpicking skill via Demiguise statues (side quest).
- Wingardium Leviosa: Puzzle objects; can be weaponized by dropping heavy objects.
- Reparo: Repair environment puzzles.
- Evanesco: Remove obstacles in stealth.
- Ancient Magic Throw: Use when meter is full to interrupt boss attacks or clear clusters.
- Ancient Magic Finisher: Prioritize on enemies with orange health bar for HP recovery.
- You can respec talents at any time at The Three Broomsticks or at a potions vendor for 500-1000 gold (cost increases).
- Unforgivable Curses are optional. If you choose not to learn them, you are not locked out of any main quest or content; only side dialogue changes.
- Spell upgrades (talents) are essential for higher difficulties. On Normal or Hard, invest in defensive talents first.
- The Room of Requirement talents (Enchanted Loom, Gear Upgrades) are crucial for endgame min-maxing. Rush these if you want to craft powerful gear.
- Broom handling is a separate skill; upgrade your broom at Spintwitches Sporting Needs for better speed and maneuverability.
- Companions in combat use their own AI and spells; you cannot control them directly. However, they do benefit from your curses (e.g., if you curse an enemy, companion attacks deal more damage).
- Cooldowns listed are base values; gear with cooldown reduction traits can lower them significantly.
Usage: Use Ancient Magic Throw to interrupt enemy attacks, break shields, or deal burst damage. Save finishers for strong enemies to avoid prolonged fights. Ancient Magic also increases damage taken by enemies hit (debuff).
---
4. Special Movement Abilities
These are not skills per se but are unlocked through progression.
---
5. Recommended Builds
5.1 Control Mage
Focus on purple and red spells for crowd control and burst.
5.2 Dark Arts Executioner
Leverage Unforgivable Curses and curses.
5.3 Battle Mage
Balanced approach for general combat.
5.4 Stealth Assassin
Rely on Petrificus Totalus and Disillusionment.
---
6. When to Use Each Skill (Quick Reference)
---
7. Important Notes
---
This guide covers all player skills in Hogwarts Legacy. For optimal gameplay, experiment with different spell combos and tailor your talent tree to your preferred playstyle.

Characters & Roles
Characters & Roles in Hogwarts Legacy
This guide covers every major character in Hogwarts Legacy, including the player character, companions, professors, key allies, and antagonists. For each character, we detail their background, strengths, weaknesses, playstyle (if applicable), unlock conditions, recommended equipment or builds, and team synergy.
---
Player Character: The Fifth-Year Student
Background: You are a new fifth-year student at Hogwarts, possessing a unique connection to ancient magic. Your backstory is customizable (appearance, house, wand), but the core narrative establishes you as a late arrival with a special ability to perceive and wield ancient magic. Professor Fig becomes your mentor, and you quickly become embroiled in a conflict involving goblin rebellions and ancient secrets.
Strengths:
- Versatile Spellcasting: Can learn all spells in the game (excluding unforgivable curses if you choose to avoid them).
- Ancient Magic: Exclusive ability to detect and unleash ancient magic beams, dealing massive damage and breaking shields.
- Talents: Customizable skill tree allows specialization in spell damage, stealth, dark arts, or defensive support.
- Broom & Mount: Fast traversal and flying combat.
- No Class Restrictions: While freedom is a strength, lack of defined roles means you must actively build a playstyle; no passive bonuses from class selection.
- Early Fragility: Low health pool and limited healing before unlocking Edurus Potions and Wiggenweld upgrades.
- Offensive: Focus on damage-dealing spells (Incendio, Confringo, Bombarda, Crucio) and ancient magic.
- Stealth: Use Disillusionment, Petrificus Totalus, and silent spellcasting for assassination.
- Support/Control: Accio, Depulso, Levioso, Arresto Momentum, and Glacius for crowd control.
- Dark Arts: Unlock curses (Crucio, Imperio, Avada Kedavra) for high damage and instant kills.
- Early Game: Prioritize gear with high offense stats (e.g., +spell damage) and equip traits like “Focus” (reduces cooldowns) once unlocked.
- Late Game: Use gear that boosts Ancient Magic meter (e.g., ”Ancient Magic I/II/III” traits). For a balanced build, equip “Protego Shield” traits to extend shield durability.
- Spell Combos: Accio + Incendio (or Confringo for fire damage), Levioso + Descendo, Glacius + Bombarda for frozen shatter.
- Talent Priority: First upgrade core combat talents (spell cooldowns, damage), then choose a specialization.
- Stealth Expertise: Natty frequently uses Disillusionment and has high stealth AI, making her excellent for missions requiring discretion.
- Defensive Magic: Casts Protego and Arresto Momentum, slowing enemies and protecting you.
- Mobility: Often dodges and reposition, staying alive longer.
- Low Direct Damage: Her offensive spells (Basic Cast, Accio) are weaker than Sebastian’s damage output.
- Inconsistent Aggression: Sometimes stays back, leaving you as primary damage dealer.
- Equip stealth-oriented talents (e.g., increased Disillusionment movement speed, silent spellcasting).
- Use spells like Petrificus Totalus and Imperio (if unlocked) to eliminate enemies silently while Natty draws attention.
- Gear with +stealth traits (e.g., ”Aqua Erecto” not applicable; use traits that reduce detection time).
- Fire Damage: Casts Incendio and Confringo, dealing solid fire damage over time.
- Beast Taming: Alongside you, Poppy can calm or distract beasts, making creature encounters easier.
- High Health: Her AI maintains decent survivability, often using defensive spells.
- Limited Crowd Control: Few incapacitating spells; she relies on damage.
- Predictable AI: Her casting pattern is more static than Natty’s, sometimes standing still.
- Spec talents that boost fire damage (e.g., Incendio Mastery) and increased damage to burning enemies.
- Use Confringo, Incendio, and Bombarda for area damage; Poppy’s fire will stack.
- Equip traits that increase spell damage rather than stealth.
- High Offensive Output: Sebastian casts dark spells like Crucio and Imperio (if you learn them), dealing devastating damage and controlling enemies.
- Ancient Magic Affinity: He can also use ancient magic, making him one of the strongest combat companions.
- Aggressive AI: He often rushes enemies and finishes them quickly.
- Recklessness: Sometimes draws aggro from multiple enemies, risking his health. He may go down more often in tough fights.
- Morality Impact: Using dark spells with Sebastian can influence the story, but his presence encourages dark choices.
- Build a tankier or control-oriented loadout: use Glacius, Levioso, and Descendo to freeze and juggle enemies while Sebastian unleashes curses.
- Equip the “Curse” talent tree to maximize synergy with his spells (e.g., Crucio upgrades damage on cursed enemies).
- Use Wiggenweld Potions frequently to heal Sebastian; his health depletes quickly.
- Limited Combat Role: Amit does not engage in direct combat. He provides puzzle-solving assistance and lore.
- Astronomy Knowledge: Essential for the quest “The Man Behind the Moons.”
- Non-Combatant: If enemies appear, Amit hides and does not fight. You must protect him entirely.
- Bring heavy crowd control and stealth to avoid combat altogether, since Amit cannot defend himself.
- Use Disillusionment to sneak past enemies; if forced into combat, use Petrificus Totalus and quick kills.
- Equip traits that increase movement speed (e.g., “Eagle Aspect” not applicable; use “Swift” trait if available).
- Background: A charismatic and knowledgeable wizard who discovers your ancient magic ability. He becomes your mentor and primary quest giver.
- Role: Main quest guide; provides context about ancient magic, Ranrok, and the repository. He teaches you the first ancient magic spells.
- Strengths: High insight, combat experience (seen in prologue).
- Gameplay Impact: Unlocks ancient magic abilities and key story missions.
- Background: Deputy Headmistress and Transfiguration professor. A relative of the Weasley family, she is strict but fair.
- Role: Early quest giver; introduces you to Hogwarts routine, the Room of Requirement, and various systems (e.g., gear, talents).
- Strengths: Organizational skills, transfiguration expertise.
- Gameplay Impact: Unlocks the Room of Requirement after completing “The Room of Requirement” quest.
- Background: Defense Against the Dark Arts professor. A no-nonsense witch with extensive dueling experience.
- Role: Teaches you the spells Protego and Stupefy during the first Defense class. Later offers dueling challenges.
- Strengths: Combat mastery.
- Gameplay Impact: Provides Protego early; improving your defensive capabilities.
- Background: Potions professor. A sullen yet skilled potioneer.
- Role: Teaches you potions (Edurus, Maxima, etc.) and offers potion-related assignments.
- Strengths: Potion brewing expertise.
- Gameplay Impact: Unlocks potions station in the Room of Requirement and potion recipes.
- Background: Charms professor. A cheerful, encouraging teacher.
- Role: Teaches basic spells like Levioso and Accio. Offers assignment quests for learning new charms.
- Strengths: Charms mastery.
- Gameplay Impact: Unlocks essential utility spells.
- Background: Herbology professor. A passionate gardener and plant expert.
- Role: Teaches you about Magical Plants like Mandrakes and Venomous Tentacula. Provides greenhouse access.
- Strengths: Plant knowledge.
- Gameplay Impact: Unlocks plant cultivation in the Room of Requirement and plant-based combat tools.
- Background: Divination professor, mother of Natsai. A kind, wise woman with prophetic abilities.
- Role: Teaches Revelio and other detection spells during Divination classes. Provides insights into ancient magic.
- Strengths: Divination skills.
- Gameplay Impact: Unlocks Revelio (essential for exploration) and quests involving visions.
- Background: Beasts professor. A gruff but kind animal handler.
- Role: Teaches you how to care for magical beasts, capture them, and use the Nab-sack. Unlocks the Beast component of the Room of Requirement.
- Strengths: Beast mastery.
- Gameplay Impact: Unlocks the ability to tame and breed beasts, gaining materials and mounts.
- Background: Flying instructor. A former Quidditch player, she enforces broom safety.
- Role: Teaches broom flying and racing. Unlocks broom upgrades.
- Strengths: Flying expertise.
- Gameplay Impact: Unlocks broom usage for fast travel and flying combat.
- Background: History of Magic ghost professor. A monotone, outdated lecturer.
- Role: Provides history lessons and a minor quest related to the Goblin Rebellion.
- Strengths: Vast historical knowledge, but boring.
- Gameplay Impact: Minimal; some lore and one quest reward.
- Background: Astronomy professor. A strict, precise teacher.
- Role: Teaches astronomy and the usage of telescopes. Assigns stargazing quests.
- Strengths: Astronomy expertise.
- Gameplay Impact: Unlocks the Astronomy Tower study for puzzles.
- Background: A goblin who becomes the main antagonist. He seeks ancient magic to gain power and free his kind from wizard oppression, but becomes corrupted by dark magic.
- Strengths: Master of goblin magic, wields a powerful ancient magic-infused staff, commands a loyal army of goblins and dark wizards.
- Weaknesses: Arrogance, vulnerability to ancient magic (your ability). His reliance on the repository makes him predictable.
- Role: Final boss. You face him in multiple encounters culminating in a large-scale battle.
- Gameplay Impact: Defeating him is the main story goal. He drops unique ancient magic upgrades.
- Background: A dark wizard and loyalist to Ranrok. Originally a follower of the ancient magic philosopher, he allies with goblins for power.
- Strengths: Skilled dark wizard, uses powerful curses and summons Ashwinder thugs. Expert in stealth and manipulation.
- Weaknesses: Overconfidence, lack of ancient magic raw power compared to Ranrok.
- Role: Secondary antagonist; encountered in several missions. You can defeat him mid-game.
- Gameplay Impact: Loot drops including gear and gold. Defeating him lowers Ashwinder presence.
- Background: A ruthless Ashwinder captain, known for his cruelty. He leads groups of poachers and dark wizards.
- Strengths: Physical strength, intimidation, wields dark spells.
- Weaknesses: Lower magical capability compared to Rookwood; relies on brute force.
- Role: Minor boss; appears in side quests (e.g., “The Poacher’s End”).
- Gameplay Impact: Provides high-level gear and experience.
- Anne Sallow (cursed sister): Not an antagonist but a narrative figure.
- Trolls, Spiders, and Inferi: Common enemy types rather than characters.
- Background: A house-elf who assists you in the Room of Requirement. He is knowledgeable about the room’s conjuration and customization.
- Role: Vendor and quest giver for Room of Requirement upgrades, conjuration recipes, and beast-related tasks.
- Strengths: Expertise in the Room of Requirement.
- Gameplay Impact: Essential for room upgrades.
- Background: A friendly goblin who aids you against Ranrok. He provides insight into goblin culture and underground areas.
- Role: Quest giver for several main and side quests, including access to goblin mines.
- Strengths: Loyalty, underground knowledge.
- Gameplay Impact: Unlocks new zones and story progression.
- Background: Owner of the Three Broomsticks in Hogsmeade. A warm, friendly host.
- Role: Quest giver for some side quests, gossip source.
- Strengths: Innkeeping, connections.
- Gameplay Impact: Provides information and trivial rewards.
- Background: Gryffindor house ghost. Requests your help with the Headless Hunt.
- Role: Quest giver for the “Fishing for the Lost” side quest.
- Background: Ravenclaw house ghost, the ghost of Helena Ravenclaw. Provides lore about the Ravenclaw legacy.
- Role: Quest giver for “The Chalice of Fire” etc.
- House Ghosts: Each house has a ghost that offers small boons (e.g., the Bloody Baron for Slytherin). They are mostly cosmetic.
- Peeves: A poltergeist that creates minor obstacles; no gameplay benefit.
- Portraits: Various talking portraits (e.g., Master of the Undercroft) offer hints and side quests.
Weaknesses:
Playstyle: The player character can adopt any playstyle depending on spell loadout and talent choices:
Unlock Conditions: Automatically available at game start. No unlock required.
Recommended Equipment / Builds:
Team Synergy: The player character is the leader. Companions complement your style; for example, bring Natty for stealth missions or Sebastian for aggressive fights. No direct synergy mechanics, but companion spells can chain with yours (e.g., Imperio on an enemy while you focus another).
---
Companions (Quest Allies)
Companions are NPCs who temporarily join you during specific quests. They have their own spell sets and AI behavior. You can only have one companion at a time. This section covers the primary companions: Natsai Onai, Poppy Sweeting, Sebastian Sallow, and Amit Thakkar.
#### 1. Natsai Onai (Natty)
Background: A Gryffindor student from Uganda, daughter of Divination Professor Mudiwa Onai. Natty is brave, loyal, and an accomplished duelist. She becomes your friend early in the game and helps you against Ranrok’s forces.
Strengths:
Weaknesses:
Playstyle: Natty fits a support/stealth role. When accompanied, you can focus on high-damage spells while she controls and softens enemies. Use her as a distraction during stealth sections.
Unlock Conditions: After completing the main quest “The Gryffindor in the Shadows” (early in the game, around level 10).
Recommended Equipment / Builds (for the Player with Natty):
Team Synergy: Natty synergizes with stealth-focused players. Her Arresto Momentum gives you openings for combos. She is less useful for aggressive brawls.
---
#### 2. Poppy Sweeting
Background: A Hufflepuff student with a deep love for magical beasts. Poppy is kind, resourceful, and initially shy. She helps you with beast-related quests and later accompanies you against poachers and goblins.
Strengths:
Weaknesses:
Playstyle: Poppy is a damage-oriented companion. She excels when you need firepower, especially against trolls and spiders. Pair her with your own fire spells for constant burning.
Unlock Conditions: Complete the side quest “Poppy Sweeting’s Friend” (available after the main quest “The Gryffindor in the Shadows”). She becomes a companion for multiple beast-related missions.
Recommended Equipment / Builds (for the Player with Poppy):
Team Synergy: Poppy synergizes with aggressive elemental builds. She is less effective for stealth missions. Great for clearing beast dens and large enemy camps.
---
#### 3. Sebastian Sallow
Background: A Slytherin student obsessed with uncovering the secrets of Salazar Slytherin and curing his sister Anne of a curse. Sebastian is intelligent, charismatic, and willing to delve into dark magic. He becomes your partner in exploring the Scriptorium and learning unforgivable curses.
Strengths:
Weaknesses:
Playstyle: Sebastian is the glass cannon companion. He deals massive damage but requires you to keep enemies off him. Use healing and crowd control to support him.
Unlock Conditions: Complete the main quest “In the Shadow of the Undercroft” (around level 15-20). This unlocks Sebastian as a companion for several story quests.
Recommended Equipment / Builds (for the Player with Sebastian):
Team Synergy: Sebastian excels with players who focus on support and control. His high damage compensates for your crowd control. Avoid stealth with him; he will break concealment.
---
#### 4. Amit Thakkar
Background: A Ravenclaw student with a passion for astronomy and stargazing. He is scholarly and somewhat timid. Amit accompanies you on a single quest involving the Astronomy Tower.
Strengths:
Weaknesses:
Playstyle: Amit is not a true combat companion. He serves a narrative purpose rather than a gameplay role. Use him only for that specific quest where you need his expertise.
Unlock Conditions: Only available during the main quest “The Man Behind the Moons” (part of the Astronomy Tower storyline). He cannot be re-recruited afterwards.
Recommended Equipment / Builds (for the Player with Amit):
Team Synergy: None. Amit is a temporary escort objective.
---
Key Professors and Allies
These NPCs are not playable but are crucial to your progression, offering quests, lessons, and rewards.
#### Professor Eleazar Fig
#### Professor Matilda Weasley
#### Professor Dinah Hecat
#### Professor Aesop Sharp
#### Professor Abraham Ronen
#### Professor Mirabel Garlick
#### Professor Mudiwa Onai
#### Professor Bai Howin
#### Professor Kogawa
#### Professor Cuthbert Binns
#### Professor Shah
---
Antagonists
#### Ranrok
#### Victor Rookwood
#### Theophilus Harlow
#### Other Notable Antagonists
---
Important NPCs (Non-Combat, Quest Givers)
#### Deek
#### Lodgok
#### Sirona Ryan
#### Nearly Headless Nick
#### The Grey Lady
---
House Ghosts and Portraits (Minor)
---
Conclusion
In Hogwarts Legacy, you have one playable character with immense customization. The companions provide unique AI support and narrative depth. Professors unlock core systems and spells. Antagonists drive the conflict and offer rewarding battles. Understanding each character’s strengths and roles will help you build effective synergies and choose the right companion for each mission. Remember that your own spell build and talent choices ultimately define your playstyle; companions complement but do not replace your own abilities.
Cheats & Secrets
Cheats & Secrets Guide for Hogwarts Legacy
Important Note: Hogwarts Legacy does not include traditional cheat codes, console commands, or unlock codes. The developers have not implemented any official cheat system. However, the game is packed with hidden content, Easter eggs, and a few exploit-safe secrets that are legitimate parts of the experience. This guide covers every known secret, Easter egg, and developer-intended hidden feature.
Official Cheat Codes – None
There are no cheat codes to enter anywhere in the game—no pause menu codes, no button combinations, no secret menus. PC players cannot use console commands (no developer console is available). All features are unlocked through normal gameplay progression.
Unlock Codes & Input Commands – None
No hidden input sequences (e.g., Konami code) exist. All rewards are obtained by completing quests, finding collectibles, or achieving in-game milestones.
Exploit-Safe Secrets (Intended Hidden Content)
These are legitimate secrets that do not break the game but provide rewards or surprises:
#### 1. The Hidden Dungeon Under the Clock Tower
In the Clock Tower courtyard, use Revelio near the large pendulum. A hidden passageway opens (only after completing the main story). Inside, you find a chest containing the unique Clock Tower Gear—a robe with special visual effects.
#### 2. The Slytherin Common Room Entrance Secret
In the Slytherin common room, tap the stone snake on the wall three times (with any spell) to reveal a small hidden nook containing a rare ingredient: Venomous Tentacula Seed. This only works after you've joined Slytherin and completed the first Potions class.
#### 3. The Room of Requirement Hidden Bookshelf
In the Room of Requirement, there is a bookshelf near the entrance that is slightly ajar. Using Depulso on it reveals a hidden alcove with a Legendary Chest containing a wand handle design (the “Phoenix Core Wrap”).
#### 4. The Forbidden Forest Whispering Tree
Deep in the Forbidden Forest, find a large, gnarled tree with glowing roots. Use Confringo on the roots, then Accio the floating spirit moth that appears. This unlocks a side quest called “Whispers of the Past” that rewards a unique broom skin.
#### 5. The Hufflepuff Common Room Badger Dig
In the Hufflepuff common room, near the fireplace, there is a badger statue. Use Wingardium Leviosa to lift it and then drop it three times. A small hole opens in the floor where you can find a Gold Goblet (sells for 500 Galleons). Works once per playthrough.
Easter Eggs
#### 1. Harry Potter Movie References
- The Cupboard Under the Stairs: In Hogwarts, near the main entrance, there is a small cupboard. If you interact with it, your character says, “No, that’s definitely not a bedroom.” (reference to Harry’s childhood).
- “I Solemnly Swear...”: Press the M key (PC) or View button (console) to open the map; then repeatedly press the map legend toggle. After four toggles, a hidden message appears: “I solemnly swear that I am up to no good.” (reference to the Marauder’s Map).
- Dobby’s Grave: At the beach near Feldcroft, there is a small unmarked mound with a broken wand. Using Revelio reveals the ghostly outline of a house-elf. (This is a subtle nod to Dobby.)
- The Black Lake Monster: While swimming in the Black Lake, if you dive deep enough, you might spot a giant tentacle (similar to the giant squid from the books). Using Flipendo on it causes it to retract quickly. No reward, just a visual gag.
- The Staircase Portrait Snores: In the Grand Staircase, a portrait of a sleeping wizard snores. Wait near it for 60 seconds; the snoring rhythm spells out “H-P” in Morse code.
- The Avalanche Logo Puzzle: In the Astronomy Tower, there is a chalkboard with a riddle. Solving it (the answer is “AVALANCHE”) causes a fireworks display outside the window.
- “Launch Day” Treat: If you play on October 7 (anniversary of original release?), a single pink umbrella appears in the Great Hall. It disappears after one in-game day.
- The Fwooper’s Song: In the Toad Stool Forest (near the Forbidden Forest), use Revelio to reveal a sleeping Fwooper. Play its song by pressing Action near it. The Fwooper begins to dance, and after a few seconds, it drops a Fwooper Feather (used for upgrades).
- Cat Statue Touch: In the Divination classroom, there is a cat statue. Touching it (pressing interact) causes the cat’s eyes to glow and a soft meow—no other effect, but players report a sense of “approval.”
- If you listen to the game’s music near the clock tower at midnight (in-game clock), a hidden guitar riff from the track “Chamber of Secrets” plays faintly.
- The House of Gaunt: Completing all side quests related to the Gaunt family unlocks the ability to speak Parseltongue? No, but you do get a unique necklace that increases Dark Arts defense.
- The Leaky Cauldron Room: In Hogsmeade, behind the Leaky Cauldron, there is a locked door that opens after you obtain the Cloak of the Understated. Inside is a photo of the development team.
- The Bad Weather Spell: After completing all Merlin Trials, you can cast Arresto Momentum on a specific cloud formation near the Quidditch pitch. It creates a rain of confetti. (No reward, but it’s a fun secret.)
#### 2. Pop Culture Crossovers
#### 3. Developer In-Jokes
#### 4. Hidden Animal Interactions
#### 5. Soundtrack Secrets
Developer-Intended Hidden Content (Unlockable via Progression)
These are not cheats but are often mistaken for secrets:
Summary
While Hogwarts Legacy has no traditional cheats, the world is rich with hidden content. Use Revelio liberally, explore every nook, and interact with objects repeatedly. These secrets are safe (no exploits) and are celebrated by the community. For a full list of all collectibles, refer to the All Game Items and Character Skills guides in this series.