
Horizon Forbidden West
## Game Introduction **Horizon Forbidden West** is an action role-playing game developed by **Guerrilla Games** and published by **Sony Interactive Entertainment**. It is the direct sequel to the critically acclaimed *Horizon Zero Dawn* (2017). ### Release Timeline & Platforms - **PlayStation 5 / ...

Download & Installation
Horizon Forbidden West – Download & Installation Guide
This guide covers the official methods to download and install Horizon Forbidden West on PlayStation 4, PlayStation 5, and PC (Steam / Epic Games Store). The game is not available on Xbox, Nintendo Switch, or mobile platforms.
---
1. Supported Platforms & Legitimate Sources
| Platform | Official Stores | Notes |
|---|---|---|
| PlayStation 4 (PS4) | PlayStation Store (digital) or physical disc | PS4 disc works on PS5 via backward compatibility (requires disc drive). |
| PlayStation 5 (PS5) | PlayStation Store (digital) or physical disc | Native PS5 version includes DualSense features, faster loading, and enhanced graphics. |
| PC (Windows) | Steam, Epic Games Store | Released March 21, 2024. Available as standard and digital deluxe editions. |
---
2. System Requirements (PC Version)
#### Minimum Requirements (720p / low settings, 30 FPS)
- OS: Windows 10 64-bit (version 1909 or newer)
- CPU: Intel Core i5-8600 or AMD Ryzen 5 3600
- GPU: NVIDIA GeForce GTX 1060 (6GB) or AMD Radeon RX 590 (8GB)
- RAM: 16 GB
- Storage: 150 GB SSD (NVMe recommended)
- DirectX: Version 12
- Other: Broadband internet, keyboard & mouse or controller
- OS: Windows 11 64-bit
- CPU: Intel Core i7-9700 or AMD Ryzen 7 3700X
- GPU: NVIDIA GeForce RTX 3060 (8GB) or AMD Radeon RX 5700 XT (8GB)
- RAM: 16 GB
- Storage: 150 GB SSD (NVMe required for optimal streaming)
- DirectX: Version 12
- Other: Broadband internet, controller recommended
- PlayStation: A free or active PlayStation Network (PSN) account is needed to download digital copies. Physical discs require no account for single‑player, but updates and patches require PSN.
- PC (Steam / Epic): A Steam or Epic Games Store account is required. Both are free to create. The game activates via the respective store client.
- Language selection: Choose subtitle and audio languages (supports multiple languages – English, French, German, Spanish, etc.).
- Graphics presets (PC only): The first launch will calibrate graphics settings automatically based on your hardware. You can later adjust in the Options menu.
- Controller support: The game natively supports DualSense, Xbox, and generic controllers on PC. PlayStation versions default to DualShock 4 or DualSense.
- Performance mode (PS5/PC): On PS5 you can choose between Favor Resolution (30 FPS, 4K) or Favor Performance (60 FPS, dynamic 4K). On PC, options are extensive.
- Save sync: If you have a previous save (e.g., Horizon Zero Dawn import for some bonuses, or cloud saves), the game will prompt you.
- Online features: No online multiplayer, but you may need to sign in to receive pre‑order bonuses or complete the DLC (Burning Shores). Updates are mandatory.
- PS5: ~95 GB (with high‑resolution texture pack included).
- PS4: ~85 GB (lower‑resolution textures, no 4K assets).
- PC: ~137 GB (base game) – expands to ~150 GB with the Burning Shores DLC and high‑quality textures.
#### Recommended Requirements (1080p / high settings, 60 FPS)
> Note: The game requires a high-end SSD and 150 GB free space. An HDD will cause severe texture pop‑in and stuttering.
---
3. Account Requirements
---
4. Step-by-Step Installation
#### 4.1 PlayStation 4 / PlayStation 5 (Digital)
1. Turn on your console and connect to the internet.
2. Go to the PlayStation Store from the main menu.
3. Search for “Horizon Forbidden West” (or find it under “New Releases”).
4. Select your edition (Standard, Digital Deluxe, or Complete Edition).
5. Click “Download” (PS4 version) or “Download PS5 version” if on PS5 (you can also choose to download both if you own the Cross‑Gen bundle).
6. Wait for the download to finish. On PS5, the game will install automatically. On PS4, you may need to confirm installation.
7. Play – the game will appear on your home screen.
#### 4.2 PlayStation 5 (Physical Disc)
1. Insert the disc into the PS5 disc drive.
2. The console will prompt installation—follow on‑screen instructions.
3. Wait for the full install (copy from disc, then download any mandatory update).
4. Launch from the home screen.
> Note: To play the PS5 native version, you must insert the PS5 disc. A PS4 disc will install the PS4 version (playable via backward compatibility).
#### 4.3 PC – Steam
1. Download and install the Steam client from [store.steampowered.com](https://store.steampowered.com).
2. Log in to your Steam account (create one if needed).
3. Open the Store and search for “Horizon Forbidden West”.
4. Click “Add to Cart” (or “Buy for myself”) and complete the purchase.
5. After purchase, go to your Library → find “Horizon Forbidden West”.
6. Click “Install” → choose your install location (ensure at least 150 GB free on an SSD).
7. Wait for the download – Steam will download and unpack the game.
8. Optional: Pre‑load if available (usually 1–2 days before release) to play immediately at launch.
#### 4.4 PC – Epic Games Store
1. Download and install the Epic Games Launcher from [store.epicgames.com](https://store.epicgames.com).
2. Log in to your Epic account.
3. Go to the Store and search for “Horizon Forbidden West”.
4. Purchase the game (you may need to add payment method).
5. After purchase, go to your Library → find the title.
6. Click “Install” → select installation directory (SSD required).
7. Wait for the download to complete.
---
5. First Launch Setup (All Platforms)
---
6. Storage Space & Download Size
> Always ensure you have at least 15 GB of additional free space for patches, temp files, and operating system overhead.
---
7. Common Installation Errors & Fixes
| Error / Issue | Platform(s) | Solution |
|---|---|---|
| “Not enough storage” | All | Free up space by deleting unwanted games/files. Ensure you have the required free space before installing. |
| “Download stuck at 0%” | PC (Steam/Epic) | Restart the launcher. Check antivirus/firewall – add Steam/Epic to exceptions. Verify internet connection. |
| “File corruption” / CRC errors | PC | Run file verification: Steam: right‑click game → Properties → Local Files → “Verify integrity of game files”. Epic: click the three dots → Manage → Verify. |
| “Application has stopped working” / crash on launch | PC / PS4/PS5 | Update graphics drivers (PC). On console, restart the system and check for system software updates. |
| “Failed to initialize renderer” | PC | Your GPU does not support DirectX 12 Ultimate features (e.g., RTX 20 series or newer required for ray tracing). Lower graphics settings or upgrade GPU. |
| Black screen on launch | PC | Disable overlays (Steam, Discord). Run the game as administrator. Temporarily disable antivirus. |
| PS5 disc install error | PS5 | Clean the disc. Restart in Safe Mode → Rebuild Database. If issue persists, contact Sony support. |
| Slow download speed | All | Pause other network activity. Use a wired connection. On Steam/Epic, change download region to a less congested server. |
8. Post-Installation Verification
- Launch the game: If it opens to the main menu without errors, installation is successful.
- Check for updates: On console, the game will automatically check for patches. On PC, Steam/Epic will prompt to update if a newer version is available.
- Graphics test (PC): Run the built‑in benchmark (Options → Graphics → Benchmark). Compare results with expected performance.
- Save game: Start a new game or load a previous save. Ensure quick‑save works.
- DLC: If you purchased the Burning Shores DLC, verify it is installed. On PS5, go to game icon → Options → Manage Game Content. On PC, check DLC tab in library.
- Controller: On PC, ensure the controller is recognized (check in Options → Controls → Controller). DualSense features (haptic triggers) work only via wired USB on PC.
- Pre‑loading (PC): Purchase before release and pre‑load the game to play instantly on launch day. Decryption happens automatically.
- Cloud saves: PlayStation Plus and Steam/Epic cloud saves are supported. Sync your progress across devices if you play on multiple PCs or consoles.
- Cross‑gen progression: If you own both PS4 and PS5 versions, saves are not transferable between generations (except via PlayStation Plus cloud save upload/download).
- Mod support: Not officially supported on PC, but community mods are available (use Nexus Mods, install at your own risk).
---
9. Additional Tips
---
Final note: Always keep your graphics drivers, operating system, and store clients up to date for the best experience. Enjoy the wilds of the Forbidden West!

Game Introduction
Game Introduction
Horizon Forbidden West is an action role-playing game developed by Guerrilla Games and published by Sony Interactive Entertainment. It is the direct sequel to the critically acclaimed Horizon Zero Dawn (2017).
Release Timeline & Platforms
- PlayStation 5 / PlayStation 4: February 18, 2022
- PC (Steam / Epic Games Store): March 21, 2024 (Complete Edition, includes Burning Shores DLC)
- Platforms: PlayStation 4, PlayStation 5, Windows
- Aloy (voiced by Ashly Burch) – The protagonist, a gifted hunter and machine expert.
- Varl (voiced by John Macmillan) – Aloy’s loyal friend from the Nora tribe.
- Erend (voiced by JB Blanc) – Oseram captain and ally.
- Zo (voiced by Erica Luttrell) – A Utaru priestess and grave-mind expert.
- Kotallo (voiced by Noshir Dalal) – A Tenakth marshal with a strong sense of honor.
- Sylens (voiced by Lance Reddick) – A mysterious, knowledge-driven former Eclipse member (appears in sequel).
- Tilda van der Meer – A key new character connected to the Far Zenith project.
- Fans of action RPGs with strong narrative focus.
- Players who enjoy exploration, crafting, and puzzle-solving.
- Those who appreciate science fiction with post-apocalyptic themes.
- Horizon Zero Dawn veterans seeking a direct continuation.
- Single-player only – no online multiplayer or co-op modes.
- Requires an internet connection for initial installation and optional updates, but the entire game can be played completely offline after installation.
- PS5 Performance Mode: 60 fps at 1800p; Fidelity Mode: 30 fps at native 4K.
- New Game+ and Ultra Hard difficulty available after patch updates.
- Burning Shores (released April 19, 2023 on PS5, bundled with PC version) – A major expansion set in the ruins of Los Angeles. Adds new story quests, a new tribe (Quen), new machines, weapons, and abilities. Requires completion of the main game. Only available on PS5 and PC (no PS4 support for this DLC).
- Horizon Forbidden West: Complete Edition (released October 6, 2023 on PS5, March 21, 2024 on PC) includes base game + Burning Shores + digital soundtrack, art book, and cosmetic items.
The game is not available on Xbox or Nintendo platforms.
Story Overview & Setting
Set six months after the events of Horizon Zero Dawn, the story follows Aloy, a young Nora hunter and clone of Dr. Elisabet Sobeck. A mysterious and deadly blight is spreading across the land, killing all organic life. Simultaneously, unpredictable and catastrophic storms rage, threatening the tribes. Aloy sets out to the Forbidden West—a dangerous frontier region stretching from the ruins of San Francisco to the Yosemite Valley—in search of the source of the blight and a way to restore the planet’s failing terraforming system. The narrative explores themes of legacy, sacrifice, and humanity’s relationship with technology.
Main Characters
Core Appeal & Target Audience
Horizon Forbidden West offers a vast open world filled with stunning visual detail, dynamic ecosystems, and mechanical beasts. The core loop combines stealth, ranged combat (using the iconic bow, spear, and new tools like the grapple shot and shieldwing), and RPG progression. The game appeals to:
Game Modes & Online/Offline Support
DLC / Expansion Overview
What Makes This Game Unique?
1. Mechanoid Wildlife: Over 40 new machine types, each with realistic behaviors and weak points. Machines can be overridden and used as mounts or combat allies.
2. Unparalleled Visual Fidelity: Decima Engine delivers photorealistic environments, dynamic water physics, and detailed facial animations.
3. Underwater Exploration: For the first time, Aloy can swim underwater, explore sunken ruins, and fight aquatic machines.
4. Grappling Hook & Shieldwing: Adds vertical mobility and a paraglider-like traversal tool.
5. Valor Surges & Weapon Techniques: New skill trees and combat mechanics allowing custom playstyles.
6. Lore-Rich Worldbuilding: Expanded tribal cultures (Tenakth, Utaru, Quen) and deeper ties to the ancient Metal World backstory.
7. DualSense Controller Features (PS5): Haptic feedback, adaptive triggers, and built-in speaker enhance immersion.
In summary, Horizon Forbidden West is a masterful blend of gripping storytelling, strategic combat, and breathtaking exploration, cementing itself as a must-play for action-adventure fans.
Getting Started
Getting Started with Horizon Forbidden West
Welcome to Horizon Forbidden West! This guide is tailored for brand-new players, covering the critical first hour, controls on all platforms, UI basics, early objectives, resource priorities, common mistakes, and a clear day-one checklist.
---
First Hour Walkthrough: From Opening to Chainscrape
1. Opening Cinematic & Prologue — The game begins with a brief recap of the first game. After the cutscene, you control Aloy in the frozen ruins of the Daunt. Follow the linear path, learning basic movement and camera controls. You’ll encounter a broken Focus (you get a new one) and a few easy tutorials.
2. Speak with Varl — Your first objective is to reach Varl. Along the way, you’ll practice climbing (yellow handholds) and gather simple resources (medicinal plants, wood).
3. Enter the Carja Fort — You’ll meet Captain Jaela and learn about the Tenakth and the Forbidden West. There’s no real combat yet; pay attention to dialogue.
4. Head to Barren Light — After the fort, follow the road. You’ll pass a campfire — interact to learn fast travel (initially only via campfires). You’ll also see a Tallneck in the distance (you can’t reach it yet).
5. Arrive at Barren Light — A hub area with merchants and side quests. Talk to the Merchant’s assistant for a side quest (optional). Main objective: Talk to Commander Ligan to get permission to enter the Forbidden West.
6. The Point of the Lance (Main Quest) — Ligan asks you to prove yourself by clearing a tremortusk attack. This is your first serious fight. Stick to stealth: use tall grass, silent strikes, and the rope caster (given). Dodge the machine’s charging attacks. After defeating it, you gain entry.
7. Enter the Forbidden West — You’ll cross the gate. Follow the path to Chainscrape, the first major village. This takes about 40–60 minutes depending on your pace.
---
Character Creation
There is no character creation. You play as Aloy, a fixed protagonist. You cannot change her appearance, gender, or name. However, you can customize her outfits (armor) later, which change stats and visuals.
---
Controls on All Platforms
#### PlayStation 5 (DualSense) - Default
| Action | Button |
|---|---|
| Move | Left Stick |
| Look / Aim | Right Stick |
| Sprint | L3 (click left stick) |
| Crouch / Slide | Circle |
| Jump / Climb | Cross |
| Dodge | Circle (while moving) |
| Attack (melee) | R1 |
| Heavy Attack (hold) | R2 |
| Shoot (bow) | R2 (aim with L2) |
| Focus | R3 (click right stick) |
| Weapon Wheel | L1 (hold) |
| Quick Heal | D-Pad Up |
| Use Item (e.g., trap) | D-Pad Right |
| Use Tool (e.g., whistle) | D-Pad Left |
| Call Mount | D-Pad Down |
| Interact / Pick Up | Triangle |
| Reload | Square (while weapon drawn) |
| Aim (weapon) | L2 |
| Override | Hold Triangle (when prompt appears) |
| Swim Down | Cross (while swimming) |
| Swim Up | Circle |
Same as PS5 except:
- Touchpad click = Map
- Options = Pause / Menu
- No haptic feedback differences.
#### PC (Keyboard + Mouse) - Default
| Action | Key |
|---|---|
| Move | W/A/S/D |
| Look / Aim | Mouse (move) |
| Sprint | Left Shift |
| Crouch / Slide | C |
| Jump / Climb | Space |
| Dodge | C (while moving) or Double-tap W/A/S/D? Actually default dodge is Space + direction? Let's confirm: default dodge is C while moving. |
| Attack (melee) | Left Mouse Button |
| Heavy Attack | Right Mouse Button (hold) |
| Shoot (bow) | Left Mouse (while aiming with right mouse) |
| Focus | Q |
| Weapon Wheel | Tab (hold) |
| Quick Heal | 1 |
| Use Item | 2 |
| Use Tool | 3 |
| Call Mount | 4 |
| Interact / Pick Up | E |
| Reload | R (while weapon drawn) |
| Aim (weapon) | Right Mouse Button (hold) |
| Override | Hold E |
| Map | M |
| Menu | Esc |
---
UI Overview
- Compass (top of screen) — Shows cardinal directions, quest markers (main quest: yellow diamond; side quests: green; errands: blue), and points of interest.
- Health Bar (bottom left) — Green bar; turns yellow when damaged. You can restore health with medicinal berries (collected from bushes) or potions.
- Stamina Bar (below health) — Only appears when using Valor Surges; otherwise hidden.
- Weapon / Ammo Indicator (bottom center) — Shows current weapon and ammo count.
- Ammo Wheel (hold L1/Tab) — Pause time to select weapons and ammo types. Also shows tools (trap, whistle, etc.) and a quick-heal slot.
- Notifications (center-right) — Quest updates, XP gained, skill points, etc.
- Tool / Item Slots (D-Pad) — Quick access to health, traps, potions, mount call.
- Focus Mode (R3/Q) — Highlights interactable objects, machine weak points, tracks, and enemies. Essential for finding climbable surfaces and resources.
- Mini-map — Available when you unlock the map; shows local area with markers. You can toggle it in options.
- Don’t ignore side quests completely — Some give skill points and unique gear. But don’t spend hours on them early; focus on main quest until you get the Shieldwing and Sunwing (mount).
- Avoid high-level machines — Shell-walkers, snapmaws, and especially Thunderjaws will one-shot you. Run away until you have better weapons and skills.
- Don’t waste resources on every weapon — Stick to a Hunter Bow, a Sharpshot Bow (long-range), and a Ropecaster early. Upgrade them rather than buying new ones.
- Don’t skip the tutorial logs — They explain elemental weaknesses and machine parts. Read them in the Notebook menu.
- Avoid fall damage — The early game has many cliffs. Use the Shieldwing (unlocked mid-game) to glide. Before that, climb carefully and use ledges.
- Don’t sell machine parts — Many are needed for weapon/outfit upgrades. Only sell Scrap and Unprocessed Metal (green quality resources).
- Don’t fight machines head-on — Use stealth, traps, and elemental arrows. A direct fight against a large group will drain your resources fast.
---
Essential Early Objectives (What to Do First)
1. Complete the Main Quest "The Point of the Lance" — This unlocks the Forbidden West and gives you the rope caster (crucial for later fights).
2. Reach Chainscrape — The first hub. Talk to everyone: merchants, the blacksmith (for weapon upgrades), and the stitcher (for outfits).
3. Buy a better bow — The Hunter Bow from the merchant is cheap and powerful. Also buy fire arrows (useful against machines weak to fire).
4. Upgrade your pouches — Visit the Trapper in Chainscrape to craft larger capacity for arrows, potions, and resources. Prioritize the Resource Pouch (more inventory space) and Small Pouch (more ammo).
5. Unlock the Shieldwing — This is part of the main quest "The Embassy" (second main quest). Do it as soon as possible; gliding saves time and avoids fall damage.
6. Learn to Override machines — Early quests teach you stealth overrides. Practice on grazers and striders.
7. Gather medicinal plants — Always collect them; they’re the primary healing source in the early game.
8. Complete the first Hunting Ground (optional but helpful) — The Reward from the hunting grounds near Chainscrape gives you a Warbow (good for freezing machines).
---
What to Avoid (Early Game Pitfalls)
---
Early Resource Priorities
| Resource | Use | Priority |
|---|---|---|
| Medicinal Berries | Healing | High |
| Wood | Arrows (all types) | High |
| Wire | Tie-down and shock arrows | High |
| Ridge-Wood | Long-range arrows | Medium |
| Machine Parts | Upgrades | High (don’t sell) |
| Celestial Water | Potions | Medium |
| Blaze | Fire arrows / fuel | High |
| Chillwater | Freeze arrows | Medium |
| Sparker | Shock arrows | Medium |
| Metal Shards | Currency | Low (early game) |
---
Common Beginner Mistakes
1. Not using Focus — The Focus highlights weak spots, climbable surfaces, and lootable items. Press it frequently.
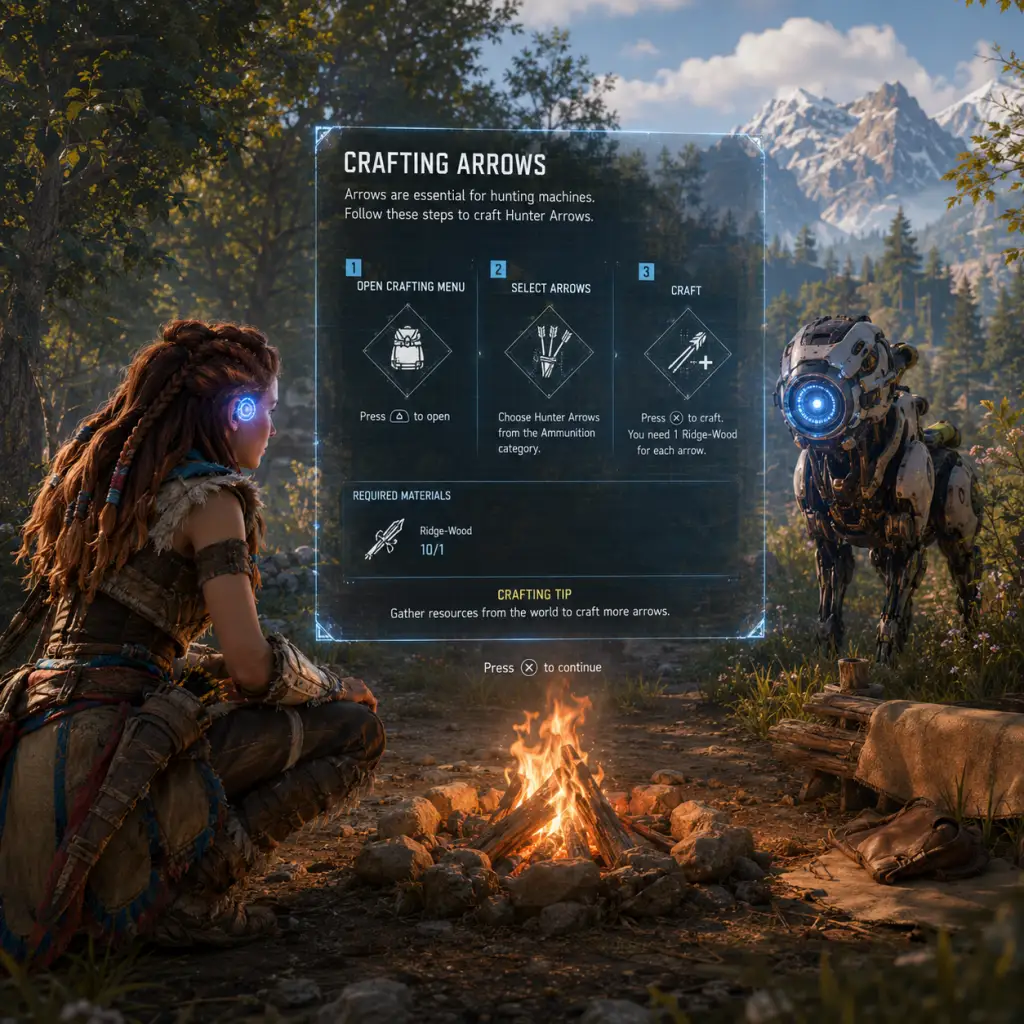
2. Not crafting ammo mid-combat — You can craft arrows from the weapon wheel (R1/Tab). Don’t run out.
3. Ignoring weapon upgrades — Visit the workbench in Chainscrape to improve bow damage, handling, etc. Use machine parts.
4. Forgetting to dodge — Circle/C is your best friend. Every machine has a tell; dodge sideways or toward the machine (not away).
5. Over-encumbered inventory — Sell waste resources daily. Otherwise you can’t pick up new parts.
6. Fighting from a mount — Early mounts are fragile. Dismount before combat.
7. Not reading machine lore — Each machine has weaknesses (fire, freeze, shock, acid). Use the Notebook to learn.
8. Wasting metal shards on cosmetics — Save them for gear upgrades.
---
Day-One Checklist
- [ ] Complete the prologue and reach Barren Light.
- [ ] Finish "The Point of the Lance" main quest.
- [ ] Enter Chainscrape and talk to all NPCs.
- [ ] Buy a Hunter Bow and Fire Arrows from the merchant.
- [ ] Upgrade at least Resource Pouch and Small Pouch at the Trapper.
- [ ] Equip a Nora Tracker outfit (if available) for stealth bonus.
- [ ] Loot every machine you kill for parts.
- [ ] Collect at least 50 medicinal berries.
- [ ] Complete the First Hunting Ground (optional but recommended).
- [ ] Unlock the Shieldwing (progress main quest to "The Embassy").
- [ ] Save manually before every major battle.
- Save often — Autosave is frequent, but manual saves at campfires prevent loss.
- Toggle Aim Assist (Settings > Controls) if you struggle with aiming.
- Use photo mode — You’ll encounter stunning vistas. Pause (Options/Esc) > Photo Mode.
- Explore — This game rewards curiosity. Look for glowing yellow flowers (metal flowers), caves, and ruins.
- Difficulty — Start on Normal or Easy if you’re new to action RPGs. You can change it anytime.
---
Final Tips
Enjoy your journey through the Forbidden West, Aloy!
Core Gameplay
Core Gameplay – Horizon Forbidden West
This section breaks down the fundamental gameplay systems of Horizon Forbidden West and how they evolve as you progress through the story. The game is a sprawling open-world action RPG with a heavy focus on machine combat, exploration, and character progression. Understanding the core loop and how it changes will help you plan your journey efficiently.
The Core Gameplay Loop
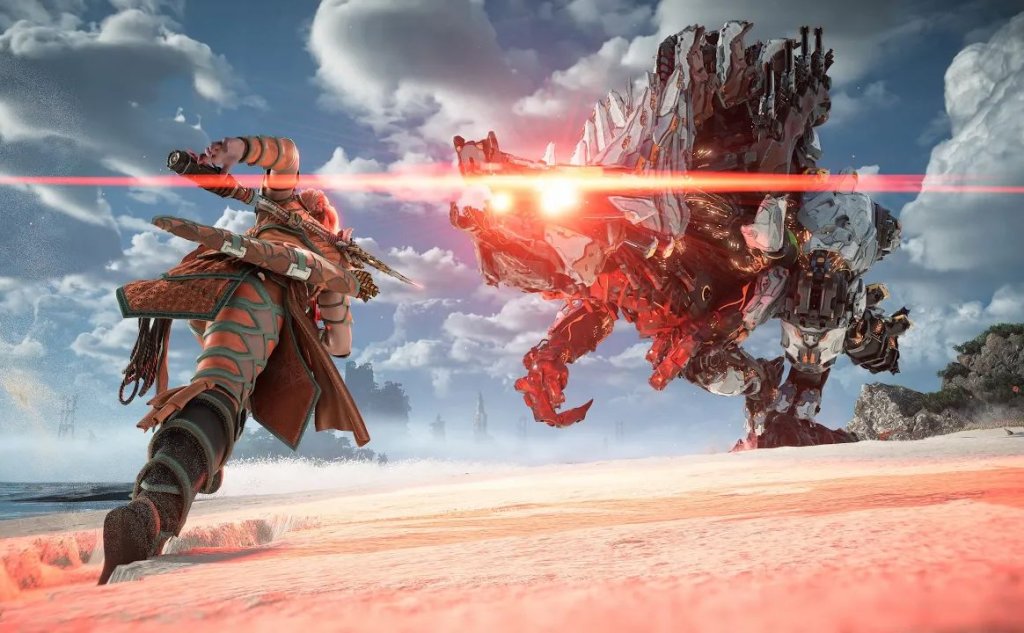
The central loop is: Explore → Encounter machines/humans → Interact (fight, stealth, or bypass) → Loot resources → Craft/Upgrade → Progress quests → Unlock new areas → Repeat.
- Exploration: Scan the environment with your Focus to mark resources, enemies, and points of interest. Use the Sunwing (unlocked mid-game) for aerial traversal.
- Interaction: Choose direct combat, stealth takedowns, or hacking machines (via Override). The environment is highly interactive – use tall grass, ropes, and traps.
- Looting: Machines drop machine parts (hearts, lenses, circulation) used for upgrades. Human enemies drop weapons, ammo, and shards (currency). Plants and animal parts are also crucial.
- Crafting: Ammo, traps, potions, and weapon/outfit upgrades all require resources. Craft at workbenches or in the field using the D-pad.
- Progression: Earn XP to level up (grants skill points), complete quests, and upgrade gear to tackle stronger machines.
- Combat & Interaction:
- Exploration: The Daunt and first open area (Restless Weald) are linear but teach traversal: climbing yellow handholds, using the Shieldwing (glider) unlocked in the tutorial, and swimming. Green highlighted resources are common: medicinal plants, metal shards, wood.
- Quests & Missions:
- Economy:
- Character/Build Growth:
- Endgame Structure (Early Game Perspective): The main story continues; you haven’t reached mid-game yet. There is no “endgame” at this point.
- Combat & Interaction:
- Exploration: You can unlock the Sunwing override (after completing “The Sea of Sands”) – aerial travel revolutionizes exploration. Use it to reach high ruins and survey regions. Underwater breathing mask is available after “The Eye of the Earth” – explore underwater caves and ruins for valuable loot.
- Quests & Missions:
- Economy:
- Character/Build Growth:
- Endgame Structure (Mid Game Perspective): The main story is halfway; you can tackle optional side content but the final act is still ahead.
- Combat & Interaction:
- Exploration: Complete all Signal Towers to unlock the full map. The Greenhouses in the far north reward skill points. Cauldrons (e.g., Cauldron KAPPA) unlock overrides for the most powerful machines.
- Quests & Missions:
- Economy:
- Character/Build Growth:
- Endgame Structure (Late Game Perspective): The final mission is the conclusion. After that, you enter a free-roam state with no new story content – but still many collections and challenges.
- Combat & Interaction:
- Exploration:
- Quests & Missions:
- Economy:
- Character/Build Growth:
- Endgame Structure (Definitive):
Early Game (Levels 1–15, The Daunt to Plainsong)
Progression Focus: Survival basics, learning machine weak points, and building a foundation for crafting.
- Weapons: Start with a Hunter Bow (fire arrows), a Sharpshot Bow (precision), and a Tripcaster (traps). Use fire arrows to inflict burning damage – very effective against early machines like Watchers and Scroungers.
- Stealth: Crouch in tall grass, use silent strike (melee from behind) for instant kills on small machines or humans. Lure enemies with rocks.
- Melee: The spear is weak; use it only to finish off stunned enemies or break crates. Unlock the “Resonator Blast” skill later.
- Critical systems: Focus scanning to see machine components (e.g., blaze canisters, chillwater sacs). Hitting these with elemental arrows can cause explosions or freeze.
- Main quest: “The Point of the Lance,” “To the Brink,” “The Embassy” – these introduce Sylens, the Tenakth, and the main threat (the blight). Focus on these to unlock the Sunwing and base.
- Side quests: Help out at Chainscrape like “The Wound in the Sand”. They teach basic mechanics and reward skill points and early weapon coils.
- Errands: Simple fetch or kill tasks; great for shards and early upgrades.
- Shards are the main currency. Earn from looting, selling machine parts (but keep rare ones), and quest rewards. Early on, prioritize buying ammo pouches and a better Hunter Bow (e.g., Carja’s Wily Bow from the merchant in Chainscrape).
- Resources: Wood and branches are plentiful; machine parts are scarce. Don’t sell rare machine parts (hearts, lenses) – they are needed for upgrades later.
- Skill Tree: Start with Trapper (for expanded trap capacity) and Survivor (for health regen). Take Silent Strike early for stealth.
- Unlock the Hunter tree for concentration (slows time while aiming) – critical for hitting weak points.
- Weapon Stamina: Manage stamina with dodge rolls and attacks. Upgrade stamina via skills.
Mid Game (Levels 16–30, Plainsong to Base Acquisition)
Progression Focus: Unlocking the full skill tree, obtaining powerful weapons, and mastering elemental weaknesses. You’ll have access to the Base (after “Death’s Door”) and can fast travel freely.
- Expand arsenal: Unlock the Blast Sling (explosive damage), Ropecaster (ties down large machines), and Spike Thrower (powerful, throwing axes). Use elemental arrows (freeze + frost bombs) to freeze big machines, then use high-damage attacks.
- New mechanics: Valor Surges (activated special abilities from the skill tree) – e.g., “Ranged Power” increases damage. Weapon Techniques (alternative fire modes like double-notching arrows) unlock as you upgrade weapons.
- Human enemies become tougher (Tenakth with shields). Use piercing arrows to bypass shields, or stealth kill from above.
- Main quests: “The Dying Lands,” “The Sea of Sands,” “The Eye of the Earth” – each reveals major story reveals (the Odyssey, the HADES backup). These unlock new tools and areas.
- Side content: Campaigns like the “A Tribe Apart” (exploring Banuk ruins). Contracts from merchants – kill a number of certain machines for rewards (shards, weapon upgrades).
- Errands evolve into longer chains (e.g., “The Blood Choke”).
- Shards inflow increases due to higher tier loot. Spend on specialized weapon coils (e.g., +damage, +elemental) and outfit weaving mods.
- Machine parts become more important – need hearts for upgrading purple weapons. Farm specific machines (e.g., Tremortusk for the heart).
- Workbench upgrades: Your pouch and weapon carrying capacity need upgrades using animal parts (skins, bones). Hunt animals proactively.
- Skill trees: Unlock Master skills in each tree – like “Triple Notch” (firing three arrows at once) in Hunter. Specialize: either go heavy into Machine Master for overrides, or Infiltrator for stealth.
- Valor Surges: Equip a surge that suits your playstyle (e.g., “Toughened” for melee builds, “Overshield” for survivability).
- Weapon upgrades: Buy purple (Very Rare) weapons from merchants in settlements like Plainsong or Scalding Spear. Upgrade them at workbenches using machine parts – each upgrade tier adds more mod slots.
Late Game (Levels 31–50, From Base to The Final Mission)
Progression Focus: Min-maxing equipment, completing high-level side content, and preparing for the final confrontations. You’ll have access to all tools and most of the map.
- Use fully upgraded legendary (orange) weapons obtained from side quests, arena challenges, or endgame vendors (e.g., the Death-Seeker’s Shadow bow). These have three mod slots and unique weapon techniques.
- Master the Valor Surge combos: pair “Ranged Power” with “Chain Burst” arrows for massive damage. Use Ropecaster as a crowd control tool.
- New machines: Apex variants (stronger, spawn at night) and rare machines like the Slaughterspine (fire/plasma attacks). Use plasma damage against them, or corrosive to melt armor.
- Main quests: “The Wings of the Ten,” “All That Remains,” and the final mission “The Way Home.” These are linear and intense – stock up on supplies.
- Side content: Gauntlet Runs (mount races), Pit Challenges (melee combos), Arena (fight waves of machines for medals to buy legendary gear).
- Legendary Gear quests: “The Stillsands’ Secret” for the Skyhammer bow, “The Sea of Sands” for the Sun Scourge (legendary blastsling).
- Shards are abundant. Spend on upgrade materials (e.g., Apex machine hearts) and mods (ideally purple coils with 25%+ stats).
- Arena Medals are a new currency from the Arena in Memorial Grove – grind these to buy legendary weapons.
- Greenhouse loot boxes contain rare mods; open with keys found in side quests.
- Max level cap (50) is reachable by completing all side content. All skill points earned, but you can’t unlock every skill – respec if needed (buy a respec potion from merchants).
- Legendary weapons fully upgraded to Level 4 unlock all mod slots (typically three). Slot with +damage, +elemental, +handling mods for optimal DPS.
- Outfits: Legendary armors (e.g., Nora Thunder Warrior) provide strong passives like extra arrow damage or stagger resistance. Upgrade with machine parts.
Endgame (Post-Credits, Free Roam)
Progression Focus: Completing all content, obtaining 100% completion, and tackling the New Game+ (if available) or DLC (Burning Shores). The game offers a robust endgame loop without a raid or MMO-like structure.
- No new mechanics; focus on perfecting your build. Try different weapon loadouts, like an all-explosive build with blast sling and spike thrower, or a stealth archer with sharpshot bow and silent strike.
- Arena challenges at the hardest difficulty (Very Hard) reward unique weapon skins and trophies.
- New Game+ (unlocked after credits) carries over all gear, skill points, and stats. Enemies scale to level 50+ and have new attack patterns. Obtain New Game+ exclusive gear like the Oseram Artificer outfit.
- Complete all collectibles: Survey Drones, Black Boxes, Metal Flowers, Vantage Points, Relic Ruins (each prize lore or gear).
- Burning Shores DLC (if purchased) adds a new region south of the map, new machines (Bilegut, Stingspawn), and a legendary bow (The Tie That Binds).
- All side quests can be completed post-story – some have epilogue dialogue with companions.
- Contracts remain available from merchants – great for farming shards.
- The Arena offers repeatable waves for medals; buy all legendary gear from the arena vendor.
- Money is essentially infinite. Sell excess low-tier machine parts; stockpile legendary upgrade parts (especially Apex hearts).
- In the Dive (underwater area) has frequent respawning loot chests for mods and greenshine.
- You can now fully upgrade all legendary gear. The skill tree is maxed – no further progression beyond stats from gear and coils.
- The Valor Surge masteries reach their strongest forms when paired with matching outfit weaves (e.g., “Tracer” for more critical hits).
- Achievement hunting: Most trophies are missable only if you ignore certain errands pre-story (e.g., “All Corners of the Map” requires all collectibles).
- Prestige activities: The Arena, Gauntlet Runs, and Hunting Grounds offer replayable challenges. No infinite scaling or seasonal events.
Summary of Progression Tiers
| Aspect | Early Game (1-15) | Mid Game (16-30) | Late Game (31-50) | Endgame (Post-Story) |
|---|---|---|---|---|
| Weapons | Green/Blue rarity | Blue/Purple | Purple/Legendary | Legendary/NG+ |
| Mobility | Ground + glider | Ground + Sunwing | + underwater | All tools unlocked |
| Enemies | Small machines, basic humans | Medium+ large, Tenakth | All machines, Apex variants | Same as late game + higher scaling |
| Progression Goal | Learn basics, unlock Sunwing | Unlock Base, get powerful gear | Max level, legendary gear | 100% completion, NG+ |
| Economy | Shard constrained | Moderate income | High income | Infinite income |
Game Tips
Game Tips – Horizon Forbidden West
This guide compiles essential tips for Horizon Forbidden West, covering every major gameplay system. Tips are grouped by category and range from beginner fundamentals to advanced optimizations. Each tip includes clear explanations and deeper analysis to help you master the Forbidden West.
Combat Tips
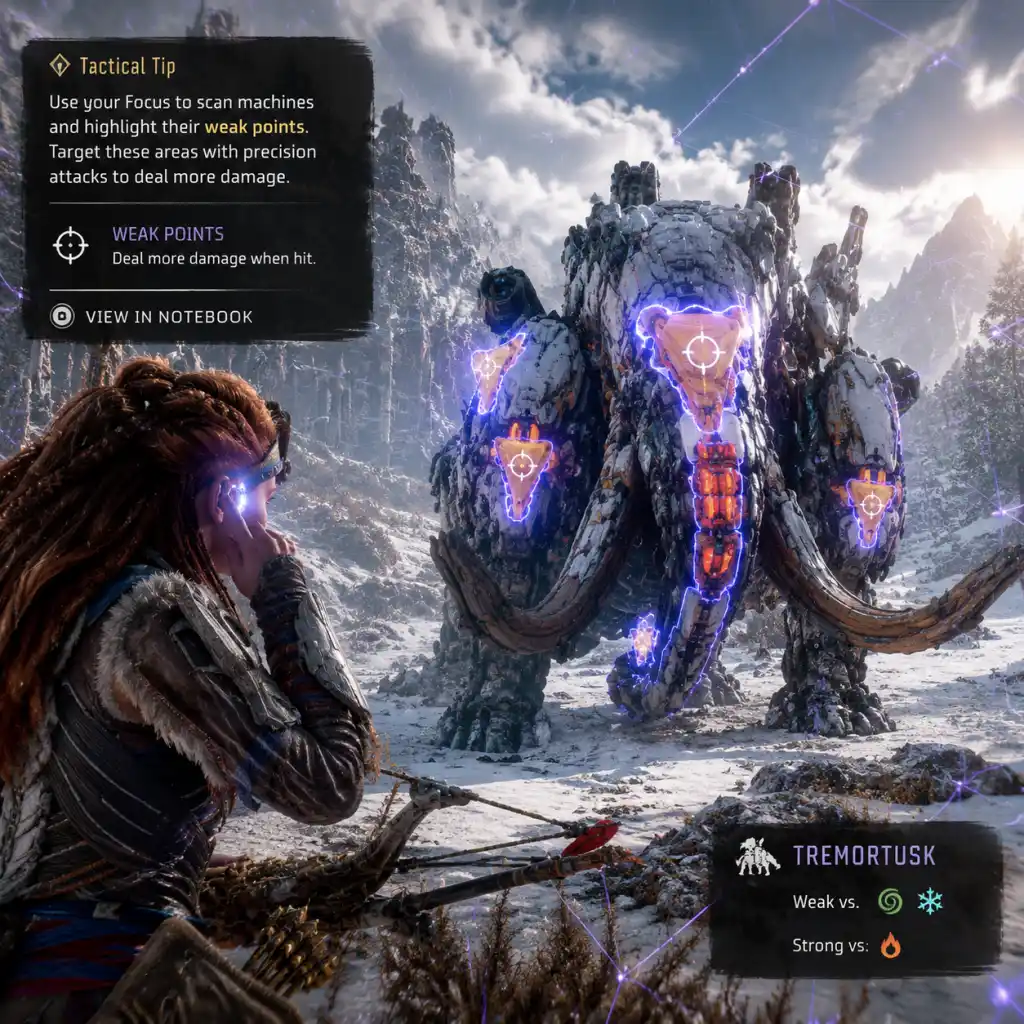
1. Always Scan Machines Before Engaging
- Explanation: Use the Focus (R3/Right Stick click) to highlight a machine’s weak points, components, and machine class. Scanning reveals elemental weaknesses (e.g., fire vs. Chillwater) and damageable parts (e.g., Blaze canisters).
- Analysis: Knowledge of enemy anatomy dramatically reduces ammo usage and fight duration. For example, targeting a Bellowback’s Blaze sac causes a massive explosion if hit with fire arrows, wiping out nearby machines.
- When to Use: Before any engagement, even against familiar machines, as difficulty modifiers may alter component health.
- Explanation: Apply a status effect (fire, freeze, shock, acid, purgewater) to a machine, then follow up with a damaging attack. For example, freeze (Frost Arrow) increases damage from impact-type weapons by 2.5x.
- Analysis: Combos are the core of efficient combat. Freeze + Sharpshot Bow critical hits can one-shot many medium machines. Acid lowers armor durability, making physical attacks more effective.
- When to Use: Against armored enemies (e.g., Scroungers, Rockbreakers) or when you want to conserve powerful ammo.
- Explanation: The spear has a light combo (R1 x4) and a heavy combo (R2 x2). The heavy combo’s final hit knocks down small-to-medium machines. The Braced Shot skill (from Warrior tree) lets you hold R2 for a powerful charged thrust that deals high stagger.
- Analysis: Spear attacks are stamina-free and excellent for close-quarters when ammo is low. Braced Shot can interrupt machine attacks, giving you a window for a critical strike.
- When to Use: After dodging an attack, or when you need to quickly down an enemy to perform a critical strike (R1 prompt near fallen machine).
- Explanation: The standard dodge (X/o) has invincibility frames, but only during the initial part of the roll. The slide (sprint + crouch) is faster and covers distance but no i-frames.
- Analysis: Late dodges are punished; learn the timing of enemy wind-up animations (e.g., Thunderjaw tail slam). Use slide to quickly reposition or escape area-of-effect (AoE) attacks like Fireclaw lava splashes.
- When to Use: Dodge only when you see the attack animation lock; slide as a gap-closer or escape tool outside combat or during machine charge attacks.
- Explanation: Each weapon has unique special abilities tied to Skill Tree unlocks—e.g., Triple Notch (Hunter Bow), Spread Shot (Blastslings), Close Range Damage (Spike Thrower).
- Analysis: Weapon Techniques consume stamina, not ammo, making them powerful free shots. Triple Notch fires three arrows at once, massively increasing burst damage vs. a single target.
- When to Use: When you have full stamina and need to quickly bypass armor or hit a weak point. Recharge stamina via weapon stamina coils or by not using for a few seconds.
- Explanation: Set traps before triggering a group fight. Use Tripwires (elemental or explosive) across patrol routes; shoot canisters (e.g., Chillwater sacs) to ignite them.
- Analysis: Pre-placed traps allow you to control engagement zones and deal massive AoE damage without exposing yourself. Combine with smoke bombs to disengage and re-trigger.
- When to Use: Against human camps or machine sites with clear patrol patterns. Also useful for farming resources by luring machines into a trap corridor.
- Explanation: Crouch and approach unaware enemies to perform a Silent Strike (one-hit kill on small humans/machines) or a regular Stealth Strike (high damage to larger machines like Lancehorns). Upgraded skills allow chain stealth kills.
- Analysis: Silent Strike consumes concentration but is instant. Use tall grass or crouch behind rocks to stay hidden. For large machines, stealth strike is rarely lethal; instead use it as an opening to remove armor or disable a weapon.
- When to Use: Always open a fight with stealth when possible. For machine sites, stealth-strike the watchers first to avoid alarm.
- Explanation: The Shieldwing is obtained via the main quest "Reach for the Stars" (shortly after starting). It allows you to glide from any height and survive falls.
- Analysis: This is the single most important traversal tool. It lets you bypass climbing sections, descend quickly from mountains, and reach isolated platforms. Upgrades (via machine parts) increase duration and speed.
- When to Use: Always keep it equipped. Use it to glide between ruins, over ravines, or to escape open-world encounters by launching off a cliff.
- Explanation: After the main quest "The Wings of the Ten," you unlock the ability to override a Sunwing and fly. Flying consumes stamina but is the fastest means of travel.
- Analysis: The Sunwing can outrun most ground patrols and allows you to spot question marks on the map from high altitude. It also provides a platform for aerial combat (shoot arrows while hovering).
- When to Use: For long distance travel, reaching high-altitude collectibles (black boxes, vantage points), and scouting Cauldrons from above.
- Explanation: The Pullcaster (obtained early) fires a rope that can pull you to weak walls, grapple over gaps, and yank machine parts (e.g., armor plates, resource containers).
- Analysis: Pulling parts off machines is a combat tactic—removing a Thunderjaw’s disc launcher disables its ranged attack. Also, Pullcaster can trigger environmental traps (e.g., hanging rocks) without using ammo.
- When to Use: Use in combat to cripple heavily armored enemies. Outside combat, use to reach hidden caves or break fragile walls revealing loot.
- Explanation: The Diving Mask (obtained during main quest) allows unlimited underwater breathing. Underwater, you can use a spear but no ranged weapons except some tools (e.g., Pullcaster on breakable corals).
- Analysis: Underwater areas contain valuable resources (greenglow, ancient containers). Swim quickly by holding sprint (R2), but watch for aggressive machines like Snapmaws and Tiderippers. Use stealth or avoid them entirely.
- When to Use: When hunting for parts for upgrades or completing side quests requiring salvage. Only engage underwater machines if you have a powerful spear or use the Pullcaster to dislodge them.
- Explanation: Many rock faces have yellow paint indicating climbable surfaces, but the Focus (R3) reveals all interactive handholds even on natural or ruined walls.
- Analysis: Not all yellow paths are obvious; Focus highlights hidden ledges and vertical vines. This is crucial for reaching Vantage Points and survey drones without backtracking.
- When to Use: Whenever you cannot find a clear path upward. Spam Focus in circle motion to tag all climbable edges within 30 meters.
- Explanation: The Salvage Scrounger skill (Hunter tree) automatically collects machine parts from nearby kills. Combined with the "Loot All" option (hold triangle/square), you can quickly gather resources.
- Analysis: Machine parts are needed for weapon upgrades, ammo crafting, and gear purchases. Always loot enemies, especially rare machines like Apex variants or Shelldivers for unique parts.
- When to Use: Always keep Salvage Scrounger active. After combat, spam loot to collect everything before parts despawn.
- Explanation: Open the weapon wheel (L1/Tab) and press the craft button (hold square/X) while the weapon is selected. This uses materials from your inventory.
- Analysis: This is faster than crafting through the menu and can be done while dodging. Prioritize crafting ammo types you use most (e.g., hunter arrows, precision arrows). Always carry at least 50 Ridge-Wood and 100 Shards for emergency crafting.
- When to Use: When you run out of arrows during a fight, especially against a boss. Practice quick crafting so you don’t stop moving.
- Explanation: Workbenches are found in settlements and some camps. They allow you to upgrade weapons and outfits using machine parts and shards. Each upgrade level adds mod slots or increases stats.
- Analysis: Upgrading a weapon from level 1 to level 5 adds two mod slots and significantly increases damage. Focus on your favorite weapon first (e.g., Hunter Bow or Sharp Shot Bow). Upgrading outfits improves resistance and abilities (e.g., Stealth Boost, Melee Defense).
- When to Use: Whenever you have enough parts. Don’t hoard resources; upgrade early to make combat easier. The final tier often requires rare parts from Apex machines.
- Explanation: You can upgrade your resource pouches (shards, machine parts, skill items) via Carja alchemists or certain merchants. Each upgrade increases capacity.
- Analysis: Running out of inventory space is common. Upgrading pouches lets you carry more components for crafting and selling. Focus on Shard Pouch and Machine Parts Pouch first.
- When to Use: Whenever you have excess shards or machine parts and see a merchant offering pouch upgrades (orange icon). The cost is modest.
- Explanation: There are six skill trees: Warrior, Trapper, Hunter, Survivor, Infiltrator, and Machine Master. You earn skill points by leveling up and completing quests.
- Analysis: A balanced build is recommended for new players—at least 5 points in Hunter (for Triple Notch and Concentration), 3 in Survivor (for health boost and medicine capacity), and 2 in Infiltrator (for silent strike damage). Advanced players can specialize; e.g., stealth-heavy Infiltrator + Machine Master for overriding machines to fight for you.
- When to Use: Respeccing is possible but limited. Plan your first 20 points as: 7 Hunter, 5 Survivor, 4 Infiltrator, 4 Warrior (for braced shot). Then branch into Trapper or Machine Master based on playstyle.
- Explanation: Mods (coils for weapons, weaves for outfits) can be found or purchased. They improve specific stats: damage, elemental buildup, tear, handling, etc.
- Analysis: Stacking similar coils exponentially boosts effectiveness. For example, three 15% damage coils on a Hunter Bow turn it into a high-damage machine destroyer. For outfits, prioritize weaves that counter the most common enemy damage types (fire, shock, melee).
- When to Use: Always attach mods to your main gear. Sell lower-tier mods once you have better ones. Use the workbench to change mods freely.
- Explanation: You have four weapon slots. Assign each a specific role: e.g., Hunter Bow (general damage), Shredder Gauntlet (tear damage), Spike Thrower (melee range AoE), Sharpshot Bow (sniper).
- Analysis: Having a weapon for every situation is less effective than masterfully using three specialized weapons. Your fourth slot can be a utility weapon (Ropecaster, Tripcaster). This reduces ammo types to craft and simplifies combat decisions.
- When to Use: Choose your weapons based on the machines you’re hunting. For example, against a Thunderjaw: Sharpshot Bow (disabling disc launchers), Hunter Bow (fire arrows to cause blaze explosion), and Spike Thrower (explosive spikes for weak points).
- Explanation: Shards are used for buying gear, ammo, and upgrades. They drop from machines, chests, and quest rewards.
- Analysis: High-shard farming spots: hunting grounds (completing trials rewards shards and parts), selling excess machine parts (especially those from Apex machines), and looting ancient containers (valuable trinkets). Also, complete salvage contracts for steady income.
- When to Use: Always have at least 2000 shards before major story missions for emergency purchases. Sell parts you have more than 10 of (except rare upgrade parts).
- Explanation: Merchants in different settlements have unique stock and prices. Some offer rare coils or unique outfits (e.g., Oseram Artificer).
- Analysis: The best economy tip: never buy common ammo crafting materials (Ridge-Wood, Blaze, Metalburn) – they are easily gathered in the wild. Instead, buy rare machine parts for upgrades or unique mods. Also, check merchant inventories after completing side quests, as they may unlock new items.
- When to Use: Visit all merchants you encounter. Use the map filter to see their specialty (weapons, outfits, resources).
- Explanation: Hunting Grounds provide challenges that test your skills. Completing them with a gold medal gives skill points and rare mods.
- Analysis: You can retry challenges infinitely. Use them as a training ground to practice combat techniques (slide shooting, elemental combos). Gold medals also yield unique weapon mods (e.g., 25% Tear damage).
- When to Use: Unlock as soon as you find them. Spend an hour to get gold on all three trials—the rewards drastically improve your combat effectiveness.
- Explanation: Unlock overrides via Cauldrons. Once a machine is overridden (sneak up behind and hold triangle), it becomes a temporary ally that attacks enemies.
- Analysis: Overridden machines draw aggro and deal damage, giving you breathing room. Best candidates: Chargers (fast, distract humans), Bellowbacks (AoE fire attacks), Thunderjaws (powerful, but hard to override).
- When to Use: When outnumbered or facing a large herd. Override a mid-range machine (like a Broadhead) and retreat to let it tank while you snipe from a distance.
- Explanation: Use tear-based attacks (Tearblast arrows, Shredder Gauntlet) to rip off weapon components: disc launchers, mortar launchers, tail cells.
- Analysis: Removing a Thunderjaw’s disc launcher not only damages it but also gives you a heavy weapon to pick up and use against it. Similarly, tearing off a Slitherfang’s earth grinders stops its powerful ranged attacks.
- When to Use: At the start of any large machine fight. Use Concentration (L2) to aim specifically for weapon components.
- Explanation: The Ropecaster fires ropes that, after many hits, tie a machine down, leaving it vulnerable to critical strikes or prolonged damage.
- Analysis: This is a game-changer against aggressive machines like Fireclaws, Stormbirds, and Tiderippers. Once tied down, you have a window to weak point bash with heavy attacks or sharpshot bow crits.
- When to Use: When a machine is enraged (glowing red) and unleashing unblockable attacks. Also useful for overriding – tie down, then override safely.
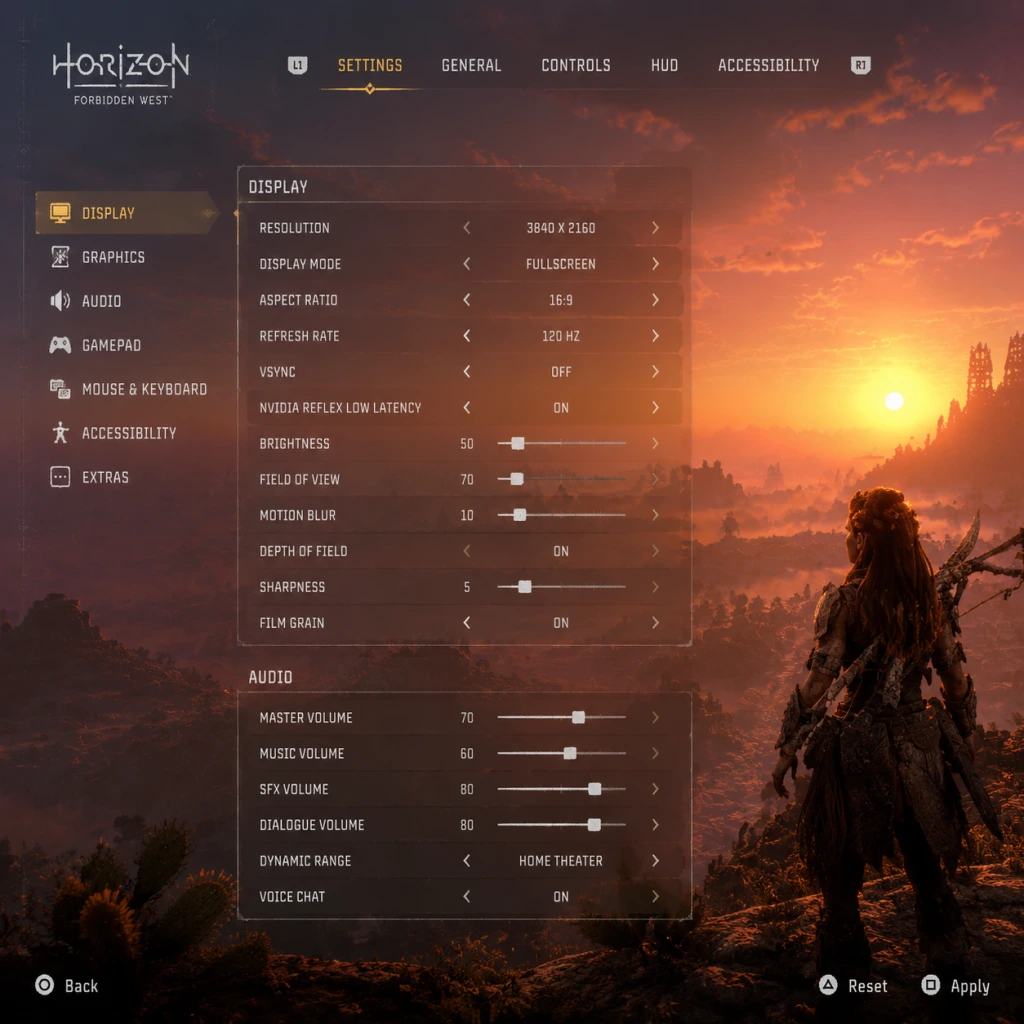
- Explanation: On PC, adjust settings: enable DLSS/FSR (Quality mode), disable Motion Blur, set Shadow Quality to Medium, and lock FPS to 60 for consistency. On PS5, switch to Performance Mode (60 FPS) for smoother combat.
- Analysis: Horizon Forbidden West is demanding. These settings maintain visual fidelity while reducing input lag. For PC, also install on SSD (NVMe preferred) to eliminate texture pop-in.
- When to Use: Before starting the game. Adjust in options menu. On PC, also enable Nvidia Reflex for reduced latency.
- Explanation: After completing the main story, New Game+ allows you to carry over gear, skills, and resources, but enemies are stronger. You earn a new currency (New Game+ tokens) to purchase unique coils and outfits.
- Analysis: New Game+ is the ultimate test of your builds. The exclusive coils like "Elite Sharpshot Damage" with +35% damage are worth the difficulty spike. Also, you can replay decisions and complete any missed side quests.
- When to Use: After finishing the main quest and completing most side content. Start on Hard or Very Hard difficulty for the best rewards.
- Explanation: The Arena (located in Thornmarch) offers combat challenges against multiple machine types. Higher difficulty completions earn Arena Medallions used to buy legendary weapons (e.g., The Blast Forge, The Sun Scourge).
- Analysis: Legendary weapons have superior stats and three mod slots. They are endgame goals. To grind Medallions efficiently, do the "Gauntlet Run" challenges on Easy difficulty for quick tokens.
- When to Use: After reaching level 30 and having decent gear. Focus on one weapon at a time.
- Explanation: The map is vast with icons: question marks (unknown), rebel camps, Cauldrons, Relic Ruins, Vantage Points, etc.
- Analysis: To optimize progression, prioritize side quests that unlock new tools (e.g., Diving Mask, Shieldwing) or permanent upgrades (Cauldrons for overrides). Then clear question marks as you travel between main quests.
- When to Use: After the "Reach for the Stars" quest, complete all nearby side quests in Daunt. This gives you skill points and resources to ease main story.
- Explanation: A high-efficiency combat loop: 1) Scan machine with Focus. 2) Apply status effect (freeze preferred). 3) Use Triple Notch with Sharpshot Bow to hit weak spots. 4) If close, follow with Braced Shot from spear. 5) Use Ropecaster if necessary to control. 6) Loot and move on.
- Analysis: This loop maximizes damage while minimizing resource usage. Freeze + Triple Notch can kill a Thunderjaw in under 10 seconds with high-level gear. Practice this on hunting grounds.
- When to Use: Against any large machine or group of medium machines. Adjust elements based on enemy weakness (e.g., fire for Chillwater-based machines, acid for armor).
- Explanation: You can change difficulty in the settings menu at any time (except in Ultra Hard NG+). Story difficulty makes combat trivial; Very Hard requires precision.
- Analysis: If you find combat frustrating, lower difficulty temporarily, then raise it later. There is no shame. The game is meant to be fun.
- When to Use: At any point. Use Story for farming parts, then switch to Normal for main content.
- Explanation: Photo mode (pause menu) allows free camera movement. Use it to scout areas, locate hidden chests, or plan approach routes without moving your character.
- Analysis: This is a hidden gem. You can see >100 meters away from your character, revealing climbing paths or enemy positions behind walls.
- When to Use: Before entering a bandit camp or machine site. Also useful for finding buried treasure spots.
- Explanation: The game autosaves frequently, but manual saves (pause -> save) let you revert if you make a bad decision (e.g., failing a stealth mission, spending rare parts).
- Analysis: Manual saves are separate from autosave slots. Use before any major fight or purchase. This prevents regret.
- When to Use: Before entering a Cauldron, before buying an expensive item, or before a main story turn-in.
2. Use Elemental Arrows to Trigger Combos
3. Spear Combos and Braced Shot
4. Master Dodge Timing and Slide
5. Weapon Techniques (R2 + Triangle/L2)
6. Chain Traps and Tripwires
7. Stealth Strikes and Silent Strike
Exploration & Movement Tips
1. Unlock the Shieldwing (Glider) Early
2. Use the Sunwing (Flying Mount) for Fast Travel
3. The Pullcaster: More Than a Grapple
4. Diving Mask & Underwater Navigation
5. Climbing: Use the Focus to Highlight Handholds
Resources & Crafting Tips
1. Salvage Scrounger Skill & Loot Everything
2. Craft Ammo Mid-Combat from Weapon Wheel
3. Use Workbenches to Upgrade Gear
4. Resource Pouch Upgrades (Important!)
Builds & Skills Tips
1. Skill Tree Overview – Invest in Multiple Trees
2. Weapon Coils & Outfit Weaves
3. Focus on One Weapon Type Per Combat Role
Economy & Vendors Tips
1. Shards Are the Main Currency – Farm Them Smartly
2. Merchants – Compare Prices and Stock
3. Hunting Grounds – Free Training and Good Rewards
Machine Encounters Tips
1. Override Machines to Fight for You
2. Disable Weapons to Neutralize Threats
3. Use Ropecaster to Immobilize Big Machines
Advanced Optimization Tips
1. Valve & PC Settings for Smooth Performance
2. New Game+ Benefits
3. The Arena: Farm for Unique Gear
4. Map and Quest Prioritization
5. Ultimate Combat Loop
General Beginner Tips
1. Change Difficulty Freely
2. Use Photo Mode to Scan Environment
3. Save Often and Manually
---
These tips should equip you with everything needed to conquer the Forbidden West. Remember: the key is preparation, knowledge of machines, and efficient use of resources. Happy hunting!
Game Settings
Game Settings – Horizon Forbidden West
This guide covers every settings category in Horizon Forbidden West, explaining each option and providing recommended configurations for PlayStation 4, PlayStation 5, and PC. Whether you're chasing high frame rates, maximum visual fidelity, or an accessibility‑friendly experience, you'll find platform‑specific presets and explanations of easily overlooked options.
---
1. Graphics Settings
1.1 PlayStation 4 & PlayStation 5
The game offers pre‑set display modes on console. On PS5, you can switch between Performance and Fidelity modes at any time via the in‑game Settings menu.
| Platform | Mode | Resolution | Frame Rate | Details |
|---|---|---|---|---|
| PS4 Base | – | 1920×1080 | 30 FPS (locked) | Medium textures, standard shadows, no HDR. |
| PS4 Pro | – | 3200×1800 (checkerboard) → 1080p output | 30 FPS (locked) | High textures, improved shadows, optional HDR. |
| PS5 | Fidelity | 3840×2160 (native) | 30 FPS (locked) | Ultra textures, ray‑traced reflections, best LOD. |
| PS5 | Performance | 3840×2160 (dynamic, ~1800p average) | 60 FPS (target) | High textures, standard reflections, minor LOD reduction. |
- PS5: Use Fidelity if you have a 4K display and prefer visuals; use Performance for smooth 60 FPS gameplay, especially during combat.
- PS4 Pro: Stick with the default mode (30 FPS) – the visual uplift is worth the frame rate cap.
- PS4 Base: No choice; enjoy the solid 30 FPS experience.
1.2 PC Graphics Options
PC offers extensive scalers and quality presets. Access via Settings > Graphics.
Key Options & How They Affect Performance:
| Setting | Impact | Low | Medium | High | Ultra |
|---|---|---|---|---|---|
| Display Resolution | High. Native 1440p/4K is demanding. | – | – | – | – |
| Upscaling | Medium. Use DLSS (Nvidia), FSR (AMD), or XeSS (Intel). | Performance | Balanced | Quality | Native |
| Texture Quality | VRAM usage. Low uses ~4GB, Ultra uses ~8GB+. | Low | Medium | High | Ultra |
| Shadow Quality | CPU/GPU. Shadows from many sources. | Low (flickery) | Medium | High | Ultra (contact shadows) |
| Ambient Occlusion | Medium. SSAO vs HBAO+ vs RT AO (very heavy). | Off | SSAO | HBAO+ | RT AO |
| Reflections | High. Screen Space vs RT Reflections. | Off | SSA | SSR | RT Reflections |
| Anti‑Aliasing | Medium. TAA is default. DLAA uses extra power. | FXAA | TAA low | TAA high | DLAA |
| Depth of Field | Low. Blurs distant objects. | Off | On (low) | On (high) | – |
| Motion Blur | Low. Blurs during camera movement. | Off | Per‑object | Per‑object high | – |
| Field of View | Negligible. Wider FoV reduces performance slightly. | 70° | 80° | 90° | 100°+ |
| Hardware Tier | Graphics Preset | Resolution | Upscaling | Target FPS | Notes |
|---|---|---|---|---|---|
| Low (GTX 1060 / RX 580) | Low | 1920×1080 | FSR 1.0 Ultra Performance | 30‑40+ | Reduce shadow quality to “Low”, disable RT features. |
| Mid (RTX 3060 / RX 6600 XT) | High | 2560×1440 | DLSS/FSR Quality | 50‑60 | Enable RT reflections? Only if FPS stays above 50. |
| High (RTX 3080 / RX 6800 XT) | Ultra | 3840×2160 (4K) | DLSS Quality or FSR Quality | 60 | Enable RT reflections, RT AO at medium. |
| Ultra (RTX 4090 / RX 7900 XTX) | Ultra + RT | 3840×2160 | DLSS Balanced or Native with DLAA | 60+ | Full ray tracing, ultra shadows. |
---
2. Audio Settings
- Master Volume: Fine‑tune game, music, SFX, and dialogue volumes separately.
- Dynamic Range: Choose Headphones (small range), TV (medium), or Home Theater (wide). Home Theater can cause quiet whispers to be lost – use TV if unclear dialogue.
- 3D Audio (PS5 / PC): Enable for binaural sound with headphones. On PC, ensure your device is set to spatial sound (Windows Sonic, Dolby Atmos, or DTS Headphone:X).
- Subtitles: Recommended to ON for story clarity. Choose Large font size if playing at 4K distance.
- Subtitle Background: Set to Dark to improve readability against bright scenes.
- Audio Language: See Language section.
- Vibration (PS5/PS4/PC): Enable for immersion, but may cause fatigue. Turn off if aiming precisely.
- Trigger Effect (PS5 DualSense): Adaptive triggers add tension for bows and mounted weapons. Can be disabled if too heavy.
- Aim Assist (Controller):
- Invert Y‑Axis: Toggle for flight/camera controls.
- Camera Sensitivity: Start at 50% (default), adjust upward if you need faster turns.
- Aiming Sensitivity: Separate slider – set lower (30‑40%) for precision shooting.
- Button Mapping: All actions can be remapped per platform. Common changes:
- Quick Slot Wheels: Assign potions, traps, and tools to the D‑pad (up/down/left/right). Default is fine.
- Mouse Sensitivity: Match your desktop mouse speed. 800 DPI with 5‑10 in‑game works for most.
- Mouse Acceleration: Disable in both Windows and game settings for consistent aim.
- Key Bindings: Aloy’s Focus (temporary scan) is default R. You may prefer Middle Mouse or Side Button.
- Secondary Bindings: You can bind two keys per action. Handy for “Use” (E + Space).
- Aim Sensitivity (Controller/PC): Separate from camera sensitivity – many players leave it high and wonder why they overshoot. Lower it.
- Trigger Deadzones: Don’t touch unless you have stick drift. The default is fine.
- Difficulty Options:
- Custom Difficulty: Fine‑tune Aloy’s damage taken, enemy health, stealth detection, and tear/component damage independently.
- Subtitles: As mentioned, but also Subtitle Speaker Names – ON helps identify who speaks.
- Colorblind Modes: Choose from Protanopia, Deuteranopia, Tritanopia, and custom color filters for UI elements.
- Audio Cues: Enable Sound Cues for Interactions (e.g., a tone when a puzzle element is ready).
- Menus: Options for Menu Background Opacity (e.g., make menus translucent to see behind).
- Auto Pickup: Instantly collect resources without pressing a button. Recommended.
- Simplified Controls (Quick Mode): Streamlines combat inputs. Not recommended for advanced players.
- High Contrast Mode: Outlines enemies, loot, and important objects in bright colors.
- Difficulty settings are not locked – you can change them at any time from the pause menu. However, the game tracks “Hardest Difficulty” for trophies. If you switch to a lower difficulty, you cannot unlock the “Ultra Hard” trophy on that save.
- Custom difficulty allows you to keep story‑mode damage while retaining normal stealth mechanics – useful for a relaxed but not trivial experience.
- Interface Language: Controls all menu text.
- Audio Language: Voice‑over language (e.g., English, French, German, Japanese). Note: Lip sync is only correct for English. Other languages use pre‑rendered cutscenes with mismatched mouth movements.
- Subtitles Language: Independent of audio. You can play with Japanese voices and English subtitles.
- Online Features: Required for sharing photos in Photo Mode, uploading/downvoting machine strike boards, and leaderboards. Can be disabled for offline play.
- Share Play (PS5/PS4): Allows friends to take control. Disable if not needed (and to avoid accidental invites).
- Update Data: The game will prompt to check for updates. Stay connected for patches and New Game+ fixes.
- Auto Aim (Controller): Strongly recommended Off unless you have accessibility needs. It pulls the reticle toward enemies even when you don’t want it.
- Auto Sprint: Set to On to start running automatically after a short walk – saves button presses.
- Quick Turn (Controller): Double‑tap down to turn 180°. Very useful in combat – On by default.
- Hold vs Toggle:
- Reticle Options: Change crosshair color (white, red, green) and style (dot, cross, ring). Red is easier to see against foliage.
- Damage Numbers: Show/hide enemy damage. Helpful for learning weapon effectiveness.
- Focus Holding: Default is Hold to keep Focus active. Switch to Toggle if you scan frequently.
- Mount Controls: Set Mount Follows Road to On – your mount will automatically stay on paths, letting you focus on the world.
- Machine Attack Alerts: Visual cue + sound when a machine is about to strike. On for beginners, Off for immersion challenges.
- Reset to Defaults: Every settings page has a Reset option. Use this if you experiment too much.
- Save Before Tweaking: Graphics changes apply immediately. Save your game before messing with resolution to avoid crashes.
- Performance vs Quality (PC): If you have variable refresh rate (VRR) monitor, aim for 30‑60 FPS with VRR enabled – it will feel smooth even at lower frame rates.
- The “Easy” Mistake: New players often leave Auto Aim on and wonder why they miss shots – it imposes a slight magnetism that can fight against manual adjustments. Turn it off to develop skill.
- Accessibility is Not Cheating: Use whichever settings make the game enjoyable. The story and world are worth experiencing, regardless of difficulty.
---
3. Controls Settings
3.1 Controller & Keyboard/Mouse
- Standard: Mild magnetism. Recommended for all players.
- Heavy: Strong magnetism – use if you struggle with aiming.
- Off: No assistance – for experienced players.
- Swap R1 (light attack) and R2 (heavy attack) for quicker combos.
- Set Dodge (O) to L1 for easier evasion while aiming.
3.2 PC Keyboard & Mouse
Easy to Misconfigure:
---
4. Accessibility Settings
Guerrilla Games has included extensive accessibility options. Access via Settings > Accessibility.
- Story: Enemies are very weak; combat is forgiving. Good for narrative focus.
- Easy: Standard easy mode.
- Normal: Balanced.
- Hard: Enemies have more health and deal more damage.
- Very Hard: For veterans of the genre.
- Ultra Hard: Unlocked after completing the game once. No manual saves, higher resource costs.
Special Attention:
---
5. Language Settings
Important: Language settings are separate per platform license. On PC (Steam/EGS), you may need to download additional language packs in the store client before they appear in‑game.
---
6. Network Settings
---
7. Gameplay Settings
- Crouch: Toggle recommended (press O to toggle crouch).
- Aim: Hold L2 (default) is more precise; some prefer toggle.
- Sprint: Toggle (click L3 once) vs hold (hold L3). Most prefer toggle to avoid fatigue.
---
8. Important Notes & Final Tips
---
Adjust these settings to your preference and hardware. The goal is to immerse yourself in the Forbidden West without technical frustrations. Happy hunting!
Important Notes
Important Notes
This section covers critical warnings, pitfalls, irreversible choices, missable content, difficulty spikes, and common regrets that players often discover too late in Horizon Forbidden West. Knowledge of these will save you frustration, time, and ensure you don’t miss key content or achievements.
---
Warnings and Pitfalls
- Point of No Return – The Looming Shadow: The quest “The Looming Shadow” (the final story mission) displays a clear on-screen warning before you start it. Once you begin, you cannot return to the open world until you finish the main story. Always complete all side quests, collectibles, and upgrades you want before starting this mission. After the credits, you can continue free-roaming, but some missable content (see below) may already be locked.
- Don’t Rush the Main Story: The game is designed to be played at a steady pace. Ignoring side quests and exploration will leave you underleveled, with poor equipment, and facing artificially hard encounters. Each region has recommended levels on the map—heed them.
- Inventory and Stash Limitations: Your inventory pouch has limited space for resources, but you can access your stash at any workbench or shelter. Do not hoard early; instead, regularly stash excess materials. The stash is shared globally, so you can return later to retrieve items.
- Machine Overrides Are Essential: Progress through the main quest to unlock “Cauldron” facilities. These allow you to override machines (even large ones like Tremortusks) to fight for you or use as mounts. Ignoring Cauldrons makes combat and traversal much harder.
- The Arena Is Highly Challenging: The Arena in Thornmarsh becomes available after ~20% of the story. The difficulty of Arena challenges scales with your level and equipment. Do not waste Arena tokens early – save them for Legendary weapons and coils, as they are expensive and limited. Attempt the challenges only when you have strong gear and well-upgraded weapons.
- Multiple Endings: The final choice during “The Looming Shadow” determines which ending you receive (two variations). You can reload a manual save made immediately before that choice to see both, but once you proceed past that point without a save, the choice is locked for that playthrough.
- Aloy’s Dialogue Options: Some side quests have branching dialogue that affects the outcome or availability of later quests. For example, certain characters may refuse to help you in the final battle if you make antagonistic choices. To ensure the best possible ending and the trophy “All Allies Joined”, you must:
- Datapoints in Story Missions: Several main story quests contain datapoints that are only accessible during that specific mission. After the mission ends, the area often becomes inaccessible or is closed off. Always scan thoroughly and listen for Focus signals before leaving a story area. Examples: the facility in “The Eye of the Earth,” the Zenith base, and the final island.
- Machine Part Components: Some machine parts required for legendary upgrades are exclusive to specific machine types that only appear in limited numbers during certain quests. For instance, Apex machine hearts are more common at higher difficulties but may be farmed from any machine post-game. However, parts like Sacred Coils from special enemies in “Cauldron: IOTA” cannot be obtained elsewhere.
- Missable Trophies:
- Trophy for One Playthrough Only: Most trophies are achievable in a single playthrough if you are thorough, but New Game Plus offers exclusive cosmetic items and a different trophy for completing the game on Ultra Hard difficulty. If you plan to get Platinum, you can do it in one Normal playthrough and then start NG+ for the Ultra Hard trophy.
---
Irreversible Choices and Missable Content
#### Story Choices and Endings
- Complete all side quests (including all companion quests).
- Make positive dialogue choices when interacting with Zaid, Kotallo, Alva, Erend, and Zo during their personal quests.
- Persuade all optional allies to help you before the final mission (use a checklist, as it’s easy to miss one).
#### Missable Collectibles and Loot
- All Allies Joined – as described above.
- Fully Upgraded – requires upgrading every weapon and outfit to the maximum level. This is not missable, but extremely grindy if you neglect part-hunting early.
- Shieldwing – you cannot miss this, but some players forget to use it for traversal.
---
Difficulty Spikes
The game’s difficulty can spike unexpectedly. Prepare for these encounters:
| Encounter | Location | Why It’s a Spike | Tips to Survive |
|---|---|---|---|
| First Sawtooth | The Daunt (story) | Early game, limited ammo, low health. | Use stealth, tripwires, and the environment. Avoid direct confrontation; the game expects you to run or trap it. |
| First Thunderjaw | Plainsong area | Massive health, long-range weapons, and devastating stomp attacks. | Bring tearblast arrows to remove its disc launcher; use slide and dodge liberally; override robots nearby. |
| Cauldron: MU | Deep in the desert | Claustrophobic corridors, fire Bellowbacks, and a final fireclaw boss. | Use fire-resistant armor; bring purgewater ammo to douse flames; use advanced traps. |
| Specter Prime (Final Boss) | “The Looming Shadow” | Multiple phases, fast movement, area denial attacks, weak spot RNG. | Stock up on large health potions, ammo pouches fully upgraded, and use the shieldwing to dodge energy attacks. |
| The Bulwark Arena Challenge | Thornmarsh Arena | Enemies hit extremely hard, limited retries, restricted loadouts. | Wait until level 35+ with legendary gear; watch YouTube strategies for specific challenges; use overrides liberally. |
---
Grinding Traps
- Chasing Shards: Early in the game, you may spend hours hunting small machines like Scrappers or Watchers for shards (the basic currency). This is inefficient. Instead, complete side quests and explore ruins – they give far more shards and valuable rewards. Selling unused machine parts from farming is better than hunting for shards directly.
- Hoarding Green/Blue Weapons: Don’t invest resources into upgrading low-tier (green, blue) weapons and outfits. They are quickly outclassed by purple (very rare) and gold (legendary) gear obtained mid-to-late game. Save your upgrade resources for the best items.
- Arena Token Waste: Arena tokens are earned by completing challenges and are used to purchase legendary weapons and coils. If you lose early challenges repeatedly, you’ll spend tokens without reward. Only attempt the highest difficulty challenges when you have top-tier gear. Tokens are finite (until NG+).
- Legendary Upgrade Resource Farming: Several legendary upgrades require rare machine parts with a low drop rate (e.g., Apex Slitherfang hearts, Fireclaw sac webbings). Trying to farm these without proper gear and techniques can be soul-crushing. Use stealth, the “Easy Loot” setting (in Gameplay settings), and exploit machine weaknesses. The “Easy Loot” option makes it so destroyed components still drop, hugely reducing grind.
- Skill Point Grind: Skills points are earned through XP from kills, quests, and exploration. Grinding kills for skill points is slow; instead, focus on completing side content and story missions—they grant large XP boosts.
- No multiplayer etiquette is required. You play alone at your own pace.
- No anti-cheat software is present. On PC, the game uses Steam/Epic overlay but no third-party anti-cheat. You can use console commands (on PC) or mods without penalty for single-player. However, save editors or cheats may corrupt your save file; always back up saves before modding.
- Photo Mode Sharing: The only online component is uploading photos to the in-game photo feed (optional) and sharing screenshots via platform services. Be respectful of others’ content, but there are no strict rules.
- Leaderboards: The Arena has leaderboards for fastest completion times. There is an online aspect but no direct interaction. Cheating on these leaderboards (via mods) may violate platform terms, but Guerrilla Games does not actively police them.
- Manual Saves Are Your Best Friend: The game has an auto-save slot that overwrites frequently, especially after quest completions. To avoid losing progress before a crucial choice or difficulty spike, create a manual save (up to 15 slots on console; unlimited on PC in theory but only 15 quick slots).
- Auto-Save Overwrites: Beware that auto-saves can be overwritten during long play sessions. If you need to revert to an earlier point, load a manual save from before the quest.
- Cloud Save Sync (PC/PS5): On Steam/Epic, cloud saves are automatic. On PS5, you can sync to the cloud with PlayStation Plus. Enable cloud saves to protect against corruption or accidental overwrites. On PS4, you can manually copy save data to USB.
- Modding on PC: If you use mods, keep a clean, unmodded save backup. Mods can break future updates or DLC. Also, mods may prevent trophy unlocks (though most trophies unlock regardless on PC).
- Use the Focus Constantly: Scan every machine, enemy, and interactable object. The Focus reveals weak points, lootable components, and environmental puzzles. Many players forget to use it during combat, missing critical weak spots.
- Upgrade Pouches First: Upgrade your resource pouch, potion pouch, and ammunition pouch as early as possible at the workbench. Without upgrades, you’ll constantly run out of ammo and resources mid-fight.
- Tearblast Arrows Are OP: Available relatively early, Tearblast arrows (from the Sharpshot Bow) instantly detach components like cannons and armor plates. Use them to cripple large machines quickly. Buy the “Carja’s Bane” or “Wing of the Ten” bows early.
- The Shieldwing Glider Is Not Just for Falling: You can also use it to traverse upwind using ziplines, to cross gaps, and to slow your descent during jumps. Experiment with it.
- Enable “Easy Loot” in Settings: This setting ensures that when you destroy a machine component (like a horn or tail), it is not lost if the machine dies. It saves hours of frustration. There is no trophy penalty for using it.
- The Whistle Ability Is a Stealth Gem: Available early in the skill tree, Whistle lets you lure a single enemy to your position for an easy silent strike. Critical for stealth clearing bandit camps and machine sites.
- You Can Change Difficulty Anytime: Many players struggle early but don’t realize they can lower the difficulty mid-game. Go to Settings → Gameplay → Difficulty. No punishment except for trophy restrictions on Ultra Hard NG+.
- Market Prices Vary by Settlement: When buying or selling, check different merchants. Some offer better prices for specific items (e.g., the salvage contractor in Scalding Spear buys machine parts for more shards).
- The Stash Is Everywhere: You don’t have to run back to a shelter to access your stash. Any workbench (many are in the open world) has a stash menu. You can also store items directly from the inventory screen.
- Kill Tallnecks for the Map: Climbing Tallnecks reveals large portions of the map. Prioritize these early to spot side quests and collectibles. They are not difficult once you know the mechanics (usually scanning and climbing).
- The Machine Strike Board Game Is Optional: Losing doesn’t lock content, but winning grants exclusive tokens and a trophy. Don’t stress about it—watch guides for winning strategies if you struggle.
- Late-Game Weapons Are Locked Behind Side Quests: The best Legendary gear often requires completing lengthy side quest chains. For example, “The Arena” offers weapons, but the true legendary weapons come from “The Delver,” “The Burning Shores” DLC, or certain salvage contracts. Research which gear you want and pursue those quests early.
---
Online Etiquette / Anti-Cheat (Single Player – No Multiplayer)
Horizon Forbidden West is a strictly single-player experience. There is no cooperative or competitive multiplayer mode. Consequently:
---
Save Management Advice
- Save before starting any main story quest, especially “The Looming Shadow.”
- Save before attempting a Cauldron or a difficult Arena challenge.
- Save after acquiring a rare weapon or upgrade, just in case you accidentally sell it.
---
Things Players Commonly Regret Not Knowing Earlier
---
Final Advice: Horizon Forbidden West is a massive open world with rich content. The most common regret from players is rushing the main story, missing side quests, and then having to replay or grind excessively. Take your time, explore, use all tools available, and save often.
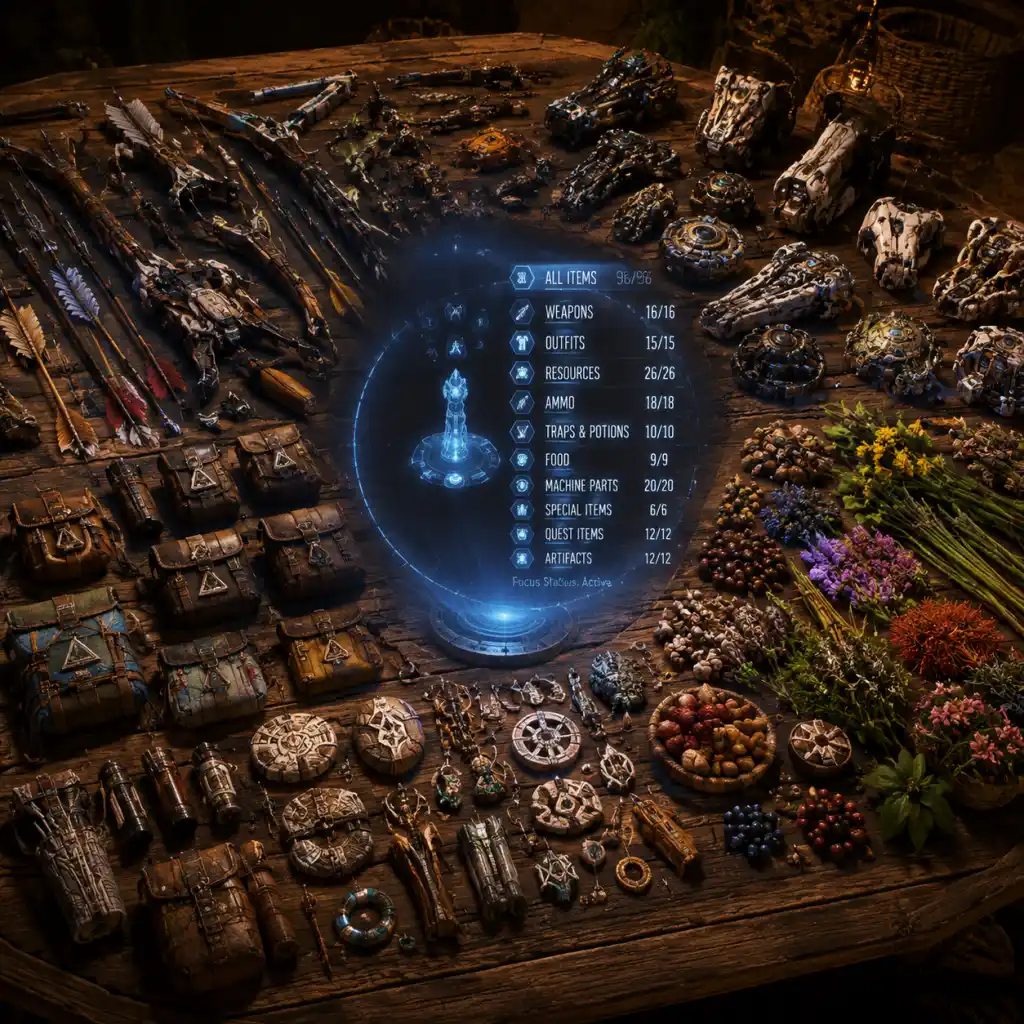
All Game Items
All Game Items
This section catalogs every major item category in Horizon Forbidden West. Items are grouped logically, with descriptions, acquisition methods, usage tips, and notable synergies. All information is based on the latest game version (1.18+).
Weapons
Weapons are your primary tools for combat. Each class has unique mechanics and can be upgraded at Workbenches using Machine Parts and Metal Shards.
#### Hunter Bow
- Description: Versatile mid-range bow. Fires standard arrows (hunting, hardpoint, elemental). Best for general damage and tear.
- How to Obtain: Starting weapon. Better variants (e.g., Carja's Bane, Sunshot) purchased from merchants or rewarded for quests.
- When Useful: All-purpose combat. Use Hardpoint Arrows for high tear and damage.
- Synergies: Combine with Concentration + Coils for increased accuracy and damage.
- Upgrades: Up to 3 upgrade levels at Workbench, requiring Metal Shards, Processed Metal Blocks, and specific machine parts.
- Description: Long-range precision bow. Fires precision arrows, plasma arrows, and advanced arrows. High tear but slow draw.
- How to Obtain: Early game at Chainscrape merchant. Legendary version "Forgefall" from Arena or Black Box collectibles.
- When Useful: Sniping weak points, removing components from a distance. Stealth kills.
- Synergies: Use Braced Shot weapon technique for massive single target damage.
- Upgrades: Unlock after completing "The Point of the Lance" main quest.
- Description: Short-range rapid-fire bow. Fires spread, but high rate of fire. Best for close combat and elemental buildup.
- How to Obtain: Purchase from merchants in Plainsong. Legendary variant "Rain of Sparks" from Apex machine hunts.
- When Useful: Build up elemental statuses quickly (fire, frost, acid, shock) on aggressive machines.
- Synergies: Pair with Melee Follow-Up coil to boost melee damage after hitting with Warrior Bow.
- Upgrades: Requires Sturdy Ropecaster parts and machine weaves.
- Description: Sets tripwires that trigger on contact. Different wires: shock, fire, blast, acid, frost, purification.
- How to Obtain: Default at start. Upgraded versions (e.g., Carja's Trap, The Final Chapter) from vendors.
- When Useful: Area denial, pre-battle traps, controlling enemy movement. Excellent for Human enemies.
- Synergies: Use for stealth ambushes. Combine with Blast Wire and skill "Quick Wire" for faster deployment.
- Upgrades: Unlock via main quest progression.
- Description: Fires ropes that tether machines to the ground. Can immobilize large enemies.
- How to Obtain: Purchased from merchants after "The Point of the Lance". Legendary "The Tie That Binds" from Cauldron KAPPA completion.
- When Useful: Roping down large machines like Thunderjaw, Slaughterspine, or Tremortusk for safe component removal.
- Synergies: Use when allies are present for coordinated attacks. Very low damage but high utility.
- Upgrades: Requires Braided Rope and various machine parts.
- Description: Launches grenades that explode on impact. Types: explosive, adhesive, fire, acid, frost, purgewater.
- How to Obtain: Purchase in The Daunt or Chainscrape. Legendary "The Blast of Time" from side quest "The Way Home".
- When Useful: AOE crowd control, destroying weak points from a distance, applying elemental states.
- Synergies: Use with Adhesive to slow machines, then switch to precision weapons.
- Upgrades: Unlock after completing "The Embassy" main quest.
- Description: Throws a disc that ricochets between targets. Catch the disc to empower the next throw (up to 5 stages).
- How to Obtain: First one from a Relic Ruin in The Daunt. More variants (e.g., Ancestor's Return) from Arena or Collector's Edition.
- When Useful: Fun alternative combat style. High tear and damage when mastered. Effective against groups.
- Synergies: Use with Stealth to get first empowered throw. Skill "Kill Zone" increases shredder damage.
- Upgrades: Requires Machine Cores and Chromatic Shards.
- Description: Lobbs explosive spikes. Can be aimed or fired quickly. Types: drill spikes (piercing), explosive, acid, fire, etc.
- How to Obtain: Purchased after reaching the Stillsands. Legendary "The Skykiller" from side quest "Lofty Ambitions".
- When Useful: High burst damage, especially to weak points. Drill spikes can pin machines.
- Synergies: Use with Valor Surge "Ranged Master" for massive spike damage.
- Upgrades: Needs Metal Shards and precious machine parts.
- Description: Automatic crossbow that fires bolts in bursts. Has two modes: Standard (spread) and Full Draw (charged single bolt).
- How to Obtain: First one given by Erend during "The Dying Lands" side quest. Legendary "The Blast Forge" from Arena Grind.
- When Useful: Sustained DPS on large machines. Full Draw mode for accuracy against fast movers.
- Synergies: Use with Stealth to open with a charged bolt. Works well with elemental bolts.
- Upgrades: Requires Processed Metal Blocks and machine sac webbings.
- Description: Low-level outfits focusing on stealth and survival. Examples: Nora Brave (starter), Nora Tracker (stealth)
- How to Obtain: Purchased in early settlements. Free from story progression.
- When Useful: Early game when stealth is key.
- Synergies: Combine with Silent Strike skills.
- Description: Balanced defense with bonuses to Concentration and weapon stamina. Examples: Carja Trader, Carja Wanderer
- How to Obtain: Merchants in Carja territory (Meridian area).
- When Useful: Mid-game concentration builds.
- Notable: Carja Stalker outfit has excellent stealth for collecting items.
- Description: High melee defense and stamina regen. Examples: Oseram Wayfarer, Oseram Explorer
- How to Obtain: Found in The Claim or purchased from Oseram merchants.
- When Useful: Melee-focused builds. Good against machines that charge.
- Synergies: Use with Melee coils on weapons.
- Description: Aggressive, with bonuses to close combat and valor. Examples: Tenakth Reaver, Tenakth Marshal
- How to Obtain: Best from Tenakth clan settlements (Deserted Lands, Memorial Grove).
- When Useful: Late-game high risk/high reward playstyles.
- Synergies: Valor Surge builds that expend valor quickly.
- Description: Defensive with elemental resistances and healing bonuses. Examples: Utaru Winterweave, Utaru Harvest">
- How to Obtain: From Plainsong merchants and quests.
- When Useful: Surviablity against elemental attacks.
- Synergies: Pair with food that boosts healing.
- Description: Rare, focused on machine damage and weapon stamina. Examples: Quen Deadeye, Quen Commander
- How to Obtain: In the San Francisco area (post-game expansion: Burning Shores adds Quen gear).
- When Useful: Endgame and New Game+.
- Important: Burning Shores DLC required for most Quen outfits.
- Description: Top-tier outfits with unique perks. Examples: Nora Thunder Warrior (melee combat), Oseram Artificer (trap-focused), Carja Stalker Elite (stealth), Tenakth Skirmisher (shock damage)
- How to Obtain: Arena Challenges, collecting all Black Boxes, or completing specific side quests.
- When Useful: Endgame optimization. Each requires 3 upgrade tiers.
- Note: Can be dyed at Dyer NPCs.
- Health Potion: Restores small HP. Crafted with Ridge-Wood (herbs).
- Large Health Potion: Restores ~50% HP. Crafted with Medicinal Berries and Power Cell (machine drop).
- Poultices: Over-time healing. Crafted with animal organs (e.g., Chicken Heart).
- When Useful: Combat emergencies. Use Large Health Potions before boss fights.
- Resistance Potion: Boosts a specific elemental defense. Crafted with machine lens + herbs.
- Purification Potion: Removes current elemental state. Crafted with Purified Water and Berries.
- When Useful: Against Apex machines that spam elemental attacks. Keep Purification for DoTs.
- Stamina Potion: Restores stamina (for weapon techniques). Crafted with Animal Bones.
- Large Stamina Potion: Full stamina restore. Crafted with Machine Circulator + herbs.
- When Useful: Before using multiple Valor Surges or weapon combos.
- Meals: Cooked at Campfires using animal meat. Provide long-lasting buffs (e.g., +damage, +stealth, +health regen). Recipes found throughout the world.
- Examples: Bristleback Roast (melee damage+), Juicy Roast (tear+), Sunwing Omelet (concentration duration+).
- When Useful: Before hunting rare machines or entering Cauldrons.
- Synergies: Stack with potions and outfit weaves.
- Explosive Trap: Deals damage. Crafted with Blastpaste (machine fat) and wires.
- Elemental Trap: Applies fire, frost, shock, or acid. Crafted with machine elemental sacs.
- Ropecaster Trap: Immobilizes. Crafted with Braided Rope and wire.
- When Useful: Pre-position before engaging large groups or tough machines.
- Tip: Use Trap Limit skill to place more.
- Common: Metal Shards (currency), Wire, Braided Rope
- Uncommon: Machine Lens, Machine Heart, Processed Metal Block
- Rare: Large Machine Core (from Thunderjaw, Slaughterspine), Apex Heart (from Apex machines), Sac Webbing (only from intact sacs)
- Legendary: Stormbird Cannons, Tremortusk Tusks – used for final weapon upgrades.
- How to Obtain: Loot after combat. Use Tear weapons to detach components for bonus drops.
- When Useful: Constantly needed for upgrades. Stockpile sac webbings early.
- Medicinal Berries: Heal small amount. Gathered from bushes.
- Ridge-Wood: Crafting potions and food. Found in forests.
- Wild Meat: Used for food. Hunt animals (boar, fox, goose).
- How to Obtain: Scan with Focus to highlight. Use Gatherer skill to increase yield.
- When Useful: Crafting health and stamina items. Always collect.
- Minor Machine Core: Tier 1 upgrade material.
- Machine Core: Tier 2.
- Large Machine Core: Tier 3.
- How to Obtain: Dropped from machines (e.g., Scroungers, Leaplashers). Apex machines drop rarer cores.
- When Useful: Weapon and outfit upgrades beyond level 1.
- Bones: Craft traps, potions, pouches.
- Skin: Craft pouches and some outfits.
- Organs: Craft poultices. Rare organs like Behemoth Tusk used for legendary gear.
- How to Obtain: Hunt animals with predator arrows or traps.
- When Useful: Pouch upgrades require specific animal parts (e.g., Fox Skin for quiver).
- Universal currency. Used for buying items, upgrading, crafting. Dropped from most containers and machines.
- How to Farm: Sell unwanted gear, complete salvage contracts, sell machine parts.
- Important: Do not sell rare materials unless needed.
- Earned by leveling up, completing quests, and discovering Tallnecks. Spend in Skill Trees.
- How to Obtain: Any XP source. Skill Points are character-specific (no shared pool).
- When Useful: Unlock new abilities. Consider "Concentration " and "Intense Concentration" early.
- Currency specific to DLC. Used to purchase legendary gear from the Quen merchant.
- How to Obtain: Found in lava rock deposits, from Apex machines, and as rewards.
- When Useful: Late-game DLC gear upgrades.
- Description: Yellow boxes scattered across the Forbidden West. Turn them in to the pilot at The Stillsands for rewards.
- Total: 12. Rewards include legendary weapons and outfits.
- How to Obtain: Found in ruins, mountains, or underwater. Use Focus to locate.
- Description: Small flying drones. Shoot them down to collect data. Turn in to the botanist at Plainsong.
- Total: 9. Reward: Legendary outfit (Utaru Winterweave).
- Tips: Use stealth arrows or sharpshot bow to avoid alerting nearby machines.
- Description: Ancient ruins with puzzles. Solve to get ornaments. Turn in to collector in The Daunt.
- Total: 10. Rewards include legendary weapons (e.g., Shredder Gauntlet: Ancestor's Return).
- Description: Scan drone points to match a historical photograph. Unlocks lore and sometimes loot boxes.
- Total: 9. Complete all for a legendary outfit (Nora Thunder Warrior).
- Description: Climb towers and activate signals. Rewards include skill points and XP.
- Total: 7. No major gear reward but useful early levels.
- Description: Firegleam (red cysts) can be destroyed with fire arrows to reveal loot. Metal Flowers (white plants) guard loot.
- Useful for machine parts and shards.
- Description: Aloy's AI device. Scans environment, highlights items, machine weak points, and enemy patrol paths.
- How to Obtain: Starting item. Upgraded later with "Focus Upgrade" skill.
- Usage: Press R3 to scan. Essential for stealth and resource gathering.
- Description: Parachute-like device that allows slow fall from heights. Also used for puzzles (wind currents).
- How to Obtain: Early main quest "The Point of the Lance".
- Usage: Hold X while airborne. Can be used with Sunwing mount for fast travel.
- Description: Fires a hook to pull yourself toward grapple points. Also pulls objects.
- How to Obtain: Very early main quest.
- Usage: Use L2 + R2 on golden grapple points. Helps traverse cliffs.
- Description: Allows underwater breathing and vision. Needed for underwater exploration.
- How to Obtain: Main quest "The Diving Mask" in San Francisco area (mid-game).
- Usage: Equipped automatically underwater.
- Description: Unlockable flying mount. After completing main story, you can override Sunwings at specific Cauldrons.
- How to Obtain: Cauldron GEMINI (story).
- Usage: Fast travel in open world, aerial combat.
- Description: Melee weapon. Can be upgraded at Workbench to increase damage and add power attacks.
- Special: Can be infused with elemental damage after completing "The Broken Sky".
- How to Obtain: Starting weapon. Upgrades require Machine Cores and Metal Shards.
- Description: Expand inventory capacity for arrows, potions, traps, machine parts, etc.
- Upgrade via Workbench using animal parts and machine components.
- Examples: Quiver (arrows) requires Fox Skin and Ridge-Wood. Potion Pouch requires Boar Bristle.
- Tips: Upgrade early to avoid running out of space.
- New Game+: Legendary gear can be acquired again for two versions (one for base, one for NG+). Coils and weaves carry over.
- Difficulty: No missable gear that locks you out of story, but some items (e.g., Burning Shores legendaries) are exclusive to DLC.
- Synergies: Consider outfits that complement weapon types. For example, Oseram Artificer outfits increase trap damage, ideal for Tripcaster users.
- Upgrade Priority: Focus on one weapon and one outfit early to maximize resources. Late-game, upgrade legendary gear fully.
#### Sharpshot Bow
#### Warrior Bow
#### Tripcaster
#### Ropecaster
#### Blast Sling
#### Shredder Gauntlet
#### Spike Thrower
#### Boltblaster
Outfits (Armor)
Outfits provide defense and passive bonuses. Each has three equipable Weaves (mods) and can be upgraded to increase defense and unlock weave slots. Outfits are obtained from merchants, quest rewards, or crafting.
#### Nora Outfits
#### Carja Outfits
#### Oseram Outfits
#### Tenakth Outfits
#### Utaru Outfits
#### Quen Outfits
#### Legendary Outfits
Consumables
Consumables grant temporary buffs or healing. They are crafted from herbs, animal parts, and machine drops. Stack effects with food and valor surges.
#### Health Potions
#### Elemental Potions
#### Stamina Potions
#### Food Buffs
#### Traps
Materials
Materials are used for crafting, upgrading, and trading. They are dropped by machines, gathered from plants, or found in loot.
#### Machine Parts
Each machine drops specific parts. Some are detachable (weak points) for extra loot.
#### Plants and Herbs
#### Machine Cores
#### Animal Parts
Currencies
Multiple currencies exist; manage them wisely.
#### Metal Shards
#### Skill Points
#### Brimshine (Burning Shores DLC)
Collectibles
Collectibles offer lore, XP, and special items.
#### Black Boxes
#### Survey Drones
#### Relic Ruins
#### Vista Points
#### Signal Towers
#### Firegleam and Metal Flowers
Key Equipment (Plot & Tools)
These items are essential for progression and exploration.
#### Focus
#### Shieldwing (Glider)
#### Pullcaster (Grapple Hook)
#### Diving Mask
#### Sunwing Mount
#### Spear
#### Pouches (Inventory Upgrades)
Important Notes
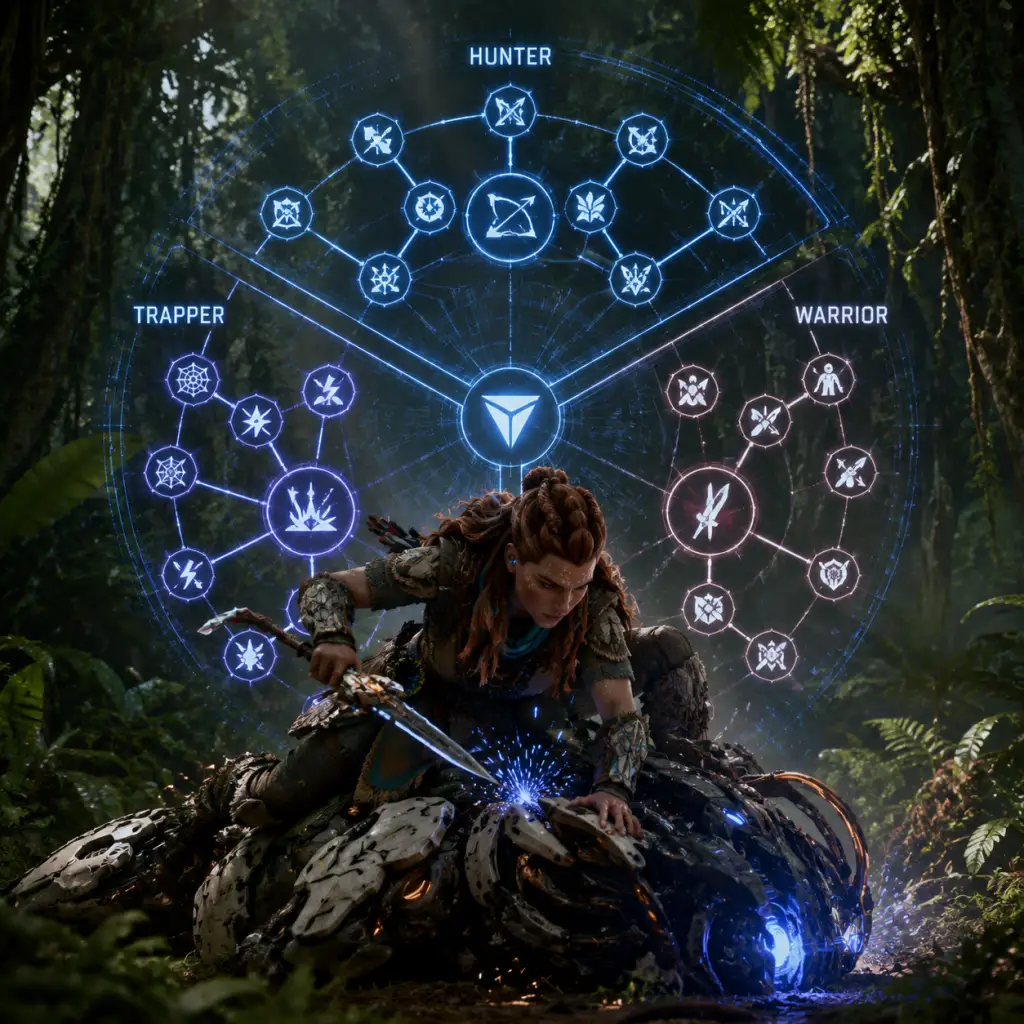
Character Skills
Character Skills – Horizon Forbidden West
Overview
Only one character is playable: Aloy. Her skills are divided into six skill trees (Hunter, Brave, Infiltrator, Warrior, Survivor, Machine Master) plus a Trapper tree added in the Burning Shores DLC. Additionally, Weapon Techniques and Valor Surges act as special abilities. Each skill tree offers passive bonuses and active abilities that can be upgraded via skill points earned from leveling, quests, and exploration.
Skill Trees
1. Hunter Tree – Ranged Combat & Precision
Focuses on bow accuracy, concentration, and advanced arrow techniques.
- Hunter’s Reflex: Rank 1-3 – Time slows briefly after a dodge or slide while aiming. Useful for lining up shots under pressure.
- Concentration: Rank 1-3 – Extends time slow while aiming. Synergizes with Hunter’s Reflex for extended slow-motion.
- Concentration+: Rank 4 – Further extends duration and reduces stamina cost for Concentration.
- Part Breaker: Rank 1-3 – Increases damage to machine parts and components. Essential for harvesting. Combos with precision arrows.
- Double/Triple Notch: Rank 1-2 – Allows firing 2 or 3 arrows at once, consuming extra resources. Massive burst damage; best used with high-damage arrows (e.g., Precision Arrows).
- Spread Shot: Load multiple arrows into Hunter Bow for a fan shot. Great for groups; moderate damage per arrow.
- Coil Breaker: Destroy armor plates temporarily, leaving machines vulnerable. Effective on heavily armored enemies.
- Agile Archer: Faster movement while aiming. Improves survivability during ranged fights.
- Scout’s Instinct: Highlight enemies and resources through walls while Focus is active. Rank 1-2 increases range.
- Stealth Runner: Silent sprint without alerting enemies. Essential for infiltration.
- Low Profile: Reduce enemy detection range. Combine with stealth armor for near-invisibility.
- Concentration+ (Brave): Additional ranks for slowing time; shared with Hunter tree but cheaper here.
- Nora Survivor: Increase healing from berries and potions. Rank 1-3.
- Valor Surge Mastery: Reduce Valor Surge cooldown and increase duration. High priority.
- Rescuer: Automatically heal yourself when low health (once per combat). Lifesaver on harder difficulties.
- Silent Strike: Perform a one-hit kill from stealth on human enemies and small machines. Upgradable to larger machines.
- Silent Strike+: Extends range and damage. Combine with stealth gear.
- Critical Strike: Heavy damage attack on downed or stunned enemies. Use after acid/blaze state or knockdown.
- Critical Strike+: More damage and faster execution.
- Lure: Whistle to attract enemies into ambush position. Rank reduces cooldown.
- Smoke Bomb: Create smoke screen for escape or stealth kill setups. Duration can be extended.
- Master Trapper: Deploy traps faster and increase trap damage. Essential for trap builds.
- Trap Limit: Increase number of traps you can place simultaneously (up to 8 with max rank).
- Power Attack: Hold R2 for a heavy spear strike that can break guard and stagger machines. Upgrades increase damage and AOE.
- Melee Combo: Execute a multi-hit combo (e.g., light, light, heavy). Rank adds more hits and finishers.
- Block Breaker: A heavy swing that shatters enemy blocks. Effective against humans with shields.
- Northstar: A spear throw that damages and knocks back. Unlocks a ranged melee option.
- Resonator Blast: After a melee hit, a small energy orb appears; shooting it with an arrow causes an explosion. High skill ceiling.
- Warrior’s Valor: Increase melee damage and reduce stamina cost for melee skills.
- Endurance: Reduce damage taken while using melee skills.
- Potent Potions: Increase effectiveness of potions (health, stamina, elemental). Upgrades to 3 ranks.
- Potion Proficiency: Craft potions faster and with fewer ingredients.
- Health Boost: Add a flat health bonus. Stackable.
- Environmental Resistance: Reduce damage from fire, ice, shock, acid, and plasma. Very useful in endgame elemental zones.
- Shieldwing: Deploy a shield that blocks one hit. Cooldown-based. Saves from instant kills.
- Dodge Mastery: Increase invincibility frames and movement speed during dodges.
- Override: Temporarily take control of a machine to fight for you. Upgrades allow overriding higher-tier machines (e.g., Thunderjaw).
- Machine Repair: Heal your overridden machine. Important for keeping pets alive.
- Mount Combat: Increased damage and stamina while riding a machine.
- Ride Mastery: Reduce stamina drain when sprinting on mounts.
- Override+: Longer override duration and reduced cooldown.
- Machine Sync: Synchronize overridden machines to attack same target.
- Force Loader: Faster trap deployment with no movement penalty.
- Fling Trap: Throw traps to distant locations – ideal for ambushes.
- Ripcord Trap: A tripwire that activates twice. Great damage potential.
- Shock Trap: Upgraded shock trap that chains to nearby enemies.
- Acid Trap: Deploy acid puddle that eats armor. Synergizes with elemental weaknesses.
- Trap Disciple: Increase trap damage by a percentage based on how many traps are active.
- Hunter Bow: Triple Notch (burst), Spread Shot (fan), Braced Shot (sniper-style high damage with long cooldown).
- Sharpshot Bow: Precision Arrow (higher crit chance), Penetrating Arrow (pierces armor), Tearblast Arrow (deals tear damage).
- Warrior Bow: Quick Shot (rapid fire), Crossbow Pulse (stun), Grapple Shot (pull enemies).
- Spear: Power Attack, Charge Attack (gigantic damage), Block Breaker, Northstar.
- Ropecaster: Tie Down (immobilize), Rope Burst (AOE immobilize).
- Tripcaster: Triple Wire (multiple wires), Shield Wire (deflects projectiles).
- Blastslings: Bomb Volley (multiple bombs), Sticky Bomb (attaches to enemy).
- Shredder Gauntlet: Tear Blast (explosive tear), Return Damage (when caught).
- Stealth Surge: Become invisible for a short time. Rank increases duration and damage bonus on first attack. Great for opening a fight.
- Ranged Surge: All bow shots deal bonus damage and have chance to ricochet. Rank increases ricochet chance and duration.
- Melee Surge: Spear attacks become faster and stagger more. Rank adds lifesteal.
- Shatter Surge: Melee hits cause explosive bursts. Rank increases blast radius.
- Trapper Surge: All traps deal bonus damage and have increased radius. Rank adds fire/acid effect.
- Machine Override Surge: Immediately override a machine without cooldown, plus buff its stats. Rank allows overriding larger machines instantly.
- Elemental Surge: Apply a random elemental effect to your arrows for a period. Rank increases element chance and duration.
- Health Surge: Rapidly regenerate health over time. Rank adds damage reduction during surge.
- Stamina Surge: Unlimited stamina for a short time. Rank increases duration. Combos with weapon techniques that cost stamina.
- Trees: Prioritize Hunter (Concentration, Double/Triple Notch, Part Breaker) and Infiltrator (Silent Strike, Critical Strike, Lure).
- Valor Surge: Stealth Surge for open fights, then Ranged Surge for sustained damage.
- Weapon Techniques: Triple Notch, Braced Shot.
- Playstyle: Engage from afar, use stealth to one-shot humans, and break parts from distance.
- Synergies: Use stealth armor (e.g., Nora Shadow), weapon coils with stealth damage.
- Trees: Max Warrior (Power Attack, Melee Combo, Resonator Blast), Survivor (Health Boost, Dodge Mastery), Brave (Valor Surge Mastery).
- Valor Surge: Melee Surge or Shatter Surge.
- Weapon Techniques: Power Attack, Block Breaker, Northstar.
- Playstyle: Aggressive close-quarters, stagger machines with combos, use Resonator Blast for huge AOE.
- Synergies: Armor with melee damage and stagger resistance.
- Trees: Max Machine Master (Override, Machine Repair, Mount Combat), Trapper (Fling Trap, Ripcord Trap), Hunter (Part Breaker for damage).
- Valor Surge: Machine Override Surge for quick control.
- Weapon Techniques: Tie Down (Ropecaster) for immobilization, then override.
- Playstyle: Override a big machine to tank, heal it, and let it fight while you support from range.
- Concentration: Always use when aiming at weak spots or in mid-air. Essential for precision.
- Triple Notch: When you have a clear shot at a weak point (e.g., Thunderjaw heart) – immense burst.
- Power Attack: To break block or stagger a machine for a critical strike. Use after dodge.
- Silent Strike: Any stealth kill opportunity on unaware targets. Best with Lure.
- Traps: Place before engaging a patrol path or chokepoint. Use Ripcord Trap for double activation.
- Valor Surges: Activate before a big fight (e.g., Stormbird). Use Health Surge when low; Stealth Surge for arena encounters.
- Lure + Silent Strike: Lure an enemy into grass, then silent strike. Repeat.
- Resonator Blast + Ranged Damage: Melee an enemy to create orb, then shoot it for explosive damage that can trigger chain reactions.
- Trap + Override: Place traps around a machine you plan to override; after override, traps won't harm it but hurt enemies.
- Stamina Surge + Weapon Techniques: Spam Braced Shot or Triple Notch without stamina concerns.
- Elemental Surge + Death-Seeker Bow: Apply fire/acid to multiple arrows quickly.
- Invest in Valor Surge Mastery early for faster fill rate.
- Part Breaker is critical for farming rare components like Thunderjaw Tails.
- Low Profile + stealth armor = you can walk near machines without detection.
- Shieldwing can save you from one-hit kill attacks (e.g., Stormbird lightning).
- In Burning Shores, Fling Trap enables remote detonation combos with Trap Disciple for massive damage.
2. Brave Tree – Survival & Stealth
Enhances health, stealth, and resource gathering.
3. Infiltrator Tree – Stealth Kills & Traps
Focuses on silent takedowns, traps, and critical hits.
4. Warrior Tree – Melee Combat
Boosts spear combos, charged attacks, and melee damage.
5. Survivor Tree – Health & Potions
Enhances healing, potion capacity, and damage reduction.
6. Machine Master Tree – Overrides & Mounts
Allows control over machines and enhances mounted combat.
7. Trapper Tree (Burning Shores DLC)
Specializes in advanced traps and tools.
Weapon Techniques
Weapon Techniques are special moves unlocked by spending skill points in specific trees. Each weapon type has at least one technique. Cooldowns vary.
Valor Surges
Valor Surges are powerful activated abilities that fill a Valor meter (earned by dealing/taking damage, breaking parts). Each surge has 3 ranks. Activate with L1+R1.
Recommended Builds
Stealth Archer Build
Melee Brawler Build
Machine Tamer Build
When to Use Each Skill
Synergies & Combos
General Tips

Characters & Roles
Characters & Roles – Horizon Forbidden West
This guide covers every major character in Horizon Forbidden West, including the sole playable unit Aloy, key allies, and antagonists. For each character, you'll find background, strengths, weaknesses, narrative role, and practical tips for leveraging their presence in gameplay (where applicable). Since Aloy is the only playable character, this guide also details her customization options and how she synergizes with NPC companions.
---
Aloy – The Nora Seeker (Playable Protagonist)
Background: Aloy is a cloned descendant of Dr. Elisabet Sobeck, the scientist who created Project Zero Dawn to restore life on Earth after the Faro Plague. Orphaned at birth and cast out by the Nora tribe, she rose to become a master hunter, machine tamer, and savior of the Meridian region. In Horizon Forbidden West, she ventures into the dangerous frontier to stop a mysterious blight that threatens all life, following a signal from a space-bound AI named GAIA.
Strengths:
- Versatile combatant: Excels with bows, spears, traps, and stealth takedowns. The Valor Surge system and weapon techniques allow for diverse combat approaches.
- Superior traversal: Can climb almost any surface (with the Pullcaster), swim underwater (with Diving Mask), fly on Sunwings/Waterwings, and use the Shieldwing for gliding.
- Machine override: Can override most machines to fight for her, ride them, or disable them temporarily.
- Scanning ability: Focus can reveal enemy weaknesses, patrol routes, and lootable resources.
- Low health: Aloy is relatively fragile; heavy hits from machines or humans can kill her in a few strikes, especially on higher difficulties.
- Limited ammo: Resource management is crucial; running out of arrows or traps mid-fight can be fatal.
- Single target focus: Crowd control can be challenging without proper preparation (traps, elemental effects).
- No passive heal: Must rely on medicinal berries or potions; health does not regenerate automatically.
- Early Game: Hunter Bow (fire arrows), Sharpshot Bow (precision), Nora Warrior outfit for stealth. Focus on unlocking Hunter skill tree for triple notch and concentration.
- Mid Game: Upgrade to Carja or Oseram weapons. The Blastslings and Spike Throwers become very effective. Use the Trapper skill tree for enhanced tripwires and traps.
- Late Game: Legendary weapons like the Sun Scourge (freeze), The Last Argument (explosive spikes), and the Forgefall (sharp bolt). Wear the Oseram Artificer or Nora Anointed outfit for stat boosts. Specialize in a Valor Surge like “Stealth Stalker” for infiltration or “Part Breaker” for machine farming.
- General Build: Prioritize skills that increase concentration duration, weapon stamina, and damage multipliers. Always carry at least one fire, one freeze, and one shock weapon for versatility.
- Background: A brave Nora warrior and son of Sona. He traveled west to find Aloy after the events of Zero Dawn. Loyal, empathetic, and a skilled fighter.
- Role in Combat: Uses a spear and bow; good at holding aggro. He can revive Aloy and will call out enemy weaknesses.
- Strengths: High durability, can take hits. His dialogue often reveals lore or clues.
- Weaknesses: Limited ranged options; prefers melee range, which puts him in danger from machines with shockwaves.
- Best Used: As a tank to distract large machines while you target weak points or set up traps.
- Background: Captain of the Vanguard and former prince of the Oseram. A heavy-drinking but loyal friend to Aloy. He wields a heavy hammer and a ranged weapon.
- Role in Combat: Melee brawler with a hammer that can stun machines; also uses a tripcaster or boltblaster.
- Strengths: High stagger potential; can knock down smaller machines. Good crowd control.
- Weaknesses: Slow movement, susceptible to ranged attacks. His hammer can be unwieldy against agile foes.
- Best Used: In close-quarters fights or when you need an enemy stunned for a critical strike.
- Background: A gentle but fiercely protective Utaru tribe member, Zo is a former Chorus member who lost her family to the Red Raids. She wields a unique weapon – a fan-shaped crossbow that fires multiple bolts.
- Role in Combat: Durable ranged attacker; her fan crossbow can hit multiple arrows at once, good for spreading status effects.
- Strengths: Can apply elemental ailments efficiently, especially with fire or corrosion ammo. Her high health pool makes her survivable.
- Weaknesses: Low damage per individual bolt; relies on sustained fire. Not effective against heavily armored machines.
- Best Used: To apply status effects to groups of enemies or to soften up multiple targets at once.
- Background: A bright and curious Quen scholar sent to investigate Old World ruins. She is eager to learn and often provides technical insight. Wields a sophisticated Quen energy rifle.
- Role in Combat: Ranged precision; her energy rifle fires high-damage plasma bolts that can bypass some armor. She also uses deployable shields.
- Strengths: High single-target damage against armored enemies. Can create temporary cover for Aloy.
- Weaknesses: Slow rate of fire; vulnerable while reloading. Shield deployer has a cooldown.
- Best Used: To take down high-value targets at range or to provide defensive cover in open fights.
- Background: A proud Marshal of the Tenakth tribe who lost his arm in a skirmish. He is stoic, strategic, and deadly with his machine-based weapon arm (depending on story choice). In combat, he uses a modified spike thrower or a powerful bow.
- Role in Combat: Versatile artillery; his weapon arm can fire explosive spikes or heavy arrows with long range.
- Strengths: Exceptional damage output against single targets; his explosive spikes can break armor plates.
- Weaknesses: Slow movement; his weapon arm overheats if used continuously. Needs time to aim for best effect.
- Best Used: As a long-range support that weakens massive machines before you close the distance.
- Background: A younger clone of Elisabet Sobeck, created by the Zeniths. Beta is timid, highly intelligent, and traumatized by her upbringing. She does not fight directly but provides critical hacking support via the Focus network during certain missions.
- Role in Combat: Non-combatant; she deactivates security systems, hacks machines remotely, or opens locked doors. You never fight alongside her.
- Strengths: Her technical abilities allow you to bypass obstacles and disable powerful machines temporarily.
- Weaknesses: Cannot engage in direct combat; must be protected if she accompanies you in hostile areas.
- Best Used: In stealth missions where you need to disable alarms or silence a specific threat without engaging.
- Background: A brilliant but morally ambiguous Banuk shaman and scholar. He serves as Aloy's primary adviser and often provides cryptic guidance. He does not fight alongside Aloy in this game but communicates via Focus.
- Role in Gameplay: Provides information and optional objective markers. His perspectives shape the narrative.
- Strengths: Deep knowledge of Old World technology and machine behavior.
- Weaknesses: Untrustworthy; his advice may hide his own agenda.
- Best Used: As a lore resource and quest giver.
- Background: A savage Tenakth commander who leads a rebel faction against the Carja and the peacekeeping efforts of the Tenakth Marshals. She rides a powerful flying machine (a Corruptor-like Sunwing) and wields a heavy bow.
- Role in Gameplay: Major boss fight on several occasions. She uses stealth, explosives, and machine mounts. Her attacks are devastating in melee and ranged.
- Strengths: High mobility, can summon machine allies (Corrupted machines). Her bow can fire volleys of arrows with elemental damage.
- Weaknesses: Vulnerable to shock and freeze during certain attack animations. Her machines can be overridden against her.
- Encounter Tips: Use terrain to break line of sight. Freeze her then pelt with high-damage spikes. Override her Sunwing if possible to ground her.
- Background: A member of the Zeniths – a group of ancient humans who fled Earth and returned centuries later. Tilda initially poses as an ally but has her own agenda involving the AI GAIA.
- Role in Gameplay: Final human antagonist; she pilots a Zenith combat exoskeleton with advanced energy shields and projectiles.
- Strengths: Rapid teleportation, energy shields that regenerate, powerful plasma beams and homing projectiles.
- Weaknesses: Shield can be overwhelmed by sustained damage from multiple sources (use smoke bombs, explosive weapons). Teleportation has a brief cooldown; she pauses after teleporting, leaving her open.
- Encounter Tips: Use acid and purgewater to degrade her shield efficiency. Stay mobile to avoid homing attacks. The Arena-style boss arena has columns for cover.
- Background: Synthetic humanoid machines controlled by the Zeniths. They are encountered in the final act and in certain side missions.
- Role in Gameplay: Standard enemy with ranged plasma and melee chains. They can teleport and have weak points on their back.
- Strengths: Hits hard; can stun lock if you get caught in a combo.
- Weaknesses: Weak to shock (slows them down) and they cannot swim. Use smoke bombs to break their targeting.
- Tremortusk: A gigantic mammoth-like machine with multiple weapon pods. Kills by charging, shooting, or stomping. Weak to ice and rope.
- Slaughterspine: A spinosaur-like machine with explosive plasma attacks. Very dangerous at range. Use purgewater to disable its plasma then freeze.
- Thunderjaw: Returns from the first game. Still a heavy-hitter with laser cannons and disc launchers. Tie it down with ropecaster and target its heart.
- Sunwing: Used as a mount for air travel after overriding it. Also appears as an enemy. Weak to fire when unridden.
- Waterwing: Underwater equivalent; can be overridden for deep-sea travel. Vulnerable to shock.
Weaknesses:
Playstyle: Aloy rewards patient, tactical gameplay. Stealth and environmental positioning are key – use tall grass, bushes, and vantage points to pick off enemies before they detect you. In open combat, exploit elemental weaknesses (fire, freeze, shock, acid, purgewater) and machine weak points. The skill trees allow specialization: you can lean into stealth, heavy weaponry, traps, or machine taming. Adapt your loadout based on the enemy type – for example, use freeze arrows followed by high-damage spikes against armored machines.
Unlock Conditions: Aloy is playable from the start. No unlocking required.
Recommended Equipment & Builds:
Team Synergy: Although Aloy fights alone most of the time, she is often accompanied by story allies in missions. NPCs like Varl, Erend, Zo, Alva, and Kotallo provide combat support – they can draw aggro, deal moderate damage, and revive Aloy if she falls. Their AI is competent but not flawless; they cannot replace player skill. Use them as distractions while you flank enemies or focus on vulnerable spots.
---
Major Allies (Supporting Characters)
These characters fight alongside Aloy during specific quests and provide narrative context, but are not directly controllable.
#### Varl – The Brave Nora
#### Erend – The Oseram Vanguard
#### Zo – The Utaru Plainsong Chorus
#### Alva – The Quen Delver
#### Kotallo – The Tenakth Marshal
#### Beta – The Clone-Sister
#### Sylens – The Mysterious Banuk
---
Antagonists & Key Villains
These characters oppose Aloy and are encountered in story missions.
#### Regalla – The Rebellious Commander
#### Tilda van der Meer – The Zenith Manipulator
#### The Specters (Zenith Grunts)
---
Machine Combatants (Notable Threat Types)
While not characters, these machines stand out for their story significance:
---
Summary Table of Ally NPCs
| Character | Tribe | Weapon | Role in Combat | Best Used Against |
|---|---|---|---|---|
| Varl | Nora | Spear + Bow | Tank/Distraction | Large machines, crowd control |
| Erend | Oseram | Hammer + Tripcaster | Bruiser/Stun | Human enemies, small to medium machines |
| Zo | Utaru | Fan Crossbow | Status Spreader | Groups, unarmored enemies |
| Alva | Quen | Energy Rifle + Shield | Precision/Defense | Armored enemies, single targets |
| Kotallo | Tenakth | Spike Thrower | Artillery/Heavy Damage | Large machines, weak spots |
Final Notes
- No class system exists – Aloy is the only playable character. Her skill trees and gear choices function as a flexible “class” system.
- NPC companions are AI-controlled and appear only during specific quests. Their effectiveness depends on your playstyle; you can’t give direct orders.
- Role customization is achieved through weapon loadouts, Valor Surges, and skill tree builds. Experiment with different combinations to suit your preferred playstyle – stealth archer, explosive trapper, or aggressive melee.
For detailed skill tree breakdowns and recommended gear progression, see the Character Skills and All Game Items sections of this guide.
Cheats & Secrets
Cheats & Secrets – Horizon Forbidden West
Official Cheat Codes
Horizon Forbidden West does not include any traditional cheat codes, console commands, or password entries. There are no built-in debug menus, invincibility codes, or unlimited ammo unlocks available through standard gameplay. The game was designed without these features on all platforms (PS4, PS5, and PC).
Hidden Content & Developer-Intended Secrets
While there are no cheat codes, Guerrilla Games embedded numerous hidden secrets, Easter eggs, and intentional discoveries. These are not exploits or bugs but carefully placed content for observant players.
#### 1. Secret Ending Dialogue & Optional Boss
- Location: The final main quest "Singularity" has an optional objective to collect five Demeter Flowers before the final battle. Doing so triggers an extended cutscene and special dialogue from Aloy and Beta referencing the Horizon Zero Dawn DLC The Frozen Wilds.
- Requirement: Complete the side quest "The Souvenir" (unlocked after main quest "All That Remains") to obtain the Demeter Flowers.
- Result: The final boss fight (the Specter Prime) does not change, but the epilogue conversation with Gaia and Sylens includes unique lines about the old world and CYAN.
- Armor: Quen Commander Armor (legendary) – found during the DLC's main quest "The Eye of the Earth". After defeating the final boss, revisit the flooded basement in the Poseidon facility. Use the Durocher Tools (side quest item) to hack a hidden terminal, revealing a room with the armor.
- Note: This is the only legendary armor with a unique active skill: Glowbooster – increases elemental build-up resistance by 30% and provides a faint glow in dark areas.
- Trigger: During the main quest "The Broken Sky", talk to Zo at the base. If you stand idle near her for 10 seconds, she will say a line that sounds like "Alexa, play Desperado" (a reference to the Amazon Alexa voice assistant and the Eagles song "Desperado"). This is a dev joke.
- Nora Tribe Shrine: In the Daunt, find a shrine with a small Nora totem. Interacting with it plays a recording of Rost (Aloy's mentor from Zero Dawn). The recording is triggered only after completing the side quest "The Door to the Past".
- Old World Artifacts: Collect all 12 Vantage Points. The final vantage point in The Stillsands shows a hologram of Elisabet Sobeck waving at a very specific mountain – a direct callback to the Horizon Zero Dawn quest "The Mountain That Fell".
- Location: In the Tenakth Desert (west of the Salt Bite camp), there is a hidden gully with no map marker. During a sandstorm (weather condition), a Fireclaw – a rare machine normally exclusive to The Frozen Wilds – spawns. It has a 50% chance to be an Apex variant.
- Reward: Drops Fireclaw Circulation and Apex Fireclaw Heart – both required for legendary upgrades.
- Location: In the Lagoon (south of Dunehollow), dive into an underwater cave behind a large waterfall. The entrance is hidden behind plants and debris. Inside is a chest containing a Legendary Overdraw Coil (+25% Overdraw Damage, +15% Draw Speed). No other copy exists.
- Note: Underwater breathing is required (Aqua Lung valor surge or Diver's Mask outfit upgrade).
- Access: PC version only. In the Shadows of the West quest area (the Oseram salvage camp called "The Maw of the Arena"), look for a glitched texture on a wall near the campfire. Repeatedly jump into it for 5 seconds, and you'll phase through into a small room with a table and chairs. A message from the developers is on the table: "If you're reading this, you've found our lunch room. We hope you're having fun! – The Guerrilla Team"
- Platform: This room is absent on PS4/PS5.
- New Game+ and Ultra Hard were added via patch. On Ultra Hard, machine prices at merchants are tripled, but the following secrets unlock:
- Foxes and Raccoons: In the Jungle region (southwest of the Scalebreaker settlement), there is a hidden pond where you can find a raccoon washing its food. If you approach slowly (crouch) while wearing the Utaru Winterweave outfit, the raccoon will not flee and will perform a unique animation. This is a reference to a similar interaction in The Last of Us Part II.
- Seagull Colony: On the roof of the Poseidon building, there is a colony of seagulls that can be shot to trigger a brief cutscene of them flying away. No gameplay effect – purely cosmetic.
- Weapon Reload Animation Cancel: Switching weapons immediately after firing a single-shot weapon (e.g., Sharpshot Bow) cancels the end of the reload animation. This is not a glitch but a hidden mechanic intended by the developers – they never patched it.
- Respawn of Legendary Crates: In the Burning Shores, the three legendary crates in the Harp's Roost region respawn every 30 minutes of real time. This allows unlimited farming of legendary upgrade parts without restarting the game.
#### 2. The Burning Shores DLC Secret Armor
#### 3. Easter Egg: "Alexa, Play Desperado"
#### 4. Easter Egg: Horizon Zero Dawn References
#### 5. Hidden Machine: Apex Fireclaw
#### 6. Secret Coil: "Overdraw Coil"
#### 7. Developer Room (Easter Egg)
#### 8. Ultra Hard Difficulty Exclusive Content
- Focus HUD Customization – a hidden toggle in settings that changes the Focus highlight color to gold (Activate by completing a full playthrough on Ultra Hard).
- Trophy: "New Game+ Complete on Ultra Hard" – grants a unique Face Paint (Hunter's Mark) for Aloy.
#### 9. Secret Animal Encounters
#### 10. Exploit-Safe Secrets (Gameplay)
Summary of Hidden & Secret Content
| Type | Name | Requirement | Reward |
|---|---|---|---|
| Secret | Additional Ending Dialogue | Collect 5 Demeter Flowers before final boss | Extended cutscene & unique dialogue |
| Armor | Quen Commander Armor | DLC, after final boss hack terminal | Legendary armor with Glowbooster skill |
| Easter Egg | Alexa, Play Desperado | Stand near Zo for 10 sec | Funny voice line |
| Easter Egg | Rost's Recording | Find Nora shrine after a side quest | Audio log from Zero Dawn |
| Machine | Apex Fireclaw | Sandstorm in desert gully | Rare machine loot |
| Coil | Overdraw Coil | Underwater cave in Lagoon | Legendary weapon coil (unique) |
| Developer Room | Glitched wall at "The Maw of the Arena" | PC only, jump into glitch | Dev message |
| Difficulty | Ultra Hard exclusive | Complete NG+ on Ultra Hard | Gold Focus toggle & Face Paint |
| Animal | Raccoon washing food | Special approach with Utaru outfit | Animation Easter egg |
Conclusion
While Horizon Forbidden West lacks traditional cheat codes, it is rich in developer-intended secrets, Easter eggs, and hidden content that reward exploration and replay. These range from minor cosmetic callbacks to powerful unique items. No exploits exist that break the game, but the hidden mechanics and locations listed above are safe to use and officially recognized by the community as intended.