
Horizon Zero Dawn
## Game Introduction: Horizon Zero Dawn **Horizon Zero Dawn** is a critically acclaimed action role-playing game developed by Guerrilla Games and published by Sony Interactive Entertainment. It blends open-world exploration, stealth, and tactical combat against robotic creatures in a lush post-apoc...

Download & Installation
Download & Installation Guide for Horizon Zero Dawn
This guide provides comprehensive instructions for downloading and installing Horizon Zero Dawn on all supported platforms: PC (Steam, Epic Games Store), PlayStation 4, and PlayStation 5 (via backward compatibility). Note that the game is not available on Xbox, Nintendo Switch, or mobile devices.
---
1. Official & Legitimate Download Sources
| Platform | Storefront | Notes |
|---|---|---|
| PC | [Steam](https://store.steampowered.com/app/1151640/Horizon_Zero_Dawn_Complete_Edition/) | Complete Edition (base game + The Frozen Wilds DLC) |
| PC | [Epic Games Store](https://store.epicgames.com/en-US/p/horizon-zero-dawn-complete-edition) | Same content as Steam |
| PlayStation 4 | PlayStation Store (PS4) | Base game or Complete Edition |
| PlayStation 5 | PlayStation Store (PS5) | Backward compatible; PS5 patch available to unlock 60 FPS |
---
2. System Requirements (PC)
Minimum Requirements (1080p / 30 FPS / Low settings)
- OS: Windows 10 64-bit (version 1909 or newer)
- Processor: Intel Core i5-2500K @ 3.3 GHz or AMD FX 6300 @ 3.5 GHz
- Memory: 8 GB RAM
- Graphics: NVIDIA GeForce GTX 780 (3 GB) or AMD Radeon R9 290 (4 GB)
- DirectX: Version 12
- Storage: 100 GB available space (SSD recommended)
- Additional: Requires a 64-bit processor and operating system
- OS: Windows 10 64-bit (version 1909 or newer)
- Processor: Intel Core i7-4770K @ 3.5 GHz or AMD Ryzen 5 1500X @ 3.5 GHz
- Memory: 16 GB RAM
- Graphics: NVIDIA GeForce GTX 1060 (6 GB) or AMD Radeon RX 580 (8 GB)
- DirectX: Version 12
- Storage: 100 GB SSD
- OS: Windows 10 64-bit (version 1909 or newer)
- Processor: Intel Core i7-8700K @ 3.7 GHz or AMD Ryzen 7 2700X @ 3.7 GHz
- Memory: 16 GB RAM
- Graphics: NVIDIA GeForce RTX 2070 Super (8 GB) or AMD Radeon RX 5700 XT (8 GB)
- DirectX: Version 12
- Storage: 100 GB NVMe SSD
- Total download size: ~70 GB (varies by platform)
- Installed size: ~100 GB (due to decompression and patches)
- SSD mandatory: The game streams large world assets; an HDD will cause texture pop-in and stuttering.
- Free up space: Ensure at least 110 GB free to accommodate temporary files during installation.
- Steam: A Steam account (free). The game must be purchased or redeemed on your account.
- Epic Games Store: An Epic Games account (free). Same purchase requirement.
- PlayStation: A PlayStation Network (PSN) account (free). You must be signed in to download and play.
- No additional launchers are required on PC besides Steam/Epic.
Recommended Requirements (1080p / 60 FPS / High settings)
Ultra Requirements (4K / 60 FPS / Ultra settings)
> Important: The game has known CPU threading issues on older quad-core processors. A 6-core/12-thread CPU is strongly recommended for smooth gameplay.
---
3. Storage Space & Pre-Installation
---
4. Account Requirements
---
5. Step-by-Step Installation by Platform
5.1 PC via Steam
1. Launch the Steam client and log in to your account.
2. Go to the Library tab.
3. Locate Horizon Zero Dawn Complete Edition in your library. If you haven't purchased it, visit the store page and complete the purchase.
4. Click Install.
5. In the pop-up, select the destination folder (ensure the drive has at least 110 GB free).
6. Choose whether to create a desktop shortcut (optional).
7. Click Next and then Install.
8. Wait for the download and installation to complete (may take 1–3 hours depending on internet speed).
9. Once finished, the Play button will become active.
5.2 PC via Epic Games Store
1. Open the Epic Games Launcher and log in.
2. Go to your Library.
3. Find Horizon Zero Dawn Complete Edition and click Install.
4. Choose the installation path and click Install.
5. Wait for the process to finish. The Launch button will appear.
5.3 PlayStation 4 (Physical Disc or Digital)
#### Digital Download
1. On the PS4 home screen, go to PlayStation Store.
2. Search for "Horizon Zero Dawn" and select the Complete Edition or base game.
3. Click Download (if purchased) or Buy then Download.
4. The game will be added to your library and download in the background.
5. Once downloaded, the game icon will appear on the home screen. Select it to install (if not auto-installing).
6. Launch the game.
#### Physical Disc
1. Insert the game disc into the PS4.
2. The game should appear on the home screen with a progress bar for installation.
3. If prompted, install any mandatory updates (recommended).
4. The disc acts as a license key; keep it in the drive while playing.
5.4 PlayStation 5 (Backward Compatibility)
1. Insert the PS4 disc (if physical) or navigate to your PS4 library (if digital).
2. If digital, go to Game Library > Your Collection and select Horizon Zero Dawn.
3. Click Download. The PS5 will install the PS4 version.
4. After installation, do not launch yet.
5. Go to the game’s Options button (three dots) and select Game Version.
6. Choose PlayStation 5 | Horizon Zero Dawn (this is the PS5-optimized patch that unlocks 60 FPS and faster load times).
7. The patch will download (approx. 2 GB).
8. Launch the game. It will run at 60 FPS based on your display settings.
> Note: The PS5 version is not a native remaster. It uses the PS4 Pro enhancements with an unlocked frame rate.
---
6. First Launch Setup
1. Launch the game from your platform (Steam, Epic, PS4 home, PS5 home).
2. PC only: A splash screen will appear. If it's your first time, you may be prompted to install the Microsoft Visual C++ Redistributable (if not already installed). Allow it.
3. Automatic detection of graphics settings (PC): The game will attempt to set optimal settings based on your hardware. You can change these later.
4. Language selection: Choose your preferred language for audio and subtitles.
5. Display Calibration (optional): Adjust brightness and HDR settings if supported.
6. Sign in to PSN (PlayStation only): You may need to confirm your PSN account. If on PS5, the game will tie to your account automatically.
7. Main menu: Confirm you are on the latest version. The in-game version number is displayed in the bottom-left corner of the main menu (e.g., 1.11).
8. Create a new game or load an existing save. If you transferred a save from PS4 to PS5, you can use the in-game cloud save feature.
---
7. Common Installation Errors & Fixes
| Error | Platform | Cause | Solution |
|---|---|---|---|
| "Not enough disk space" | All | Insufficient free space. | Delete temporary files, move other games to another drive, or free up at least 110 GB. Use Disk Cleanup (Windows) or rebuild database (PS4). |
| "Steam disk write error" | PC (Steam) | Corrupted download cache or permissions issue. | Restart Steam as admin, clear download cache (Steam > Settings > Downloads > Clear Download Cache), or change the download region. |
| "The file is corrupted" | PC (Steam/Epic) | Incomplete download or antivirus interference. | Verify integrity of game files (Steam: right-click game > Properties > Local Files > Verify integrity of game files. Epic: click three dots > Verify). |
| "Missing MSVCP140.dll" | PC | Visual C++ redistributable not installed. | Install the latest Visual C++ Redistributables from [Microsoft](https://aka.ms/vs/17/release/vc_redist.x64.exe). Restart PC. |
| "Horizon Zero Dawn has stopped working" | PC | Outdated graphics drivers or insufficient RAM/VRAM. | Update GPU drivers (NVIDIA or AMD). Lower graphics settings, especially texture quality and shadows. Close background apps. |
| "Can't purchase/launch on PS4/PS5 due to region lock" | PlayStation | Disc or digital version region mismatch. | Ensure the game and your PSN account are from the same region. For digital, create an account in the same region as the store. |
| "Installation stuck at 99%" | All | Corrupted update file. | On PC: restart the launcher and re-verify files. On PS4/PS5: rebuild database (Safe Mode > Option 4) or delete and re-download (ensure good internet). |
| "Error CE-34878-0" | PlayStation | Game crash during installation or launch. | Update system software. Rebuild database. If persistent, reinstall the game. |
| "FPS drops or stuttering after install" | PC | Background processes, high settings, or lack of SSD. | Close unnecessary programs. Lower settings (especially shadows and reflections). Ensure the game is installed on an SSD. Enable "Hardware-accelerated GPU scheduling" in Windows (optional). |
| "Controller not working" | PC | Incorrect input mapping or Steam Input conflict. | Launch via Steam Big Picture mode for automatic controller support. Disable other controllers. |
8. Post-Installation Verification
After installation, perform these checks to ensure the game is running correctly:
1. Check game version: On PC, from the main menu look at the bottom-left corner. The latest version is 1.11 (as of this guide). On PlayStation, check the game’s information (Options > Information) for the same version.
2. Test performance: Start a new game and play through the opening sequence. Verify:
- Frame rate is stable (target 30 FPS on PS4, 60 FPS on PS5 or PC).
- No graphical glitches, texture tearing, or audio desync.
- Loading times are reasonable (under 30 seconds from launch to gameplay).
3. Audio check: Ensure both dialogue and ambient sounds are working. If using surround sound, test all channels.
4. Saving: Create a manual save (Menu > Save). Then exit to main menu and reload the save to confirm it loaded without errors.
5. DLC access: On the main menu, look for The Frozen Wilds option under the main story. On PC, if you own the Complete Edition, it should be included. On PlayStation, the DLC must be purchased separately or you may need to install it from the store.
6. Update to latest patch: Always install any available patches. On PC, Steam/Epic will auto-update. On PS4/PS5, go to the game icon, press Options, and select Check for Update.
7. Backup saves (PC): Steam cloud saves are automatic. For manual backup, locate saves in `%USERPROFILE%\Documents\Horizon Zero Dawn\Saved Game` and copy the folder. On PlayStation, use PS+ cloud storage or USB backup.
---
9. Additional Tips
- PC performance tuning: The game is CPU-intensive. Use the in-game benchmark tool (Options > Graphics > Benchmark) to test your settings.
- Modding (PC): Horizon Zero Dawn supports mods through sites like Nexus Mods. To install mods, you'll need to unpack the game's `.bin` files (use the [Horizon Mod Manager](https://www.nexusmods.com/horizonzerodawn/mods/5) but be aware that mods may break with updates). Modding is not covered in this installation guide.
- VRAM usage: At 1080p High, the game uses up to 5 GB VRAM. If you have a 4 GB card, you may need to lower textures to Medium.
- Refund policy (Steam/Epic): If you experience issues and cannot fix them, request a refund within 2 hours of playtime and 14 days of purchase.
- Steam Discussions: [Horizon Zero Dawn Steam Community](https://steamcommunity.com/app/1151640)
- Epic Games Support: https://www.epicgames.com/support
- PlayStation Support: https://www.playstation.com/support/
---
10. Conclusion
By following this guide, you should have Horizon Zero Dawn installed and ready to play on your chosen platform. Always ensure you have the latest drivers, adequate free storage, and a stable internet connection. If you encounter any persistent issues, consult the official support forums:
Enjoy your journey through the vibrant but dangerous world of the Nora tribe and the machines!
---
Last updated: October 2023

Game Introduction
Game Introduction: Horizon Zero Dawn
Horizon Zero Dawn is a critically acclaimed action role-playing game developed by Guerrilla Games and published by Sony Interactive Entertainment. It blends open-world exploration, stealth, and tactical combat against robotic creatures in a lush post-apocalyptic world. The game is renowned for its stunning visuals, compelling narrative, and innovative gameplay mechanics.
Genre
- Action role-playing (ARPG) with elements of stealth, survival, and open-world exploration.
- Developer: Guerrilla Games (known for the Killzone series)
- Publisher: Sony Interactive Entertainment
- Original Release (PS4): February 28, 2017
- PC Release (Steam & Epic Games Store): August 7, 2020
- Horizon Zero Dawn: Complete Edition (PS4, PC): Bundled with The Frozen Wilds DLC; released December 5, 2017 (PS4)
- PlayStation 5 Enhancement: Backward compatible with Performance/Resolution modes (60 fps on PS5 via patch)
- PlayStation 4
- PlayStation 5 (via backward compatibility with enhanced performance)
- PC (Windows) via Steam and Epic Games Store
- Aloy – The protagonist, a skilled hunter and archer raised as an outcast, destined to uncover the truth about her origins.
- Rost – Aloy’s gruff but caring guardian who trains her.
- Sylens – A mysterious, knowledgeable figure who aids Aloy with cryptic advice.
- Lance Reddick (voice) – Portrays Sylens with distinct gravitas.
- Grent, Olin, Teb – Supporting tribe members.
- Erend, Vanasha – Key allies from different tribes.
- Stunning Open World: Breathtaking visuals with dynamic weather, day-night cycles, and diverse biomes.
- Machine Combat: Strategic engagements that require studying enemy patterns, using elemental weaknesses, and utilizing traps, stealth, and a bow as the primary weapon.
- Engrossing Story: A deep sci-fi mystery that gradually reveals the fall of civilization, with emotional beats and unforeseen twists.
- Lore-Rich Exploration: Collectibles, audio logs, and datapoints that expand the world’s history.
- Skill Progression & Customization: A skill tree allowing different playstyles—stealth, ranged, or close-quarters combat.
- Fans of story-driven action RPGs with exploration (e.g., The Legend of Zelda: Breath of the Wild, Tomb Raider, Assassin’s Creed).
- Players who enjoy challenging combat against robotic foes.
- Those who appreciate rich lore, world-building, and a strong female protagonist.
- Suitable for ages 16+ due to mild violence and some mature themes.
- Single-Player Campaign: The main story plus side quests, errands, and activities (corrupted zones, bandit camps, hunting grounds).
- New Game+: Available after completing the main story, allowing players to replay with upgraded gear and skills.
- Ultra Hard Difficulty: Available in New Game+ for a greater challenge.
- Offline: The entire game is playable offline with no internet connection required after installation.
- Online: No multiplayer or co-op. Online features are limited to leaderboards for hunting ground trials and eventual updates/patches. On PC, online connectivity may be required for initial activation on Steam/Epic Game Store.
- Horizon Zero Dawn: The Frozen Wilds – The major story expansion, set in the harsh, snowy region of the Cut. It introduces new machines (Frostclaws, Fireclaws), new side quests, additional skills, and deepens Aloy’s connection to the world. Approximately 10–15 hours of extra content. Included in the Complete Edition.
- Pre-Order/Timed Exclusive Content: Items like the Carja Storm Ranger outfit (different editions) are generally available as microtransactions or bundled in the Complete Edition.
Developer & Publisher
Release Timeline
Platforms
Story Overview
Set a thousand years after the mysterious collapse of modern civilization, humanity has regressed to tribal societies. The player controls Aloy, a young hunter and outcast from the Nora tribe, who embarks on a journey to discover her past and the truth behind the fall of the old world. The story unravels through a richly woven narrative involving ancient technologies, rogue machines, and a looming threat called the Derangement—a phenomenon that has turned the once-peaceful machines into aggressive beasts. Aloy’s quest for identity and answers leads her across vast, beautiful landscapes, uncovering secrets that could save or doom the world again.
Setting
The world of Horizon Zero Dawn is a unique blend of lush natural environments—snowy mountains, dense forests, arid deserts, and vibrant ruins—populated by robotic creatures inspired by prehistoric animals (e.g., Thunderjaws, Sawtooths, Striders). Human tribes, such as the Nora, Carja, Oseram, and Banuk, live in a pre-industrial society, often worshiping or fearing the machines. The contrast between primitive human cultures and advanced technology forms a compelling backdrop.
Main Characters
Core Appeal
Target Audience
Game Modes
Online / Offline Support
DLC / Expansion Overview
What Makes This Game Unique
1. Robotic Wildlife: Instead of traditional fantasy creatures, Horizon Zero Dawn features stunningly designed mechanical beasts that behave like real animals, requiring strategic hunting.
2. Tear and Elemental Combat: Players can strip armor from machines using tear arrows, ignite them with fire, freeze them, or shock them—all affecting the combat dynamically.
3. Dual-Setting Appeal: A rare combination of primitive tribal culture and high-tech remnants creates a distinct “post-post-apocalyptic” atmosphere.
4. Aloy as a Character: A memorable, well-written protagonist whose journey of self-discovery resonates deeply.
5. Visual Mastery: Considered one of the best-looking games of its generation, with minute attention to detail in foliage, weather, and creature animations.
Whether you are a newcomer to action RPGs or a seasoned explorer, Horizon Zero Dawn offers a rich, immersive experience that stands as a landmark title in the genre.
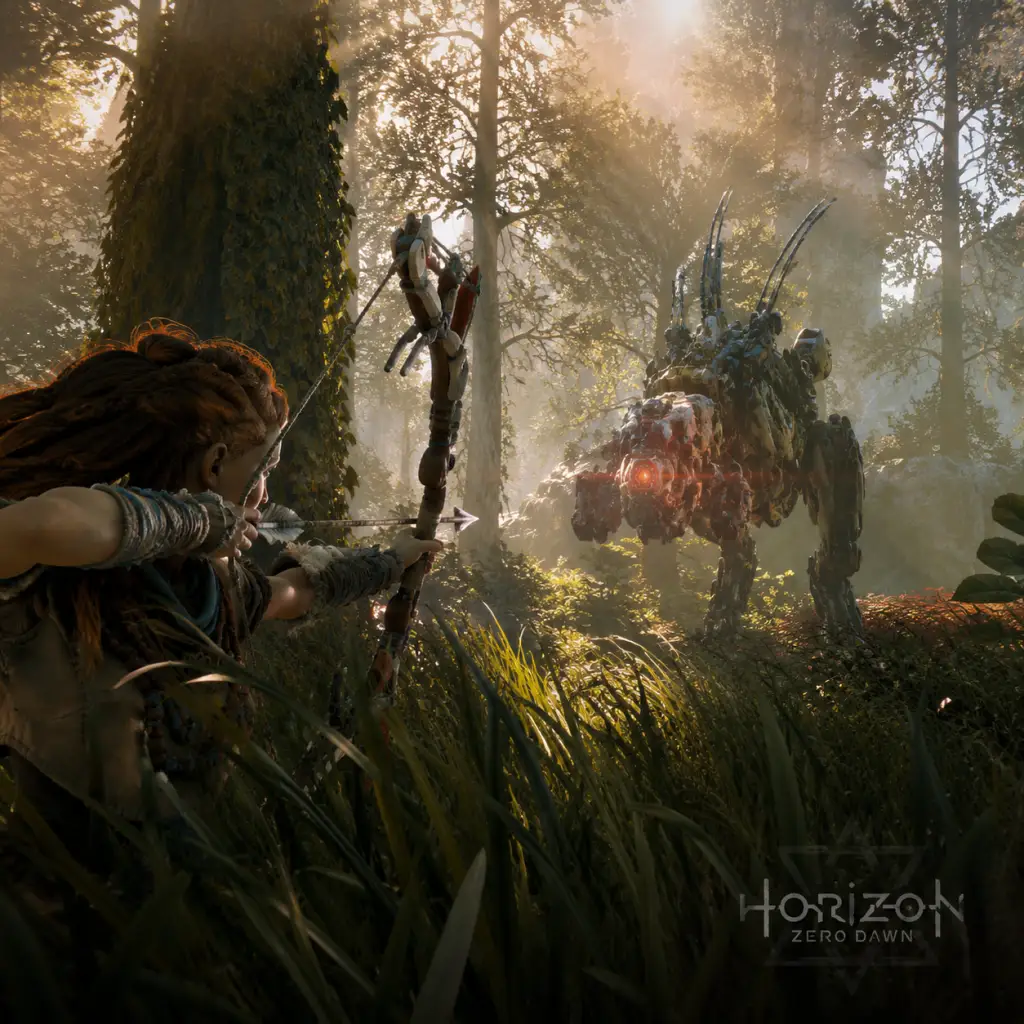
Getting Started
Getting Started: Horizon Zero Dawn
Welcome to the world of Horizon Zero Dawn. This guide is designed for brand-new players to help you survive the first few hours, understand the basics, and avoid common pitfalls. You play as Aloy, an outcast Nora tribeswoman who must uncover the mysteries of a lost civilization while hunting robotic machines. There is no character creation—Aloy’s appearance and background are fixed, so you can jump straight into the story.
---
First Hour Walkthrough
Your first hour will take you through the tutorial area and into the first major quest. Follow this path:
1. Opening Cutscene & Prologue (0–5 minutes)
- Watch the cinematic introducing Aloy as a baby and the world. No player input needed.
- You’ll gain control as child Aloy. Follow the linear path, interact with glowing focus (press R3/right stick on controller or F on PC) to trigger memories.
- Climb ledges using X (PlayStation) / Space (PC) / A (Xbox controller).
2. Learning the Basics (5–15 minutes)
- Young Aloy meets Rost, your mentor. He’ll teach you to sprint (press L3), crouch (Circle / C), and shoot a sling.
- Complete the target practice with the sling. Aim with L2 / right mouse, fire with R2 / left mouse.
- Climb the watchtower to trigger the next story beat.
3. The Proving (15–30 minutes)
- Time-skip to adult Aloy. You’ll participate in the Proving, a survival trial.
- Before the Proving, you can explore the village, talk to NPCs, and collect some resources (more on resources below).
- The Proving itself is a timed race: follow the waypoints, climb, and slide. No combat is required—just run and climb efficiently.
- After the Proving, a dramatic event unfolds. You’ll lose your gear temporarily but regain it shortly after.
4. First Steps into the Open World (30–60 minutes)
- You’ll receive the Focus (if you didn’t have it earlier) and your first bow. The world opens up near the Embrace.
- Use your Focus to scan machines and learn their weaknesses (press R3 / F).
- Complete the first few main quests: "The Womb of the Mountain" and begin "A Gift from the Past".
- By the end of the hour, you should have completed the initial tutorial area and be in the open world. Save your game at a campfire.
---
Controls on All Platforms
Horizon Zero Dawn supports PlayStation 4/5, PC (keyboard & mouse), and PC with controller.
PlayStation (4/5) Default Controls
| Action | Button |
|---|---|
| Move | Left stick |
| Camera | Right stick |
| Sprint | L3 (click stick) |
| Crouch | Circle |
| Jump / Climb | X |
| Interact / Loot | Triangle |
| Use Focus | R3 (click stick) |
| Shoot (bow) | R2 |
| Aim (bow) | L2 |
| Melee attack | R1 |
| Heavy attack | Hold R1 |
| Dodge | Square |
| Weapon wheel | L1 |
| Tool / Potion wheel | D-pad left/right |
| Map | Touch pad |
| Pause | Options |
PC (Keyboard & Mouse) Default Controls
| Action | Key / Mouse |
|---|---|
| Move | W/A/S/D |
| Look around | Mouse |
| Sprint | Shift (hold) |
| Crouch | C |
| Jump / Climb | Space |
| Interact / Loot | E |
| Use Focus | F |
| Shoot (bow) | Left mouse button |
| Aim (bow) | Right mouse button |
| Melee attack | R |
| Heavy attack | Hold R |
| Dodge | Q |
| Weapon wheel | Tab (hold) |
| Tool / Potion wheel | 1–4 keys |
| Map | M |
| Pause | Esc |
PC (Controller) – Same as PlayStation but button prompts match your controller.
Tip: You can rebind controls in the Options menu. On PC, both keyboard and controller can be used simultaneously.
---
UI Overview
The heads-up display (HUD) provides vital information:
- Health Bar – Top-left corner (green). When it turns red, you’re critically injured. Use medicinal plants to heal (hold D-pad up to consume).
- Weapon/Tool Icons – Next to health bar. Shows equipped weapon (bow, sling, etc.) and ammo type. Use weapon wheel (L1/Tab) to switch.
- Compass – Top center. Shows cardinal directions and icons for quests, waypoints, and points of interest.
- Focus Mode – When active, the screen desaturates and highlights enemies, lootable items, climbable surfaces, and machine weak points. Press R3/F to toggle.
- Machine Information – When scanning with Focus, a small window shows the machine’s name, health, components, and elemental weaknesses.
- Resource Counter – Bottom-right shows Metal Shards (currency) and other key inventory items.
- Quest Tracker – Left side, shows current objective name and optional objectives.
Pro Tip: You can adjust HUD visibility in Settings > General > HUD. New players may want to set it to "Always On" until they get comfortable.
---
Essential Early Objectives
In your first few hours, prioritize these goals:
1. Complete "The Womb of the Mountain" – This main quest teaches you to use your Focus and fight basic machines (Watchers, Striders). It ends with you leaving the Sacred Lands.
2. Unlock the Skill Tree – After gaining a few skill points, invest in the Prowler tree: Lure Call and Concentration (slows time while aiming) are early game-changers.
3. Craft a Health Potion and a Fast Travel Pack – Gather medicinal plants (blue flowers) and trade with merchants or craft at workbenches.
4. Unlock the Carja merchant at Mother’s Heart – Sell excess machine parts and buy better weapons (hunter bow, tripcaster).
5. Explore the area around the first Tallneck – Overriding Tallnecks reveals the map. The first Tallneck is near the city of Meridian (accessible after the main quest "The City of the Sun").
6. Complete side quests – They reward skill points, resources, and lore.
---
What to Do First and What to Avoid
Do First:
Scan every new machine with your Focus to learn its weaknesses (fire, freeze, shock, etc.). Mark components for easier aiming.
Craft arrows immediately. Wood from trees, Ridge-Wood from bushes, and Metal Shards from loot. Don’t run out of ammo.
Use stealth – Crouch in tall grass, whistle to lure enemies away, and use silent strike (press R1/R from behind) to one-shot weak enemies.
Collect everything – Medicinal plants, wood, rocks, machine parts. You’ll need them later.
Override basic machines (Striders, Watchers) for mounts. This requires the Override skill from the Prowler tree.
Save at campfires often (manual save available).
Avoid:
Don’t fight large machines early – Sawtooths, Scrappers, and especially Thunderjaws will kill you in 1–2 hits. Sneak around them until you have better gear and skills.
Don’t ignore the weapon wheel – You can slow time (with Concentration skill) to pick ammo types. Always have fire and shock arrows ready.
Don’t sell all machine parts – Some are needed for upgrades or quests. Keep things like Lenses, Hearts, and Braiding.
Don’t fast travel excessively – You’ll miss valuable resources and side quests. Walk or ride a mount.
Don’t neglect side content** – The main quests are great, but side quests provide essential XP, money, and lore.
---
Early Resource Priorities
| Resource | Use | Where to Find |
|---|---|---|
| Metal Shards | Currency, crafting ammo | Loot from machines, containers, merchants |
| Wood / Ridge-Wood | Crafting arrows (most important) | Bushes and trees (always pick up) |
| Medicinal Plants | Craft health potions | Blue flowers near water or in forests |
| Machine Cores | Crafting better ammo and upgrades | Looted from dead machines |
| Wire | Crafting shock ammo | Scavenged from machines, bought from merchants |
| Blaze | Crafting fire ammo | Found in machines weak to fire (Scorcher, etc.) |
| Chillwater | Crafting freeze ammo | Same as Blaze but from freeze-vulnerable machines |
| Sturdy Parts | Upgrading pouches (carry capacity) | Looted from adult machines |
---
Common Beginner Mistakes
1. Not using the Focus – Many new players forget to scan enemies. Always scan before engaging.
2. Trying to fight like a traditional shooter – Horizon rewards stealth and tactical planning. Rushing in gets you killed.
3. Ignoring health – Don’t wait until health is critical. Heal often. Use potions or eat medicinal plants.
4. Hoarding skill points – Spend them as soon as you have one. Concentration (Prowler tree) is the first must-have skill.
5. Selling all machine parts – Keep at least 5–10 of each common part until you understand upgrades.
6. Not upgrading pouches – Visit merchants with Animal Skins (rabbit, boar, etc.) to increase carry capacity for arrows, potions, etc.
7. Ignoring the map – Set custom waypoints and use the compass. The world is large; you can get lost.
8. Failing to dodge – Master the dodge roll (Square/Q). It gives invincibility frames. Use it against heavy attacks.
9. Sticking with the starting bow – Buy a Hunter Bow (better stats) and Tripcaster (trap) from the first merchant near Mother’s Heart.
10. Fast traveling too much – You miss random encounters, bandit camps, and resource nodes. Save fast travel for long distances.
---
Day-One Checklist
Complete these tasks in your first play session (2–4 hours):
- [ ] Complete the opening prologue and become adult Aloy.
- [ ] Learn to sprint, crouch, climb, and use Focus.
- [ ] Win the Proving.
- [ ] Retrieve your gear and escape the ruins.
- [ ] Activate the first Tallneck (after reaching Meridian or the Carja encampment).
- [ ] Craft 50+ arrows (wood + metal shards).
- [ ] Buy a Hunter Bow from the merchant.
- [ ] Invest first skill point in Concentration (Prowler).
- [ ] Unlock Lure Call (Prowler skill) to distract enemies.
- [ ] Complete 2–3 side quests (e.g., help the village with machines).
- [ ] Collect at least 20 medicinal plants.
- [ ] Upgrade your Quiver (arrow pouch) at a merchant (requires animal skins).
- [ ] Save the game at a campfire.
- [ ] Override a Strider or Broadhead to ride as a mount.
Follow this checklist and you’ll be well prepared for the challenges ahead. Remember: patience, stealth, and preparation are your greatest allies. Good luck, Nora.
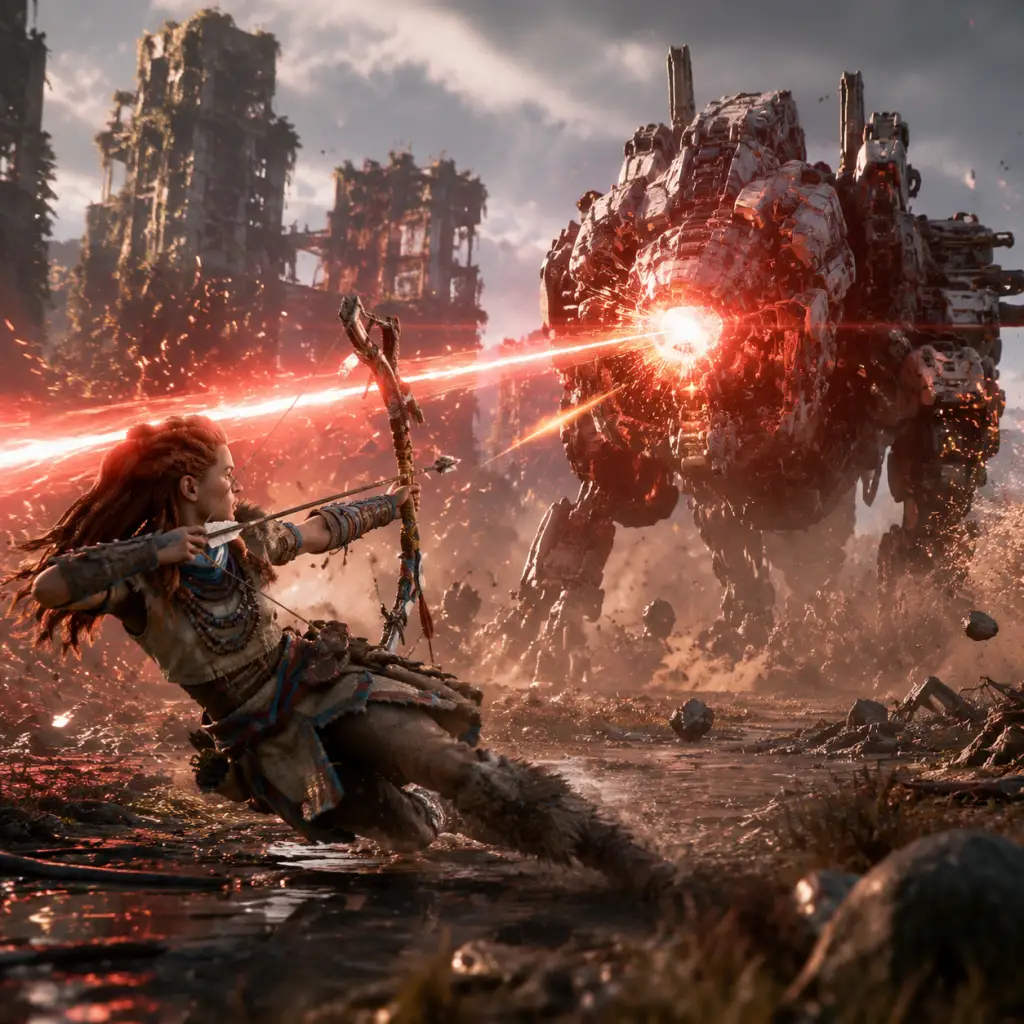
Core Gameplay
Core Gameplay Overview
Horizon Zero Dawn combines third-person action, stealth combat, and open-world exploration in a post-apocalyptic world overrun by robotic creatures. You play as Aloy, a hunter and machine specialist. The core gameplay loop is: Explore → Encounter Machines → Gather/Loot → Craft/Upgrade → Take on Quests → Progress Story & Skills. Each loop pushes you deeper into the world, unlocking new areas, weapons, and abilities. The game’s systems are tightly interwoven: your combat effectiveness depends on your weapon loadout, elemental ammo types, stealth tactics, and skill upgrades. Progression is tiered by story milestones and area difficulty, which this guide breaks down into four tiers.
---
Early Game (Levels 1–15 / The Embrace & First Nora Lands)
Main Gameplay Loop
- Explore the Sacred Lands (The Embrace, Mother’s Watch, Nora hunting grounds).
- Encounter small machines: Watchers, Striders, Grazers, Scrappers, Lancehorns.
- Gather resources: wood, metal shards, machine parts, medicinal plants.
- Craft basic arrows (Hunting, Fire, Hardpoint), health potions, traps.
- Complete main quests (e.g., “The Point of the Spear”, “The Proving”) and side quests from Nora settlements.
- Upgrade the Focus, unlock first skills (e.g., Silent Strike, Lure Call, Concentration).
- Stealth is critical early on. Use tall grass, whistle (Lure Call skill), and silent strikes (critical kill from behind).
- Melee: Aloy’s spear is weak against machines; use it mainly for stealth kills vs. humans.
- Ranged: Warrior Bow and Hunter Bow. Focus on weak points: fire canisters, blaze canisters, antennae. Tearblast arrows (unlock later) are not available yet; use Hardpoint arrows for damage.
- Elemental: Fire arrows cause burning over time (effective against Grazers). Electric arrows stun (stops a machine for critical hits).
- Tripcaster: Wire traps for corridors. Useful for ambushing patrol routes (e.g., near Blaze canisters).
- Reminder: Always override Tallnecks early (there’s one near Mother’s Watch) to map the area.
- Leveling: Completing quests and killing machines grants XP. Each level gives skill points and small health/stamina boosts.
- Skill Trees: Three trees:
- Weapons: Purchase Hunter Bow (Merchant in Mother’s Heart), Tripcaster, and a Carja Sharpshot Bow as soon as possible. Complete the “Hearts of the Nora” quest to get the War Bow (for frost/electric arrows).
- Outfits: Buy a Carja Blazon (fire resistance) for early machine fights; upgrade with weaves.
- Tallnecks: Override to reveal map zones. The first is in the Embrace (southwest of Mother’s Watch).
- Collectibles: Banuk Figurines, Metal Flowers, Vantage Points. They give lore and reward boxes later.
- Side Quests (e.g., “The Pilgrim’s Descent”, “The Sun and the Moon”) provide XP and shards.
- Cauldrons: First Cauldron (Sigma) introduces overriding machines—requires spear upgrade. Do it before mid-game to override Striders/Watchers for mounts.
- Metal Shards: Main currency. Farm by looting dead machines, selling unneeded mods.
- Machine Parts: Tearblast arrows can remove components without destroying them (e.g., Blaze hearts). Cook meat for health.
- Merchants: Buy weapons, ammo boxes, potions. Early tip: buy the “Blast Sling” after reaching Daytower (mid-game transition).
- Recommended early skills: Silent Strike → Lure Call → Easy Loot → Concentration → Call Mount (after first Cauldron).
- Weapon loadout: Hunter Bow (fire/hardpoint), Sharpshot Bow (precision arrows), Tripcaster (blaze wires).
- Outfit: Nora Silent Hunter for stealth, or Brave for defense.
- Mods: Use +damage mods on bows, +fire on War Bow, +handling on Sharpshot. Sell low-tier mods.
- Open up the Sundom (Daytrow, Meridian, Jewel).
- Encounter medium machines: Behemoths, Shell-Walkers, Ravagers, Longlegs, Stormbirds (rare).
- Acquire the Shadow weapons (purple rarity) from Meridian merchants.
- Begin main quest line “The Heart of the Nora”, “The City of the Sun”, “Maker’s End”.
- Unlock new overrides: Striders, Watchers, Broadheads, Chargers, and eventually Sawtooths.
- Hunting Grounds challenges: Sun-Steps, Greatrun, Nora hunting grounds give practice and rewards.
- Elemental combos: Freeze a machine (with War Bow frost arrows) then unleash hardpoint arrows for triple damage (freeze status). Same with shock to stun then critical hit.
- Tearblasting: Use Tearblast arrows (from Sharpshot bow with special ammo) to strip off armor plates, cannons, or weapon components. Example: tear off a Ravager’s cannon and use it against other machines.
- Rope Caster: Essential for big machines (Stormbirds, Thunderjaws). Tie them down to freeze or shoot weak points safely.
- Tripcaster upgrades: Use electric wires (shock) to immobilize. Blaze wires for area denial.
- Override machines (requires Corruptor hearts or more skill points): Control a machine to fight for you briefly. Useful for distracting a herd.
- Human combat: Stealth kill or use precision arrows; avoid open fights with multiple enemies.
- Level cap increases; you will have ~25 skill points by level 30. Focus on filling one tree to unlock the final skill (e.g., Prowler > Double Shot / Triple Shot, Brave > Shield-Weaver armor unlock?).
- Weapons: Buy Shadow Hunter Bow (handling/damage), Shadow War Bow (3 elemental ammo slots), Shadow Sharpshot Bow (tearblast + precision). Shadow Ropecaster (fast draw).
- Outfits: Shield-Weaver armor is found at the “Ancient Armory” quest (requires energy cells). This is a game-changer for survivability. Alternatively, Carja Silks for stealth or Nora Protector for defense.
- Skill priorities: Triple Shot (Brave tree), Double Shot (Brave), Tinker (Forager – allows removing mods without destroying them), and an upgrade to Call Mount for faster travel.
- Tallnecks: Three in the Sundom; override to reveal full map.
- Cauldrons: Rho and Xi give overrides for bigger machines (Sawtooths, Thunderjaws? No, Thunderjaw override comes from Cauldron Zeta late game). Also unlock ability to override flying machines? (No, only ground).
- Vantage Points and Metal Flowers: Collect to complete sets for Merchant rewards (e.g., “The Frozen Wilds” DLC items if you have it).
- Hidden Caches: Loot for shards and mods. Use Focus to scan for them.
- Side Quests: Many in Meridian, including corruptor quests (e.g., “The Terror of the Sun”), errands (collect X parts).
- Hunter’s Lodge: After defeating the Redmaw (one of the main quests), unlock lodge weapons (Striker Bow, Blast Sling). These are high-tier.
- Shards become plentiful: sell unwanted mods (green/blue) to merchants, sell extra machine parts (e.g., lenses, hearts except for upgrades).
- Buy ammo boxes because they auto-craft when you rest at campfires – convenient.
- Mods: Purple mods (Shadow rarity) drop from tougher machines (Behemoths, Ravens, Corruptors). Save them for final weapons.
- Skill tree: Max out Prowler for stealth bonuses, get Triple Shot from Brave, and get Tinker from Forager.
- Weapons:
- Outfit: Shield-Weaver armor (best overall) or Carja Silks (vs. fire).
- Consumables: Always carry health potions, resist potions (fire, freeze, shock), and Blaze canisters for traps.
- Main quest ramps up: “The Grave-Hoard”, “Deep Secrets of the Earth”, “The Mountain that Fell”.
- Explore The Frozen Wilds DLC (if playing Complete Edition) after reaching Meridian; enemies are tougher (Scorchers, Daemonic machines, Fireclaws).
- Acquire the strongest weapons: Banuk weapons (e.g., Banuk Striker Bow, Banuk Powershot Bow) have superior stats when fully charged.
- Complete all Hunting Grounds (including Frozen Wilds) for gold medals to get special mod boxes.
- Farm high-level machines for purple mods: Thunderjaws, Rockbreakers, Stormbirds.
- Override all Cauldrons (Zeta, other DLC cauldrons) to control Thunderjaws and other apex machines.
- Use multiple rope casters: Tie down a Thunderjaw, blow off its disc launchers, then freeze and triple-shot the heart.
- Corruptor / Deathbringer fights: Focus on glowing weak points (heatsinks), use fire arrows to expose them, then heavy damage. Use shield-weaver to absorb hits.
- Human enemies (Shadow Carja): Use stealth or precision arrows from distance; they have shields but are vulnerable to shock wires.
- Machine overrides: In chaotic fights, override a Ravager and let it attack others. Works best with machines that have powerful ranged attacks (e.g., Stormbird).
- Elemental synergies: Apply freeze + then use ice bombs (from Shadow Blast Sling) for shatter damage. Or shock + then critical hit.
- Banuk weapons have a charge mechanic: hold L2 to draw, then release for higher damage. Practice timing.
- Level 50 cap: After ~40-50 hours of content. Skill points fill all trees; final skills like Shield-Weaver are already unlocked. Max out health (500 HP).
- Weapons:
- Outfits: Shield-Weaver for general use; Carja Blazon for fire resistance fights; Carja Silks for underwater areas.
- Mods: Use all purple mods from Thunderjaws (e.g., +25% damage, +30% handling). Stack damage on Hunter Bow, handling on Ropecaster.
- Skill focus: By this point you have all skills; optimize for combat: Double/Triple Shot, Fast Reload, Tinker, and the stealth capstone (Shadow Strike+).
- Frozen Wilds: New area north of the map. High-level machines and new quests. Banuk merchants sell exclusive weapons and outfits (e.g., Banuk Ice Hunter outfit).
- Cauldron Zeta: Located in the southwest; after completion, you can override Thunderjaws and Rockbreakers (game-changers).
- Ancient Ruins: Leftovers of human civilization; loot mods and lore.
- Hunting Grounds (Frozen Wilds): Snowchants – gold medal gives a unique mod (e.g., +damage +handling triple stack).
- Shards are abundant: Sell green/blue mods, loot boxes from quests.
- Best farm spot: The area near a site with two Thunderjaws (e.g., near the Eternal Wash in the Cut). Use Tearblast arrows to remove disc launchers, then freeze and kill. Loot each for 4-5 purple mods.
- Merchants: Banuk traders accept Bluegleam (Frozen Wilds currency) for unique items. Bluegleam can be found in quests, treasure chests, and from Scratchers.
- Weapon loadout: Banuk Striker Bow (damage), Banuk Powershot (handling), Ropecaster (handling), Blast Sling (freeze/fire).
- Outfit: Shield-Weaver with maybe a +stealth weave for humans.
- Potions: Always have three health potions, two resist potions of each type.
- Traps: Use blast wire (triple stacked) for ambushing herds.
- Complete the final main quest “The Looming Shadow” and the epilogue. The world remains open for free play.
- New Game+: Unlocks after finishing the main story. Reset with all skills, weapons, outfits, and mods but increased enemy difficulty (Very Hard or Ultra Hard).
- Ultra Hard mode: Available in New Game+. Machines are more aggressive, health increased, and prices quadruple. Not recommended for first playthrough.
- Hunting Grounds gold medals (already done? can redo for fun).
- Cauldron overrides: Already obtained; make an army of overridden machines for photo mode.
- Lore: Collect all data points (audio, text) for 100% completion.
- Achievements/Trophies: Many require specific feats (e.g., kill a Grazer with a sled, override all machines, etc.).
- Same as late game, but enemies in New Game+ Ultra Hard require perfect tactics: always freeze then triple shot, use ropes, tear off weapons first. One hit from a Thunderjaw face cannon can kill you without shield-weaver.
- Frozen Wilds DLC endgame content: Fireclaws and Frostclaws (boss-level machines). Use Banuk weapons, dodge rolling frequently, and exploit their weak spots (blaze sacs on Fireclaw, freeze sacs on Frostclaw).
- No further level cap: Level 50 is max. Skills are all unlocked.
- Weapons: Already maxed; only improvements come from god-roll mods (e.g., +25% damage + 30% handling on same mod). Farming for perfect mods is endgame activity.
- Outfits: Shield-Weaver remains best; Banuk Ice Hunter (cold resistance) for Frozen Wilds.
- Mods: Supreme mods (purple with triple stats) rarely drop from corrupted or daemonic machines (Frozen Wilds). Farm Daemonic Thunderjaws or Fireclaws for best chance.
- 100% completion: Scan all Tallnecks, find all Vantages, Metal Flowers, Banuk Figurines, and all machine overrides. Use map filters for collectibles.
- The Frozen Wilds has additional side quests (“Waterlogged”, “The Forbidden Wilds”) that reward Bluegleam and final mods.
- Photo Mode: Unlock all locations for screenshots.
- Shards: By this point, you have hundreds of thousands. Main expense: ammo crafting in Ultra Hard (costs more). Turn to selling extra parts.
- Box farming: Complete Hunting Grounds gold medals repeatedly to get boxes with random mods. Or farm Thunderjaws for components to sell.
- Skill loadout: All skills unlocked. Optimize weapon wheel for different scenarios (e.g., fire bow vs freeze bow).
- Perfect mod setup: For example, a Hunter Bow with three 35% damage mods = +105% damage. A Ropecaster with three 35% handling mods = +105% draw speed.
- Consumables: Unlimited thanks to abundant resources.
- New Game+: Use the same build; no new abilities. Ultra Hard demands you use the Focus heavily to avoid detection.
- Thunderjaw farming for mods
- Hunting Grounds gold medals for bragging rights (e.g., completing all with under 1 second left)
- Cauldron overrides to ride a Thunderjaw into battle (fun but not critical)
- New Game+ Ultra Hard for the ultimate test of skill and resource management
Combat & Interaction Systems
Progression
- Prowler (stealth, trapping): Prioritize Silent Strike, Lure Call, Easy Loot (harvest components without destroying them).
- Brave (combat, ranged): Concentrate (bullet time), Precision (zoom for sharpshot bow), Critical Hit (multi-hit from stealth).
- Forager (resources, gathering): Scavenger (more loot), Tinker (mod cooldowns), Merchant discounts.
Exploration
Economy
Character/Build Growth – Early Focus
---
Mid Game (Levels 16–30 / The Sundom, Carja Territory, Makers’ End)
Main Gameplay Loop
Combat & Interaction Systems – Expanded Tactics
Progression
Exploration
Economy
Character/Build Growth – Mid Game Loadout
- Shadow Hunter Bow (damage mods)
- Shadow War Bow (freeze/shock mods)
- Shadow Sharpshot Bow (tearblast + handling mods)
- Shadow Ropecaster (handling mods)
---
Late Game (Levels 31–50 / The Frozen Wilds, Grave-Hoard, Gaia Prime)
Main Gameplay Loop
Combat & Interaction Systems – Advanced Tactics
Progression
- Banuk Striker Bow (best damage, charge mechanic)
- Banuk Powershot Bow (highest precision damage)
- Shadow Ropecaster (already good)
- Sharpshot Bow (keep for tearblast)
- Lodge Blast Sling (fire bombs, freeze bombs – excellent AoE)
Exploration
Economy
Character/Build Growth – Late Game Perfected
---
Endgame (Post-Story & New Game+)
Main Gameplay Loop
Combat & Interaction Systems – No New Mechanics
Progression
Exploration
Economy
Character/Build Growth – Endgame Min-Maxing
---
Endgame Structure & The Final Verdict
The endgame is primarily about mastery, collectible completion, and challenge runs. The story is finite, but the open world remains alive. Key activities:
There is no typical endgame raid or dungeoning; rather, you set your own goals. For players wanting more, Horizon Zero Dawn: The Frozen Wilds adds a complete side story with new machines and upgrades that fit seamlessly into the late-game and endgame tiers.
---
Summary Table
| Tier | Levels | Key Areas | Key Weapons | Core Mechanic Focus |
|---|---|---|---|---|
| Early Game | 1–15 | The Embrace, Nora lands | Hunter Bow, Tripcaster | Stealth, basic crafting |
| Mid Game | 16–30 | Sundom, Meridian | Shadow bows, Ropecaster | Elemental combos, freezing |
| Late Game | 31–50 | Frozen Wilds (if DLC) | Banuk weapons, Shield-Weaver | Rope+freeze+triple shot |
| Endgame | 50 (max) | All areas | Optimal purple mods | Perfect mod hunting, Ultra Hard |
Final Note: Horizon Zero Dawn rewards careful planning, environmental awareness, and tactical use of its deep combat systems. The progression tiers above guide you from a vulnerable outcast to a machine-slaying legend. Master the loop, and the world is yours.
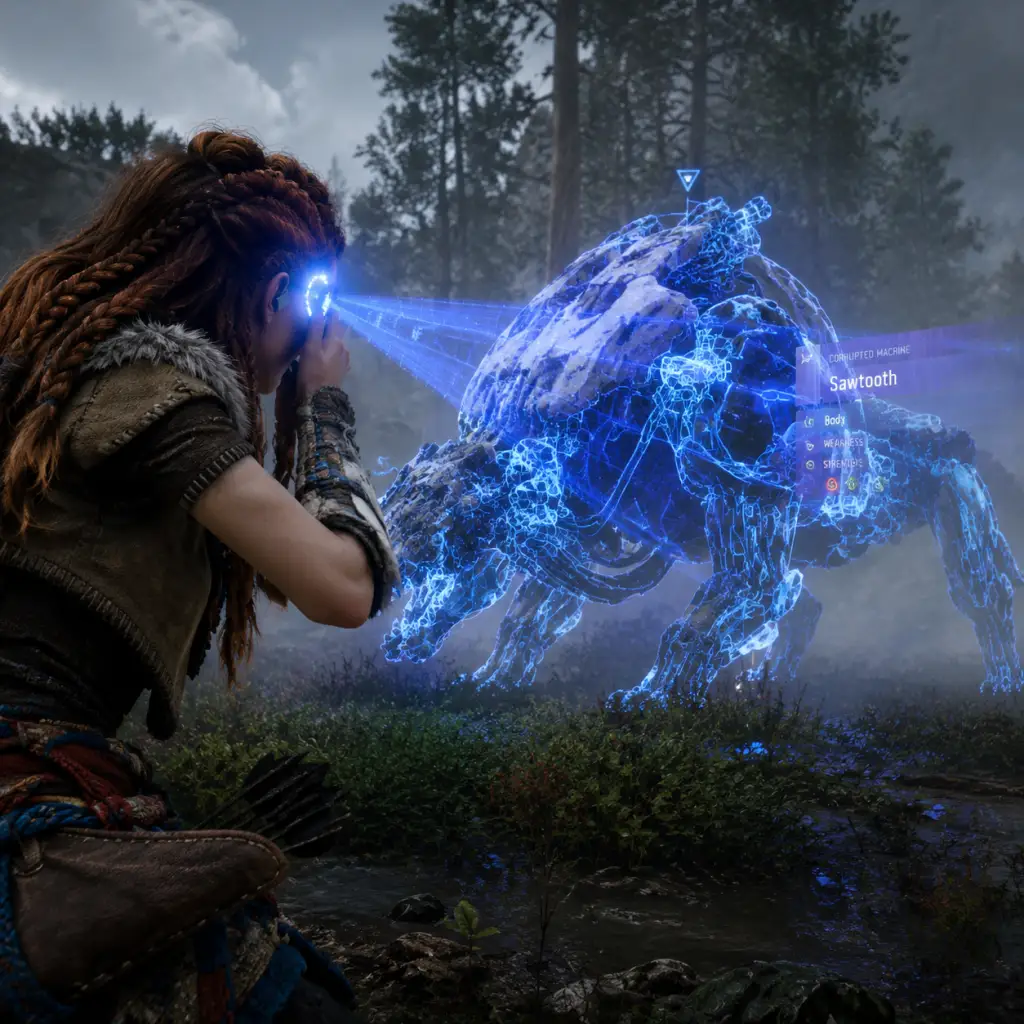
Game Tips
Game Tips: Horizon Zero Dawn
This guide covers essential tips for mastering Horizon Zero Dawn, from beginner survival to advanced machine hunting. Tips are grouped by category for quick reference.
Combat Tips
#### 1. Use the Focus to Scan Machines
- Tip: Always use R3 (Focus) before engaging any machine. Highlight components, weaknesses, and enemy level.
- Why it works: Shows elemental weaknesses (fire, freeze, shock), tearable parts, and armor. Attaching ropes or removing components becomes easier.
- When to use: Before every fight, especially against new machines or in crowded areas.
- Tip: Target a machine's canisters (fire, freeze, shock), eyes, or exposed power cells for massive damage.
- Why it works: Each machine has specific weak spots that cause extra damage or explosive reactions. For example, shooting a Blaze canister ignites the machine and deals area damage.
- When to use: When you need to quickly disable a threat or conserve resources. Best used with precision arrows.
- Tip: Use Tearblast arrows (from Tearblaster? Actually Tearblast ammo) to remove armor plates, weapons, or heavy components from machines.
- Why it works: Tear damage strips parts instantly, exposing weak points or disabling special attacks (like a Thunderjaw's disc launcher).
- When to use: At the start of a fight against armored machines (Sawtooth, Ravager, Thunderjaw) to leave them vulnerable.
- Tip: Use the Ropecaster to tie down large machines, then attack weak points or place traps.
- Why it works: Ropecaster fires ropes that immobilize machines for a few seconds. Allows safe removal of components or setting up critical hits.
- When to use: When facing multiple aggressive machines (e.g., two Bellowbacks) or a single high-level target like a Behemoth.
- Tip: Time your dodge rolls to evade machine charges and area attacks. Don't spam dodge; wait for the attack animation.
- Why it works: Most attacks have a telegraph (wind-up). Rolling later avoids the hitbox and conserves stamina for counterattacks.
- When to use: Against Watcher leaps, Ravager bursts, and Thunderjaw charges. Practice timing in the early game.
- Tip: Hold L2 to enter Concentration mode (slows time) while aiming. Upgrade this skill early.
- Why it works: Gives you a critical window to aim at moving weak points. Essential for headshots on humans or canisters on machines.
- When to use: During combat when you need a precise shot, especially against human enemies or while sliding/jumping.
- Tip: Most yellow handholds are climbable. Look for yellow ropes, poles, and ledges.
- Why it works: Verticality offers vantage points, hidden loot, and safe paths to avoid ground patrols.
- When to use: When exploring ruins, crossing canyons, or evading machines.
- Tip: Tallnecks reveal the entire map. Prioritize overriding them to uncover Cauldrons, collectibles, and side quests.
- Why it works: Clear map reduces confusion and shows areas of interest. Each Tallneck has a puzzle to solve.
- When to use: As soon as you leave the Embrace. Start with the first one near Nora territory.
- Tip: While exploring, scan with Focus to tag machines, paths, and resources. Marked enemies show through walls.
- Why it works: Planning routes avoids ambushes. Tagged loot glows through obstacles.
- When to use: Before entering a new area, especially near machine sites or bandit camps.
- Tip: Fast Travel requires Fast Travel Packs (crafted from Ridge-Wood) or use the Golden Fast Travel Pack (unlocked later).
- Why it works: Saves time but costs resources. Plan journeys or hunt for merchants to buy the unlimited Golden pack.
- When to use: Only when crossing long distances after unlocking multiple campfires. Conserve packs early.
- Tip: Aloy can swim indefinitely. Look for sunken ruins or caverns; some contain ancient tech or Datapoints.
- Why it works: Hidden areas hold skill points and lore. Watch for underwater currents that block paths.
- When to use: After obtaining the diving mask (lore-wise no diving gear required actually; just swim mod from Banuk? Actually you get a modification that lets you breathe longer underwater. It's a skill. Unlock the "Deep Diver" skill in the Traveler tree.)
- Tip: After defeating a machine, loot its corpse for crafting materials (wire, metal shards, machine-specific parts like Blaze, Chillwater, etc.).
- Why it works: Resources are essential for ammo crafting and selling. Mechanical parts like Large Machine Cores are needed for quests or weapons.
- When to use: Every kill. Loot before the body despawns (they vanish after a while).
- Tip: Ridge-Wood is the primary resource for all regular arrows. Harvest it from trees and bushes.
- Why it works: You can never have enough Ridge-Wood. It's light and used in hunting arrows, precision arrows, and more.
- When to use: Always pick it up when you see it. Restock at merchants if low.
- Tip: Use the D-pad to craft ammo quickly. You don't need to exit the weapon wheel.
- Why it works: Saves time and keeps you in combat. You can craft arrows while dodging if resource menu is open.
- When to use: When ammo runs low during a fight, especially for tearblast or elemental arrows.
- Tip: Some machine parts are only needed for specific upgrades or quests. Sell excess to earn shards fast.
- Why it works: Heavy components like "Luminous Braiding" or "Metal Vessel" can be sold for high prices early on. Check with merchants for what you need.
- When to use: After looting many machines, visit a merchant and compare sell prices. Only keep parts for upgrades or buy back later if necessary.
- Tip: Medicinal plants (green jerky? Actually there are health potions and herbs) are plentiful. Hold Square to heal without using potions.
- Why it works: Herbs are free and instant. They restore a small amount of health. Combine with skills to increase capacity.
- When to use: Between fights or when low on potions. Always keep your herb slots filled (you can carry up to 25? Max is 35 with upgrades).
- Tip: Unlock Silent Strike, Lure Call, and Quiet Sprint early.
- Why it works: Stealth makes early game much easier. Silent Strike kills small machines instantly. Lure Call brings enemies into melee range.
- When to use: As soon as you have skill points. This build allows you to clear bandit camps and stealth sections effortlessly.
- Tip: Max out the Hunter tree for Improved Concentration and Concentration+ skills.
- Why it works: Extended slow-motion aiming makes hitting weak points trivial. Essential for high difficulty.
- When to use: After building a solid stealth foundation. Combine with good bows for devastating damage.
- Tip: Unlock Double Shot and Triple Shot skills (Brave tree).
- Why it works: Fires multiple arrows at once, multiplying damage and tear. Use with Tearblast or elemental arrows for massive effect.
- When to use: Against large machines (Thunderjaw, Stormbird) to quickly remove components or apply statuses.
- Tip: Unlock "Scavenger" and "Resourceful" skills to increase loot from machines and reduce crafting costs.
- Why it works: More resources mean less farming. Reduces frustration in harder difficulties.
- When to use: Mid-game when you start upgrading all weapons and need efficient resource flow.
- Tip: Carry at least one hunter bow (damage), one war bow (elemental), and one sharpshot bow (precision or tear). Specialize one weapon with damage mods, another with handling.
- Why it works: Provides flexibility against different machine weaknesses. Handling mods increase draw speed while damage mods boost output.
- When to use: After acquiring multiple weapons (around level 15-20). Experiment with modifications to suit combat style.
- Tip: Fox, Boar, and Goose skins are rare and sell for good shards. Sell them early.
- Why it works: Early game shard shortage. These skins are not used in many crafts until later.
- When to use: When you need quick shards for a new weapon or outfit. Don't sell if you plan to upgrade pouches.
- Tip: Once available, purchase the unlimited Fast Travel Pack from any merchant (costs around 200 shards and 10 Ridge-Wood? Actually it's one time and costs 50 metal shards and a few parts).
- Why it works: Infinite fast travel saves time and resources. No need to craft packs repeatedly.
- When to use: As soon as you have the shards early-mid game.
- Tip: Upgrade your primary weapons (bow, sling) before buying new ones. A purple-tier weapon with mods outclasses a poorly modded blue.
- Why it works: Weapon damage increases significantly with levels and mods. Upgrading mod slots cheaply improves power.
- When to use: After acquiring the Shadow Hunter Bow (purple) and Carja Blazon outfit. Focus on fully modding them.
- Tip: Each merchant specializes (e.g., weapons, armor, resources). Prices vary, but some offer unique loot.
- Why it works: Some rare mods and materials are only sold at certain locations (e.g. the Banuk Merchant in the Frozen Wilds DLC area has unique weapons).
- When to use: Visit every settlement and check stock. Buy special modifications like handling or damage coils.
- Tip: Items like "Metal Vessel" or "Luminous Braiding" are only used in one quest each. After completing those quests, sell them.
- Why it works: Free up inventory space and gain shards. Use the "hunt" guide to know what to keep.
- When to use: After finishing the associated quest or if you're sure you don't need them for upgrades.
- Tip: Always crouch in tall grass to become invisible to machines and humans. Sound is reduced.
- Why it works: Most enemies cannot detect you while you're in grass unless they are alerted. Allows picking off enemies one by one.
- When to use: When approaching bandit camps or machine herds. Re-enter grass after every kill.
- Tip: Use stones (R1) or the Lure Call skill to attract a single enemy away from its group.
- Why it works: Breaks patrols and allows silent strikes without alarm.
- When to use: Against clustered machines or bandits. Prioritize Watchers first as they alert others.
- Tip: Some machines can be overridden (after Cauldron unlocks) to become mounts or allies. A tamed Strider can distract enemies or help in fights.
- Why it works: Overridden machines attack other machines, causing chaos and thinning the herd.
- When to use: Have a mount ready when entering a hostile area. Override a machine before combat to turn the tide.
- Tip: Craft smoke bombs (from Wire and ?) to blind enemies and slip away if detected.
- Why it works: Breaks enemy line of sight and allows repositioning. Essential for escape or resetting the fight.
- When to use: When overwhelmed or trying to assassinate a priority target.
- Tip: Each machine has elemental weaknesses. For example, Fire destroys Glinthawks, Freeze immobilizes Stormbirds, Shock stuns Snapmaws.
- Why it works: Using the correct element triggers a chain reaction (e.g., freezing a machine doubles physical damage).
- When to use: Prepare ammunition based on the machine type. Use Focus to see weaknesses.
- Tip: Use Tearblast arrows to rip off a Thunderjaw's Disc Launcher or a Ravager's cannon, then pick up and use the weapon against them.
- Why it works: These weapons deal massive damage and use the machine's own ammo. Clever resource efficiency.
- When to use: At the start of a fight with these machines. Be careful not to destroy the weapon when tearing it off.
- Tip: Use the Ropecaster on Glinthawks or Stormbirds to bring them to the ground for effective melee or precision shots.
- Why it works: Flying machines are evasive and hard to hit. Roping them eliminates their mobility advantage.
- When to use: As soon as they take flight. Fire ropes quickly before they dodge.
- Tip: Place trap wires (Tripcaster) or radial mines along known patrol paths. Use elemental or blast wires for maximum damage.
- Why it works: Prevents ambushes and damages multiple enemies. Allows safe damage before engaging.
- When to use: Before luring a machine herd into a bottleneck or when setting up a defense.
- Tip: Cauldrons unlock the ability to override new machine types. Each has a puzzle and boss fight.
- Why it works: Overriding opens mounts (Broadhead, Charger, Strider) and control over powerful machines during combat.
- When to use: After reaching the corresponding area. Start with Cauldron RHO (near Daytower).
- Tip: Clearing bandit camps yields large skill point rewards and removes some roadblocks.
- Why it works: Skill points are scarce early. Each camp gives a number of points and loot.
- When to use: Early-mid game after gathering some stealth skills. Use silent strikes and lures.
- Tip: These collectibles provide lore and unlock special rewards (like the Carja outfit or Banuk items).
- Why it works: Some rewards are exclusive; also provides XP and shards. Use guides to locate them.
- When to use: Any time while exploring. Mark them on the map.
- Tip: Complete Hunting Ground trials to earn sun medals which can be traded for special weapons and mods.
- Why it works: Some of the best weapons (like the Striker Bow or Lodge War Bow) require medals.
- When to use: After unlocking mounts and better gear. Practice trials for gold ranking.
- Tip: While sprinting, press crouch to slide, then immediately aim with Concentration to get bonus damage and slow-mo.
- Why it works: This combo triggers the "Slide" damage bonus (increases damage by 50% for that shot).
- When to use: To finish off a machine or hit a critical weak point during evasion.
- Tip: After hitting a frozen or shocked machine, follow up with a heavy melee (R2) to trigger a critical hit.
- Why it works: Frozen machines take 2x physical damage, and melee critical hits deal high damage with the spear.
- When to use: After applying freeze (war bow) or when a machine is stunned.
- Tip: Use three identical mods on one weapon (e.g., three 15% damage mods) for maximum effect. Use the same for handling or tear.
- Why it works: Mod percentages stack additively, so focusing one stat yields better results than mixing.
- When to use: When you have high-tier mods (blue or purple). Test different combos on test dummies.
- Tip: After overriding a Tallneck, it will walk a circuit. Ride its head for a safe tour and to mark surrounding datapoints.
- Why it works: Tallnecks ignore you while riding them. You can scan for nearby collectibles without getting attacked.
- When to use: After each Tallneck override.
- Tip: Cooked meats (from animals or merchants) provide temporary buffs like increased health or stamina regeneration. Drink potions before tough fights.
- Why it works: Buffs stack with skills and outfit weaves. For example, resist potions help against elemental damage.
- When to use: Before entering Cauldrons, fighting Deathbringers, or exploring Frozen Wilds.
- Tip: Each machine has a limited set of attacks. Memorize telegraphs (e.g., Thunderjaw rears up before stomp).
- Why it works: Perfect dodging opens windows for counterattacks. Reduces resource waste from unnecessary healing.
- When to use: Practice against low-level machines first. Watch and learn before engaging higher tiers.
#### 2. Aim for Weak Points
#### 3. Tearblast Arrows Are Your Best Friend
#### 4. Ropecaster for Crowd Control
#### 5. Dodge Roll Timing
#### 6. Use Slowing (Concentration) Effectively
Exploration Tips
#### 1. Climb Everything (But Smartly)
#### 2. Unlock Tallnecks Early
#### 3. Use Your Focus to Mark Enemies and Loot
#### 4. Fast Travel is Limited Early
#### 5. Underwater Exploration
Resources & Crafting Tips
#### 1. Always Loot Machines Completely
#### 2. Farm Ridge-Wood for Arrows
#### 3. Craft Ammo Mid-Battle
#### 4. Sell Extra Machine Parts
#### 5. Forage Herbs for Health
Builds & Progression Tips
#### 1. Prioritize Stealth Skills First
#### 2. Hunter Skills - Concentration Boost
#### 3. Brave Skills - Double and Triple Shot
#### 4. Forager Skills for Resource Management
#### 5. Choose Weapon Loadout Based on Playstyle
Economy & Trading Tips
#### 1. Hunt Animals for Their Skins
#### 2. Buy the Golden Fast Travel Pack
#### 3. Invest in Better Weapons and Outfits First
#### 4. Trade with Merchants in Settlements
#### 5. Don't Hoard - Sell Low-Value Items
Stealth Tips
#### 1. Use Tall Grass and Crouching
#### 2. Lure Call to Isolate Targets
#### 3. Override as a Stealth Tool
#### 4. Use Smoke Bombs to Escape
Machine Hunting Tips
#### 1. Know Machine Weaknesses
#### 2. Detachable Weapons (Thunderjaw Disc Launcher & Ravager Cannon)
#### 3. Rope Down Flying Machines
#### 4. Use Traps and Tripcasters
Side Content & Quests Tips
#### 1. Complete Cauldrons ASAP
#### 2. Do Bandit Camps for Skill Points
#### 3. Collect All Vantage Points and Metal Flowers
#### 4. Hunting Grounds for Weapon Upgrades
Advanced Optimization Tips
#### 1. Slide Shot - Advanced Combat Technique
#### 2. Use Melee Follow-Up with R1
#### 3. Mod Stacking and Min-Maxing
#### 4. Override a Tallneck for Best View
#### 5. Use Food and Potions Wisely
#### 6. Learn Enemy Attack Patterns
Conclusion
Mastering Horizon Zero Dawn requires patience, observation, and resource management. Combine stealth with elemental planning to overcome any machine. Spend skill points strategically, upgrade gear consistently, and explore every corner of the world. The tips above will help you survive the wilds and reveal the secrets of the Old Ones.
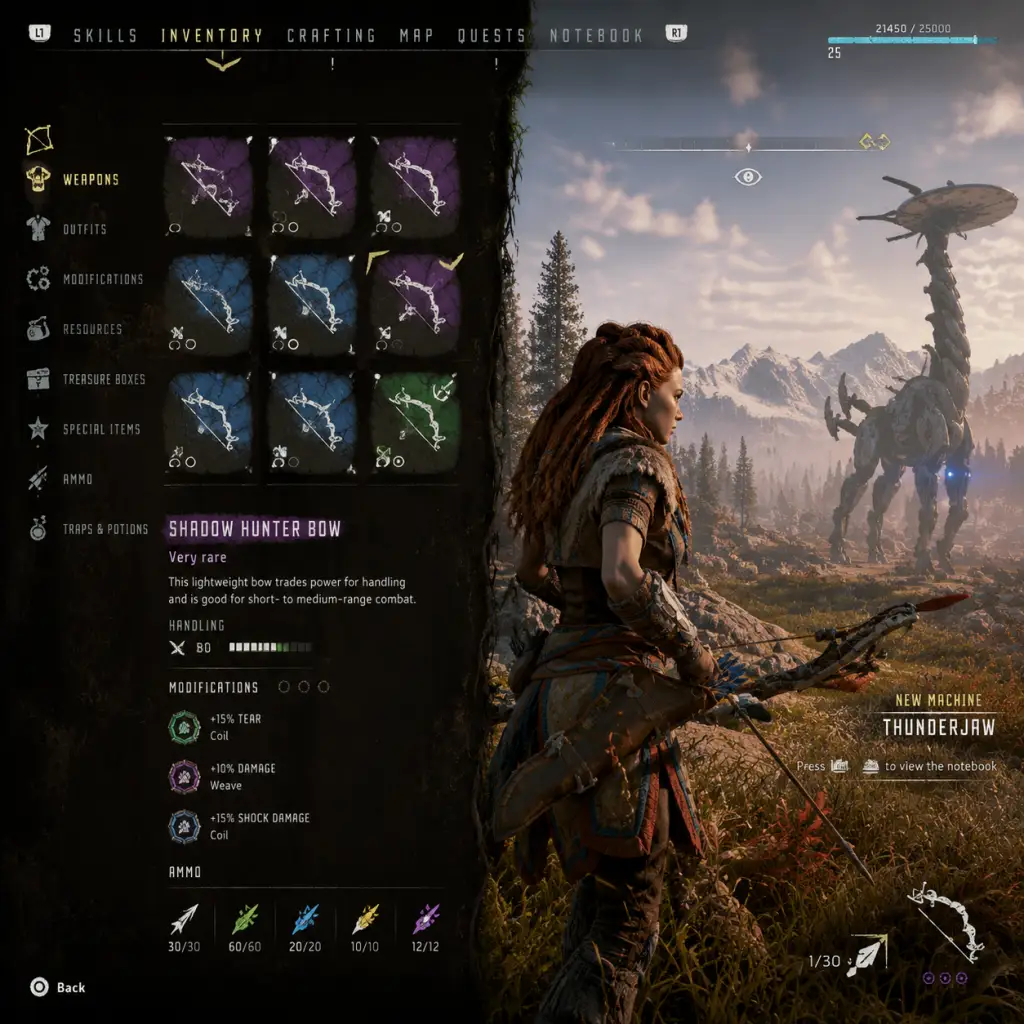
Game Settings
Game Settings: Horizon Zero Dawn
This guide covers all in-game settings for Horizon Zero Dawn on PC (Steam, Epic Games Store), PlayStation 4, and PlayStation 5. It provides detailed explanations, optimal configurations for different hardware tiers, and highlights settings that are easy to misconfigure or require special attention.
1. Graphics Settings
The graphics menu is the deepest and most impactful for performance and visual quality. Below is a breakdown of each setting, followed by recommended presets.
#### Key Graphics Settings (PC)
| Setting | Options | Performance Impact | Notes |
|---|---|---|---|
| Display Mode | Fullscreen, Borderless Windowed, Windowed | Low | Use Fullscreen for best performance. Borderless Windowed may introduce input lag. Windowed reduces performance. |
| Resolution | Native, lower options | High | Run at your monitor's native resolution (e.g., 1920×1080, 2560×1440). Lowering gives significant FPS boost but reduces clarity. |
| Field of View (FOV) | 60-100 (default 70) | Low | Wider FOV helps situational awareness but can slightly reduce performance. Set between 80-90 for comfortable gameplay. Beyond 90 may cause fisheye effect. |
| Adaptive Performance FPS | Off, 30, 45, 60 | Medium | Locks FPS to a target to maintain consistency. Recommended: Off if you have a variable refresh rate monitor; otherwise set to match your display's refresh rate. |
| Brightness | 0-100 | None | Calibrate using the in-game test image. Default 50 is usually fine. |
| Graphics Quality Preset | Very Low, Low, Medium, High, Very High, Ultra | High | Start here, then fine-tune individual settings. Ultra is for top-end hardware (RTX 3080+). |
| Texture Quality | Low, Medium, High, Very High | Medium (VRAM) | Important for visual detail. High and Very High require 4-6 GB VRAM. If you run out, textures will blur. |
| Model Quality | Low, Medium, High, Very High | Low | Affects polygon detail on characters and machines. High/Ultra for close-ups. |
| Shadows | Off, Low, Medium, High, Very High, Ultra | High | Major FPS hit at high settings. Medium to High balances quality and performance. Off looks terrible. |
| Reflections | Off, Low, Medium, High, Very High, Ultra | High | Screen-space reflections. Very performance-intensive on water/metal. Medium is recommended for most systems. |
| Clouds | Low, Medium, High, Ultra | Medium | Dynamic volumetric clouds. High/Ultra look beautiful but cost FPS. Medium is a good compromise. |
| Ambient Occlusion | Off, SSAO, HBAO, High Quality HBAO | Medium | Adds depth to shadows. High Quality HBAO is best but heavier. SSAO is fine on lower systems. |
| Anti-Aliasing | Off, FXAA, SMAA, TAA, TAA+SMAA | Low | TAA is best for image stability. Off causes jagged edges. TAA+SMAA is slightly sharper but costs FPS. |
| Motion Blur | Off, Per Object, Full | Low | Blurs movement. Many players disable this because it can cause nausea or make fast turns confusing. Get used to off for clarity. |
| Depth of Field | Off, On | Low | Blurs distant objects. Can hide distant detail and cause headaches. Recommended: Off. |
| Bloom | Off, On | Low | Adds light glow. Personal preference; on for atmosphere, off for clarity. |
| Lens Flares | Off, On | Low | Similar to bloom. Can be distracting in bright scenes. |
| HDR Calibration (if supported) | Brightness, White Point, Black Point | None | Required only on HDR displays. Use in-game hints to set correctly. Wrong calibration washes out colors. |
| Hardware Level | Resolution Target | Preset | Key Adjustments for 60 FPS |
|---|---|---|---|
| Budget (GTX 1050, RX 560, 8GB RAM) | 1080p | Medium | Lower Shadows to Low, Reflections to Low, Adaptive FPS to 30 if unstable. |
| Mainstream (GTX 1660 Super, RX 580, 16GB RAM) | 1080p | High | Disable Motion Blur and Depth of Field. Set Ambient Occlusion to SSAO. |
| High-End (RTX 2070, RX 5700 XT, 16GB RAM) | 1440p | Very High | Lower Clouds to High, Reflections to High, Shadows to High. |
| Enthusiast (RTX 3080+, 32GB RAM) | 4K | Ultra | Consider enabling HDR, keep Motion Blur off for clarity. Lock to 60 FPS if needed. |
- FOV: Increasing FOV past 80 can reduce immersion for some. Test in combat – a wider view helps see machines but may make aiming feel different. Default 70 is safe.
- Motion Blur & Depth of Field: These are commonly disabled by experienced players. They obscure important visual cues and can cause motion sickness. Turn them off immediately.
- Shadows & Reflections: These are the biggest FPS hogs. Lowering them one step often gains 10-15 FPS without ruining visuals.
2. Audio Settings
| Setting | Options | Notes |
|---|---|---|
| Master Volume | 0-100 | Global loudness. Start at 100 and adjust other sliders. |
| Sound Effects Volume | 0-100 | Covers combat, machines, environment. Keep high to hear enemy cues. |
| Music Volume | 0-100 | Atmospheric background music. Lower to focus on sounds. |
| Dialogue Volume | 0-100 | Important for story and hints. Keep at 100. |
| Voice Language | English, French, German, etc. (varies by region) | Applies to spoken dialogue. |
| Subtitles | Off, On | Recommended: On, especially for lore and audio logs. |
| Cinematics Subtitles | Off, On | Separate toggle for cutscenes. |
| Dynamic Range | TV, Home Theater, Headphones | Select based on your audio setup. Headphones compresses loudness for clear quiet sounds. Home Theater keeps wide range. |
3. Controls Settings
#### Controller Settings (PS4/PS5/PC with gamepad)
| Setting | Options | Recommended | Notes |
|---|---|---|---|
| Controller Vibration | On, Off | On for immersion; Off for precision aiming | Vibration can interfere with fine aim. |
| Invert Y-Axis | Off, On | Off unless you prefer inverted | Common for flight sim fans; not recommended for third-person. |
| Aim Assist | Off, Low, High | Low or High | High helps new players lock onto machines. Low is better for skilled players. |
| Stick Deadzone Inner | 0-100 | 5-10% | Reduce if your sticks drift. Too high causes slow response. |
| Stick Deadzone Outer | 0-100 | 0% | Leave at minimum for full range. |
| Horizontal Sensitivity | 1-100 | 50-70 | Adjust to your comfort. Lower for precision, higher for quick turns. |
| Vertical Sensitivity | 1-100 | Same as horizontal for consistency | Some prefer slightly lower for aiming. |
| Aim Sensitivity | 1-100 | 50-70 | Separate multiplier when aiming down sights. |
| Swap Shoulder Cam | Hold/Toggle | Toggle (if available) | Allows switching Aloy's shoulder view with a button. Useful for peeking corners. |
| Setting | Options | Recommended | Notes |
|---|---|---|---|
| Mouse Sensitivity | 1-100 | 50-70 | Adjust to avoid twitchy or sluggish aim. |
| Mouse Smoothing | Off, On | Off | Adds artificial smoothness; can feel floaty. Disable for raw input. |
| Mouse Acceleration | Off, On | Off | Accelerates cursor with speed; inconsistent for muscle memory. |
| Invert Mouse Y | Off, On | Off | Same as controller. |
| Key Binding | Fully customizable per action | Use default then adjust | Important to bind dodge, focus, weapon wheel to easy-to-reach keys. |
| Aim Down Sights (Hold/Toggle) | Hold, Toggle | Depends on playstyle | Hold is common for shooters; Toggle reduces finger strain. |
- Aim Assist (controller): Set to Low or Off if you find it pulling your crosshair away. High is good for beginners but can be frustrating during multi-target fights.
- Mouse Smoothing: Always turn off. This setting is notorious for causing input lag.
- Key Binding: The weapon wheel (default Q) and Focus (default R) are crucial. Consider rebinding Focus to a thumb mouse button for quick scans.
4. Accessibility Settings
| Setting | Options | Notes |
|---|---|---|
| Subtitle Size | Small, Medium, Large | Increase if you have difficulty reading small text. |
| Subtitle Background Opacity | 0-100 | Higher makes subtitles more readable over bright areas. |
| Color Blind Modes | Off, Protanopia, Deuteranopia, Tritanopia | Adjusts HUD colors for different types of color blindness. |
| High Contrast Mode | Off, On | Highlights interactable objects and enemies with strong outlines. Helps visibility. |
| Camera Shake | Off, On | Disable if motion sensitive. Shake occurs on heavy attacks and explosions. |
| Damage Numbers | Off, On | Shows numeric damage on hits. Mostly cosmetic; can be distracting. |
| Screen Effects | Off, Low, Full | Controls screen flash, blood, etc. Reduce if sensitive. |
| Audio Cues for Enemies | Always On | Subtle sounds that indicate enemy awareness. Keep on for gameplay advantage. |
5. Language Settings
Settings are found under Audio or Language. You can mix voice and text languages.
| Setting | Options (Example) | Notes |
|---|---|---|
| Voice Language | English, French, German, Spanish, Italian, Japanese, Polish, Russian, Arabic, etc. | Affects spoken dialogue. Japanese voice acting is popular with some fans. |
| Text Language | Same language list | Affects menus, subtitles, and UI text. |
| Subtitle Language | Same list or Off | Choose a different language for subtitles if you want the original voice. |
6. Network Settings
Horizon Zero Dawn is primarily a single-player offline game. Network options are limited.
| Setting | Options | Notes |
|---|---|---|
| Online Connectivity | On, Off | For PC: disables leaderboards and achievement sync? Mostly for DRM validation. Turn off to play completely offline. |
| Cloud Saves (Platform specific) | On, Off | On: automatically syncs saves to cloud. Recommended to prevent data loss. |
| Leaderboards | Visible, Hidden | Hunting ground scores and speedrun records. Request data only when viewing. Disabling may speed up loading. |
7. Gameplay Settings
These affect how the game plays and feels.
| Setting | Options | Recommended | Notes |
|---|---|---|---|
| Difficulty | Story, Easy, Normal, Hard, Very Hard, Ultra Hard | Normal for first playthrough | Affects enemy health/damage, resource quantity, and damage from Aloy. Ultra Hard is for New Game+ and disables HUD elements. |
| Aiming Style | Hold, Toggle | Hold | Controls aiming down sights. Hold is standard for fast reaction. Toggle reduces finger fatigue. |
| Sprinting Style | Hold, Toggle | Toggle | Hold: must keep button pressed. Toggle: press once to run. Toggle recommended for long distances. |
| Auto Pickup | Off, On | On | Automatically collects loot from small containers and plants. Off requires pressing interact each time – tedious. |
| Loot Crate Interact | Hold, Tap | Tap | Tap is faster. Hold can cause unwanted actions if you hold too long. |
| Auto-Save Frequency | Often, Moderate, Rare | Often | Saves at checkpoints. Often is safest; you lose minimal progress. Rare can lead to frustration. |
| Compass | Always On, Dynamic, Off | Dynamic | Shown only when relevant. Off clears HUD. |
| Quest Tracker | Show All, Show Active Only, Hide | Show Active Only | Prevents screen clutter. Switch to Show All when exploring multiple quests. |
| HUD Opacity | 0-100 | 70-100 | Lower for immersion; higher for visibility. |
| HUD Scale | Normal, Large | Normal | Large makes icons bigger but can cover more screen. |
| Damage Numbers | Off, On | On (for feedback) | Learn enemy weak points. Off for realism. |
| Hit Markers | Off, On | On | Visual confirmation of hits. Helps with ranged combat. |
| Weapon Quick Select | Radial Menu, Hotkeys | Radial Menu | Radial pauses time, allowing slow-mo weapon swaps. Hotkeys are faster but require memorization. |
- Difficulty: Do not start on Very Hard or Ultra Hard unless you are experienced with action RPGs. Story mode is forgiving and lets you focus on exploration. You can change difficulty at any time except when Ultra Hard is locked (New Game+).
- Auto Pickup: Definitely enable. You'll gather berries, wood, and metal shards automatically – saves time and reduces button mashing.
- Weapon Quick Select: The radial menu is highly recommended. It pauses combat briefly, letting you equip the right arrow or trap without frantic keyboard/controller mashing.
Summary of Must-Adjust Settings
| Setting | Action | Reason |
|---|---|---|
| Motion Blur | Off | Reduces motion sickness and improves clarity. |
| Depth of Field | Off | Keeps distant enemies visible. |
| Mouse Smoothing (PC) | Off | Eliminates input lag. |
| Auto Pickup | On | Saves time. |
| Aim Assist (controller) | Low or Off | Prevents aim pull on multiple targets. |
| Dynamic Range (audio) | Headphones if using headset | Enhances directional audio. |
| FOV | 80-90 | Best compromise between visibility and distortion. |
Important Notes
Important Notes: Horizon Zero Dawn
This guide covers crucial warnings, pitfalls, irreversible choices, missable content, difficulty spikes, grinding traps, save management advice, and things players commonly regret not knowing earlier. Horizon Zero Dawn is a single-player game with no online features, so anti-cheat and online etiquette are not applicable.
---
Irreversible Choices
- No major branching endings – The main story has a single fixed ending. Your choices in dialogue or side quests do not alter the final outcome.
- Side quest consequences – Some side quests have minor outcomes that affect NPC fates (e.g., who survives in "The Queen's Gambit" or "The Sun and the Shadow"). These do not impact the main story or ending.
- The Frozen Wilds DLC – A few choices in the DLC change dialogue or quest availability (e.g., "The Forbidden West" quest outcome). None are game-breaking.
- Tip: You can always reload a save before making a choice if you want to see alternate results. There is no way to undo a choice after progressing.
- Missable side quests – These quests become unavailable after reaching certain main story milestones. Complete them before progressing:
- Point of no return – After starting "The Looming Shadow", the game warns you that you cannot return to the open world until after the credits. You can still free roam post-game, but some side quests may be permanently locked if not done beforehand. Always complete all side content you care about before that mission.
- Collectibles – Vantage points, Banuk figures, Metal Flowers, and Power Cells are all accessible after the story. However, one Power Cell (inside the Grave-Hoard) can only be obtained during that main quest; if you miss it, you can still re-enter the area after completing the story using a specific path (but it's easy to overlook – check a guide).
- DLC missables – The Frozen Wilds quests and collectibles remain available after the main story. No DLC content is missable once you start it.
- Early game Sawtooth fight – This is the first major machine you must kill. It can be tough at low level. Tip: Use stealth, lay traps (shock wires), and aim for the blaze canister on its back with fire arrows to cause a large explosion.
- First Corruptor fight (in "Maker's End") – The machine is fast, shoots projectiles, and can corrupt nearby machines. Tip: Use the tearblaster (if obtained) to remove its weapons, or freeze it with ice arrows before hitting it hard.
- Frozen Wilds Frostclaws and Fireclaws – These are significantly harder than base game machines. They have high damage, area attacks, and can heal. Tip: Use fire or ice ammo (weakness opposite of their element), dodge sideways, and target the cooling/heat vents.
- Final boss (the last Corruptor in the final quest) – It has multiple phases and high damage. Tip: Use hardpoint arrows on weak points, keep moving, and bring plenty of healing items and potions.
- General difficulty scaling – The game does not have level-based difficulty scaling. Machines have fixed levels. If you're undergeared, you will struggle. Always upgrade your spear, weapons, and armor when possible.
- Don't grind for resources – Loot everything from machines and containers. Ammo and health items are plentiful if you scavenge regularly. Avoid spending hours gathering specific items; you'll get enough through normal play.
- Weapon and armor upgrades – The game encourages buying new gear rather than grinding to upgrade existing ones. Focus on earning shards and hearts from machines, then purchase better equipment from merchants.
- Side quests for XP – Side quests and errands give generous XP. If you feel underleveled, do a few side quests instead of killing random machines repeatedly.
- The hunting grounds challenges – These are not required for progression. Trying to get gold on all of them early can be frustrating. Come back later with better gear and skills.
- Skill point waste – Prioritize skills that improve stealth (Silent Strike, Lure Call) and combat (Tinker, Heavy Weapons). Avoid spreading points too thin early on.
- Manual saves are your friend – The game autosaves frequently (quest progress, entering areas), but manual saves let you revert missed content or bad choices. Save before starting a main quest, entering a new region, or making a difficult choice.
- Use multiple save slots – Many players fill all slots with manual saves at key milestones. That way, if you accidentally overwrite, you still have backups.
- Quick save – On PC (F5) and consoles (inventory menu) you can quick save. Use it before tough fights.
- No cloud save for PC? – Steam and Epic Games Store have cloud saving enabled by default. Ensure it's turned on to avoid losing progress.
- PS4/PS5 – Use the system's cloud save backup (requires PlayStation Plus) as an extra layer.
- The game autosaves frequently, but manual saves are essential for avoiding progress loss. Save before entering a new area or starting a quest chain.
- Do not rush the main story. Exploring, doing side quests, and gathering collectibles enriches the experience and provides much-needed upgrades.
- No difficulty achievements are locked behind anything – play on the difficulty that feels best. You can change difficulty at any time (except for the Very Hard or Ultra Hard? Actually you can change anytime, but Ultra Hard is only available in New Game+).
- New Game+ carries over all gear and skills but locks the difficulty to the mode you started. Plan accordingly.
- If you encounter a bug or crash, verify your game files (PC) or rebuild database (PS4). The game has been patched but rare issues persist.
---
Missable Content
- "The Mountain that Fell" – Must be completed before the main quest "The Grave-Hoard".
- "Hunter's Blind" – Must be completed before "The Heart of the Nora".
- "The Queen's Gambit" – Must be completed before "The Looming Shadow" (the final pre-endgame quest).
- "Acquired Taste" – Must be completed before starting "The Heart of the Nora" (or it fails).
---
Difficulty Spikes
---
Grinding Traps
---
Save Management Advice
---
Things Players Commonly Regret Not Knowing Earlier
1. Always use the Focus – Scan constantly to highlight machines, enemy paths, lootable items, and climbable surfaces. It's infinite and free.
2. Whistle + Silent Strike – You can whistle from behind cover to lure a machine close, then use Silent Strike (requires skill) to instantly kill small machines or damage larger ones. This is the most efficient stealth tactic early on.
3. Fast travel is not free initially – You need to craft or buy Fast Travel Packs from merchants. After completing the "Hunter's Blind" side quest, you get an unlimited Fast Travel Pack (best item in the game). Get it early!
4. Overriding machines – Unlock the "Override" skill tree to learn how to override machines. You can then ride some (like Strider, Broadhead, Charger) for faster travel. Also, overriding a machine then setting it to aggressive mode creates a powerful ally.
5. Teardown arrows – These are invaluable for removing components (weapon mounts, armor plates) without dealing much damage. Use them on heavy machines to expose weak spots.
6. Ropecaster is not just for immobilizing – It can also be used to tie down flying machines (Glinthawks, Stormbirds) so you can shoot them safely.
7. Elemental status effects – Freezing increases damage on most machines, fire causes damage over time, shock stuns. Combine effects: freeze then hit with hardpoint arrows is a devastating combo.
8. No fall damage – You can jump from any height without taking damage. But watch out for cliffs that lead to water – drowning is possible.
9. Weapon upgrades from merchants – Don't ignore weapon coils and outfit weaves. They provide significant stat boosts. Strip them from old weapons before selling.
10. The skill tree has respect options? No, you cannot reset skill points. Choose wisely, but you will eventually get all skills by the end of the game + DLC.
11. The DLC (Frozen Wilds) is designed for characters around level 25-30. It is much harder if you go there immediately after the early game. Save it for after the main story or at least after reaching "The Grave-Hoard" quest.
12. Merchant prices vary by region – Carja merchants in Meridian often have better selection but higher prices. Nora merchants have basic gear. Banuk merchants in the Cut sell unique upgraded versions of base weapons (but they cost a lot).
---
Final Warnings
---
With these notes in mind, you'll avoid common frustrations and enjoy the breathtaking world of Horizon Zero Dawn.
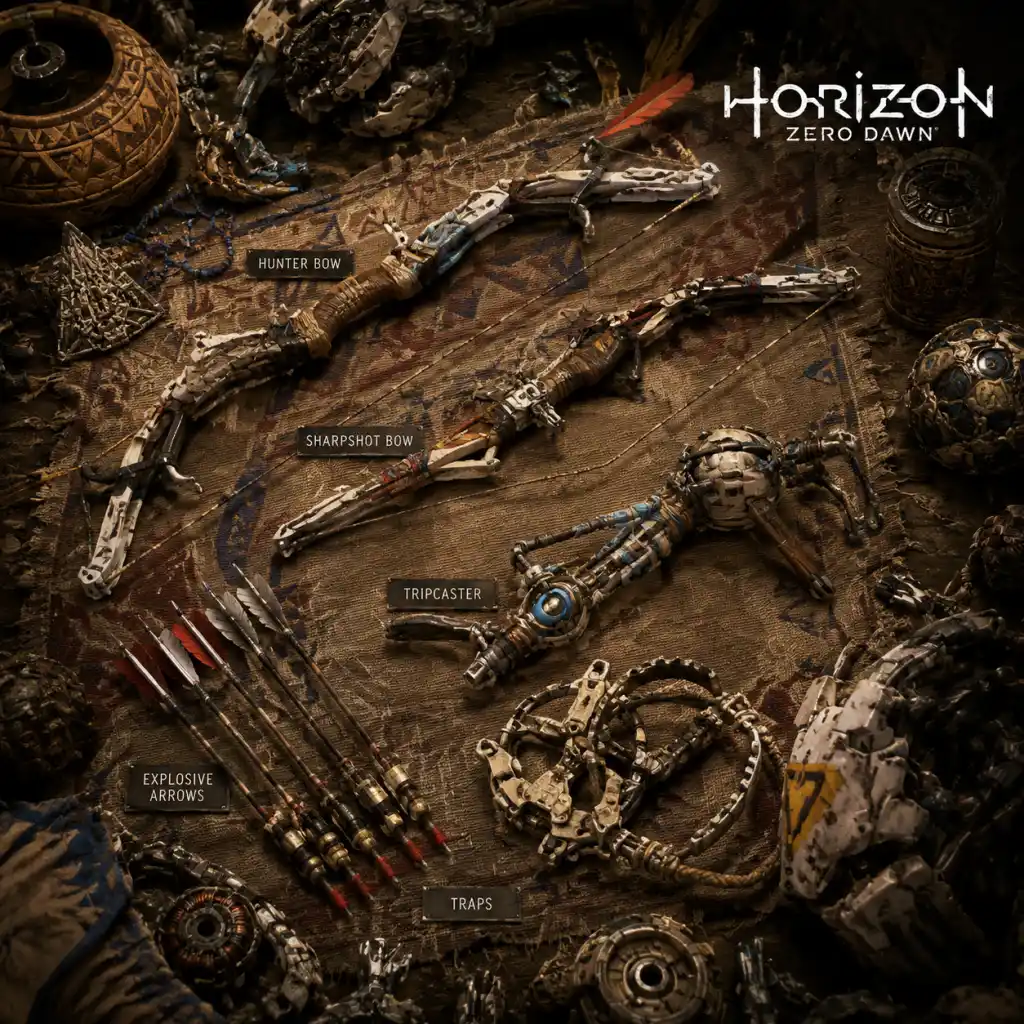
All Game Items
All Game Items: Horizon Zero Dawn
This guide catalogs every major item in Horizon Zero Dawn, including weapons, armor, consumables, materials, currencies, collectibles, and key equipment. Items are grouped logically with explanations on acquisition, usage, synergies, and upgrades.
---
Weapons
Weapons in Horizon Zero Dawn are divided into categories based on their primary function. Most can be purchased from merchants, acquired through side quests, or found in ancient boxes. Higher-tier versions (Shadow, Carja, Banuk) offer better stats and more modification slots.
Hunting Bows
- Standard Hunter Bow (Nora): Basic bow. Fires arrows (Hunter, Hardpoint, Fire). Purchase from early merchants.
- Carja Hunter Bow (Carja): Improved handling and damage. Available from Carja merchants after reaching Meridian.
- Shadow Hunter Bow (Shadow): Best tier; 3 modification slots. Deals high tear and damage. Purchase from Shadow merchants or found in late-game loot.
- Sharpshot Bow (Nora): High damage, long range. Fires Precision, Tearblast, and Harvest arrows.
- Carja Sharpshot Bow: Better stats. Obtained after main quest "The City of the Sun".
- Shadow Sharpshot Bow: Top tier. Best for sniping machine components.
- War Bow (Nora): Fires elemental arrows (Shock, Freeze, Corruption). Useful for applying status effects.
- Carja War Bow: Improved elemental buildup.
- Shadow War Bow: Best for elemental damage; 3 slots.
- Sling (Nora): Throws elemental bombs (Fire, Freeze, Shock). Area effect.
- Carja Sling: Longer range, faster reload.
- Shadow Sling: Highest elemental damage. Purchase from Shadow merchants.
- Ropecaster (Nora): Fires ropes to tie down machines. Upgrades reduce time. Essential for overriding.
- Carja Ropecaster: Ties faster.
- Shadow Ropecaster: Best; 3 slots. Buy from Meridian.
- Tripcaster (Nora): Sets wire traps (Blast, Shock, Fire). Good for ambushes.
- Carja Tripcaster: Deploys faster.
- Shadow Tripcaster: Highest damage traps.
- Blast Sling (Nora): Throws explosive bombs (Blast, Proximity). High damage.
- Carja Blast Sling: Larger blast radius.
- Shadow Blast Sling: Best explosive damage.
- Rattler (Nora): Rapid-fire close-range weapon. Uses Rattler Ammo.
- Carja Rattler: Higher fire rate.
- Shadow Rattler: Best for DPS; 3 slots.
- Tearblaster (Unique): Uses Blaze canisters. Extreme tear damage; ideal for ripping off armor. Obtained from side quest "Hunter's Blind".
- Lodge War Bow & Lodge Ropecaster: Rewards from Hunter’s Lodge quests. Unique stat lines; no modifications but built-in perks.
- Banuk Striker Bow: Charged shots deal extra damage. Bluegleam purchase.
- Banuk Powershot Bow: High damage per charged shot. Best for one-shot builds.
- Banuk Ice Rail: Freeze beam + explosive. Versatile.
- Banuk Stormslinger: Shocks and AoE lightning. Dangerous but powerful.
- Banuk Icerail: Long-range freeze launcher. Ammo efficient.
- Banuk Forgefire: Flamethrower with explosive rounds. Excellent against clustered enemies.
- Nora Brave (starting): Low stats. Free.
- Nora Protector: Higher melee and ranged resist. Purchase in Mother’s Heart.
- Nora Silent Hunter: Stealth boost. Purchase from merchants.
- Carja Blazon: Fire resistance. Good for fighting Fire Bellowbacks.
- Carja Silks: Stealth and corruption resistance. Available in Meridian.
- Carja Trader: Melee resistance, moderate.
- Shadow Stalwart: All-round resistances, 3 slots. Best early-mid game.
- Shadow Carja: Specialized; available from Shadow merchants.
- Banuk Chieftain: High freeze and shock resistance. Bluegleam.
- Banuk Ice Hunter: Excellent freeze protection.
- Banuk Fireclaw Armor: Fire resistance and handling boost.
- Shield-Weaver Armor: Unique “shielding” outfit that absorbs damage until depleted. Requires 5 Power Cells. Best for survivability. See Key Equipment.
- Oseram Sparkler: Shock resistance. Reward from side quest.
- Nora Survivor: Boosted healing and resistances. Purchase late game.
- Handling Coil: Increases reload speed and draw speed.
- Damage Coil: Increases physical damage.
- Tear Coil: Increases tear damage.
- Elemental Coil: Increases elemental buildup.
- Shock/Freeze/Fire Coils: Specific elemental. Rare.
- Purple (Legendary) Coils: Best stats. Found in ancient ruins, DLC, hunters lodge rewards.
- Melee Resist​: Reduces physical melee damage.
- Ranged Resist​: Reduces projectile damage.
- Fire Resist​: Reduces fire damage.
- Freeze Resist​: Reduces freeze buildup.
- Shock Resist​: Reduces shock damage.
- Corruption Resist​: Reduces corruption buildup.
- Stealth Weave: Increases stealth.
- Health Weave: Increases health? (Actually improves healing rate).
- Purple Weaves: Highest percentages.
- Hunter Arrow: Crafted with Ridge-Wood + Shards. Basic damage.
- Hardpoint Arrow: Ridge-Wood + Metal Vessel. High tear/damage.
- Fire Arrow: Ridge-Wood + Blaze + Sparker. Ignites enemies.
- Precision Arrow: Ridge-Wood + 2× Wire. Long range, high damage.
- Tearblast Arrow: Ridge-Wood + Blaze + Metal Vessel. Massive tear.
- Harvest Arrow: Ridge-Wood + Wire. Harvests components without destroying them.
- Shock Arrow: Ridge-Wood + Sparker + Chillwater. Paralyzes.
- Freeze Arrow: Ridge-Wood + Chillwater + Metal Vessel. Freezes.
- Corruption Arrow: Ridge-Wood + Blaze + Chillwater. Turns machines hostile.
- Blast Trap: Blaze + Metal Vessel. Explosive.
- Shock Trap: Sparker + Metal Vessel. Stuns.
- Fire Trap: Blaze + Sparker. AoE fire.
- Frost Trap: Chillwater + Metal Vessel. Freeze AoE.
- Fire Bomb: Blaze + Metal Vessel.
- Freeze Bomb: Chillwater + Metal Vessel.
- Shock Bomb: Sparker + Metal Vessel.
- Rattler Rounds: Ridge-Wood + Metal Shards.
- Rope: Wire + Ridge-Wood.
- Blast Wire: Blaze + Wire.
- Shock Wire: Sparker + Wire.
- Fire Wire: Blaze + Sparker.
- Health Potion: +150 HP. Craft with Medicinal + Desert Glass. Essential.
- Full Health Potion: +300 HP. Requires 2× Medicinal + 2× Desert Glass.
- Fire Resist Potion: 50% fire resistance 60s. Craft with Medicinal + Blaze.
- Freeze Resist Potion: 50% freeze resistance. Medicinal + Chillwater.
- Shock Resist Potion: 50% shock resist. Medicinal + Sparker.
- Corruption Resist Potion: 50% corruption resist. Medicinal + Metal Vessel.
- Scavenger Meat: +15 HP. Common.
- Wild Meat: +25 HP.
- Hearty Meat: +50 HP.
- Fresh Meat: Cooked; provides bonuses (e.g., extra damage). Sold by cooks.
- Fast Travel Pack: Allows fast travel to discovered campfires. Craft with Metal Vessel + 10 Shards.
- Golden Fast Travel Pack: Unlimited fast travel. Buy from Meridian.
- Trap Lure: Lures machines to traps. Craft with Sparker + Medicinal.
- Fire Arrow Potion: (DLC) Temporary fire arrow buff.
- Blaze: Common from Fire Bellowbacks, Strider. Used for fire ammo.
- Chillwater: Frozen machines (Glinthawks, Snapmaws). Freeze ammo.
- Sparker: Shock machines (Stalkers, Stormbirds). Shock ammo.
- Metal Vessel: Drop from most large machines. Crafting ammo.
- Metal Shards: Currency, also used for crafting. Loot and trade.
- Wire: From Scrappers, Longlegs. Ropes and traps.
- Lens: Machine-specific (e.g., Watcher Lens). Required for some purchases.
- Heart: Machine-specific (e.g., Thunderjaw Heart). Used for purple upgrades.
- Braiding: From Tallnecks, Behemoths. Rare.
- Sac Webbing: From machines; sensitive; used for health/potions.
- Echo Shell: From Shell-Walkers. Used for some ammo?
- Ancient Vessel: Rare from ancient boxes. Sold for shards.
- Blastpaste: From Watchers etc. Used for explosive ammo.
- Bones (small, medium, large): From boars, foxes, etc. Used for pouch upgrades.
- Skins (small, medium, large): From same animals. Pouch upgrades.
- Rare Fish: Not used much except in DLC for odd quest.
- Medicinal: Found in plains. Craft potions.
- Ridge-Wood: Shrubs. Arrow crafting. Buy cheap.
- Desert Glass: Craft health potions.
- Woods: For arrows (shards buy).
- Bluegleam: DLC currency. Found in deposit boxes and quests.
- Metal Shards: Primary currency. Loot, trade, sell.
- Bluegleam (DLC): Used to buy Banuk weapons and armor. Obtain from quests and treasure boxes in The Cut.
- Merchant Tokens: Not present; instead, trading uses shards and machine parts as barter.
- Special Tokens: None; but Hunter’s Lodge uses Hunt tokens? Actually, Hunter’s Lodge uses Metal Shards and gives unique weapons, no special currency.
- 30 total. Spherical metal structures emitting hum. Collect to unlock Cauldron Omicron? Actually, they unlock a flower box in Meridian. No major gameplay benefit but trophy.
- Located in the wild; use Focus to see glow.
- 6 wooden figurines. Collect to unlock a Banuk merchant’s best items (including Shield-Weaver-like outfit? No, special weapons). Follow quest "The Survivor".
- 12 datapoints from pre-apocalypse. Listen to audio logs and view scenes. No gameplay reward but world-building.
- Over 70 scattered texts/audio. No ability to collect; they auto-add to notebook. No reward.
- 15 ceramic pots. Return to Meridian for shards. Not required for 100%.
- Not collectible; just for trial.
- Focus: Acquired in childhood. Allows scanning machines, highlighting tracks, hacking. Can be upgraded with mods? Not; but essential.
- Basic Spear: Starting melee weapon. Override unlocked after main quest.
- Upgraded Spear: After main quest, dealt more damage. No modifications.
- Shield-Weaver: Crafted from 5 Power Cells found in ancient ruins. Provides energy shield that regenerates. Best armor for late game. Must complete the "Ancient Armory" side quest.
- Five cells needed for Shield-Weaver. Locations: Ruins near Mother’s Heart, Ruins by Nora lands, Maker’s End, Grave-Hoard, The Mountain. Missable? Yes, some later become inaccessible if not grabbed before final mission.
- Unlock override for machine types by completing Cauldrons (Sigma, Rho, Xi, Zeta). Not items but key abilities.
- Unique weapon from side quest. See weapons section.
- Weapon + Coils: Apply damage coils to Sharpshot bows for one-shot kills; tear coils for removing armor; handling coils for fast ropecasting.
- Armor + Weaves: Stack stealth weaves for ghost-like approach; stack fire resist vs Fire Bellowbacks.
- Ammo + Status: Freeze + Hardpoint arrows deal massive damage; Shock + Blast works well.
- Potions + Environments: Use frost resist in high cold zones.
- Skills: Unlock skills like Double Shot, Triple Shot, elementals to boost item effectiveness.
- All weapons and armor can be sold but not retrieved; avoid selling unique items.
- DLC items (Banuk gear) are locked until The Frozen Wilds is installed.
- Trading with merchants can yield rare coils; check their inventory after each story progression.
- Crafting ammo from resources is cheaper than buying.
- Always carry Ridge-Wood and Medicinal for basic needs.
Sharpshot Bows
Warbows
Slings
Ropecaster
Tripcaster
Blast Sling
Rattler
Tearblaster
Lodge Weapons
Banuk Weapons (The Frozen Wilds DLC)
---
Armor (Outfits)
Outfits provide protection and resistances. Upgrade via modification slots. Purchase from merchants, reward from quests, or discover in the world.
Nora Outfits
Carja Outfits
Shadow Outfits
Banuk Outfits (DLC)
Special Armor
---
Weapon/Outfit Modifications
Weapon Coils
Outfit Weaves
---
Ammo & Crafting Components
Most ammo is crafted from machine parts and plants. Always gather resources.
Arrow Types
Trap Ammo
Sling Ammo
Rattler Ammo
Ropecaster Ammo
Tripcaster Ammo
---
Consumables
Potions
Food (The Frozen Wilds)
Utility Items
---
Materials
Machine Parts
Animal Parts
Plants and Other
---
Currencies
---
Collectibles
Metal Flowers
Banuk Figures (The Frozen Wilds)
Vantage Points
World Datapoints
Ancient Vessels (Vases)
Training Dummies
---
Key Equipment & Special Items
Focus
Spear
Shield-Weaver Armor
Power Cells
Override Modules
Tearblaster Weapon
---
Synergies & Upgrades
---
Notes

Character Skills
Character Skills Overview
Horizon Zero Dawn features a single playable character: Aloy, a hunter and machine specialist. Her skills are divided into three skill trees—Brave, Prowler, and Forager—each containing 10 skills (some with multiple ranks) for a total of 29 base game skills. Additionally, The Frozen Wilds DLC adds 9 new skills that branch off from the existing trees. This guide covers every skill, including effects, upgrades, cooldowns, synergies, recommended builds, and usage tips.
Skills are unlocked using skill points earned by gaining experience (XP) from quests, kills, and exploration. Each skill point can be spent on any skill, allowing flexible builds.
---
Brave Branch (Red) – Combat & Override
The Brave tree focuses on direct combat prowess, health, and machine override abilities. It includes offensive passives, active abilities, and utility.
1. Concentration (3 Ranks)
- Effect: When aiming a bow or weapon, time slows down. The duration of slow-motion increases per rank.
- Cooldown: None; activates automatically upon aiming.
- Upgrades: Rank 1: 1.5s slow; Rank 2: 2.0s; Rank 3: 2.5s.
- Synergies: Pairs well with any precision weapon (Sharpshot Bow, Tearblaster) to line up critical hits. Combines with Critical Hit for massive weak point damage.
- Recommended Build: Essential for all builds, especially those relying on bow combat. Max out early for easier aiming.
- When to Use: Always when aiming; particularly effective against moving machines or fragile weak points (e.g., Blaze cannisters, eyes).
- Effect: Increases damage dealt when hitting a machine's weak point (vulnerable areas). Rank 1: +25% damage; Rank 2: +50%; Rank 3: +75%.
- Cooldown: Passive.
- Upgrades: Linear damage bonus.
- Synergies: Essential with Concentration for pinpoint shots. Works with all weapons that target weak points, especially Tearblast Arrows (to strip armor) followed by Hardpoint Arrows.
- Recommended Build: Mandatory for any combat-focused build. Combine with Precision skill (Brave) for maximum output.
- When to Use: Always; aim for orange glowing weak points on machines. Prioritize on aggressive machines like Thunderjaws.
- Effect: Allows overriding machines even while they are alert or in combat (previously only possible when undetected).
- Cooldown: None, but requires crafting override modules and being close enough.
- Upgrades: Single rank.
- Synergies: Use with Override Abilities (unlocked via Cauldrons) to turn machines against each other. Pairs well with Heavy Lifter to use machine weapons.
- Recommended Build: Useful for crowd control and creating distractions. Not essential early but powerful for late-game combat.
- When to Use: When surrounded or facing a tough machine; override a nearby enemy (e.g., a Ravager) to fight for you.
- Effect: Allows Aloy to pick up and carry heavy weapons dropped by machines (e.g., Ravager Cannon, Thunderjaw Disc Launcher).
- Cooldown: None.
- Upgrades: Single rank.
- Synergies: The heavy weapons deal massive damage but have limited ammo. Combine with Concentration for easier aiming. Requires good positioning due to slow movement while carrying.
- Recommended Build: Not mandatory but adds fun and powerful options. Consider picking up for specific encounters.
- When to Use: After disabling a machine’s weapon (e.g., tearblast arrow off Ravager cannon), pick it up and unleash on groups or bosses.
- Effect: Increases the number of resources (e.g., bones, skins, lenses) obtained from animals (boars, foxes, etc.).
- Cooldown: Passive.
- Upgrades: Single rank.
- Synergies: Useful for crafting larger pouches and selling resources. Pairs with Gatherer (Forager) for overall resource income.
- Recommended Build: Take early if you want to craft pouches quickly; otherwise skip until later.
- When to Use: Always when hunting animals.
- Effect: Increases damage dealt by precision weapons (Sharpshot Bow, Tearblaster, Forgefire). Rank 1: +15% damage; Rank 2: +30% damage.
- Cooldown: Passive.
- Upgrades: Additive damage.
- Synergies: Stacks with Critical Hit for massive weak point damage on precision shots. Ideal for sniping.
- Recommended Build: Core for sniper/heavy damage builds. Combine with Concentration.
- When to Use: Always when using precision weapons.
- Effect: Unlocks the ability to craft the Shield Weaver Armor (requires completing the Ancient Armor quest). Note: The skill itself is often a prerequisite; once obtained, the armor provides a rechargeable energy shield.
- Cooldown: Passive on armor; shield regenerates after a short time out of combat.
- Upgrades: Single rank.
- Synergies: Provides excellent survivability, especially against ranged attacks. Pairs with heavy weapon builds to reduce risk.
- Recommended Build: Extremely valuable for any build; aim to acquire early via quest and skill point.
- When to Use: Any combat; best when facing multiple enemies or high-damage machines.
- Effect: Increases melee damage by 50% when health is above 75%.
- Cooldown: Passive.
- Upgrades: Single rank.
- Synergies: Works with Power Attack and Strike from Above (Prowler). Encourages aggressive melee play with high health.
- Recommended Build: For melee-focused or hybrid builds. Combine with Health potions.
- When to Use: When you are at full health and close to machines.
- Effect: Hitting enemies with melee attacks increases damage of next ranged attack by 30% (stackable up to 3 times).
- Cooldown: Passive; stacks reset if you take damage.
- Upgrades: Single rank.
- Synergies: Promotes switching between melee and ranged. Use with Hunter Bow for rapid shots.
- Recommended Build: For players who enjoy mixing combat styles.
- When to Use: Build up stacks on smaller machines, then unleash on a larger target.
- Effect: Reduces frost status effect duration by 5% and frost damage by 10%.
- Cooldown: Passive.
- Upgrades: Single rank.
- Synergies: Useful in snowy areas or against Frostclaws. Combine with cold resistance potions.
- Recommended Build: Situational; take before exploring The Cut.
- When to Use: Against machines that use frost attacks.
- Effect: Perform a one-hit kill from behind on small to medium human and machine enemies (can't kill large machines, but deals heavy damage).
- Cooldown: None; requires being undetected and close.
- Upgrades: Single rank.
- Synergies: Use with Lure skill to bring enemies close. Essential for stealth clearing human camps.
- Recommended Build: Mandatory for stealth builds. Take early.
- When to Use: When undetected; also for dealing massive damage to machine weak points from behind.
- Effect: Jump off a tall ledge and perform a powerful melee attack on an enemy below. Deals significant damage and can kill smaller enemies.
- Cooldown: None; requires height advantage.
- Upgrades: Single rank.
- Synergies: Works with Quiet Sprint to approach silently. Combine with Fighter's Might for extra damage.
- Recommended Build: Useful but situational; take if you enjoy vertical combat.
- When to Use: From tall rocks or trees to surprise enemies below.
- Effect: Hold the melee button to charge a heavy spear attack that deals extra damage and can knock down smaller enemies.
- Cooldown: Requires brief charge time.
- Upgrades: Single rank.
- Synergies: Break through armor plates or stagger machines. Pairs with Critical Hit for follow-up weak point shots.
- Recommended Build: Core for melee builds; good for breaking components.
- When to Use: When you need a quick hard hit, especially after dodging.
- Effect: Sprinting does not increase detection radius; you can run silently past enemies.
- Cooldown: Passive.
- Upgrades: Single rank.
- Synergies: Essential for stealth approaches; combine with Silent Strike and Lure.
- Recommended Build: Highly recommended for any stealth-focused player.
- When to Use: When trying to reposition stealthily or escape combat.
- Effect: Press a button to whistle, attracting a nearby enemy to your location.
- Cooldown: Short (a few seconds).
- Upgrades: Single rank.
- Synergies: Use to bring enemies into grass for Silent Strike or to group them for area attacks.
- Recommended Build: Essential for stealth players. Combine with Quiet Sprint.
- When to Use: When you want to isolate an enemy from a patrol.
- Effect: Allows Aloy to aim and shoot while sliding, jumping, or sprinting without significant accuracy loss.
- Cooldown: Passive.
- Upgrades: Single rank.
- Synergies: Adds mobility during combat. Works well with Concentration for acrobatic shots.
- Recommended Build: Great for aggressive players who like to stay mobile.
- When to Use: While sliding down slopes or jumping to gain height advantage.
- Effect: Increases tear damage (chance to remove components) when attacking from stealth.
- Cooldown: Passive.
- Upgrades: Single rank.
- Synergies: Use with Tearblast Arrows while undetected to strip armor before combat.
- Recommended Build: Useful for machine hunters who want to disable weapons early.
- When to Use: Before initiating combat; tear off dangerous components silently.
- Effect: Increases dodge distance and invulnerability frames during rolls.
- Cooldown: Passive.
- Upgrades: Single rank.
- Synergies: Essential for survivability against fast enemies. Pairs with Heavy Lifter to dodge while carrying weapons.
- Recommended Build: Strongly recommended for all builds.
- When to Use: Always; dodge more effectively.
- Effect: After performing a Silent Strike, Aloy enters a state of increased movement speed for 5 seconds.
- Cooldown: Passive.
- Upgrades: Single rank.
- Synergies: Chains into multiple stealth kills quickly. Combine with Lure and Quiet Sprint.
- Recommended Build: For pure stealth assassins.
- When to Use: After a stealth kill to quickly reposition to another enemy.
- Effect: Increases damage dealt by ice-based weapons (e.g., Ice Rail, Frost Arrows) by 15%.
- Cooldown: Passive.
- Upgrades: Single rank.
- Synergies: Useful against machines weak to frost (e.g., Scorchers, Frostclaws).
- Recommended Build: Take before fighting frost-vulnerable enemies in The Cut.
- When to Use: Against any machine that has a freeze weakness.
- Effect: Increases the chance of obtaining rarer resources from looted machines (e.g., hearts, lenses). Rank 1: +10% chance; Rank 2: +20% chance.
- Cooldown: Passive.
- Upgrades: Two ranks.
- Synergies: Pairs with Expert Carver (Brave) for maximum resource yield. Essential for crafting high-level modifications.
- Recommended Build: Take early to accelerate gear upgrades.
- When to Use: Passive; always active when looting.
- Effect: Allows removal of weapon and armor modifications (coils) without destroying them (previously removal destroyed the mod).
- Cooldown: None; used from inventory.
- Upgrades: Single rank.
- Synergies: Critical for min-maxing builds; lets you move best mods between weapons.
- Recommended Build: Essential for all players; get early to avoid wasting mods.
- When to Use: Whenever you want to reallocate mods from one piece of gear to another.
- Effect: Increases the yield from harvesting plants, wood, and other resources in the world. Rank 1: +1 extra per harvest; Rank 2: +2 extra.
- Cooldown: Passive.
- Upgrades: Two ranks.
- Synergies: Helps craft more potions, traps, and arrows. Pair with Scavenger.
- Recommended Build: Take early for resource abundance.
- When to Use: Always when gathering plants and wood.
- Effect: Allows Aloy to call her currently mounted machine (e.g., Strider, Broadhead) from a distance with a whistle. The mount will travel to her position if within range (approx. 150m).
- Cooldown: Short cooldown after a mount dies or is dismissed.
- Upgrades: Single rank.
- Synergies: Useful for fast travel and escaping combat. Pair with Quiet Sprint to dismount undetected.
- Recommended Build: Highly recommended for open-world traversal.
- When to Use: When you need a mount quickly or want to escape.
- Effect: Medicinal plants (e.g., Medicinal Herb) restore more health when used. Approximately +20% healing.
- Cooldown: Passive.
- Upgrades: Single rank.
- Synergies: Helps in extended combat without potions.
- Recommended Build: Good for survival; take if you rely on healing plants.
- When to Use: Passive; improves all herb healing.
- Effect: Increases damage dealt by traps and tripwires by 25%.
- Cooldown: Passive.
- Upgrades: Single rank.
- Synergies: Essential for trap-focused builds. Combine with Disarm Traps (actually Disarm Traps is a skill? It's in Forager – see next).
- Recommended Build: Core for trap users.
- When to Use: Always when using traps.
- Effect: Allows Aloy to disarm enemy traps (e.g., Ravager mines) and collect them as resources.
- Cooldown: None.
- Upgrades: Single rank.
- Synergies: Provides extra resources and prevents trap damage. Pair with Trap Master.
- Recommended Build: Situational; useful in areas with many bandit traps.
- When to Use: When you spot a red glowing trap; approach and interact.
- Effect: Increases the effectiveness of all health potions and healing items by 25%.
- Cooldown: Passive.
- Upgrades: Single rank.
- Synergies: Stacks with Herbalist for maximum healing.
- Recommended Build: Recommended for all builds to reduce downtime.
- When to Use: Passive; always active.
- Effect: Increases the amount of ammunition gained from ammo crates that hold 5 or more arrows by 25%.
- Cooldown: Passive.
- Upgrades: Single rank.
- Synergies: Useful for extended fights; reduces ammo scavenging.
- Recommended Build: Good for players who use ranged weapons heavily.
- When to Use: Passive; always active.
- Effect: Reduces fire status duration by 5% and fire damage by 10%.
- Cooldown: Passive.
- Upgrades: Single rank.
- Synergies: Helps against Fireclaws and human enemies with fire weapons.
- Recommended Build: Situational; take before entering fire-heavy areas like Cauldrons.
- When to Use: Passive; always active.
- Skill Points: Earned from leveling up (XP) and completing certain quests. The maximum level is 60 (base game) and 80 with The Frozen Wilds. You can respec? No, skill choices are permanent, but you can eventually learn all skills if you collect enough skill points.
- No Cooldowns for Passives: Most skills are passive (always active). Active skills like Lure have a short cooldown; Concentration is triggered by aiming.
- Build Recommendations:
- Frozen Wilds Skills: These 9 skills are obtained in the same skill tree but require base skills to unlock (some have prerequisites). They are highly recommended for survival in The Cut.
2. Critical Hit (3 Ranks)
3. Combat Override (1 Rank)
4. Heavy Lifter (1 Rank)
5. Expert Carver (1 Rank)
6. Precision (2 Ranks) – Base Game Skill
7. Shield Weaver (1 Rank) – Base Game Skill
8. Fighter's Might (1 Rank) – Frozen Wilds Skill
9. Surge of Power (1 Rank) – Frozen Wilds Skill
10. Frost Resistance (1 Rank) – Frozen Wilds Skill
Bonus skill added via DLC.
---
Prowler Branch (Blue) – Stealth & Movement
The Prowler tree enhances Aloy’s stealth capabilities, movement speed, and melee attacks. It’s ideal for silent assassins and agile combatants.
1. Silent Strike (1 Rank)
2. Strike from Above (1 Rank)
3. Power Attack (1 Rank)
4. Quiet Sprint (1 Rank)
5. Lure (1 Rank)
6. Balanced Aim (1 Rank)
7. Stealth Tear (1 Rank) – Base Game Skill
8. Evade (1 Rank) – Base Game Skill
9. Agile Assassin (1 Rank) – Frozen Wilds Skill
10. Ice Hunter (1 Rank) – Frozen Wilds Skill
---
Forager Branch (Green) – Crafting & Resources
The Forager tree improves resource gathering, crafting efficiency, and tool usage. Ideal for resource management and trap-based combat.
1. Scavenger (2 Ranks)
2. Tinker (1 Rank)
3. Gatherer (2 Ranks)
4. Call Mount (1 Rank)
5. Herbalist (1 Rank)
6. Trap Master (1 Rank)
7. Disarm Traps (1 Rank)
8. Medicine (1 Rank) – Base Game Skill
9. Harvester (1 Rank) – Frozen Wilds Skill
10. Fire Resistance (1 Rank) – Frozen Wilds Skill
---
Additional Notes on Skills
- Stealth Sniper: Max Concentration, Critical Hit, Precision (Brave); Silent Strike, Quiet Sprint, Lure (Prowler); Tinker (Forager) for mods.
- Berserker/Hvy weapon: Max Heavy Lifter, Combat Override, Fighter's Might (Brave); Power Attack, Evade (Prowler); Harvester (Forager) for ammo.
- Trapper: Max Trap Master, Scavenger, Gatherer (Forager); Stealth Tear (Prowler) for disarming; Concentration for placing traps with precision.
This guide covers every playable character (Aloy) and every skill in Horizon Zero Dawn, including The Frozen Wilds expansion. Use the skill trees to tailor Aloy to your preferred playstyle.

Characters & Roles
Characters & Roles Guide for Horizon Zero Dawn
This guide provides an in-depth look at every major character in Horizon Zero Dawn, including the sole playable protagonist, key allies, antagonists, and notable figures. While Aloy is the only character you directly control, you will interact with a rich cast that influences your journey. Each entry covers background, role, strengths/weaknesses, and—where applicable—playstyle, unlock conditions, recommended equipment, and team synergy.
---
Main Playable Character: Aloy
Background: Aloy is a young Nora outcast, born to a mysterious mother and raised by the outcast warrior Rost. She discovers an ancient Focus device that reveals holographic data from the old world. Driven by a desire to learn her origins and prove herself to the tribe, she becomes one of the most formidable machine hunters in the land.
Role: The primary hunter and machine specialist. She is a flexible, all-around character capable of stealth, ranged combat, melee, and tactical manipulation of machines using her Focus and various weapons.
Strengths:
- Exceptional agility and climbing ability.
- Ability to use a Focus to scan machines for weaknesses, components, and patrol patterns.
- Access to a wide array of weapons (bows, slings, tripcasters, ropecasters, etc.) and ammo types (fire, ice, shock, etc.).
- Three skill trees: Brave (combat), Prowler (stealth), Forager (resources/crafting).
- Can override machines to fight for her or use as mounts.
- Limited health; must rely on potions and healing items.
- No dedicated tank/damage reduction; positioning is critical.
- Stealth is broken if detected; cannot outrun many machines.
- Resource management for ammo and traps is necessary.
- Early Game: Carja Bow (hunter arrows), Nora Longbow (precision arrows), Tripcaster (blast traps), sling for elemental effects. Armor: Nora Silent Hunter (stealth) or Nora Brave (health).
- Mid Game: Shadow weapons from Meridian merchants—especially Shadow Hunter Bow (tearblast arrows) and Sharpshot Bow (fire arrows). Carja Blazon outfit (fire resistance).
- Late Game: Banuk weapons (Striker Bow, Powershot Bow) from The Frozen Wilds DLC. Shield-Weaver armor (energy shield) for survivability. Oseram armor (melee resistance) for close-quarters.
- Skill Build: Prioritize Bravado (critical hit chance), Double/Triple Shot from Brave; Silent Strike from Prowler; gatherer skills from Forager. Unlock "Cauldron Override" for larger machines.
- Background: A grim, exiled Nora warrior who raised Aloy after her mother's death. He trained her in survival, hunting, and combat.
- Role: Mentor and temporary protector for the first few hours. Dead after challenge—his role is narrative/farewell.
- Strengths: Skilled melee fighter and archer; provides early guidance.
- Weaknesses: Not playable; dies early.
- Playstyle: N/A (NPC only).
- Unlock: Automatically present in prologue.
- Recommended Equipment: None (pre-set).
- Team Synergy: Helps Aloy learn basics; his death motivates her journey.
- Background: A mysterious, whip-smart traveler from the Banuk tribe. He assists Aloy via Focus transmissions, sharing ancient knowledge and a cynical perspective.
- Role: Information broker and quest-giver; provides crucial lore and hacking tools (Override module).
- Strengths: Deep understanding of old world tech; excellent historian and strategist.
- Weaknesses: Morally ambiguous; uses Aloy for his own ends.
- Playstyle: N/A (off-screen helper).
- Unlock: Met after leaving Nora lands.
- Recommended Equipment: None.
- Team Synergy: Provides mission objectives and unique override abilities (e.g., Corrupted Thunderjaw).
- Background: A loud, boisterous Oseram Vanguard captain. Loyal to the Carja king Avad, he becomes a trusted ally during the Meridian battle.
- Role: Melee-focused ally in specific quests; provides heavy weapon support.
- Strengths: Strong melee damage; uses a heavy hammer; draws aggro.
- Weaknesses: Slow; lacks ranged combat; can be overwhelmed.
- Playstyle: NPC in "The Looming Shadow" and final mission; stands and fights alongside Aloy. Use him as a distraction while you pick off ranged threats.
- Unlock: First encountered in "A Seeker at the Gates".
- Recommended Equipment: None (carries his own gear).
- Team Synergy: Good partner for crowd control; let him tank while you freeze or tearblast machines.
- Background: A young Nora warrior and former rival to Aloy. After initially opposing her, he becomes a steadfast friend during the defense of the Sacred Lands.
- Role: Ally in Nora-related quests (e.g., "The Heart of the Nora"). He is a supporting character.
- Strengths: Decent archer; brave; inspires other Nora.
- Weaknesses: Not as skilled as Aloy; dies in battle (if you fail side quest).
- Playstyle: NPC that fights with you in "The Grave-Hoard" and other missions. He uses a bow and can hold off enemies.
- Unlock: Met after becoming a Seeker.
- Recommended Equipment: None.
- Team Synergy: Backup during defense sequences; his presence raises morale.
- Background: An Oseram scrappers guild leader who salvages old world ruins. She helps Aloy with gear and quests.
- Role: Merchant and quest-giver (side quest "Hammer and Steel"). Provides a unique trap upgrade.
- Strengths: Knows her way around machines; resourceful.
- Weaknesses: Not a combatant.
- Playstyle: N/A (non-combat NPC).
- Unlock: Found near the Carja border.
- Recommended Equipment: None.
- Team Synergy: Provides early access to blast sling upgrades.
- Background: A Carja huntress who becomes the Sunhawk of the Hunter’s Lodge. She befriends Aloy and helps her through Lodge conflicts.
- Role: Quest-giver and temporary ally during "Hunter's Blind" side quests. She is a skilled archer.
- Strengths: Excellent markswoman; uses longbows.
- Weaknesses: Can be arrogant.
- Playstyle: NPC ally in Lodge missions; she provides ranged cover.
- Unlock: Recruited after helping her get into the Lodge.
- Recommended Equipment: None.
- Team Synergy: Pairs well with Aloy’s stealth; she can provide distractions.
- Background: A psychopathic Carja soldier who loves killing bandits. He offers to team up to clear bandit camps.
- Role: Ally for clearing bandit camps; offers unique dialogue and rewards.
- Strengths: Brutal combat skills; enjoys violence.
- Weaknesses: Unstable; may turn on you (optional choice).
- Playstyle: NPC that fights alongside you in bandit camps. He is very aggressive and draws attention.
- Unlock: First encountered at the first bandit camp location.
- Recommended Equipment: None.
- Team Synergy: Good for loud approach; he kills many enemies quickly, but may leave you exposed.
- Background: A zealot of the cult known as the Eclipse, dedicated to reviving the ancient AI HADES. He is the Sun-Priest of the Shadow Carja and main human antagonist.
- Role: Final human boss; commands Eclipse forces. Personal grudge against Aloy.
- Strengths: Skilled swordsman; heavily armored; uses fire traps and machine mounts.
- Weaknesses: Overconfident; vulnerable to crowd control once armor is stripped.
- Playstyle (encounter): Battle in "The Looming Shadow". Aloy must dodge his sword strikes, destroy his armor components, and use freeze or shock arrows to stun him.
- Unlock: Encountered throughout story; final boss fight at endgame.
- Recommended Equipment (for fight): Shadow Sharpshot Bow (precise shots to helmet/armor), Carja Blazon (fire resistance), blast traps for phase 2.
- Team Synergy: N/A (solo boss).
- Background: Founder of Faro Automated Solutions, creator of the rogue swarm that destroyed the old world. He also erased the project’s records and murdered the Alphas.
- Role: Symbol of humanity's destruction; encountered only in holographic recordings and a reveal in the Genealogy facility.
- Strengths: Wealth and influence (historical).
- Weaknesses: Not combatant.
- Playstyle: N/A (narrative only).
- Unlock: Discovered during main story.
- Team Synergy: N/A.
- Background: A rogue AI created during Project Zero Dawn to terraform Earth after the Faro Plague. It seeks to reawaken the swarm and extinguish all life.
- Role: Final antagonist; controlling the Eclipse and corrupting machines.
- Strengths: Can corrupt machines; has vast knowledge; controls the Eclipse and the Horus units.
- Weaknesses: Vulnerable to the Master Override from the Corruptor; can be deactivated by Aloy.
- Playstyle (encounter): Final mission: Aloy must override a Corruptor to upload a virus to HADES. Sequence requires stealth and combat to protect the override.
- Unlock: Revealed in late game.
- Recommended Equipment (for final fight): Shield-Weaver armor, Banuk Powershot Bow, sticky bombs.
- Team Synergy: Allies Erend and Varl assist during phases.
- Background: The Sun-King of the Carja, son of the mad king Jiran. He seeks to reform the Carja and forge alliances.
- Role: Quest-giver (main and side quests); provides resources and political support.
- Strengths: Charismatic; wise ruler.
- Weaknesses: Sometimes naive.
- Playstyle: N/A (non-combat).
- Unlock: Met during "The Sun Shall Fall".
- Team Synergy: Provides access to Meridian vendors and information.
- Background: Avad's mistress and leader of the Vanguards. Her death sets Erend on a path of vengeance.
- Role: Narrative presence; her absence motivates Erend.
- Strengths: Was a legendary warrior.
- Weaknesses: N/A (deceased).
- Playstyle: N/A.
- Unlock: Mentioned in quests.
- Team Synergy: None.
- Background: Matriarch of the Nora tribe. She supports Aloy against the tribe’s superstitions.
- Role: Quest-giver (early game); provides shelter and guidance.
- Strengths: Wise; protective of Aloy.
- Weaknesses: Limited political power.
- Playstyle: N/A.
- Unlock: First encountered in "The Point of the Spear".
- Team Synergy: Provides access to Nora vendors.
- Background: A Carja scholar who aids the Eclipse under duress. He is connected to Aloy’s mystery.
- Role: Quest-giver ("The City of the Sun" line); provides leads.
- Strengths: Knowledgeable about ruins.
- Weaknesses: Cowardly; easily manipulated.
- Playstyle: N/A.
- Unlock: First seen in his house during "The Point of the Spear".
- Team Synergy: Provides info on Aloy’s mother.
- Background: A Banuk shaman who helps Aloy navigate the Cut region in The Frozen Wilds DLC.
- Role: DLC quest-giver and ally during certain missions.
- Strengths: Shamanic abilities; can communicate with spirits.
- Weaknesses: Not a fighter.
- Playstyle: N/A (non-combat).
- Unlock: Found in Banuk camp during DLC.
- Team Synergy: Provides lore and access to unique machines.
- Background: An Oseram merchant obsessed with old world artifacts. She aids Aloy with a side quest.
- Role: Side quest-giver ("Ancient Armory").
- Strengths: Tinkering skills.
- Weaknesses: Clumsy.
- Playstyle: N/A.
- Unlock: Met during main story.
- Team Synergy: Rewards the Shield-Weaver armor.
Weaknesses:
Playstyle:
Aloy is a hit-and-run tactician. In combat, use the Focus to identify elemental weaknesses and component weaknesses. Start encounters with stealth kills on human enemies or critical strikes on machines. Use the environment—tall grass, ledges, rock outcroppings—to reposition. Engage from distance with arrows or throw traps for crowd control. In melee, use the spear for finishing stunned enemies but avoid prolonged brawls with large machines.
Unlock Conditions: Aloy is unlocked from the very start of the game; no requirements.
Recommended Equipment & Builds:
Team Synergy: As a solo character, Aloy does not have a party. However, in certain quests, allied NPCs (e.g., Erend, Varl, Petra) will fight alongside her temporarily. These allies draw enemy aggro and deal moderate damage, allowing Aloy to flank or use heavy weapons. Her own skills complement any ally by disabling machines (shock/freeze) or creating openings (stealth).
---
Allies & Friends
#### Rost
#### Sylens
#### Erend
#### Varl
#### Petra
#### Talanah
#### Nil
---
Antagonists
#### Helis
#### Ted Faro
#### HADES (Extinction Signal)
---
Other Notable Characters
#### Avad
#### Ersa (deceased)
#### Teersa
#### Olin Delverson
#### Vanasha
#### Laulai
---
Summary of Roles
| Character | Type | Role in Game | Playable? |
|---|---|---|---|
| Aloy | Protagonist | Main hunter & story driver | Yes (sole) |
| Rost | Mentor | Temporary guide | No |
| Sylens | Information Broker | Quest-giver, hacking aids | No |
| Erend | Ally (Oseram Vanguard) | Combat support in story | No |
| Varl | Ally (Nora Warrior) | Combat support in Nora quests | No |
| Petra | Merchant/Scrapper | Side quests, upgrades | No |
| Talanah | Hunter's Lodge | Side quests, combat aid | No |
| Nil | Bandit Hunter | Side quests, aggressive ally | No |
| Helis | Antagonist | Boss fight | No |
| HADES | Antagonist | Final quest objective | No |
| Avad | Ally (Political) | Quest-giver, resources | No |
---
This guide covers the base game and The Frozen Wilds DLC. Characters like Ourea (Banuk chieftain) are included in the DLC section; they are not playable but important.
---
Recommended Loadouts for Key Encounters
- Bandit Camps (with Nil): Stealth gear (Nora Silent Hunter), Sharpshot Bow (strike from above), blast traps for chokepoints. Let Nil charge in, then pick off survivors.
- Eclipse Fort (with Erend): Freeze arrows to slow Eclipse soldiers; heavy melee resistance armor; use the environment to separate enemies.
- Final Mission: Shield-Weaver armor, Banuk Powershot Bow for ranged damage, sticky bombs for clusters of machines. Use Erend and Varl as distractions during the HADES upload.
By understanding each character's role, you can make the most of their contributions to your journey through the world of Horizon Zero Dawn.
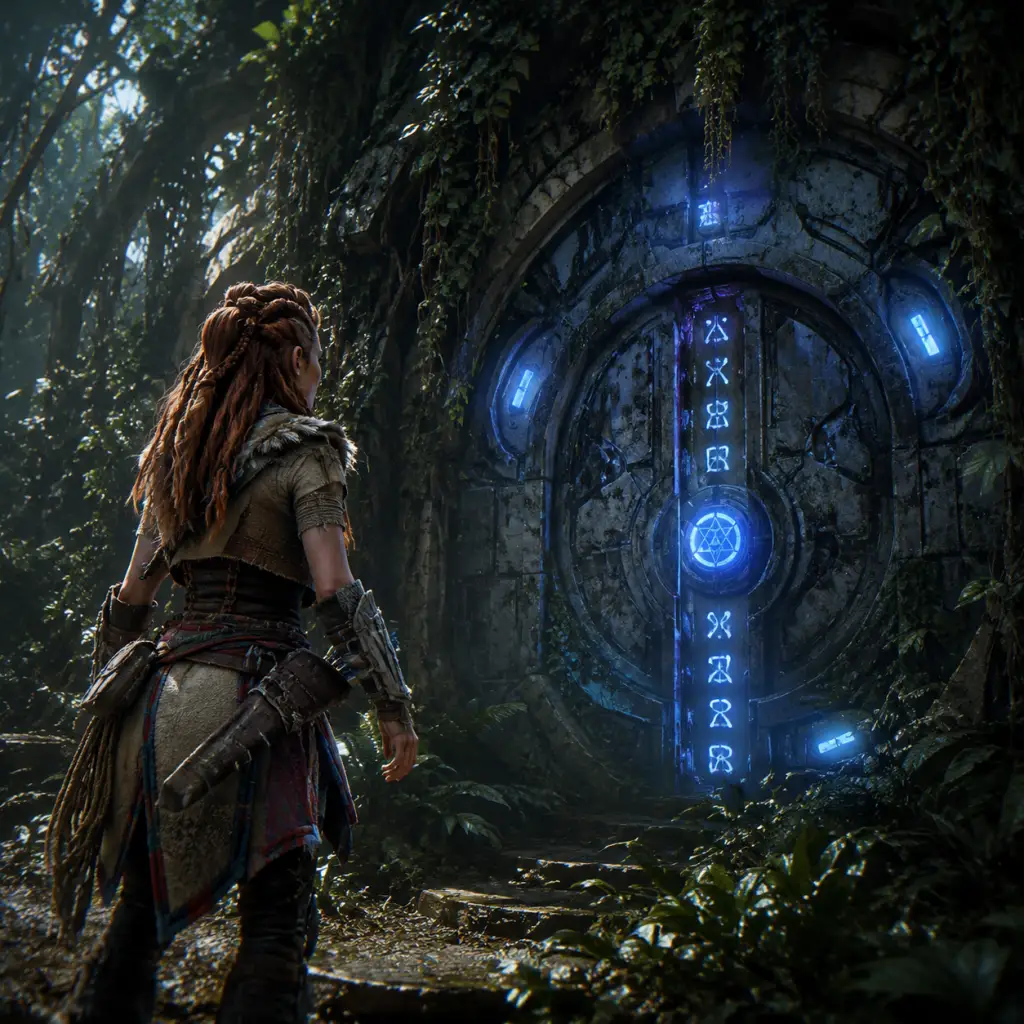
Cheats & Secrets
Cheats & Secrets: Horizon Zero Dawn
Horizon Zero Dawn does not have any traditional cheat codes, console commands, unlock codes, or developer debug menus available to players on any platform (PC, PlayStation 4, PlayStation 5). There are no built-in codes to give yourself infinite health, unlimited resources, or instant machine kills. However, the game contains a wealth of hidden content, Easter eggs, and developer-intended secrets that are well worth discovering. This guide covers all known legitimate hidden features and secrets.
---
Official Secrets & Hidden Content
#### 1. Easter Eggs & Pop Culture References
- Machine References: Many machines are named after real-world animals or mythological creatures (e.g., Thunderjaw, Stormbird, Rockbreaker). The Corruptor and Deathbringer are direct callbacks to the Killzone series (also by Guerrilla Games).
- Frozen Wilds DLC: The expansion includes a side quest called "The Frozen Wilds" that features a hidden easter egg referencing "The Shining" – a typewriter with the phrase "All work and no play makes Jack a dull boy" typed repeatedly on a piece of paper. Found in a small cabin near the Banuk settlement.
- Metal Flowers: These collectibles have poems inscribed on them. The poems are quotes from various real-world poets (e.g., Maya Angelou, Emily Dickinson) but also include one quote from "The Last of Us" (a Naughty Dog game): "Look for the light" – a reference to the Ellie’s song.
- Banuk Werak Shaman: In the Frozen Wilds, there is a shaman named Brina who tells a story about a "great shining one" that resembles E3 2015 demo footage of Aloy talking to a mysterious figure (later revealed to be Sylens). This is a self-referential nod.
- Horizon Zero Dawn: The Board Game Poster: Inside the Hunter’s Lodge in Meridian, you can find a poster on a wall that advertises a fictional board game called "Horizon Zero Dawn: The Board Game" – a real product later released.
- Aloy’s Reflection: In certain reflective surfaces (like water), Aloy’s reflection is visible. If you stand near a campfire at night, she sometimes hums or mutters to herself.
- Mother’s Heart Banter: After completing certain main quests, NPCs in Mother’s Heart (the Nora village) have unique dialogue that disappears after progressing. Revisit early to catch all lines.
- Silent Striker NPC: In Meridian, there is a NPC named Jor who can be seen practicing combat moves. If you talk to him, he says “I’m training… in case the machines get in here.” He is a subtle homage to the generic guards in other games.
- The Grave of a Friend: Near the first Carja fort (the one with the Shadow Carja), there is a small unmarked grave with a bouquet of flowers. Interacting with it gives no quest, but Aloy says a quiet line about loss.
- Sun-Pylon Jump Puzzle: In the Sundom, there is a tall Sun-Pylon structure. Climbing it leads to a high vantage point with a unique view and a small treasure cache (contains a datapoint about a Sun-Priest’s suicide note).
- Banuk’s Secret Hot Springs: In the northern part of the Frozen Wilds, there are natural hot springs. If you sit in them, Aloy relaxes and the game triggers a unique idle animation.
- Killzone References: The Deathbringer and Corruptor machines have visual designs that clearly mimic the Helghast technology from Killzone. Also, the Focus UI resembles the HUD from Killzone: Shadow Fall.
- Guerrilla Games Employee Names: Many datapoints in the game are written by fictional scientists. Some names are anagrams or direct references to Guerrilla developers (e.g., “Dr. Sobeck” shares a partial name with the game’s creative director Mathijs de Jonge – though Sobeck is a fictional character).
- All Machines Killed Trophy: Requires killing at least one of every machine type. There is no in-game tracker, so use a checklist. Includes machines from the DLC.
- Sightseer Trophy: Reach the top of the Tallneck in the Frozen Wilds by climbing the Tallneck’s back and then jumping onto the platform – a hidden achievement.
- Banuk Figures: In the Frozen Wilds, there are 6 hidden Banuk animal figures that unlock a unique decoration for your shelter. They are well hidden and require puzzle-solving.
- Pigment Plants: While not truly secret, the Bluegleam (Frozen Wilds currency) trade items are often overlooked. You can trade Bluegleam for rare weapons and armor from the Banuk merchants.
- After completing the main story, you can start New Game+ and obtain Shadow Weapons – upgraded versions of all weapons that are exclusive to New Game+. Additionally, you unlock the ability to buy the Adept versions of armor which have two modification slots.
- PC (Steam/Epic): There are no console commands or .ini file tweaks that give unfair advantages. The game has no developer console.
- PlayStation: No button combinations or save editor codes exist. Patches have fixed any glitches that allowed item duplication (early patch had a weapon crate glitch, but it was patched).
#### 2. Hidden Dialogue & Optional Conversations
#### 3. Unmarked Locations & Secrets
#### 4. Developer Self-References
---
Exploit-Safe Secrets (No Glitches, Intended by Developers)
#### 1. The "Secret" Machine Kill Trophies
#### 2. Hidden Collections
#### 3. The "New Game+" Special Items
---
No Cheat Codes on Any Platform
---
Summary of Legitimate Hidden Content
| Type | Content | How to Access |
|---|---|---|
| Easter Egg | The Shining reference | Frozen Wilds, cabin with typewriter |
| Easter Egg | Last of Us quote on metal flower | Collect Metal Flower “Bloom” |
| Reference | Killzone machine design | Corruptor/Deathbringer machines |
| Secret Dialogue | Aloy’s humming near fire | Stand idle at a campfire at night |
| Hidden Location | Unmarked grave with flowers | Near first Carja fort |
| Unlockable | Banuk figures | Frozen Wilds puzzle collection |
| New Game+ | Adept weapons/armor | Complete main story, start NG+ |