Hunt: Showdown
## Game Introduction: Hunt: Showdown Welcome to the comprehensive game introduction for **Hunt: Showdown**, a high-stakes, first-person PvPvE bounty hunting game that blends extraction shooter mechanics with survival horror elements. Developed and published by **Crytek** (the creators of the CryEng...
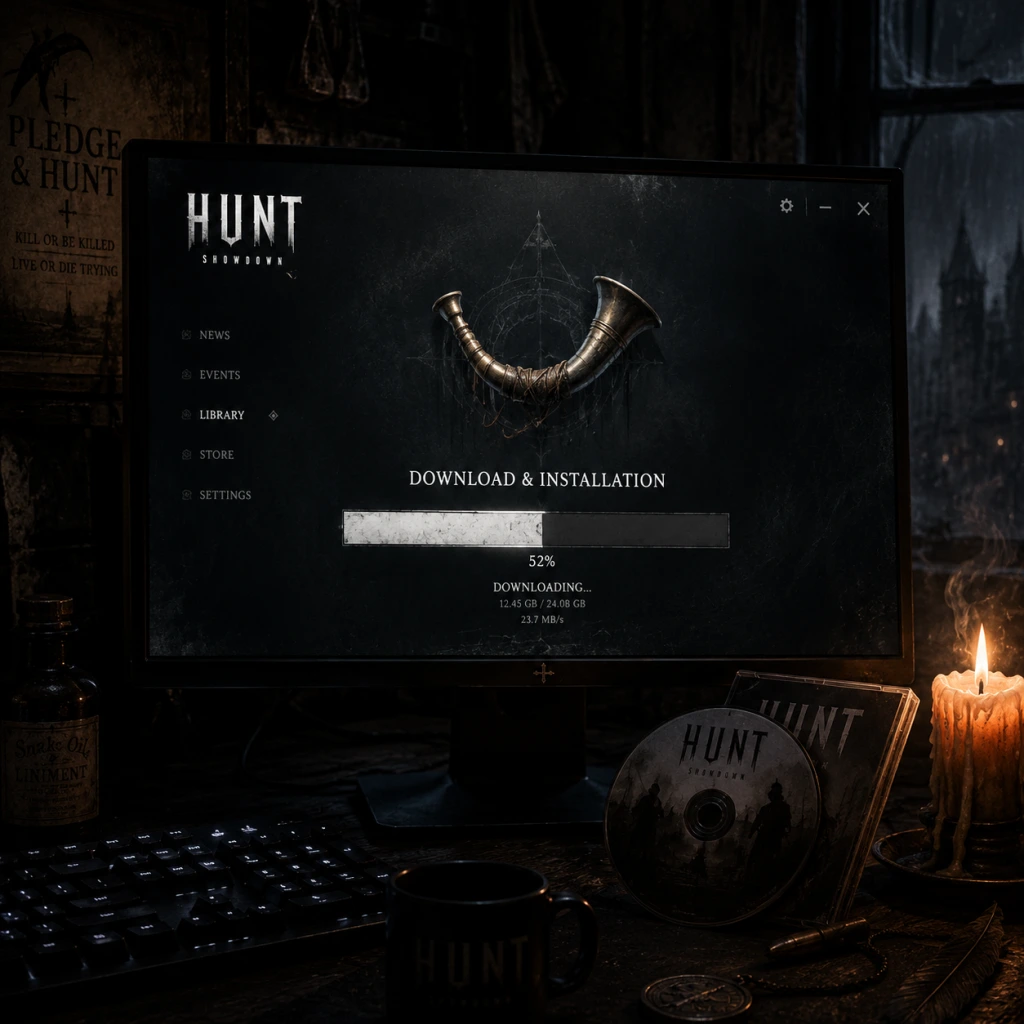
Download & Installation
Download & Installation Guide for Hunt: Showdown
This guide provides comprehensive instructions for downloading and installing Hunt: Showdown on all supported platforms. The game is available on PC (Steam and Epic Games Store), PlayStation 4, PlayStation 5, Xbox One, and Xbox Series X|S. There is no native version for Nintendo Switch or mobile devices.
---
Official Download Sources
| Platform | Store / Source | Notes |
|---|---|---|
| PC (Steam) | [Steam Store](https://store.steampowered.com/app/594650/Hunt_Showdown/) | Direct purchase and download. |
| PC (Epic Games) | [Epic Games Store](https://store.epicgames.com/en-US/p/hunt-showdown) | May occasionally be free or discounted. |
| PlayStation 4 / 5 | PlayStation Store | Purchase via console or web store. |
| Xbox One / Series X\ | S | Microsoft Store |
---
System Requirements (PC)
Minimum Requirements (30fps at Low settings, 1080p)
- OS: Windows 10 64-bit
- CPU: Intel i5-4590 @ 3.3 GHz or AMD FX-8350
- RAM: 8 GB
- GPU: Nvidia GeForce GTX 660 Ti or AMD Radeon R9 270 (2 GB VRAM)
- DirectX: Version 11
- Storage: 40 GB (SSD recommended)
- OS: Windows 10 64-bit
- CPU: Intel i7-6700 @ 3.4 GHz or AMD Ryzen 5 1500X
- RAM: 16 GB
- GPU: Nvidia GeForce GTX 1070 or AMD Radeon RX 590 (8 GB VRAM)
- DirectX: Version 11
- Storage: 40 GB SSD
- Universal: An internet connection is required for authentication and gameplay. No single-player offline mode exists.
- PC (Steam): A Steam account and the Steam client.
- PC (Epic Games): An Epic Games account and the Epic Games Launcher.
- PlayStation: A PlayStation Network (PSN) account and PlayStation Plus subscription (for online multiplayer).
- Xbox: A Xbox Live account and Xbox Game Pass Core or Ultimate subscription (for online multiplayer).
Recommended Requirements (60fps at High settings, 1080p)
> Note: The game uses the CryEngine and benefits significantly from an SSD. HDD may cause texture pop-in and longer loading times.
---
Account Requirements
---
Step-by-Step Installation by Platform
PC (Steam)
1. Install Steam (if not already installed) from [store.steampowered.com](https://store.steampowered.com).
2. Log in to your Steam account.
3. Purchase Hunt: Showdown from the Store page (or redeem a key).
4. Install:
- Go to your Library.
- Find Hunt: Showdown in the list.
- Click Install.
- Choose your installation directory (ensure at least 40 GB free space).
- Wait for download and installation to complete.
5. Launch: Click Play from the Library.
PC (Epic Games Store)
1. Install the Epic Games Launcher from [epicgames.com](https://store.epicgames.com).
2. Log in to your Epic Games account.
3. Purchase Hunt: Showdown from the Store (or claim if free).
4. Install:
- Go to your Library.
- Find Hunt: Showdown.
- Click Install.
- Choose installation location (40 GB free).
- Wait for download.
5. Launch: Click Launch from the Library.
PlayStation (PS4 / PS5)
1. Ensure your console is connected to the internet and you have a PSN account with PlayStation Plus.
2. Navigate to the PlayStation Store.
3. Search for "Hunt: Showdown".
4. Purchase and download:
- Click Add to Cart or Buy.
- Confirm purchase.
- The download will start automatically. You can monitor progress from the Downloads/Notifications menu.
5. Install – The game installs automatically after download. On PS5, you may choose to install the PS5 version if prompted.
6. Launch – Find the game on your home screen or in the Game Library.
Xbox (One / Series X|S)
1. Ensure you have a Xbox profile with an active subscription (Game Pass Core/Ultimate).
2. Go to the Microsoft Store on your console.
3. Search for "Hunt: Showdown".
4. Purchase and download:
- Select the edition you want.
- Follow the purchase prompts.
- The game will begin downloading. You can check queue in My games & apps > Manage > Queue.
5. Install – Automatic after download. For Xbox Series X|S, Smart Delivery will give you the optimized version.
6. Launch – From the Home screen or My games & apps.
---
First Launch Setup
1. Accept the End User License Agreement (EULA).
2. Loading shaders – On first launch, the game will compile shaders. This can take several minutes and may appear frozen. Do not close the application.
3. Configure graphics settings – The game may auto-detect optimal settings. Adjust resolution, quality, and controls from the Options menu.
4. Login – The game will authenticate via the store’s platform (Steam/Epic/PSN/Xbox). No separate in-game account is needed.
5. Tutorial – You can skip the tutorial but it is recommended for new players.
---
Common Installation Errors & Fixes
| Error | Possible Cause | Solution |
|---|---|---|
| Insufficient disk space | Game requires 40 GB. | Free up space or choose a different drive. For PC, move other files to an external drive. |
| Download stuck at 0% / slow | Network issues or store server load. | Pause and resume download. Restart store client/console. Check internet connection. |
| Corrupted files / CRC error | Incomplete download or bad sectors. | PC (Steam): Verify integrity of game files (Library > right-click Hunt > Properties > Local Files > Verify integrity). Epic: Verify files via launcher (Library > click three dots > Manage > Verify). Console: Delete and reinstall the game. |
| Shader compilation crash | Outdated GPU drivers or insufficient VRAM. | Update GPU drivers to the latest version. Lower graphics settings before launching. |
| Antivirus blocking installation | False positive detection. | Temporarily disable real-time scanning during installation. Add the game folder and executable to exclusions. |
| "Failed to create D3D11 device" | Missing DirectX or outdated GPU. | Install/update DirectX End-User Runtimes (from Microsoft). Update GPU drivers. |
| PlayStation/Xbox error CE-34878-0 / 0x80070422 | Corrupted system cache or network issues. | Rebuild database (PS4/PS5 safe mode). For Xbox, restart console, clear cache (hold power button until it powers off). |
| Game fails to launch after installation | Corrupted configuration files or missing dependencies. | PC: Delete the `user` folder in the game’s installation directory (back up if needed). Reinstall Visual C++ Redistributables. |
Post-Installation Verification
- Check game version: From the main menu, look at the bottom-left corner for the version number. Cross-reference with the latest patch notes on the official website.
- Test connectivity: Try to join a random Quick Play or Bounty Hunt match. If you get disconnected or stuck in matchmaking, check server status at [status.huntshowdown.com](https://status.huntshowdown.com).
- Update graphics drivers: For optimal performance, install the latest drivers for your GPU from Nvidia, AMD, or Intel.
- Create/Recover Crytek account: While not mandatory, linking your account via the official website (crytek.com) enables cross-play invites and some cosmetic rewards. This is done after first launch.
- Adjust audio settings: Audio cues are critical in this game. Ensure your speakers/headphones are properly configured and that spatial audio (Windows Sonic, Dolby Atmos) is enabled if supported.
- SSD strongly recommended: The game’s large textures and open world benefit greatly from an SSD. Expect longer load times and asset pop-in on HDD.
- Cross-play: Hunt: Showdown supports cross-play between PC (Steam & Epic) and consoles (PlayStation and Xbox separately). Mobile and Switch are not supported.
- Multi-platform accounts: If you own the game on multiple platforms, you must purchase it separately for each ecosystem – progress and DLC do not carry over.
- Free weekends: Occasionally, the game is free to play for a limited time. During such events, installation is the same; licenses expire after the weekend.
---
Additional Tips
---
For further help, visit the official [Hunt: Showdown Support](https://support.crytek.com) or the community [Discord](https://discord.gg/huntshowdown).
Game Introduction
Game Introduction: Hunt: Showdown
Welcome to the comprehensive game introduction for Hunt: Showdown, a high-stakes, first-person PvPvE bounty hunting game that blends extraction shooter mechanics with survival horror elements. Developed and published by Crytek (the creators of the CryEngine and the Crysis series), Hunt: Showdown was initially released in Early Access on February 22, 2018, and officially launched version 1.0 on August 27, 2019. The game continues to receive regular content updates, events, and balancing patches.
Platforms
Hunt: Showdown is available on:
- PC (via Steam and Epic Games Store)
- PlayStation 4 (with backward compatibility on PlayStation 5 via enhanced performance)
- Xbox One (with backward compatibility on Xbox Series X|S via enhanced performance)
- PlayStation 5 (native version released alongside the 1896 engine upgrade, with enhanced graphics and performance)
- Xbox Series X|S (native version in 2024 with the 1896 update)
- High-stakes, tactical PvPvE where one mistake can cost your hunter and gear.
- Atmospheric horror with incredible sound design (directional audio is crucial).
- Slow-paced, methodical gameplay that rewards patience, map knowledge, and careful decision-making.
- Extraction shooter fans who appreciate risk/reward systems (e.g., Escape from Tarkov, but in a Victorian supernatural setting).
- Competitive multiplayer with a unique blend of stealth, gunplay (lever-action rifles, revolvers, shotguns), and supernatural abilities.
- Bounty Hunt (Main Mode): Teams of 1-3 hunters compete on a large map (e.g., Stillwater Bayou, Lawson Delta, Desalle) to locate clues, find and kill a boss, banish it, collect the bounty, and extract while fending off other teams and AI monsters. The match ends when all bounty tokens are extracted or all hunters are dead.
- Quickplay (Solo Mode): A faster, solo-only mode where you start with a single weapon and must collect four wellspring clues scattered across the map to become the Wellspring. Once you hold it, you must survive until the timer runs out, or kill the other hunters who are coming for you. The last hunter standing wins the match and keeps the hunter (with gear).
- Trials (PvE Challenges): Single-player or co-op challenges testing specific skills (e.g., killing grunts with only throwing knives, completing objectives under time pressure).
- Shooting Range: A practice area to test weapons, tools, and consumables without risk.
- PvPvE Fusion: The threat of both AI monsters and other human teams creates unpredictable, tense encounters.
- Sound as a Core Mechanic: Every action—crouch-walking, opening a cage, shooting, or even reloading—makes noise that can be heard by everyone on the map. Players rely heavily on sound to track enemies.
- Victorian-Era Weaponry: No automatic weapons; instead, you find slow-firing rifles, revolvers, crossbows, and melee tools like machetes and bomblances. Iron sights and bullet travel time require skill.
- Permadeath & Loot Risk: Your hunter (with its gear and traits) is gone forever if you die. You only keep what you survive with. This adds deep emotional stakes.
- Atmosphere and Horror: The bayou is dark, foggy, and filled with flickering lanterns, buzzing flies, and terrifying monsters. The game is genuinely spooky, with jump scares from the AI and psychological tension from the human opponents.
- The Bounty Token Gamble: You can choose to extract immediately after getting the token, or you can hunt other teams with the bounty—they show up on the map for everyone, making them targets. This creates dynamic risk/reward decisions.
Cross-play is supported between PlayStation and Xbox consoles, but PC players remain in their own matchmaking pool to maintain competitive integrity.
Story Overview & Setting
The game is set in the year 1895 in the Louisiana Bayou, a dark and swampy region plagued by a mysterious, infectious blight known as "The Sculptor." This entity manifests by corrupting living beings and resurrecting the dead, creating monstrous creatures that roam the bayou in a perpetual nightmarish twilight. As a Hunter, you are part of a secret organization tasked with tracking down and eliminating these creatures, specifically those that have accumulated enough dark energy to become "bosses." Once a boss is slain, you must banish its soul using dark rituals, collect its Bounty Token, and extract from the map alive. However, you are not alone—other hunters are competing for the same prize, forcing you to choose between cooperation, betrayal, and all-out conflict.
Main Characters
There are no fixed named protagonists in the traditional sense. Instead, players choose from a roster of Legendary Hunters—unique characters with backstories and visual themes (e.g., The Prodigal Daughter, The Reverend, The Llorona's Heir). Each legendary hunter is purely cosmetic and has no gameplay advantage; the actual playable characters are randomly generated Recruited Hunters that you can hire with in-game currency. These hunters have randomized traits and loadouts, and they gain experience and level up, but if they die in a match, they are permanently lost (in the core “Bounty Hunt” mode). This permadeath mechanic adds tension.
Core Appeal & Target Audience
Hunt: Showdown appeals to players who enjoy:
It is not a run-and-gun shooter; it demands strategic thinking, teamwork (up to trios), and noise discipline.
Game Modes
Online / Offline Support
Hunt: Showdown is primarily online-only. An internet connection is required for all modes, including the menu, because progression and matchmaking are server-based. There is no offline campaign or local multiplayer. The game features dedicated servers hosted by Crytek.
DLC / Expansion Overview
Hunt: Showdown has a large library of paid DLC content, mostly consisting of legendary hunter skins, weapon skins, tool skins, and charm items. These are purely cosmetic and do not affect gameplay. Notable themed bundles include the "Crytek Anniversary" packs, "Scrapbeak" event-related items, and crossover collabs like "A Ghostly Pact" (featured in events). Major content updates (called Events) are free and introduce new bosses (e.g., The Assassin, The Butcher, The Spider, Scrapbeak, Rotjaw), new maps, new weapons, and seasonal battle passes. There are no mandatory expansions or season passes; all gameplay content is available to all players. The "1896" engine upgrade was a free update that modernized graphics and performance on current-gen consoles and PC.
What Makes This Game Unique?
Several elements set Hunt: Showdown apart from other shooters:
In summary, Hunt: Showdown is a masterclass in tension, atmosphere, and high-stakes gameplay. It rewards patience, skill, and careful planning, and it offers a unique experience that you won't find in any other shooter.
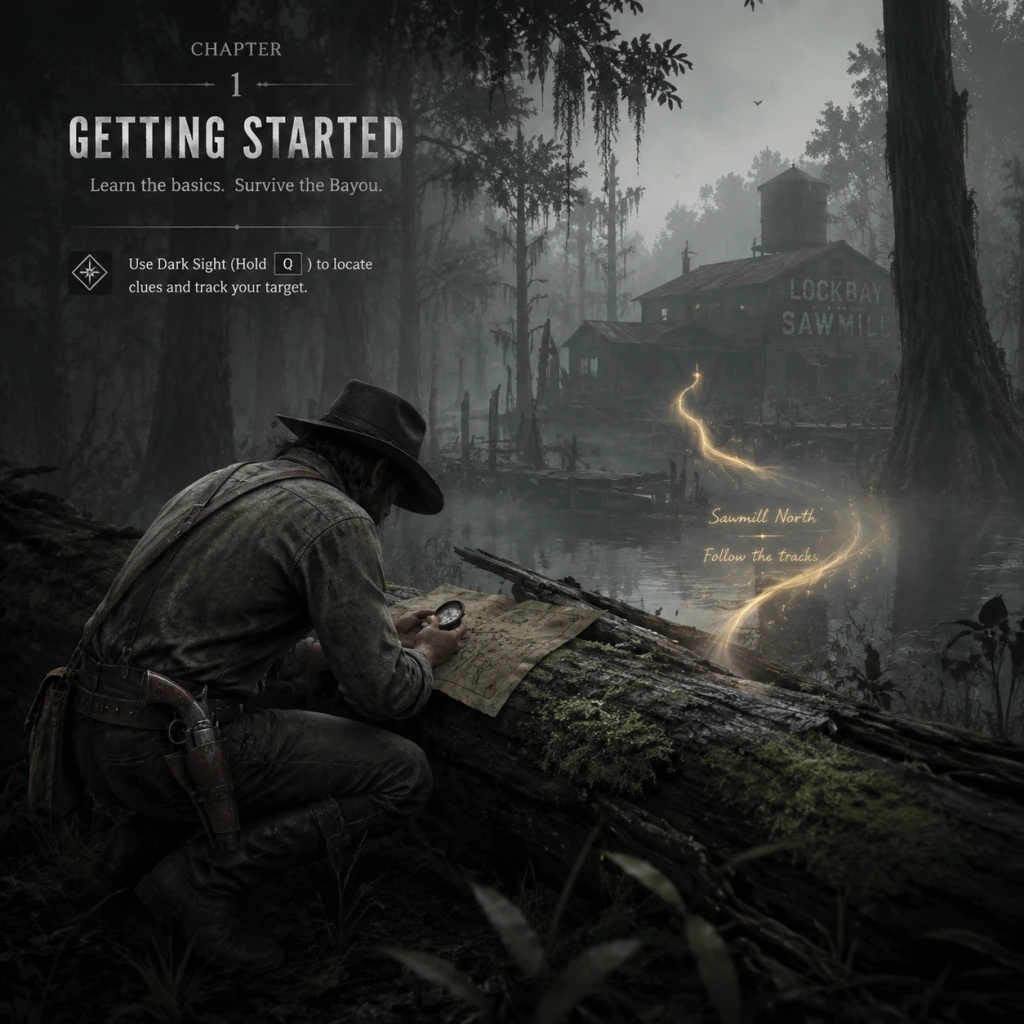
Getting Started
Getting Started Guide for Hunt: Showdown
This guide is designed to help brand-new players navigate their first few hours in Hunt: Showdown. We'll cover everything from initial setup and controls to early objectives, common mistakes, and a clear day-one checklist. By the end, you'll have the confidence to enter the bayou and survive.
First Steps & Your First Hour (Walkthrough)
1. Launch and Main Menu
After installation, launch Hunt: Showdown. You'll arrive at the main menu. The important tabs at the top are: Bounty Hunt (core mode), Quickplay (solo free-for-all), Trials (PvE challenges), Roster (manage hunters), Store (buy gear), and Settings.
2. Complete the Tutorial (Training)
Go to Trials → Training. This is a short, guided mission that teaches you movement, shooting, melee, using Dark Sight, finding clues, banishing a boss, and extracting. Complete it fully—you'll earn some Hunt Dollars (game currency) as a reward.
3. No Character Creation
There is no character creation. Instead, you recruit Hunters from the Roster screen. Each Hunter has random traits and starting gear. For your first match, use the "Free Hunter" button (located in the Roster screen). This gives you a randomly rolled Hunter with a stock loadout (usually a weak gun and minimal tools). Alternatively, you can spend $100–$200 to recruit a one-time random Hunter with better gear. For beginners, use Free Hunters until you understand the economy.
4. Enter Your First Match (Bounty Hunt)
From the main menu, click Bounty Hunt. Choose Random Team (if you want teammates), or Solo if you prefer to go alone. Matchmaking will place you into a bayou map with 12 players total. Your goal: locate clues, find and kill a boss monster, banish it, then extract with the bounty. You can also just survive and extract without the bounty—both give XP and rewards.
5. First Match Tips
- Stick to the edges of the map initially to avoid early fights.
- Follow the yellow clue beams. Interact with them until the map highlights the boss lair.
- Use Dark Sight (press the Dark Sight button) after picking up a clue—it reveals a red whisper direction towards the boss.
- Avoid shooting unless you have to; noise attracts other hunters.
- When you find the boss lair, consider waiting for another team to start the fight, then engage when they are weak. Or, if solo, try to kill the boss quietly.
- After the boss is banished, pick up a bounty token. Then head to an extraction point (shown on map as a wagon icon). Hold the extraction zone for a few seconds to extract.
- Even if you die, you may still get some rewards if you contributed to banishing or extracted with a token.
Controls (All Platforms)
The default control schemes vary by platform. You can rebind keys/buttons in Settings. Below are the essential controls:
| Action | PC (Keyboard & Mouse) | PlayStation | Xbox |
|---|---|---|---|
| Move | W, A, S, D | Left Stick | Left Stick |
| Look | Mouse | Right Stick | Right Stick |
| Shoot | Left Mouse Button | R2 | RT |
| Aim Down Sights | Right Mouse Button | L2 | LT |
| Melee | F (or V) | R3 (right stick click) or R1 | RS (right stick click) or RB |
| Reload | R | Square | X |
| Switch Weapon | Q | Triangle | Y |
| Use/Take/Interact | E | Circle | B |
| Dark Sight | Mouse Button 4 (or Middle Mouse) | Touchpad (click) | View Button (click) |
| Consumable (throw/use) | G | R1 (hold) | RB (hold) |
| Crouch | Ctrl | L3 (left stick click) | LS (left stick click) |
| Sprint | Shift | Move stick click (while moving) | Move stick click (while moving) |
| Map | M | Options/Start | Menu/Start |
| Ping | T | L1 | LB |
| Voice Chat | V (push-to-talk) or Open Mic | Built-in | Built-in |
- Use crouching often to move silently.
- The Touchpad on PS (or View button on Xbox) toggles Dark Sight—use it liberally.
- Console aim assist is very slight; practice aiming in the Training mode.
- Top-left corner: Health bars (chunks). White = healthy, red = missing, can be healed. Broken chunks (grey) require a Medkit or consumable to recover.
- Bottom-left: Stamina bar (yellow) – depletes when sprinting or doing melee attacks. Recovers over time.
- Bottom-right: Ammo counters for current weapon (left) and secondary weapon (right). Numbers in brackets are reserve ammo.
- Center bottom: Weapon/tool icons. Current tool highlighted.
- Top center: Clue count (0/3) and Dark Sight boost timer (after picking up a clue).
- Minimap: Bottom-right corner (can be opened fully with Map key). Shows your position, compounds, extracted hunters (skull icons), and loud noise events (red circles).
- Dark Sight: When activated, screen turns blue/grey. While looking at a clue your dark sight will show a red whisper direction. While holding a bounty token, you can see enemy hunters through walls as red silhouettes for a short duration.
- Extraction Point: A yellow wagon icon on the map. Stand in the glowing zone until timer completes.
- Roster: Shows all your recruited Hunters. Each has a name, level, traits (passive buffs), health, and a loadout. You can dismiss them or equip gear from your inventory.
- Store: Buy weapons, tools, consumables, and charms (cosmetic) with Hunt Dollars. Also sells legendary skins for Blood Bonds (premium currency).
- Inventory: Manage your pool of items. When you recruit a Hunter, you can equip items from your inventory.
- Blood Bond Store: Legendary weapons, hunters, and consumables. Spend real money or earn bonds through gameplay.
- Settings: Graphics, audio (important: enable "Sound mode" to stereo/headphones), controls, and gameplay options (e.g., aim assist, reticule).
- Use silent weapons when possible: silenced Winfield, crossbow, bow, or throwing knives/axes.
- Move from cover to cover. Never run in open fields.
- Check your surroundings (look behind you, listen for footsteps).
- Take cheap loadouts (e.g., Winfield C, medkit, knife, weak vitality shot).
- Play with random teammates; they can teach you callouts and tactics.
- Use the map to plan your route to extract.
- Making unnecessary noise – Don't sprint unless in combat. Don't shoot AI unless it's an emergency. Sound travels far and attracts both hunters and more AI.
- Standing still while aiming – Strafe slightly; you become an easy target if stationary.
- Engaging in prolonged fights – If you get pinned, retreat or flank. Peek-shooting against experienced players will get you killed.
- Using high-tier guns too early – Expensive weapons (like the Dolch, Mosin) are costly to replace. Stick to medium-tier until you understand the game.
- Wasting medkits on small damage – Use a weak vitality shot to heal missing small chunks; save medkits for broken chunks.
- Forgetting to bring a melee tool – A knife or knuckle knife is essential for quickly killing AI without spending ammo.
- Ignoring the clock – The match has a 60-minute timer, but extract points may be camped. Don't take too long.
- Blood Bonds (premium currency): Do not spend these early. Save them for legendary skins (cosmetic only) or later for hunter rerolls. Earn them through gameplay (challenges, daily quests).
- Hunt Dollars (main currency): Spend wisely. Prioritize:
- Upgrade Points: Unlock trait slots and traits in the progression tree. Traits like Lightfoot (quiet movement), Greyhound (faster stamina recovery), and Determination (passive health regen) are excellent for survival.
- Inventory Management: Keep a stock of cheap consumables. Don't hoard high-tier weapons—use them occasionally to practice.
- [ ] Download and install Hunt: Showdown on your platform.
- [ ] Launch the game and complete the Training tutorial (Trials → Training).
- [ ] Go to the Roster screen and click Free Hunter to claim a free random Hunter.
- [ ] Equip that Hunter: add a Knife or Knuckle Knife (if not already slotted) and at least a Medkit. If you have spare currency, buy a Weak Vitality Shot.
- [ ] Queue for your first Bounty Hunt match (select Random Team or Solo).
- [ ] In-match: locate the first clue (yellow beam), follow it, and use Dark Sight after pickup to find the boss direction.
- [ ] Avoid other players. Try to kill a few grunts for XP. If you find the boss, consider waiting for another team to engage.
- [ ] Extract with or without the bounty. Even just surviving yields XP.
- [ ] After the match, check your Roster. Your Hunter should still be alive (if extracted). Level up your Bloodline by earning XP.
- [ ] Optional: Play a second match, this time with a recruited Hunter (spend $100-200 for a better loadout).
- [ ] Watch at least one beginner tips video on YouTube (search "Hunt Showdown beginner tips 2024") to reinforce knowledge.
- [ ] Bind your control rebinds to comfort (e.g., change Dark Sight to a easy-to-reach button on PC).
UI Overview
In-Match HUD (Heads-Up Display):
Out-of-Match Screens:
Essential Early Objectives
1. Learn to kill AI quietly. Melee headshots are instant kills on most AI except Hives and Armored. Use a Knife or Knuckle Knife as a tool. Heavy melee attack (hold button) one-shots basic grunts.
2. Master following clues. Clues are glowing yellow locations. Interact with them (hold E/Interact). After 3 clues, the boss lair is revealed on the map.
3. Practice extraction. Without the bounty, you can still extract at any extraction point. Do this if you're hurt or low on ammo.
4. Learn the compounds. There are about 15 unique compounds on each map. Each has distinct layouts. In your early matches, memorize one compound's layout and nearby spawns.
5. Use Dark Sight after clues. It only lasts a few seconds, but it can show the direction of the boss, helping you navigate.
6. Prioritize survival. Your Hunter lives forever if they extract. If you die, that hunter and all their gear are lost. So focus on staying alive over getting kills.
What to Do First & What to Avoid
Do:
Avoid:
Early Resource Priorities
- Tools (always have a Medkit, a Knife/Knuckle Knife, and 1-2 consumables like Weak Vitality Shot and a blank fire decoy (for distractions) or a flare (to damage certain bosses)).
- Weapons: The Winfield 1873 C (or suppressed variant) is cheap and reliable. The Vetterli 71 Karabiner is a good mid-tier step up. Avoid shotguns as primary unless you plan to get close.
Common Beginner Mistakes
1. Over-reliance on sound cues: New players often crouch-walk everywhere to be quiet, but that makes you slow and easy to ambush. Walk normally; only crouch when you suspect nearby enemies.
2. Not using Dark Sight enough: After a clue, you have a short Dark Sight boost. Use it to check for enemies near the boss lair.
3. Forgetting to bring a melee tool: You cannot kill grunts silently without one. Throwing knives work but consume ammo; a knife is better.
4. Poor map awareness: Not checking the map regularly. Use the map every time you hear a distant gunshot or see a clue ping.
5. Peeking the same angle repeatedly: Experienced players will pre-aim. Move to a different window or flank.
6. Not burning downed hunters: If you kill an enemy hunter, you can burn their body with a flare or lantern to prevent revival. Beginners often forget this, and the enemy gets revived.
7. Extracting too early or too late: If you have no bounty and low on HP, extract. But don't extract at the nearest point if it's exposed; pick a far one if safe.
8. Buying expensive legendary hunters: Spend your early Hunt Dollars on gear, not cosmetic hunters.
Day-One Checklist
By following this guide and completing the checklist, you'll have a solid foundation to enjoy Hunt: Showdown and start improving. The bayou is harsh, but with patience and smart play, you'll quickly go from prey to predator. Good luck, hunter!
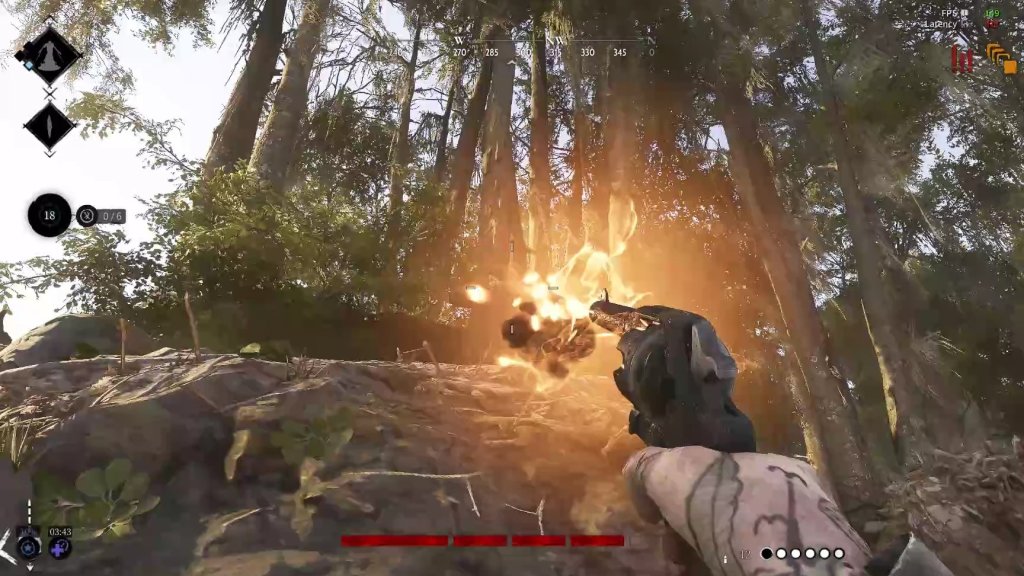
Core Gameplay
Core Gameplay Guide for Hunt: Showdown
This guide breaks down the core gameplay of Hunt: Showdown across four progression tiers: Early Game, Mid Game, Late Game, and Endgame. Each tier explains the main gameplay loop, combat/interaction systems, progression, exploration, quests/missions, economy, character/build growth, and endgame structure. Examples and platform-specific details (PC, PlayStation, Xbox) are included.
Overview of the Core Gameplay Loop
Hunt: Showdown is an extraction shooter with PvPvE elements. Each match begins with a team of up to three Hunters entering a map (bayou or mountains) to track and kill a Bounty Target (a monstrous boss). The loop: Preparation → Contract Selection → Spawn → Exploration & Clues → Bounty Target Banishing → Extraction. Along the way, you encounter NPC monsters (Grunt, Hive, Immolator, etc.), other player Hunters, and environmental hazards. You earn Blood Bonds, Experience, and Hunt Dollars to upgrade Hunters, unlock gear, and prestige. Death can be permanent for a Hunter if you do not extract.
---
Early Game (Bloodline Rank 1–33, No Prestige)
Main Gameplay Loop
- Preparation: Recruit a free Hunter or buy a cheap one (e.g., $100–$200). Equip basic loadouts: a Winfield rifle (e.g., Vetterli Karabiner) or shotgun (e.g., Romero 77), a revolver (e.g., Caldwell Conversion), melee weapon, medkit, and maybe a weak throwable (e.g., fire bomb).
- Contract Selection: Choose from Quickplay (solo) or Bounty Hunt (teams). Stick to Bounty Hunt for team play. Select a contract with a known boss (Assassin, Spider, Butcher, Scrapbeak) and a map (Stillwater Bayou, Lawson Delta, Desalle).
- Spawn & Exploration: You start at an edge of the map. Move toward the nearest clue location (compound). Clues lead to boss lair. Travel carefully – monsters and ambushes await.
- Combat/Interaction: Beginner-friendly enemies: Grunt (slow, melee), Hive (spits poison, avoid close), Immortal (fire weakness). Melee kills are quiet; gunshots attract PvP. Use Dark Sight (press Q on PC, up on D-pad on console) briefly to see clue glow.
- Bounty Target: Kill the boss using melee or high-damage weapons (e.g., sticky bomb, frag, shotgun). After death, banish (press E/interact near body) for 60 seconds. During banish, boss lair is marked on map for all players. Defend against incoming Hunters.
- Extraction: After banish, collect Bounty Tokens (one per player). Head to extraction point (horse-drawn carriage, boat, or airship). Survive until timer ends – or get killed.
- Progression: Earn Bloodline XP to unlock new weapons and tools. Spend Hunt Dollars on equipment. Recruit/retire Hunters. First prestige is optional but gives a legendary skin.
- Economy: Very tight early on. Avoid expensive consumables. Focus on cost-effective loadouts (e.g., $200 per run). Sell unused equipment to other players? No – you loot from dead Hunters.
- Character/Build Growth: Hunter stats (health chunks, stamina, traits) are random. Buy cheap traits (e.g., Gator Legs – faster in water, Beastface – calm animals, Nimble – vault faster).
- Quests/Missions: Daily challenges (e.g., “Kill 10 Grunts”, “Extract with Bounty”). Weekly events. Trials for unlocks. These reward XP and blood bonds.
- Endgame Structure (Early): No prestige yet. Focus on leveling Bloodline to 33 to unlock medium and large weapon variants, tools, and consumables.
- Preparation: Recruit random Hunters with 2–3 trait points. Build loadouts costing $300–$500. Unlock mid-tier weapons: Caldwell Rival 78 (shotgun), Winfield Swift (lever), Vetterli 71 Karabiner (rifle), Silenced Nagant (pistol). Use special ammo (poison, incendiary, FMJ) for advantages.
- Combates/Interactions: Advanced techniques: Wall penetration (shoot through wood, thin metal). Baiting (throwable sounds). Dragonsbreath (fire shotgun shells). Poison crossbow for area denial. Use Dark Sight at boss compound to see other players holding bounty tokens (short range).
- Progression: Unlock Tier II and III Hunters (better starting traits). Prestige (optional) resets Bloodline to 1, but you keep skins, blood bonds, and prestige rewards (slot, exclusive weapons).
- Economy: More stable. Hunt Dollars accumulate. You can afford long-duration consumables (sticky bomb, frag, dynamite). Sell looted weapons from dead Hunters (but keep good ones).
- Character/Build Growth: Traits become game-changing: Doctor (large healing from medkit), Frontiersman (extra consumable), Fanning (fast revolver hipfire), Levering (fast lever-action hipfire). Build synergy: e.g., Fanning + Pax Claw revolver for close range; Levering + Winfield Talon for mid-range.
- Quests/Missions: Monthly Battle Pass (if season active) with challenge trees. Legendary skins unlocked via tokens. Weekly traits and legendary equipment. Trials remain; harder variations (triple boss, night map).
- Endgame Structure (Mid): Consider first prestige (Rank 1 to 66) to unlock permanent bonuses. Focus on mastering boss counters: Assassin (weak to poison), Butcher (weak to fire), Spider (weak to flashbangs), Scrapbeak (loud noise attracts grunts, but traps work).
- Preparation: Build a meta loadout costing $700–$1200. Top-tier weapons: Crown & King Auto-5 (shotgun), Mosins-Nagant M1891 (bolt action), Lebel 1886 (marksman), Specter 1882 (semi-auto). Use special ammo effectively: Dum Dum (bleeding), High Velocity (faster bullet). Consumables: Fragmentation Bomb, Dynamite Bundle, Chokes (for fire weapons). Traits: Bulwark (explosion reduction), Salveskin (fire resistance), Ghoul (regain health from killing enemies).
- Combat/Interactions: Advanced tactics: Wallbang shooting through important covers. Flashbangs for boss push. Poison crossbow for area control. Levering/Fanning/Quartermaster (four weapon slots). Dynamic inventory swapping (left-hand weapons for hipfire). Zone control with fire and concertina.
- Progression: Prestige often; each prestige grants a skin/legendary item. Unlock all weapons and traits. Prestige 10 gives a unique skin. Focus on Achievement hunting (kills with specific weapons, extract 5 bounties in a row).
- Economy: Abundant Hunt Dollars. Buy legendary skins (some paid with blood bonds). No financial limitation; live loadouts every match.
- Character/Build Growth: Max stats (150 health, three bars of 50). Traits: Serpent (snake-like reload speed), Gataling, Stamina Shot for sprint regeneration. Synergy: e.g., Quartermaster (big weapon in small slot) + Silenced Winfield + Levering. Assassins use Silent Killer (no sound when melee killing).
- Quests/Missions: Battle pass levels 50–100. Legendary hunters (e.g., The Reaper, The Keeper). Special events (e.g., Halloween, Xmas) with unique contracts (fog, night). Trials completed for all maps.
- Endgame Structure (Late): You have near-perfect loadouts. Focus on high KD (kill/death ratio), extracting often. Play both Bounty Hunt and Quickplay (solo) for variety. Master all bosses and compound tactics.
- Preparation: Minimal cost concerns. You use legendary skins routinely. Loadouts are highly optimized: e.g., Mosin-Naganant Sniper + Dolch 96 (semi-auto pistol) + Knife throwing (tomahawk). Tools: Chokes, Flare Gun, Dusters, Medkit. Consumables: Fragmentation Bomb, Dynamite Bundle, Vitality Shot, Stamina Shot. Traits: Levering, Fanning, Quartermaster, Backwater (resist water spawn), Bolt Thrower (crossbow faster).
- Combat/Interactions: Executing clean PvP trades. Use Dark Sight specifically to track bounty holders. Wallbang based on sound (relocate after shooting). Bunny hopping minimal, but slide and AD strafe important. Mechanical skills: high headshot accuracy, quick scopes. Team synergy: voice comms, cover fire, and resurrecting.
- Progression: No more Bloodline XP rewards – prestige locked. Focus on Weekly Challenges for blood bonds and legendary items. Achievement hunting for 100%. Leaderboards if competitive. Twitch drops for cosmetics.
- Economy: Blood bonds used for prestige skins, generous amount from weekly. Hunt Dollars meaningless (millions).
- Character/Build Growth: You have all traits unlocked. Builds are tailored to playstyle: Carrier (many throwables) + Frontiersman + Packmule (loot more). Sniper: Steady Hand, Sharpshooter, Lightfoot (silent movement). Brawler: Brawler, Greyhound, Mithridatist (poison resistance).
- Quests/Missions: Bounty Hunt still main loop. Quickplay for solo practice. Dark Sight boosted during events (e.g., “The Shadow”). Special contracts (e.g., Night, Fog, Trios only). Wildcard modes sometimes.
- Endgame Structure (Endgame): Chase high MMR (Skill Based Matchmaking rating). Win streaks. Participate in community tournaments. Content creation (guide making, streaming). Game mastery: know all compounds, spawns, loot spots. Prestige beyond 10 for prestige bragging rights.
Example Early Game Run:
1. Recruit a free Hunter with a Romero 77 hatchet shotgun and Caldwell Conv. pistol. Bring a weak vitality shot, a fire bomb, and a knife.
2. Load into Stillwater Bayou. Clue at Chapel of Madonna. You see a team in the distance? Hide or avoid. Use zombie bait (chicken coop) to distract Grunts.
3. Boss is Assassin at Scupper Lake. Enter compound, clear NPCs. Boss fight: Use shotgun at close range, avoid clones. Throw firebomb to ignite boss (flammable). After banish, pick up token. Extract at nearest boat. Profit ~$250 and ~2000 XP.
---
Mid Game (Bloodline Rank 34–66, First or Second Prestige)
Main Gameplay Loop
Example Mid Game Run:
1. Recruit a Hunter with 2 trait points. Buy a Vetterli Karabiner Deadeye (scope) + Silenced Nagant + Medkit + Flare Pistol (for immolator) + Concertina Bomb (area denial).
2. Load into Desalle (medium map). Clues point to Fort Carmick (Butcher). On the way, you hear a firefight – you engage a duo. Use silenced pistol to pick off grunts, then snipe one player. Finish with bayonet. Loot their loadout (Winfield Swift + levering).
3. Boss is Butcher. Use flares to ignite him (fire damage). He enrages – use stamina shot to melee. After banish, two players approach. Place concertina bomb at doorway, then use shotgun from loot to ambush them. Extract with two tokens. Net $600 and 3500 XP.
---
Late Game (Bloodline Rank 67–100, Several Prestiges)
Main Gameplay Loop
Example Late Game Run:
1. Recruit a legendary hunter (e.g., “The Marshal”). Loadout: Crown & King Auto-5 + Uppercut (powerful pistol) + Concertina Tripwire (trap) + Poison Bomb (area) + Sticky Bomb (boss). Traits: Bulwark, Doctor, Frontiersman.
2. Contract: Bounty Hunt – Lawson Delta. Clues point to Prison (Spider likely). You hear other bounty teams fighting – wait. Use spycam (Dark Sight to check for traps). Enter boss lair quietly. Kill Spider with sticky bomb (2 hits). Banish. While defending, use concertina tripwires at doorways. Two teams fight – you pick off one with shotgun, use poison bomb on second team. Extract with tokens.
3. Net $1000 and 5000 XP. Prestige to get rank 100 reward.
---
Endgame (Prestige 10+, All Achievements, High Skill)
Main Gameplay Loop
Example Endgame Run:
1. Start with a legendary skin “The Revenant”. Loadout: Mosin Marksman (SNPR) + Dolch 96 + Chokes + Concertina Bomb + Poison Bomb. Traits: Steady Hand, Sharpshooter, Lightfoot, Greyhound.
2. Bounty Hunt on Desalle – boss is Assassin at Upper Desalle (center). Snipe one player from a ridge. Move quickly (use stamina). Drop inside, kill Assassin with sticky bomb (takes 2 because Assassin weak to poison – but sticky works). After banish, two teams close. Use concertina + poison bombs to block door. Use Dolch to finish wounded enemy. Extract with both tokens.
3. Net $1500, 8000 XP. Continue for prestige 11.
---
Summary Table: Core Gameplay Across Tiers
| Aspect | Early Game (1–33) | Mid Game (34–66, Prestige 1–2) | Late Game (67–100, Prestiges 3–10) | Endgame (Prestige 10+) |
|---|---|---|---|---|
| Weapon Tier | Tier I (Winfield, Romero) | Tier II (Vetterli, Rival) | Tier III (Crown & King, Mosin) | Any legendary variant |
| Traits Focus | Cheap basics (Gator Legs, Beastface) | Synergies (Fanning, Levering) | Meta combos (Quartermaster+ big+small) | Specialized builds (sniper, brawler) |
| Economy | Tight; spend ~$200 per run | Manageable; ~$400 per run | Abundant; no budget | Infinite; cosmetics focus |
| PvP Skill | Avoid; shoot only if forced | Engage carefully; use ambushes | Aggressive pushes; high aim | Pre-aiming, wallbang, quick peeks |
| Boss Strategy | Melee and basic throwables | Poison/Sticky bombs | Frag bombs, traps | Speed kills (1-2 sticky bombs) |
| Map Knowledge | Learn compound locations | Learn loot caches, boss lairs | Learn all spawns and rotations | Know every sound trap, audio cue |
| Progression Goal | Unlock gear slots, Bloodline 33 | Prestige unlock, level traits | Max gear and traits, high KD | Leaderboards, prestige skin, achievements |
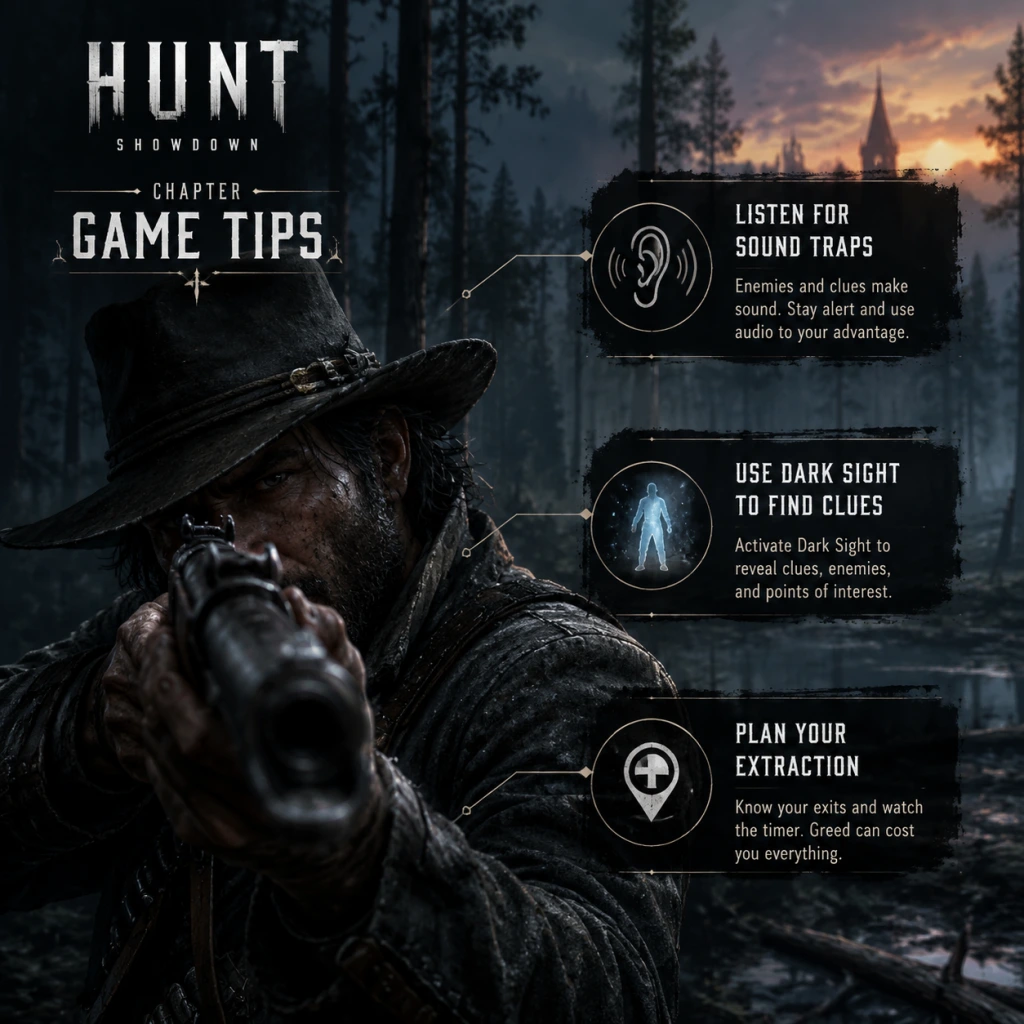
Game Tips
Game Tips for Hunt: Showdown
This guide provides a comprehensive collection of tips for Hunt: Showdown, organized by category. Whether you are a new hunter or a seasoned veteran, these strategies will help you survive the bayou and claim your bounties.
---
General Tips
#### 1. Sound is Your Most Important Sense
- Explanation: Every action you make produces sound: walking, sprinting, crouching, jumping, shooting, even ADS (aiming down sights) with certain weapons. Sound travels differently through different surfaces (water, mud, wood, metal). Use a good headset and listen carefully. Enemies can hear you from up to 100-150 meters depending on the action.
- Analysis: The game relies heavily on audio cues. Prioritize hearing over visual scanning. Crouch walking is nearly silent but very slow. Use it to sneak up on compounds or to rotate without alerting enemies. Learn the distinct sounds: a ladder creak, a dog kennel aggro, a horse neighing (horses are often near clue locations). This is the most critical skill to develop.
- Explanation: Sprinting creates a loud, distinct footstep sound and consumes stamina. Running inside a compound will alert everyone to your exact position. In open fields, you become an easy target.
- Analysis: Walk or crouch walk when approaching a compound you suspect has enemies. If you must cross an open field, use bushes or trees as cover and sprint only short distances between cover. The stamina bar is used for sprinting, melee, and jumping; keep it high for emergencies.
- Explanation: Dark Sight Boost is activated after you pick up a bounty and reveals all living hunters in a large radius (150m?) but for a limited duration (5 seconds per bounty token, usually 10 seconds for two). It also drains the bounty's health if you hold it too long.
- Analysis: Only use it to quickly check if enemies are near the extract or to scan while inside a building. Don't waste it early; save at least 4-5 seconds for the final push. Also, remember that you are visible to others when using dark sight because your character glows. Use it in short bursts behind cover.
- Explanation: Hunt: Showdown has realistic bullet travel and drop. Each weapon has a different muzzle velocity. For example, a Springfield 1866 has ~760 m/s while a Winfield Swift has ~400 m/s. Leading is essential at medium to long ranges.
- Analysis: Practice on the shooting range (available in the menu) to learn the feel of each weapon. For leads, aim roughly 1-2 player widths ahead at 50m with slower bullets. At 100m, lead more. For bullet drop, know that most rifles are zeroed to 100-150m; beyond that, aim slightly higher. Headshots are often one-hit kills but require precise aim. Use the compact ammo weapons for close-mid, long ammo for long ranges.
- Explanation: Meleeing a grunt or hive with a heavy attack is silent and doesn't alert players. Heavy attacks with a knife kill grunts in one hit; light attacks take two. Use a dusters for armored enemies (takes 3-4 heavy hits to the head).
- Analysis: Always clear AI silently when approaching a clue or compound. A gunshot will give away your position and potentially bait other hunters. Carry a knife or dusters. The heavy attack (hold left click) is more powerful. For bosses, use sticky bombs or axes, but otherwise avoid making noise.
- Explanation: When multiple teams converge on a boss lair, it's often wise to let them fight each other rather than rushing in. Wait outside, listen, and ambush the survivors.
- Analysis: This is a core PvPvE strategy. Park yourself 50-100m away from the compound in a bush or behind a ridge. Use a silenced weapon or a bow to pick off a straggler. When the fighting inside stops, the remaining team will be low on health and consumables. Wait for them to leave the building or banish the bounty, then strike. Patience wins games.
- Explanation: Clues are glowing blue points that narrow down the boss lair location. The first clue gives a general area (one of three zones), second clue narrows to a few compounds, third pinpoints the exact compound. A clue can be "banished" (greyed out) if another team already took it.
- Analysis: Move quickly to the center of the map first; clues are usually in fixed locations but can spawn anywhere. If you see a clue already taken, it means a team is ahead of you. Consider a more cautious approach or rotate to a different compound. Use the map to plan your route – avoid open fields and high-traffic areas. The map has many POIs (points of interest) like the Reeker, Healing Waters, etc. – these are good for looting but dangerous.
- Explanation: Each compound has unique buildings, windows, and roof access. Know where sniping spots are, where to hide inside, and where exits lead. For example, in Port Reeker, the lighthouse offers elevation but is a death trap if camped.
- Analysis: Spend time in Quickplay (Soul Survivor) to learn compounds without risk of losing your hunter. In Bounty Hunt, memorize the entrances, sound traps (horse, dog/chicken coops, metal scrap piles), and typical boss spawns. Use this knowledge to predict enemy movements. For instance, if you hear a dog kennel go off at a compound, you know someone just entered that area.
- Explanation: Compounds often have lootable ammo boxes, toolboxes, first aid kits, and cash registers (worth $200-$1000). Cash registers make a distinct high-pitched beep when nearby.
- Analysis: Looting is crucial for restocking consumables and earning money. Even if you are in a firefight, a quick stop at a toolbox might give you a medkit or dynamite. Cash registers are rare but always spawn in fixed spots inside compounds (like the church altar, bank vault, etc.). Memorize those spots. Also, looting dead hunters can yield their gear (weapons, consumables, money).
- Explanation: Your loadout should always include a medkit (preferably a large vitality shot) and a melee weapon (knife/dusters). Medkits heal 50 HP instantly (large) or slowly over time (small). Melee tools are essential for quiet AI kills.
- Analysis: Without a medkit, you are vulnerable to chip damage. A large vitality shot can save you in a fight by quickly healing after taking damage. Dusters are better against armored enemies than knives. Consider bringing a throwing knife or throwing axe for mid-range silent kills.
- Explanation: Common consumables: dynamite (stick, bundle, sticky), frag bomb, flash bomb, firebomb, decoys, concertina bomb, etc. Each has a different purpose. Dynamite is for area denial and killing bosses; flash bombs blind players for 3-4 seconds; firebombs block chokepoints.
- Analysis: Carry at least one explosive (dynamite or frag) to flush out campers. Sticky bombs are excellent for bosses (deals 1/3 of boss HP). Flash bombs are great for pushing into a building. Concertina bombs can block doors or create barriers. Decoys (like blank fire decoys) can mislead enemies. Manage your consumables: you start with two slots (more with traits like Packmule can give extra slots).
- Explanation: Choke bombs create a cloud that puts out fire. If a teammate is on fire (either from a firebomb or Hellhounds), throw a choke bomb on them to extinguish instantly. It also provides temporary cover.
- Analysis: Always bring at least one choke bomb for teamplay. It can save a teammate from burning to death. Also, choke bombs can be used to silence sound traps (like dog kennels) for a short duration. Very versatile.
- Explanation: Some traits are universally useful. The core four are:
- Analysis: Doctor is essential for any loadout because healing is so important. Frontier and Greyhound help with repositioning. Lightfoot makes you silent, which is invaluable for flanking. Other great traits: Fanning (for single-action revolvers), Levering (for lever-action rifles), Serpent (for interacting with clues/banishes from distance), Beastface (makes animals ignore you).
- Explanation: Carry a primary and a secondary that cover different ranges. Common combos:
- Analysis: Your primary should be your main damage dealer. Your secondary should cover its weakness. For example, a Sparks LRR (long ammo, high damage, slow fire rate) pairs well with a fast-firing compact pistol for close range. Romero (shotgun) is powerful at close range but weak at range, so pair with a medium or long rifle. Never use two long-range weapons (like two scoped rifles) because you'll be helpless up close.
- Explanation: Each hunter has up to 150HP divided into health chunks (small: 25HP, medium: 50HP). When you die and are revived, you lose a small chunk permanently for that match (unless you use a Bounty token at extraction). You can also lose health chunks from being downed multiple times.
- Analysis: It is better to have large health chunks (50HP each) than many small ones because you won't lose as much total HP per death. The maximum health is 150, which can be achieved with 1x50 + 1x50 + 1x50 or 2x50 + 1x25 + 1x25, etc. Ideally, aim for a configuration of 50+50+50 (three large bars). That way, each death loses only 50HP, leaving you with 100HP. If you have small bars, you lose 25HP per death, making you more fragile. Use health packs to heal faster. The trait "Greyhound" helps you move faster to avoid damage.
- Explanation: The main way to earn Hunt Dollars is to extract with a bounty (either a boss bounty from a boss kill or a soul bounty from other dead hunters). Bounty tokens are worth $100-200 each, plus extraction bonuses. You also get money from looting hunters, cash registers, and completing challenges.
- Analysis: Focus on survival over kills. A single bounty extraction with a token gives you $200+; killing a team but failing to extract gives nothing. If you are low on money, play Quickplay (free hunter) to earn cash without risking your own hunter. Always try to extract with at least one bounty. Additionally, the weekly challenges reward XP and money.
- Explanation: Free hunters have random loadouts (usually Tier 1 equipment). They are free to recruit and cost nothing. Use them to learn weapons or take risky plays without fear of losing money.
- Analysis: If you die with a free hunter, you lose nothing. Use them to test new guns or practice in Bounty Hunt. When you have a good Legendary hunter or a highly-geared hunter, be more cautious. Also, the free hunter's loadout often includes a medkit and duster, which are decent.
- Explanation: Bloodline XP is earned by killing enemies, looting, and extracting. As you level up, you unlock new weapons, tools, and consumables. Leveling from 1-100 is the main progression path. After 100, you prestige (reset) for a skin.
- Analysis: Focus on completing the "Book of Weapons" (kill 100 hunters with each weapon type) to permanently unlock those weapons for future generations. Also, prioritize unlocking the Sparks LRR (rifle) and Romero 77 (shotgun) early, as they are very effective. Don't rush to prestige if you want to keep all unlocks; prestige resets everything except skins and bloodline.
- Explanation: Every weapon excels at a certain range. For example, a Lebel 1886 (long ammo) is deadly at 100m+, but useless at melee range. A Romero hatchet (shotgun) kills at 10m but can't hit at 30m. Choose your fights based on your loadout.
- Analysis: If you have a long-range rifle, keep distance and force enemies to push into open areas. If you have a shotgun, get inside compounds and use corners. Never engage at a range where your weapon is ineffective. If enemies are far, reposition closer or wait for them to come to you. Use the environment: run through forests to close distance with a shotgun, or use roof tops for sniper rifles.
- Explanation: When two teams are fighting, you can often attack from an unexpected direction. The combatants are focused on each other, making them vulnerable to a flank attack.
- Analysis: Listen for prolonged gunfights. Approach carefully, staying out of the main line of fire. Use silenced weapons or bows to pick off distracted enemies. The best time to attack is when one team is reviving a downed mate. Throw a dynamite into the building or use a frag bomb. After the chaos, you can pick off the survivors.
- Explanation: Set traps with concertina bombs, poison bombs, or trip mines (if available). Lure enemies into your kill zone by making noise (like shooting near a choke point).
- Analysis: Place a concertina bomb at a doorway you expect enemies to come through. Then stand at a safe distance and fire a shot to bait them. When they run through, they get slowed and damaged, making them easy targets. Poison mines are great near clue locations because players often use dark sight. Trip mines are rare but devastating.
- Explanation: If you are playing Duos and one teammate is down, the remaining player can pick up a bounty and use dark sight to see enemy locations. This can help identify where the enemy is hiding to revive a teammate.
- Analysis: This is risky because you are holding the bounty and can be tracked by others. But if you are confident, grab the bounty quickly (if the boss is banished) and give a brief scan. Communicate the enemy positions to your downed teammate. Then try to revive. Alternatively, if both enemies are visible, you can engage more effectively.
- Explanation: In Trios or Duos, call out enemy positions using compass directions (e.g., \"Enemy north, inside the church, on the balcony\"). Use cardinal directions (N, S, E, W) relative to your position.
- Analysis: Clear callouts prevent confusion. Describe what you hear: \"I hear a dog kennel south\", \"Someone is burning a teammate at the barn\". Use the ping system (Q) to mark locations. Combine audio with visuals: \"I saw a flash behind the hay bale, pinged.\"
- Explanation: Move as a team within 20-30 meters of each other. If you are too far, you can't support each other in fights. If too close, one explosive can kill all of you.
- Analysis: Maintain spacing such that you can cover each other's angles. For example, one player watches left, another right when entering a compound. When fighting, don't all peak the same window. Try to get crossfires on the enemy. If a teammate is downed, the others should provide covering fire or smoke while the revive happens.
- Explanation: If you kill an enemy, sometimes it's better to not loot immediately. Instead, use their body as bait – camp it and wait for teammates to revive.
- Analysis: If you kill one enemy, the other teammate(s) will likely try to revive. Set up an ambush near the body. Wait for them to attempt a revive, then kill them. This is particularly effective if you have a silenced weapon or a long-range angle. Be patient; enemies may wait a long time before reviving. Use sound to your advantage: if you hear footsteps near the body, you know they are close.
- Running everywhere: Sprinting constantly makes you loud and stamina-drained. Walk more.
- Fighting every AI: AI can be avoided or killed silently. No need to shoot every grunt.
- Not using cover: Always be near a tree, rock, or wall. Never stand in the open.
- Peeking the same window: Enemies will predict that. Change positions after firing.
- Staying too long in a compound: Once you have your clues, move out. Looting is fine but don't linger.
- Reviving immediately without checking: Always scan or listen before reviving a downed teammate.
#### 2. Never Sprint Indoors or in Open Fields
#### 3. Use the Dark Sight Boost Sparingly
---
Combat Tips
#### 4. Master the Lead and Bullet Drop
#### 5. Use Melee for Silent Kills on AI
#### 6. Bait and Switch: Let Others Fight First
---
Exploration & Map Knowledge
#### 7. Understand the Clue System and Compound Rotation
#### 8. Learn Compound Layouts and Vantage Points
#### 9. Always Check for Loot and Cash Registers
---
Resources & Consumables
#### 10. Always Carry a Medkit and a Melee Tool
#### 11. Consumables: Choose Based on Playstyle
#### 12. Use Choke Bombs to Extinguish Teammates
---
Hunter Builds & Traits
#### 13. Traits: Prioritize the "Core Four"
- Doctor: Reduces health gain delay and improves healing effectiveness.
- Frontier: Increases movement speed while aiming down sights.
- Greyhound: Increases movement speed while crouching.
- Lightfoot: Reduces noise made when walking and falling.
#### 14. Weapon Loadout Synergies
- Rifle + Handgun (e.g., Sparks LRR + Conversion Pistol)
- Shotgun + Long ammo rifle (e.g., Romero 77 + Vetterli Karabiner)
- Compact rifle + Medium pistol (e.g., Winfield + Pax)
#### 15. Hunter Health: Should You Lose Bars?
---
Economy & Progression
#### 16. Earn Money by Extracting with Bounties
#### 17. Use Free Hunters as Disposable Tools
#### 18. Upgrade Your Bloodline to Unlock Better Gear
---
Advanced Strategies
#### 19. Control the Engagement Range with Weapon Choice
#### 20. Use the "Third Party" to Your Advantage
#### 21. Master the Art of the Bait and Ambush
#### 22. Use the "Bounty Skip" in Duos
---
Team Play Tips
#### 23. Communication is Key: Call Out Everything
#### 24. Stick Together but Not Too Close
#### 25. Use the "Body Trade" Tactic
---
Beginner Mistakes to Avoid
---
Conclusion
These tips cover the fundamentals of survival in Hunt: Showdown. Practice, learn map layouts, and always listen. Every death is a lesson. Good luck, hunter!
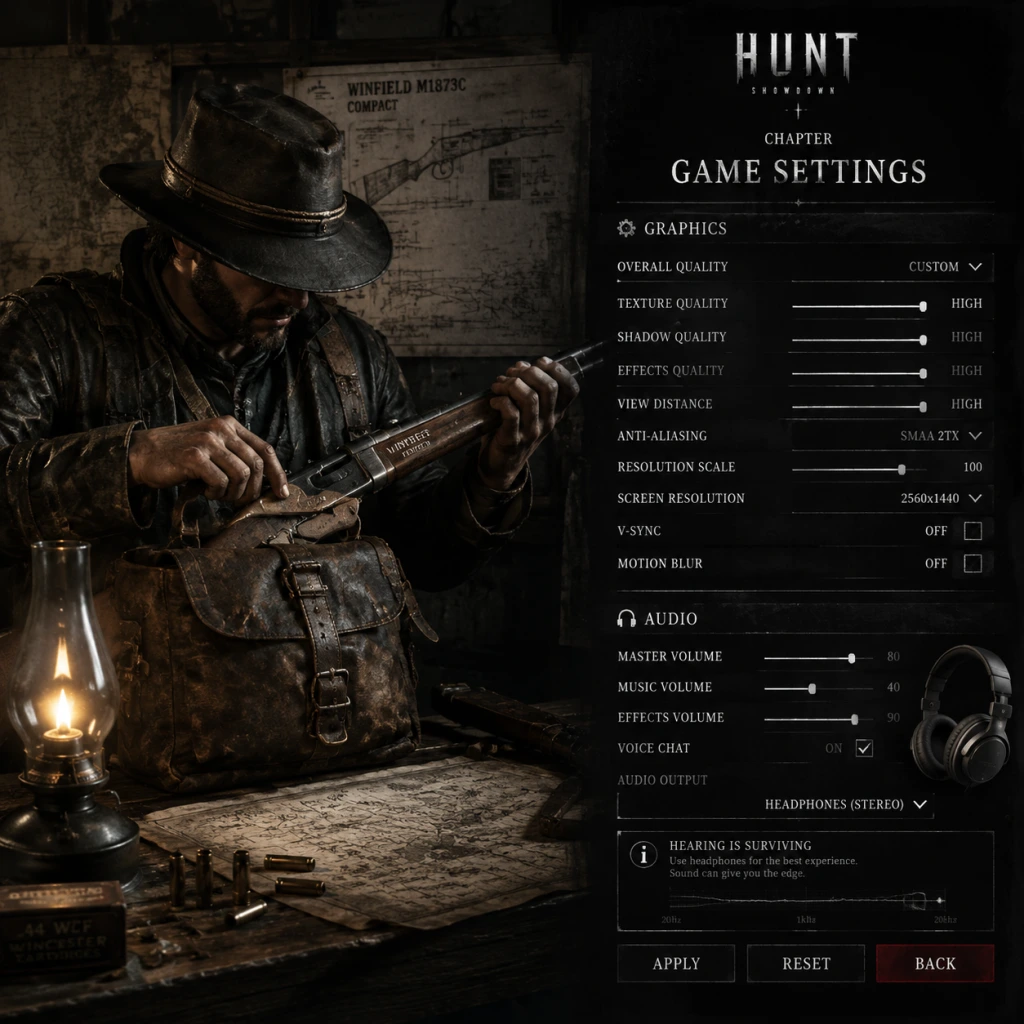
Game Settings
Game Settings Guide for Hunt: Showdown
This guide covers all key settings categories in Hunt: Showdown on PC (Steam/Epic Games Store) and consoles (PlayStation, Xbox). Proper configuration can improve performance, audio clarity, controls responsiveness, and overall gameplay quality. Below you'll find recommended settings for different hardware tiers, along with pitfalls to avoid.
---
1. Graphics Settings
Graphics impact both performance and visibility. Higher settings improve immersion but may reduce FPS and hide enemy silhouettes. Optimize for a balance between smoothness and competitive advantage.
#### Recommended Graphics Presets by Hardware Level
| Hardware Level | Example GPU | Resolution Target | Preset | Key Adjustments |
|---|---|---|---|---|
| Low | GTX 1060 / RX 580 | 1080p 60 FPS | Low | Turn off motion blur, set lighting to Low, use NVIDIA Reflex (if available) |
| Mid | RTX 2060 / RX 5600 XT | 1080p 144 FPS or 1440p 60 FPS | High | Keep object quality High, turn shadows to Medium, texture quality High |
| High | RTX 3070 / RX 6800 | 1440p 144 FPS or 4K 60 FPS | High | Enable VRS (Variable Rate Shading), shadows High, keep anti-aliasing SMAA 1x |
| Ultra | RTX 4080 / RX 7900 XTX | 4K 144 FPS | Ultra | Max everything, enable ray tracing (if available), but beware of performance cost |
- Field of View (FOV): Default 90° is good. Higher FOV (max 110°) gives peripheral vision but reduces target size. Set to 90-100 for most players.
- Motion Blur: Disable – it hurts visibility and offers no competitive advantage.
- Depth of Field: Disable – blurs distant objects, making it harder to spot enemies.
- Object Quality: Keep at High or above – on Low, trees and grass pop-in can reveal enemy positions but also hide them. High is fair.
- Shadow Quality: Medium is recommended – lowest makes enemies invisible in dark spots; highest costs performance.
- Texture Quality: Set as high as your VRAM allows (6GB+ for High/Ultra). Low textures make terrain muddy but can help spotting movement.
- Anti-Aliasing: Use SMAA 1x (or SMAA T2x if you have spare performance). FXAA is blurry; MSAA is expensive.
- Lighting Quality: Low reduces eye adaptation and makes interiors less dark, exposing enemies. Medium is balanced.
- Volumetric Fog: Disable – hurts FPS and adds little visual benefit. If on Low, fog is still present but lighter.
- Vignette: Disable – darkens edges unnecessarily.
- Chromatic Aberration: Disable – reduces visual clarity.
- NVIDIA Reflex: Enable if you have an NVIDIA GPU (reduces input lag).
- Spatial Audio (Headphones): Enable if you own headphones. Use Windows Sonic for Headphones (free) or Dolby Atmos/3D Audio for consoles.
- Audio Output: Headphones (not stereo speakers) – even with speakers, set to Headphones to get better directional cues.
- Master Volume: 80-100% – do not reduce; you need to hear distant sounds.
- Sound Effects Volume: 100% – footsteps and gunshots.
- Music Volume: 0-30% – ambient music can mask enemy noises. Many pro players set it to 0%.
- Voice Chat Volume: Adjust to your preference. Keep at 70-100% for team communication.
- UI Volume: 50-70% – not critical.
- Doppler Effect: Enable – helps determine if a sound source is moving towards or away from you.
- Reverb: Enable – provides spatial cues about environment (e.g., inside vs outside).
- Never use sound compression/equalizers that boost footstep frequencies too much – they may distort gunfire.
- Test your headset with Hunt's built-in audio test (available in Settings > Audio).
- On consoles, ensure your headset is set to “Headphones” and not “TV”.
- ADS (Aim Down Sights): Keep Right Mouse Button. Consider toggle vs hold – toggle reduces finger strain during long fights.
- Sprint: Left Shift (default). Bind to thumb mouse button if easier.
- Crouch: Ctrl (default) or C. Avoid toggle crouch – hold crouch is safer for peeking.
- Vault/Climb: Space (same as jump) but tricky. Some rebind to another key to avoid accidental vaults. Consider separating Jump (Space) and Climb (e.g., V).
- Melee Fast Attack: Default V – keep for quick knife/butt strikes.
- Melee Heavy Attack: Default B – keep.
- Consumable/Dark Sight: Mouse4/5 recommended. Map Dark Sight to a thumb button for quick activation.
- Weapon Switch (1-4): Keep default – essential for fast weapon swapping.
- Map/Objectives: M (default). Rebinding to Tab may conflict with scoreboard.
- DPI: 400-800. Hunt benefits from low sensitivity (cm/360).
- In-game Sensitivity: Start at 0.5 for 400 DPI, adjust until you can do a 180° turn with one full wrist swipe.
- ADS Sensitivity Multiplier: 1.0 (match hipfire). Many players lower it to 0.8-0.9 for fine adjustments.
- Scoped Sensitivity Multiplier: Keep 1.0 or slightly lower (0.9) for stable sniping.
- Raw Input: Enable – bypasses Windows mouse acceleration.
- Mouse Acceleration: Disable – ensure consistent movement.
- Aim Assist: Enable (console) or Disable (PC) – console aim assist is strong; PC players should disable for consistency.
- Stick Deadzone: Lower to 10% or less for quicker response, but increase if you get drift.
- Controller Sensitivity: Start at 3-4 (out of 10).
- Look Smoothing: Disable – adds input lag.
- Trigger Deadzone: Low (10%) for faster actions.
- Colorblind Mode: There are three options (Protanopia, Deuteranopia, Tritanopia). If you have difficulty distinguishing UI elements (team outlines, dark sight glow), enable the appropriate mode. It also changes the color of the bullet damage indicators and bounty icons.
- Subtitles: Enable – shows spoken voice lines from characters and monsters. Helps hearing-impaired players.
- Crosshair Color: Change from white to green/red/blue for better contrast against bright backgrounds.
- Screen Shake: Disable – reduces motion sickness during explosions.
- Show FPS: Enable (in Developer tab via console command `fps 1` or use third-party overlays) – monitor performance.
- Text size cannot be changed – may be an issue for some players.
- Console has no vibration control – toggle in system settings.
- Language Selection: Available at game start (Steam/Epic properties) or in Settings > Language. Options include English, French, German, Spanish, etc. Changing language changes all UI text and voice lines. Be aware that some community servers (e.g., matchmaking) may prioritize language, but it’s not strict.
- Voice Chat Language: Not filterable – you may hear players speaking different languages.
- Text Chat Language: Not filtered – use common sense.
- Server Region: Select the region closest to you: US East, US West, Europe, Asia, Oceania, South America, Russia. Choosing a distant region increases ping (over 150 ms results in noticeable lag). You can change region in the main menu before searching for a match. Cross-region play is possible but not recommended.
- Matchmaking: No fine-tuning. In a party, the host’s region determines server.
- Network Quality: Ensure your internet is stable (wired connection preferred). Open ports: UDP 27015-27030, TCP 27015-27030 (for Steam).
- Bandwidth Limits: Hunt does not have settings, but low bandwidth (<2 Mbps) causes desync. Use Ethernet.
- Packet Loss Check: Run a continual ping to a Hunt server (e.g., `ping 185.130.120.20` for EU) – packet loss >1% is problematic.
- Disable background downloads/streaming.
- Use a VPN only if your ISP throttles game traffic (but it adds latency).
- Set game priority to High in Task Manager.
- Dark Sight Mode: Default to toggle (press once to activate, again to deactivate). Some prefer hold – change in Controls.
- Sprint Behavior: Hold vs Toggle. Hold is better for precise control (stop sprinting instantly). Toggle can cause accidental sprint when you want to crouch.
- Crouch Hold vs Toggle: Hold – you rise immediately when key released, essential for peeking.
- Weapon Inspect: No in-game toggle; not important.
- Auto-Pickup: Enable – automatically pick up items when you walk over them. May cause accidental pickups, but saves time. Disable if you clutter inventory.
- Auto-Equip: Enable – automatically equip picked up weapons/consumables. Can be annoying; consider disabling.
- Minimap / Compass HUD: Always displayed – cannot hide.
- Teammate Outlines: Always visible – no setting to turn off. Color is team-specific (yellow).
- `client_fov` – set to any value (90-110).
- `gpu_...` – advanced graphics (not recommended).
- `sensitivity` – for fine-tuning.
#### Console Graphics Options
Console versions (PS5, Xbox Series X/S) offer limited graphics settings: typically just FOV, motion blur, and brightness. Use the same FOV (90-100) and disable motion blur. Performance mode (120 FPS target on Series X/PS5) is recommended over Quality mode.
---
2. Audio Settings
Audio is critical in Hunt: Showdown – footsteps, gunfire direction, and compound sounds define gameplay.
#### Recommended Audio Settings
#### Audio Pits and Tips
---
3. Controls Settings
Customizing controls improves speed and accuracy. Hunt has a learning curve; presets help but fine-tuning is key.
#### Key Rebinds for PC
#### Mouse Settings
#### Controller Settings (PC & Console)
---
4. Accessibility Settings
Hunt: Showdown offers limited accessibility features. Below are options to improve comfort.
#### Additional Notes
---
5. Language Settings
---
6. Network Settings
Network settings affect latency and matchmaking. Hunt uses dedicated servers.
#### Latency Troubleshooting
---
7. Gameplay Settings
These settings affect how the game behaves and are not in a typical “options” menu but in the in-game HUD or in the configuration files.
#### Configuration File Tweaks (PC Advanced)
For competitive players, file `.cfg` in `%appdata%\Hunt Showdown\user\profiles\default\` allows altering:
Warning: Editing config files may flag anti-cheat if changed incorrectly. Use official UI settings first.
---
8. Easy-to-Misconfigure Settings
| Setting | Common Mistake | Correct Recommendation |
|---|---|---|
| Audio Output Device | Setting to “Speakers” with headphones | Always choose “Headphones” for spatial audio |
| Motion Blur | Leaving on | Disable for clarity |
| Depth of Field | Enabled | Disable |
| FOV | Too low (70) or too high (110) | 90-100 median |
| Mouse Acceleration | Enabled | Disable and enable Raw Input |
| Sprint Toggle | Using toggle (accidental sprint) | Use hold |
| Region Selection | Playing on wrong region (high ping) | Always choose nearest region |
| Texture Quality | Setting too low (reveals enemies but looks bad) | High if VRAM enough |
| Anti-Aliasing | Using FXAA (blurry) | SMAA 1x |
| Volumetric Fog | Enabled | Disable for performance |
| Music Volume | Loud (masks footsteps) | 0-30% |
9. Special Attention Points During Setup
- First Launch: The game will auto-detect your hardware and set a graphics preset. Always review and manually adjust because auto-detect often chooses very low settings even on mid-range PCs.
- Color Calibration: Go to Settings > Display > Brightness. Adjust until the Hunt logo is barely visible on the black background (as per instructions). This ensures correct gamma for day/night cycles.
- Audio Test: Run the audio test under Settings > Audio. You should hear clear directional sounds from all five positions. If not, check your headset configuration.
- Controller vs Keyboard: If playing on PC with a controller, ensure “Controller Input” is set to “Enabled” in Controls – otherwise the game ignores the controller.
- Console Performance Mode: On PS5 and Xbox Series X, you must manually select “Performance” in the console’s game settings or system display settings. Hunt’s graphics menu does not toggle this. On Xbox, enable “FPS Boost” if available.
- Cross-Play Settings: On PC, you can disable cross-play with consoles (Settings > Gameplay > Cross-play). Console players cannot turn it off – they are always matched with other consoles and PC players who choose to enable cross-play.
- File Patching: After major updates, occasionally settings reset. Take a screenshot of your settings after configuration to restore quickly.
---
By following these recommendations, you'll maximize your performance, audio awareness, and control responsiveness in Hunt: Showdown. Remember that settings are personal – experiment within the guidelines to find what suits your playstyle.
Important Notes
Important Notes for Hunt: Showdown
This section collects critical warnings, common pitfalls, irreversible decisions, missable content, difficulty spikes, grinding traps, online etiquette, anti-cheat details, save management advice, and knowledge that veterans wish they had from day one. Read this carefully to avoid costly mistakes.
---
Warnings & Pitfalls
Sound is Everything: Every action you take makes noise—walking over glass, shooting, using consumables, even breathing near a barrel. Sound travels a long distance (shots can be heard across the map). Many ambushes happen because someone ran through a patch of reeds or kicked a can. Always move quietly when you suspect enemies are nearby. Use the hold-to-walk key (default `Ctrl` on PC) to reduce footstep range.
Alert Trip Mines (Alerts) are Visible: When you place an alert trip mine, it creates a small orange wire that any player can see. Placing them on commonly used doors or windows without covering the wire often tips off experienced hunters. Instead, place them in shadows, inside bushes, or in water where the wire is less obvious.
Lanterns and Fires are Dangerous: Carrying a lit lantern makes you a beacon at night and can attract enemies if you throw it. Also, standing too close to explosive barrels when shooting (or when an enemy shoots them) will kill you or your teammates instantly. Treat every red barrel as a potential bomb.
Don't Trust Random Matchmaking: Playing with random teammates can lead to frustrating experiences: teammates who make loud noise, steal your bounties, or rage quit. Always check the teammate's prestige/kill count if you can, and consider using the official Hunt: Showdown Discord to find premade groups with voice chat.
Bounty Extraction is not the only way to die: You can lose your hunter in other ways: dying in a match (especially with a bounty token), being disconnected (the hunter dies if you timeout during a match), or retiring a hunter (irreversibly loses all experience/upgrades). Always extract with your bounty if possible, but also remember that you can extract without bounty to keep your gear.
---
Irreversible Choices
Permanent Hunter Death (Permadeath): Once your hunter dies in a mission, they are gone forever, along with all their equipment and upgrade points. All legendary hunters cost additional in-game currency each time you recruit them (they are not free after the first purchase). If you recruit a legendary hunter and they die, you must pay blood bonds or hunt dollars again to get them back.
Prestige System: Prestiging resets your hunter roster, inventory, money, and progression unlocks. The only rewards are prestige tokens (which can buy exclusive skins). Prestige is optional and irreversible. Do not prestige until you have unlocked all weapons and gear you enjoy, and have a comfortable bank of hunt dollars. Many players regret prestiging early and losing their favorite loadouts.
Retire Hunter: You can retire a level 50 hunter to earn 500 prestige XP, but this permanently removes that hunter and all their gear. Retiring is only beneficial if you are trying to progress through prestige ranks quickly and don't mind losing a strong character.
Selling Gear: Once you sell guns, tools, or consumables from your inventory, you cannot get them back. Only sell duplicates or items you truly never use. Don't sell a weapon you might want later just for a few dollars.
Blood Bonds Purchases: Some cosmetic items are only purchasable with blood bonds (premium currency). While you can earn bonds in-game, spending them on items like legendary hunters or unique weapon skins is a personal choice. There is no way to refund a purchase, so think carefully before buying.
---
Missable Content
Event-exclusive Skins and Contracts: Hunt: Showdown frequently runs limited-time events (e.g., The Light the Shadow, The Asylum, etc.). These events offer unique weapon skins, legendary hunters, and sometimes exclusive variants. Once the event ends, these items may become unavailable for months or forever. Always participate in events if you want the special cosmetics.
Seasonal Twitch Drops: Occasionally, watching official Hunt streams on Twitch can reward you with exclusive skins. These are time-limited, so set reminders.
Weekly Bounties: There are sometimes weekly challenges that reward high amounts of blood bonds or rare items. Check the in-game “Challenges” tab every week and complete them before they expire.
Legendary Hunter Prestige Rewards: Certain legendary hunters (e.g., The Black Coat) are only unlockable at specific prestige levels (Prestige 1, 10, 25, etc.). If you never prestige, you will never get those skins.
---
Difficulty Spikes
Early Game (Levels 1-15): You face only tier 1 hunters with basic weapons. Once you pass level 15, you start matching against tier 2 and 3 hunters with better gear, scopes, and shotguns. The sudden jump in loadout quality can feel punishing. Be prepared by having multiple cheap loadouts ready.
Boss Fights: The first few times you fight a boss (especially the Assassin and the Butcher), you will likely panic and take heavy damage. Learn the attack patterns of each boss in Training Mode or watch guides. The Assassin is the most dangerous because it can clone itself and move quickly.
Trios Matches: Playing in teams of three (trios) is significantly harder because you have more enemy hunters to deal with and coordinated teams can triple-team you. Until you are comfortable with the game’s mechanics, stick to duos or solo against duos.
High MMR (Matchmaking Rating): As you win more games, your MMR increases. You will eventually face very skilled players who can headshot you instantly from range, hear your footsteps, and rotate perfectly. If you feel outmatched, consider deranking by playing with lower-ranked friends or using budget loadouts until you improve.
---
Grinding Traps
Buying Expensive Gear Every Match: Using a fully kitted-out loadout (e.g., Avtomat, Dolch, Quartermaster perks) every match drains your hunt dollars quickly. Most players run expensive loadouts only when they have a high-level hunter they want to protect. For leveling up new hunters, stick to cheap weapons like the Winfield, Romero 77, or Nagant Officer.
Attempting to Farm Experience on Low-Level Hunters: It’s better to try to survive and extract regularly than to go for kills and risk death. The highest XP gain comes from extracting with a bounty. If you die, you lose the hunter and any progress toward unlocking new gear. So play conservatively until you have a stable income.
Ignoring the Weapon Unlock Tree: Every weapon has a variant (e.g., Winfield -> Winfield Swift) that requires a certain number of kills with the base weapon. Don’t keep switching weapons before you unlock better variants. Focus on one weapon family at a time.
Overusing Special Ammo: Special ammo (poison, fire, explosive) costs more hunt dollars and can be scarce in the bayou. Only bring it when you have a specific strategy (e.g., fire ammo to burn downed hunters) and you are prepared to restock at supply points.
---
Online Etiquette & Anti-Cheat Notes
Voice Chat & Communication: Use the in-game voice chat (proximity chat) to talk to teammates and enemies. But be aware that enemies can hear you within about 50 meters. Do not shout out your position or plans in proximity. Use Discord or party chat if you want private communication. Teammates who are downed can still hear everything, so be considerate.
No Griefing: Don’t intentionally teamkill, block doorways, or loot teammates’ bodies unless they are clearly dead and you need their gear. Griefing can get you reported and potentially banned.
Cheating & Anti-Cheat: Hunt: Showdown uses Easy Anti-Cheat (EAC). Cheating is rare but exists. If you encounter a suspicious player (instant headshots through walls, speed hacking), report them after the match using the in-game report system. Do not publicly accuse them in chat.
Spectating Enemies: After you die, you can spectate teammates or enemies (if your team wipes). Do not use spectating to give live callouts to your team; this is considered cheating by many. Stick to watching your teammates only.
Respect Extraction Points: If multiple teams are at the same extraction point, usually only one can extract (except if they cooperate). Try to coordinate or fight fairly. Some players will wait at extraction points to ambush, so always clear the area before boarding.
---
Save Management Advice
No Manual Save: Hunt: Showdown has no manual save system. Your progression (hunters, funds, unlocks) is saved on the server automatically after every match. Closing the game during a match will cause you to lose the hunter (die) and all equipped gear. Always ensure the game shows “Return to Menu” before closing.
Backup on PC: Your local configuration files (settings, keybinds) are stored in %appdata%\Local\Hunt_Showdown\Config. If you want to keep your settings across reinstalls, back up this folder. However, in-game currency and hunters are server-side and cannot be backed up locally.
Cloud Saves: Steam Cloud is enabled for settings but not for game progression. Do not expect to recover a lost hunter by deleting local files; they are tied to your account server-side.
* Multiple Hunter Slots: You start with 5 hunter slots. You can purchase more with hunt dollars (up to 50 slots). Use extra slots to recruit a few high-level hunters with good traits and cheap gear for backup. Never burn all your hunters in expensive loadouts.
---
Things Players Commonly Regret Not Knowing Earlier
1. You can switch between shoulder cameras: Use `Q` (default) to swap between left and right shoulder aim. This helps you peek around corners without exposing your whole body.
2. Dark Sight Boost (DSB) reveals enemy hunters: When you carry a bounty token, you can use Dark Sight (press E) to see enemies within 150 meters (or 50 meters for the first 5 seconds). Use this to scan for snipers or check if the boss lair is empty.
3. The enemy team can see your bounty icon on the map: Picking up a bounty token puts a large icon on your location for all other teams. Use this to your advantage: fake a direction or lure enemies into an ambush.
4. You can set downed hunters on fire: Use a lantern, fire bomb, or flare to ignite a downed enemy hunter. This causes them to burn and eventually die permanently, preventing revival. Similarly, you can choke bombs to extinguish burning teammates.
5. Ducking reduces noise and vision: Crouching not only makes your footsteps quieter but also reduces the distance sound travels. Bush camouflage works better when crouched.
6. Ammo boxes refill all ammo types, not just what you’re out of: Opening an ammo box refills all ammo for all weapons and tools. Use ammo boxes strategically, and don’t waste them if you already have full reserves.
7. The Spider can climb walls and ceilings: Many new players lose track of the Spider because it can jump on walls and ceilings. Always look up when fighting the Spider.
8. You can shoot through walls and wood: Most weapons can penetrate single thin walls, fences, and doors. If you know an enemy is on the other side of a wall, you can wallbang them. Use the “penetration” stat on weapons to judge effectiveness.
9. Empty the boss lair before banishing: Check all hiding spots and corners in the boss compound before starting the banishment. Often an enemy team is hiding inside waiting to ambush you while you’re distracted.
10. Finally, have fun: Hunt is a punishing game with high stakes, but don’t let frustration ruin the experience. Take breaks, experiment with different loadouts, and learn from each death. The community is generally helpful, and the thrill of extracting a bounty after a tense fight is unmatched.
---
> Pro Tip: Keep a notepad of the “lessons learned” after each match. Write down what mistake killed you (e.g., “ran out in the open,” “forgot to check compound completely”). This will accelerate your improvement faster than almost any guide.
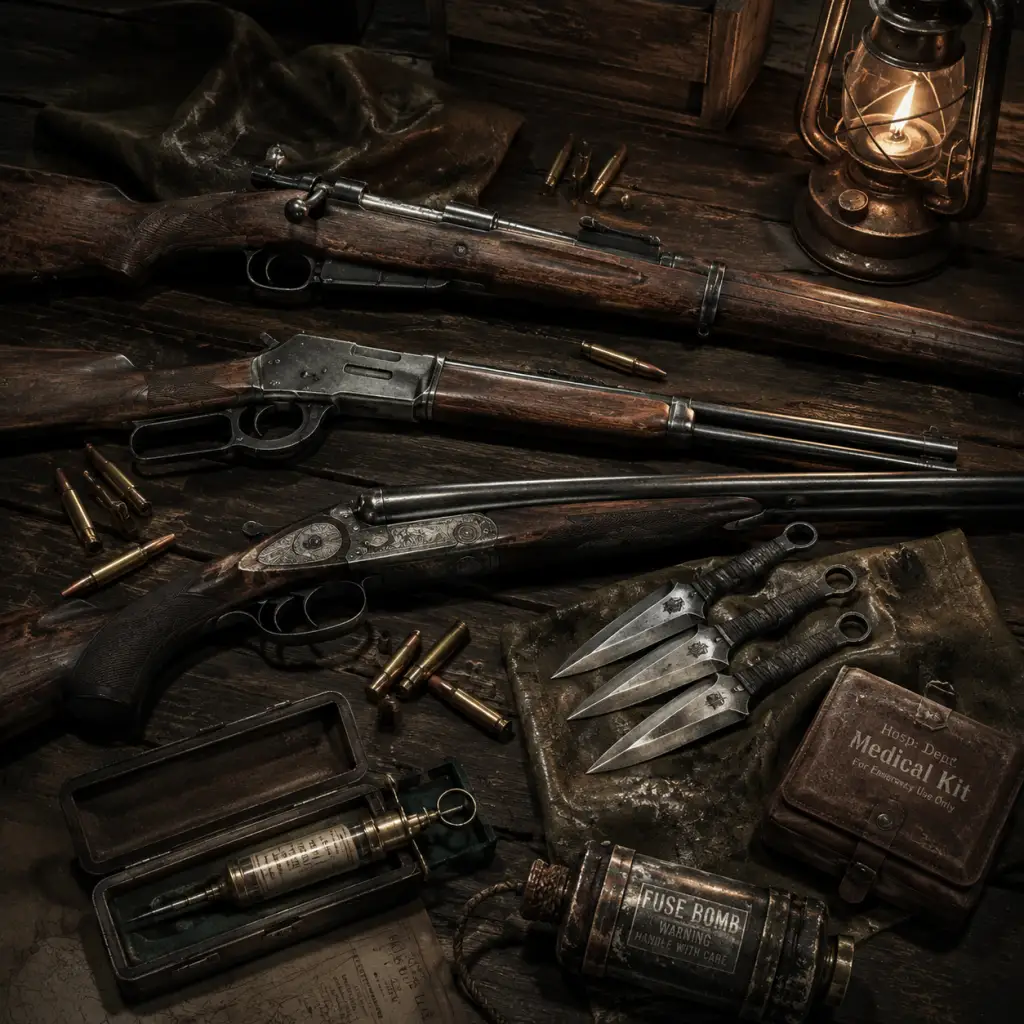
All Game Items
All Game Items in Hunt: Showdown
This guide covers every functional item in Hunt: Showdown — from weapons and tools to consumables, special ammo, equipment, currencies, and key collectibles. Items are grouped by category with details on function, acquisition, optimal use, and important synergies. All items function identically across PC, PlayStation, and Xbox platforms.
---
1. Weapons
Weapons are divided into Primary (two-hand slot) and Secondary (one-hand slot). Each has variants that alter handling, ammo capacity, or scope.
#### 1.1 Primary Weapons
| Weapon Class | Example Weapons | Notes |
|---|---|---|
| Rifles | Winfield M1873, Mosin-Nagant, Lebel 1886 | Long ammo rifles excel at range; medium ammo (Vetterli) is versatile; compact ammo (Winfield) is fast-firing. |
| Shotguns | Caldwell Rival 78, Specter 1882, Romero 77 | Close-range power; Romero 77 is single-shot but one-shots reliably. Crown & King Auto-5 is semi-auto. |
| Compact (SMG-like) | Dolch 96 (pistol but primary-like), Bornheim No. 3 | High fire rate, low damage. Often used with fanning or dual wielding. |
| Sniper Rifles | Sparks LRR, Mosin-Nagant Sniper, Lebel Marksman | Very long range, slow fire rate. Sparks is single-shot but high damage. |
| Special | Bomb Lance, Crossbow, Nitro Express Rifle | Unique mechanics. Bomb Lance has melee and explosive harpoon; Crossbow is silent; Nitro is a two-shot kill but has iron sights. |
When useful: Choose weapon based on engagement range. Shotguns on compounds, rifles for open fields. Pair with a secondary that covers weaknesses (e.g., shotgun primary + long ammo pistol).
Synergies / Upgrades: Traits like Fanning (fast fan-fired revolvers), Levering (fast hip-fire for lever-action rifles), Scopesmith (faster scope transitions), Iron Repeater (faster iron-sight firing for Winfield). Custom ammo types (see Section 3) significantly alter performance.
#### 1.2 Secondary Weapons
| Weapon Class | Examples | Notes |
|---|---|---|
| Revolvers | Caldwell Conversion, Pax, Nagant M1895 | Six-shooters; conversion has fanning synergy; Pax is powerful but slow reload. |
| Semi-auto Pistols | Bornheim No. 3, Dolch 96 | Bornheim is compact ammo; Dolch is special ammo (very strong). |
| Hand Crossbow | Hand Crossbow | Silent, one-hit kill with shotbolt. Limited ammo. |
| Sawed-off Shotguns | Romero 77 Hatchet, Specter Compact | Short range, but can be paired with a rifle for close quarters backup. |
| Knife / Dusters | (Tools, not weapons) | Melee tools can also be used as weapons but occupy tool slot. |
---
2. Tools
Tools occupy the tool slot (2 slots). They are essential for utility and melee.
| Tool | Effect | How to Obtain | When Useful | Synergies / Upgrades |
|---|---|---|---|---|
| Knife | Fast melee attack, good against grunts and immolators. | Default unlocked. | All-purpose melee; can kill armored with heavy. | Silent killer trait. |
| Dusters | Blunt melee, effective against armored and immolators without causing explosion. | Default unlocked. | Immolators explode if shot; dusters safely kill them. | None specific. |
| Throwing Knives / Axes | Ranged silent melee; can retrieve from bodies. | Unlock via bloodline or store. | Silent clear of dogs/grunts from distance. | Blademancer trait gives ammo regeneration. |
| First Aid Kit | Heals one health chunk when used (consumable per match). | Free per match. | Essential for healing mid-fight. | Physician trait speeds up use. Packmule lets you carry two. |
| Choke Bombs | Creates a smoke cloud that puts out fires (incendiary, sticky dynamite, burning hunters). | Unlocked early in bloodline. | Extinguish burning teammate; obscure vision; counter immolator explosions. | Bulwark trait reduces damage from explosives but no direct synergy. |
| Alert Trip Mines | Places a tripwire that triggers a loud noise and flash when crossed. | Unlock via bloodline. | Early warning; disrupt enemy pushes; combo with bear traps. | Lightfoot may reduce sound but not synergy. |
| Decoy Fuses | Makes noise like gunshot or explosion to mislead enemies. | Unlock via bloodline. | Distraction; fake out rotations. | None specific. |
| Signal Flare | Ignites an area; can light barrels, bosses, or hunters. | Default unlocked. | Light up dark areas; ignite oil spills; burn downed hunters. | Can be combined with oil pools for larger fire. |
| Flare Pistol | Fires a flare that can ignite from a distance. | Unlock via bloodline. | Long-range ignite; set off immolator safely from range. | Same as signal flare. |
| Electric Lamp | Battery-powered light; can be turned on/off. | Unlock via bloodline. | See in dark; but attracts attention. | None. |
| Bear Trap | Places a trap that holds an enemy in place for several seconds. | Unlock via bloodline. | Area denial; combo with alert mine for teamwork. | Hornskin reduces damage but not direct synergy. |
| Derringer | Small two-shot pocket pistol (compact ammo). | Unlock via bloodline. | Backup when primary/secondary empty. | None. |
3. Consumables (Consumable Slot)
Consumables take the consumable slot (4 slots by default, can increase with Frontiersman trait). They are one-time use per match.
| Consumable | Effect | How to Obtain | When Useful | Notes |
|---|---|---|---|---|
| Dynamite / Bundle | Explosive with fuse; bundle does more damage and radius. | Unlock via bloodline. | Destroy bosses; kill teams behind cover. | Sticky Dynamite sticks to boss. Use Bulwark to reduce self-damage. |
| Frag Bomb | Explosive with shrapnel; large radius. | Unlock via bloodline. | Area denial; clearing rooms. | Shrapnel causes bleed. |
| Molotov Cocktail | Creates fire pool on impact. | Default unlocked. | Block doorways; burn downed hunters; kill Hive (bees die to fire). | Fire damage can be extinguished with Choke Bomb. |
| Sticky Bomb | Sticks to surfaces/hunters; explosion after fuse. | Unlock via bloodline. | Guarantee boss damage (sticks to Assassin). | Can be removed by teammates with choke? No, but can be shot off. |
| Flash Bomb | Blinds enemies in radius for several seconds. | Unlock via bloodline. | Push into a compound; escape. | Blind your team as well. |
| Poison Bomb | Creates poison cloud that damages and obscures vision. | Unlock via bloodline. | Area control; break line of sight. | Poison immunity from Antidote Shot (consumable). |
| Liquid Fire Bomb | Creates a persistent fire puddle. | Unlock via bloodline. | Block chokepoints; deny revive. | Fire can be extinguished. |
| Fuse / Decoy | (Overlaps with tools) Decoys in consumable slot function similarly. | Unlock via bloodline. | Distraction. | |
| Spyglass | Binoculars – zoom in to scout. | Default unlocked. | Identify enemies at range. | No direct combat use. |
| Dark Sight Boost | (Bounty token) See clue hint? Actually Bounty tokens grant dark sight boost to see enemy outlines. | Acquire bounty token after banishing boss. | Essential for tracking nearby hunters. | Lose after leaving with bounty. |
These are specialized consumables that provide temporary effects.
| Shot | Effect | Unlock | Use Case |
|---|---|---|---|
| Weak Vitality Shot | Heals 50 hp instantly. | Default. | Emergency heal. |
| Vitality Shot | Heals 100 hp instantly. | Bloodline. | Full heal. |
| Antidote Shot | Immunity to poison for 30 minutes (real time). | Bloodline. | Negate poison bombs, spider poison, poisonous dog attacks. |
| Stamina Shot | Unlimited stamina for 30 minutes. | Bloodline. | Sprint forever; melee spam without rest. |
| Regeneration Shot | Passive health regen for 30 minutes. | Bloodline. | Heal over time; useful for prolonged fights. |
| Weak Regeneration Shot | Slower regen. | Default. | Budget option. |
---
4. Special Ammo
Many firearms can be loaded with specialized ammunition, unlocked via weapon progression. Special ammo takes up a separate slot (can carry one type per weapon).
| Ammo Type | Effect | Weapons Example | Best Use |
|---|---|---|---|
| Incendiary | Sets target on fire; reduced damage (except Sparks). | Winfield, Vetterli, Nagant | Ignition utility; burn loose health chunks; ignite barrels. |
| Poison | Poison damage; leaves poison cloud on body? Actually applies poison dot; makes target cough and disoriented. | Pax, Nagant, Mosin? Limited weapons. | Causing panic; combo with Antidote Shot to ignore own poison. |
| Bleed | Causes bleeding which requires bandaging. | Nagant, Winfield, Caldwell | Pressure; forces enemy to heal or bandage. |
| High Velocity | Faster bullet travel, less damage falloff. | Winfield, Mosin | Easier leading at range. |
| Spitzer | Very fast bullet, no damage drop, but less damage. | Mosin, Lebel | Precision long-range. |
| Slug | Replaces shotguns pellets with a single high-damage bullet; one-shot headshot at medium range. | Romero, Rival, Specter | Shotgun becomes a rifle at close-heavy cost. |
| Flechette | Shotgun ammo that causes bleed with wider spread. | Rival, Specter | Area denial without guaranteed kill. |
| Explosive | Bullets that explode on impact; tiny damage but huge noise and shake. | Crossbow, Nitro | Disorient; destroy windows/barricades. |
| Shredder (Not in game) |
Important: Switching ammo types changes recoil pattern, velocity, and damage. Always test in shooting range first.
---
5. Equipment & Gear (in-match pickups)
These are found in the map or from killed hunters, not purchasable in loadout.
| Item | Effect | Where to Find | Usage |
|---|---|---|---|
| Clues | Piecing together the boss location; requires interaction. | World spawn on compounds. | Required to find boss lair. |
| Bounty Token | Grants Dark Sight Boost (see enemy outlines) and bonus Hunt Dollars at extraction. | From banished boss. | Win condition; carry out to earn rewards. |
| Toolboxes / Ammo Boxes | Refill tools or ammo partially. | World spawns, lootable from dead hunters. | Restock consumables. |
| Trait Chary (Not item) | |||
| Supply Points | Consumable crates that give random consumable. | Fixed locations. | Free consumable. |
| Trait Points | (Currency) Earned by leveling bloodline; spent to unlock traits. | Per match based on XP. | Unlock traits permanently per bloodline rank. |
6. Currency & Progression Items
| Currency | Purpose | How to Obtain | Restrictions |
|---|---|---|---|
| Hunt Dollars (HD) | Purchase consumables, weapons, tools, retrain hunters, revive dead hunters (for a fee). | Extract with bounty (primary); kill enemies, loot bodies, find cash registers. | Lost on hunter death (if not extracted). |
| Blood Bonds (BB) | Cosmetic store currency; buy legendary skins, hunter slots, battle pass levels. | Completing daily/weekly challenges, random drops after matches, battle pass rewards. | Not lost on death; account-bound. |
| Upgrade Points (Bloodline XP) | Level up Bloodline to unlock new items and traits. | Earned through in-match performance (kills, bounties, clues). | Permanent progression. |
| Event Points | During limited-time events; used to unlock event-specific items. | Completing event tasks. | Temporary currency. |
7. Collectibles & Lore Items
These are purely cosmetic/background – no gameplay effect.
- Weapon Charms: Small trinkets that dangle from equipped weapons; purchased with BB or earned from events.
- Legendary Hunter Skins: Cosmetic outfits for hunters; some unlock via challenges, some via BB purchase.
- Weapon Skins: Change appearance of firearms; unlocked via bloodline rank, event, or store.
- Lore Books / Documents: Found on maps? Actually no in-game collectibles for lore; lore is accessed via Main Menu -> Library -> Lore. But there are Rift Points during events, but not permanent collectibles.
Note: There is no armor, health packs (only first aid kit), or upgrade materials like wood/iron. The progression is linear via bloodline and weapon XP.
---
8. Important Traits (not items but key to loadout)
Traits are permanent upgrades per hunter (up to 5 slots initially, more with Trait Surge or unlocked via bloodline). They are purchased with Upgrade Points in the lobby before a match.
| Trait Category | Example Traits | Effect | Synergy with Items |
|---|---|---|---|
| Weapon Specialization | Fanning, Levering, Iron Repeater, Scopesmith | Improve specific weapon handling | Fanning with Conversion/Pax; Levering with Winfield |
| Survival | Physician, Packmule, Hornskin, Frontiersman | Faster heal, extra consumable slots, damage reduction | Packmule for double First Aid |
| Stealth | Lightfoot, Silent Killer, Kiteskin | Silent movement, no noise from melee kills | Use with throwing knives or crossbow |
| Combat | Bulwark, Salveskin, Bloodless | Reduced explosive damage, fire damage, bleed resist | Counter enemy consumables |
| Utility | Greyhound (energy recovery), Determination (stamina), Unwavering (pain tolerance) | Improved mobility or recovery | Synergize with Stamina Shot |
9. Tips for Loadout Synergy
- Shotgun + Fanning: Romero + Caldwell Conversion with fanning for close quarters.
- Long Ammo Sniper + Poison Pistol: Sparks Sniper + Nagant with poison to pressure at all ranges.
- Stamina Shot + Bomb Lance: Infinite heavy melee; great for clearing compounds.
- Antidote Shot + Poison Bomb: Deny an area while immune.
- Double Dynamite Bundle + Frontiersman: Carry four consumables; throw two bundles for boss kill.
---
10. Summary of Acquisition Routes
| Item Type | Primary Acquisition | Secondary |
|---|---|---|
| Weapons & Tools | Unlock via Bloodline level → Purchase with HD | Also found as loot on dead hunters |
| Special Ammo | Unlock via weapon XP → Purchase with HD | Can be looted from weapon boxes (rare) |
| Consumables (non-shot) | Unlock via Bloodline → Purchase with HD | Found in supply points |
| Shots | Unlock via Bloodline → Purchase with HD | Rare spawn in world |
| Legendary Skins | Blood Bonds / Event completion | Battle pass |
| Traits | Unlock via Bloodline level → Spend Upgrade Points | Refreshed per hunter |
This guide covers every functional item in Hunt: Showdown. For exact unlock requirements, refer to the in-game progression panel or the official Hunt: Showdown wiki. Remember that loadouts are highly situational – adapt your items to the playstyle and map. Good hunting!
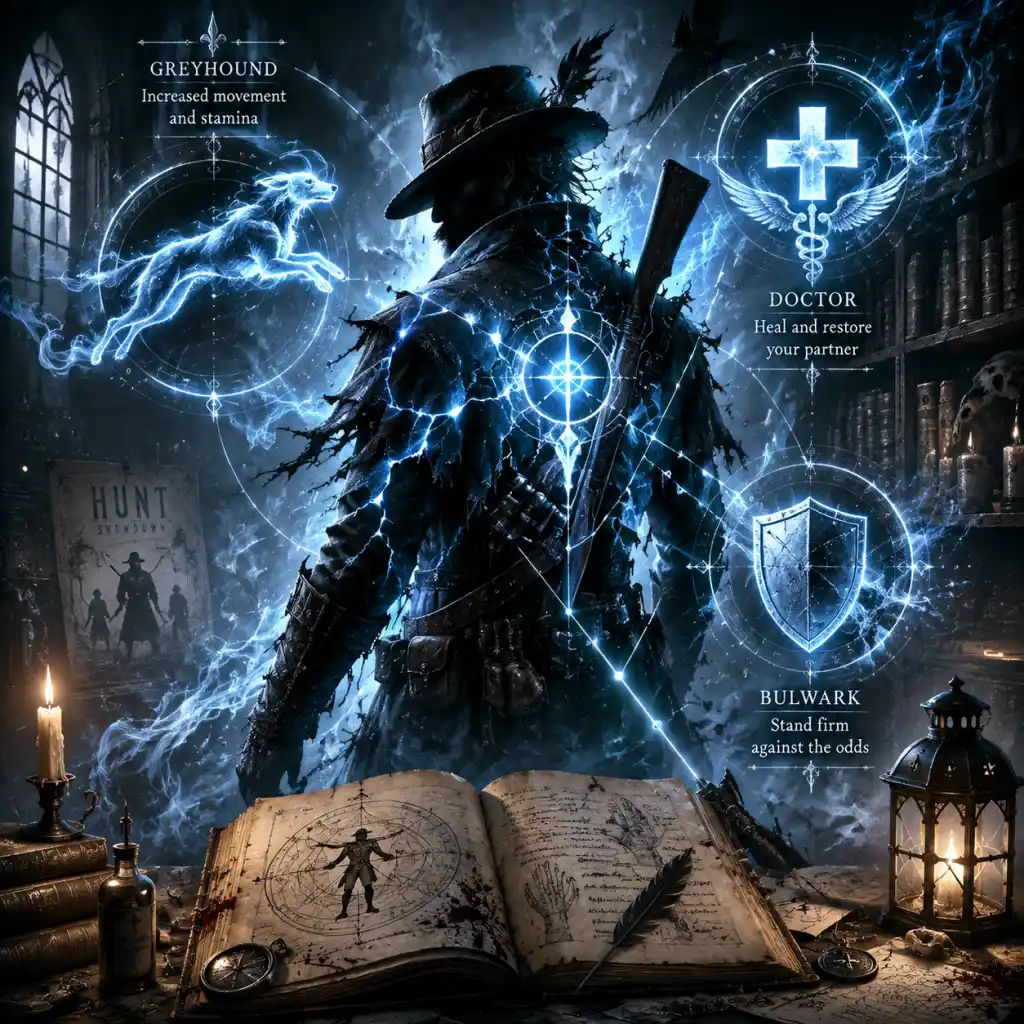
Character Skills
Character Skills Guide for Hunt: Showdown
This guide covers all player abilities, traits, and special moves in Hunt: Showdown. The game does not use traditional classes; instead, you recruit individual Hunters (random or legendary) who can learn Traits – passive perks that modify your gameplay. Each Hunter has a maximum of 5 trait slots (more can be earned via leveling up) and a total trait point budget based on level (max 50 at level 50). Traits are purchased in-game with Trait Points earned by leveling a Hunter. Legendary Hunters come with fixed trait loadouts; others are random.
Additionally, every Hunter has access to Dark Sight, a limited-use ability that lets you see clues, bounties, and nearby enemy hunters when the bounty is active. There are no active spells or skills beyond consumable items and weapons.
---
Dark Sight (Universal Ability)
- How it works: Hold the Dark Sight button (default `E` on PC, RB/RT on consoles) to enter a ghostly vision. While in Dark Sight:
- Cooldown/Charges: Dark Sight recharges over time (outside of boost) and has no limit on use, but the boost mode consumes a charge from your bounty token. Each token gives you 1 charge of Dark Sight Boost.
- Upgrades: None directly, but the Vulture trait lets you see consumables on dead bodies while in Dark Sight.
- Synergies: Use Dark Sight Boost to wall-bang enemies through thin cover or to confirm kills before pushing.
- You can see the golden glow of bounty tokens carried by other hunters (range ~150m).
- You can see clues and boss lairs as bright white beams.
- If you are holding a bounty token, you can see enemy hunters as red silhouettes (Dark Sight Boost) – this is extremely powerful but only lasts about 3-5 seconds per token.
---
Trait Categories
Traits are divided into several functional categories. They cost different amounts of trait points (from 1 to 7). You can only equip a trait if you have enough free points and an empty slot.
#### 1. Combat Traits
| Trait | Cost | Effect | When to Use | Synergies |
|---|---|---|---|---|
| Doctor | 5 | Increases healing speed from medkits and regeneration shots by 50%. | When you expect frequent fights; reduces downtime. | Paired with Physician for even faster heals. |
| Physician | 5 | Increases healing speed from bandages, medkits, and shots by 25%. Stacked with Doctor for massive speed. | Essential for aggressive players who need quick heals. | Doctor, Packmule (to carry more healing). |
| Bulwark | 3 | Reduces explosive damage by 25%. | Against dynamite, explosive crossbow, or frag grenades. | None directly. |
| Bounty Hunter | 2 | You can pick up bounty tokens faster. | If you are the first to banish or need to steal the bounty quickly. | Vigilant to see traps at the lair. |
| Iron Eye | 4 | Increases aim-down-sights speed for single-shot rifles and precision weapons. | For marksmen using Sparks, Lebel, etc. | Deadeye Scopesmith (not a trait) – actually iron eye pairs well with steady aim. |
| Steady Aim | 4 | Reduces weapon sway when targeting with a scope. | For long-range sniping. | Iron Eye, Sniper Scopesmith (console only?). |
| Scopesmith | 5 | Increases scoped weapon handling (reload speed while scoped, less recoil). | For players who use scoped rifles like Sparks Sniper. | Steady Aim. |
| Fanning | 7 | Allows rapid fire from single-action revolvers (like the Uppercut) by fanning the hammer. | Close-quarters ambushes; devastating within 10m. | Levering for lever-action rifles. |
| Levering | 5 | Greatly increases fire rate for lever-action rifles (like Winfield) when hip-firing. | Aggressive pushes or compound fights. | Fanning for dual pistol style. |
| Quartermaster | 6 | Allows a large weapon in the small weapon slot (two large weapons possible). | Carrying a rifle and a shotgun, or two rifles. | Frontiersman (if using tools). |
| Frontiersman | 4 | Unlocks an extra tool slot (total 5 tools). | If you rely on tools like traps, choke bombs, or fusees. | Quartermaster, Packmule. |
| Packmule | 4 | Allows picking up two items from ammo/medkit boxes instead of one. | When ammo scarcity is a concern; also improves healing pickup. | Doctor, Physician. |
| Trait | Cost | Effect | When to Use | Synergies |
|---|---|---|---|---|
| Silent Killer | 5 | Crouch walking makes no sound. | Perfect for solo sneaking or ambushes. | Lightfoot for silent vaulting. |
| Lightfoot | 3 | Vaulting, climbing, and jumping produce 50% less sound. | Combined with Silent Killer to be nearly silent. | Silent Killer. |
| Whispersmith | 2 | Quiet weapons (bows, crossbows, suppressed) reload faster. | If you use a suppressed weapon or bow. | Beastface (less noise from animals). |
| Beastface | 2 | Animals (crows, horses, dogs) are less likely to be spooked by you. | Stealth approach; reduces accidental noise. | Silent Killer, Lightfoot. |
| Determination | 2 | Increased health regeneration speed (passive). | Supplements stealth play, reduces need for healing. | Doctor, Physician. |
| Gator Legs | 2 | Move faster in shallow water. | Bayou bayou maps have lots of water; helps flank. | None. |
| Vigilant | 3 | See traps (concertina, poison, etc.) through walls when within 10m. | Safely navigate compounds; avoid ambushes. | Bloodless (poison resistance). |
| Bloodless | 4 | Reduce bleeding duration and damage. | If often hit by bleeding weapons. | Berserker? Not really. |
| Mithridatist | 4 | Reduce poison damage and duration. | Poison crossbows, bees, or hive bombs. | Bloodless. |
| Tomahawk | 2 | Throwable melee weapons (like combat axe) can be thrown with more accuracy and speed. | If you carry a large melee. | Greyhound? No. |
| Vulture | 2 | See lootable bodies (consumables, tools) through walls in Dark Sight. | Late game looting; find special ammo. | None. |
| Trait | Cost | Effect | When to Use | Synergies |
|---|---|---|---|---|
| Resilience | 3 | Revive faster and with more health (25 extra HP). | Teamplay; clutch revives. | Necromancer (consumeable) – actually not a trait; Witness no. |
| Salveskin | 2 | Reduces fire damage (flaming hitpoints). | Against incendiary ammo, lanterns, hellhounds. | Bloodless. |
| Dewclaw | 3 | Increases ladder climbing speed. | Niche; some compounds have tall ladders. | None. |
| Greyhound | 3 | Increases sprint speed by 5%. | Always useful for rotation and flanking. | Determination (regeneration). |
| Conduit | 2 | Increases stamina regeneration rate. | For melee-heavy builds or long sprints. | Greyhound. |
| Marathon Runner | 3 | Reduces stamina drain from sprinting. | Combined with Conduit for endless sprint. | Conduit, Greyhound. |
| Poacher | 2 | Set traps faster and quieter. | Trapper builds. | Vigilant (to see enemy traps). |
| Kiteskin | 2 | Reduce fall damage. | Climbing towers or jumping from high spots. | None. |
| Iron Will | 1 | Reduces damage from hellhounds and immolators. | If fighting monsters often. | Salveskin (immolators fire). |
| Berserker | 2 | Melee attacks deal more damage to AI monsters. | PvE-focused; not recommended for PvP. | Iron Will. |
Recommended Builds
#### Stealth Solo
- Traits: Silent Killer (5), Lightfoot (3), Beastface (2), Gator Legs (2), Vulture (2) = 14 points.
- Weapons: Suppressed Nagant or Bow, melee tool.
- Strategy: Avoid detection, ambush players, loot bodies.
- Traits: Doctor (5), Physician (5), Packmule (4), Fanning (7), Frontiersman (4) = 25 points (high level).
- Weapons: Romero 77 (large) + Uppercut (small) with Fanning.
- Strategy: Rush compounds, heal fast, use tools like flashbombs.
- Traits: Steady Aim (4), Scopesmith (5), Iron Eye (4), Greyhound (3), Determination (2) = 18 points.
- Weapons: Sparks Sniper or Lebel Marksman, secondary with high damage.
- Strategy: Hold angles, slow movement, use Dark Sight Boost for vision.
- Traits: Resilience (3), Vigilant (3), Packmule (4), Bloodless (4), Mithridatist (4) = 18 points.
- Focus: Team play, trap avoidance, revives, looting.
- Recruited Hunters start with 0 to 3 random traits and 0-15 points.
- Leveling up gives trait points: +1 per level up to 50. So max points = 50, but slots limit to 5 traits unless you use traits that grant extra slots (Frontiersman, Quartermaster) – these also cost points.
- You can respec a Hunter using blood bonds (premium currency) or by retiring and recruiting a new one.
- Purchasing a trait costs trait points equal to its cost. When you have enough points, you can buy any trait from the trait screen (even if the Hunter already has a similar one, it won't stack).
#### Aggressive Shotgun Pusher
#### Long Range Sniper
#### Versatile Support
---
Trait Point Economy
---
Summary of All Traits (Alphabetical)
| Trait | Cost | Category |
|---|---|---|
| Beastface | 2 | Stealth |
| Berserker | 2 | Survival |
| Bloodless | 4 | Stealth |
| Bounty Hunter | 2 | Combat |
| Bulwark | 3 | Combat |
| Conduit | 2 | Utility |
| Determination | 2 | Utility |
| Dewclaw | 4 | Survival |
| Doctor | 5 | Combat |
| Fanning | 7 | Combat |
| Frontiersman | 4 | Combat |
| Gator Legs | 2 | Stealth |
| Greyhound | 3 | Utility |
| Iron Eye | 4 | Combat |
| Iron Will | 3 | Survival |
| Kiteskin | 2 | Survival |
| Levering | 5 | Combat |
| Lightfoot | 3 | Stealth |
| Marathon Runner | 3 | Utility |
| Mithridatist | 4 | Stealth |
| Packmule | 4 | Combat |
| Physician | 5 | Combat |
| Poacher | 2 | Survival |
| Quartermaster | 6 | Combat |
| Resilience | 3 | Survival |
| Salveskin | 2 | Survival |
| Scopesmith | 5 | Combat |
| Silent Killer | 5 | Stealth |
| Steady Aim | 4 | Combat |
| Tomahawk | 2 | Stealth |
| Vigilant | 3 | Stealth |
| Vulture | 2 | Stealth |
| Whispersmith | 2 | Stealth |
---
Final Tips
- Prioritize traits that suit your playstyle and weapon loadout. Fanning requires a single-action revolver; Levering requires a lever-action rifle; Quartermaster is expensive but enables two large weapons.
- Doctor + Physician stack for fastest heals – great for clutch moments.
- Vigilant is cheap and invaluable for avoiding trap deaths.
- Greyhound + Conduit + Marathon Runner make you extremely mobile.
- Dark Sight Boost is limited; use it only when you suspect enemies nearby or to secure a kill through walls.
- Good luck, Hunter!
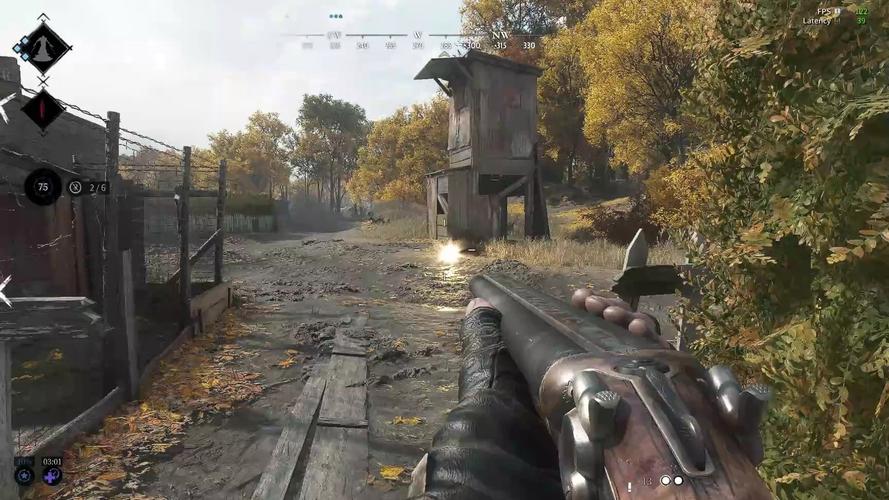
Characters & Roles
Characters & Roles in Hunt: Showdown
Unlike traditional class-based games, Hunt: Showdown does not have fixed classes, heroes, or playable units with unique abilities. Instead, every Hunter you recruit — whether a randomly generated Tier 1/2/3 Hunter or a Legendary Hunter skin — is a blank slate with the same base stats and health (150 HP). The game’s deep customization comes from traits, weapons, tools, and consumables. Your role in a team is defined entirely by your loadout and playstyle, not by an inherent class. This guide will help you understand the major roles (archetypes) that emerge from loadout choices, and highlight the most notable Legendary Hunters for lore and cosmetic purposes.
---
Understanding Hunters (No Classes)
- Random Hunters: Recruited from the roster using Hunt Dollars. They have random names, appearances, and a small number of starting traits (1–4, scaling with Bloodline level). Tiers (1, 2, 3) indicate increasing quality of starting gear and number of traits, but the Hunter is still a blank slate.
- Legendary Hunters: Cosmetic skins purchased with Blood Bonds (earned in matches or bought with real money) or earned through events. They have unique lore and appearance but no gameplay advantages. They come with zero traits and no gear — you must equip them from your arsenal.
- Free Hunters: Occasionally available as a “free recruit” after matches — these are random Tier 1 Hunters with minimal gear.
- Strengths: Excels at long-range engagements, can land headshots from 100+ meters, controls open sightlines and compounds from a distance.
- Weaknesses: Very vulnerable in close quarters (below 20m). Slow handling and low rate of fire leave little room for error. Requires good aim and map awareness.
- Playstyle: Position yourself on high ground, near windows, or behind cover away from the main compound. Use a scoped or high-damage rifle to pick off enemies before they can close the distance. Always scan for movement and sound cues; reposition after shooting to avoid being flanked.
- Recommended Weapons:
- Tools: Spyglass (for scouting without scope glint), Throwing Knives/Axes (for silent AI kills), Medkit, Concertina Trap.
- Consumables: Frag Bomb (to flush out enemies), Dynamite Bundle (area denial), Ammo Box (to sustain long fights).
- Traits (Must-Have):
- Team Synergy: Best paired with a Shotgunner or close-range fighter who can cover your flanks and defend compounds when you need to push. The Rifleman provides overwatch while teammates secure clues or bounties.
- Strengths: Devastating damage within 15m, can one-shot enemies with body shots, creates fear in tight spaces. Excels inside compounds and boss lairs.
- Weaknesses: Useless beyond medium range (30m+). Slow reload times. Ammo is scarce if you miss. Requires aggressive play and good map knowledge to force close encounters.
- Playstyle: Run toward gunfights, use doorways and corners to close distance. Learn compound layouts to ambush from unexpected angles. Use traps to block exits chokepoints. After getting a kill, immediately loot ammo or switch to a secondary pistol.
- Recommended Weapons:
- Tools: Concertina or Poison Traps (to control entrances), Alert Trip Mines (to warn of flankers), Choke Bombs (to block lines of sight).
- Consumables: Flash Bomb (to blind enemies before rushing), Dynamite Stick (to break through campers), Vitality Shot (for instant heal before a push).
- Traits (Must-Have):
- Team Synergy: The Shotgunner should stick close to a Rifleman or Support to cover the team’s six when pushing into compounds. The Shotgunner takes point inside lairs, while the Rifleman provides covering fire from outside.
- Strengths: Keeps the team alive and fully supplied. Can heal/revive faster, carry extra consumables, and provide area denial. Reduces downtime between fights.
- Weaknesses: Often less combat-oriented, may rely on mediocre weapons. If the Support is killed, the team loses sustain. Cannot outfight a dedicated damage dealer in direct combat.
- Playstyle: Stick with teammates, always have a healing item ready. Use traps to protect flanks. Call out enemy positions and use consumables strategically (e.g., Antidote Shot before a Spider boss fight). Prioritize reviving downed teammates safely.
- Recommended Weapons:
- Tools: Medkit (essential), Choke Bombs (to put out burning teammates), Electro-prompt? No — use a Flare Pistol (to ignite anything) or Tirel? Best: Syringe (revive), Fuse (to take down armored?). Actually, Support should bring Concertina Traps to block doors, Alert Mines to detect. Or use Throwing Knives to kill AI safely.
- Consumables: Vitality Shot (large), Antidote Shot (immunity to poison), Ammo Box (shared), Stamina Shot (for extended runs).
- Traits (Must-Have):
- Team Synergy: The Support is the backbone of any team. Works well with any other role. In trios, one Support can carry the team through multiple engagements by ensuring everyone stays healed and trap-reliant.
- Strengths: Can move almost silently, kills monsters without noise, scouts enemy positions without alerting them. Uses poison and traps to ambush.
- Weaknesses: Low damage per second in open combat. Limited range. Relies on catching enemies off-guard. If spotted first, easily outgunned.
- Playstyle: Avoid direct confrontation; use cover and sound discipline. Always stay in bushes or shadows. Use silenced weapons to take down AI and grunts without attracting attention. Listen for enemy footsteps and plan ambushes. Place traps along expected paths.
- Recommended Weapons:
- Tools: Poison Trip Mines (kills AI and slows enemies), Chaos Bombs (makes noise to distract), Decoy Fuses (sound like gunshots). A Knife or Knuckleknife for melee.
- Consumables: Flash Bombs (to blind then run), Sticky Bomb (melts bosses silently? No explosion sound but big damage). Stamina Shot (to keep moving).
- Traits (Must-Have):
- Team Synergy: A stealthy player can scout ahead and relay information to the team, then flank enemies when they engage the rest of the team. Pair with a Rifleman for long-range support.
- Strengths: Effective at most ranges, no glaring weakness. Adaptable to any situation. Great for new players and for filling gaps in team composition.
- Weaknesses: Jack-of-all-trades, master of none. May be outclassed in specialized situations (e.g., snipers at long range, shotguns up close).
- Playstyle: Stay with the team, engage enemies at medium range (30-60m), and use your secondary or tools to handle close or long threats. Always carry a versatile loadout that can handle pve and pvp efficiently.
- Recommended Weapons:
- Tools: Medkit (mandatory), Choke Bombs (versatile), Tomahawk (if you have throwing axes), Dynamite Stick (emergency AOE).
- Consumables: Vitality Shot (small), Frag Bomb, Ammo Box.
- Traits (Must-Have):
- Team Synergy: Fits into any team comp. In a trio, an All-Rounder can reinforce whichever teammate is under pressure.
- Ranged Overwatch: 1 Rifleman + 2 Shotgunners/All-Rounders. The Rifleman stays on the perimeter while the others push compounds. Works well on open maps like Stillwater Bayou.
- Aggressive Push: 3 Shotgunners with traps. Blitz through compounds, forcing close-range fights. Risky but devastating.
- Stealth Squad: 1 Stealth/Recon + 2 Riflemen. The Recon silently marks enemies and places traps, while Riflemen pick off targets from distance.
- Balanced Trio: 1 Rifleman + 1 Shotgunner + 1 Support/Medic. Covers all ranges and has sustain.
Key Point: You can turn any Hunter into any role by simply equipping the right weapons, tools, consumables, and traits. The skin does not matter for gameplay.
---
Major Roles (Playstyles)
Below are the five most common and effective roles in Hunt: Showdown. Each role is defined by preferred weapon ranges, tool/consumable choices, and synergizing traits. Note that these are guidelines, not strict rules — hybrid builds are also viable.
#### 1. The Rifleman (Ranged Precision)
- Primary: Sparks LRR (best single-shot rifle), Mosin-Nagant (with or without Marksman scope), Lebel 1886 (high capacity), Vetterli 71 Karabiner (slightly faster, medium range). The Springfield 1866 is a budget alternative.
- Steady Aim (reduces sway when aiming down sights — essential for scoped rifles)
- Marksman Scopesmith (faster scope-in)
- Deadeye Scopesmith (if using Deadeye variant)
- Bulwark (reduces explosive damage — you'll be targeted by explosives)
- Determination (faster recovery from stamina drain after aiming)
#### 2. The Shotgunner (Close Quarters Brawler)
- Primary: Romero 77 (best single-shot damage, very tight spread), Specter 1882 (longer effective range), Caldwell Rival 78 (semi-auto, good fire rate) — handcannon or full-size. The Crown & King (full auto, high DPS, but expensive). The Slate (lightweight, fast follow-up).
- Secondary: Caldwell Conversion Pistol with Fanning (for backup if your shotgun runs dry) or a medium pistol like the Nagant Officer.
- Iron Devastator (faster levering action — not for shotguns, but for lever-action pistols? Actually, this trait reduces spread for lever-action shotguns? No, there is no lever-action shotgun. Use Lightning Lizard? Better choices: Lightfoot (silent movement), Hornskin (10% blunt damage reduction), Vulture (loot more consumables from dead hunters).
- Gator Legs (faster movement in water — Bayou is full of it)
- Salveskin (reduces fire damage — you’ll be near burning barrels often)
#### 3. The Support / Medic (Utility Focus)
- Primary: Winfield M1873C (fast, large magazine), Centennial (medium range, fast fire rate), Officer Carbine (full auto). All-rounders that keep you effective but not specialized.
- Secondary: Nagant M1895 Officer (fast backup) or Hand Crossbow with poison bolts (area denial).
- Doctor (heals twice as much with first aid kit)
- Physician (faster healing animation)
- Packmule (increase consumable and tool slots? Actually gives extra tool/consumable capacity? No, it lets you loot more items from dead hunters — good for resupply)
- Frontiersman (gives you an extra tool and consumable slot? No, it makes traps deploy faster? Actually, it reduces trap placement time and increases inventory capacity? Wait: Frontiersman reduces the cost of tools and consumables? Not sure. Better: Vulture (loot more), Greyhound (move faster outside of combat).
#### 4. The Stealth / Recon (Silent Hunter)
- Primary: Suppressed Nagant M1895 (silent pistol, low damage), Crossbow (silent, high damage but slow reload — use special bolts like explosive or poison). The Bow (if available? Not yet in base game).
- Secondary: Hand Crossbow with poison bolts (area denial).
- Silent Killer (makes melee attacks nearly silent)
- Whispersmith (reduces weapon swap noise? No, there is no such trait. Use Lightfoot (silent movement)
- Greyhound (faster sprint)
- Gator Legs (faster in water)
- Beastface (animals ignore you? Actually, Beastface is for?) Note: There is a trait called Beastface (reduces noise from running over branches?) Not in current game. Better: Determination (stamina recovery).
#### 5. The All-Rounder (Flexible)
- Primary: Winfield M1873 (great iron sights, high fire rate, large magazine), Centennial (slightly longer range, same fast fire), Vetterli 71 (medium damage, good irons).
- Secondary: Caldwell Pax (good all-round pistol) or Nagant Officer (fast follow-up).
- Fanning (increases pistol fire rate — great for close range)
- Levering (for lever-action rifles — turns Winfield into a close-range beast)
- Steady Hand (reduces sway for ironsight rifles)
---
Team Composition Synergies
While Hunt: Showdown is famously unforgiving, having a well-balanced team increases survival odds significantly. Common compositions include:
Duo Tips: In a duo, both players should cover each other’s weaknesses. Avoid both being snipers; one should have a close-range option. Communication is key — call out enemy positions and your reload status.
---
Notable Legendary Hunters (Lore & Suggested Roles)
While Legendary Hunters are purely cosmetic, they often have backstories that hint at a preferred style. Here are some of the most iconic, with suggestions for role assignment based on their theme:
| Legendary Hunter | Lore Background | Recommended Role | Suggested Loadout |
|---|---|---|---|
| The Reverend | A defrocked priest who hunts demons with faith and a shotgun. | Support/Medic (heals and blesses? Actually, just cosmetic) | Shotgun (Romero) + Medkit + Consumables |
| The Sheriff | A lawman turned bounty hunter, known for his iron will and reliable weapon. | All-Rounder | Winfield + Pax |
| The Mountain Man | A feral trapper who survives alone in the wilderness. | Stealth/Recon | Crossbow + Traps |
| The Carcass Gunrunner | A former weapons dealer using experimental rifles. | Rifleman | Sparks LRR + scoped variant |
| The Bone Doctor | A surgeon who dissects the undead for research. | Support/Medic | Medkit + Syringe + Scrapbeak's? |
| The Phantoms | A pair of twin hunters (duo skin) from the 1896 Battle of Shiloh. | Shotgunner or All-Rounder | Shotgun + Fanning pistol |
---
Final Tips for Choosing Your Role
- New Players: Start as an All-Rounder with a Winfield. It forgives mistakes and teaches sound fundamentals.
- Intermediate Players: Experiment with Rifleman and Shotgunner to learn compound and map flow.
- Advanced Players: Specialize in Support or Stealth to master utility usage and team coordination.
- Always Adapt: Your role can change mid-match. If you lose your primary weapon, pick up a fallen enemy’s gun and adjust your playstyle.
Remember: In Hunt: Showdown, your loadout defines your role — not your character skin. Use this guide to build effective loadouts and synergize with your team for the best chance at claiming the bounty and extracting alive.
Cheats & Secrets
Cheats & Secrets Guide for Hunt: Showdown
No Cheat Codes
Hunt: Showdown does not contain traditional cheat codes, console commands, or unlock codes. As a competitive multiplayer extraction shooter with a dedicated anti-cheat system (Easy Anti-Cheat), any form of manual cheating, glitching, or exploitation is strictly prohibited and can lead to permanent bans. The game is designed to be a fair and punishing experience for all players.
---
Hidden Features & Developer-Intended Secrets
Although there are no cheat codes, the developers at Crytek have sprinkled several intentional secrets, Easter eggs, and hidden lore elements throughout the bayou. These are all safe and legitimate discoveries that enhance the atmosphere and world-building.
#### 1. The Fourth Horseman – Secret Note in Stillwater Bend
- Location: At the Stillwater Bend compound (southwest corner of the map), on the second floor of the main building, look on a desk near a broken window.
- Content: A handwritten note titled “The Fourth Horseman” referencing a legendary hunter. This is a nod to Crytek's earlier game Crysis and its protagonist’s nickname.
- Effect: None; purely cosmetic lore.
- Location: In the basement of the Port Reeker compound. Look for a mannequin dressed in a blue-tinted body suit resembling the Nanosuit from the Crysis series.
- Details: The mannequin is posed in a crouching stance. It’s a direct tribute to Crytek’s flagship franchise. Can be destroyed but does nothing else.
- Location: On the map “DeSalle”, there is a small, fog-shrouded island in the northern river that cannot be reached by normal means. If viewed from the bridge near Fort Carmick, you may see a single tree and faint structure.
- Note: This island is not interactable and serves only as a visual Easter egg. It is believed to be a leftover debugging area left intentionally for observant players.
- The loading screen artwork often contains hidden text or symbols. For example, the “Bounty Hunt” loading screen has faint Russian text that translates to “They are coming”. This is a nod to the in-game lore about the Sculptor’s corruption.
- Audio Secret: At Scupper Lake, if you stand near the weeping willow tree by the water’s edge for 10–15 seconds, you may hear a faint, distorted female voice whispering. This is not a player audio; it’s an environment trigger tying into the game’s tragic lore of a mother who lost her child to the Sculptor.
- On certain night-time maps, if you look directly up at the sky, the stars form a faint pattern resembling the game’s logo (a crosshair inside a skull). This is only visible if you disable in-game motion blur and use a high brightness setting.
- In the Quick Play game mode (Soul Survivor), check the walls inside the underground tunnels of the “Prison” compound. You may find graffiti that says “Crytek Was Here” in neon green paint. It appears in about 1 in 20 matches.
- When you pick up a bounty token, you gain a short period (5 seconds per token) of Darksight that lets you see enemy hunters through walls. Most players know this, but a hidden bonus: if you burn the bounty with a Fire Bomb or using the “Infernal” trait, the Darksight duration is not increased. Burning doesn’t affect the timer.
- Dropping from a height of 3 meters or less makes no sound. But from 4+ meters, you emit a loud landing noise. There is no way to suppress this sound except by using the “Lightfoot” trait — but even then, the sound is only reduced, not eliminated.
- Bolts and arrows can be retrieved from walls or bodies at a distance of up to 5 meters by looking directly at the projectile and pressing the interact key. This is a secret mechanic not mentioned in tutorials. Useful for conserving ammo.
- If you use the Necromancer trait to revive a downed teammate from a distance while they are in water, the revive time is reduced by 1 second (from 5 to 4 seconds). This is undocumented.
- No save file manipulation: The game’s progress is server-side; modifying local files will trigger a ban.
- No console commands: The game has no developer console enabled for players.
- Easter eggs are not linked to unlocks: Discovering them does not give any in-game advantage, skins, or currency. They are purely for enjoyment.
- Hidden achievements: There are no hidden achievements in Hunt: Showdown; all achievements are publicly listed in your platform’s achievement tracker.
#### 2. Crysis Easter Egg – The "Nanosuit Mannequin"
#### 3. The "Misty" Area – Unreachable Island Easter Egg
#### 4. Hidden Messages in Loading Screens
#### 5. The “Weeping Woman” Ghost at Scupper Lake
#### 6. The “Hunt” Logo in the Night Sky
#### 7. Developer Graffiti in Quick Play
---
Exploit-Safe Hidden Mechanics (Not Cheats)
These are intended game mechanics that are not immediately obvious but are perfectly legitimate and safe to use.
#### 1. Darksight Boost Timing
#### 2. Silent Drop from Rooftops
#### 3. Crossbow Bolt Retrieval Distance
#### 4. Necromancer Trait Interaction with Downed Teammates
---
Important Notes on Anti-Cheat & Legitimate Secrets
---
Conclusion
While Hunt: Showdown lacks any cheat codes or unlock secrets, it compensates with a richly detailed world full of developer-placed Easter eggs and hidden environmental storytelling. These secrets reinforce the dark, oppressive atmosphere and reward observant players with a deeper connection to the lore. Always remember: exploiting actual bugs or using third-party tools for an unfair advantage is not only against the rules but also ruins the unique tension the game is built upon.