It Takes Two
# Game Introduction for It Takes Two **It Takes Two** is a groundbreaking cooperative action-adventure platformer developed by **Hazelight Studios** and published by **Electronic Arts** under the EA Originals label. Released on **March 26, 2021**, the game won the prestigious **Game of the Year** a...

Download & Installation
Download & Installation Guide for It Takes Two
This guide covers the official, legitimate methods to download and install It Takes Two on all supported platforms. The game requires a constant internet connection and a linked EA Account (even on console) for online co-op. Cross-play is supported between all platforms except Nintendo Switch.
---
System Requirements (PC)
Minimum Requirements (1080p, 30 FPS, Low Settings)
- OS: Windows 8.1 64-bit or Windows 10 64-bit
- CPU: Intel Core i3-2100T / AMD FX 6100
- RAM: 8 GB
- GPU: NVIDIA GeForce GTX 660 (2GB) / AMD Radeon HD 7870 (2GB)
- DirectX: Version 11
- Storage: 50 GB free space (SSD recommended)
- Internet: Broadband connection (for Friend’s Pass and updates)
- OS: Windows 10 64-bit
- CPU: Intel Core i5-3570K / AMD Ryzen 3 1300X
- RAM: 16 GB
- GPU: NVIDIA GeForce GTX 970 (4GB) / AMD Radeon R9 290 (4GB)
- DirectX: Version 11
- Storage: 50 GB SSD
- Internet: Broadband connection
Recommended Requirements (1080p, 60 FPS, High Settings)
Note: The game uses the Frostbite engine and is optimised for dual‑core and quad‑core CPUs. Higher core counts do not significantly improve performance.
---
Platform Availability & Official Sources
| Platform | Digital Storefront | Account Requires | Notes |
|---|---|---|---|
| PC – Steam | Steam Store | Steam account | + EA Account (linked on launch) |
| PC – Epic Games | Epic Games Store | Epic account | + EA Account (linked on launch) |
| PC – EA App | EA app (Windows) | EA Account | Only via EA Desktop or Origin |
| PlayStation 4/5 | PlayStation Store | PSN account | + EA Account for online co‑op |
| **Xbox One / Series X | S** | Microsoft Store | Xbox Live account |
| Nintendo Switch | Nintendo eShop (cloud version) | Nintendo Account | Cloud streaming only (no local install; requires stable internet 10+ Mbps). Not available in all regions. |
---
Installation Steps for Each Platform
PC – Steam
1. Create/Log in to your Steam account (if not already).
2. Purchase It Takes Two from the Steam Store (or redeem a key).
3. Click Install on the game’s library page. Choose a destination drive (ensure 50 GB free).
4. Steam will download the installer and then the game data. Wait for completion.
5. First Launch: The game will prompt you to link a free EA Account. Follow the on‑screen instructions (this is mandatory).
6. After linking, the game will download a small EA app overlay update and then start.
PC – Epic Games Store
1. Open Epic Games Launcher (download from [epicgames.com](https://epicgames.com) if needed).
2. Purchase the game from the Epic Store or claim it if free.
3. Go to your Library, locate It Takes Two, and click Install.
4. Choose installation path (50 GB free).
5. First Launch: Same EA Account linking as Steam. Enter your EA credentials when prompted.
6. The game will then run via the EA app integration.
PC – EA App (Origin) – Direct Purchase
1. Install the EA app from [ea.com/ea-app](https://www.ea.com/ea-app) (or use Origin if you still have it; EA app is recommended).
2. Log in with your EA Account.
3. Search for It Takes Two and purchase or locate it in your library.
4. Click Download and select installation folder (50 GB free).
5. After download, the game is ready. Launch from the EA app.
PlayStation 4 & PlayStation 5
1. On your console, go to the PlayStation Store.
2. Search for It Takes Two. Purchase and download (or redeem code).
3. The download will install automatically. Ensure at least 50 GB free on internal storage or an extended drive.
4. Once installed, launch the game.
5. First Launch: You will be asked to sign in to an EA Account (or create one). Use a web browser link or on‑screen code. This is required for online co‑op and Friend’s Pass.
6. After linking, you can play single‑player, couch co‑op (split‑screen on same console), or online co‑op.
Xbox One / Xbox Series X|S
1. Turn on your console and sign in to your Xbox Live profile.
2. Navigate to the Microsoft Store (or “Store” on Xbox).
3. Search for It Takes Two. Purchase and Install.
4. The game requires approximately 50 GB of storage. Choose where to install (internal or external).
5. After installation, launch the game.
6. First Launch: Link your EA Account. On Xbox, this is done by scanning a QR code or entering a code on [ea.com/activate](https://ea.com/activate).
7. Note: Xbox Live Gold is required for online multiplayer (even with Friend’s Pass). The game does not require Gold for local split‑screen.
Nintendo Switch (Cloud Version)
1. Open the Nintendo eShop from the home menu.
2. Search for It Takes Two. The game appears as a Cloud Version (streaming). Purchase or redeem a code.
3. Once purchased, the eShop will automatically start downloading a small launch app (approx. 100 MB). The actual game is streamed.
4. After the launcher is installed, launch it from the home menu.
5. First Launch: You must have a stable internet connection (minimum 10 Mbps download, wired connection recommended). Link your Nintendo Account and EA Account.
6. The game will stream the full experience – no game data is stored locally beyond the launcher.
7. Important: The Switch Cloud version is not cross‑play with other platforms. Only Switch cloud players can play together.
---
Storage Space Details
- PC: ~45–50 GB installation size. Additional space may be needed for patches (2–5 GB). Recommend 60 GB free to be safe.
- PlayStation 4: 48.2 GB (base install). Patches up to ~5 GB.
- PlayStation 5: Same as PS4 but with faster SSD loading. Size ~46 GB.
- Xbox One/Series X|S: ~50 GB.
- Switch (Cloud): Only the launcher (~100 MB) is installed on the console. No game data stored locally.
---
Account Requirements – Detailed
| Requirement | Details |
|---|---|
| EA Account | Mandatory on all platforms to play the full game. Free to create. Must be linked once. If you already have an account (e.g., for FIFA or Apex), use that. |
| Platform Account | Steam / Epic / PSN / Xbox Live / Nintendo Account – required for store and basic functionality. |
| Friend’s Pass | The co‑op partner (who does not own the game) must also have a platform account and an EA Account. They download the It Takes Two Friend’s Pass from the same store (free). They must be invited by the owner and both must be online. |
| Online Multiplayer | On Xbox, an Xbox Live Gold subscription is required for the online co‑op mode (including Friend’s Pass). On PlayStation, no PS Plus is needed for the game’s online co‑op (unique to this title). On PC, no subscription needed. On Switch, a Nintendo Switch Online membership is not required for the cloud version? Actually, due to the nature of streaming, no NSO needed – but check official sources. |
First Launch Setup & Tips
1. Language & Region: The game will detect your system language. You can change audio (English, French, German, etc.) and subtitle languages from the in‑game options.
2. Control Customisation: Remap buttons on all platforms. Recommended: adjust sensitivity if playing on controller.
3. Graphics Settings (PC): On launch, the game sets automatic presets based on hardware. For best performance, turn down Shadow Quality and Post‑Processing if you experience frame drops. Enable VSync to avoid tearing.
4. EA Account Linking: If you encounter a blank browser window on PC, copy the URL manually and open in an external browser. On consoles, use the provided code on [ea.com/activate](https://ea.com/activate).
5. Friend’s Pass Invite: From the main menu, select “Play Online” and invite a friend. The friend must have the Friend’s Pass installed (search in their store). They do not need to own the full game.
6. Cross‑Play: Ensure all players have cross‑play enabled in the game’s settings (on by default).
---
Common Installation Errors & Fixes
1. “EA app failed to install” or “Unable to link account” (PC)
- Cause: Anti‑virus or firewall blocking the EA app helper.
- Fix: Temporarily disable antivirus during installation. Also, run the EA app as administrator. If using Steam/Epic, ensure the EA background service is running.
- Cause: Corrupted cache or network issue.
- Fix: Pause and resume the download. Restart the store launcher. On Steam, verify integrity of game files (right-click game > Properties > Local Files > Verify). On EA app, clear cache: close app, navigate to `%localappdata%\Electronic Arts\EA Desktop\cache` and delete contents.
- Cause: Console reserves space for system updates or the game’s patch.
- Fix: Free up additional space (at least 60 GB for safety). On PS4, rebuild database (Safe Mode > option 5).
- Cause: Partner is trying to download from wrong store.
- Fix: The Friend’s Pass must be downloaded from the same storefront as the full game owner. For example, if owner bought on Steam, the friend must download the Steam Friend’s Pass (not Epic). Also, ensure region matches.
- Cause: EA Account not linked on both sides, or one player is on Switch.
- Fix: Verify both players have linked EA Accounts. Switch cloud version is isolated – cross‑play only with other Switch cloud players.
- Cause: Outdated graphics drivers or conflicting overlays (Discord, Nvidia GeForce Experience).
- Fix: Update drivers (NVIDIA / AMD). Disable overlays for the game executable. Also, run the game in windowed mode by adding `-windowed` to launch options (Steam: Properties > General > Launch Options).
- Cause: EA server timeout during account link.
- Fix: Wait a few minutes and retry. If persistent, restart console and router.
- Cause: Dynamic resolution scaling.
- Fix: Go to Display settings and turn off “Dynamic Resolution” or set a fixed resolution. Also check that the Windows display scaling is set to 100%.
- Official EA Help: [help.ea.com](https://help.ea.com)
- It Takes Two Known Issues: [EA Answers HQ](https://answers.ea.com)
- Steam Community Hub: [Steam Community](https://steamcommunity.com/app/1426210)
- Friend’s Pass download links:
2. “Download stuck at X%” (PC)
3. “Insufficient storage” despite having free space (Console)
4. “Friend’s Pass not showing in library”
5. “Cross‑play not working”
6. “Game crashes on launch” (PC)
7. “Error code: 10011” (console)
8. “Game is blurry or low resolution” (PC)
---
Post‑Installation Verification
After installation, confirm the game works correctly:
1. Launch the game – it should reach the title screen without errors.
2. Check for updates – the game may download a small patch on first run. Do not skip it.
3. Test audio and video – ensure both channels work. If no sound, check your default audio device.
4. Verify account linking – try accessing the online menu. If it asks for EA login again, link successfully.
5. Test Friend’s Pass – if possible, invite a friend to verify co‑op works.
6. On PC, run the built‑in benchmark (found in Settings > Graphics > Benchmark) to ensure stable performance. Target 30+ FPS.
7. On consoles, check that the game has installed all required files (no “installation incomplete” messages).
If everything works, you are ready to play It Takes Two with a partner!
---
Additional Resources
- [Epic Friend’s Pass](https://store.epicgames.com/en-US/p/it-takes-two)
- [PlayStation Friend’s Pass](https://store.playstation.com/product/EP0006-CUSA25204_00-ITTWO00000000000)
- [Xbox Friend’s Pass](https://www.microsoft.com/store/productId/9N6DZ8DM5K7P)
- [Switch eShop](https://ec.nintendo.com/ES/ec/titles/70010000047123) (cloud version)
Note: The Friend’s Pass allows the invited player to experience the entire game with the owner, but only while they are invited. Progress is saved only for the owner (if hosting) or separately? Actually, each player’s progress is saved individually – the invited player can keep their collectibles if they later buy the game.
---
Last updated: October 2023. Ensure your platform store is up to date.
Game Introduction
Game Introduction for It Takes Two
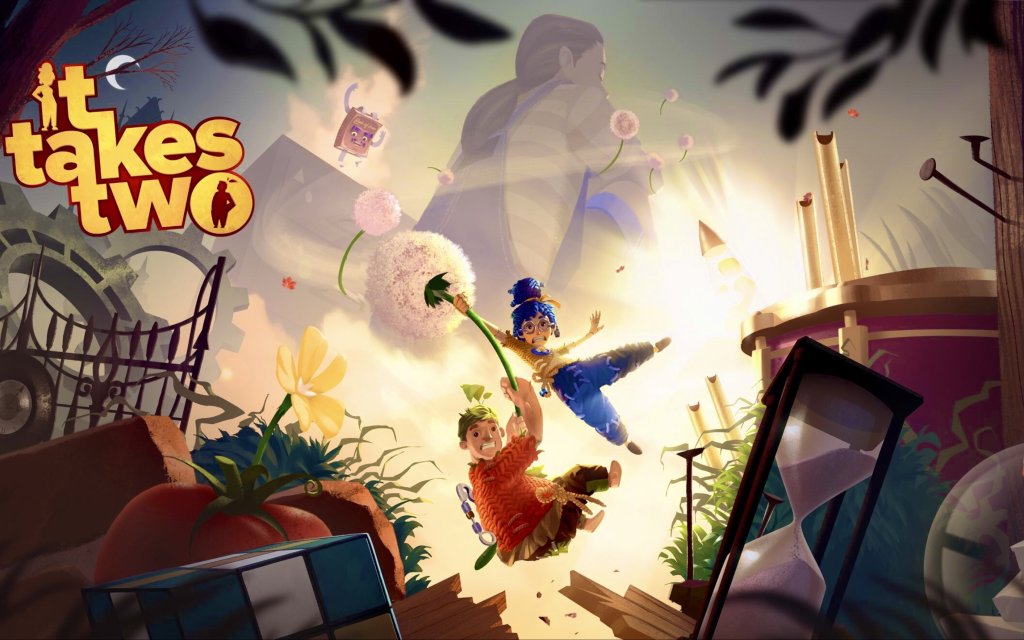
It Takes Two is a groundbreaking cooperative action-adventure platformer developed by Hazelight Studios and published by Electronic Arts under the EA Originals label. Released on March 26, 2021, the game won the prestigious Game of the Year award at The Game Awards 2021 and has been praised for its innovative co-op design, emotional storytelling, and constantly shifting gameplay.
Game Overview
- Genre: Cooperative action-adventure platformer with puzzle, action, stealth, racing, and mini-game elements.
- Developer: Hazelight Studios (founded by Josef Fares, known for Brothers: A Tale of Two Sons and A Way Out)
- Publisher: Electronic Arts (EA Originals)
- Release Timeline: Announced at E3 2020, released worldwide on March 26, 2021; later launched on Nintendo Switch (cloud version) on November 4, 2022.
- Platforms:
- Price: Standard $39.99 / €39.99 (one copy grants full access; the second player can play using the free Friend's Pass on all platforms)
- Cody: A down-to-earth handyman who enjoys gardening and fixing things. He is more sentimental and reluctant to change.
- May: An ambitious engineer and architect, focused on career success but often distant. She is pragmatic and determined.
- Rose: The couple’s daughter, whose magical tears create the doll world. She acts as the emotional catalyst for the journey.
- Dr. Hakim: A talking, magical romance book who serves as the couple’s guide and narrator, offering (often questionable) relationship advice.
- Forced Co-op: The game is designed exclusively for two players. There is no single-player mode; you must play either in local split-screen or online co-op with another person.
- Genre-Blending Gameplay: Each level introduces fresh mechanics—one moment you’re platforming with nail guns, the next flying a jetpack, fighting as a cowboy in a saloon, or sneaking past a squirrel sentry. Over 15 unique levels and dozens of distinct gameplay styles keep the experience constantly surprising.
- Emotional Storytelling: The narrative tackles mature themes like marriage, communication, and forgiveness, with heartfelt moments interspersed with humor and high adventure.
- Innovative Ability Design: Each player receives different abilities that must be combined to solve puzzles. For example, one player can fire sticky sap while the other ignites it; or one can shrink while the other grows large.
- Accessibility: Subtitles with customizable size, colorblind modes (Cyan/Red, Deuteranopia, Protanopia, Tritanopia), and aim assist options ensure more players can enjoy the game.
- Ideal for couples (romantic partners, spouses, or co-op buddies), friends, siblings, or any duo who enjoy a cooperative challenge.
- Older children (ESRB T for Teens) and adults will appreciate the story depth.
- Fans of cooperative games like Portal 2, A Way Out, or Unravel Two will feel right at home.
- Requires two players—suitable for both casual and hardcore gamers, as difficulty is moderate and forgiving (checkpoints are frequent).
- Campaign Mode: The entire story is playable only in two-player co-op, either:
- Cross-Platform Play: Not supported. Players must be on the same platform family (e.g., PS4 ⇔ PS5, Xbox One ⇔ Xbox Series X|S). PC-to-console cross-play is not available.
- Friend’s Pass: One purchase enables both players to play online; the friend downloads the free It Takes Two Friend’s Pass from the same store (Steam, Origin, Epic, PlayStation Store, Microsoft Store).
- 25+ collectible mini-games scattered across the world (e.g., chess, tank battles, whack-a-mole, and even a full-fledged rhythm game).
- Unlockable cosmetics for the characters (hats, outfits) found through exploration.
- Chapter Select added post-launch, allowing replay of any level.
- Free updates improved subtitle size, performance patches, and quality-of-life features.
- OS: Windows 8.1 64-bit
- CPU: Intel Core i3-2100T / AMD FX 6100
- RAM: 8 GB
- GPU: NVIDIA GeForce GTX 660 / AMD Radeon HD 7850 (2GB VRAM)
- Storage: 50 GB HDD
- DirectX: 11
- PS5 / Xbox Series X|S: 4K/30fps quality mode; 60fps performance mode.
- PS4 / Xbox One: 1080p/30fps.
- Switch (Cloud): Requires stable internet (15+ Mbps); streams the game; no local install.
- Game of the Year at The Game Awards 2021 – beating titles like Deathloop, Resident Evil Village, and Forza Horizon 5.
- Innovative Co-op Design: Unlike many games that allow solo play as an afterthought, It Takes Two is built from the ground up for two, with each character having unique, interdependent abilities.
- Sheer Variety: No two levels feel alike. From a flying tree branch catapult to a boss fight against a giant squirrel, the game constantly reinvents itself.
- Emotional Core: The story about a couple rekindling their relationship resonates with many players, offering both laughter and tears.
- Industry Recognition: Won over 50 Game of the Year awards and sold more than 10 million copies (as of 2023), making it one of the best-selling co-op games ever.
- PC (Steam, Origin, Epic Games Store)
- PlayStation 4 & PlayStation 5
- Xbox One & Xbox Series X|S
- Nintendo Switch (cloud streaming version)
- Available via EA Play and EA Play Pro subscriptions
Story Overview
Setting
The game begins in the real world—a rustic family home—before the protagonists are magically transformed into dolls created by their daughter’s tears. They are transported into a fantasy realm that constantly shifts, drawing on the couple’s memories, emotions, and the whims of their daughter’s imagination. Environments range from a giant shed and a magical tree to a clockwork universe and a threatening vacuum cleaner.
Premise
Cody and May are a married couple on the verge of divorce. Their young daughter Rose, heartbroken by the fighting, creates two doll versions of her parents and wishes for them to work things out. The parents suddenly find themselves trapped inside the dolls, in a magical world overseen by a quirky self-help book named Dr. Hakim. To return to the real world and save their marriage, they must cooperate to overcome inventive obstacles, revisit painful memories, and rediscover why they fell in love.
Main Characters
Core Appeal & Unique Features
Target Audience
Game Modes & Multiplayer Support
- Local Split-Screen (Offline): Both players play on the same console, sharing the screen. No online connection required for gameplay itself, but a persistent internet connection and a linked EA Account are mandatory for launching the game (even local co-op).
- Online Co-op: Each player needs their own copy of the game AND a EA Account (the Friend’s Pass allows one free copy for the second player). Both players must be online and connected to EA servers throughout the session.
DLC & Expansions
There is no paid DLC or story expansion for It Takes Two. The game is a complete, self-contained experience. However, the base game includes:
Technical Requirements & Platform Details
PC Minimum Specs (for 1080p/30fps Low)
Console Performance
Connectivity Note
It Takes Two requires a persistent internet connection to play, even for local split-screen. Both players must have a linked EA Account and be signed in online. This is a significant design choice to enforce DRM and online features.
Why It Stands Out
It Takes Two is not just a game—it’s a celebration of collaboration, creativity, and the messy beauty of real relationships. Whether you’re playing with your partner, a friend, or a sibling, it’s an unforgettable journey that demands teamwork and rewards communication.

Getting Started
First Hour Walkthrough
- The game begins with a cinematic prologue showing the troubled couple May and Cody, who are turned into tiny dolls by their daughter Rose's tears. You must choose who controls which character (the inviter picks first; you can switch later via the pause menu).
- After the prologue, you start in The Shed – the tutorial zone. This introduces basic movement and cooperation. Around 20 minutes in, you unlock the first two tools: Cody's Nail Gun (can shoot nails into walls to create platforms) and May's Explosive Socks (can stomp to break weak floors or activate switches). These are your primary cooperative tools for the first hour.
- Navigate through the Shed by solving puzzles that require both abilities. You'll also face a few simple enemies, culminating in a miniboss – the Vaccuum Cleaner – which you must defeat by using both tools together.
- After the miniboss, you meet the magical book Dr. Hakim, who becomes your guide. By the end of the first hour, you should have exited the Shed and entered the Garden area.
- There is no character creation in It Takes Two. You play as either Cody (male) or May (female). No customization of appearance, stats, or abilities is available. Each character receives unique tools per level, but these are predetermined by the game's progression. The only choice is which character you control. When you invite a friend, the inviter picks first; the other player gets the remaining character. You can swap at any time via the pause menu ("Switch Characters" option).
- Left Stick: Move character
- Right Stick: Look / Camera
- X: Jump
- Square: Use tool / interact
- Triangle: Primary attack (tool-specific)
- Circle: Crouch / Slide
- R1: Special ability (tool-specific)
- L1: Dash (unlocked later)
- L2: Aim (with ranged tools)
- R2: Secondary tool action
- Touchpad: Pause menu
- Options: Game menu
- Left Stick: Move
- Right Stick: Look
- A: Jump
- X: Use tool / interact
- Y: Primary attack
- B: Crouch / Slide
- RB: Special ability
- LB: Dash
- LT: Aim
- RT: Secondary tool action
- View button (two overlapping squares): Pause
- Menu button: Game menu
- WASD: Move
- Mouse: Look (camera follows mouse)
- Left Click: Primary attack / tool fire
- Right Click: Aim / Secondary action
- Space: Jump
- E: Interact / use tool
- Shift: Dash (hold to run? Actually running is default; dash is a separate unlock – but Shift acts as sprint/dash)
- Ctrl: Crouch / Slide
- Q: Special ability (tool-specific)
- R: Reload (if tool has ammo)
- Esc: Pause menu
- Health bar: Each character has a round health indicator near their portrait in the corner. Hearts represent health – lose all and you respawn at the last checkpoint. Both players must be alive to progress.
- Tool icons: A small icon in the bottom center of your screen shows your current tool (e.g., nail gun, explosive socks). A cooldown bar appears after using a special ability.
- Ammo counter: Tools with limited ammo (like the nail gun) display a number. Ammo recharges over time when not in use.
- Split-screen: The screen is divided horizontally (top/bottom) for each player. Each sees their own perspective. You cannot change to full screen. A glowing line indicates the tether distance; if you stray too far, the line turns red and you'll be teleported back after a few seconds.
- Pause menu: Offers options to restart from checkpoint, switch characters, adjust audio/visual settings, and view controls.
- Do: Communicate constantly – use voice chat or an external program. Announce your actions and ask for help.
- Do: Look for visual hints: glowing objects, cracks in walls, climbable surfaces. The game teaches through environment design.
- Do: Collect optional items like "May's Juice" or "Cody's Coffee" (backstory collectibles) but they are not required. You can revisit areas later? Not necessary – but they add story depth.
- Avoid: Rushing ahead of your partner. Many puzzles require both characters in specific positions. The tether mechanic will eventually pull you back, but it's frustrating.
- Avoid: Ignoring breakable objects – they often contain coins or health pickups.
- Avoid: Using tools recklessly; ammo may run out temporarily. Wait for recharge.
- Health: Does not regenerate automatically. Pick up pink hearts (health pickups) when damaged. They are common in the environment.
- Coins: Found in shiny piles or containers. Used at the end of each chapter to buy cosmetic hats/accessories for your characters. Purely cosmetic – not needed for progression. In the early game, prioritize health over coins, but collect them if you want all cosmetics.
- Time: Be patient. Puzzles may require multiple attempts.
- [ ] Download and install It Takes Two (ensure your partner uses the Friend's Pass if they don't own the game).
- [ ] Log in or create an EA Account (required to play).
- [ ] Invite a friend to play (online or local co-op with two controllers).
- [ ] Complete the prologue (the divorce scene and transformation).
- [ ] Finish the tutorial area The Shed.
- [ ] Unlock both starting tools (Nail Gun and Explosive Socks).
- [ ] Defeat the Vaccuum Cleaner miniboss.
- [ ] Meet Dr. Hakim and receive initial guidance.
- [ ] Exit the Shed and enter the Garden.
- [ ] Explore the Garden, collect coins and health if desired.
- [ ] Enjoy the story and cooperative experience!
Character Creation
Controls on All Platforms
All versions support standard controller input. PC also offers keyboard & mouse. Below are the default controls.
PlayStation (PS5 / PS4)
Xbox (Xbox Series X|S / Xbox One)
PC (Keyboard & Mouse)
(On PC, you can also use any supported controller; the game detects input automatically.)
UI Overview
The user interface is minimal, focusing on cooperative play.
Essential Early Objectives
1. Complete the tutorial (The Shed): Master basic movement and cooperation.
2. Unlock and use the first tools: Obtain Cody's Nail Gun and May's Explosive Socks. Learn how they interact: May breaks weak floors; Cody creates platforms for May to reach higher ground.
3. Defeat the Vaccuum Cleaner: The first miniboss, requiring coordinated use of both tools.
4. Meet Dr. Hakim: The magical book appears after the miniboss and provides ongoing guidance.
What to Do First and What to Avoid
Early Resource Priorities
Common Beginner Mistakes
1. Not communicating: Silence leads to confusion. Always talk with your partner.
2. Misunderstanding split-screen: Each player has their own camera angle. Announce when you move to avoid disorientation.
3. Forgetting tool mechanics: Each tool has a primary and secondary use. For example, Cody's nail gun can shoot nails into walls (platforms) or shoot at enemies; May's explosive socks can stomp to break floors or create a shockwave. Experiment with both buttons.
4. Ignoring the tether: The glowing line shows direction and distance; when red, you are too far. Don't fight the teleport – it's meant to keep you together.
5. Skipping Dr. Hakim's instructions: He gives valuable tips. Pay attention.
Day-One Checklist
Remember: It Takes Two is a journey through many unique levels. The first hour sets the foundation. Take your time, communicate, and work together. Happy gaming!
Core Gameplay
Core Gameplay Overview
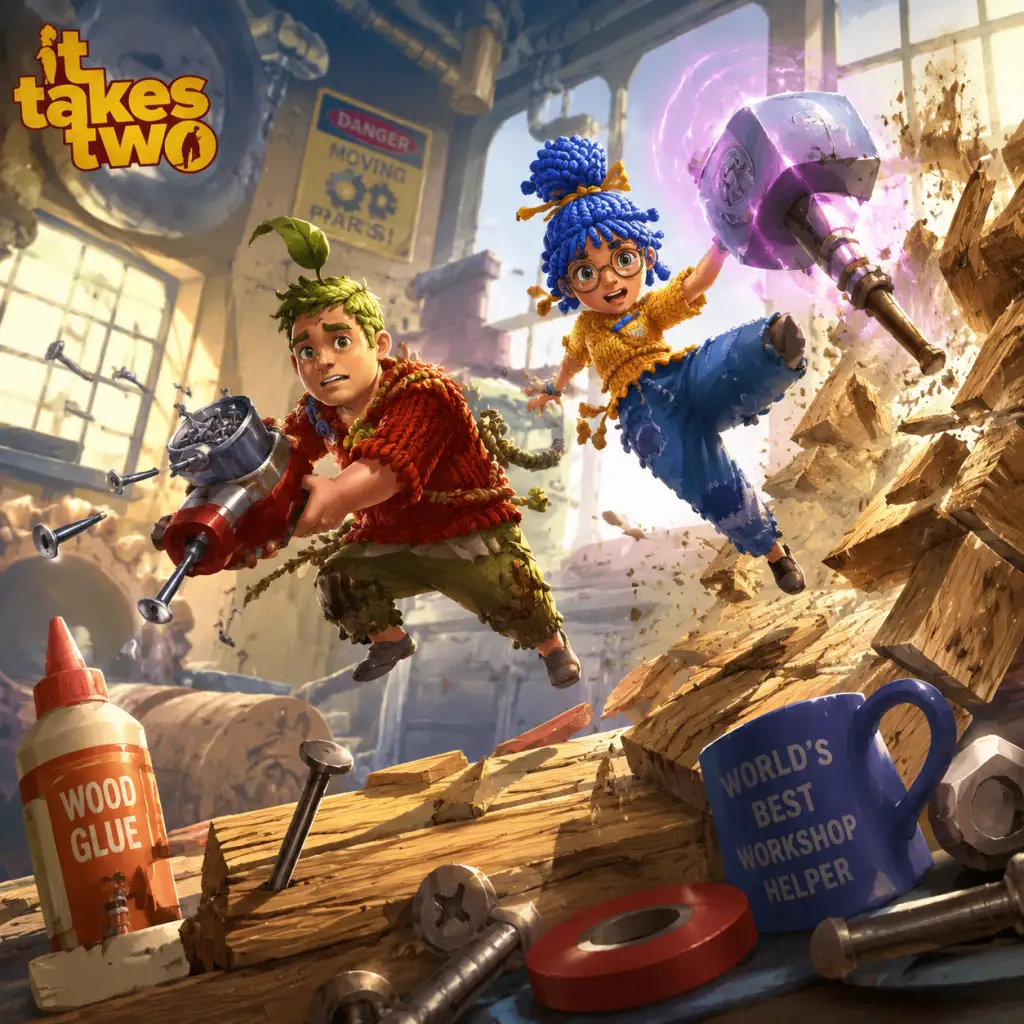
It Takes Two is a mandatory two-player cooperative action-adventure platformer. There is no single-player mode. The entire game is designed around two characters—Cody and May—each with unique, complementary abilities that change with every chapter. The core gameplay loop is a seamless blend of puzzle-solving, platforming, combat, and narrative-driven exploration that constantly introduces new mechanics, ensuring no two chapters feel the same. There is no traditional experience points, skill trees, or currency. Progression is entirely linear through the story, with optional collectibles that unlock cosmetic items and minigames. The game does not feature an open world; instead, it offers semi-linear levels with branching optional paths for exploration.
---
Player Progression Tiers
Because character abilities reset and change per chapter, progression is best understood through the chapter structure and the complexity of mechanics introduced. The game has seven chapters, roughly dividing into four tiers:
- Early Game (Chapters 1–2): The Shed and The Tree – Learn basic movement, simple co-op puzzles, and first combat.
- Mid Game (Chapters 3–5): Rose's Room, Snowglobe, The Garden – Introduce more diverse abilities and inter-dependent puzzles.
- Late Game (Chapters 6–7): The Attic, Space Travel – Complex multi-step puzzles, tougher enemies, and refined combat.
- Endgame (Post-Story): Chapter select, cleanup, and achievement completion.
- Chapter 1 – The Shed: Cody uses explosive resin (fire glue) and May uses matches to ignite it. Puzzles involve combining these to burn obstacles, create platforms, or launch objects. Combat uses the same abilities against wasp enemies: Cody coats wasps in resin, May ignites them. No health upgrades yet; both characters have three hearts. The level is linear with a few short side paths containing collectibles (e.g., a piece of a minigame).
- Chapter 2 – The Tree: Cody gets tree sap (sticky substance) and May gets air bubbles (can shoot air pockets to lift things). Puzzles require using sap to stick objects together or to surfaces, then May's bubbles to move or float them. Platforming includes wall-running on sap bridges. Enemies include squirrels and beetles; combat uses sap to trap and bubbles to knock back. First introduction to environmental hazards (spikes, water).
- Early combat is simple and experimental. Each player's ability is used directly on enemies. There are no complex combos or weapon switching.
- No health pickups – health can only be restored by finding health hearts (small floating hearts) hidden in the environment or occasionally dropped by enemies. Once three hearts are lost, a player dies and is revived a few seconds later if the partner stays near the corpse; otherwise, the player respawns at a checkpoint.
- Optional path right after the first boss (vacuum cleaner) leads to a minigame piece (there are 25 minigames total). Another optional area rewards a character skin (cosmetic item) for either Cody or May.
- Health upgrades (increase maximum hearts) are hidden in each chapter; in Chapter 1, a health upgrade is behind a puzzle requiring resin and matches on a high ledge.
- Chapter 3 – Rose's Room: Massive shift in scale (toy-sized world). Cody gets time-reversal (can rewind objects' positions) and May gets clone-splitting (can create a copy of herself for a few seconds). Puzzles become more conceptual: reversing a moving train to create a bridge while May clones to hold switches. Combat involves shooting glue at wasp-like enemies and clone-dodging. First multi-floor vertical levels.
- Chapter 4 – The Snowglobe: Cody uses plant seeds that grow instantly (like ivy) and May uses explosives (firecrackers). Platforming involves growing plants to create vertical surfaces; May's explosives destroy ice barriers. Enemies include penguin soldiers and ice golems. Combat requires close coordination: Cody traps enemies in ice or on vines, May blows them up. This chapter introduces boss fights with multiple phases (the ice golem queen).
- Chapter 5 – The Garden: Cody uses garden hose (water stream) and May uses cactus darts (sharp projectiles). Water can make plants grow, move obstacles, or fill containers; cactus darts stick to walls for platforming. Combat involves watering enemies to soften them then shooting darts. This chapter introduces vertical combat arenas and the concept of simultaneous interaction (both players must trigger two switches at once).
- Health upgrades continue to be hidden in each chapter, allowing a maximum of eight hearts by endgame. Collecting them is purely optional but helpful for survival.
- Abilities are temporary but return during the chapter’s boss fight. There is no way to customize or upgrade abilities; the game deliberately removes them after the chapter to keep each experience fresh.
- No currency, shops, or experience points. The only “economy” is the collection of collectibles that unlock cosmetic skins (hats, outfits) and minigames that can be played from the main menu after finding their pieces. There is no in-game economy to manage.
- Chapter 6 – The Attic: Cody gets a magnet (can attract or repel metallic objects) and May gets a hammer (can smash objects or stomp the ground). Puzzles involve manipulating magnetic fields to move platforms, and using the hammer’s shockwave to break brittle floors or stun enemies. Combat includes flying enemies (magnetic bats) and armored enemies (needs hammer to break defenses). This chapter combines previous skills: players must use magnetic pulls to move heavy objects while May hammers to create pathways.
- Chapter 7 – Space Travel: Cody gets a laser gun (shoots beams that can cut through certain materials or charge crystals) and May gets a gun that fires explosive projectiles. Puzzles involve cutting metal plates to reveal paths, then May destroying obstacles. This chapter also introduces zero-gravity sections where movement changes drastically. Combat features drones and spaceship enemies. The final boss (the Magic Wand) requires both players to use their guns simultaneously to break shields and then dodge attacks.
- Late-game combat adds multi-phase boss fights where players must switch between using their abilities for offense, defense, and environmental manipulation. Example: In Chapter 7’s boss, Cody must cut energy orbs while May shoots them to destroy the boss’s shield, all while avoiding obstacles.
- Enemy variety increases – includes shielded, fast, and area-denial enemies.
- Health management becomes critical; health hearts are rarer in these chapters, so exploration for health upgrades is more rewarding.
- “Missions” are the main story. There are no side quests. However, each chapter has optional areas that require solving extra puzzles to reach collectibles. These are not marked on a map; exploration is encouraged visually.
- Minigames – up to 25 total – can be discovered during chapters (e.g., a basketball game in the tree, a snowball fight in the snowglobe). Playing these with a partner yields no rewards beyond achievements and fun.
- Chapter Select – Players can replay any chapter from the menu. All progress (health upgrades, collectibles found) is saved. This is primarily for finding missed collectibles or replaying favorite sections.
- Completionist Goals: Collect all 25 minigame pieces (unlocks the “Minigame Extra” mode where you can play any minigame at any time), collect all health upgrades (necessary for the “Max Health” achievement), and find all character skins (cosmetic rewards). Each chapter has a specific set of hidden skins; there is no new game+ or increased difficulty.
- Achievements/Trophies: Many require both players to perform specific actions (e.g., hitting each other with specific objects). These can be done via chapter select. There is no endgame boss or raid-like content.
- Replayability: No procedural generation or difficulty scaling. The only reason to replay is for collectibles or speedruns. The game’s linearity means there is no “post-game” content besides cleanup.
Each tier introduces permanently new mechanics that become more intricate but never carry over to later chapters; instead, the game re-invents itself at every turn.
---
Early Game: Chapters 1 & 2
#### Gameplay Loop
#### Combat & Interaction
#### Exploration & Collectibles
---
Mid Game: Chapters 3–5
#### Gameplay Loop
#### Progression & Build Growth
#### Economy
---
Late Game: Chapters 6 & 7
#### Gameplay Loop
#### Combat Complexity
#### Exploration & Quests
---
Endgame: Post-Story Structure
Once the main story is completed, the game offers:
---
Summary Table of Core Systems
| System | Description |
|---|---|
| Main Gameplay Loop | Enter new chapter → receive unique abilities → solve puzzles + platform to reach next area → combat encounters → boss fight → next chapter. |
| Combat | Each player uses their chapter-specific ability to damage enemies; some enemies require coordination (one stuns, other kills). |
| Progression | Linear story; no levels or skill trees. Only permanent unlocks are health hearts and cosmetic skins. |
| Exploration | Linear levels with optional side paths for collectibles (minigame pieces, skins, health upgrades). No maps or markers. |
| Quests/Missions | Main story only; no side quests. The narrative is the quest. |
| Economy | None. No currency, inventory, or merchants. |
| Build Growth | No character builds. Abilities change per chapter and cannot be upgraded. Heath can increase from 3 to 8 hearts max. |
| Endgame | Chapter select for collectibles; no new content post-story. Cleanup for achievements. |
Practical Tips for Each Tier
- Early Game: Don’t rush. Experiment with each ability on everything. The first health upgrade in Chapter 1 requires jumping onto a shelf after using resin and matches—look for sparkles. Communicate constantly. Use the in-game “ping” system (hold L1/LB) to highlight objects for your partner.
- Mid Game: Watch for environmental change indicators: a small light or sound often signals that a puzzle is solvable. For Chapter 3’s time-reversal, note that you can rewind multiple objects if you hold the button. Save minigames for a fun break, but don’t stress about collecting all pieces on your first run.
- Late Game: The Attic (Chapter 6) has a notorious puzzle involving magnetic rail carts—plan movements before acting. In Chapter 7, the zero-gravity sections require you to float using a grappling point; if you miss, you fall into a pit and die. Use the partner’s corpse as a guide for safe spots.
- Endgame: Use Chapter Select to revisit early chapters for missed minigames. There is no penalty for leaving a chapter mid-way; progress saves automatically. If you need a specific achievement, look up its trigger location; many require both players in specific positions.
It Takes Two is a masterclass in cooperative game design that never overstays its welcome. Its lack of traditional progression systems is intentional—every moment is about learning new ways to work together, making the journey itself the reward.
Game Tips
Game Tips for It Takes Two
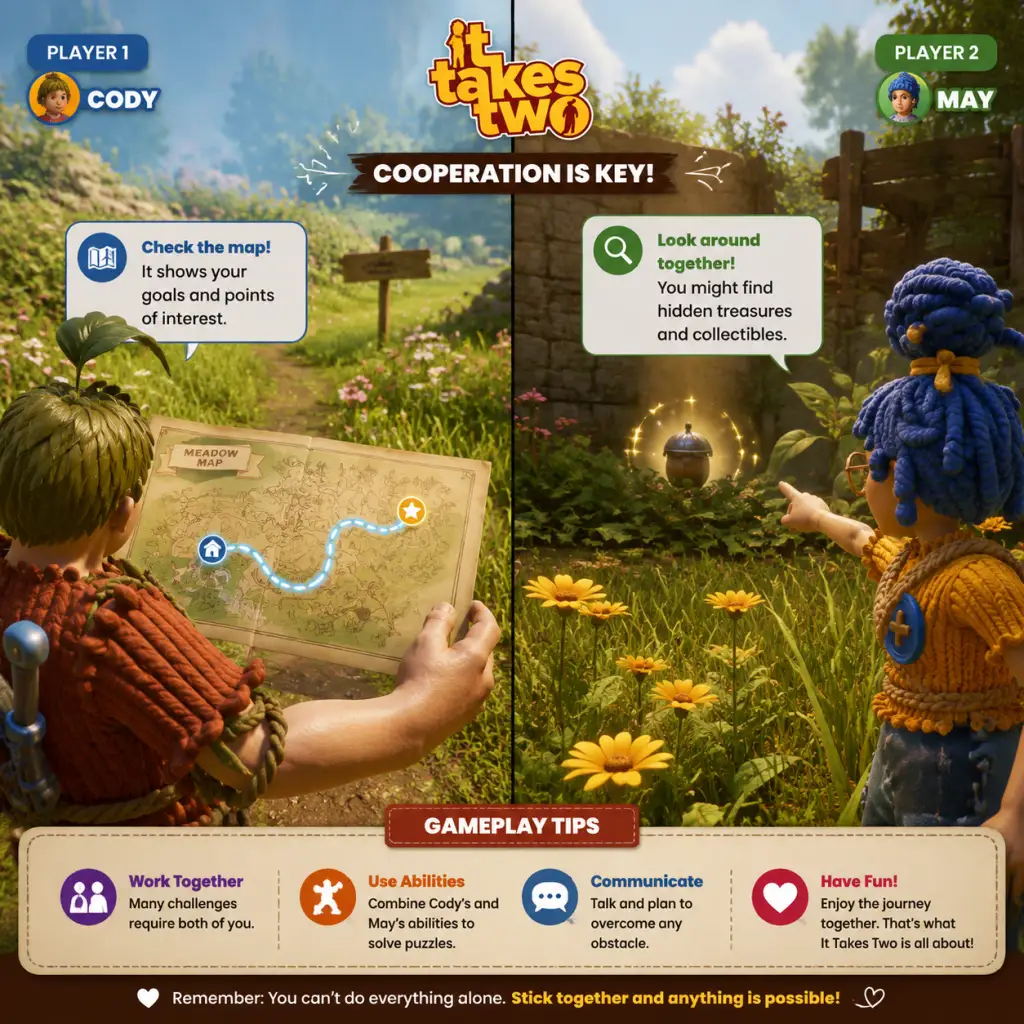
Below is a comprehensive collection of tips organized by category and difficulty level. These insights are designed to enhance your cooperative experience, reduce frustration, and uncover hidden depths in Hazelight’s masterpiece.
Beginner Tips (Essential for New Players)
Communication is Everything
- Why it works: Every puzzle, combat encounter, and platforming section requires coordination. Use voice chat (even a simple “jump now” or “wait”) to synchronize actions. Without it, you’ll often fail repeatedly.
- When to use: Always. Before starting a new section, quickly discuss roles (who goes first, who activates what).
- Why it works: Cody and May have radically different abilities (e.g., Cody’s sticky sap vs. May’s buzzsaw). Understanding both sides helps you anticipate what your partner can do and plan better strategies.
- When to use: After completing the first playthrough, swap characters in New Game+ or replay levels to see the other perspective.
- Why it works: The story is central to the emotional payoff. Skipping cutscenes may make you miss context for why certain abilities appear or why characters behave in specific ways.
- When to use: First playthrough – let the narrative breathe.
- Why it works: The camera can be controlled independently, allowing you to spot hidden ledges, collectibles, or enemy positions while your partner waits.
- When to use: In open areas like the toolbox or snow globe, pan the camera around to find secret paths.
- Tip: Always eliminate enemies that summon more enemies first (e.g., the floating eyes in the Tree level).
- Why it works: These “spawners” quickly overwhelm you if ignored. Focusing them reduces incoming damage and simplifies the fight.
- When to use: In any encounter with multiple enemy types.
- Tip: Combine Cody’s sticky sap with May’s buzzsaw to create explosive traps. Cody coats an area, May throws a saw into it, and the sap detonates, dealing area damage.
- Why it works: The game design encourages pairing abilities. This combo clears groups quickly and stuns tougher enemies.
- When to use: When facing clusters of enemies or a large boss minion segment.
- Tip: Jump immediately after attacking to cancel the recovery animation, allowing faster follow-up attacks.
- Why it works: Reduces the time you’re vulnerable after a swing. Useful against fast enemies like the Toy Soldier blitzers.
- When to use: In rapid melee exchanges, especially against the Queen Bee’s swarm.
- Tip: Many hidden items (like Minigames and Canisters) emit a faint humming or musical tone when you’re near.
- Why it works: The game uses audio to guide attentive players. Turning up your headphones can reveal secrets without constantly checking a guide.
- When to use: In every level, especially in dense forests or industrial sections.
- Tip: The game often hides collectibles above eye level (on ceilings) or below platforms (in crevices). Use Cody’s transformation (if available) to reach high ledges or May’s grappling to swing to unexpected spots.
- Why it works: Level designers deliberately place rewards at vertical extremes. Sticking to the main path will miss many.
- When to use: Anytime you see an unusual vertical texture or ledge that seems just out of reach.
- Tip: Some collectibles can be obtained earlier than intended by using advanced movement techniques (e.g., wall jumps, timed ability swaps). For instance, in the “Wells” section, use May’s grappling to skip a locked gate and grab a Canister out of order.
- Why it works: The game allows some flexibility in order if both players master movement. This saves backtracking time.
- When to use: In subsequent playthroughs or when speedrunning.
- Tip: When one player heals, the health station (e.g., the blue hearts) becomes unavailable for a short cooldown. Don’t both rush for the same pickup.
- Why it works: Wasting heals leads to both players being low on health during boss fights.
- When to use: Coordinate who takes the heal – the player with lower health or the one who will face immediate danger next.
- Tip: Many abilities (like Cody’s transformation into a turret or May’s hammer slam) grant brief invulnerability windows. Use these to tank a single hit without losing health.
- Why it works: You can intentionally absorb small damage to protect your partner or to bypass a dangerous obstacle.
- When to use: During the train section or the cursed clock tower, where chip damage is common.
- Tip: To get the “Complete the game without dying” achievement (if you’re aiming for it), restart the chapter if either player dies. However, note that falls into pits that respawn you immediately do not count as deaths for this achievement – only when health reaches zero does it count.
- When to use: Only if you’re achievement hunting – otherwise, dying is part of learning.
- Tip: When your character needs to shoot a projectile (e.g., May’s nails), aim at the glowing indicator that your partner’s action creates. The game often provides a visual cue of where to shoot.
- Why it works: The indicator is literally a “shoot here” sign designed by the developers. Ignoring it makes puzzles harder.
- When to use: In almost every puzzle involving projectiles or pressure plates.
- Tip: Do not activate a lever or button until your partner is in position. Many puzzles reset if one player acts too early, wasting time and resources.
- Why it works: The co-op design requires simultaneous or precisely timed actions. Rushing leads to retries.
- When to use: In the giant vacuum cleaner, the space section, and the final boss.
- Tip: Some puzzles have multiple phases that repeat a pattern. Memorize the pattern (e.g., three lights in sequence) and call it out to your partner. This reduces the need to look up every time.
- Why it works: Faster execution means fewer mistakes, especially under time pressure.
- When to use: In the “Cuckoo Clock” and “Symphony” puzzles.
- Tip: Every boss has distinct visual or audio cues when transitioning phases. For example, the Toolbox boss (The Moon) changes color and spawns adds. Prepare for a new attack pattern when you see the cue.
- Why it works: Knowing what’s coming allows you to reposition or use defensive abilities preemptively.
- When to use: In all boss fights, especially against the Dragon and the Elephant.
- Tip: Many boss arenas have interactive objects (exploding barrels, collapsing pillars). Lure the boss near them and detonate.
- Why it works: These objects deal massive damage and can stagger the boss, creating openings.
- When to use: Against the Toolbox boss (use the nail gun on gas tanks) and the Turtle boss (drop icicles on its head).
- Tip: Some bosses have regenerating health or time-limited phases. In those cases, focus all abilities on damage output rather than dodging. For example, the final boss’s third phase: both players should use their strongest attacks (e.g., Cody’s homing rockets, May’s charged hammer) simultaneously.
- Why it works: The boss will regenerate if you take too long, so burst damage is critical.
- When to use: Against the final boss and the space station boss.
- Tip: Scattered across levels are 25 minigames (like Whack-a-Mole, Tennis, etc.). They don’t affect progression but unlock a trophy/achievement and provide fun breaks.
- Why it works: They offer a change of pace and a chance to compete with your partner, strengthening your teamwork dynamic.
- When to use: During exploration segments – if you hear a minigame jingle, stop and find it.
- Tip: Many minigames have simple tricks. For example, in “Sock Drifting” (soccer), aim diagonally to curve the ball. In “Ramp Jumping”, hold forward just before the launch pad to get maximum distance.
- Why it works: These tricks give you a competitive edge if your partner is trying to win.
- When to use: Only if you want to beat your partner – otherwise, just have fun.
- Tip: Since there is no currency or shop, the only “resource” is time. Use the generous checkpoint system to your advantage: if you fail a difficult jump or puzzle, the game usually respawns you right before the challenge. No need to replay long sections.
- Why it works: Saves frustration and encourages experimentation.
- When to use: In any difficulty spike – just keep trying without fear of losing progress.
- Tip: Learn to “wave dash” by jumping and immediately using your character’s ability (e.g., Cody’s sap slide or May’s hammer bounce) right after landing. This preserves momentum and speeds up traversal.
- Why it works: The game’s physics allow ability animation to override landing lag, giving a speed boost.
- When to use: In any long straight corridor or when racing a timer.
- Tip: You can open the start menu during a cutscene to skip it almost instantly. However, some skippable moments are hidden in quick-time events – wait for the prompt.
- Why it works: Saves seconds per cutscene, which adds up in a full playthrough.
- When to use: Only in repeat playthroughs, never on your first time.
- Tip: When Cody gets the magnet boots (around the Snow Globe section), you can cling to magnetic surfaces indefinitely. Use this to bypass entire platforming sections by jumping from magnet point to magnet point without touching the ground.
- Why it works: Many puzzles are skip-able if you chain magnetic surfaces correctly.
- When to use: In the Magnet level and later in the Cuckoo Clock.
- Tip: If you own the full game, your friend can download the “Friend Pass” for free and play the entire game with you online. No need for both to buy it.
- Why it works: Saves one player the cost.
- When to use: If you’re the host.
- Tip: Enable closed captions, increase subtitle size, and turn on “Hold to Interact” in settings if you have difficulty with rapid button presses.
- Why it works: Reduces frustration for players with slower reaction times or hearing impairments.
- When to use: Before starting the game, especially for younger or less experienced gamers.
- Tip: The game can be emotionally intense and physically demanding. If you find yourselves arguing or stuck, pause for 5 minutes.
- Why it works: Frustration leads to poor teamwork. A short break resets your patience.
- When to use: After three consecutive failures on the same section.
Play Both Characters at Some Point
Don’t Rush the Cutscenes
Use the Camera Freely
Combat Tips
Beginner: Target Priority
Intermediate: Ability Synergy
Advanced: Animation Canceling
Exploration & Collectibles
Beginner: Listen for Sound Cues
Intermediate: Look Up and Down
Advanced: Sequence Breaking for Collectibles
Resource Management (Health and Lives)
Beginner: Health Pickups Are Shared
Intermediate: Stacking Invincibility Frames
Advanced: No-Death Strategy for Achievements
Puzzle Solving Strategies
Beginner: Use the Aim Marker
Intermediate: The “Wait for Partner” Rule
Advanced: Environmental Memory
Boss Fight Tactics
Beginner: Phase Recognition
Intermediate: Use Environmentals
Advanced: Damage Race vs. Survival
Mini-Games and Economy (No In-Game Currency)
Beginner: Minigames Are Worth Finding
Intermediate: Minigame Strategies
Advanced: No Economy – But Use Checkpoints
Advanced Strategies (Speedrunning & Tech)
Movement Optimization
Skip Pausing with Quick Menus
Abuse the Magnet Boots (Cody’s Upgrade)
Miscellaneous Tips
Easter Egg: The “Friend Pass” Works for the Whole Game
Accessibility Features
When to Take Breaks
---
Final Note: The most important tip is to enjoy the journey. It Takes Two is a celebration of cooperation – laugh at mistakes, celebrate small victories, and let the story unfold naturally. Good luck!
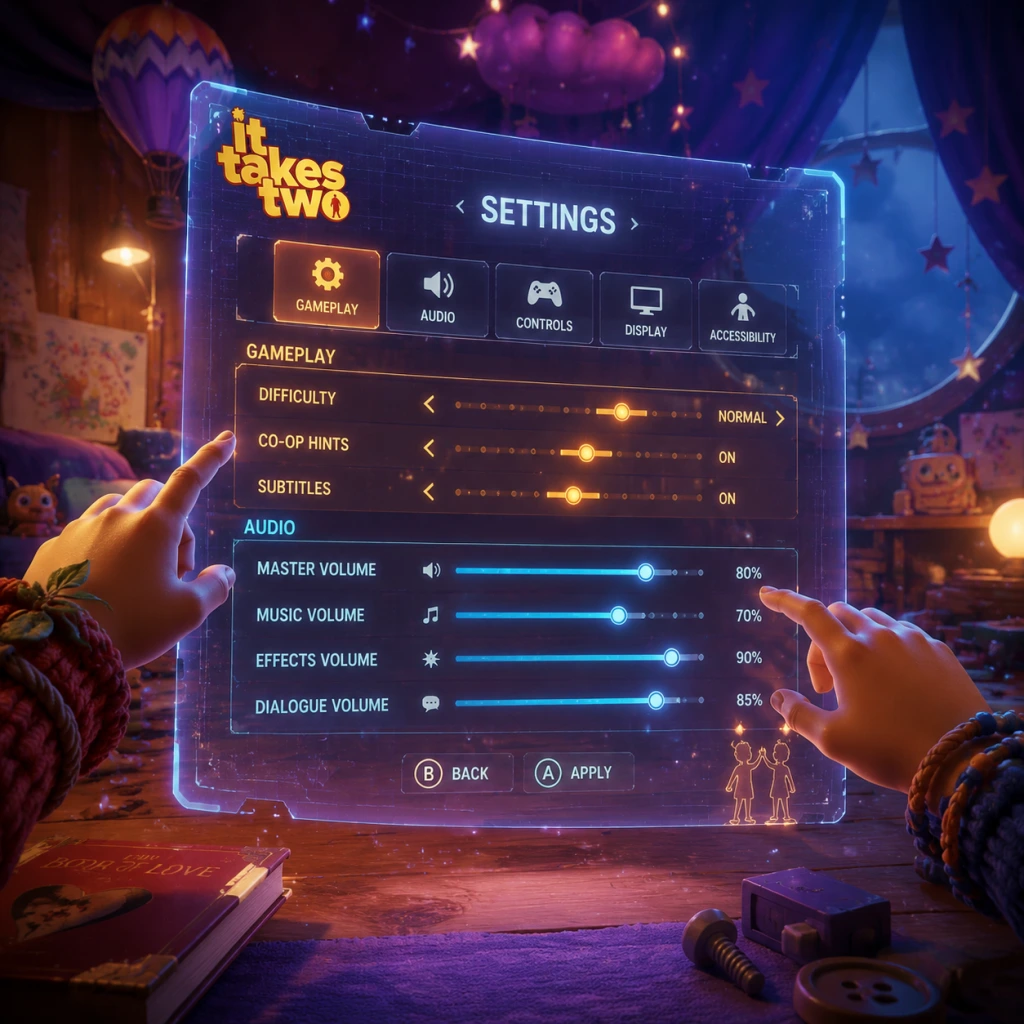
Game Settings
Game Settings Guide for It Takes Two
This guide covers every adjustable setting in It Takes Two across PC and console platforms. We explain what each option does, recommend optimal values for different hardware tiers, and point out settings that are easy to misconfigure or cause performance issues.
Platform Overview
It Takes Two is available on:
- PC (Steam, EA App, Epic Games Store)
- PlayStation 4 & PlayStation 5
- Xbox One, Xbox Series X|S
- Mandatory Internet Connection: Even for local co-op (couch co-op), the game requires online authentication via an EA Account. All settings can be adjusted before starting a game.
- Friend's Pass: The co-op partner who does not own the game must install the Friend's Pass version. Settings on the pass version are identical to the full game.
- Cross-Platform Co-Op: Works across PC, PlayStation, Xbox, but not Nintendo Switch (game not released there). Settings are independent per platform, but network quality affects cross-play.
The game does not support keyboard-and-mouse on consoles; only controllers are used. PC players can freely switch between controller and keyboard/mouse.
Important Setup Notes
---
Graphics Settings (PC)
All graphics settings can be changed from the main menu or during gameplay (press Escape > Options > Graphics). Options range from Low to Ultra (or specific sliders). The game uses Unreal Engine 4 and is well-optimized.
Graphics Presets
| Preset | Description | Best for |
|---|---|---|
| Low | Minimizes quality for maximum FPS. Disables many effects. | Low-end systems, laptops with integrated GPUs |
| Medium | Balanced quality/performance. Good for high FPS on mid-range PCs. | e.g., GTX 1060, RX 580 |
| High | High-quality textures and effects. Targets 60 FPS on decent hardware. | e.g., RTX 2060, RX 5600 XT |
| Ultra | Maximum visual fidelity. Heavy on GPU and VRAM. | High-end GPUs (RTX 3060 Ti+, RX 6700 XT+) |
| Custom | Manually adjust all options below. | Enthusiasts |
Detailed Graphics Options
| Setting | Options | Performance Impact | Recommendation |
|---|---|---|---|
| Resolution | Native (e.g., 1920x1080, 2560x1440, 3840x2160) | High (more pixels = more GPU load) | Set to monitor's native resolution. If struggling, lower to 900p or 720p with upscaling. |
| Display Mode | Fullscreen, Windowed, Borderless | Low | Use Fullscreen for best performance. Borderless for alt-tab convenience. |
| V-Sync | On/Off | Medium (limits FPS to refresh rate) | Off if you have G-Sync/Freesync. On to eliminate screen tearing. |
| FPS Cap | 30, 60, 120, 144, Unlimited | Low | Cap to your monitor's refresh rate (e.g., 60 or 144) to reduce GPU load and input lag. |
| Texture Quality | Low, Medium, High, Ultra | Medium (VRAM dependent) | Set to High or Ultra if you have 4GB+ VRAM. Low reduces quality but frees VRAM. |
| Shadow Quality | Low, Medium, High, Ultra | Medium-High | Medium for slight drop in quality but big FPS gain. High/Ultra only with strong GPU. |
| Post Processing | Low, Medium, High, Ultra | Medium | Affects bloom, depth of field, motion blur. Personal preference; High is good for aesthetics. |
| Anti-Aliasing | Off, FXAA, TAA, MSAA 2x/4x | Varies (MSAA heavy) | TAA is best balance of quality and performance. Off causes jagged edges. |
| Ambient Occlusion | Off, SSAO, HBAO+ | Medium | HBAO+ looks better but costs FPS. SSAO is good. Off for performance. |
| Reflections | Low, Medium, High, Ultra | Medium-High | Screen-space reflections; Ultra uses ray-traced (if available? No RTX in this game). High is fine. |
| Effects Quality | Low, Medium, High, Ultra | Medium | Controls particle density, lighting effects. High recommended. |
| View Distance | Low, Medium, High, Ultra | Medium | Higher values draw distant objects. Medium is safe. |
| Foliage Quality | Low, Medium, High, Ultra | Medium | Affects grass/leaves density. Low for FPS boost in forest areas. |
| Motion Blur | Off, Per Object, Full | Low | Personal preference; many turn Off for clarity. |
| Depth of Field | Off, On | Low | Cinematic blur; can be distracting. Off for competitive clarity. |
| Chromatic Aberration | Off, On | Low | Adds tiny color fringing; turn Off if you dislike it. |
| Film Grain | Off, On | Negligible | Adds noise; Off for cleaner image. |
Hardware Tier Recommendations (60 FPS Target)
Low-End PC (e.g., GTX 960, Ryzen 3)
- Use Low Preset, then adjust:
- Expected FPS: 40–60, possibly with occasional dips.
- Use Medium Preset or High with adjustments:
- Expected FPS: 60 stable.
- Use Ultra Preset at 1440p or 4K.
- Disable Motion Blur, Depth of Field if you want competitive clarity.
- Expected FPS: 60+ at 4K, 120+ at 1440p.
- VRAM Overload: The “Texture Quality” setting can exceed VRAM limits, causing stuttering. Monitor VRAM usage with MSI Afterburner. If you see high usage, lower texture quality.
- V-Sync + Frame Cap: Enable V-Sync only if you experience tearing. For adaptive sync monitors, disable V-Sync and set FPS cap slightly below refresh rate (e.g., 140 for 144Hz).
- Windowed Mode Performance: Playing in windowed mode may decrease FPS due to desktop compositing. Use Fullscreen for best performance.
- PlayStation 4 / Xbox One: 1080p, 30 FPS (dynamic resolution)
- PlayStation 4 Pro / Xbox One X: 1440p upscaled to 4K, 30 FPS (or 1080p 60 FPS on certain modes? Actually It Takes Two on these consoles targets 30 FPS only; no performance mode. Check updates).
- PlayStation 5 / Xbox Series X|S: Native 4K at 60 FPS (performance mode) or 1440p upscaled? It has a “Performance Mode” option in the console settings menu? Wait — It Takes Two on PS5/XSX runs at 4K 60 FPS dynamically. There is a toggle for “Graphics Mode” (Quality vs Performance) in the game's options? Actually, the game does not have a performance/quality toggle on console; it runs at 4K 60 FPS on PS5/XSX (dynamic). But confirm: On PS5 it's 4K 60 FPS. On Series S, 1440p 60 FPS. On Series X, 4K 60 FPS. No user adjustable settings beyond brightness and audio.
- Resolution: 1920x1080 (or 1600x900 if needed)
- Shadows: Low
- Anti-Aliasing: FXAA
- Ambient Occlusion: Off
Mid-Range PC (e.g., GTX 1060, RX 580)
- Shadows: Medium
- Reflections: Medium
- Anti-Aliasing: TAA
High-End PC (e.g., RTX 3070, RX 6800)
Special Attention Points
Console Graphics
Consoles have no detailed graphics options. The game runs at:
Recommendation: For console, ensure your system is set to 60Hz or 120Hz if display supports; input latency may benefit from game mode on TV.
---
Audio Settings
Access from Menu > Options > Audio.
| Setting | Description | Recommendation |
|---|---|---|
| Master Volume | Overall game volume | 70–80% to hear game but avoid ear fatigue |
| Music Volume | Background music | 80% (music is fantastic) |
| SFX Volume | Sound effects, footsteps, explosions | 100% |
| Dialogue Volume | Voice lines from characters | 100% (critical for story and gameplay hints) |
| Cinematic Volume | Cutscene audio (separate from dialogue?) | 100% |
| Dynamic Range | Full, Night Mode | Night Mode for late-night play to compress loud sounds. Full for immersive experience. |
| Subtitles | On/Off | On to never miss dialogue. Also available in different languages. |
| Subtitle Size | Small, Medium, Large | Medium or Large for readability on TV. |
Special Attention
- Dialogue vs Music Balance: Keep Dialogue volume equal or higher than Music. Key story hints are given audibly.
- Night Mode: Useful for apartment living. Avoids complaints from neighbors.
- Voice Chat (Co-op): The game has built-in voice chat (PC and console). Adjust your OS-level microphone volume separately. In-game, you can mute the other player or adjust their volume via the in-game overlay (Press ESC > Social > Player Volume).
- Movement: WASD
- Camera: Mouse
- Jump: Space
- Interact/Action 1: E
- Action 2: Q
- Sprint: Left Shift
- Crouch: X / C
- Inventory: Tab
- Use Item: F
- Drop Item: G
- Special Ability (unique per character): Right Mouse Button + LMB? Actually each character has distinct abilities. Check in-game controls.
- Left Stick: Move
- Right Stick: Camera
- A (Xbox) / X (PS): Jump
- B (Xbox) / Circle (PS): Crouch/Slide
- X (Xbox) / Square (PS): Interact
- Y (Xbox) / Triangle (PS): Inventory/Ability Wheel
- Left Trigger: Action 1 (often utility)
- Right Trigger: Action 2 (often attack/use)
- Left Bumper: Sprint
- Right Bumper: Use item (or special)
- D-Pad Up: Switch item
- Select/Back: Map
- Start: Pause menu
- Jump on Space (PC) or A (Xbox) – do not change, it's intuitive.
- Swap triggers/bumpers if you prefer to use bumpers for actions (many FPS players).
- Crouch to ‘C’ on PC for easier sliding (hold).
- Change “Use Item” to Mouse Wheel Click if you frequently switch gadgets.
---
Controls Settings
Controls can be remapped on all platforms. On PC, both keyboard/mouse and controller can be fully customized. On consoles, only controller.
Keyboard & Mouse (PC Defaults)
Controller Layout
Both Xbox and PlayStation controllers are supported. Default layout:
Remapping Tips
Sensitivity Settings
| Setting | Range | Recommendation |
|---|---|---|
| Camera Sensitivity (Controller) | 1–20 | 5–8 for precise aiming; higher for quick turns |
| Camera Sensitivity (Mouse) | 1–100 | Convert your usual eDPI; start at 60 and adjust |
| Aim Sensitivity (Controller) | 1–20 | Same as camera or slightly lower (10) for better control |
| Vertical Sensitivity Multiplier | 0.5–2.0 | 1.0 default; lower if you overshoot vertically |
| Invert Y-Axis | Off/On | Off unless you are a flight simmer |
| Vibration | On/Off | Off for reduced input lag (subjective) |
| Trigger Effect (PS5 only) | On/Off | On for haptic feedback; Off if it's distracting |
Special Attention Points
- Trigger Effects on PS5: Some players find the adaptive triggers tiring during extended play. You can disable them in settings.
- Controller Dead Zone: Not adjustable in-game. If stick drift occurs, increase dead zone via platform settings (PS5: Accessories > Controller > Dead Zone, Xbox: Accessories app).
- Keyboard vs Controller: The game is designed with controller in mind; certain sections (e.g., aiming with Cody's sap gun) are easier with a mouse. Switch mid-game if needed.
---
Accessibility Settings
It Takes Two includes several accessibility options to accommodate different needs.
| Feature | Options | Details |
|---|---|---|
| Subtitle Size | Small, Medium, Large | Larger for easier reading. |
| Subtitle Background | Default, High Contrast, Black Box | High contrast helps readability. |
| Speaker Name | On/Off | Shows who is speaking. |
| Directional Subtitles | On/Off | Subtitles indicate sound direction (left/right). |
| Screen Shake | On/Off | Disable for motion sickness. |
| Camera Shake | On/Off | Same as above. |
| Motion Blur | On/Off | Disable for clarity and nausea reduction. |
| Color Blind Mode | Off, Protanopia, Deuteranopia, Tritanopia | Adjusts UI colors for better visibility. |
| High Contrast UI | On/Off | Bolder outlines for HUD elements. |
| Text Chat | On/Off (PC) | Allows typing to partner (no voice). |
| Voice Chat Mix | In-Game, Party Chat (console) | Choose where voice audio comes from. |
| Narration for UI | On/Off (PC) | Screen reader for menus. |
| Auto-Aim (Controller) | On/Off | Slight aim assist for easier targeting. |
Special Attention Points
- Motion Sickness: Many players report nausea from camera movement. Disable Camera Shake and Motion Blur immediately. Also set FOV to higher value if available (no FOV slider in this game? Actually check – It Takes Two does not have a FOV slider. There is no adjustable FOV in the options. That's a known missing setting. Players cannot change FOV. This can be a problem for motion sickness. The only workaround is sitting farther from screen or using smaller window. We must mention this limitation.)
- Color Blind Mode: Test each mode; the game uses many color-coded abilities. This is critical.
- Audio Language: English, French, German, Italian, Spanish, Japanese, Korean, Polish, Portuguese, Russian, Chinese (Simplified), etc. (Subtitles remain in selected text language.)
- Text Language: Same set as above.
- Subtitle Override: You can keep audio in original language while subtitles in another.
- Voice Chat Language: Does not affect voice chat; you speak your own language.
- Cross-Platform Play: Language settings are client-side only; they won't affect what the other player hears in voice.
- Voice Chat Device (PC): Choose microphone.
- Voice Chat Toggle (PC): Push-to-talk or always-on.
- Voice Chat Volume (per player): Adjust volume of co-op partner.
- Push-to-Talk Key (PC): Default ‘V’.
- Cross-Play (On/Off): Toggle with ‘Host Game’. If you have trouble connecting to friends on another platform, ensure cross-play is enabled.
- Invite Friends (via platform overlay): Use platform's friend list (Steam, EA App, Xbox Live, PSN).
- Bandwidth: The game uses minimal bandwidth (< 100 MB/hour). Stable 1 Mbps connection is sufficient.
- Latency: The game is playable up to ~200 ms ping, but high latency causes input delay and desync. Aim for < 100 ms for best experience.
- NAT Type: Strict NAT may prevent connecting. Open NAT recommended. Use UPnP or port forwarding if issues. Ports: TCP 443, 80, 3659 (EA games).
- Packet Loss: Even 1% packet loss can cause teleportation. Use Ethernet or strong Wi-Fi.
- Friend's Pass Issues: If you own the full game and invite a friend with Friend's Pass, both players must have the same region settings for language? Not needed, but both must be online and have EA accounts linked.
- Disconnection During Game: If network drops, you'll be kicked to the main menu. Auto-rejoin is not available; you must re-invite. Save progress is checkpoint-based (frequent).
- PC Firewall: Add executable `ItTakesTwo.exe` (and `EADesktop.exe` if using EA App) to firewall exceptions to prevent connectivity issues.
---
Language Settings
Language can be changed from the main menu or in Options > Language.
Recommendation: Play with original English voice acting if possible; the performances are top-notch. If using Japanese dubbing, enable subtitles to understand story.
Special Attention
---
Network Settings
It Takes Two requires constant online connectivity even for local play. Network settings are mostly limited but important for smooth co-op.
In-Game Network Options
Performance Considerations
Special Attention Points
---
Gameplay Settings
These settings affect how the game plays, beyond graphics and controls.
| Setting | Options | Description | Recommendation |
|---|
| Quick Time Events | On/Off | QTEs are possible in cutscenes? No separate toggle. They are always on.
| Skip Cutscenes | Hold button | Skip cinematic after first playthrough. | Use for replays.
| Auto-Equip Items | On/Off | Automatically switch to newly acquired items. | Off to manually choose what you want.
| Item Wheel Speed | Normal, Fast | How quickly the weapon wheel appears. | Fast for quicker switching. |
| Hint Frequency | Minimal, Normal, Verbose | Controls in-game tutorial pop-ups. | Verbose for first-time; Minimal for returning players. |
| Pause When One Player Opens Menu | On/Off | If both players are online, should the game pause when one opens menu? | On to prevent missing progress. Off if you want uninterrupted action. |
| Camera Lock-On | On/Off | Toggle auto-lock to enemies (without manual targeting). | Off for more control; On for easier aiming. |
| Conversation Auto-Advance | On/Off | Subtitles advance without button press in cinematics. | Off to allow reading at your own pace. |
| Skip Death Animations | On/Off | After dying, skip respawn animation. | On to reduce downtime. |
Special Attention Points
- Pause on Menu: In online co-op, if you turn this off and your partner opens the map, you can still move. This can be confusing. Keep it On.
- Item Wheel Speed: Fast allows you to switch tools quickly in combat. Essential for advanced gameplay.
---
Summary of Optimal Settings
| Platform | Graphics Target | Key Settings |
|---|---|---|
| Low-End PC | 1080p 30–60 FPS | Low preset, shadows low, FXAA, motion blur off |
| Mid-Range PC | 1080p 60 FPS | High preset with shadows medium, reflections medium, TAA |
| High-End PC | 4K 60+ FPS | Ultra preset, disable motion blur/depth of field if desired |
| PS5/XSX | 4K 60 FPS (fixed) | – |
| PS4/Xbox One | 1080p 30 FPS (fixed) | – |
For a list of all other options like subtitles see Accessibility section.
Note: Some settings like FOV are unavailable in this game, which may cause motion issues for some players. In that case, try sitting farther from the screen or use smaller display.
Important Notes
Critical Warnings & Pitfalls
- Mandatory Co-op Only: It Takes Two cannot be played solo. You must have a second player locally (split-screen) or online. There is no AI partner, no single-player mode, and no way to control both characters yourself.
- Friend's Pass: Only one person needs to buy the full game. The other player can download the free Friend's Pass version on the same platform (Steam, Origin, Xbox, PlayStation). However, cross-platform play is not supported—both players must be on the same platform family (e.g., both on PC or both on PlayStation).
- EA Account Required: Even on Steam or console, you must link an EA Account to play. Make sure this is done before launching the game to avoid login errors.
- No Offline Mode: The game requires a constant internet connection for online co-op, and even local co-op may need periodic online validation. If your internet drops, you may be kicked back to the main menu.
- Linear Story with No Branching: The main plot is completely linear. There are no dialogue choices or story-altering decisions. You cannot change the outcome of the story—it's a fixed narrative.
- Collectibles & Minigames: Each chapter contains collectibles (e.g., hats, minigame trophies) and optional minigames. These are missable per chapter. Once you progress past a chapter's point of no return (usually marked by a "Chapter Complete" screen or zone transition), you cannot return to that area. To 100% the game, you must replay chapters via Chapter Select after finishing the story.
- Achievements/Trophies: Many achievements require completing all minigames, collecting all hats, or discovering all optional interactions. If you skip them during your first playthrough, you will need to replay chapters. No achievements are permanently missable—Chapter Select lets you clean up later.
- No Skill Reset: You cannot re-spec or change the order of ability upgrades. Each character's abilities are automatically unlocked as you progress through the story. There is no leveling system or skill tree to regret.
- Chapter 3: The Toolbox (Vacuum Cleaner Boss): The first major boss fight requires both players to coordinate movement and timing. One player distracts while the other activates switches. Many first-timers get stuck here—communication is key.
- Chapter 5: The Wellspring (Elephant Section) : A notorious emotional and gameplay spike. You must kill a toy elephant ("Cutie the Elephant") by tearing off its limbs. The sequence is mechanically demanding and requires precise timing to avoid frustration.
- Chapter 7: The End (Final Boss): The final boss has multiple phases requiring perfect synchronization. If you and your partner have poor communication, expect many retries.
- No Grinding Necessary: There is no experience points, currency, or gear to grind. All abilities are story-gated. You can never be underpowered or overleveled.
- Optional Minigames are Purely Cosmetic: The only "grind" is for achievements/trophies. Don't feel forced to win every minigame on your first attempt—you can replay chapters anytime.
- Communication is Mandatory: This game is designed around verbal (or text) coordination. Use voice chat or a call system. Never assume your partner knows what to do—many puzzles require explicit callouts.
- Patience with Puzzles: If you or your partner are stuck, take turns trying. Avoid back-seat gaming—let the other player experiment.
- No Anti-Cheat: The game has no anti-cheat software. It uses EA's online services for matchmaking only. Cheating is not a concern in a co-op game, but be aware that mods may cause desyncs or bans.
- Disconnection Protocol: If one player disconnects online, the session ends. You can rejoin by re-inviting. Save data is managed by the host's save file. If the host loses internet, the guest is kicked. Always have the host's connection be stable.
- Autosave Only: The game saves automatically at checkpoints. There is no manual save or multiple save slots. Be careful: if you start a new game with a different partner, it overwrites your previous save on the same platform profile.
- Chapter Select Saves Progress: Once you complete the story, you can use Chapter Select to replay any chapter. This does not erase your collectibles count—everything accumulates. However, if you start a brand new game, all progress is wiped.
- Backup Your Save (PC): For PC (Steam/Origin), locate the save file in `%USERPROFILE%\Documents\My Games\It Takes Two\` and back it up regularly. On consoles, cloud saves are automatic but you cannot revert to a previous state without manual backup.
- Host Saves the World: Online co-op progress is saved on the host's account. The guest player's progress (collectibles, chapter unlocks) is not stored locally unless they also host. If you always play as guest, you will need to redo chapters if you later host.
- Friend's Pass Confusion: Many players buy two copies of the game unnecessarily. Always check if your platform supports Friend's Pass (all major platforms do).
- No Crossplay: If you and your friend are on different platforms (e.g., PC and PS5), you cannot play together unless you both use the same platform family via remote play or similar.
- Accessibility Options Exist: The game includes options for adjusting subtitles, contrast, and control stick sensitivity. Use the pause menu settings to enable larger UI or reduce motion blur if you get motion sick.
- You Can Swap Characters at Any Time: There is an option in the pause menu to swap control of Cody and May. This is useful if one player is struggling with a specific ability or just wants a change.
- Most Puzzles Have a Hint System: If you're stuck for 30+ seconds, the game often shows a vague hint on the screen or via character dialogue. Don't ignore those visual/audio cues.
- Collectibles Are Visible on the Mini-Map: You can toggle the mini-map to see the location of nearby collectibles. Use this to avoid missing them.
- Minigames Can Be Replayed Immediately: After finding a minigame location, you can return to that spot later within the same chapter to replay it. You don't need to wait for chapter select.
- The Story Is Heavy: Prepare for emotional themes about divorce and childhood. The game handles these seriously despite the whimsical presentation. It may be uncomfortable for some players.
- Performance: On PC, the game is well-optimized but can stutter during large open sections (e.g., snowball fight). Lower shadow quality and post-processing for stable 60 FPS on mid-range hardware.
- Local Co-op Requires Full Controllers: Each player needs a controller. Keyboard + controller works on PC, but two keyboards do not.
- Online Input Lag: If lag occurs, try lowering graphics settings or switching to a wired connection. The game uses peer-to-peer connections—no dedicated servers.
- Have Fun with It: It Takes Two is designed to be playful and creative. Don't rush through it yelling instructions. Embrace the chaos, laugh at your deaths, and enjoy the ride. The game is short (around 12-15 hours) so savor each chapter.
Irreversible Choices & Missable Content
Difficulty Spikes
Grinding Traps
Online Etiquette & Anti-Cheat
Save Management Advice
Things Players Commonly Regret Not Knowing Earlier
Technical Notes
Final Pro-Tip
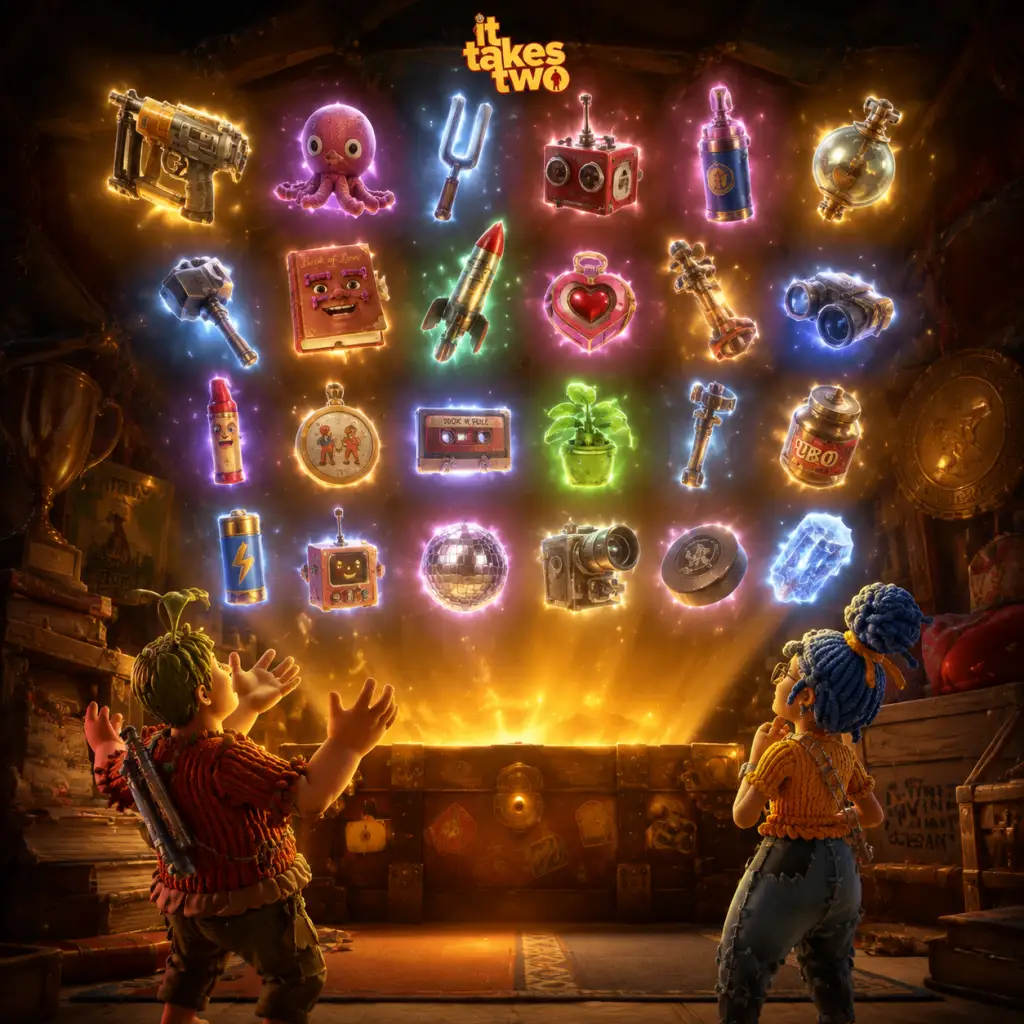
All Game Items
All Game Items Guide for It Takes Two
This guide catalogues every major item, gadget, collectible, and key object in It Takes Two. The game does not feature traditional weapons, armor, consumables, or currencies. Instead, each chapter grants Cody and May unique complementary gadgets that serve as both tools for environmental puzzles and weapons for combat. Additionally, there are cosmetic collectibles and optional minigames.
1. Gadgets & Abilities (by Chapter)
Each chapter introduces a new set of abilities that replace previous ones. All gadgets are obtained automatically as you progress through the story.
Chapter 1: The Shed
- Cody – Nail Gun
- May – Hammer
- Cody – Sap Shooter
- May – Matchstick Shooter
- Cody – Bubble Gun
- May – Vacuum Cleaner
- Cody – Magnet Gun
- May – Thruster Boots
- Cody – Snowball Launcher
- May – Shovel
- Cody – Seed Launcher
- May – Shears
- Cody – Conductor’s Baton
- May – Tape Recorder
- Total: 30 collectible hats (15 for Cody, 15 for May).
- Description: Purely cosmetic headwear that changes your character’s appearance in cutscenes and gameplay.
- How to Obtain: Hidden throughout all chapters. Look for glowing sparkles or small pedestals in out-of-the-way locations. Each hat is unique (e.g., detective hat, pirate hat, party hat).
- Use: No gameplay effect; only aesthetic. You can change hats at any time from the pause menu (Options > Customize).
- Tips: Co-op partners should actively search together; some hats require both players’ gadgets to reach.
- Total: 30 optional minigames (not counting the forced story minigames).
- Description: Short, fully playable minigames scattered across the world. They range from shooting galleries to racing to card games.
- How to Obtain: Find a special interaction prompt (usually a game board or arcade machine) and both players must interact simultaneously.
- Use: Completing a minigame rewards a trophy/achievement (“Friendship” or “World Tour” etc.). No in-game benefit.
- Notable Minigames: “The Queen’s Challenge” chess game, “Squid Game” type red light green light, “Mario-like” platforming duel.
- Tips: Minigames are completely optional but often hilarious. If you miss one, you can replay chapters via Chapter Select.
- Wedding Rings: The central object of the story. Cody and May want to destroy them to divorce. They are the source of the magic transformation.
- Rose’s Tears: Not an item per se, but Rose’s emotional tears triggered the doll transformation.
- The Book of Love: A sentient self-help book that guides (and annoys) the couple throughout their journey. It is a character, not a usable item.
- Toolbox Items: In the shed, tools like pliers, screwdrivers appear as background elements but aren’t collectible.
- No Permanent Inventory: Gadgets are chapter-specific and do not carry over. You cannot revisit old chapters with new gadgets.
- No Consumables: There are no health potions, ammo, or crafting materials. Gadgets have unlimited use.
- No Currency: The game has no economy – everything is gifted through story progression.
- Synergy is Everything: Most puzzles require coordinated use of the two current gadgets. Communication is the real “item.”
- Description: A handheld nail gun that fires single nails. Nails can stick into wooden surfaces, rope, or soft materials.
- How to Obtain: Automatically acquired early in the chapter after escaping the initial shed room.
- Uses:
1. Combat: Shoot enemies (e.g., wasps, gnomes) to damage them.
2. Puzzles: Fire nails into target boards to create footholds, pull levers, or anchor rope for May to swing on.
3. Co-op synergy: May can hammer nails deeper to open new paths.
- Upgrades: None; the nail gun remains the same throughout the chapter.
- Description: A standard household hammer. May can swing to strike objects.
- How to Obtain: Obtained at the same time as Cody’s nail gun.
- Uses:
1. Combat: Smash small enemies or break weak barriers.
2. Puzzles: Hit nails driven by Cody to drive them further, activate pressure plates, break fragile objects.
3. Co-op synergy: Cody’s nail provides a target; May’s hammer completes the action.
- Note: The hammer can also be used to pound on surfaces in rhythm-based sequences.
Chapter 2: The Tree
- Description: A glob of tree sap that Cody can shoot from his hand. Sap sticks to surfaces and hardens into a gooey platform after a few seconds.
- How to Obtain: Acquired when Cody is separated in the tree’s root system.
- Uses:
1. Puzzles: Create temporary platforms for May to jump on, or to reach higher areas. Sap can also be used to seal holes or block vents.
2. Co-op synergy: May’s matchstick fire ignites sap to burn vines or destroy obstacles.
3. Combat: Rarely used offensively; sap can slow enemies briefly.
- Description: May shoots a small flame from her fingertip. The flame can be held or shot.
- How to Obtain: Acquired shortly after Cody gets the sap shooter.
- Uses:
1. Puzzles: Light flammable objects, burn vines, ignite Cody’s sap to create fire barriers.
2. Co-op synergy: Combined with sap to burn through obstacles or heat metal mechanisms.
3. Combat: Can set enemies on fire over time.
Chapter 3: Rose’s Room
- Description: A toy-like gun that creates large, floating bubbles. Bubbles can envelop objects or enemies.
- How to Obtain: Found after entering Rose’s bedroom.
- Uses:
1. Puzzles: Enclose objects in bubbles to make them float, then use May’s vacuum to move them. Bubbles can also lift Cody or May to higher ledges.
2. Co-op synergy: May’s vacuum directs bubbles; Cody can create a bubble chain.
3. Combat: Trapping enemies in bubbles leaves them helpless briefly.
- Description: A miniature vacuum that can suck in and blow out air.
- How to Obtain: Acquired simultaneously with Cody’s bubble gun.
- Uses:
1. Puzzles: Suck up objects (e.g., keys, small items) to retrieve them or blow them away. Move bubbles created by Cody.
2. Co-op synergy: Directs and positions bubbles for puzzle solving.
3. Combat: Suck enemies toward you or blow them off edges.
- Note: The vacuum can also clear debris from vents.
Chapter 4: The Bellow (Space Level)
- Description: A device that creates a magnetic field – both pulling and pushing metal objects.
- How to Obtain: Given by the space explorers in the zero-gravity section.
- Uses:
1. Puzzles: Pull or push metal crates, activate magnetic switches, manipulate metal platforms.
2. Co-op synergy: May’s thrusters allow her to ride magnetic objects Cody moves.
3. Combat: Attract enemy robots or repel them.
- Description: Boots with built-in rocket thrusters that allow limited flight and zero-gravity navigation.
- How to Obtain: Same area as Cody’s magnet.
- Uses:
1. Puzzles: Reach high or distant platforms, hover over gaps, push objects in zero-G.
2. Co-op synergy: Cody uses magnetism to move platforms that May rides with thrusters.
3. Combat: May can quickly dodge or pursue flying enemies.
Chapter 5: The Snowglobe
- Description: A sling-like device that fires compact snowballs.
- How to Obtain: Found after entering the snowglobe world.
- Uses:
1. Puzzles: Build snowman structures, hit distant targets, activate snow levers.
2. Co-op synergy: May shapes snow with her shovel; Cody provides the material.
3. Combat: Freeze enemies temporarily on direct impact.
- Description: A toy shovel used to dig and shape snow.
- How to Obtain: Same area as snowball launcher.
- Uses:
1. Puzzles: Dig up buried items, carve paths in snow, create ramps.
2. Co-op synergy: Use the shovel to create snow blocks that Cody can use snowballs to shape.
3. Combat: Can shove enemies or block attacks.
Chapter 6: The Garden
- Description: Shoots magical seeds that instantly grow into large plant stems.
- How to Obtain: Given by the gardening gnomes.
- Uses:
1. Puzzles: Create vertical climbing vines, block gaps, create bounce pads.
2. Co-op synergy: May’s shears trim overgrown plants to adjust growth.
3. Combat: Seeds can entangle small enemies.
- Description: Large gardening shears for cutting stems and leaves.
- How to Obtain: Same area as seed launcher.
- Uses:
1. Puzzles: Cut Cody’s vines to control growth direction, open seed pods, trim barriers.
2. Co-op synergy: Controls the height and shape of Cody’s plants.
3. Combat: Slices enemies up close.
Chapter 7: The Attic
- Description: A music-themed baton that influences rhythmic platforms and movable objects.
- How to Obtain: Acquired after entering the musical toy area.
- Uses:
1. Puzzles: Sync with May’s tape recorder to activate moving platforms and music mechanisms.
2. Co-op synergy: Must coordinate timing with May’s recordings.
3. Combat: Tap on enemies to stun them in rhythm.
- Description: A vintage tape recorder that can record up to a few seconds of actions and replay them in a loop.
- How to Obtain: Same location as the baton.
- Uses:
1. Puzzles: Record a series of moves (e.g., jumping, pressing buttons) and have the recording repeat to keep a mechanism active while May does something else.
2. Co-op synergy: Cody’s baton and May’s recording combine to solve complex timing puzzles.
3. Combat: Record a defensive action to act as a decoy.
4. Collectibles
Hats
Minigames
5. Key Story Items (Plot Objects)
These items drive the narrative but have no direct gameplay function.
6. Important Notes
This guide covers all items present in It Takes Two. Enjoy your cooperative adventure!
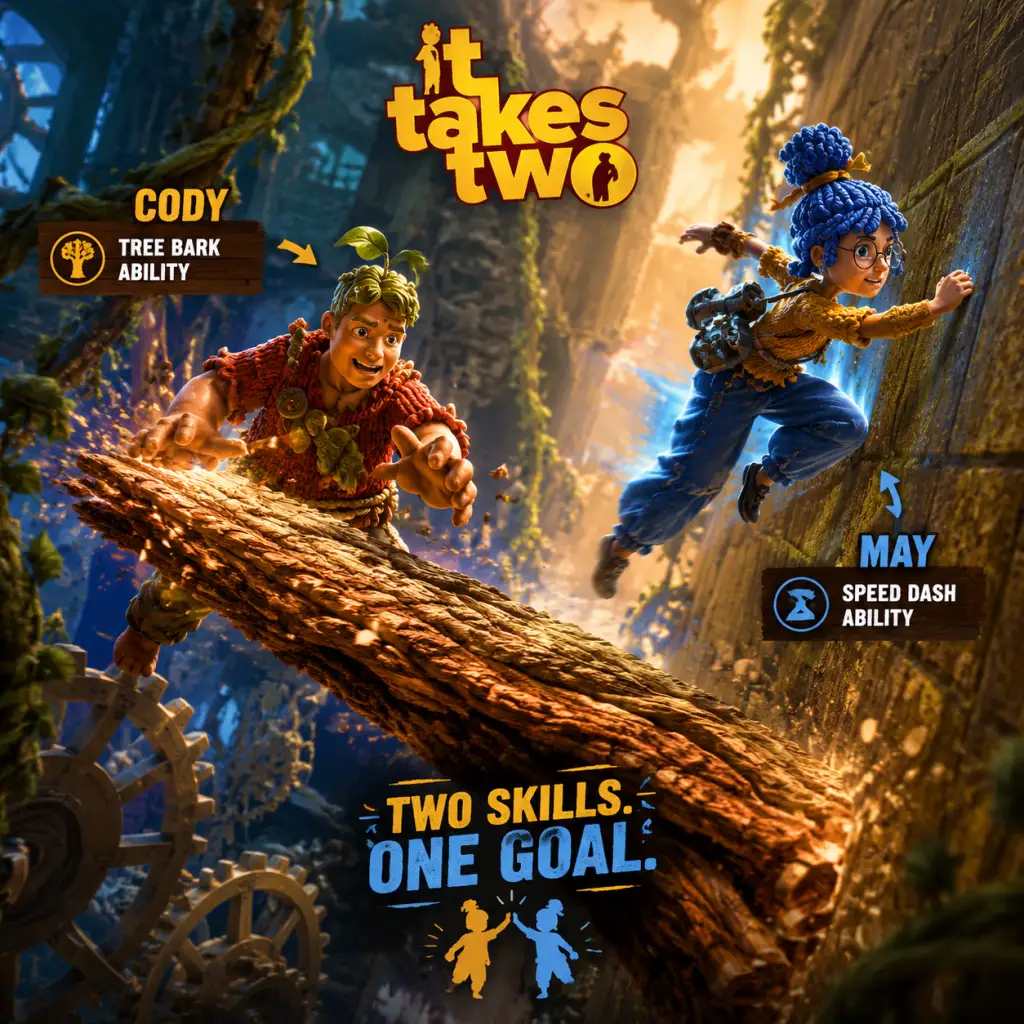
Character Skills
Character Skills Guide for It Takes Two
Overview
In It Takes Two, the two protagonists – Cody and May – do not have permanent skill trees or character progression. Instead, each chapter grants them unique, complementary abilities that define the gameplay for that section. These abilities are used exclusively within their home chapter and are essential for solving puzzles, traversing the environment, and defeating boss encounters. This guide lists every ability for both characters across all seven chapters, including effects, controls, cooldowns, upgrades, combos, synergies, and optimal usage strategies.
---
Chapter 1: The Shed
Cody – Nail Gun
- Description: Shoots nails that adhere to most surfaces. Nails can be used as footholds, handholds, or anchors. Hold the button to charge a more powerful shot that embeds the nail deeper.
- Controls: RT / R2 (shoot nail), LT / L2 (hammer a previously shot nail to drive it deeper)
- Cooldown: None; can shoot nails rapidly, but ammo is limited (infinite in practice; nails disappear after some time or when hammered)
- Upgrades: Early in the chapter, Cody gains the ability to hammer his own nails (initially only May can). Later, he can shoot a spread of three nails at once.
- Combos & Synergies: May’s Sledgehammer can break nails Cody shoots, or May can hammer them to create permanent platforms. Use Cody’s nails as anchors for May to swing from.
- Use Cases: Creating stepping-stones over gaps, providing climbing points for May, triggering pressure-sensitive switches by stacking nails.
- Description: A heavy hammer that can smash objects, break walls, hit switches, and drive Cody’s nails deeper.
- Controls: RT / R2 (swing)
- Cooldown: Brief recovery after each swing (0.5 seconds)
- Upgrades: None directly; after defeating the first boss (the vacuum), May’s hammer can break stronger walls.
- Combos & Synergies: Hit Cody’s nails to embed them, creating safe ledges. Cody can also hammer nails himself later. Use the hammer to clear obstacles blocking Cody’s path.
- Use Cases: Destroying barriers, activating floor switches, smashing enemies, driving nails for climbing, opening secret areas.
- Description: Shoots a stream of sticky sap that adheres to surfaces and objects. Sap can be ignited by May’s matches to create explosions or burns.
- Controls: RT / R2 (shoot sap, hold for continuous stream)
- Cooldown: None; sap dissipates after a few seconds unless ignited.
- Upgrades: None; the sap remains the same throughout the chapter.
- Combos & Synergies: May ignites the sap with matches to destroy obstacles or burn away blockages. Sap can also be used to glue objects together or slow down enemies.
- Use Cases: Covering enemies to immobilize them, creating patches for May to ignite, sticking moving parts to prevent rotation, bridging gaps by coating platforms.
- Description: Lights a match that can set fire to Cody’s sap, igniting it and causing combustion. Can also be used to light other flammable objects like fuses or torches.
- Controls: RT / R2 (strike match, hold to keep lit; release to toss)
- Cooldown: Each match lasts about 2 seconds; can hold up to three matches before needing to “reload” by shaking the canister (automatic after a short cooldown)
- Upgrades: None; match supply is infinite.
- Combos & Synergies: Always use with Cody’s sap. The fire from ignited sap can deal damage, melt ice, or reveal hidden paths. Matches alone can light candles and torches.
- Use Cases: Igniting sap to blow up obstacles, starting fires to melt blockage, lighting fuses for timed puzzles, stunning or damaging enemies in sap.
- Description: Fires globs of soft pillow material that stick to surfaces and grow into puffy platforms. Also can suck in small objects and shoot them out with force.
- Controls: RT / R2 (shoot pillow glob); hold LT / L2 and release (suck in small items); then press RT / R2 to shoot them
- Cooldown: Pillow globs have a short delay before solidifying; suction and shoot have no cooldown.
- Upgrades: Later, Cody can charge the vacuum to launch larger projectiles from sucked objects.
- Combos & Synergies: May can use the rope gun to swing from Cody’s pillows. Sucked objects can be fired at targets or into May’s rope loops. Use pillows to create safe landing zones.
- Use Cases: Creating floating platforms, bridging gaps, deflecting enemy projectiles (with suction), providing anchor points for May’s rope, launching projectiles at weak points.
- Description: Shoots a rope that can attach to certain anchors (including Cody’s pillows). Once attached, May can swing, zipline, or pull objects.
- Controls: RT / R2 (shoot rope at anchor point); while attached, move to swing; press A / X to detach
- Cooldown: Rope can be shot repeatedly; each rope connection lasts until cancelled.
- Upgrades: Can shoot two ropes to create a zipline for Cody. Later, can attach rope to enemies to pull them.
- Combos & Synergies: Attach rope to Cody’s pillows to traverse large gaps. Cody can also shoot pillow globs to create new anchor points for May’s rope. Use the rope to lift heavy objects with Cody’s vacuum assist.
- Use Cases: Swinging across pit, pulling levers from a distance, creating ziplines for both characters, restraining enemies, reaching high ledges.
- Description: Magnetic ability that attracts or repels metal objects. Hold left bumper (LB / L1) to attract, right bumper (RB / R1) to repel. Can also affect May if she holds a metal item.
- Controls: LB/L1 (attract), RB/R1 (repel); hold trigger for continuous effect; press Y / Triangle to toggle polarity
- Cooldown: None; uses a stamina bar that depletes when active and refills quickly.
- Upgrades: Later can magnetize large objects to move them slowly. Also can create temporary magnetic fields on certain surfaces.
- Combos & Synergies: May’s platform launcher creates platforms that can be moved by Cody’s magnet. Use magnetism to pull May across gaps (if she holds a metal part). Attract or repel enemies and objects into May’s platform path.
- Use Cases: Moving floating platforms, redirecting projectiles, pulling distant switches, creating bridges by repositioning metal debris, trapping enemies in magnetic fields.
- Description: Fires a disc that expands into a solid floating platform. The platform stays for a limited time (about 10 seconds) and can be moved by Cody’s magnetism.
- Controls: RT / R2 (shoot platform); hold for trajectory aim
- Cooldown: Can shoot up to three platforms before needing a recharge (platforms disappear automatically after time).
- Upgrades: Platforms can be made larger or stick to metal surfaces. Later, May can shoot platforms that act as trampolines.
- Combos & Synergies: Cody uses magnetism to reposition May’s platforms. Use platforms as stepping stones or to block enemy projectiles. May can stand on her own platforms to reach new heights.
- Use Cases: Bridging gaps not reachable by jumping, creating temporary cover, elevating both characters, holding objects in mid-air for Cody to magnetize.
- Description: Shoots seeds that rapidly grow into plants (vines, leaves, etc.). The type of plant depends on the surface (soil, wood, etc.). Vines can be climbed or used as bridges.
- Controls: RT / R2 (shoot seed); aim with left stick
- Cooldown: Seeds grow after 1 second; can hold up to 6 seeds before automatic reload.
- Upgrades: Later can shoot explosive seeds that bloom into damaging vines.
- Combos & Synergies: May’s water gun speeds up growth and can make plants larger or create flowering platforms. Use vines as attach points for May’s rope? (Not directly, but May can climb vines).
- Use Cases: Climbing walls, growing bridges over gaps, covering enemies with vines to immobilize them, creating platforms for May’s water to enlarge.
- Description: Sprays water that immediately grows plants hit by Cody’s seeds. Also can shrink certain overgrown plants by spraying them with a different mode (press R3 / right stick to toggle).
- Controls: RT / R2 (spray water); hold for continuous stream; press R3 / right stick to toggle shrink mode
- Cooldown: Water supply is infinite; toggle has no cooldown.
- Upgrades: Later can shoot a high-pressure stream that pushes enemies and objects.
- Combos & Synergies: Water on Cody’s seeds makes them grow instantly and become climbable. Use shrink mode to reduce large obstacles. Combine both modes to solve size-based puzzles.
- Use Cases: Accelerating plant growth, shrinking barriers, watering vines to create solid paths, pushing rotating gears, stunning enemies with water jet.
- Description: Shoots a steady stream of fire that melts ice, burns obstacles, and damages enemies. Can also be used to ignite flammable objects.
- Controls: RT / R2 (spray flame); hold for continuous fire; uses fuel gauge (auto-replenishes after a short pause)
- Cooldown: Fuel recharges when not firing (about 2 seconds for full refill).
- Upgrades: None; flame intensity remains constant.
- Combos & Synergies: May’s Freeze Ray creates ice platforms that Cody can melt back into water. Use fire to thaw frozen mechanisms or melt ice walls blocking paths. Fire can also melt snow piles to reveal items.
- Use Cases: Melting ice obstacles, burning through thickets, damaging ice enemies, creating steam clouds that obscure vision (sometimes useful), heating frozen objects to unlock them.
- Description: Shoots a beam of cold that freezes water into solid ice platforms, freezes enemies, and can create ice walls. Also can freeze moving machinery components.
- Controls: RT / R2 (spray freeze beam); hold for continuous freeze; uses a freeze gauge (auto-replenishes)
- Cooldown: Gauge recharges after not firing for about 2 seconds.
- Upgrades: Later can fire a charged shot that creates a large ice block.
- Combos & Synergies: Cody melts ice back into water for reuse. Use ice platforms to cross water surfaces. Freeze enemies for Cody to incinerate. Freeze moving parts to stop them temporarily.
- Use Cases: Creating bridges across lakes, trapping enemies, stopping dangerous machinery, forming ice walls for cover, freezing waterfalls to climb.
- Description: Each character shoots homing projectiles shaped like hearts that deal damage to the final boss (Dr. Hakim). The hearts home in on the boss’s weak points.
- Controls: RT / R2 (shoot heart); no ammo limitation; fire rate is moderate.
- Cooldown: No cooldown; continuous fire possible.
- Upgrades: None; the ability remains the same throughout the boss fight.
- Combos & Synergies: Both characters shoot simultaneously for double damage. Hearts can be used to activate special objects in the arena. Timing shots together can stun the boss faster.
- Use Cases: Only used during the final boss fight. Shoot hearts to damage the boss, activate platforms, or break shields.
- Description: A heavy mace that swings in a wide arc. Can be used to smash ground-based enemies or break certain obstacles in the final arena.
- Controls: X / Square (swing)
- Cooldown: Swing speed is moderate; can be chained into a combo of three hits.
- Upgrades: None.
- Combos & Synergies: Use after May’s attacks to create openings. Mace can stun the boss briefly.
- Use Cases: Destroying spawned enemies, breaking fragile objects, dealing extra stagger damage to the boss when close.
- Description: A whip that can reach distant targets, pull levers, and damage enemies at range. Can also be used to swing from special hooks in the arena.
- Controls: X / Square (whip attack); hold to charge a more powerful lash
- Cooldown: Quick recovery; charged whip has a longer cooldown.
- Upgrades: None.
- Combos & Synergies: Whip can stun the boss from a distance, allowing Cody to close in with the mace. Use whip to interact with environmental objects while Cody attacks.
- Use Cases: Hitting boss weak spots from afar, activating switches, pulling down shields, grabbing items.
- Complementary Design: Every chapter’s abilities are built to require cooperation. Always communicate which ability you are using and when you need assistance.
- No Permanent Upgrades: Abilities only exist within their chapter. Don’t expect to carry skills forward; learn each set fresh.
- Environmental Interactions: Many objects in the environment react to both characters’ abilities. Experiment with using your skill on anything that looks interactive.
- Practice in Safe Areas: Each chapter starts with a safe zone to test your new abilities. Spend a minute practicing before moving into puzzles.
- Cooldown Management: Abilities with gauges (Flamethrower, Freeze Ray) require careful management. Don’t empty them completely unless necessary; save a reserve for emergencies.
- Hidden Content: Some collectibles are only reachable using specific skill combos, e.g., May’s rope gun combined with Cody’s vacuum or magnets. Replay chapters to find everything.
May – Sledgehammer
---
Chapter 2: The Tree
Cody – Sap Gun
May – Matches
---
Chapter 3: The Pillow Fort
Cody – Vacuum (Pillow Shooter)
May – Rope Gun
---
Chapter 4: The Space Station
Cody – Magnet
May – Platform Launcher
---
Chapter 5: The Garden
Cody – Seed Launcher
May – Water Gun
---
Chapter 6: The Snow Globe
Cody – Flamethrower
May – Freeze Ray
---
Chapter 7: The Finale (The Wedding / Final Boss)
Both Characters – Heart Power (Love Beams)
Cody – Melee Mace
May – Energy Whip
---
General Tips & Synergies
---
Recommended Passive Skills? (None)
It Takes Two has no passive skills, talent trees, or character builds. Everything is situational. The “best build” for any chapter is simply to use the abilities as the game teaches you, and to coordinate with your partner. The true “skill” is communication and timing.
---
Conclusion
This guide covers every active ability for Cody and May across all chapters of It Takes Two. By mastering the synergies between each pair of skills, you will overcome every puzzle and boss with efficiency and fun. Remember: no two players approach a chapter the same way – experiment, communicate, and enjoy the cooperative journey.

Characters & Roles
Character Overview
It Takes Two features exactly two playable characters: Cody and May. There are no additional heroes, classes, or roles to unlock. The entire game is built around the mandatory cooperative interaction between these two protagonists. Each chapter grants them unique, complementary abilities that define their playstyle for that segment. However, at the character level, certain intrinsic traits and tendencies shape how they approach puzzles, combat, and exploration.
Cody
- Background: Cody is a professional engineer and inventor. He is practical, analytical, and often tries to solve problems with logic and tools. His transformation into a tiny doll reflects his feeling of being undervalued and overlooked by his family.
- Strengths:
- Weaknesses:
- Playstyle: As Cody, you adopt a methodical, tactical approach. Focus on positioning, resource management (e.g., sap bombs, nails), and coordinating with May. Use your abilities to create safe paths, control enemy groups, or solve environmental puzzles. You are the engineer – your job is to make the impossible possible for your partner.
- Unlock Conditions: Immediately available from the start. The game automatically assigns one player to Cody (the inviter chooses first; the player who invites a friend can pick which character to control, then the second player gets the other).
- Recommended Equipment / Builds: It Takes Two has no traditional equipment or skill trees. Instead, “build” refers to how you use your chapter-specific tool. For example, in Chapter 3 (Tree), Cody’s Nail Gun can be fired rapidly or charged for a stronger shot. Practice aiming and learning the arc of sap bombs. For Chapters 5 (Shed) and 7 (Garden), time your special attacks (e.g., Vacuum Cleaner’s suck/pull, or Ice Wand’s freeze) to maximize crowd control. There is no best “loadout”; adapt to the puzzle.
- Team Synergy:
- Background: May is a freelance musician and a free spirit. She is impulsive, creative, and relies on intuition rather than planning. Her transformation reflects her feeling of being unheard and unappreciated.
- Strengths:
- Weaknesses:
- Playstyle: As May, you are the brawler and the scout. Lead the way, break obstacles, and engage enemies directly. Use your mobility to flank or rush down threats. While Cody prepares the battlefield, you execute the plan. Your role is to be the dynamic, responsive partner who adapts to changing situations.
- Unlock Conditions: Same as Cody – available from the start, assigned second by default if the inviter picks Cody, or chosen first if the inviter prefers May.
- Recommended Equipment / Builds: Again, no traditional builds. Focus on mastering the timing of her attacks and platforming. For example, in Chapter 2 (Shed), May’s Hammer has a charged ground pound that can break weak floors. In Chapter 4 (Cabin), her Smashing ability (from the Magic Rose) can destroy certain walls. Learn the range and recovery of each attack to avoid mistakes.
- Team Synergy:
- Precision and Control: Cody’s abilities often involve careful timing, aiming, or precise placement (e.g., throwing nails, setting sap bombs).
- Gadget-Focused: His tools (e.g., Nail Gun, Vacuum Cleaner, Vacuum Squirrel) emphasize construction, manipulation, and indirect damage.
- Supportive Role: Many of Cody’s skills are designed to set up opportunities for May (e.g., creating platforms with sap, freezing enemies with ice, or clearing obstacles).
- Slower Mobility: Cody generally lacks fast traversal options; his movement is more deliberate.
- Less Direct Damage: In combat, Cody often relies on setting traps or using ranged tools that require line-of-sight and charging.
- Vulnerable Under Pressure: His abilities typically require a moment to deploy, making him less effective in chaotic close-quarters fights.
- Cody’s abilities are almost always dependent on May’s actions. For instance, he may need May to activate a switch so he can shoot across a gap, or May may need to stand on a platform he creates.
- In combat, Cody excels at area denial and crowd control. May then follows up with heavy damage or quick kills.
- Puzzles often require Cody to set up (e.g., glue platforms) while May executes (e.g., jump across). Communication is vital.
May
- Agility and Speed: May’s abilities usually grant faster movement, double jumps, dodges, or quick escapes (e.g., her smashing attacks, hammer swing, or hover jump).
- Direct Damage: She often wields weapons that hit hard and fast (e.g., Hammer, Smashing Punch, Shovel).
- Exploration: May can reach high ledges or cross gaps that Cody cannot, using her traversal tools.
- Less Strategic Depth: May’s tools are more straightforward – smash, dash, or attack – with fewer options for manipulation.
- Resource-Intensive: Some of her abilities (e.g., Smashing attacks) consume stamina or require a cooldown, limiting repeated use.
- Vulnerable When Overextending: May’s aggressive playstyle can leave her exposed if she rushes ahead without Cody’s support.
- In co-op combos, May can stun enemies with her hammer, allowing Cody to land precise nail shots or freeze them.
- May’s mobility complements Cody’s stationary tools. She can dodge enemy fire while Cody provides covering support.
Role Dynamics Throughout the Game
Though Cody and May maintain their core personalities, each chapter introduces new abilities that temporarily shift their roles. The table below summarizes the primary role each character fulfills per chapter.
| Chapter | Cody’s Role | May’s Role |
|---|---|---|
| 1 – The Shed | Trapper (Nail Gun + Sap Bombs) | Brawler (Hammer) |
| 2 – The Tree | Platformer (Nail Gun for swings) | Shooter (Squirrel’s Nutsack) |
| 3 – The Pillow Fort | Defender (Vacuum Cleaner / Shield) | Attacker (Grenades / Bombs) |
| 4 – The Cabin | Manipulator (Vacuum Squirrel – pull/push) | Smasher (Magic Rose – heavy attacks) |
| 5 – The Moon | Shooter (Ice Wand) | Dasher (Firefly – speed & fire) |
| 6 – The Rose Garden | Controller (Sap Bombs again) | Jumper (Jump via Rose petal) |
| 7 – The Road | Driver (Car – steering) | Gunner (Car – shooting) |
| 8 – The Finale | Mixed (all previous abilities) | Mixed (all previous abilities) |
Strengths & Weaknesses Comparison
| Aspect | Cody | May |
|---|---|---|
| Mobility | Lower, deliberate | Higher, agile |
| Direct Damage | Low (except charged shots) | High |
| Crowd Control | Excellent (sap, freeze, suction) | Moderate (AoE attacks) |
| Puzzle Complexity | Requires more planning | Executes actions quickly |
| Traversal | Needs assistance to reach high spots | Can reach many areas solo |
| Survivability | Good with defensive tools | Lower if caught off guard |
Team Composition & Synergy
It Takes Two is designed so that neither character can succeed alone. Their abilities are always intertwined. The best “team synergy” comes from:
1. Communication: Always announce your actions (e.g., “I’m placing a sap platform now – jump on it”).
2. Role Flexibility: Be prepared to switch between leading and following. Some puzzles require Cody to be the initiator; others require May to act first.
3. Complementary Timing: Many boss fights require one player to distract the enemy while the other sets up a weakness. For example, in the Vacuum Cleaner boss, Cody must freeze the enemy while May attacks.
4. Resource Sharing: There are no items to share, but you can coordinate who collects health pickups (they are individual) and who triggers checkpoints.
Recommended Character Choice
Since both characters are mandatory and equally important, choosing who plays Cody vs. May is purely a matter of personal preference. However, consider:
- Player 1 (Inviter): If you prefer strategic, support-oriented gameplay, pick Cody. If you prefer action-heavy, fast-paced roles, pick May.
- Player 2 (Invitee): The second player automatically gets the remaining character. If you have a strong preference, ask the inviter to choose the other character.
There is no competitive advantage to one character over the other. The game is balanced so that both players have a satisfying experience regardless of assignment.
Conclusion
Cody and May are the only characters in It Takes Two, but their dynamic roles evolve with every chapter. Understanding their intrinsic strengths – Cody’s precision and control, May’s speed and power – will help you approach each new ability with the right mindset. There are no unlockable characters, builds, or equipment to tweak, making the game pure co-op interaction. Success depends entirely on how well you and your partner synchronize. Embrace your assigned role, communicate constantly, and you will master this unique character-driven adventure.
Cheats & Secrets
Cheats & Secrets for It Takes Two
It Takes Two does not feature traditional cheat codes, developer console commands, or unlockable cheats (like invincibility, level select, or infinite ammo). The game is designed as a purely cooperative experience with no shortcuts or God modes. However, Hazelight Studios has packed the game with numerous Easter eggs, hidden references, and secret areas for observant players. Below is a comprehensive list of all known hidden content, including secrets that modify gameplay or reveal developer humor.
No Cheat Codes
- No in-game cheat codes exist for any platform (PC, PlayStation, Xbox, Nintendo Switch). There is no pause menu cheat entry, no controller button combination, and no save-file manipulation that unlocks special abilities or warps.
- No unlockable cheats are awarded for completing the game or meeting any criteria. The only unlockable is the post-credits chapter “Chapter 13: The Finale” (which is part of the main story) and a handful of achievements/trophies.
- The ‘Friendship Is Magic’ Trophy: In the Tree of the Roses chapter, choose to hug each other five times in a row. This gives a unique hug animation and triggers a hidden trophy/achievement.
- The ‘You Monster’ Trophy: In the Snow Globe chapter, you must tear the wings off a specific butterfly (found near the telephone) by having both players pull it simultaneously. This results in a rare, dark scene where Rose cries.
- The ‘Serious Co-op’ Trophy: After completing the game, watch the credits entirely (without skipping), then a secret cutscene plays showing Dr. Hakim’s vacation photos. This unlocks the “Therapists” trophy on PlayStation and “Vacation” achievement elsewhere.
Known Easter Eggs & Hidden Content
#### 1. Flipping the Bird (The Bird’s Nest - Chapter 2)
In the early area of The Bird’s Nest (after receiving the Tree Sap and Fire ability), find two birds chirping on a branch. One bird is larger and wears a tiny top hat. If both players stand on the branch and repeatedly press the jump button near the birds, the larger bird will eventually flip its tail feathers in a gesture that resembles “flipping the bird.” This is a nod to Hazelight’s irreverent humor.
#### 2. The ‘Easter Egg’ Egg (Cody’s Tree - Chapter 3)
In the Tree of the Roses chapter, after gaining the Nail and Hammer abilities, head to a hidden alcove behind a waterfall in the area with the giant rosebush. Inside is a single giant egg with a question mark on it. Hit the egg repeatedly with the hammer (Cody) or shoot it with the nail gun (May). After ten hits, the egg cracks open to reveal a small, glowing pink bird that chirps the first notes of the game’s main theme (“I Can’t Stop”) before disappearing. This reward is purely cosmetic and amusing.
#### 3. The Vacuum Cleaner Minigame (Sewers - Chapter 6)
In the Sewers chapter (where Cody has the vacuum pack), look for a submerged area with a broken pipe. If you use Cody’s vacuum on the pipe for exactly 15 seconds, the pipe emits a tune (the “Mario coin” sound effect). This reveals a secret panel that opens a small room containing a vintage arcade cabinet labeled “Hazelight Hustle.” Interact with it to play a short bullet-hell minigame where you control a tiny spaceship. Successfully surviving 30 seconds unlocks a hidden achievement/trophy: “Arcade Ace” (on Xbox/PlayStation/Steam).
#### 4. Developer Statue Room (The Snow Globe - Chapter 8)
In the Snow Globe chapter, after the ice-skating puzzle, veer left before entering the final cave. Look for a small crack in the ice wall. Both players need to use their abilities to break the ice: Cody’s explosive sap (or later May’s grappling hook can pull a weak block). Inside is a room filled with miniature statues of the Hazelight development team, each with a nameplate. Reading all nameplates (10 total) unlocks a hidden audio log where the game’s director says, “Thanks for playing our silly co-op game.” This also counts toward the “Curious Collector” achievement if you get all 30 stories (audio logs) in the game.
#### 5. The Rose’s Hidden Messages (Throughout the game)
The book ‘The Love Dr. Hakim’s Guide to Love’ interacts with the environment more than you might think. In every chapter, if you let the book idle on the ground for 5 minutes (without picking it up), a faint voice reads a random “love tip” from the book. These tips are often absurd or contradictory. One such tip says, “Never use a vacuum cleaner on your partner’s hair – especially not a magical one.” This voice is only audible if both players are near the book and no other sound is playing.
#### 6. The ‘We’re Not Alone’ Head Tilt (The Spaceship - Chapter 7)
In the Spaceship chapter (Cody and May explore the Shed’s “spaceship” section from Ant-Man perspective), after defeating the first vinyl-vinyl robot, look for a vent on the ceiling. If you climb into it and crawl to the end, you find a small alien creature (a plush toy from Hazelight’s previous game A Way Out). The alien will turn its head to follow you. If both players stare at it for 10 seconds, it emits a high-pitched “Hello” in developer-speak (distorted). This is a direct reference to A Way Out’s secret alien Easter egg.
#### 7. The Hedge Maze Exploit (Safe) (The Garden - Chapter 4)
This is a developer-intended secret shortcut, not a cheat. In the Garden chapter, after gaining the Burst Flower (Cody) and Magnet (May) abilities, you can skip a large section of the hedge maze by having May attach a magnet to a spinning windmill, then Cody shoots a burst flower to propel the windmill, launching both players onto a hidden ledge. This bypasses the multiple hedge puzzles and drops you right before the boss fight. This is not a glitch; it’s a hidden path that rewards interaction between the two abilities. The developers left a small sign reading “Shortcut” nearby.
#### 8. The Magic Hat (The Carnival - Chapter 9)
In the Carnival chapter, near the bouncy castle minigame, there is a magician’s hat on a table. If you interact with it (May can use her grappling hook to pull a rabbit out; Cody can throw a sap bomb at it), a rabbit puppet that looks like the game’s director (Josef Fares) pops out and says “Fuck the Oscars!” – a famous quote from his BAFTA speech. This also unlocks a secret sticker for photo mode on the platform where photo mode is available (PC and next-gen consoles).
#### 9. The ‘Unplugged’ Easter Egg (The Shed - Chapter 10)
In the Shed chapter, before the final battle with the vacuum cleaner boss, look for a tool chest in the back right corner. Inside is a power cord with a plug. If you plug it into a nearby socket, the lights dim and a retro 8-bit version of the game’s theme plays. This is a reference to Hazelight’s early prototype for the game. While it doesn’t affect gameplay, it changes the background music for the boss fight to the chiptune version if activated before engaging the boss.
#### 10. Hidden Co-op Achievements That Are Secrets
Developer-Intended Secrets & Exploit-Safe Content
Hazelight Studios intentionally crafted these secrets to be discovered organically. None of them break the game or provide unfair advantages. The design philosophy is that secrets reward exploration and cooperation, not cheating. There are no known glitches or exploits that allow sequence breaking, item duplication, or invulnerability in the current versions of the game. Any online claims of such exploits are likely false or patched out.
Summary Table of Hidden Content
| Secret Name | Chapter | Location | How to Trigger | Reward |
|---|---|---|---|---|
| Flipping the Bird | The Bird’s Nest | Branch with two birds | Both players jump near large bird | Humorous animation |
| Easter Egg Egg | Cody’s Tree | Hidden alcove behind waterfall | Hit egg 10 times | Glowing pink bird and music |
| Vacuum Minigame | Sewers | Submerged pipe | Use vacuum for 15 seconds | Arcade cabinet, trophy |
| Developer Statue Room | Snow Globe | Ice crack near final cave | Break ice entrance | Audio log, story progress |
| Rose’s Hidden Messages | All chapters | The Love Book idle | Leave book untouched for 5 min | Random love tip voice line |
| Alien Head Tilt | Spaceship | Ceiling vent at start | Enter vent and stare | Distorted “Hello” |
| Hedge Maze Shortcut | Garden | Windmill area | Use flower + magnet on windmill | Skip maze section |
| Magic Hat Rabbit | Carnival | Near bouncy castle | Interact with hat | Director quote, photo sticker |
| Unplugged Chiptune | The Shed | Tool chest before boss | Plug power cord | 8-bit boss music |
| Friendship Is Magic | Tree of Roses | Any open area | Hug 5 times | Hidden trophy |
| You Monster | Snow Globe | Butterfly near telephone | Both pull wings | Dark cutscene, hidden achievement |
| Vacation | Post-credits | After full credits | Watch entire credits | Secret scene, trophy |
Final Note
It Takes Two is a carefully crafted co-op experience without cheats. The only way to unlock all content is through cooperative exploration. The Easter eggs above are the closest you’ll get to “secrets,” and they are well worth finding for the extra laughs and sense of discovery.