Jetpack Joyride
## Game Introduction: Jetpack Joyride ### Overview **Jetpack Joyride** is a side-scrolling endless runner developed and published by **Halfbrick Studios**, the Australian studio behind the *Fruit Ninja* franchise. First released on **September 1, 2011** for iOS, the game quickly became a mobile gam...
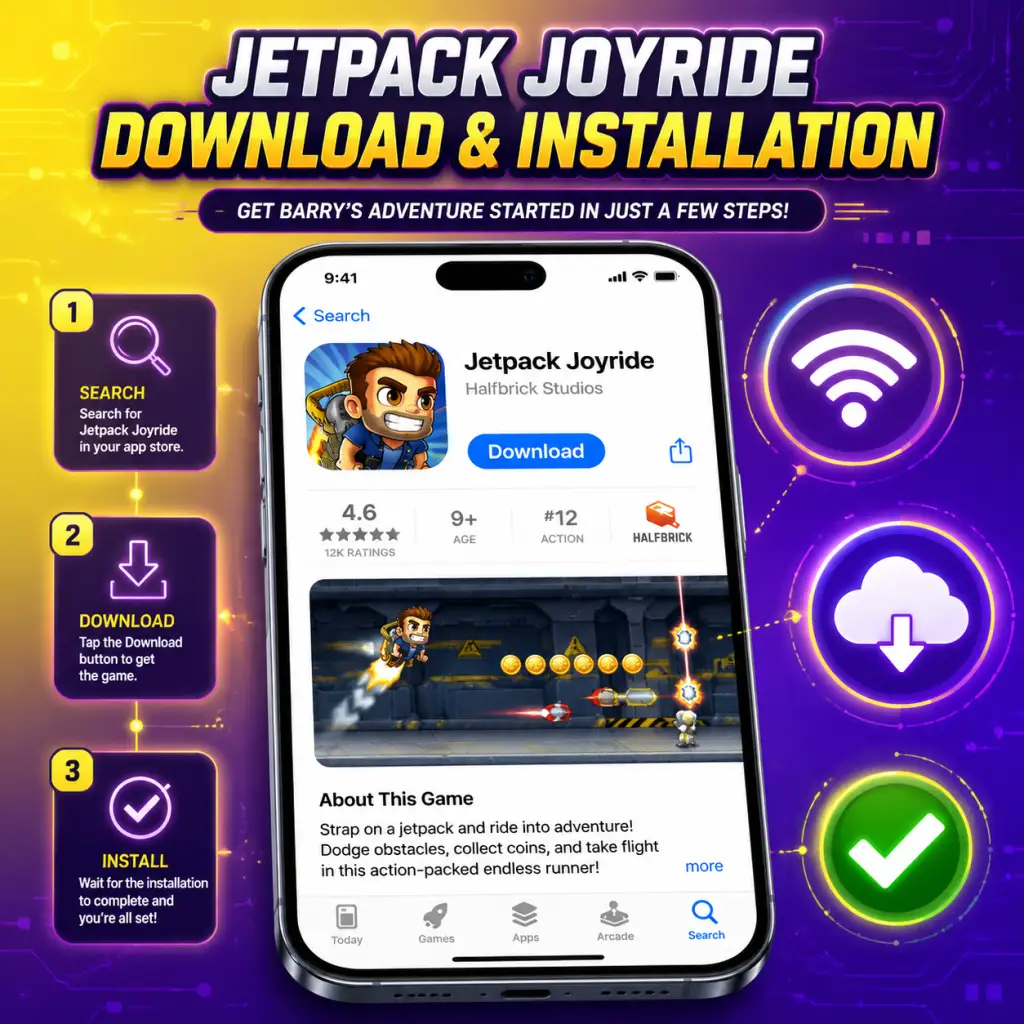
Download & Installation
Download & Installation Guide for Jetpack Joyride
Jetpack Joyride is a side-scrolling endless runner developed by Halfbrick Studios. The game is available on multiple platforms, each with its own download and installation process. Below you'll find detailed instructions for PC, consoles, and mobile devices.
Platforms & Official Sources
| Platform | Official Store / Source | Price Model |
|---|---|---|
| PC (Steam) | [Steam Store](https://store.steampowered.com/app/45730/) | Paid (one-time) |
| PC (Epic Games) | [Epic Games Store](https://store.epicgames.com/en-US/p/jetpack-joyride) | Free (permanent offer) |
| PlayStation 4/5 | PlayStation Store | Paid |
| Xbox One / Series X\ | S | Microsoft Store |
| Nintendo Switch | Nintendo eShop | Paid |
| iOS (iPhone/iPad) | Apple App Store | Free (with ads / IAP) |
| Android | Google Play Store | Free (with ads / IAP) |
| Windows Phone (discontinued) | Microsoft Store (legacy) | Not recommended |
System Requirements
PC (Steam / Epic)
#### Minimum:
- OS: Windows 7 or newer
- Processor: 2.0 GHz dual-core
- Memory: 2 GB RAM
- Graphics: DirectX 9 compatible or equivalent
- DirectX: Version 9.0c
- Storage: 250 MB available space
- Sound Card: DirectX compatible
- OS: Windows 10 64-bit
- Processor: 2.4 GHz quad-core
- Memory: 4 GB RAM
- Graphics: Intel HD Graphics 4000 or better
- DirectX: Version 11
- Storage: 500 MB available space (for extra content)
- Storage: ~400 MB
- Online: Optional for leaderboards (PS Plus not required for solo play)
- Storage: ~400 MB
- Online: Optional (Xbox Live Gold not required for solo play)
- Storage: ~320 MB (save data requires additional ~100 MB)
- Online: Optional for leaderboards (Nintendo Switch Online not required)
#### Recommended:
PlayStation 4/5
Xbox One / Series X\|S
Nintendo Switch
Mobile (iOS / Android)
| Requirement | Minimum | Recommended |
|---|---|---|
| iOS | iOS 9.0 | iOS 12+ |
| Android | Android 4.4 (KitKat) | Android 6.0+ |
| RAM | 1 GB | 2 GB |
| Storage | 150 MB | 200 MB |
| Internet | Required for initial download and optional ads | Same |
Step-by-Step Installation by Platform
PC (Steam)
1. Install Steam (if not already): Download from [steampowered.com](https://store.steampowered.com) and install.
2. Create/Login to your Steam account.
3. Open Steam client and go to the Store tab.
4. Search for "Jetpack Joyride" or use [this direct link](steam://store/45730).
5. Click Add to Cart and complete purchase ($3.99 / regional price).
6. After purchase, click Library > select Jetpack Joyride > click Install.
7. Choose installation location (default is fine) and wait for download (~200 MB).
8. Launch the game from Library or desktop shortcut.
PC (Epic Games Store)
1. Install Epic Games Launcher: Download from [epicgames.com](https://store.epicgames.com).
2. Login to your Epic account (create if needed).
3. In the launcher, go to Store and search for "Jetpack Joyride".
4. Click Get (even if it shows a price – it will be free if available).
5. Once added to library, go to Library > find Jetpack Joyride > click Install.
6. Select destination folder and wait for download.
7. Launch from launcher or desktop shortcut.
PlayStation 4 / 5
1. On your console, go to PlayStation Store. Ensure you are signed in with a PSN account.
2. Search for "Jetpack Joyride".
3. Select the game and choose Add to Cart / Buy. Price is $3.99 (may vary).
4. Complete purchase (funds or credit card).
5. After purchase, click Download (or find it in Library > Purchased).
6. The game will automatically install. Wait for completion (~400 MB).
7. Launch from home screen or Library.
Xbox One / Series X\|S
1. Navigate to Microsoft Store on your dashboard.
2. Sign in with your Xbox account (if not already).
3. Search for "Jetpack Joyride".
4. Select the game, click Buy. Price $3.99.
5. Confirm purchase using your payment method or gift card.
6. The download will start automatically. Check My games & apps for progress.
7. Once installed, launch from the tile.
Nintendo Switch
1. From the Home menu, open Nintendo eShop.
2. Select your user account (must have Nintendo Account).
3. Search for "Jetpack Joyride".
4. Select the game, click Proceed to Purchase. Price $3.99.
5. Add funds or use linked payment method, confirm.
6. The download begins automatically. Check Download progress from Home screen.
7. After installation (~320 MB), launch the game from Home menu.
iOS (iPhone / iPad)
1. Open the App Store app.
2. Ensure you are signed in with your Apple ID.
3. Tap Search and type "Jetpack Joyride".
4. Tap Get (free, with ads) then Install.
5. Authenticate with Face ID / Touch ID / password.
6. Wait for download to finish (icon turns from loading to full).
7. Tap the app icon to launch.
Android
1. Open Google Play Store app.
2. Sign in with your Google account.
3. Tap the search bar and type "Jetpack Joyride".
4. Select the game by Halfbrick Studios.
5. Tap Install (free, with ads).
6. Accept permissions (storage, network state).
7. Wait for download (~150 MB).
8. Tap Open to start.
Account Requirements
- PC (Steam/Epic): Must have a Steam or Epic account (free to create). No additional account.
- PlayStation: Requires PlayStation Network (PSN) account. Free.
- Xbox: Requires Xbox Live account (Microsoft account). Free for solo play.
- Nintendo Switch: Requires Nintendo Account (free).
- Mobile: No account required for playing. Optional Google Play Games / Apple Game Center for leaderboards.
First Launch Setup
1. Language Selection: On first launch, most platforms automatically detect system language. If not, choose from the settings menu.
2. Audio/Video Options: The game adjust to default settings. On PC, you can change resolution, fullscreen, and sound in Options.
3. Tutorial: A brief tutorial will appear – tap/click to fly and dodge obstacles. Follow on-screen instructions.
4. Login (Optional): For leaderboards, you may be prompted to sign into Game Center (iOS) or Google Play Games (Android). On PC/console, leaderboards sync automatically with the respective platform account.
5. Permissions (Mobile): Android may request storage permissions for saving screenshots; iOS may ask for notifications. Grant as desired.
6. First Game: After tutorial, you'll run a single level to get a feel. The game will prompt you to buy upgrades or skip.
Common Installation Errors & Fixes
| Error / Issue | Platform | Cause | Solution |
|---|---|---|---|
| "Download Failed" | Steam | Network timeout or corrupted cache | Verify internet, restart Steam, clear download cache (Steam > Settings > Downloads > Clear Download Cache) |
| "Not enough disk space" | All | Storage full | Free up space (delete unused apps/files) or change install location to a drive with more space |
| "Platform not supported" | PC (old OS) | OS too old | Update Windows to at least Windows 7 SP1 |
| "Installation stuck" | All | Background processes or slow network | Pause and resume download, restart the store app / console |
| "Unable to purchase" | Consoles | Region restrictions | Change console region to a supported region (e.g., US) or buy via web store |
| Black screen on launch | PC | Outdated graphics drivers | Update GPU drivers (NVIDIA/AMD/Intel). Check DirectX version. |
| "App not installed" | Mobile | Insufficient storage or corrupt APK | Delete and reinstall from official store. Ensure enough space. |
| "Jetpack Joyride keeps crashing" | All | Outdated game version / corrupted data | Update game, reinstall if necessary, clear game cache (on mobile: Settings > Apps > Clear Cache) |
| "No sound" | PC | Audio device not set | Check in-game Options > Sound volume. Ensure correct playback device in Windows sound settings. |
Post-Installation Verification
1. Launch the Game: Double-click the desktop icon or open from library.
2. Check Main Menu: Should see the iconic title screen with music. Test buttons (Start, Options, Leaderboards).
3. Play a Run: Start a game. Control your character – tap/click to boost, dodge lasers and missiles. Ensure no graphical glitches or lag.
4. Check Settings: Go to Options > Audio – verify both music and sound effects work. On PC, change resolution to native (e.g., 1920x1080) if not detected.
5. Leaderboards (Optional): If connected online, open Leaderboards to see if your platform account name appears.
6. Verify Integrity (PC – Steam): Right-click game in Library > Properties > Installed Files > Verify integrity of game files. This checks for missing/corrupted files.
7. Confirm Storage Used: Go to system settings and check that Jetpack Joyride takes up expected space (~250 MB on PC, ~400 MB on consoles, ~150 MB on mobile).
8. Update Check: On first launch, the game should check for updates automatically. Make sure you have the latest version (v7.1.3 as of early 2025).
If everything works, you're ready to enjoy Jetpack Joyride! For further troubleshooting, visit the [official Halfbrick support page](https://www.halfbrick.com/support).
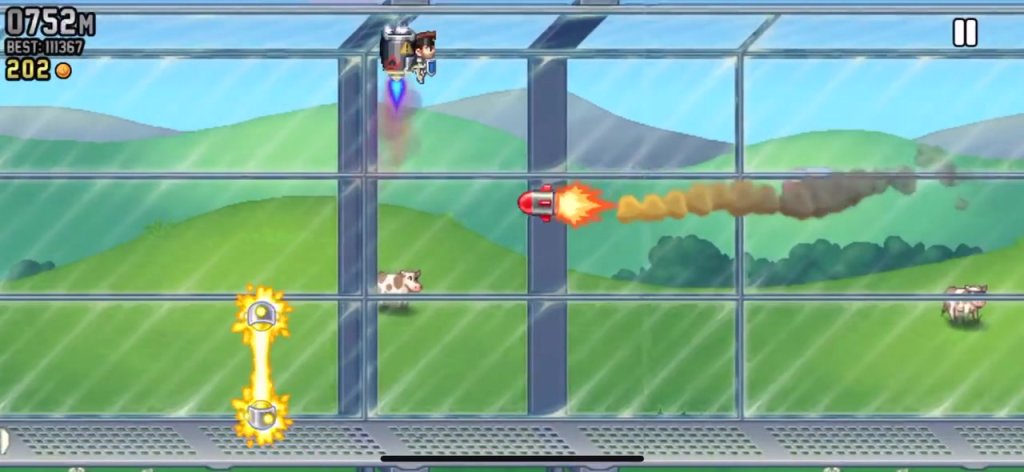
Game Introduction
Game Introduction: Jetpack Joyride
Overview
Jetpack Joyride is a side-scrolling endless runner developed and published by Halfbrick Studios, the Australian studio behind the Fruit Ninja franchise. First released on September 1, 2011 for iOS, the game quickly became a mobile gaming icon, later arriving on Android, Windows Phone, PC (via Steam), PlayStation 4, PlayStation Vita, Xbox One, and Nintendo Switch. Its simple yet addictive gameplay, combined with vibrant visuals and a quirky sense of humor, has made it one of the most critically and commercially successful mobile games of all time.
Story & Setting
You play as Barry Steakfries, a secret agent (or just a guy with a jetpack) who breaks into a high-tech laboratory run by the mysterious Legitimate Research corporation. The lab is filled with dangerous experiments, mutants, robots, and an endless series of corridors. Barry uses a stolen jetpack to fly through the facility, dodging obstacles, collecting coins, and causing general mayhem. There is no deep narrative—the story is a thin but amusing premise that perfectly supports the gameplay loop.
Main Characters
- Barry Steakfries – The protagonist. A rugged, mustachioed man who, after stealing a jetpack, becomes a legend. His only motivation is fun and chaos. No dialogue or backstory is given—just a man and his jetpack.
- Legitimate Research – The unnamed corporation (often referred to by fans as the bad guys) that owns the lab. Their defensive systems (lasers, zappers, missiles, etc.) are the main obstacles. They never speak, but their technology is everywhere.
- Classic Mode – The main endless runner. Travel as far as possible, dodge obstacles, collect coins, and avoid the many traps. Each run ends when you hit an obstacle or the exit door.
- Missions – A sequence of short objectives (e.g., “Collect 5 tokens,” “Fly through 10 zappers”) that unlock new gear and vehicles upon completion.
- Vehicles – Special power-ups like the Profit Bird, Crazy Dog, Bad as Hog, Gravity Suit, and more. Each vehicle has unique abilities (e.g., flying sideways, breaking barriers) and lasts a short time.
- Endless Mode (via missions) – Some missions have specific requirements but all runs are technically endless until you die. No separate “endless mode” menu—it’s all the same core loop.
- Sampler Mode – A limited demo version with fewer features (removed from most platforms).
- Offline: The game can be played entirely offline once installed. Coins and progress are saved locally.
- Online: Online features are optional and include leaderboards, weekly challenges (e.g., collect X coins in a week), social sharing, and cloud save (via iCloud/Google Play). No multiplayer exists.
- Vehicles: Regular new vehicles added via updates.
- Costumes: Hundreds of cosmetic outfits for Barry, many themed after holidays, movies, or memes.
- Token Machines: In-game prize games that award random collectibles.
- Special Events: Themed events like Valentine’s Day or Halloween with limited-time items.
- No expansions: There are no story expansions or paid add-ons.
- Perfect one-touch controls that anyone can master in seconds.
- Player agency in upgrade paths—choose between jetpacks, magnetic boots, coin magnets, etc.
- High replayability through mission variety and vehicle unlocks.
- Timeless visual style that aged gracefully: colorful, crisp 2D art with smooth animations.
- No energy system (unlike many later mobile games)—you can play as much as you want.
- Cross-platform availability with most versions identical in content.
- Cultural impact: It’s a benchmark of mobile game design, inspiring countless clones and remaining popular over a decade later.
Core Appeal & Target Audience
Jetpack Joyride appeals to a broad audience thanks to its one-touch controls (tap to ascend, release to descend). It is a pick-up-and-play game perfect for casual gamers, kids, and anyone looking for short bursts of fun. The game’s reward loop—collecting coins, upgrading gear, completing missions, and unlocking vehicles—encourages repeated play without feeling grindy. The humor, bright cartoon art style, and silly costumes/vehicles (like a piggy bank or a dragon jetpack) give it lasting charm.
Game Modes
Online/Offline Support
DLC & Expansions
Jetpack Joyride has received numerous free content updates and microtransactions (no paid DLC). Key additions include:
What Makes Jetpack Joyride Unique?
Supported Platforms & Release Timeline
| Platform | Release Date |
|---|---|
| iOS | September 1, 2011 |
| Android | September 28, 2011 |
| Windows Phone | December 2012 |
| Steam (PC) | February 22, 2017 |
| PlayStation 4 | May 30, 2017 |
| PlayStation Vita | May 30, 2017 |
| Xbox One | June 2017 |
| Nintendo Switch | December 2017 |
Final Thoughts
Jetpack Joyride is a masterclass in minimalist game design. Its legacy as a mobile classic is undisputed, and its enduring fun ensures that whether you’re playing on a phone, console, or PC, you’ll quickly find yourself lost in the endless corridors, grinning as Barry dons a silly hat and zaps through lasers.
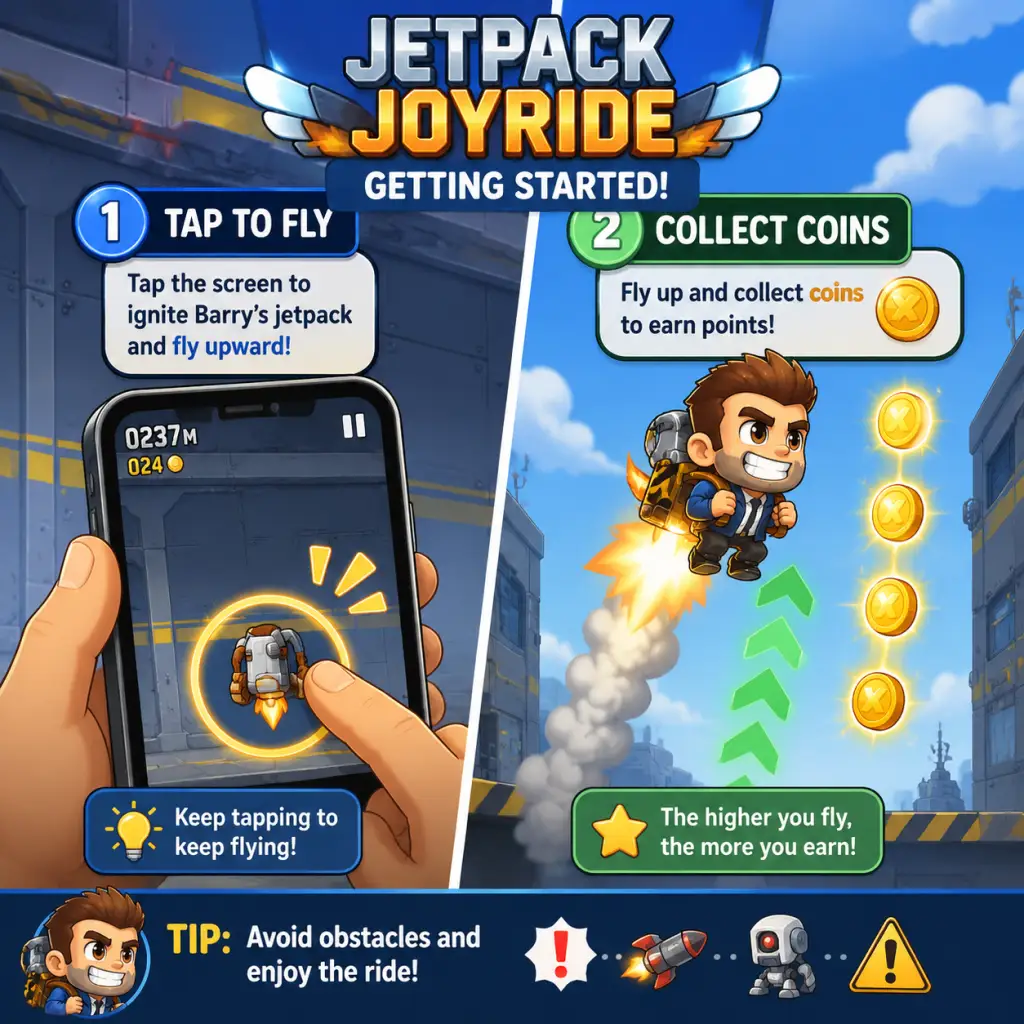
Getting Started
Getting Started with Jetpack Joyride
This guide is designed to help brand-new players survive their first hour, avoid common pitfalls, and build a strong foundation for endless runs. Jetpack Joyride is an endless runner where you control a test subject using a stolen jetpack to fly through a laboratory, avoiding obstacles and collecting coins. Read on for platform-specific controls, UI breakdowns, early priorities, and your day-one checklist.
---
First Hour Walkthrough
1. Complete the Tutorial (First 2 Minutes)
- The game opens with a short tutorial that teaches the core mechanic: tap and hold to fly upward, release to fall.
- Follow the on-screen prompts to dodge the first few zappers (electric barriers) and collect a few coins.
- After the tutorial, you’ll be taken to the main menu. Your lab coat and red jetpack are the default look – there is no character creation in this game.
- Press the big green PLAY button to start your first unlimited run.
- Focus on learning the rhythm: tap to rise, release to drop. Don’t try to go far – just get comfortable with the controls.
- Coins will appear everywhere. Grab as many as you can without running into zappers, missiles, or the ceiling/floor.
- Most first runs end within 500 meters. That’s normal. After each run, you’ll see a Results screen showing coins earned, distance, and mission progress.
- From the main menu, tap MISSIONS (the clipboard icon). You’ll see three active missions, e.g., “Collect 100 coins” or “Fly 200 meters.”
- Your primary early goal: complete the first set of missions. Each completed mission rewards cash and experience, which levels up your Badge (your player rank).
- Focus on one mission at a time – don’t try to do all three in a single run unless they overlap.
- With your first few thousand coins, go to the SHOP and buy the Coin Magnet gadget for 500 coins. This is the best early investment.
- Equip it in the Gadgets slot (tap the gadget icon on the main menu). Now coins near you will automatically attract during runs.
- After a few runs, you’ll randomly find a vehicle token (e.g., a small icon floating mid-run). Grab one to unlock the Crazy Freaking Teleporter (a giant mech that stomps everything).
- Vehicles last a short time but let you smash through obstacles without dying. Don’t buy vehicles with coins yet – your first one is always given for free.
2. Your First Few Runs (Minutes 3–10)
3. Missions and the First Objective (Minutes 10–20)
4. Unlock Your First Gadget (Minutes 20–40)
5. First Vehicle Encounter (Minutes 40–60)
---
Character Creation and Customization
There is no character creation in Jetpack Joyride.
You start as a bald man in a lab coat. You can change your appearance later by buying outfits from the shop (coins or tokens), but these are purely cosmetic. None affect gameplay. Focus on gadgets and upgrades first.
---
Controls on All Platforms
| Platform | Control Scheme | Notes |
|---|---|---|
| Mobile (iOS/Android) | Tap and hold to fly up. Release to fall. | Use your thumb. You can also tilt the device if you enable Tilt Controls in Settings (not recommended for beginners – tap is more precise). |
| PC (Steam/Windows) | Press and hold Spacebar (or Up Arrow) to fly up. Release to fall. | The mouse does nothing. You can also use a controller. |
| Console (Xbox/PlayStation/Nintendo Switch) | Hold A (Xbox) / X (PlayStation) / B (Switch) to fly. Release to fall. | On Switch, you can also use touchscreen in handheld mode. |
---
UI Overview
When you start a run, the screen shows:
- Top Left: Your current coin count (collected this run, but these are temporary – you can lose them if you die before collecting? No, you keep all coins collected during the run, even if you crash. Coins are permanent.)
- Top Center: Distance in meters.
- Top Right: Mission progress bar (shows how close you are to completing the current mission).
- Bottom Left (Vehicles): A progress bar for the next vehicle token. Fills as you collect tokens during a run.
- Bottom Center (Gadgets): Small icons showing your equipped gadgets (e.g., Coin Magnet, Turbo Boost). They charge or activate automatically.
- Bottom Right (Spin Token): Shows your collected spin tokens (every 1000m you earn one).
- Obstacles: Zappers (electric walls), missiles (red rockets), lasers (yellow lines), and the ceiling/floor.
- PLAY – big green button to start a run.
- MISSIONS – clipboard icon where you see active missions.
- SHOP – cart icon for buying gadgets, vehicles, outfits, and upgrades.
- GADGETS – gear icon to equip up to two gadgets.
- VEHICLES – car icon to see your unlocked vehicles.
- STATS – graph icon showing total distance, coins, etc.
- SETTINGS – gear icon for sound, controls, and language.
- Play 5–10 short runs to get a feel for timing.
- Always check missions before pressing play – they guide your early progress.
- Save all coins until you have 500 for the Coin Magnet.
- Revive once per run if you die near a milestone (e.g., within 50m of a new mission objective) – revival costs a coin spin token or a small gem fee (gems are rare early on).
- Don’t buy cosmetic outfits early – They cost thousands of coins that should go to gadgets and upgrades.
- Don’t waste coins on the Slot Machine – The wheel in the shop costs 2,500 coins and usually gives junk.
- Don’t try to dodge coins – Grab every coin you see. Even if you crash, coins are banked permanently.
- Don’t fly too high or too low – The ceiling and floor kill you instantly. Stay in the middle 50% of the screen.
- Don’t focus on distance alone – Early on, distance is less important than completing missions. A 300m run with 200 coins is better than a 1000m run with 50 coins.
The Main Menu (after a run) has these important buttons:
---
Essential Early Objectives (First Day)
1. Complete the Tutorial – Basic movement down.
2. Finish the First Mission Set – You’ll get 3 missions. Complete all three to earn your first big cash reward and rank up.
3. Buy the Coin Magnet – It costs 500 coins and is the best gadget for beginners.
4. Collect Your First Vehicle Token – Easiest way to survive longer runs.
5. Unlock the ‘Body Shield’ Gadget – Your second gadget priority (costs 2,000 coins). It blocks one hit per run.
6. Try to Reach 1000m – That’s the distance for your first spin token (wheel spin). The wheel gives random prizes like coins, tokens, or rare items.
---
What to Do First and What to Avoid
✅ Do This First:
❌ Avoid These Mistakes:
---
Early Resource Priorities
| Resource | How to Get | What to Spend On | Avoid Spending On |
|---|---|---|---|
| Coins | Collected during runs | Gadgets (Coin Magnet, Body Shield), then vehicle upgrades (e.g., longer vehicle time) | Cosmetics, slot machine, temporary power-ups |
| Spin Tokens | Every 1000m, or from achievements | Wheel of Fortune (free spin) – use tokens when you have 3+ to guarantee a prize. | Don’t use tokens on low-probability spins early. |
| Gems | Rare from missions/loot boxes | Only use for reviving if you have a great run going (e.g., >2000m). | Don’t buy anything with gems until you’ve unlocked all basic gadgets. |
| Experience (Badge Level) | Completing missions | Unlocks new gadgets and vehicles in the shop. | – |
1. Coin Magnet (500 coins) – Doubles your coin income.
2. Body Shield (2,000 coins) – Survive one hit per run.
3. Turbo Boost (3,000 coins) – Temporary speed burst that also makes you invincible.
---
Common Beginner Mistakes
- Mashing the button – Causes you to bounce erratically and hit obstacles. Practice split-second taps.
- Ignoring missions – You’ll earn coins and level up much slower.
- Spending coins on outfits – A lab coat recolor won’t help you get past 1000m.
- Reviving every time – Early runs are short; reviving wastes gems or tokens for little gain.
- Flying at the top of the screen – The ceiling is a common death. Keep your character’s head about one-third from the top.
- Not using the pause button – If you need to check a mission mid-run, pause (top-left corner). You can also exit safely without losing coins.
- [ ] Complete the tutorial run.
- [ ] Play 3–5 runs, each lasting at least 30 seconds.
- [ ] Check the MISSIONS screen and note your three active missions.
- [ ] Complete at least one mission (e.g., “Collect 100 coins”).
- [ ] Buy the Coin Magnet from the Shop for 500 coins.
- [ ] Equip the Coin Magnet in the Gadgets slot.
- [ ] Collect your first vehicle token during a run (it will appear randomly).
- [ ] Reach at least 500 meters in one run.
- [ ] Try the free Wheel of Fortune spin (the one that costs 0 tokens – appears after your first 1000m run).
- [ ] Save all future coins until you can afford the Body Shield (2,000 coins).
- [ ] Avoid buying anything cosmetic until you own at least three gadgets.
---
Day-One Checklist
Follow this checklist and you’ll be well on your way to becoming a competent Jetpack Joyride player within your first hour. Remember: the game is about risk vs. reward. The more you play, the better your muscle memory becomes. Happy flying!
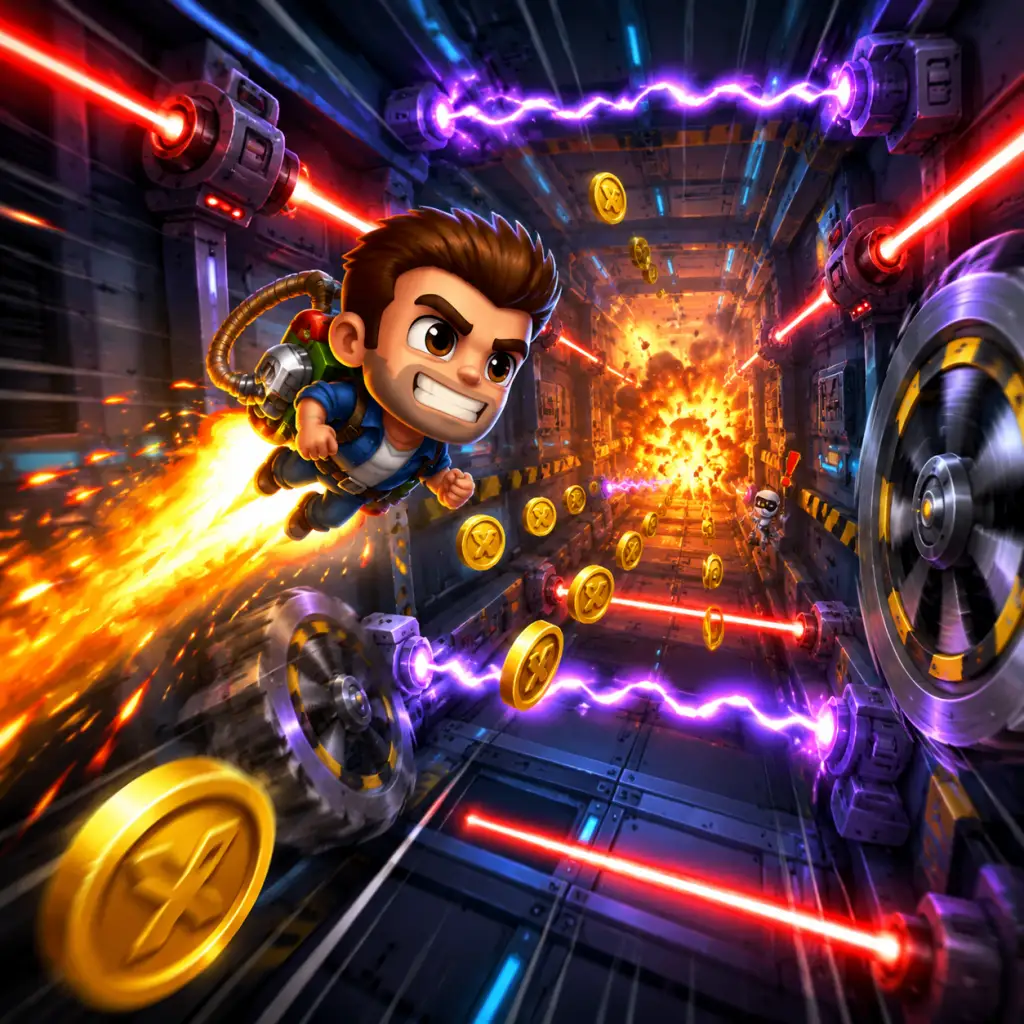
Core Gameplay
Core Gameplay: Jetpack Joyride
Jetpack Joyride is an endless runner that emphasizes timing, reflex-based dodging, and strategic resource management. The core gameplay loop is simple: run to the right, collect coins, avoid zappers and missiles, and cover as much distance as possible. However, beneath this simplicity lies a deep progression system driven by missions, vehicle unlocks, and gear upgrades. This guide breaks down the gameplay by typical player progression tiers, from first launch to mastery.
Main Gameplay Loop
- Run Phase: Control the test subject (Barry Steakfries) with one-touch controls. Tap to fly upward with the jetpack; release to fall. The goal is to travel as far as possible while collecting coins, blue tokens, and completing missions.
- Hazard Avoidance: Dodge zappers (electric barriers), homing missiles, and laser walls. Colliding with any hazard ends the run immediately.
- Vehicle Acquisition: During a run, special crates (gray boxes) can be collected. Collecting 3 crates activates a vehicle (e.g., Mr. Cuddles or Bad As Hog) that grants temporary invincibility and unique abilities.
- End of Run: When the run ends, all coins, tokens, and mission progress are tallied. Coins are used to purchase upgrades, cosmetics, and vehicles in the lab.
- There is no direct combat. Interaction is purely avoidance: tapping to ascend and releasing to descend to navigate through hazards.
- Vehicles provide brief invincibility and often alter controls (e.g., teleporting with the teleporter, spinning with the gravity suit).
- Some vehicles (like the Profit Bird) collect all coins on screen automatically.
- Coins: Primary currency. Earned by collecting during runs, completing missions, or buying with real money.
- Mission System: A set of 3 active missions appears in the lab. Completing them awards coins, experience, and sometimes exclusive items (e.g., heads, outfits). Missions include “Collect 500 coins in a single run” or “Fly through 20 rings.”
- Vehicle Unlocks: Each vehicle has a coin cost. Once unlocked, it becomes available to use in runs (if you collect 3 crates).
- Gear Upgrades: Permanent upgrades like the “Bling Vest” (coin multiplier), “Headstart” (boosted start), or “Lucky Last” (second chance).
- Outfits & Heads: Cosmetic items that sometimes grant minor gameplay bonuses (e.g., more coins).
- Token Spin: Blue tokens collected during runs are used for a slot-machine spin after the run, offering random prizes (coins, costumes, etc.).
- The environment is procedurally generated but thematically consistent: a high-tech laboratory with neon lights, pipes, and wires. No branching paths; the only variation is hazard patterns and crate placements.
- Missions are the primary structured objectives. They rotate regularly and often require specific behaviors (e.g., “Grind the rail for 50 meters”). Completing missions contributes to “Mission Packs” (collections tied to themes like “Starter Pack” or “Super Hero Pack”).
- Daily missions and event missions (e.g., Halloween events) provide limited-time rewards.
- Coins are earned at a rate of ~1 coin per 10-15 meters normally. The Bling Vest multiplies this by 2x-3x.
- Premium currency: Gems. Used to revive mid-run (offering a second chance) or to buy rare items. Gems are earned sparingly from spins or purchased with real money.
- The token spin is a gambling mini-game that can give high value rewards but is unpredictable.
- Always prioritize upgrading the Bling Vest first, as it accelerates all future coin earnings.
- Upgrading gadgets (e.g., the Stomper boots reduce damage from landing).
- Unlocking better vehicles (like the Teleporter which lets you skip obstacles).
- Purchasing the Lucky Last gadget (auto-revive upon first hit).
- High Score Chasing: Strive for personal bests and compete on global leaderboards.
- Completionist Goals: Collect every outfit, head, and vehicle. Achieve 100% mission completion for all packs.
- Event Runs: Participate in limited-time events (e.g., Christmas Eve marathon) for unique cosmetics.
- Speed Runs: Optimize routes and gadget usage to achieve the fastest possible times for certain distances.
- Run, collect coins, avoid zappers. Expect to die under 500 meters.
- Complete the initial three missions (e.g., “Tap 50 times” or “Collect 100 coins”).
- Coins earned per run: ~100–300 coins without upgrades.
- Spend coins only on essentials; avoid cosmetic items.
- Complete the Starter Pack missions for extra 500 coins total.
- Avoid failing missions that require specific vehicles (you don’t have them yet).
- Always grab the first crates you see to get a vehicle early in the run—the invincibility helps you survive longer.
- Focus on staying in the middle of the screen; zappers appear from top and bottom.
- You can now activate the token spin after each run, giving rare items.
- Grind missions to unlock new vehicles and cosmetic packs (e.g., “Super Hero” or “Space” pack).
- Upgrade Bling Vest to level 2 (costs 5,000 coins) for 2.5x multiplier.
- Unlock the Teleporter vehicle (12,000 coins). Teleporting through obstacles makes high scores easier.
- Buy the Lucky Last gadget (15,000 coins) for a free revive after first death.
- Average coins per run: 500–1,000 with Bling Vest and longer runs.
- Token spin can give 100–1,000 coins or rare items; use tokens liberally.
- Focus on missions that reward vehicle parts or exclusive head items (e.g., “Fly through 30 rings”).
- Missions now require specific conditions (e.g., “Earn 2,000 coins in a run”)—use upgrades to achieve them.
- Equip Headstart + Lucky Last + Bling Vest (if you have it) for maximum distance.
- Vehicle: Teleporter is best for survival; Mr. Cuddles for coin collection.
- You can now survive long enough to see repeated hazards patterns. Memorize spawn cycles.
- Token spins often give duplicates (small coin rewards) unless you buy the “Token Magnifier” upgrade.
- Max out Bling Vest (level 3, 25,000 coins) for 3x multiplier.
- Unlock all vehicles (e.g., Profit Bird, Gravity Suit) – each costs ~20,000–50,000 coins.
- Complete all Mission Packs for exclusive outfits (e.g., “Dragon Wings” head item).
- Coin rate: 1,500–3,000 per run with max vest.
- Spend on token upgrades (e.g., Token Magnifier) to increase spin value.
- Start chasing high scores (>20,000m). Optimize gadget loadout: Lucky Last + Headstart + Coin Magnet + Super Bundle (more coins).
- Use the Teleporter to bypass long sections of lasers.
- Perfect execution is required. One mistake can end a run of 30 minutes.
- Grind for the “7,777,777 coin” achievement if not yet done.
- No further upgrades; all coins are spent on cosmetic flairs (beards, outfits) or token refinements.
- Leaderboards become the main driver.
- The lab environment is fully memorized. You can predict where crates and hazards spawn.
- Use the “Gravity Suit” vehicle for a fun twist, but Teleporter remains meta.
- Limited to event missions. Regular missions become trivial (e.g., “Collect 10,000 coins in one run”).
- Gadgets: Lucky Last + Headstart + Coin Magnet + Super Bundle (all max level).
- Vehicle: Teleporter (for survivability) or Profit Bird (for coin collection and score rushing).
- Outfit: Any with coin bonus (e.g., “Pirate” outfit).
- Endless High Score Attempts: Goal is to beat your personal record (e.g., 50,000m).
- Weekly Challenges: Halfbrick sometimes runs events (e.g., “Beat 100,000m in a week”).
- Complete The List: Unlock every item, including rare head items from event spins (e.g., “Samurai Helmet”).
- Speedrunning: Try to reach 10,000m in under 3 minutes using optimal vehicle switching and teleport skips.
Combat/Interaction Systems
Progression Systems
Exploration
Quests/Missions
Economy
Character/Build Growth
“Build” here refers to your active loadout: one vehicle, one outfit, one head item, and a set of four gadgets (collected during runs). You can equip items before a run in the lab. Growth comes from:
Endgame Structure
Once you have all vehicles, maxed gadgets, and high coin multipliers, the endgame becomes:
---
Early Game (First 1–10 Runs)
Overview
You start with only the basic jetpack, no upgrades, and a handful of missions. The focus is on learning controls and accumulating your first coins.
#### Main Loop
#### Progression Priorities
1. Buy the Bling Vest (1000 coins) as soon as possible. This doubles coin income.
2. Unlock the Headstart gadget (500 coins) to begin each run with a speed boost and 500m headstart.
3. Save for a first vehicle, like the “Mr. Cuddles” (3000 coins) which gives a simple invincibility shield.
#### Economy
#### Missions
#### Exploration Tips
---
Mid Game (10–50 Runs)
Overview
You have a few upgrades, a vehicle unlocked, and coin income is steady. You start attempting longer runs (1,000–3,000m).
#### Main Loop
#### Progression Priorities
#### Economy
#### Missions
#### Build Suggestions
---
Late Game (50–200 Runs)
Overview
You have most vehicles, high-level gadgets, and can consistently reach 5,000–10,000m. The game becomes about optimizing every run for maximum score and completing remaining achievements.
#### Main Loop
#### Progression Priorities
#### Economy
#### Endgame Prep
---
Endgame (200+ Runs / Mastery)
Overview
All content is unlocked. The only remaining goals are increasing the high score, completing the “All Vehicles” achievement, and participating in seasonal events.
#### Main Loop
#### Progression
#### Exploration
#### Missions
#### Build (Endgame Loadout)
#### Endgame Structure
---
This guide covers the full Core Gameplay loop of Jetpack Joyride, from the first tap to the highest of high scores. Remember: the better your economy early, the faster you progress. Happy flying!
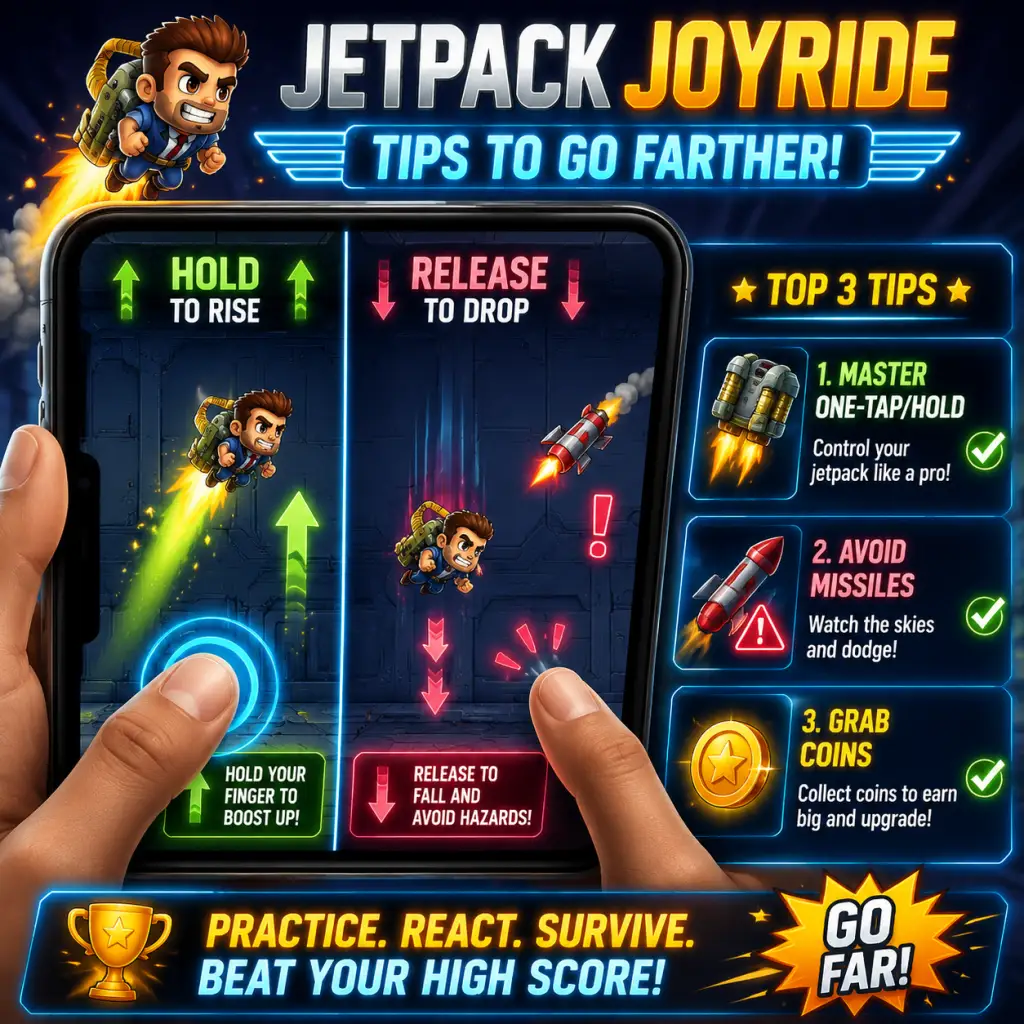
Game Tips
Jetpack Joyride Game Tips
Category: Beginner Tips
#### 1. Master the One-Tap/Hold Mechanic
- Explanation: The game is controlled by a single action: tap and hold to fly up, release to fall. Beginners often hold too long or tap too erratically. Practice smooth, short taps to maintain a stable altitude.
- Why it works: Stable altitude lets you navigate zappers and missiles without overcorrecting. Use small taps to stay in the middle of the screen for maximum reaction time.
- When to use: Always, but especially in the first 1000 meters where obstacles are sparse.
- Explanation: In early runs, go out of your way to collect coins, even if it means bumping into a few obstacles. Coins unlock gadgets, vehicles, and upgrades.
- Why it works: Early coin investment leads to faster progression. Don't worry about high score until you have a decent vehicle (e.g., Bad As Hog).
- When to use: First 20-30 runs until you unlock Mr. Cuddles or Crazy Daze vehicle.
- Explanation: Green tokens (Spin Tokens) appear in set patterns. Memorizing one or two reliable collection paths helps you earn free spins without compromising survival.
- Why it works: Free spins earn vehicle tokens, which unlock powerful vehicles faster than coin grinding.
- When to use: Every run where you see a green token cluster (e.g., early section with three coins in a vertical line).
- Explanation: The game offers a revive for 10 coins (later 20 coins). Only use it if you are within 200 meters of a personal best or an achievement reward.
- Why it works: Coins are scarce early on. Wasting them on mid-range revives delays vehicle purchases.
- When to use: When you're about to break a record (e.g., 3000m) or during a Daily Challenge that guarantees a coin bonus.
- Explanation: The Spin Wheel costs a token and can give coins, vehicles, or upgrades. Stop spinning once you have all common prize vehicles; save tokens for special events where rare vehicles appear.
- Why it works: Tokens are finite. Hoard them for limited-time vehicle releases (e.g., Sharky).
- Advanced tip: The wheel’s odds change based on ownership; after owning 4 out of 6 common vehicles, chances of a rare drop increase.
- Explanation: Not all vehicles are equal. Prioritize upgrading the Bad As Hog (extra coin magnet duration) and Mr. Cuddles (auto-collect coins). Then move to Teleporter for survival.
- Why it works: Coin vehicles yield more coins per run, accelerating future upgrades. Survival vehicles help you reach deeper distances for higher coin multipliers.
- When to use: Upgrade Bad As Hog to level 3 first, then Mr. Cuddles to level 2.
- Explanation: Zappers (electrical fields) follow fixed patterns: horizontal lines, vertical columns, or checkerboard grids. Learn the timing by counting “mississippi” beats.
- Why it works: Pattern recognition reduces reaction time. For example, a 3-zapper grid takes 1.5 seconds to cycle; fly through during the gap.
- When to use: Every run. Focus on memorizing the first pattern (three horizontal zappers starting at top left).
- Explanation: Missiles spawn from the sides. Staying near the center gives you maximum escape time. If a missile appears from the left, you have 0.4 seconds to move right.
- Why it works: Centered position allows bidirectional dodging. Flying at the edge leaves no escape room.
- Intermediate tip: Use the Teleporter vehicle to vanish through missile waves.
- Explanation: After a certain distance (around 3000m), gravity flips. Prepare by adjusting your tap rhythm: very light taps now make you fall faster. Hold slightly longer to stabilize.
- Why it works: Gravity reversal disorients most players. Practice this area in “No End Mode” for 5 minutes to internalize the new physics.
- When to use: When you see the laboratory ceiling texture change to a floor pattern.
- Composition: Vehicle: Bad As Hog (at least level 3) + Gadget: Coin Magnet + Lucky Spin (optional).
- How to execute: Activate magnet just before a dense coin cluster. The Bad As Hog increases magnet range and duration.
- Best use: First 2000m where coin clusters are thick. Ideal for grinding coins fast.
- Composition: Vehicle: Mr. Cuddles (level 2+) + Gadget: Teleporter + Shield.
- How to execute: Use Teleporter to bypass zapper walls; shield absorbs one hit. Mr. Cuddles auto-collects coins so you can focus on dodging.
- Best use: Late game (5000m+) where obstacles are relentless. Prioritize distance over coins.
- Composition: Vehicle: Crazy Daze (level 3) + Gadget: Missile Launcher + Gravity Belt.
- How to execute: Crazy Daze rockets blast zappers; missile launcher destroys obstacles ahead; gravity belt helps with tight spaces.
- Best use: Short burst scoring runs for daily challenges. Less effective for long distance.
- Explanation: Each run multiplies coins based on distance (every 500m adds 0.5x). To maximize coin income, focus on surviving slightly further each run rather than aggressive coin chasing.
- Why it works: A 6x multiplier (3000m) gives 6 coins per collectible. If you die at 2500m (5.5x), the lost multiplier costs far more than the coins you could have grabbed.
- When to use: After unlocking 3 vehicles, set a distance goal (e.g., beat 4000m) before caring about coin pathing.
- Explanation: Complete daily missions (e.g., “Collect 500 coins without using a vehicle”) to earn bonus coins and tokens. Weekly events offer exclusive vehicles like the Steampunk Jet.
- When to use: Log in daily to claim mission sets. Save tokens for event vehicles that are harder to obtain.
- Advanced tip: Stack missions: start a run when you have 3 active daily missions, so one run can clear multiple objectives simultaneously.
- Explanation: Gadgets (e.g., Coin Magnet, Shield) can be earned through spins or vehicle prize packs. Coins are better spent on vehicle upgrades.
- Why it works: Vehicle upgrades provide passive benefits; gadgets are one-time use per run. Upgrade cost vs. benefit ratio favors vehicles.
- When to use: Only purchase gadgets if you’ve max upgraded your primary vehicle and still lack them.
- Explanation: Some obstacles (e.g., double zappers with 1-pixel gap) require near-perfect timing. Learn the exact tap duration to fit through. Practice in the “Training Mode” (unlocked at 10,000m cumulative distance).
- Why it works: This saves milliseconds that stack into longer survival. For example, a 1-frame late tap on a tight horizontal gap causes death.
- When to use: When you consistently reach 5000m and feel plateaued.
- Explanation: In specific areas near the 10,000m mark, you can clip through a wall using a rocket vehicle at full speed, causing the game to loop back to 0m but with coin multiplier preserved. This resets obstacle difficulty but keeps score.
- Why it works: Effectively doubles your coin earnings per run (since you restart with same multiplier).
- When to use: Only if you are comfortable losing a run (glitch may crash). Not recommended for beginners.
- Explanation: Green tokens appear in clusters of 5-7 at specific distances (every 1500m). Memorize the exact layout (e.g., after the third missile wave, tokens form a diamond shape).
- Why it works: Collecting all tokens in one cluster gives you a 20% chance of a free spin. Doing this twice per run yields one extra token on average.
- When to use: After unlocking 4 vehicles, when you need tokens for the final rare vehicle.
- Explanation: The lab has distinct zones: Test Chambers (0-1000m) – sparse obstacles; Missile Range (1000-3000m) – missiles and zappers; Anti-Gravity Lab (3000-5000m) – gravity flips; Experimental Wing (5000m+) – extreme combos.
- Why it works: Zone awareness lets you predict upcoming dangers. For instance, in Missile Range, stay center; in Anti-Gravity, tap twice as often.
- When to use: Refer to zone boundaries while running; they are marked by subtle wall color changes.
- Explanation: At 2500m, a doorway with a green arrow leads to a separate room with 100 coins and a free spin token. This is guaranteed on every run if you enter (fly through the opening).
- Why it works: Instant 100 coins and a token without extra danger.
- When to use: Always. If you miss the door, you can still enter from the right side by reversing (vehicle needed).
- Practice daily – 10 minutes of focused runs improves reflex speed more than hour-long sessions.
- Watch replays – After death, look at your angle of approach to obstacles. Identify if you overshot or undershot.
- Use headphones – Audio cues (zapper hum, missile whoosh) give 0.2s early warning.
- Join community – Reddit r/JetpackJoyride and Discord share updated spin wheel odds and event schedules.
#### 2. Prioritize Coin Greed Early
#### 3. Learn the Green Token Paths
Category: Resource Management
#### 4. Revive Only for Major Mile Stones
#### 5. Spin to Win – But Know When to Stop
#### 6. Upgrade Vehicles in Order of Utility
Category: Combat & Obstacles
#### 7. Zapper Patterns are Predictable
#### 8. Missile Dodge – Never Fly at the Edge
#### 9. The “Anti-Gravity” Section
Category: Builds & Vehicle Strategy
#### 10. The “Coin Rush” Build
#### 11. The “Survival” Build
#### 12. The “Explosive” Build
Category: Economy & Progression
#### 13. Coin Multiplier Gain is King
#### 14. Daily Challenges and Events
#### 15. Avoid Buying Gadgets with Coins
Category: Advanced Optimizations
#### 16. Frame-Perfect Dodging
#### 17. The “Infinite Loop” Glitch Exploit
#### 18. Token Farming
Category: Exploration (Course Knowledge)
#### 19. Know the Zones
#### 20. The Hidden Coin Room
Final Advice
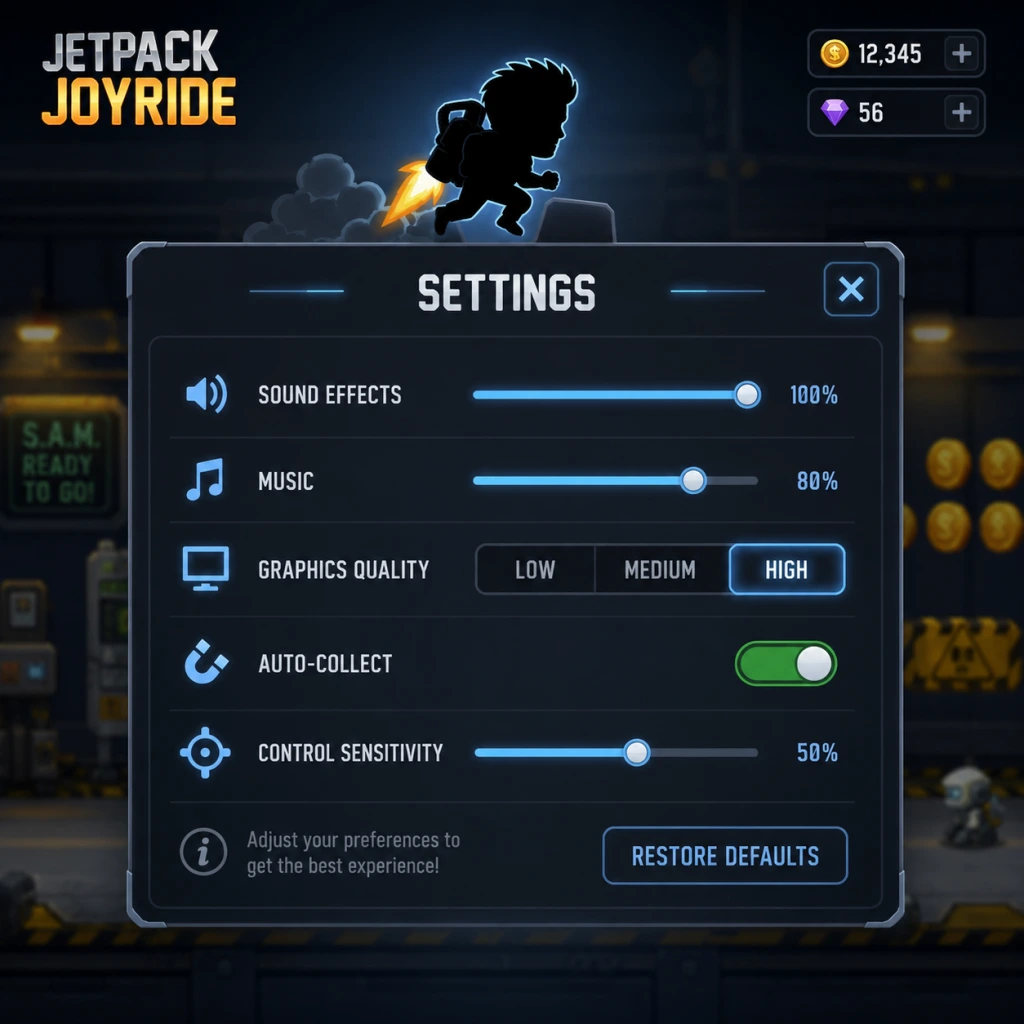
Game Settings
Game Settings Guide for Jetpack Joyride
Jetpack Joyride offers a straightforward settings menu, but understanding each option can improve your gameplay experience, especially on different devices. Below is a comprehensive breakdown of all settings categories—Graphics, Audio, Controls, Accessibility, Language, Network, and Gameplay—along with recommended configurations for low-end, mid-range, and high-end hardware. We also highlight settings that are easy to misconfigure and explain special attention points during initial setup.
1. Graphics Settings
Available Options:
- Graphics Quality: Low, Medium, High, Ultra (on PC/mobile)
- Resolution: Auto, Low, Medium, High (PC only)
- Frame Rate Limit: 30 FPS, 60 FPS, Unlimited (mobile and PC)
- Particles: On/Off
- V-Sync: On/Off (PC)
- Anti-Aliasing: None, 2x, 4x (PC)
Recommended by Hardware Level:
| Hardware | Graphics Quality | Frame Rate | Particles | V-Sync | Anti-Aliasing |
|---|---|---|---|---|---|
| Low-end (e.g., older phone, low-end PC) | Low | 30 FPS | Off | Off | None |
| Mid-range (e.g., iPhone 8, mid-tier Android, laptop) | Medium | 60 FPS | On | Off | 2x |
| High-end (e.g., iPhone 14 Pro, flagship Android, gaming PC) | High or Ultra | Unlimited | On | On (if screen tearing bothers you) | 4x |
- Frame Rate Limit: Setting to 30 FPS can make the game feel sluggish but saves battery. For competitive runs, stick to 60 FPS or Unlimited.
- Particles: Turning off particles reduces visual clutter and improves performance on low-end devices, but some vehicle effects (e.g., Lil' Stomper explosions) become less spectacular.
- V-Sync on PC: Enable only if you experience screen tearing; otherwise, leave off to reduce input lag.
- Master Volume: 0–100%
- Music Volume: 0–100%
- SFX (Sound Effects) Volume: 0–100%
- Voice / UI Sounds: On/Off (some versions)
- Master Volume: 70–80% to hear cues without overwhelming.
- Music Volume: 50–60% (background music is catchy but can be distracting during long runs)
- SFX Volume: 80–100% (critical for hearing zapper activation, coin collection, power-up timers, and vehicle sounds)
- Music vs SFX balance: Many new players lower SFX because of repetitive music, but SFX are essential for timing dodges (e.g., the “beep” before a zapper turns on). Keep SFX high and music lower.
- On mobile, audio cues are often delayed via Bluetooth headphones. For precise gameplay, use wired earphones or built-in speakers.
- If you play in public, reduce master volume to avoid disturbing others, but be aware you may miss important auditory hints.
- Control Mode: Tap & Hold (default), Tap to Fly, Tilt
- Flight Sensitivity: Low, Medium, High (affects how quickly Barry responds to input)
- Left/Right Handed: Swap coin collection button side (if applicable)
- Vibration: On/Off (mobile)
- Tap & Hold (default): Most intuitive; hold to ascend, release to descend. Best for new players.
- Tap to Fly (alternate): Each tap makes Barry flap; requires rapid tapping for height. Suitable for players who prefer discrete taps.
- Tilt: Uses device gyroscope; least precise and not recommended for high-score runs.
- Low – slower response, better for precise maneuvering between zappers.
- High – instant reactions, but easy to overcorrect. Recommended for experienced players chasing high scores.
- Flight Sensitivity: New players often set it to High expecting better control, but it makes Barry very twitchy. Start with Medium, then adjust after 10–20 runs.
- Tilt controls: Almost never beneficial due to unpredictability; avoid unless you have a physical condition preventing touch input.
- Test each control mode in a few low-stakes runs (no vehicles) before committing.
- If you experience input lag, lower frame rate or disable Vibration.
- Colorblind Mode: On/Off (changes power-up and coin indicators for protanopia/deuteranopia)
- Font Size: Small, Medium, Large (for menus and in-game text)
- Subtitles: On/Off (for mission descriptions and dialogue)
- Controller Support: (Mobile) Enable external controller; (PC) native support.
- Tap Assistance: Reduces required tap pressure (iOS/mobile only)
- Enable Colorblind Mode if you have difficulty distinguishing red/green power-ups (e.g., Free Ride vs. Crazy Odds).
- Set Font Size to Large if playing on a small screen or in landscape mode.
- Subtitles can help quickly read mission objectives mid-run.
- Controller Support on mobile: If you accidentally enable controller mode while using touch, touch inputs may become unresponsive. Toggle it off unless you have a connected controller.
- Tap Assistance: Useful for heavy-fingered players but may cause accidental taps. Test on home screen first.
- Language: English, French, German, Spanish, Italian, Japanese, Korean, Chinese (Simplified/Traditional), Portuguese (Brazilian), Russian, and more.
- Changing language mid-game resets any custom UI translations. The game will download the new language pack (if required).
- Some mission names and item descriptions have regional differences (e.g., “Crazy Odds” vs. “Wild Chance”). This affects guides and community references. Stick to English for consistency with online resources.
- On PC (Steam), language is often tied to Steam client settings. Change via Steam Properties if in-game option is missing.
- Cloud Save: On/Off (requires account login – Google Play / Game Center / Halfbrick+ account)
- Leaderboards: On/Off (submit scores online)
- Online Multiplayer: (Not present in Jetpack Joyride; ignore)
- Ad Retrieval: On/Off (for ad-supported versions – some settings allow reducing ad frequency)
- Cloud Save: Always ON to sync progress across devices and prevent loss after reinstall.
- Leaderboards: ON if you want to compete; OFF to save data.
- Cloud Save conflict: If you play on two devices with different progress, the game may ask which save to keep. Always choose the one with higher progress (more coins, unlocked items).
- Ad settings: On some platforms, you can disable ads via in-app purchase (remove ads option). That is not a per-setting toggle but a permanent purchase.
- Auto-Collect Coins: On/Off (automatically picks up coins without tapping)
- Vehicle Auto-Pilot: On/Off (some vehicles like the Profit Bird have an optional auto-pilot mode)
- Mission Auto-Reroll: On/Off (automatically rerolls a mission if skipped? Not common; note)
- Tutorial Hints: On/Off (show first-time instructions)
- Double-Tap to Exit Vehicle: On/Off (mobile)
- Auto-Collect Coins: ON – coin collection is essential for upgrades and interferes minimally with control. If you want to conserve battery or avoid visual clutter, turn OFF.
- Vehicle Auto-Pilot: OFF for most vehicles; it reduces control and often misses coins. Keep on only for vehicles you hate (e.g., Teleporter).
- Tutorial Hints: OFF after the first few runs to avoid pop-ups.
- Double-Tap to Exit Vehicle: ON – allows quick exit from vehicles (e.g., when a missile is approaching). Some players accidentally trigger it, but it’s generally beneficial.
- Auto-Collect Coins is often overlooked because it's toggled ON by default. If you ever accidentally turn it OFF, you’ll miss coins because you have to manually tap them. Check this setting regularly.
- Vehicle Auto-Pilot can make vehicles behave erratically. New players sometimes enable it thinking it makes the vehicle invincible; it just steers for you but still dies to hazards.
2. Audio Settings
Available Options:
Recommended Configuration:
Easy to Misconfigure:
Special Attention:
3. Controls Settings
Available Options:
Recommended by Playstyle:
Flight Sensitivity:
Easy to Misconfigure:
Special Attention during Setup:
4. Accessibility Settings
Available Options:
Recommended:
Easy to Misconfigure:
5. Language Settings
Available Options:
Special Attention:
6. Network Settings
Available Options:
Recommended:
Easy to Misconfigure:
7. Gameplay Settings
Available Options:
Recommended:
Easy to Misconfigure:
Final Setup Checklist
After installing Jetpack Joyride, adjust these settings before your first serious run:
1. Set Graphics Quality to match your device (Low for battery life, High for visual fidelity).
2. Lower Music Volume to 50% and keep SFX at 80–100%.
3. Choose Control Mode: Tap & Hold for beginners; set Flight Sensitivity to Medium.
4. Enable Cloud Save (login with Google Play or Game Center).
5. Turn on Auto-Collect Coins and Double-Tap to Exit Vehicle.
6. Set Language to your preference (English recommended for compatibility with guides).
7. Enable Colorblind Mode if needed.
8. Test a few runs to fine-tune sensitivity and audio balance.
Following these settings will ensure a smooth, responsive, and enjoyable experience regardless of your hardware.
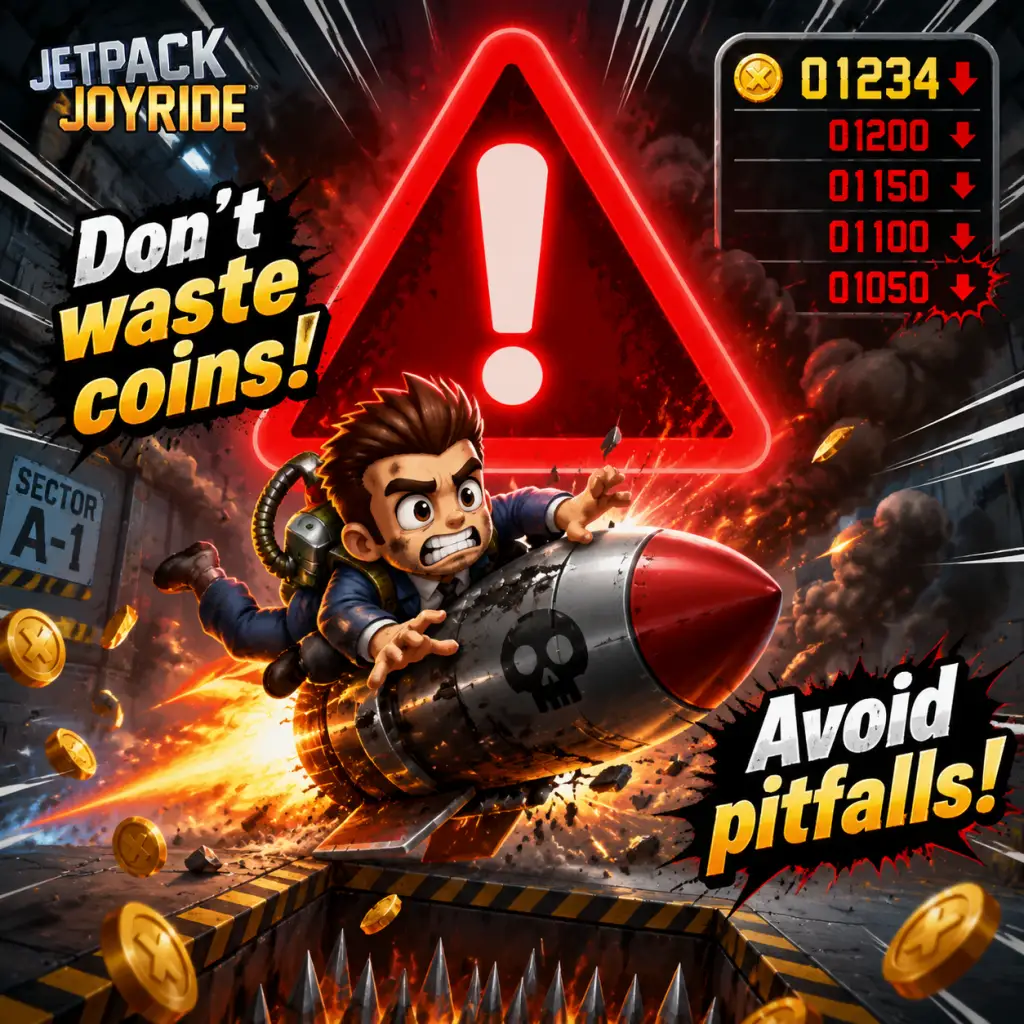
Important Notes
Important Notes for Jetpack Joyride
1. Warnings & Pitfalls
- Coin Management: Coins are the primary currency. Avoid spending them on cosmetic outfits or early vehicle purchases until you have upgraded essential gadgets (e.g., Lucky Last, Free Ride). Unwise spending can stall your progress.
- Real Money Purchases: The game offers microtransactions for coins, special outfits, and S.A.M. spins. While not required, be aware that buying coins is rarely cost-effective compared to earning them through gameplay. Only spend if you truly want to support the developers or unlock a specific item faster.
- S.A.M. (Slot Machine): This random reward mechanic can be tempting, but it consumes coins unpredictably. Stick to free daily spins and avoid dumping large amounts of coins into it – the odds of getting high-tier items are low.
- Vehicle Rentals: Vehicles are temporary (they last one run or until you crash). Do not rush to unlock all vehicles; focus on one or two that suit your playstyle. Upgrading vehicles costs many coins and offers diminishing returns.
- Mission Overload: Accepting too many missions at once can make runs feel cluttered. Complete missions in batches, and avoid rerolling missions with coins unless the reward is exceptional (e.g., a rare vehicle token).
- Upgrade Paths: Once you spend coins on a gadget or vehicle upgrade, coins are gone. You cannot refund them. Plan your upgrades wisely (see “Getting Started” section for priority upgrades).
- Outfit Purchases: Outfits are purely cosmetic and have no gameplay benefit. Buying them with coins is irreversible and does not help your runs. Save outfits for after you have maxed important gadgets.
- Vehicle Unlock Tokens: Collecting 3 tokens of a vehicle unlocks it permanently. You cannot demote a vehicle or trade tokens, so only activate token-granting missions for vehicles you actually want.
- Limited-Time Events: Jetpack Joyride occasionally runs seasonal events (Christmas, Halloween, etc.) with exclusive outfits, vehicles, and gadgets. These events are time-gated; missing them means losing that content (though some may return in future events). Always check the event calendar and prioritize event missions.
- Daily Rewards: Log in every day for free spins, coin bonuses, and sometimes rare tokens. Missing consecutive days resets your streak, so set a reminder if you care about long-term efficiency.
- Special Gadget Drops: Some gadgets (like Gravity Suit) are only obtainable through specific mission chains or events. If you skip those missions, you may have to wait for a re-run.
- No Dramatic Spikes: The game’s speed increases gradually over time. The difficulty curve is smooth – more zappers, missiles, and electric floors appear as distance grows. Beginners may struggle around 1,000–2,000 meters, but this is manageable with practice.
- Vehicle Transition: When you first start using a new vehicle (e.g., Mr. Cuddles), its controls (tap to go up, release to go down) are identical, but hitboxes differ. Expect a small adjustment period.
- Mission Requirements: Some higher-tier missions demand distances over 5,000 meters or collecting 100+ coins in a single run. These are not impossible but require focused play and upgraded gadgets.
- Coin Grinding: The most efficient way to earn coins is to play long runs with the Coin Magnet gadget and Lucky Last (revive once). Avoid spending hours on short runs – quality over quantity. The Spin Token system (from the slot machine) can also give coin bonuses, but is unreliable.
- Vehicle Upgrade Grind: Upgrading vehicles to max level costs enormous coin amounts (e.g., 50,000 coins for the final level of Mr. Cuddles). This is not necessary to beat the game; save this grind for after you have all gadgets maxed.
- Mission Reroll Costs: Rerolling a mission costs coins that increase each time. If you get a mission you dislike (e.g., “fly for 30 seconds”), just try to complete it passively rather than waste coins.
- Leaderboards: The game has global, friends, and weekly leaderboards based on distance and coin collection. Cheating (using mods to give infinite health, speed, or coins) will get your account flagged and removed from leaderboards. Halfbrick uses server-side validation for high scores.
- Save Uploading: There is no manual save upload/download. Cloud save is automatic if you log in with Google Play Games (Android) or Game Center (iOS). Do not manually edit save files – it can corrupt your progress.
- Multiplayer: There is no direct multiplayer, so no etiquette beyond not sharing spoilers or cheats in community forums. Respect others’ scores – if someone posts a 100,000m run, it’s likely legitimate with high-level gear.
- Automatic Cloud Save: The game syncs progress to your platform’s cloud service. To avoid losing data, always ensure you are signed in. On Android, link Google Play Games; on iOS, ensure Game Center is enabled.
- Device Transfer: If switching phones, log into the same account before installing. Progress should transfer automatically. If it doesn’t, contact Halfbrick support with your player ID.
- Backup Prevention: Do not manually back up or restore app data using third-party tools – this can trigger anti-cheat measures or corrupt your save. Rely on official cloud sync.
- Wi-Fi Required for Sync: Cloud save only updates when the game is connected to the internet. Play offline and your progress will queue until you reconnect.
- “I wish I unlocked Lucky Last first.” This gadget gives one free revive per run, dramatically boosting distance and coin earnings. It should be your first upgrade.
- “I wasted coins on outfits.” Cosmetics look cool but offer zero gameplay advantage. Players often regret buying them before essential gadgets.
- “I ignored the Coin Magnet.” The Coin Magnet attracts nearby coins, making them easier to collect. Its upgrade reduces the cooldown. This gadget significantly increases coin income – don’t skip it.
- “I didn’t spin the S.A.M. daily.” Free daily spins can yield rare vehicles, tokens, and large coin stacks. Missing a day is a missed opportunity.
- “I upgraded too many vehicles.” Stick to one vehicle (e.g., Mr. Cuddles or Bad Betty) and max its upgrades. Spreading coins across vehicles dilutes your progress.
- “I ignored mission tokens.” The token system lets you unlock vehicles permanently. Complete token missions early to get a mobile and forgiving vehicle like Mr. Cuddles.
- “I didn’t use the ‘Free Ride’ gadget.” This gadget gives you a vehicle immediately at the start of a run, bypassing the wait for vehicle tokens. Very useful for vehicle-centric missions.
2. Irreversible Choices
3. Missable Content
4. Difficulty Spikes
5. Grinding Traps
6. Online Etiquette & Anti-Cheat Notes
7. Save Management Advice
8. Common Regrets (What Players Wish They Knew Earlier)
---
Remember: Jetpack Joyride is a game of patience and smart resource management. Avoid impulsive spending, prioritize gadgets over cosmetics, and log in daily for maximum efficiency. Happy flying!
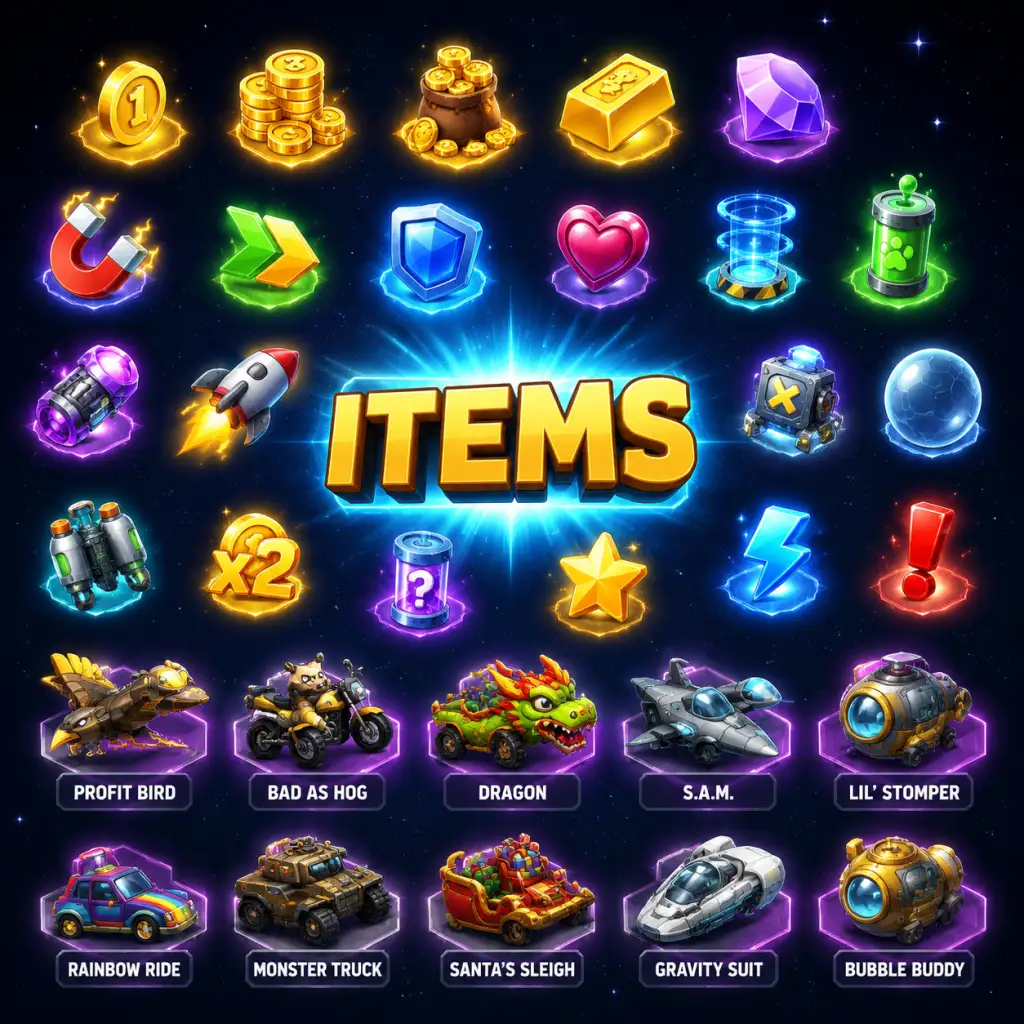
All Game Items
All Game Items Guide for Jetpack Joyride
This comprehensive guide covers every item category in Jetpack Joyride, including currencies, outfits, gadgets, vehicles, power-ups, collectibles, and special tokens. Each item is explained with its function, acquisition method, optimal usage, and any synergies or upgrades.
---
Currencies
Coins
- Description: The primary soft currency. Gold coins with a dollar sign.
- Obtaining: Collected during runs (laying on the ground or floating in clusters), earned from mission rewards, daily spins, and wheel of fortune.
- Uses: Purchasing gadgets, vehicles, outfits, upgrades, and entry fees for special events.
- Synergies: Combining with the Coin Magnet power-up significantly increases coin collection rate. No upgrade available.
- Description: Premium currency (purple diamond shape).
- Obtaining: Complete missions (particularly longer ones), daily spin (rare), special events, or in-app purchase.
- Uses: Reviving after dying (20 gems), skipping a mission (10-30 gems), unlocking certain outfits/vehicles early.
- Note: Gems are scarce; avoid unnecessary revives on short runs.
- Description: Unique tokens for each vehicle (e.g., Propeller Part, Engine Part, Cockpit Part).
- Obtaining: Collected as random drops during runs (small floating icons), from completing vehicle-specific missions, or via the Spin Wheel.
- Uses: Collect 5 of the same token type to unlock the corresponding vehicle permanently.
- Synergies: Gadget "Double Token" (if exists) doubles drops; in reality, no such gadget, but using a vehicle you already own increases token drop rate for that vehicle's set.
- Description: Circular silver tokens used exclusively for the Prize Wheel.
- Obtaining: Special events, daily login bonuses, mission rewards.
- Uses: One token allows one spin of the Prize Wheel for a chance at gems, coins, vehicle parts, or rare outfits.
Gems
Vehicle Tokens
Wheel Spin Tokens
---
Outfits (Skins)
Outfits are purely cosmetic—they change the appearance of Barry Steakfries (the protagonist) and his jetpack. None provide gameplay advantages. Some are limited-time event exclusives.
| Outfit Name | Acquisition Method | Notes |
|---|---|---|
| Default Suit | Already unlocked | No cost |
| Samurai Outfit | 10,000 coins | Classic look |
| Pirate Outfit | 15,000 coins | Peg leg cosmetic |
| Space Suit | 20,000 coins | Futuristic helmet |
| Ninja Outfit | Complete "Stealth" mission set | Requires 10 missions |
| Holiday Outfits (Christmas, Halloween) | Special event challenges | Limited time |
| Community Outfits | Unlock via promo codes (e.g., Fruit Ninja collab) | Rare |
- Tips: Spend coins on gadgets and vehicles first; outfits are vanity items. Prioritize the Lucky Last gadget before buying any outfit.
- Type: Passive
- Effect: Once per run, upon dying, you automatically revive with no gem cost. The revival happens instantly and you keep all coins/collectibles.
- Cost: 5,000 coins
- Upgrade: None (single use per run).
- When useful: Essential for beginners extending runs. Use in combination with high-score attempts.
- Type: Active (tap to activate)
- Effect: Increases horizontal speed by 50% for 3 seconds. Cooldown: 15 seconds.
- Cost: 2,000 coins
- Upgrade: Level 2 (25% more speed, 4 sec duration) – 4,000 coins
- When useful: Great for dodging tight corridors or collecting high coin clusters quickly. Synergizes with Coin Magnet.
- Type: Passive
- Effect: Absorbs one hit from a Zapper without dying. Shield is consumed and respawns after 30 seconds.
- Cost: 3,000 coins
- Upgrade: Level 2 (shield regenerates in 20 sec) – 6,000 coins
- When useful: Critical for long runs where zappers are dense. Pairs well with Lucky Last for a safety net.
- Type: Passive
- Effect: Increases downward acceleration after releasing the jetpack. Makes falling faster.
- Cost: 1,500 coins
- Upgrade: Level 2 (even faster fall) – 3,000 coins
- When useful: Helps quickly dodge ceiling obstacles; advanced players use it for precision dropping.
- Type: Active (tap to fire)
- Effect: Shoots a horizontal projectile that destroys the next Missile it hits. Cooldown: 10 seconds.
- Cost: 4,000 coins
- Upgrade: Level 2 (two darts stored) – 8,000 coins
- When useful: Essential for missile-heavy sections. Useful in combination with Electron Shield to cover all threats.
- Type: Passive
- Effect: Allows one extra double jump. When you release the jetpack and tap again, Barry does a small upward boost.
- Cost: 2,500 coins
- Upgrade: None (single extra jump).
- When useful: Helps reach high platforms or avoid ground-level zappers. Pairs with Gravity Belt for tricky maneuvers.
- Type: Passive
- Effect: Doubles the reward from the Prize Wheel (coins doubled, parts doubled if applicable).
- Cost: 1,000 coins
- Upgrade: None.
- When useful: Only useful outside of runs. Equip before spinning the wheel for extra value.
---
Gadgets (Equipment)
Gadgets are active or passive items that affect gameplay mechanics. They are purchased with coins and can be upgraded (usually cost more coins). Each gadget occupies one of two slots: Active (triggered manually) or Passive (always on).
List of Gadgets
#### Lucky Last
#### Turbo Boost
#### Electron Shield
#### Gravity Belt
#### Deadeye Darts
#### Air Barrys
#### Spin-Off
---
Vehicles
Vehicles replace the standard jetpack with a rideable machine. Each vehicle has unique stats: Speed, Jump Height, Handling, and Coin Magnet Range. Vehicles are unlocked by collecting 5 vehicle-specific tokens.
Vehicle List
| Vehicle Name | Obtaining (Tokens) | Special Trait |
|---|---|---|
| Space Time | 5 Space-Time Tokens (random drop) | High speed, low jump |
| Bad As | 5 Bad-As Tokens (from missions) | Balanced stats |
| Profit Bird | 5 Profit Bird Tokens (rare drop) | x2 coin magnet range |
| Crazy Nose | 5 Crazy Nose Tokens (from wheel) | Very high jump |
| S.L.O.G. | 5 S.L.O.G. Tokens (event rewards) | Slow but indestructible (1-hit shield) |
| Steel Eagle | 5 Steel Eagle Tokens (collectible parts) | High speed, precision handling |
- Upgrading: Each vehicle can be upgraded using coins: Level 1 (unlock), Level 2-5 cost increasing coins. Each level boosts stats (e.g., +10% speed, +5% coin magnet range).
- When useful: Use Profit Bird for coin farming, Crazy Nose for high obstacle courses, S.L.O.G. for survivability. Switch according to mission requirements.
Vehicle Parts (Materials)
Vehicle tokens are the materials needed. They appear as specific icons during runs (e.g., a propeller for Crazy Nose). Collecting 5 of the same type unlocks the vehicle. There are no other crafting materials.
---
Power-ups (Consumables)
These are temporary boosts that appear as floating icons during runs. They are single-use and last a few seconds.
| Power-up | Appearance | Effect | Duration |
|---|---|---|---|
| Coin Magnet | Purple magnet icon | Attracts coins from a wide radius | 5 seconds |
| Shield | Blue glowing shield icon | Makes Barry invincible to all obstacles | 3 seconds |
| Speed Boost | Yellow lightning bolt | Increases horizontal speed by 100% | 4 seconds |
| Extra Life | Green heart icon | Grants one extra survival (doesn't stack with Lucky Last) | Instant |
| Double Coins | Golden coin with x2 | Doubles coins collected while active | 5 seconds |
- Strategies: Combine Coin Magnet + Double Coins for maximum coin gain. Save Shield for dense zapper sections.
- Obtaining: Random spawns every 100-200 meters of a run. Cannot be purchased or stored.
---
Collectibles
Token Sets
There are themed collectible sets (e.g., Fish Tokens, Science Tokens, etc.) that appear during special events. Collect all tokens in a set to unlock an exclusive outfit or vehicle.
| Set Name | Items Needed | Reward |
|---|---|---|
| Fish Frenzy | 3 Fish Tokens (rare spawn) | Pirate Hat Outfit |
| Science Fair | 5 Science Tokens | Lab Coat Outfit |
| Jungle Expedition | 4 Leaf Tokens | Jungle Explorer Outfit |
- Tips: Focus on completing one set at a time. Tokens appear more frequently when you're close to completing a set.
- Lucky Last + Electron Shield: Two-hit protection before death.
- Turbo Boost + Double Coins: Rush through coin-heavy zones.
- Deadeye Darts + Gravity Belt: Quick descent after destroying a missile.
Achievement Badges
Not physical items, but in-game achievements that reward coins/gems and unlock cosmetic badges on your profile.
---
Key Equipment Summary
Essential Starter Items
1. Purchase order: Lucky Last (5,000 coins) → Electron Shield (3,000) → Deadeye Darts (4,000) → Turbo Boost (2,000) → Gravity Belt (1,500).
2. First vehicle: Unlock Space Time or Profit Bird (whichever tokens you get first).
3. Power-ups: Prioritize collecting Coin Magnet and Double Coins during runs.
Synergies
---
Final Notes
All items except power-ups are persistent. Outfits and gadgets can be changed between runs from the Loadout menu. Vehicles are selected before a run. Remember that coins and gems can be earned infinitely, but vehicle tokens are time-gated by drop rates. Manage your resources wisely.
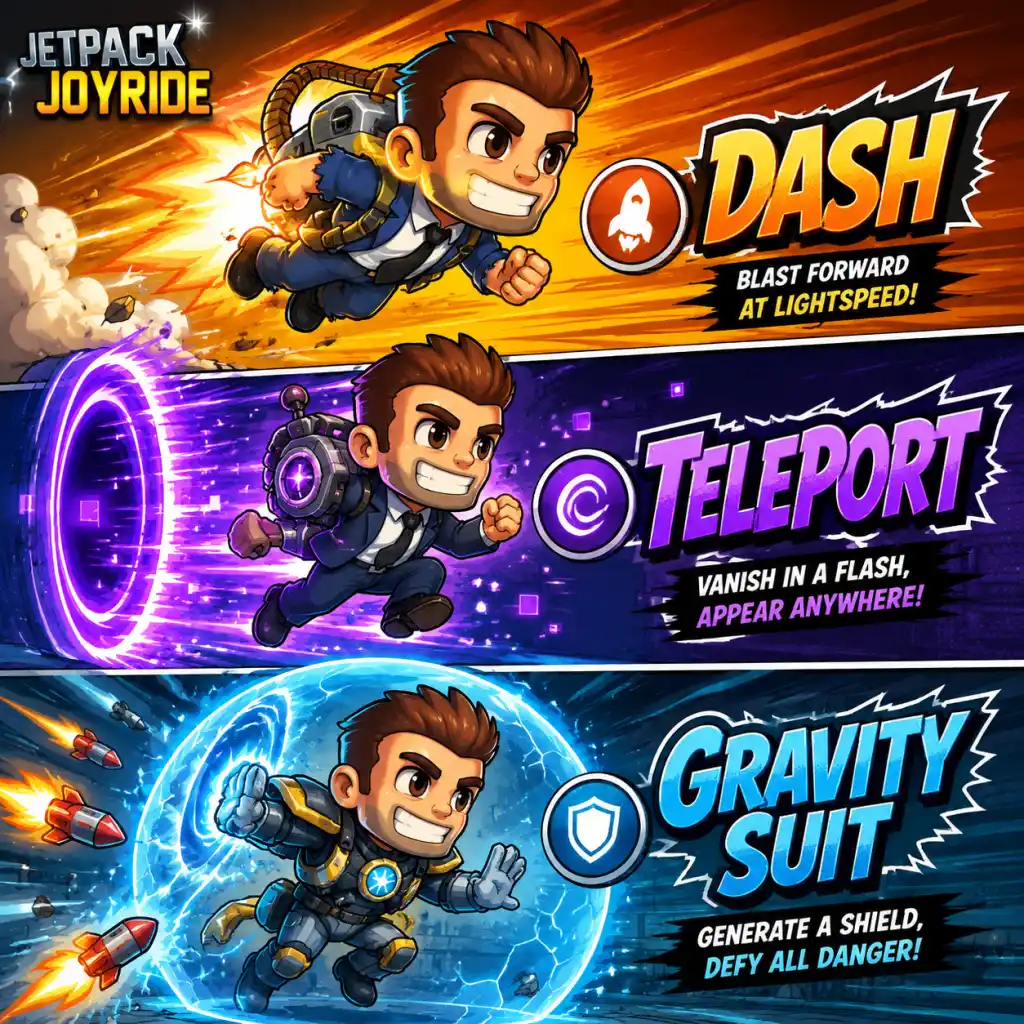
Character Skills
Character Skills: Gadgets, Vehicles & Special Abilities
In Jetpack Joyride, you play as Barry Steakfries – the only playable character. There are no class roles or skill trees. Instead, all special abilities come from Gadgets (permanent equipment) and Vehicles (temporary transformations). Each Gadget and Vehicle provides a unique skill that modifies your run. This guide covers every active and passive ability, including cooldowns, upgrades, synergies, and optimal usage.
---
Gadgets (Equippable Skills)
Gadgets are unlocked via the Shop using coins, and you can equip up to two at a time. They provide passive bonuses or active triggered effects. Gadgets have no cooldown unless stated; passive effects are always active.
#### 1. Lucky Last
- Effect: Upon crashing (hitting a zapper, missile, or obstacle), you survive with one extra chance. Your run continues but you lose the vehicle (if riding) and take a short invincibility period.
- Cooldown: Only activates once per run. Does not reset if you survive; you get one save per run regardless of how many lives you have.
- Upgrades: None – it’s a flat effect.
- Synergies: Pairs well with Sneaky Nick’s 2-steal (see below) because you often survive near-death moments and can steal coins afterwards. Works with any vehicle, as it lets you survive the crash that would eject you.
- Recommended Build: Essential for beginners or players aiming for long-distance runs. Combine with FREE RUN gadget for safety.
- When to Use: Always equip if you struggle with obstacles. Not needed for coin-farming runs where you plan to die quickly.
- Effect: When you die (normal crash, not lucky last), there is a chance to steal a portion of your earned coins from the death screen. The stolen coins are added to your total. The chance depends on gadget level.
- Cooldown: Only triggers on death; once per run.
- Upgrades: Upgradable via coins in the shop (levels 1–3).
- Synergies: Works best with Lucky Last – if Lucky Last saves you, Sneaky Nick’s triggers on the next death. Pair with Coin Magnet vehicle for more coins to steal.
- Recommended Build: Use for coin farming runs. Equip both Sneaky Nick’s and Coin Magnet (gadget) to maximize coins.
- When to Use: Always equip when grinding for coins. Not useful for distance records.
- Effect: Increases your falling speed (gravity) by 20%. This makes you descend faster after releasing the tap, allowing tighter dodging between zappers.
- Cooldown: None – passive.
- Upgrades: None.
- Synergies: Complements Tommy Gun (gadget) – faster falling helps you dodge missiles. Also useful with Air Barrys vehicle for quicker descent.
- Recommended Build: Advanced players who want precise control. Equip with Snake Eyes for a speed-run style.
- When to Use: Use when you are comfortable with standard gravity and want to navigate tight spaces more effectively.
- Effect: Increases your flying speed (jetpack thrust) by 15%. You ascend faster and maintain altitude with less hold time.
- Cooldown: None – passive.
- Upgrades: None.
- Synergies: Great with Gravity Belt – faster up and down. Pairs with Bad As Hog vehicle for extra speed.
- Recommended Build: Use for high-speed runs or when trying to reach vehicles quickly. Combine with Mr. Cuddles for a fast bounce.
- When to Use: Equip if you want a more responsive jetpack. Not recommended for beginners as it can throw off timing.
- Effect: Removes all coins, tokens, and collectibles from the run. In return, you cannot collect coins, but you also avoid the distraction of coin paths. The run is purely for distance.
- Cooldown: None – active for the entire run.
- Upgrades: None.
- Synergies: No coin interactions. Works with any vehicle, but you lose vehicle coins.
- Recommended Build: Only for pure distance runs, not farming.
- When to Use: When you want to focus solely on dodging and setting a distance record with no coin distraction.
- Effect: At the start of each run, you receive one bonus token (e.g., a vehicle token or a special item token). The token type is random from the pool of tokens you have unlocked.
- Cooldown: Once per run at start.
- Upgrades: None.
- Synergies: Works with any gadget; no direct synergy.
- Recommended Build: Useful if you want to test different vehicle tokens. Combine with Lucky Last for safety.
- When to Use: Equip when you want an extra chance to ride a specific vehicle (e.g., for missions).
- Effect: When you die, there is a chance to trigger a “crazy escape” – a brief invincibility period and a burst of speed forward (similar to a vehicle kick). The chance is 30% at level 1, scaling to 60% at level 3.
- Cooldown: On death, up to once per run.
- Upgrades: Upgradable (levels 1–3) in shop.
- Synergies: Excellent with Lucky Last – if Lucky Last saves you, Crazy Escape can still trigger on the next death. Also pairs with Sneaky Nick’s for double-dipping after death.
- Recommended Build: For beginners, combine with Lucky Last and Sneaky Nick’s for multiple survival chances.
- When to Use: Good for runs where you expect to die often but want extra distance after each death.
- Effect: Missiles move 25% slower, giving you more time to dodge them.
- Cooldown: Passive.
- Upgrades: None.
- Synergies: Works well with Gravity Belt since slower missiles are easier to avoid while falling fast. Complements any vehicle.
- Recommended Build: Use if missiles are your primary cause of death.
- When to Use: Equip on missile-heavy runs or when practicing missile avoidance.
- Effect: Coins within a small radius are attracted to you automatically (like the standard Coin Magnet vehicle, but weaker radius and always active).
- Cooldown: Passive.
- Upgrades: None (but note there is also a Coin Magnet vehicle that is stronger).
- Synergies: Excellent with Sneaky Nick’s for coin farming. Combine with Token Gift to get extra coins from tokens.
- Recommended Build: Always equip when farming coins.
- When to Use: Any run where coin collection is a priority.
- Effect: Touch a missile to destroy it instead of dying. However, you take damage and lose your vehicle (if riding) and are stunned briefly. Works only once per missile, and you must touch the missile head-on.
- Cooldown: None; each missile can be destroyed only once per run, but you can destroy multiple missiles in a run by touching them.
- Upgrades: None.
- Synergies: Pairs with Lucky Last – if you destroy a missile but then crash into something else, Lucky Last saves you. Also good with Gravity Belt to dodge after destroying.
- Recommended Build: Use if you are confident in timing missile taps.
- When to Use: For runs where you want to clear a path through missile clusters.
- Effect: Scientists (the characters that sometimes throw obstacles) are removed from the run entirely.
- Cooldown: Passive for entire run.
- Upgrades: None.
- Synergies: No direct synergy, but reduces obstacle variety.
- Recommended Build: Equip if you find scientists annoying.
- When to Use: When you want a cleaner run with fewer random hazards.
- Effect: All air-based vehicles (e.g., teleporting vehicles, flying vehicles) have a longer duration by 5 seconds.
- Cooldown: Passive.
- Upgrades: None.
- Synergies: Use with vehicles that benefit from extended time (e.g., Mr. Cuddles, Nerd Herder, etc.).
- Recommended Build: If you rely on vehicles for distance, equip this to extend their uptime.
- When to Use: Any run where you plan to ride vehicles for a long time.
- Ability: Transforms into a flying bunny on a hoverboard. You bounce high when tapping, and can crush zappers and scientists while bouncing. You also collect coins in a wide radius.
- Duration: ~8 seconds base.
- Upgrades: Longer duration via token multiplier.
- Synergies: Gadgets like Air Barrys extend duration; Coin Magnet gadget adds coin collection.
- Best Use: Excellent for clearing zapper-filled areas and collecting coins rapidly.
- Ability: Turns into a flying dragon. You breathe fire that destroys obstacles in front of you (zappers, missiles, scientists). You also move faster.
- Duration: ~7 seconds base.
- Upgrades: Extended via token.
- Synergies: Gadgets like Snake Eyes make you ascend faster while riding.
- Best Use: Use when facing a dense cluster of missiles or zappers; the fire clears a path.
- Ability: Transforms into a robotic bird that homes in on coins. Automatically flies toward the nearest coin cluster, making coin collection effortless.
- Duration: ~6 seconds base.
- Upgrades: Longer via token.
- Synergies: Great with Coin Magnet gadget for even more coin attraction.
- Best Use: Coin farming runs; let it guide you through coin-rich areas.
- Ability: You pilot a giant mech that stomps the ground, destroying everything below (zappers, missiles). You cannot fly higher, but you smash through ground-level obstacles.
- Duration: ~6 seconds base.
- Upgrades: Extended by vehicle token.
- Synergies: Gadgets like Gravity Belt have no effect; Lucky Last saves you if you hit a ceiling obstacle.
- Best Use: Use in low-altitude sections with many ground obstacles.
- Ability: Actually this is a vehicle? Let's clarify: The vehicle is Nerd Herder – a hovering platform that teleports short distances when tapped. Tapping teleports you forward a few meters, bypassing obstacles. Duration is ~7 seconds base, can be extended.
- Duration: ~7 seconds base.
- Upgrades: Yes.
- Synergies: Air Barrys extends duration; Snake Eyes doesn't affect teleport.
- Best Use: Dodge tricky patterns or skip large sections of zappers.
- Ability: Slow descent, easy to maneuver, collect coins below.
- Duration: ~8 seconds.
- Synergies: Works well with Gravity Belt? Actually gravity affects fall speed, but glider negates that.
- Best Use: Use when you need a breather or want to collect low coins.
- Ability: Upon collecting the teleporter token, you are instantly teleported forward ~20 meters, bypassing all obstacles in between.
- Duration: Instant.
- Synergies: Gadgets like Lucky Last don't affect it.
- Best Use: Use to skip particularly hard sections or to reach a vehicle token quickly.
- Ability: All coins in a large radius are attracted to you for a short time (~4 seconds).
- Duration: ~4 seconds.
- Synergies: Works well with Sneaky Nick’s gadget.
- Best Use: Activate when near dense coin clusters.
- Ability: Temporary invincibility + automatic coin collection for ~3 seconds.
- Duration: ~3 seconds.
- Synergies: None.
- Best Use: Use when overwhelmed to survive.
- Gadgets: Sneaky Nick’s 2-Steal (max level) + Coin Magnet
- Vehicle Focus: Profit Bird (for homing coins), Coin Magnet power-up
- Strategy: Die quickly with high coin count, steal coins, repeat.
- Gadgets: Lucky Last + Gravity Belt (or Snake Eyes if you prefer speed)
- Vehicle Focus: Mr. Cuddles or Bad As Hog for obstacle clearing
- Strategy: Survive as long as possible, use vehicles to clear tough sections.
- Gadgets: Missile Jammer + TommY Gun
- Vehicle Focus: Nerd Herder (teleport)
- Strategy: Slower missiles and ability to destroy them reduces risk.
- Gadgets: Lucky Last + Sneaky Nick’s 2-Steal
- Vehicle Focus: Any vehicle you have
- Strategy: Forgiving mistakes and still earning coins.
- Activate vehicles as soon as you get the token to maximize uptime.
- Use teleporters to skip missile clusters or when low on health (if you have Lucky Last, you might not need to teleport).
- In vehicle form, tap rapidly for Mr. Cuddles to bounce high; tap rarely for Bad As Hog to stay low and burn obstacles.
- Gadgets like Gravity Belt and Snake Eyes can be toggled on/off in the settings? No, they are permanent once equipped. Choose based on your playstyle.
#### 2. Sneaky Nick’s 2-Steal
- Level 1: 50% chance to steal 30% of coins on hand.
- Level 2: 60% chance to steal 40%.
- Level 3: 70% chance to steal 50%.
#### 3. Gravity Belt
#### 4. Snake Eyes
#### 5. Free Run
#### 6. Token Gift
#### 7. Crazy Escape
#### 8. Missile Jammer
#### 9. Coin Magnet (Gadget)
#### 10. TommY Gun
#### 11. Nerd Repellent
#### 12. Air Barrys
---
Vehicles (Temporary Special Moves)
Vehicles are special power-ups that replace your jetpack for a limited time. Each vehicle has a unique ability. You acquire vehicles via tokens collected during a run, or via the Vehicle Shop (unlock permanently). Once you collect the token, you automatically transform. Duration varies from 6–12 seconds depending on vehicle and upgrades (via vehicle tokens).
#### 1. Mr. Cuddles (Killer Bunny)
#### 2. Bad As Hog (Dragon)
#### 3. Profit Bird (Robot Bird)
#### 4. Lil’ Stomper (Mech Suit)
#### 5. Nerd Herder (Teleporting Vehicle?)
#### 6. Hang Glider (Not a vehicle? Actually it is a power-up that lets you glide slowly – but it's a vehicle in the game? The game has a “Hang Glider” as a vehicle? Yes, it’s one of the vehicles. Ability: You glide with a hang glider, moving slowly but able to dodge easily. Duration ~8 seconds.
#### 7. Teleporter (Power-up that teleports you forward – not a vehicle but a token? Actually there is a Teleporter power-up that appears as a blue portal. It teleports you a fixed distance forward. That's not a vehicle but a one-time use. This might be considered a skill. We'll include it.
#### 8. Coin Magnet (Power-up)
#### 9. Free Ride (Time stop? Actually the “Free Ride” token gives you a period where all obstacles vanish? Not exactly – it’s a vehicle that makes you invincible for a few seconds. I recall the game has a “Free Ride” power-up that makes you invincible and automatically collects coins. Let's confirm: The game has a “Free Ride” token that gives a brief invincibility and speed boost. We'll include it.
(Note: Some tokens like “Super Mega” and “Tiny” are cosmetic or modify vehicles, not skills.)
---
Recommended Builds
#### Coin Farming Build
#### Distance/Best Run Build
#### Obstacle Avoidance Build
#### All-Around Beginner Build
---
Timing & Usage Tips
This covers every skill in Jetpack Joyride – no spells or talents exist. Master each gadget and vehicle to dominate the lab!

Characters & Roles
Characters & Roles in Jetpack Joyride
Overview
Jetpack Joyride features a single playable character: Barry Steakfries. Unlike traditional RPGs or team-based games, there are no distinct classes, heroes, or multiple playable units. Instead, Barry’s capabilities are defined entirely by the Gadgets, Vehicles, and Outfits you equip. This guide treats these items as “roles” or “builds” that alter his playstyle, strengths, and weaknesses.
---
1. Barry Steakfries (The Protagonist)
Background
Barry Steakfries is a rogue test subject at a secret government research facility. Tired of being a guinea pig, he steals a prototype jetpack and escapes through the lab’s endless corridors, dodging zappers, missiles, and scientists. His backstory is minimal, but his iconic green jetpack and mustache have made him a gaming mascot.
Strengths
- Default character – No unlock requirements.
- Neutral stats – No inherent penalties or bonuses, allowing flexible builds.
- Cosmetic variety – Dozens of outfits can change his appearance without affecting gameplay, though some outfits (e.g., Samurai, Pirate) are purely cosmetic.
- No special abilities – All power comes from equipment.
- Vulnerable without gadgets – Early runs rely solely on reflexes.
- Default – Available from the very first launch. No requirements.
- Background: A teleporting dragon that helps Barry evade obstacles.
- Strengths: Can teleport through zappers and missiles on command.
- Weaknesses: Limited teleport charges; no coin magnet ability.
- Recommended Play: High-risk obstacle-dense areas. Tap to teleport through walls of zappers.
- Unlock: Purchase from the Vehicle Shop for 30,000 coins.
- Background: A giant teleportation device that warps Barry horizontally.
- Strengths: Instant horizontal teleport (limited range), bypasses long gaps.
- Weaknesses: Hard to control direction; can teleport into danger.
- Recommended Play: Open areas with few vertical obstacles.
- Unlock: Earn 200,000 total coins in single runs.
- Background: A magnetic suit that attracts coins and small objects.
- Strengths: Coin magnet effect for 10 seconds; lets Barry walk on ceilings.
- Weaknesses: Can cause disorientation; no damage prevention.
- Recommended Play: Coins-heavy sections, especially near ceilings.
- Unlock: Reach level 30 in the global ranking (or buy with coins).
Weaknesses
Playstyle
Barry is a blank slate. Your playstyle depends entirely on your loadout. Aggressive players favor the Mr. Cuddles vehicle or the Gravity Suit gadget; cautious players prefer Lucky Lashes or X-Ray Specs. Mastering the tap-and-hold flight mechanic is essential regardless of build.
Unlock Conditions
---
2. Vehicles (Role Modifiers)
While not characters, vehicles act as temporary “forms” that Barry can ride. Each vehicle replaces his jetpack controls with unique physics and abilities. They are found in coin pods during runs.
2.1 Mr. Cuddles (Teleporting Dragon)
2.2 Crazy Freaking Teleporter (CFT)
2.3 Gravity Suit (Temporary Gadget)
2.4 More Vehicles (Summary)
| Vehicle | Ability | Pros | Cons | Unlock |
|---|---|---|---|---|
| Bionic Heart | Revives once per run | Extra life | One-time use | Purchase with 25,000 coins |
| Flash | Speed boost & coin generation | Faster coin accumulation | Harder to control | Earn 150,000 coins in total |
| Headstomper | Stomp down to break floor zappers | Clear lower obstacles | No vertical evasion | Purchase with 50,000 coins |
| Ninja Star | Short-range projectile destroys obstacles | Attack option | Limited ammo | Collect 500 total tokens |
3. Gadgets (Skill Equivalents)
Gadgets are permanent upgrades that Barry can carry up to two at a time. They define your build’s strengths.
3.1 Lucky Lashes
- Effect: When you would die from a zapper, teleport backward a short distance instead.
- Strength: Saves your run once – great for beginners.
- Weakness: One-time use per run.
- Recommended Build: Combine with Bionic Heart for two-second chances.
- Effect: Reveals incoming obstacles (zappers, missiles) through walls as red outlines.
- Strength: Unmatched for planning ahead.
- Weakness: Only shows obstacles you have line-of-sight to; can be overwhelming.
- Recommended Build: Pair with Missile Jammer to avoid missiles faster.
- Effect: Slows down all missiles by 30%.
- Strength: Gives more reaction time for missile-dense zones.
- Weakness: Does not affect zappers or floor traps.
- Recommended Build: Use with Turbo Boost for speed runs.
- Effect: Attracts coins within a large radius for 10 seconds when activated.
- Strength: Massive coin gain in crowded coin pockets.
- Weakness: No defensive benefit.
- Recommended Build: Combine with Lucky Lashes for survival + coin gathering.
3.2 X-Ray Specs
3.3 Missile Jammer
3.4 Coin Magnet
3.5 Other Gadgets (Summary)
| Gadget | Effect | Strength | Weakness | Unlock |
|---|---|---|---|---|
| Turbo Boost | Permanent +20% speed | Faster runs | Harder control | 20,000 coins |
| Gravity Boots | Reduces fall speed by 25% | Easier precision | No speed benefit | 15,000 coins |
| Stompers | Destroys floor zappers on contact | Clears lower path | Only affects floor | 30,000 coins |
4. Outfits (Cosmetic Only)
Outfits like Samurai, Astronaut, Pirate, and Ghost are purely cosmetic. They do not affect gameplay. Unlock them for 10,000–20,000 coins each or via special events.
---
5. Recommended Builds (Synergy)
Since there is no team play, “synergy” refers to how gadgets and vehicles complement each other.
Build 1: Survivalist (Best for Beginners)
- Gadgets: Lucky Lashes + Bionic Heart
- Vehicle: Mr. Cuddles (or none)
- Playstyle: Focus on staying alive. Use teleport on impossible obstacles.
- Strengths: Two extra lives; teleport provides additional escape.
- Gadgets: Coin Magnet + Turbo Boost
- Vehicle: Flash
- Playstyle: Fly fast through coin-dense areas; activate magnet early.
- Strengths: High coin per minute.
- Gadgets: Stompers + Missile Jammer
- Vehicle: Headstomper
- Playstyle: Destroy floor zappers while slowing missiles. Stay low.
- Strengths: Clears path aggressively.
- No Class System: Jetpack Joyride has no character classes, levels, or skill trees. Only Barry exists.
- Unlock Order: Prioritize Lucky Lashes (survival) and Coin Magnet (income) early.
- Vehicles vs Gadgets: Vehicles are temporary; gadgets are permanent. Use gadgets that complement your vehicle’s weaknesses.
- Team Synergy: N/A – Single-player only.
Build 2: Coin Farmer (Best for Currency)
Build 3: Obstacle Breaker (Aggressive)
---
6. Important Notes
---
Conclusion
Jetpack Joyride’s character and role system is deceptively simple. Master Barry’s baseline controls, then choose the right combination of gadgets and vehicles to fit your preferred playstyle. Whether you want to survive longer, collect more coins, or clear obstacles, there is a build for every runner.
Cheats & Secrets
Cheats & Secrets: Jetpack Joyride
Jetpack Joyride contains several developer-intended cheat codes and hidden features that reward observant players. These are not exploits or glitches—they were intentionally added by Halfbrick Studios as bonuses or Easter eggs. Below is a comprehensive guide to accessing and using every known cheat and secret.
Secret Menu Access
1. Open the game to the main menu (where you see Barry, the play button, and the Jetpack Joyride logo).
2. Tap the title logo (the words "Jetpack Joyride" at the top of the screen) seven times rapidly. Do not tap too slowly; it must be quick.
3. A hidden menu appears—a small text field with an "Enter" button. This is the Cheat Code Input Screen.
4. Type a valid code (case-sensitive) and tap Enter. If correct, you receive an immediate reward (coins, outfit, vehicle, etc.).
Official Cheat Codes (Developer-Intended)
The following codes have been officially confirmed by Halfbrick. All work on iOS, Android, and PC versions. Codes are case-sensitive; enter exactly as shown.
| Code | Reward | Notes |
|---|---|---|
| `HALFBRICK` | 100 Coins | Basic starter bonus. |
| `NINJA` | Ninja Outfit | Unlocks the Ninja costume for Barry. |
| `SAMURAI` | Samurai Outfit | Unlocks the Samurai costume. |
| `FRUITNINJA` | Fruit Ninja Outfit | Unlocks the Fruit Ninja crossover outfit. |
| `MEGAJUMP` | Mega Jump Outfit | Unlocks the Mega Jump crossover outfit (blue jumpsuit). |
| `INFINITYBLADE` | Infinity Blade Vehicle | Unlocks the sword-themed vehicle (rare). |
| `COMMANDO` | Commando Outfit | Unlocks the Commando camo outfit. |
| `SPACE` | Space Suit Outfit | Unlocks the astronaut space suit. |
| `STEAMPUNK` | Steampunk Outfit | Unlocks the Steampunk attire. |
| `PIRATE` | Pirate Outfit | Unlocks the Pirate costume. |
| `ROBOT` | Robot Suit Outfit | Unlocks the robot costume. |
| `BIGDADDY` | Big Daddy Vehicle | Unlocks the bulky vehicle (requires enough coin/vehicle slots). |
| `SONIC` | Sonic the Hedgehog Outfit | Unlocks the Sonic crossover outfit (blue and red). |
| `KONAMI` | 500 Coins | Entering the classic Konami code via this word rewards coins. |
Hidden Features & Unlockables (Beyond Codes)
#### Konami Code Easter Egg
- On the main menu, tap the title logo seven times (as above) but instead of entering a code, enter the Konami sequence with taps: Up, Up, Down, Down, Left, Right, Left, Right, B, A. This unlocks a secret animation of Barry doing a dance. (Works on most versions.)
- Gravity Suit: Unlocked by collecting all 10 tokens in the "Gravity" event (limited-time).
- Robot Suit: Unlocked by completing the "Robot" mission chain.
- Mr. Cuddles: Not a cheat—unlocked by collecting 100,000 coins total.
- Lucky Lashes: Obtainable only by completing the "Lucky Legend" achievement (revive 100 times). Not a cheat but a hidden item for persistent players.
- During gameplay, if you fly through a group of watermelons or oranges, Barry will occasionally say "Fruit Ninja!" This references Halfbrick’s other hit game.
- The Mega Jump monster (a giant red creature) appears as a background decoration in some zones, especially after unlocking the Mega Jump outfit.
- The Infinity Blade sword vehicle is a crossover from the game Infinity Blade. When equipped, Barry holds a glowing sword and occasionally swings it (no effect on gameplay).
- Tap the bacon icon (sometimes displayed on the ground or in the coin shop) repeatedly. After 10 taps, a bacon-themed outfit unlocks temporarily for that run.
- In the background of certain stages, you’ll see a gravestone reading "RIP Age of Zombies"—a nod to Halfbrick’s zombie shooter.
- On the Setting screen, tap the version number five times. A small popup shows the names of the dev team.
- Billionaire Token: Collect 1,000,000,000 coins total. Not a cheat, but an extremely rare hidden achievement visible only in stats.
- Secret Outfits via Update Celebrations: Sometimes Halfbrick releases limited-time codes during events (e.g., "XMAS" for a Santa hat). These are announced via social media.
#### Secret Vehicles via Gameplay
Two vehicles are hidden behind specific actions:
#### Secret Gadgets
Easter Eggs (Developer References)
#### Fruit Ninja Slice
#### Mega Jump Cameo
#### Infinity Blade References
#### Bacon Easter Egg
#### Age of Zombies Gravestone
#### Developer Room
Exploit-Safe Secrets (Legitimate Hidden Content)
All of the above are intentional and safe. There are no known glitches or exploits that break the game (e.g., infinite coins or invincibility). Any online claims of such are unverified and likely outdated. The game’s design prevents cheating;
Additional Hidden Content
Summary of Access Methods
| Feature | How to Unlock |
|---|---|
| Cheat Menu | Tap logo 7 times on main menu |
| Code Entry | Type code in cheat menu |
| Konami Animation | Tap Konami sequence on main menu |
| Developer Room | Tap version number 5 times in Settings |
| Easter Egg Outfits | Specific in-game interactions (bacon, etc.) |