Kerbal Space Program
## Kerbal Space Program – Game Introduction ### Overview **Kerbal Space Program (KSP)** is a critically acclaimed space flight simulation and sandbox game developed by **Squad** and published by **Private Division**. It first entered Early Access on June 24, 2011, and officially launched version ...
Download & Installation
Kerbal Space Program: Download & Installation Guide
This guide covers everything you need to know to download and install Kerbal Space Program (KSP) on PC, PlayStation, Xbox, and Nintendo Switch. Mobile versions are not officially supported; only the original PC KSP and its sequel (KSP2) are considered here.
---
1. Official Sources & Platforms
| Platform | Official Store | Notes |
|---|---|---|
| PC (Windows/Mac/Linux) | [Steam](https://store.steampowered.com/app/220200/Kerbal_Space_Program/), [Epic Games Store](https://store.epicgames.com/en-US/p/kerbal-space-program), or direct from [Squad’s website](https://www.kerbalspaceprogram.com/) (download code) | Steam offers the base game + all DLC bundles. Epic Games Store occasionally gives the game for free. Direct purchase from Squad provides a DRM-free copy. |
| PlayStation 4 / PS5 | PlayStation Store | PS5 runs via backward compatibility. No native PS5 version. |
| **Xbox One / Xbox Series X | S** | Microsoft Store (Xbox) |
| Nintendo Switch | Nintendo eShop | Simplified controls; performance capped at 30fps. DLC available separately. |
2. System Requirements (PC)
Minimum Requirements
- OS: Windows 7 64-bit / macOS 10.11+ / Linux (Ubuntu 16.04+)
- CPU: Intel Core i3-530 or AMD FX-4350
- RAM: 4 GB
- GPU: NVIDIA GeForce GTX 550 Ti (1GB VRAM) / AMD Radeon HD 5770
- Storage: 3 GB available space
- DirectX: Version 9.0c (Windows only)
- OS: Windows 10 64-bit / macOS 10.13+ / Linux (Ubuntu 18.04+)
- CPU: Intel Core i5-4590 or AMD Ryzen 3 1200
- RAM: 8 GB
- GPU: NVIDIA GeForce GTX 760 (2GB VRAM) / AMD Radeon R9 280X
- Storage: 4 GB (with DLC)
- DirectX: Version 11 (Windows only)
- Base game: ~2.5 GB on disk (after download).
- With all DLC (Making History, Breaking Ground): ~3.5 GB.
- Save files & mods: Additional space varies. Allow at least 1 GB for mods.
- Steam: A free Steam account. No additional subscription needed for single-player.
- Epic Games Store: A free Epic Games account.
- PlayStation / Xbox: Respective online platform accounts (free for store purchases).
- Nintendo Switch: Nintendo Account required.
- Error: “MSVCP140.dll not found” or similar.
- Fix: Install Microsoft Visual C++ Redistributables. Download from [Microsoft official site](https://support.microsoft.com/en-us/help/2977003/the-latest-supported-visual-c-downloads). Both x86 and x64 versions may be needed.
- Fix:
- Fix:
- Fix: Delete unused games or expand storage (external USB drive for PS4/Xbox One; internal SSD for PS5/Xbox Series). Switch can use microSD card (up to 2TB).
- Fix: Ensure controller is synced. For Switch, check Joy-Con connection. For PC, use Xbox/PlayStation controller with official adapters or Bluetooth.
- Fix:
- Steam: Right-click KSP in Library → Properties → Local Files → “Verify integrity of game files”. Steam will compare and redownload corrupt files.
- Epic: Library → three dots on KSP → “Verify”.
- Consoles: No file verification tool, but you can reinstall if issues occur.
- PC: DLC should appear automatically if purchased. In main menu, check “Expansions” to see if they’re enabled.
- Consoles: DLC is separate purchases or included in Enhanced Edition. Ensure they are installed via store.
- Modding: KSP has a huge modding community. Use [CurseForge](https://www.curseforge.com/kerbal) or [SpaceDock](https://spacedock.info/) for mods. Manually install mods by copying to `GameData` folder. Use [CKAN](https://github.com/KSP-CKAN/CKAN) for automatic mod management.
- Backing Up Saves: Saves are located in:
- Performance Mods: Install “KSP Community Fixes” or reduced textures mods for smoother gameplay on lower-end systems.
Recommended Requirements
Note: KSP is CPU-intensive, especially with large vessels. An SSD significantly reduces loading times.
---
3. Storage Space
---
4. Account Requirements
No internet connection is required after installation for single-player play, but updates and DLC verification need internet.
---
5. Step-by-Step Installation
5.1 PC (Windows, macOS, Linux) – Steam
1. Download and install the [Steam client](https://store.steampowered.com/about/).
2. Log in to your Steam account.
3. Go to Store → search for "Kerbal Space Program".
4. Click Add to Cart, then Purchase (or Install if already owned).
5. After purchase, go to your Library → find Kerbal Space Program.
6. Click Install. Choose a location (default: `C:\Program Files (x86)\Steam\steamapps\common`).
7. Wait for download (Steam shows progress).
8. Once installed, click Play from the Library.
5.2 PC – Epic Games Store
1. Install the [Epic Games Launcher](https://store.epicgames.com/en-US/download).
2. Log in to your Epic account.
3. Open the Store tab, search "Kerbal Space Program".
4. Click Get (or Buy if not free). Follow checkout.
5. Go to your Library → find Kerbal Space Program → click Install.
6. Choose installation path (default: `C:\Program Files\Epic Games`).
7. After installation, click Launch.
5.3 PlayStation 4 / PS5
1. On your console, go to PlayStation Store.
2. Search “Kerbal Space Program”.
3. Select the game and choose Add to Cart → Proceed to Checkout.
4. Confirm purchase (payment method needed).
5. The game will automatically download to your console.
6. Once downloaded, the icon appears on your home screen. Select it to launch.
Note: PS5 runs the PS4 version via backward compatibility. No separate PS5 version exists.
5.4 Xbox One / Xbox Series X|S
1. Press the Xbox button → Microsoft Store.
2. Search “Kerbal Space Program”.
3. Select the game → Buy (or Install if already owned via Game Pass or previous purchase).
4. Wait for download (can monitor in My games & apps).
5. Launch from My games & apps or Home.
Xbox Game Pass: KSP is not currently included in Game Pass. Purchase required.
5.5 Nintendo Switch
1. From the Home menu, open Nintendo eShop.
2. Search “Kerbal Space Program”.
3. Select the game → Proceed to Purchase (or Download if already bought).
4. Confirm payment.
5. Download begins automatically. A progress bar shows on the Home menu.
6. Once done, launch from Home.
Note: The Switch version is a port by BlitWorks. Performance is lower than other platforms.
---
6. First Launch Setup
When you first run KSP, follow these steps:
1. Language Selection – Choose your language.
2. Graphics Settings – The game automatically detects hardware. You can adjust resolution, quality, and anti-aliasing later in Settings.
3. Control Settings – Default keyboard/mouse or controller layout. Customize later.
4. Main Menu – You’ll see options: Start Game (new or load save), Training, Settings, Credits.
5. Create a Save – Click “Start Game” → type a save name → choose “Sandbox” (unlimited parts), “Science Mode” (unlock parts via experiments), or “Career Mode” (with funds, contracts).
Recommended first step: Play the in-game tutorials under “Training” to learn basic rocket design and flight.
---
7. Common Installation Errors & Fixes
7.1 “Missing redistributables” (PC)
7.2 “Steam Error: Disk Write Failure” (PC)
1. Run Steam as Administrator.
2. Clear download cache: Steam → Settings → Downloads → Clear Download Cache.
3. Free up disk space (ensure >5 GB).
4. Temporarily disable antivirus.
7.3 “Epic Games Launcher installation hangs” (PC)
1. Restart launcher.
2. Verify files: Library → click three dots on KSP → Verify.
3. Reinstall launcher if persistent.
7.4 “Not enough space” on consoles
7.5 “Controller not working” (all consoles)
7.6 “Black screen on launch” (PC)
1. Disable overlays (Steam, Discord, NVIDIA GeForce Experience).
2. Update graphics drivers.
3. Run in windowed mode: add `-popupwindow` to launch options (Steam: Right-click KSP → Properties → General → Launch Options).
---
8. Post-Installation Verification
Check Game Version & Integrity
Test Basic Functionality
1. Launch the game.
2. Start a new Sandbox save.
3. Build a simple rocket (e.g., Mk1 command pod + RT-10 booster).
4. Launch and stage until space.
5. If the game runs smoothly and you can control flight, installation is successful.
DLC Installation Check
---
9. Additional Tips
- Windows: `%USERPROFILE%\AppData\LocalLow\Squad\Kerbal Space Program\saves`
- macOS: `~/Library/Application Support/Squad/Kerbal Space Program/saves`
- Linux: `~/.config/unity3d/Squad/Kerbal Space Program/saves`
---
Kerbal Space Program is developed by Squad and published by Private Division. This guide is for educational purposes. Always purchase from official channels to support the developers.
Game Introduction
Kerbal Space Program – Game Introduction
Overview
Kerbal Space Program (KSP) is a critically acclaimed space flight simulation and sandbox game developed by Squad and published by Private Division. It first entered Early Access on June 24, 2011, and officially launched version 1.0 on April 27, 2015. The game is available on PC (Windows, macOS, Linux), PlayStation 4, Xbox One, and Nintendo Switch (via the Enhanced Edition). Mobile versions are not officially supported.
Genre & Core Appeal
KSP blends simulation, sandbox, and strategy genres. Its core appeal lies in the realistic orbital physics (powered by the patched-conic approximation) combined with a whimsical, cartoonish aesthetic. Players build and fly rockets, spacecraft, and aircraft using a modular part system, then manage a space program with limited resources. The game rewards creativity, problem-solving, and patience, often with spectacular (and hilarious) failures.
Setting & Story
KSP has no traditional narrative; instead, it offers a player-driven story set in a fictional solar system called the Kerbol System. The system includes the star Kerbol, the home planet Kerbin (analogous to Earth), and its moon Mün, plus other planets and moons like Duna (Mars), Eve (Venus), Jool (Jupiter analog with multiple moons), and more. The titular Kerbals are small, green, cheerful humanoid creatures with a knack for building and exploring. Prominent Kerbals include Jebediah Kerman (brave/cocky), Valentina Kerman (first female Kerbal), Bill Kerman (nerdy), and Bob Kerman (scientist). While they have minimal characterization, their exaggerated reactions and names add charm. The “story” you create might be landing a Kerbal on the Mün, establishing a space station, or launching an interplanetary mission, with every triumph or disaster forming your own unique narrative.
Main Characters
- Jebediah Kerman – The iconic pilot with a goofy grin; often the first Kerbal players send to space.
- Valentina Kerman – The first female Kerbal added in version 0.24; represents the program’s diversity.
- Bill Kerman – The engineer; prone to nervousness but skilled.
- Bob Kerman – The scientist; frequently seen as a passenger for experiments.
- Numerous other procedurally generated Kerbals join the program as you hire them.
- Sandbox – Unlimited parts, unlimited funds, no research. Pure creative freedom.
- Science Mode – Earn science points by performing experiments in different biomes and altitudes to unlock new parts. No monetary constraints.
- Career Mode – Full simulation: manage funds, research tech tree, build contracts, and hire Kerbals. Failures can bankrupt the program.
- Realistic Physics Simulation – The game uses a simplified but convincing orbital mechanics model. Achieving orbit requires understanding thrust, delta-v, and gravity turns, making it a genuine learning tool for spaceflight.
- Sandbox Creativity – With hundreds of parts (fuel tanks, engines, structural pieces, etc.), players can build anything from simple rockets to complex rovers, spaceplanes, or even replicas of real spacecraft.
- Hilarious Failure – Crashes, explosions, Kerbal reactions, and unintended disassemblies are part of the charm. The game encourages experimentation without punishing failure too harshly.
- Educational Value – Many schools use KSP to teach physics, mathematics, and engineering principles.
- Modding Community – An enormous library of mods extends gameplay with new parts, visual enhancements, life support systems, and even full solar system overhauls.
- Space enthusiasts and amateur astronomers
- Gamers who enjoy creative sandboxes (like Minecraft or Besiege)
- Physics and engineering hobbyists
- Players with patience for trial-and-error learning
- Suitable for teens and older due to complexity (rated E for Everyone by ESRB)
Game Modes
Players can choose from three primary modes:
Additionally, a Tutorial Mode guides beginners through basic concepts like building rockets, achieving orbit, and docking.
Online/Offline Support
KSP is primarily an offline single-player experience. There is no official multiplayer or online mode. However, the community has developed mods like DMP (Dark MultiPlayer) for unofficial multiplayer. The game includes a physics warp feature for fast-forwarding time locally.
DLC & Expansions
Two major expansion packs add content:
1. Making History (released March 2018) – Adds a mission builder, historical rocket parts (e.g., Saturn V ), and new launch sites.
2. Breaking Ground (released May 2019) – Introduces robotic parts (hinges, pistons, rotors), deployable science experiments, and surface features like craters and geysers that can be scanned.
Both DLCs integrate seamlessly into all game modes.
What Makes KSP Unique
Target Audience
KSP appeals to a broad audience:
Summary
Kerbal Space Program is more than a game; it’s a physics playground where the journey matters as much as the destination. Whether you’re launching your first wobbly rocket or executing a precise transfer to Jool, KSP offers infinite replayability and a unique blend of education and entertainment. Buckle up, recruit some green astronauts, and reach for the stars.
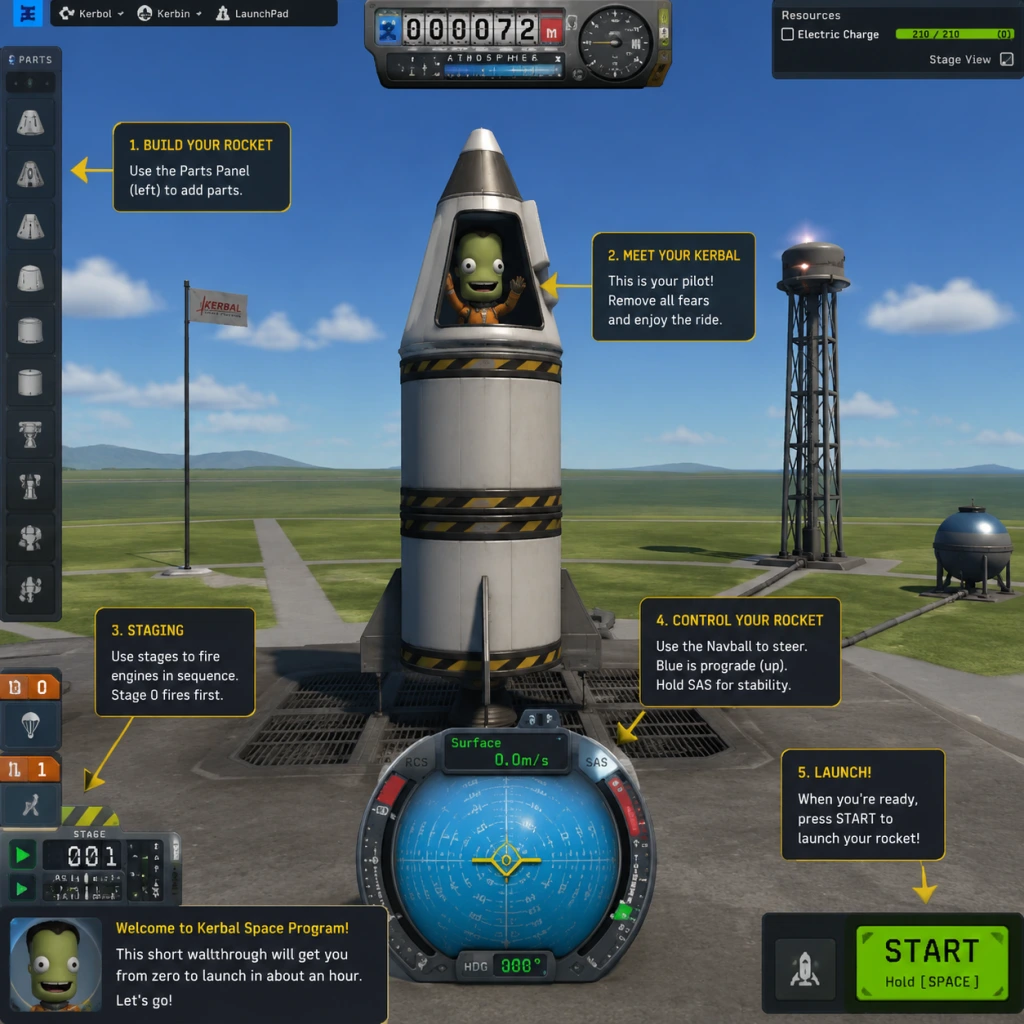
Getting Started
Getting Started Guide for Kerbal Space Program
First Steps: The First Hour Walkthrough
1. Launch the Game: After installation, start KSP. You'll see the main menu with options like "Start Game", "Settings", and "Credits".
2. Create a New Save: Click "Start Game", then "New Game". Name your save (e.g., "My First Rocket") and choose a game mode:
- Sandbox: All parts unlocked, unlimited funds. Recommended for pure experimentation.
- Science Mode: Unlock parts by performing experiments and gaining science points. Good for learning progression.
- Career Mode: Full economy with contracts, reputation, and funds. Most complex; avoid for your first hour.
For beginners, choose Science Mode – it gives structure without financial pressure.
3. Initial Load into Space Center: The game loads you into the Kerbal Space Center (KSC) view. You see a flat starfield with buildings. The tutorial pop-up may appear; read it or skip if desired.
4. Locate the VAB (Vehicle Assembly Building): Hover over the main building with a rocket icon – it’s the Vehicle Assembly Building (VAB). Click it to start building your first rocket.
5. First Rocket Build:
- Drag the Mk1 Command Pod into the center of the workspace (it’s the capsule).
- Attach a TR-18A Stack Decoupler below the pod.
- Attach a T800 Fuel Tank below the decoupler.
- Attach a LV-T45 Swivel Liquid Fuel Engine below the fuel tank.
- Add TT-38K Radial Decoupler and four Mk1 Sidepods? Actually, keep it simple: use the Basic Fin – attach four fins around the bottom.
- Click the Parts Catalog icon (left side) to find these. Use the search bar.
6. Check Stats: Click the "Engineer's Report" button (wrench icon) – ensure no warnings (like insufficient control). Add a SAS module (e.g., Inline Reaction Wheel) if needed – place it between decoupler and fuel tank.
7. Launch: Click the green "Launch" button. You enter the control scene. Press Spacebar to activate the engine. Press Spacebar again to stage (if you have decouplers).
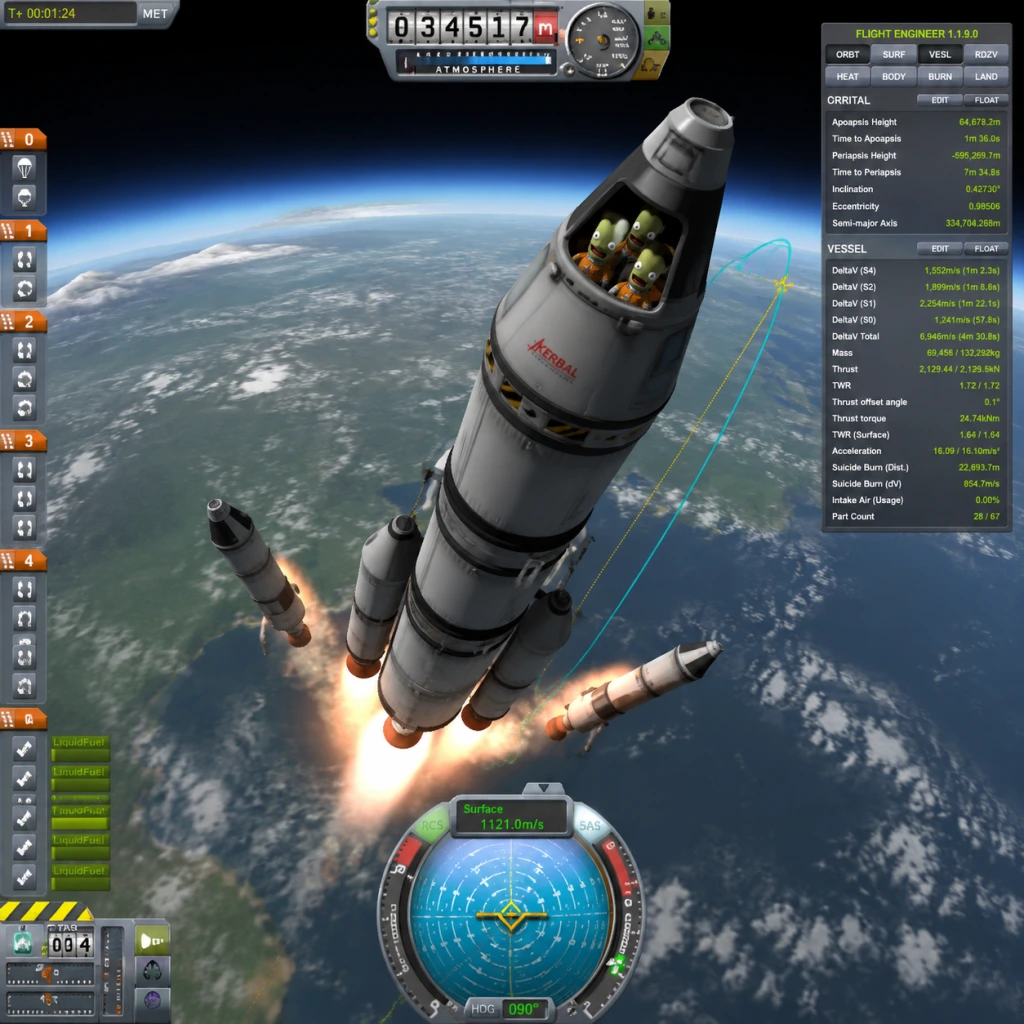
8. Basic Flight: As you climb, throttle up (Left Shift on PC) to full. Use W to pitch (tilt) east (right) once you’re stable. Aim for a gravity turn – tilt slowly toward 45° by 10 km altitude.
9. First Orbital Attempt (optional but fun): Continue burning until your apoapsis (Ap marker) is above 70 km. Then cut throttle (X key). When near Ap, burn prograde to circularize. This is tough for first hour; don’t worry if you crash.
10. Return to KSC: If you survive, you can revert flight via the escape menu → “Revert to Launch” or “Revert to VAB”. This lets you try again without losing parts.
Character Creation (There Is None!)
KSP does not have character creation. You control Kerbals – cute green astronauts – but they have preset names and appearances. You can rename them in the astronaut complex (building with a flag) after unlocking, but it’s cosmetic only. No stats or customization exist.
Controls on All Platforms
| Action | PC (Keyboard & Mouse) | Xbox / PlayStation | Nintendo Switch |
|---|---|---|---|
| Throttle Up | Left Shift (hold) | RT (hold) | ZR (hold) |
| Throttle Down | Left Ctrl (hold) | LT (hold) | ZL (hold) |
| Stage (Activate next stage) | Spacebar | A | A |
| Pitch (Up/Down) | W / S | Left Stick (up/down) | Left Stick (up/down) |
| Yaw (Left/Right) | A / D | Left Stick (left/right) | Left Stick (left/right) |
| Roll (Rotate) | Q / E | LB+Left Stick / RB+Left Stick | L+B Button+Left Stick / R+B Button+Left Stick |
| SAS (Stability Assist) On/Off | T | Y | X |
| RCS (Reaction Control) On/Off | R | B | Y |
| Time Warp | . (period) / , (comma) | D-pad Up/Down (hold to engage) | D-pad Up/Down (hold to engage) |
| Map View | M | View button (Select) | Minus (-) |
| Zoom in/out (VAB/SPH) | Scroll wheel | Right stick (click + drag) | Right stick (click + drag) |
| Camera Orbit (flight) | Middle mouse button (hold + drag) | Right stick (drag) | Right stick (drag) |
UI Overview (Key Elements)
- Navball (center top): Shows orientation and velocity vector (prograde/retrograde). Prograde (yellow marker) = direction of travel; retrograde (pink) = opposite. Use SAS to point to them.
- Altitude Display (left): Shows altitude above sea level (ASL) and above terrain (AGL) when near surface.
- Velocity (left): Shows speed relative to surface (surf) or orbit. Use map mode to see orbital velocity.
- Staging Display (left): Shows your stage sequence. Green indicates active stage; click an icon to activate it early.
- Resource Panel (top right): Shows current fuel levels, electricity, monopropellant, etc. Click to expand.
- Mission Clock (top center): Displays elapsed time. Click to open time warp options.
- App Launcher (top right toolbar): Includes buttons for Maneuver Nodes, Alarms, etc. Customizable.
- Build a stable first rocket that reaches the upper atmosphere (30–50 km) and safely parachutes back.
- Learn basic orbital mechanics: launch east (90° heading) to exploit Kerbin’s rotation.
- Unlock basic parts in Science Mode: Get science from the launch pad and low atmosphere.
- Perform your first EVA (Extra-Vehicular Activity) on a Kerbal – but wait until you have a stable orbit to avoid losing them.
- Understand the Transfer Window for reaching the Mun (moon) – but that’s day 2 or 3.
- Run the basic tutorials from the main menu. They cover moving, staging, and landing.
- Start a Sandbox save to crash rockets freely without penalties.
- Watch the navball – keep your direction aligned with prograde for efficient burns.
- Use symmetry mode (press R) when attaching fins, boosters, or solar panels to ensure balance.
- Revert flights often while learning – it’s your safety net.
- Don’t build huge, complex rockets your first hour. Keep it under 10 parts.
- Don’t skip adding fins – they prevent flipping during atmospheric flight.
- Don’t attempt a Mun landing until you can reliably achieve a 75 km circular orbit.
- Don’t engage time warp while in atmosphere (below 30 km) unless you want to explode.
- Don’t forget parachutes on return capsules. Click the parachute part and set its deploy altitude (default 1000 m).
- Science Points: Your primary resource in Science Mode. Collect them by doing experiments (Mystery Goo, Thermometer, etc.) at various altitudes and biomes. Focus on the launch pad (surface) and low altitudes (0–18 km) first.
- Funds: Only matter in Career Mode. Avoid Career until you grasp basics.
- Reputation: Also Career only. Early failed contracts lower rep but not disastrous.
- Building Upgrades: In Career/Science, you upgrade buildings to unlock larger parts. Priority: VAB first (more part count), then Tracking Station (more orbits), then Mission Control (more contracts).
- [ ] Complete the first three in-game tutorials (Basic, Staging, and Orbiting).
- [ ] Build and launch a simple rocket that reaches at least 30 km.
- [ ] Successfully deploy parachutes and land safely back on Kerbin.
- [ ] Collect science data from the launch pad and low altitude (2–18 km).
- [ ] Unlock your first new part (e.g., Basic Jet Engine or more fuel tanks) in Science Mode.
- [ ] Perform a gravity turn to 45° by 10 km and maintain it.
- [ ] Understand the navball markers (prograde, retrograde, normal, anti-normal).
- [ ] Practice reverting a flight and making adjustments in the VAB.
- [ ] Watch a beginner video (optional) – search “KSP beginners guide 2025”.
- [ ] Set aside 2–3 hours for uninterrupted learning. KSP rewards patience.
Essential Early Objectives
What to Do First and What to Avoid
DO FIRST:
AVOID:
Early Resource Priorities
Common Beginner Mistakes
1. Throttling too early/late: Stage activation must have engine running. Always set throttle to full (Shift) before hitting Space.
2. Not using SAS: Toggle SAS (T key) to keep stable. Without it, your rocket spins.
3. Forgetting antennas: For probes (unmanned), you need an antenna to transmit science. Kerbals can transmit without one, but probes can’t.
4. Over-engineering: More delta-v doesn’t always help; adding too much weight reduces efficiency. Aim for 3400 m/s delta-v to reach orbit.
5. Ignoring center of mass: When building, check the blue ball (CoM). Keep it forward relative to center of pressure (purple) to avoid flipping.
6. Panicking and reverting too late: Use “Revert to Launch” before you lose all parts; you can’t revert after a crash if you quit.
7. Not saving: Manual save (F5) before critical maneuvers. Quickload with F9.
Day-One Checklist
Remember: Failure is part of the fun. Every explosion teaches you something. Keep a notebook of what worked and what didn’t. The Kerbal motto: “Fly safe… or fly spectacularly!”
Core Gameplay
Core Gameplay Overview
Kerbal Space Program (KSP) is a physics-based space flight simulation where you design, build, and fly spacecraft for the Kerbals—a cheerful, green-skinned species. The core gameplay loop revolves around the engineering process: design → build → test → iterate. Instead of combat, the game features environmental challenges (orbital mechanics, fuel management, re-entry heat) and a robust career mode that acts as a mission system. There is no combat or hostile NPCs; the primary “interaction” is with celestial bodies and the game’s realistic orbital physics. Progression is unlocked through Technology, Funds, Reputation, and building upgrades. This guide breaks down the gameplay into four distinct tiers based on player progression.
Player Progression Tiers
---
Early Game (Tier 1)
Goal: Achieve Kerbin orbit and return safely. Understand basic rocket design and atmospheric flight.
Gameplay Loop:
1. Accept simple contracts (e.g., “Launch a vessel to 10 km,” “Test a part at the launch pad”).
2. Use pre-built rockets or design simple two-stage rockets with liquid fuel engines and a small command pod.
3. Launch, stage, and control ascent to reach low Kerbin orbit (70-100 km).
4. Perform a de-orbit burn and re-enter, deploying parachutes for landing.
5. Recover the vessel to gain Funds and Reputation.
Progression:
- Tech Tree: Start with basic node “Start” (Mk1 Pod, RT-10 Booster, basic fins). Earn Science points by performing crew reports, EVA reports, and surface samples in different biomes (Launch Pad, Grasslands, Water).
- Building Upgrades: The Vehicle Assembly Building (VAB) and Launch Pad start at level 1, limiting part count (~30 parts). Upgrade with Funds.
- Funds & Reputation: Earned through contract completion. Early contracts reward small amounts; focus on “first flight” and “crew report” missions.
- World’s First Contracts: “Fly a vessel”, “Reach space” (>70 km), “Orbit Kerbin”.
- Part Testing: Use specific parts in certain situations (e.g., “Test the LV-T30 engine while splashed down”).
- Crew Reports: Perform experiments in various biomes.
- Funds are the primary currency. Spent on building new parts, upgrading buildings, and paying for vessel recovery (cost is 100% recovered if vessel is not destroyed).
- Strategy: Avoid overly expensive designs; recover everything. Use Boosters wisely to reduce cost.
- Kerbal Experience: Each Kerbal gains experience from missions. Levels unlock Green (0), Regular (1), Veteran (2), Elite (3), Badass (4). Higher levels increase stability, science collection rates, and allow special actions like repairing wheels. Early game, you only have Jebediah, Bill, Bob, and Valentina. Keep them alive – death is permanent in Career mode.
- Build Skills: Learn to design stable rockets with enough thrust-to-weight ratio (TWR > 1.5 on launch) and adequate delta-v (~3,400 m/s for orbit). Use action groups and staging.
- Poorly designed rockets flip or explode.
- Running out of fuel or electricity.
- Re-entry overheating without heat shield.
- Tech Tree: Key nodes: Flight Control (improves SAS/stability), Space Exploration (LV-909 engine), Heavy Rocketry (Skiff engine), Landing (advanced landing legs). Unlock batteries, solar panels, retractable solar panels.
- Building Upgrades: Level 2 VAB (part limit 255), Level 2 Launch Pad (max mass 250t), Level 2 Tracking Station (can view encounters), Level 2 Mission Control (more contracts).
- Contracts become more varied: “Explore the Mun,” “Plant a flag on Minmus,” “Test part in orbit of Mun.”
- Mun: Medium gravity (1.63 m/s²), no atmosphere. Landing requires careful suicide burn (~580 m/s delta-v from low orbit). Biomes: Highlands, Midlands, Lowlands, Poles, Farside Crater.
- Minmus: Low gravity (0.49 m/s²), flat plains make landing easy. High science returns from Flats biomes (especially the “Great Flats”).
- Interplanetary: Duna is reachable with a transfer window (~90° angle). Eve is extremely difficult to return from. Probes are cheaper and risk-free for Kerbals.
- World’s First: “Land on the Mun”, “Return from the Mun”, “Orbit Minmus”.
- Satellite Contracts: Deploy a satellite in specific orbit around Mun/Minmus/Kerbin.
- Survey Contracts: Take temperature, atmosphere readings over certain locations.
- Turf that stage: “Perform a crew report while flying low over Mun’s surface”.
- Funds become tighter if you lose expensive craft. Recover everything. Sell unwanted parts (reimburse 50% when recovering a vessel).
- Strategies: Use reusable landers (recover on Kerbin). Combine multiple contracts into one mission (e.g., plant flag + science + satellite).
- Science points are crucial: Each Mun/Minmus biome can yield several hundred science. Prioritize unlocking the Mobile Processing Lab (MPL) – it allows converting data into Science over time (lab science).
- Kerbals gain experience from landing on new bodies. One Mun landing can jump a Kerbal to level 3 (Veteran).
- Build skills: Learn to use maneuver nodes, fine-tune burns, and set transfer windows with the help of mods (Kerbal Alarm Clock) or in-game tools (Maneuver Node Planner).
- Rendezvous and Docking become necessary for space station segments. Practice docking by matching orbits and using RCS.
- Landing on a slope tips the lander over – use wide landing legs and low center of mass.
- Insufficient delta-v for return – always calculate with a margin (use Δv maps like from MechJeb or Olex's).
- Solar power outages behind planets – include batteries and RTGs if possible.
- Tech Tree: Fully unlock all 9 tiers. Key nodes: Specialized Science (SC-9001 Science Jr., Mystery Goo), Advanced Science (Materials Bay), Precision Propulsion (Nerv engine), Very Heavy Rocketry (Mammoth, Rhino), Large Electrics (large solar panels), Advanced Grabbing Unit (drill).
- Building Upgrades: Level 3 VAB (no part limit), Level 3 Launch Pad (no mass limit), Level 3 Astronaut Complex (hire up to 8 Kerbals), Level 3 R&D (allows part unlocking via science).
- Contracts: Turn into colony/settlement contracts: “Establish a base on Eeloo with 1000 units of Ore capacity,” “Perform orbital survey over Jool.”
- Jool System: Gas giant with five moons (Laythe, Vall, Tylo, Bop, Pol). Each has distinct challenges – Laythe has seas and a thin atmosphere; Tylo has high gravity and no atmosphere (very hard).
- Eeloo: Icy dwarf planet, no atmosphere, low gravity. Requires advanced thermometers and gravioli detectors.
- Duna & Ike: Duna has thin atmosphere, perfect for parachute-assisted landings; Ike is a small moon easily orbited. Base-building possible.
- Eve: Extremely thick atmosphere – landers need huge heat shields, and ascent requires massive delta-v (11,500+ m/s). Mainly for advanced challenges.
- Moho: Small, hot, close to sun – needs radiators.
- “Construct a base on Duna with 5 crew capacity and a science lab.”
- “Launch a space station in orbit of Minmus with at least 12 crew capacity.”
- “Ferry 500 units of Ore to Kerbin from Mun surface.”
- “Deploy a constellation of 3 communication satellites around Jool.”
- Funds become abundant from high-reward contracts (often 500k-1M Funds). Use the money to upgrade remaining buildings and buy expensive parts.
- Strategies: Build permanent fuel depots at Kerbin orbit and Minmus. Use mining rigs to produce free fuel, drastically reducing mission costs.
- Science can be generated indefinitely using a Mobile Processing Lab on the Mun surface or space station. Create a “science farm”: send lab, fill it with data from multiple biomes, let it process over time.
- Kerbals can reach level 5 (Very Experienced) via many missions. Level 5 Kerbals have 100% stability and very fast science collection.
- Build Skills: Master interplanetary transfers using transfer windows (Kerbal Space Program wiki or in-game DSN network). Use gravity assists (e.g., Kerbin -> Mun -> Minmus -> Kerbin slingshot).
- Complex builds: Rotating ring structures (for gravity – mods required? No, stock KSP allows radially attached parts but no rotation simulation except via reaction wheels). Stock designs for large stations: use struts and senior docking ports.
- Interplanetary burns require large vessels; design in orbit around Kerbin (not launching as single piece).
- Heat management on Eve or near Sun; use radiators and heat shields.
- Time warp management: use alarm clock mod or careful manual planning to not miss windows.
- Kraken attacks (physics glitches): autosave frequently.
- Stock contracts dry up but procedural contracts from “Tourist” missions remain. These involve ferrying paying kerbals around the solar system for large sums of money but no new science.
- Self-imposed challenges: “Bases on all planets with no mods,” “100% stock grand tour,” “Orbital ring around Kerbin.”
- Money is essentially infinite if you have a mining and tourism infrastructure. Focus on optimizing: build automated supply lines.
- Science becomes redundant; you can have labs maxed out producing 5,000+ science per Kerbin day.
- Kerbals can be retired; you may have dozens of veterans. Focus on those with high courage and stupidity (?) – Stupidity affects efficiency of experiments; high stupidity is worse. Send low-stupidity Kerbals on important missions.
- Build mastery: Stock aerodynamics, orbital mechanics, and advanced propulsion (ion, nuclear). You can build vessels with 1,000+ parts (performance may suffer).
- Performance: Large craft cause lag. Optimize part count (use auto-strut, reduce excess struts).
- Complex docking sequences: Multi-port docking for kerbin return.
- Keeping interest: Set personal goals like constructing a Duna colony with habitation module (Breaking Ground DLC robot parts) or a Jool ring station.
- The only true “ending” is when you have done everything the game offers – it is sandbox-like.
Exploration: Limited to Kerbin’s surface and immediate space above. Biomes include KSC buildings, Shores, Highlands, Desert. Flying to the “Mun” (moon) is possible but difficult without upgraded tech.
Missions (Contracts):
Economy:
Character/Build Growth:
Key Challenges:
---
Mid Game (Tier 2)
Goal: Land on the Mun and Minmus, return samples. Start interplanetary probes to Duna or Eve. Upgrade KSC buildings to level 2.
Gameplay Loop:
1. Design multi-stage lander with dedicated descent/ascent engines.
2. Perform a trans-lunar injection, circularize orbit, then land using precision burns.
3. Collect surface samples and crew reports from different biomes.
4. Return to Kerbin, possibly with a heat shield.
5. Use Science to unlock the first tier of advanced nodes (e.g., General Rocketry, Advanced Rocketry).
6. Begin unmanned probes—unlock Probe cores and solar panels.
Progression:
Exploration:
Missions:
Economy:
Character/Build Growth:
Key Challenges:
---
Late Game (Tier 3)
Goal: Establish a permanent presence on other moons/planets, build space stations, and refineries. Complete long-term contracts like “Base on Duna,” “Space Station around Minmus.”
Gameplay Loop:
1. Design reusable interplanetary transfer vehicles (e.g., nuclear thermal engines, ion thrusters).
2. Build orbiting space stations with docking ports, labs, and habitation modules.
3. Deploy surface bases with drill modules, converters, and greenhouses (if using DLC).
4. Use ISRU (In-Situ Resource Utilization) to mine ore and convert to fuel.
5. Execute complex missions: crew rotation, resupply, science farming via mobile science lab.
6. Unlock the top tier of the tech tree (Experimental Science, Very Heavy Rocketry).
Progression:
Exploration:
Missions:
Economy:
Character/Build Growth:
Key Challenges:
---
Endgame (Tier 4)
Goal: Achieve all achievements, unlock the entire tech tree, complete “World’s First” milestones, and create your own self-sustaining interstellar colony. Essentially, sandbox mode with career constraints.
Gameplay Loop:
1. No more new contracts? The game doesn’t have a final boss; endgame is self-directed.
2. Build a “Grand Tour” mission: land Kerbals on all planets and moons in one voyage.
3. Construct massive orbital shipyards, interplanetary highways (refueling depots), and comprehensive base networks.
4. Explore extreme biomes: Jool’s atmosphere, Eve’s ocean, Eeloo’s cryovolcanoes.
5. Create replicas of real-world spacecraft (Apollo, Saturn V, Space Shuttle).
6. If using mods (e.g., KSP Interstellar, RSS/RO), expand to other star systems.
Progression: None – all tech unlocked, all buildings maxed. The remaining progression is personal: fill the “Career” screen with all milestones completed. The game tracks achievements like “First Kerbal on Eeloo,” “First Return from Eve.”
Exploration: Complete mapping of all celestial bodies. Use surveys to find anomalies (e.g., the Monolith on Mun, the pyramid on Minmus). Send probes to rare biomes like “Giant Irradiate” on Jool’s atmosphere.
Missions:
Economy:
Character/Build Growth:
Key Challenges:
---
Summary Table
| Tier | Key Goals | Typical Delt-V Required | Tech Level |
|---|---|---|---|
| Early | Orbit Kerbin, return | ~3400 m/s | Basic nodes |
| Mid | Mun/Minmus landing, probes | ~5800 m/s | Flight Control, Space Exploration |
| Late | Interplanetary bases, stations | ~10,000 m/s + | Full tech except final tier |
| Endgame | Grand Tour, colony | 15,000+ m/s | All unlocked |
---
Additional Tips
- Always quicksave (F5) before risky maneuvers, and quickload (F9) if needed.
- Use mods like Kerbal Engineer Redux (KER) for delta-v readouts and KAC for alerts, but vanilla game is entirely playable.
- Watch tutorials from Scott Manley or Matt Lowne for advanced techniques.
- Progression is not linear – you can skip tiers by completing risky missions early, but it’s discouraged.
Endgame essentially transitions to sandbox creativity. Enjoy the journey!
Game Tips
Game Tips for Kerbal Space Program
Introduction
Mastering Kerbal Space Program (KSP) requires a blend of creativity, physics intuition, and patience. Below are hundreds of actionable tips organized by category, from getting your first rocket off the launch pad to executing interplanetary missions. Each tip includes an explanation of why it works and when to apply it.
---
Basic Building & Physics (Beginner/Intermediate)
1. Keep it simple for your first rocket – Use the smallest parts: a Mk1 Command Pod, a FL-T400 fuel tank, and an LV-T30 Swivel engine. Add a parachute on top and fins at the bottom. This teaches you basic staging and stability without overwhelming complexity.
- Why: Simpler rockets are easier to control and troubleshoot. Fins provide aerodynamic stability, preventing flips.
2. Always check the center of mass (CoM) vs. center of lift (CoL) – In the VAB/SPH, enable the CoM/CoL markers. Ensure the CoL is behind and slightly below the CoM for stable flight. If not, add fins or move fuel.
- When: Designing any aircraft or rocket that flies through atmosphere. For space-only ships, this matters less.
3. Use the “Auto-Strut” feature – In the VAB, right-click a part (e.g., fuel tank) and enable Auto-Strut (to root part, heaviest part, or grandparent). This prevents wobbly rockets without adding a dozen struts.
- Why: Eliminates physics flex that can cause catastrophic failure. Use on large rockets or space stations.
4. Put parachutes on every crewed stage that returns – Even if you plan to land propulsively, a backup parachute can save Kerbals. Set deployment altitude high (≥1000 m) for safe opening.
- When: All manned missions; also useful for recovering expensive boosters.
5. Angle your fins slightly – In the VAB, rotate fins 5–10 degrees (using Q/E keys) to impart a gentle spin. This stabilizes the rocket passively during ascent.
- Why: Spin stabilization reduces the need for active SAS correction, saving battery and reaction wheel torque.
---
Maneuvering & Orbital Mechanics (Intermediate/Advanced)
6. The golden rule of orbits: prograde to go higher, retrograde to go lower – Burning prograde (direction of travel) increases your orbit’s altitude on the opposite side; retrograde decreases it. Memorize this for all burns.
- Why: Fundamental to rendezvous, transfers, and landing. Misunderstanding leads to wasted delta-V.
7. Perform Hohmann transfers for efficient orbit changes – To go from a low orbit to a higher one, burn prograde at the periapsis (lowest point) of the current orbit. This raises the apoapsis. Then circularize at the new apoapsis.
- When: Moving from LKO to Mun or higher orbits. It’s the most fuel-efficient two-burn maneuver.
8. Use maneuver nodes to plan burns – Click on your orbit in Map View to create a node. Drag the radial/antinormal handles to adjust. The burn indicator tells you how long to burn (half before the node, half after).
- Why: Eliminates guesswork. Experiment with nodes before committing fuel.
9. For rendezvous, aim for a 0° relative inclination – At the ascending/descending node, burn normal (blue triangle pointing up) or anti-normal (down) until the relative inclination reads 0.0°. Then it’s much easier to catch up.
- When: Docking, station assembly, or crew transfer. Skipping this step wastes delta-V chasing a target.
10. Match speeds at closest approach – When you’re near the target, switch to Target mode on the navball. Burn retrograde relative to target until velocity reaches near zero. Then use translational controls to dock.
- Why: Simulates real docking procedures. The navball’s target velocity readout is your best friend.
---
Exploration & Science (All Skill Levels)
11. Always bring multiple Science Jr. units on crewed missions – A single unit can be used multiple times (reset it after each experiment) if you have a scientist aboard. This yields immense science points from biomes.
- Why: Science jr. is compact and gives high science value. Max out your experiments per biome.
12. Transmit vs. recover? – For cheap, low-science experiments like Crew Reports, transmit (especially with antenna upgrades). For high-value results (e.g., Surface Samples), return them home for 100% recovery bonus.
- When: Early game: transmit everything; later, recover when you need max science. Use Communotron 16 for early transmissions.
13. Visit multiple biomes on the Mun and Minmus – Each biome (e.g., Highlands, Midlands, Craters) yields full science points. Use a mobile lab (Science Lab) to process data and generate more science.
- Why: One well-planned mission can net thousands of science points, unlocking the tech tree faster.
14. Plant a flag on every significant location – KSP tracks “landmarks” but not biomes. Flag planting gives a permanent marker and is required for some contracts.
- When: After landing on a new body. Always bring a flag in your cargo.
15. Use the Mun as a stepping stone – It’s easy to reach, has low gravity, and is rich in biomes. Master Mun landings before attempting Duna or Eve.
- Why: Builds confidence and unlocks critical tech (e.g., landing legs, larger engines).
---
Resource Management (Funds, Science, Reputation)
16. Accept contracts that align with your current capabilities – Don’t tackle “Explore Jool” when you’ve just got to orbit. Stack simple “Test part” contracts near the launchpad.
- Why: Easy funds and reputation boost. Failing contracts reduces reputation, limiting future contract offers.
17. Build the Astronaut Complex and upgrade it early – This lets you hire more Kerbals and improve their performance. A level 3 facility gives you 10 kerbals and faster recovery.
- Why: More pilots mean more SAS options; more scientists and engineers help with science and repairs.
18. Recover boosters by adding parachutes – For first-stage boosters, attach radial-mounted parachutes and a small probe core (e.g., HECS) with a battery. Set them to deploy at low altitude (500–1000 m). They’ll fall safely and be recovered for partial refund.
- Why: Saves funds in career mode. Can recover 30-50% of booster cost.
19. Don’t overbuild engines – Use the smallest engine that can lift your payload. Check Delta-V map (available online or via mods) to know required amounts. Bigger engines are heavy and inefficient.
- Why: Overpowered rockets waste fuel and increase cost. The “Tsiolkovsky rocket equation” penalizes extra mass.
20. Sell extra science data at the R&D center – If you have duplicate experiments (e.g., multiple crew reports from the same biome), you can “Run Experiment” again—but you cannot sell it directly. Instead, use the “Recover” action to get funds for recovered vessels with science data.
- Tip: Plan missions to bring back all unique experiments; duplicates are wasted.
---
Advanced Rocketry & Engineering
21. Use asparagus staging for extreme payloads – In this setup, multiple boosters feed fuel to the center engine; spent boosters are dropped asymmetrically. This gives a high thrust-to-weight ratio and fuel efficiency.
- Build: Six side tanks: three pairs, each pair feeds the next pair inward. Requires fuel ducts and crossfeed control.
- When: Heavy lifts (interplanetary ships, giant space stations).
22. Nerv engines (Nuclear Thermal) are not for atmospheric use – They have terrible thrust at sea level but excellent vacuum Isp (800s). Use them for interplanetary transfer stages.
- Why: Atmo Isp is ~85s – useless below 20 km altitude. Always pair with chemical engines for launch.
23. Ion engines are for slow, efficient maneuvers – They have low thrust (2 kN) but extraordinary Isp (4200s). Use them for small probes or station-keeping.
- Requires: Xenon gas tanks and a lot of electricity (deploy solar panels). Never use for landing.
24. Design your landers with low center of mass – Place heavy parts (engines, fuel tanks) low and light parts (science pods, batteries) high. This prevents tipping on slopes.
- Why: Many a lander has tipped over on Mun due to top-heavy design.
25. Use reaction wheels for fine attitude control, RCS for translation – Standard SAS uses reaction wheels. For docking, add RCS thrusters and enable RCS (R key). Place them symmetrically around CoM.
- When: Docking, asteroid redirect missions. RCS allows lateral movement without rotating.
---
Efficient Missions & Timelines
26. Launch to the correct inclination for your target – If going to Minmus (6° inclination), launch when the KSC passes under Minmus’s orbital plane (visible in Map View). This saves hundreds of m/s vs. a mid-course correction.
- Why: Changing inclination costs significant delta-V (up to 10% of burn).
27. Use a “rescue taxi” for stranded Kerbals – Build a cheap, reusable craft with a Mk1 Cmd Pod, parachute, and minimal fuel to rendezvous with a stranded Kerbal and bring them home. Complete rescue contracts for funds and reputation.
- Economy: Rescue contracts pay well and often give you a free Kerbal.
28. Plan interplanetary transfers using transfer windows – Use in-game alarm clock (or a website like “KSP Transfer Window Planner”) to launch when planets align. Wrong windows can multiply travel time and delta-V by 3x.
- Example: Duna launch window occurs every 2 years (game time). Launch at ~45° ahead of Duna.
29. Aerobrake whenever possible – When entering an atmosphere (Kerbin, Duna, Eve), set your periapsis to around 35-45 km for Kerbin. The atmosphere slows you down for free, saving fuel.
- Warning: Test with heat shield; too low can burn up or overshoot.
30. Use a “refueling station” in orbit – Build a station in LKO (100 km) with a large tank, docking ports, and a tug. This allows you to refuel interplanetary ships without bringing all fuel from the ground.
- Why: Cheaper than launching fully fueled ships. Use mining operations on Mun/Minmus to produce fuel.
---
KSP-Specific Pro Tips
31. Use the “Alt+F12” cheat menu wisely – In Sandbox, you can enable infinite fuel, unbreakable joints, etc., for testing. In Career, avoid unless debugging. It can corrupt saves.
- Tip: Use “Set Orbit” to move a craft to a specific orbit for testing landers.
32. Learn to use the “kOS” mod (optional) – It allows scripting automated launches, maneuvers, and landings. For advanced players, it simulates real space programming.
- Before mod: Master manual flying first.
33. Quicksave often (F5) and quickload (F9) – Always before a critical burn or landing. KSP can crash unexpectedly.
- Why: Saves hours of frustration. Also use multiple save files for big missions.
34. Name your ships descriptively – Include purpose and fuel capacity (e.g., “Mun Lander v2 – 2400 m/s”). This helps track missions.
- Organization: When you have 50 ships, a good name saves time.
35. Use action groups for complex crafts – Bind toggles for solar panels, engine gimbals, ladder, etc. (1-9 keys). This avoids fumbling through right-click menus.
- Example: Action group 1: deploy solar panels + extend antenna; group 2: toggle rocket engines.
---
Troubleshooting Common Problems
- Rocket flips? – Add fins at the bottom; reduce thrust during first 1 km; improve control authority with reaction wheels or gimballing engines.
- Can’t reach orbit? – Increase TWR to ~1.5-2.0 at launch; include an upper stage for orbital injection; use a gravity turn (start tilting at 10 km altitude, 45° at 20 km).
- Battery dies on night side? – Add solar panels (deployable or static) and sufficient battery capacity. Use RTGs (Radioisotope Thermoelectric Generators) for deep space.
- Docking is impossible? – Practice in LKO with a simple target. Use Docking Port Alignment Indicator mod (highly recommended). Ensure both ports are same size and facing each other.
---
Conclusion
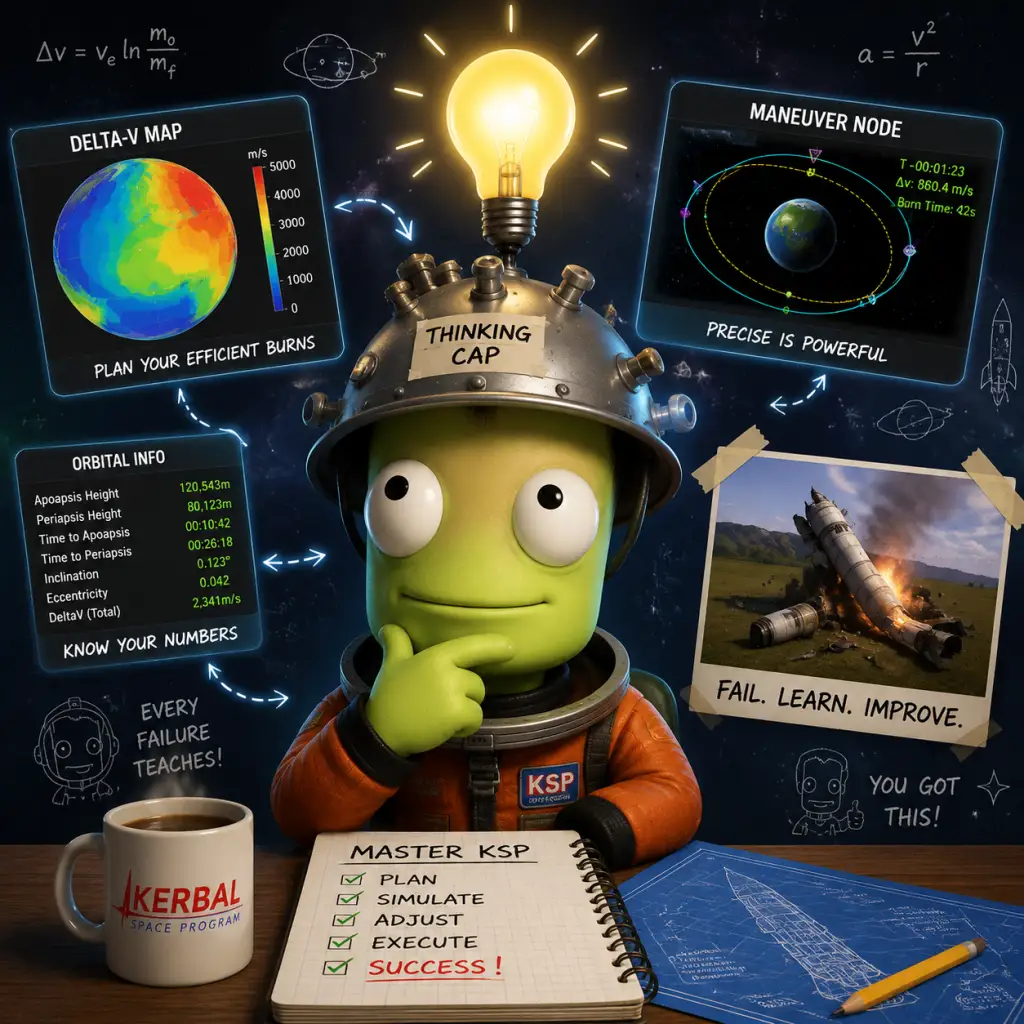
These tips cover the breadth of KSP’s depth. Start with the beginner building advice, then gradually incorporate orbital mechanics and efficiency strategies. Remember: failure is part of the learning curve—each explosion teaches you something. May your rockets reach the stars!
Game Settings
Game Settings Guide for Kerbal Space Program
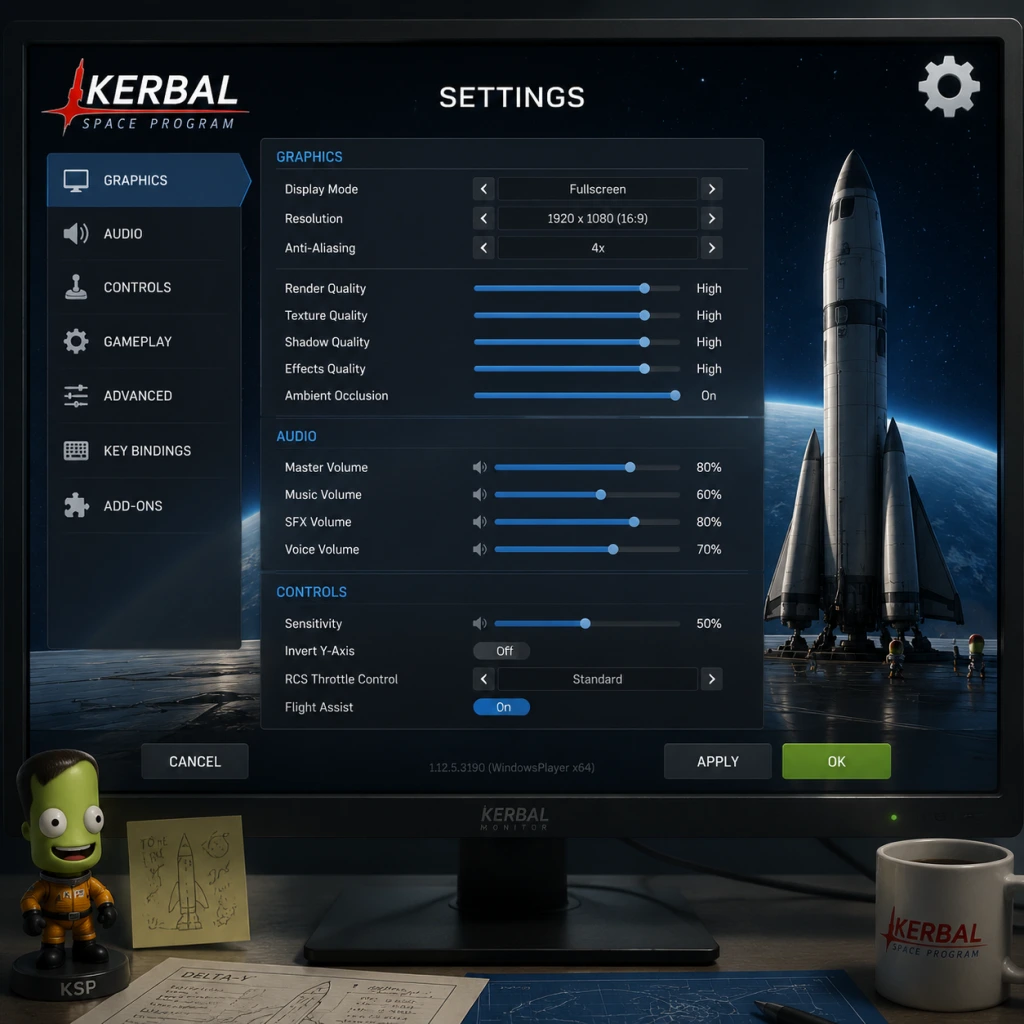
Configuring Kerbal Space Program (KSP) correctly is crucial for a smooth experience, as the game is heavily CPU-bound due to real-time physics simulation. This guide covers all major settings categories—Graphics, Audio, Controls, Accessibility, Language, Network, and Gameplay—and provides optimal recommendations for low-end, mid-range, and high-end hardware. Special attention is given to settings that are easy to misconfigure or have a disproportionate impact on performance or gameplay.
---
Graphics Settings
KSP's graphics options affect both visual quality and performance. The most impactful settings are those related to terrain, shadows, and effects. Note that KSP uses Unity engine and is sensitive to CPU performance, especially with many parts or large vessels.
| Setting | Description | Low-End (e.g., Intel HD Graphics, 8 GB RAM) | Mid-Range (e.g., GTX 1060, 16 GB RAM) | High-End (e.g., RTX 3080, 32 GB RAM) | Notes |
|---|---|---|---|---|---|
| Render Quality | Controls anti-aliasing and overall shader quality. | Fastest (low) | Good (medium) | Fantastic (ultra) | Lower settings reduce blur and improve FPS on weak GPUs. |
| Terrain Detail | Draw distance and detail of terrain geometry. | Low (25-50%) | Medium (50-75%) | High (75-100%) | Easy to misconfigure: Setting too high on low-end causes severe stutter during flight over mountains. |
| Terrain Scatters | Amount of trees, rocks, etc. | 0-10% | 30-50% | 60-100% | Scatters have a notable CPU cost when near ground. Disable entirely for lander missions on low-end. |
| Texture Quality | Resolution of planet and part textures. | Half Resolution | Full Resolution | Full Resolution | VRAM usage: high textures may cause crashes on GPUs with <2 GB VRAM. |
| Shadow Cascades | Number of shadow layers; affects shadow sharpness. | 2 Cascades | 4 Cascades | 4 Cascades | Higher cascades improve close-up shadows but cost GPU. 4 is good middle ground. |
| Anti-Aliasing | Smooths edges. MSAA is expensive; FXAA is lighter. | FXAA or Off | MSAA 4x | MSAA 8x or SMAA | On low-end, use FXAA or none. |
| Ambient Occlusion | Adds contact shadows. | Off | SSAO (low) | HBAO (high) | High-end: use HBAO for best look. Disable on low-end. |
| Motion Blur | Blurs fast-moving objects. | Off | Off | On | Personal preference; increases motion sickness for some. |
| V-Sync | Locks FPS to monitor refresh rate. | Off | Off or On | Off or On | Disable if you experience input lag. On can reduce screen tearing. |
| Framerate Limit | Caps FPS. | 30-60 FPS | 60 FPS | 60-144 FPS | Setting 60 FPS often yields smoother physics simulation. |
- Terrain Detail and Scatters: These are the #1 performance killers for mid-range systems. If you notice stutter when approaching the ground in a lander or plane, lower both.
- Texture Quality: Setting to "Full Resolution" on a GPU with less than 2 GB VRAM can cause crashes or heavy stuttering. Choose "Half Resolution" if unsure.
- Anti-Aliasing: MSAA does not work effectively in KSP's deferred rendering path; consider using FXAA or SMAA instead.
- V-Sync and Framerate Limit: KSP's physics simulation tick rate is tied to the frame rate up to a cap. Setting a framerate limit (e.g., 60 FPS) can reduce CPU load and provide more consistent physics – especially important for large vessels.
---
Audio Settings
KSP offers standard audio controls. Proper configuration can improve immersion and help with gameplay cues (e.g., engine sound indicating throttle level).
| Setting | Description | Recommended Value | Special Notes |
|---|---|---|---|
| Master Volume | Overall volume. | 100% (adjust as needed) | – |
| Music Volume | Background music. | 50-70% | Music can be distracting during precise maneuvers; lower to 30% for concentration. |
| Effects Volume | Sounds of engines, collisions, UI, etc. | 100% | Crucial for hearing engine cutoffs and staging sounds. |
| Ambient Volume | Wind, planet atmosphere sounds. | 70-100% | Adds immersion; can be lowered if too noisy. |
| Voice Volume | Kerbal voice lines (e.g., "Go for launch"). | 100% | Helps with mission alerts. |
| Mute When Minimized | Pauses audio when alt-tabbing. | On (recommended) | Prevents sound overlapping when game is backgrounded. |
| Spatial Audio | Enables 3D positional audio for engine sounds. | On | Requires good headphones or surround setup. |
- Effects Volume: Do not reduce below 50% if you rely on engine sounds to gauge throttle – many players find it helpful for docking and landing.
- Mute When Minimized: Turn this on to avoid audio glitches when switching windows, common with some audio drivers.
---
Controls
KSP supports keyboard, mouse, gamepad, and joystick (with custom axis mapping). Proper setup is essential for fine precision during docking and landing.
| Setting | Description | Recommended | Notes |
|---|---|---|---|
| Keyboard Layout | QWERTY, AZERTY, etc. | Match your physical keyboard. | Rebind keys if needed (e.g., spacebar for staging, Shift/Ctrl for throttle). |
| Mouse Sensitivity | Controls camera rotation speed. | 50-70% | Higher sensitivity can cause overshoot; lower is better for precise orbital views. |
| Invert Y Axis | For camera and controls. | Off (unless used to flight sims) | Personal preference; many airplane sim vets prefer inverted. |
| Joystick / Gamepad | Axis assignment, dead zones. | Calibrate in OS first. | Set a small dead zone (~5-10%) to prevent drift. Use linear response for throttle, exponential for pitch/yaw. |
| SAS / RCS Toggle Keys | Usually T and R. | Keep defaults | Easy to mis-press in flight; consider rebinding to less accidentally hit keys. |
| Quick Save / Load | Default F5/F9. | Keep or rebind to side keys | F9 can be pressed accidentally – rebind to a safer key like F8. |
| Time Warp Controls | < (slower) > (faster). | Default | No need to change. |
- Staging Key (Spacebar): The default action is to activate the next stage. Many beginners accidentally stage while trying to time warp or toggle SAS. Consider rebinding staging to a less convenient key (e.g., Backspace) if you have fat-finger issues.
- Throttle Controls: Shift (increase) and Ctrl (decrease) are standard. If using a joystick with analog throttle, map the axis at 50% for neutral (KSP uses 50% as zero throttle).
- Joystick Dead Zone: Too small a dead zone may cause unwanted roll/pitch due to drift. Too large loses fine control. Experiment with 5-10%.
---
Accessibility Settings
KSP has limited built-in accessibility features, but some workarounds exist.
| Setting / Feature | Description | Recommendation |
|---|---|---|
| Color Blind Mode | _Not present in vanilla KSP._ | Use mod: KSP Accessibility Mod or TextureReplacer with high-contrast UI. |
| UI Scale | Adjusts size of interface elements. | In `settings.cfg` (open with Notepad) find `UIScale = 1.0` and increase to 1.25-1.5. |
| Font Size | Cannot change separately; follows UI scale. | Increase UI scale for larger fonts. |
| Auto-Hide Navball | Hides navball after few seconds. | Off (keeps navball always visible) – helpful for clarity. |
| Kerbal Names | Shows names of crew members. | On – aids in tracking astronauts. |
| Speech Bubble Text | Kerbal voice lines appear as text. | On – for hearing-impaired players. |
- Color Blindness: KSP's stock UI uses green/gray for delta-V maps and red/green for staging icons. Install KSP dV Colorblind mod (available on CurseForge) to adjust colors.
- UI Scaling for High-Resolution Monitors: If you play on 4K or 1440p, the default UI is tiny. Manually editing `UIScale` in the settings.cfg file (located in `<KSP install>/settings.cfg`) to 1.2-1.5 is highly recommended. This file is regenerated on launch, so change it while the game is closed.
---
Language Settings
KSP is available in multiple languages. The language affects all in-game text including tutorials, parts descriptions, and menus.
| Setting | Description | Recommendation |
|---|---|---|
| Language | Select from available options (English, French, German, Spanish, Italian, Japanese, Russian, Chinese Simplified, Chinese Traditional, Korean). | Choose your native language. |
| Force Language | If the game doesn't detect correctly, use launch options in Steam: `-language japanese` (for example). | Add launch option if auto-detection fails. |
- Mod Compatibility: Many mods (e.g., MechJeb, Kerbal Engineer Redux) display additional text that may not be translated. If you rely heavily on mods, English is safest.
- Steam Cloud Saves: Language choice is independent of saves, so you can switch mid-playthrough without losing progress.
---
Network Settings
KSP does not have built-in multiplayer or network features (aside from mods). The only network-related settings are indirect.
| Setting / Feature | Description | Recommendation |
|---|---|---|
| Steam Cloud | Syncs saves and settings across devices via Steam. | On (recommended to backup progress). |
| Mod Updates | When using CurseForge or CKAN, allow automatic updates. | Manage manually to avoid breaking save files. |
| DLC Authentication | Requires occasional online check for DLC ownership. | Ensure internet connection when launching after DLC purchase. |
| Telemetry | Sends anonymous usage data. | Can be disabled in `settings.cfg` (set `SendAnonymousUsageData = False`). |
- Steam Cloud conflicts: If you play on multiple PCs, ensure cloud sync is complete before launching, else saves may be overwritten. Disable cloud if you have many mods as synced settings may cause errors.
- No Multiplayer: As of KSP 1.12.x, there is no official multiplayer. The Luna Multiplayer mod exists but is complex to set up and not covered in this guide.
---
Gameplay Settings
These settings affect difficulty, simulation complexity, and convenience features.
| Setting | Description | Recommended | Notes |
|---|---|---|---|
| Difficulty Preset | Easy, Normal, Hard, Custom. | Normal for first-time players. | Easy gives infinite fuel – unrealistic. Hard disables quick saves and reverts. Custom allows fine-tuning. |
| Reversion | Allow revert to launch / VAB/SPH. | On (Normal) – essential for learning. | Turn off for hardcore playthrough. |
| Quick Saves / Loads | F5/F9. | On (Normal) – critical for testing. | Disabling causes high frustration. |
| Auto Save Interval | How often the game auto-saves. | 5 minutes (moderate). | Too frequent causes micro-stutter; too long risks losing progress. |
| Comm Network | Requires antenna connection for probe control. | Off for beginners; On for realism. | Easy to misconfigure: New players can get stuck with no signal. Start with Off. |
| Resource Transfer | Allow fuel crossfeed regardless of part orientation. | On (enabled). | Off forces realistic fuel flow – more challenging. |
| Kerbal Experience | Damage from g-forces, part failures. | Off (unless you want extra difficulty). | G-force effects can kill Kerbals if ignored. |
| Part Pressure Limits | Parts can only withstand certain atmospheric pressure. | Off initially; On for advanced. | Makes high-speed atmospheric flights harder. |
| Command Seat Restrictions | Only certain Kerbals can use external seats. | Off (easier). | On adds role-playing depth. |
| Tutorials | Show guidance for basic actions. | On for first playthrough. | Can be turned off in settings after learning. |
| Theta (Advanced Tweakables) | Show hidden part options like deploy limits. | On (improves design flexibility). | Turn on from Main Menu > Settings > Gameplay. |
| Show Center of Mass, Thrust, Lift | Display VAB overlays. | On (enabled) – helps balance craft. | Essential for designing stable rockets. |
- Comm Network (Difficulty Setting): _Most common trap for new players._ If enabled, probes without a clear line of sight to Kerbin (or relay satellites) will become uncontrollable. Many first-time players accidentally enable this by choosing "Hard" difficulty. Always start with Comm Network OFF.
- Quick Saves vs. Auto Saves: Quick saves (F5) are per-vessel sessions; auto saves are global. Use quick saves frequently (before staging, landing, or docking).
- Theta (Advanced Tweakables): _Hidden by default._ You must go to Main Menu > Settings > Gameplay and check "Enable Advanced Tweakables" to see options like limiter for landing struts, tweakable solar panels, and more. This is essential for optimizing craft.
- Resource Transfer: Leaving this OFF can cause confusion when fuel doesn't flow from docked ships. Turn ON for convenience.
- Target: 30 FPS stable.
- Settings Preset: Use "Fastest" graphics preset, then adjust:
- Additional Tips: Play in windowed mode at 1280x720. Avoid large part counts (keep vessel < 100 parts). Disable ambient occlusion and motion blur. Close background apps.
- Target: 60 FPS with mods.
- Settings:
- Additional Tips: Use SSD for faster loading. Install MechJeb for auto-pilot to reduce CPU load during burns. Keep vessel part count < 200 for smooth physics.
- Target: 60-144 FPS with max visuals and many mods.
- Settings:
- Additional Tips: Use mods like EVE (Environmental Visual Enhancements) and Scatterer for atmospheric effects. Monitor CPU temperature – KSP stresses single-core performance heavily. Consider overclocking your CPU's single core speed.
---
Performance Optimization by Hardware Level
#### Low-End System (e.g., Intel i3, 8 GB RAM, Intel HD Graphics 4000, HDD)
- Terrain Detail: 25%
- Terrain Scatters: 0%
- Shadow Cascades: 1 (requires editing settings.cfg: `SHADOW_CASCADES = 1`)
- Anti-Aliasing: Off
- Texture Quality: Half Res
- Framerate Limit: 30 FPS
- V-Sync: Off
#### Mid-Range System (e.g., Intel i5, 16 GB RAM, GTX 1060 6GB, SSD)
- Graphics Preset: Good
- Terrain Detail: 75%
- Terrain Scatters: 40%
- Shadow Cascades: 4
- Anti-Aliasing: FXAA or MSAA 4x
- Texture Quality: Full
- Ambient Occlusion: SSAO (low)
- Framerate Limit: 60 FPS
- V-Sync: On (if no screen tearing)
#### High-End System (e.g., Intel i7/i9, 32 GB RAM, RTX 3080, NVMe SSD)
- Graphics Preset: Fantastic
- Terrain Detail: 100%
- Terrain Scatters: 70% (can go to 100% but may cause occasional dips near surface)
- Shadow Cascades: 4
- Anti-Aliasing: SMAA (for deferred rendering) or MSAA 8x
- Texture Quality: Full
- Ambient Occlusion: HBAO
- Motion Blur: Off (can toggle on)
- Framerate Limit: 60 FPS (to ensure stable physics) or 120+ if you can maintain >60.
- V-Sync: Off (use G-Sync/Freesync instead)
---
Summary of Easy-to-Misconfigure Settings
| Setting | Why It's Tricky | Correct Action |
|---|---|---|
| Terrain Detail & Scatters | Too high on low-end = stutter. | Match to hardware; start low, increase gradually. |
| Texture Quality | Full resolution on <2 GB VRAM = crash. | Use Half Res if unsure. |
| Comm Network | New players lose control of probes. | Turn OFF in difficulty settings. |
| Advanced Tweakables | Hidden setting limits part options. | Enable in Main Menu > Settings > Gameplay. |
| Quick Save / Staging Keys | Spacebar accidentally pressed during flight. | Rebinding to a less accessible key is safer. |
| UI Scale for High Res | Default UI tiny on 4K. | Edit `UIScale` in settings.cfg. |
| Framerate Limit | Too high = physics inconsistency. | Cap at 60 FPS for reliable simulation. |
By carefully adjusting these settings, you can tailor KSP to your hardware and playstyle. Remember that KSP is CPU-bound; prioritize lower physics load (fewer parts, lower time-warp settings) over graphical flare for a smoother experience. Happy launching!
Important Notes
Important Notes for Kerbal Space Program
Warnings & Initial Advice
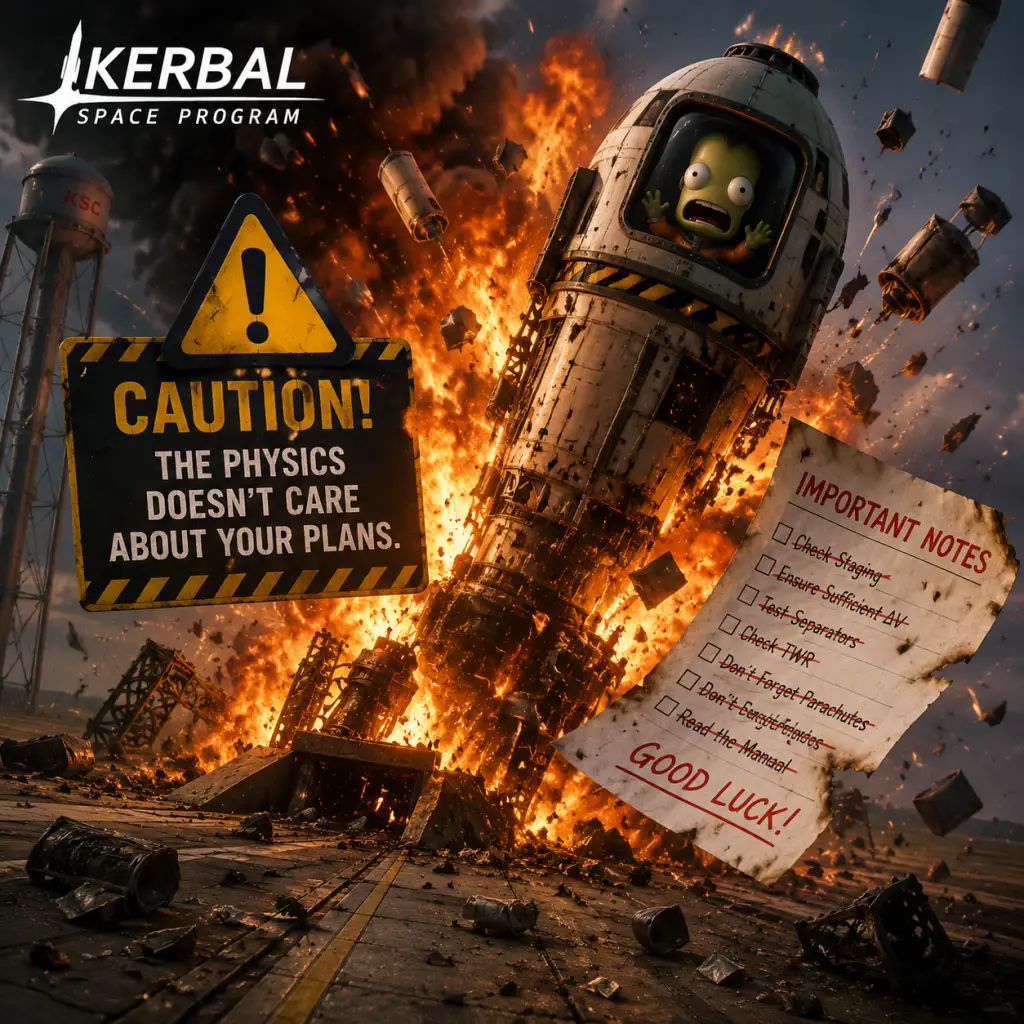
- Physics is unforgiving: KSP uses realistic orbital mechanics. A small mistake in delta-v planning or staging can lead to catastrophic failure. Always quicksave (F5 with default controls) before critical maneuvers.
- Quicksave is your best friend: Press F5 to quicksave, F9 to quickload. But note: quicksave overwrites automatically, so use named saves for major missions.
- The Kraken is real: The term "Kraken" refers to physics glitches that can violently explode your craft. Common triggers: high time warp near celestial bodies (especially Jool), very large ships with many parts, or docking with extreme forces. Avoid time warp above 1000x near planets, and keep part counts reasonable.
- Beware of the Debug Menu: Press Alt+F12 to open the debug console. It can be tempting to cheat, but overusing it ruins the sense of achievement. Use only to recover from bugs.
- Ignoring the VAB/SPH building limits: Each building has a level (upgradeable for funds). Low-level buildings restrict part count, weight, and size. Build accordingly until upgraded.
- Forgetting to add solar panels or batteries: Without electric charge, control surfaces, reaction wheels, and probe cores stop working. On unmanned missions, you'll lose control. Always check electric charge budget.
- Non-optimal staging: Heavy stages that are discarded too late (or too early) waste delta-v. Use the Delta-v maps and the Kerbal Engineer Redux mod to plan.
- Not unlocking the right tech first: In Career mode, prioritize basic rocketry, stability (fins, reaction wheels), and solar panels. Avoid rushing to high-tier engines without enough fuel tank tech.
- Overheating: Reentry from high velocities (e.g., Mun return) or flying inside atmospheres without a heat shield can destroy parts. Always point the heat shield retrograde and control descent speed.
- Losing kerbals permanently: In Career mode if you have permadeath enabled (default), dead kerbals are gone. Revert flights (Alt+ F12 or abort) before disaster.
- Building upgrades are permanent and cost many funds: Once you upgrade a building (e.g., VAB to level 2), you can't downgrade. Choose wisely; rush the most needed upgrades (Mission Control, Tracking Station, VAB/SPH).
- Contract selection: Accepting a contract that you later cannot complete wastes reputation. You can cancel contracts, but with a reputation penalty. Only accept what you're certain to achieve.
- Tech tree choices: You cannot revert tech nodes. If you unlock a dead-end node early, you may lack crucial parts for early contracts. Look up a recommended tech tree order online.
- Kerbals on EVA can drift away: If a kerbal runs out of EVA propellant while in orbit, they are stranded forever unless you rescue them. Keep extra fuel or limit EVA distances.
- Mission log completion: Some historical missions (like first Mun landing) are only rewarded once per save. If you revert flight, the contract resets, but the milestone might be missed if you load a save that already passed it. Usually safe, but be careful.
- The first orbit: Getting a rocket above 70 km is straightforward, but circularizing requires understanding of prograde burns and throttle management. Many new players either don't burn long enough or burn at the wrong time.
- The Mun landing: Asymmetric fuel consumption, no atmosphere for braking, and low gravity make it easy to tip over. Use wide landing legs, low center of mass, and manual suicide burns.
- Docking: Mastering rendezvous and docking is one of KSP's hardest skills. Use the chase camera, set your target, and practice with the built-in docking tutorial. Expect many failures.
- Interplanetary transfers: Beyond Duna, you need precise launch windows and node planning. Use external tools (like Transfer Window Planner mod) or the game's maneuver nodes to set up efficient burns.
- Aerobraking at Jool or Laythe: The atmosphere is dense; too deep and you burn up or overshoot. Use heatshields and brake gradually.
- Career mode early grind: Doing only the first few contracts (fly by, reach altitude) can be tedious. Alternate with part testing contracts that offer big payouts. Use the Strategy system (Administration building) to convert reputation to funds.
- Science farming: You don't need to do fully biome-complete science on Kerbin. A few missions to Mun and Minmus give more than enough science to unlock the whole tech tree. Avoid spending hours driving a rover around the KSC.
- Overbuilding: Building gigantic rockets to compensate for inefficiency wastes time and funds. Smaller, well-designed rockets are cheaper and easier to pilot.
- Manual flying for hours: Use MechJeb (mod) or the game's SAS and maneuver nodes to automate burns. But relying entirely on autopilot can prevent learning.
- Part testing contracts that require specific conditions (e.g., 'Test part X while splashed down at Kerbin at 10000 m altitude 300 m/s'): These are often impossible or require cheats. Ignore contradictory contracts unless you exploit a bug.
- KSP is a single-player game with no built-in online multiplayer. There is no anti-cheat system. Mods are widely allowed and encouraged.
- If you play in multiplayer mods (Luna Multiplayer, DMP, etc.): Follow server rules—no griefing (e.g., crashing ships into others), no exploiting physics glitches, and be respectful. Voice chat may not be present, but text chat etiquette still applies.
- Sharing craft files on KerbalX or similar: Always credit original creators if using their designs. Don't claim others' work as your own.
- No official leaderboard or competitive ranking exists, so cheating in single-player only ruins your own experience.
- Use multiple save slots: Avoid overwriting your main Career mode save. Create a separate Science or Sandbox save for testing crazy designs.
- Back up your saves: The save files are located at `%USERPROFILE%\AppData\LocalLow\Squad\Kerbal Space Program\saves\` on Windows, `~/Library/Application Support/ Squad/Kerbal Space Program/saves/` on Mac, and `~/.config/unity3d/Squad/Kerbal Space Program/saves/` on Linux. Periodically copy the entire save folder to avoid losing progress from corruption.
- Persistent.sfs vs. quicksave.sfs: The main save is `persistent.sfs`. The `quicksave.sfs` is overwritten every quicksave. You can manually copy persistent.sfs to backup before risky missions.
- Modding caution: Installing or removing mods mid-career can corrupt your save. Always back up before adding mods, and read mod compatibility notes.
- The "Revert Flight" feature (available in difficulty settings) lets you go back to VAB/SPH or launchpad. If you have it disabled, you lose that safety net. Recommend enabling it for beginners.
- The 'M' key opens the map where you can set maneuver nodes and see your orbit. Many new players don't realize they can plan burns in map view.
- SAS (Stability Assist System) can be toggled with T and can point to prograde, retrograde, normal, etc., but only if you have a pilot or a sufficiently upgraded probe core. Without it, controlling a rocket is much harder.
- Action groups (default 1-9) let you activate multiple parts (e.g., solar panels, lights, ladders) with a single key. Use them to simplify complex ships.
- The 'Alt' key toggles fine control mode (snap to 5° increments) when building or rotating parts. Also, holding 'Alt' while clicking a part in the parts list adds multiple.
- You can recover funds from vessels landed at KSC (or splashed down near shore) by opening the tracking station, selecting that vessel, and clicking 'Recover'. This gives back most of the vessel's cost.
- The tracking station can be used to see all your active vessels and also to warp time while waiting for a transfer window planet alignment. Don't waste time on the launch pad.
- Reentry heating can be reduced by taking a shallow reentry angle (aerobraking several times) rather than plunging straight in. Aim for periapsis around 30-40 km for Kerbin.
- You can rename vessels and kerbals in the Tracking Station or Astronaut Complex. Renaming helps keep track of mission purpose.
- The 'F3' key brings up a flight log after a crash or explosion, showing what exactly broke. Useful for debugging structural failures.
- Alt+Left click on a part in the editor to duplicate it along with its children (symmetry mode). Speeds up building.
- Kerbal Experience (stars) affects abilities. Pilots gain better SAS options; scientists unlock experiments; engineers repack parachutes and repair wheels. After leveling up (via flights), they become invaluable.
- Don't be discouraged by failures. Every explosion teaches you something. Watch tutorials from Scott Manley, Matt Lowne, or KSP YouTubers.
- Use mods wisely. Essential quality-of-life mods: Kerbal Engineer Redux (delta-v info), MechJeb (optional automation), and Community Resource Pack for life support mods (if you want more challenge).
- Have fun and embrace the chaos. KSP's charm is in its emergent stories: the stranded kerbal on Minmus, the accidental Mun slingshot that became a solar orbit, the Kraken attack that sent your space station spinning. These become your best memories.
Pitfalls & Common Mistakes
Irreversible Choices & Missable Content
Difficulty Spikes
Grinding Traps & Time Wasters
Online Etiquette & Anti-Cheat Notes
Save Management Advice
Things Players Commonly Regret Not Knowing Earlier
Final Advice
This guide condenses lessons from thousands of hours of KSP failure and success. Apply this knowledge and you'll avoid many common pitfalls.
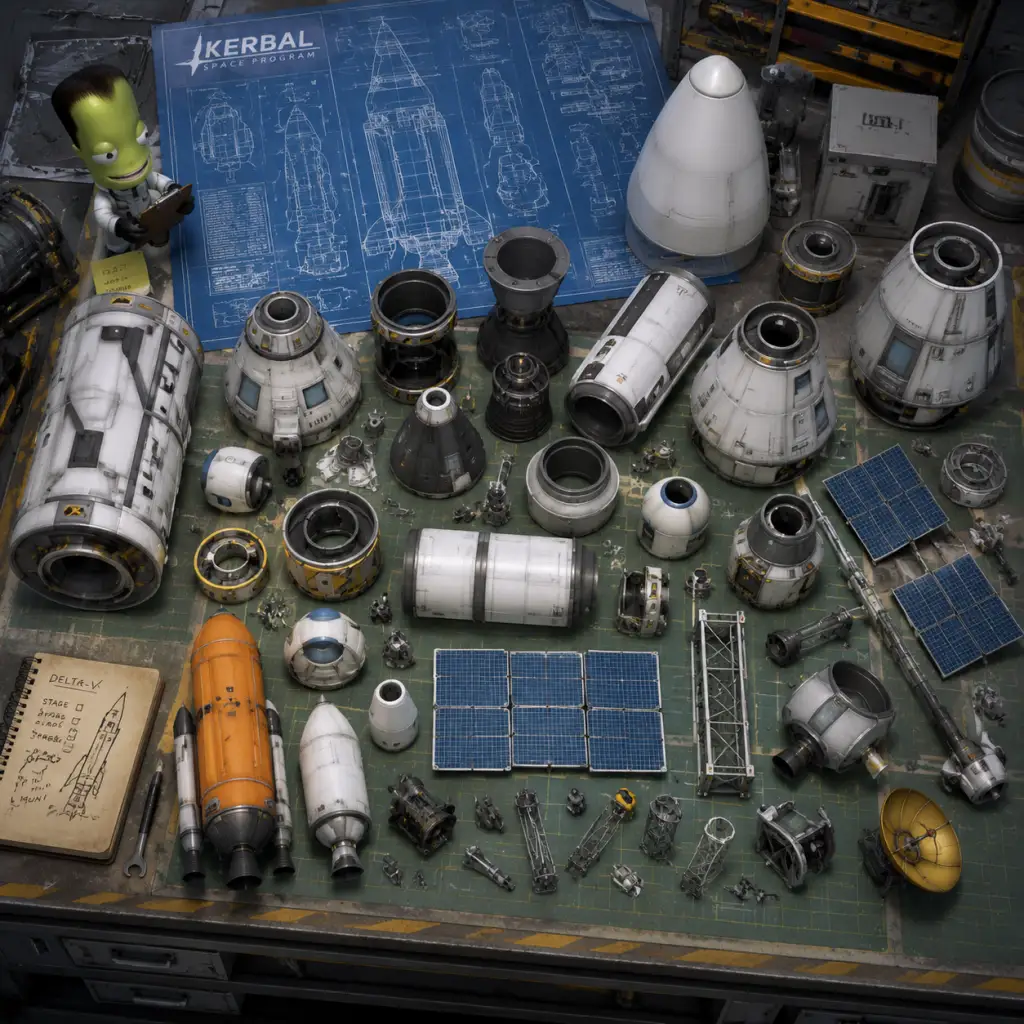
All Game Items
All Game Items in Kerbal Space Program
Kerbal Space Program (KSP) does not include traditional weapons, armor, or typical RPG currencies. Instead, the game revolves around constructing rockets, spacecraft, and bases using a vast catalog of parts, managing resources, and conducting science. This guide categorizes all major items—parts, resources, science equipment, collectibles, and special modules—with explanations on how to unlock, obtain, and effectively use them.
1. Core Resource Items
Resources are consumed or produced during missions. They are stored in tanks and transferred between vessels.
#### 1.1 Liquid Fuel & Oxidizer
- Description: The primary propellant for most rocket engines. Liquid Fuel (LF) and Oxidizer are stored in combined or separate tanks.
- How to Obtain: Unlocked via the tech tree (e.g., Basic Rocketry, General Rocketry). Purchased in the Vehicle Assembly Building (VAB) or Spaceplane Hangar (SPH) as part of a fuel tank part.
- When Useful: Every launch, orbital maneuver, and interplanetary transfer.
- Synergies: Used by liquid fuel engines (e.g., LV-T30, Swivel). Pair with engine-specific performance (Isp, thrust) for optimum delta-v.
- Description: Used by RCS (Reaction Control System) thrusters for fine attitude control and translation.
- How to Obtain: Unlocked via tech (e.g., Precision Propulsion). Stored in dedicated monopropellant tanks.
- When Useful: Docking, landing on small bodies, precise maneuvers.
- Synergies: RCS blocks (e.g., Place-Anywhere 7, Linear RCS) consume monopropellant. More efficient than reaction wheels for translation.
- Description: Propellant for ion engines – highly efficient but low thrust.
- How to Obtain: Unlocked via tech (e.g., Ion Propulsion). Stored in spherical Xenon containers.
- When Useful: Long-duration missions (e.g., interplanetary probes, rovers). Requires patience due to low thrust.
- Synergies: Used exclusively with the PB-ION Electric Propulsion System and Dawn ion engine (Breaking Ground DLC). Pair with solar panels or RTGs for power.
- Description: Power for avionics, reaction wheels, lights, and science instruments. Measured in ElectricCharge units (EC).
- How to Obtain: Generated by solar panels, RTGs (Radioisotope Thermoelectric Generators), fuel cells. Stored in batteries.
- When Useful: Always needed for active control and communication. Critical during eclipses or distant from Sun.
- Synergies: High-power antennas and ion engines drain large amounts. Use multiple solar panels or RTGs for deep space.
- Description: Raw material for the Convert-O-Tron to produce Liquid Fuel, Oxidizer, and Monopropellant. Found on planetary surfaces via drills.
- How to Obtain: Drill equipped with an ore tank. Available via tech (e.g., Mining, Advanced Metalworks).
- When Useful: In-situ resource utilization (ISRU) for refueling bases or landers.
- Synergies: Requires drills, ore tanks, and Convert-O-Tron. Fuel cells can convert Ore and ElectricCharge to power.
- Description: Consumed by heat shields during atmospheric reentry to dissipate heat.
- How to Obtain: Integrated into heat shield parts (e.g., Heat Shield 1.25m, 2.5m).
- When Useful: Returning from orbit or interplanetary travel; preventing overheating on craft.
- Synergies: Use with a heat shield and ensure ablator quantity matches reentry speed. Pair with parachutes for landing.
- Description: Containers for Kerbals or probes. Provide control, SAS, and crew capacity.
- Types:
- How to Obtain: Early tech: Start, Basic Rocketry, etc. Larger pods later.
- When Useful: Essential for any manned or unmanned mission. Choose based on crew capacity and mass.
- Synergies: Pair with reaction wheels for better SAS. For probe cores, ensure enough battery and antenna for communication.
- Description: Convert propellant into thrust. Categories: Liquid Fuel, Solid Fuel, Ion, Nuclear.
- Key Examples:
- How to Obtain: Unlock via tech nodes like General Rocketry, Propulsion Systems, Nuclear Propulsion.
- When Useful: Each engine excels in a specific environment (atmosphere, vacuum) or role (booster, upper stage, lander).
- Synergies: Match engine Isp with atmospheric pressure. Use multiple engines for heavy lift. Combine with fuel tank sizes for desired thrust-to-weight ratio.
- Description: Store propellant (LF/O, Monopropellant, Xenon, Ore).
- Variants: Various diameters (0.625m, 1.25m, 2.5m, 3.75m) and shapes (cylindrical, spherical, structural).
- How to Obtain: Unlocked alongside engines or through tech (e.g., Fuel Systems, Heavy Rocketry).
- When Useful: Every craft. Select tank size to fit engine and mission delta-v requirements.
- Synergies: Stack tanks in series; use radial tanks for extra capacity. Lightweight tanks improve mass ratio.
- Description: Connectors, struts, fairings, adapters, and girders to build custom shapes.
- Examples: Cubic Octagonal Strut, TR-18A Stack Decoupler, Modular Girder Adapter.
- How to Obtain: Unlocked via tech (e.g., General Construction, Advanced Construction).
- When Useful: Reducing part count, transferring loads, attaching side boosters, fairing payloads.
- Synergies: Use struts to prevent wobbling in large builds. Fairings protect payload from aerodynamic drag.
- Description: Nose cones, wings, control surfaces, and air intakes for atmospheric flight.
- Examples: Nose Cone, Delta Wing, Elevon 1, Advanced Nose Cone (Breaking Ground).
- How to Obtain: Unlocked via tech like Aerodynamics, Supersonic Flight.
- When Useful: Reducing drag on launch; controlling airbreathing stages; building spaceplanes.
- Synergies: Wing area affects lift. Control surfaces provide pitch/roll/yaw during atmospheric flight. Pair with air-breathing engines for early ascent.
- Decouplers: Separate stages (e.g., TT-38K Radial Decoupler, TR-2V Stack Decoupler).
- Docking Ports: Allow docking two vessels (e.g., Clamp-O-Tron Sr., Jr.).
- How to Obtain: Early tech (Stage Separation, General Construction) for decouplers; later (Advanced Docking) for ports.
- When Useful: Essential for staging, assembling space stations, refueling, and crew transfers.
- Synergies: Combine decouplers with sepatrons for safe separation. Docking ports require precise alignment and RCS.
- Description: Instruments to gather scientific data from experiments.
- Major Items:
- How to Obtain: Unlock via science-focused tech nodes (e.g., Basic Science, Advanced Science).
- When Useful: Every mission to gain science points (Career/Science mode). Use different experiments in biomes or at high/low altitude.
- Synergies: Combine with a mobile processing lab to transmit data multiple times. Return experiments to Kerbin for maximum science yield.
- Description: Enable communication link to Kerbin (required in some modes with CommNet).
- Types:
- How to Obtain: Unlock via tech (e.g., Advanced Electrics, Large Electrics).
- When Useful: Essential for controlling unmanned probes (requires CommNet signal). Relay antennas extend network.
- Synergies: Multiple antennas can combine. Directional antennas require pointing; deployable antennas save space.
- Solar Panels: Convert sunlight to EC (e.g., OX-4B, Gigantor XL).
- RTGs: Generate EC constantly (e.g., PB-NUK, Breaking Ground RTG).
- Fuel Cells: Convert LFO into EC + heat (e.g., Fuel Cell Array).
- Batteries: Store EC (e.g., Z-100, RC-001S).
- How to Obtain: Tech nodes: Basic Electrics, Advanced Electrics, Nuclear Power.
- When Useful: Every vessel needs power. Solar panels are best near Kerbin; RTGs for deep space.
- Synergies: Batteries act as buffer for peak loads. Fuel cells can also produce water (with mods or DLC).
- Wheels: For rovers (e.g., RoveMax Model S2, TR-2L).
- Landing Legs: For stable landings (e.g., LT-1, LT-5).
- How to Obtain: Tech like Landing, Field Science.
- When Useful: Landing on planets; exploring surfaces with rovers.
- Synergies: Use landing legs on landers; wheels need suspension for rough terrain.
- Reaction Wheels: Provide torque for attitude control (e.g., Inline Reaction Wheel, SAS).
- RCS Thrusters: Use monopropellant (e.g., RV-105 RCS, Place-Anywhere 7).
- How to Obtain: Tech: Precision Propulsion, Advanced Flight Control.
- When Useful: Maneuvering without main engines; docking; stabilizing large vessels.
- Synergies: Reaction wheels need EC. RCS is essential for translation. Combine both for best control.
- Cargo Bays: Hold payloads inside aircraft/spaceplanes (e.g., Mk3 Cargo Bay, Mk2 Cargo Bay).
- EVA Jetpack: Used by Kerbals during spacewalks for small thrust.
- Ladders: Allow Kerbals to climb (e.g., Telescopic Ladder).
- How to Obtain: Via tech (e.g., Spaceplane parts for cargo bays; EVA items default, but better jetpacks via EVA Propulsion).
- When Useful: Transporting rovers, satellites; Kerbals collecting surface samples.
- Breaking Ground: Adds robotic parts (hinges, pistons, rotors, servos), deployable science parts (e.g., Surface Experiment Package, Weather Station), and propellers.
- Making History: Adds historical parts (e.g., Soviet-style nose cones, 2.5m fairings, new engines like the Wolfhound), mission builder props.
- Obtaining: DLC purchased separately. Parts appear in VAB.
- Usefulness: Robotics allow moving parts, folding wings, drills. Propellers enable atmospheric flight without rockets. Surface experiments add long-term science.
- Synergies: Robotics can automate solar panel deployment, rover arms. Combine with KAL-1000 controller for sequences.
- Description: Generated by experiments (crew reports, EVA reports, surface samples, etc.). Can be transmitted (partial science) or recovered (full value).
- How to Obtain: Perform experiments in flight/on surface.
- When Useful: Unlock tech tree in Career/Science mode.
- Synergies: Use a Mobile Processing Lab to convert data into more science points. Transmit high-value experiments (e.g., goo, sci jr) from remote locations.
- Description: Plantable flags on celestial bodies to mark achievements.
- How to Obtain: Crafted in VAB/SPH under 'Flags' tab; also available as a part.
- When Useful: Tradition upon first landing; can be placed via EVA.
- Synergies: None gameplay-wise, but provide a sense of accomplishment.
- Surface Samples: Collected by Kerbals on EVA. Highly valuable science.
- Crew/EVA Reports: Small science from command pod or Kerbal.
- When Useful: Early science gains; biome-specific.
- Description: Money used in Career mode to buy parts and vessel costs.
- How to Obtain: Completing contracts, recovering vessels, world firsts.
- When Useful: Purchase new parts at the start; upgrade buildings.
- Synergies: Build efficient, reusable rockets to save costs. Accept lucrative contracts.
- Description: Points to unlock tech tree nodes.
- How to Obtain: Recovering or transmitting science experiments; world firsts.
- When Useful: Progressing through tech tree.
- Synergies: Prioritize high-value experiments (surface samples, goo, materials bay). Use mobile lab to double research.
- Description: Public image affecting contract rewards and new contract types.
- How to Obtain: Completing contracts (especially world firsts, milestones). Lose reputation from failures.
- When Useful: Unlock better contracts (e.g., exploration, satellite networks).
- Synergies: Maintain high reputation for lucrative offers.
- Description: Small amount of monopropellant in Kerbals' EVA jetpacks.
- How to Obtain: Default with Kerbal; refilled by entering command pod or using a dedicated part.
- When Useful: Spacewalks, moving between docked ships, rescues.
- Synergies: Manage propellant carefully; use only for small corrections.
- Note: Vanilla KSP has no life support. Mods add food, water, oxygen.
- Training: In Career mode, Kerbals gain experience levels (Pilot, Engineer, Scientist) improving SAS, repair, science yields.
- How to Obtain: Recruited from Astronaut Complex; can rescue stranded Kerbals via contracts.
- Usefulness: Each has unique skills: Pilots enable SAS stability, Engineers repair wheels and struts, Scientists boost science experiments.
- Synergies: Assign appropriate Kerbal to role: Pilot on crewed capsule, Scientist on lab, Engineer on rover/station.
- Delta-V (Δv) is the single most important metric: sum of Isp × g0 × ln(mass_fueled / mass_dry).
- TWR (Thrust-to-Weight Ratio) must be >1 to lift off Kerbin (ideal ~1.2-1.5).
- Engine Clustering: Use multiple small engines for redundancy but higher part count.
- Staging: Decouple empty tanks to reduce mass; asparagus staging increases efficiency.
- Heat Management: Radiator panels prevent overheating from engines/atmosphere.
- CommNet: Antenna strength and range; relay network for far planets.
- ISRU Loop: Drill → Ore tank → Convert-O-Tron → LFO/Mono → tank → engine.
- Tech Level: Higher-tier parts (e.g., Poodle, Mammoth) have better Isp, thrust, or efficiency. Unlock via deeper tech nodes.
- Upgrade via Building Upgrades: In Career, upgrading VAB, Launch Pad, R&D, etc., unlocks larger part limits, higher thrust limits, and more complex actions.
- DLC Parts: Making History adds high-performance engines like Wolfhound (high Isp, low thrust) suitable for upper stages. Breaking Ground robotics allow movable science arms, solar panel deployers.
#### 1.2 Monopropellant
#### 1.3 Xenon Gas
#### 1.4 Electric Charge
#### 1.5 Ore
#### 1.6 Ablator (Heat Shield Resource)
2. Spacecraft Parts (Components)
Parts are the building blocks of any vessel. They are unlocked through the tech tree and purchased with in-game Kerbal currency (Funds) in Career mode. In Science mode, they are unlocked via science points; in Sandbox, all are available.
#### 2.1 Command Modules
- Mk1 Command Pod: Single-Kerbal, basic control.
- Mk1-2 Command Pod: Three-Kerbal, advanced SAS.
- Mk2 Lander Can: Two-Kerbal, low profile for landers.
- Probodobodyne RoveMate: Probe core for rovers (no crew).
#### 2.2 Engines
- LV-T30 Liquid Fuel Engine: Powerful, no gimbal, early game.
- LV-909 Terrier: Vacuum-optimized, efficient for upper stages.
- LV-N Atomic Rocket Motor: Nuclear thermal engine, high Isp in vacuum, heavy.
- RT-10 Solid Fuel Booster: High thrust, simple staging, no throttle.
- PB-ION Dawn Ion Engine: Low thrust, high Isp, long burns.
#### 2.3 Fuel Tanks
#### 2.4 Structural Parts
#### 2.5 Aerodynamic Parts
#### 2.6 Decouplers & Docking Systems
#### 2.7 Science Equipment
- Mystery Goo Containment Unit: Measures goo behavior; returns goo observation.
- Science Jr. (Material Bay): Analyzes material samples.
- Thermometer: Measures temperature.
- Barometer: Measures pressure.
- Gravioli Detector: Measures gravity.
- Accelerometer: Measures acceleration.
- SC-9001 Science Jr.: Upgraded material bay.
- PresMat Barometer: Advanced barometer.
- Spectrometer: Analyzes light spectrum.
- Multispectral Imaging Platform: High-res imaging.
- Atmospheric Fluid Spectro-Variometer: Measures atmospheric composition.
#### 2.8 Communication & Antennae
- Communicatron 16-S: Short range, low power.
- HG-5 High Gain Antenna: Medium range.
- RA-2 Relay Antenna: Long range, can relay.
- DTS-M1: Short-directional.
#### 2.9 Power Generation & Storage
#### 2.10 Landing Gear & Rovers
#### 2.11 Propulsion-Related (RCS, Reaction Wheels)
#### 2.12 Cargo & Kerbal Equipment
#### 2.13 Special DLC Items (Breaking Ground, Making History)
3. Science & Collectibles
#### 3.1 Science Reports & Data
#### 3.2 Flags
#### 3.3 Surface Samples & Astronaut Reports
4. Currency & Progression Items
#### 4.1 Funds (Kerbal Currency)
#### 4.2 Science Points
#### 4.3 Reputation
5. Consumables & Kerbal Items
#### 5.1 EVA Propellant (Jetpack Fuel)
#### 5.2 Ablator (already covered)
#### 5.3 Life Support
#### 5.4 Kerbals (Crew)
6. Important Part Upgrade & Synergy Concepts
7. Part Quality Tiers & Upgrades
8. Summary Table of Key Resource Tanks
| Resource | Storage Part Examples | Best Used For |
|---|---|---|
| LF/O | FL-T800, Jumbo-64 | Rocket stages |
| Monoprop | Stratus-V, Mk2 Monoprop | RCS systems |
| Xenon | PB-X150, X200-16 | Ion propulsion |
| Ore | Small Ore Tank, Large Ore Tank | ISRU mining |
| Electric | Z-400, RC-001S | Power buffer |
Conclusion
This guide covers all major items in Kerbal Space Program. Unlike action games, KSP's "items" are parts and resources that you combine to overcome physics. Understanding each part's purpose and synergy is key to efficient rocket design. Always consider the mission environment (atmo vs vacuum) and plan for power, control, and communication. With practice, you'll master the game's inventory of over 200 parts and build anything from a simple suborbital hopper to an interstellar colony.
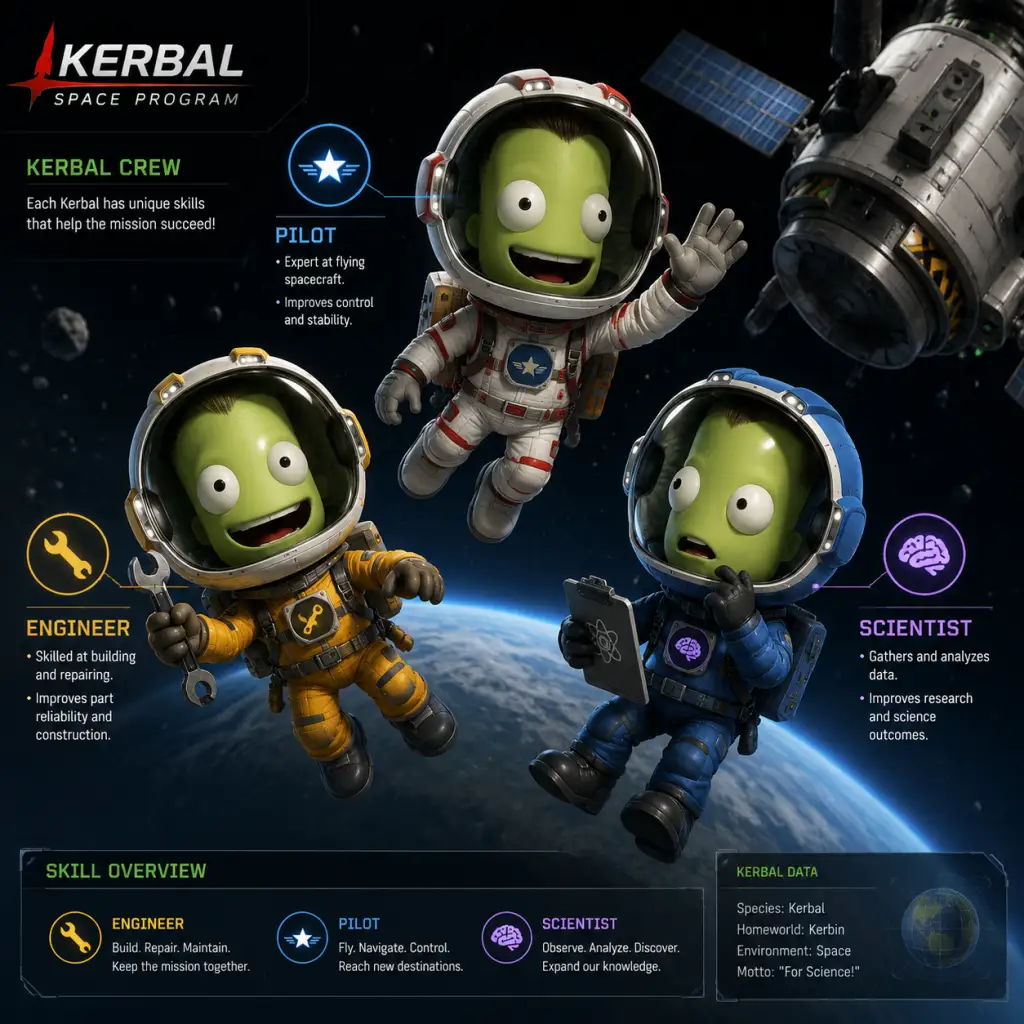
Character Skills
Character Skills Guide for Kerbal Space Program
In Kerbal Space Program (KSP), the playable characters are the Kerbals — small, green, cheerful astronauts. While they share basic traits, they are divided into three distinct classes (or roles): Pilot, Engineer, and Scientist. Each class has unique skills that unlock as they gain experience (usually through performing specific actions on missions). This guide covers every skill, ability, and upgrade for each class, including recommended builds, synergies, and when to use each skill.
Kerbal Experience & Skill Progression
- Kerbals earn experience points (XP) for: surviving flights, performing science experiments (Scientists), repairing parts (Engineers), or piloting vessels (Pilots).
- Every 2 or 4 XP (depending on game difficulty) they level up. Max level is 5 (or 5 stars).
- Higher levels unlock active abilities and passive bonuses.
- Skills are permanent — once learned, a Kerbal retains them even if reassigned.
- You can view a Kerbal's skills in the Astronaut Complex or in-flight via the crew portrait.
---
Pilot Skills
Pilots specialize in control and navigation. They are the best choice for manual flight, docking, and landing.
| Level | Skill/Ability | Effect | Use Case |
|---|---|---|---|
| 1 | Basic Stability Assist (Passive) | Reduces SAS (Stability Assist System) power consumption by 20%. | Useful early game to save electric charge on small probes or pods. |
| 2 | Maneuver Node Planner (Passive) | Allows creation of maneuver nodes up to 2x the normal amount (i.e., more precise burns). | Essential for complex orbital transfers (Mun, Minmus, interplanetary). |
| 3 | Prograde/Retrograde Hold (Active) | Active ability: automatically points the vessel prograde or retrograde when engaged (uses SAS). | Simplifies burns during maneuvers; great for beginners. |
| 4 | Radial In/Out Hold (Active) | Active ability: holds vessel orientation relative to radial markers (useful for docking). | Docking alignment and adjusting orbit inclination. |
| 5 | Target Hold (Active) | Active ability: continuously points the vessel toward a selected target (e.g., space station, lander). | Precision docking and formation flying. Can use with docking port autopilot (mod). |
- Pair a Pilot with a Reaction Wheel (part) for faster orientation changes.
- Use Maneuver Node Planner (Level 2) before executing burns with Prograde Hold (Level 3) to reduce manual corrections.
- Target Hold (Level 5) works best when a Docking Camera mod is installed, but even stock it reduces docking difficulty.
- For manned interplanetary missions, take a Level 5 Pilot for all four active holds and precision nodes.
- For early career, any Pilot with Level 2 is sufficient for basic orbital work.
- Level 1: Always active; saves battery during long coast phases.
- Level 2: Use before any transfer burn to adjust node timing/delta-v.
- Level 3: Activate during burns to maintain prograde/retrograde.
- Level 4: Use when docking or aligning to a docking port.
- Level 5: Use when approaching a space station or chasing a target vessel.
Recommended Build:
When to Use Each Skill:
---
Engineer Skills
Engineers are repair and construction specialists. They can fix broken parts, deploy solar panels, repack parachutes, and improve wheel traction.
| Level | Skill/Ability | Effect | Use Case |
|---|---|---|---|
| 1 | Basic Repairs (Passive) | Unlocks ability to repair struts, fuel ducts, and small solar panels via EVA. | Simple fixes after minor collisions. |
| 2 | Wheel Enhancement (Passive) | +50% traction and reduced damage to rover wheels. | Useful for exploration rovers on rough terrain. |
| 3 | Advanced Repairs (Passive) | Allows repair of landing legs, large solar panels, and radiators. | Essential for bases and permanent installations. |
| 4 | Parachute Repacking (Active) | Can repack chutes (deployed or cut) using inventory resources (e.g., parachute parts). | Recover reusable landers; critical for return missions. |
| 5 | Part Upgrading (Passive) | Improves efficiency of thermal parts (radiators) and electric generation (solar panels, RTGs) by 25%. | Increases power output and heat rejection; vital for long-term bases. |
- Combine Level 2 Wheel Enhancement with rugged rover wheels (e.g., TR-2L Rovemax) for high-speed surface operations.
- Use Level 3 Advanced Repairs to fix solar panels after a bumpy landing.
- Level 4 Parachute Repacking works only if you bring Parachute Parts (resource; must be stored in inventory containers).
- Level 5 Part Upgrading pairs well with large solar arrays (e.g., OX-4L) to produce more power.
- For space stations or bases, bring a Level 5 Engineer. They can repair everything and boost power/thermal efficiency.
- For early rover missions, a Level 2 Engineer is enough to keep wheels intact.
- Level 1: Use immediately after any minor structural damage (e.g., strut breakage during ascent).
- Level 2: Always active; improves rover performance automatically.
- Level 3: Use when landing legs or critical solar panels fail (common on rough landings).
- Level 4: Activate via right-click menu on the parachute (requires inventory parts). Use before reentry.
- Level 5: Passive; no activation needed.
Recommended Build:
When to Use Each Skill:
---
Scientist Skills
Scientists excel at data collection and science point generation. They can also reset experiments for reuse.
| Level | Skill/Ability | Effect | Use Case |
|---|---|---|---|
| 1 | Basic Experiment Reset (Passive) | Can reset goo containers, science jr., thermometers, barometers via EVA. | Reuse experiments on multiple biomes without carrying extras. |
| 2 | Surface Sample Efficiency (Passive) | When collecting surface samples (EVA report), gain an extra 10% science points for each sample. | Maximize science from landings. |
| 3 | Advanced Experiment Reset (Passive) | Can reset mystery goo, accelerometers, gravioli detectors, spectrometers. | Reuse all stock experiments; critical for long-term science labs. |
| 4 | Mobile Science Lab (Active) | While in a Science Lab module, the Scientist produces science points 25% faster. | Boost lab output for high-efficiency science farming (e.g., on Minmus). |
| 5 | Data Transmission Bonus (Passive) | All transmitted science data provides 40% more science points than normal. | Useful when you cannot recover the vessel physically. |
- Combine Surface Sample Efficiency (Level 2) with crew report and EVA report for maximum return per biome.
- Use Mobile Science Lab (Level 4) with a Laboratory Module (part) and another Scientist (or multiple) to stack the bonus? No, only one Scientist per lab applies; having multiple Scientists in different labs works.
- Data Transmission Bonus (Level 5) synergizes with Dish Antennas to beam back high-value experiments without returning.
- For science farming space stations, put a Level 5 Scientist in the lab and a Level 3 Scientist to reset experiments in the field.
- For early career biome hopping, a Level 1 Scientist is sufficient to reset basic experiments.
- Level 1: Use after landing on a new biome to reset goo/Science Jr. for another reading.
- Level 2: Passive; always active when collecting surface samples.
- Level 3: Use after completing any advanced experiment (e.g., gravity scan) to reset for another location.
- Level 4: Ensure the Scientist is assigned to the lab module via the crew management panel (active while inside).
- Level 5: Passive; only matters when transmitting data.
- EVA (Extra-Vehicular Activity): Can leave the capsule in space or on a surface. Must use a jetpack (with limited fuel) to move.
- Crew Report: Conduct a report from inside a command pod (science generation).
- EVA Report: Collect a report while outside the vessel (science generation).
- Surface Sample: On a surface, collect a soil sample (science generation, Scientist gets bonus).
- Survival: Kerbals can survive a few seconds of vacuum, but lose consciousness quickly without a spacesuit.
- Perks (Random): Some Kerbals spawn with BadS (no cowardice) or Courage/ Stupidity stats affecting panic/fear (cosmetic).
- Cross-class synergy: A Level 5 Pilot + Level 5 Engineer + Level 5 Scientist on a single vessel covers all bases: precise control, repairs, and science efficiency.
- Combo for base building: Engineer repairs; Scientist resets experiments; Pilot handles landing/docking. This trio is ideal for surface bases.
- Combo for interplanetary crew: Have at least one of each class on board. Example: Duna mission with a Pilot for descent hold, Engineer for rover repairs, Scientist for surface science.
- Pilot (Level 1-2) – provides basic stability and node planning.
- Scientist (Level 1) – to reset goo/junior for multiple biomes.
- Engineer (Level 1) – optional; can repair minor strut damage.
- Pilot (Level 3+) – prograde hold for landing.
- Scientist (Level 2+) – extra surface sample science.
- Engineer (Level 2+) – wheel enhancement for rover.
- Scientist (Level 5) – lab boost + data transmission bonus.
- Engineer (Level 5) – part upgrade for power/thermal + full repairs.
- Pilot (Level 5) – target hold for docking.
- Engineer (Level 5) – repairs and wheel upgrades for surface rovers.
- Scientist (Level 5) – max science from multiple biomes.
- Pilot (Level 5) – precision landing and orbital burns.
- Maneuver Node Planner (Pilot Lv2): Use to fine-tune encounter delta-v by moving the node radially. Gives finer control than default.
- Radial Hold (Pilot Lv4): Perfect for aligning docking ports that are sideways relative to the orbital plane.
- Parachute Repacking (Engineer Lv4): Always carry at least 5 Parachute Parts (resource) on any manned mission that returns to Kerbin. Use before reentry.
- Mobile Science Lab (Scientist Lv4): Activate via the lab's right-click menu; the Scientist must be inside. Works best with multiple science experiments stored.
- Data Transmission Bonus (Scientist Lv5): Only useful if you send data by antenna rather than recovering the vessel. Combine with CommNet for far-reaching probes.
Recommended Build:
When to Use Each Skill:
---
General Kerbal Abilities (All Classes)
All Kerbals share these base traits:
---
Skill Upgrades & Combos
Recommended Builds by Mission Type
#### Early Orbital Flight (Career Mode)
#### Mun Landing (First Landing)
#### Space Station (Long-Term)
#### Interplanetary Base (e.g., Laythe)
When to Use Each Skill (Advanced Tips)
---
Conclusion
Kerbal Space Program's skill system may seem simple, but optimizing your Kerbal selection is crucial for efficiency in Career and Science modes. Always level up your Kerbals by sending them on diverse missions. A well-rounded crew of all three classes (with high levels) will make any mission easier, from simple suborbital hops to grand interplanetary expeditions. Remember that experience is earned by doing, so fly often, explore boldly, and your Kerbals will become true experts.
---
Note: There are no spells, talents, or special moves in KSP. All skills are either passive bonuses or active abilities accessible via the in-game UI (right-click menus or SAS modes). Mods may add extra skills, but this guide covers the stock game.
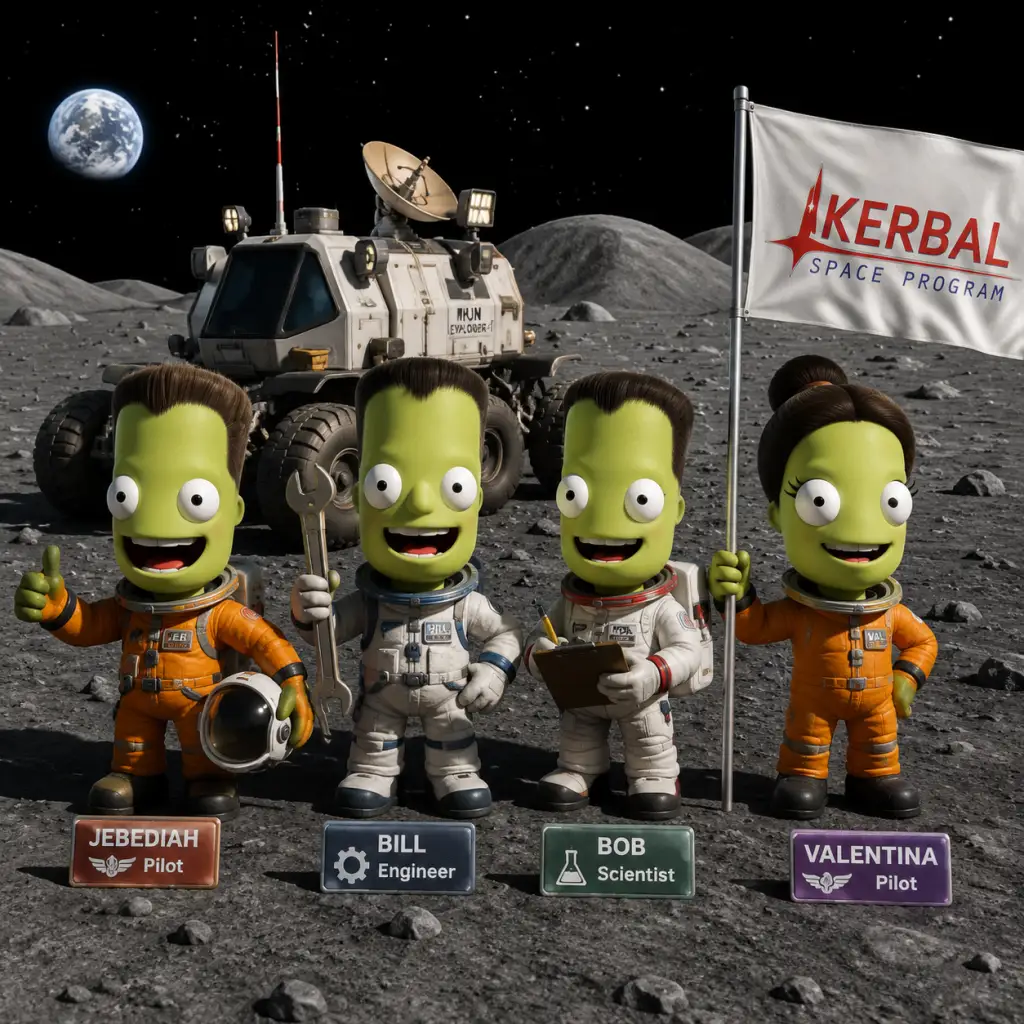
Characters & Roles
Characters & Roles in Kerbal Space Program
In Kerbal Space Program (KSP), your playable characters are the Kerbals—small, green, cheerful humanoid beings with an insatiable appetite for adventure. While they share a unified appearance, each Kerbal belongs to one of three distinct classes: Pilot, Engineer, and Scientist. These classes, combined with unique individual traits and experience levels, define how they contribute to missions. In Career mode, you can also encounter Tourists (non‑playable passengers) and Administrators (who provide global bonuses). This guide covers every playable Kerbal class, their backgrounds, strengths, weaknesses, recommended builds, and team synergies.
1. Overview of Kerbal Classes & Unlock Conditions
| Class | Primary Role | Unlock Condition (Career Mode) | Starting Availability |
|---|---|---|---|
| Pilot | Spacecraft control, stability assist | Available at start; can be hired from Astronaut Complex | Always present in Sandbox / Science mode |
| Engineer | Structural repairs, EVA construction, wheel/leg repairs | Available at start; hire from Astronaut Complex | Always present |
| Scientist | Experiment resetting, data collection, lab management | Available at start; hire from Astronaut Complex | Always present |
2. Pilot Class
Background: Pilots are the heart of any space program. They are trained to fly spacecraft with precision, perform complex maneuvers, and keep the crew calm under pressure. Notable Pilots include Jebediah Kerman (the iconic daredevil), Valentina Kerman (the first female Kerbal in orbit), and Bill Kerman (a calm, reliable pilot).
Strengths:
- Flight Control: Can activate SAS (Stability Assist System) without a probe core, saving weight and electricity.
- Maneuver Execution: At level 1+, Pilots can sas to target and hold prograde/retrograde automatically.
- Maneuver Node Assistance: At level 3+, they can execute precise node burns with higher accuracy.
- Re-entry Control: Pilots are less likely to panic during re-entry, reducing wobble.
- Cannot repair broken parts or perform scientific experiments.
- Useless on the surface without a command pod (no EVA science or construction).
- Low level Pilots have limited SAS modes.
- First‑time orbiters and interplanetary missions where manual control is critical.
- Spaceplanes and shuttles that require frequent attitude adjustments.
- Any mission where you want to save electricity by using crewed SAS instead of a reaction wheel module.
- Career mode contracts that demand a “Pilot” aboard.
- Available from the start in all modes.
- Hire cost: ~12,000 Kredits (Career).
- Experience levels gained by flying missions (e.g., achieving orbit, docking, landing on another body).
- Skill priority: Level up to unlock SAS modes: Level 0: Basic SAS (hold orientation). Level 1: Prograde/Retrograde hold. Level 2: Normal/Anti-normal. Level 3: Target‑relative modes. Level 4: Maneuver node auto‑execution.
- Equipment: A command pod with a good reaction wheel (e.g., Mk1-2 Command Pod) to complement SAS. For spaceplanes, pair with the Mk2 Cockpit.
- Traits: Daredevil (Jebediah) grants faster XP gain; Hardy reduces G‑force penalties.
- Works best with an Engineer to fix any structural damage from hard landings.
- A Scientist aboard can process data from experiments while the Pilot flies.
- For docking, a Pilot and Engineer can perform manual alignment while the Engineer repairs docking ports if misaligned.
- Experiment Resetting: Can reset certain experiments (e.g., Thermometer, Barometer, Seismometer) on EVA, allowing repeated use without needing multiple copies.
- Lab Operations: Can manage the Mobile Processing Lab MPL-LG-2, producing science points from data.
- Data Collection: Can collect and store experiment results from multiple biomes on EVA.
- Science Bonus: At higher levels, science output is multiplied (e.g., 2x at level 5).
- Cannot control spacecraft without a probe core (no SAS from piloting).
- Cannot repair broken parts or repack parachutes.
- Low level scientists cannot reset advanced experiments.
- Orbital missions around Mun/Minmus where you visit multiple biomes to gather surface samples and surface experiments.
- Deploying and operating the Mobile Processing Lab on a station or lander.
- Long‑duration missions where you need to grind science for the tech tree.
- Career contracts requiring a “Scientist” aboard.
- Available from start; hire for ~12,000 Kredits.
- Experience gained by performing experiments, processing data, and returning results.
- Skill priority: Level up to unlock experiment reset (Level 1). Higher levels increase data recovery multiplier.
- Equipment: Carry all science parts (Mystery Goo, Materials Bay, thermometers, etc.). A Science Jr. is essential for early career. For lab work, include the Mobile Processing Lab with ample electricity and living space.
- Traits: Perfectionist reduces cooldown on experiment reset; Observant gives a small science bonus.
- Pair with a Pilot to fly the craft while you science.
- An Engineer can extend solar panels or repair the lab if it gets damaged.
- For surface missions, bring both an Engineer and Scientist so the Engineer can set up a base that the Scientist uses for long‑term research.
- Repairs: Can repair broken solar panels, radiators, antennas, wheels (rover wheels), landing legs, and even repack parachutes on EVA.
- Construction: Can deploy EVA construction mode (with the Breaking Ground DLC) to attach/detach parts in space (level 1+).
- Wheel & Leg Enhancement: Higher levels improve the robustness of landing legs and rover wheels (less likely to break).
- Fuel Transfer: Can manually transfer fuel between tanks using EVA, though this is partly handled by stock mechanics.
- Cannot fly the spacecraft or process science experiments.
- Repair requires EVA time; insufficient EVA propellant can strand them.
- Cannot reset experiments.
- First‑time landings where you expect hard impacts (they can repair broken legs).
- Space stations and bases where you need to attach new modules via EVA construction.
- Rovers that might flip or break wheels on rough terrain.
- Repacking parachutes after a descent, allowing reusable landers.
- Career contracts requiring an “Engineer” aboard.
- Available from start; hire for ~12,000 Kredits.
- Experience gained by performing repairs, attaching parts via EVA construction, and surviving mishaps.
- Skill priority: Level 1 unlocks EVA construction (Essential for base building). Level 2+ improves wheel/leg durability. Level 5 grants the ability to repair heat shields and inflatable parts.
- Equipment: Always carry a KM‑KX‑S2 Fuel Pack (if using the Making History DLC) for EVA propellant. For construction, carry extra parts in cargo bays or use a Klaw (Advanced Grabbing Unit) to dock with debris. A Drill‑O‑Matic (Breaking Ground DLC) can harvest resources.
- Traits: Tough reduces repair time; Builder increases construction speed.
- Essential for any mission where damage is likely (e.g., atmospheric entry, rough landing).
- Pairs brilliantly with a Scientist on a mobile lab: the Scientist runs experiments, the Engineer fixes the lab if it overheats.
- With a Pilot, an Engineer can perform EVA construction while the Pilot maintains orientation.
Weaknesses:
Playstyle:
Pilots excel as the primary commander of crewed vessels. Use them for:
Unlock Conditions:
Recommended Equipment / Skill Build:
Team Synergy:
3. Scientist Class
Background: Scientists are the brains behind the operation. They analyze data from the Mun, Minmus, and beyond, unlocking new technologies. Famous Scientists include Wernher von Kerman (visionary rocket scientist), Melgee Kerman, and Katy Kerman.
Strengths:
Weaknesses:
Playstyle:
Scientist‑crewed vessels are ideal for science farming. Use them for:
Unlock Conditions:
Recommended Equipment / Skill Build:
Team Synergy:
4. Engineer Class
Background: Engineers are the tinkerers and repairers. They keep the spacecraft intact, build bases, and fix broken equipment. Notable Engineers include Bob Kerman (the quiet fixer), Kris Kerman, and Gretchen Kerman.
Strengths:
Weaknesses:
Playstyle:
Engineers are essential for complex, long‑duration missions. Use them for:
Unlock Conditions:
Recommended Equipment / Skill Build:
Team Synergy:
5. Notable Named Kerbals
While all Kerbals share the same class mechanics, certain named Kerbals have unique traits and backstories that affect gameplay in small ways:
| Name | Class | Unique Trait | Effect | Best Use Case |
|---|---|---|---|---|
| Jebediah Kerman | Pilot | Daredevil | +2 XP gain per mission, reduced G‑force tolerance penalty | Lead dangerous first‑time flights |
| Valentina Kerman | Pilot | Lucky | Slightly reduces chance of catastrophic failures (e.g., engine explosions) | Risky missions with low delta‑v margins |
| Bob Kerman | Engineer | Planner | Gives a 2% boost to all part efficiency (subtle) | Engineering teams building stations |
| Bill Kerman | Pilot | Steady | No panic during atmospheric flight | Spaceplane test flights |
| Wernher von Kerman | Scientist | Innovator | +5% science output from lab processing | Dedicated science stations |
| Katy Kerman | Scientist | Efficient | 10% reduction in experiment reset time | Fast science gathering on multiple biomes |
| Melgee Kerman | Scientist | Calm | No science penalty from G‑forces | High‑G reentry science missions |
| Kris Kerman | Engineer | Resourceful | Lowers construction part count by 1% (minor) | Base building with many struts |
6. Tourists & Administrators (Non‑Playable Roles)
Tourists: These are passengers with no skills; they cannot control anything or perform actions. They exist solely to fulfill contracts (e.g., “Fly a tourist to the Mun and back”). They take up crew capacity and require life support (if modded). Recommendation: Use empty crew cabins and treat them as dead weight. No special equipment needed.
Administrators: In Career mode, the Administration building allows you to assign a Kerbal administrator (e.g., Walt Kerman, Gus Kerman, Linus Kerman). Each provides a global bonus to your space program:
- Wally Kerman: +15% Kredits from contracts.
- Gus Kerman: +20% reputation gains.
- Linus Kerman: +10% science from experiments.
- …and others depending on DLC.
These are not playable units but can define your playstyle. Choose based on your goals: science rush (Linus), fund push (Wally), or reputation farming (Gus).
7. Team Composition & Synergy Strategies
| Mission Type | Recommended Team | Rationale |
|---|---|---|
| First orbiter | 1 Pilot (Jeb) | SAS saves weight; no repair needed |
| Mun landing (science) | 1 Pilot + 1 Scientist | Pilot flies, Scientist gathers data |
| Mun base construction | 1 Engineer (Bob) + 1 Scientist + 1 Pilot | Engineer builds, Scientist processes, Pilot flies modules |
| Interplanetary mission | 1 Pilot + 1 Scientist + 1 Engineer | Redundancy; engineer for mid‑course repairs, scientist for long‑term research |
| Space station operations | 1 Scientist (lab) + 1 Engineer (construction) + optional Pilot for logistics | Optimal for science and expansion |
| Rover mission | 1 Engineer (wheel repair) + 1 Pilot (drive) | Engineer keeps rover rolling |
| High‑risk rescue | 2 Pilots (extra SAS) + 1 Engineer (repair) | Pilot redundancy; Engineer fixes rescued vessel |
8. Experience, Leveling, and Skills
Each Kerbal gains experience as they “do things.” Here’s what earns XP:
- Any mission: +1 XP for achieving orbit, +2 XP for leaving Kerbin’s SoI, +3 XP for landing on another body, +5 XP for planting a flag.
- Specific actions: Performing an EVA repair (+1 XP), using a lab to produce data (+1 XP per batch), resetting experiments (+1 XP).
- Levels: Up to 5. Each level unlocks new abilities as described in the class sections.
- Pilot: Command pod with built‑in SAS (e.g., Mk1-2). Add a reaction wheel only if large vessel. Use ASAS module for extra stability during launch.
- Scientist: Equip all available science parts. Include a Mobile Processing Lab if doing orbital research. Add solar panels and batteries for lab power.
- Engineer: Carry EVA propellant packs (extra fuel on suit). For EVA construction, bring spare parts in cargo bays or use a Klaw to manipulate debris. Include Drills and Convert‑O‑Tron if building refueling bases.
- Use the Astronaut Complex: In Career, hire Kerbals early. A second Pilot and Engineer are cheap insurance.
- Don’t neglect low‑level Kerbals: Send them on simple suborbital hops to grind XP before complex missions.
- Mix classes for synergy: A Pilot + Engineer team can perform orbital assembly of a large interplanetary ship.
- Remember permadeath: Quickload if a Kerbal dies in Career (unless you want the drama).
- Tourists are not playable: They just take seats; you can ignore their lack of skills.
Recommendation: Focus on leveling up a core team of 3–4 Kerbals early by sending them on repeated short missions. Avoid killing them (permadeath in Career); losing a high‑level Kerbal is costly.
9. Equipment & Build Recommendations per Class (Summary)
10. Final Tips
With this guide, you understand every playable character in KSP and how to maximize their potential. Assemble the right team, respect their roles, and the stars are yours!
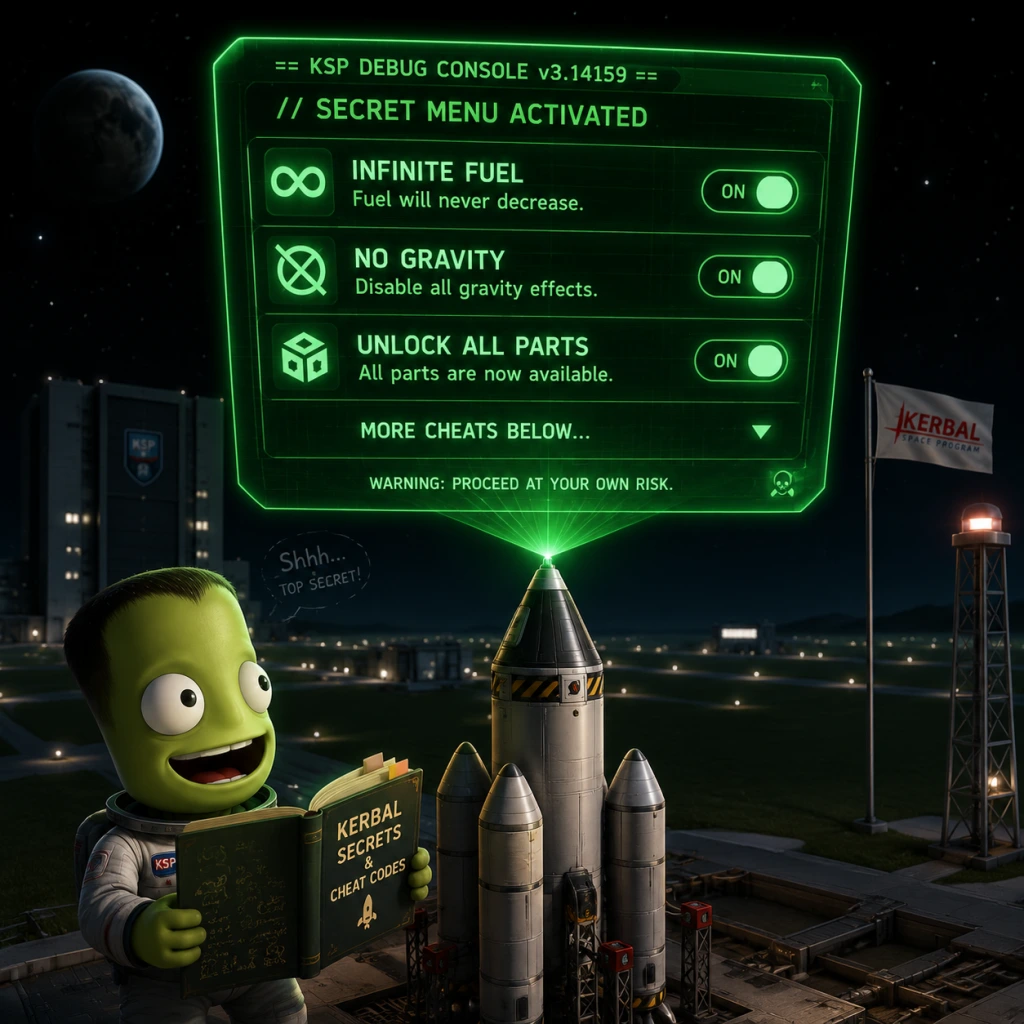
Cheats & Secrets
Cheats & Secrets Guide for Kerbal Space Program
Kerbal Space Program (KSP) offers a robust set of developer-intended cheat tools and a wealth of hidden secrets and Easter eggs. This guide covers all known cheat codes, secret commands, hidden features, and Easter eggs, organized for easy reference. Use cheats responsibly—they can break immersion or cause instability.
Debug Console (The Cheat Menu)
Press Alt+F12 (Windows/Linux) or Option+F12 (macOS) to open the Debug Console. This is the primary cheat interface. It contains multiple tabs with cheats categorized by function.
#### 1. Cheats Tab
| Cheat | Description | How to Use |
|---|---|---|
| Infinite Fuel | Prevents any fuel or resource consumption | Check the box |
| Infinite Propellant | Same as infinite fuel but also applies to RCS, monopropellant, etc. | Check the box |
| Infinite Electricity | Never run out of electric charge | Check the box |
| Infinite Comms | Always have perfect communication signal | Check the box |
| Unbreakable Joints | No parts can break due to stress or over-G | Check the box |
| Ignore Max Temperature | Parts never overheat | Check the box |
| Ignore G-Limits | Kerbals never suffer G-force effects | Check the box |
| Disable Vessel Crash Damage | No damage from collisions | Check the box |
| No Delta-V Limits | Override delta-v calculations (used in map view) | Check the box |
| Never Death | Kerbals cannot die | Check the box (under "Kerbal" section) |
- Set Position / Rotation: Instantly move the active vessel to any location (e.g., orbit, surface of a planet). Use the buttons to set exact coordinates or use the "Landing" presets.
- Set Orbit: Place the active vessel into a specific orbit around a celestial body (altitude, inclination, etc.).
- Set Target: Instantly target a specific celestial body.
- Time Warp Control: Increase or decrease time warp instantly to any rate.
- Set Time: Jump to any date/time.
- Hack Gravity: Set the local gravity multiplier (0 means no gravity, 1 is normal).
- Thermal: Adjust part temperatures or disable thermal system.
- Resource: Add or remove resources (fuel, ore, etc.) directly to the vessel.
- Set Params: Edit vessel stats like mass, thrust, etc.
- Autopilot: Enable autopilot for hold altitude, heading, etc. Not a full autopilot but useful.
- Massive Gizmo: Toggle to enable oversized translation/rotation gizmos for easier fine adjustments in the VAB/SPH.
- Show Input Lock: Debug UI for input devices.
- Show Vessel Labels: Display all vessels in the tracking station.
- Clear Input Locks: Fix stuck keys.
- FPS Counter: Display frames per second.
- Disable signal delay, etc.
- Hire All Kerbals: Instantly unlock all kerbals (even Jeb, Bill, Bob, Val).
- Resurrect Kerbals: Bring dead Kerbals back to life.
- Set Experience: Level up any kerbal instantly.
- Give All Skills: Unlock all pilot, engineer, scientist bonuses.
- Cheats are not saved; they reset each session unless you use mods like "Cheat Menu" or "HyperEdit".
- Using cheats can break achievements (if enabled) and may corrupt saves – always backup.
- The debug menu is fully developer-intended and not considered a mod.
- Location: On the Mun, near the equator, approximately 14° S, 138° W (coordinates may vary slightly).
- Appearance: A tall, green, rectangular structure reminiscent of 2001: A Space Odyssey.
- Effect: None directly, but it's a famous Easter egg. Kerbals can walk up to it and take pictures.
- How to Find: Use a Mun lander with a scanner or search online for precise coordinates. It's on the eastern edge of the Eastern Farside Crater.
- Location: On the Mun, at coordinates 0° N, 0° E (exactly at the prime meridian).
- Description: A small metal plaque with the text "Here men from the planet Earth first set foot upon the Moon, July 1969, A.D. We came in peace for all mankind." It's a replica of the Apollo 11 plaque.
- How to Find: Land precisely at the equator and 0° longitude. Use the surface scanner or orbital fine-tuning.
- Location: On Duna, in a specific canyon region. Coordinates approximately 63° S, 238° E.
- Description: A rock formation that resembles a face (like the Face on Mars). It's a natural formation but very recognizable.
- How to Find: Requires a surface rover and careful navigation. Best viewed from orbit.
- Location: Deep inside the Mohole (a deep hole on Moho). Coordinates approximately 60° S, 10° E.
- Description: At the bottom of the Mohole, there is a strange glowing object that resembles an eye. It's a reference to the mythical Kraken that destroys ships.
- How to Find: Land at the Mohole rim and descend carefully. Beware of steep slopes.
- Location: On Bop (a moon of Jool). It's a large, dark boulder that floats above the surface and rotates.
- Description: It looks like a potato-shaped asteroid but hovers. Touching it or entering its physics range can cause glitches.
- How to Find: Orbit Bop and look for a small moonlet. It's visible as a tiny dot. Approach with caution.
- Location: On the surface of Minmus, near the equator, at approximately 0° N, 0° E.
- Description: A small radio antenna emitting a slow-scan television (SSTV) signal. Decoding the signal reveals an image of the KSP logo.
- How to Find: Land at the equator and 0° longitude. Use a probe with a Communotron antenna to receive the signal (requires Kerbal Engineer Redux or a mod to decode).
- Location: On Eeloo, at coordinates 33° N, 138° E.
- Description: A small pyramid structure made of stone blocks. It's a reference to ancient Egyptian architecture.
- How to Find: Requires a lander or rover to reach. It's not easily visible from orbit; you'll need a surface scanner or careful mapping.
- There are several monoliths scattered across the Kerbol system: one on the Mun (the Green Monolith), one on Minmus (smaller and black), one on Duna (in a crater), and one on Vall (underwater). Each has a different appearance and effect (some make your ship spin or bounce).
- Effect: Some monoliths can cause strange physics behavior when touched. For example, the one on Vall creates a massive geyser of water.
- Location: At the KSC, inside the VAB (Vehicle Assembly Building) under the floor. Requires clipping through the ground using the "clipping" cheat or a Kerbal with no-clip (KAS mod).
- Description: A hidden room with pictures, models of classic rockets (like the Saturn V), and a portrait of the developers.
- Description: A common term for physics glitches that cause catastrophic explosions or extreme forces. There is no actual creature, but players refer to the "Kraken" when parts break unexpectedly. The developers intentionally left some physics quirks for fun.
- While the debug menu is open you can press Alt+F5 to create a named quicksave. This is faster than the normal F5 quicksave.
- In older versions, removing launch clamps in flight would cause them to fall and sometimes destroy the pad. Now they simply disappear.
- By using the "Hack Gravity" cheat set to 0 and then toggling infinite fuel, you can achieve infinite acceleration without fuel consumption. This is considered a cheat but is officially recognized as a feature of the debug menu.
- There are hidden structures on the Mun that resemble temples or arches. These were intended for a challenge but were never officially named. They exist in the game files as static models.
- As mentioned, you can decode the SSTV signal from Minmus using the mod "SSTV Decoder" or by manually converting audio. The image is a picture of the KSP logo with the text "This is our message."
- There is a hidden, small asteroid-like planet called "Planet 9" or "Krax". It is not officially in the stock game but was a placeholder in early versions. It no longer exists.
- Backup your save file before enabling any cheats, especially those that modify orbits or delete vessels.
- Use cheats for learning: Try infinite fuel to practice docking or landing without worrying about fuel.
- Combine cheats: For example, enable unbreakable joints and ignore max temperature to build massive ships without structural failure.
- Respect the physics: Even with cheats, glitches can occur. Save often.
- Multiplayer mods: Cheats do not carry over to modded multiplayer servers unless the server allows them.
#### 3. Part Tab
#### 4. Vessel Tab
#### 5. Input Tab
#### 6. Misc Tab
#### 7. Remote Tech (if using mod)
#### 8. Kerbal Tab
#### Important Notes:
Hidden Features & Easter Eggs
KSP is filled with intentional secrets placed by the developers. These are not cheats but rewards for exploration.
#### 1. The Green Monolith
#### 2. The Armstrong Memorial
#### 3. The Face on Duna
#### 4. The Kraken's Eye
#### 5. The Magic Boulder (Easter Egg on Bop)
#### 6. The SSTV Signal (Kerbal Space Program Official Easter Egg)
#### 7. The Pyramid on Eeloo
#### 8. The Monoliths (Multiple)
#### 9. The Kerbin Side Museum
#### 10. The Kraken (Physics Exploit)
Exploit-Safe Secrets
These are legitimate, developer-intended shortcuts or hidden mechanics that can be considered "secrets" but are not cheats.
#### 1. The "Alt+F12" Quick Save Trick
#### 2. The "Launch Clamps" Exploit (Patched but still fun)
#### 3. The "Zero-Point Energy" Glitch
#### 4. The "Moon Temple" (Unused Content)
#### 5. The "SSTV Signal" Decoding
#### 6. The "Kerbolar System" Hidden Planet
Tips for Using Cheats
Summary
KSP's debug menu provides a full suite of official cheats, while exploration rewards diligent players with Easter eggs scattered across the solar system. Whether you want to skip the grind or discover hidden lore, this guide covers everything from the Green Monolith to the debug console's infinite fuel. Use responsibly and have fun exploring the Kerbol system!