Little Nightmares II
## Overview **Little Nightmares II** is a dark puzzle-platformer adventure developed by Tarsier Studios and published by Bandai Namco Entertainment. It is the sequel to the critically acclaimed *Little Nightmares* (2017) and expands the series' signature blend of haunting atmosphere, clever puzzles...
Download & Installation
Overview
Little Nightmares II is a dark puzzle-platformer adventure developed by Tarsier Studios and published by Bandai Namco Entertainment. It is available on multiple platforms: PC (Steam and Epic Games Store), PlayStation 4, PlayStation 5, Xbox One, Xbox Series X|S, and Nintendo Switch. There is no official mobile version. This guide covers legitimate download sources, step-by-step installation for each platform, system requirements, storage space, account requirements, first launch setup, common installation errors and fixes, and post-install verification.
---
Official Download Sources
| Platform | Store / Service | Notes |
|---|---|---|
| PC (Windows) | Steam, Epic Games Store | Both require free accounts and internet connection for download. |
| PlayStation 4 / PlayStation 5 | PlayStation Store | Requires PlayStation Network account. PS5 version is backward compatible and runs via backward compatibility or native version. |
| Xbox One / Xbox Series X/S | Microsoft Store | Requires Xbox Live account. Smart Delivery provides the best version for Xbox Series X/S. |
| Nintendo Switch | Nintendo eShop | Requires Nintendo Account. |
---
System Requirements (PC)
| Component | Minimum | Recommended |
|---|---|---|
| OS | Windows 10 64-bit | Windows 10 64-bit |
| Processor | Intel Core i5-2400S @ 2.5 GHz / AMD FX-4350 @ 4.2 GHz | Intel Core i5-4590 @ 3.3 GHz / AMD Ryzen 3 1200 @ 3.1 GHz |
| Memory | 4 GB RAM | 8 GB RAM |
| Graphics | NVIDIA GeForce GTX 760 / AMD Radeon R7 260x (2GB VRAM) | NVIDIA GeForce GTX 960 / AMD Radeon R9 280 (2GB VRAM) |
| DirectX | Version 11 | Version 11 |
| Storage | 10 GB available space | 10 GB available space |
| Sound Card | DirectX compatible | DirectX compatible |
---
Storage Space
- PC (Steam/Epic): ~10 GB (actual download size may be slightly less ~8.5 GB, plus extra space for unpacking).
- PlayStation 4 / 5: ~10 GB (PS5 version may be slightly larger due to higher resolution assets).
- Xbox One / Series X/S: ~10 GB.
- Nintendo Switch: ~8.5 GB (varies by region).
- PC (Steam): Free Steam account. Internet required for download and first-time activation.
- PC (Epic Games Store): Free Epic Games account. Internet required for download and DRM check.
- PlayStation: PlayStation Network (PSN) account. Internet required to download digital versions; disc versions may need internet for updates.
- Xbox: Xbox Live account (free tier is sufficient). Internet needed for digital download and updates.
- Switch: Nintendo Account. Internet required for download; disc/cartridge may still need updates.
- Language Selection: Choose your preferred language (voiced languages may be limited – English, French, German, Spanish, etc.). This can usually be changed later in the options menu.
- Brightness Calibration: Adjust brightness until the logo is barely visible (follow on-screen instruction).
- Controller Vibration: Option to enable/disable.
- Audio Settings: Set volume for SFX, music, dialogue.
- Graphics Settings (PC only): Resolution, VSync, anti-aliasing, texture quality, etc. Recommended to start with Medium or High and adjust based on performance.
- Controls: Default controller layout. Can be remapped on PC.
Always maintain at least twice the required space temporarily during installation (especially on PC) to allow for decompression.
---
Account Requirements
---
Step-by-Step Installation
PC (Steam)
1. Download and install Steam from [store.steampowered.com](https://store.steampowered.com).
2. Create or log in to your Steam account.
3. Purchase or redeem Little Nightmares II (if you have a key, follow "Activate a Product on Steam" in the Games menu).
4. Go to your Library and find Little Nightmares II.
5. Click "Install" and choose the installation directory (default: `C:\Program Files (x86)\Steam\steamapps\common`).
6. Select a disk with at least 10 GB free space.
7. Click "Next" and wait for the download and installation. The game will automatically install.
8. Launch from Library or desktop shortcut.
PC (Epic Games Store)
1. Download and install Epic Games Launcher from [store.epicgames.com](https://store.epicgames.com).
2. Log in with your Epic Games account.
3. From the Store page or Library, find Little Nightmares II.
4. Click "Install" (green button).
5. Choose installation path (default: `C:\Program Files\Epic Games\LittleNightmaresII`).
6. Click "Install" again and wait for download/install.
7. Launch from Library.
PlayStation 4 / PlayStation 5
#### Digital Version
1. Turn on your console and sign in to your PSN account.
2. Go to PlayStation Store from the home screen.
3. Search for "Little Nightmares II" and select it.
4. Purchase (or download if already owned).
5. Click "Download" (on PS4) or "Download" on PS5 (the game will be added to your library).
6. Wait for download (can be monitored from Notifications).
7. Launch from the home screen or Game Library.
#### Disc Version
1. Insert the disc into the console.
2. The game tile will appear on the home screen.
3. Select the tile and choose "Install" if prompted.
4. Wait for installation (may require a mandatory update if connected to internet).
5. Launch from the tile.
Xbox One / Xbox Series X|S
#### Digital Version
1. Sign in to your Xbox Live account.
2. Go to Microsoft Store (or search from the guide).
3. Search for "Little Nightmares II" and select it.
4. Purchase (or "Install" if already bought).
5. Select "Install" (game will download to internal or external storage).
6. Wait for completion (check progress in "My games & apps").
7. Launch from Home or My games & apps.
#### Disc Version
1. Insert the disc – the console will automatically detect it.
2. If prompted, install the game (may require update).
3. Follow on-screen instructions.
4. Launch from Home.
Nintendo Switch
#### Digital (eShop)
1. Ensure your Switch is connected to the internet and linked to a Nintendo Account.
2. Open the Nintendo eShop from the home menu.
3. Search for "Little Nightmares II" using the search bar.
4. Select the game and choose "Proceed to Purchase" (or "Download Later" if already owned).
5. Complete purchase and select "Download".
6. The game will download in the background (check progress on Home screen).
7. Once complete, launch from the Home screen.
#### Physical Cartridge
1. Insert the game card into the Switch.
2. If there is a software update, you will be prompted to download it (requires internet).
3. Wait for installation (usually a few seconds; the game icon appears).
4. Launch from Home.
---
First Launch Setup
When you launch the game for the first time, regardless of platform:
After confirming these settings, the game will begin the opening scene.
---
Common Installation Errors and Fixes
PC (Steam and Epic)
| Error | Cause | Solution |
|---|---|---|
| Disk write error | Insufficient permissions or corrupted download cache. | Run Steam/Epic as Administrator; clear download cache: Steam > Settings > Downloads > Clear Download Cache; Epic: Settings > Manage Storage > Clear Cache. |
| Missing DLL files (e.g., MSVCP140.dll) | Missing Visual C++ Redistributables. | Install the latest Visual C++ Redistributable from Microsoft (both x86 and x64). |
| Freeze during installation | Antivirus interference or insufficient RAM. | Temporarily disable antivirus; close background apps; increase page file size. |
| Anti-piracy errors | DRM conflicts. | Update Windows, drivers, and verify game files. |
| "Failed to initialize graphics device" | Outdated GPU drivers or incompatible hardware. | Update to latest GPU drivers; ensure GPU meets min specs; disable integrated graphics if possible. |
| Game won't launch after install | Corrupted files or conflicting processes. | Verify integrity of game files: Steam: Right-click game > Properties > Local Files > Verify integrity... ; Epic: Library > three dots > Manage > Verify. |
PlayStation
| Error | Cause | Solution |
|---|---|---|
| CE-30005-8 error | Corrupted game data. | Delete the game and reinstall; rebuild database (Safe Mode > Option 5). |
| Download stuck or slow | Network issues or PSN congestion. | Pause and resume download; restart console; use wired connection; change DNS to Google (8.8.8.8/8.8.4.4). |
| Disc not reading | Dirty disc or drive issue. | Clean disc with soft cloth; restart console; try another disc. |
Xbox
| Error | Cause | Solution |
|---|---|---|
| 0x80070005 | Permission or data corruption. | Power cycle console (hold power button 10 sec); clear local saved games (Settings > System > Storage > Clear local saved games). |
| Slow download | Network throttling or server load. | Pause/resume; restart console; change DNS; disable instant-on mode temporarily. |
| Installation stopped | Lack of space or disc issues. | Free up storage; try a different drive; clean disc. |
Nintendo Switch
| Error | Cause | Solution |
|---|---|---|
| Error 2005-0001 | Corrupted download. | Restart console; redownload from eShop; clear cache (System Settings > System > Formatting Options > Reset Cache). |
| Download stuck | Network problem. | Airplane mode on/off; move closer to router; restart Switch. |
| Insufficient space | Not enough free memory. | Delete unnecessary games or data; use microSD card for storage. |
Post-Installation Verification
After installation, perform these checks to ensure the game is ready:
1. Check installed size: Verify that the game folder matches expected size (~10 GB or slightly less).
2. Launch the game: Should reach the title screen without crashes.
3. Check for updates: On all platforms, the game may have a day-one patch. Install any available updates.
4. Test basic controls: Move, jump, interact. Ensure controller works (on PC, test with keyboard and controller).
5. Monitor performance: On PC, check FPS with settings; on console, ensure smooth 30 FPS (Switch) or 60 FPS (PS5/Xbox Series).
6. Graphics and audio: Ensure textures load, sound is clear.
If problems persist, visit the official support pages:
- PC (Bandai Namco): https://support.bandainamcoent.com
- Steam Community Hub: https://steamcommunity.com/app/860510
- PlayStation Support: https://www.playstation.com/en-us/support/
- Xbox Support: https://support.xbox.com
- Nintendo Support: https://support.nintendo.com
- On PC, if you encounter crashes, try running the game in administrator mode or setting compatibility to Windows 8.
- Disable overlays (Steam, Discord, NVIDIA GeForce Experience) temporarily to improve stability.
- For Nintendo Switch, ensure your system firmware is up to date.
- Cloud saves are supported on Steam, Xbox, and PlayStation (with PS Plus). On Switch, cloud saves require Nintendo Switch Online.
---
Final Tips
Enjoy the eerie adventure of Little Nightmares II!
Game Introduction
Overview
Little Nightmares II is a dark puzzle-platformer adventure developed by Tarsier Studios and published by Bandai Namco Entertainment. It is the sequel to the critically acclaimed Little Nightmares (2017) and expands the series' signature blend of haunting atmosphere, clever puzzles, and stealth-based gameplay. The game was released on February 11, 2021 for PC, PlayStation 4, Xbox One, and Nintendo Switch. Enhanced versions for PlayStation 5 and Xbox Series X|S arrived later on August 25, 2021, offering improved performance (60 FPS) and resolution options. A Google Stadia version launched on August 17, 2021.
Genre & Core Appeal
- Genre: Puzzle-platformer, stealth horror, adventure
- Core appeal: An unnerving, atmospheric journey through a distorted world, relying on tension, clever level design, and minimal UI. The game eschews direct combat for evasion, hiding, and environmental interaction. Its distinctive, grotesque art style and sound design create a constant sense of dread and wonder.
- The Wilderness: A bleak forest and abandoned schoolhouse, introducing the game's mechanics and the hostile, oversized environment.
- The School: A twisted educational institution filled with porcelain-faced, bullying children known as "Bullies."
- The Hospital: A grotesque medical facility where patients are strapped down and manipulated by a silent, masked surgeon.
- The Pale City Streets: A decaying urban landscape where citizens are glued to television screens, controlled by the malevolent Thin Man.
- The Signal Tower: The final, nightmarish destination – a pulsating structure that distorts reality and serves as the game's climax.
- Mono (Protagonist): A silent boy with a paper bag mask. He is nimble, resourceful, and capable of wielding a variety of items (like a flashlight, an axe, or a pipe) to solve puzzles and temporarily fight back. His motivations are tied to saving Six and stopping the broadcast.
- Six (Companion): Returning from the first game, Six is now a secondary character who follows Mono. She is smaller and more fragile, often requiring protection. Her interactions – such as holding hands or pointing out threats – are pivotal to cooperative puzzles. Her past remains mysterious.
- The Thin Man: A towering, gaunt figure with the ability to control televisions and manipulate space. He is the primary antagonist, representing the oppressive influence of the Signal Tower.
- Other inhabitants: The Bullies (student-like monsters), the Doctor (a grotesque, long-armed surgeon), and the Viewers (television-obsessed citizens) populate the city, each with unique behaviors.
- Fans of atmospheric horror and puzzle games (e.g. Inside, Limbo, The Last Guardian)
- Players who enjoy dark, narrative-driven adventures with minimal hand-holding
- Those who appreciate challenging stealth sections and clever environmental puzzles
- Suitable for ages 16+ due to disturbing imagery, violence, and psychological horror
- Single-player only: The game is a solo experience. There is no multiplayer or cooperative mode, though Six is controlled by AI and plays a interactive role.
- Offline support: Yes, the entire game can be played offline after installation. Internet is only required for download and updates.
- No online connectivity needed: There are no leaderboards, achievements that require online, or multiplayer components.
- Standard Edition: Base game only.
- Digital Deluxe Edition: Includes the base game, a digital artbook, the original soundtrack by Tobias Lilja, and a mobile phone wallpaper.
- Physical editions: Vary by region but generally include the base game; some limited editions may include bonus items like a mini art print or sticker sheet.
Story Overview
Set in the same universe as the first game, Little Nightmares II follows a new protagonist, Mono, a young boy with a paper bag over his head. He awakens in a mysterious wilderness and soon encounters Six (the protagonist of the first game), now seemingly more vulnerable and lost. Together, they must navigate the decaying, surreal landscape of the Pale City – a sprawling, nightmare-ridden metropolis where reality has twisted into horrifying forms. The story unfolds as Mono and Six try to escape the city's monstrous inhabitants and uncover a mysterious signal emanating from a distant tower. The narrative is conveyed almost entirely through environmental storytelling, character animations, and dreamlike sequences, with no spoken dialogue.
Setting
The Pale City is a grotesque, labyrinthine world that shifts between eerie outdoor areas and claustrophobic interiors. Key locations include:
Every inch of the setting is crafted with meticulous detail, from the faint sounds of creaking floorboards to the grotesque anatomy of the enemies, all contributing to the oppressive atmosphere.
Main Characters
Target Audience
Game Modes & Online/Offline Support
DLC / Expansion Overview
Little Nightmares II has not received any story-based DLC expansions. However, it does include:
Notably, the game received a free update adding a "Photo Mode" (available on all platforms) that allows players to capture the game's stunning environments with adjustable filters and depth of field.
What Makes This Game Unique
1. Cooperative puzzle design with an AI companion: Unlike many platformers, Six is not just an NPC – she interacts with the environment, must be protected, and occasionally helps solve puzzles, creating a tangible sense of partnership.
2. Weapon-based gameplay variation: Mono can pick up and use tools (pipes, hammers, flashlights) to solve puzzles or temporarily stun enemies, adding a layer of combat – but combat is always risky and often futile, reinforcing the game's powerlessness theme.
3. No hand-holding: There is no HUD, no tutorial text, and no objective markers. Learning is done through observation and trial-and-error, rewarding attentive players.
4. Atmospheric storytelling: The narrative is told through visual cues, character animation, and the environment, leaving much to interpretation while still conveying a clear emotional arc.
5. Themes of isolation and childhood fears: The game explores universal fears of being lost, powerless, and alone against overwhelming odds, all viewed through a childlike perspective.
6. Kotaku's praise and critical acclaim: The game holds a Metacritic score of 82 (PC) and 81 (PS4), with critics lauding its art direction, sound design, and level design.
> Note: This introduction is part of a larger guide series. For installation and download instructions, refer to the [Download & Installation] section.
Getting Started
Overview
Little Nightmares II is a dark puzzle-platformer adventure developed by Tarsier Studios and published by Bandai Namco Entertainment. It is the sequel to the critically acclaimed Little Nightmares (2017) and expands the series' signature eerie atmosphere, tense stealth, and physics-based puzzles. You control Mono, a young boy with a paper bag over his head, who must navigate a nightmarish world while guiding the AI companion Six (from the first game) through dangerous environments. There is no character creation—Mono is fixed. The game is a pure linear experience with no upgrades, inventory, or dialogue choices.
First Hour Walkthrough (Spoiler-Free)
The first hour introduces core mechanics gradually:
1. Opening Cutscene (0-2 min): Mono wakes up in a forest, hears a voice (Six), and begins walking toward a faint light. Move forward and learn basic movement.
2. Forest & First Puzzles (2-10 min): Follow the path, climb over logs, push a rolling ball to reach a high ledge. Encounter your first interactive object: a shoe to pick up and throw to distract a dog-like creature. Learn running and crouching.
3. Entering the Hunter’s Cabin (10-20 min): Approach a dilapidated cabin. Inside, find Six hiding. She will follow you automatically. Solve a simple puzzle: pull a table, climb onto a shelf, open a door. Learn grabbing (hold and release) and climbing.
4. The Kitchen Puzzle (20-30 min): In the kitchen, avoid the Hunter (first enemy). He patrols with a shotgun. Use hiding spots (lockers, under tables). Key objective: find a key on the counter while the Hunter’s back is turned. Give it to Six who unlocks a door. Here you learn cooperative puzzle solving with Six.
5. Exiting the Cabin & First Chase (30-45 min): After unlocking the door, the Hunter spots you. A scripted chase sequence begins: run, jump over obstacles, slide under gaps. Six will help by kicking down a plank. You escape into a dark tunnel.
6. The Pale City (45-60 min): Exit into a rainy city street. The first hour ends as you approach a large building with flickering lights. You now have a solid grasp of movement, stealth, and interaction.
Controls (All Platforms)
Little Nightmares II uses simple controls. Below are the default inputs. Customization is available on PC; console players can remap buttons via system settings.
| Action | PlayStation (4/5) | Xbox (One/Series) | PC (Keyboard & Mouse) | Switch |
|---|---|---|---|---|
| Move | Left Stick | Left Stick | WASD | Left Stick |
| Look | Right Stick | Right Stick | Mouse | Right Stick |
| Run | Hold L3 (click left stick) | Hold L3 | Hold Shift | Hold L3 |
| Crouch/Sneak | Hold R3 (click right stick) | Hold R3 | Hold Ctrl | Hold R3 |
| Interact/Pick up | R1 or X (on PS4/5) | RB or A | E or Left Mouse Button | R or B? (Check) |
| Drop/Grab Release | R1 again or Triangle? | RB again or Y? | Q or Right Mouse Button | L or Y? (Check) |
| Pull/Push objects | Hold Interact + Move | Hold Interact + Move | Hold E + Move | Hold Interact + Move |
| Jump | Cross (PS) | A | Space | B |
| Climb (auto) | (hold move toward ledge) | Same | Same | Same |
| Slide (run + crouch) | (run then crouch) | Same | Shift + Ctrl | Same |
| Pause/Options | Options button | Menu button | Esc | + |
UI Overview
The game has a minimal UI—no health bar, stamina, or inventory. The only persistent HUD elements are:
- Control prompts (bottom center): Appear when near an interactive object (e.g., "Press E to pick up").
- Torch/Item indicator (top-left corner): Shows if you’re holding an item (e.g., a flashlight or key). Only one item can be held at a time.
- Six’s position (no icon): She follows automatically; if she lags behind, she may call out. Keep moving forward to keep her close.
- Loading screen tips: Occasional hints appear during loading.
- Find all collectible hats (Mono can wear paper hats; they are hidden throughout levels. First one: inside a hollow log early in the forest).
- Complete without dying on first playthrough is not recommended—dying is part of learning.
- Explore every corner: The game rewards curiosity with lore glimpses and hidden paths. Look behind where you came from before moving on.
- Learn to run + jump: Essential for chase sections. Practice in the forest (open area).
- Observe enemy patterns: The Hunter has a fixed patrol route. Watch for 10 seconds before acting.
- Use Six as a tool: She can push objects, hold buttons, or stand on switches. If a puzzle requires two people, wait for her to auto-position.
- Throw objects to distract: Picking up a shoe, bottle, or brick and throwing it (aim with camera, release interact) will make noise and lure enemies away.
- Don’t rush into dark areas without listening. Enemies emit breathing or footsteps.
- Don’t jump into pits unless you see a platform. Many drops are instant death.
- Don’t run constantly: Running makes noise and attracts enemies. Only sprint when absolutely necessary (chases).
- Don’t ignore Six: If she stops moving, there is likely a puzzle nearby. Wait for her prompts.
- Don’t hoard items: You can only carry one at a time. Use items immediately or drop to pick up something else.
- Items: Keys, tools (wrench, axe), light sources (flashlight, lighter). Always pick up a key when you see it. Keys are single-use for specific doors.
- Enemy attention: Use thrown items strategically. A broken bottle can be used as a sharp tool to cut ropes (later in the school level).
- Checkpoints: You don’t control them, but note that progression is saved automatically after major events. If you quit, you resume at the last checkpoint.
- [ ] Play through the first 60 minutes (ends at city entrance).
- [ ] Fully master the control scheme (try each action: run, crouch, jump, slide, interact, drop).
- [ ] Learn the Hunter’s patrol pattern in the kitchen; practice stealth.
- [ ] Find the first collectible hat (in a hollow log after the rolling ball puzzle).
- [ ] Die at least once (to understand respawn mechanics and reduce fear).
- [ ] Complete the cabin chase without pausing.
- [ ] Save at the first checkpoint after the tunnel (exit to city).
- [ ] Adjust settings: Set brightness as recommended (adjust until the image is barely visible to match intended atmosphere).
- [ ] Optionally, watch the intro cutscene again from main menu for missed details.
- Play with headphones: Audio cues (enemy footsteps, breathing, Six’s whispers) are crucial for survival.
- Take breaks: The atmosphere is tense; don’t marathon for hours. The game is best in 1-2 hour sessions.
- There are no consequences for dying—checkpoints are generous. Experiment freely.
- If stuck on a puzzle, observe the environment for 30 seconds. The solution is almost always visible.
- The game respects your intelligence. There is no handholding beyond early prompts. Trust yourself.
No ammo, health, or score. If you die, you respawn at the last checkpoint (automatic, frequent).
Essential Early Objectives
Your primary goal in the first hour is to reach the Pale City. To do that, you must:
1. Find Six (occurs automatically in the forest).
2. Get past the Hunter by solving the kitchen key puzzle.
3. Escape the cabin during the chase sequence.
4. Survive the dark tunnel (avoid traps like bear traps on the ground—indicated by subtle metal glints).
5. Exit to the city streets.
Secondary objectives (for achievement hunters):
What to Do First / What to Avoid
Do First
What to Avoid
Early Resource Priorities
There are no traditional resources (health, mana, currency). The only "resources" are:
Common Beginner Mistakes
1. Trying to fight enemies: You cannot attack. Solve puzzles and run. The Hunter will one-shot you if you stand in front of him.
2. Ignoring Six's hints: She points or vocalizes when near a hidden item or puzzle element. If she makes a sound, look around.
3. Standing in the open: Use crouch to stay quiet and hide in lockers, under beds, or inside boxes. Enemies have poor vision but excellent hearing.
4. Forgetting to drop an item before jumping: You cannot climb while holding a large object. Release it first (press drop button) then jump.
5. Pulling instead of pushing: Some objects require pushing. Experiment with both directions if stuck.
6. Overlooking climbable surfaces: Walls with handholds (cracks, pipes, chains) are marked by a slight white outline when you get close. Look up!
Day-One Checklist
For a smooth first session, complete these steps in your first hour:
Final Tips
Welcome to the Pale City. Good luck, Mono.
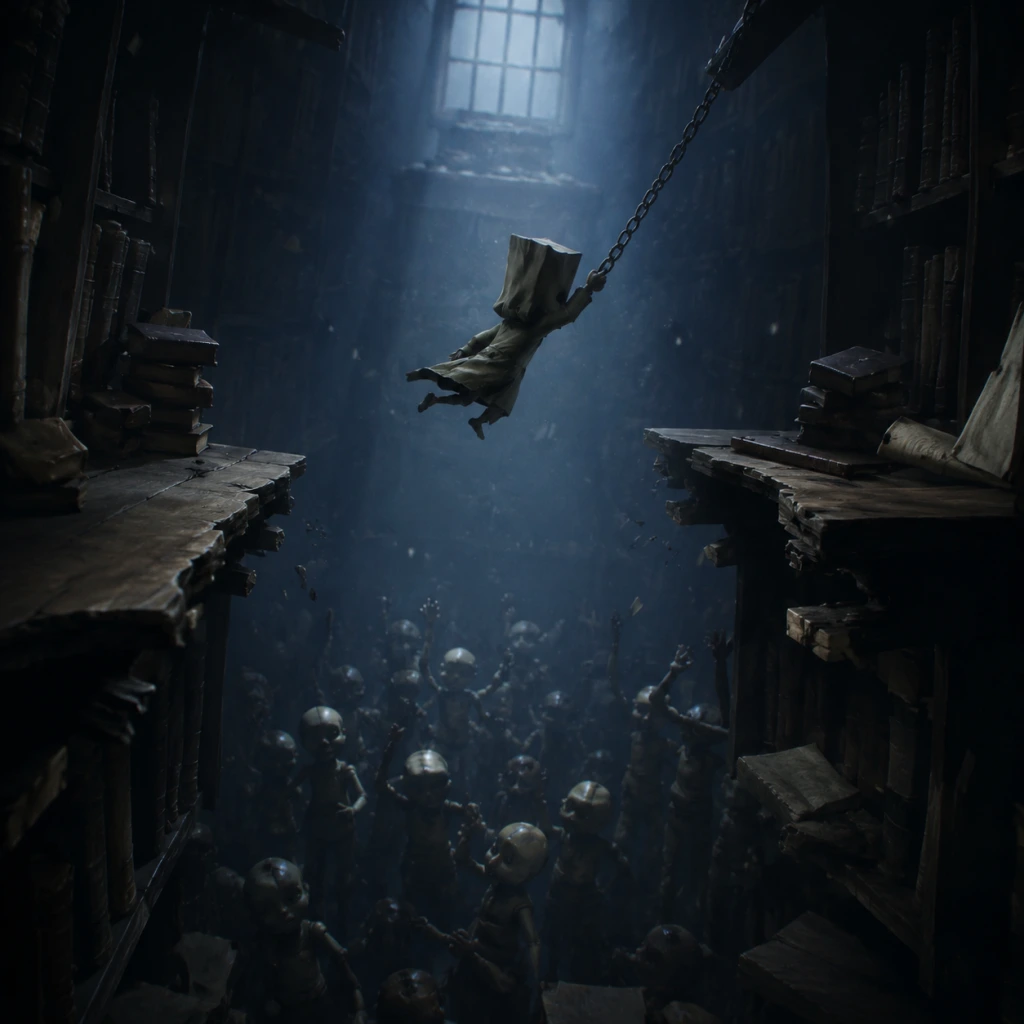
Core Gameplay
Overview
Little Nightmares II is a 2.5D puzzle-platformer horror adventure where you play as Mono, a young boy wearing a paper bag over his head. The core gameplay loop revolves around stealth, environmental puzzle-solving, and evading grotesque enemies. Unlike many action games, you have no traditional combat—Mono is fragile and must rely on wits, the environment, and occasional items to survive. The game is structured into five chapters (The Wilderness, The School, The Hospital, The Pale City, The Signal Tower), each introducing new mechanics and threats. Progression is linear, exploration is rewarded with collectibles and lore, and there is no character leveling, economy, or endgame beyond completing the story. Below is a breakdown of core gameplay by player progression tiers, with detailed explanations and examples.
The Main Gameplay Loop
The loop in Little Nightmares II is simple yet tense:
1. Explore a dark, claustrophobic environment to find the path forward.
2. Solve puzzles—often involving moving blocks, pulling levers, using objects (e.g., a key, a shoe) to unlock doors or activate mechanisms.
3. Evade or outsmart enemies—use stealth (crouch, hide under beds, avoid line of sight) or temporary tools (e.g., a hammer to stun) to survive.
4. Progress to the next area—each section ends with a door, elevator, or transition that loads the next area.
5. Uncover story fragments via VHS tapes, drawings, and environmental storytelling.
This loop repeats throughout the 4–6 hour campaign, with increasing complexity and horror.
Combat and Interaction Systems
No traditional combat: Mono cannot attack directly. The only offensive action is using a thrown object (e.g., a brick, a broken bottle) to stun an enemy briefly, giving you time to run. This is not a kill—just a delay.
- Grab: Interact with objects, pull levers, pick up items.
- Drop: Release held item.
- Run/Sprint: Tap to sprint (limited duration; stamina depletes quickly).
- Crouch/Crawl: Essential for stealth; hide under furniture or in vents.
- Jump: Context-sensitive; hold run to jump farther.
- Swim/Duck under water: Some sections require holding breath.
- Swing (with weapon): In certain sections (e.g., The School), you can swing a makeshift weapon (like a pipe or hammer) to stun enemies—but never kill them.
- Linear story chapters: The game is strictly linear. You cannot return to previous chapters. Save points (projector screens) auto-save progress; death respawns at the last save point.
- No leveling or skill trees: Mono does not gain new abilities. The only progression is your own skill and understanding of puzzles and enemy patterns. You acquire new interactions (e.g., swinging a pipe, using a flashlight) as the environment provides them, but these are temporary tools, not permanent upgrades.
- Collectibles: There are 30 Mono’s Hats (cosmetic only) and 36 VHS Tapes (lore). No gameplay benefit.
- 3D environments in a 2.5D plane: You can move left/right, up/down ladders, and forward/backward in some rooms. Exploration is encouraged off the main path to find collectibles and hidden rooms.
- Puzzle solving as exploration: Many collectibles require lateral thinking—e.g., using a thrown object to break a window or using a lever to raise a platform.
- Environmental storytelling: Game world tells the story through imagery; no dialogue. Exploration reveals how the world fell to the Signal Tower’s influence.
- No quest log or explicit missions. The only objective is stated through environmental cues: reach the door, turn on the generator, cross the gap. The game is essentially one continuous “quest” to escape the Pale City and reach the Signal Tower.
- Sub-objectives appear contextually: e.g., “Find a way to turn on the TV” or “Get the key from the hanging man.” These are immediate puzzles.
- No currency, shops, or upgrades. There is no economy. The only “resource” is collected hats (cosmetics) and tapes (lore enrichment). No in-game purchases or microtransactions.
- No growth system. Mono starts and ends exactly the same. The only change is your companion, Six, who is present for most of the game and can assist in certain situations (e.g., standing on a switch, giving you a boost). She does not gain abilities either.
- AI companion: Six is controlled by the game’s AI. She will follow, hide, and help with specific puzzles. She cannot die permanently—if she is grabbed, you must rescue her quickly.
- No post-game content. After completing Chapter 5 (The Signal Tower), the credits roll. There is no New Game Plus, no free roam, and no difficulty levels. The only replay value is to collect all hats and VHS tapes, or to unlock achievements/trophies.
- Multiple endings? The game has one canonical ending (with a twist). The ending is the same regardless of collectibles.
- Speedrun potential: The linear nature and lack of upgrades make it a popular speedrun game.
- Objective: Escape the Hunter’s cabin and the surrounding forest.
- New mechanics: Crouch, hide, push/pull objects, throw items. First encounter with an enemy (the Hunter).
- Puzzles: Simple: use a shoe to attract Hunter, rotate a valve to lower a bridge, climb trees to avoid traps.
- Exploration: Limited area; collectible hats hidden in side rooms (e.g., the bear hat behind a locked door).
- Difficulty: Low. Game teaches basic controls and stealth. Deaths are forgiving.
- Example puzzle: In the cabin, you must pull a chair to reach a high shelf, then push a TV to create a light beam that reveals hidden door.
- Objective: Survive the mannequin-filled school and the grotesque Hospital.
- New mechanics: Use of weapons (e.g., pipe in the school to stun the Bullies). Stealth becomes critical; enemies patrol in patterns.
- Puzzles: Multi-step: e.g., in the School, you must lure a Bully into a classroom by throwing a bottle, then sneak behind and hit a lever. In the Hospital, use a wheeled bed to reach high vents.
- Exploration: More branching paths; some areas require backtracking within the same room.
- Difficulty: Moderate. Enemies are more aggressive; one hit kills you. Save points become less frequent.
- Example puzzle: The Hospital’s operating room: you must dodge the Doctor by hiding under a gurney while he performs surgery, then grab the key from his table without being seen.
- Objective: Navigate the decaying city streets and the TV-obsessed citizens.
- New mechanics: Use of a flashlight (temporary) to reveal hidden platforms; enemies that are attracted to light/sound. The Viewers (zombie-like figures) require careful movement to avoid.
- Puzzles: Complex timing and sequence: e.g., using a television to distract a group of Viewers, then sprinting across a gap. Some puzzles involve manipulating light beams.
- Exploration: Verticality—climb scaffolding, crawl through subway cars. Several hidden rooms with tapes.
- Difficulty: High. Tight timings; long sequences without save points. Enemies can kill instantly.
- Example puzzle: The music box room: you must turn off three TVs in a specific order to disable a fan, then jump across rotating platforms.
- Objective: Reach the top of the tower and confront the Signal Tower’s influence. This is the final and most surreal chapter.
- New mechanics: No new tools; environmental puzzles become abstract. Glitches in reality (inverted gravity, repeating rooms).
- Puzzles: Purely environmental: walk on walls, avoid invisible enemies, navigate distorted geometry.
- Exploration: Linear, but with multiple “fake” doorways that loop; you must identify the correct path by observing subtle clues.
- Difficulty: Very high due to disorienting visuals and limited save points. Final chase sequence requires perfect timing.
- Example puzzle: A room where you must walk upside down on the ceiling to reach a door, while avoiding falling debris. Only the correct path (indicated by a faint glow) is safe.
Example: In the Hunter’s cabin (Chapter 1), you find a shoe that can be thrown at a door to attract the Hunter’s attention, allowing you to sneak past. No direct attack.
Progression
Exploration
Example: In The Hospital (Chapter 3), you can break a glass case by throwing a doll at it, revealing a VHS tape that explains the origins of the Doctor.
Quests and Missions
Economy
Character and Build Growth
Endgame Structure
Core Gameplay by Progression Tiers
Early Game (Chapter 1: The Wilderness)
Mid Game (Chapters 2–3: The School & The Hospital)
Late Game (Chapter 4: The Pale City)
Endgame (Chapter 5: The Signal Tower)
Summary
Little Nightmares II is a pure horror puzzle-platformer with no traditional RPG mechanics. Its core gameplay focuses on stealth, environmental puzzles, and evasion, with progression measured purely by player skill and exploration. The tiers map directly to chapters: Early (Wilderness), Mid (School/Hospital), Late (Pale City), Endgame (Signal Tower). There is no economy, character builds, or endgame content—the experience is a tightly crafted, linear story. Replayability comes from collectibles and speedrunning.
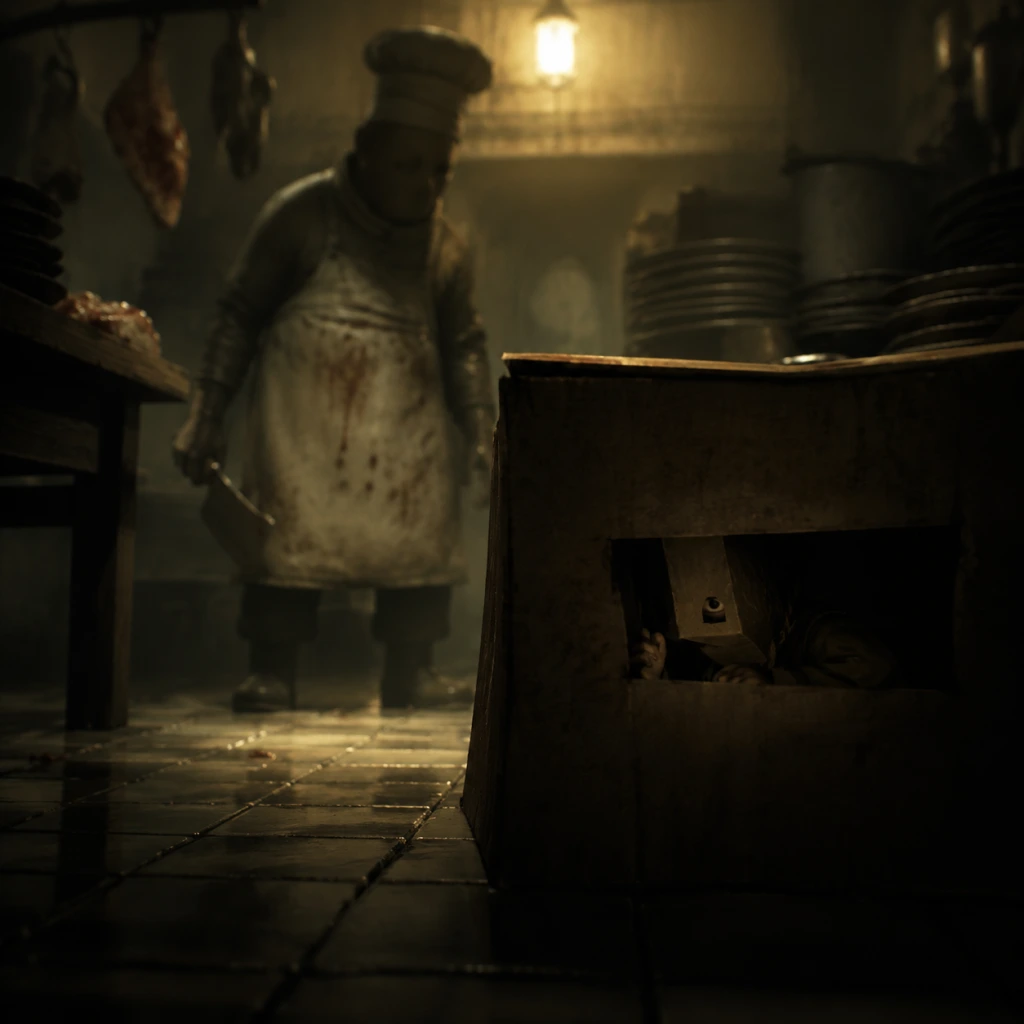
Game Tips
Overview
Little Nightmares II is a dark puzzle-platformer horror adventure where survival depends on stealth, observation, and quick reflexes. Unlike traditional games, there are no health bars, weapons (for most of the game), or upgrade systems. Resources are limited to collectibles (hats, glitching remains) and environmental items. This guide provides essential tips for beginners, intermediate players, and advanced optimizers, grouped by core gameplay aspects.
---
General Tips for All Players
Beginner Tips
1. Always observe before moving. Use the camera to look around corners, through gaps, and at the environment. Many threats are stationary until you trigger them. Wait for patrols to pass or for cues (like a door opening) before advancing.
- Listen carefully. Audio cues are critical. Footsteps, machinery, and monster sounds indicate danger. For example, the Hunter’s shotgun blast or the Teacher’s chalk snapping warns you to hide. Use headphones for better spatial awareness.
- Master the run button. Hold the run button (Shift on PC, R2 on consoles) to sprint, but remember that running makes noise and can attract enemies. Sprint only when you have a clear path or need to outrun a chase.
- Interact with everything. Press the interact button on levers, doors, objects. Many puzzles require precise timing. Don’t be afraid to experiment—if an object is movable, it likely serves a purpose.
- Save frequently. The game auto-saves at key points but manually check that a checkpoint icon appears after completing a section. If you die, you respawn at the last checkpoint. Avoid rushing into unknown areas without recent saves.
- Use Six wisely. Six follows you but can be directed to help with puzzles (e.g., pulling levers or standing on switches). When separated, listen for her voice to locate objectives. In chase sequences, stay close to Six to avoid getting caught.
- Hide in unexpected places. Enemies search predictable spots (lockers, under desks). Sometimes staying in plain sight behind a pillar or in shadow works better. Use the environment creatively—climb onto shelves or behind curtains.
- Master the throw mechanic. You can throw objects (like shoes, bottles) to distract enemies. Aim at hard surfaces to create a louder noise. Useful for luring the Teacher away from keys or the Hunter away from your path.
- Speedrun techniques. Certain areas allow sequence breaks. For instance, in the School section, you can jump over the Teacher’s head if timed perfectly during her spin. This saves several seconds but requires precise input on console/PC.
- Minimize deaths. Dying resets puzzle progress. For speedrunning or low-death runs, memorize the exact timings and animations. Use quicksaves on PC (manual save mods) to practice specific sections repeatedly.
- Little Nightmares II has no direct combat. Mono cannot attack enemies until the finale. All encounters are solved via stealth, evasion, or using the environment. Treat every enemy as an invincible threat until you gain the lightsaber-like weapon in Chapter 5.
- Crouch is your default state. Stay crouched (Ctrl on PC, L3 on consoles) when moving near enemies. Walking upright produces louder footsteps.
- Hold breath. When hiding in a locker or under a bed, hold your breath (Shift on PC, R2 on consoles) to reduce detection if an enemy searches nearby. Release when safe to avoid suffocation.
Intermediate Strategies
1. Learn enemy patterns. Each enemy (Hunter, Teacher, Doctor, Thin Man) has a specific behaviour cycle. For example, the Teacher scans the room in arcs; you can slip behind her during her blind spots. Study the timing to know exactly when to move.
Advanced Optimizations
1. Chain movements. In timed sequences (e.g., escaping the Doctor’s hands), plan your route to minimize stops. Learn the exact button sequence to climb, jump, and squeeze without hesitation. Practice speedrun strats like wall jumps to skip minor obstacles.
---
Stealth & Evasion (Combat Substitute)
General Principles
Enemy-Specific Tips
| Enemy | Weakness | Effective Strategy |
|---|---|---|
| Hunter | Slow turning speed, limited range | Use trees and buildings for cover. Throw bait items to lure him away from doors. Sprint only when he is reloading or distracted. |
| Teacher | Predictable patrol path, blind during chalkboard moments | Crouch-walk behind her. She cannot see you if you are below her eye level (e.g., crawling under desks). Throw objects to create noise in opposite direction. |
| Doctor | Slow movement, pauses to talk | Wait for him to stop and monologue. Then sneak past. Do not run on creaky floors—he will hear you from rooms away. |
| Thin Man | Teleports but has a wind-up before attacks | The final boss is a pattern-based chase. Run diagonally to avoid his grabs. Use the environment (TVs) to break line of sight. |
Advanced Evasion
- Use the environment as a weapon. In the Hunter’s shed, you can drop a saw blade on his head to stun him. Similarly, in the School, you can break lightbulbs to create dark spots where the Teacher cannot see you.
- Chain hiding spots. When escaping the Doctor, plan a route that moves from cover to cover (locker to under bed to behind curtain). Do not stay in one spot too long—enemies check areas they haven’t searched recently.
- Look for visual cues. Game designers highlight usable items with a faint glow or unusual colour. A lever may be slightly brighter; a drawer may be slightly ajar. Scan the screen systematically.
- Interact with Six. Six can activate switches, hold doors, or carry objects. If a puzzle requires two actions at once, command Six (press the interact button near her). For example, she can hold a lever while you climb.
- Solve puzzles in stages. Many puzzles have multiple steps. Don’t rush; understand the objective first. For instance, in the Hospital, you need to create a pathway by moving beds and then distracting the Doctor.
- Find all collectibles. Hats (replace your paper bag) and Glitching Remains (six locations) are hidden throughout. Hats are often in optional rooms or behind fake walls. Tap walls to find hollow spots. Glitching Remains appear as floating, flickering figures—approach them to trigger a cutscene.
- Explore every corner. Many secrets are behind doors that can be unlocked by solving nearby puzzles. In the Wilderness, look for loose boards you can pry open. In the City, climb onto rooftops to find hat locations.
- Replay chapters. After completing the game, chapter select allows you to revisit specific areas for missed collectibles. Use this to get achievements or 100% completion.
- Purpose: Cosmetic only. Hats replace your default paper bag. They do not affect gameplay.
- Tips: There are 13 hats in total. They are often found in hard-to-reach places. For example, the “Bat” hat is on a high shelf in the Museum; you need to push a crate to reach it. Use online guides for exact locations.
- Best hats for fun: The “Fox” hat fits the aesthetic; the “Paper Boat” hat is a callback to the first game.
- Purpose: Lore collectibles that reveal backstory. Collecting all six unlocks a new achievement and a bonus secret scene.
- Locations: One per chapter except the final one. They are always in hidden passages. For example, in the School, the Glitching Remain is inside a closet after solving the book puzzle.
- Tip: Listen for a faint static sound when near a Glitching Remain. Use that audio cue to guide you.
- None. There are no consumable items, health packs, or resources. The game relies purely on player skill. Do not worry about managing inventory.
- Levers & Switches: Pull them to activate mechanisms (platforms, doors, lights). Some require holding; others are one-time use.
- Movable Objects: Push crates, chairs, or tables to create stepping stones. Pull them to block enemy paths. In the School, you can push a bookcase to climb to higher floors.
- Breakable Items: Windows can be broken to create escape routes. Glass shatters loudly—use it to distract enemies or alert them. Beware that breaking glass may attract the Teacher.
- Liminal Spaces: Squeeze through narrow gaps (press interact on cracks). These often lead to hidden areas or alternative paths.
- Create distractions. Throw a bottle or shoe at a metal surface to create a loud sound. Enemies will investigate. This gives you a window to sneak past.
- Turn off lights. If a light is on, you are more visible. Some puzzles require you to break bulbs or pull cords to darken a room. In the Doctor’s domain, darkness reduces his detection range.
- Use shadows. Stand in dark patches to remain invisible. Learn the patrol patterns so you know when enemies look your way.
- Bunny hopping? No, the game does not allow bunny hopping. But you can chain jumps: jump immediately after landing from a previous jump to conserve a tiny amount of momentum.
- Wall jumps. Some walls have ledges you can grab. Jump and then press the grab button (E on PC, X on PS) to mantle. Quickly, you can jump off walls to reach higher platforms.
- Sprint-into-pull. When pulling a lever, start sprinting before you press interact, then immediately release to reduce the animation delay.
- Skip the School’s first encounter? Not possible legitimately—you must trigger the teacher. But you can minimize backtracking by planning the order of actions.
- Skip the Hospital elevator puzzle? No, but you can speed up the Doctor’s animation by not looking at him when he monologues. Turn the camera away to avoid triggering longer dialogue.
- Final boss skip? No, but you can damage rush the Thin Man by staying close to TVs and using the weapon immediately after each teleport.
- No currency or upgrades. The game has no economy. Do not look for shops or skill trees. All progress is story-based. The only “economy” is your trust in Six—be aware that her actions sometimes change based on hidden variables.
- Don’t panic during chases. The game often gives you a few frames to react. Stay calm, stick to the intended path, and don’t button mash. Precision is key.
- Learn from death. Each death teaches you the enemy behaviour or puzzle solution. The game is forgiving with checkpoints, so treat failures as learning opportunities.
- Enjoy the atmosphere. Little Nightmares II is a work of art. Take time to appreciate the environments, music, and storytelling. Rushing through reduces the experience.
---
Puzzle Solving & Exploration
Core Principles
Exploration Tips
---
Resource & Collectible Management
Hats
Glitching Remains
Other Collectibles
---
Environmental Mastery
Interaction Elements
Advanced Environmental Tricks
---
Advanced Techniques & Speedrunning
Movement Optimization
Sequence Breaks
Economy (Non-Existent)
---
Final Tips
1. Play with headphones. The sound design is crucial for immersion and detection. Subtle audio cues like the Hunter’s breathing or the Teacher’s footsteps give away positions.
---
For 100% completion, refer to dedicated collectible guides. Use chapter select to replay any missed sections. Good luck, Mono.
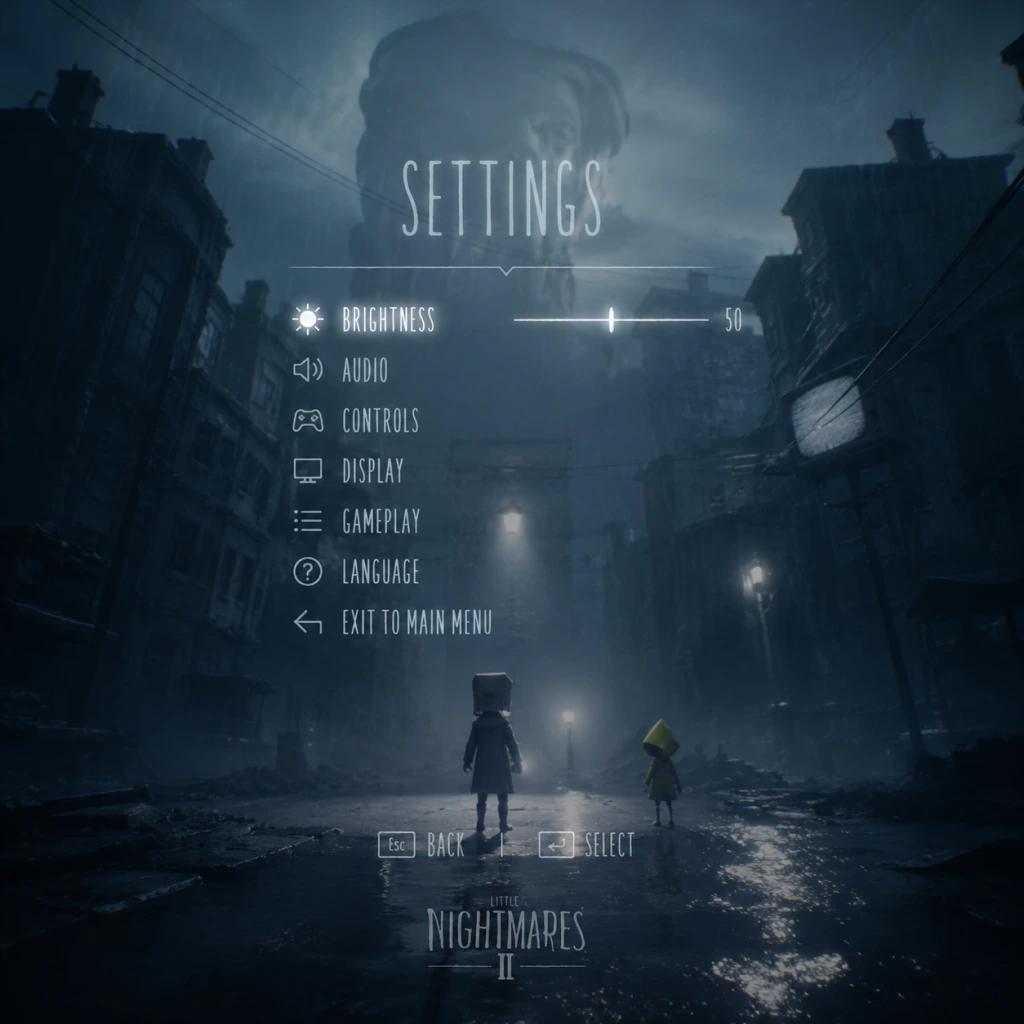
Game Settings
Overview
_Little Nightmares II_ offers a focused but essential set of settings menus to tailor your experience. Most options are accessible from the main menu or in-game pause screen. The game is primarily a single-player experience, so network settings are minimal (only related to achievements and cloud saves on PC). This guide covers every major category—Graphics, Audio, Controls, Accessibility, Language, Network, and Gameplay—with platform-specific notes and optimized presets for different hardware levels.
Graphics Settings
Graphics settings heavily impact performance and visual quality. _Little Nightmares II_ uses Unreal Engine 4 and has a stylized, dimly lit art style where details matter. The following table lists all available options, their effects, and recommended values for Low, Medium, High, and Ultra hardware targets.
| Setting | Description | Low (30 FPS) | Medium (60 FPS) | High (60 FPS) | Ultra (60+ FPS) |
|---|---|---|---|---|---|
| Resolution | Native display resolution. Lower = sharper but more GPU load. | 1280×720 | 1920×1080 | 1920×1080 | 2560×1440 or 4K |
| Display Mode | Fullscreen, Borderless, Windowed. Fullscreen yields best performance. | Fullscreen | Fullscreen | Fullscreen | Fullscreen |
| VSync | Synchronizes frame rate with monitor refresh; eliminates tearing but can add input lag. | Off (cap at 30) | Off (cap at 60) | On | Off (use G-Sync/FreeSync) |
| Frame Rate Limit | Caps maximum FPS. | 30 | 60 | 60 | Off or 144 |
| Resolution Scale | Renders at a lower internal resolution and upscales. 100% = native. Lower = better performance. | 75% | 100% | 100% | 100% |
| Anti-Aliasing | Smooths jagged edges. Options: Off, FXAA, TAA. TAA best quality. | Off | FXAA | TAA | TAA |
| Texture Quality | Detail of surfaces. High VRAM required. | Low | Medium | High | Ultra |
| Shadow Quality | Shadow resolution and distance. Low = no shadows. | Low | Medium | High | Ultra |
| Post Processing | Enables bloom, depth of field, motion blur. | Low | Medium | High | Ultra |
| Ambient Occlusion | Adds contact shadows for depth. | Off | Low | High | Ultra (SSAO) |
| Motion Blur | Blurs moving objects. Can cause nausea. Personal preference. | Off | Off | Per Object | On (personal preference) |
| Depth of Field | Blurs distant objects. Cinematic but reduces clarity. | Off | Off | On | On |
| Bloom | Glow from bright lights. Adds atmosphere. | Off | On | On | On |
| Volumetric Fog | Dense, volumetric lighting. Heavy performance impact. | Off | Low | Medium | High |
| Reflections | Screen Space Reflections (SSR) quality. | Off | Low | High | Ultra |
| Grass Quality | Detail of vegetation. | Low | Medium | High | Ultra |
| Decal Density | Number of persistent marks/decals. | Low | Medium | High | Ultra |
| Tessellation | Adds geometric detail to surfaces (displacement). | Off | Off | On | On |
Hardware Tier Recommendations
#### Low-End (GTX 1050 Ti / RX 560, 8 GB RAM, SSD)
- Resolution: 720p or 900p
- Resolution Scale: 75%
- Preset: Custom (Low on most, Medium on Textures)
- Target: 30 FPS stable
- Disable: Volumetric Fog, Tessellation, Ambient Occlusion, Reflections, Motion Blur, Depth of Field
- Resolution: 1080p
- Resolution Scale: 100%
- Preset: Medium
- Target: 60 FPS (cap at 60)
- Enable: TAA, Medium Shadows, Low Volumetric Fog, Off Motion Blur (optional)
- Resolution: 1080p or 1440p
- Resolution Scale: 100%
- Preset: High
- Target: 60 FPS (uncapped if monitor >60Hz)
- Enable: TAA, High Shadows, Medium Volumetric Fog, On Depth of Field, Off Motion Blur (or Per Object)
- Resolution: 1440p or 4K
- Resolution Scale: 100%
- Preset: Ultra
- Target: 60+ FPS (uncapped)
- Enable: All options maxed out including Volumetric Fog, Tessellation, Ultra Reflections. Personal preference on Motion Blur.
#### Mid-Range (GTX 1060 / RX 580, 16 GB RAM)
#### High-End (RTX 2060 / RX 5700, 16 GB RAM)
#### Ultra (RTX 3070+ / RX 6800+, 16+ GB RAM)
> Note: The game is not especially demanding; a modern integrated GPU (e.g., Intel Iris Xe) can manage 720p Low at 30 FPS.
Audio Settings
Audio is critical for immersion and horror cues (e.g., listening for footsteps, creaks). The settings menu is straightforward.
| Setting | Options | Notes |
|---|---|---|
| Master Volume | 0–100 | Controls overall volume. |
| Music Volume | 0–100 | Background score. Set lower if you want to hear ambient sounds. |
| SFX Volume | 0–100 | Sound effects like footsteps, puzzles, monsters. Keep high for gameplay cues. |
| Voice Volume | 0–100 | Subtle character sounds, grunts, and cries. |
| Cinematic Volume | 0–100 | Audio during cutscenes. |
| Output Device | Default, Speakers, Headphones | Select Headphones for spatial audio benefit. |
| Dynamic Range | Low, Medium, High | Controls loudness range. High = greater contrast between quiet and loud sounds. Recommended: Medium or High for headphones. |
| Audio Language | English, French, German, etc. | Affects voice-over in cinematics. Game has very little dialogue; most is environmental. |
| Subtitles | Off, On | See Accessibility section. |
Controls Settings
Controls can be remapped on PC. Console versions have fixed layouts but support controller customization for some actions.
PC Keyboard and Mouse
| Action | Default Key | Notes |
|---|---|---|
| Move | W/A/S/D | Can rebind to arrow keys. |
| Look | Mouse | Sensitivity adjustable. |
| Interact / Pick Up | E | Also used for pulling levers. |
| Run | Left Shift | Hold to sprint. |
| Crouch | Left Ctrl | Toggle or hold? Default toggle. |
| Jump | Spacebar | |
| Attack / Use Item | Left Mouse Button | Only when holding an item. |
| Flashlight | F | Toggle. |
| Pause | Escape | |
| Inventory | I | Shows held items (rarely used). |
- Mouse Sensitivity (1–100): Default 50. Lower is better for precise platforming; higher for panoramic looking. Recommended 30–50.
- Invert Y-Axis: Off (most players).
- Controller Vibration: On/Off (only applies if using a controller).
Controller (Xbox / PlayStation / Switch Pro)
The game is best played with a controller due to its precise platforming and analog movement.
| Action | Default Button (Xbox) | Notes |
|---|---|---|
| Move | Left Stick | |
| Look | Right Stick | |
| Run | Left Stick Click (L3) | Hold to sprint. |
| Crouch | B / Circle | Hold or toggle? Default toggle. |
| Jump | A / Cross | |
| Interact / Pick Up | X / Square | |
| Attack / Use Item | Right Trigger (RT) | |
| Flashlight | Left Bumper (LB) | Toggle. |
| Pause | Start / Options | |
| Inventory | Select / View |
- Look Sensitivity (1–100): Default 50. Recommended 40–60.
- Aim Sensitivity (controls walking speed? – actually not present; the game has no aiming).
- Dead Zone: Can be adjusted for sticks to reduce drift. Default is fine for most controllers.
> ⚠️ Easy to Misconfigure: _Run/Crouch Toggle vs Hold_ – The game defaults to toggle for crouch; many players prefer hold for quick ducking in stealth. Check the Controls menu to switch if needed. _Keyboard Mouse Sensitivity_ – Setting it too high makes camera jerky during chase sequences.
Accessibility Settings
Little Nightmares II includes several options to improve accessibility.
| Setting | Description | Recommended |
|---|---|---|
| Subtitles | Display dialogue and sound descriptions (e.g., "creak", "footsteps"). | On (especially for hearing impaired) |
| Subtitle Size | Small, Medium, Large | Large for easier reading. |
| Subtitle Background | Off, On (dark box) | On improves readability against bright backgrounds. |
| Colorblind Modes | Protanopia, Deuteranopia, Tritanopia | Adjusts puzzle colors (important for signal puzzle in Chapter 4). |
| Camera Shake | Off, Reduced, Full | Off reduces motion sickness; Full for cinematic feel. |
| Screen Flash | Off, Reduced, Full | Some sequences have bright flashes. Reduce or off for photosensitivity. |
| Controller Vibration | On/Off | Off for sensory sensitivity; On for tactile feedback. |
| High Contrast Mode | Off, On (PC only?) | Increases contrast between Mono and backgrounds. Helps visibility. |
| Auto-Aim | Off, On (only for throwing mechanics) | Not present; no ranged combat. |
Language Settings
| Setting | Options | Notes |
|---|---|---|
| Text Language | English, French, German, Italian, Spanish, Portuguese, Japanese, etc. | Affects menus, subtitles, UI. |
| Audio Language | English, French, German, etc. (subset) | Only affects a few spoken lines in cutscenes. Subtitles follow text language. |
Network Settings
Little Nightmares II is a completely offline single-player game. There are no online multiplayer or multiplayer modes. The only network-related functionality is:
- Achievements / Trophies: Synced online.
- Cloud Saves: On Steam and Epic Games Store, automatic.
- Leaderboards: None.
Therefore, there are no in-game network settings. If you are on console, ensure you are connected to the internet for trophy syncing, but the game itself does not require an internet connection to play.
Gameplay Settings
These settings affect how the game plays but are not about difficulty (there is no difficulty slider). They are mostly related to control and camera.
| Setting | Description | Recommendation |
|---|---|---|
| Camera Auto-Centering | On: camera slowly repositions behind Mono. Off: you control camera always. | Off gives more control, especially when looking for hidden secrets. |
| Camera Speed | 1–5 (or slider). Default 3. | 4 for faster look. |
| Invert Camera X/Y | Off by default. | Keep default unless you are used to inverted. |
| Aim Assist | Not present. | N/A |
| Quick Turn | On/Off (console only? PC keyboard has no binding). | On helps in chase sequences to quickly turn around. |
| Input Buffer | Not adjustable. | The game has a small input buffer for jumps and interactions. |
Special Attention Points During Setup
1. First Launch Brightness Calibration: The game prompts you to adjust brightness so that the logo is barely visible. This is important for the dark horror atmosphere. Make sure your room lighting is consistent. If you set it too bright, you lose shadow detail; too dark, you can't see paths.
2. Controller vs Keyboard: The game was designed for a controller. If using keyboard, rebind keys for comfort (e.g., Sprint to Space, Jump to Right Click). Many players report mouse-only camera feels slippery.
3. HDR Settings (PC/PS5/Xbox Series): If your display supports HDR, enable it in the system settings, then toggle HDR in the game. The game's HDR implementation is subtle but enhances the contrast of the flashlight. Adjust HDR brightness (paper white) to 200–300 nits for best results.
4. Disable Steam Overlay / Discord Overlay: These can cause stuttering in Unreal Engine 4 games. Turn off overlays for smoother performance.
5. Audio for Headphones: Select the Headphones output device and set Dynamic Range to High for the best spatial awareness—you'll hear which direction the Thin Man or other enemies are approaching.
By following these settings, you will have the optimal gameplay experience whether you're aiming for buttery-smooth performance or maximum visual fidelity. Adjust to your personal comfort, especially regarding motion blur and camera shake.
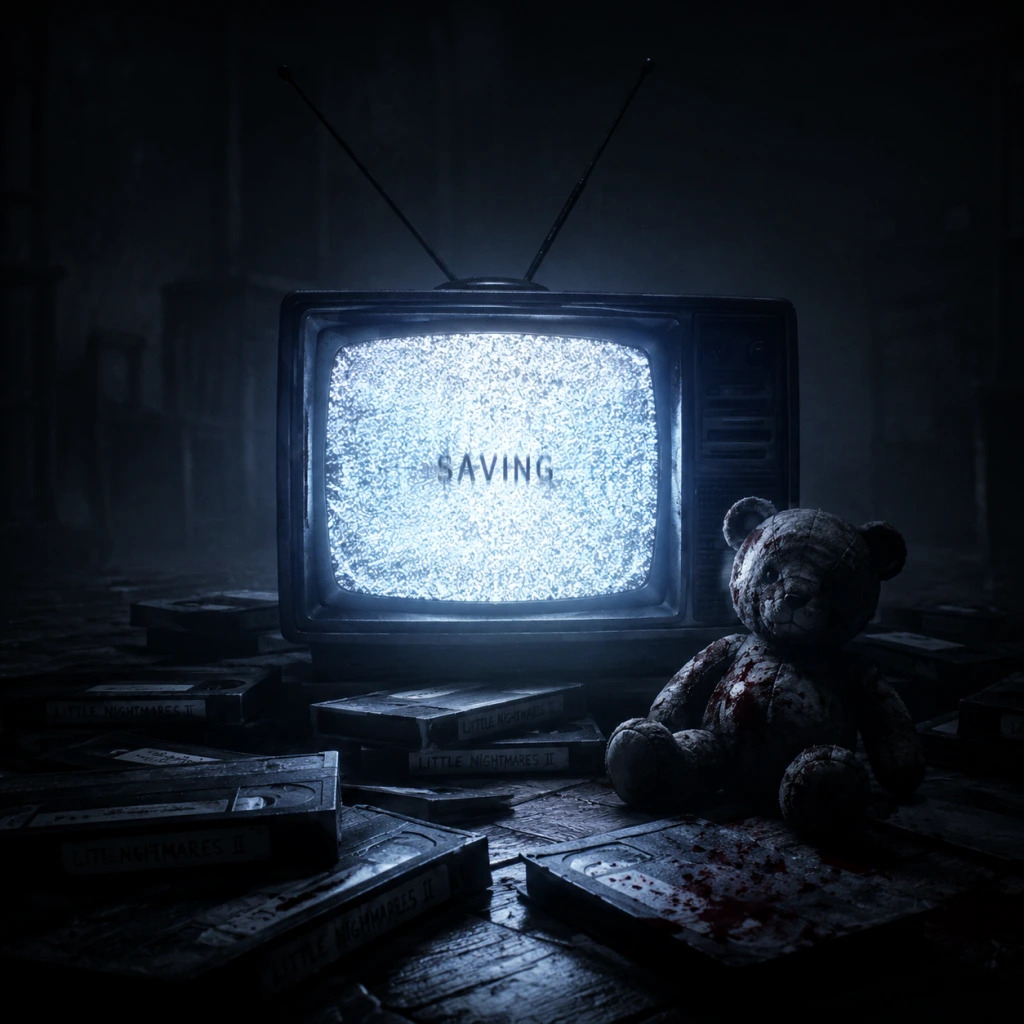
Important Notes
Important Notes
Warnings and Pitfalls
- No Manual Saves: The game uses an autosave system. You cannot manually save or reload a previous checkpoint. If you miss a collectible, you must replay the entire chapter from the start.
- One-Shot Deaths: Most enemies and hazards kill Mono instantly. There are no health bars or second chances. Quick reflexes are essential.
- Dark and Disturbing Themes: The game contains intense psychological horror, disturbing imagery, and implied violence. Not suitable for young children or those sensitive to dark themes.
- Jump Scares: Several scripted jump scares occur, especially in the Hospital and School chapters. Be prepared for sudden loud noises and shocks.
- No Combat (Mostly): For the majority of the game, you cannot fight back. Your only options are hiding, running, or solving puzzles. Direct confrontation is almost always fatal.
- Limited Sprint: Mono can sprint only for a short time. Running too long will cause him to tire and slow down, leaving you vulnerable.
- The Ending: There is only one ending (the "canon" ending) after the final boss. No choices affect the outcome. However, collecting all Glitching Remains unlocks a secret ending during the credits.
- Secret Ending Requirement: To unlock the secret ending, you must collect all 16 Glitching Remains in a single playthrough. Missing even one forces you to replay the entire game or start a new save.
- Glitching Remains (16 total): These are ghostly figures that appear in specific locations. They are often hidden in dark corners, behind furniture, or require solving a small puzzle to reach. Every chapter has at least one.
- Hats (10 total): Hats are optional cosmetic items that change Mono's headgear. They are found in explorable areas, sometimes requiring backtracking or risky jumps. Hats are not needed for achievements or endings but are fun to collect.
- Chapter Select: Once you complete the game, you unlock Chapter Select from the main menu. This lets you replay any chapter to hunt for missed collectibles. However, progress does not carry over to your main save; you must collect everything in one continuous playthrough for the secret ending trophy/achievement.
- The School (Chapter 2): The Bullies (students) are relentless and fast. They can be stunned temporarily but never defeated. The chase sequences require precise timing and quick hiding.
- The Hospital (Chapter 3): The Doctor and the Mannequins create intense tension. The Mannequins only move when you look away; this gimmick requires careful camera management and memorization of enemy patterns.
- The Thin Man (Chapter 4): The final chase with the Thin Man is one of the most difficult sections. You must navigate a collapsing environment while avoiding his instant-kill attacks. Deaths are frequent.
- The Signal Tower (Chapter 5): The final boss encounter is a series of quick-time events and environmental hazards. Missing a prompt or slipping can result in death and restarting the entire sequence.
- No Grinding: Little Nightmares II is a linear experience with no stats, upgrades, or experience points. There is no reason to grind. Focus on exploration and puzzle-solving.
- No Currency: There is no in-game economy. The only "rewards" are collectibles and story progression.
- Single-Player Only: There is no multiplayer, co-op, or online component. No etiquette or anti-cheat systems are relevant.
- No Modding Support: The game does not officially support mods. Using third-party tools or save editors may corrupt your save file or prevent achievement unlocking.
- Cheats: PC players can use console commands (e.g., for invincibility) if enabled via launch options, but this is not recommended for first playthroughs and may disable achievements.
- Autosave Only: The game saves automatically at checkpoints (typically after completing a puzzle, entering a new room, or reaching a safe zone). You cannot manually save or backup saves easily.
- Cloud Saves: On platforms like Steam, cloud sync is enabled by default. Be cautious when switching between devices; ensure you don't overwrite a newer save with an older one.
- Replaying Chapters: Using Chapter Select from the main menu creates a temporary save for that chapter. Collectibles found there do not carry over to your main story save. To unlock the secret ending, you must collect all Glitching Remains in a single story playthrough.
- Deleting Saves: To start fresh, you can delete your save file from the game's folder (PC) or system storage (consoles). This is permanent.
Irreversible Choices
The game is linear. However, once you move a story trigger (e.g., entering an elevator, crossing a certain threshold), you cannot go back to previous areas. Collectibles missed in a chapter are permanently lost for that playthrough unless you replay the whole chapter.
Missable Content (Collectibles)
Difficulty Spikes
Grinding Traps (Not Applicable)
Online Etiquette & Anti-Cheat Notes
Save Management Advice
Things Players Commonly Regret Not Knowing Earlier
1. Hold Sprint Carefully: You can sprint by holding R2/RT or Left Shift on PC. Use it only when necessary because stamina depletes quickly and recharges slowly.
2. Look Around Constantly: The camera can be moved freely with the right stick. Many secrets are hidden above, below, or behind objects.
3. You Can Use Items as Tools: Many objects can be picked up and used: shoes to distract enemies, pans to block doors, or even a flashlight to reveal hidden paths.
4. Enemies Have Blind Spots: Bullies cannot see you if you stay still in the dark or inside cabinets. Mannequins freeze when you look at them directly.
5. The Axe Can One-Hit Some Enemies: In the School chapter, you acquire an axe that can instantly kill Bullies if you hit them. Use it to clear a path, but be aware it attracts others.
6. Glitching Remains Activate After Collecting: After you complete the game with all 16 Glitching Remains, a secret ending plays during the credits. You can also unlock a special filter for the game’s menu.
7. Jump Timing Is Crucial: Many platforming sections require precise jumps. The game has some pixel-perfect leaps, especially in the final chapters. If you fall, you may have to repeat a lengthy section.
8. You Can Run Past Many Enemies: Not every enemy encounter requires stealth. In some cases, simply sprinting past an enemy (if you know the path) is faster and safer.
9. The First Playthrough Is Short: The game is roughly 3-5 hours long. The atmosphere is dense, but the length is compact. Replaying for collectibles adds value.
10. The Environment Is Interactive: Many objects in the environment can be moved, climbed, or interacted with. Experiment with everything, especially drawers, boxes, and levers.
By keeping these notes in mind, you’ll avoid common frustrations and fully appreciate the haunting world of Little Nightmares II.
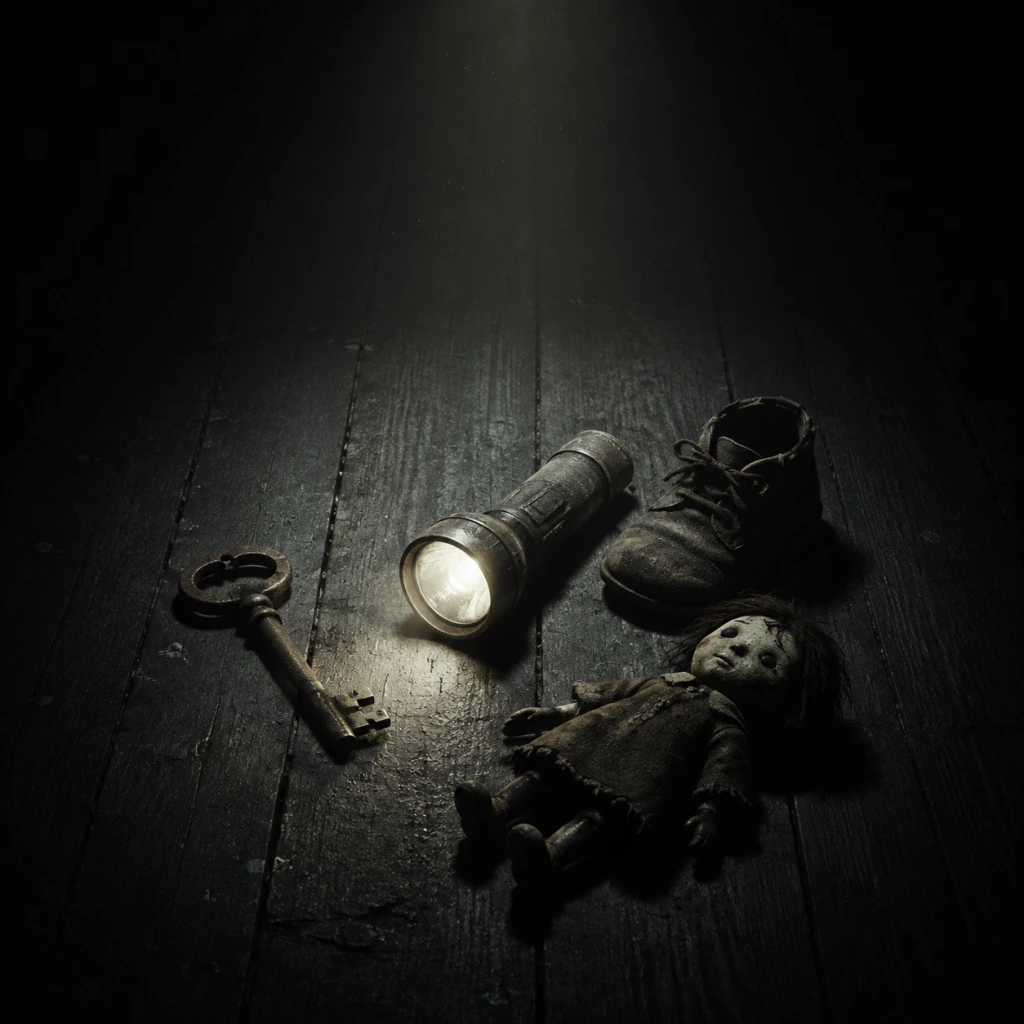
All Game Items
Overview
Little Nightmares II is a horror puzzle-platformer with a minimalistic item system. There are no traditional weapons, armor, health items, currencies, or upgrade systems. Instead, the game focuses on a few key tools that Mono can pick up and use for specific puzzles or segments, along with collectibles that unlock achievements and lore. This guide lists every major item grouped by category: Key Equipment, Chapter-Specific Items, Collectibles, and Environmental Objects (which are not inventory items but critical to progression).
---
Key Equipment
These items can be carried by Mono and used across multiple chapters or for extended sections.
Flashlight
- Description: A portable flashlight that Mono finds early in the game (Chapter 2: The School). It is the only persistent tool throughout the adventure.
- How to Obtain: In the School chapter, after escaping the janitor, you enter a classroom with a desk. The flashlight is on the desk.
- Use: Turn it on/off by holding the interact button. Needed to illuminate dark areas, reveal hidden paths, and temporarily stun certain enemies (e.g., the Teacher's shadows, the Thin Man's hand).
- When Useful: Essential in nearly every chapter for navigation and puzzle-solving. Especially crucial in the Hospital and Pale City areas where darkness is abundant.
- Synergies: None; it is a standalone tool. No upgrades.
- Description: A small TV remote with a single button. It appears only in the final chapter (Chapter 5: The Signal Tower).
- How to Obtain: Found inside the Signal Tower, after the Thin Man's lair sequence, on a table near a TV.
- Use: Press the button to turn TVs on/off or interact with the distorted transmissions. Required to progress through the final area and to defeat the Thin Man by turning off the TV sets he appears from.
- When Useful: Only in the Signal Tower chapter. Critical for the final boss fight.
- Synergies: Must be used in combination with the environment (TVs).
- Description: A large fire axe with a wooden handle and metal blade.
- How to Obtain: In the School kitchen area, stuck in a chopping block. Mono pulls it out.
- Use: Can be swung to break wooden planks and barriers. Also used to attack the Janitor (stun him briefly) and to break a locked door later.
- When Useful: Only in Chapter 2 (The School). Needed to access the attic and escape the Janitor's pursuit.
- Note: Cannot be taken outside the School chapter; it is discarded after the segment.
- Description: A heavy mallet-like hammer.
- How to Obtain: In a supply closet near the start of the School (after the first encounter with the Janitor). Not mandatory.
- Use: Same as the axe – can break wooden crates and boards. Functions identically to the axe but is found earlier.
- When Useful: Optional; can be used to break a few boxes for collectibles or shortcuts, but the axe is required for story progression.
- Note: If you pick up the hammer, you cannot carry the axe simultaneously. Usually players skip the hammer once the axe is found.
- Description: A small metal key.
- How to Obtain: In Chapter 3 (The Hospital), you must solve a shoe puzzle in a patient room to drop the key from a vent.
- Use: Opens a locked door in the same chapter leading to the next area.
- When Useful: Only in The Hospital chapter.
- Description: A small glass bottle of dark medicine.
- How to Obtain: In the Hospital pharmacy after solving a puzzle with a mannequin and a gurney.
- Use: Give to Six (your companion) when she is sick and coughing. She drinks it and recovers, allowing her to continue following you.
- When Useful: Only in The Hospital chapter, during the sequence where Six collapses.
- Description: A pair of worn shoes.
- How to Obtain: Found in a locker or on a shelf in a patient room (same room as the shoe puzzle).
- Use: Place the shoes on a pressure plate or in a specific slot to trigger a mechanism that drops the hospital key (see above).
- When Useful: Only for that puzzle. Not carried beyond that room.
- Description: A wall-mounted lever that Mono can pull.
- How to Obtain: Not a pick-up; it is a fixed fixture.
- Use: Pull to lower a platform or open a gate.
- Note: Included here because it is a significant environmental object.
- Description: Floating, glowing, distorted childlike figures that emit a static hum. They are the souls of children trapped in the Signal Tower.
- How to Obtain: Hidden in all chapters. Some are in obvious locations, others require solving optional puzzles or exploring hidden areas. No chapter select – must replay entire chapter to collect missed ones.
- Use: Collecting all 45 Glitched Remains unlocks a secret cutscene at the end of the game and the achievement/trophy "Fetching the Light."
- When Useful: For 100% completion and lore understanding. Each collected Remains triggers a brief flashback showing the child's final moments.
- Tips: Listen for static sounds; the Remains are often in shadowy corners or behind destructible objects. Use the flashlight to illuminate them.
- Description: Various headwear that Mono can wear. They are purely cosmetic and change the appearance of Mono's paper bag.
- List of Hats:
- How to Obtain: Found in hidden areas, often behind breakable walls or by solving optional puzzles. Some require the flashlight to reveal.
- Use: Cosmetic only. Worn automatically upon pickup. You can switch between hats in the main menu under "Collectibles" after completing the game (chapter select? Actually no chapter select – but hats unlocked persist across new game? Only collectibles are tracked. You can equip them from the menu once found).
- When Useful: Purely for fun and achievements. No gameplay effect.
- Use: Push or pull to reach higher ledges, block doors, or weigh down switches.
- Use: Push to move heavy objects or to ride across gaps (e.g., in the Pale City streets).
- Use: Pull or turn to activate machinery, open gates, or raise platforms.
- Use: Interact with (using the remote in the final chapter) to turn off or on. In earlier chapters, they are just environmental hazards (the Thin Man can emerge from them).
- Use: Open, close, lock, or unlock. Some require keys or levers.
- Use: Can be thrown to distract enemies (e.g., the Janitor, the Teacher's shadow). Found in the School and Hospital.
- Note: Not an inventory item; Mono can pick up and hold a bone for a short time, then toss it.
- Description: A small mechanical music box that plays a tune. It belongs to Six in the final chapter.
- Use: In the Signal Tower, Mono must pick up the music box and carry it to Six to calm her. It is a key story element.
- How to Obtain: Found in a dream-like room after the Thin Man fight.
- Note: This is a carried item for that segment only.
- No Inventory Management: Mono can only hold one item at a time (except the flashlight, which is always on his person). You cannot store items.
- No Upgrades: The flashlight never runs out of battery or upgrades. The axe/hammer are the only "weapons" but are limited to one chapter.
- Collectibles Are Missable: Because there is no chapter select, you must replay the entire game to get missed Glitched Remains or Hats. Use a guide for your first playthrough if aiming for 100%.
- Cosmetic Hats Do Not Affect Gameplay: They are purely for the player's enjoyment.
Remote Controller
---
Chapter-Specific Items
These are single-use key items found in specific chapters, used to solve puzzles or open paths.
Axe (The School)
Hammer (The School – optional)
Key (The Hospital)
Medicine Bottle (The Hospital)
Shoes (The Hospital – puzzle item)
Lever (The Hospital – not an inventory item)
---
Collectibles
Collectibles are hidden throughout the game and tracked in the main menu. They affect achievements/trophies and reveal lore. There are two types: Glitched Remains and Hats.
Glitched Remains (45 total)
Hats (14 total)
- Cone Hat (School - playground slide)
- Top Hat (School - library)
- Party Hat (School - after defeating the Janitor)
- Rain Hat (Hospital - locker room)
- Chef Hat (Hospital - kitchen)
- Crown (Pale City - behind a TV)
- Traffic Cone (Pale City - construction area)
- Paper Boat (Pale City - at the docks)
- Tinfoil Hat (Signal Tower - final chapter)
- and others (see guide for exact locations).
---
Environmental Objects (Not Inventory)
These are items found in the world that Mono can interact with but cannot carry. They are crucial for puzzles.
Boxes / Crates
Carts / Dollies
Lever / Cranks
TVs
Doors
Bones / Body Parts
Music Box
---
Important Notes
---
Summary Table
| Category | Item | Purpose | Chapter | Persistent? |
|---|---|---|---|---|
| Key Equipment | Flashlight | Lighting, stunning | School onward | Yes |
| Key Equipment | Remote Controller | Turn TVs on/off | Signal Tower | No |
| Chapter-Specific | Axe | Break barriers, stun Janitor | School | No |
| Chapter-Specific | Hammer | Optional breaking | School | No |
| Chapter-Specific | Key | Open locked door | Hospital | No |
| Chapter-Specific | Medicine Bottle | Heal Six | Hospital | No |
| Chapter-Specific | Shoes | Puzzle solving | Hospital | No |
| Chapter-Specific | Music Box | Calm Six | Signal Tower | No |
| Collectibles | Glitched Remains | Lore, secret ending, achievement | All | Yes (tracked) |
| Collectibles | Hats | Cosmetic | All | Yes (tracked) |
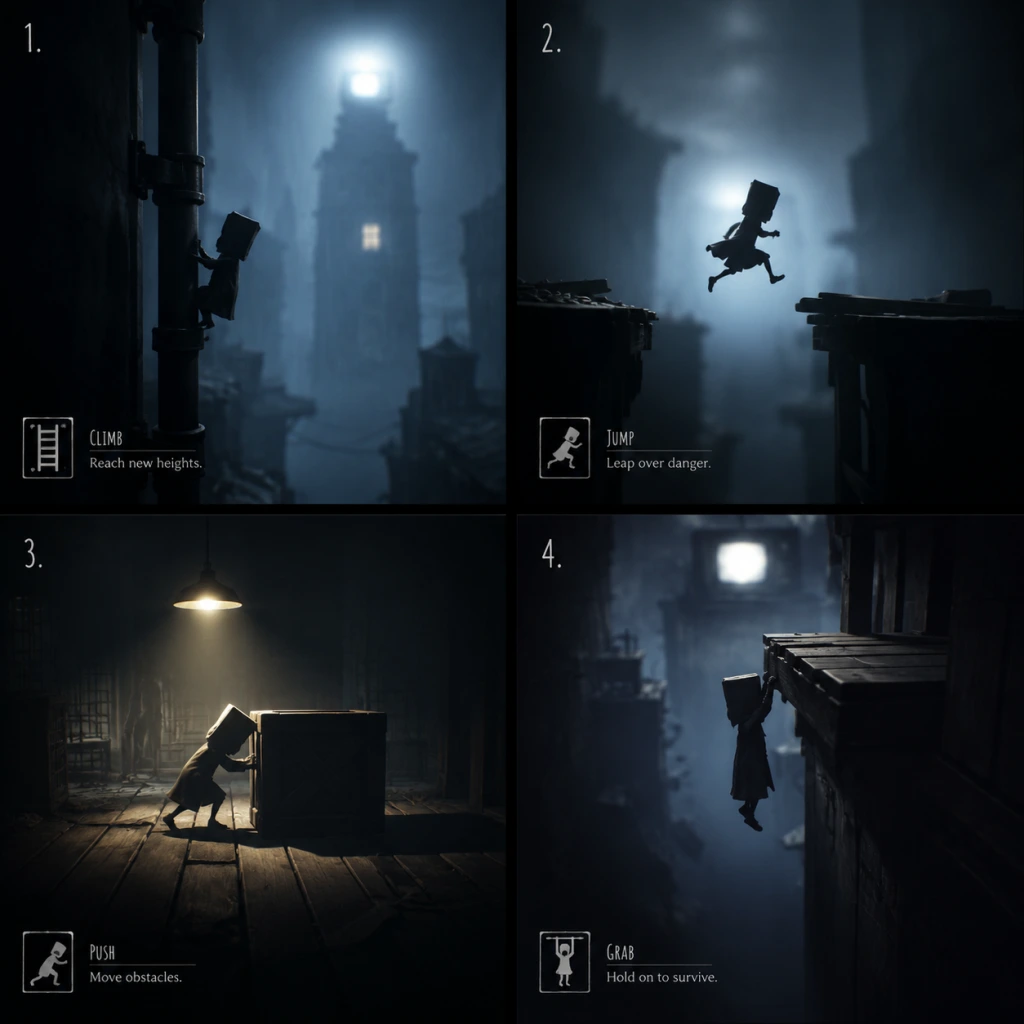
Character Skills
Overview
Little Nightmares II is a horror puzzle-platformer without traditional skill trees, cooldowns, or upgrade systems. The two primary characters—Mono (the player-controlled protagonist) and Six (the AI-controlled companion)—have a set of innate abilities that are essential for survival and puzzle-solving. This guide covers every action and interaction available to both characters, including how to use them effectively, when to deploy them, and how Mono and Six synergize. While no skills can be upgraded or combined in a menu, mastering these abilities is the key to progressing through the game's treacherous environments.
---
Mono – Player-Controlled Skills
Mono is a small, frail boy wearing a paper bag. His skills are purely physical and require precise timing and environmental awareness.
1. Walking & Sprinting
- Effect: Move left or right at a default pace. Hold the sprint button (Shift on PC, R2/RT on console) to run faster.
- Cooldown: None; sprinting can be maintained indefinitely but is noisy and attracts enemies.
- When to Use: Sprinting is useful for short bursts to escape threats or cross gaps before platforms collapse. Avoid sprinting near enemies like the Hunter or the School Teacher, as noise alerts them.
- Effect: Press crouch (Ctrl on PC, L3 or circle/B on console) to lower Mono’s profile. While crouched, movement is silent and Mono can fit under low obstacles.
- Cooldown: None.
- When to Use: Essential for stealth sections. Use when stalking past the Hunter in the woods, crawling through vents, or hiding under desks from the Teacher.
- Effect: When an enemy is close and searching, you can hold the interact button (E on PC, X/Square on console) to make Mono freeze and hold his breath, reducing the chance of detection.
- Cooldown: None, but you must release the button normally after the danger passes.
- When to Use: In tight spaces where hiding is unavailable. Most effective against the Doctor and the Thin Man.
- Effect: Press jump (Space on PC, A/Cross on console) to leap across gaps, onto ledges, or up onto platforms. While airborne, you can grab climbable edges (automatically). Climbing is context-sensitive on ladders, pipes, and chains.
- Cooldown: None. Jump height is fixed; no double jump or air control.
- When to Use: For all platforming. Note that Mono cannot climb certain vertical walls; look for handholds or vines. Synergy: Six can boost Mono up to higher ledges (see Six skills).
- Effect: Press the interact button to pick up objects (keys, weapons, dolls), open doors, pull levers, push blocks, or use items.
- Cooldown: None. You can drop or swap items at any time.
- When to Use: Constantly. Almost every puzzle requires interacting with the environment. Holding a weapon (pipe, axe, hammer) allows Mono to attack certain enemies (like the Hunter's traps or the Mannequins).
- Effect: When holding a melee weapon, press the attack button (left mouse button on PC, R1/RB on console) to swing. This can break fragile obstacles, stun enemies, or kill specific foes (e.g., the Hunter after being shot, or the Mannequins).
- Cooldown: There is a brief recovery animation after each swing (about 1 second).
- Upgrades: None. The weapon’s effectiveness depends on the target; an axe can break doors, a pipe can shatter glass, a hammer can smash porcelain dolls.
- When to Use: Use attacks sparingly because they make noise and can alert nearby enemies. Best used for one-hit-kill opportunities (e.g., hitting the Mannequins after they freeze in light).
- Effect: After acquiring the flashlight, press the interact button to turn it on/off. While on, it illuminates dark areas and can stun the Mannequins (they freeze when caught in the beam).
- Cooldown: None. No battery drain; can be used indefinitely.
- When to Use: Essential in the School and Hospital levels. Always keep it on while moving through dark corridors. Use the beam to scan for threats and freeze Mannequins before attacking them.
- Effect: Keys and similar items are held in Mono’s hands. They block the use of other weapons/shields. Keys are used to unlock doors or machinery.
- Cooldown: None.
- When to Use: Follow visual cues—a keyhole or mechanism next to a gate. Never drop a key in a dangerous area; carry it to its destination.
- Effect: Six carries a lighter that always emits a small flame, providing ambient light in dark areas. She automatically holds it up when needed.
- Cooldown: Always active (never runs out).
- When to Use: Her light is less strong than Mono’s flashlight but helpful for navigating and spotting enemies. It also reveals hidden symbols and clues.
- Effect: At certain platforms, Six will crouch down to allow Mono to jump on her shoulders and reach higher ledges. This is an automatic scripted action when Mono stands near her at the correct spot.
- Cooldown: Only occurs at predetermined puzzle points.
- When to Use: Look for tall obstacles that are above Mono’s jump height. Approach Six and press the interact prompt. She will always be available for boosts when needed.
- Effect: Six can perform actions like pulling levers, turning valves, or holding doors open when Mono is doing something else. She reacts to Mono’s position and contextual cues.
- Cooldown: Part of scripted sequences.
- When to Use: You do not control this directly. When you see a puzzle requiring two people (e.g., a valve that must be turned while another is pressed), interact with your part and Six will automatically handle the other.
- Effect: Six occasionally makes small noises (coughs, footsteps) that can inadvertently alert enemies. This is usually a downside, but sometimes it can be used to lure enemies away from Mono’s hiding spot (unreliable).
- Cooldown: Random, but frequent.
- When to Use: Be aware that Six may cause unwanted attention. Hide in closets or behind furniture to minimize detection. Occasionally, you can use her presence to bait enemies into traps, but this is not a reliable skill.
- Effect: Six will point or gesture in the direction of the next objective. She also shows fear or urgency (e.g., shaking when an enemy is near).
- Cooldown: Continuous.
- When to Use: Watch Six’s animations to get hints about where to go or if danger is imminent. Her pointing is especially helpful in confusing maze-like areas (e.g., the Hospital).
- In the School, Mono must hold a lever while Six climbs a rope to open a door.
- In the Hospital, Mono uses the flashlight to freeze a Mannequin while Six retrieves a key.
- In the final chapter, Six must be at a specific location to open a gate while Mono pulls a switch.
- Focus: Crouching, Holding Breath, minimal interaction.
- Best For: The Wilderness (Chapter 1) and the School (Chapter 3) where enemies are patrol-based.
- Strategy: Never sprint. Learn patrol routes. Use hiding spots (wardrobes, under beds). Let Six stay behind you.
- Focus: Using the pipe/axe/hammer to break obstacles and stun enemies.
- Best For: The Hospital (Chapter 4) where Mannequins can be killed with the flashlight + weapon combo.
- Strategy: Keep weapon equipped, use flashlight to freeze enemies, then attack. Break doors and shelves for shortcuts.
- Focus: Carrying keys, using flashlight, exploiting Six’s cooperation.
- Best For: Chapter 2 (The City) and Chapter 5 (The Signal Tower).
- Strategy: Examine every interactive object. Use Six’s boost at every opportunity. Pay attention to Six’s pointing—it often indicates the next key or puzzle step.
2. Crouching & Sneaking
3. Holding Breath
4. Jumping & Climbing
5. Grabbing/Interacting
6. Attacking (Weapon Swing)
7. Flashlight (Chapter 3 – School)
8. Key/Item Interaction
---
Six – AI Companion Skills
Six is an AI-controlled character who follows Mono throughout most of the game. She cannot be directly commanded but will perform actions that aid progression.
1. Light Source (Lighter)
2. Boost / Lift
3. Cooperative Puzzle Solving
4. Distraction / Noise
5. Emotional Support (Visual Commands)
---
Synergies Between Mono and Six
Combined Puzzle Solving
Many puzzles require both characters to act simultaneously. For example:
Combat Synergy
Six never directly attacks. However, Mono can use weapons (pipe, axe) to defeat enemies while Six provides light or distraction. In the Hunter’s cabin, Six will hide in a wardrobe while Mono creates noise to distract the Hunter, then both escape.
Stealth Synergy
Six is often the one who triggers alarms inadvertently. To avoid this, move slowly through areas with enemies and stay close to each other. If Mono crouch-walks, Six will also crouch. This is essential for stealth segments.
---
Recommended “Builds” (Situational Strategies)
Because there are no customizable skills, “builds” refer to how you approach each chapter with the tools available.
Stealth-First Build
Aggressive Build (Weapon Heavy)
Puzzle-Solving Build (All Items)
---
When to Use Each Skill (Quick Reference Table)
| Skill | Character | Primary Use Case | Enemy Type | Danger Level |
|---|---|---|---|---|
| Sprint | Mono | Escape collapsing floors or chasing enemies | Hunter, Thin Man | High (noisy) |
| Crouch | Mono | Stealth past patrolling enemies | Hunter, Teacher, Doctor | Low (silent) |
| Hold Breath | Mono | Near enemies in hiding spots | All enemies | Medium (prevents detection) |
| Jump | Mono | Gap crossing, climbing ledges | N/A | Low |
| Attack (Weapon) | Mono | Kill stunned Mannequins, break objects | Mannequin, Doctor (scripted) | Medium (noise) |
| Flashlight | Mono | Stun Mannequins, illuminate dark areas | Mannequins | Low (reveals threats) |
| Lighter | Six | Ambient light, reveals secrets | N/A | Low |
| Boost | Six | Reach high ledges (puzzle required) | N/A | None |
| Cooperative Action | Both | Two-person puzzles (levers, valves) | N/A | None (scripted) |
Important Notes on Skill Limitations
- No Skill Tree: You cannot unlock new abilities or upgrade existing ones. The skills described are all you will ever have.
- No Cooldowns: All actions can be performed consecutively, but animations (e.g., swing recovery) introduce a brief delay.
- No Combos: There are no attack chains or special moves. The only “combo” is using the flashlight to freeze a Mannequin then hitting it with a weapon.
- Item Dependency: Many skills require a specific item (flashlight, weapon). If you drop the item, you lose the ability until you pick it up again.
- Six’s Autonomy: You cannot control Six’s actions directly. If she fails to cooperate due to a bug, restart from the last checkpoint.
---
Conclusion
Little Nightmares II’s character “skills” are minimal but deeply integrated into the environment and enemy behavior. Mastery comes from knowing when to sprint or sneak, how to use Six’s AI assistance, and which weapon works best in each situation. Focus on observation and patience—the game rewards careful use of these abilities over reckless action.
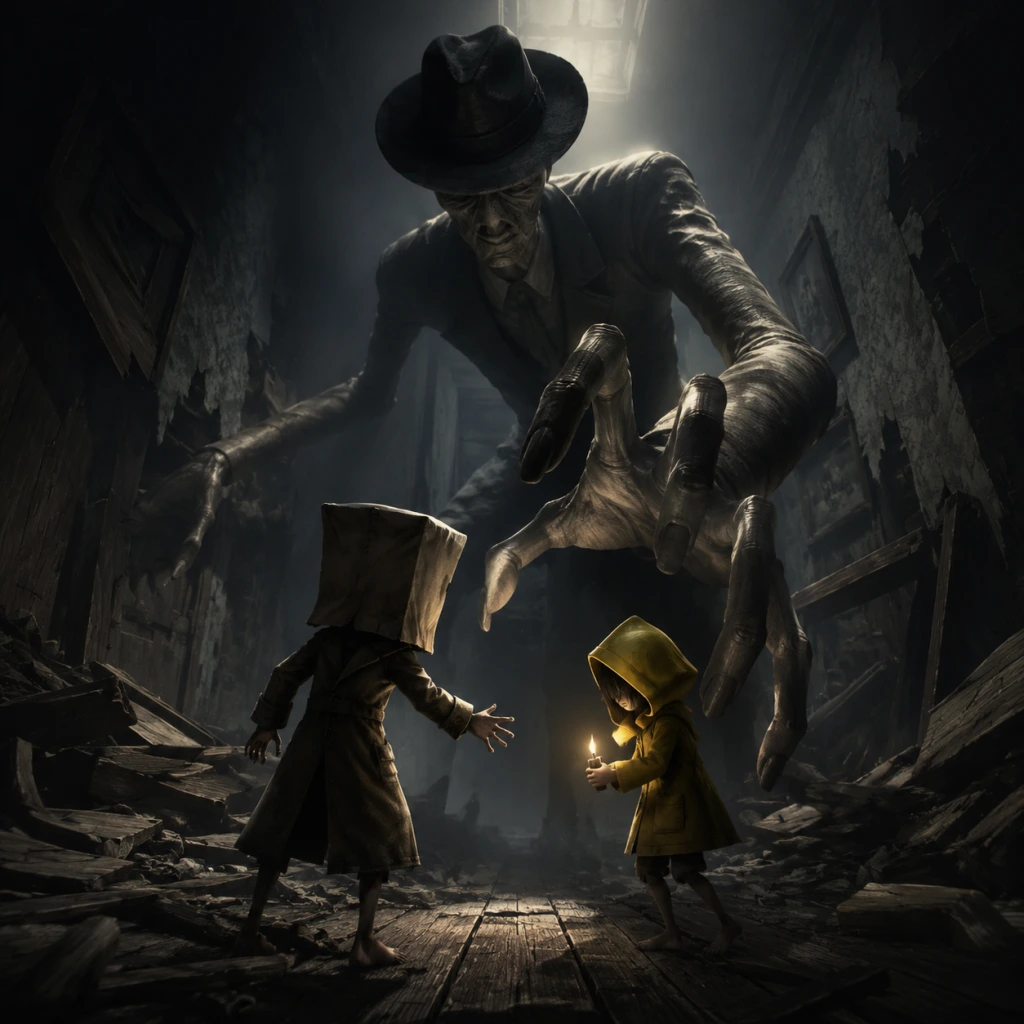
Characters & Roles
Overview
Little Nightmares II features a small cast of deeply characterized individuals, but only two are directly controlled or guided by the player: Mono (the protagonist you control) and Six (the AI companion who follows you). The antagonists—The Hunter, The Teacher, The Doctor, The Thin Man, and the Viewers—are not playable but are essential to the experience. This guide covers every major character that appears in the game, focusing on their background, gameplay role, strengths, weaknesses, and how they interact with the world and each other. Since the game has no traditional classes, skill trees, or unlockable equipment, the “build” and “team synergy” sections are adapted to the limited items and cooperative moments available.
---
Playable Characters
Mono
#### Background
Mono is a young boy wearing a brown paper bag over his head. He awakens in a dark forest and must traverse a twisted world to rescue a girl named Six. His true identity and the reasons for his journey are revealed only at the climax of the story. He possesses no special powers, only his wits, agility, and an uncanny ability to use everyday objects as tools or weapons.
#### Strengths
- Agility and Climbing: Mono can vault over obstacles, shimmy across ledges, climb chains, and squeeze through tight spaces. He is faster than most enemies when sprinting.
- Object Interaction: He can pick up, carry, and throw items such as shoes, pipes, bricks, and axes. Thrown objects can stun enemies, break glass, or activate distant switches.
- Stealth Core: His small size allows him to hide under beds, inside lockers, behind curtains, or in shadows. He can peek around corners and hold his breath to avoid detection.
- Flashlight Utility: While not a weapon, the flashlight reveals hidden paths, disorients some enemies briefly, and is essential in dark areas.
- Frail and Unarmed: Mono cannot take a single hit from any enemy. Direct contact means instant death and a reload from the last checkpoint.
- Limited Inventory: He can only carry one large item at a time (e.g., a pipe). Smaller items like shoes or bricks can be held in his hand but must be thrown to free up his hands.
- No Permanent Upgrades: There is no health bar, stamina meter, or ability progression. Every encounter relies on player skill rather than character growth.
- Slow for Puzzles: Carrying heavy items slows his movement and prevents sprinting, making him vulnerable in chase sequences.
- Empty Hands: Best for sprinting and climbing quickly.
- Shoe: Useful for reaching high ledges (stand on it) or for throwing to create noise. Only one shoe appears per area, so use it wisely.
- Pipe / Axe / Brick: Best for stunning enemies or breaking barriers. Remember that after throwing a weapon, it is gone unless you retrieve it.
- Flashlight: Always keep it on in dark sections; it can momentarily blind The Hunter when he is close, giving you time to escape.
- Pull levers while Mono holds a door open.
- Provide a boost to reach higher ledges (Mono steps on Six’s hands).
- Hide in cupboards while Mono distracts enemies.
- Hand items to Mono through gaps.
- Leave a hiding spot to reunite after danger passes.
- Small and Silent: Six is even smaller than Mono and can fit into tighter hiding spots (e.g., inside a small cabinet). She never makes noise unless scripted (screaming when grabbed).
- Cooperative Actions: She can perform specific actions that Mono cannot do alone, such as pulling levers from opposite sides or boosting Mono to higher platforms.
- Distraction Potential: If Mono is hidden, Six may wander into an enemy’s line of sight, causing the enemy to move towards her and away from Mono’s path.
- Immune to Some Hazards? Six cannot be killed by the environment (falling into pits, drowning) as she will simply teleport to Mono. However, enemies can grab and kill her, resulting in a game over.
- AI Limitations: Six does not always follow the optimal path. She may get stuck on geometry or fail to react quickly in chase sequences.
- Vulnerable to Enemies: If Six is caught by an enemy, the game ends instantly. You cannot control her defense—she will run or hide automatically but is not guaranteed to escape.
- No Direct Commands: You cannot tell Six where to go or what to do. She acts based on triggers in the environment.
- Can Be Left Behind: If you progress too fast, Six may not be able to catch up, and a closed door or rising water can trap her, causing a reset.
- She can pick up and hold certain items (like a key) but only as part of a scripted interaction.
- You cannot give her items manually; she will only take what the puzzle demands.
- Boosting: When Mono stands near a high ledge, Six will cup her hands. Jump onto her hands and then press the action button to boost upward.
- Simultaneous Actions: Some doors require both characters to pull levers at the same time. Mono must be at his lever; Six will automatically go to hers when you interact with yours.
- Hiding Together: Both can hide in the same closet or under the same bed. If one is spotted, the other is often safe if not in line of sight.
- Item Handoffs: In the school and hospital, Six can pass items through small holes or over low walls. She will automatically do so when you position Mono correctly.
- Background: A hulking, deformed man who dwells in the forest and operates a derelict shack. He captures Six and hangs her from a meat hook. He is obsessed with hunting and taxidermy.
- Role: The first major enemy encountered. He appears in the opening chapter and later chases Mono through his property.
- Strengths: He carries a shotgun that can kill Mono instantly from range. He is relentless and has keen hearing (footsteps attract him).
- Weaknesses: He is slow when not alerted, can be stunned by a thrown object (shoe, brick), and cannot climb through small gaps. He also cannot see Mono if hidden in tall grass or inside a wardrobe.
- Encounter Strategy: Stay low, move quietly (crouch-walk), use tall grass for cover, and throw objects to create noise away from your path. In the cabin chase, use quick sprints between hiding spots like under beds or in cabinets. The shotgun blast has a short wind-up—listen for the click and move before he fires.
- Background: A porcelain-skinned, long-necked creature who runs a twisted school. She is warped by the environment and seems to be searching for lost students.
- Role: Appears in the School chapter. She patrols classrooms and hallways, and can extend her neck to an unnatural length to spot Mono from above.
- Strengths: Her neck can reach across rooms and through small openings, making high hiding spots unsafe. She moves silently. Her chalkboard pointer can knock items out of Mono’s hands.
- Weaknesses: She is slow when walking normally. She cannot crouch, so low hiding spots under desks or in cabinets are safe. If you hide inside a locker, she will eventually leave.
- Encounter Strategy: Keep to the shadows under desks and inside cabinets. Move only when her back is turned or when she is at the far end of the hallway. Use thrown chalk or pencils to distract her. If she spots you, run to the nearest hiding spot—she will search but not chase forever.
- Background: A blind, gangly surgeon who runs a crumbling hospital. He has a hearing problem and relies on sound to locate prey. He uses a scalpel and sometimes chases Mono with alarming speed.
- Role: Primary antagonist of the Hospital chapter. He appears in operating rooms, corridors, and morgue-like areas.
- Strengths: Extremely fast when sprinting (faster than Mono). He can break through flimsy furniture and open lockers. His scalpel causes instant death. He is attracted to any noise, including footsteps, dropped items, or even Mono’s flashlight beam.
- Weaknesses: He is blind—if you stand still and hold your breath, he will walk past you. He cannot see you if you are completely immobile and silent. He also becomes confused if you create a noise far away and then hide.
- Encounter Strategy: Move only when he is not nearby. When he is close, freeze and hold your breath (press the control stick not at all). Use thrown organs or objects to lure him away. If you need to run, wait until he turns his back and sprint to the next safe spot. Never run in a straight line; zigzag if he is chasing.
- Background: A towering, gaunt figure in a suit, with a television for a face. He is the ultimate puppet master, responsible for the twisted world Mono and Six traverse. He can teleport through televisions and manipulate reality.
- Role: Final boss and true antagonist. He appears in the final chapter, the Signal Tower. He is encountered in a series of surreal chase sequences and a final confrontation.
- Strengths: He can teleport behind Mono instantly, create clones, alter the environment (change corridors, shift walls), and shoot beams that turn Mono to static. His presence is oppressive and hard to escape.
- Weaknesses: He cannot enter certain safe zones (small crawlspaces, behind certain projections). He is vulnerable to light—exposing him to bright light (from the TV static or the flashlight) momentarily stuns him. The final confrontation relies on Mono using a long pipe to stun him repeatedly.
- Encounter Strategy: In chase sequences, run through the predetermined path and use tight corners to break line of sight. In the final fight, you must time your swings with the pipe to interrupt his attacks. Keep moving to avoid his teleport grab.
- Background: The twisted, glitching inhabitants of the Pale City. They are mesmerized by televisions and are essentially zombies—slow, shambling, and attracted to sound and light.
- Role: Minor enemies that appear in the city sections. They are not individually dangerous but can swarm and grab Mono if he gets too close.
- Strengths: Numbers—they often appear in groups. They can climb over low obstacles (tables, chairs). Their grab causes instant death.
- Weaknesses: Very slow. They cannot move through small gaps or climb up ledges. They are easily distracted by thrown objects or breaking glass. They will stop chasing if you hide in a closet for a few seconds.
- Encounter Strategy: Avoid direct confrontation. Walk past them while they are staring at TVs. If one sees you, run a short distance and hide. Use thrown items to clear a path. Never sprint near them as the sound attracts more.
#### Weaknesses
#### Playstyle
Mono’s gameplay is a mix of stealth, puzzle-solving, and precision platforming. You must constantly analyze enemy patrol patterns, choose when to run and when to hide, and use thrown objects to create distractions or stun foes. Combat is almost never a viable option except for the final confrontation. The key is patience and observation.
#### Unlock Conditions
Mono is the default player character and is available from the very first moment of the game. No unlock required.
#### Recommended Equipment / Build
Since there is no RPG equipment system, the most effective “loadout” is situational:
There is no way to customize Mono’s abilities. The only “build” is how you choose to use the limited items at your disposal.
#### Team Synergy (with Six)
Mono and Six must work together to solve puzzles. Six can:
Six does not follow a direct command—she reacts to the environment. If Mono gets too far ahead, she will catch up automatically. If danger is near, she will hide or freeze. Player timing is critical, as Six cannot be left behind when doors close or elevators move.
---
Six
#### Background
Six is the protagonist from the first Little Nightmares game. She is a small, raincoat-wearing girl who has escaped the Maw and now appears in Mono’s world. She is initially a lost child, captured by The Hunter, and Mono must free her. After rescue, she follows Mono faithfully, but her past trauma and hunger for souls (as shown in the original game) eventually surface during the finale. She is AI-controlled with limited autonomy.
#### Strengths
#### Weaknesses
#### Playstyle
For the player, Six is a tool rather than a second character to manage. The main playstyle is to lead the way, solve puzzles that require her assistance, and keep an eye on her position. When she is far behind, wait for her. When she is in danger, create a safe path. The puzzle sections are designed so that you must coordinate with her AI behavior, which usually means pulling a lever while she stands on a pressure plate, or throwing an object that she can then hand back to you.
#### Unlock Conditions
Six joins Mono automatically after completing the first chapter (The Woods) and rescuing her from the Hunter’s shack. She remains with Mono for the rest of the game, except during the final confrontation.
#### Recommended Equipment / Build
Six has no inventory or equipment. The only way to “equip” her is through the environment:
There is no build customization for Six. Your strategy should focus on positioning her correctly by moving to the right trigger points.
#### Team Synergy (with Mono)
---
Non-Playable Characters (Antagonists)
While not playable, these major characters are central to the story and gameplay. They function as obstacles that must be avoided or outsmarted.
---
The Hunter
---
The Teacher
---
The Doctor
---
The Thin Man
---
The Viewers
---
Summary Table
| Character | Type | Role | Key Strength | Key Weakness |
|---|---|---|---|---|
| Mono | Playable (Protagonist) | Stealth/puzzle solver | Agility, object use | Fragile, no health |
| Six | AI Companion | Puzzle assistant | Small size, cooperative actions | Limited AI, vulnerable |
| The Hunter | Antagonist (Chapter 1) | Chase/pursuit enemy | Shotgun, hearing | Slow when unalerted |
| The Teacher | Antagonist (Chapter 2) | Patrol/vision enemy | Extended neck sight | Can’t detect low hiding spots |
| The Doctor | Antagonist (Chapter 3) | Pursuit/stealth enemy | Fast sprint, noise detection | Blind (only hears) |
| The Thin Man | Final Boss | Reality warp/chase | Teleport, beam attacks | Stunnable by pipe/light |
| The Viewers | Minor Enemies (City) | Swarm obstacles | Numbers | Very slow, predictable |
Final Notes
Little Nightmares II focuses on atmosphere and narrative rather than character progression. Mono and Six are not classes or heroes you can customize; their identities are fixed and tied directly to the story. The true “role” you play is that of a survivor guiding a child through a nightmare, using only cunning and borrowed tools. Mastery comes from learning enemy behaviors, optimizing stealth routes, and understanding when to cooperate with Six. No matter how you play, the ending remains the same—but the journey’s quality depends entirely on your stealthy wits.
Cheats & Secrets
Overview
Little Nightmares II is a meticulously crafted horror-puzzle game that deliberately avoids traditional cheats or gameplay-altering codes. There are no console commands, password unlocks, or debug menus accessible in the released versions. However, the game is rich with developer-intended secrets, Easter eggs, and hidden content that reward thorough exploration and multiple playthroughs. This guide covers all known legitimate secrets, from collectibles that unlock alternate endings to hidden rooms, references to the first game, and cosmetic rewards.
---
Secret Collectibles: Glitching Remains
The primary secret in Little Nightmares II is the collection of Glitching Remains—faint, glitchy apparitions of children. These are hidden in every chapter (except the final one). Collecting all of them is required to unlock the secret ending and a specific achievement/trophy.
Locations Summary
| Chapter | Number of Glitching Remains |
|---|---|
| The Wilderness | 3 |
| The School | 4 |
| The Hospital | 5 |
| The Pale City | 4 |
| Total | 16 |
What They Unlock
- Secret Ending: After collecting all 16 Glitching Remains, complete the game to see a modified final cutscene that expands on the story and leads into the Little Nightmares franchise timeline.
- Achievement/Trophy: On all platforms, you earn the "Reunited" achievement/trophy (or equivalent).
- In-Game Reward: The Nome statue in the Pale City’s safe room will wear a different hat if you interact with it after collecting all remains—a subtle cosmetic change.
- PC (Steam/Epic): Achievement “Reunited” – 16 collectibles.
- PlayStation (4/5): Trophy “Reunited” (Bronze/ Silver depending on region).
- Xbox (One/Series X|S): Achievement “Reunited” – 16 collectibles.
- Nintendo Switch: All Glitching Remains are present; the secret ending is identical.
Platform-Specific Notes:
---
Secret Collectibles: Hats (Cosmetic Unlocks)
Hats are purely cosmetic items that Mono can wear. They do not affect gameplay but are hidden throughout the world. Most are found in secret locations or by solving optional puzzles.
List of All Hats
| Hat Name | Location |
|---|---|
| Paper Bag (default) | Already worn |
| Forest Hat (twig crown) | The Wilderness – after the room with the hanging deer heads, look behind a cabinet. |
| School Hat (cone hat with question mark) | The School – in the classroom after escaping the Teacher. Interact with the chalkboard to reveal a hidden panel. |
| Hospital Hat (nurse cap) | The Hospital – inside the operating room, examine the drawer under the gurney. |
| Pale City Hat (TV head) | The Pale City – in the room with the broken TV, press the power button repeatedly until a secret hatch opens. |
| Nome Hat (miniature top hat) | Unlock by collecting all Glitching Remains and then interacting with the Nome in Chapter 4's safe room. |
---
Easter Eggs & Hidden Features
1. The Hunter’s Secret Room
In Chapter 1 (The Wilderness), after the sequence where the Hunter pursues you through the forest, you enter his house. In the living room, there is a fireplace. If you move the rug in front of the fireplace, you’ll find a trapdoor. Open it to descend into a small, hidden basement containing a photograph of the Hunter’s family and a note referencing the first game’s protagonist, Six. This room is completely optional and missable.
2. Mirror Puzzle in the Hospital
In Chapter 3 (The Hospital), you encounter a room with a large mirror. If you shine your flashlight on the mirror at a specific angle (while the room is dark), the reflection will reveal the ghost of a patient. This is a reference to the hospital section of the original Little Nightmares DLC.
3. TV Static Messages
Throughout the Pale City (Chapter 4), some TVs display short static images of children from the first game, including the Janitor, the Twin Chefs, and the Lady. These are missable but add lore depth.
4. The Nome Liberation
In the Pale City, you can find a Nome (the hooded creature) trapped in a cage. If you free it by pulling the lever, it will follow you to a safe room and later give you a hat (the Nome Hat, as above). This is required for the secret ending preparation.
5. Credits Easter Egg
After completing the game, stay on the credits screen. About halfway through, the text will glitch and the word “Mono” will briefly appear amid static—a hint to the protagonist’s true nature.
---
Secret Ending Requirements
To unlock the true ending (not just the standard one), you must collect all 16 Glitching Remains. The secret ending shows a different final scene where Six’s perspective changes, and a new connection to the first game is revealed. This is the only developer-intended “secret” that alters the narrative.
Note: The secret ending is not a cheat; it is a reward for full exploration.
---
Achievements/Trophies Related to Secrets
| Achievement/Trophy Name | Requirement |
|---|---|
| Reunited | Collect all 16 Glitching Remains. |
| Hats Off | Collect all 5 hidden hats (not including default). |
| Not Alone | Free the trapped Nome. |
| Ghost in the Machine | Interact with the mirror in the Hospital. (Secret trophy) |
| Family Photo | Find the Hunter’s hidden basement photo. |
---
Platforms & Cheat Availability
| Platform | Cheats? | Known Secrets |
|---|---|---|
| PC (Steam/Epic) | None. No console commands, mods may exist but not official. | All above. Mods can enable debug menus, but not intended by developers. |
| PlayStation 4/5 | No cheats. | All above. |
| Xbox One/Series X | S | No cheats. |
| Nintendo Switch | No cheats. | All above. |
---
Final Notes
Little Nightmares II is a game that relies on atmosphere and exploration rather than cheat codes. The secrets listed above are the only known hidden content validated by the community and developers. Players seeking additional hidden content should check for DLC (the Little Nightmares II Enhanced Edition on PS5/XSX adds ray tracing but no new secrets) or the Secrets of the Maw expansion pack for the original game. There is no cheat that provides unlimited lives, skip levels, or invincibility in any official version.