Middle-earth: Shadow of Mordor
## Game Introduction Middle-earth: Shadow of Mordor is an open-world action-adventure game set in J.R.R. Tolkien's legendary fantasy universe. Developed by Monolith Productions and published by Warner Bros. Interactive Entertainment, the game was released on September 30, 2014 for PlayStation 4, Xb...
Download & Installation
Introduction
Middle-earth: Shadow of Mordor is an open-world action-adventure game set in J.R.R. Tolkien's Middle-earth. This guide covers official download and installation methods for all supported platforms: PC (Steam, Epic Games Store), PlayStation 4/5, Xbox One/Series X|S, and Nintendo Switch (cloud version). Mobile platforms are not officially supported. Always purchase or download from legitimate sources to avoid security risks and ensure proper functionality.
---
PC (Steam / Epic Games Store)
System Requirements
| Component | Minimum | Recommended |
|---|---|---|
| OS | Windows 7 SP1 64-bit | Windows 10 64-bit |
| CPU | Intel Core i5-750 2.67 GHz / AMD FX-8350 4.0 GHz | Intel Core i7-3770 3.4 GHz / AMD FX-8350 4.0 GHz |
| RAM | 6 GB | 8 GB |
| GPU | NVIDIA GeForce GTX 460 / AMD Radeon HD 5850 (1 GB VRAM) | NVIDIA GeForce GTX 660 / AMD Radeon HD 7950 (2 GB VRAM) |
| DirectX | Version 11 | Version 11 |
| Storage | 40 GB available space | 40 GB available space |
| Network | Broadband Internet connection | Broadband Internet connection |
| Sound Card | DirectX-compatible | DirectX-compatible |
Step-by-Step Installation
1. Purchase the game
- Steam: Visit store.steampowered.com, search "Middle-earth: Shadow of Mordor", add to cart, and complete purchase. Wait for download to unlock.
- Epic Games Store: Visit epicgames.com, download the launcher if not installed, sign in, search for the game, buy or claim if free, and click "Install".
- Steam:
- Epic Games Store:
- After installation, click "Play" in Steam or Epic. The game will load to a splash screen.
- Steam: A DRM activation may occur silently. On first launch, you may be prompted to accept the EULA.
- Epic: No additional DRM steps; game launches directly.
- Adjust graphics settings from the main menu before starting gameplay (Options → Video).
- Verify file integrity (Steam): Right-click the game in Library → Properties → Local Files → Verify integrity of game files.
- Verify file integrity (Epic): Go to Library → click three dots under the game → Manage → Verify.
- Confirm game version (e.g., v1.0.0.0) via main menu or properties.
- PS4: PSN account, 40 GB free storage, system software 5.0 or higher.
- PS5: Backward compatibility (PS5 runs PS4 version via disc or digital), 40 GB free storage.
- Internet connection required for initial download and updates.
- Digital: From PlayStation Store on console or web. Add to cart, purchase, and the download will start automatically if console is in rest mode with auto-download enabled.
- Physical disc: Insert disc into console. The game will begin installing automatically. Wait for installation progress bar to complete.
- Digital download: Go to Library → Purchased → select the game → Download.
- Physical: Insert disc → follow on-screen prompts. After copying, the game icon appears on home screen.
- Launch the game from the home screen. Accept any EULA. The game may apply a title update; ensure internet is connected.
- Adjust settings (Audio, Video, Controller) from in-game menu.
- Check that game version matches latest patch (e.g., 1.07) by highlighting the game icon → Options → Information.
- Run a quick gameplay sequence to ensure no crashes.
- Xbox One: 40 GB free storage, Xbox Live account, console with latest system update.
- Xbox Series X|S: Backward compatible, 40 GB free storage, SSD recommended for best load times.
- Internet required for initial download and smart delivery (if applicable).
- Digital: Xbox Store → search game → buy → automatic download begins if console is set to instant-on.
- Physical: Insert disc → installation starts automatically. If not, go to My Games & Apps → Install.
- Digital: Game appears in "Ready to install" list (My Games & Apps → Full Library). Select and install.
- Physical: After disc insertion, installation occurs in background.
- Launch from Home tab. Sign in with Xbox profile. Accept EULA if prompted.
- Update may be required; ensure internet is active.
- Configure options (e.g., controller vibration, display).
- Verify installation via My Games & Apps → Manage → Shadow of Mordor → check file size (~40 GB) and update version.
- Validate by starting a new game and playing the opening sequence.
- Nintendo Switch (any model), active Nintendo Switch Online membership, stable high-speed internet (minimum 10 Mbps).
- Storage: The game streams; no large download, but a small launcher app (~250 MB) is required. Internet data usage can be high.
- Note: Shadow of Mordor is not natively on Switch; it is a cloud streaming version. Performance depends on internet quality.
- From Nintendo eShop on Switch or via web browser. Search "Middle-earth: Shadow of Mordor Cloud Version".
- Buy the game (price includes streaming license). Internet connection required to purchase.
- After purchase, the small Cloud client app downloads (~250 MB). Installation completes quickly.
- Ensure you have free space: the launcher plus future updates require about 500 MB total.
- Launch the Cloud version app. You will be prompted to sign in with your Nintendo Account (must have active Nintendo Switch Online membership).
- Accept terms. The game will connect to the server, and you can start playing immediately after a brief loading screen.
- For best performance, use a wired internet connection or 5 GHz Wi-Fi.
- Ensure the launcher app is up to date (check for updates via console settings).
- Test connectivity: Start a game and play for 5 minutes to verify stable streaming.
2. Download the game
1. Launch Steam and sign in.
2. Go to Library → select "Middle-earth: Shadow of Mordor" → click "Install".
3. Choose installation folder (default: `C:\Program Files (x86)\Steam\steamapps\common`).
4. Click "Next" to begin download. Monitor progress in the Downloads tab.
1. Open Epic Games Launcher and sign in.
2. Go to Library → find the game → click "Install".
3. Choose installation path and click "Install". Wait for download to complete.
3. Launch and first-time setup
Post-Installation Verification
---
PlayStation 4 / PlayStation 5
Requirements
Step-by-Step Installation
1. Purchase
2. Download & Installation
3. First launch
Post-Installation Verification
---
Xbox One / Xbox Series X|S
Requirements
Step-by-Step Installation
1. Purchase
2. Download & Installation
3. First launch
Post-Installation Verification
---
Nintendo Switch (Cloud Version)
Requirements
Step-by-Step Installation
1. Purchase
2. Download the Launcher
3. First Launch
Post-Installation Verification
---
Common Installation Errors & Fixes
| Error | Platform | Cause | Solution |
|---|---|---|---|
| "Steam disk write error" | PC | Insufficient disk space, corrupted download cache, or antivirus interference. | Free up space (40+ GB), clear Steam download cache (Settings → Downloads → Clear Download Cache), disable antivirus temporarily. |
| "Epic Games Launcher not downloading" | PC | Server issues, VPN, or launcher corruption. | Restart launcher, disable VPN, run as administrator, reinstall Epic Games Launcher. |
| "Failed to launch the game (0xc000007b)" | PC | Missing or corrupt Visual C++ Redistributable or DirectX. | Install/repair DirectX and Visual C++ Redistributables from Microsoft. Verify game files. |
| "Black screen on startup" | PC | Outdated GPU drivers or conflicting overlay apps (Discord, GeForce Experience). | Update GPU drivers, disable overlays, run game in windowed mode initially (add `-windowed` to launch options). |
| "Low FPS / stutter" | PC | Graphics settings too high for hardware, background processes. | Lower settings, disable v-sync, close background apps. Update GPU drivers. |
| "PS4: Cannot install from disc" | PS4/PS5 | Dirty disc, system software issue, insufficient space. | Clean disc, rebuild database (Safe Mode → Rebuild Database), delete unnecessary data. |
| "PS4: Download stuck at 99%" | PS4/PS5 | PSN server hiccup. | Pause and resume download, restart console, check PSN status. |
| "Xbox: Installation stopped" | Xbox | Corrupt install, HDD issues, full storage. | Clear local saved games (Settings → System → Storage → Clear local saved games), restart console, reinstall. |
| "Switch: Cloud version lag" | Switch | Poor internet speed or unstable Wi-Fi. | Use wired Ethernet, move closer to router, reduce other network usage, check Nintendo Switch Online membership is active. |
Account Requirements Summary
| Platform | Account | Membership Required? | Notes |
|---|---|---|---|
| Steam | Steam account | No, but needed for multiplayer features (if any). | Single purchase per account. |
| Epic Games Store | Epic Games account | No | Same as above. |
| PSN | PlayStation Network account | No, but required for downloads and updates. | Disc version works offline after install. |
| Xbox Live | Microsoft account | No, but required for updates and online features. | Disc works offline. |
| Nintendo Switch | Nintendo Account | Yes, Nintendo Switch Online membership required for cloud streaming. | Only cloud version available; no offline play. |
Post-Installation Verification (All Platforms)
1. Check game version: Look for version number in main menu (typically v1.0.0.0 or higher). Compare with latest patch notes on official site.
2. Test basic functionality: Start a new game, run through the opening tutorial (Talion’s intro). Ensure controls respond, audio works, no crashes.
3. Update graphics drivers (PC): Install the latest drivers from NVIDIA/AMD for optimal performance.
4. Verify storage space: Ensure at least 40 GB free (PC) or correct install size shown on console.
5. Save file: Create a manual save to confirm the save system works.
---
Additional Tips
- PC modding: Shadow of Mordor has a modest modding community. For mods, use Nexus Mods or Steam Workshop (PC only). Always backup original files.
- Cross-platform saves: Not supported.
- DLC: The Game of the Year Edition includes all DLC; verify if your purchase includes them.
- Performance on Switch: Requires stable 10+ Mbps internet. Latency should be under 50 ms. Cloud version may show streaming artifacts.
---
This guide covers legitimate download sources only. Avoid unofficial torrents or key resellers to prevent malware and account bans.
Conclusion
By following this guide, you should have Middle-earth: Shadow of Mordor installed and running on your chosen platform. If you encounter any issues not listed, consult the game’s official support pages (WB Games Support) or community forums.
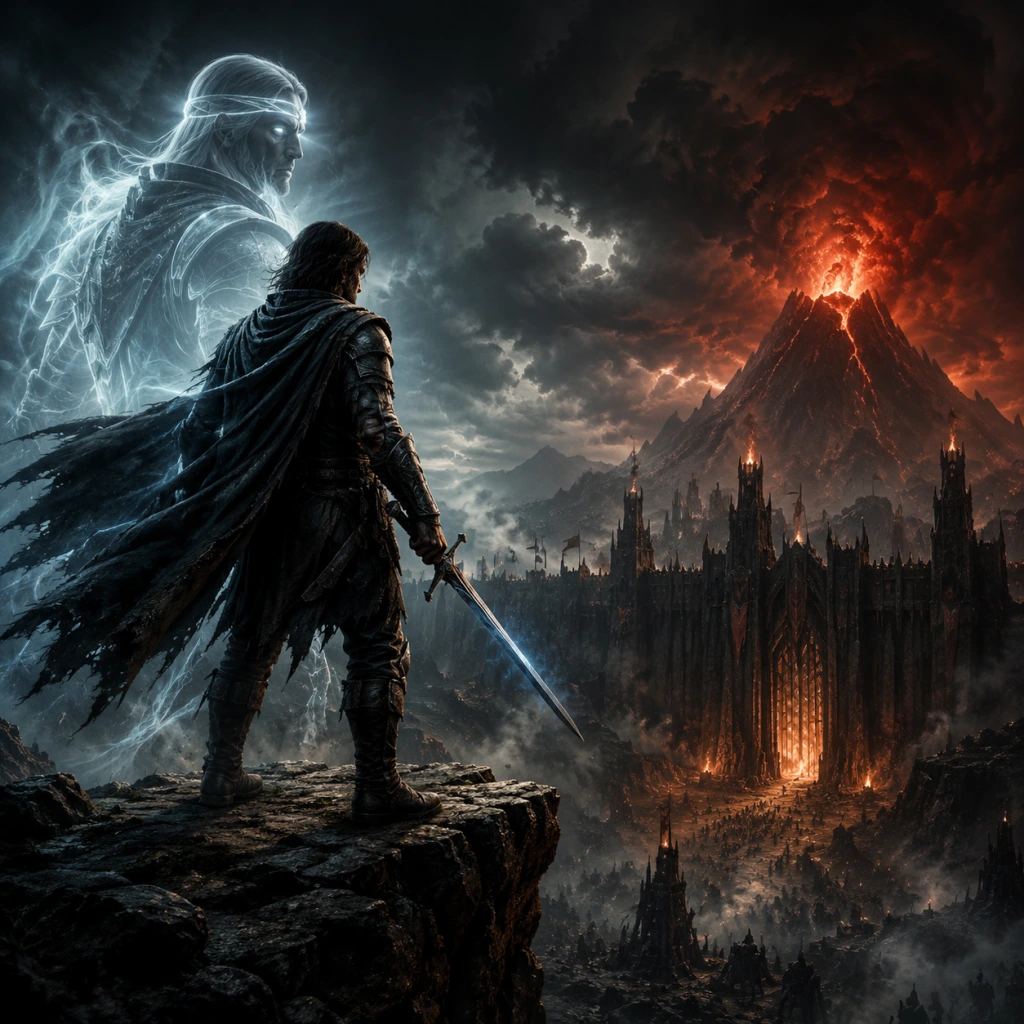
Game Introduction
Game Introduction
Middle-earth: Shadow of Mordor is an open-world action-adventure game set in J.R.R. Tolkien's legendary fantasy universe. Developed by Monolith Productions and published by Warner Bros. Interactive Entertainment, the game was released on September 30, 2014 for PlayStation 4, Xbox One, and PC (Windows, via Steam and later Epic Games Store), followed by PlayStation 3 and Xbox 360 versions on November 18, 2014. The game also became available on macOS and Linux in July 2015.
Genre
The primary genre is open-world action-adventure with strong stealth, combat, and RPG elements. It incorporates a unique Nemesis System that dynamically shapes player encounters with enemy Uruks (orcs). The game blends fluid third-person melee combat inspired by the Batman: Arkham series with freeform exploration and player-driven narrative.
Story Overview
The story bridges the 60-year gap between The Hobbit and The Lord of the Rings. Players control Talion, a Ranger of the Black Gate who is killed alongside his family during Sauron's resurgence. Instead of dying, Talion is resurrected by the wraith Celebrimbor—the legendary elven-smith who forged the Rings of Power. Bound together, the two seek revenge against the Dark Lord Sauron and the Black Hand of Sauron, while uncovering a deeper conspiracy involving the creation of a new Ring of Power. The narrative explores themes of vengeance, corruption, and the struggle for freedom.
Setting
The game is set primarily in the region of Mordor, specifically in two open-world zones: the black volcanic plains of Udûn and the mangrove-like Sea of Núrnen. Both areas are under the control of Sauron's forces and are populated by warring Uruk tribes. The environment ranges from ash-strewn wastelands to ruined fortresses and dark, cursed groves. Players can traverse the world on foot or by riding Caragors (wolf-like beasts) and Graugs (giant trolls). The dynamic day-night cycle and weather effects influence enemy behavior and visibility.
Main Characters
- Talion: A Gondorian Ranger of the Black Gate, driven by grief and vengeance. His combat skills are augmented by his bond with Celebrimbor.
- Celebrimbor: The ancient elven wraith who shares Talion's body. He possesses wraith powers such as teleportation, mind control, and the ability to see ghostly traces of the past.
- The Black Hand of Sauron: The primary antagonist trio—the Tower, the Hammer, and the Hand—who serve Sauron directly and orchestrated Talion's death.
- Ratbag the Coward: A comical, self-serving Uruk who occasionally aids Talion against his rivals.
- Gollum: The iconic corrupted hobbit-creature appears as a conflicted ally and enemy, guiding Talion and pursuing his "Precious."
- Sauron: The Dark Lord is a looming, unseen presence whose influence drives the conflict.
- Story Mode (Campaign): A linear narrative with 20 main missions, interspersed with side quests, collectibles, and Nemesis interactions.
- Test of Endurance (Challenge Mode): Unlocked after completing the campaign, this wave-based survival mode pits Talion against increasingly difficult Uruk hordes. It was added via a free update.
- No in-game multiplayer or co-op modes exist; the game is entirely single-player.
- Offline: The full single-player campaign, side quests, and Nemesis System work entirely offline. No internet connection is required to enjoy the core experience.
- Online: An optional online feature called "Vendetta Missions" allows players to hunt the Uruk that killed their friends (imported from their friend list's game state). This is a small, asynchronous multiplayer element. Also, leaderboards for Test of Endurance are online.
- DRM: The PC version on Steam uses Steamworks; no additional online-only DRM beyond an account is required for offline single-player.
- Lords of the Hunt (released December 2014): A campaign where Talion hunts eight legendary beast-masters to earn the trust of an exiled Uruk tribe. It introduces new weapons, abilities, and the "Test of the Wild" hunting challenges.
- The Bright Lord (released February 2015): A prequel chapter (set before the main story) where players control Celebrimbor in his own wraith form during the Second Age, fighting Sauron's forces in Mordor. It adds new wraith powers and a final boss battle against Sauron.
- Test of Endurance wave-based mode.
- The Dark Ranger skin (for those who pre-ordered or purchased the GOTY edition).
- Captain of the Watch skin and an Elven sword.
- Nemesis System: This proprietary technology procedurally generates thousands of distinct Uruk enemies with personal histories that persist across playthroughs. No other game has replicated its depth of emergent storytelling where failures are memorable and successes feel earned.
- Wraith Powers: The ability to dominate Uruks mid-combat, turning enemies into spies, assassins, or bodyguards, allows players to orchestrate betrayals and rebellions within enemy ranks.
- Freeform Assassination: Unlike linear stealth games, Shadow of Mordor encourages players to methodically dismantle the Uruk hierarchy by exploiting weaknesses, manipulating succession, and creating chaos.
- Canon-compliant Prequel Narrative: The story fills a previously unexplored gap in Tolkien's timeline, introducing new characters and events that align with the lore without altering it.
- Fluid Combat System: Building on the rock-paper-scissors mechanics of Arkham, the game adds a wraith-stun, lethal executions, and a "last chance" desperation move that feels cinematic.
Core Appeal
Shadow of Mordor excels in its innovative Nemesis System, which generates unique Uruk enemies with individual names, ranks, strengths, weaknesses, and rivalries. Enemies remember previous encounters—they become scarred, gain promotions, taunt the player, and even betray their leaders. This system creates emergent stories that feel personal and unscripted. The satisfying combat, designed by the team behind Batman: Arkham Asylum, provides fluid attack chains, brutal finishers, and ranged stealth kills. The ability to dominate and command Uruks through Celebrimbor's powers adds strategic depth.
Target Audience
The game appeals to fans of action-adventure games like the Batman: Arkham series, Assassin's Creed, and open-world RPGs. It is also a prime choice for Tolkien enthusiasts who want an alternative, darker perspective on Middle-earth that expands on lore without contradicting the canon (the story is considered a "legend" by Tolkien scholars). The skill-based combat and stealth challenges attract players who enjoy tactical combat and emergent gameplay over linear narratives. ESRB rating: M for Mature (blood and gore, intense violence).
Game Modes
Online/Offline Support
DLC and Expansions
Shadow of Mordor received two major story expansions through the Season Pass:
Additional free DLC included:
The Game of the Year Edition (released 2015) bundles all DLC and updates.
What Makes This Game Unique
Middle-earth: Shadow of Mordor stands as a landmark title for its technical innovation and immersive world. Its blend of brutal combat, deep customization, and player-driven storytelling set a new benchmark for action games in a licenced universe. Whether you seek vengeance, power, or a dynamic adventure, this game delivers a uniquely personal journey through Mordor.
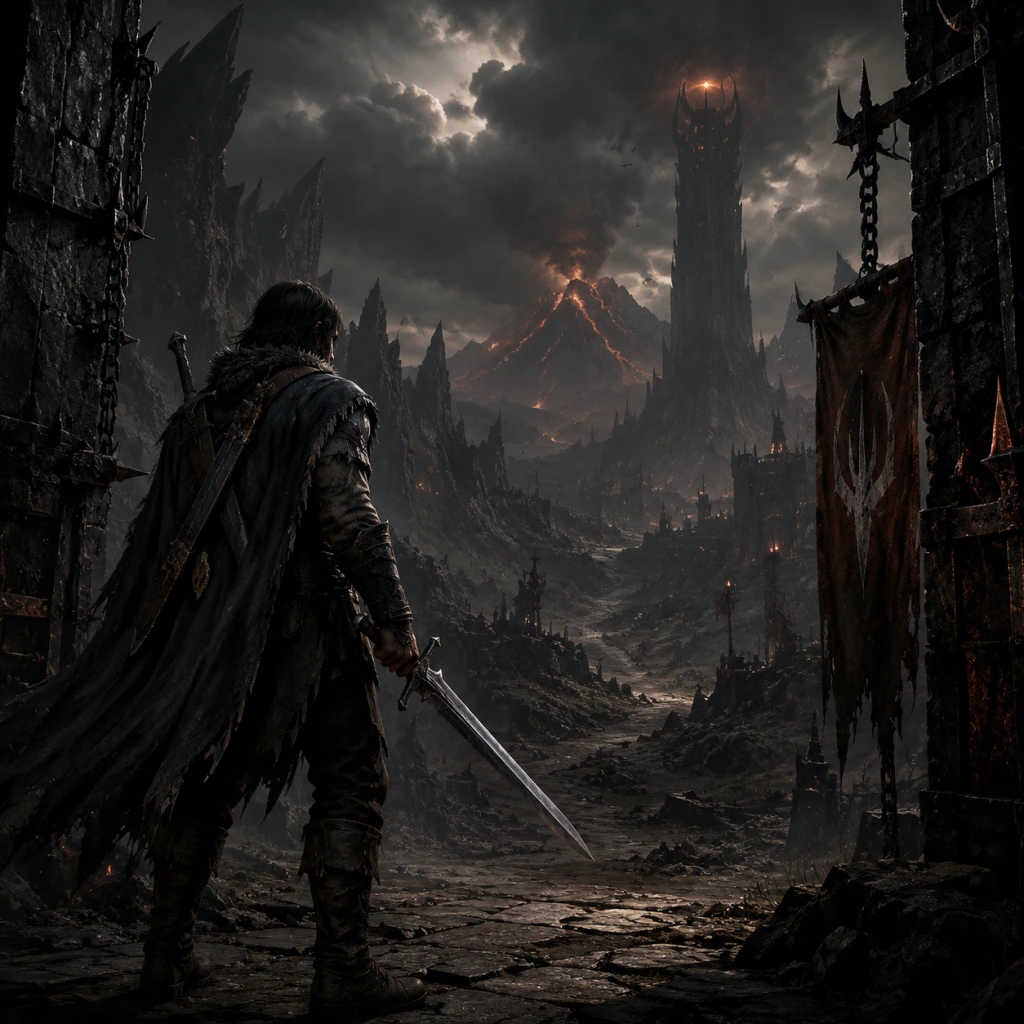
Getting Started
Getting Started
Welcome to Middle-earth: Shadow of Mordor. This guide will help you survive your first steps in Mordor, master the basics, and avoid common pitfalls. Whether you're on PC, PlayStation, or Xbox, you'll find platform-specific controls, a clear first-hour walkthrough, and a day-one checklist.
Character Creation
There is no character creation. You play as Talion, a Ranger of Gondor, whose appearance and abilities are fixed. You can later unlock different runes, skins, and abilities, but your base character is predetermined.
First Hour Walkthrough
0-10 minutes: Prologue
- Watch the opening cinematic: Talion, his wife, and son are executed by the Black Hand. You are resurrected by a wraith (Celebrimbor).
- Follow the linear path: climb the watchtower, learn basic movement (sprint, climb, jump).
- Encounter your first Orcs: use the sword (attack) and counter (deflect) buttons to survive a scripted fight. You cannot die here.
- Escape the fortress by following the quest marker. You'll learn stealth (crouch, sneak attack), ranged combat (your bow), and the wraith’s abilities (Wraith Stun, Wraith Flash).
- Important: When the game prompts you to use the Bow for the first time, aim for the weak points on the Caragor (beast). This is a tutorial – miss it and you restart that section.
- After escaping, you enter the open world of Udûn. You are immediately given the main objective: The Hunter of the Dead (Side Mission). Do not ignore side missions – they give essential early XP and Mirian (currency).
- Complete the first side mission: Hunt a Caragor to learn beast taming. This is critical for later.
- Follow the main story marker to an artifact. You'll face your first Captain (unique named Orc). Do not rush – observe his strengths/weaknesses (pop-up notification). Exploit his fears or use stealth to weaken him before engaging.
- If you die to a Captain, he levels up and gains new abilities (Nemesis System). It's okay to retreat and come back later.
- You'll encounter the first Haunted Tower. Climb it and perform a Wraith Flash to cleanse the area. This reveals collectibles and fast travel points on your map. Activate every tower you see – they are crucial for navigation and map clarity.
- You should have enough XP to unlock your first ability in the Might or Ranged skill tree. Recommended: Shadow Strike (Ranged) – lets you teleport to an enemy you hit with a bow shot. This is a game-changer for mobility and stealth.
10-20 minutes: The Black Gate
20-30 minutes: First Open World
30-40 minutes: First Main Quest – The Blade of Galadriel
40-50 minutes: Tower Activation
50-60 minutes: First Power Upgrade
Controls – All Platforms
PC (Keyboard & Mouse) – Default keybinds:
| Action | Key |
|---|---|
| Move | W/A/S/D |
| Sprint | Left Shift |
| Attack | Left Mouse Button |
| Counter/Block | Right Mouse Button |
| Bow | Q (hold to aim, release to fire) |
| Wraith Stun | F |
| Wraith Flash | E |
| Interact | E |
| Crouch | Left Ctrl |
| Roll/Dodge | Space |
| Map/Inventory | M |
| Action | Button |
|---|---|
| Move | Left Stick |
| Sprint | L3 (click left stick) |
| Attack | R1 |
| Counter/Block | Square |
| Bow | L2 (aim) + R2 (fire) |
| Wraith Stun | Circle |
| Wraith Flash | Triangle |
| Interact | Triangle |
| Crouch | L3 (while moving) |
| Roll/Dodge | X |
| Map | Touchpad |
| Action | Button |
|---|---|
| Move | Left Stick |
| Sprint | Left Stick Click |
| Attack | RB |
| Counter/Block | X |
| Bow | LT (aim) + RT (fire) |
| Wraith Stun | B |
| Wraith Flash | Y |
| Interact | Y |
| Crouch | Left Stick Click (while moving) |
| Roll/Dodge | A |
| Map | View Button |
UI Overview
- Top Left – Health (green bar) + Wraith Focus (blue bar, used for slow-motion and Wraith Flash).
- Bottom Left – Mission objective text and distance to quest marker.
- Center – Crosshairs (when using bow) or targeting reticle.
- Bottom Center – Weapon wheel (sword, bow, dagger) – accessed by holding the weapon button (e.g., hold Q on PC to switch).
- Top Right – Mini-map showing nearby enemies, collectibles, and markers.
- Right Side – Current mission info; when near an Orc Captain, their strength/weakness card appears.
- Pause Menu (Map) – Full map of Udûn, fast travel points, quests, collectibles (Ithildin, Artifacts, etc.), and skill tree.
- Immediately after the prologue: Head to the nearest Haunted Tower (marked with a white spire icon on your map).
- Spend your first few ability points on: (1) Shadow Strike (Ranged tree), (2) Critical Strike (Might tree), (3) Ranger's Speed (Stealth tree).
- Loot every corpse you see for Mirian and Runes.
- Always carry a Caragor or Graug (beast) when possible – they make combat much easier.
- Complete every side mission before progressing the main story – the main quests will become easier with more skills.
- Don't fight Captains head-on without exploiting their weaknesses.
- Don't ignore collectibles – Ithildin (white glowing runes) unlock legendary runes.
- Don't sell Runes – you can only equip them on weapons; you get plenty of Mirian from dead bodies.
- Don't fast travel too early – walking between towers helps you discover side missions and collectibles.
- Don't spam attacks against shielded enemies – use Wraith Stun (F on PC, Circle/Circle on consoles) to break their guard.
Essential Early Objectives
1. Complete the first two side quests: The Hunter of the Dead (Caragor taming) and The Tomb of the Wraith (unlocks Wraith abilities).
2. Activate all Haunted Towers in the starting zone (Udûn).
3. Gather Mirian from treasure chests and dead Orcs; you need 500 Mirian to unlock your first Rune slot on your sword.
4. Unlock the skill “Shadow Strike” – it allows you to zip to a struck enemy and is essential for mobility.
5. Find and kill at least one Warchief (the final Captain of a region) to complete the tutorial arc, but don’t rush – build up your power first.
What to Do First
What to Avoid
Early Resource Priorities
| Resource | Use | Priority |
|---|---|---|
| Mirian | Buy Rune slots, upgrade weapons, unlock skills | High – save for Rune slot upgrades first (500 Mirian per slot) |
| Runes | Equip on sword, bow, dagger to add effects (fire damage, health on kill) | High – always equip the best ones; dismantle duplicates |
| Ability Points | Unlock skills | High – follow recommended tree (Shadow Strike, Critical Strike, Ranger's Speed) |
| Power | Level up Talion (unlocks more ability points) | Medium – gained naturally through combat and missions |
| Legendary Runes | Very powerful effects (e.g., unlimited focus) | Low priority early – obtained from Warchiefs and collectibles |
Common Beginner Mistakes
1. Fighting without upgrading weapons first – You start with a basic sword that deals minimal damage. Complete the first weapon upgrade mission (unlocks after the first Warchief kill) to get a better sword.
2. Ignoring the Nemesis System – Dying to a common Orc might turn him into a Captain; dying to a Captain makes him stronger. If you see a dangerous Captain with no exploitable weakness, retreat and level up.
3. Forgetting to use the Bow – The bow is your best friend for stealth and crowd control. Always keep arrows (found in towers or from dead archers).
4. Not using Wraith Flash – This ability clears Haunted Towers, but also stuns all nearby enemies in combat. Use it when surrounded.
5. Trying to kill every Orc – You don't have to kill every grunt. Focus on Captains and objectives. Grunts are infinite.
Day-One Checklist
- [ ] Complete the tutorial prologue (Black Gate escape).
- [ ] Activate the first Haunted Tower in Udûn.
- [ ] Complete side quest “The Hunter of the Dead” (learn Caragor taming).
- [ ] Unlock the skill “Shadow Strike” (requires 2 ability points).
- [ ] Equip your first Rune on the sword (after first Captain kill).
- [ ] Collect at least 500 Mirian (from chests and bodies).
- [ ] Kill your first Warchief (optional but recommended for unlocking weapon slot upgrades).
- [ ] Find and activate all 3 Haunted Towers in Udûn (map will be fully revealed).
- [ ] Upgrade your sword with a second Rune slot (costs 500 Mirian).
- [ ] Save your game manually at a fast travel point (game autosaves, but manual save is safer before major battles).
Now you're ready to explore Mordor. Remember: stealth, patience, and exploiting weaknesses are your greatest weapons. Good luck, Ranger.
Core Gameplay
Core Gameplay
The heart of Middle-earth: Shadow of Mordor is the Nemesis System, a dynamic hierarchy of Sauron's Uruk captains and warlords that react to your actions, remember past encounters, and evolve in rank and appearance. The core gameplay loop revolves around:
1. Infiltrate & Gather Intel – Spy on Uruk camps, interrogate worms, and complete missions to learn captain weaknesses and strengths.
2. Assassinate, Dominate, or Exploit – Use stealth, combat, or brand (dominate) to neutralize enemy captains, leveraging their vulnerabilities.
3. Trigger Power Struggles – Kill or brand captains to create chaos, cause betrayals, and lure out higher-ranking warlords.
4. Conquer Regions – Defeat all warchiefs in a region to unlock the next area, eventually facing the final antagonist.
Player progression is tied to Mitchel Elhoran (Talion) and Celebrimbor as they unlock wraith abilities, combat moves, and dominate control over the Nemesis system. The game is divided into four major progression tiers, each offering new threats, tools, and challenges.
---
Early Game (Levels 1–10, First Region: Udûn)
Focus: Survival, mastering basic combat, and learning the Nemesis system.
Combat & Interaction
- Basic Combat: Light and heavy attacks, parry (time with the sword icon), dodge, and stun. The counter prompt appears when an enemy attacks; pressing the parry button just before impact executes a perfect parry, breaking an enemy's stance and allowing a counterattack.
- Wraith Abilities: Unlock Wraith Stun (summon flash that stuns nearby enemies) and Wraith Blast (AOE damage). Use them to break up groups.
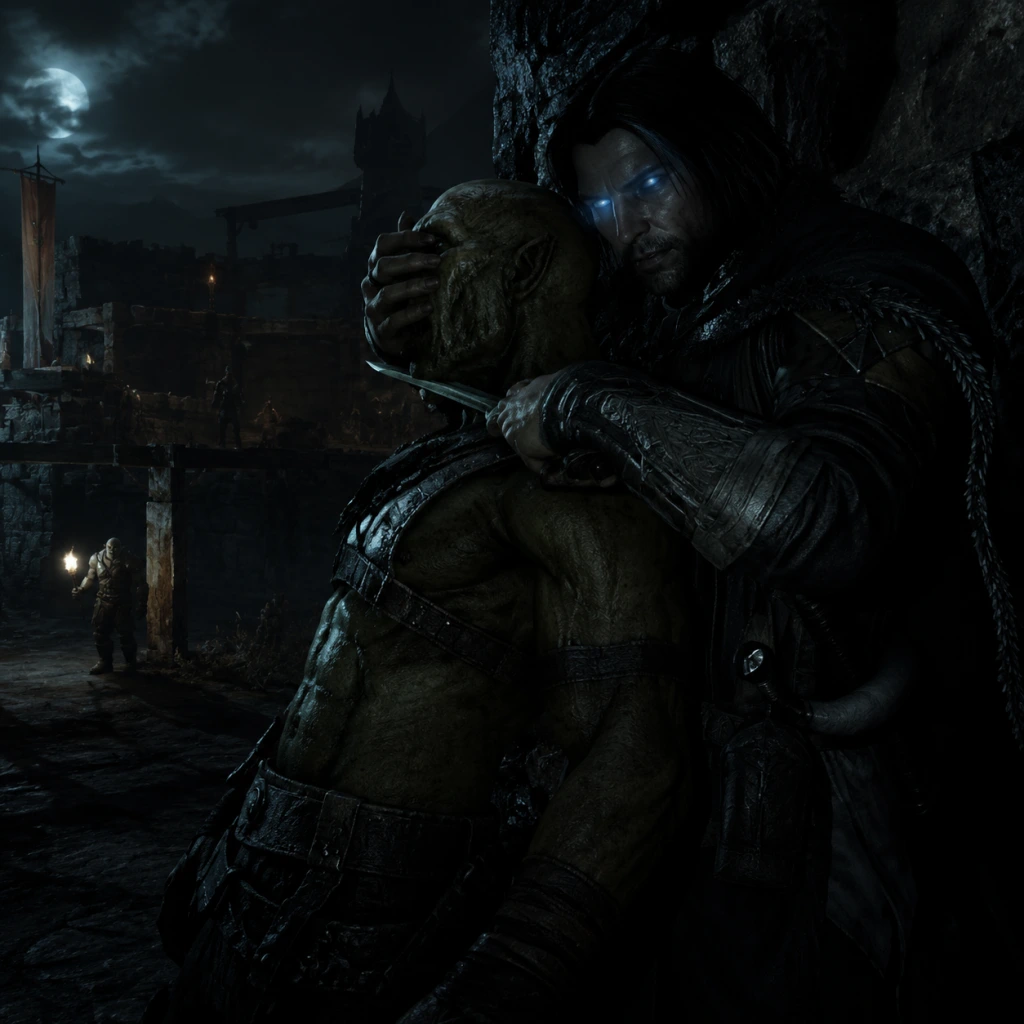
- Stealth: Take out isolated grunts with stealth kills. Climb vines, hide in bushes, and use the wraith to sense enemies through walls.
- First Captain Kills: You'll encounter your first Uruk captain early in the main quest. Killing or branding him triggers a tutorial for the Nemesis System.
- Main Quests (Sword of the Spirit, etc.) – Introduce core mechanics and grant early ability points.
- Side Quests: Complete Outcast Rescue missions to earn Mirian (currency) and experience.
- Collect Artifacts & Ithildin – Found in the open world; rewarding lore and ability points.
- Unlock Fast Travel Points – Tower of Sauron and other towers reveal the map and serve as fast travel hubs.
- Mirian: Earned from looting bodies, selling runes, and completing quests. Spend at Forge Towers to upgrade equipment (sword, bow, dagger).
- Runes: Dropped by defeated captains. Equip runes in weapon slots (Sword, Bow, Dagger) to gain passive bonuses (e.g., +x% health on kill, increased bow damage). Early runes are weak but essential for survival.
- Ability Points: Level up to earn points, invest in the skill tree. Priority early picks: Charge (close distance), Shadow Strike (instant teleport behind an enemy), and Lift of the Stag (launch enemies into the air for crowd control).
- Captains are low-level (Power rating 1–5) with few strengths and many weaknesses (e.g., fear of fire, vulnerable to stealth). Exploit these to kill them easily.
- If you die, the captain who killed you is promoted, gains new strengths, and taunts you. Avoid unnecessary deaths – they empower your enemies.
- Intimidate (using wraith to reveal more information) becomes available after a few ability unlocks.
- Brand (Unlock at level 12 via main quest) – The game-changer. Press and hold the brand button on a stunned or vulnerable enemy to turn them into a permanent ally. Branded Uruks follow you, fight alongside you, and can be commanded to kill other Uruks or even attack their own captains.
- Wraith Finisher (Unlock at level 15) – Execute a captain after building up a combo streak. This grants a powerful execution that can dominate the target instantly.
- Shadow Mount – Ride a Caragor (big cat-like beast) by stunning it. Caragors are excellent for traversal and combat.
- Combot Chain Mastery – Longer combos allow more powerful finishers. Use the sword to chain attacks, aerial strikes, and ground executions.
- Wraith Tree: Invest in Wraith Burn (AOE fire blast), Wraith Flash (extended stun), and Detonate (explode a branded orc from a distance).
- Ranger Tree: Double Charge, Elven Speed (faster bow draw), Poison (poisoned enemies spread damage).
- Some abilities require completing specific challenges (e.g., kill 30 Uruks with Shadow Strike to unlock the upgrade). Read the skill's challenge requirement and farm appropriate enemies.
- Captains now have up to 5 strengths/weaknesses. Some become epic (marked with a purple icon) – more powerful but vulnerable to specific things (e.g., combat mastery but fear of Caragors).
- Warchiefs are the top-tier captains controlling a region. They have bodyguards (other captains) and multiple strengths.
- Use branding to infiltrate the hierarchy: brand a captain, then send him to become a bodyguard of a warchief. During the warchief fight, your branded captain will betray the warchief, creating an opening.
- Power Struggles: Killing or branding captains triggers feasts, fear among lower ranks, and betrayals. Exploit these to weaken warchiefs before direct confrontation.
- Upgrade your sword, bow, and dagger at least to level 2 (requires Mirian and some collectibles). The bow's Shadow Strike upgrade unlocks a teleport attack.
- Start equipping epic runes (orange rarity) dropped by warchiefs. These provide unique bonuses like health regeneration on brand, or instant kill on a perfect parry.
- Sell excess runes to Mirian to fund upgrades. Prioritize upgrading the Bow – it's your best tool for removing enemy archers and triggering explosions.
- Sea of Núrnen opens after completing Udûn's main questline. The region has more complex terrain, larger forts, and stronger captains (Power 10–15).
- Hunting Challenges: Kill specific beasts (Graugs, Caragors, Ghouls) to unlock rune slots on equipment. The Graug Tamer ability lets you ride Graugs – massive beasts that can wipe out whole camps.
- Main Missions: Continue the story (e.g., rescuing children of the warchief). Story missions often force you into unique Nemesis scenarios – always be prepared for unexpected ambushes.
- By now you have most abilities unlocked. Master Brand+Detonate combos: brand a group of Uruks, then detonate one – the explosion will kill or terrify others.
- Shadow Strike Chain (upgraded) allows multiple teleport kills in quick succession – great for clearing archers.
- Last Chance (unlocked) gives a quick-time event when critically wounded: press the button quickly to counter a killing blow. This saves you from dying and losing to a captain.
- Wraith World (Ultimate ability) – Slows time and allows instant kills on branded Uruks (non-captains). Use it in crowded forts.
- Maximize your rune setup. For a combat build: equip runes that increase health on kill, damage when health is low, and combo generation. For a stealth/assassin build: runes that increase stealth damage and reduce detection.
- Rune slots on weapons are unlocked through hunting challenges. Complete all three hunting quests in each region to get all slots.
- Ability Points: Invest in passives like Health Boost, Focus Recovery (for bow), and Wraith Regeneration. The skill tree is forgiving – you can eventually unlock everything, but prioritize what fits your playstyle.
- All captains in a region can be branded (if you have the dominant ability). Branding a warchief makes him your permanent servant. You can then use him to attack other warchiefs or gather intel.
- Warchiefs become epic – many have immunities (e.g., immune to arrow fire, immune to poison). You must use specific weaknesses (like triggering a trap, using a beast, or exploiting a fear) to defeat them. If you cannot exploit any weakness, a prolonged fight with multiple phases may be required.
- Betrayals: If you brand too many captains, some may betray you during the fight (they have a chance to resist branding). Keep a backup plan – a powerful Caragor or a detonated barrel.
- Final Warchief in each region: The Warchief of Núrnen has a special arena fight with environmental hazards.
- Legendary Runes (yellow) become available from special challenges (e.g., Slaying a Graug with only the bow while riding a Caragor). These provide game-changing bonuses: infinite focus, instant brand on stealth kill, etc.
- Upgrade gear to Level 5 (max) – requires many Mirian and completing epic challenges. The damage increase is significant.
- Buy Elvish Medicine from Forge Towers – it temporarily increases your damage and gives wraith meter regeneration.
- Legendary Hunts appear – defeat unique beasts (e.g., The Ghoul Matron, The Caragath) for powerful runes.
- Outcast Rescue still available but less rewarding. Focus on Power Struggles and Ambush missions to manipulate the Nemesis board.
- Story missions lead to the final confrontation with the Hammer of Sauron. Complete all side missions to ensure you are fully leveled.
- After completing the main questline, the world remains open. You can continue leveling (hard cap is Level 25, but runes and abilities can still be improved).
- Vengeance for the Slain – An online feature (requires internet). When another player's branded captain kills their character, that captain invades your game as a special Vendetta Captain with unique traits. Hunt them down for rewards (legendary runes). This provides infinite replayability.
- Test of Might – Endless combat challenges in Udûn and Núrnen. Survive waves of increasing difficulty. Rewards include high-level runes and Mirian.
- Nemesis Forge (Save transfer to Shadow of War) – Not in this game, but you can still interact with the Nemesis system indefinitely. The system will continue to generate new captains and power struggles.
- Perfect Build Example:
- Playstyle: Stealth assassinate isolated captains, then go loud with high combo generation for executions.
- Defeat all Epic Captains – Kill every epic captain in the game (there are six total, three per region). Each drops a unique legendary rune.
- Master the Hunting Challenges – Achieve gold medals on all hunting quests for the best runes.
- Complete 100% – Find all Ithildin, artifacts, and plant herbs to unlock the Bright Lord skin (additional cosmetic option).
Exploration & Quests
Economy & Progression
Nemesis System Introduction
---
Mid Game (Levels 11–20, Udûn & Sea of Núrnen)
Focus: Branding Uruks, building a spy network, and tackling warchiefs.
Combat & Interaction
Progression & Skill Tree
Nemesis System: Advanced
Economy & Gear
Exploration & Quests
---
Late Game (Levels 20–25, Both Regions + Núrnen's Pit)
Focus: Dominating the Nemesis system, defeating all warchiefs, and preparing for the final battle.
Combat & Interaction
Progression & Build
Nemesis System: Endgame
Economy & Gear
Exploration & Quests
---
Endgame (Level 25+, Post-Story)
Focus: The Nemesis System is your sandbox. No more story missions – you can freely roam both regions, continue to brand or kill every Uruk, and engage in endless power struggles.
Structure
Endgame Loop
1. Scan the Nemesis board for new captains (they spawn indefinitely).
2. Pick a target – either brand him to expand your army or kill him for a powerful rune.
3. Use branded captains to manipulate the hierarchy: promote them, make them bodyguards, then have them betray the warchief.
4. Kill the warchief – new ones will rise.
5. Repeat for more runes and challenges.
Build Optimization
- Sword Runes: +10% health on kill, +20% damage when health below 50%, +20% combo per kill.
- Bow Runes: +25% focus duration, +15% arrow damage, +20% chance to poison on headshot.
- Dagger Runes: +50% stealth damage, +20% move speed while crouched, +100% chance to remove arrow resistance on stealth kill.
Final Challenges
---
Quick Reference: Progression Tiers Summary
| Tier | Level Range | Main Objective | Key Unlock | Tips |
|---|---|---|---|---|
| Early | 1–10 | Survive and learn Nemesis | Brand (later) | Die sparingly; exploit weaknesses |
| Mid | 11–20 | Build branded army | Brands on captains | Use branded bodyguards to open warchiefs |
| Late | 20–25 | Dominate region warchiefs | All abilities | Focus on epic captain weaknesses |
| Endgame | 25+ | Cleanse the board | Legendary runes | Play the endless Nemesis system; use Vendetta for more runes |
Remember: Every death has consequences in Mordor. Use intel wisely, brand strategically, and never underestimate the power of a Graug charge.
Game Tips
Game Tips
This section provides a comprehensive collection of tips for Middle-earth: Shadow of Mordor, organized by category. Each tip includes an explanation of why it works and when to use it, ranging from beginner-friendly fundamentals to advanced optimizations.
Beginner Tips
#### 1. Master the Counter Before Attacking
- What: Use the counter button (default: B on Xbox, Circle on PlayStation, Ctrl on PC) when an enemy flashes yellow just before attacking. Parry and instantly kill basic grunts.
- Why: Countering is the single most important defensive skill. It nullifies damage, interrupts enemy combos, and builds your combo multiplier safely. Without it, you will be overwhelmed quickly.
- When: In every engagement, especially when surrounded by 3+ enemies. Always prioritize countering over dodging when possible.
- What: Approach enemy camps or strongholds from high ground. Use the bow or stealth takedowns to eliminate archers and isolated warriors before the alarm is raised.
- Why: Uruks become significantly more dangerous when they have ranged support. Removing 4-5 enemies before open combat turns a 15-minute brawl into a 2-minute cleanup.
- When: Always before triggering a captain fight or entering a fortress. Use tall grass, wall ledges, and rooftops.
- What: Keep at least one Eärendil's Light (from spectral dash) or Wraith Flash available to disengage when health is low.
- Why: Dying is punishing because it empowers nemesis captains. Escaping to a safe area (like a tower) resets the encounter without giving enemies experience.
- When: Anytime you face a new, unknown captain or are below 30% health. Better to live and return stronger.
- What: Purchase the Wraith Finisher skill (second tier of Wraith abilities) which allows you to execute downed enemies instantly.
- Why: It greatly speeds up killing captains once their health is low. The skill can be upgraded to execute from any attack, making it a swift finisher.
- When: Start unlocking as soon as you have 3 skill points. It becomes essential for boss fights and crowd control.
- What: Focus on hitting multiple enemies in succession without taking damage. Each hit adds to the combo multiplier, which increases damage and unlocks special moves like Ground Execution or Charged Strikes.
- Why: The combo multiplier caps at 8x, which makes you a walking destroyer. High combo also unlocks the ability to use the Wraith Stun on multiple enemies simultaneously.
- When: During any large battle (8+ enemies). Use quick strikes and dodge/counter to maintain the streak. Avoid overcommitting to heavy attacks that interrupt the flow.
- What: When a captain starts an enrage animation (glowing red or shouting), shoot them with a charged headshot from the bow. This stuns and cancels the enrage.
- Why: Enraged captains gain damage resistance, faster attacks, and often can't be damaged by regular hits. Canceling the enrage keeps the fight manageable.
- When: Immediately when you see the captain stop moving and begin enrage. If you miss, dodge away until they calm down (about 5 seconds).
- What: Each captain has at least one weakness listed in the Nemesis menu (e.g., “Fear of Caragors,” “Weak to Stealth,” “Vulnerable to Ranged”). Exploit these.
- Why: Hitting a weakness deals massive damage, triggers a fear effect (causing the captain to flee), or grants an immediate execution opportunity.
- When: Before engaging a captain, check their profile. If they are afraid of beasts, summon a Caragor or Graug. If they are vulnerable to stealth, use an ambush from above.
- What: Unlock and use skills like “Chain of Shadows” (hit two enemies with one wraith flash) or “Blade Mastery” (increase critical hit chance).
- Why: These skills multiply damage output without extra effort. For example, Chain of Shadows allows you to stun and then execute two enemies in one move.
- When: Mid-game when you have 10+ skill points. Focus on passive upgrades that enhance your existing playstyle (e.g., stun-heavy or stealth-heavy).
- What: Activate the Wraith World vision (left bumper/L1/Shift) to see glowing blue outlines of artifacts, Ithildin, and hidden lore. These are scattered everywhere.
- Why: Collecting scrolls and poems unlocks power upgrades (like increased health, focus duration, or combo time). Also, finding all artifacts in a zone grants a massive XP and skill point bonus.
- When: Whenever you enter a new region, do a sweep using the tallest towers to scan for artifact locations. Prioritize the ones that give health upgrades.
- What: Unlock all Haedir towers in each region to enable fast travel. Each tower also reveals map icons (missions, camps, collectibles).
- Why: The map is huge. Running from one end to the other wastes time. Fast travel also resets enemy patrols and respawns resources.
- When: Immediately after arriving in a new area, climb the tower and activate it. Then use fast travel to return to the central hub for upgrades.
- What: Tame Caragors by stealth-killing them while mounted (approach from behind and press attack). Once tamed, you can ride them and command them to attack.
- Why: Caragors are faster than running, help in fights by biting captains, and can clear camps of archers quickly. They also distract enemies.
- When: After unlocking the ability to ride beasts (middle of the story). Use in open areas to travel faster, and in combat to overwhelm tough captains.
- What: Many caves, tombs, and hidden areas contain locked chests or runes that require you to solve simple puzzles (like activating pressure plates or destroying wall-mounted shields).
- Why: Epic and legendary runes provide major bonuses like +25% damage to caragors or +30% health regen. These runes can be slotted into your sword, dagger, or bow.
- When: Late-game when you have the Shadow Strike ability to teleport, as many puzzles require precision movement. Check the map for “?” icons.
- What: Mirian is the main currency for buying upgrades and rune slots. It drops from dead Uruks, treasure chests, and can be obtained by completing side missions.
- Why: Upgrades become very expensive. A single epic rune slot can cost 5000 Mirian. Without farming, you'll be broke.
- When: Always smash crates and loot bodies. Focus on “Treasure Hunt” missions (yellow circles) which give 200-300 Mirian each. Also, kill graugs (giant beasts) for 500 Mirian each.
- What: A skill that allows you to steal Mirian from stunned or downed enemies. Purchase it from the skill tree.
- Why: Each pickpocket yields 10-30 Mirian, and you can do it on every enemy before you kill them. Over a playthrough, this can net thousands of Mirian without extra effort.
- When: First 5 skill points. Combine with ground execution to kill after stealing.
- What: Runes you find can be duplicates. Go to the inventory screen and sell any rune you have more than one copy of. They give Mirian equal to 10% of their base value.
- Why: Frees up inventory and provides quick cash for upgrades. Legendary duplicates sell for 200+ Mirian.
- When: After each major battle, check your runes. Sell duplicates unless you need multiple for different weapons (e.g., two health runes for sword and dagger).
- What: The forge in Udûn (near the tower) allows you to combine three runes of the same quality to create a new random rune of one tier higher (e.g., 3 common = 1 uncommon).
- Why: Turns useless common runes into potentially valuable epic ones. It's the best way to upgrade your gear late-game.
- When: Once you have 30+ common runes and a few duplicates. Save epic runes for combining into legendaries.
- What: Maximize the Wraith Flash and Wraith Stun skills, paired with runes that increase stun duration or area. Use the ability to freeze groups and then execute them one by one.
- Why: This build excels against large crowds and captains. A fully upgraded Wraith Stun can paralyze up to 10 enemies for 5 seconds, giving you time to kill captains without interference.
- When: Use whenever you are outnumbered 5:1 or more. Recommended runes: “Sparks of the Wraith” (increases stun radius) and “Eternal Stun” (extends stun duration by 2 seconds).
- What: Focus on stealth takedowns, silent running, and the ability to teleport between kills (Shadow Strike chain). Use runes that increase stealth damage and reduce detection range.
- Why: This build makes you invisible to enemies even in plain sight, allowing you to clear entire camps without a single combat. Excellent for missions requiring no alarms.
- When: For high-difficulty strongholds or when you want to complete side objectives quickly. Essential rune: “Shadowskin” (reduces detection time by 50%).
- What: Max out the bow skills, especially “Charged Shot” and “Spectral Dash (Ranged variant)”. Use runes that increase arrow damage and focus regeneration.
- Why: This build allows you to one-shot most Uruks from distance, even captains if you hit a weakness. Great for thinning out before melee.
- When: When facing enemy encampments with many archers or during caragor fights. Pair with a rune that gives +20% bow damage.
- What: The best legendary runes are: “The Bright Lord” (increases combo time), “The Wraith of Talion” (chance to fear on hit), and “Ungoliant's Bite” (all attacks poison).
- Why: These runes provide multiplicative bonuses that drastically alter combat. “Ungoliant's Bite” makes every hit weaken enemies over time, stacking with other effects.
- When: Equip on your primary sword once obtained. Farm legendary runes by killing epic captains (Warchiefs) or completing the “Lord of the Hunt” DLC.
- What: Outcast missions (purple circles) reward large amounts of XP and skill points. They involve freeing prisoners and often escalate into captain fights.
- Why: These missions are repeatable and provide the fastest XP gain outside of story missions. They also spawn new captains for the Nemesis System.
- When: Between story missions. If you ever feel underleveled, do 2-3 outcast missions.
- What: Each weapon (sword, bow, dagger) can hold up to 4 runes. Unlocking all slots costs Mirian (progressively more expensive: 500, 1000, 2000, 4000).
- Why: Runeless weapons are weak. Having 4 epic runes on your sword can triple your damage output.
- When: Unlock slots in order: first slot early (very cheap), then second mid-game, third late, and fourth only if you have surplus Mirian.
- What: Captains you spare or die to grow stronger, gain iron will (unable to be dominated), and develop new traits. Use this to create challenging endgame bosses.
- Why: The system generates unique stories. If you want a specific captain with many weaknesses (for easy domination), let them kill you twice to boost their power then dominate them for a powerful ally.
- When: Late-game when you have all skills. For example, let a weak captain kill you so he becomes a Warchief, then dominate him to control an entire fortress.
- What: When you are hit with a killing blow, a quick-time event appears (press the attack button repeatedly). Successfully completing it kills the attacker and restores health.
- Why: This can turn around a losing fight. The timing is generous but requires focus. Use it as a safety net, not a strategy.
- When: When surrounded and low health. Prioritize surviving to trigger it then counter-attack.
- What: Walls, cliffs, and fire pits can be used to kill or incapacitate enemies. For example, knock an Uruk into a fire pit to set him ablaze, causing panic among other soldiers.
- Why: Environmental kills instantly defeat enemies, and the panic effect spreads to other Uruks, causing them to flee or hesitate.
- When: In strongholds with many hazards. Lure enemies near ledges and use a charged attack to knock them off.
- What: A skill unlocked mid-game that allows you to teleport to a targeted enemy within range (by pressing the bow button while aiming). Can be upgraded to chain multiple strikes.
- Why: This is the best mobility tool. Use it to close distance to a captain, escape a tight spot, or reposition instantly.
- When: Always when fighting large groups. Use it to zip between archers on rooftops or to dodge a heavy attack.
- What: Once you unlock the ability to dominate captains (after the story mission “The One Ring”), you can turn them into allies. Send them to attack fortresses or defend regions.
- Why: Dominated captains fight for you during sieges, vastly reducing difficulty. You can also order them to kill other captains, weakening the enemy hierarchy.
- When: After reaching level 15+. Dominate all captains with fear weaknesses for best results.
- Note: In original releases, you could dominate a warchief by attacking them while they are in a caragor fight. This is patched in most versions, but still useful to know for legacy copies.
- Alternative: If you need to dominate a warchief, bring a Graug or Caragor to the fight to distract him, then use the Wraith Flash to stun and dominate.
- What: The DLC introduces new enemies and beast-rider abilities. Playing it first can be very difficult.
- Why: The main story gives you essential skills and runes. The DLC assumes a leveled character.
- When: After completing the main campaign and unlocking all skills, then start the DLC for a fresh challenge.
- What: Pause during combat by pressing the photo mode key (P on PC). This gives you a free camera to assess the battlefield.
- Why: Helps you plan next moves, check for remaining enemies, or find a safer spot.
- When: During intense boss fights with many captains. Not available on consoles.
- What: Yellow icons on the map represent not just missions but also impromptu fights between rival captains and caragors. Intervene to earn Mirian and ride runes.
- Why: These events are the main source of XP and Mirian outside of main quests. They also advance the Nemesis System.
- When: Whenever you have free time. They are infinite and respawn quickly.
- What: Health upgrades are hidden in Gondorian artifacts. There are exactly 5 in each region (and 1 extra from the final story mission).
- Why: Without them, your health stays at 3 bars. With all, you get 6 bars, effectively doubling survivability.
- When: Find all artifacts in the first region (Udûn) before tackling the second region (Nurnen).
- What: These replayable missions (green circles) reward a specific rune on first completion. Subsequent completions give Mirian.
- Why: Some of the best runes (like “The Wraith of Talion”) come from these missions. Do them as soon as they appear.
- When: Right after unlocking them, as runes are essential.
#### 2. Use Stealth to Thin the Herd
#### 3. Always Have a Plan to Escape
#### 4. Invest in the Wraith Finisher Early
Combat Tips (Intermediate)
#### 5. Build Combo with Hit Streaks, Not Kills
#### 6. Use Ranged Attacks to Interrupt Captain Enrage
#### 7. Know the Elemental Weaknesses of Captains
#### 8. Chain Combo from Mastery Skills
Exploration Tips (Advanced)
#### 9. Use the Wraith World (Gondorian Artifacts) to Uncover Secrets
#### 10. Fast Travel Is Your Best Friend
#### 11. Ride Caragors for Speed and Combat Assistance
#### 12. Explore Caves and Underground Passages for Epic Runes
Resources & Economy Tips
#### 13. Collect Mirian from Everything
#### 14. Invest in the “Pickpocket” Skill Early
#### 15. Sell Duplicate Runes
#### 16. Use the Forge to Combine Runes (Intermediate)
Builds & Optimizations
#### 17. The “Wraith Stun” Build (Advanced)
#### 18. The “Stealth Overlord” Build (Advanced)
#### 19. The “Ranged Assassin” Build (Intermediate)
#### 20. Legendary Rune Priority
Economy & Progression
#### 21. Complete all “Outcast” Missions for Fast XP
#### 22. Don't Neglect the Weapon Rune Slots
#### 23. The Nemesis System: Play the Long Game
Combat Mastery Tips (Advanced)
#### 24. The “Last Chance” Mechanic
#### 25. Use Terrain to Your Advantage
#### 26. The “Shadow Strike” Teleport
#### 27. Dominate Captains for Easy Siege
#### 28. The “Warchief” Domination Glitch (Fixed in Some Versions)
Final Progression Tips
#### 29. Save the “Lord of the Hunt” DLC for After the Main Story
#### 30. Use the “Photo Mode” to Your Advantage in Combat (PC Only?)
#### 31. Always Check the Map for “Nemesis” Events
#### 32. The Importance of Health Upgrades
#### 33. Use the “Shadow of the Past” Missions for Runes
---
Remember: The Nemesis System thrives on player choices. Experiment freely, and don't be afraid to die—it creates memorable stories.
Game Settings
Graphics Settings
Graphics options in Middle-earth: Shadow of Mordor are located in the main menu under Options > Graphics. The game uses an in-house engine that scales well across hardware, but some settings have a disproportionate performance impact.
Key Graphics Settings
- Resolution: Set to your monitor's native resolution. Lower resolutions improve performance but cause blurriness.
- VSync: Prevents screen tearing. Disable if you have a G-Sync/Freesync monitor or if you experience input lag.
- Texture Quality: Controls texture detail. Low uses ~512MB VRAM, Ultra uses ~2GB. High texture quality is recommended for 1080p, Ultra for 1440p+.
- Shadow Quality: Medium shadows look decent and save performance. Ultra shadows are very demanding and only recommended for high-end GPUs.
- Lighting Quality: Determines dynamic light counts and volumetric effects. Set to Medium if your GPU has less than 4GB VRAM.
- Ambient Occlusion: Adds depth by darkening crevices. SSAO (on/off) is lightweight; HDAO is more accurate but costs frames. Disable if below 60 FPS.
- Mesh Quality: Controls polygon detail for objects. High is recommended; Low makes distant objects pop in.
- Depth of Field: Blurs background. Personal preference; disable for sharper image.
- Motion Blur: Blurs during camera movement. Many players disable for clarity.
- Anti-Aliasing: FXAA is low cost but blurry. SMAA is sharper with higher cost. Use SMAA if possible.
- Texture Filtering: Set to 16x for free sharpness.
- Vegetation Range: Controls draw distance of grass. Medium preserves performance without obvious pop-in.
Recommended Settings by Hardware Level
| Setting | Low (GTX 750 / HD 7850) | Medium (GTX 960 / RX 470) | High (GTX 1060 / RX 580) | Ultra (RTX 2060 / RX 5700) |
|---|---|---|---|---|
| Resolution | 720p or 900p | 1080p | 1080p or 1440p | 1440p or 4K |
| VSync | Off | Off | Off | Off (if G-Sync) |
| Texture Quality | Low | Medium | High | Ultra |
| Shadow Quality | Low | Medium | High | Ultra |
| Lighting Quality | Low | Medium | High | Ultra |
| Ambient Occlusion | Off | SSAO | SSAO | HDAO |
| Mesh Quality | Low | Medium | High | High |
| Depth of Field | Off | Off | On | On |
| Motion Blur | Off | Off | Off | Off |
| Anti-Aliasing | FXAA | SMAA | SMAA | SMAA |
| Vegetation Range | Low | Medium | High | High |
Settings That Are Easy to Misconfigure
- Resolution Scale: Hidden under advanced settings; often defaults to 100%. Setting it above 100% (e.g., 150%) forces supersampling and destroys performance. Keep at 100%.
- VSync: Enabling VSync with triple buffering can cause input lag. Disable or use adaptive VSync in GPU driver.
- Lighting Quality: Maximum lighting quality reduces FPS by 20-30% even on high-end GPUs. Leave at High unless you have an RTX 3070+.
- Shadow Quality: Ultra shadows use render-to-texture cascades that are very demanding. Medium shadows are often sufficient and nearly identical in motion.
- Master Volume: Overall volume.
- Music Volume: Background score. Lower to focus on sound effects.
- SFX Volume: Weapon clashes, orc shouts, etc.
- Voice Volume: Dialog and narration. Keep high for story immersion.
- Voice Language: Separate from text language. Options: English, French, German, Spanish, Italian, Polish, Russian, Japanese, etc. (depends on region).
- Subtitles: Toggle on/off. Recommended on for narrative-heavy moments.
- Subtitle Language: Can differ from voice language.
- Key Bindings: All actions are rebindable. Common changes:
- Mouse Sensitivity: Adjust separately for horizontal and vertical. Lower sensitivity (~30-40) improves aim precision.
- Mouse Smoothing: Disable for raw input.
- Invert Y-Axis: Toggle for camera controls (flight/crow aiming).
- Controller Support: Fully compatible with Xbox, PlayStation, and generic gamepads. Switch layout between Xbox and PlayStation.
- Vibration: On/Off.
- Controller Layout: Preset layouts (Default, Alternate, etc.) can be changed.
- Camera Sensitivity: Adjust to your comfort. Default is often too slow; set to 60-70 for quick target switching.
- Invert Y: For players used to flight controls.
- Auto-Aim: Toggle for ranged weapons. Disable for more challenge.
- Subtitles: On/Off.
- Subtitle Size: Small, Medium, Large. Recommended Large for readability.
- Difficulty Level: From Easy to Nemesis. Descriptions below in Gameplay Settings.
- Colorblind Modes: Not officially supported. Community mods exist for some color adjustments.
- Audio Cues: The game relies heavily on sound for combat alerts (e.g., incoming attacks). Ensure Voice and SFX are balanced high.
- Game Text: Choose interface and subtitle language. Affects menus, quest log, tutorial prompts.
- Audio: Choose voice-over language (note: only some versions have multiple voice tracks).
- Subtitle Language: Independent from spoken language; useful for hearing original voice while reading a different language.
- Online Features: Toggle on/off. Disabling removes leaderboards and the ability to view other players' Vendetta missions.
- Vendetta Missions: Asynchronous multiplayer where you avenge killed players. Button to claim those missions appears if online.
- Leaderboards: Track combat challenges and speedrun times.
Audio Settings
Audio settings are under Options > Audio.
Special attention: If you play with a non-English audio track, ensure subtitles match your preferred reading language. The game does not have a 'hearing impaired' subtitle mode, so environmental cues may be missing.
Controls Settings
Controls can be customized in Options > Controls.
PC (Keyboard + Mouse)
- Sprint: Change from Shift to Ctrl if Shift causes fatigue.
- Interact: The default is F; some prefer E.
- Ranged Attack: Default Q; consider binding to mouse thumb button.
Console (PlayStation / Xbox)
Special attention: On PC, the game defaults to controller-friendly prompts. If using keyboard, ensure the prompt icon set matches your input method (Options > Gameplay > Input Icon Set). Otherwise, buttons shown on screen won't match your keys.
Accessibility Settings
Middle-earth: Shadow of Mordor has limited built-in accessibility options. Available settings:
Special attention: The game does not have a contrast mode or HUD size adjustment. If you have difficulty reading small text, increase subtitle size and reduce HUD opacity in Gameplay Options (if available).
Language Settings
Language selection is separate from system language. Found under Options > Language.
Special attention: If you purchase a region-restricted version (e.g., Russian), you may be locked to that language. Changing audio language may require a separate language pack download (available on Steam under properties > DLC or language).
Network Settings
Network options are minimal because the game is primarily single-player.
Special attention: If you experience stuttering while online, disable Online Features. The constant background sync can cause micro-stutters on slower connections. The offline mode still allows full gameplay including the Nemesis System.
Gameplay Settings
Found under Options > Gameplay.
| Setting | Options | Recommendation |
|---|---|---|
| Difficulty | Easy, Normal, Hard, Nemesis | Play on Normal first. Nemesis requires perfect counter timing and full enemy awareness. |
| Auto-Sheathe Weapon | On, Off | Off to always have weapon drawn. Saves a button press when entering combat. |
| Auto-Target (Ranged) | On, Off | Off for manual aiming with bow/throwing knives. On casual runs, leave on. |
| Invert X/Y | On, Off | Only invert Y if you fly inverted in other games. X inversion is rare. |
| Vibration | On, Off | Off to save battery on controllers; on for immersion. |
| Combat Camera Distance | Near, Far | Far gives better situational awareness in large fights. |
| HUD Visibility | On, Off, Dynamic | Dynamic shows HUD only when needed (health low, quest update). Saves screen clutter. |
| Input Icon Set | Xbox, PlayStation, Keyboard (PC only) | Match your actual input device. Wrong icons confuse button prompts. |
| Quick-Use Item | Customize which item (e.g., dagger, ghost stun) is assigned to the quick-use button. | Default is fine; consider binding the 'Wraith Flash' for quick escapes. |
| Auto-Pickup Items | On, Off | On to automatically collect resources. |
- Difficulty cannot be changed mid-game – choose wisely. Nemesis mode is noticeably harder (enemies parry more, hits stun longer).
- Auto-Sheathe Weapon = Off prevents Talion from putting his sword away after attacking; good for aggressive play.
- Combat Camera Distance: Set to Far to avoid getting stuck on corners during Uruk fights.
- Input Icon Set: If you connect a controller after starting with keyboard, the prompts will still show keyboard keys unless you manually switch. Change this setting before a fight to avoid confusion.
- In-Game Menu: Press Esc (PC) or Start (console) > Options.
- Main Menu: At the title screen, select Options before loading a save.
- Launch Options: No launcher configuration file; all settings are saved in the save folder (`%USERPROFILE%\Documents\Shadow of Mordor\UserSettings.ini` on PC). You can edit this file manually (backup first) for advanced tweaks like disabling depth of field permanently.
General Setup Advice
1. Update GPU drivers – especially for Nvidia (Game Ready) and AMD (Adrenalin). Shadow of Mordor benefits from driver optimizations.
2. Disable superfluous overlays – Steam overlay, Discord overlay, etc. can cause micro-stuttering.
3. Set power management to 'Maximum Performance' in GPU control panel to prevent clock throttling.
4. If experiencing crashes, verify game files (Steam: Library > Right-click > Properties > Local Files > Verify integrity of game files).
5. For ultrawide monitors (21:9), the game natively supports them but HUD elements may be cut off. Community fixes are available on WSGF.
Accessing Settings
Special attention: The in-game graphics menu does not apply changes instantly until you close the menu. Tweak one setting at a time and observe FPS changes with a frame rate overlay (e.g., MSI Afterburner).
Important Notes
Important Notes
Warnings and Pitfalls
#### Nemesis System Consequences
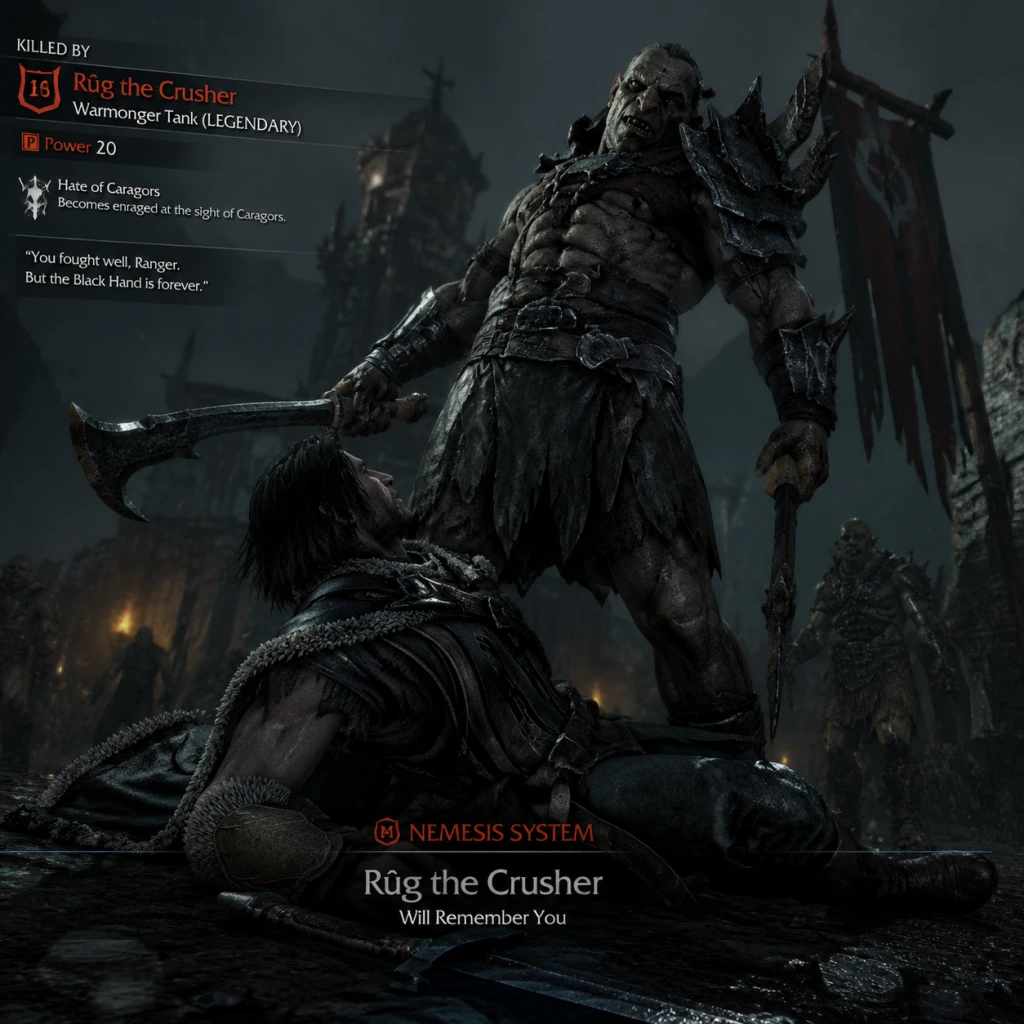
- Death is not the end: When you die, the Uruk that killed you is promoted. This can create powerful, revenge-fueled enemies that later become extremely difficult. Avoid dying to the same captain multiple times.
- Intimidation backfires: If you use the "Intimidate" ability on a captain too often without killing them, they may become immune to fear and gain Iron Will (cannot be dominated). Reserve Intimidation for targeted breakdowns.
- Warchief betrayals: If you dominate a Warchief and then use their bodyguards against them, they will betray you and become permanently hostile. Plan carefully when using dominated captains to kill their own Warchiefs.
- Button mashing fails: The combat system rewards timing and rhythm. Mash attack buttons and you will get hit. Learn the parry/counter windows.
- Ignoring Last Chance: When a QTE appears after taking heavy damage, failing it means death and a Nemesis promotion. Always be ready for the last-chance prompt.
- Overreliance on Ranged: The bow is powerful but ammo is limited. Don't neglect melee upgrades.
- Alerting Caragors: Stealth kills near caragor cages will break your cover. Always disable cages before engaging from stealth.
- Bright Lord missions: In the Bright Lord DLC, enemies are significantly more perceptive; stealth is harder. Adapt your approach.
- Branding vs. Killing Captains: You cannot undo branding. Once an Uruk is branded, they are yours permanently. However, you can use them strategically. Killing them is irreversible as well (they are permanently dead unless they cheat death).
- Warchief bodyguard assignments: Assigning a dominated captain as a bodyguard to a Warchief you plan to kill will cause that captain to betray you later. The betrayal is permanent.
- The Bright Lord: Choosing to spare or kill certain characters (like Celebrimbor) is irreversible and affects the ending. Save before the final encounter.
- Lord of the Hunt: Killing the Graug Warchief is required; no alternative path.
- Ithildin Door: Once you collect all Ithildin and open the door, the dialogue is one-time. There is no replay.
- Legendary Swords: The final sword upgrade quest (The Wraith's Reckoning) locks you into a specific sword type. You cannot change it after completing the quest. Choose the sword that matches your playstyle (warrior, ranger, or mystic).
- Online Vendetta Missions: These appear periodically and require internet. Missing them means losing unique Runes and Legendary experiences. Check the game menu regularly.
- Seasonal content: No major time-gated content, but some community challenges were removed from later patches. If playing online, complete any active challenges early.
- "The Huntsman" Quest Chain: This chain is only available before completing the final story mission. After that, the quest giver disappears. Finish all Hunting Quests before the Point of No Return.
- "The Shell of the Life" (Artifact Collection): These artifacts become unobtainable if you purify the Mithril Mines too early. Wait until you have all artifacts before activating the purification sequence.
- "The Sword of the Fallen" (Rune Collection): One Rune is only obtainable from a specific captain that spawns only in the beginning of Act II. If you kill him without looting, you miss it permanently. Check rune guides online to know which captain.
- Gondorian Artifacts in Udûn: Some are inside the Forge Tower which collapses during the story. Collect them all before completing the final Udûn mission.
- Caragor Dens: Once you unlock the ability to ride caragors, but before you can tame them, you must find and interact with all dens to complete the Bestiary. After taming, some dens become inaccessible.
- First hours: Talion starts weak. The first few missions are tutorials but can overwhelm you. Master parry and dodge before taking on groups of 5+ enemies.
- First Warchief: The first Warchief encounter (Dúsh the Merciful) is significantly harder than preceding captains. Prepare at least Combat Drain and a decent sword rune.
- The Tower of Mordor boss: The final boss of Act II is a difficulty spike. He has unblockable attacks and disarms. Bring full elf-shot and a ranged build.
- Graug Hunters: These beasts in Udûn appear after you kill a few Graug. They hit hard and are fast. Use stealth or environmental kills.
- Bright Lord Final Battle: The final boss sequence has multiple phases with tight timers. Save often.
- Endless Siege (DLC): Waves of enemies scale with your level. Without proper gear, you will be overwhelmed. Grind for perfect runes before attempting.
- Killing low-level captains repeatedly: If you kill a captain that is too low level, you gain negligible XP and renown. Focus on captains 5+ levels higher.
- Farming Elf-shot ammo: Elf-shot is scarce. Instead of hunting for ammo drops, invest in the skill "Resilience" to regenerate elf-shot from wraith attacks.
- Side quests after main story: Many side quests reward less XP after the main story ends. Complete all side quests before final story missions.
- Selling rare runes: Rare runes (Epic and Legendary) are unique and cannot be reacquired once sold or destroyed. Only sell common runes.
- Forgetting to equip runes: Runes are automatically added to inventory but not equipped. You must manually slot them into gear from the inventory screen. Many players complete half the game without equipping runes, causing unnecessary difficulty.
- Over-leveling early: Leveling too fast in Act I can cause enemy captains to scale to your level, making early missions harder. Take a balanced approach.
- Skipping skill points: Some skills (like "Double Charge", "Wraith Stun") are essential but easily ignored. Prioritize these over cosmetic upgrades.
- Do not interfere in active vendettas: If you join a vendetta mission, assist the target player by killing the marked enemies. Do not steal kills or camp loot.
- No griefing: Using weaknesses to humiliate another player's nemesis is allowed, but repeatedly targeting the same player's nemesis is considered poor form.
- No cheat engine: Using cheat engine or trainers to modify runes or XP will corrupt your save file and may lead to a ban from online features.
- Save scumming: The game detects if you reload an old save to manipulate the Nemesis system. This can cause your Nemesis hierarchy to glitch and become unresponsive.
- WBPlay account required for online: Ensure you have a stable internet connection. Disconnecting during online missions can desync your Nemesis data.
- No cross-platform saves: You cannot transfer saves between PC and console. Play on one platform to keep progress.
- Manual saves only: The game uses a single autosave slot. Create manual saves before major decisions (e.g., branding a Warchief, entering a boss arena).
- Backup saves: On PC, locate the save folder: `%USERPROFILE%\Documents\WB Games\Middle-earth Shadow of Mordor`. Copy this folder occasionally.
- Cloud saves: Steam and Epic Games Store support cloud saves. Ensure cloud sync is enabled to avoid losing progress after reinstall.
- Crash during autosave: If the game crashes while autosaving, the save file may corrupt. Always let the autosave complete before quitting.
- Modded saves: Using mods may corrupt your save. Only install mods from reputable sources like Nexus Mods, and always backup saves.
- You can jump and attack: Pressing jump then attack performs a leaping strike that can close distance.
- Caragors can be dominated: After unlocking the "Caragor Domination" skill, you can ride caragors to travel faster and cause chaos.
- Wrackers can be killed with fire: Graug and Caragors are weak to fire arrows, but Wrackers (the big beetles) explode if hit with fire, dealing massive area damage.
- Monoliths give permanent stat boosts: Collecting every Ithildin unlocks a permanent damage boost. Do this early.
- Epic runes from captain kills: Killing a captain with a specific weakness (e.g., fire) increases the chance of dropping an epic rune. Exploit weaknesses.
- Warchief bodyguards are key: Assigning your dominated captains as bodyguards to a Warchief you plan to kill makes the fight trivial. They will attack their own Warchief.
- Fast travel is unlocked by toppling watchtowers: Each watchtower destroyed unlocks a fast travel point. Do this early to save travel time.
- Artifacts and lore collectibles: Many have unique voiceovers and lore. Collect them as you explore to deepen the story. Skipping them means missing context.
- Final mission point of no return: The game warns you before the final mission. After completing it, you can still free roam, but some quests and events are gone. Complete everything beforehand.
- FOV Slider: Not present in the base game. Use a config file edit or mod to adjust.
- Performance: The game is CPU-intensive for the Nemesis system. Lower crowd density if framerate drops.
- Steam Achievements: Some achievements require online (e.g., "Master of the Wilds"). Disabling internet can cause them not to trigger.
- Trophy Missables: The "Student and Master" trophy (complete all hunting challenges) is missable if you start the final story mission first. Refer to a trophy guide.
- PS4/PS5: Save file can be transferred from PS4 to PS5, but the Nemesis system progression may not carry over perfectly. Backup saves before transfer.
- Achievement Sync: Ensure your Xbox profile is connected to WBPlay for achievements to unlock properly.
- Quick Resume (Xbox Series): Quick Resume works but may cause the Nemesis system to desync. Restart the game every few sessions to reset Nemesis state.
#### Combat Mistakes
#### Stealth Blunders
Irreversible Choices
#### Main Story Decisions
#### DLC Choices
#### Side Content
Missable Content
#### Time-Limited Events
#### Side Quests
#### Exploration
Difficulty Spikes
#### Early Game Struggles
#### Mid-Game Surprises
#### Late Game Challenges
Grinding Traps
#### Time-Wasting Activities
#### Rune Farming Mistakes
#### Leveling Traps
Online Etiquette and Anti-Cheat Notes
#### Online Vendetta Protocol
#### Leaderboards
#### Anti-Cheat
Save Management Advice
#### Save Slots
#### Corruption Risks
Things Players Commonly Regret Not Knowing Earlier
#### Gameplay Mechanics
#### Inventory and Upgrades
#### Story Missables
Platform-Specific Notes
#### PC
#### PlayStation
#### Xbox
Conclusion
Middle-earth: Shadow of Mordor rewards careful planning and punishes recklessness. The Nemesis System is its heart; respect its randomness. Save often, prioritize survivability skills early, and never sell unique runes. By avoiding these common pitfalls, you will experience the game’s full depth without frustration.
---
Last updated: October 2023. This guide is based on game version 1.0.0.1945 and all official DLCs.
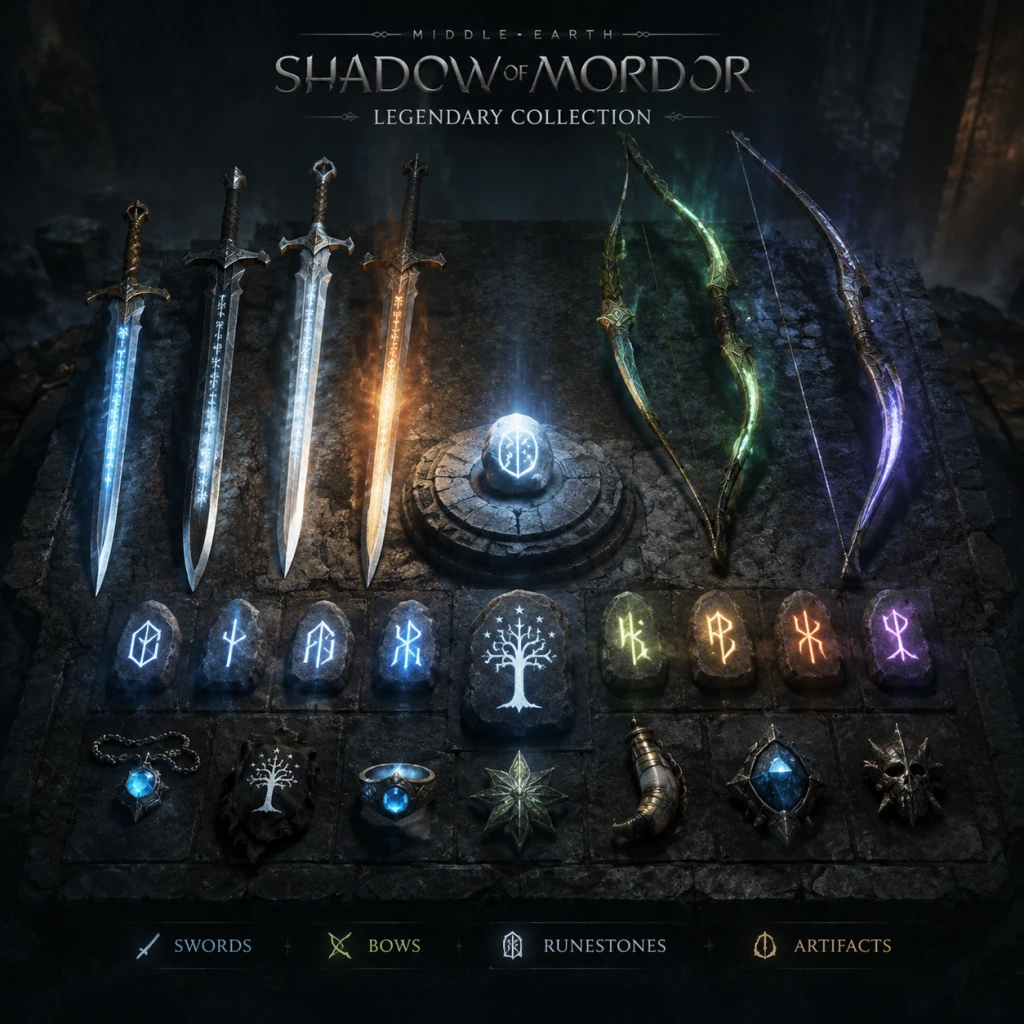
All Game Items
All Game Items
This section catalogs every major item in Middle-earth: Shadow of Mordor. Items are grouped by type: Weapons, Runes, Consumables, Currencies, Collectibles, and Key Equipment. Each entry includes its function, acquisition method, optimal use cases, and any relevant synergies or upgrades.
Weapons
Talion wields three primary weapons, each with three Rune slots unlocked through story progression (see Runes below). Weapon upgrades themselves are purely cosmetic or tied to the skill tree; the base stats remain fixed.
| Weapon | Description | Obtained | When Useful |
|---|---|---|---|
| Sword | Talion's standard longsword for melee combat. Allows execution chains, vaults, and ground finishers. | Starting equipment | All combat encounters; essential for crowd control and high-damage combos. |
| Dagger | A short blade for stealth kills, quicker strikes, and counter attacks. | Starting equipment | Stealth sections, avoiding detection, and breaking enemy shields. Pairs with Sword for fluid vaulting. |
| Bow | A Ranger bow that can be aimed in slow motion using Focus. Can be upgraded to fire Poison Arrows (skill). | Acquired early in story | Ranged elimination from a distance, explosive barrels, and headshot chains. Vital for weakening captains before engagement. |
- Slot 2: After the "The Wraith" mission (after the prologue)
- Slot 3: After completing "The Lord of Mordor" (final mission)
- Common (white) : 1 minor effect
- Uncommon (green) : 2 moderate effects
- Rare (blue) : 2 strong effects
- Epic (purple) : 3 effects (one always unique)
- Legendary (orange) : 3 effects with a signature ability (e.g., "Fire on Execution")
- Sword Runes with Health on Execution are excellent for survivability.
- Dagger Runes with Stealth Damage boost assassination damage.
- Bow Runes with Focus Regen let you fire more slow‑motion shots.
- "Fire on Execution" – Sword: Sets nearby enemies ablaze.
- "Consume on Stealth Kill" – Dagger: Instantly replenishes Elven Wraith focus.
- "Explosive Arrows" – Bow: Arrows detonate on impact.
Runes
Runes are equippable modifiers dropped by Uruk Captains and Warchiefs. Each Rune is tied to a specific weapon (Sword, Dagger, or Bow) and provides a permanent passive bonus as long as it’s slotted. Rune rarity determines the number of bonus effects:
How to Obtain: Defeat Uruk Captains and Warchiefs. Higher rarity Runes drop from higher‑ranked, more powerful enemies, especially those with specific traits (e.g., arrow-proof captains drop bow Runes). Completing certain challenges (e.g., “Kill a Captain with a Headshot”) also rewards Runes.
When Useful: Always equip the highest rarity Runes you have. Specific synergies:
Examples of Legendary Rune Effects:
Consumables
There are no traditional “consumables” in Shadow of Mordor. Instead, the environment provides temporary resources:
| Item | Effect | Acquisition | Use Cases |
|---|---|---|---|
| Focus Flowers | Restores the Elven Wraith Focus meter (used for slow‑motion aiming). | Found growing in the wild (glowing green). | When you need extended time-dilation for archery or precision moves. Grab them before a large fight. |
| Red Flowers | Instantly fills your Wraith Charge meter for a single ability (e.g., Wraith Flash). | Rarely found in the open world. | During stealth or chase sequences to instantly activate a Wraith power. |
| Explosive Barrels | Not a pick‑up, but shootable with the Bow to create area damage. | Scattered in Uruk strongholds. | Clear groups, destroy shields, create chaos before engaging a captain. |
Currencies
| Currency | Purpose | Acquisition |
|---|---|---|
| Mirian | Used to purchase Skill upgrades from the skill tree. | Complete missions (story and side), kill Uruks, find hidden chests, loot fallen enemies. |
Collectibles
Collectibles serve two main purposes: unlocking lore and obtaining permanent stat boosts or new abilities.
| Collectible | Description | How to Obtain | Reward |
|---|---|---|---|
| Ithildin | Translucent wraith artifacts. Found in the open world (often hidden in caves or on ledges). | Interact with them | Unlocks Wraith Abilities at the Havens (e.g., increased Focus duration, new Wraith moves). |
| Artifacts | Ancient stone carvings of historical events. | Found in specific ruin locations | Adds to the “Lore Master” counter; unlocks background on the world and characters. No gameplay effect. |
| Songs | Written works by slaves and rangers. | Found scattered in Uruk camps | Same as Artifacts; purely lore. |
| Mithril | Rare, glowing ore. | Killed by certain Warchiefs or found in treasure piles | Given to the dwarf Azmâr in the “Mithril” side mission to receive Epic Runes or Mirian. |
| Flora (Hidden Plants) | Plants needed for the Power of the Wild side quests (e.g., Elf-weed). | Gathered from specific areas (marked on map after starting quest) | Completing these quests rewards Skill Points (Mirian) and sometimes Runes. |
Key Equipment
These are unique items tied to Talion’s abilities—not equipable but interactable.
| Equipment | Function | Notes |
|---|---|---|
| The Skull of the Wraith | Allows communication with the Wraith (Celebrimbor). Enables Wraith Flash and Wraith Stun. | Story‑given; cannot be lost. |
| The Ring of the Wraith | A spectral ring that lets Talion bind Uruks (the “Brand” ability). | Unlocked late in Act 2. Lets you turn enemies into allies. |
| Graug Lure / Caragor Meat | Not items; you can mount wild Caragors or Graugs by using the appropriate action (e.g., hitting a Caragor with the Wraith Chain). | Available after learning the “Beastmaster” skill. |
Important Synergies & Upgrades
- Rune + Skill: Sword Runes that grant “Health on Execution” pair excellently with the Execution skill (unlocked at level 3).
- Ithildin Unlocks + Bow: Full Ithildin collection gives the “Wrath of the Wraith” ability, which makes your Bow fire faster.
- Mithril Traded for Runes: Give Mithril to the dwarf Azmâr to get a random Epic Rune; repeatable. Save Mithril for this rather than hoarding.
This covers all major items in Middle-earth: Shadow of Mordor. For an optimal playthrough, collect Ithildin early, equip Legendary Runes as they drop, and spend Mirian freely on essential skills.
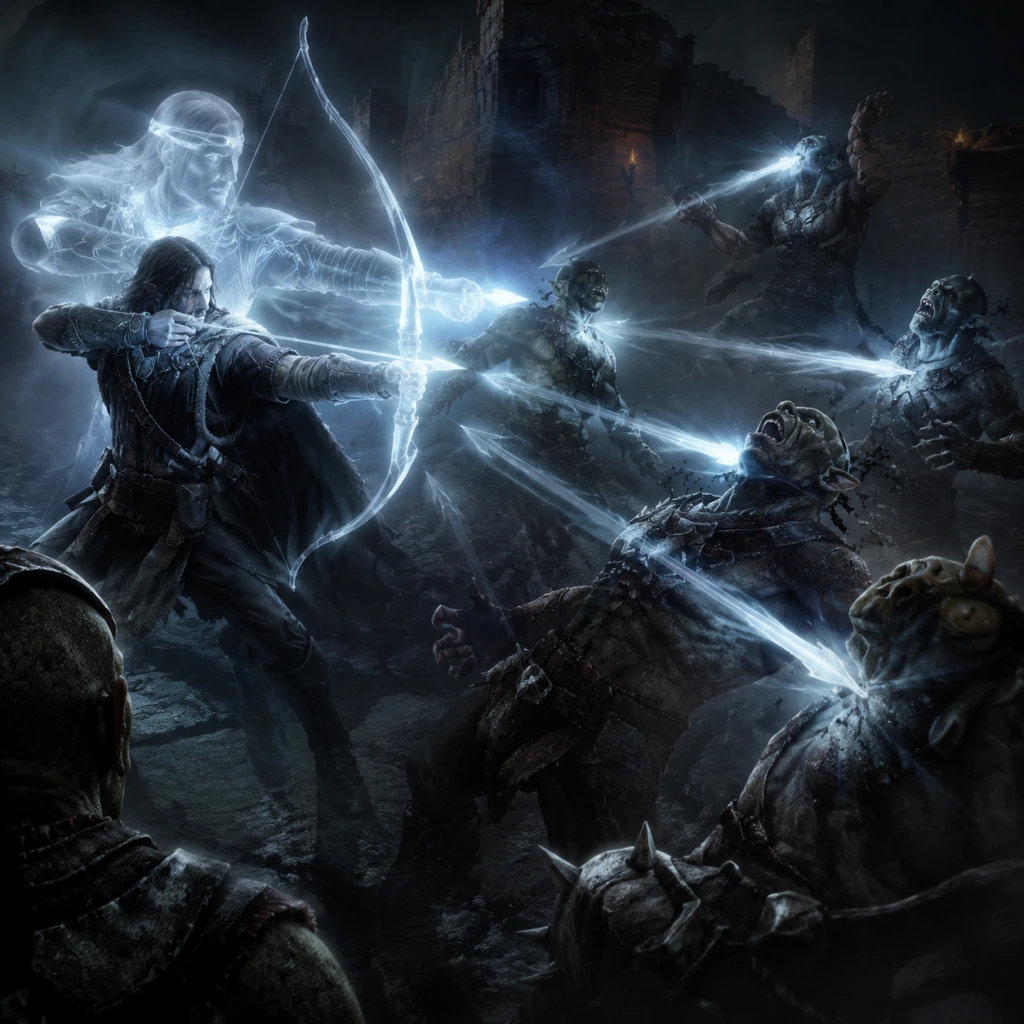
Character Skills
Character Skills
In Middle-earth: Shadow of Mordor, you control Talion, a Ranger bonded with the Wraith Celebrimbor. All skills are purchased using Miryam (earned from missions, collectibles, and challenges) through the Skills Menu (press Tab on PC, Touchpad on PlayStation, View on Xbox). Skills are organized into three trees: Ranger, Wraith, and Might. Each skill has upgrades that enhance its functionality. This guide covers every skill, its effects, cooldowns (if applicable), upgrade paths, synergies, recommended builds, and optimal use cases.
---
Skill Trees Overview
The three trees:
- Ranger: Focuses on stealth, ranged attacks, and physical combat maneuvers.
- Wraith: Harnesses Celebrimbor's spectral powers—teleportation, domination, and elemental abilities.
- Might: Enhances your Might resource, enabling powerful executions and special attacks.
- Precision II (400 Miryam): Headshot chance increases to 40% instant kill.
- Precision III (500 Miryam): Headshots now always kill basic Uruks; captains take 50% extra damage from headshots.
- Pinpoint II (300 Miryam): Time slow increases to 75%.
- Pinpoint III (400 Miryam): Time slow makes enemies move in slow motion, making headshots trivial.
- Shadow Strike II (500 Miryam): Can target allies (caragors, graugs) to mount them instantly.
- Shadow Strike III (600 Miryam): Increases damage on impact: 50% bonus damage to targeted enemy.
- Dagger Expert (300 Miryam): Can throw two daggers in quick succession.
- Dagger Mastery (400 Miryam): Daggers cause 50% bonus damage and can interrupt captain attacks.
- Charge II (400 Miryam): Bash now stuns and leaves enemy open for ground execute.
- Charge III (500 Miryam): Can chain bash into a second enemy within 2 seconds.
- Drain II (400 Miryam): Drain also recharges 10% of your Might.
- Drain III (500 Miryam): Draining a captain intimidates nearby Uruks, causing them to flee temporarily.
- Blast II (500 Miryam): Radius increases to 15 meters and stun duration to 3 seconds.
- Blast III (600 Miryam): Blast now deals 25% of enemy max health as damage and can break shields.
- Stun II (400 Miryam): Stun duration increases to 4 seconds.
- Stun III (500 Miryam): Stunned enemies are vulnerable to brutal executions (instant kill with Might).
- Flash II (450 Miryam): Teleport distance increases to 10 meters.
- Flash III (550 Miryam): Teleporting leaves a spectral copy that distracts enemies for 3 seconds.
- Domination II (600 Miryam): Dominated Uruks gain 50% increased damage and health.
- Domination III (700 Miryam): Dominated Uruks can be ordered to attack specific targets (tap R1/RB/Q while looking at target).
- Burn II (500 Miryam): Duration extends to 15 seconds and fire spreads to nearby enemies on kill.
- Burn III (600 Miryam): Burning enemies are terrified and flee; captains take 30% bonus fire damage.
- Fury II (700 Miryam): Duration increases to 12 seconds.
- Fury III (800 Miryam): While active, every kill grants 1 Focus and you are immune to damage.
- Brutalize II (450 Miryam): Terrify radius increases to 20 meters.
- Brutalize III (550 Miryam): Executing a captain terrifies his entire retinue, causing them to abandon him.
- Finisher II (350 Miryam): Finisher now restores 10% health.
- Finisher III (450 Miryam): Ground finishers generate 1 Focus.
- Mighty Shot II (500 Miryam): Fully charged shot now explodes on impact, dealing AoE damage.
- Mighty Shot III (600 Miryam): Explosion radius increases by 50% and ignites all enemies hit.
- Critical II (400 Miryam): Critical strikes now execute non-captains instantly.
- Critical III (500 Miryam): Critical strikes generate 1 Focus.
- Vault II (400 Miryam): Slam creates a shockwave that knocks back nearby enemies.
- Vault III (500 Miryam): After slam, you have invincibility frames for 1.5 seconds.
- Execution II (800 Miryam): Execution now terrifies all enemies within 30 meters.
- Execution III (900 Miryam): Cooldown for Might regeneration reduced by 50% after a successful execution.
- Last Chance (Reward: Ratbag's mission line): When downed, press the displayed button to get back up with 25% health. One use per fight.
- Brand (Reward: "The Bright Master" story quest): Hold LB/L1/Q on dominated Uruk to brand them permanently. Allows you to create a network of spies.
- Ride Caragors (Reward: "Hunting the Pack"): Press Y/Triangle/F near a caragor to mount it. Can attack with B/Circle/E.
- Dominate Caragors (Reward: "The Red Dream"): During Caragor mount, hold LB/L1/Q to dominate the beast; it fights for you.
- Ride Graugs (Reward: "The Great White Graug"): Similar to Caragor, but massive strength.
- Wraith Finisher: After a Wraith Stun, press B/Circle/E to execute (Might cost reduced by 1).
- Fire Sword Combo: Use Wraith Burn, then use Combat Drain to regain health—fire persists.
- Stealth Brand: From behind, hold LB/L1/Q to dominate without consuming Focus (requires Brand unlocked).
- Arrow volley: With Pinpoint active, fire multiple arrows quickly (requires Mighty Shot upgrade).
- Early Game (Level 1-10): Prioritize Pinpoint, Blade Master, Combat Drain, and Shadow Strike. Focus on survivability and basic combat.
- Mid Game (Level 11-20): Unlock Wraith Domination, Wraith Fury, and Mighty Shot for crowd control and captain handling.
- Late Game (Level 21-30): Max out Wraith Fury, Shadow Execution, and all Might finishers. Perfect your combo flow.
You can respec at any time for free by holding the reset button (R on PC, Triangle on PlayStation, Y on Xbox) in the Skills Menu.
---
Ranger Skills
1. Blade Master
Cost: 250 Miryam
Effect: Increases melee damage by 25% (multiplicative).
Upgrades: None.
Cooldown: Passive.
Use: Essential for all builds; allows you to kill basic Uruks in fewer hits. Prioritize early.
2. Elven Precision
Cost: 300 Miryam
Effect: Headshots with the bow deal 2x damage and have a 20% chance to instantly kill non-captain Uruks.
Upgrades:
Cooldown: None.
Use: Core for ranged builds. Combine with Pinpoint upgrades below.
3. Pinpoint
Cost: 250 Miryam
Effect: Holding L2/LT/Zoom slows time by 50% while aiming the bow.
Upgrades:
Cooldown: None; drains Focus (regenerates passively).
Use: Mandatory for sniping nests, grog barrels, and headshotting moving targets. Learn to manage Focus.
4. Shadow Strike
Cost: 400 Miryam
Effect: Teleport to a targeted enemy (or location) by pressing LB/L1/Q with bow drawn. Costs 1 arrow (if enemy) or 1 Focus (if ground). Range: ~30 meters.
Upgrades:
Cooldown: None, but costs 1 arrow (per target) or 1 Focus (per teleport).
Combos: Shadow Strike into a group, then execute with Might. Also useful for escaping.
Use: Gap closer, aerial assassination tool, and mobility skill.
5. Throwing Daggers
Cost: 200 Miryam
Effect: Press R1/RB/Q while sprinting to throw a dagger that staggers an enemy (stun for 2 seconds). Deals minimal damage.
Upgrades:
Cooldown: 3 seconds between uses.
Use: Interrupt enemy combos or set up stealth kills.
6. Double Charge
Cost: 350 Miryam
Effect: Press B/Circle/E while sprinting to shoulder-bash an enemy, knocking them down. Deals no damage.
Upgrades:
Cooldown: 4 seconds.
Use: Crowd control tool; bash into a group, then use area attacks.
7. Combat Drain
Cost: 300 Miryam
Effect: While stunned or during a combat counter, press Square/X/E to drain an enemy’s health (restores 15% health) and knock them back. Does not kill.
Upgrades:
Cooldown: 1 second (but can only drain enemies that are stunned or countering).
Use: Lifesaver in prolonged fights. Combine with ground finishers (Ranger skill tree later) for maximum recovery.
---
Wraith Skills
1. Wraith Blast
Cost: 400 Miryam
Effect: Press RB/R1/E near an enemy to unleash a spectral blast that knocks back all nearby enemies (radius 10 meters) and stuns them for 2 seconds. Consumes 1 Focus.
Upgrades:
Cooldown: 5 seconds (but requires at least 1 Focus to use).
Use: Emergency crowd control; surround yourself with explosions.
2. Wraith Stun
Cost: 300 Miryam
Effect: Tap LB/L1/Q to emit a short-range spectral pulse that stuns a single enemy for 3 seconds. Consumes 1 Focus.
Upgrades:
Cooldown: 2 seconds.
Use: Interrupt enemy attacks or set up combos. Stun a captain, then execute.
3. Wraith Flash
Cost: 350 Miryam
Effect: Press LB/L1/Q while aiming bow to teleport a short distance (5 meters) in the direction you're facing. Costs 1 Focus.
Upgrades:
Cooldown: 2 seconds.
Use: Instant dodge; avoid arrows, melee strikes, or exit dangerous areas.
4. Wraith Domination
Cost: 500 Miryam
Effect: Hold LB/L1/Q near an enemy to dominate them, making them fight for you. Requires 2 Focus. Can dominate up to 3 Uruks at once.
Upgrades:
Cooldown: None; costs 2 Focus per dominate.
Use: Create a small army. Dominate archers, defenders, or berserkers to turn the tide in fortress assaults.
5. Wraith Burn
Cost: 400 Miryam
Effect: Press LB/L1/Q while near a campfire, grog barrel, or fiery terrain to ignite your sword, dealing fire damage on melee hits for 10 seconds. Costs 1 Focus.
Upgrades:
Cooldown: 10 seconds (but cannot ignite again until fire expires).
Use: Area denial and captain melting. Combine with Combat Drain to keep health high.
6. Wraith Step
Cost: 250 Miryam
Effect: While sprinting, press LB/L1/Q to become intangible for 0.5 seconds, passing through enemies and hazards. Costs 1 Focus. Can be used while falling to avoid fall damage.
Cooldown: 3 seconds.
Use: Escape grapples, jump through enemy lines, or pass through gates.
7. Wraith Fury
Cost: 600 Miryam
Effect: Press LB/L1/Q+RB/R1/E (or L3+R3) to expend all Might and enter a rage mode for 8 seconds. During Wraith Fury: attacks hit all enemies in arc, damage is doubled, and you regenerate health. Consumes all Might (minimum 3 bars).
Upgrades:
Cooldown: 90 seconds after the Fury ends.
Use: Save for boss fights or when overwhelmed. Pop before engaging warlord groups.
---
Might Skills
1. Brutalize
Cost: 350 Miryam
Effect: While sprinting and pressing Circle/B/E near an enemy, perform a brutal execution that kills instantly and terrifies nearby Uruks (make them flee for 5 seconds). Consumes 1 bar of Might.
Upgrades:
Cooldown: None; costs Might.
Use: Best for clearing crowds. Get one kill, watch them scatter.
2. Ground Finisher
Cost: 250 Miryam
Effect: On a knocked-down enemy, press B/Circle/E to finish them (instant kill). Consumes 0.5 Might (only if you strike while standing; free if you stomp).
Upgrades:
Cooldown: None.
Use: Efficient Might spender; useful for building Focus for Wraith skills.
3. Mighty Shot
Cost: 400 Miryam
Effect: Draw fully while aiming with bow to fire a piercing shot that penetrates multiple enemies (up to 3). While fully drawn, hold R2/RT/LMB to charge; release to fire. Full charge consumes 1 Might.
Upgrades:
Cooldown: Requires full draw (approx 1.5 seconds).
Use: Crowd control at range; perfect for grog barrel detonation.
4. Battle Cry
Cost: 350 Miryam
Effect: Hold R1/RB/E for 2 seconds to let out a war cry that increases your damage output by 30% for 10 seconds. Costs 1 Might.
Cooldown: 20 seconds after activation ends.
Use: Trigger before entering combat with a captain.
5. Critical Strike
Cost: 300 Miryam
Effect: Press Triangle/Y/F while in combat (after a successful counter or during an enemy's attack) to perform a critical strike that deals 2x damage and interrupts. Costs 1 Might.
Upgrades:
Cooldown: None.
Use: Captain killer; wait for their attack, counter, then crit.
6. Vault Slam
Cost: 300 Miryam
Effect: While vaulting over an enemy (press Space/A/X during sprint), press B/Circle/E to slam them into the ground, stunning and dealing 50% damage. Costs 1 Might.
Upgrades:
Cooldown: None.
Use: Style points; also effective for breaking shields.
7. Shadow Execution
Cost: 700 Miryam
Effect: While Shadow Striking an enemy, press B/Circle/E just before landing to perform a devastating execution that deals 3x damage to the target and shreds their armor. Costs 2 Might (consumes both Might and the arrow cost of Shadow Strike).
Upgrades:
Cooldown: None; Might regeneration penalty none.
Use: Ultimate assassination; one-shot lower captains.
---
Additional Abilities & Combos
Passive Skills (Unlocked via "Story Missions")
Combat Combos
---
Synergies & Recommended Builds
1. Stealth Assassin Build
Focus on stealth kills and Quick Escape. Invest heavily in: Pinpoint (all upgrades), Shadow Strike (all), Throwing Daggers (all), and Wraith Stun (all). Use Shadow Strike to teleport behind enemies for instant kills. Synergy: Shadow Strike + Shadow Execution to eliminate captains silently. Pair with Might skills for Brutalize (to clear if discovered).
2. Berserker Build
Max Might generation and raw damage. Prioritize: Blade Master, Combat Drain, Wraith Fury, Battle Cry, Critical Strike, and Vault Slam. Use Battle Cry before engagement, then spam Critical Strikes and Ground Finishers. Wraith Fury is your panic button. Synergy: Combat Drain keeps health high; Battle Cry boosts damage for Fury.
3. Warlord Dominator Build
Master the Nemesis System by controlling Uruks. Purchase: Wraith Domination (all), Wraith Burn (for crowd control), and Brand (story). Use Shadow Strike to reach isolated captains, then dominate them. During fortress sieges, dominate all captains to turn them against each other. Synergy: Domination + Brand creates a network of spies that lower enemy ranks.
4. Elemental Mage Build
Exploit environmental hazards. Essentials: Wraith Burn (all), Wraith Blast (all), Mighty Shot (explosion upgrade), and Shadow Strike. Fire up your blade, then use Mighty Shot to explode grog barrels. Combos: Wraith Blast to knock enemies into fire pits. Synergy: Burn + Blast = AoE chaos.
---
When to Use Each Skill
---
Conclusion
Mastering Talion’s skill set is key to conquering Mordor’s Nemesis System. Mix and match based on your playstyle—stealth, brawling, or manipulation. Always buy Combat Drain early; it’s a lifeblood. And remember: you can respec anytime, so experiment freely.
“A ranger may not be a mighty warrior, but with the Wraith at his side, he is more than a match for any Uruk.”
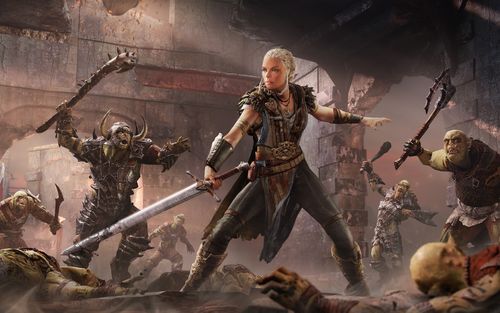
Characters & Roles
Characters & Roles
In Middle-earth: Shadow of Mordor, you control a single playable character: Talion, a Ranger of the Black Gate who becomes bound to the Wraith Celebrimbor. This fusion grants unique abilities. There are no separate classes or heroes to choose from, but Talion’s skills and equipment allow for distinct playstyles. This guide covers the primary character, key supporting NPCs, and the role of Uruk Captains and Warlords in the Nemesis System.
Playable Character: Talion (with Celebrimbor)
#### Background
Talion is a Ranger of Gondor stationed at the Black Gate of Mordor. He is killed by Sauron’s Black Hand, but his spirit refuses to pass into the afterlife. He becomes bound to the elven wraith Celebrimbor, forging a symbiotic relationship. Together they seek revenge and the means to overthrow Sauron’s forces.
#### Strengths
- Versatile Combat: Talion can adapt to any situation – stealth, direct combat, or ranged attacks.
- Wraith Powers: Celebrimbor grants spectral abilities: Wraith Stun, Wraith Flash, and the ability to drain enemies for health or intel.
- Nemesis System Manipulation: You can intentionally die to power up specific Uruks or use Branding to turn enemies into allies.
- High Mobility: Talion can climb any surface, quickly traverse rooftops, and use a short-distance teleport (Elven Agility).
- Fragile Against Groups: Without upgrades, Talion can be overwhelmed by large packs of Uruks.
- Slow Early Progression: Many powerful skills require significant Miryam investment.
- No True Invisibility: Wraith Flash is a brief stun, not stealth.
- Primary Abilities: Unlocked via spending Miryam. Many require a minimum number of total abilities purchased.
- Wraith Abilities: Become available after the story mission “The Wraith’s Vengeance.”
- Branding: Unlocked after the mission “The One Truth” (mid-game).
- Best Sword Rune: The Memory of Isildur – +30% damage during full health (epic drop). Alternatively, Sword of the Fallen for health-on-kill.
- Best Bow Rune: Bow of the Shadow – +25% headshot damage (earned from Warchief kills).
- Best Dagger Rune: Dagger of the Fallen – +20% stealth kill speed (from Outcast missions).
- Warchief Bodyguards: Brand the bodyguards of a Warchief to weaken him.
- Uruk Traits: Some Uruks have traits that complement your style (e.g., Caragor Rider, Hunter of the Slain).
- Betrayals: Branded Uruks may betray you if you die repeatedly – manage loyalty through death avoidance.
- Class: Archer, Berserker, Defender, Hunter, Warrior, etc. – determines combat style.
- Strengths: e.g., Combat Master (takes less damage from combat), Fear of Morgai Flies (flees from flies).
- Weaknesses: e.g., Fear of Caragors, Intolerance to pain, etc.
- Rank: Captain (intermediate) → Warchief (top of hierarchy).
- You must eliminate or brand them to weaken Sauron’s army.
- They remember prior encounters – if you flee, they mock you. If you die, they are promoted.
- Use intel from Ratbag or interrogated Uruks to exploit weaknesses.
- Branding a Captain makes him your ally. He will fight other Uruks and can become a bodyguard for a Warchief.
- Rivalries: Captains may have rivalries with others – you can use this to create chaos.
#### Weaknesses
#### Playstyle
Talion’s playstyle is defined by your skill choices and equipment. Three primary builds:
1. Stealth Assassin – Focus on stealth kills, bow attacks, and movement. Essential skills: Death From Above, Critical Strike, Pinpoint Shot. Gear: Upgrade bow, dagger.
2. Brutal Brawler – High combo count, heavy hits, and AoE. Skills: Execution, Combat Drain, Vault Stun. Gear: Runes that increase might generation or combo duration.
3. Wraith Master – Maximize drain and wraith-flash abilities. Skills: Wraith Burn, Wraith Finisher, Shadow Strike. Gear: Runes enhancing drain range or giving health on drain.
#### Unlock Conditions
All skills are purchased using Miryam from the Skills menu. There are no character unlocks – you start as Talion and gain powers progressively through story missions and exploration.
#### Recommended Equipment
Talion wields three weapons: Sword, Bow, and Dagger. Each can be upgraded with Runes earned from defeating captains and completing challenges.
#### Team Synergy
There is no formal team. However, you can Brand Uruks to become temporary allies in combat. Branded captains will fight for you, betray other Uruks, and even perform assassinations. Synergy depends on:
Supporting Characters (Non-Playable)
#### Celebrimbor
The wraith bound to Talion. He grants all wraith abilities and provides narrative guidance. He has no separate stats but is essential for progression. His strengths: infinite spectral sight, ability to interrogate Uruks for intel, and resistance to shadows. He has no weaknesses; he is part of Talion.
#### Ratbag the Slimy
An Uruk who acts as a reluctant ally. He helps you infiltrate the Uruk hierarchy and provides comic relief. He is not playable but his missions teach you about the Nemesis System. He can be killed in specific story events; if he dies early, it affects the story.
#### Gollum
Appears as an informant and guide. He leads you to the One Ring’s location but cannot be controlled. He is vulnerable but essential for key story moments. His role is purely narrative.
#### The Black Hand (Sauron’s Servant)
The main antagonist. Not playable. He is a powerful Black Númenórean who killed Talion’s family. Defeating him is the end goal. His strengths: high health, area attacks, and ability to summon Uruks. Weakness: susceptible to Wraith Flash and sticking to ranged combat.
#### The Hammer and The Tower
Supporting villains. The Hammer is a skilled blacksmith who upgrades his Uruks; The Tower is a powerful sorcerer. Both appear in missions and can be killed permanently. They have unique traits but are not playable.
Nemesis System Characters: Uruk Captains & Warlords
These are procedurally generated enemies with personalities, strengths, and weaknesses. They are not playable but are integral to the game’s role system. Each has:
Role in Gameplay:
Synergy:
The Nemesis system effectively creates hundreds of unique “characters” with distinct roles, but none are playable.
Conclusion
There is only one playable character: Talion (with Celebrimbor). His dual nature allows for flexible playstyles. Supporting NPCs guide the story, and the Nemesis system generates a dynamic cast of enemies that serve as both obstacles and tools. Master Talion’s skills, choose your runes wisely, and manipulate the Uruk hierarchy to survive Mordor.
Cheats & Secrets
Cheats & Secrets
Are There Cheat Codes?
No. Middle-earth: Shadow of Mordor does not contain traditional cheat codes, developer console commands, or unlock codes on any platform (PC, PlayStation 4, Xbox One). There are no god mode, infinite health, or item spawn cheats built into the game. Any claims of such codes are false or mod-based (PC mods are not official cheats).
Easter Eggs
- "I Am No Man" Achievement/Trophy: Obtain this by killing a Caragath while riding a Caragor. A reference to Éowyn's line from The Lord of the Rings.
- "The Scourge of the Black Pit" Achievement/Trophy: Earned by defeating a Warchief during a mission. Name references the "Scourge of the Black Pit" from the Return of the King video game.
- "Power to the People" Achievement/Trophy: Unlock by freeing all slaves in a region. Plays off the classic phrase but also nods to the Shadow of Mordor lore.
- "The Hunt is My Mistress" Achievement/Trophy: Kill 40 Uruks with stealth. Named after a line spoken by the character Azog in The Hobbit films.
- "You've Never Seen an Elf" Achievement/Trophy: Complete a mission without being spotted. References a famous line from The Lord of the Rings.
- "The Gravewalker" Achievement/Trophy: Earned by completing the final story mission. This is Talion's canonical title in the sequel.
- "Unstable" Secret Achievement: Requires you to kill an Uruk captain while the captain is terrified of you. The achievement description hints at the Nemesis System's reactions.
- "Bright Lord" Hidden Ending: After completing all main story missions, side quests, and collecting all Ithildin, the game's final cutscene changes to include a post-credits scene where Celebrimbor betrays Talion. This leads into Shadow of War.
- "Lore of the Nine": Collecting all Artifacts (lore items) unlocks a final audio log about the Nine Rings of Men, providing backstory on the Nazgûl.
- "The One Ring" Easter Egg: In the area of Udûn near the Forge Tower, there is a small pool of water where you can see a reflection of the One Ring. Interact with it (press the action button) to hear a whisper: "Ash nazg durbatulûk, ash nazg gimbatul..." (the Ring-inscription in Black Speech). This does nothing else but is a fun nod.
- "Black Ops" Reference: In the mission "The Black Gate", a cutscene shows Talion and Celebrimbor looking at the Black Gate. If you pause at the right moment, you can see a graffiti tag reading "Treyarch" (the developers of Call of Duty: Black Ops). This is a cross-reference since Monolith and Treyarch share parent company Warner Bros.
- "Mount Doom" Secret: On top of the volcano (Mount Doom) in the Núrn region, there is a small platform with a single red flower. Interacting with it gives Talion a brief line: "Even here, life finds a way." No gameplay effect.
- PC: No console commands, but mods exist on Nexus Mods that unlock debug features (use at your own risk).
- PlayStation: Trophy list includes the hidden "Unstable" trophy. Use the Share button to clip your moments.
- Xbox: Achievements match the trophies. No exclusive secrets.
- All secrets listed are developer-intended and safe to perform (no exploits that break the game).
- Easter eggs and hidden content do not affect gameplay progression but reward curious players.
- The "One Ring" whisper and the Developer's Note Room are the most well-known secrets in the community.
Hidden Content & Developer Secrets
1. Secret Intro Sequence: If you start a new game and press the following button sequence on the title screen (within 3 seconds): Up, Up, Down, Down, Left, Right, Left, Right, Circle/B, Enter (PC), you trigger an alternate intro showing Talion's death and bonding with Celebrimbor from a different camera angle. This is known as the "Wraith Intro" and was likely a debug sequence left in.
2. Unused Nemesis Events: Through save file editing (PC only), you can trigger unused dialogue and events for Uruk captains. Examples include captains reacting to seeing Talion after a long absence, or a captain being "humbled" after losing a fight. Not accessible normally.
3. Developer's Note Room: In the Forge Tower in Udûn, there is a hidden room behind the waterfall. Enter by walking through the waterfall while in Wraith World. Inside, you find a carving of the Monolith logo and a note from the developers: "For those who seek beyond the shadows. - Team Monolith". This is a genuine developer-intended secret.
4. The Unkillable Captain: There is a rare Nemesis captain named "Ushgû the Unkillable" who can only be killed by a specific sequence: you must first shame him three times (using the Brand ability), then kill him with a fire-based kill. If you kill him any other way, he returns stronger. This is a scripted encounter that tests player mastery of the Nemesis System.
5. Secret Rune: The "Wraith's Rune" is a legendary rune that grants infinite focus during Wraith World. It is hidden in a cave in the Núrn region behind a wall that requires a Caragor's roar to break. You must lure a Caragor to the wall and have it roar to destroy the barrier. This rune is not marked on any map.
6. Additional Post-Game Content: After the credits, a new mission appears called "The Shadows of Mordor". Completing it unlocks the ability to replay boss fights from the main campaign with all your abilities. This was added in a patch and is considered secret until discovered.
Platform-Specific Notes
Important Notes
For more detailed walkthroughs on collecting Ithildin or finding all Artifacts, refer to the [Collectibles](/wiki/Shadow_of_Mordor/Collectibles) section of the guide.