Minecraft
## Game Introduction: Minecraft ### Genre Minecraft is a sandbox survival game that blends elements of action-adventure, open-world exploration, and creative construction. Its genre-defining mechanics have spawned the "survival-crafting" and "voxel-based building" subgenres. ### Developer & Publis...
Download & Installation
Comprehensive Minecraft Download & Installation Guide
Minecraft is available on a wide range of platforms, each with its own download and installation process. This guide covers all official sources, step-by-step instructions, system requirements, account requirements, first-launch setup, common errors, and post-installation checks.
Important Notes Before You Start
- Minecraft is not available on Steam or Epic Games Store. The official PC versions are obtained through the Minecraft Launcher (from minecraft.net) or the Microsoft Store (for Windows 10/11).
- A Microsoft account is required to play the Java Edition and Bedrock Edition on PC, as well as on consoles and mobile.
- The game offers two main editions: Java Edition (original, mod-friendly) and Bedrock Edition (cross-platform, includes Marketplace). On consoles and mobile, you get the Bedrock Edition.
- Prices vary by platform; always purchase from official sources to avoid scams.
---
1. Download Sources by Platform
| Platform | Official Source | Edition |
|---|---|---|
| Windows PC | [minecraft.net](https://www.minecraft.net) or Microsoft Store | Java & Bedrock (separate purchases) |
| macOS | [minecraft.net](https://www.minecraft.net) | Java Edition only |
| Linux | [minecraft.net](https://www.minecraft.net) (via .deb/.rpm or manual install) | Java Edition only |
| Xbox One/Xbox Series X\ | S | Microsoft Store on console |
| PlayStation 4/5 | PlayStation Store (PSN) | Bedrock Edition |
| Nintendo Switch | Nintendo eShop | Bedrock Edition |
| iOS / iPadOS | App Store | Bedrock Edition (Minecraft) |
| Android | Google Play Store or Samsung Galaxy Store | Bedrock Edition (Minecraft) |
2. System Requirements
Java Edition (PC, Mac, Linux)
- Minimum (Java Edition):
- Recommended:
- Windows 10/11 (Bedrock):
- Consoles: Built-in hardware is sufficient; no specific requirements.
- Mobile (iOS/Android):
- Microsoft Account: Essential for all modern versions (Java and Bedrock). You can create one for free at [account.microsoft.com](https://account.microsoft.com).
- Mojang Account: Legacy accounts (pre-2020) are being migrated to Microsoft accounts. If you have an old Mojang account, you will be prompted to migrate.
- Consoles: You need the respective platform account (Xbox Live Gold not required for playing alone, but needed for online multiplayer on Xbox; PlayStation Plus required on PS4/PS5 for online multiplayer; Nintendo Switch Online required for online play).
- Mobile: No additional account beyond your Apple ID or Google account, but you must sign in with a Microsoft account online to access realms, servers, or cross-play.
- CPU: Intel Core i3-3210 or AMD A8-7600 (or equivalent)
- RAM: 4 GB
- GPU: Intel HD Graphics 4000 or AMD Radeon R5 series
- Storage: At least 1 GB for game files (plus extra for worlds)
- OS: Windows 10/11 (64-bit), macOS 10.14 Mojave or newer, Linux (any modern distribution)
- CPU: Intel Core i5-4690 or AMD A10-7800
- RAM: 8 GB or more
- GPU: NVIDIA GeForce 700 Series or AMD Radeon Rx 200 Series
- Storage: 4 GB SSD recommended
- OS: 64-bit OS
Bedrock Edition (Windows 10/11, Consoles, Mobile)
- CPU: Intel Celeron J4105 or AMD FX-4100 (minimum)
- RAM: 4 GB (minimum), 8 GB recommended
- GPU: Intel HD Graphics 4000 or better; supports DirectX 12
- Storage: 1 GB
- iOS: iPhone 5s or newer, iPad Air/Mini 2 or newer, iPod touch 6th gen or newer; iOS 12.0+.
- Android: Android 5.0 (Lollipop) or later, at least 2 GB RAM recommended.
---
3. Step-by-Step Installation
A. Windows PC (Java Edition via Minecraft Launcher)
1. Visit [minecraft.net](https://www.minecraft.net) and click "GET MINECRAFT".
2. Select Computer and then Java Edition.
3. Click “Download Launcher” (MinecraftInstaller.msi).
4. Run the downloaded installer. Follow prompts (accept license, choose install location, or use default).
5. The installer will place the Minecraft Launcher on your desktop.
6. Launch the launcher; sign in with your Microsoft account.
7. The launcher will download the latest Java Edition version automatically. You can also select specific versions.
8. After download completes, click Play.
B. Windows PC (Bedrock Edition via Microsoft Store)
1. Open the Microsoft Store app.
2. Search for “Minecraft for Windows + Bedrock Edition” (or just “Minecraft”).
3. Select the correct edition: Minecraft for Windows (Bedrock Edition).
4. Click Get or Buy (price displayed).
5. Sign in with your Microsoft account if prompted.
6. The store will download and install the game. You can launch it from the Store or Start menu.
C. macOS
1. From [minecraft.net](https://www.minecraft.net), download the Mac launcher (Minecraft.dmg).
2. Open the .dmg file and drag the Minecraft Launcher icon into your Applications folder.
3. Launch the game from Applications; sign in with your Microsoft account.
4. The launcher will download Java Edition. Click Play.
D. Linux
1. Use the official .deb (Ubuntu/Debian) or .rpm (Fedora) installer from [minecraft.net](https://www.minecraft.net).
2. For other distributions, download the universal .tar.gz archive: extract and run `minecraft-launcher` executable.
3. Ensure Java (usually OpenJDK 17 or later) is installed. If not, install via your package manager (e.g., `sudo apt install openjdk-17-jre`).
4. Launch the launcher, sign in, and play.
E. Xbox Console
1. Press the Xbox button to open the guide.
2. Select Microsoft Store (or search for Minecraft).
3. Search for “Minecraft”. Select the Bedrock Edition (listed as “Minecraft for Xbox”).
4. If not already owned, purchase (or install if you have Game Pass).
5. Click Install. The game will download to your console.
6. Launch from My games & apps.
F. PlayStation 4/5
1. On the home screen, go to PlayStation Store.
2. Search for “Minecraft”.
3. Select the game (Bedrock Edition).
4. Click Download (if purchased previously) or Buy.
5. The download will start automatically. You can find it in your library.
6. Launch the game.
G. Nintendo Switch
1. From the home menu, open Nintendo eShop.
2. Search for “Minecraft”.
3. Select the game and click Proceed to Purchase (or Redownload if already bought).
4. Complete payment if needed. The download will begin.
5. Once downloaded, the icon appears on your home screen.
H. iOS / iPadOS
1. Open the App Store. Search for “Minecraft”.
2. Tap Get (or the cloud icon to re-download).
3. Authenticate with Face ID/Touch ID or password.
4. The app will download and install automatically.
5. Launch from home screen.
I. Android
1. Open the Google Play Store.
2. Search for “Minecraft”. Ensure it’s by Mojang (publisher).
3. Tap Install (or Buy if not owned).
4. Accept permissions. The download will begin.
5. After installation, tap Open.
---
4. Account Requirements
---
5. First Launch Setup
1. Launcher Login: After installing the launcher, sign in with your Microsoft account.
2. Select Edition (Java Launcher): The launcher allows you to choose between Java Edition, Bedrock Edition (if purchased), and Dungeons. Choose the one you want to play.
3. Download Latest Version: The launcher downloads the latest release. You can also install older versions or snapshots.
4. Adjust Settings: Before playing, go to Options → Video Settings to set render distance (recommend start at 12), graphics quality (Fast or Fancy), and resolution matching your monitor.
5. Audio: Check volume levels.
6. Language: Change if needed in Options → Language.
7. Skin: You can change your character skin in the launcher or in-game.
8. First World: Click Singleplayer → Create New World → set a name, game mode (Survival or Creative), difficulty, and click Create New World.
---
6. Common Installation Errors and Fixes
| Error | Platform | Fix |
|---|---|---|
| “Java is not found” | PC | Install Java 17 or later from [java.com](https://www.java.com) (or use OpenJDK). Ensure it is added to PATH. |
| Launcher fails to install | Windows | Run the installer as Administrator. Disable antivirus temporarily if it quarantines the file. |
| “Unable to update the Minecraft Native Launcher” | Windows | Delete the `.minecraft` folder (back up saves first) and relaunch launcher. Or reinstall the launcher. |
| Black screen on launch | PC | Update graphics drivers. On Windows, try running the launcher in compatibility mode (Windows 8). |
| Download stuck at 0% | Any | Check internet connection. Disable VPN or proxy. For Microsoft Store, run the Store troubleshooter. |
| Game crashes on startup | PC | Allocate more RAM: In launcher → Installations → Edit profile → JVM Arguments: add `-Xmx4G` (adjust number). Also disable mods if any. |
| “Not enough space” | Console/Mobile | Free up storage: delete unused games or apps. Move screenshots to cloud. |
| Microsoft Store error 0x80073CF0 | Windows | Reset Store cache: `wsreset.exe`. Or repair the Store via Settings → Apps → Microsoft Store → Advanced options → Reset. |
| PlayStation “Cannot install” | PS4/PS5 | Rebuild database: boot into Safe Mode and select “Rebuild Database”. Ensure system software is updated. |
| Nintendo Switch error 2002-2060 | Switch | Update console firmware and redownload from eShop. Check SD card if used. |
| iOS/Android “Download Failed” | Mobile | Check WiFi, clear App Store/Play Store cache. On Android, go to Settings → Apps → Google Play Store → Storage → Clear Cache. |
7. Post-Installation Verification
1. Launch the game and verify it opens without errors.
2. Check version number in the main menu (bottom left). It should match the latest release (e.g., 1.20.4).
3. Create a test world and move around to ensure no graphical glitches or lag.
4. Test sound by breaking a block or hitting a mob.
5. Verify multiplayer if possible: try connecting to a public server (e.g., `play.hypixel.net`) to confirm online functionality.
6. Save and exit properly. Check that your world saves correctly.
7. Update check: The launcher will auto-update. You can manually check for updates on PC by clicking “Installations” → “Latest release”.
---
8. Additional Tips
- Back up your worlds: Regularly copy the saves folder (`%appdata%\.minecraft\saves` on Windows) to an external drive.
- Mods and resource packs: Only download from trusted sources like CurseForge or Planet Minecraft. Always back up before installing.
- Bedrock vs Java: If you want mods (Forge/Fabric) or more advanced gameplay, choose Java Edition. For cross-play (Xbox, Switch, mobile), choose Bedrock.
- Multiple accounts: The launcher can store multiple Microsoft accounts; switch via the profile icon.
- Offline mode: You can play offline after the first login, but some features (realms, servers) require internet.
---
This guide should cover all legitimate ways to download and install Minecraft. Always purchase from official sources to avoid malware. Enjoy building and exploring!
Game Introduction
Game Introduction: Minecraft
Genre
Minecraft is a sandbox survival game that blends elements of action-adventure, open-world exploration, and creative construction. Its genre-defining mechanics have spawned the "survival-crafting" and "voxel-based building" subgenres.
Developer & Publisher
- Developer: Mojang Studios (formerly Mojang AB), a Swedish game developer founded by Markus "Notch" Persson. Since 2014, Mojang has been a subsidiary of Xbox Game Studios (Microsoft).
- Publisher: Xbox Game Studios (Microsoft) on all platforms (console, PC, mobile), except for certain older/regional versions.
- Pre-release: Minecraft was first publicly available on May 17, 2009, as an alpha version (Classic).
- Official full release: November 18, 2011, following a beta period.
- Key editions: Java Edition (original), Bedrock Edition (unified cross-platform version released in 2017), and legacy console editions (discontinued).
- Major updates: The game receives continuous free content updates (e.g., Caves & Cliffs, The Nether Update, Trails & Tales).
- PC: Windows, macOS, Linux (Java Edition); Windows 10/11 (Bedrock Edition via Microsoft Store)
- Consoles: Xbox One, Xbox Series X|S, PlayStation 4, PlayStation 5, Nintendo Switch
- Mobile: iOS, Android (Bedrock Edition)
- Other: Amazon Fire TV, Raspberry Pi (legacy), Windows Mixed Reality VR, Oculus Rift (via Bedrock), etc.
- Players start in a world with no memory or context.
- They must gather resources, build shelter, and survive against hostile creatures that appear at night.
- The ultimate goal (if chosen) is to defeat the Ender Dragon in a dimension called The End, which triggers a simple end credit sequence written as a philosophical poem. After defeating the dragon, an exit portal appears, and the player can choose to return to the Overworld – but the game continues indefinitely.
- The Nether: A hellish, cavernous realm filled with lava, dangerous mobs, and unique resources.
- The End: A barren, void-like dimension where the Ender Dragon resides.
- Total player agency: No forced goals, quests, or linear paths.
- Procedural generation: Every world is unique, ensuring infinite replayability.
- Emergent gameplay: The player creates their own stories through building, exploring, and surviving.
- Scalable complexity: Easy to start (punch a tree, make a crafting table) but offers deep systems (redstone engineering, enchanting, potions).
- Multiplayer connectivity: Join friends’ servers or massive public communities (like Hypixel).
- Casual players: Children, families, and anyone who enjoys relaxed building and exploration.
- Hardcore builders: Architects, engineers, and artists who create massive structures, pixel art, or redstone machines.
- Survival enthusiasts: Players who enjoy tough, resource-management gameplay with perma-death options (Hardcore mode).
- Modding community: Tech-savvy users who modify the game with custom content (Java Edition).
- Survival Mode: Players must gather resources, maintain health/hunger, and fend off hostile mobs. Crafting and exploration are essential.
- Creative Mode: Unlimited resources, flight, and invulnerability – pure building and experimentation.
- Adventure Mode: Designed for custom maps with restricted interactions (e.g., cannot break blocks without proper tools).
- Spectator Mode: Ghost-like mode that allows flying through terrain and viewing the world from any perspective.
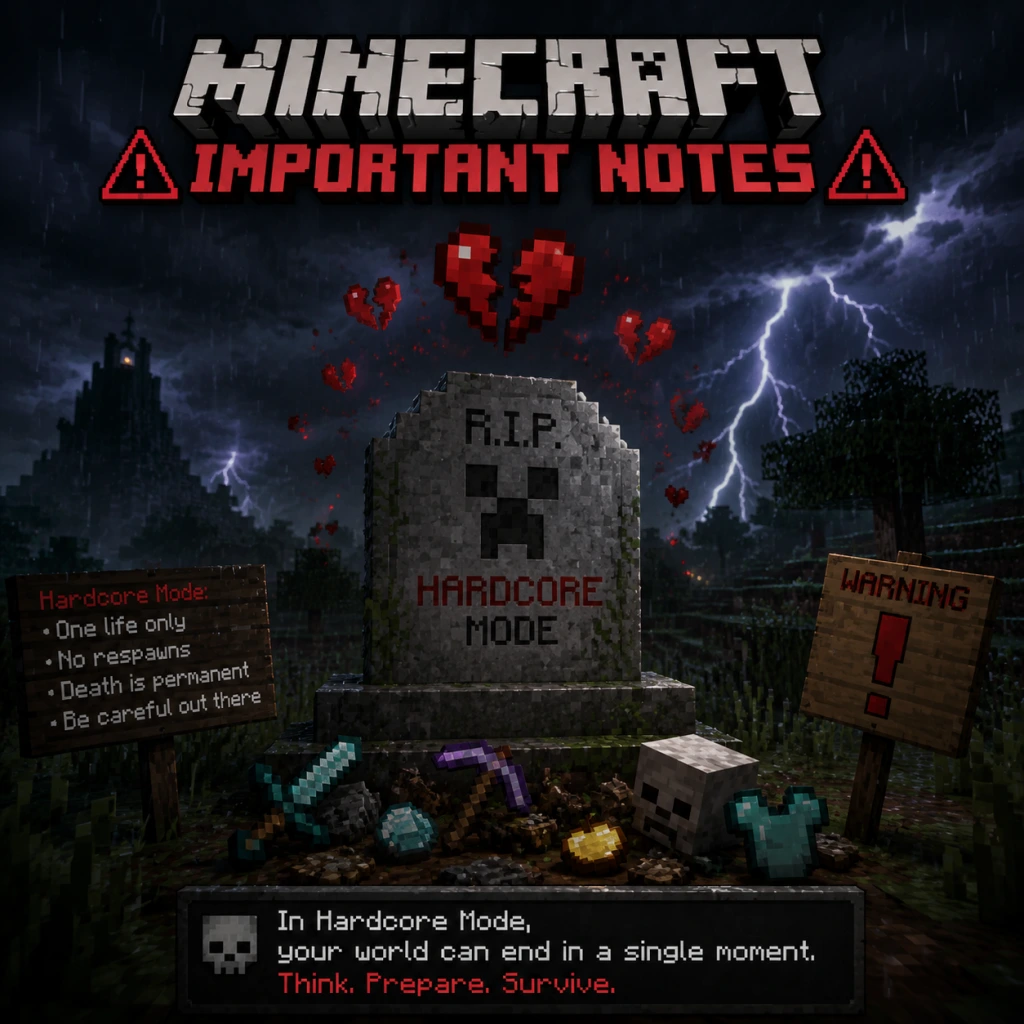
- Hardcore Mode: A variant of Survival with permadeath and locked difficulty (Hard).
- Offline: All game modes can be played fully offline in single-player (no internet connection required after installation).
- Online: Multiplayer is supported via:
- Cross-platform multiplayer: Bedrock Edition supports play across PC, console, mobile, and VR.
- Minecraft Marketplace (Bedrock Edition): A store for community-created maps, skins, texture packs, and mini-games – many free, some paid.
- Minecraft Dungeons: An action-adventure spin-off released as a separate game (with DLCs like “Jungle Awakens” and “Flames of the Nether”).
- Minecraft Legends: A real-time strategy spin-off released in 2023.
- Minecraft Education Edition: A classroom-focused version with lesson plans (available via subscription).
Release Timeline
Platforms
Minecraft is available on virtually every modern gaming platform:
Story Overview
Minecraft does not have a traditional narrative-driven story. Instead, it presents a player-defined emergent narrative set in a procedurally generated world. The only "story" is the optional progression path:
Setting
The game takes place in a blocky, 3D world made entirely of 1x1 meter cubes (voxels). The primary dimension is the Overworld, which features diverse biomes (forests, deserts, mountains, oceans, etc.). Two other dimensions exist:
Main Characters
Minecraft has no named protagonists or NPCs with backstories. The player controls a customizable character (default "Steve" or "Alex") who is essentially a silent avatar. The only significant "character" is the Ender Dragon (the final boss), which serves as a non-verbal adversary. Villagers (passive NPCs) and Illagers (hostile variants) inhabit structures but lack dialogue or personality.
Core Appeal
Minecraft’s appeal lies in its boundless creativity and freedom:
Target Audience
Game Modes
Minecraft offers several core modes:
Online/Offline Support
- Local LAN: Up to 8 players connected on the same network.
- Online servers: Thousands of public servers or private servers run by players.
- Realms: Mojang-hosted subscription-based servers for small groups (up to 10 players).
DLC & Expansions Overview
Minecraft’s core game receives regular free updates (themes like “Caves & Cliffs” or “The Wild Update”) that add new biomes, mobs, and features. Paid content includes:
No traditional paid expansions exist for the base Minecraft game itself (aside from cosmetic DLC).
What Makes This Game Unique?
Minecraft stands apart due to its voxel-based, modifiable world that encourages unscripted creativity. It is one of the best-selling video games of all time (over 300 million copies as of 2023) and has become a cultural phenomenon. Its simplicity (punch a tree, build a shelter) belies immense depth in crafting recipes, redstone circuitry, and enchanting. The game’s open-endedness has led to a massive community that creates custom mods, maps, and adventure maps, effectively extending the game infinitely. Minecraft also pioneered the cross-platform unified experience (Bedrock Edition) and remains a benchmark for family-friendly, accessible, and limitless gaming.
Getting Started
Getting Started: A Brand-New Player's Guide to Minecraft
Welcome to Minecraft! This guide is designed to get you through your first hour, avoid common frustrations, and start your survival journey with confidence. Whether you're on PC, console, or mobile, the core principles are the same. Let's begin.
Character Creation (Skins & Appearance)
Minecraft does not have a character creation system that affects gameplay. Your character is always Steve (or Alex for Bedrock/Java Edition default). However, you can customize your appearance by changing your skin (the texture on the model).
- Java Edition: On the official website (minecraft.net) or using third-party tools, you can upload a custom .png file.
- Bedrock Edition (Windows 10/11, Xbox, PlayStation, Switch, Mobile): You can change your skin from the main menu's "Dressing Room" – some are free, others require purchase.
- For beginners, the default skin is perfectly fine. Don't worry about this yet.
Controls Overview (All Platforms)
#### PC (Java & Bedrock)
| Action | Java Edition | Bedrock Edition |
|---|---|---|
| Move | WASD | WASD |
| Jump | Space | Space |
| Sneak | Left Shift | Left Shift (toggle with Ctrl?) |
| Attack / Break Blocks | Left Click | Left Click |
| Use / Place Blocks | Right Click | Right Click |
| Drop Item | Q | Q |
| Inventory | E | E |
| Chat | T | T |
| Pause / Menu | Esc | Esc |
| Sprint | Double-tap W (or Ctrl?) | Double-tap W (or hold ?) |
#### Console (PlayStation, Xbox, Nintendo Switch)
| Action | Default Control |
|---|---|
| Move | Left Stick |
| Look | Right Stick |
| Jump | A (Xbox/Switch), X (PlayStation) |
| Sneak | Left Stick press (or B? depends on edition) |
| Attack / Break | Right Trigger (RT) |
| Use / Place | Left Trigger (LT) |
| Inventory | Y (Xbox), Triangle (PS), X (Switch) |
| Pause / Menu | Start / + |
| Drop Item | Right D-pad (usually) – check settings |
| Sprint | Press left stick while moving (toggle) |
- Touch controls appear on screen. You can customize the layout in settings.
- Attack/Break: Tap and hold on blocks.
- Place/Use: Tap once.
- Sneak: Tap the crouch button (default bottom left).
- Jump: Tap the jump button (bottom right).
- Inventory: Tap the backpack icon.
- Sprint: Double-tap forward arrow or use auto-sprint option.
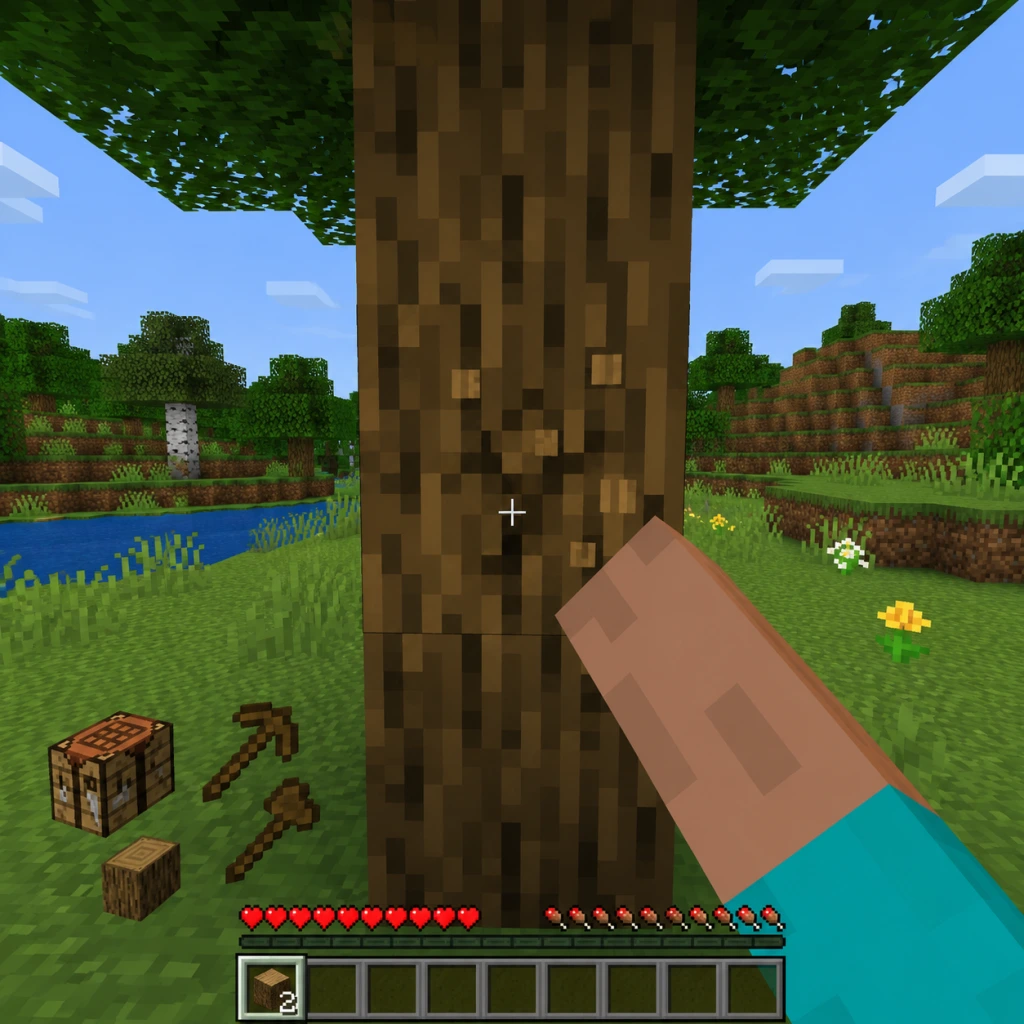
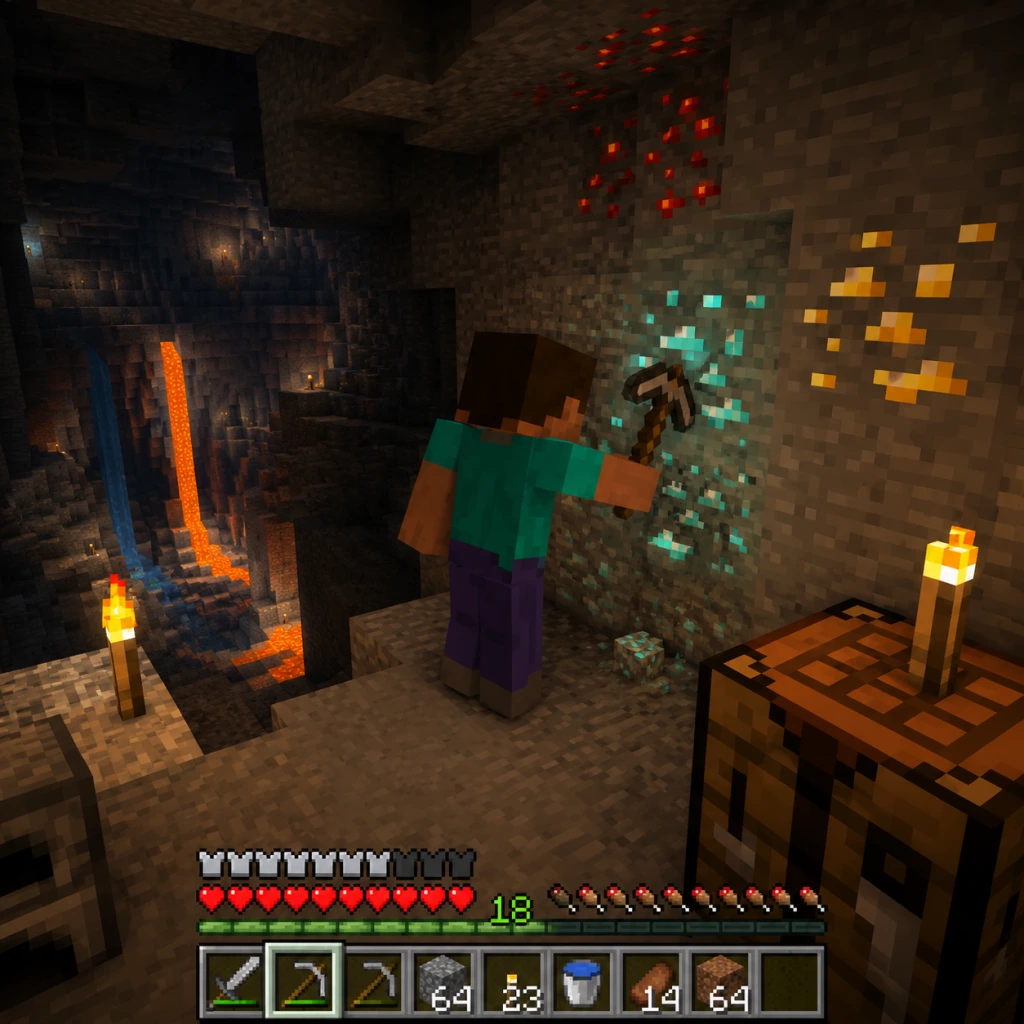
- Crosshair (center): Where you're looking. You break/place blocks here.
- Hotbar (bottom): 9 slots for quick access. Use number keys (1-9) on PC, D-pad on console, or scroll wheel/tap on mobile.
- Health & Hunger: Two bars at the bottom left. The hearts show your health (10 hearts = 20 HP). The drumsticks show hunger – when empty, you start losing health.
- Experience bar (bottom center, above hotbar): Shows XP (gained from mining, killing mobs). Not essential early on.
- Air bubbles (appears near health bar when underwater).
- Armor icons (above health when you wear armor).
- Inventory (press E on PC, Y on Xbox, Triangle on PS, X on Switch, backpack icon on mobile): 27 storage slots + crafting grid (2×2) + armor slots.
- Don't mine straight down – you may fall into lava or a deep cave.
- Don't punch a creeper (green hissing mob) – it explodes and kills you.
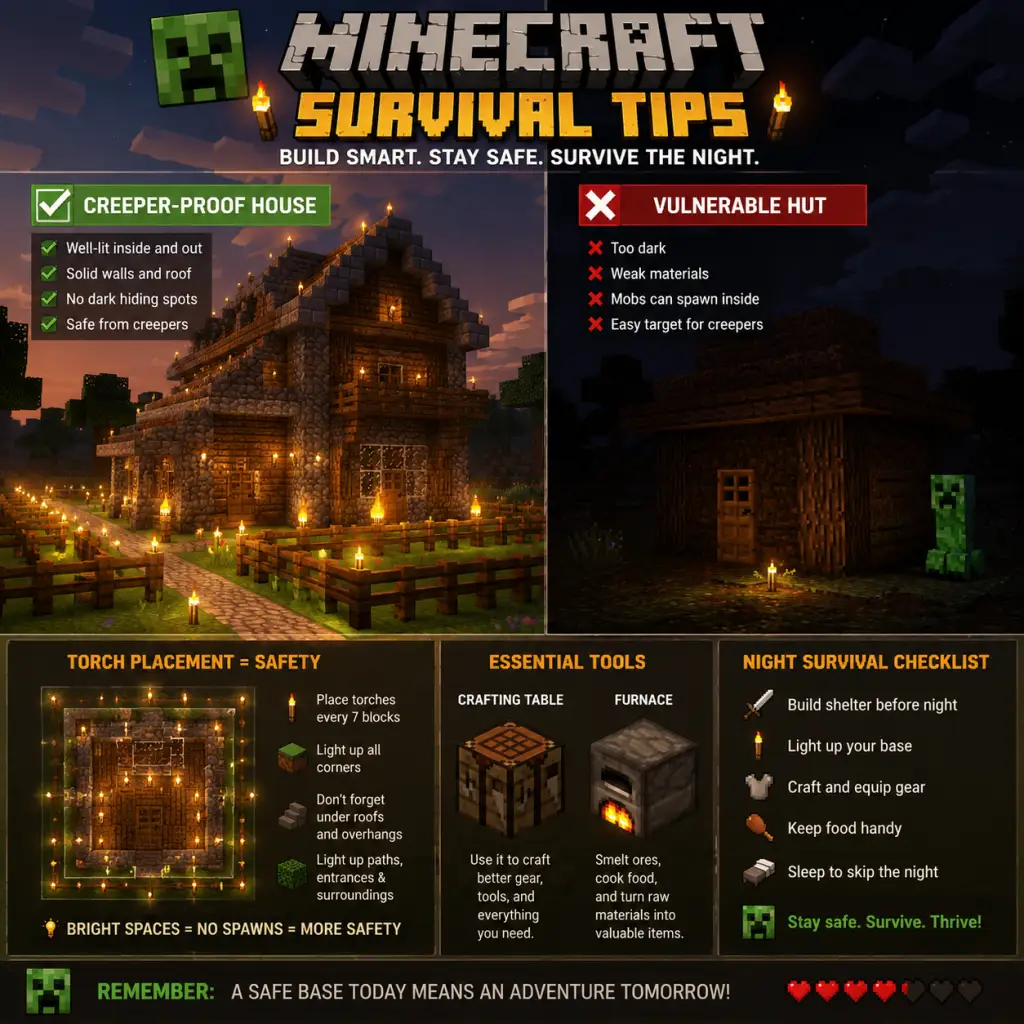
- Don't go into dark caves without torches – mobs spawn in darkness.
- Don't eat raw meat (chicken, pork) – it can give you food poisoning (hunger drain). Cook it in a furnace first.
- Don't attack a zombie with your fist – they hit hard. Use a sword.
- Don't wander too far from spawn – you might get lost. Build a landmark (tower of dirt) to find your base.
> Tip: On all platforms, you can change controls in the "Settings > Controls" menu. For keyboard/mouse, consider rebinding sprint to a comfortable key like Left Ctrl.
UI Overview
When you first start a new world, your screen looks like this:
Essential Early Objectives (First Hour Walkthrough)
Your first day in Minecraft (10 minutes long) is critical. Here's a step-by-step plan:
1. Spawn and Survey
- Look around. Note your surroundings: trees, water, animals, hills.
- Don't move far. Stay near spawn so you can find your way back.
2. Punch a Tree (Yes, literally)
- Aim at a tree trunk, hold left-click (or RT/tap) until it breaks.
- Collect at least 10 logs (any type: oak, spruce, etc.). Logs are brown with bark patterns.
3. Open Inventory & Craft Planks
- Press E (or inventory button).
- In the 2×2 crafting grid, place a log in any slot. You get 4 planks.
- Repeat until all logs are converted.
4. Craft a Crafting Table
- Fill the 2×2 grid with 4 planks (one in each slot).
- This creates a Crafting Table. Pick it up and place it on the ground (right-click/use on block).
5. Craft Basic Tools
- With the crafting table open (right-click it), you have a 3×3 grid.
- First, craft Sticks: place 2 planks vertically in a column (one above the other). Get 4 sticks.
- Then craft:
- Wooden Pickaxe (3 planks across top row, 2 sticks in middle column below).
- Wooden Axe (3 planks in one column, 2 sticks in middle and bottom of adjacent column – see recipe).
- Wooden Sword (2 planks in middle column, 1 stick below them).
- (Optional) Wooden Shovel (1 plank on top, 2 sticks below).
6. Mine 3 Stone Blocks
- Find a hill or cliff. Use your wooden pickaxe to mine cobblestone (gray block with cracks). You need at least 3.
- Stone is found underground or on mountain sides. It's lighter than dirt.
7. Upgrade to Stone Tools
- Back at your crafting table, make stone versions of pickaxe, axe, sword, and shovel using the same patterns but with cobblestone instead of planks.
- Stone tools are faster and last longer.
8. Build a Shelter Before Nightfall
- Night (7 minutes) brings hostile mobs: zombies, skeletons, spiders, creepers.
- You have 10 minutes in daytime. Use it!
- Simple shelter: dig a small hole in a hill (3 blocks deep, 1×2 hole), or build a small house with dirt/wood. Place a door (craft 6 planks in two vertical columns in crafting table) if you have planks.
- Minimum survival shelter: A 1×1 hole, 2 blocks deep, then block the top with dirt. You'll be safe from most mobs.
9. Create a Bed (Optional but Highly Recommended)
- If you find sheep (white fluffy animals), kill 3 for wool (drop 1-3 each). Craft a bed: 3 wool (any color) on top row, 3 planks on bottom row. Beds let you skip night and set your respawn point.
- If no sheep, don't worry – just stay safe in your shelter until dawn.
10. Survive the Night
- Wait inside your shelter. You can punch a hole to see outside but be wary of skeletons' arrows.
- If you have a bed, right-click it to sleep.
What to AVOID Early Game
Early Resource Priorities
| Resource | Priority | Why & How to Get |
|---|---|---|
| Wood | ★★★★★ | First block. Punch trees. Essential for tools, shelter, fuel. |
| Cobblestone | ★★★★☆ | After wood. Mine with pickaxe. Stone tools, furnace, stronger tools. |
| Coal | ★★★★☆ | Mine with pickaxe. Used for torches (lights up caves, prevents mob spawns) and furnace fuel. |
| Food | ★★★★☆ | Initially hunt animals (beef, pork, mutton, chicken). Cook them. Don't starve! |
| Iron Ore | ★★★☆☆ | Second day. Mine with stone pickaxe. Smelt ingots for iron tools, armor, buckets. |
| Wool | ★★☆☆☆ | For bed (skip night). Kill sheep (3). |
| Dirt | ★☆☆☆☆ | Easy to get. Used for filling holes or temporary structures. |
Common Beginner Mistakes
1. Not building a shelter on day one – The most frequent cause of death. Always have a safe place by nightfall.
2. Wasting wood on random structures – Save wood for tools, doors, and crafting tables. Use dirt for temporary builds.
3. Ignoring hunger – Your health doesn't regenerate unless your hunger bar is at least 9 drumsticks (18 out of 20). Always carry food.
4. Falling into water while mining – Avoid digging straight down, especially near oceans. Build a staircase instead.
5. Using the wrong tool – A pickaxe mines stone fast, but an axe chops wood. Using the wrong tool is slow and wastes durability.
6. Not making torches – Torches prevent mobs from spawning. Without them, your base or mine becomes a death trap. Place torches every 12 blocks.
7. Attacking creepers with melee – Creepers explode when close. Use a bow and arrow from a distance, or run away.
8. Leaving your inventory open while moving – In Java, you can walk while inventory is open. Watch out for cliffs.
9. Not naming your world – You'll have multiple worlds; name them something memorable (e.g., "First Survival").
10. Being afraid to die – Death sets you back to spawn with items lost. But you can always recover them if you die near your base. It's part of the learning.
Day-One Checklist
Complete these before your first night (within the first 10 minutes):
- [ ] Punch at least 10 logs.
- [ ] Craft planks from all logs.
- [ ] Craft a Crafting Table.
- [ ] Craft a Wooden Pickaxe.
- [ ] Mine at least 3 cobblestone.
- [ ] Upgrade to Stone Pickaxe.
- [ ] Craft a Wooden Sword.
- [ ] Find and kill 3 sheep (optional but ideal).
- [ ] Build a shelter (dirt hut, cave, or house).
- [ ] Place a bed (if you have wool) and sleep.
- [ ] Light up your shelter with torches (coal + stick).
- [ ] Cook any raw meat you have (make a furnace with 8 cobblestone).
- Expand your base.
- Mine for iron ore (found in caves at Y-levels < 64).
- Create a farm (wheat seeds from grass, carrots from villages) for sustainable food.
- Explore cautiously. Always bring torches, food, and armor.
What to Do After Day One
After surviving your first night, your priorities shift:
Remember: Minecraft is about learning through trial and error. Every death is a lesson. Enjoy your adventure!
Core Gameplay
Core Gameplay: The Complete Survival Journey
Minecraft’s core gameplay is a sandbox survival loop built around resource gathering, crafting, building, and exploration. Unlike linear games, Minecraft gives you full control over your objectives, but natural threats (hunger, monsters, environmental hazards) create a de facto progression path. Below, we break this path into four distinct tiers—Early Game, Mid Game, Late Game, and Endgame—with detailed guidance for each stage. All mechanics described are consistent across PC, console, and mobile editions (Bedrock/Java differences noted where relevant).
The Core Gameplay Loop
The foundation of every game session is the Day-Night Cycle:
- Day (10 minutes): Gather wood, stone, food, explore, and build. Mobs like sheep, cows, and chickens are passive; zombies, skeletons, and creepers burn in sunlight.
- Nighttime (7 minutes): Hostile mobs spawn in darkness. You must either sleep in a bed to skip night or fight/hide in a lit shelter.
- Melee Combat: Left-click (or trigger) to attack. Damage depends on weapon type and enchantments. Axes deal high damage but have slower attack speed; swords have balanced damage and speed; tridents can be thrown. A critical hit (jump-attack) deals 50% extra damage.
- Ranged Combat: Bows and crossbows fire arrows. Bows allow charging for more power/distance; crossbows can be fast-fired with fireworks or multi-projectile. Tridents with Impaling and Loyalty can be thrown and return.
- Blocking: Shields block up to 100% of frontal damage (including arrows). Right-click to raise.
- Mobs & AI: Zombies chase, skeletons shoot from distance, spiders climb, creepers explode, endermen teleport if looked at. Bosses (Ender Dragon, Wither) have unique attacks and phases.
- Interaction: Villagers trade emeralds for items; wandering traders offer exotic goods; tamed wolves/cats help in combat. Redstone components (levers, buttons, pressure plates) interact with the environment.
- Combat mastery: Learn strafing/bunny-hopping, shield timing, potion hotkeying.
- Building: From dirt shack to redstone contraptions and grand castles.
- Farming: Crop farms (wheat, carrots, potatoes), animal farms (cows, chickens for XP and materials), tree farms.
- Redstone: Create automated doors, item sorters, mob farms, flying machines, and calculators.
- Punch a tree, craft wooden pickaxe, mine 15+ cobblestone.
- Craft a crafting table, stone pickaxe, stone axe, stone sword.
- Hunt animals (sheep for bed, cows for leather, chickens for feathers & food). Gather wheat seeds from tall grass.
- Locate a safe position: a hill face to carve a shelter, a cliff overhang, or a village (if nearby).
- Before night: build a small enclosed shelter (at least 5x5x3 inside), light with torches (coal + stick). If you have 3 wool (from 3 sheep), craft a bed to skip the night.
- Surface coal and iron deposits.
- Caves (entrance) but don't go deep yet.
- Villages: loot chests (bread, seeds, iron ingots), claim a bed, take beds from houses. Be cautious of zombie villagers at night.
- Water bodies (for fishing with a crafted fishing rod).
- Craft a furnace (8 cobblestone) to cook iron ingots and smelt food.
- Upgrade to full iron armor (iron ingots + crafting table) if you find enough.
- Build a small wheat farm (hoe the dirt, water nearby, plant seeds).
- Optional: Craft a shield (wooden plank + iron ingot) for extra safety.
- Mining: Dig down to Y=11 (best for diamonds, iron, redstone). Use branch mining: main tunnel 2×1, side tunnels every 3 blocks. Avoid lava pools (place cobblestone to block). Gather at least 10-20 diamonds.
- Craft Diamond Gear: Diamond pickaxe (to mine obsidian), diamond sword, diamond armor (chestplate first). Use a bucket of water when near lava.
- Nether Preparation: Craft flint and steel, obsidian (20 blocks) for a nether portal (at least 4×5 frame). Bring iron armor (at minimum), a bow with many arrows, a fire resistance potion (if you found a pre-brewed one via dungeon loot), a shield, and food.
- Nether Exploration: Locate a Nether Fortress. Fight blazes (bow works; they shoot fireballs). Collect blaze rods (craft into blaze powder) and nether wart (found near stairs in fortress). Avoid ghasts (block their fireballs with a snowball or sword). Gather soul sand for base blocks.
- Brewing: Set up a brewing stand (blaze rod + cobblestone). Make awkward potion (nether wart + water bottle) then add blaze powder (Strength), ghast tear (Regeneration), or magma cream (Fire Resistance). Fire Resistance is critical for Nether roaming.
- End Preparation: Convert blaze rods to powder, combine with ender pearls (from Endermen killed while looking at them) to craft Eyes of Ender.
- Enchantment Table: Place 15 bookshelves around it (one block away) for level 30 enchants. Apply to diamond gear.
- Netherite Upgrade: Find ancient debris in Nether (Y=15, blast resistant). Smelt into netherite scrap, combine 4 scrap + 4 gold ingots to make netherite ingot. Use smithing table to upgrade diamond gear → netherite (gear keeps enchantments). Netherite is stronger, more durable, and floats in lava.
- Upgrade Elytra with Unbreaking III and Mending (via anvill). Combine with chestplate or elytra only (can’t wear both).
- Shulker Boxes: Put valuable items inside, then break box to keep contents, stack boxes in inventory.
- The Wither: Spawn four soul sand in a T shape, place three wither skeleton skulls on top. Summon in a confined space (underground or at bedrock ceiling) to prevent escape. Use Smite V on sword (deals 12.5 damage vs undead), bow with Infinity or arrows, milk bucket to cure wither effect. The Wither drops a Nether Star → craft a beacon.
- The Warden: Found in the Deep Dark (Y=-52 below). Do not summon unless prepared—it can kill in two hits with full netherite. Use wool to block vibrations, avoid running, use invisibility potions and sneaking. Best to not fight for early players. If fought, use a mace (new 1.21+ weapon) or bow with Power V and punch arrows.
- Ancient City: Under Deep Dark. Contains chests with Swift Sneak enchantment, echo shards, and a redstone room. The Warden guards the central portal frame (sculk catalyst). You can go full sneaking or break sculk shriekers carefully.
- Trial Chambers (1.21+): Multi-room challenge structures with spawners (trial spawners), vaults, and ominous trial keys. Farm heavy cores and mace enchantments.
- Mob Farms: Build a dark room high in the sky to spawn creepers, skeletons, zombies, spiders for gunpowder, bones, arrows, string. Use water channels and a drop chute to one-hit kill. XP from furnace smelting or mob farm spawners.
- Iron Farms: Use villagers and zombie to scare them, spawning iron golems. Produces iron ingots automatically.
- Villager Trading Hall: Capture villagers (using minecart) with all professions maxed out for cheap diamond gear, enchanted books, and emeralds.
- Beacon Effects: Build beacon pyramid with iron/gold/diamond/emerald blocks (at least 9 blocks for tier 1, 164 for tier 4). Activate with Nether Star. Provides area buffs like Haste (great for mining), Speed, Jump Boost (with feather falling), Resistance, Strength.
- Completionist Goals:
- Java Edition (PC): More game mechanics (quasi-connectivity for redstone, combat cooldown with weapon attack speed). Has modding support and advanced technical builds.
- Bedrock Edition (Console, Mobile, Windows 10): No combat cooldown (continuous attack), different redstone mechanics, and add-ons/behavior packs. May have slight differences in villager trading and structure generation.
Primary Loop:
1. Gather raw materials (wood, stone, iron, food).
2. Craft tools, weapons, armor, and blocks.
3. Build shelters, farms, and functional structures.
4. Explore caves, biomes, and generated structures.
5. Fight hostile mobs for XP, loot, and resources.
6. Improve gear through enchantments, potions, and upgrades.
This loop intensifies as you progress to new dimensions and face stronger threats.
Combat & Interaction Systems
Core Progression Systems
Tools & Weapons: Progress from wood → stone → iron → diamond → netherite. Each tier increases durability, mining speed, and damage.
Armor: Leather → golden → chainmail → iron → diamond → netherite. Higher tiers offer more damage reduction and knockback resistance.
Enchanting: Use an enchantment table (requires obsidian, diamonds, and bookshelves) to apply mostly random enchants. Anvils combine enchanted books (from librarian villagers or fishing) with items. High-level enchantments (Protection IV, Sharpness V, Mending) drastically improve gear.
Brewing (Potions): Requires blaze powder (from Nether) and a brewing stand. Potions include Healing, Strength, Fire Resistance, Invisibility, etc. Extended/upgraded versions need glowstone or redstone.
Beacons: Built with Nether Star (from Wither) and mineral blocks. Provide area effects like Haste, Speed, Jump Boost, Resistance, etc.
Advancements (Quests/Missions): Minecraft’s built-in progression system. Divided into categories (Minecraft, Nether, The End, Adventure, Husbandry). Examples: "Getting an Upgrade" (craft a pickaxe); "We Need to Go Deeper" (enter the Nether); "The End" (kill the Ender Dragon). Completing advancements gives no reward other than satisfaction and in-game achievements/achievement points.
Economy
Villager Trading: Villagers with professions (librarian, armorer, weaponsmith, etc.) offer trades. Emeralds are the currency. Early game: sell farm produce (wheat, carrots, potatoes) or sticks. Mid game: trade paper/books for emeralds; buy enchanted books and diamond gear. Late game: set up trading halls for max-level enchants (Mending, Unbreaking III).
Piglin Bartering: In the Nether, give gold ingots to piglins (not aggressive if you wear golden armor) to receive random items (fire resistance potions, ender pearls, gravel, etc.).
Wandering Traders: Spawn near player after some in-game days, sell specialty items (e.g., coral, small dripleaf) for emeralds.
Character / Build Growth
Your "character" grows through gear upgrades and skill mastery (player skill, not RPG stats).
---
Player Progression Tiers
Early Game (First Days)
Goal: Survive the first night, establish a basic base, obtain stone tools and a food source.
Day 1:
Combat: Avoid fighting at night unless necessary. If mobs approach your shelter, you can kill zombies with a stone sword (4 hits) to collect rotten flesh (emergency food) and XP. Skeletons are dangerous—use a shield or wall edge to block arrows.
Exploration: Explore the immediate area for:
Progression Steps:
End of Early Game: You have a lit base, a bed, iron tools (pickaxe, sword, axe), a stack of torches, a small food farm, and knowledge of nearby biomes. You are ready to explore caves and the deep underground.
---
Mid Game (Caves & Nether)
Goal: Obtain diamonds, enter the Nether, get blaze rods and ender pearls, upgrade gear with enchantments and diamond/netherite.
Activities:
Economy: Trade with villagers. Craft paper (3 sugarcane) → emeralds from librarian. Buy an enchanting table (if no obsidian) or enchanted books. Get Riptide from a hero? Actually, you can trade for Mending from a librarian (they may unlock after first trade).
Advanced Gear:
End of Mid Game: You have full enchanted diamond or netherite gear, a bow with Power IV, a stack of food, several Eyes of Ender, a supply of ender pearls, and a portal to the End. You are ready to fight the Ender Dragon.
---
Late Game (The End & Beyond)
Goal: Defeat the Ender Dragon, explore End cities, obtain Elytra and shulker boxes.
Steps:
1. Find the Stronghold: Throw Eyes of Ender—they float toward the nearest stronghold. Follow. Dig down to find the stronghold (stone bricks, mossy stone bricks, silverfish). Locate the End portal room (under a large staircase).
2. Activate Portal: Place Eyes of Ender in all 12 portal frames (each eye has 100% chance to fill the missing slot).
3. Fight Ender Dragon:
- Before going: remove your bed? Actually, reset spawn at a bed near portal. Bring building blocks, water bucket (to negate fall damage), good bow with many arrows (at least 2 stacks), ender pearls, pumpkin (wear on head to avoid Enderman aggression), diamond/netherite sword with Sharpness V.
- Strategy: Destroy all end crystals on obsidian towers (shoot with bow). Watch for dragon attacks—charge attack deals severe damage. Once crystals destroyed, target dragon’s head (use bow) or melee when perched. After dragon death, collect Dragon Egg (if desired) and access End gateways.
4. End Cities & Elytra: Jump through the gateway (or bridge across the void) to find End islands with cities. Inside chests: Elytra (wings), Shulker Boxes (portable storage), Enchanted Diamond gear, Beacons? (No, beacons aren’t there). Fly using Elytra + fireworks (firework rocket in offhand, press jump). Explore ships for Elytra and dragon head.
Post-Dragon Activities:
Exploration: Visit ocean monuments (kill elder guardians for sponge, use conduits for underwater breathing), woodland mansions (kill evokers for totem of undying), pillager outposts (for badges, capture captain for raid).
Character growth: Full netherite (optional), max enchantments on all gear, elytra with mending, shulker boxes, and a totem of undying in off-hand.
---
Endgame (Ultimate Challenges)
Goal: Slay the Wither, conquer raids and ancient cities, build massive farms and complex redstone contraptions.
Boss Fights:
Advanced Structures:
Economy & Farms:
Endless Progression:
- All 122 advancements (Java) including "How Did We Get Here?" requiring 30+ status effects simultaneously.
- Building a mega-base spanning multiple chunks.
- Mastering redstone: automatic sorting systems, flying machines, item elevators, mob switches.
- Conquering all biomes and structures.
Endgame Mindset: There is no final ending. The game continues infinitely. Most players set personal goals: building a city, creating an automated farm for every resource, or defeating the Warden without cheese. The Endgame is about leveraging your vast knowledge and resources to automate, build, and explore without limitation.
---
Platform-Specific Notes:
This progression guide provides a structured path, but remember—Minecraft’s magic lies in deviating from the path and creating your own adventures!
Game Tips
Comprehensive Minecraft Game Tips Guide
Whether you're punching your first tree or planning a megabase, these tips will help you survive, thrive, and master Minecraft. Tips are organized by category and include beginner fundamentals, intermediate strategies, and advanced optimizations.
---
1. Combat Tips
#### Beginner: Master the Timing of Attacks
- Explanation: In Java Edition 1.9+ and Bedrock Edition, swords and axes have a cooldown. Spamming attack deals minimal damage. Wait for the cooldown indicator (sword reticle or animation) to fully reset before attacking for maximum damage.
- Why it works: A fully charged critical hit (while falling) does 150% damage. For example, a diamond sword deals 7 damage normally and 10.5 on a crit. Mastering the cooldown doubles your DPS.
- When to use: Every melee encounter – zombies, creepers, skeletons, and especially the Ender Dragon and Wither.
- Explanation: Right-click with a shield to block most incoming damage (up to 100% from arrows, 66% from melee). Block just before a creeper explosion to reduce damage to 0 and prevent knockback.
- Why it works: Shields negate skeleton arrows entirely and can save you from fatal creeper blasts. In PvP, a well-timed block can absorb a critical hit and let you counter-attack.
- When to use: Always have a shield in your off-hand when exploring caves or fighting ranged enemies. Practice blocking projectiles – you can even block blaze fireballs.
- Explanation: The sweep edge enchantment creates a sweeping attack that damages multiple enemies when you attack while moving. Combine with critical hits (jump and attack) to hit a group for massive burst damage.
- Optimization: Use a sword with Sweeping Edge III and Sharpness V. Sprint, jump, and swing to hit all mobs in a 2-block radius for ∼10 damage each.
- When to use: Hordes of zombies, piglin brutes, or during a raid. Avoid in tight spaces (sweep may hit unintended mobs or players).
- Explanation: Craft a compass (iron ingots + redstone) to always point to world spawn. Use a map (paper + compass) to fill in explored areas. Mark your home base with a waypoint (e.g., a tall tower of cobblestone).
- Why it works: Compasses prevent getting lost. Maps reveal terrain and show where you've been. Without them, desert, ocean, or dense forest disorientation can waste hours.
- When to use: Carry a compass and a paper map on every major expedition. Upgrade to an empty locator map (in Bedrock) to track other players.
- Explanation: Build a nether portal in the Overworld, go to the Nether, then break the bedrock ceiling (in Java Edition using glitches like ender pearl + piston). Build a portal on the roof – coordinates are divided by 8, so 1 block in the Nether = 8 in the Overworld.
- Why it works: The Nether roof has no lava oceans, few ghasts, and you can build unlimited blue ice highways. A 1000-block Overworld journey becomes 125 blocks in the Nether.
- When to use: For long-distance travel (biome hunting, village finding, or connecting bases). Requires a few early-game materials and a bit of practice.
- Explanation: Before massive builds, pre-generate chunks using world-border or mods like Chunky. On servers, use `/forceload add` to keep chunks active.
- Why it works: Pre-generating eliminates lag from loading new chunks while exploring. For redstone contraptions or farm designs, test in pre-generated areas to avoid performance dips.
- When to use: Large servers or single-player worlds with mega-builds. Also useful for ensuring specific biomes are loaded before creating important farms.
- Explanation: Punch a tree (wood) -> craft planks -> craft crafting table -> make wooden pickaxe -> mine stone -> stone tools. Then dig down to y=11 for iron and diamonds.
- Why it works: This sequence is the most efficient path to iron tools in under 2 minutes. Wooden tools break stone, but stone tools are faster and more durable.
- When to use: Every new world start. Do not skip to iron without making a full set of stone tools first – you'll waste time.
- Explanation: Dig a main tunnel at Y=11 (just above lava level). Mine two high, one wide, and branch off every 3 blocks left and right. This maximizes block exposure per chunk.
- Why it works: Diamonds appear between Y=1 and Y=15, most commonly at Y=11. Lava lakes spawn at Y=10, so Y=11 avoids flooding. One branch line covers ∼80% of all ores in a chunk.
- When to use: Once you have a stone pickaxe and at least 16 torches. Carry water buckets to turn lava into obsidian.
- Explanation: Use observer blocks to detect bamboo growth and pistons to break it automatically. Connect to a hopper clock to feed a composter for bone meal, or use a furnace array for smelting fuel.
- Why it works: Bamboo grows extremely fast – 64 bamboo per hour per plant in optimal conditions. A single observer-piston setup generates enough fuel for ∼30 furnace operations per minute.
- When to use: For infinite fuel without coal mining, or as a renewable bone meal source for crop farms. Extremely early-game (dirt + bamboo + redstone + piston).
- Explanation: Build a 10x10 floor of any material (wood planks, stone bricks). Add walls 3 blocks high, a roof (slabs or stairs), door, windows (glass panes). Use accent colors for trim (spruce logs for corners).
- Why it works: A box is fast and functional. Adding depth (e.g., window frames with trapdoors, overhanging roof) transforms it from ugly to acceptable. You can always expand later.
- When to use: First night shelter, early base, or temporary house while scouting location.
- Explanation: Place upside-down stairs for a flat ceiling, or full block stairs for slanted roofs. Slabs make half-height decorations like window sills, fences, or pathways.
- Why it works: Stairs and slabs create curves and depth. A roof made of stairs is structurally realistic and looks professional. Slabs prevent mob spawning (mobs cannot spawn on slabs that are bottom-half).
- When to use: All builds after the first night. Experiment with different stair materials (stone brick stairs for medieval, prismarine stairs for underwater).
- Explanation: Use pressure plates + redstone dust to open iron doors. For hidden entrances, use sticky pistons + bookshelves or stone blocks. Use daylight detectors to turn on lamps at night automatically.
- Optimization: Use a 2x2 piston door with a Jeb door design (smooth, compact). Connect to a lever inside for manual override.
- When to use: Bases with automation needs – prevents mobs from entering if you forget doors. Daylight detector lamps save coal for torches.
- Explanation: Find a village, give farmers bread (from wheat) or carrots. They breed. Trading with farmers (wheat for emeralds) is easy early emeralds.
- Why it works: Villagers can be infinite emerald generators. Each wheat trade (20 wheat = 1 emerald) can be automated with a hoe and a large field.
- When to use: As soon as you find a village, start a small wheat farm (9x9) and trade with farmers.
- Explanation: Infect a villager using a zombie, then cure it with a golden apple + weakness potion. The cured villager gives permanent discounts on trades (e.g., 1 emerald for 10 wheat instead of 20).
- Why it works: Discounts stack up to ∼70% off. Trading with cured villagers legendary items (e.g., Mending book for 10 emeralds). You can re-cure multiple times for even lower prices.
- When to use: After obtaining a brewing station and golden apples. Best done in a secure area (lead the zombie into a trap).
- Explanation: Create 3+ villagers in a 5x5 space with beds and workstations. Place a zombie in a glass enclosure within 16 blocks. Villagers panic, summoning golems, which fall into a lava blade and drop iron ingots.
- Why it works: Iron golems spawn every 35 seconds on average (Java) if conditions met. A simple farm yields ∼40 iron ingots per hour, enough for anvil repairs, beacon bases, or tools.
- When to use: Mid-game, once you have villagers and a zombie. Essential for large-scale building or trading.
- Explanation: Hotbar slots: 1 – Sword, 2 – Pickaxe, 3 – Axe, 4 – Shovel, 5 – Torches, 6 – Food, 7 – Water bucket, 8 – Blocks, 9 – Compass/Map. Shift-click items from chests into inventory quickly.
- Why it works: Muscle memory lets you switch tools without looking. Reduces panic during combat. Always have torches in hand when mining.
- When to use: From day 1. Adjust for specific tasks (e.g., replace shovel with shears for wool).
- Explanation: Build a storage hall where a main chest feeds items into a chain of hoppers. Each hopper leads to a chest with a filter (non-stackable items like tools don't get sorted cheaply; use item frames with a sample item on the chest).
- Why it works: Automatically organizes blocks (cobblestone, wood, ores) into separate chests. Saves hours of manual sorting. Can be expanded infinitely.
- When to use: When you have at least 20 iron for hoppers and a few double chests of materials. Build it near your main base.
- Explanation: Store shulker boxes in an ender chest. Each shulker box holds 27 slots; ender chest holds 27 boxes = 729 inventory slots accessible from anywhere across dimensions.
- Why it works: You can carry entire base resources in a single inventory slot. For example, a box of stone, a box of wood, a box of food – all in one ender chest. Great for building away from home.
- When to use: After defeating the Ender Dragon and raiding End cities for shulkers. Essential for large-scale building projects.
- Explanation: Place 15 bookshelves around your enchanting table (1 block away, leaving a 2-high gap for the table). This unlocks level-30 enchantments (max). Enchant a diamond pickaxe with Efficiency III or IV.
- Why it works: Level 30 enchants give the best possible enchantments (e.g., Fortune III, Mending). Efficiency on a pickaxe triples mining speed.
- When to use: As soon as you have 45 leather (books), 30 obsidian, and 15 diamonds for the table. First enchant priority: pickaxe or sword.
- Explanation: Use an anvil to apply enchanted books to tools/armor. Combine two books with same enchantment but different levels (e.g., Protection III + Protection II = Protection IV). Repair with diamonds/ingots only if necessary.
- Why it works: Anvil costs increase with each use. Plan a sequence: put all lower-level books on a book first, then apply to gear. For Mending, always put on final step to avoid repair cost escalation.
- When to use: Mid-game after obtaining many books from villagers or fishing.
- Explanation: Brew awkward potion (nether wart + water) then add ingredients: blaze powder for Strength, sugar for Speed, magma cream for Fire Resistance. Extend with redstone, improve with glowstone (except for instant health).
- Why it works: Strength II (+6 attack damage) and Speed II (+40% speed) make melee combat trivial. Fire Resistance is essential for Nether and End fights.
- When to use: Before boss fights (Ender Dragon, Wither), Nether exploration, large raids, or PvP.
- Explanation: Place 2 sticky pistons facing each other, 2 blocks apart. Attach stone blocks to pistons. Use redstone torches and levers to control. Lift the top pistons to hide the door.
- Why it works: A functional secret door that blends with walls. Adds security and cool factor. Uses only basic redstone.
- When to use: Any time you want a hidden entrance to your base.
- Explanation: Place observer blocks behind each sugarcane stem. When sugarcane grows to height 3, observer triggers a piston that breaks the top two sugar canes. They fall into water stream leading to a hopper.
- Why it works: Sugarcane grows up to 3 blocks. The farm harvests every growth cycle (18 minutes) automatically. Produces enough paper for books and maps.
- When to use: After you have a few pieces of sugarcane, a piston, and a redstone repeater.
- Explanation: Build a sorter that separates 16+ different item types. Uses locked hoppers with 41 items of the type in a filter slot. Redstone comparators output signal when hopper has 42+ items (the input item), unlocking a hopper to drop into chest.
- Why it works: Sorts items automatically into chests. Scalable – each module handles one item. Works with any stackable item (64, 16, or 1).
- When to use: When you have at least a double chest of cobblestone, iron for hoppers, and redstone. Essential for large bases.
- Explanation: Craft a bed (3 wool + 3 planks) to set spawn point and skip night. Craft a clock (gold + redstone) to tell time underground.
- Why it works: Beds prevent night mobs from overwhelming you. Clocks let you know when it's safe to surface (if you need daylight for certain tasks).
- When to use: Bed from first night. Clock once you have gold (lower priority).
- Explanation: Craft a lead (string + slimeball). Right-click an animal (horse, cow, sheep, etc.) to attach lead; right-click a fence to tie it. Use boat on water for faster transport.
- Why it works: Leads let you move animals without building elaborate pathways. Perfect for bringing animals to your base for breeding and food.
- When to use: When you need to relocate a stable or bring exotic animals (llamas, parrots) home.
- Explanation: Obtain an elytra from End ships. Equip in chestplate slot. Use fireworks (with gunpowder) to boost flight. Glide with careful angle to maintain speed. Combine with Unbreaking III and Mending.
- Why it works: Elytra allows fast travel across whole map. With a few stacks of fireworks, you can easily travel 10,000 blocks. Use slow fall potions for more control.
- When to use: After defeating the Ender Dragon. Essential for exploring far biomes and finding End cities.
- Explanation: In most servers, use /claim to protect your land. Never grief, steal from chests, or build within 50 blocks of another player's base without permission.
- Why it works: Prevents conflict. Server rules often ban griefing – violation may lead to ban. Building far from others also reduces lag.
- When to use: Always on public servers.
- Explanation: Install a minimap mod (e.g., Xaero's Minimap) or use server-friendly data packs that show waypoints for bases, biomes, and portals.
- Why it works: Reduces reliance on memory. Coordinates shared among teammates become easy to navigate.
- When to use: After getting comfortable with vanilla mechanics.
- Explanation: On a server, limit render distance to 8-12 chunks. Use `chunk-loader` mechanisms (e.g., hopper clock + dropper + redstone) to keep specific chunks loaded for farms. Avoid loading hundreds of chunks unnecessarily.
- Why it works: High chunk load kills TPS (ticks per second). Efficient chunk loading keeps server smooth while running farms.
- When to use: Server owners or players with large automated farms.
- Water Bucket MLG: Practice dropping a water bucket just before hitting the ground to survive any fall. Essential for building towers and mountains.
- F3 Debug Screen (Java): Press F3 to see coordinates (get y-level), biome, light level, and facing direction. Immensely useful for mining and navigation.
- Villager Hall for All Trades: Build a hall with 1 of each profession villager (farmer, fletcher, librarian, cleric, etc.) to unlock all tradeable items (enchanted books, arrows, lapis, redstone).
- Kill the Ender Dragon with Beds: In the End, place beds near crystal towers and explode them (right-click at night) to damage the dragon – one bed does ∼20 damage.
- Netherite Upgrade: Use 4 gold + 4 scrap to make a netherite ingot. Upgrade diamond gear by combining with netherite ingot in smithing table. Gear becomes lava-proof and has higher durability.
- Honey Bottles Cure Poison: Drink a honey bottle (from bee nest) to remove poison effect. Great alternative to milk.
#### Intermediate: Use a Shield and Block Timing
#### Advanced: Sweep Edge + Critical Hit Combos (Java)
---
2. Exploration Tips
#### Beginner: Always Carry a Compass or Map
#### Intermediate: The Nether Roof – Fast Travel Hub
#### Advanced: Pre-Generated Chunk File Manipulation (Java)
---
3. Resource Gathering Tips
#### Beginner: The "Punch Tree, Make Bench" Starter
#### Intermediate: Branch Mining at Y-Level 11
#### Advanced: Automatic Bamboo/Bone Meal Farms with Observers
---
4. Building Tips
#### Beginner: Start with a Simple 10x10 Box (But Make It Pretty)
#### Intermediate: Use Stairs and Slabs for Roofs and Details
#### Advanced: Redstone Automatic Door and Lighting Systems
---
5. Economy (Trading & Villager) Tips
#### Beginner: Villager Breeding for Emeralds
#### Intermediate: Zombie Villager Curing for Discounts
#### Advanced: Automatic Iron Farm (Villager-based)
---
6. Inventory & Storage Management
#### Beginner: Keep a "Tool Belt" Hotbar Setup
#### Intermediate: Bulk Storage with Sorting System (Hoppers + Chests)
#### Advanced: Shulker Box Storage System with Ender Chest
---
7. Enchanting & Potion Making
#### Beginner: The 15 Bookshelf Enchanting Setup
#### Intermediate: Combining Enchanted Books for Perfect Gear
#### Advanced: Potion Brewing for Combat (Strength, Speed, Fire Resistance)
---
8. Redstone Automation & Farms
#### Beginner: Simple Piston Door (2x2)
#### Intermediate: Automatic Sugarcane Farm (Observer-based)
#### Advanced: Multi-Item Sorter (Stackable)
---
9. Survival Utilities & Quality of Life
#### Beginner: Always Have a Bed and a Clock
#### Intermediate: Lead for Animal Transport
#### Advanced: Elytra + Firework Rocket for Infinite Flight
---
10. Multiplayer & Server Etiquette
#### Beginner: Respect Claims and Bases
#### Intermediate: Use Waypoint Mods/Data Packs
#### Advanced: Optimize Server Chunk Loading
---
11. Miscellaneous Pro Tips
---
Remember: Minecraft is about creativity and personal goals. Use these tips as a foundation, then adapt them to your own playstyle. Happy mining and crafting!
Game Settings
Game Settings: Minecraft
This guide covers every settings category in Minecraft (Java and Bedrock Editions), with recommendations for performance, quality, and accessibility. Pay special attention to settings marked ⚠️ Misconfiguration Risk.
1. Graphics Settings (Java & Bedrock)
#### Java Edition – Video Settings
| Setting | Option | Recommended (Low-End) | Medium-End | High-End | Notes |
|---|---|---|---|---|---|
| Graphics | Fancy / Fast | Fast | Fancy | Fancy | Fast disables transparency and smooth lighting. |
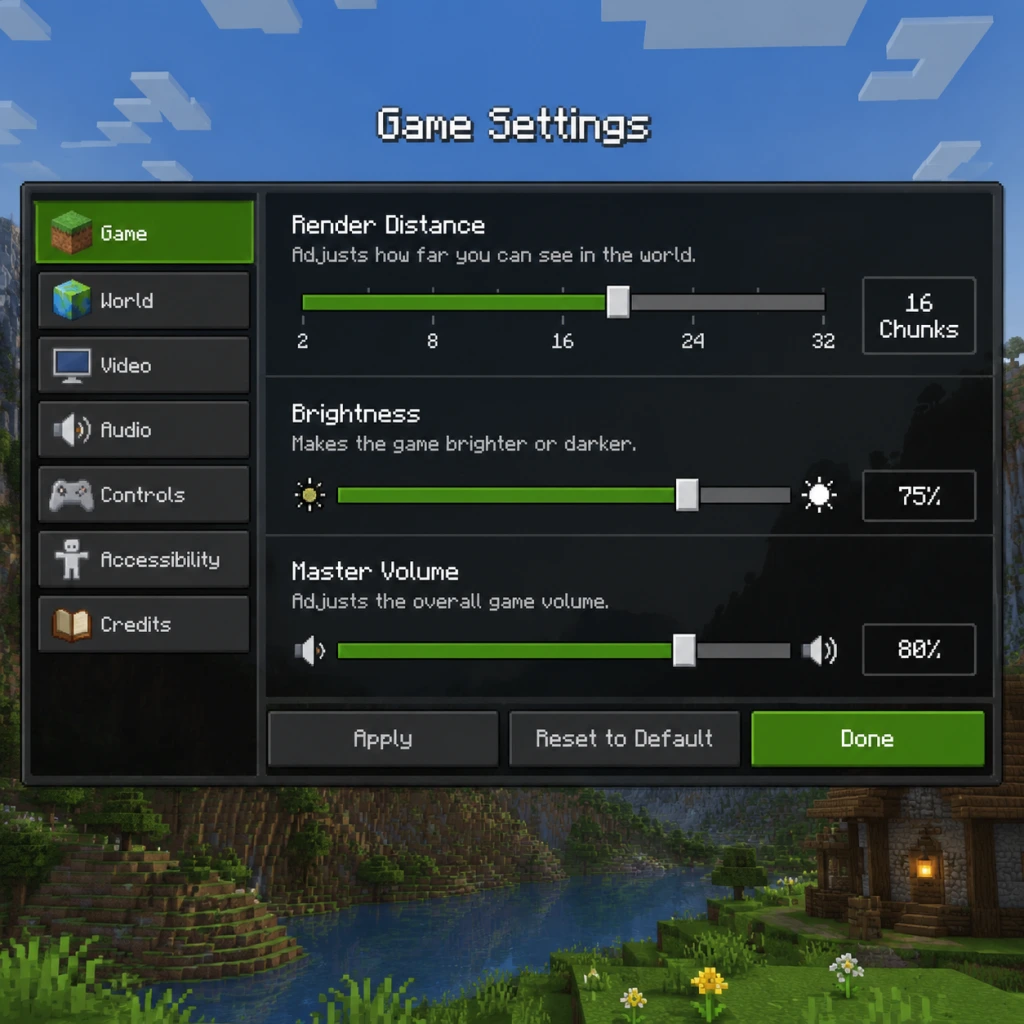
| Render Distance | 2–32 chunks | 4–8 chunks | 12–16 chunks | 20–32 chunks | ⚠️ Largest performance hit. Reduce if FPS drops. |
| Smooth Lighting | Off / Minimum / Maximum | Minimum | Maximum | Maximum | Affects lighting quality, minor performance cost. |
| Smooth FPS | Off / VSync / Adaptive | Off | Off | Off | Adaptive may help screen tearing. VSync locks to monitor refresh. |
| Brightness | Dark / Moody / Bright | Bright (best visibility) | Bright | Bright | Personal preference; does not affect performance. |
| GUI Scale | Auto / Small / Normal / Large | Auto | Auto | Normal | If UI is tiny, increase manually. |
| Fullscreen | On/Off | Off (windowed) | On | On | Fullscreen may improve FPS. |
| Advanced OpenGL | On/Off | ⚠️ Keep ON | ON | ON | Disabling can cause flickering with mods. |
| Mipmaps | 0–4 | 0–1 | 2 | 4 | Higher = sharper distant textures; low memory cost. |
| Entity Distance | 50%–500% | 100% | 200% | 300%+ | Controls entity render distance independent of chunks. |
| Clouds | Off / Fast / Fancy | Off | Fast | Fancy | Minimal impact. |
| Particles | Minimal / Decreased / All | Minimal | All | All | Setting to All can clutter screen in combat. |
- Graphics (Simple / Fancy / Ray Tracing) – Simple is best for low-end. Ray Tracing requires RTX GPU.
- Render Distance (4–24 chunks) – Similar scale to Java.
- UI Profile (Legacy / Classic / Pocket) – Adjusts button layout.
- Fancy Leaves – Off for performance.
- Beautiful Skies – On/Off. Off gives performance boost.
- Smooth Lighting (Off / On) – On for nicer shadows.
- Master Volume – 100% default. Adjust to taste.
- Music & Jukebox – Separate sliders. Music can be distracting; reduce to 50%.
- Sound Effects – Keep at 100% for critical game audio (monsters, blocks).
- Voice/Speech – Only in Bedrock (text-to-speech for chat).
- Directional Audio – Minecraft uses stereo. Headphones improve spatial awareness.
- Sprint – Change from Left Ctrl to Left Shift (toggle) to avoid finger strain.
- Sneak – Toggle Sneak is under Accessibility Settings or mods. ⚠️ Default hold sneaks – many players miss the toggle.
- Inventory – E key; change to Tab if you prefer inventory in shooters.
- Pick Block – Middle mouse button; useful for building.
- Mouse Sensitivity – Start at 50–70% (default 50%). Adjust until you can turn 180° with a single wrist flick.
- Invert Y-Axis – Personal preference for flying/boats.
- Touchscreen users: adjust button size and opacity.
- Controller: swap A/B for jump interact if desired.
- Auto-Jump – ⚠️ Many players disable this to avoid accidental jumps.
- Narrator (Ctrl+B) – Speaks UI text, useful for blind players.
- Menu Background Blur – Off reduces visual noise.
- Chat Background – Can set opacity to 0% for clear view.
- Lightning Flash – Can be disabled for photosensitivity.
- Subtitles – On shows text for all sounds (footsteps, mobs). Highly recommended for deaf/HOH.
- Toggle Sprint / Sneak – Enable to hold state instead of pressing.
- Text-to-Speech for chat and menus.
- Screen Reader (Narrator) – Reads on-screen items.
- Controller Cursor Speed – For navigating emote wheel.
- Vibration – Toggle for controller feedback.
- Colorblind Mode – Change chat/damage colors (e.g., red-green).
- Interface Opacity – Reduce for transparent HUD.
- Change language in Options > Language (Java) or Settings > General > Language (Bedrock).
- ⚠️ Resource Packs – Not technically a language setting, but often used for language patches. Ensure pack order: language packs above default.
- Font – Java defaults to a pixel font. Resource packs can replace with Unicode fonts for non-English characters.
- Multiplayer Settings – Allow / Deny server resource packs. ⚠️ Set to Prompt to avoid forced downloads.
- Server Ping – Affects multiplayer list refresh rate.
- Online Mode – Must stay ON for official authentication (unless running a cracked server).
- Chat Settings – Chat can be filtered (Hide / Hidden / Full). Colors and Links – On allows clickable URLs.
- Multiplayer – Toggle on/off. Requires Xbox Live account.
- Spawn Protection – Only for hosts of LAN worlds.
- Allow Cheats – Toggle for creative/fly in survival.
- Peaceful – No mobs, no hunger. Good for builders.
- Easy – Low damage, minor skeleton aim, zombies don't break doors.
- Normal – Standard AI, mobs can open doors.
- Hard – High damage, zombies break doors, starvation possible.
- ⚠️ Hardcore – One life, world deletes on death. Enable only if prepared.
- Game Mode – Survival, Creative, Adventure, Spectator (Java only). Change with /gamemode.
- Difficulty Lock – Java only. Locks difficulty so it cannot be changed even with commands. ⚠️ Once locked, permanent.
- Allow Flight – In creative mode, double-tap jump.
- Keep Inventory – Gamerule (`/gamerule keepInventory true`) – Not a settings menu option, but essential for casual play.
- Auto-Jump (Bedrock) – Off to prevent accidental leaps.
2. Audio Settings
3. Controls Settings
#### Java Edition – Key Bindings
#### Bedrock Edition – Controls
4. Accessibility Settings
#### Java Edition (Menu > Accessibility Settings)
#### Bedrock Edition (Settings > Accessibility)
5. Language Settings
6. Network Settings
#### Java Edition
#### Bedrock Edition
7. Gameplay Settings
#### Difficulty (Java: /difficulty command or Options > Difficulty)
#### Other Gameplay Settings
Performance & Quality Recommendations by Hardware Level
| Hardware Tier | Java Edition | Bedrock Edition |
|---|---|---|
| Low-End (Intel HD Graphics, 4GB RAM, old CPU) | Graphics: Fast, Render Distance: 6-8, Particles: Minimal, Mipmaps: 0, Smooth Lighting: Off, leave Advanced OpenGL ON. Allocate only 2GB RAM in launcher. | Graphics: Simple, Render Distance: 6, Fancy Leaves: Off, Beautiful Skies: Off, Smooth Lighting: Off. |
| Medium-End (GTX 1060/RX 580, 8-16GB RAM, modern CPU) | Graphics: Fancy, Render Distance: 12-16, Particles: All, Mipmaps: 2, Smooth Lighting: Maximum. Assign 4GB RAM. | Graphics: Fancy, Render Distance: 16, Fancy Leaves: On, Beautiful Skies: On, Smooth Lighting: On. |
| High-End (RTX 3070+, 32GB RAM, high-end CPU) | Graphics: Fancy, Render Distance: 24-32, Particles: All, Mipmaps: 4, Smooth Lighting: Maximum. Assign 8GB RAM for mods. | Graphics: Fancy (or Ray Tracing if RTX), Render Distance: 24, all visual effects max. |
| Ultra / Ray Tracing | Java does not support RT. Use Bedrock with RTX: Graphics: Ray Tracing, Render Distance: 16 (RT halves distance), enable DLSS if available. |
Common Misconfigurations & Special Attention Points
- ⚠️ Java RAM Allocation – Default is 2GB. If you have a modern pack/mod, increase to 4-8GB in the launcher (Installations > Edit > JVM Arguments: `-Xmx8G -Xms2G`). Too much (>12GB) can cause garbage collection stutters.
- ⚠️ Fullscreen vs Windowed – On some systems, fullscreen causes input lag. Test both.
- ⚠️ VSync – Can double input delay. Use Adaptive VSync or cap FPS with external tools.
- ⚠️ Resource Packs – High-res packs (>32x) will tank FPS on low-end. Match pack resolution to your GPU.
- ⚠️ Render Distance on Servers – Servers may cap render distance; setting it higher won't help FPS.
- ⚠️ Narrator Toggle Shortcut – Ctrl+B in Java accidentally enables narrator; many players panic thinking their game is broken. Just press Ctrl+B again.
- ⚠️ Bedrock Auto-Jump – On by default. Off in Settings > Game > Auto-Jump.
- ⚠️ Java vs Bedrock Differences – Java has more granular video options; Bedrock has better optimization and Ray Tracing. Use Java for modability, Bedrock for multiplayer with friends on console.
---
Always test settings in a singleplayer world before joining a server. Use F3 (Java) to monitor FPS and chunk updates. For Bedrock, use the coordinates debug screen.
Important Notes
Important Notes: Warnings, Pitfalls & Insider Knowledge
⚠️ Irreversible Choices & Permanent Progress
- Hardcore Mode (Java Edition): Death is final. The world is deleted unless you use a backup. Never play Hardcore without regular manual backups.
- World Spawn Point: Your initial spawn point is set based on your first log-in. If you die without setting a bed spawn, you respawn there. You cannot relocate the original world spawn without external tools (e.g., NBT editors).
- Ender Dragon Respawning: After the first defeat, you can respawn the Ender Dragon by placing four End Crystals on the exit portal. This resets the End island but does NOT refill end cities – only respawns the dragon for more dragon’s breath or easy XP.
- Enchanting Table Bookshelves: The 15 bookshelves must be placed exactly one block away from the enchanting table, with air in between. Misplacing them permanently limits enchantment levels until corrected. No refund for bookshelves – you must break them manually.
- Villager Trading Lock: If you cure a zombie villager, you get a huge discount on trades. But if you trade too many times without curing again, the discounts expire. Re-curing works only once per villager (until Java 1.20.2 re-enabled infinite curing discounts). On Bedrock, cured discounts are permanent.
- Potion Effects on Death: All active potion effects (including slow falling, night vision, fire resistance) are lost on death unless you have a backup totem. Stock up on potions for exploration, not just for boss fights.
###
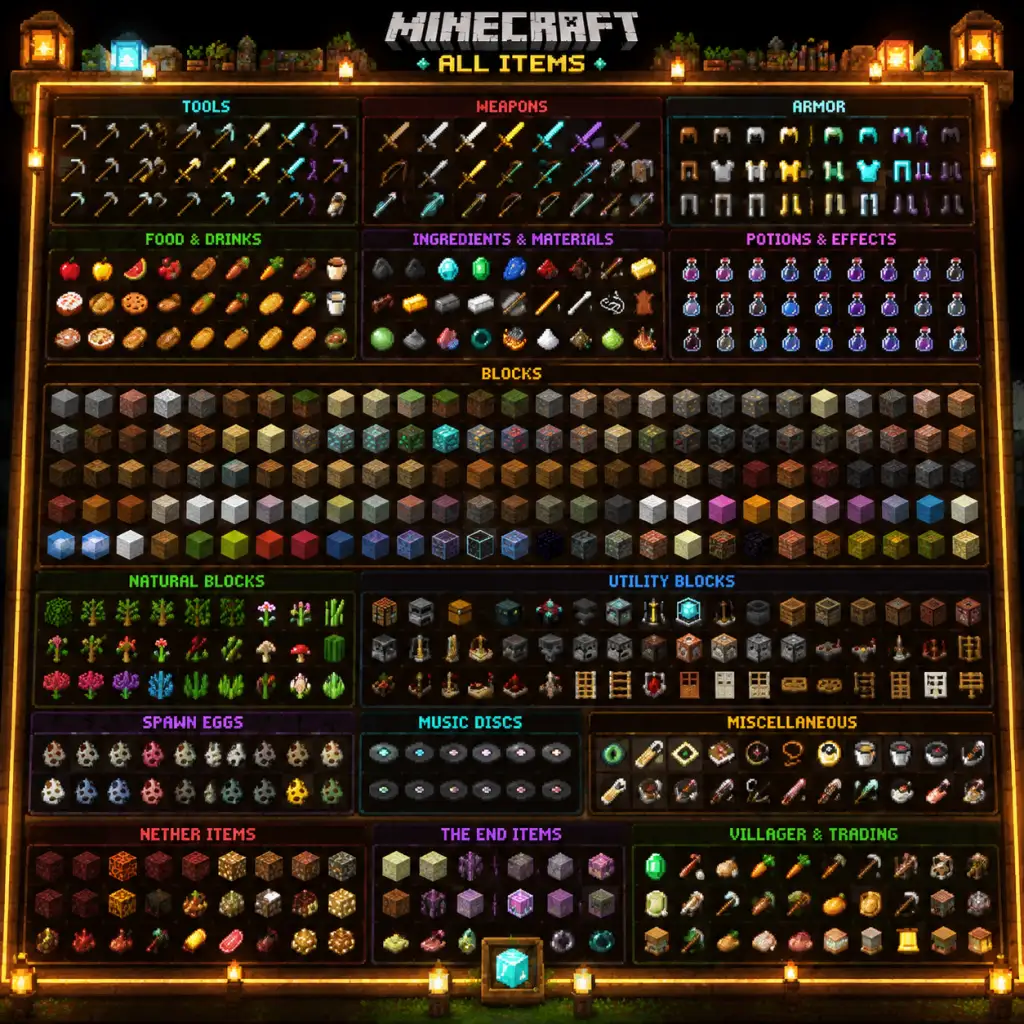
All Game Items
All Game Items: Complete Minecraft Item Guide
Minecraft contains hundreds of items, each with specific uses, crafting recipes, and interactions. This guide categorizes every major item type—materials, tools, weapons, armor, consumables, currencies, collectibles, and key equipment—with detailed explanations on acquisition, usage, optimal moments, and important upgrades or synergies.
Materials
Materials form the building blocks of Minecraft. They are mined, farmed, or looted and used in crafting, building, and enchanting.
| Material | How to Obtain | Primary Uses | Notes |
|---|---|---|---|
| Wood (Oak, Spruce, Birch, Jungle, Acacia, Dark Oak, Mangrove, Cherry, Bamboo) | Chop tree trunks with an axe or hand. | Crafting planks, sticks, tools, building blocks. | Different wood types are purely cosmetic; all function identically. Bamboo is a plant, not a tree—harvest with any tool. |
| Cobblestone | Mine stone with a pickaxe. | Furnaces, tools, weapons, building. Most common early material. | Smelt cobblestone into stone for smoother building blocks. |
| Iron Ingot | Smelt iron ore (found in caves, mountains). Drop from iron golems (rare). | Tools, armor, anvils, buckets, minecarts, hoppers. | Essential for mid-game progression. |
| Gold Ingot | Smelt gold ore (lower altitudes, badlands). Drop from zombified piglins (rare). | Tools (low durability but fast mining), powered rails, golden apples, clock. | Used in bartering with piglins for loot. |
| Diamond | Mine diamond ore (deep underground, Y-level -58 to -15). Treasure chests, villager trading. | Top-tier tools, armor, enchantment tables, jukeboxes. | Rare; best found with Fortune enchantment. |
| Netherite Scrap | Smelt ancient debris (found in Nether Y-8 to 22). | Combined with gold ingots to make Netherite ingots. | Requires a diamond pickaxe or better to mine ancient debris. |
| Netherite Ingot | Combine 4 Netherite Scrap + 4 Gold Ingots in a crafting table. | Upgrade diamond tools, weapons, and armor to netherite (higher durability, knockback resistance). | Netherite items do not burn in lava or fire. |
| Redstone Dust | Mine redstone ore (Y-level 1–16, best at -64 to -58). Witches drop 0–2. | Powering mechanisms, crafting redstone components (repeaters, comparators, pistons). | Essential for automation, traps, and contraptions. |
| Lapis Lazuli | Mine lapis lazuli ore (Y-level 0–30, best at 15). | Enchanting (required for enchanting table), blue dye. | Use with enchanting table to apply and reroll enchantments. |
| Emerald | Mine emerald ore (mountain biomes Y-level -16 to 320). Villager trading, raids. | Currency for villager trading (buy items like enchanted books, armor). | Also used in beacon pyramids. |
| Nether Quartz | Mine nether quartz ore anywhere in the Nether. | Redstone comparators, daylight sensors, decorative blocks. | Valuable early Nether resource. |
| Obsidian | Mine with diamond/netherite pickaxe (from water + lava source). | Nether portal frames, enchantment tables, ender chests, beacons. | Requires diamond or netherite pickaxe; very slow to mine. |
| Ender Pearl | Kill endermen. Trade with piglins (bartering). | Teleportation (throw), crafting Eyes of Ender. | Essential for reaching the End dimension. |
| Blaze Rod | Kill blazes in Nether fortresses. | Crafting blaze powder (brewing stand fuel, Eye of Ender ingredient). | Required to access the End and brew potions. |
| Ghast Tear | Kill ghasts in the Nether. | Brewing regeneration potions. | Rare drop; ghasts are dangerous. |
| Shulker Shell | Kill shulkers in the End cities. | Crafting shulker boxes (portable chests that keep inventory when broken). | End-game storage item. |
| Phantom Membrane | Kill phantoms (spawn after 3+ sleepless nights). | Repair elytra, brew slow falling potions. | Elytra repair is the main use. |
Tools
Tools speed up block breaking, resource gathering, or special actions. Higher tier = faster and more durable.
#### Tool Tiers
| Tool Type | Wood | Stone | Iron | Gold | Diamond | Netherite |
|---|---|---|---|---|---|---|
| Pickaxe | Mine stone, coal, iron ore. | Mine iron ore, lapis, gold. | Mine diamond, redstone, emerald. | Fastest but low durability. | Mine obsidian, ancient debris. | Same as diamond but more durable and lava-resistant. |
| Axe | Chop wood slowly. | Faster wood chopping. | Strips logs, disables shields. | Fast wood chopping but breaks quickly. | Efficient wood chopping, high damage as weapon. | Same as diamond + lava resistance. |
| Shovel | Dig dirt, sand, gravel. | Same. | Same. | Fastest but fragile. | Efficient digging, also digs paths (right-click grass). | Same as diamond. |
| Hoe | Till dirt for farming. | Same. | Faster tilling. | Fast but weak. | Efficient tilling, also breaks leaves quickly. | Same as diamond. |
- Shears: Cut wool from sheep, collect leaves, cobwebs, ferns. Crafted with 2 iron ingots.
- Flint and Steel: Ignite fires, light nether portals, activate creepers. Crafted with iron ingot + flint.
- Fishing Rod: Cast into water to catch fish, treasures (enchanted books, bows, nautilus shells), or junk. Can be enchanted with Luck of the Sea, Lure, Unbreaking.
- Carrot on a Stick: Controls saddled pigs (right-click to ride). Crafted with fishing rod + carrot.
- Warped Fungus on a Stick: Controls saddled striders in lava. Crafted with fishing rod + warped fungus.
- Compass: Points to world spawn (or lodestone if linked). Crafted with iron ingots + redstone.
- Clock: Shows sun/moon position (time of day). Crafted with gold ingots + redstone.
- Map: Paper + compass (optional for locator map). Fills as you explore. Can be cloned, enlarged.
- Lead: Leash animals or mobs. Crafted with string + slimeball.
- Name Tag: Name any entity (mob, animal) via anvil. Found in chests, fishing.
- Spyglass: Zoom in on distant objects. Crafted with copper ingots + amethyst shard.
- Brush: Used for archaeology on suspicious sand/gravel. Crafted with copper ingot + feather + copper ingot.
Weapons
Weapons are used to deal damage to mobs and other players.
#### Melee Weapons
| Weapon | Damage | Attack Speed | Special | How to Obtain |
|---|---|---|---|---|
| Sword (any tier) | Wood: 4, Stone: 5, Iron: 6, Gold: 4, Diamond: 7, Netherite: 8 | 1.6 | Sweep attack (Java), increased reach. | Craft with 2 sticks + 2 material (or 1 for wood). |
| Axe (as weapon) | Iron: 9, Diamond: 10, Netherite: 11 (crit hits) | 0.9–1.0 | Slower but higher damage, disables shields (Java). | Craft with 3 material + 2 sticks. |
| Trident | 8 melee, 8 thrown | 1.1 melee | Can be thrown (ranged), returns with Loyalty enchant. Requires channeling/riptide. | Kill drowned with trident (rare drop). |
| Mace (1.21+) | 6 base, damage scales with fall distance | 0.5 | New weapon; deals massive damage when falling. | Craft with breeze rod + heavy core (trial chambers). |
| Weapon | Damage | Ammo | Special | How to Obtain |
|---|---|---|---|---|
| Bow | Up to 10 (fully charged) | Arrows (or tipped arrows) | Enchantments: Power, Flame, Infinity, Punch. | Craft with 3 sticks + 3 string. |
| Crossbow | 6–11 (varies with enchantments) | Arrows, fireworks | Can be loaded in advance; enchanted with Multishot, Piercing, Quick Charge. Faster fire rate with Quick Charge. | Craft with 3 sticks + 2 string + 1 iron ingot + 1 tripwire hook. |
| Trident (thrown) | 8 | None (returns if Loyalty) | Underwater combat advantage ; Riptide allows flight in water/rain. | See above. |
- Snowball: Deals 0 damage but knocks back mobs (good for blazes). Craft with 3 snowballs.
- Egg: Throw to spawn chickens (rare). Deals 0 damage.
- Splash Potion of Harming: Instant damage. Brewed using fermented spider eye + potion of healing or awkward potion + fermented spider eye.
- Lingering Potion: Creates a cloud that damages. Use dragon's breath on splash potion.
Armor
Armor reduces incoming damage. Each piece covers a specific area: helmet, chestplate, leggings, boots. Tiers: Leather, Chainmail, Iron, Gold, Diamond, Netherite.
#### Armor Points and Protection
| Material | Helmet | Chestplate | Leggings | Boots | Total | Toughness | Knockback Resistance |
|---|---|---|---|---|---|---|---|
| Leather | 1 | 3 | 2 | 1 | 7 | 0 | 0 |
| Chainmail | 2 | 5 | 4 | 1 | 12 | 0 | 0 |
| Iron | 2 | 6 | 5 | 2 | 15 | 0 | 0 |
| Gold | 2 | 5 | 3 | 1 | 11 | 0 | 0 |
| Diamond | 3 | 8 | 6 | 3 | 20 | 8 | 0 |
| Netherite | 3 | 8 | 6 | 3 | 20 | 12 | 3 (per piece, total 12) |
- Enchantments: Protection, Fire Protection, Blast Protection, Projectile Protection, Thorns, Unbreaking, Mending. Only one Protection type per piece (except Thorns/Mending).
- Boots Special: Feather Falling (reduces fall damage), Depth Strider (faster swimming), Frost Walker (freezes water).
- Helmet Special: Respiration (underwater breathing), Aqua Affinity (faster underwater mining).
- Turtle Shell: Crafted with 5 scutes (from baby turtles). Acts as a helmet with 2 armor points. Grants Water Breathing status effect when worn (30 seconds after surfacing). Synergy: Respiration + Aqua Affinity.
- Elytra: Chestplate slot item. Allows gliding when pressing jump mid-air. Can be enchanted with Unbreaking, Mending. Repair with phantom membranes. Synergy: Firework rockets for propulsion. No protection; must use other armor pieces. Requires a chestplate slot, so you lose chestplate protection.
Consumables
Items that are eaten, drunk, or used up.
#### Food (Saturation and Hunger Restoration)
| Food | Hunger Restored | Saturation | Special Effect | How to Obtain |
|---|---|---|---|---|
| Steak | 6 | 12.8 | None | Cook raw beef (kill cows). |
| Cooked Porkchop | 6 | 12.8 | None | Cook raw porkchop (kill pigs). |
| Golden Apple | 2 | 9.6 | Absorption II (2 min), Regeneration II (5 sec) | Craft with 8 gold ingots + apple. |
| Enchanted Golden Apple | 2 | 9.6 | Absorption IV (2 min), Regeneration II (20 sec), Fire Resistance I (5 min) | Found in chests (dungeons, mineshafts, bastions). Cannot be crafted in Survival. |
| Suspicious Stew | varies | varies | Random short-duration status effect (e.g., Blindness, Night Vision, Jump Boost) | Trade with farmer villagers, from shipwrecks. |
| Chorus Fruit | 1 | 2.4 | Teleports player randomly; useful for escaping tight spots. | Harvest from chorus plants in the End. |
| Honey Bottle | 3 | 9.6 | Cures poison (drinking). | Use glass bottle on bee nest/hive. |
| Cooked Chicken | 4 | 7.2 | None | Cook raw chicken (kill chickens). |
| Baked Potato | 5 | 7.2 | None | Cook potato. |
| Carrot | 2 | 4.8 | None | Farm or harvest. |
| Bread | 5 | 6 | None | Craft from 3 wheat. |
| Mushroom Stew | 4 | 7.2 | None | Craft with red mushroom + brown mushroom + bowl. |
| Pumpkin Pie | 4 | 7.2 | None | Craft with pumpkin + sugar + egg. |
| Cookie | 1 | 2.4 | None | Craft with wheat + cocoa beans. |
| Dried Kelp | 1 | 0.6 | None | Smelt kelp. |
#### Potions
Brewed using a brewing stand with blaze powder fuel.
| Potion | Base Ingredient | Effect | Duration | Upgrade/Extension |
|---|---|---|---|---|
| Potion of Healing | Glistering Melon + Awkward Potion | Instant Health (2 hearts) | Instant | Splash/Lingering, II (4 hearts) |
| Potion of Regeneration | Ghast Tear + Awkward Potion | Regeneration (1 heart per 2.5 sec) | 0:45 | II (faster), Extended (1:30) |
| Potion of Strength | Blaze Powder + Awkward Potion | +3 melee damage | 3:00 | II (+6 dmg, 1:30), Extended (8:00) |
| Potion of Fire Resistance | Magma Cream + Awkward Potion | Fire immunity | 3:00 | Extended (8:00) |
| Potion of Swiftness | Sugar + Awkward Potion | +20% movement speed | 3:00 | II (+40%, 1:30), Extended (8:00) |
| Potion of Night Vision | Golden Carrot + Awkward Potion | See in darkness | 3:00 | Extended (8:00) |
| Potion of Water Breathing | Pufferfish + Awkward Potion | Breathe underwater | 3:00 | Extended (8:00) |
| Potion of Leaping | Rabbit's Foot + Awkward Potion | Jump boost | 3:00 | II (+higher jump, 1:30), Extended (8:00) |
| Potion of Slowness | Fermented Spider Eye + Potion of Swiftness | -15% speed | 1:30 | Extended (4:00), II (very slow) |
| Potion of Weakness | Fermented Spider Eye + Potion of Strength | -4 melee damage | 1:30 | Extended (4:00) |
| Potion of Poison | Spider Eye + Awkward Potion | Poison damage (0.5 hearts every 1.25 sec) | 0:45 | II (faster damage, 0:21), Extended (1:30) |
| Potion of Harming | Fermented Spider Eye + Potion of Healing | Instant damage (3 hearts) | Instant | II (6 hearts) |
| Potion of Slow Falling | Phantom Membrane + Awkward Potion | Fall slower, no fall damage | 1:30 | Extended (4:00) |
| Potion of Luck (Java only) | Rabbit's Foot + Awkward Potion | +1 luck (affects loot table quality) | 5:00 | None |
| Potion of the Turtle Master | Turtle Shell + Awkward Potion | Slowness IV + Resistance III | 0:20 | Extended (0:40), II (Slowness VI, Resistance IV) |
Making Lingering Potions: Add dragon's breath to splash potion.
Modifiers: Redstone extends duration; glowstone increases potency. Fermented spider eye corrupts the effect.
#### Other Consumables
- Milk Bucket: Removes all status effects (positive and negative). Can be used on cake to make slice drop.
- Honey Block: Not consumed but can be placed; reduces fall damage and slows movement.
- Totem of Undying: Held in off-hand; when fatal damage is taken, you survive with 1 heart + Absorption + Regeneration. Found in woodland mansions and raids.
- Firework Rocket: Used to boost elytra flight (propulsion). Crafted with paper + gunpowder (optional dyes, stars). Duration depends on gunpowder count.
- Emerald: Primary trading currency with villagers. Also used in beacons. Can be mined, traded from fletchers/clerics, or obtained from pillager outposts.
- Netherite Ingot: Not a currency per se, but the most valuable upgrade material. Trade with piglins? No—piglins barter gold ingots, not netherite. But netherite ingots are used in smithing templates for trim and armor upgrade.
- Music Discs: Found in chests (dungeons, mineshafts, strongholds, woodland mansions). Used in jukeboxes to play music. 13 discs total (including Pigstep from bastions). Some drop from creepers killed by skeletons.
- Enchanted Books: Obtained via enchanting, fishing, or trading with librarian villagers. Can be applied to tools/armor using anvil.
- Head / Mob Head: Wither skeleton skull (from wither skeletons), zombie head, skeleton skull, creeper head (from charged creeper kills), player head (creative only). Used for decoration, beacon bases, and as gamer head for dragon fight?
- Banner: Crafted with wool and stick. Can be patterned with dyes, shields, etc. Used for decoration or marking.
- Tropical Fish Bucket: Collect tropical fish in bucket; used in aquariums or as decoration.
- Nautilus Shell: Found by fishing, drowned drops, or trading with wandering trader. Combined with heart of the sea to make a conduit (underwater beacon).
- Heart of the Sea: Found in buried treasure maps. Used with nautilus shells for conduit.
- Dragon's Breath: Collected from Ender Dragon's breath (use empty glass bottle). Used for lingering potions.
- Amethyst Shard: Mined from amethyst geodes. Used for spyglass, tinted glass, and decorated blocks.
- Copper Ingot: Smelted from copper ore. Used for spyglass, lightning rod, decorative blocks (oxidizes).
- Raw Materials (Iron, Gold, Copper): Raw versions drop when mined without fortune; can be smelted into ingots.
Currencies
Collectibles
Items that are rare, decorative, or achievement-related.
Key Equipment
Functional blocks and items central to progression and utility.
| Item | Purpose | How to Obtain | Important Details |
|---|---|---|---|
| Crafting Table | 3x3 crafting grid | Craft with 4 planks | Essential for most advanced recipes. |
| Furnace | Smelt ores, cook food | Craft with 8 cobblestone | Also blast furnace (faster ores), smoker (faster food). |
| Enchanting Table | Enchant tools, armor, weapons | Craft with 4 obsidian + 2 diamonds + 1 book | Requires bookshelves placed 1 block away to unlock higher levels (max 15 bookshelves). Lapis lazuli input required. |
| Anvil | Repair items, combine enchantments, rename | Craft with 3 iron blocks (27 ingots) + 4 iron ingots (31 total) | Cost increases with prior work; cannot be disenchanted. |
| Brewing Stand | Brew potions | Craft with 1 blaze rod + 3 cobblestone | Fueled by blaze powder. Place water bottles + ingredients. |
| Cauldron | Store water (up to 3 buckets), dye leather armor (Bedrock), wash banners | Craft with 7 iron ingots | Fills with rain; can be used as a water source in the Nether. |
| Chest | Store items | Craft with 8 planks | 27 slots. Double chest (54 slots) with 2 adjacent chests. |
| Ender Chest | Shared inventory across all ender chests (per player) | Craft with 8 obsidian + 1 eye of ender | Cannot be pushed; contents are private. |
| Shulker Box | Portable chest with 27 slots; keeps items when broken | Craft with 2 shulker shells + 1 chest | Can be dyed; placed in ender chest for huge portable storage. |
| Respawn Anchor | Set respawn point in the Nether | Craft with 6 crying obsidian + 3 glowstone | Must be charged with glowstone blocks (up to 4). Does not work in Overworld or End. |
| Lodestone | Alter compass to point to its location | Craft with 1 netherite ingot + 8 chiseled stone bricks | Use compass on lodestone; compass now points to that lodestone even in other dimensions. |
| Beacon | Grants status effects (Speed, Haste, Resistance, Jump Boost, Strength, Regeneration) within a radius | Craft with 5 glass + 3 obsidian + 1 nether star | Requires pyramid base (min 9 blocks of iron/diamond/emerald/gold/ netherite). Activated by placing beacon on top. |
| Conduit | Underwater beacon (night vision, water breathing, haste, etc.) within 32-96 blocks | Craft with 8 nautilus shells + 1 heart of the sea | Requires 5x5 square of prismarine (full activation 42 blocks). |
| Fletching Table | Villager job block; no functional use for player | Craft with 4 planks + 2 flint | Used for fletcher villager profession. |
| Smithing Table | Upgrade diamond to netherite; apply armor trims | Craft with 4 planks + 2 iron ingots | Important for late-game upgrades. |
| Stonecutter | Craft stone-type blocks with precise cuts, cheaper recipes | Craft with 3 stone + 1 iron ingot | Simplifies building with stone variants. |
| Composter | Convert excess crops/bonemeal | Craft with 7 wooden slabs | Increases fertility; empty into bone meal (1 per 20-30% fill). |
| Lectern | Hold books; read written books; villager job block (librarian) | Craft with 4 wooden slabs + 1 bookshelf | Interact to read. |
| Jukebox | Play music discs | Craft with 8 planks + 1 diamond | Right-click to insert disc; right-click again to eject. |
| Enchanted Apple (see consumables) | Extremely rare; gives powerful effects for boss fights or PvP | Only found in loot chests | Cannot be crafted; stackable up to 64. |
Item Synergies & Upgrades
- Mending Enchantment: Absorbs XP orbs to repair items, making diamond/netherite gear nearly unbreakable.
- Unbreaking + Mending: Best combination for tools and armor; Unbreaking reduces durability loss, Mending repairs when gaining XP.
- Frost Walker Boots + Depth Strider: Cannot be combined; choose based on environment.
- Elytra + Fireworks: Infinite flight when fireworks are used as boost.
- Ender Pearl + Feather Falling Boots: Teleport and survive fall damage.
- Netherite Armor + Fire Resistance Potion: Immunity to lava damage.
- Beacon (Haste II) + Efficiency V Pickaxe: Instant mining of common blocks.
- Conduit + Depth Strider + Respiration Helmet: Ultimate underwater mobility.
- Trident + Riptide + Channeling: Use in thunderstorm to summon lightning bolts on mobs.
- Bow + Flame (fire arrows) + Infinity (infinite arrows): Efficient ranged combat.
- Crossbow + Multishot + Firework Rockets: AoE aerial barrage.
- Totem of Undying + Elytra: Survive crashes and keep gliding.
This comprehensive guide covers every major item category in Minecraft. For additional details on crafting recipes, exact numbers, or latest versions, consult the official Minecraft Wiki.

Character Skills
Character Skills Guide for Minecraft
Minecraft does not feature traditional character classes, skill trees, or unlockable abilities. Instead, the player (Steve or Alex) gains capabilities through items, enchantments, status effects, game mechanics, and potion effects. This guide covers every practical "skill" you can use, including innate player actions, special item abilities, and strategic synergies.
Innate Player Abilities (No Items Required)
| Ability | How to Use | Effect | Cooldown/Notes |
|---|---|---|---|
| Punching | Left-click (or attack button) while holding nothing or a block. | Deals 1 damage (0.5 hearts). Can break blocks slowly. | No cooldown; very inefficient for combat. |
| Sprinting | Double-tap W (or forward) and hold. | Increases movement speed by about 40%. Drains hunger while sprinting. | Toggle on/off. Hunger must be >6 (3 drumsticks). |
| Sneaking | Hold Shift (or crouch button). | Slows movement, prevents falling off edges, reduces visibility to mobs (player name hidden). Cannot jump while sneaking. | Toggle (Bedrock: double-tap crouch). |
| Jumping | Press Space. | Standard jump height ~1.1 blocks. | No cooldown. |
| Swimming | Press Space while in water to swim upward; hold Shift to dive. | Faster movement in water. Sprint-swimming is even faster. | Hunger drain while sprint-swimming. |
| Mining/Chopping | Hold left-click on a block with an appropriate tool. | Breaks blocks. Speed depends on tool, enchantments, and block type. | Instant break for soft blocks with correct tool. |
| Block Placing | Right-click with a block in hand. | Places the block in the targeted location. | Instant. Can be used mid-air (e.g., bridging). |
| Attacking | Left-click with weapon or any item. | Deals damage based on weapon, enchantments, and critical hits. | Swing cooldown (Java: ~0.5s for full damage). Spam-click reduces effectiveness. |
| Blocking (with shield) | Right-click while holding a shield. | Blocks incoming melee and projectile damage (reduced knockback). | Shield must be equipped in off-hand. Breaks after taking ~100 damage. |
| Eating | Hold right-click with food in hand. | Restores hunger and saturation. | Animation takes ~1.5 seconds; can be interrupted. |
| Sleeping | Right-click on a bed at night. | Sets spawn point, skips night (only if all players sleep). | Must be night or thunderstorm. Cannot sleep near hostile mobs. |
| Fishing | Right-click with a fishing rod to cast; right-click again when bobber moves. | Obtains fish, enchanted items, junk or treasure. | ~5-30 seconds per catch. |
| Shearing | Right-click on sheep with shears. | Harvests wool without killing the sheep. | Instant. |
| Breeding | Feed two animals their favorite food (e.g., wheat for cows). | Produces baby animal. | 5-minute cooldown for parents. |
Combat Skills (Weapon-Specific)
#### Swords
- Sweep Attack (Java): When moving while attacking, a sweeping motion hits multiple enemies (knocks them back). Deal less damage than a single target. Synergy: Combine with Sweeping Edge enchantment for increased sweep damage.
- Critical Hit: Land an attack while falling (jump or fall off a block). Deals +50% extra damage (rounded up). Visual: stars appear. Best used: Always jump before melee hits for extra damage (careful – consumes more hunger).
- Shield Break: Using an axe to attack a player or mob holding a shield disables their shield for 5 seconds. Cooldown: Same as weapon cooldown. Recommended: Use axes in PvP to disable shields.
- Charge Attack: Axes have a longer cooldown but higher base damage. Fully charge for maximum damage.
- Throwing: Right-click to throw (if Loyalty enchanted, returns). Can be used as a melee weapon or ranged.
- Riptide (enchantment): While in rain or water, right-click to launch yourself in the direction you’re looking. Fast travel underwater and through the air. Cooldown: ~1 second. Combo: Use with Elytra for flight in rain.
- Impaling (enchantment): Increased damage to aquatic mobs (plus players in water). Synergy: Use Loyalty to retrieve after throws.
- Charged Shot: Hold right-click to draw back. Fully charged arrows deal maximum damage (up to 10 damage without enchantments). Time to full charge: ~1.5s.
- Flame (enchantment): Arrows set targets on fire for 5 seconds (4 ticks of damage). Used for: Extra damage over time, preventing natural regeneration.
- Infinity (enchantment): Shot arrows are not consumed (need only one arrow in inventory). Synergy: Paired with Flame for infinite fire arrows.
- Loading: Hold right-click to load an arrow or firework rocket. Takes ~1.5 seconds. Can be pre-loaded and stored.
- Multishot (enchantment): Fires 3 arrows at once in a spread (only consumes 1 arrow). Used for: Crowd control and hitting targets more easily.
- Piercing (enchantment): Arrows pass through multiple enemies (up to 4 levels). Combo: With Multishot, each arrow passes through targets.
- Quick Charge (enchantment): Reduces loading time by up to 0.75s.
- Blocking: Holding right-click reduces damage by 100% from the front (melee and projectiles). Knockback reduced. Cannot block explosions fully (still reduced).
- Shield Bash (not official name): Attack immediately after blocking to perform a quick jab. Not a separate skill but useful in close combat.
- Sharpness: Increases melee damage (up to +3 per level, max level V). Best for: General combat.
- Smite: Extra damage to undead (zombies, skeletons, wither). Use when: Nether or skeleton-heavy areas.
- Bane of Arthropods: Extra damage to spiders, cave spiders, silverfish, and bees. Situational.
- Fire Aspect: Sets target on fire for 4 seconds per level. Synergy: Combine with Sharpness for DoT.
- Looting: Increases drops from mobs (more items, rare drops more likely). Must-have for: Farms and resource gathering.
- Knockback: Pushes enemies farther on hit. Useful for: Keeping mobs at distance, but can scatter loot.
- Sweeping Edge (Java): Increases sweep attack damage (up to +50%). Best with: Swords for crowd control.
- Efficiency: Increases mining speed (up to +70% at level V). Best for: Any tool.
- Fortune: Increases block drops (e.g., diamonds, coal, etc.). Use on: Ore blocks, gravel flint, etc.
- Silk Touch: Mined blocks drop themselves (e.g., ore block as block, not item). Use for: Building, preserving decorative blocks.
- Unbreaking: Chance to not reduce durability (higher level = higher chance). Use on: All tools, weapons, armor.
- Mending: Repairs item with XP orbs instead of breaking. Invaluable for: Any valuable tool/weapon.
- Protection: Reduces all damage (except starvation, void, etc.). Max 4 levels, but 4 pieces can stack (max 20% reduction per level? Actually cap of 80% damage reduction). Best general enchantment.
- Fire Protection: Reduces fire damage. Use for: Nether survival.
- Blast Protection: Reduces explosion damage and knockback. Use for: Creeper and wither fights.
- Projectile Protection: Reduces arrow/trident damage. Use for: Skeleton-heavy areas.
- Feather Falling: Reduces fall damage (boots only). Critical: For any exploration or flying.
- Thorns: Reflects damage back to attacker. Use on: Chestplate for passive damage.
- Respiration: Extends underwater breathing time (helmet). For: Ocean exploration.
- Aqua Affinity: Increases mining speed underwater (helmet). For: Underwater builds.
- Depth Strider: Increases swim speed and reduces water slowdown (boots). Alternative: Frost Walker (creates ice while walking).
- Power: Increases arrow damage (up to +150% at level V). Must-have for bow.
- Punch: Increases knockback (up to 40 blocks). For: PvP or mob control.
- Flame: Sets arrows on fire. For: DoT.
- Infinity: Infinite arrows (need one arrow). Best: With Power and Flame.
- Multishot, Piercing, Quick Charge (crossbow only).
- Luck of the Sea: Better loot (enchanted books, bows, etc.) Priority.
- Lure: Faster fish biting (reduces wait time). Combine with Luck of the Sea.
#### Axes
#### Trident
#### Bows
#### Crossbow
#### Shields
Enchantments (Enhancements for Items)
All enchantments are applied via an enchantment table, anvil (combining books), or from loot. Major categories:
#### Weapon Enchantments
#### Tool Enchantments
#### Armor Enchantments
#### Bow/Crossbow Enchantments
#### Fishing Rod Enchantments
Potion Effects (Temporary Skills)
Brew potions using a brewing stand. Potions can be extended, upgraded to II, or made into splash/lingering.
| Potion | Effect | Duration | Use Case |
|---|---|---|---|
| Strength | Increases melee damage by +3 (I) or +6 (II) | 3:00 (I) / 1:30 (II) | Boss fights, PvP |
| Speed | Increases movement speed +20% (I) or +40% (II) | 3:00 (I) / 1:30 (II) | Exploration, kiting |
| Regeneration | Heals 1 HP every 2.5 sec (I) or 1.25 sec (II) | 0:45 (I) / 0:22 (II) | Emergency healing |
| Healing (Instant) | Instant health +4 (I) or +8 (II) | Instant | Quick heal |
| Fire Resistance | Immunity to fire and lava | 3:00 (I) | Nether travel, blaze fights |
| Night Vision | See in darkness (brightness increased) | 3:00 (I) | Mining, underwater |
| Water Breathing | Oxygen bar doesn't deplete | 3:00 (I) | Ocean monument, underwater builds |
| Invisibility | Become invisible (armor still shows unless not worn) | 3:00 (I) | Sneak past mobs, PvP ambushes |
| Jump Boost | Jump higher (but fall damage still applies) | 3:00 (I) | Climbing, parkour |
| Poison | Damages until 0.5 HP left (not lethal) | 0:45 (I) | Harmful splash potion |
| Weakness | Reduces melee damage by -4 (I) or -8 (II) | 1:30 (I) | Debuff opponents |
| Slowness | Slows movement -15% (I) or -60% (II) | 1:30 (I) | Trap enemies |
| Turtle Master (Slowness + Resistance) | Slowness -90% and Resistance +40% (I) | 0:20 (I) | Survival tanking |
| Harming (Instant) | Instant damage +6 (I) or +12 (II) | Instant | Offensive splash |
Status Effects from Other Sources
- Beacon Effects: From a beacon pyramid. Choose between Speed, Haste, Resistance, Jump Boost, Strength, and Regeneration. Primary effect: Up to level II depending on pyramid size.
- Conduit Power: Grants water breathing, night vision, and haste while in rain/water near a conduit. Effect radius: 32-96 blocks based on frame completeness.
- Bad Omen: Obtained from killing a raid captain (pillager with banner). When entering a village, triggers a raid. Can be removed: Drink milk.
- Hero of the Village: After defeating a raid, gives discounts from villagers. Lasts 40 minutes (Java) or 60 minutes (Bedrock).
- Oozing: From slime chunks or slime spawners when under certain conditions (not standard).
- Wind Charged: From wind charge items (new in 1.21).
- Weaving: From cobwebs or certain mobs.
- Elytra: Equipped in chestplate slot. Press jump while falling to glide. Upgrade: Combine with fireworks to boost speed and distance. Synergy: Riptide trident for flight in rain.
- Totem of Undying: When you would die, it saves you with +1 HP and clears negative effects, then removes itself from hand/offhand. Must have in inventory.
- Ender Pearl: Throw (right-click) to teleport to the landing point. Cooldown: 1 second (but damage if landing from high). Use: Escape, parkour, travel.
- Chorus Fruit: Teleports you to a random nearby location (within 8 blocks horizontally) and restores hunger. Cooldown: 1 second. Risk: Might teleport into danger.
- Firework Rocket: Launches upward. Elytra combo: Use while gliding for boost. Crossbow: Can be loaded as ammunition for area burst.
- Lingering Potion: Creates an area cloud of that potion effect. Use: Create damaging fields or healing stations.
- Bow of Flame: Arrow sets target on fire (enchantment).
- Crossbow with Multishot: Spread shot.
- Shield blocking.
- Weapons: Diamond or Netherite Sword (Sharpness V, Fire Aspect II, Looting III, Unbreaking III, Mending) and Shield.
- Armor: Full Protection IV, Thorns III, Unbreaking III, Mending; Boots with Feather Falling IV.
- Potions: Strength II, Speed II, Regeneration.
- Combo: Sprint + jump for critical hit, then shield block, repeat. Use Fire Aspect for DoT.
- Synergies: Looting for drops; beacons for Strength/Resistance.
- Weapons: Bow (Power V, Flame, Infinity) or Crossbow (Multishot, Quick Charge III, Piercing IV). Optional: Trident for water combat.
- Armor: Same as Warrior but prioritize Projectile Protection.
- Potions: Night Vision, Invisibility for sneak attacks, Speed for kiting.
- Combo: Use bow with Flame to deter mobs; crossbow Multishot for groups. In water, use Riptide trident for mobility.
- Synergies: Infinity saves arrows; Riptide + Elytra for aerial sniping.
- Tools: Pickaxe (Efficiency V, Fortune III, Unbreaking III, Mending); Shovel (Efficiency V, Silk Touch or Fortune); Axe (same).
- Armor: Feather Falling IV boots; rest unneeded but wear for protection.
- Potions: Night Vision, Water Breathing (for drowned mineshafts), Haste beacon.
- Skills: Use Fortune on diamonds, redstone, etc. Use Silk Touch for glass, ice, etc.
- Synergy: Haste II beacon + Efficiency V insta-mines stone.
- No special skills beyond block placement. Use observer, comparator, etc. Items: Redstone, pistons, hoppers.
- Skills: Timing, logic design. No innate abilities.
- Gear: Elytra, rockets, boots with Depth Strider/Feather Falling, Loyalty trident, map, compass, clock.
- Potions: Fire Resistance, Speed, Night Vision.
- Skills: Elytra flight with rockets; Riptide for water travel; Ender pearls for quick teleports.
- Synergy: Chorus fruit for last-minute teleportation; Totem of Undying for safety.
- Sprint: Always when moving, except when sneaking on ledges.
- Critical hit: Every melee attack except when skeleton fire rate is high (jump makes you vulnerable).
- Sheild blocking: Against skeletons, creepers (reduces explosion damage), and PvP.
- Sneak: On edges, near cliffs, to avoid detection.
- Elytra gliding: For long-distance travel (nether roof or overworld).
- Potions: Drink before major fights (Strength, Regen) or when entering dangerous biomes (Fire Resistance in Nether).
- Enchantments: Always apply Mending and Unbreaking to all gear. Choose specialty enchantments based on your role.
Special Item Abilities
Builds and Recommended Skill Combinations
Since no classes exist, players optimize around a playstyle. Below are archetypes with skill/item recommendations.
#### 1. The Warrior (Melee Combat)
#### 2. The Ranger (Ranged Combat)
#### 3. The Digger (Mining/Resource Focus)
#### 4. The Redstone Engineer
#### 5. The Explorer (Travel Focus)
When to Use Each Skill
This guide covers every skill-like ability available to the player in Minecraft. Unlike traditional RPGs, your "character" grows through gear choices and knowledge. Master these skills to become an unstoppable force in the blocky world.
Characters & Roles
Characters & Roles
Playable Characters: Steve & Alex
Steve and Alex are the default player characters in Minecraft. They are identical in gameplay stats and abilities; the choice is purely cosmetic. Both represent a human survivor in a blocky world.
Background: According to Minecraft lore, Steve is a human from an unknown origin who appears in the Overworld. Alex has a similar backstory, introduced in the 1.8 update. They are the only playable units in vanilla Minecraft.
Strengths: No inherent strengths beyond being a blank slate. Can equip any item, enchantment, or armor. Can break and place blocks. Unlimited potential for growth through gear and knowledge.
Weaknesses: No innate abilities. Starting with empty inventory and no armor. Vulnerable to all environmental hazards and mobs. Cannot fly or teleport without items/commands.
Playstyle: Completely flexible. The player can be a miner, builder, farmer, explorer, or warrior by choosing appropriate tools and armor. The playstyle is defined by the player's actions, not by the character.
Unlock Conditions: Always available. Select Steve or Alex during world creation or via skin customization.
Recommended Equipment/Builds: None specific. Equipment depends on chosen role (see Player Roles below).
Team Synergy: In multiplayer, multiple Steve/Alex characters can cooperate. No inherent synergy besides shared ability to share resources and combine efforts.
Player Roles (Archetypes)
Since the player has no class, they can adapt to any role by changing gear and focus. Here are the most common roles players adopt:
#### 1. The Miner
Strengths: Fast block breaking with enchanted pickaxes; able to find ores, diamonds, and ancient debris.
Weaknesses: Poor combat capability when mining; vulnerable to cave mobs; requires torches and food.
Playstyle: Descend into caves or strip-mine at low levels (Y=-59). Focus on Fortune or Efficiency enchantments.
Recommended Equipment: Diamond/Netherite Pickaxe with Efficiency V and Fortune III; Full armor (preferably with Feather Falling boots); Shield; Torches; Food (steak/golden carrots); Water bucket for lava.
Team Synergy: Escorted by a Fighter; supplies ores for a Builder.
#### 2. The Builder
Strengths: Creativity and large-scale construction; can create farms, bases, and redstone contraptions.
Weaknesses: Requires large amounts of resources; vulnerable during building if not in safe area; slow progress without assistance.
Playstyle: Collect blocks (wood, stone, concrete, glass), plan structures, and build. May use scaffolding and elytra for height.
Recommended Equipment: Elytra with fireworks; Feather Falling IV boots; Silk Touch pickaxe or shears (for leaves/glass); Building blocks; Shulker boxes for storage.
Team Synergy: Needs resource input from Miner/Farmer; can build defensive structures for the whole team.
#### 3. The Combat Specialist / Warrior
Strengths: High damage output and survivability in fights; can handle mobs, raids, and the Ender Dragon.
Weaknesses: Relies on good gear and potions; less efficient at gathering resources compared to Miner.
Playstyle: Enchant weapons (Sharpness, Smite, or Bane of Arthropods) and armor (Protection, Thorns); carry a bow or crossbow; use totems of undying and golden apples.
Recommended Equipment: Netherite Sword with Sharpness V; Bow with Power V and Flame; Full Netherite armor with Protection IV; Shield; Potions of Strength, Regeneration, Slow Falling.
Team Synergy: Protects the team; can clear dangerous areas for the Miner and Builder.
#### 4. The Farmer / Gatherer
Strengths: Provides sustainable food and resources; can breed animals and grow crops; good at renewable resource collection.
Weaknesses: Requires initial seeds and animals; vulnerable to crop trampling; needs water and bone meal.
Playstyle: Set up crop fields (wheat, carrots, potatoes, beetroot), animal pens (cows, pigs, sheep, chickens), and tree farms. Use bone meal from skeleton farms or composters.
Recommended Equipment: Hoe (preferably with Unbreaking and Mending); Shears for sheep; Lead and name tags for animals; Buckets for milk/water.
Team Synergy: Supplies food and leather for the whole team; can provide wool for Builder.
#### 5. The Explorer
Strengths: Discovers new biomes, structures, and valuable loot; fast travel using elytra or horses.
Weaknesses: High risk from unknown terrain and mobs; may get lost; needs navigation tools.
Playstyle: Travel to new areas on foot, by boat, horse, or elytra. Use maps, compasses, and coordinates. Raid ocean monuments, woodland mansions, end cities, etc.
Recommended Equipment: Elytra + Fireworks; Map and compass; Lodestone compass; Enchanted armor (Feather Falling); Food; Bed to set spawn.
Team Synergy: Brings back rare items and maps of locations for the team.
#### 6. The Redstone Engineer
Strengths: Builds automated contraptions, farms, and mob grinders; uses complex logic.
Weaknesses: Requires understanding of redstone mechanics; slow to build; components are costly (redstone, repeaters, comparators, pistons, observers).
Playstyle: Design and build machines for item sorting, automatic farms, traps, etc. Uses redstone dust, repeaters, comparators, pistons, observers, and command blocks (creative only).
Recommended Equipment: Silk Touch pickaxe for mining redstone ore; plenty of redstone dust; iron and gold for components; bookshelves for enchanting.
Team Synergy: Provides automation for the entire team (e.g., automatic crop farms, mob grinders for XP and loot).
Non-Playable Characters (NPCs)
Although not playable, several important NPCs inhabit the Minecraft world:
- Villagers: Passive NPCs found in villages. They have professions (farmer, librarian, weaponsmith, etc.) and trade items for emeralds. They can be bred, and their trades can be refreshed. Important for obtaining enchanted books, armor, tools, and food.
- Iron Golems: Neutral mobs that protect villages. They attack hostile mobs and players who attack villagers. Can be built by the player.
- Wandering Traders: Passive NPCs that appear randomly with llamas. They offer a variety of trades for emeralds, often useful items like nautilus shells or coral.
- Illagers (Vindicators, Evokers, Pillagers, Ravagers): Hostile NPCs that spawn in woodland mansions, raids, and outposts. They are aggressive and have special abilities (Evokers summon vexes, Pillagers use crossbows).
- Endermen, Creepers, Zombies, Skeletons, etc. are hostile mobs, not characters with roles, but are central to gameplay.
Background & Strengths/Weaknesses: Each NPC has its own behavior and utility. For example, Villagers strengthen a player's economy through trading, but are weak and need protection. Illagers are dangerous enemies that drop valuable loot (totems of undying, emeralds).
Summary
Minecraft's character system is intentionally simple: the player is a versatile human with no fixed class. The variety comes from the tools, blocks, and strategies the player chooses. Roles are fluid; a single player can be a miner in the morning, a builder in the afternoon, and a warrior at night. Team synergy emerges when players specialize and combine their efforts. The NPCs add depth and opportunity but are not playable.
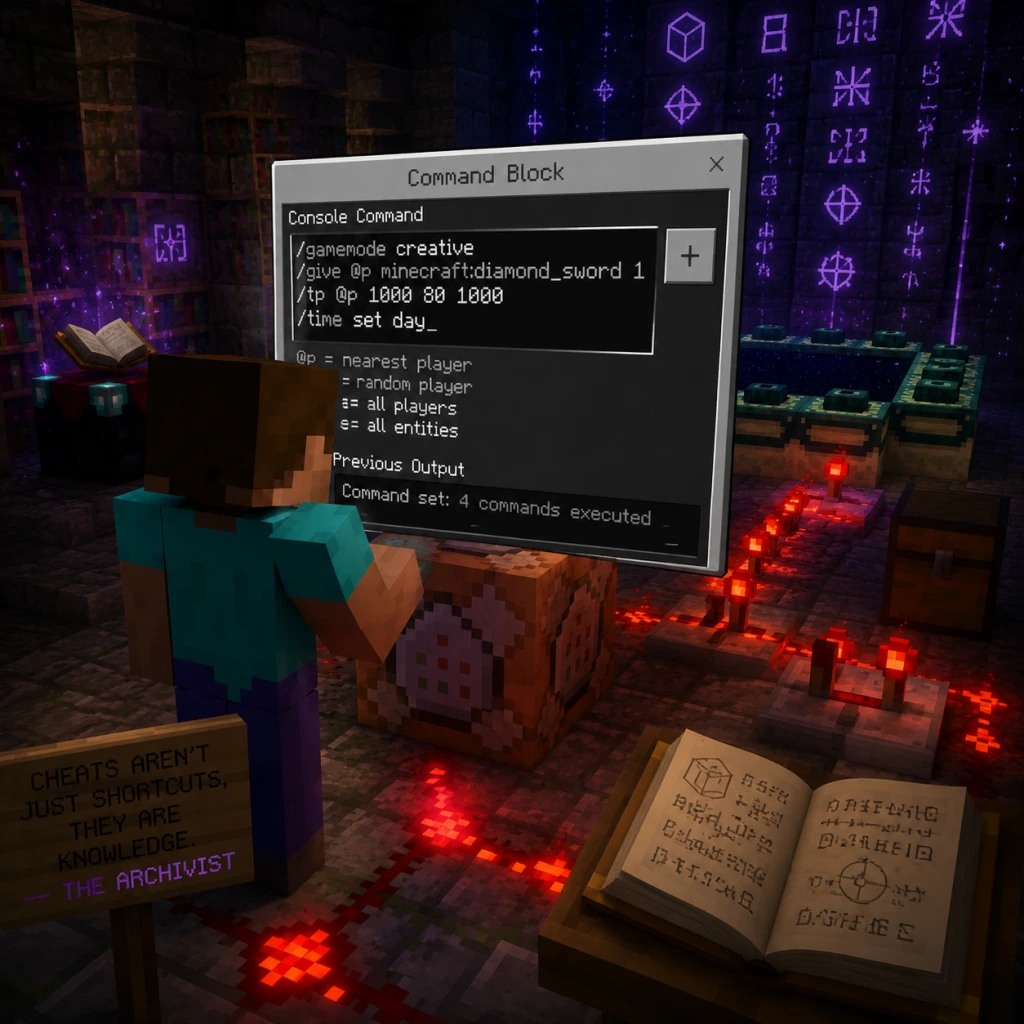
Cheats & Secrets
Introduction
Minecraft doesn't have traditional cheat codes entered via a button combo or key sequence. Instead, the game offers commands (often called cheats) that can be activated only if cheats are enabled in the world. Beyond commands, Minecraft is filled with Easter eggs, hidden features, and developer secrets that reward exploration and curiosity. This guide covers everything from enabling cheats to the rarest secrets in both Java and Bedrock Editions.
---
Cheats & Commands
Enabling Cheats
- Java Edition: Open the world to LAN (Esc → Open to LAN → Allow Cheats: ON) or create a world with "Allow Cheats: ON". Single-player worlds can have cheats toggled via the "Open to LAN" method even if originally created without cheats.
- Bedrock Edition: When creating a world, toggle "Cheats" to ON. In an existing world, go to Settings → Game → Cheats → Enable Cheats. Note: Enabling cheats disables achievements/trophies on that world.
Most Useful Cheat Commands
Commands are typed into the chat window (press T or /). A slash automatically inserts at the start.
| Command | Effect | Example |
|---|---|---|
| `/gamemode <mode>` | Changes game mode (survival, creative, adventure, spectator) | `/gamemode creative` |
| `/give <player> <item> [amount]` | Spawns any item | `/give @p minecraft:diamond_sword 1` |
| `/tp <x> <y> <z>` | Teleports the player to coordinates | `/tp 100 64 -200` |
| `/time set <time>` | Sets the time of day (0 = dawn, 6000 = noon, 12000 = dusk, 18000 = night) | `/time set 6000` |
| `/weather <type>` | Changes weather (clear, rain, thunder) | `/weather clear` |
| `/kill @e[type=!player]` | Kills all entities except players (useful for clearing lag) | `/kill @e[type=!player]` |
| `/locate <structure>` | Returns coordinates of the nearest structure | `/locate village` |
| `/effect give <player> <effect> [seconds] [amplifier]` | Applies a status effect | `/effect give @p minecraft:regeneration 60 4` |
| `/enchant <player> <enchantment> [level]` | Enchants the item in the player's hand | `/enchant @p minecraft:sharpness 5` |
| `/summon <entity> [x] [y] [z]` | Summons an entity | `/summon minecraft:creeper ~ ~10 ~` |
| `/setblock <x> <y> <z> <block>` | Places a block at coordinates | `/setblock 0 64 0 minecraft:diamond_block` |
Unlock Codes & Advancement Commands
There are no unlock codes, but you can use commands to grant or revoke advancements (the equivalent of achievements).
- Java: `/advancement grant @p only <advancement>` e.g., `/advancement grant @p only minecraft:story/mine_diamond`
- Bedrock: `/achievement give <achievement> [player]` (works only for achievements that are unlocked in your current world)
- "Alban" – Replaces the original painting with a note from artist Kristoffer Zetterstrand (only in older versions).
- "Kebab med tre stjerner" – A kebab reference.
- "Donkey Kong" – A pixelated portrait of a monkey (very rare).
- "The Creeper" – Shows a creeper face.
- "Herobrine" – A painting with a creepy figure that looks like Herobrine (only in certain paintings).
- Disc 11 – Infinite loop and static; a reference to a lost glitch? Actually intentional.
- Disc 13 – Contains a ghostly sound that is actually a slowed-down creeper hiss.
- Disc "Pigstep" – Only found in Bastion Remnants (Bedrock Edition exclusive? No, added in Java too).
- In the Java Edition, the missing texture block (when a texture can't load) displays a purple/black checkerboard pattern. If you place it, it looks like a grid. Not exactly an Easter egg but a debugging tool.
- Herobrine – A fan-made creepypasta character. Mojang has never officially added Herobrine, but they have removed it from update notes as a joke ("Removed Herobrine" listed in many patch notes until 1.11).
- Ancient Cities (Deep Dark biome): Extremely rare, contain the Warden and skulk blocks. Only found in deepslate areas below Y=0.
- Woodland Mansions: Rare structures found in Roofed Forest biomes. Contain secret rooms (e.g., illager cages, wool rooms, plant rooms).
- Witch Huts: Sometimes have a cat spawn near them (black cat).
- Desert Temples: Have hidden TNT traps in the chest area. Press the pressure plate correctly to avoid explosion.
---
Easter Eggs
Paintings (Java & Bedrock)
Some paintings are based on real Minecraft developer photos or inside jokes:
Music Discs
Hidden Credits Text
When you beat the Ender Dragon and watch the credits (the End poem), the text is an actual poem written by Julian Gough. It's a philosophical narrative.
The Missing Texture / "Herobrine"
The "Potato of Knowledge" (Java Edition, removed)
In very early versions, a baked potato with the name "Potato of Knowledge" could be found via debug keys. It was a developer joke.
---
Hidden Features & Developer Secrets
The Far Lands (Glitch, but famous)
At extreme coordinates (around X/Z ±12,550,821), the terrain generation breaks down, creating massive walls and strange structures. This was a bug in Beta 1.7.3 and earlier, but is now considered a legendary secret. Not present in modern versions; you can only reach it via mods or older versions.
The End Poem (Java Edition)
After defeating the Ender Dragon, you can view the End Poem. It cannot be skipped for 30 seconds, but you can close the game and it will save your progress. The poem is actually a text file in the game's resources.
The Redstone Bug / "Piston Pushing Limit"
There is a known limit to how many blocks a piston can push (12). Exceeding this causes the piston to not extend. This is intentional but often discovered by players.
Structure Generation Secrets
The "Wandering Trader" Lemmings
When a Wandering Trader spawns, his llamas will occasionally spit at hostile mobs. If the trader dies, the llamas become wild and can be tamed.
The "Dragon Egg" Easter Egg
The dragon egg can be obtained only once per world after defeating the Ender Dragon. It teleports when you try to break it. To collect it safely, use a piston to push it into a torch hole, then pick up the item.
---
Exploit-Safe Secrets (No Glitches)
Finding the End Portal Without Eyes of Ender
You can locate strongholds by searching for dungeon patterns, but the easiest way is to throw an Eye of Ender and follow it. However, if you have cheats enabled, use `/locate stronghold`. Without cheats, you can dig straight down at the chunk coordinates derived from the seed? That's a complex exploit; simpler: craft an Eye of Ender.
The "One Punch" Achievement (Java)
Kill any hostile mob with a single hit using a weapon with Smite V, Strength II potion, critical hit, and possibly a Sharpness V sword. Not a cheat, but a secret technique.
Getting All Potion Effects in Survival
Through beacons, suspicious stew, and conduits, you can have many effects simultaneously. No cheat required.
---
Summary
Minecraft's "cheats" are commands that require enabling in world settings. Its secrets are abundant: Easter eggs in paintings, music discs, and the End Poem, hidden structures like Ancient Cities and mansions, and developer jokes like "Removed Herobrine" in patch notes. Whether you use commands to spawn items or explore to find every rare biome, Minecraft rewards both types of players. Always remember that enabling cheats in Bedrock Edition disables achievements, so choose wisely.