Monster Hunter: World
## Game Introduction: Monster Hunter: World ### Overview **Monster Hunter: World** is an action role-playing game developed and published by **Capcom**. Released in January 2018 for PlayStation 4 and Xbox One, with a PC (Steam) version following in August 2018, it is the fifth mainline installment ...

Download & Installation
Download & Installation Guide for Monster Hunter: World
This guide covers the legitimate ways to download and install Monster Hunter: World (including the Iceborne expansion) on all supported platforms. The game is available on PC, PlayStation 4/5, and Xbox One/Series X|S. There is no version for Nintendo Switch or mobile devices.
---
Supported Platforms and Official Sources
| Platform | Official Source(s) | Notes |
|---|---|---|
| PC (Windows) | Steam, Microsoft Store (Xbox Game Pass for PC) | Steam is the primary storefront. The Microsoft Store version is included with Game Pass Ultimate or Game Pass for PC. |
| PlayStation 4 & 5 | PlayStation Store (digital), Retail disc (PS4) | Backward compatible on PS5. Digital version includes both PS4 and PS5 via Smart Delivery (free upgrade to PS5 version, but note that the PS5 version is the same as PS4 Pro with boosted performance; no native PS5 app, but runs via backward compatibility). |
| **Xbox One & Series X\ | S** | Microsoft Store (digital), Retail disc (Xbox One) |
System Requirements (PC)
#### Minimum Requirements (for 1080p @ 30fps, Low settings)
- OS: Windows 7/8/8.1/10 (64-bit)
- CPU: Intel Core i5-4460 or AMD FX-8350
- Memory: 8 GB RAM
- GPU: NVIDIA GeForce GTX 760 or AMD Radeon R7 260X (2GB VRAM)
- DirectX: Version 11
- Storage: 50 GB available space (SSD recommended)
- Additional: Broadband internet connection, controller optional but recommended
- OS: Windows 10 (64-bit)
- CPU: Intel Core i7-3770 or AMD Ryzen 5 1500X
- Memory: 16 GB RAM
- GPU: NVIDIA GeForce GTX 1060 (3GB) or AMD Radeon RX 570 (4GB)
- DirectX: Version 11
- Storage: 50 GB SSD
- Additional: Same as minimum
- Digital version:
- Physical disc (PS4):
- PS5 note: The game runs via backward compatibility. No separate PS5 native app exists, but loading times are improved on PS5’s SSD.
- Digital version:
- Physical disc (Xbox One):
- Series X|S: The game benefits from auto HDR, faster loading, and higher framerates (up to 60fps on Series X).
- Steam: Steam account with purchased license.
- Microsoft (PC / Xbox): Microsoft account (Xbox profile) – required for multiplayer and Game Pass access.
- PlayStation: PlayStation Network account (free, but PlayStation Plus required for online multiplayer).
- Cross-play: Monster Hunter: World does not support cross-play between platforms. Each platform has its own ecosystem.
#### Recommended Requirements (for 1080p @ 60fps, High settings)
Important: The Iceborne expansion does not increase the requirements significantly, but an SSD greatly improves load times.
---
Step-by-Step Installation by Platform
#### PC – Steam
1. Create or log into a Steam account at [store.steampowered.com](https://store.steampowered.com).
2. Purchase and add the game – Search for "Monster Hunter: World" or "Monster Hunter World: Iceborne Master Edition" (which includes base game + expansion). Click "Add to Cart" and complete purchase.
3. Download Steam Client if not already installed – [https://store.steampowered.com/about/](https://store.steampowered.com/about/). Install and launch Steam.
4. Locate the game in your Library – Go to Library > Games and find "Monster Hunter: World".
5. Click "Install" – Choose installation directory (ensure at least 50 GB free). Select whether to install Iceborne (if separate) – typically it’s bundled.
6. Wait for download – Steam will download and automatically install. Time depends on internet speed.
7. Launch – Once installed, click "Play". The game will apply initial settings and may prompt for language selection.
#### PC – Microsoft Store / Xbox Game Pass for PC
1. Open the Xbox app (pre-installed on Windows 10/11) or download from Microsoft Store.
2. Subscribe to Game Pass (Ultimate or PC) or purchase the game outright from Microsoft Store.
3. Search for "Monster Hunter: World" in the Xbox app or Microsoft Store.
4. Click "Install" – Choose drive (avoid Windows system drive if low space). The download size is ~50 GB.
5. Wait for download & install – Progress appears in Xbox app. After completion, click "Play".
6. First launch – The game may require signing into your Xbox Live account and setting up graphics preferences.
#### PlayStation 4/5
1. On PS4/PS5, go to PlayStation Store.
2. Search for "Monster Hunter: World" or the Master Edition (includes Iceborne).
3. Select and purchase (or download if already owned).
4. Click Download – Ensure enough free space (50 GB).
5. After download, the game appears on your home screen. Launch to begin.
1. Insert the disc into the console.
2. If prompted, install the game data (may require the disc to be in the drive to play).
3. Downloads any necessary updates via internet (patch size may be large).
4. Launch from the game icon.
#### Xbox One / Series X|S
1. Open Microsoft Store on your console.
2. Search for "Monster Hunter: World" and purchase/claim.
3. Click Install – Select storage device (internal or external).
4. Download completes – Launch from Home or My Games & Apps.
1. Insert disc – console will begin installation automatically.
2. Download any required updates.
3. Game is playable immediately after installation.
---
Account Requirements
---
First Launch Setup
After installation, the game will start with the following typical initial screens:
1. Language Selection – Choose your preferred language for menus/subtitles (audio is fixed to Japanese/English depending on region; can be changed later in options).
2. Graphics Settings (PC only) – The game will auto-detect or ask you to select a preset (Low/Medium/High/Ultra). Customize resolution, frame rate limit, vsync, etc.
3. Controller Detection – Keyboard & mouse supported but the game is optimized for gamepad. On PC, the game will prompt you to use a controller if detected.
4. Save Data – The game will create a save file (cloud saving enabled on all platforms).
5. Optional DLC/Patch Notes – You may see a news screen about free DLC or events. Dismiss.
6. Profile Creation – Enter a character name and appearance (though this is part of the main game, not at launch).
---
Common Installation Errors and Fixes
| Error | Platform | Cause | Solution |
|---|---|---|---|
| "DirectX 11 not supported" | PC | Outdated GPU drivers or unsupported hardware | Update graphics drivers from NVIDIA/AMD. Ensure your GPU supports DirectX 11 (most do). |
| "Missing DLL" (e.g., MSVCP140.dll) | PC | Missing Visual C++ redistributables | Install the latest Visual C++ Redistributable package from Microsoft (both x86 and x64). |
| "Steam disk write error" | PC (Steam) | Permission issues or corrupt download | Run Steam as Administrator, free disk space, clear download cache (Steam > Settings > Downloads > Clear Cache). |
| Game fails to launch / crash on start | PC | Anti-cheat conflicts (e.g., Denuvo) or outdated drivers | Verify game files in Steam (right-click game > Properties > Local Files > Verify integrity). Disable overlays (Discord, NVIDIA). Update GPU drivers. |
| "Insufficient storage" error | All | Not enough free disk space | Free up space (need at least 50 GB, more for patches). Check your drive’s available space. |
| Microsoft Store download stuck at 0% | PC (MS Store) | Corrupt Windows Store cache | Run `wsreset.exe` (Windows Store Reset). Restart PC. |
| Playstation disc install fails | PS4/PS5 | Disc damage or dirty lens | Clean disc with soft cloth. Try reinstalling in safe mode (rebuild database). |
| Xbox installation stalling | Xbox One/Series | Network issues or system cache | Go to Settings > Network > Advanced > Alternate MAC Address > Clear. Restart console. |
Post-Installation Verification
After successfully installing, verify the following:
- Check for Updates – Launch the game; if a patch is available, it will prompt to download. Always install the latest version to access all content and fixes.
- Verify Game Files (PC) – In Steam, right-click game > Properties > Local Files > Verify integrity of game files. For Microsoft Store, use the Xbox app’s “Repair” option.
- Test Performance – Run the built-in benchmark (available in the title screen on PC under “Options > Graphics > Benchmark”). For consoles, ensure smooth gameplay in the first area.
- DLC Ownership – If you purchased the Iceborne expansion, verify that your version shows as “Master Edition” or that the expansion content is accessible (e.g., new character creation options, Seliana town). On PlayStation/Xbox, check your add-ons in the game’s management menu.
- Multiplayer Test – Join a low-level online session to confirm connectivity. Firewall issues may require allowing the game through Windows Firewall or router port forwarding (ports 27015-27030 for Steam).
- Save Data Backup – Consider manually backing up your save file (for PC, located in `%APPDATA%\SaveData\[Steam ID]\582010` – back this up periodically).
- Storage Management – Install on an SSD for significantly faster loading times (especially for Ancient Forest and Rotten Vale areas).
- High Resolution Texture Pack – Available as free DLC on all platforms (PC ~50 GB extra, PS4 Pro/Xbox One X ~10 GB). Only use if you have 4K display and sufficient VRAM.
- Language Packs – PC allows downloading additional voice languages via Steam’s DLC list (e.g., Japanese voice pack).
- Mods (PC Only) – Monster Hunter: World has an active modding community (via NexusMods). Always back up original files (or use a mod manager) and be aware that mods may cause issues with online play (use at own risk).
---
Additional Tips
---
Summary
Download and installation of Monster Hunter: World is straightforward on all platforms. Ensure you have a stable internet connection, sufficient storage, and the correct account. The game runs well on mid-range hardware and both last-gen and current-gen consoles. Follow the specific steps for your platform above, and if you encounter issues, refer to the common errors table. Happy hunting!

Game Introduction
Game Introduction: Monster Hunter: World
Overview
Monster Hunter: World is an action role-playing game developed and published by Capcom. Released in January 2018 for PlayStation 4 and Xbox One, with a PC (Steam) version following in August 2018, it is the fifth mainline installment in the long-running Monster Hunter series. The game redefined the franchise by introducing a fully connected, seamless open-world design and unprecedented accessibility while retaining the deep, challenging gameplay that fans love. A major expansion, Monster Hunter World: Iceborne, launched in September 2019 on consoles and January 2020 on PC, adding a new region, story, monsters, master rank quests, and mechanics.
Platforms
- PlayStation 4 (PS4)
- Xbox One
- PC (Microsoft Windows via Steam)
- PlayStation 5 and Xbox Series X|S (via backward compatibility with enhanced performance)
- The Hunter (Player Character) – A silent protagonist whose actions drive the narrative. Fully customizable appearance and equipment.
- Handler – The Hunter’s ever-present partner, providing quest information, navigation, and comic relief.
- Commander – Leader of the Fifth Fleet, overseeing operations from Astera.
- Field Team Leader – A seasoned hunter who guides the player through early quests.
- Serious Handler – A no-nonsense member of the Research Commission, especially prominent in the Iceborne story.
- The Admiral – Legendary hunter and head of the Research Commission.
- Trappers, Researchers, and Smithy – Key support NPCs who manage resources, research, and weapon crafting.
- Newcomers – World is the most accessible entry, with a lengthy tutorial, simplified systems, and an open-world that lowers the barrier to entry.
- Veterans – Despite accessibility, the game retains deep mechanics and high difficulty, especially in endgame content and Master Rank (Iceborne).
- Co-op Enthusiasts – The game shines in multiplayer, with easy SOS flares and seamless drop-in/drop-out co-op.
- Loot-Grind Fans – Players who enjoy Diablo or Destiny-style progression loops will appreciate the endless grind for decorations, augmentations, and layered armor.
- Story Quests (Assignments) – Linear narrative progression, often introducing new monsters or areas.
- Optional Quests – Repeatable hunts for materials, farming, and unlocking gear upgrades.
- Investigations – Randomized quests with modified conditions (time limit, number of faints, rewards) offering bonus drops.
- Expeditions – Free-roam mode to explore locales, gather resources, and hunt without a formal quest.
- Arena Quests – Fixed equipment challenges for solo or two-player, focusing on skill rather than gear.
- Event Quests – Time-limited special hunts with unique rewards, often for collaboration cosmetics or extreme challenges.
- Special Assignments (Iceborne) – Story-based quests that unlock new regions, mechanics, and final bosses.
- The Guiding Lands (Iceborne) – Endgame open-world region where players can lure specific monsters, gather unique materials, and fight tempered and elder dragons.
- Offline – The entire story can be played solo with a companion Palico (AI-controlled cat). The game does not require an internet connection except for updates and online multiplayer.
- Online – Up to 4 players can hunt together. The SOS Flare system allows players to summon help mid-quest. Session-based matchmaking lets players gather in hubs before quests. Voice chat and text chat are supported on all platforms.
- Cross-play – Not supported. PS4, Xbox One, and PC players cannot play together.
- Dedicated Servers – Capcom uses peer-to-peer connections for quest sessions, but a server handles matchmaking and sessions.
- Monster Hunter World: Iceborne – The only major paid expansion. It adds:
- Free Title Updates – Capcom released several free updates post-launch and during Iceborne, including:
- Microtransactions – Cosmetic only: gesture packs, sticker sets, hairstyles, and layered armor sets (no pay-to-win).
- A seamless, open-world with no loading screens between zones in a locale.
- Living ecosystems – Monsters interact with each other and the environment; you can use the terrain to your advantage (e.g., triggering a falling boulder, luring a monster into a trap, or using a dam to create a flood).
- True co-op integration – The SOS Flare allows any player to join any quest, eliminating the old complex lobby system.
- High-quality visuals and sound – The game is stunning on all platforms, with detailed monster animations, dynamic weather (e.g., rainstorms, day/night cycles), and a sweeping orchestral score.
- Accessibility without dumbing down – While tutorials and UI improvements welcome newcomers, the core combat remains punishingly difficult, rewarding mastery and preparation.
Story & Setting
Set in the New World—a vast, uncharted continent across the sea—players take on the role of a Hunter sent by the Commission to investigate the mysterious Elder Crossing. This periodic migration of colossal Elder Dragons threatens the ecological balance. The story follows the Hunter as they establish the Fifth Fleet base in Astera, a mobile town built on a ship, and later relocate to the Seliana Supply Cache in the Iceborne expansion. The narrative weaves through discovering the ancient Everstream, battling the fearsome Zorah Magdaros, and eventually confronting the hidden cause behind the Elder Crossing: the colossal Xeno'jiiva. In Iceborne, the plot expands to the frozen Hoarfrost Reach, where a new threat, Velkhana, triggers a dangerous interaction between two legendary Elder Dragons.
Main Characters
Gameplay & Core Appeal
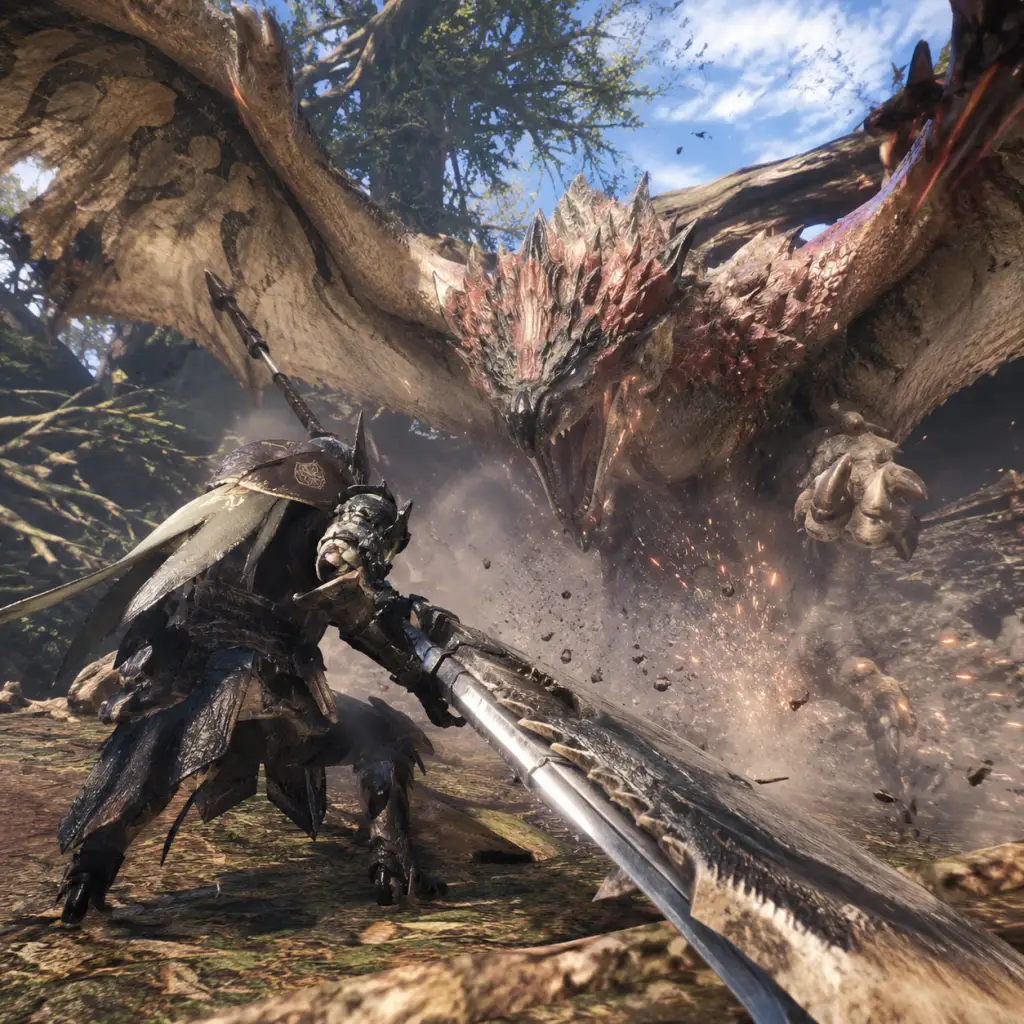
Monster Hunter: World combines third-person action combat with deep RPG mechanics and loot-driven progression. The core loop: hunt massive monsters, carve parts, craft better gear, and hunt even stronger monsters. Combat requires mastery of 14 unique weapon types (e.g., Great Sword, Charge Blade, Bow), each with distinct movesets and strategies. The game emphasizes preparation, environmental interaction, and teamwork. Monsters behave like living ecosystems—they hunt, sleep, eat, fight each other, and can be affected by terrain traps, environmental hazards, and status effects. The Slinger, a versatile tool, allows grappling, launching projectiles, and using environmental ammo. Iceborne added the Clutch Claw, enabling wall slams and tenderizing monster parts.
Target Audience
Game Modes
Online & Offline Support
DLC & Expansions
- A new story chapter set in the Hoarfrost Reach.
- Master Rank (a new difficulty tier above High Rank).
- New monsters (e.g., Banbaro, Barioth, Glavenus, Velkhana, Shara Ishvalda).
- The Clutch Claw mechanic.
- The Guiding Lands – an endgame biome where players control monster spawns.
- New weapon attacks for all 14 types.
- New armor sets, layered armor, and the Rajang / Furious Rajang variants.
- Deviljho, Lunastra, Behemoth (Final Fantasy XIV crossover), Leshen (The Witcher 3 crossover), Safi'jiiva, Alatreon, Fatalis.
- Seasonal festivals (Appreciation Fest, etc.) offering limited-time events and gear.
What Makes Monster Hunter: World Unique
Before World, the series was niche, with segmented zones and less approachable systems. World broke that mold by offering:
Conclusion
Monster Hunter: World stands as Capcom’s best-selling game of all time (over 22 million copies by 2024), and for good reason. It revitalized a beloved franchise, introduced millions to the thrill of the hunt, and set a new standard for action RPG co-op gameplay. Whether you’re a seasoned hunter or a complete beginner, the New World awaits—full of danger, discovery, and the unyielding satisfaction of taking down your first (or hundredth) colossal beast.
Getting Started
Getting Started Guide for Monster Hunter: World (Newcomers)
Welcome to the New World! Monster Hunter: World is an action RPG where you hunt giant monsters, craft gear, and explore vast ecosystems. This guide focuses on your first hours, the biggest pain points for beginners, and everything you need to survive your first day.
First Hour Walkthrough: What to Expect
Step 1: Character Creation (10-15 mins)
- Customize your hunter (appearance, voice, gender). This does not affect stats.
- Choose a Palico (cat companion) appearance. Your Palico is invaluable in combat.
- Both can be changed later with special items (but that's endgame). Take your time.
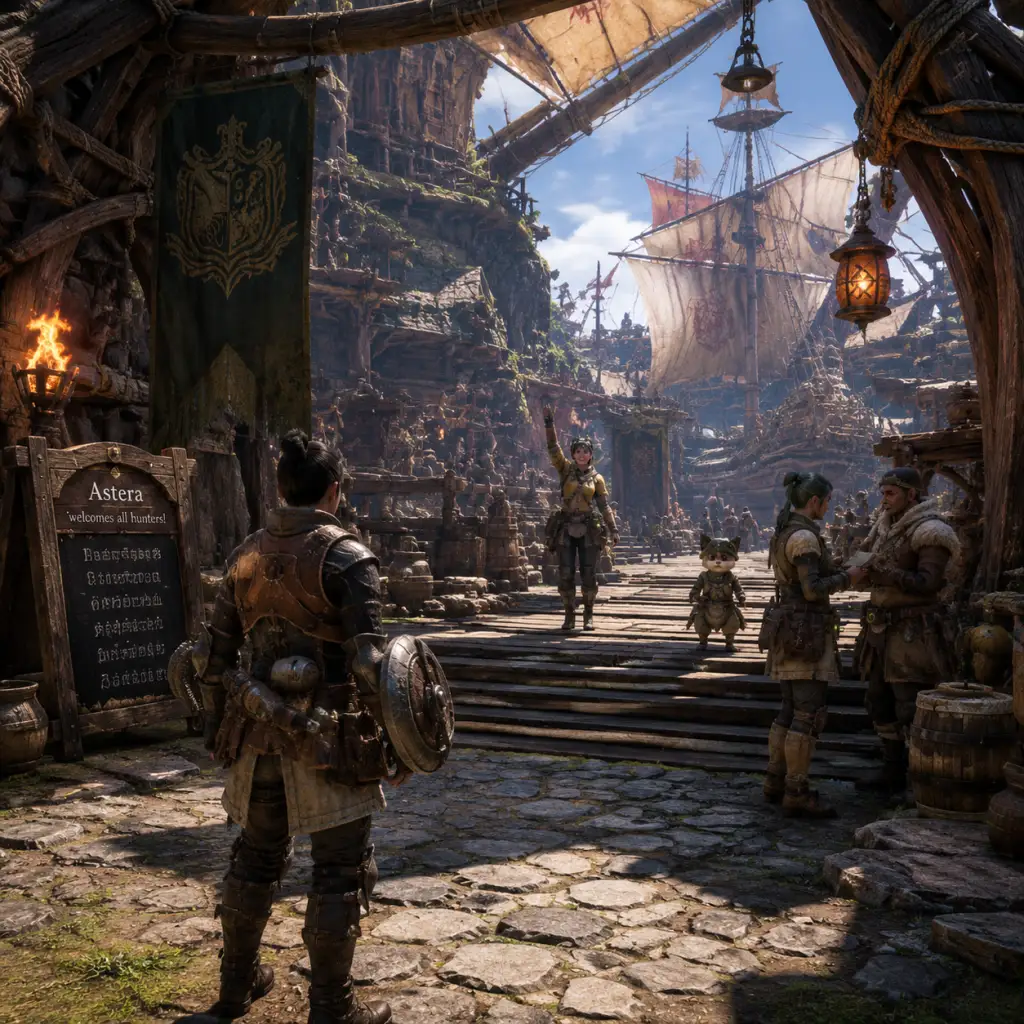
- You wake up in a ship arriving at Astera (the main hub). Follow the tutorial prompts.
- Learn to move: Left stick moves, right stick controls camera. R3 (click right stick) locks on to monsters.
- Pick up items on the ground (bones, herbs, mushrooms). Press Triangle/Y to gather.
- Speak to the quest giver (a woman with an exclamation mark) at the Research Base.
- Your first quest is to hunt small Jagras in the Ancient Forest. You start with basic equipment (Iron Sword & Shield or equivalent depending on weapon choice).
- Follow the scoutflies (green particle trails) to the monster. Attack with R2/RT (light) and Triangle/Y (heavy).
- Kill 5 small Jagras. Use the carving knife after each kill to gather materials.
- Return to camp and report to complete the quest. You earn experience and ingredients.
- Astera has several facilities:
- Accept optional quests from the Quest Board (Exclamation marks on map).
- Craft the Leather Armor set (low cost from early bones) for defense.
- Eat a meal at the Canteen before each hunt (use the Chef's Choice for balanced buffs).
- Stock up on Potions and First Aid Meds from the box in your room or the Provisions NPC.
- No wrong choices – appearance is purely cosmetic.
- Palico: Choose armor color and pattern (affects not stats, but Palico gadgets unlock later).
- Voice can be changed at the in-game item shop (Face/Barber).
- Body type: Preset options only (cannot adjust height/weight beyond presets).
Step 2: Opening Cinematic & Basic Movement (5 mins)
Step 3: First Quest – \"The Great Journey Begins\" (15-20 mins)
Step 4: After First Quest – Explore Astera (10 mins)
- Resource Center (blue icon): Bounties, investigations, and research points.
- Smithy (anvil icon): Craft and upgrade weapons/armor.
- Canteen (fork/knife icon): Eat before hunts for stat boosts.
- Provisions NPC: Buy basic items (potions, rations).
Step 5: Equip & Eat (5 mins)
Character Creation Details
Controls on All Platforms
#### PlayStation 4 (PS4)
| Action | Button |
|---|---|
| Move | Left Stick |
| Camera | Right Stick |
| Light Attack | R1 |
| Heavy Attack | R2 |
| Special Ability (weapon) | Circle |
| Evade/Sprint | X (hold) |
| Sheath/Use Item | Triangle |
| Target Lock | R3 (click right stick) |
| Interact/Gather | Square |
| Item Wheel (Hold) | L1 + left stick choose, release to use |
| Action | Button |
|---|---|
| Move | Left Stick |
| Camera | Right Stick |
| Light Attack | RB |
| Heavy Attack | RT |
| Special Ability | B |
| Evade/Sprint | A (hold) |
| Sheath/Use Item | Y |
| Target Lock | R3 |
| Interact/Gather | X |
| Item Wheel (Hold) | LB + left stick choose, release to use |
| Action | Key |
|---|---|
| Move | W/A/S/D |
| Camera | Mouse |
| Light Attack | Left Mouse Button |
| Heavy Attack | Right Mouse Button |
| Special Attack | Spacebar (while weapon drawn) |
| Evade | Ctrl (hold) or Spacebar (single tap) |
| Sprint | Shift (hold) |
| Sheath/Use Item | E |
| Interact/Gather | F |
| Item Wheel | Q (hold) + mouse move, release to use |
| Target Lock | Middle Mouse Click |
UI Overview (Essential Elements)
HUD (heads-up display):
- Top-left: Health (green), Stamina (yellow). Stamina depletes when sprinting/dodging. Eat rations to refill.
- Below health: Sharpness bar (melee weapons only). Keen weapons bounce less.
- Top-right: Mini-map with scoutflies, monster icons (eye open = monster sees you; eye closed = it doesn't).
- Bottom-left: Item bar (quick-select with directional pad on consoles, number keys on PC).
- Bottom-center: Weapon specific gauges (e.g., for Switch Axe, Charge Blade, etc.).
- Map: Shows whole area, can set waypoints.
- Equipment: Equip weapons, armor, charms, decorations.
- Items: Manage consumables, crafting materials.
- Craft List: Craft potions, traps, ammo from gathered materials.
- Hunter Notes: Monster weaknesses, ecology info.
- Eat before every quest (Canteen).
- Collect everything you see: herbs, honey, ore, bones.
- Accept bounties from the Resource Center (they reward armor spheres for defense upgrades).
- Upgrade your armor early (especially the chest piece).
- Use the Training Area to practice combos.
- Use the "Rest" option in camp to skip night cycles if you prefer daytime (some monsters are nocturnal).
- Sell materials – You need them for crafting/upgrading. Only sell excess (e.g., extra bones after you've made armor).
- Ignore the canteen – Meals give 50+ health and stamina, attack/defense buffs.
- Charge into large monsters without learning patterns – Observe first, then attack.
- Use the Defender weapon or Guardian armor (if you have Iceborne DLC). These are overpowered and will skip the learning curve, making the base game trivial but later content frustrating. Save them for NG+ or speedrunning.
- Farm the same monster endlessly – Progression is about variety. But do repeated hunts for specific rare drops.
- Herbs → Potions (healing)
- Honey → Mega Potions (more healing)
- Ore (Iron Ore, Earth Crystal) → Upgrade weapons
- Bones (Monster Bone S, M) → Craft armor
- Monster parts (scales, claws, fangs) → Gear upgrades
- Fire Herb, Ivy, Spider Web → Early traps (pitfall, shock)
- Potions (herb)
- Mega Potions (potion + honey)
- Antidote (antidote herb)
- Rations (well-done steak later for stamina)
- Paintballs (track monsters)
- Basic traps (for capturing monsters – capture rewards more parts)
- Early game: Leather set (easy to make, decent defense). Then upgrade to Bone or Alloy set.
- Focus on skills like Health Boost, Attack Boost, or Defense Boost.
- [x] Complete character creation (hunter + Palico).
- [x] Finish the tutorial quest (kill 5 small Jagras).
- [x] Explore Astera: Talk to every NPC with an exclamation mark.
- [x] Unlock the Resource Center bounties (talk to the cat near the exit to Ancient Forest).
- [x] Craft Leather armor set and upgrade with Armor Spheres.
- [x] Eat at the Canteen once.
- [x] Gather herbs, honey, and ore in the Ancient Forest during a free roam.
- [x] Complete first large monster hunt: Great Jagras.
- [x] Learn your chosen weapon's basic combos in Training Area (at least 10 minutes).
- [x] Set up your radial menu (Item Wheel) with potions, antidotes, and traps.
- [x] Save the game (auto-saves often but manual save after significant progress).
- Patience is key. You will cart (faint) – it's fine. Learn from each cart.
- Watch the monster – Every attack has a telegraph (wind-up, roar, body movement).
- Use the environment – Vine traps, falling rocks, and even other monsters can help you.
- Join a Session – Playing with others reduces pressure. Use the SOS flare or join low rank quests.
- Read Hunter Notes – They show monster weaknesses (element, part breakability).
Menu Screens (Options/Touchpad):
Essential Early Objectives (First 2-3 Hours)
1. Complete the first 3 assigned quests (Low Rank 1-3 stars). They unlock the base camp, farm cultivation, and the ability to use the equipment box.
2. Unlock the Botanical Research (through optional quests from the chief botanist). Grow herbs, honey, and mushrooms for potions and antidotes.
3. Craft a weapon from a monster – Kill Great Jagras to get its hide/claw. Upgrade your weapon at the Smithy.
4. Learn your weapon's combos – Practice in the Training Area (talk to the cat in your room). Pick one weapon and stick with it for a while.
5. Use the SOS Flare – If stuck on a tough monster, fire an SOS flare from the menu (when in a quest). Other players can join to help.
What to Do First (And What to Avoid)
DO:
DO NOT:
Early Resource Priorities
Materials to hoard:
Items to craft first:
Armor priority:
Common Beginner Mistakes (And How to Avoid)
1. Greedy attacks – Monster Hunter punishes over-commitment. Attack 1-2 times, then dodge.
2. Wrong weapon for the fight – Try all 14 weapons in Training Area. Some weapons have different matchups (e.g., hammer vs. flying monsters is hard; use ranged or use flash pods).
3. Not using items – Potions, traps, flash pods, dung pods (to escape from a second monster) are essential. Bind them to quick access.
4. Ignoring the environment – Use wedge beetles to mount monsters, falling boulders for extra damage, and smoke/water for ambushes.
5. Not upgrading gear – Armor spheres are easy to get from bounties. Upgrade armor to reduce damage substantially.
6. Not capturing – Capturing a monster ends the hunt faster and gives extra rewards. Use a shock trap + tranq bombs when the monster limps or has a skull icon on the map.
7. Not eating before a hunt – End up with low health/stamina, making fights harder.
8. Running away too far – Staying near the monster but at a safe distance lets you learn attacks. Running far away wastes time.
Day-One Checklist (First Play Session)
Final Advice for New Hunters
Now go forth, hunter! The New World awaits. Happy hunting!
Core Gameplay
Core Gameplay Guide for Monster Hunter: World
This guide breaks down the core gameplay loop, systems, and progression of Monster Hunter: World across four distinct player progression tiers: Early Game, Mid Game, Late Game, and Endgame (including the Iceborne expansion). Each tier covers the main gameplay loop, combat/interaction, progression, exploration, quests/missions, economy, character/build growth, and endgame structure.
Early Game (Hunter Rank 1–5, Low Rank Assignments)
Main Gameplay Loop:
1. Accept a quest or expedition from the Astera Quest Board.
2. Prepare equipment, items, and canteen meal.
3. Track the target monster using scoutflies and clues.
4. Engage the monster in combat, breaking parts and dealing damage.
5. Capture or slay the monster to complete the quest.
6. Carve materials from the monster, return to Astera.
7. Use materials to forge/upgrade weapons and armor at the Smithy.
8. Repeat with stronger monsters to progress the story.
Combat & Interaction Systems:
- Weapon Types: 14 weapon classes (e.g., Great Sword, Long Sword, Bow, Hammer). Each has unique combos, move sets, and special mechanics (e.g., Insect Glaive’s kinsect, Charge Blade’s phial management).
- Basic Controls: Light attack, heavy attack, dodge roll, sheathe weapon. Use items from radial menu.
- Health & Stamina: Health bar (red) increases with max potions/meals; stamina (green) affects sprinting, dodging, and attacks. Stamina depletes and recovers over time.
- Sharpness: Blademaster weapons have a sharpness gauge (green to red). Higher sharpness = higher damage, less bounce. Use Whetstone to sharpen.
- Monster Tells & Dodging: Learn attack patterns (wind-ups, roars). Dodge rolls have invincibility frames (i-frames).
- Slinger: Use environmental projectiles (stones, redpits) to stagger monsters or trigger traps.
- Mounting: Clutch Claw not available yet; only mounting via aerial attacks (jumping off ledges, slide attacks).
- Item Usage: Potions, antidotes, traps (Pitfall, Shock), flash pods, dung pods. Crafting items on the fly.
- Hunter Rank (HR): Increases by completing main quests and optional quests. Early cap at HR 11 after Zorah Magdaros.
- Story Quests (Assignments): Linear narrative: Great Jagras → Kulu-Ya-Ku → Pukei-Pukei → Barroth → Jyuratodus → Tobi-Kadachi → Anjanath → Rathalos/Diablos → Zorah Magdaros.
- Unlocks: Canteen ingredients, botanical research, cultivation, tailraider safari, and basic gear upgrades.
- Locations: Ancient Forest, Wildspire Waste (first two maps).
- Scoutflies: Follow the glowing green particles to track footprints, mucus, etc. Increases research level for that monster, unlocking tracking shortcuts.
- Gathering: Collect herbs, ore, bones, honey, mushrooms, and endemic life. Use gathering net, pickaxe, and bug net from item box.
- Camp System: Unlock and fast travel to base camps. Expand camps by delivering supply requests (e.g., resources for the Provisions Depot).
- Assignments (Story): Required to progress HR and unlock new areas.
- Optional Quests: Unlock new canteen ingredients, mantles, and tool upgrades. Some repeatable for materials.
- Investigations: Randomly generated quests with different conditions (time limit, faints allowed, rewards). Higher reward boxes give more materials.
- Expeditions: Free-roam to explore, gather, hunt without time limit. Use to farm low-rank materials or find tracks.
- Bounties: Daily/weekly tasks (e.g., hunt X small monsters, gather Y items) for armor spheres and research points.
- Zenny: Main currency from quest rewards, selling items. Used to forge/upgrade gear, restock items.
- Research Points (RP): Earned from gathering, tracking monsters, completing bounties. Used to upgrade canteen, botanical research, and unlock provisions from the Melder.
- Materials: Monster parts (carves, breaks, captures), ores, bones. Sell excess for Zenny.
- Melding Pot: Convert unwanted materials into consumables (e.g., might seeds, mega potions) or decorations (later).
- Armor Skills: Each armor piece grants skills (e.g., Attack Boost, Health Boost). Early game aim for skills like Health Boost, Divine Blessing, or element-specific resists.
- Weapon Upgrades: Forge new weapons from monster materials or upgrade from base tree. Each weapon tree branches into different elements/statuses.
- Decorations: Not available until High Rank. Early game relies on armor pieces for skills.
- Charm: Craft low-rank charms at the Smithy for additional skill points (e.g., Attack Charm I).
- Canteen: Eat before quests for stat boosts and food skills (e.g., Felyne Moxie prevents cart once). Unlock ingredients by completing optional quests and gathering.
- No true endgame in Low Rank. Once you complete the Zorah Magdaros assignment, you unlock High Rank quests and the story continues.
- Low Rank Endgame Activities: Finish optional quests for canteen ingredients, complete all deliveries, capture endemic life, farm low-rank monster materials for all weapons/armor you want before advancing.
- Gardening: Upgrade Botanical Research to cultivate healing items (e.g., honey, herbs).
- Same as Early Game but with High Rank monsters (stronger, new moves, more health).
- New loop elements: Elder Dragon Hunts (e.g., Nergigante, Kushala Daora, Teostra) and Investigation Grinding for decorations and streamstones.
- Decorations become a major part of builds.
- Mantles & Boosters: Unlock via optional quests (e.g., Vitality Mantle, Temporal Mantle). Consumable tools with cooldowns. Boosters (e.g., Affinity Booster) provide area buffs.
- Clutch Claw: Not yet available (Iceborne only). Mid game uses base-game mechanics only.
- New Monster AI: Aggressive patterns, new area-specific hazards (e.g., Rotten Vale effluvium, Coral Highlands verticality).
- Part Breaks: Essential for breaking specific parts (tails, horns) to get rare materials. Use blunt damage for heads, slashing for tails.
- Capture vs. Slay: Capturing gives more rewards and ends fight early. Use traps and tranq bombs.
- Hunter Rank Cap: Initially unlocked to HR 29 after completing base game story ( ??? assignment: \"The White Winds of the New World\"? Actually after Xeno'jiiva, HR cap is 29. Then you need to complete \"Beyond the Blasting Scales\" (double Bazelgeuse) to unlock HR 49, then \"The Thronetaker\" (double Tempered Kirin) for HR 100.
- Story Assignments: From Pink Rathian → Legiana → Odogaron → Rathalos/Diablos (HR 11) → Bazelgeuse (HR 13) → Nergigante → Kushala Daora → Teostra → Xeno'jiiva (HR 16).
- Unlocks: Mantles, boosters, canteen ingredients, tailraider safari upgrades, botanical research max, Argosy trade routes.
- Research Commission: Unlock tempered investigations after HR 30. Tempered monsters drop decorations and streamstones.
- New Maps: Coral Highlands, Rotten Vale, Elder’s Recess (unlocked gradually). Each has unique gathering points and endemic life.
- Camp Unlocks: More camps per map (e.g., Ancient Forest has 6). Deliver supply requests from each map’s hub to unlock.
- Tailraider Safari: Send palicoes on expeditions to bring back materials (including unique items like dragonbone).
- Fishing & Capturing Endemic Life: Use fishing rod and capture net for small creatures that can be kept in your room.
- Optional Quests: High Rank versions of earlier fights; unlock critical tools like Mantles (e.g., \"Trouble in the Ancient Forest\" for Vitality Mantle).
- Investigations: High Rank investigations with up to 5 reward boxes. Tempered investigations (purple rewards) unlock after HR 30. Focus on these for decorations.
- Special Assignments: Unique quests like \"The Blazing Sun\" (Teostra) or \"The Stormy Wind\" (Kushala Daora).
- Event Quests: Timed events offering special rewards (e.g., collaboration gear, layered armor).
- Arena Quests: Fixed equipment fights for coins used to craft special gear (e.g., Brigade set).
- Zenny & RP: Higher quest rewards. Sell excess materials (e.g., low-rank parts, common ores).
- Decorations: Rare drops from tempered investigations (Tier 1, 2, 3). Tier 1: low rarity, Tier 2: medium, Tier 3: highest rarity (e.g., Attack Jewel).
- Streamstones: Used to augment weapons (unlock after HR 50). Only drops from Tier 3 tempered monsters (like Tempered Nergigante).
- Melding: Can meld decorations using decorations obtained from quests. High risk, low reward (mostly for clearing inventory).
- Armor Skills: Optimize skills via mixing sets (e.g., Rathalos chest + Kaiser greaves for Weakness Exploit). Use Decorations to slot skills into armor (level 1–4 slots).
- Weapon Augmentation: After HR 50, augment weapons with streamstones to add health regen, affinity, attack, or defense. Need hero streamstones for Rarity 8 weapons.
- Charm Upgrades: Upgrade charms to level 3 or 4 (e.g., Attack Charm III).
- Recommended Skills: Weakness Exploit, Critical Boost, Attack Boost 4, Health Boost 3, Elemental skills for specific monsters.
- Build Examples:
- Tempered Monsters: The main endgame loop. Hunt tempered investigations for decorations and streamstones. The final goal is to obtain enough Attack Jewels to max Attack Boost (though extremely rare).
- Arch-Tempered Elder Dragons: Event quests with extremely hard versions of Elders (e.g., Arch-Tempered Nergigante, Teostra). Drop tickets for gamma armor sets and layered armor.
- Behemoth & Leshen: Crossover monsters with unique mechanics (Mojang?). Behemoth is a repurposed final boss. Requires team coordination.
- Optional Quests Completion: Unlock all tool upgrades and mantles.
- Achievement Hunting: Crowns for small/gold large monsters, complete all optional quests, obtain all weapons.
- Same loop but with Master Rank (MR) difficulty. Monsters have new moves, more health, and new subspecies (e.g., Viper Tobi-Kadachi, Coral Pukei-Pukei).
- Clutch Claw introduced: grapple onto monsters to weaken parts (tenderize) or wallbang (flinch). Essential for damage optimization.
- New Hub: Seliana replaces Astera as main base. Has new services: Steamworks, Guiding Lands management.
- New Items: Potions upgrade to Max Potions become more valuable. Use Dash Juice, Demon Drug, Armorskin.
- Clutch Claw: L2 + Circle (PS4) to grapple. Can attack weakened parts (L2 + R2) to drop slinger ammo or wallbang (face monster into wall, then L2 + R2). Tenderizing increases critical hit rate on that part.
- Slinger Burst: New move; fires slinger ammo in a burst, staggering monster. Good for quick openings.
- Weapon Movesets: Each weapon got new combos (e.g., Long Sword: Iai Slash, Charge Blade: Savage Axe mode).
- Flinch Shots: Use slinger ammo (e.g., bomb pods, scatternuts) to flinch monsters and create openings.
- Environmental Hazards: More use of wedge beetles, boulders, and gatherack animals.
- Mounting Changes: Mounting is easier with Clutch Claw aerial attacks.
- Master Rank (MR): Separate from HR. Progression through story assignments: Beotodus → Banbaro → Viper Tobi-Kadachi → Nightshade Paolumu → Coral Pukei-Pukei → Barioth → Nargacuga → Glavenus → Brachydios → Tigrex → Shrieking Legiana → Velkhana → Namielle → Shara Ishvalda.
- Unlocks:
- Special Assignments: Unlock additional monsters like Rajang, Stygian Zinogre, Brute Tigrex, Furious Rajang, Raging Brachydios (post-launch updates).
- New Maps: Hoarfrost Reach (full map), Guiding Lands (unique endgame map with level system).
- Guiding Lands: After main story. Has 6 regions (Forest, Wildspire, Coral, Rotten, Tundra, Volcanic) that level up individually (1–7). Higher levels spawn stronger monsters (Tempered, then Arch-Tempered). Materials from GL are essential for augmenting Master Rank gear.
- Gathering: Clutch Claw can break gathering nodes for double yields (e.g., mining outcrops).
- Room Customs: New room in Seliana with additional décor from endemic life.
- Assignments (Story): 20+ assignments to complete Iceborne main story.
- Optional Quests: New optional quests for tools (e.g., Rocksteady Mantle upgrade, Temporal Mantle upgrade).
- Investigations: Master Rank investigations (MR 1–6). Rewards include decorations (level 4), spiritvein gems, and materials.
- Event Quests: Many post-launch events (e.g., \"The Wrath of Thunder Descends\" for Zinogre, \"Safi'jiiva Siege\").
- Sieges: Kulve Taroth (High Rank) and Safi'jiiva (Master Rank). Cooperative sieges requiring multiple runs to pursue and slay.
- Guiding Lands: Not a quest but an expedition-like region with infinite respawns of monsters. Use lures to summon specific monsters.
- Zenny & RP: Still used. RP also used to upgrade regions in Guiding Lands and for melding.
- Melding: New melding recipes for decorations (especially level 4 decos). Celestial Wyverian Print can be melded for rare monster parts.
- Steamworks: Minigame that provides random items (consumables, lucky vouchers, capture nets, treasure). Use fuel from gathering (Dragonvein Coal, Guiding Lands materials).
- Investigations: Reward boxes can contain monster materials, decorations, and spiritvein gems (used for augmenting MR gear).
- Rockets: Not applicable.
- Master Rank Armor: New sets with higher defense and new skills (e.g., Master's Touch, Divine Blessing 5). Mix sets for skill efficiency.
- Weapon Trees: New Iceborne weapons with higher raw and element. Upgrade to Rarity 10–12.
- Augmentations: Weapon augments require Guiding Lands materials (spiritvein gems, bones, monster parts). Health Regen is a priority. Armor augment for extra defense.
- Charms: Upgrade to level 5 (e.g., Attack Charm V).
- Decorations: Level 4 decorations (combination skills like Critical/Protection, Attack/Expert). Farm tempered Teostra, Rajang, and other Tier 3 monsters for max level decorations.
- Meta Builds: Aim for Master's Touch (Teostra armor) + Weakness Exploit 3, Critical Eye 7, Attack Boost 4, Agitator 7, Crit Boost 3. For elemental builds, use Safi'jiiva armor or Silver Rathalos essence.
- Examples:
- Guiding Lands Grind: Level regions to 7 to unlock tempered elder dragons and rare materials for augmentations. Farm for Spiritvein Gems (hard) and large elder dragon gems.
- Tier 3 Tempered Investigations: For level 4 decoration farming. Best monsters: Tempered Rajang, Tempered Teostra, Tempered Lunastra.
- Safi'jiiva Siege: Requires a full session. Siege loop: break parts, gather energy, repel Safi. Rewards include Safi weapons (awakened weapons with custom upgrades) and Dracolite to awaken.
- Kulve Taroth Siege (High Rank): Still relevant for Kjarr weapons (critical element) until you get Safi weapons or better.
- Arch-Tempered Master Rank Events: Post-launch events like Arch-Tempered Velkhana, Arch-Tempered Namielle. Drop tickets for layered armor and special pendants.
- Raging Brachydios & Furious Rajang: Special assignments for higher tier weapons and armor.
- Alatreon & Fatalis: Final challenge monsters. Alatreon requires elemental damage check; Fatalis is ultimate gear check. Their materials are used for best-in-slot weapons and armor.
- Continuous loop of hunting Tier 3 tempered monsters in investigations and Guiding Lands, sieges (Safi, Kulve), and fatalis/Alatreon farming.
- Goal: Maximize damage builds, acquire all rare decorations, fully augment all weapons, and get crown achievements.
- Daily: Check bounties, do Steamworks, maybe a few investigations for decos.
- All mechanics fully unlocked. Clutch Claw is mandatory for optimal damage (tenderize + wallbang).
- Consumables: Use Mega Demon Drug, Mega Armorskin, Dash Juice, Might Seed, Demon Powder, etc. Consistently.
- Multiplayer Scaling: Monsters scale with number of players (2-player is 2.6x health, 3-4 is 3.2x). Solo or 4-player is generally easier due to predictability.
- Palico Gadgets: Upgrade to max level: Vigorwasp Spray (heal), Flashfly Cage (traps), Coral Orchestra (buff), Plunderblade (extra materials).
- MR Cap: Up to MR 999. Increases by completing quests and Guiding Lands hunts.
- Post-Story Assignments: Special assignments for Rajang, Stygian Zinogre, Raging Brachydios, Furious Rajang, Alatreon, Fatalis.
- Guiding Lands Level: Max level 7 per region. Tundra+Volcanic unlocked via special quests (Gold Rathian, Silver Rathalos, Brute Tigrex, Scarred Yian Garuga).
- Guiding Lands: Optimize region levels to get materials needed for specific augments (e.g., Tempered Namielle for Spiritvein Solid Bone). Use Lures from the NPC to summon desired monsters.
- Treasure Hunts: New expedition side quests in Hoarfrost Reach and other maps for treasure pendants.
- Event Quests: Rotating schedule for all event quests (e.g., “The Greatest Jagras” for HR decos, “The Name’s Lavasioth!” for decos, “The Lingering Frost” for Velkhana tickets).
- Sieges: Safi'jiiva siege rotates with Kulve Taroth every two weeks. Best to join full sessions.
- Investigations: Focus on Tier 3 tempered monsters with at least 4 reward boxes for decorations.
- Arena & Challenge Quests: For competitive scores and special rewards like the Brigade layered set.
- Zenny: Usually overflowing; sell extra monster parts and decos.
- Decorations: Farm for rarity 12 decorations like Attack Jewel+ 4, Handicraft Jewel, Guard Up, Shield Jewel, and skill combinations. Use Melding Tickets from Steamworks to do Base Melding (rare decos).
- Guiding Lands Materials: Specific bones and monster specific parts for augments and charms. Use a mining hammer for high efficiency.
- Steamworks: Overdrive rewards often include Gold Melding Tickets (guaranteed rarity 7/8 decos) and Celestial Wyverian Print.
- Max Augmentation: All weapons augmented with Health Regen, Affinity, and Slot Upgrade. Armor fully augmented with defense and elemental resist.
- Best-in-Slot Builds:
- Layered Armor: Unlocked via events, Guiding Lands materials, and special requests.
- Pendants & Gestures: Cosmetic rewards from achievements and Alatreon/Fatalis.
- Fatalis Farming: The hardest monster in the game. Requires full endgame gear. Complete the special assignment to unlock farming. Fatalis weapons are best for raw builds. Armor pieces are used in many meta sets.
- Alatreon Farm: He is difficult but offers elemental checks. His weapons are top for some elements (dragon, fire, ice). Armor is niche for elemental builds.
- Achievement Hunting: Gold Crowns for all large monsters (tricky). Complete all optional quests (including MR). Reach MR 999. All endemic life captures.
- Speedrunning & Challenge Runs: Use mods? On console, self-imposed restrictions (no armor, no items).
- Supporting New Players: Join low-rank hunts via SoS flares to help others, earn guild cards and titles.
Progression:
Exploration:
Quests & Missions:
Economy:
Character/Build Growth:
Endgame Structure (Early):
Mid Game (Hunter Rank 6–15, High Rank Assignments & Base Game Story)
Main Gameplay Loop:
Combat & Interaction Systems (High Rank Changes):
Progression:
Exploration:
Quests & Missions:
Economy:
Character/Build Growth:
- Dragon Piercer Bow: Rathalos head, Dober chest, Val Hazak arm Nergigante waist, Diablos legs. Decorations: Tenderizer, Critical, Spread/Power Shots.
- Great Sword Crit Draw: Velkhana? No, base game: use Wyvern Ignition "Impact" (event weapon) with non-elemental boost, Focus, Crit Draw, Quick Sheathe.
Endgame Structure (Base Game):
Late Game (Iceborne Expansion, Master Rank, Hunter Rank 16–69 before post-game)
Main Gameplay Loop:
Combat & Interaction Systems (Iceborne Additions):
Progression:
- MR 1: Clutch Claw, new base camp unlocks.
- MR 3: Steamworks unlocked.
- MR 4: Guiding Lands unlocked after main story completion (actually after Shara Ishvalda).
- MR 6: Post-story unlocks Tempered monsters and layered armor from event quests.
Exploration:
Quests & Missions:
Economy:
Character/Build Growth:
- Blast CB: Lightbreak Charge Blade (Raging Brachydios) with Agitator 7, Artillery 5, Capacity Boost.
- Frostcraft GS: Velkhana armor for Frostcraft skill, combined with Great Sword's draw attacks.
Endgame Structure (Iceborne Post-Story):
Endgame (Post-Main Story, after Shara Ishvalda, HR/MR 100+ & All Updates)
Main Gameplay Loop:
Combat & Interaction Systems (Master Rank):
Progression:
Exploration:
Quests & Missions:
Economy:
Character/Build Growth:
- Melee Raw: Fatalis armor (4-piece) + Vaal or Brachydios legs? Actually Fatalis armor (5-piece is best due to True Razor Sharp + True Spare Shot + high skill points). Weapons: Fatalis (Lightbreak for blast, Alatreon for element).
- Elemental Bow: Full Safi'jiiva armor + Kjarr bows (critical element) or Alatreon bow.
- Support SnS: Wide Range 5, Speed Eating 3, Free Meal 3, Mushroomancer, etc.
Endgame Structure (Final):
This tier-based overview encapsulates the full lifecycle of a Monster Hunter: World player, from the first steps in Astera to becoming a master hunter capable of taking down the ultimate threats of the New and Old Worlds.
Game Tips
Game Tips: Monster Hunter: World
This guide collects essential tips for hunters of all skill levels, organized by category. Each tip includes a clear explanation and a deeper analysis of why and when to use it.
---
1. Combat Tips
#### Beginner Tips
- Always eat before a hunt.
- Use the Radial Menu for quick item access.
- Sheathe your weapon to sprint and use items.
- Learn monster tells and punish openings.
- Use environmental hazards often.
- Mounting is a game-changer.
- Master the i-frames of the roll.
- Flinch Shot abuse (Iceborne only).
- Elemental damage > Raw damage for fast weapons.
- Always carry a map and look for scoutflies.
- Climb vines and use wed beetles.
- Learn the layout of each locale for shortcuts.
- Use the Slinger to interact with environment.
- Master the use of Ghillie Mantle for traversal.
- Fishing and catching pets for tailrider gadgets.
- Always harvest materials as you run past them.
- Use the Farm at the Botanical Research Center.
- Craft ammo and coatings at the camp.
- Use Tailraider Safari for rare materials.
- Optimize item loadouts for different fights.
- Manage your inventory space while mining and gathering.
- Prioritize Health Boost skill over damage early.
- Always upgrade your armor defense.
- Build around one core weapon skill.
- Use the “Defense” skill for survivability vs large monsters.
- Maximize Weakness Exploit (WEX) and Critical Eye.
- Master the “Safi’jiiva” and “Fatalis” (endgame) sets.
- Sell monster parts you don’t need.
- Complete bounties for Armor Spheres and Zenny.
- Use the Steamworks (Iceborne) to get Gold Eggs and items.
- Trade in excess monster gems for decorations.
- Efficient farming routes in Guiding Lands.
- Invest in the “Plunderblade” gadget for extra loot.
- Use the SOS Flare for tough fights.
- Set your auto-shoutouts to be helpful.
- Learn the “life powder” and “wide range” cleric builds.
- Coordinate status effects with your team.
- Use the “Assess” function to share research.
- Master the “clutch claw” teamwork (Iceborne).
- Change the camera speed in options.
- Use the Training Room to practice combos.
- Read the Hunter’s Notes for monster weaknesses.
- Always eat for “Insurance” or “Safeguard” in difficult quests.
- Use the “Slinger Burst” to interrupt monster attacks.
- Farm “Investigations” for better loot.
- Why: The canteen at the Gathering Hub provides temporary stat boosts (HP, Stamina, Attack, Defense).
- Analysis: A meal is the single most cost-effective preparation. For early game, prioritize Chefs Choice (HP +50, Stamina +50). Later, stack Attack (L) or Defense (L) from Fresh ingredients. Without eating, you risk one-shot kills and lower damage output.
- Why: Customizing the radial menu (Options → Customize Radial Menu) lets you use potions, sharpen, or fire a Slinger shot with one button.
- Analysis: During combat, scrolling through the item bar wastes precious seconds. The radial menu reduces input lag and keeps your focus on the monster. Example: Set a Big Potion to a quick slot for emergency healing.
- Why: With weapon drawn, you move slowly and cannot use consumables. Press the sheathe button (default R1 on PS4, RB on Xbox, or the weapon special button to sheathe automatically after some attacks).
- Analysis: Many new hunters die because they try to heal while slow. Always sprint away from the monster, sheathe, then drink a potion. The Sheathing skill speeds this up, but early on, just be mindful.
#### Intermediate Strategies
- Why: Every monster has distinct wind-up animations for attacks, leaving brief windows for counterattacks.
- Analysis: Instead of mindlessly attacking, wait for the monster to commit. For example, Anjanath rears back before its forward bite – roll to the side and punish its legs. The game rewards positioning over button-mashing. Practice with low-threat monsters like Great Jagras first.
- Why: The New World is full of traps like vine traps, boulders, and flashbugs.
- Analysis: Luring a monster under a hanging rock and firing your Slinger at it deals massive damage and topples the monster. In the Ancient Forest, you can trigger a dam to wash away a monster. This saves ammo and creates free knockdowns. Check your map for interactive points (shown as sparkles).
- Why: Attacking a monster from ledges or clutch claw (not in base game without Iceborne) sends you into a mount state where you must hold on and stab until it falls.
- Analysis: A successful mount knocks the monster down for 10+ seconds, allowing your whole team to wail on a weak spot. Look for cliffs or slide down slopes to initiate a jump attack. In solo, mount once per fight to control the pace.
#### Advanced Optimizations
- Why: Dodging in Monster Hunter has a few invincibility frames (i-frames) at the start. With Evade Window skill, you can roll through roars and attacks.
- Analysis: At base, you have about 13 frames (0.2 sec) of invincibility. With Evade Window +5, it jumps to ~36 frames. Practice rolling through Nergigante’s dive bomb – timing is tight but it saves you from needing Guard or superman dive. Use the Training Room pole to practice.
- Why: The Clutch Claw allows you to grapple onto a monster and use a Flinch Shot (weapon attack) to turn it, or if the eye icon is yellow, you can slap it to enrage it.
- Analysis: In endgame, you can chain Flinch Shots to wall-bang monsters, dealing huge damage and creating openings. The strategy: soften a part, then Flinch Shot into a wall (requires monster not enraged). This is essential for speedruns and breaking tough parts like Shara Ishvalda’s head.
- Why: Weapons like Dual Blades, Bow, and Sword & Shield benefit more from element because of high attack rate.
- Analysis: Raw attack is multiplied a fixed amount per hit, while elemental damage adds a flat value per hit. For a bow spamming Power Shots, a high-elemental bow (like Anja Arch III for fire) outperforms raw bows. Check a weapon’s element cap (maxed at Free Element skill). Use the Training Room to compare DPS with different builds.
---
2. Exploration Tips
#### Beginner Tips
- Why: Scoutflies guide you to the nearest monster tracks, and following them reveals the monster’s location on the map.
- Analysis: If you lose the monster, open the map and set a waypoint – scoutflies will lead you. Collect tracks, footprints, and mucus to increase the scoutfly level, which permanently improves tracking for that monster species. In the Ancient Forest, focus on Rathalos tracks early.
- Why: Many areas have climbable ivy or wed beetles that let you zip across gaps.
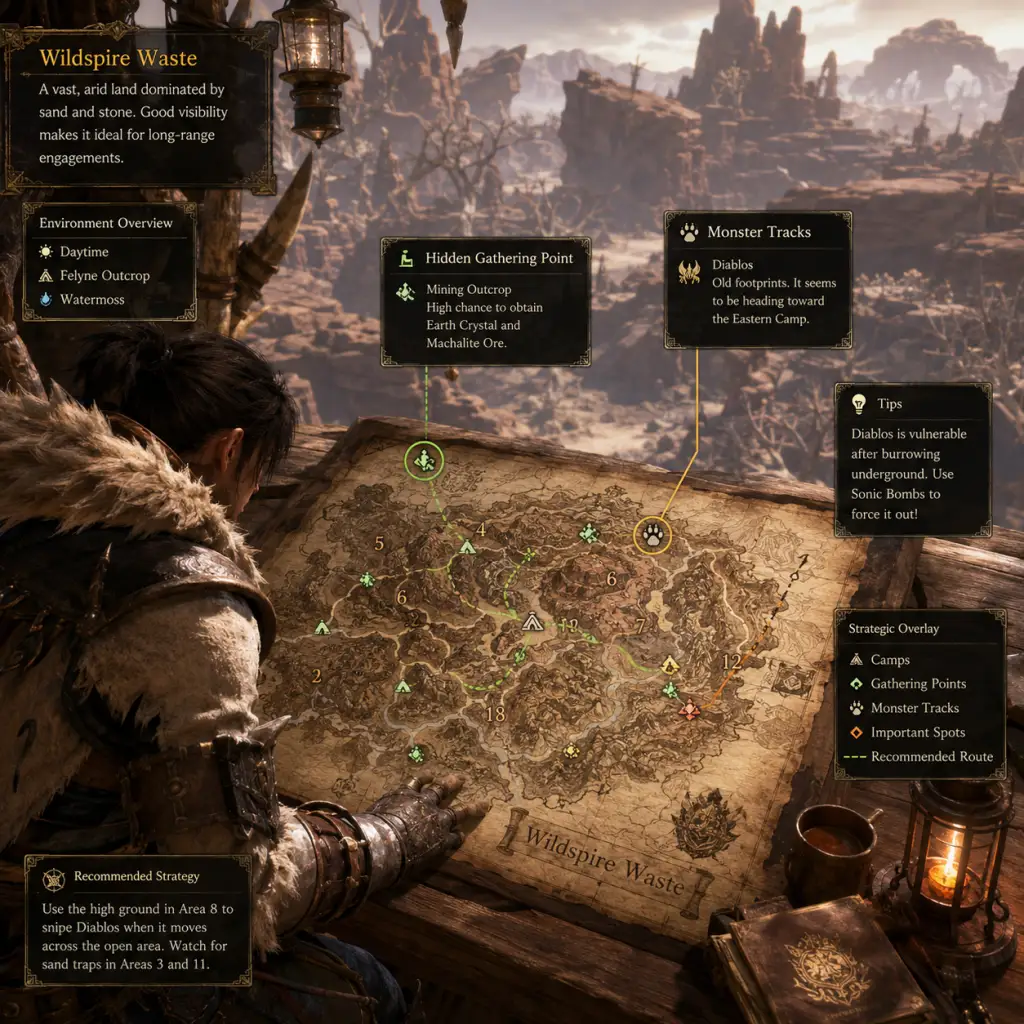
- Analysis: Vines can be scaled quickly by holding R1 (PS4) while moving toward them. Wed beetles are small pink beetles that, when fired with your Slinger, create a grapple point. Use them to reach high ledges or escape monsters. Example: In Wildspire Waste, use wed beetles to reach Diablos’ nest without going through the long tunnel.
#### Intermediate Strategies
- Why: Each map has hidden paths, camp shortcuts, and ancient tunnels that connect zones.
- Analysis: Memorize the camp locations (unlock more by completing delivery bounties). For example, Coral Highlands has a path from Area 1 to Area 11 using a bug net and climbable walls. Knowing these cuts travel time and lets you intercept monsters faster. Use the map’s legend to identify climbable walls (marked with a little person icon).
- Why: Besides firing pods, the Slinger can trigger explosive barrels, shooting Torch Pods to light fires, or use Dung Pods to repel monsters.
- Analysis: Brightmoss will stick to monsters and make them visible in dark areas (Vale). If a monster starts fleeing to sleep, shoot a Dung Pod to make it change areas – useful for avoiding a turf war you don’t want. Also, trigger boulders above the monster for free damage.
#### Advanced Optimizations
- Why: The Ghillie Mantle makes you invisible to monsters, allowing you to walk safely through dangerous areas and set up traps.
- Analysis: In endgame, use Ghillie to place Mega Barrel Bombs right next to a sleeping monster before waking it. It also prevents monsters from detecting you while you sharpen. Pair with Assassin’s Hood (Iceborne) for infinite stealth.
- Why: Your Palico can be equipped with gadgets unlocked by befriending endemic life.
- Analysis: At the end of any expedition, use the Capture Net to catch rare pets like the Great Gunpowderfish. These unlock the Meowlotov Cocktail gadget, which deals extra damage. Advanced hunters keep their Palico on the “Plunderblade” gadget for extra loot (especially for rare materials like Elder Dragon gems).
---
3. Resource Management Tips
#### Beginner Tips
- Why: Herbs, honey, and bugs are the backbone of potions and traps.
- Analysis: Even if you don’t need them now, stockpile. Honey is crucial for crafting Mega Potions (regular Potion + Honey). Set the Radial Menu to auto-craft Mega Potions when you pick up honey. Never leave a node unharvested – you can always sell extras later.
- Why: After completing a few deliveries, you unlock cultivation plots where you can grow plants, honey, mushrooms, etc.
- Analysis: Set all three plots to Honey. You can increase the number of slots by completing optional quests for the botanist. Honey is the most needed resource for healing. Later, consider farming Godbugs and Bitterbugs for Ancient Potion ingredients. Check your farm every few missions; it’s free resources.
#### Intermediate Strategies
- Why: The item box at each camp allows you to craft ammo and coatings from materials.
- Analysis: If you are a Bowgunner or Bow user, you can carry raw materials and craft on the go. For example, bring Gunpowder (L) and Latchberries to craft Pierce 2 ammo mid-hunt. This extends your ammo supply without needing to restock. Use the Item Loadout to include the necessary materials.
- Why: After befriending Grimalkynes, you can send your Palico on expeditions that bring back monster parts.
- Analysis: Assign the highest-level expedition to areas containing Elder Dragons or rare monsters. This is a passive source of gems and mantles. Check the Safari after every few missions – it takes about 3-4 quests to complete.
#### Advanced Optimizations
- Why: Carrying unnecessary items wastes space. Create loadouts for specific monsters.
- Analysis: For an Elder Dragon like Teostra, bring Cool Drinks, Nullberries, and Fire Res Jewels. For Kirin, bring Thunderproof Mantle and Nullberries. Use the Item Box → “Manage Items” → “Loadouts” to save up to 10 loadouts. Include farcasters for emergency retreats. Advanced players also bring ancient potions and max potions for max healing without sheathing.
- Why: Each slot is limited; you may run out of room during a long expedition.
- Analysis: Always leave some empty slots for rare drops. Set your item pouch to carry only essentials: potions (max of 10), mega potions (10), rations or well-done steaks, powercharm and powertalon, armorcharm and armortalon (these passive items take space but boost stats). Discard low-tier bones and ores if you need space – you can farm them anytime.
---
4. Builds (Equipment & Skills)
#### Beginner Tips
- Why: The skill “Health Boost” increases max HP by +50 at level 3.
- Analysis: New hunters die quickly. With 150 HP (base 100 + meal 50 + skill 50), you survive hits that would one-shot you at 100 HP. Slot in Health Boost 3 using decorations or armor pieces like the Bone Helm. It’s a crutch you can drop later when you get better at dodging.
- Why: Armor spheres increase defense, reducing damage taken.
- Analysis: In Low Rank, upgrade your armor fully before taking on Anjanath. Use the blacksmith to spend Armor Spheres (gained from bounties and quests). Each upgrade adds 2-4 defense. In High Rank, aim for 400+ defense before Elder Dragons. Defense is more valuable than elemental resistance in general.
#### Intermediate Strategies
- Why: Each weapon type has essential skills that drastically improve performance.
- Analysis: For Great Sword, always aim for “Focus” (faster charging). For Charge Blade, “Capacity Boost” and “Artillery” are mandatory. For Long Sword, “Handicraft” extends sharpness. Pick a weapon, then look up its meta skills. Example: A basic Great Sword build: Focus 3, Weakness Exploit 3, Critical Boost 3, and Attack Boost 4. Use the series of “Dragonking Eyepatch” for Weakness Exploit early on.
- Why: Defense Boost just adds flat defense, but it also provides elemental resistances at Lv4+.
- Analysis: Against Diablos’ physical attacks, Defense Lv7 gives +35 defense, which reduces damage by about 10%. Pair with Guard skill if using a shield weapon. It’s a safe bridge until you learn the monster’s moves.
#### Advanced Optimizations
- Why: WEX gives +50% affinity for hitting weak spots (need to soften with Clutch Claw in Iceborne).
- Analysis: Aim for 100% affinity (critical hit chance). Use Critical Eye for flat affinity and WEX for situational boost. Example: if you have WEX 3 (+50% on weak spots) and Critical Eye 7 (+30%), you get 80% base + 50% on weak spots = always crits. That’s a 25% damage increase on average. Prioritize these skills over raw Attack Boost.
- Why: These armor sets have unique set bonuses that redefine builds.
- Analysis: Safi’jiiva armor gives +40% affinity when your weapon is drawn and HP is full, plus a set bonus that increases element. For bow users, 3-piece Safi + 2-piece Velkhana is meta. Fatalis armor gives True Spare Shot for Bowguns, and all skills maxed out. Farming these requires top-tier coordination. The key is to focus on one set at a time; complete Safi siege then move to Alatreon, then Fatalis.
---
5. Economy Tips
#### Beginner Tips
- Why: You will accumulate hundreds of common materials.
- Analysis: After finishing Low Rank, you rarely need Great Jagras scales. Sell them for quick Zenny. Rule of thumb: keep at least 10 of each material for future crafts, sell the rest. Later, use the Argosy (captain) to buy cheap materials for selling? Actually, better to sell unneeded parts.
- Why: The Resource Center (table near the entrance) offers bounties that reward Armor Spheres and Research Points.
- Analysis: Always have bounties active. They refresh after each quest. Focus on “Hunt 3 large monsters” or “Collect 10 bones” – these are easy and give multiple Armor Spheres. Use Research Points to farm at the Botanical Center.
#### Intermediate Strategies
- Why: During events like the Appreciation Fest, the Steamworks can be overdriven with Limited Bounties to produce huge amounts of Zenny.
- Analysis: In the endgame, you can gather Fuel from mining in Guiding Lands, then feed the Steamworks. The output includes Gold Eggs (sold for 20k Zenny each), King Armor Spheres, and rare decorations. This is the primary way to earn money in late game. Prioritize over-time bounties to get the daily bonus.
- Why: The Melder allows you to meld unwanted materials into decorations (if you have the right items).
- Analysis: For example, you can meld a Bird Wyvern Gem into a random T1 decoration. This is best used once you have duplicate gems. Advanced players meld for Armor Spheres when desperate. The weekly bounties also provide Gold Wyverian Prints for melding specific decorations.
#### Advanced Optimizations
- Why: Mining nodes in Guiding Lands drop rare bones and ores that sell high (e.g., Dragonvein Crystal for 10k+).
- Analysis: Equip Geologist skill (Lv3) to double mining/gathering yields. Then run a circuit through a level 7 region (e.g., Coral). Collect all nodes, then exit to expedition and return to reset the nodes. This yields 10-15 large dragonvein crystals per run, netting 150k-200k in 15 minutes. Combine with farming for layered weapon materials.
- Why: Your Palico can steal monster parts, including rare materials.
- Analysis: For monsters like Fatalis or Alatreon, using Plunderblade gives you extra chances at mantles and horns. Equip the tool, command your Palico to attack, and hope for steals. This reduces the number of hunts needed. Also, it can be combined with the “Meowster” skill from food to further increase loot.
---
6. Multiplayer & SOS Tips
#### Beginner Tips
- Why: If you’re struggling, fire an SOS to invite other hunters.
- Analysis: SOS summons random players who often are high-rank veterans helping out. Make sure to set the quest to “Join via SOS” before starting. You can also restrict to players who speak your language. Note that monsters scale up by 2.2x for 2 players and 2.6x for 3-4 players, so don’t SOS unless you absolutely need help – it’s easier solo for some monsters.
- Why: You can customize auto-replies for status effects like getting stunned, sleeping, etc.
- Analysis: Change them to something like “I’m stunned! Hit me!” so teammates know to knock you out. For mounting, say “I mounted! Keep attacking!” to coordinate. This improves team synergy without voice chat.
#### Intermediate Strategies
- Why: Wide Range skill lets you share potions and items with nearby teammates.
- Analysis: If you play Sword & Shield or Hunting Horn with Wide Range 5, you can heal your team while dealing damage. Bring 10 Mega Potions and 10 regular potions, plus materials to craft more. This turns a tough hunt like Behemoth into a manageable fight. The build requires “Friendship”-based decorations.
- Why: Parallel applying sleep, paralysis, or stun may overwrite each other (e.g., two sleep shots will waste).
- Analysis: Use the in-game chat or quick messages to call out when you’re applying a status. For example, “I’ll sleep it at next aura.” Then have the heavy hitters prepare a wake-up hit (Great Sword, Charge Blade SAED, or a bomb). Similarly, let the LBG user know when paralysis is ready.
#### Advanced Optimizations
- Why: Each hunter can gather tracks for the monster’s research level independently.
- Analysis: In multiplayer, spread out at the start to collect different tracks. This levels up the scoutfly level faster, revealing the monster earlier. Once at level 3, the monster’s location is shown permanently. Also, if someone mounts, everyone should stop DPS briefly to let the mounter finish – or they can continue attacking but avoid using bombs that might break the mount.
- Why: In multiplayer, softening parts requires teamwork because the monster moves unpredictably.
- Analysis: One person should focus on softening a single part (e.g., head) while others attack. Use Temporal Mantle or Rocksteady to stay latched. After softening, the monster will take extra damage from all hits to that part. Also, if everyone has the “Flinch Free” skill (Lv1), you won’t interrupt each other’s combos.
---
7. Miscellaneous Pro Tips
- Why: Default camera speed is too slow for fast monsters.
- Analysis: Increase to 3 or 4 out of 5. Also, set “Camera Distance” to Far for better situational awareness. These settings make a huge difference in tracking a Odogaron’s leaps.
- Why: The room has a training pole that takes no damage but shows numbers.
- Analysis: Practice your main weapon’s bread-and-butter combos until muscle memory kicks in. For Charge Blade, practice guard pointing. For Long Sword, practice foresight slash timing. 10 minutes before a session improves your performance dramatically.
- Why: The in-game database shows each monster’s elemental and status weaknesses.
- Analysis: Before fighting a new monster, open the map and press R3 (PS4) to view notes. If you haven’t unlocked them, research by collecting tracks. Bring the right element – for example, use Thunder vs. Legiana, Fire vs. Vaal Hazak. This triples your damage.
- Why: These food skills prevent your first faint from failing the quest.
- Analysis: For Elder Dragon investigations with only 1 faint allowed, eat for Insurance (rare) or Safeguard (from Heavy Dango in Iceborne). This gives you a second chance. Also, the “Moxie” skill prevents one lethal hit if HP is above a threshold.
- Why: Firing a Slinger pod into a monster’s face can flinch it and stop an attack.
- Analysis: For example, when Rajang is about to do a lightning beam, shoot a Bomb Pod or Thorn Pod at its face – this causes a flinch and cancels the attack. This is especially useful for bow and light bowgun users who can shoot quickly. Stock up on Scatternuts for this purpose.
- Analysis: After hunting a monster, check the Resource Center for new investigations. Prioritize those with gold and silver rewards. You can also meld prints to create investigations for specific monsters. For endgame decoration farming, run Tempered Rathalos or Tempered Odogaron investigations for Warped Feystones.
---
_Remember: Monster Hunter World is a game of preparation and practice. Each tip here builds towards making you a more efficient, knowledgeable hunter. Happy hunting!_
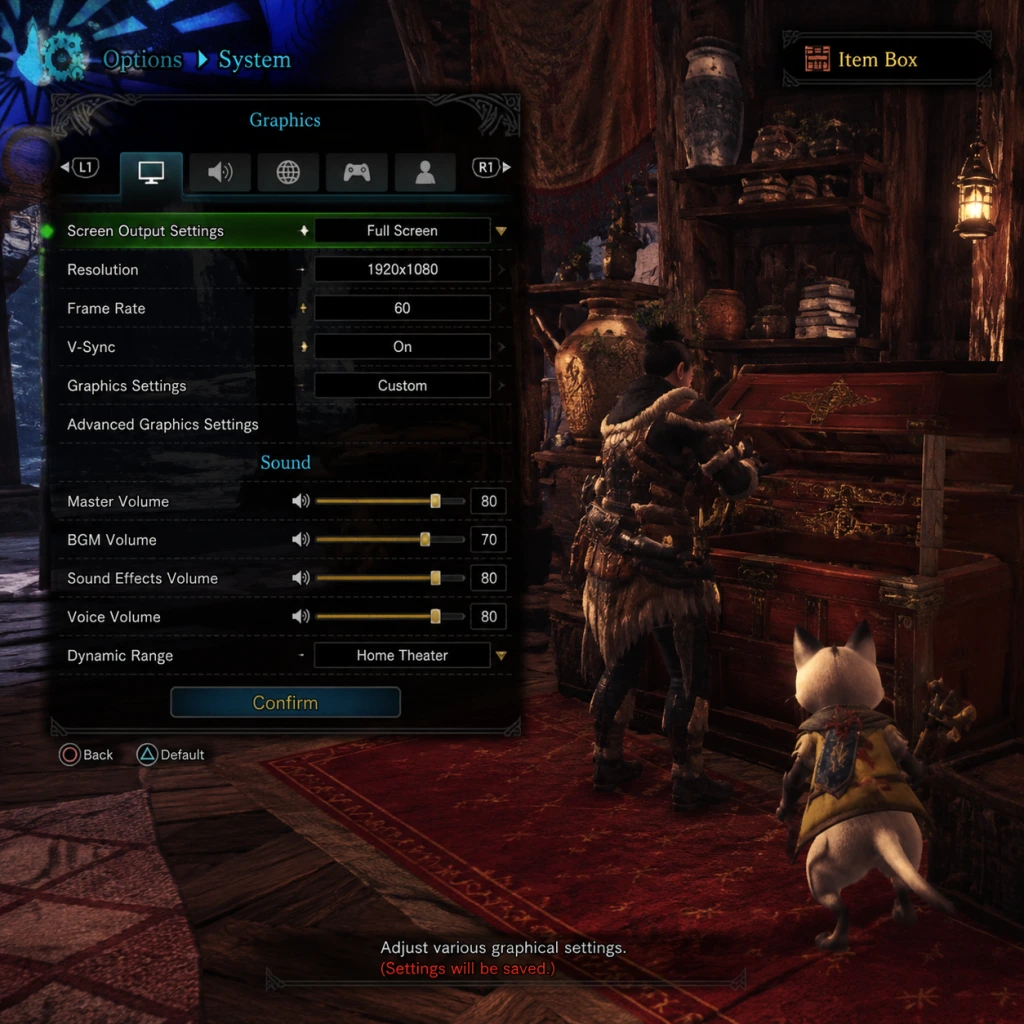
Game Settings
Game Settings Guide for Monster Hunter: World
This guide covers all game settings in Monster Hunter: World (including Iceborne), with platform-specific notes and recommendations for balancing performance and visual quality. Settings are grouped into Graphics, Audio, Controls & Accessibility, Language & Network, and Gameplay. Optimal settings for different hardware tiers are provided for PC; console players will find pre-set options but can still adjust brightness, audio, and controls.
---
Graphics Settings (PC)
Graphics settings are the most impactful. The game has a built-in benchmark tool (accessible from the title screen menu) – use it to test changes. Capcom’s engine (MT Framework) can be CPU-heavy, especially in crowded locales like the Ancient Forest or during multiplayer.
#### Resolution & Display
- Resolution: Set to native monitor resolution. Lowering this improves performance significantly but blurs the image. For 1080p low-end rigs, consider 720p or dynamic resolution.
- Screen Mode: Fullscreen is recommended for stability and performance. Borderless Windowed can cause slight input lag and performance loss; use only if alt-tabbing frequently.
- Framerate Limit:
- Vertical Sync: Enable to eliminate screen tearing, but introduces input lag. For competitive play, disable and use Fast Sync (NVIDIA) or Enhanced Sync (AMD).
- Display Brightness: Adjust until the logo on the calibration screen is barely visible. Overly dark settings hide detail; too bright washes out shadows.
- If your monitor is 60 Hz, cap at 60 to avoid screen tearing (use in-game limiter or NVIDIA/AMD control panel).
- For 144 Hz+, cap at your refresh rate or leave uncapped if V-Sync is disabled (see below).
#### Graphics Quality Presets (Quick Reference)
| Tier | Preset | Description |
|---|---|---|
| Low | Low (or minimum scalars) | 60+ FPS on old GPUs (GTX 960/1050 Ti) |
| Mid | Medium with some High | 60 FPS on GTX 1060 / RX 580 |
| High | High | 60 FPS on GTX 1070 / RTX 2060 |
| Ultra | Highest custom | 60+ FPS on RTX 2070+ or for 1440p/4K |
| Setting | Impact | Recommended (Low)<br>60 FPS target | Recommended (Mid)<br>60 FPS target | Recommended (High)<br>60 FPS target | Notes |
|---|---|---|---|---|---|
| Image Quality (Scaled Resolution) | Directly controls internal resolution. 1.0 = 100%. | 0.8 – 0.9 (sharpening helps) | 1.0 | 1.0 or 1.1 (if GPU headroom) | Values above 1.0 supersample but cost heavily. Keep at 1.0 for clarity. |
| Texture Quality | VRAM usage. Higher = sharper surfaces. | Low (512 MB) | High (1024 MB) | High or Highest (2048 MB) | High textures require 4 GB VRAM. Lowest causes blurry walls and ground. |
| Anti-Aliasing | Smooths edges. TAA blurs; FXAA is lighter. | TAA (Low) or FXAA | TAA | TAA + TAA Sharpen (optional) | TAA Sharpen adds cost but reduces blur. For sharpness, use Resolution Scale >1.0 instead. |
| Ambient Occlusion (SSAO) | Adds shadow contact. | Off | Low or SSAO (HDAO) | HBAO+ (if NVIDIA) or SSAO | HBAO+ is heavy but looks best. Ambient occlusion hides flat lighting. |
| Volumetric Fog | Atmospheric fog/light shafts. | Off | Low | High | Heavy cost in forest/desert zones. Low still looks okay. |
| Dynamic Range | Controls HDR. Standard or HDR (if monitor supports). | Standard | Standard | Standard (or HDR if calibrated) | HDR mode requires proper SDR/HDR calibration; otherwise colors may look washed. |
| Depth of Field | Blurs distant background. | Off | Off | On (cinematic; not gameplay relevant) | Costs little, but some find it disorienting. Turn off for clarity. |
| Motion Blur | Blurs fast motion. | Off | Off | On (personal preference) | Performance impact negligible. Many turn off for competitive clarity. |
| Bloom | Glow from bright sources. | Off | Off | On | Light performance hit. Can obscure monster tells in bright areas. |
| SSReflections | Screen-space reflections on water/wet surfaces. | Off | Low | High | Helps immersion but not critical. Low is fine. |
| Subsurface Scattering | Skin/hair light bleed. | Off | Off | On | Only noticeable on characters and monsters close up. Minor performance cost. |
| Ambient Light | Global illumination bounces. | Off | Low | High | Heavy. Low still looks good. |
| LOD Bias | Level of detail distance. | -1 | 0 | 0 or +1 | Negative reduces LOD pop-in. +1 lowers quality but improves FPS at distance. |
| Max Foliage (Grass/Trees) | Vegetation density. | Low | Medium | High | High in forest areas can tank FPS on mid-range GPUs. Adjust as needed. |
| Shadow Quality | Shadow resolution and distance. | Low (512 or 1024) | Medium (1024) | High (2048) | Shadows are costly. Low still works but may flicker. |
| Texture Filtering | Anisotropic Filtering. | 4x | 8x | 16x | Impact on performance is minimal; always use at least 4x for crisp textures. |
| DirectX 12 | DX12 API (experimental). | Off (use DX11) | Off (DX11 stable) | On (if stable) | DX12 can improve CPU multi-threading but may cause crashes on some systems. Test thoroughly. |
| Variable Rate Shading (VRS) | Reduces shading where detail low. | N/A (requires Turing+) | Off | On (if supported) | Slight performance gain, minimal visual loss. Only on RTX 20 series and newer. |
- Texture Quality & VRAM: The game will warn if you exceed your VRAM. High textures require 4+ GB. If you have 2 GB, stay on Low. Ignoring warnings causes stuttering.
- DirectX 11 vs 12: Start with DX11 for stability. DX12 can provide 5-10% CPU improvements on 6+ core processors, but some users report random crashes. Use the benchmark to test.
- NVIDIA/AMD Control Panel: For extra performance, force "Power Management Mode" to "Prefer Maximum Performance" (NVIDIA) or equivalent (AMD). Disable Shader Cache if you have SSD space; otherwise keep default.
- Modded Settings: The .ini files (located in `steamapps/common/MHW/graphics_option.ini`) allow tweaks like disabling individual effects. Not recommended for new players.
- Master Volume: Set to comfortable level. The game has dynamic range – quiet moments like camp ambience and loud monster roars. Adjust to avoid ear damage.
- BGM Volume: Controls background music. During hunts, music swells when monster is enraged. Some players lower BGM to hear audio cues (roars, footsteps).
- SFX Volume: Most important for gameplay. Kept at 100% to hear monster tell sounds (e.g., Rathalos tail flip, Nergigante divebomb).
- Voice Volume: For cutscenes and handler dialogue. Lower if annoying; keep for important story hints.
- Audio Output:
- Audio Quality: Dynamic Range can be set to Low (compressed), Medium (default), or High (wide dynamic). Headphones: High recommended for immersion. Speakers: Medium to avoid explosive roars drowning out dialogue.
- Volume Equalization: In Windows/console audio settings, disable "Loudness Equalization" – it masks quiet sounds (like monster footsteps) crucial for gameplay.
- Controller Type: Xbox, PlayStation, or Switch Pro (PC). The game shows button prompts based on controller.
- Button Mapping: Customizable through in-game menu. Default is fine. Common changes:
- Camera Speed: Adjust between 5-8 (scale 1-10). Faster for big monsters; slower for precision.
- Invert Y-Axis: Optional – most leave default.
- Vibration: Enable for immersion; disable for battery saving or if it causes distraction.
- Gyro Aiming: Available on Switch Pro/PS5 controller on PC? Limited. Only for certain slinger ammo aiming; not essential.
- Key Bindings: Fully customizable. Default is awkward for some. Popular changes:
- Mouse Sensitivity: Set independent for aiming and general camera. Values 5-20. Lower for precision.
- Raw Input: Enable for consistent mouse movement (bypasses Windows sensitivity). Recommended.
- Enable Mouse Acceleration: Disable in Windows mouse settings as it interferes.
- Subtitle Display: On by default. Can be toggled off. No additional customization (e.g., background opacity, size) in base game – mods needed for larger text on PC.
- Colorblind Modes: None included. Monster parts (tail cuts, break marks) are visually distinct; rely on damage numbers and glowing red wounds. Mods exist for PC.
- Chat Text Size: In multiplayer, chat font is small. No adjustment – use voice chat or Discord.
- HUD Scaling: Can scale HUD size (Settings > Miscellaneous > HUD Scale). Increase if playing at 4K or far from screen. Range 0.5 to 1.5.
- Camera Auto-Center: Off by default. Turn on if you want camera to follow monster when locked on; off for manual control.
- Voice Language: English, Japanese, Monster Hunter Language (fake gibberish). Choose Japanese for authenticity (many prefer). English voice acting is fine.
- Text Language: Determines UI, menus, subtitles. Multiple languages available. Note: Changing text language requires restart.
- Region Lock: For matchmaking. Can be set to Worldwide (larger player base) or to your region (lower ping). The game uses peer-to-peer sessions; region preference affects who you connect with.
- Session Options:
- Steam/PSN/Xbox Live Settings: Ensure you are online to use SOS flares and multiplayer.
- NAT Type: For console, ensure NAT Type 1 or 2 for stable connections. PC: Forward ports 27015-27030 (Steam) and UDP 3074 (Xbox/PS4).
- Connection Quality: In-game indicators (green/yellow/red). Red means high latency – avoid SOS flares. Use filter options when joining quests (e.g., language, quest type).
- Auto-Decline SOS: Optional – prevents random players from joining your quest without invite.
- Auto-Sheath: When out of combat, character automatically sheathes weapon after a few seconds. Disable for immediate unsheathed response (e.g., using items).
- Self-Improvement (Weapon): Auto-activate certain buffs (like Hunting Horn song queuing). Keep default.
- Radial Menu Type: Choose between type 1 (drag) or type 2 (click). Type 2 is faster for item use. Set in Options > Controls > Radial Menu.
- Quick Item Switch: Use item cycling with L1+face buttons (customizable). Assign potions, whetstone, dung pods for quick access.
- Target Camera:
- Lock-On Toggle: Choose between hold (hold button to lock) or toggle (press once to lock, press again to release). Most use toggle.
- Zoom in/out while aiming slinger: Adjustable slider. Set to fast for quick aiming.
- Controller Vibration: Affects haptic feedback when taking damage or landing hits. Disable if it interferes with rhythm (e.g., Great Sword charge timing).
- Auto-Equip Items / Mantles: In Options > Controls, you can enable auto-equip of mantles when reusing the same slot. Often turned off for manual control.
- Endemic Life: Not a setting but note that you can adjust the palico's gadget behavior; not in main settings but in Buddy Board.
- Use Low preset.
- Set Image Quality to 0.8.
- Turn off Volumetric Fog, SSAO, SSR, Subsurface Scattering, Depth of Field, Motion Blur, Bloom.
- Shadows: Low.
- Texture Quality: Low (to save VRAM).
- Anti-Aliasing: FXAA.
- Resolution: 1600x900 if needed.
- Use Medium preset, tweak:
- Custom High:
- PS4 Base: Runs at 30 FPS dynamic 1080p. No graphics options except brightness and HDR.
- PS4 Pro: 30 FPS with higher resolution (approx. 1800p checkerboard) or 1080p 60 FPS? Note: MHW on Pro is capped at 30 FPS in 4K mode; no 60 FPS mode exists base game. Iceborne added a Graphics vs Performance mode (uncapped 30-45 FPS). Set to Performance mode for smoother gameplay.
- Xbox One X: Same – prioritize performance mode.
- PS5/Xbox Series X (backward compatible): 60 FPS with high resolution (dynamic 1800p). No settings menu.
- Always run the benchmark after changing settings. It simulates a hunt and shows average FPS and bottlenecks.
- Update GPU drivers – Capcom released specific optimizations for MHW in driver updates. GeForce 461.00+ or Radeon Adrenalin 21.2.3+ recommended.
- Disable Steam overlay? Some users report stutter with overlay enabled. Try disabling if you experience hitches.
- Mods that improve settings: Skyrim-like .ini tweaks to disable individual post-processing effects, increase LOD, or fix TAA. Search Nexus Mods for "MHW settings" – but use at your own risk.
---
Audio Settings
- Speakers: For TV/desktop speakers (stereo).
- Headphones: Enables spatial audio (virtual surround). Better for directional audio like monster positions.
- 5.1/7.1: For surround sound systems. Ensure correct config.
---
Controls & Accessibility
#### Controller (Recommended)
- Lock-On Target Switch: Change from R3 (right stick click) to L1/LB to avoid accidental camera reset.
- Sprint/Dodge: Default R1/RT for sprint, X/A for dodge. Some swap to L3 for sprint (like Dark Souls).
#### Keyboard & Mouse (PC)
- Slinger Aim: Change from left Ctrl to right mouse button (RMB).
- Special Action (clutch claw): Map to a thumb mouse button or middle click.
- Dodge: Usually left Shift or Space. Space also used for climbing/vaulting; separate bind for dodge (e.g., right click).
#### Accessibility Options
---
Language & Network
#### Language Settings
#### Network Settings
- Public Session: Anyone can join via SOS or search.
- Private Session: Only friends/invites.
- Squad Session: For pre-formed groups.
---
Gameplay Settings
#### Beginner-Friendly Options
#### Camera & Lock-On
- Type 1: Focus camera on monster when pressing lock-on button (default).
- Type 2: Camera only faces monster when you press lock-on again (toggle). Type 2 recommended for manual aiming.
#### Combat-Related
---
Settings That Are Easy to Misconfigure
1. Volume Equalization: Windows (or console) audio processing that compresses dynamic range. In Monster Hunter, subtle audio cues like a monster's breathing before a charge or the glint of a tail attack are crucial. Turning on loudness equalization flattens these. Must be disabled both in OS and in-game if available (some sound cards have it).
2. Anti-Aliasing / TAA Sharpen: TAA blurs the image significantly. Many players complain it causes motion blur effect. Recommendation: Use TAA + TAA Sharpen (if available) or try FXAA and use resolution scaling (1.0 or 1.1). Alternatively, use NVIDIA DLDSR (if supported) and set lower resolution with high DSR for sharpness.
3. Volumetric Fog: Set to Low or Off for competitive advantage – it reveals monsters earlier in smoke/fog areas (e.g., Elders Recess, Coral Highlands). High looks pretty but hides monsters behind thick fog.
4. DirectX 12: As mentioned, can cause crashes on certain systems. Many guides recommend DX11 for stability. Test thoroughly with the benchmark before committing.
5. HDR Settings: If you enable HDR without calibrating your display, the game may look washed out or too dark. Use in-game calibration slider. On PS4 Pro/PS5, HDR is generally well-implemented; on Windows, ensure HDR is enabled in OS first.
6. Texture Filtering (Anisotropic): Default is often low. Set to at least 4x or 8x. The performance impact is negligible (1-2 FPS) but visual improvement is drastic for ground textures. Many assume it's turned up automatically – it's not.
7. Control Scheme (Keyboard): Capcom’s default keyboard bindings are infamous for being clunky (e.g., slinger aim on left Ctrl, special action on C). Spend time remapping to feel natural – many guides recommend using mouse side buttons.
8. Radial Menu Type: Type 1 (drag) requires precise mouse/thumbstick movement; Type 2 (click) is faster for controller. New players often stick with default (Type 1) and struggle mid-hunt. Switch to Type 2 immediately.
---
Recommended Settings Summary
#### Low-End PC (e.g., GTX 1050 / Ryzen 3, 1080p 30-60 FPS)
#### Mid-Range PC (e.g., GTX 1060 / RX 580, 1080p 60 FPS)
- Volumetric Fog: Low.
- Ambient Occlusion: SSAO (not HBAO+).
- Shadows: Medium.
- Texture: High (if 6GB VRAM).
- Anti-Aliasing: TAA.
- Image Quality: 1.0.
#### High-End PC (e.g., RTX 2060+ / Ryzen 5, 1440p 60 FPS or 1080p 144 FPS)
- Texture: Highest.
- Shadows: High (2048).
- Ambient Occlusion: HBAO+.
- Volumetric Fog: Low (for visibility) or High (for eye candy).
- Anti-Aliasing: TAA + TAA Sharpen.
- Image Quality: 1.0, or 1.1 if GPU headroom.
- Subsurface Scattering: On.
- Depth of Field: Off.
#### Consoles (PS4, PS4 Pro, Xbox One X)
---
Final Tips
With these settings and adjustments, you can enjoy Monster Hunter: World smoothly across all platforms, with clarity and responsiveness essential for hunting monsters effectively.

Important Notes
Important Notes Guide for Monster Hunter: World
This guide collects critical warnings, pitfalls, and advice every hunter should know before setting foot in the New World. Read carefully to avoid common regrets, irreversible choices, and wasted time.
---
1. Irreversible Choices and Missable Content
#### Character Creation
- Appearance is permanent. You cannot change your character's name, gender, facial features, voice, or hair after creation. The only exception is the name change ticket (paid DLC) and the Character Edit Voucher (one free voucher included, additional purchased separately). Use the voucher wisely.
- Palico customization is also permanent. You can change its armor and weapon later, but not its fur color, ear type, or tail. Plan ahead.
- No branching story. The main quest line is linear. All choices during dialogue are purely flavor; they do not affect gameplay or rewards.
- Skipping cutscenes is irreversible. You cannot rewatch story cutscenes in-game unless you start a new save or watch recordings. If you care about lore, watch them.
- You unlock Palico gadgets (Vigorwasp, Flashfly, etc.) by completing optional quests that become available as you progress through the story. If you miss the quest, it's gone until you complete the prerequisite assigned quests. Track optional quests via the Quest Board → Optional tab.
- You can only equip one gadget at a time, but you can swap freely. However, upgrading gadgets requires completing specific optional quests. Missing an upgrade quest does not lock you out permanently; it will reappear after fulfilling prerequisites.
- Some NPCs offer trades that are one-time opportunities. For example, the Poogie pet can be obtained by befriending it in Astera. If you ignore it, you lose the chance to dress it up and get a cute effect. To befriend: pet it multiple times until hearts appear, then the Handler will give you a costume.
- Rare endemic life (e.g., Downy Crake, Wintermoon Nettle) are catchable only in specific conditions. They are not required for any quest, but missing them means you cannot complete the endemic life achievement/trophy.
- Most event quests return on a seasonal rotation. However, collaboration quests with other franchises (e.g., with Final Fantasy XIV, Witcher 3, Street Fighter V) are permanently available once downloaded as long as you have the free event quest download. They do not expire. But if you delete the save data and restart, you'll need to redownload them.
- Iceborne expansion content requires completing the main story of World (HR 16) and purchasing the DLC. If you plan to get Iceborne, do so after finishing the base game story, as many late-game base weapons are outclassed by master rank gear.
- The first major wall for many new hunters is Anjanath (assigned quest "The Great Glutton"). It hits hard and is fast. If you struggle, upgrade your armor with Armor Spheres, eat canteen meals for defense, and bring traps and flash pods.
- Rathalos (HR 11, quest "The Red and Blue Bird of Wrath") flies constantly. Use flash pods to ground it. Diablos (HR 11, optional quest) has high defense and powerful charge attacks. Use screamer pods to make it surface when burrowed.
- Tempered monsters (HR 29+) deal significantly more damage and drop decorations. Do not attempt them without upgraded armor (Defense Boost skill, Health Boost). Elder Dragons (Kushala Daora, Teostra, Vaal Hazak, Nergigante) each have unique mechanics that require specific preparations.
- Kushala Daora creates wind barriers that push you back. Use Windproof skill or equip Rocksteady Mantle. Vaal Hazak causes Effluvium ailment (halves health bar). Carry Nulberries and use Effluvia Resistance decorations.
- Behemoth (collaboration quest, HR 16) is an extreme difficulty spike designed for multiplayer coordinated groups. Do not solo unless you are extremely skilled.
- Rajang (MR 24) is an extremely aggressive monster with high damage. Requires precise dodging and high defense. Alatreon (MR 24) has elemental damage checks; if you fail to deal enough elemental damage, it will one-shot the entire party with Escaton Judgment. Fatalis (MR 24) is the hardest boss in the game. Be prepared to farm gear and learn its moves.
- Do not craft every weapon and armor set. Focus on one or two weapon types initially. The game encourages experimentation but resources are limited early on. If you spread too thin, you'll run out of materials and Zenny.
- Guardian Armor and Defender Weapons (Iceborne only): These are overpowered gear designed to rush through the base game to reach Iceborne. They trivialize the early game but teach bad habits (tanking hits). Do not use them if you want the intended difficulty. They can also cause you to miss farming essential materials for later upgrades.
- Upgrade armor only when you need survivability. Use Armor Spheres wisely: higher rarity armor requires more spheres to upgrade. Save high-grade spheres for endgame gear.
- Zenny is tight. Do not buy potions or equipment from the store; craft them from materials. Sell monster parts you have 100+ of only. Check bounties for Zenny rewards.
- Investigations are key for farming. They reward bonus materials and give more rewards than optional quests. Always have investigations active for monsters you need.
- Do not overharvest ore and bones. You only need a few stacks. Instead, focus on farming monster parts via investigations or expeditions.
- Decorations are obtained randomly from quests (Tempered monsters, threat level 2 and 3). Do not farm for specific decos by repeating the same quest thousands of times. Instead, meld decorations at the Elder Melder using unwanted decos or materials. Also do the weekly limited bounties for tickets.
- The Guild Alchemy melding option (Iceborne) allows you to target specific decos by using monster parts. Use this for critical skills like Attack Boost, Weakness Exploit, etc.
- Do not waste research points on low-level Palico armor. Save for the high-tier sets like Plunderblade or Meowlotov Cocktail.
- Some deliveries (e.g., Giant Frog, Downy Crake) are only available during specific times. Check the Research Base (after reaching HR 16) for deliveries that reward rare materials for canteen ingredients. Missing them means you lose access to certain food buffs.
- Weekly limited bounties (from the Resource Center) give valuable items like Gold Wyverian Prints (can be traded for gems) and Celestial Wyverian Prints (for mantles). Do them every week. They reset on Thursday/Friday depending on your region.
- Seasonal event quests (e.g., Spring Festival, Summer Festival) return yearly. They offer exclusive layered armor, pendants, and weapons. Participate when available, as you may have to wait a year for a rerun.
- Collab quests (e.g., Final Fantasy XIV: 2B layered armor) are permanent once downloaded.
- Some rare endemic life (e.g., Wintermoon Nettle) spawns only in specific conditions (night time, clear weather, high altitude). Use capture net after sneaking. If you miss them, you lose the achievement and the chance to display them in your room.
- Wait for everyone at camp before leaving. Starting the countdown early can leave teammates behind.
- Do not flash pod a monster when a teammate is mounted. It will dismount them and waste the opportunity.
- Do not use cluster bombs or sticky ammo to stagger teammates. You can knock them around. If using explosive weapons, aim away from others.
- If you faint, apologize or use the sticker. No need to rage.
- When joining a sos, respect the leader's tactics. If they are capturing, do not kill the monster. If they are killing, do not capture unless discussed.
- Do not AFK in the middle of a hunt. If you must leave, return to camp or use the "Quit Quest" option.
- For Behemoth and Alatreon, communicate roles. These fights require coordination. Use text chat or voice.
- Monster Hunter: World uses Denuvo anti-tamper on PC. Modding is allowed but use caution. Only install mods from trusted sources (Nexus Mods). Some mods (e.g., damage scaling, auto-Harvest) may violate the Terms of Service and could lead to a ban. Capcom generally does not ban for cosmetic or QoL mods, but avoid any that modify online play.
- Save file editing is possible but risky. You may corrupt your save, lose DLC items, or get flagged as a cheater. If you edit, back up your save first.
- If you cheat online (e.g., one-hit kills, infinite items), you ruin other players' experience and risk a permanent ban. Do not use cheat engine in multiplayer.
- PC: Your save is located at `%LOCALAPPDATA%\CAPCOM\MonsterHunterWorld\`. Copy the entire `savedata.bin` file to a safe location. Consider cloud backups (Steam Cloud saves are enabled by default, but disabling them and manually backing up is safer).
- PS4: Use PS Plus cloud saves or external USB backup. Note that save transfers from one console to another are not possible due to encryption.
- Xbox One: Use Xbox cloud saves (automatic) or USB backup.
- Regularly backup before major DLC releases or after long sessions. If your save corrupts, you lose hundreds of hours.
- Cross-platform save transfer is not possible. You cannot move a PS4 save to PC or Xbox.
- If you upgrade from Standard to Iceborne, your save carries over automatically. But if you buy a different region version, save may not be compatible.
- Do not delete your save if you plan to replay. There is no new game+; you must start from scratch.
- The game has three save slots. Use them wisely: one for main, one for challenge runs, one for testing. You cannot rename them, so keep a note.
- Not eating before quests. Always eat at the canteen to boost health, stamina, and skills. Repeating a quest because you forgot to eat is frustrating.
- Ignoring the radial menu. Customize the radial menu (Item Pouch options) for quick access to potions, traps, and whetstones. It saves lives.
- Not upgrading armor early. Many players try to fashion hunt and get regularly one-shot. Upgrade with Armor Spheres regularly.
- Selling Monster Gems or Plates early. These rare materials are needed for high-level weapons and armor. Never sell them; keep at least 3-5 of each.
- Not using investigations. Relying solely on optional quests for materials is inefficient. Investigations give more rewards and higher drop rates.
- Skipping the training area. The Training Room (accessed from your room) lets you practice combos and learn your weapon. Use it before facing tough monsters.
- Underestimating environmental traps. In many maps, you can use falling rocks, vines, or endemic life (like Paratoads) to your advantage. Learn them for easier hunts.
- Not using the SOS system. If you are stuck, fire an SOS flare. The community is generally helpful. Do not be shy.
- Ignoring the Research Commission. Complete their requests for useful items like the Bandit Mantle (moneymaking) and Affinity Booster (crit chance).
- Forgetting to manage inventory before quests. Carry only essential items: potions, mega potions, antidotes, nullberries, whetstones, traps, tranq bombs, flash pods, and maybe a couple of bombs. Too many items lead to clutter.
- The game does not pause in single-player. If you need to step away, return to camp or go to a tent (safe zone). Monster can kill you while idle.
- Fainting reduces rewards. The cart system: three faints and quest fails. In multiplayer, faints are shared. Be cautious.
- Losing to Fatalis or Alatreon solo is common. Do not get discouraged. They require perfect knowledge and gear.
- The guiding lands (Iceborne) allows leveling areas by hunting specific monsters. If you level an area too high, you may prevent friends from joining if they have lower MR. Coordinate.
- Protect your handler. She's your partner; you cannot lose her, but she occasionally gets stuck in scenery. She is fine.
#### Story Choices
#### Palico Gadgets
#### Limited Resource Trades
#### DLC and Event Quests
---
2. Difficulty Spikes and Progression Traps
#### Early Game: Anjanath
#### Mid Game: Rathalos and Diablos
#### Late Game: Tempered Monsters & Elder Dragons
#### Iceborne Endgame: Rajang, Alatreon, Fatalis
---
3. Grinding Traps and Efficiency Pitfalls
#### Armor and Weapon Progression
#### Resource Management
#### Decoration Grind
#### Palico Equipment
---
4. Missable Content and Events
#### Delivery Quests
#### Limited Bounties
#### Event Quests
#### Endemic Life
---
5. Online Etiquette and Anti-Cheat Notes
#### Multiplayer Etiquette
#### Anti-Cheat Notes (PC)
---
6. Save Management Advice
#### Backup Your Save
#### Transferring Saves
#### Multiple Save Slots
---
7. Common Regrets from Experienced Hunters
---
8. Final Warnings
By keeping these notes in mind, you'll avoid wasted effort and enjoy your hunt across the New World. Happy hunting!
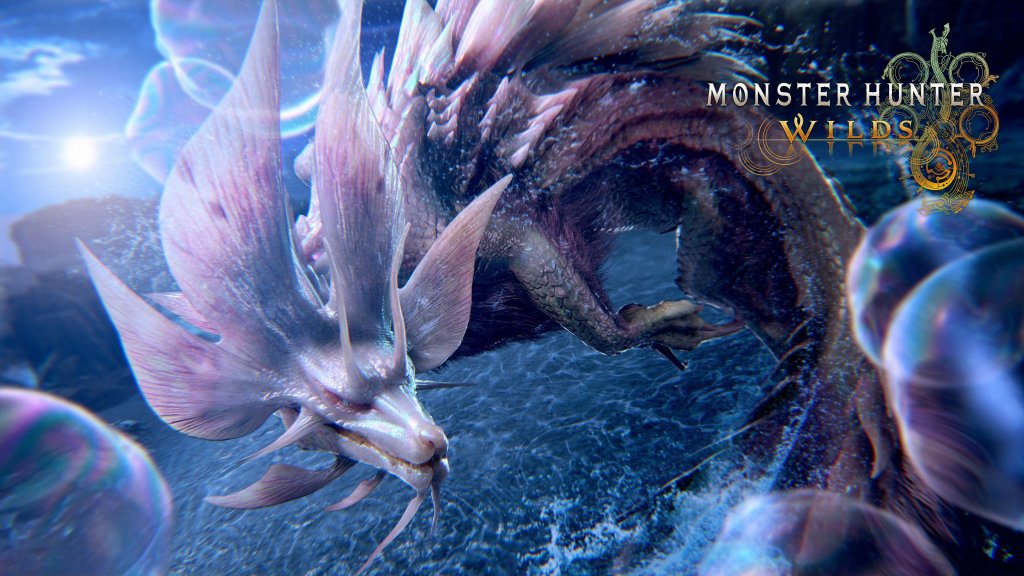
All Game Items
All Game Items Guide for Monster Hunter: World
This guide catalogs every major item category in Monster Hunter: World (including the Iceborne expansion). Items are grouped logically with explanations of what they do, how to obtain them, when they are useful, and any important synergies or upgrades.
---
1. Weapon Types (14 Classes)
Each weapon class has unique movesets, strengths, and upgrade paths (Rarity 1–12). Weapons are crafted from monster materials and can be upgraded along branching trees. Below is a summary of each class.
| Weapon Class | Playstyle | Key Features | Best For |
|---|---|---|---|
| Great Sword | Slow, heavy hits | Charged attacks, high raw damage, tackle block | Punishing openings, cutting tails |
| Long Sword | Fluid combos, counter | Spirit gauge, iai slash, foresight slash | Consistent damage, evasion |
| Sword & Shield | Versatile, fast | Mounting, item use without sheathing, shield | Status builds, support |
| Dual Blades | Fast, aggressive | Demon mode, blade dance, high elemental | Elemental damage, breaking parts quickly |
| Hammer | Blunt, stun | Charge attacks, KO damage, spinning bludgeon | Head breaks, stunning monsters |
| Hunting Horn | Support, blunt | Melody buffs, exhaust damage, encore | Team support, fatigue |
| Lance | Defensive, poke | Guard, counter thrust, power guard | Tanking, consistent pokes |
| Gunlance | Explosive, shield | Shelling (Normal/Long/Wide), wyrmstake, wyvernfire | Breaking hard parts, ignoring hitzones |
| Switch Axe | Transform, burst | Axe/Halberd forms, amped state, discharge | Raw damage, phial bursts |
| Charge Blade | Combo, guard points | Sword/Axe modes, phial charging, SAED | Versatile damage, guard point counters |
| Insect Glaive | Aerial, kinsect | Vaulting, kinsect extracts, airborne combos | Mounting, mobility, elemental damage |
| Light Bowgun | Ranged, mobile | Rapid fire, status shots, wyvernblast | Elemental/status ammo, support |
| Heavy Bowgun | Ranged, stationary | Wyvernheart/snipe, cluster ammo, shield mods | Pierce/Spread/Sticky builds, tanky gunner |
| Bow | Ranged, stamina | Charged shots, power coating, dragon piercer | Elemental damage, evade/dance builds |
2. Armor & Equipment Sets
Armor pieces (Head, Chest, Arms, Waist, Legs) provide Defense and Skills. Sets offer set bonuses (e.g., Rathalos Mastery). High Rank (HR) armor upgrades to G-rank (Master Rank, MR) in Iceborne.
- Low Rank (LR) armors: Leather, Bone, early monster parts.
- High Rank (HR) armors: Rarity 5–8, start appearing after Zorah Magdaros.
- Master Rank (MR) armors: Rarity 9–12, from Iceborne monsters.
How to obtain: Quest rewards, carving, mining, gathering. Craft at the Smithy with monster materials.
When useful: Equip armor with skills matching your weapon (e.g., Attack Boost for Great Sword, Artillery for Gunlance). Upgrade Defense at the Smithy using Armor Spheres + Zenny.
Synergies: Mix sets to activate multiple skills (e.g., Weakness Exploit + Critical Boost). Set bonuses like Nergigante Hunger (HR) or Teostra Technique (MR) grant additional effects.
---
3. Consumables & Items
#### 3.1 Healing & Recovery
| Item | Effect | How to Obtain | Use Cases |
|---|---|---|---|
| Potion | Restores 30 HP | Craft: Herb<br>Buy from Vendor | Basic healing |
| Mega Potion | Restores 60 HP | Craft: Potion + Honey | Standard healing mid-hunt |
| Max Potion | Restores HP fully + max HP | Craft: Nutrients + Mandragora | Emergency full heal (one per hunt) |
| Ancient Potion | Restores HP fully + max stamina | Craft: Kelbi Horn + Godbug | Full restore before battle |
| Herbal Medicine | Cures Poison & restores HP | Craft: Antidote + Blue Mushroom | Fast poison cure |
| Dust of Life | AoE heal for party | Craft: Godbug + Lifecrystals | Team healing (multiplayer) |
| Item | Effect | Duration | Craft |
|---|---|---|---|
| Demon Drug | +10 Attack (small) | Until faint | Might Seed + Catalyst |
| Mega Demon Drug | +15 Attack (large) | Until faint | Demon Drug + Pale Extract |
| Armor Drug | +25 Defense (small) | Until faint | Adamant Seed + Catalyst |
| Mega Armor Drug | +30 Defense (large) | Until faint | Armor Drug + Pale Extract |
| Cool Drink | Heat resistance (15 min) | Craft: Chillshroom + Ice Crystal | Volcanic areas (Elder's Recess) |
| Hot Drink | Cold resistance (15 min) | Craft: Hot Pepper + Ice Crystal | Frozen areas (Hoarfrost Reach) |
| Item | Effect | How to Obtain |
|---|---|---|
| Pitfall Trap | Immobilizes some monsters | Craft: Net + Ivy + Spiderweb |
| Shock Trap | Immobilizes many monsters | Craft: Thunderbug + Trap Tool |
| Flash Pod | Blinds monster | Craft: Flashbug |
| Screamer Pod | Roar to unearth burrowed monsters | Craft: Screamer Sac + Sap Plant |
| Dung Pod | Repels monsters | Craft: Dung + Smokenut |
Used by Bowguns and Bow. Crafted from gunpowder and materials. Examples:
- Normal Ammo 1/2/3: Basic damage.
- Pierce Ammo 1/2/3: Hits multiple times through body.
- Spread Ammo 1/2/3: Short-range cone.
- Sticky Ammo 1/2/3: Explosive, KO damage (builds stun).
- Power Coating (Bow): +30% raw damage (limited quantity).
- Blast Coating: Applies blastblight.
- Scales, Hides, Bones: Common drops from monsters.
- Monster-specific parts: Rathalos Ruby, Nergigante Gem, Anjanath Fang, etc.
- Sacs/Marbles: Elemental sacs (Flame Sac, Thunder Sac) used for weapons.
- Tears & Drops: Dropped when monster flees (e.g., Nergigante Regrowth Plate).
---
4. Materials & Resources
#### 4.1 Monster Materials
Obtained from carving, capturing, breaking parts, quest rewards. Used for crafting and upgrading gear.
#### 4.2 Mining & Gathering Items
| Resource | Locations | Uses |
|---|---|---|
| Iron Ore | All zones | Base weapons, armor upgrades |
| Machalite Ore | High Rank zones | Mid-tier upgrades |
| Dragonite Ore | High Rank + Elder's Recess | High Rank gear |
| Carbalite Ore | Master Rank zones | MR upgrades |
| Dragonbone Relic | Bone piles in Rotten Vale | Weapons, charms |
| Godbug | Ancient Forest, Wildspire Waste | Dust of Life, Demon/Armor Drugs |
- Armor Spheres: Used to upgrade armor defense. Obtain from Bounties, rewards, or melding.
- Decorations (Jewels): Socketed into armor/set pieces to add skills. Rarity 6–12. Farmed from Tempered or Arch-Tempered monsters.
- Charms: Equippable items that provide skills. Crafted at the Smithy from materials and upgraded with Streamstones (HR) / Spiritvein Gems (MR).
- Kinsect Foods: Used to upgrade Kinsects (Insect Glaive). Crafted from monster parts.
---
5. Currencies & Points
| Currency | Symbol | How to Obtain | Primary Use |
|---|---|---|---|
| Zenny | Z | Quest rewards, selling items | Crafting, upgrading, buying from vendors |
| Research Points (RP) | RP | Gathering, tracking monsters, canteen bonuses | Fuel for Argosy, melding, upgrading Palico gear |
| Guild Alchemy Points | — | Trading in materials | Crafting specific items at the Melder |
| Steam Tickets | — | Steamworks (Iceborne) | Special gear, consumables |
| Celestial Wyverian Print | — | Limited quests or events | Trade for any rare monster material (e.g., gem) |
6. Collectibles & Special Items
#### 6.1 Endemic Life
Small creatures found in each locale (e.g., Wiggler, Cactuar, Dapper Coral). They can be caught with a Capture Net. Some have unique interactions:
- Wiggler (cure poison allies).
- Sturdy Plant (can be mounted on slinger).
- Bitterbug (used in crafting).
- Fish: Caught with fishing rod (Ancient Forest, Wildspire Waste, etc.). Used for certain materials (e.g., Gastronome Tuna for meals).
- Bounties: Weekly and limited bounties reward Armor Spheres, Decorations, Steam Tickets.
- Golden Egg, Silver Egg, Ancient Bone: Sold for Zenny.
- Treasure Spots: Marked on map, can be dug up with a pickaxe for rare resources.
- Palico Weapons & Armor: Crafted from monster materials. Skills like Plunderblade (extra carves) or Vigorwasp Delivery (healing).
- Palico Gadgets: Unlock via quests: Flashfly Cage, Shieldspire, Coral Orchestra, Meowlotov Cocktail.
- Slinger: Basic slinger stones (picked up in field) or special ammo dropped by monsters (e.g., Piercing Pod, Bomb Pod). Used for flinching, breaking parts, or triggering environmental traps.
- Clutch Claw (Iceborne): Used to tenderize monster parts or launch into walls for knockdowns. Requires Slinger Ammo to use clutch claw attacks.
#### 6.2 Fishing & Bounties
#### 6.3 Treasure Items
#### 6.4 Palico Equipment
#### 6.5 Slinger & Clutch Claw Items
---
7. Key Equipment & Progression
#### 7.1 Mantles & Boosters
Unlocked through optional quests and story progression. Equip one + one booster.
| Mantle | Effect | Duration / Cooldown |
|---|---|---|
| Health Booster | Creates healing area | 60s active, 120s cooldown |
| Affinity Booster | +30% affinity area | 60s active, 180s cooldown |
| Temporal Mantle | Auto-dodge all attacks | 90s, 120s cooldown (MR 5 minutes) |
| Rocksteady Mantle | Super armor + damage reduction | 90s, 300s cooldown |
| Evasion Mantle | +30% damage after successful dodge | 90s, 180s cooldown |
| Ghillie Mantle | Invisibility while stationary | 60s, 120s cooldown |
| Glider Mantle | Allows glide + mounting | 120s, 60s cooldown |
| Impact Mantle | +30% stun damage | 120s, 300s cooldown |
- Meals: Provide stat boosts (Attack, Defense, Elemental Resistance, etc.) and skills (e.g., Felyne Moxie, Felyne Foodie).
- Ingredients: Gathered from expeditions or from Palico in the field. Higher quality ingredients give larger bonuses.
- Canteen Upgrades: Unlock new ingredients and drink types (e.g., Mega Nutrients).
- Smithy: Forge/upgrade weapons, armor, charms, Kinsects, Palico gear.
- Melding Pot (Melder): Convert materials into specific items (e.g., Decoration melding, Streamstone melding). Key for post-game efficiency.
- Attack Jewel 1: +1 Attack Boost (common)
- Expert Jewel 1: +1 Critical Eye
- Handicraft Jewel 3: +1 Handicraft (rare)
- Artillery Jewel 2: +1 Artillery (rare)
- Expert Jewel 4 (MR): +2 Critical Eye
- Elementless Jewel 2: +10% raw for weapons without element
- Streamstone Shard/Chunk/Gem: Used to augment HR weapons (add health steal, affinity, slot, etc.).
- Hero Streamstone: Only from Arch-Tempered Elder Dragons.
- Spiritvein Gems (MR): Used to augment MR weapons.
- Safi’jiiva Siege: Reward weapons with dormant abilities. Awaken using dracolite from siege rewards.
- Essences: Can add set bonuses (e.g., Teostra Technique) to weapons.
- Kulve Taroth Siege: Rewards Golden weapons with unique stats and element values. Can be upgraded to MR versions via Master Rank HR Kulve materials.
- Bait: Berries, Raw Meat, Poison Meat placed to lure monsters or apply status.
- Fire Pods, Watermoss, Torch Pods: Environmental items that trigger reactions (e.g., Watermoss washes off mud).
- Thunderbug Cages: Flash fly cage trap (harvestable).
- Elemental Damage: Dual Blades / Bow / SnS benefit greatly from elemental weapons + respective element attack skills.
- Status Effects: Para/Sleep weapons with Status Attack Up and Free Meal skills.
- Artillery + Capacity Boost: Gunlance and Charge Blade phial damage.
- Health Boost + Divine Blessing: Survival builds.
- Weakness Exploit + Critical Boost: Standard raw damage combo.
- Master’s Touch (Teostra Technique): Prevents sharpness loss on crit.
- True Dragonvein Awakening (Safi Set): Massive raw/element boost with health drain.
#### 7.3 Smithy & Melder
---
8. Rare Items & Post-Game Grind
#### 8.1 Decorations (Jewels)
Rarity 5–12. Examples:
Obtain: Threat Level 2/3 Tempered investigations, Arch-Tempered events, The Greatest Jagras (event).
#### 8.2 Streamstones & Augments
#### 8.3 Safi’jiiva Weapons & Awakening (Iceborne)
#### 8.4 Kulve Taroth Weapons (HR & MR)
---
9. Ecology & Field Items
---
10. Important Synergies & Upgrades
For detailed weapon upgrade trees, refer to the Weapon Tree Guide (Smithy in-game menu). For armor set bonuses, consult the Armor Set Search (third-party tools like MHW Builder recommended).
---
Quick Reference: Common Farming Routes
| Item | Best Source |
|---|---|
| Zenny | Sell monster parts from Kulve Taroth / Stormsoul event quests |
| Research Points | Gather bone piles in Rotten Vale / elder melder |
| Decorations | Tempered Zinogre or The Greatest Jagras (HR), FrostCrown Bounties (MR) |
| Armor Spheres | Weekly Bounties, Farewell to Zinogre event |
| Monster Gems | Break head + carve tail + capture; use Celestial Wyverian Print for rare ones |
This guide covers all major item categories. For exact drop rates or conversion ratios, consult the in-game Hunter's Notes or community databases like Kiranico.
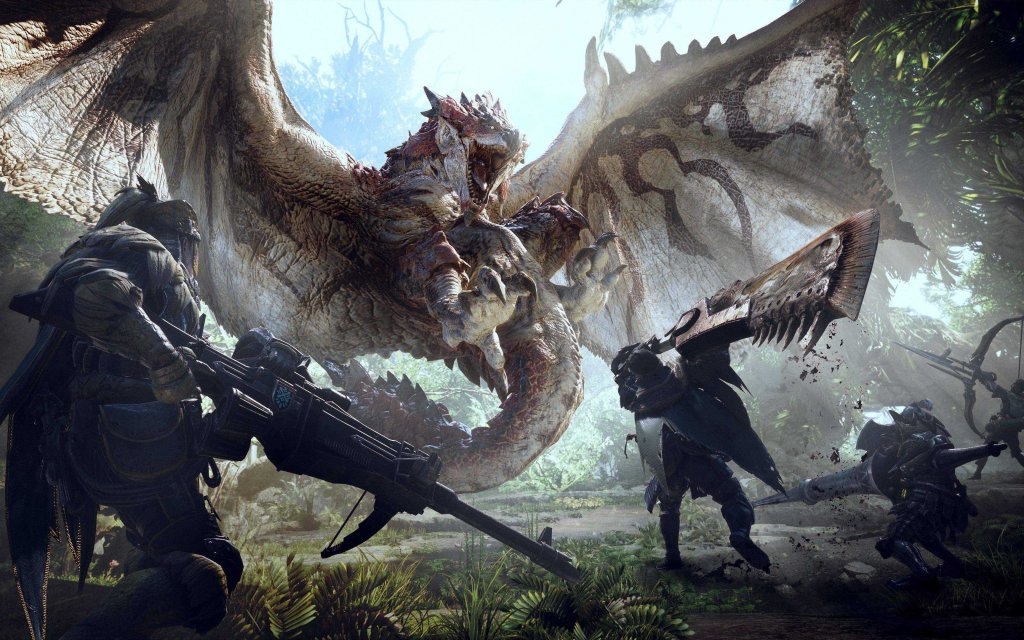
Character Skills
Character Skills Guide for Monster Hunter: World
This guide covers all skills available in Monster Hunter: World (including the Iceborne expansion). Unlike traditional RPGs, there are no playable character classes or unique character skill trees. Instead, Skills are granted by equipping armor pieces, decorations (jewels), and charms. Each skill has multiple levels (typically 1 to 7) that increase its effectiveness. Additionally, each of the 14 weapon types has its own unique moveset, which includes special attacks and combos. This guide details every armor skill (with effects, max level, acquisition, synergies, and recommended builds) and every weapon’s key abilities and special moves.
---
1. Armor Skills Overview
Armor skills are divided into categories: Offensive, Defensive, Utility, Elemental/Status, and Set Bonuses. Below is a comprehensive list of every skill in the game (base + Iceborne). Each entry includes: Skill Name, Max Level, Effect per level, How to obtain (representative armor pieces / decorations / charms), Synergies, and When to use.
> Note: Some skills have multiple levels that unlock additional effects. Always check the in-game description for exact values.
1.1 Offensive Skills
| Skill | Max Lv | Effect | Key Sources | Synergies | Use Cases |
|---|---|---|---|---|---|
| Attack Boost | 7 | Increases base attack (+3 per lv, +5% affinity at Lv4, +10% affinity at Lv7) | Dober armor, Attack Jewel | Crit Eye, Weakness Exploit, Agitator | Pure damage builds, early game |
| Critical Eye | 7 | Increases affinity (+5% per lv, +40% at Lv7) | Rathalos armor, Critical Jewel | Attack Boost, Weakness Exploit, Master’s Touch | Reaching 100% affinity |
| Weakness Exploit | 3 | +50% affinity on weak spots at Lv3 | Rathalos armor, Tenderizer Jewel | Critical Eye, Agitator, Crit Boost | Essential for most melee builds |
| Critical Boost | 3 | Increases critical hit damage (1.3/1.35/1.4 multiplier) | Dragonking Eyepatch, Critical Jewel | Any high affinity build | Maximizes damage output |
| Agitator | 5 | When monster is enraged: +attack and +affinity (Lv5: +20 attack, +15% affinity) | Nergigante armor, Agitator Jewel | Weakness Exploit, Resentment | Enrage-heavy fights like Diablos |
| Peak Performance | 3 | +5/10/20 attack when health is full | Vaal Hazak armor, Refresh Jewel | Health Boost, Recovery Speed | Safe play with health augments |
| Resentment | 5 | +5/10/15/20/25 attack when using Red Health | Diablos armor, Resentment Jewel | Health Augment, Resentment builds | Builds that self-damage (e.g., Berserker) |
| Maximum Might | 5 | +10/20/30/40/50% affinity when stamina is full | Kushala Daora armor, Mighty Jewel | Critical Eye, Stamina management | Bow / DB builds (stamina regen) |
| Heroics | 5 | +10/15/20/30/40% attack when health ≤ 35% | Rathian armor, Heroics Jewel | Fortify, Survival skills | Speedruns or challenge runs |
| Resuscitate | 1 | +20 true raw when affected by a blight | Various gear | Resentment, Coalescence | Niche blight builds (e.g., Fire Resentment) |
| Coalescence | 3 | +15/18/21 attack and +10/15/25 elemental for 90s after recovering from a blight | Odogaron armor, Elemental Jewel | Resuscitate, Blight Resistance | Elemental builds vs. blight-heavy monsters |
| Elemental Attack (each element) | 6 | Increases elemental attack (+30/60/100/150/200/250 true element) | Appropriate armor / jewel | Crit Element, True Crit Element, Elemental weapons | Must for Bow, DB, LBG elemental builds |
| Critical Element (Velkhana set bonus) | 1 | Elemental critical damage 1.35x | Velkhana armor set bonus | Elemental Attack, High affinity | Elemental crit builds |
| True Critical Element (Silver Rathalos) | 1 | 1.55x elemental crit | Silver Rathalos set bonus | Same as above | Endgame elemental meta |
| Artillery | 5 | Increases explosive damage (1.1/1.2/1.3/1.4/1.5x) | Uragaan armor, Bombardier Jewel | Gunlance, Charge Blade (Phial), Stickies | Explosive weapon builds |
| Special Ammo Boost | 2 | +10/20% damage for Wyvernheart/Wyvernsnipe, etc. | Rajang armor, Special Ammo Jewel | HBG, LBG special ammo | HBG/LBG endgame |
| Normal/Spread/Pierce Shots | 2 | +10/20% damage for respective shot types | Lavasioth (Normal), Legiana (Spread), Uragaan (Pierce) | Ballistics, Ammo Up | Bowgun builds |
| Bow Charge Plus | 1 | Adds one charge level to Bow | Mighty Bow Jewel, Legiana set bonus | Crit Element, Elemental Attack | Essential for Bow DPS |
| Power Prolonger | 3 | Extends weapon buff duration (1.2x/1.3x/1.4x) | Odogaron armor, Sharp Jewel | Charge Blade, Switch Axe, Insect Glaive | Maintains weapon states |
| Capacity Boost | 1 | +1 shell capacity for Gunlance, +1 phial for Charge Blade | Dodogama armor, Magazine Jewel | Artillery, Focus | Critical for Gunlance/CB |
| Focus | 3 | Speeds up charge attacks (1.1/1.2/1.3x speed) | Diablos Nero armor, Focus Jewel | Great Sword, Hammer, Longsword, Charge Blade | Faster charge times |
| Quick Sheath | 3 | Increases sheathing speed (moderate) | Odo armor, Sheath Jewel | Great Sword, Lance, Longsword | Sheath-heavy weapons |
| Slugger | 5 | Increases stun damage (1.2/1.3/1.4/1.5/1.6x) | Diablos armor, KO Jewel | Hammer, Hunting Horn, Sticky Ammo | KO-focused builds |
| Stamina Thief | 3 | Increases exhaust damage (1.2/1.3/1.4x) | Kadachi armor, Exhaust Jewel | Hammer, Bow, DB | Exhausting monsters |
| Marathon Runner | 3 | Reduces stamina drain when sprinting (20/40/50%) | Ingot armor, Runner Jewel | Bow, Dual Blades, Lance | Stamina-heavy weapons |
| Constitution | 5 | Reduces stamina consumption of dodging, attacking (10/20/30/40/50%) | Legiana armor, Constitution Jewel | Bow, DB, Lance | Stamina management |
| Stamina Surge | 3 | Increases stamina recovery rate (10/20/30%) | Tobi-Kadachi armor, Refresh Jewel | Constitution, Marathon Runner | Sustained stamina use |
| Evade Window | 5 | Increases invincibility frames on evade (frames +X per level) | Nergigante armor, Evasion Jewel | Evade Extender, Evasion Mantle | Survival / i-frame dodging |
| Evade Extender | 3 | Increases evade distance (moderate) | Kushala armor, Evade Jewel | Evade Window, Mobility | Lance, Gunlance, HBG |
| Guard | 5 | Reduces knockback and stamina drain when guarding (levels reduce chip damage) | Barroth armor, Guard Jewel | Guard Up, Guard skills | Lance, Gunlance, Charge Blade, SnS |
| Guard Up | 1 | Allows blocking of normally unblockable attacks (e.g., Teostra nova) | Uragaan set bonus, Shield Jewel | Guard, any shield weapon | Essential for tank builds |
| Offensive Guard | 3 | +10/20/30% attack for 12s after a successful guard (timing matters) | Diablos armor, Offensive Guard Jewel | Guard, Counter-style weapons | Lance, Charge Blade, Gunlance |
| Flinch Free | 3 | Prevents flinching from small attacks (Lv1: wind up resistance) | Vaal Hazak armor, Brace Jewel | Teammate protection / multiplayer | Multiplayer / cluster bombs |
| Tremor Resistance | 3 | Negates tremors (Lv3: full immunity) | Radobaan armor, Tremor Res Jewel | Versus monsters that cause tremors (e.g., Uragaan) | Situational |
| Windproof | 5 | Reduces wind pressure effects | Kushala Daora armor, Wind Resist Jewel | Versus wind monsters (Kushala, Legiana) | Kushala Daora fights |
| Earplugs | 5 | Negates roars (Lv5: all roars) | Bazelgeuse armor, Earplug Jewel | Any weapon that hates interruptions | General QoL; great for glaive, GS |
| Stun Resistance | 3 | Reduces stun duration / prevents stun | Rathian armor, Stun Resist Jewel | Combat recovery | Prevent stunlock deaths |
| Paralysis Resistance | 3 | Reduces paralysis duration / immunity at Lv3 | Hornetaur armor, Paralyzer Jewel | Versus paralysis monsters (e.g., Great Girros) | Situational |
| Sleep Resistance | 3 | Reduces sleep duration / immunity at Lv3 | Radobaan armor, Sleep Resist Jewel | Versus sleep monsters (e.g., Radobaan) | Situational |
| Blast Resistance | 3 | Prevents blastblight | Anjanath armor, Blast Resist Jewel | Tempered Bazelgeuse | Versus blast monsters |
| Fire/Ice/Water/Thunder/Dragon Resistance | 3 | Increases elemental resistance, reduces blight buildup/infliction | Respective armor, Elemental Resist Jewel | Builds vs. specific element monsters | Always good to have 20+ to negate blight |
| Effluvia Resistance | 3 | Negates effluvia (Vaal Hazak’s health drain) | Vaal Hazak armor, Effluvia Res Jewel | Health Boost, Recovery Speed | Vs Vaal Hazak |
| Poison Resistance | 3 | Prevents poison buildup / immunity at Lv3 | Pukei-Pukei armor, Antidote Jewel | Versus poison monsters | Situational |
| Blight Resistance | 3 | Prevents all elemental blights at Lv3 | Namielle armor, Blight Res Jewel | General defense | Useful against multiple elements |
| Recovery Up | 3 | Increases healing from items and skills (1.1/1.2/1.3x) | Odogaron armor, Recovery Jewel | Health Augment, Wide Range | Supports, aggressive healers |
| Recovery Speed | 3 | Increases natural health recovery speed (2x/3x/4x) | Vaal Hazak armor, Recover Jewel | Health Augment, Peak Performance | Passive healing builds |
| Health Boost | 3 | +15/30/50 max health (stacks with food) | Anjanath armor, Vitality Jewel | Defense Boost, Survival | Essential for survivability |
| Defense Boost | 7 | Increases defense (+10 per lv, +5% at Lv7) | Ingot armor, Defense Jewel | Health Boost, Divine Blessing | General survival, early game |
| Divine Blessing | 5 | Chance to reduce damage taken by 30/50/60% (trigger % per level) | Legiana armor, Protection Jewel | Health Boost, Defense | Excellent survival skill |
| Fortify | 2 | +10% attack and +15% defense per cart (up to 2 times) | Gajau armor, Fortify Jewel | Heroics, Survival | Solo harder hunts, multi-cart runs |
| Botany | 4 | Increases herb yield, etc. | Various | --- | Gathering |
| Geologist | 3 | Extra gather from bonepiles, etc. | Various | --- | Expeditions |
| Honey Hunter | 1 | Gets honey from beehives | --- | --- | Free honey |
| Pro Transporter | 2 | Faster item transport | --- | --- | Cargo missions |
| Forager’s Luck | -- | More rare gathering | --- | --- | Endemic life |
1.5 Set Bonus Skills
Some armors provide set bonuses when wearing 2, 3, or more pieces. These are not stand-alone skills but active when the set condition is met.
| Bonus | Required Pieces | Effect | Example Armor |
|---|---|---|---|
| Master’s Touch | 3 | Critical hits don’t consume sharpness | Teostra |
| True Master’s Touch | 4 | Same, higher trigger? (Iceborne) | Teostra Essence? Actually from Teostra Gamma? |
| Element Acceleration | 3 | Increases elemental damage over time | Namielle |
| Critical Element | 3 (Velkhana) | Elemental crits | Velkhana |
| True Critical Element | 4 (Silver Rathalos) | Higher elemental crit | Silver Rathalos |
| Garuga Greaves not a set | |||
| Spare Shot | 3 (Xeno’jiiva) | 20% chance to not consume ammo | Xeno |
| True Spare Shot | 5 (Safi’jiiva) | 30% chance? | Safi |
| Razor Sharp | 2 (Drachen for IG?) | Halves sharpness loss (not in base) | Drachen set from Behemoth |
| Safi’jiiva Set | 3/5 | Drain HP for affinity | Safi’jiiva |
| Frostcraft | 4 | Charge gauge that boosts attack when sheathed | Velkhana |
> Set bonuses are vast; for a full list see in-game armor set details.
---
2. Weapon-Specific Moves (Special Abilities)
Each weapon has unique moves and combos that are effectively its skills. Below is a concise breakdown for each of the 14 weapons.
2.1 Great Sword
- Charged Slash: Hold Triangle to charge; levels 1-3 cause more damage. Use on openings.
- Tackle: Circle during charge to cancel with hyper armor. Great for ignoring roars.
- True Charged Slash: After two charged slashes or a shoulder tackle, follow up with a massive TCS. Highest single-hit damage in game.
- Slinger Burst: Aim slinger while weapon drawn to stagger monster and follow up with a fast TCS.
- Combos: Tackle > TCS, or Charged Slash > Strong Charged Slash > TCS.
- Spirit Blade: Triangle sequence builds Spirit Gauge.
- Foresight Slash: RT + B (R2+O). Evade with precise timing to counter and raise gauge.
- Spirit Helm Breaker: After reaching Red Spirit Gauge, use RT+B to leap and slash. Consumes gauge but deals high damage.
- Special Sheathe: (Iceborne) Hold RT after a move to sheathe, then use RT for Iai Slash (timed counter) or RT+R2 for Iai Spirit Slash (damage).
- Combos: Foresight > Spirit Blade > Helm Breaker, Iai counter loops.
- Perfect Rush: (Iceborne) After a Backstep, press Y+B to perform a combo with iframes. Deals massive damage if timing is perfect.
- Falling Bash: After a jumping slash or backstep, press Y to perform a shield bash that can stun.
- Clawryuken: Slinger burst while weapon drawn to clutch claw.
- Combos: Triangle > Circle > Backstep > Perfect Rush is main DPS.
- Demon Mode: R2 (RT) activates demon gauge. Attacks use stamina but deal more damage and grant new moves.
- Archdemon Mode: When demon gauge fills, you enter a state with enhanced moves even outside Demon Mode.
- Demon Flurry: In Demon Mode, mash Triangle for rapid slashing.
- Spinning Slash: Circle after certain moves to spin and close distance.
- Combos: Demon Flurry > Heavenly Blade Dance (when gauge full with R2+B) or Triangle+Circle for a lunging attack.
- Charge Attack: Hold R2 to charge; moves have different properties at levels 1-3.
- Big Bang: After a charged stop, press Circle 5 times for a massive combo.
- Spinning Bludgeon: Level 2 charge moving attack that can be followed with a powerful slam.
- Sliding Attack: While sliding, press Y to perform a sliding hammer spin that can mount.
- Combos: Level 3 charge (golf swing) is good for KO; Big Bang on downed monsters.
- Perform/Encore: R2 to play a note sequence (three notes max). Press R2 again to play a melody; press again for encore that extends effects.
- Recital: While weapon drawn, press R2 to play stored songs.
- Self-Improvement: One song gives movement speed up and mind’s eye (no bounce).
- Echo Note: (Iceborne) L2+Triangle/Circle for different damage songs.
- Combos: Rotate notes for desired buffs (Attack Up XL, Defense Up, etc.). Use Perform on monster head for KO.
- Charge: R2+Triangle+X to sprint with weapon forward; can jump.
- Counter Thrust: Hold R2 and press Triangle after taking a hit to counter.
- Power Guard: R2 + B then R2 again to enter a stronger guard that can pivot.
- Clutch Counter: (Iceborne) During a guard, press L2 to clutch claws and counter.
- Combos: Triangle x3 triple thrust, then hop; countering monster attacks.
- Shelling: Press Circle to fire shells (ignore armor, fixed damage). Options: Normal (more shells), Long (range), Wide (damage).
- Wyrmstake Blast: (Iceborne) R2+Triangle+Circle after a shell to attach a stake that explodes with further attacks.
- Wyvernfire: R2+Triangle+Circle when not out. High damage, long cooldown.
- Full Burst: After a slam attack, press Triangle+Circle to fire all loaded shells.
- Combos: Shell > Shell > Wyrmstake > Full Burst > Wyvernfire.
- Sword Mode: R2 to morph from axe to sword. Sword has phial effects (power, element, exhaust).
- Zero Sum Discharge: (Iceborne) When in sword mode, press Circle+B to latch onto monster and discharge phials.
- Element Discharge: Triangle+Circle in sword mode to discharge (consumes phials).
- Combos: Axe: Triangle x3 or Circle for wild swing; Morph to sword, use sword combos, then discharge.
- Phial Management: Store phials (Circle in sword mode), then transfer to shield (R2+Triangle).
- Super Amped Element Discharge (SAED): When shield is charged with phials, press R2+Triangle+Circle to unleash massive explosion.
- Axe Hopper: (Iceborne) In axe mode, press R2+Circle to leap and strike, can mount.
- Guard Points: Certain sword-to-axe morphs have guard points that allow counter with SAED.
- Combos: Sword: Triangle x3, store phials, morph to axe, SAED.
- Kinsect: L2 to aim, R2 to send kinsect. Extract buffs from monster body parts (Red: attack, Orange: defense, White: speed, Green: heal).
- Vault: R2+X to jump, can dodge and attack mid-air.
- Air Combos: Triangle mid-air for slashes, Circle for a descending thrust.
- Diving Wyvern: (Iceborne) While jumping, press Triangle+Circle to plunge down with massive damage.
- Combos: Ground combo: Triangle x3, then Circle for a tornado slash. Air: Vault > Triangle > Diving Wyvern.
- Wyvernblast: Place mines on ground that explode when hit by attacks.
- Special Ammo: Some guns have Wyvernblast, others have other specials.
- Rapid Fire: Some guns fire multiple shots per bullet.
- Slide Reload: (Iceborne) While sliding, press reload to reload and keep moving.
- Combos: Use normal/pierce/spread ammos, place mines, keep distance.
- Wyvernheart: Continuous rapid fire (spread).
- Wyvernsnipe: Single piercing shot that hits multiple times.
- Wyvern Ammo: Single high-damage explosive shot.
- Shield Mod: Equip shield mod to auto-block some attacks.
- Combos: Use spread/cluster/sticky, deploy wyvernsnipe, reload with evade reload (Iceborne).
- Charging: Hold R2 to charge arrows; three charge levels.
- Power Shot: After a charged shot, press Circle for a stronger shot costing stamina.
- Dragon Piercer: R2+Circle for a long-range piercing shot (slow).
- Thousand Dragons: (Iceborne) L2+Circle after equipping slinger ammo to fire a spread of arrows with ammo.
- Combos: Charge > Power Shot > Power Shot (spread), or charge > Dragon Piercer on long openings.
- Key Skills: Attack Boost 7, Critical Eye 7, Weakness Exploit 3, Critical Boost 3, Agitator 5, Health Boost 3.
- Weapons: Any melee with high raw.
- Set Example: Teostra Head/Body/Arms (Master’s Touch), Garuga Legs, and a combo piece.
- Key Skills: Elemental Attack 6 of chosen element, Critical Element (Silver Rath set), Critical Eye 7, Weakness Exploit 3, Bow Charge Plus, Constitution 3-5, Stamina Surge.
- Weapon: Bow of that element.
- Key Skills: Guard 5, Guard Up, health Boost 3, Divine Blessing, Offensive Guard.
- Weapon: Lance or Gunlance.
- Key Skills: Wide Range 5, Speed Eating, Free Meal, Mushroommancer (if using mushrooms), Horn Maestro (for Hunting Horn).
- Weapon: Hunting Horn with Attack Up L.
- Key Skills: Sleep Attack 3, Status Trigger (for Bowguns), etc.
- Offensive skills: Always prioritize if you are comfortable with monster.
- Defensive skills (Health Boost, Divine Blessing): Recommended for learning fights or difficult content.
- Utility skills (Earplugs, Stun Resistance): Use when specific monster behaviors hinder your play.
- Elemental skills: Essential for elemental weapons (Bow, DB, LBG, elemental CB).
- Set bonuses: Plan builds around set bonuses like Master’s Touch for sharpness management.
2.2 Longsword
2.3 Sword & Shield
2.4 Dual Blades
2.5 Hammer
2.6 Hunting Horn
2.7 Lance
2.8 Gunlance
2.9 Switch Axe
2.10 Charge Blade
2.11 Insect Glaive
2.12 Light Bowgun
2.13 Heavy Bowgun
2.14 Bow
---
3. Recommended Skill Builds
3.1 All-Purpose Melee DPS
3.2 Elemental Bow Build
3.3 Tank/Lance Build
3.4 Support Horn Build
3.5 Status/Sleep Build
---
4. When to Use Each Skill
> Finally: Skills in Monster Hunter: World are highly customizable. Experiment with different combinations to suit your playstyle and the monster you face. Use the in-game armor set builder or online tools to optimize.
This guide covers all available skills and weapon moves. Happy hunting!
Characters & Roles
Characters & Roles Guide for Monster Hunter: World
In Monster Hunter: World, you create a custom hunter with no fixed class or leveling system. Instead, your role is defined entirely by your chosen weapon type—each offering a unique playstyle, strengths, and weaknesses. Additionally, a colorful cast of NPCs supports your journey. This guide covers all major characters and every weapon type as a playable role.
Major Characters (NPCs)
#### The Handler
- Background: Your personal quest manager and companion. She handles administrative tasks, cooking, and provides lore commentary.
- Role: Supportive helper—she provides quests, meal buffs, and comic relief. Not playable.
- Key Interactions: Manages your Provision Stockpile, activates Meal Vouchers, and gives tips during expeditions.
- Background: The stern leader of the Fifth Fleet. He directs major story quests and oversees Research Commission operations.
- Role: Quest giver for story assignments and special investigations. He issues key assignments and encourages progression.
- Background: A no-nonsense handler introduced in the Iceborne expansion. She assists with Master Rank quests and provides focused support.
- Role: Similar to the main Handler but more direct. She manages new features like the Steamworks and Tailraider Safari.
- Background: A rugged veteran hunter who commands the Research Commission from the sea vessel. He appears during critical moments.
- Role: Mentor figure—provides high-level guidance and occasional assistance in story cutscenes.
- Background: A stoic, silent hunter from the Commission who prefers solitude. He uses a Long Sword.
- Role: Rival and ally—appears in certain assignments to demonstrate advanced techniques or help against tough monsters.
- Background: An eccentric researcher obsessed with monster footprints. He helps track elder dragons.
- Role: Provides tracking tools and lore for monster ecology. Unlocks special investigations.
- Background: The blacksmith who forges all weapons and armor from monster parts.
- Role: Equipment crafting and upgrading. He is essential for gear progression and can be accessed in Astera and Seliana.
- Background: A cat-like creature that accompanies you on hunts. Fully customizable in appearance and gear.
- Role: Support role—heals, distracts, or deals damage depending on equipment. Can be upgraded via Palico Gadgets.
- Strengths: Provides consistent support, revives you with Vigorwasp, traps monsters, or heals. Highly versatile.
- Weaknesses: AI-controlled, sometimes inefficient. Cannot replace a human teammate.
- Recommended Equipment: Vigorwasp Spray for healing, Coral Orchestra for buffs, or Shieldspire for tanking (Iceborne). Tailraider Signal for solo help.
- Background: A massive, slow blade that delivers devastating charged strikes. Iconic for hit-and-run tactics.
- Strengths: Highest single-hit damage in the game; can sever tails easily; good reach; tackle provides super armor.
- Weaknesses: Very slow movement and attacks; long recovery; requires monster knowledge to land charges.
- Playstyle: Sheathe often, position for level-3 charged slashes on openings, then roll away. Use tackle to tank roars.
- Recommended Equipment: Focus skill (charges faster). Critical Draw builds for hit-and-run. Example: Wyvern Ignition “Impact” (event greatsword).
- Team Synergy: Works well with weapons that immobilize monsters (Hammer stuns, Bow sleep) so you can land big charges. Avoid crowding near other melee users.
- Background: A katana-style weapon with fluid combos and a spirit gauge mechanic that powers up attacks.
- Strengths: Excellent reach, high mobility, can perform a powerful helm splitter for burst damage. Has a parry move (Foresight Slash).
- Weaknesses: Team tripping (can stagger allies), requires gauge management, lacking blunt damage for stuns.
- Playstyle: Build spirit gauge by hitting monster, use Spirit Blade combo to raise gauge level (white→yellow→red), then consume with Helm Breaker or Special Sheathe (Iceborne).
- Recommended Equipment: Handicraft for sharpness, Weakness Exploit. Example: Reaver “Calamity” (Nergigante tree).
- Team Synergy: Avoid flinching allies with Flinch Free deco. Provides consistent cutting damage and tail cuts. Good with Hammer for KOs.
- Background: A versatile one-handed sword with a shield. Allows item use without sheathing.
- Strengths: Fast attacks, good mounting potential, can use items while blocking, deals both cut and blunt damage (shield bash). Excellent elemental/status weapons.
- Weaknesses: Low raw damage per hit; short reach; poor wake-up damage.
- Playstyle: Stay aggressive, use shield bashes for stun, use Perfect Rush (Iceborne) for high motion value combos. Apply status or elemental damage efficiently.
- Recommended Equipment: Elemental builds (e.g., Kjarr weapons from Kulve Taroth). Example: Kirin Bolt (thunder).
- Team Synergy: Ideal for support roles (Wide-Range, Mushroommancer) while still dealing damage. Pair with heavy hitters like Great Sword.
- Background: Fast, dual-wielded blades that emphasize relentless aggression and element/status application.
- Strengths: Highest DPS for elemental builds; excellent mobility; Demon Mode grants extra damage and dodging.
- Weaknesses: Short range; drains stamina quickly; poor for tail cuts unless using certain moves; can be stamina-hungry.
- Playstyle: Activate Demon Mode, use Blade Dance combo, then use Archdemon Mode when stamina low. Focus on elemental weaknesses.
- Recommended Equipment: Critical Element (Rathalos set bonus) with high elemental weapons. Example: Decimation Claws (Nergigante).
- Team Synergy: Benefit from Hammer and Hunting Horn for KOs so they can unload combos. Avoid staggering teammates with Flinch Free.
- Background: A massive blunt weapon specialized in dealing stun damage to the head.
- Strengths: Highest stun potential; can KO monsters multiple times per hunt; good mobility for a heavy weapon; can charge attacks while moving.
- Weaknesses: Cannot cut tails; short reach compared to Great Sword; slow recovery on missed hits.
- Playstyle: Aim for the head, use charged brutal uppercut and spinning bludgeon for KOs. Use level-2 charge for mobile hits.
- Recommended Equipment: Slugger skill for more stuns; Affinity skills. Example: Diablos Shatterer (high raw).
- Team Synergy: King of KOs. Great with weapons that can capitalize on downed monsters (Great Sword, Charge Blade). Avoid head competition with other hammer/lance users.
- Background: A musical blunt weapon that can play songs to buff allies. Supportive but can also deal heavy damage.
- Strengths: Provides unique buffs (attack up, defense up, health recovery, earplugs); good stun damage; has high reach and movement speed.
- Weaknesses: Complex song system; requires positioning to play songs effectively; lower raw damage potential compared to Hammer.
- Playstyle: Learn song rotations, smack monster while queueing notes, then perform recitals to activate buffs. Encores extend effects.
- Recommended Equipment: Horn Maestro skill (extends song duration). Example: Deep Vero (Nergigante HH) with Attack Up L.
- Team Synergy: The ultimate team player. Buffs stack with items. Pairs with any weapon, especially those benefiting from attack boosts. Can also KO.
- Background: A long spear with a massive shield. Defensive powerhouse with exceptional guarding capabilities.
- Strengths: Best guard in the game; can block almost anything with Guard Up; good reach for consistent damage; can charge to close gaps.
- Weaknesses: Low mobility (hopping instead of dodging); takes practice to counterattack; less burst damage than other weapons.
- Playstyle: Use pokes and thrusts, counter with Power Guard (Iceborne) or Counter Thrust after blocking. Use dash attack to reposition.
- Recommended Equipment: Guard skills (3-5) and Guard Up for unblockable attacks. Example: Fiendish Tower (Deviljho).
- Team Synergy: Anchor for the team. Can hold aggro with Guard, allowing others to attack freely. Works well with hammer/horn for KOs.
- Background: A lance with a firearm that shoots shells and performs devastating wyvern fire.
- Strengths: Shelling deals fixed damage ignoring monster armor; large shield; wyvern fire for burst; can close range with blast dash.
- Weaknesses: Slow movement; sharpness drains quickly with shelling; limited mobility; poor for elemental builds.
- Playstyle: Alternate between pokes and shelling. Use Full Burst for wide shelling types. Use Wyrmstake Blast (Iceborne) to stick a mine on monster.
- Recommended Equipment: Artillery skill for shelling damage, Capacity Boost for more shells. Example: Royal Burst (Rathalos tree).
- Team Synergy: Provides consistent damage through shells that don't bounce. Can use wide shelling for area denial. Pairs with weapons that need extra breaks.
- Background: A transforming weapon that switches between a great axe and a sword mode with elemental discharge.
- Strengths: High mobility in axe mode; sword mode deals explosive damage (phial effects); zero sum discharge (Iceborne) can mount or deal huge damage.
- Weaknesses: No defensive options except hop; requires gauge management; long recovery on some moves.
- Playstyle: Build gauge in axe mode, then switch to sword for damage. Use amped state for phial bursts. Perform discharge on downed monsters.
- Recommended Equipment: Power Prolonger to extend amp state; focus on raw or element depending on phial. Example: Axe of Demons (Diablos tree).
- Team Synergy: Good for applying status (para/spare) phials. Works well with hammer for KOs. Avoid tripping allies with wild swings.
- Background: A complex weapon that switches between sword-and-shield mode and massive axe mode, storing energy in phials for explosive attacks.
- Strengths: High burst damage; guard points for defense; can KO with shield thrust; great for breaking parts.
- Weaknesses: High skill floor; requires management of phials, shield charge, sword charge, and axe mode; long animations.
- Playstyle: Build phials in sword mode, charge shield, then use charged slash to fill more phials, then use Super Amped Elemental Discharge (SAED) in axe mode for massive damage.
- Recommended Equipment: Artillery for impact phials, Capacity Boost, Focus. Example: True Gae Bolg (Lunastra).
- Team Synergy: Excellent for applying huge bursts when monster is toppled. Can cut tails and stun. Avoid hitting teammates with SAED.
- Background: A polearm that allows jumping and aerial attacks, paired with a kinsect that extracts monster essences.
- Strengths: Unmatched mobility; can mount easily; extracts buffs from monster (red: attack, white: speed, orange: defense); good elemental and status damage.
- Weaknesses: Ground combos are weaker than aerial; kinsect management is crucial; can be difficult to aim in air.
- Playstyle: Use kinsect to collect extracts (always get red first), then unleash aerial combos or ground strong attacks. Use descending thrust for mount damage.
- Recommended Equipment: Power Prolonger for longer extract duration; elemental kinsects. Example: Catastrophe's Light (Nergigante).
- Team Synergy: Excellent mount spammer. Can easily mount monsters, giving team openings. Pairs well with heavy hitters like Great Sword.
- Background: A rapid-fire ranged weapon with high mobility and status/status support capabilities.
- Strengths: Fast movement; can reload while moving; high elemental and status shot efficiency; good for applying debuffs (poison, sleep, paralysis).
- Weaknesses: Low raw damage per shot; defensive options limited; requires crafting ammo on the fly; less burst than heavy bowgun.
- Playstyle: Equip appropriate elemental/status ammo, maintain distance, use Wyvernblast mines (Iceborne) for extra damage. Special scope for crits.
- Recommended Equipment: Spare Shot skill, True Spare Shot (Nargacuga set bonus). Example: Taroth Support “Spread” (rapid fire paralyze).
- Team Synergy: Perfect support with status shots. Can paralyze/sleep monsters frequently. Pair with weapons that benefit from free hits (Great Sword for sleep bombing).
- Background: A massive cannon with high damage per shot but slow mobility. Can use special ammo types like Wyvernheart (machine gun) or Wyvernsnipe (piercing).
- Strengths: Highest ranged damage; excellent for pierce, spread, or sticky ammo; can shield attachment for defense; special ammo with good burst.
- Weaknesses: Slow movement; long reload times; relies heavily on ammo management; shield only covers one direction.
- Playstyle: Choose ammo type based on monster: spread for close, pierce for long, sticky for brains. Use special ammo on downed monsters. Manage distance carefully.
- Recommended Equipment: Artillery for sticky, Spare Shot, Ammo Up. Example: Deviljho Dark Devourer (sticky/cluster).
- Team Synergy: Provides consistent damage from range. Can use Wyvernsnipe to break parts. Avoid clustering not to trip allies. Works with melee that hold monster still.
- Background: A versatile ranged weapon with high mobility and elemental damage, using coatings for status effects.
- Strengths: Fast attacks; excellent elemental DPS; can apply sleep, paralysis, poison with coatings; high evade mobility.
- Weaknesses: Stamina intensive; requires precise aiming; coating crafting is limited; poor raw damage without element/status.
- Playstyle: Dash around, use Spread shot, Power shot, and Thousand Dragons (Iceborne) for burst. Maintain natural coating supply (craft more). Use Dragon Piercer for long monsters.
- Recommended Equipment: Bow Charge Plus skill, Constitution for stamina management, Critical Element. Example: Anja Arch III (fire).
- Team Synergy: Excellent for applying status with coatings. Good for breaking wings and tails. Pairs with hammer for KOs.
- Standard Party (4 Hunters): Ideally cover at least one cutting weapon (tail), one blunt weapon (KO), and one ranged (safety). Have at least one support (Hunting Horn or Wide-Range user).
- Duo/Trio: Balance roles similarly; if lacking a role, adjust gear (e.g., Hammer user can bring something for tails via bombs or wall bangs).
- Solo: Any weapon works; Palico provides backup. For difficult monsters, consider bringing traps and environmental aids.
#### Field Team Leader (The Commander)
#### Serious Handler (Iceborne)
#### The Admiral
#### The Huntsman
#### The Tracker
#### The Smithy (The Forge)
#### The Palico (Your Felyne Companion)
Playable Roles: The 14 Weapon Types
Each weapon is a distinct "class" with its own combos, mechanics, and positioning. All are available from the start, but some advanced moves must be unlocked via weapon tutorials (optional). Below is a complete breakdown.
#### 1. Great Sword
#### 2. Long Sword
#### 3. Sword & Shield
#### 4. Dual Blades
#### 5. Hammer
#### 6. Hunting Horn
#### 7. Lance
#### 8. Gunlance
#### 9. Switch Axe
#### 10. Charge Blade
#### 11. Insect Glaive
#### 12. Light Bowgun
#### 13. Heavy Bowgun
#### 14. Bow
Team Composition Guidelines
Every weapon is viable for all content. Experiment to find what suits your playstyle.
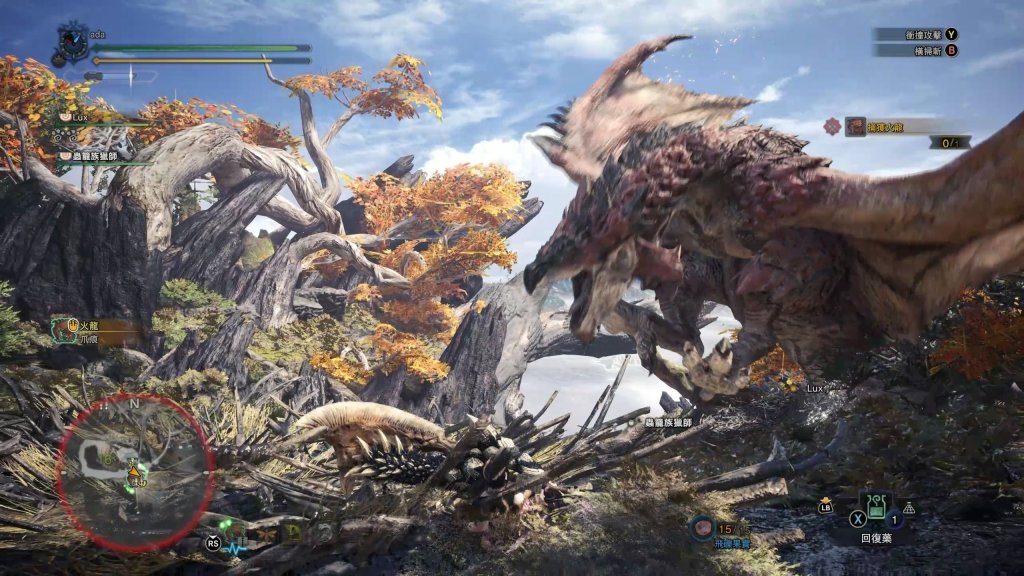
Cheats & Secrets
Cheats & Secrets Guide for Monster Hunter: World
Important Note: No Traditional Cheat Codes
Monster Hunter: World does not include any built-in cheat codes, unlock codes, or debug commands. There is no console, no password entry, and no developer menu accessible through normal gameplay. All content must be earned through hunting, crafting, and exploration. However, the game is rich with hidden features, Easter eggs, and developer-intended secrets that can enhance your experience. This guide covers all known legitimate secrets and hidden content.
---
Secret Techniques & Hidden Mechanics
Capture vs. Kill – The Hidden Rewards
- Secret: Capturing a monster (using a trap and tranq bombs) yields more rewards than carving from a corpse. It also unlocks unique Arena quests and gives bonus materials for some monsters.
- Tip: Always capture unless the quest specifically asks for a kill (e.g., "Slay").
- Secret: If you wield a large weapon (Great Sword, Hammer, etc.) and stand still near small monsters like Jagras or Shamos, they will sometimes flee in fear instead of attacking. This is a hidden intimidation mechanic based on weapon size and hunter rank.
- Secret: Flash Pods are most effective when the monster is airborne (e.g., Rathalos, Legiana) – they cause a knockdown. But using a Flash Pod while mid-air yourself (e.g., while falling from a ledge) does nothing special – that is a myth. The real secret: Flash Pods can be used to interrupt monster roars only if timed correctly while the monster is in the animation.
- Secret: When you are knocked down, pressing no buttons (or just lying still) often causes you to stay down longer, becoming invulnerable during the animation. This is a hidden mechanic to avoid follow-up attacks. Test it against Diablos or Nergigante – staying down lets you avoid the tail slam.
- Secret: Whetfish Fins (especially Whetfish Fin+) are hidden items found in certain fishing spots. They act as a whetstone but can sharpen in one stroke. The Whetfish Fin+ is rare but incredibly useful for fast sharpening mid-combat.
- Location: Best spot – the fishing hole in the Rotten Vale area at the bottom of the central pit (requires bait). Also in the Elder's Recess geothermal pool.
- Secret: Your Palico can unlock several hidden gadgets beyond the default Vigorwasp Spray. Each requires specific conditions:
- Easter Egg: Each gadget has a hidden "critter" helper – e.g., the Flashfly Cage summons a tiny beetle.
- Secret: You can find and activate hidden camps in every locale. Each zone has up to 4 possible camp sites, but only 2 are available initially. The others require finding "Camp Gestures" (rare endemic life or NPC interactions).
- Tip: To unlock all camps, you must complete quests from the Provisioner (a research NPC) and sometimes capture specific monsters. For example, the Ancient Forest N.E. camp requires hunting a Pukei-Pukei with a special condition.
- Hidden Upgrade: You can upgrade your camps to have a Canteen, Private Room, and Botanical Research – but the Secret Kitchens in Astera (the personal quarters) require finding rare endemic life like the Downy Crake to unlock special cooking recipes.
- Secret: Several fishing spots are hidden behind obstacles or require bait. The Rotten Vale has a fishing spot that requires you to use a Slinger Torch to melt the effluvium. The Elder's Recess has a spot on the highest platform that can only be reached by using Wedge Beetles (hidden grapple points).
- Secret: The game has over 20 rare endemic life creatures that are purely cosmetic. They do not affect gameplay but are a major Easter egg. Examples:
- Trophy/Achievement: Catching all rare endemic life unlocks the "Angling Aficionado" trophy/achievement.
- Easter Egg: During the final battle against Xeno'jiiva (base game) or Fatalis (Iceborne), the classic Monster Hunter theme "Proof of a Hero" plays at specific moments. It is triggered by reaching certain health thresholds. This is a callback to the series' history – no other way to hear it in World.
- Easter Egg: If you eat all 12 Felyne food items in a certain order (the "Secret Meal"), you get a hidden buff called "Felyne Lucky Cat" which increases the chances of rare material drops. The order is: Meat > Fish > Vegetable > Bread > Cheese > Eggs > Milk > Rice > Fruit > Beans > Soup > Drink. This is not documented in-game.
- Easter Egg: If you stand idle in Astera for 5+ minutes without opening any menu, your Handler will start saying unique, quirky lines. She also comments on specific outfits – e.g., if you wear the Bazelgeuse armor, she says "You look explosive!"
- Easter Egg: Kulu-Ya-Ku often picks up rocks. If you break the rock with a slinger shot, it will stagger. But if you let it keep the rock and it holds it near its mouth, you can see it is actually eating something from the rock – a tiny insect. This is a behavioral secret.
- Easter Egg: In Astera, behind the main building (up the stairs near the Research Base), there is a locked gate. Later in the game (after completing the main story), you can find a key item behind the Canteen (a "Grimalkyne Doodle") that opens it. Inside is a small room with a stuffed animal – the Moofy plushie from Monster Hunter Stories. Interacting with it gives you a special pose for your guild card.
- Easter Egg: In the Arena, if you use a specific combo of attacks (Great Sword charge + Hammer spin + Hunting Horn encore), the Felyne cook in the background will occasionally throw a giant meat cleaver at the monster. This is a hidden animation.
- Easter Egg: During the special assignment "The Witcher 3: The Trail of the Ancient Forest", you can find Jinn (Geralt's horse) in a secret spot, or find the Novigrad signpost. Also, using the Igni sign (Slinger fire pod) on a beehive will trigger a special dialogue from the Handler. These are pure fan service.
- Secret (Historical): In the base game, during the Behemoth fight, if you stood on a certain rock in the Elder's Recess while being targeted by Charybdis, the tornado would hit the rock and you would be launched high into the air. This allowed you to mount Behemoth easily. It was patched but remains a famous exploit.
- Secret: Some quests only appear after completing specific optional objectives. For example:
- Secret: In the Training Room (accessed via the Handler in Astera), there is a hidden item box in the corner behind a pillar. It restocks your ammo and items for training – but only if you leave the room and re-enter.
- Secret: In the Rotten Vale, there are hidden Gajalaka (small tribe) camps. If you befriend them by completing deliveries, they will occasionally show up in hunts to help you. Their secret gift is the Poison Smoke Bomb – a powerful area denial tool.
- Easter Egg: If you use the Ghillie Mantle and approach a sleeping monster, you can hear it snoring. Some monsters have unique sleep sounds – e.g., Paolumu makes high-pitched whistles, Diablos growls.
- Secret: To unlock all guild card backgrounds, you need to complete hidden achievements like catching every rare endemic life or completing all event quests on a single character. These are developer-intended rewards for completionists.
- Secret: Purchasing the "Proof of a Hero" emote from the Deluxe Kit (DLC) is not a secret, but there is a hidden animation: if you use the emote while standing near a camp, your hunter will play a lute version instead of the default trumpet.
- Warning: Using mods or cheat engines is against Capcom's terms of service and can result in ban. However, there are legitimate, developer-approved cosmetic mods that do not affect gameplay. The only officially supported mod is the High Resolution Texture Pack.
- Note: The PC version can be modified via Cheat Engine for infinite health, one-hit kills, etc. These are not legitimate and violate the game's anti-cheat. Use at your own risk and only for offline content. No official secrets involve using third-party tools.
- Secret: On PS4 and Xbox One, there are exclusive gestures and stickers that come from playing other Capcom games (e.g., the Spyro crossover gave a special Quest). These are time-limited and not listed in the main game.
- Historical Exploit: Before Iceborne, the Cluster Bomb (from Heavy Bowgun) could deal massive damage and knock teammates flying. It was often used to troll. Capcom nerfed its damage and stagger. No secret code – just a broken mechanic that was fixed.
- Historical Exploit: Sword and Shield users could repeatedly jump off a ledge and do an aerial attack to infinite combo monsters. This was patched to limit the damage scaling. No secret code involved.
- Historical Exploit: Using the Capture Net on certain items could duplicate them in your inventory. This was patched early in the game's life. No legitimate secret requires duplication.
- No shortcuts: The only way to truly progress is by hunting. The secrets listed above are meant to enhance your experience, not break the game.
- Always check for updates: Capcom frequently adds hidden content via free title updates and event quests. Check the in-game notice board for active events.
- Explore thoroughly: The New World is full of hidden nooks. Use Scoutflies to track endemic life, breakable walls, and secret gathering points marked by a faint blue glow.
Intimidating the Jagras / Shamos
Flash Pods in the Air
The "Crouching" Recovery
Whetfish Fin + – The Hidden Sharpener
Secret Palico Gadgets
1. Flashfly Cage – Complete the quest "The Trail of the Anjanath" and then talk to the Grimalkyne in the Ancient Forest near the South Camp. Requires finding three Doodles.
2. Shieldspire – Progress Wildspire Waste Grimalkyne questline; find three Doodles in that zone.
3. Vigorwasp Spray (already have) – upgrade to max by collecting all Vigorwasp locations.
4. Coral Orchestra – Coral Highlands Grimalkyne; find three Doodles near the exit to Rotten Vale.
5. Meowlotov Cocktail – Rotten Vale Grimalkyne; find three Doodles near the central camp.
Hidden Camps & Camp Upgrades
Secret Fishing Spots
Rare Endemic Life – The True Hunt
- Downy Crake – Small fluffy bird that appears on the backs of Aptonoth or Gastodon. Found in Ancient Forest or Wildspire Waste. Requires patience and Ghillie Mantle.
- Petricanth – A rare fish that requires a specific rod and bait. It’s a throwback to earlier Monster Hunter games.
- Wintermoon Nettle – A jellyfish-like creature that appears only at night in the Coral Highlands at the highest point. It glows and is extremely rare.
---
Easter Eggs & Developer-Intended Hidden Content
The "Proof of a Hero" Secret
The Canteen Felyne Foodie
The Hidden Handler Dialogue
The "Kulu-Ya-Ku" Pet Rock
The Secret Room in Astera
The Felyne Meteor Strike
The Witcher Crossover Secrets
The Behemoth Jump Exploit (Patched but Historical)
---
Legitimate Hidden Content & Unlockable Secrets
Hidden Quest Chains
- "The White Monster" (capture a Legiana) – triggers after capturing all base monsters.
- "The Sapphire Star's Guidance" – unlisted quest that appears when you have hunted 100 of each monster type.
- "The Greatest Jagras" – a hidden event quest that gives massive amounts of decorations. Only available during certain festivals.
Secret Item Box in the Training Room
The "Gajalaka" Secret
Hidden Monster Dialogue
The Secret Guild Card Backgrounds
The Proof of a Hero Emote
---
Platform-Specific Secrets (PC & Console)
PC Modded Secrets (Unofficial)
Cheat Engine (PC – Not Recommended)
Console Exclusive Secrets
---
Exploit-Safe Secrets (Patched Exploits Listed for Historical Knowledge)
The "Cluster Bomb" Pre-Nerf
The "SnS Jump Attack" Ledge Glitch
The "Capture Net" Duplication Glitch
---
Final Notes
Happy hunting, and may the Sapphire Star guide you!